Learn how to cute and springy window treat boxes for party favors, Easter baskets, and more!
Imagine you’ve just picked out the sweetest little springtime treats, and now you need the perfect box to show them off. Or maybe you’ve got some sweet surprises to hand out for a special occasion, and you’re unimpressed with the packaging options at the store. I’ve got just the fix: Window Treat Boxes! They look like the cuter, tinier cousin of those big bakery boxes you get at the pastry shop – except you can make these yourself in just a few minutes!

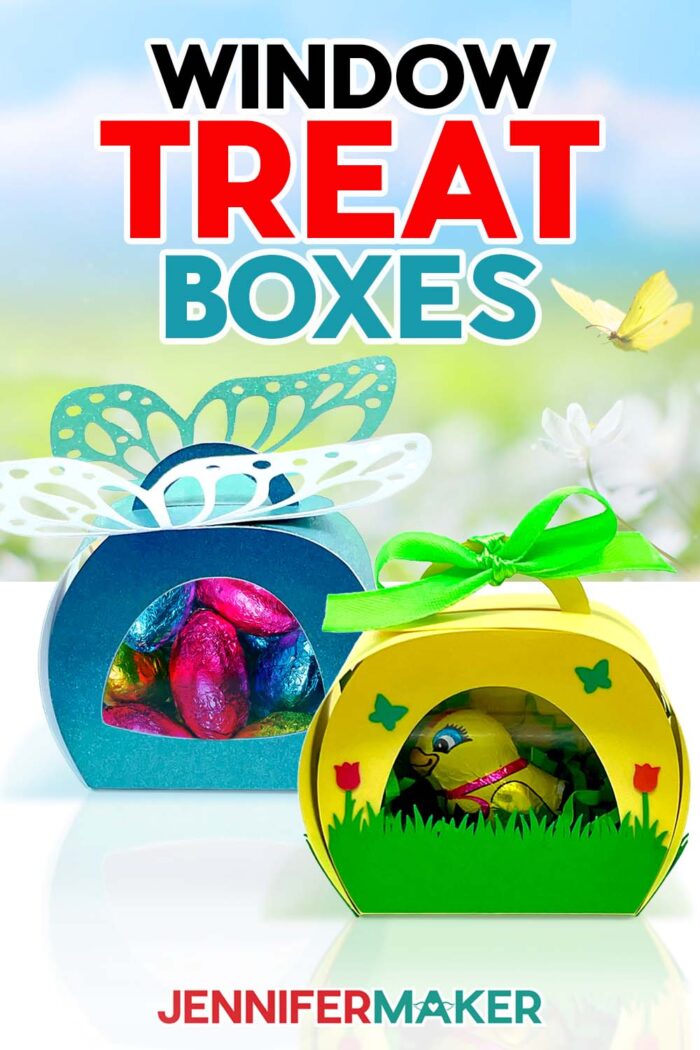
The magic of these springtime gift boxes is the clear plastic window that lets you catch a glimpse of the goodies inside before you even open it up! It’s like a little peekaboo moment for your treats! Whether you’re filling them with store-bought chocolates, homemade sweets, or even gift cards (because let’s be honest, sometimes those are the best treats of all), these great boxes add that extra touch of charm that makes a simple gift feel a little more special.
Let’s talk about how easy these are to make. If you’ve got some cardstock, a bit of acetate for the window, and a little craft glue, you’re good to go.
No acetate? No problem. If you’re planning to fill your box with a larger item that won’t fit through the window cutout, or if you can be careful moving it, just leave the acetate off! Make sure nothing will fall out!
I’ve got free SVG cut files with my butterfly and flower box designs all ready for you to download, so all you have to do is upload them into Cricut Design Space and let your cutting machine do the work. If you don’t have a cutting machine, don’t worry — you can still cut them by hand using my free PDF files as a guide. They’re in the free download folder too, along with DXF files if you have a cutting machine that uses those instead of SVGs.
Depending on the brand, your acetate may come with protective coverings on one or both sides. When preparing to cut it, remove only the side that will be placed face up on your green StandardGrip machine mat. Leave the covering in place on the side that will be placed directly on your mat to help reduce scratches and sticky residue. Use a brayer to make sure the acetate is fully adhered to the mat before cutting.
Once your box is cut out, all that’s left is a little folding, a little gluing (if you’re making the flower box), and — voila! You’ve got a handmade treat box sweeter than the treat inside! Just follow my easy written instructions with photos below.
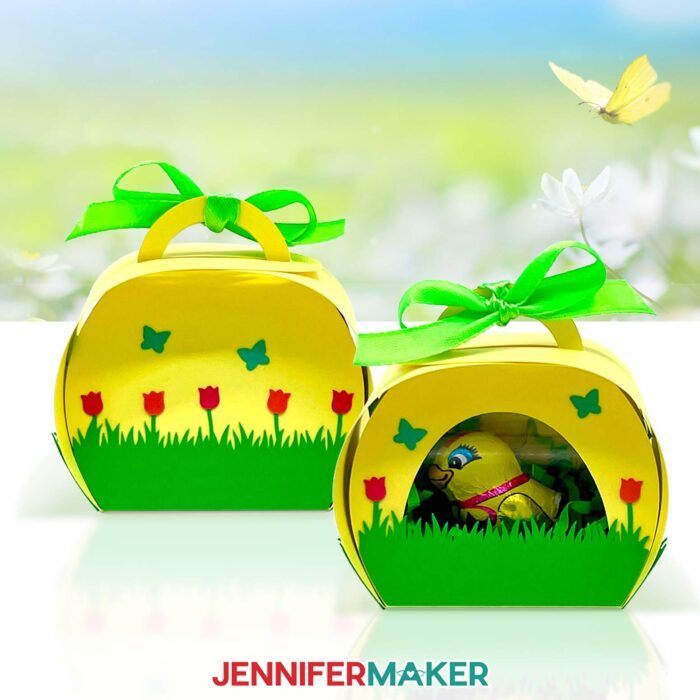
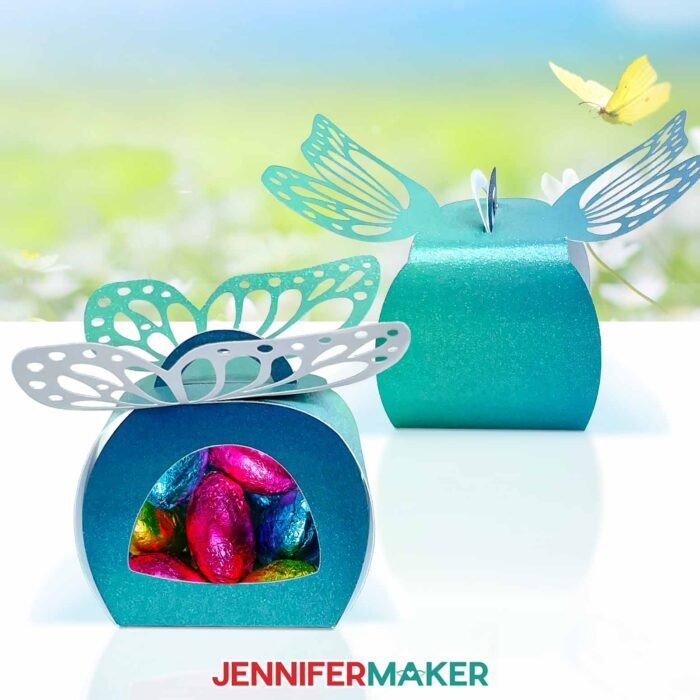
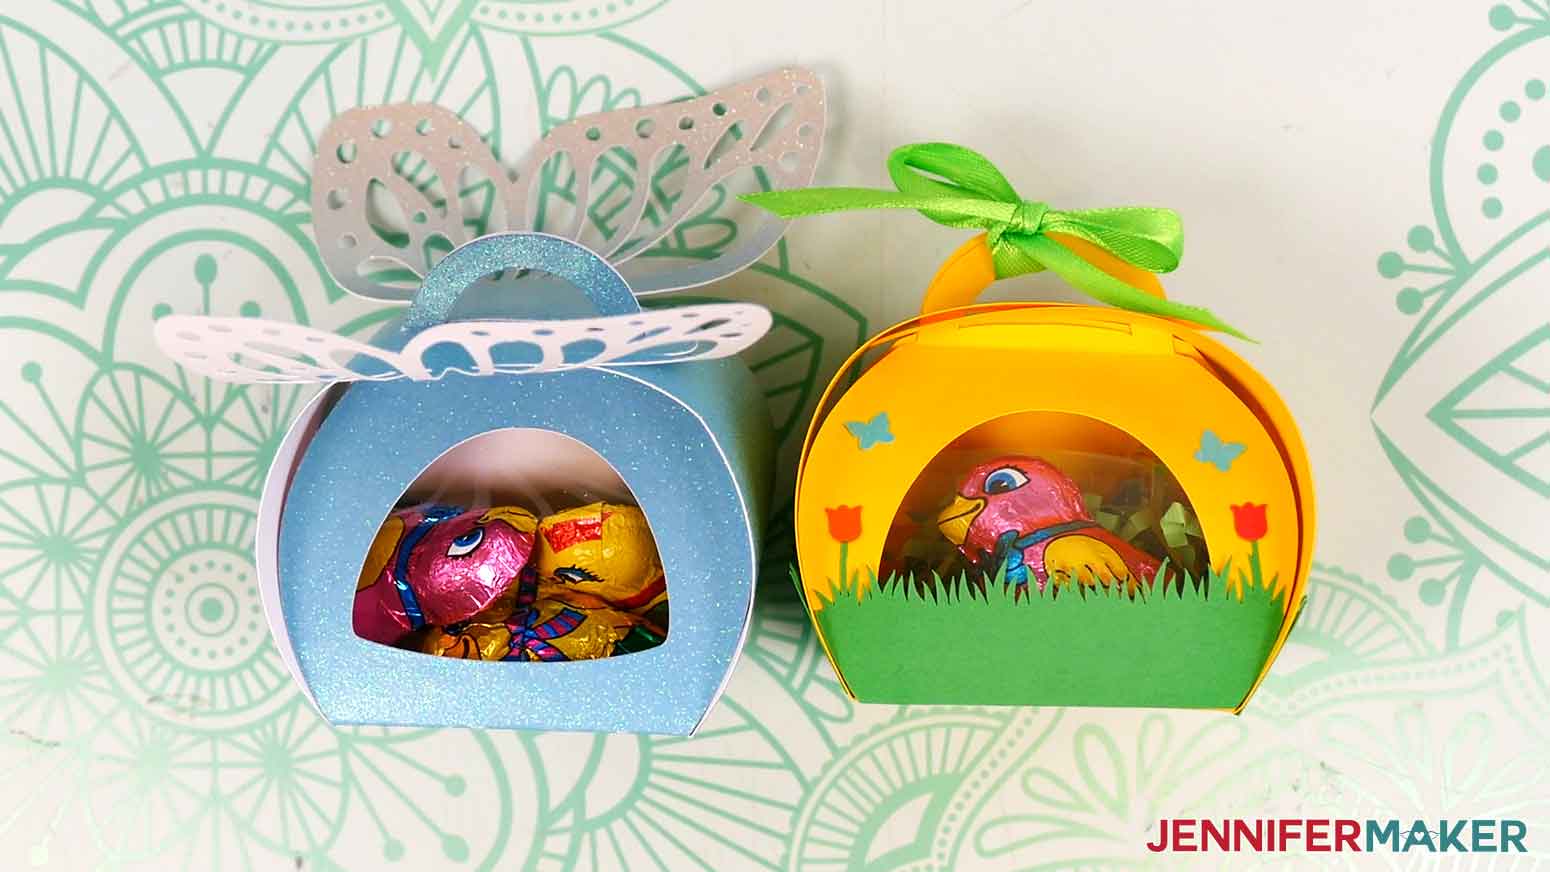
I love how versatile these little boxes are, too. You can make multi piece candy boxes, or display a special single item or candy in the window. I filled up my butterfly box with several candies, then used Easter grass and a wrapped animal chocolate to create a little scene you can see through the window of my flower treat box. How cute is that!
TIP: Use adhesive glue dots to make the candy stand up and stay in place.
These tiny treat boxes are the perfect way to gift something small for any special occasion this spring. You can even make a few in advance to have on hand for last-minute gifting emergencies. We’ve all been there! Just store them flat until you’re ready to fill them with goodies. Whether you’re preparing for Easter, creating a gift for Mother’s Day, or putting together party favors for a springtime soiree, these adorable window treat boxes are the REAL treat!

Let me show you how to make window treat boxes! This post contains some affiliate links for your convenience (which means if you make a purchase after clicking a link I will earn a small commission but it won’t cost you a penny more, there is no additional cost)! Read my full disclosure policy.
Materials to Make Window Treat Boxes
View my Amazon shopping list for the exact items I used!
- One (1) Sheet of 12″ x 12″ Glitter Ombré Cardstock (for the Butterfly design)
- Four (4) Sheets of 12″ x 12″ 65 lb. Cardstock (light yellow, green, red, and orange for Flower design)
- One (1) Sheet 8.5″ x 11″ 65 lb. Teal Cardstock (for Flower design)
- One (1) Sheet of 12″ x 12″ Acetate
- A way to cut your materials – I’m using the Cricut Maker 4, but you can also use the Cricut Maker, a Cricut Explore Series machine, or the Cricut Venture
- Cricut Green StandardGrip Machine Mat 12″ x 12”
- Scissors
- Scraper
- Brayer
- Scoring Stylus (optional for files with score lines) -OR-
- Single Scoring Wheel (optional for files with score lines)
- Craft Glue (I used Bearly Art Precision Craft Glue)
- Green Crinkle Paper Grass (optional for Flower treat box) -AND-
- Chocolate Baby Chick (optional for Flower treat box)
- 10″ of Ribbon (optional for Flower treat box)
- Two (2) Small Zots Glue Dots (optional to secure treat)
How to Make Window Treat Boxes!

Window Treat Boxes
Learn how to make easy window treat boxes!
Materials
- One (1) Sheet of 12" x 12" Glitter Ombre Cardstock (for the Butterfly design)
- Four (4) Sheets of 12" x 12" 65 lb. Cardstock (Light Yellow, Green, Red, and Orange for the Flower design)
- One (1) Sheet of 8.5" x 11" 65 lb. Teal Cardstock (For Flower design)
- One (1) Sheet of 12" x 12" Acetate
- Green Crinkle Paper Grass (optional for Flower treat box) -AND-
- Chocolate Baby Chick (optional for Flower treat box)
- 10" of Ribbon (optional for Flower treat box)
- Two (2) Small Zots Glue Dots (optional to secure treat)
- Design #726 (My free SVG/PDF/DXF design files are available in my free resource library - get the password by filling out the form at the bottom of this page)
Tools
- A way to cut your materials - I’m using the Cricut Maker 3, but you can also use the Cricut Maker, a Cricut Explore Series machine, or the Cricut Venture
- Cricut Green StandardGrip Machine Mat 12" x 12”
- Brayer
- Spatula
- Scraper
- Scoring Stylus (optional for files with score lines) -OR-
- Single Scoring Wheel (optional for files with score lines)
- Craft Glue (I used Bearly Art Precision Glue)
Instructions
STEP 1: GET MY FREE EASTER TREAT BOX DESIGNS
First, download my Easter Treat Boxes SVG/PDF/DXF files from my free library -- look for Design #726. Alternatively, you can use the Save This Project form near the top of this post and the design link will be emailed to you.
There are two designs in the folder: a butterfly box and a flower box. There are score and no-score versions of each design. There is also a DXF folder with cut files, and a PDF folder with versions you can print and cut by hand.
TIP: If you’re not sure how to upload, go to jennifermaker.com/svgs to learn how to unzip and upload SVG files.
STEP 2: PREPARE AND CUT YOUR EASTER TREAT BOX DESIGN
See my original Easter Treat Boxes tutorial for details on preparing these designs in Cricut Design Space.
CUTTING
- On the Make Screen, click “Browse All Materials.”
- Search for and select the settings needed for the materials you’re using. I used glitter cardstock for the butterfly box mat, 65 lb. cardstock for the flower box mats, and Cricut acetate for the windows.
These are the settings you can use for each material:
65 lb. Cardstock - “Medium Cardstock - 80 lb (216 gsm)” setting with "More" Pressure
Glitter Cardstock - "Glitter Cardstock" setting with "More" Pressure
Acetate - "Acetate" setting with "More" Pressure
STEP 3: ASSEMBLE YOUR EASTER TREAT BOXES
BUTTERFLY
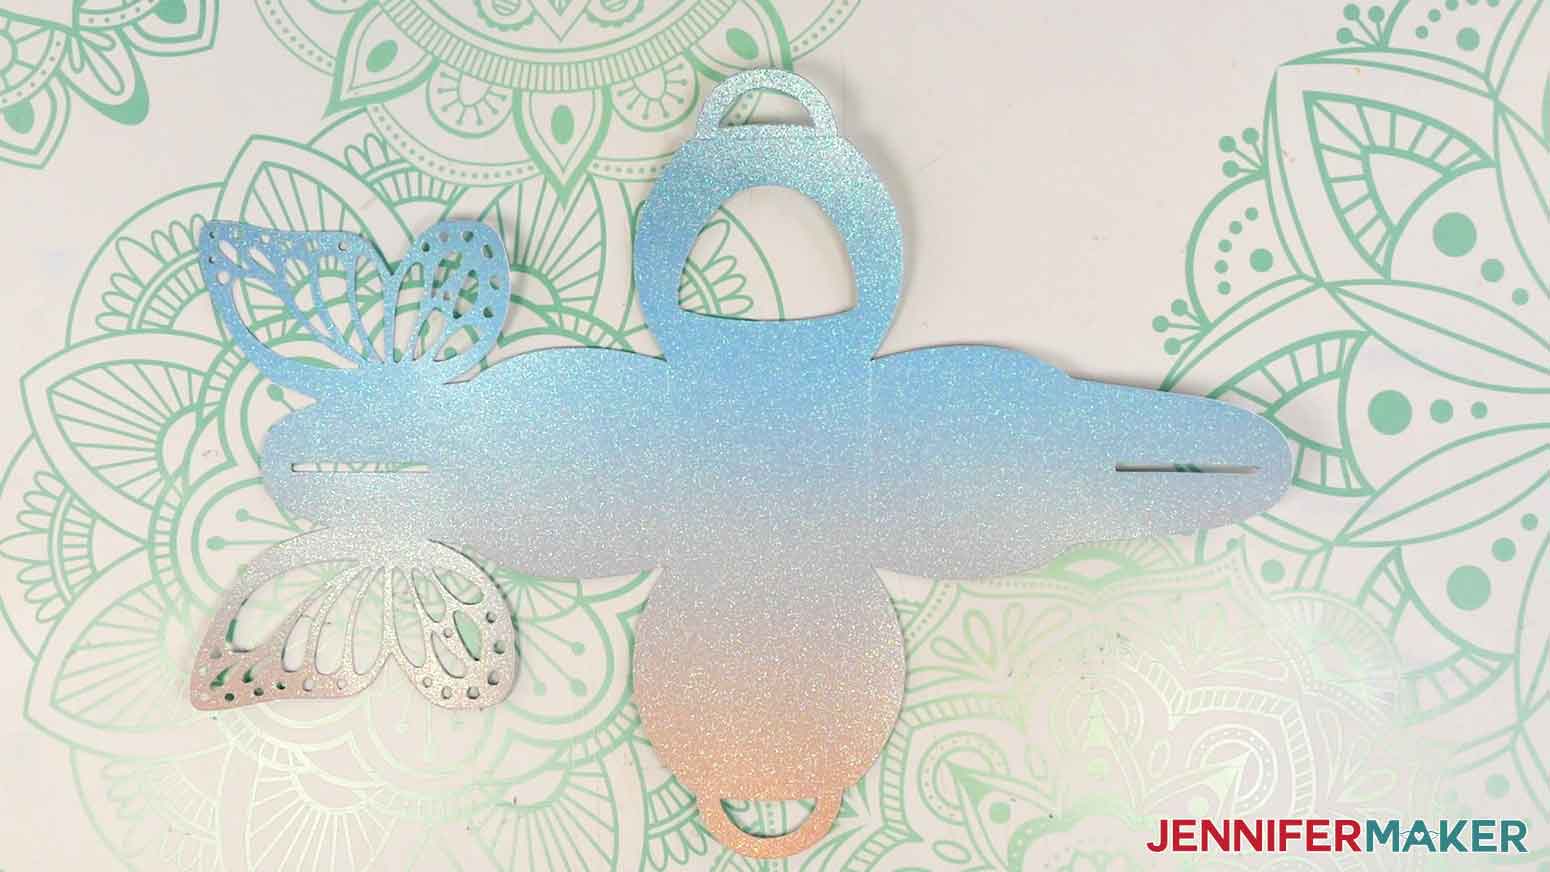
- The butterfly box has four sides: one small front side with a window cutout and tab, one small back side that is solid with a tab, one side with a butterfly and slit, and one long side with a slit.

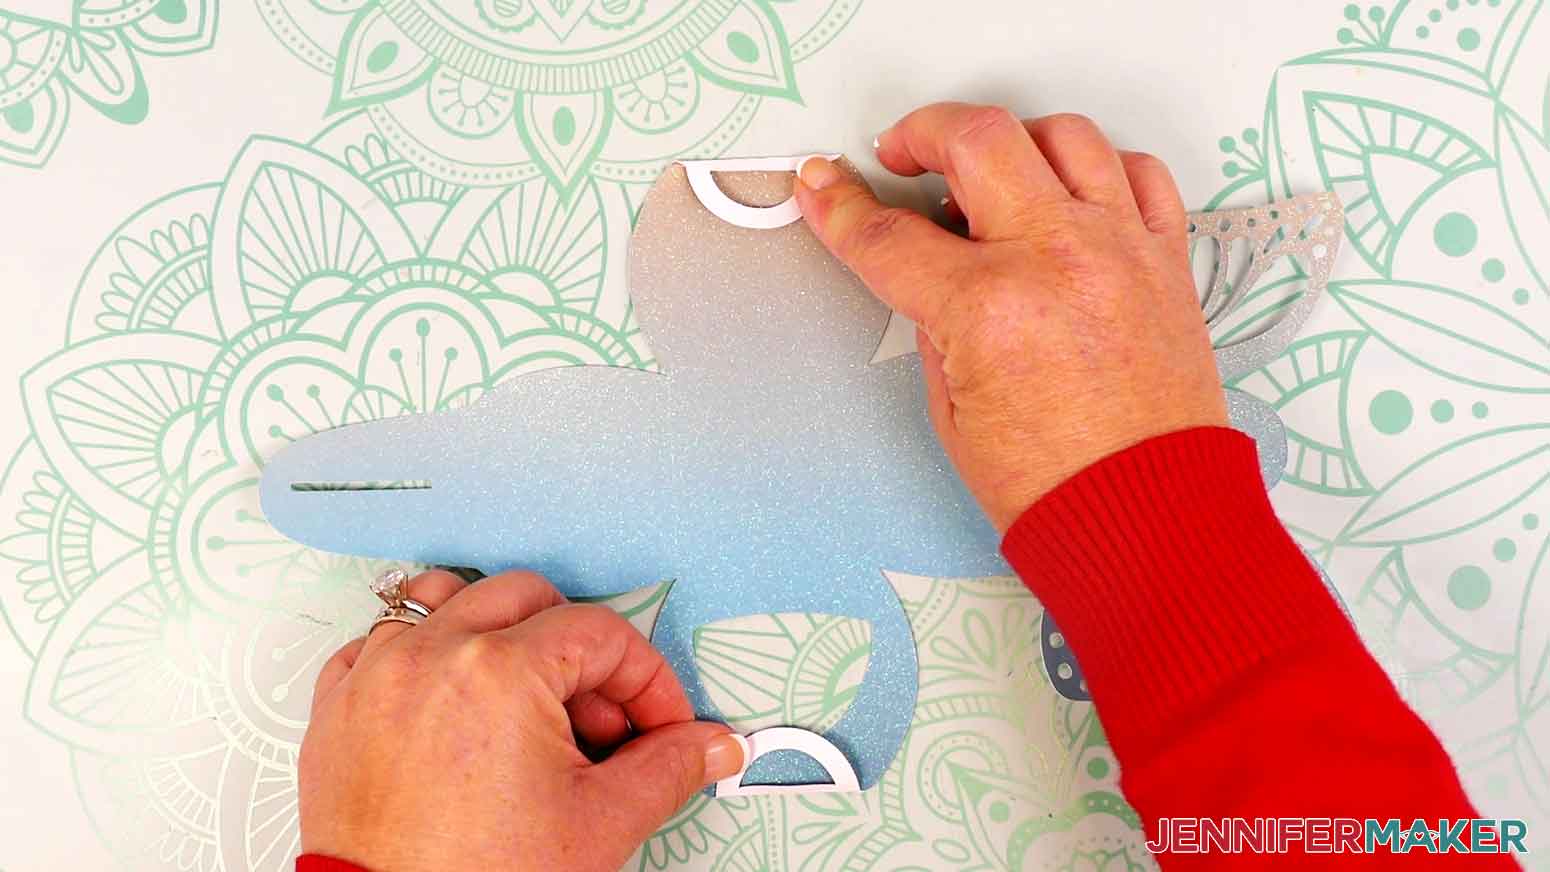
- With the box piece pretty-side-up, carefully fold up the two tabs at the end of the smaller two sides.
- Turn the box piece pretty-side-down.
- Carefully fold up the four sides along the creases.
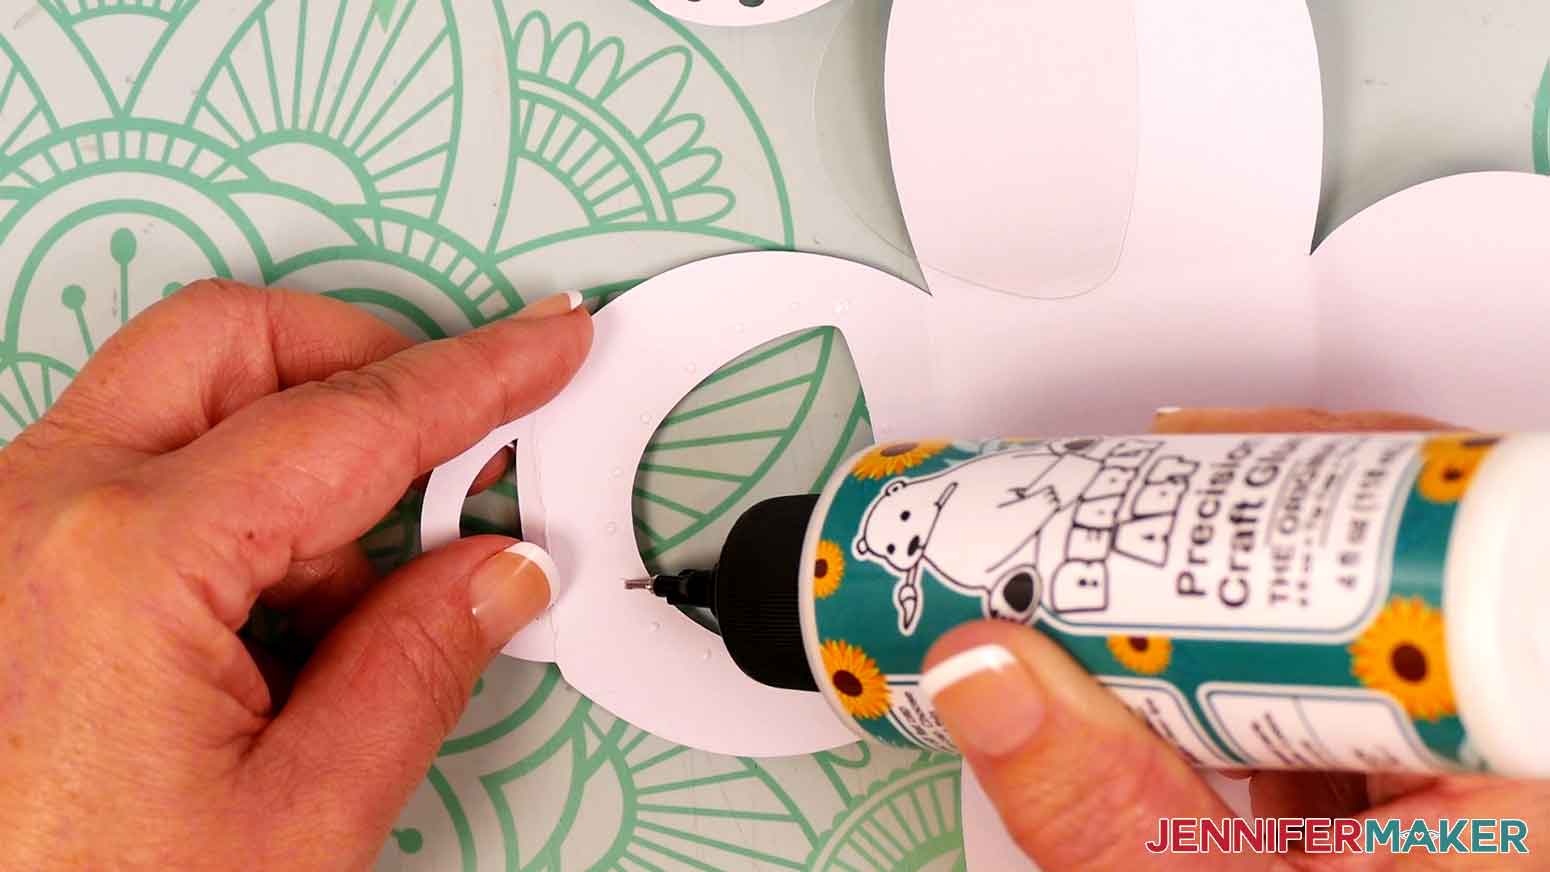
- Apply small dots of craft glue around the window cutout.
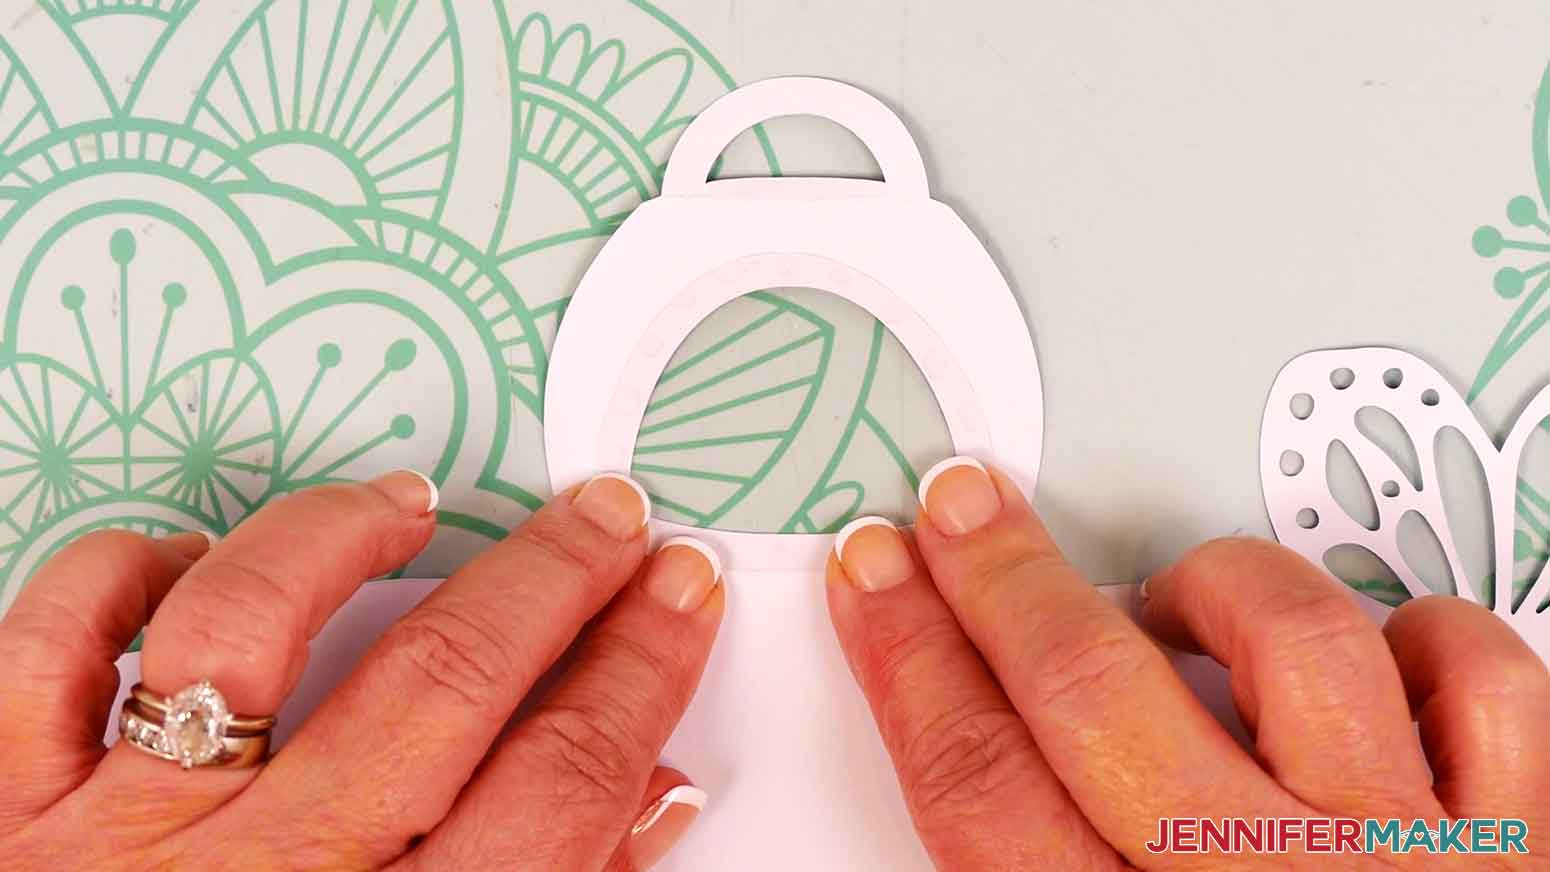
- Orient the piece of acetate so it matches the window cutout, then place the piece of acetate over the window, onto the glue. Press to adhere it, then let the glue dry.
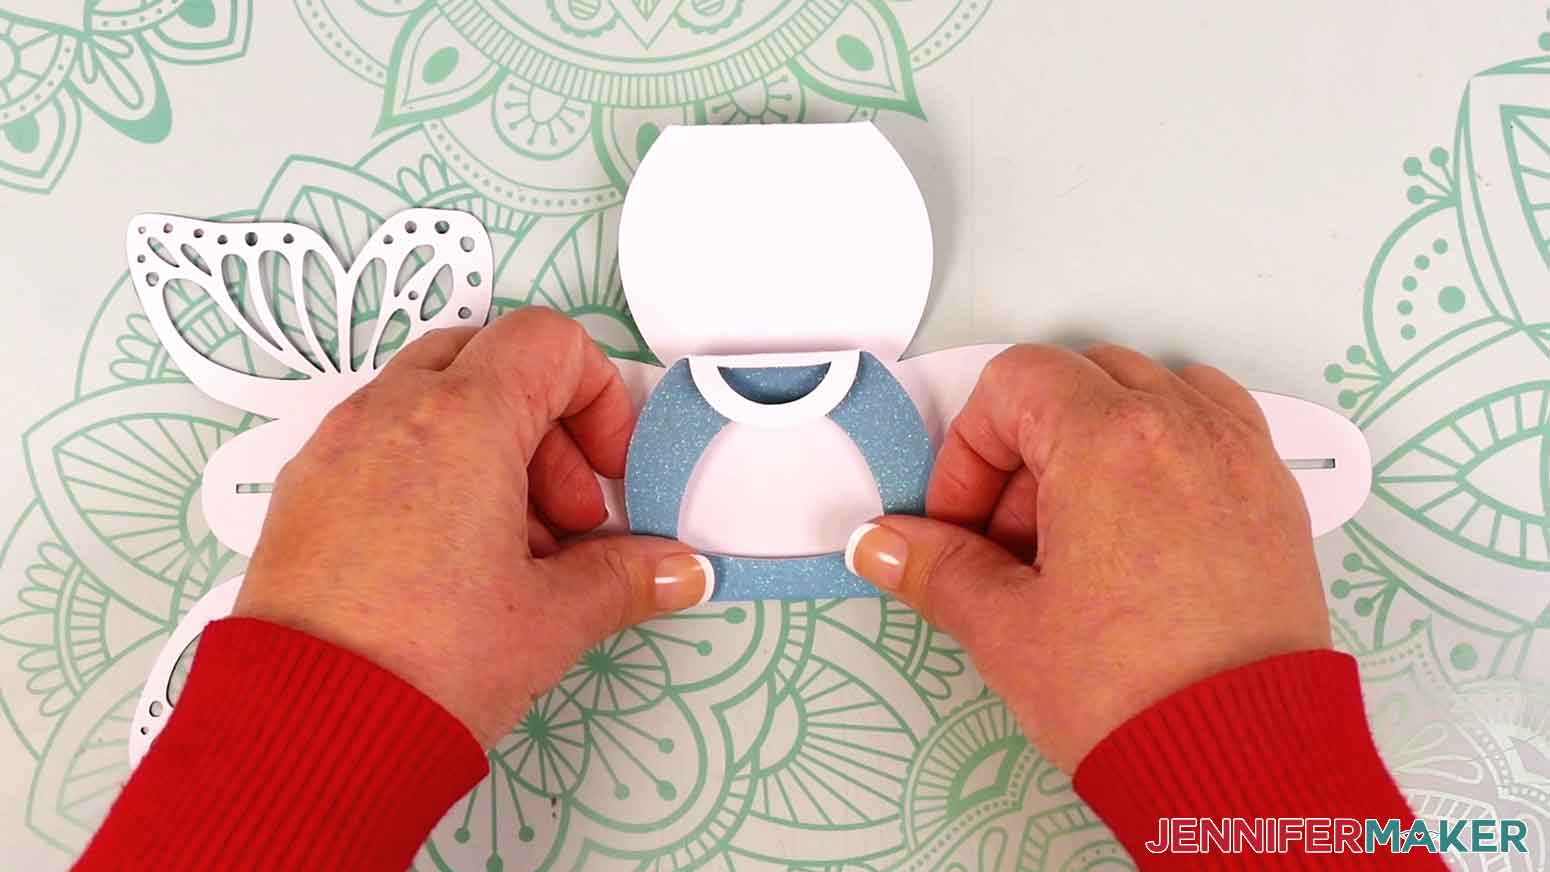
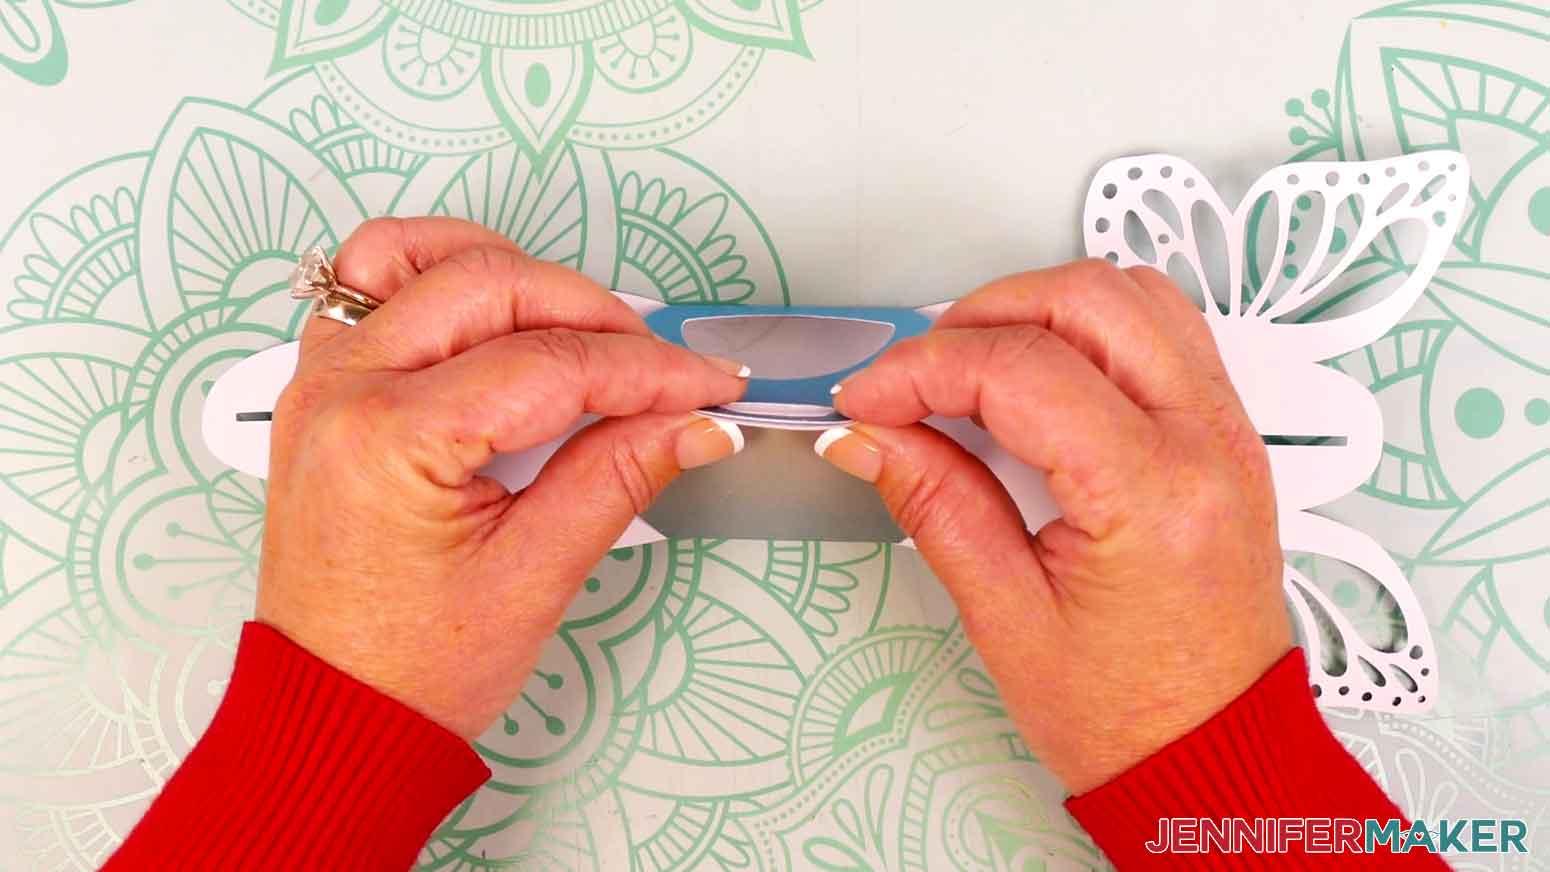
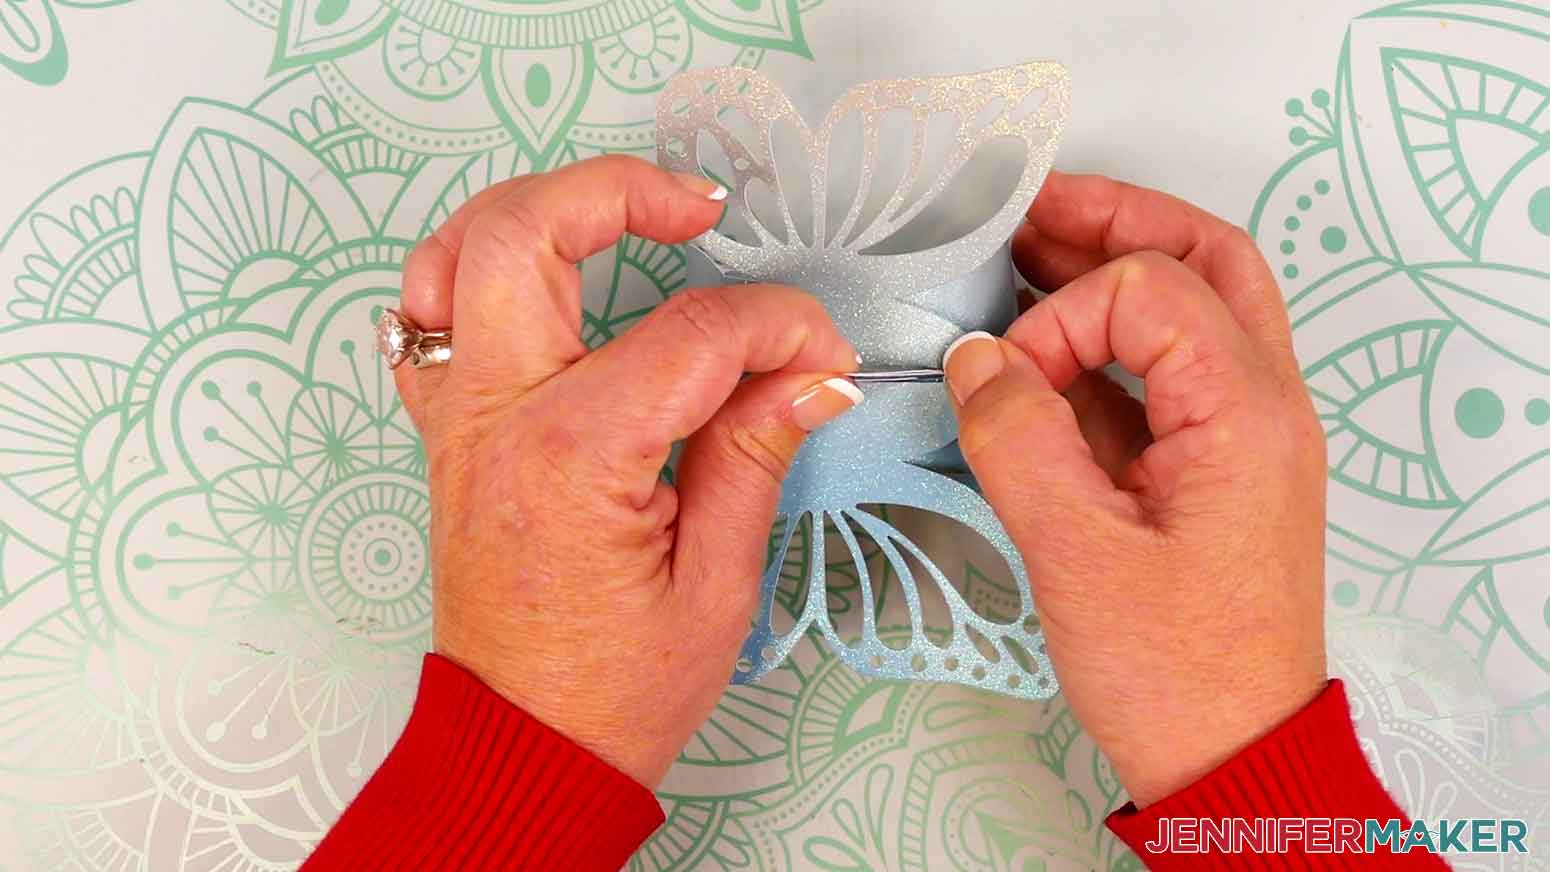
- Lift the front window side and back solid sides up so the tabs match. Pinch the tabs together with your fingers.
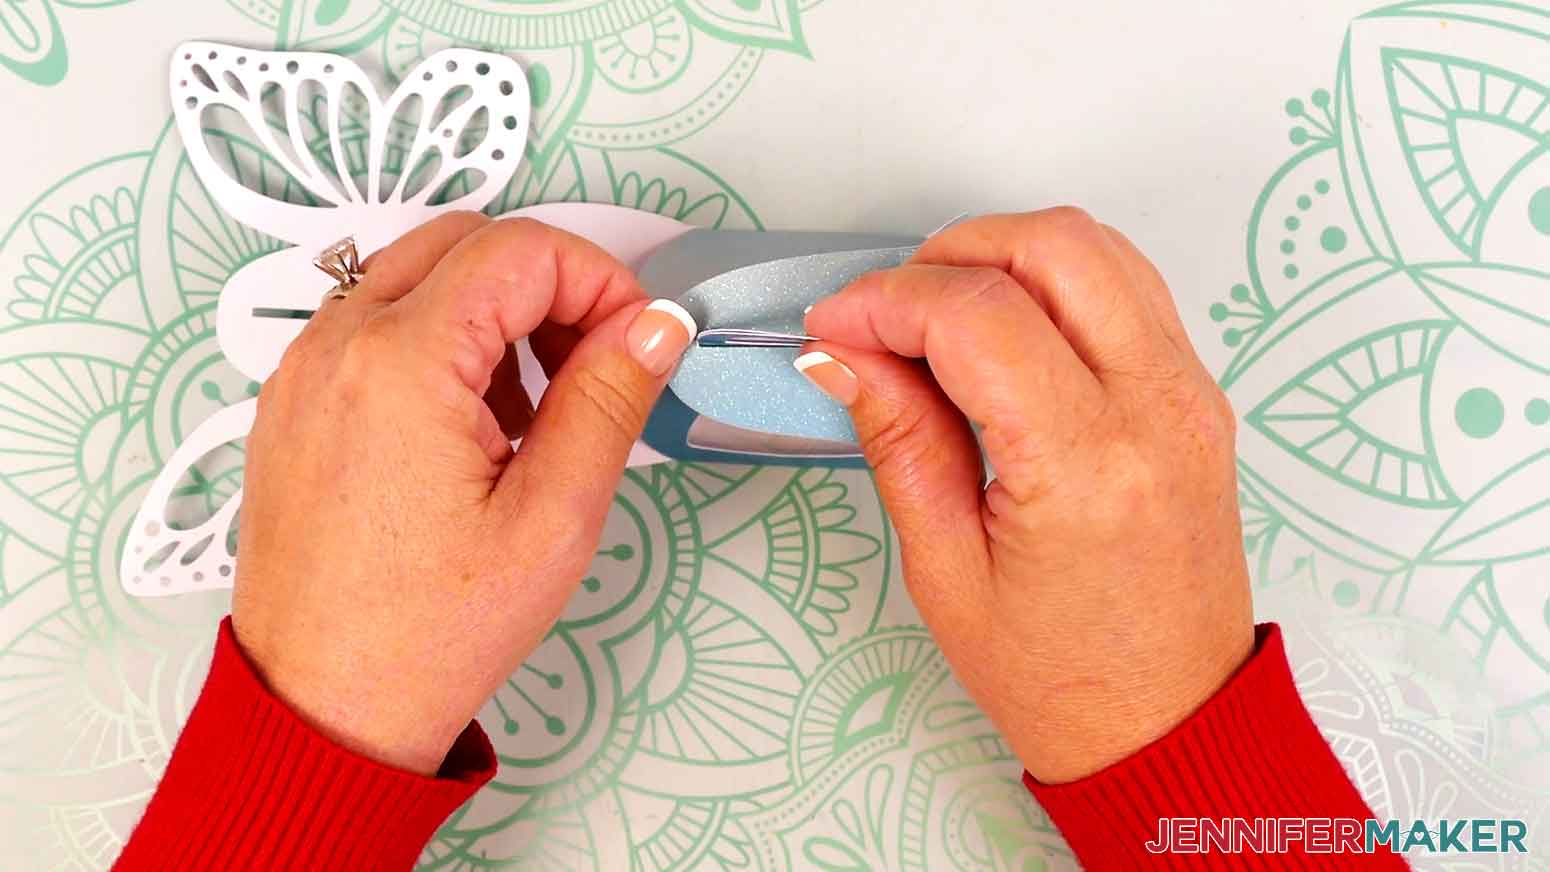
- Lift the long side with a slit up and gently tuck the pinched tabs through the slit.
- If you are putting candy inside the box, add it now.
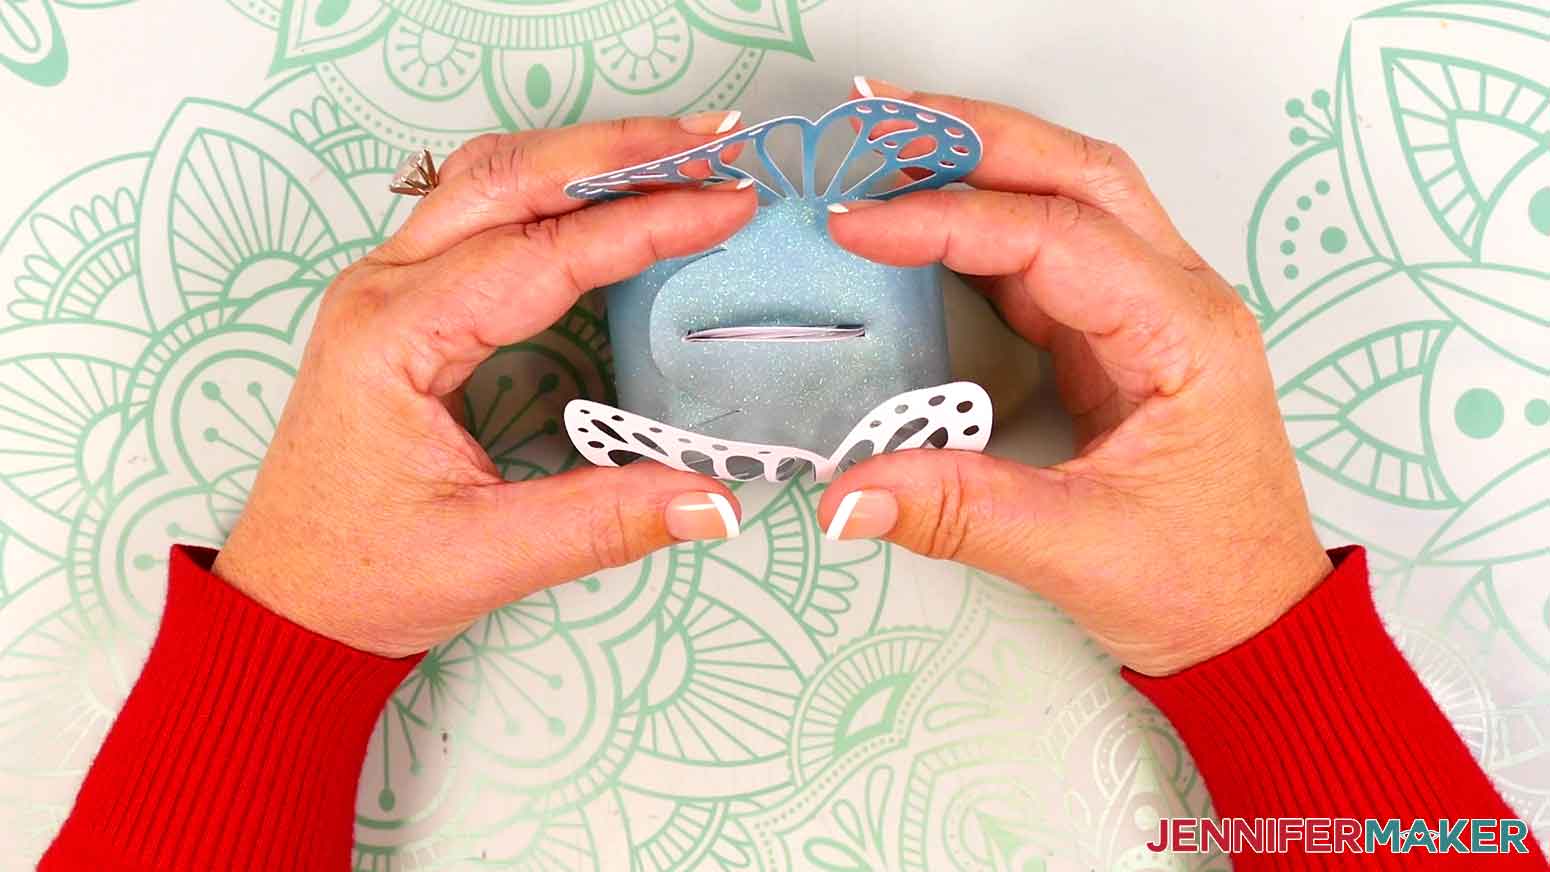
- Lift the butterfly side up and gently tuck the pinched tabs through the slit in the butterfly.
NOTE: For a slightly different look, you can fold the butterfly side up first, then fold the long tab side up. - Gently curve the butterfly’s wings up with your fingers for a finished look.
FLOWER
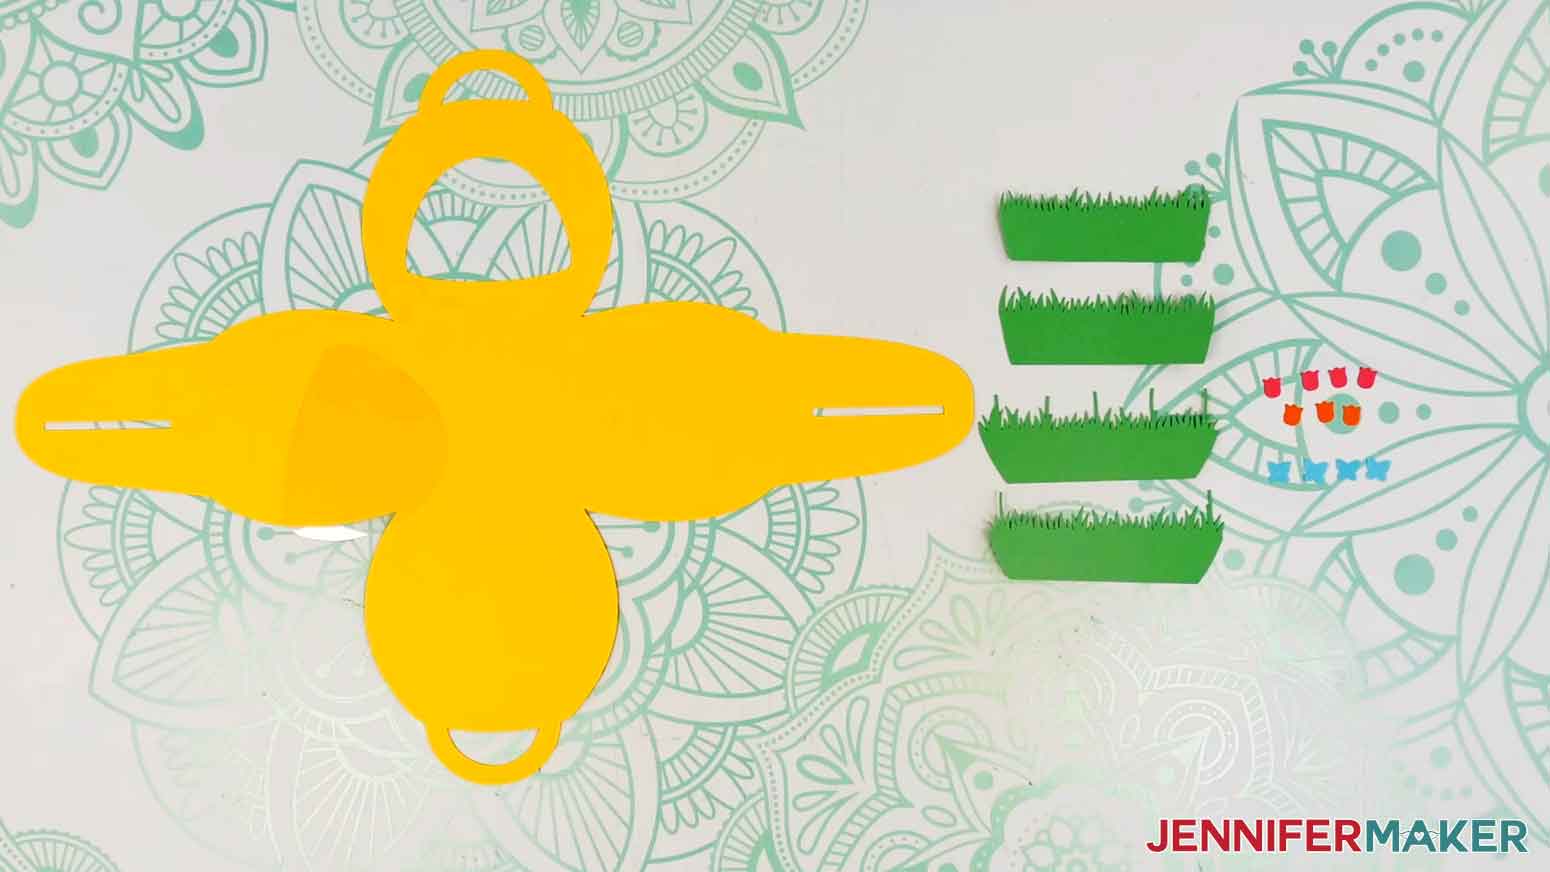
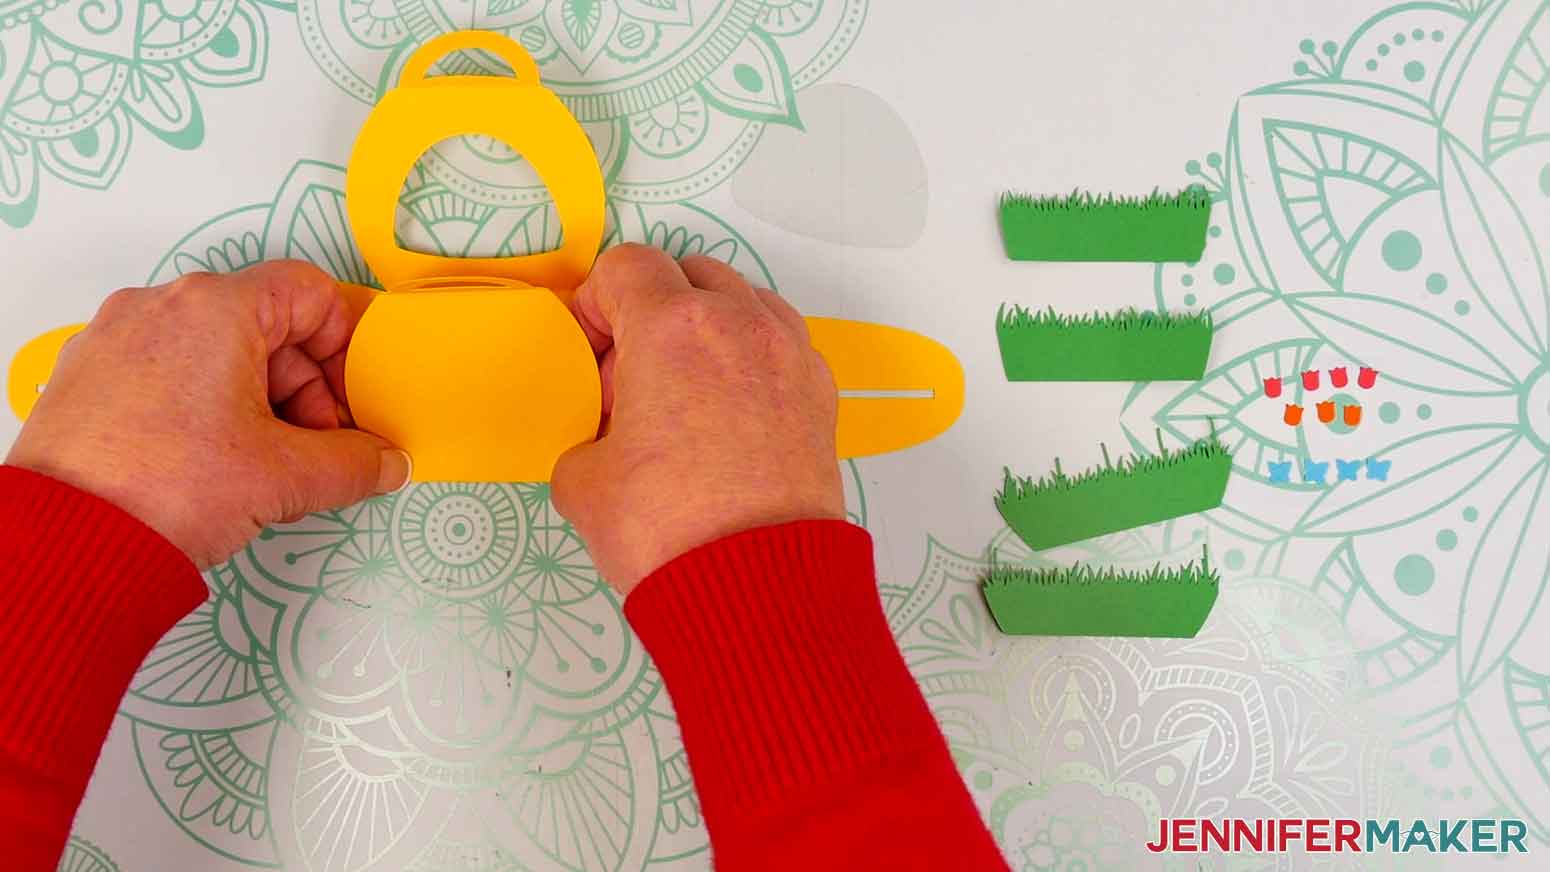
- The flower box has four sides: one small front side with a window cutout and tab, one small solid back side with a tab, and two long sides with slits. There are two shorter grass pieces, two longer grass pieces, seven tiny tulips, and four tiny butterflies.
- With the box piece pretty-side-up, carefully fold up the two tabs at the end of the smaller two sides.
- Turn the box piece pretty-side-down and carefully fold up the four sides along the creases.
- Turn the box piece pretty-side-up again.
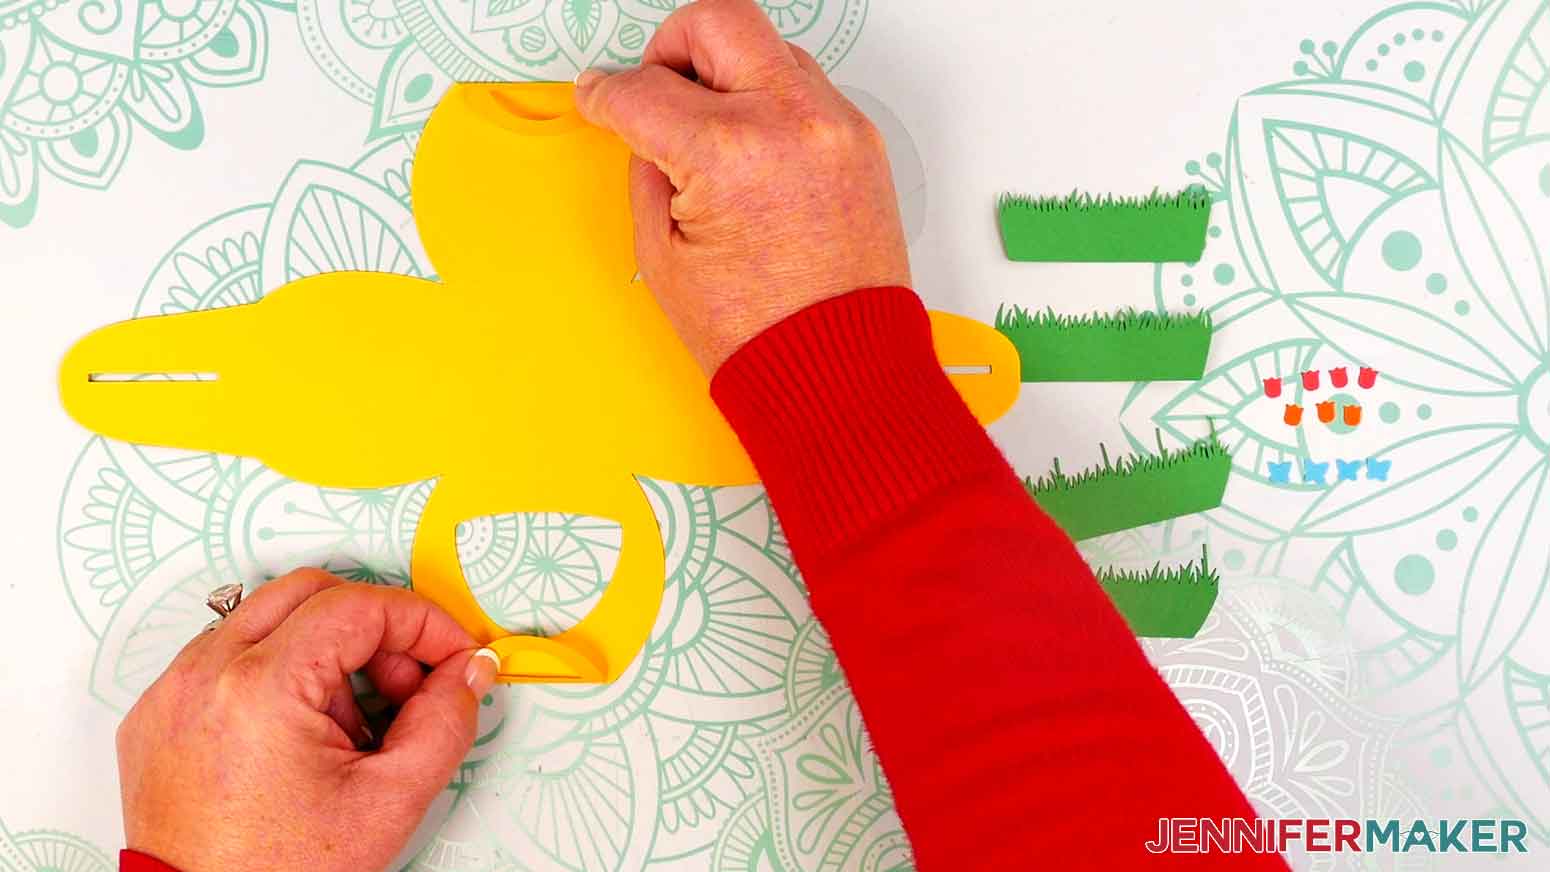
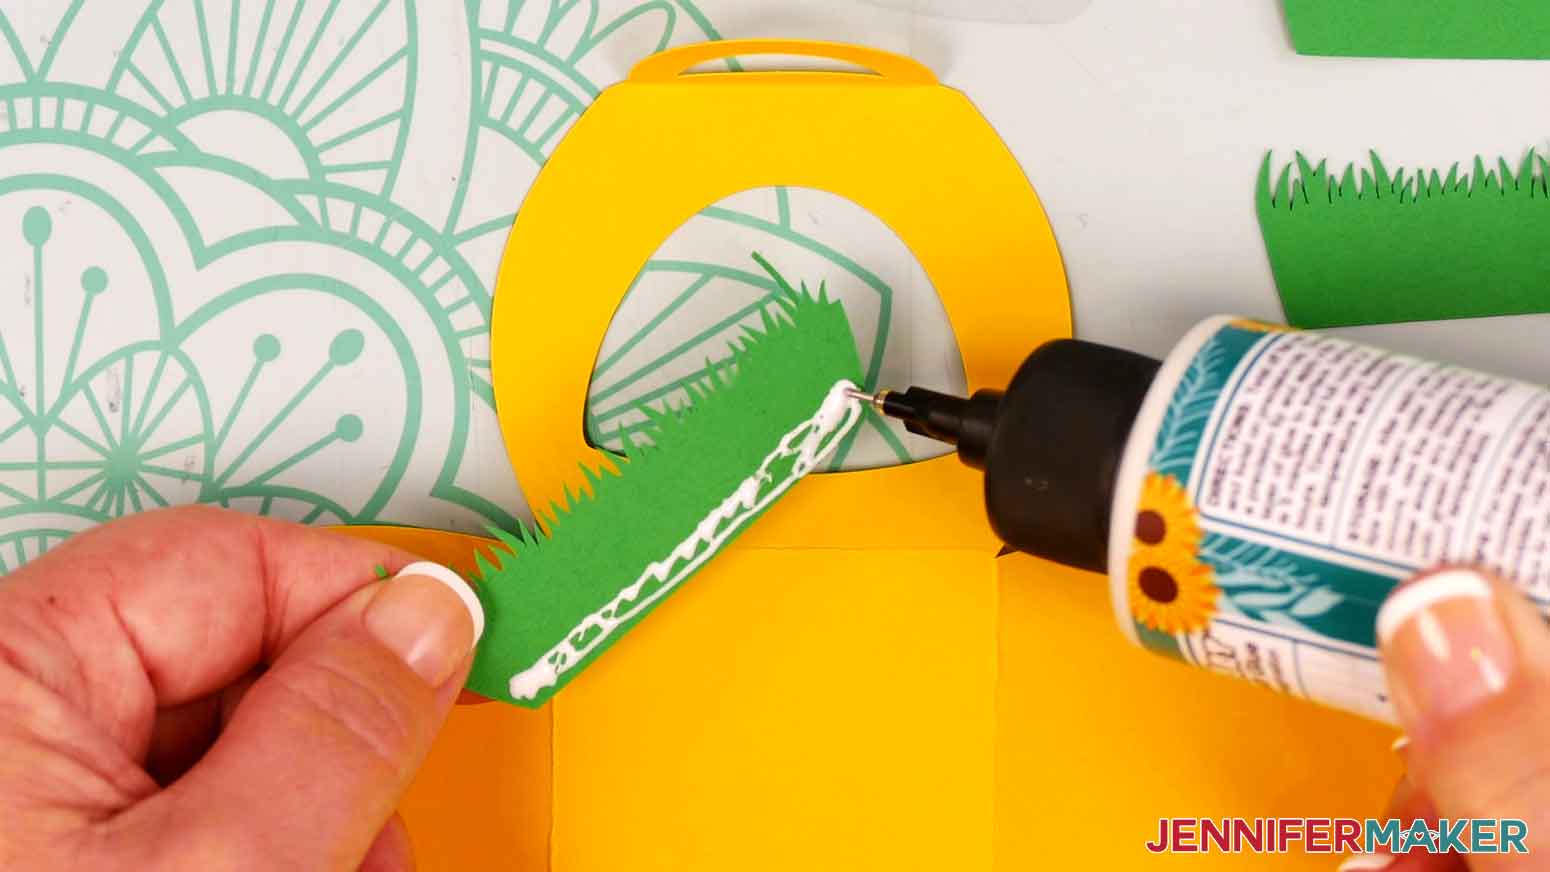
- Grab the longer grass piece with two tall stems on either end. Apply glue to the back of the solid area.
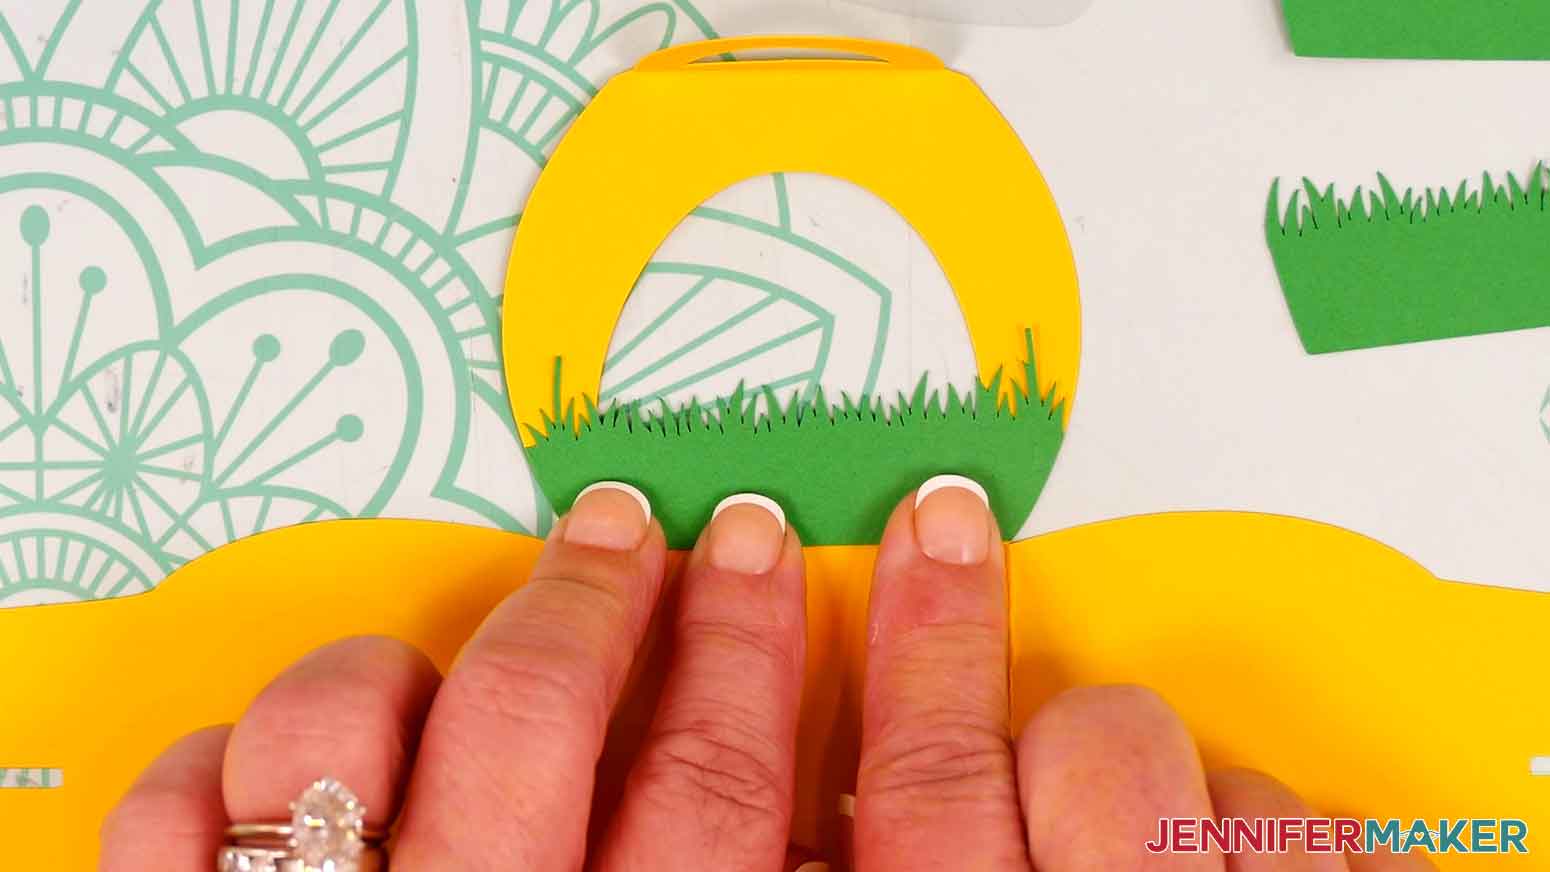
- Adhere the grass piece to the bottom of the side with the window cutout. Align the straight edge with the crease and the two curved ends with the curved edges of the box’s side.
TIP: Fold the box’s side up and ensure the grass piece’s straight edge is well-aligned with the crease. Make adjustments before the glue dries. - Grab the longer grass piece with five tall stems. Repeat steps 5-6 to adhere it to the solid back side of the box with a tab.
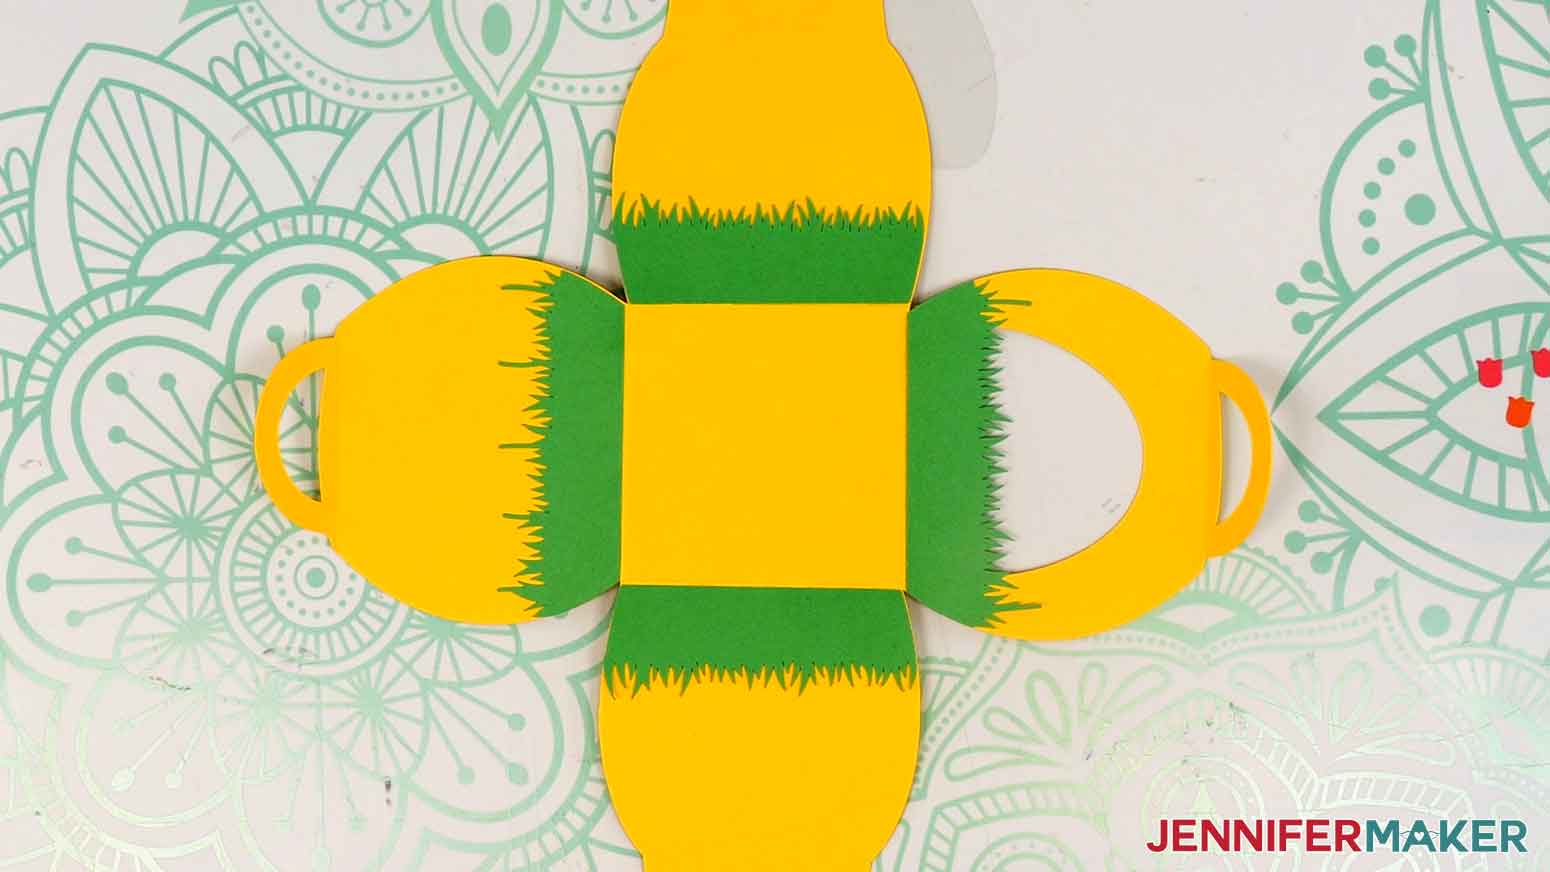
- Grab a shorter grass piece. Apply glue to the back of the solid area.
- Adhere the grass piece to the bottom of one of the longer sides with slits. Align the straight edge with the crease and the two curved ends with the curved edges of the box’s side.
- Repeat steps 8-9 with the other shorter piece of grass on the box’s other long side.
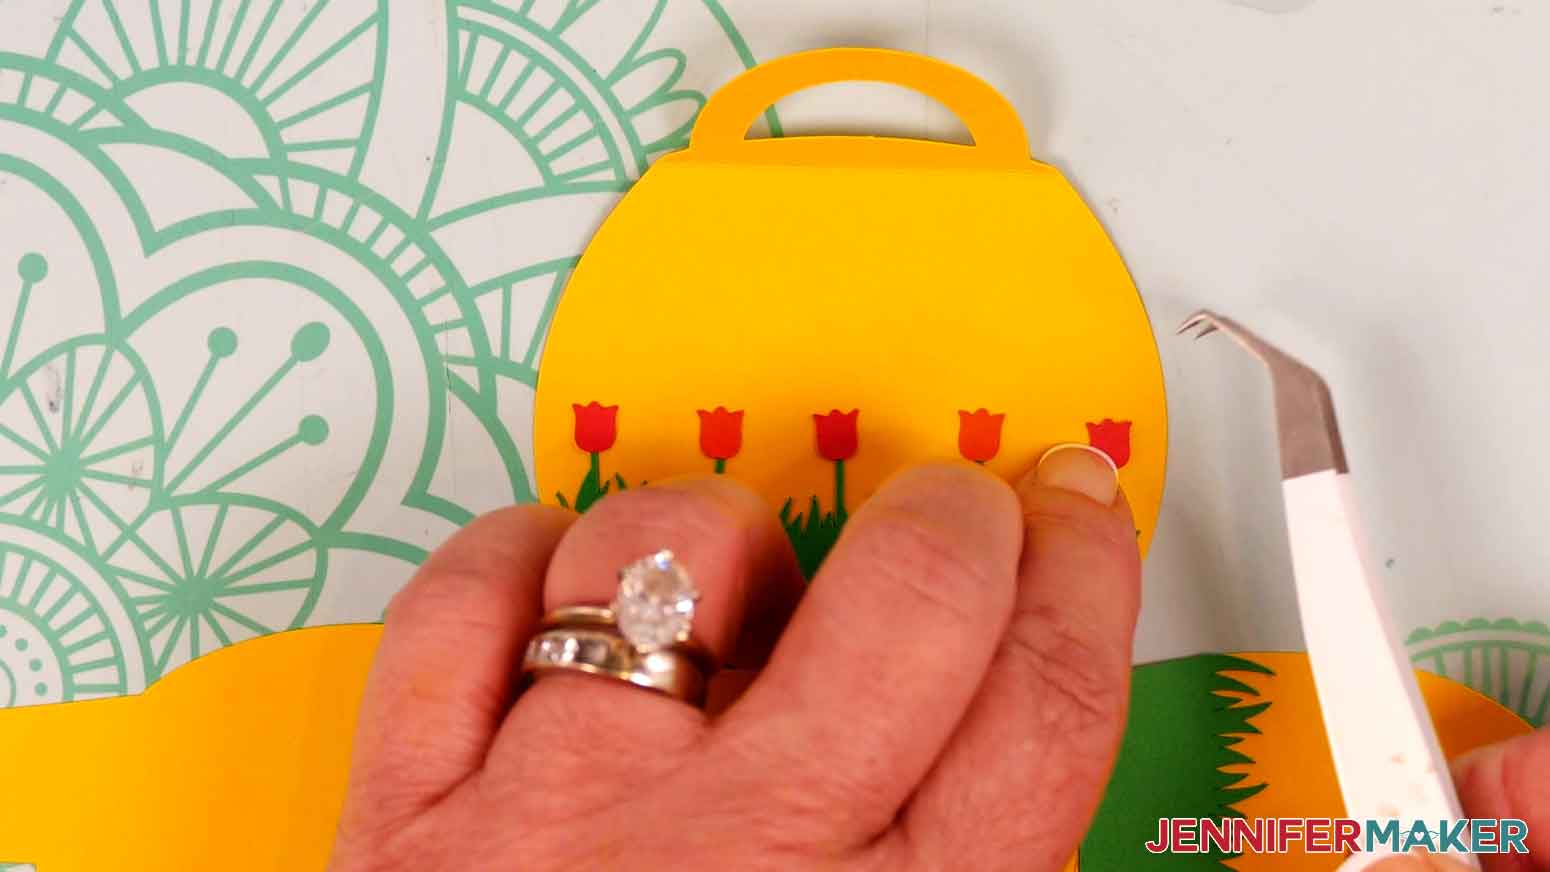
- Place a tulip at the top of each stem in the grass.
- Apply a dot of craft glue to the back of one of the tulip pieces. Adhere it to the top of its stem.
TIP: Use tweezers to help place the tiny pieces on the box. - Repeat step 12 with the remaining six tulips.
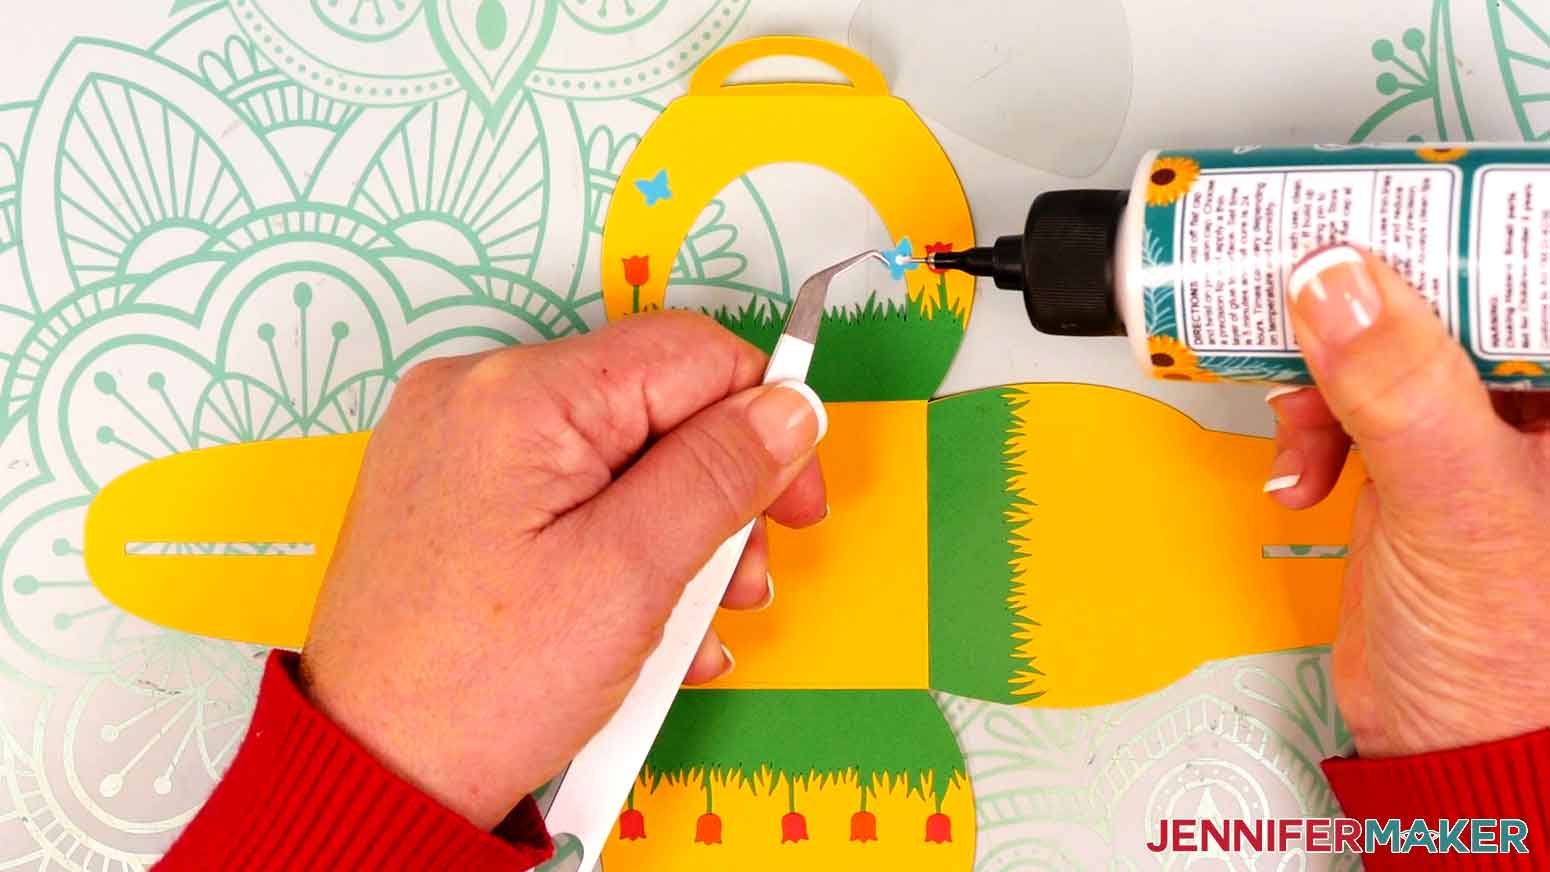
- Place two butterfly pieces above the flowers on the back side of the box, and two butterfly pieces above each flower on the front window side of the box.
TIP: Use your Canvas in Cricut Design Space for reference on placing the butterflies. - Apply a dot of craft glue to the back of one of the butterflies. Adhere it to the box.
- Repeat step 15 with the remaining three butterflies.
- Once the glue is dry on the grass, flower, and butterfly pieces, turn the box piece pretty-side-down.
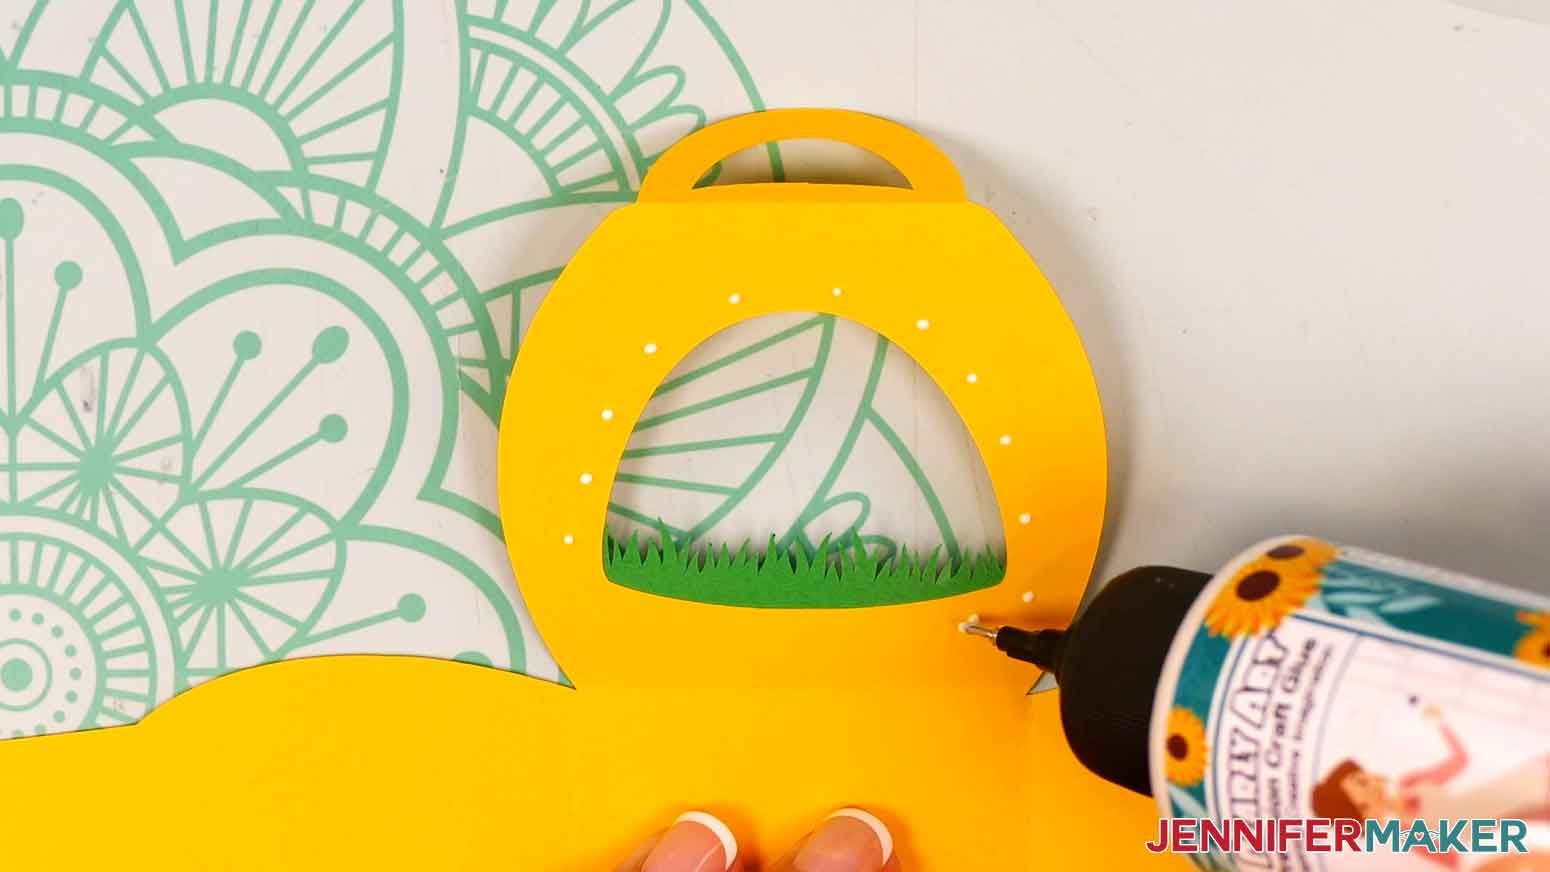
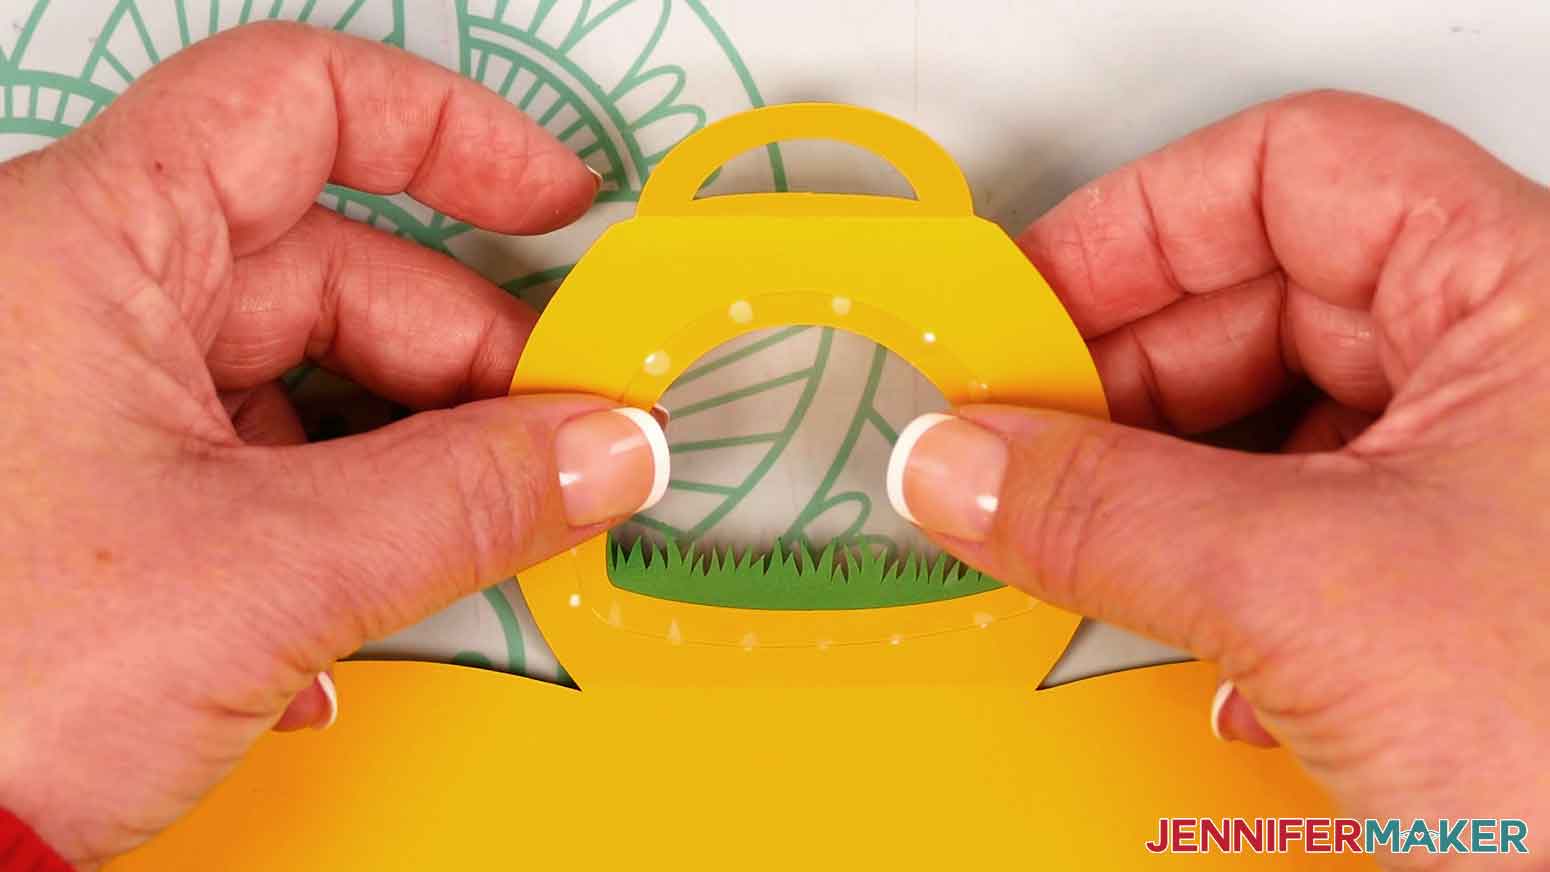
- Apply small dots of craft glue around the window cutout.
- Orient the piece of acetate so it matches the window cutout, then place the piece of acetate over the window, onto the glue. Press to adhere it, then let the glue dry.
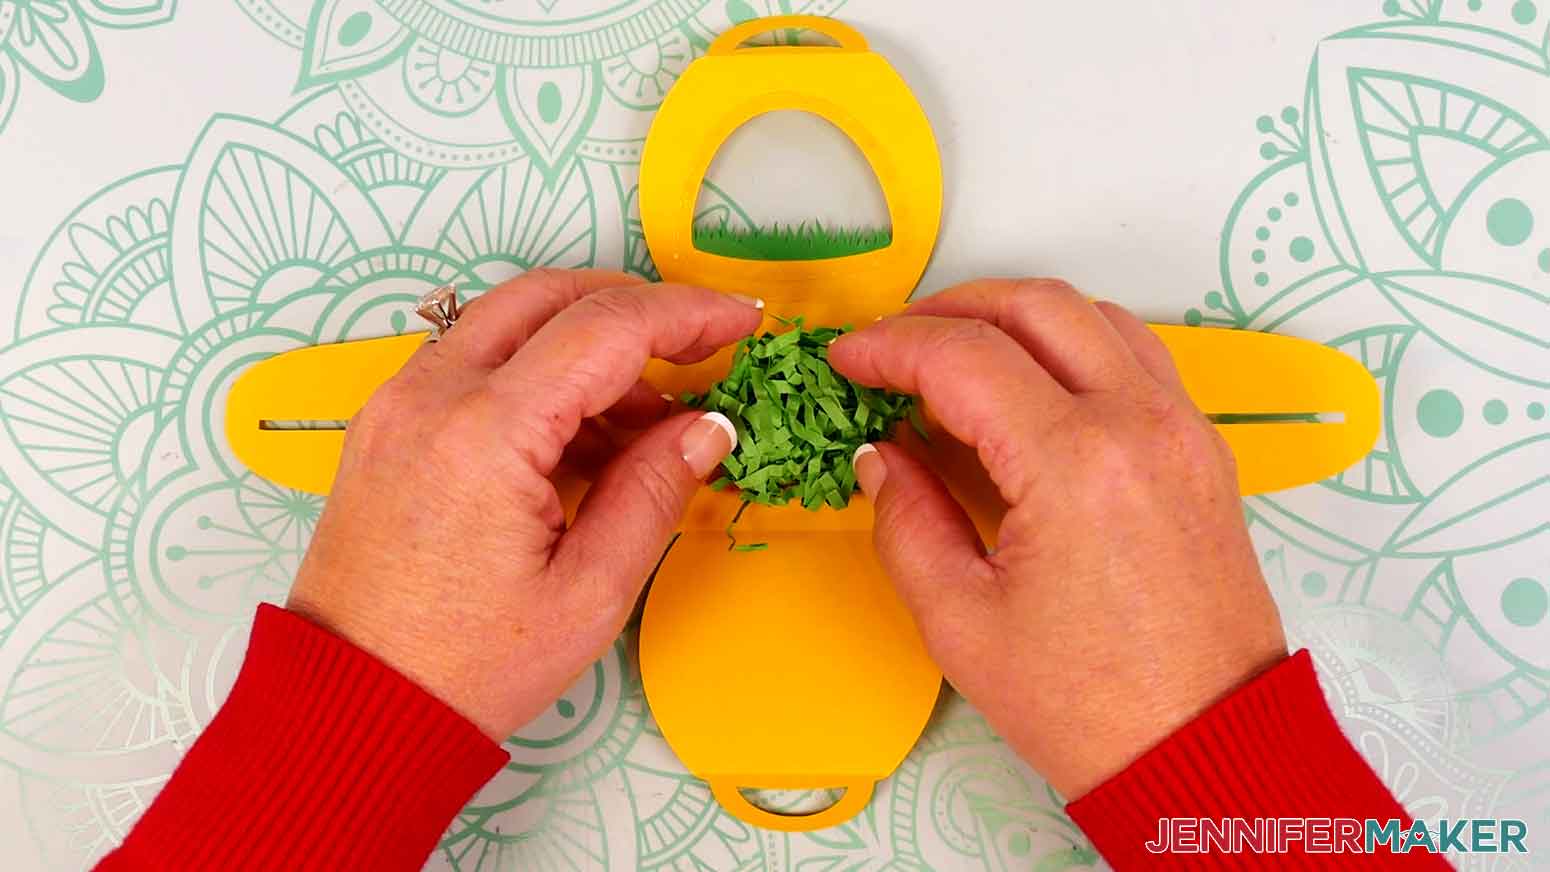
- Place a small pile of Easter grass into the middle of the box.
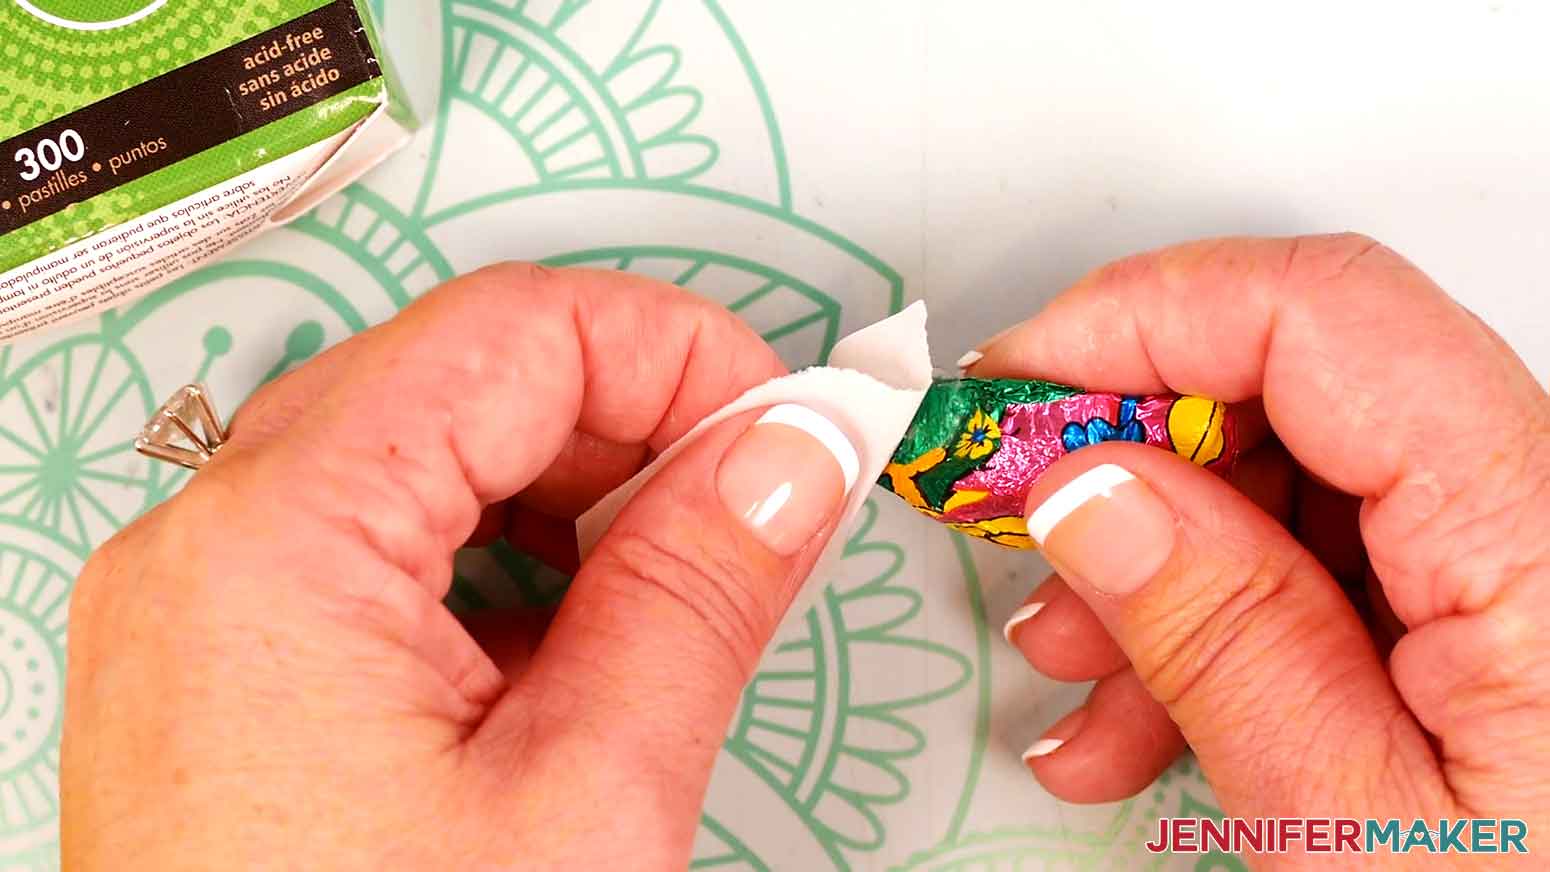
- Apply one or two glue dots to the bottom of a piece of wrapped candy.
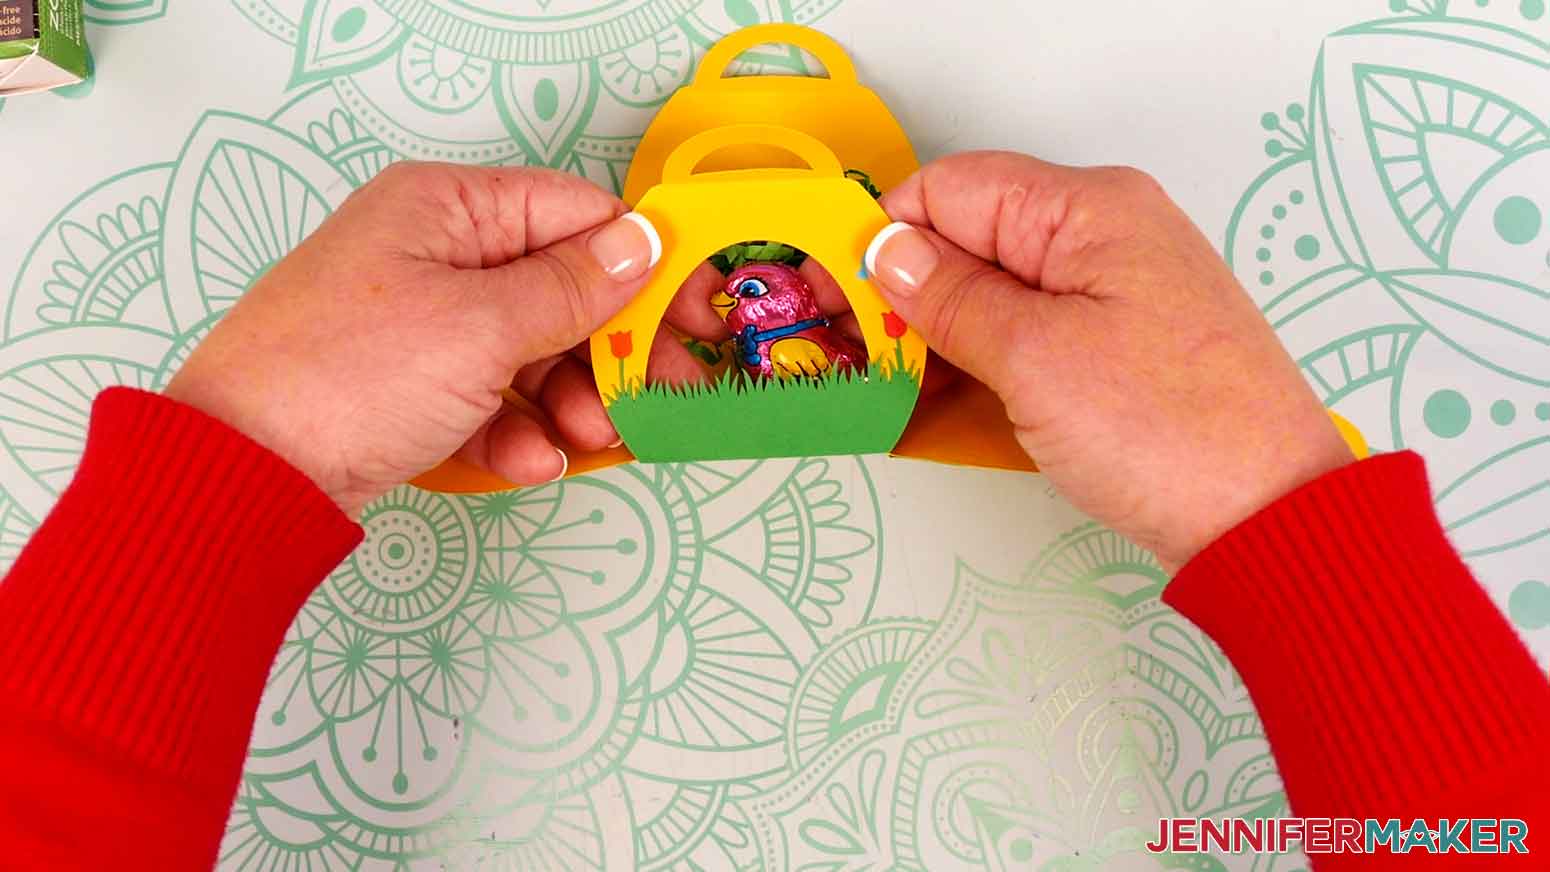
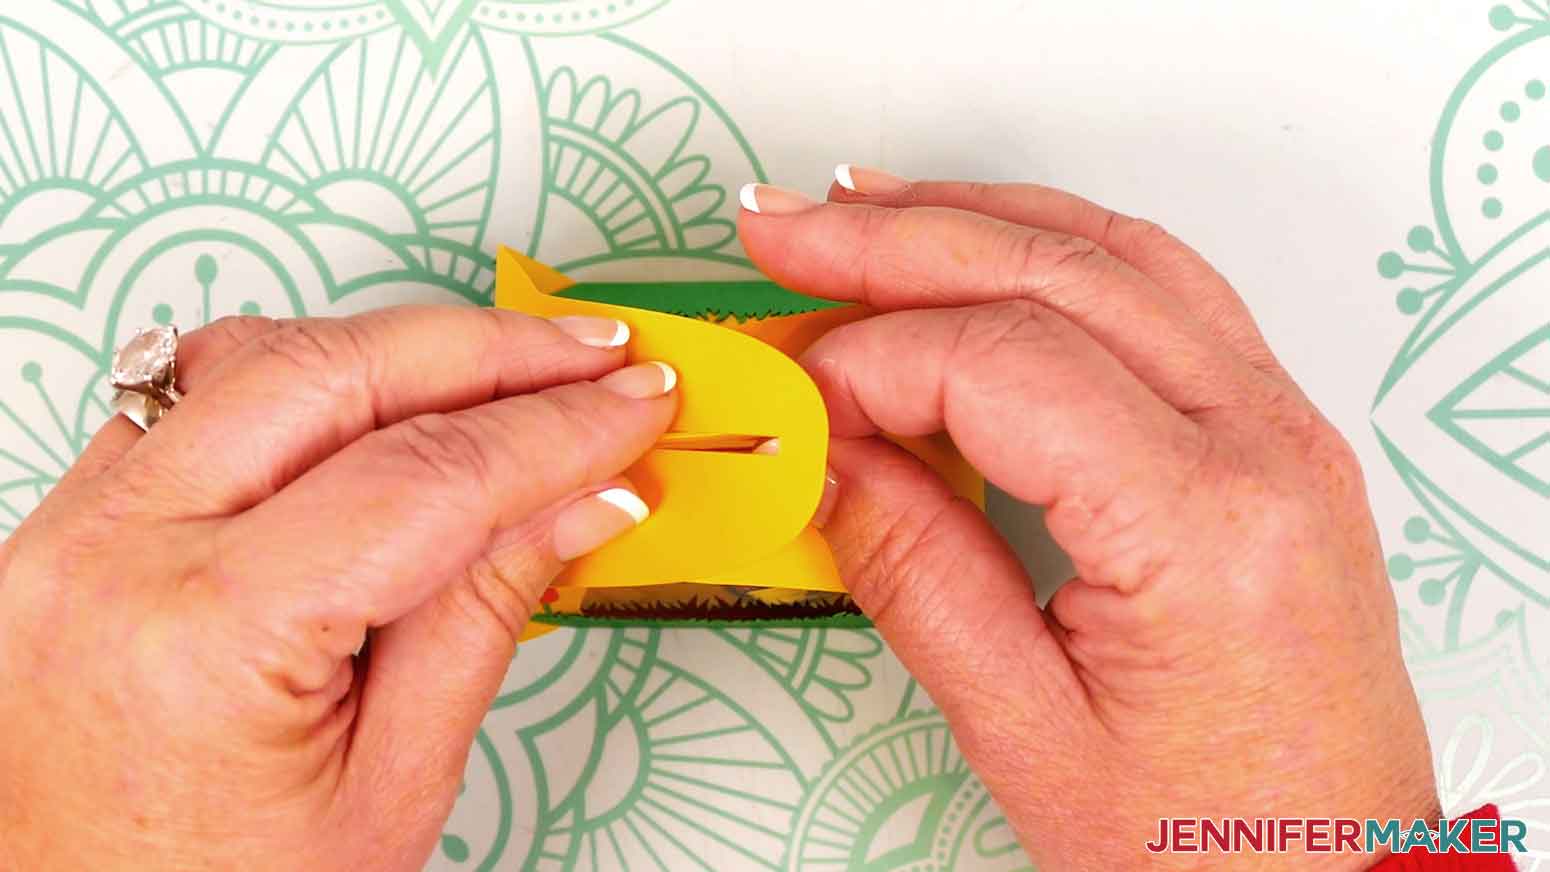
- Lift up the side of the box with the window.
- Position the candy behind the window, between the Easter grass and the crease, so it’s clearly visible through the window. Press the candy down to adhere it directly to the bottom of the box.
TIP: If the wrapped candy looks like an animal, position it so it’s “looking” out the window! - Lift the front window side and back solid sides up so the tabs match. Pinch the tabs together with your fingers.
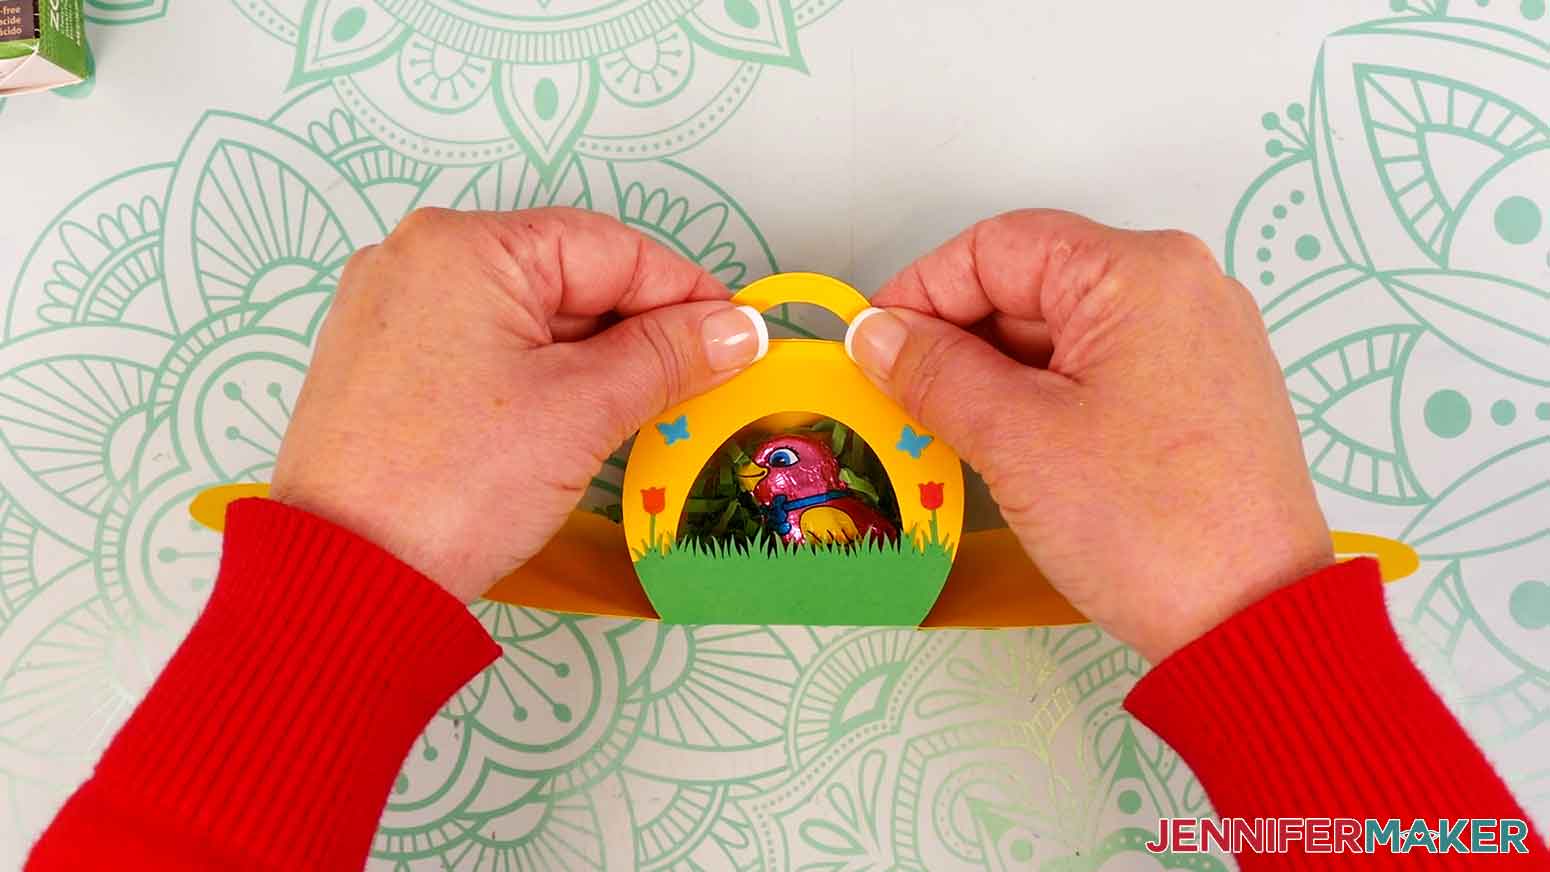
- Lift the one long side up and gently tuck the pinched tabs through the slot.
- If you are putting more candy in the box, add it now.
TIP: Tuck any Easter grass that may be poking out back into the box. - Lift the other long side up and gently tuck the pinched tabs through the slot.
- String a ribbon through the cutout at the top of the tabs, and tie a bow to hold the box closed.

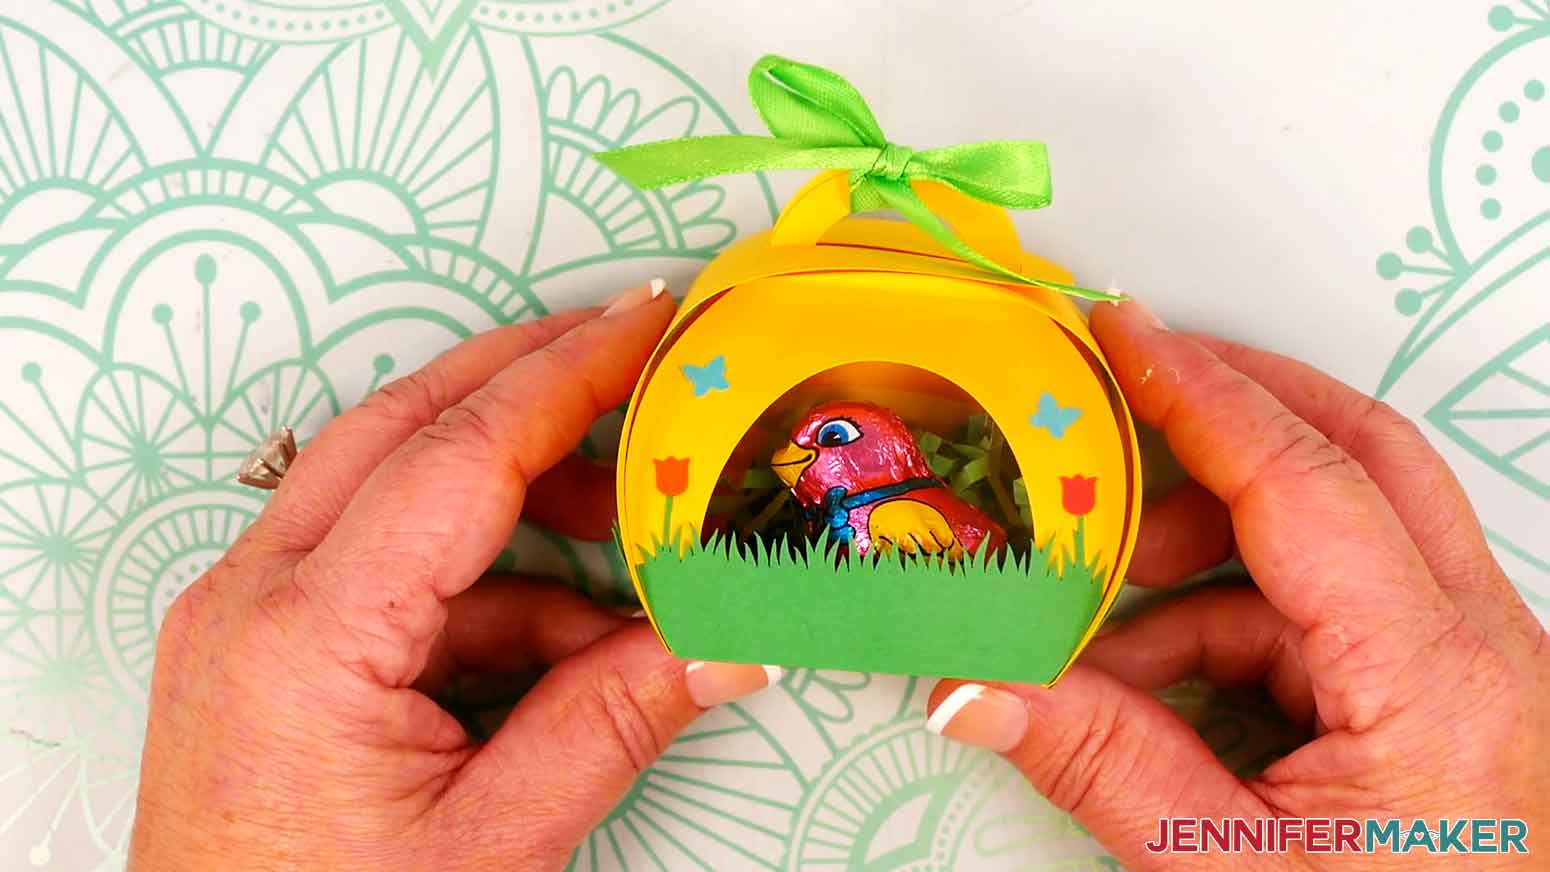
STEP 4: SHOW IT OFF
Here are what my finished window treat boxes look like!
Notes
Assembled sizes:
Butterfly box: 3" H x 3" W x 4.5" D
Flower box: 3" W x 3" H x 2.5" D
Answers to Your Questions About How to Make a Window Treat Box
Q: What can I make window boxes out of?
A: I recommend using 65 lb. to 80 lb. cardstock for your window treat boxes. Experiment with different colors, patterns, and specialty paper like foil, glitter, shimmer, and textured cardstock! I used 0.18mm acetate for the windows, or you can leave the window open.
Q: What can I put inside window treat boxes besides candy?
A: My paper treat boxes can fit small items like stickers, crayons, and small toys and party favors like miniature cars, puzzle toys, keychains, a tea bag, and more. You can also make mini cookie boxes or fill them with other small baked goods.
Q: What Cricut blade should I use for cardstock?
A: The Cricut Fine Point Blade is my favorite blade for cutting cardstock and a long list of materials like most other paper projects, glitter cardstock, poster board, vinyl, and most other popular materials used in many craft projects. It’s versatile, comes standard with your Cricut machine, and gives the best results on these basic materials time and time again — especially when you keep your blade clean for a nice, clean cut!
Q: Help! My Cricut Design Space screen looks different than yours!
A: If you’re using the latest version of Cricut Design Space, your screen may have slight variations from the screen you see on the video tutorial. Good news: All of the same functions are there, they may just be in different spots or have new icons. If you get stuck, ask for support in our Facebook group. Our group is a fun and friendly place full of crafters from all over the United States and the world who are there to share projects, find help, and get inspired! Plus, you can catch the latest news on JenniferMaker projects, files, tutorials and more.
Q: Can I make and sell my window treat boxes?
A: I love supporting creative entrepreneurs! If you want to use my designs and projects for commercial use, please familiarize yourself with my important licensing information before selling your crafts.
I do not permit sale of my digital items, but you can sell the creative goods you make with them — as long as you follow my licensing requirements. That means you cannot sell the window treat box SVG files, but you can sell treat boxes that you made with the files within the guidelines linked above.
Q: How do I know if my design is the right size?
A: Not sure if your design is uploading at the correct size or aspect ratio? If you are using Cricut Design Space Beta for Desktop, try switching to the Live version as this has worked in our testing. Here are the dimensions you should see for each design on your Canvas:
- window-boxes-flower-score-jennifermaker-SVG: 11.15″ x 8.48″
- window-boxes-flower-no-score-jennifermaker-SVG: 11.15″ x 8.48″
- window-boxes-butterfly-score-jennifermaker-SVG: 11.49″ x 8.2″
- window-boxes-butterfly-no-score-jennifermaker-SVG: 11.49″ x 8.2″
If you need help resizing your design, open my Resizing Guide in a new window.
Q: Can I resize the window treat box SVGs?
A: You can resize the treat boxes, but be careful because they will be more delicate, and the teeny tiny flowers and butterflies on the flower treat box may be difficult for your machine to cut and for you to work with. I don’t recommend cutting the designs on the Cricut Joy, as the details will be too small for your machine to cut well. You can size the boxes bigger if you have large cardstock and a larger format cutting machine like the Cricut Venture.
Q: Do you have other treat box projects I can make?
A: I have lots of great box and treat holder crafts for goodies and small gifts! Here are some of my favorites:
- Easter Treat Boxes
- Easter Lollipop Holders
- Ice Cream Treat Box Gift Card Holder
- Cute Lollipop Holders
- DIY Money Holders
- Favor Box & Luminary
- Tower Gift Box
- Halloween Treat Boxes
- Snowflake Candy Holder
- Gnome Gift Boxes
Get my free SVG/DXF/PDF files to make window treat boxes!
(If you do not see the signup form above, click here.)
I love seeing what you make with my designs and how you use them! Please share a photo of your window treat boxes in our Facebook group or tag me on social media with #jennifermaker.
Love,

Want to remember this? Save this Window Treat Boxes tutorial to your favorite Pinterest Board!