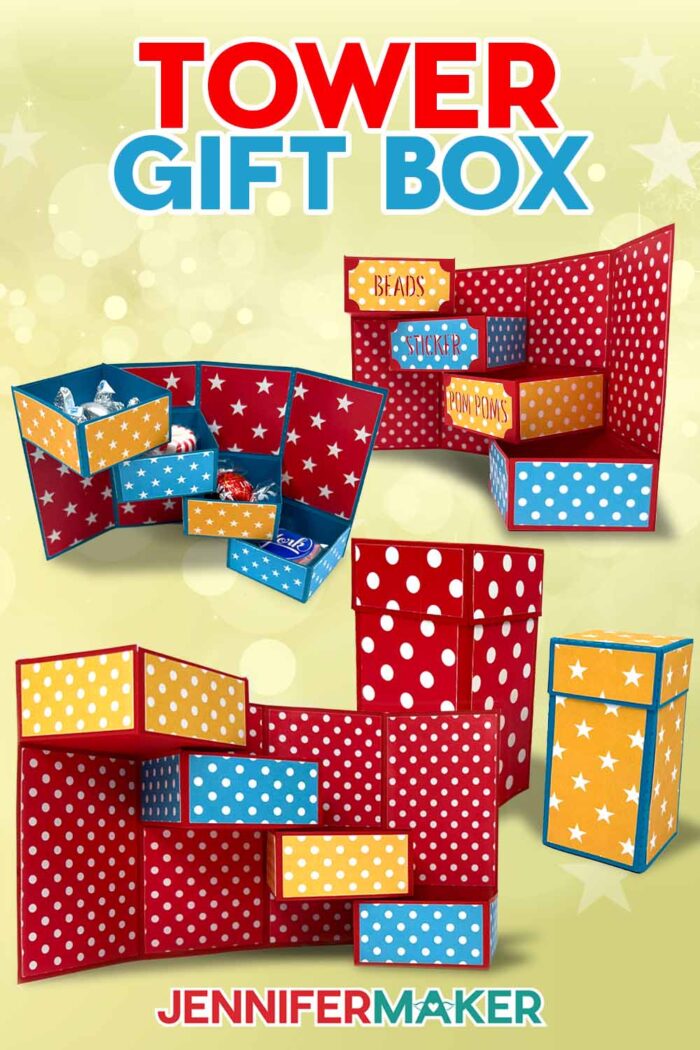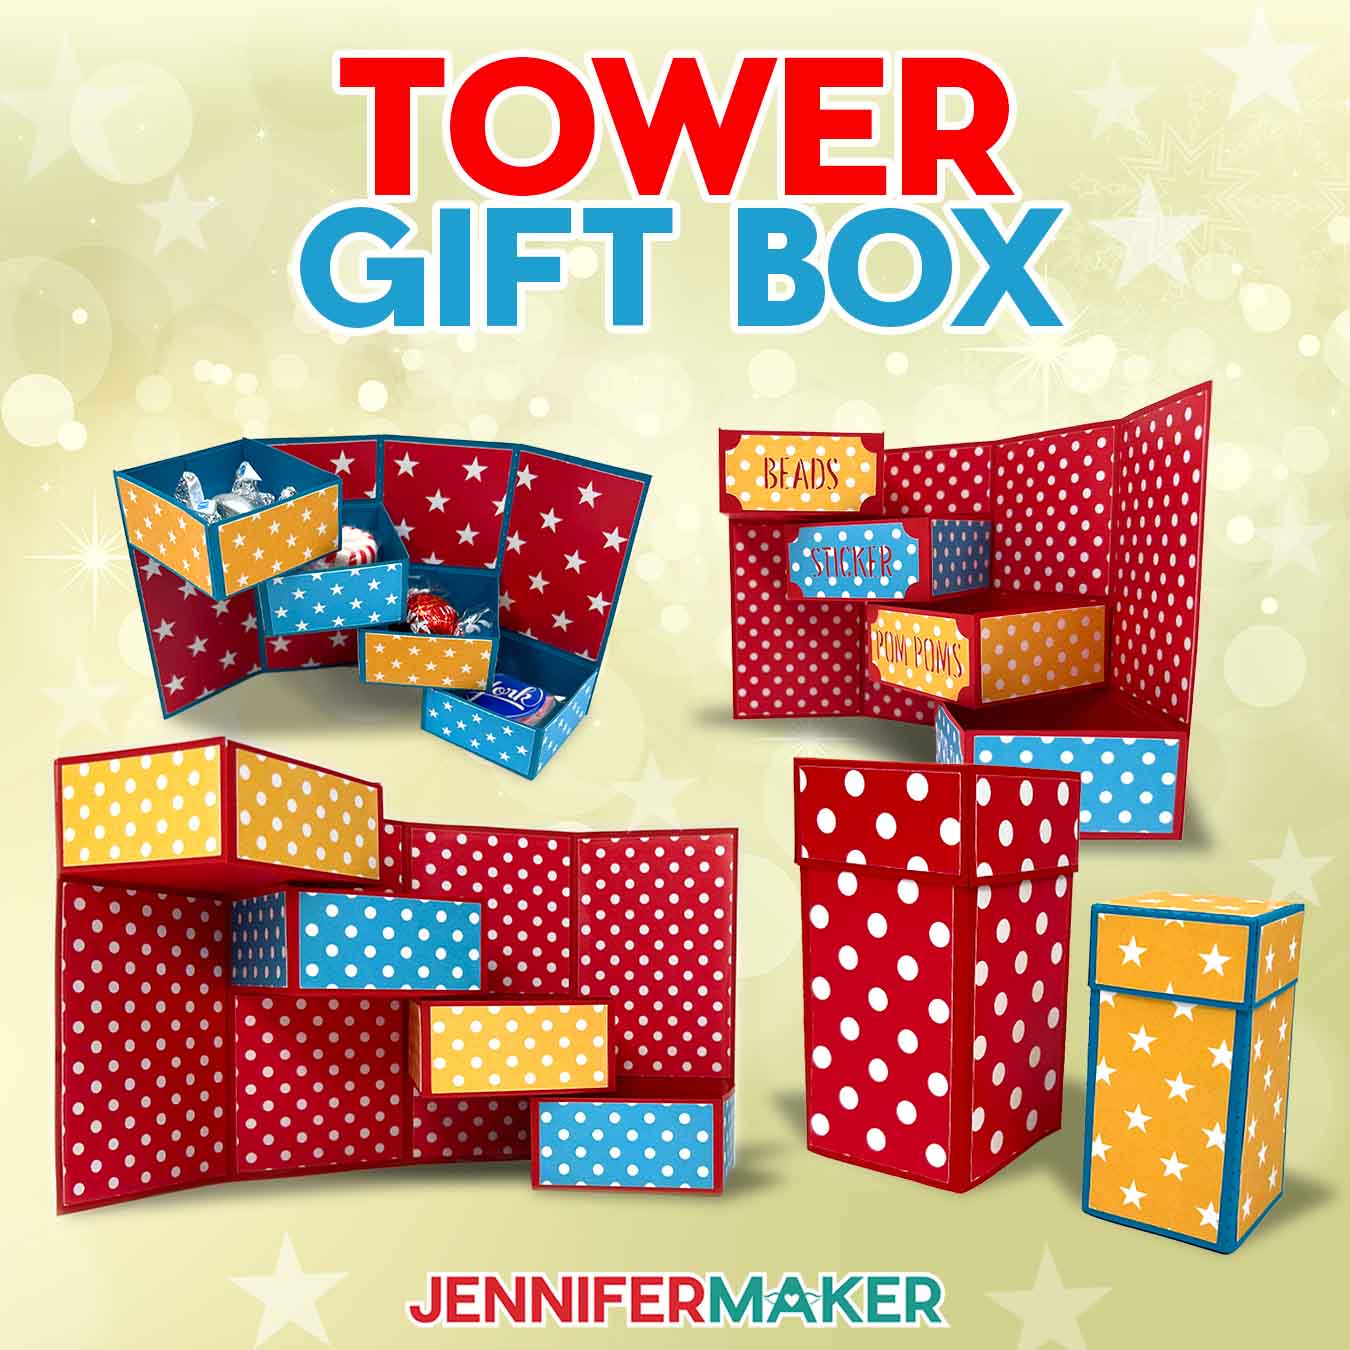
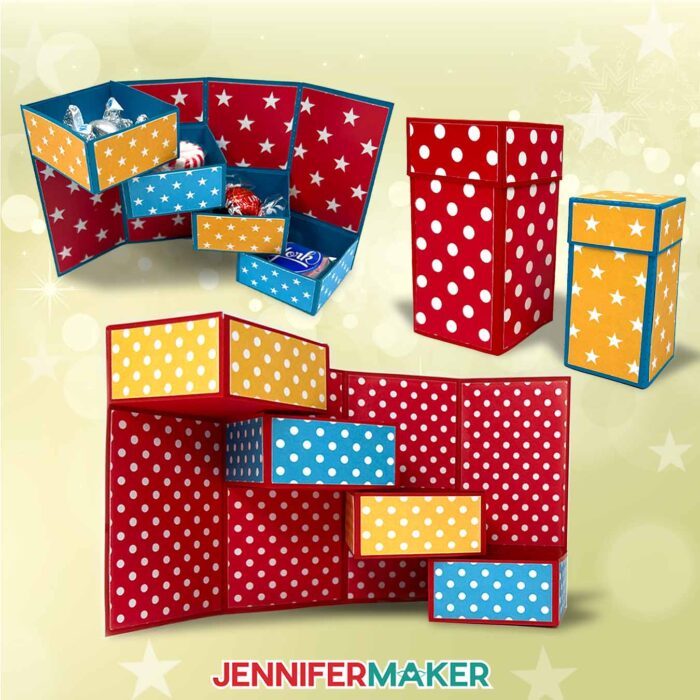
Learn how to make a tower gift box for a fun surprise that doubles as an organizer!
Have you ever fallen in love with a hand-cut papercraft, only to lose a bit of that excitement when you realized how much cutting and assembly were involved? That’s exactly how I felt when I discovered a tower organizer project online. I loved the concept but wondered if I could streamline the process by using a cutting machine. Spoiler alert: I did! In this tutorial, I’ll walk you through each step to create your own tower gift box — with your cutting machine doing most of the work!
Watch the full step-by-step video tutorial on making a tower gift box:

Crafting doesn’t have to be complicated to be impressive. In fact, my favorite projects (and the ones that get the most attention) tend to be on the simpler side! They may look complex, but with the help of a cutting machine, you can make incredible tower gift boxes in no time. And nobody will believe you made them yourself!
I first saw this project by Girl Crafts where they made a DIY desk organizer completely by hand – including planning, measuring, cutting, and assembling almost thirty pieces of cardstock! While the finished product looked amazing, I knew I could simplify the process with my Cricut. By using a cutting machine, you can skip the tedious hand-cutting and focus on assembling your perfect gift box with precision.
In this tutorial, I’ll show you how to create a cute and colorful tower gift box that’s perfect for any special occasion — or no occasion at all! Plus, I’ll share tips on adapting hand-cut designs for cutting machines to save time and effort.
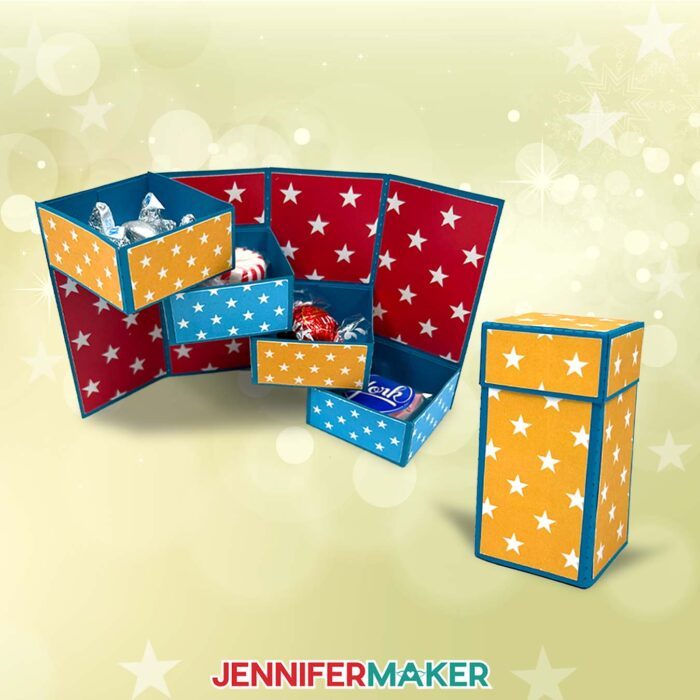
These tower boxes are so versatile, they’re perfect for gifting or keeping and using as an organizational tool. Fill it with treats for a special occasion gourmet gift tower, place homemade or store-bought gifts in each compartment to send your best wishes, or use it to stash materials in your craft room!
I’ve included two versions of the gift box design in my free download: A full-size version that can be cut on full-size cutting machines as well as a smaller version that can be cut with a Cricut Joy!
It’s not necessary, but if you’re using a cutting machine that can create score lines like a Cricut Maker or Explore series machine, you can have your Cricut add them with a scoring stylus or a single scoring wheel. This ensures clean, crisp folds, creating a polished look for your gift boxes.
No scoring tool? No problem! I’ve also included no-score versions of the full-size tower gift box design that uses dashed cut lines to make the creases.
I used a variety of solid colored and patterned cardstock to make my tower box. One challenge when using patterned cardstock is that Cricut Design Space doesn’t consider the direction of your patterns. This can mean your pieces might be cut with the patterns pointing in different directions on each of the pieces. To avoid this, I’ll show you how to manually position and rotate the pieces in Cricut Design Space so all the patterns align perfectly across the organizer box when it’s assembled. This attention to detail will make your tower gift box even more impressive!
After they’re cut, I’ll show each step of folding your gift box pieces, then demonstrate how to use my favorite craft glue to hold everything together.
Want to customize it even more? Add a hand-tied bow to the box lid made from paper or beautiful ribbon to complete the look.
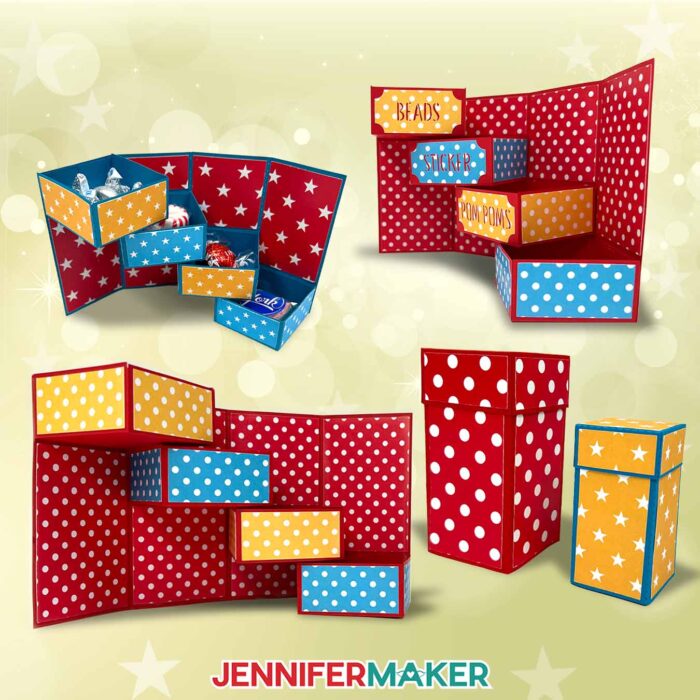
This tower gift box is a versatile way to spread cheer to loved ones — or to yourself through this cute homemade storage solution! Fill each box with different types of chocolate, gourmet delights, small trinkets, or other gifts to create a great gift that doubles as a truly memorable surprise this holiday season and beyond.
Let me show you how to make a tower gift box! This post contains some affiliate links for your convenience (which means if you make a purchase after clicking a link I will earn a small commission but it won’t cost you a penny more, there is no additional cost)! Read my full disclosure policy.
Materials to Make A Tower Gift Box
View my Amazon shopping list for the exact items I used!
- Three (3) Sheets of 12″ x 12″ 65 lb Cardstock (any color)
- Several Sheets of Patterned Paper or Cardstock (I used the Magic Basics Pattern 12″ x 12″ 80 lb Cardstock)
- A way to cut your cardstock – I’m using the Cricut Maker 3, but you can also use the Cricut Maker, a Cricut Explore series machine, the Cricut Venture, the Cricut Joy Xtra, or the Cricut Joy
- Scoring Stylus (optional for files with score lines)
- Single Scoring Wheel (optional for files with score lines)
- Cricut StandardGrip Machine Mat 12″ x 12″
- Craft Glue (I used Bearly Art Precision Craft Glue)
- Brayer
- Spatula
- Weeding Tool (optional for popping out small cutouts from intricate areas)
- Scraper
How to Make a Tower Gift Box!

Tower Gift Box
Learn how to make this adorable Tower Gift Box with patterned cardstock accents!
Materials
- Three (3) Sheets of 12” x 12” 65 lb Cardstock (any color)
- Several Sheets of Patterned Paper or Cardstock (I used the Magic Basics Pattern 12" x 12" 80 lb Cardstock)
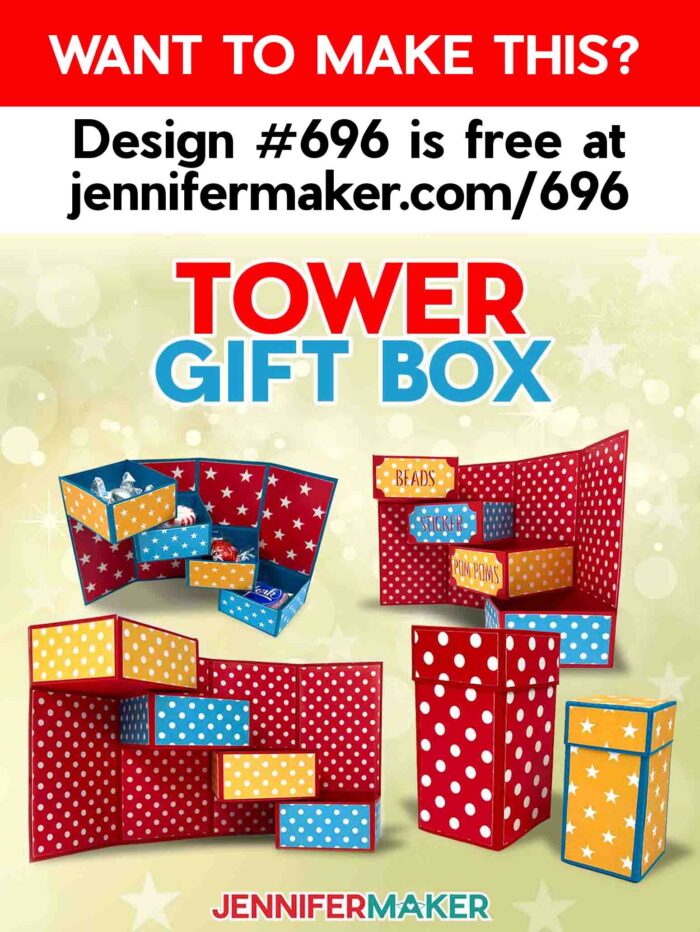
- Design #696 (My free SVG/PDF/DXF design files are available in my free resource library - get the password by filling out the form at the bottom of this page)
Tools
- A way to cut your cardstock - I’m using the Cricut Maker 3, but you can also use the Cricut Maker, a Cricut Explore Series machine, the Cricut Venture, the Cricut Joy, or the Cricut Joy Xtra
- Scoring Stylus (optional for files with score lines) -OR-
- Single Scoring Wheel (optional for files with score lines)
- Cricut Green StandardGrip Machine Mat 12" x 12"
- Craft Glue (I used Bearly Art Precision Glue])
- Brayer
- Spatula
- Weeding Tool (optional for popping out small cutouts from intricate areas)
- Scraper
Instructions
STEP 1: GET MY FREE TOWER GIFT BOX DESIGNS
First, download my Tower Gift Box files from my free library – look for Design #696. Alternatively, you can use the Save This Project form near the top of this post and the design link will be emailed to you.
In the SVG folder, you’ll find “score” and “no-score” versions of my design to cut on a cutting machine, including a version optimized for Cricut Joy users. There is also a DXF folder with cut files, and a PDF folder with versions you can print and cut by hand.
TIP: If you’re not sure how to upload, go to jennifermaker.com/svgs to learn how to unzip and upload SVG files.
STEP 2: PREPARE AND CUT YOUR TOWER GIFT BOX DESIGN
CRICUT DESIGN SPACE
- In Cricut Design Space, open a blank Canvas.
NOTE: If you’re new to using Cricut Design Space, go to cricutkickoff.com for my introductory tutorial on Design Space basics. - Click “Upload” and then “Upload Image.”
- Click “Browse.”
- Select the SVG file of your choice.
NOTE: I’ll pick the “score” version. - Click “Open” and then “Continue.”
- Click “Upload” to add the design to your Canvas.

- Click “Save” and give your project a name.
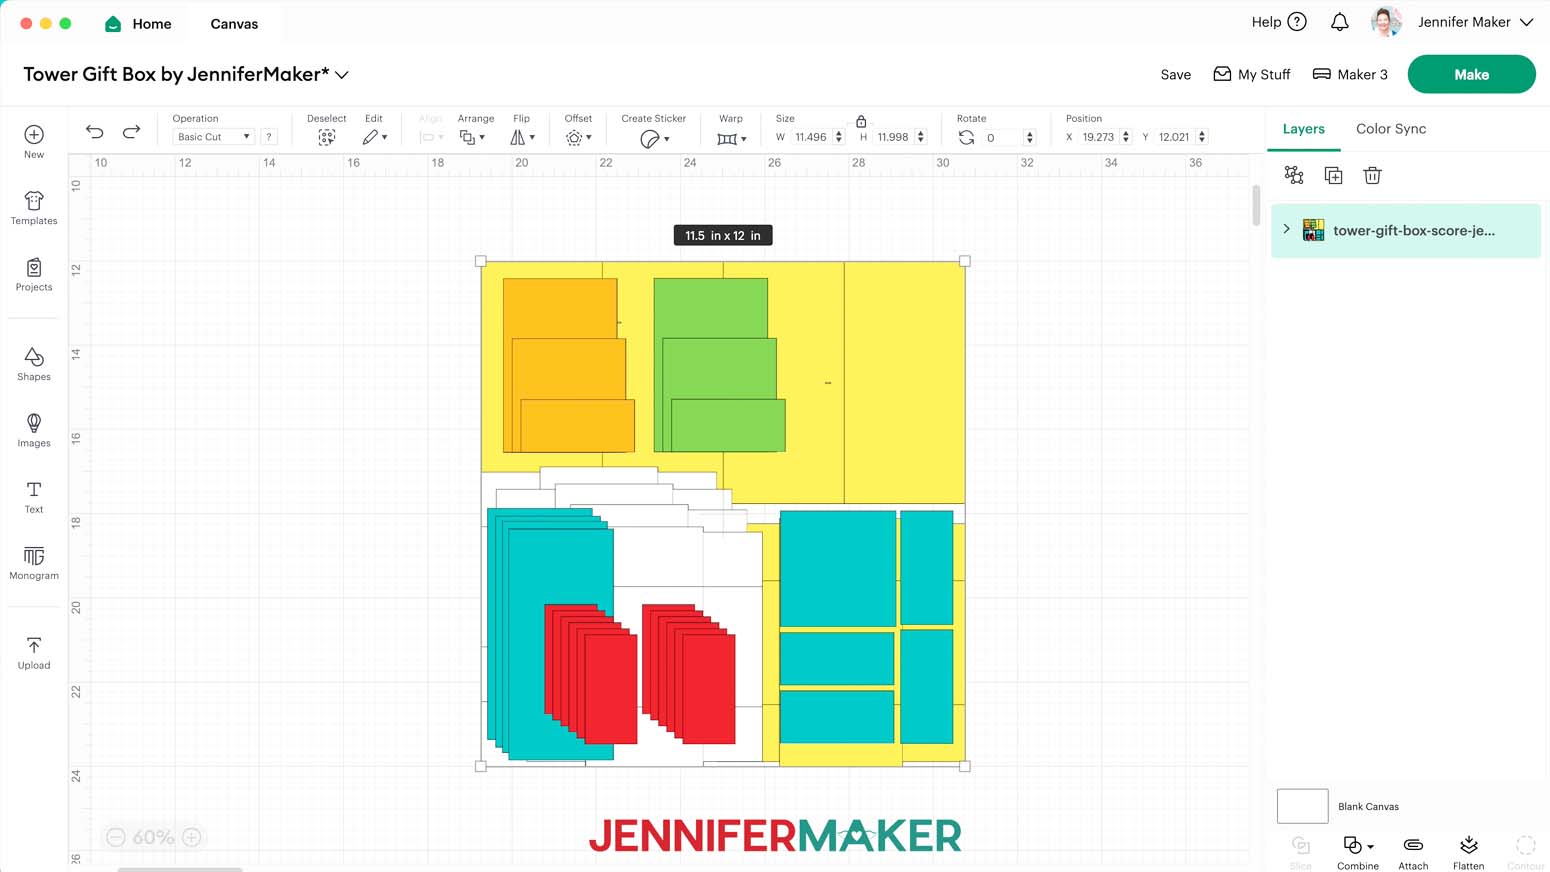
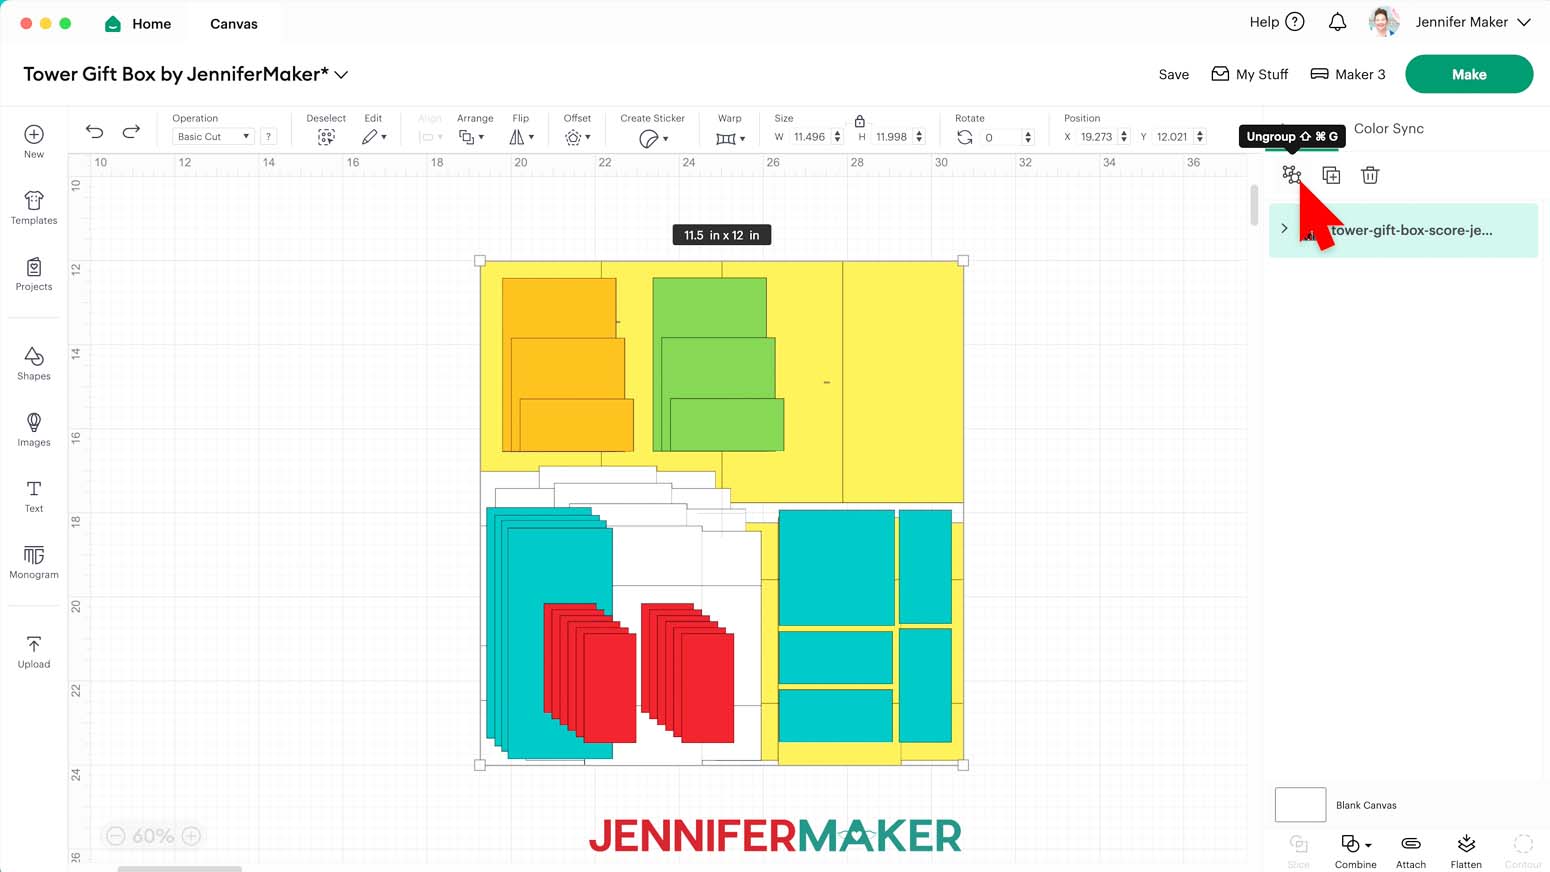
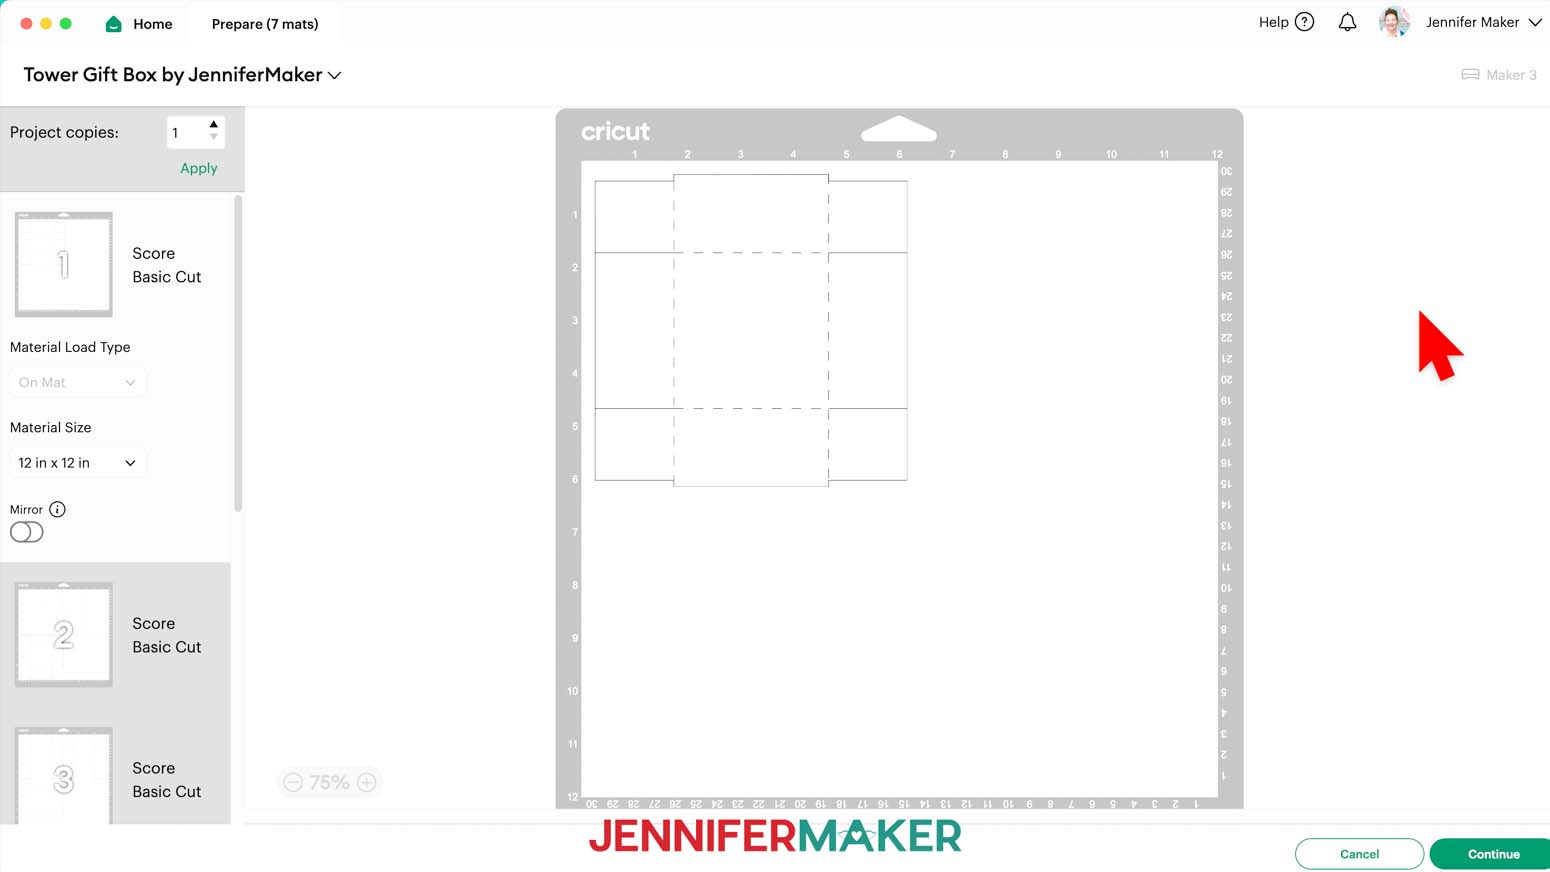
- Click the “Minus (-)” icon in the lower left corner to zoom out and see everything on your Canvas:
• For the tower: six rectangular inner panels of various sizes, four tall rectangular outer panels, and one long rectangular main tower piece with alignment marks in the second and third sections
• For the drawers: four large main drawer pieces, and twelve rectangular side panels (three per drawer)
• For the lid: one large main lid piece, one square top panel, and four rectangular side panels - Ungroup the design and spread out the pieces.
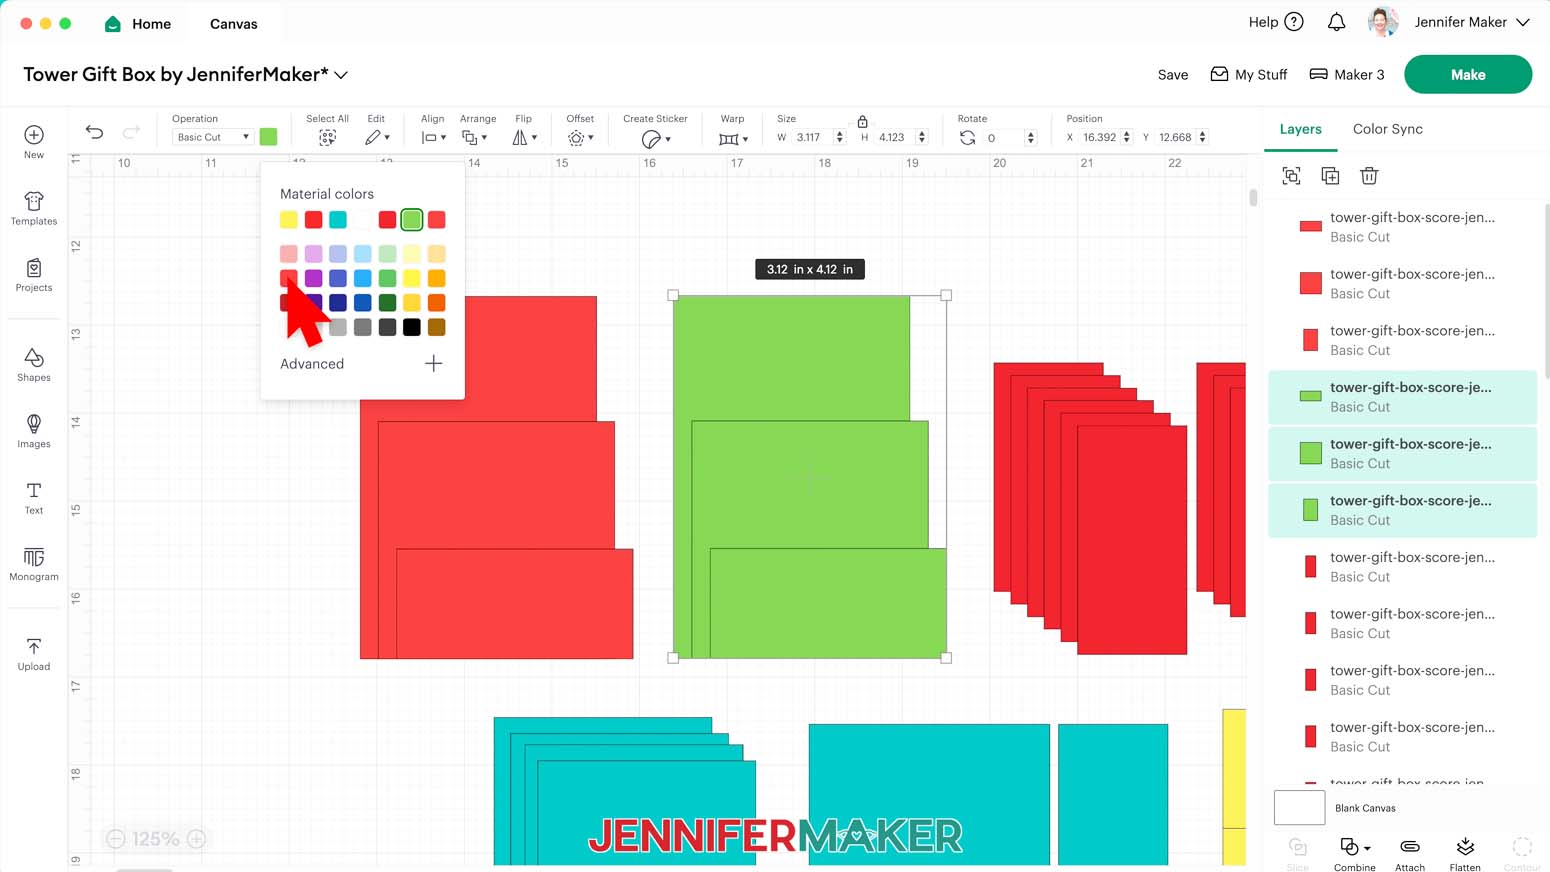
- To change the color of any piece to match the cardstock you’ll use for it, select it and click the Color Box to select an option to match your cardstock.
TIP: You can select multiple pieces with a bounding box to make this easier.
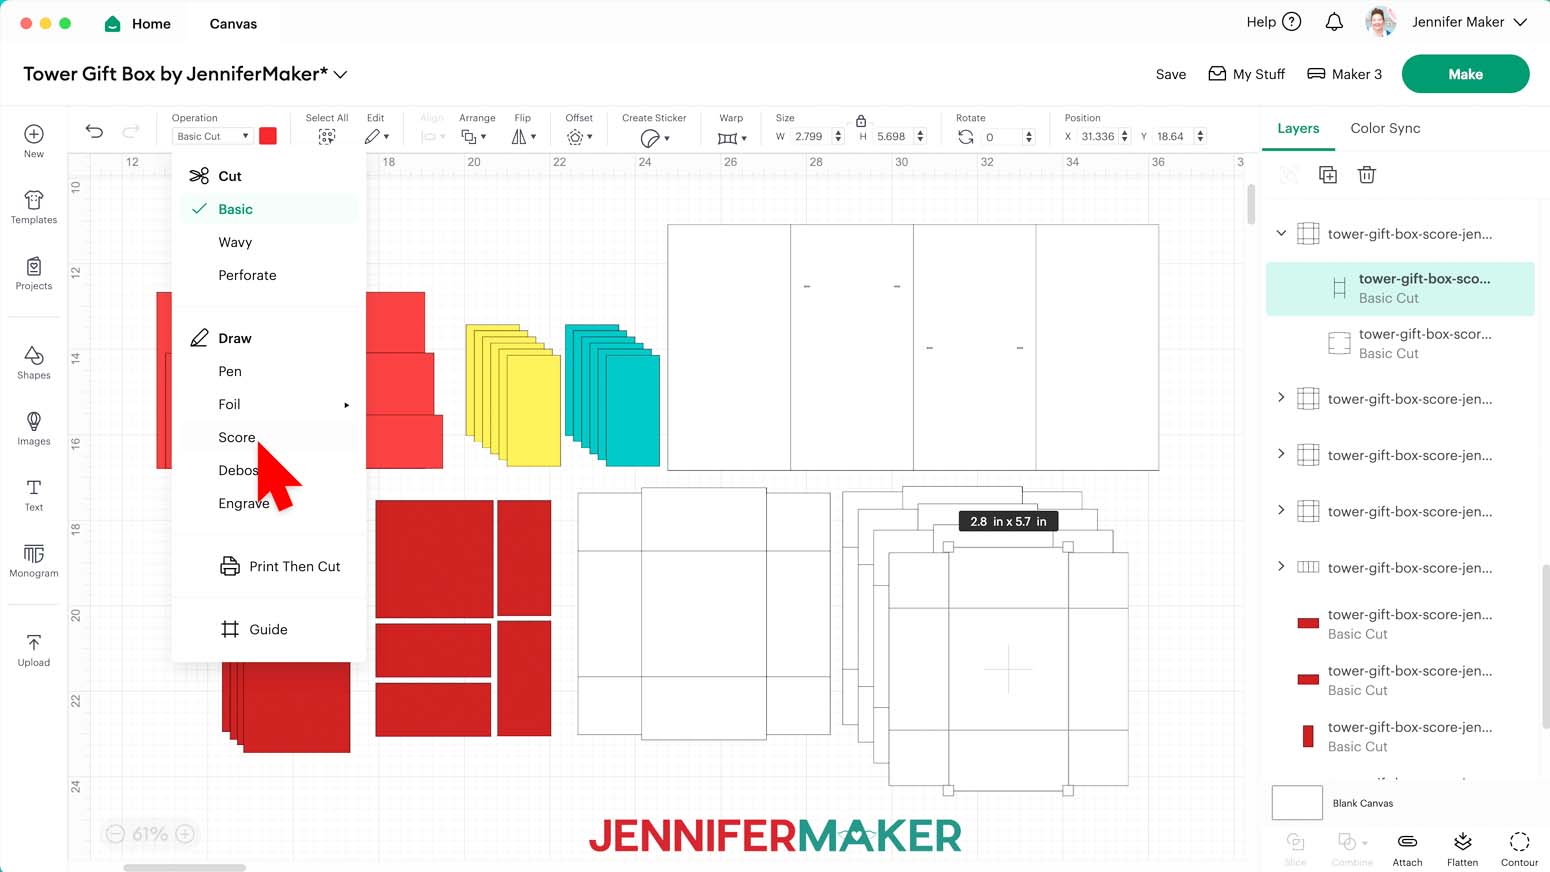
NOTE: I’ll change both sets of the tower’s inner panels to light red so all six will cut from the same patterned paper. - In the Layers Panel, there are still six grouped layers indicated by small arrows.
NOTE: We need to adjust these groups to make sure the score lines are drawn onto the cardstock pieces correctly. - Click the small arrow to expand the first group, which has a layer with solid lines (which is how I indicate that lines will be scored) grouped with a basic cut shape layer.
- Select the top layer with the solid lines and change its “Operation” to “Score” so the Cricut knows to make the crease lines where your cardstock will be folded.
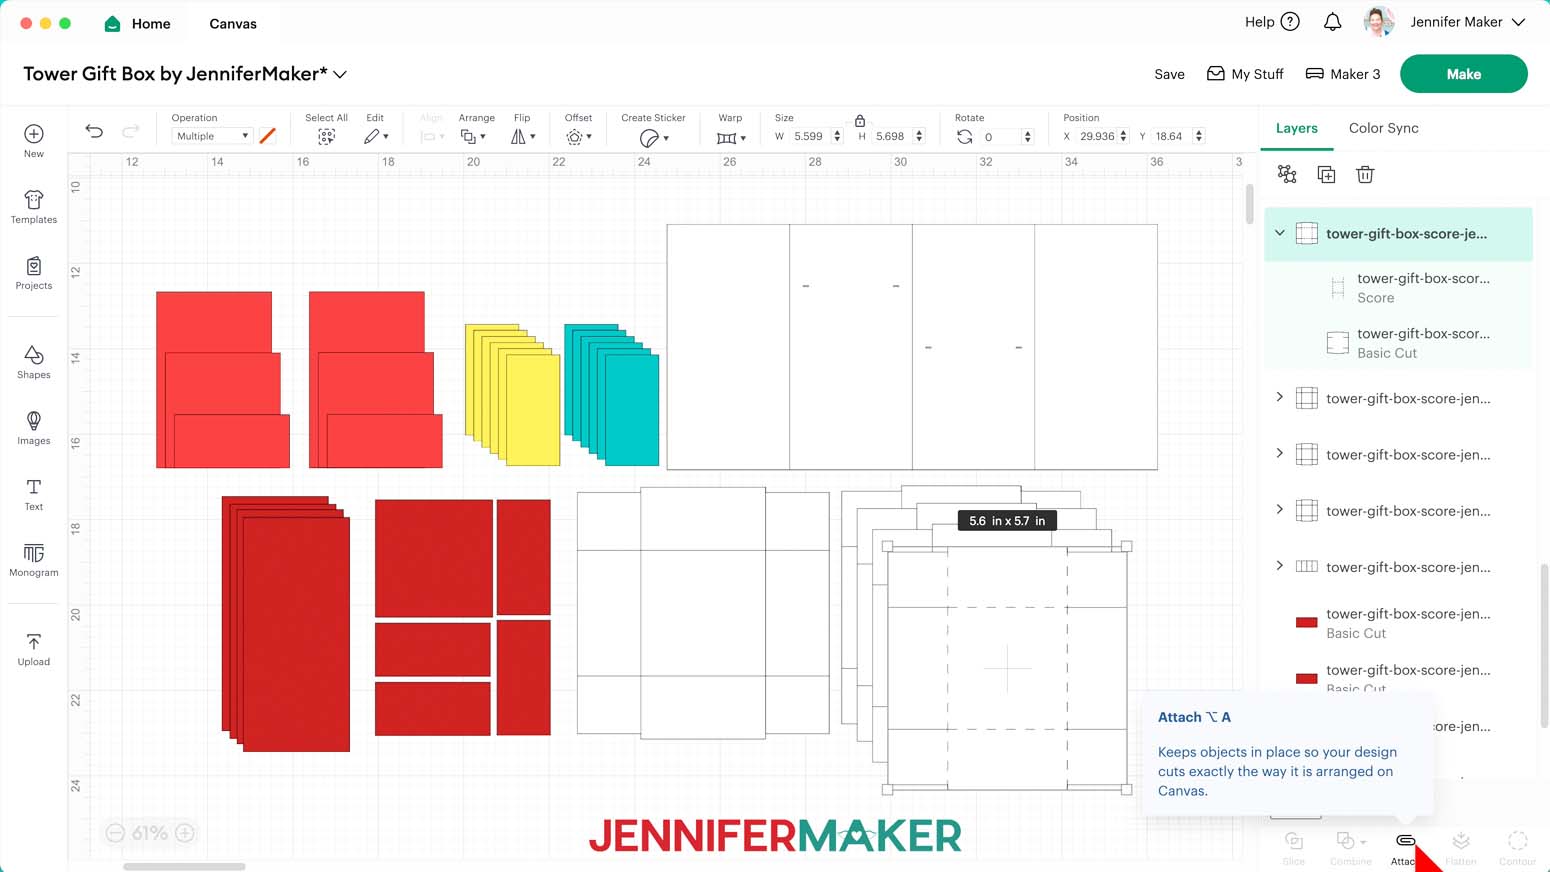
NOTE: The “no-score” version will have dashed cut lines in the same locations, but you do not need to change their “Operation” to “Score.” - Click the Group layer with the arrow to select both layers in the group, then click “Attach” to keep your score line with your cut shape.
- Repeat Steps 12-14 for the remaining five groups to change their top lines to “Score” and “Attach” them to their cut shapes.
- Your project is ready to cut!

CUTTING
- Make sure the correct machine is selected in the top right.
- Click “Make.”
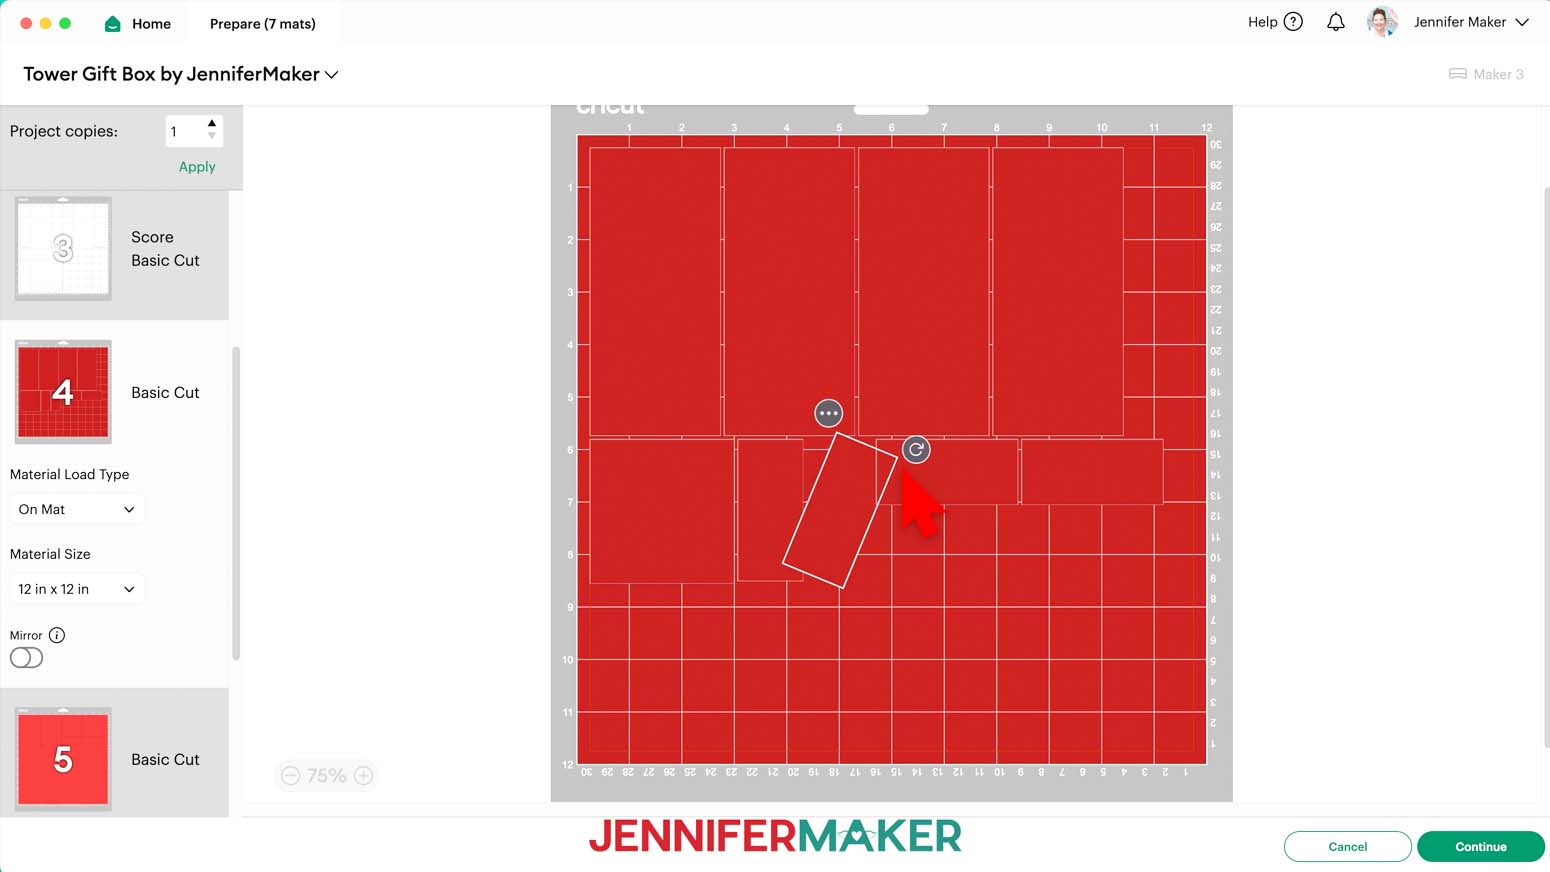
- On the Prepare screen, make sure the correct Material Size is selected for your mats.
NOTE: I’ll keep mine at “12 in x 12 in.” - Make sure your Score layers are properly attached to their cardstock Cut layers.
TIP: If you see a mat with just lines, one or more of your score layers may not have attached correctly, so click on “Cancel” to return to the Canvas to check, adjusting as needed. - If you are using patterned cardstock that has words or an obvious “up” direction, make sure your pieces are oriented so they’ll cut from the cardstock in the correct direction. If you need to rotate a piece on a mat, click on it to select it, then use the rotation handle to adjust its orientation.
NOTE: I’ll rotate my lid and drawer side panel pieces so they’re all horizontal and will be cut from the patterned paper the same way. - Once you are satisfied with your mat layouts, select the first mat so it loads first on the next page and click “Continue.”
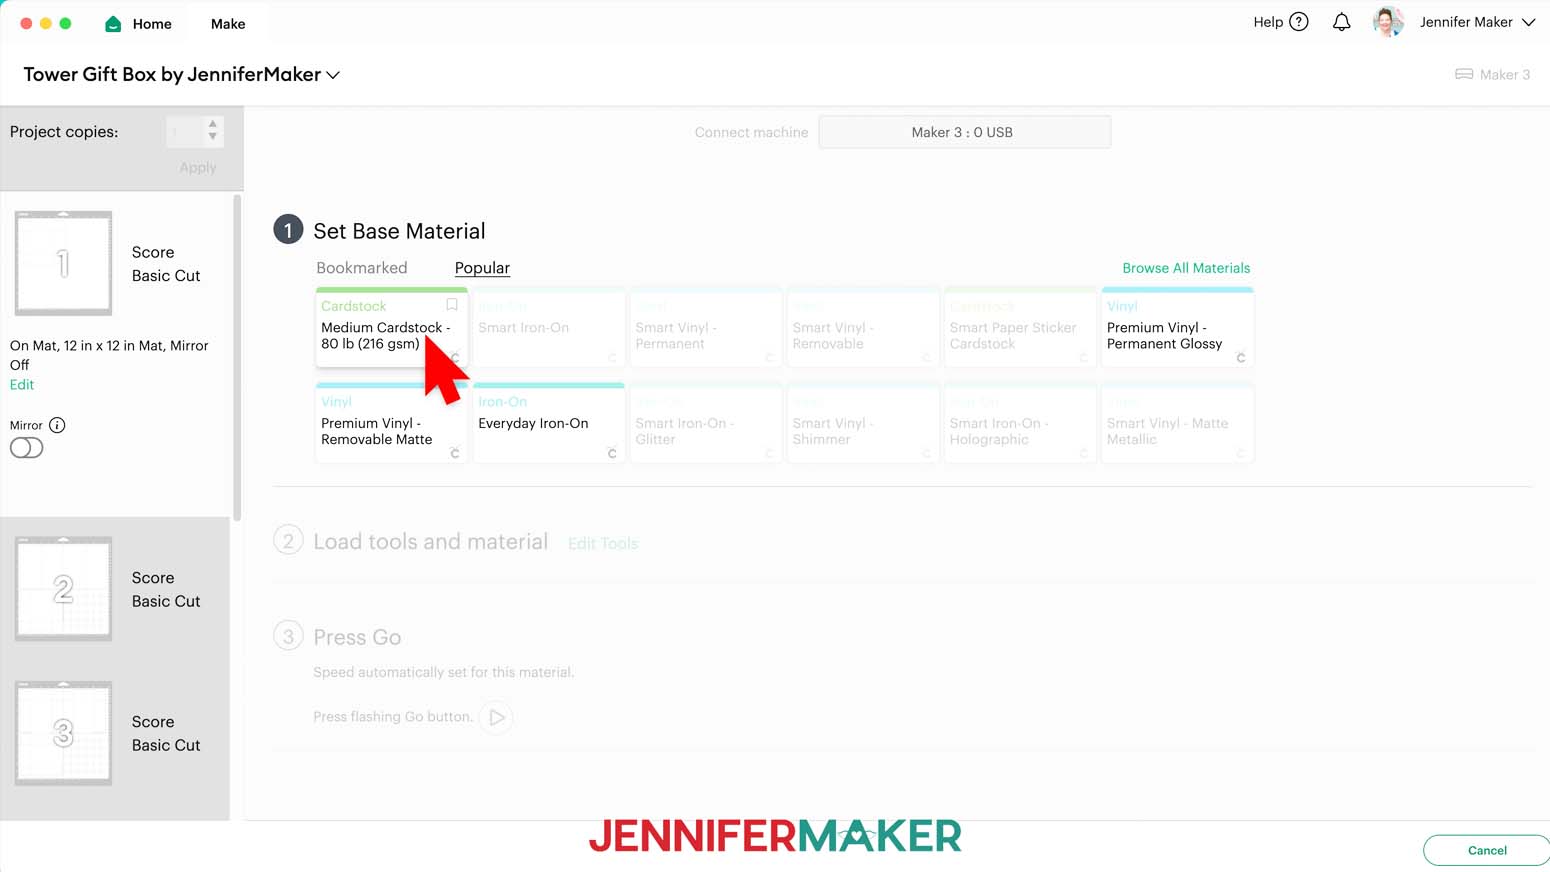
- On the Make screen, set the Base Material for your first mat. I’ll use the “Medium Cardstock - 80 lb (216 gsm)” setting for all my cardstock mats.
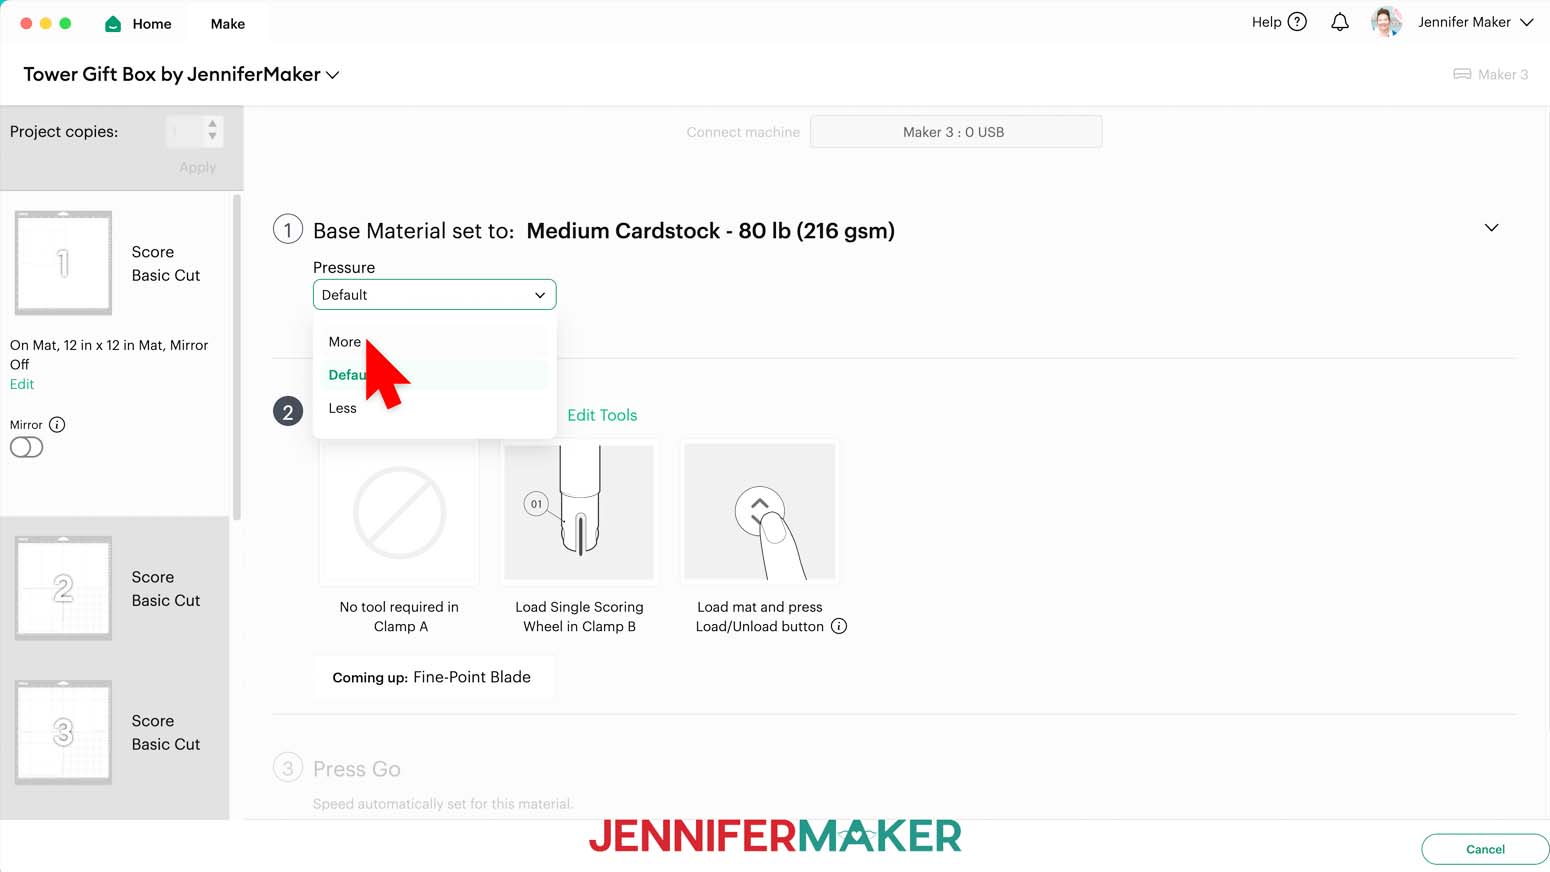
TIP: After you set the material for a mat color, you can check the box next to “Remember Material Settings” to save time between mats using the same material. - Change the pressure to “More.”
TIP: Changing the Pressure to “More” results in a cleaner cut. - For mats with score lines, follow the screen prompts to load your tools in the order indicated.
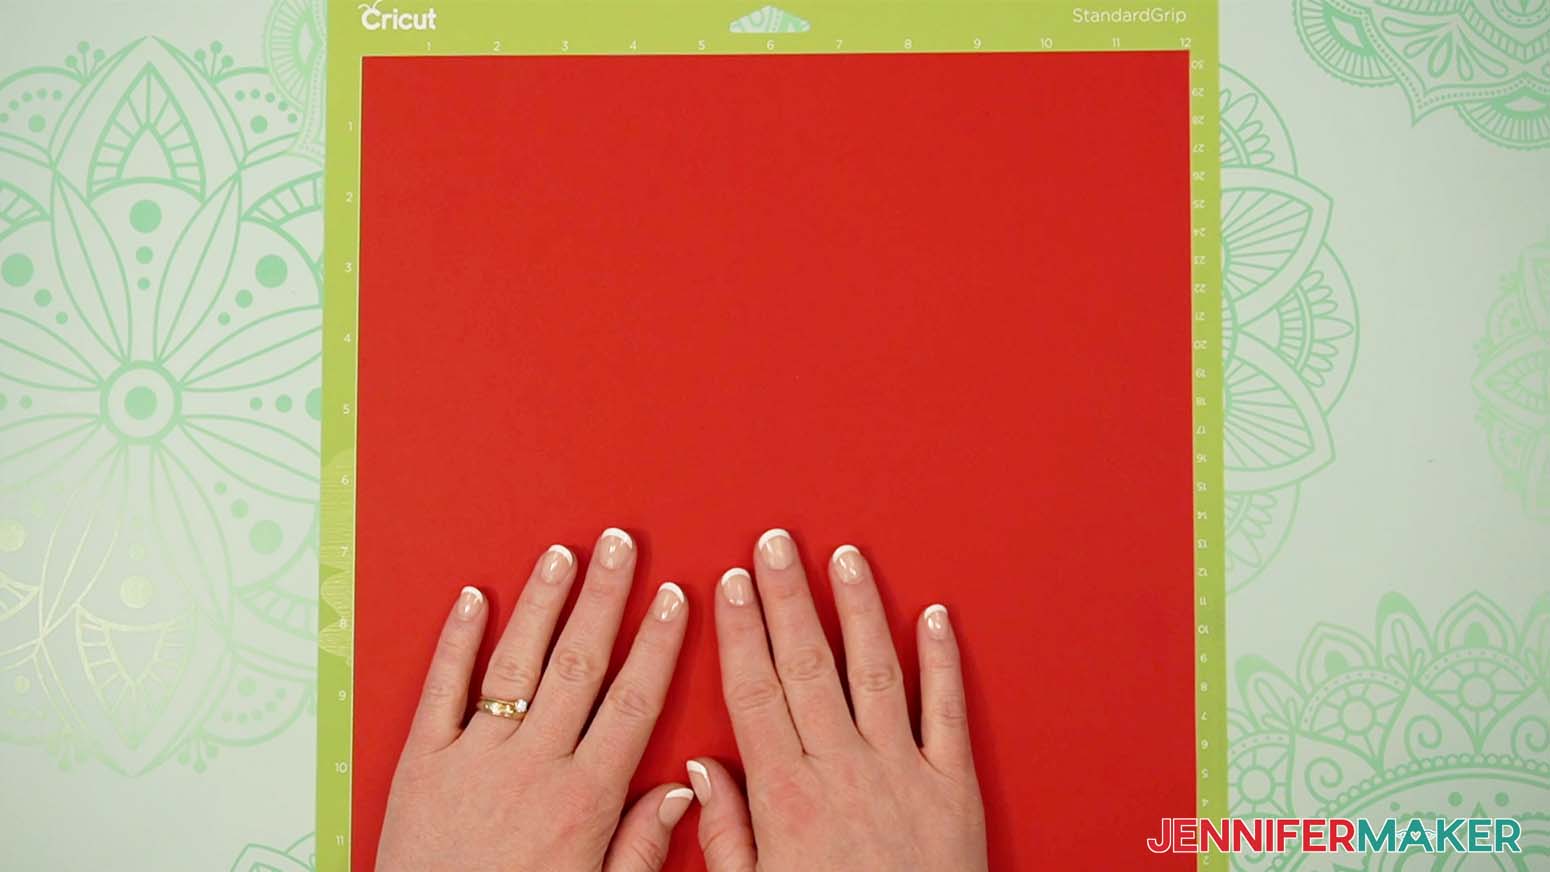
NOTE: I’ll click “Edit Tools” and select the Scoring Stylus so I can load both the scoring tool and my blade at the same time. If you use a Scoring Wheel, your Cricut will score and then cut, prompting you to switch tools when necessary. - Place your cardstock face up on a green StandardGrip machine mat.
NOTE: Remember to place patterned cardstock in the direction you want the pieces to be cut. - Use a brayer to make sure it’s fully adhered.
- Check that your Premium Fine-Point Blade (and Scoring Tool, if applicable) is clean and in the proper clamp.
- Press the flashing “Load/Unload” button to load the prepared mat into your Cricut.
- Press the flashing middle button to begin cutting.
- When it has finished cutting, don’t unload the mat right away. Gently lift a corner of the material to make sure the cuts went all the way through. If not, press the middle button again to make a second pass of cuts in the same spots.
- When the cuts are complete, unload the mat, flip it over onto your work surface, and roll it back to release the cardstock.
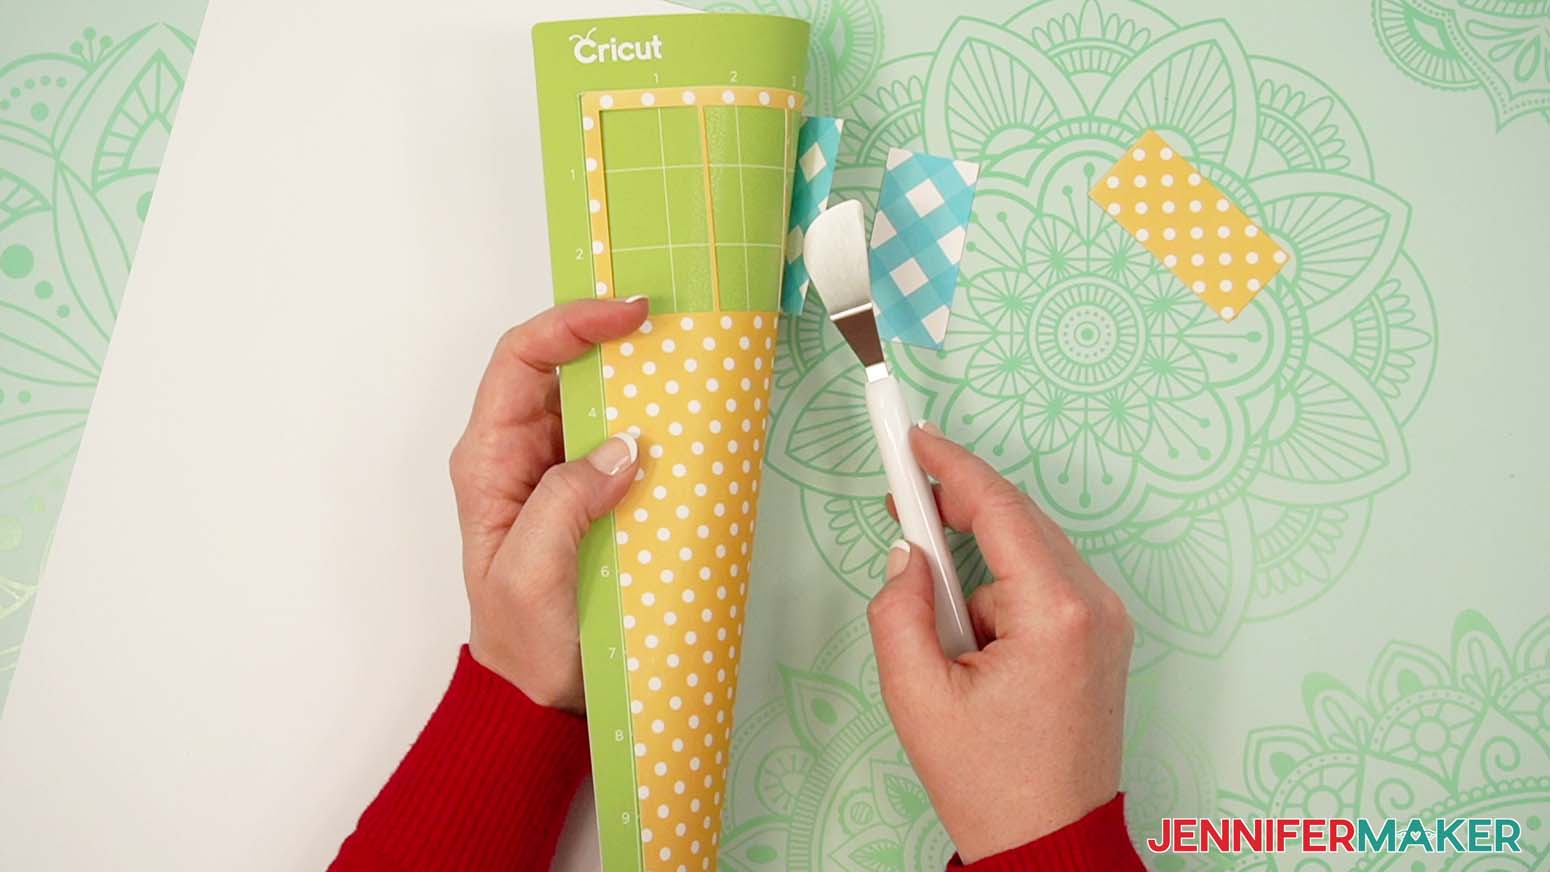
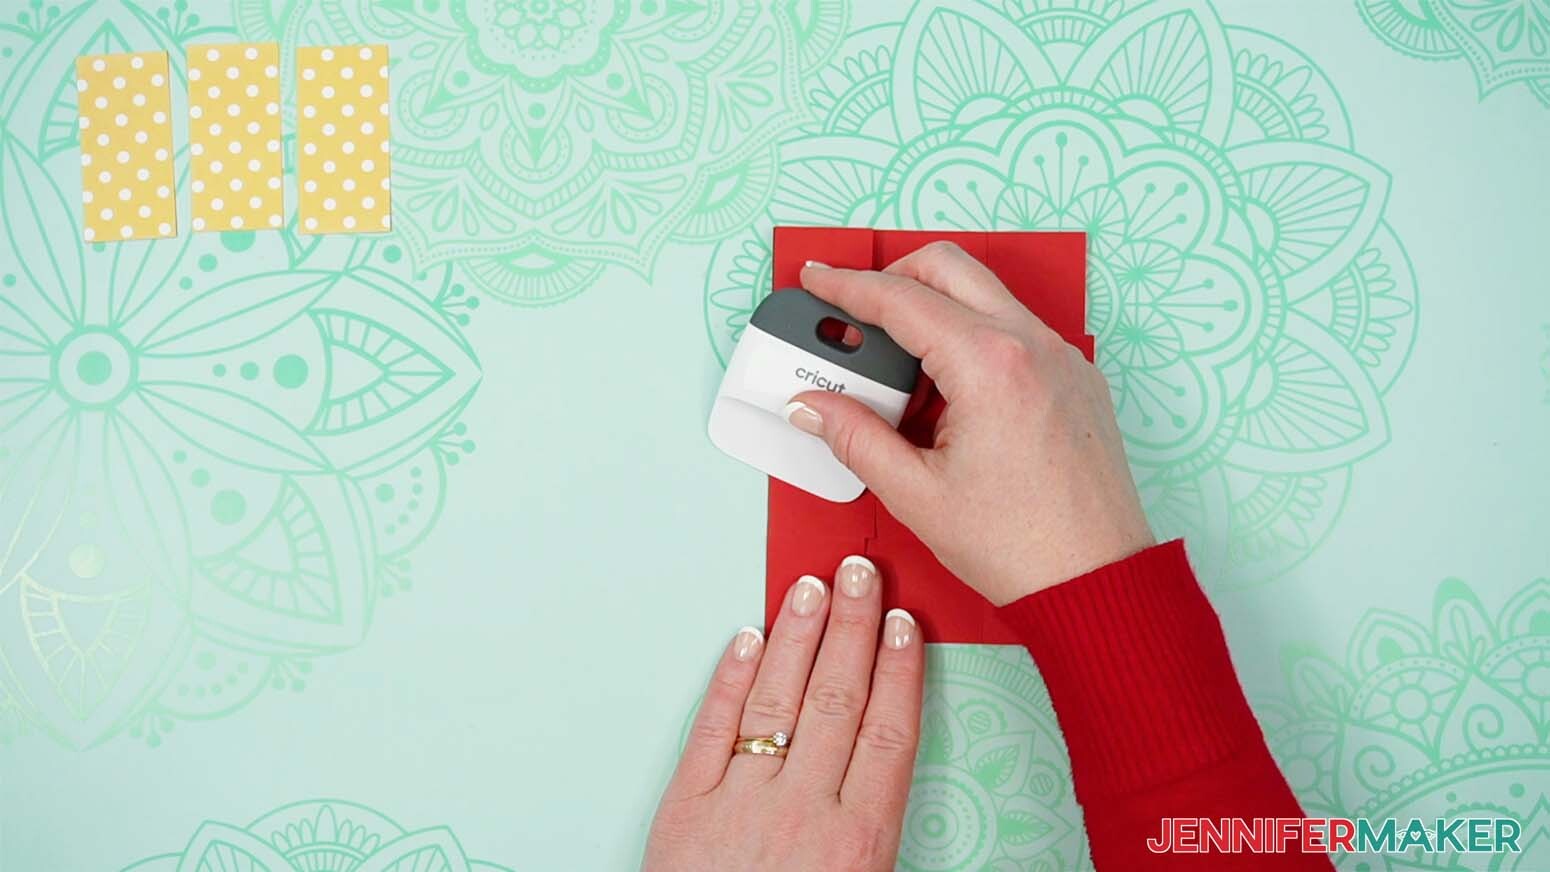
TIP: Use the spatula to help lift delicate parts, such as tabs or small pieces. If you have any issues with your cuts, go to jennifermaker.com/cleaner-cuts. - Use a scraper tool to remove the small bits left on your mat after you remove the cut pieces.
- Then follow the same steps to load, cut, and unload your remaining mats.
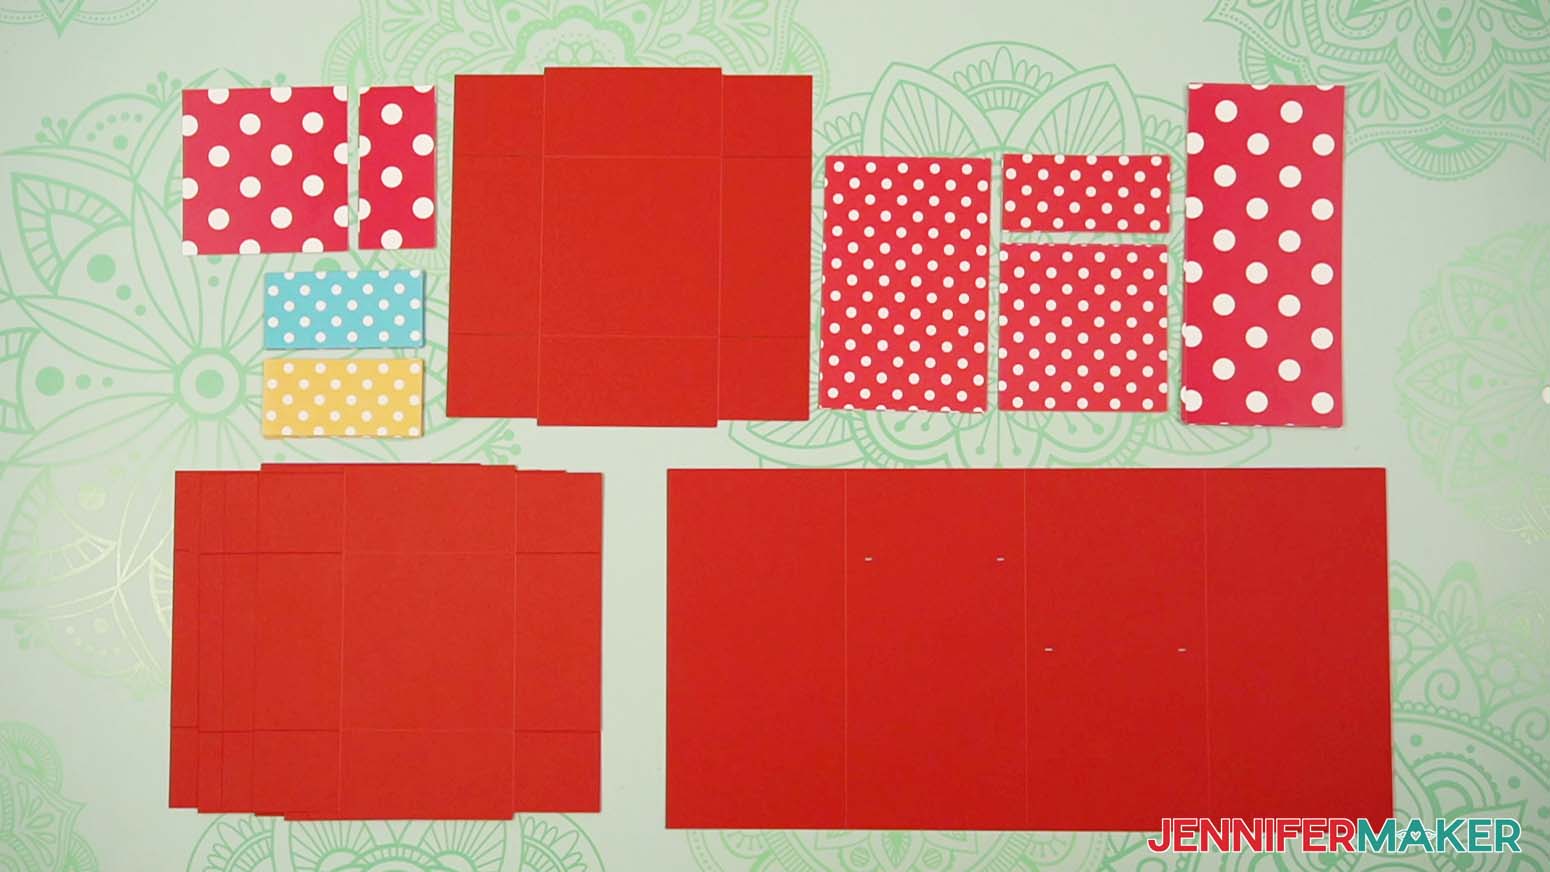
TIP: Make sure to match your cardstock colors with the proper mats in Design Space. If you’re using patterned paper, load each sheet of cardstock onto the mat so the pieces will be cut in your desired direction. - Lay out all of the cut pieces face up to make sure everything is cut correctly.
TIP: Refer to the Design Space screen if you’re not sure about some pieces’ orientation.

STEP 3: ASSEMBLE YOUR TOWER GIFT BOX
- Lay out one of the main drawer pieces with the crease lines face up.
TIP: If you’re having trouble distinguishing between the drawer pieces and the lid piece, compare their sizes. Both the main drawer pieces and the drawer side panels are smaller than their lid counterparts.
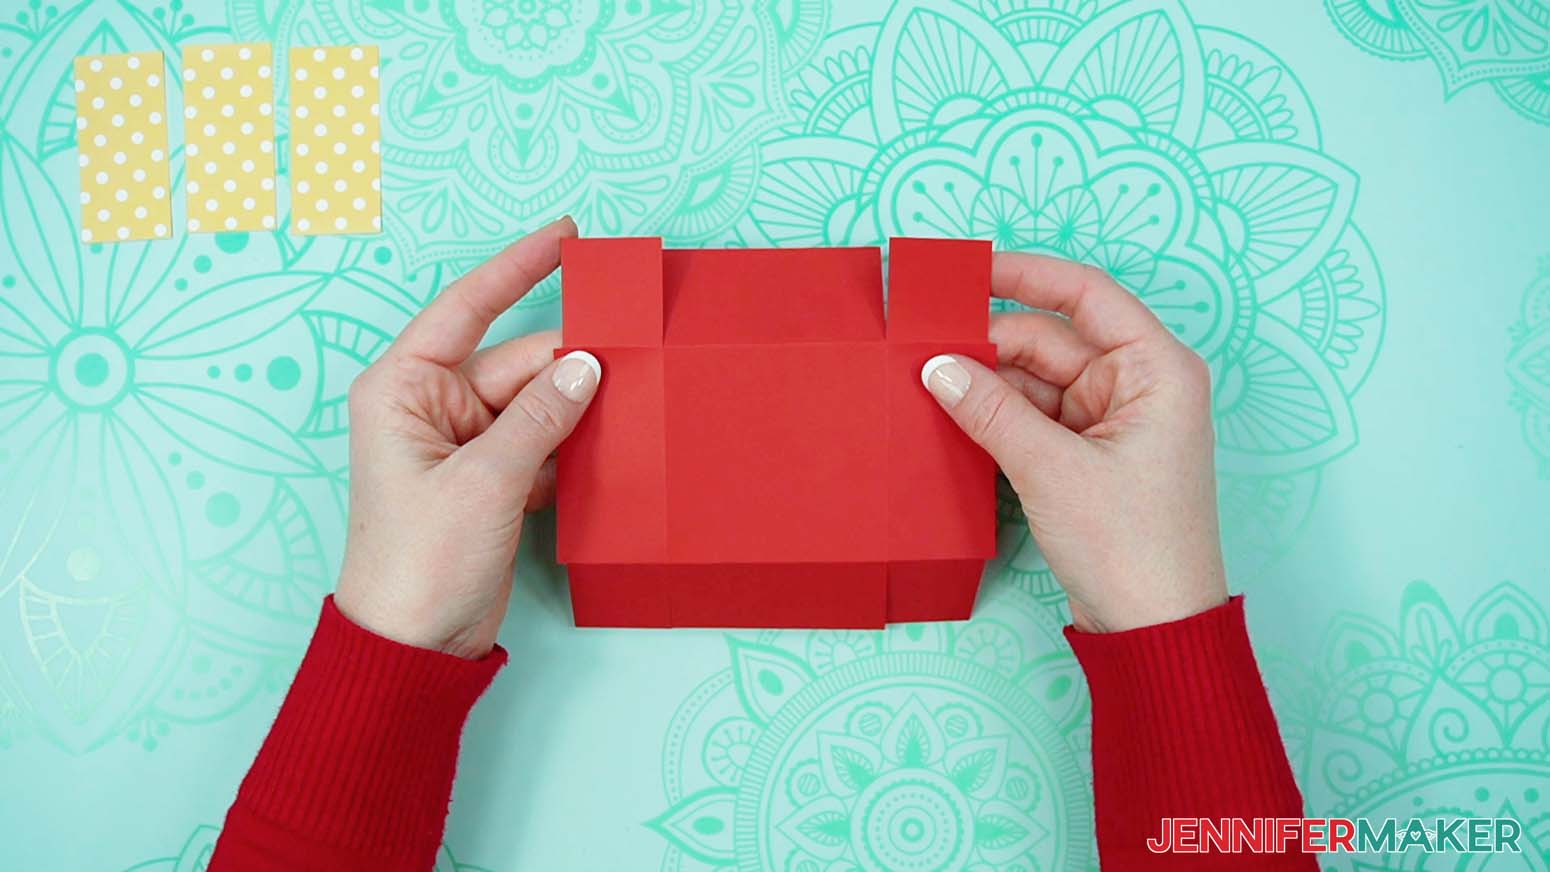
NOTE: If you’re using the dashed cut lines version, the cut lines are a bit clearer on the front side, but the pieces can be folded from either side. - Fold inwards along each of the crease lines, making sure to fold all four flaps and all four corner tabs.
TIP: Use a Scraper Tool to help sharpen your folds. - Flip the drawer piece over and rotate it so the two flaps without corner tabs are positioned on the top and bottom sides.
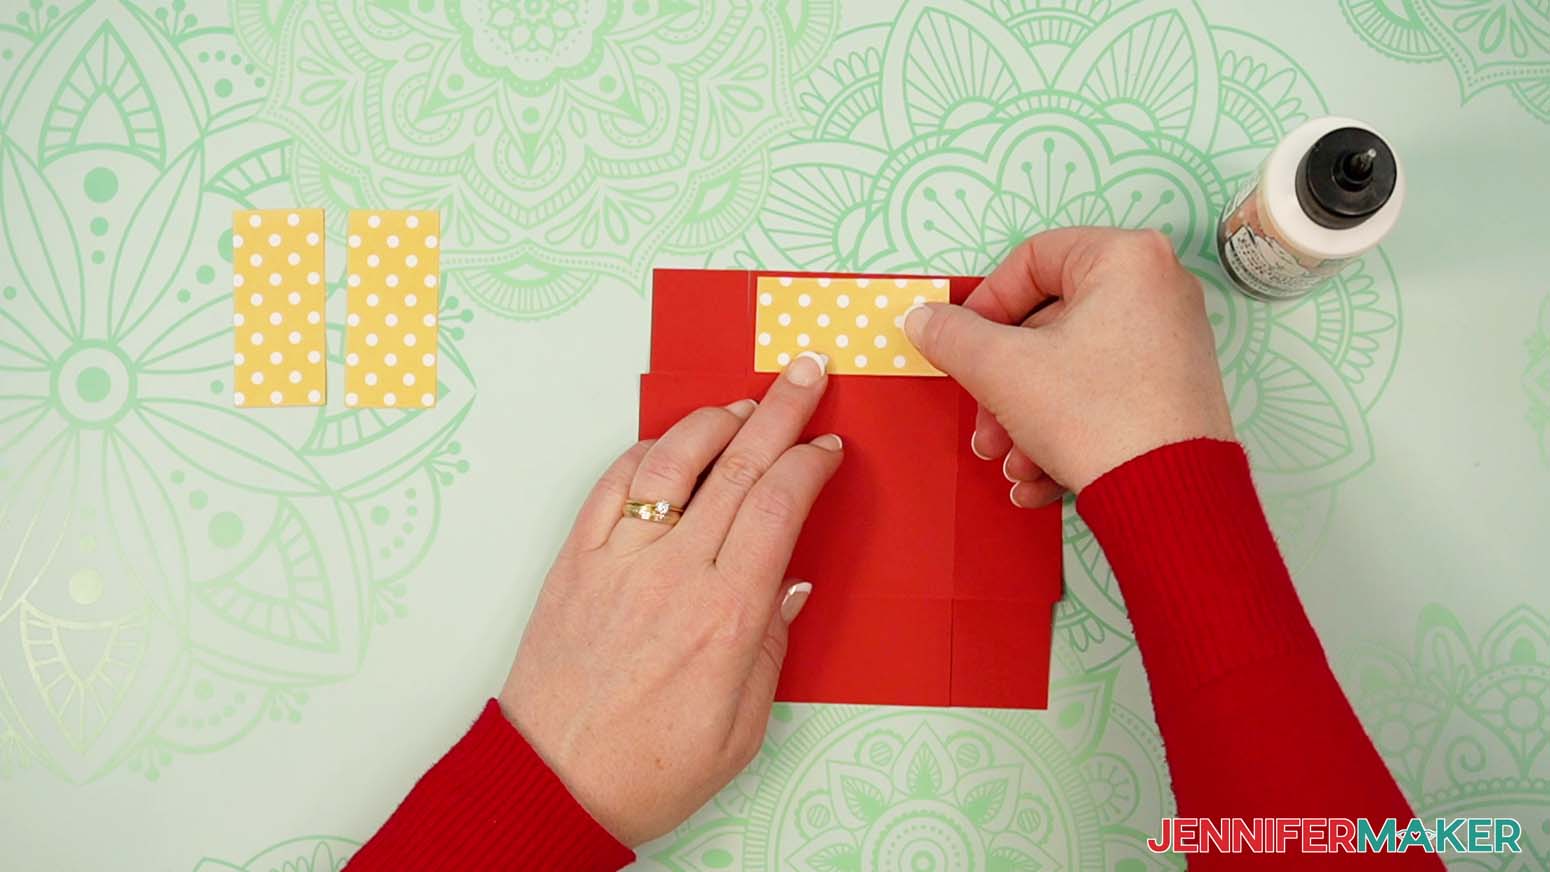
- Take a drawer side panel and lay it face down (pretty side down if you’re using patterned cardstock).
- Apply craft glue around the perimeter on the panel’s back side, then flip it over and adhere it to the center of the drawer piece’s top flap. This will be your drawer’s front side.
NOTE: If you’re using patterned cardstock that has an obvious “up” direction or printed words, make sure it will look right when folded. - Repeat Steps 4-5 to adhere side panels to the left and right flaps.
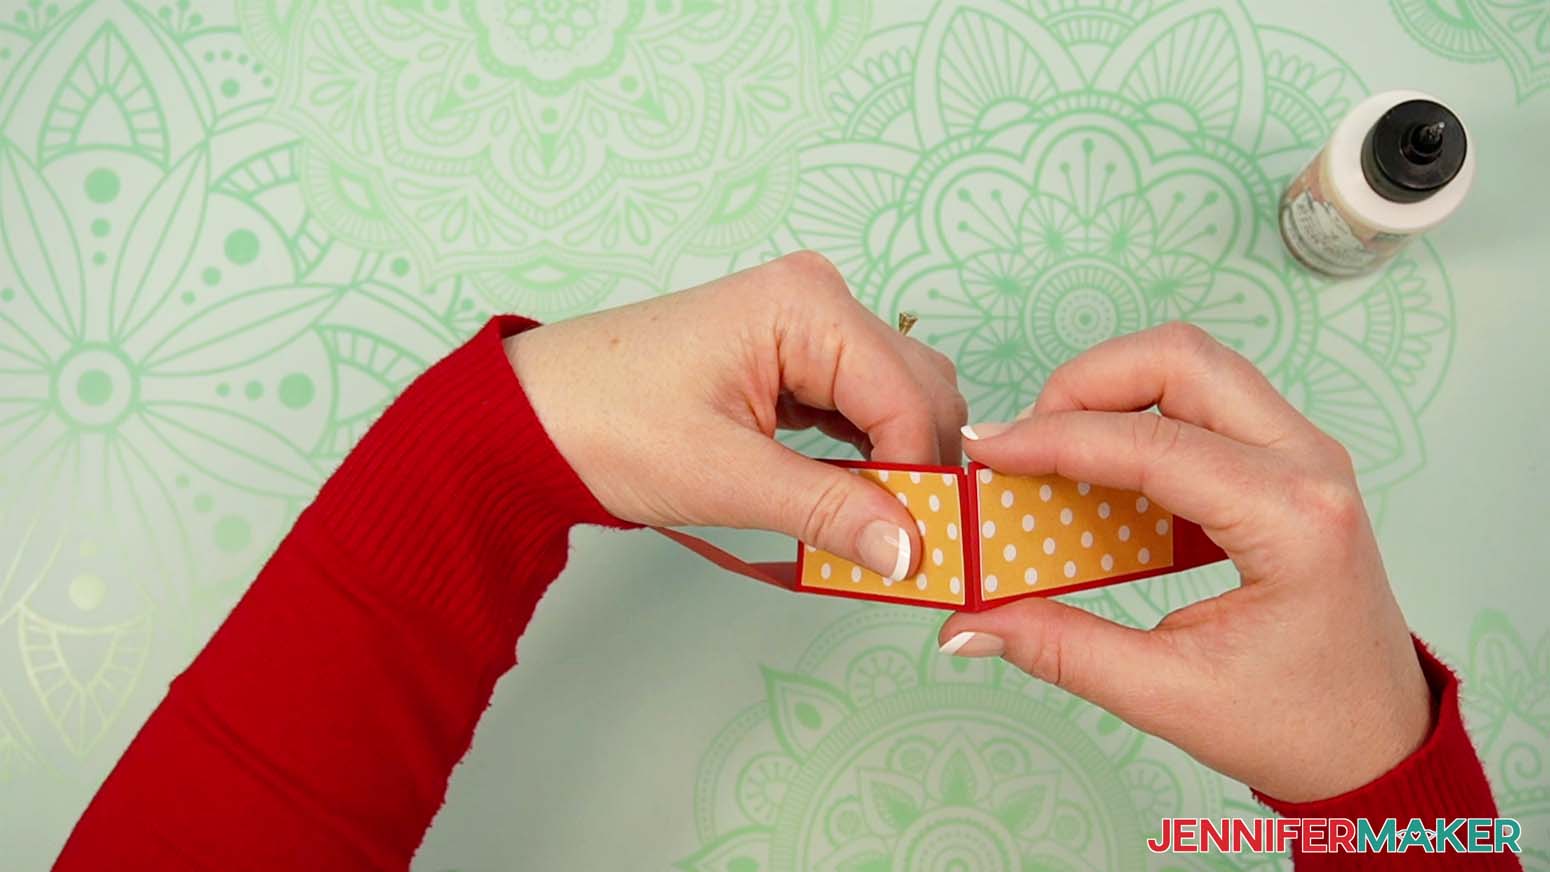
- Apply a small amount of craft glue to one of the corner tabs.
- Keeping the panels facing outward, bring in the corner and attach the tab to the inside matching flap, aligning the flap’s edge flush with the tab’s crease.
- Press firmly and hold to secure the corner.
- Repeat Steps 7-9 to secure the remaining three corner tabs.
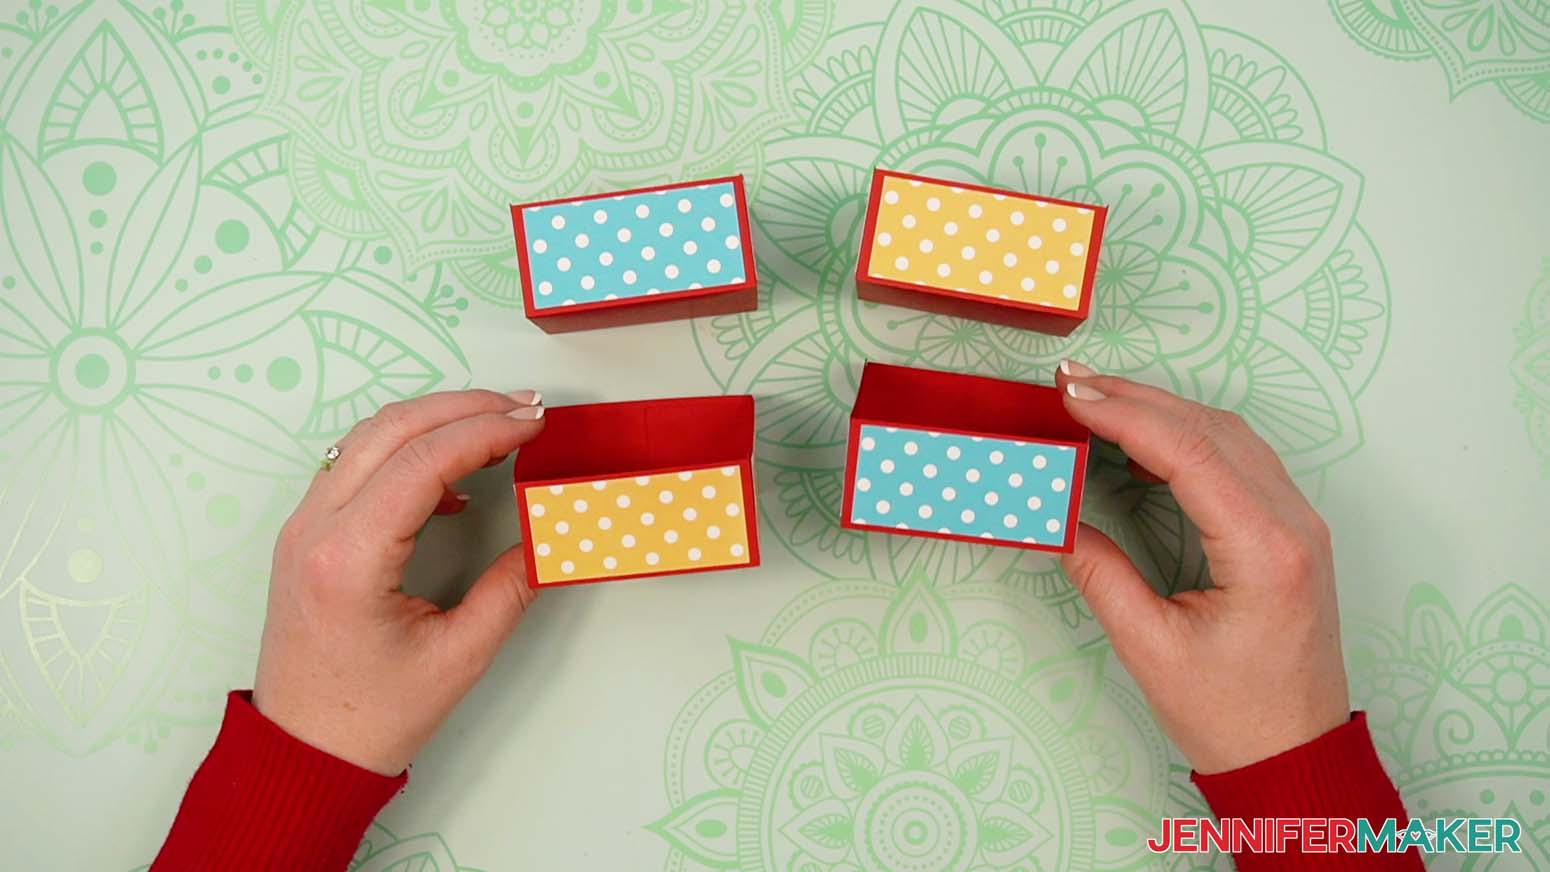
- Then repeat Steps 1-10 to assemble the remaining three drawers.
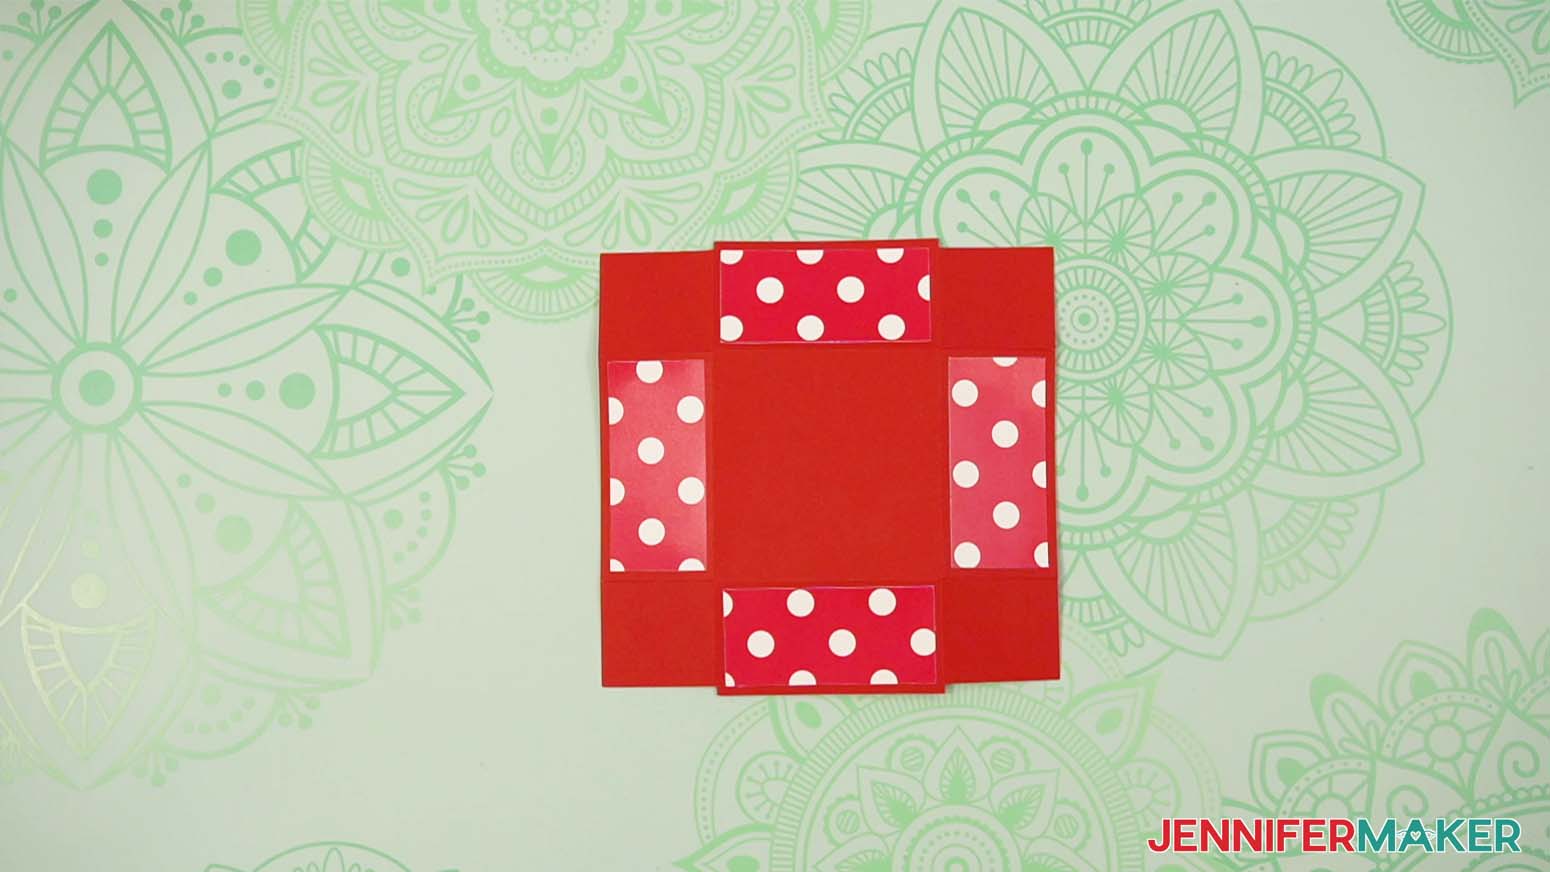
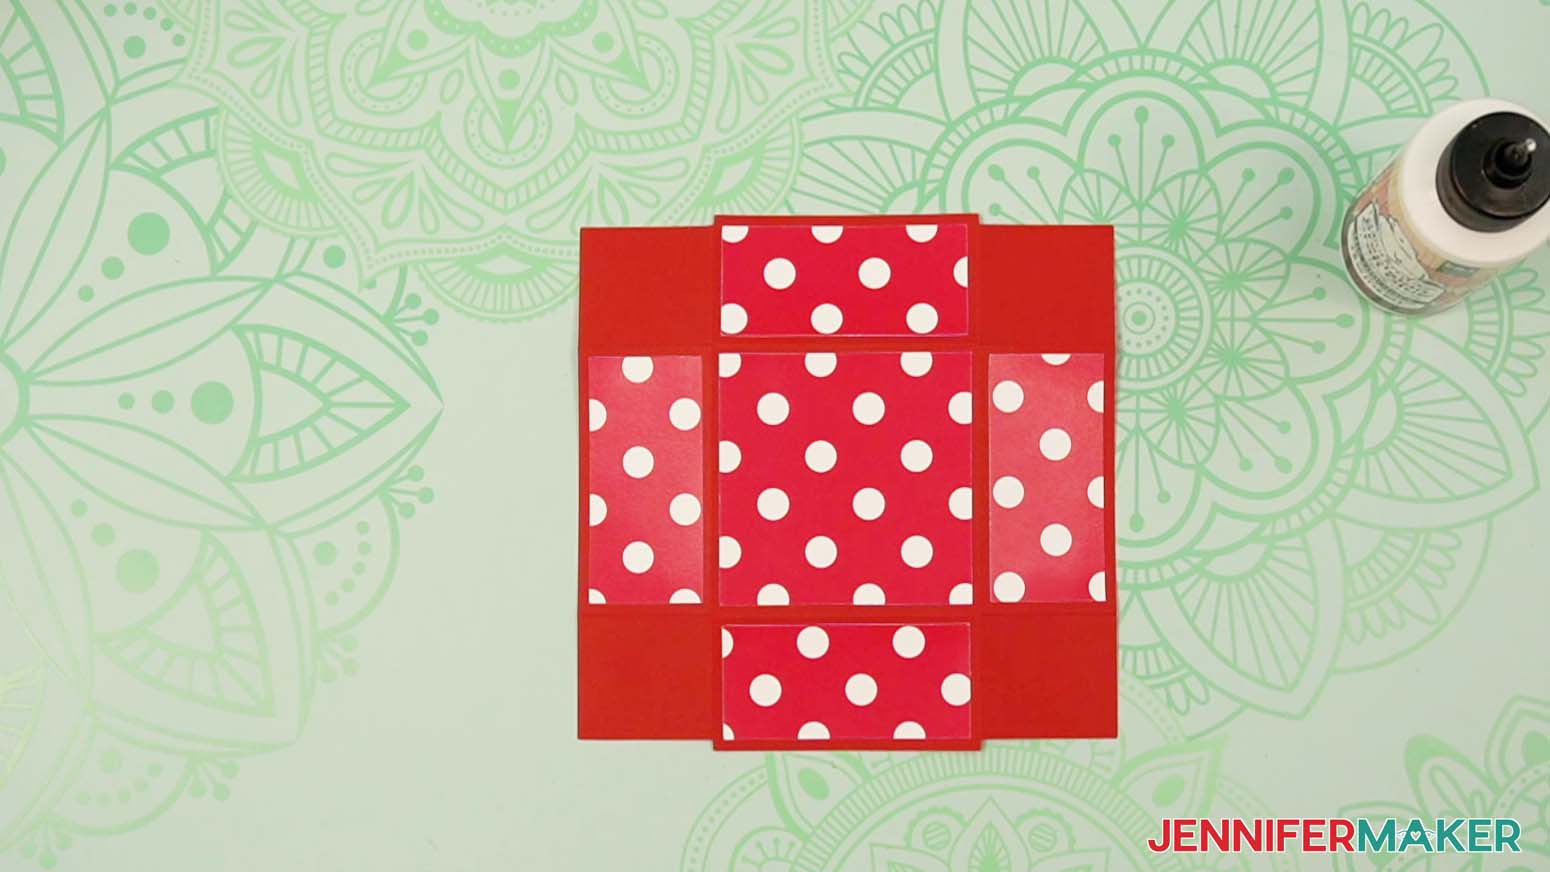
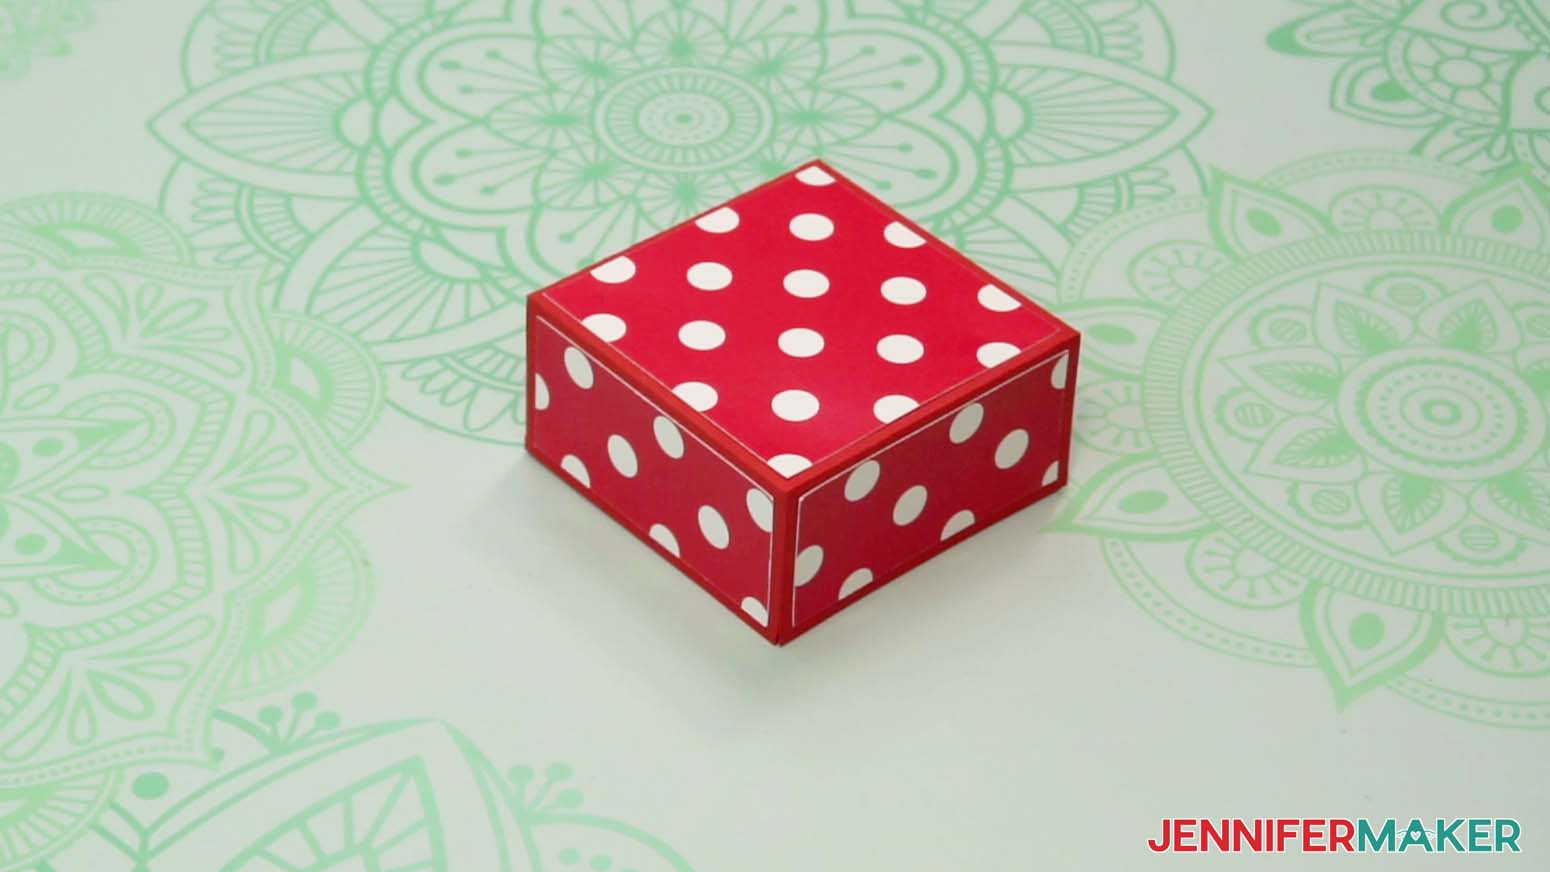
- To assemble the lid, follow Steps 1-6 to fold the main lid piece and adhere the lid’s four side panels to the piece’s four flaps.
NOTE: If you’re using patterned cardstock that has an obvious “up” direction or printed words, make sure you adhere it so the top of the pattern faces the crease lines. That way the pattern will appear upright when the lid is in place. - Take the lid’s top panel piece and lay it face down.
- Apply craft glue to the top panel’s back side, then flip it over and adhere it in the center of the main lid piece’s middle section.
- Then repeat Steps 7-10 to secure the lid’s corners.
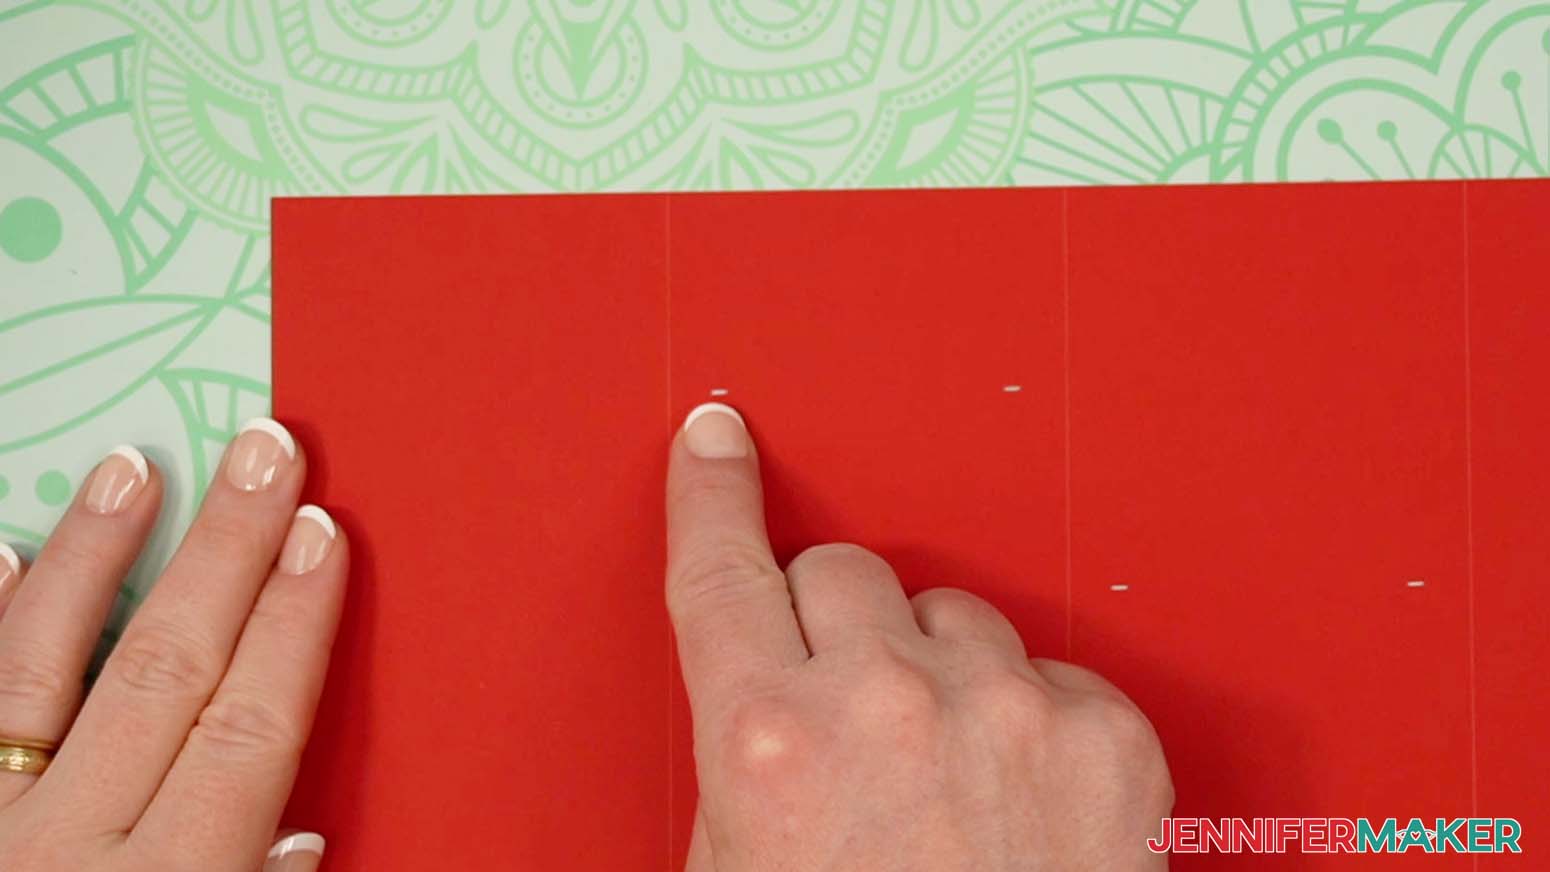
- To assemble the tower, lay out the main tower piece with the crease lines facing up, and the alignment marks in the second section closer to the top than the alignment marks in the third section.
- Fold inward along all three crease lines to form the four sides of your tower, then unfold.
- Flip your main tower piece face down so that the alignment marks in the second section are closer to the bottom now.
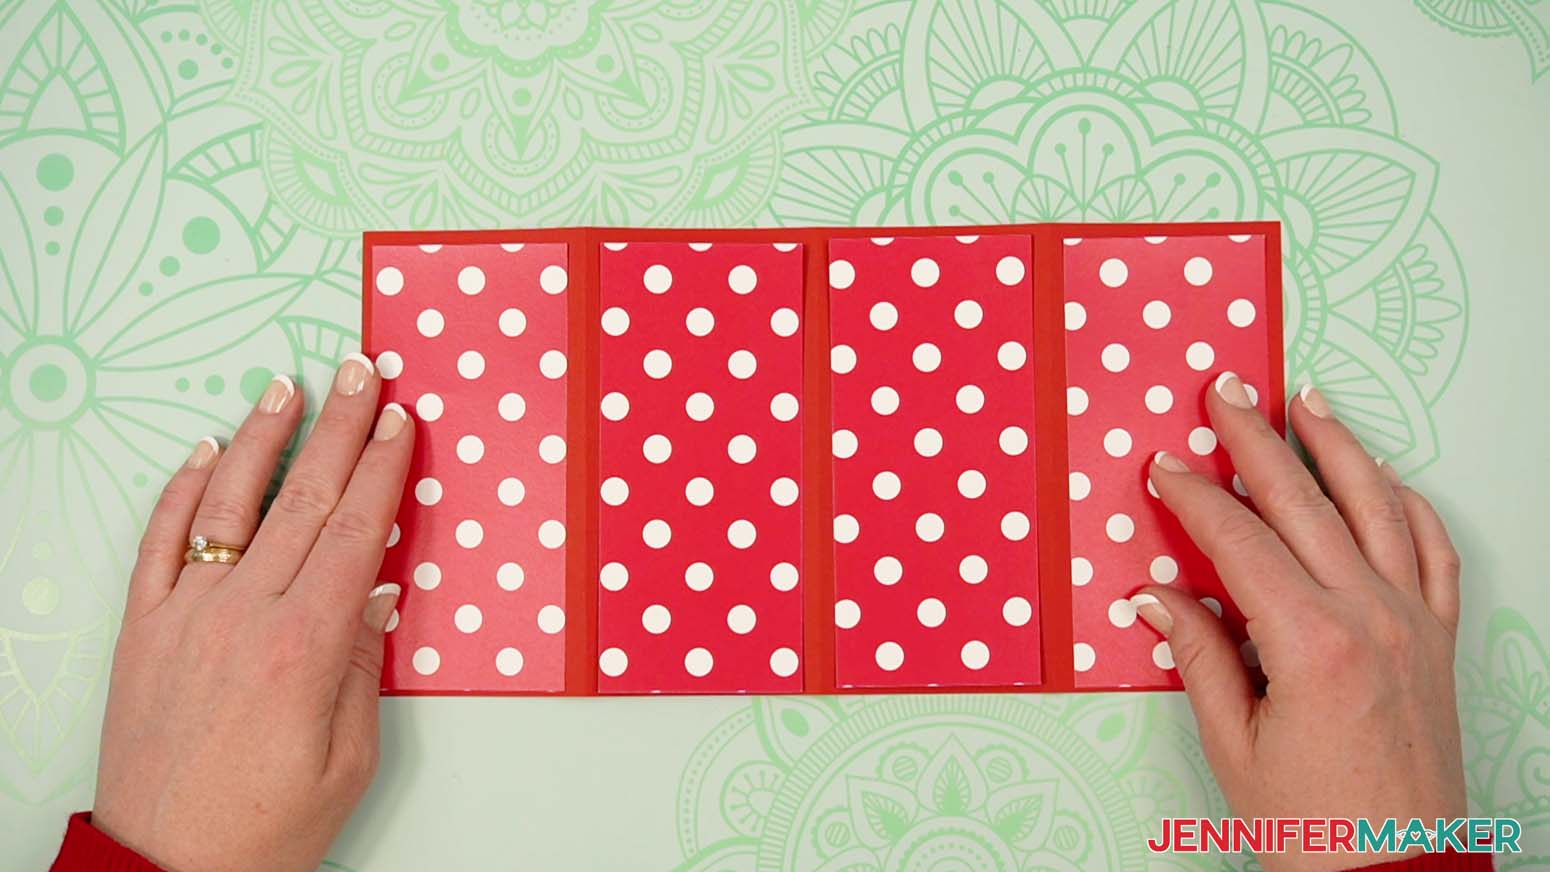
- Arrange your outer tower panels across the main piece to make sure the pattern is oriented correctly.
- Then take the first outer tower panel, flip it face down, and apply craft glue to its back.
- Flip the panel over, center it in the main tower piece’s first section, then press and smooth to adhere it.
- Repeat Steps 20-21 to adhere the remaining three outer panels to the rest of the main tower’s sections.
- Once the outer panels are in place, flip the main tower piece over, with the second section’s alignment marks closer to the top.
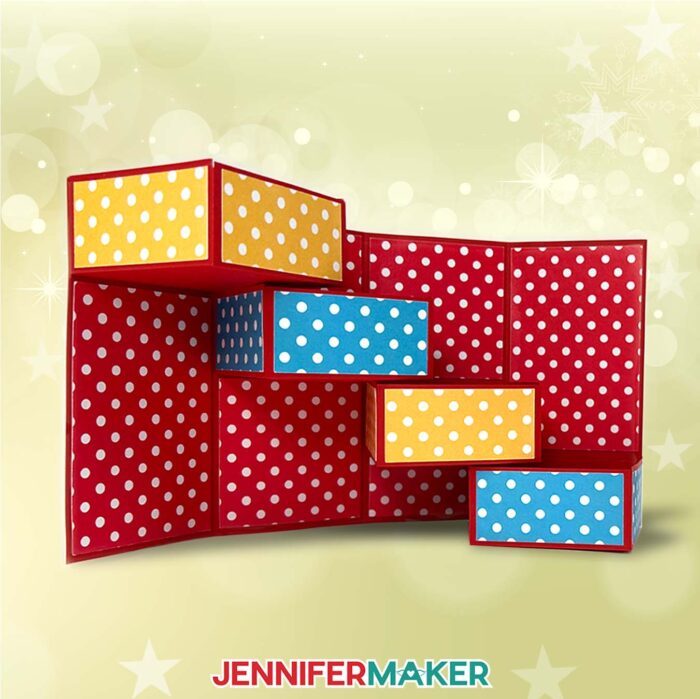
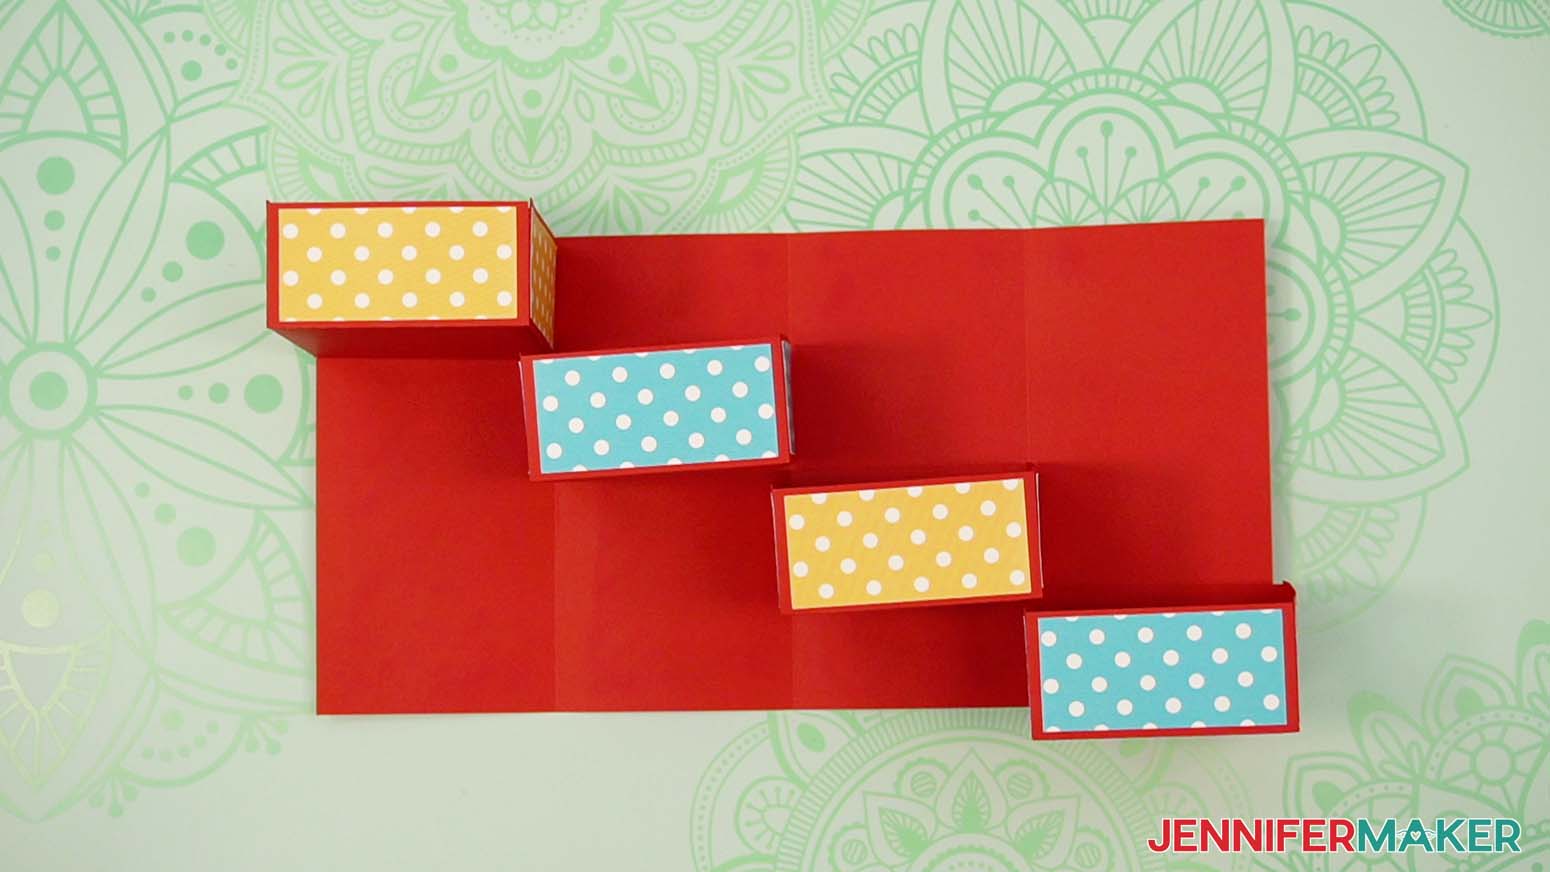
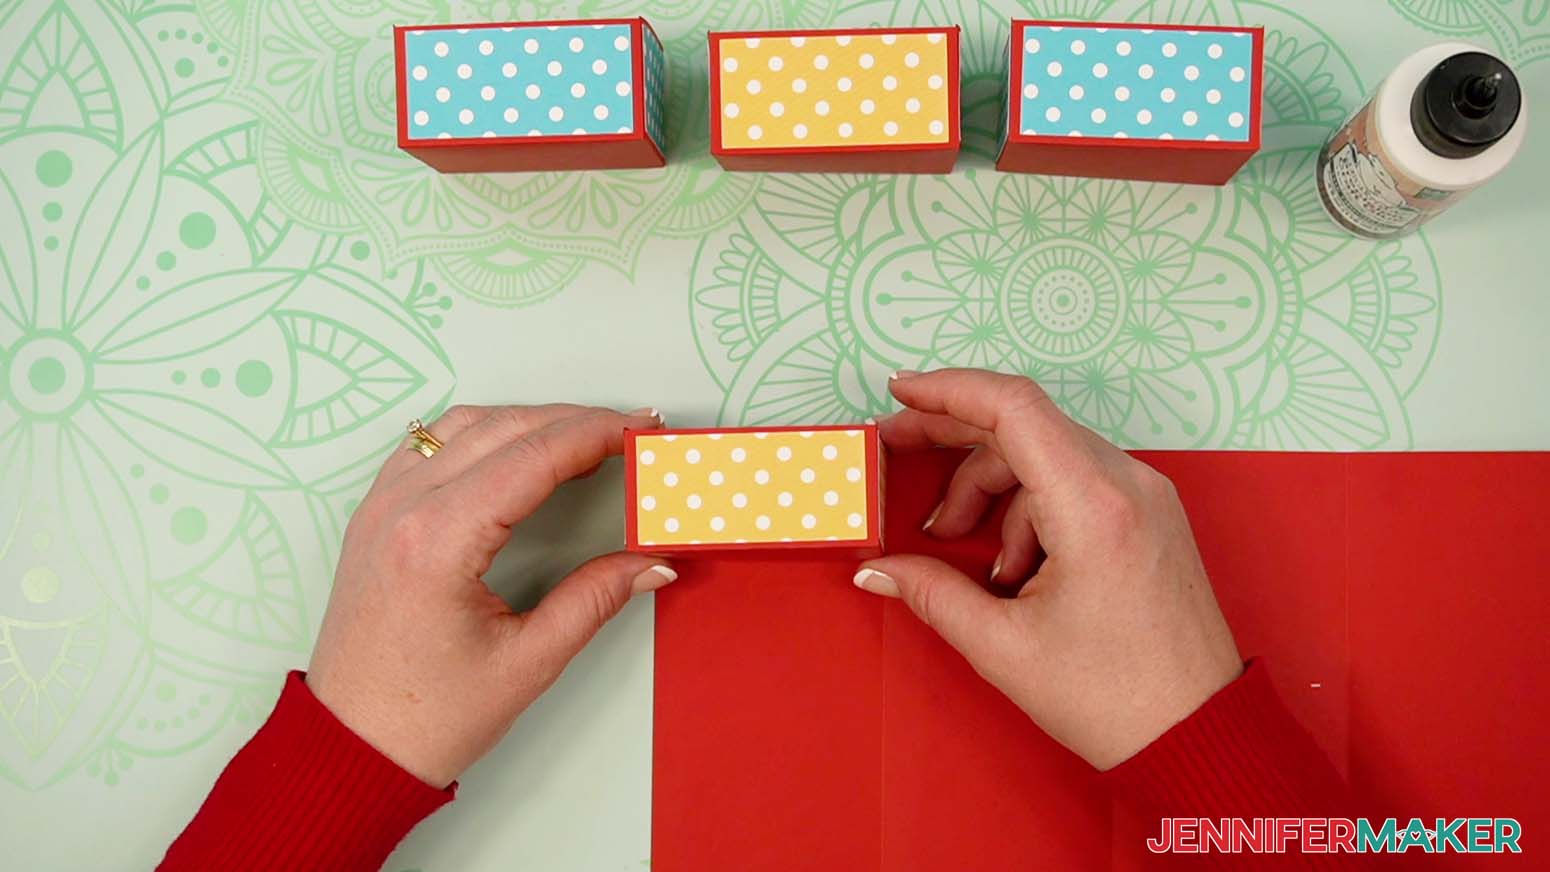
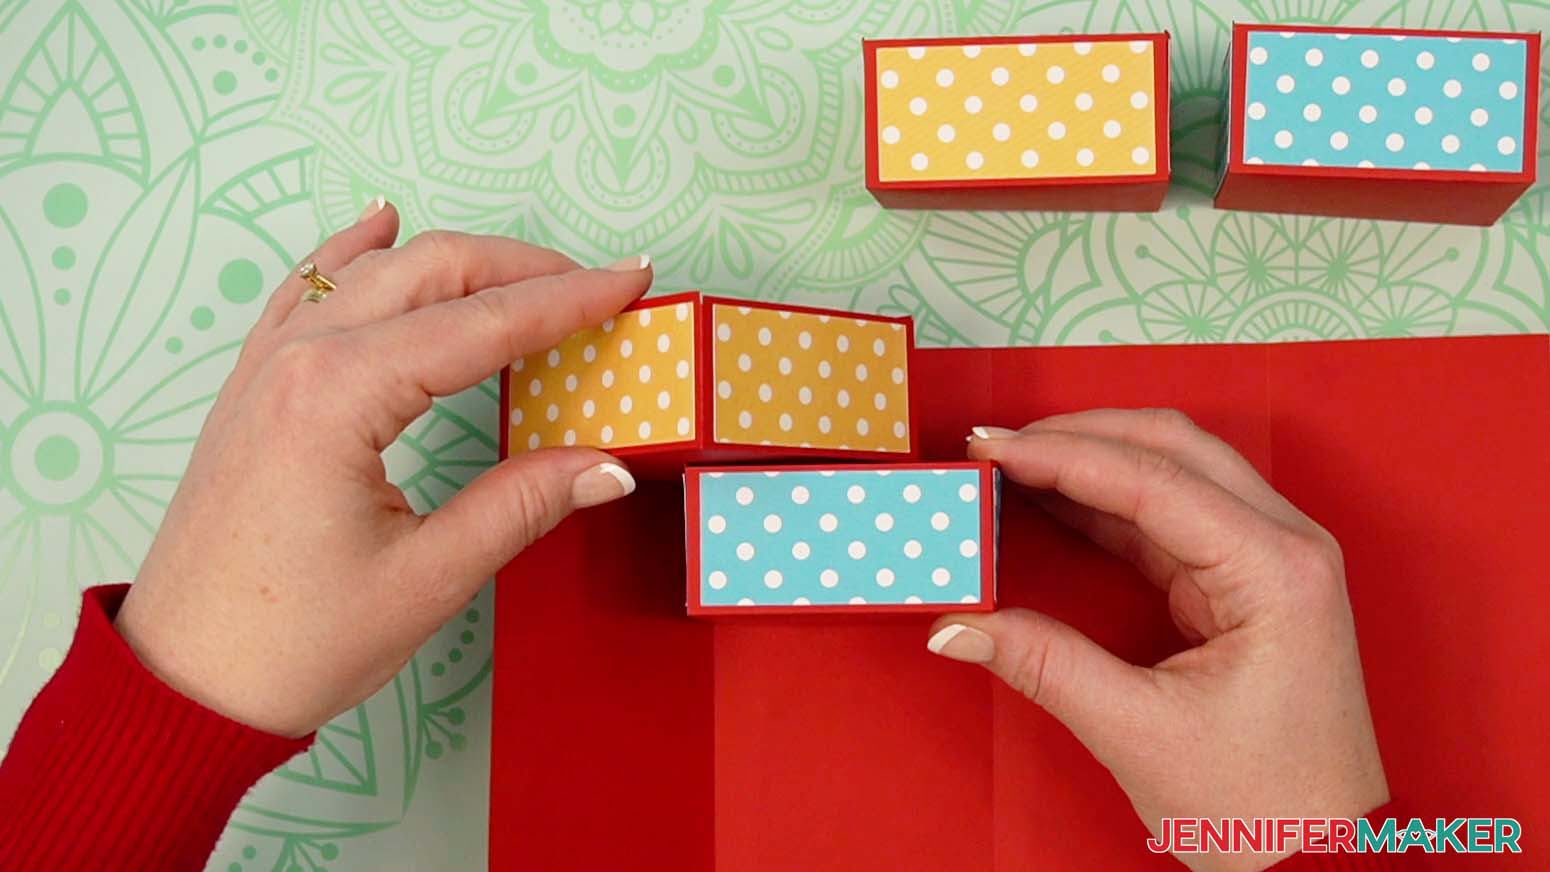
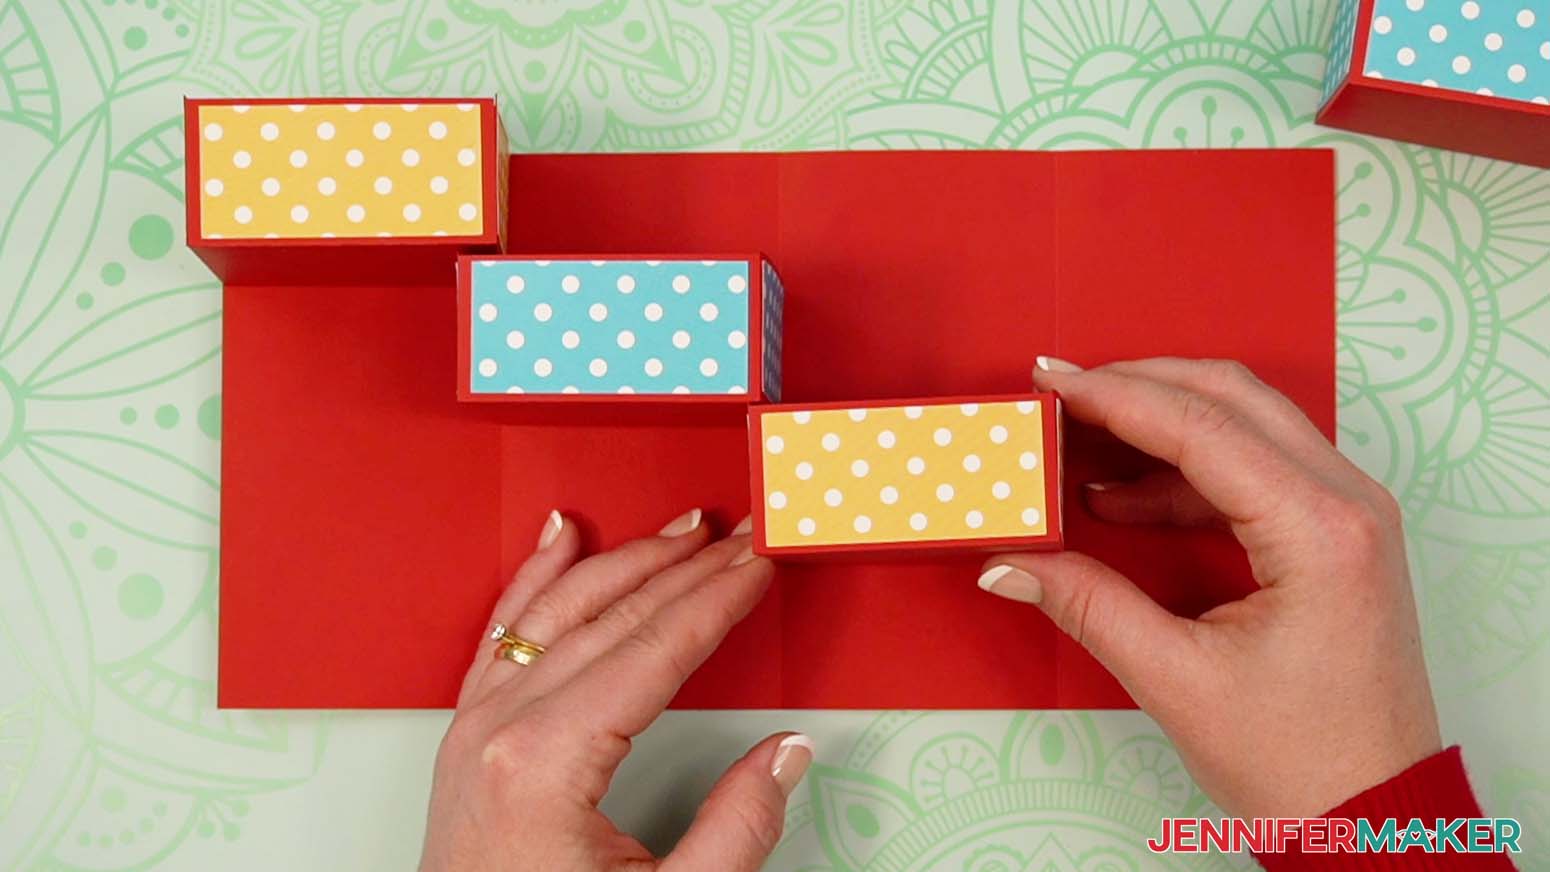
- Place one drawer in each of the main tower piece’s sections in the order you like, descending like stairsteps from the top left corner to the bottom right corner.
NOTE: Make sure the drawer sides without panels are against the main tower piece and that the drawers open toward the top. - Move your drawers to the side, keeping them in the correct order and orientation.
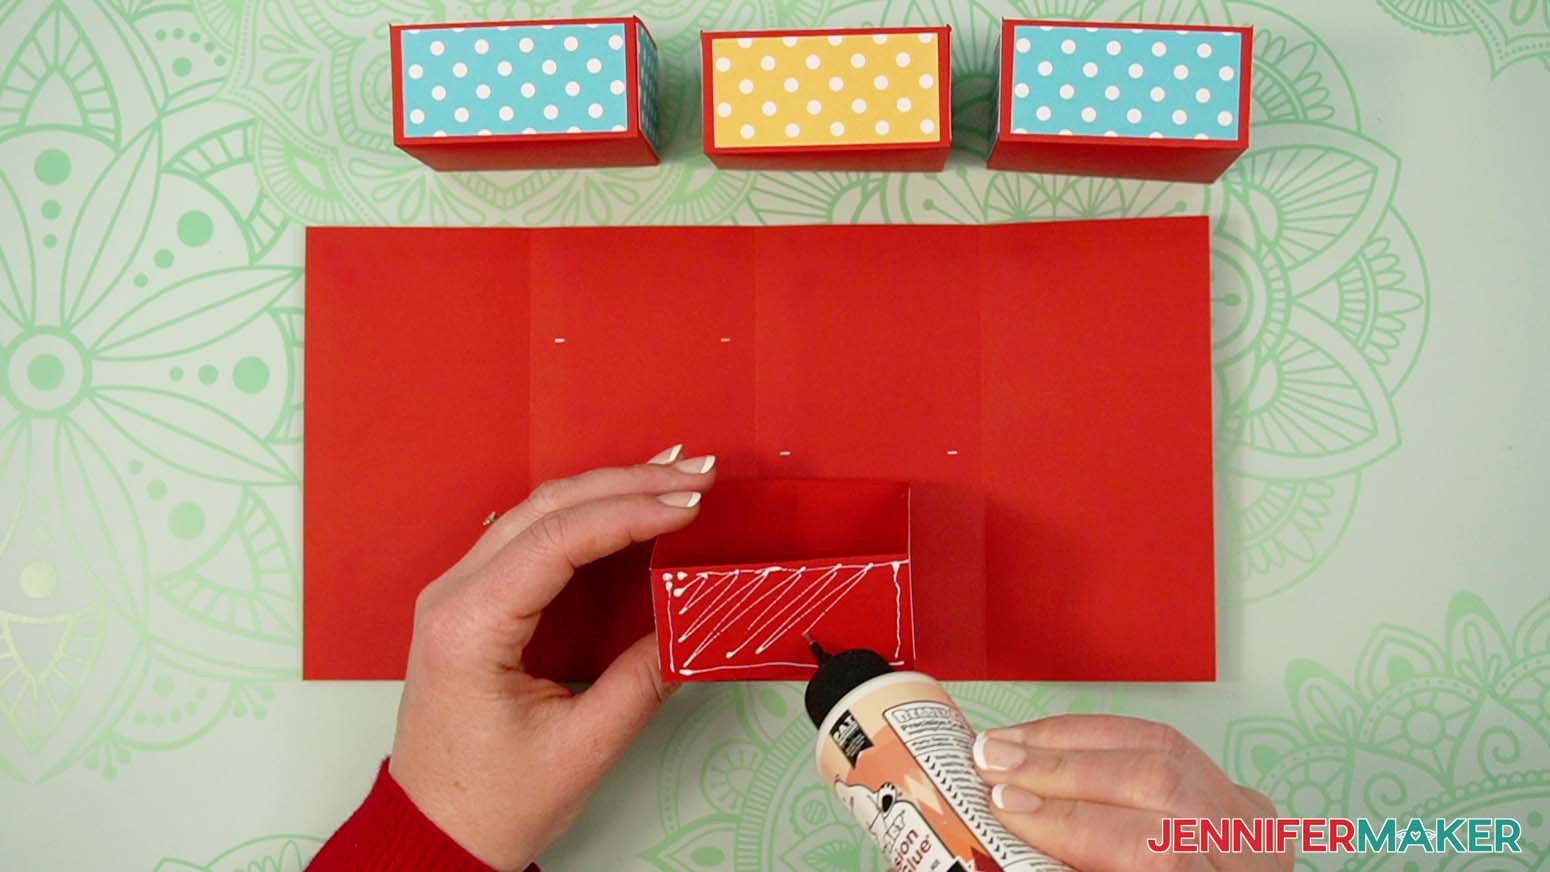
- Take the drawer for the first section and apply craft glue to its back side (the one without a panel attached).
- Attach the drawer to the main tower piece so it is flush with the top left corner and edges, pressing to make sure it is well-adhered.
- Add craft glue to the back of the second drawer, then center and adhere it between the second section’s creases, flush with the top alignment marks.
NOTE: Make sure that the drawers will be able to slide past each other when the tower is folded. Remember to check each time you add a new drawer! - Center and adhere the third drawer so the top is flush with the third section’s alignment marks, and make sure it’s centered between the crease lines of that section.
- Then adhere the fourth drawer the same way, making sure it is flush with the bottom right corner and edges.
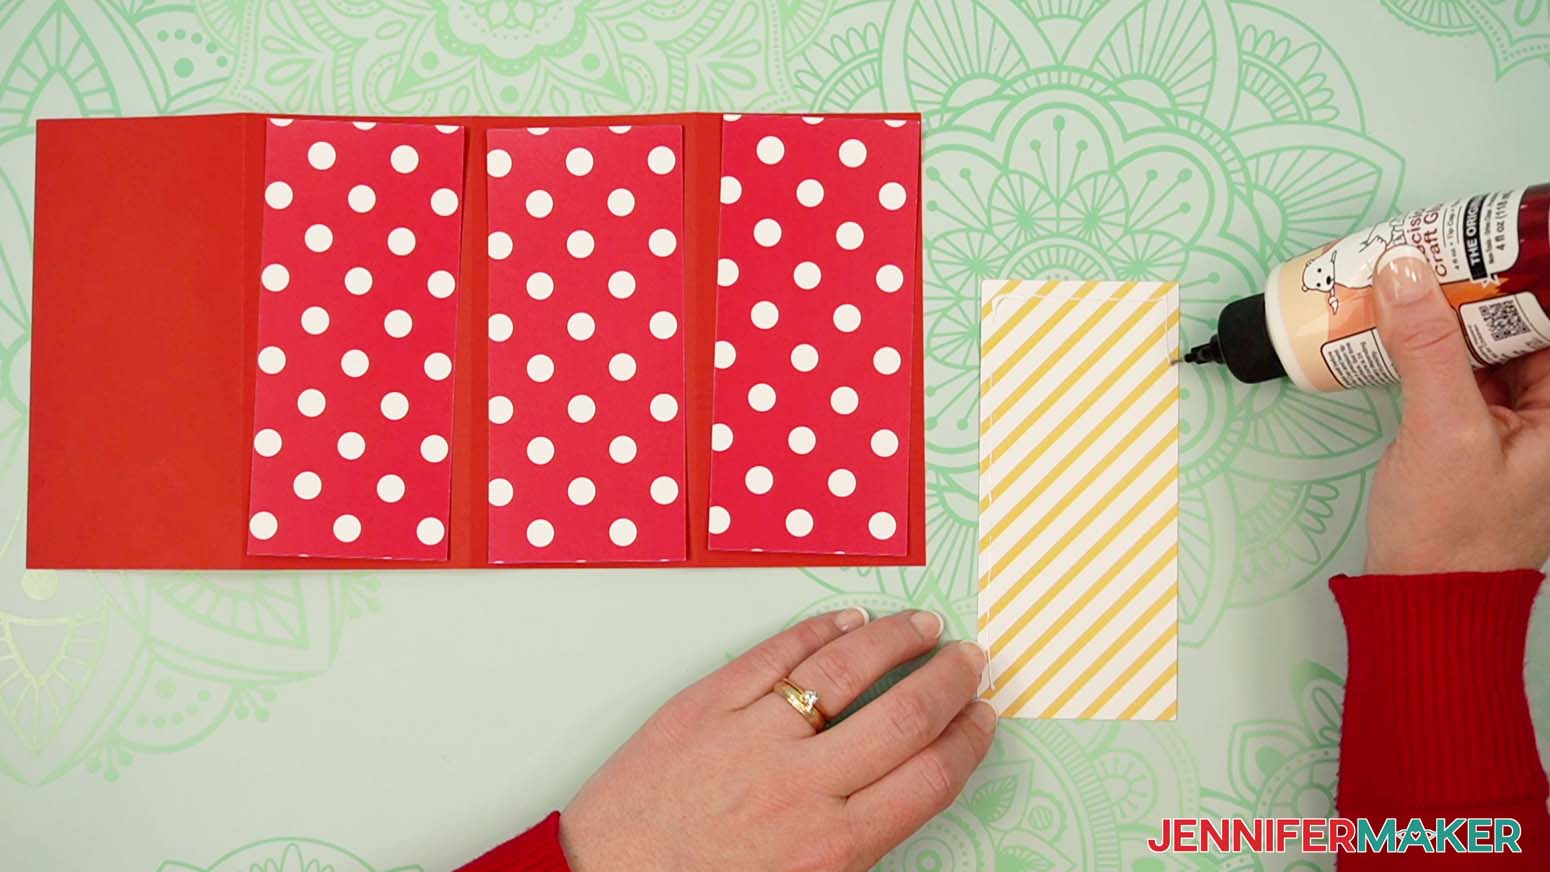
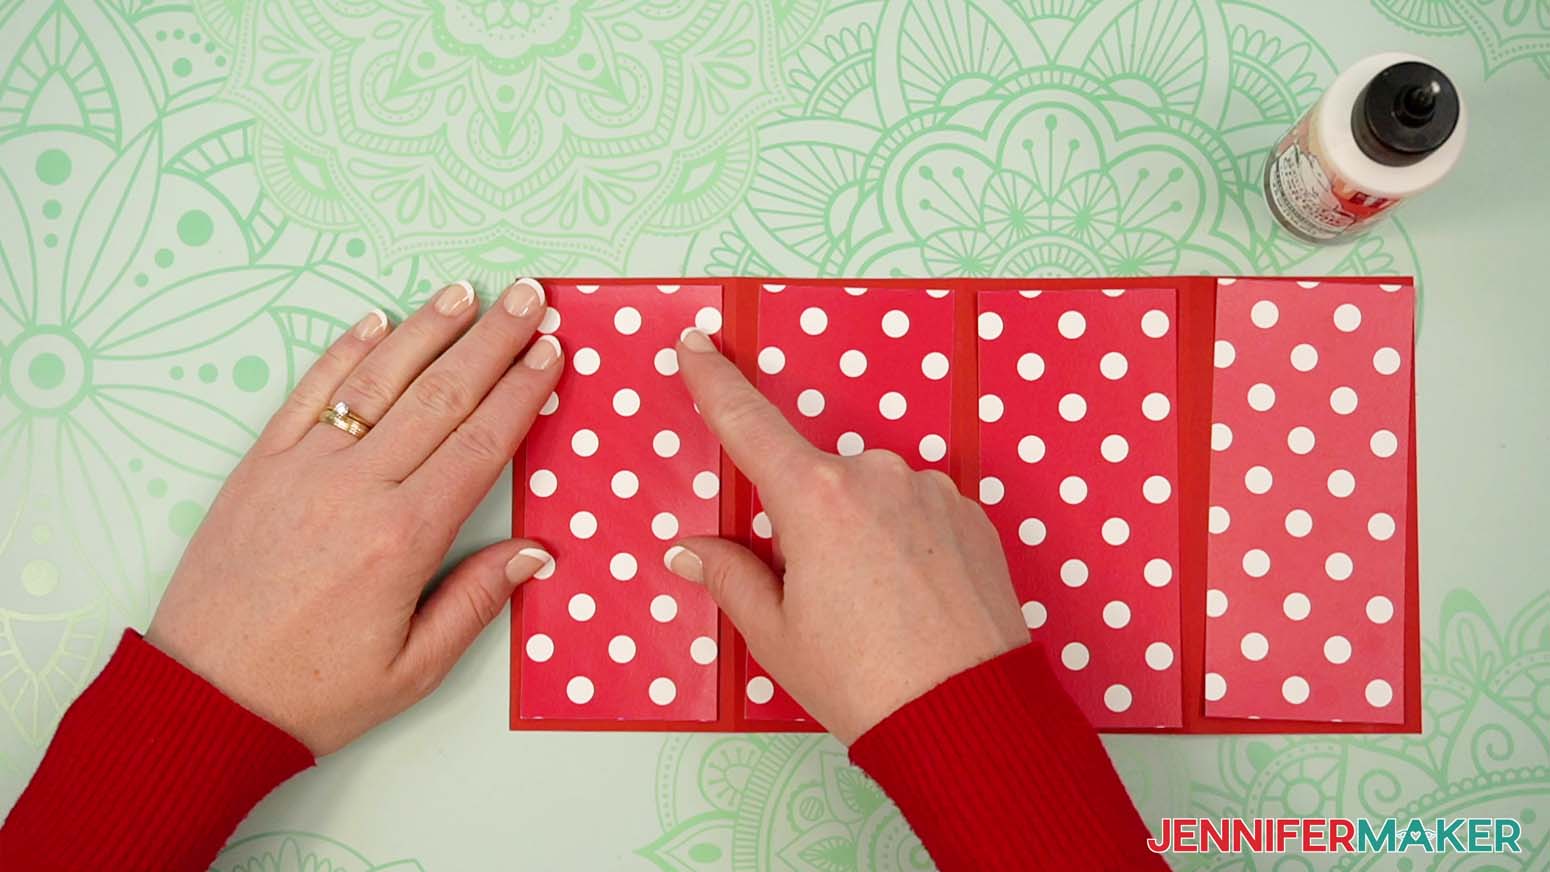
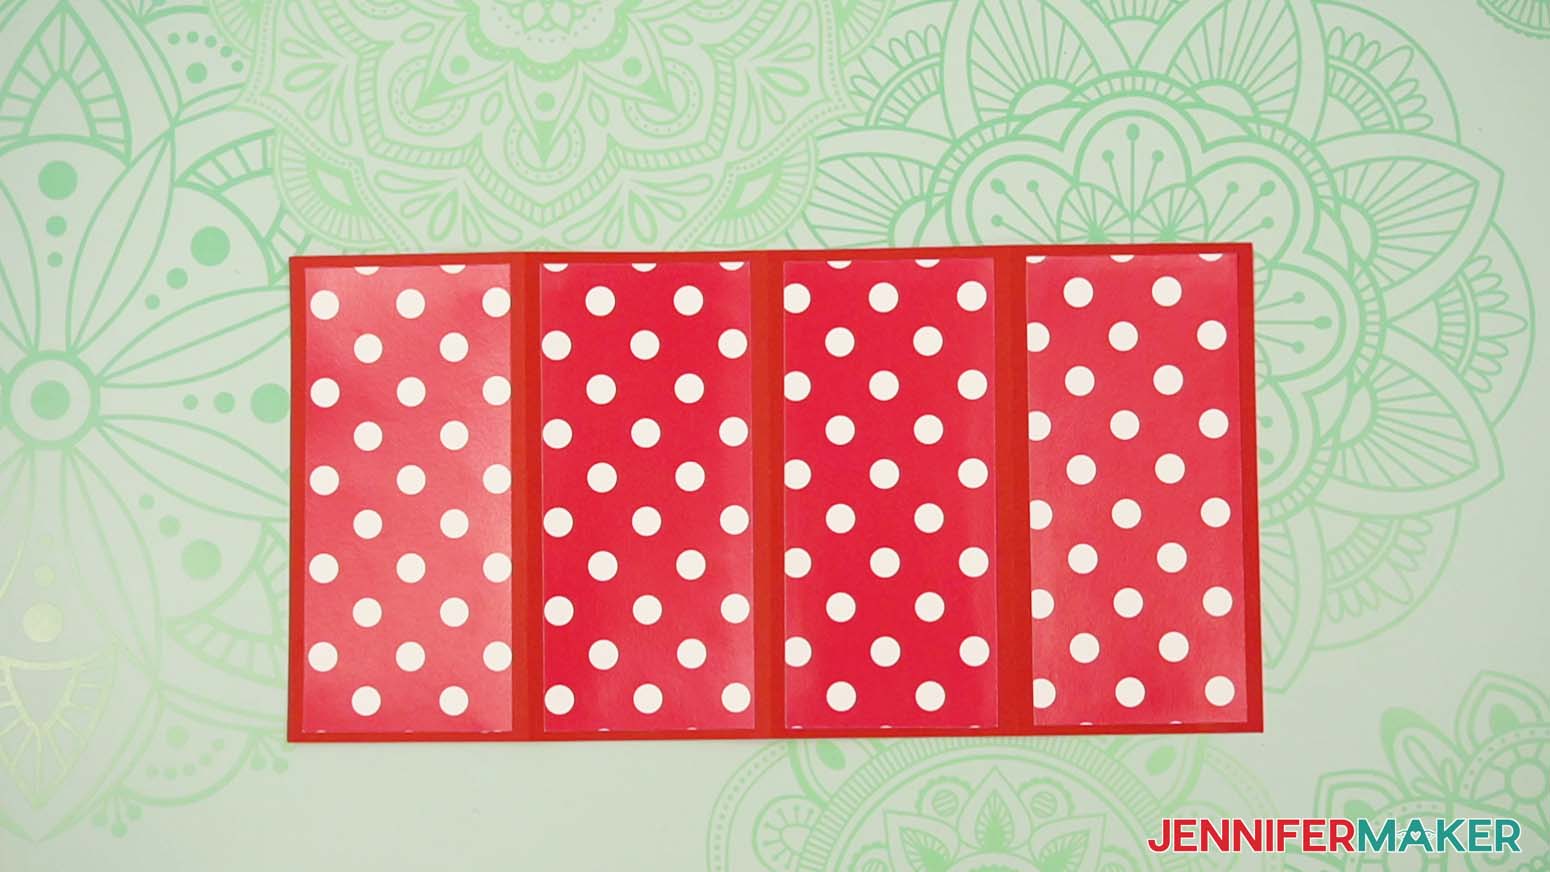
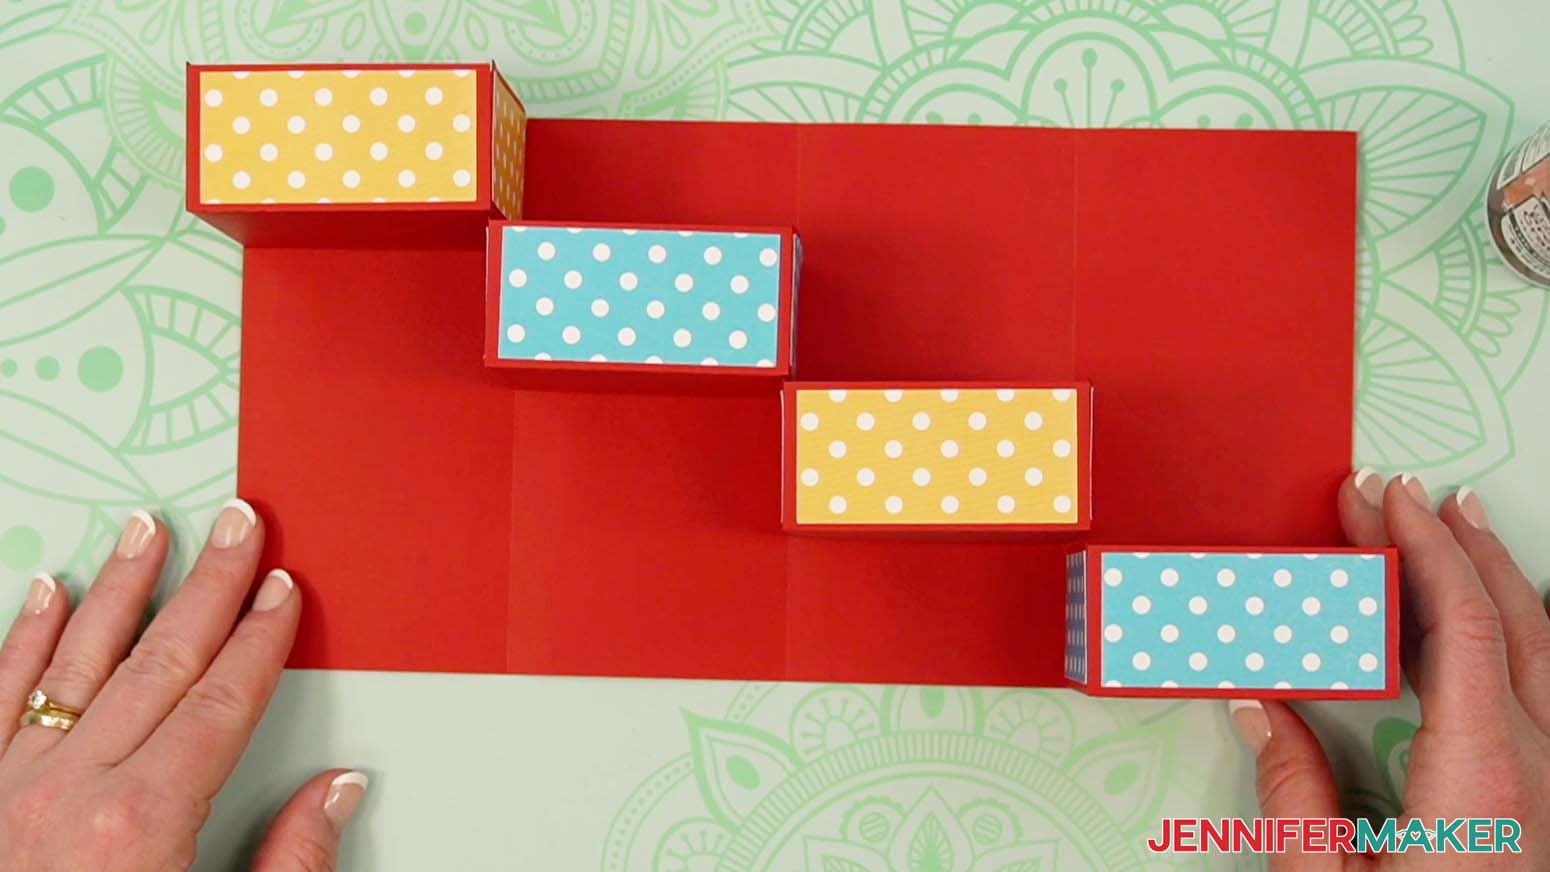
- Next, arrange the tower’s inner panel pieces face up on the main tower piece, matching the panels to sections of the same size.
NOTE: If you cut the inner panel sets from two different patterns, arrange one set in the sections above the drawers, and one set in the sections below the drawers. - One by one, apply craft glue to the back of each inner panel, then center and press to adhere each to its section on the main tower piece.
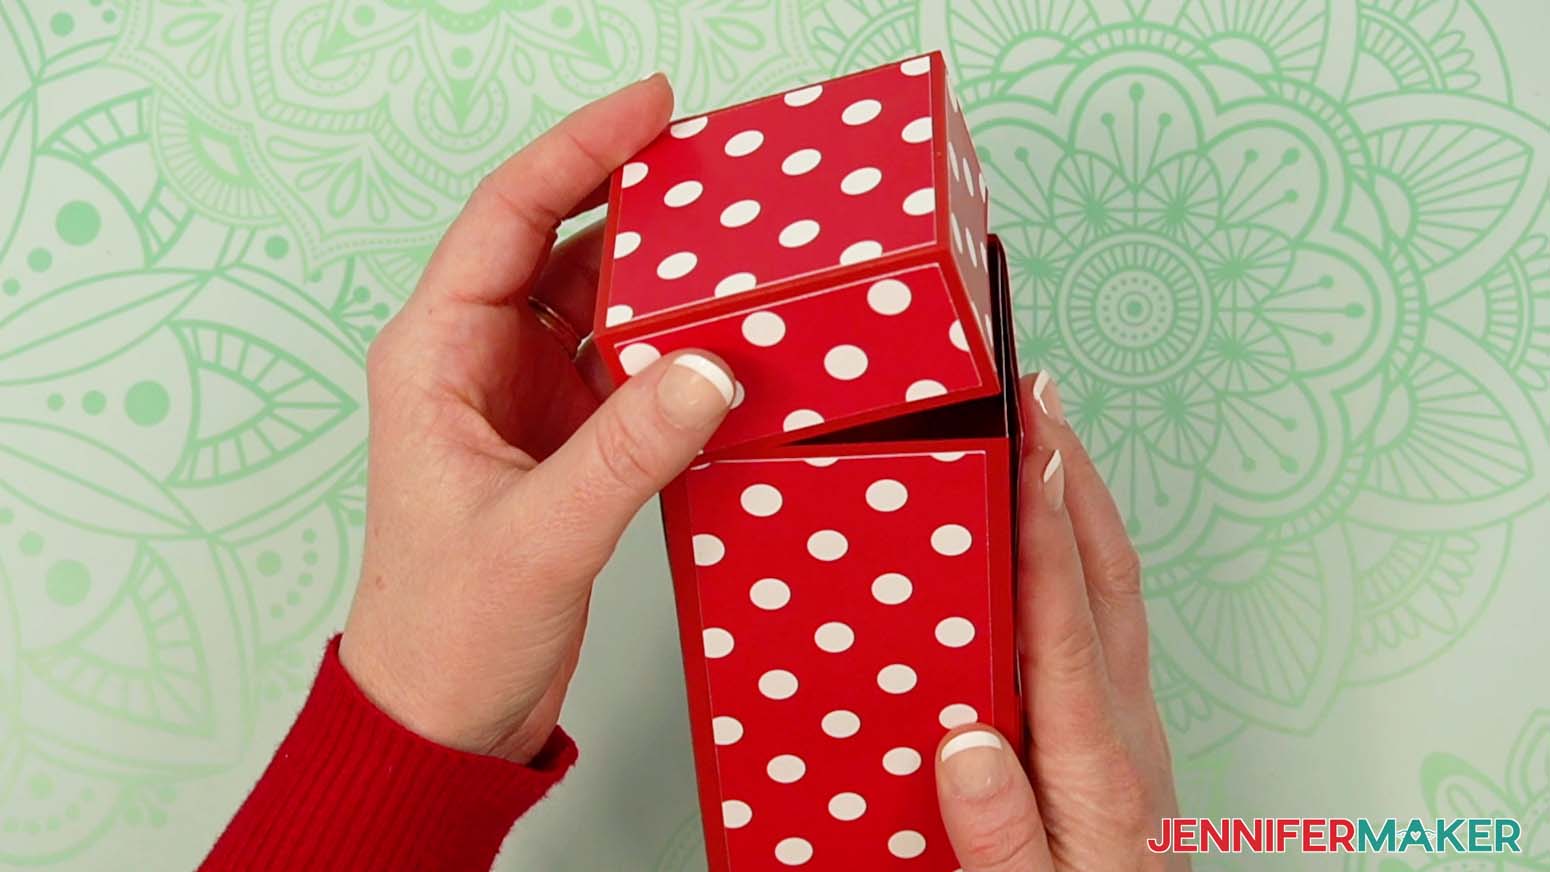
- Now you can fold the sections up to form a tower and pop on the lid to hold it all together!


STEP 4: SHOW IT OFF
You now have a super cute Tower Gift Box for storing small items like desk or craft supplies, make-up, or even candy!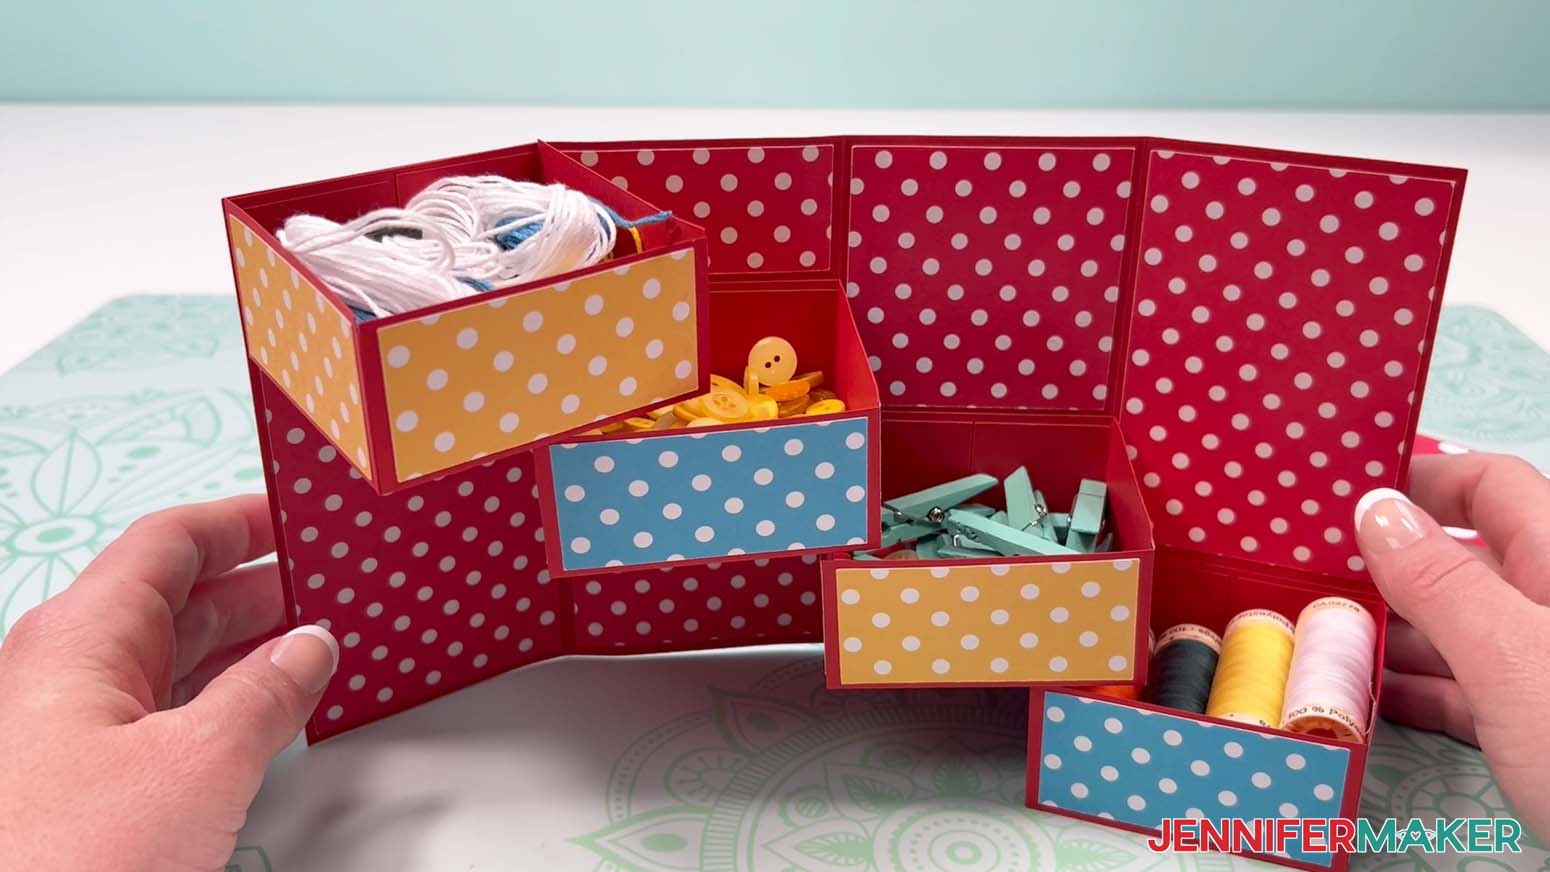
Notes
Finished Sizes:
Closed Box: 2.875" W x 2.875" D x 5.75" H
Open Box: 11.5" W x 2.875" D x 5.75" H
Joy Size Closed: 2.25" W x 2.25" D x 4.25" H
Joy Size Open: 8.188" W x 2.25" D x 4.25" H
Answers to Your Questions About Making a Tower Gift Box
Q: I want to customize my tower box with customized labels. How do I do that?
A: You can learn how to create a custom labels for your tower gift box in my ADVANCE program. Learn more about ADVANCE here!
Q: Help! My Cricut Design Space screen looks different than yours!
A: If you’re using the latest version of Cricut Design Space, your screen may have slight variations than the screen you see on the video tutorial. Good news: All of the same functions are there, they may just be in different spots or have new icons. Pause the video if you need, or follow along with the written tutorial. If you get stuck, ask for expert support in our Facebook group. Our group has become not just a help center, but also a vibrant community of real people and crafters! Plus, you can catch the latest news on JenniferMaker tutorials and more.
Q: Where can I find the supplies and tools to make a tower gift box?
A: My tower gift box SVG files can be made with simple supplies you may already have in your crafting stash. I like to shop on Amazon for their free shipping with my Amazon Prime membership (just make sure to look for sellers with 5-star reviews). You can also find most, if not all of the supplies and tools at your local craft store.
Q: Can I make and sell these tower gift box designs?
A: I love supporting creative entrepreneurs! If you want to use my designs and projects for commercial use, please familiarize yourself with my important licensing information before selling your crafts.
I do not permit sale of my digital items, but you can sell the creative goods you make with them — as long as you follow my licensing requirements. That means you cannot sell the tower gift box SVG files, but you can sell boxes that you made with the files within the guidelines linked above.
Q: What paper is used for gift boxes?
A: I recommend using 65 to 80 pound cardstock for your tower gift boxes. It cuts well with a cutting machine and is easy to score, fold, and assemble.
Q: What kinds of gifts can I put inside the tower gift box?
A: For gifting, you can fill your tower gift box with candy, homemade treats, small crafts, store-bought trinkets, love notes, and more! Avoid using items that are heavy enough to really bend the paper, though. Whether you’re crafting holiday gift towers, Christmas gift towers, or a chocolate gift tower filled with gourmet treats, this project is a great way to create a thoughtful and impressive gift – easy!
Q: How do I know if my design is the right size?
A: Not sure if your design is uploading at the correct size? If you are using Cricut Design Space Beta for Desktop, try switching to the Live version as this has worked in our testing. Here are the dimensions you should see for each design on your Canvas:
- tower-gift-box-score-jennifermaker-SVG: 11.5″ x 12″
- tower-gift-box-no-score-jennifermaker-SVG: 11.49″ x 11.5″
- tower-gift-box-label-jennifermaker-SVG: 5.4″ x 2.73″
- tower-gift-box-joy-jennifermaker-SVG: 10″ x 8.55″
- tower-gift-box-label-joy-jennifermaker-SVG: 3.9″ x 1.89″
If you need help resizing your design, see my Resizing Guide.
Get my free SVG/DXF/PDF files to make a tower gift box!
(If you do not see the signup form above, click here.)
I love seeing what you make with my designs and how you use them! Please share a photo of your tower gift box in our Facebook group or tag me on social media with #jennifermaker.
Love,

Want to remember this? Save this Tower Gift Box tutorial to your favorite Pinterest Board!