Learn how to make fun candy crafts with Easter lollipop holders!
Spring has sprung, and Easter is just around the corner! If you want to add a personal touch to your Spring celebrations and gifts, why not try crafting these adorable Easter lollipop holders using your trusty Cricut cutting machine, cardstock, and a dab of glue? They’re a fantastic way to spread joy and creativity while sharing some sweet treats!
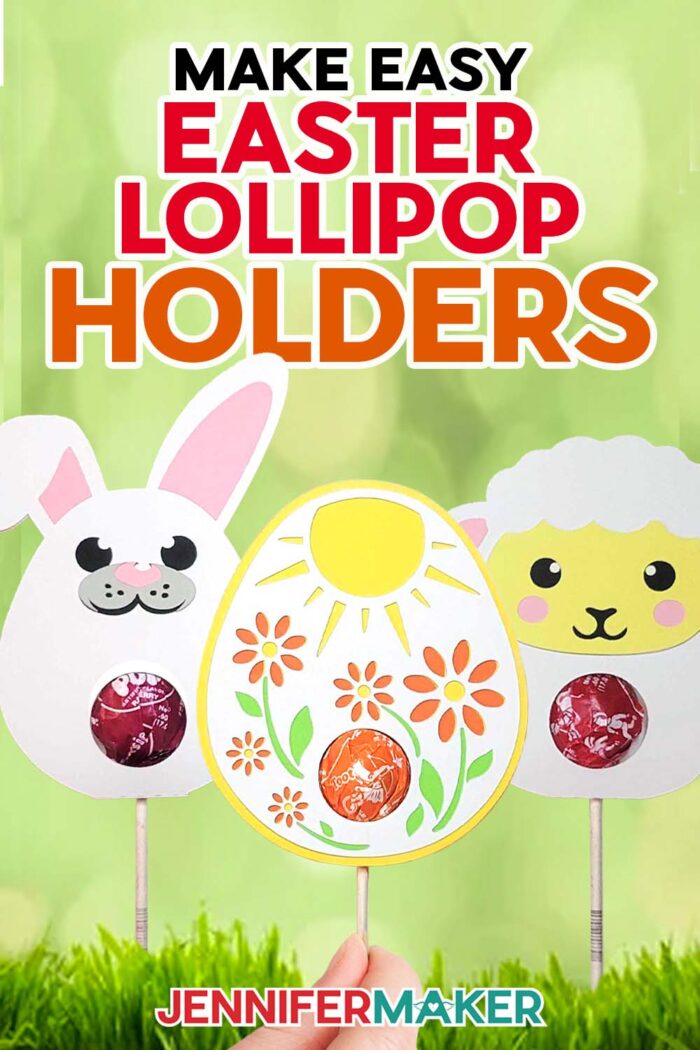
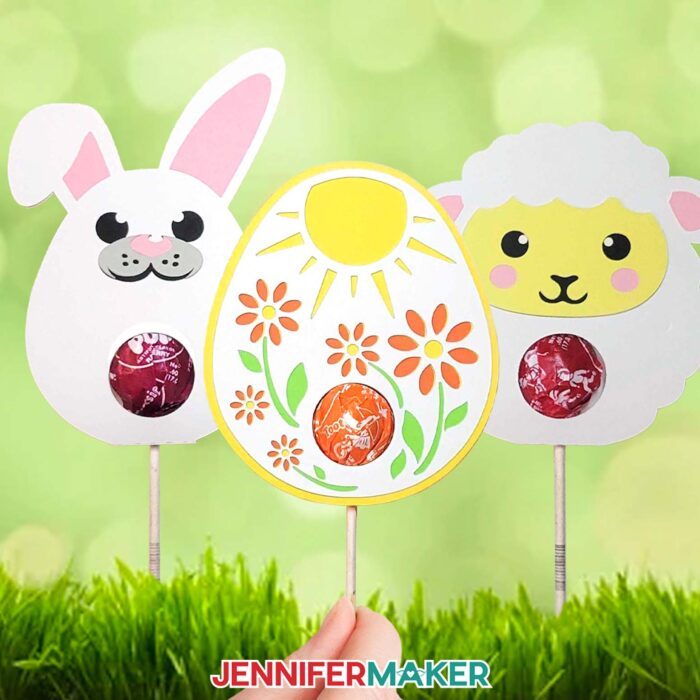
These Easter lollipop holders use the same supplies and steps as the original tutorial for my unicorn, chick, butterfly, and present projects. Watch the full step-by-step video tutorial on how to make DIY Lollipop Holders and apply the steps to the new bunny, egg, and lamb designs!


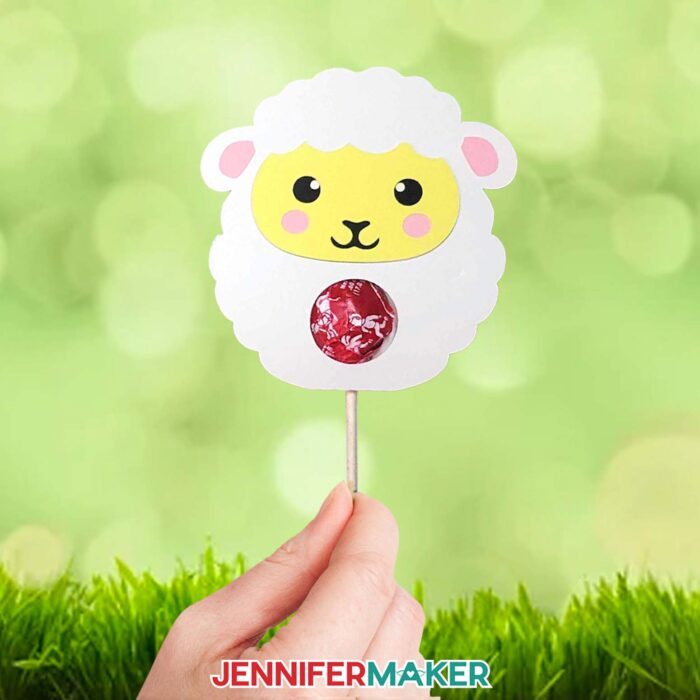
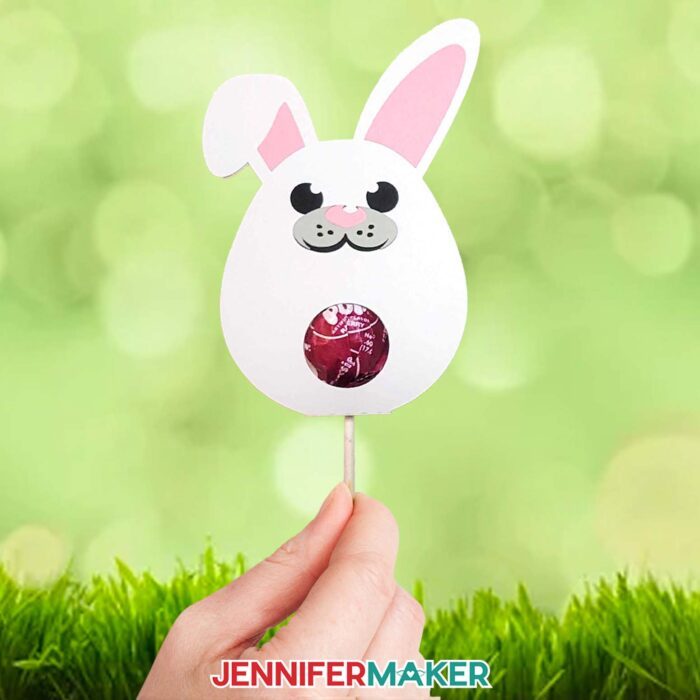
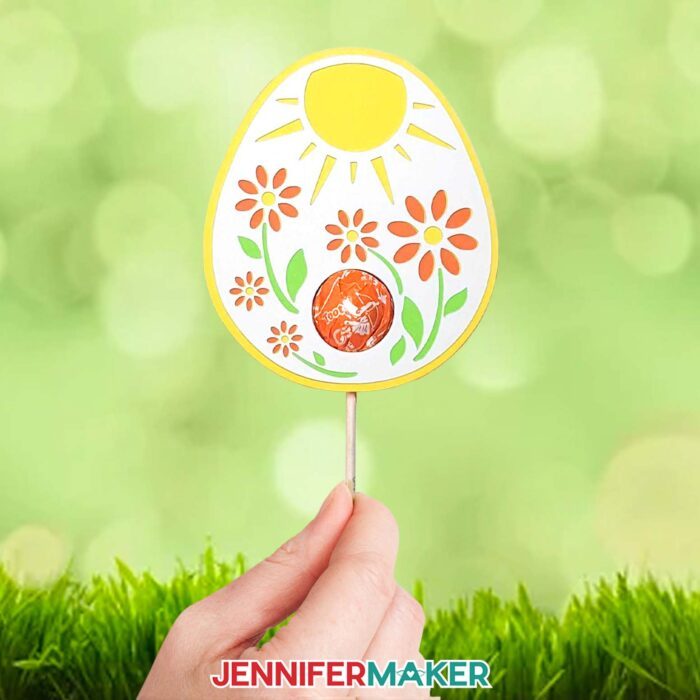
These Easter lollipop holders are super simple, and super cute! The Easter bunny has a cute floppy ear, the egg has fun floral details, and check out the lamb’s fluffy shape!
These DIY lollipop holders aren’t just cute; they’re a delightful way to share the Easter spirit with friends, family, or anyone who would appreciate an Easter treat with a handmade touch!
And since these designs are so easy to cut and assemble, you can even share the process with non-crafters! Prepare the supplies and make a set of Easter lollipop holders with friends. You might convert a new papercrafter!
So, hop on over to your craft corner, fire up your Cricut, and get started on the perfect Easter craft project with a sweet touch!
I used a Cricut Maker 3 for my Easter gifts, but you can use any Maker or Explore machine. They’re also small enough to cut on a Joy or Joy Xtra, or you can cut multiple copies on a Venture! You can use either a green Cricut StandardGrip Machine Mat, 12″ x 12″ or blue Cricut LightGrip Machine Mat, 12″ x 12″ to hold your cardstock. A brayer, tweezers, weeding tool, scraper, and spatula will also be useful. I’ve also included printable PDF files if you’d like to cut your lollipop holder designs by hand.
Let me show you how easy it is to make these Easter lollipop holders with my free designs! This post contains some affiliate links for your convenience (which means if you make a purchase after clicking a link I will earn a small commission but it won’t cost you a penny more)! Read my full disclosure policy.
Materials to Make Easter Lollipop Holders
View my Amazon shopping list with the exact items we used to make this project
- 12″ x 12″ 65 lb Cardstock — The number of sheets and colors depend on the lollipop candy holder design(s) you choose.
- Lollipops — I used Original Gourmet lollipops and Tootsie Roll pops!
- Craft Glue — I used Bearly Art Precision Glue, my favorite, but you can use another craft or tacky glue.
- A method to cut your cardstock — I used the Cricut Maker 3, but you can use any Explore or Maker series machine, Joy, Joy Xtra, or Cricut Venture with the standard Fine-Point Blade.
- Cricut Green StandardGrip Machine Mat 12″ x 12″ or Cricut Blue LightGrip Machine Mat 12″ x 12″, either one works well
- Brayer to secure cardstock to machine mats
- Scraper Tool for creasing tabs
- Spatula for removing small pieces from mats
- Tweezers for holding small parts while glueing
- Design #593 — My free SVG lollipop holder SVG/DXF/PDF designs (available in my free resource library — get the link at the bottom of this post)

How to Make Easter Lollipop Holders
DIY Lollipop Holders
Learn how to make the cutest lollipop holders for any occasion!
Materials
- 12" x 12" Assorted Cardstock 65 lb — each design requires 2-6 colors
- Craft Glue — I used Bearly Art Precision Craft Glue
- Lollipops — I designed these holders to fit the Original Gourmet lollipops available at this link
- Design #379 — My free SVG/DXF/PDF files (available in my free resource library—get the password at the bottom of this post)
Tools
- A method to cut your cardstock — I used the amazing Cricut Maker 3 but you can also use the Cricut Maker, Cricut Explore Series, or Cricut Joy
- Cricut Blue LightGrip Machine Mat 12″ x 12″ -OR-
- Cricut Green StandardGrip Machine Mat 12″ x 12″
- Brayer
- Scraper
- Spatula
- Tweezers
- Scoring Stylus — optional, for the file version with score lines -OR-
- Cricut Single Scoring Tool — optional, for the file version with score lines
Instructions
STEP 1: GET MY FREE DIY LOLLIPOP HOLDER SVG FILES
First, download my DIY Candy Holder SVG/DXF/PDF files from my free resource library. It's Design #379.
Note: I've included two SVG versions of the lollipop holders. One has "scores" in the name and is suited for crafters comfortable with changing and attaching score lines in Design Space. The other has "no-scores" in the name. Instead of score lines, I added dashed cut lines that can be used to fold the cardstock. I have instructions for both versions. This tutorial will cover the "score" version and the video will cover the "no-score" version.
Upload the "no-scores" SVG file to Cricut Design Space and add it to your Canvas.
TIP: If you are not sure how to upload an SVG cut file to Cricut Design Space, watch this helpful video training series I made. If you are on an iPad or iPhone, here is how to download and upload SVG files to the Cricut Design Space app.
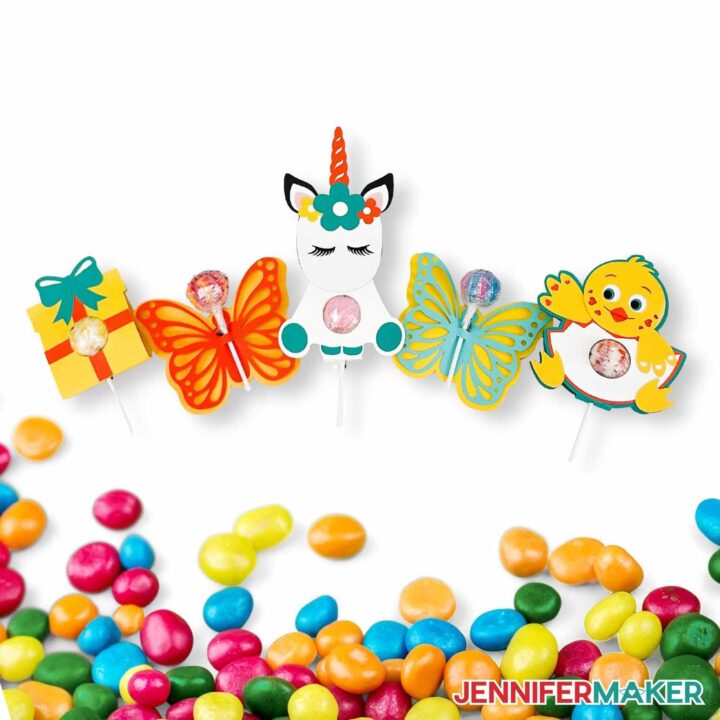
You can zoom out to see all four designs by clicking on the minus (-) sign on the lower left. This is what my DIY Lollipop Holders SVG designs look like when uploaded to Cricut Design Space.
I have included four designs: a cute unicorn, a baby chick, a butterfly, and a present. There's something for every occasion! And, I have even more candy holder designs in my free resource library, look for Design #350.
STEP 2: PREPARE YOUR DESIGN FOR CUTTING
In this tutorial, we will make the unicorn candy holder, but the steps are basically the same for the others. I will point out any differences at the end.
For now let's delete the other three designs.
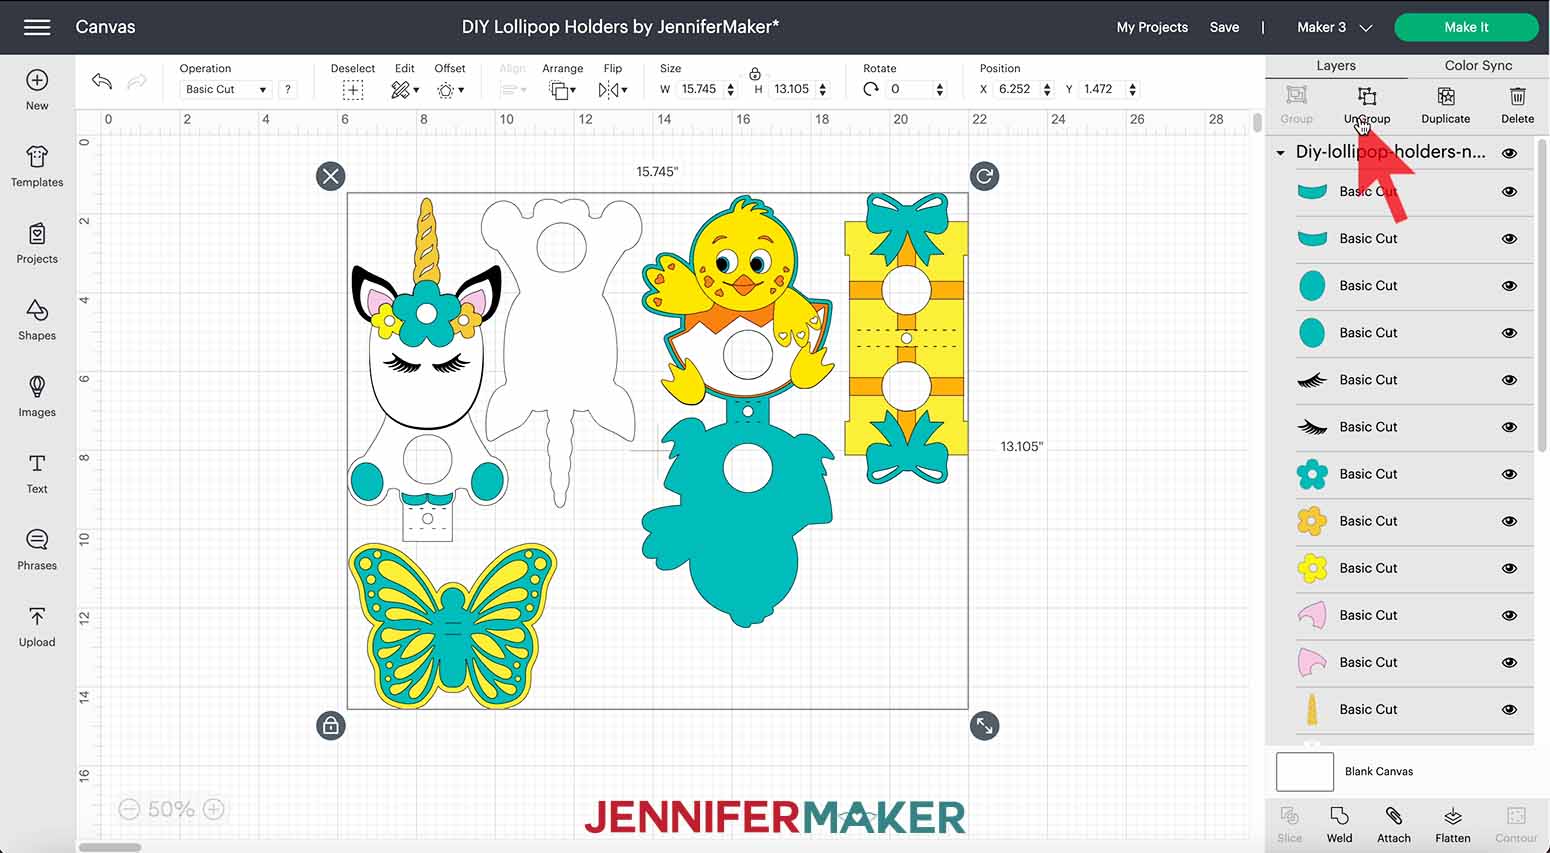
First, separate the designs by clicking “UnGroup” at the top of the Layers Panel.
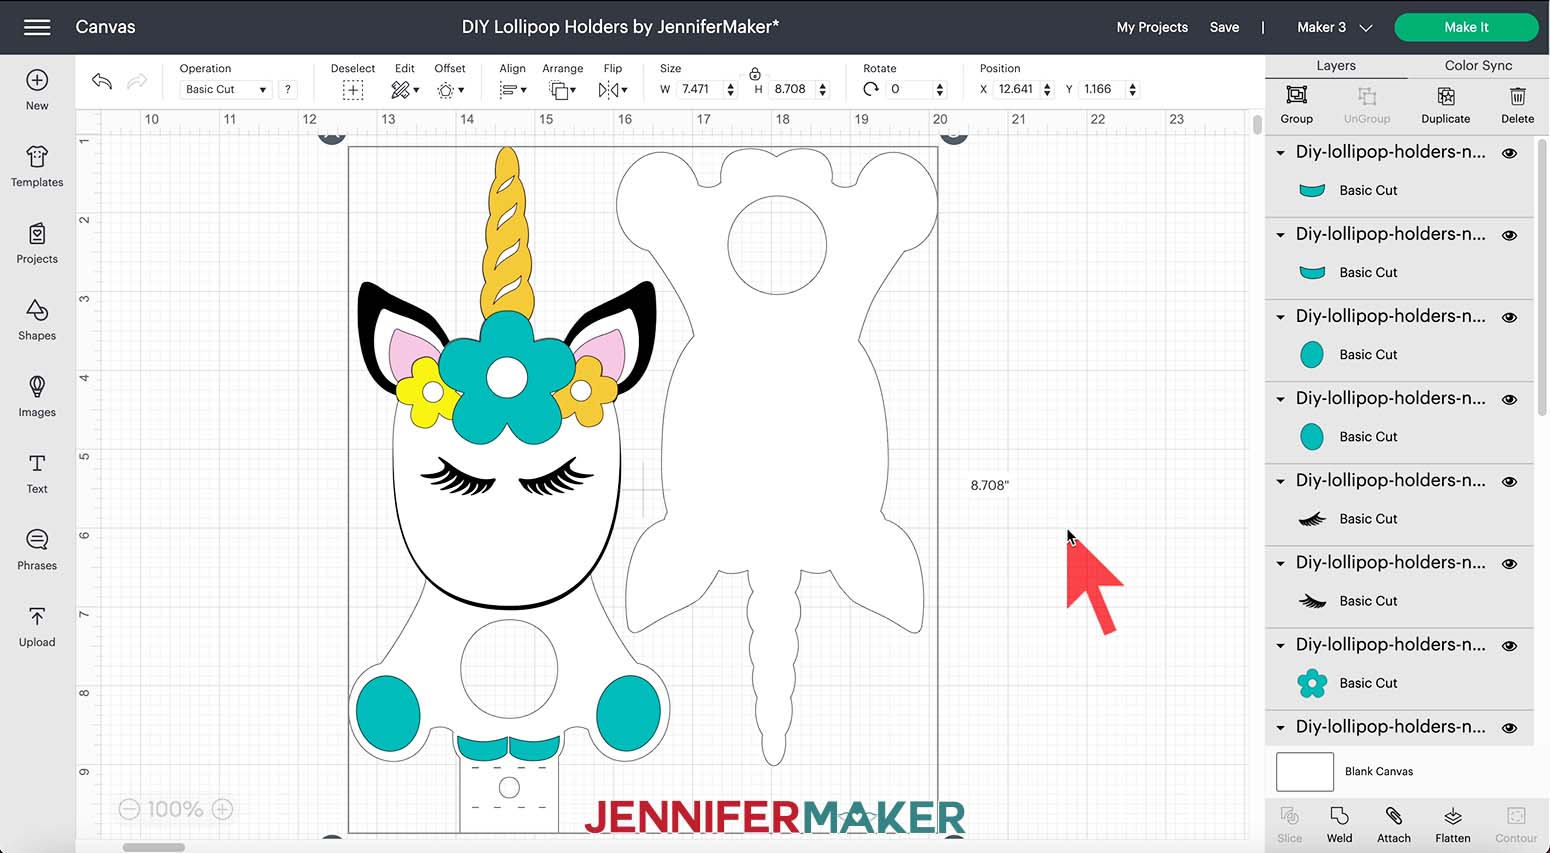
Next, click and drag a bounding box over the unicorn design and drag it to the side. Then, select the other designs and click the "X" circle at the top left of the bounding box to delete them. You should be left with just the unicorn design on the Canvas. Your screen should look similar to mine.
Note: If you are cutting the "no-scores" version, skip down to "Check that you have the right machine selected..." to proceed. If you are cutting the "scores" version, let's make the necessary changes to our unicorn.
Now, since we want to fold our unicorn, we need the Cricut to add Score Lines in the correct spots. My file includes them, but Design Space requires a few steps to get them perfect.
Look at the Layers Panel and select the Layer with two faint lines. Under "Operation" in the top menu, click "Basic Cut," scroll to "Score," and click again. The lines are now dashed to indicate the machine will score instead of cut them.
If we don't attach the scores to their correct layer, when it's time to cut, the lines will appear by themselves on a separate mat on our Prepare screen. So, with the Score Line layer still selected, scroll down the Layers Panel until you see the layer that shows an upright unicorn with a horn. Hold down the shift key and select that layer. Click "Attach" at the bottom of the Layers Panel.
Design Space moves newly-attached layers to the front, but nothing is lost! Click and drag the unicorn with the score lines to the side and you'll see that the rest of the design is still there.
Now, we're finished on the Canvas.
Check that you have the correct machine selected at the top right and click "Make It." If prompted, click "On Mat" and "Continue."
You should see seven mats on your Prepare screen. If not -- and you're using the "score" file -- it's possible the Score Lines didn't attach correctly. To fix that, just press "Cancel" at the bottom right to return to the Canvas and follow the previous steps again.
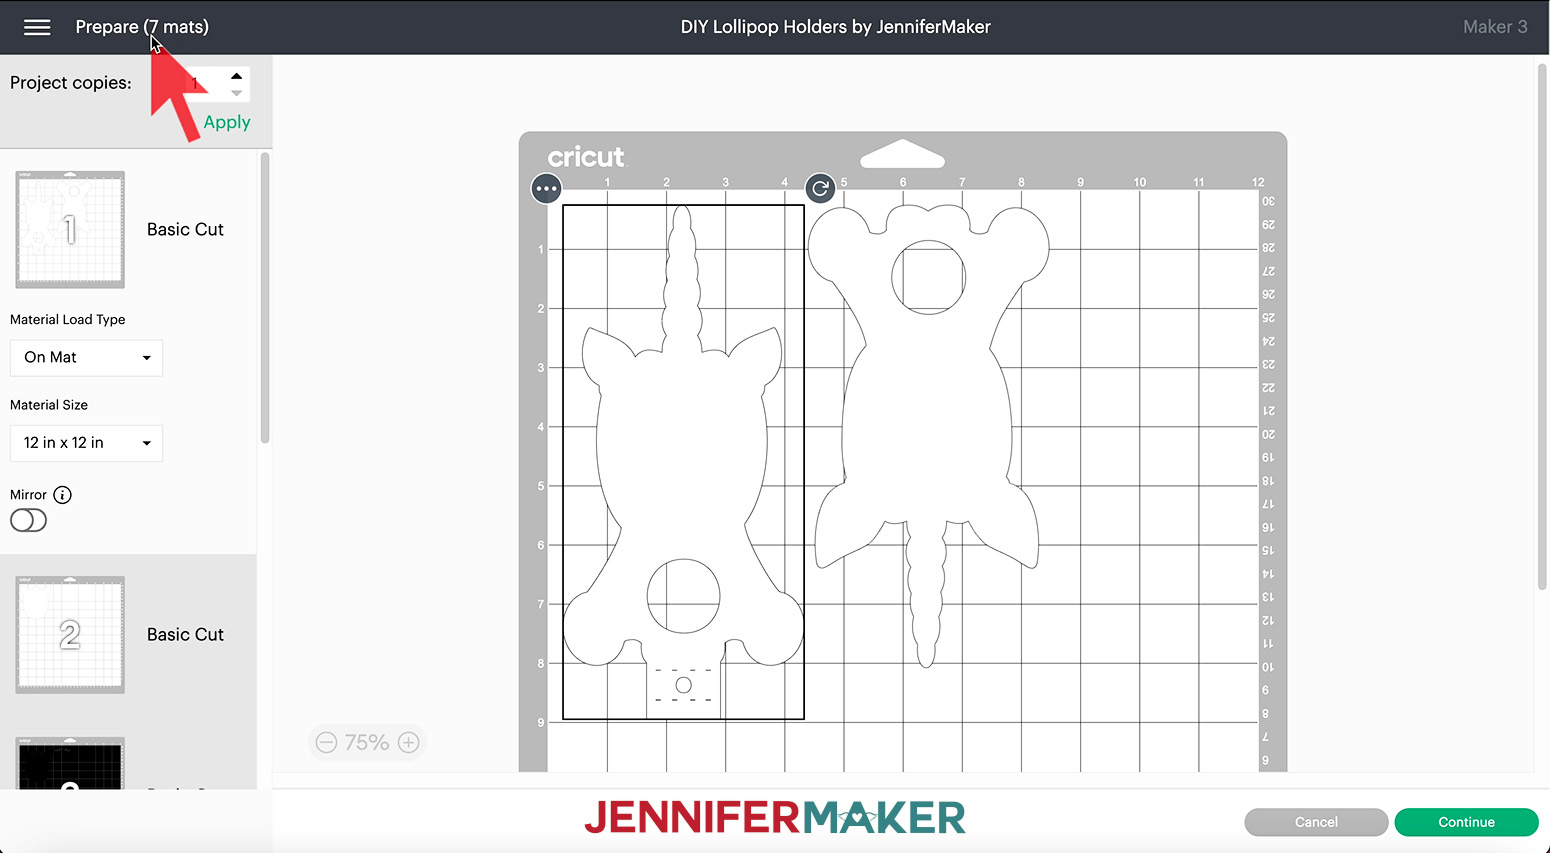
Make sure that the "Material Size" field below each mat reflects your material choices.
If you see seven mats, that's great! Now, we could click "Continue" and cut all seven mats, but here's a tip and this is one of my favorites.
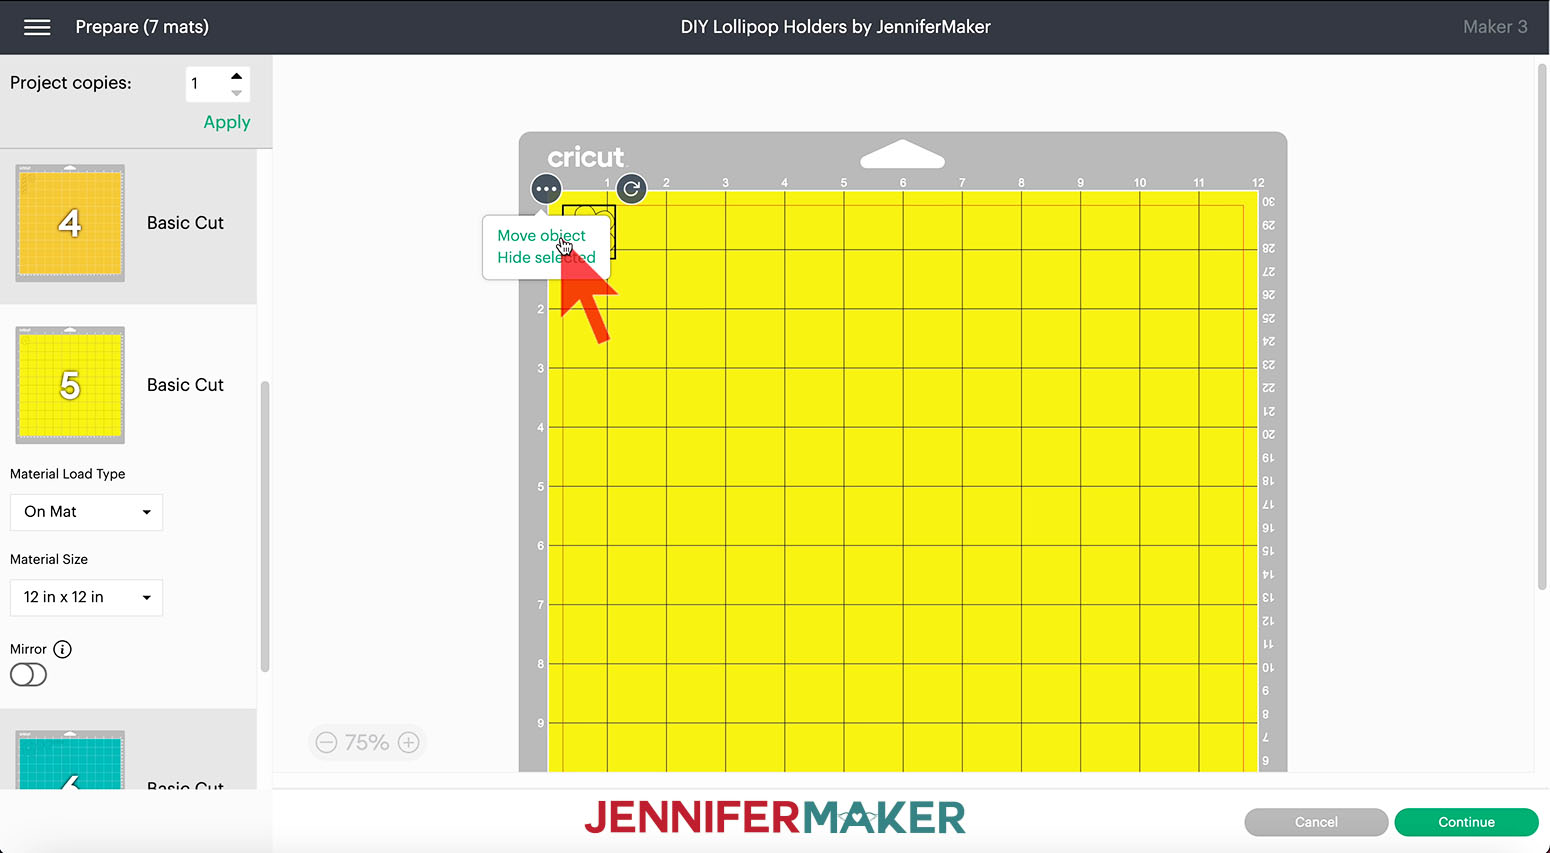
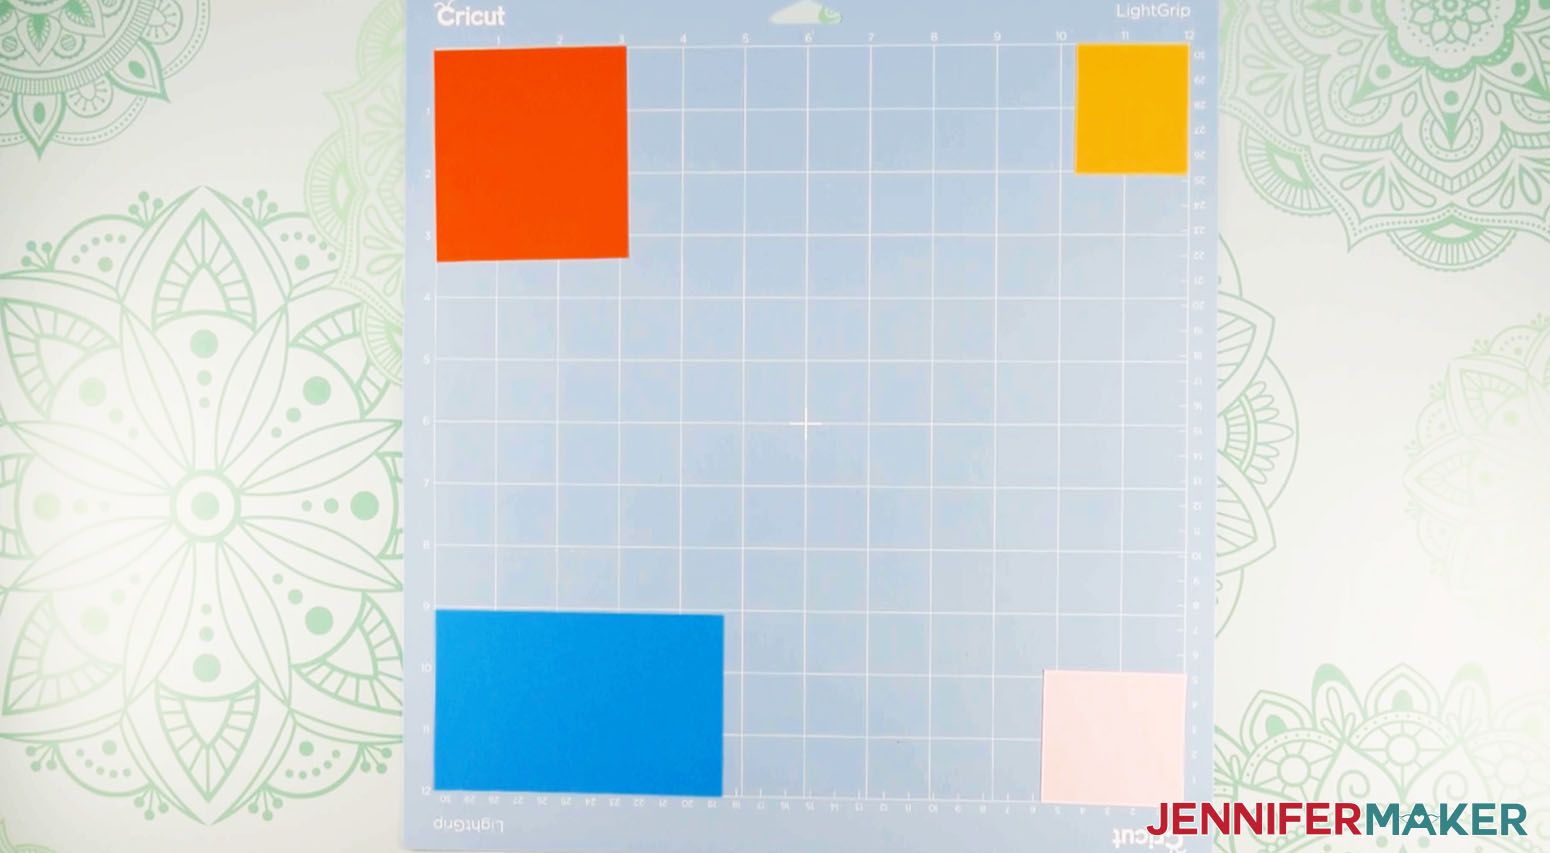
TIP: Combine your cuts to use fewer mats, saving time and material! I'm going to move the cuts from Mats 5, 6, and 7 to Mat 4. First, note the intended colors of each mat so you know which color cardstock to use for each object. If you changed Mat 4's Material Size, return it to "12" x 12"" so that the Cricut knows you want to use the entire machine mat area.
Select Mat 5, click the three dots to the upper left of the first object, and choose "Move Object."
A "Move Object" pop-up will appear displaying thumbnails of your mats. Click on Mat 4 (orange horn and flower) and hit "Confirm."
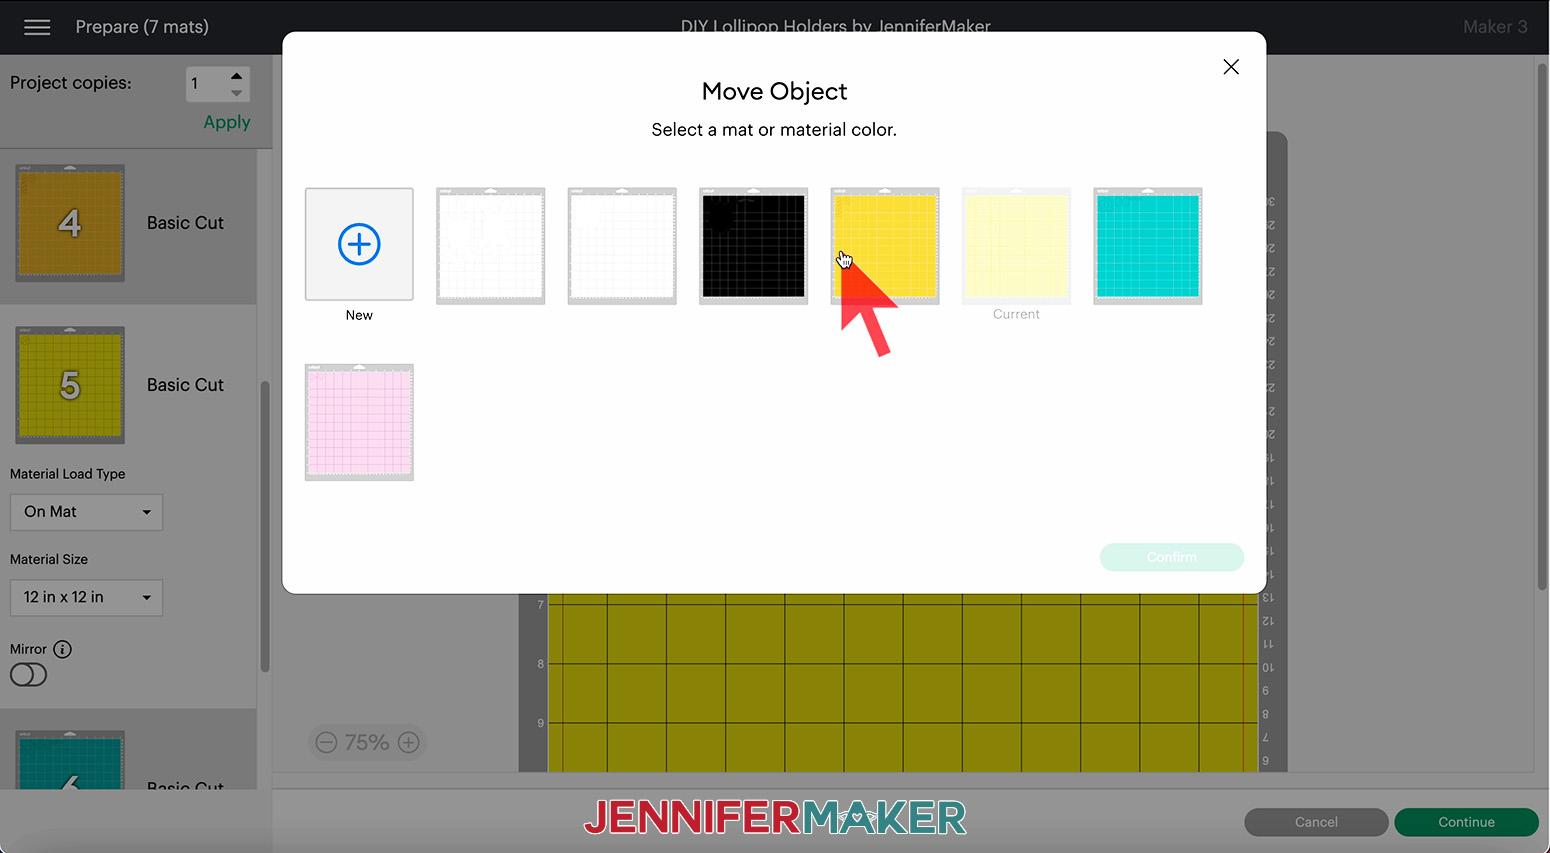
Your view will switch to Mat 4, with the object you just moved from Mat 5 added to it. Drag that piece to the top right corner of the mat.
Repeat the process for the objects on Mat 6, placing them in the bottom left corner of Mat 4. Then, move the objects from Mat 7 to the lower right corner of Mat 4.
Now, your Mat 4 should look similar to mine.
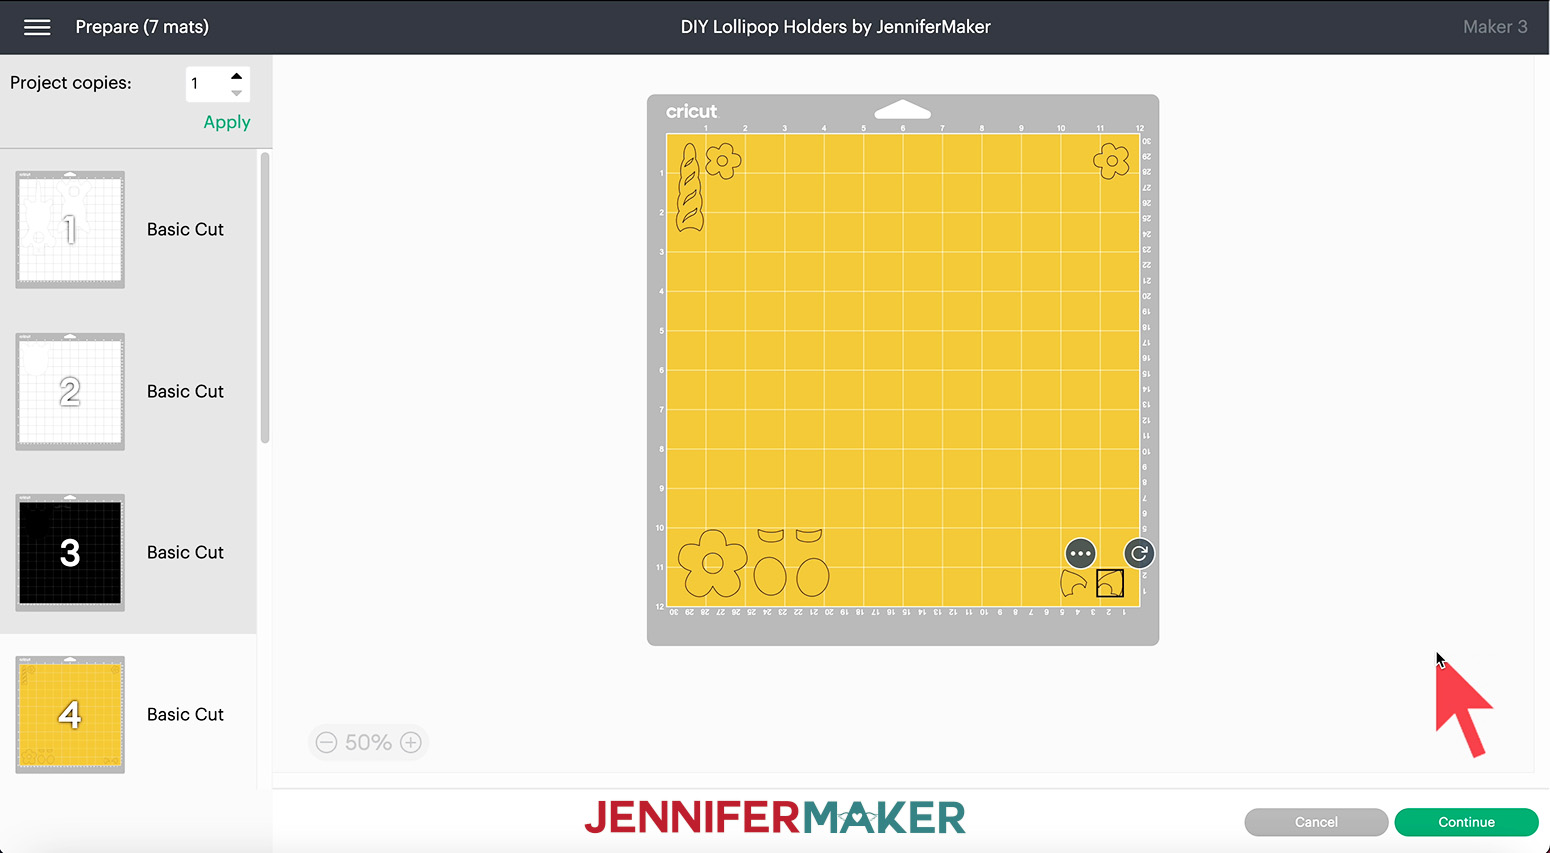
Instead of seven mats, now you only have four mats to handle! Cut your different cardstock colors for each group of objects so that it covers all of them. When Design Space prompts you to load Mat 4, place the right color card stock in each corner. Don't overlap your cardstock and make sure it's well-adhered to the machine mat.
Click back on Mat 1 to make sure everything still looks good and then click "Continue" to load the Make screen. Under Set Base Material, select "Medium Cardstock - 80 lb (216 gsm), change Pressure to "More," and click "Remember Material Settings" if you're using the same paper for each mat as I am.
If you are using the "no-scores" file like I am in the video, proceed to Step. 3.
Note for "scores" file crafters: As noted on the screen, we will need a scoring tool for the first mat. The machine defaults to a Single Scoring Wheel, but I suggest using a Scoring Stylus so you don't have to swap tools. Click "Edit Tools," select "Scoring Stylus" under Score, and click "Apply." Place your Scoring Stylus in Clamp A and make sure your Cricut Standard Fine-Point Blade in Clamp B is clean.
STEP 3: CUT YOUR DESIGN
Place your first mat's cardstock on a blue Cricut LightGrip or green Cricut StandardGrip Machine Mat and use a brayer to adhere it well. Load your mat and press your machine's Go button.
Once the mat is finished, unload it, flip it over on your workspace, and gently roll a corner back to release the card stock. This helps prevent curling and ripping.
Complete the process for the rest of the mats, making sure to prep Mat 4 and its multiple colors correctly.
STEP 4: ASSEMBLE YOUR UNICORN CANDY HOLDER
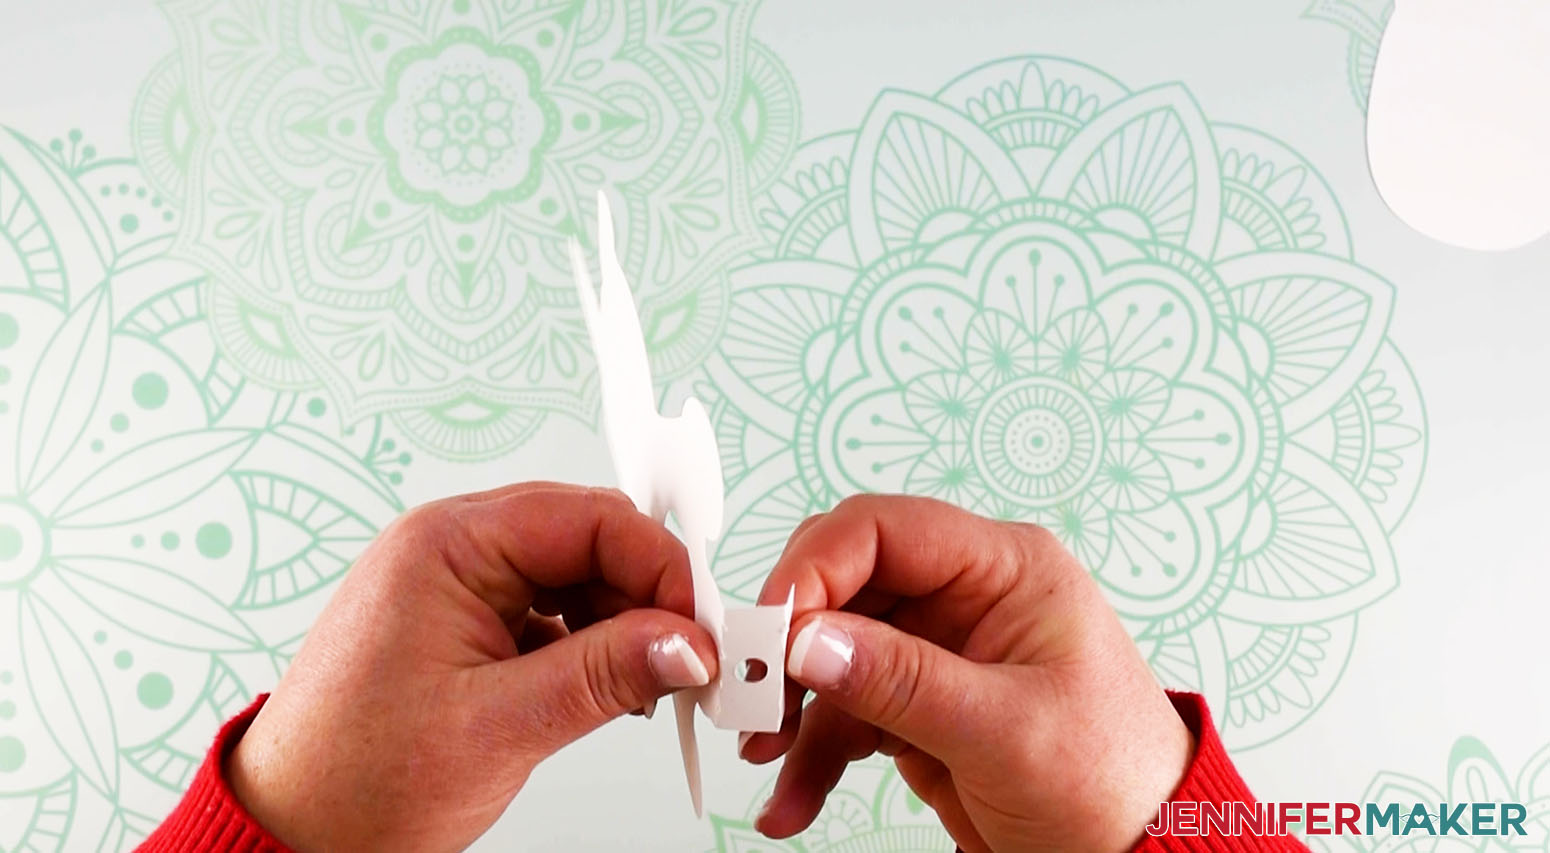
Let's start with the unicorn's front piece. Find and fold the score or dashed cut lines on the bottom tab to the back.
When gluing, I hold each piece in a place for a few seconds to make sure everything sticks. Make sure to do your best to line everything up too.
Next, take the black head piece, add glue to one side, and place it behind the front piece, leaving the top part of the ears showing.

Now glue the white head piece on top of the front piece.
The unicorn's features fit together like a little puzzle to help get their placement correct.
First, add a bit of glue to the back of the horn and line it up with the same shape on the white front piece. Then, glue the smaller flowers just under the ears. There are small bumps where the ears meet the unicorn's head. Line up a petal of each flower with that curve and you'll get the correct placement.
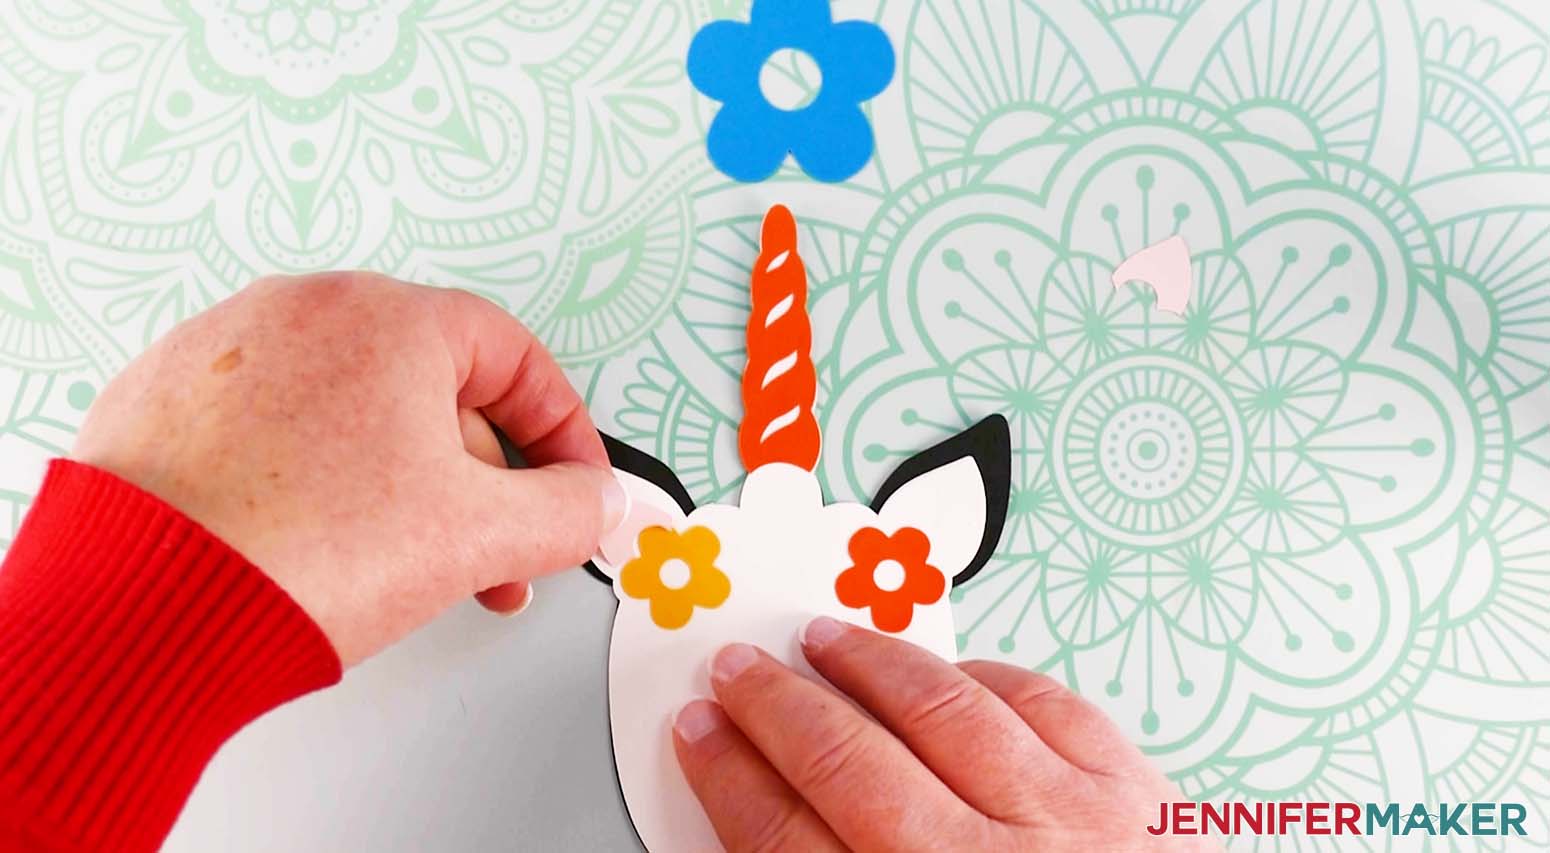
Glue the pink ear pieces on next, lining up the bottom curves with the small flower under each ear. Align then glue the large flower so that its top petal matches the bump under the horn. The last flower will overlap with the horn and smaller flowers, but a bit of white will show between it and the ears.
Next we will add the eyelashes. I used tweezers to hold my lashes while I added just a tiny bit of glue to the back. Then, place them one at a time just under the flowers on each side.
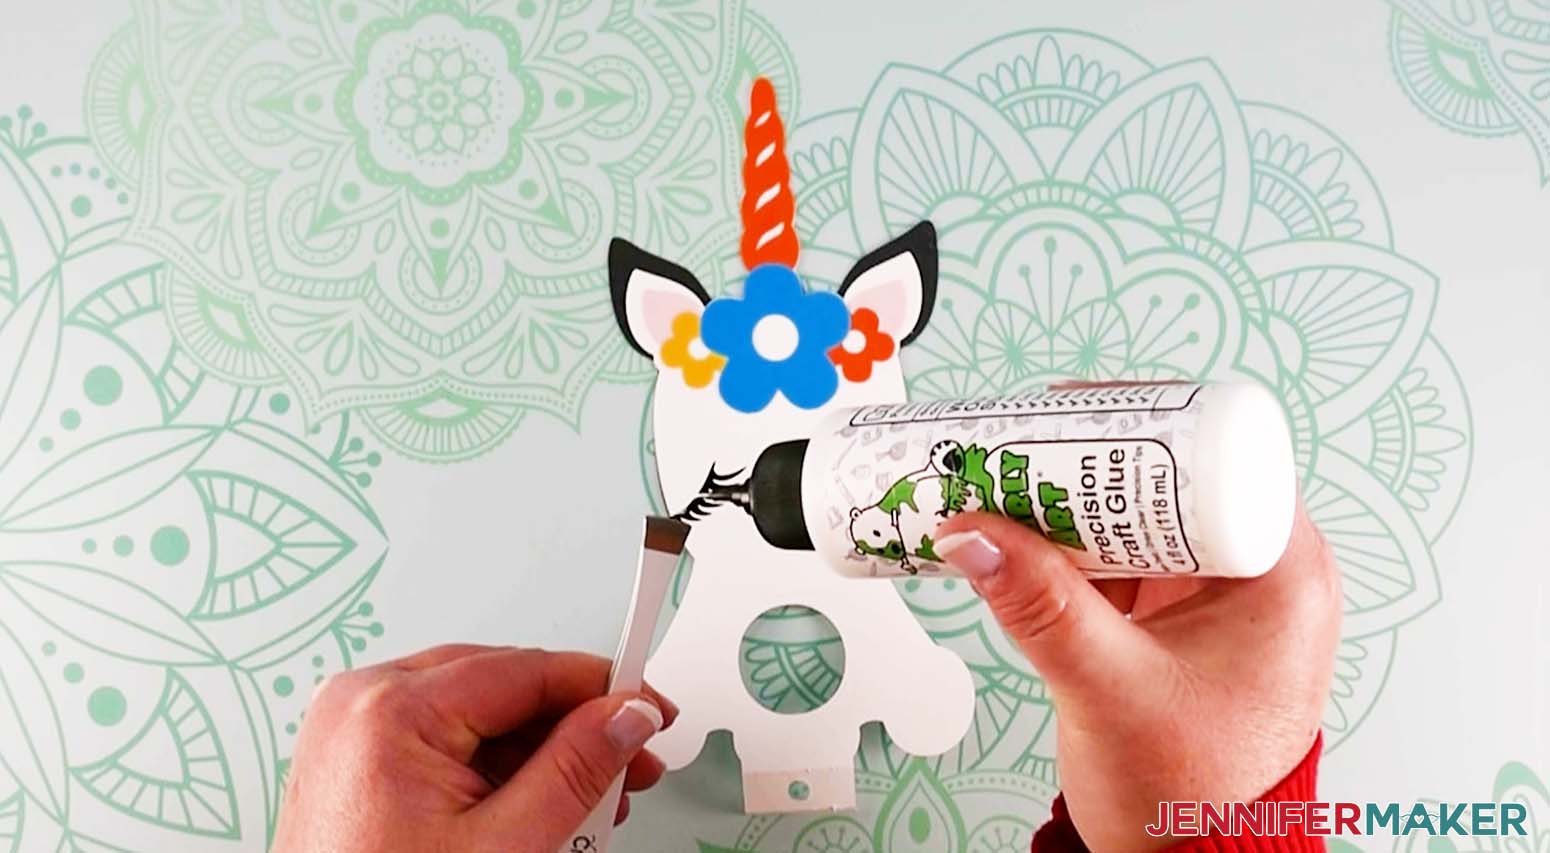
Glue the oval teal pieces to the center of the unicorn's hooves sticking out to the sides. Then, glue the crescent-shaped back hooves to the matching curves at the bottom of the body.
And finally, I will add a little glue to the tab piece we folded earlier on the front piece and attach that to the back piece of the unicorn. Hold that in place to make sure it's dry. And that's it for the unicorn.
Like I mentioned earlier, you can follow the same basic steps for the other designs.
Two things I wanted to point out on the baby chick design are the beak and the eyes. The eyes are actually made up of three layers of cardstock. Mine are black, blue, and white in that order with the black layer in the back. I designed these layers as hearts so they would stack just so.
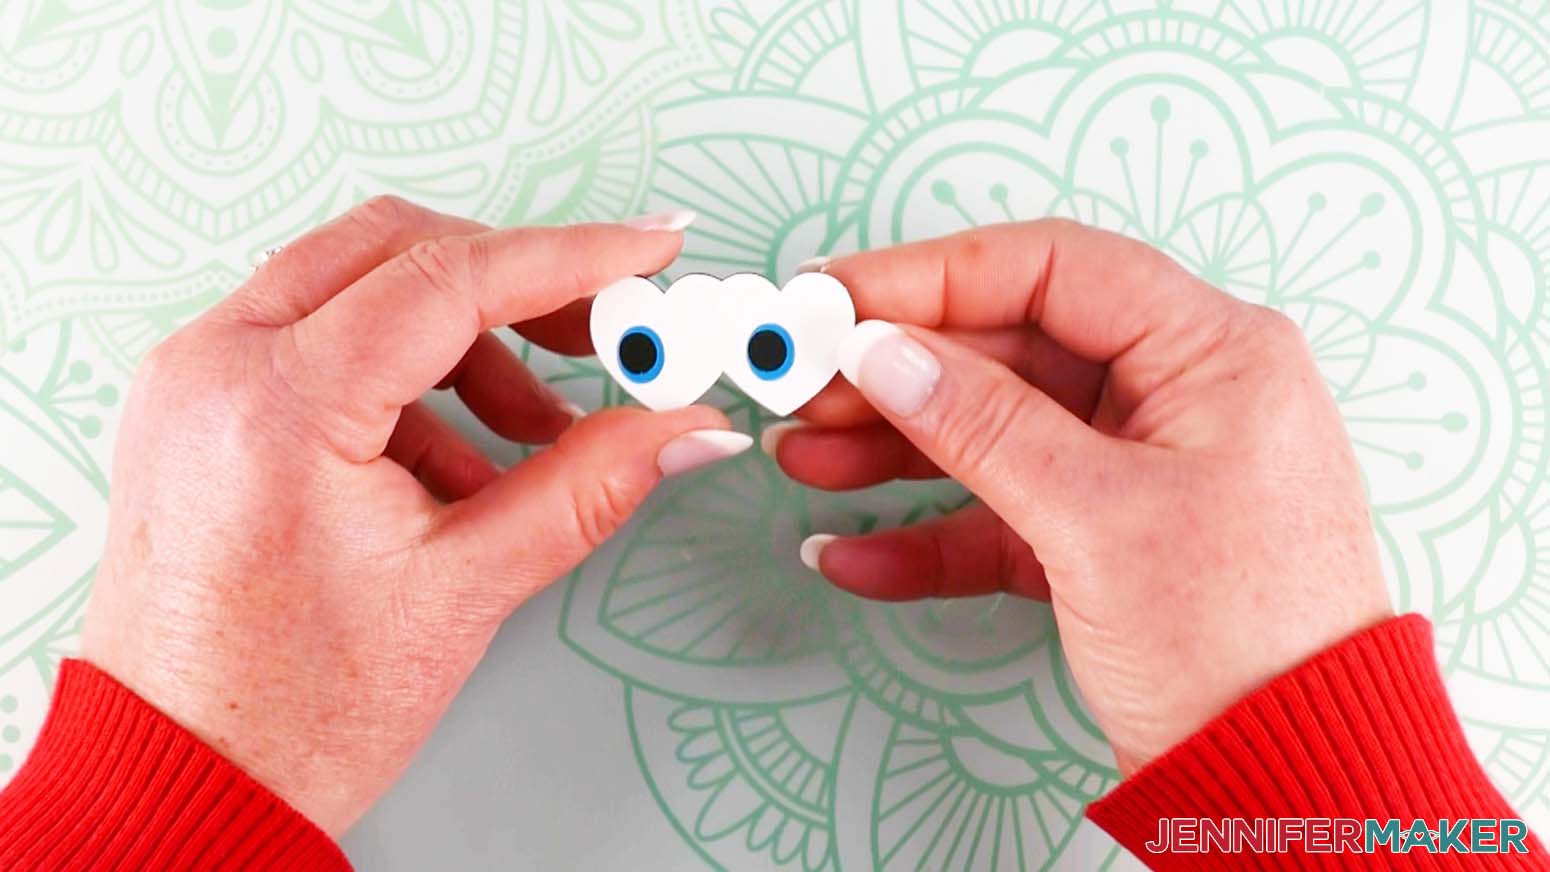
Once they are glued together, place them behind the cut-out eyes to line them up and glue them in place.
I designed the beak piece to be 3-dimensional. There are little cut-out pieces or perforations along each side.
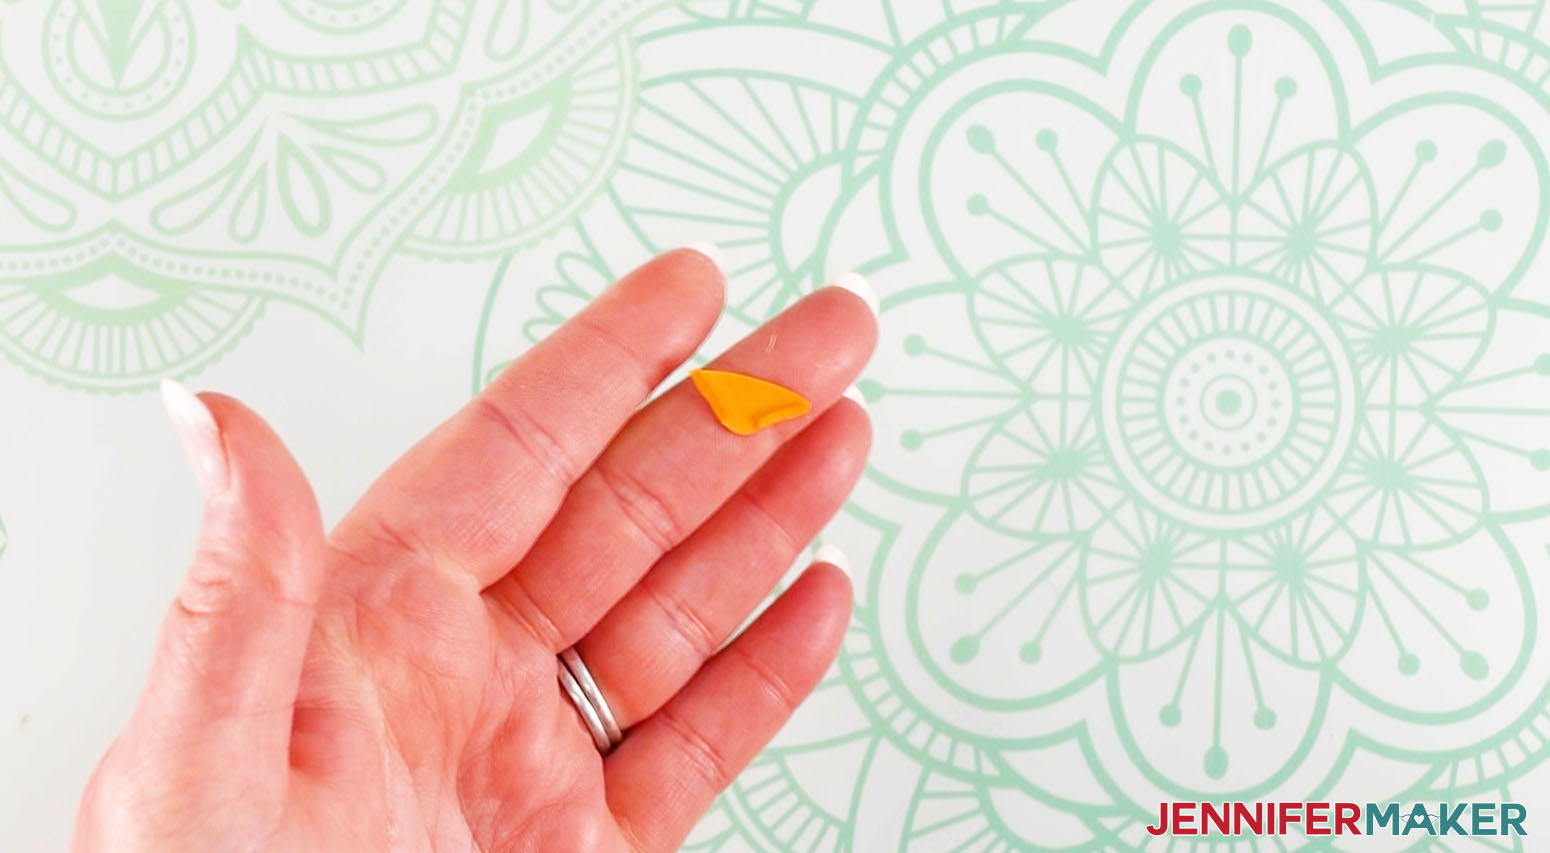
Bend the beak a little down the middle, add a tiny bit of glue to each side, and glue them on the back of the head piece with the beak poking through the front. Once it's all in place and dry, you can give the beak some shape.
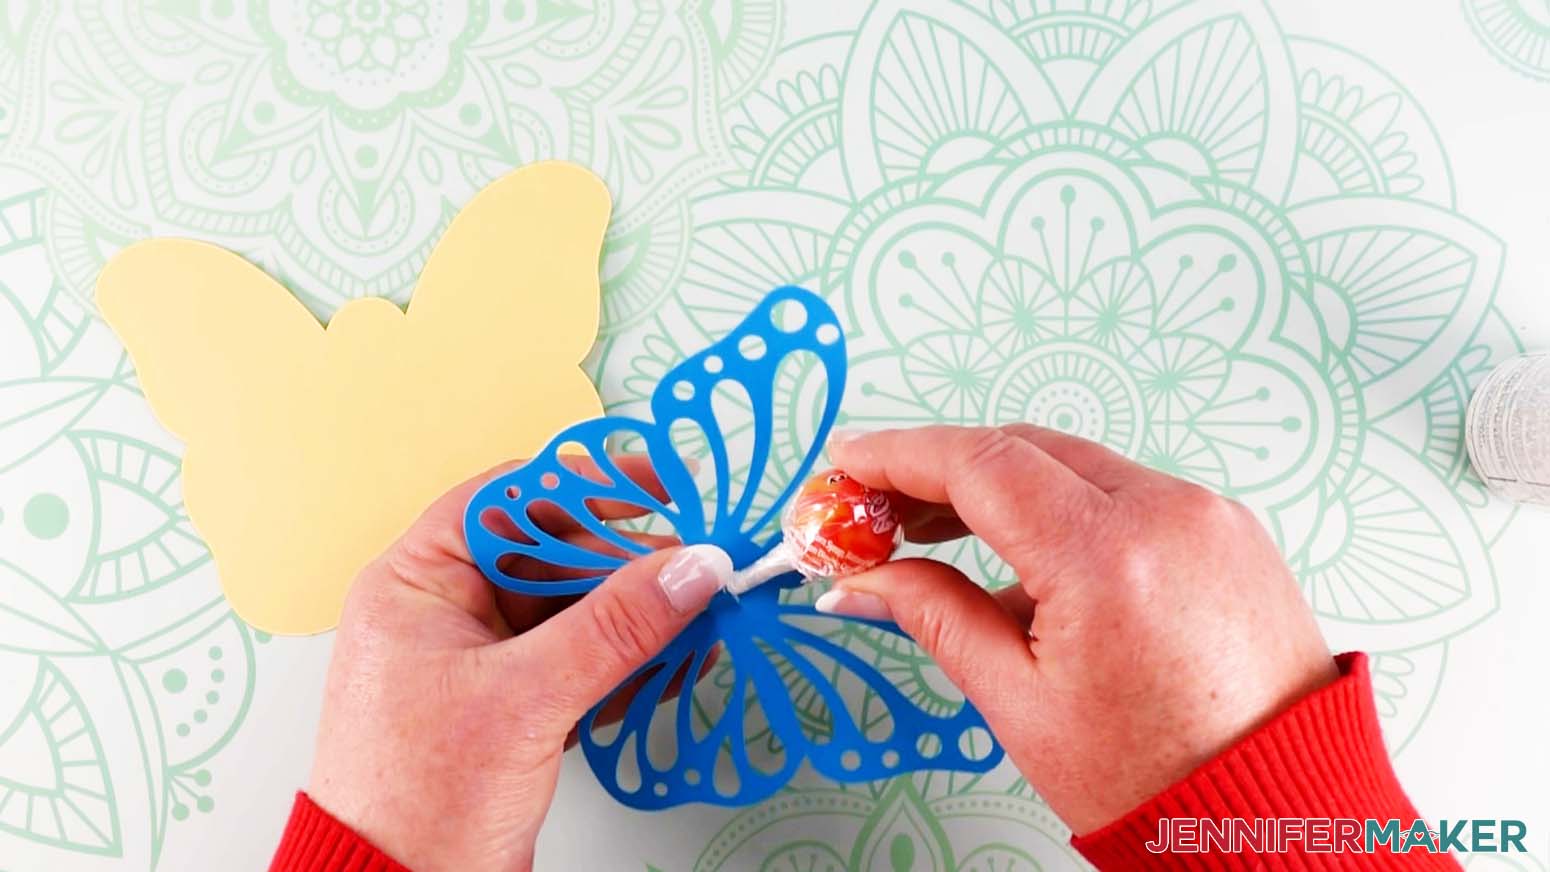
And finally, a note about the butterfly design. Before you glue the pieces together, I found that it helps to poke a lollipop stick through the slits on the front. That gives it a little lift. Then, put glue on the back of the head and body and attach it to the back piece and you are ready to go!
STEP 5: SHOW IT OFF!
Now, just add your favorite lollipop and this sweet little gift is ready to give. We noticed in our Facebook groups that the most popular lollipop is the “Original Gourmet” brand. It’s available at various retailers including the The Dollar Tree. We found them online, too. You can get 120 for $60 or buy them for 50 cents a piece.
They fit right into the hole in these designs. All you need to do is add a dab of glue to the top, pinch the sides together, let that dry, and you are ready to go!
Here are my finished DIY lollipop holders!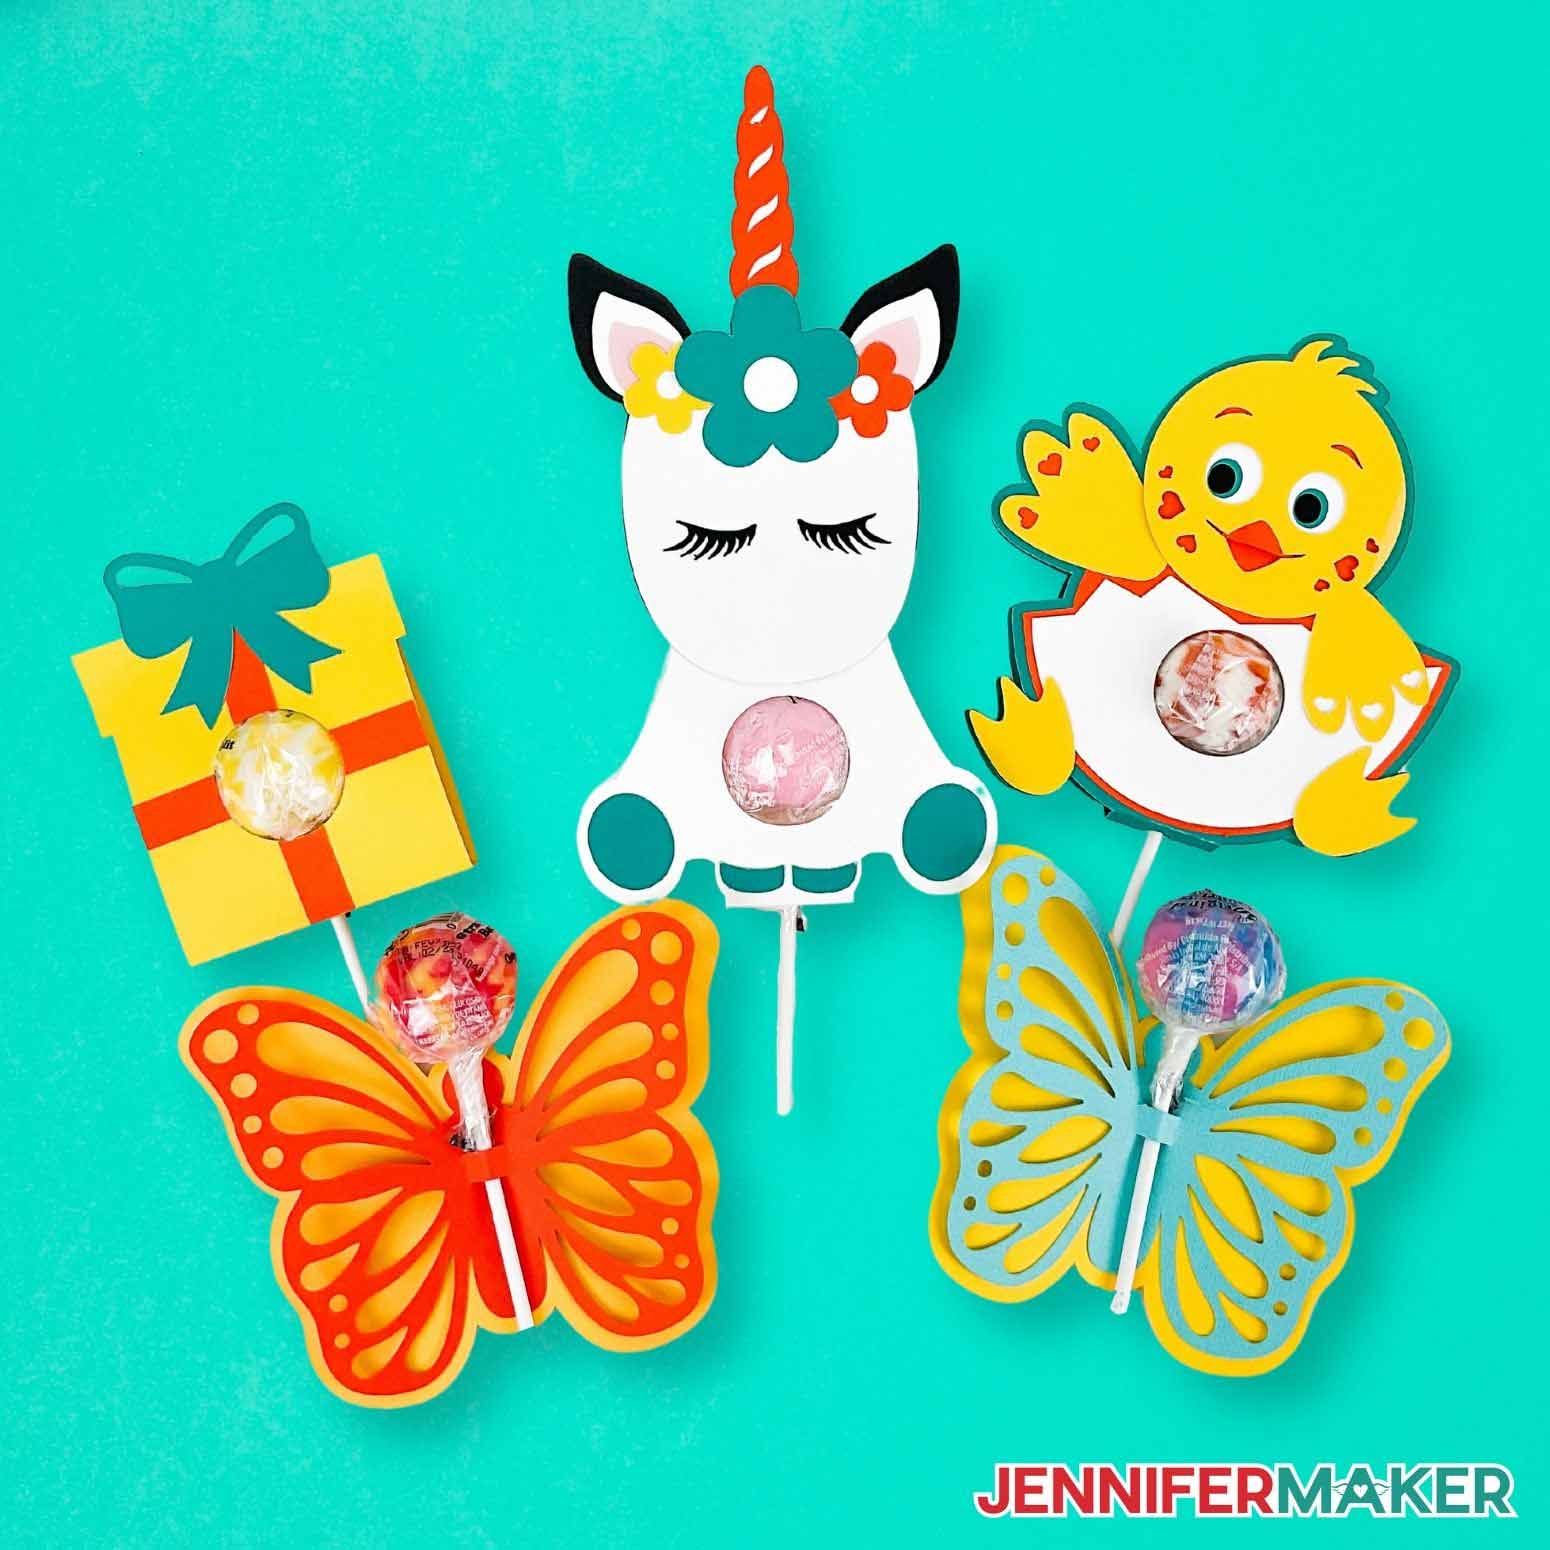
Notes
CANDY HOLDER MEASUREMENTS:
Unicorn: 4" W x 8" H
Chick: 5" W x 5.25" H
Butterfly: 5.5" W x 4.25" H
Present: 3" W 3" H
Answers to Your Questions About How to Make Easter Lollipop Holders
Q: What kind of cardstock do I need for Cricut lollipop holders?
A: I recommend 65-80 lb. cardstock for these crafts. Thicker cardstock will be harder to cut and fold.
Q: Are lollipops safe for young children?
A: Lollipops, chocolate eggs, and other small candies often found in Easter eggs can be a serious choking hazard for children. For safety reasons, please don’t give these to young children without adult supervision.
Q. How do you make Cricut lollipop holders?
A: Making Cricut lollipop holders is simple with my free digital files and tutorial!
Q. What are some lollipop holder ideas?
A: I have a variety of cute designs in addition to these Easter lollipop holders, I also have spring designs and winter and Christmas-themed designs!
Q. What size lollipop sticks work best for Cricut holders?
A: My Easter bunny lollipop holders fit sticks about 1/8″ wide and 1.75″ long before the wrapper starts. You may have to trim the bottom edge of the wrapper if it interferes with the design. A candy part about 1.75″ wide and tall fits best in the circle cutouts. These are designed for a round lollipop shape, and Original Gourmet are a perfect match. If you need your gifts soon, check the delivery times listed by an online seller (and remember they usually go by the business day) to get your candy on time and avoid a rush order fee or other additional fees.
Q. How can I display lollipops with holders?
A: You could use a rectangular piece of styrofoam as a lollipop stand. Just make starter holes about an inch deep with a chopstick a few inches apart and set your decorated lollipop sticks in them! The display you see in my video is white acrylic plastic that we cut to fit on our Glowforge.
Q: Can I sell these Easter lollipop holders or are they just for personal use? Do you offer commercial use designs?
A: Yes, you can sell completed projects using these designs (with limitations) — please read about licenses here so you know what you can and cannot do. If you use them, please share photos with us!
Q. Do I have to use a Cricut and Cricut Design Space?
A: No! I always include several versions of each digital item in special folders in the instant download file. While I used the SVG as a Cricut Design Space file, there are different formats for popular cutting machines. If you have a Silhouette Cameo, which uses Silhouette Studio, you can use the DXF cut files (in the DXF folder in the downloadable package) in Silhouette Basic Edition. If you have upgraded to Silhouette Designer Edition, Designer Edition Plus, or Business, you can use the SVG files with the correct software.
While using a cutting machine is the easiest way, if you don’t have one, you can print and then cut out the lollipop holder designs as PDF files, too and then use scissors or an X-acto knife to make the paper cut outs.
Get my free patterns to create Easter Lollipop Holders!
I love seeing what you make with my designs and how you use them! Please share a photo of your Easter lollipop holders and candy crafts in our Facebook group or tag me on social media with #jennifermaker.
Love,

Want to remember this? Save this Easter Lollipop Holders Tutorial to your favorite Pinterest Board!