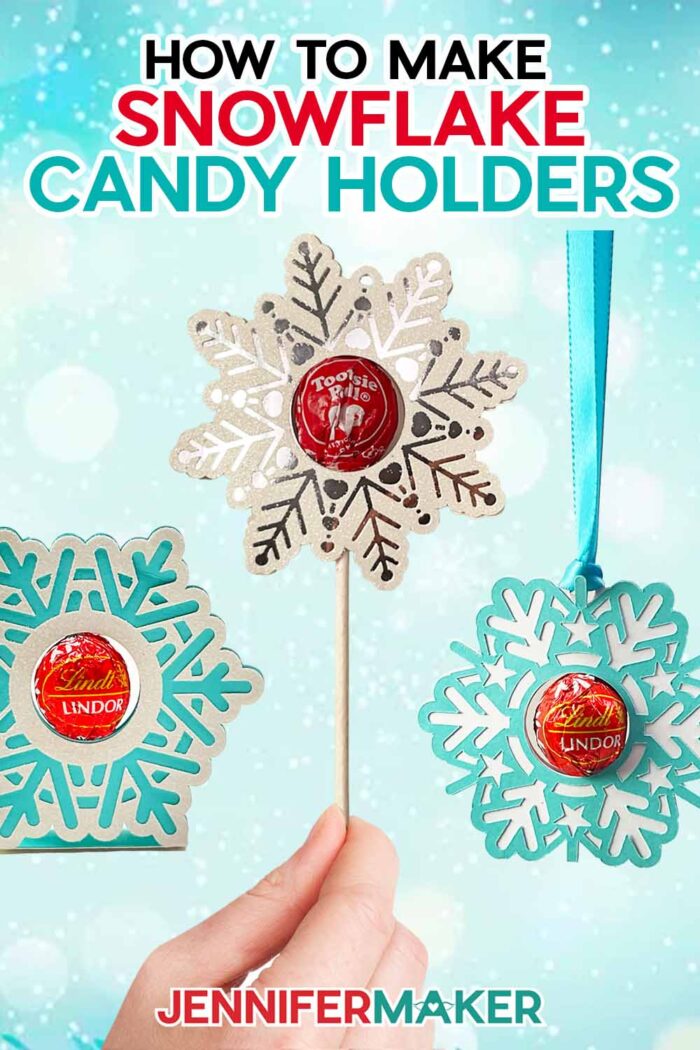
Learn how to make a snowflake candy holder for the holidays!
There are few things sweeter than sharing treats with the ones you love. In my family, our tradition is to fill each other’s stockings with candy and little gifts and trinkets, but ever since I learned how to make candy into a gift all by itself, I end up making tons of candy holders like this every year!
Watch the full step-by-step video tutorial on how to make snowflake candy holders:

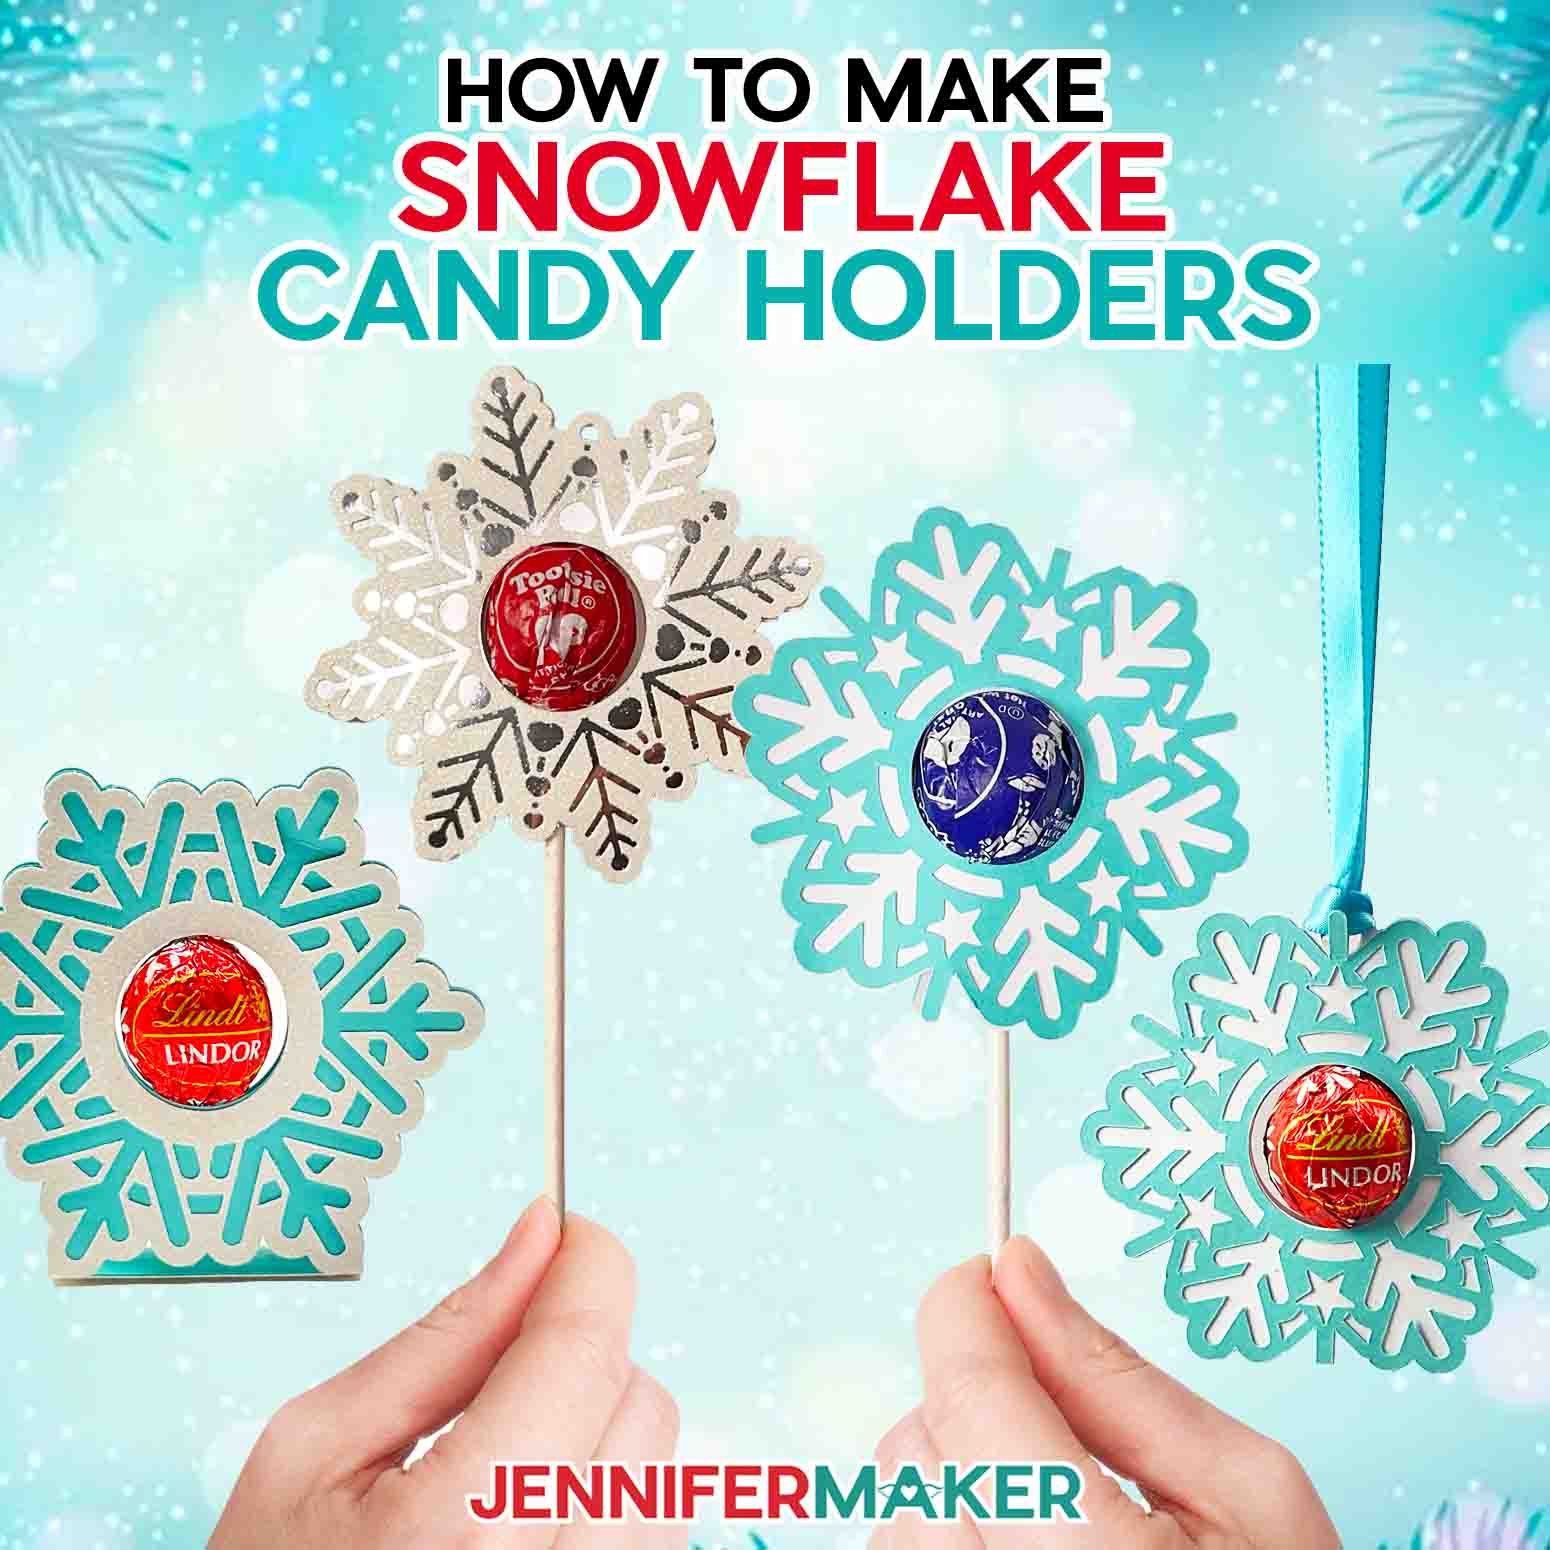
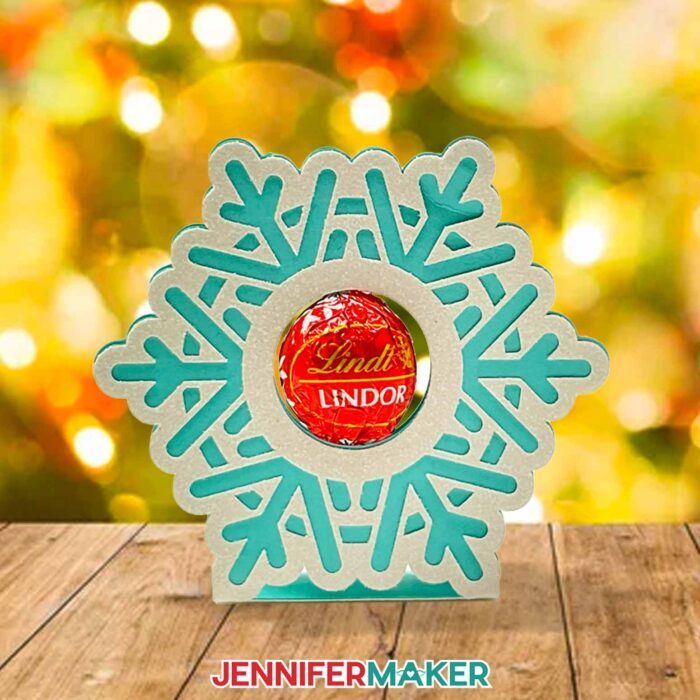
In this tutorial, I’ll show you how to share some sweetness this winter with some sparkly snowflake candy holders! These turn a simple piece of candy into a miniature gift, perfect for decorating presents or hanging as ornaments on your Christmas tree! And what could be better than a tree filled with candy ornaments? That sounds like one sweet holiday.
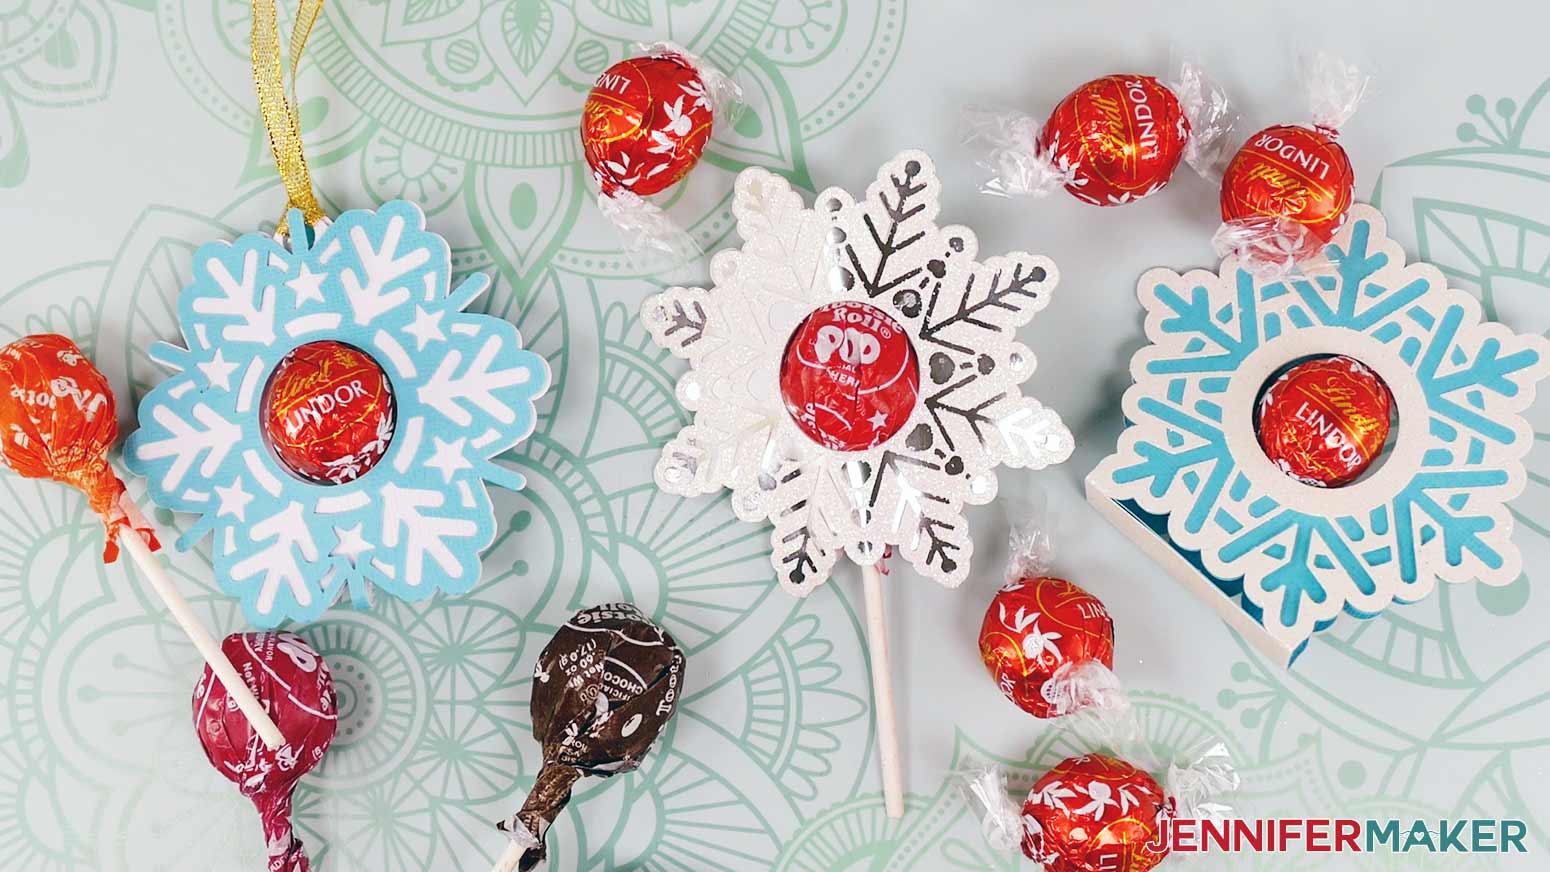
I’ve designed my snowflake candy holders to fit round, ball-shaped candy about the size of Lindor chocolate truffles, Tootsie Pops, or my favorite — old-fashioned gourmet lollipops. You could even use them for homemade wrapped cake pops. Yum! My snowflake candy holder designs work well with treats with a stick or a twisted wrapper, which helps the candy stay in the holder without falling out.
Inside the download folder, you’ll find an SVG file for cutting on a Cricut cutting machine with Cricut Design Space, a DXF file for use with Silhouette Studios cutting machines, and a PDF to guide you in cutting the snowflakes by hand if you don’t have a cutting machine. You can also use the PDF file to help you get a visual of the order of the layers.
Once everything is cut, I’ll show you how to make a candy holder three different ways: An ornament style, a style for treats with sticks like lollipops or cake pops, and a style that stands up on its own, which is great for placing on a table as a party favor.

I’ll also share my favorite trick to save lots of time AND cardstock when you’re cutting out your designs on your cutting machine. Hint: It’s SO easy, you’ll wish you knew it sooner!
Often we have SO many people to think of during the holidays, and these are a fun alternative to a card – not to mention an inexpensive way to give some love to everyone on your list. And wouldn’t they be cute not just for ornaments, but as fun gift tags too? I absolutely love when crafts can have more than one purpose!
Here’s a supply list of what you need to make a snowflake candy holder and ornament! This post contains some affiliate links for your convenience (which means if you make a purchase after clicking a link I will earn a small commission but it won’t cost you a penny more)! Read my full disclosure policy.
Materials and Tools to Make a Snowflake Candy Holder
View my Amazon shopping list with the exact items we used to make this project
- 1 Sheet 12″ x 12″ 65 lb Turquoise Cardstock
- 1 Sheet 12″ x 12″ 80 lb White Cardstock
- 1 Sheet 12″ x 12″ White Glitter Cardstock
- 1 Sheet 12″ x 12″ Silver Foil Cardstock
- 1/8″ Silver Ribbon for hanging the ornaments -or- 3/8″ Turquoise Ribbon
- Chocolate Truffles -or- Old-Fasioned Lollipops -or- Standard-Size Tootsie Roll Pops
- A method to cut your cardstock: I used the amazing Cricut Maker 3, but you can also use the Cricut Maker, Cricut Explore Series, Cricut Venture, Cricut Joy, or Cricut Joy Xtra
- Cricut Green StandardGrip Mat
- Brayer
- Spatula
- Scissors
- Weeding Tool
- Scraper
- Bearly Art Glue

How to Make Your Own Snowflake Candy Holder

Snowflake Candy Holder
Learn to make unique snowflake-shaped ornaments and lollipop holders that can hold your favorite round chocolates or lollipops using a variety of eye-catching cardstock materials.
Materials
- Here is a shopping list of the actual items I used to create this project! This list contains affiliate links. As an Amazon Associate I earn from qualifying purchases.
- 1 Sheet 12" x 12" 65 lb Turquoise Cardstock
- 1 Sheet 12" x 12" 80 lb White Cardstock
- 1 Sheet 12" x 12" White Glitter Cardstock
- 1 Sheet 12" x 12" Silver Foil Cardstock
- 1/8" Silver Ribbon for hanging the ornaments -or-
- 3/8" Turquoise Ribbon
- Chocolate Truffles -or-
- Lollipops -or-
- Standard-Size Tootsie Roll Pops
Tools
Instructions
STEP 1: GET MY FREE SNOWFLAKE CANDY HOLDER FILE
First, download my Snowflake Candy Holder designs from this page.
Each file includes pieces to make two different ornament holders, two matching lollipop holders, and one free-standing holder made to hold round chocolates.
Upload the SVG to Design Space. To do so, click “Upload” on the bottom left of the menu next to your Canvas, then click “Upload Image.”
TIP: If you're not sure how to upload, go to jennifermaker.com/svgs to learn how to unzip and upload SVG files.
To add the Snowflake Candy Holders to your Canvas, select the image in the preview area, then select "Add to Canvas."
STEP 2: PREPARE YOUR DESIGN FILE
This is what my Snowflake Candy Holder file looks like when uploaded to Cricut Design Space. You can zoom out to see the design by clicking on the minus (-) sign on the lower left.
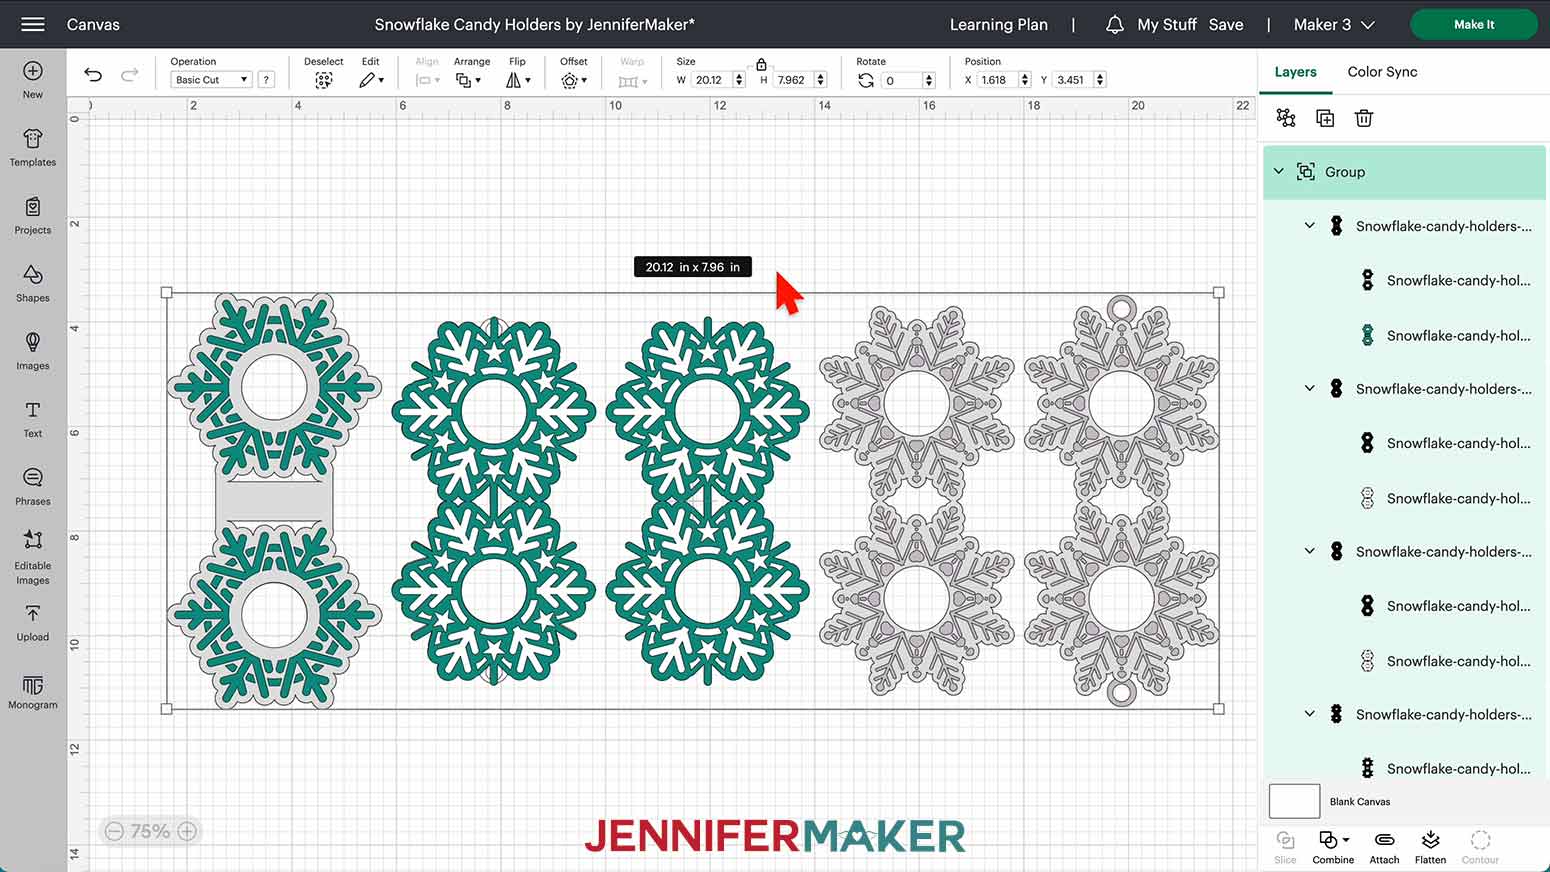
The design is set up to make five different snowflake candy holders.
You can choose to make all five designs, or just one.
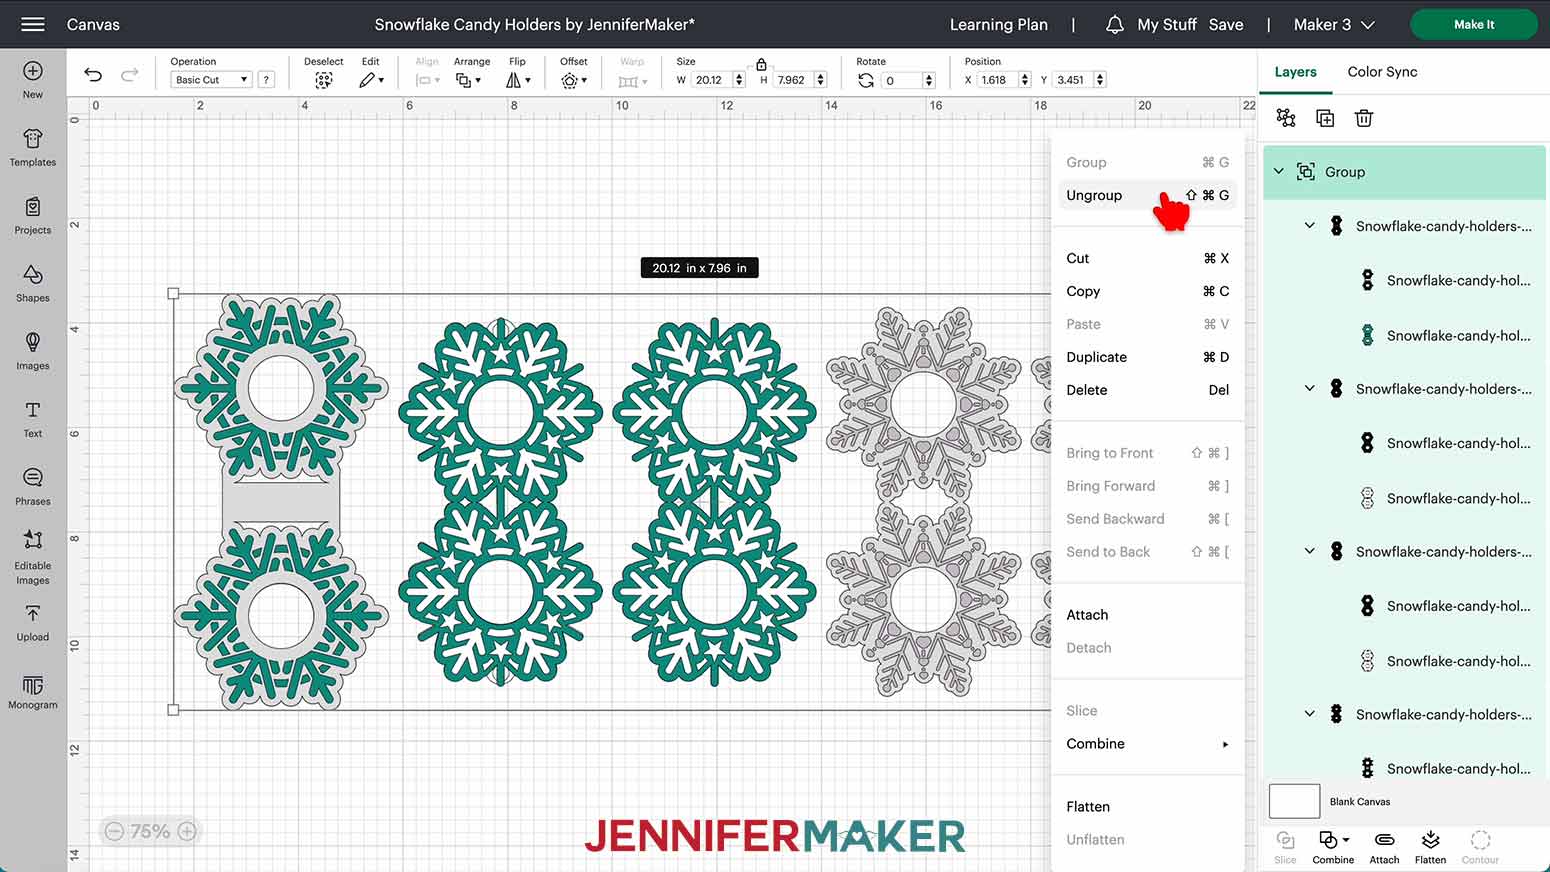
To choose just one design, first, separate the designs by selecting the group and clicking the Ungroup icon at the top of the Layers Panel, or right-clicking and selecting “UnGroup” from the menu options.
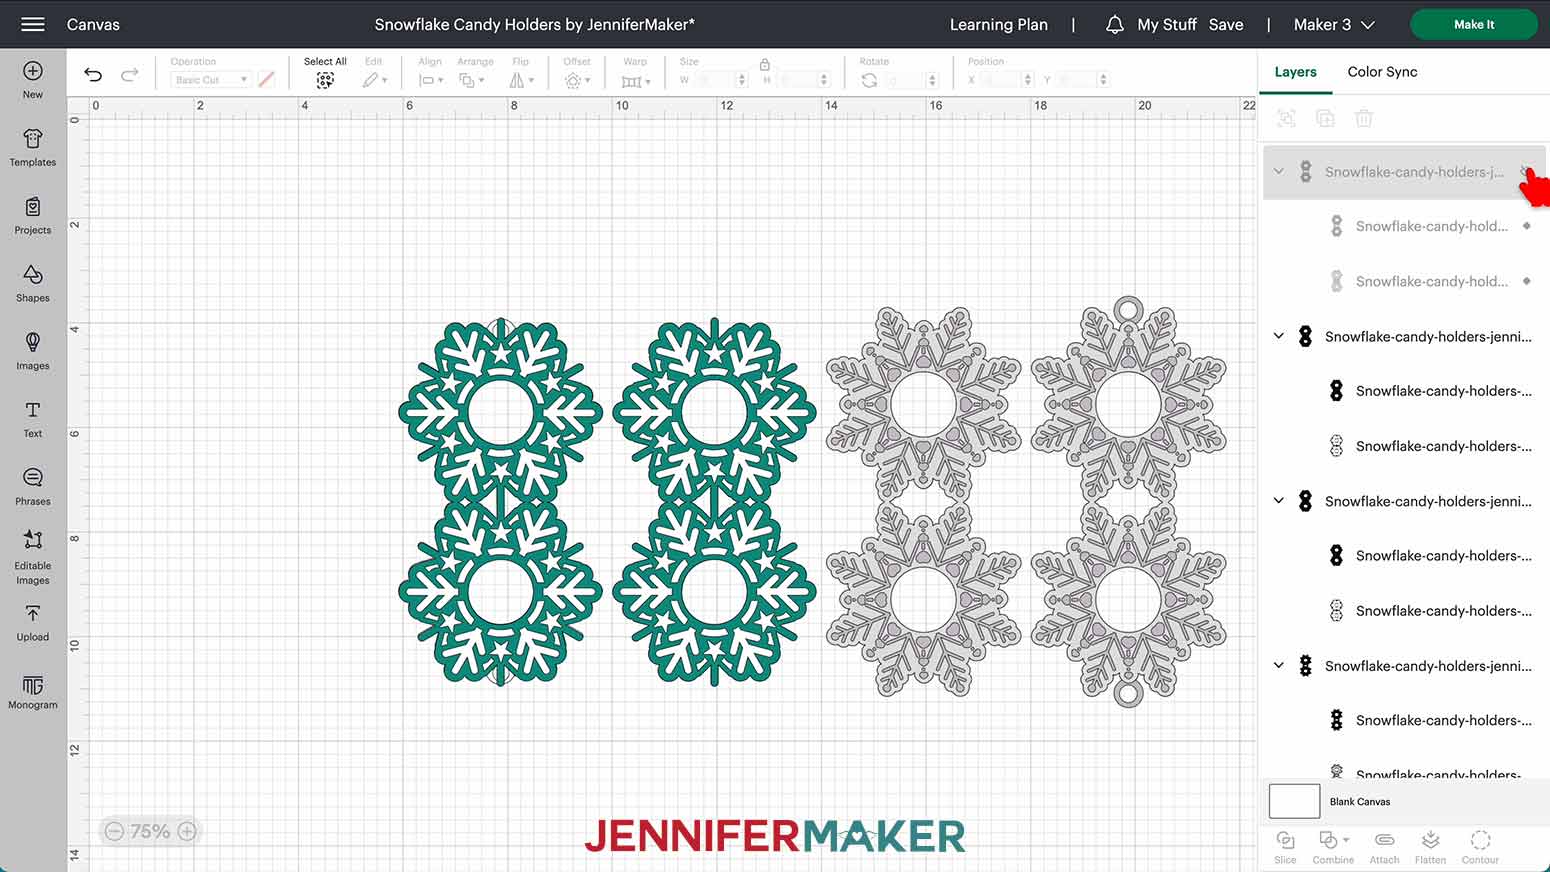
Next, click and drag a bounding box over the unwanted designs, then either hide them by clicking the eye in the Layers Panel next to the selected layers or delete them with the trash can icon above the Layers Panel.
For this tutorial, I will cut all five designs. They're perfectly sized to fit the candies in my materials list and are ready to go.
STEP 3: CUT THE SNOWFLAKE CANDY HOLDERS
Check that the right machine is listed in the top corner, then click "Make It!"
If prompted, click "On Mat," choose your mat size, and click “Confirm.”
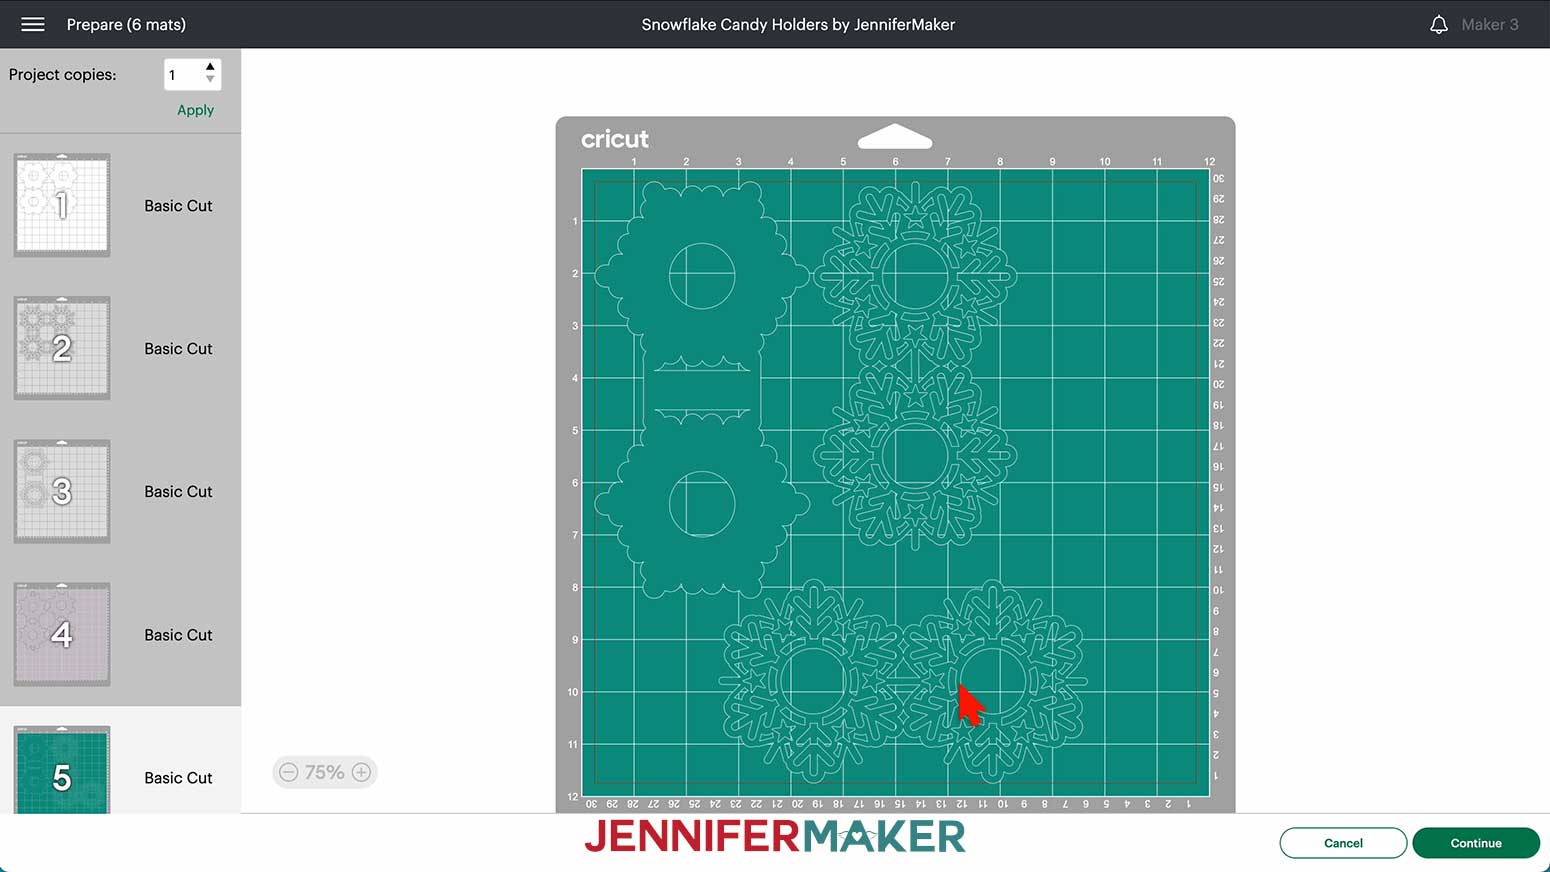
The designs will appear on six mats.
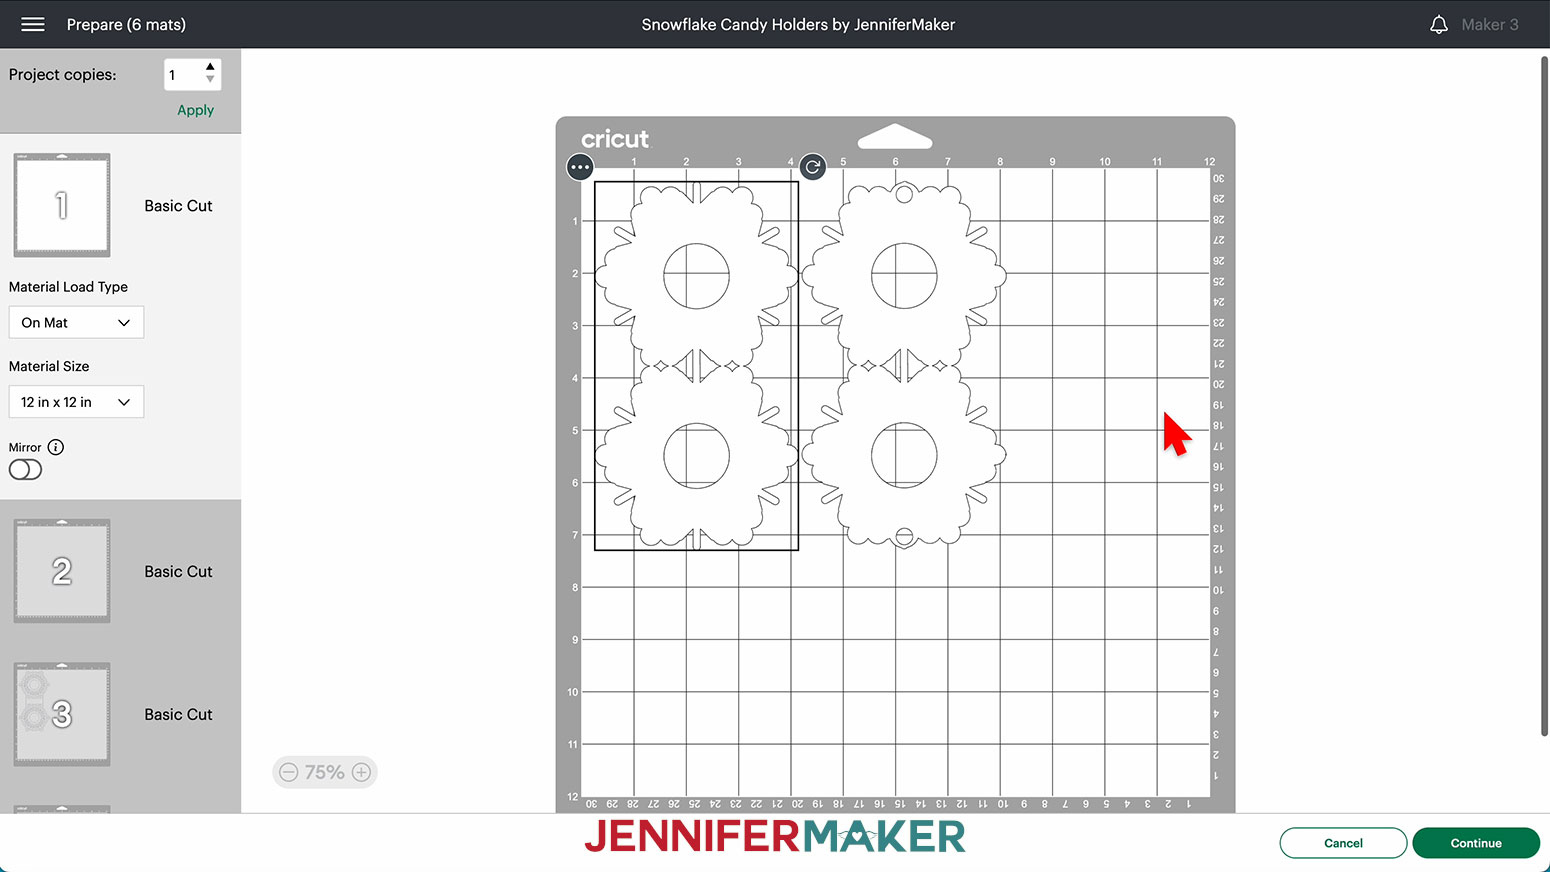
We can save material by combining mats.
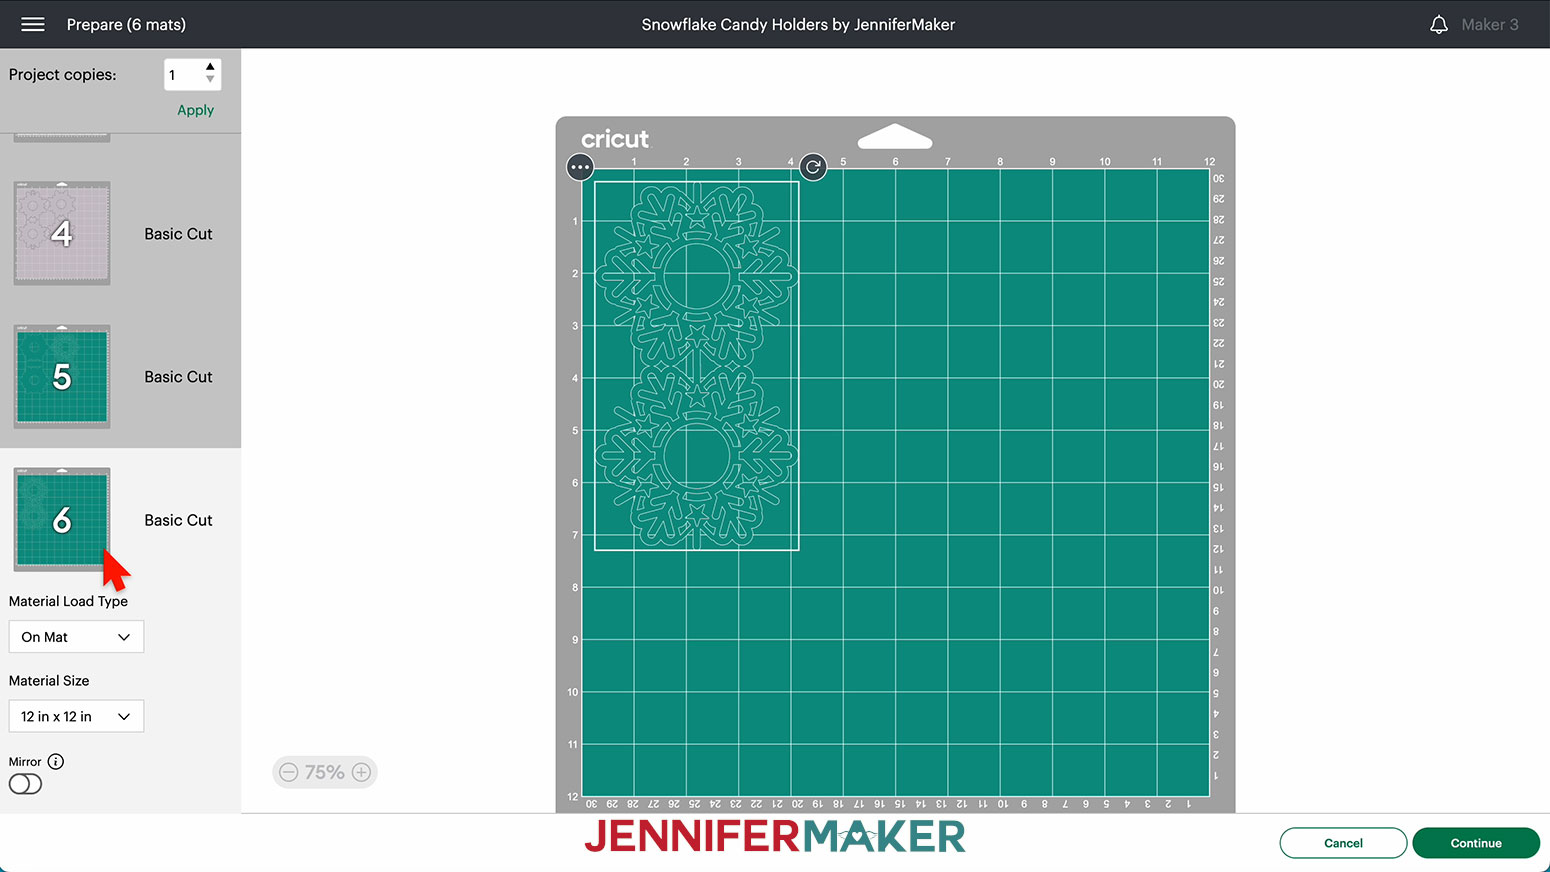
To move pieces between mats, first click the mat thumbnail on the left-hand side that contains the piece that needs to be moved. I’ll move the single turquoise piece on Mat 6 to the other turquoise pieces on Mat 5.
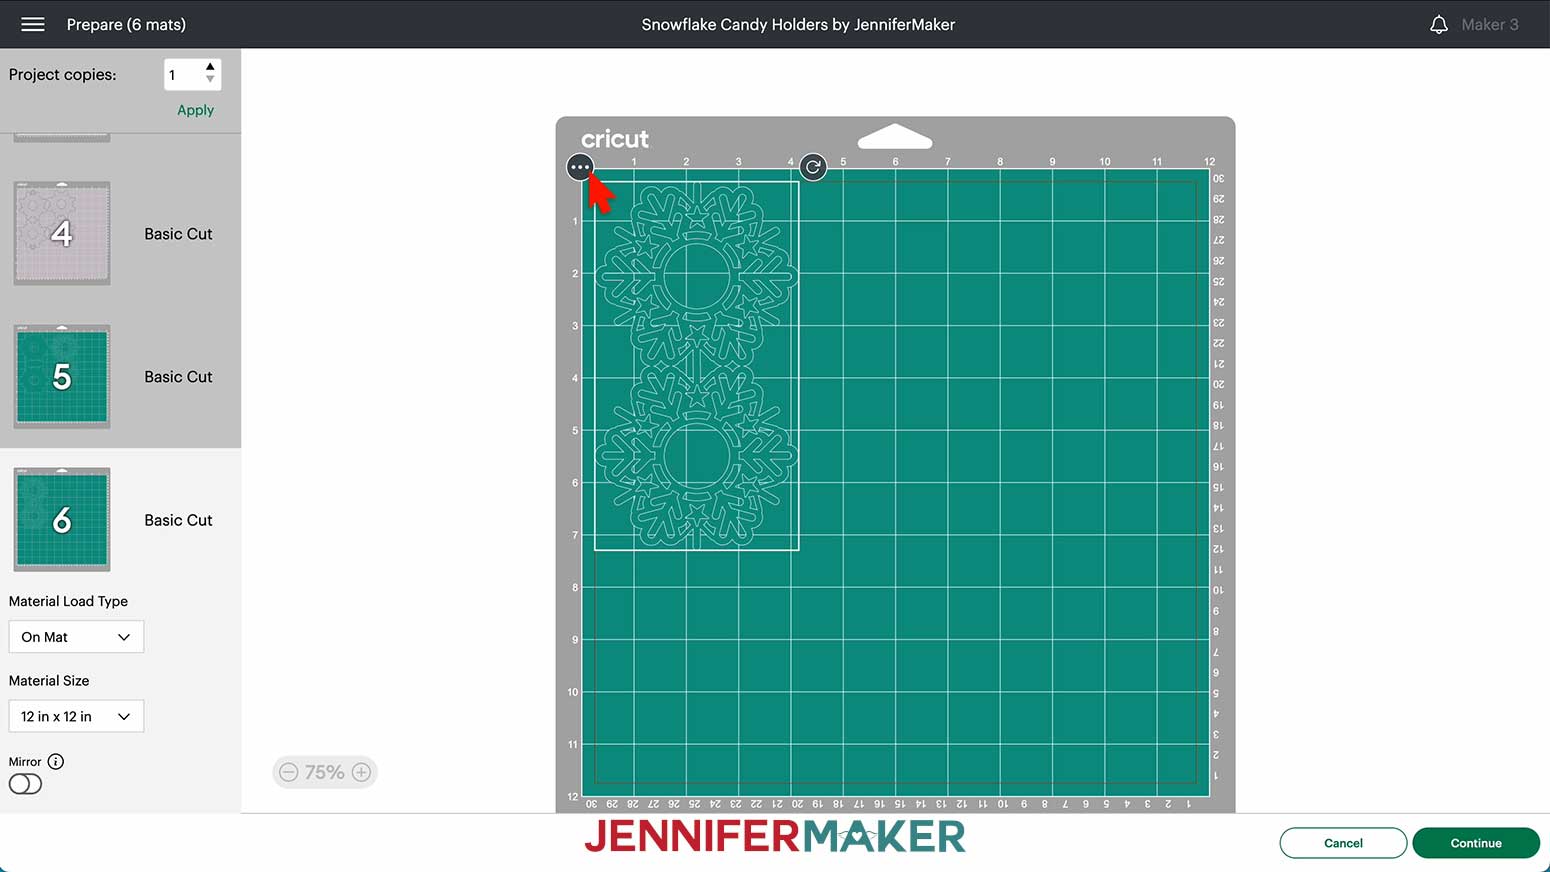
Now, select the piece on the large version of the mat and click the three dots in the upper left corner of the selection.
Click “Move object” to see a “Move Object” menu. Click the mat to which the piece needs to be moved (in this case, Mat 5) and click the green “Confirm” button.
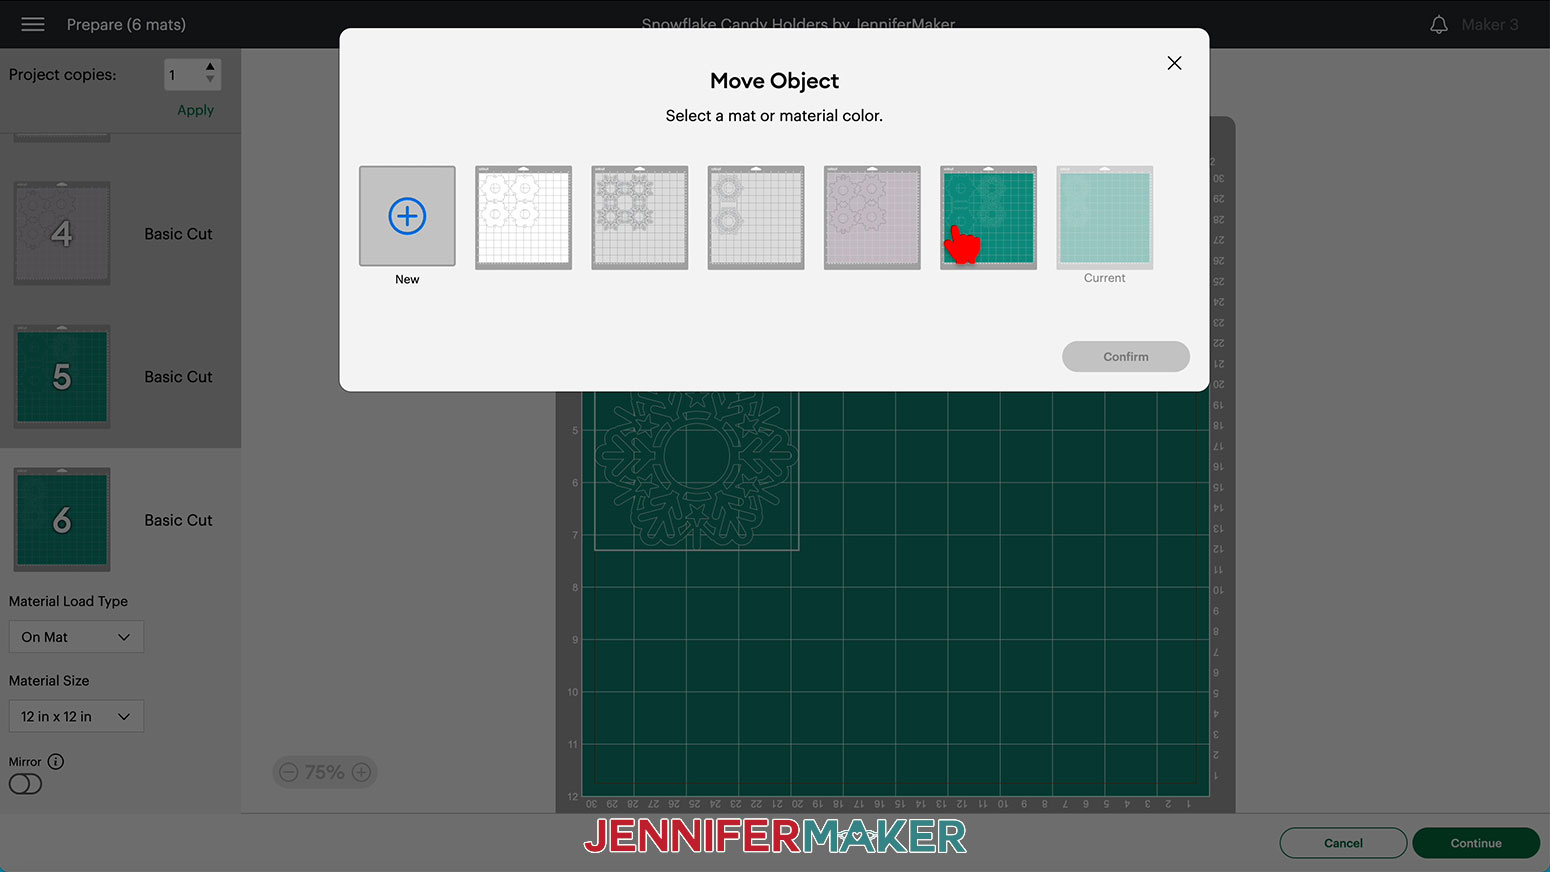
The piece will now appear on the newly selected mat. Make sure to move it over to an empty part of the mat by dragging it with the mouse!
Now, I can move the white glitter cardstock layer piece from Mat 3 to Mat 2.
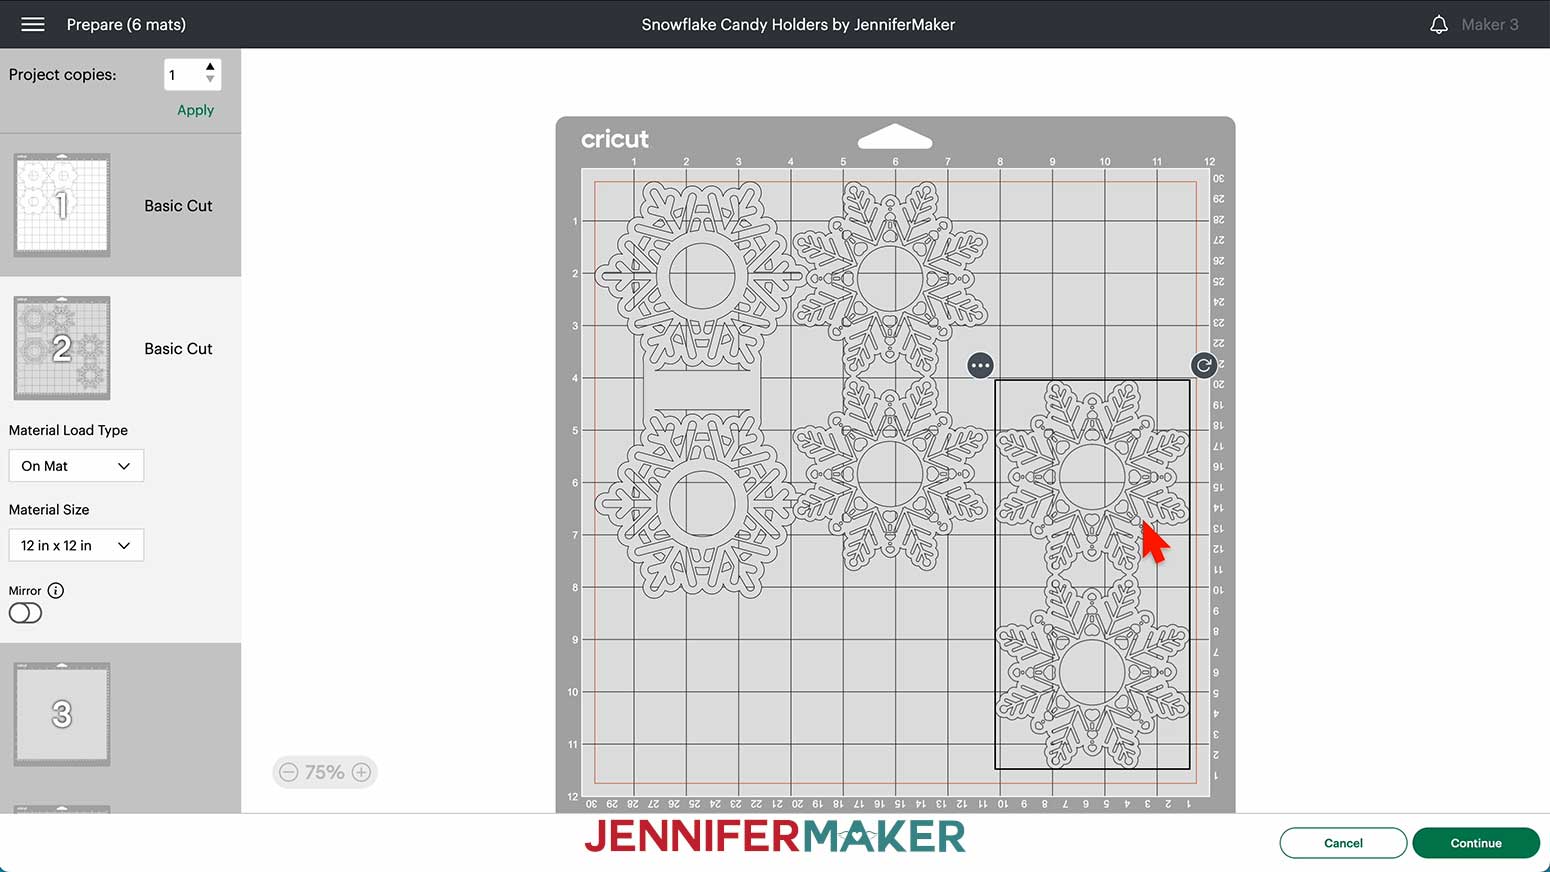
Once all the pieces have been combined into the fewest number of mats, click back on the first mat. Then, click “Continue.”
On the Make screen, select the cut settings for each mat. I used a variety of materials to make my candy holders, so I need to change the cut settings as I load and cut each mat.
The first mat is the white 80 lb. cardstock. Select “Medium Cardstock – 80 lb” and “More" Pressure.

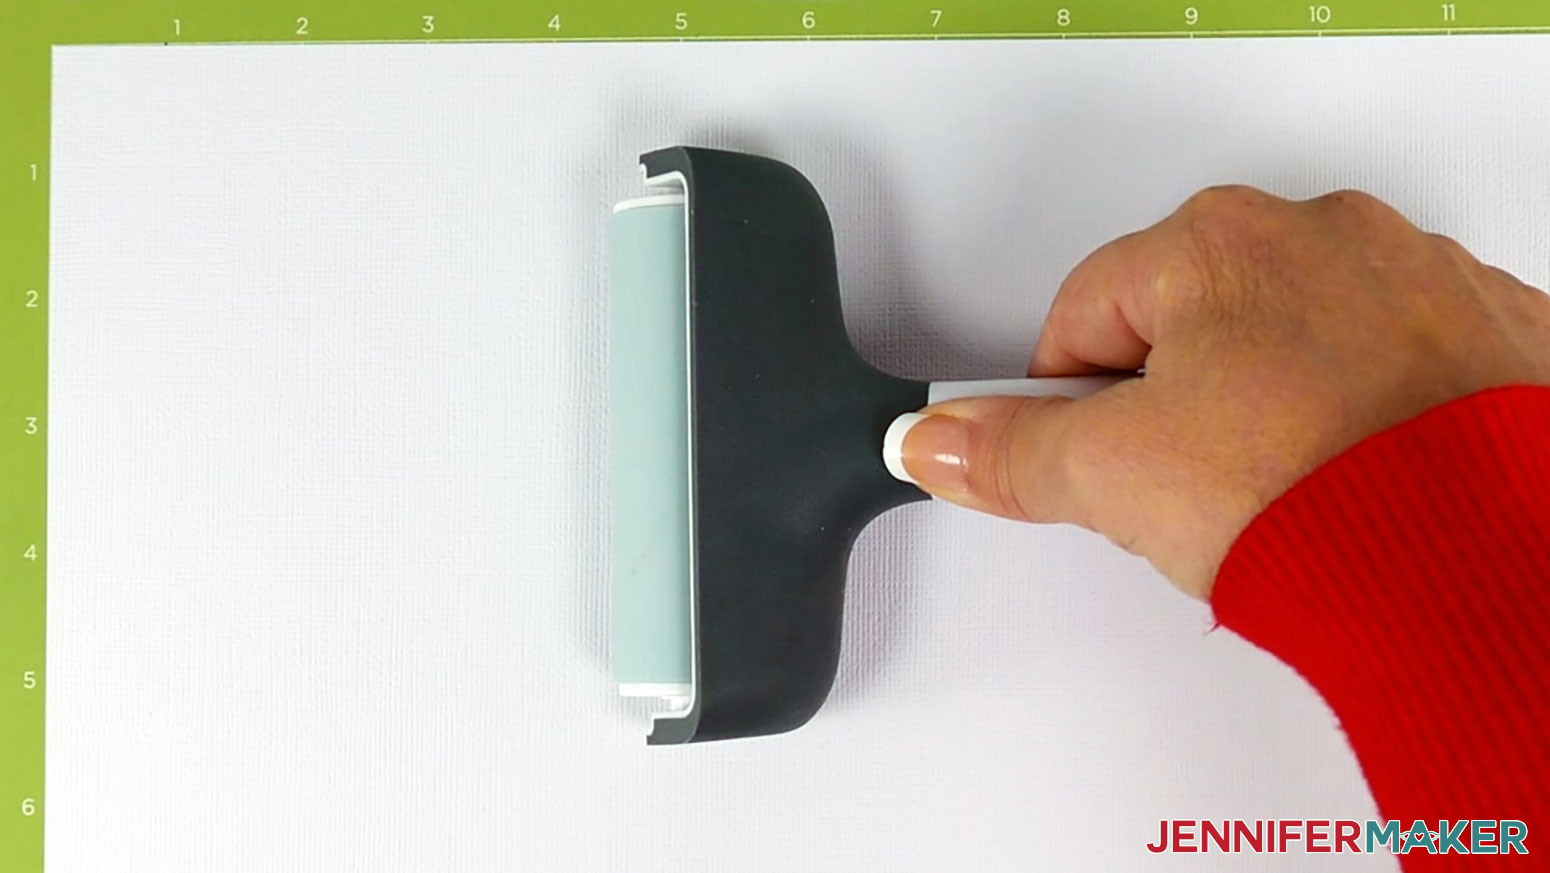
Place the cardstock face up on your green StandardGrip mat and make sure it has adhered well by pressing it with your brayer.
Load the mat into your Cricut and press the flashing button to begin cutting.
Once the cutting is complete, and before unloading your mat, check to see if the cut went all the way through. If not, press "Start" for another pass.
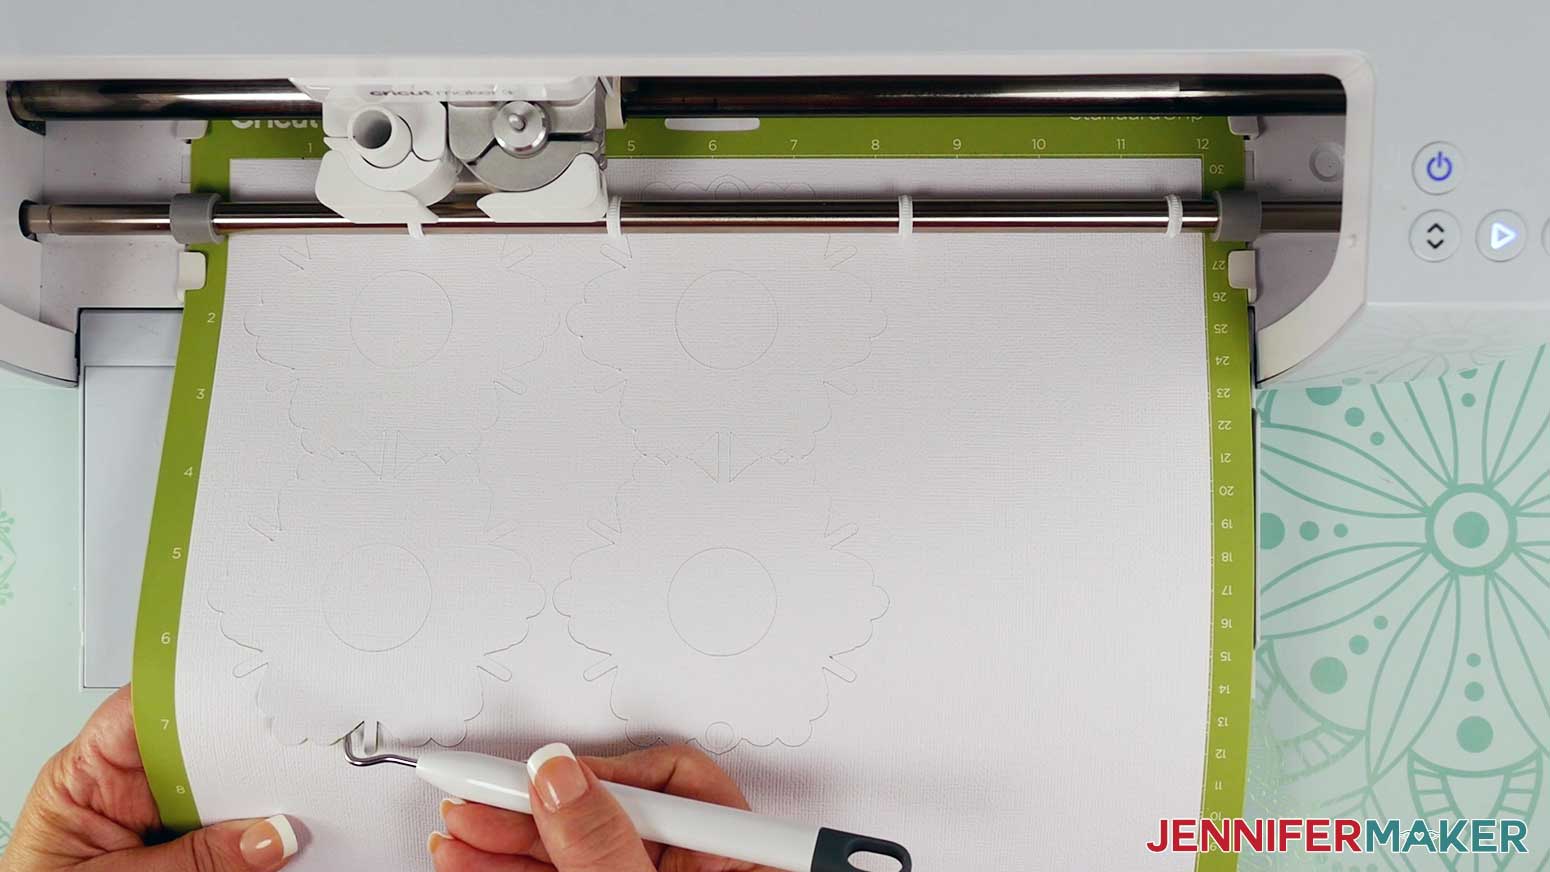
Unload the mat. Remove the cut pieces from the mat by turning the mat over and rolling it away from the cardstock.
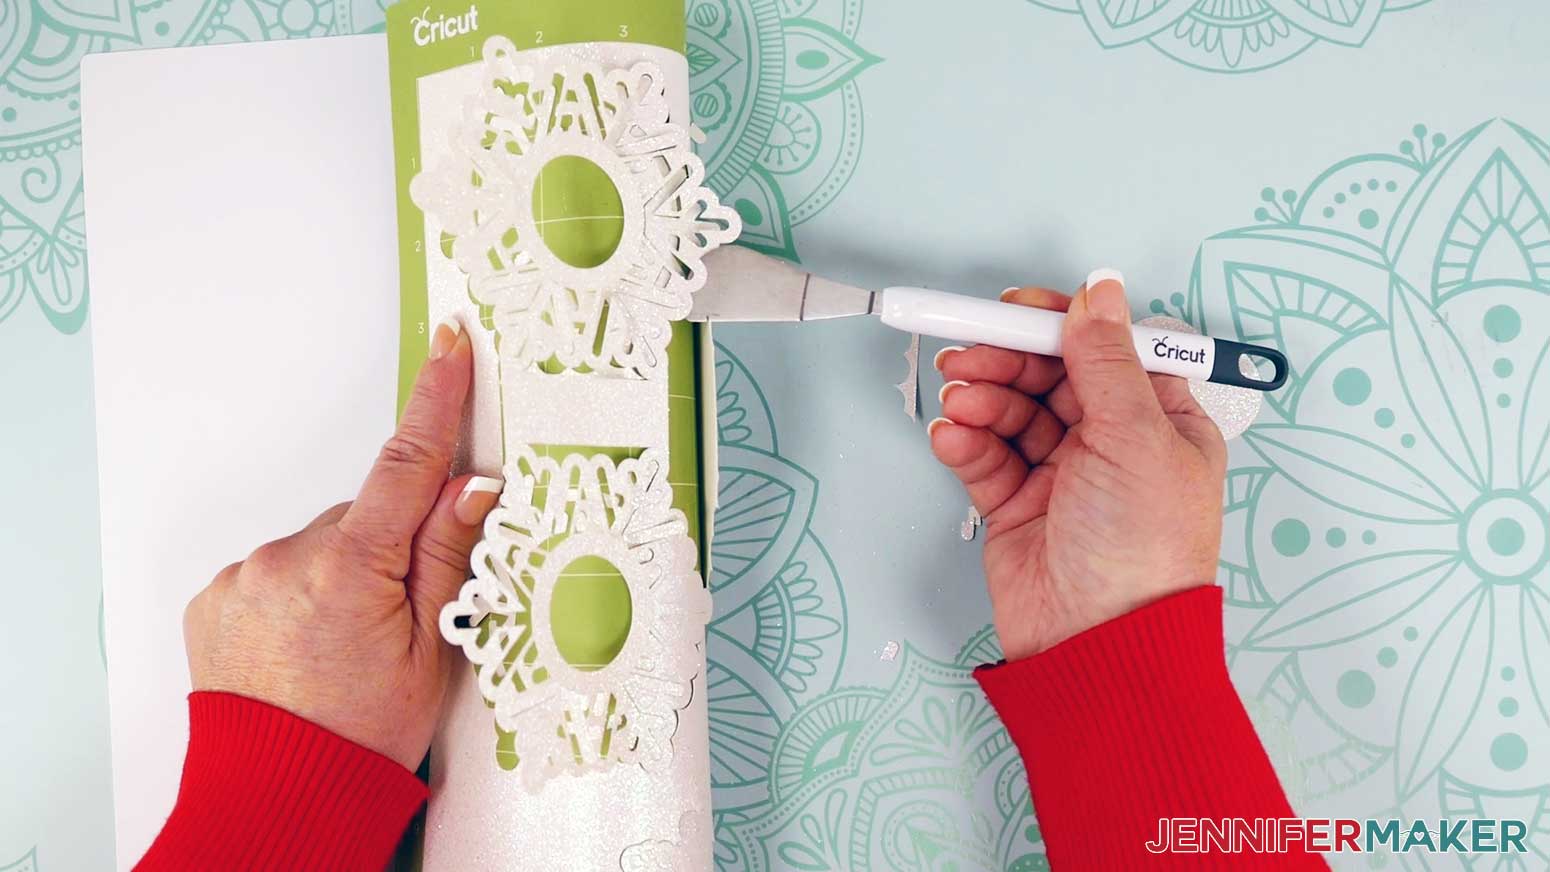
Move slowly and use a spatula to carefully remove the intricate pieces from the mat.
Continue to prepare, load, cut, and remove mats until all the pieces are cut.
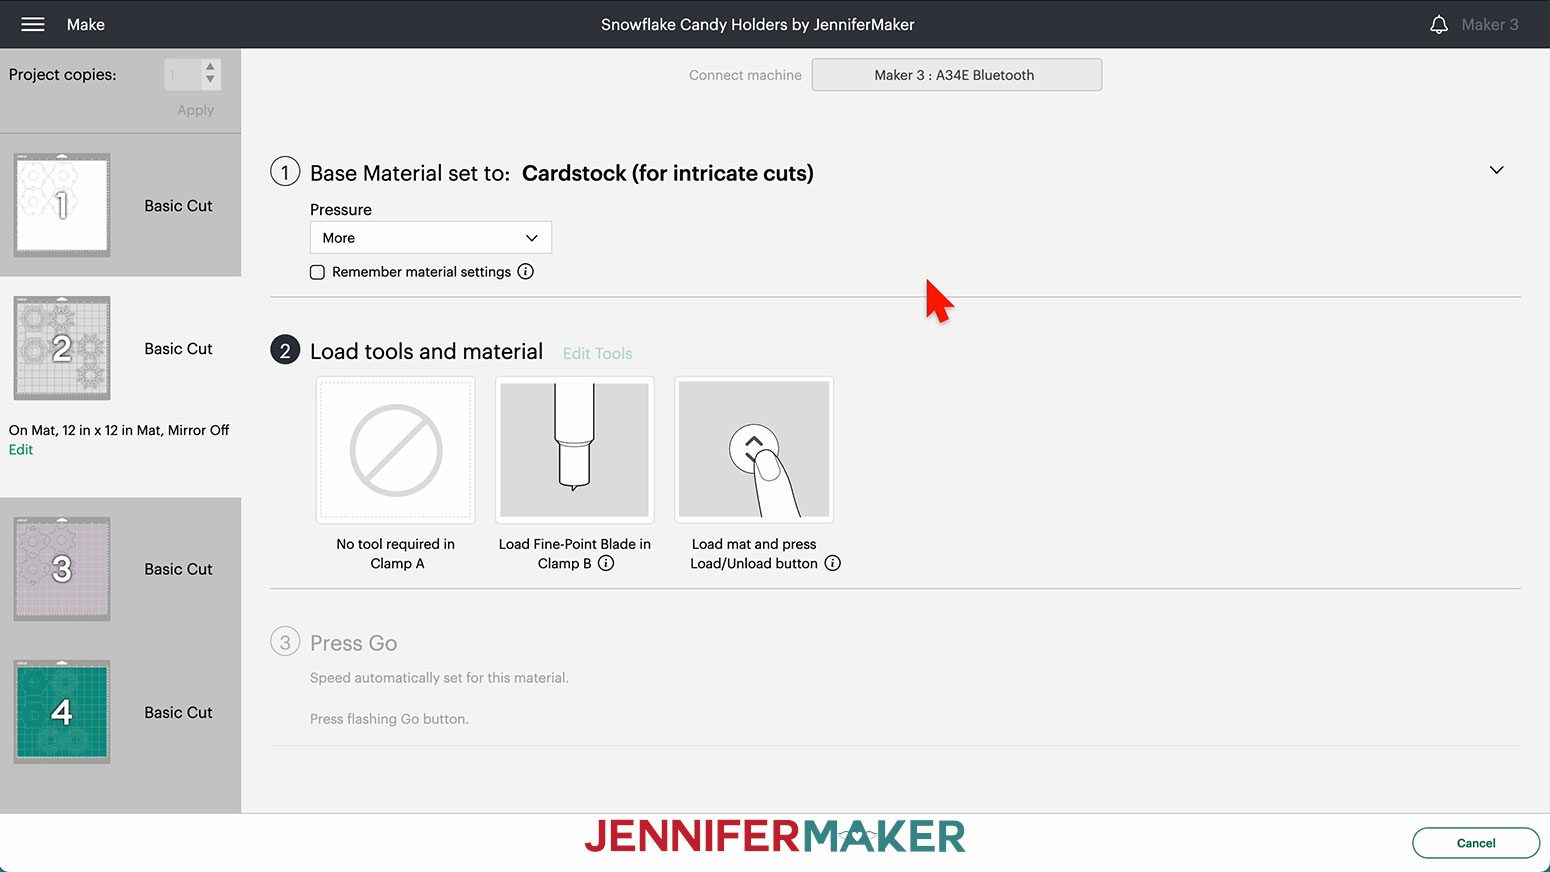
The second mat will be white glitter cardstock. The “Cardstock (for intricate cuts)” setting with “More" Pressure works best for the intricate details on the glitter cardstock layers.
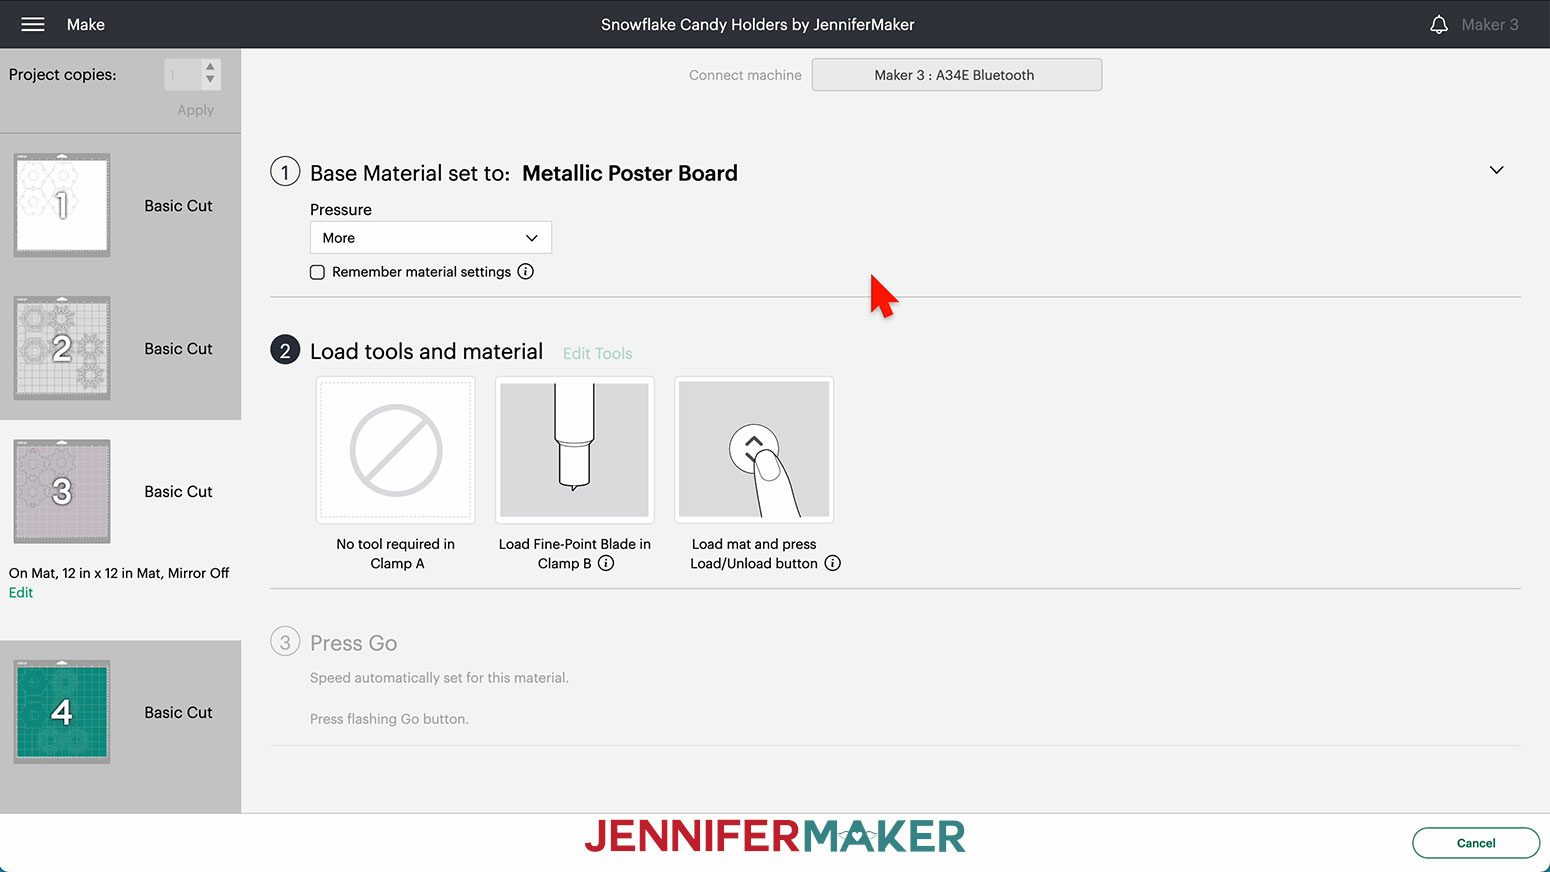
The third mat will cut the silver cardstock. The silver cardstock is quite thick, so the “Metallic Poster Board” setting with "More" Pressure works quite well.
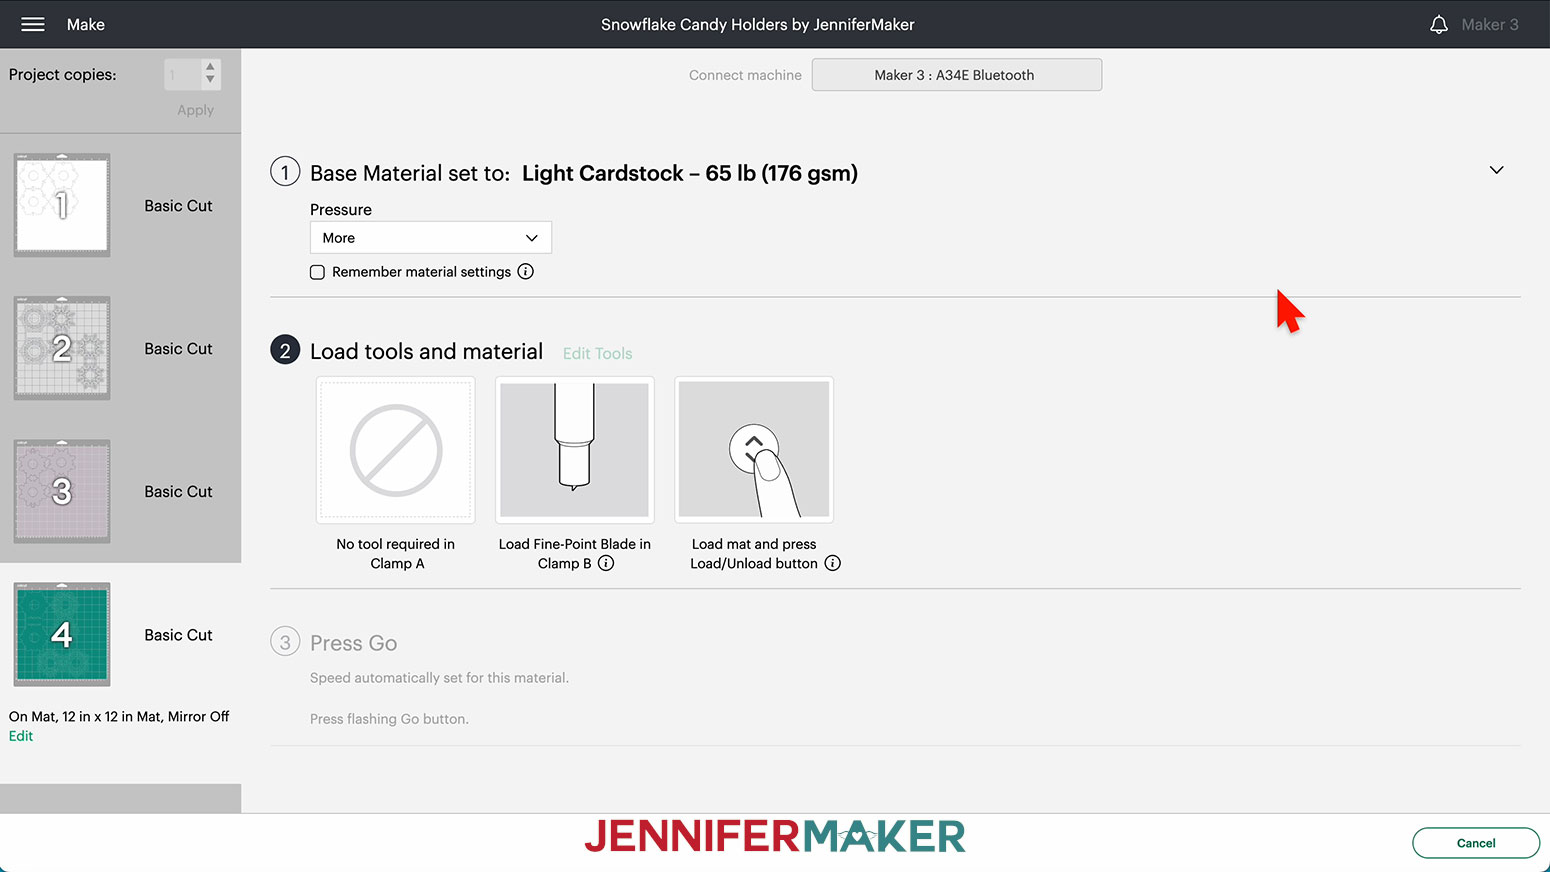
The final turquoise mat is 65 lb. cardstock, so I used “Light Cardstock – 65 lb” with “More" Pressure.
These settings worked quite well for me, but every machine is different, so you may need to test settings before finding one that works correctly for you.
TIP: If you run into any issues cutting your materials, check out my Cricut Tips & Tricks for Cleaner Cuts.
STEP 4: ASSEMBLE THE SNOWFLAKE CANDY HOLDERS
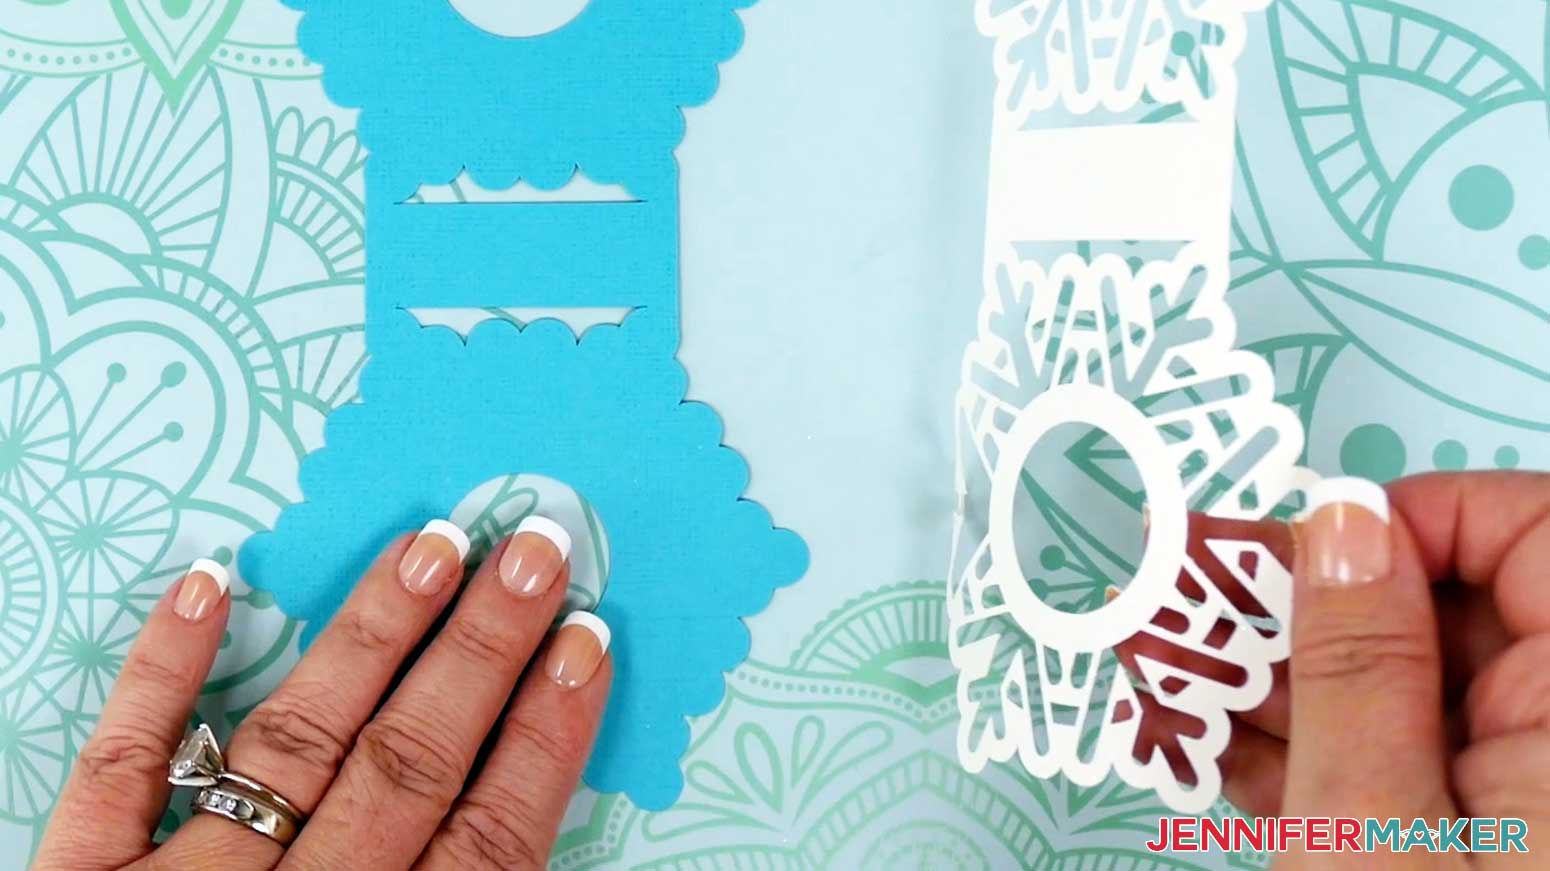
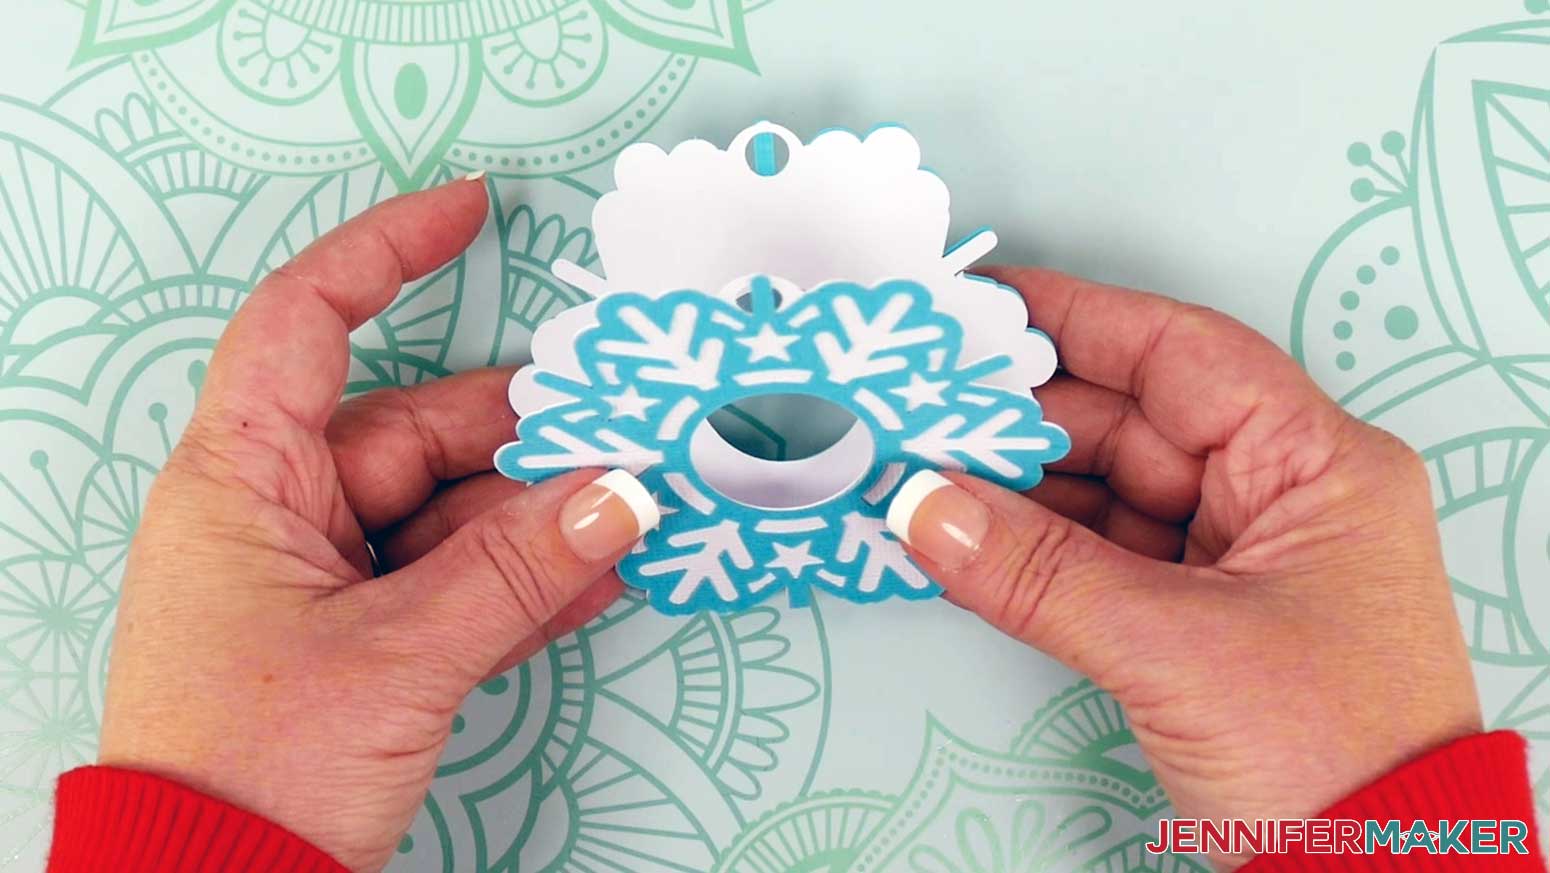
Each candy holder consists of two layers – a back and a front. The intricate designs are cut into the front of each holder, while the back pieces are mostly solid.
First, to prepare for assembly, gather glue and all the cut pieces, matching the correct layers to each other.
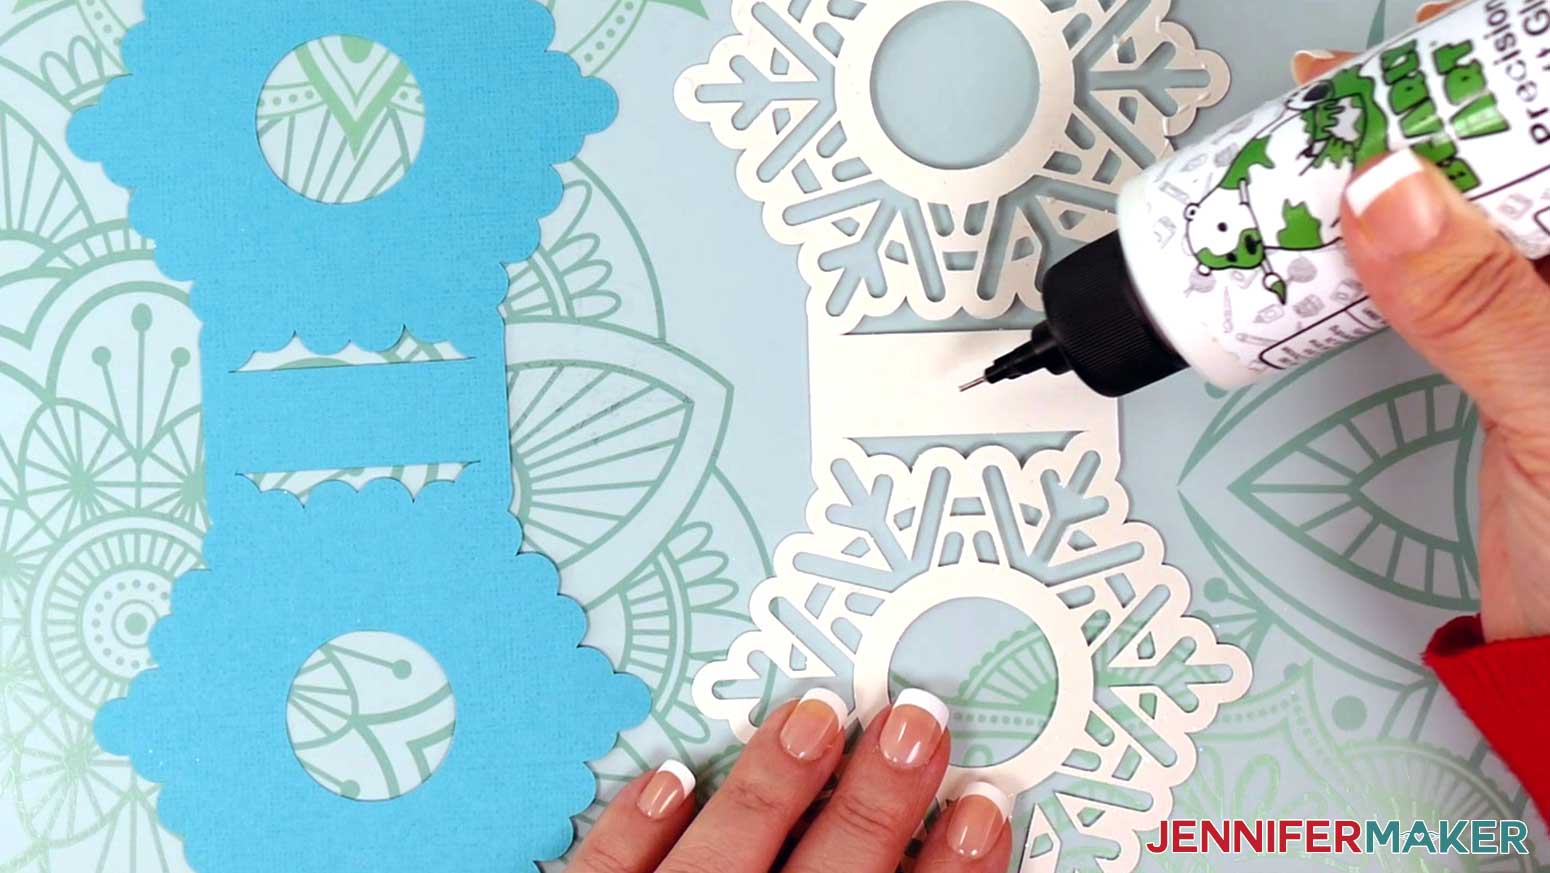
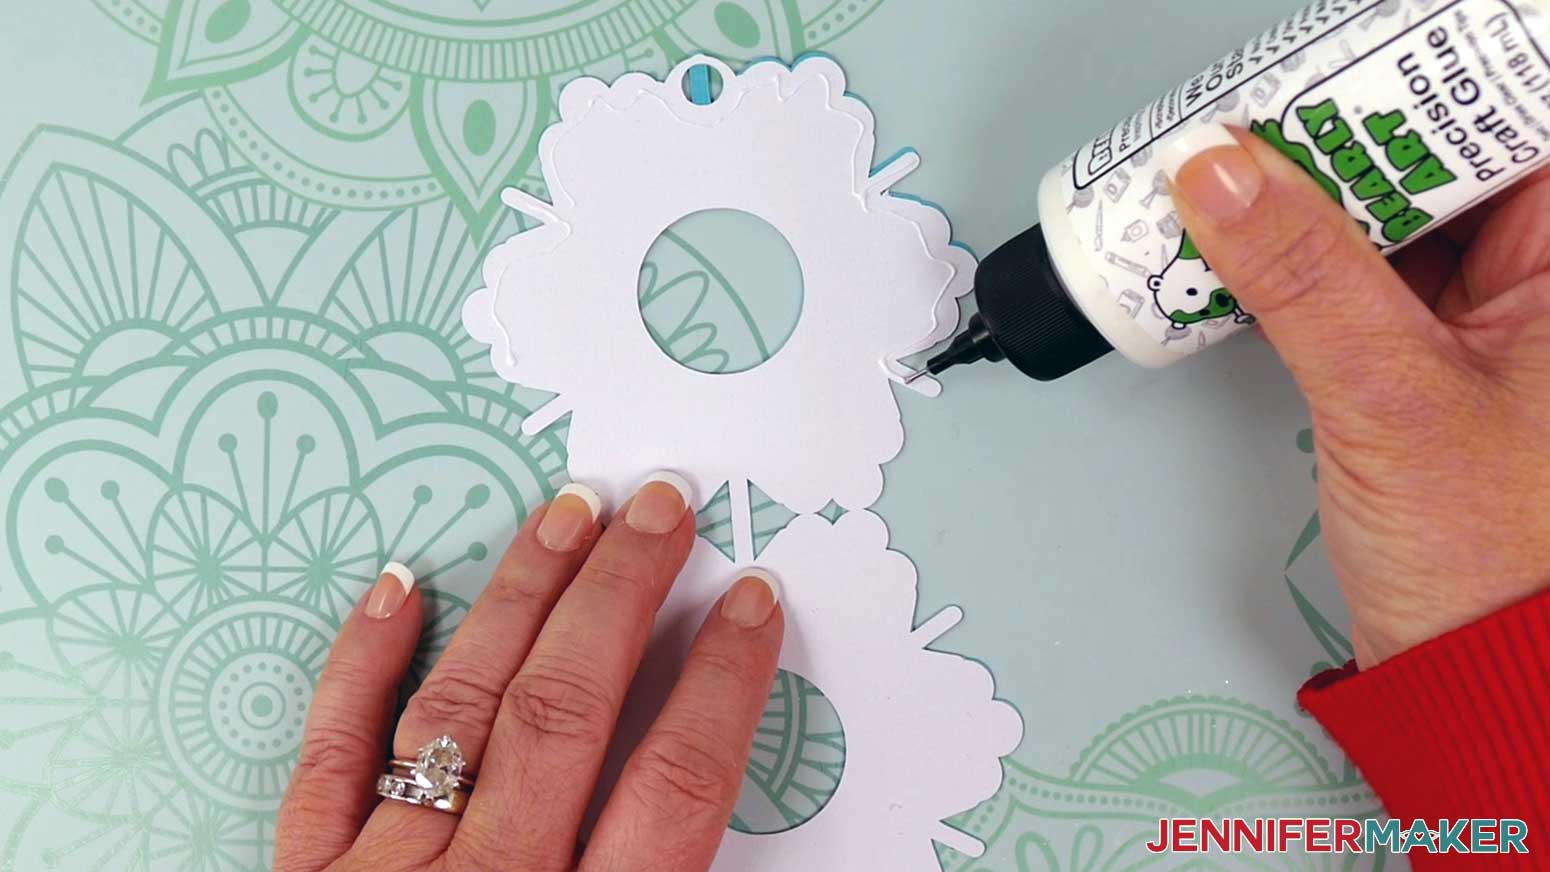
Next, choose a candy holder set to glue together. I’ll start with the standing candy holder. Lay the front piece onto the back piece as if it were glued together. Then flip the top layer over next to the bottom layer so that the back side of the top is exposed.
Now place small dots of glue on the back of the top layer. Make sure to place glue throughout the design, not just on the outer edges.
Finally, flip the top piece right side up and place it on top of the back piece, making sure the edges line up cleanly
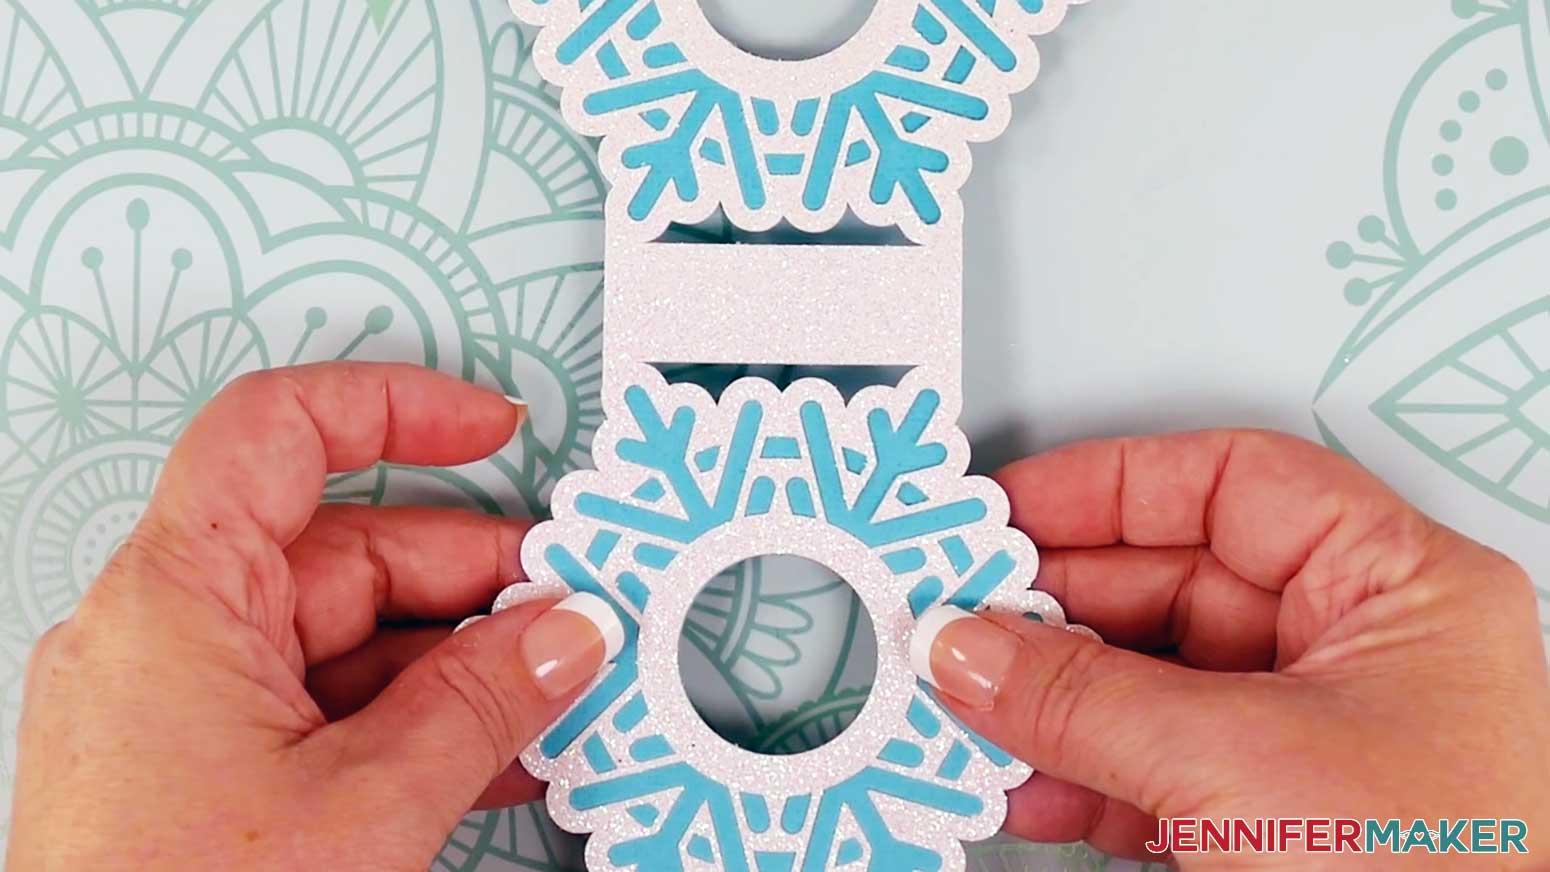
Assemble each of the other sets all in the same manner.
It is now time to add the candy!
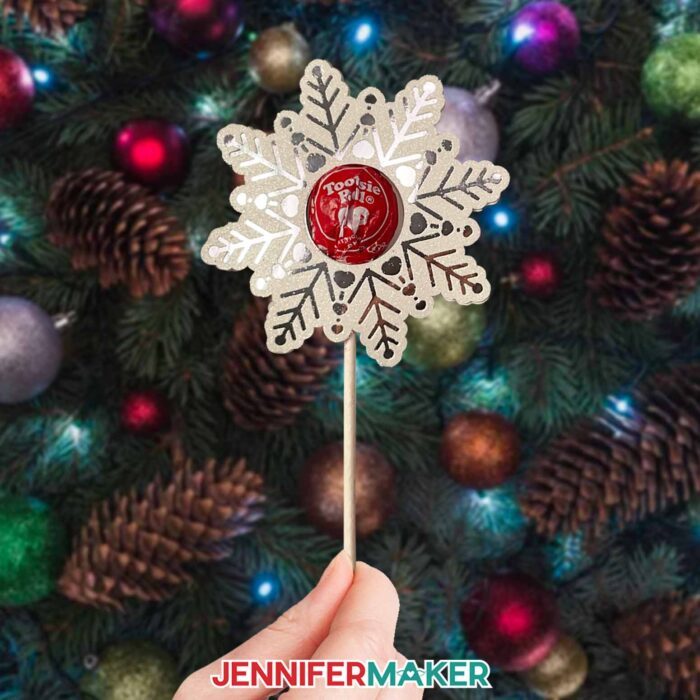
The ornaments and lollipop holders simply fold in half, but the free-standing holder has a base section when it's folded. Fold it at the point where each side of the holder meets the rectangle base to create it.
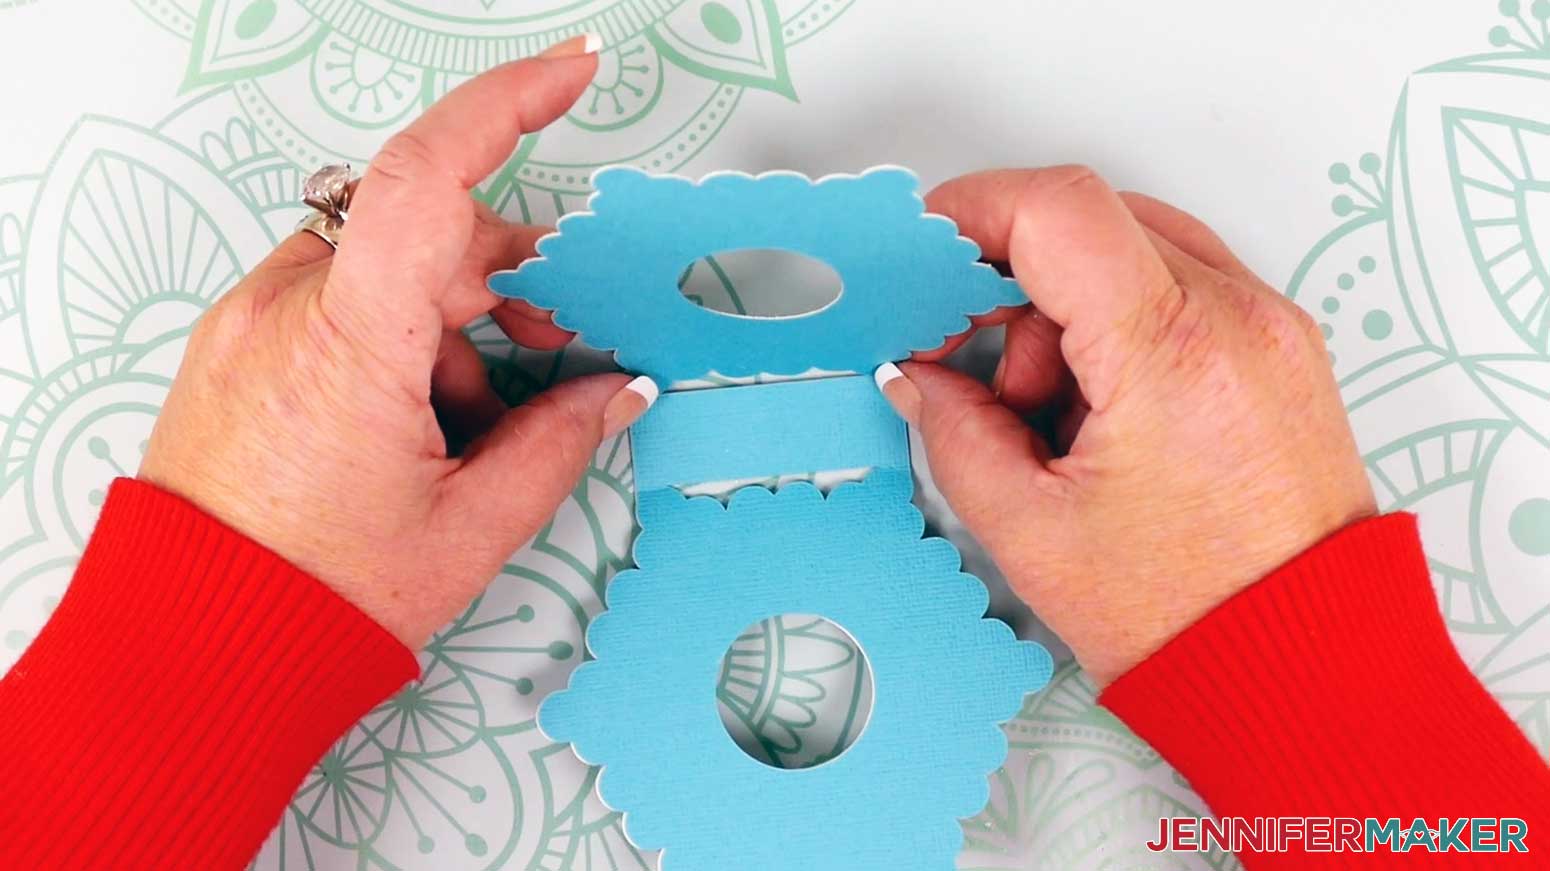
Fold each of the holders to crease the hinges, then open them back up slightly.
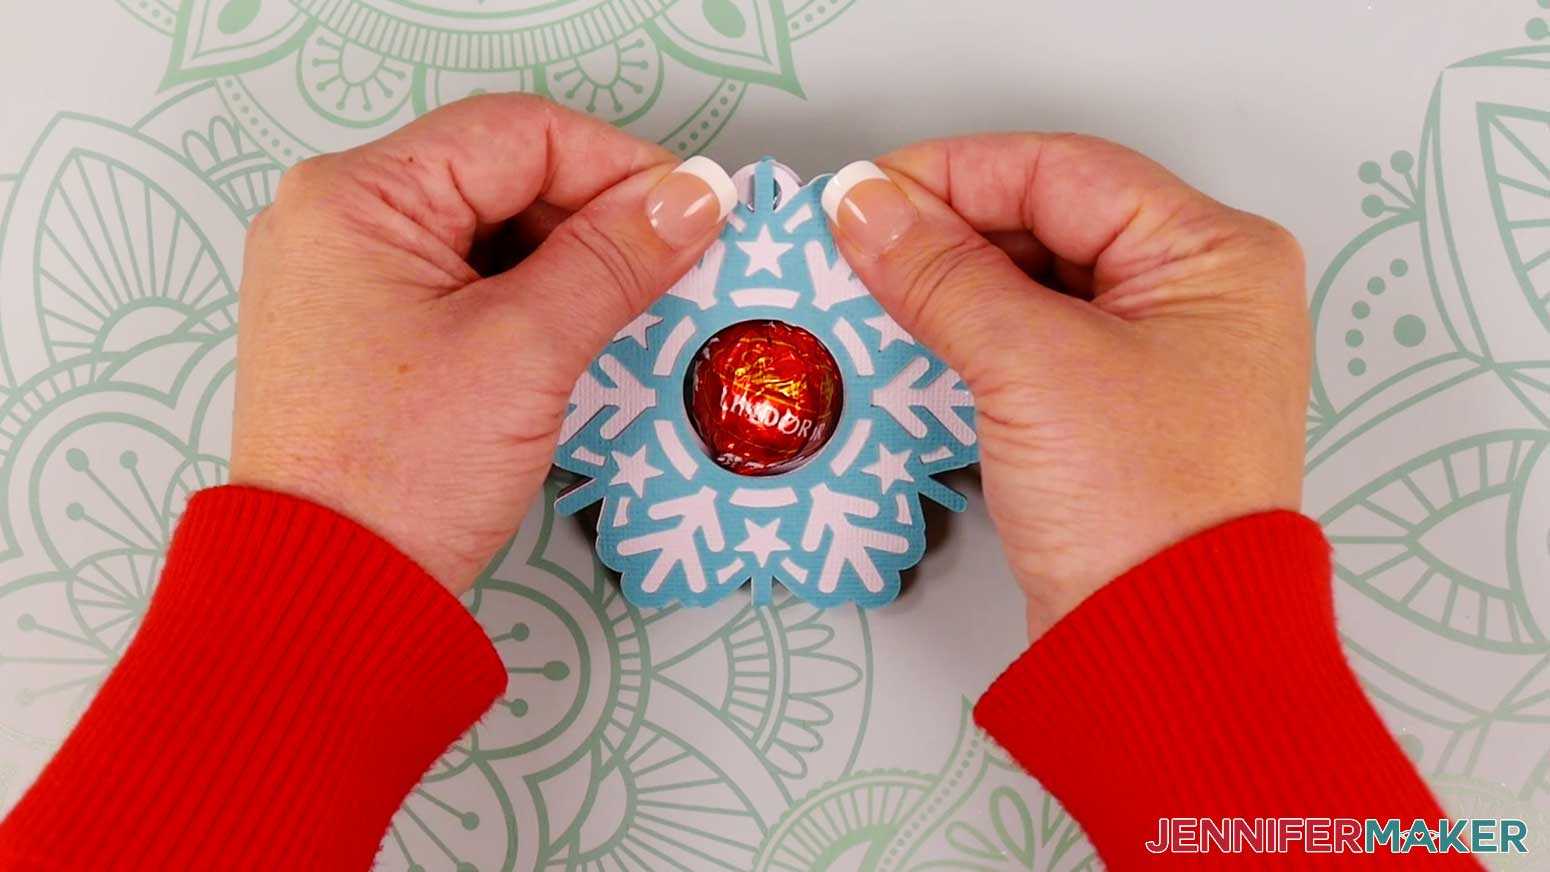
Pick a candy holder to fill, then add glue to the inside edges of one side of the holder.
The standing candy holder can only be glued on the edges that are on the top and sides so that the base remains open to keep the candy holder standing up. The candy will stay in place with help from the wrapper!
Place a piece of candy inside and close the holder while being sure to match up the outer edges of the halves. Place pressure with your fingers on the glued areas until the glue adheres well.
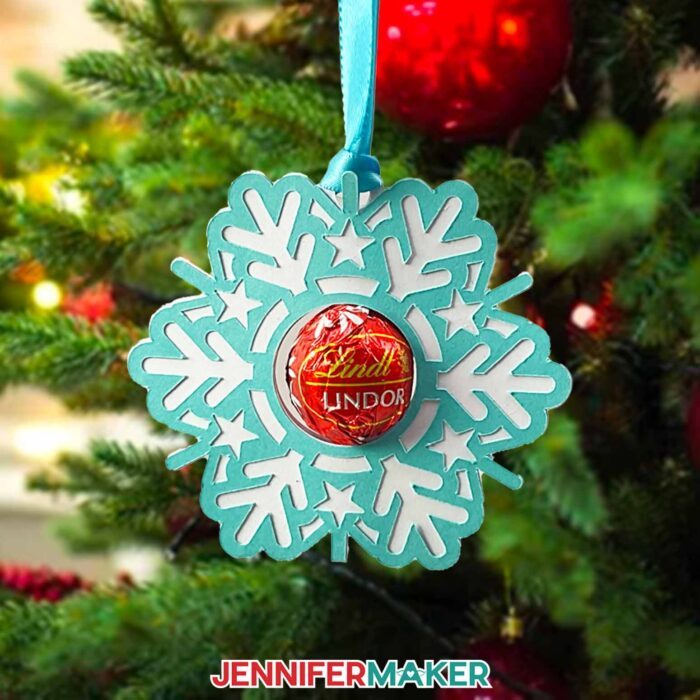
The ornaments will need ribbons for hanging. Use scissors to cut a piece of ribbon approximately 12 inches long. Tie a knot with the ends of the ribbon to form a loop.
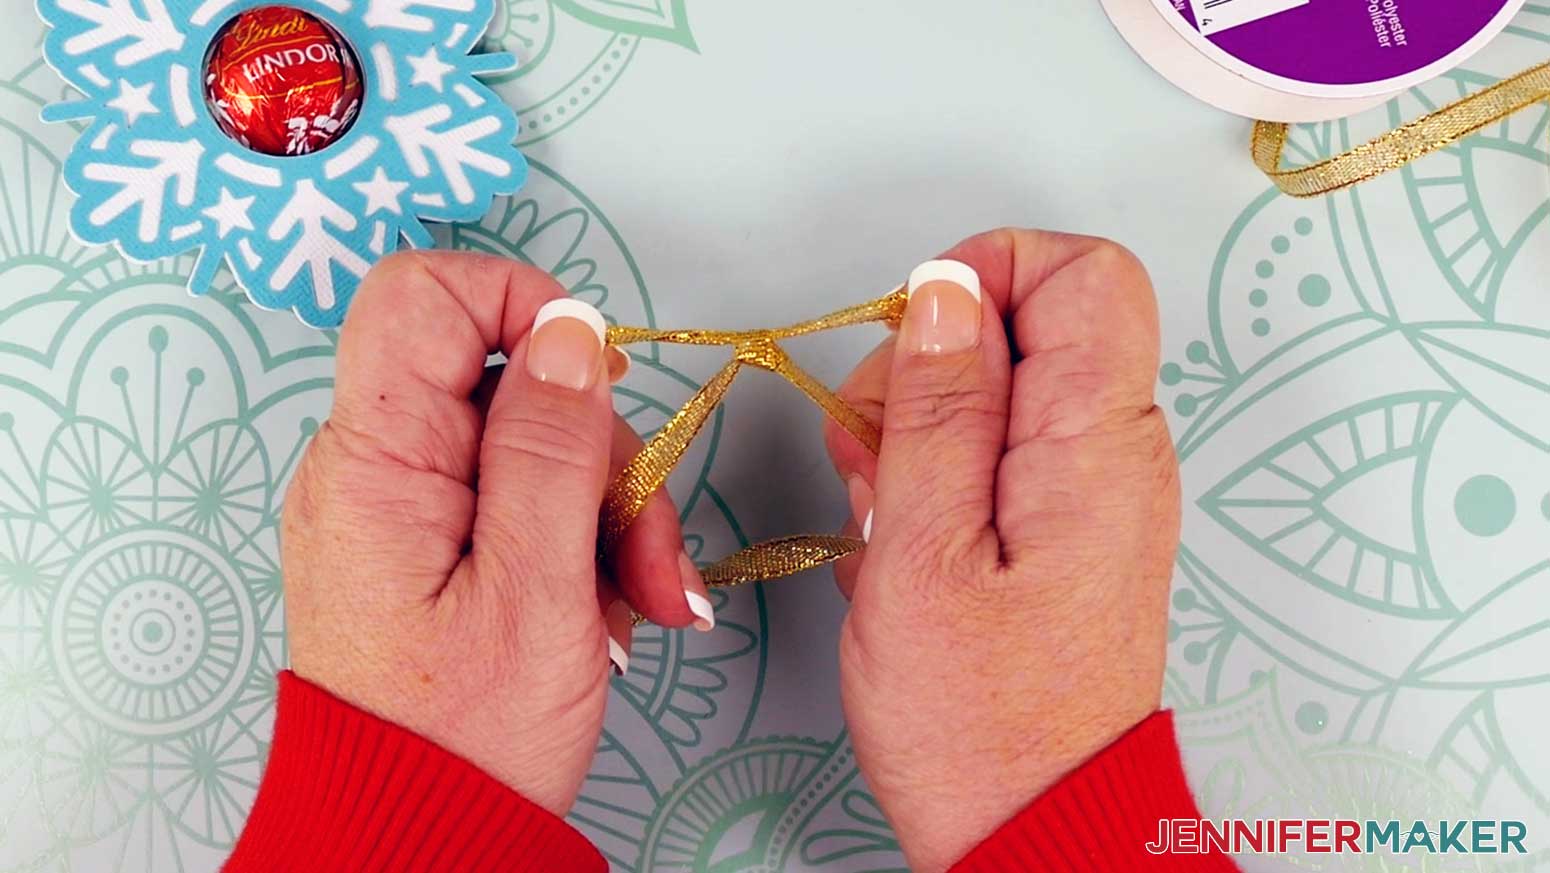
Push the loop into the ornament ribbon hole, then pull the knotted end down and through the end of the loop that was pushed through the hole. This will attach the ribbon to the ornament ribbon hole.
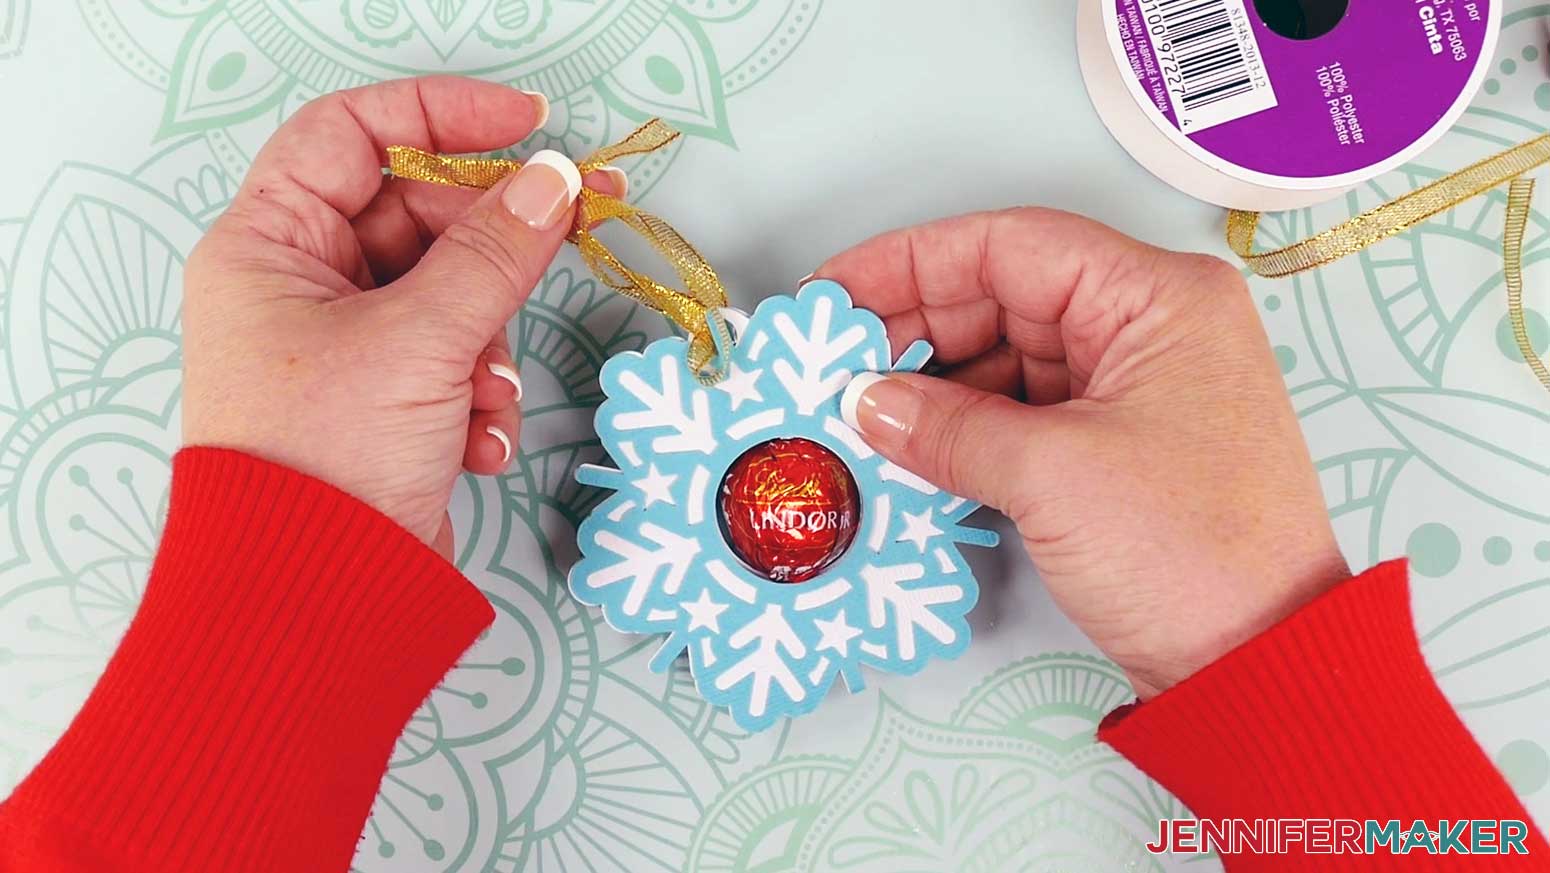
The candy ornaments are now complete!
STEP 5: SHOW IT OFF
The snowflake candy holders are perfect for giving as gifts or using as holiday decorations in your tree or around your house!
Notes
Finished Sizes:
Stand Up Holder: 4.21" x 3.66"
Snowflake with Stars: 3.93" x 3.52"
Snowflake with Hearts: 3.64" x 3.72"
Answers to Your Questions About How to Make Snowflake Candy Holders
Q: How do you make your own Christmas candy decorations?
A: This tutorial is a great place to start! I go through the whole process step-by-step, so it’s super easy and fun. And if you’d like to try other Christmas candy crafts and decorations, check my website or scroll through this blog post — there’s tons!
Q: How do you make candy tree ornaments?
A: First you’ll prepare your file in Cricut Design Space, then choose and cut your cardstock with your Cricut cutting machine. After that, I’ll walk you through assembling the layers of cardstock, adding the candy, and adding the ribbon to hang your snowflake candy holder on your tree! It’s super simple, and my tutorial includes everything you need to know, including a handy list of materials.
Q: What kind of candy works with these candy holders?
A: I recommend round candy about the size of Tootsie Pops, old-fashioned lollipops, Blow Pops, Lindor Truffles, Ferrero Rocher chocolates, or peppermints to fit inside each snowflake ornament or holder.
Q: Can I make these on a Cricut Joy Xtra?
A: You sure can! As long as you’re using 8.5 x 11″ or smaller sized cardstock, you can cut this project on the Cricut Joy Xtra — and if you size the files down a little, you can even cut this on the original Cricut Joy!
Q: Is there a way to make these reusable?
A: Yes! You could use just a tiny dot of glue to hold the candy holder shut, and then re-glue the next time you want to use it. You could also add a small hook-and-loop closure, a ribbon to create a tie closure, or even use tiny adhesive magnets!
Q: Are there other candy holders I can make?
A: I have lots of holiday candy holders to share with you, like my gingerbread village treat boxes, ornament gift box, easy candy holders, gnome candy holders, top hat gift box, candy cane spoons, easy DIY gift boxes for candy, Christmas tree advent calendar, treat box luminaries, and larger gift boxes. For candy and treat holders for other times of year, check out my ice cream bar treat boxes, Halloween countdown boxes, cupcake box, and easy lollipop holders!
Get my free SVG/DXF/PDF files to decorate mirrors!
(If you do not see the signup form above, click here.)
I SO hope you’ll make a cute snowflake candy holder (or multiples)! Please share a photo of your candy holders in our Facebook group or tag me on social media with #jennifermaker.
Love,

Want to remember this? Save this Snowflake Candy Holder tutorial to your favorite Pinterest Board!