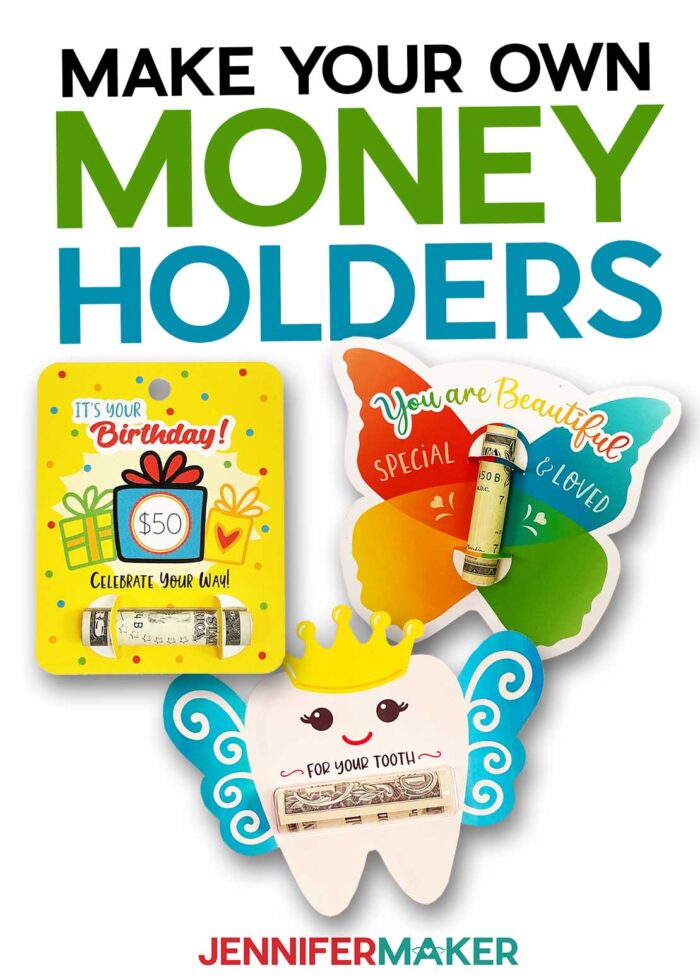
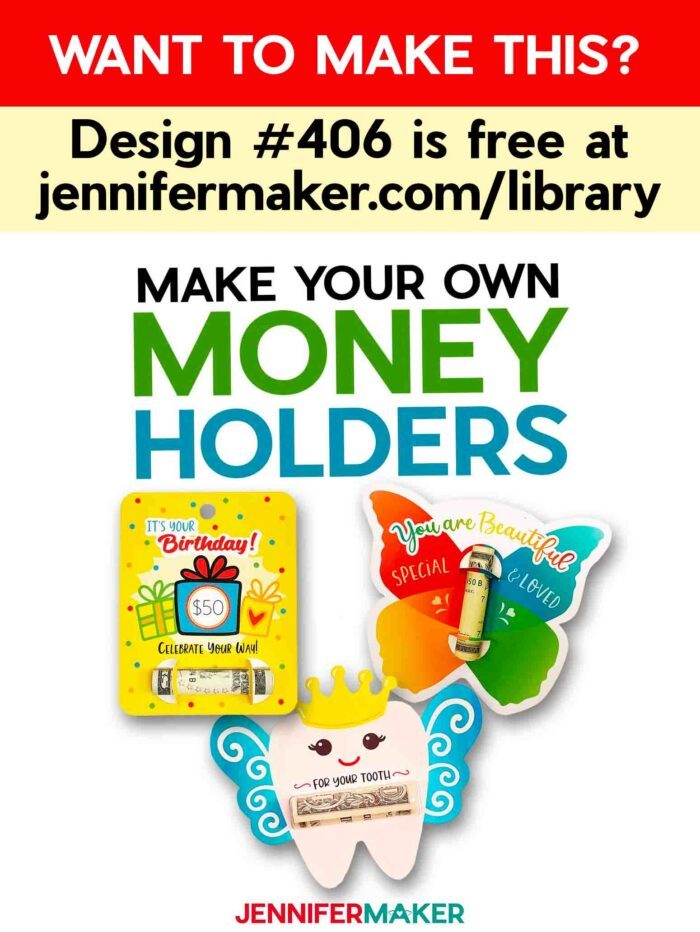
Learn how to make three DIY money holders using different methods to hold the cash!
Sometimes, cash is the perfect gift, especially if you’re short on time. But it can feel so impersonal! I have a fun way to help: DIY money holders! Once you get the Print then Cut process down, you can have customize, cut, and assemble these money gifts in cardstock in just minutes! If you have a bit more time, I’ll show you how to add a plastic dome for a professional finish. Slip the money holder in a gift bag and you’re ready to go. Let me show you how!
Want to save this project? Enter your email below and we’ll send the project straight to your inbox.
Watch my step-by-step tutorial on how to make DIY money holders with Cricut premiering on my Youtube channel at 2 pm on Saturday, October 8!
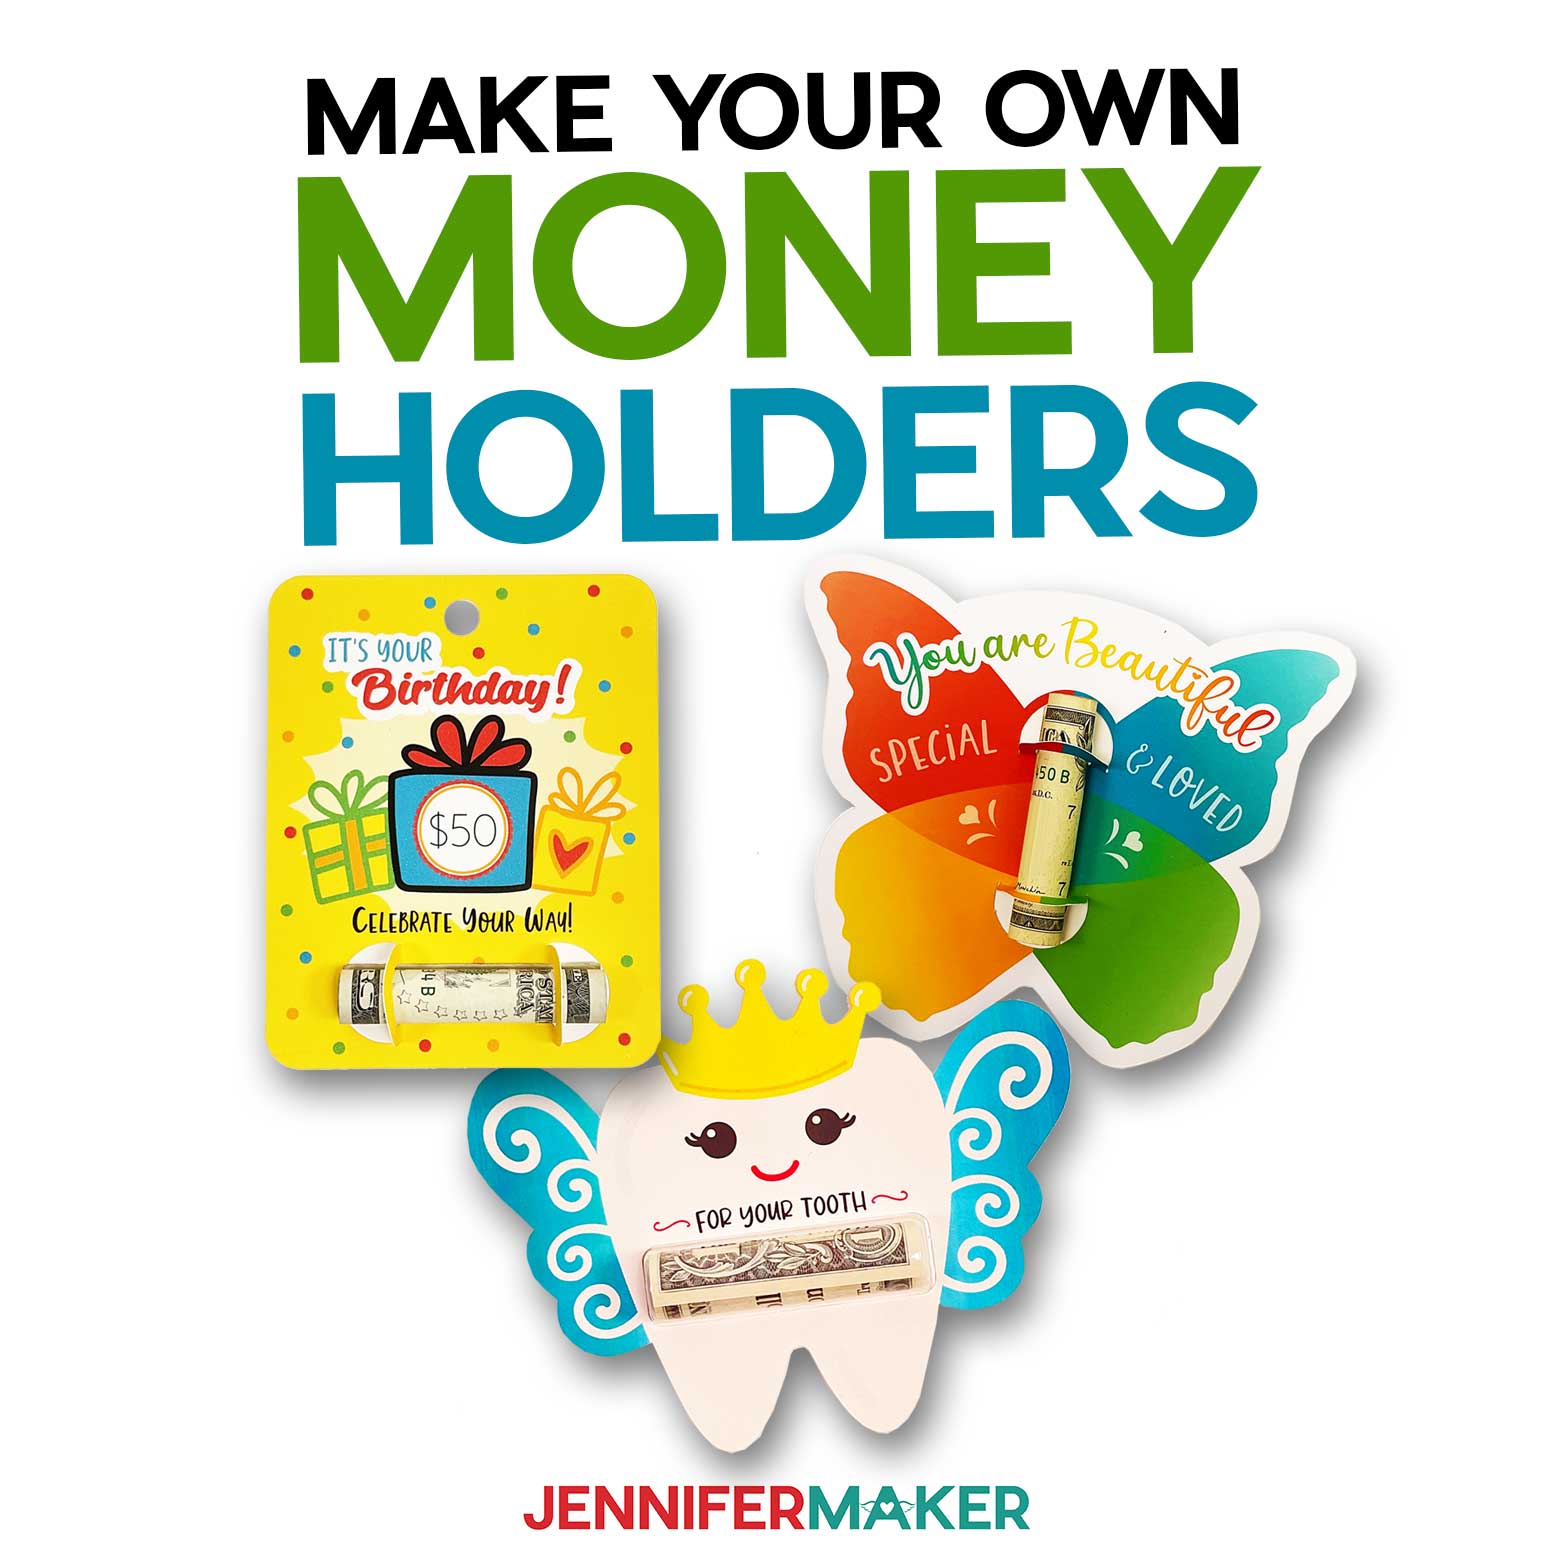

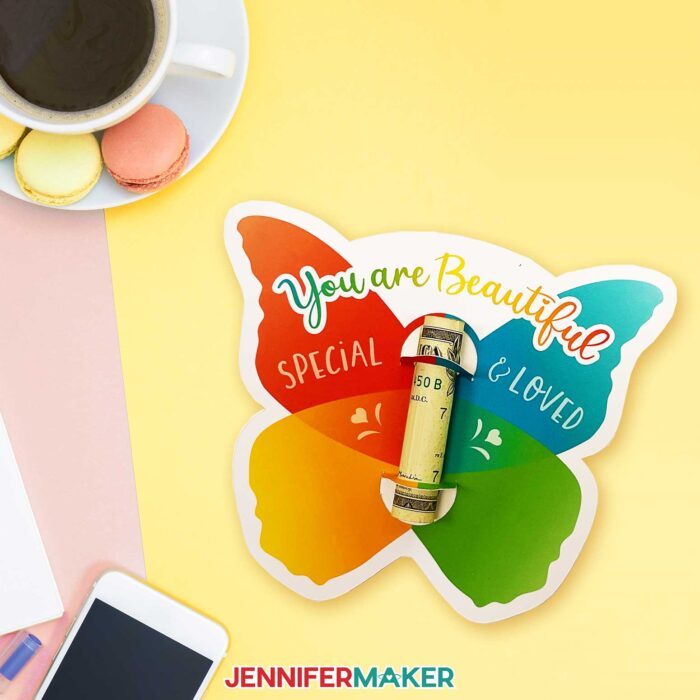
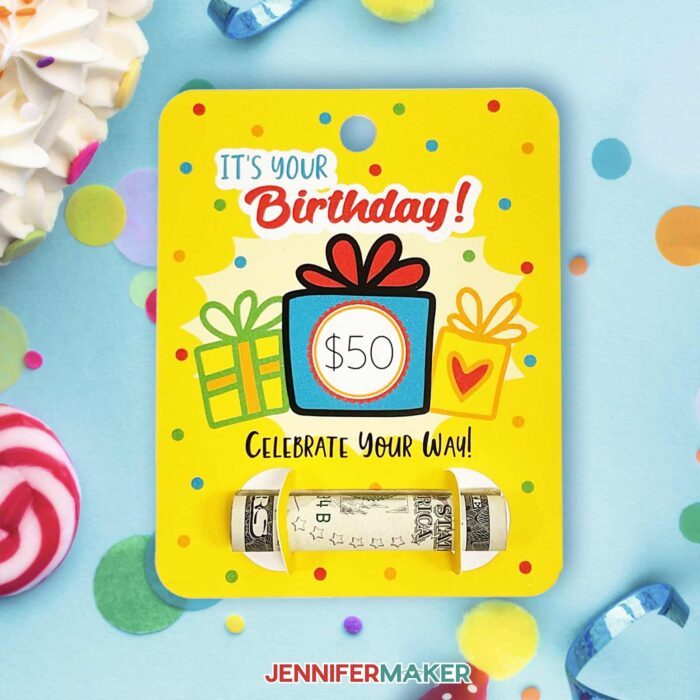
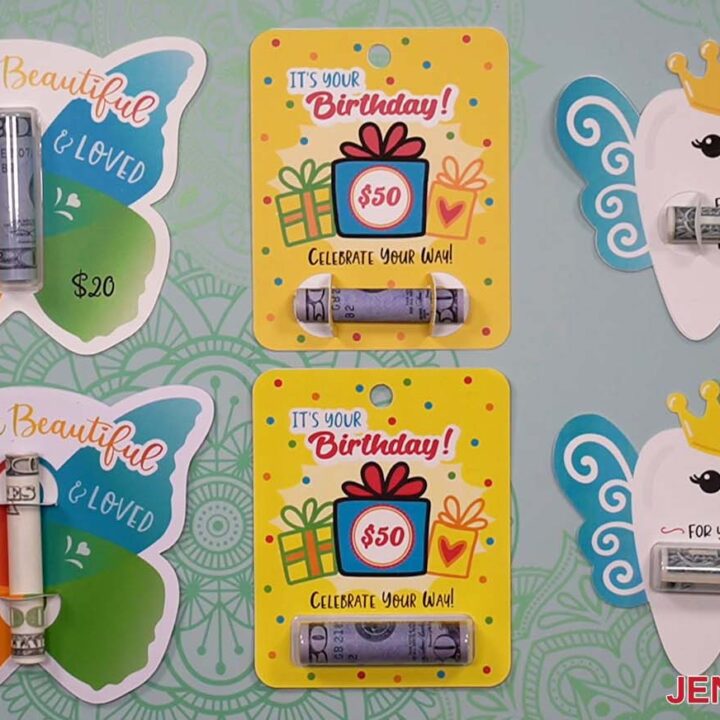
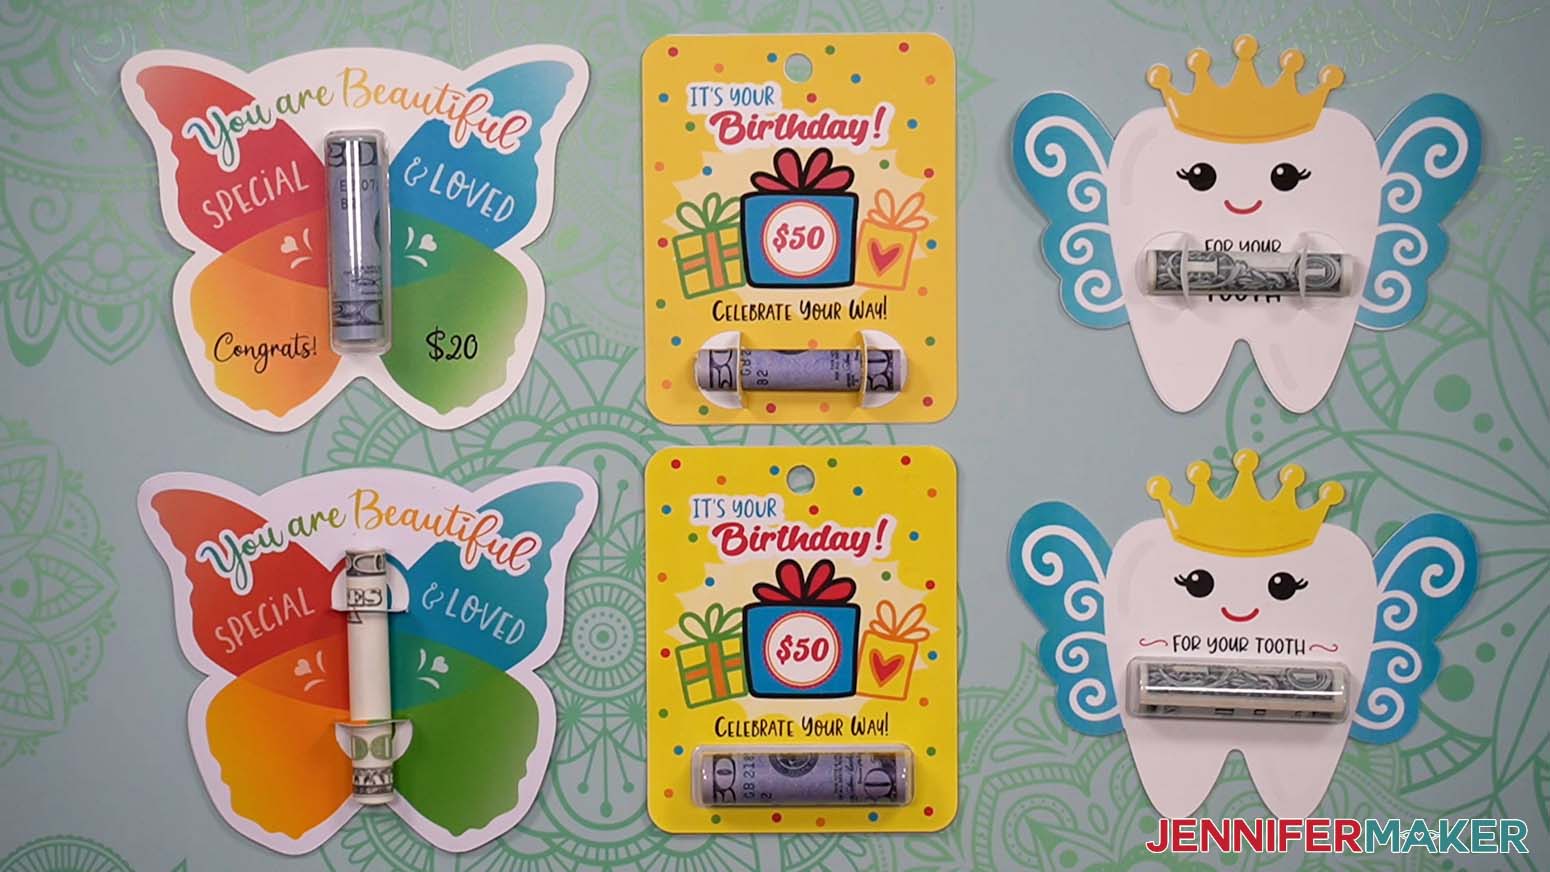
These DIY money holders are so handy, I wanted to give you options for different ocassions! So, I’ve included a design for a birthday gift, a multi use butterfly design that’s a great way to cheer up your gift recipient, and a tooth fairy card for those emergencies.
If you’ve looked at DIY money holder projects, the big question is, with or without the dome? Well, you can do either!
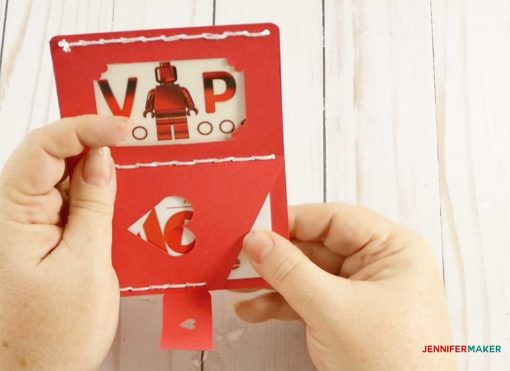
Each design has a version that is created just from printable cardstock and craft glue. I added cutouts that pop up, making a unique way to keep the dollar bills in place.
Or, if you want to try out the version with a plastic dome, I’ve included those files, too! In addition to cardstock and glue, you’ll also need a 2.75” x 0.75” plastic dome. That’s the perfect size for rolled up US bills. I found a few listings for them online (check the materials list!) but will also show you how to use one from a chapstick package. It’s the perfect way to upcycle!
No matter which version you pick, you can follow my customization tutorial to add a personal touch to your DIY money holders!
You can make these DIY money holders on both Maker and Explore machines, as long as you have a color printer! Cricut’s Print then Cut feature uses your printer to print images and registration marks on the same page. Then, the machine uses a light to find the registration box and calculates where to cut out the shapes using the black marks as reference points. I cut my cardstock on a green StandardGrip machine mat. Using a brayer to get a good stick is really important, too!
If you haven’t used the Print then Cut feature recently (or if it’s totally new to you!) I strongly recommend following the Calibration process to make sure your printer and cutting machine. It takes a few moments, some printer paper, and a blue LightGrip mat, but it’s worth it! Don’t worry, the directions are below.
If you’re looking for other creative ways to personalize cash gifts for different ocassions, visit my free project resource library! Here are some of my cute ideas to give the gift of cash:
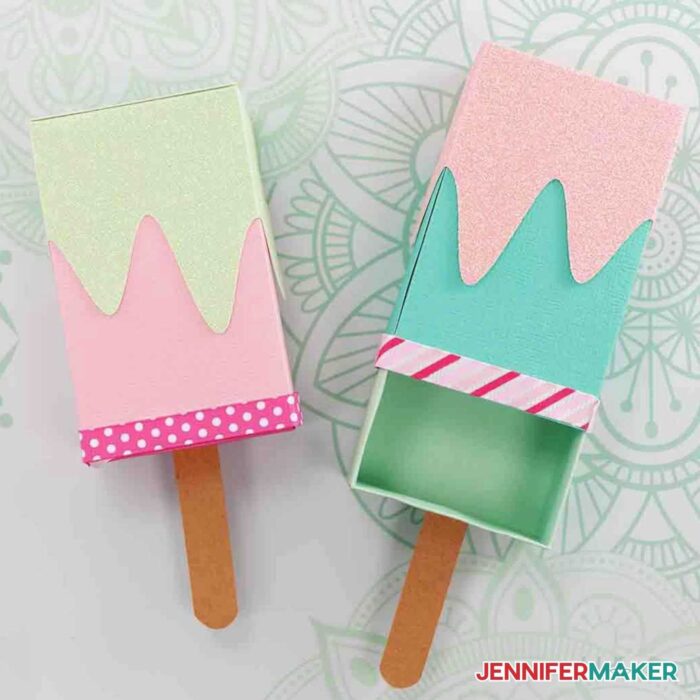
DIY Gift Card Holders – the ice cream treats make cute decor once you’re done, too!
Gift Card Holder Ideas in Leather
Pair the butterfly DIY money holder with a custom mortar board for a graduation gift for a college student.

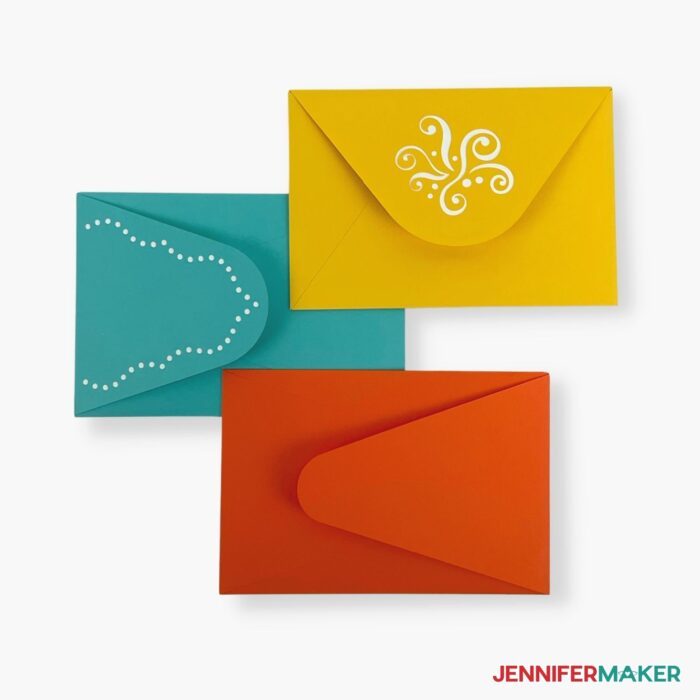
If you’re giving gift certificates, place them in a pretty envelope.
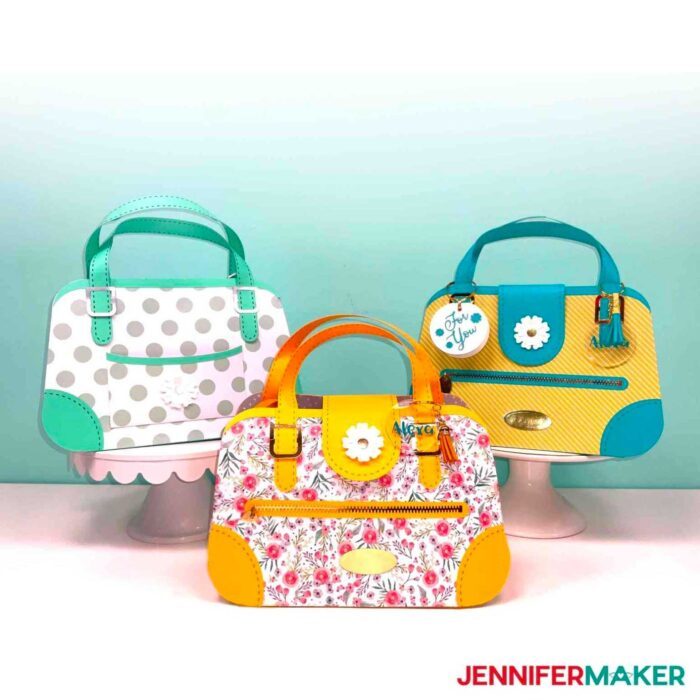
If you want to impress, make one of my designer paper purse gift bags to present your money holder cards!
Let me show you how easy it is to make DIY money holders with Cricut using my free designs! This post contains some affiliate links for your convenience (which means if you make a purchase after clicking a link I will earn a small commission but it won’t cost you a penny more)! Read my full disclosure policy.
Materials for DIY Money Holders
View my Amazon shopping list with the exact items we used to make this project
If you want to make your cards with the plastic domes, you can use a plain 2.75” x 0.75” Plastic Dome or a 2.75” x 0.75” Plastic Dome with Adhesive Tape, or one from a chapstick package. Make sure the flat plastic doesn’t cover the whole package, just a bit around the dome.
For any of the money card holder designs, you will need:
- One (1) (or Two (2) if you want to make the back plain) Sheet of 8.5″ x 11″ 65 lb White Cardstock, which you’ll print the front design on with an Inkjet Printer — I used the HP ENVY Photo 7155
- One (1) Sheet of 8.5″ x 11″ or 12″ x 12″ 65-80 lb designer or Solid Core Cardstock — optional, for the back of the card
- A method to cut your materials — I used the amazing Cricut Maker 3, but you can also use the Cricut Maker or the Cricut Explore Series machines with your Fine-Point Blade
- A Cricut Green StandardGrip Machine Mat 12″ x 12″ for the money holder cards and a Cricut Blue LightGrip Machine Mat 12″ x 12″ for the optional calibration with printer paper
- Tools including Craft Glue (I used Bearly Precision), a Brayer, and a Scraper
- Design #406 (My free SVG/PDF/PNG design files are available in my free resource library – get the password by filling out the form at the bottom of this page)
How to Make DIY Money Holders
DIY Money Holders
Learn how to make DIY money holders to use as fun cards for giving money to someone special!
Materials
- One (1) (or Two (2) if you want to make the back plain) Sheet of 8.5" x 11" 65 lb White Cardstock
- One (1) Sheet of 8.5" x 11" or 12" x 12" 65-80 lb Patterned or Solid Core Cardstock — optional, for the back of the card
- 2.75” x 0.75” Plastic Dome optional, -OR-
- 2.75” x 0.75” Plastic Dome Option with Adhesive Tape optional, -OR-
- Plastic dome from a chapstick package, optional — make sure the flat plastic doesn't cover the whole package, just a bit around the dome
- Design #406 (My free SVG/PDF/PNG design files are available in my free resource library - get the password by filling out the form at the bottom of this page)
Tools
- A method to cut your materials — I used the amazing Cricut Maker 3, but you can also use the Cricut Maker or the Cricut Explore Series machines with your Fine-Point Blade
- Inkjet Printer — I used the HP ENVY Photo 7155
- Cricut Green StandardGrip Machine Mat 12" x 12"
- Craft Glue
- Brayer
- Scraper
- Cricut Blue LightGrip Machine Mat 12" x 12" (optional) — for calibration
- Printer Paper (optional) — for calibration
Instructions
STEP 1: PREPARE TO PRINT THEN CUT
If you've never used the Print Then Cut feature with your specific printer - or if it's been a while - calibrate your machine's settings before starting.
In a new Cricut Design Space window, click the three lines in the upper left corner, then select "Calibration."
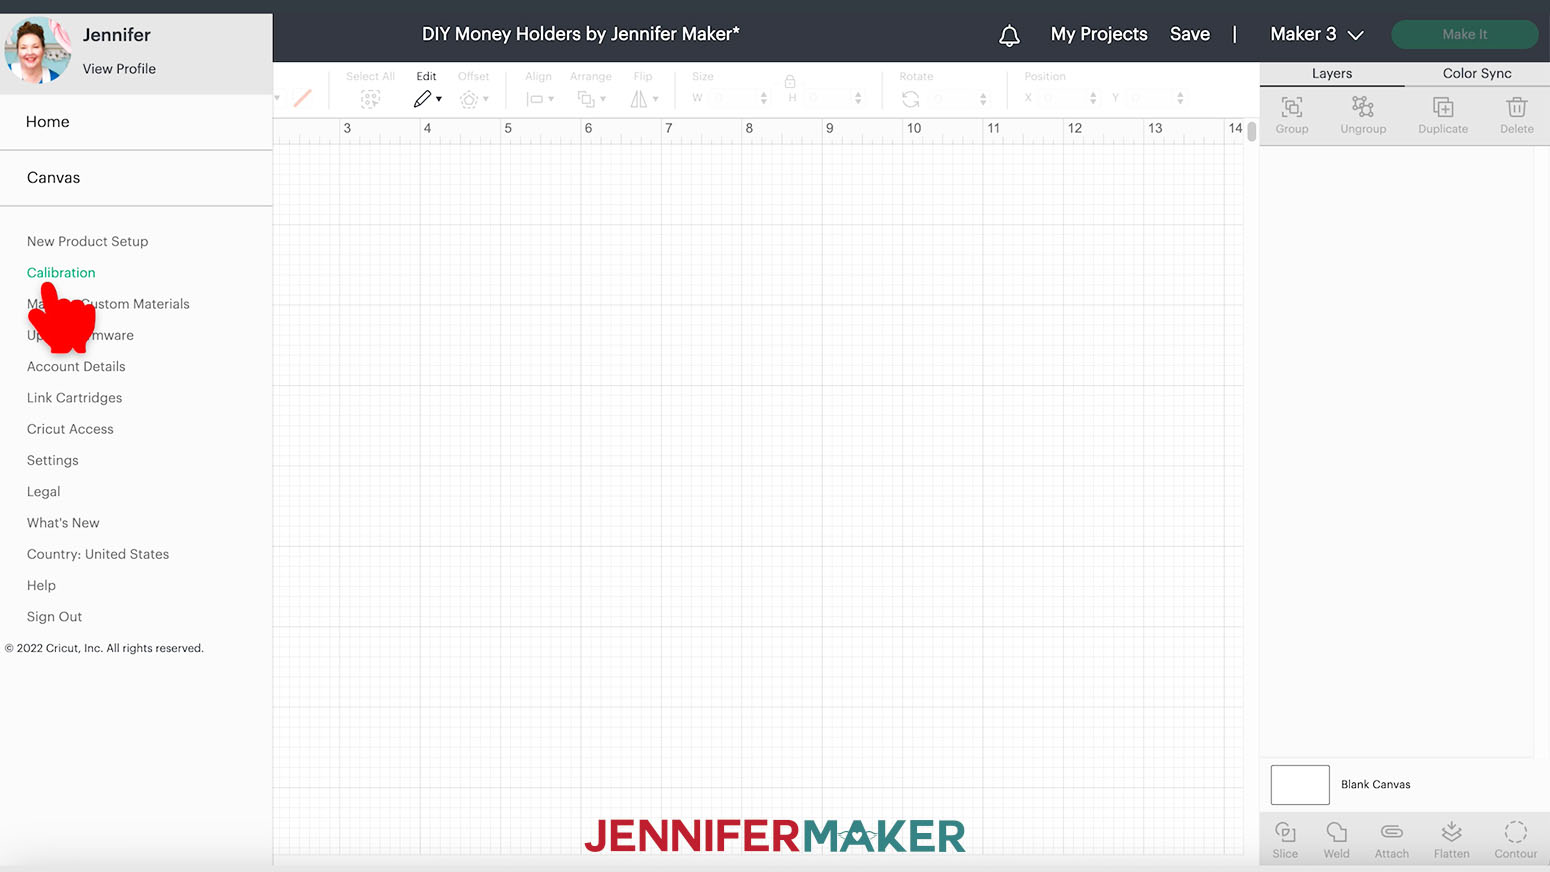
Select "Print Then Cut." Then, follow the prompts to select your printer and print a test sheet.
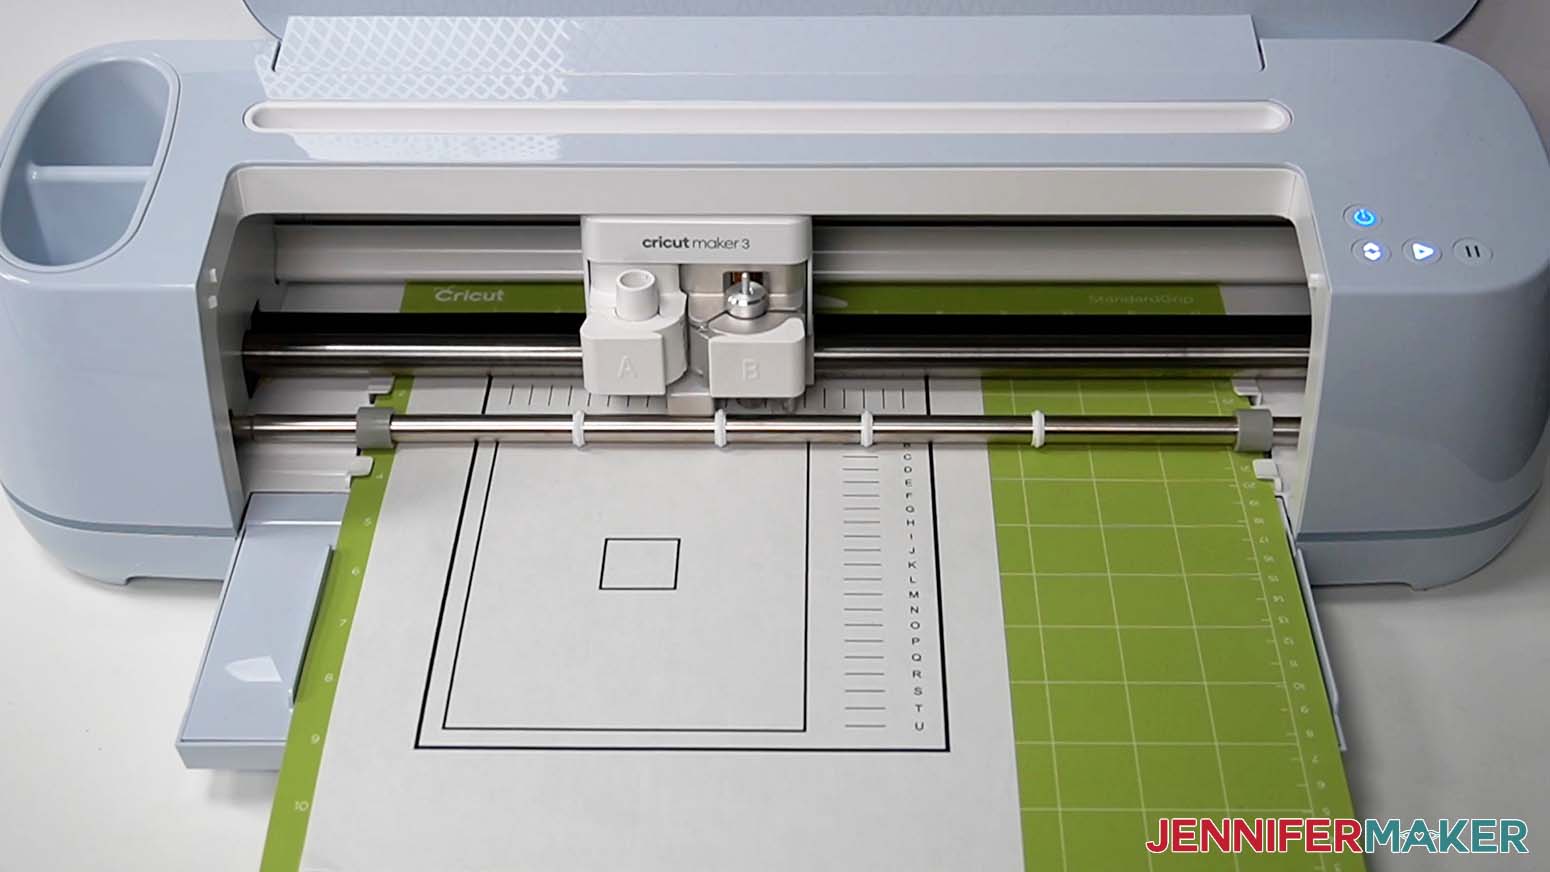
Place the test sheet on your machine mat following the instructions and load it into your Cricut.
Your Cricut will perform many cuts that may or may not line up with the coded lines.
IMPORTANT: Do NOT unload your mat until the Calibration test is complete.
Answer the questions in Design Space about the cut results. If the calibration was off, you may need to print another test sheet and check the settings once more.
Keep working on the calibration process until your cuts look good.
Once your Calibration is successful, your Cricut is ready!
Also, clean the print heads on your inkjet printer for the best print quality. Consult the printer's manual for the specific steps as they vary.
STEP 2: GET MY FREE DIY MONEY HOLDERS DESIGNS
Next, download my free DIY Money Holders PNG/SVG/PDF files from my free resource library. It's Design #406. It contains folders for three designs' fronts and backs with versions for using a plastic dome or just cardstock to hold the money in place:
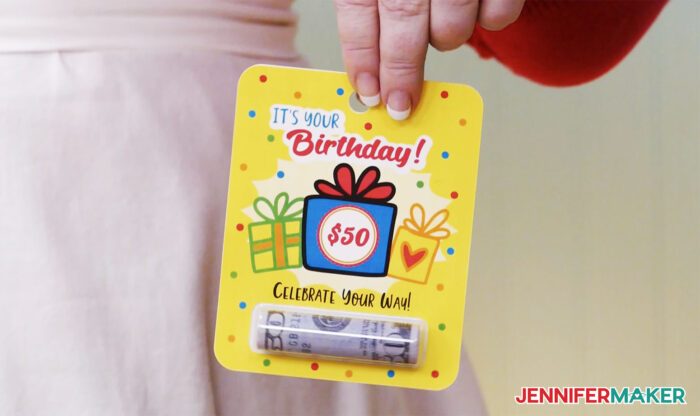
1. Birthday Card (4" x 5")
- Cardstock
Front: money-holders-birthday-front-cardstock-jennifermaker-PNG
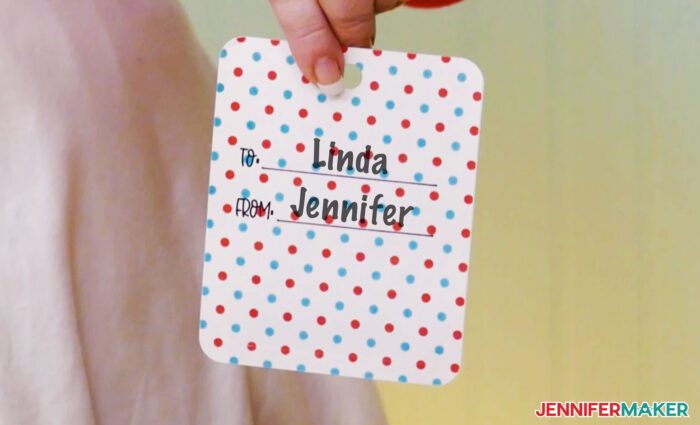
Back: money-holders-birthday-back-cardstock-jennifermaker-SVG
- Plastic Dome
Front: money-holders-birthday-front-plastic-jennifermaker-PNG
Back: money-holders-birthday-back-plastic-jennifermaker-SVG
2. Butterfly-Shaped Card (6" x 5")
- Cardstock
Front: money-holders-butterfly-front-cardstock-jennifermaker-PNG
Back: money-holders-butterfly-back-cardstock-jennifermaker-SVG
- Plastic Dome
Front: money-holders-butterfly-front-plastic-jennifermaker-PNG
Back: money-holders-butterfly-back-plastic-jennifermaker-SVG
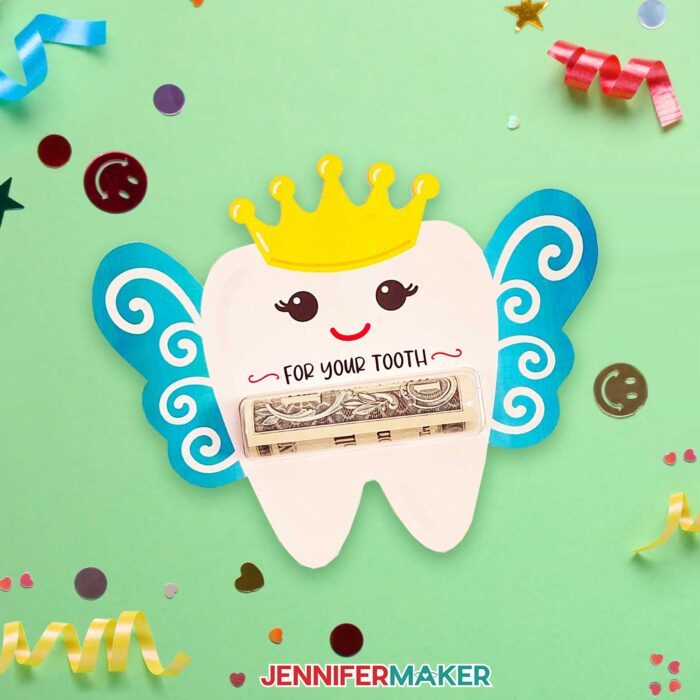
3. Tooth Fairy Card (6" x 4.8")
- Cardstock
Front: money-holders-tooth-front-cardstock-jennifermaker-PNG
Back: money-holders-tooth-back-cardstock-jennifermaker-SVG
- Plastic Dome
Front: money-holders-tooth-front-plastic-jennifermaker-PNG
Back: money-holders-tooth-back-plastic-jennifermaker-SVG
There is also a folder containing PDF files that you can print and cut by hand.
I will show you how to make the cardstock-only Birthday design and the Butterfly with a plastic dome. You can follow the same steps to make the other design variations.
NOTE: When placing the PNG files on your Canvas, they will come in very large. That's due to the way Design Space uploads PNGs, but it's easy to fix. All you need to do is resize them according to the directions below.
STEP 3: PREPARE AND CUT YOUR DESIGN
Birthday Card: Cardstock-Only Variation
For each card, you'll need the included PNG for the front and the SVG for the back.
Upload the SVG file as you normally would.
If you are not sure how to upload an SVG cut file to Cricut Design Space, watch this helpful video training series I made.
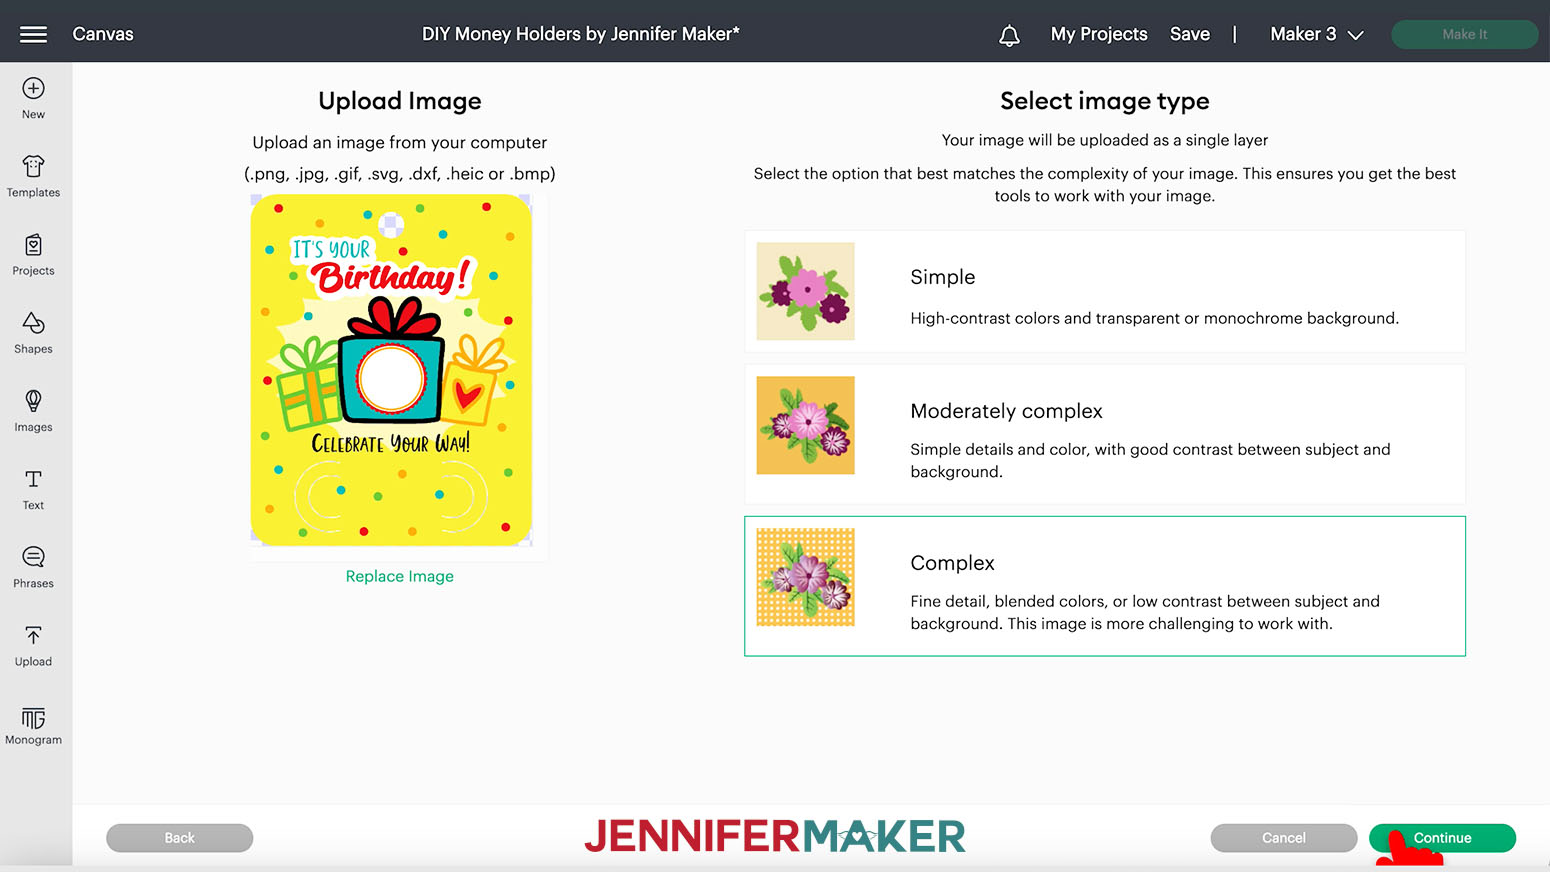
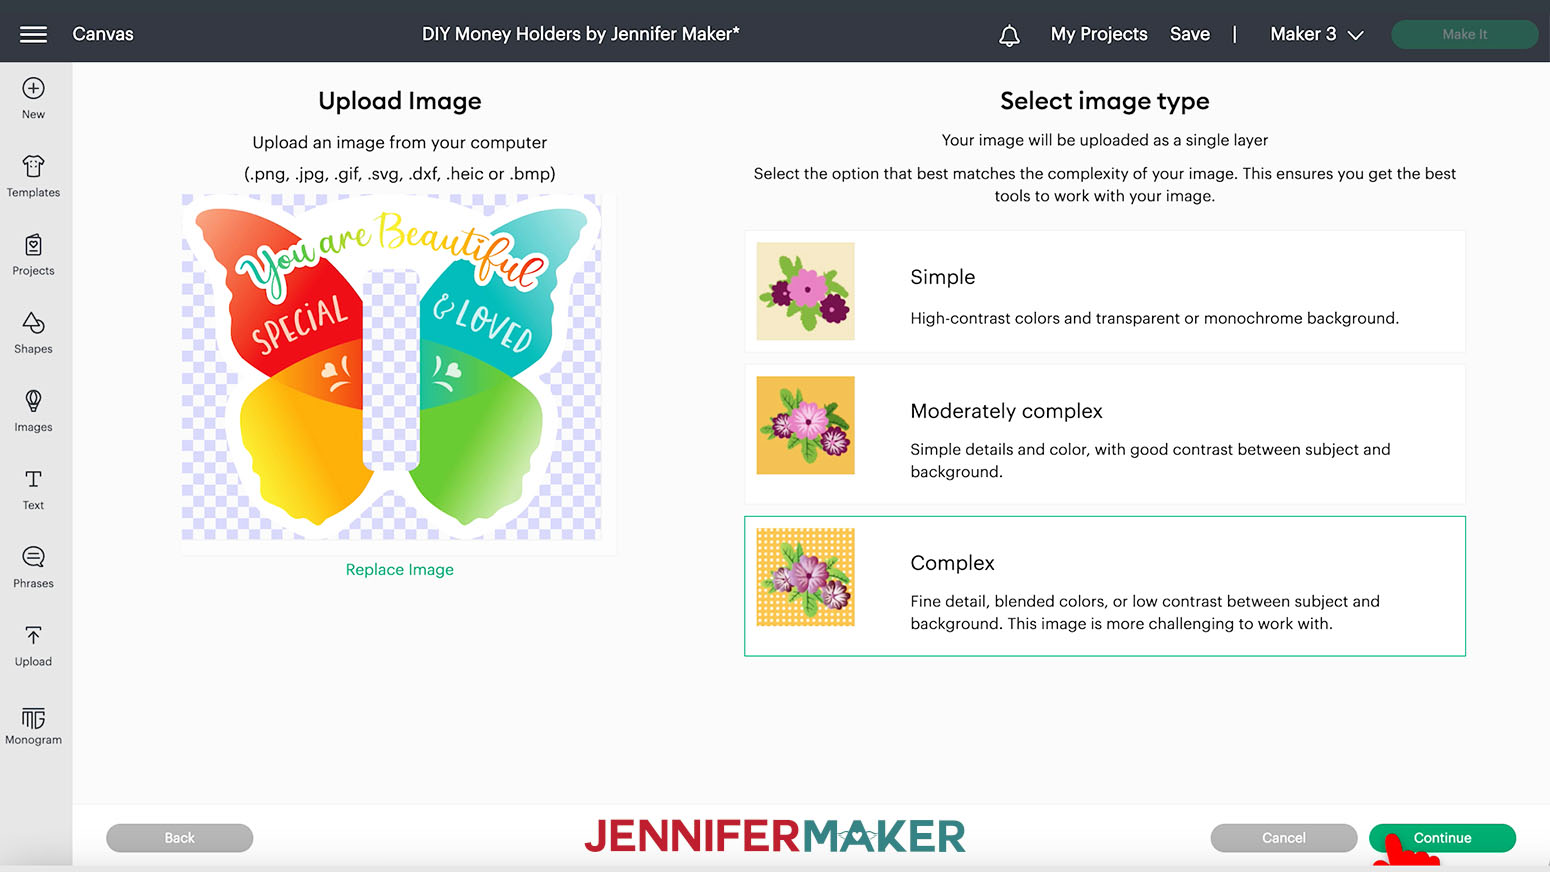
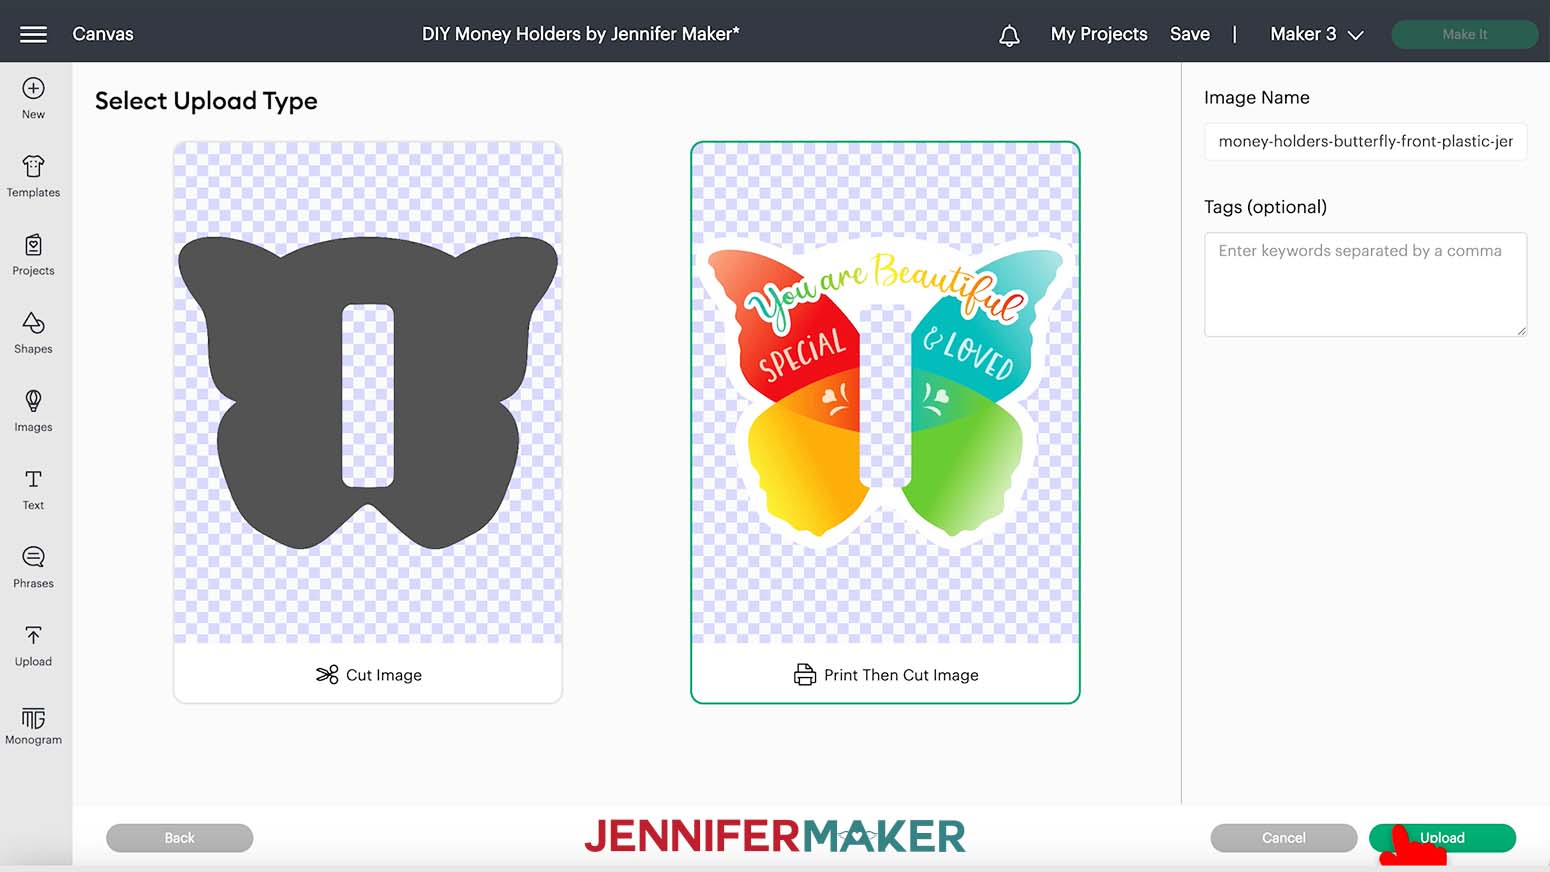
For the PNG, use the same upload steps until you reach a screen with the PNG on the left.
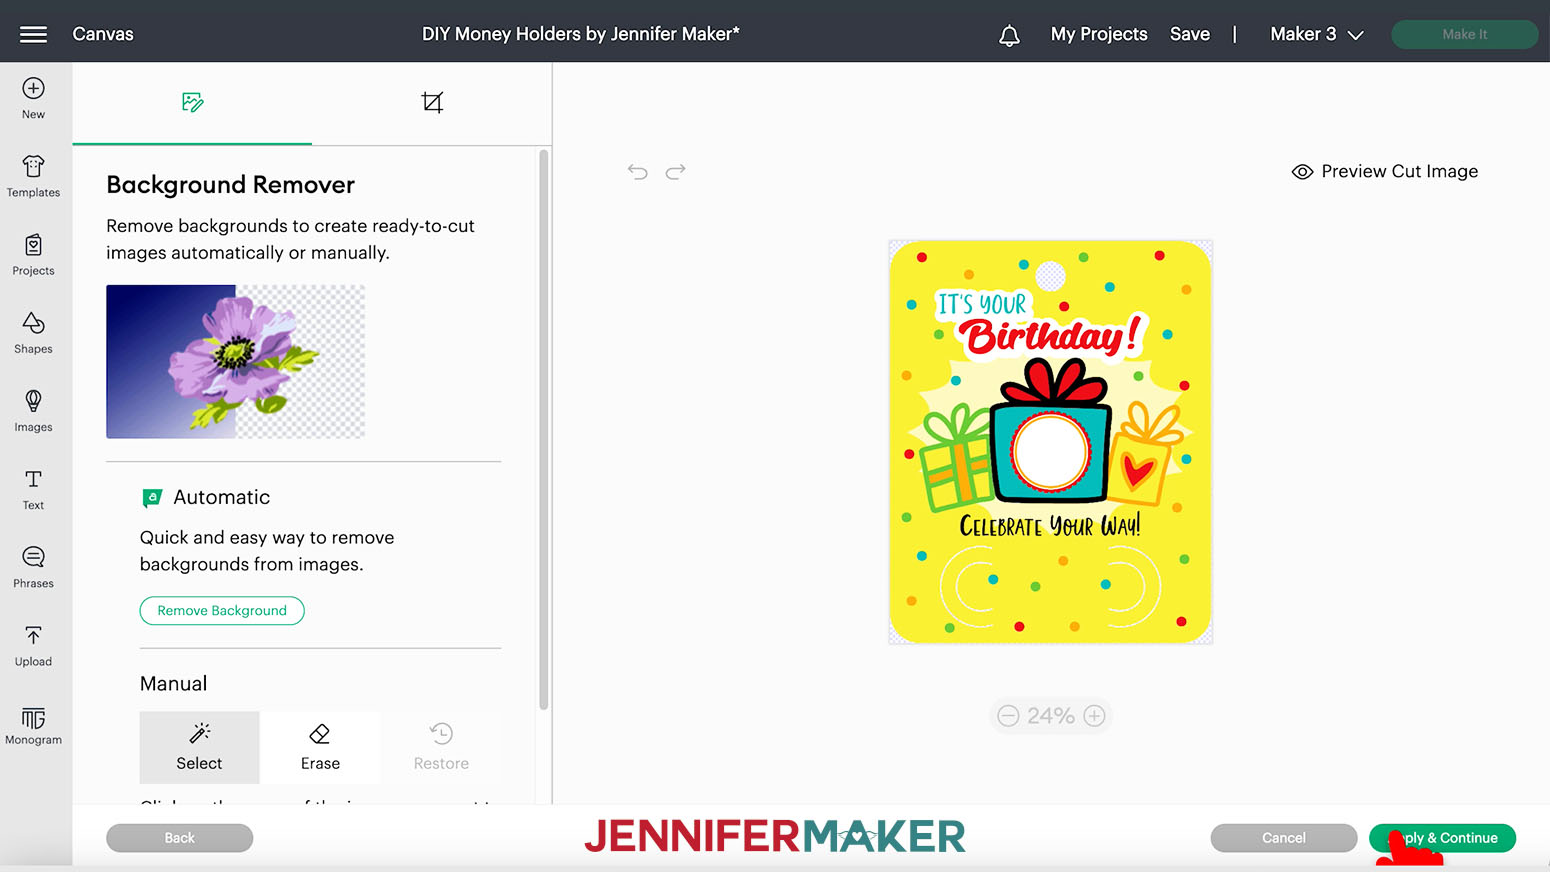
Select "Complex" for the image type and then click "Continue" in the lower right corner.
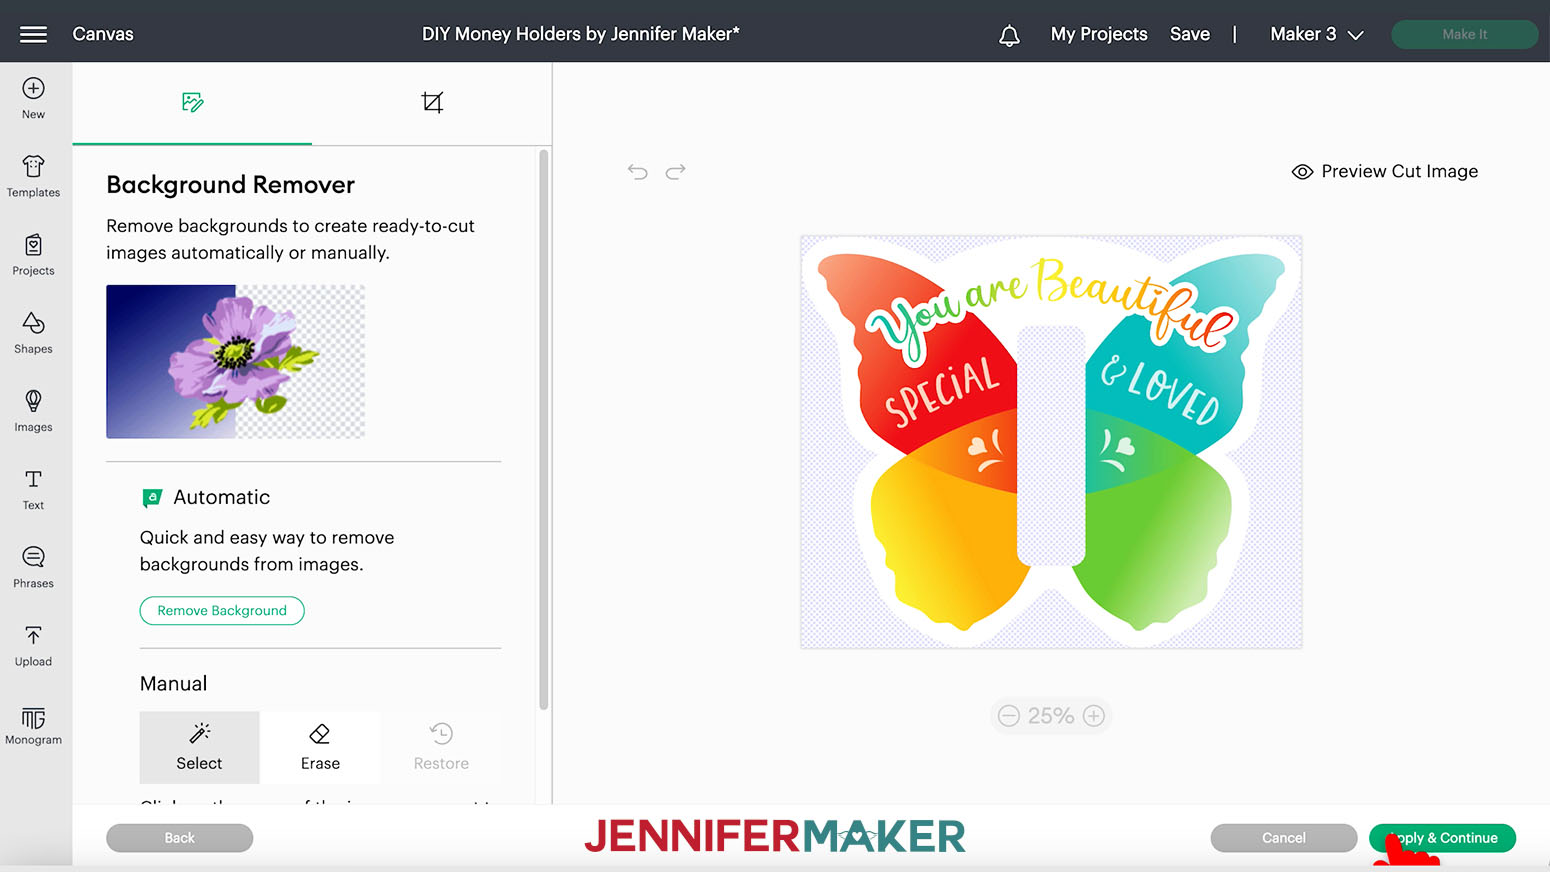
You do not need to do anything on the next screen, so click "Apply & Continue."
For Upload Type, select "Print Then Cut" and click "Upload."
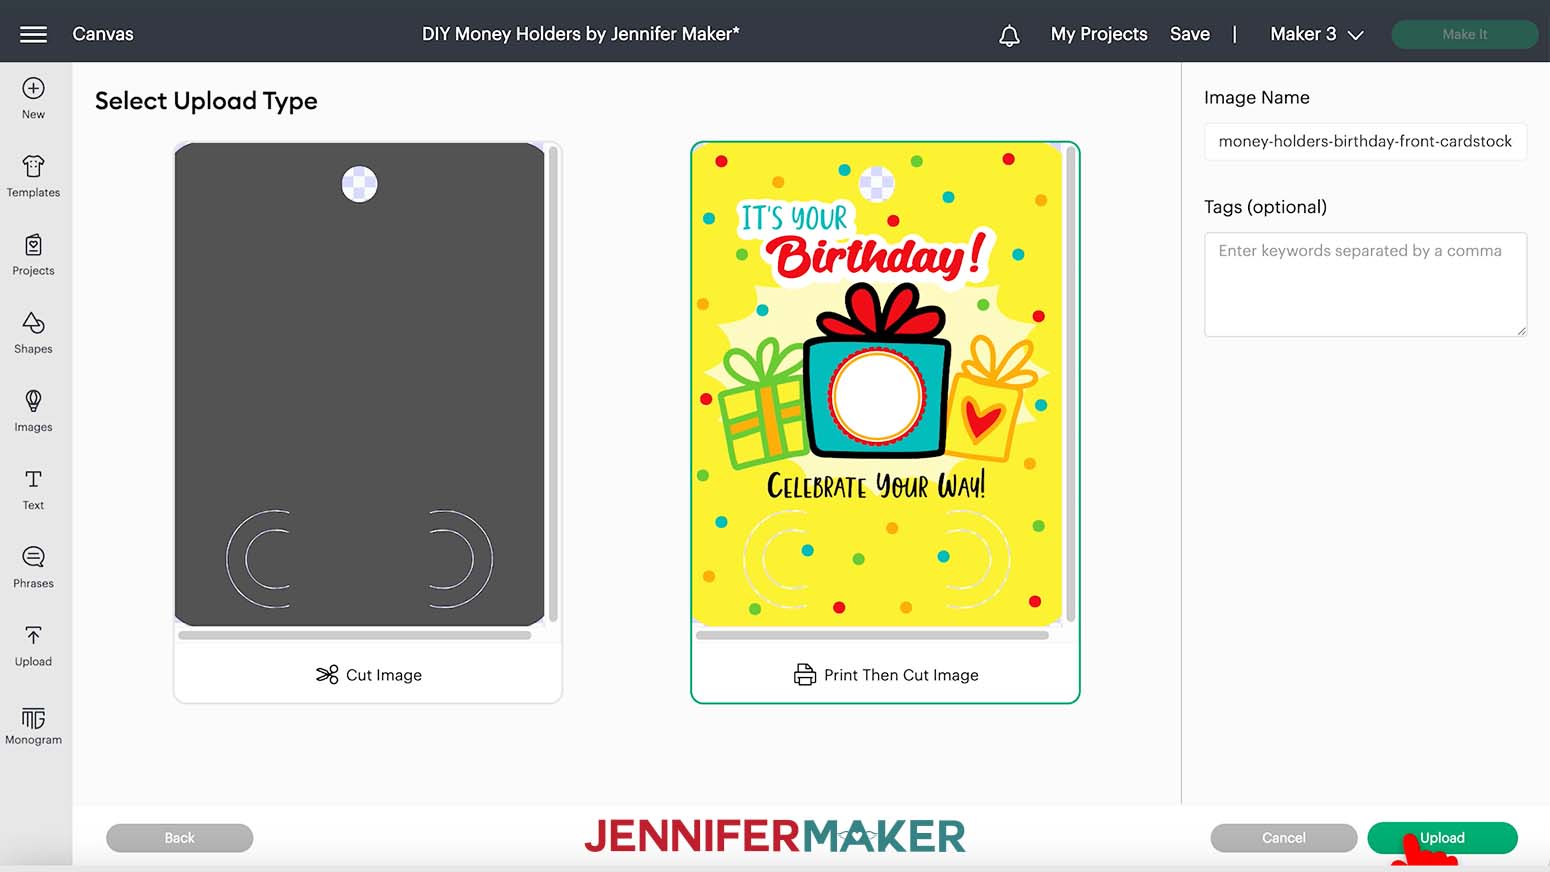
You should now see both your Birthday designs in your Recent Uploads. Select both and click "Add to Canvas."
Here is what my Birthday cardstock-only designs look like on the Canvas.
You can zoom out to see all of the design by clicking on the minus (-) sign on the lower left.
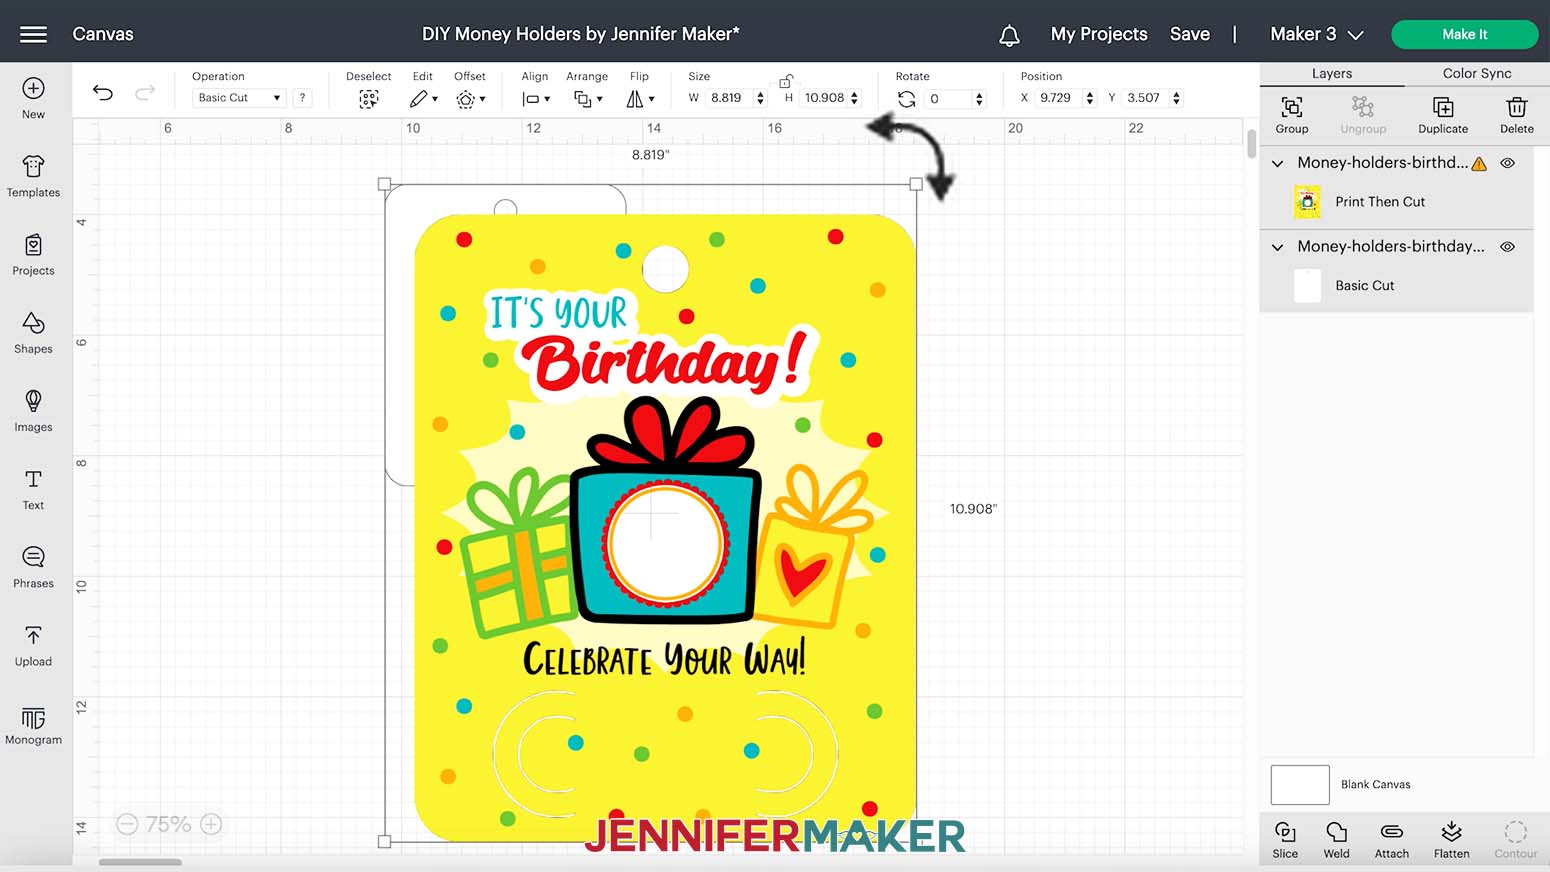
As you can see, the design for the front is much larger than the one for the back. That's because of the way Design Space uploads PNGs, but it's easy to fix and make them match.
Click on the back layer to find the correct dimensions for the design, which is 4" wide by 5" tall for the Birthday card. Select the front layer and make sure the lock icon is closed at the top. Type "4" in the Width (W) field at the top of your screen and press Enter. This will make the height very close to 5". Now the front and back are the same size!
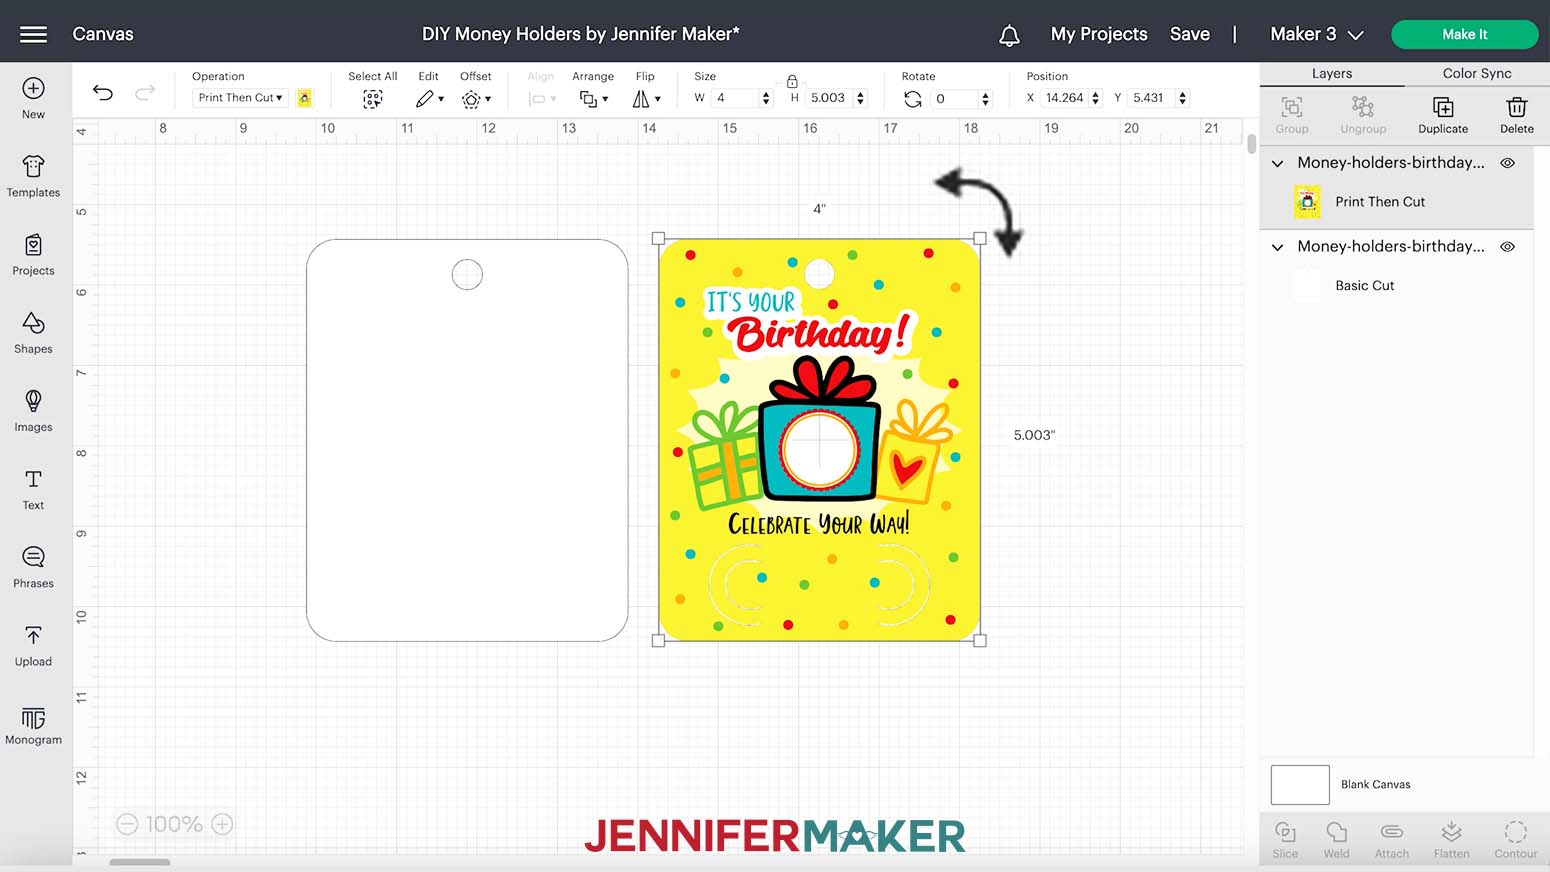
I have designed all of these files to perfectly fit a rolled up dollar bill, so I do not recommend resizing them once you've fixed the front to match the back.
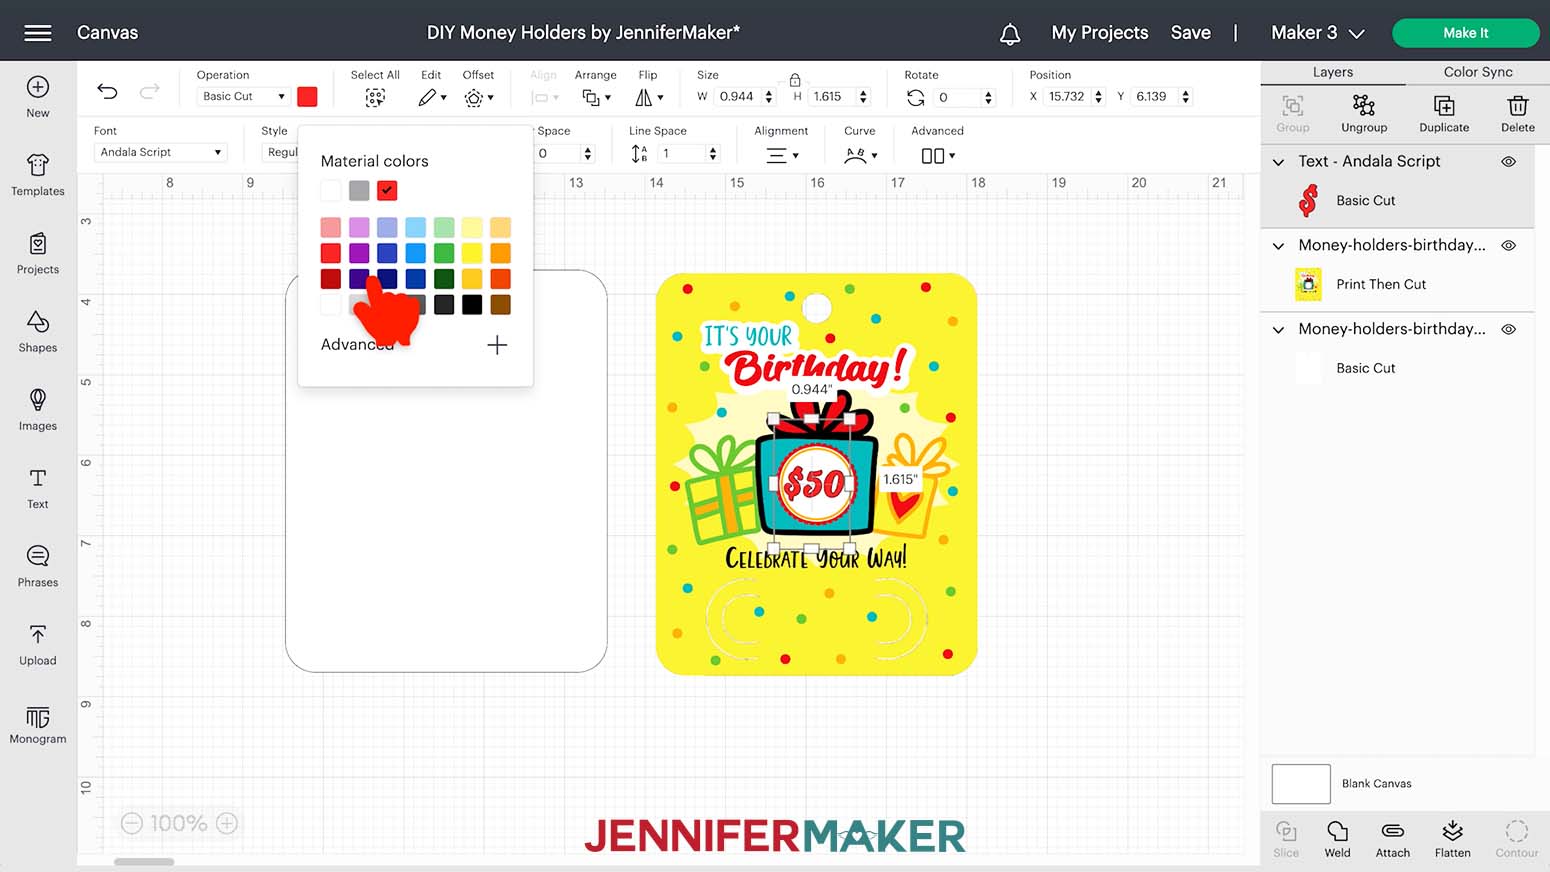
Now you can customize the design by adding a dollar amount inside the white circle on the present.
Click the Text icon on the left hand side of the screen. A box with "Text" highlighted in it will appear on the Canvas. Without clicking anything else, type in your desired amount. I'll add "$50." Then, click the box that says "Cricut Sans" under Font in the top menu to see your font options.
Scroll through and click a font name to see how your text looks until you find one you like. I chose Andala Script, which you can download for free for personal use from FontBundles.net. Remember to look in the System section for downloaded fonts.

Make sure your font choice doesn't have a price next to it to avoid a charge when you go to cut the design.
Move the text box onto the circle and center it as best you can.
Click and drag a corner of the text's bounding box to fit it in the white circle.
I also changed the color swatch at the top to red to match the word "Birthday" in my design.
Now we need to adjust the design so our machine knows which parts to print and which parts to cut.
Hold Shift and click the text layer and the Print Then Cut front layer. Click "Flatten" at the bottom of the Layers Panel.
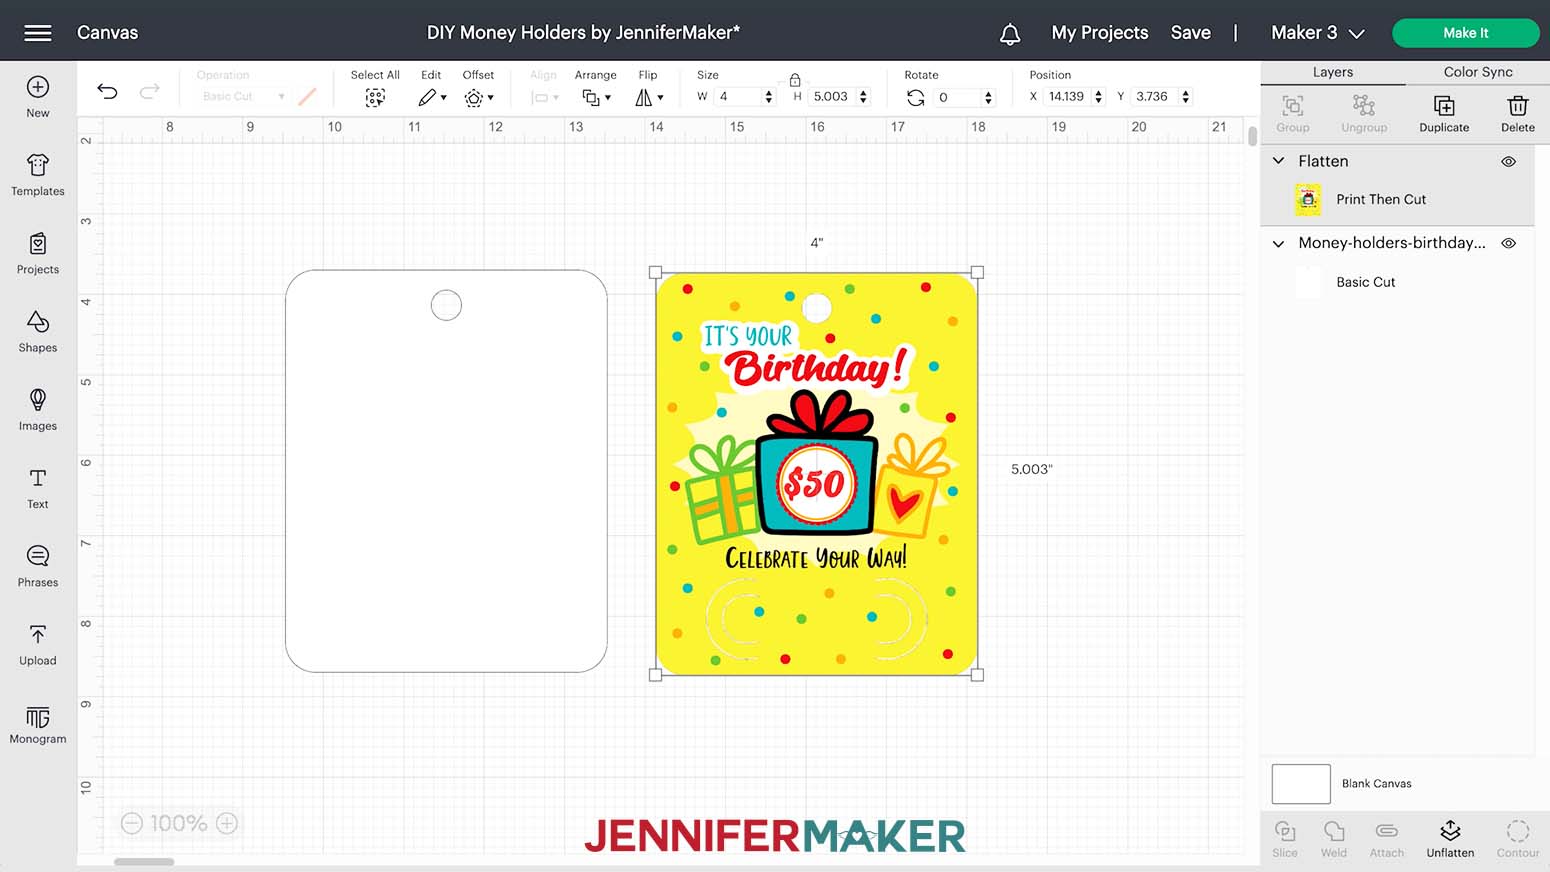
You should now see a single Print Then Cut layer for the front of your card. Since the cutouts to hold the money are transparent, the Cricut will make cuts allowing you to pop them up.
Your card is ready to cut!
Make sure the correct machine is selected, then click "Make It" in the upper right corner.
If prompted, click "On Mat" and "12 x 12" on the pop up.
On the Prepare screen, check that your first mat says Print Then Cut and your second mat says Basic Cut. And that the Material Size for your first mat is 8.5" x 11" and your second mat is the size of your back layer's material. You may also need to select "On Mat" for the Material Load Type for your second mat. Then, select your first mat again and click Continue in the lower right.
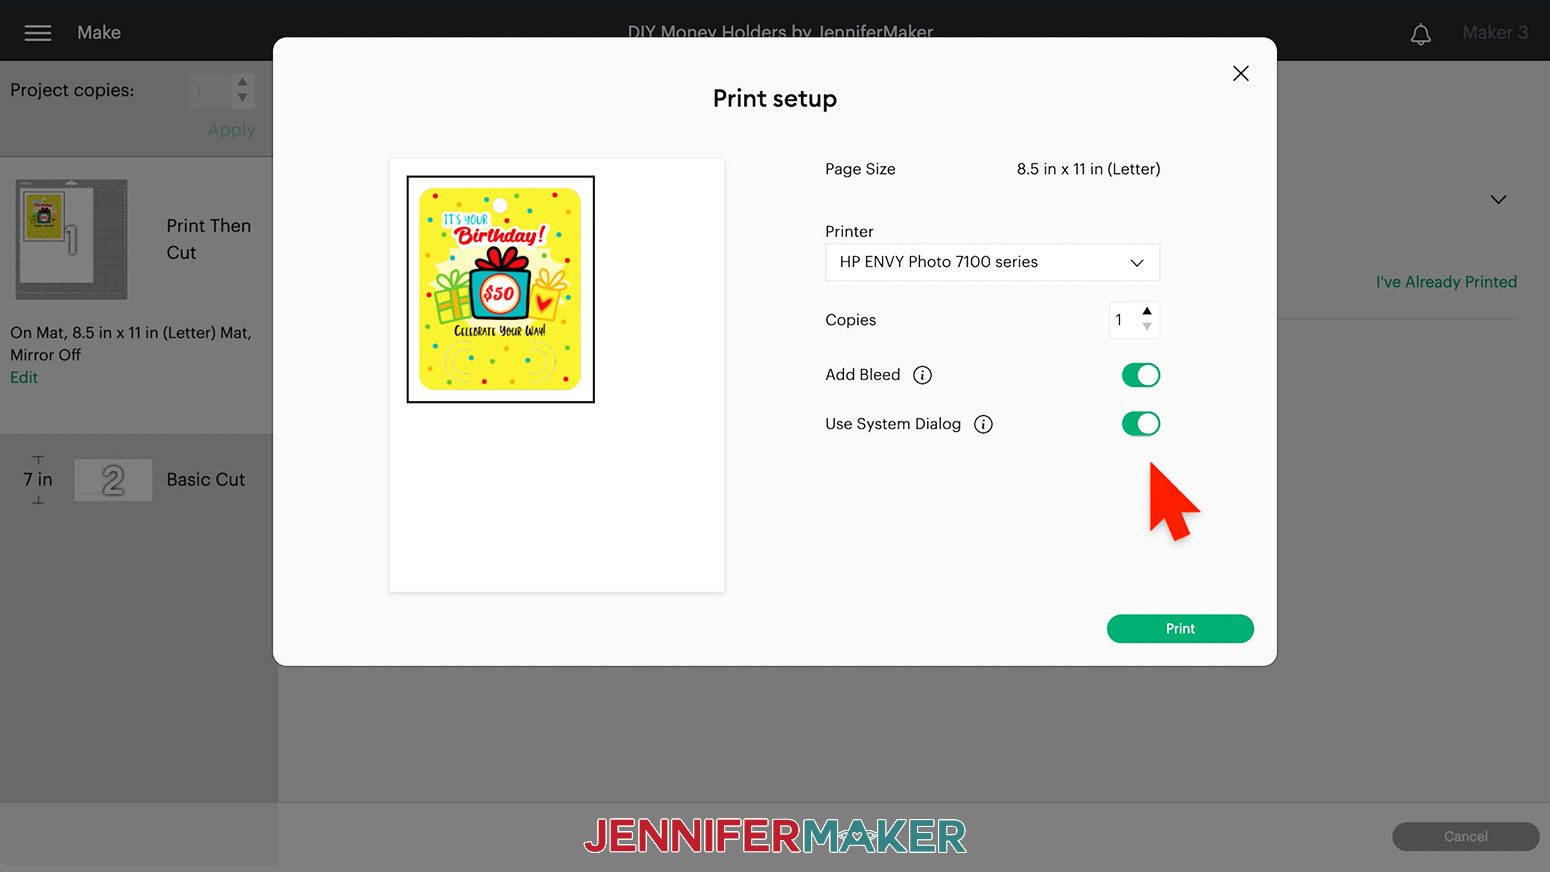
Click the green Send to Printer button to open the Print Setup window. Make sure your printer is listed and the sliders next to "Add Bleed" (a small border around each image that allows for more precise cutting) and "Use System Dialog" are green. Then click Print.
 The print screen for your printer will appear, but it might be hidden behind Design Space. Minimize your Cricut window to see the print settings.
Your window will look different depending on your computer and printer. Make sure your printer is listed in the window. Set the paper type to plain and the print quality to the highest available. Put your cardstock in the printer. Press Print.
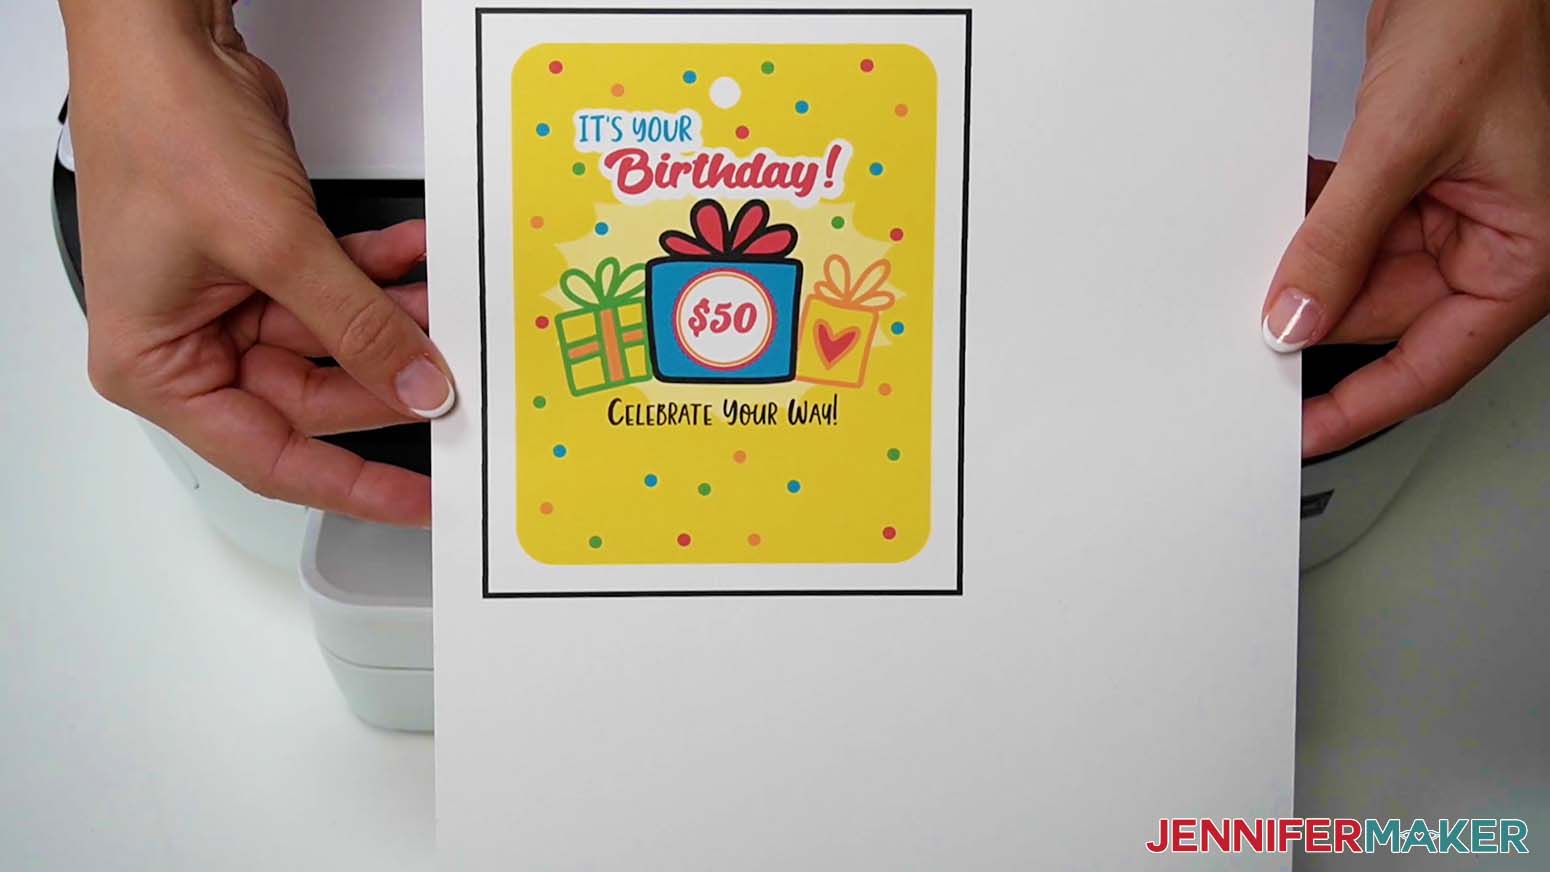
After your money holder design has printed, let it dry to avoid any smears during the cutting process.
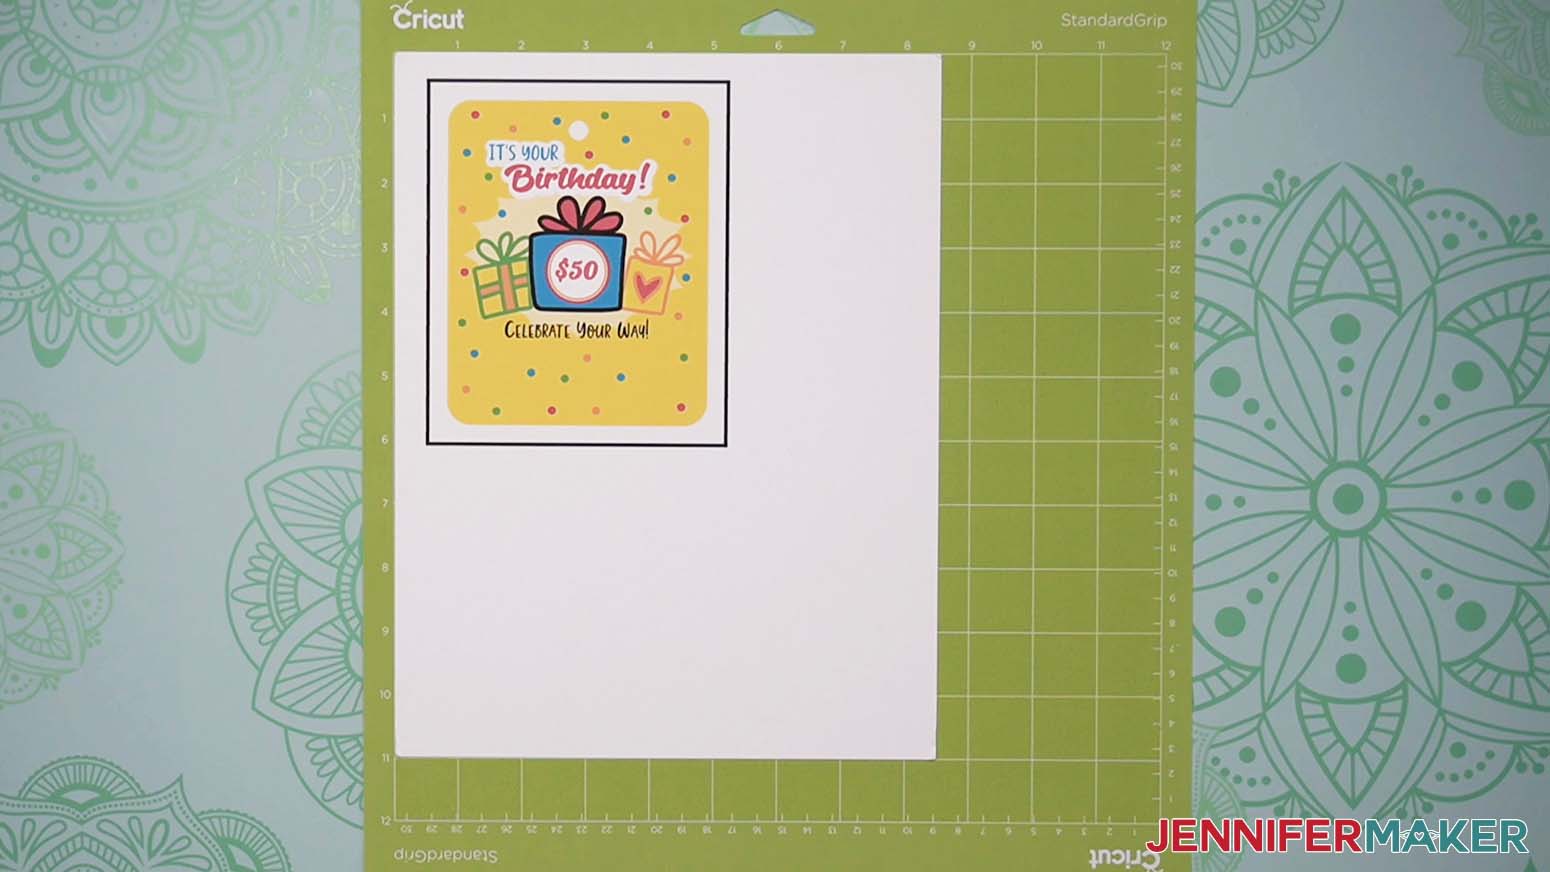
See the black box around my design? This is called a registration box and is used by your Cricut machine to tell it exactly where to cut your project.
On your Make Screen, select the Medium Cardstock setting and change the Pressure to "More" for a cleaner cut. Check the "Remember material settings" box.
Place your printed sheet on your green StandardGrip machine mat like it is on the screen and use a brayer to make sure it's fully adhered.
Check that your Fine-Point Blade is clean and in Clamp B.
Then, load the mat into the machine and press the flashing button to cut your design.
When the cut is finished, unload the mat, flip it over, and roll it back to release the cardstock. This helps prevent the material from curling and ripping. Use your scraper to remove any small pieces of cardstock that are left on the mat.
For the back of your card, place your chosen cardstock face up on your mat and adhere it with your brayer.
Follow the same steps as above to cut and remove your design.
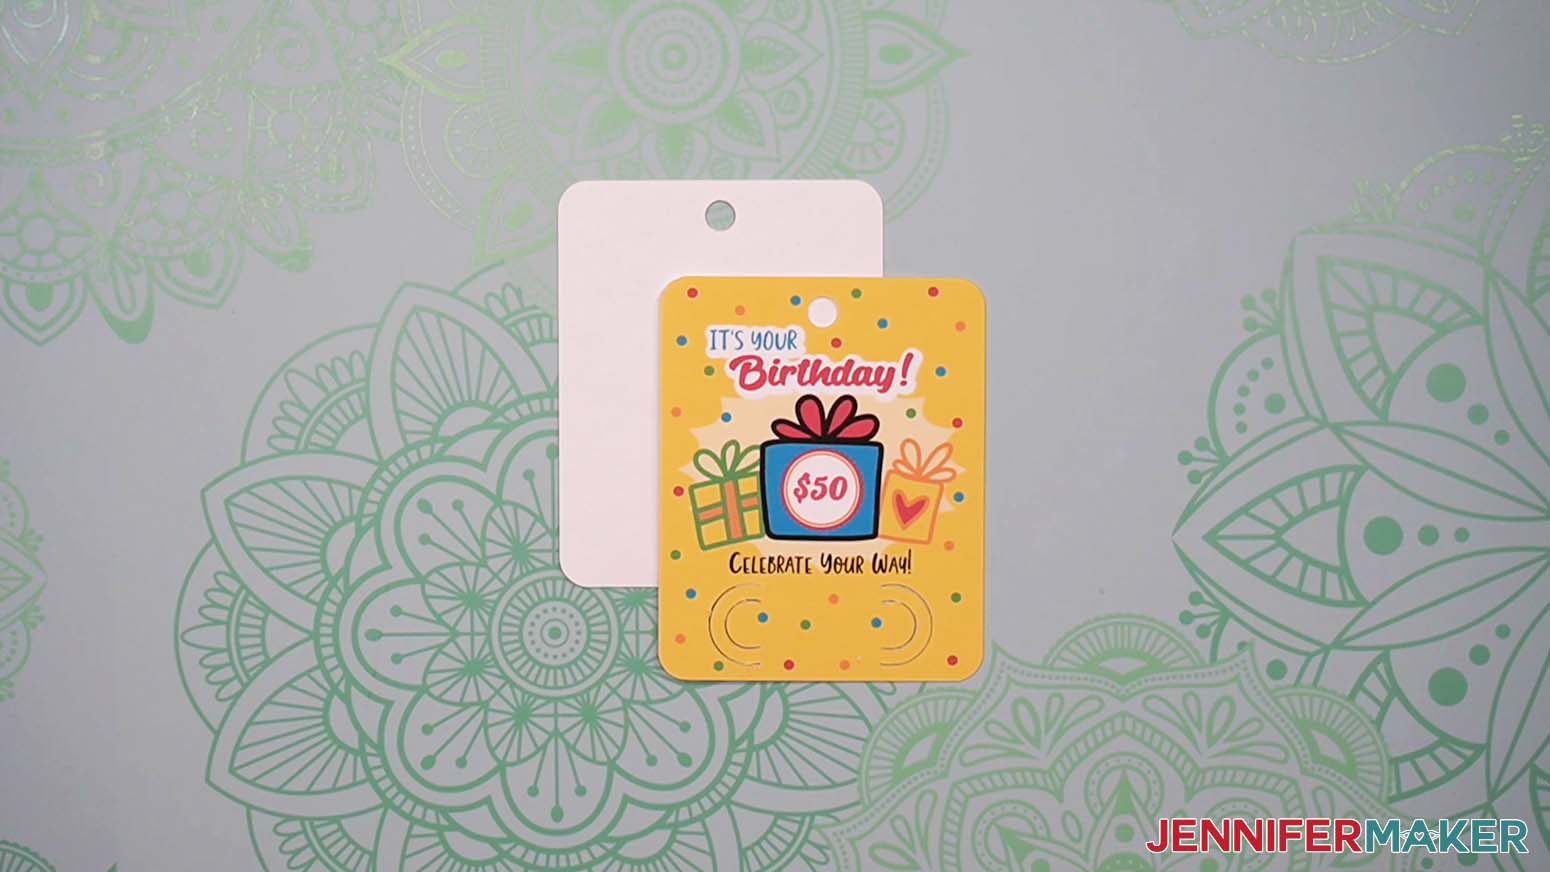
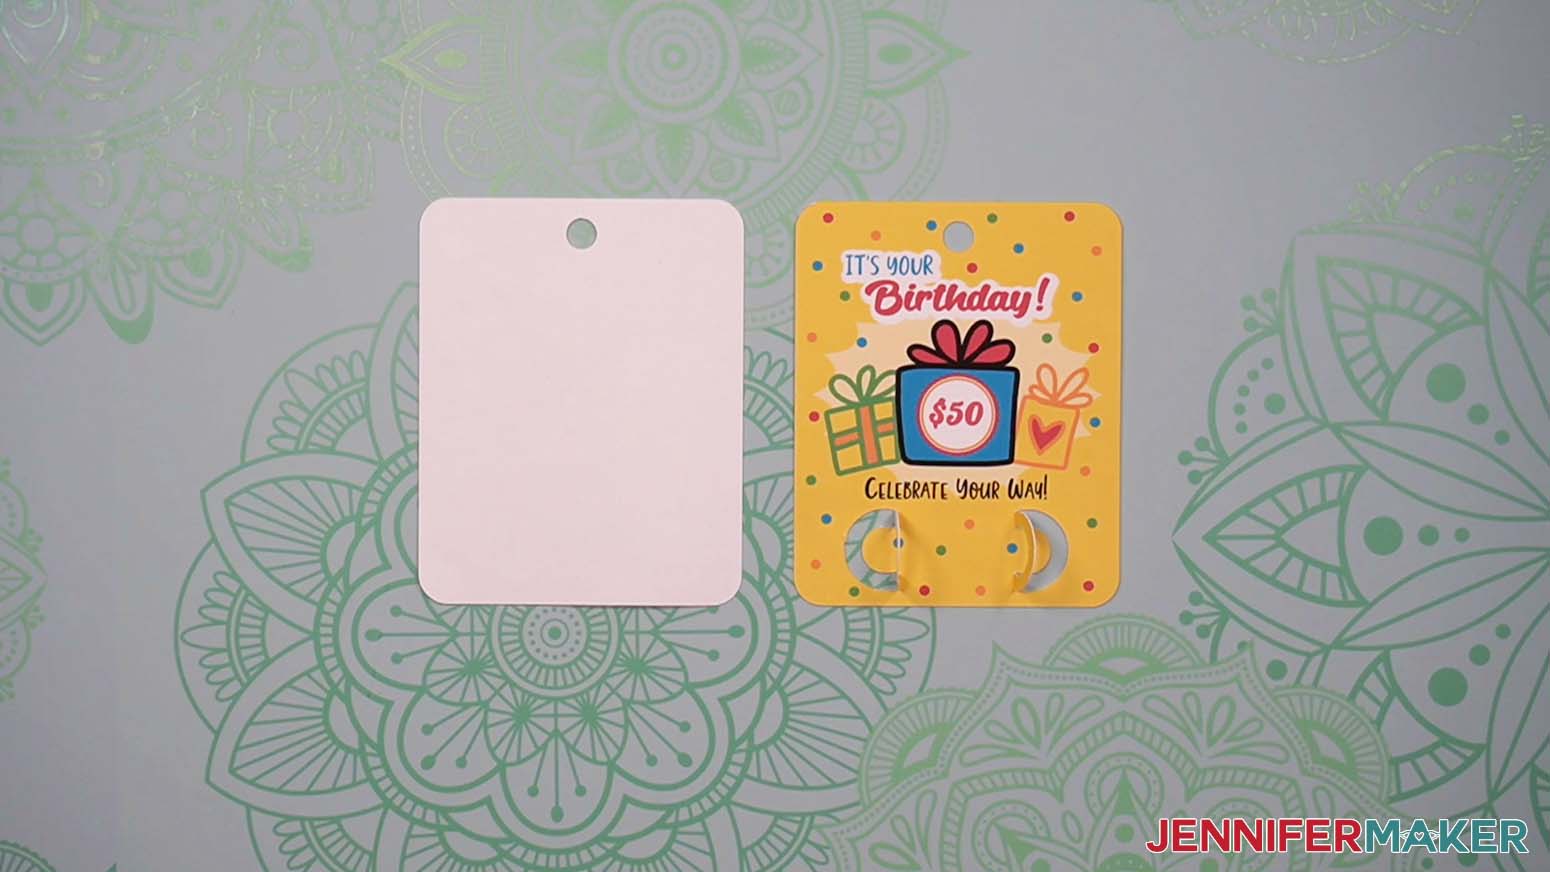
Here's what the cut pieces for the front and back of my Birthday cardstock card look like.
Butterfly-Shaped Card: Plastic Dome Variation
For each card, you'll need to use the PNG for the front and the SVG for the back.
Upload the SVG file as you normally would.
If you are not sure how to upload an SVG cut file to Cricut Design Space, watch this helpful video training series I made.
For the front PNG image, use the same upload steps until you reach a screen with the PNG on the left.
Select "Complex" for the image type and then click "Continue" in the lower right corner.
You do not need to do anything on the next screen, so click "Apply & Continue."
For Upload Type, select "Print Then Cut" and click "Upload."
You should now see your butterfly designs in your Recent Uploads. Select both and click "Add to Canvas."
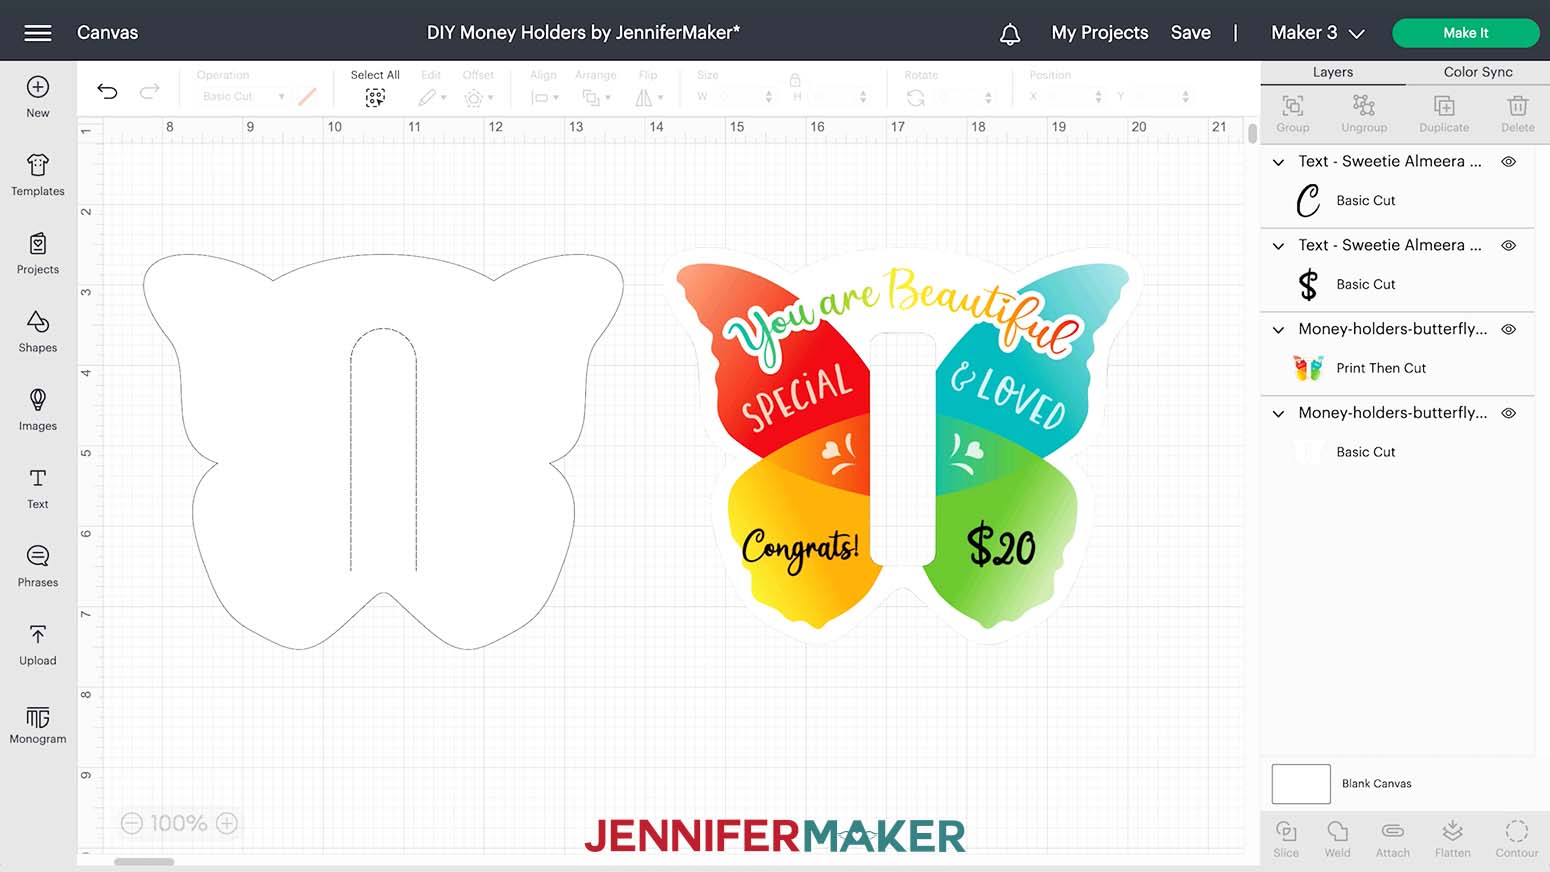
Here is what my butterfly designs for a domed money holder look like on the Canvas.
You can zoom out to see all of the design by clicking on the minus (-) sign on the lower left.
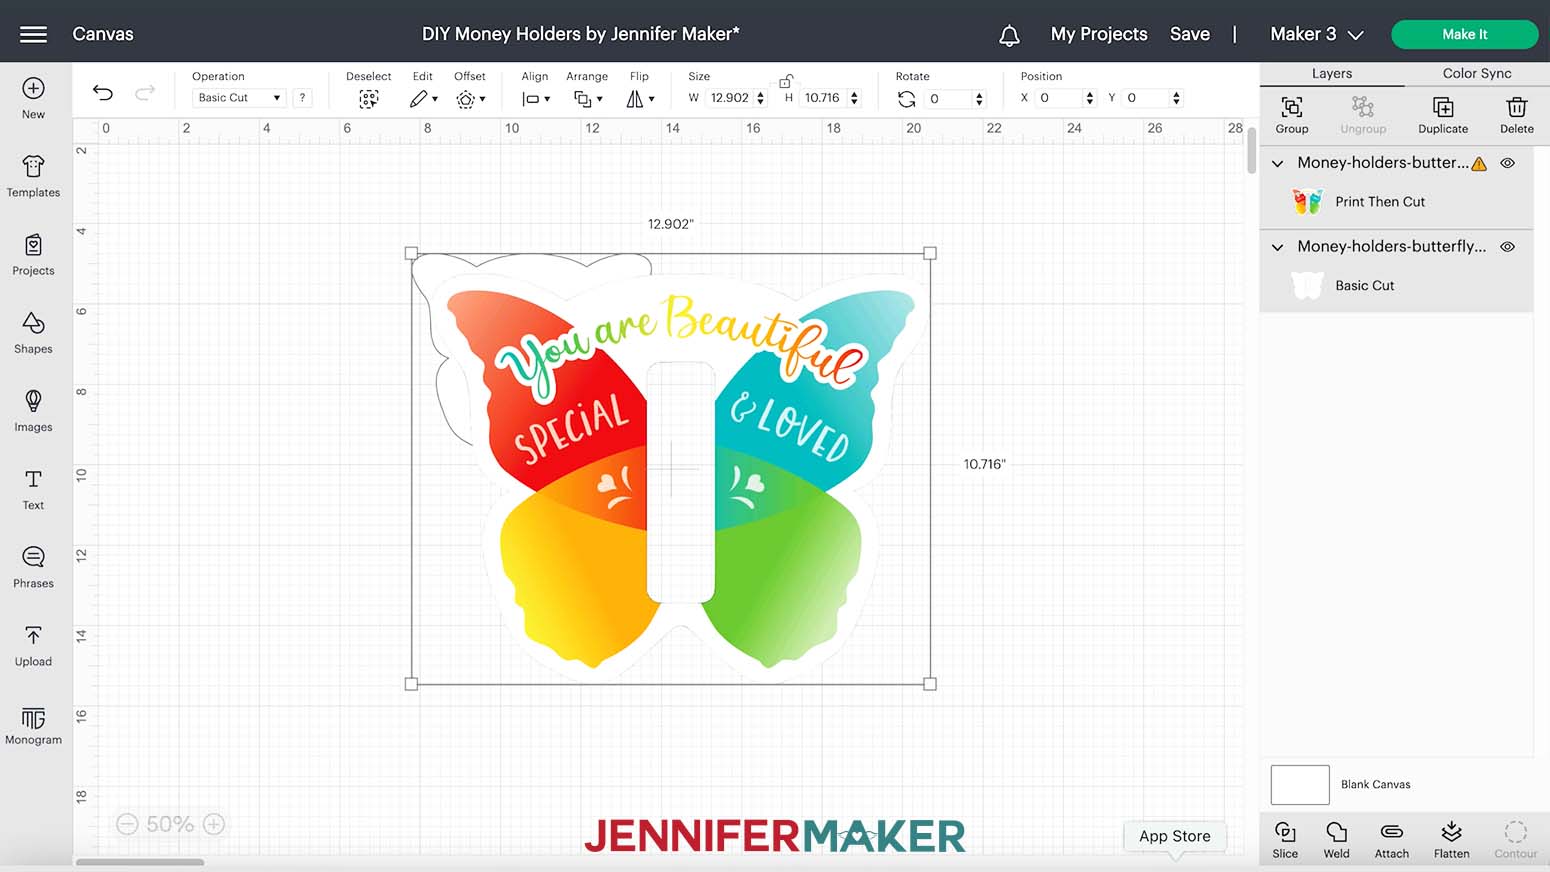
As you can see, the design for the front is much larger than the one for the back. That's due to the way Design Space uploads PNGs, but it's easy to fix and make them match.
Click on the back layer to find the correct dimensions for the design, which is 6" wide by 5" tall for the Butterfly-Shaped card. Select the front layer and make sure the lock icon is closed at the top. Type "6" in the Width (W) field at the top of your screen and press Enter. This will make the height very close to 5". Now the front and back are the same size!
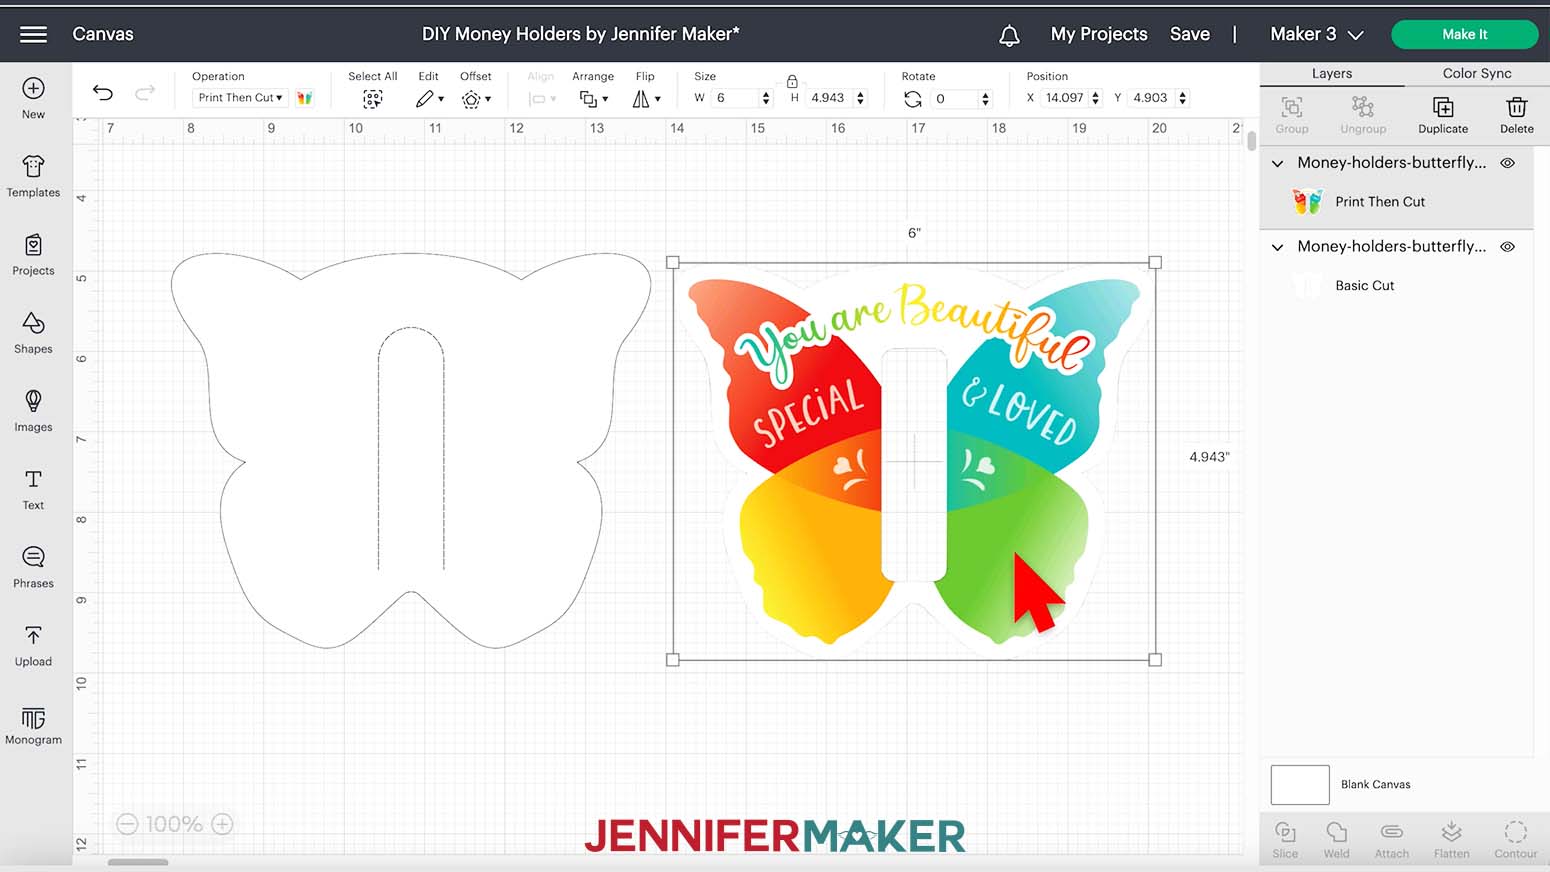
I have designed all of these files to perfectly fit a rolled up dollar bill, so I do not recommend resizing them once you've fixed the front to match the back.
Next, you can add a message and dollar amount to the bottom wings on the front of your card if you'd like.
Click the Text icon on the left hand side of the screen. A box with "Text" highlighted in it will appear on the Canvas. Without clicking anything else, type in your desired amount. I'll add "$20." Then, click the box that says "Cricut Sans" under Font in the top menu to see your font options.
Scroll through and click a font name to see how your text looks until you find one you like. I chose Sweetie Almeera Script, which you can purchase from FontBundles.net. Remember to look in the System section for downloaded fonts.
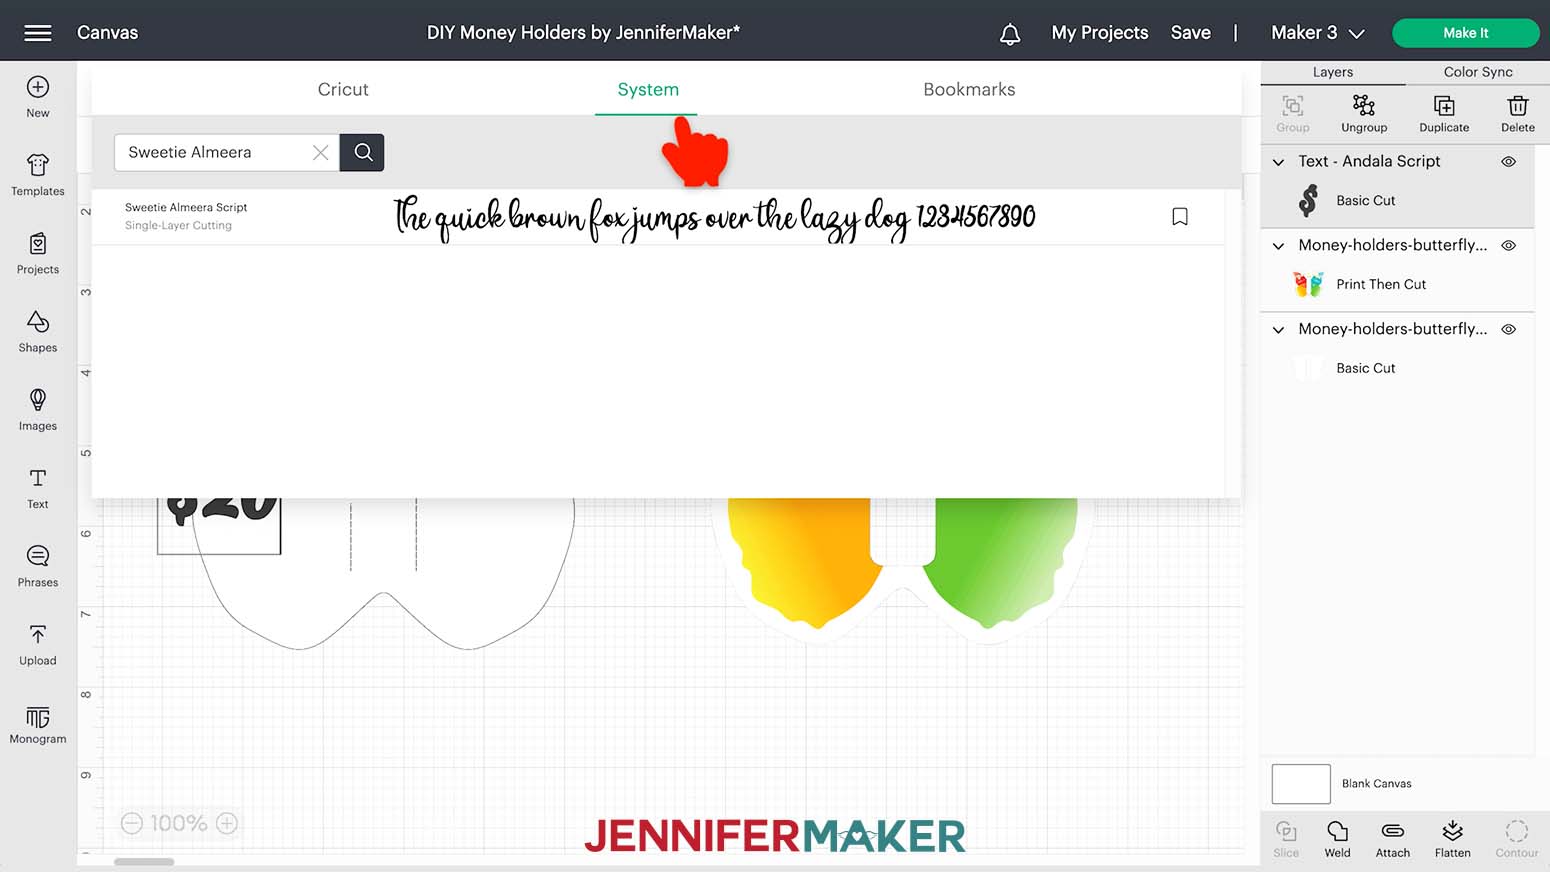
Make sure your font choice doesn't have a price next to it to avoid a charge when you go to cut the design. Change the color swatch at the top to Black.
Then, click "Duplicate" to make another text box in the same font and color.
Double-click the new text box and type your sentiment. I'll use "Congrats!"
Drag the text boxes to the lower wings. Click and drag a corner of each text's bounding box to fit it in the area.
Now we need to flatten our design so our machine knows which parts to print and which parts to cut. While holding your Shift key, select both of your text layers and the Print Then Cut layer for the front of your card. Click "Flatten" at the bottom of the Layers Panel.

You should now see a single Print Then Cut layer for the front of your card.
Now your card is ready to cut!
Make sure the correct machine is selected, then click "Make It" in the upper right corner.
If prompted, click "On Mat" and "12 x 12" on the pop up.
On the Prepare screen, make sure your first mat says Print Then Cut and your second mat says Basic Cut. Check that the Material Size for your first mat is 8.5" x 11" and your second mat is the size of your back layer's material. You may also need to select "On Mat" for the Material Load Type for your second mat. Then, select your first mat again and click Continue in the lower right.
Click the green Send to Printer button to open the Print Setup window. Make sure your printer is listed and the sliders next to "Add Bleed" (a small border around each image that allows for more precise cutting) and "Use System Dialog" are green. Then click Print.
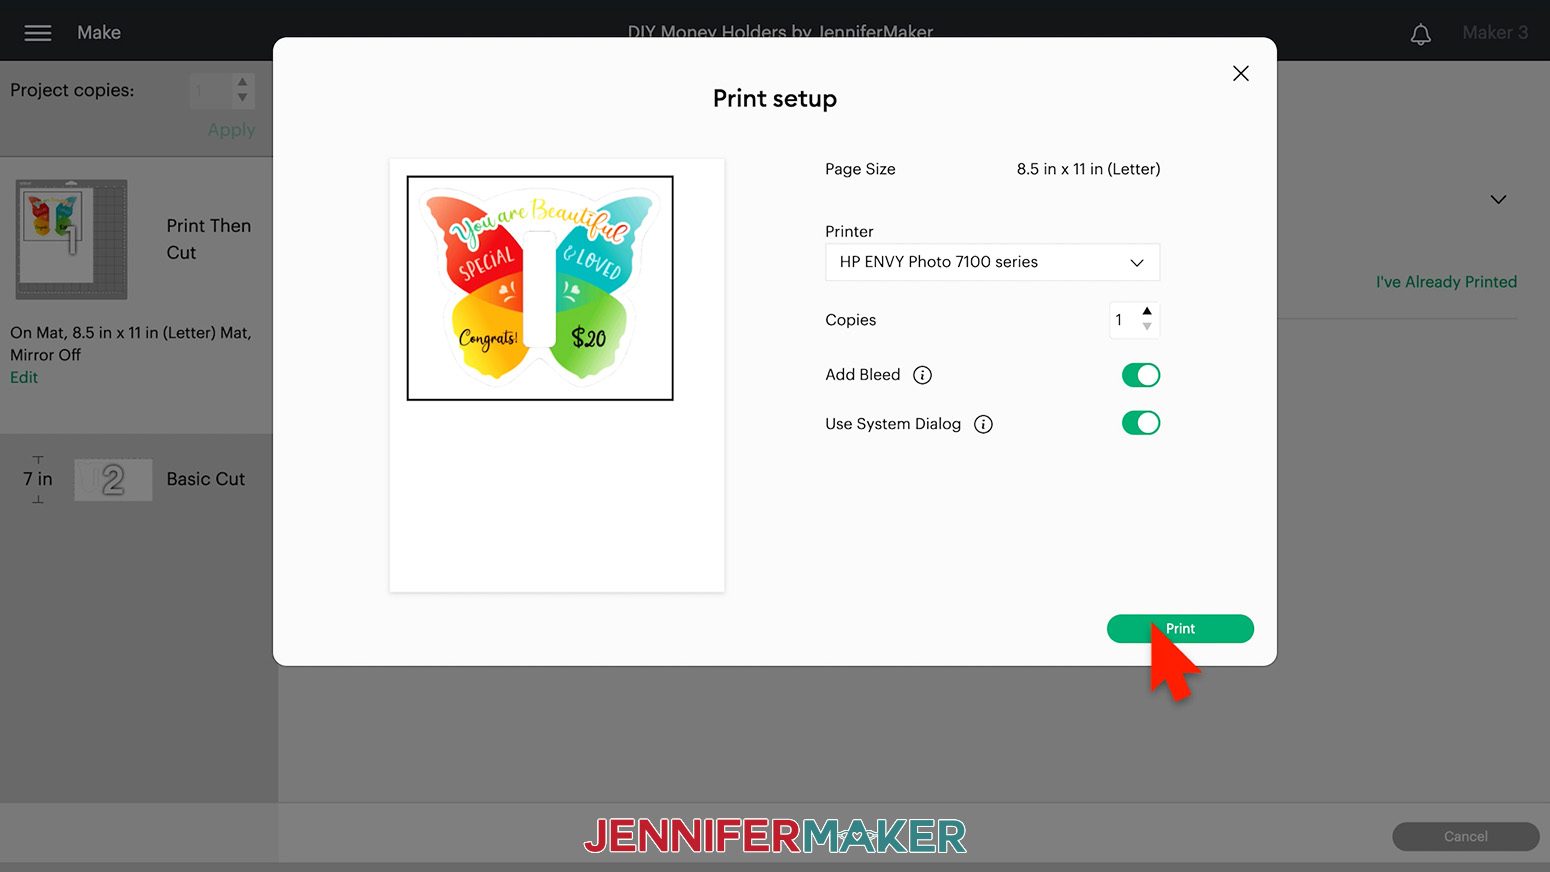
The print screen for your printer will appear, but it might be hidden behind Design Space. Minimize your Cricut window to see the print settings window.
Your window will look different depending on your computer and printer. Make sure your printer is listed in the window. Set the paper to plain and print quality to the best available. Put your cardstock in the printer and print!
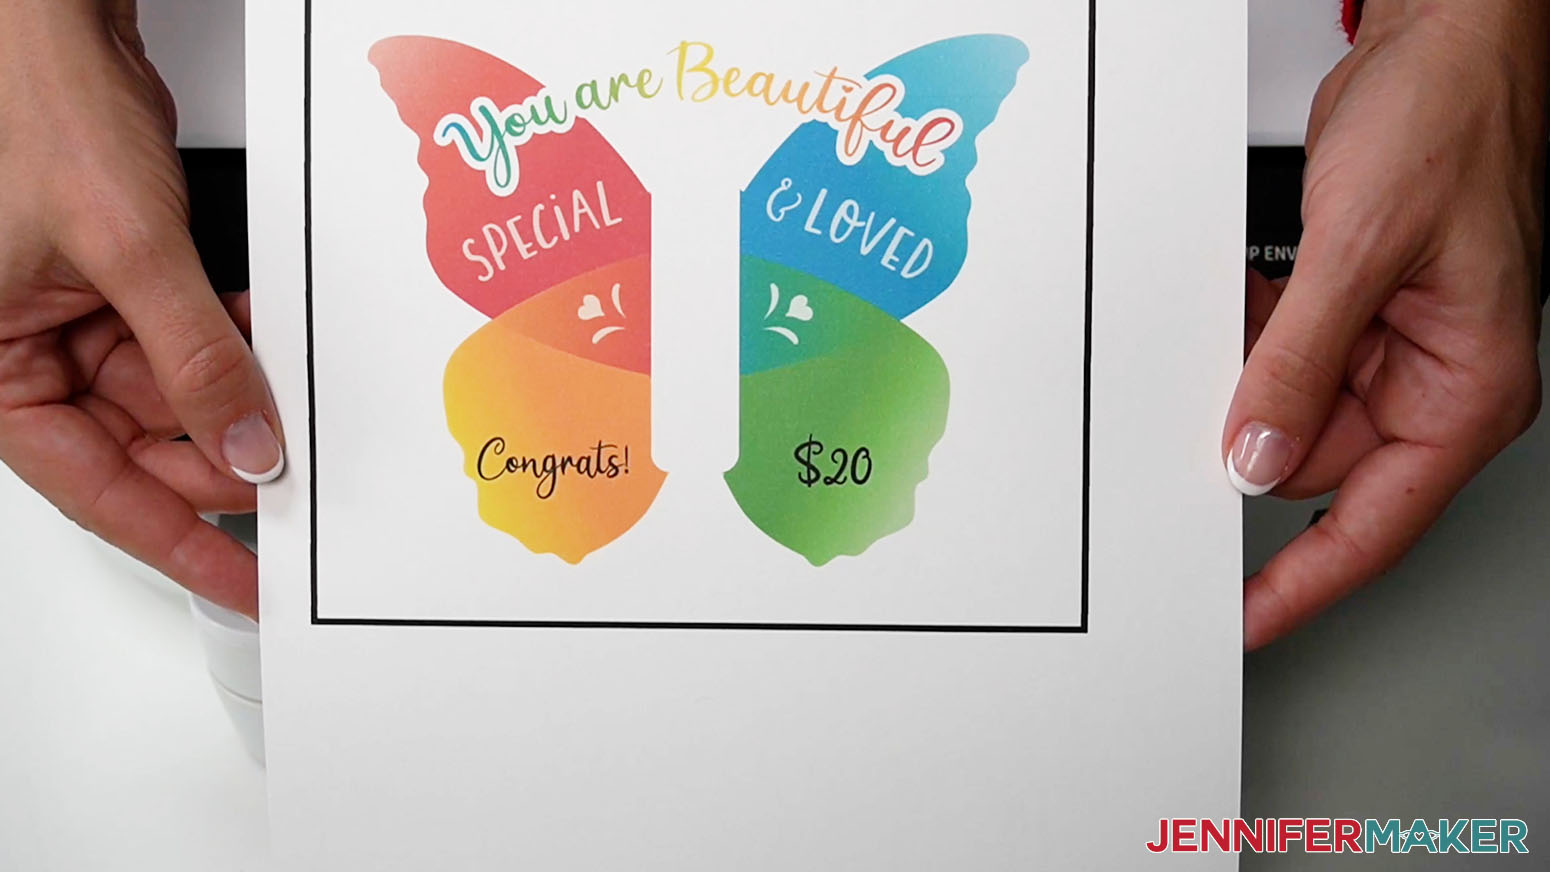
After your design has printed, set it aside until the ink is completely dry to avoid any smears during the cutting process.
See the black box around my design? This is called a registration box and is used by your Cricut machine to tell it exactly where to cut your project.
On your Make Screen, select the Medium Cardstock setting and change the Pressure to "More" for a cleaner cut. Check the "Remember material settings" box.
Place your printed sheet on your green StandardGrip machine mat like it is on the screen and use a brayer to make sure it's fully adhered. Check that your Fine-Point Blade is clean and in Clamp B.
Then, load the mat with your printed sheet into the machine and press the flashing button to cut your design.
When the cut is finished, unload the mat, flip it over, and roll it back to release the cardstock. This helps prevent the material from curling and ripping. Use your scraper to remove any small pieces of cardstock that are left on the mat.
Follow the same steps as above to cut and remove your back design.
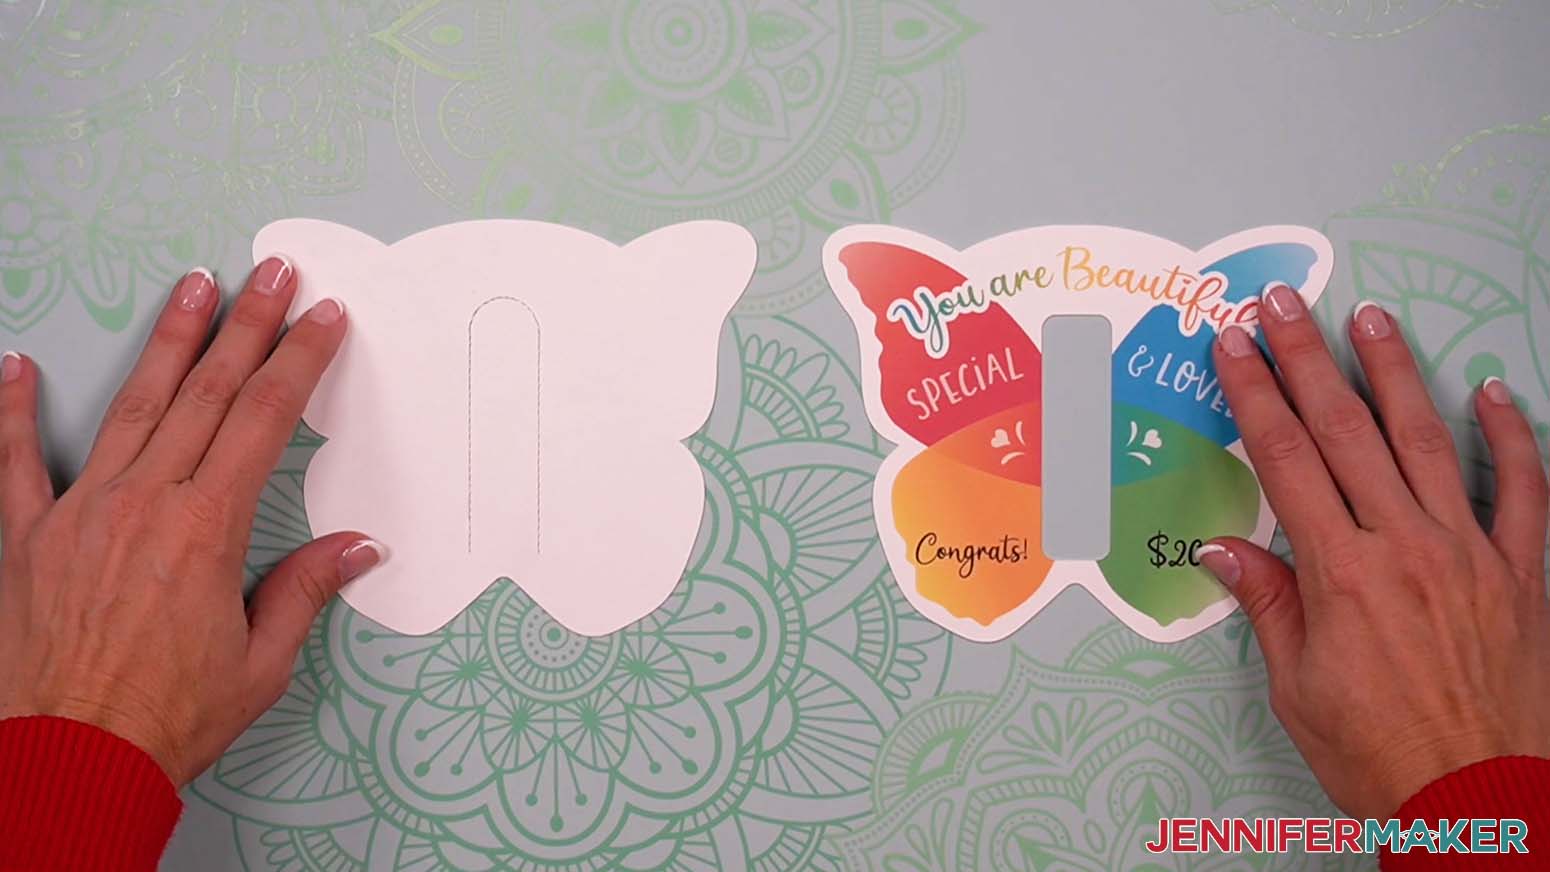
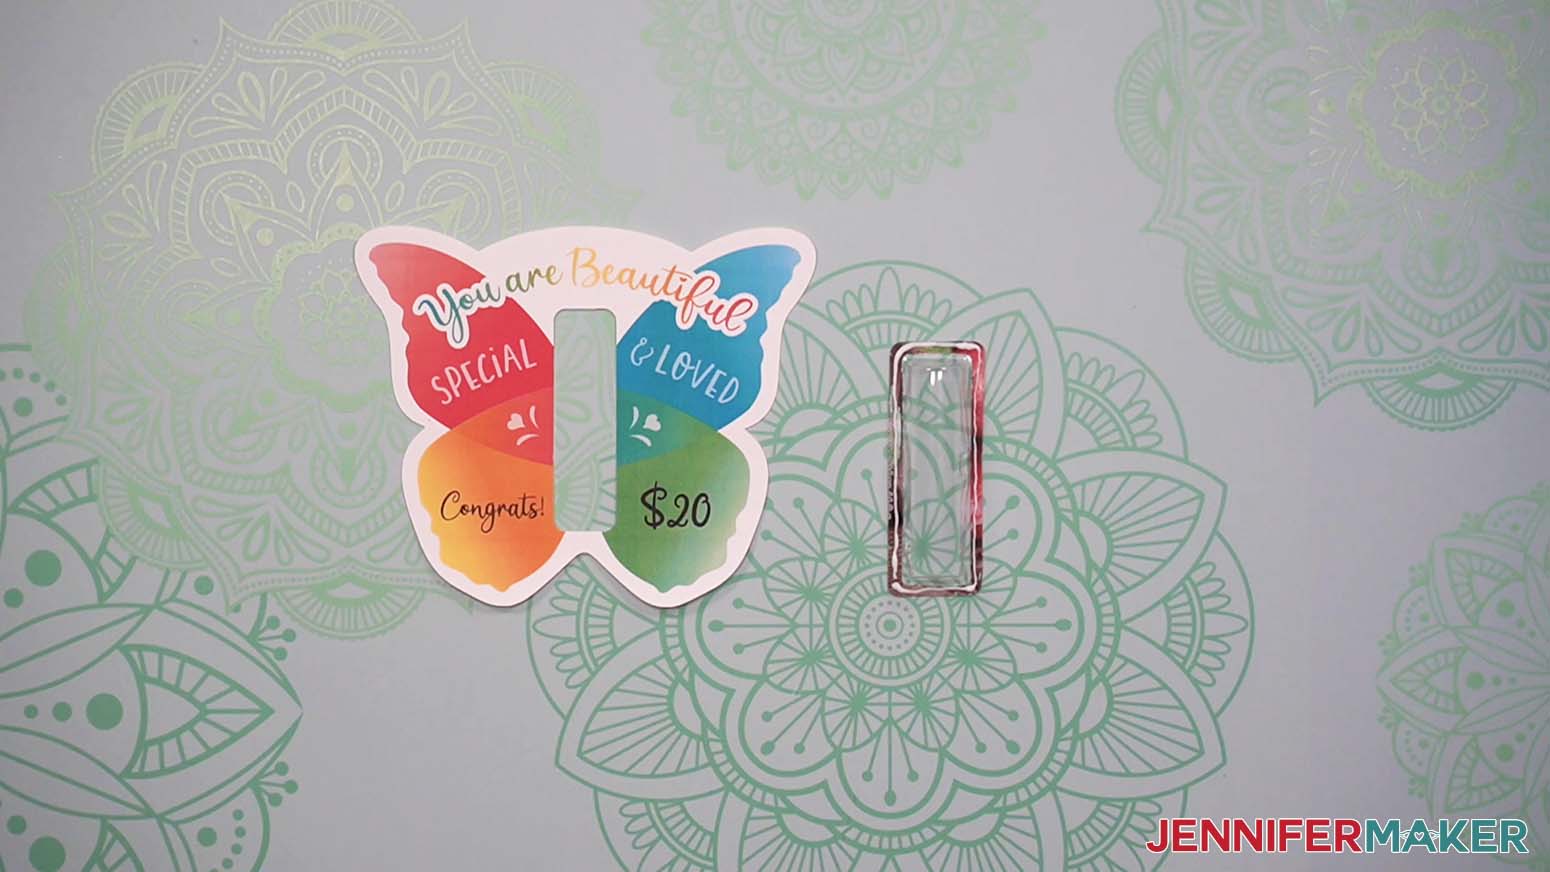
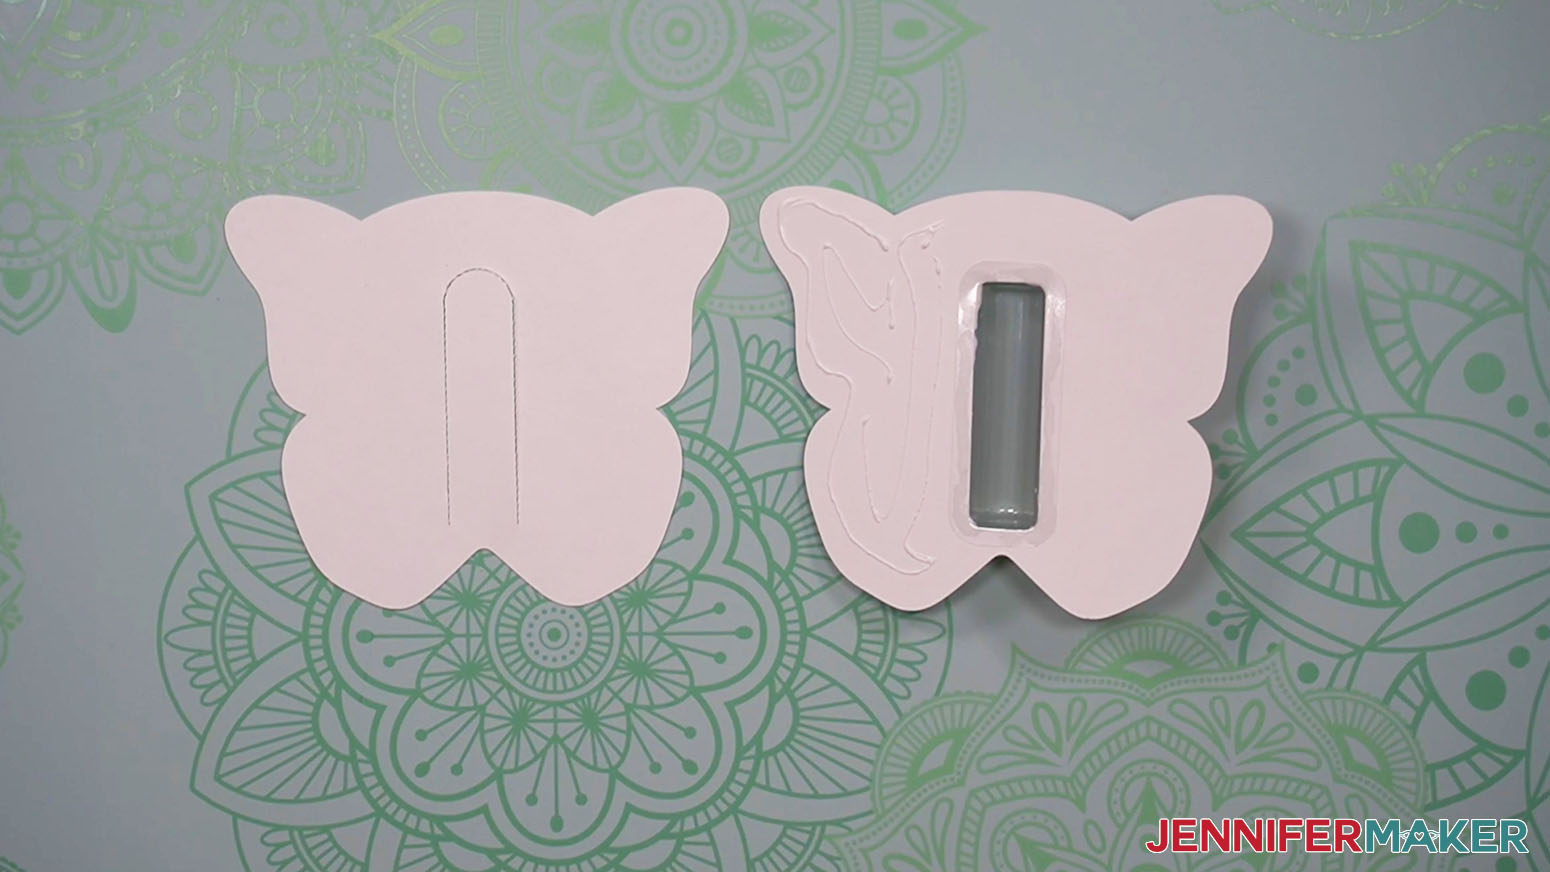
Here's what the cut pieces for the front and back of my Butterfly-Shaped card with plastic dome cutout look like.
STEP 4: ASSEMBLE YOUR DIY MONEY HOLDERS
Cardstock-Only Variation
Take your front piece and crease the rounded cutouts up so they're perpendicular to the card.
Place the back face down on your work surface.
Then, flip your front piece over and apply glue to the back side, avoiding the money holder cutouts and the hole at the top.
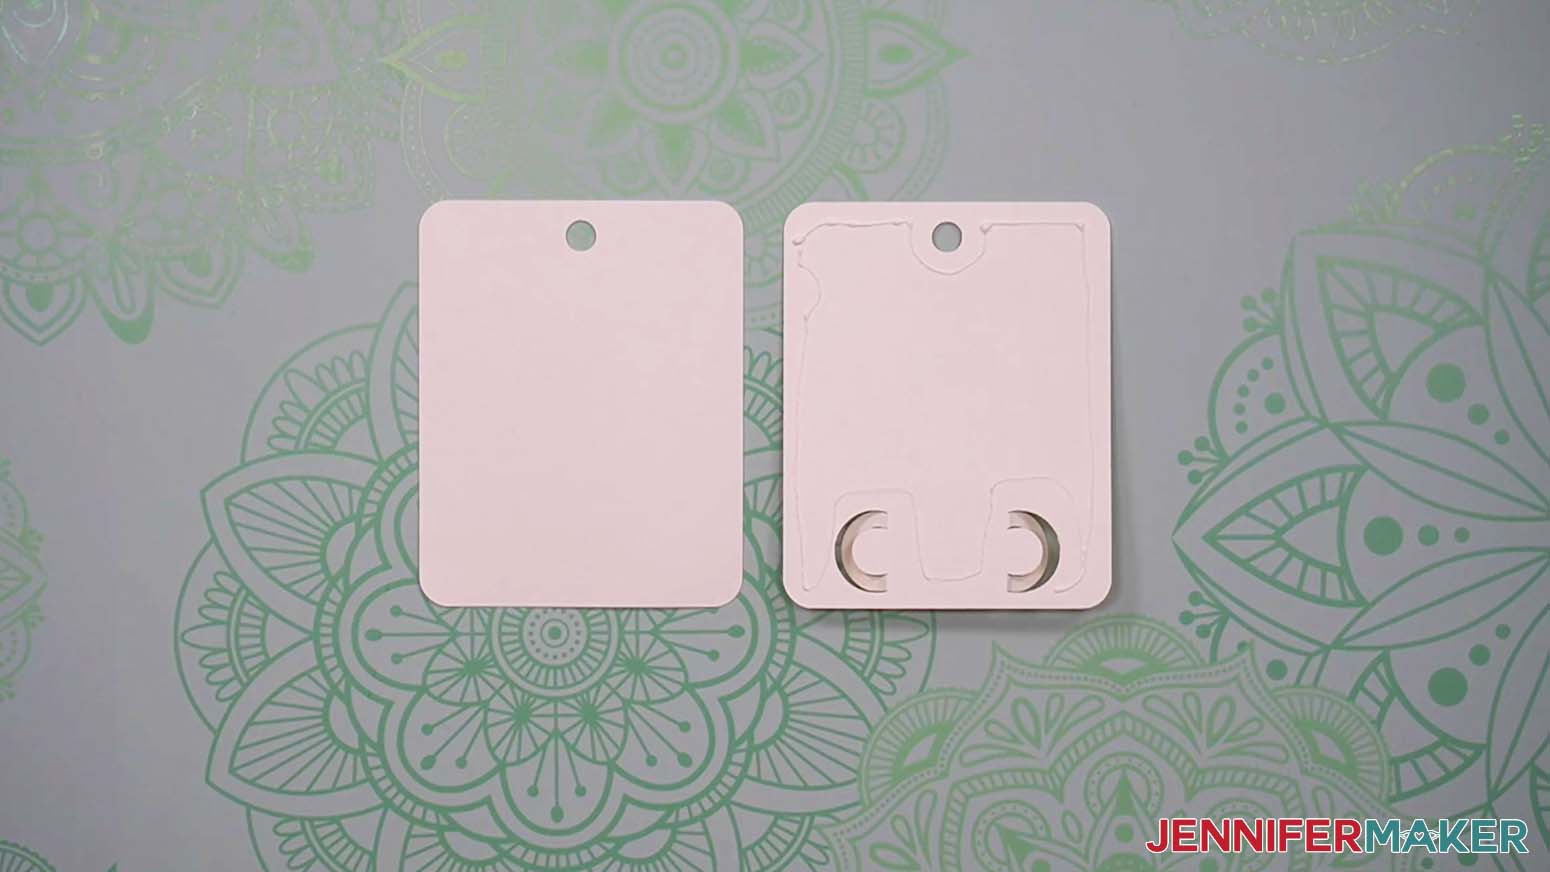
Hold the front piece on top of the back piece to align the edges and press them together. If you're making the Birthday card, make sure the holes at the top line up. Make sure all areas are well adhered and give the glue a few seconds to dry.
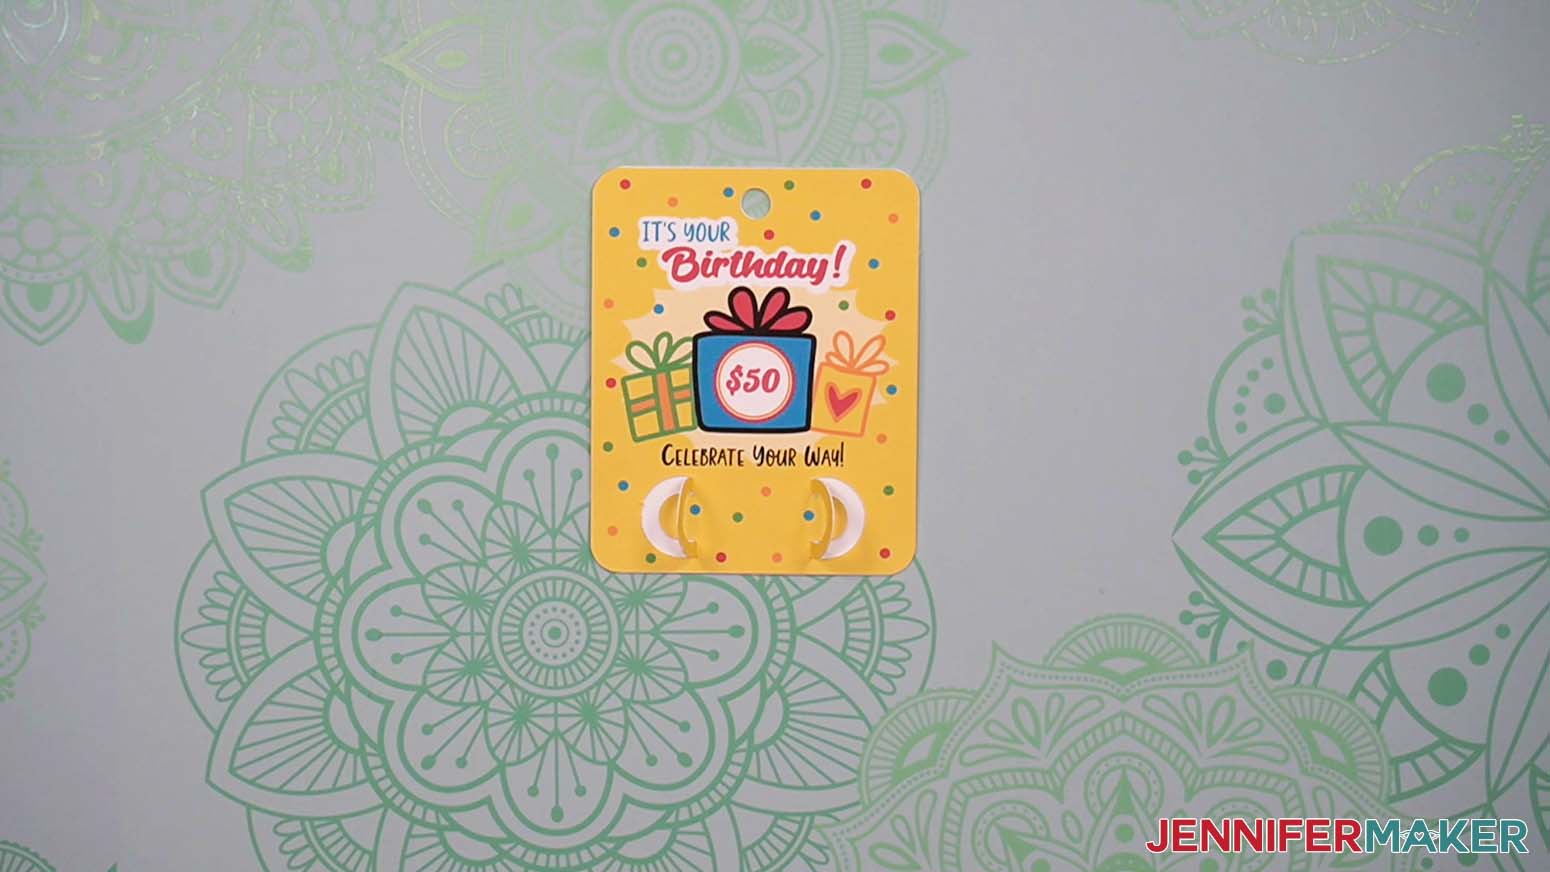
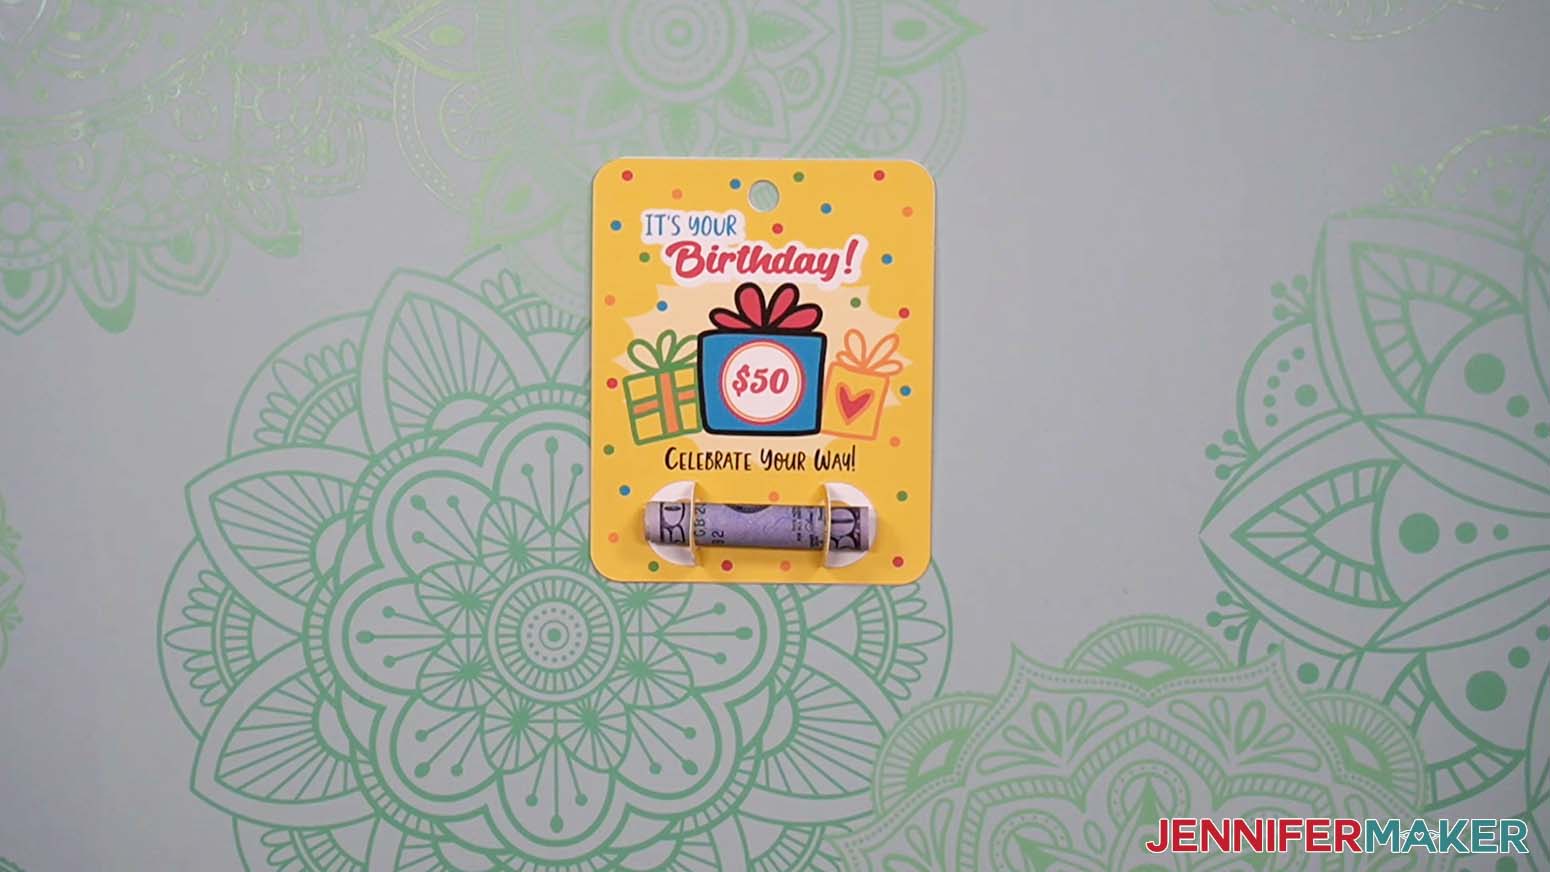
Roll up your dollar bill and slide it through the folded cutouts to hold it in place. Make sure the dollar amount faces out on your bill so your recipient can read it when they're looking at the card.
Plastic Dome Variation
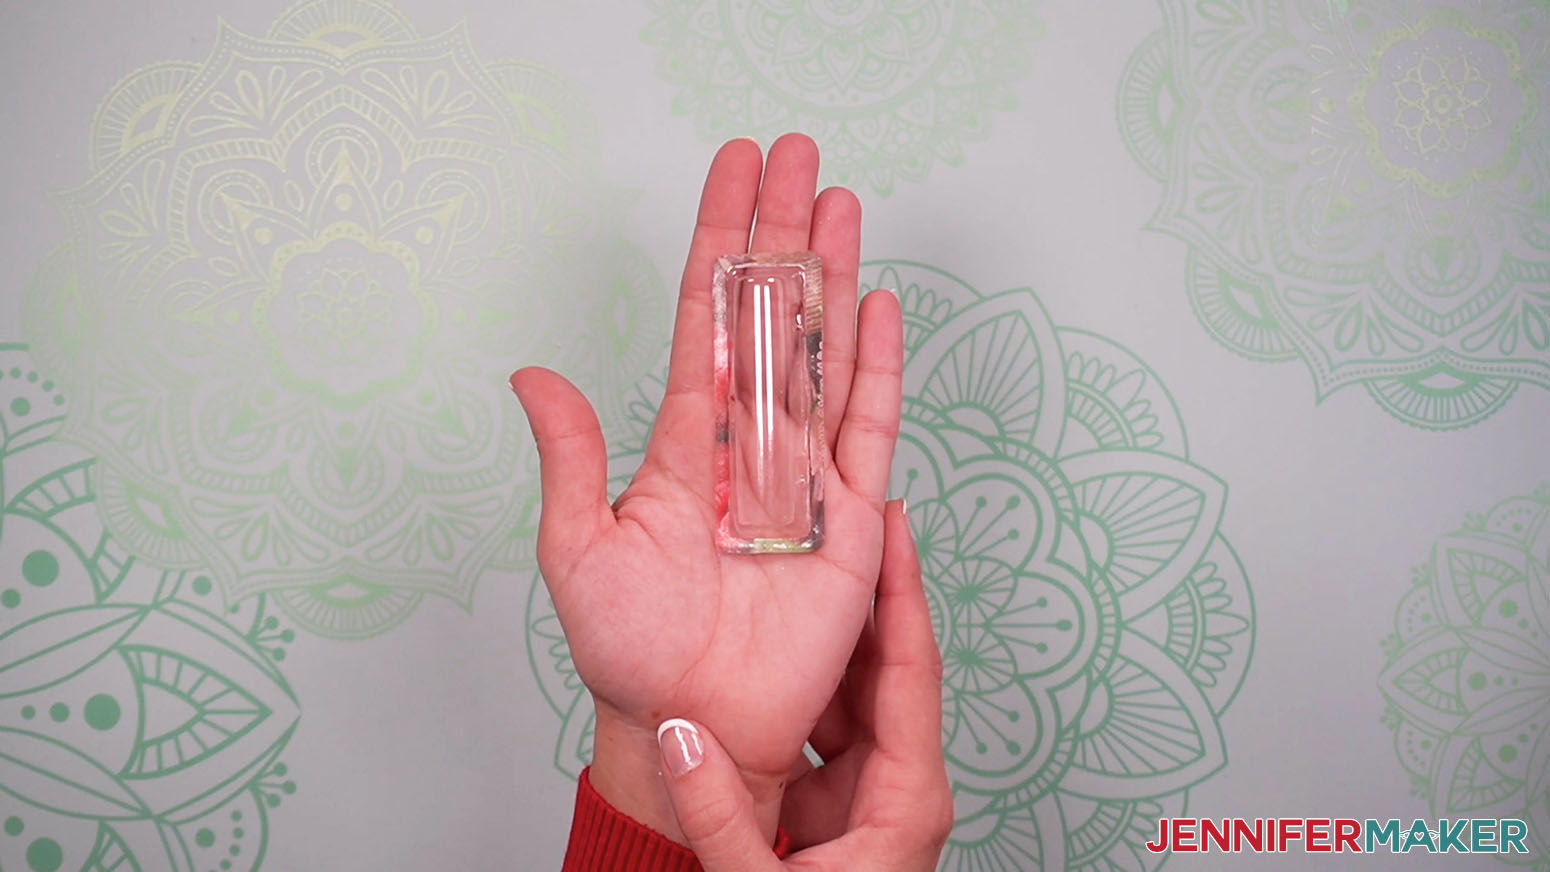
If you're using a dome from a chapstick package, peel the dome off of the package and use a craft knife to remove the excess paper. You won't need the chapstick, but don't waste it!
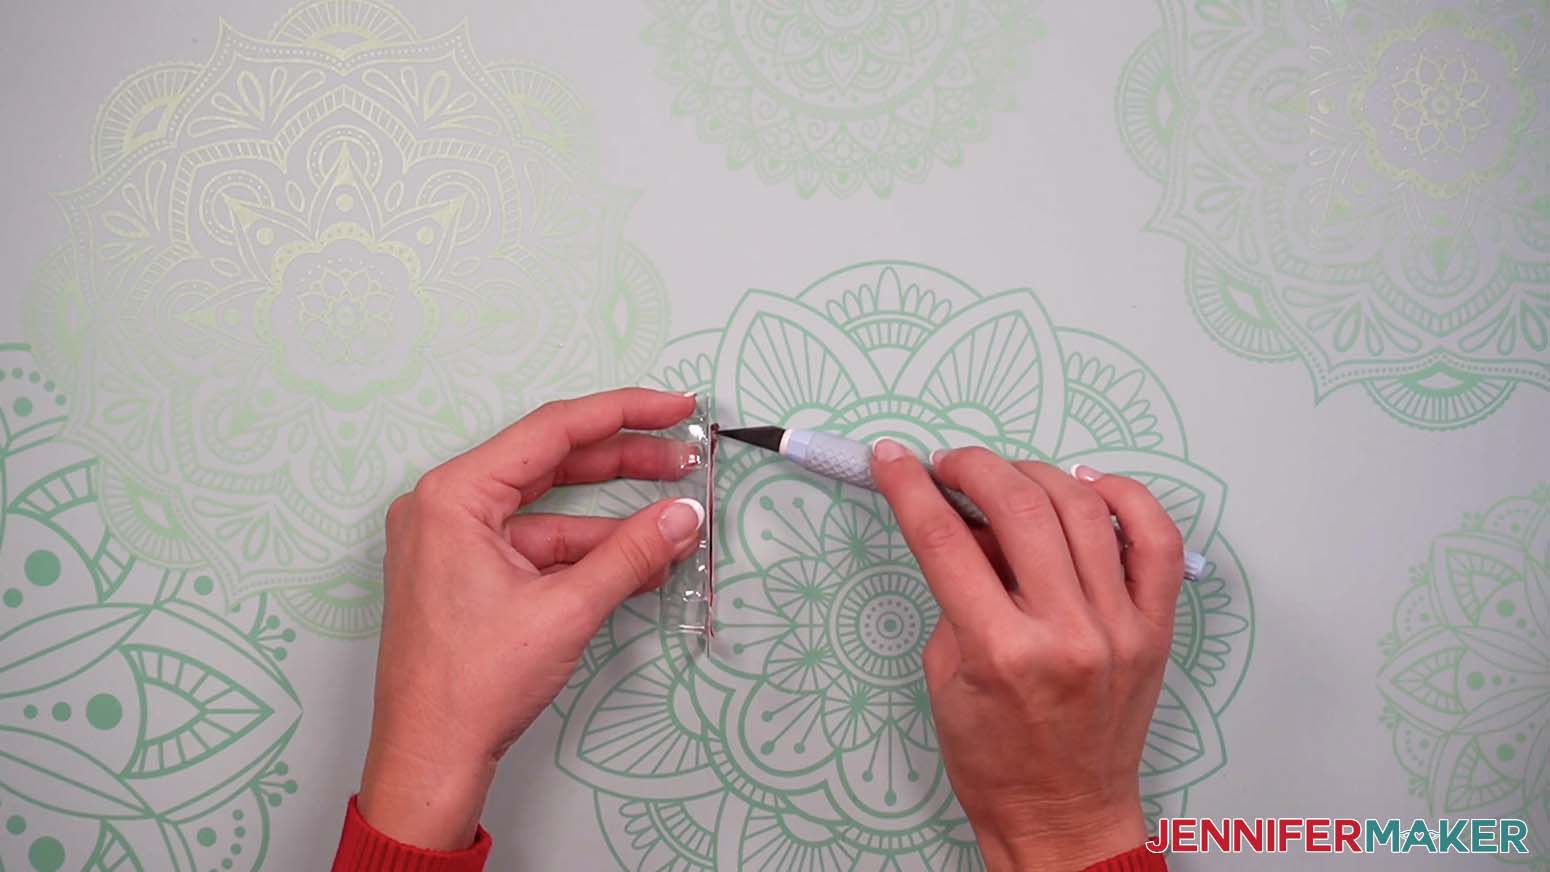
Since the dome's plastic edges will be between the card's layers, you don't have to get all of the paper off of them. You can use your craft knife to trim as much as you like.
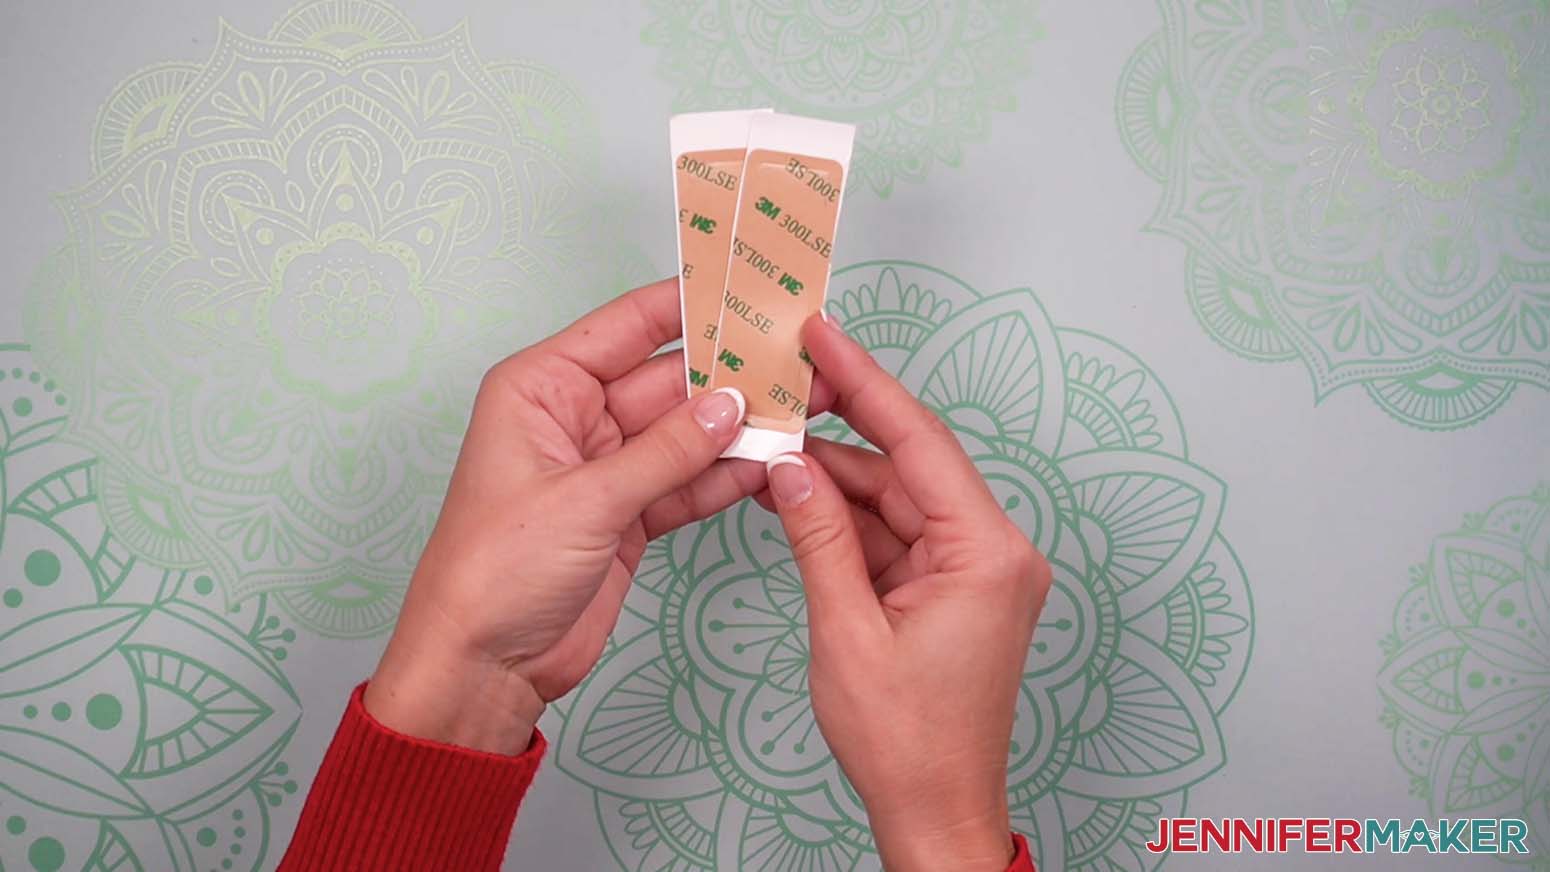
If you are using a dome with adhesive tape, ignore the tape pieces with backing paper and treat it like the plain dome by adding glue.
The rest of the steps are the same for any dome.
For All Three Dome Types
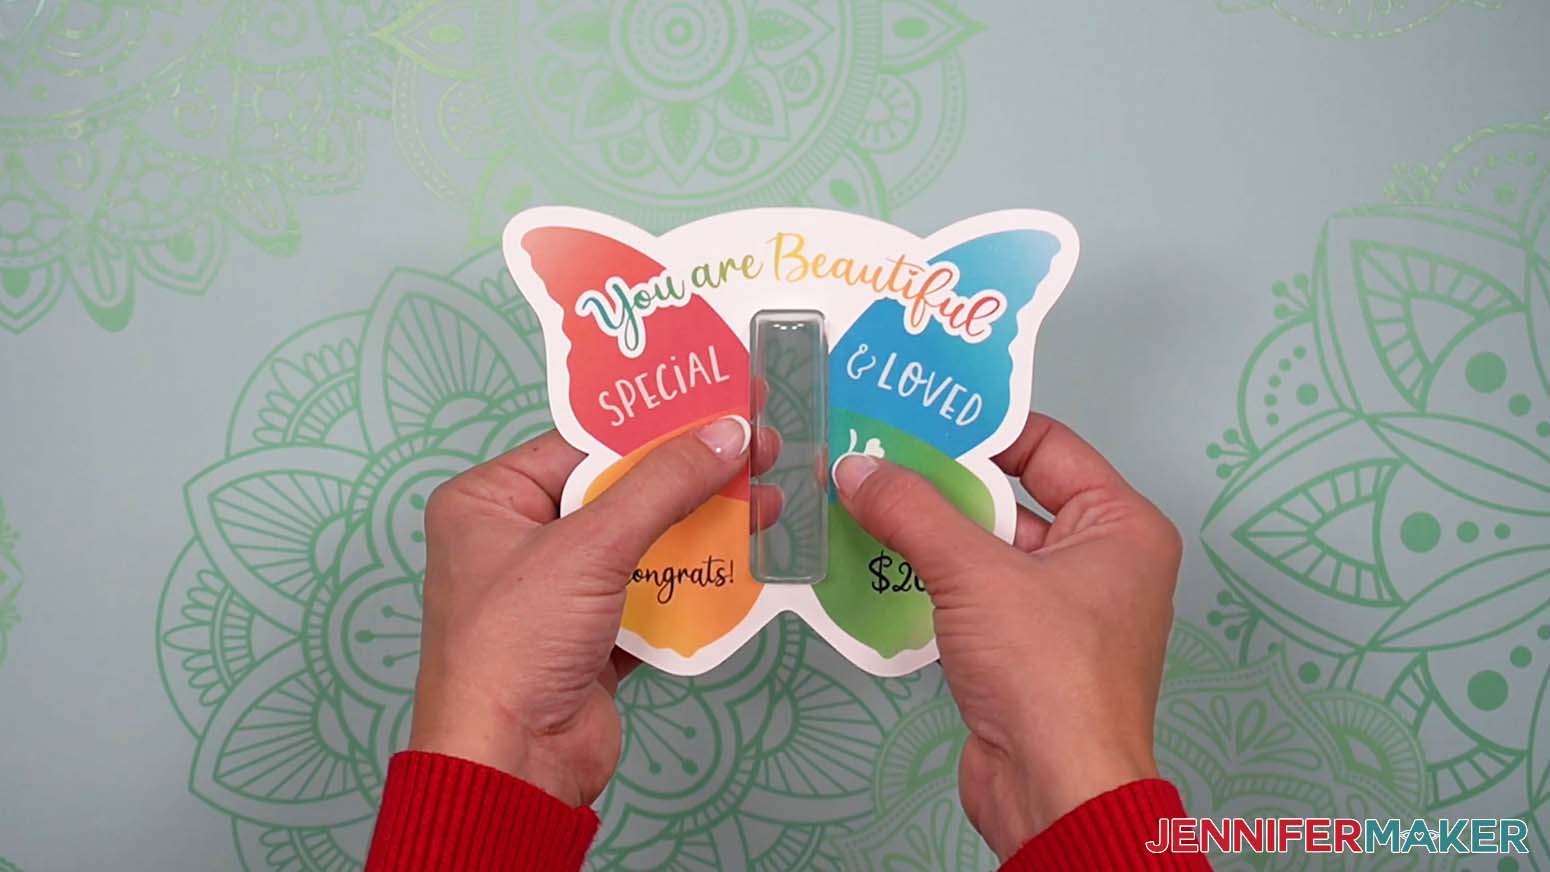
Lay the piece on your work surface with the dome facing up. Apply a thin line of glue to the flat ridge.
Place the card's front face up over the dome so the plastic slides through the cut out shape. Press down around the edges to adhere the paper to the top dome edge. Wait several seconds for the glue to dry.
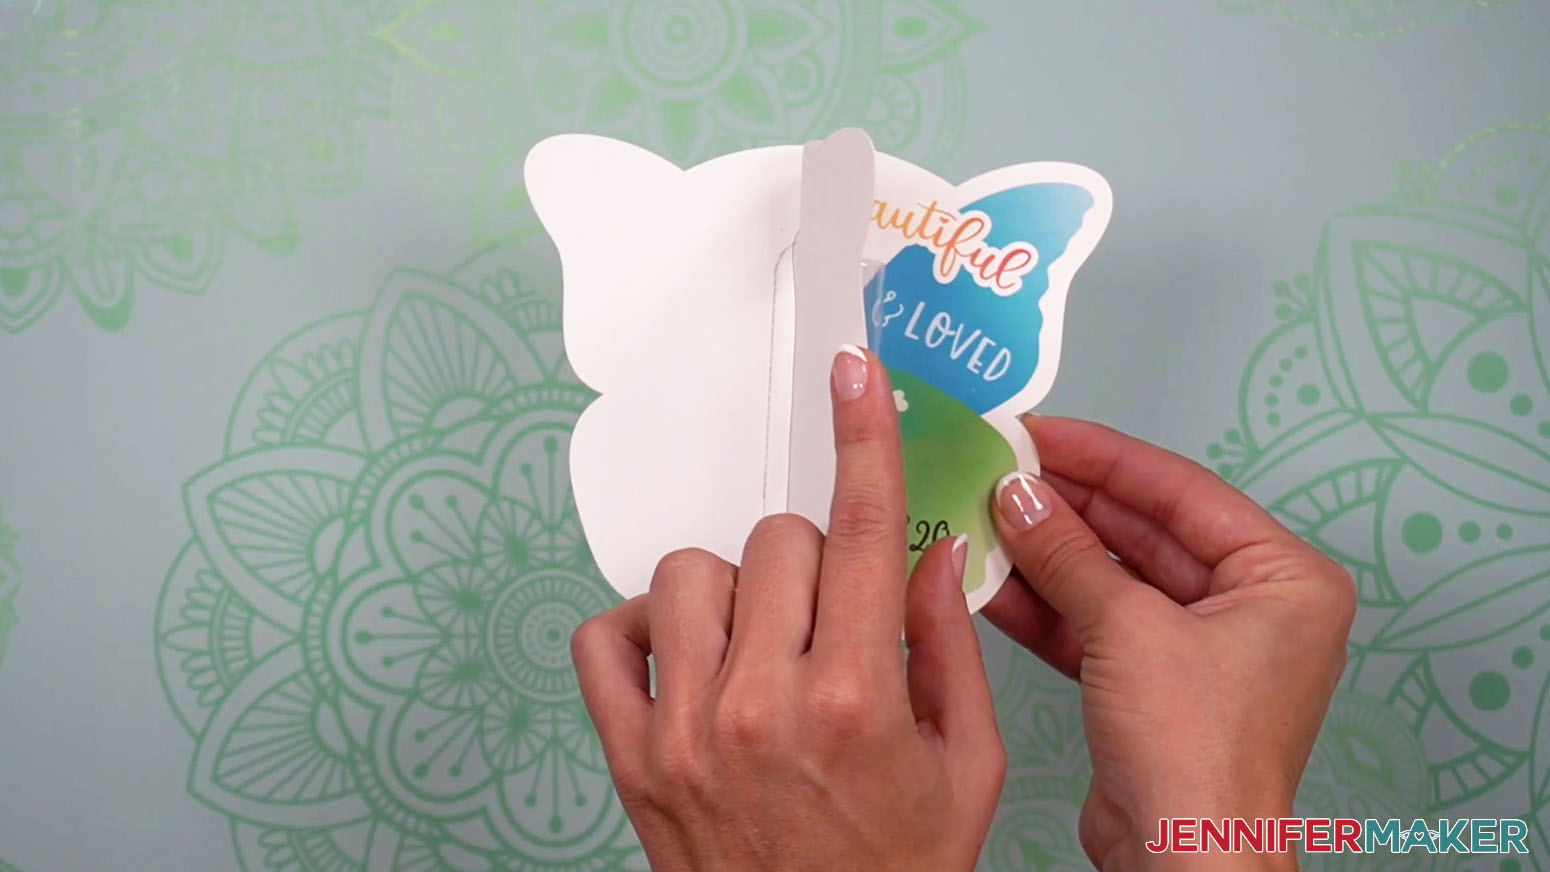
With the back face down in front of you, flip over the front and apply glue to the left half, leaving at least an 1/8" clear around the dome.
Carefully align the front face up on the back and press to adhere.
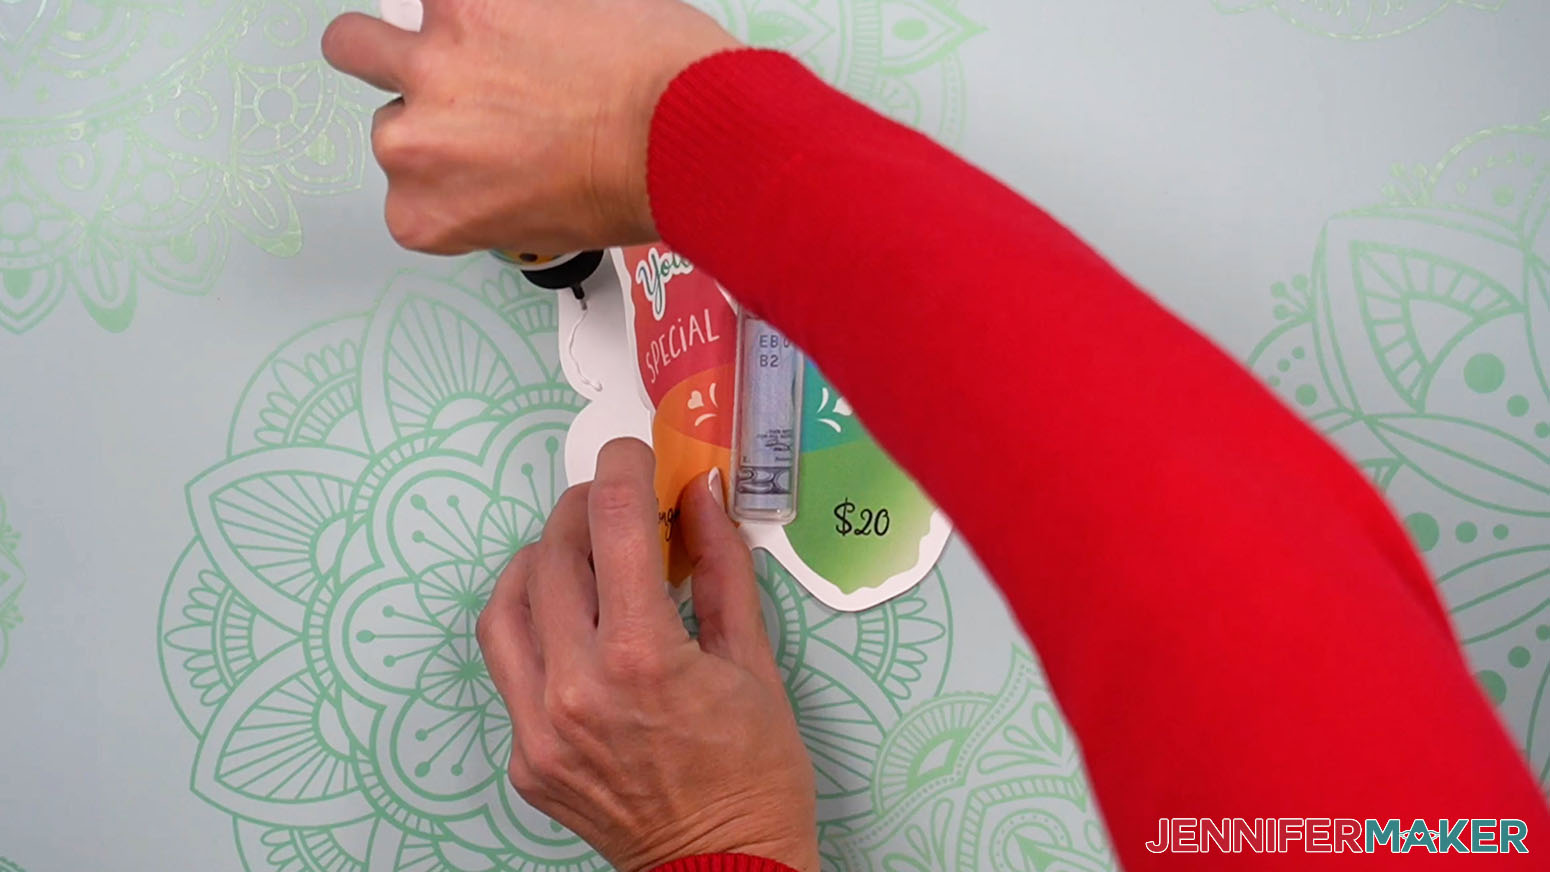
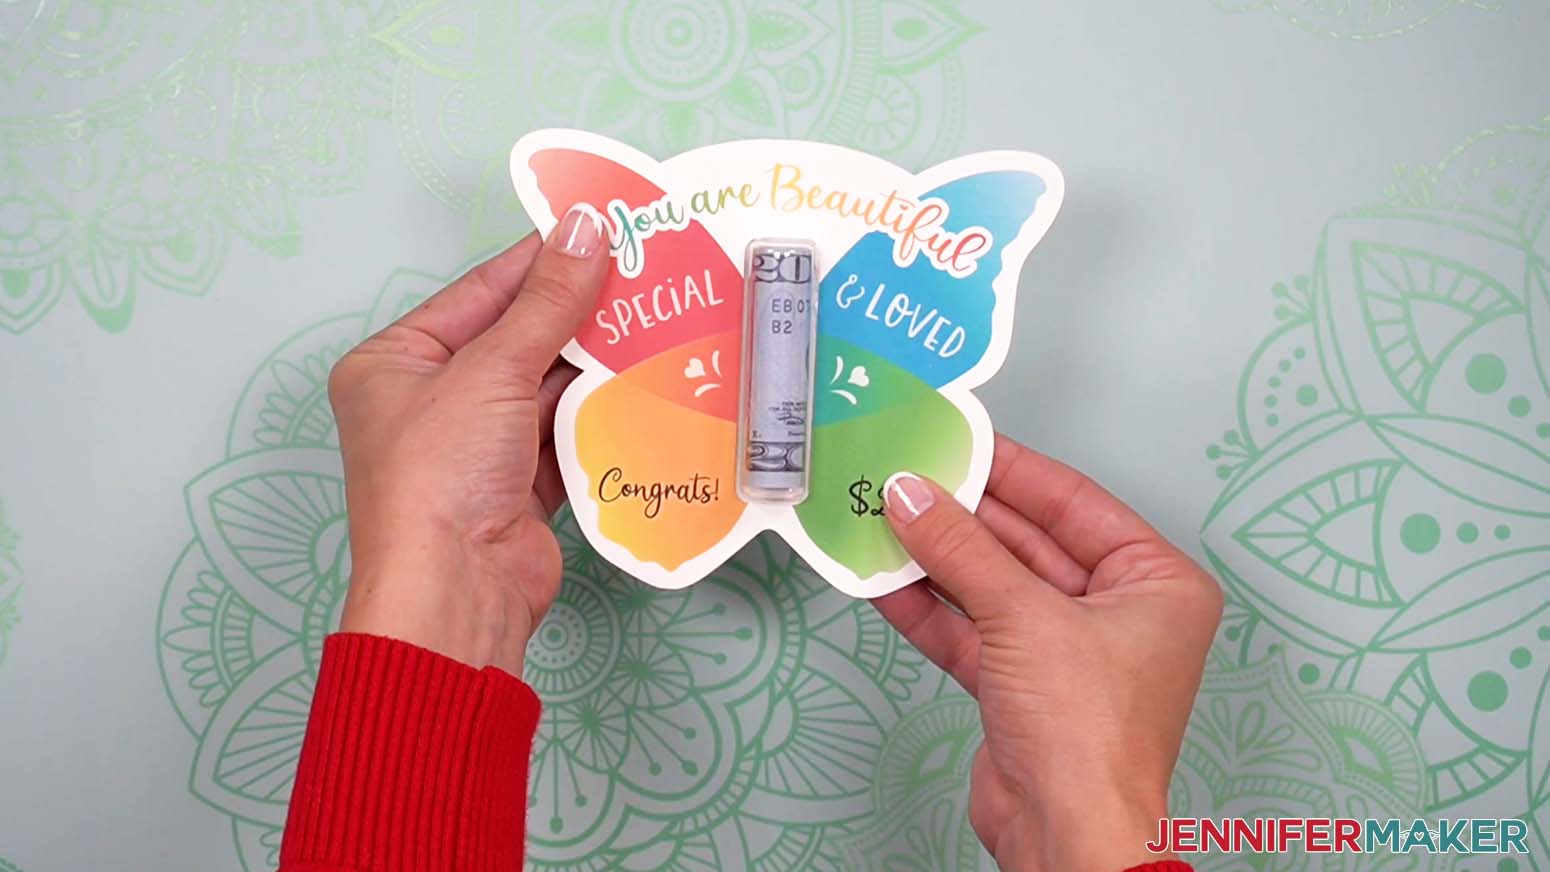
Roll up your dollar bill and gently curve the unglued side of your card up to push the money into the holder. Make sure the dollar amount is facing out on your bill so your recipient can see it when they're looking at the front of the card.
Apply glue to the other half of the inside of your card, avoiding the cutout again. You may need to hold the dollar bill in place while you apply the glue so it doesn't unroll.
Press down to adhere both sides and give the glue a few seconds to dry.
STEP 5: SHOW IT OFF!
You're done! Here's what my finished DIY Money Holders look like. Aren't they adorable? Now you can give your friend or family member the gift of money with a creative twist. They'll love getting such a unique and thoughtful card made just for them. You can even give your little one money from the tooth fairy in a custom tooth fairy card!
These cards are a bit wide for normal envelopes, but they fit well in our DIY Gift Bags!
Notes
Birthday Money Card Finished Size: 4" wide by 5" tall
Butterfly-Shaped Money Card Finished Size: 6" wide by 5" tall
Tooth Fairy Money Card Finished Size: 6" wide by 4.8" tall
Fonts Used:
Cattieshine Sans (Birthday and Butterfly-Shaped Cards)
Andala Script (Birthday Card)
Sweetie Almeera Script (Butterfly-Shaped and Tooth Fairy Cards), Free Alternative: Sanies Script
Falling Leaves Print (Tooth Fairy Card)
Answers to Your Questions About DIY Money Holders
Q. How do you make a homemade money holder?
It’s surprisingly easy! You can use any shape or design, just add cutouts like mine if you’re using just cardstock. To make one for a plastic dome, just make two layers and cut out the shape I used to place the plastic in between them. You can make them extra pretty with special cardstock or different scrapbooking paper.
Q. How do I gift money holders?
My DIY money holders don’t fit in normal envelopes, so I recommend placing them in gift bags.
Q. How do I make a gift card holder with my Cricut?
I have lots of handmade gift card holders available in my free file library! Just search for “gift card” and you’ll have tons of creative gift card holders to pick from.
Q: Can I change the design to make my own version?
You are welcome to create a new project from scratch or change up my designs! You could add words or names using the text tool, or add to the collection for your own personal use. You could make really nice gifts for the holiday season with a Christmas tree design!
Q: Can I sell these DIY money holders on my Etsy shop/online store?
Thank you for wanting to create and sell our designs. The only thing we ask is that when selling the completed designs that you give credit to Jennifermaker.com and that you not sell the digital PNG files.
Q: I can’t find the Print Dialog Box to customize my settings. What do I do?
You will need to minimize or move your Cricut Design Space window to see and use system dialog. The print dialog box pops up behind Design Space. There is a chance the system dialog box will not work on all printers. Each home printer is different so consult your printer’s user guide for additional support. I have a detailed overview in my personalized snow globe ornament tutorial.
Get my free designs to make DIY Money Holders!
I love seeing what you make with my money card designs and how you use them! Please share a photo of your DIY money holders with Cricut in our Facebook group or tag me on social media with #jennifermaker.
Love,

Want to remember this? Save this How to Make DIY Money Holders With Cricut tutorial to your favorite Pinterest Board!