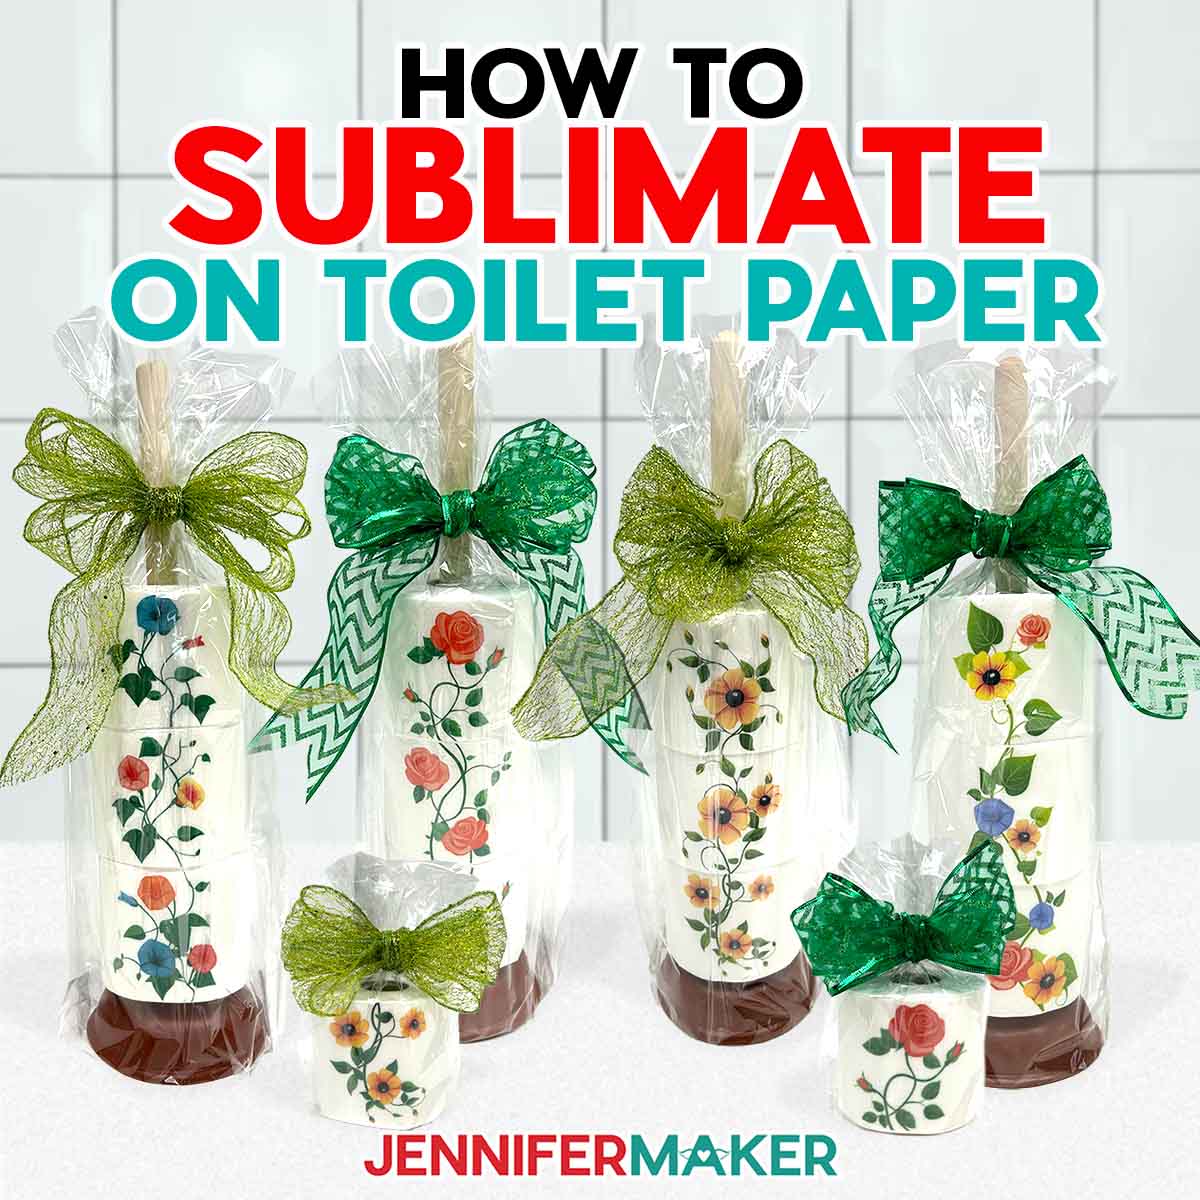
Learn how to sublimate on toilet paper to make quirky decor & unforgettable gifts!
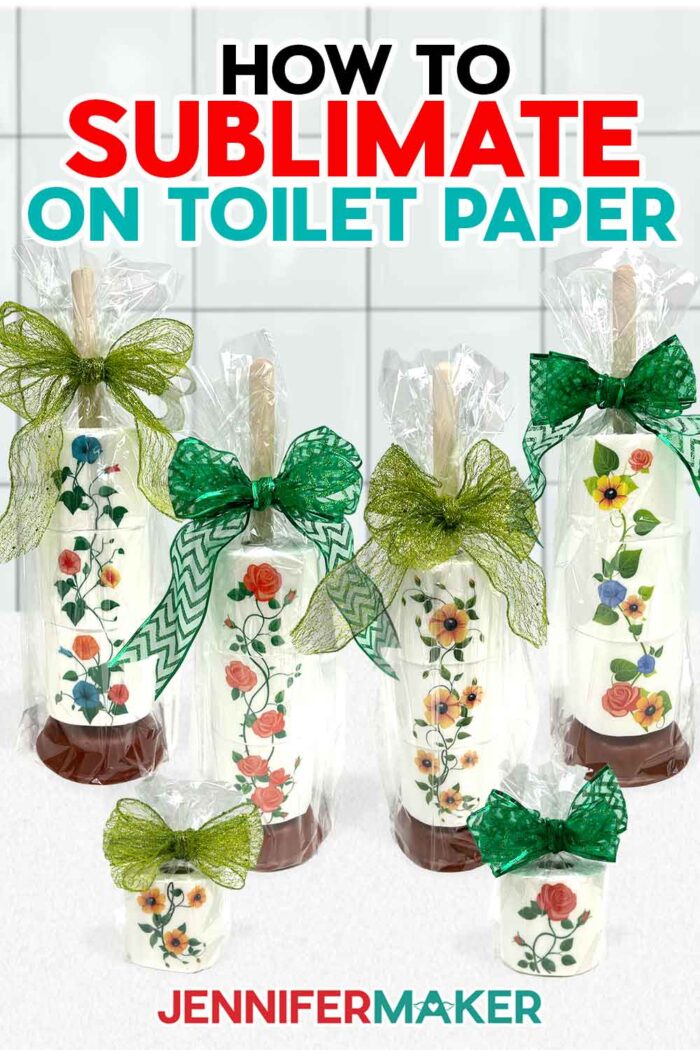
We’re rolling into something totally unexpected — let’s learn how to sublimate on toilet paper! This quirky DIY is a little offbeat, a whole lot of fun, and makes for the cutest bathroom decor (or the most unique gift ever!). So grab your heat press and get ready to turn a stack of plain TP into a lovely floral masterpiece — because in this project, the only thing getting wiped away is dull decor!
Watch the full step-by-step tutorial on how to sublimate on toilet paper:

Who knew toilet paper could be the star of your next craft project? You’re going to love making these, even if you never thought to use toilet paper in your crafting before. It’s a little unconventional, a whole lot of fun, and makes the best bathroom decor — or a super unique gift idea.
Sublimation uses specially formulated inks to produce designs that are transferred onto certain materials with the help of a heat press. When exposed to high temperatures, these inks turn into gas, bonding with the surface to create a vivid, permanent image!

My free tutorial video guides you through the whole process, and I’ll share three of my favorite methods to sublimate on toilet paper rolls: You can sublimate directly onto the toilet paper for a slightly faded vintage look, or you can apply a sublimation spray for bolder colors. I’ve also got a method which uses a thermal laminating pouch adhered to the toilet roll for extra vibrancy. No matter which method you choose, I’ve included every step to help you get the best results.
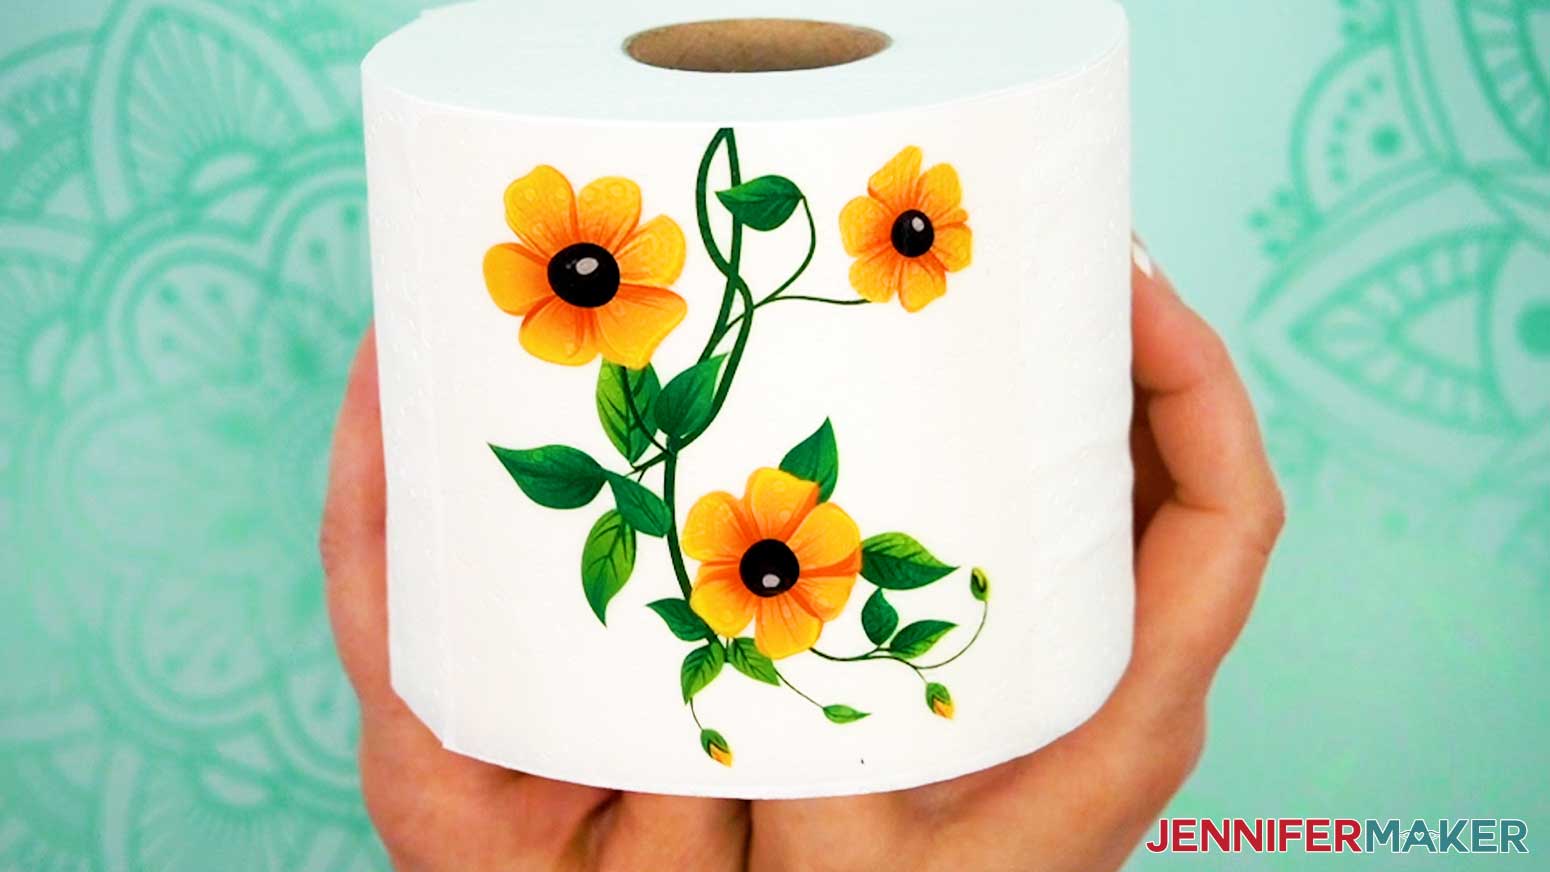
For this project, I’ve designed three lovely floral images: a dewy morning glory, a cheerful black-eyed susan, and a beautiful rose. I made them using an AI art generator, and then got them sublimation-ready with image editing software. If you want to learn how to make your own sublimation designs using AI images, be sure to check out my AI Art Playbook.
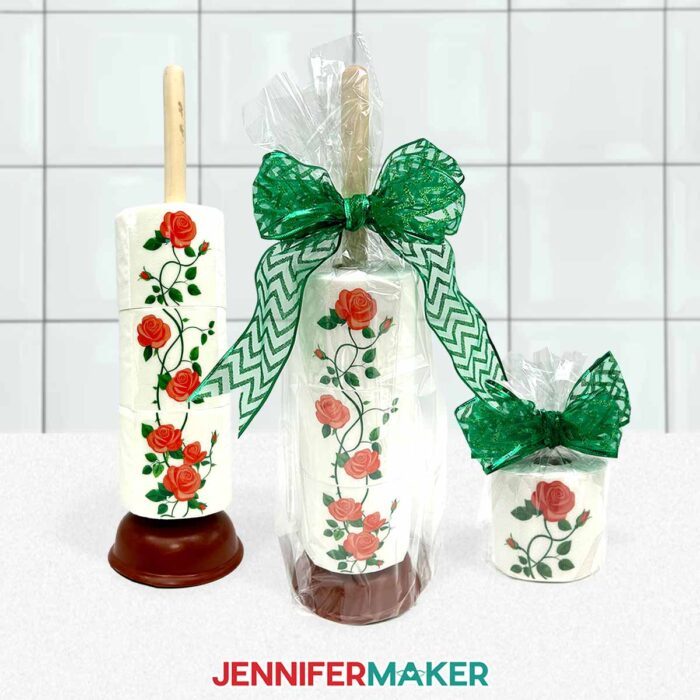
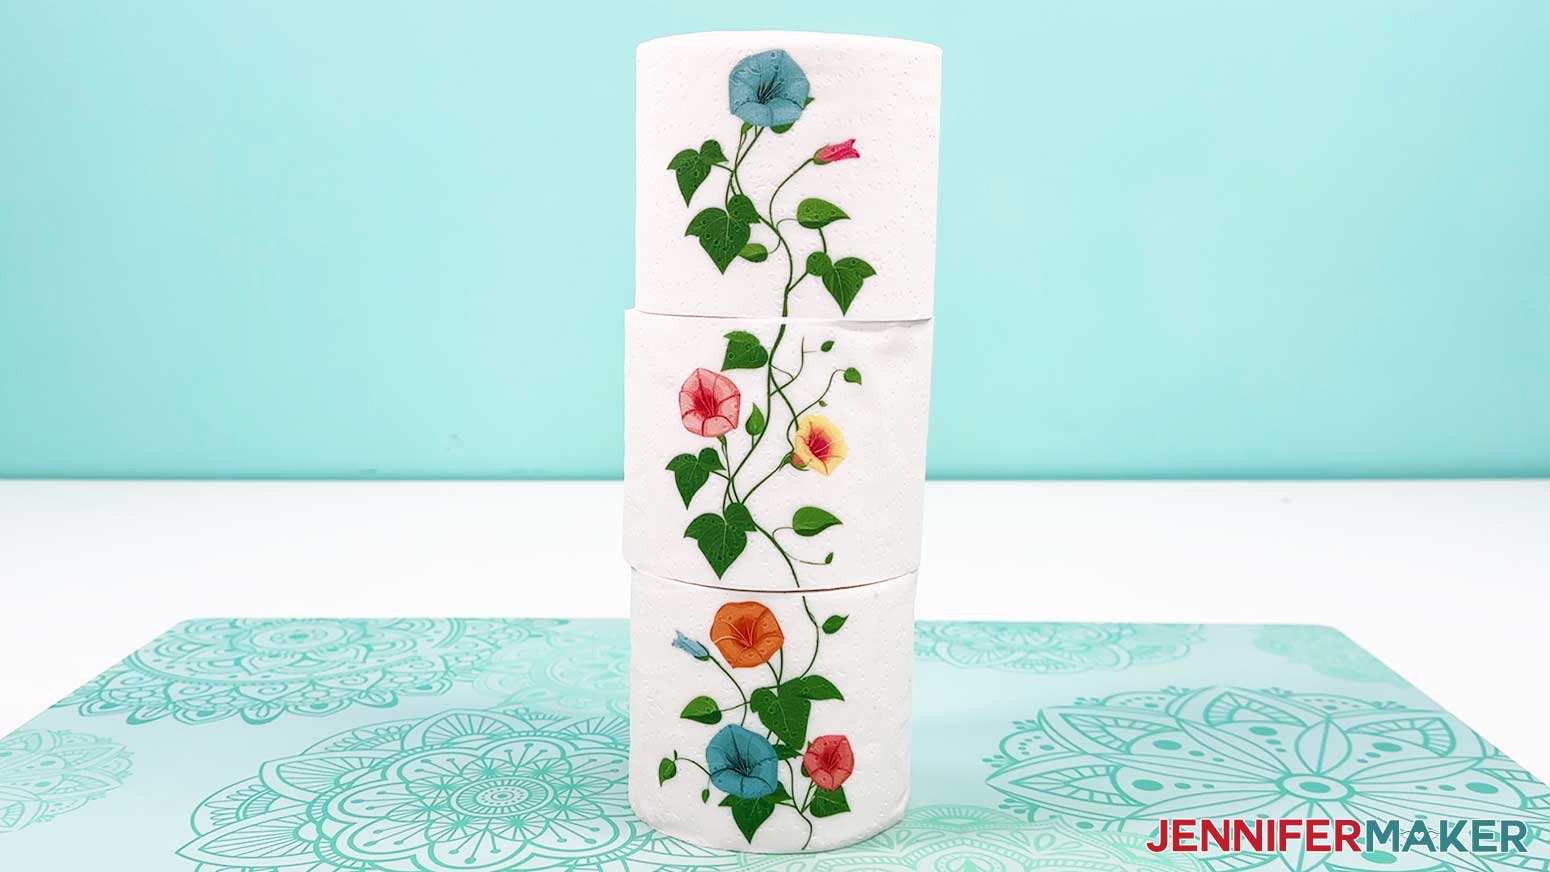
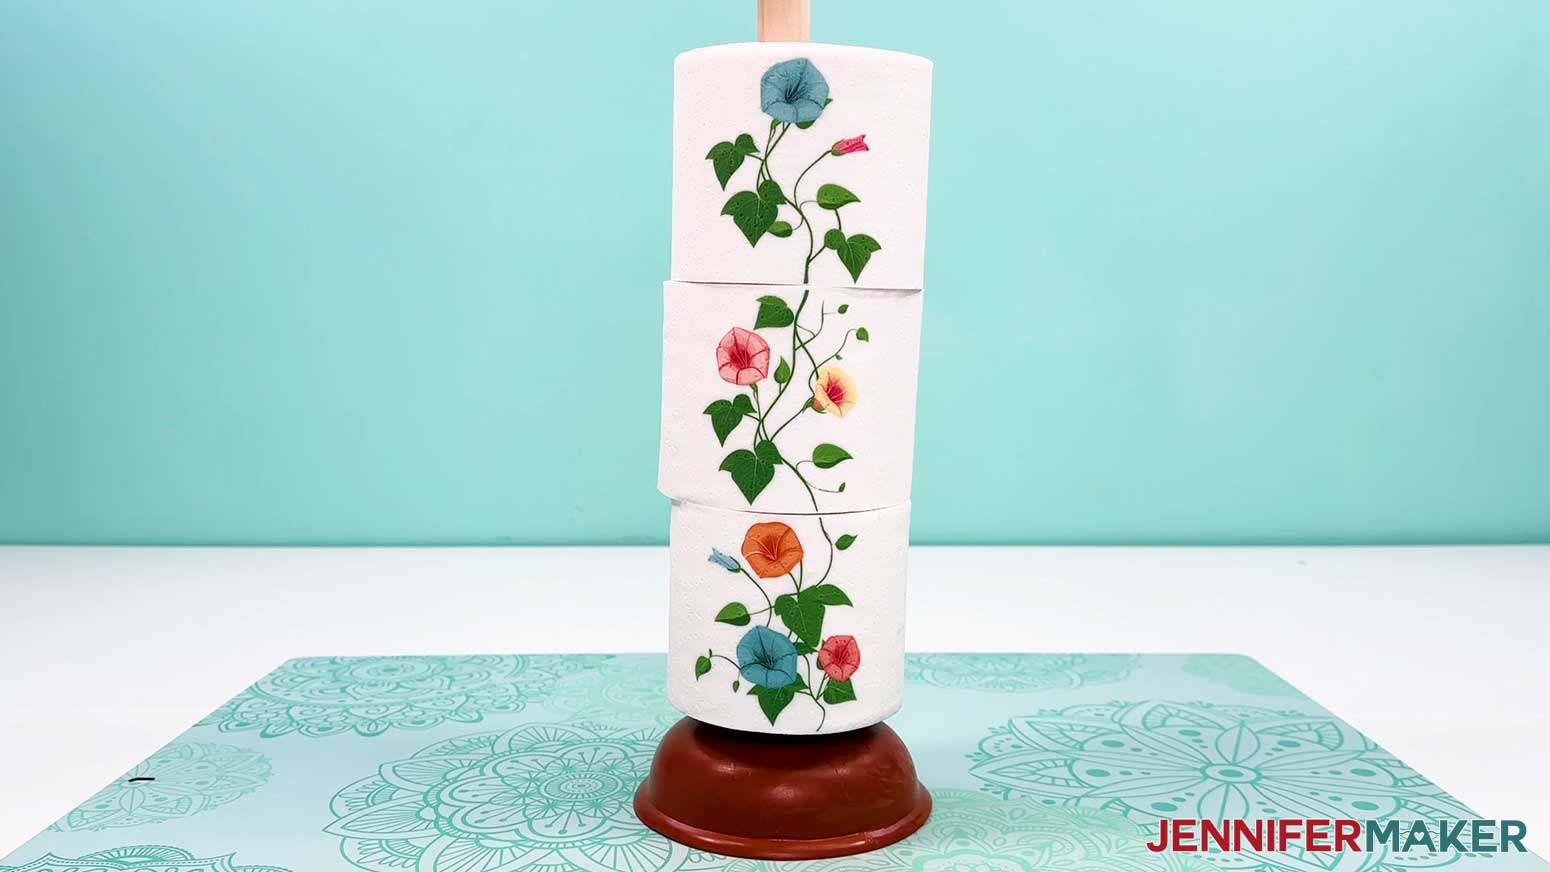
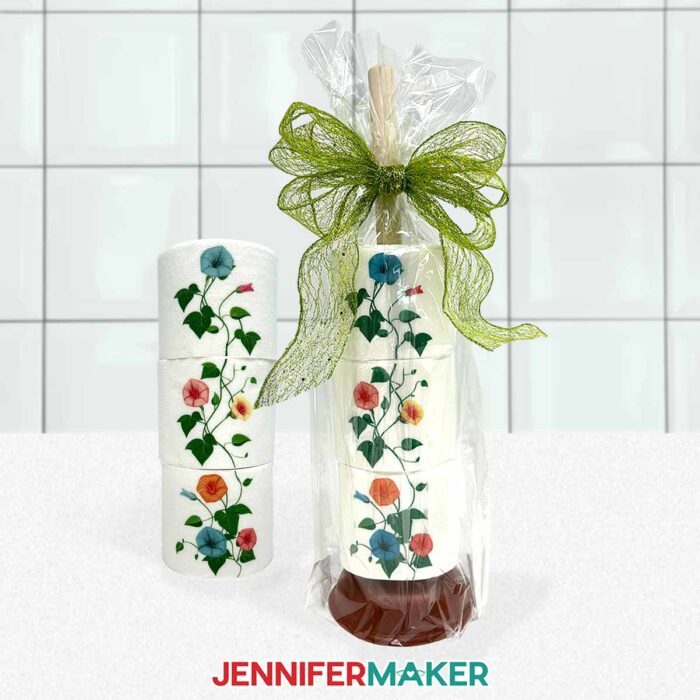
My favorite part? Each flower design seamlessly spans across a tower of three toilet paper rolls without any interruption! That means when you stack them up, the image flows beautifully from the bottom roll to the middle and then to the top with minimal gaps or margins in the design.
If you’d like to practice by sublimating just one roll of toilet paper, just pick your favorite flower section and go for it!
Start by downloading the sublimation toilet paper PNG files and upload them to a new document in Google Docs. Using Google Docs allows you to easily resize and position the designs, making sure they print with the right margins so they can be perfectly and seamlessly sublimated onto your toilet paper rolls.
Once your designs are ready, print your sublimation transfers using a sublimation printer with sublimation ink. My converted Epson EcoTank works great for sublimation, and when it comes to sublimation ink, Hiipoo is my go-to brand. You also need special sublimation paper for high-quality results, and A-SUB sublimation transfer paper is a popular choice. I use it all the time with fantastic results! You’ll find links to everything I use in the materials list below.
Now, the key to a seamless look across your toilet paper tower is trimming and attaching your sublimation transfer just right to each roll. I’ll show you exactly how to do it so your floral design looks flawless on your stack. In my step-by-step guide, you’ll find detailed instructions tailored to the toilet paper brand I use, but if you’re working with a different one, be sure to measure a square and adjust your design before printing.
Need guidance on times and temperatures for different materials? My Sublimation Cookbook is packed with helpful details to ensure great results, whether you’re just starting out or a seasoned sublimation pro!

You might be wondering how we get that curved shape to work with sublimation. I’ll show you how to make it simple and press it on a flat surface. Don’t forget to craft with caution and wear heat-resistant gloves so you don’t burn yourself!
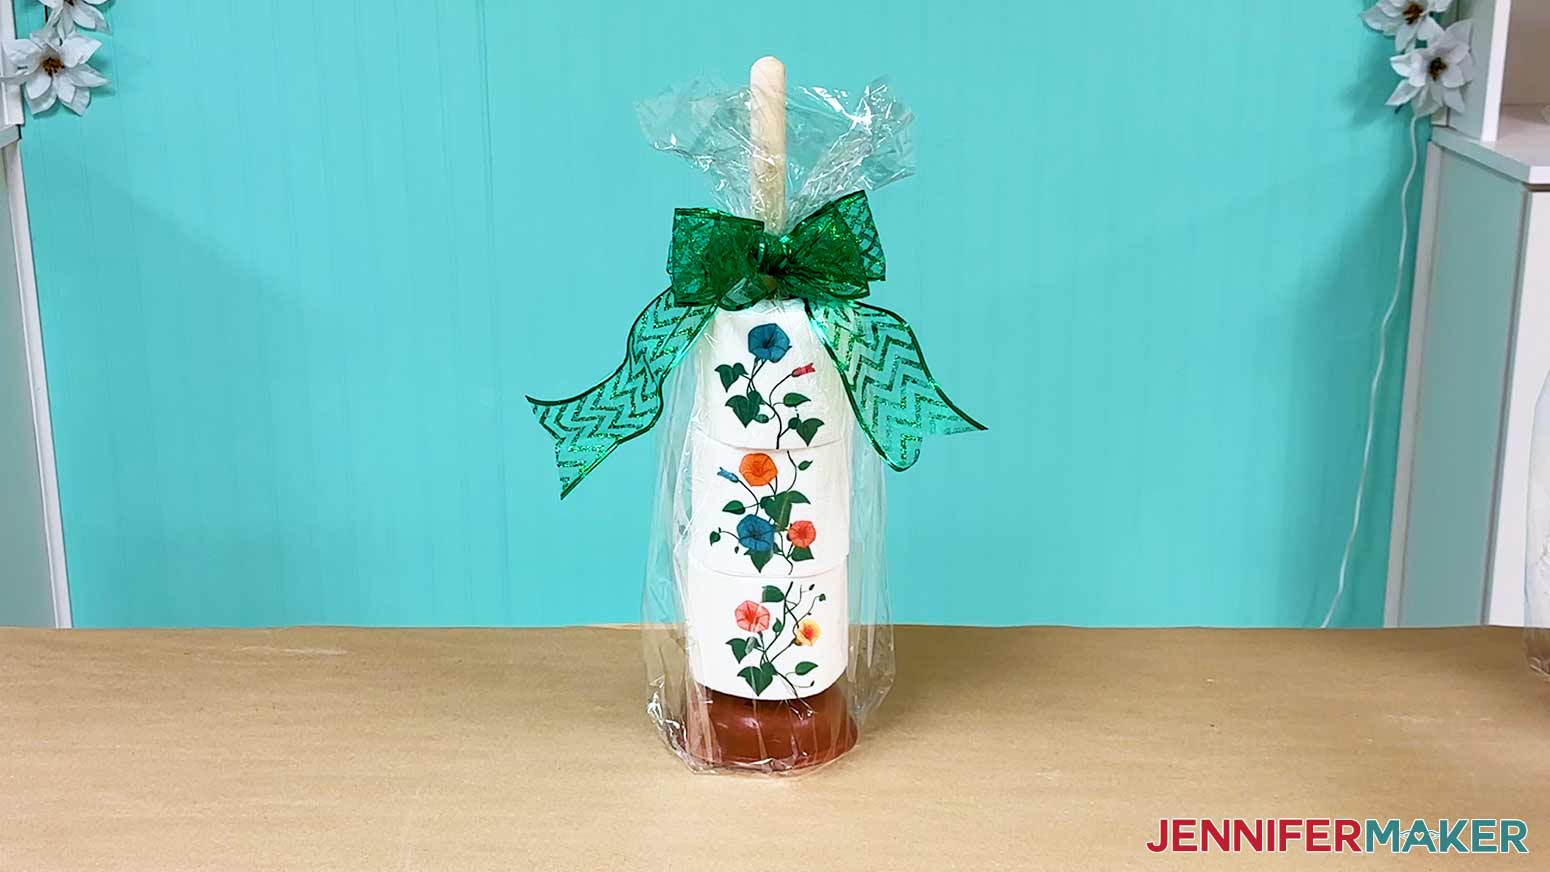
When your rolls are decorated, it’s time to marvel over your amazing creation — then display them in a fun way! Stack them on a new plunger, wrap them up in cellophane, and tie a ribbon around them for gifting. Whether you’re using them as bathroom decor or giving them as a fun present, these sublimated toilet paper rolls are sure to bring a smile. Pair a TP tower with a gift card for some pampering bath products, and you’ve got the perfect present!
So, want to learn how to sublimate on toilet paper? Let me show you how fun and easy it is! This post contains some affiliate links for your convenience (which means if you make a purchase after clicking a link I will earn a small commission but it won’t cost you a penny more)! Read my full disclosure policy.
Materials to Sublimate on Toilet Paper
View my Amazon shopping list with the exact items I used.
For all methods:
- Two (2) Sheets of 8.5″ x 11″ 125g Sublimation Paper
- Three (3) Rolls of 2-Ply Toilet Paper
- Sublimation Printer – I used a converted Epson EcoTank ET-2800 Inkjet Printer -AND-
- Sublimation Ink
- Heat Press – I used the Cricut EasyPress 2 -AND-
- Cricut EasyPress Mat
- Fan (for ventilation)
- Three (3) Sheets of 12″ x 12″ White 65 lb. Cardstock
- White, Uncoated Butcher Paper
- Heat-Resistant Tape
- Scissors
- Tape Measure or Ruler
- Paper Trimmer
- Craft Glue like Bearly Art Glue (optional for securing the edge of the toilet paper) -OR-
- Clear Tape (optional, for securing the edge of the toilet paper)
- One (1) 18″ Plunger (optional, for display
- One (1) 16″ x 24″ Cellophane Bag (optional, for gift wrapping a 3-roll stack) -OR-
- One (1) 9″ x 12″ Cellophane Bag (optional, for gift wrapping a single roll) -AND-
- 2.5″ Wide Ribbon (optional for gift wrapping — I used green)
For the Dyepress method:
For the lamination method:
For both:
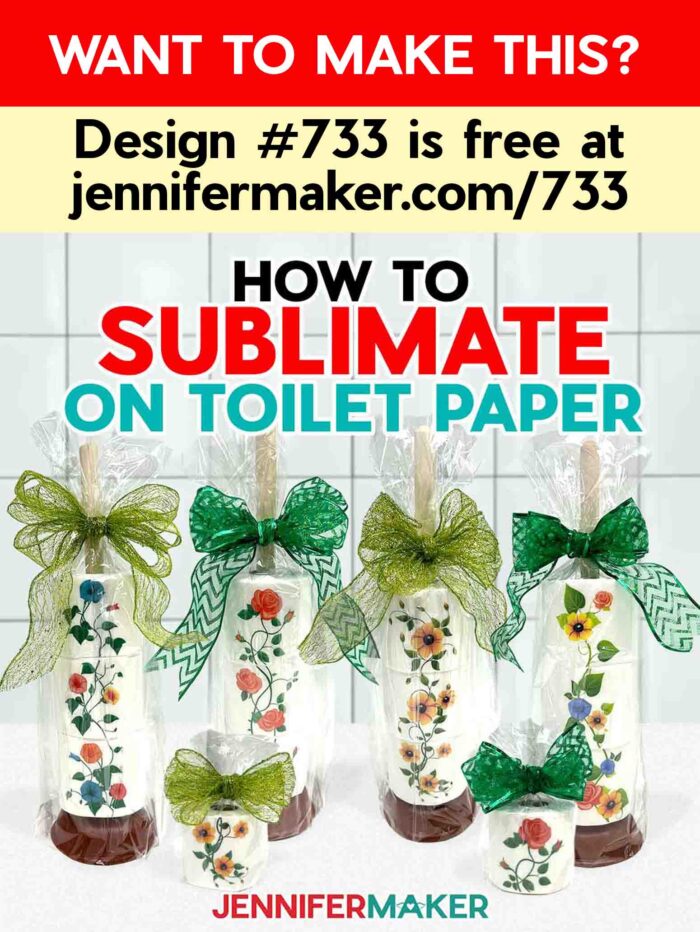
- Design #733 (My free PNG design files are available in my free library – get the password by filling out the form at the bottom of this page)
How to Sublimate on Toilet Paper

How To Sublimate On Toilet Paper
Learn how to sublimate on toilet paper safely (without hairspray) and make pretty bathroom decor!
Materials
- One (1) Sheet of 8.5” x 11” 125g Sublimation Paper
- Three (3) Rolls of 2-Ply Toilet Paper per stack
- One (1) 18” Plunger (for display or gifting of the finished rolls)
- Several Sheets of 12” x 12” White 65 lb Cardstock
- White Uncoated Butcher Paper
- Dyepress PolyTPro Sublimation Spray (optional, for Dyepress method) -AND-
- Bottled Water (optional, for Dyepress method) -OR-
- One (1) 8.9” x 11.4” Thermal Laminating Pouch (optional, for lamination method)
- One (1) 16” x 24” Cellophane Bag (optional, for gift wrapping a three-roll stack) -OR-
- One (1) 9” x 12” Cellophane Bag (optional, for gift wrapping single rolls) -AND-
- 2.5” Wide Ribbon (optional for gift wrapping - I used the green ribbon)
- Design #733 (My free PNG/PDF design files are available in my free resource library - get the password by filling out the form at the bottom of this page)
Tools
- Sublimation Printer - I used a converted Epson EcoTank ET-2800 Inkjet Printer
- Sublimation Ink
- Heat Press - I used the Cricut EasyPress 2
- Cricut EasyPress Mat
- Fan for Ventilation
- Heat Resistant Tape
- Scissors
- Tape Measure -OR-
- Ruler
- Paper Trimmer
- Spray Bottle (optional, for the Dyepress method)
- Bearly Art Glue (optional, for securing the edge of the toilet paper) -OR-
- Clear Tape (optional, for securing the edge of the toilet paper)
Instructions
STEP 1: GET MY FREE TOILET PAPER SUBLIMATION DESIGNS
First, download my toilet paper sublimation designs from my free library – look for Design #733. Alternatively, you can use the Save This Project form near the top of this post and the design link will be emailed to you.
There are nine design files in the PNG folder – a top, middle, and bottom image for three different flowers: a Morning Glory, a Rose, and a Black-Eyed Susan. You can use all three images of a flower to sublimate a three-roll stack, or choose your favorite and sublimate a single roll of toilet paper.
I’m using Google Docs to prepare and print my sublimation designs, and my Cricut EasyPress to sublimate them, but you can use any flat heat press with a plate large enough to fully cover one square of toilet paper.
STEP 2: PREPARE AND PRINT YOUR TOILET PAPER SUBLIMATION DESIGNS
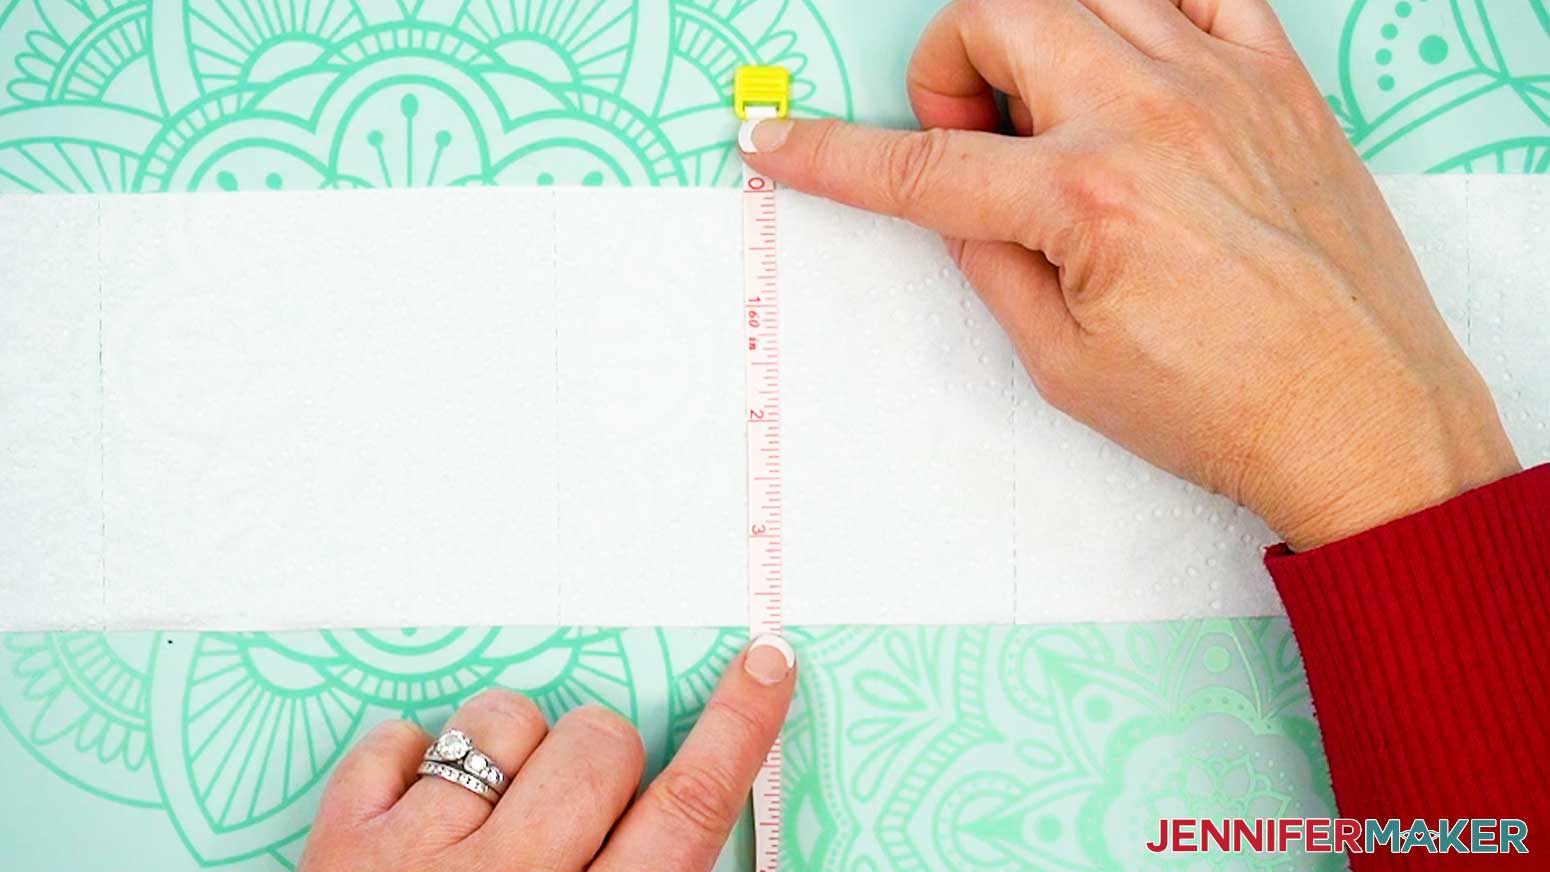
- Use a tape measure to measure the length and width of one square of the toilet paper.
NOTE: My toilet paper’s squares measure 3.75” by 3.75”.
- Open Google Docs in the Google Chrome web browser on your computer. You can also download and open the Google Docs app, but be aware that you won’t be able to install or access any printer profiles from a mobile device, and you’re also limited in features, so I do not recommend it on a mobile device.
NOTE: You will need a free Google account to use the free Google Docs software. - With Google Docs open, click on “Blank document” in the upper left corner to open a new document.
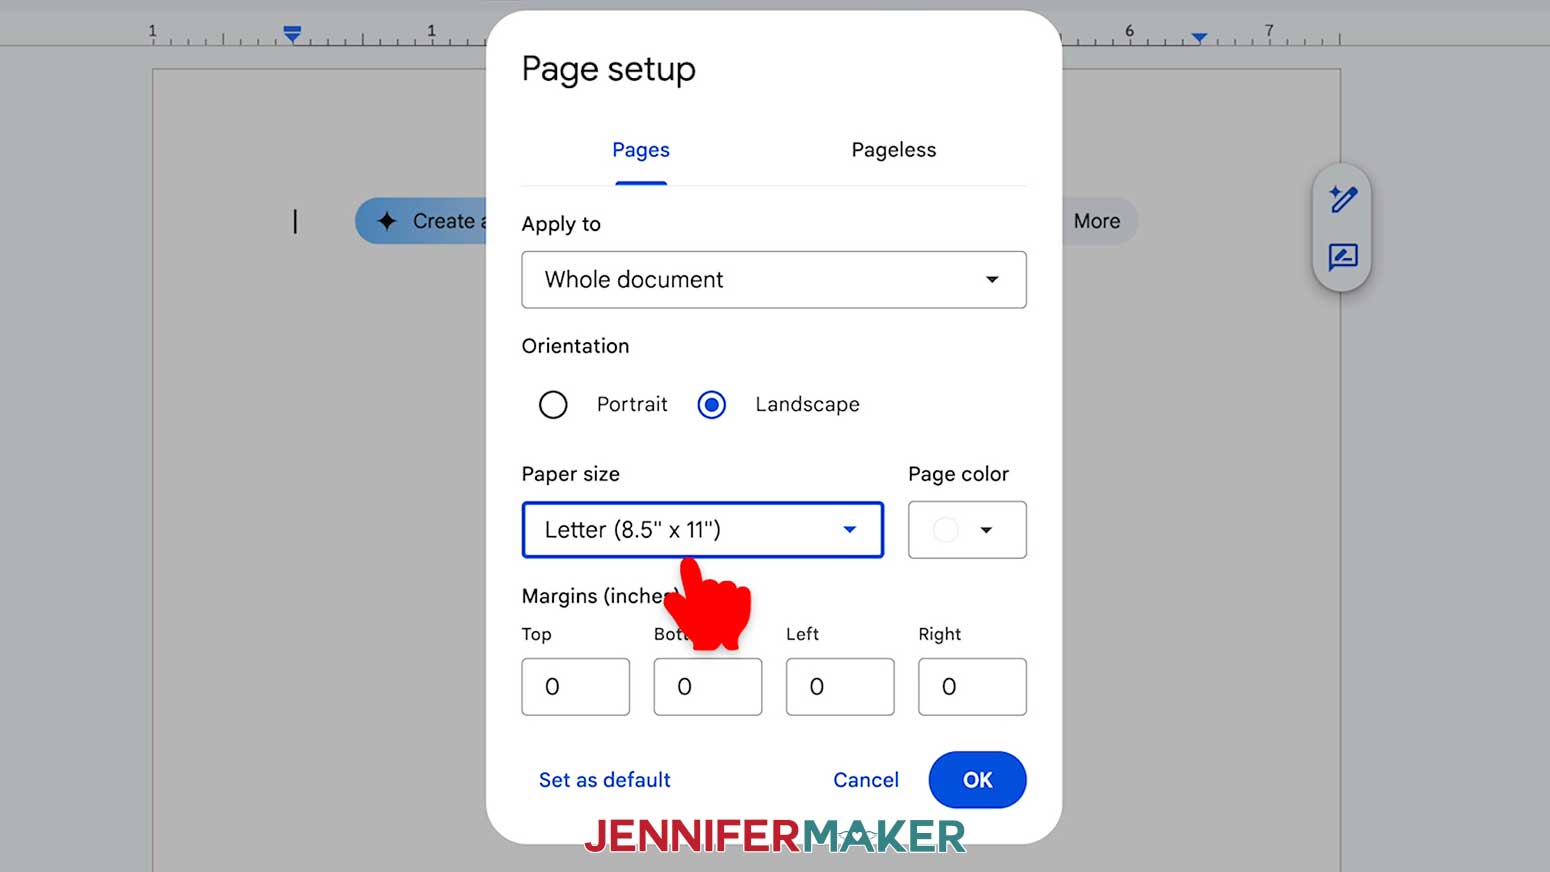
- Go to the File menu and select “Page setup.”
- Check the box next to “Landscape,” change your margins to “0,” and change your Paper Size to match your sublimation paper size (it’s probably 8.5” x 11”). Then click “OK” to apply the settings.
- Go to the Insert menu, select “Image,” and select “Upload from Computer.”
- Locate a sublimation design you want to use (hint: it’s probably in your Downloads folder), and click “Open.”
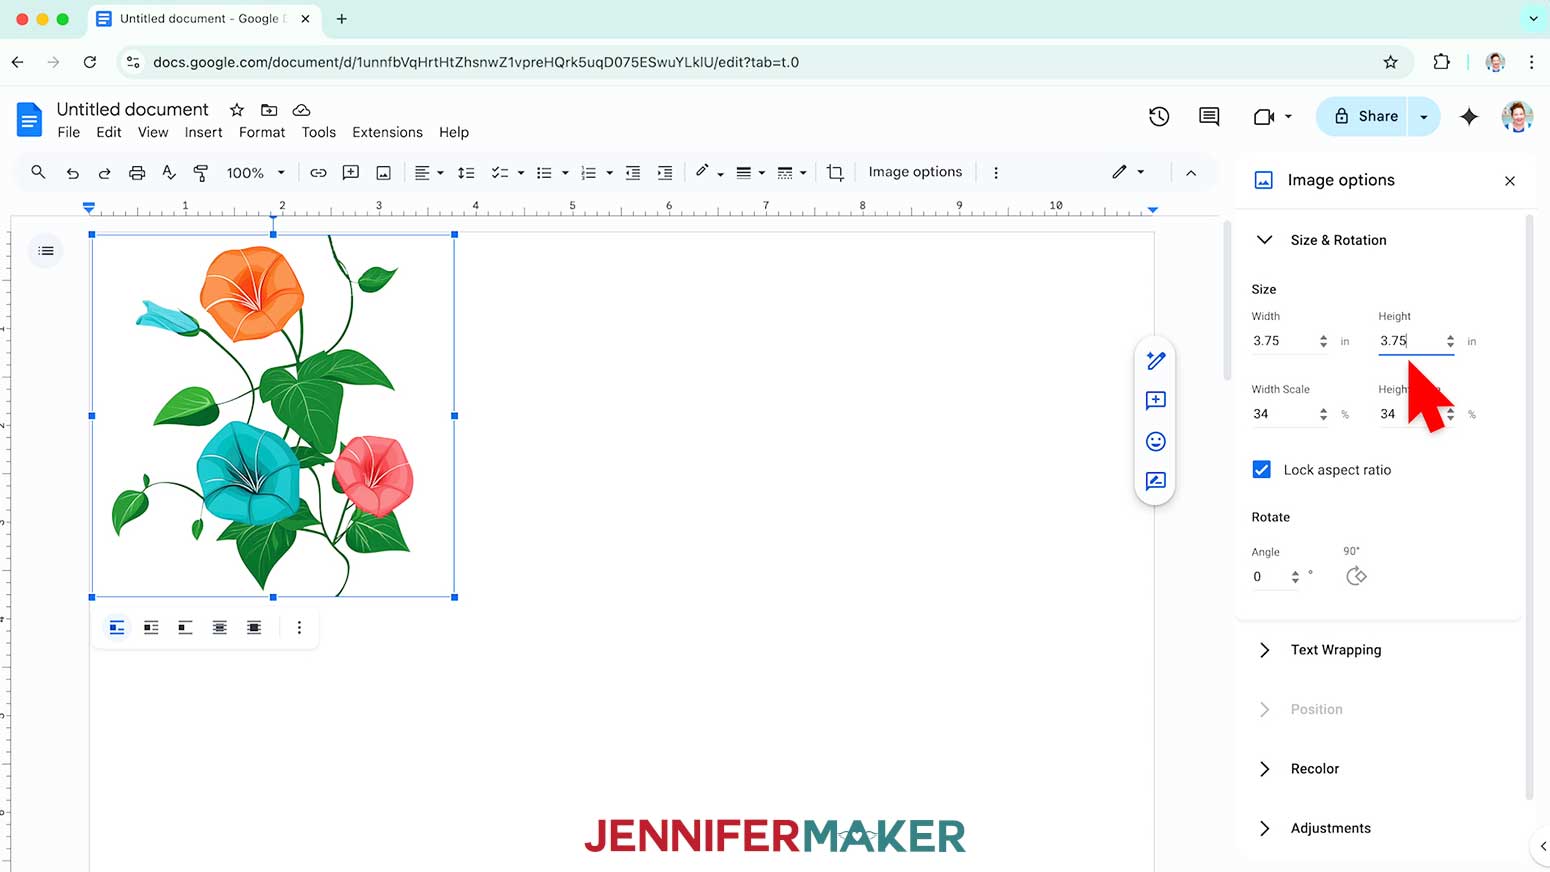
- Check your image size, and if necessary, click “Image options” and resize it to the same height as a square of your toilet paper.
- Reposition the image on your page by selecting the image, then click on “Wrap text” from the menu that appears below it.
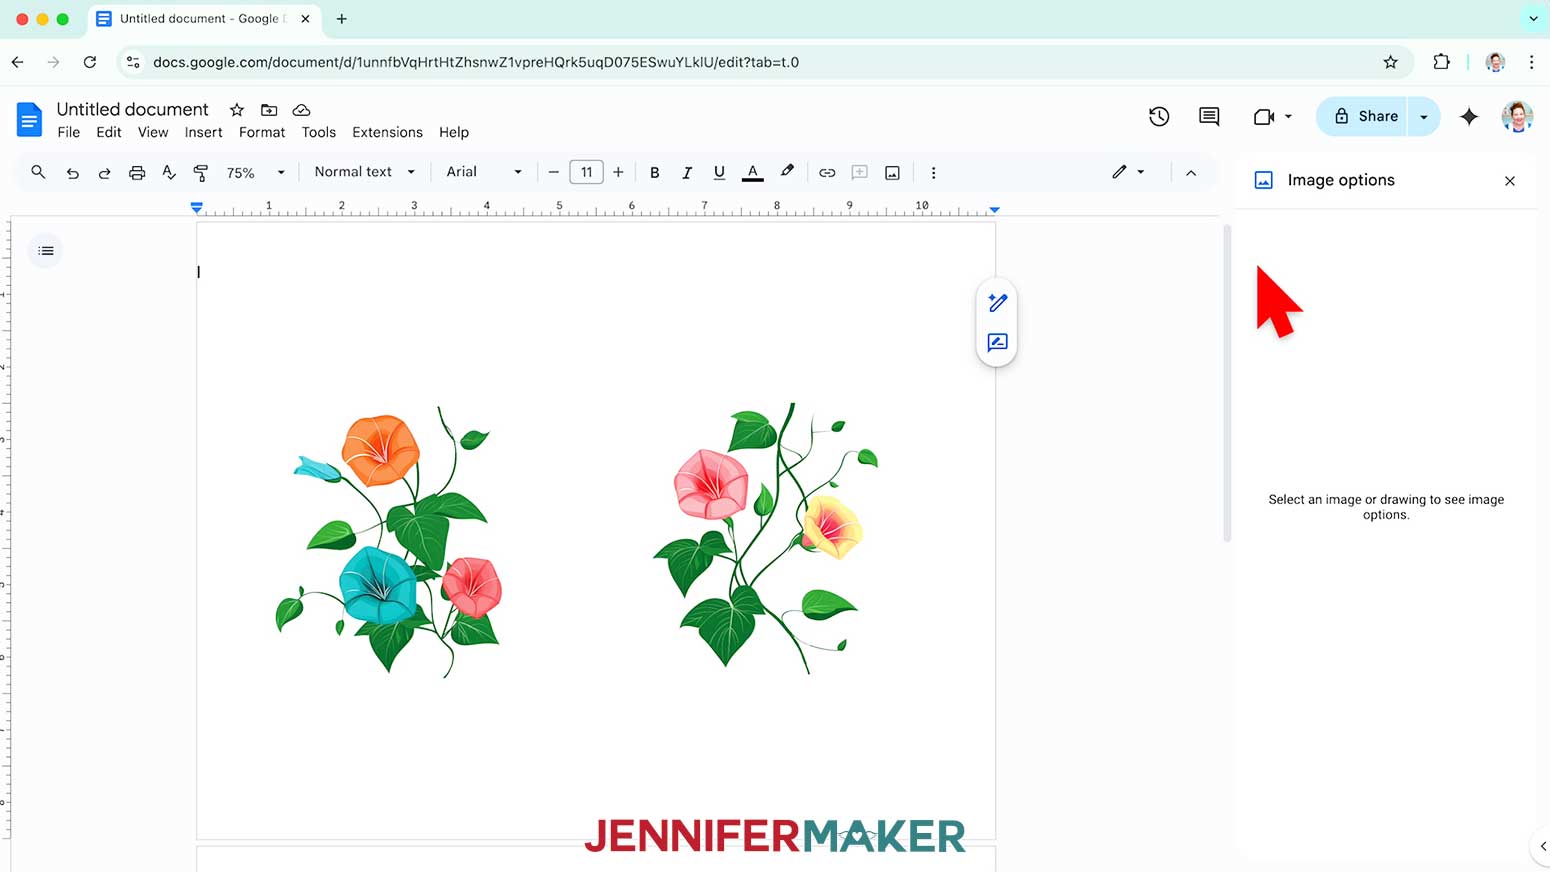
TIP: Once you do this, you can click and drag the image anywhere on your page. I recommend putting your design in the center of your page, as that ensures it won’t get cut off at the edges and you have plenty of space for cutting/tearing edges. - If you’re sublimating multiple rolls of toilet paper, follow steps 6-9 to upload and add your other designs to your Google doc.
- Give your document a name so you can find it later. Google Docs will automatically save the document.
- Go to the File menu and choose “Print.”
- Select your printer under “Destination.”
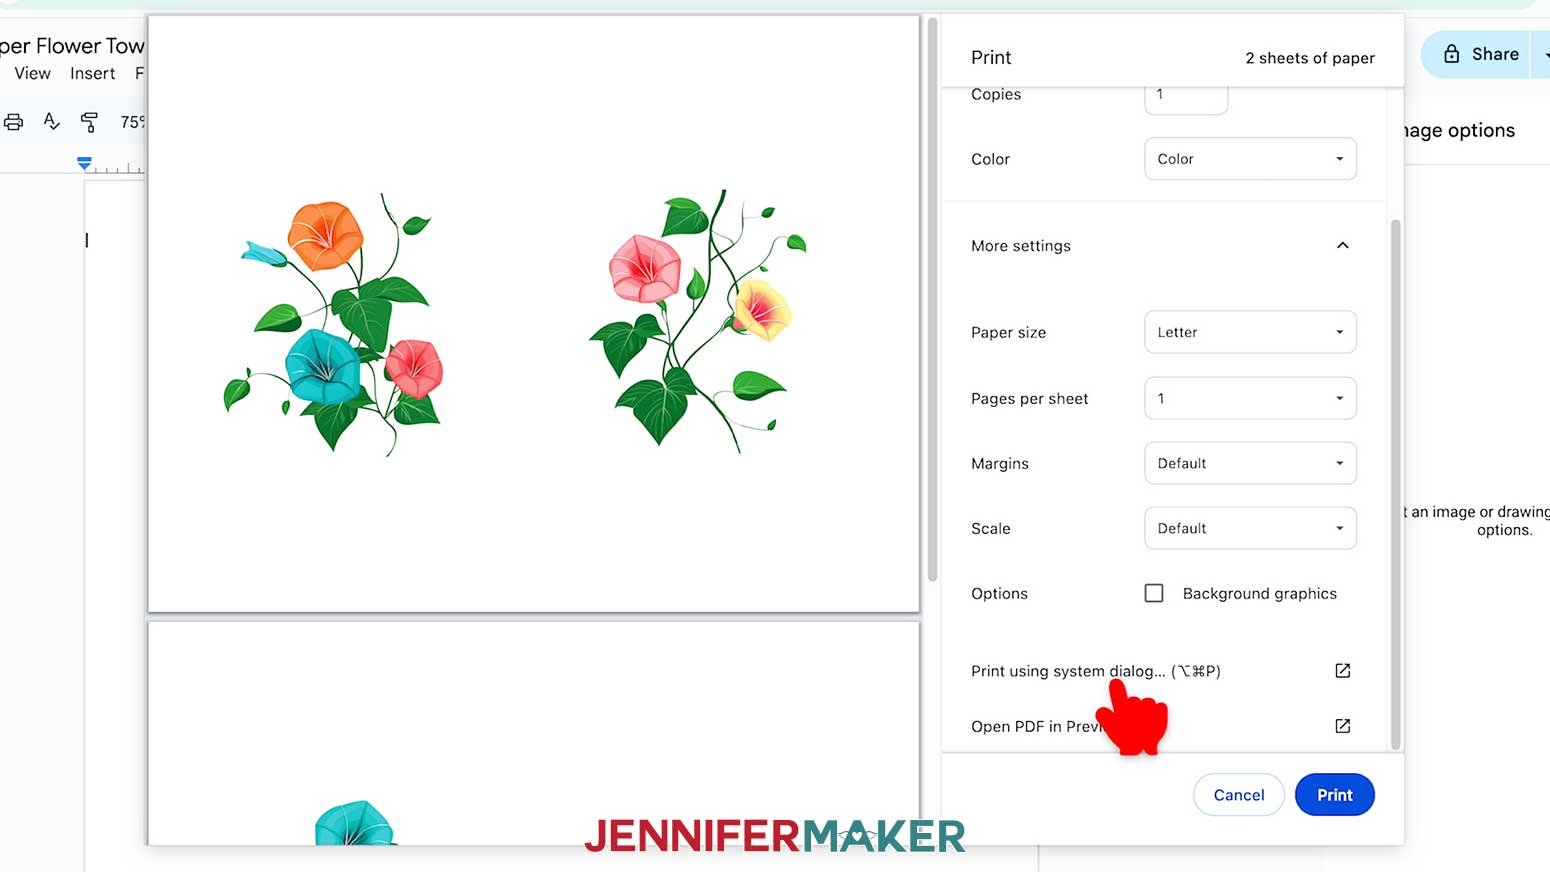
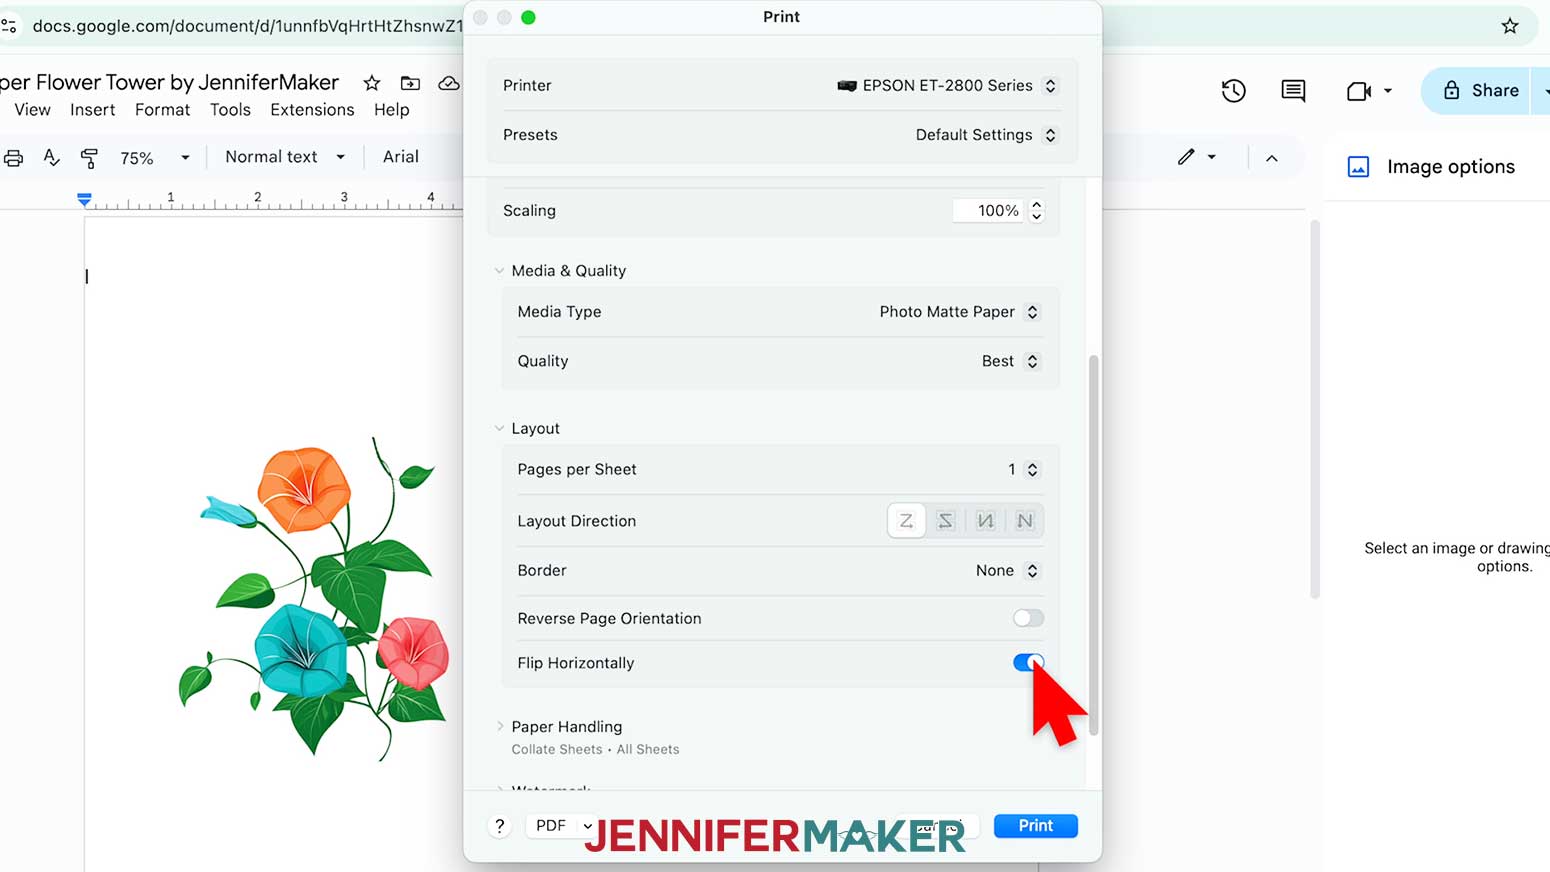
- Click the arrow beside “More Settings” and click on “Print Using System Dialog.”
- Your print menu may look different, but use these settings as a guide - make sure you “mirror” the print and select the highest quality matte paper setting.
- Check how many sheets you are printing, and load that number of sheets of sublimation paper correctly into your sublimation printer.
NOTE: Check the packaging for information on how to load the paper. - Click “Print.”
- Allow the print to dry before handling it, as the ink can smear.
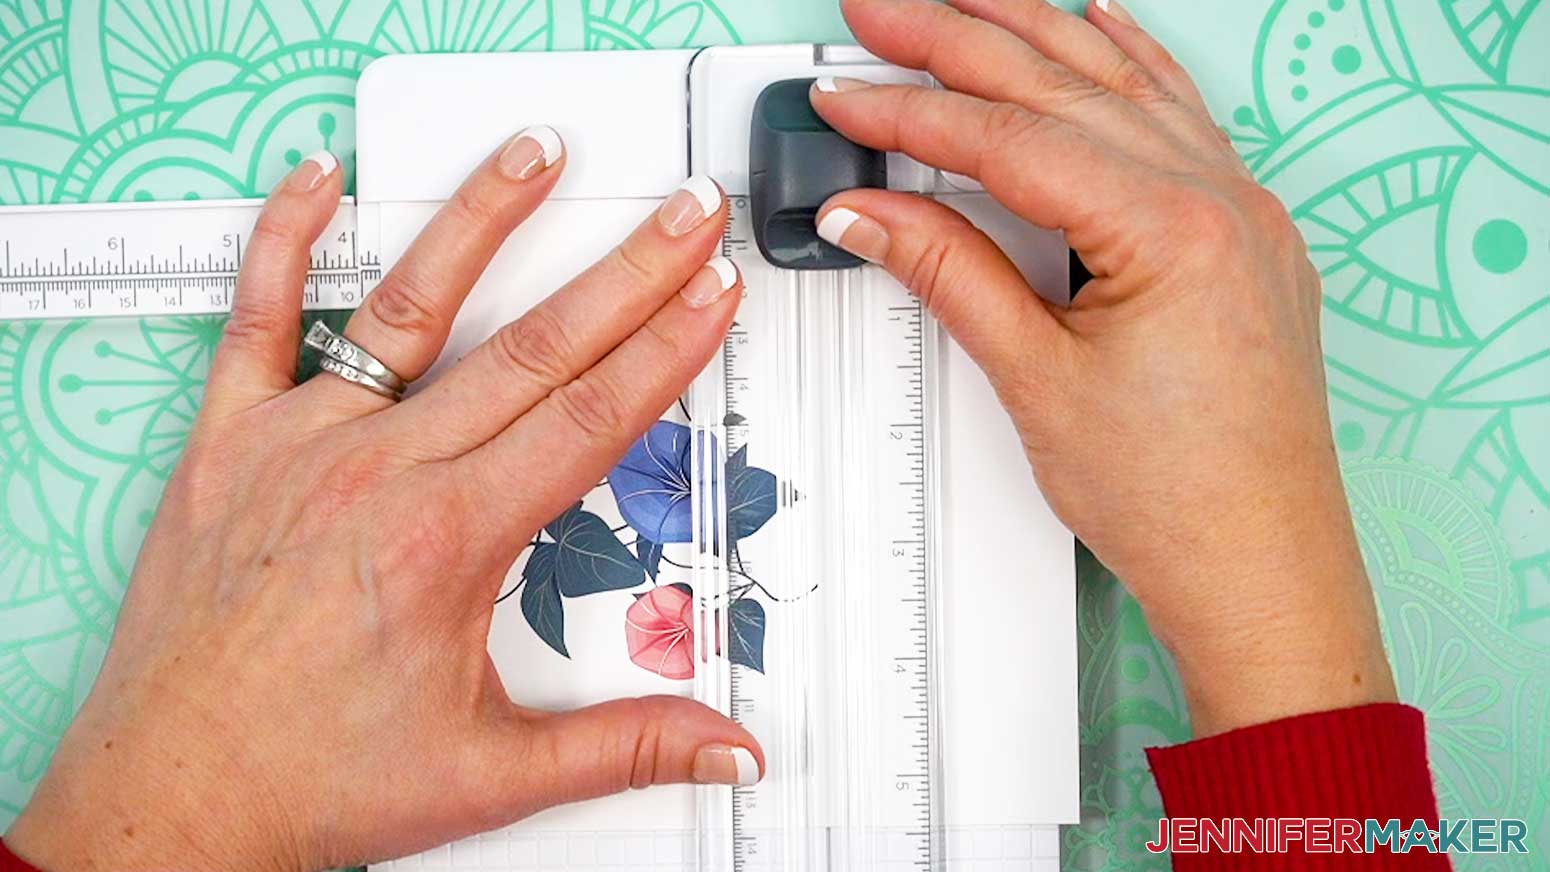
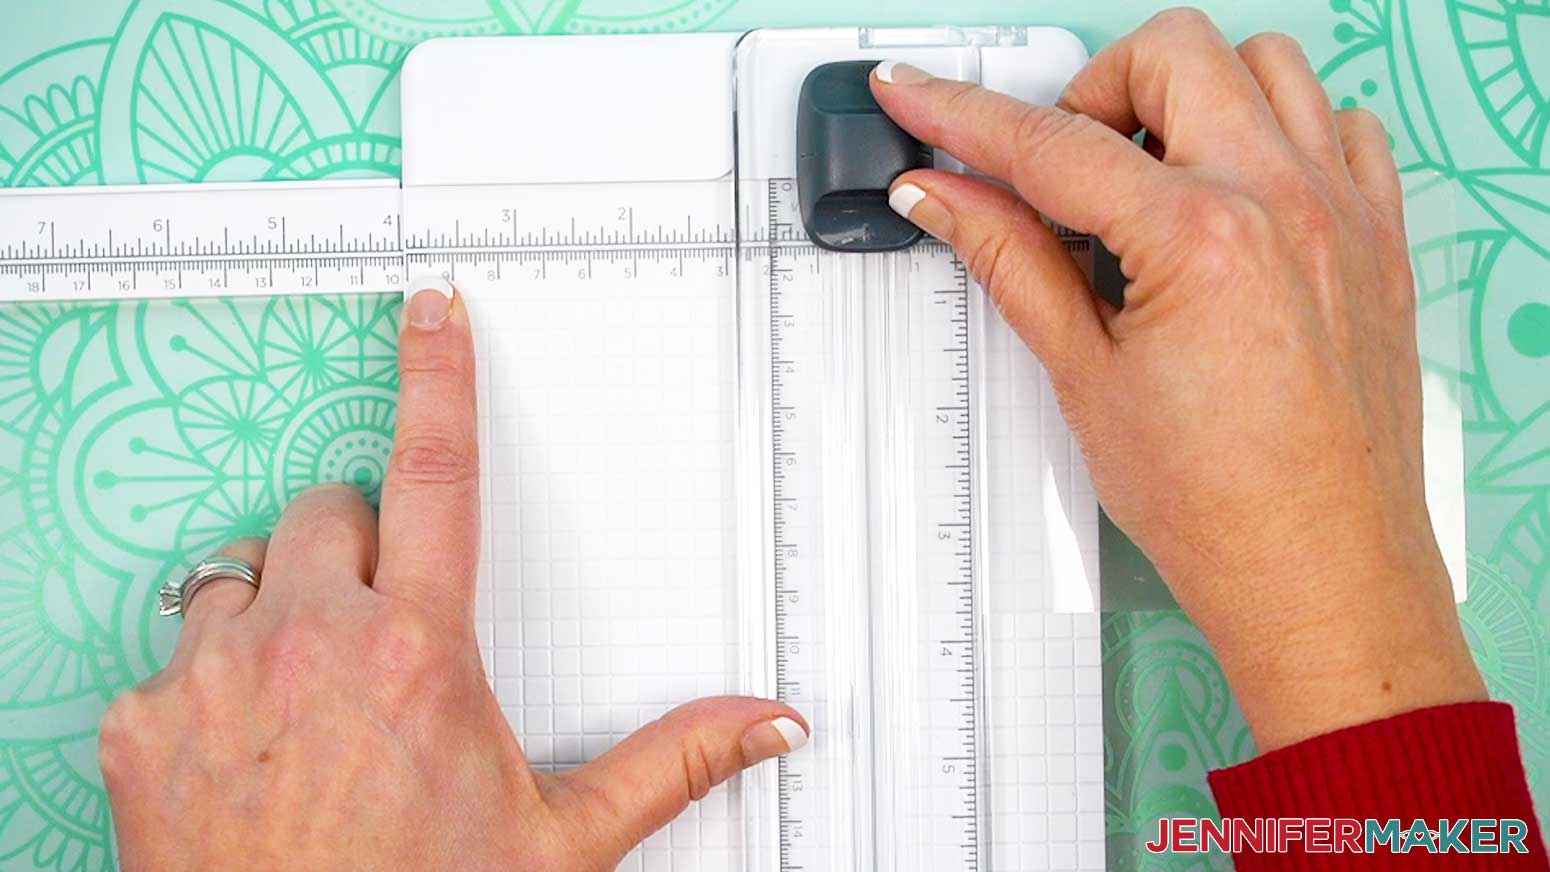
NOTE: The printed designs will appear lighter before pressing. - Use scissors or a paper trimmer to cut the printed designs into three sections—top, middle, and bottom—each matching the height of your toilet paper (mine is 3.75”). Be sure the blunt ends of the vine on all three pieces are flush to the edges of the paper.
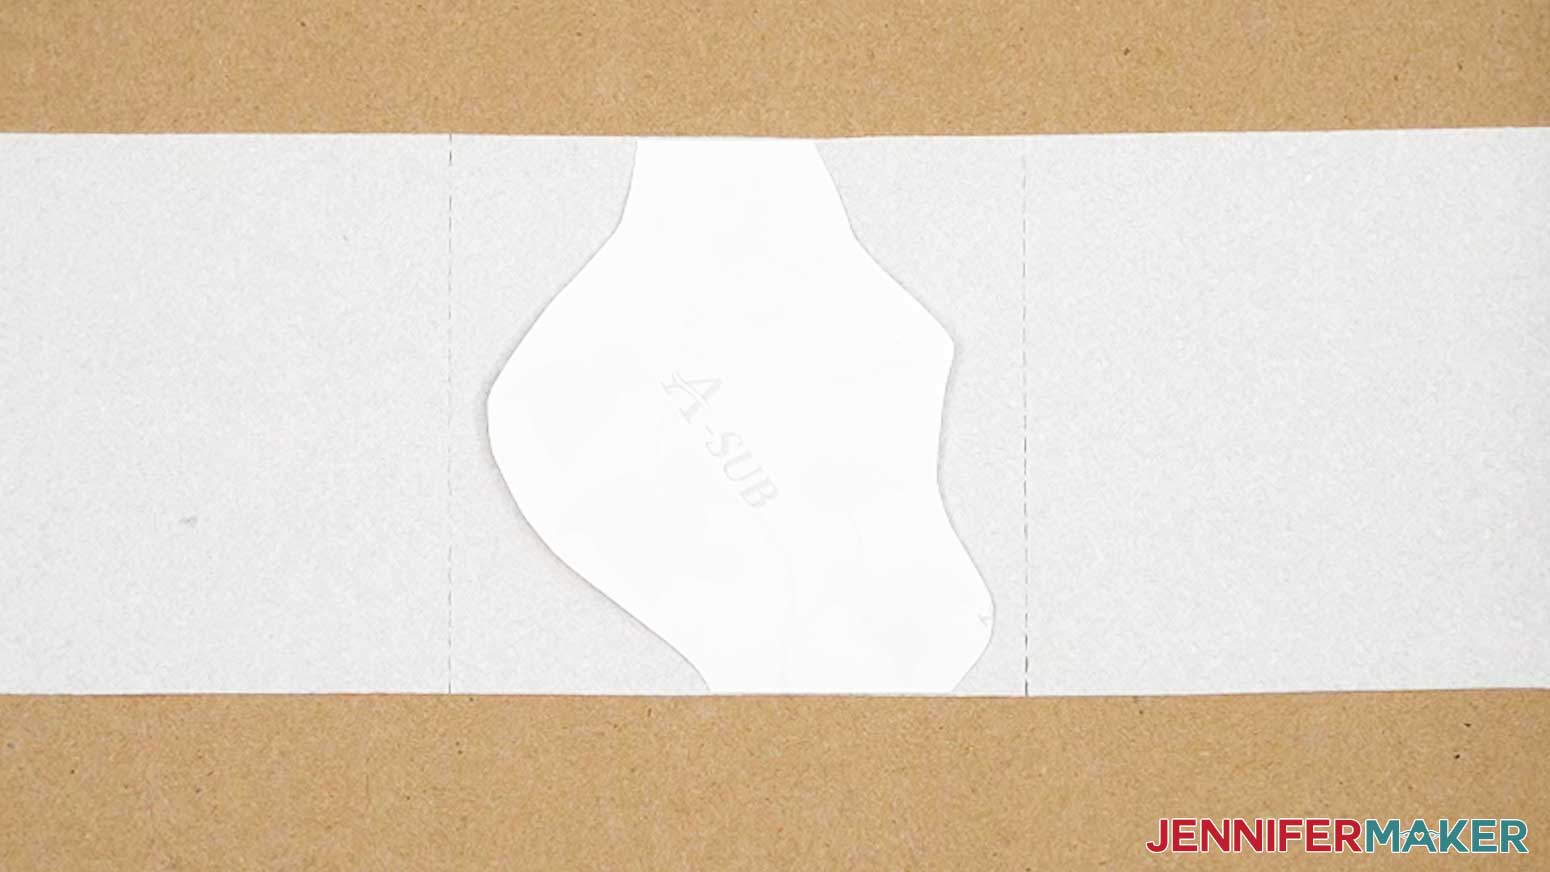
NOTE: The designs are oriented correctly when the vine is running vertically. - If you’d like, trim around the images on the left and right sides of each design section, leaving the top and bottom edges untouched. This allows you to tape the design onto the white cardstock instead of directly onto the toilet paper.


STEP 3: SUBLIMATE YOUR DESIGNS ON TOILET PAPER
As always, turn on a fan and open a window before you sublimate!
OPTION 1: BASIC SUBLIMATION DIRECTLY ON TOILET PAPER
The basic method is the simplest, and results in colors that are soft and muted.
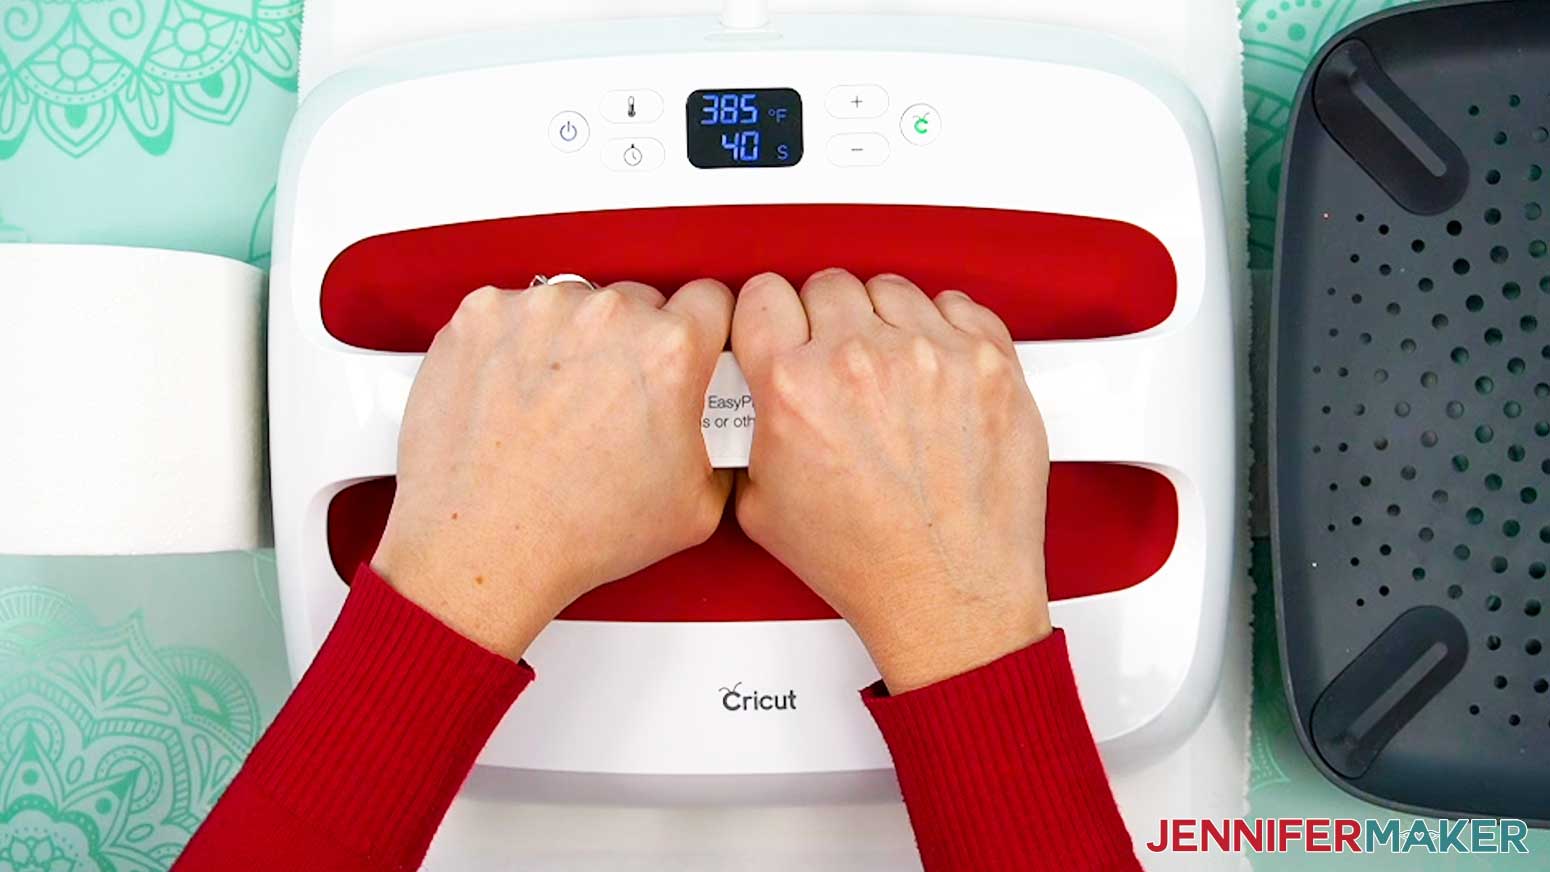
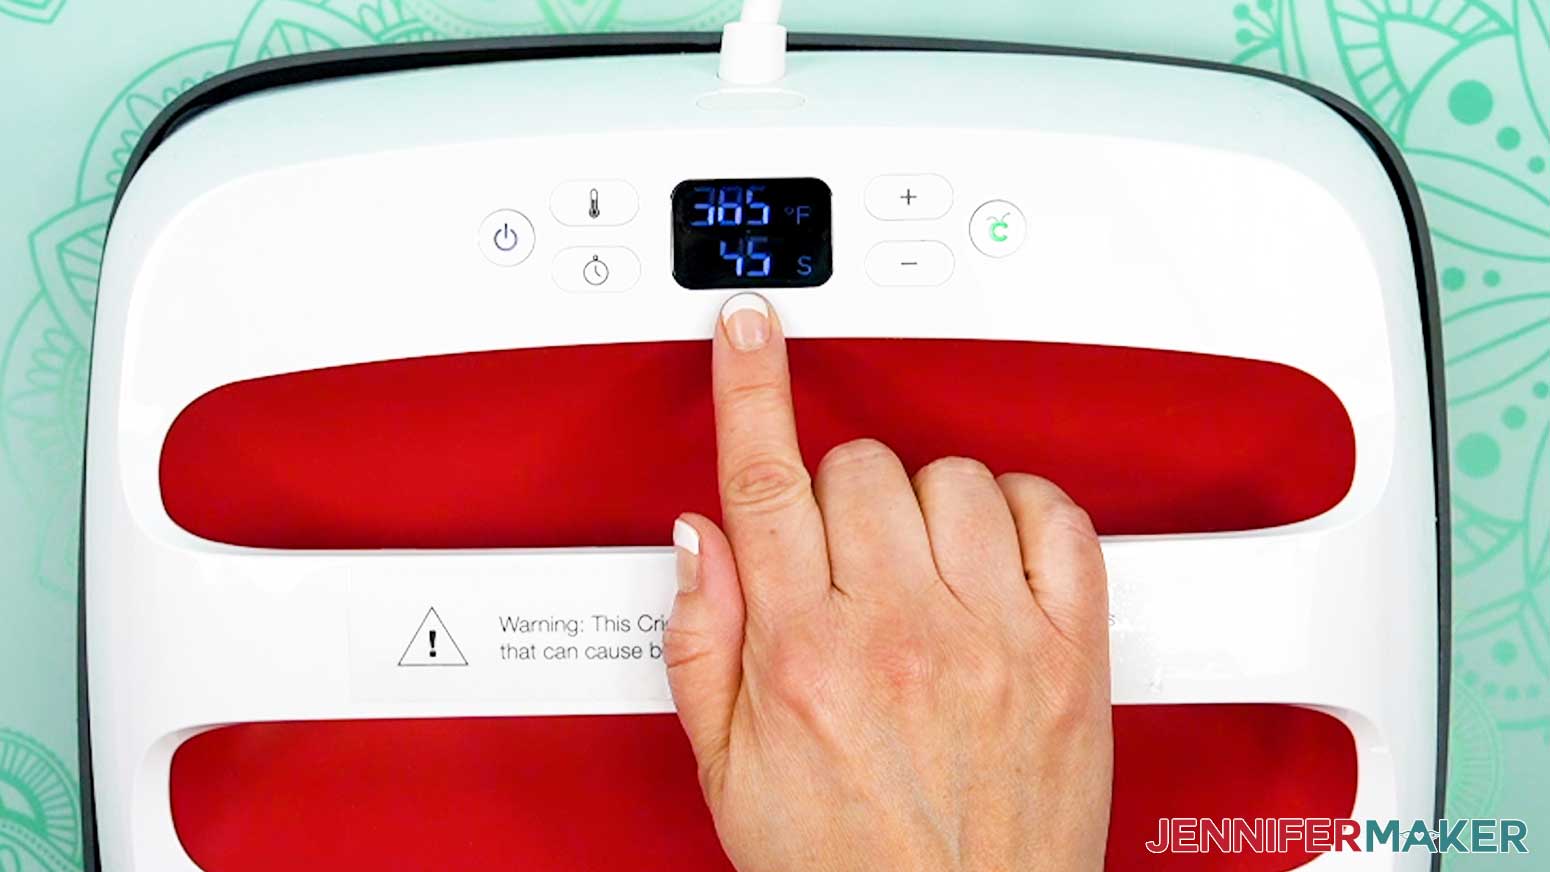
- Turn on your heat press and set the temperature to 385° F (196° C) and the timer to 45 seconds.
TIP: Check out my Sublimation Cookbook to get time and temperature settings for tons of sublimation projects! - Lay down a pressing pad on your work surface.
- Place a clean piece of 12” by 12” white cardstock on top of the pressing pad.
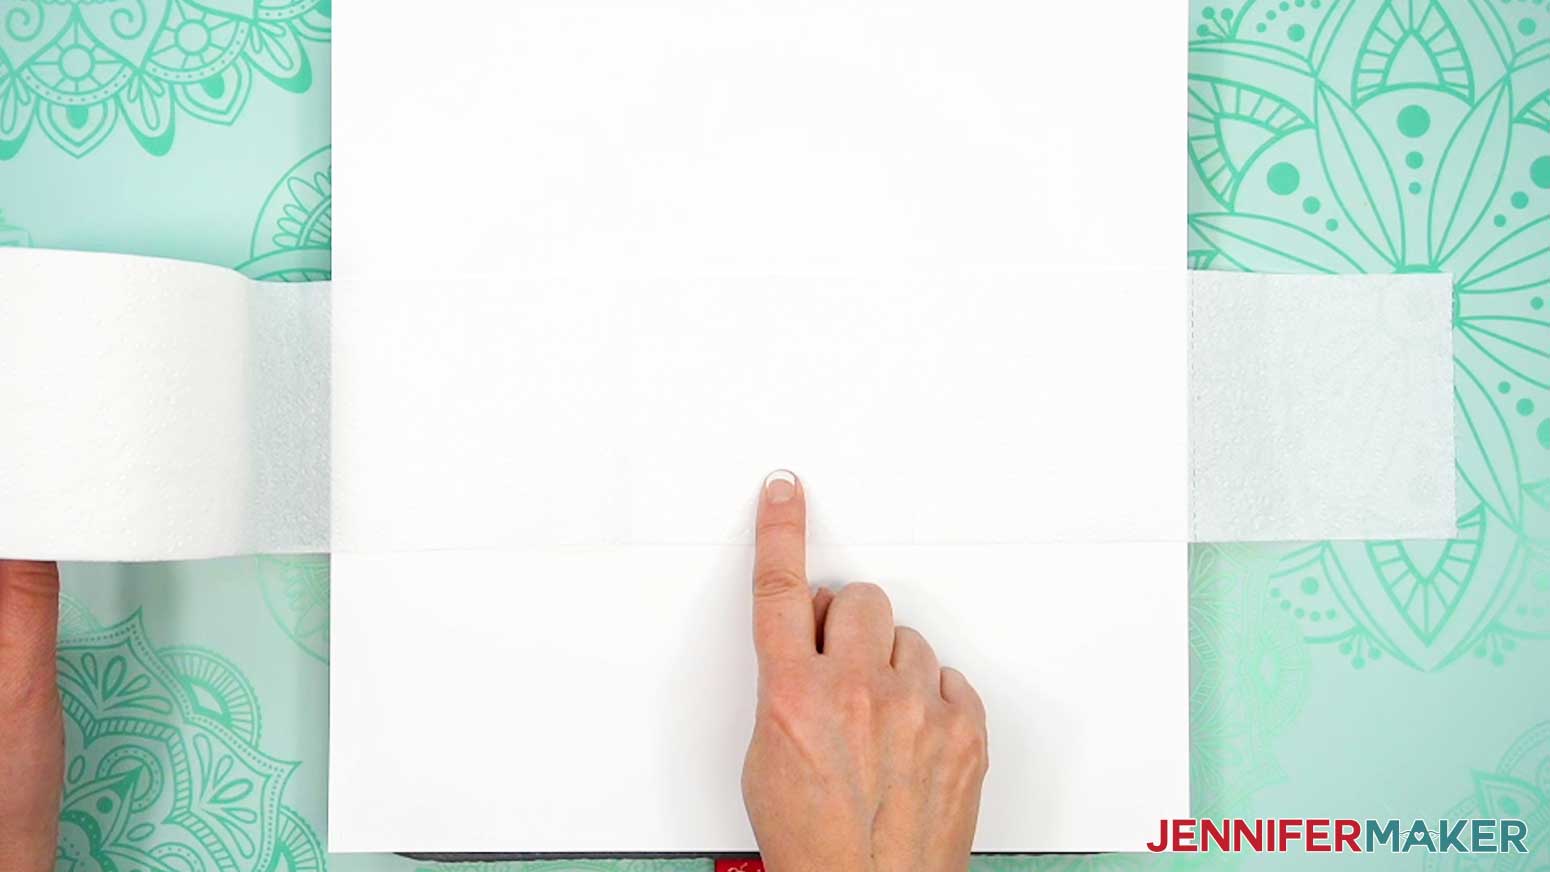
- Unroll one roll of toilet paper so the third square from the end is in the center of the cardstock, and the rest of the roll is out of the way. Make sure the pieces are rolling off the top and not the bottom, so the design shows on the outside of the roll when it’s rolled back up.
NOTE: The glue that holds your toilet paper roll closed may penetrate the first couple of layers on the roll. Tear off the sheets that have glue on them and discard them first. - Preheat the toilet paper and remove excess moisture by placing your heat press on top of the cardstock and toilet paper and pressing with medium pressure at 385° F (196° C) for 5-10 seconds.
- Remove the press by lifting it straight up and place it back into its cradle.
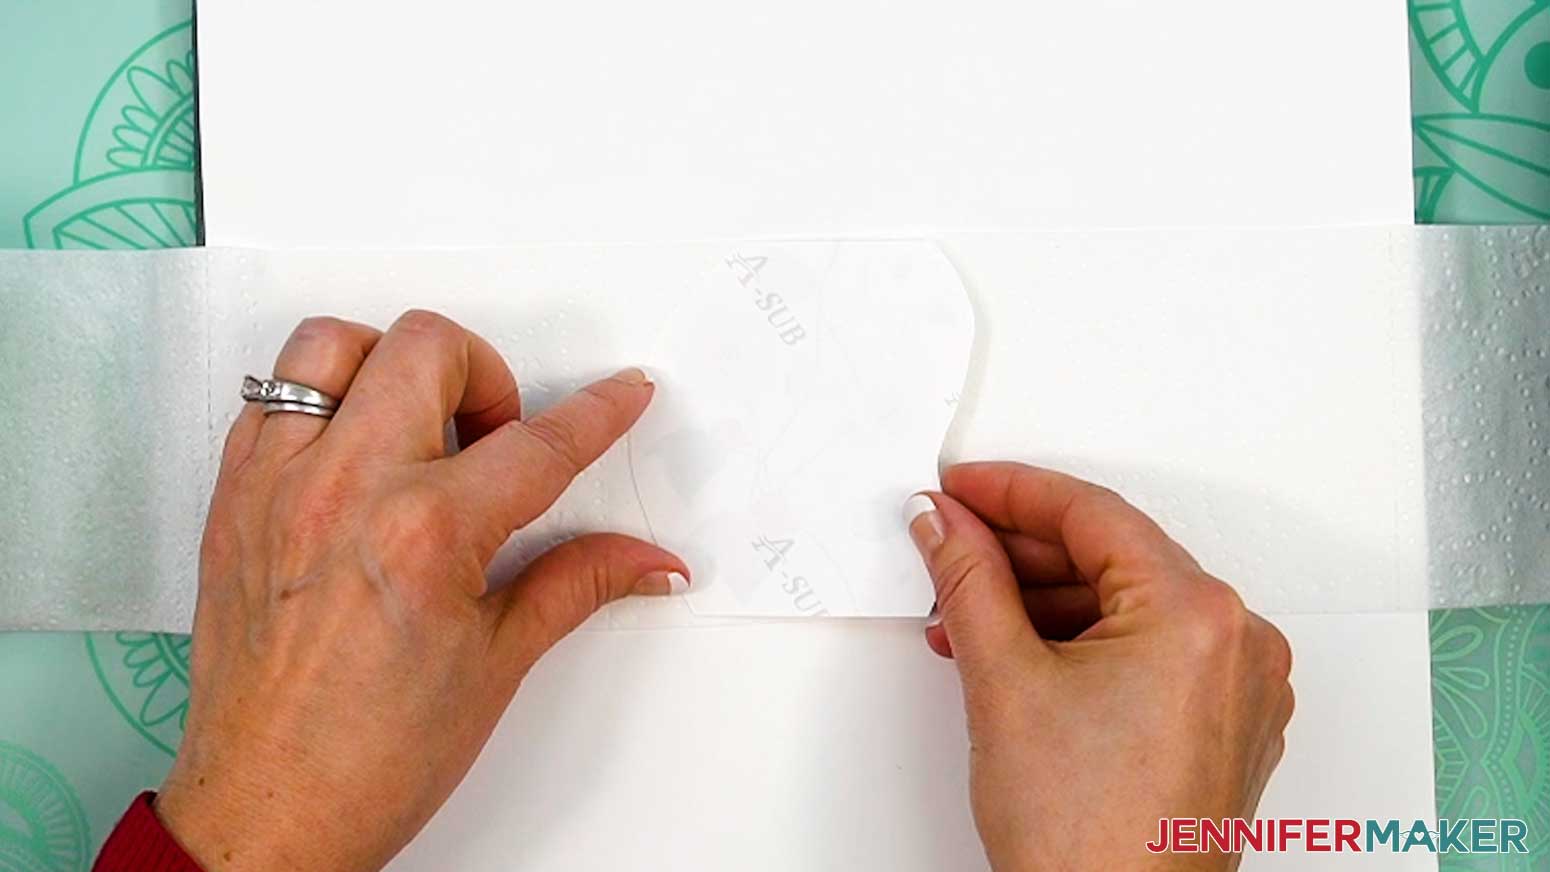
- Place the top section of the design transfer face down onto the center of the toilet paper square. Align its bottom edge so it is flush with the bottom edge of the toilet paper square.
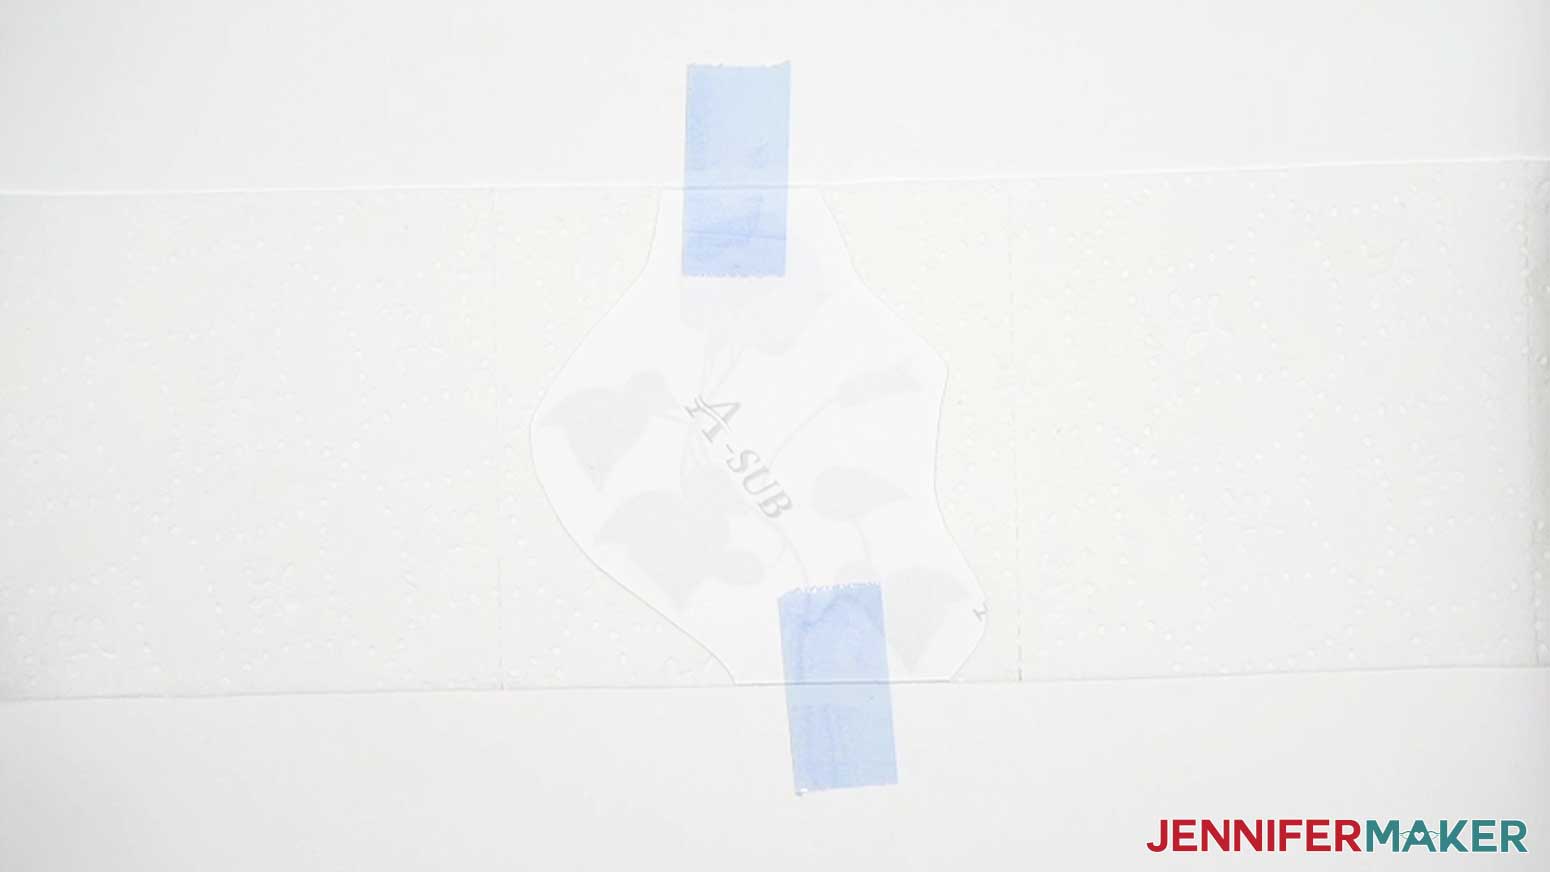
- Use heat-resistant tape to tape the design to the white cardstock – not onto the toilet paper.
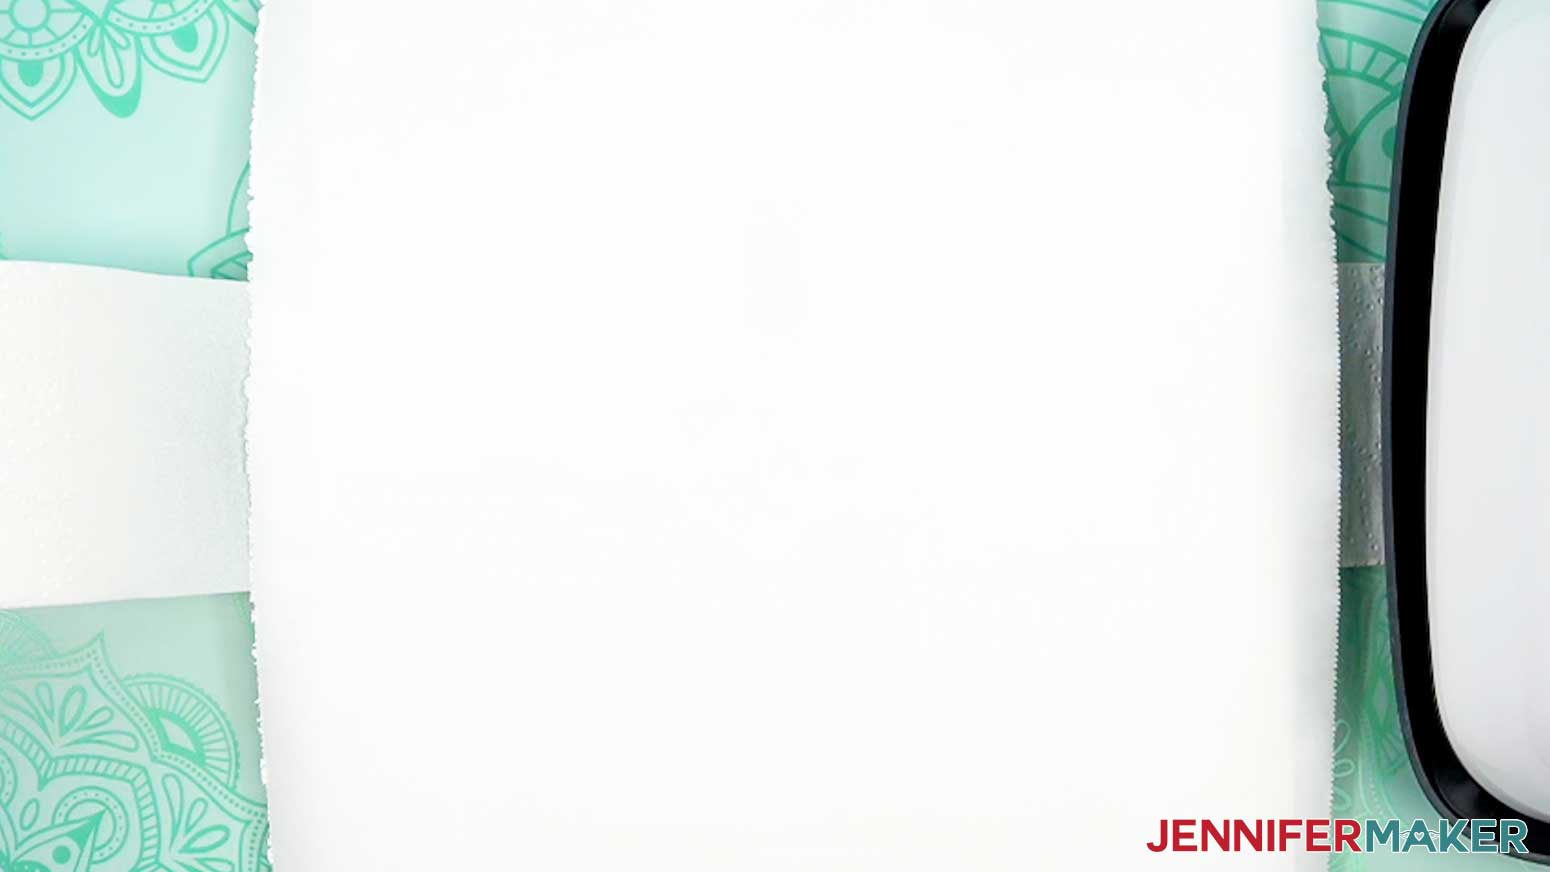
- Place a sheet of butcher paper over the toilet paper and design.
- Press at 385° F (196° C) with medium pressure for 45 seconds.
- When the time is up, remove the press by lifting it straight up and place it back into its cradle.
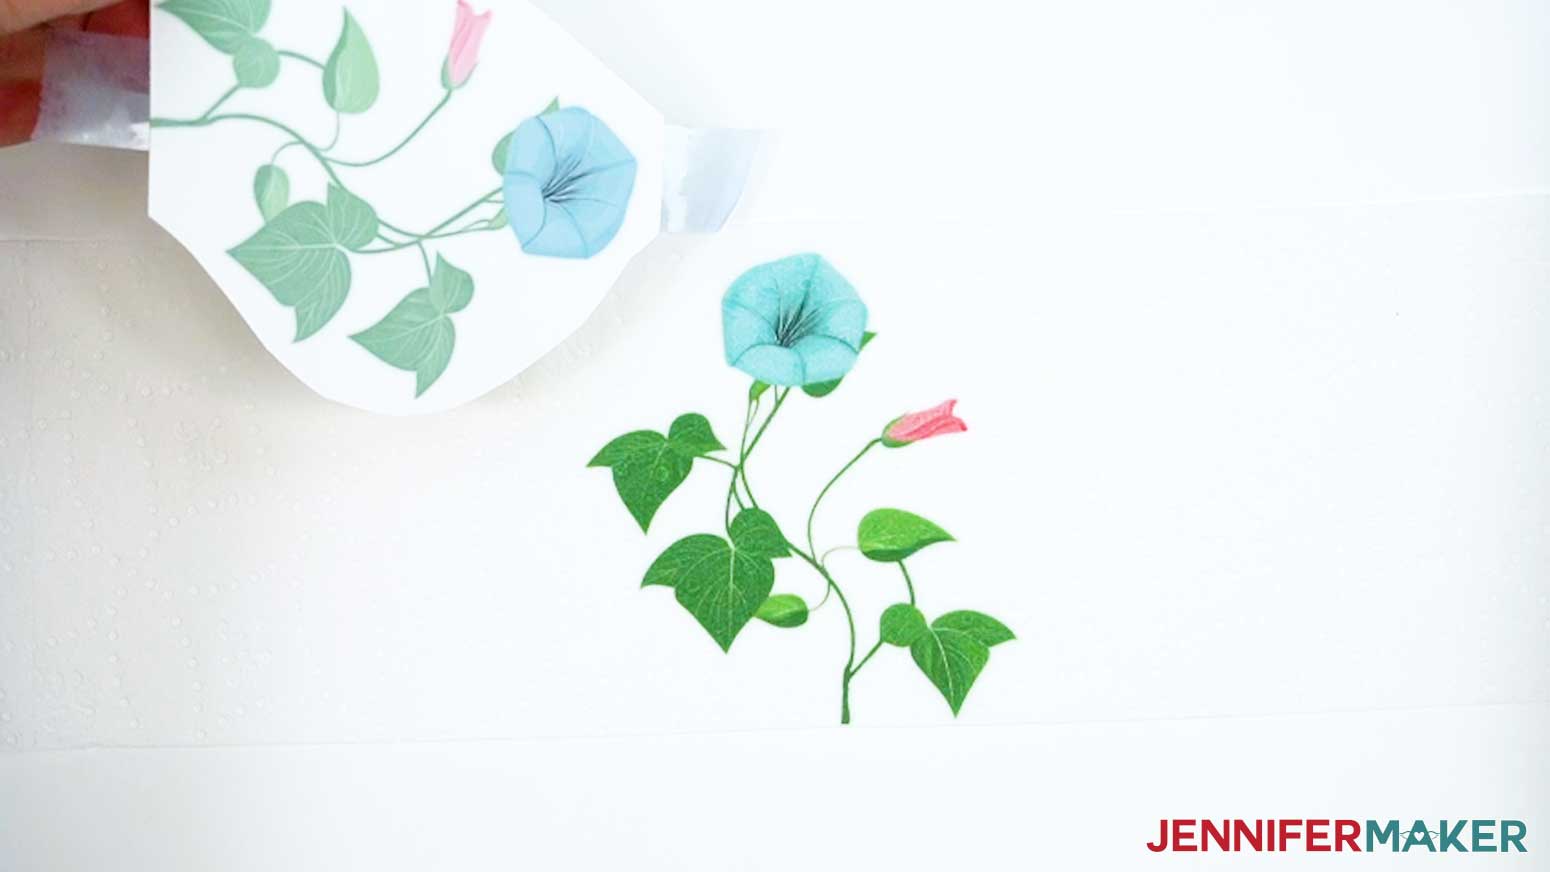
- Let the toilet paper and design cool for a minimum of 10 seconds before removing the butcher paper to help prevent ghosting.
- Remove and discard the taped design.
- Repeat the steps to sublimate the middle and bottom designs, making sure the sublimation design is flush with the top and bottom edge of the toilet paper.
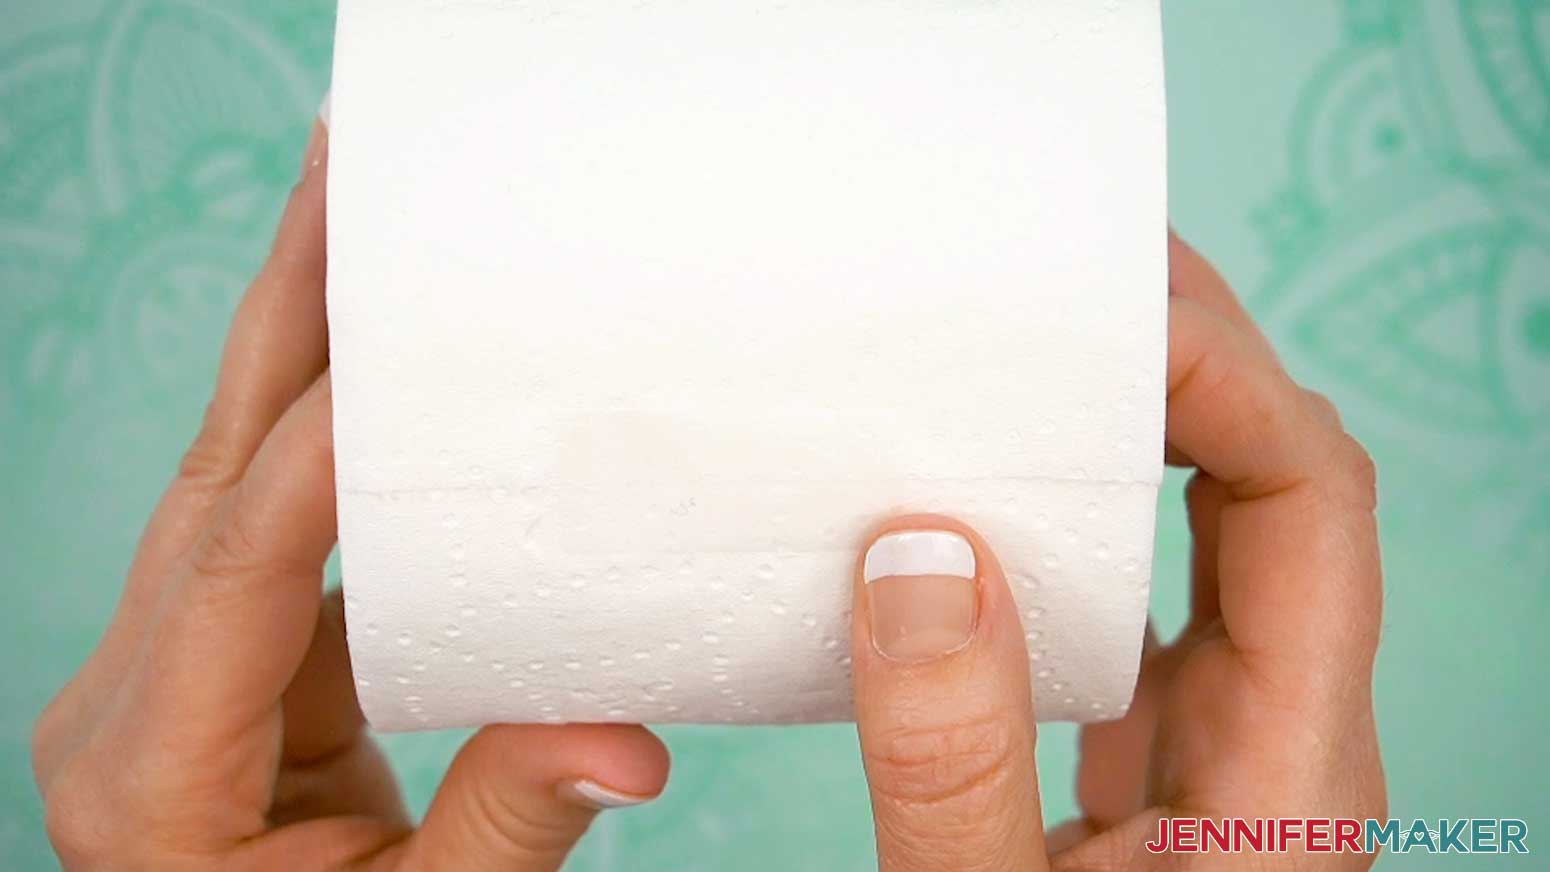
- Roll the end of your toilet paper roll back up and re-adhere it to the roll using lines of glue or pieces of cellophane tape. Do the same thing for the other two sublimated rolls.
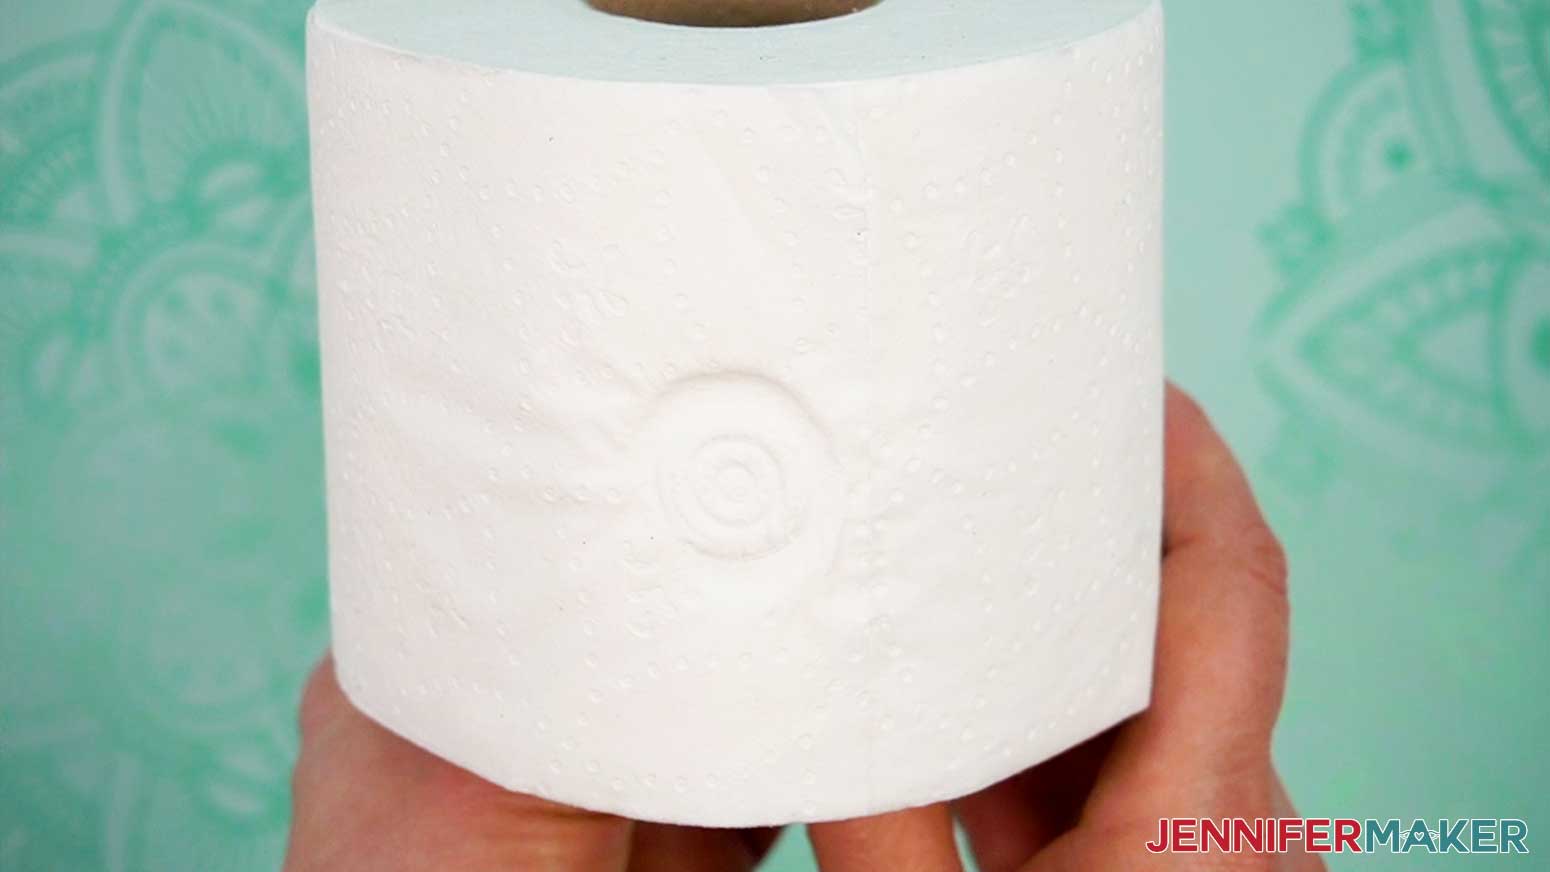
TIP: You can also create a water stamp by holding the roll under a (turned off) faucet and firmly pressing the loose end up against the faucet opening. The residual water from the opening will help seal the end! - This is what my finished direct sublimation toilet paper rolls look like!

OPTION 2: DYEPRESS SUBLIMATION ON TOILET PAPER
The dyepress method produces vibrant and colorful results, with a wrinkled texture to the toilet paper.
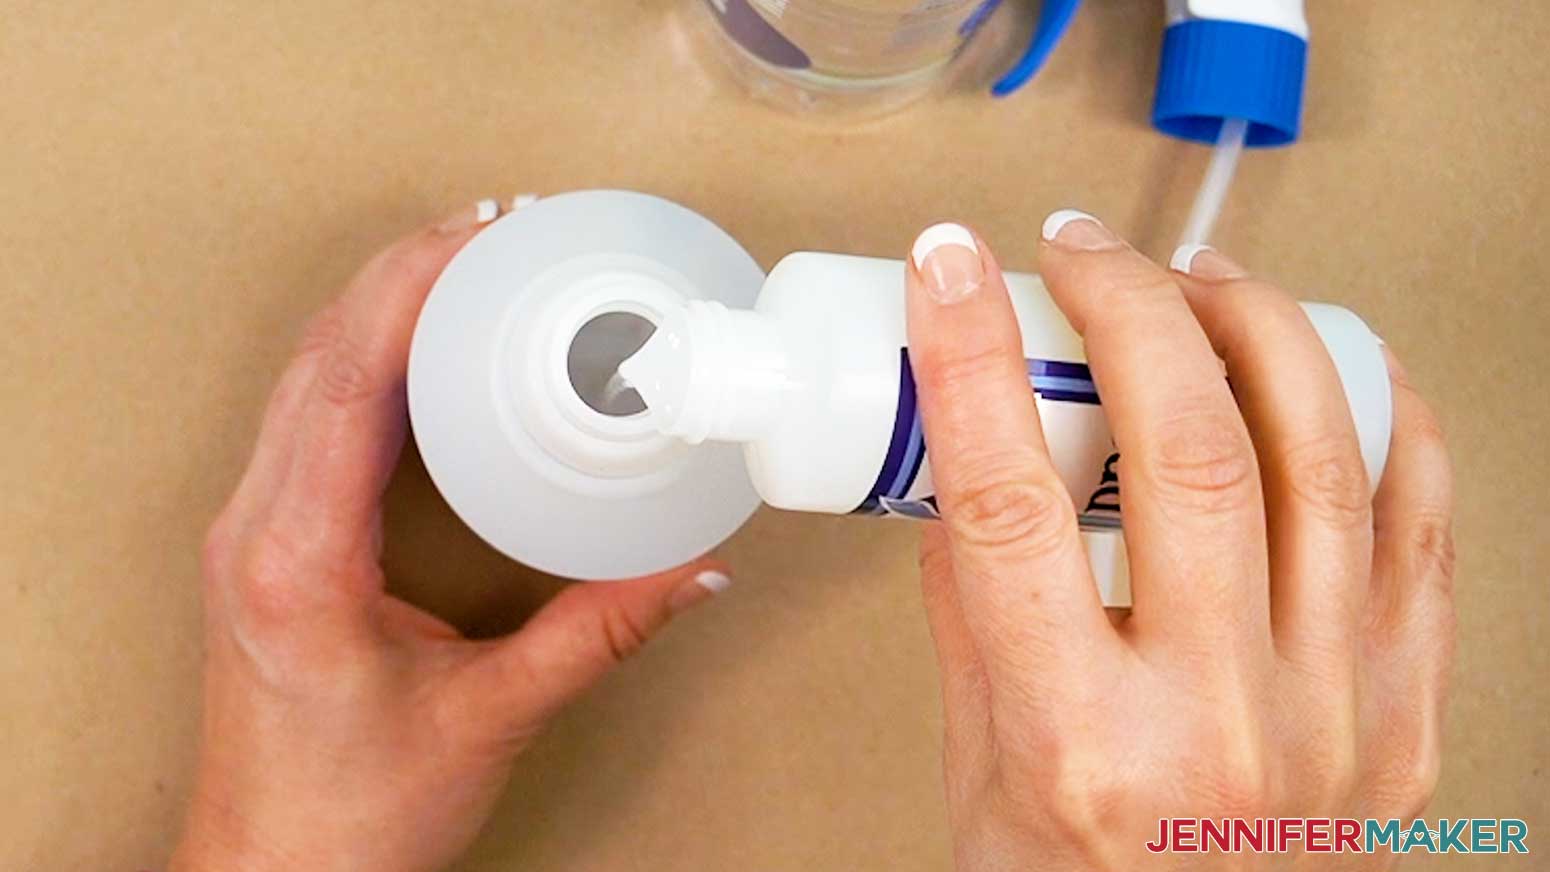
- Mix the Dyepress PolyTpro spray solution following the directions on the bottle. I recommend using bottled or filtered water rather than tap water, as it can have additives that may cause the solution to not work properly. The instructions on my packaging say to mix equal parts solution and water.
NOTE: The solution has a shelf life of 6 months once mixed, so save the mixed solution for a future project – or make more sublimated toilet paper rolls! - Place a sheet of butcher paper down onto your work surface to protect it from the Dyepress spray.
- Unroll your toilet paper roll so the third square from the end is in the center of the butcher paper, and the rest of the roll is out of the way. Make sure the pieces are rolling off the top and not the bottom, so the design shows on the outside of the roll when it’s rolled back up.
NOTE: The glue that holds your toilet paper roll closed may penetrate the first couple of layers on the roll. Tear off the sheets that have glue on them and discard them first. - Spin the nozzle on the bottle to change the spray width until you have a fine mist.
- Spray the third square from the end until the toilet paper is saturated, but not soggy. If you spray too much, just tear off the affected sheets and try again.
- Keeping it connected to the roll, move the saturated piece of toilet paper onto a dry part of the butcher paper.
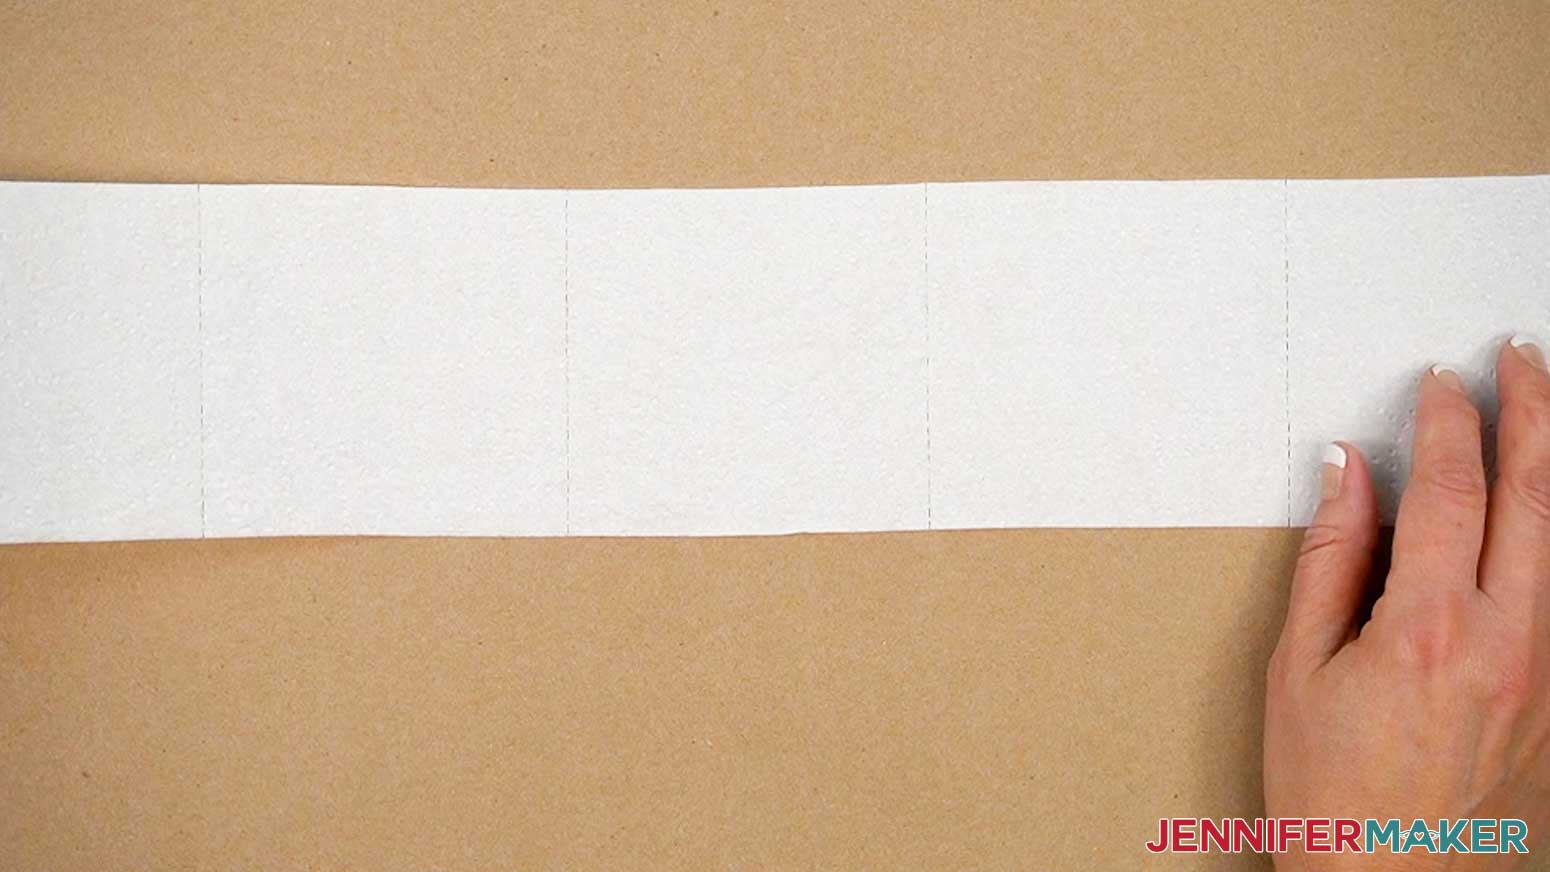
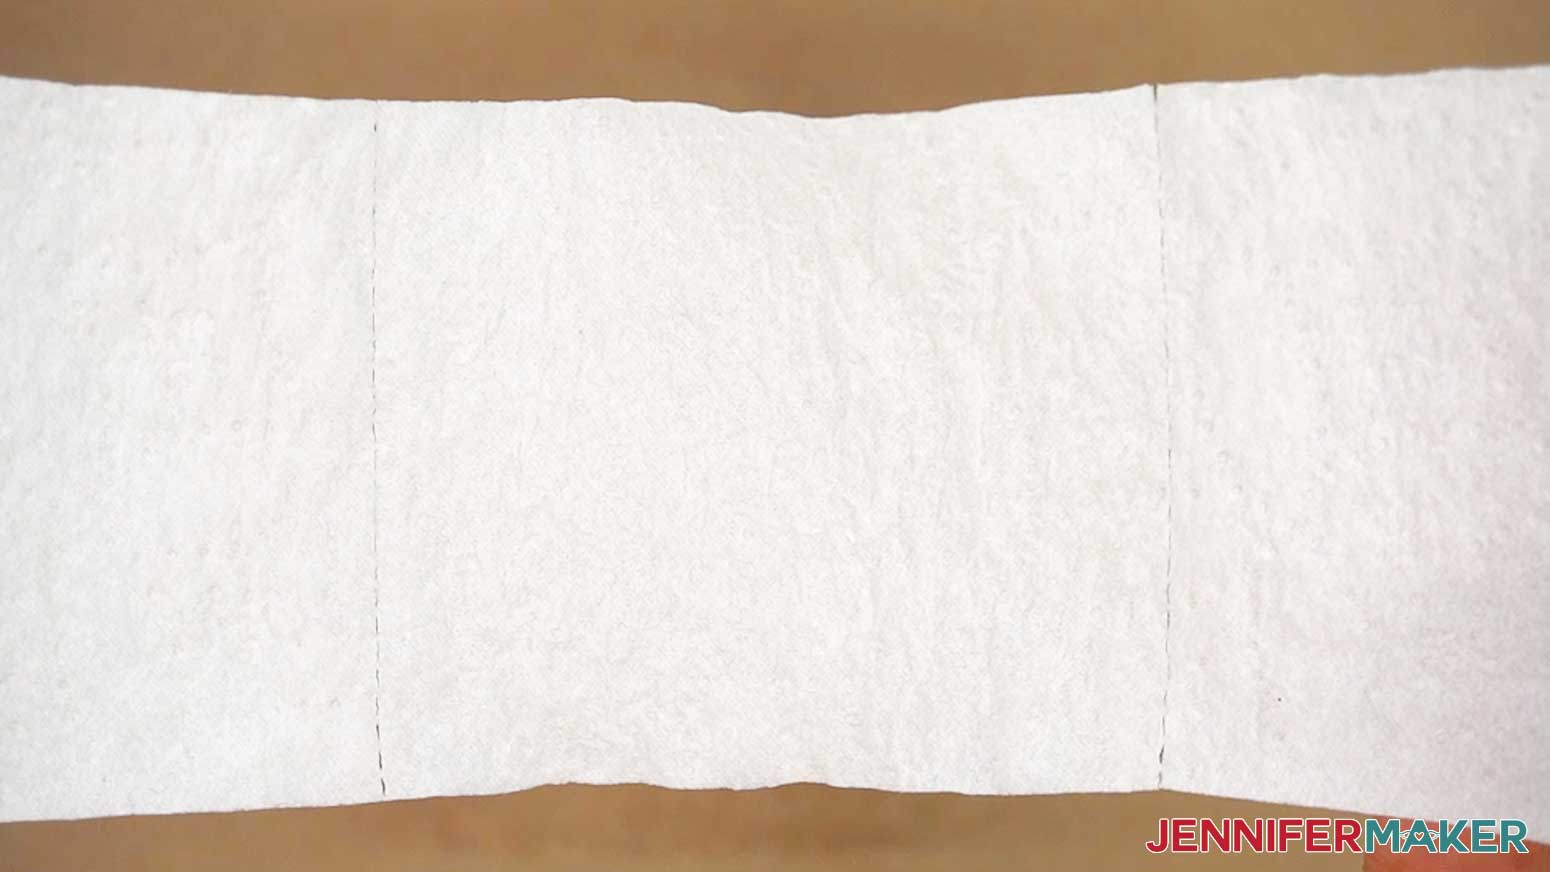
- Let the toilet paper dry thoroughly, which will take approximately 15-20 minutes. The toilet paper will be wrinkly when dry.
- Follow steps 1-15 in "OPTION 1: BASIC SUBLIMATION DIRECTLY ON TOILET PAPER" above to sublimate your toilet paper roll(s).
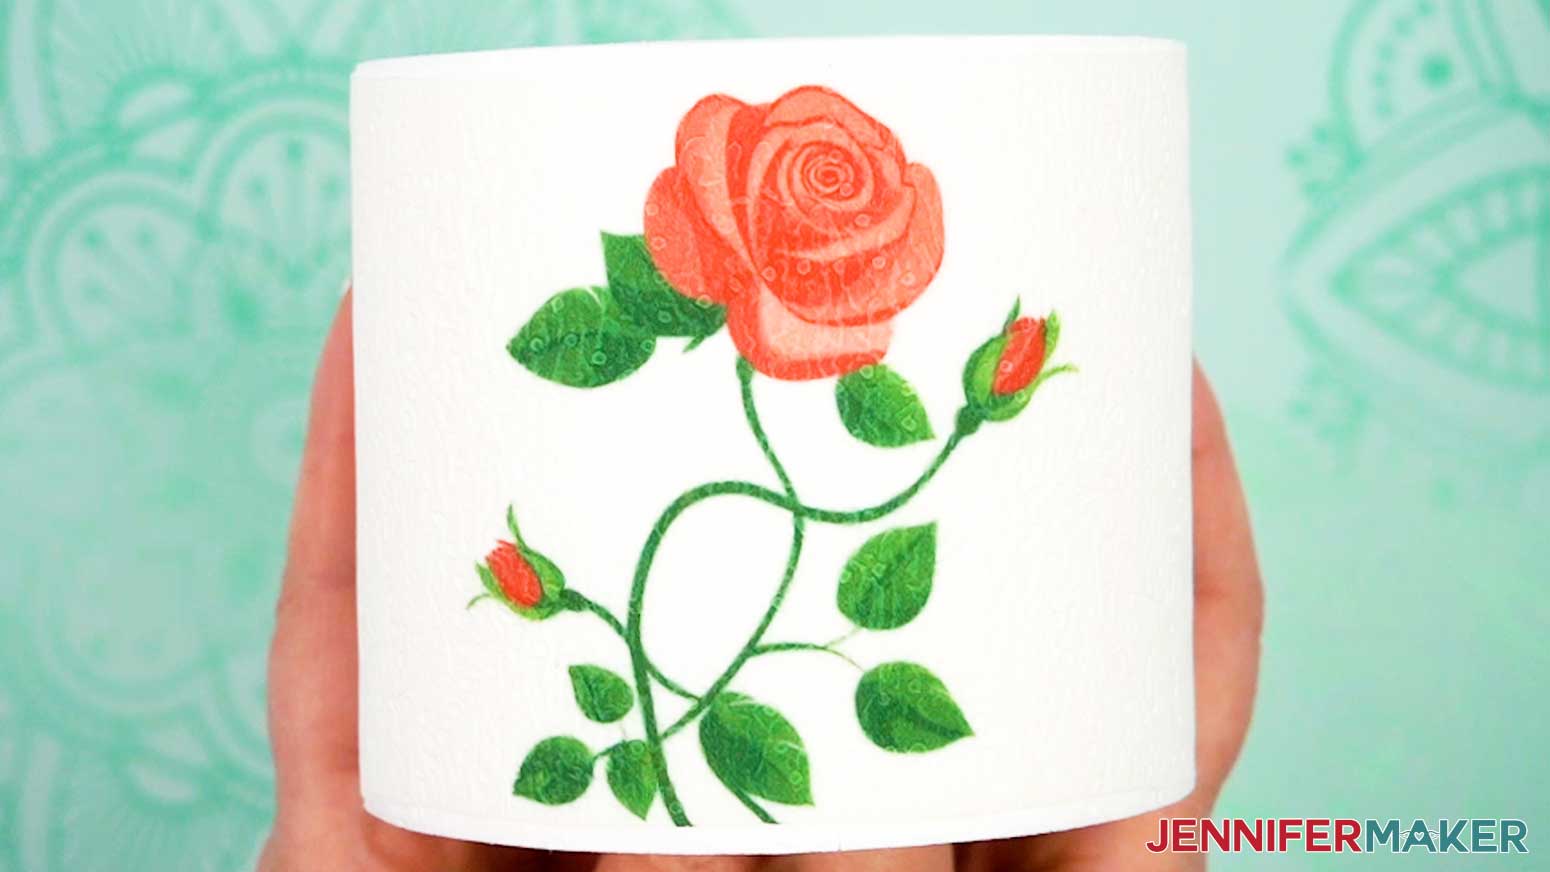
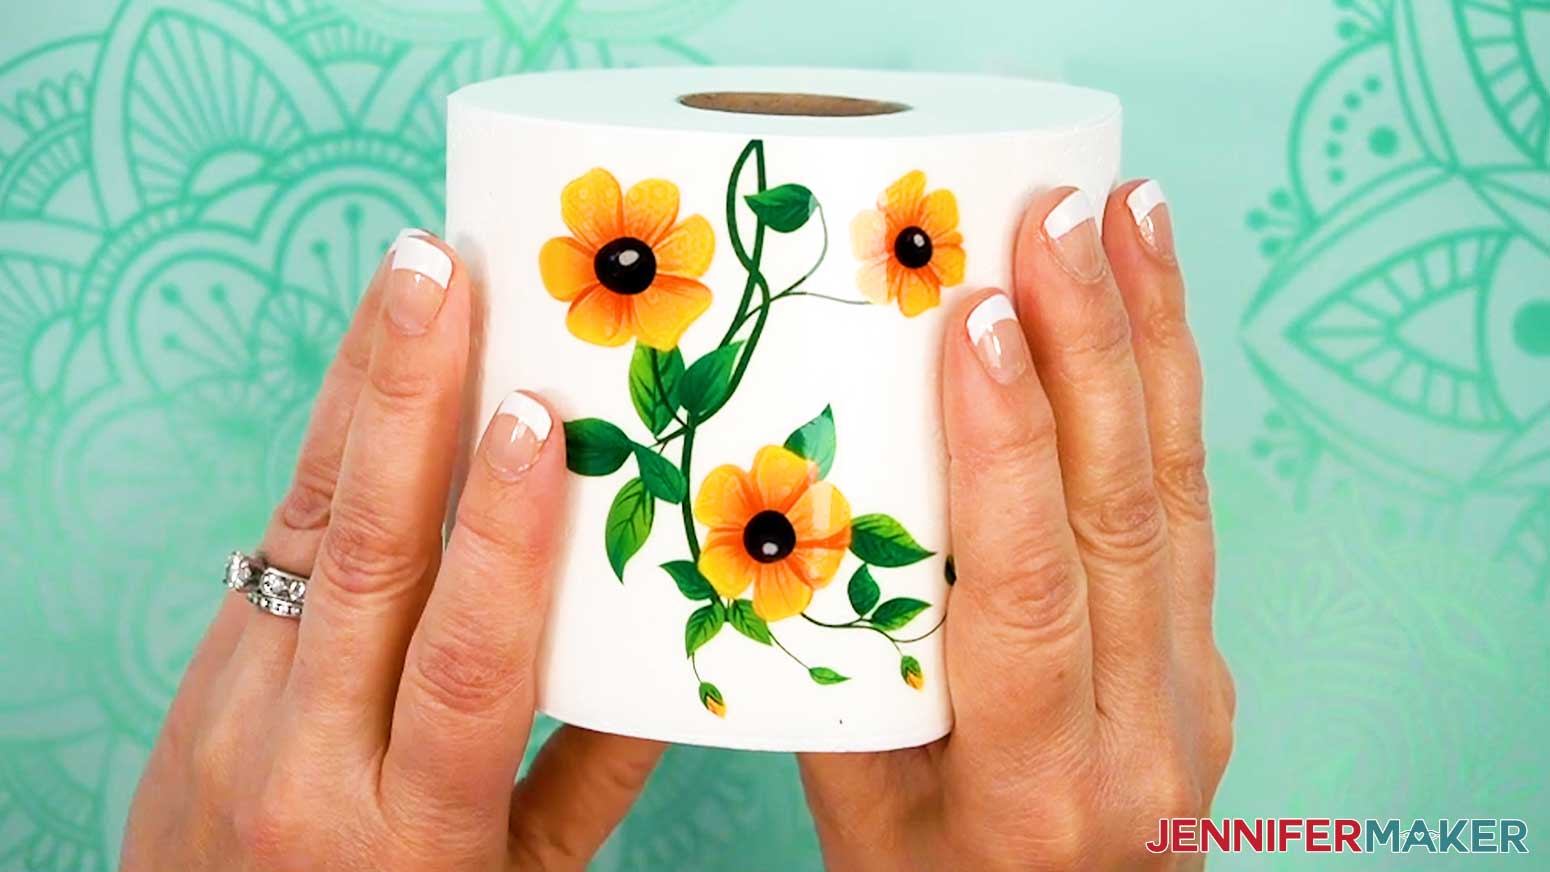
- Here’s what my finished dyepress sublimation toilet paper roll looks like!

OPTION 3: LAMINATION SUBLIMATION ON TOILET PAPER
The lamination method produces vibrant and colorful results with a shiny finish.
- Use a ruler and scissors or a paper trimmer to trim a closed laminate pouch to the same size as one square of toilet paper.
- Set your heat press to 385° F (196° C) and set the time to 45 seconds.
- Lay down a pressing pad on your work surface.
- Place a clean piece of 12” by 12” white cardstock on top of your pressing pad.
- Unroll your toilet paper roll so the third square from the end is in the center of the cardstock, and the rest of the roll is out of the way. Make sure the pieces are rolling off the top and not the bottom, so the design shows on the outside of the roll when it’s rolled back up.
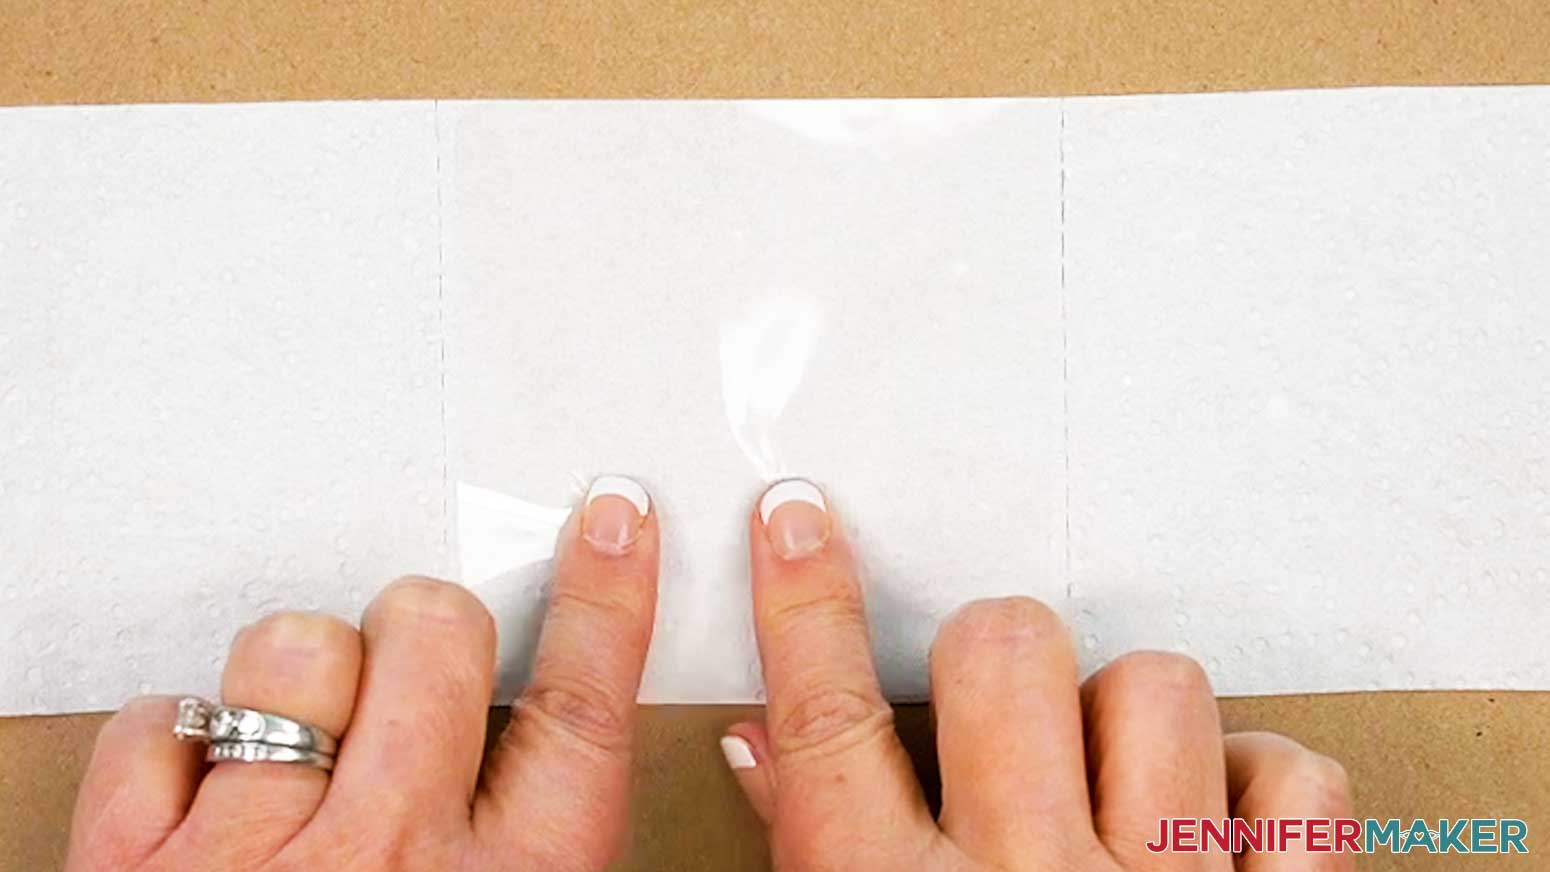
NOTE: The glue that holds your toilet paper roll closed may penetrate the first couple of layers on the roll. Tear off the sheets that have glue on them and discard them first. - Peel the laminate layers apart, and place one laminate piece shiny side up and dull side down on the third square from the end. You do not need to tape it in place.
- Place the design face down in the center of the laminate. Align its bottom edge so it is flush with the bottom edge of the toilet paper square.
- Follow steps 8-14 in “OPTION 1: BASIC SUBLIMATION DIRECTLY ON TOILET PAPER” above to sublimate the laminate on the toilet paper.
NOTE: When sublimating laminate, after removing the butcher paper, leave the design in place for about 60 more seconds to avoid ghosting. - While the laminate is still warm, but cool enough to handle, roll the toilet paper back up, smoothing the laminate over the curve of the roll while it cools.
- Repeat steps 4-9 above to sublimate your remaining toilet paper rolls.
- Re-adhere the loose ends of your toilet paper rolls using a line of glue, a piece of cellophane tape, or press the loose end up against your sink faucet to create a water stamp.
STEP 4: PACKAGE YOUR SUBLIMATED TOILET PAPER FOR GIFTING
- If you decorated a stack of toilet paper, slide all three rolls, in order, onto the handle of a new plunger.
- Place the plunger into a 16” x 24” cellophane bag.
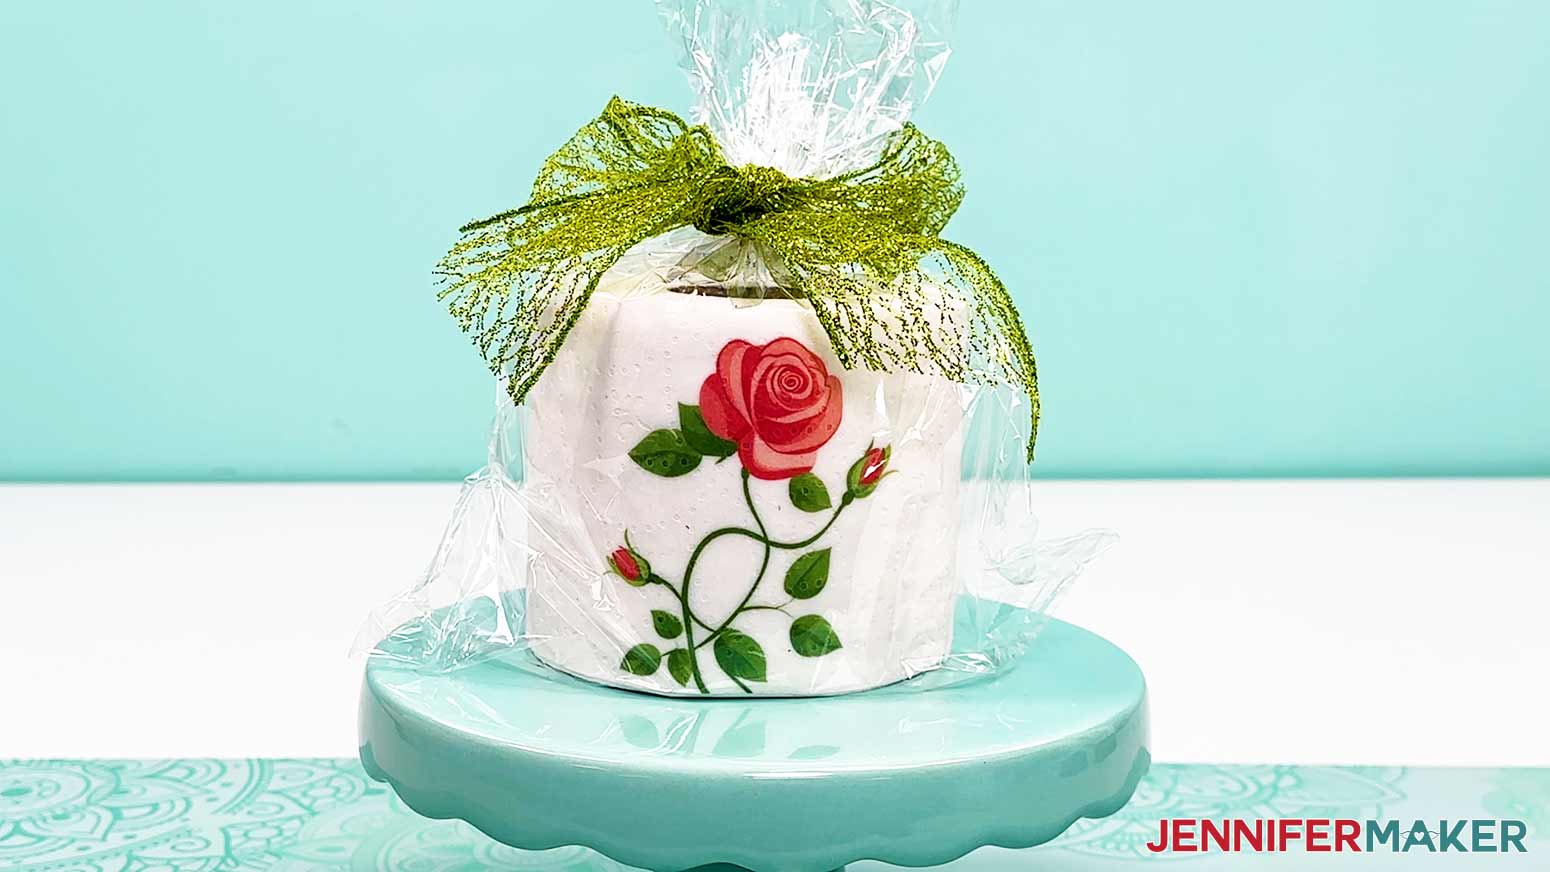
TIP: To package a single decorated roll, simply place it into a 9” x 12” cellophane bag! - Gather the cellophane at the top of the plunger stick and tie it closed with ribbon.
- Add a festive bow!
STEP 5: SHOW IT OFF
Here are what my sublimated toilet paper projects look like!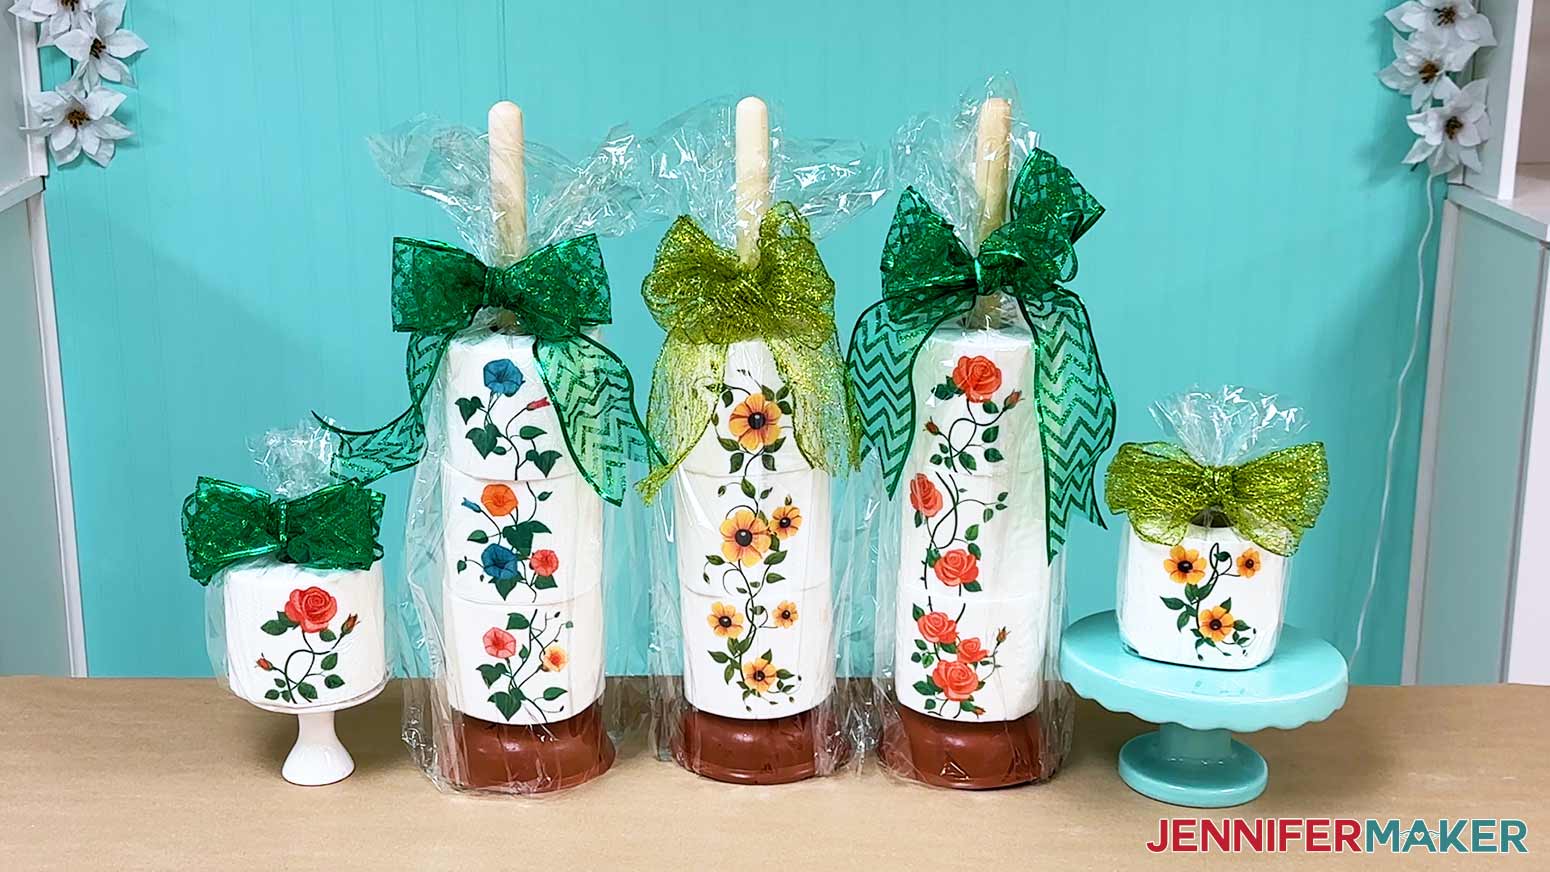
Notes
Assembled Size:
Varies depending on the toilet paper roll used. A single square of the toilet paper rolls in the materials list is 3.75” by 3.75”.
Care Instructions:
It’s best to not display sublimated images in direct sunlight to prevent fading. Lightly dust with a soft dry cloth if needed.
Answers to Your Questions About How to Sublimate on Toilet Paper
Q: I want to design my own custom toilet paper tower design. How do I do that?
A: You can learn how to design your own custom toilet paper flower tower using Canva in my ADVANCE program. Learn more about ADVANCE here!
Q: How do I find images for my custom toilet paper tower?
A: You can use any of the images included in the project files, or find more in our library! You can also use your own photos and designs, images created through AI generators, graphics from Canva or other online sources, or stock photos for your custom oven mitt.
Q: How long do you sublimate on toilet paper?
A: Just follow the tutorial with my free files to learn what times and temperatures work when learning how to sublimate on toilet paper! I walk you through each step of making a toilet paper flower tower of your own. It’s so much fun!
Q: What toilet paper can you sublimate on?
A: To sublimate on toilet paper with the best results, I recommend using unquilted 2-ply toilet tissue without a design printed on it.
Q: How can you sublimate toilet paper if it’s not polyester?
A: While sublimation ink will wash out or off of items like T-shirts or tumblers that aren’t made of polyester, they will stay in items that don’t get washed. Since we’re not washing the toilet paper, or getting it wet, the sublimation ink will hold! Please do not use hairspray when sublimating toilet paper or other projects because it is flammable and should not be heated up.
Q: Can you print on toilet paper?
A: I’ve never tried it, but I can imagine toilet paper and a regular inkjet printer would NOT play very nicely together! So no, I don’t recommend trying to print on toilet paper using a home printer. Sublimation is a tried and true way to get an image on toilet paper — follow this tutorial to learn how.
Q: Do I need to use a plunger with my toilet paper tower?
A: Nope! Using a plunger is just one way to display them. You can wrap the stack of rolls in cellophane without a plunger, or display them another way.
Q: Which is the best method to sublimate toilet paper?
A: Each method has a slightly different look, and it’s really a matter of personal preference. Check out the tutorial video to see which one you like best!
Q: Can you use sublimation paper twice?
A: Though it may look like there’s ink left on your sublimation transfer after pressing, there’s not actually enough to create another press. You can try, but your second attempt will probably look super faded and not the way you expect.
Q: Can a Cricut do sublimation printing?
A: While a Cricut cutting machine can be useful in some sublimation projects, it does not sublimate or print sublimation ink. However, you can use a Cricut and Infusible Ink pens to draw designs onto paper which can be sublimated, or use a Cricut to cut SVG designs out of Infusible Ink transfer sheets. If you want to learn how to sublimate on toilet paper, you’ll need a sublimation printer, a heat press, and other tools and materials you can find above in my materials list.
Q: Can I make and sell sublimated toilet paper rolls?
A: If you want to use my designs and projects for commercial use, please familiarize yourself with my important licensing information before selling your crafts.
Get my free PNG files to learn how to sublimate on toilet paper!
(If you do not see the signup form above, click here.)
I love seeing your sublimated projects, and how you display them! Once you’ve learned how to sublimate on toilet paper, inspire others and share a photo of your sublimated toilet paper rolls in our Facebook group or tag me on social media with #jennifermaker.
Love,

Want to remember this? Save this How To Sublimate On Toilet Paper Tutorial to your favorite Pinterest Board!