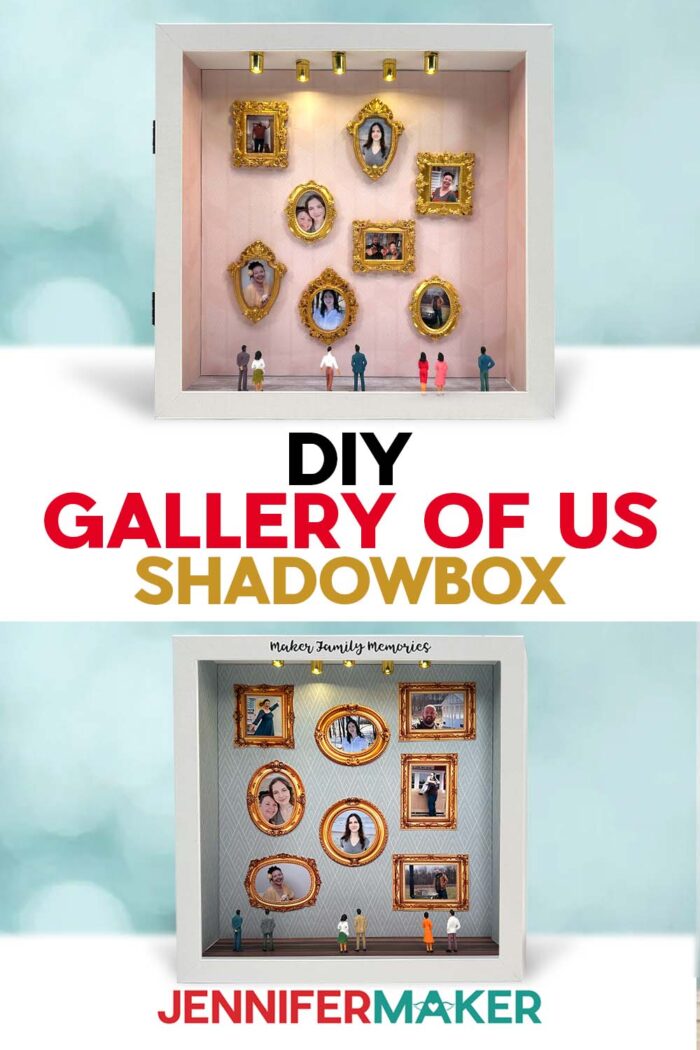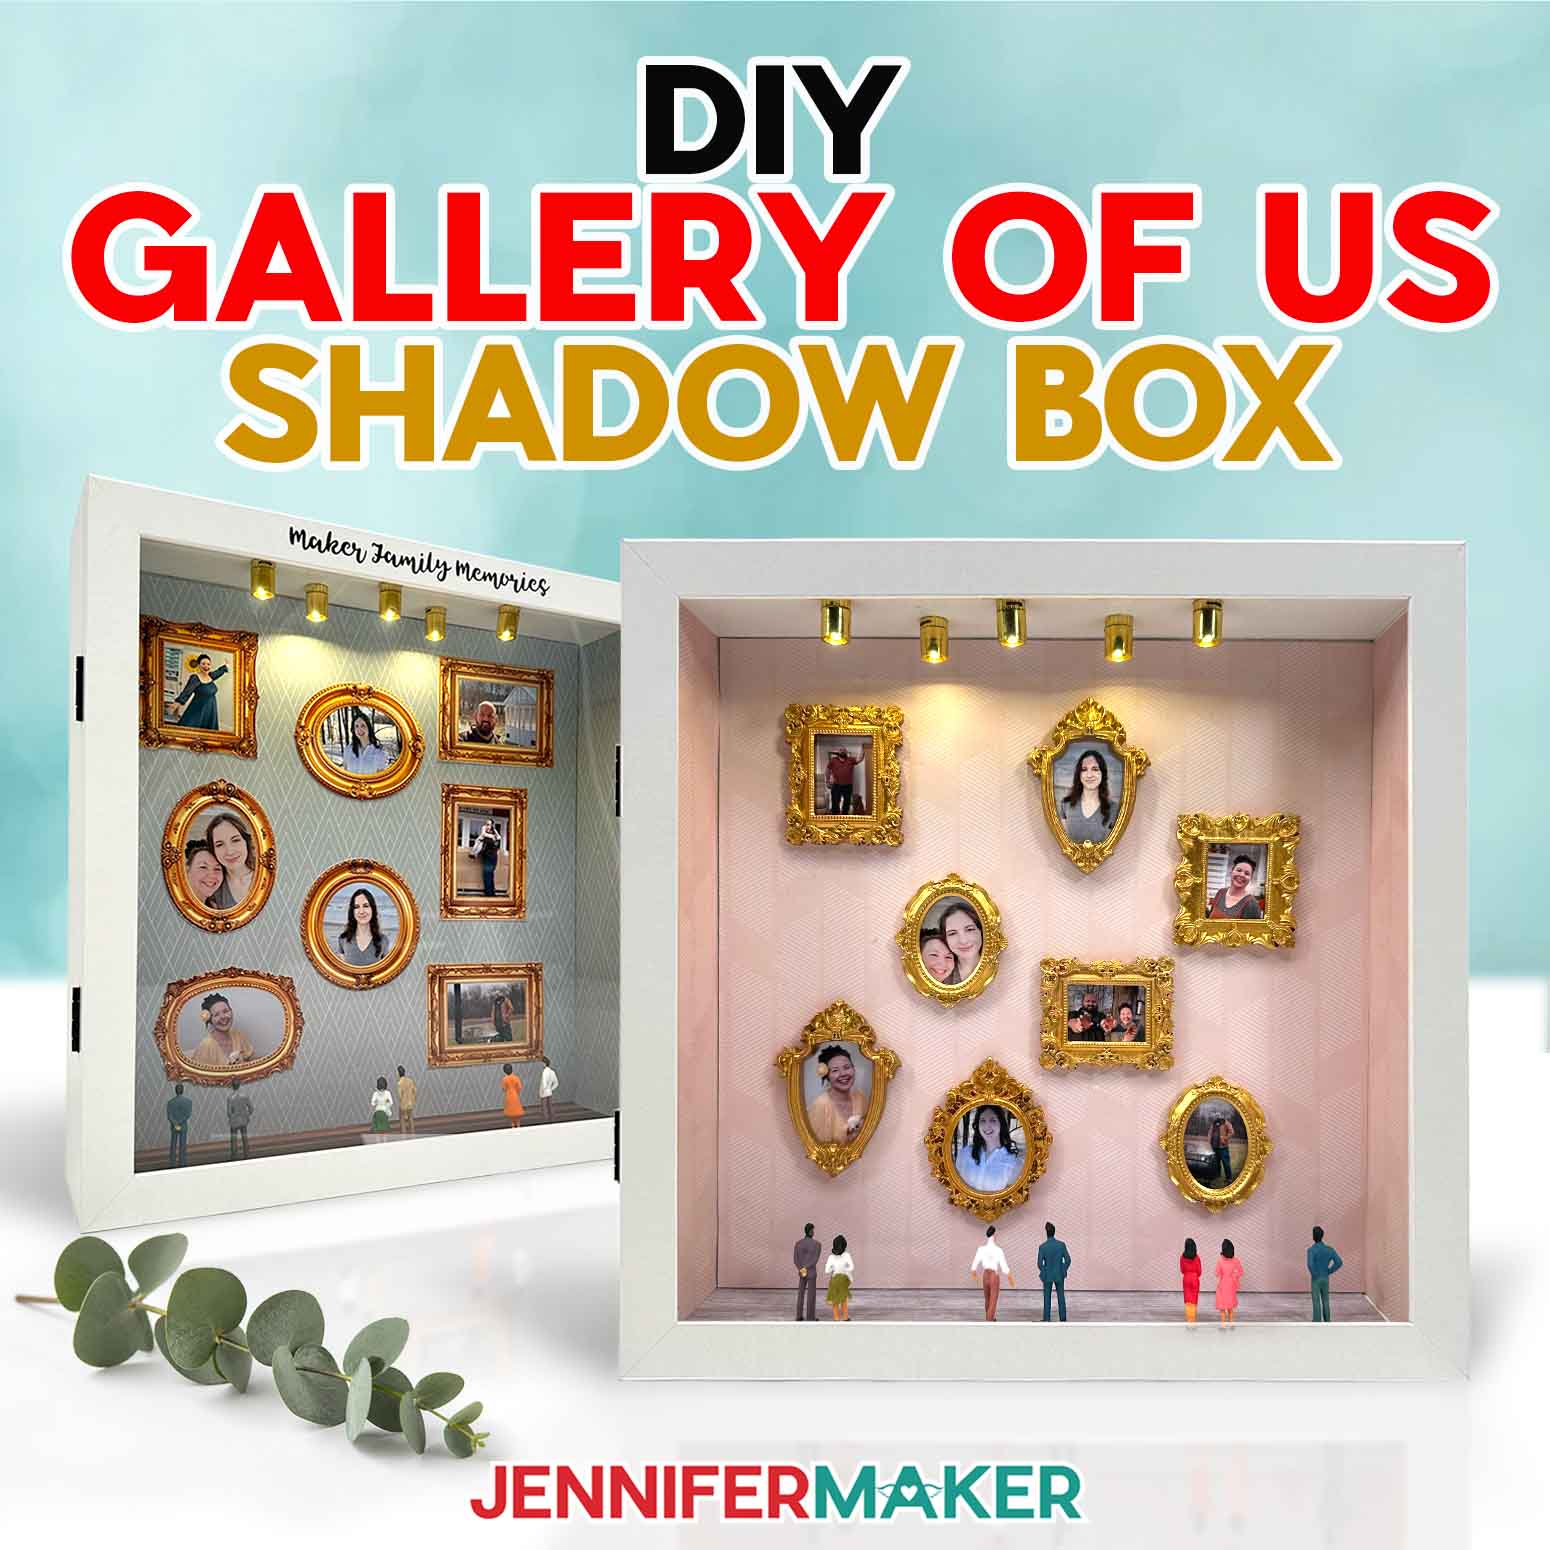
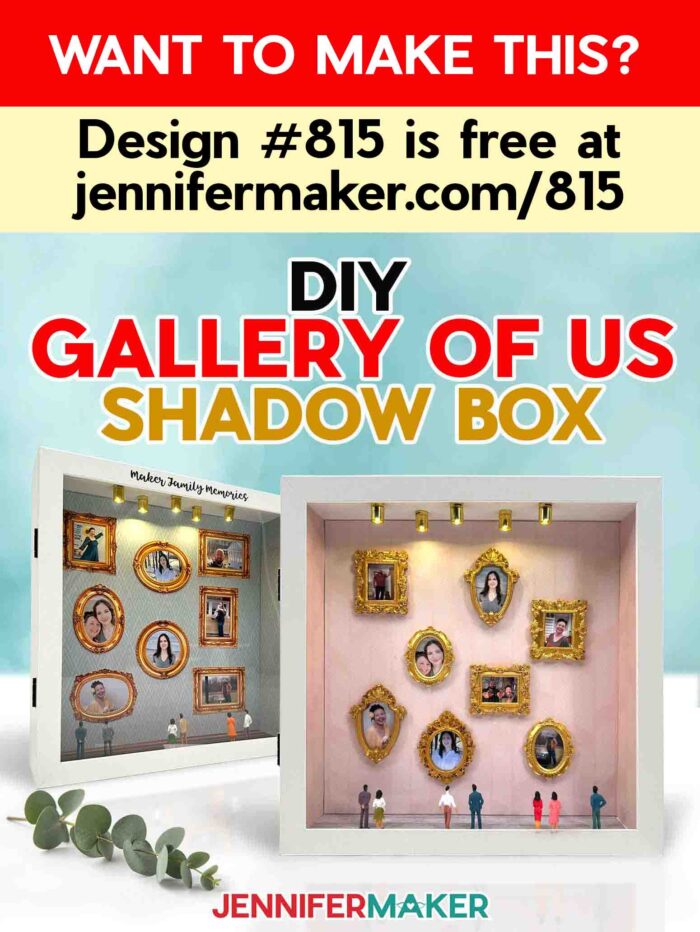
Learn how to make a “Gallery of Us” miniature art gallery shadow box using printed photos, miniature frames, and tiny figurines!
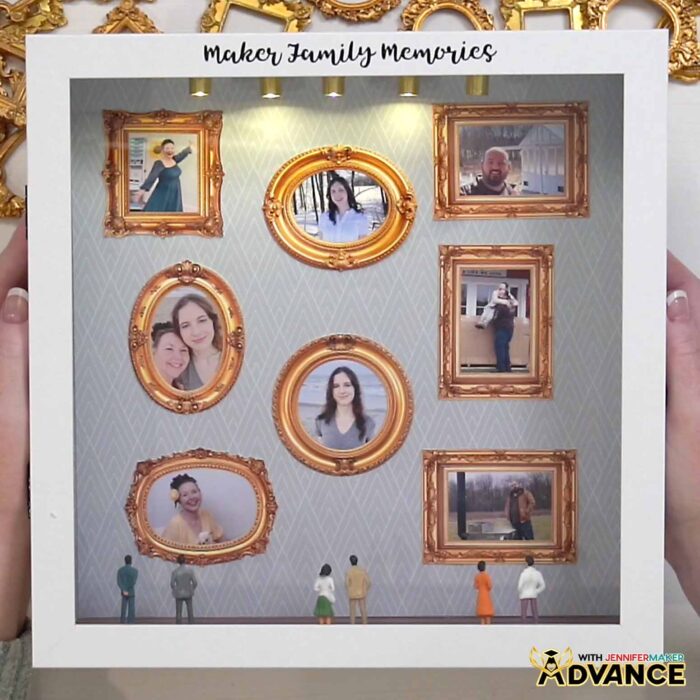
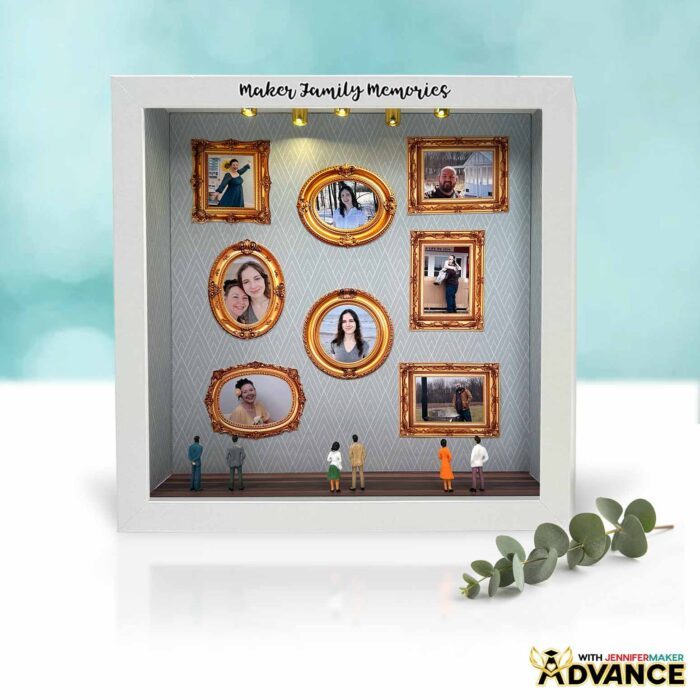
Tiny photos. Tiny frames. Big sense of satisfaction! This “Gallery of Us” shadow box turns your favorite memories into a miniature art exhibit for your home. I love projects that take ordinary photos and make them feel extra special. This one does that in such a sweet way. It looks like a tiny museum wall, but every picture tells the story of you and your loved ones!
Watch the full step-by-step tutorial on how to make a Gallery of Us shadow box:

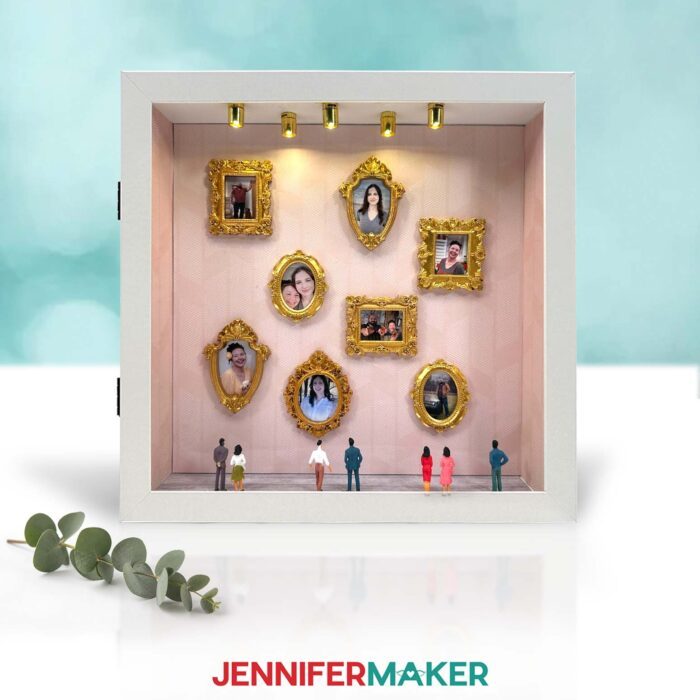
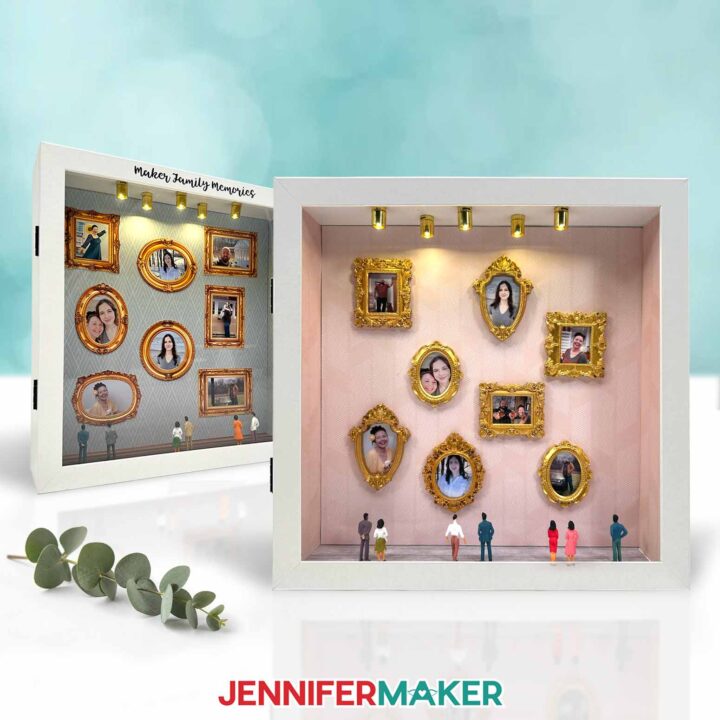
Each finished project features a glimpse of the past inside an elegant display box. You’ll decorate the inside walls with cardstock, add framed photos, glue LED lights to the ceiling, and finish it with tiny figurines. When the lights turn on, the whole piece glows. It feels personal, cozy, and full of nostalgia.
The best part is that you can make it your own from the very beginning. Use favorite family photos, vacation snapshots, pet pictures, wedding memories, or tiny copies of children’s artwork. Once everything is arranged inside the box, it becomes more than a photo display. It’s a tiny art gallery that captures exactly who you are.
Which Frames Work Best for a Mini Art Gallery?
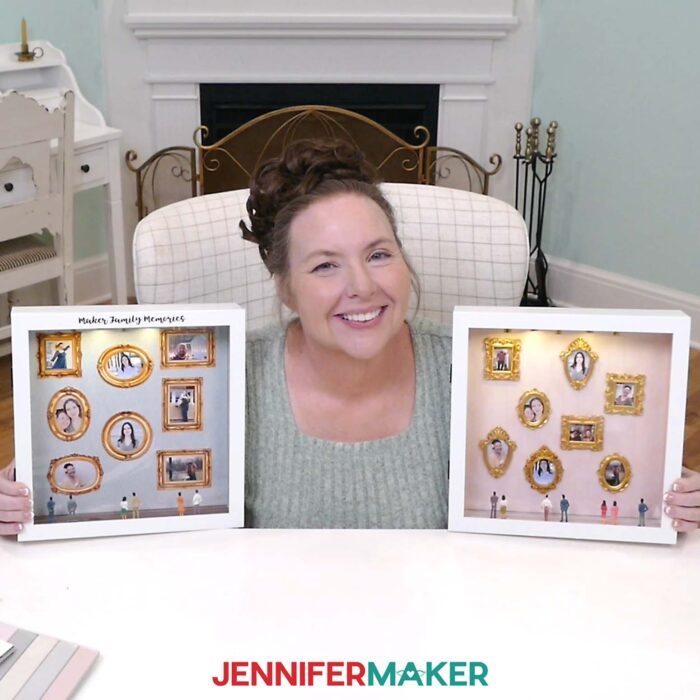
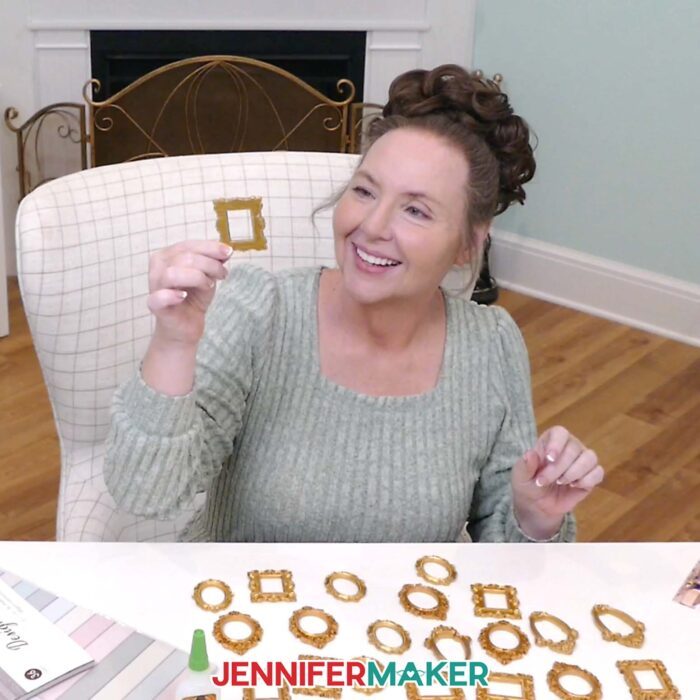
In my tutorial, I show you two different ways to create frames for your photos: Print Then Cut frames with a compatible Cricut, and mini craft frames you glue on top of your photos. Both versions are beautiful. The Cricut version is flatter and cleaner, which helps if your box isn’t very deep. The mini frame version adds more texture and looks closer to real art exhibitions.
If you want more control over the size and shape of your gallery pieces, the Print Then Cut version will work best for you. You can size both the frames and photos in Cricut Design Space, then print and cut them as single, finished pieces. This keeps everything neat and makes it easier to create a balanced layout.
The mini frame version has more depth, but requires a smidge more work. You can choose your favorite mini frame shapes, then trim your photos to fit behind them. I’ll show you how to use digital photos with the mini frames in my tutorial, but you can use already printed photos if the subject isn’t too large. This option is especially fun if you want the shadow box to feel like a real tiny room with 3D framed memories hanging on the wall.
Both versions look impressive, and you’ll have fun making either one! But choose the Print Then Cut frames if you want a sleek paper look with less effort, and choose the mini frames if you want more depth and a handmade gallery feel.
How to Decorate a Shadow Box Like an Art Gallery
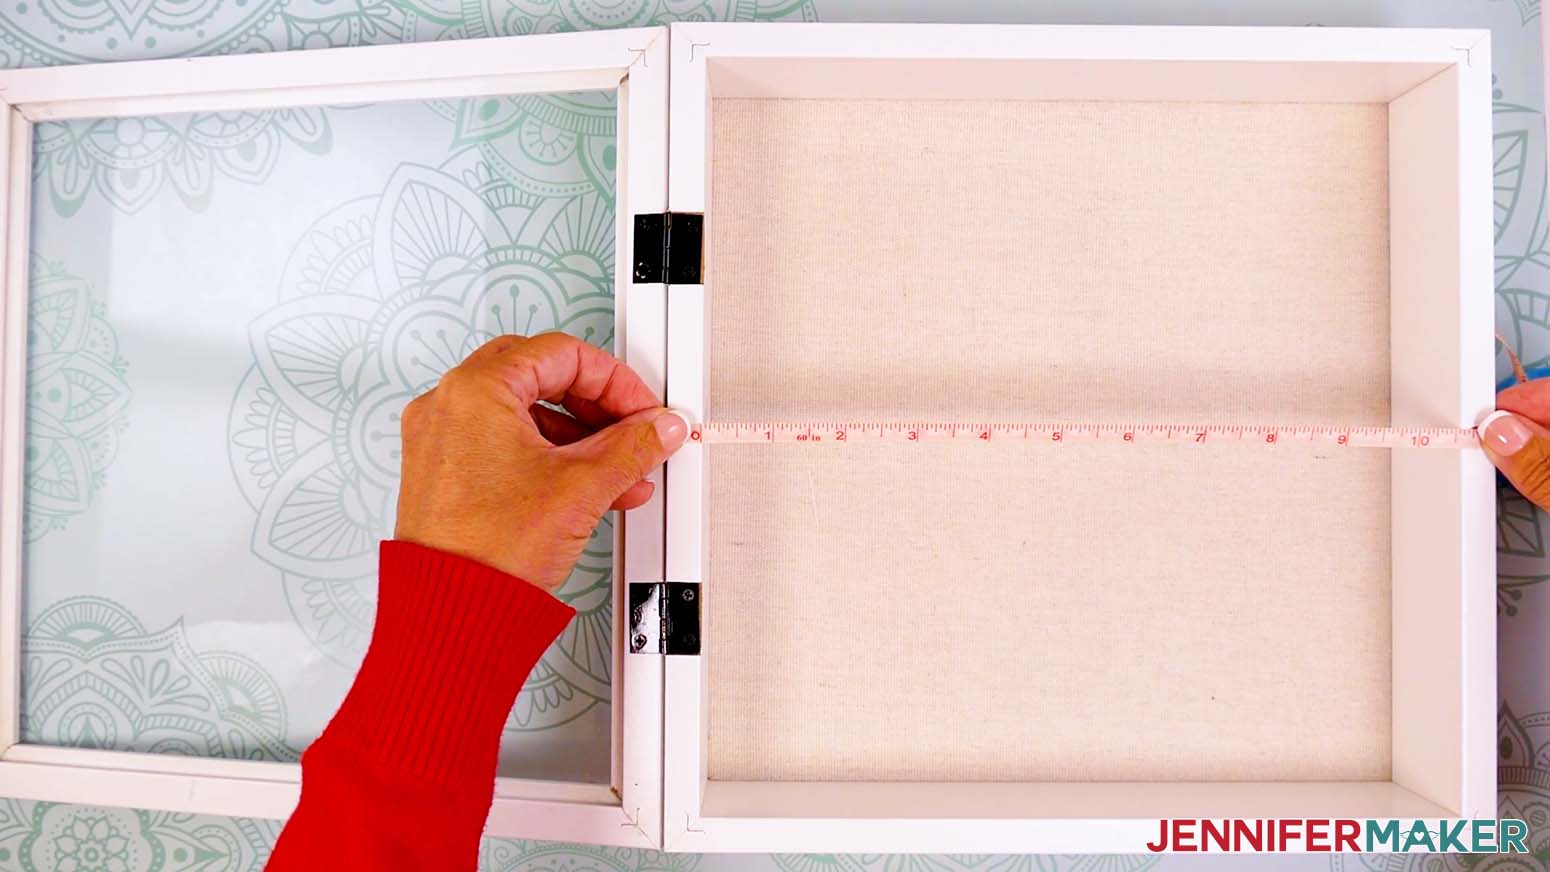
The key to decorating inside your shadow box is planning before you glue. Measure the inside of your box from side to side and top to bottom to find the back wall’s dimensions. Then measure the depth to find your side walls and floor. Cut different patterns of cardstock for your walls and floor to give your photos a polished background and help the whole design feel like a collection of artwork instead of random display items.
Once the cardstock is in place, the inside starts to look like a real little room. My supplies list has patterned cardstock that looks just like art gallery wallpaper, plus patterns that mimic wood flooring. Simple pieces like this help elevate the entire design.
And here’s a quick tip: make sure your cardstock pattern is facing the right direction before you glue. The side pieces may not line up perfectly with the back wall pattern, and that’s okay. As long as the colors and style coordinate, the finished scene will still feel connected.
How to Add Photos to a Gallery of Us Shadow Box
Once the gallery is ready, it’s time to add your photos. I recommend choosing images with a clear focal point so each tiny frame is easy to see. Good image resolution matters here, especially if you’re printing small photos. Use photos that are high enough quality so faces and details stay crisp.
Arrange your photos before gluing them down. I like to position photos so the subjects appear to be looking toward the center of the display. Photos with people facing forward go in the middle, while photos where people are turned slightly to one side are placed along the edges facing inward. That small detail makes the scene feel more immersive, like the subjects are looking back at you from the little gallery wall.
If you’re using mini frames, place the frame over the photo first. Adjust the photo until the subject fills the opening, then trim away the extra paper. Add craft glue to the back of the frame, place it over the photo, and press until secure. Once your framed images are ready and you like the placement, “hang” them on the gallery wall with some craft glue!
If you’re using Print Then Cut frames, you’ll size, crop, and flatten the photos with the frames in Cricut Design Space. Then your Cricut can cut the finished framed images so they’re ready to add to your shadow box.
How to Add Figurines and Lights to a Shadow Box
After the photos are secure, add your figurines to bring the display to life. Place them so they look like they are viewing the photos. You can have them all facing the same direction, or angle them toward different frames so your tiny guests can enjoy the exhibit along with you!
The lights are the final bit of magic. Test them first, then attach them to the “ceiling” of the shadow box. When the spotlights are on, they brighten the framed photos and add some enchantment to the tiny exhibit.
Be careful when attaching the lights. The video shows how to test the placement, glue each light in place, and let the adhesive dry fully before turning the box upright again. That way, the lights stay secure inside the frame.
What Is a Gallery of Us Shadow Box Best For?
A Gallery of Us shadow box makes a wonderful gift for any special occasion, and is a perfect family room display. Hang it on a wall or keep it up on the mantel for everyone to see. And when you need a special spotlight for the photos, just twist on the ceiling lights!
You can also change the mood with your materials. Use floral cardstock for a soft family keepsake, or try bold colors for a vacation memory. Elegant patterns work well if you’re giving the shadow box as a romantic gift. Add tiny themed details, like signs, mini plants, or small paper accents, to make the scene match the story behind the photos.
For the most cohesive mini gallery, think about the feeling you want the finished box to have. A wedding shadow box might use soft neutrals and romantic photos, while a birthday version could use bright colors and playful figurines. A family memory box might include favorite everyday moments that make you smile.
Add a Custom Sentiment With ADVANCE
If you want to customize your Gallery of Us shadow box even more, be sure to check out the ADVANCE tutorial linked with this project. Inside ADVANCE with JenniferMaker, I show you how to personalize the front display with names, dates, or a special phrase step by step. It’s a great next step if you want to expand beyond the starter design and make your shadow box truly unique. Learn more about ADVANCE with JenniferMaker here!
Watch my Video Tutorial For Step-by-Step Instructions
I recommend watching the full video tutorial before you start. I walk you through every step, including sizing and cropping photos in Cricut Design Space, printing and cutting the photos, using both printed and mini craft frames, and putting everything together inside the box to create your special scene.
The video is especially helpful for the photo setup. Once you see how the Guide shapes, Slice tool, and Flatten tool (if you’re using my PNG frames) work together, the rest of the photos go much faster. Then you can focus on the fun part: arranging your tiny gallery and making it feel like your own.
Do you want to learn how to make your own Gallery of Us shadow box? Let me show you how fun and easy it is! This post contains some affiliate links for your convenience (which means if you make a purchase after clicking a link I will earn a small commission but it won’t cost you a penny more)! Read my full disclosure policy.
Materials to Make a Gallery of Us Shadow Box
View my Amazon shopping list with the exact items I used.
- One (1) 11″ x 11″ Front-Loading Shadow Box
- Two (2) Sheets of 12″ x 12″ Pattern Cardstock (for the gallery wallpaper)
- One (1) Sheet of 12″ x 12″ Wood Grain Cardstock (for the gallery floor)
- Eight (8) Mini Gold Frames
- One-Two (1-2) Sheets of 8.5″ x 11″ Matte Photo Paper
- Five (5) Miniature Spot Lights
- Five-Six (5-6) 1:50 Scale Mini People Figurines
- 8.5″ x 11″ Copy Paper (to protect design when using brayer, and for optional Print Then Cut calibration)
- A way to cut your materials – I’m using the Cricut Maker 4, but you can also use any Cricut Maker Series machine, a Cricut Explore Series machine, or the Cricut Venture
- Color Inkjet Printer
- Cricut Green StandardGrip Machine Mat 12″ x 12”
- Brayer
- Paper Trimmer
- Craft Glue (I used Bearly Art Precision Glue)
- Measuring Tape
- Scissors
- Super Glue (for adhering spot lights)
- Disposable Gloves (to protect skin from super glue)
- Safety Glasses (to protect eyes from super glue)
- Isopropyl Alcohol -AND-
- Lint-Free Cloth
- OPTIONAL: Cricut Blue LightGrip Machine Mat 12″ x 12″ (for Print Then Cut calibration)
- Design #815 (My free PNG/SVG/DXF/PDF design files are available in my free library – get the password by filling out the form at the bottom of this page)
How to Make a Gallery of Us Shadow Box
Gallery of Us Shadow Box
Learn how to make a Gallery of Us shadow box miniature art gallery using printed photos, decorative frames, lights, and tiny figurines.
Materials
- One (1) 11" x 11" Front-Loading Shadow Box
- Two (2) Sheets of 12" x 12" Pattern Cardstock (for the gallery wallpaper)
- One (1) Sheet of 12" x 12" Wood Grain Cardstock (for the gallery floor)
- Eight (8) Mini Gold Frames
- One-Two (1-2) Sheets of 8.5" x 11" Matte Photo Paper
- Five (5) Miniature Spot Lights
- Five-Six (5-6) 1:50 Scale Mini People Figurines
- 8.5" x 11" Copy Paper (to protect design when using brayer, and for optional Print Then Cut calibration)
- Design #815 (My free SVG/PNG/PDF/DXF design files are available in my free resource library - get the password by filling out the form at the bottom of this page)
Tools
- A way to cut your materials - I’m using the Cricut Maker 4, but you can also use any Cricut Maker Series machine, a Cricut Explore Series machine, or the Cricut Venture
- Color Inkjet Printer
- Cricut Green StandardGrip Machine Mat 12" x 12”
- Brayer
- Paper Trimmer
- Craft Glue (I used Bearly Art Precision Glue)
- Measuring Tape
- Scissors
- Super Glue (for adhering spot lights)
- Disposable Gloves (to protect skin from super glue)
- Safety Glasses (to protect eyes from super glue)
- Isopropyl Alcohol -AND-
- Lint-Free Cloth
- OPTIONAL: Cricut Blue LightGrip Machine Mat 12" x 12” (for Print Then Cut calibration)
Instructions
STEP 1: GET MY FREE GALLERY OF US SHADOW BOX DESIGNS
First, download my Gallery of Us Shadow Box files from my free library – look for Design #815. Alternatively, you can use the Save This Project form near the top of this post and the design link will be emailed to you.
In the SVG folder, you’ll find a file with six gallery frame templates to help prepare your photos for Print Then Cut. There is also a DXF folder with a version of the frame templates for cutting on other machines, and a PDF version you can print and cut by hand.
The PNG folder contains six decorative frame images you can Print Then Cut for the photos in your gallery. I created these frames with the help of AI, and adjusted them using image editing software.
TIP: If you’re not sure how to upload, go to jennifermaker.com/svgs to learn how to unzip and upload SVG files.
This project can be done using Print Then Cut for the photos and decorative frames, or you can Print Then Cut the photos and use the gold mini frames in my supplies list, instead. I’ll show you how to make both versions.
STEP 2: MEASURE YOUR SHADOW BOX’S DIMENSIONS
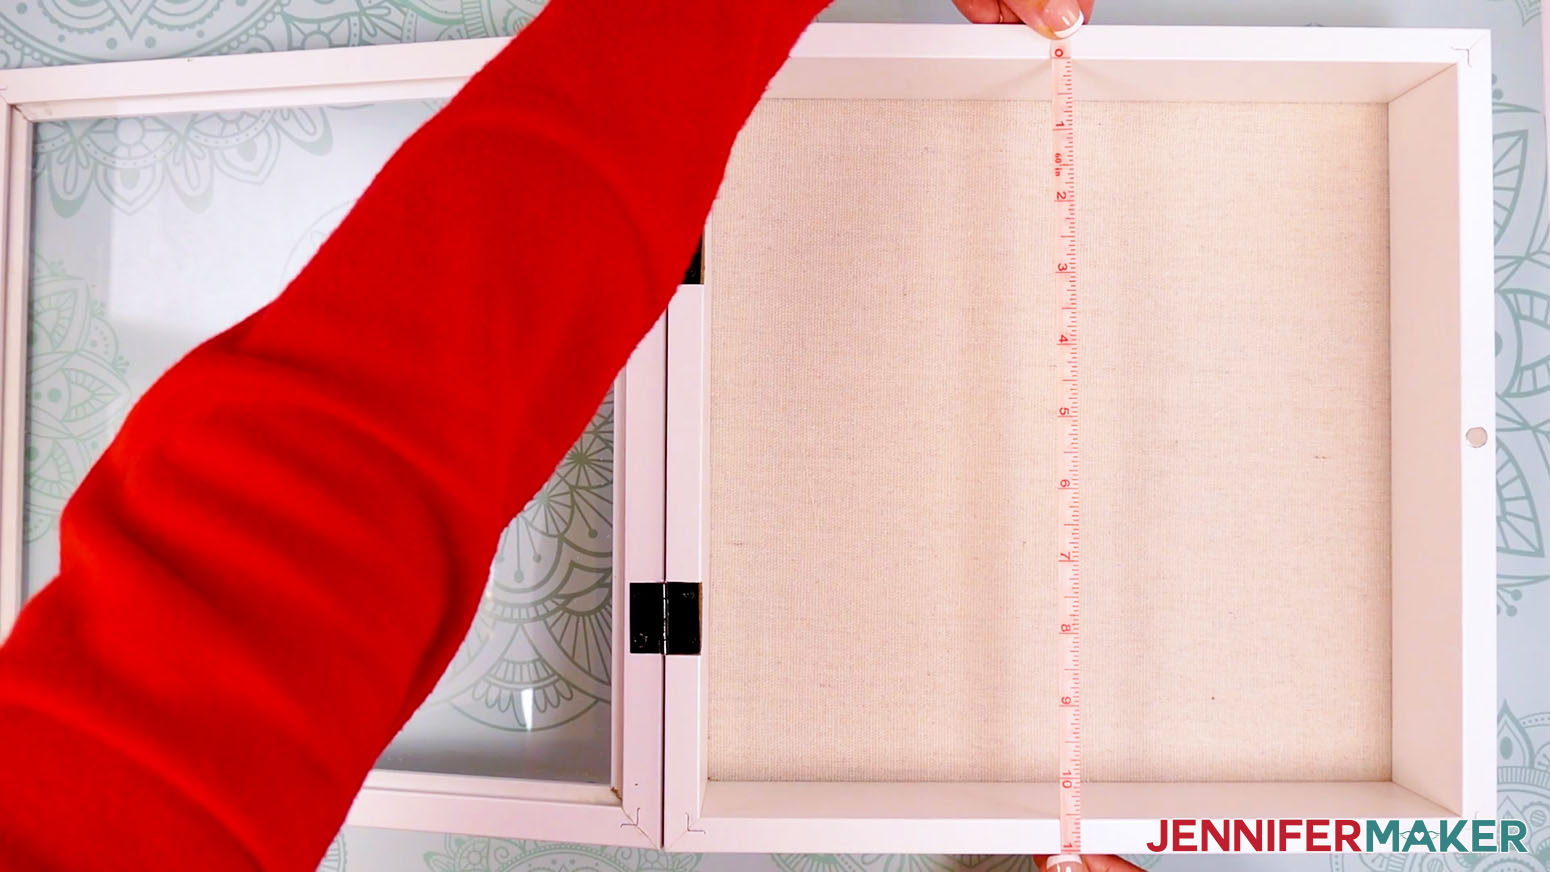
- Use a ruler or measuring tape to measure the distance from the left side of your shadow box’s interior display area to its right side to find the back wall’s width.
TIP: I recommend writing all your measurements down on scrap paper for easy reference.
NOTE: My box’s back wall measures 10.5” wide.
- Then measure the box’s interior area from the top side to the bottom side to find the back wall’s height.
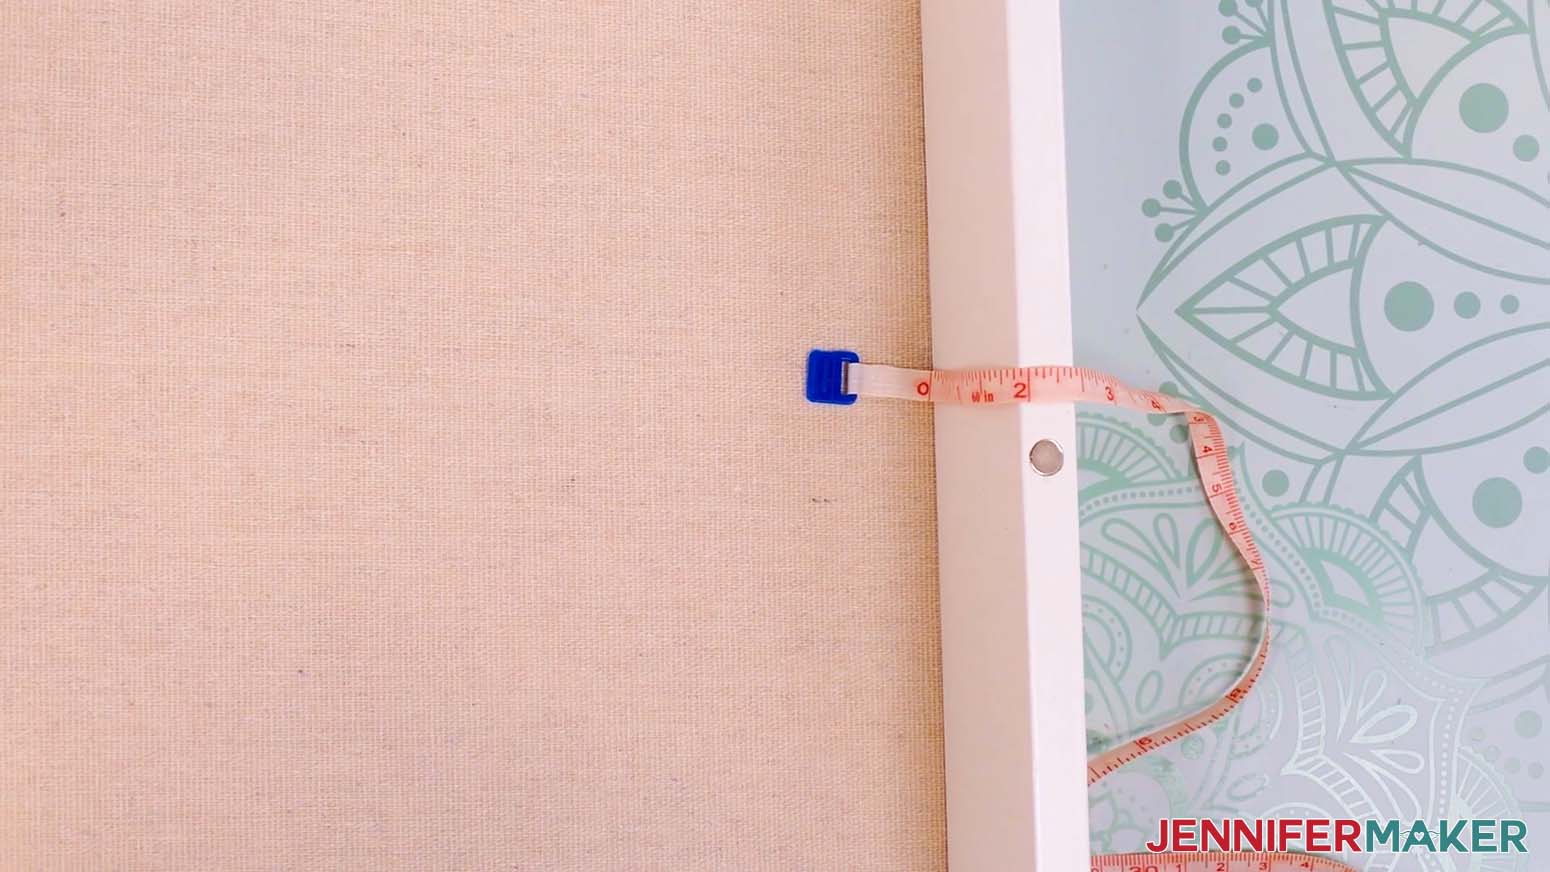
NOTE: My box’s back wall measures 10.5” high. - Measure the distance from the interior back wall to the front edge of one side to find the depth of your box’s interior side walls.
NOTE: My box’s side walls measure 2” wide.
STEP 3: PREPARE AND CUT YOUR PHOTOS AND FRAMES
OPTION 1: PRINT THEN CUT FRAMES
CRICUT DESIGN SPACE
- In Cricut Design Space, open a blank Canvas.
NOTE: If you’re new to using Cricut Design Space, go to cricutkickoff.com for my introductory tutorial on Design Space basics. - Click “Upload” and then “Upload Image.”
- Click “Browse.”
- Select the “frames” SVG file with your cutout shapes.
- Click “Open,” and then “Continue.”
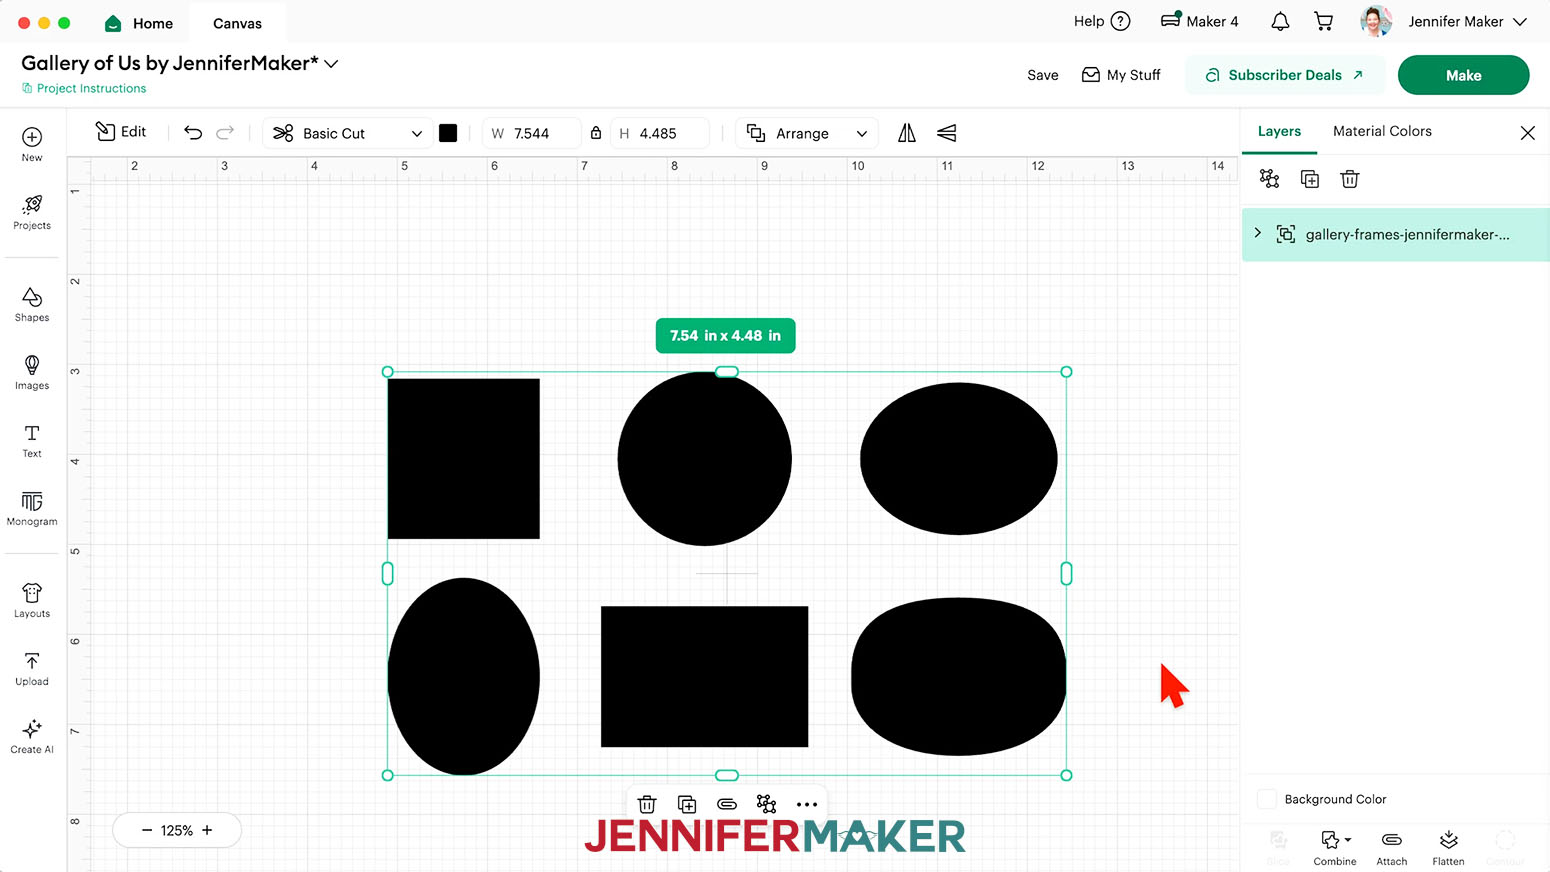
- Click “Upload” to add the design to your Canvas, then use the small arrow to close the side panel.
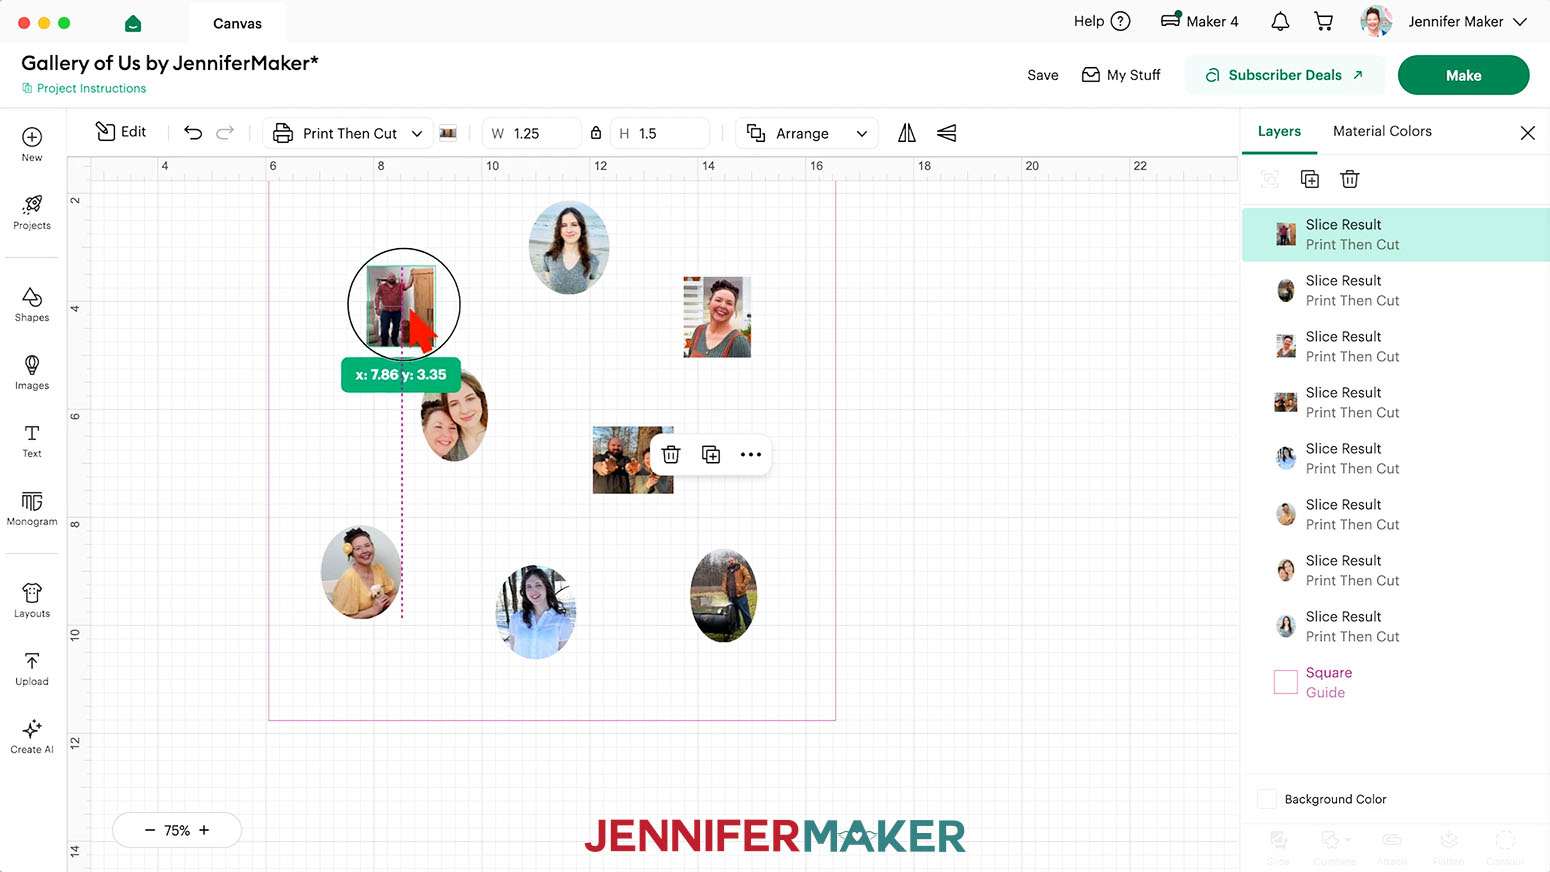
NOTE: On your Canvas, you’ll see six black shapes you can use to cut your gallery photos to fit my Print Then Cut frames. - Click “Save” and give your project a name.
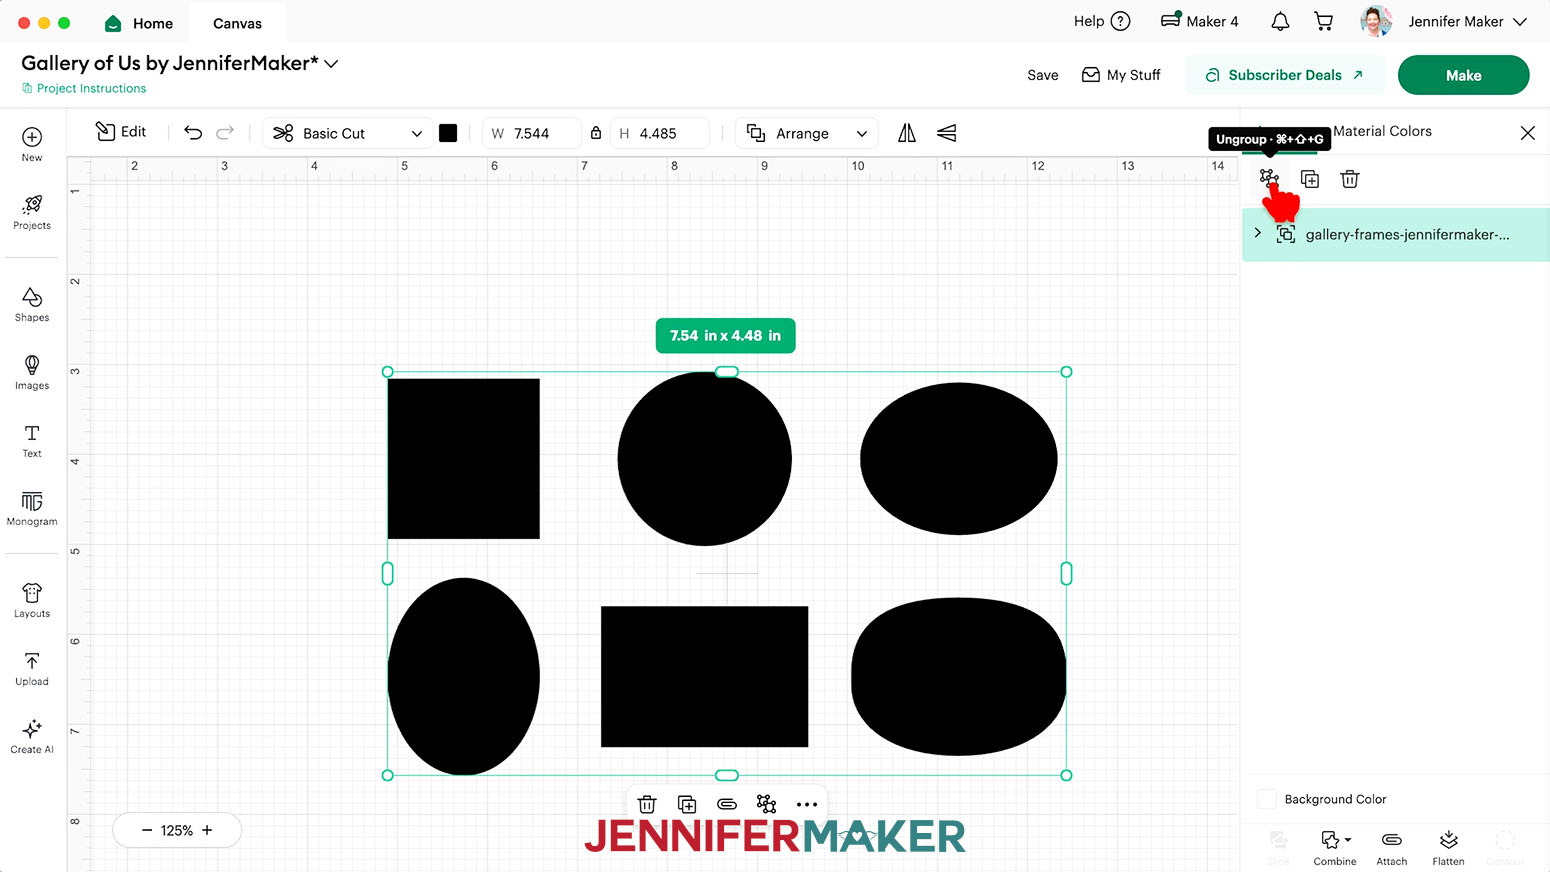
- Click the “Ungroup” icon above the Layers Panel to work with the cutout templates individually.
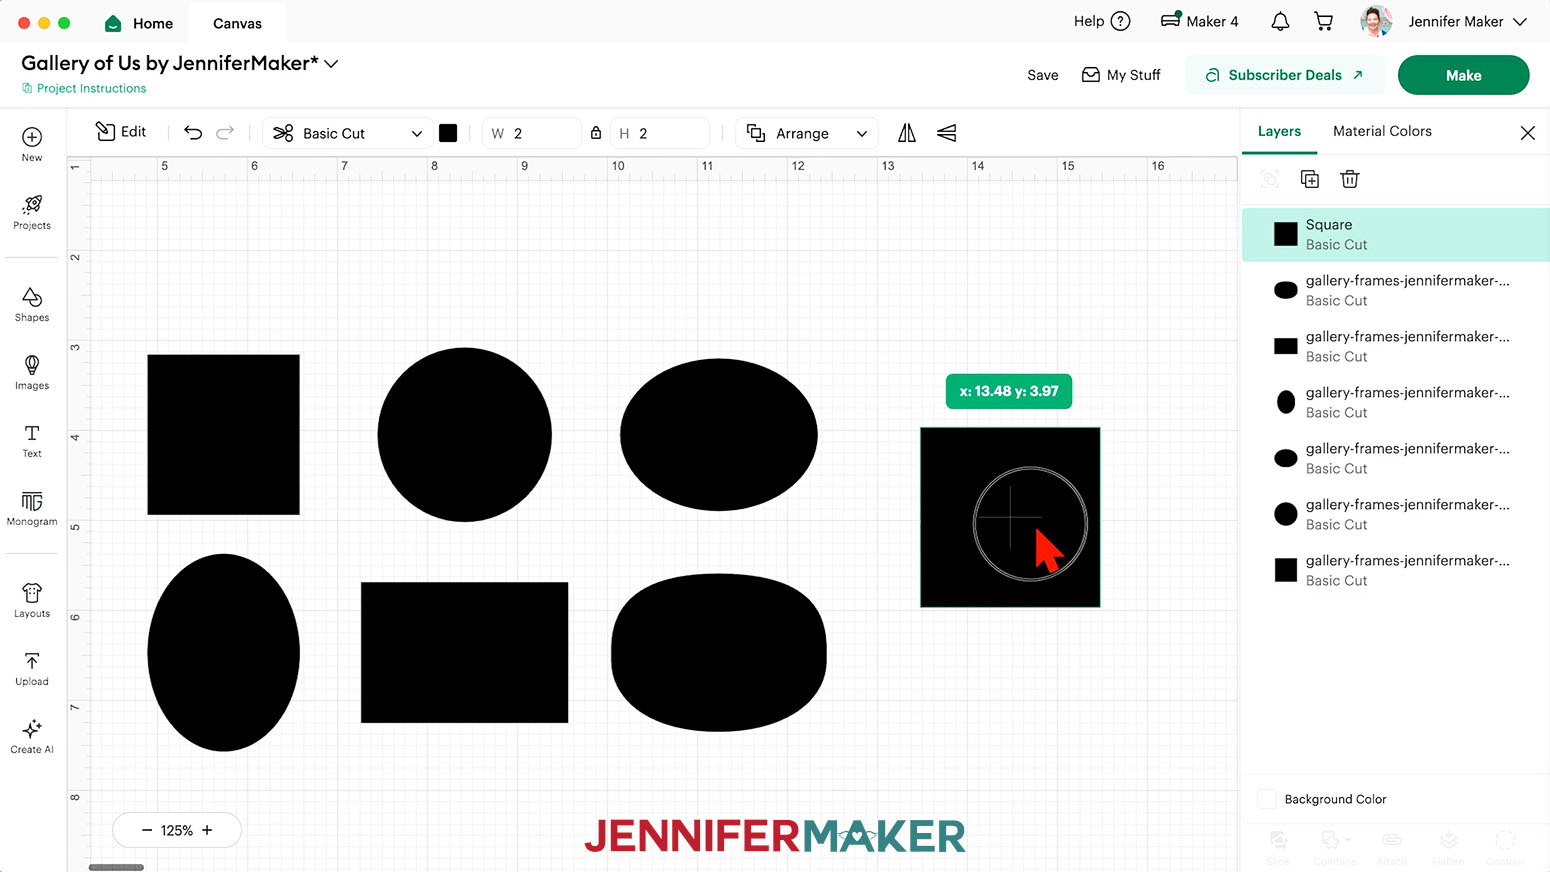
- To create a template of your shadow box’s back wall to help place your frames, click the “Shapes” icon on the left.
- Click the free “Square” shape to add it to your Canvas, then move it to an open space.
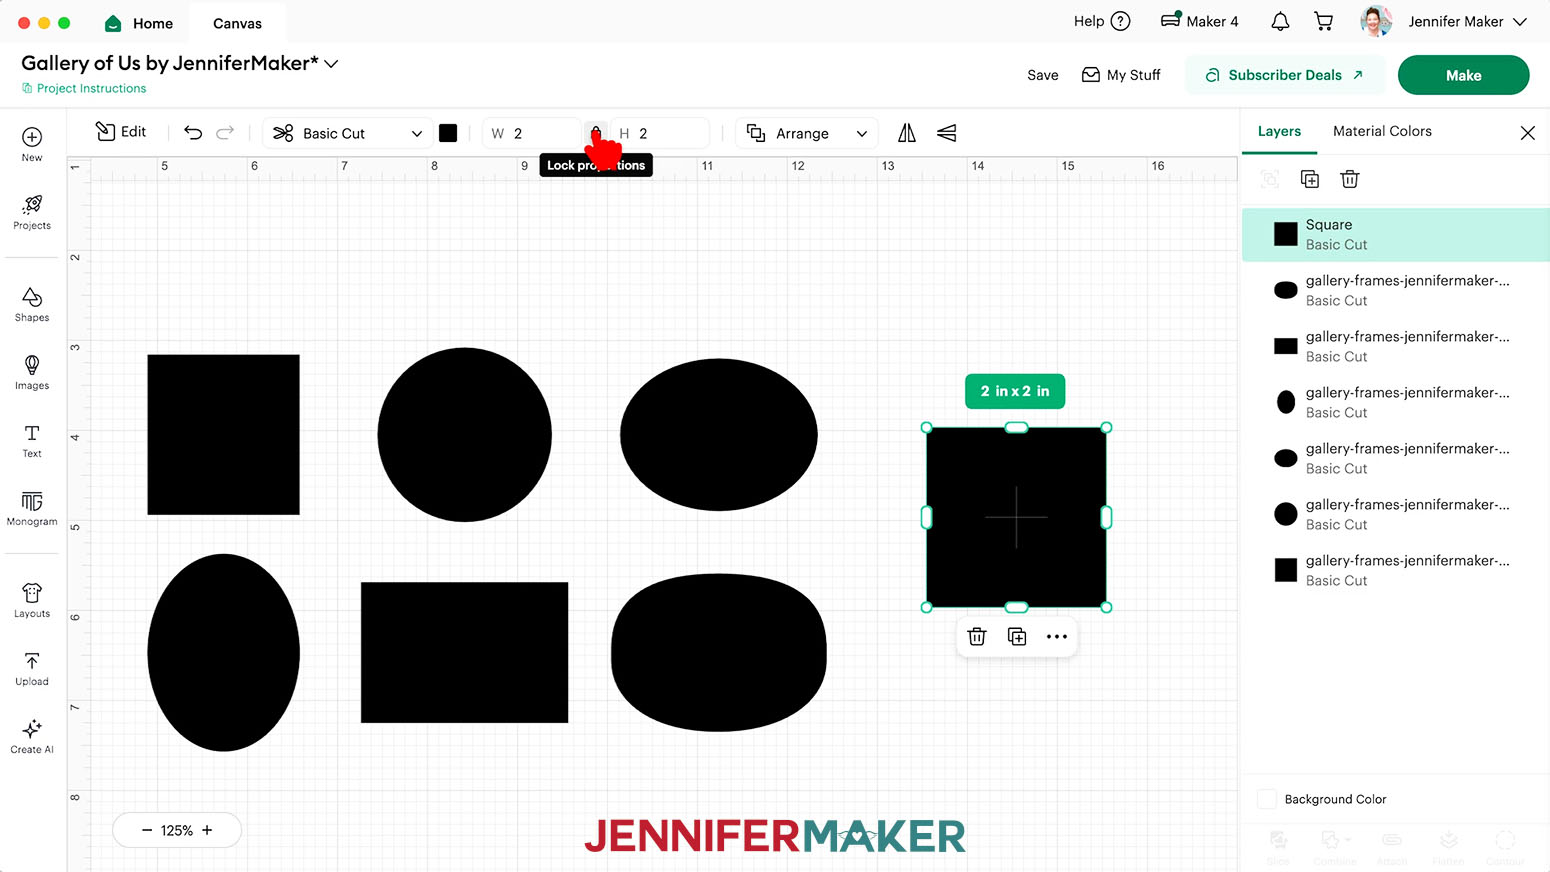
- Keep the “Lock” icon closed to maintain the shape’s proportions if your shadow box is a square, or click to unlock it if your shadow box’s dimensions are different.
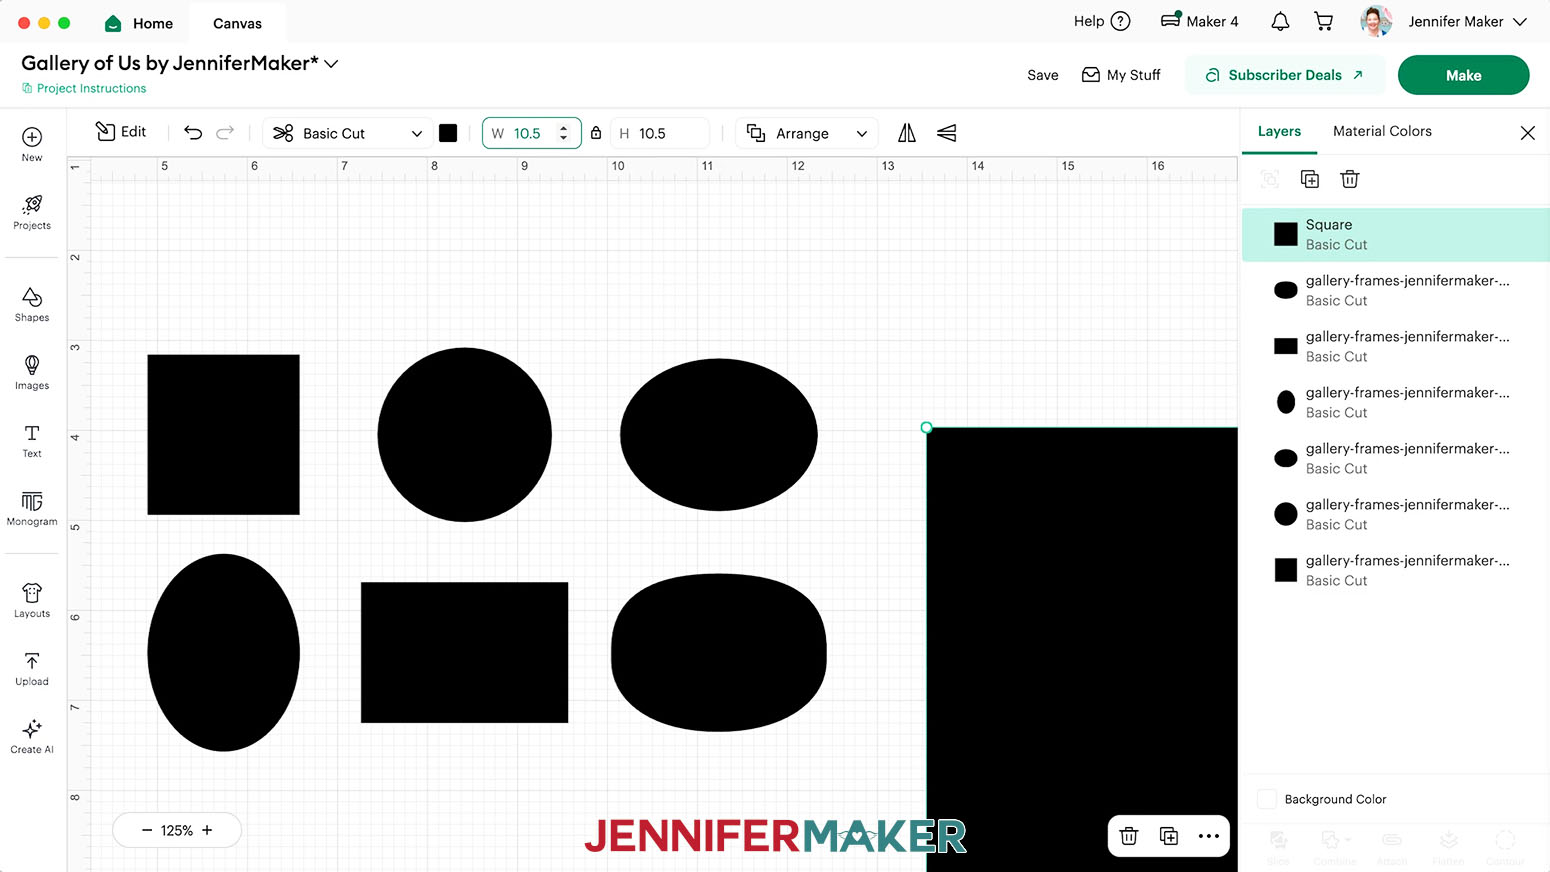
NOTE: Since my shadow box is a square, I’ll keep the “Lock” icon closed. - Enter the width of your shadow box’s back wall in the “Width (W)” field. If the box is a square, the “Height (H)” field will adjust automatically.
NOTE: I’ll enter “10.5” in the “Width (W)” field to match my shadow box’s back wall measurements. - If needed, enter the back wall’s height measurement in the “Height (H)” field.
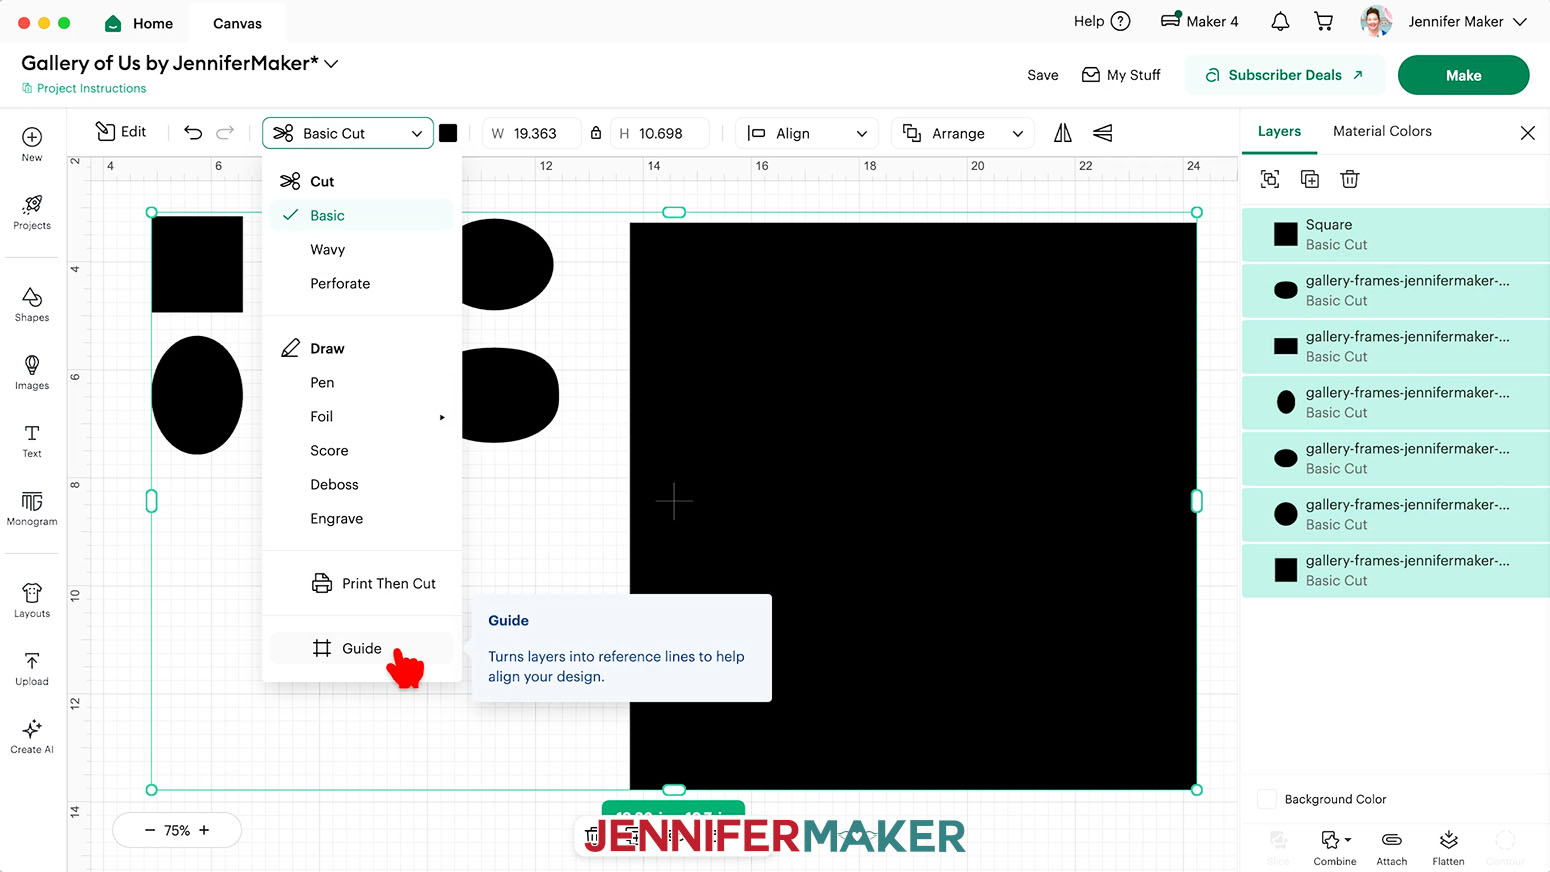
- Drag a bounding box around both your back wall template and the cutout shapes to select them.
- Click the “Basic Cut” dropdown menu, then select the “Guide” option to turn the shapes into pink “Guide” layers.
TIP: The Guide layers are visual references that won’t be part of your finished design. - To add the Print Then Cut frames to your Canvas, click “Upload” and then “Upload Image.”
- Click “Browse.”
- Select the first frame PNG file you’d like to upload.
- Click “Open,” and then “Continue.”
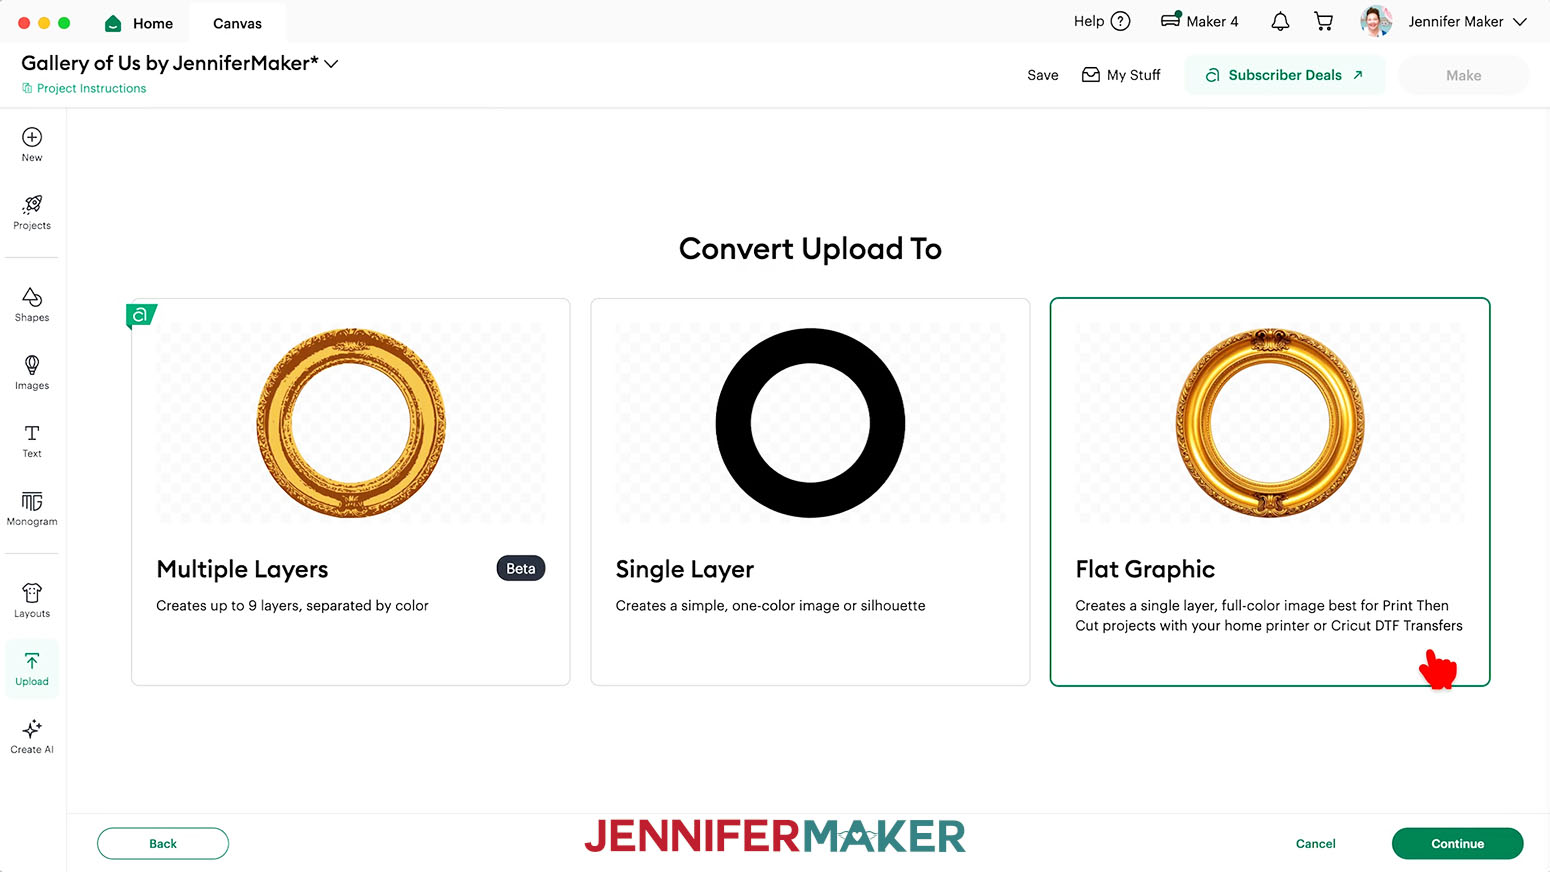
- On the “Background Remover” screen, the frames already have the background removed, so click “Apply & Continue.”
- On the “Convert Upload To” page, select “Flat Graphic” and click “Continue.”
- Click “Upload” to add the frame image to your Canvas.
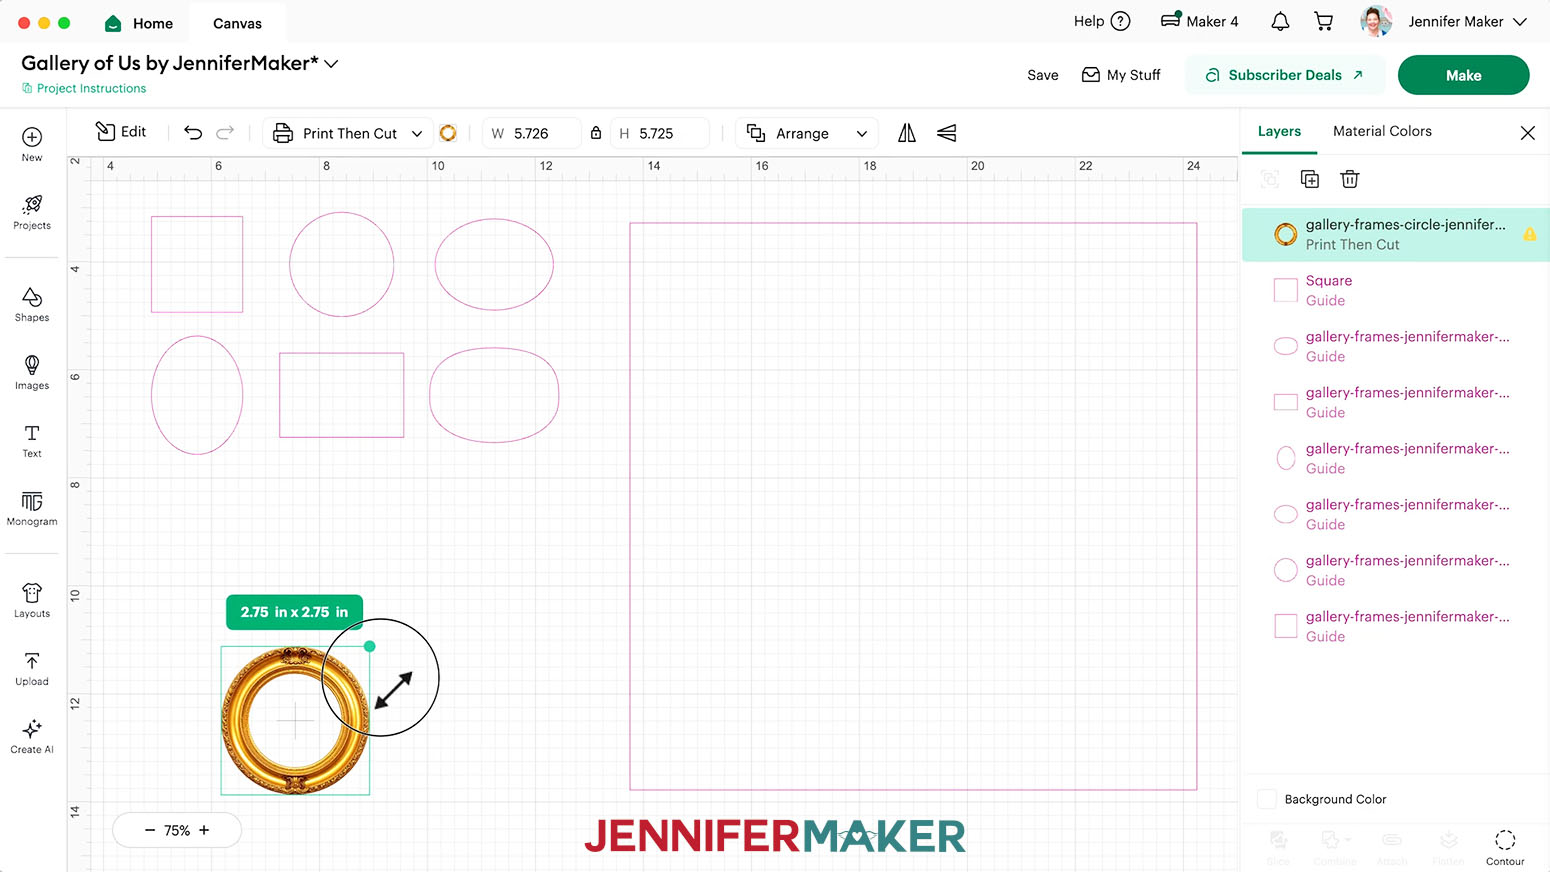
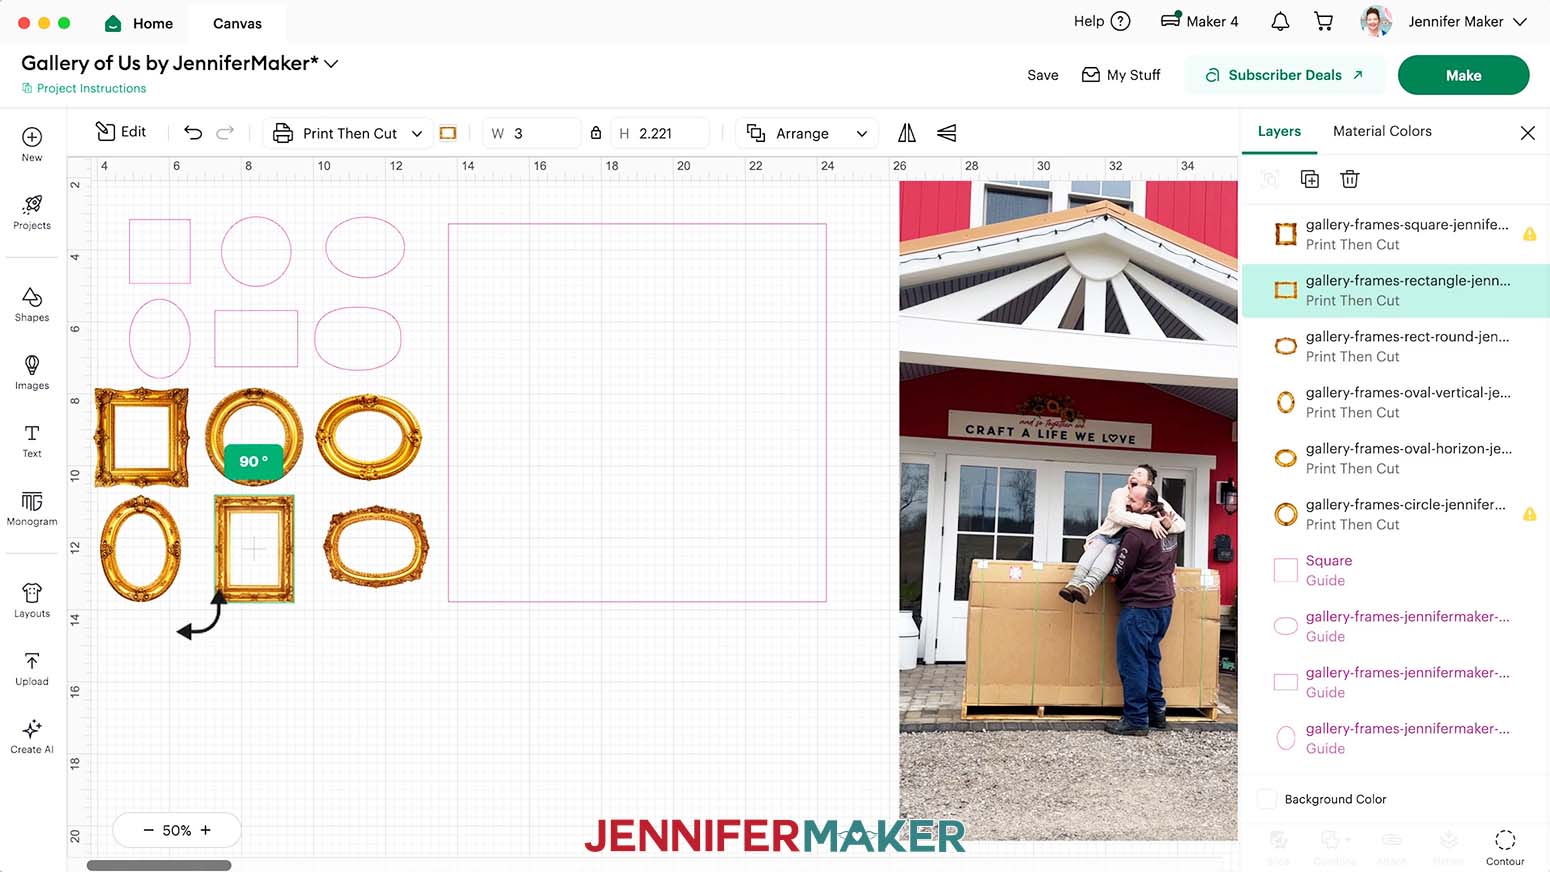
NOTE: Some of the frame images may load in with a “low resolution” message and a yellow warning icon in the Layers Panel. - Select the image, and with the “Lock” icon closed to maintain proportions, use a corner “Resize” handle to shrink the frame so it’s more proportional inside your gallery wall template.
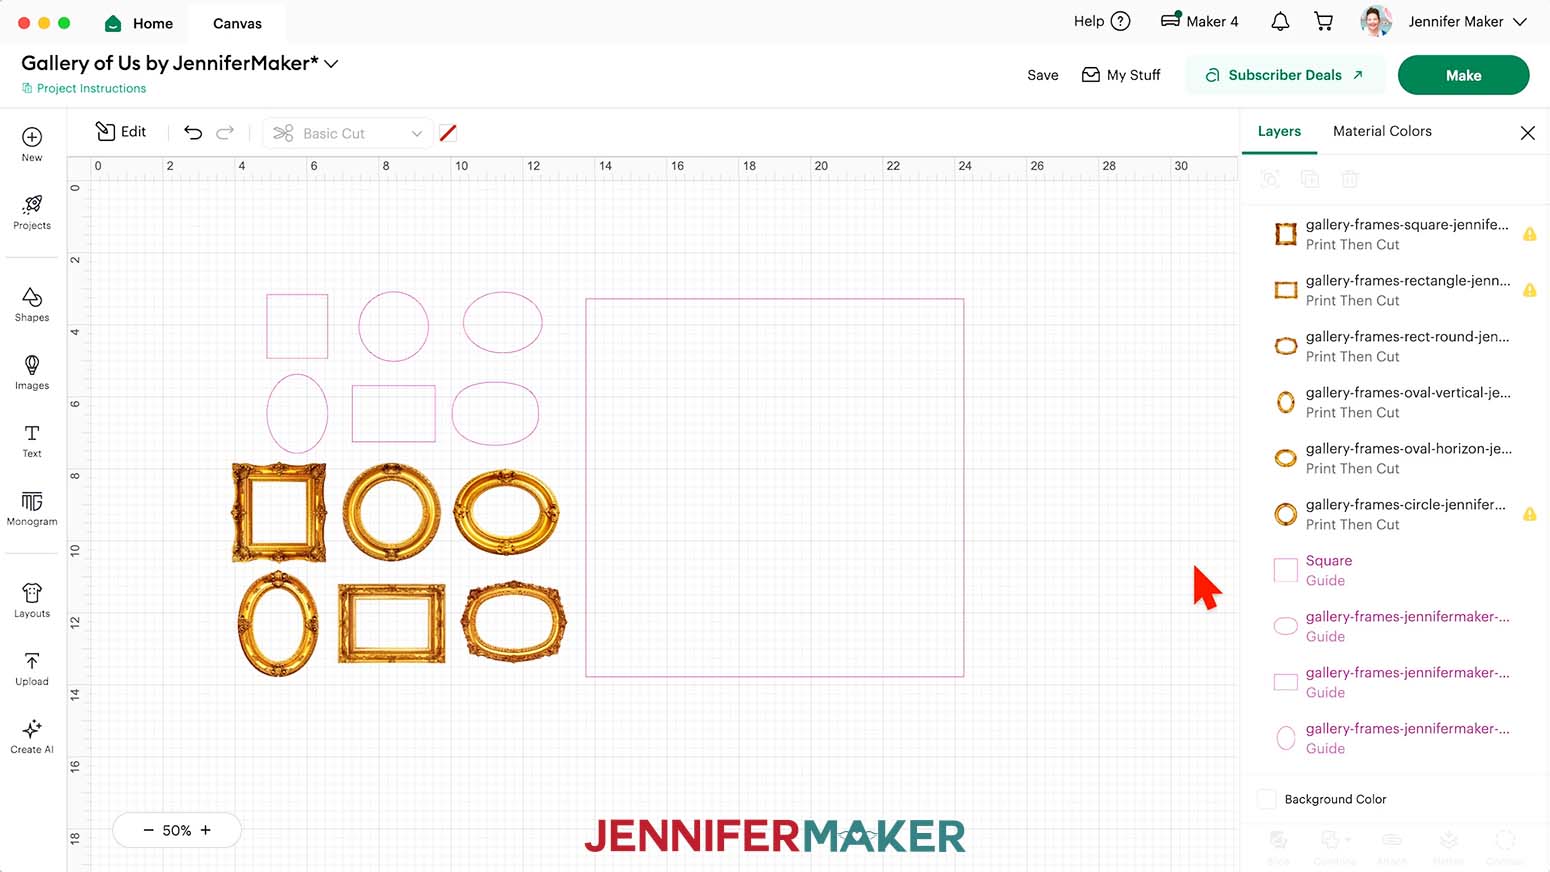
NOTE: I resized the circle frame to 2.75” wide, and the remaining frames to 3” on the longer dimension. I could fit a maximum of nine images in my gallery at this size. - Repeat Steps 16-23 to add any other frames you like to your Canvas.
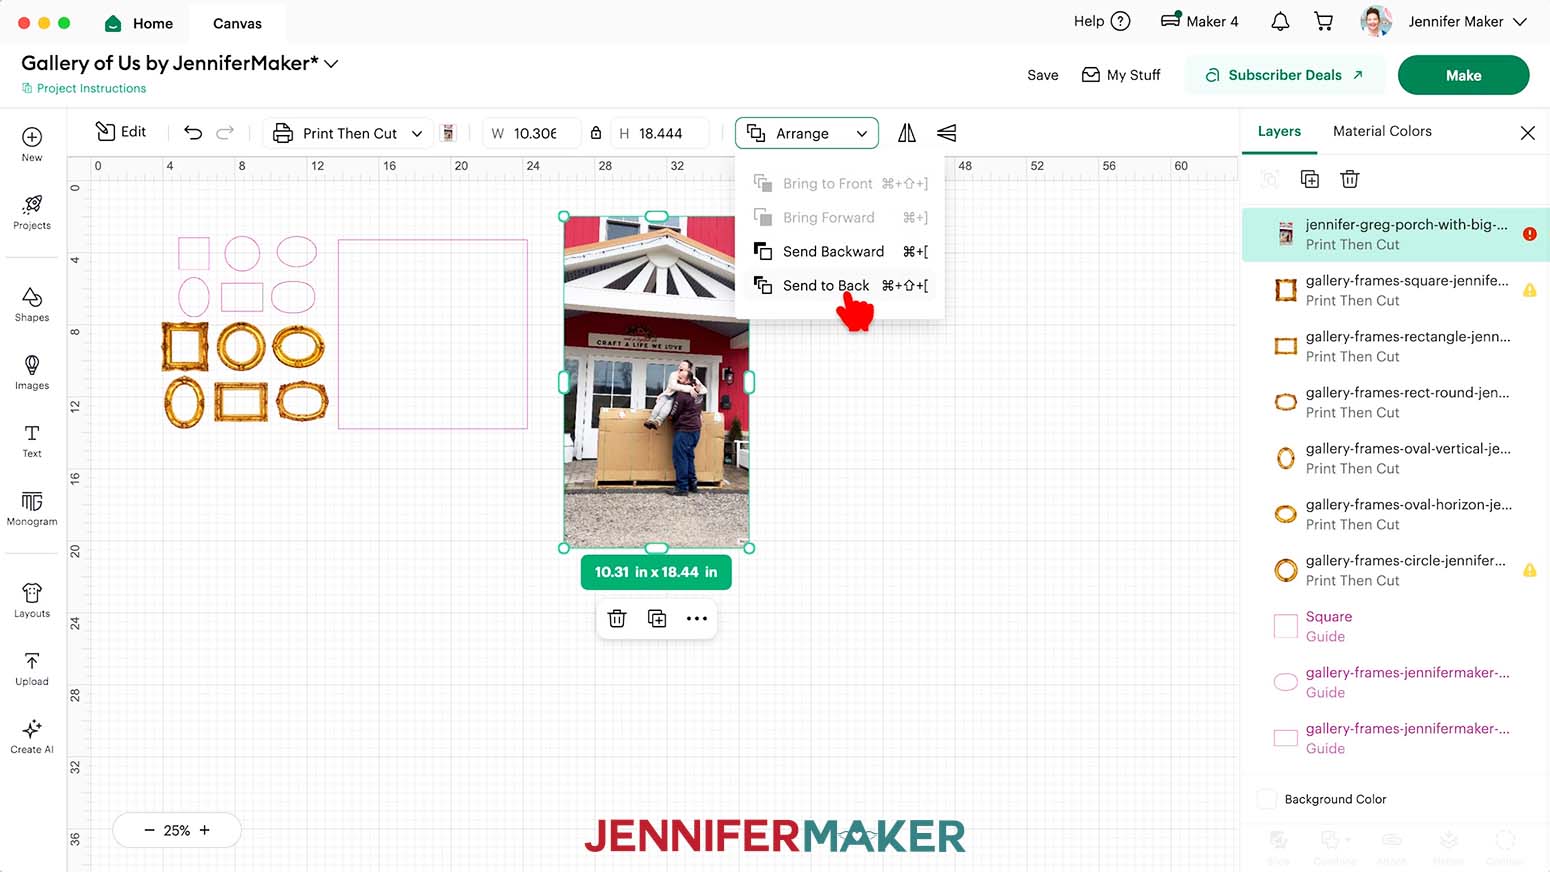
- To add a photo for your gallery wall, repeat Steps 16-22 to upload the photo of your choice.
NOTE: If your photo is very large on your Canvas, use the corner “Resize” handles to shrink it down to a workable size. - Select the photo on your Canvas and drag it into an empty space.
- Then click “Arrange” at the top of the Canvas and select “Send to Back” so your photo is behind the frames.
- Click a frame with a shape you like.
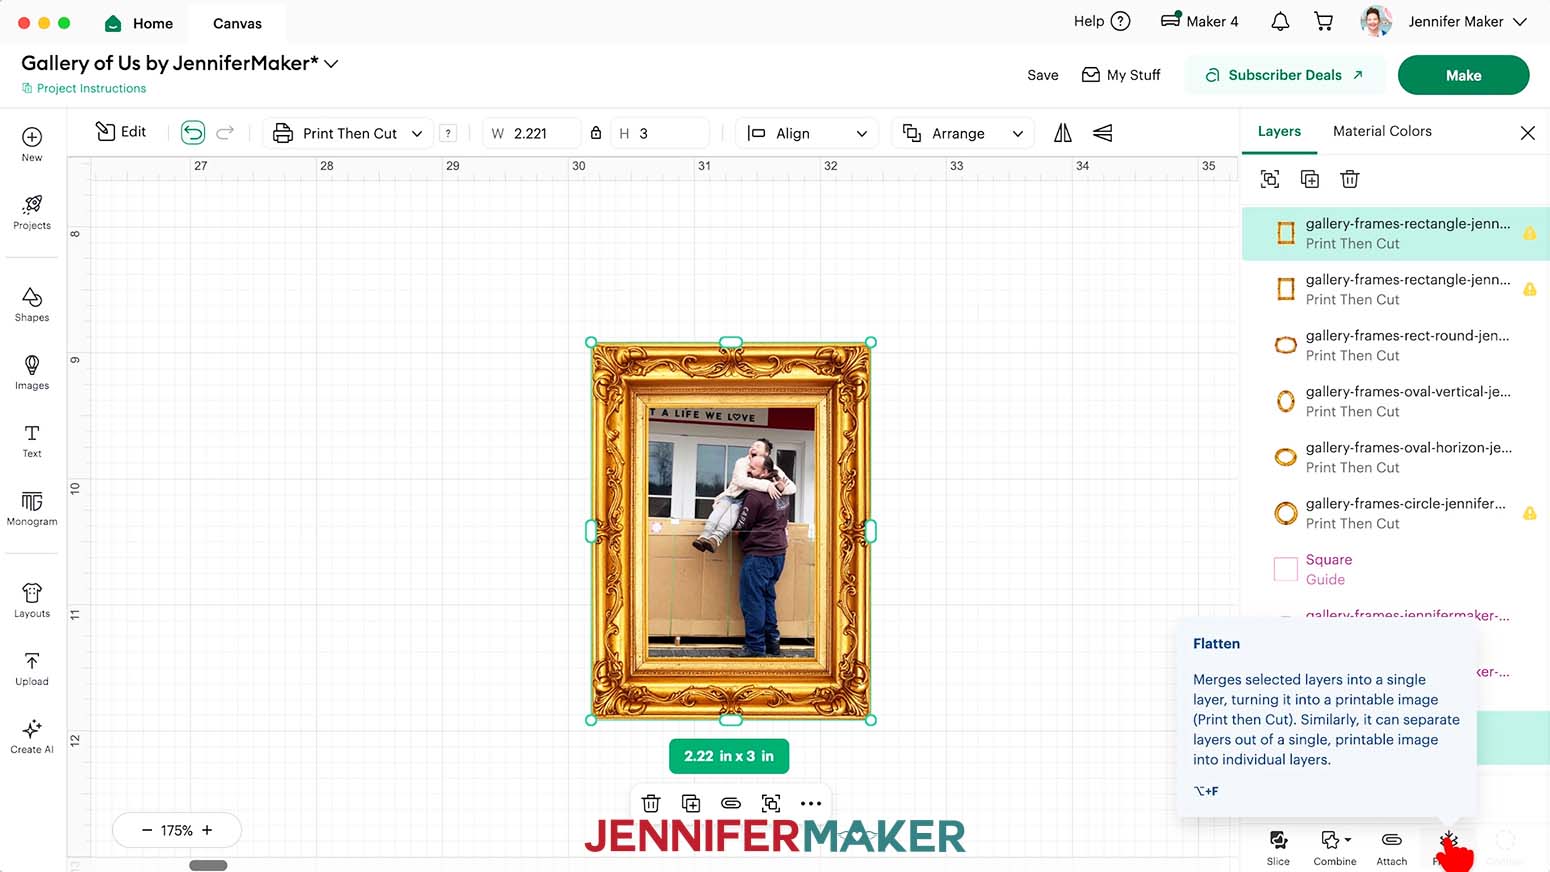
- If you’d like to rotate the frame to match the orientation of the photo’s important elements, hover your cursor just outside the frame’s bottom right corner until it turns into a curved arrow icon, then click and drag to rotate the frame 90°.
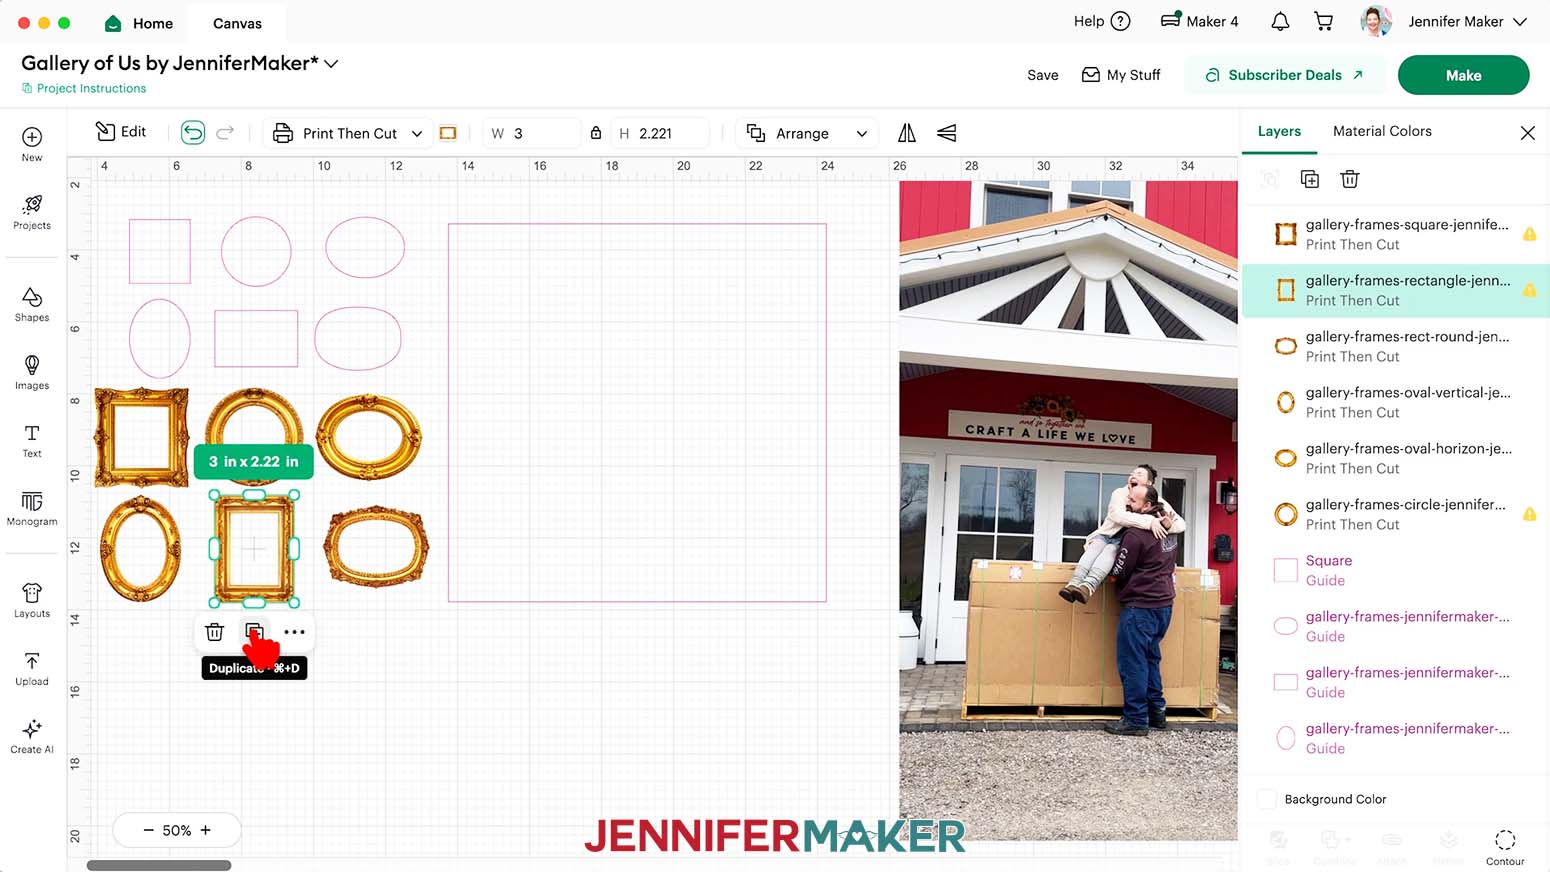
NOTE: You can also rotate the frame by clicking the “Edit” icon in the top toolbar and entering “90” in the “Rotate” field. - With your chosen frame selected, click the “Duplicate” icon to create a copy of it, then move the copy onto your photo.
TIP: Click the “Plus (+)” sign in the bottom left corner of the Canvas to zoom in and see the frame, if needed. - Use the photo’s corner handles to resize the photo so its important elements are visible inside the frame, and the frame is completely filled. Adjust the sizing further as needed to get the right positioning.
TIP: If your photo’s important elements don’t fit inside the frame’s opening the way you want, try swapping frames; a different shape might work perfectly for your photo! - To trim away excess parts of the photo, select the cutout Guide that matches the shape of the frame and click “Duplicate” to create a copy of it.
NOTE: You may need to rotate the Guide if you rotated the frame. - Position the copied Guide over the frame and resize it until it’s just larger than the frame’s opening.
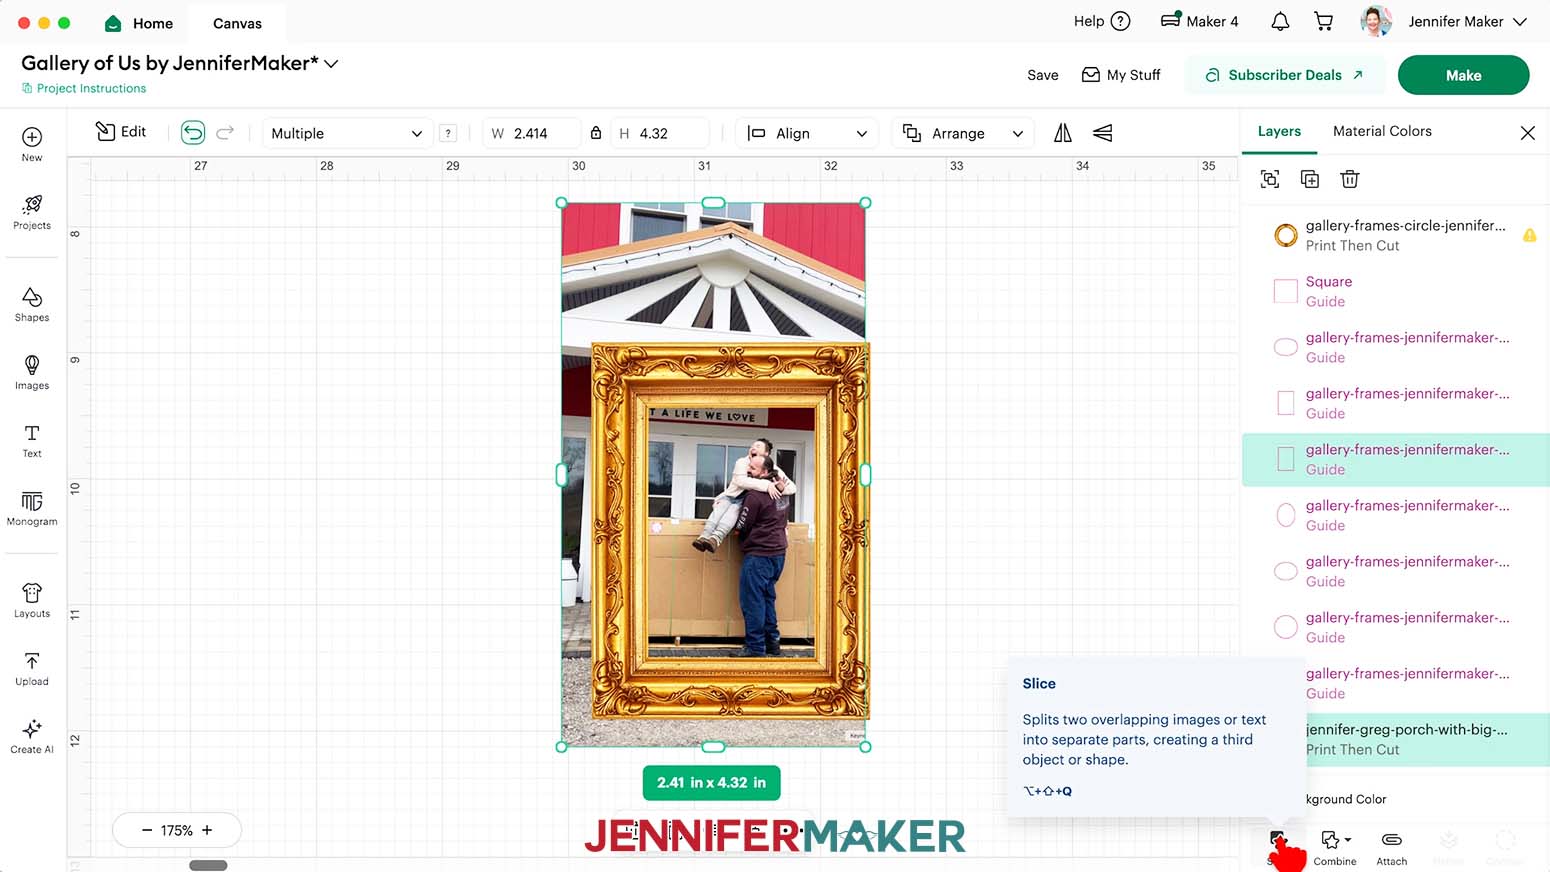
- Drag a selection box around the photo, Guide, and frame.
- Hold down the “Shift” key on your keyboard and select just the frame layer highlighted in the Layers Panel to deselect it, leaving just the photo and the Guide highlighted.
- Click “Slice.”
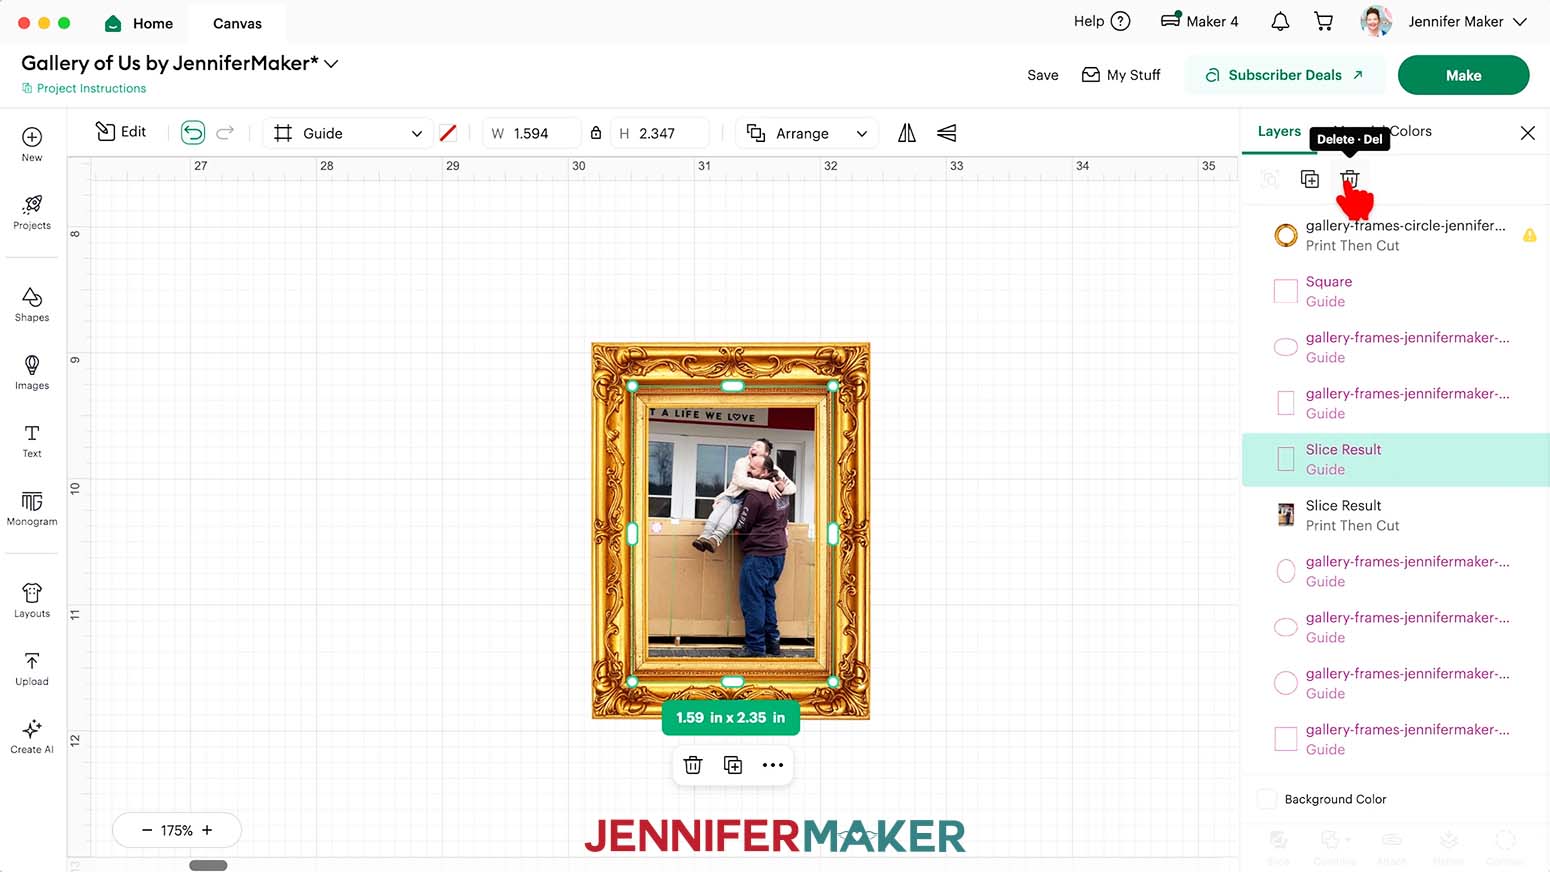
- In the Layers Panel, delete the “Slice Result” layers that look like the Guide or pieces cut away from your photo.
- Make sure the frame is still on top of your photo, and the photo fills the inside of the frame.
- Drag a selection box over both the frame and the photo, and click “Flatten” to combine them into a single Print Then Cut layer.
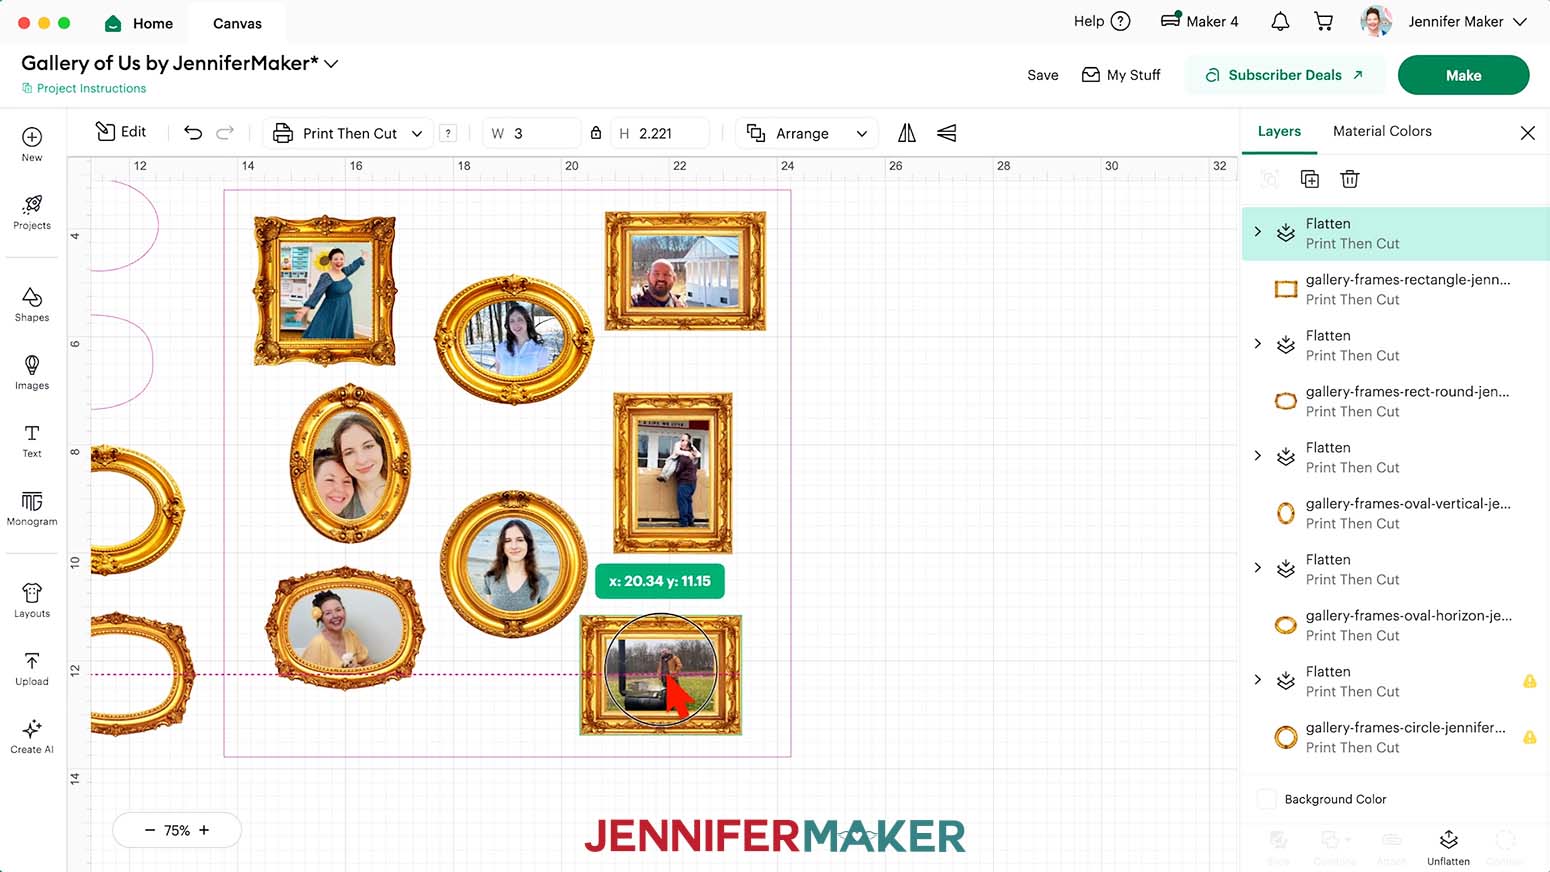
- Drag your finished photo into the wall template guide to see how it fits in your gallery.
- Repeat Steps 16-22 and 26-40 to add and adjust as many photos for your gallery as you like.
TIP: Arrange your photos so the ones on the sides have their subjects angled inward and the ones in the middle have their subjects facing forward. This gives your gallery a more balanced feel. - Delete any unused frames from your Canvas.
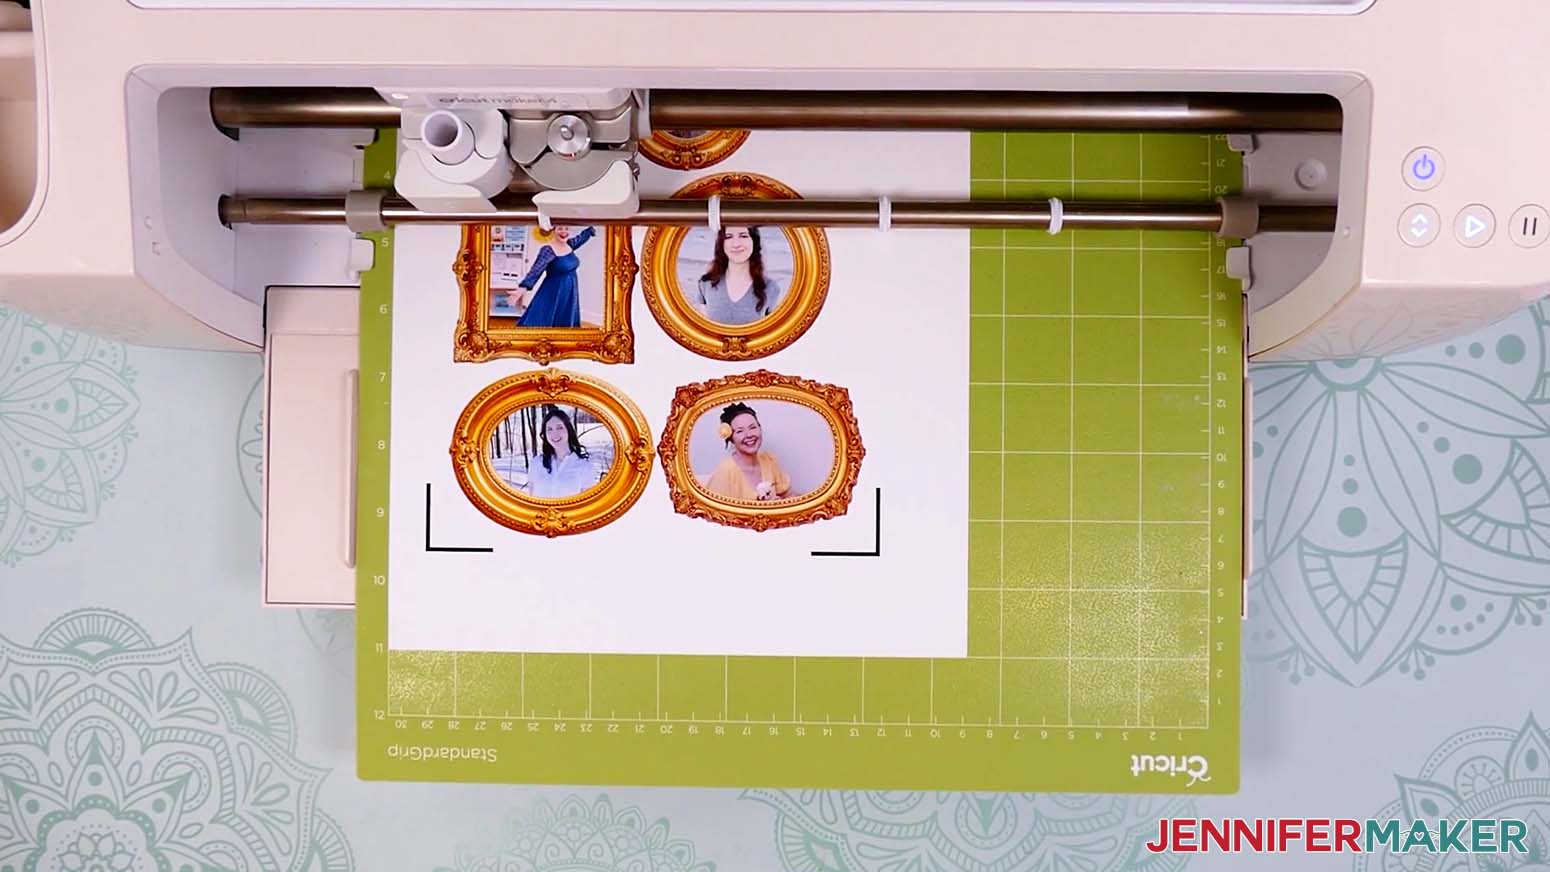
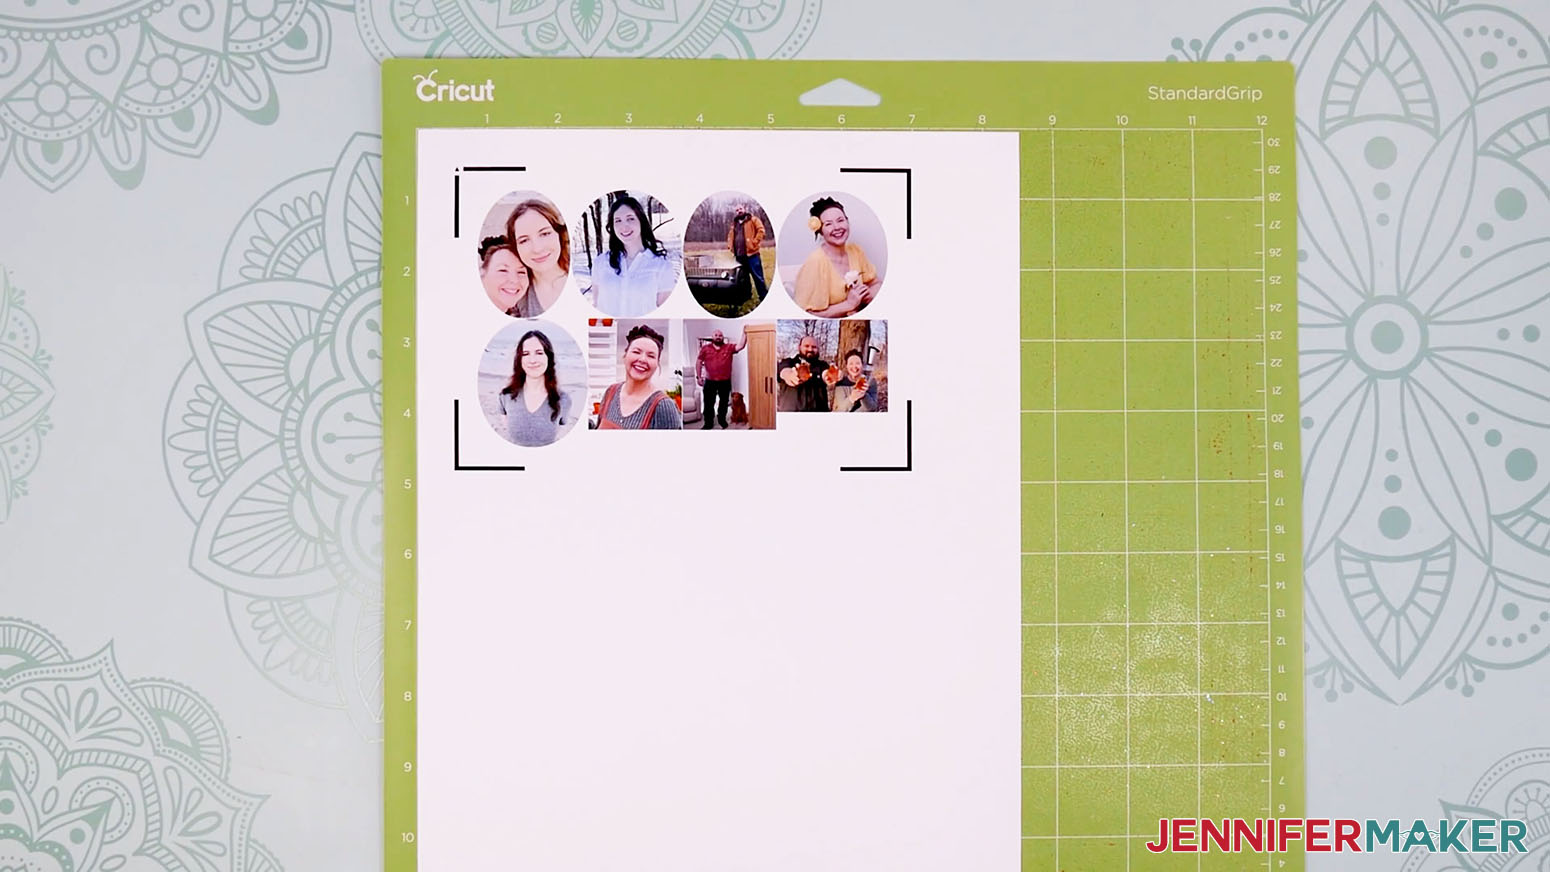
- And now your photos are ready to Print Then Cut! Follow the instructions from STEP 3 and STEP 4 of my Patterns in Cricut Design Space tutorial to calibrate your Cricut, if needed, and Print Then Cut your photos on photo paper using a green StandardGrip machine mat.
NOTE: Make sure to “Add Bleed,” select the highest print quality setting available, and match your paper type when printing your photos for the best results.

OPTION 2: GOLD MINI FRAMES
PREPARE YOUR FRAME LAYOUT
- Lay your shadow box face up on your work surface with the hanging parts in the back pointing away from you, and open the front door of the display.
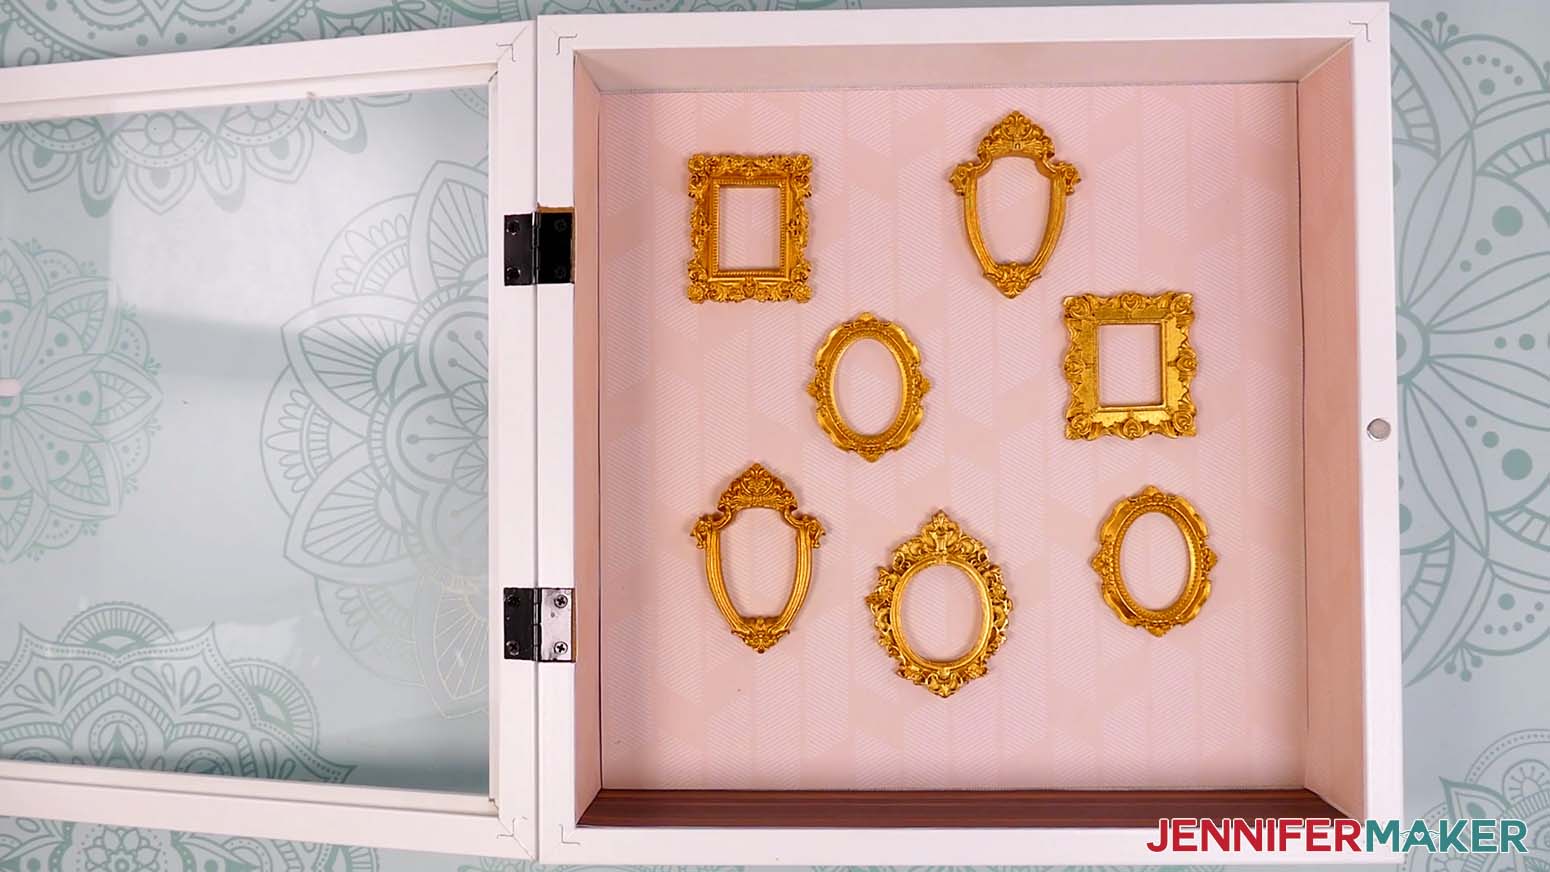
- Place mini frames you like inside the box to create a gallery arrangement.
TIP: Leave space between the frames so the gallery doesn’t feel too crowded.
NOTE: Seven mini frames fit nicely in my box. - Keep your frames in position as you adjust your photos so you can refer back to your layout.
TIP: Take a picture with your phone in case your box is accidentally jostled!
CRICUT DESIGN SPACE
- In Cricut Design Space, open a blank Canvas.
NOTE: If you’re new to using Cricut Design Space, go to cricutkickoff.com for my introductory tutorial on Design Space basics. - Follow Steps 9-13 from the “OPTION 1: PRINT THEN CUT FRAMES” section above to add your gallery back wall template to your Design Space Canvas.
- Select the back wall template and click the “Basic Cut” operation dropdown in the top toolbar, then select the “Guide” option to turn it into a pink “Guide” layer.
TIP: Guide layers are visual references that won’t be part of your finished design. - To make your photos for your gallery wall, decide which of your mini frames you’d like to add a photo to first.
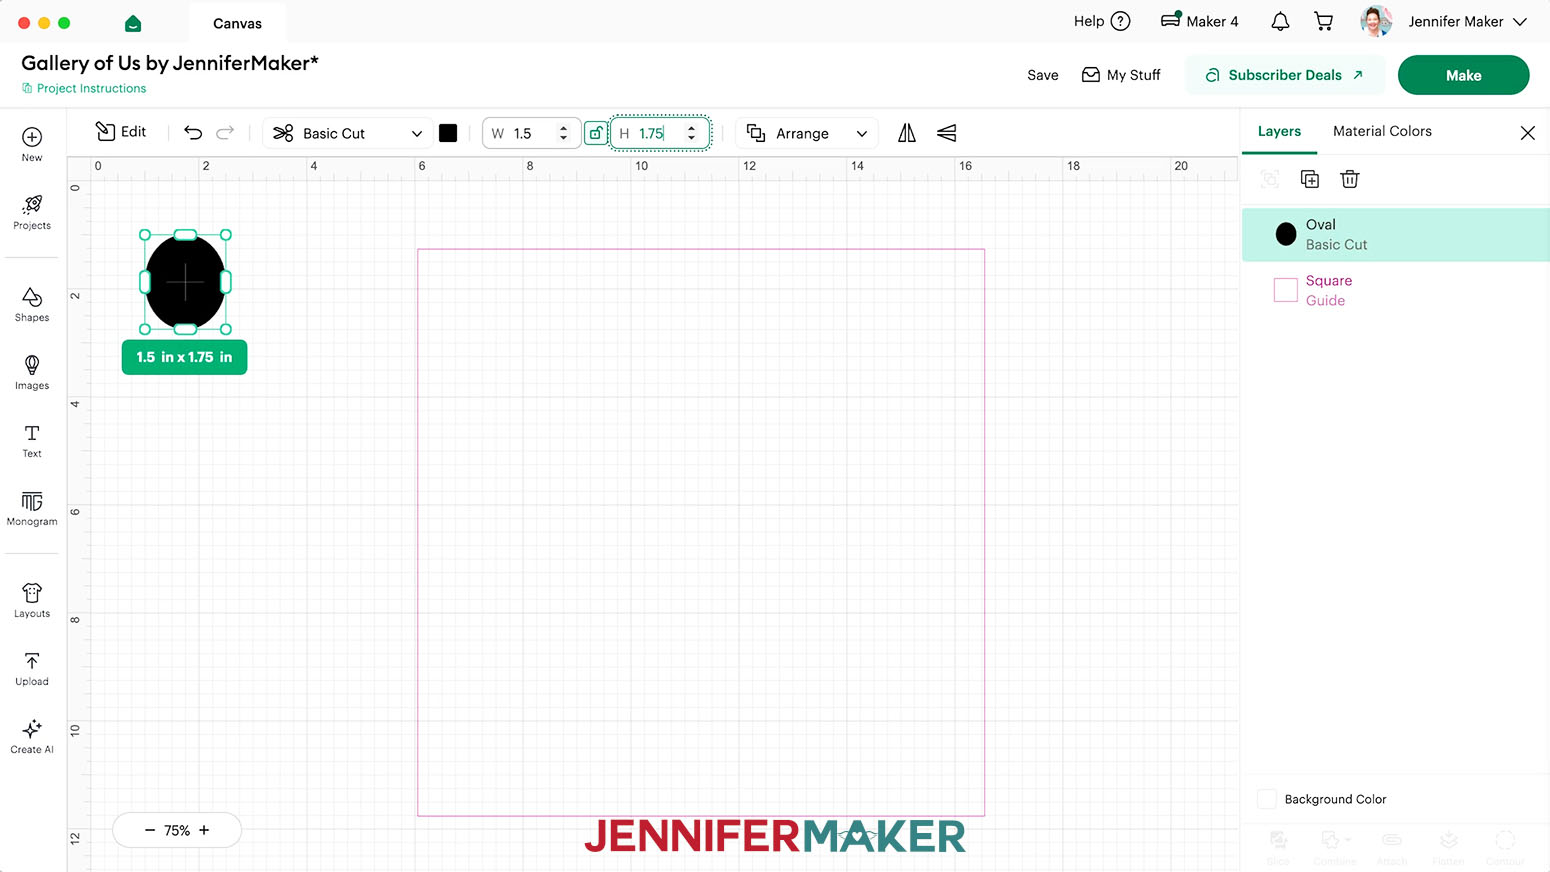
NOTE: I’ll start with an oval-shaped frame with an ornate top. - Click on the “Shapes” icon and add a free Shape that is similar to the mini frame’s shape.
NOTE: I’ll add the free Oval shape. - Click the “Lock” icon to open the shape’s proportions.
- Use a measuring tape or ruler to measure the mini frame’s width.
- Add a quarter of an inch to the frame’s width, and then enter that number in the “Width (W)” field at the top.
NOTE: My frame’s width measures 1.25”, so I’ll enter 1.5” in the “Width” field. - Then measure the frame’s height, add a quarter of an inch, and enter that number in the “Height (H)” field at the top.
NOTE: My frame’s height measures 1.5”, so I’ll enter 1.75” in the “Height” field. - With your adjusted shape selected, click the “Basic Cut” dropdown menu and change it to a “Guide” layer.
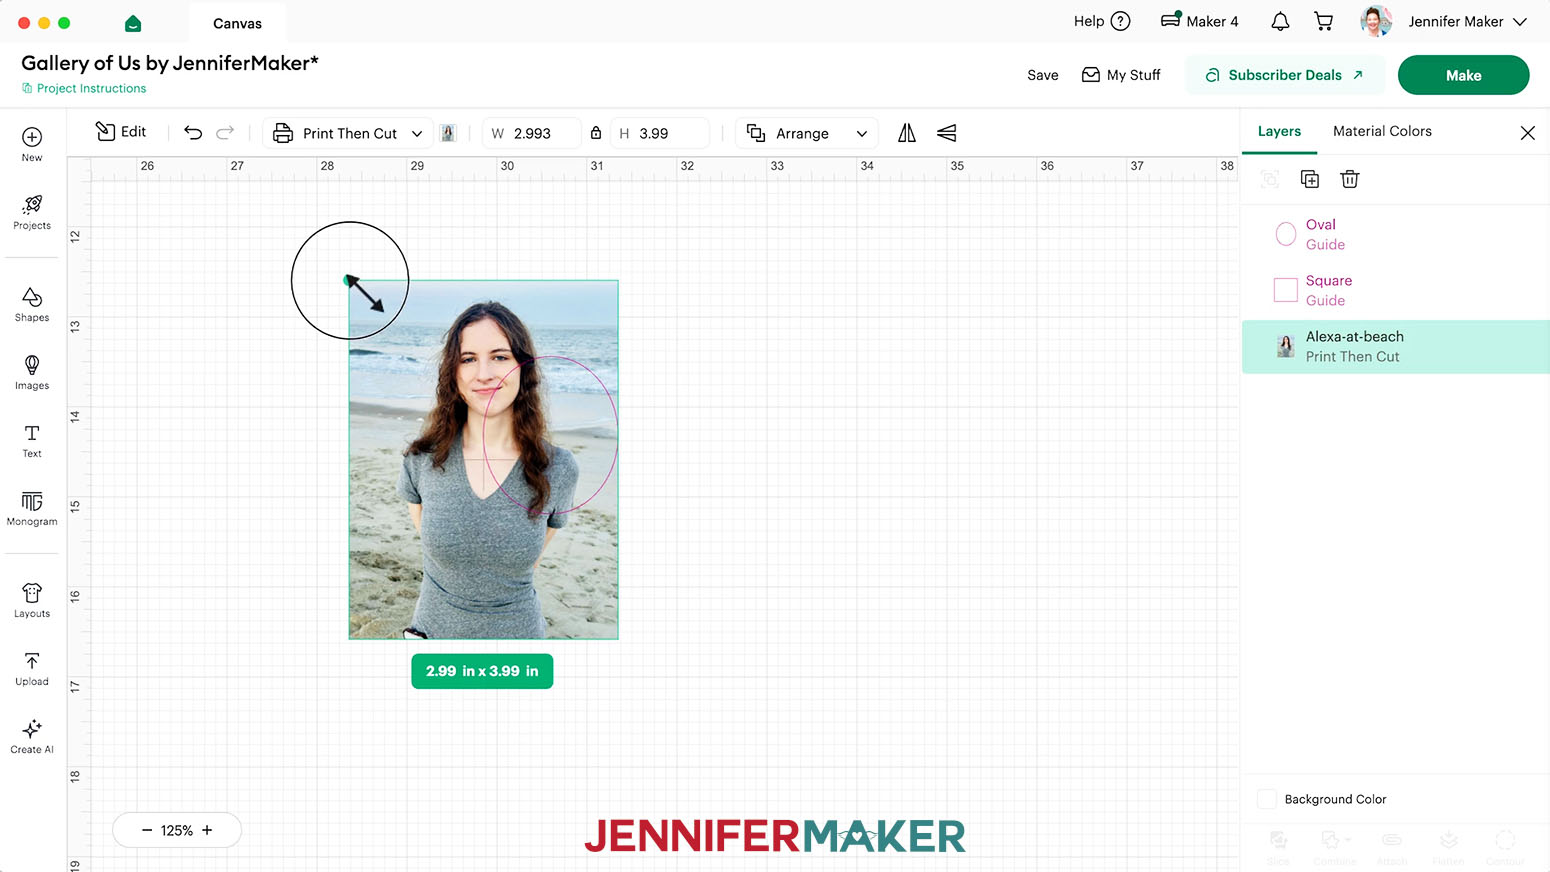
- Repeat Steps 16-22 from the “OPTION 1: PRINT THEN CUT FRAMES” section to upload a photo for your mini frame.
NOTE: If your photo is very large on your Canvas, use the corner “Resize” handles to shrink it down to a workable size. - Drag the photo into an empty space on your Canvas, then move the frame Guide onto your photo.
TIP: If you can’t see the pink frame Guide, select the photo and click “Arrange” and “Send to Back.” - Use the photo’s corner handles to resize the photo so its important elements are visible inside the frame, and the frame is completely filled. Adjust the sizing further as needed to get the right positioning.
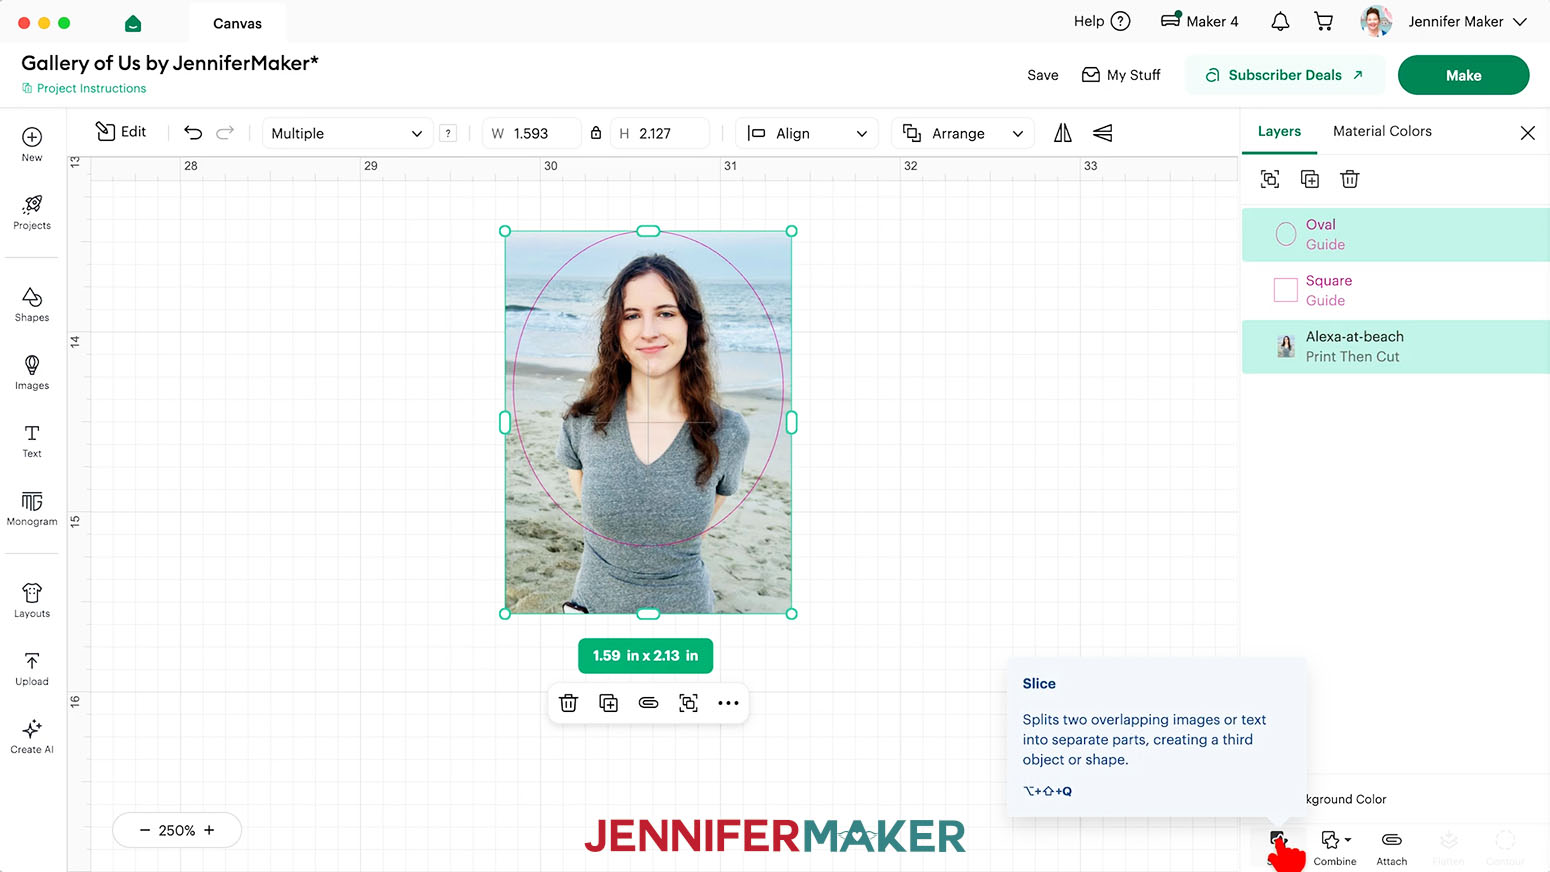
TIP: If your photo’s important elements don’t fit inside the frame’s opening the way you want, try swapping frames; a different shape might work perfectly for your photo! - To trim away excess parts of the photo, drag a selection box around the Guide and your photo.
- Click “Slice.”
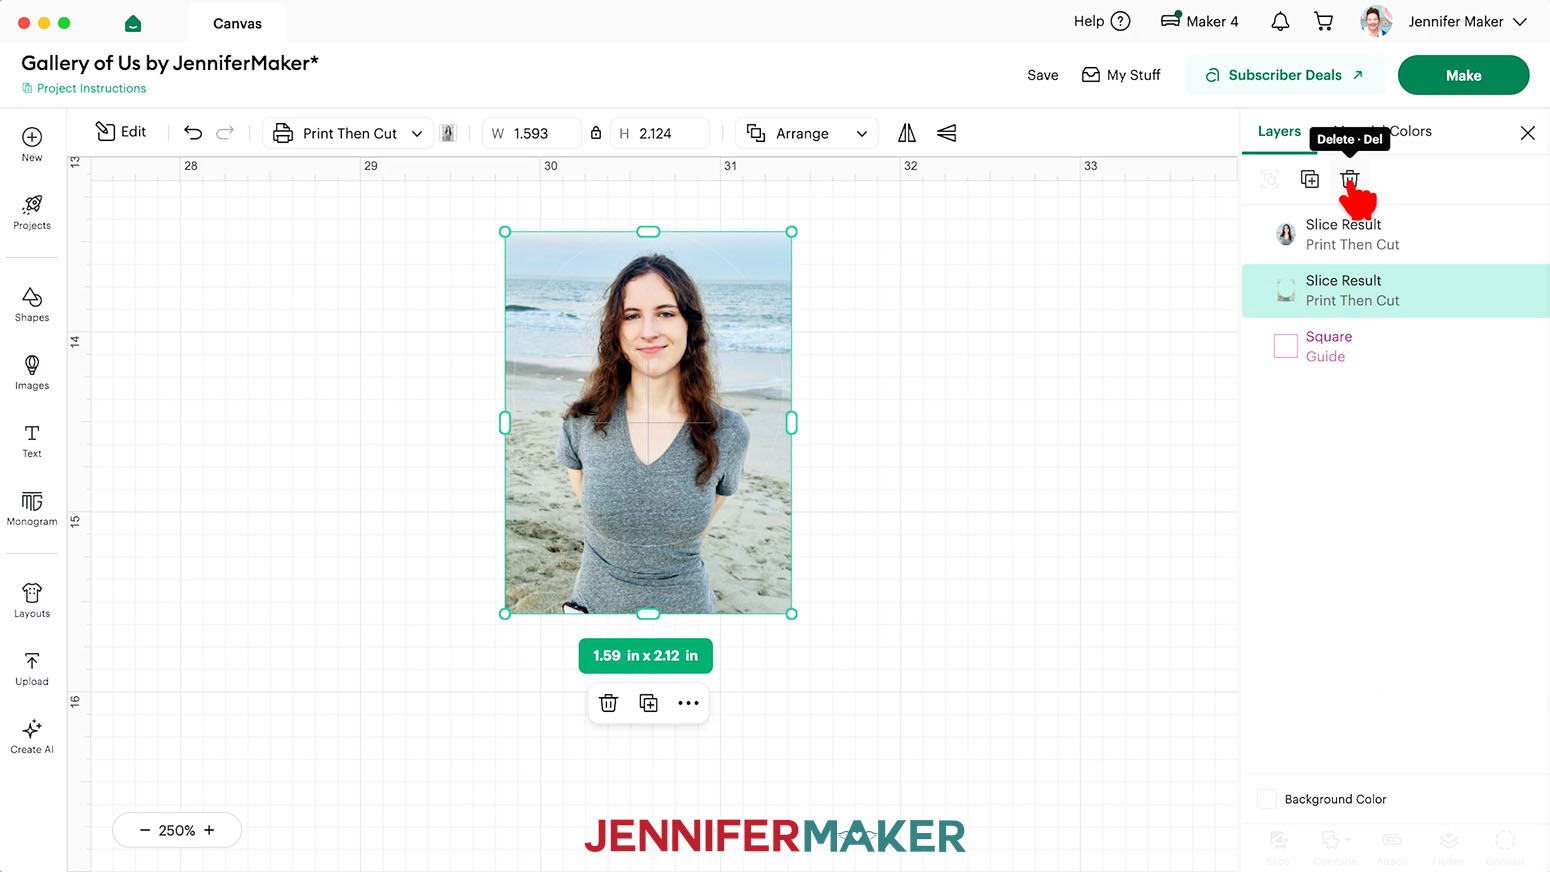
- In the Layers Panel, delete the “Slice Result” layers that look like the Guide or pieces cut away from your photo.
- Drag your finished photo into position in the back wall template to mark your progress.
- Repeat Steps 4-17 to add as many photos to your gallery as you like.
TIP: Arrange your photos so the ones on the sides have their subjects angled inward and the ones in the middle have their subjects facing forward. This gives your gallery a more balanced feel. - And now your photos are ready to Print Then Cut! Follow the instructions from STEP 3 and STEP 4 of my Patterns in Cricut Design Space tutorial to calibrate your Cricut, if needed, and Print Then Cut your photos on photo paper using a green StandardGrip machine mat.
NOTE: Make sure to “Add Bleed,” select the highest print quality setting available, and match your paper type when printing your photos for the best results.


STEP 4: ASSEMBLE YOUR SHADOW BOX
CUT YOUR GALLERY WALLPAPER AND FLOORING
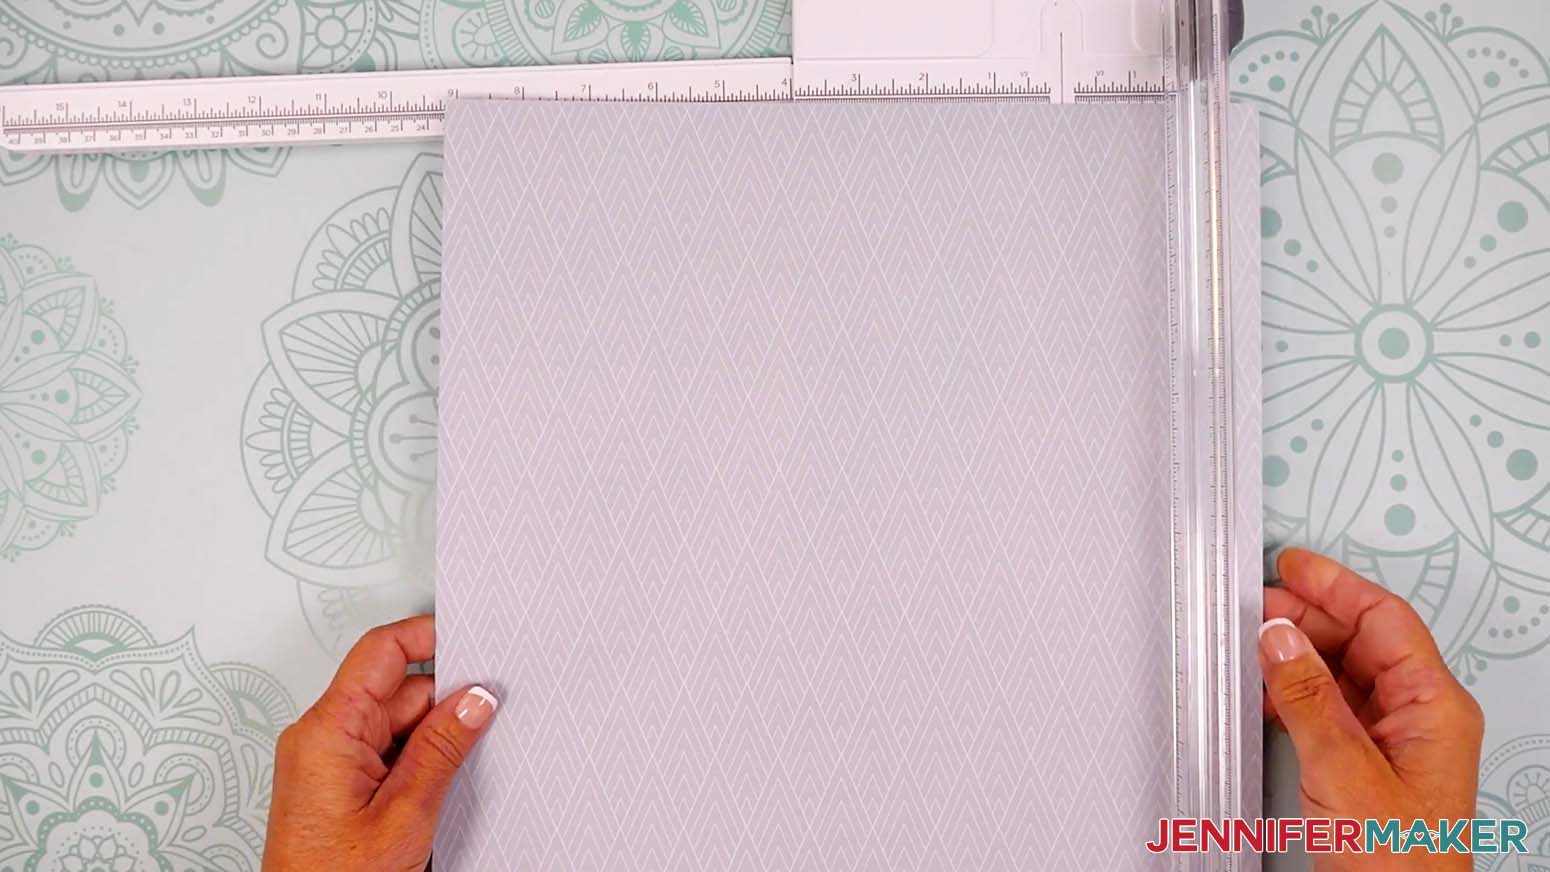
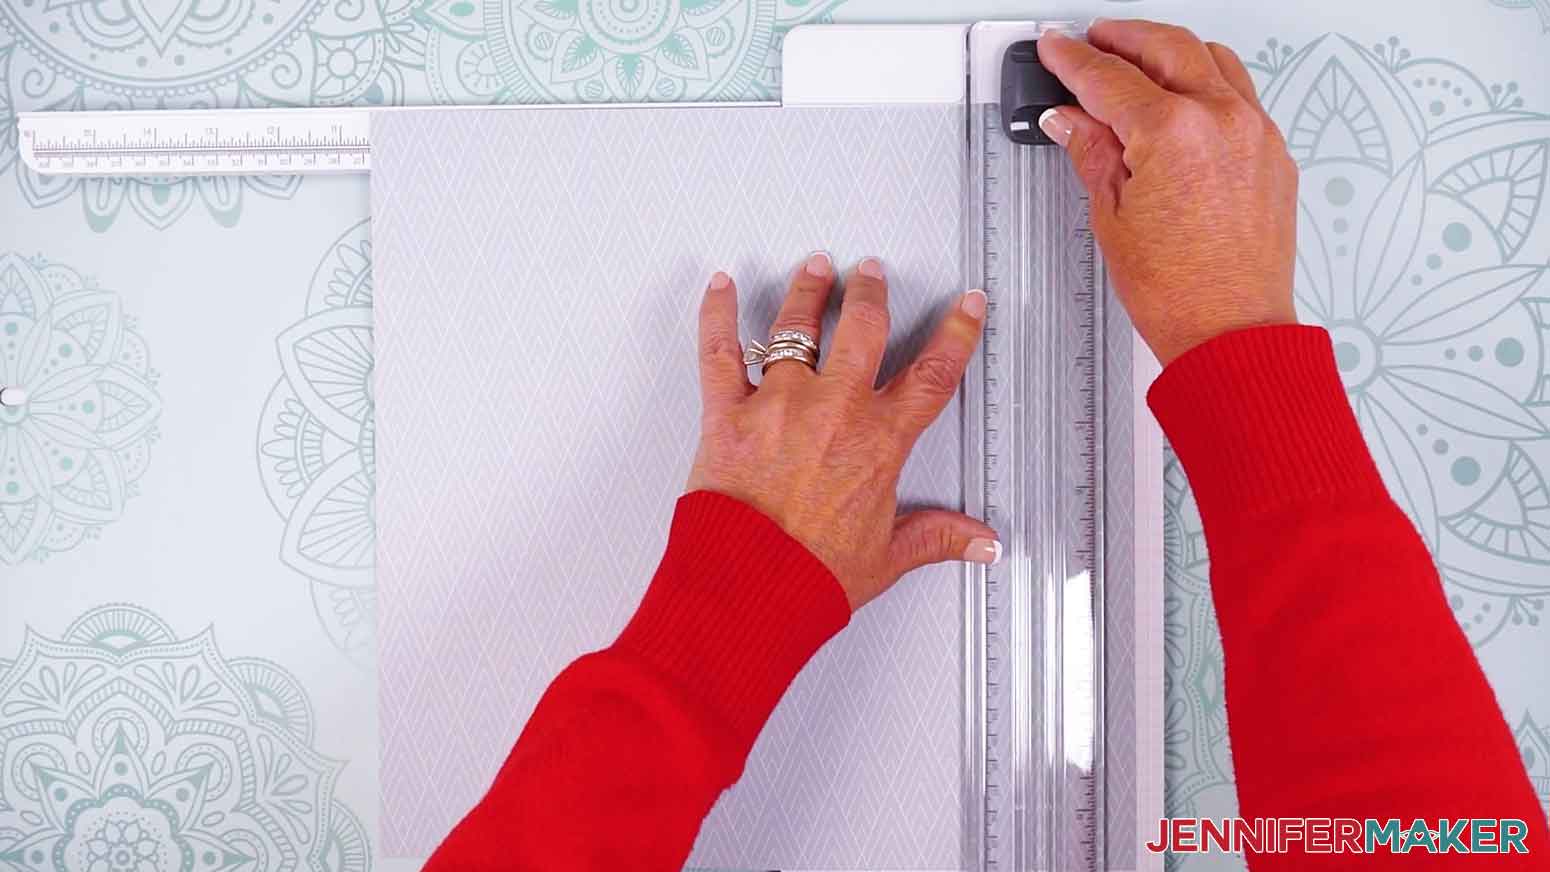
- To cut your cardstock to decorate the inside of your shadow box, extend the guide arm on your paper trimmer.
- Lift the guide ruler.
- Place the cardstock you want to use for the back wall on the trimmer’s cutting area so it’s oriented the way you want it, and its right edge is under the guide ruler.
- Line up the sheet’s left edge with the mark on the guide arm that matches your inner wall’s width measurement, keeping the top edge straight against the guide.
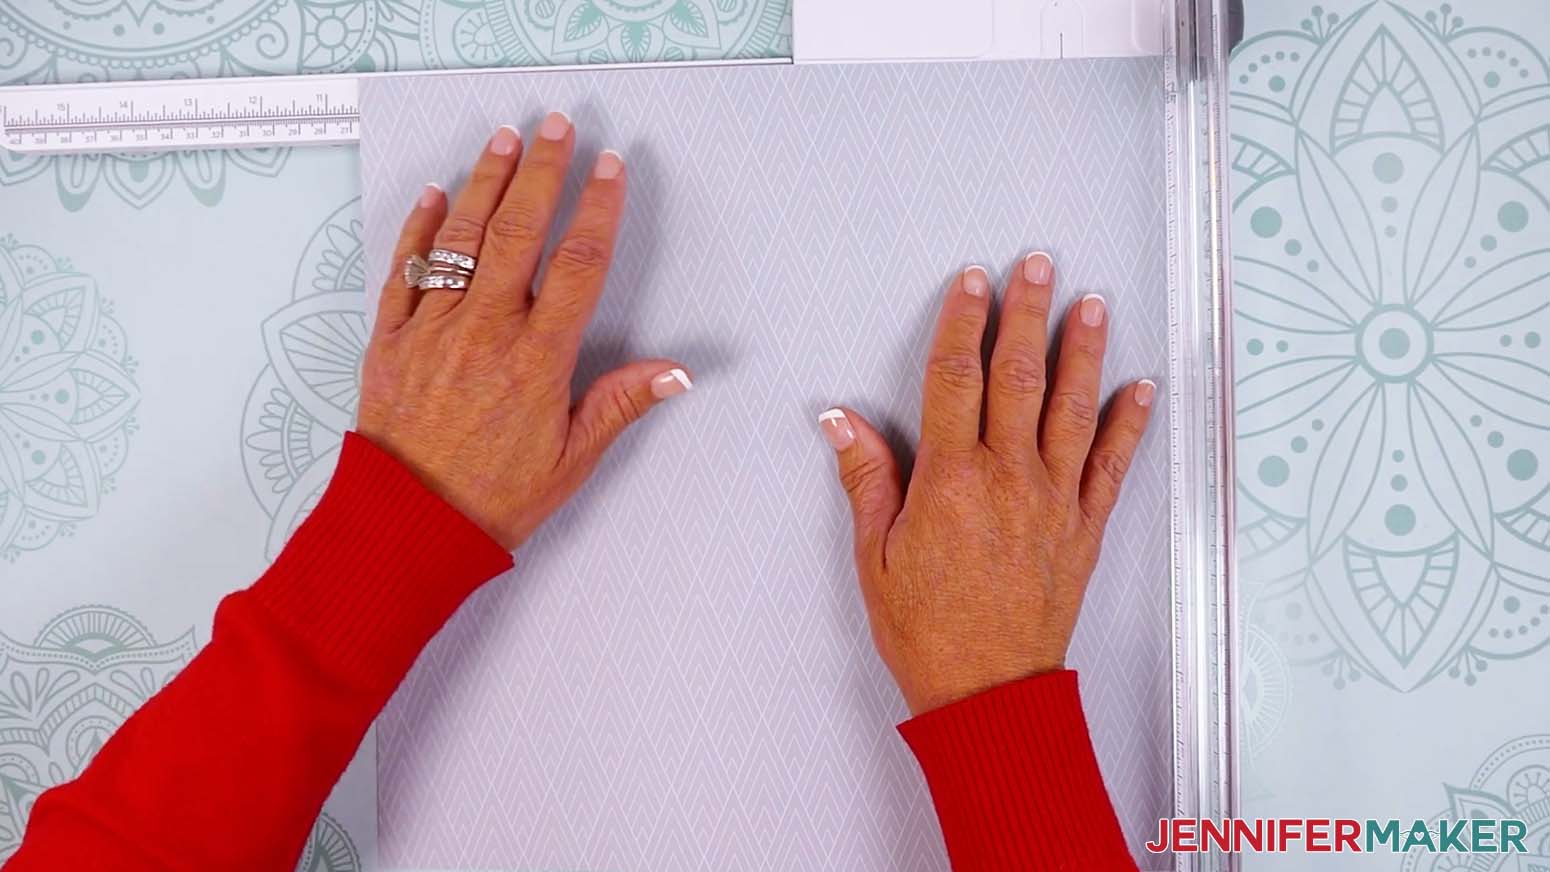
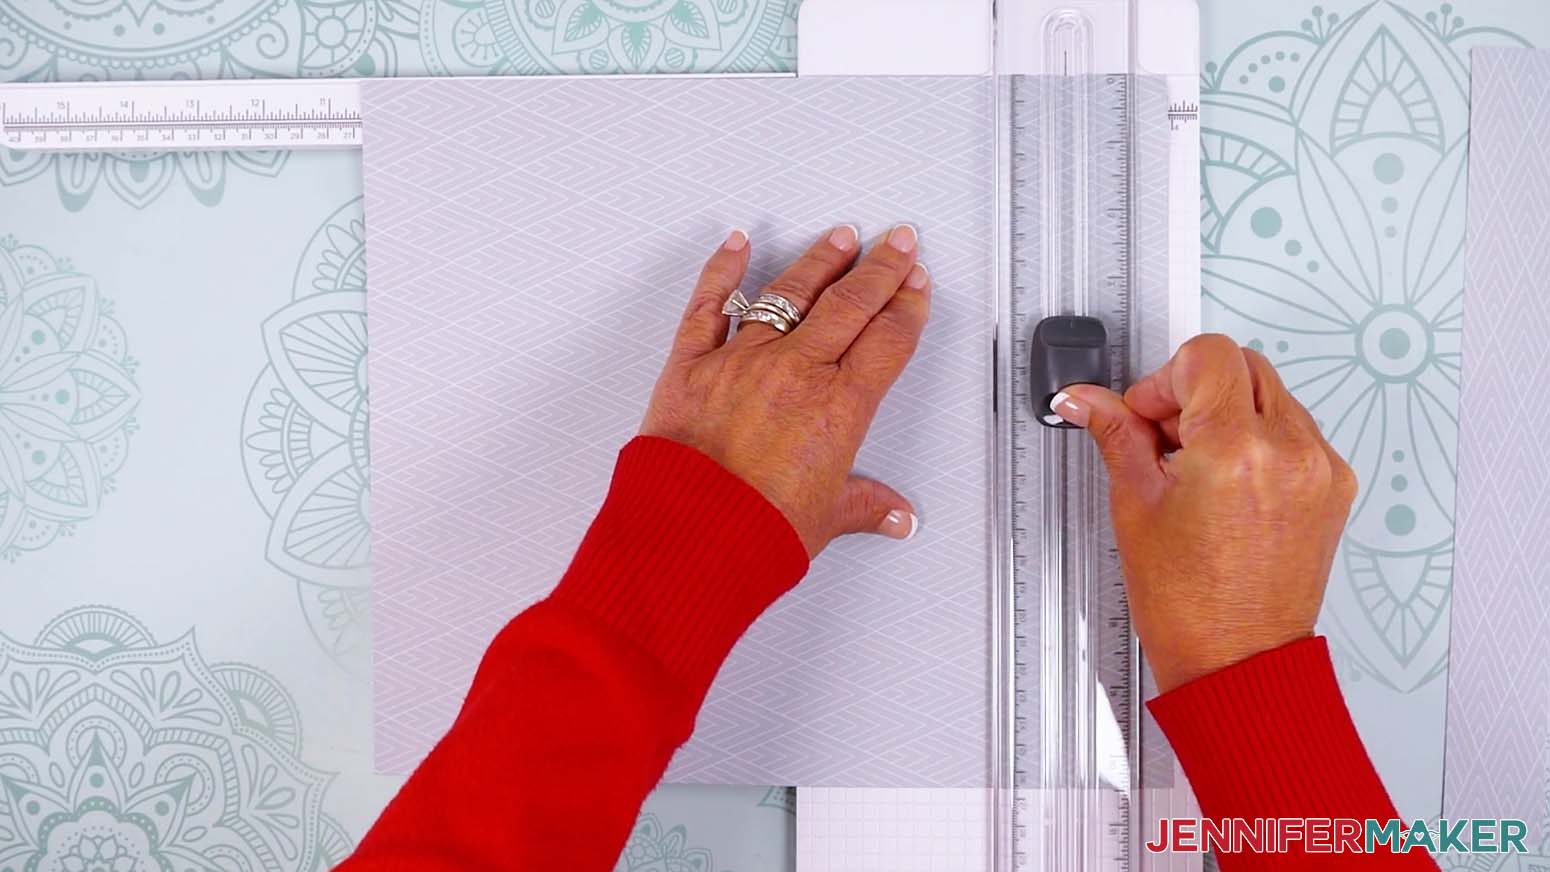
NOTE: I’ll line mine up along the 10.5” mark. - Lower the guide ruler and hold it in place with one hand, keeping your fingers safely away from the blade.
- With your other hand, bring the blade straight down in a smooth motion to cut away the excess.
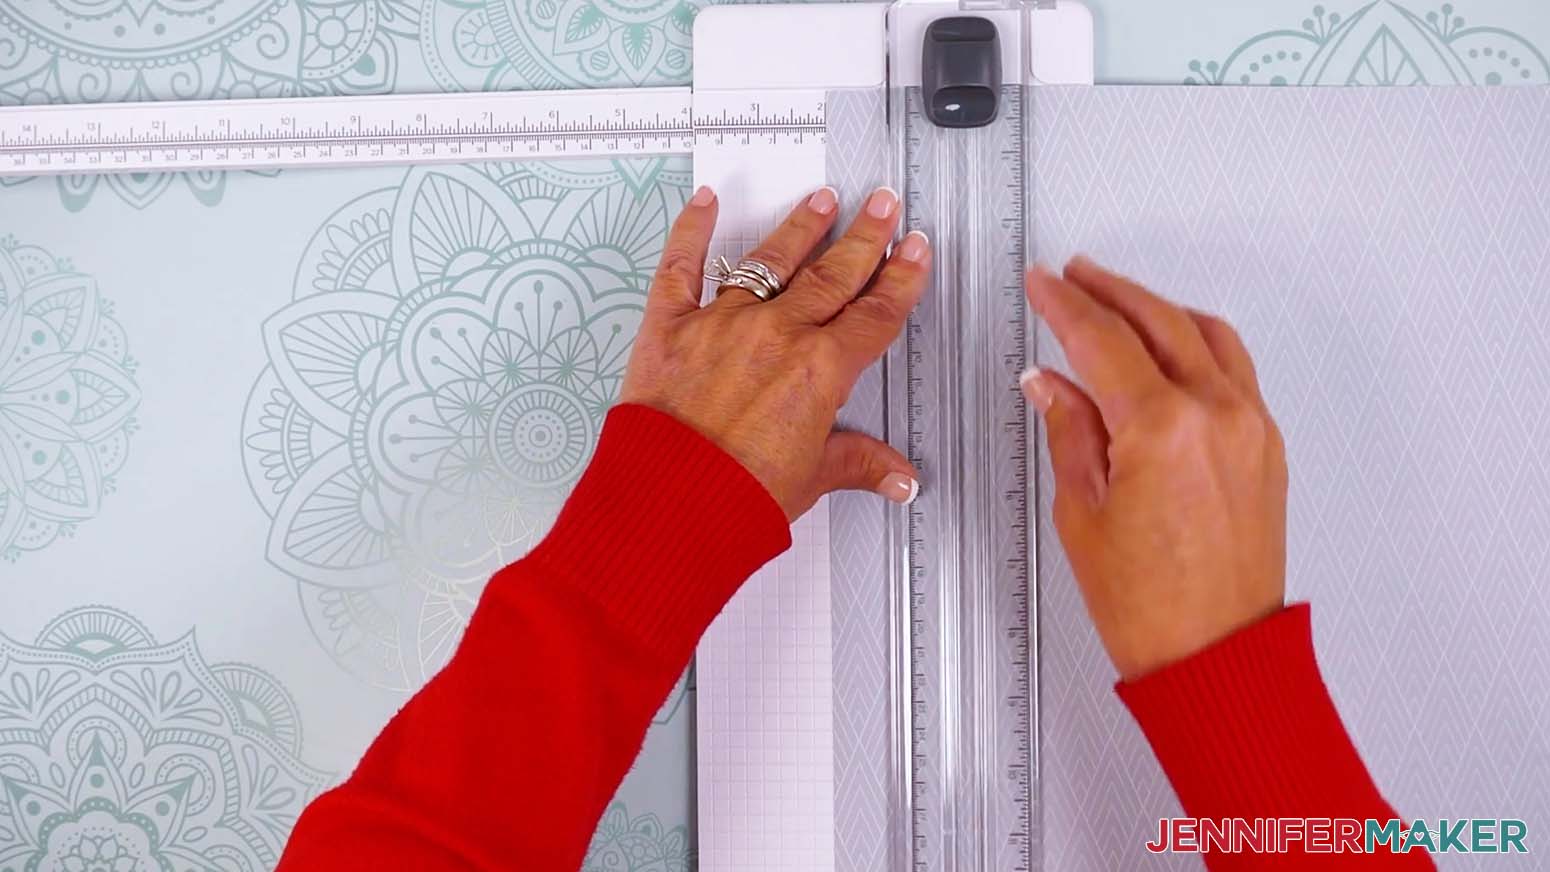
- Lift the guide ruler and rotate the cardstock.
- Repeat Steps 4-6 to cut the sheet along the inner wall’s height measurement.
NOTE: I’ll line mine up along the 10.5” mark for the height. - Repeat Steps 2-8 to cut two sheets of the same cardstock for the side walls according to their measurements.
TIP: Make sure to cut in the same orientation as your original sheet so your walls match the background.
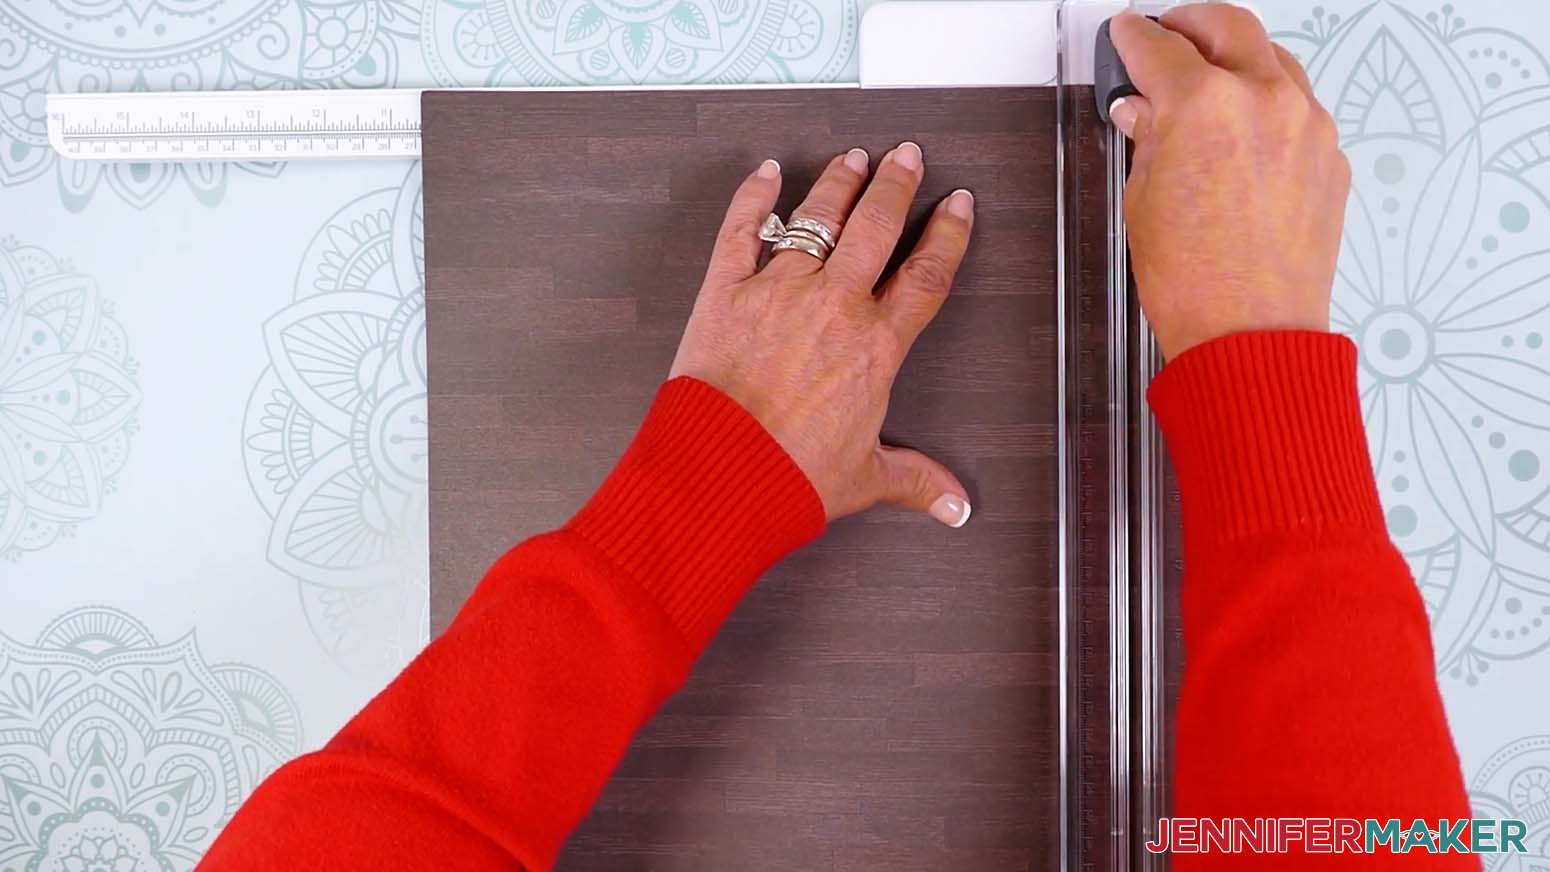
NOTE: I’ll cut my walls to 2” wide by 10.5” high. - Then repeat Steps 2-8 to cut a sheet of cardstock for the floor, using the same measurements as your side walls.
TIP: If your paper has a particular direction you want it to face, flip the side wall dimensions when cutting.
NOTE: I’ll cut my floor to 10.5” wide by 2” high so it faces the direction I want. - Your gallery walls and floor are ready!
DECORATE YOUR SHADOW BOX
- Lay your shadow box face up so the hanging parts in the back are pointing away from you.
- Open the box’s front cover and let it rest to the side.
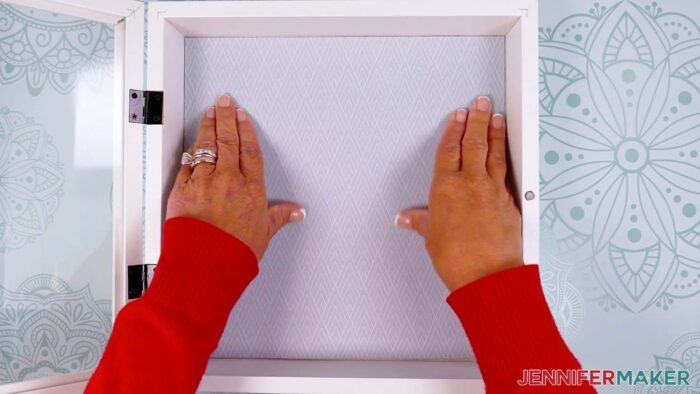
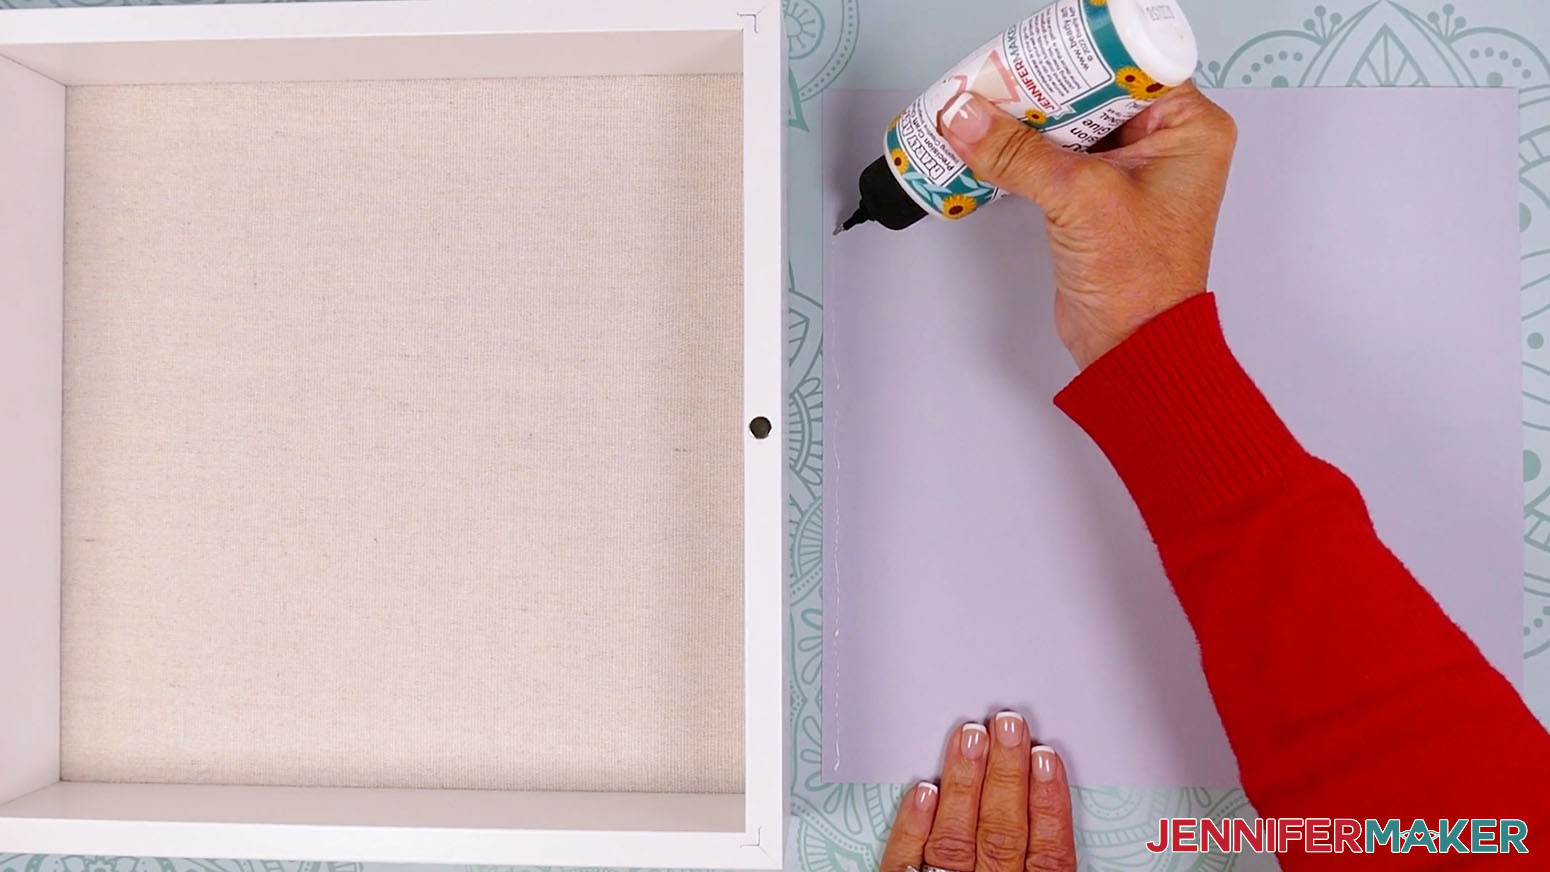
- Lay the back wall piece face down in front of you and add thin lines of glue around the edges and over the inside area.
- Flip the wall piece face up and orient it the way you want it on your wall.
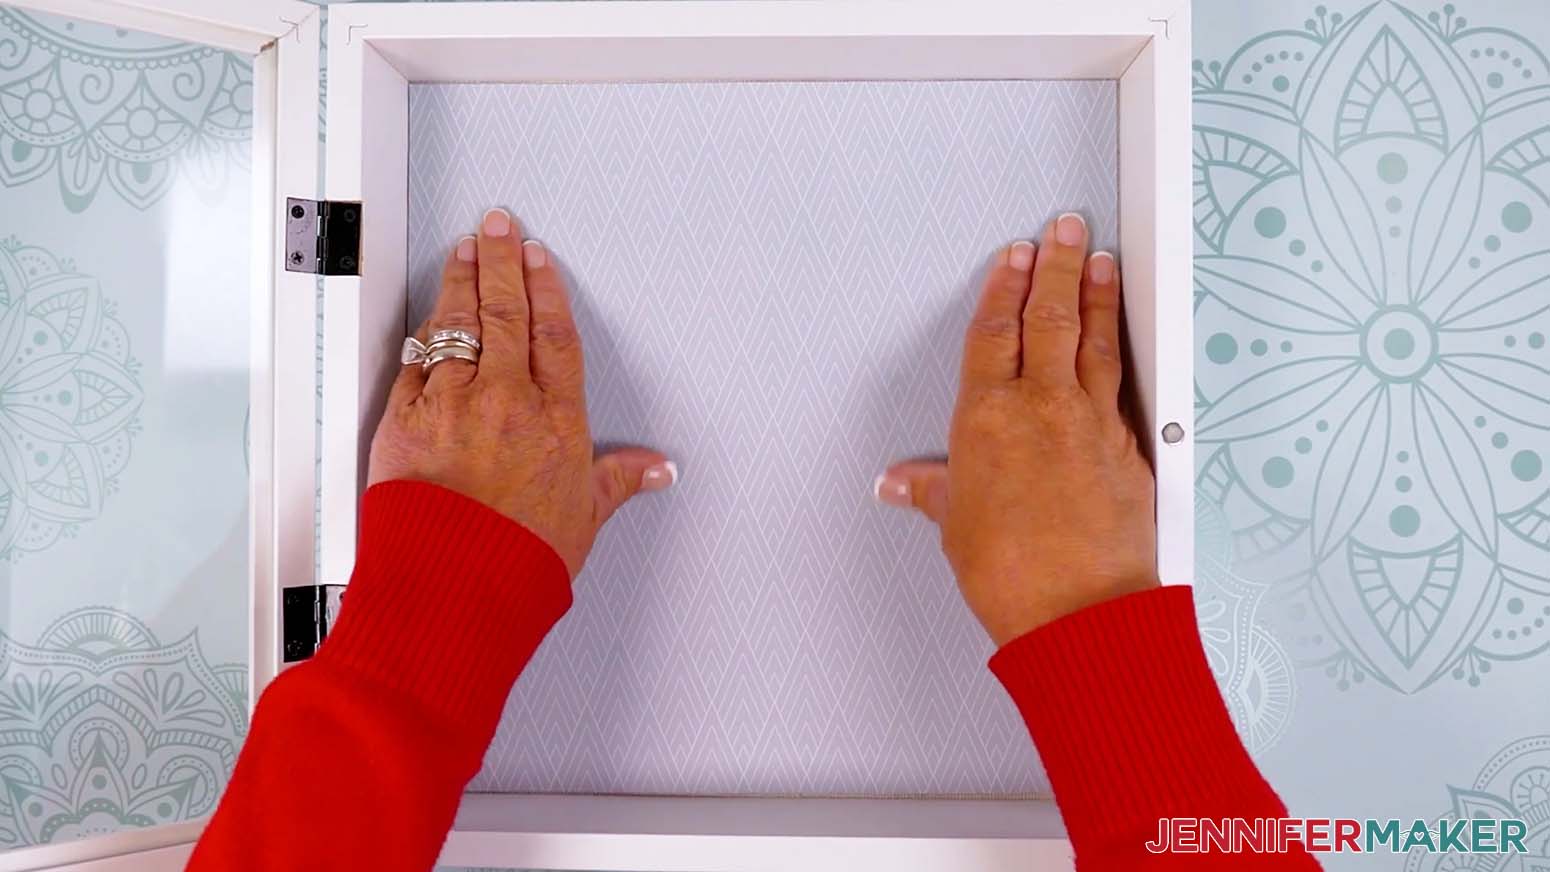
- Gently lower it inside your shadow box, keeping the edges lined up with the walls of your box.
- Gently smooth and press the wall in place to adhere it.
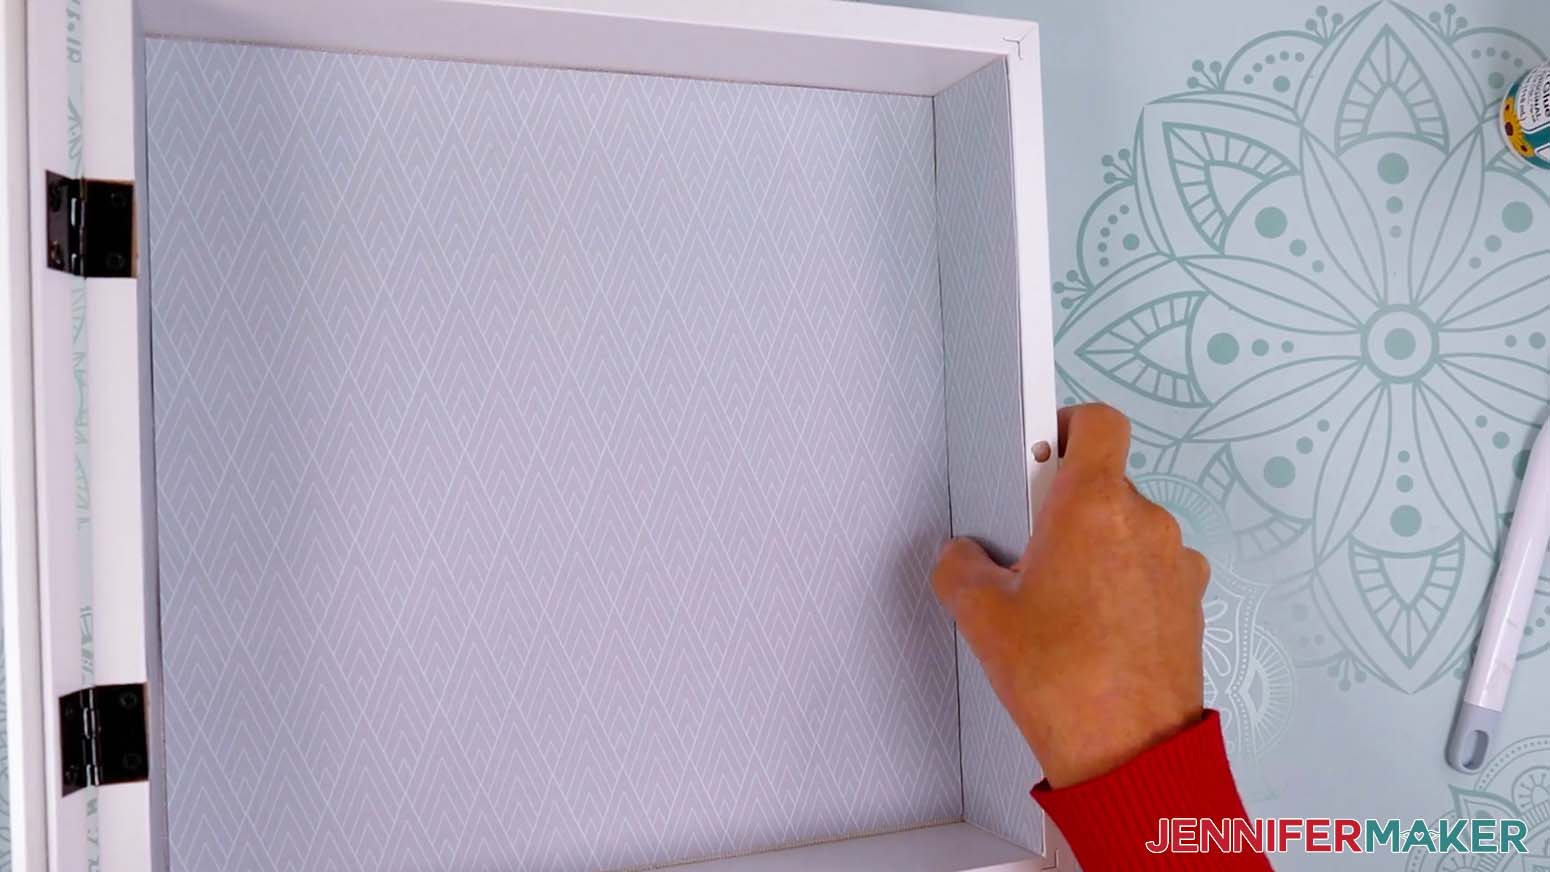
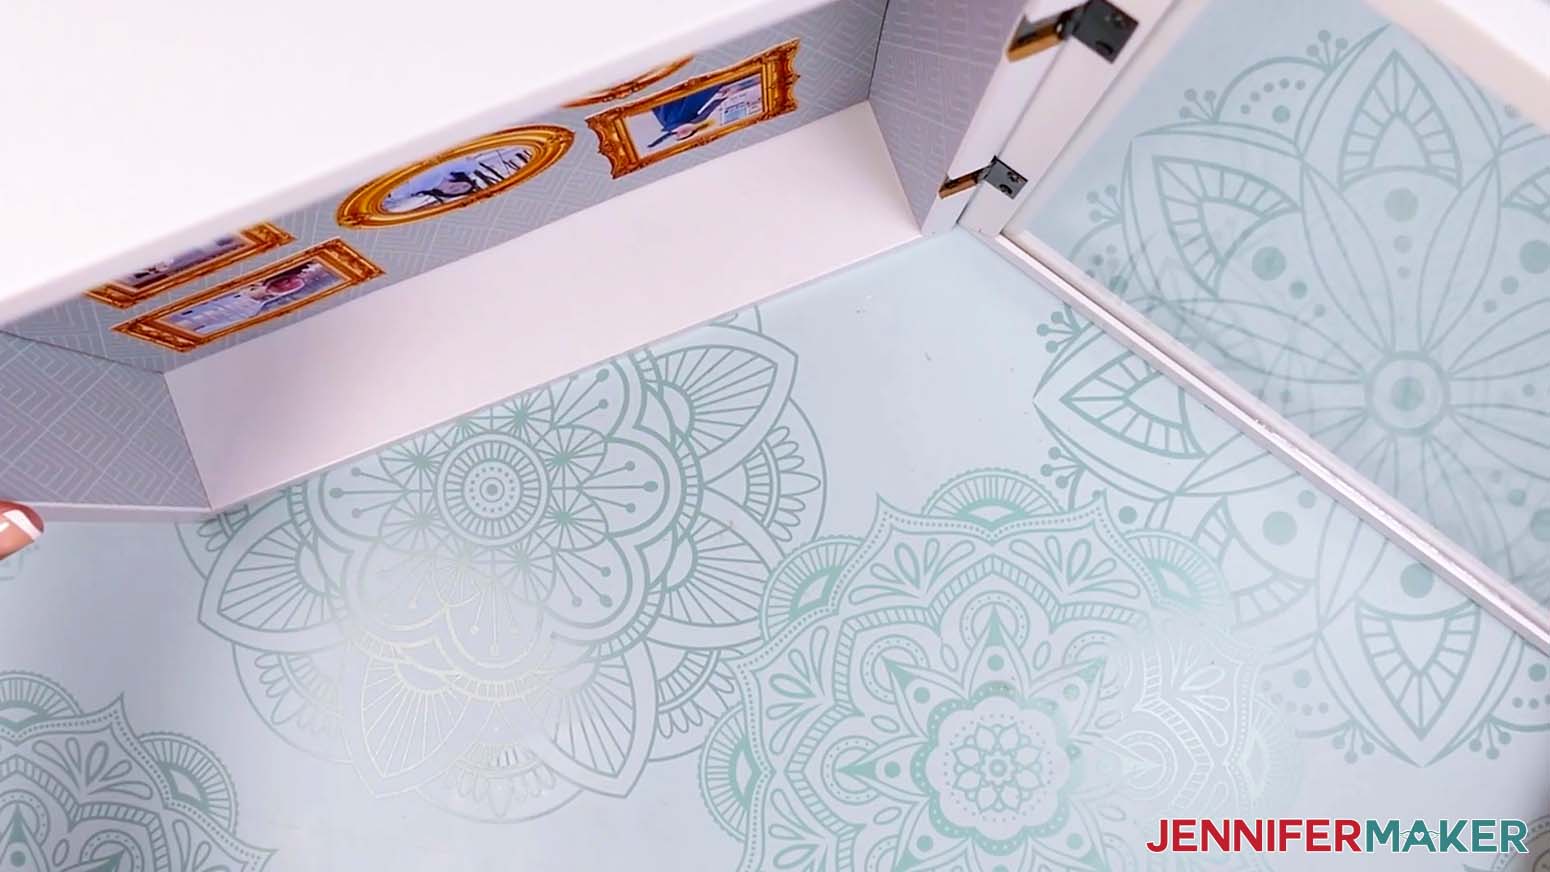
- Add glue to the back of the left wall piece.
- Hold the piece so the glued side faces the box’s left side wall, then line it up carefully before pressing it into place.
NOTE: Double-check that the piece’s pattern matches the same direction as the back piece. They won’t line up perfectly in the corners, but the design will still flow. - Then repeat Steps 7-8 for the right wall piece.
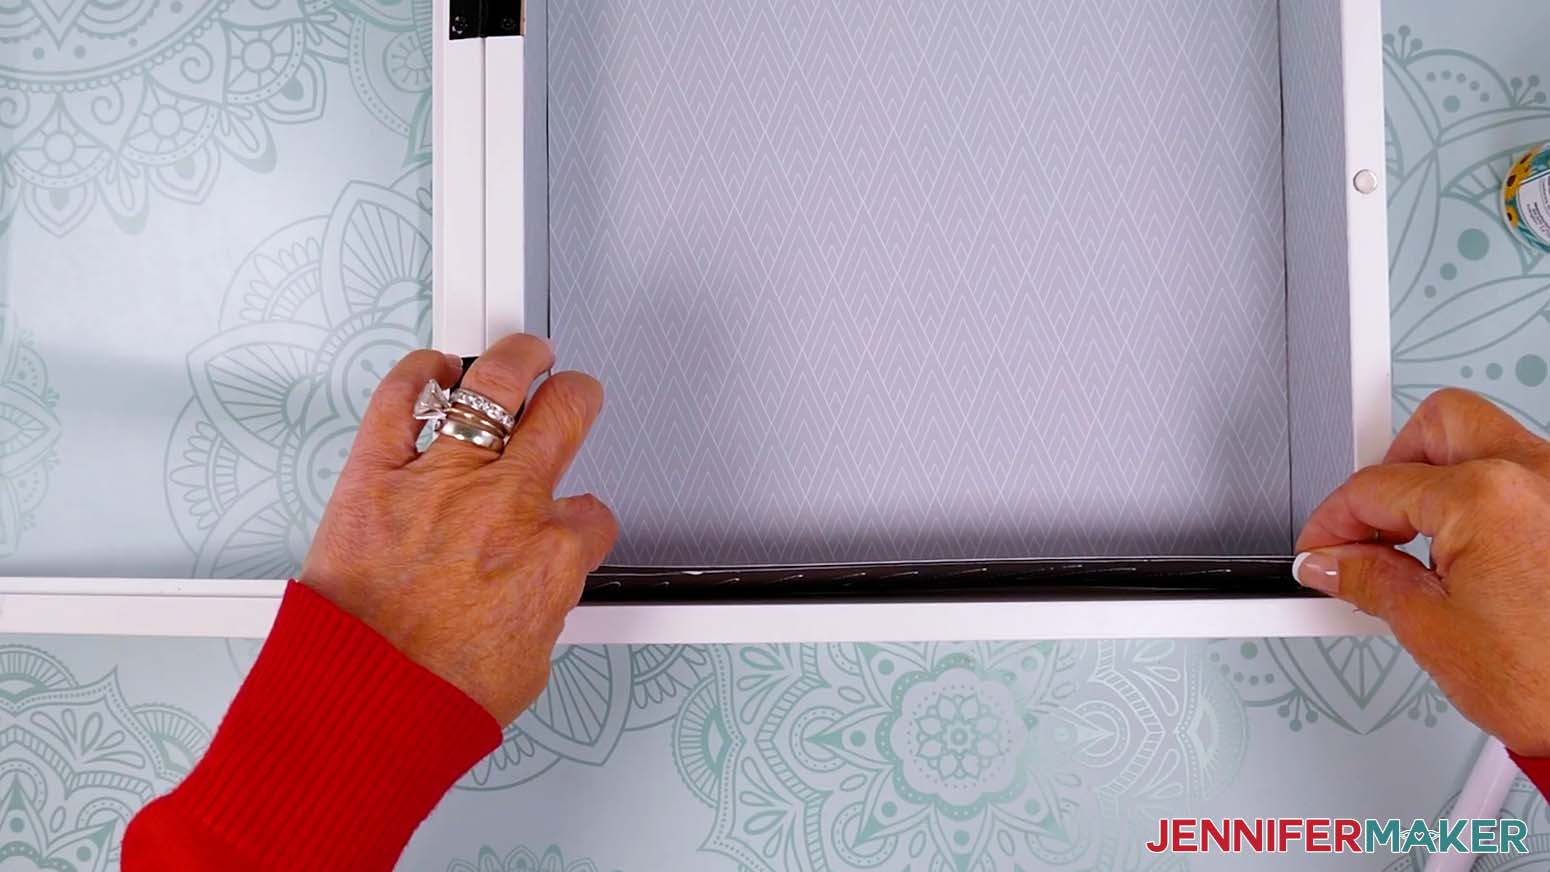
- Add glue to the back of the floor piece.
- Hold the piece so the glued side faces the box’s bottom side wall, then line it up carefully before pressing it into place.
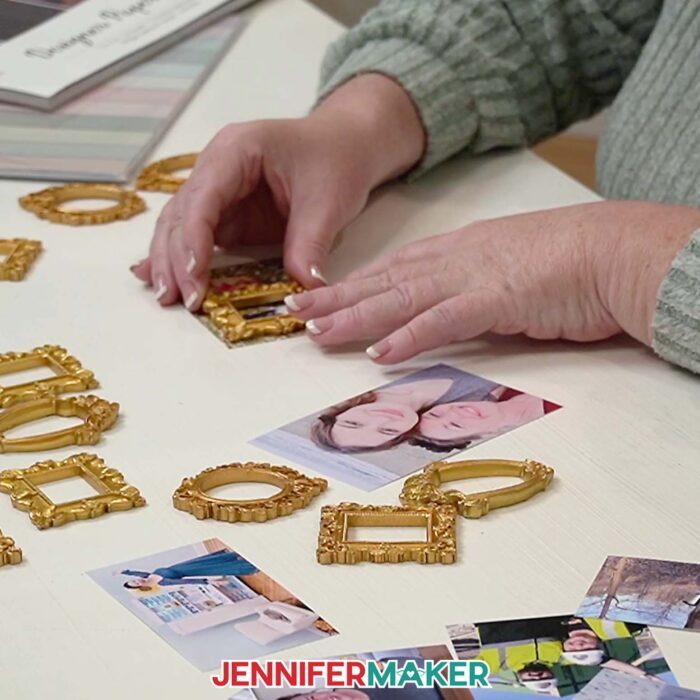
- If you printed and cut just the photos, match them with their mini gold frames.
TIP: Use a pair of scissors to trim away any excess photo paper visible outside the frame. - Lay your first photo face up on your work surface.
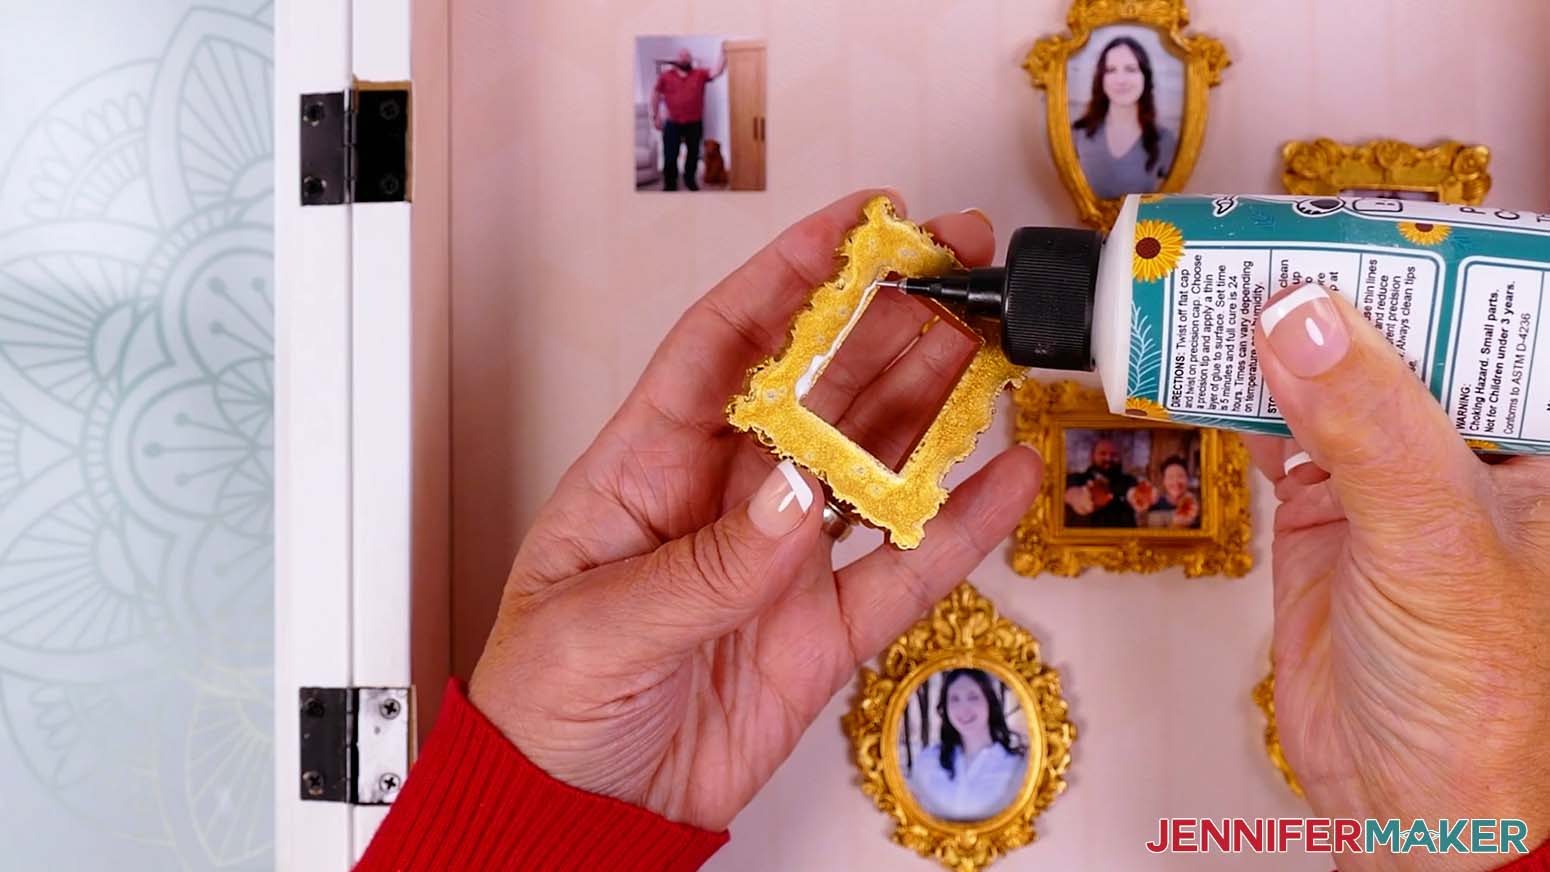
- Flip the first photo’s mini gold frame face down and add craft glue around the opening.
- Line up the frame on top of the photo so the image fills up the inside of the frame in the correct orientation.
- Lower the frame onto the photo, then press and hold the pieces until they are secure.
- Repeat for the remaining photos and mini gold frames.
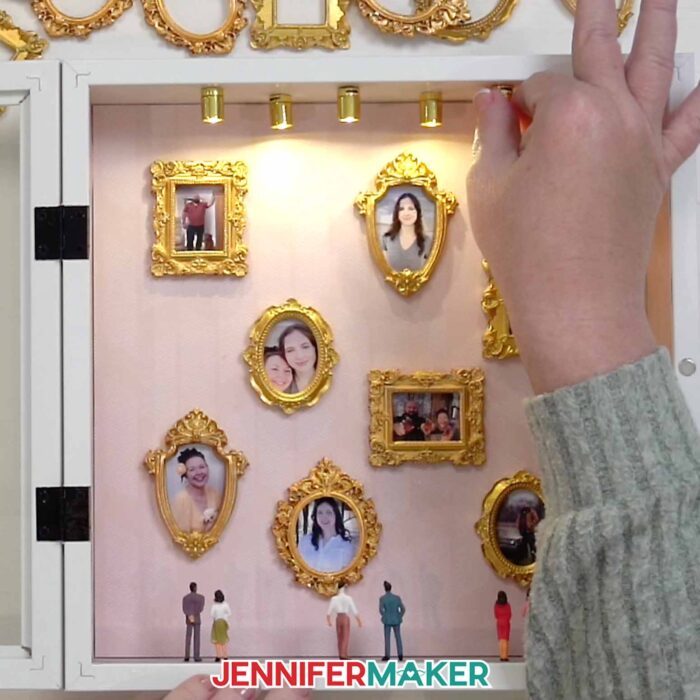
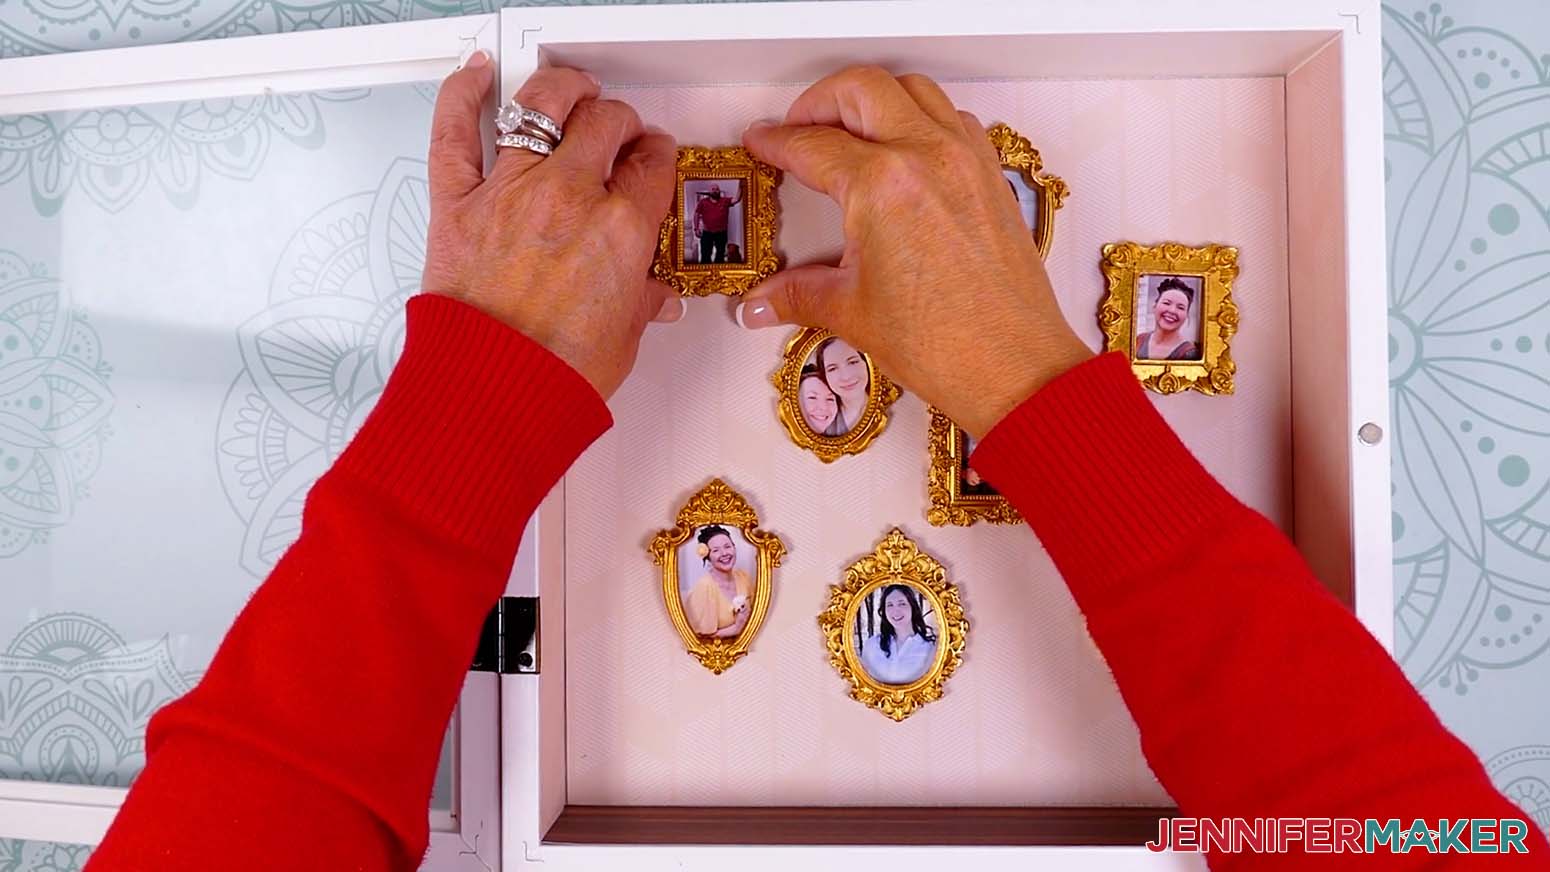
- Arrange your framed photos as desired inside the shadow box.
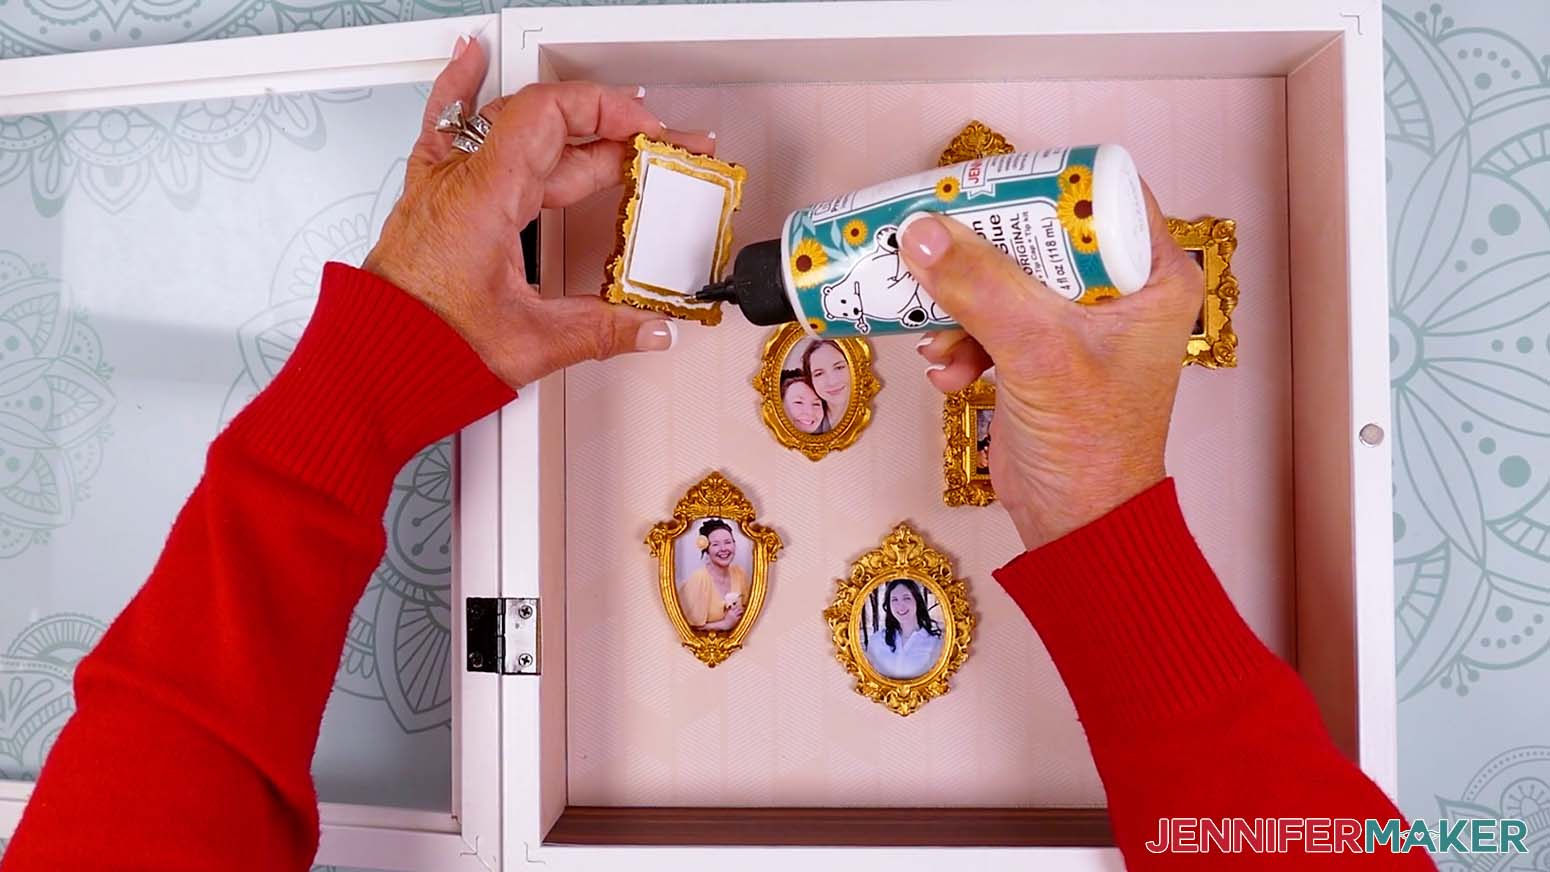
NOTE: Remember to keep the hanging hardware on the back pointing away from you. - One at a time, lift each photo, add craft glue to the back, then press it into place in the shadow box, glued side down, until secure.
- When your photos are secure, stand your shadow box upright on the table and turn it upside down so the ceiling is at the bottom.
- Remove the lights' pull tabs and twist them on to make sure they work.
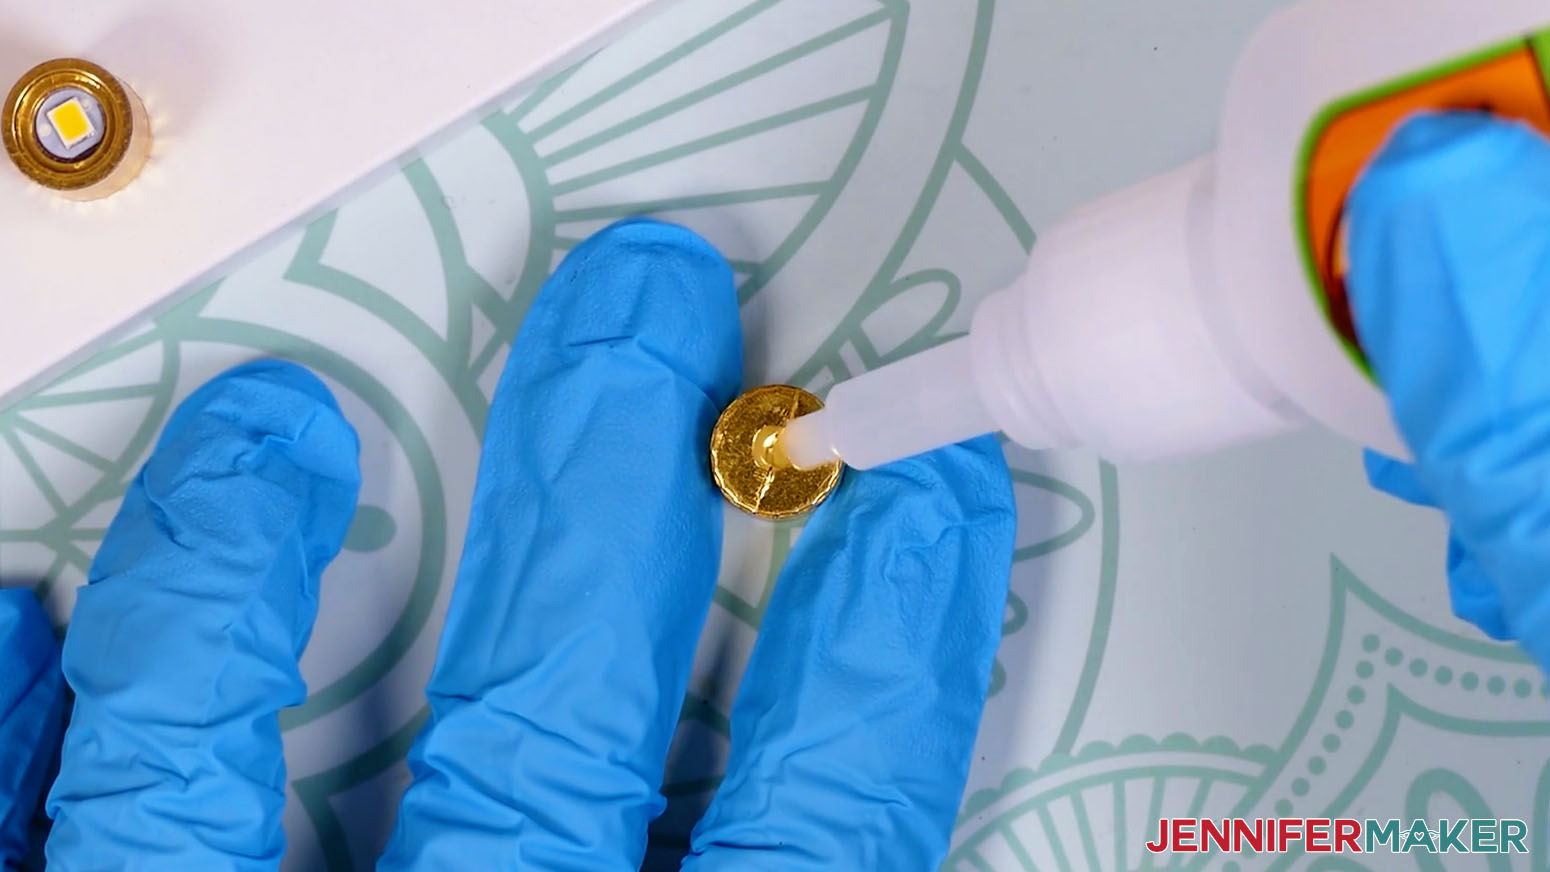
- Put on your gloves and safety goggles to protect yourself from the super glue.
- Place your lights flat-side down on the shadow box’s ceiling in the arrangement you like.
NOTE: I’ll arrange my lights in a zigzag pattern with three evenly spaced lights toward the front of the box, and two lights toward the wall of the box to fill in the gaps. - One at a time, add a small amount of super glue to the bottom of each light, then carefully press it into place.
- Allow the super glue to fully dry so the lights are strongly adhered to the ceiling.
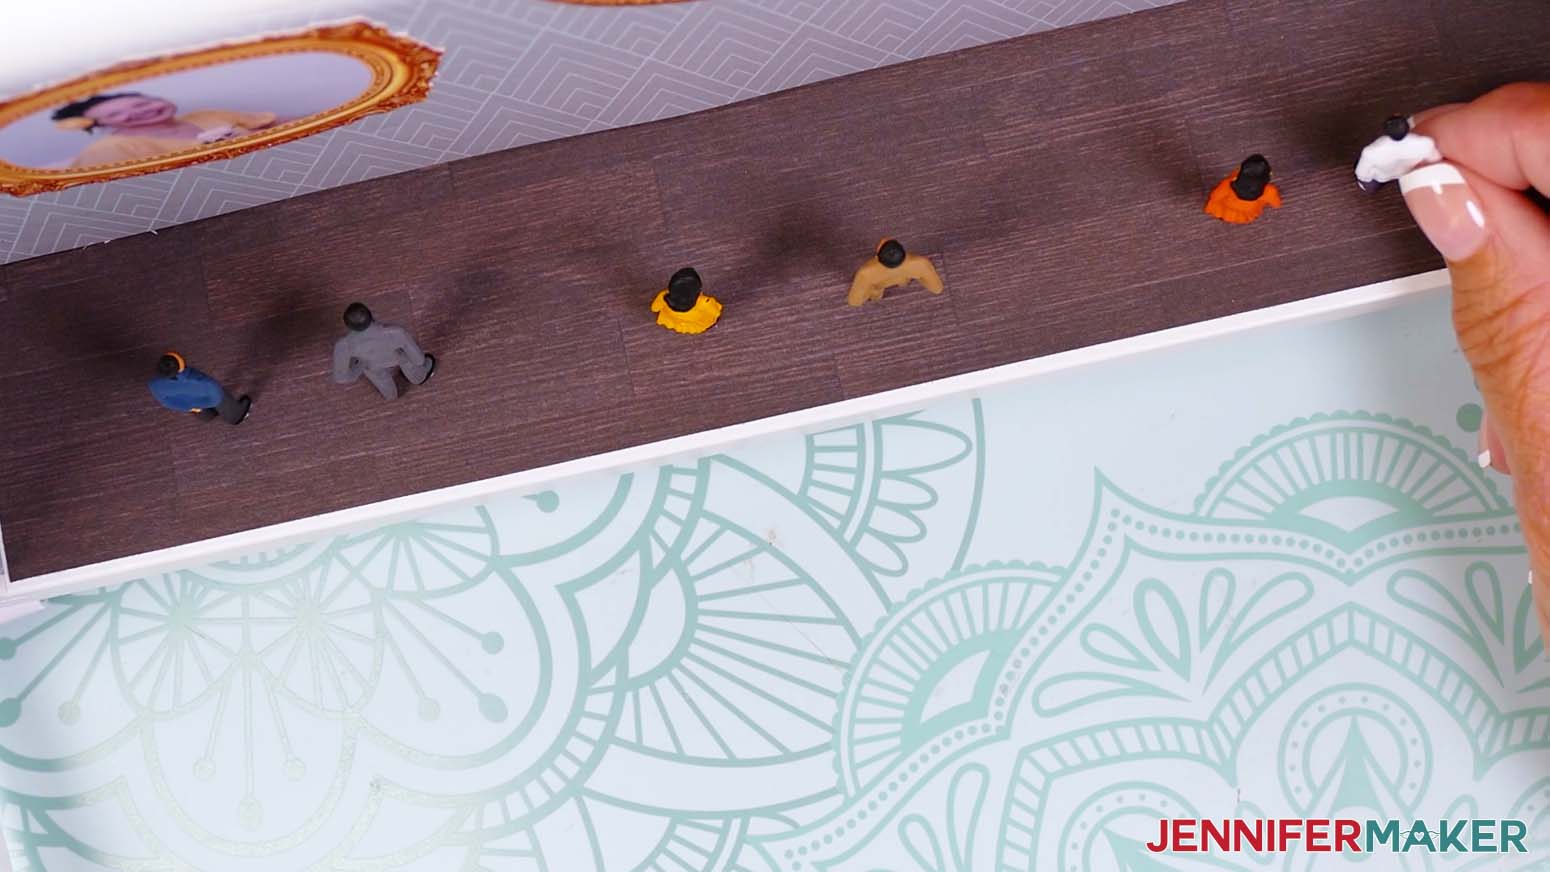
- When your lights are secure, rotate the shadow box so the gallery floor is resting on your work surface.
- Take one of the small figurines and add craft glue to each of its feet.
- Place the figurine where you’d like it on the floor of the gallery, facing the photos, and hold it in place until it’s secure.
- Repeat Steps 27-28 to add your remaining figurines.
- Close the door to your shadow box.
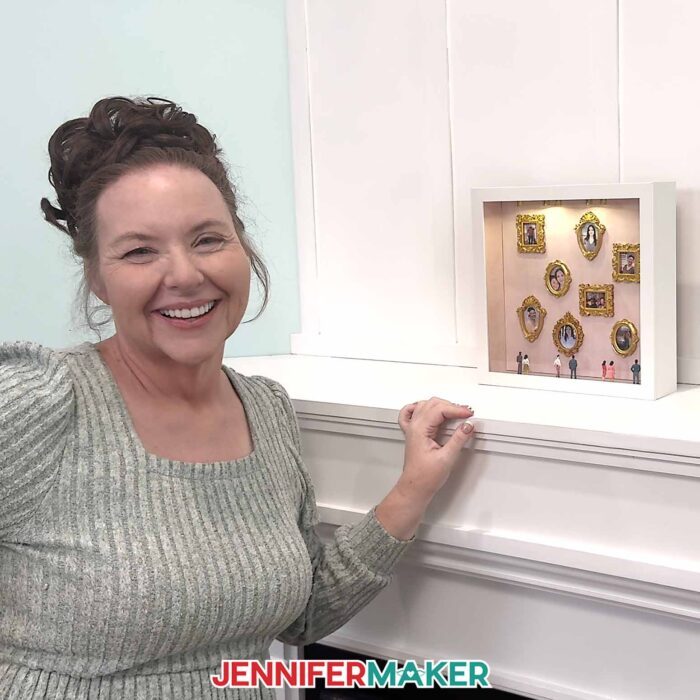
STEP 5: SHOW IT OFF
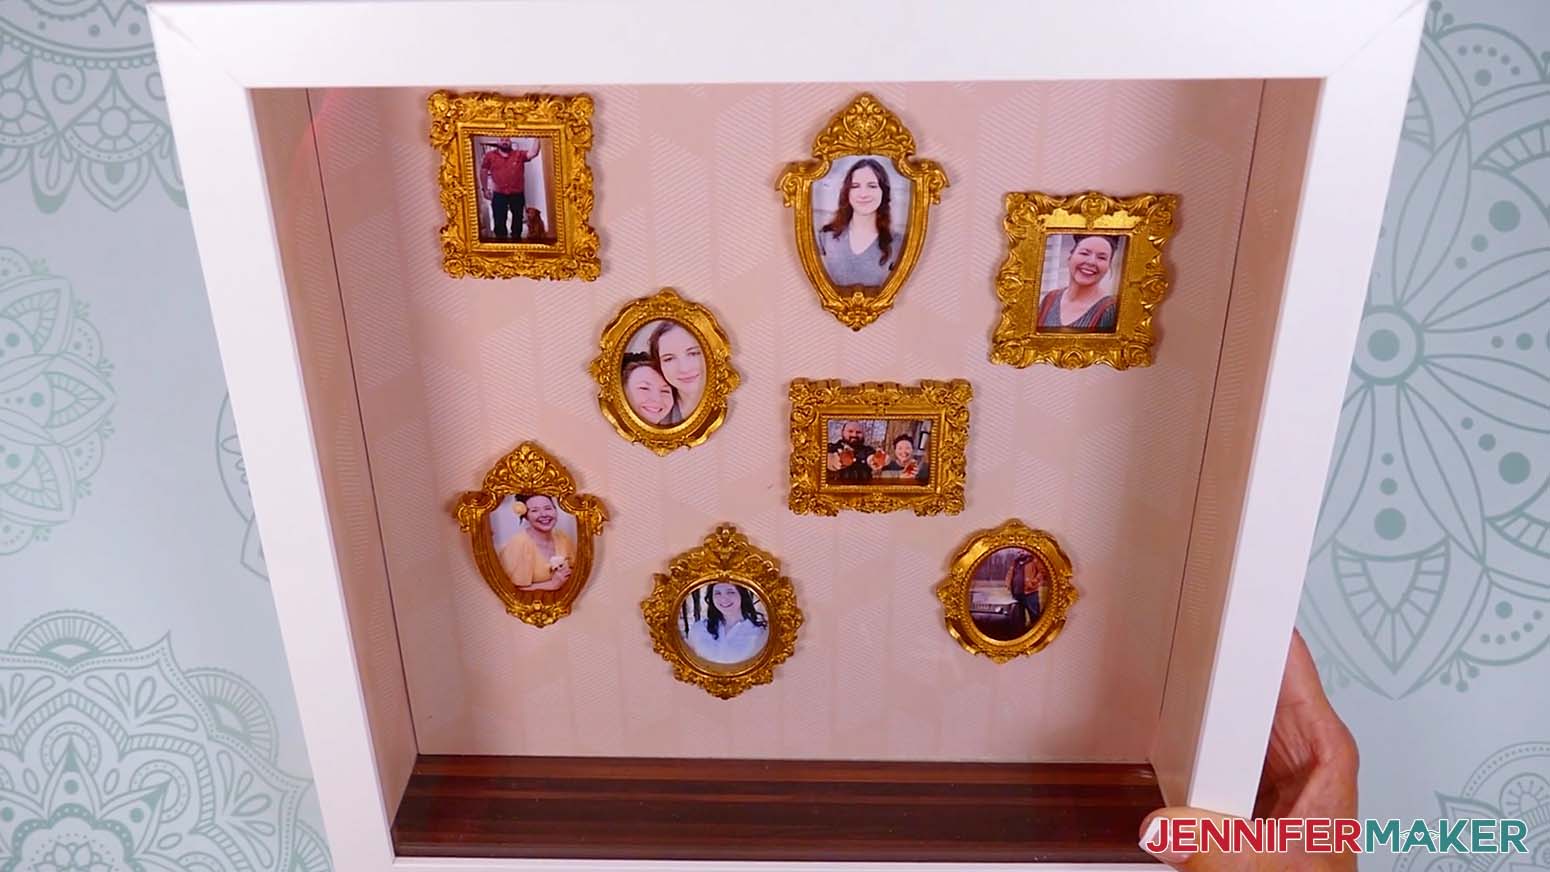
You now have a beautiful Gallery of Us Shadow Box with miniature memories to display!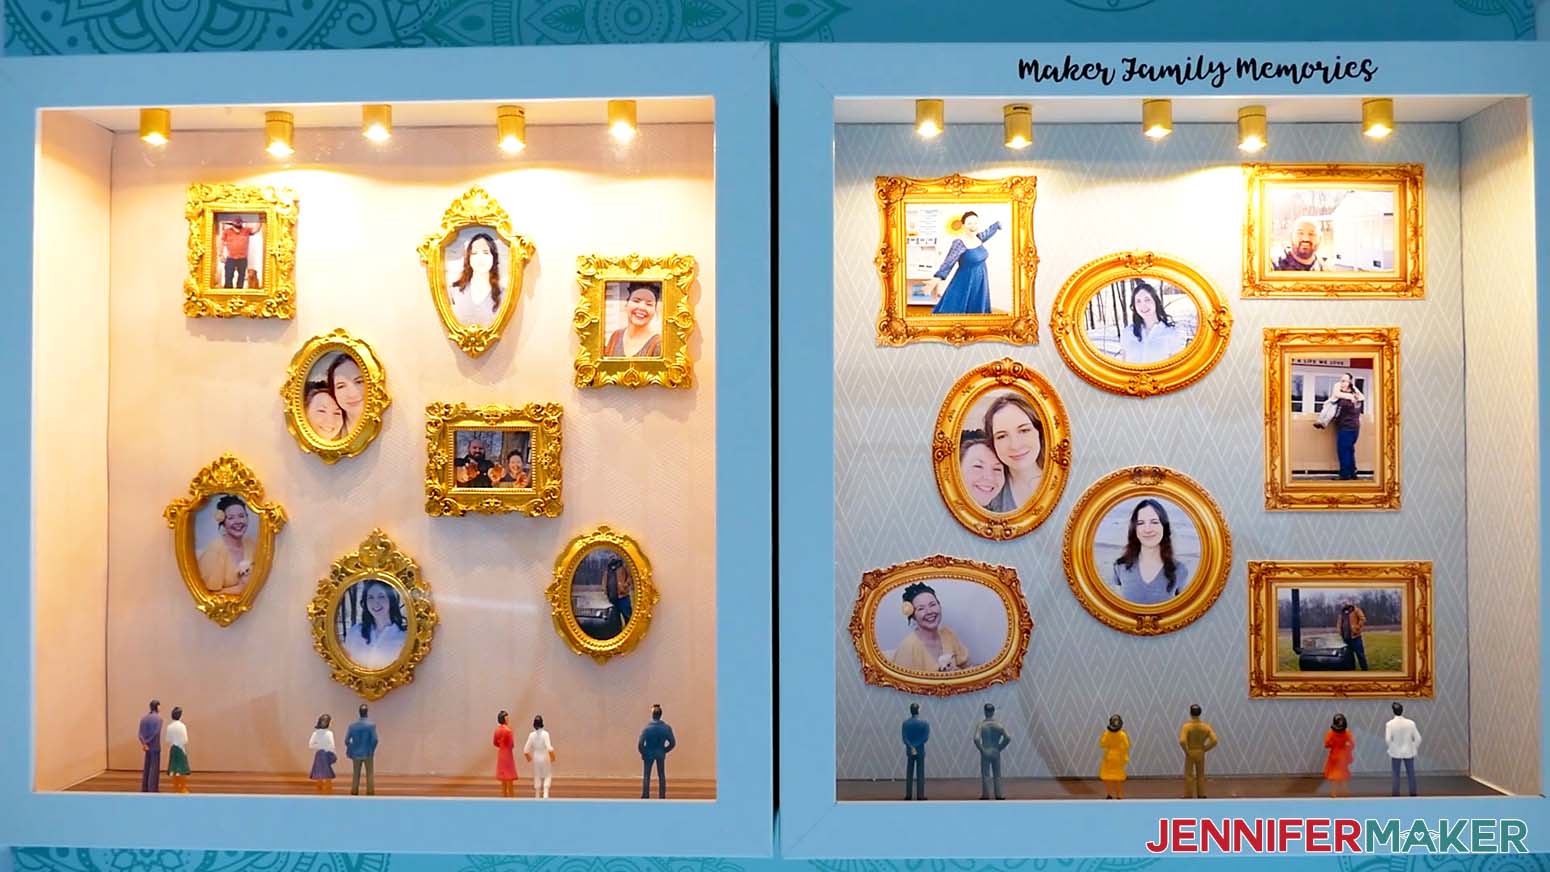
Notes
Finished Size: 11.5” x 11.5” Shadow Box
Answers to Your Questions About Gallery of Us Shadow Boxes
Q: How can I create a custom label for the outside of my shadow box?
A: You can learn how to create your own custom vinyl label for your shadow box just like below in my ADVANCE program. Learn more about ADVANCE here!
Q: What size shadow box should I use?
A: I recommend using the shadow box in my supplies list for the best proportions, which measures about 11.5″ wide x 11.5″ tall x 2.5″ deep. If you go any smaller, your pictures might be too tiny to make out, or you won’t be able to fit as many photos inside without cramping them. You could go larger, but keep in mind how sizing will affect the ratio between your photos and the miniature people inside.
Q: Do I need a Cricut to make this?
A: While a Cricut cutting machine does help with precise trimming, especially for Print Then Cut frames and photos, you can make this project without one. Just print your photos in different software like Google Docs or trim photos you already have, and then glue mini craft frames on top. For the wallpaper and flooring, use a paper trimmer to make sure your cardstock is cut to the right size.
Q: What materials do I need for a Gallery of Us shadow box?
A: Start with a shadow box, cardstock for the inside “walls” and “floor,” and your favorite printed photos. Then choose either mini craft frames or Cricut-cut frames, depending on the version you’re making. You’ll also want craft glue, super glue for the lights, small figurines, isopropyl alcohol, a lint-free cloth, and a set of tiny lights to make your gallery glow.
Q: How should I arrange the photos inside the shadow box?
A: Treat the back wall like it’s your personal art gallery and this is your debut show! Start by choosing the photo that feels most important and place it near the center as your focal point. Then arrange the other photos around it with a little breathing room between each frame. I like to place the photos so the ones with face-forward subjects are in the center, while the ones where people are turned slightly are on the outside facing inward. That way, everything feels connected instead of scattered.
Q: How do I size photos for mini frames?
A: Start by measuring the opening of your mini frame, not the outside edge. Then make your printed photo just a little bigger than that opening. I like to add about a quarter inch to the width and height so the photo has enough extra space behind the frame. That small overlap keeps the opening completely filled, so you do not end up with little gaps around the edges.
Q: How do I size photos in Cricut Design Space?
A: Think of the frame shape as a little window for your photo. Upload your photo, place the matching guide shape over the part you want to show, and adjust the photo until the important details are inside the “window.” Then use Slice to trim away the extra photo areas. If you are making the Print Then Cut version, Flatten the photo and frame together so Cricut knows to print them as one finished image before cutting.
Q: Why add lights to the shadow box?
A: The LED lights make the whole scene feel more like one of those tiny art exhibitions you want to peek inside. They also help the framed photos stand out.
Q: Which lights are safe to use in a shadow box?
A: The safest lights to use in a shadow box are LED lights like the ones found in my supplies list. LED strip lights and fairy lights can also work, but I like the way the spotlights lend a “gallery” feel to the display. Avoid using other types of electric lights as they can overheat and catch fire inside a closed box.
Q: Are the lights hard to attach?
A: No, but use care. Wear gloves and safety goggles when using super glue. Test the light layout first, then glue each light to the “ceiling” of the box.
Q: Can I add other creative elements?
A: Definitely! Try tiny signs, mini plants, handmade labels, small paper shapes, themed flooring, or little display items that add to your growing art scene and match the memory you are showing.
Q: How long does this project take?
A: The hands-on time depends on how many photos and frames you use. Plan time for measuring the box, trimming the cardstock, sizing or printing your photos, gluing the pieces, and letting everything dry. If you order mini frames, lights, or figurines online, check the listing so you know how many business days shipping may take. You might even be able to rush delivery for an additional charge.
Q: Can I use artwork instead of family photos?
A: Yes. You could use a child’s drawings, cute animal pictures, travel sketches, or mini paintings as long as you have permission to use them. It is a sweet way to make each original piece feel celebrated like its own little piece of art.
Q: Can this project look like a real gallery?
A: Yes. Matching frames, repeated colors, and careful spacing can make it feel like curated fine artwork. A handpainted finish on tiny frames can also make it look extra special, almost like a limited edition keepsake made just for your home.
Q: Could this work for a small business or studio display?
A: Yes, as inspiration for a personal display. A maker, photographer, or artist with a legitimate business could adapt the idea with their own photos, samples, or own logo to create a miniature gallery-style scene. Just keep the design personal to your brand and follow any file-use terms for the project.
Q: Can I sell finished shadow boxes made with this project?
A: If you want to sell finished crafts made with my files, please review my important licensing information first. Rules can vary depending on the files, materials, and designs used, and art sellers should always make sure they understand what is allowed before offering finished items to avoid fraudulent activity.
Q: What if I want mine to feel really unique?
A: Choose photos that tell a specific story, then add details that support it. A tiny vacation gallery, wedding memory box, family room display, or original piece inspired by your favorite people will feel much more special than a random set of pictures.
Q: What inspired the “Gallery of Us” shadow box idea?
A: I first came across this idea on social media and wanted to make my own version! I loved the thought of turning personal photos into a tiny gallery scene, almost like the shadowbox street scenes you might see in miniature art shops. But instead of a public gallery with shadow box artists, a growing art scene, or a community of artists, this one celebrates your own favorite people, memories, and moments.
Q: Where can I get help if I get stuck?
A: If you want quick troubleshooting or you want to show off your finished projects afterward, my Cricut Facebook group can be a helpful place to compare notes and see what others are doing. You can be part of that group and share your finished Gallery of Us shadow box with other crafters.
Get my free SVG/DXF/PNG/PDF files to make your own Gallery of Us shadow box!
(If you do not see the signup form above, click here.)
I absolutely love seeing your handmade crafts! Once you’ve crafted your own Gallery of Us shadow box, inspire others and share photos of your project in our Facebook group or tag me on social media with #jennifermaker.
Love,

Want to remember this? Save this Gallery of Us Shadow Box Tutorial to your favorite Pinterest Board!