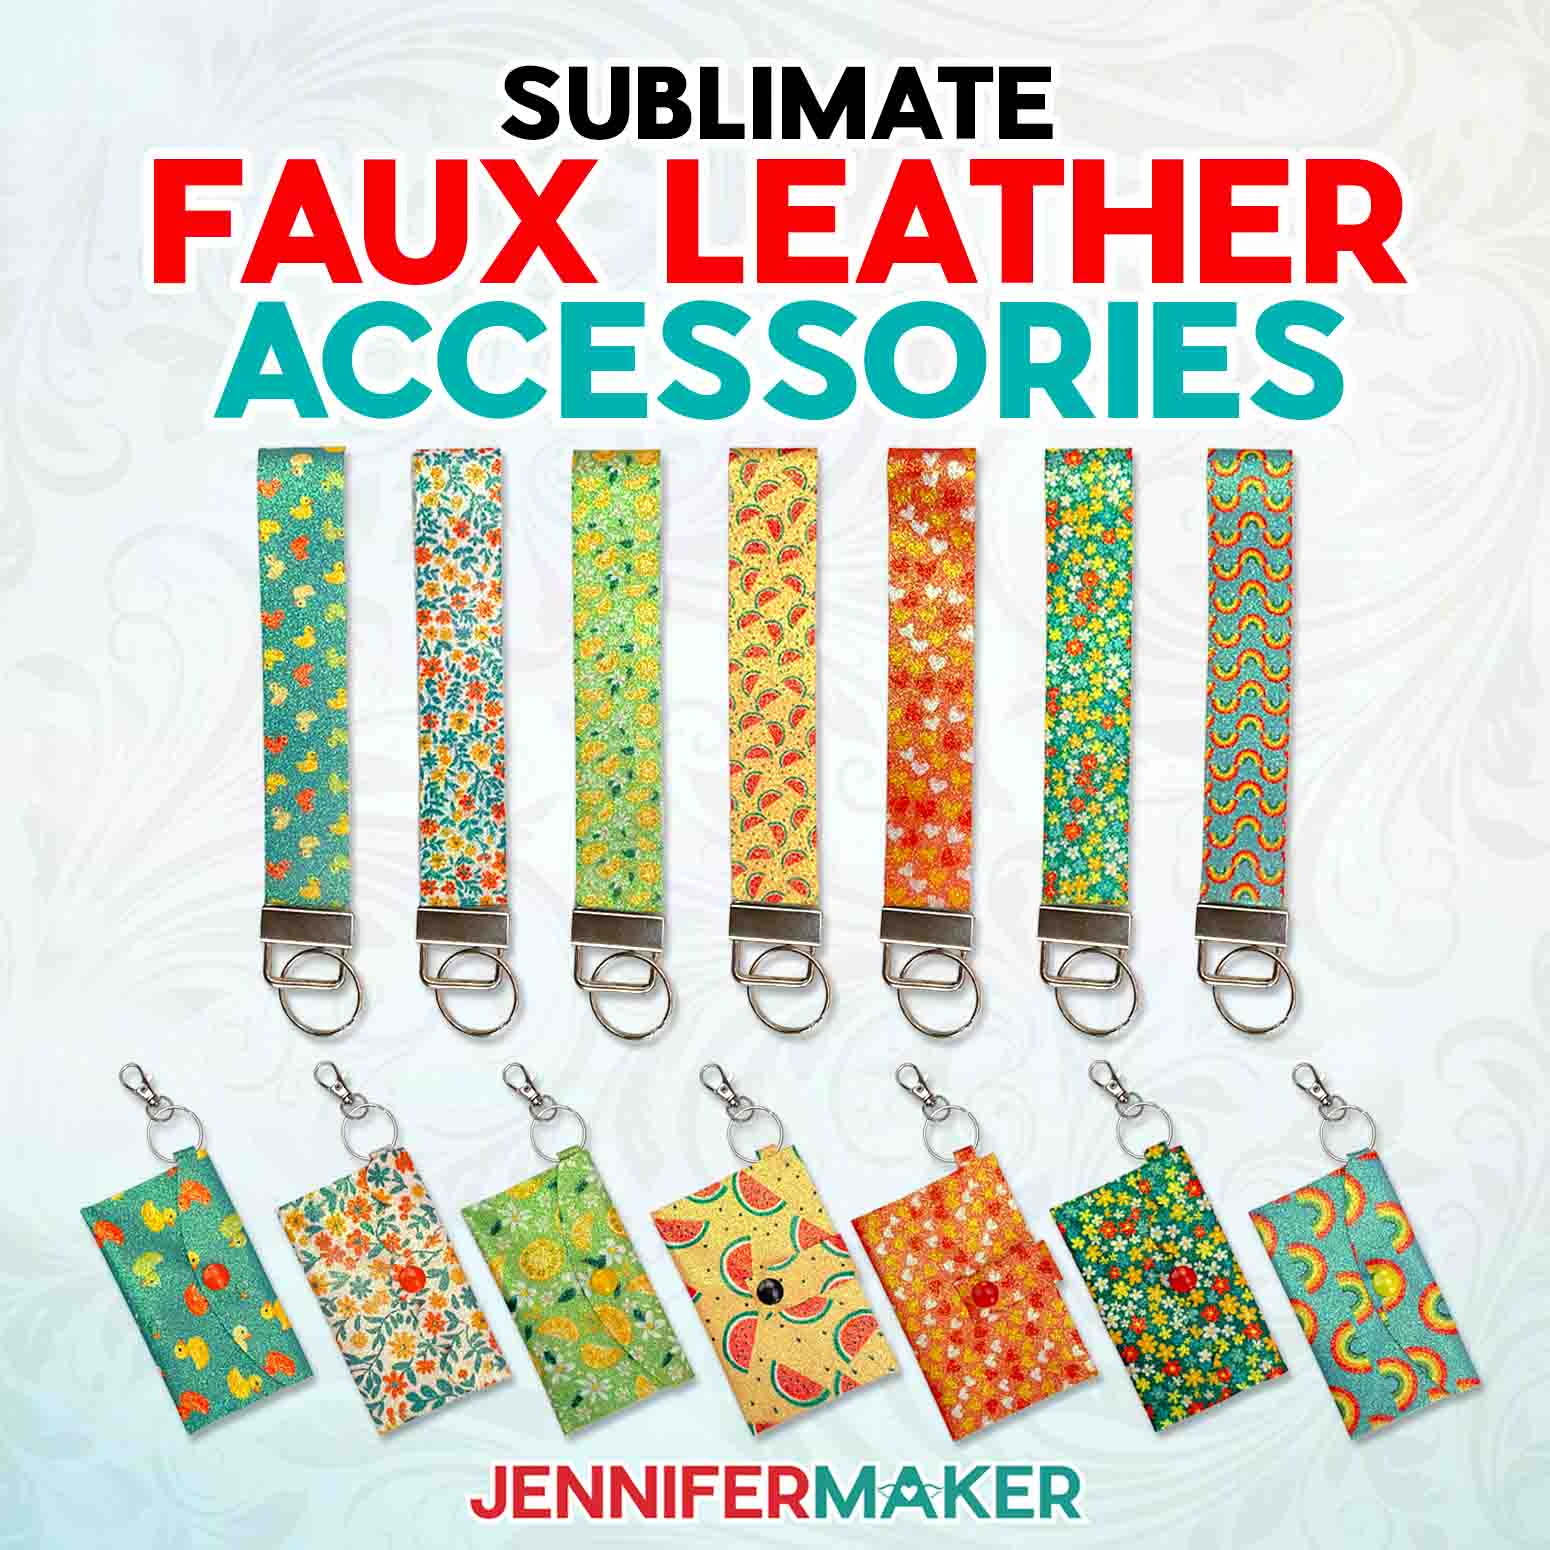
Learn how to sublimate faux leather to make cute accessories!
Lately, I’ve gotten big into playing with patterns in Cricut Design Space. There are just so many different ways to use them! Sublimation produces vibrant results that really allow colorful patterns to shine — even on new blanks you may not have tried before. That’s right, we’re trying out a new material, and learning to sublimate faux leather key fob wristlets that sparkle!
Watch the full step-by-step video tutorial on how to sublimate faux leather:

I really enjoy making fun projects like these fobs, because at the end you have something not just pretty, but useful too!
You can’t sublimate real leather, but you can sublimate faux leather, also known as synthetic leather. It’s commonly made from polyester fabric, which is coated by a colorful PVC material to give the look of real leather. And polyester works with sublimation ink!
To sublimate, you need white faux leather so the surface will show the pattern. I’ve tested all kinds, and found that the white glitter faux leather from my materials list gave the best results. It sublimates like a dream! Plus, it adds an extra-sparkly finish to your already-cute patterns. You can try other brands of white glitter faux leather, too — just be sure to use material with fine glitter, rather than the chunky kind. Bigger pieces of glitter won’t sublimate the way you expect!
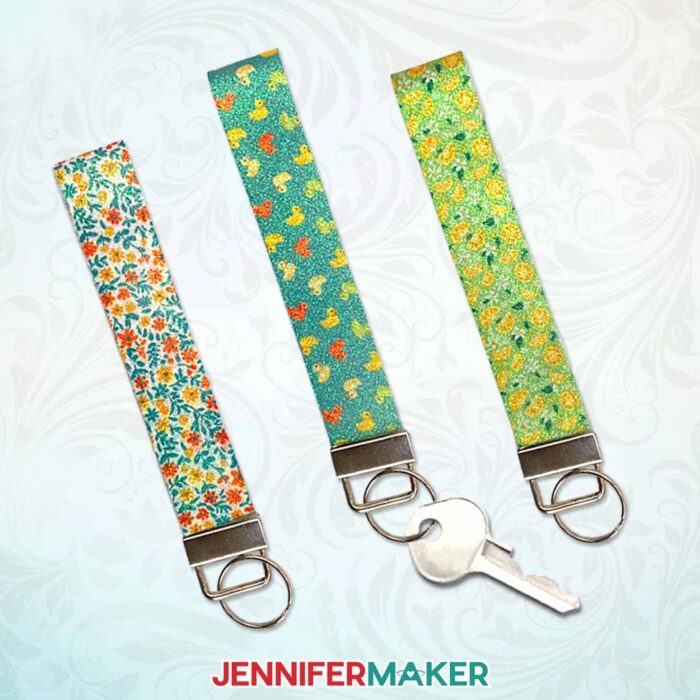
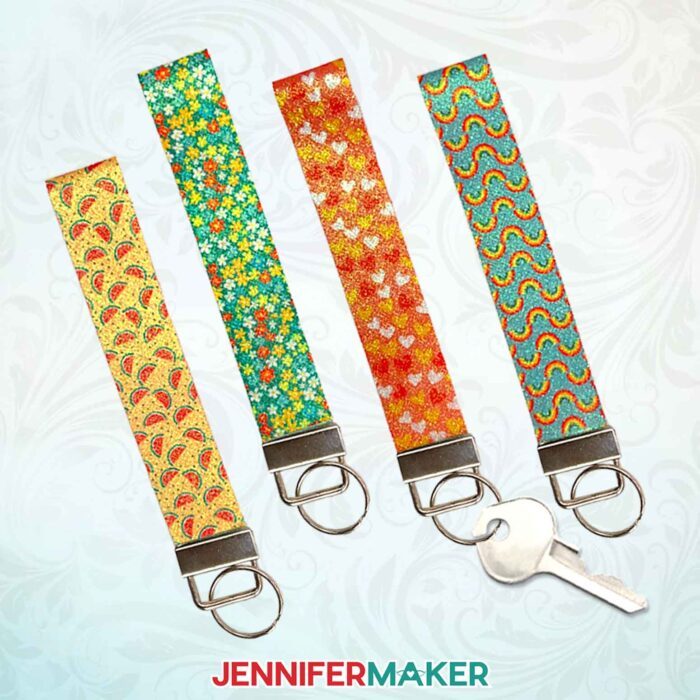
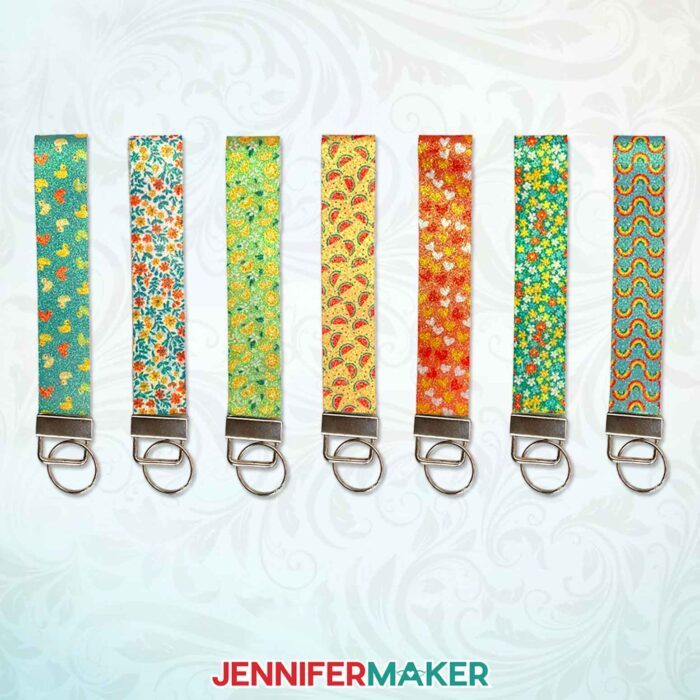
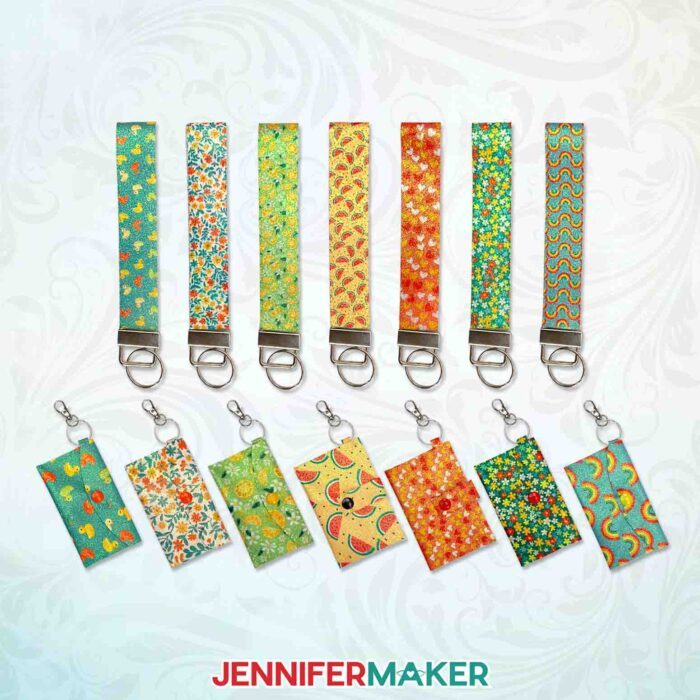
Speaking of patterns, I have seven cute new patterned designs for you to try! There are flowers, fruits, rainbows, and hearts — and even a delightful rubber ducky pattern! Once you get your techniques down, you can experiment with all kinds of patterns and designs for your custom keychains.
I’ll show you how to prepare them in Cricut Design Space, including how to print the perfect size and shape sublimation transfer sheet for your wristlet — without wasting ink.
Once printed, you can use your Cricut to trim around the design, but I’ll use scissors to cut it since it’s quicker. Then I’ll use my Cricut Maker 3 and a purple StrongGrip machine mat to cut the strip of faux leather to the exact right size. You can cut the glitter faux leather from my materials list on any Cricut cutting machine.
To sublimate your key fob, you’ll need a sublimation printer, along with a piece of 8.5 inch by 14 inch (legal size) sublimation transfer paper. You’ll also need a white piece of butcher paper, a sheet of white cardstock, and some heat-resistant tape to prepare your sublimation transfer for the heat press.
But what about the metal part of the wristlet? I have those linked in the materials list, too. The key fob hardware kit comes with a clamp tool, so there are no additional tools to worry about! When it comes time to finish your wristlet with the hardware, I’ll walk you through exactly how to do it.
Whether you’re crafting for a small business or making goodies for your family, friends, or yourself, sublimated faux leather wristlets are a fun and easy sublimation project for beginners and beyond. Soon, you’ll be transforming glittery faux leather sheets into the cutest fobs your keys have ever seen!
Let me show you how to sublimate faux leather and make patterned accessories! This post contains some affiliate links for your convenience (which means if you make a purchase after clicking a link I will earn a small commission but it won’t cost you a penny more, there is no additional cost)! Read my full disclosure policy.
Materials to Sublimate Faux Leather
View my Amazon shopping list for the exact items I used!
-
- White Glitter Faux Leather
- Key Fob Hardware with Press
- 8.5″ x 14″ A-Sub Sublimation Paper
- A way to cut your faux leather – I’m using the Cricut Maker 3, but you can also use the Cricut Maker, a Cricut Explore Series machine, the Cricut Venture, or the Cricut Joy 2 or Joy Xtra
- Cricut Purple StrongGrip Machine Mat 12″ x 12″
- Sublimation Printer or Printer Converted for Sublimation -AND-
- Sublimation Ink
- Heat Press – I used the Cricut EasyPress 12″ x 10″ -AND-
- EasyPress Pressing Pad
- White Cardstock (for sublimation)
- White Butcher Paper (for sublimation)
- Painter’s Tape (optional)
- Scissors
- Heat Resistant Tape
- Paper Trimmer
- Brayer
- Lint Roller
- Fan (for ventilation)

How to Sublimate Faux Leather

Sublimate Faux Leather
Learn how to sublimate faux leather and make key fobs!
Materials
- White Glitter Faux Leather
- Key Fob Hardware
- 8.5″ x 14″ A-Sub Sublimation Paper
- White Cardstock (for Sublimation)
- White Butcher Paper (for Sublimation)
- Painter’s Tape (Optional)
- Design #632 (My free PNG design files are available in my free resource library - get the password by filling out the form at the bottom of this page)
Tools
- A way to cut your faux leather - I’m using the Cricut Maker 3, but you can also use the Cricut Maker, a Cricut Explore Series machine, the Cricut Venture, or even the Cricut Joy Xtra
- Cricut Purple StrongGrip Machine Mat 12″ x 12″
- Sublimation Printer or Printer Converted for Sublimation
- Sublimation Ink
- Heat Press - I used the EasyPress 12″ x 10″
- EasyPress Pressing Pad
- Scissors
- Heat Resistant Tape
- Cricut Trimmer
- Brayer
- Lint Roller
- Fan (for Ventilation)
Instructions
STEP 1: GET MY FREE SUBLIMATE FAUX LEATHER DESIGNS
First, download my Sublimate Faux Leather designs from my free library – look for Design #632. Alternatively, you can use the Save This Project form near the top of this post and the design link will be emailed to you.
In the PNG folder, you’ll find seven sublimation designs I have created for you:
A ducks design,
A flower design with a teal background,
A flower design with a white background,
A hearts design,
A lemons design,
A rainbows design,
And a watermelon design.
I’ll show you how to use these designs to create a custom print area using free shapes and the Pattern Fill function. I’ll also demonstrate how to sublimate your design onto faux leather to make a unique fashion accessory.
TIP: If you’re not sure how to download Zip files, go to jennifermaker.com/svgs because the steps are similar for PNGs.
STEP 2: CREATE YOUR WRISTLET AND CUSTOM PRINT AREA
CRICUT DESIGN SPACE
- Open Cricut Design Space and click “New Project.”
- Since we’ll be working with shapes that are too large for 12” x 12” machine mats and letter-size paper, let’s change our default “Load Type” settings to prevent sizing issues when sending our project to the Make screen.
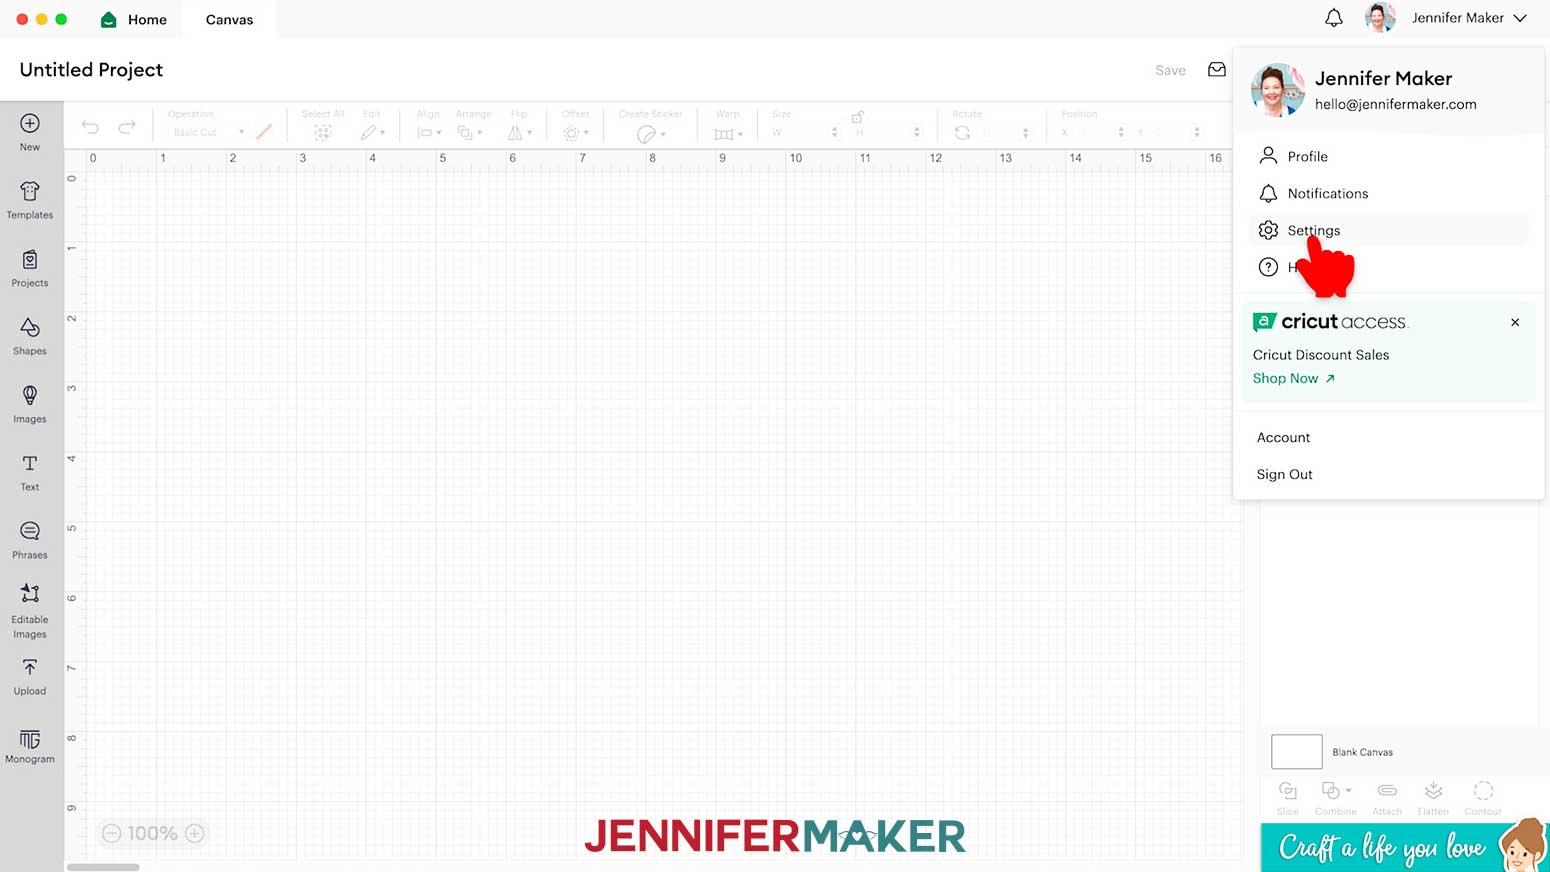
- Click on your name up in the top menu bar of Design Space, then click on “Settings.”

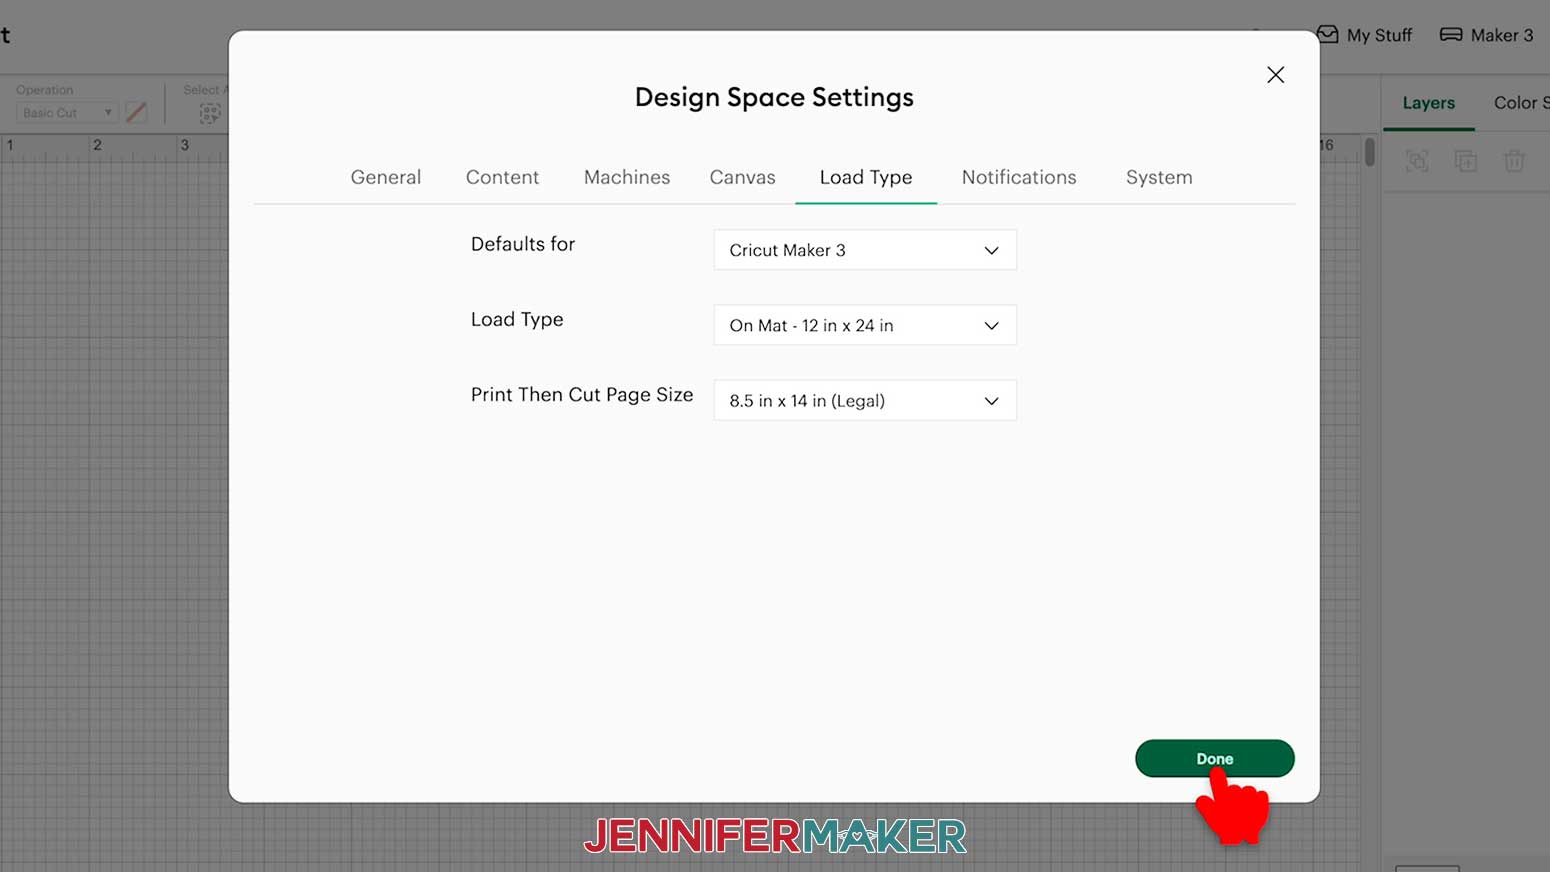
- Click the “Load Type” tab, then select your machine in the “Defaults for” field.
- Set the “Load Type” field to “On Mat - 12 in x 24 in” and the “Print Then Cut Page Size” field to “8.5 in x 14 in (Legal).”
- Click “Done” to return to your Canvas.
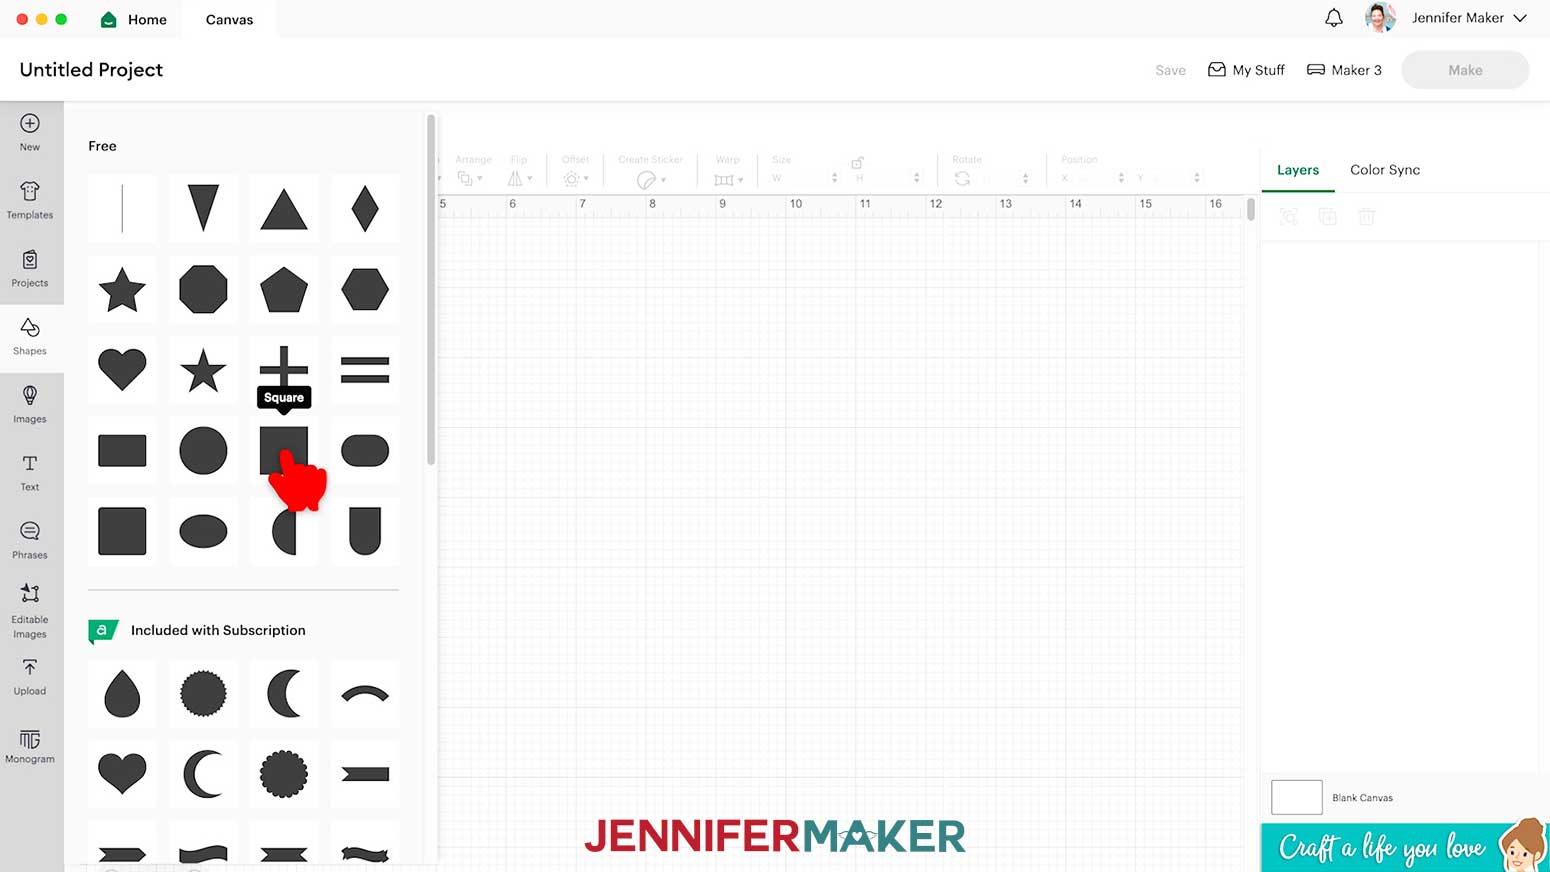
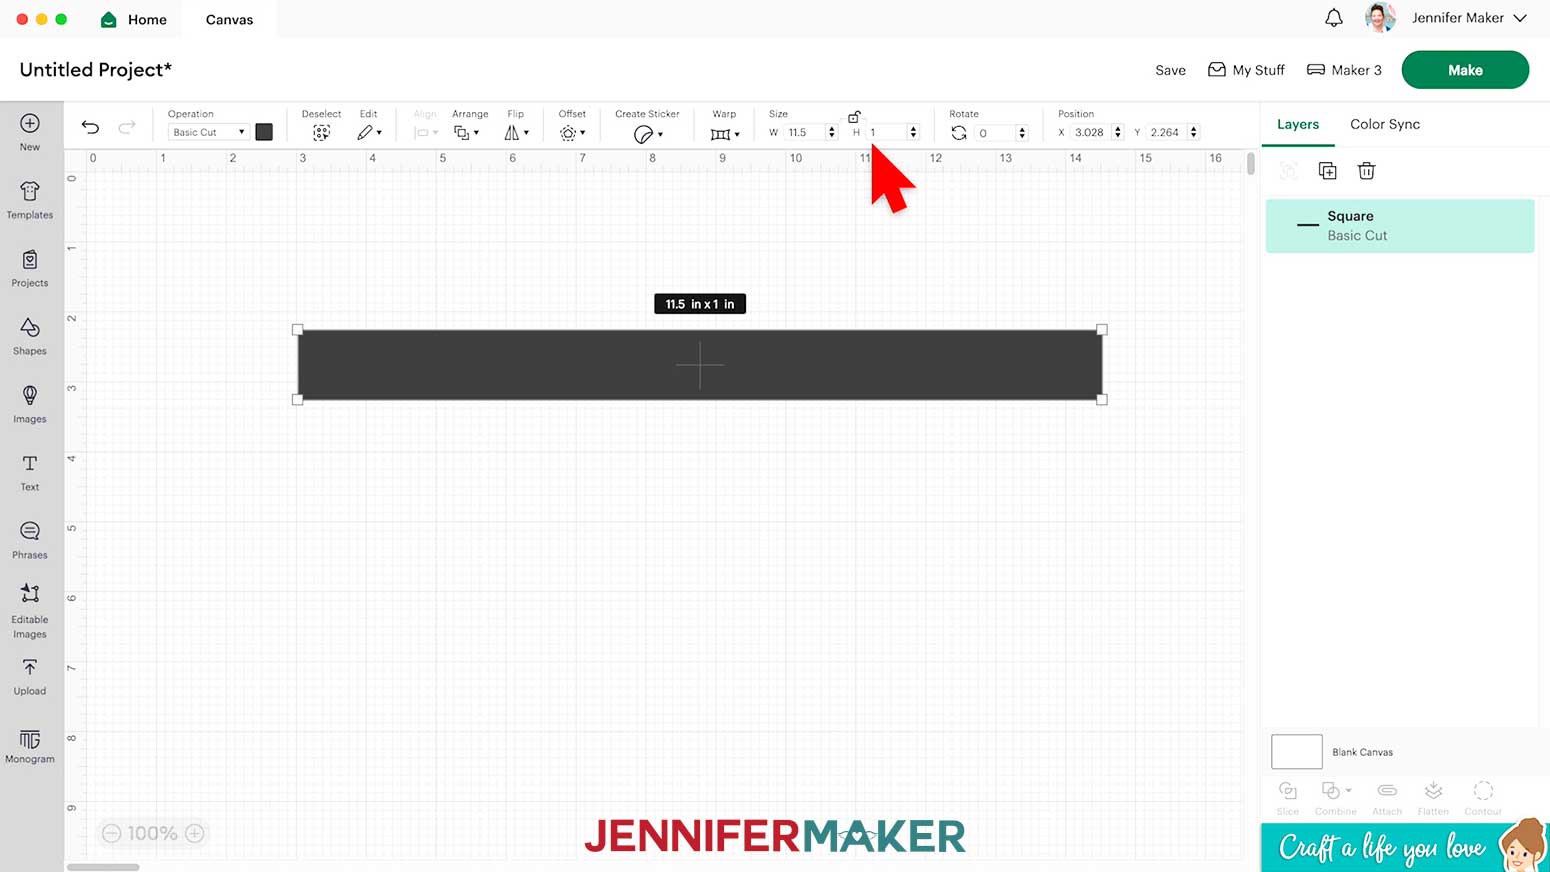
NOTE: After you have finished this project, you can return to these settings to change them back if you want. - To create your wristlet, click on “Shapes” and select the free Square shape.
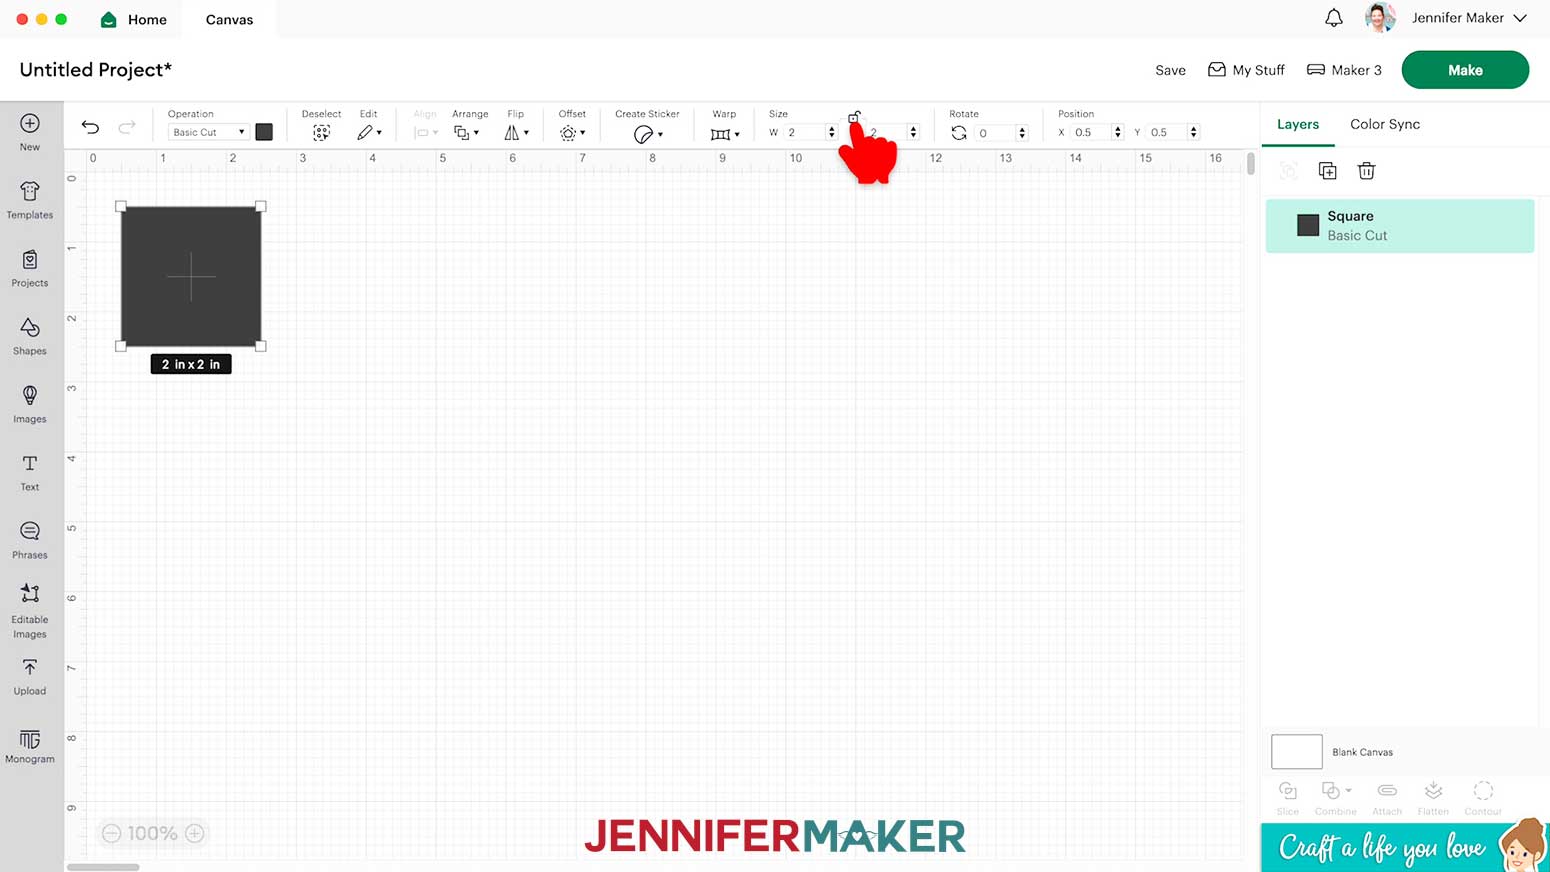
- In the Size Menu at the top, click the “Lock” icon to open it.
- Type “11.5” into the “W (width)” box and “1” in the “H (height)” box to set the dimensions for your wristlet.
- To create a custom-sized print area for your design pattern, click on “Shapes” again and add another free Square.
- I want the print area to be larger than the wristlet to provide good coverage during sublimation, so I’ll type “12” into the “W (width)” box and “1.5” in the “H (height)” box to set its dimensions.
- Click “Save” and give your project a name so you don’t lose your wristlet.
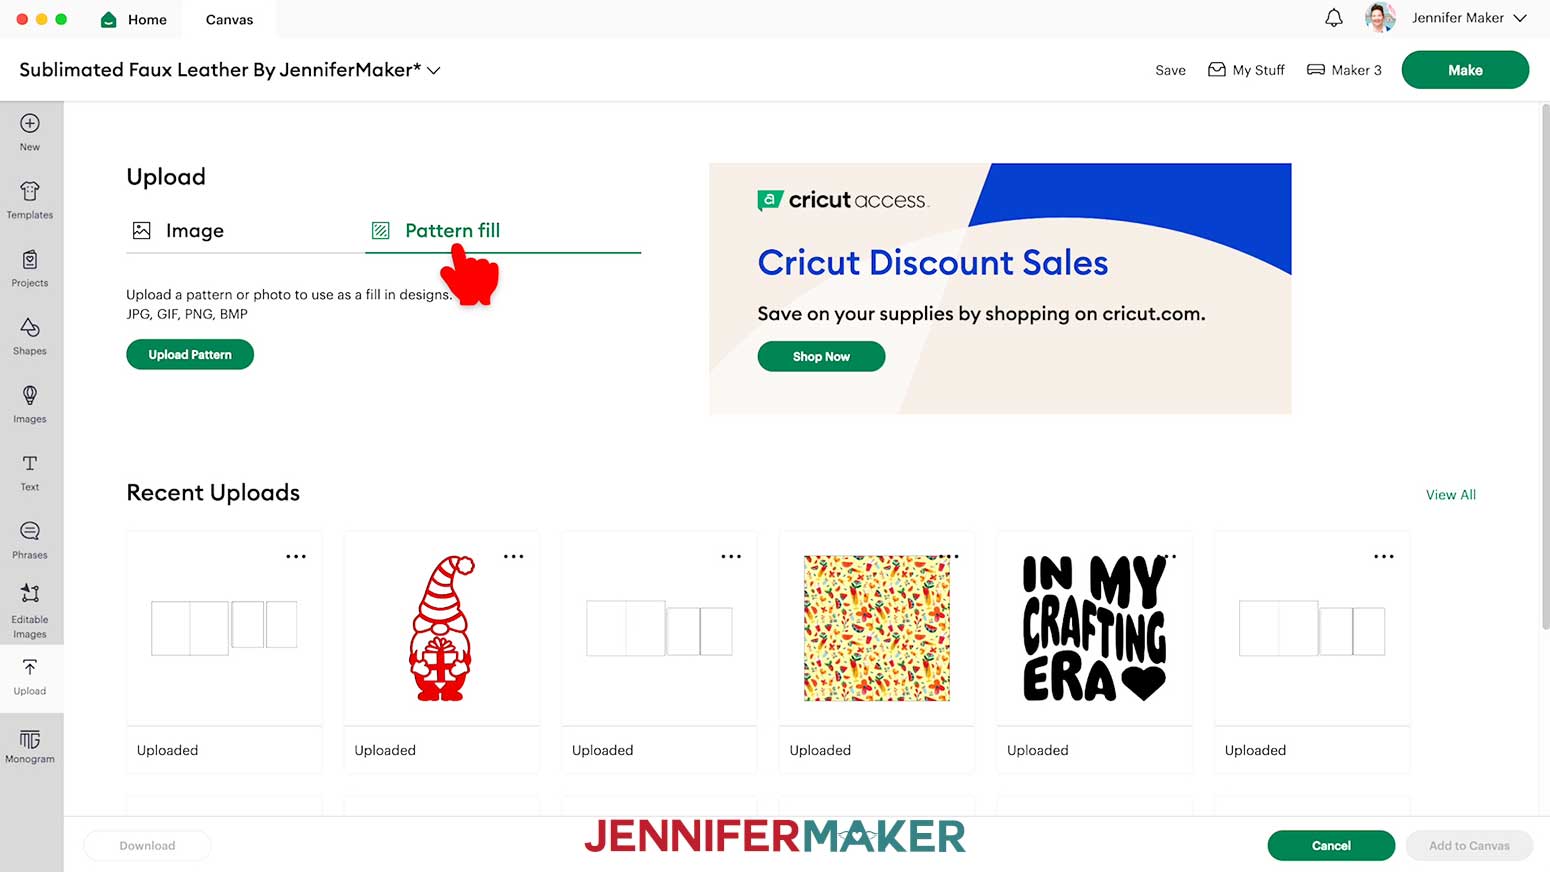
- To add a downloaded Pattern to the larger print area shape, click “Upload.”
- Select “Pattern fill” and click “Upload Pattern.”
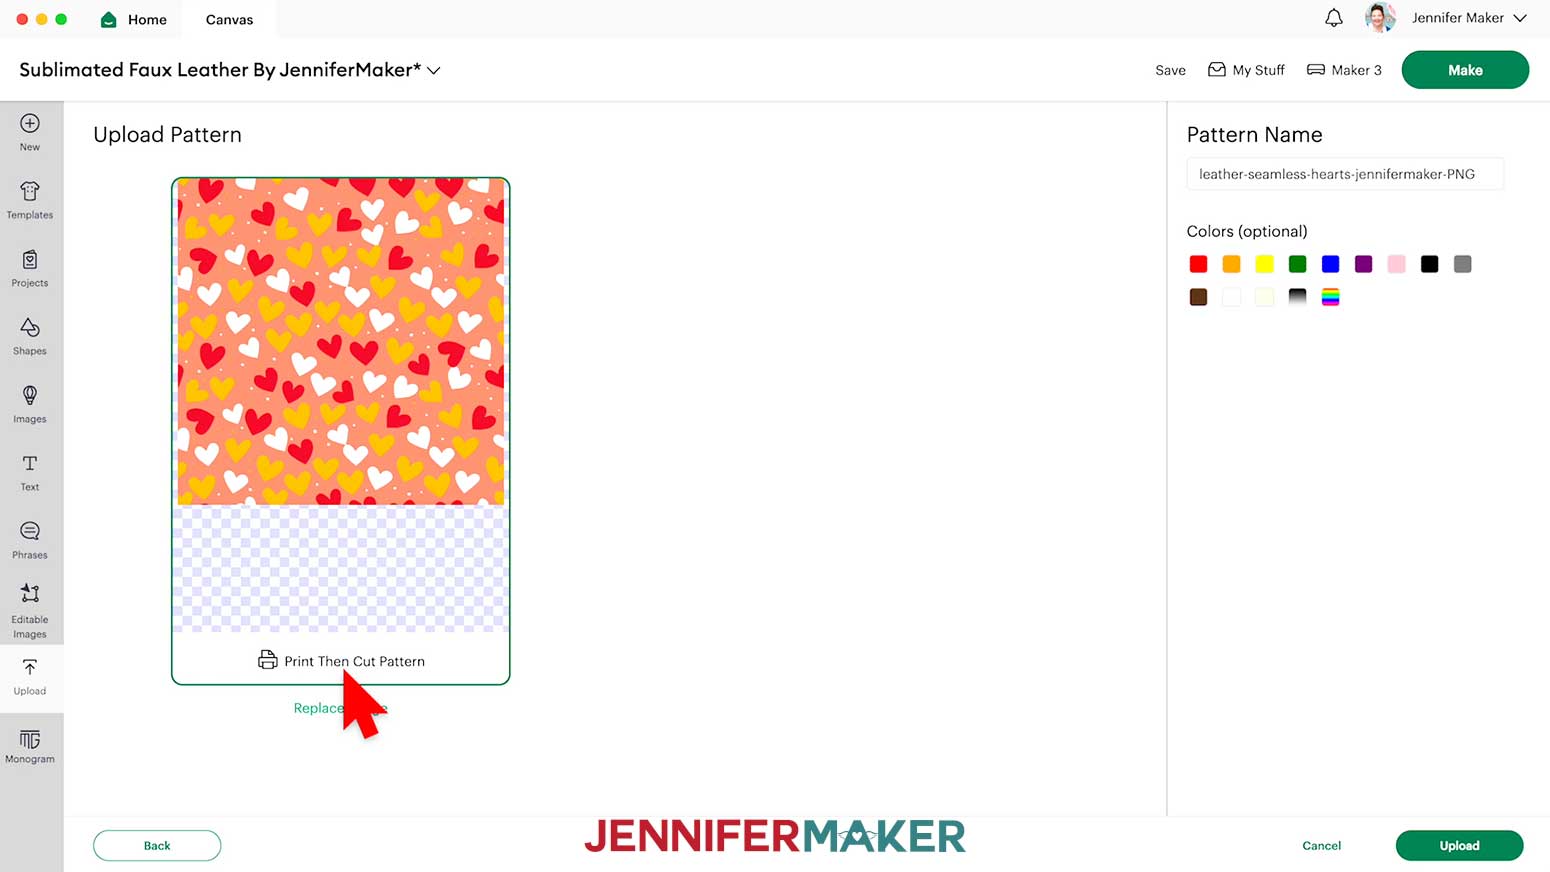
- Click "Browse" to find your downloaded design files, then select the pattern you want in the “PNG” folder. I’ll choose the “hearts” design.
- Click “Open” to add it to Cricut Design Space as a Print Then Cut Pattern.
- Click “Upload.”
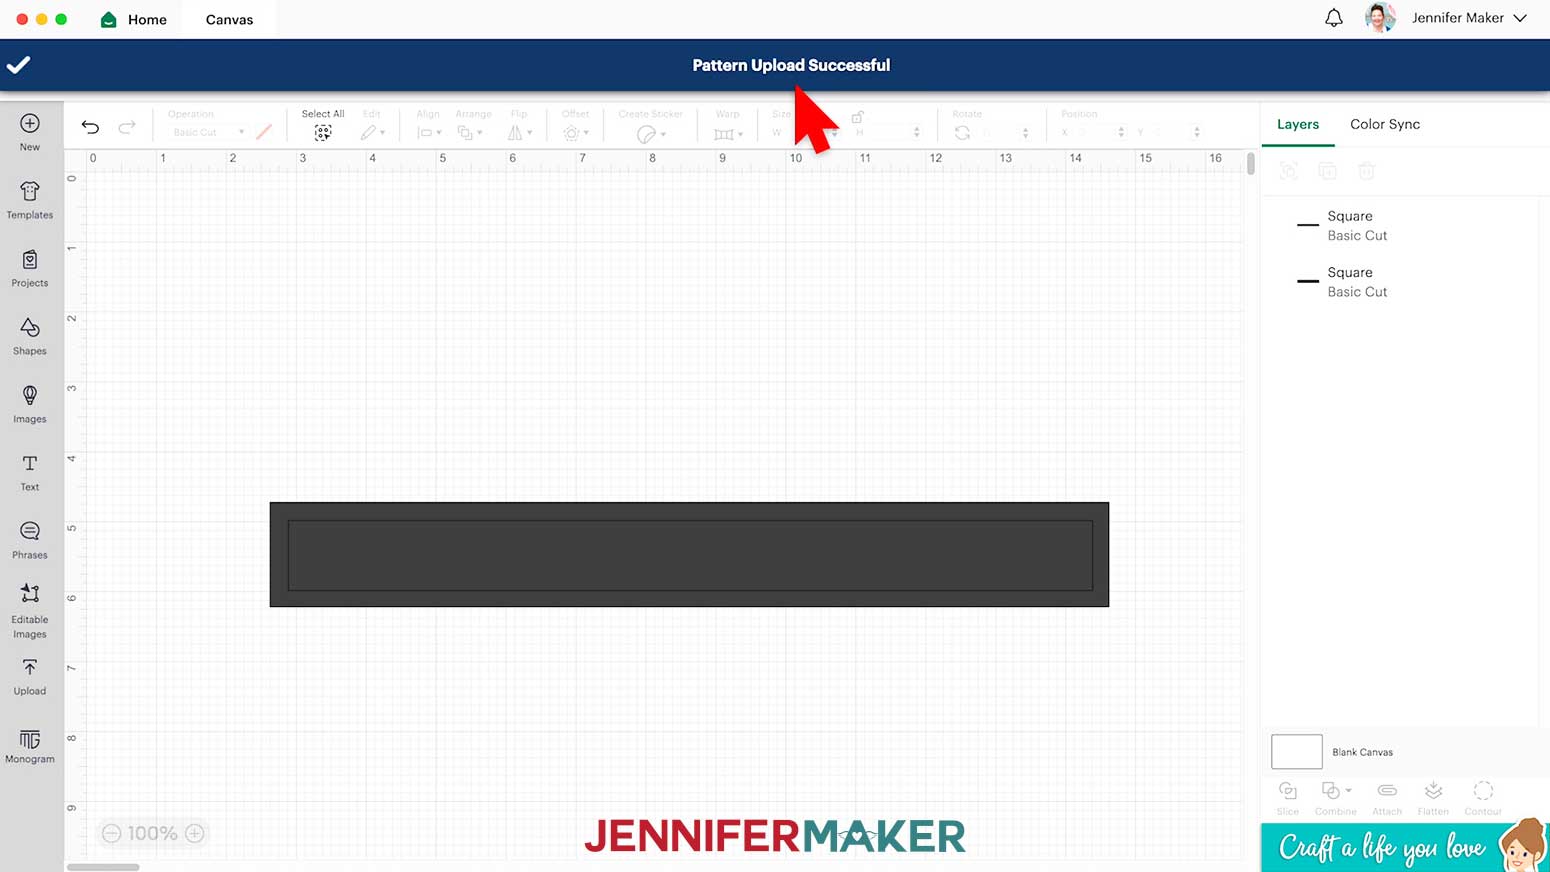
- Your Canvas will reload with a message at the top saying “Pattern Upload Successful.”
- Select the larger rectangle to apply the Pattern Fill to the print area.
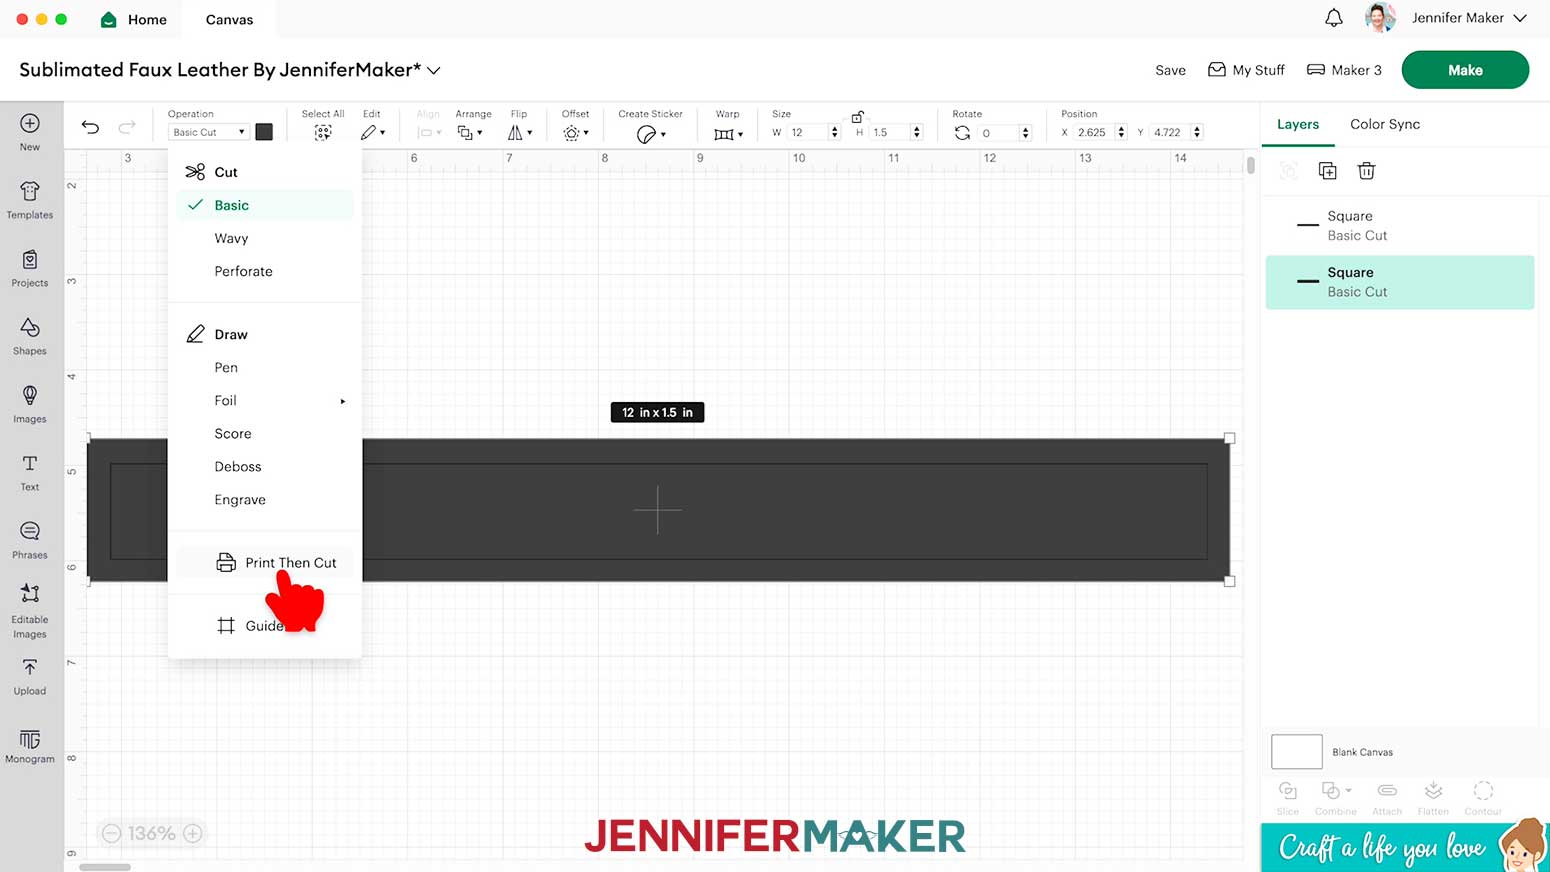
- Click “Operation” to open a drop-down menu and select “Print Then Cut.”
- Then, click the Color Box next to “Operation.”
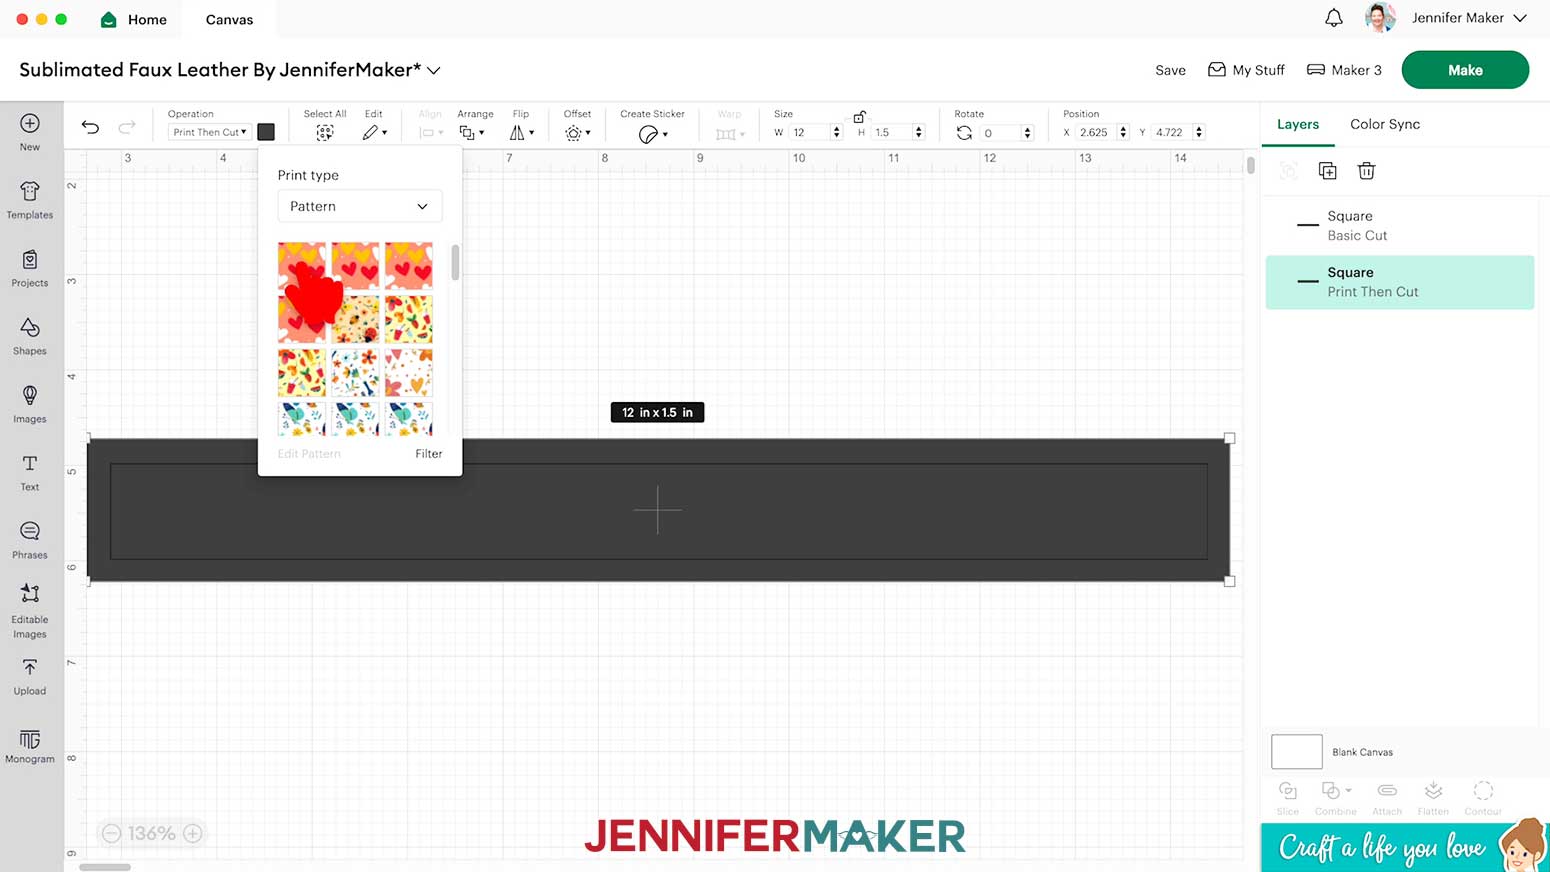
- Click the drop-down menu below “Print type” and select “Pattern.”
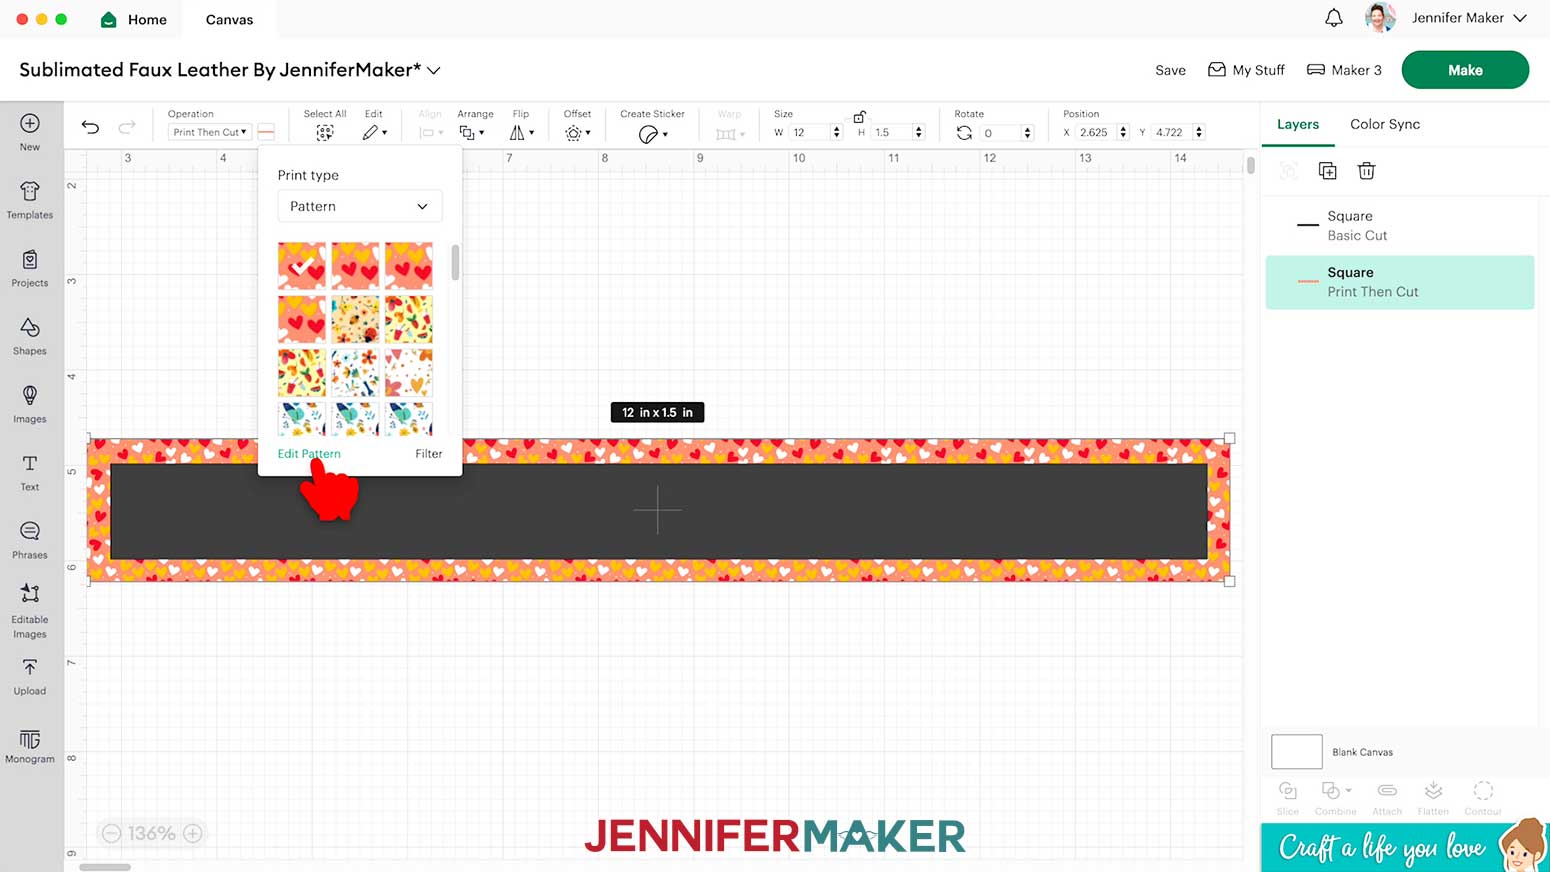
- Select the Pattern Fill you want to use.
NOTE: Your most recently-added Pattern Fill will be the top left preview square. - If you want to adjust the Pattern Fill, click “Edit Pattern.”
- In the “Edit Pattern” menu, use the arrows in the “Scale” field or the slider to the right to adjust the density of your pattern. Increasing the “Scale” will make the pattern elements bigger and use fewer repeats. Decreasing the “Scale” makes the elements smaller and tiles more of the original pattern to fill the space.
NOTE: To learn more about Pattern Fill options, check out our Patterns in Cricut Design Space tutorial. - When the Pattern Fill looks the way you want, click the “X” in the top right corner of the menu to return to your Canvas.
- Your wristlet and your print design are ready to go!

PRINTING AND CUTTING
- Make sure the correct machine is selected in the top right.
- Click “Make.”
- On the Prepare screen, you should have one “Print Then Cut” mat and one “Basic Cut” mat.
- Make sure your “Material Size” matches for each type of mat and material you’re using.
- Your Print Then Cut mat should be “8.5 in x 14 in (Legal).” Toggle ON “Mirror” for this mat as well since we’ll apply the design face down when sublimating.
- For your Basic Cut mat, select “12 in x 12 in.”
- Click back on the first mat, then click “Continue.”
- On the Make screen, select “Send to Printer.”
- In the “Print setup” window, select your printer, then make sure “Add Bleed” is toggled off and “Use System Dialog” is toggled on.
- Click “Print.”
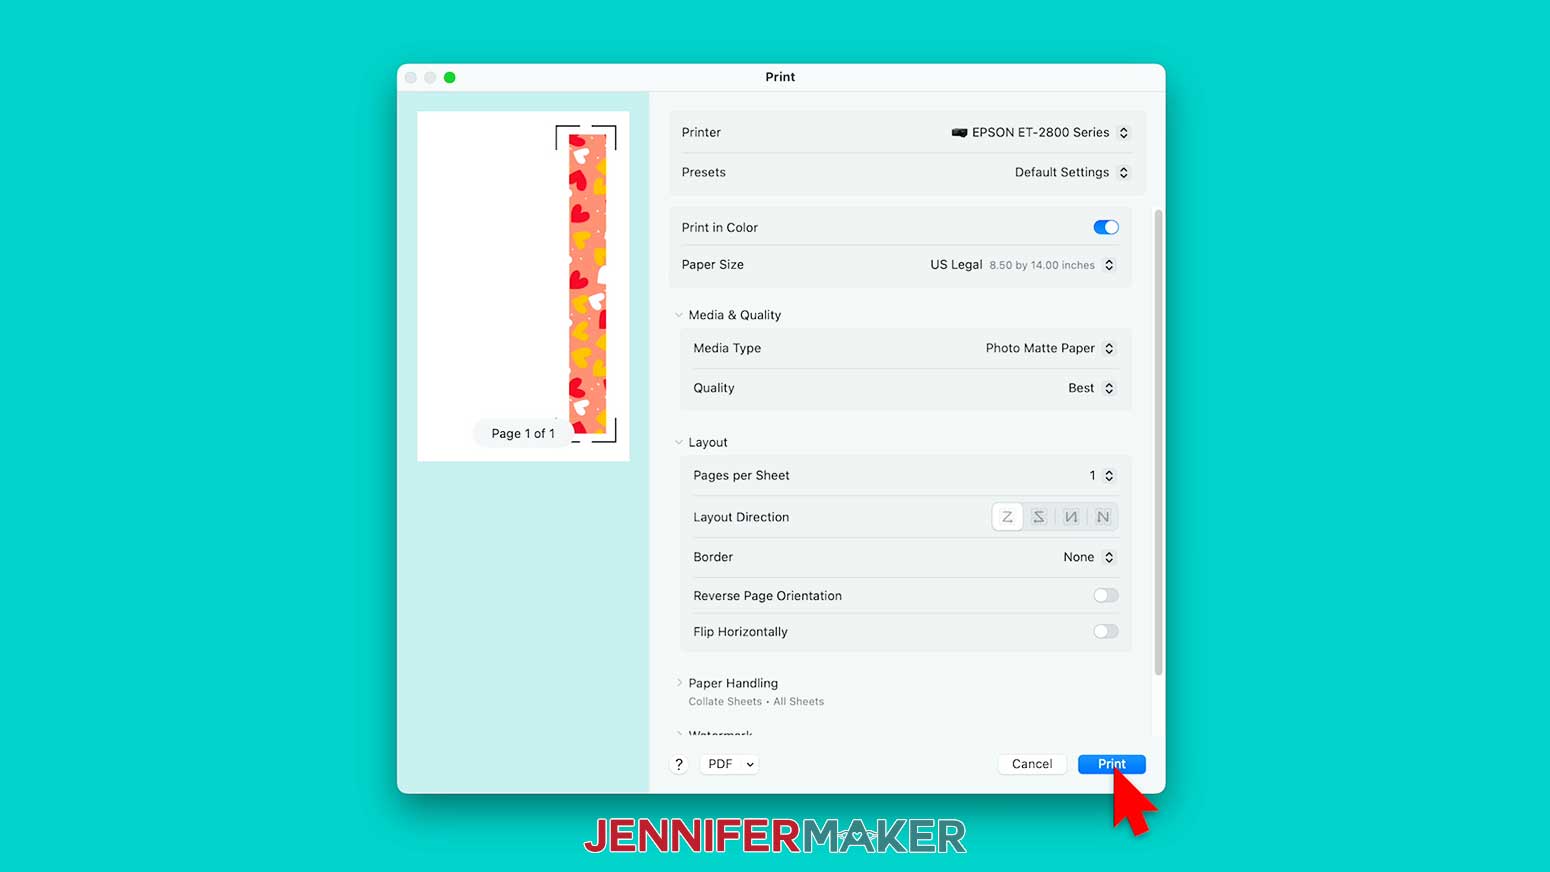
NOTE: Your System Dialog window might be hiding behind Cricut Design Space, so minimize Design Space if you don’t see the settings. - In the System Dialog window, make sure your printer is selected. Change the Media Type to “Photo Matte Paper,” and set the Quality to “Best.” “Flip Horizontally” should be unchecked, or else you’ll undo the mirroring we set on the Prepare screen!
NOTE: Not all printer settings will be the same, but you can use my choices as guidelines. - Click “Print.”
- Once your design is printed, set it aside to dry.
NOTE: Your ink will be a lighter color, but this is normal for sublimation prints. - On your screen, click on Mat 2 to select the Basic Cut mat with the wristlet.
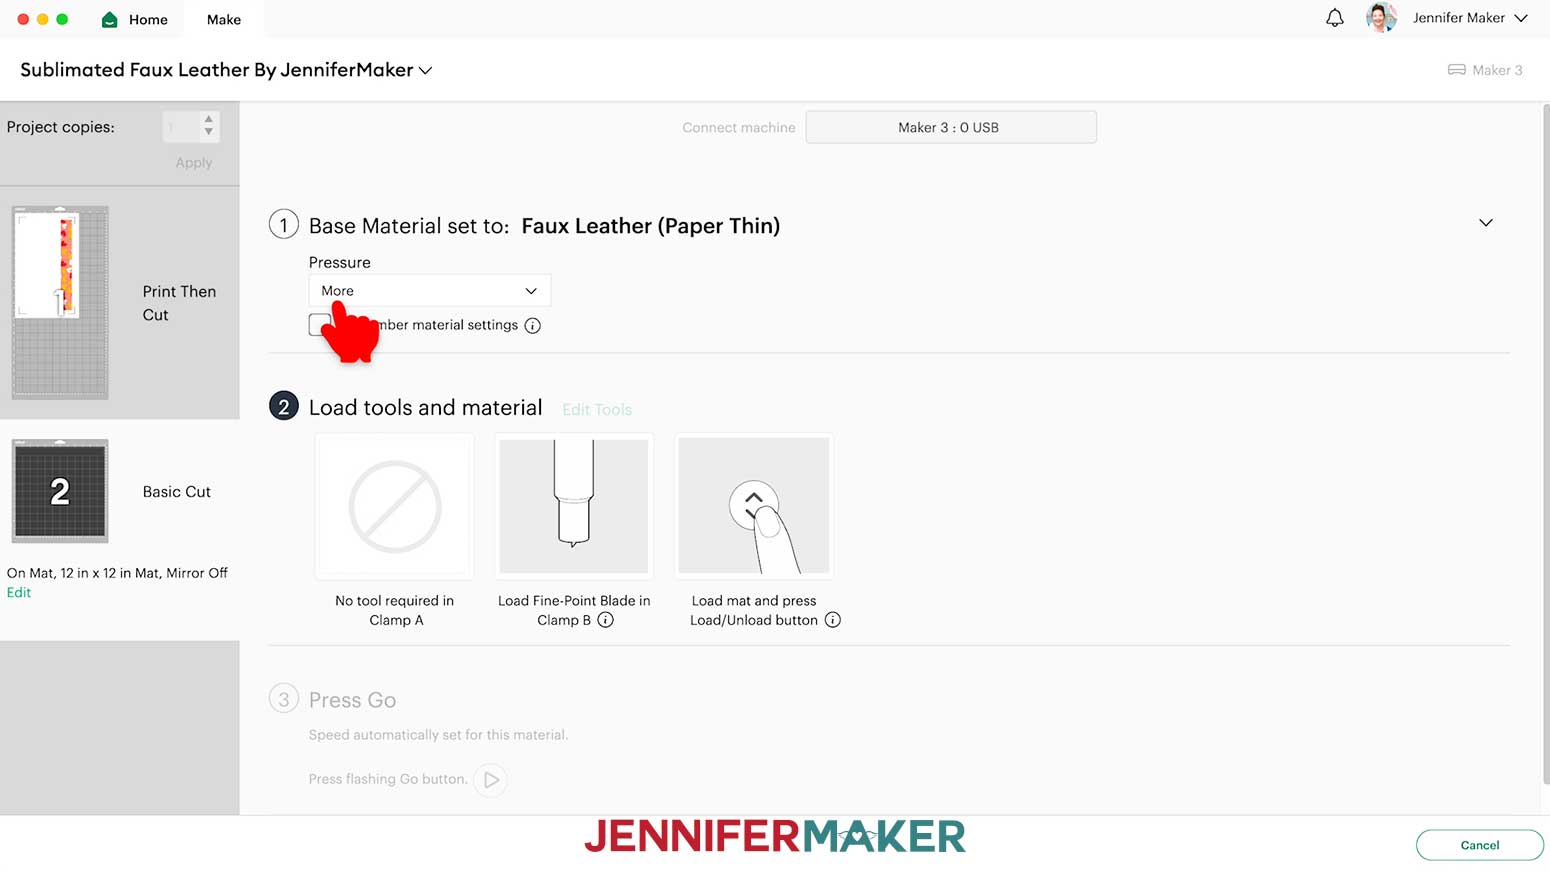
NOTE: We’re skipping the “Cut” part of Print Then Cut for now, but we’ll trim our print down to size later. - Set the Base Material to the “Faux Leather (Paper Thin)” setting and change the Pressure to “More.”
TIP: Changing the Pressure to “More” results in a cleaner cut.
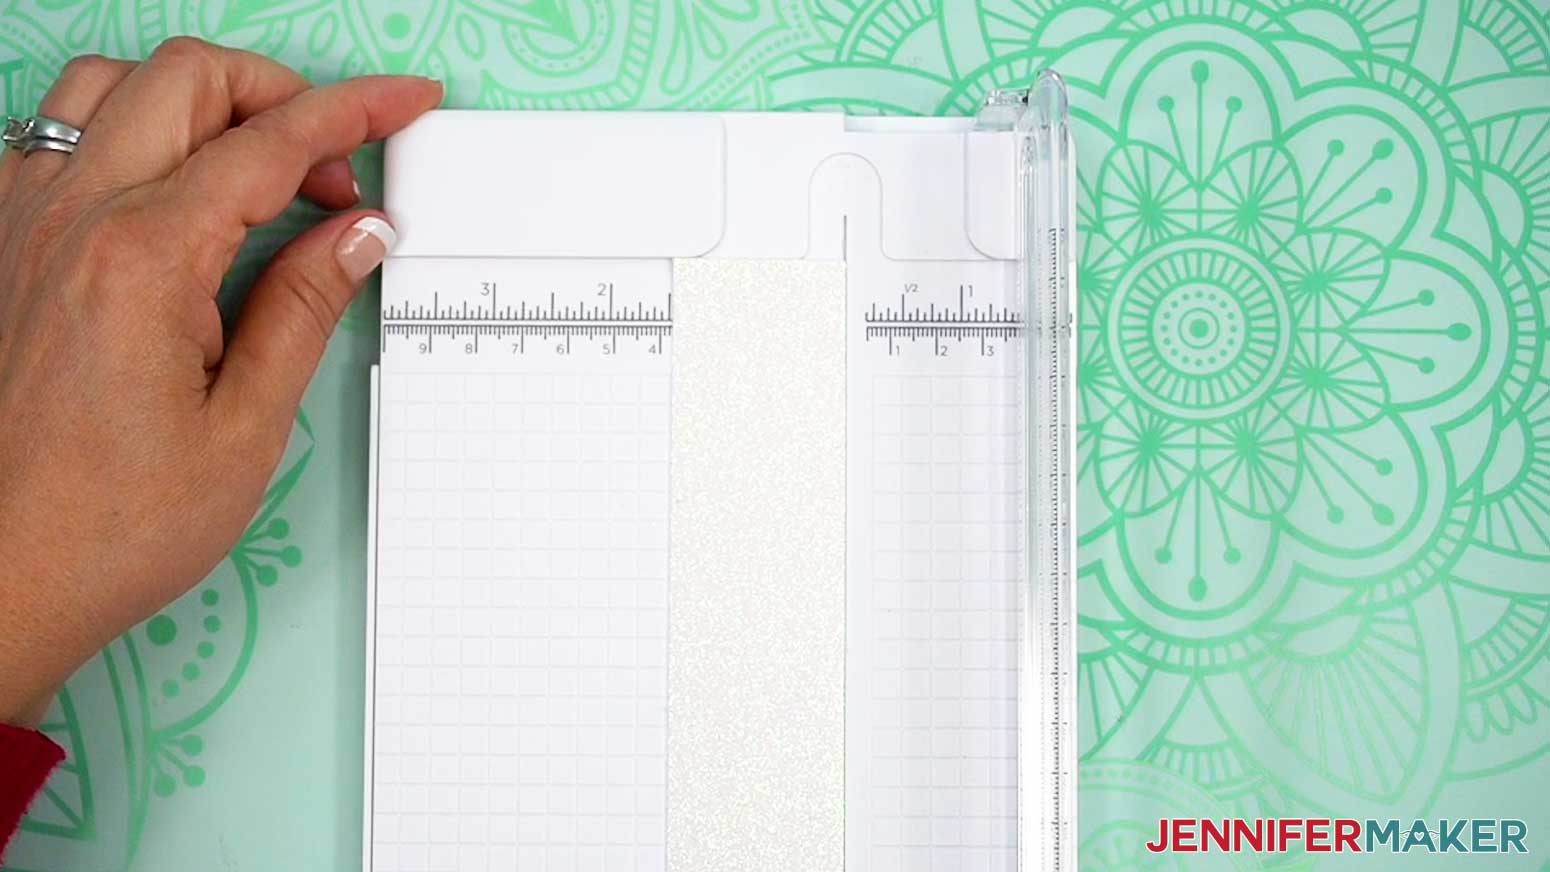
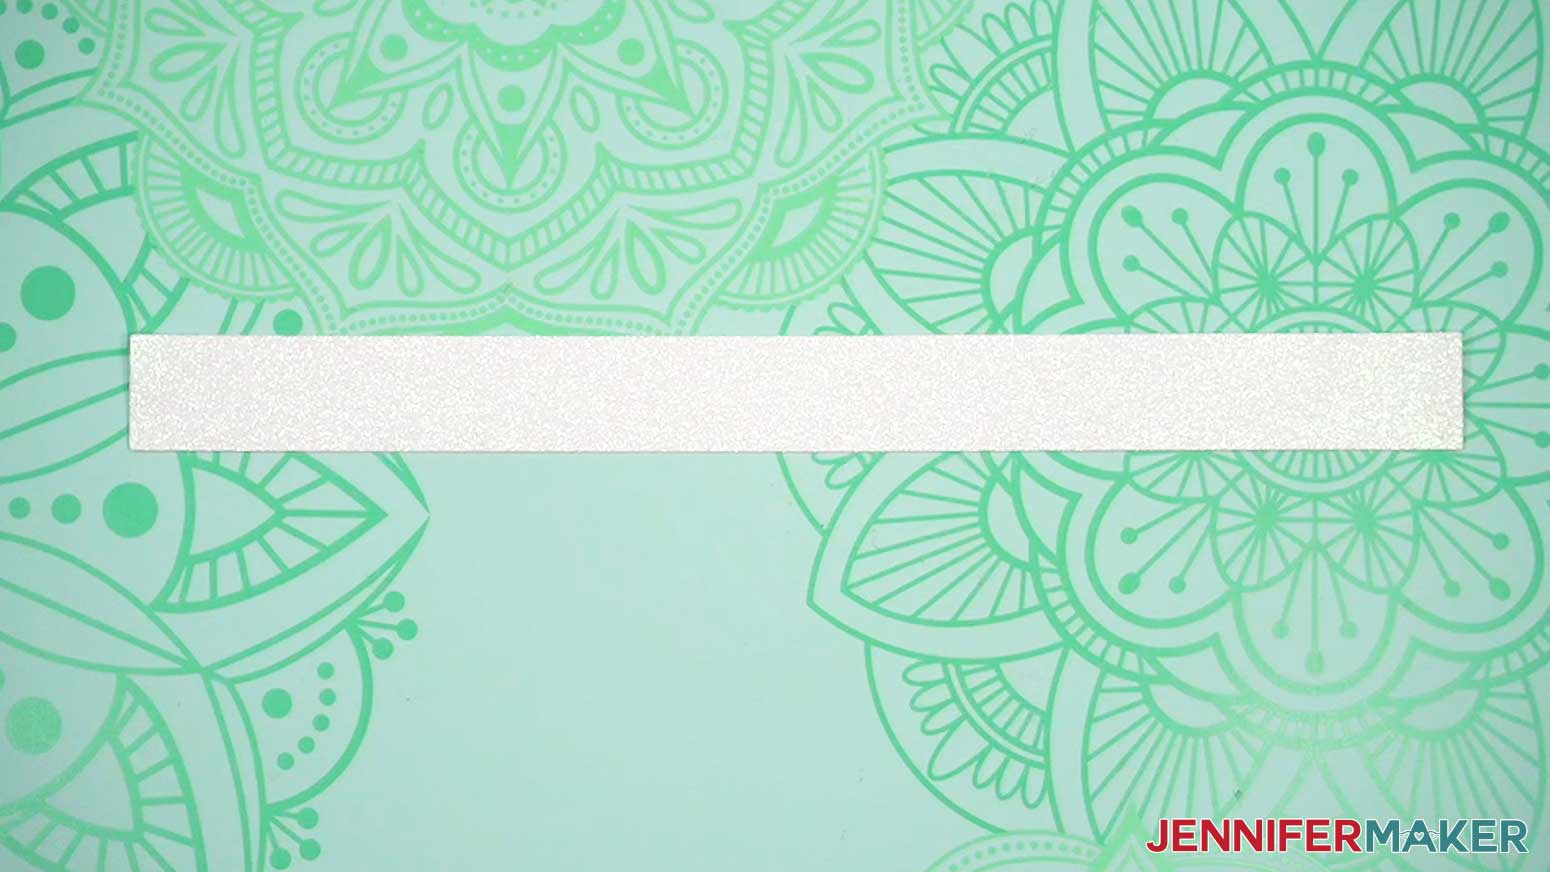
NOTE: If you don’t see “Faux Leather (Paper Thin)” in your materials list, click on “Browse All Materials,” search for “faux,” and select the correct material from the list. - Use your paper trimmer to cut a 1.5″ x 12″ strip of white glitter faux leather.
TIP: Use white faux leather with small, or fine glitter -- chunky glitter may not sublimate the way you expect.
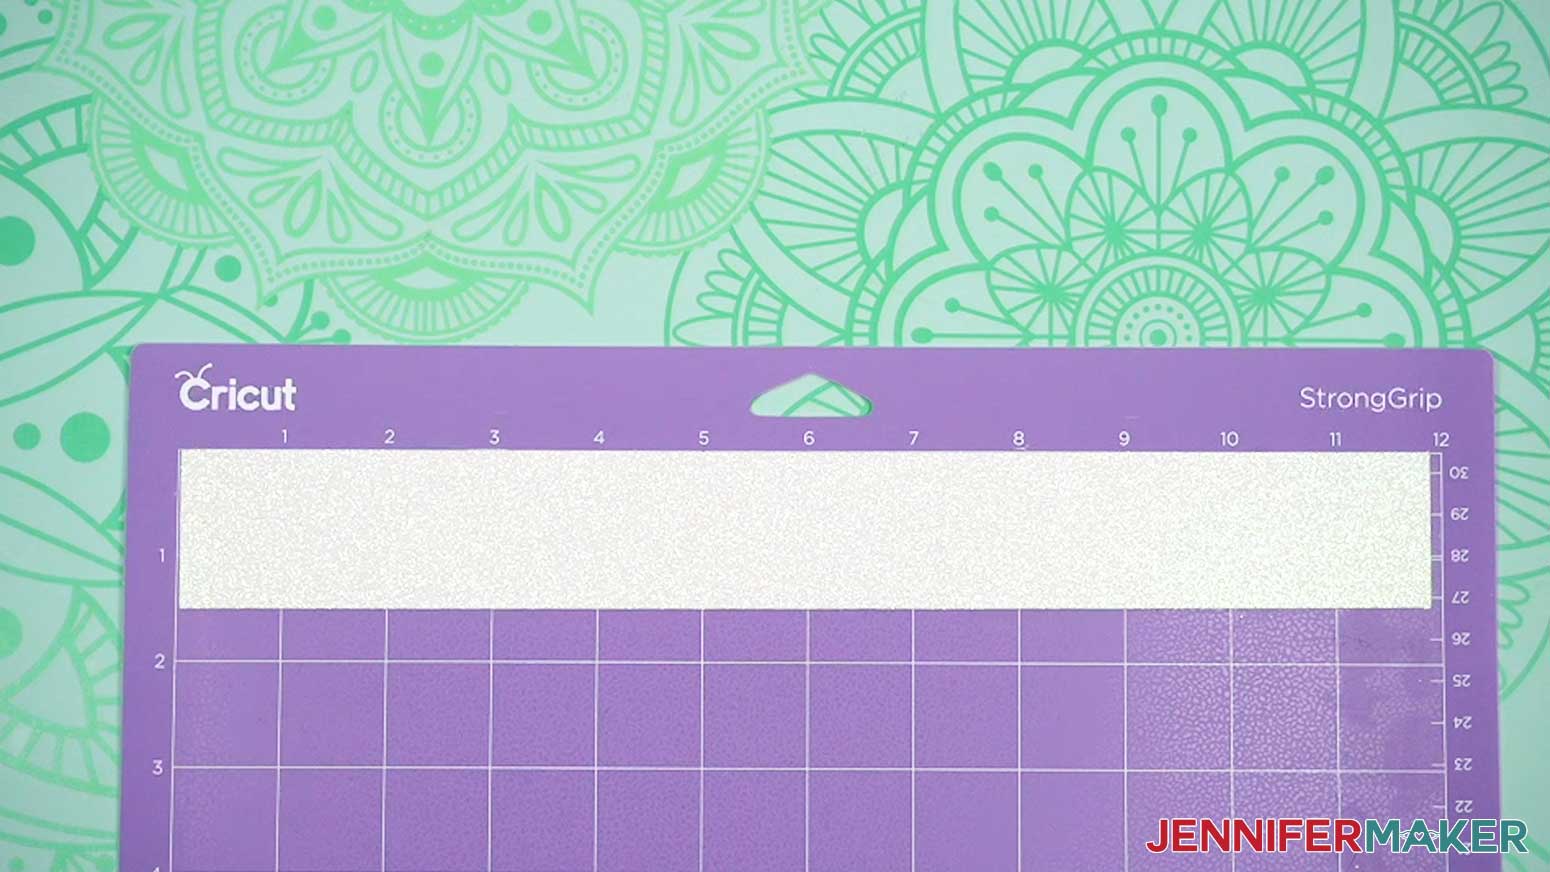
NOTE: I recommend only using the paper trimmer to trim the leather down to size, and then using the Cricut to cut the wristlet since the machine cuts are more precise. - Place your faux leather glitter side up on a purple StrongGrip machine mat.
- Use a brayer to adhere it well.
TIP: If you have trouble getting the faux leather to stick to your mat, you can use painter’s tape. - Check that your Premium Fine-Point Blade is clean and in the clamp.
- Press the flashing “Load/Unload” button to load the prepared mat into your Cricut.
- Press the flashing “Go” button to begin cutting.
- When the cuts finish, don’t unload the mat right away. Gently lift a corner of the material to make sure the cuts went all the way through. If not, press the “Go” button again to make a second pass of cuts in the same spots.
- When the cuts are complete, unload the mat, flip it over onto your work surface, and roll it back to release the faux leather.
TIP: If you have any issues with your cuts, go to jennifermaker.com/cleaner-cuts. - If there are any frayed edges or spots the machine didn’t cut through, use your scissors to trim away the excess leather.
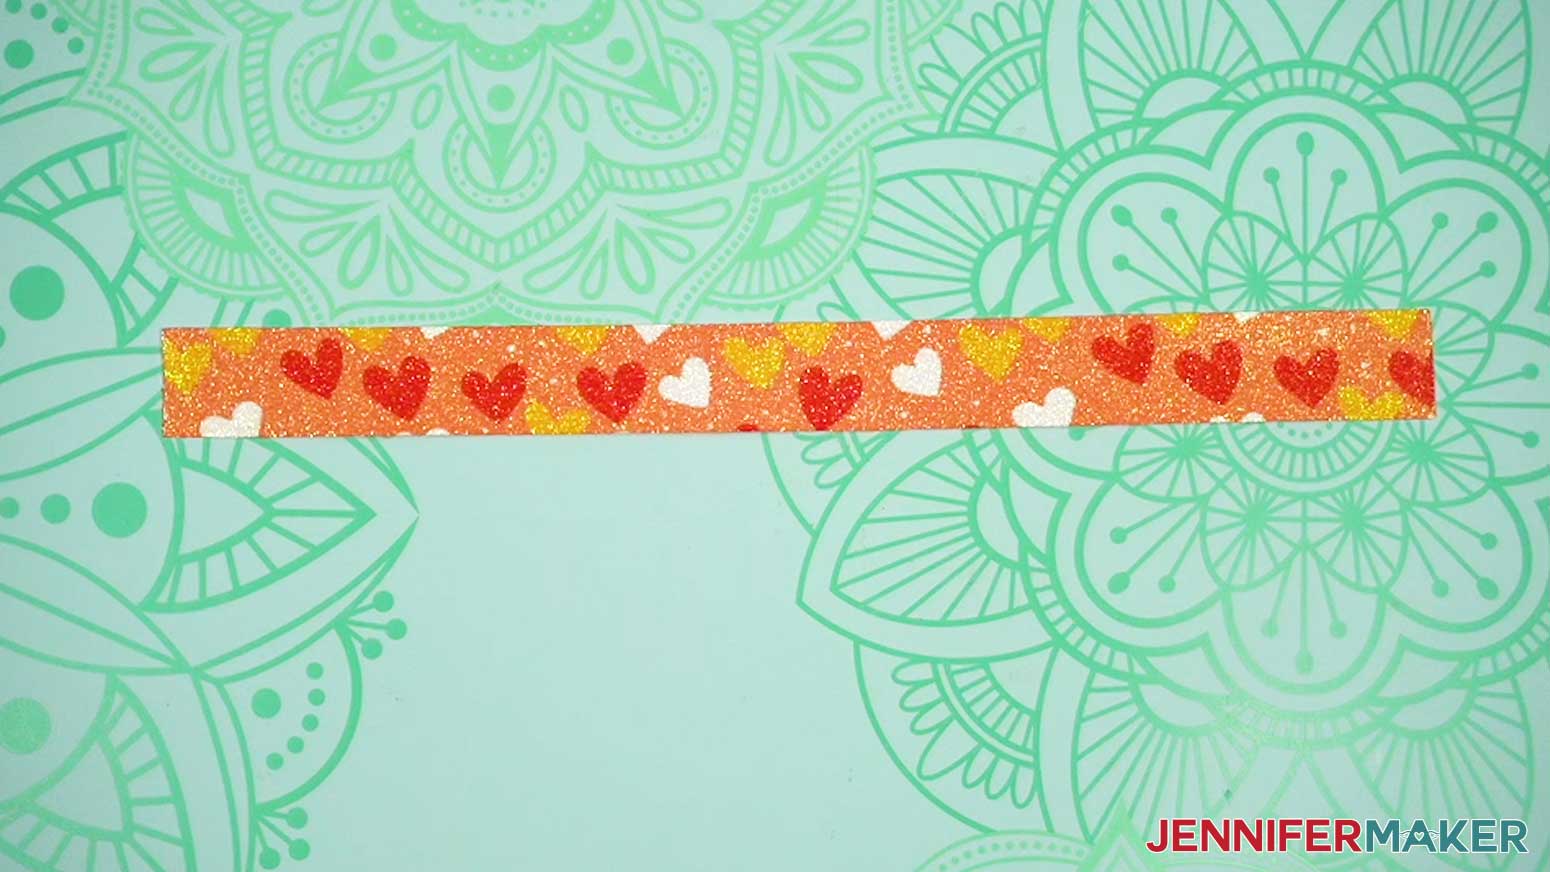
- Your printed design and faux leather wristlet are ready for sublimation!

STEP 3: SUBLIMATE AND ASSEMBLE YOUR WRISTLET
SUBLIMATE YOUR PRINT ONTO YOUR WRISTLET
IMPORTANT: As with all sublimation projects, turn on a fan and open a window to improve your ventilation before beginning.
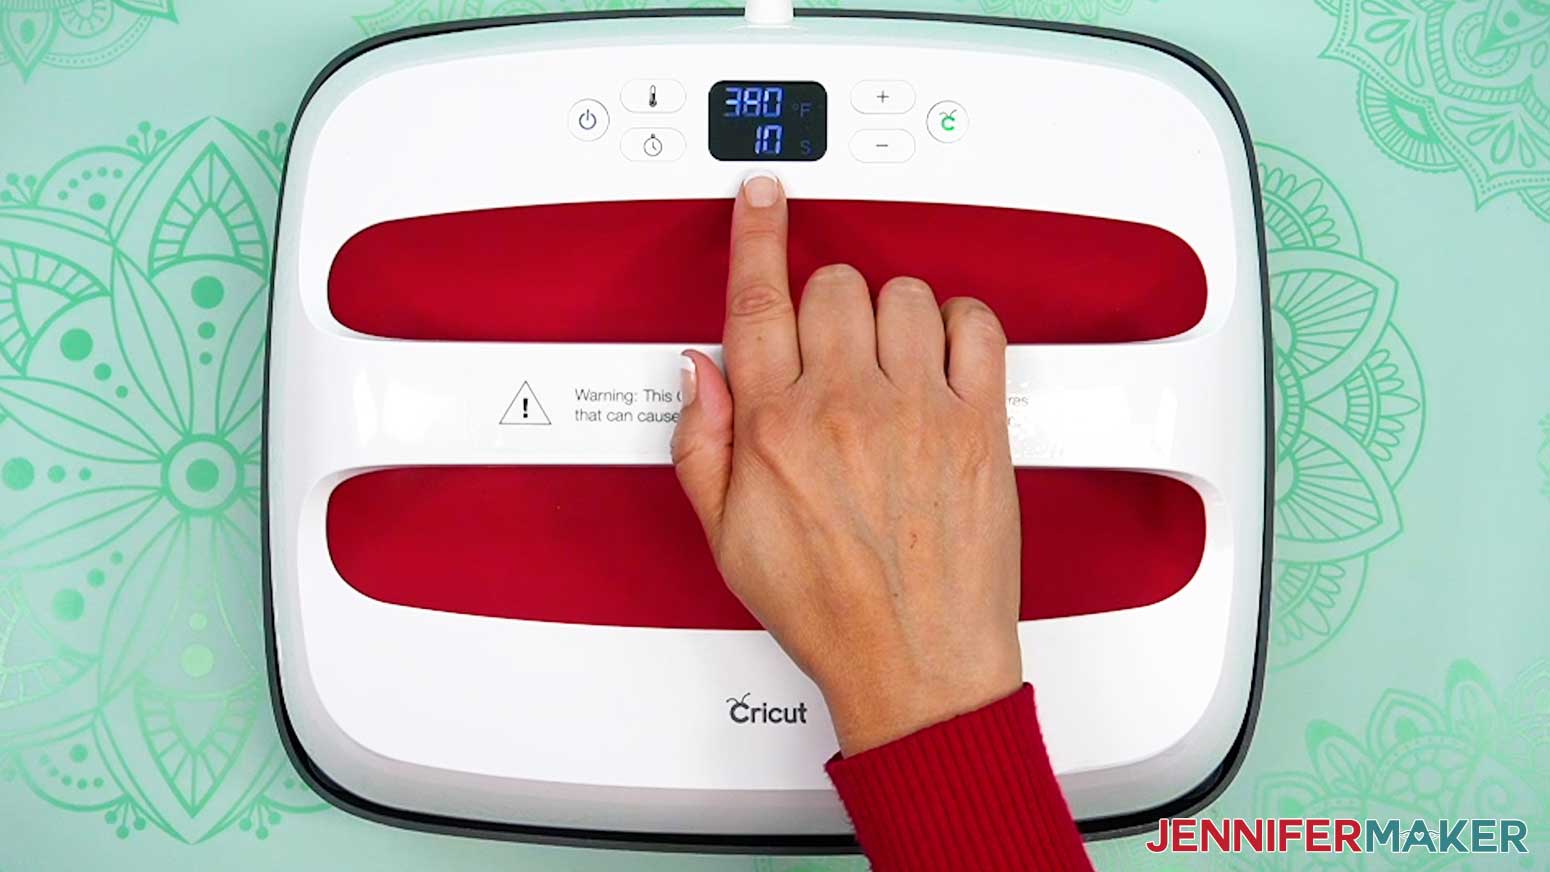
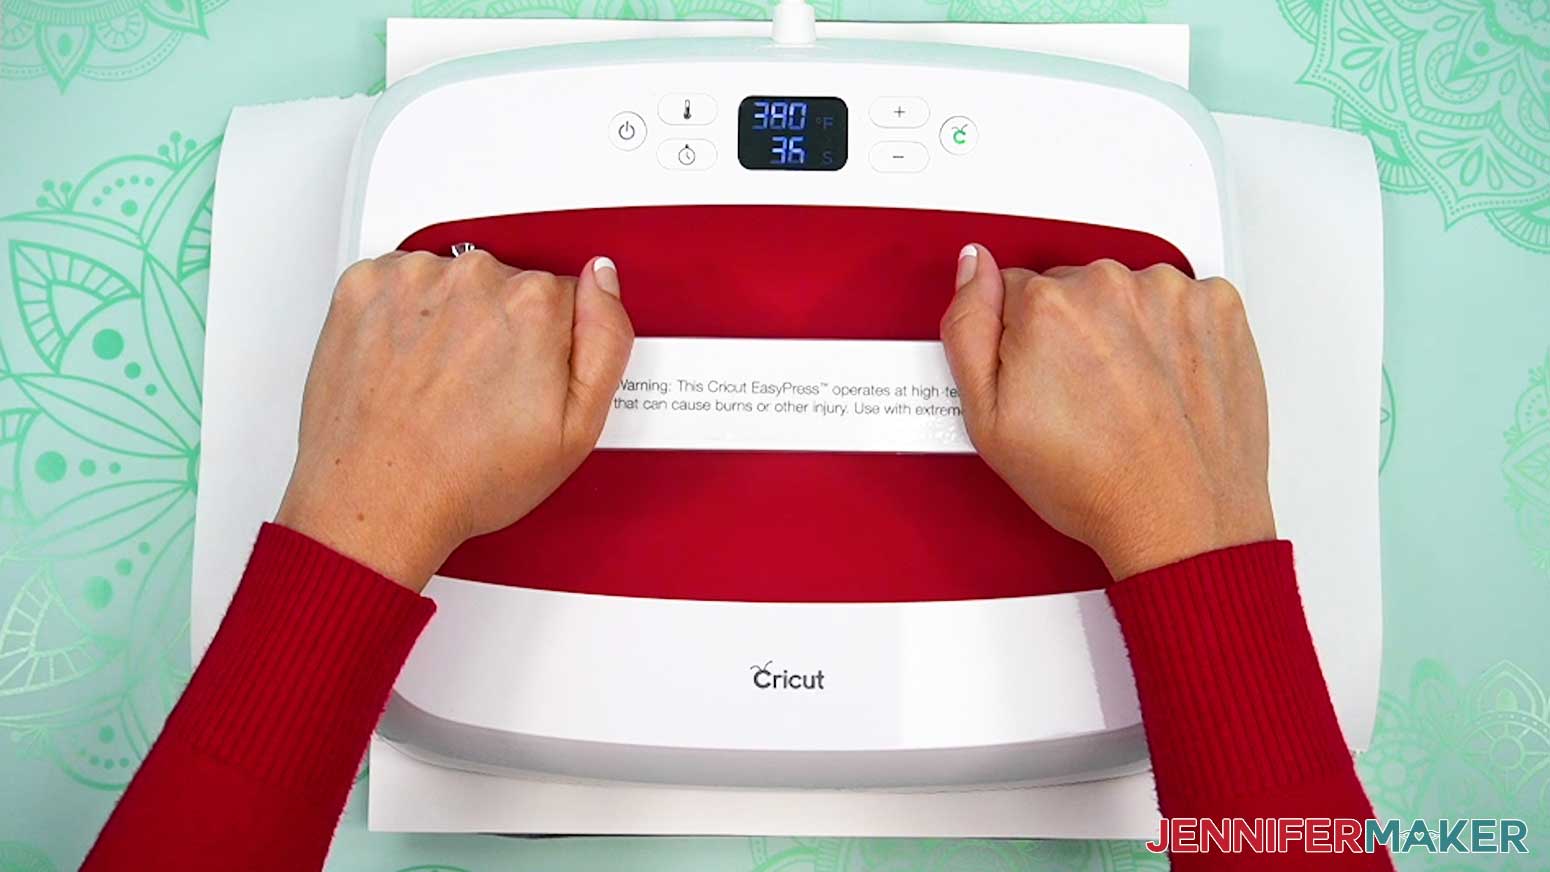
- Set the temperature of your EasyPress to 380℉ (193℃), and set the timer for 40 seconds.
TIP: I’ll use the settings that I’ve found work the best for this type of project, but if you’re not sure where to start, check out my Sublimation Cookbook to get time and temperature settings for tons of sublimation projects! - Place your pressing pad on your work surface.
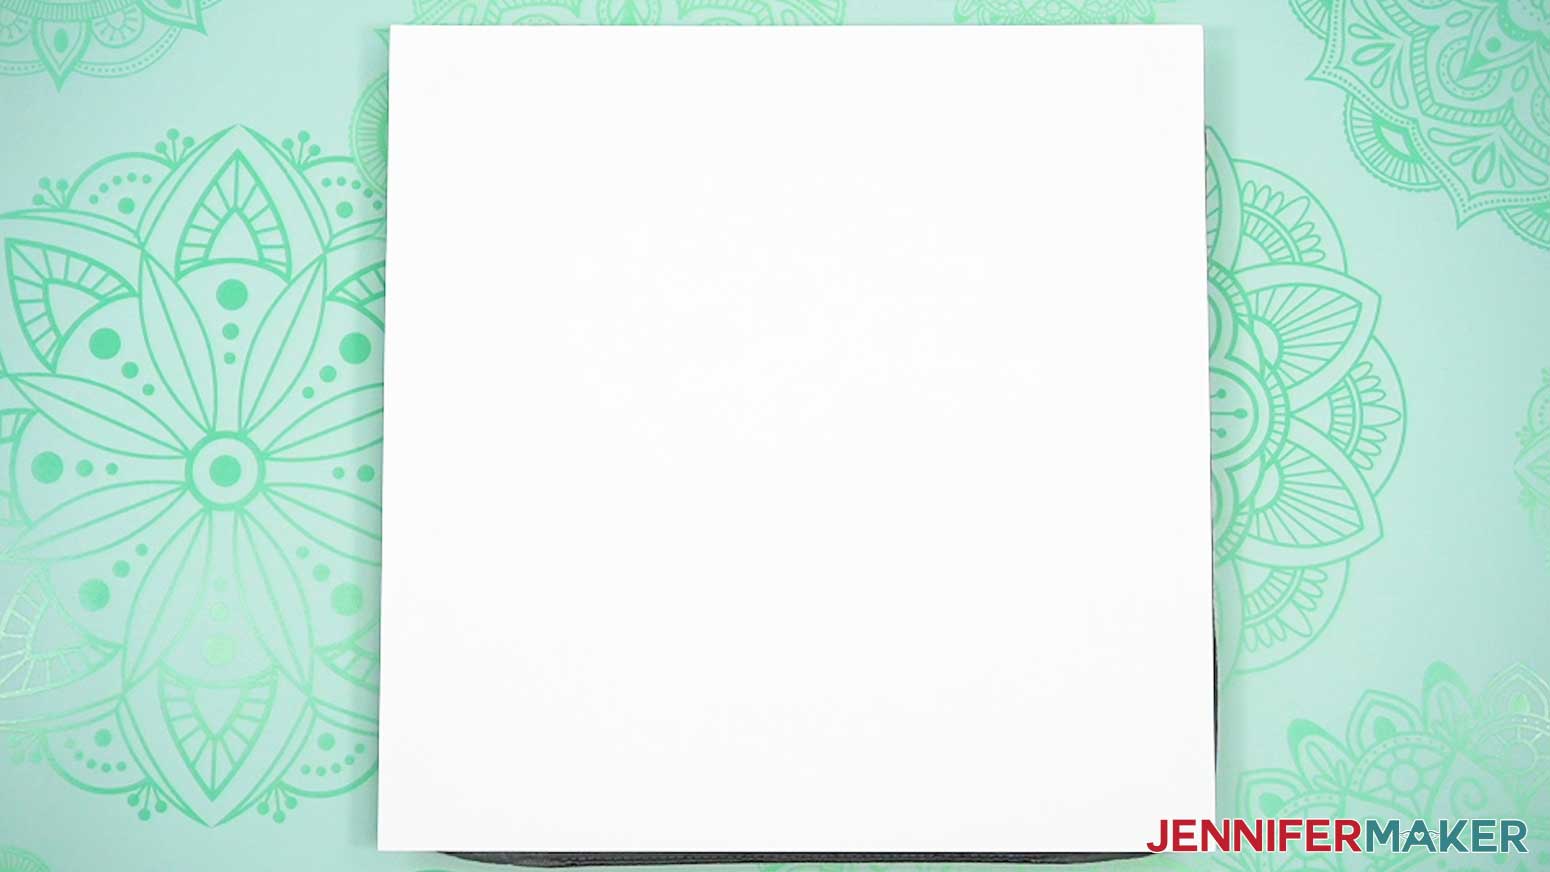
- Place a piece of white cardstock onto your pad to protect it from any ink that may escape during the sublimation process.
TIP: Your cardstock should be clean and free of any ink or other marks that could transfer to your blank during the sublimation process. - Use your lint roller to clean your faux leather wristlet of any dust, debris, or extra glitter.
- Put the faux leather wristlet face up on your protected pressing pad.
- Place a fresh piece of white uncoated butcher paper on your wristlet to completely cover it.
- Cover the entire area of your wristlet with the EasyPress and preheat the blank for 10 seconds to remove moisture.
- When the time is up, lift the EasyPress straight up.
NOTE: Always remember to place your press back on the base after using it. - Carefully lift away the butcher paper and allow the faux leather to cool.
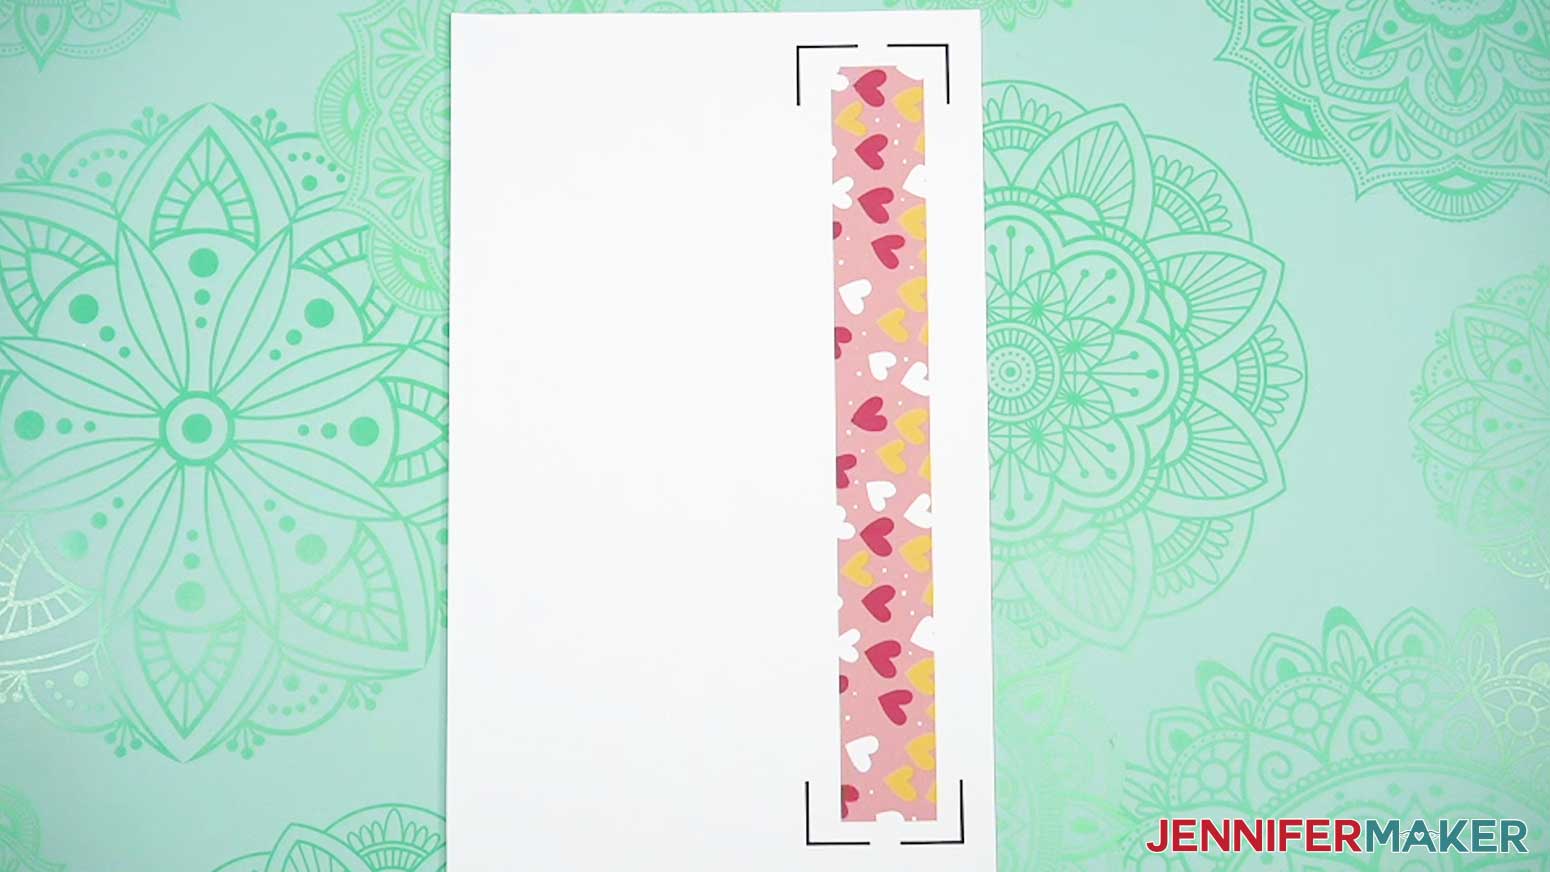
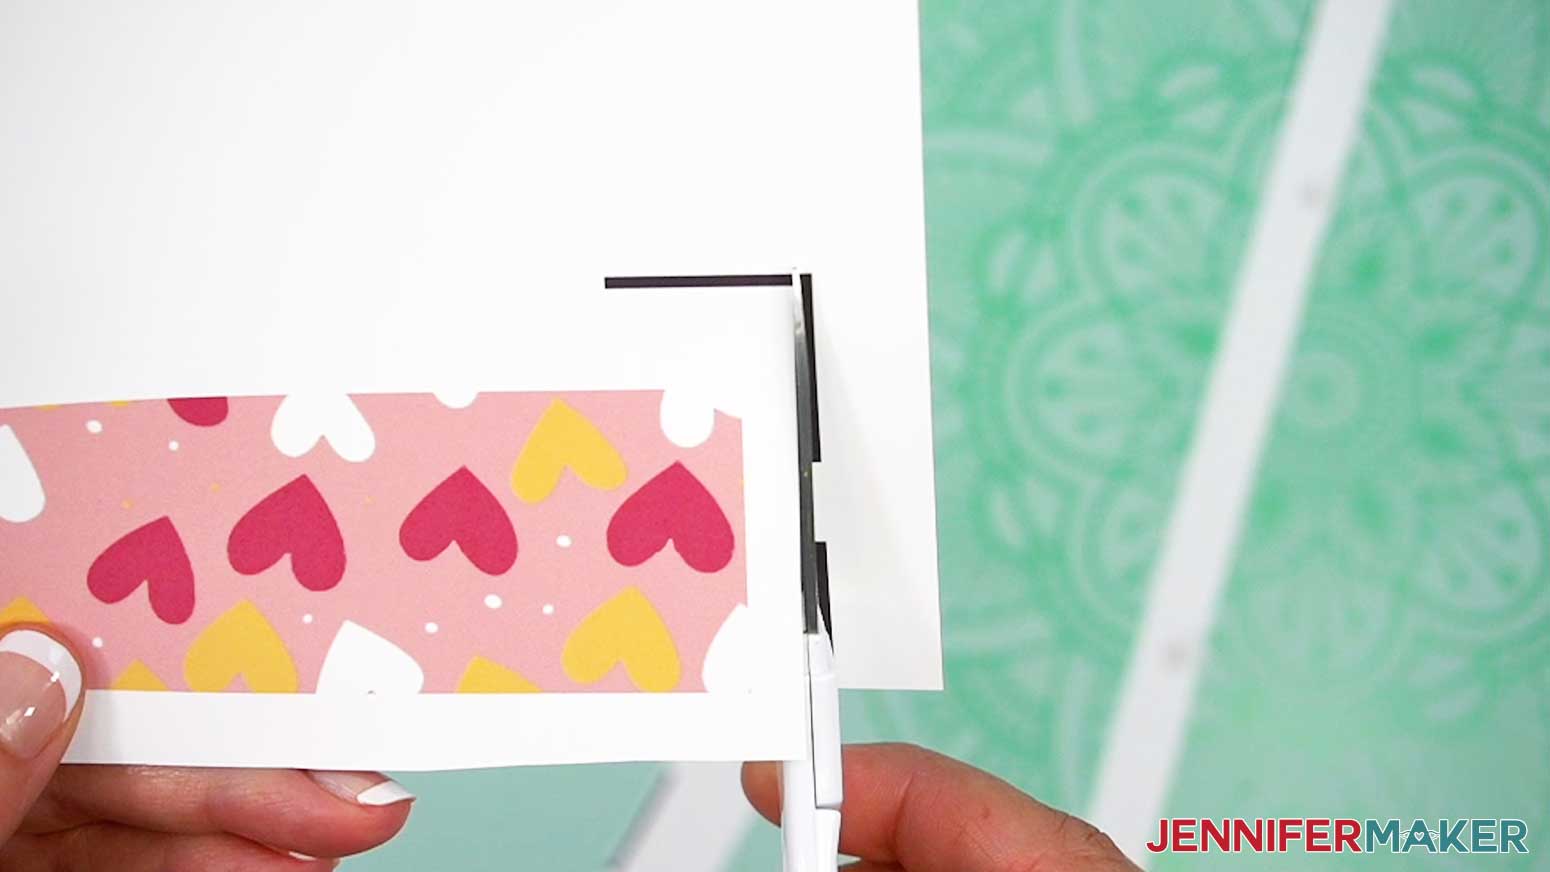
- Use scissors to trim away most of the white area around your printed design. Don’t let any of the black Print Then Cut registration marks remain on your print, or else they’ll transfer during sublimation!
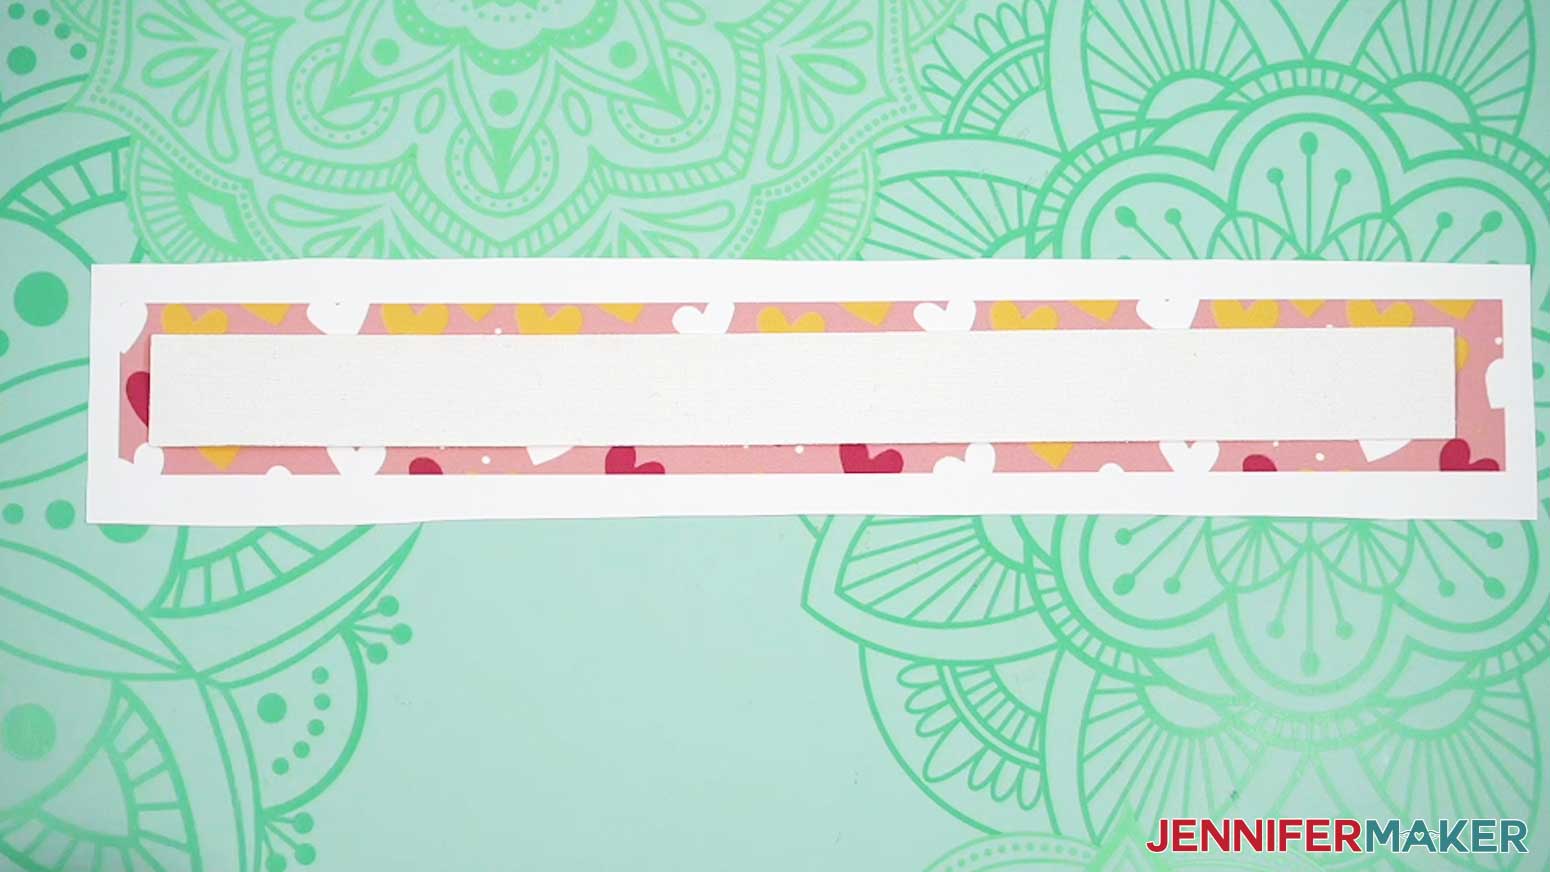
- Place your trimmed print face up on your work surface.
- Hold your leather wristlet glitter side down and position it on top of your print, leaving a border of ink around the wristlet to ensure full coverage.
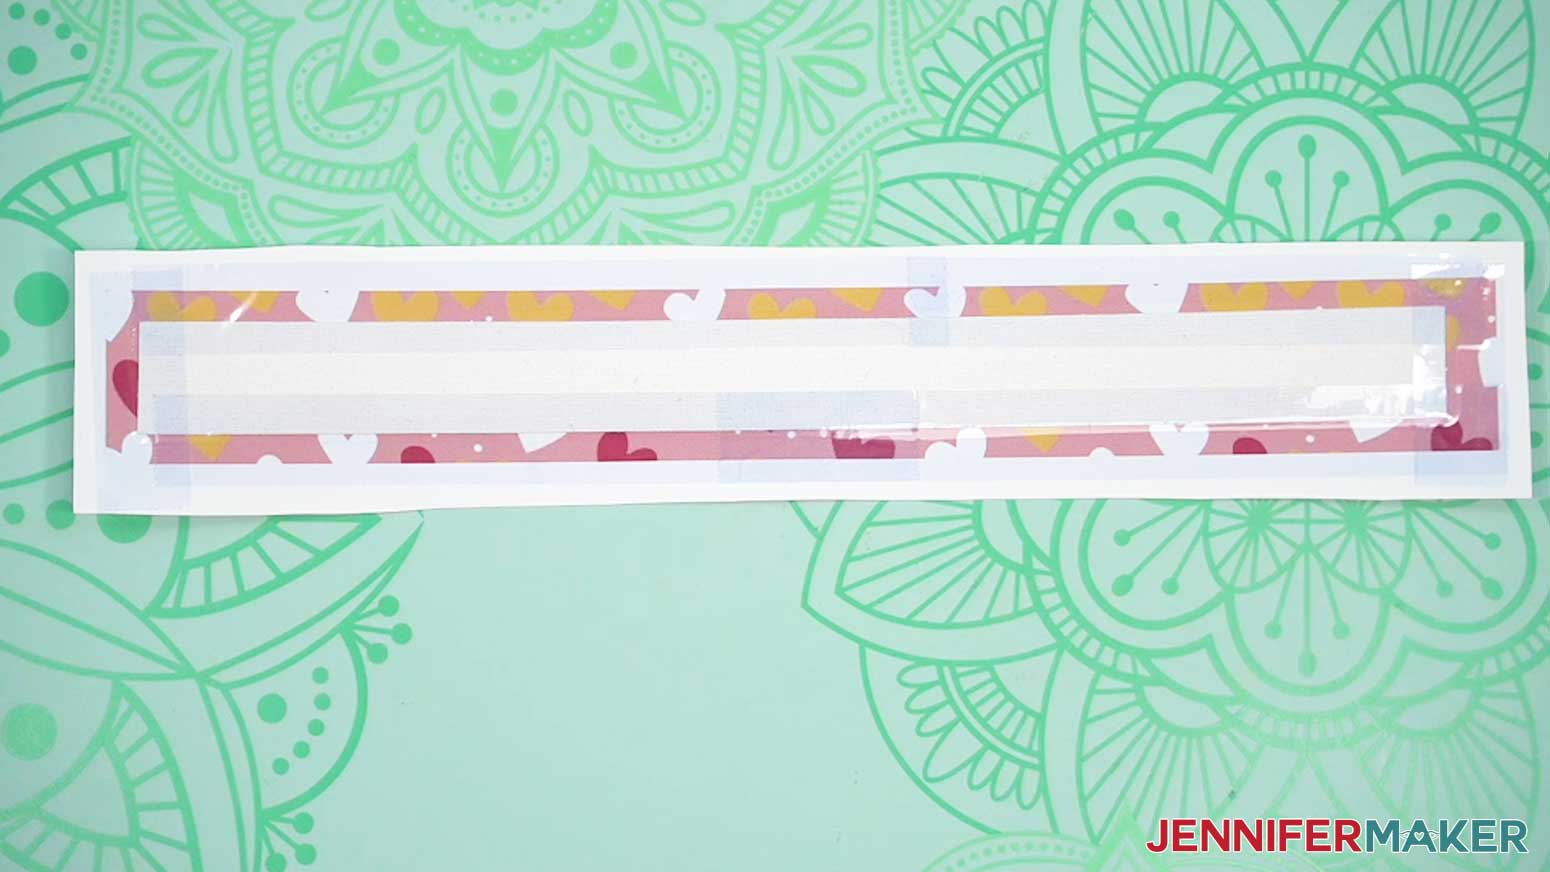
- Place heat-resistant tape around all the edges of the faux leather to secure the wristlet to the print.
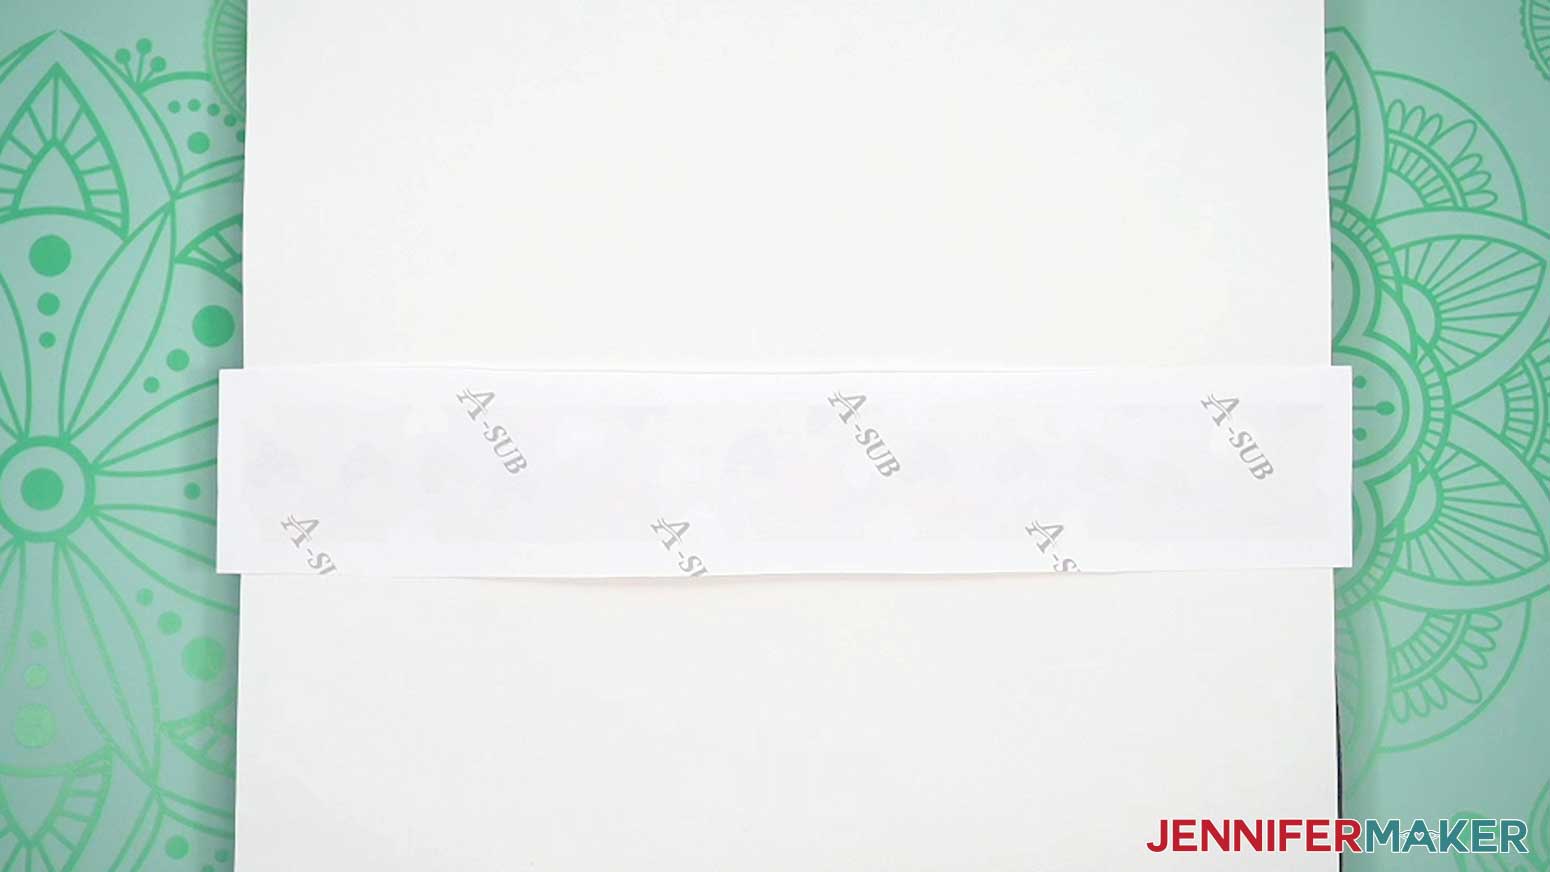
- Turn your wristlet over so that the print is on top and place it on the protected pressing pad.
- Place a fresh piece of white uncoated butcher paper on your leather wristlet to completely cover it.
- Make sure the EasyPress has come up to temperature and the timer is set for 40 seconds.
- Cover the entire area of your wristlet with the EasyPress and heat it with light pressure for 40 seconds to sublimate the print.
TIP: Keep even pressure on both sides of the press for best results. - When the time is up, lift the EasyPress straight up to avoid ghosting.
- Remove the butcher paper.
- Allow your wristlet to cool completely.
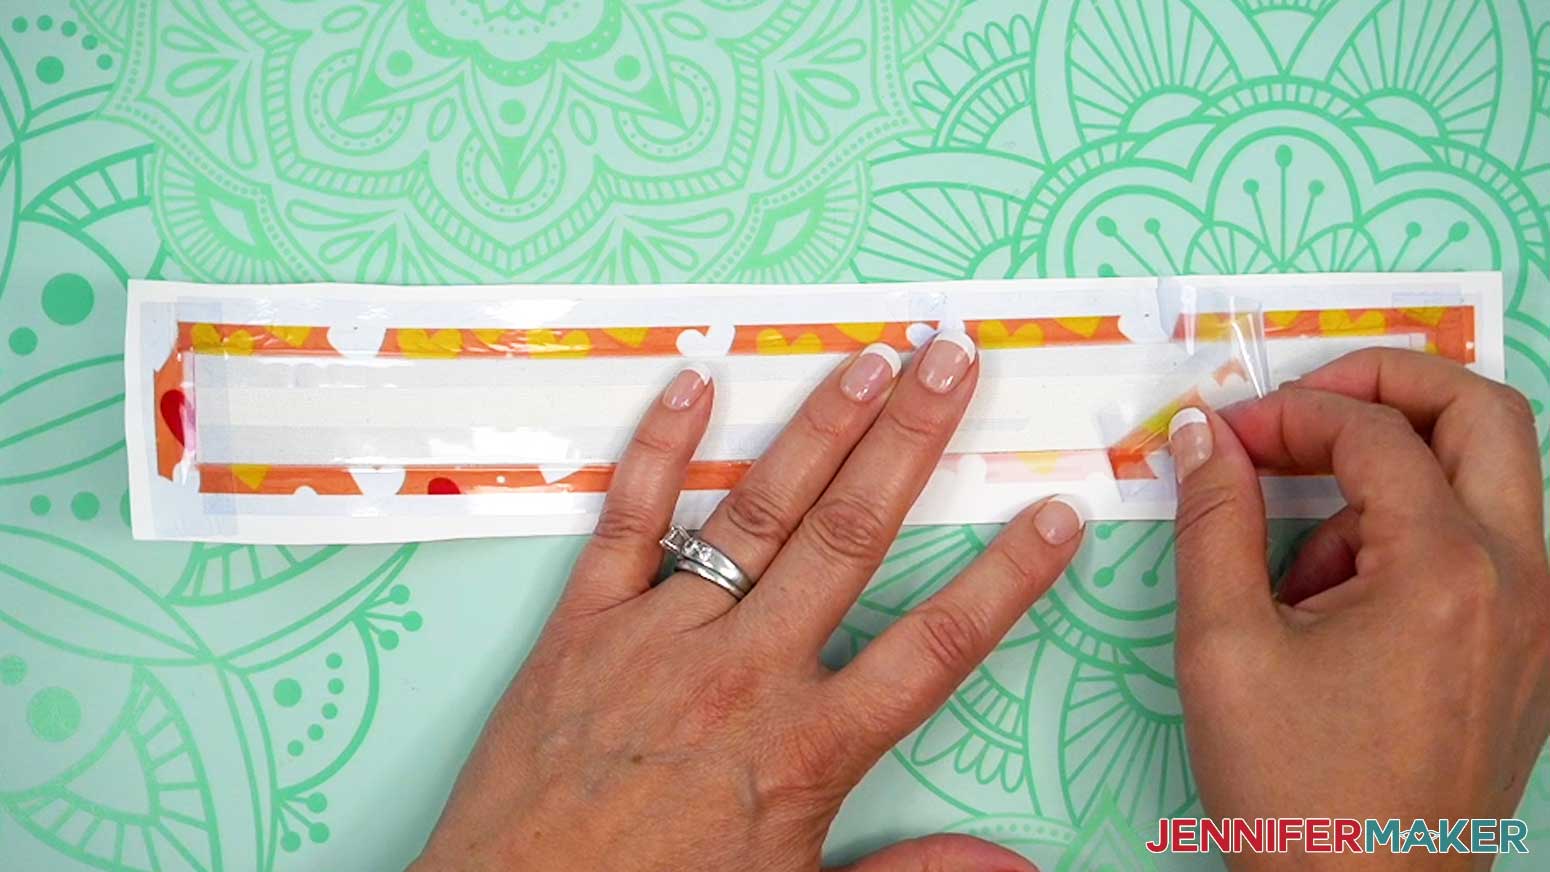
- Once the faux leather is cool, peel the tape from the print to release and remove the wristlet.
- Your image is sublimated onto the faux leather wristlet and ready to be assembled!
ASSEMBLE YOUR SUBLIMATED WRISTLET
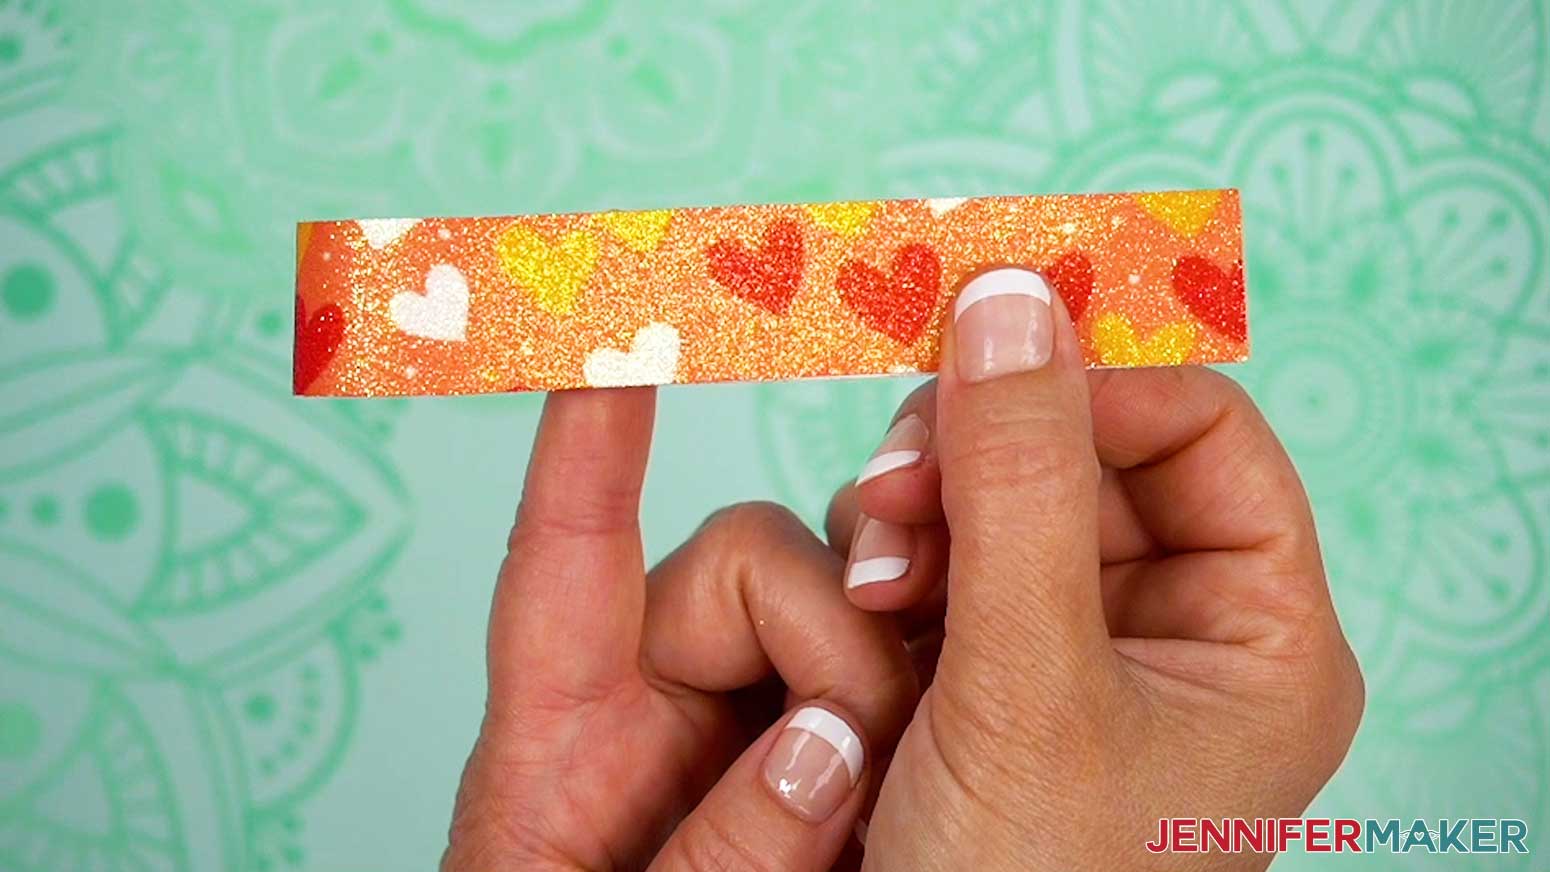
- Check your wristlet for any frayed edges or hanging strings, and use scissors to trim away any that you find.
NOTE: Sometimes the tape loosens little bits you might have missed earlier, so check this even if you did so before sublimating. - Fold your wristlet in half so the two short ends meet and your design is on the outside.
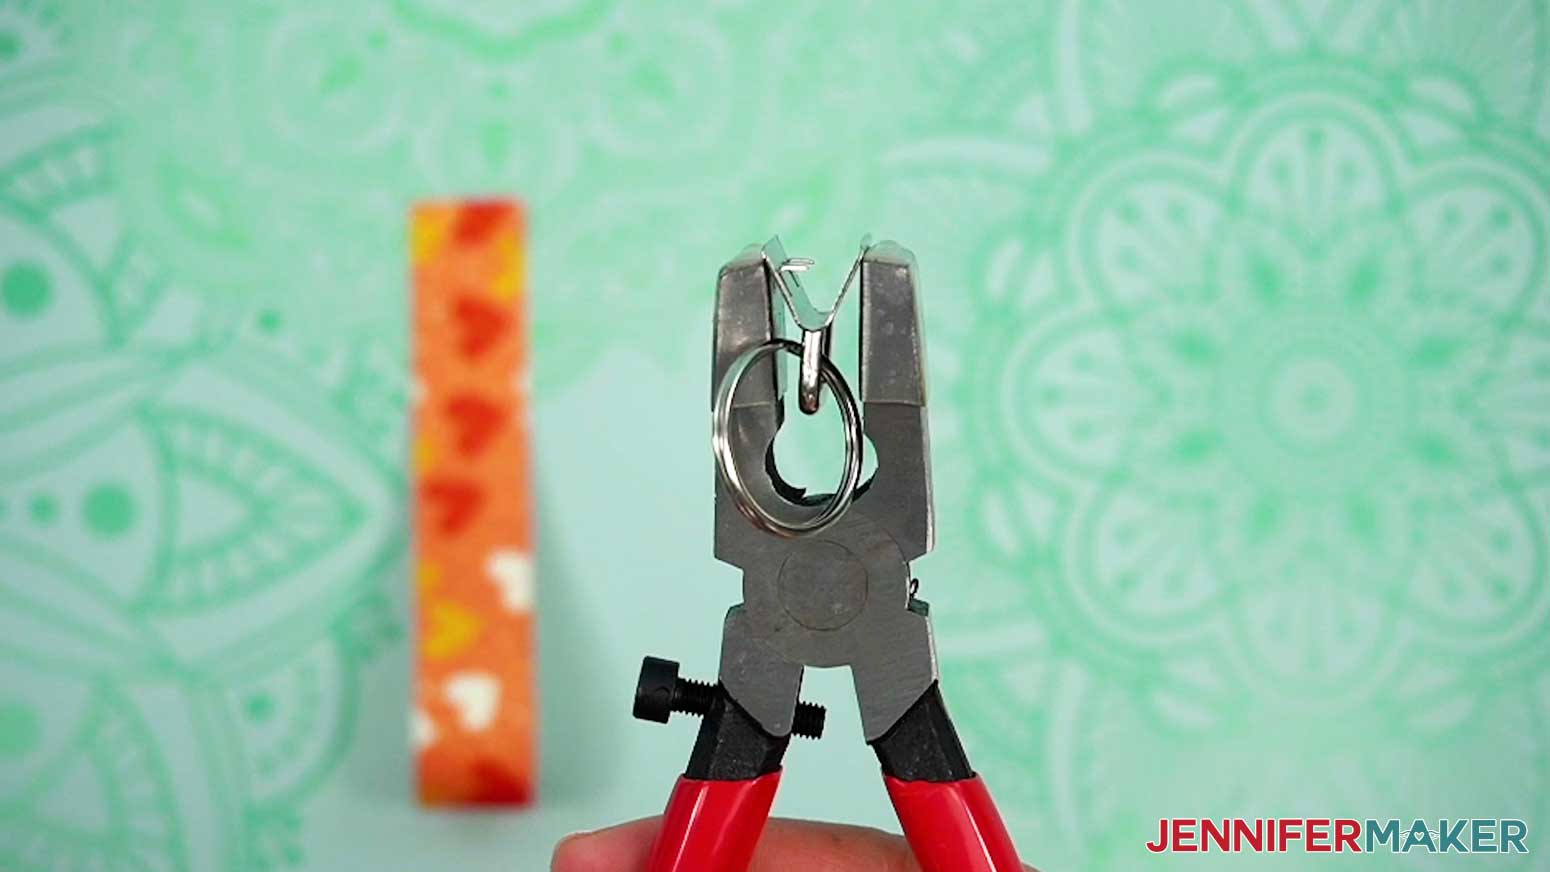
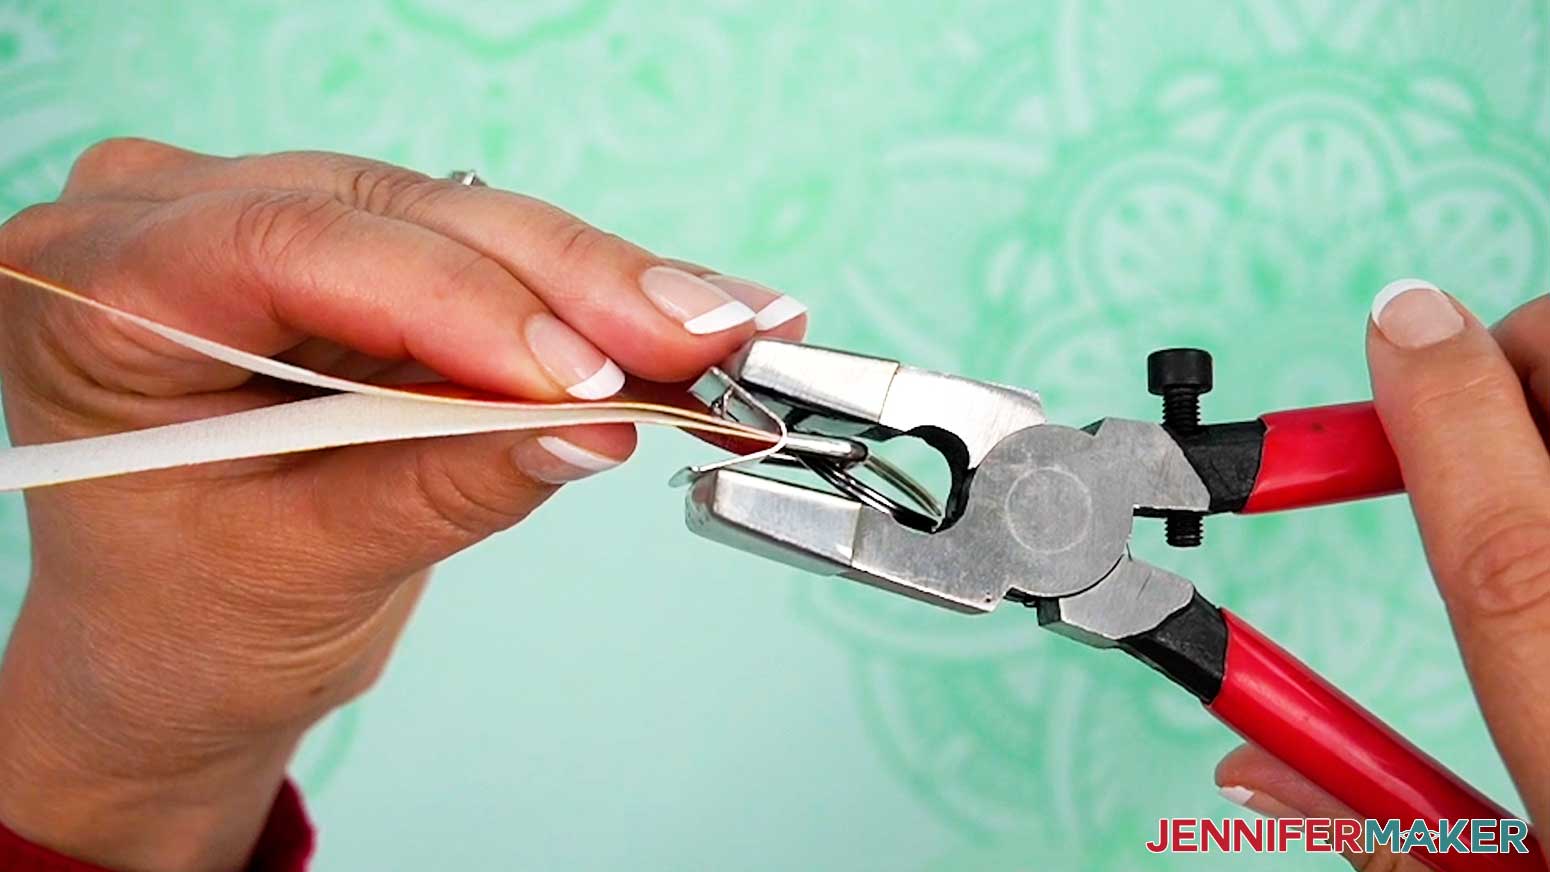
- Insert the key fob hardware between the two flat pieces of the pliers that come with the kit.
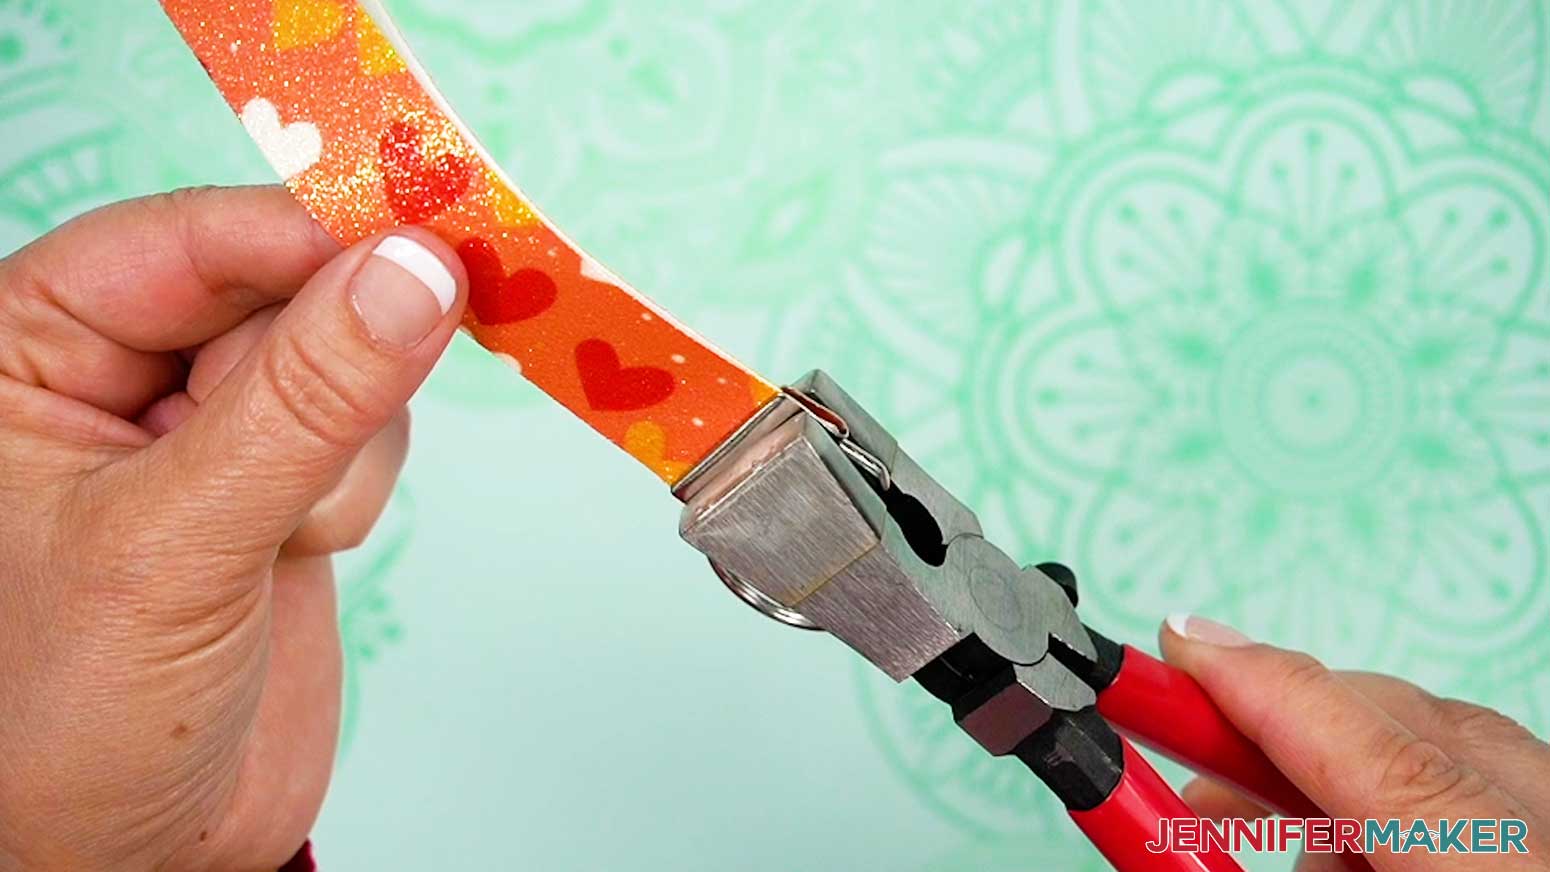
TIP: If the hardware doesn’t fit in snugly, you can squeeze the pliers just enough to hold it in place, but don’t close it! - Tuck the leather ends into the key fob hardware so they touch the back of it, and line up the wristlet’s edges with the edges of the hardware.
TIP: If you’re using a design that has an obvious front side, keep the key fob’s teeth on the back of the wristlet. - Squeeze the pliers firmly until the metal pieces are clamped on the ends of the faux leather.
TIP: Keep your fingers away to avoid pinching them!
STEP 4: SHOW IT OFF!
You now have a fully sublimated faux leather wristlet, ready to sparkle anywhere you attach it! 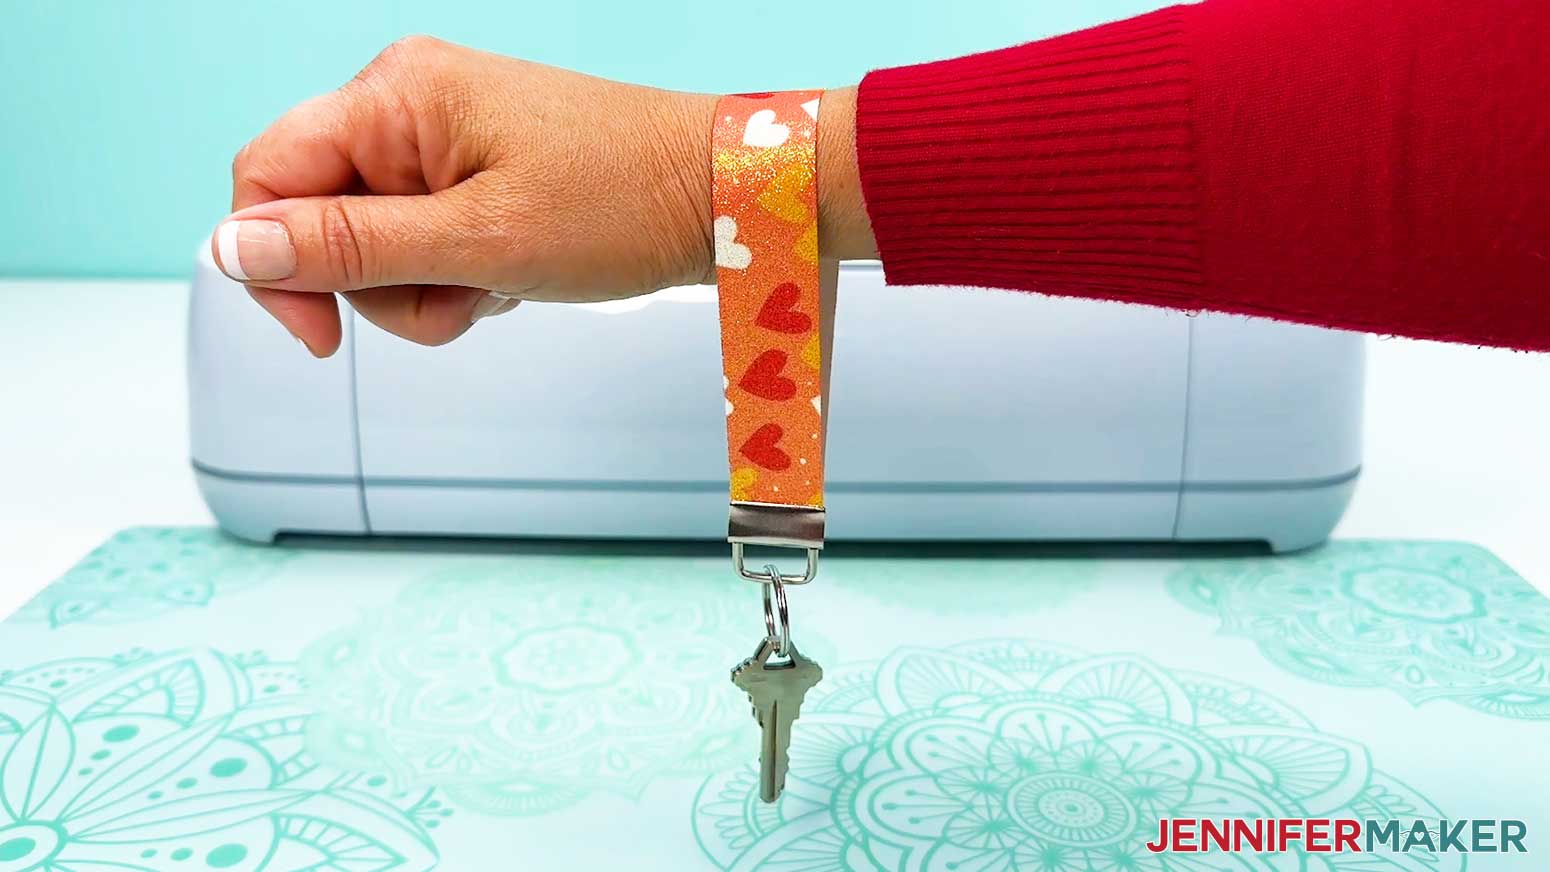
Notes
Finished Size:
1" x 6"
Answers to Your Questions About Sublimating Faux Leather
Q: I want to add something to my key fob. How do I design my own coordinating faux leather wallet?
A: You can learn how to design your own faux leather wallet in my ADVANCE program. Learn more about ADVANCE here!
Q: Can you sublimate fake leather?
A: Yes you can! Follow this tutorial to learn how to sublimate glitter faux leather.
Q: Is faux leather polyester?
A: Faux leather, also known as synthetic leather, is usually made with a polyester base and is coated with a finish of PVC or another material that mimicks the look of real leather.
Q: Can you use heat press on faux leather?
A: You can, you just have to be mindful of your time and temperature settings. Too much time at too hot of a temperature can damage your faux leather. Follow the settings I used in this tutorial for sublimating glittery faux leather, and check out my Sublimation Cookbook for more of my recommendations for settings for other materials.
Q: How do I delete a fill pattern in Cricut Design Space?
A: Currently, there is no way to delete an uploaded fill pattern in Cricut Design Space. That means, that once it’s uploaded, it will stay in your pattern options indefinitely. Be selective about which patterns you upload!
Q: What is another name for faux leather?
A: Faux or imitation leather goes by a lot of names, like fake leather, skai, leatherette, artificial leather, man-made leather, and pleather.
Q: My craft store doesn’t have any faux leather! Where else can I find it?
A: If you can’t find faux leather pieces at your usual craft store, try ordering them from Amazon. If that’s not an option, check your local dollar store!
Q: Why can’t you sublimate on black?
A: Sublimation ink is transparent, so it needs a light (ideally white) background to show up. Another important thing to note, is just like with inkjet printing, sublimation printing doesn’t include the color white. So if there’s white in your design, it will depend on the white from your blank to show through the ink. Always sublimate on a white (or very light colored) blank — otherwise your project likely won’t turn out how you expect.
Q: Why is my sublimation print color so dull?
A: Your sublimation print color will appear much more dull on the paper than it will after it is sublimated. If your image looks faded or the colors look wrong, don’t worry! The vibrant colors will appear when you use your heat press to transfer the image to your faux leather or another other sublimation blank.
Q: Can you show me how to fix sublimation mistakes?
A: Mistakes happen! I’ve been crafting for years and I still have the occasional mishap. Mistakes mean you’re learning! To help, check out my post Sublimation Mistakes I Made So You Don’t Have To for my best headache-saving sublimation tips (and pitfalls to avoid).
Get my free PNG files to sublimate key fobs & wristlets!
(If you do not see the signup form above, click here.)
I love seeing what you make with my designs and how you use them! Please share a photo of your wristlets, key fobs, and other sublimation projects in our Facebook group or tag me on social media with #jennifermaker.
Love,

Want to remember this? Save this Sublimate Faux Leather Tutorial to your favorite Pinterest Board!