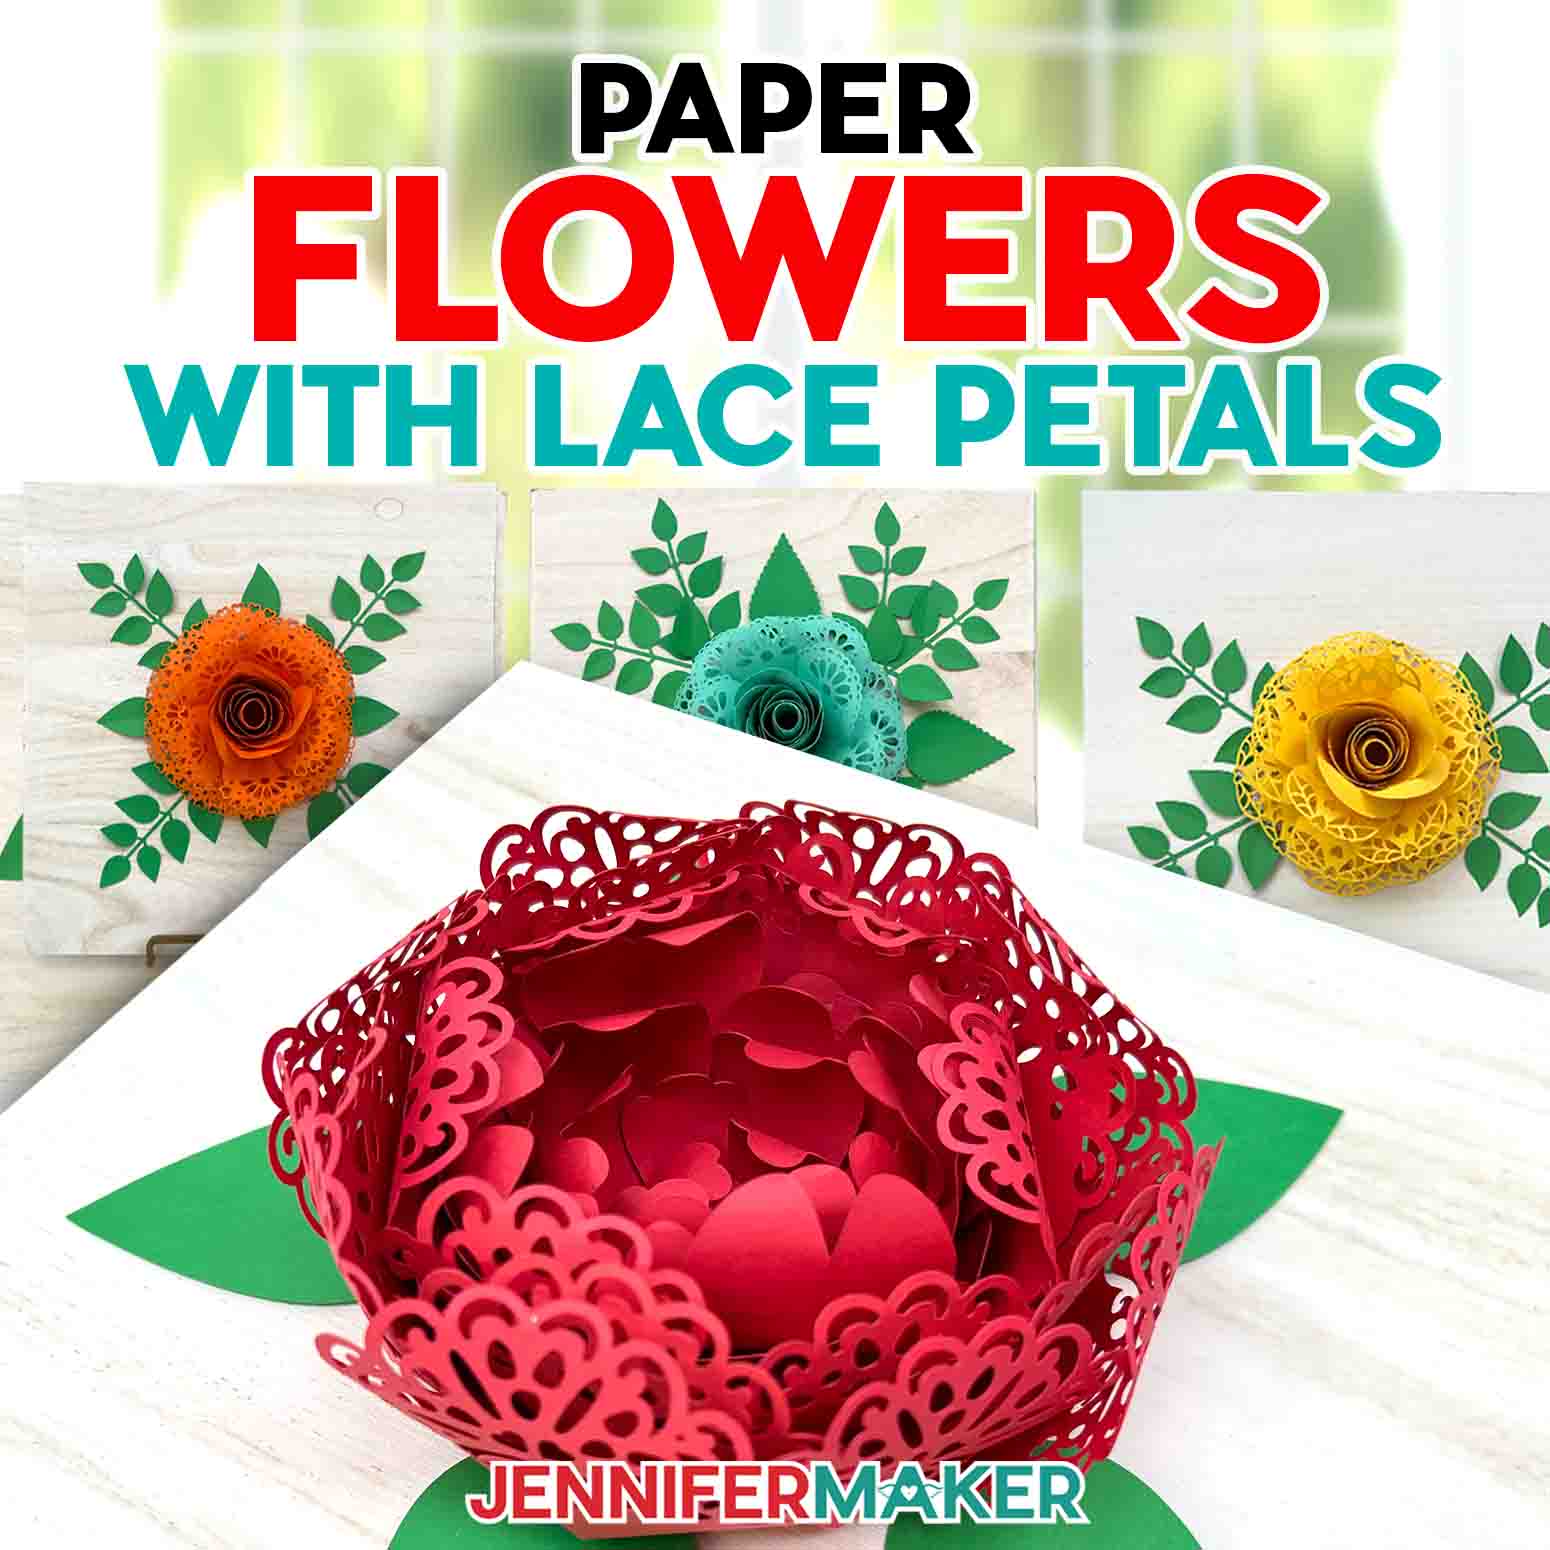
Learn how to make beautiful paper flowers with lace petals for stunning wall art!
There are few things I find more captivating than beautiful blooming flowers! I’m always so inspired by their natural elegance, and I’ve modeled some of my favorite papercrafts after real flowers. I’ve made giant paper flowers with unique petals, and even crepe paper flowers (I traced 60 real petals for the unbelievably realistic design!!), and now I have these two gorgeous paper flowers with lace petals to share with you! They are inspired by my original huge lace paper flower, and I hope you love these new peony and rose flowers just as much! I’ll even show you how to display your flowers on a wood sign to make absolutely stunning wall art!
Watch the full step-by-step video tutorial on how to make a lace paper flower wall art decoration:

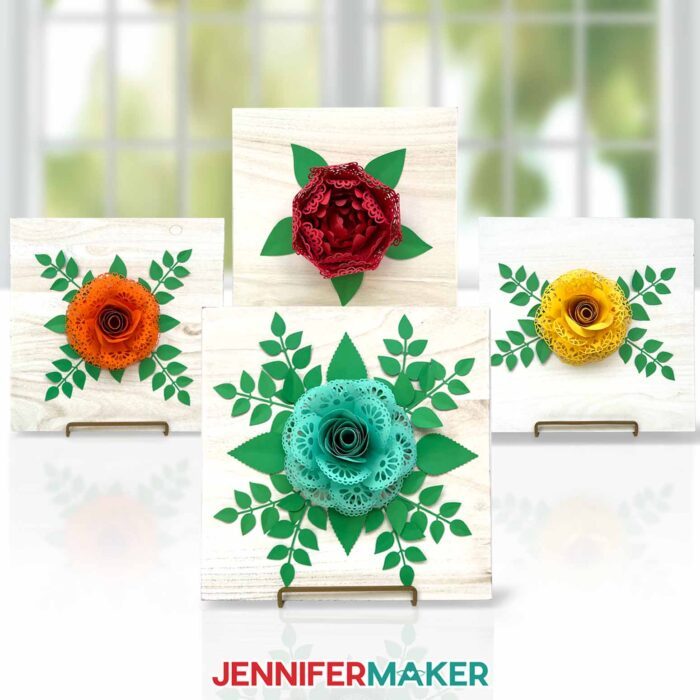
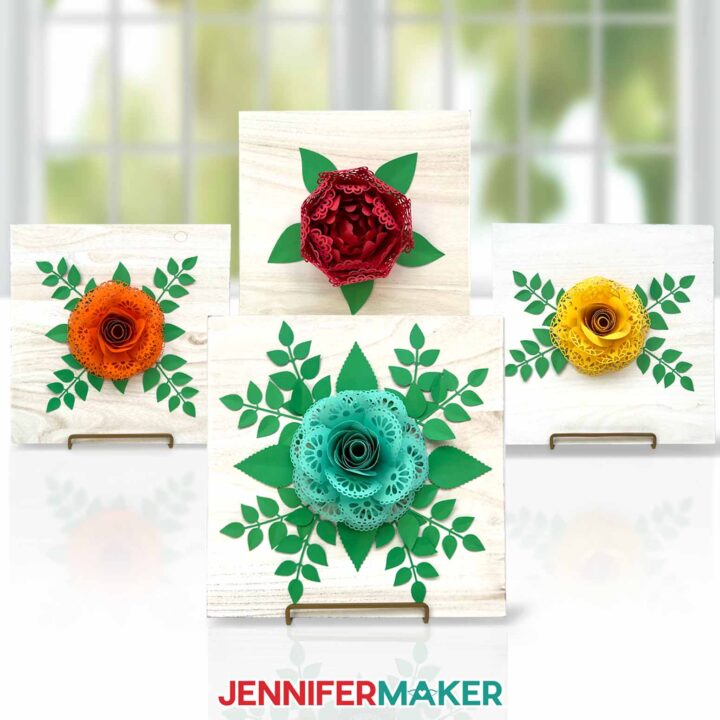
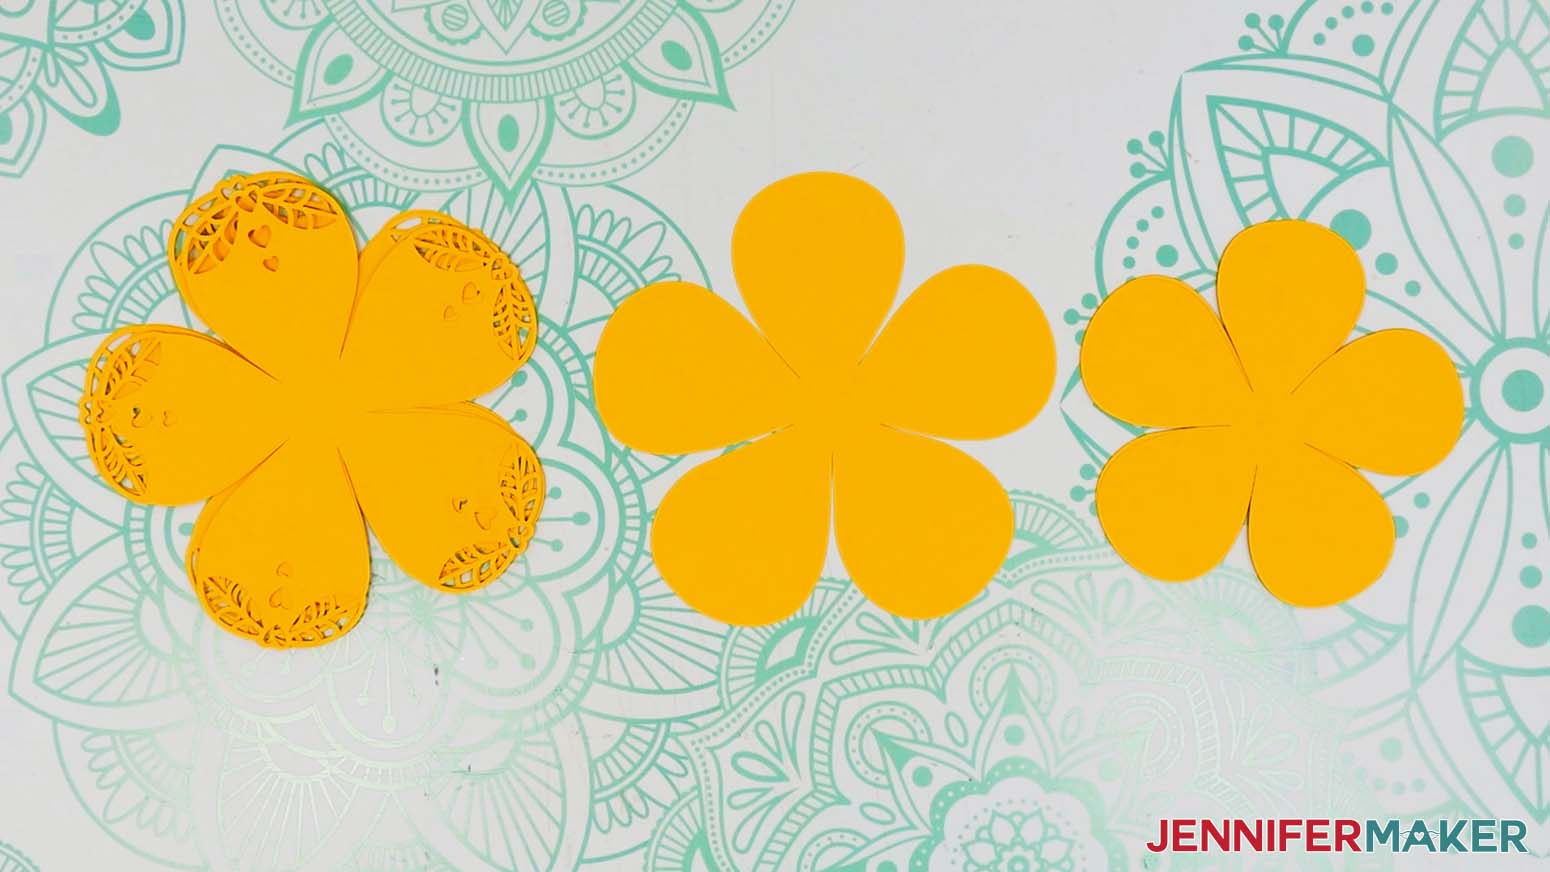
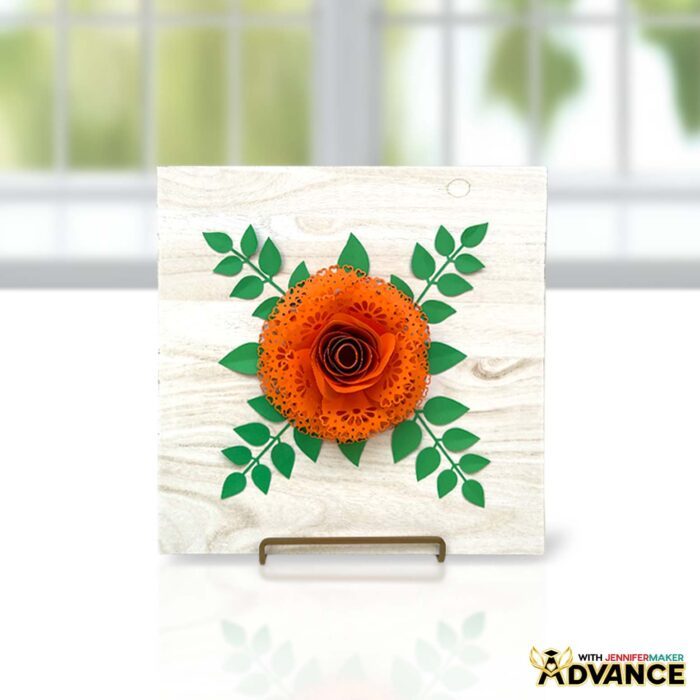
I couldn’t decide between a peony and a rose for this project, so I made both, and then added an extra rose design so give you three options to choose from! Solid petals make up the inner layers of all three designs, while intricate lace patterns adorn the outer petals, adding an airy, delicate touch to each flower. These look amazing as wall art, and also make showstopping centerpieces for wedding receptions and other formal affairs!
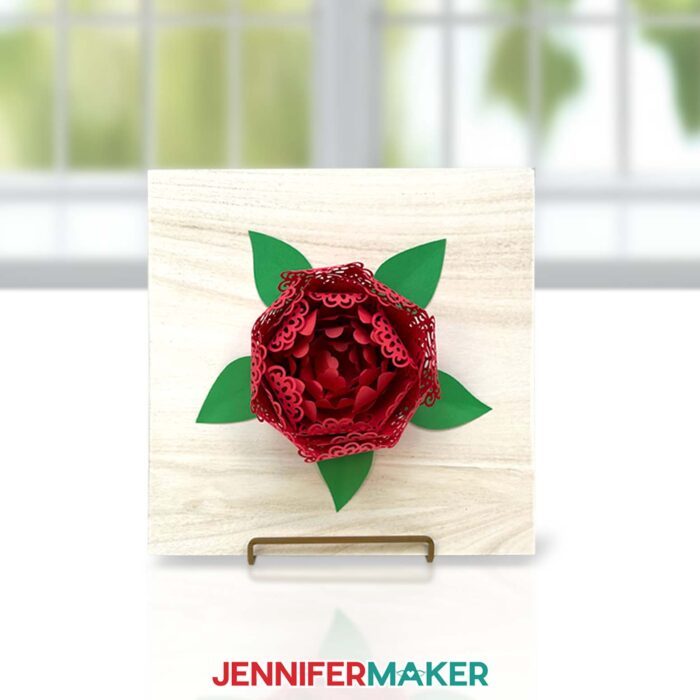
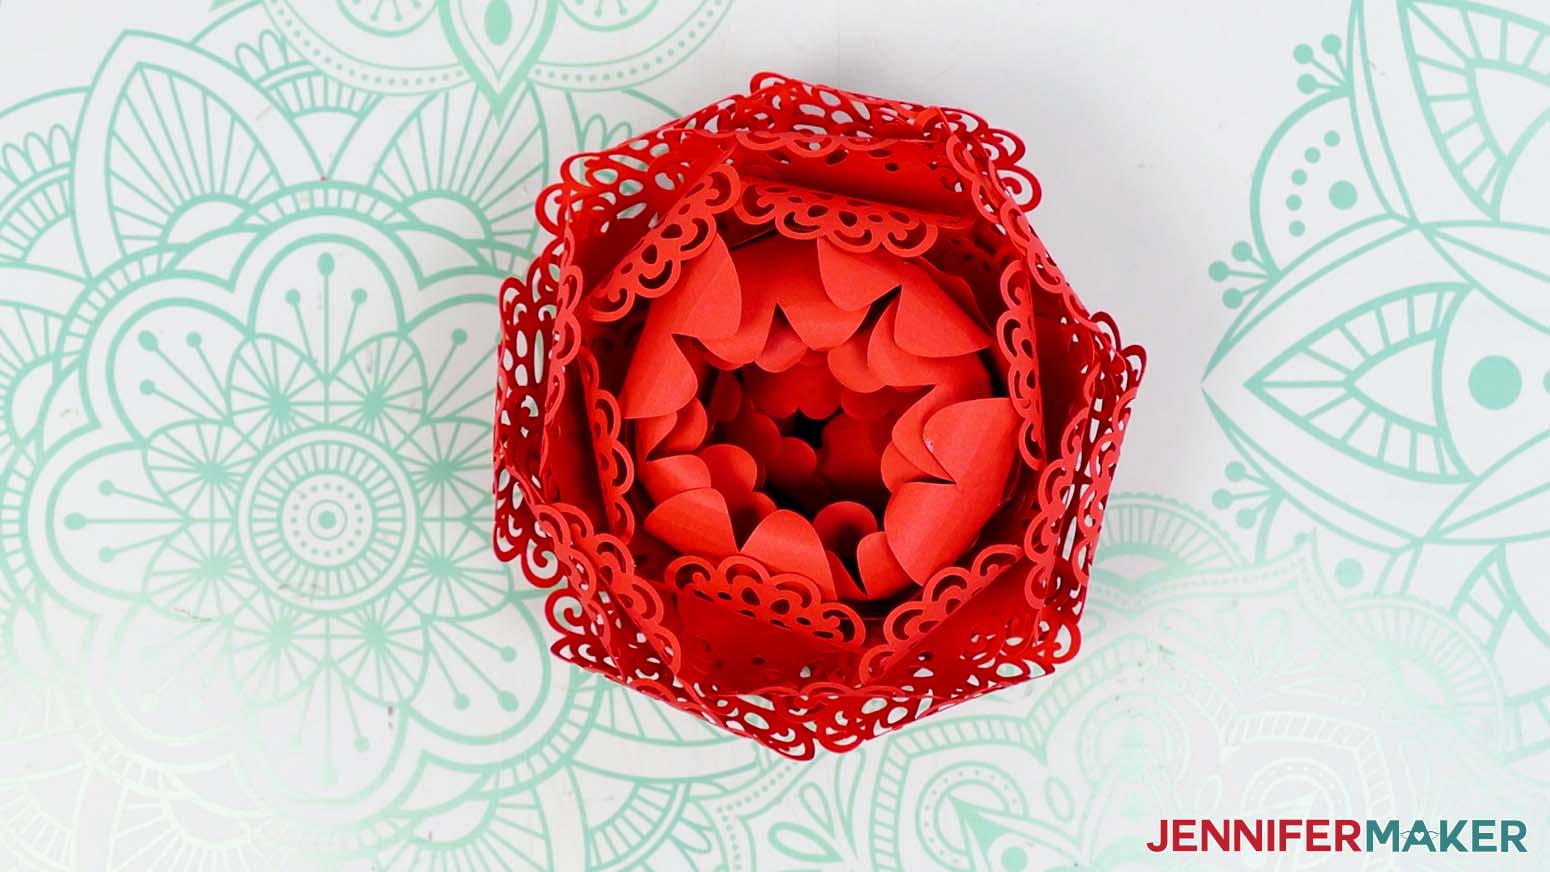
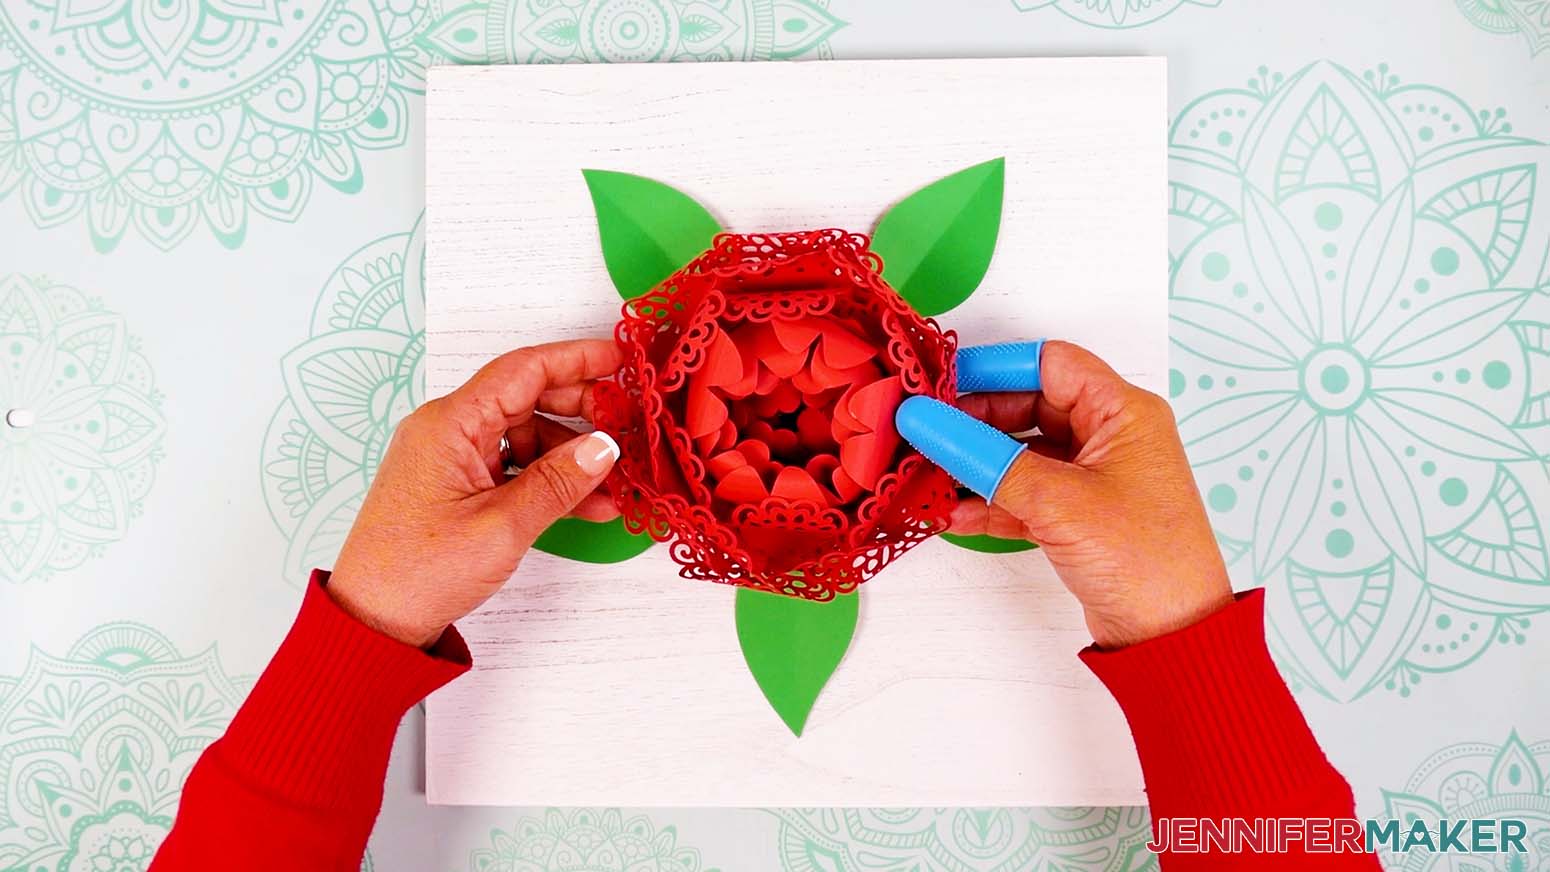
While both flowers come together easily, the general structure of the two flowers is slightly different. The peony starts with a bowl-shaped center with small petals attached to the inside and large petal pieces attached to the outside.
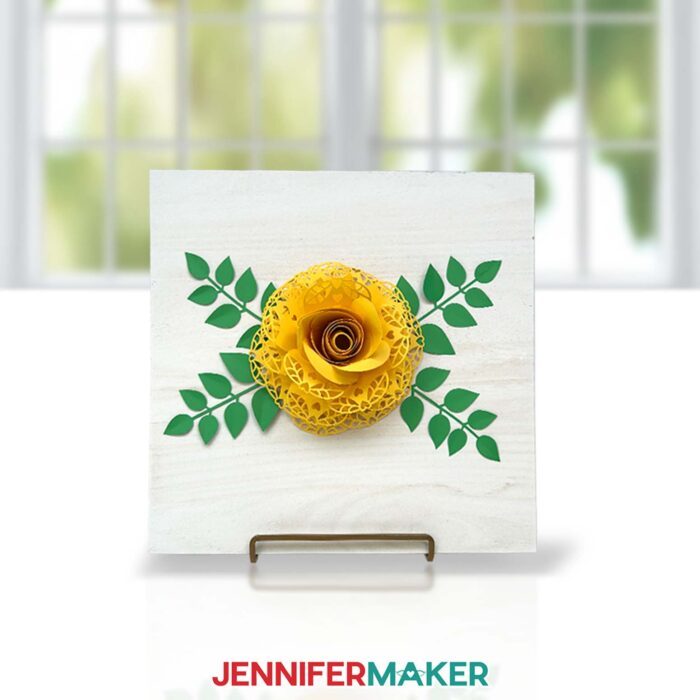
The roses, on the other hand, starts with a rolled flower bud in the center of the flower, and the layers are added outwards from the focal point. I’ll show you exactly how to build each flower in my tutorial, ensuring your petal arrangement is beautifully balanced while staying intact.
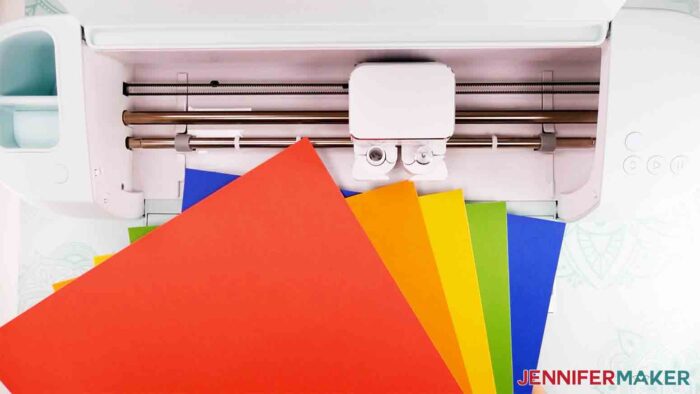
Paper choice definitely matters for these paper flowers! I opted for 65 lb. solid core cardstock for mine. This cardstock is flexible enough that I can curl the edges of each petal and roll each layer of petals around the center. Plus, it’s sturdy enough to hold shape, adding lift to the layers so the flower truly looks like it’s blooming!

And since solid core cardstock retains its color all throughout, there are no white edges around the petals or inside the lace, so the flower’s color is pure and vibrant! I like to make mine in a single color, but you can also choose different colors for each layer–or even each petal!
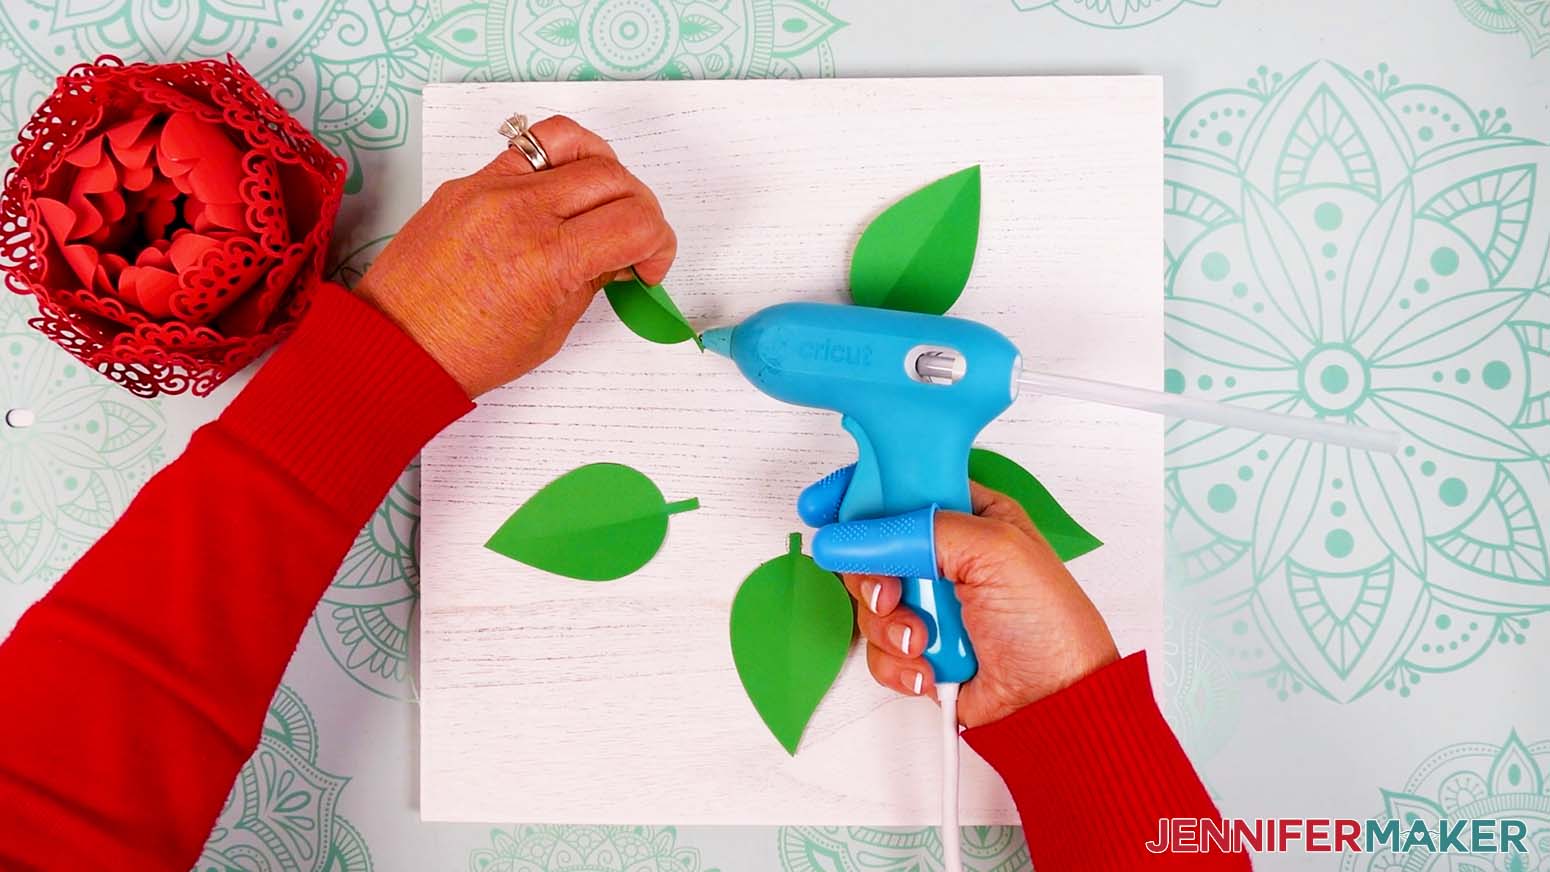
Putting these paper flowers with lace petals together is super fun and easy once you get the hang of it. My secret ingredient? Hot glue! Hot glue holds well and sets quickly for easy flower assembly. It also leaves little mounds that fill uneven areas and make it easier to arrange each petal. This gives your flower a much fuller look overall.

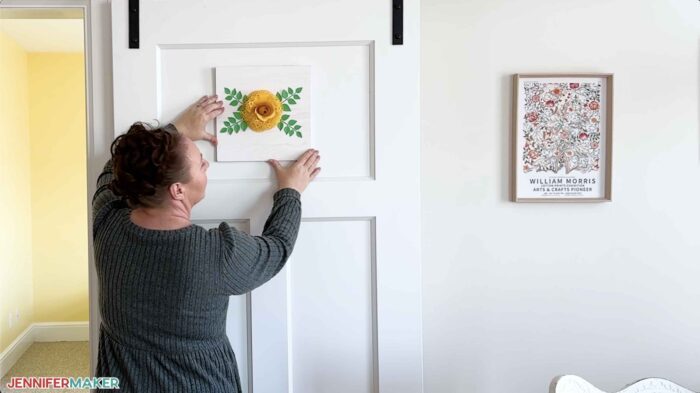
The hot glue also works for securing the flower and the filler leaves (which I’ve also included in the design!) to your final display. I opted for a wood panel sign with an open display because both the peony and the rose designs are able to achieve a lot of height! Aside from one small area where you’ll need to use clear tape, hot glue is the way to go for this project. Just don’t forget your finger protectors to save yourself from burns–ouch!

While I do include patterns to cut these designs by hand, I recommend using a cutting machine since the lace edges are so intricate. It will save you a lot of time and effort! I used my super fast Cricut Maker 4 to cut my SVG files, but you can use any Maker series machine, a Cricut Explore series machine, a Cricut Venture, or a Cricut Joy or Joy Xtra. You’ll also want a few basic papercrafting tools to help as well. I recommend a green Cricut StandardGrip Machine Mat, a brayer, a spatula, a weeding tool, and a scraper tool.
And if you’d like to customize your own lace petals design, I have a workshop just for you in my ADVANCE program. Learn more about ADVANCE with JenniferMaker here!
Let me show you how to make a paper flower with lace petals! This post contains some affiliate links for your convenience (which means if you make a purchase after clicking a link I will earn a small commission but it won’t cost you a penny more, there is no additional cost)! Read my full disclosure policy.
Materials to Make Paper Flowers with Lace Petals
View my Amazon shopping list for the items I used to make this project!
- Two to Four (2-4) Sheets of 12″ x 12″ 65 lb. Cardstock (any colors)
- One (1) 12″ x 12″ Wood Blank Sign
- A way to cut your materials – I’m using the Cricut Maker 4, but you can use any Maker series machine, an Explore series machine, the Venture, the Joy, or the Joy Xtra.
- Cricut Green StandardGrip Machine Mat, 12″ x 12″
- Brayer
- Scraper
- Weeding Tool (optional for popping out small cutouts from intricate areas)
- Spatula
- Glue Gun and Glue Sticks
- Silicone Finger Protectors
- Clear Tape
How to Make Paper Flowers with Lace Petals!
Paper Flowers with Lace Petals
Learn how to create beautiful paper flowers with lace petals!
Materials
Tools
- A way to cut your materials - I’m using the Cricut Maker 4, but you can use any Maker series machine, an Explore series machine, the Venture, the Joy, or the Joy Xtra.
- Cricut Green StandardGrip Machine Mat, 12" x 12"
- Brayer
- Scraper
- Weeding Tool (optional for popping out small cutouts from intricate areas)
- Spatula
- Glue Gun and Glue Sticks
- Silicone Finger Protectors
- Clear Tape
Instructions
STEP 1: GET MY FREE PAPER FLOWER WITH LACE PETALS DESIGNS
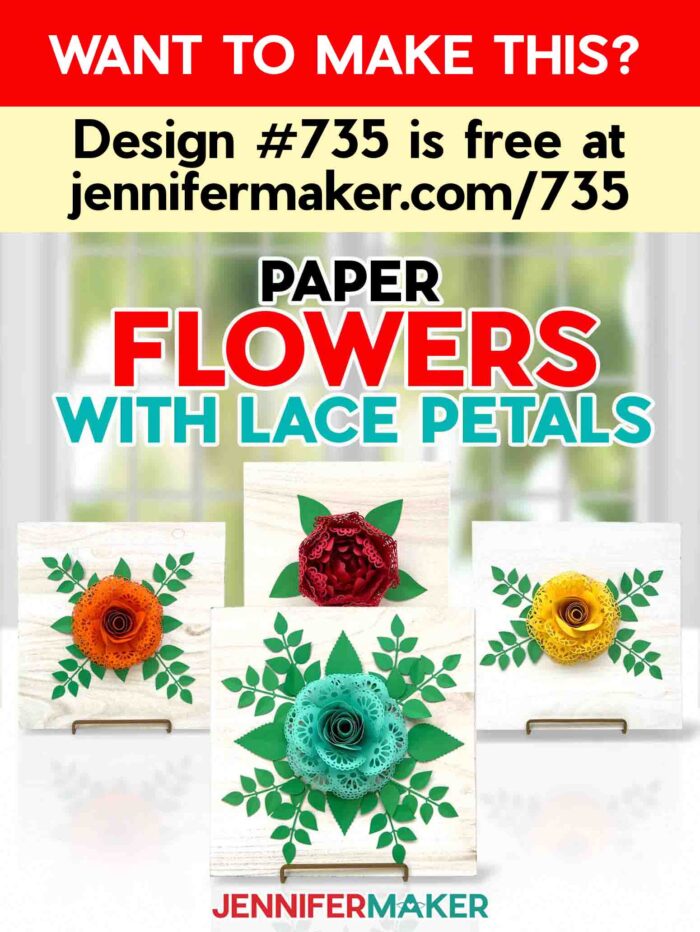
First, download my Paper Flower with Lace Petals files from my free library – look for Design #735. Alternatively, you can use the Save This Project form near the top of this post and the design link will be emailed to you.
In the SVG folder, there are three versions of my lace flower design: a rolled peony, a layered rose with a heart design, and a layered rose with a scalloped edge design. I’ve included a design with a variety of leaves for your flowers, as well.
The PDF folder has versions you can print and cut by hand, as well as a handy reference sheet for the peony pieces.
There is also a DXF folder with additional cut files for different machines.
TIP: If you’re not sure how to upload, go to jennifermaker.com/svgs to learn how to unzip and upload SVG files.
STEP 2: PREPARE AND CUT YOUR PAPER FLOWER WITH LACE PETALS
CRICUT DESIGN SPACE
- In Cricut Design Space, open a blank Canvas.
NOTE: If you’re new to using Cricut Design Space, go to cricutkickoff.com for my introductory tutorial on Design Space basics. - Click “Upload” and then “Upload Image.”
- Click “Browse” and select the flower SVG file you want to use.
NOTE: I’ll demonstrate with the “peony” file, but the preparation and cutting steps are the same for the rose designs, too. - Click “Open,” and then “Continue.”
- Click “Upload” to add the design to your Canvas.

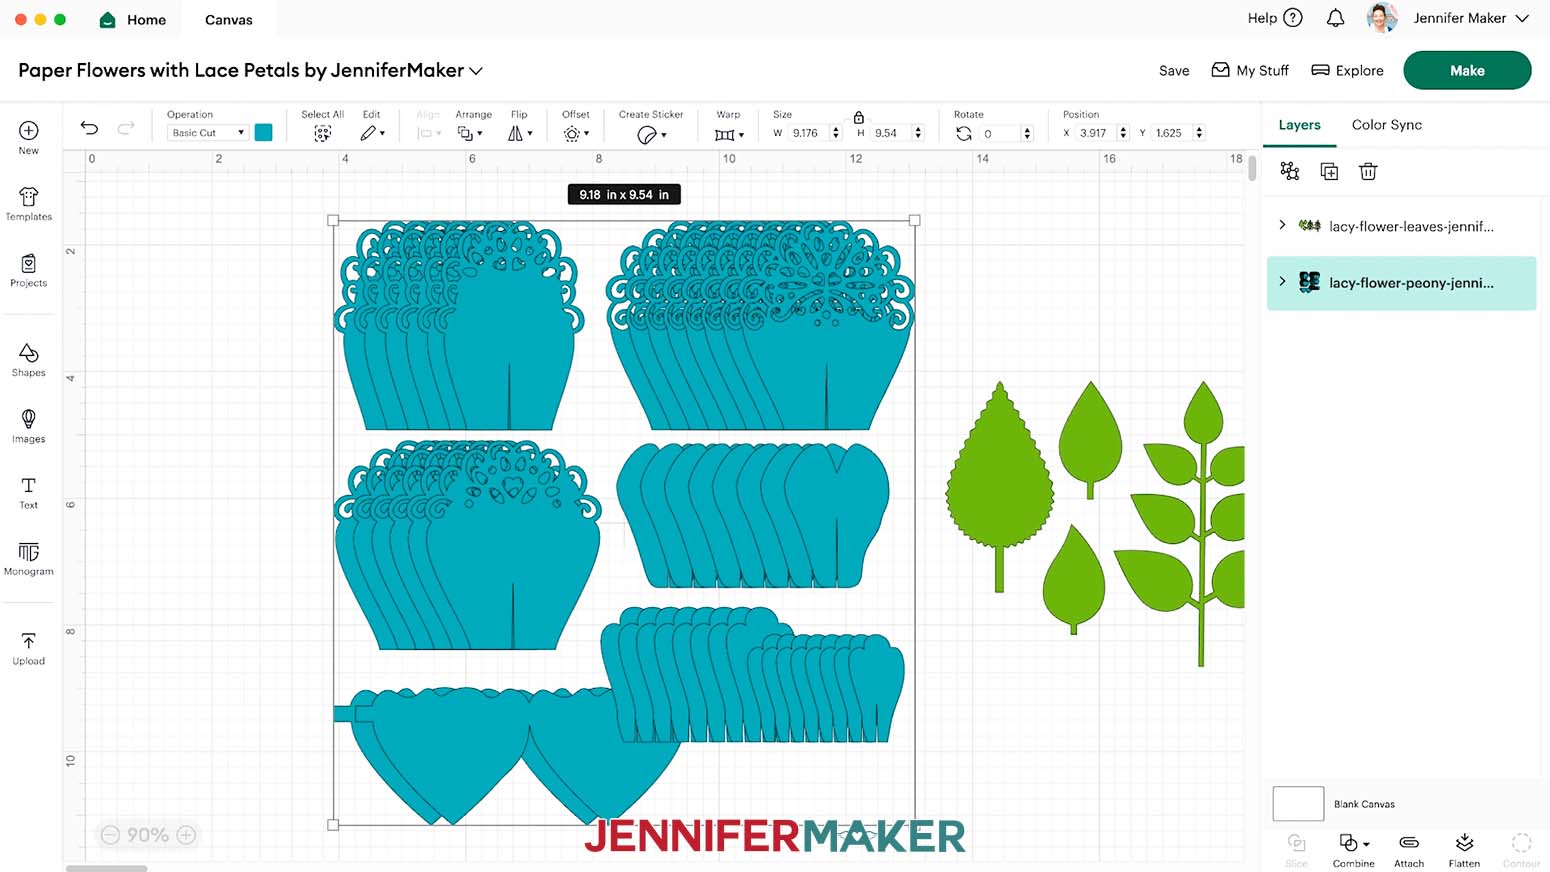
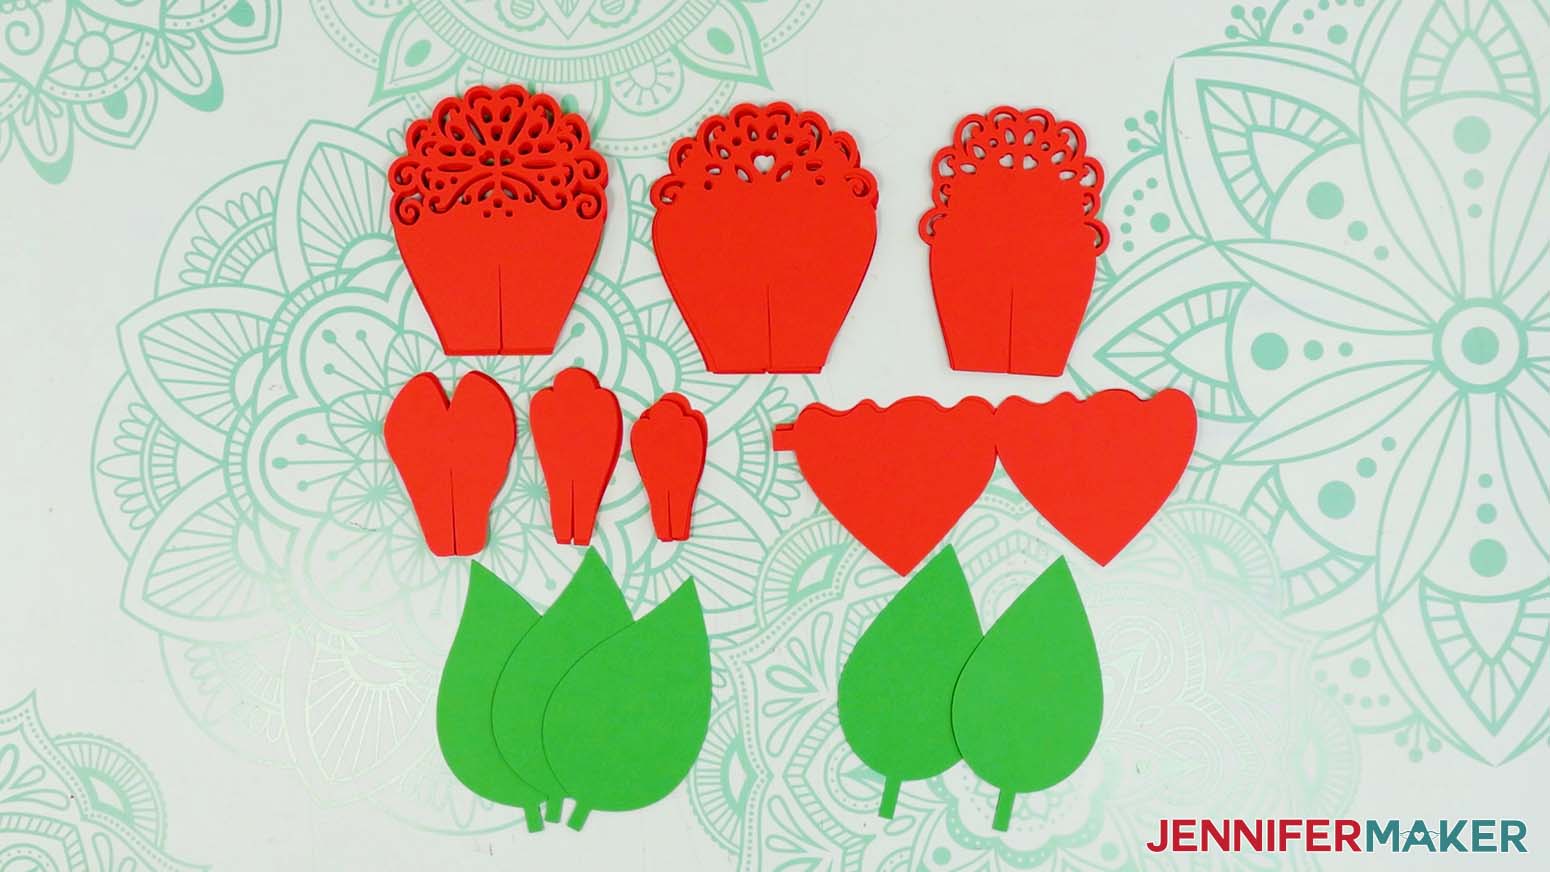
NOTE: The peony has two connected heart pieces for the bud bowl, three groups of eight simple inner petals, two groups of six petals with lacy outer details, and one group of eight petals with lacy outer details.
NOTE: The layered roses have four large pieces with lacy petals, three small pieces with smooth petals, and one large piece with smooth petals. - Repeat Steps 2-5 to add the “leaves” SVG to your Canvas, as well.
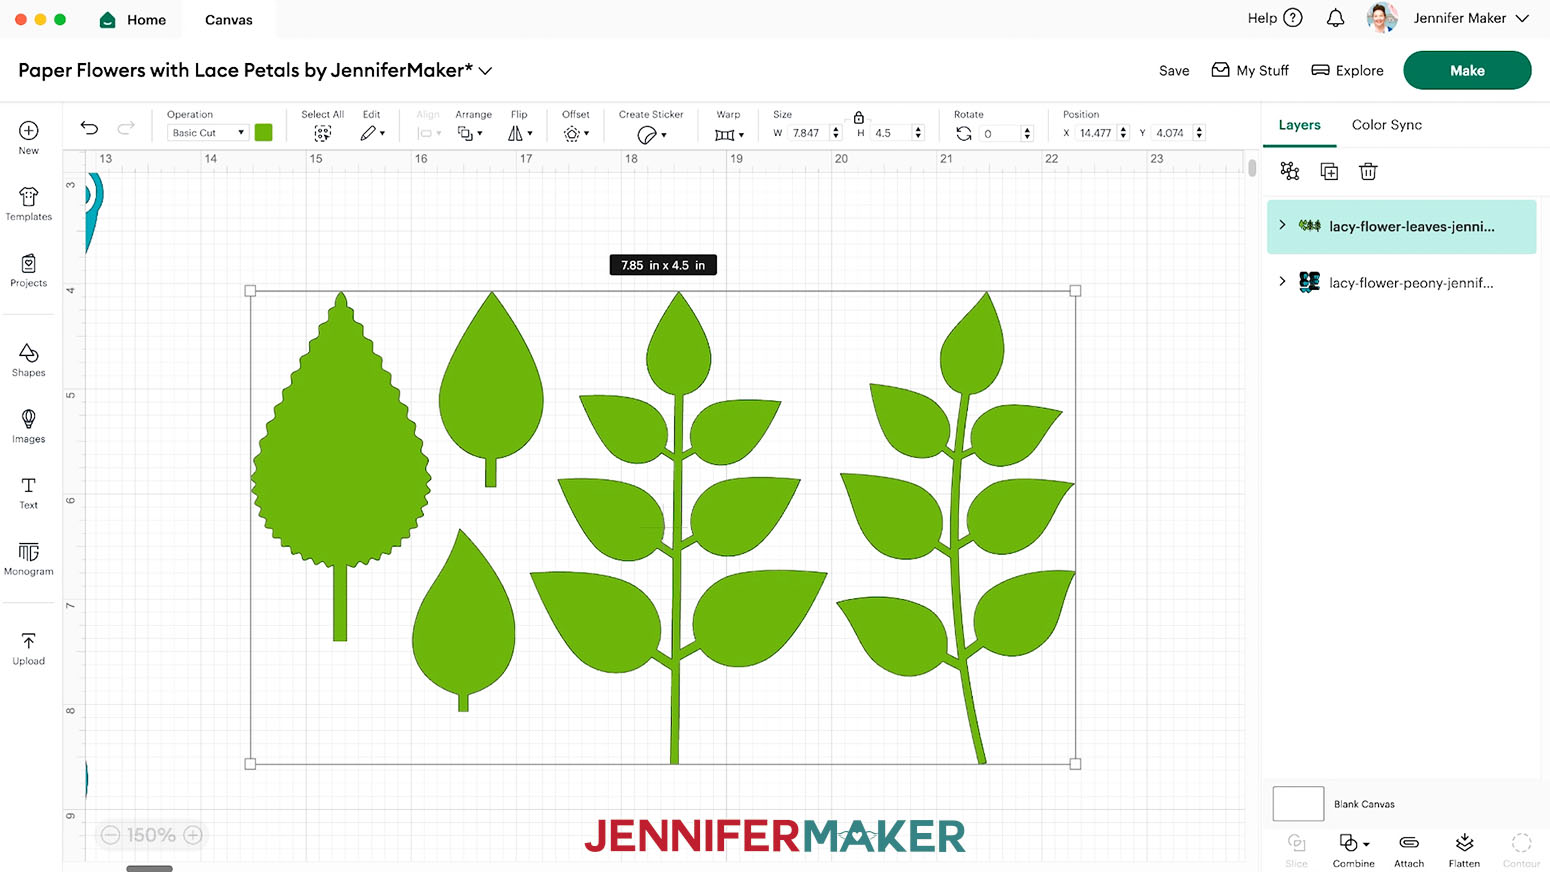
NOTE: The leaves include a large serrated edge leaf, a symmetrical smooth leaf, a smooth leaf with a curved tip, a straight stem with leaves, and a curved stem with leaves. - Click “Save” and give your project a name so you can find it easily.
- Drag the leaves design to an empty space on your Canvas.
- If you want to resize the flower, select the design and keep the “Lock” icon closed to maintain proportions. Drag the corner Resize handles in and out to adjust the size as desired.
NOTE: The assembled rose will be slightly smaller than its lace petal pieces.
NOTE: I don’t recommend reducing the size of the rose designs any more than necessary to fit the Cricut Joy (the peony already fits on a Joy mat). - Select the leaves and click “Ungroup” to work with the elements separately.
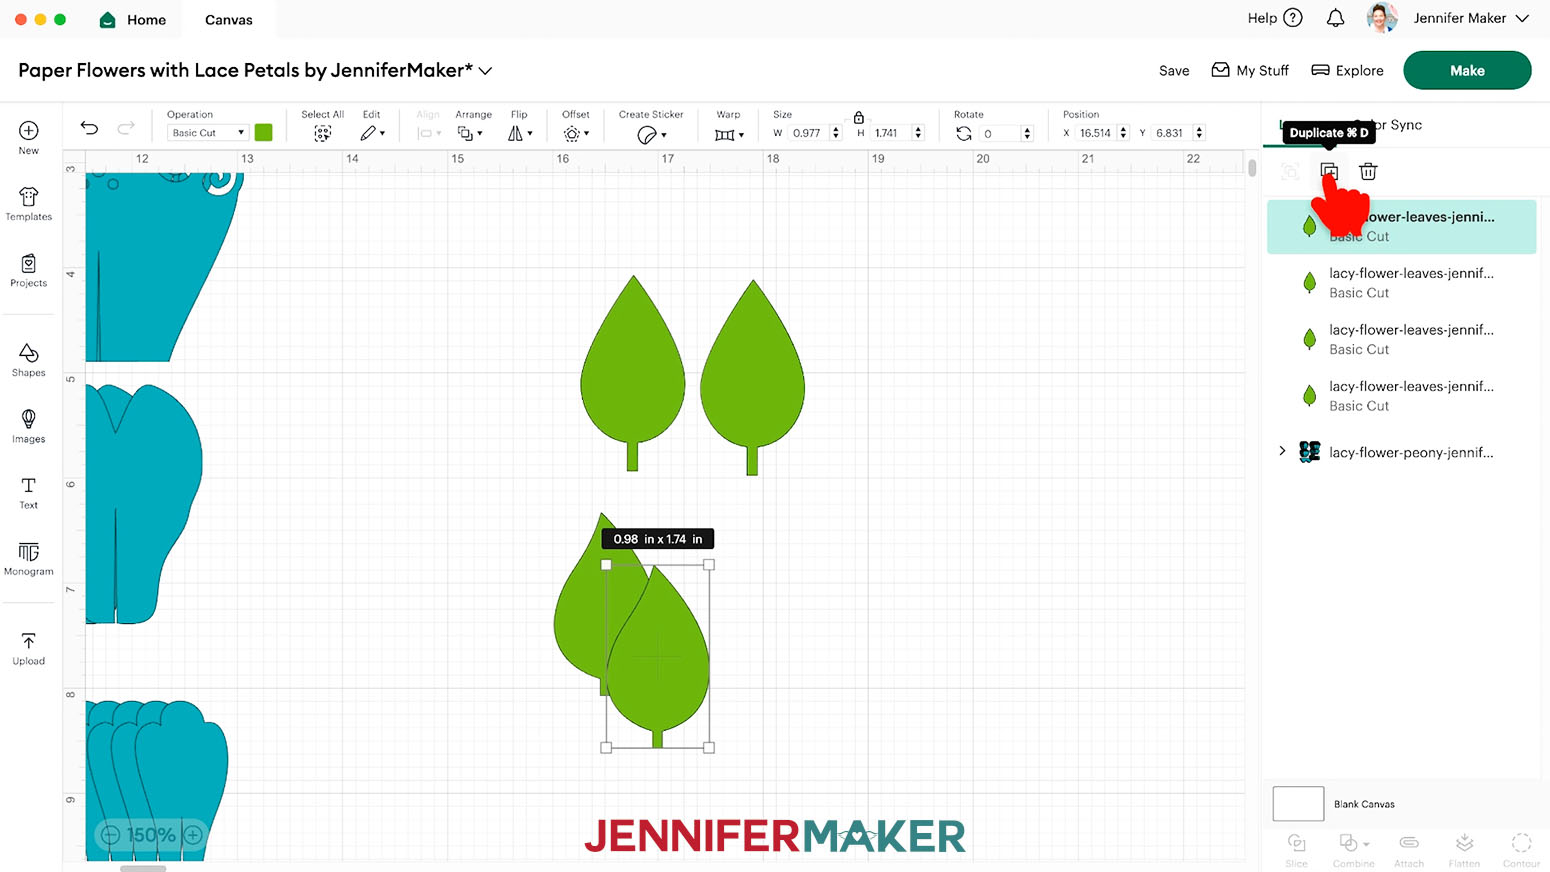
- Delete any leaves you don’t want to use.
NOTE: I’ll delete all but the two single leaves with smooth edges. - Select and “Duplicate” any leaf layers to create copies as needed.
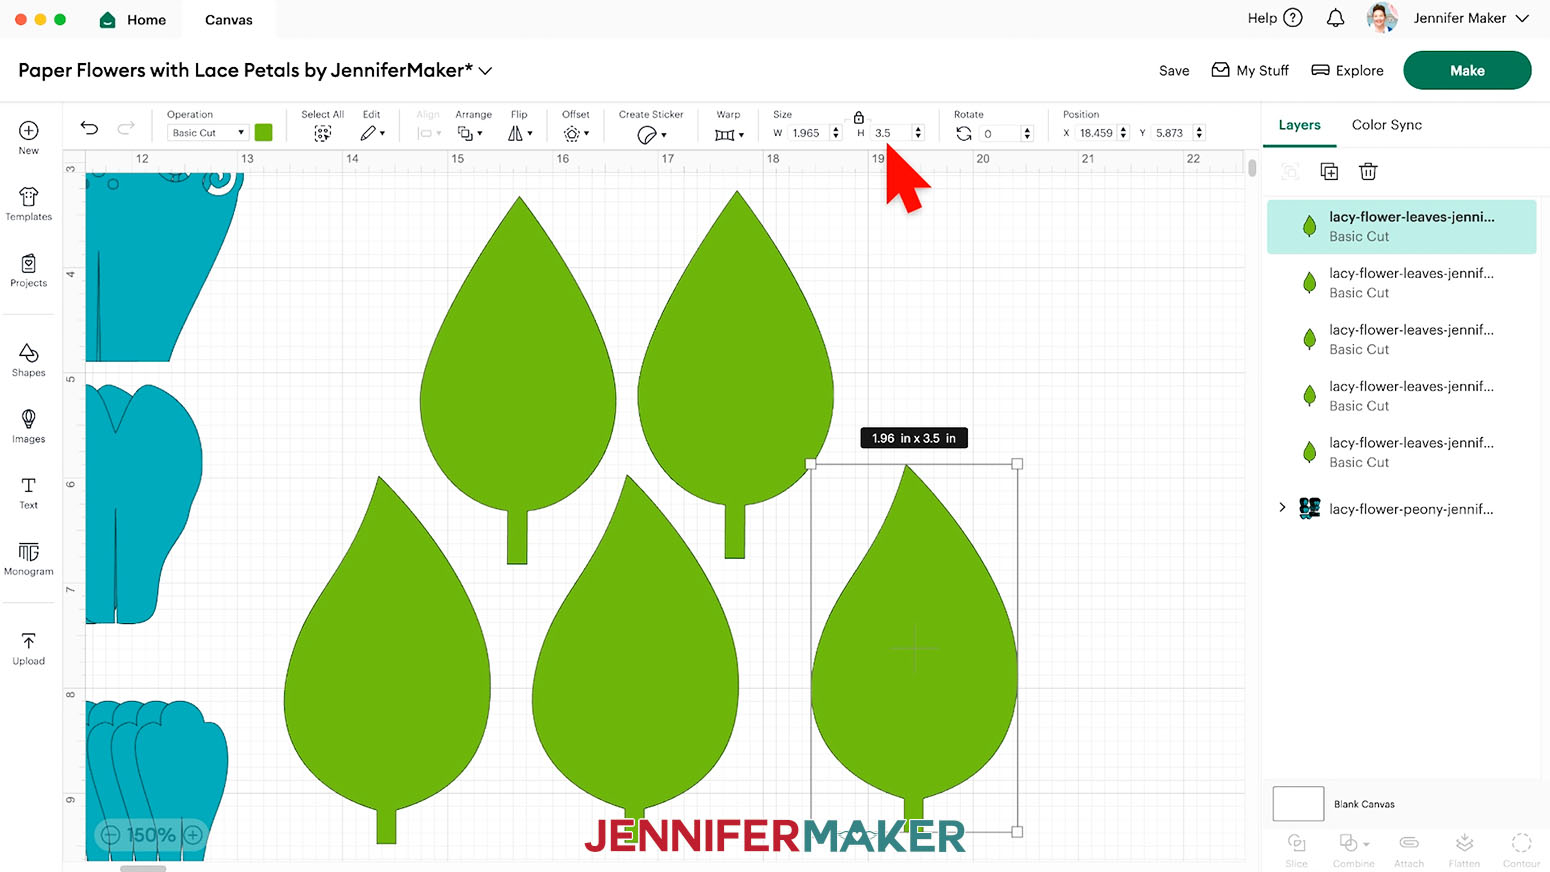
NOTE: I’ll duplicate the symmetrical leaf once, and the leaf with the curved tip twice, for a total of five leaves for my peony. - If you want to resize a leaf, select it and keep the “Lock” icon closed, then drag its corner Resize handles to adjust the size, or type in a specific measurement in the “Width (W)” or “Height (H)” field and press “Return/Enter” on your keyboard.
NOTE: I’ll enter “3.5” in the “Height (H)” field for each of my leaves. - If you want to change the color of a layer to match the cardstock you’ll cut it from, select it and use the Color Box next to “Operation” to pick a new option.
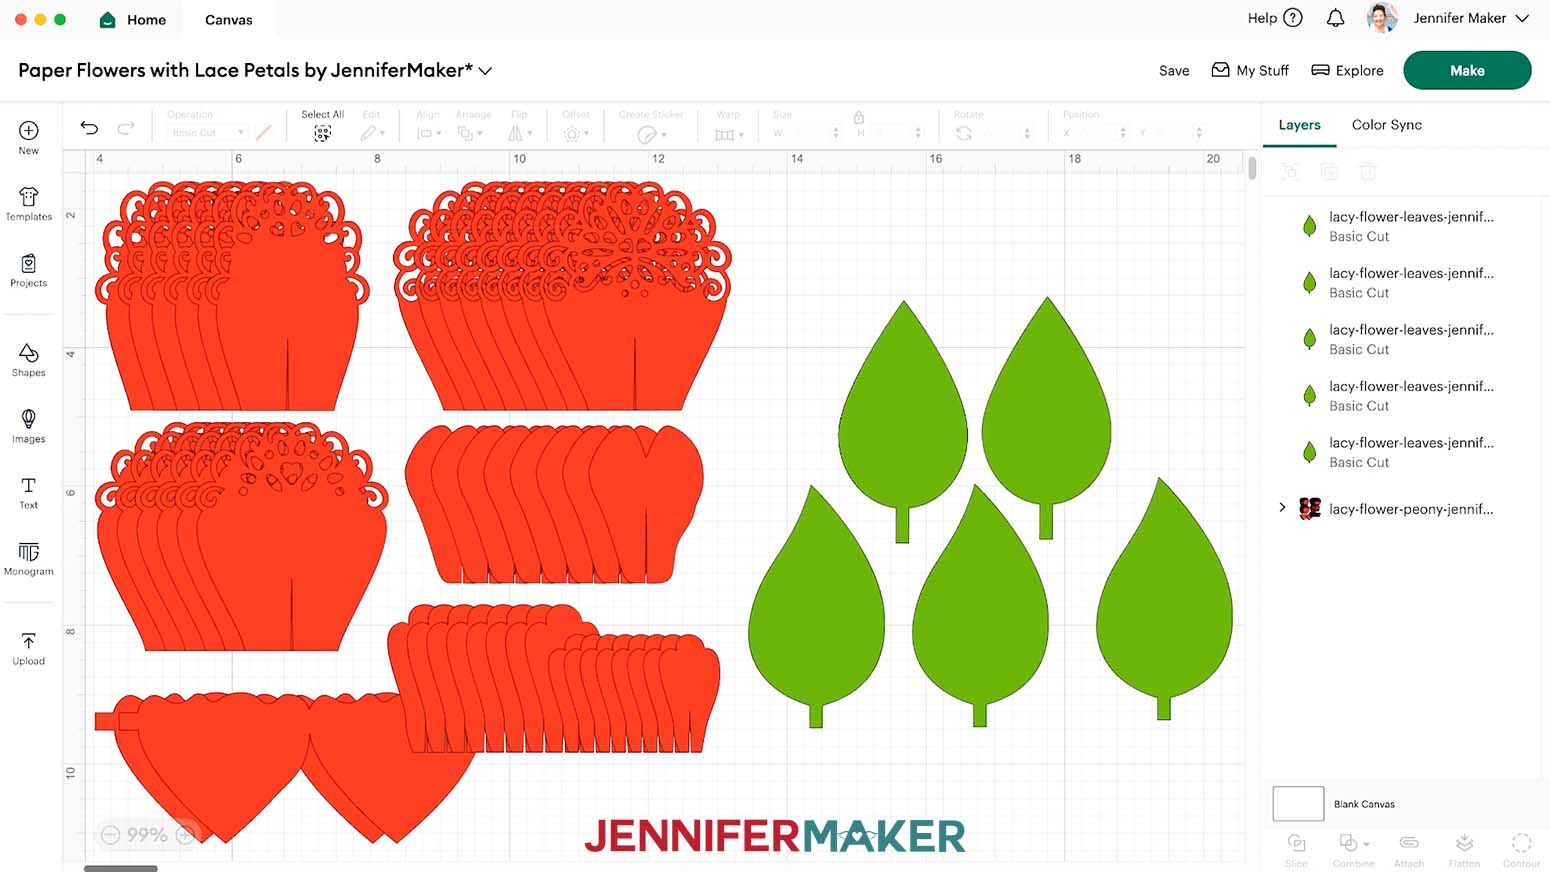
- You’re ready to cut!

CUTTING
- Make sure the correct machine is selected in the top right.
- Click “Make.”
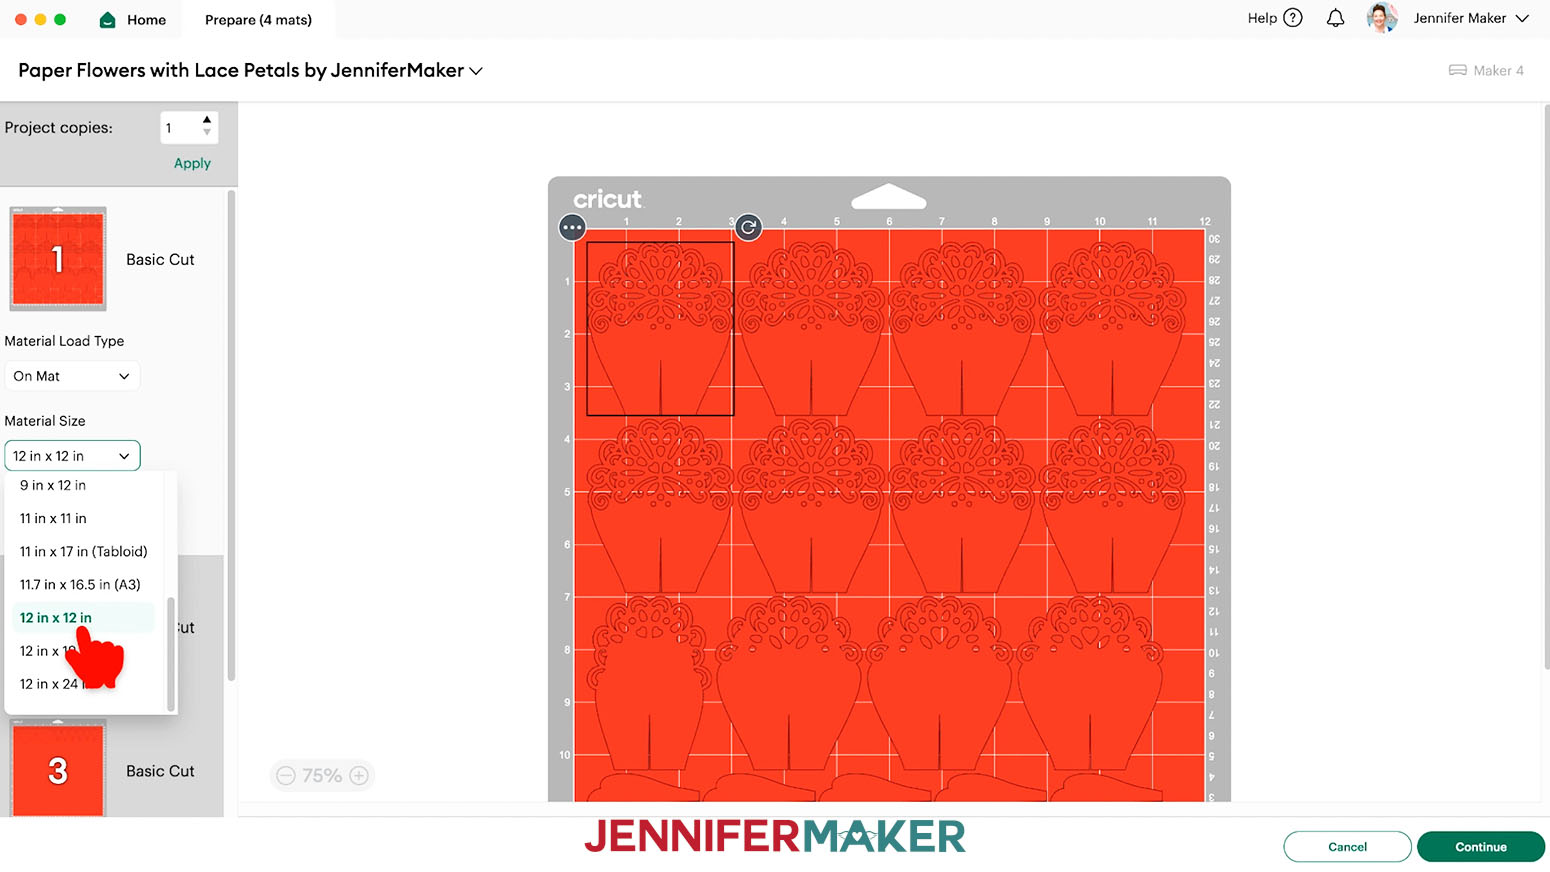
- On the Prepare Screen, make sure the Material Size matches the material you’re using.
NOTE: I’m using the "12 in x 12 in” Material Size for everything. - Select the first mat so it loads first on the next screen and click “Continue.”
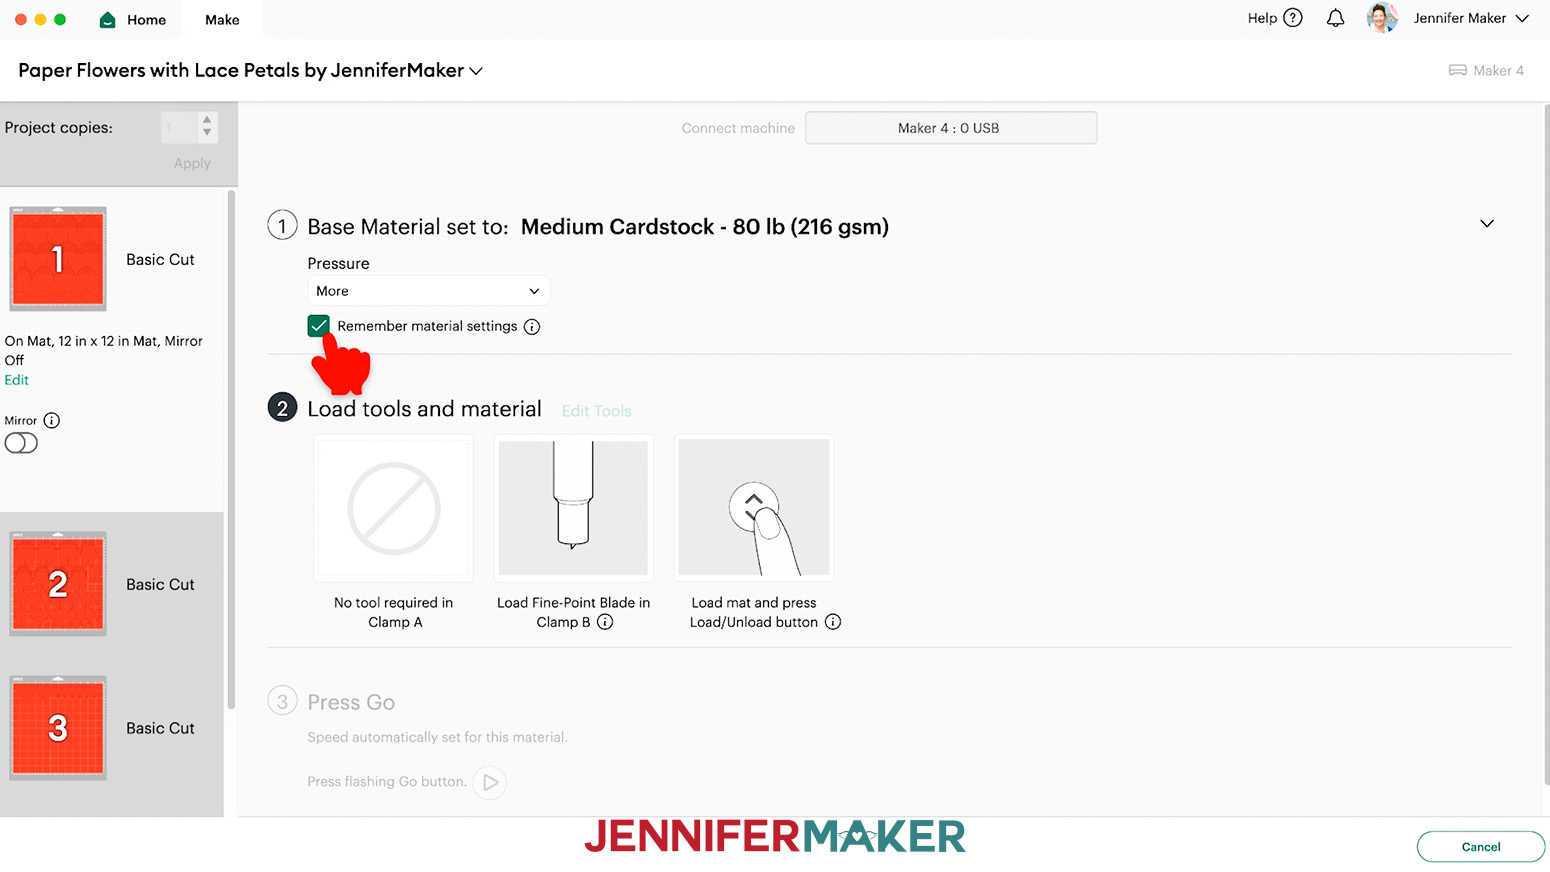
- On the Make Screen, set the Base Material for your first mat. I’m using the “Medium Cardstock - 80 lb (216 gsm)” setting with “More” pressure for all my mats.
NOTE: If you don’t see “Medium Cardstock - 80 lb (216 gsm)” in your materials list, click on “Browse All Materials.” Enter “medium cardstock” in the search box, select the correct option from the results list, and click “Done.”
TIP: Changing the Pressure to “More” results in a cleaner cut.
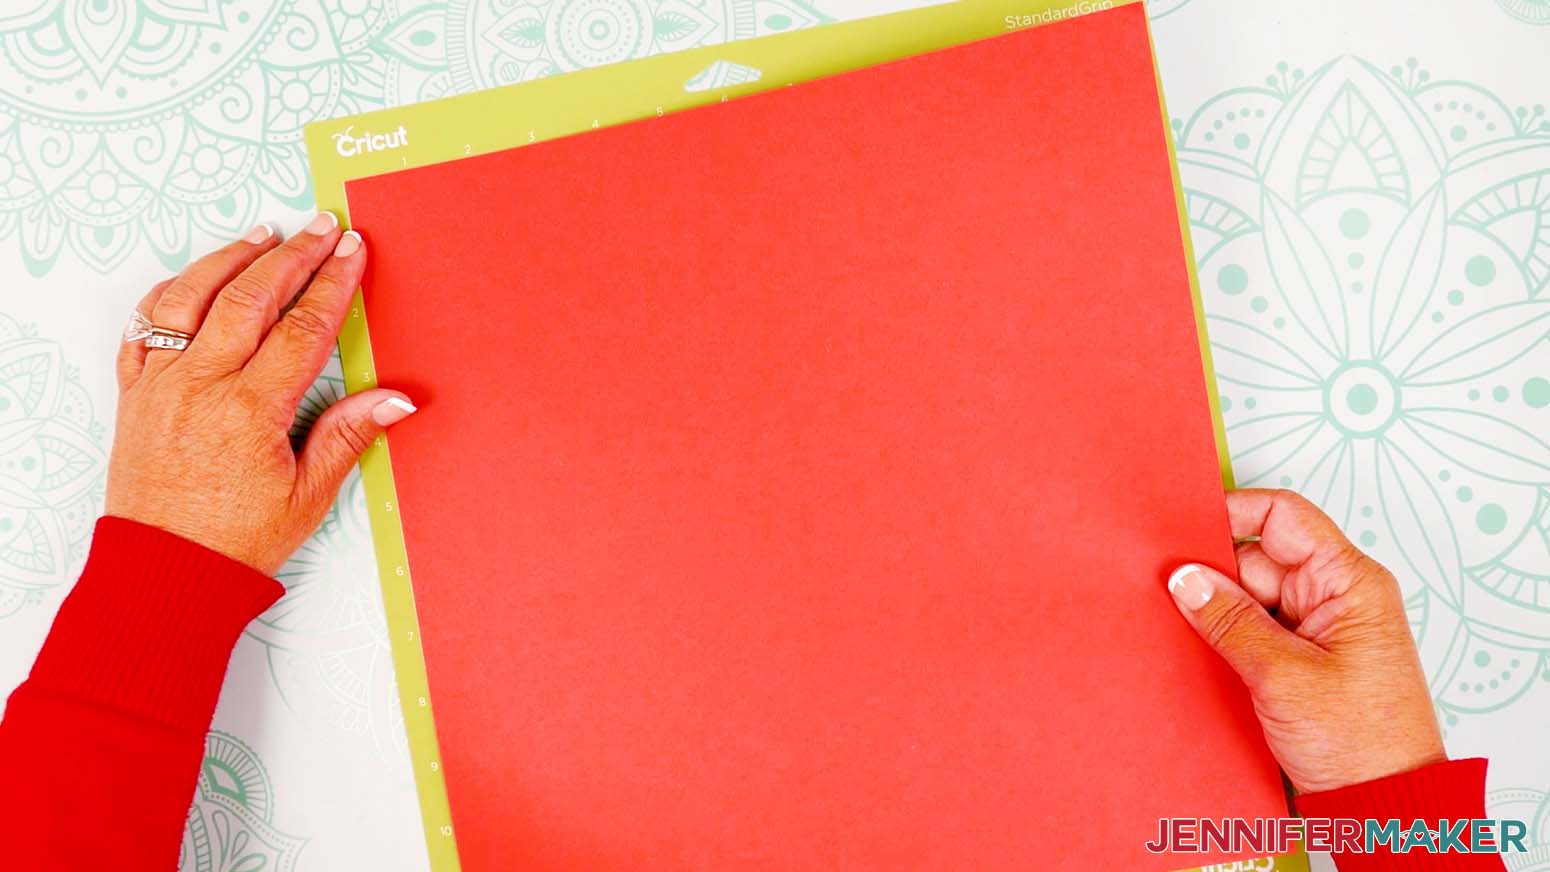
TIP: To save time between cuts of the same material, check the box next to “Remember material settings.” - Place your first mat’s cardstock face up on a green StandardGrip machine mat.
- Use a brayer to make sure it’s fully adhered.
- Check that your Fine-Point Blade is clean and in the clamp.
- Press the flashing “Load/Unload” button to load the prepared mat into your Cricut.
- Press the flashing middle button to begin cutting.
- When it has finished cutting, don’t unload the mat right away. Gently lift a corner of the material to make sure the cuts went all the way through. If not, press the middle button again to make a second pass of cuts in the same spots.
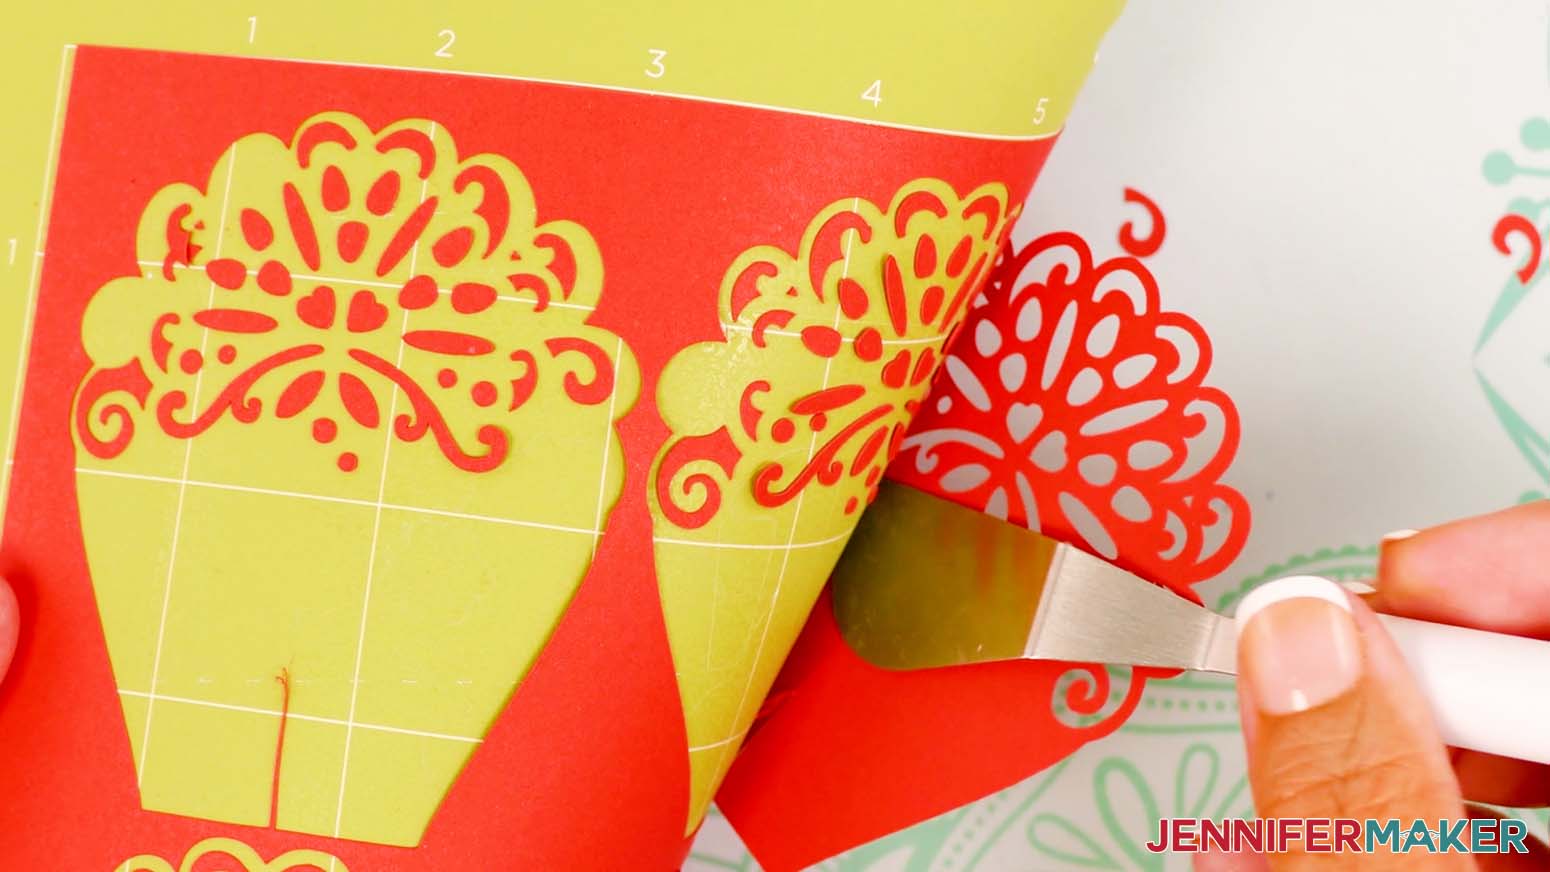
- When the cuts are complete, unload the mat, flip it over onto your work surface, and roll it back to release the cardstock.
TIP: Be careful when removing intricate pieces. Use a spatula to carefully remove any intricate parts and a weeding tool to pop out any small stuck pieces. If you have trouble with any of your cuts, check out my Cricut Tips & Tricks for Cleaner Cuts. - Repeat Steps 6-12 to cut the rest of your mats.
STEP 3: ASSEMBLE YOUR PAPER FLOWER WITH LACE PETALS
OPTION 1: PEONY
- Gather your flower pieces and place them face up in piles by size to make sure you have everything.
- Plug in your hot glue gun and put on your finger protectors as needed.
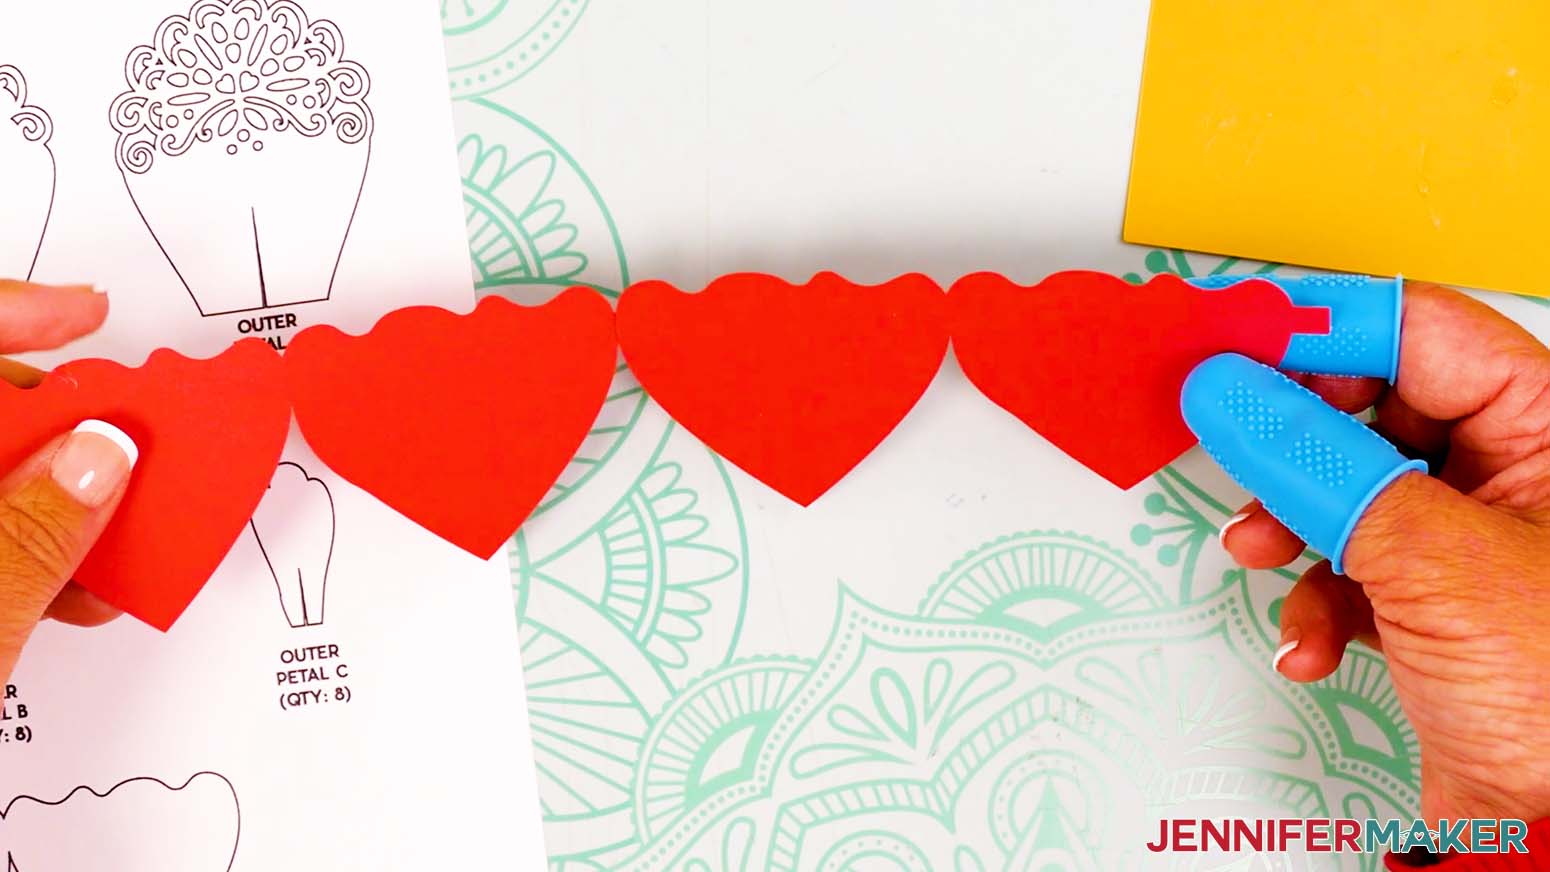
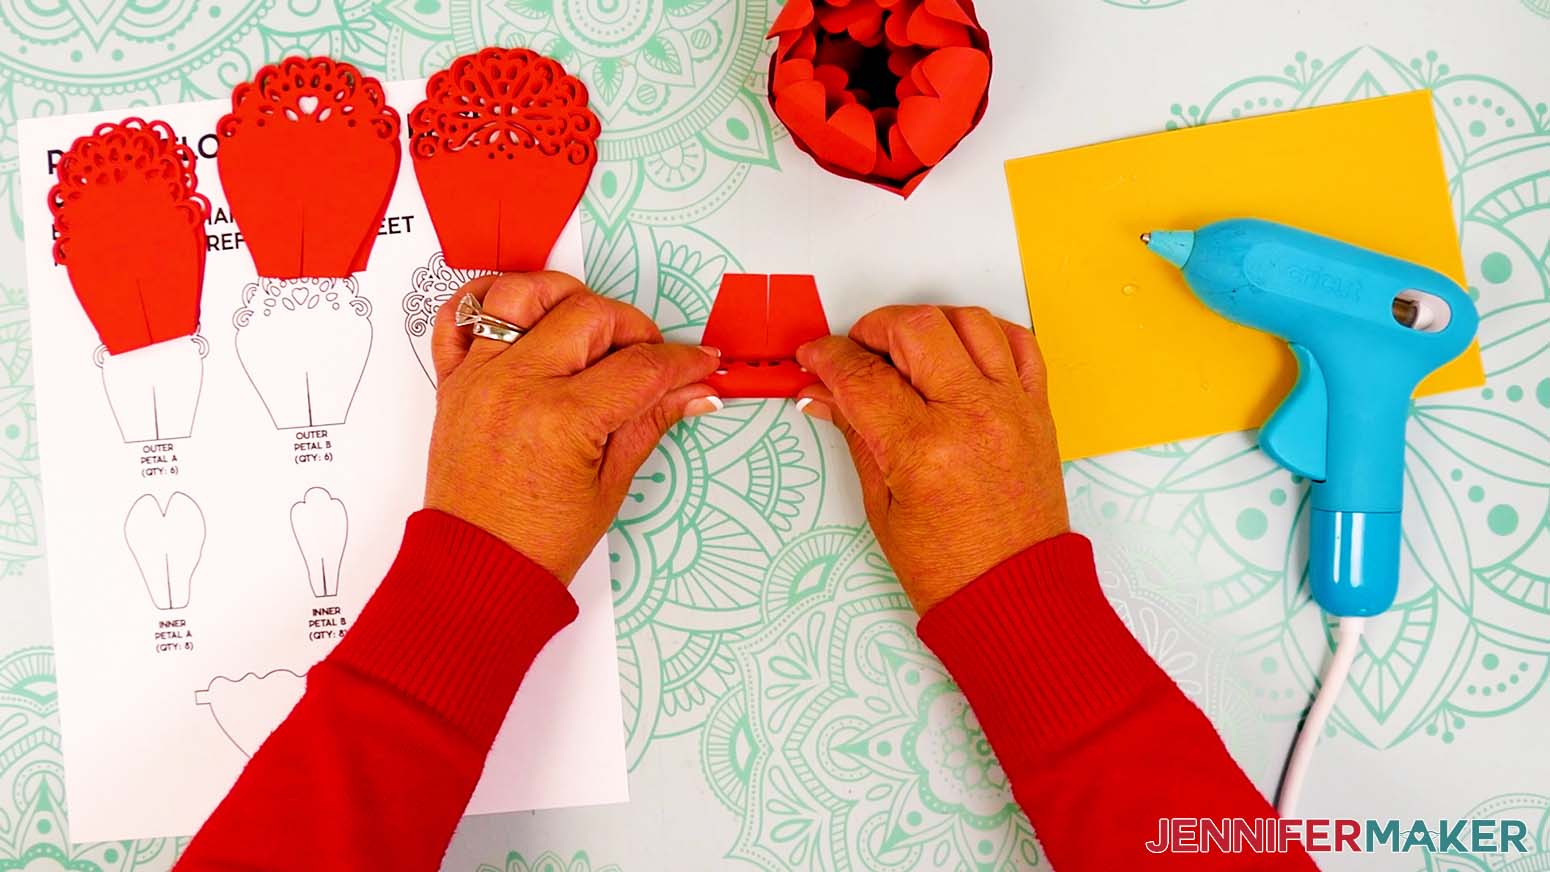
- Hold a peony bud bowl piece face up with the tab accessible.
- Add a dab of hot glue to the tab, then carefully align the bud bowl’s other piece to create a line of four pointed petals. Hold the pieces in place until the glue sets.
- Bring the remaining tab to meet the other pointed petal and create a loop.
- Hot glue the tab to the other pointed petal and hold it to set.
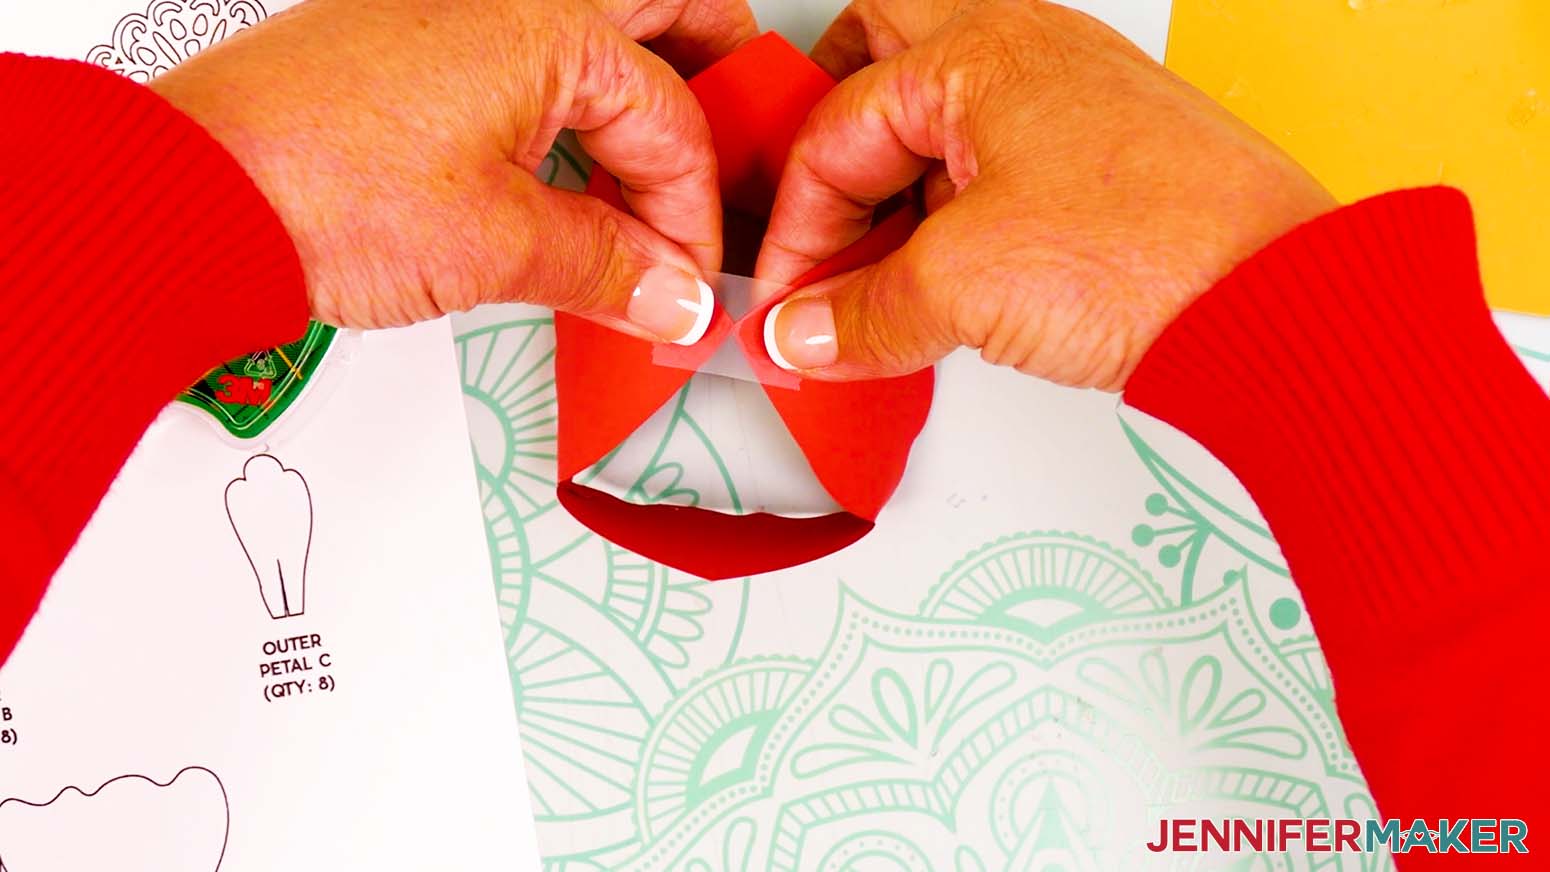
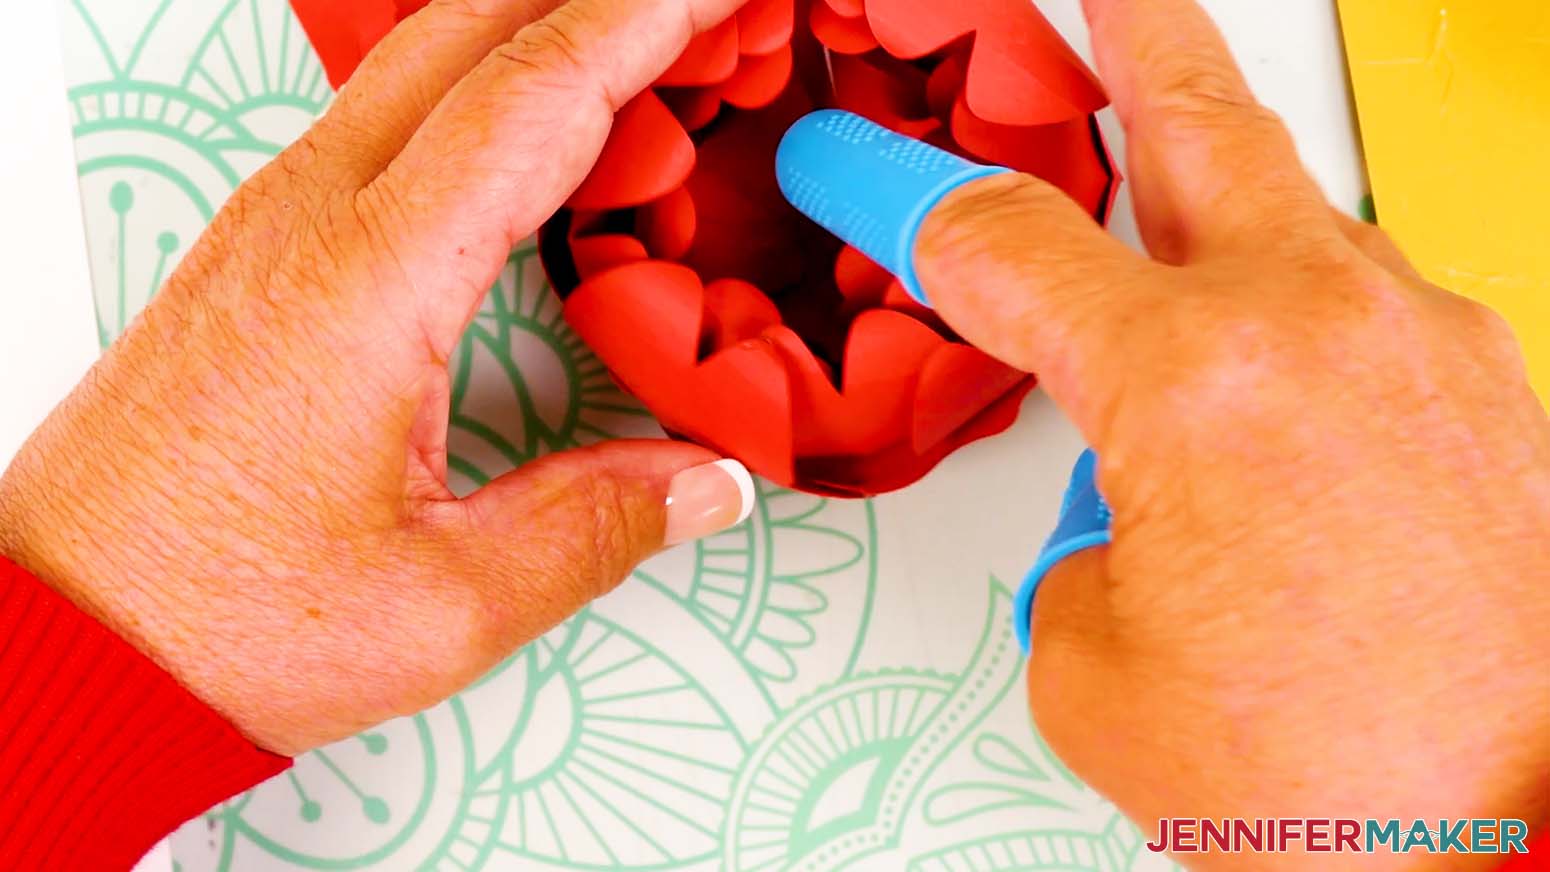
- Hold the bud bowl upside down so the petals’ points face up.
- Bring two opposite tips together so the points align and use clear tape to secure them.
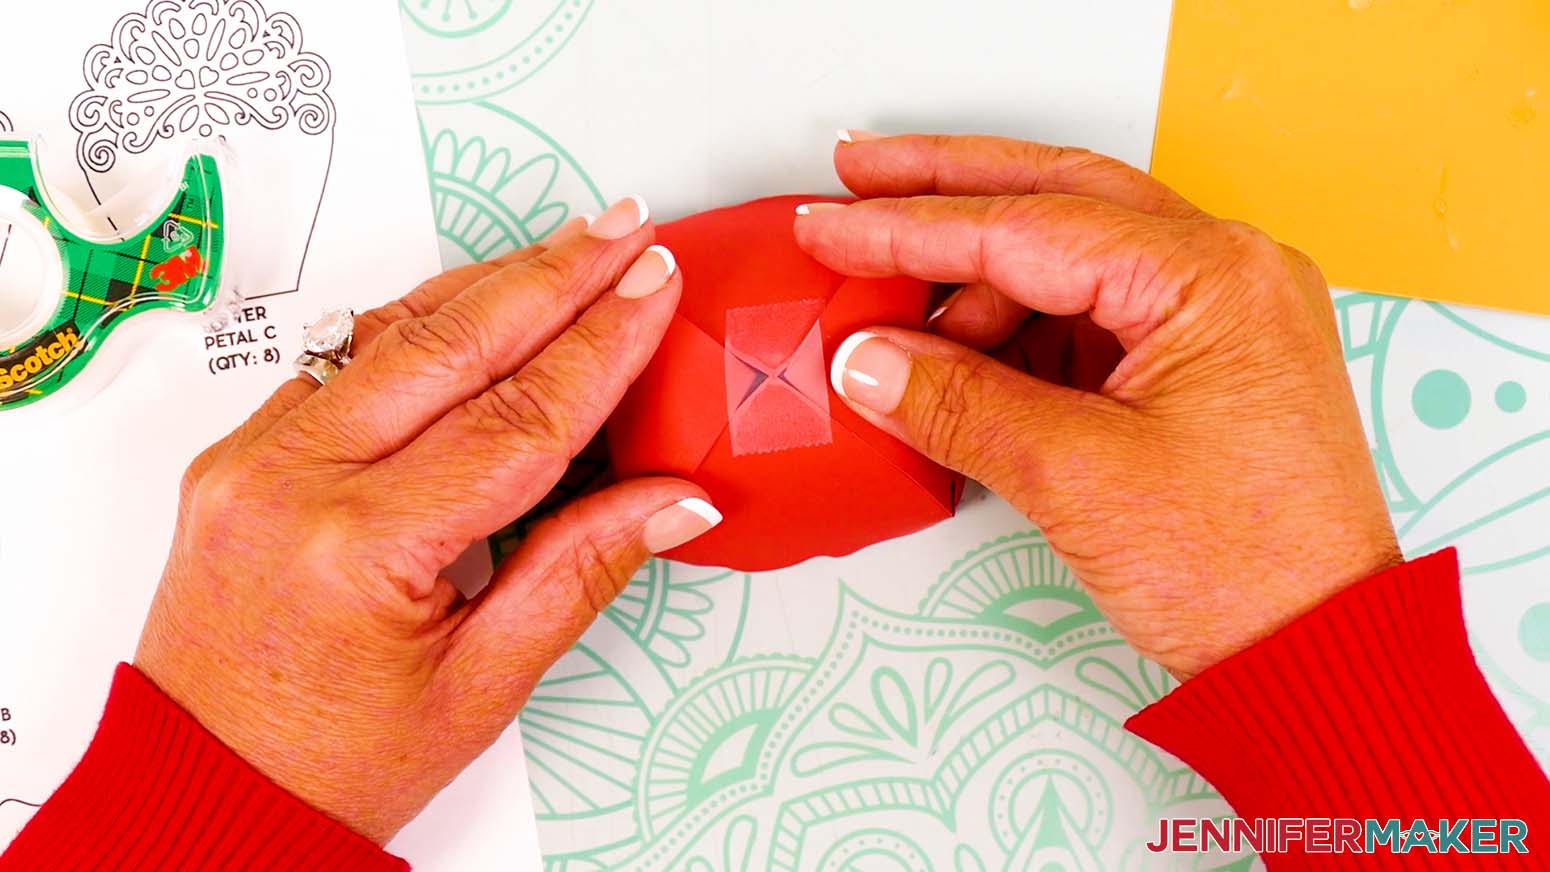
TIP: Let the remaining sticky sections of the tape stay flat. - Carefully bring the other points under the tape to meet at the middle and press them to the tape to form a bowl.
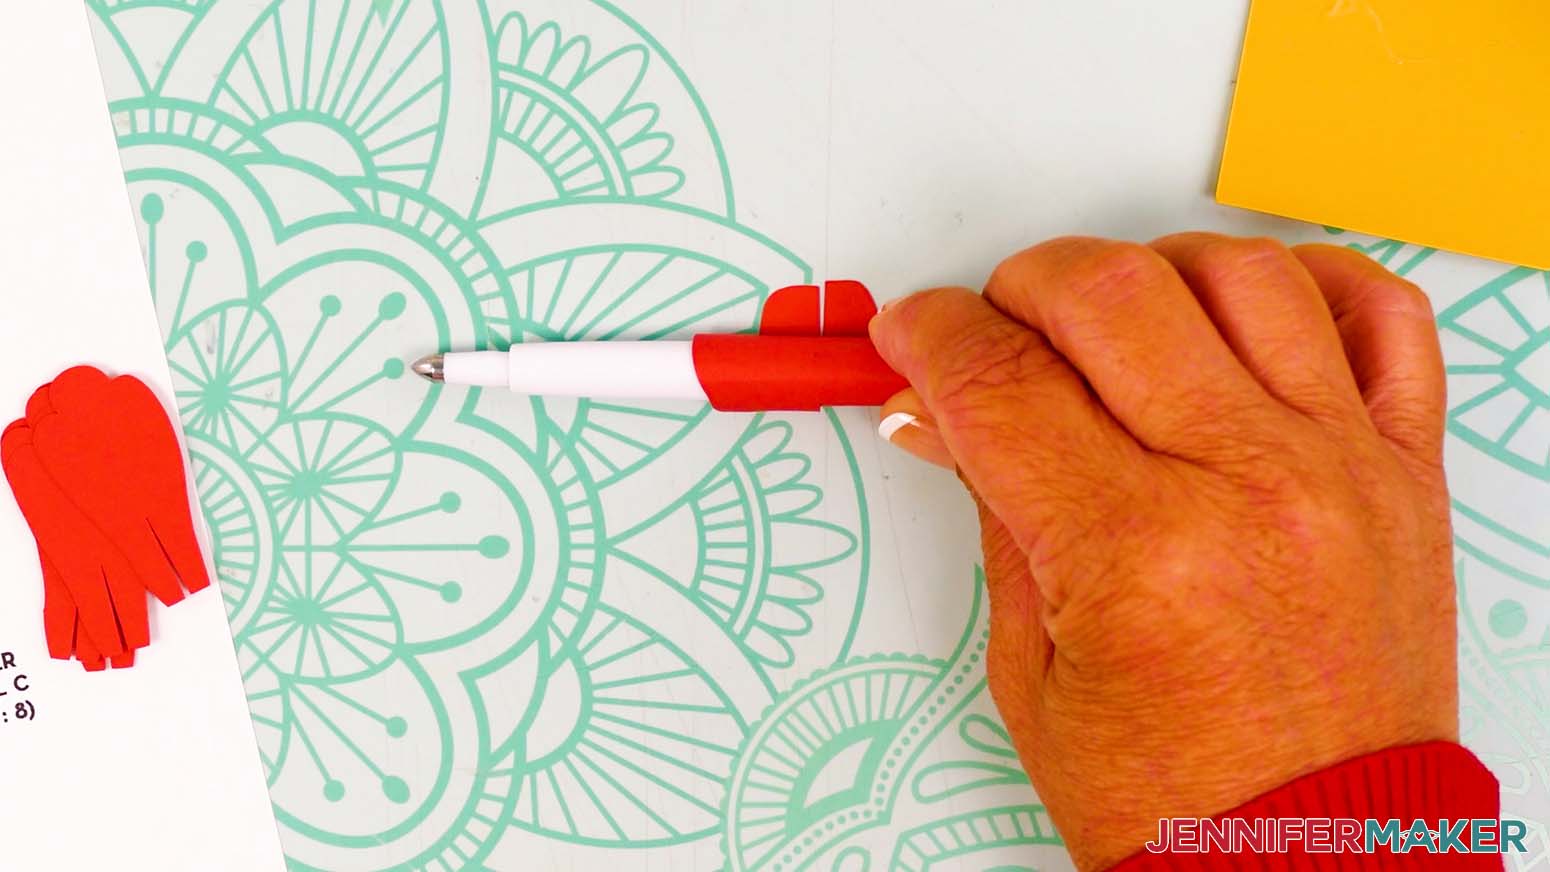
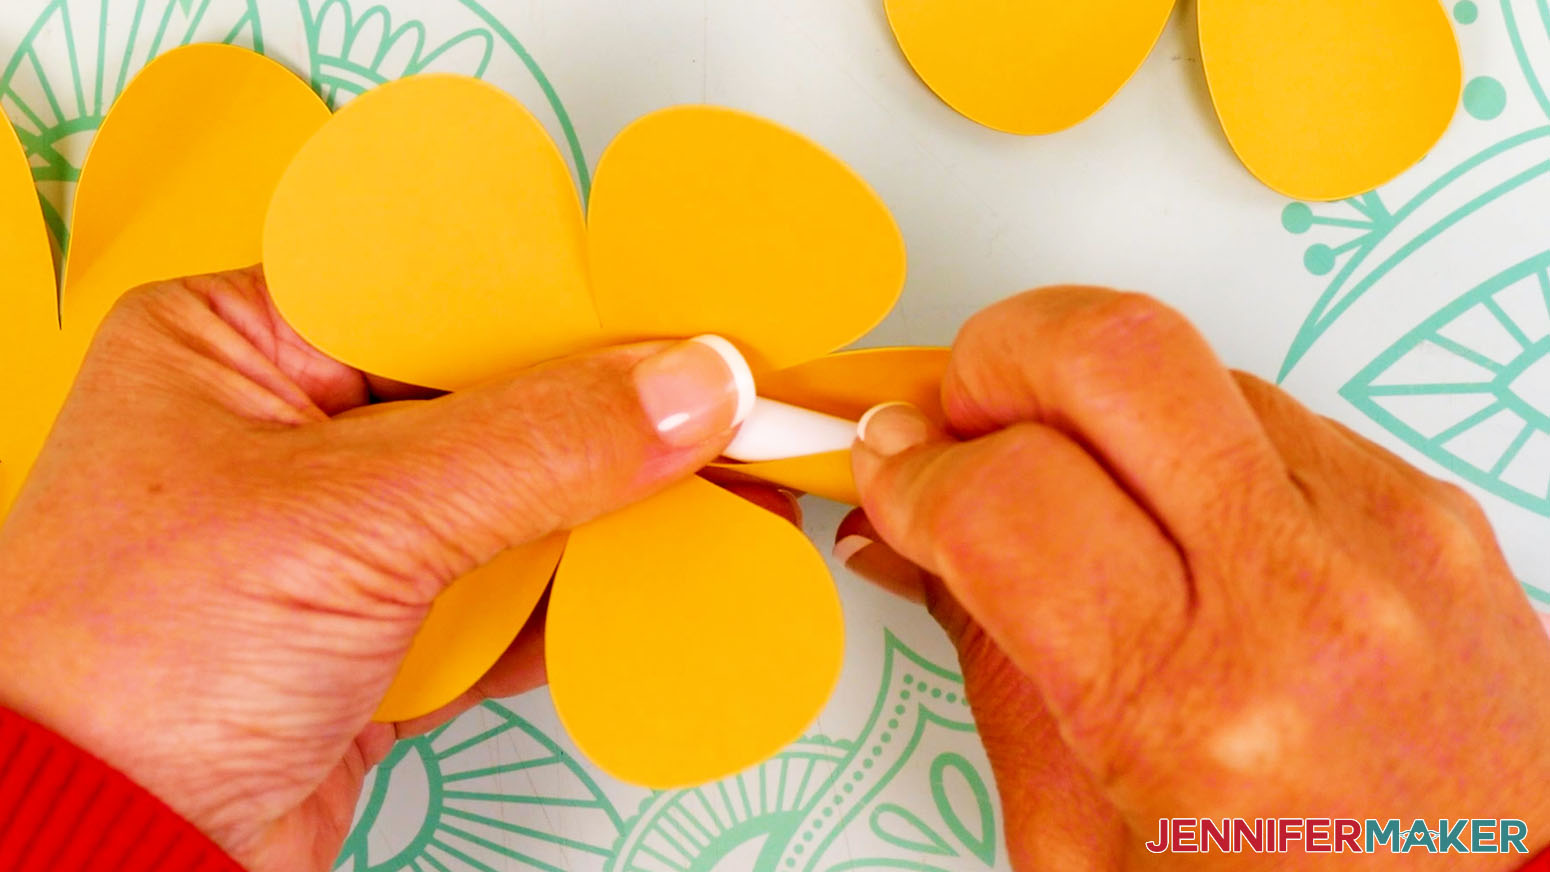
TIP: If the tabs won’t stay attached, you can reinforce them with another piece of tape. - Next, take one of the eight large inner petal pieces (Inner Petal A) and use a curling tool (like a marker or Scoring Stylus) to roll the edge of the petal halfway toward the tabs.
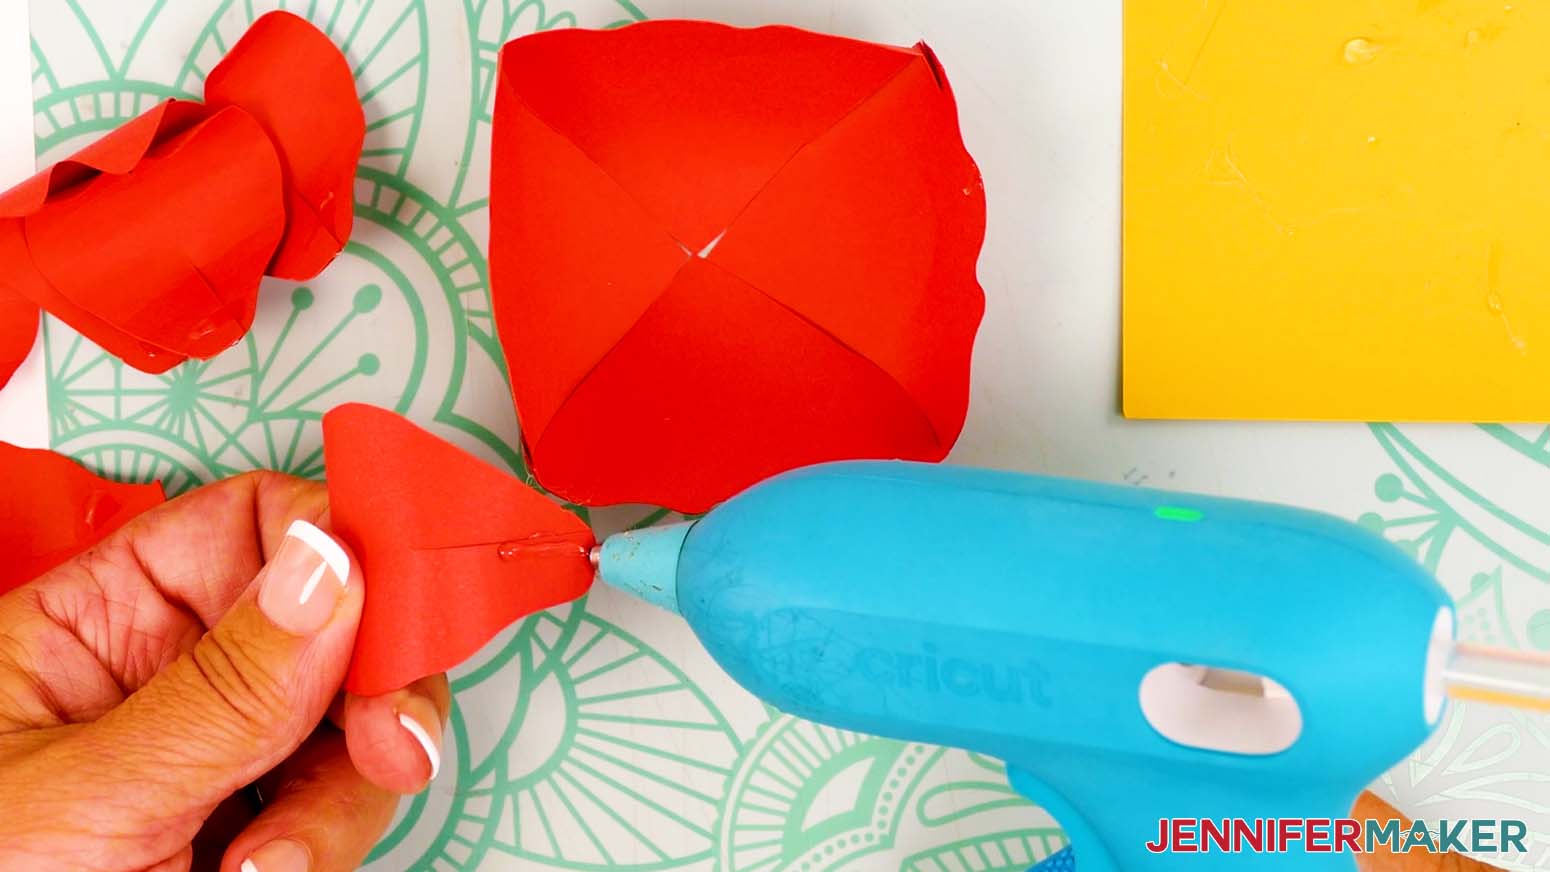
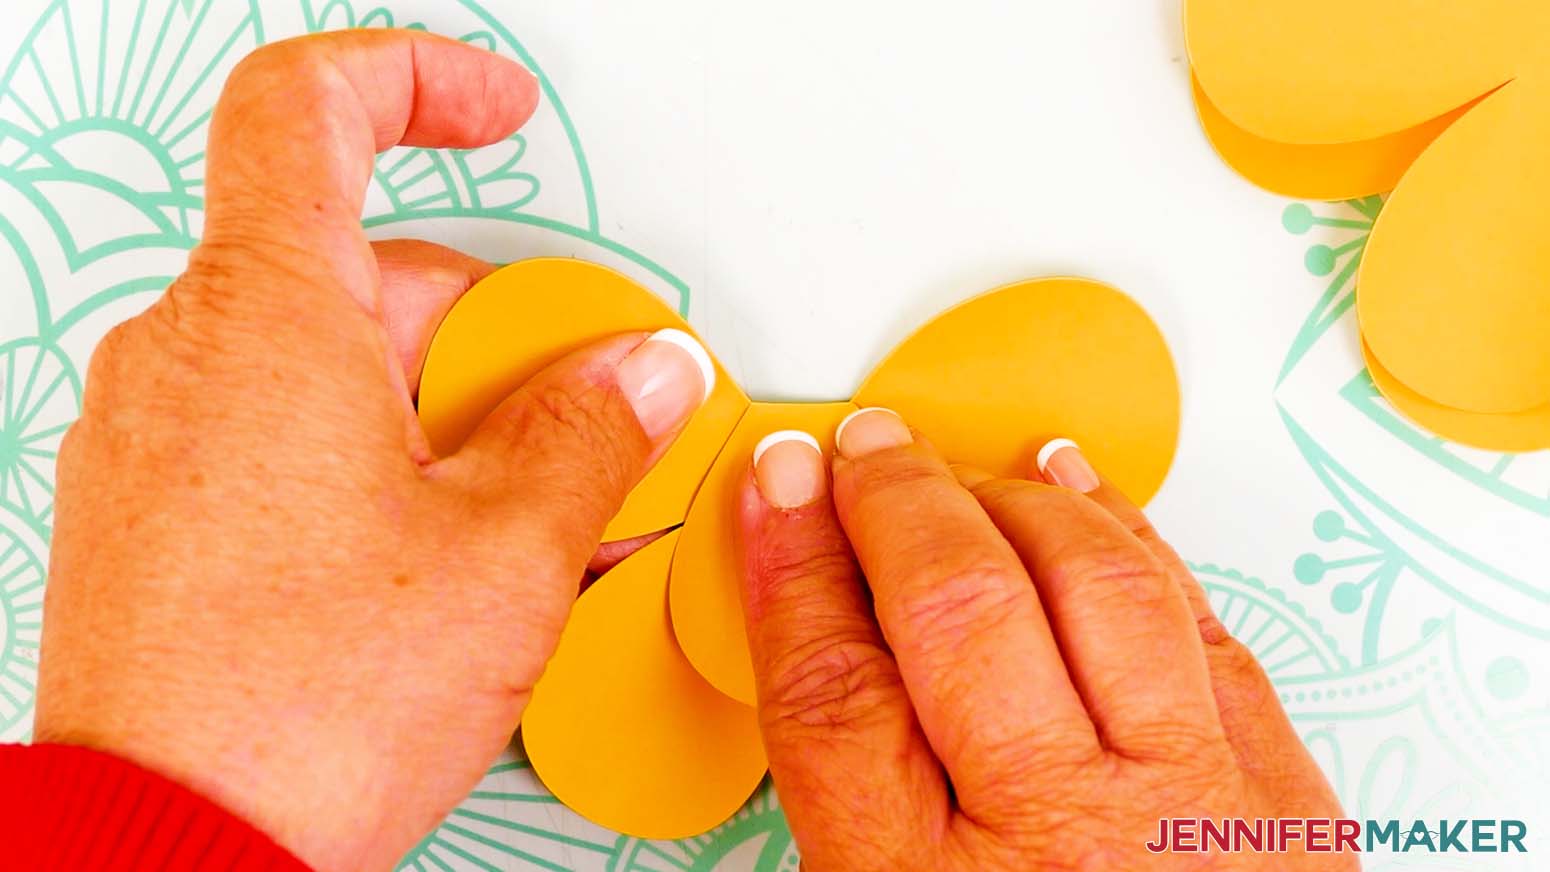
- Add a small dab of hot glue to one of the tabs, then overlap it with the other tab.
- Press and hold until the glue sets to adhere the tabs together.
- Curl and glue the remaining large petals the same way.
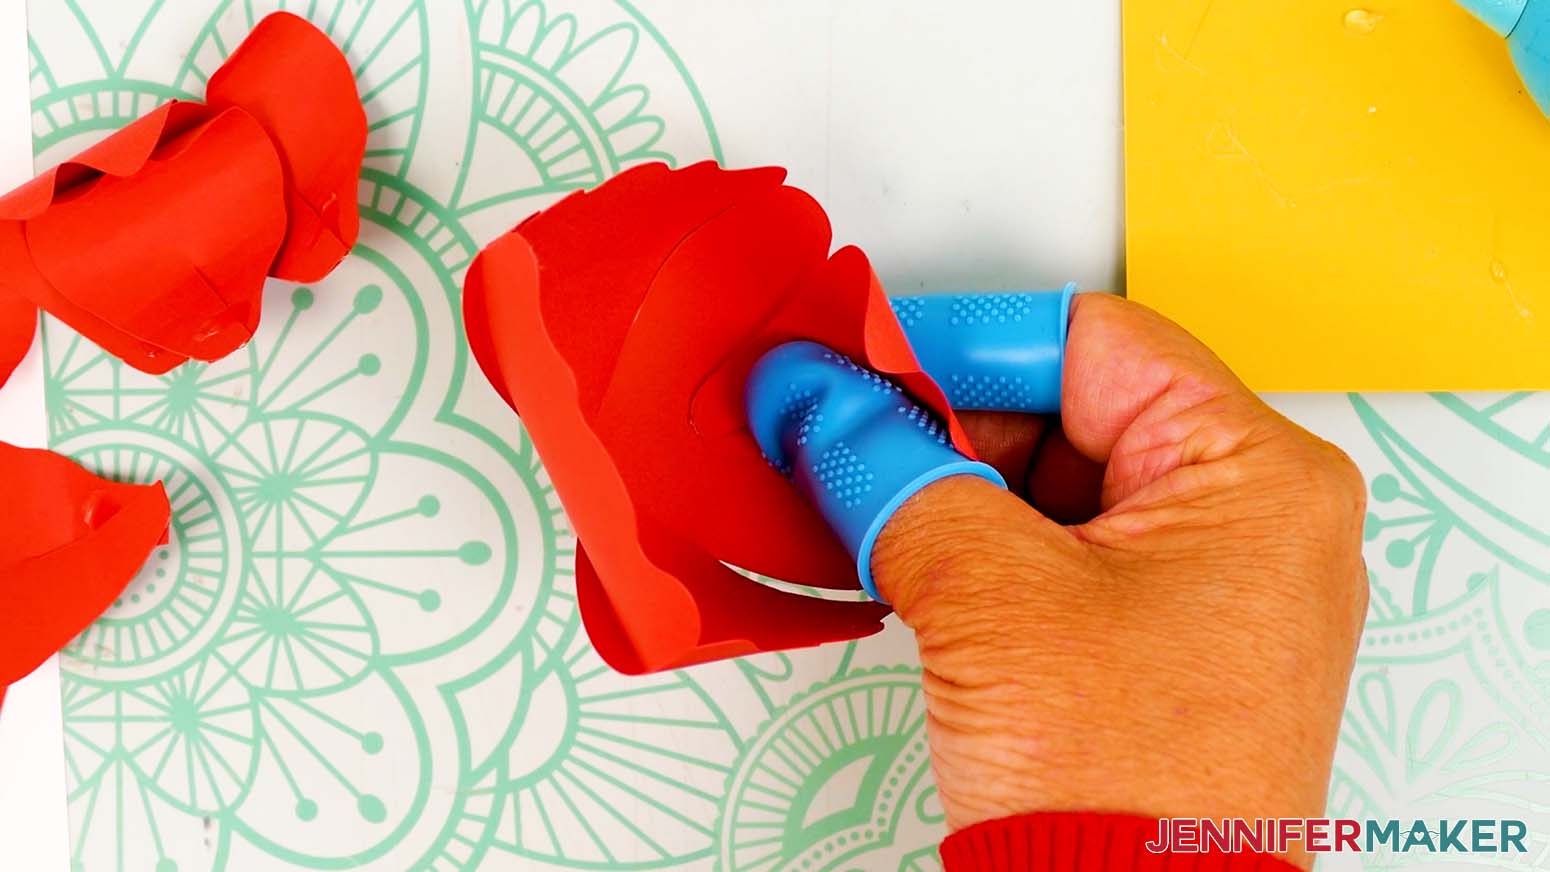
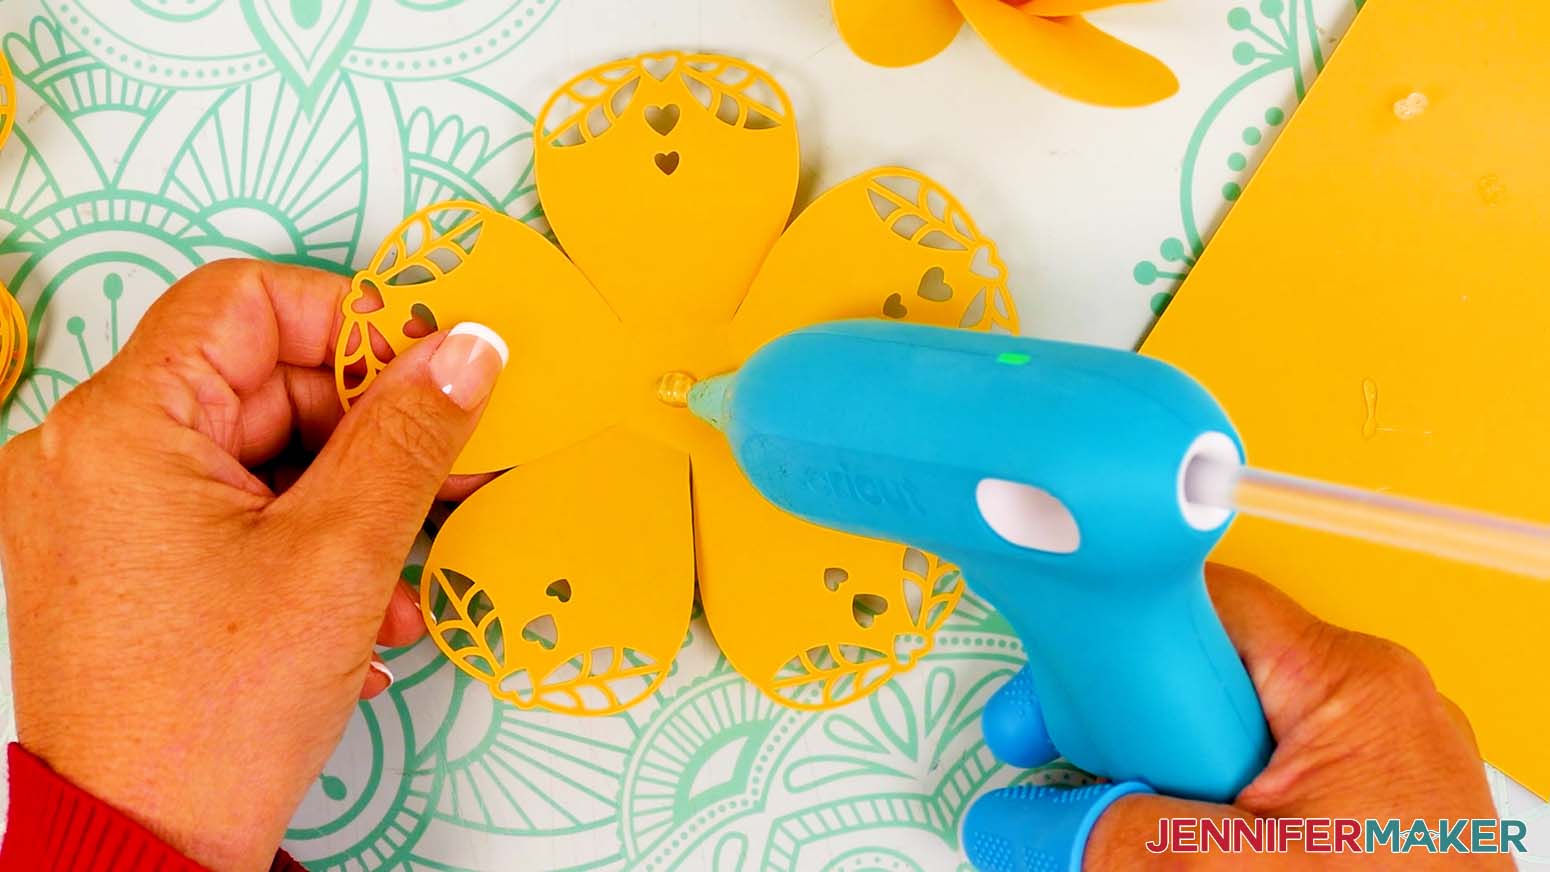
- Hold a shaped large inner petal with the curved edge facing away from you and add a dab of hot glue to the tab area.
- Place the petal’s glued tab halfway down the inside of one of the bud bowl’s sides, then press and hold until the glue sets to adhere.
NOTE: The top half of the large petals should extend above the bowl. - Adhere a large petal to the bowl’s remaining three sides the same way.
- Then adhere a large petal about 3/4 of the way down in each of the bowl’s four corners the same way.
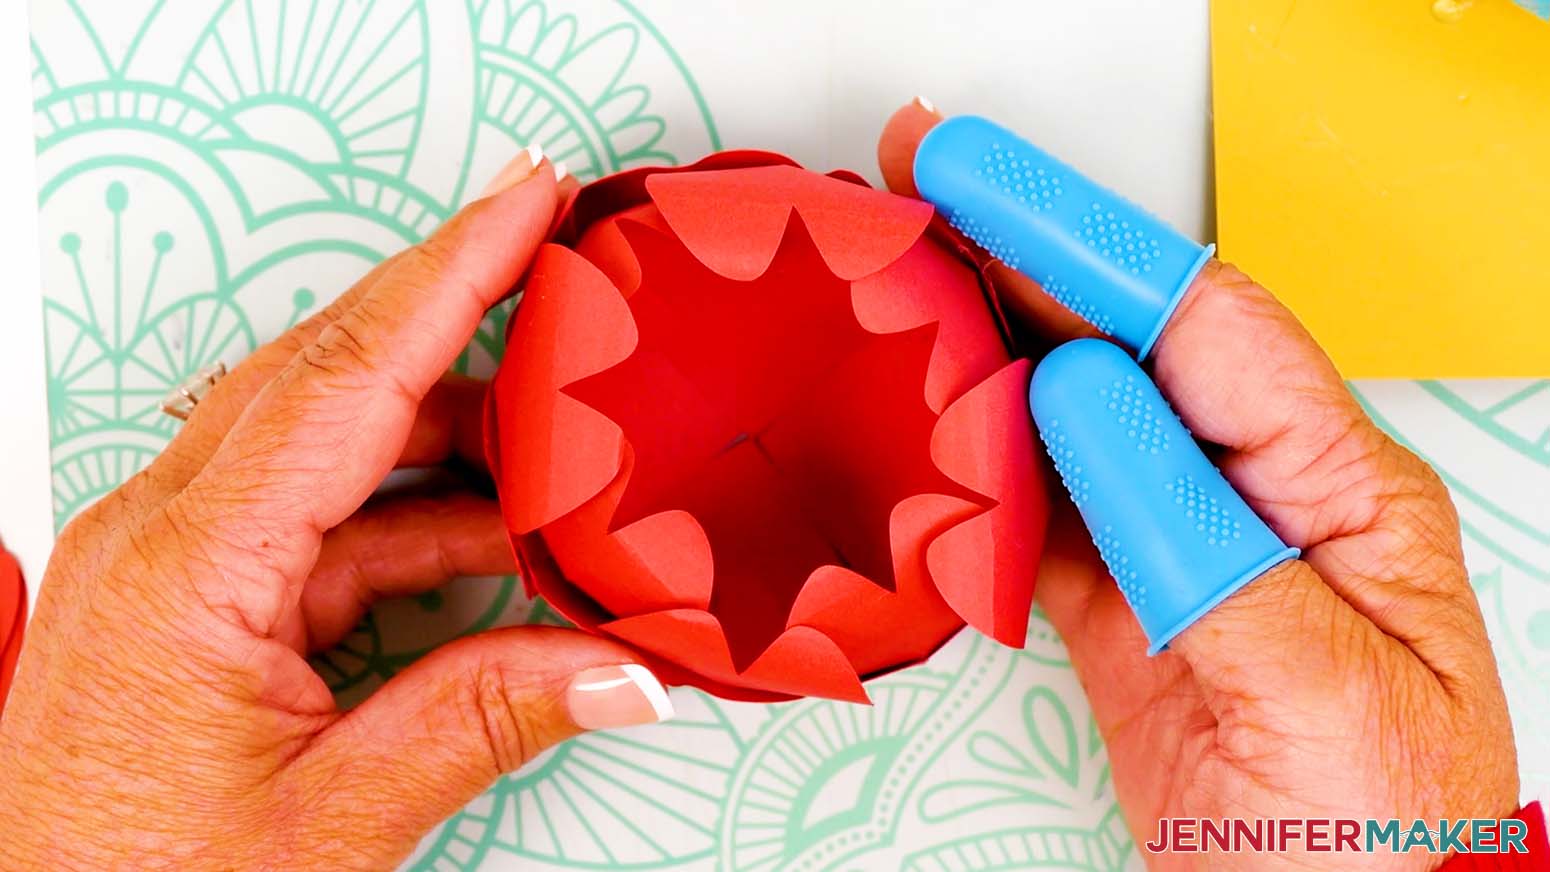
- Repeat Steps 10-17 to shape, glue, and adhere the eight medium inner petals inside the bowl (Inner Petal B), then again for the eight small inner petals (Inner Petal C).
NOTE: Each layer of petals will nest further inside the flower. - Use your fingers to curl the innermost petals inward around the center.
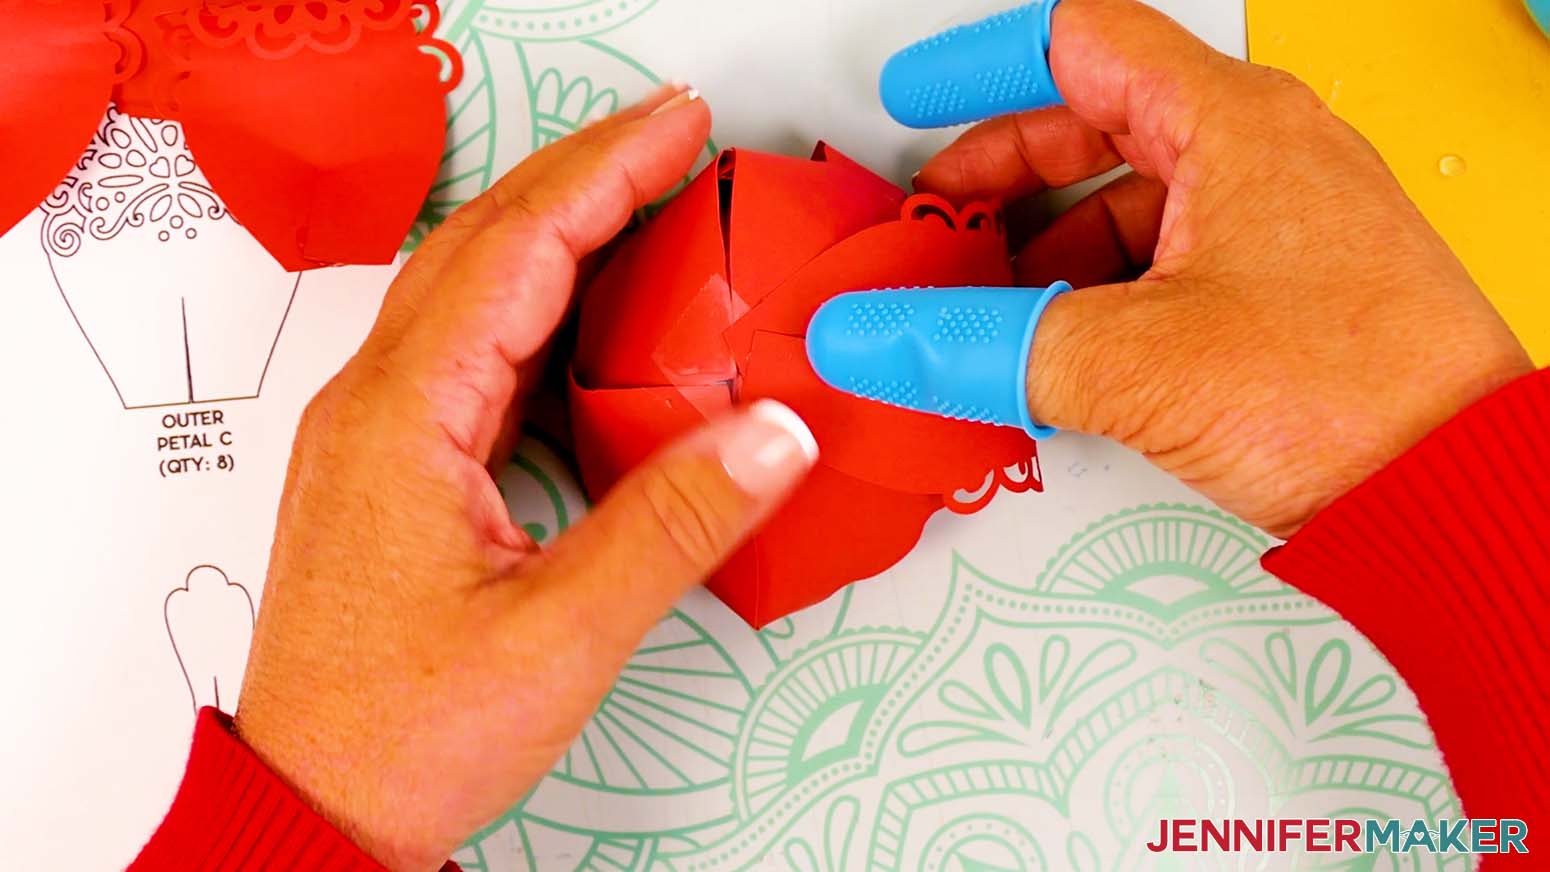
- Next, use your curling tool to curl the decorative edges of the six small outer petal pieces (Outer Petal A), and hot glue the overlapping tabs the same way as the inner petal pieces.
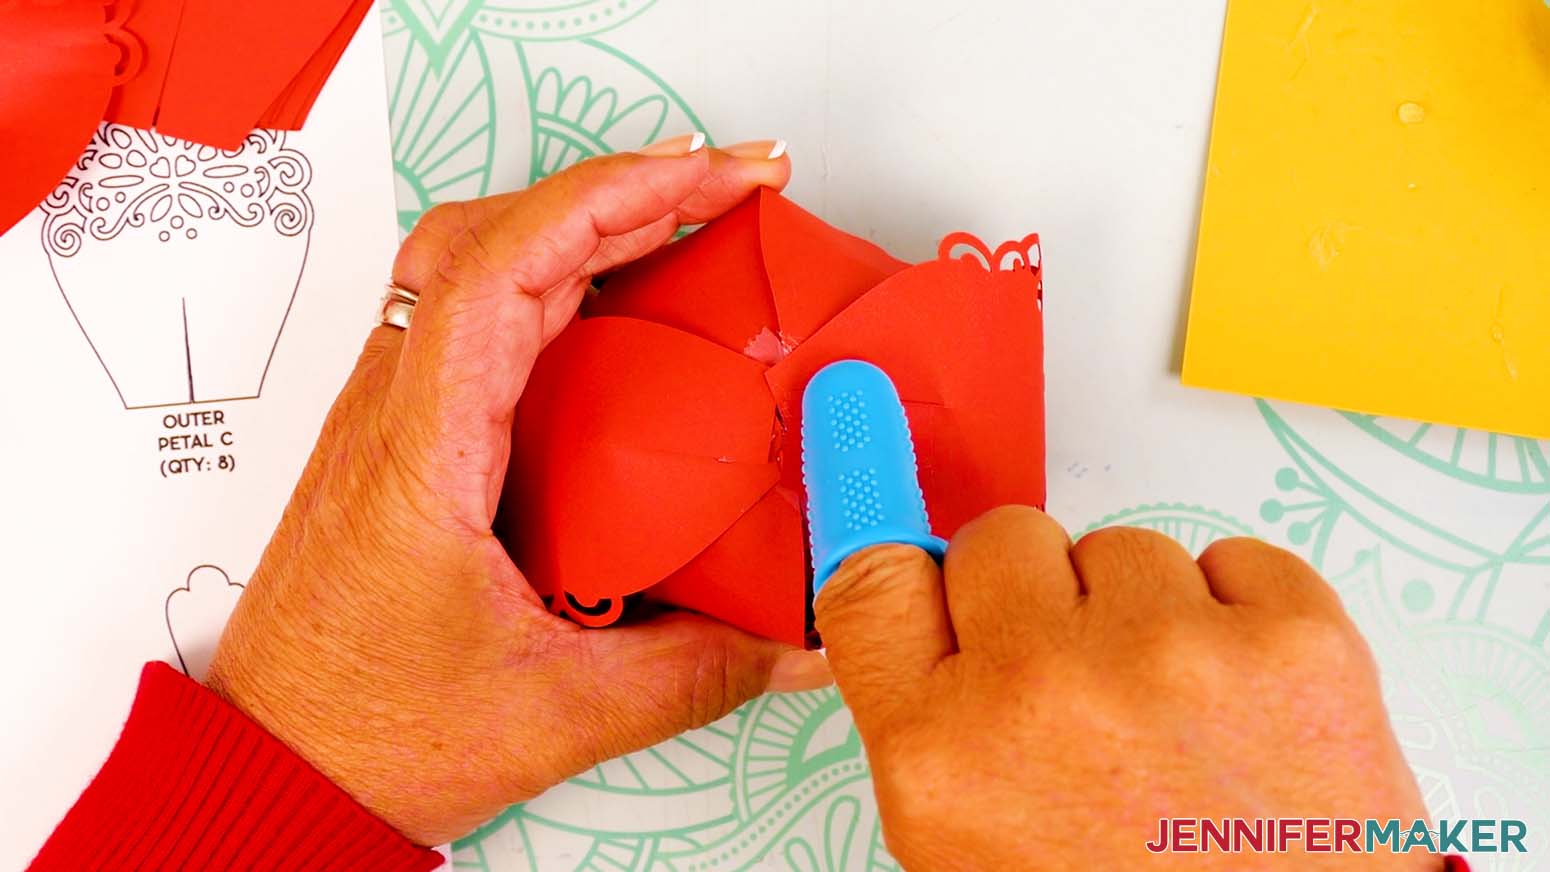
- Hold a shaped outer petal with the curved edge facing toward you and add hot glue to the inner tab area.
- Place the outer petal’s glued area against one of the bud bowl’s outer corners, then press and hold until the glue sets to adhere it.
- Add hot glue to the tab area of another small outer petal, and adhere it to the opposite outer corner of the bowl.
- Adhere the four remaining small outer petals evenly around the outside.
- Repeat Steps 20-24 to shape the edges, glue the tabs, and adhere the six medium outer petals (Outer Petal B) to the outside of the bowl, then again for the eight largest outer petals (Outer Petal C).
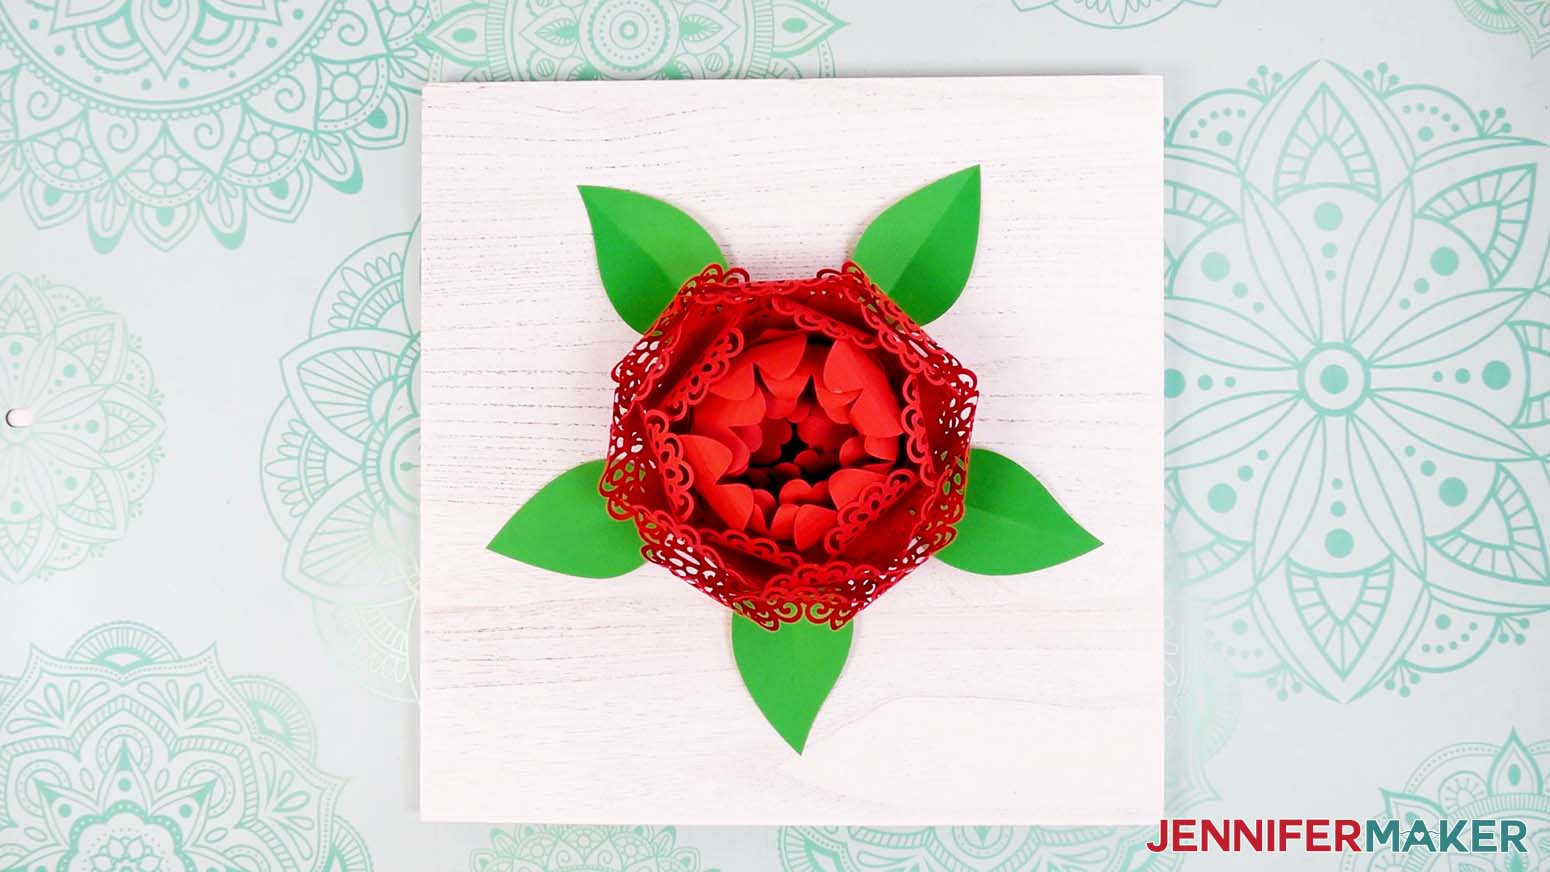
- Your lacy paper peony is ready to mount for display!


OPTION 2: HEART LAYERED ROSE OR SCALLOPED LAYERED ROSE
- Gather your flower pieces and place them face up in piles by size to make sure you have everything.
NOTE: You should have four large pieces with lacy petals, three small pieces with smooth petals, and one large piece with smooth petals. - Plug in your hot glue gun and put on your finger protectors as needed.
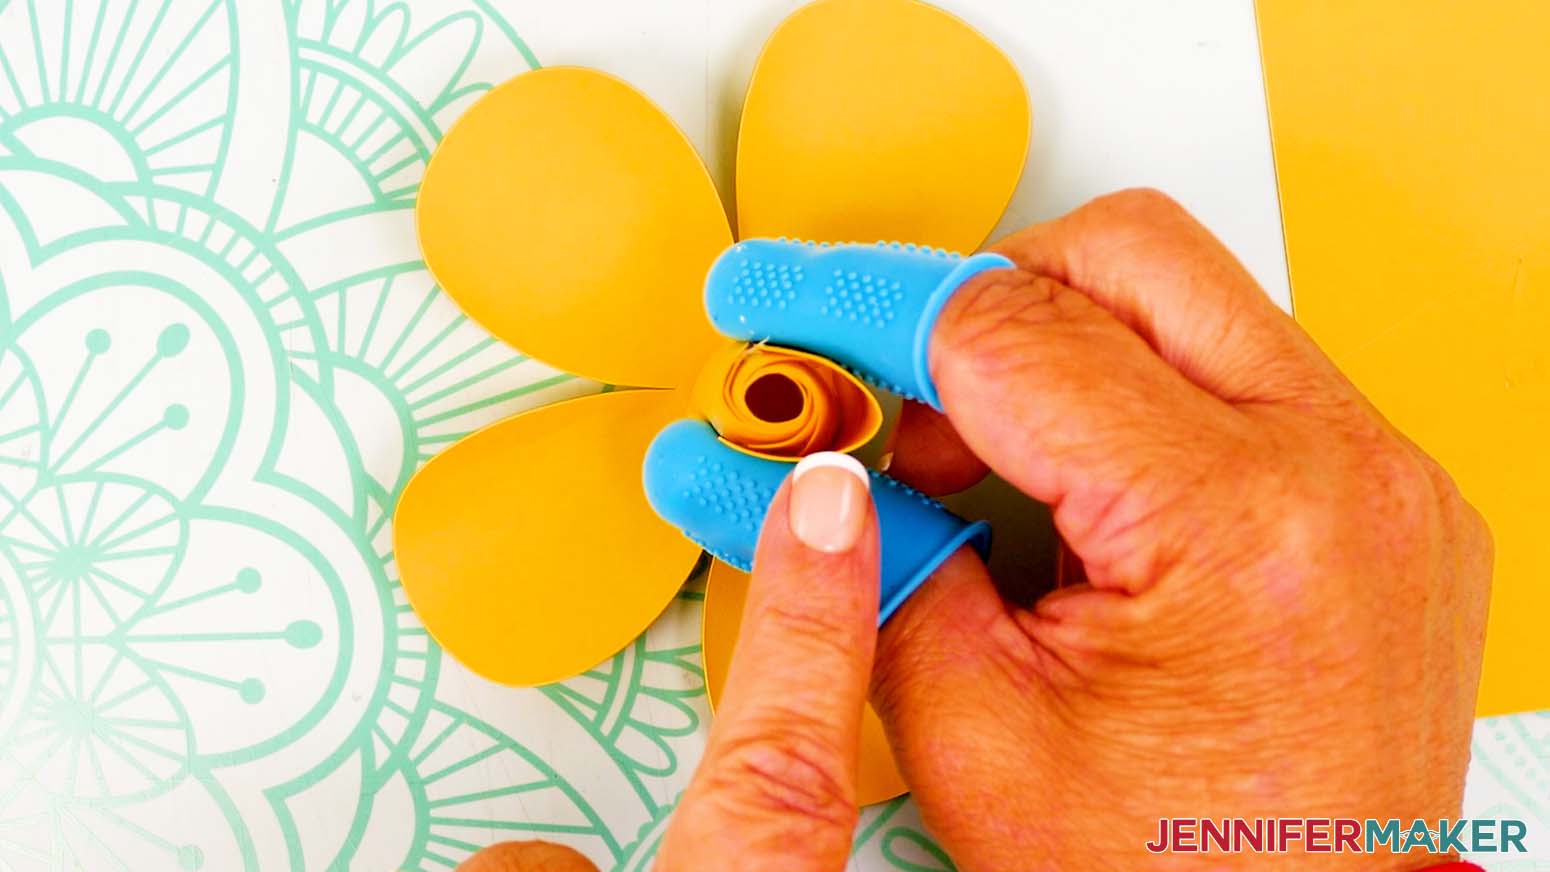
- Take one of your inner bud petal pieces and use a curling tool (like a marker or Scoring Stylus) to roll both sides of each petal inward.
- Roll the other two inner bud petal pieces the same way.
- Lay one of the curled inner bud pieces with the curls face up and fold up each of the petals to make a light crease line around the center.
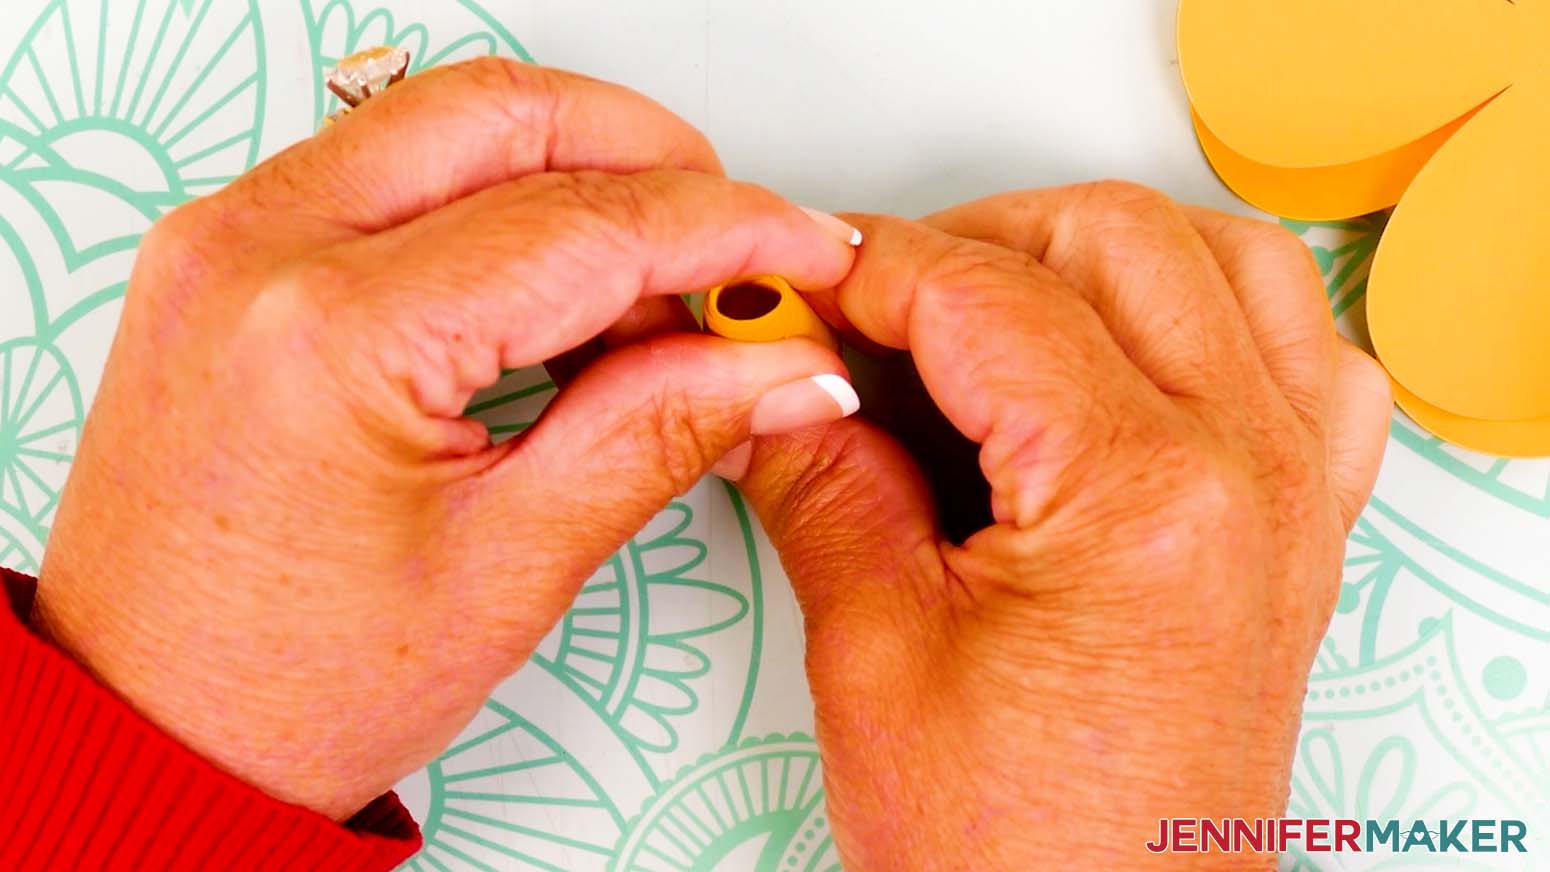
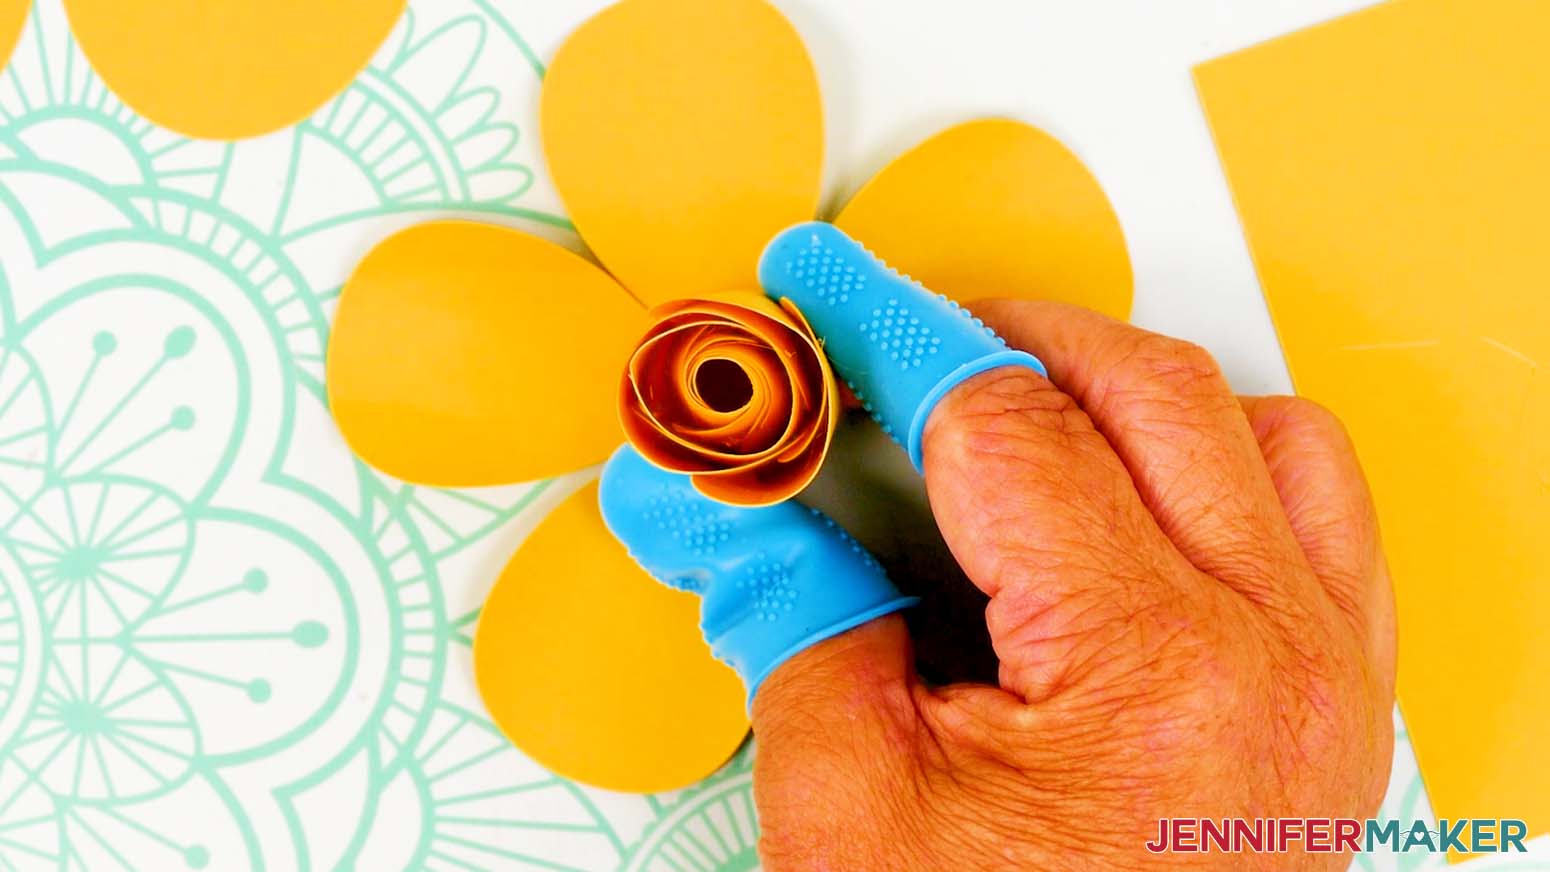
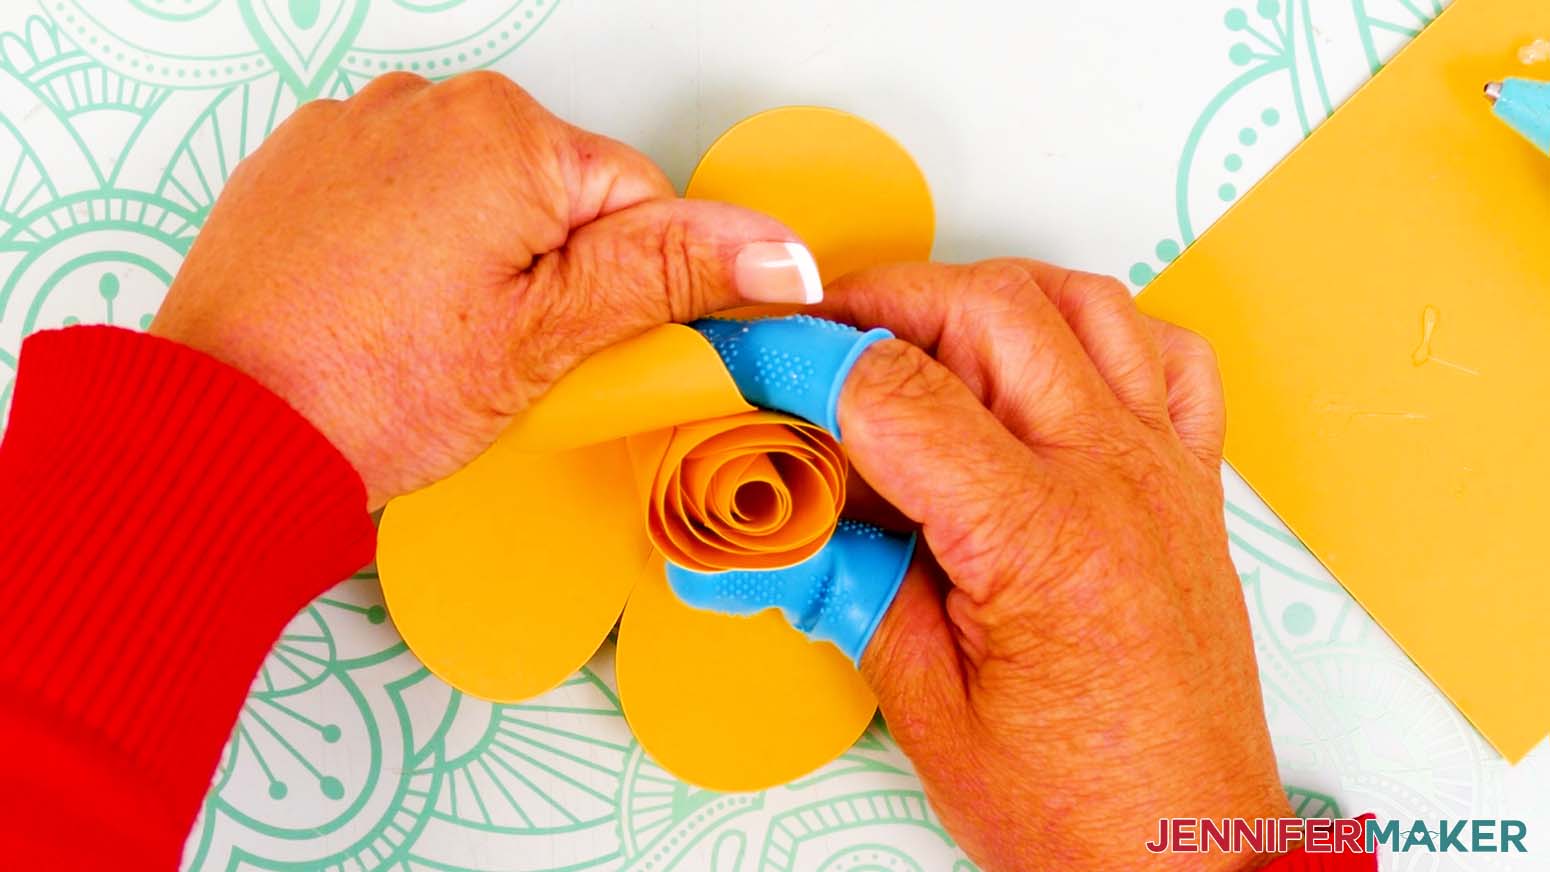
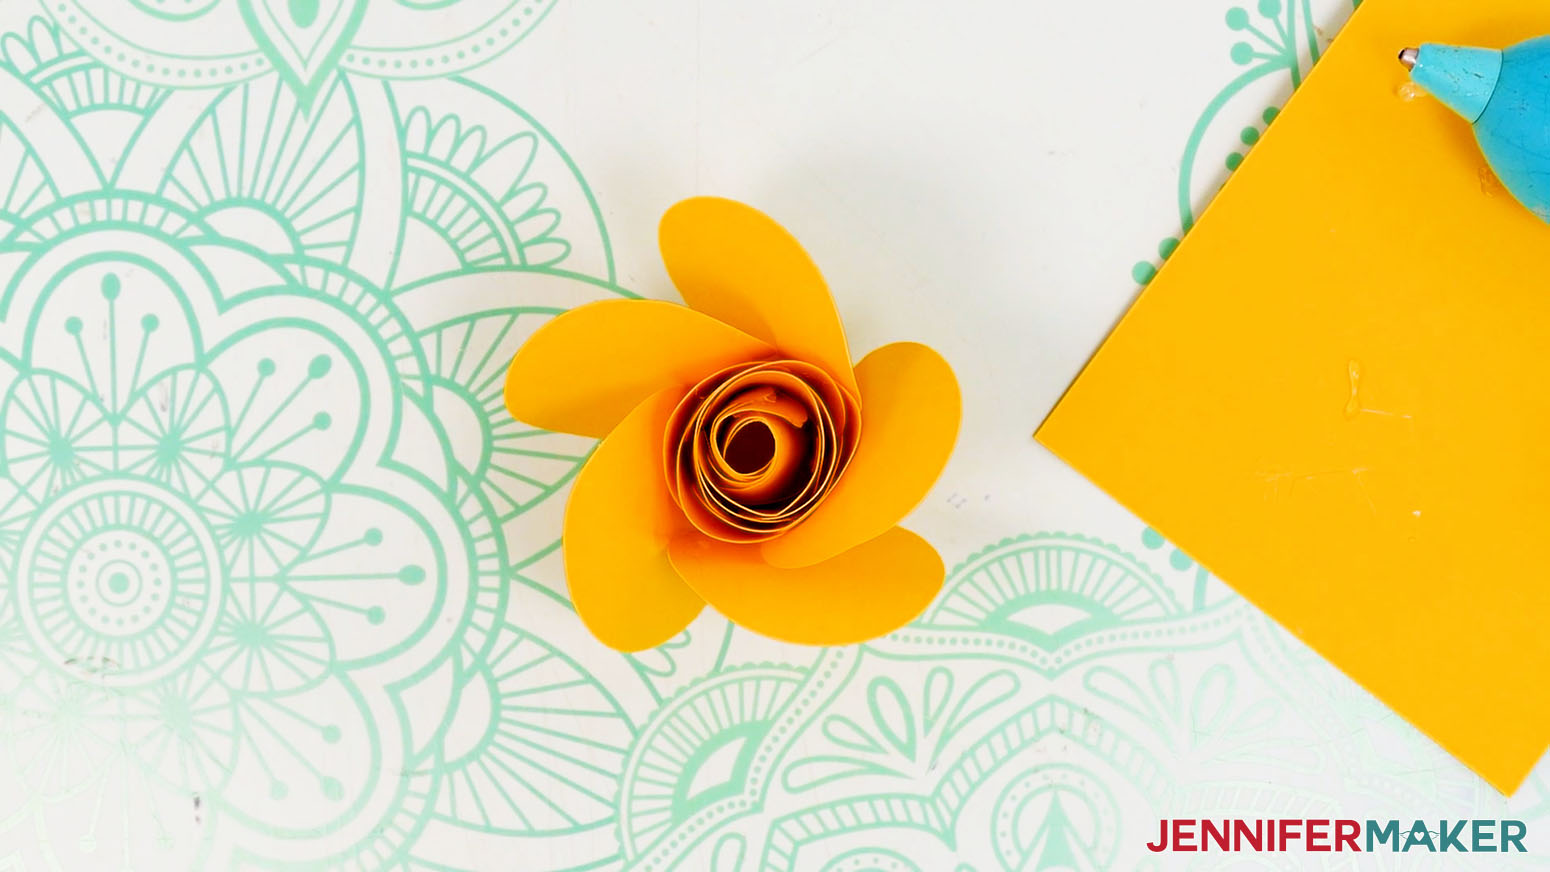
- Then pull all five petals toward the center and roll them up to form the bud.
- Use hot glue between each of the petals to hold them in place.
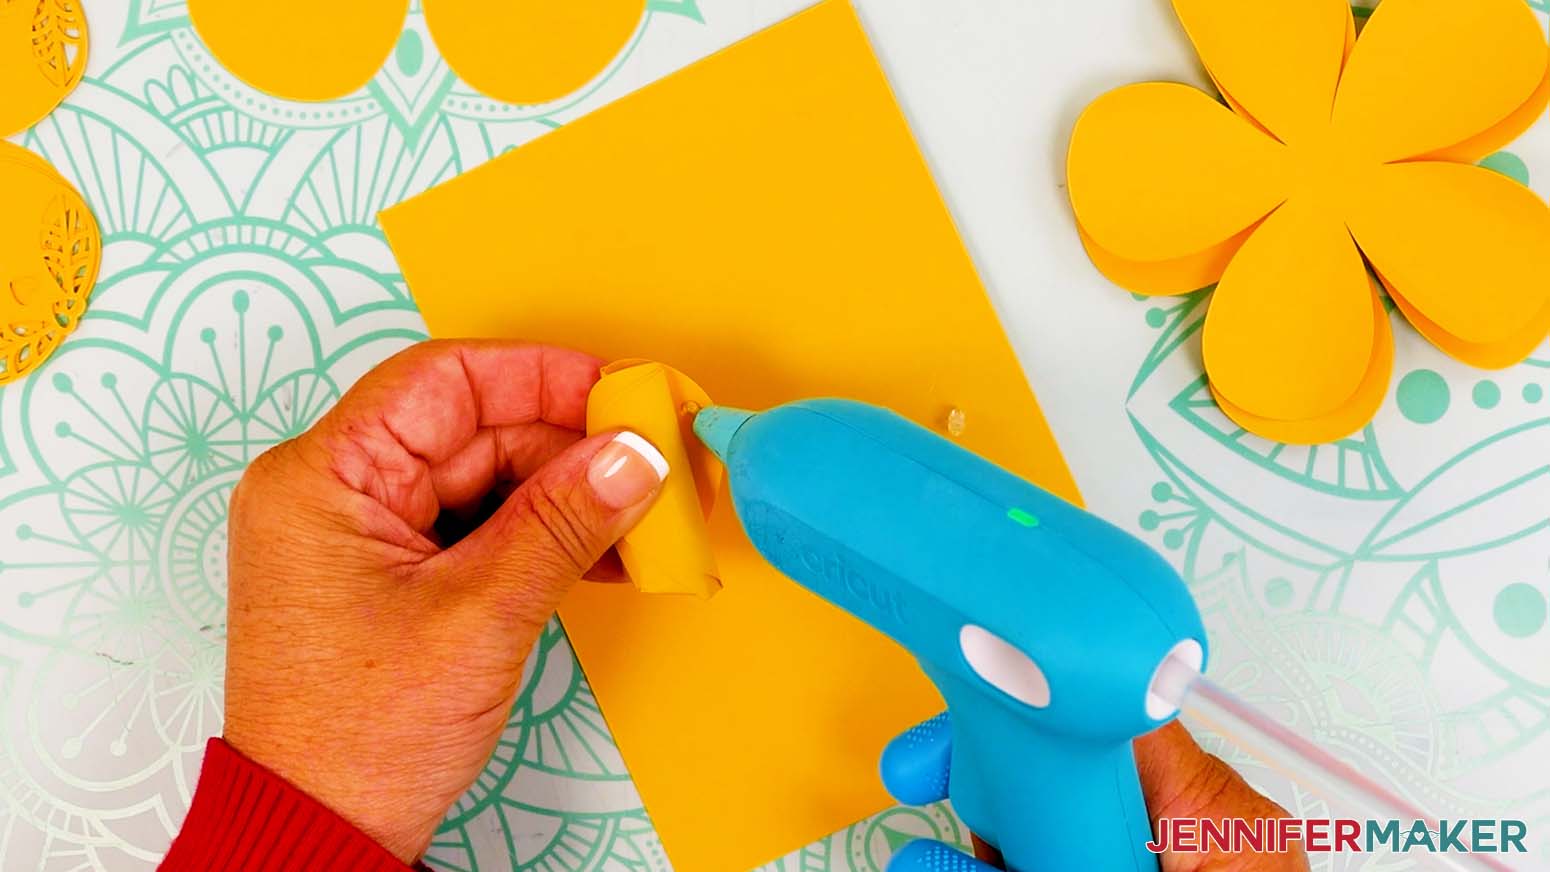
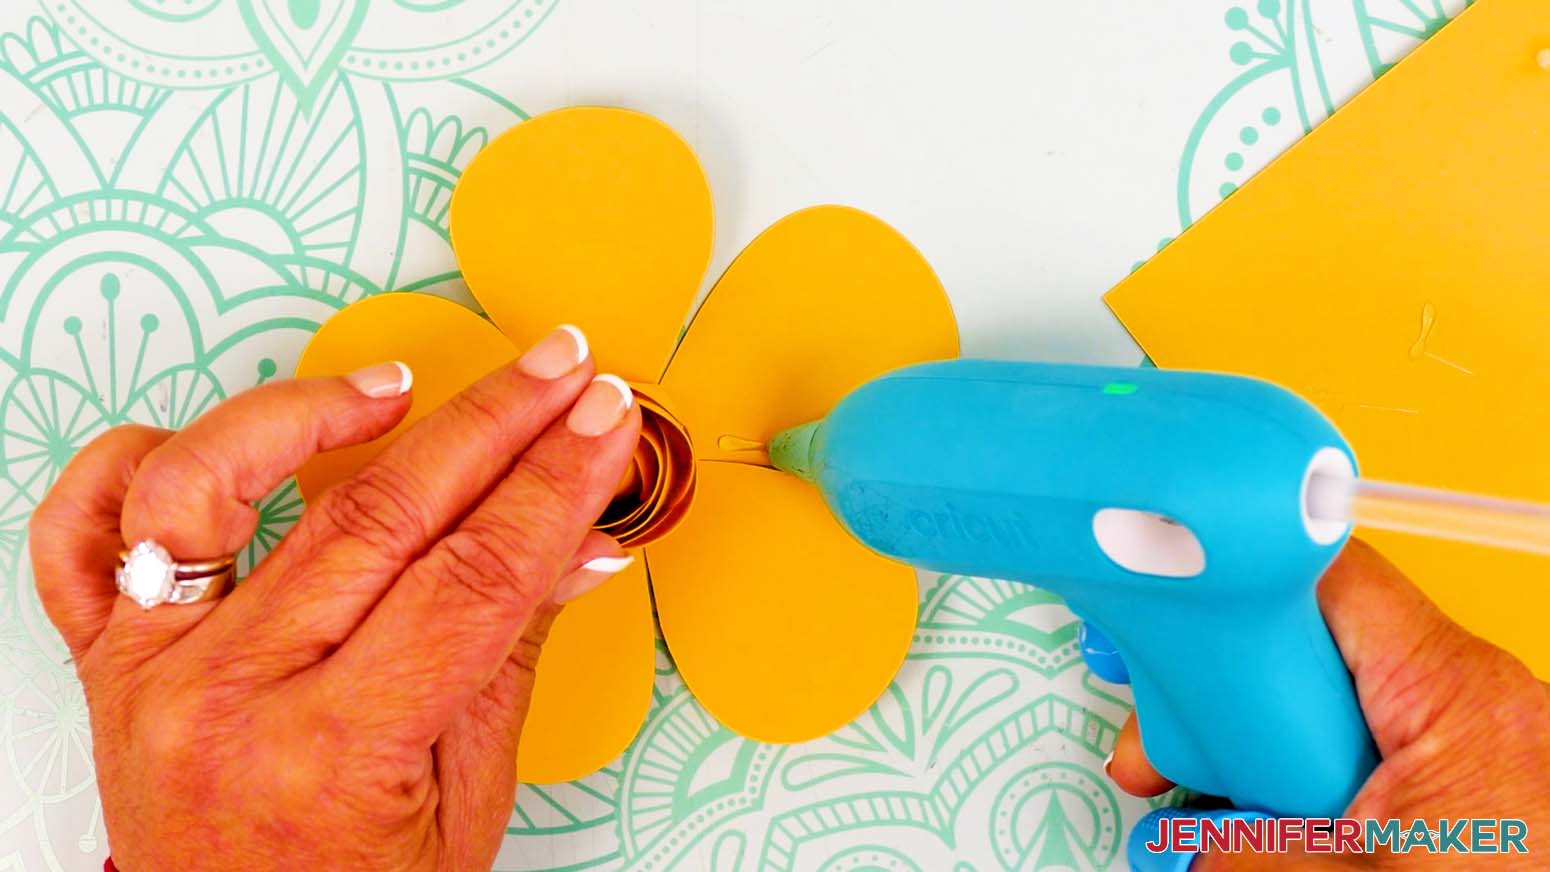
- Lay the next inner bud piece with the curls face up and add a dab of hot glue in the center.
- Adhere the bottom of the rolled bud in the center.
- Add hot glue to both sides of one petal.
- Then adhere the sides of the petal to the center bud.
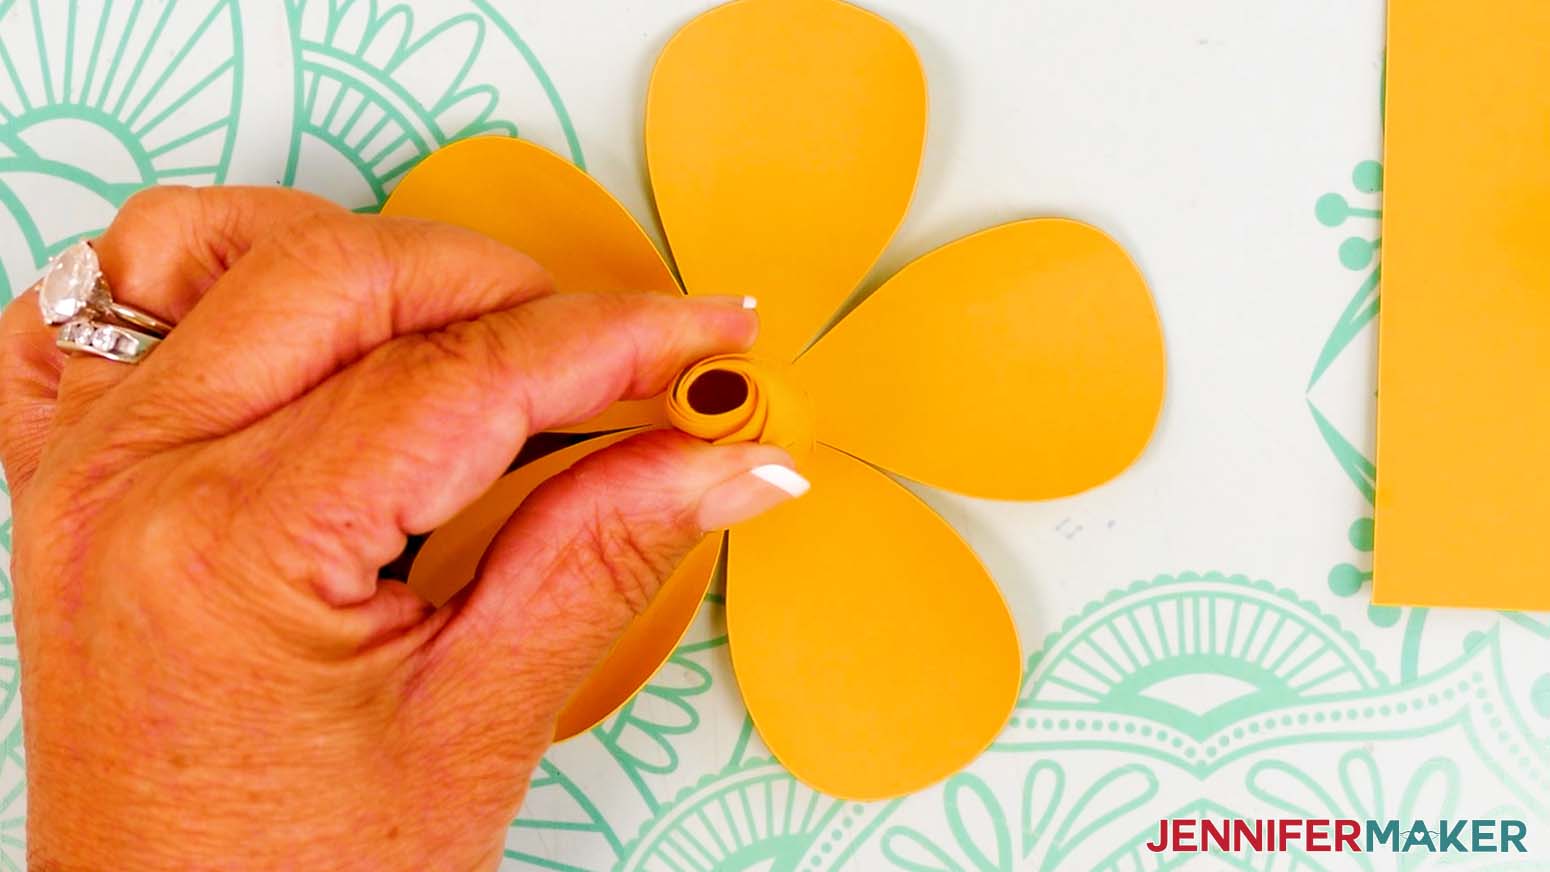
NOTE: There should be some space between the petal and the center bud. - Fold and adhere the remaining petals to the bud the same way.
NOTE: To achieve a more natural look, alternate gluing petals on opposite sides. - Repeat Steps 8-12 to adhere the bud to the third inner bud piece and attach the petals.
- Lay the outer bud piece on your work surface.
- Fold up each of the petals to create a light crease line around the center, then lay them back down on your work surface.
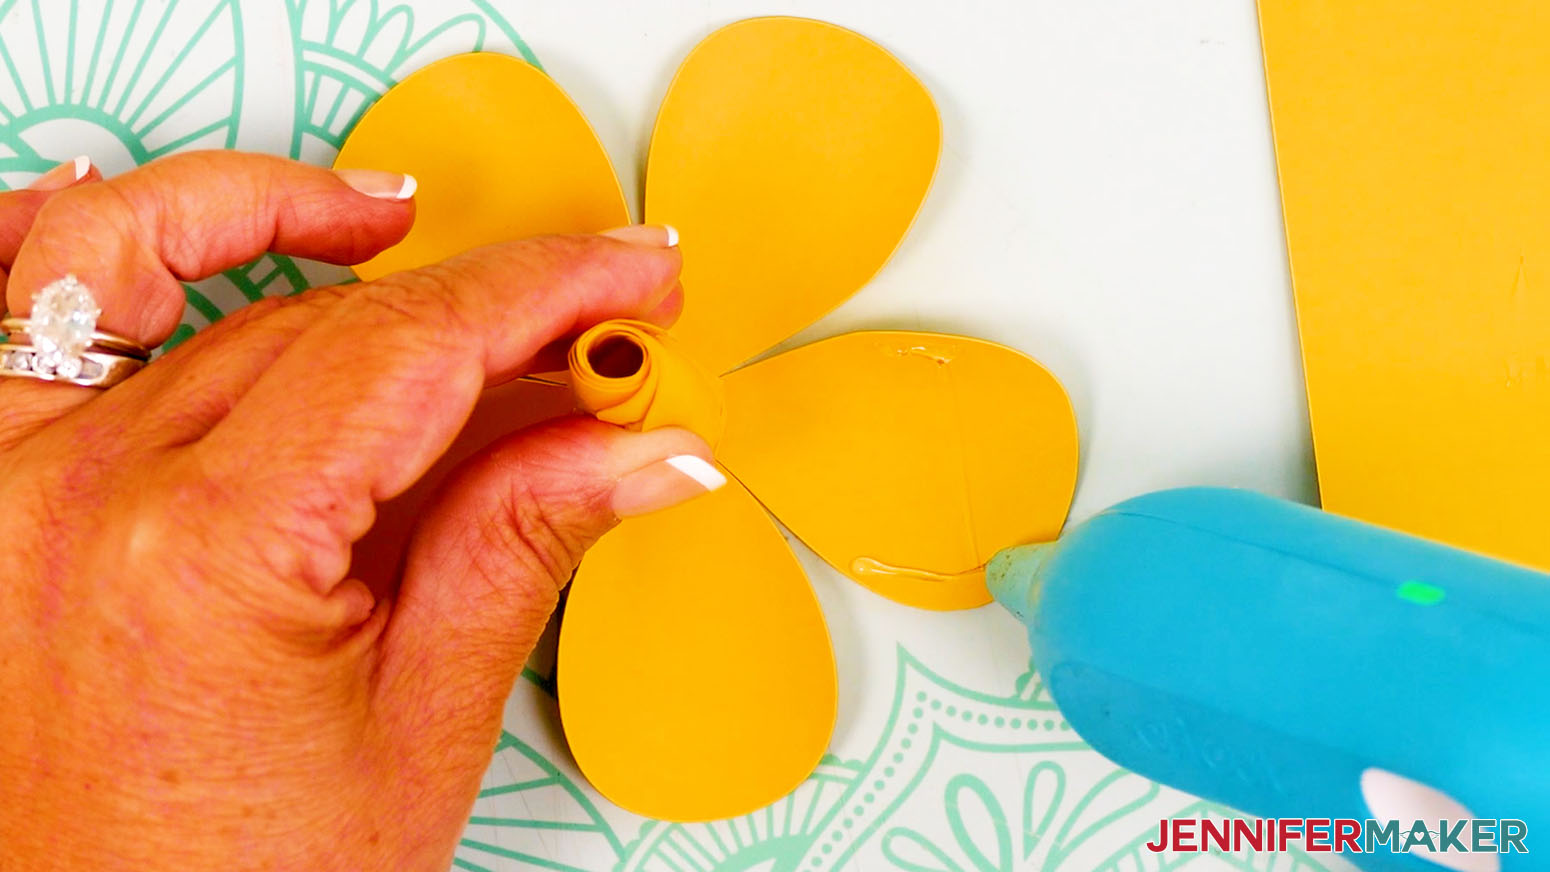
- Add hot glue to the center of the outer bud piece, then adhere the bottom of the rolled inner bud to the center.
- Add a small amount of hot glue along the lower edge of one of the outer petals.
- Then bring the petal up and adhere the glued edge to the rolled bud.
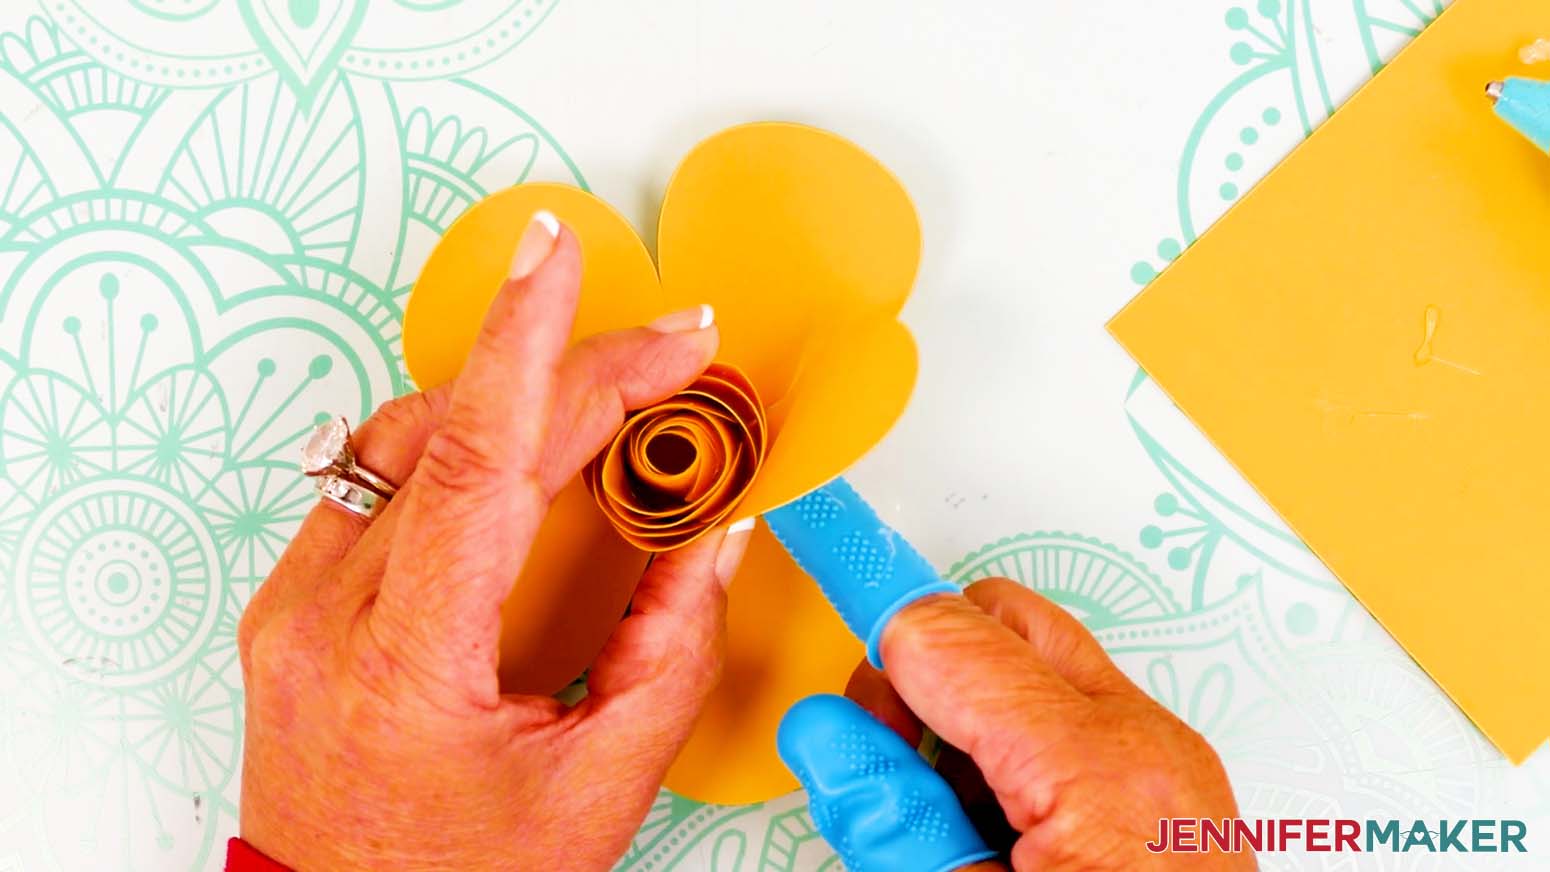
- Use your finger to curl back the opposite edge of the petal to shape it.
- Working your way around the flower, repeat Steps 17-19 to add the remaining outer bud petals.
NOTE: When you get to the last petal, you might need to tuck the glued edge under the first petal to adhere it to the center bud.
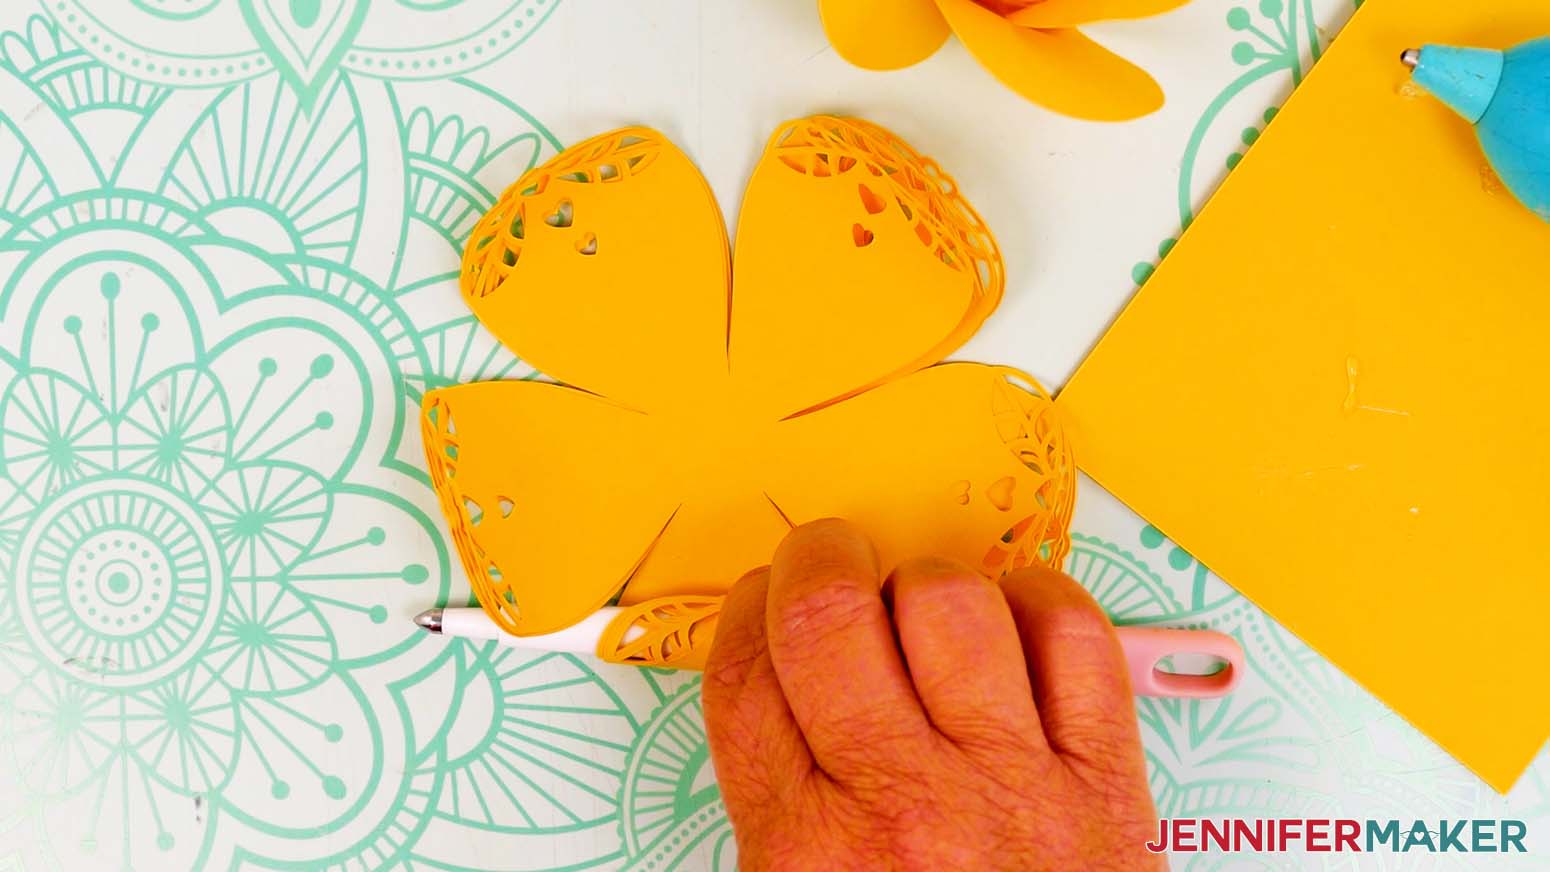
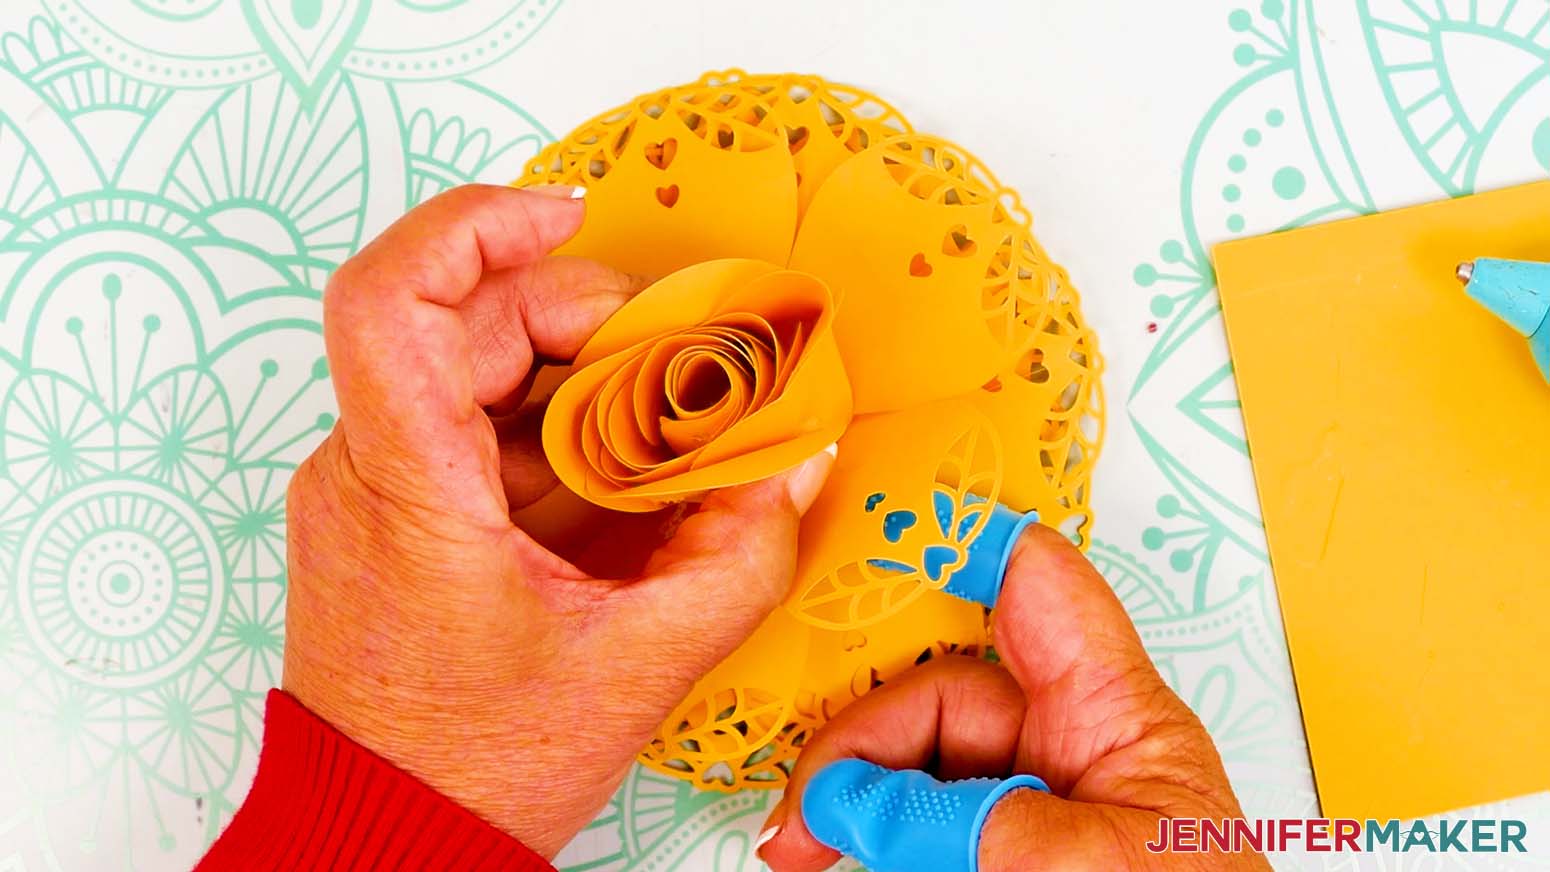
NOTE: We’ll finish closing up the bud after attaching it to the base. - Next, take one of your lace petal pieces and use your curling tool to curl its decorative edges toward the center.
- Flip the piece over and fold each of the petals upward, leaving a crease line around the center.
- Curl and fold the remaining three lace petal pieces the same way.
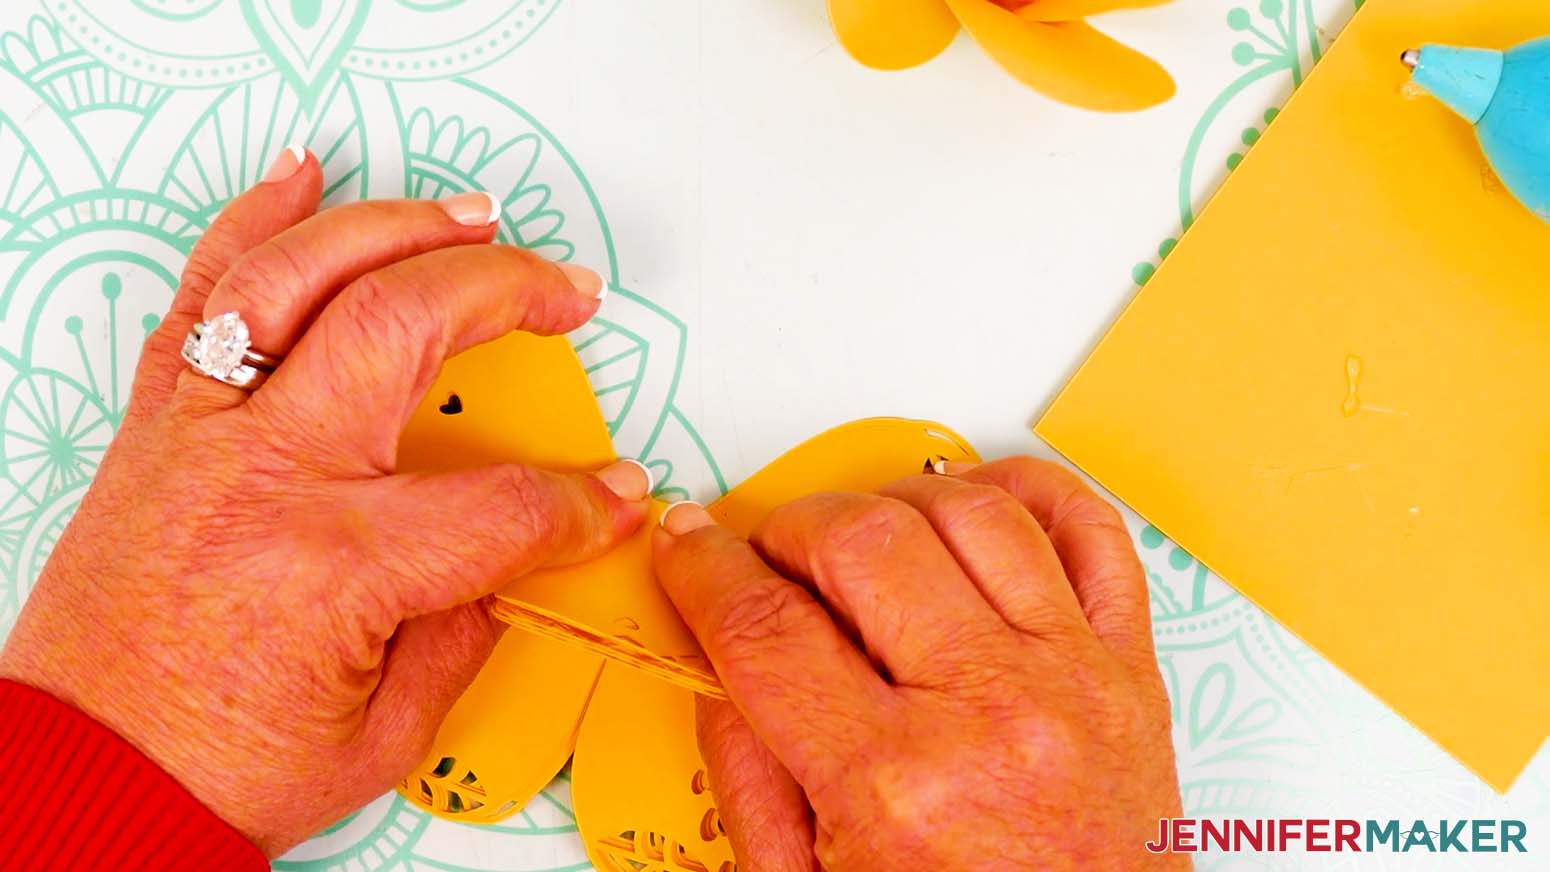
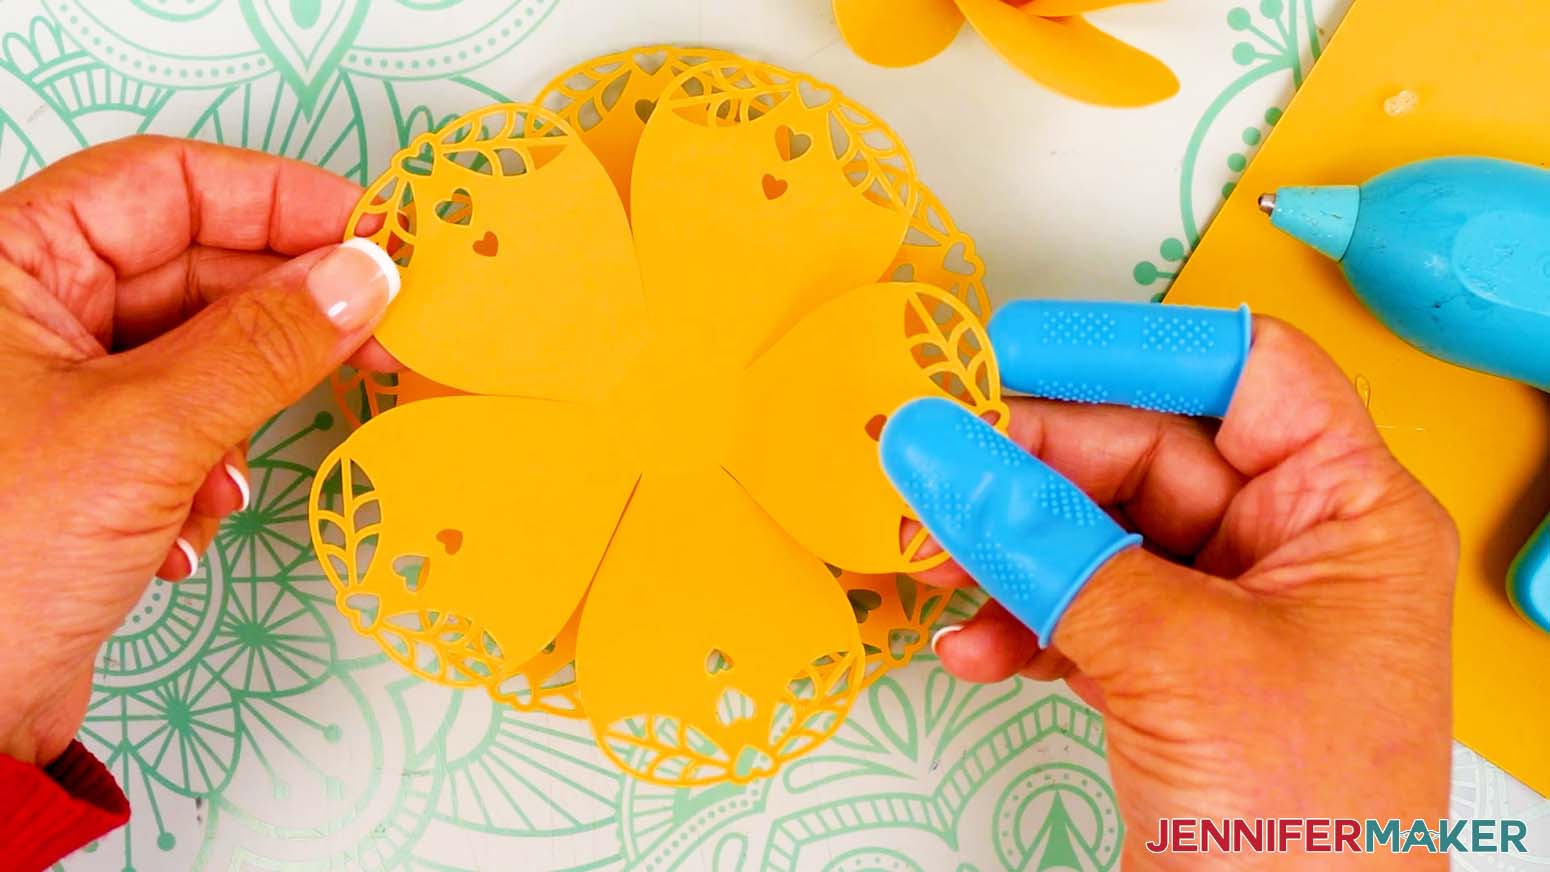
- Take the first lace petal piece and, with the curved petals facing down, add a dab of hot glue to the center.
- Hold the second lace petal piece over the first and rotate it so it fills the gaps between the first piece’s petals.
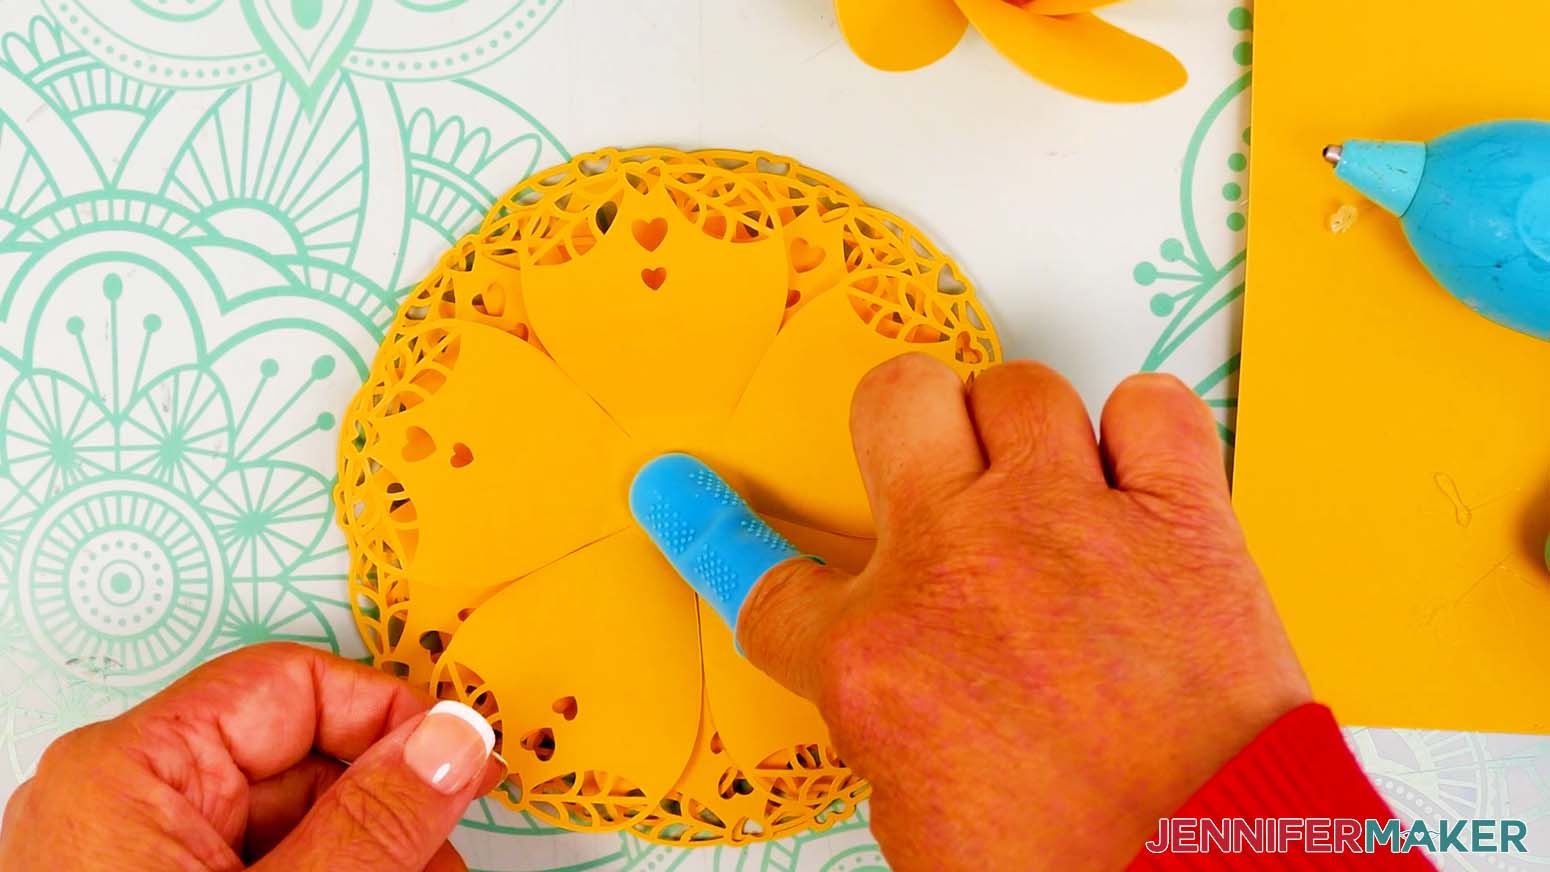
- Center and lower the second piece onto the first piece, then press and hold the center to adhere.
- Adhere the third and fourth lace petal pieces the same way, rotating to fill in the gaps each time.
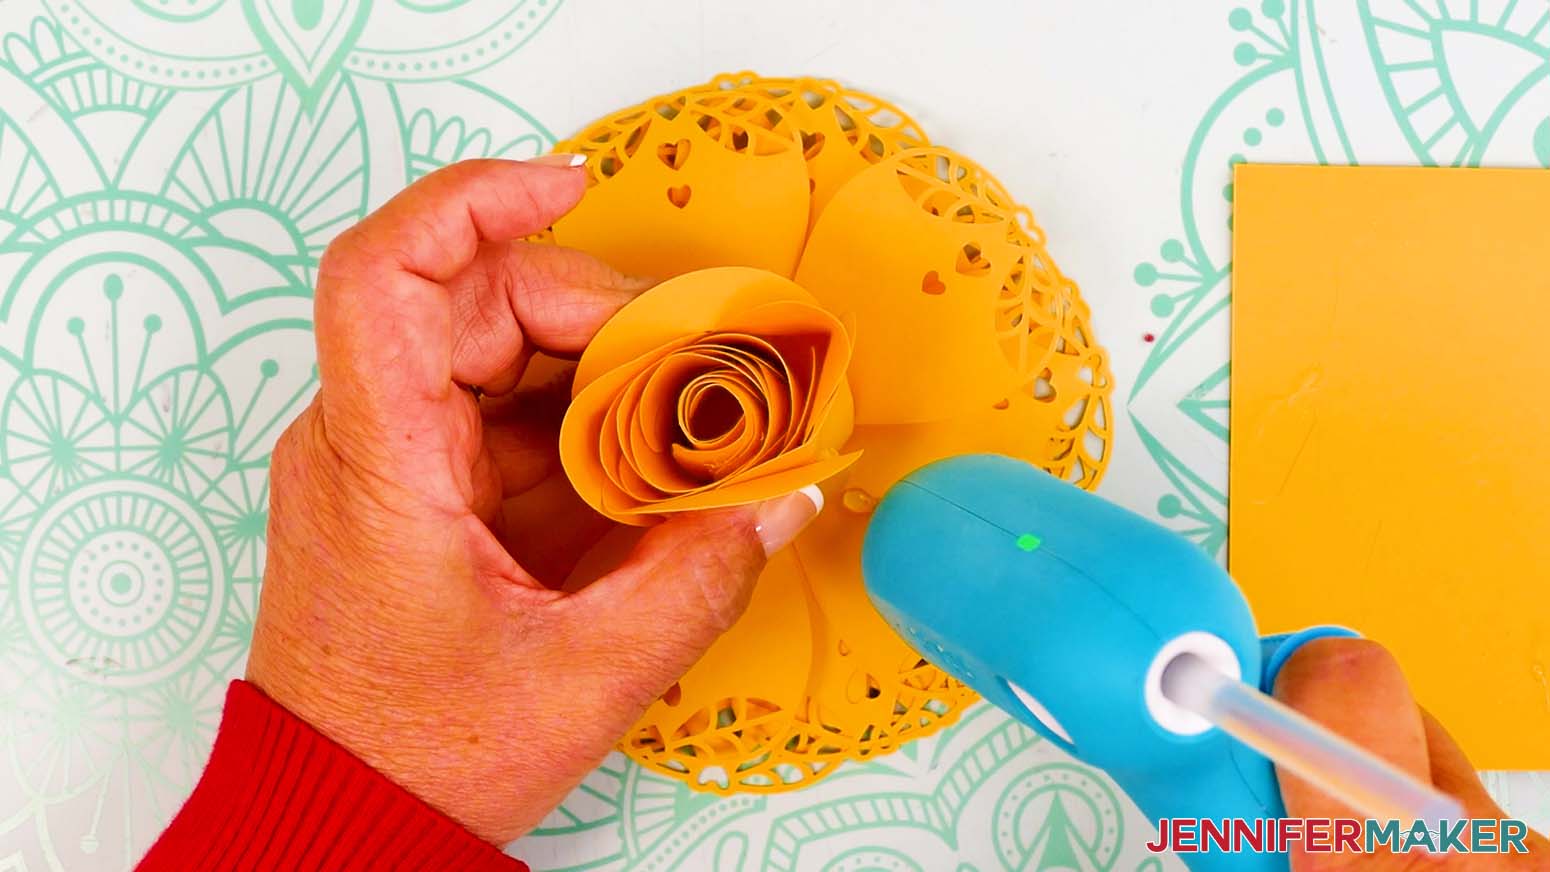
- Add hot glue to the center of the assembled lace petal pieces and place the bottom of the rolled bud onto it. Press and hold to adhere.
- To finish closing up the bud petals, add glue to the inside lower edge of one of the outer bud petals, then attach it to the back of the adjacent outer bud petal.
- Press and hold until the glue sets.
NOTE: You might need to reshape the petal as you wait for the glue to set. - Repeat Steps 29-30 for the remaining outer bud petals.
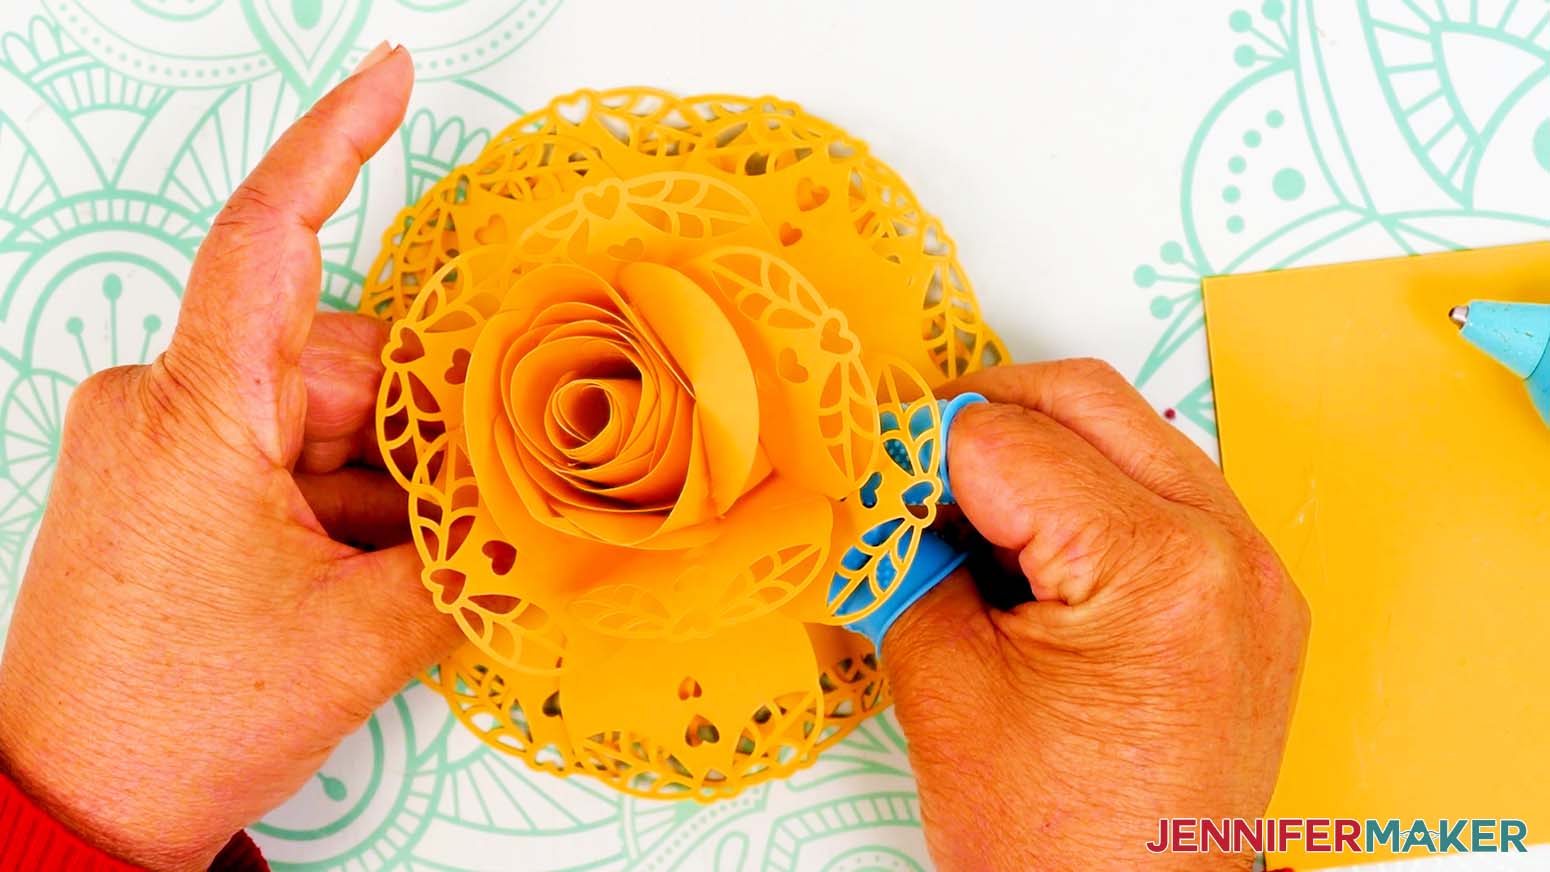
- Next, to add some lift and fan out your lacy petals evenly, add a dab of hot glue to the outside of the center bud where it meets the bottom of a petal on the top layer of lace petals.
TIP: Don’t add the glue too high or the petal won’t fan out well. - Fold the petal up toward the bud, and press and hold the glued area to adhere the petal to the bud.
TIP: Be patient when adhering the petals to the bud! Let each one set before moving to the next to prevent having to glue the same petals again. - Rotate the flower and adhere the opposite petal the same way.
- Then adhere the three other petals on the top layer the same way.
- Repeat Steps 32-35 to hot glue the second layer of lace petals behind the first.
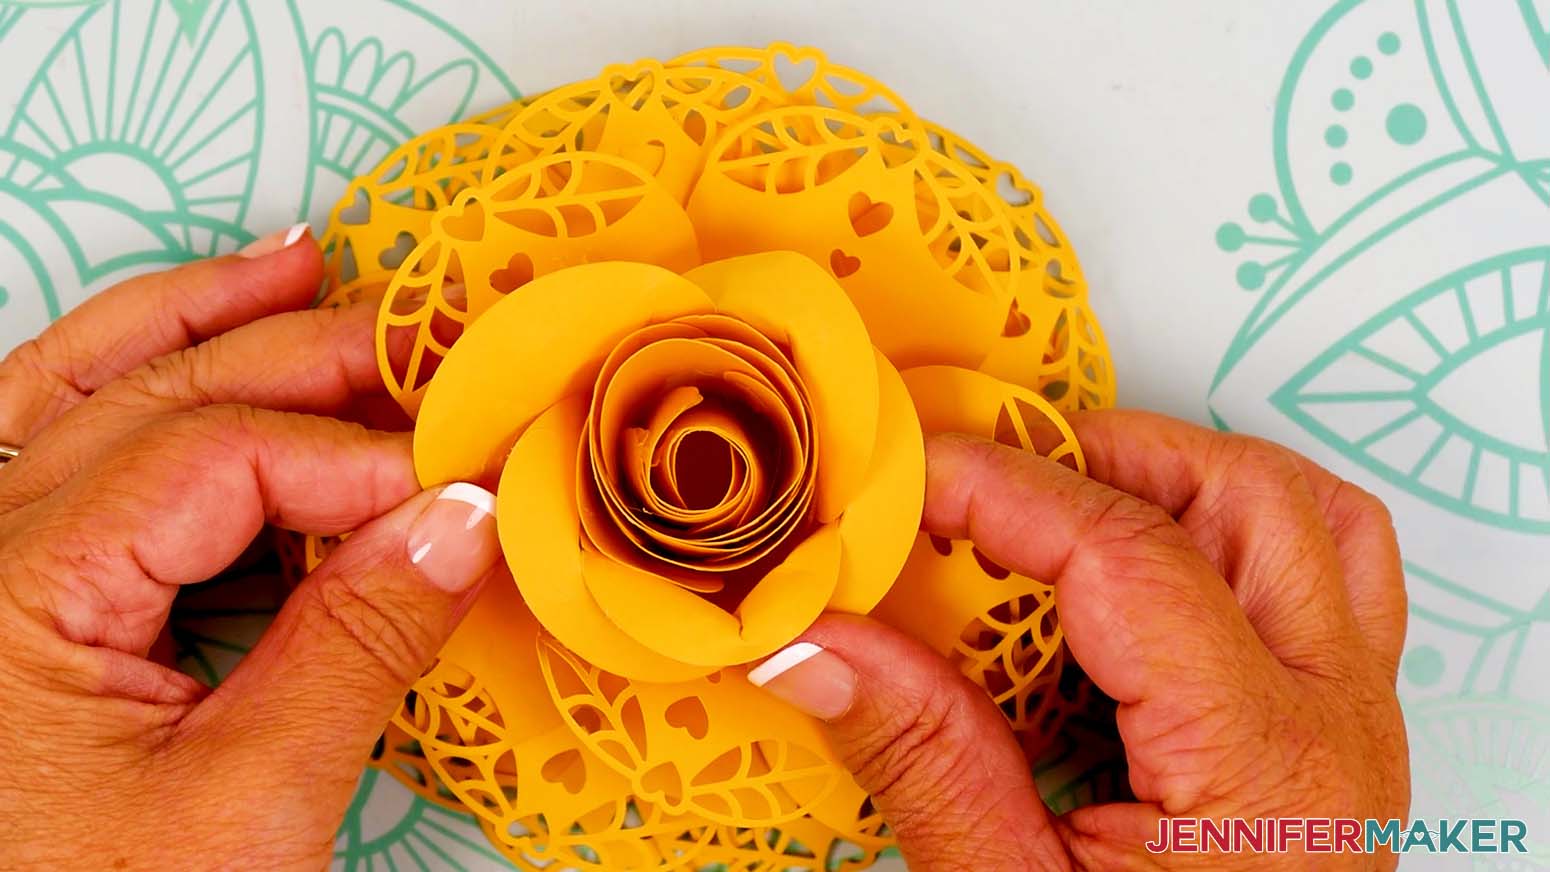
NOTE: The second layer of petals won’t be as uniform as the first, so you may need to find the best contact point between the layers and add hot glue there. - Once your petals have set, use your cylindrical curling tool to reshape the flowers as needed.
- Your Layered Rose is ready to mount for display!

STEP 4: MOUNT YOUR PAPER FLOWER FOR DISPLAY
- Lay your blank wooden sign face up on your work surface with the hanging hardware at the top.
- Place your paper flower in the center of your blank wooden sign.
- Arrange the leaves around the flower as desired.
NOTE: I like to lightly fold the leaves in half to add dimension. - Put on your finger protectors if needed.
- Remove the flower, then use hot glue to secure the bottoms of the leaves to the wood.
NOTE: You can also secure the tops of the leaves, if desired. - Turn your flower upside down and apply hot glue to its center.
- Flip your flower right side up and press it into the center of your sign. Hold in place until the glue sets.
- Your paper flower with lace petals is ready to hang!
STEP 5: SHOW IT OFF!
You now have a beautiful paper flower with lace petals ready to hang on your wall!
Notes
FINISHED SIZES
Layered Rose: 5.5” W x 2.25” H
Peony: 6” W x 2.25” H
Answers to Your Questions About How to Make a Paper Flower with Lace Petals
Q: I want to customize my own lace petal designs. How do I do that?
A: You can learn how to make customized lace petals in my ADVANCE program. Learn more about ADVANCE here!
Q: What kind of paper do I use?
A: I used 65 lb. cardstock for my paper flowers because it’s sturdy enough to hold shape, but pliant enough that I can curl and shape each petal to achieve a more natural look. I recommend using solid core cardstock for this project so you don’t end up with white edges around each piece.
Q: How do I attach the layers of petals for each flower?
A: The way you attach the petals depends on whether you’re using the peony design or the rose design. In my video, I show you how and where to attach each petal for the best placement for both designs. You can attach your petals using craft glue (my favorite is Bearly Art Precision Glue), but I’ve had better success using hot glue guns and glue sticks.
Q: How can I make my paper flower with lace petals more unique?
A: The easiest way to make your paper flowers more unique is to play with different colors and patterns of cardstock! You can choose a different color for each layer, creating an ombre effect or a rainbow effect. You can even go crazy and choose different colors for each petal! If you use a paper that is only patterned on one side, make sure the pretty side will be visible when your flower is on display!
Q: Help! My Cricut Design Space screen looks different from yours!
A: If you’re using the latest version of Cricut Design Space, your screen may have slight variations than the screen you see on the video tutorial. Good news: All of the same functions are there, they may just be in different spots or have new icons. Pause the video if you need, or follow along with the written tutorial. If you get stuck, ask for expert support in our Facebook group. Our group is a fun and friendly place to share your projects, ask questions, and find inspiration! Plus, you can catch the latest news on JenniferMaker projects, files, tutorials and more.
Q: Can I make and sell my paper flowers with lace petals?
A: I love supporting creative entrepreneurs! If you want to use my designs and projects for commercial use, please familiarize yourself with my important licensing information before selling your crafts.
I do not permit sale of my digital items, but you can sell the creative goods you make with them — as long as you follow my licensing requirements. That means you cannot sell the paper flowers with lace petals SVG, PDF, or DXF files, but you can sell paper flowers that you made with the files within the guidelines linked above.
Q: Where can I find the supplies and tools to make paper flowers with lace petals?
A: My paper flowers with lace petals can be made with simple supplies you may already have in your crafting stash. I like to shop on Amazon for their free and fast shipping with my Amazon Prime membership (just make sure to look for sellers with 5-star reviews, carefully review product information, and check out the product preview). You can also find most, if not all of the supplies and tools at your local craft store, so be sure to check for current sales!
Q: Can I resize the paper flowers with lace petals SVGs?
A: Yes, you can resize the SVGs in my free download to various sizes that work best for you. I don’t recommend sizing them a lot smaller because the lace edges will be very tiny and hard to cut. Note that the peony pieces are already small enough to cut on a Cricut Joy, but the rose petals can be sized for the Joy, as well.
Q: I love paper flowers! Do you have other paper flower projects I can make?
A: I have lots of gorgeous flower-themed projects for you to try! Check out a few of my favorites:
- DIY Paper Flower Letter
- Paper Flower Teddy Bear
- Paper Flower Shadow Box Displays
- DIY Paper Flower Bouquet with 3D Flowers
- 3D Pop-Up Spring Flowers
- Rose Gold Paper Flower with Foiled Edges
- Paper Cherry Blossom Flowers
- Easy DIY Paper Hydrangea
- Giant Lace Paper Rose (the inspiration for these designs!)
Get my free SVG/DXF/PDF files to make paper flowers with lace petals!
(If you do not see the signup form above, click here.)
I love seeing what you make with my designs and how you use them! Please share a photo of your paper flowers with lace petals in our Facebook group or tag me on social media with #jennifermaker.
Love,

Want to remember this? Save this Paper Flowers with Lace Petals tutorial to your favorite Pinterest Board!