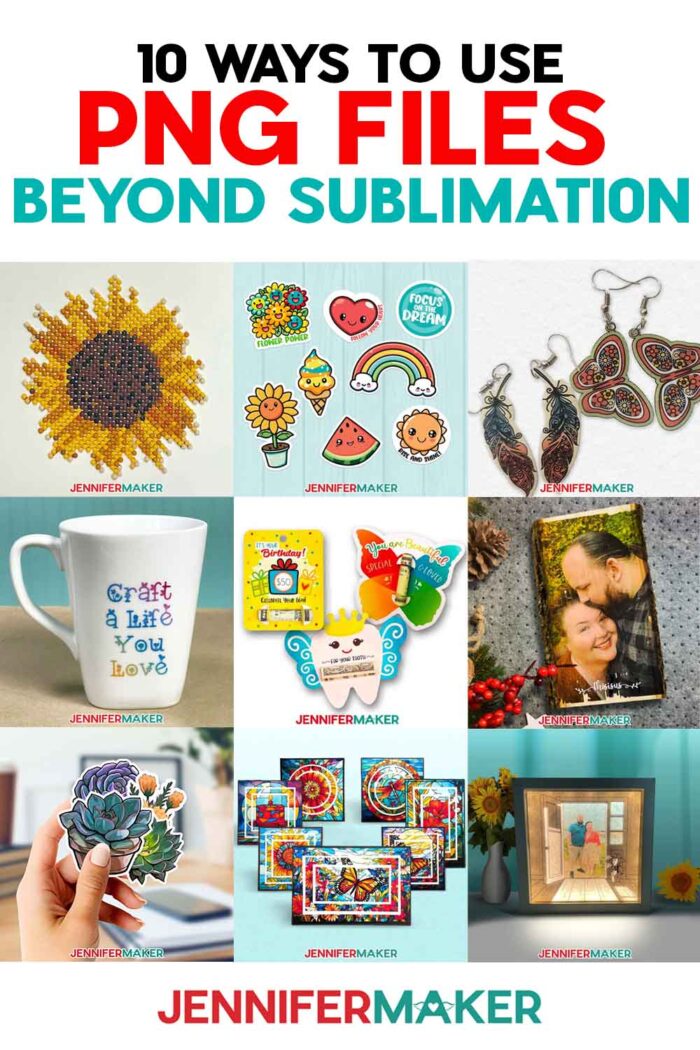
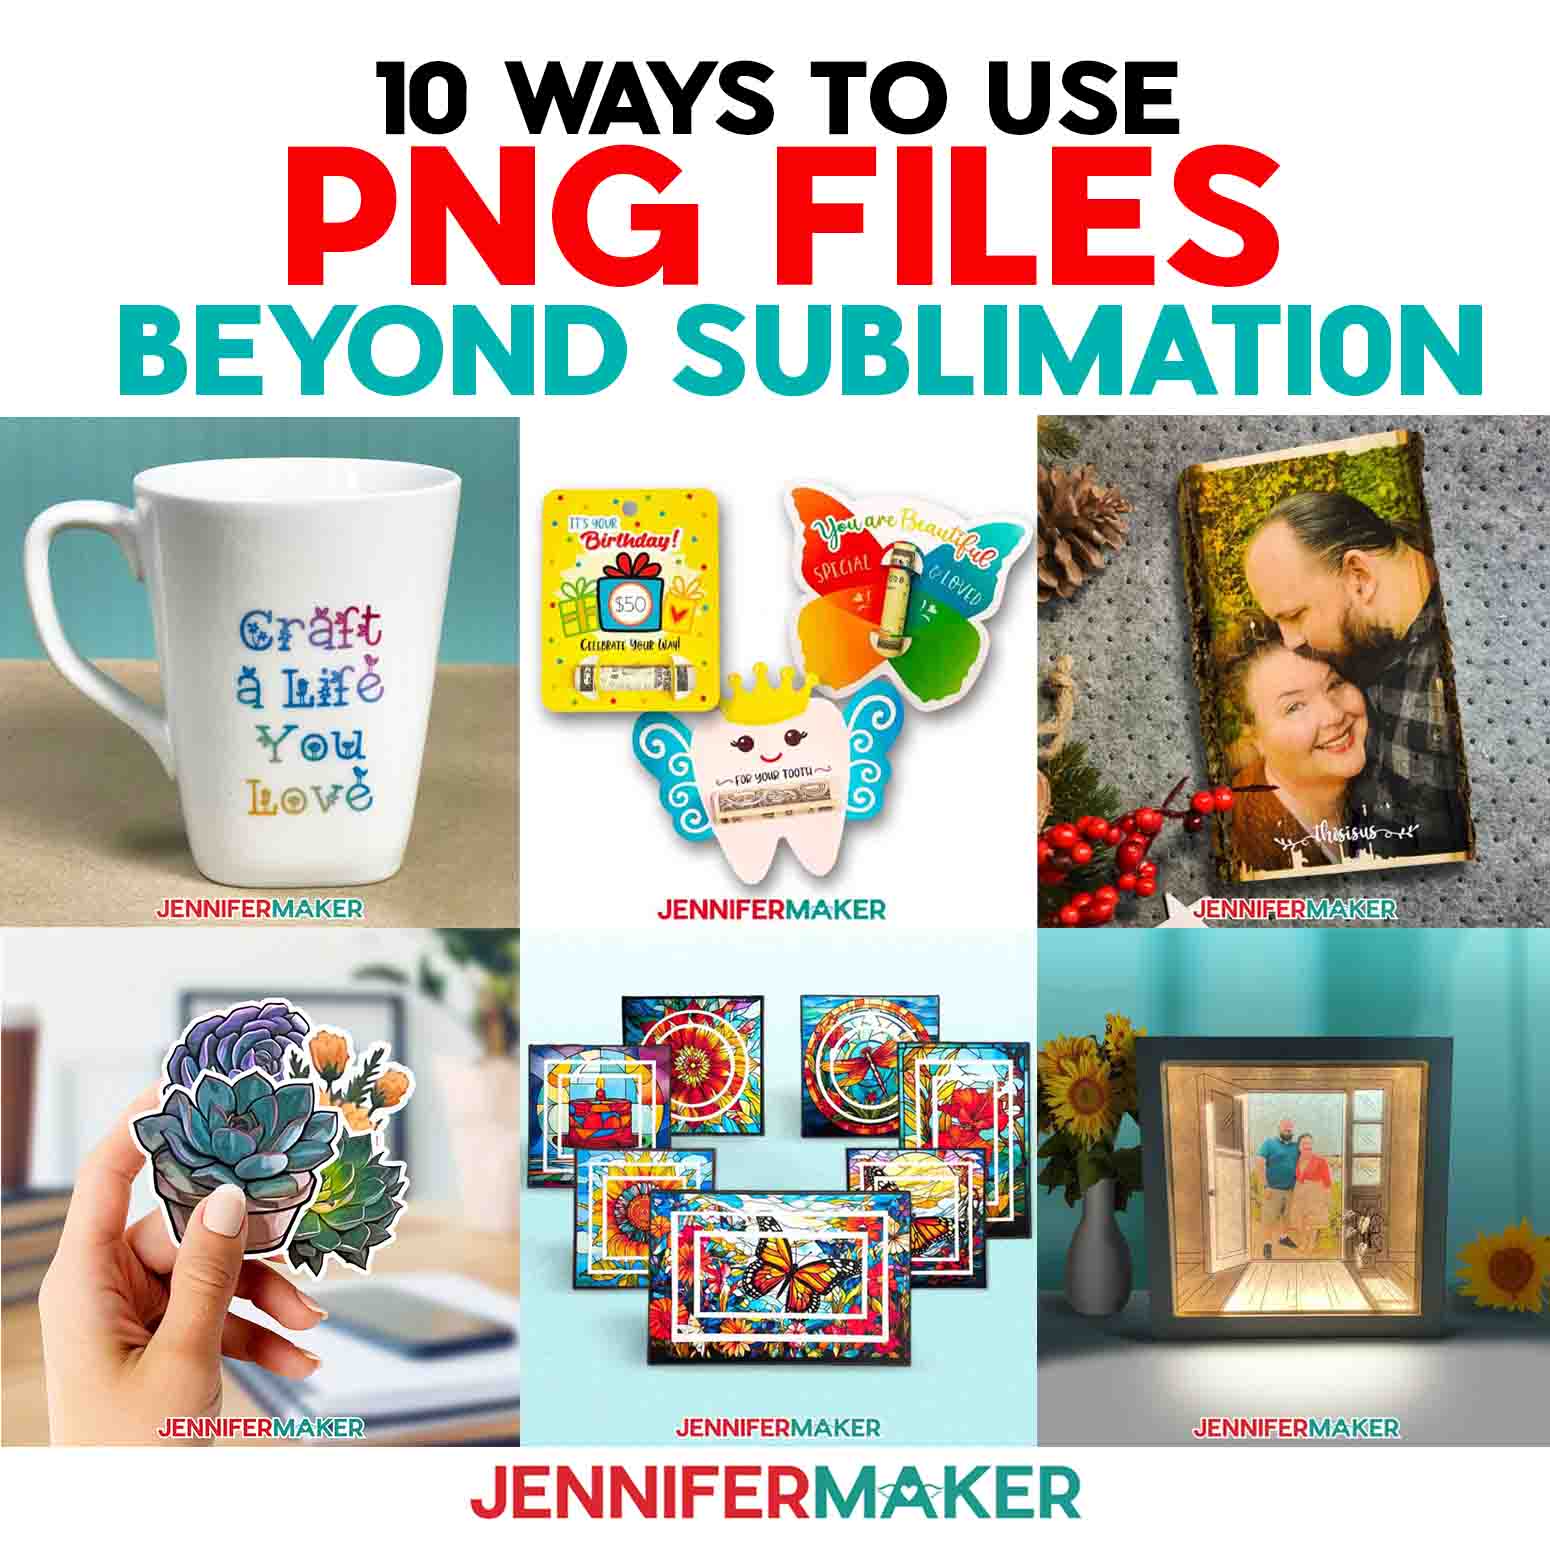
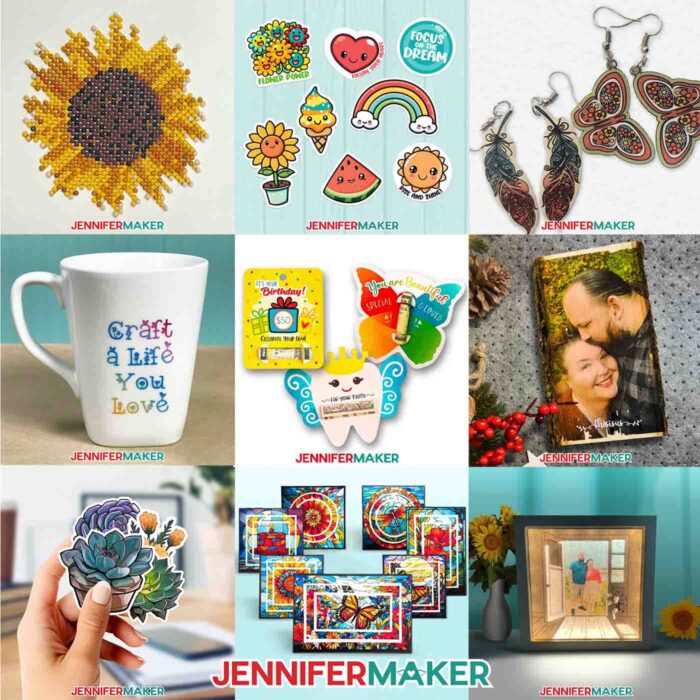
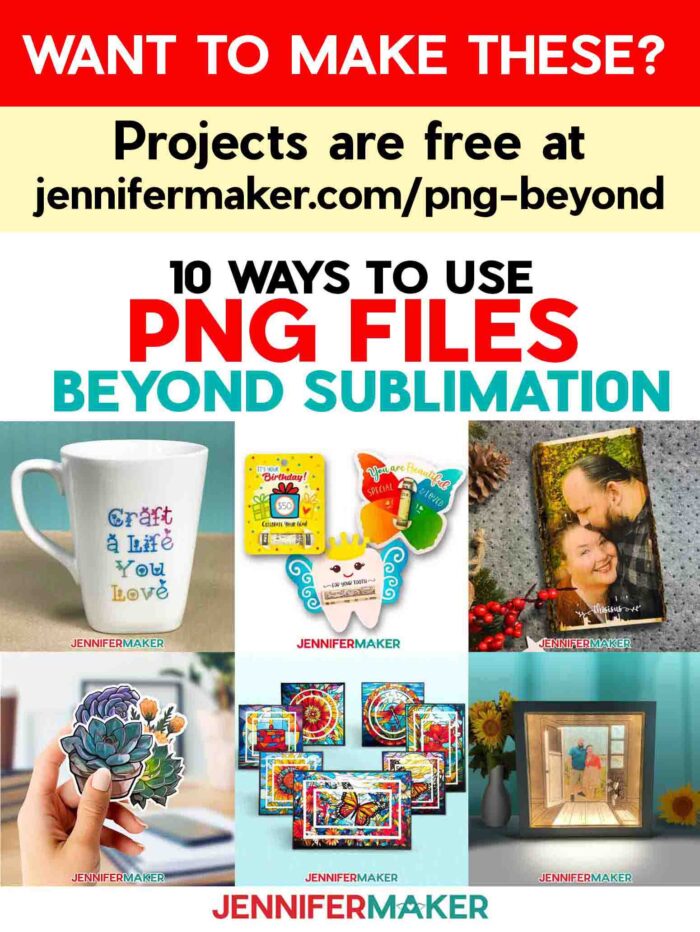
Learn how to use a PNG file for projects other than sublimation!
So, you’ve found an awesome PNG image file that you’d love to use for a craft project. But maybe you haven’t started sublimation crafting yet, and might be feeling a bit stuck. Never fear, because I’ve got ideas and inspiration for you! In this blog post, I’ll share ten ways to use PNGs without sublimating them, as well as some of my favorite crafts that demonstrate how to use a PNG file — no sublimation necessary! And once you know more about PNGs, you’ll be able to come up with even more ways to use them!
What’s a PNG File, Anyway?
There are many image formats a file can use, but which one is the best for your project? When it comes to printable projects and Cricut Print then Cut crafts, PNGs are the clear winner.
PNG stands for Portable Network Graphics. These files are high quality, compressible images that can show up to 16 million colors! They’re a popular format for web graphics, digital images, illustrations, and high-quality print media. Because there’s so much detail and image data combined in them, they do take up more space in your storage than other file types and image formats like JPG files, SVG images, and the GIF format. And typically, PNG images are more complex than files like SVGs which are typically used for vinyl and paper crafting. PNGs can have transparent backgrounds, which is very helpful for some uses!
One of my favorite ways to use PNG files is for sublimating, but if you’re not a sublimation crafter (yet!) there are still lots of ways to utilize these awesome, super high-quality images — including all of the free PNGs on my blog, as well as those available in my ADVANCE with JenniferMaker program! You can use your own original images or my PNGs for any of these projects in this post.
Here are my top 10 favorite ways to use PNG files other than sublimation. And guess what? Vinyl and paper crafting are still on the list! I’ll show you how.
Make Cute Accessories with PNGs
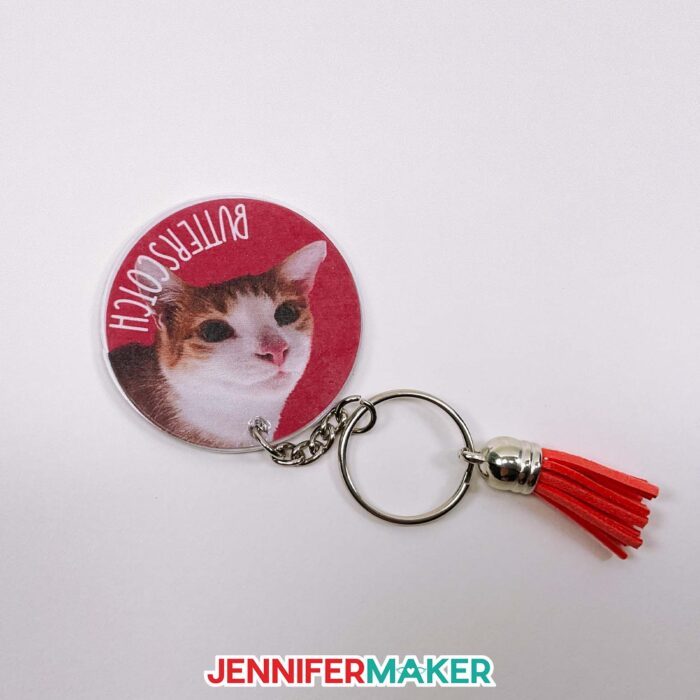
If you’ve been around for a while, you already know that I adore projects that are both fun and functional. These Acrylic Keychains certainly fit the bill! I’ll show you how they come together in a matter of minutes with Cricut’s Print then Cut feature and a few basic materials in the tutorial.
Custom acrylic keychains are the perfect way to showcase a favorite PNG image, and make great gifts for any age. Gift one to a new driver, slip one in a Christmas stocking, or make them for your kids to decorate their backpacks!
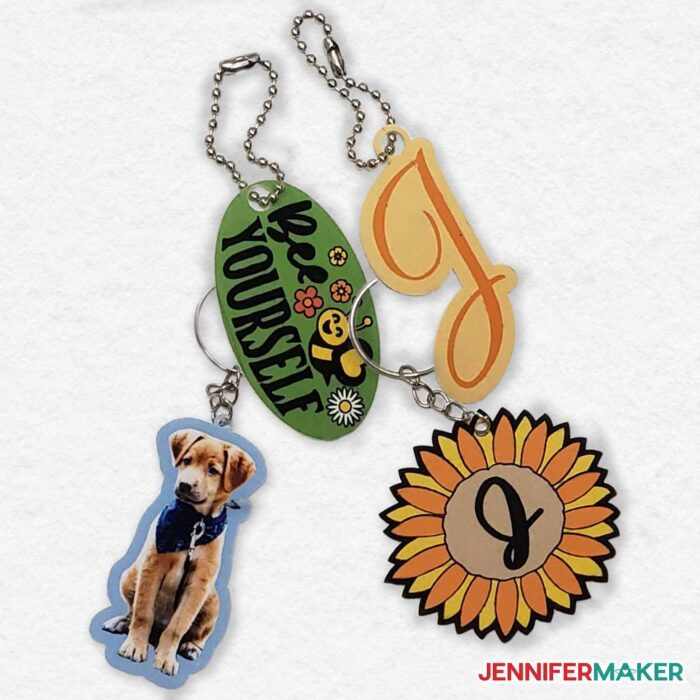
I love keychains so much, I’ve got one more idea for you. Remember Shrinky Dinks from when you were a kid? I’d spend hours standing at the oven watching mine transform from thin pieces of plastic to cute charms to use for jewelry and keychains. The high-quality images you get from the PNG image format are perfect for Shrinky Dink crafting!
In my Shrinky Dink Keychains (and Earrings!) tutorial, I’ll walk you through how to choose a quality shrink plastic product, which cut settings to use with your Cricut, and most importantly: how to size your images and plastic shapes correctly. After that, we’ll finish our Shrinky Dink creations with keychain or earring findings so you can show off your favorite PNGs!
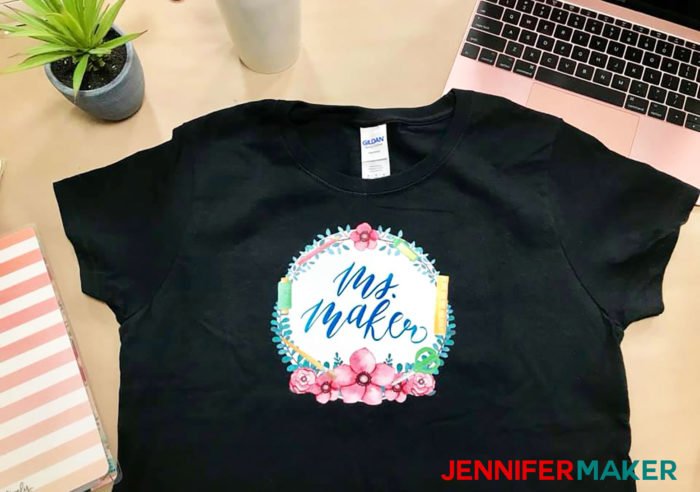
How to Use a PNG File to Make a T-Shirt
Ever wanted to put a specific design on a shirt, but regular vinyl isn’t enough to capture the colors and details you want?
One way to solve this problem is to make Printable Vinyl T-Shirts! In the tutorial, I show you how to use printable vinyl to create an HTV transfer with your perfect PNG! You can do it with your regular inkjet printer, a Cricut cutting machine, and a heat source like a household iron or heat press.
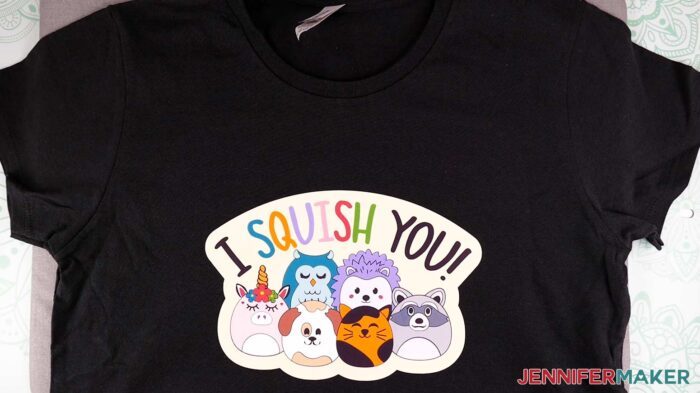
Want more options? You can also use the Print Then Cut feature on your Cricut to make Printable Iron-On Transfer T-Shirts. It’s a similar process to the printable HTV, but uses a printable iron-on transfer medium instead of vinyl.
The PNG file format is great because it will ensure clear, high quality images for your T-shirt designs. Try both methods and let us know which one gave you better results!
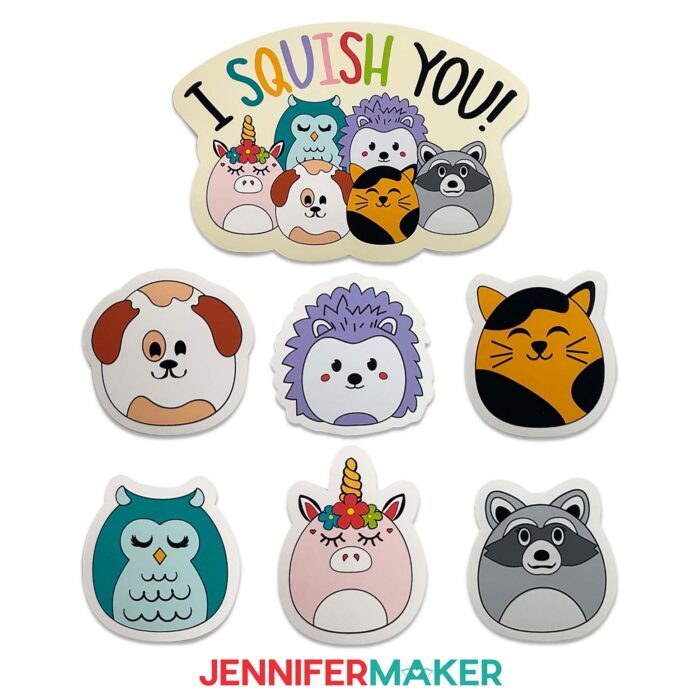
Create DIY Stickers Using PNG Files
Who doesn’t LOVE stickers!? When I was a child, if I could have, I’d have had a giant collection of stickers! Fast forward, and today we can make our own Easy Print Then Cut Stickers, customized with our own PNGs! Like many other projects in this post, all your need is a few materials: a sticker sheet, and inkjet printer, and a Cricut cutting machine.
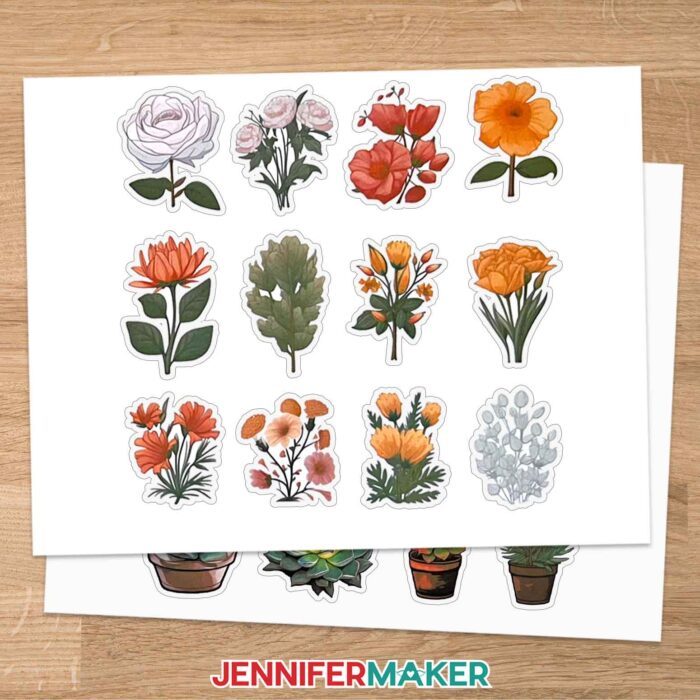
If you want to make your stickers more durable so they can stand the test of time, try making Printable Vinyl Stickers! These won’t tear or turn to sticky goo if they get wet (like regular printable sticker paper can if unprotected). Use PNG files to create a collection of stickers that’s uniquely yours — then stick them anywhere you want!
Decorate Your Fridge With Magnets Using PNGs
If you’ve made stickers using PNGs and your cutting machine, you’re ready to make DIY Fridge Magnets! They’re a great addition to your fridge, or stuck to your your family or business command center! My tutorial is filled with tips to make cute magnets for gifting, selling, or customizing your kitchen with unique PNG fridge decorations.

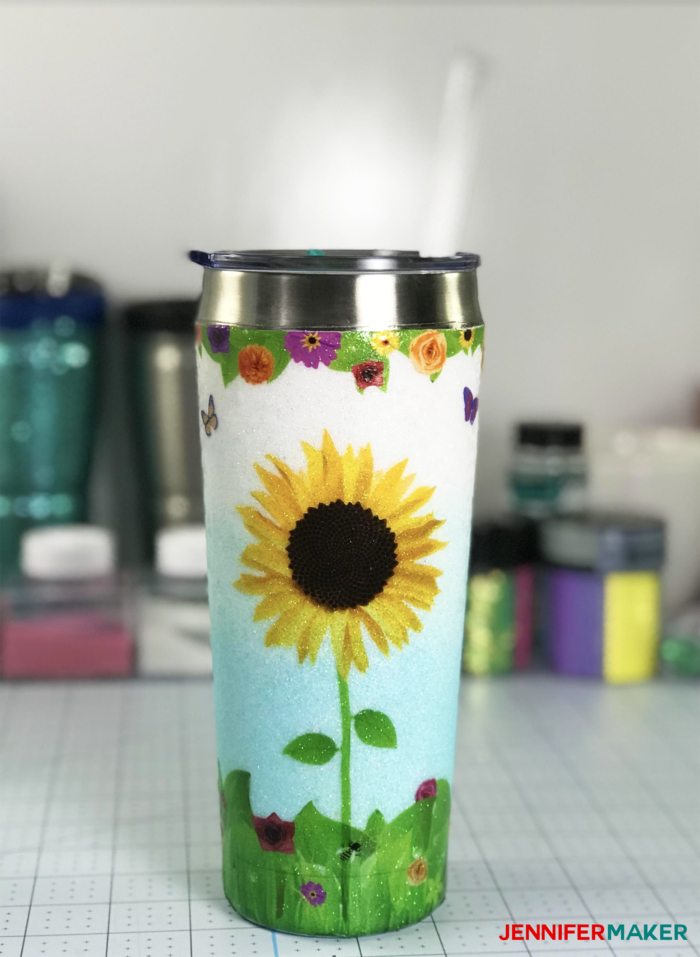
Make a Waterslide Tumbler Decal With a PNG
First thing’s first — what’s a waterslide decal? It’s okay, I didn’t always know what they were either! Waterslide decals are a cool way to get full-color PNG designs and photos onto smooth surfaces like tumblers, mugs, and glasses — all without sublimating.
The “waterslide” name comes from the application process. After using your inkjet printer to print the PNG onto decal paper, you’ll soak it in water. This allows it to slide off the paper backing and onto your smooth surface like a glass, plastic, smooth ceramic, or even a glitter tumbler. Finish the project off with some acrylic sealer (I’ll show you how in the video) and you’ve got a fun new way to display your favorite PNGs on drinkware — without sublimating them!
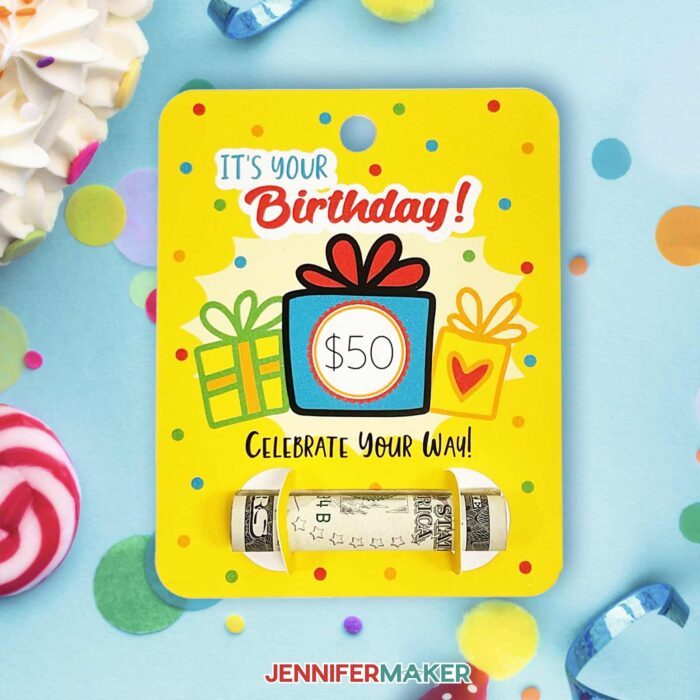
Customize Money Holders With PNGs
Another handy project you can make with PNG photos and designs are Custom Money Holders for gifting cash! A money gift is perfect if you don’t have time to shop, but it can feel impersonal. My money holders dress up the cash, making it the perfect gift! You don’t have to be a graphic designer — just upload and arrange some cool PNGs to create a cute holder for your lucky recipient. I’ll even show you how to add an optional plastic dome for an extra-polished finish.
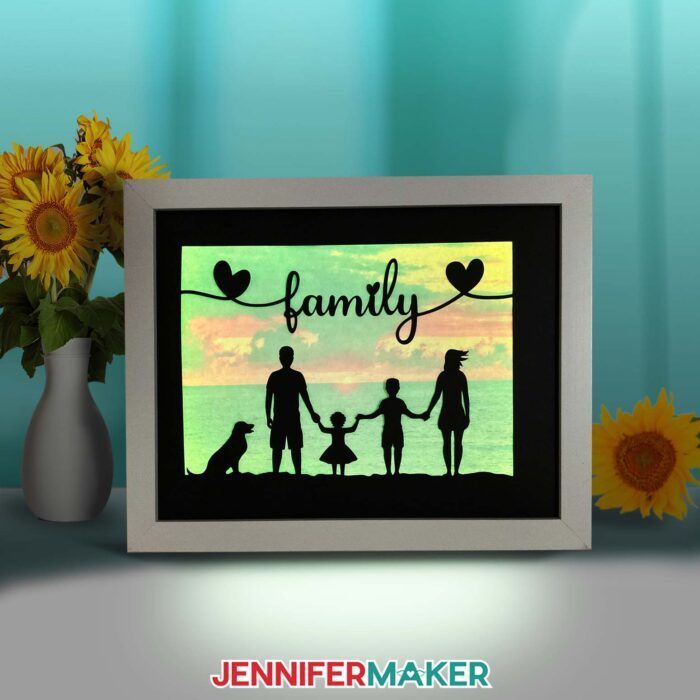
Make PNGs Glow in a Light Painting Shadow Box
Light Painting Shadow Boxes are really neat projects that combine lights and layers to create a colorful, multidimensional scene! It’s an impressive piece of art that only uses a few simple steps to prepare and put together. Choose a PNG for your background image, and I’ll show you how to print it on transparency material, rather than paper or cardstock. Doing this lets the light shine through and make the image glow from within!
Shine Bright With PNG Diamond Paintings
Diamond Painting is a craft trend that’s kind of like paint by numbers, but with sparkly, plastic gems! Using PNGs and your cutting machine, you can create one-of-a-kind diamond painting designs that are sure to dazzle. Even if your image doesn’t have a grid, you can place the gems as accents wherever you like!
The gems (also called drills) themselves aren’t sticky, so I’ll show you how to use two methods with double-sided adhesive paper and glue to adhere your “diamonds” to your design.
The PNG format is perfect for this project because of the variances in color and the ability to render detailed images. The design tells you exactly which color to place in each spot, so it’s a great way to pass the time or unwind. Practice using my free beginner-friendly designs, then experiment using your own PNGs!

DIY Greeting Cards with PNG Files
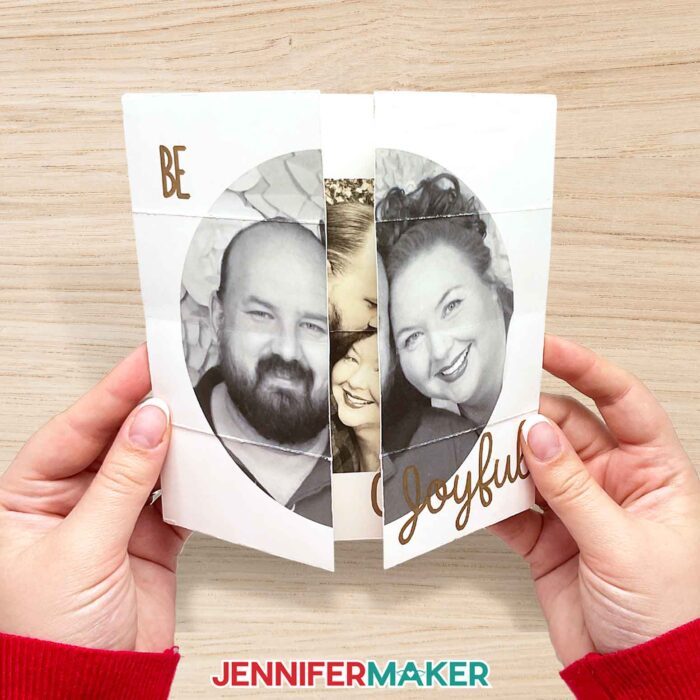
When it comes to crafting greeting cards, the possibilities to use PNGs are nearly infinite! Speaking of which, my Infinity Card is a good choice to use your favorite images!
Infinity cards are cool because when you open them up, they just keep opening and opening to reveal new layers. It’s best to use high-resolution images like PNGs that will fit into the template I provide in my tutorial, and I’ll show you how to shape the images using the Slice tool in Cricut Design Space. Then I’ll show you what it takes to make the designs move with your card!
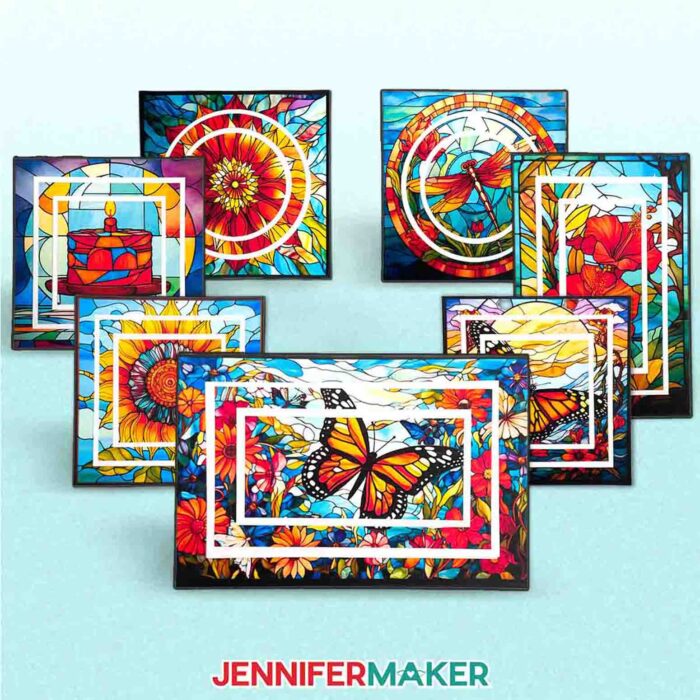
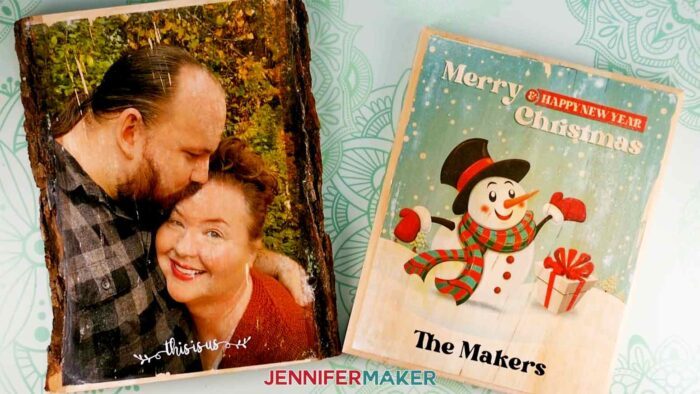
Another favorite card project using PNGs are my Stained Glass Cards. Stained glass is beautiful, and these cards are a lovely homage to the aesthetic. The multiple layers make the PNG design really pop, with the look of real stained glass windows. It turns the cards into mini works of art! While they may look elaborate, they’re really simple and easy to make. Choose any kind of PNG you want to make your own twist on this technique!
Transfer a PNG File to Wood
Did you know you can transfer images to wood? This tutorial walks you through how to print out a full-color PNG design with your printer, then transfer it to a wood plaque or sign. High image quality is best for a beautiful result, so PNGs are perfect!
This project works best when the image is printed with a laser printer, but don’t worry — these can work with inkjet printers, too. You’ll also need a piece of unfinished wood, or your image won’t transfer. It’s best to use soft wood like basswood or natural pine. This craft gives a lovely final result that still retains the natural qualities of the wood.
I hope you’ll use this list of ideas to kickstart your crafting with fun and satisfying projects using PNGs! Inspiration is everywhere, and many projects can be tweaked or adjusted to use PNG files. Once you know how to use a PNG in other ways, you’ll learn that you don’t have to be a sublimation crafter to create stunning, full-color items, decor, and more!
Make My Favorite Projects Using PNGs!
Once you learn how to use a PNG image file beyond sublimation, I hope you’ll make some of these ideas for your crafts! This post contains some affiliate links for your convenience (which means if you make a purchase after clicking a link I will earn a small commission but it won’t cost you a penny more, there is no additional cost)! Read my full disclosure policy.
Materials for Making Projects with PNGs
Learn how to use a PNG, then try some of my projects! See each project page using the links above for specifics, but many use these materials and supplies:
- Inkjet Printer (I like the Epson EcoTank series)
- A way to cut your materials: I usually use the Cricut Maker 3 but you can also use the Maker, Explore series, Venture, Joy Xtra, or Joy depending on the project! You can also use scissors or a craft knife for many projects.
- StandardGrip Machine Mat 12″ x 12″
- Brayer
- Scraper
- Weeding Tool
- Craft Glue – I love Bearly Art Precision Glue for many of these easy wedding cards
- Scoring Stylus (optional for files with score lines) -OR- Single Scoring Wheel (optional for files with score lines)
- Tweezers (for placing small elements)
- Tape (like Scotch Magic Tape)
- Scissors -OR- Craft Knife
- Self-Healing Cutting Mat
Transferring PNGs to Wood
- Basswood Plank or Basswood Rectangle Plaque
- 20 lb. white copy paper
- Mod Podge (Dishwasher Safe)
- A method to print your photo or image — like a HP laser printer
- Permanent Vinyl – Black, White
- Krylon UV Resistant Matte Finish Sealer
- Water (To remove photo transfer)
- Foam Roller (optional)
- Foam Brushes
- Rag
- Disposable Bowl
- Disposable Gloves
- Respirator
- Safety Glasses
- (Optional) Heat gun, Hairdryer
Shrinky-Dink Keychains & Earrings with PNGs
- 8.5″ x 11″ Printable Shrinky Dink Sheets or or A4 Size Printable Shrink Plastic Sheets, especially if you want to Print then Cut designs with an Inkjet Printer (like an Epson EcoTank) -OR-
- 7.9″ x 5.7″ Frosted Shrinky Dink Plastic Sheet or 8″ x 10″ Shrinky Dinks Clear Shrink Material if you want to cut the designs with the Cricut and color them in by hand with Colored Pencils or Permanent Markers
- Cricut Pen if you want to draw with your Cricut
- Oven or Convection Oven – I formerly used an Oster Convection Oven (see my safety update below) but you can use your toaster oven or home oven with a Baking Sheet
- Heat Resistant Gloves or Oven Mitts
- Something heavy and heat resistant to press the Shrinky Dinks while they cool – I used my unheated EasyPress 2!
- Sheet of Parchment Paper to go on the baking tray
- Acrylic Sealing Spray
- Keychain Ring, Earring Backs, or other findings appropriate for your projects, like a jump ring for a zipper pull!
- Single Hole Puncher for making your own hanging openings
Keychains with PNGs or Photos
- Acrylic Photo Frame Keyrings
- Color Printing Labels -OR
- Printable Vinyl Sticker Paper
- Transparent Adhesive Craft Vinyl
- Pliers – to feed the key ring findings through the small hole in the acrylic blank
Printable Vinyl T-Shirts
- T-Shirt (I used one Black, one White) made of cotton, cotton-poly blend, polyester, or similar fabric that can be heat-transferred
- One pack of Printable Iron-On Vinyl Transfer For Dark Shirts
- EasyPress, heat press, or iron
- Lint Roller – to clean shirts before applying vinyl
- DIY T-Shirt Guides or a Ruler – for placing a design on a shirt
Iron-On Vinyl T-Shirts
- Printable iron-on transfer medium — I experimented with several brands, but the one I recommend is any of the iron-on transfer mediums FOR DARK FABRICS, such as this one or this one.
- EasyPress, heat press, or iron
- Parchment paper or teflon sheet (there should be one in your package of transfers)
- Lint Roller – to clean shirts before applying vinyl
- DIY T-Shirt Guides or a Ruler – for placing a design on a shirt
Print and Cut Paper Stickers
- Printable sticker paper (Avery brand is compatible with more printers)
- A color printer (like an Epson EcoTank)
- (Optional) Acrylic sealer, gloss or matte
Printable Vinyl Stickers
- One pack of Cricut White Printable Vinyl -or- JOYEZA White Printable Vinyl
- One pack of Clear Printable Vinyl – optional for protecting your printed stickers
- One pack of Holographic Printable Vinyl – if you want a color other than white
Magnets Using PNG Files
- One (1) Sheet Matte Printable Magnet OR
- One (1) Sheet Printable Vinyl Sticker Paper AND
- One (1) 8″ x 10″ Magnetic Adhesive Sheet AND
- Cricut Deep Point Blade with Housing
- One (1) 9″ x 12″ Self-Laminating Sheet per sheet of magnets
Waterslide Tumblers, Mugs, & Glasses
- Printable Inkjet Waterslide Decal Paper (Paper for inkjet printers, but you can also get this decal paper for laser printers)
- Acrylic Sealer Spray (Gloss)
- Something to put your decal on, such as a glitter tumbler, ceramic mug, or glass
DIY Money Holders
- Lip Balm or Money Dome, or one from a chapstick package (optional)
- One (1) (or Two (2) if you want to make the back plain) Sheet of 8.5″ x 11″ 65 lb White Cardstock
- One (1) Sheet of 8.5″ x 11″ or 12″ x 12″ 65-80 lb designer or Solid Core Cardstock — optional, for the back of the card
Light Painting Shadow Box
- One (1) 8″ x 8″ Shadow Box (for doorway design) -OR- One (1) 8.5″ x 11″ Shadow Box (for silhouettes design)
- One (1) Sheet of 8.5″ x 11″ Transparency Film (for photo layer)
- One (1) Sheet of 8.5″ x 11″ 24 lb. White Copy Paper
- One (1) Sheet of 8.5″ x 11″ or 12″ x 12″ 100-110 lb. White Cardstock for doorway design (I used this Recollections 8.5″ x 11″ 110 lb. Cardstock) -OR- One (1) Sheet of 12″ x 12″ 65 lb. Black Cardstock for silhouettes design
- One (1) Strand of LED Strip Lights -AND- Three (3) AA Batteries
Diamond Painting Made from a PNG
- Round Diamond drills – I used this Variety Pack that comes with different colors in plastic bags
- Adhesive Paper – Two-sided, Clear Adhesive
- Diamond Art Painting Glue Kit – I prefer the adhesive sheets, but this is a good alternative.
- White 65lb cardstock 8.5×11
- Tool Kit for Diamond Painters
Cards Using PNGs & Photos
- Heavyweight (61 lb.) Matte Photo Paper
- 8.5″ x 11″ High quality 65 lb cardstock – use white for a neutral background when printing photos
- 8.5″ x 11″ or 12″ x 12″ 65 lb. Cardstock (various colors)
- One (1) Sheet of 12” x 12” Black -OR- White 65lb. Cardstock Per Card
- One (1) Sheet of 8.5” x 11” Epson Presentation Paper Matte Per Card
Answers to Your Questions About How to Use a PNG File for Non-Sublimation Crafting
Q: What can I do with a PNG image?
A: Unlike files of a different format, PNGs are a larger file size that can be compressed without losing quality. They’re a favorite among web designers because of their brilliant, crisp appearance on a computer screen. PNGs can also be made with transparent backgrounds, which lend themselves to tons of crafting applications. Some of my favorite ways to use them are detailed in this post — try them with stickers, T-shirt designs, cards, and more. Once you learn how to use a PNG, you’ll see how many things you can do with them!
Q: What’s the best way to use PNG images?
A: PNG images are great for Print Then Cut projects with your Cricut, as well as for sublimation. If you’re paper crafting or cutting vinyl, SVG files should be your top choice. Read my “How to Use a PNG Beyond Sublimation” post above for lots of ideas.
Q: Where can I find PNG images?
A: I have a ton of free PNG images available right here on my blog! Many are linked in this post, or you can search for other projects. To get access to even more PNG files, check out my ADVANCE with JenniferMaker program!
Q: Can I create my own PNG images?
A: You can design your own PNG images in software applications like Adobe Photoshop and Procreate, as well as Canva and many others. Many programs don’t even need to be downloaded to your operating system anymore, and have online versions you can access via your web browser (my favorite is Google Chrome). Some even have versions you can use on your mobile device!
You can also use AI software to generate PNG images based on specific prompts. Learn how in my AI Art Design Workshop!
Save the storage space on your computer, phone, or tablet for all the beautiful PNG image files you download and create, or store them in your Google Drive.
Q: Can you teach me how to use Canva?
A: Check out my Canva Creative Workshop and learn the complete step-by-step process to designing in Canva, a free-to-use online graphic design tool, that can take your sublimation and print-then-cut projects to the next level!
Q: Why did my PNG lose quality when I compressed it?
A: You may have compressed it with incorrect settings. To compress PNG images without having to deal with transparency loss and quality loss, you can use lossless compression to compress them.
Q: Why aren’t JPG or GIF files good for crafting projects?
A: JPG and GIF files can work fine for crafting projects, but it’s always best to use high quality image files like PNGs and SVGs (if cutting) whenever possible. To save time, materials, and frustration, print a test sheet on a regular sheet of printer paper if you’re not sure if your image is high enough resolution.
Q: What printer do I need to make stickers with Cricut?
A: Any inkjet printer will work to make stickers with Cricut’s Print Then Cut feature! My favorite inkjet printers are the Epson EcoTank series. Read above for more information on how to use a PNG to create stickers and other projects.
Q: What kind of oven should I use for shrinky dinks?
A: September 2025 UPDATE: In the past, I have mentioned countertop ovens as suitable for making shrinky dinks, as well as for sublimation and other crafts, including some by Oster. If you purchased an Oster Convection Oven, 8-in-1 Countertop Toaster Oven, XL, Stainless Steel French Door, please stop using it immediately and review the Consumer Product Safety Commission’s safety alert for information on what you should do and where you can seek assistance to continue using the oven safely. Now, I recommend a PYD Life Craft Oven.
Q: Are your free PNGs just for personal use or also commercial use?
A: Once you learn how to use a PNG to create a new project, you might be wondering: “Can I sell this?” First thing, I’m honored that you’d ask! Yes, you can sell completed projects using these designs (with limitations) along with other designs in my free library — please read about licenses here so you know what you can and cannot do. If you use them, please share photos with us! We love to see them.
I love seeing what you make with my designs and how you use them! Please share a photo of your PNG projects (sublimated or not) in our Facebook group or tag me on social media with #jennifermaker.
Love,

Want to remember this? Save this list of 10 Ways to Use a PNG Beyond Sublimation to your favorite Pinterest Board!