Learn how to make stunningly beautiful stained glass cards!
Stained glass is so gorgeous, don’t you think? It’s one of my favorite artforms, and I can’t get enough of their gemmy, translucent tones and lovely mosaic designs. My recent stained glass-inspired cutting board tutorial was a major hit, but these might be even more beautiful! Both projects were made with the help of amazing AI art technology (and a little fine tuning in Photoshop). When our crafting community started posting photos of these jaw-dropping stained glass cards, I knew I wanted to make my own, too. And now I’ll share how I did it with you!
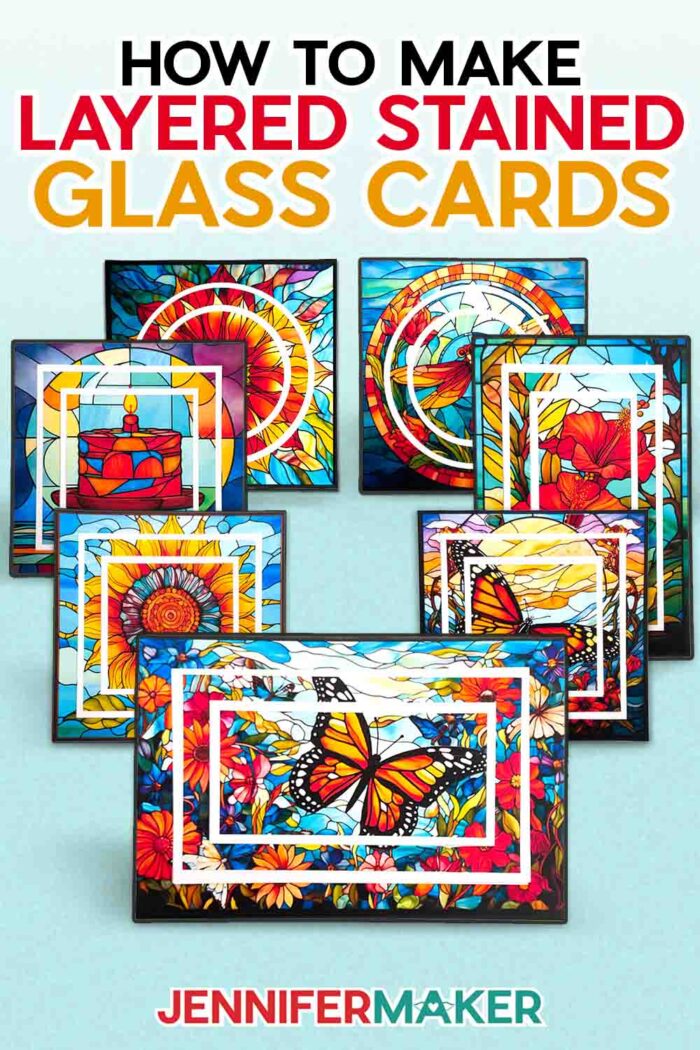
The layers make the card pop with the illusion of real stained glass windows, making these cards like mini works of art. They may look elaborate, but they’re really so simple and easy to make when you follow my tips and tricks. I can’t wait to show you how to make one of your own!
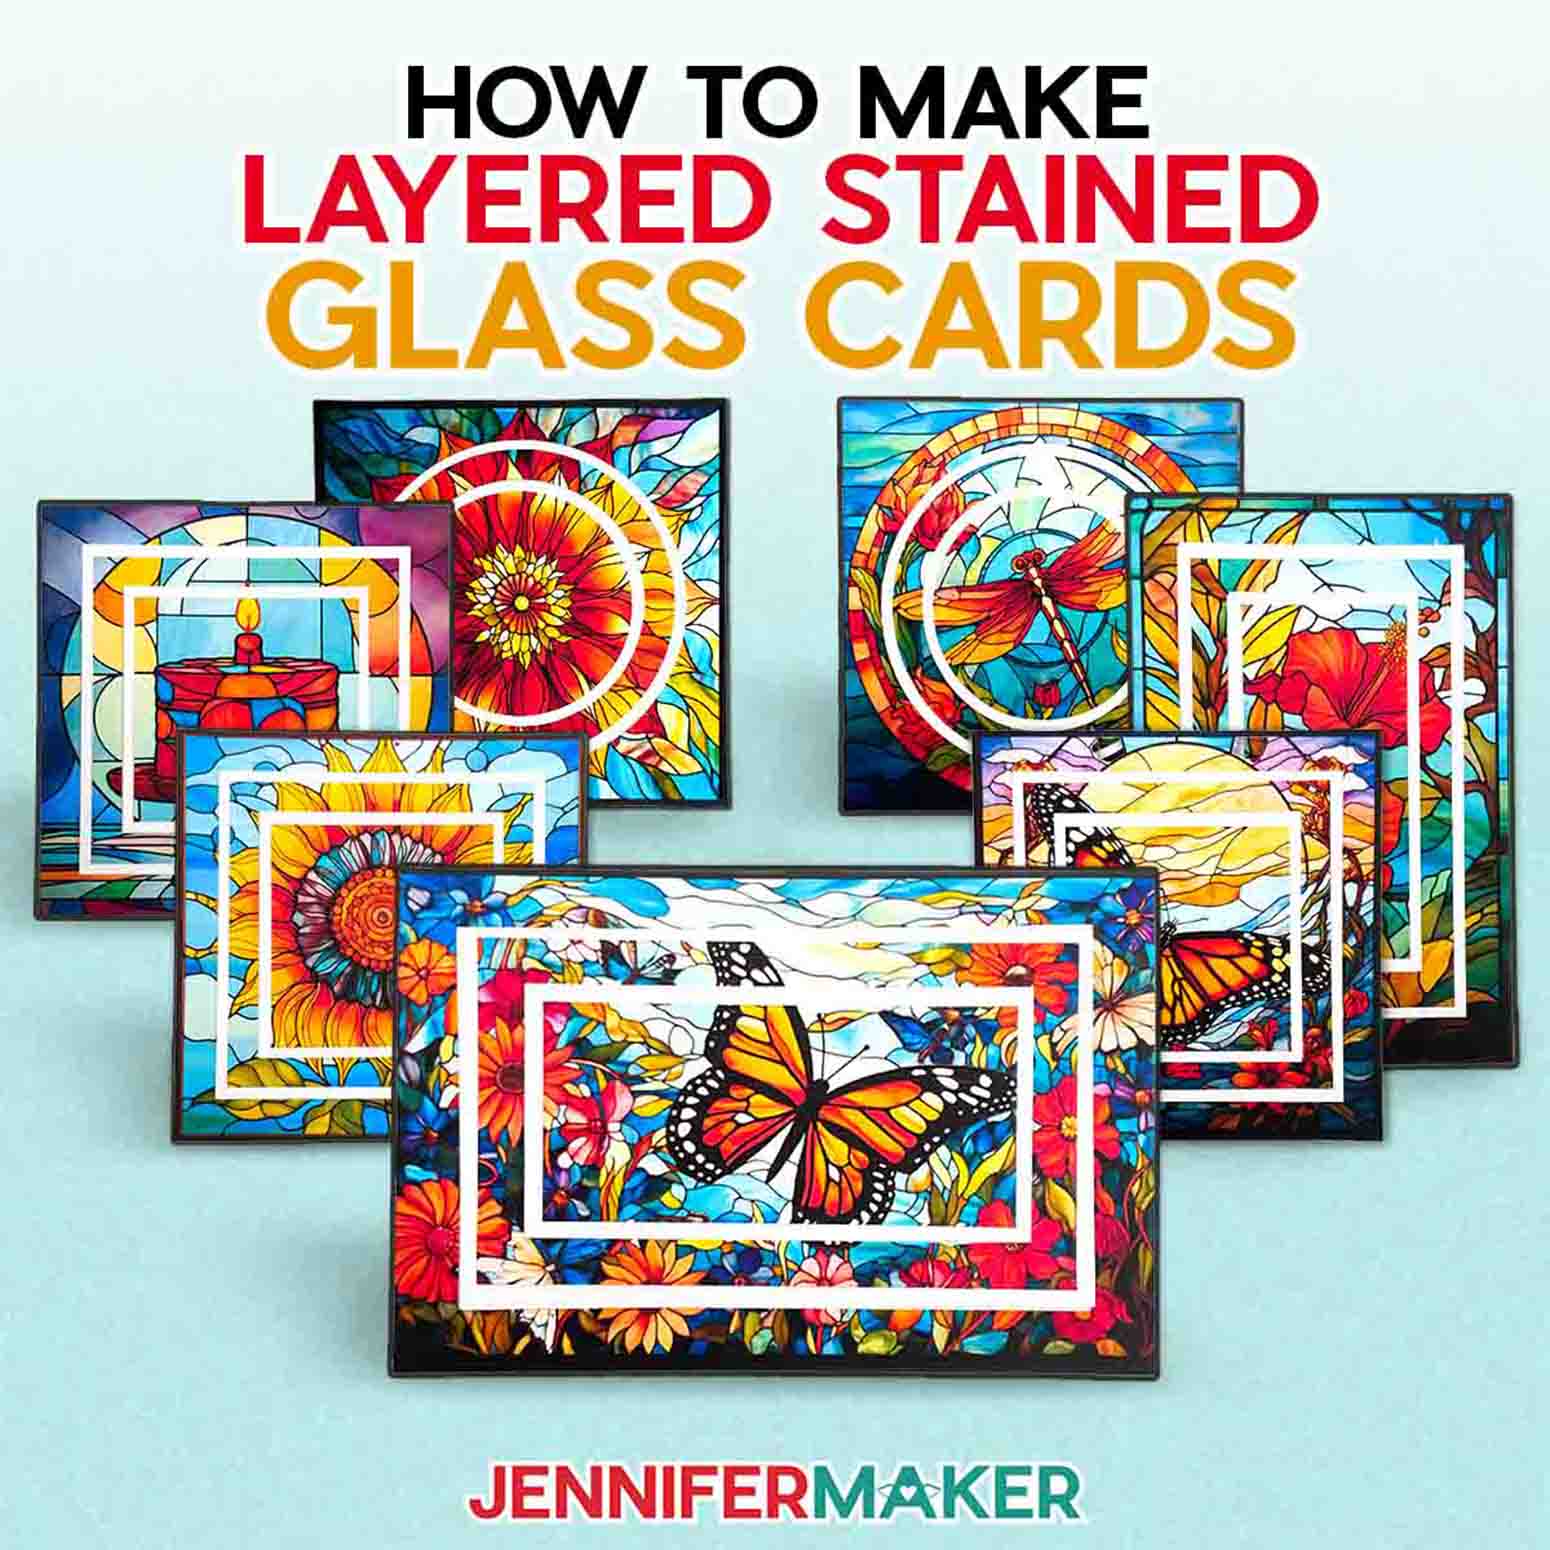
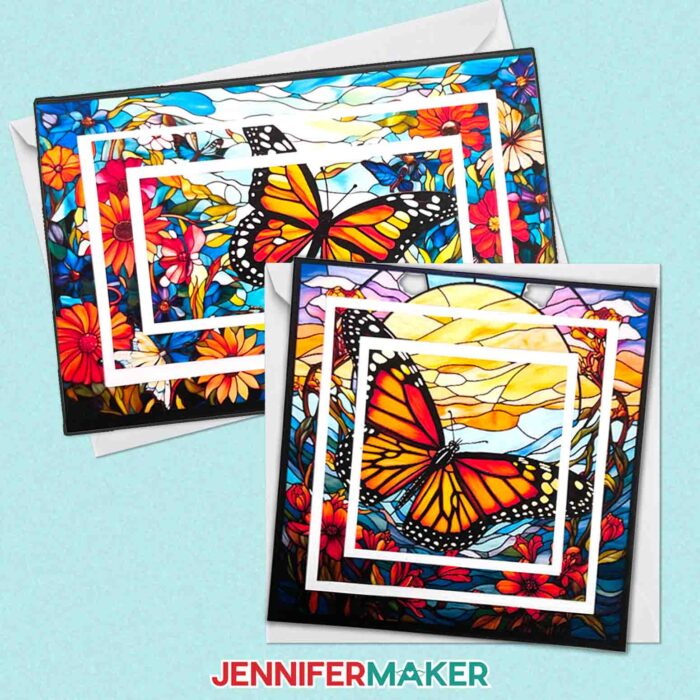
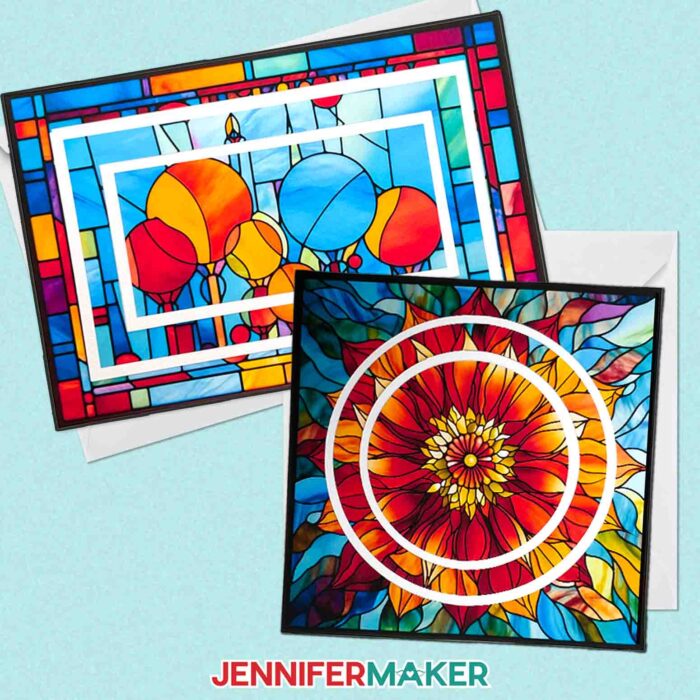
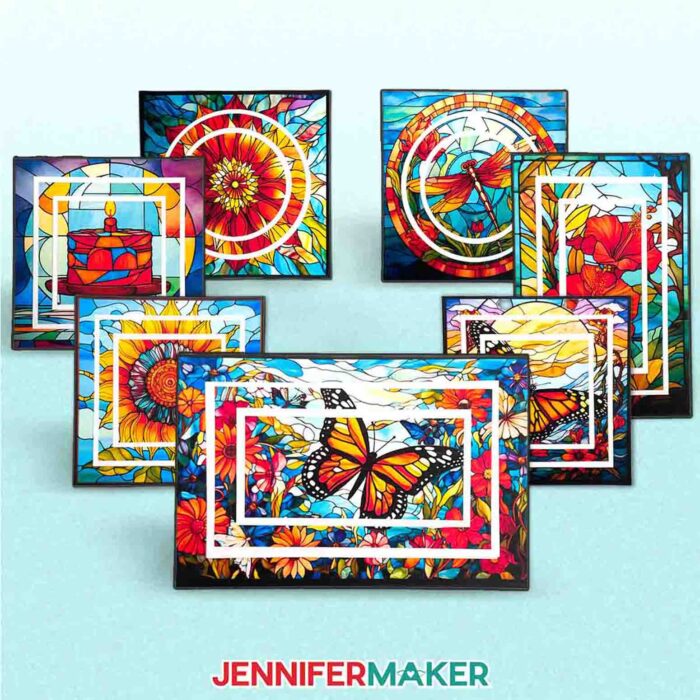
If you already have an image you’d like to use for your layered card, go for it! But if you want to try one of my beautiful stained glass designs, I’ve included eight different PNG options in my download file. They feature balloons, a butterfly and flowers, and tropical flowers to fit rectangle shaped cards, and designs with a butterfly, a cake, a dragonfly, a flower, and a sunflower to work with square shaped cards. I’ve also included a card base SVG with score lines as well as one that uses dashed cut lines.
As a bonus, I’ve also included a really pretty tropical card design that’s more of a standard card shape … with an ink-saving twist that you’ll have to watch the video tutorial to see.
In the video tutorial, I’ll demonstrate how to make the sunflower with full-color square layers and the tropical flowers with rectangular layers.

These designs are all generated through an AI art generator, then made even more magical with image editing software. If you’d like to learn more about AI art, I have an entire workshop all about it!
The supplies you need are pretty basic, and you may already have them in your crafting stash. I’ll show you how to make cards using two different kinds of paper: Matte presentation paper, as well as metallic photo paper. Both give beautiful, but different, results.

You’ll also need some quality black or white card stock, double-sided tape, and foam tape squares. I’ll show you how to use the white or black paper to frame your layers, adding to the stained glass window effect. If you use black, remember to have a light colored pen ready for adding your message!
Since we’ll use the Print then Cut process, you’ll need a color printer — and I’ll show you how to use a Cricut machine to cut them out. I’m using the Cricut Maker 3, but you can also use the original Cricut Maker, any Cricut Explore, the Cricut Venture, or the Cricut Joy Xtra for this project!
Did you know that it’s important to calibrate your Cricut before you start a Print then Cut project? You can find out how to calibrate in my DIY Money Holders tutorial.
To put the finishing touch on your card and make it mailable, you’ll need an envelope of course! You can learn to make your own (and get my free envelope SVG files) in my How to Make an Envelope tutorial.
These are so fun and unique, and unlike anything else you’ll find in the card aisle. Your recipients will be blown away by your amazing stained glass cards, and who doesn’t love spreading a little joy to others? I know I do!
Ready to learn how to make stained glass cards? This post contains some affiliate links for your convenience (which means if you make a purchase after clicking a link I will earn a small commission but it won’t cost you a penny more)! Read my full disclosure policy.
Materials And Tools to Make Stained Glass Cards
See my full and complete Amazon shopping list for the exact items used in this project!
- One (1) Sheet of 12” x 12” Black -OR- White 65lb. Cardstock Per Card
- One (1) Sheet of 8.5” x 11” Epson Presentation Paper Matte Per Card
- One (1) Sheet of 8.5” x 11” Metallic Photo Paper (Optional)
- Inkjet Printer (I used the Epson EcoTank ET-2800)
- A way to cut your cardstock – I’m using the Cricut Maker 3 but you can also use the Maker, Explore series, Venture, and Joy Xtra for this project!
- Cricut Green StandardGrip Machine Mat, 12″ x 12″
- Cricut Blue LightGrip Machine Mat, 12″ x 12″
- Brayer
- Double Sided Adhesive Tape
- Adhesive Foam Squares
- Light opaque gel pen – optional if you use black cardstock so your message shows up.
- XL Scraper
- Design #512- My free stained glass cards PNG/SVG/DXF/PDF design files are available in my free resource library – get the password by filling out the form at the bottom of this page
How to Make Stained Glass Cards!

Stained Glass Cards
Learn how to make beautiful 3D layered stained glass cards!
Materials
- One (1) Sheet of 12” x 12” Black -OR- White 65lb. Cardstock Per Card
- One (1) Sheet of 8.5” x 11” Epson Presentation Paper Matte Per Card
- One (1) Sheet of 8.5” x 11” Metallic Photo Paper (Optional)
- Design #512 (My free PNG/SVG/DXF/PDF design files are available in my free resource library – get the password by filling out the form at the bottom of this page)
Tools
- A way to cut your cardstock - I’m using the Cricut Maker 3 but you can also use the Maker, Explore series, Venture, and Joy Xtra for this project!
- Inkjet Printer (I used the HP ENVY Photo 7155)
- Cricut Green StandardGrip Machine Mat, 12" x 12"
- Cricut Blue LightGrip Machine Mat, 12" x 12"
- Brayer
- Double Sided Adhesive Tape
- Adhesive Foam Squares
- XL Scraper
Instructions
STEP 1: GET A STAINED GLASS CARD DESIGN
First, download my Vacation Sublimation designs from my free library – look for Design #512. Alternatively, you can use the Save This Project form near the top of this post and the design link will be emailed to you.
TIP: If you’re not sure how to upload, go to jennifermaker.com/svgs to learn how to unzip and upload SVG files.
There are eight PNG designs in my collection. There are three rectangular designs featuring balloons, a butterfly with flowers, and tropical flowers. There are five square designs featuring a butterfly, cake, dragonfly, flower, and sunflower. There are also two card base SVG files - one with scored lines and one with dashed cut lines.
In this tutorial, I’ll show you how to make two different versions. We’re going to make the sunflower with full-color square layers and the tropical flowers with rectangular layers using an ink-saving technique.
STEP 2: PREPARE YOUR DESIGN
PROJECT 1: FULL-COLOR SQUARE AND CIRCLE DESIGNS
The square and circle design steps are the same with the exception of the shape. I’m going to show you how to make the full-color sunflower design with a square, but you can use the circle if you’d like.
1. Open Cricut Design Space and click “New Project.”
2. Click “Upload” and then “Upload Image.”
3. Click “Browse.”
4. Select the square sunflower PNG file.
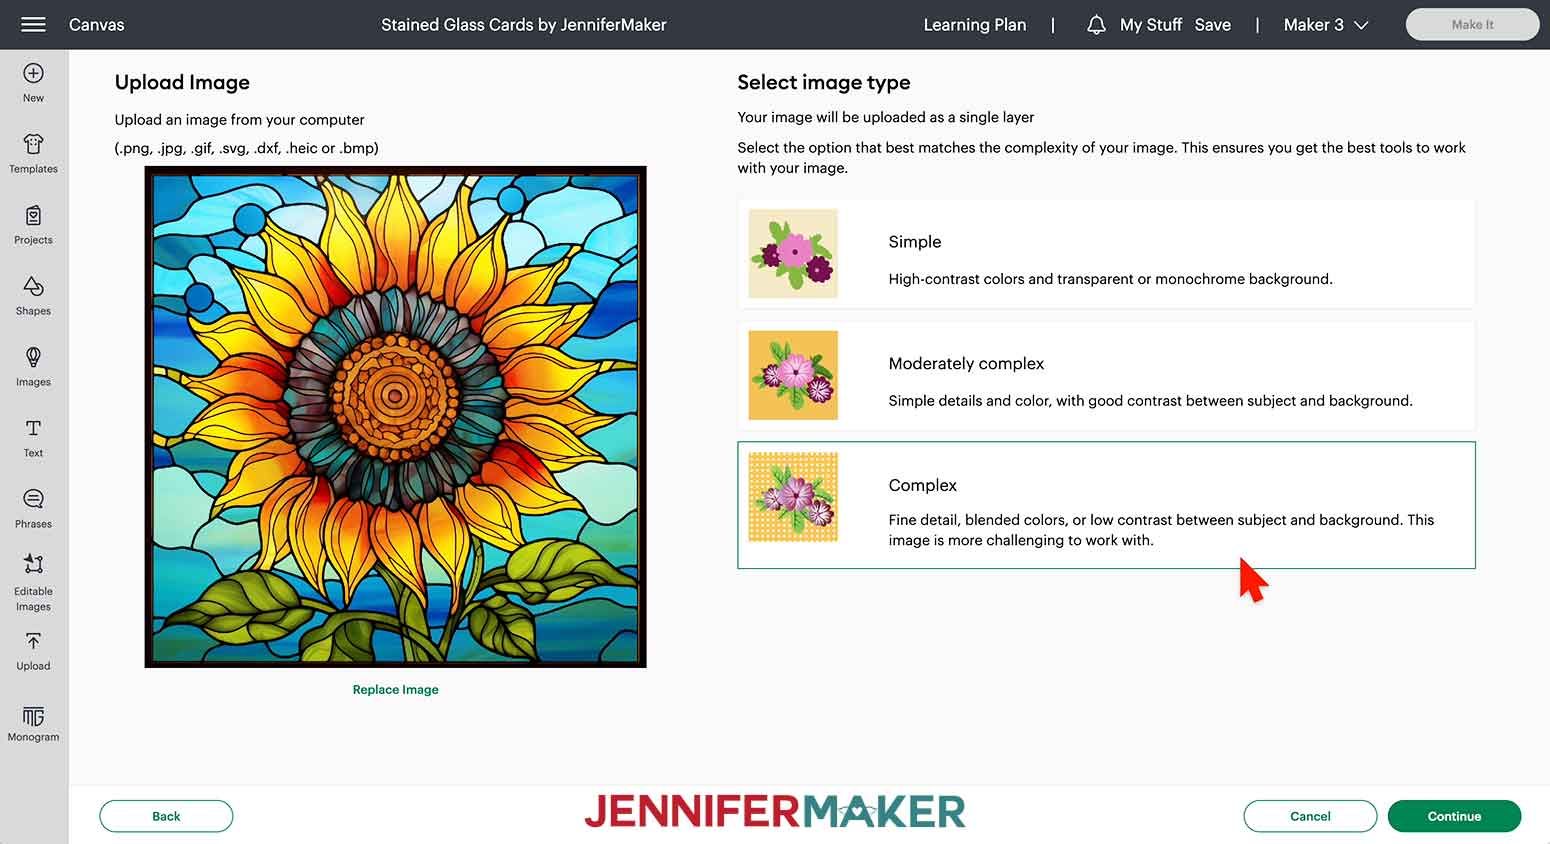
5. On the Upload Image screen, select “Complex” and click “Continue.”
6. On the next screen, click “Apply and Continue.”
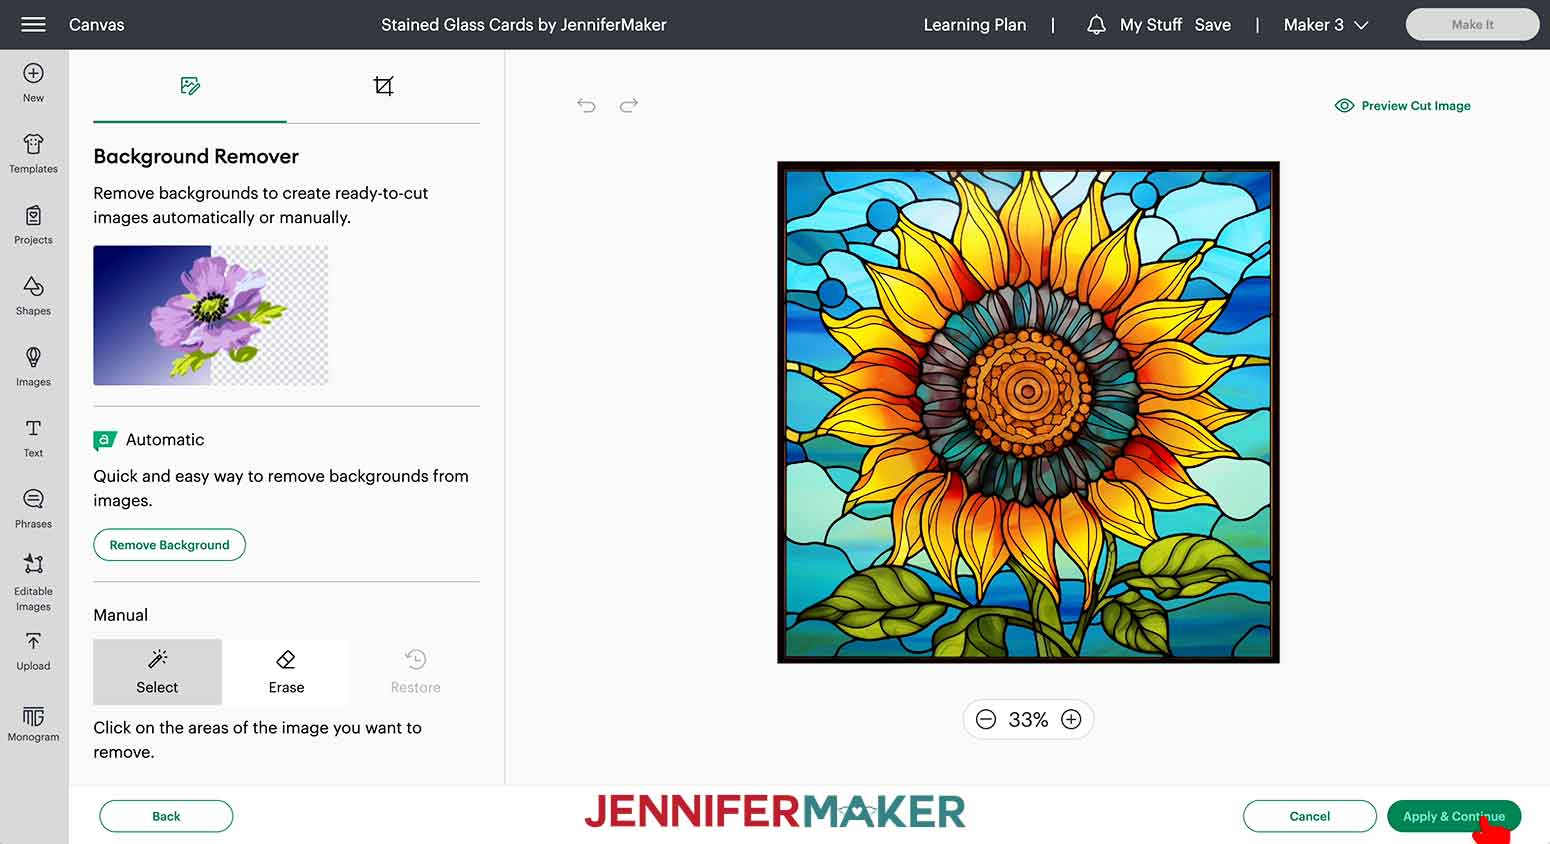
7. Select “Print Then Cut Image.”

8. Click “Upload.”
9. Find your design in Recent Uploads and click “Add to Canvas.”
10. Upload the SVG file for your card base and add it to your Canvas. I will use the file with the “NO SCORE” blank cards.

11. Click the Ungroup icon.
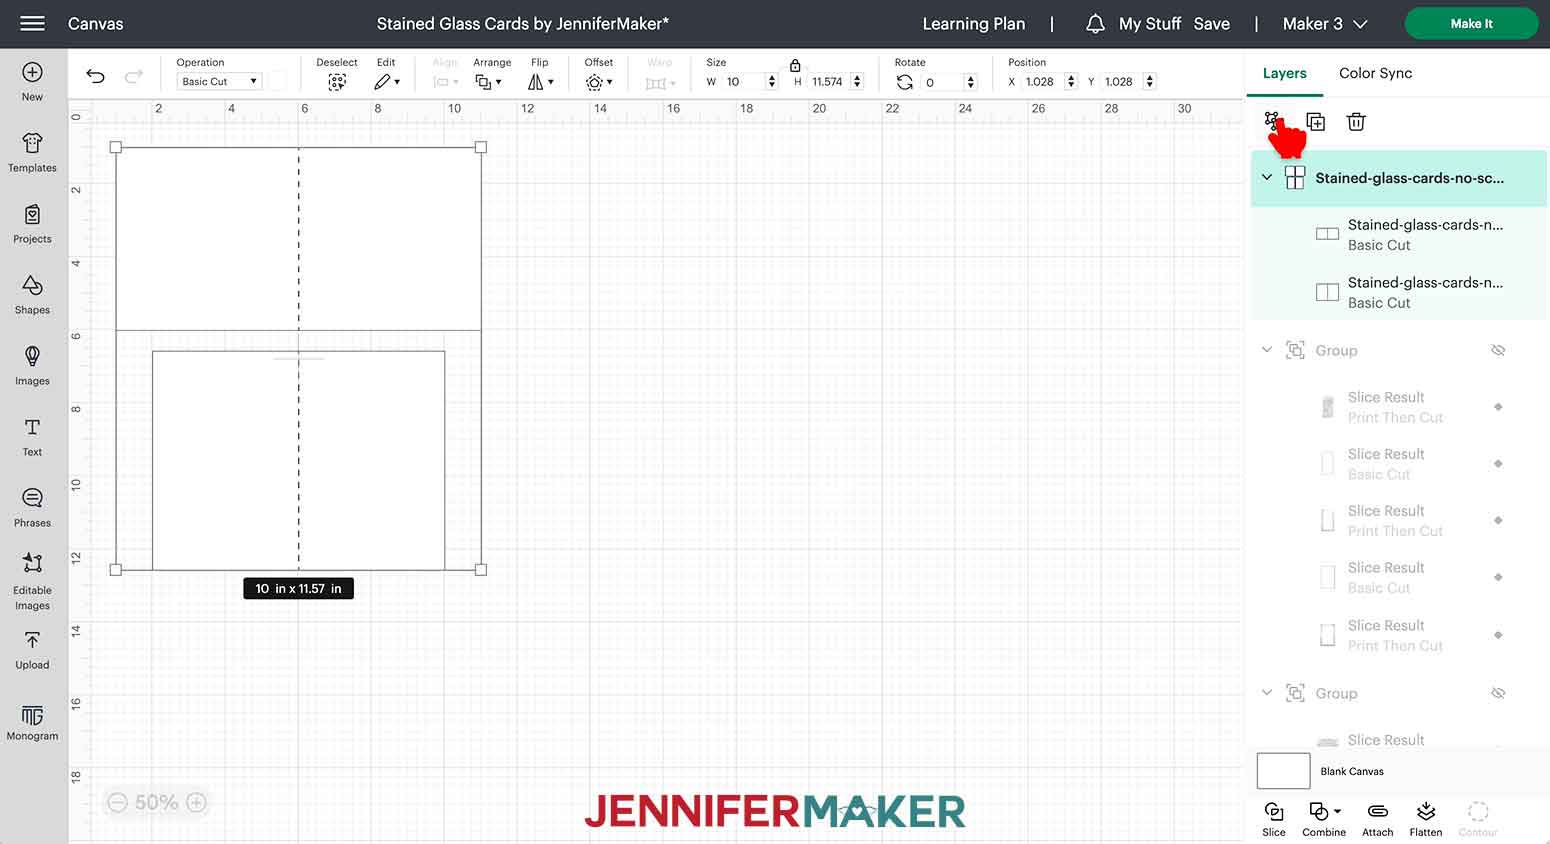
12. Delete or hide the card size you don’t need. I’m going to leave both since I’m making both cards.
13. If necessary, change the color of the card so it matches the border layers of the design. I’ll change the square base card to Black to match the border layers of the sunflower card.

14. Move the base card files to the side for now.
15. To resize the sunflower PNG, select the design and make sure the lock icon is closed. Type “5” for the width (W) in the Size menu. Press “Enter.”
16. With the design still selected, click twice on the Duplicate icon.
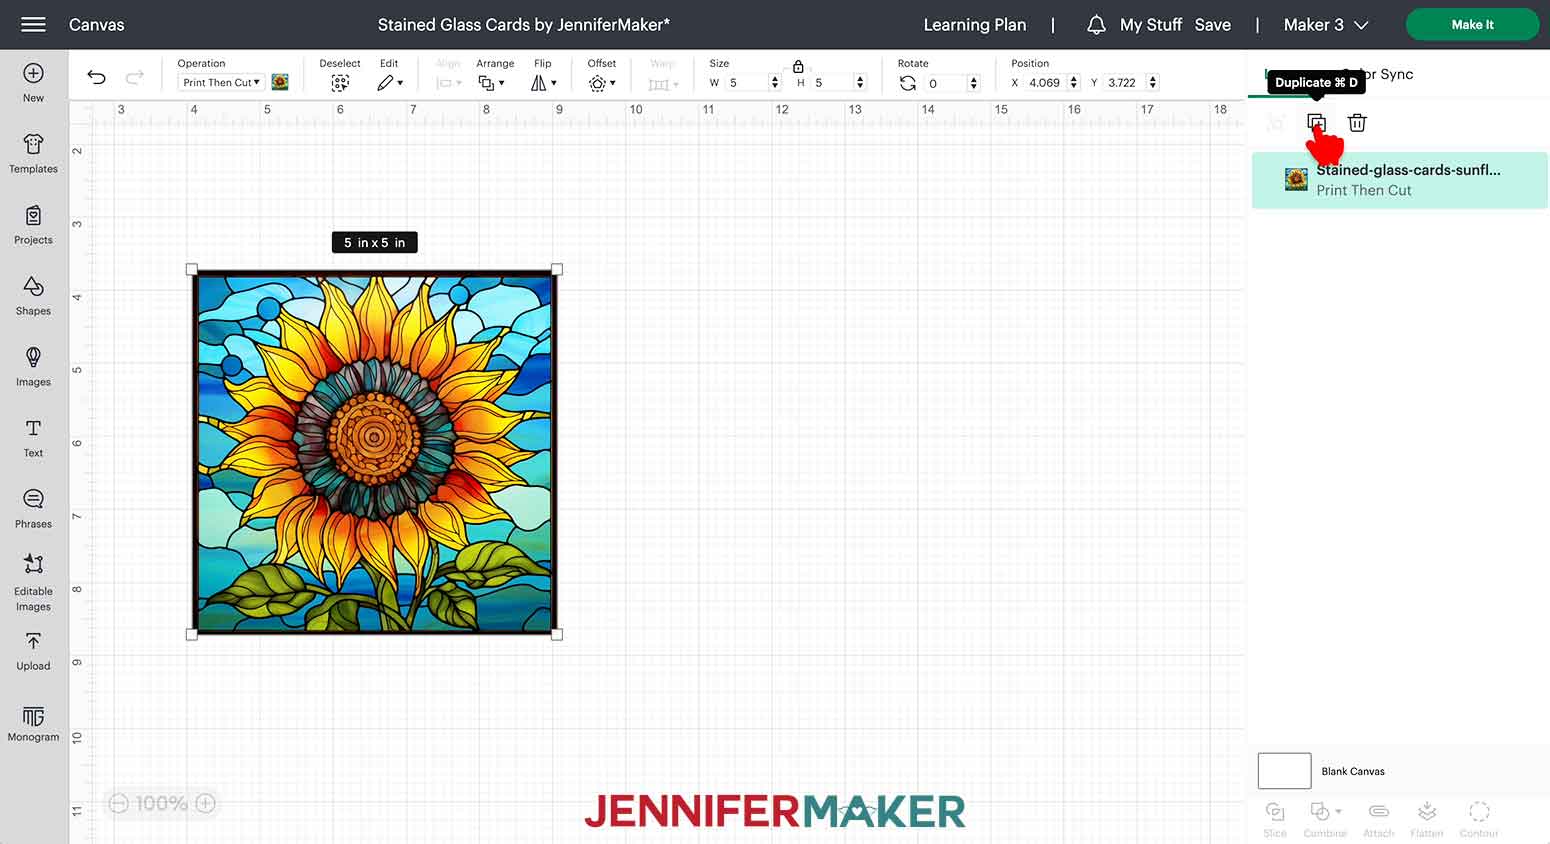
17. Click and drag the two duplicated layers next to the first image so they are easier to see.
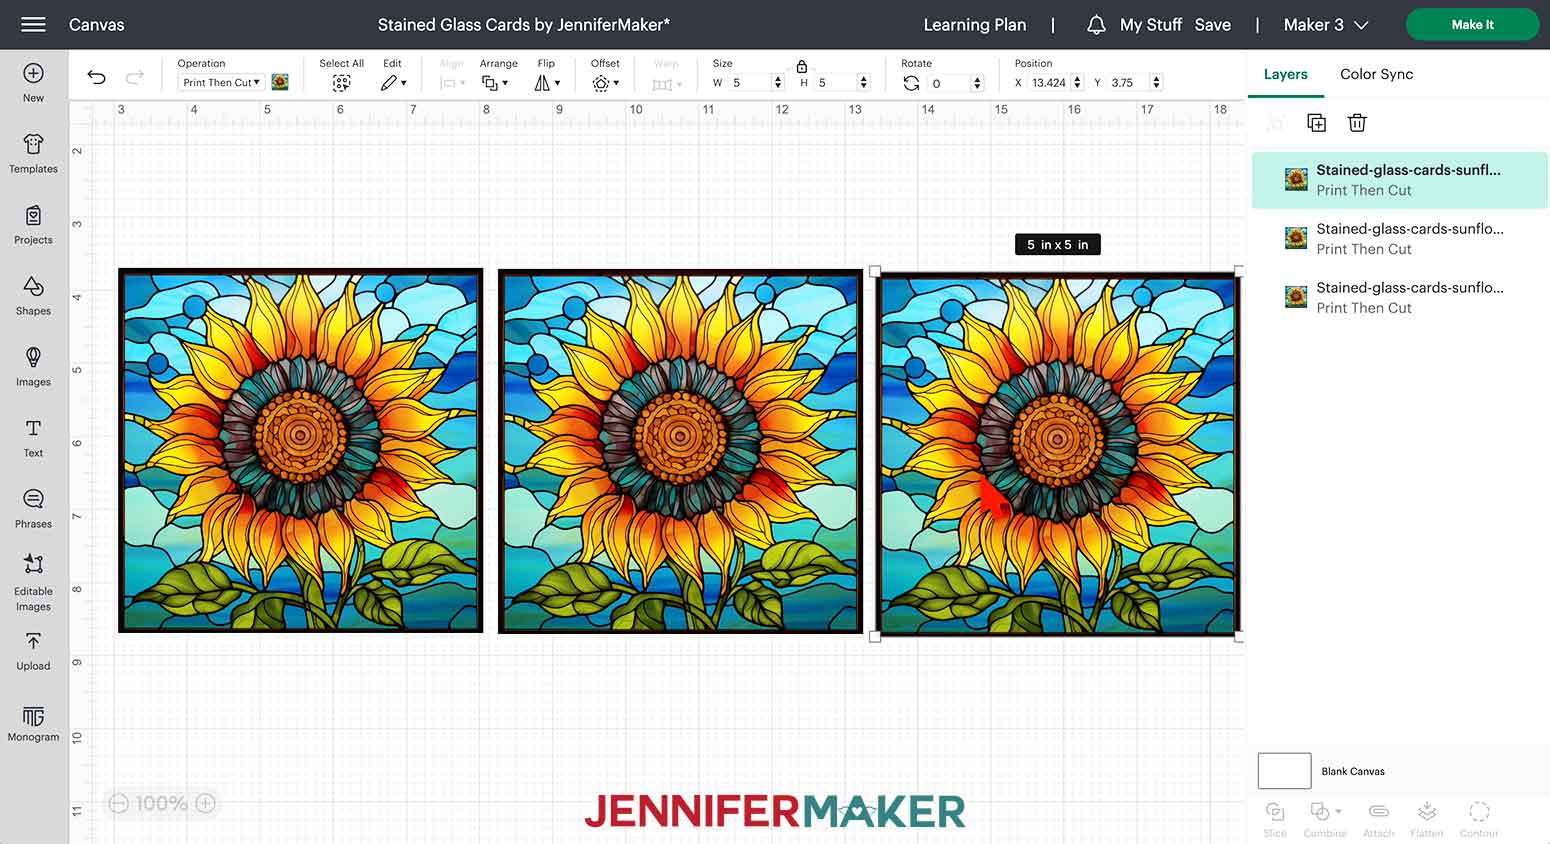
18. Leave the first image as it is.
19. Click “Shapes” in the left menu and select the Square.
20. Click the Color swatch at the top and select Black to change the color of the square.
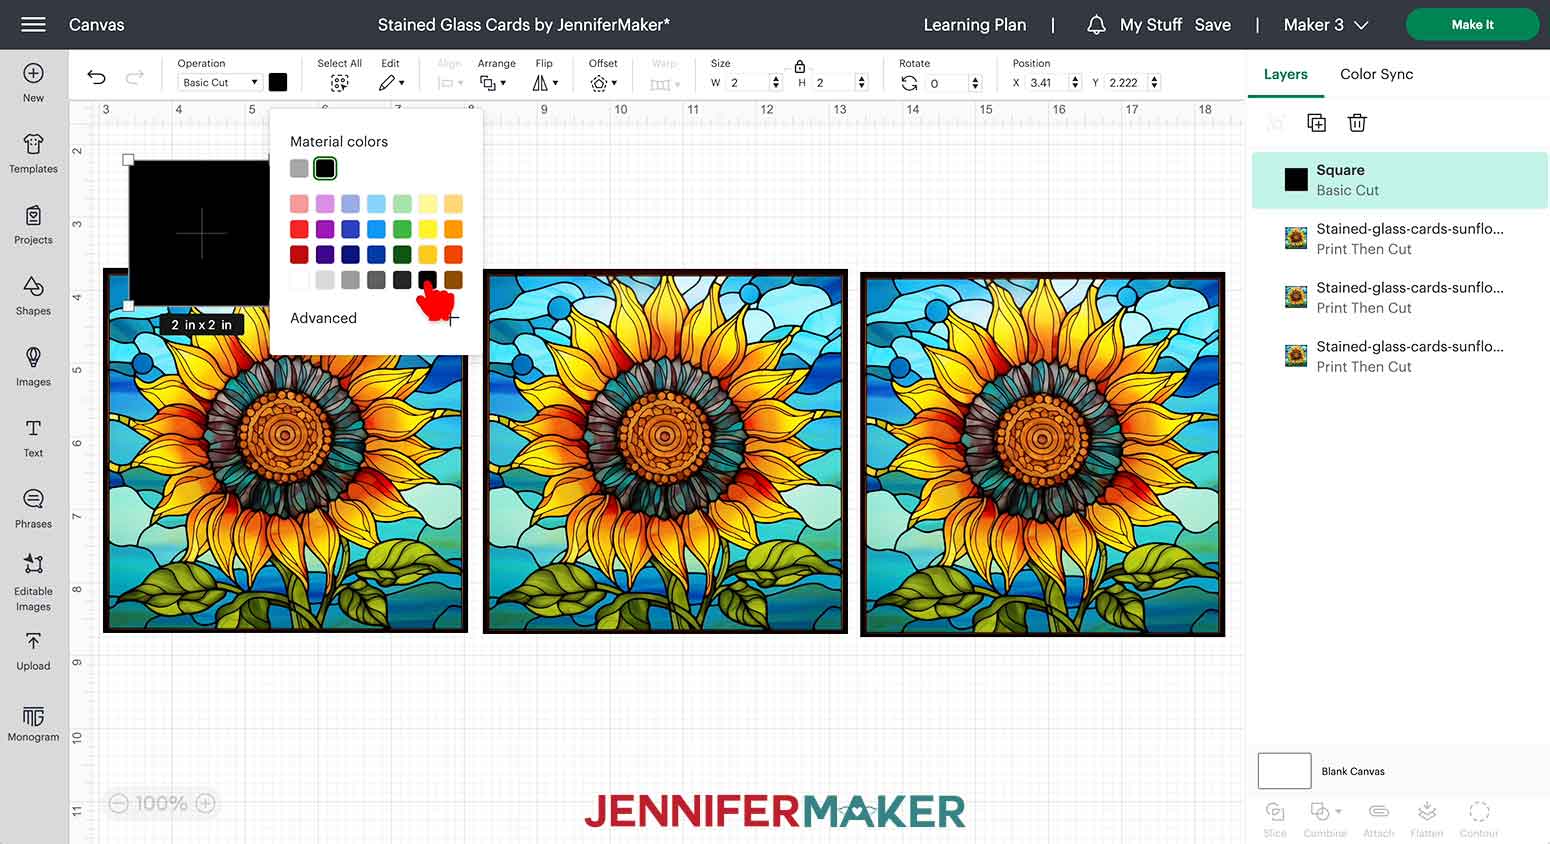
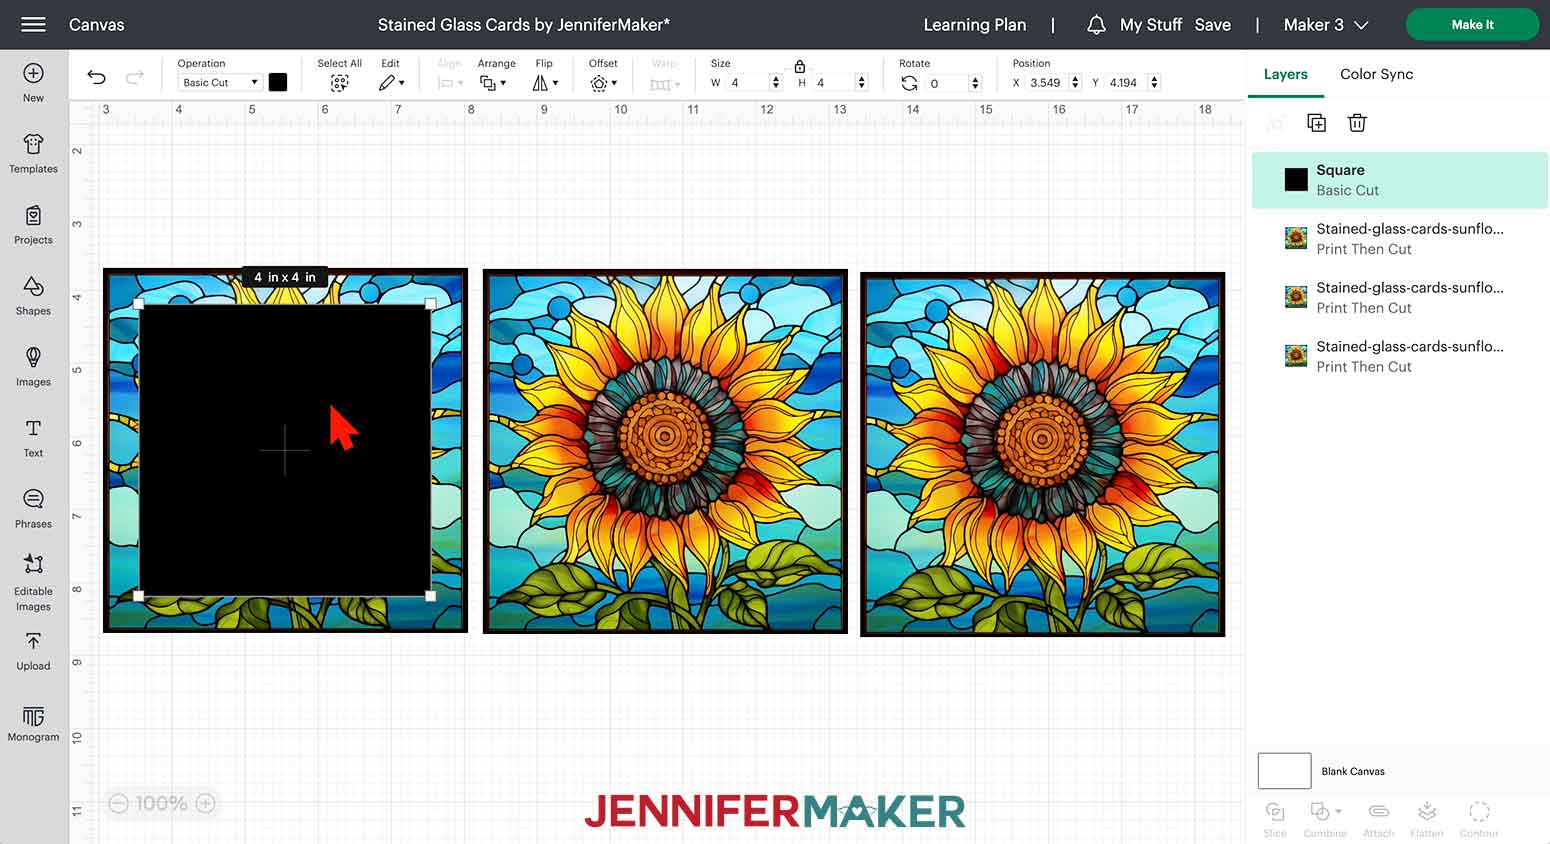
21. With the square still selected, enter “4” for the width in the Size menu. Press “Enter.”
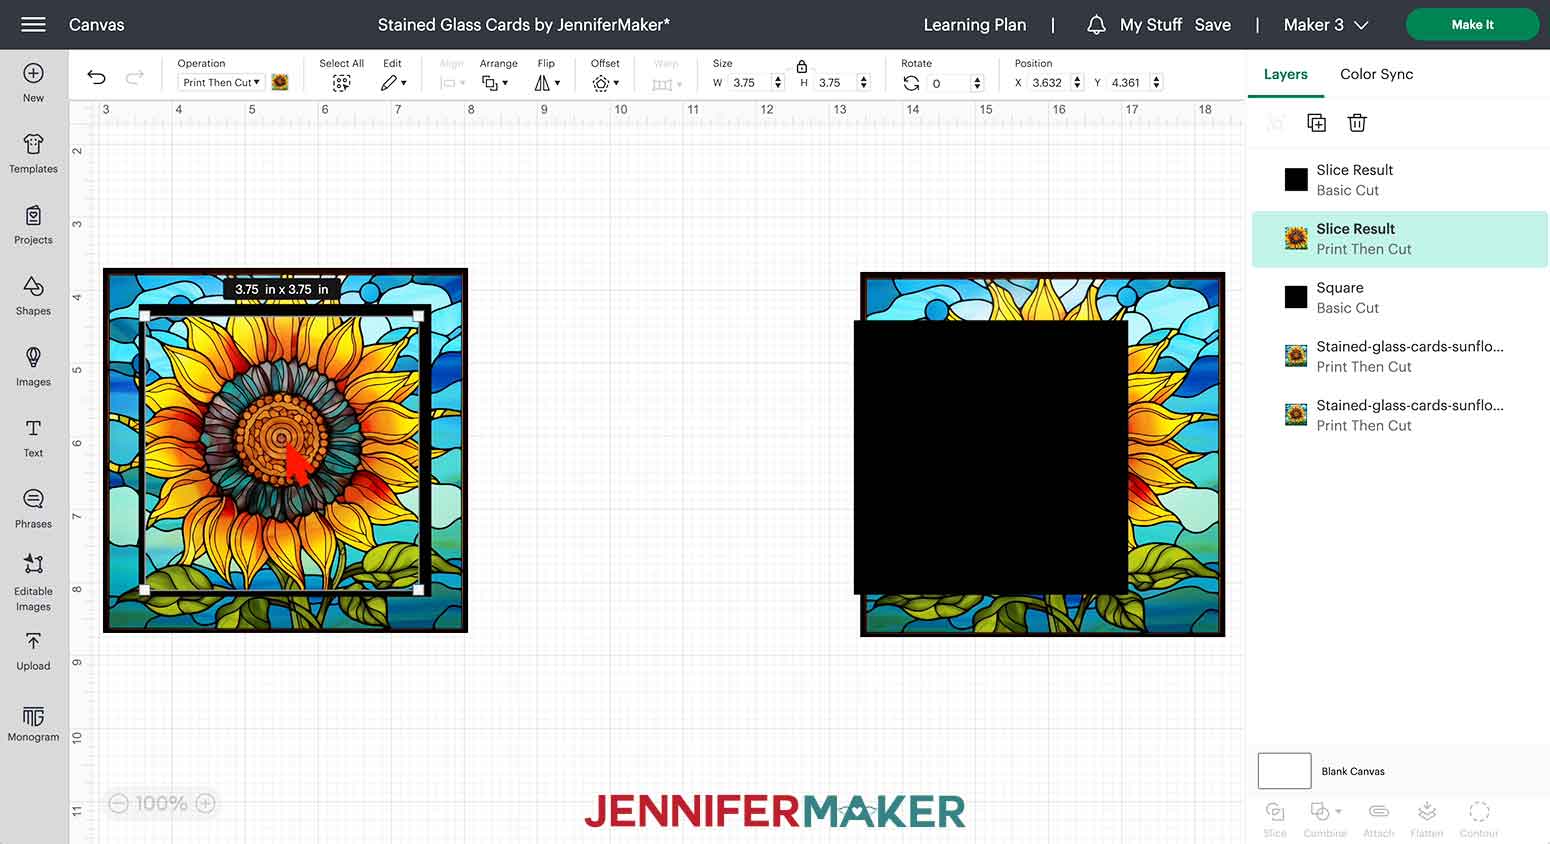
22. This square is a border piece for the middle layer. Click and drag it over the first sunflower design.
23. Select the square and click the Duplicate icon.
24. Change the size to 3.75” by entering “3.75” in the width field. Press “Enter.”
25. Select the black 3.75” square and the middle sunflower, and click “Align” and “Center.”

26. Click “Slice.”
27. Click and drag the black square to the side.
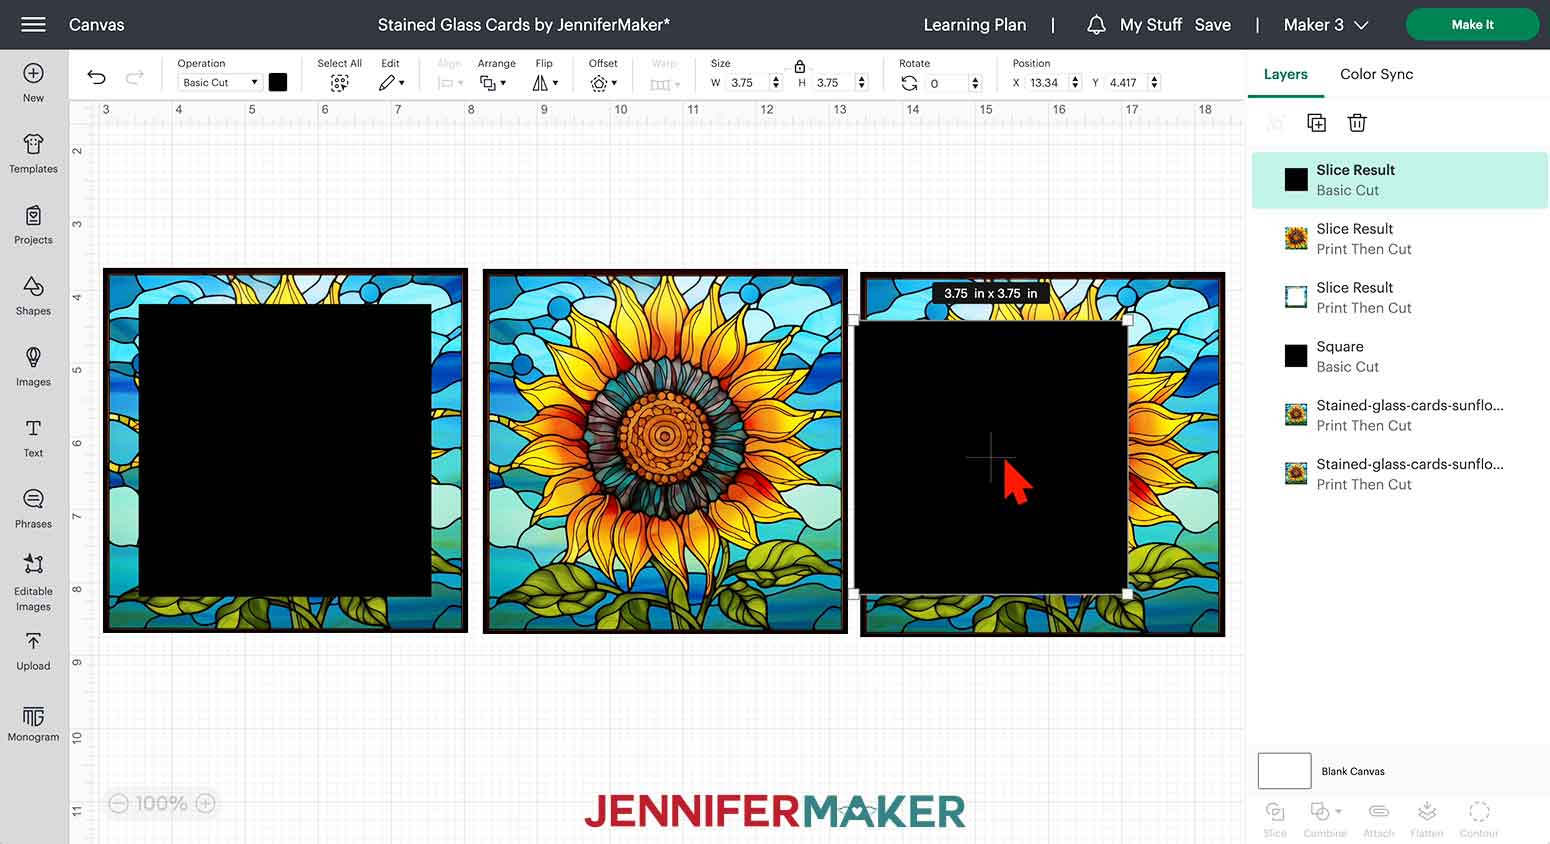
28. Delete the border piece of the design.
29. Drag the square sunflower and place it on the black square of the first design.
30. Click the 3.75” black square and change the size to 3”.
31. Drag it over the middle sunflower layer.
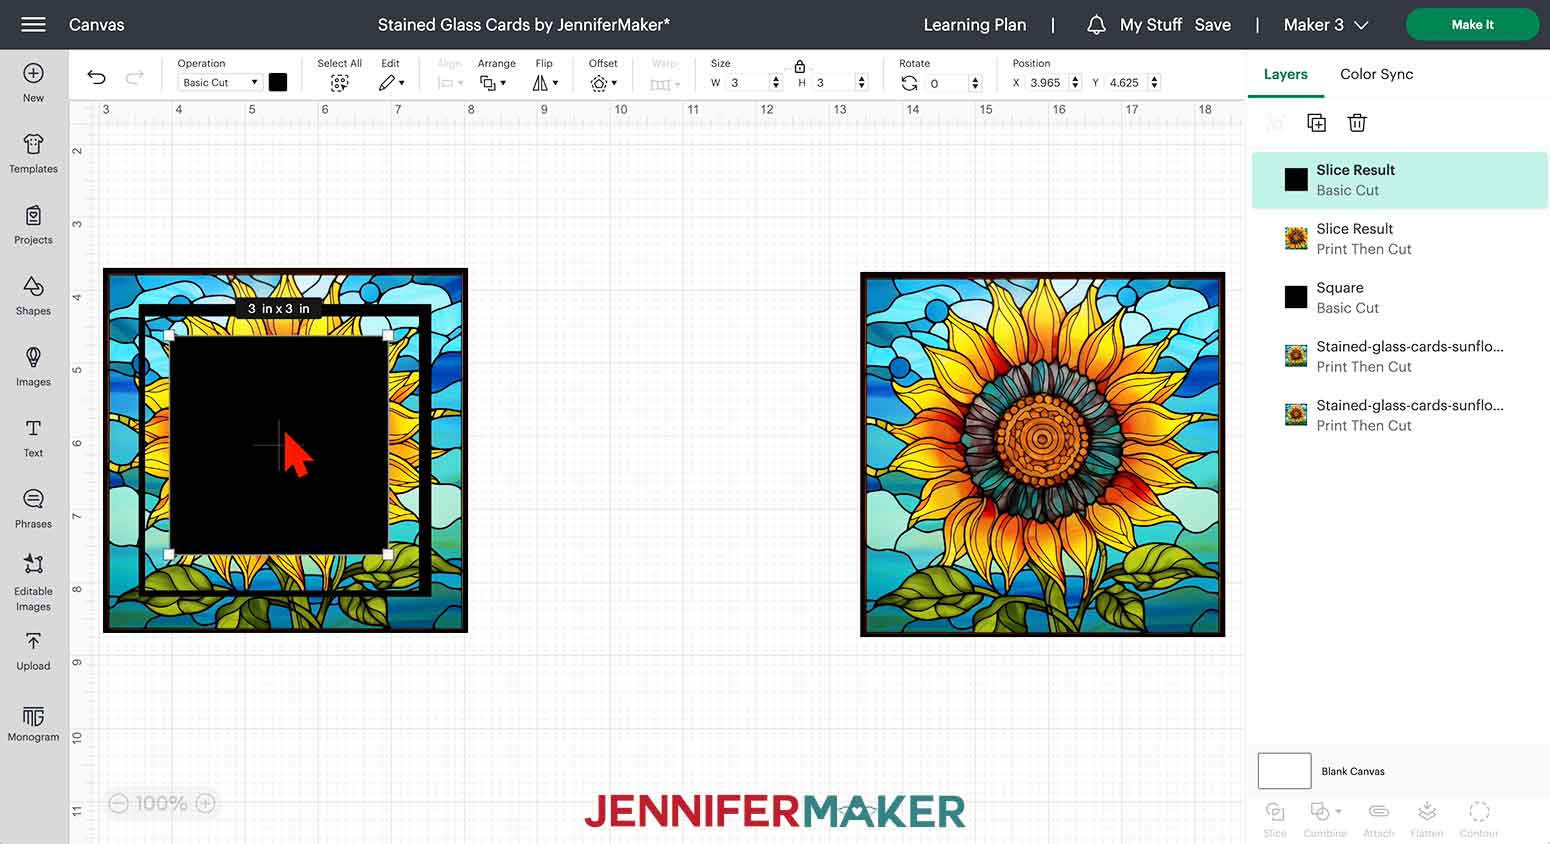
32. Click “Duplicate” to make a copy of the square.
33. Change the duplicated square size to 2.75”.
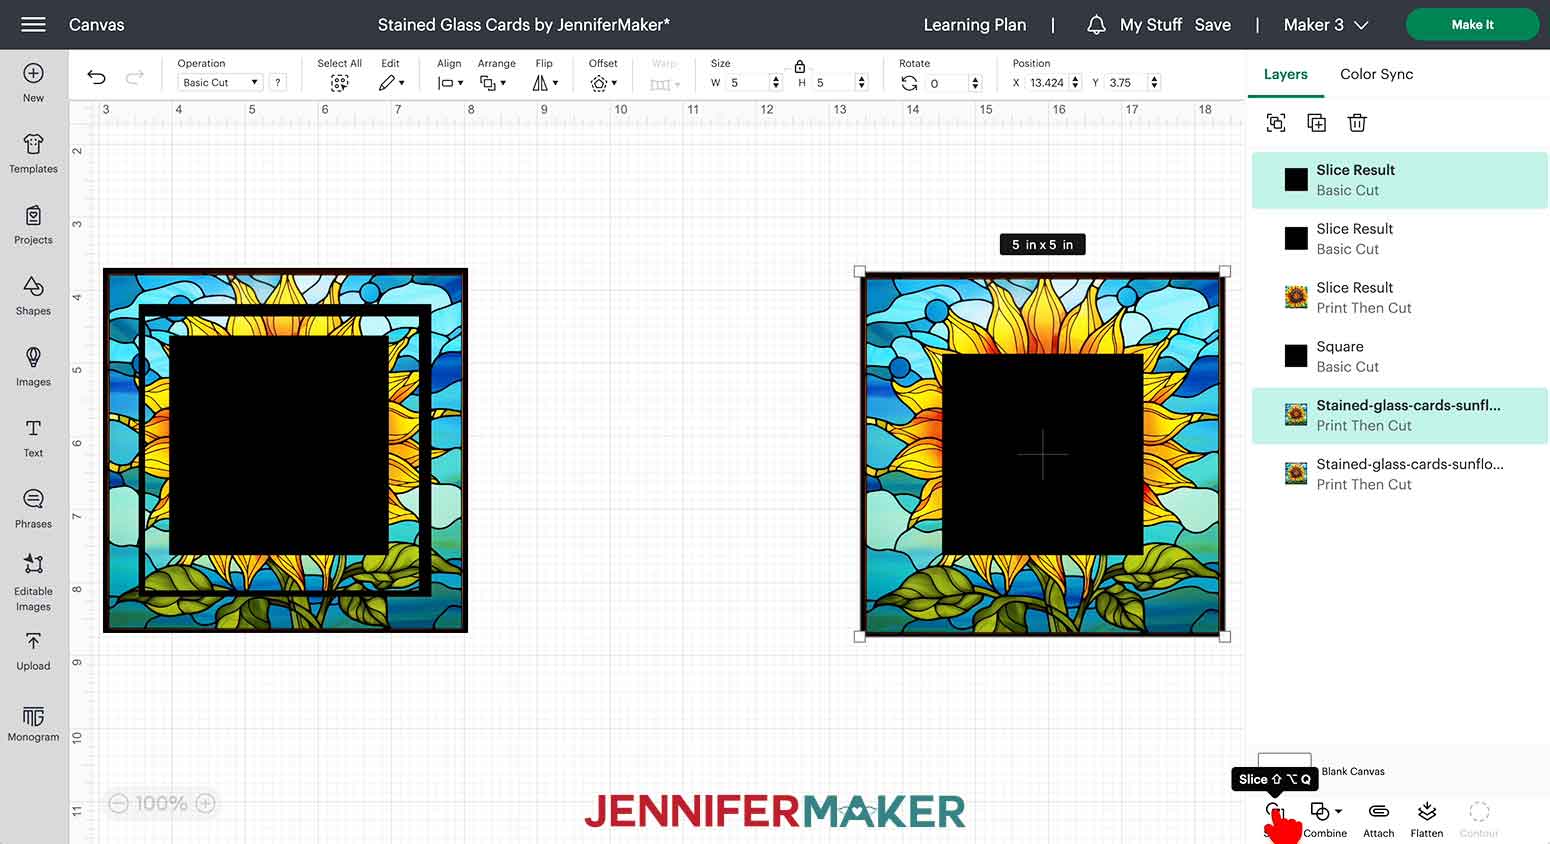
34. Select the 2.75” square and the third full-sized sunflower design.
35. Click “Align” and “Center.”
36. Click “Slice.”
37. Delete the black square layer and the border layer.
38. Drag the 2.75” square sunflower piece over on top of the 3” black square.
39. Click “Select All” to select all your completed layers.
40. Click “Align” and “Center” to confirm all layer sizes will align correctly

41. Continue to Step 3 below.
PROJECT 2: INK-SAVING RECTANGULAR DESIGN
1. Follow steps 1 - 14 from above to upload your rectangular design.
2. To resize your rectangular PNG, click the Unlock icon above the Size fields.
3. Enter “4” for the width and “6” for the height.

4. Click “Shapes” in the left menu and select the Square.
5. Click the Color swatch at the top and select White to change the color of the square.
6. With the square selected, click the Unlock icon above the Size fields.
7. Enter “3” for the width and “5” for the height. Press “Enter.”
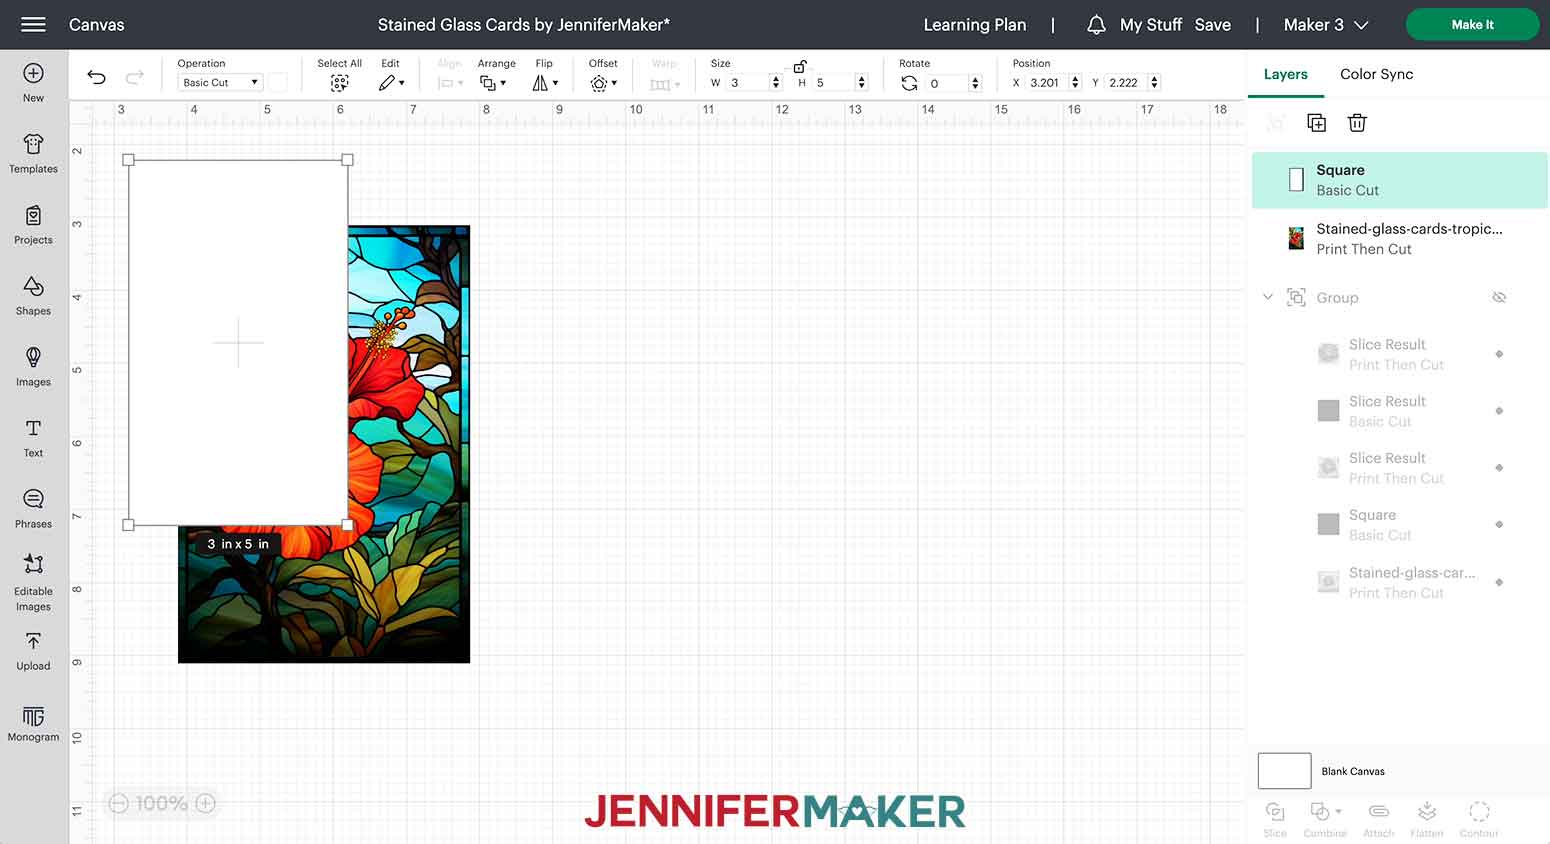
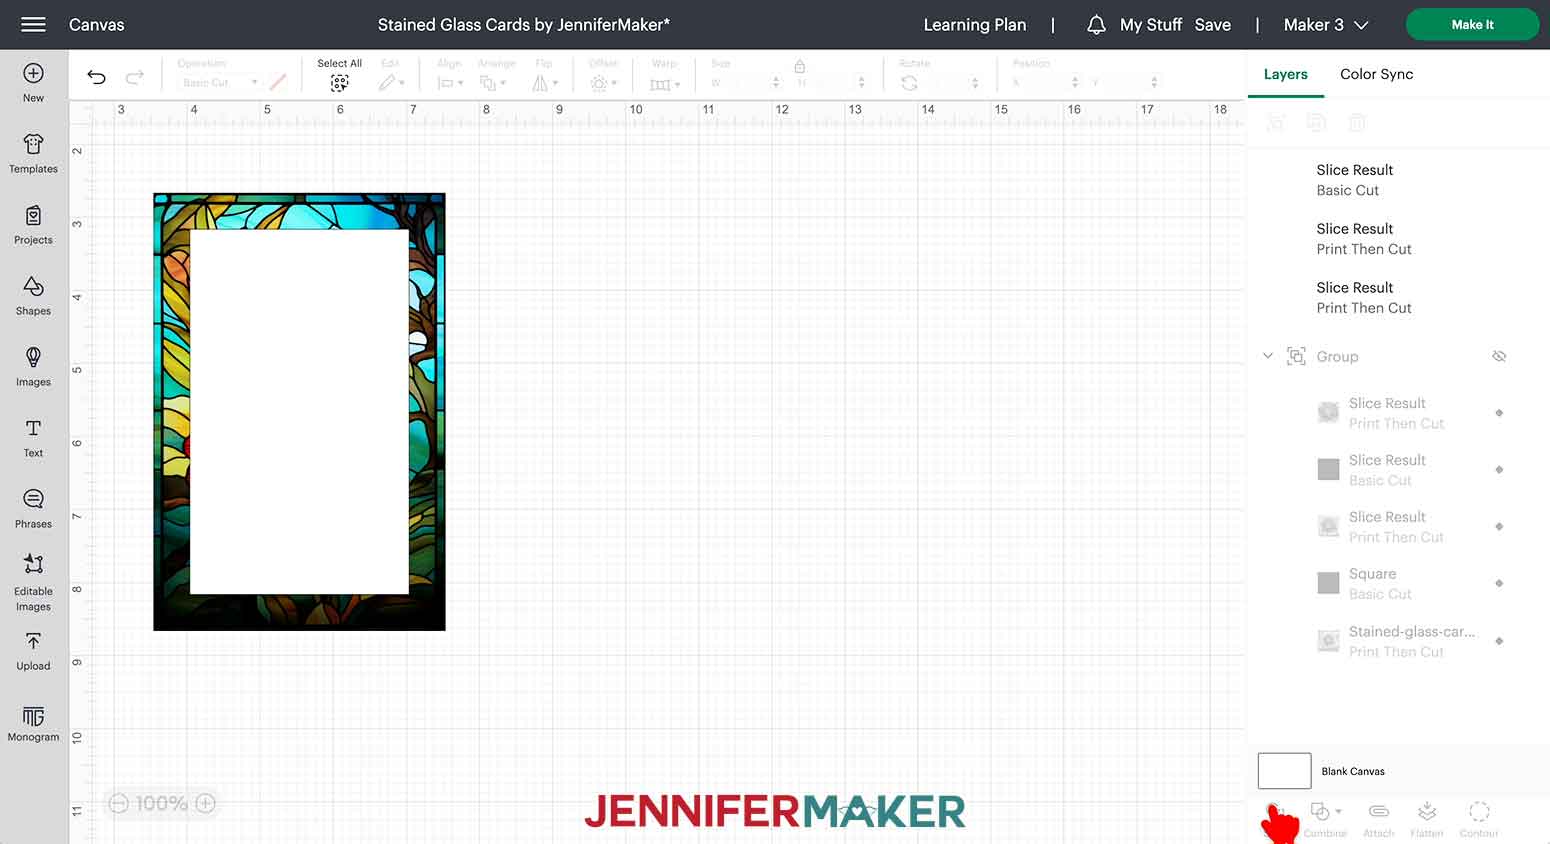
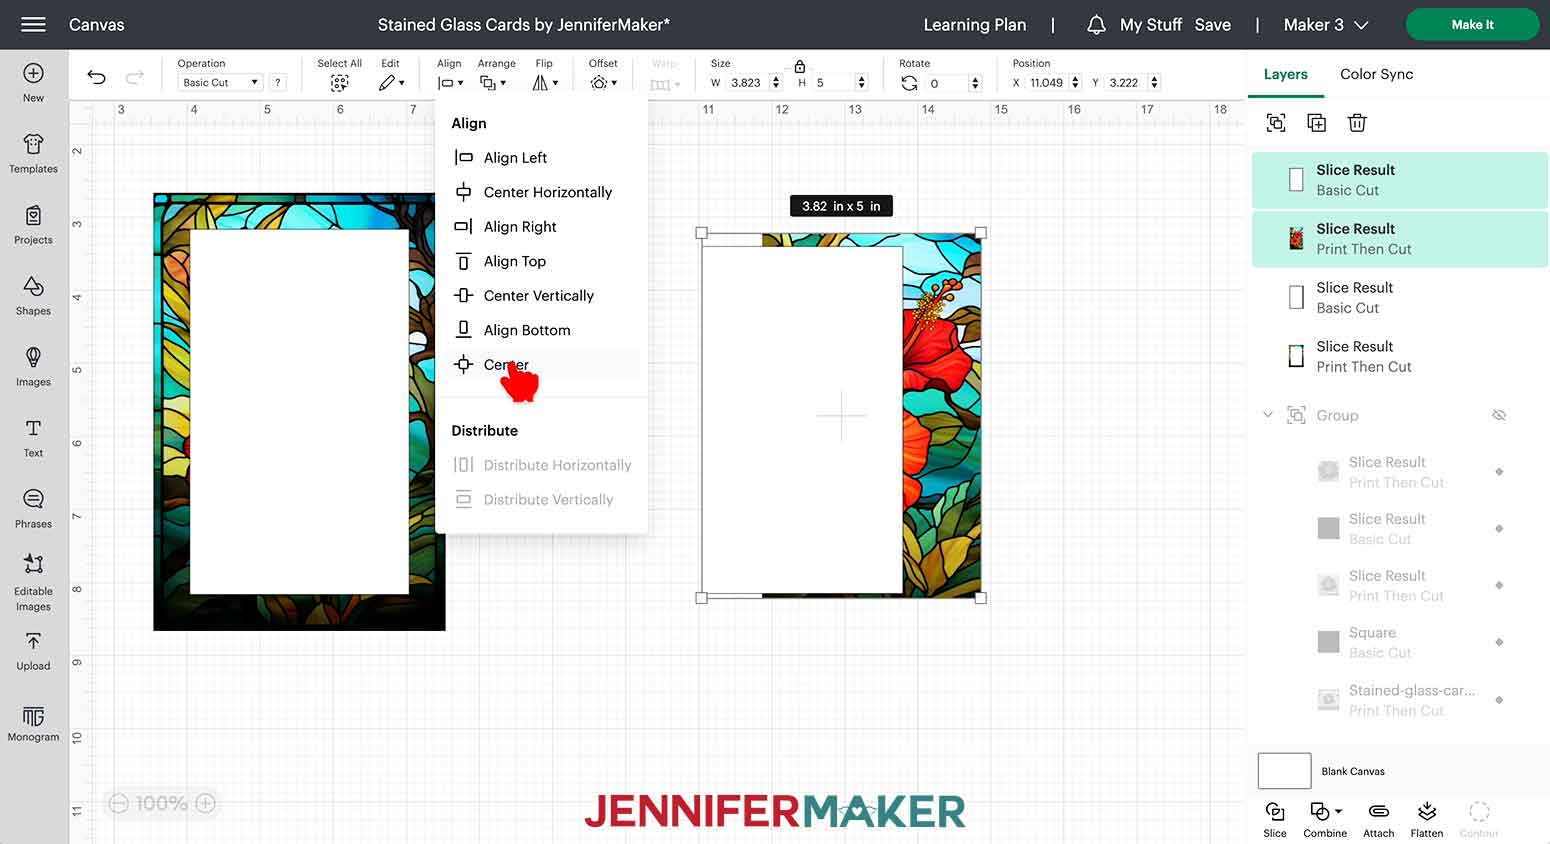
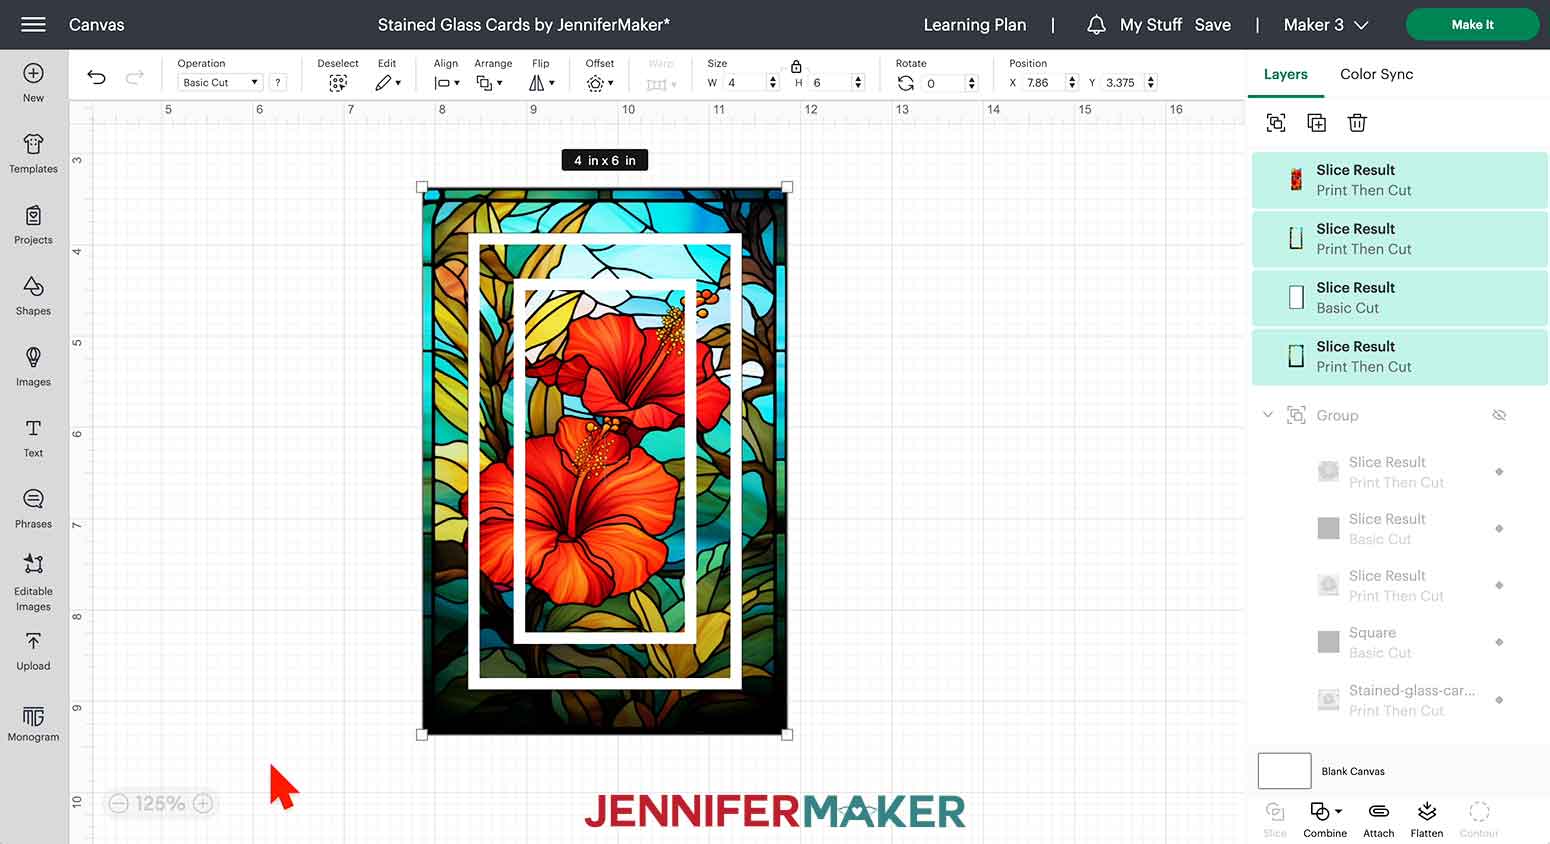
8. Select the flower design and the white rectangle.
9. Click “Align” and select “Center.”
10. Click “Slice.”
11. In the Layers Panel, select the sliced layer that has the center part of the flower design.
12. Click “Arrange” and select “Bring to Front.”
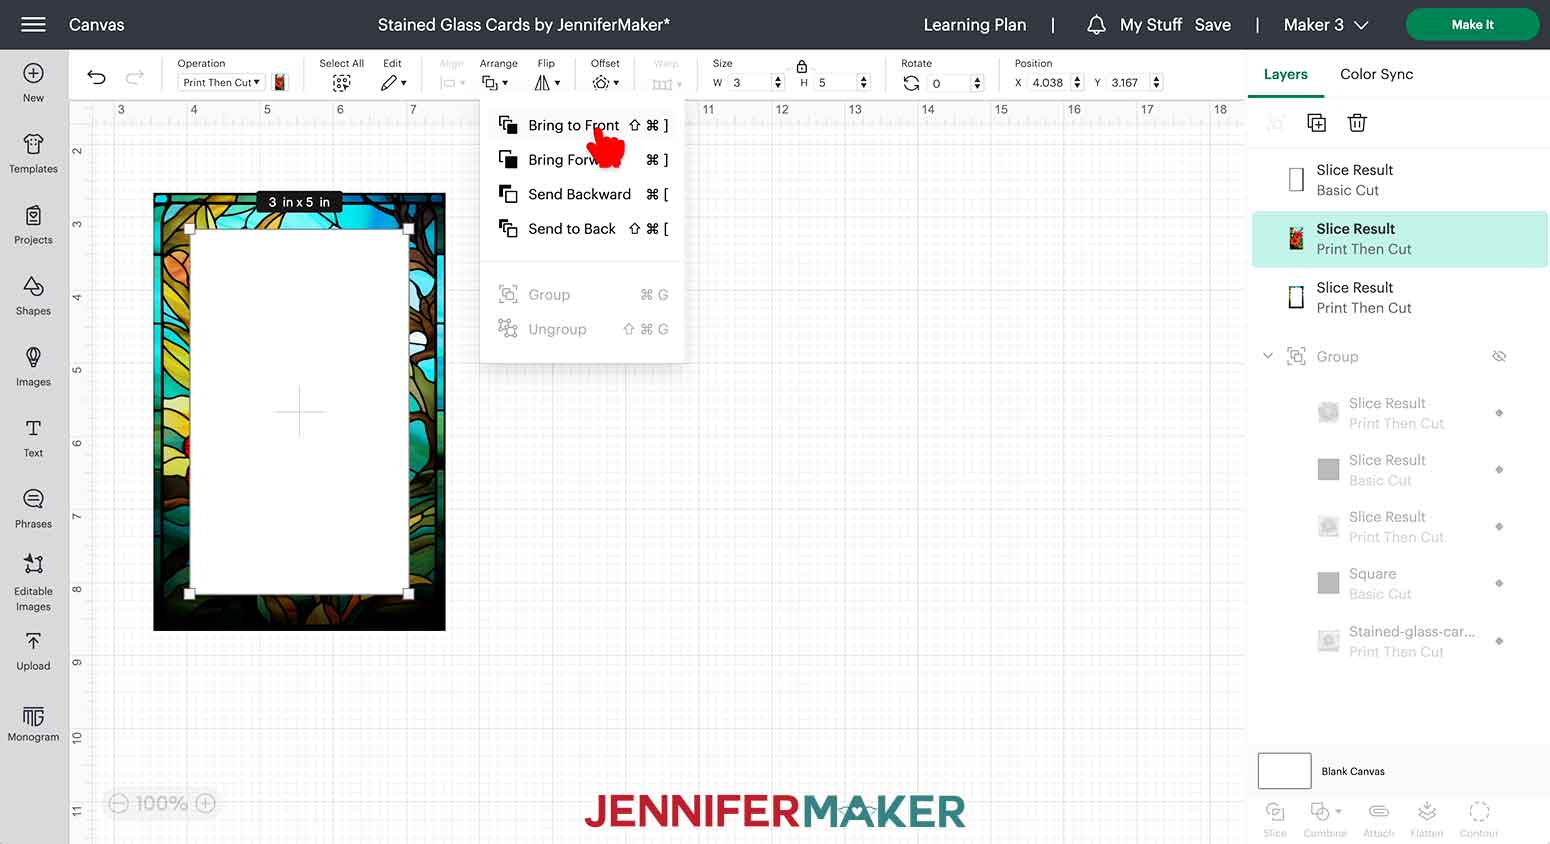
13. Drag the center flower layer to a blank area on the canvas.
14. Select the white rectangle and click “Duplicate.”
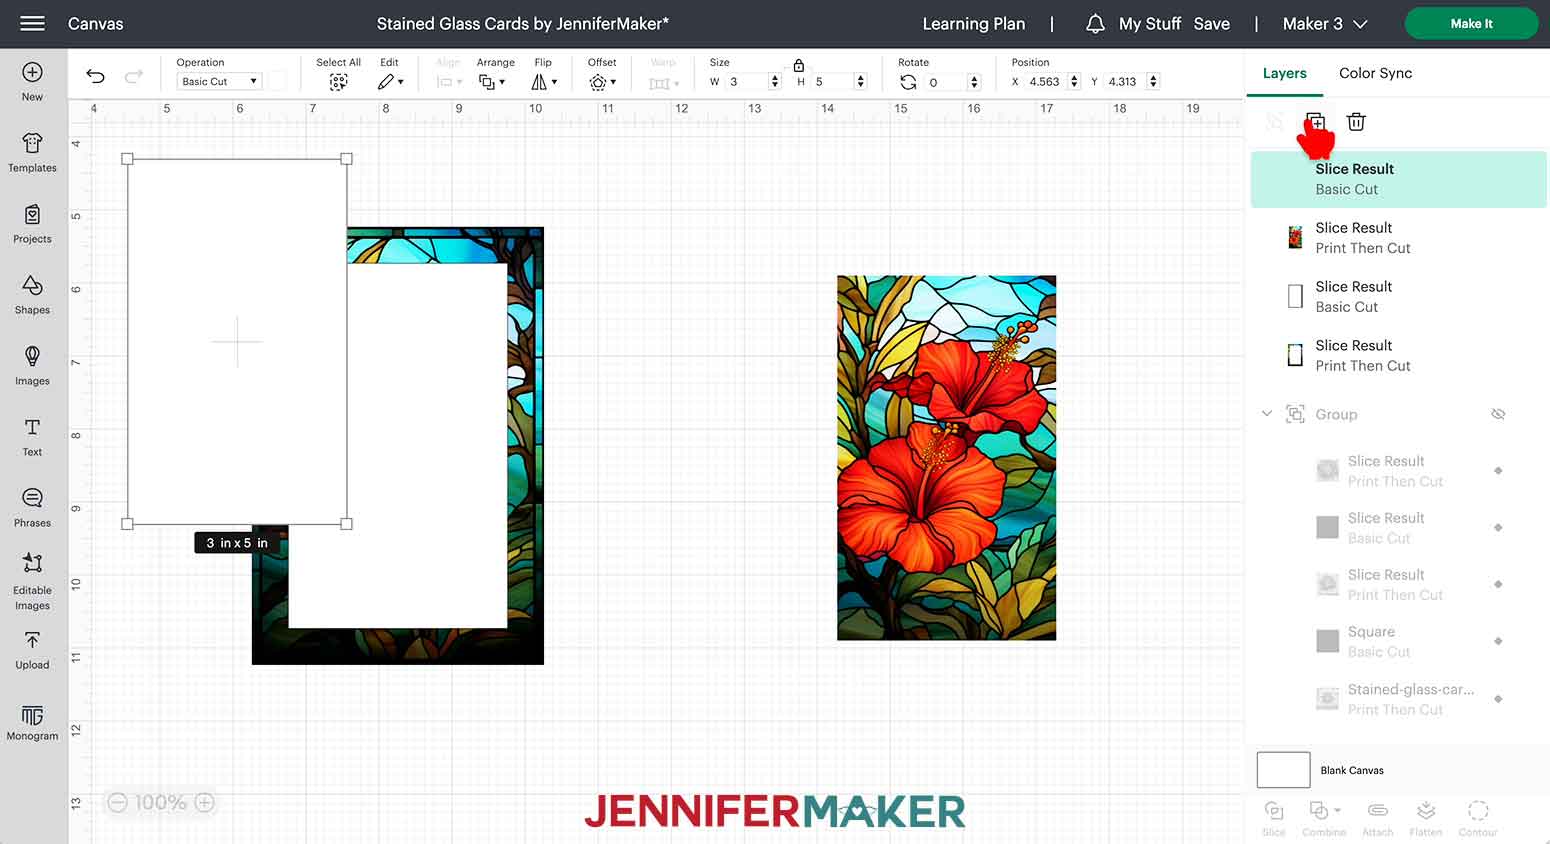
15. With the duplicate rectangle selected, click the Unlock icon above the Size fields.
16. Enter “2.75” for the width and “4.75” for the height.
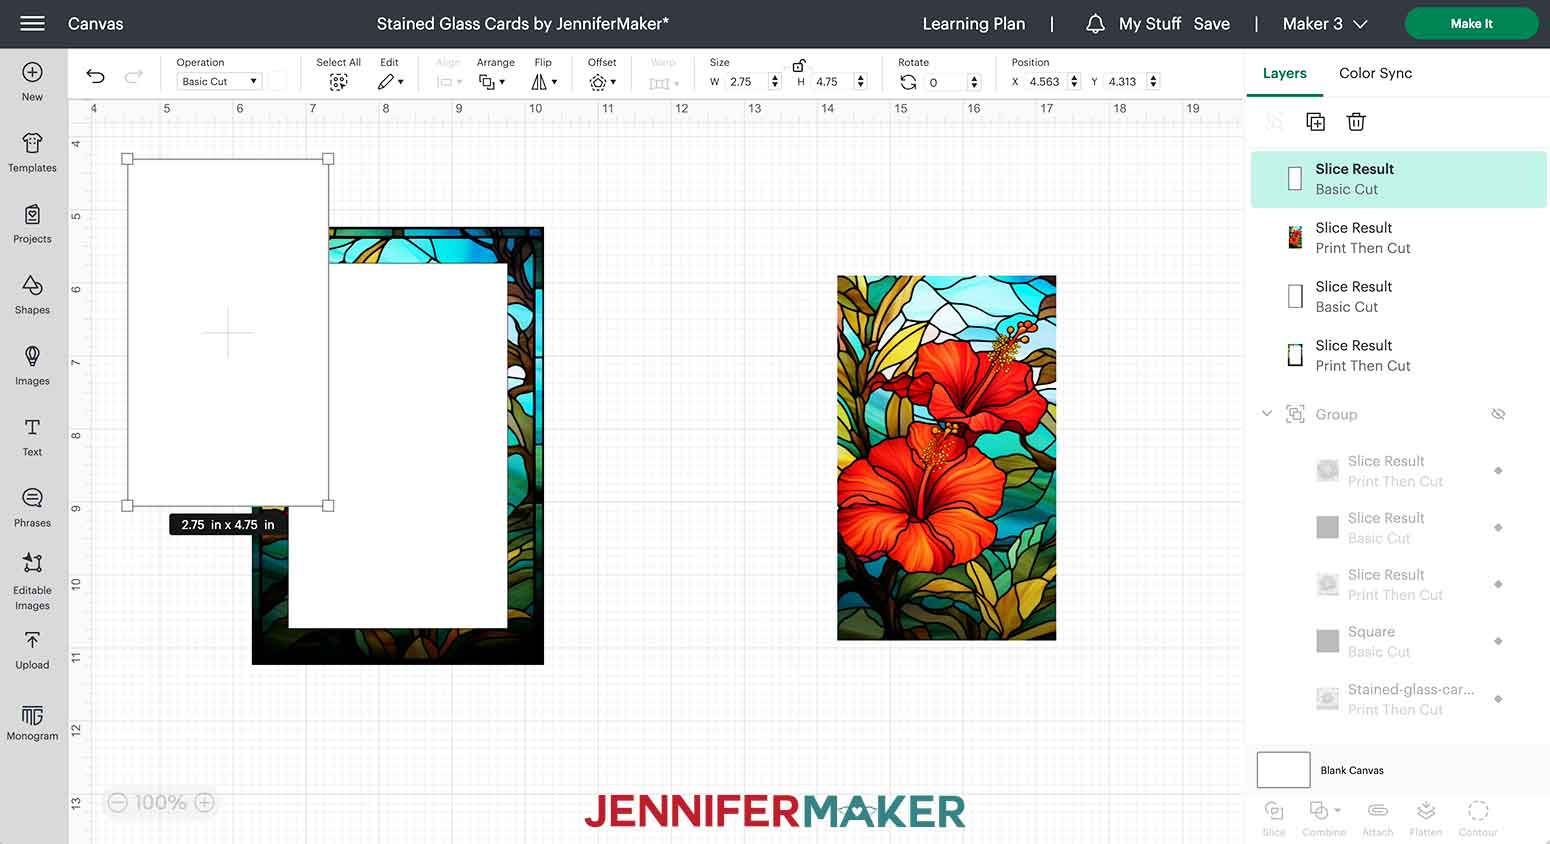
17. Select the 2.75” x 4.75” rectangle and the smaller flower layer.
18. Click “Align” and select “Center.”
19. Click “Slice.”
20. Delete the border layer.
21. Select the new white rectangle and click the Unlock icon above the Size fields.
22. Enter “2” for the width and “4” for the height.
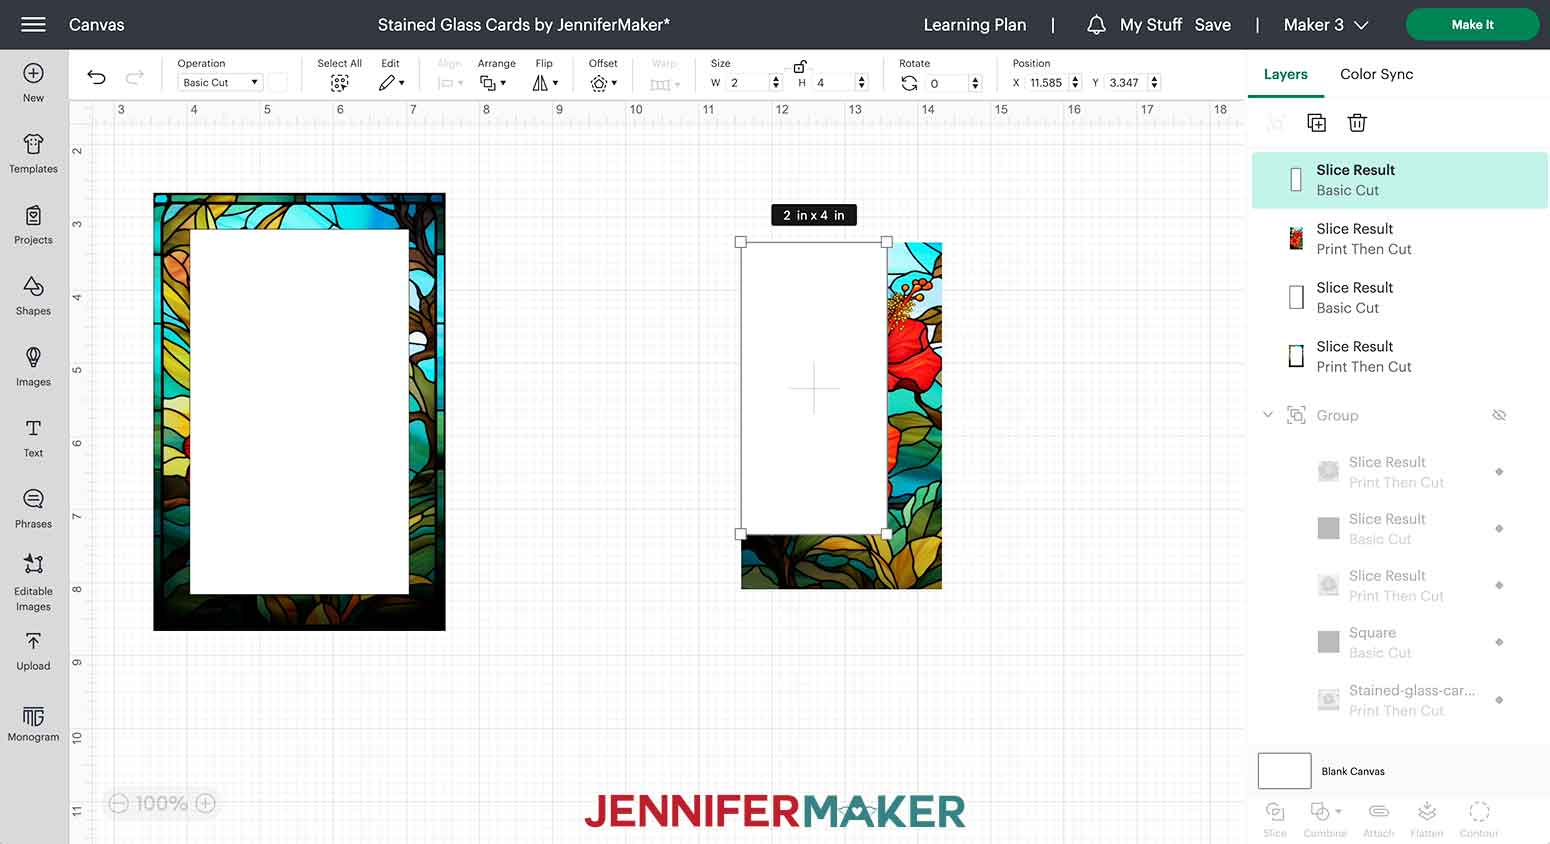
23. Select the resized white rectangle and the sliced middle flower layer.
24. Click “Align” and select “Center.”
25. Click “Slice.”
26. Drag the border layer and white rectangle over the white area of the first layer. Leave your extra flower layer where it is for now.
27. Select the smaller white rectangle and click “Duplicate.”
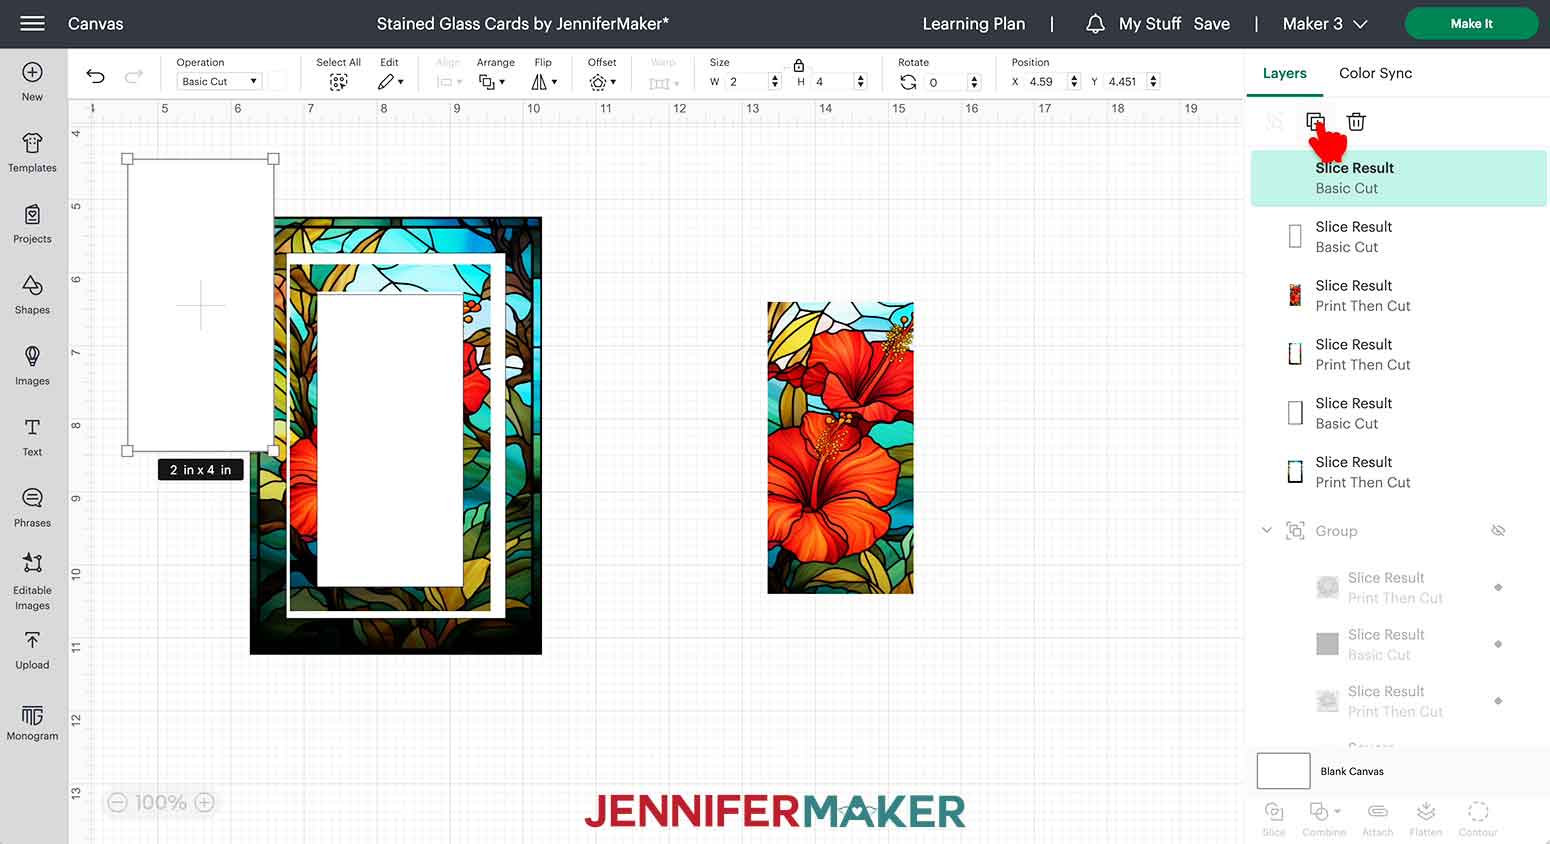
28. With the duplicate rectangle selected, click the Unlock icon above the Size fields.
29. Enter “1.75” for the width and “3.75” for the height.
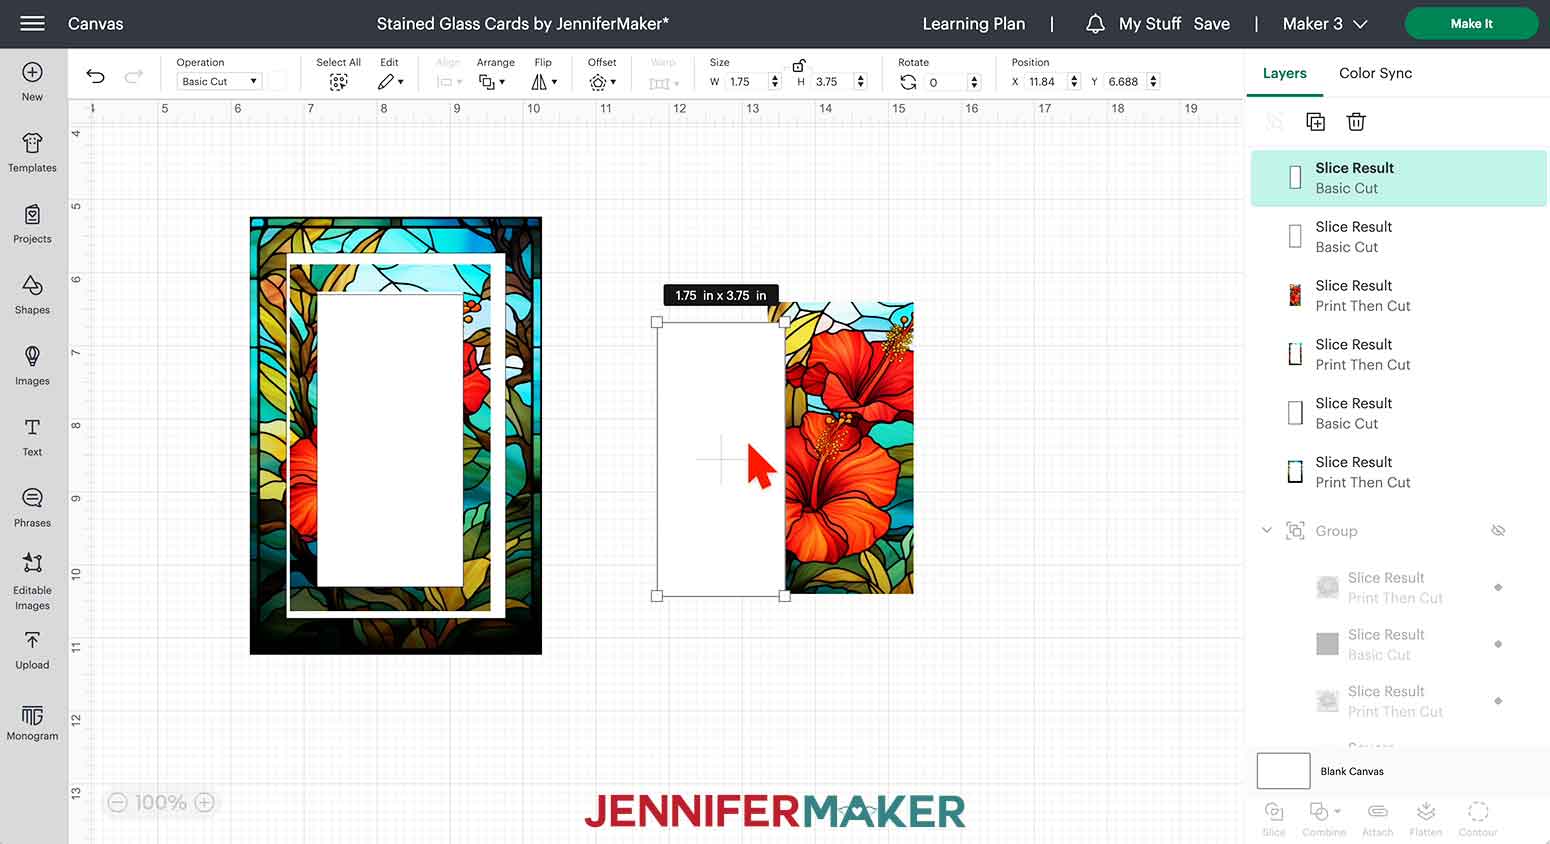
30. Select the small white rectangle and small flower layer.
31. Click “Align” and “Center.”
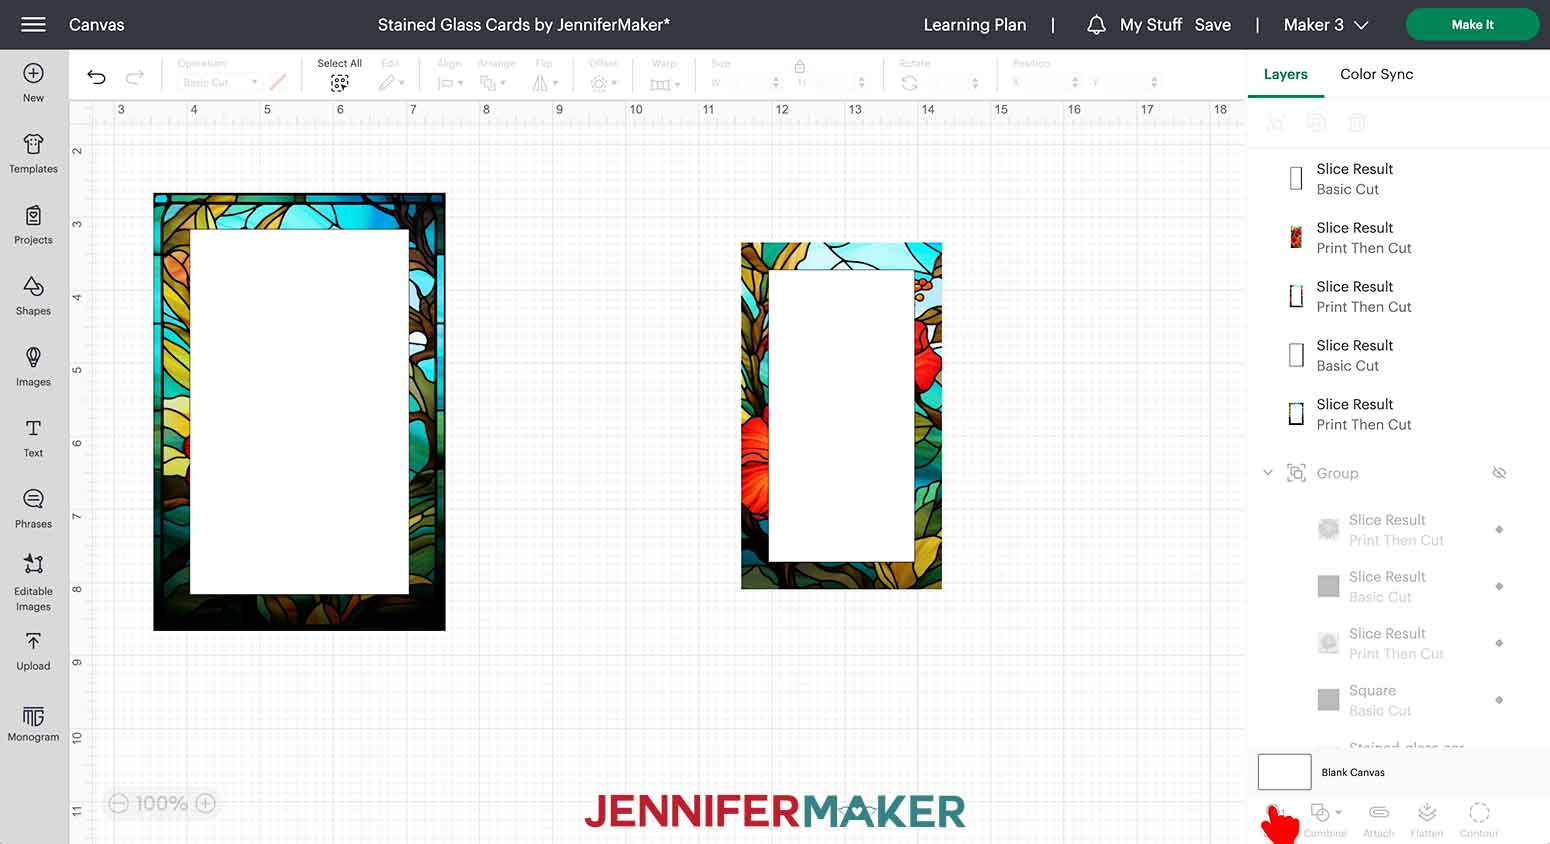
32. Click “Slice.”
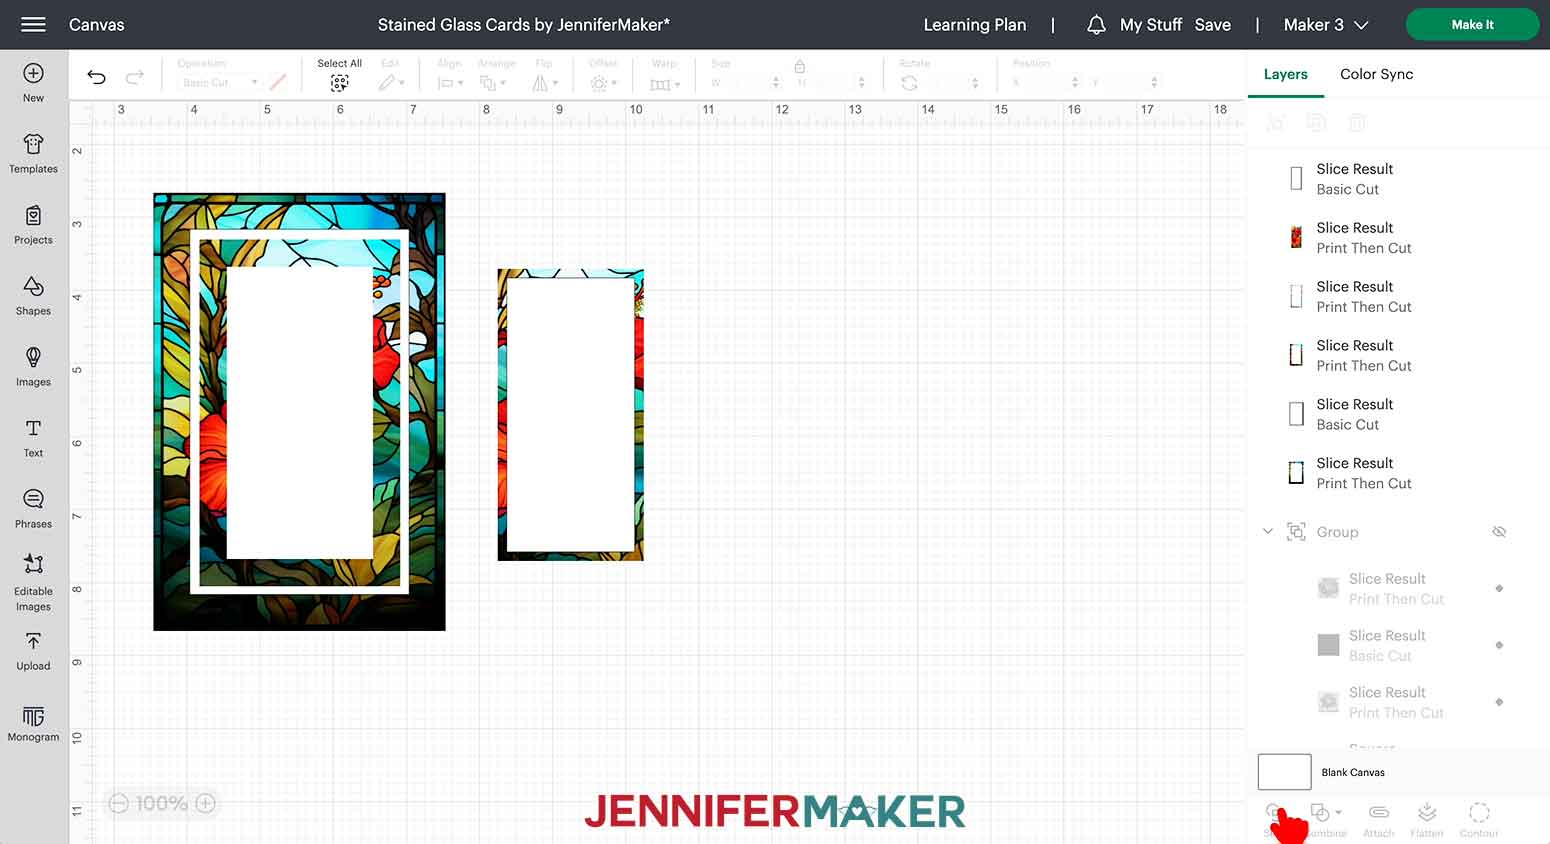
33. Delete the white rectangle layer and the sliced border layer.
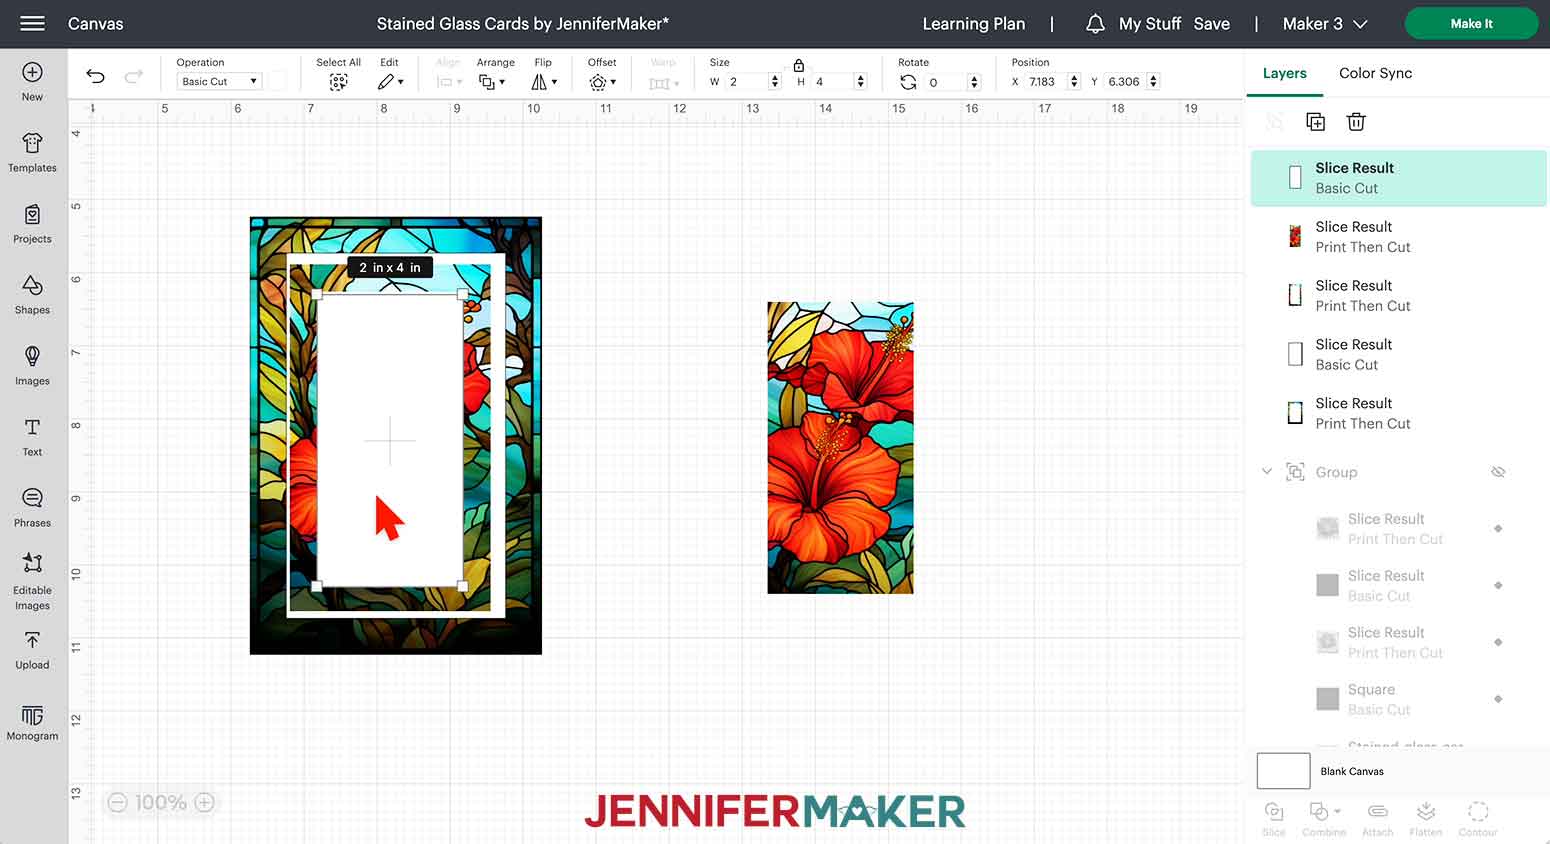
34. Drag the 1.75” x 3.75” flower piece over to the main design layers.
35. Click “Select All,” then click “Align” and “Center” to confirm all layers will align correctly.
36. Continue to Step 3 below.
NOTE: If you choose to make a square or circle design with this ink-saving technique, the dimensions you need to use are:
- Change uploaded PNG to 5” W x 5” H. (Step 3)
- Create a Square or Circle and resize to 4” W x 4” H. (Step 7)
- Change duplicated Square or Circle to 3.75” W x 3.75” H. (Step 16)
- Change Square or Circle to 3” W x 3” H. (Step 22)
- Change duplicated Square or Circle to 2.75” W x 2.75” H. (Step 29)
STEP 3: PRINT AND CUT YOUR DESIGN
1. Make sure the correct machine is selected in the top right.
2. Click “Make It.”
3. On the Prepare Screen, make sure your Print Then Cut mat’s paper size is set to 8.5” x 11.” These will be the first two mats in your preview panel if you're cutting two cards like me.
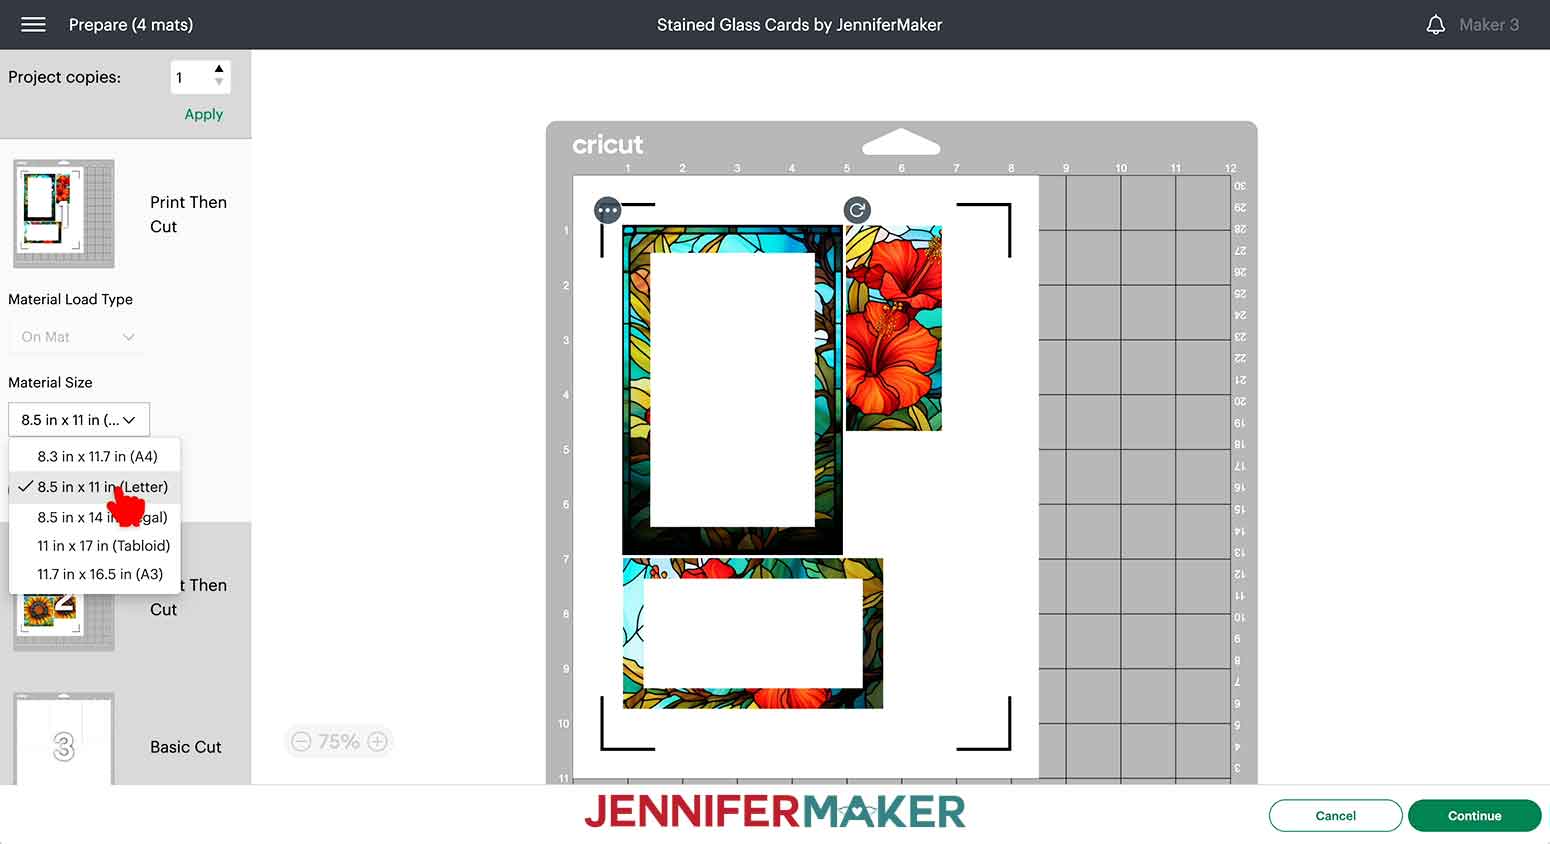
4. There is one white mat and one black mat for cardstock. They can be cut on 8.5” x 11” or 12” x 12”. I will leave both at 12” x 12”.
5. Click “Continue.”
PRINTING
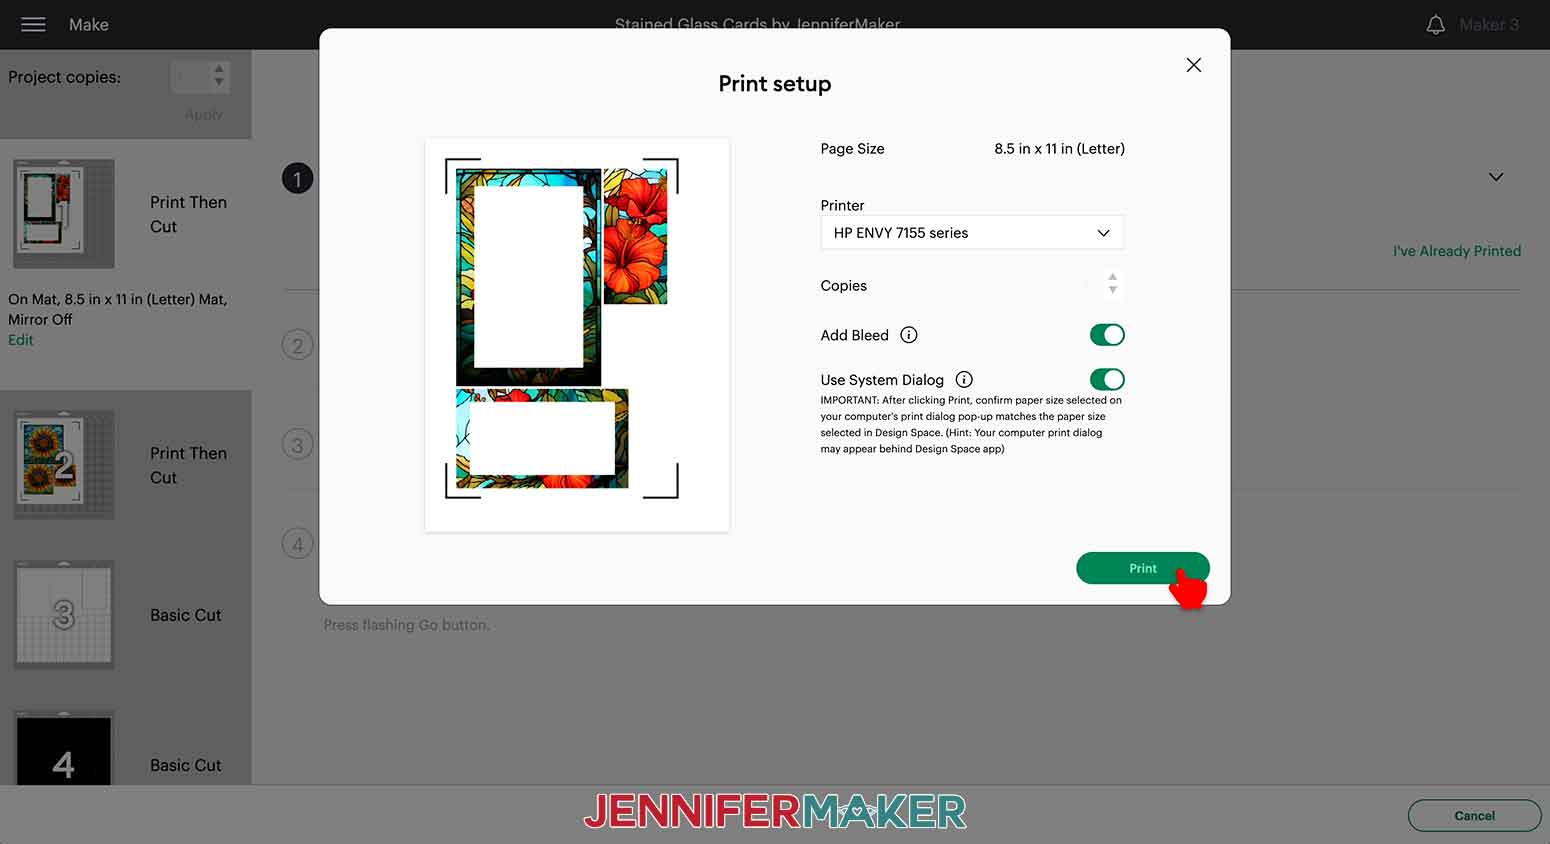
1. On the Make Screen, click “Send to Printer.”
2. Select your printer from the Printer dropdown.
3. Toggle “Add Bleed” on.
4. Toggle “Use System Dialog” on.
5. Click “Print.”
NOTE: You may need to minimize or move your Design Space window to see the print dialog window. It sometimes pops up behind Design Space. There is a chance the system dialog box will not work on all printers. Each printer is different, so consult your printer's user guide for additional support.
6. For the metallic photo paper, I will set the Media to “Photo Glossy Paper” and the Quality to “Best.” For the presentation paper, I will set the Media to “Brochure Matte Paper” and the Quality to “Best.”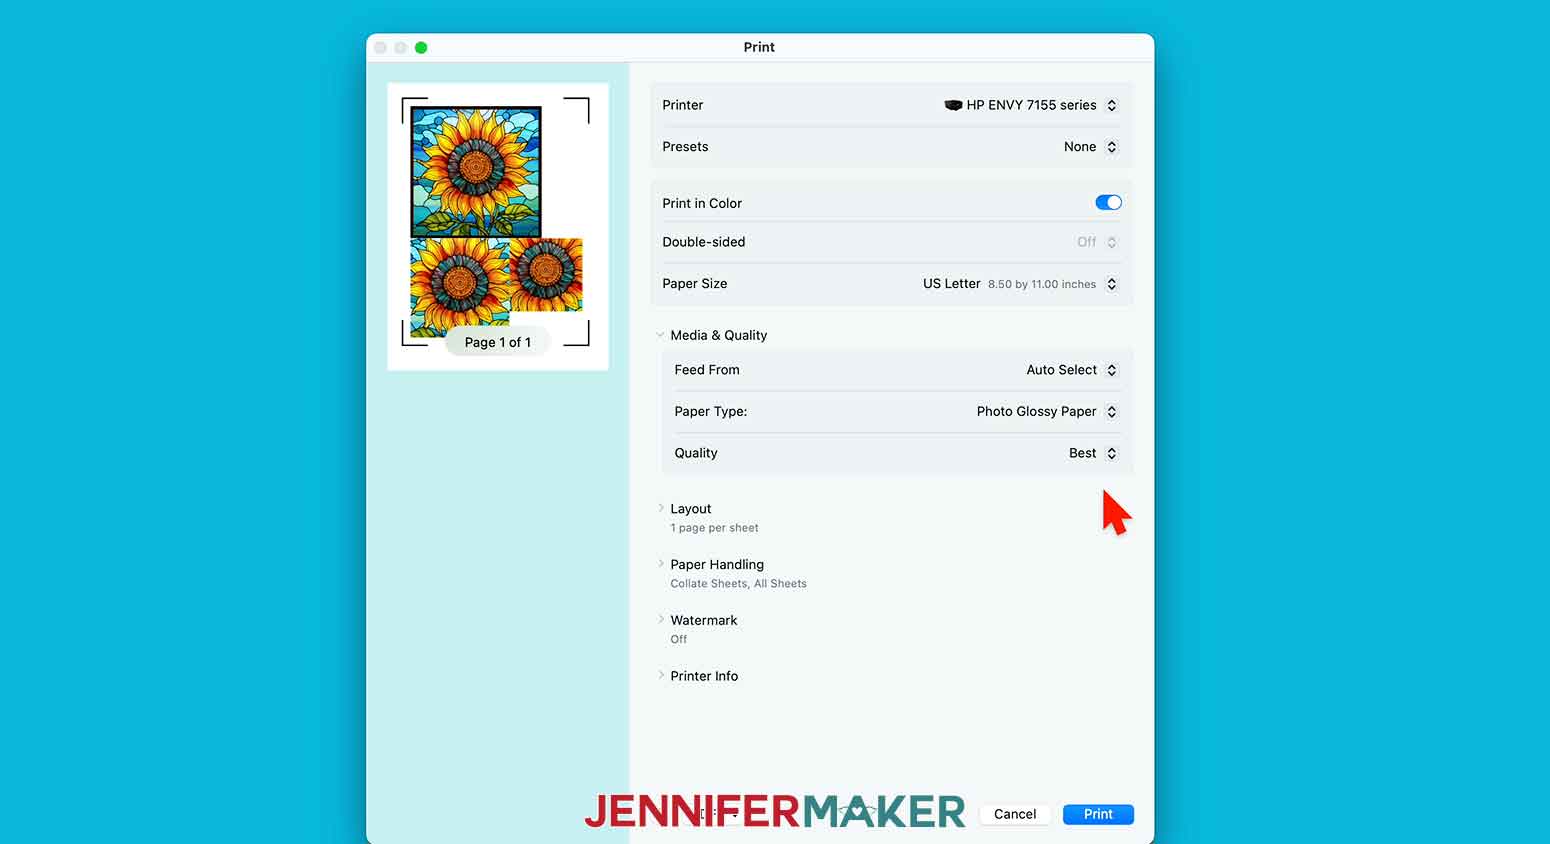

7. Make sure the metallic or presentation paper is loaded correctly in your printer.
8. Click “Print.”
CUTTING
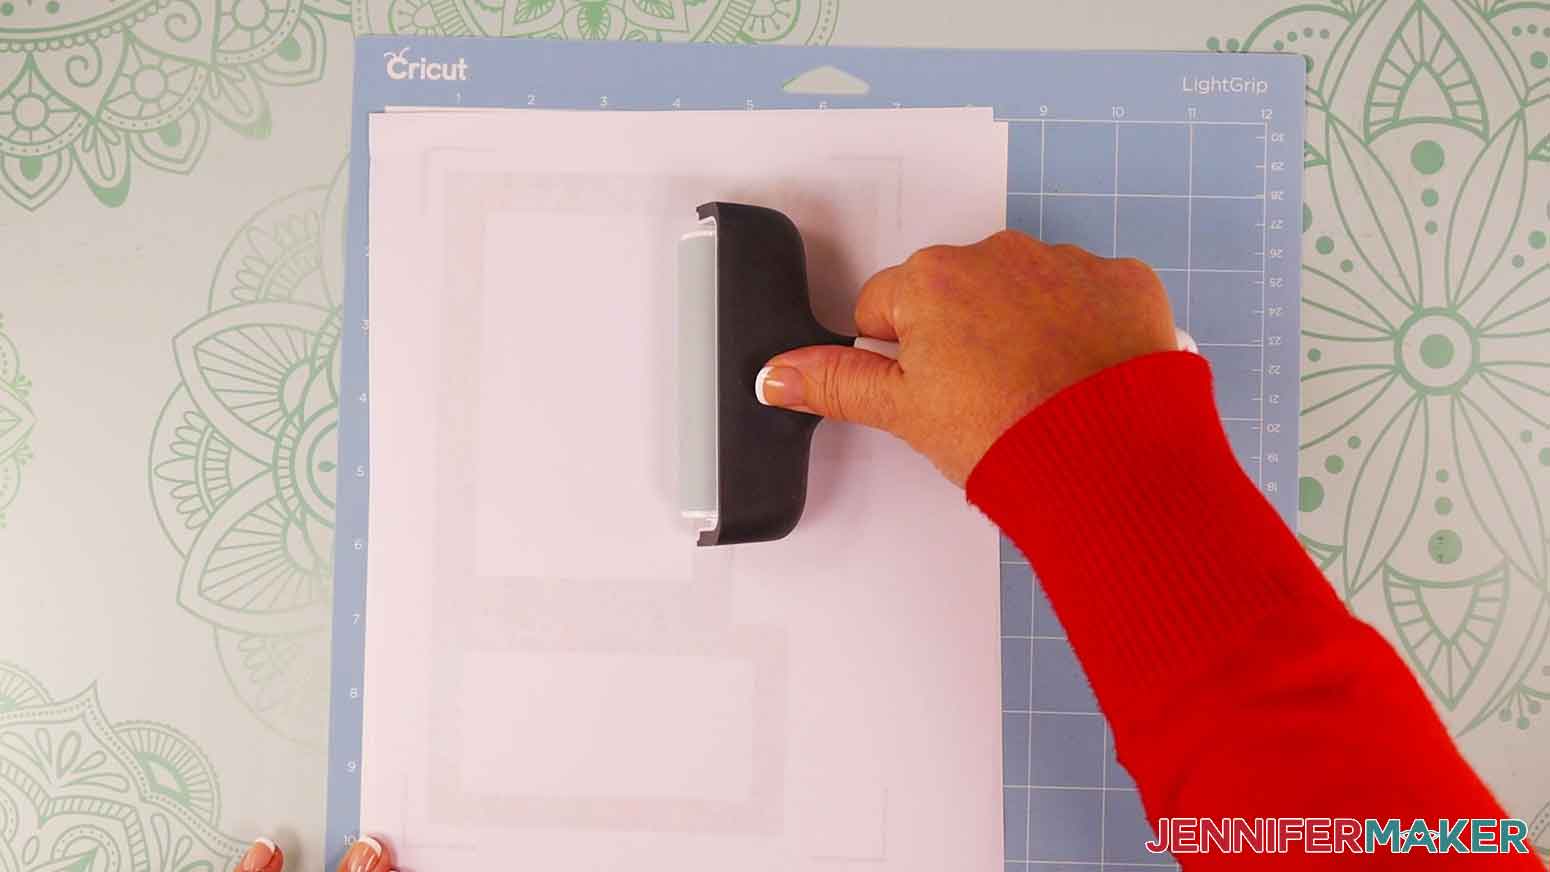
1. After the ink has dried, place the print on a blue LightGrip machine mat.
NOTE: A new, sticky blue machine mat worked well for the metallic photo paper, but if your blue mat isn’t as new, a green machine mat would be best.
2. Put a piece of copy paper on top of the print and use a brayer to secure the print to the mat
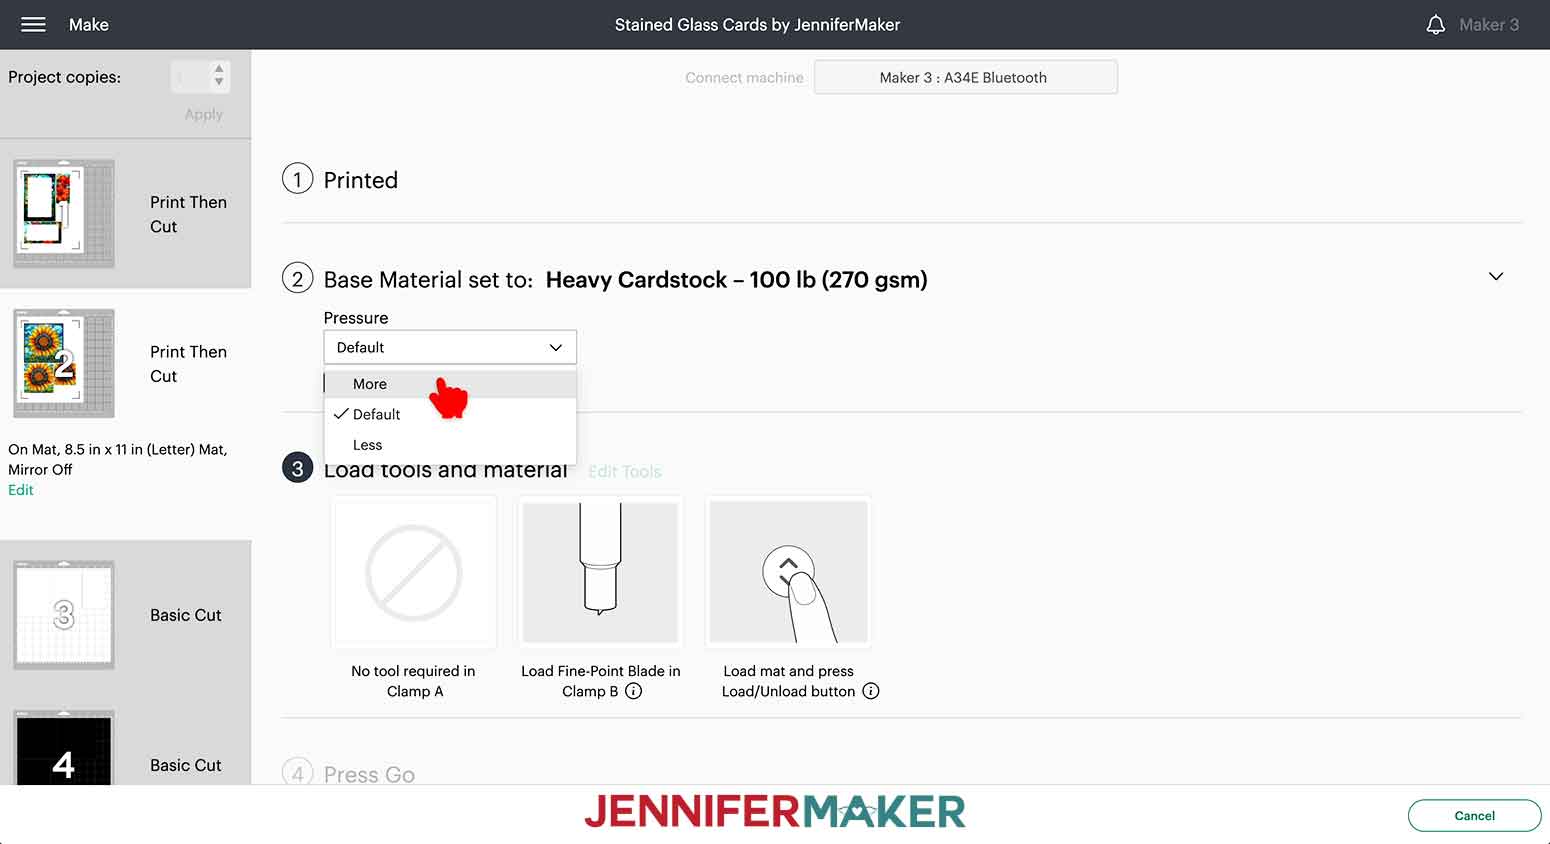
3. In Design Space, select the material type and pressure. I’m using the “Heavy Cardstock - 100 lb” setting with "More" Pressure for the metallic photo paper and the “Laser Copy Paper” setting with "Default" Pressure for the presentation paper.

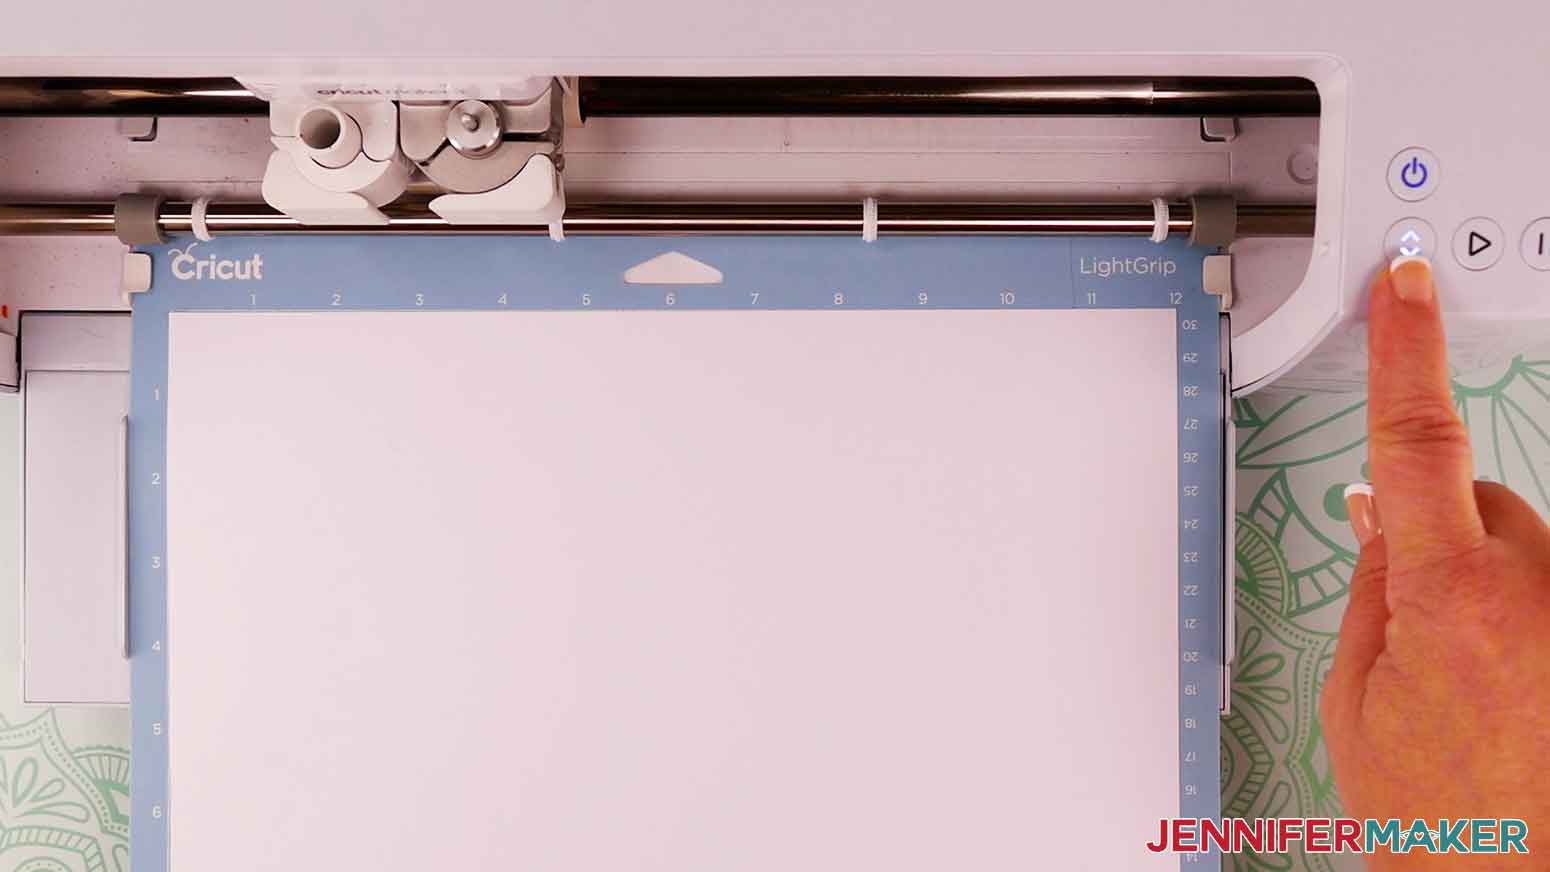
4. Load the prepared mat into your Cricut.

5. Press the flashing button to begin cutting.
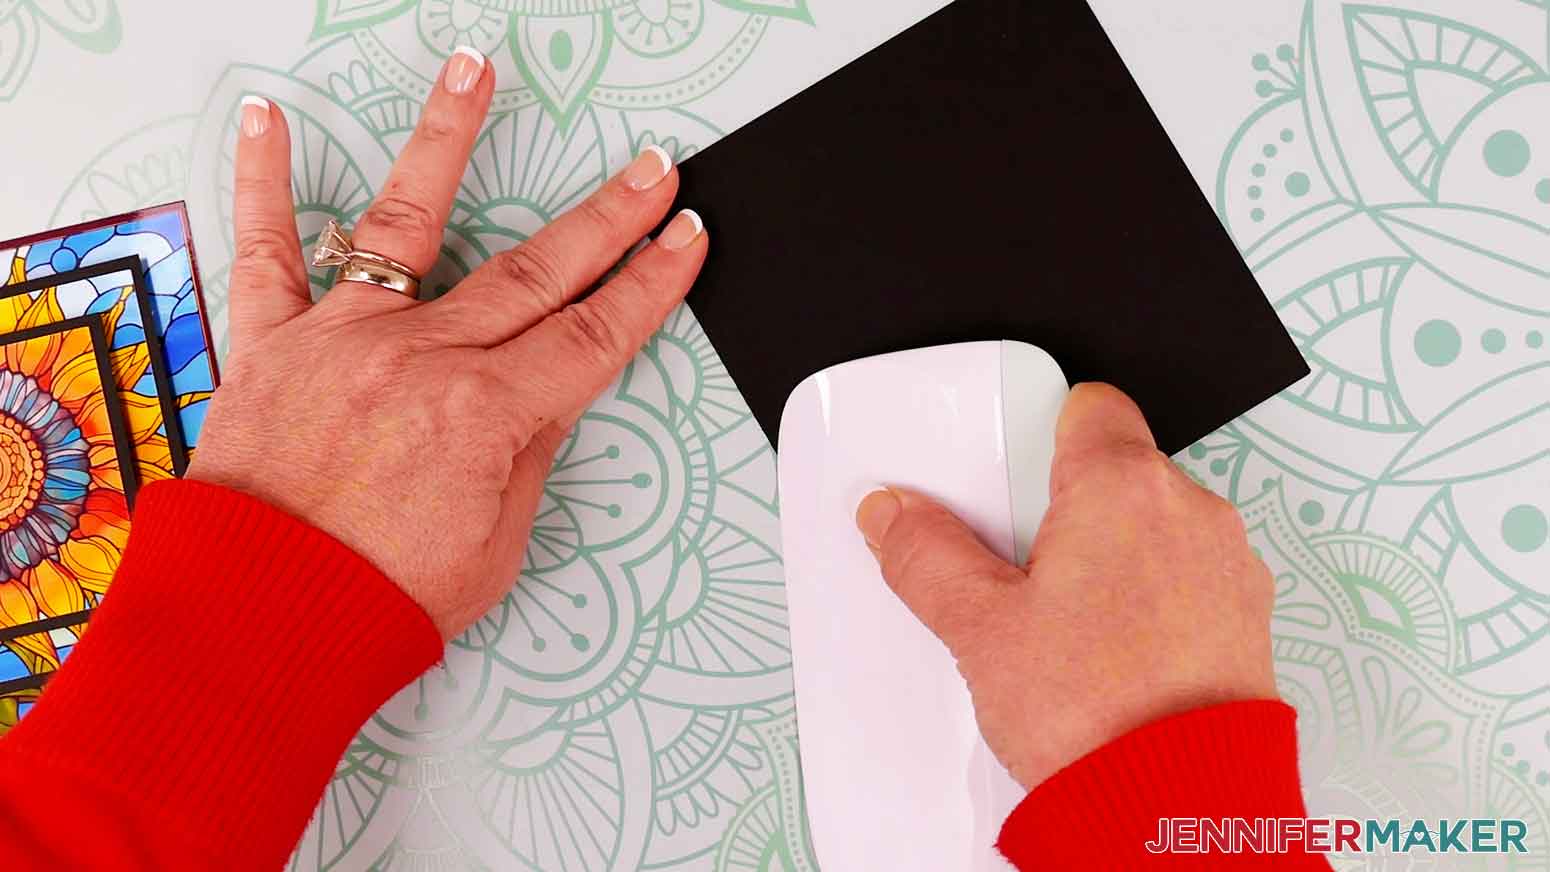
6. Unload the mat, flip it over onto your work surface, and gently roll the print off of the mat.
NOTE: The ink-saver cuts are very delicate. Remove them slowly so they don’t curl or bend.

7. For the cardstock, select the “Medium Cardstock - 80 lb” setting in Design Space and set the Pressure to “More” for a cleaner cut.

8. Place the cardstock face up on a sticky blue LightGrip machine mat.
NOTE: If your blue LightGrip mat isn't as sticky, you may have better cut results with a green StandardGrip machine mat.
9. Use a brayer to secure the cardstock to the mat.
10. Load the mat into your Cricut.
NOTE: If you are using a scoring tool, insert the scoring tool when prompted.
11. Press the flashing button to begin cutting.
12. Unload the mat, flip it over onto your work surface, and gently roll the cardstock off of the mat.

STEP 4: ASSEMBLE YOUR STAINED GLASS CARDS
Here are all of my Stained Glass Cards cut pieces.

PROJECT 1: SQUARE SUNFLOWER DESIGN
1. Fold the base card in half and use a scraper along the fold for the best crease.
2. Use double-sided adhesive tape to attach the smallest print to the smallest cardstock square.

3. Use the tape to attach the middle-sized print to its corresponding cardstock layer.

4. Place adhesive foam squares on the back side of the middle layer and remove their backing paper.
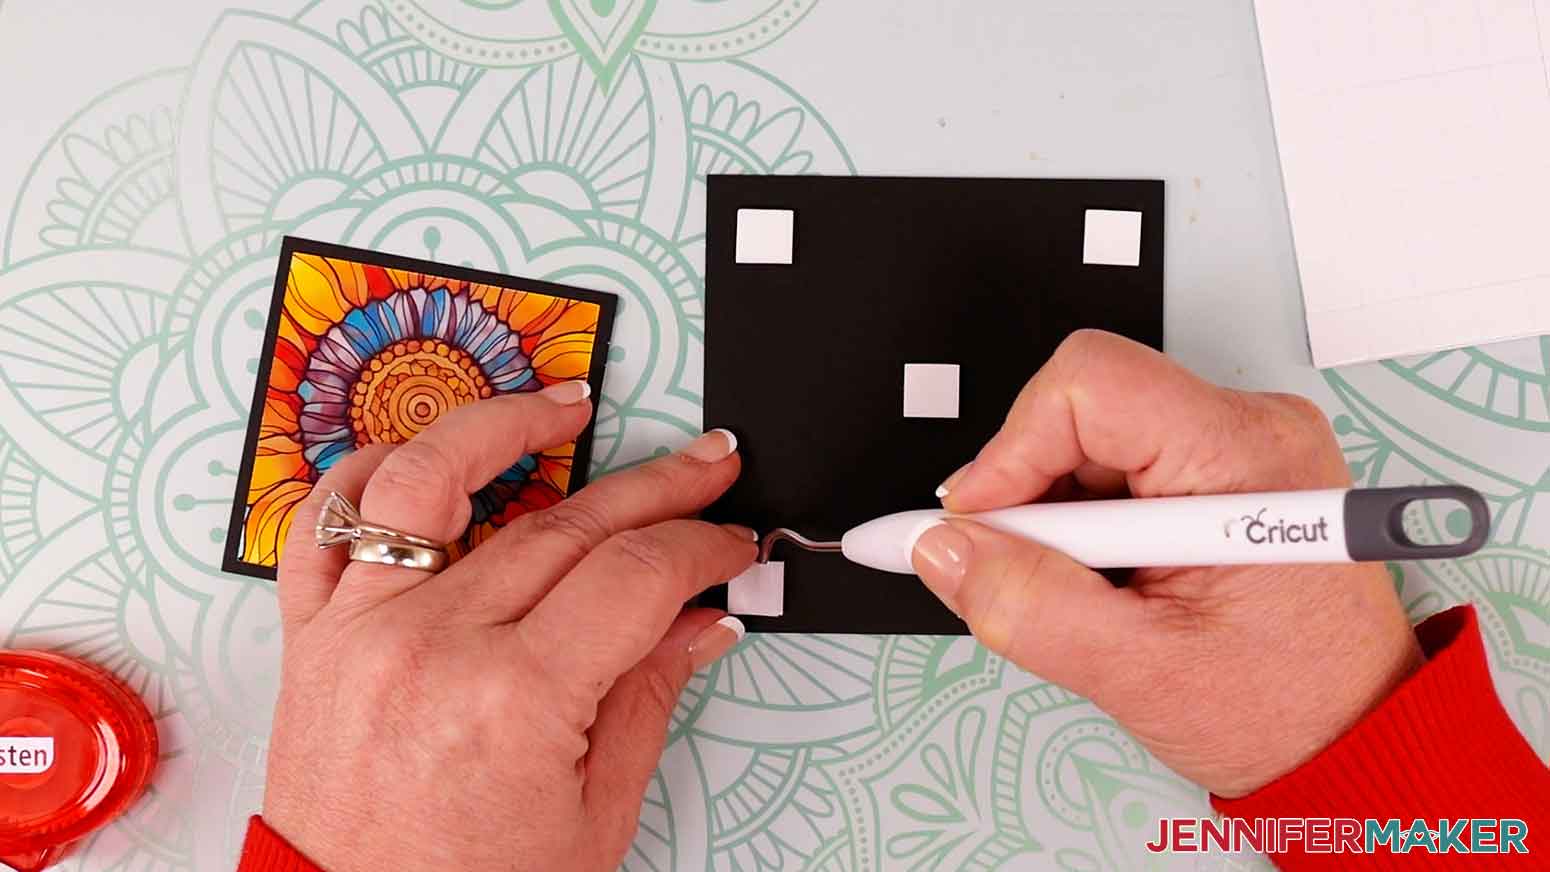
5. Align the middle cardstock layer over the largest print. There will be a one-inch border. Press it in place.
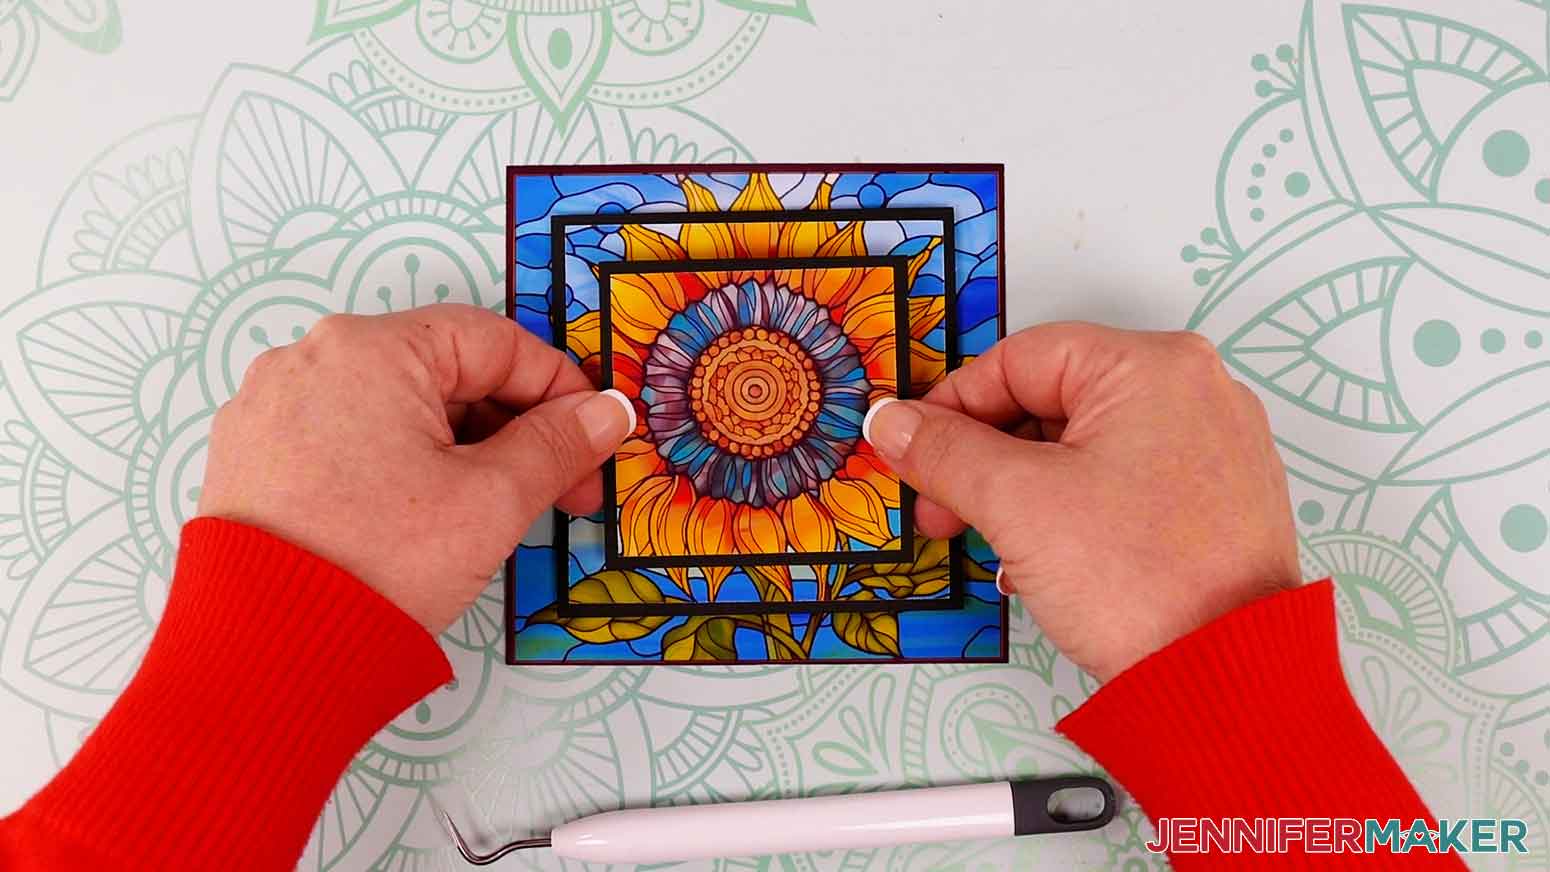
6. Place adhesive foam squares on the back side of the small layer. Align the small layer over the middle layer and press it in place.
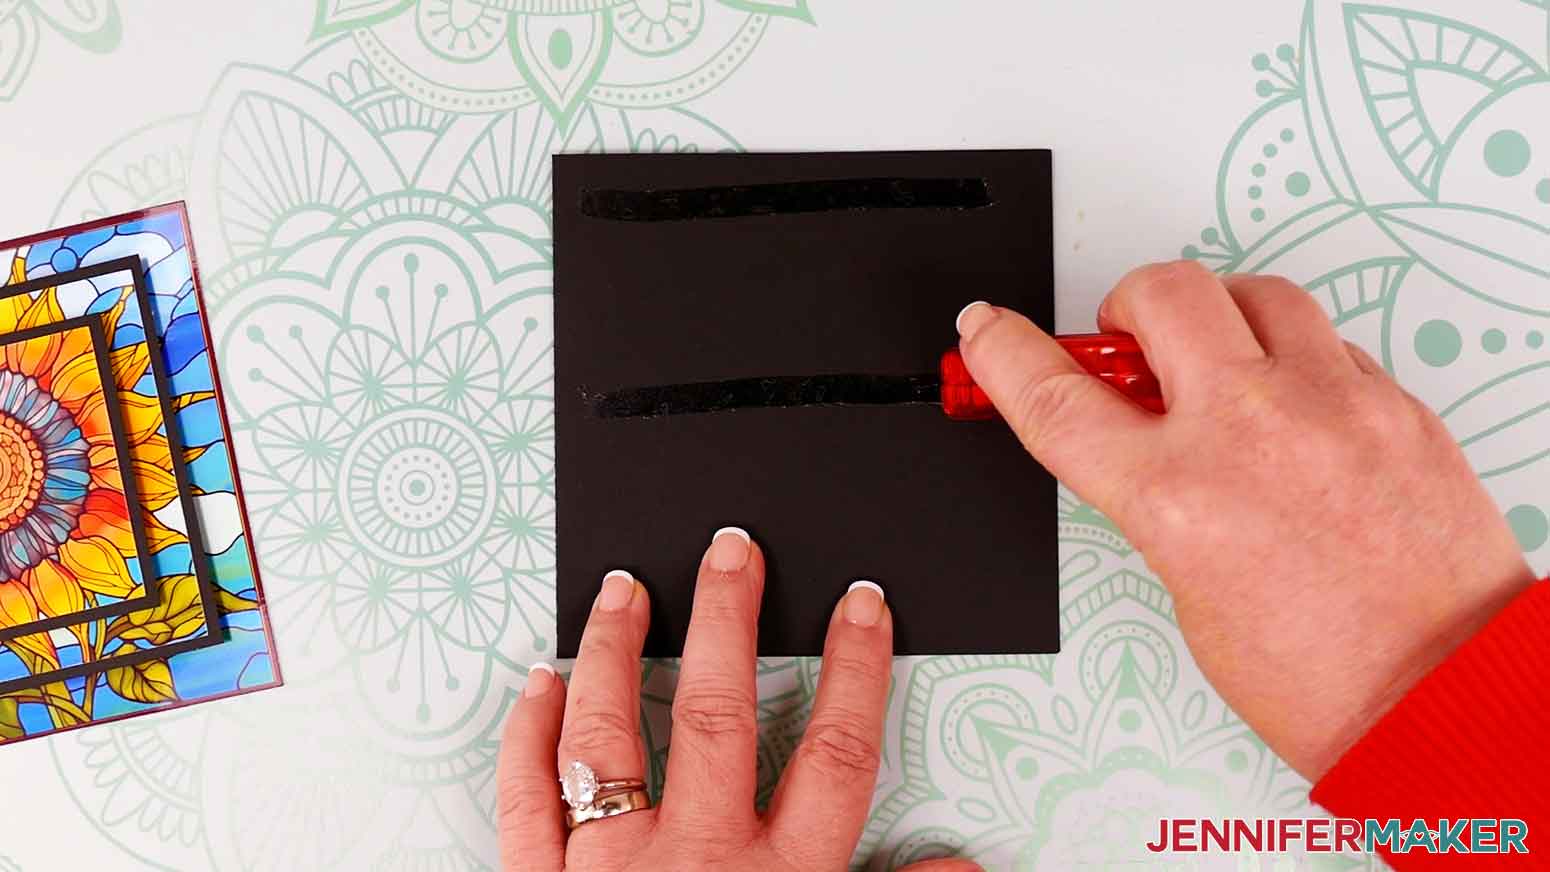
7. Attach double-sided adhesive tape to the front of the card base.
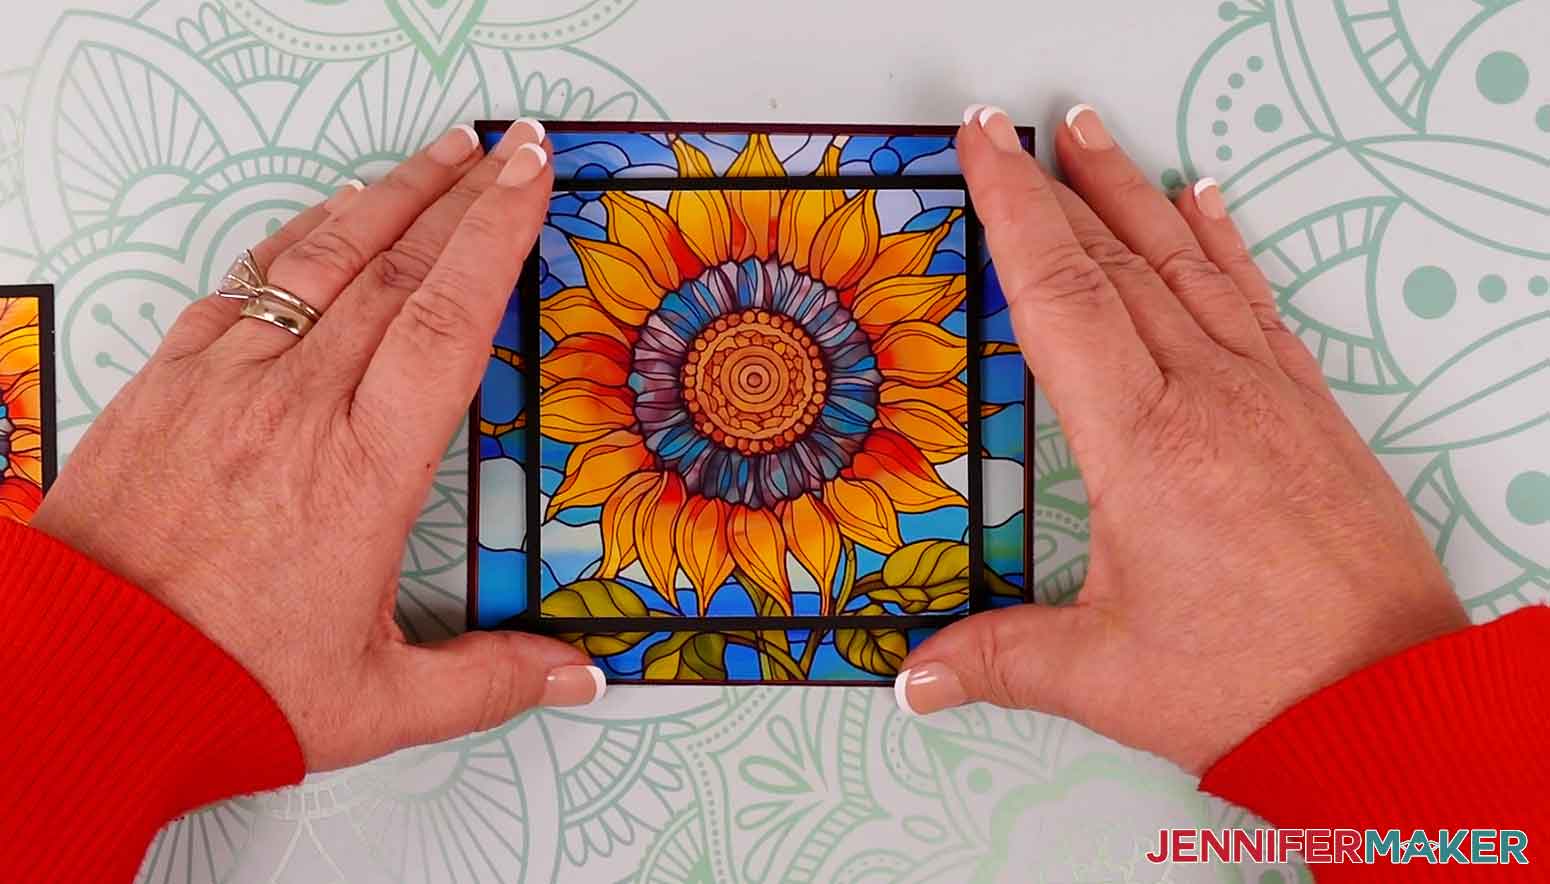
8. Place the sunflower stained glass design onto the card base. Press it in place.

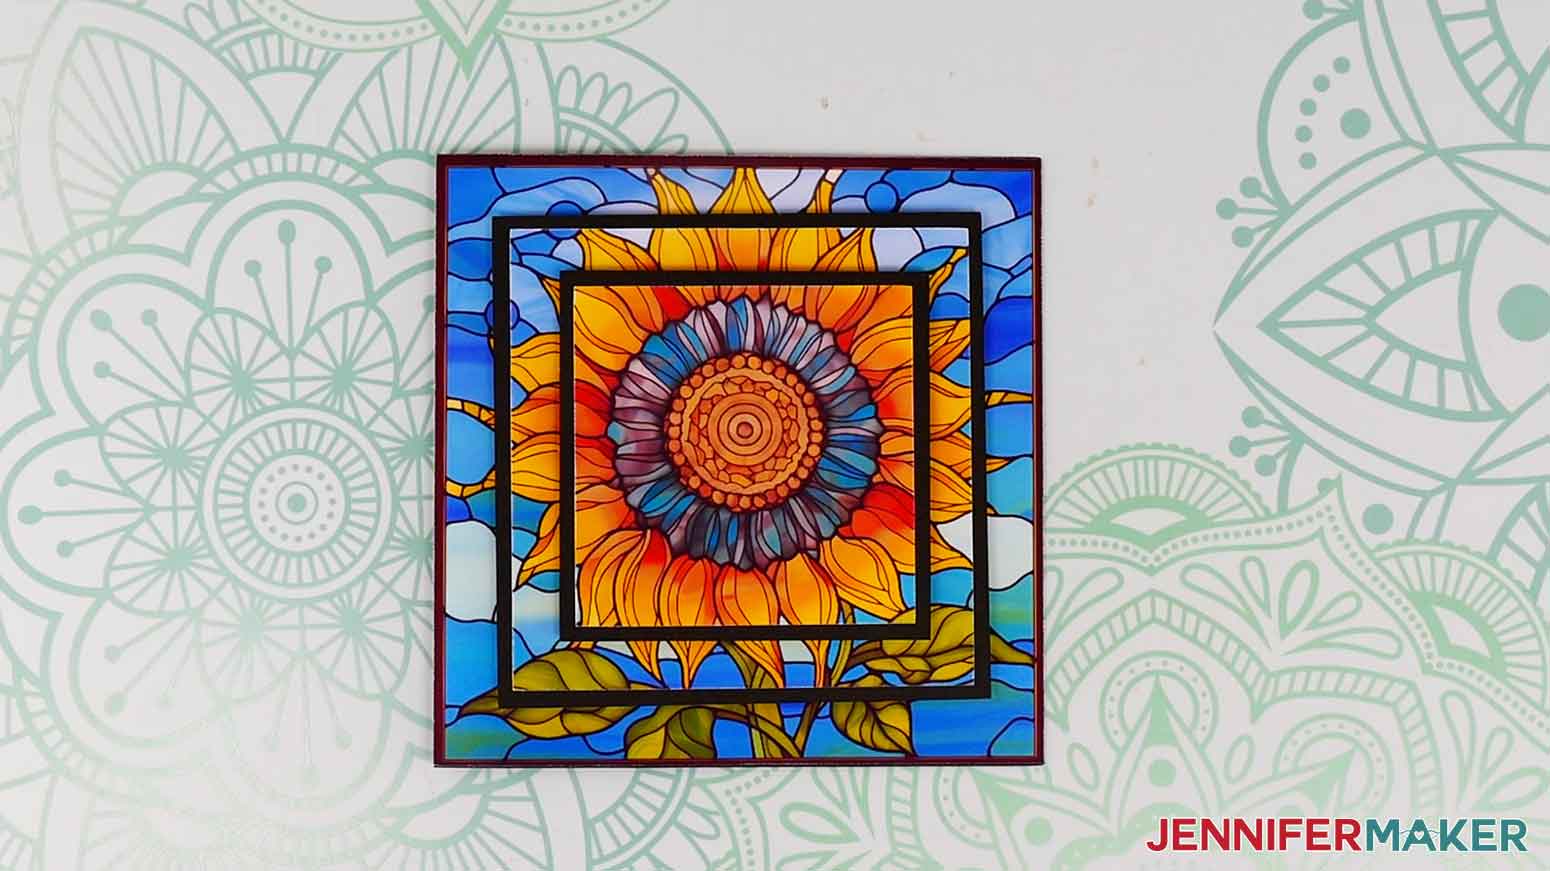
9. Here is my complete sunflower stained glass card!
PROJECT 2: RECTANGULAR TROPICAL FLOWERS DESIGN
1. Fold the card base in half and use a scraper along the fold for the best crease.
2. Attach double-sided adhesive tape to the back side of the largest printed layer.
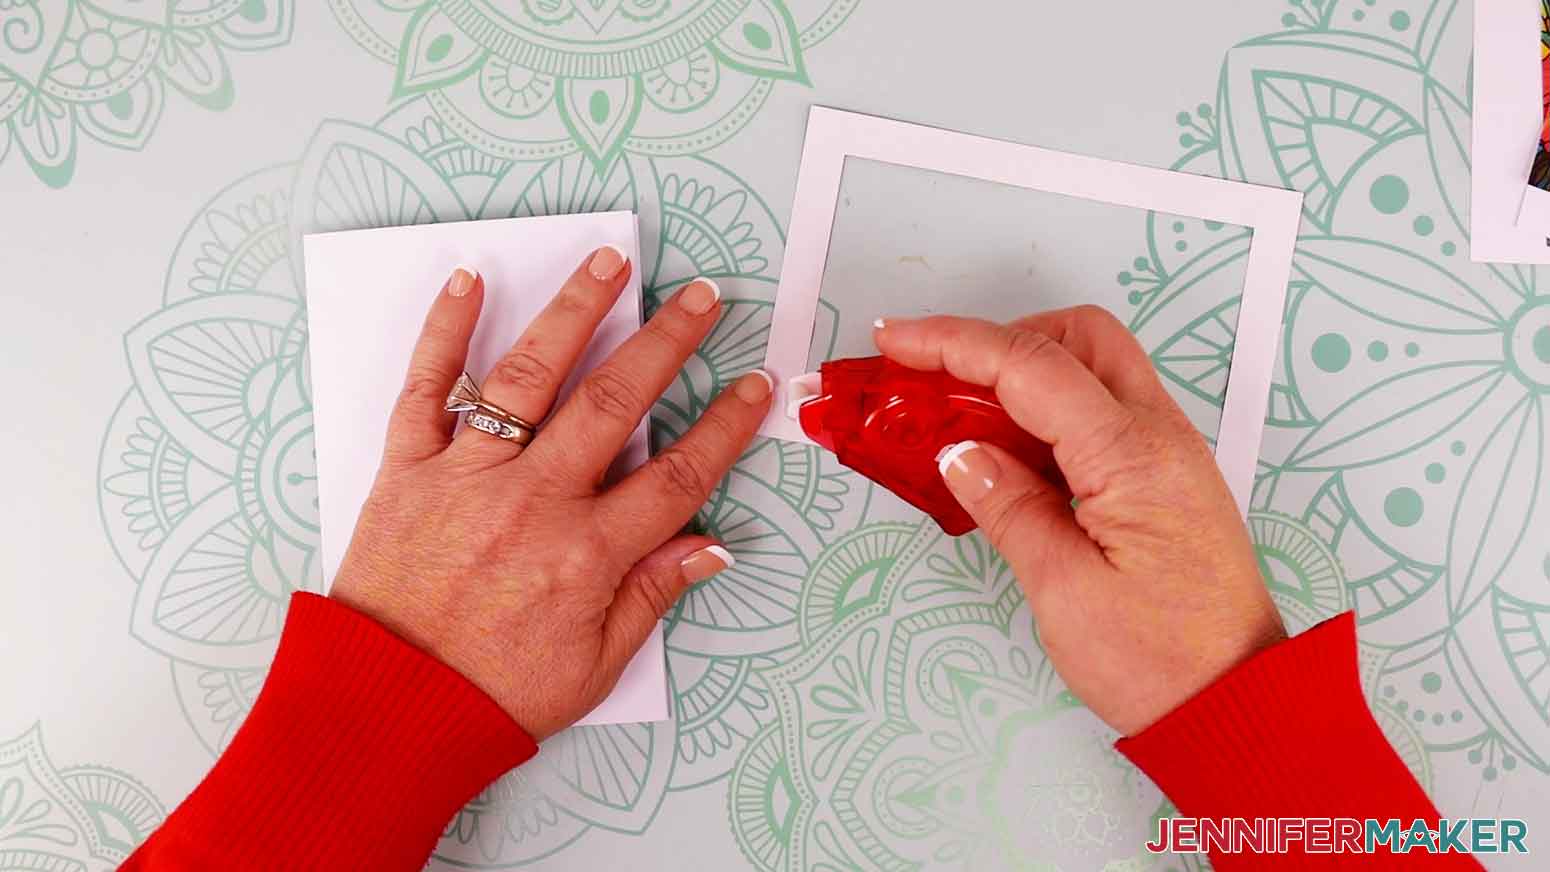
3. Place the largest design on the card base. The edges of the design will align with the cardstock.
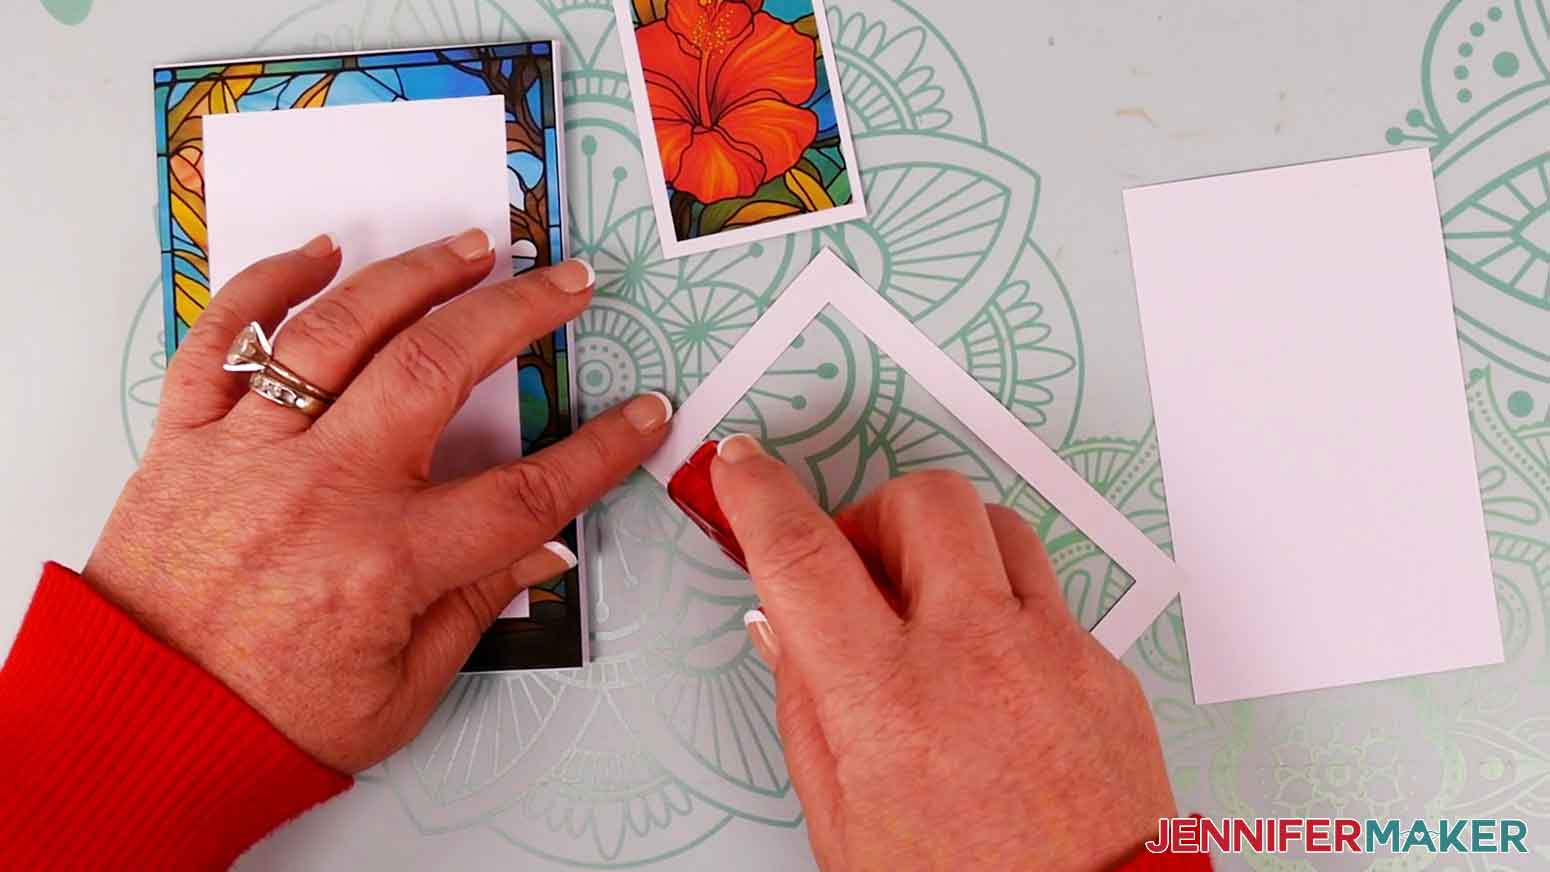
4. Use double-sided adhesive tape to attach the smallest print to the smallest cardstock rectangle.

5. Use the tape to attach the middle-sized print to its corresponding cardstock layer.
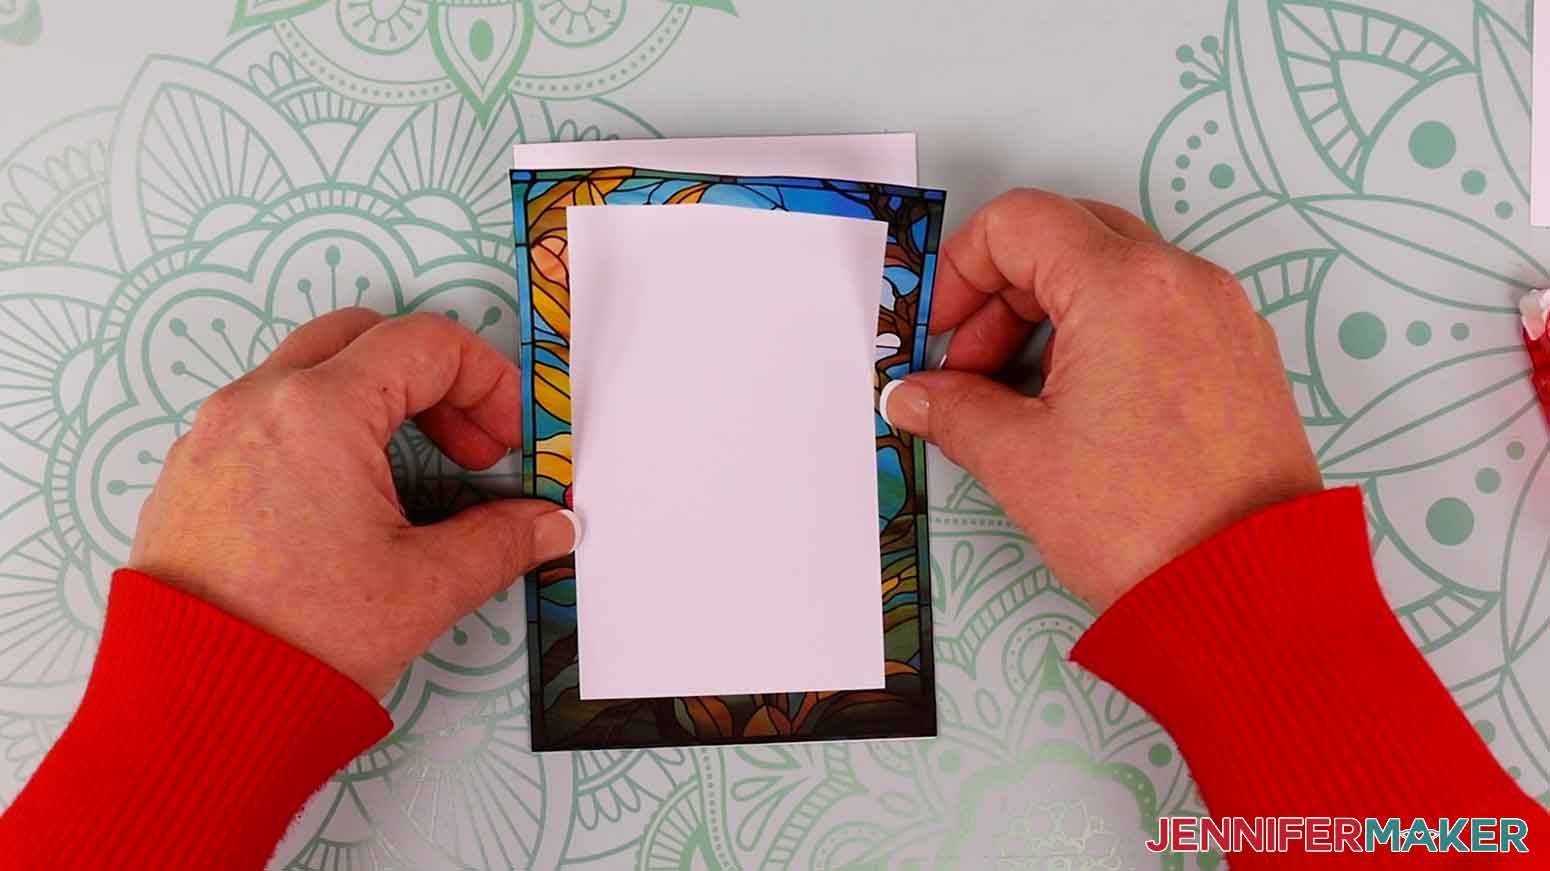
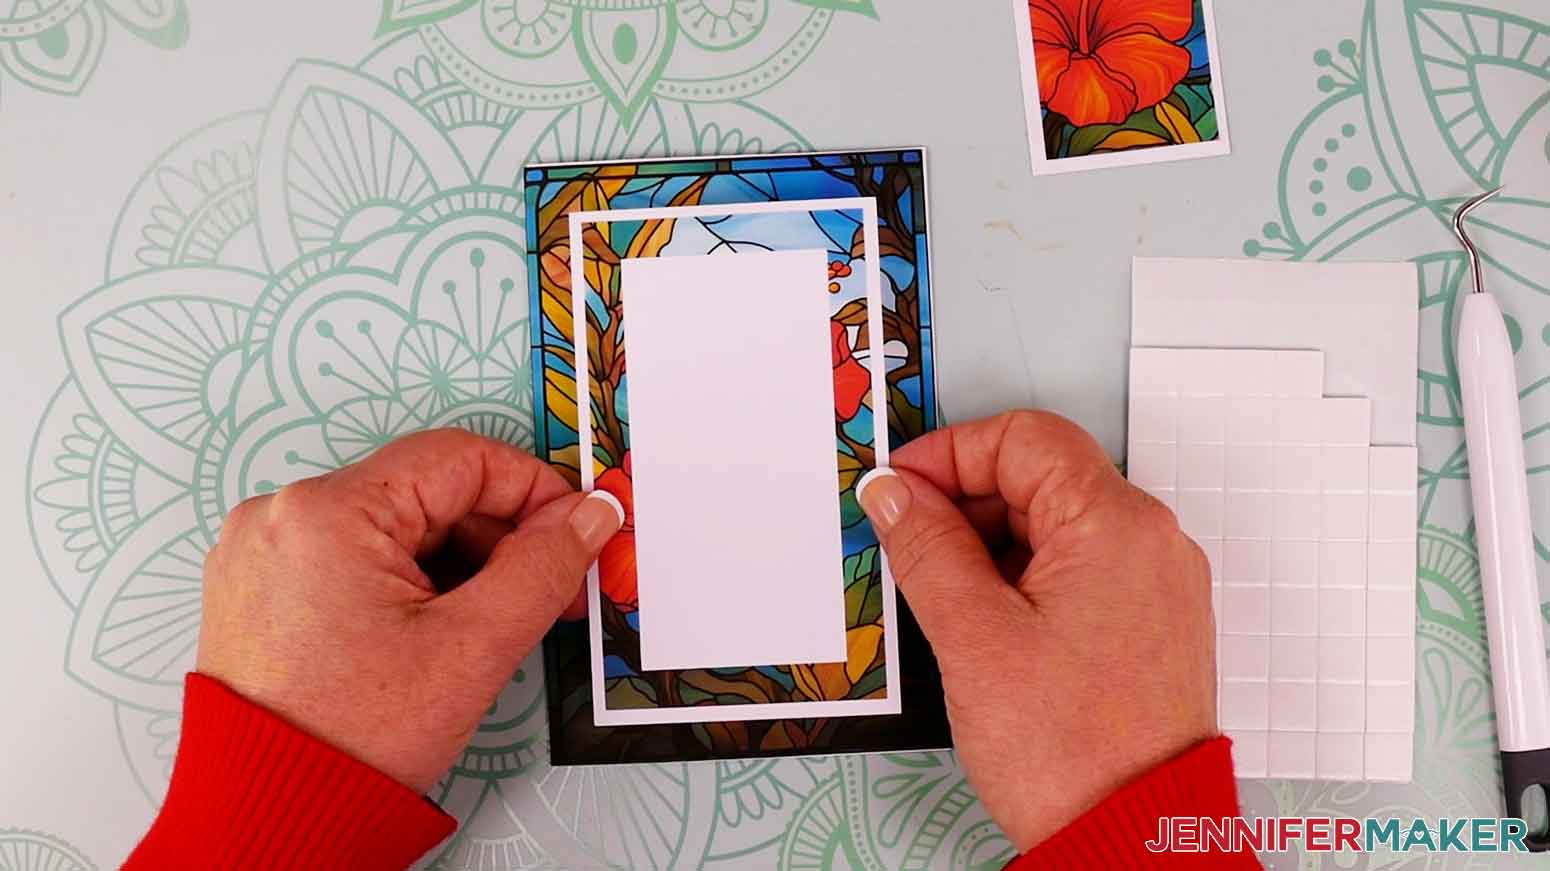
6. Place adhesive foam squares on the back side of the middle layer and remove their backing paper.
7. Align the cardstock over the open area of the largest print. Press it in place.
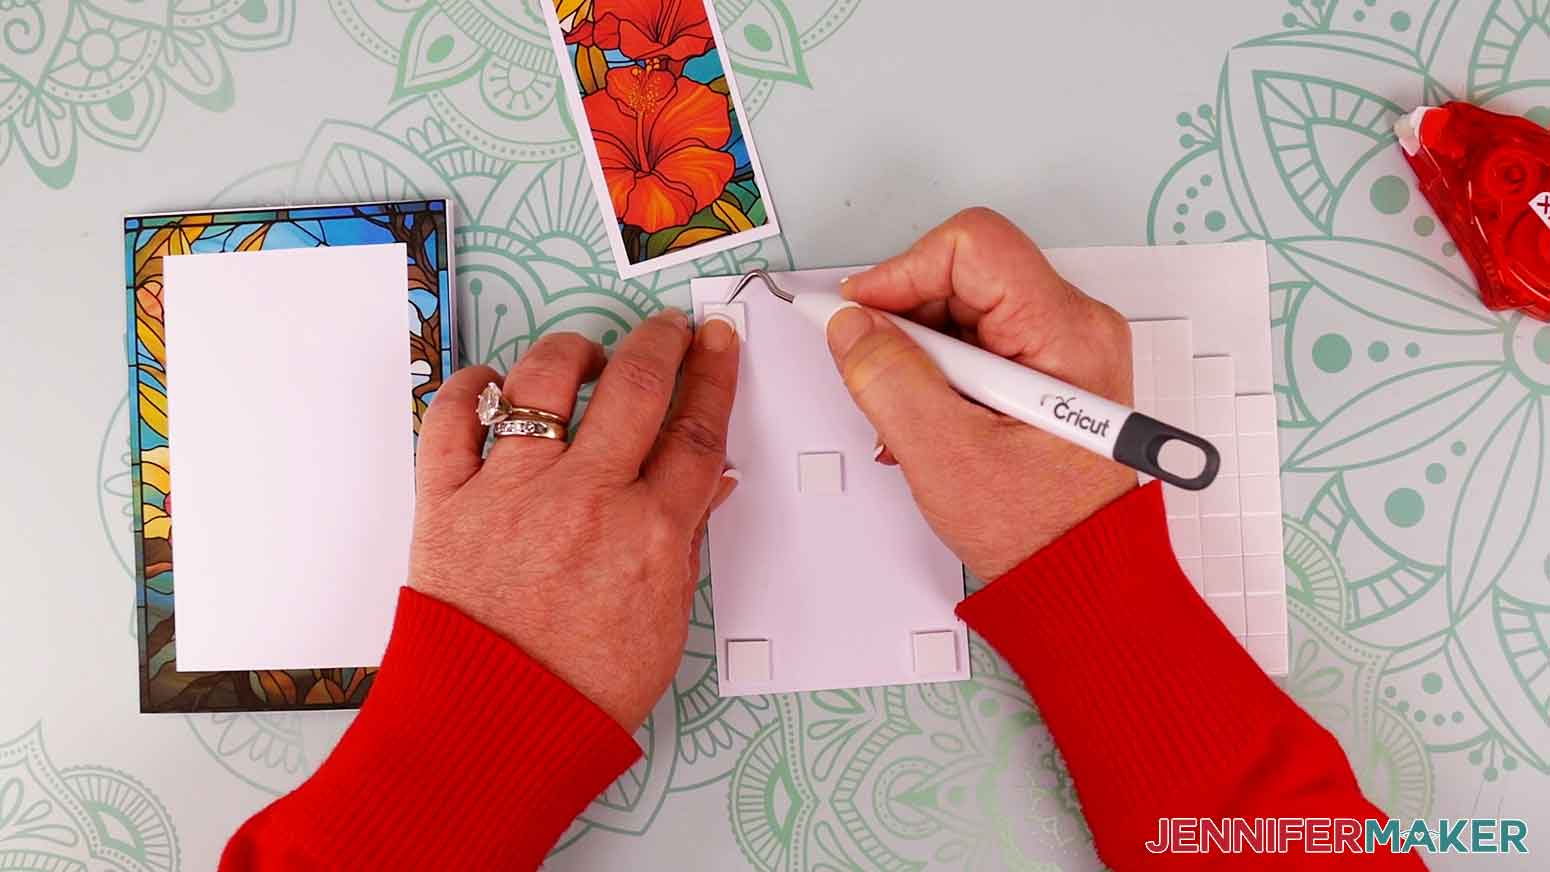
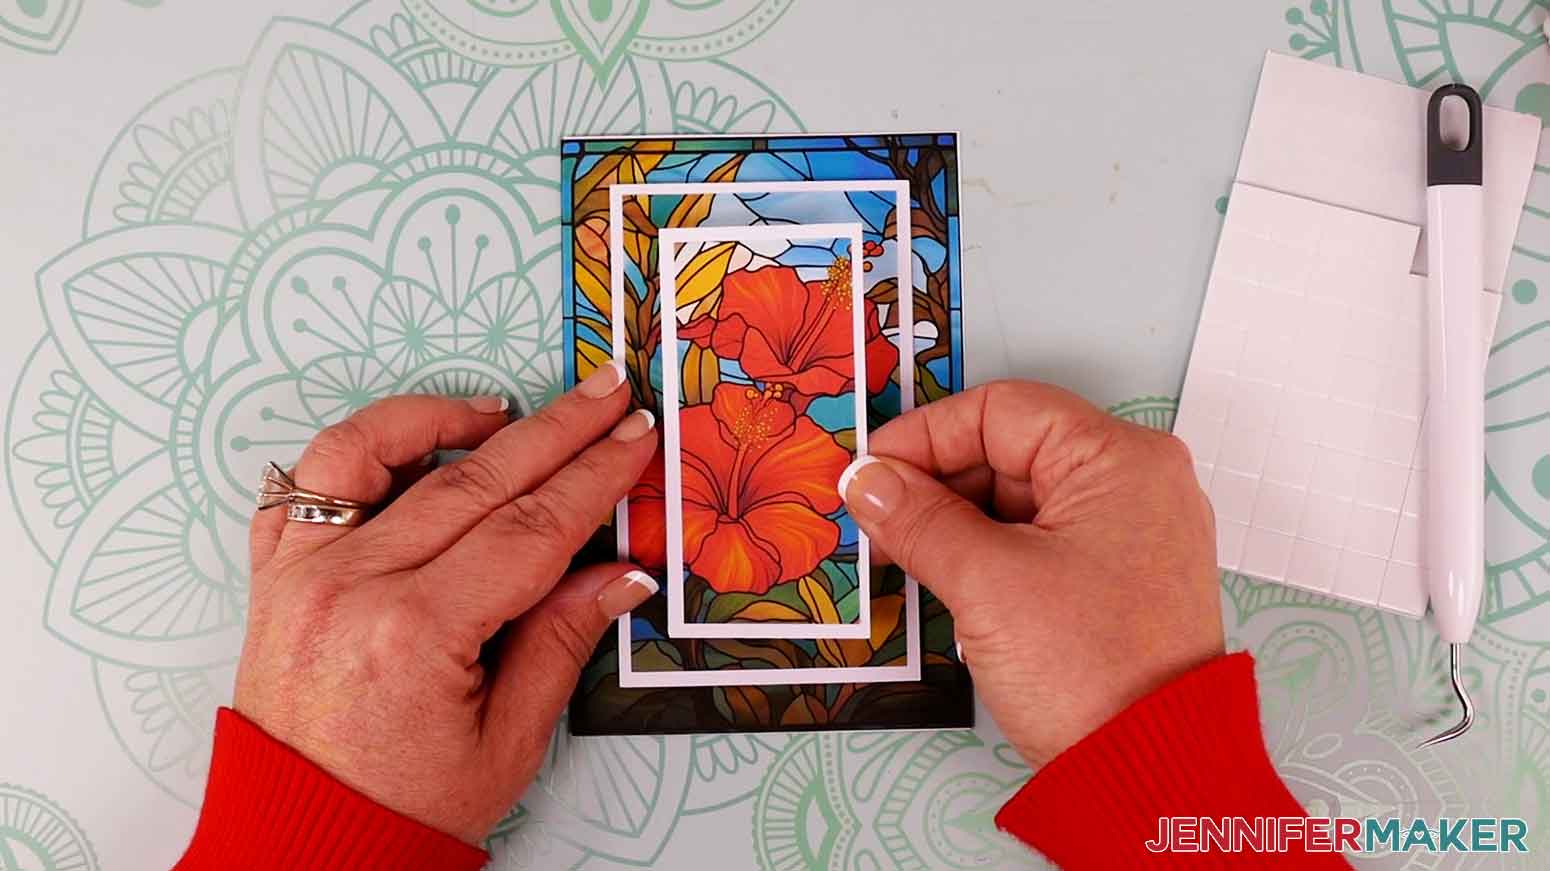
8. Place adhesive foam squares on the back side of the small top layer.
9. Align the top layer over the open area of the middle layer and press it in place.
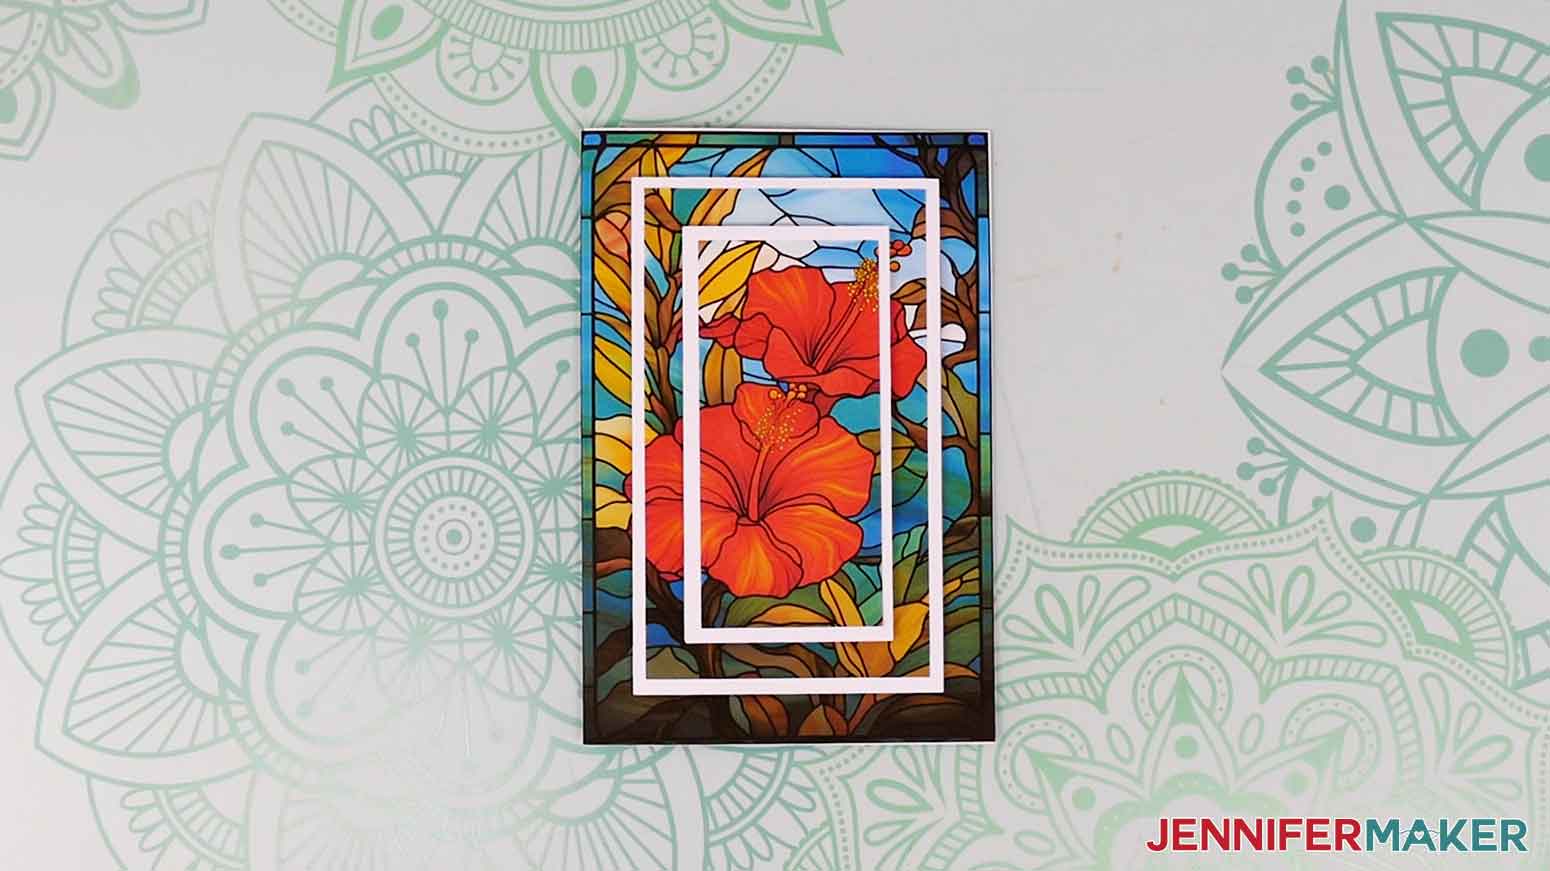
10. Your ink-saving tropical flower card is complete!
STEP 5: SHOW IT OFF!
Here is what my finished stained glass cards look like! You can also make your own envelopes with my tutorial How to Make an Envelope.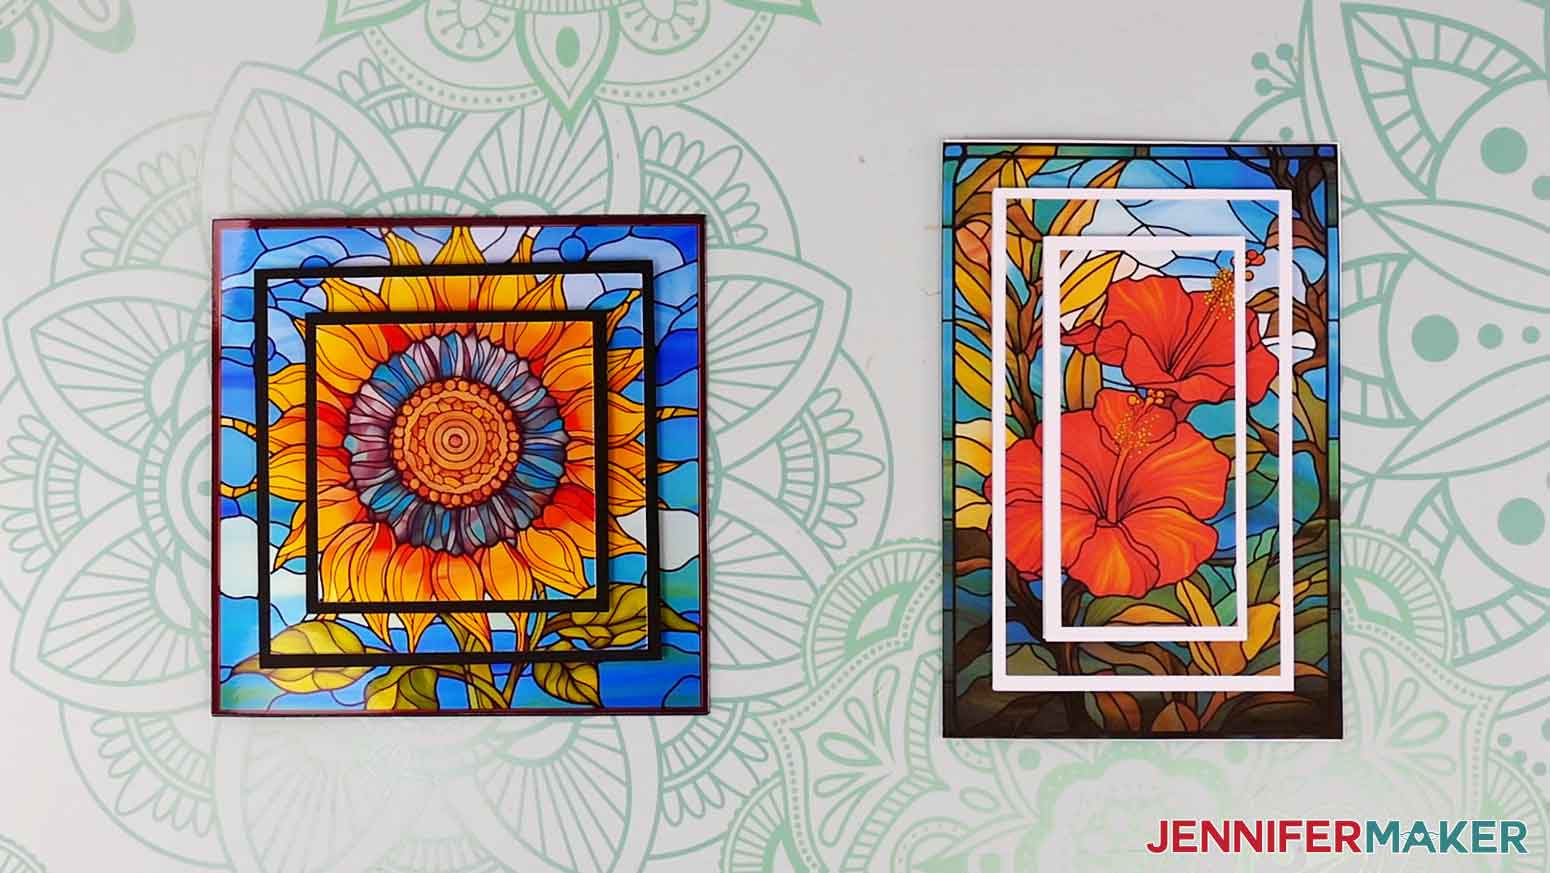
Notes
Square cards are 5” x 5”.
Rectangular cards are 4” x 6”.
Answers to Your Questions About How to Make Stained Glass Cards
Q: Can you make stained glass with Cricut?
A: In this tutorial, I’ll teach you how to make a stained glass-inspired card. If you’re a stained glass artist, you can use Cricut cutting machine with Cricut Design Space to create and cut stained glass patterns.
Q. Which Cricut can Print then Cut?
A. At the time of this post, all Cricut machines with the exception of the original Cricut Joy have Print then Cut capabilities.
Q. Why does my Print then Cut image have a box around it?
A. When you print your Print then Cut image, you’ll notice a black box or lines around the image. Don’t be alarmed! These are called registration marks, and your Cricut machine reads them to know exactly where to cut around your image. They’re only a guide and won’t be a part of your final product.
Q. How do you calibrate Print then Cut on Cricut?
A: Calibrating your Cricut helps ensure that your Print then Cut images are cut precisely. You can find all the steps on how to do this in my DIY Money Holders tutorial.
Q: What type of printer is best for Cricut Print then Cut? Can you use any printer for Print then Cut?
A: Print then Cut works with any inkjet printer. As far as which printer is “best,” that depends on your budget and your needs! I use an HP ENVY Photo 7155 inkjet printer, but there are many, many printers on the market that are great, too. Print then Cut also works with sublimation printers, which can be helpful for sublimation projects!
Q: What Cricut tool do I need to make cards?
A: Along with your Cricut machine, you’ll need a StandardGrip machine mat and the standard blade that comes with your Cricut. Some other tools that are optional but nice to have are a brayer, a scraper, and you can also use a scoring tool. Cricut also has special mats just for using with their card blanks, but they’re not necessary for this project.
Q: How hard is it to make stained glass art?
A: To be completely honest, making stained glass art can definitely be difficult — not to mention expensive to get started. That’s not to say you shouldn’t try it! It’s a beautiful artform with many talented, independent artists. If you have a passion for the craft, you can build incredible stained glass making skills with some investment, time, and dedication. However, be sure to research the health risks if you intend on getting serious with the craft, as it does involve exposure to lead. If it’s just the stained glass look you’re going for, the cards in this tutorial are a great place to start. If you want something a little closer to the real thing, try my sublimated stained glass cutting boards next!
Q: Do you have other designs for stained glass cards?
A: I don’t, but my fellow teachers do! Check out designer and educator Amy Pelzner at Leap of Faith Crafting, who shared her stained glass card techniques in her YouTube video!
Q: Do you have any other cards I can make?
A: Do I ever! Check out some of my favorites: owl shadow box card, pop-up birthday cake card, easy layered greeting cards, and so many more on my blog and YouTube channel at youtube.com/@JenniferMaker. There’s something for every skill level, so raid your craft supplies and start card-making!
Q. What other projects can I make with AI art?
A. You can make endless projects with AI art! Use AI-generated images to create your own printable iron-on and sublimation T-Shirts, hoodies, tank tops, and other clothing, sublimated jigsaw puzzles, sublimated canvas prints, sublimated metal prints, note cards, sublimated tumblers, and tons more. Many of these projects involve sublimation, which you can learn more about in my Sublimation Startup course.
Q: How can I make my message show on black cardstock?
A: If you need to write on dark paper or cardstock, use a light-colored pen so it pops! I really like the Cricut opaque gel pens!
Get my free SVG files to make Stained Glass Cards!
I’d love to see YOUR beautiful stained glass cards! Please share a photo in our Facebook group or tag me on social media with #jennifermaker.
Love,

Want to remember this? Save this tutorial on How to Make Stained Glass Cards to your favorite Pinterest Board!