Learn how to create and transfer big HTV designs to oversized hoodies!
So, you’ve got a large design that you want to apply to an oversized hoodie or T-shirt. How can you make big HTV designs if the pieces are too big to fit on your machine mat? I’ve got the secret: Break them up! Yes, even if you’re using a pre-made SVG, there are ways to edit designs using free tools in Cricut Design Space to make it fit your project. I used this technique to make trendy oversized hoodies with the perfect size designs, but it works with T-shirts, tote bags, and anywhere else you want to make a BIG statement!
Watch the full step-by-step video tutorial on adding big HTV designs to hoodies:

I really, really love HTV. All the vibrant colors available on the market let us create virtually limitless designs to fit our unique personal preferences and style. By tweaking a design just a little, we can make custom transfers in different sizes to fit any shirt — even big, oversized T-shirts and hoodies! Making custom items is a breeze when you know how to create the perfect design size that’s just right for the finished product you want — without looking too big or too small.

In this tutorial, I’ll show you how to break an SVG design down into smaller pieces that can be cut on a cutting machine, and then how to reassemble them when we press them! That means we’ll be able to get the right decal size for any hoodie, no matter what size machine or mat we have. Cool, right? Choosing the right size design makes a big difference in your final result — don’t skip over this part!
First, I’ll show you how to prepare the SVG files in Cricut Design Space, and choose the perfect size decal for an oversized hoodie, a big T-shirt, or any other fabric blank you’d like to use. Product listings for clothing and other items are often inconsistent, and it’s important to cut your design the right size for your garment. To help you get it just right, I’ve got lots of tips on how to measure blanks so you don’t have to rely on what the listing says.

With the size of the design out of the way, I’ll show you how to use pieces of the design to check your layout and make sure the elements will line up just right during the application process by including helpful registration marks on each piece you’ll transfer.
I cut my heat transfer vinyl sheets using my Cricut Maker 3 cutting machine with a fine-point blade, but you can also use a Cricut Maker or Explore series machine. If you use a Cricut Joy Xtra, (or other smaller vinyl cutters) you can use the same techniques, just with smaller pieces. This would also work with a Cricut Joy, but you might have trouble fitting an entire letter on the mat depending on your design. If you’re lucky enough to have a Cricut Venture or other super large-format cutting machine, you may even be able to cut your decal just the way it is!

I’ll use a 12″ x 12″ Green StandardGrip Machine Mat — and help you to figure out when it’s better to use big 12″ x 24″ mat to save you a lot of time (and patience!) with an extra large design.
Once you’re ready to transfer big HTV designs to your hoodies, you only need a few materials and tools besides the iron-on vinyl to get the job done. Weeding and aligning the layers can take some patience, but it’s worth it — and I have my favorite tools and materials listed below to help you out. Most importantly, have your heat-resistant tape ready!

I’ll walk you through how to get the perfect placement of the design elements on your hoodie, and get them all lined up in the right place using those registration marks I mentioned earlier. Then it’s time to press! I’ll show you the whole application process using my Cricut EasyPress 2, but you can use any other full size heat press, too.
Want to customize these big HTV designs ? Use my files as a base for your own unique design by using different colors for your vinyl — or take the sparkle up a notch with some glitter HTV! Custom apparel is so much fun to make when you’ve got nice designs to work with, colorful materials, and the correct size decal for your blank!
The designs in this tutorial are great to use (and wear!), but if want to learn to create the “In My Crafting Era” design, I can show you how in ADVANCE with JenniferMaker! It may even inspire you to create some big HTV designs of your very own!
Let me show you how to make hoodies with big HTV designs! This post contains some affiliate links for your convenience (which means if you make a purchase after clicking a link I will earn a small commission but it won’t cost you a penny more, there is no additional cost)! Read my full disclosure policy.
Materials to Make Hoodies With Big HTV Designs
View my Amazon shopping list for the exact items I used!
-
- One (1) Cotton/Poly Blend Hoodie (I used size large)
- One (1) Roll Red Heat Transfer Vinyl
- One (1) Roll Orange Heat Transfer Vinyl (or the Siser version)
- One (1) Roll Yellow Heat Transfer Vinyl
- One or Two (1-2) Rolls Bright Teal Heat Transfer Vinyl
- A method to cut your Vinyl: I’m using the Cricut Maker 3, but you can also use a Cricut Maker series, Cricut Venture, or Cricut Explore series machine for this project!
- Cricut Green StandardGrip Machine Mat 12″ x 12″ -OR-
- Cricut Green StandardGrip Machine Mat 12″ x 24″
- Heat Press – I used the Cricut EasyPress 2
- Pressing Pad
- Brayer
- Weeding Tool
- Heat Resistant Tape
- Lint Roller
- Butcher Paper
- Scissors
- Ruler

How to Make Hoodies With Big HTV Designs!

Big HTV Designs
Learn how to use big HTV designs to decorate items like hoodies!
Materials
- One (1) Cotton/Poly/Spandex Blend Hoodie (I used size large)
- One (1) Roll Red Heat Transfer Vinyl
- One (1) Roll Orange Heat Transfer Viny
- One (1) Roll Yellow Heat Transfer Viny
- One or Two (1-2) Rolls Bright Teal Heat Transfer Vinyl
- Design #627 (My free SVG/DXF/PDF design files are available in my free resource library - get the password by filling out the form at the bottom of this page)
Tools
- A method to cut your Vinyl: I’m using the Cricut Maker 3, but you can also use the Cricut Maker, Cricut Venture, or Cricut Explore Series for this project!
- Cricut Green StandardGrip Machine Mat 12" x 12" -OR-
- Cricut Green StandardGrip Machine Mat 12" x 24"
- Heat Press - I used the EasyPress 2
- Pressing Pad
- Brayer
- Weeding Tool
- Heat Resistant Tape
- Lint Roller
- Butcher Paper
- Scissors
- Ruler
Instructions
STEP 1: GET MY FREE BIG HTV DESIGNS
First, download my Big HTV designs from my free library -- look for Design #627. Alternatively, you can use the Save This Project form near the top of this post and the design link will be emailed to you.
There are three designs in the folder:
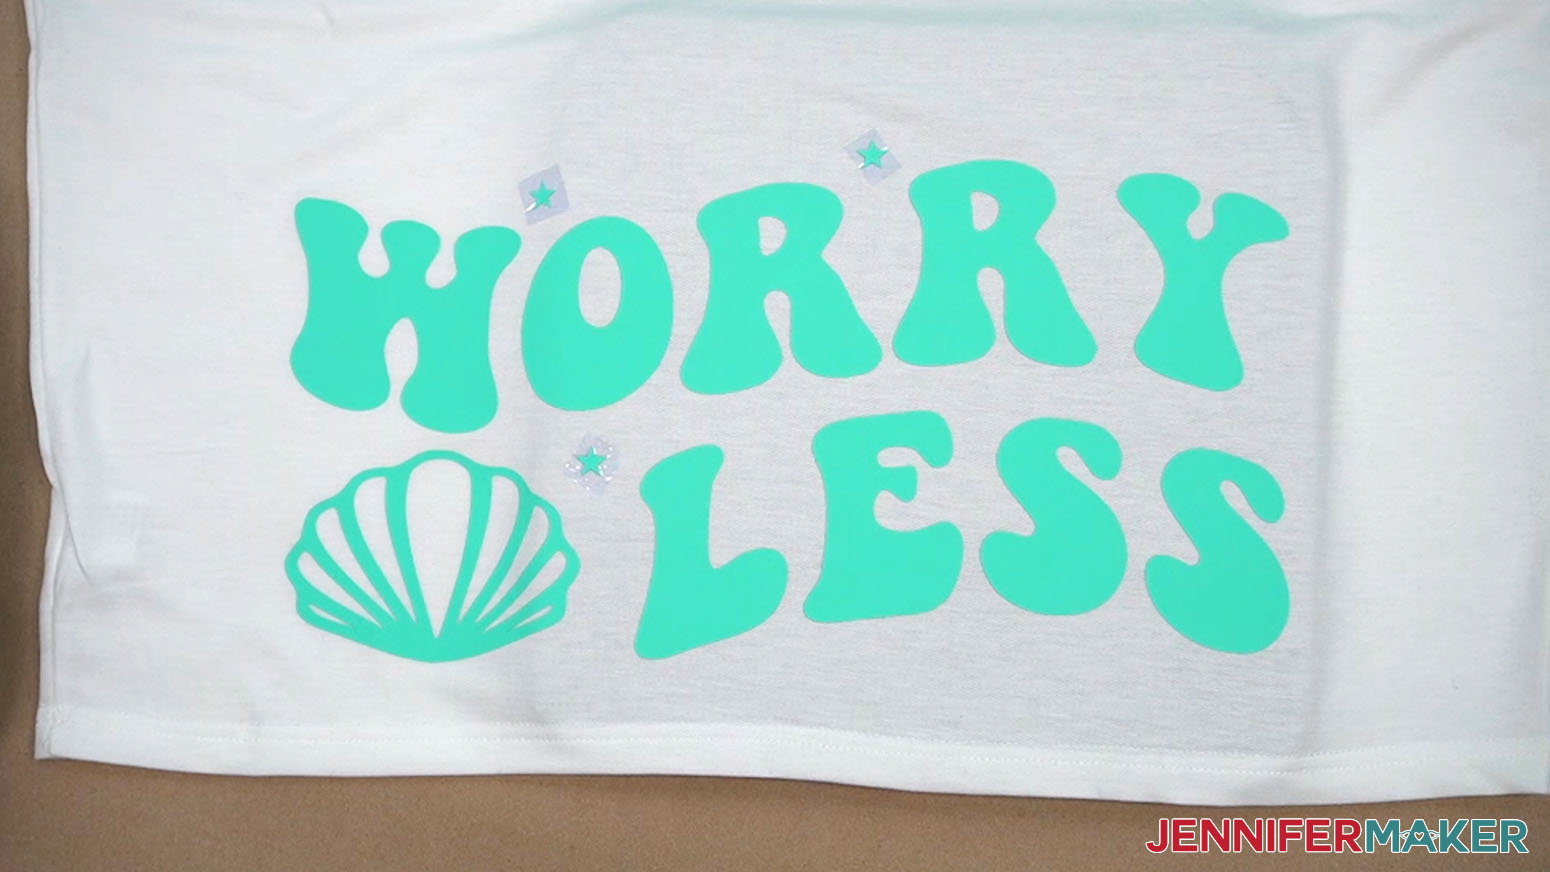
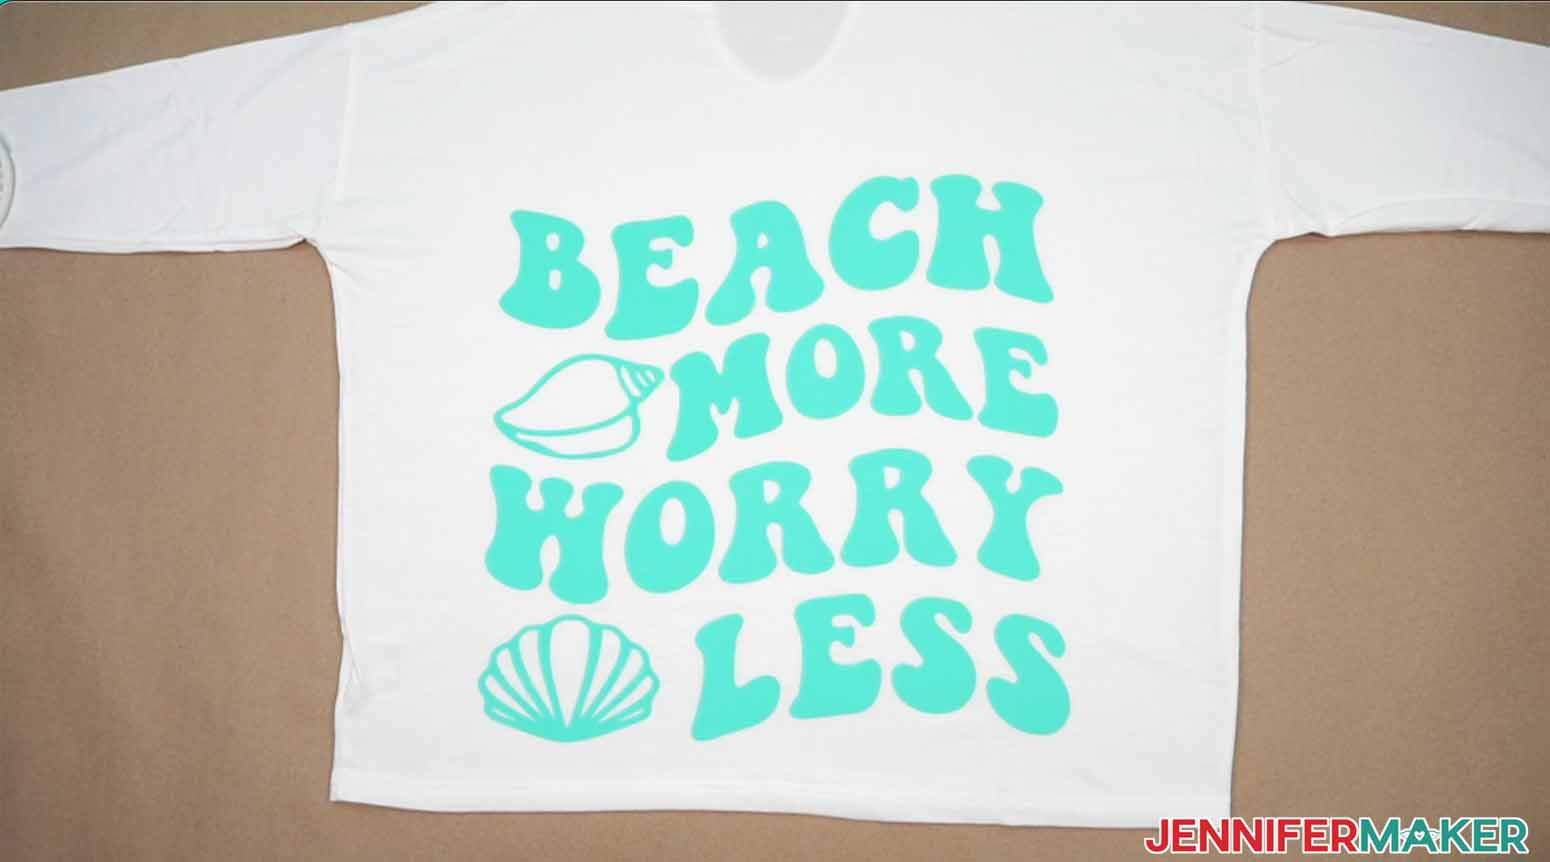
Beach More, Worry Less
Always Chasing Sunsets
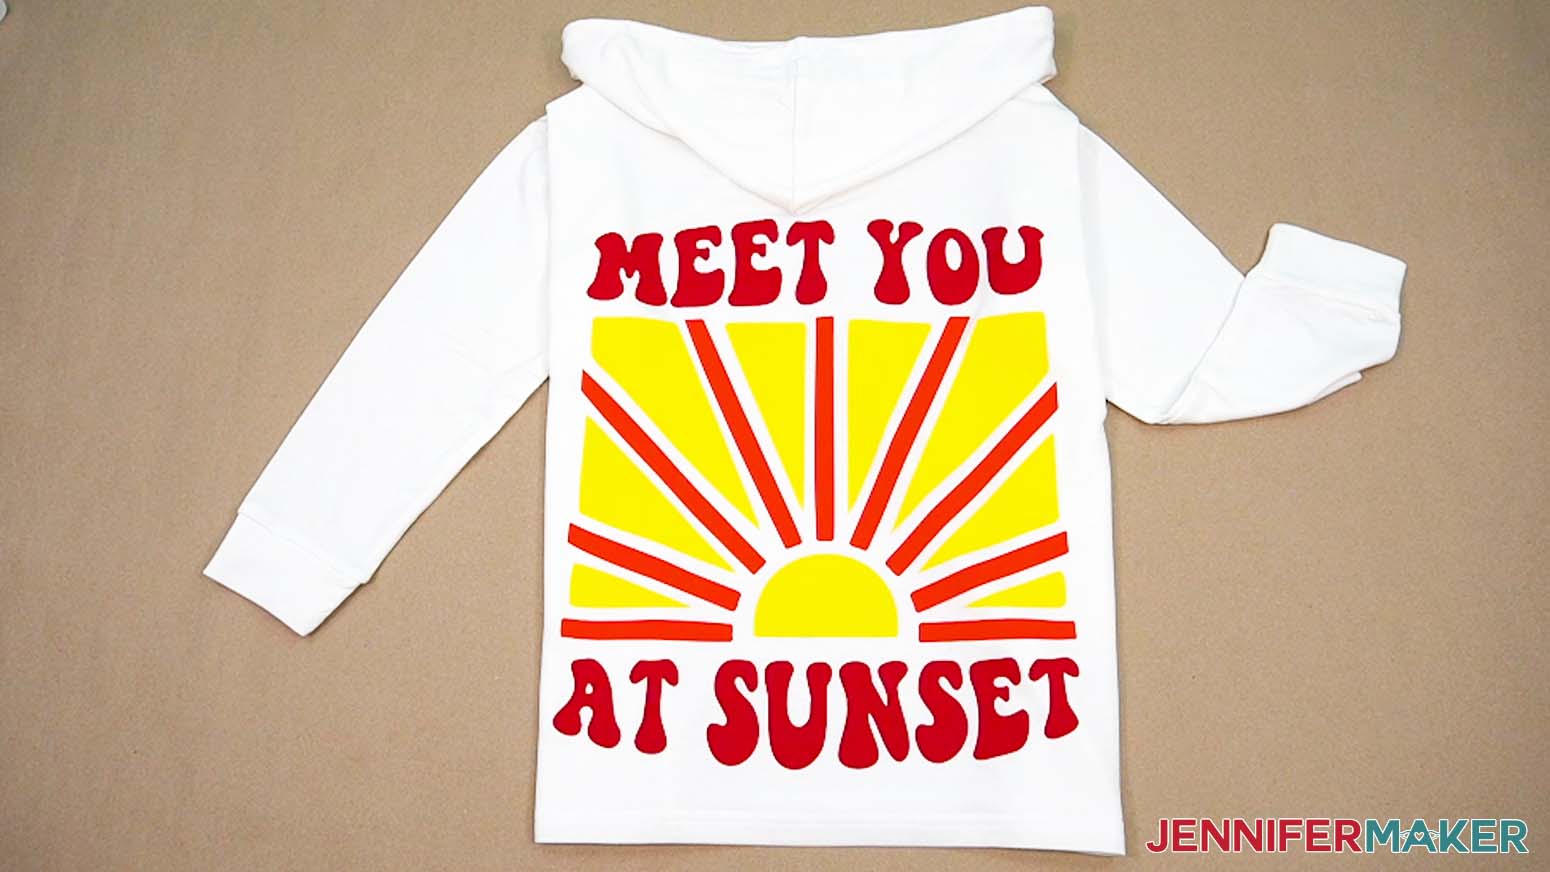
Meet You At Sunset
In this tutorial, I will show you how to prepare and press the “Beach More, Worry Less” design. You can use the same steps to prepare and press the other designs.
TIP: If you’re not sure how to upload, go to jennifermaker.com/svgs to learn how to unzip and upload SVG files.
STEP 2: MEASURE AND PREPARE YOUR HOODIE DESIGN AREA
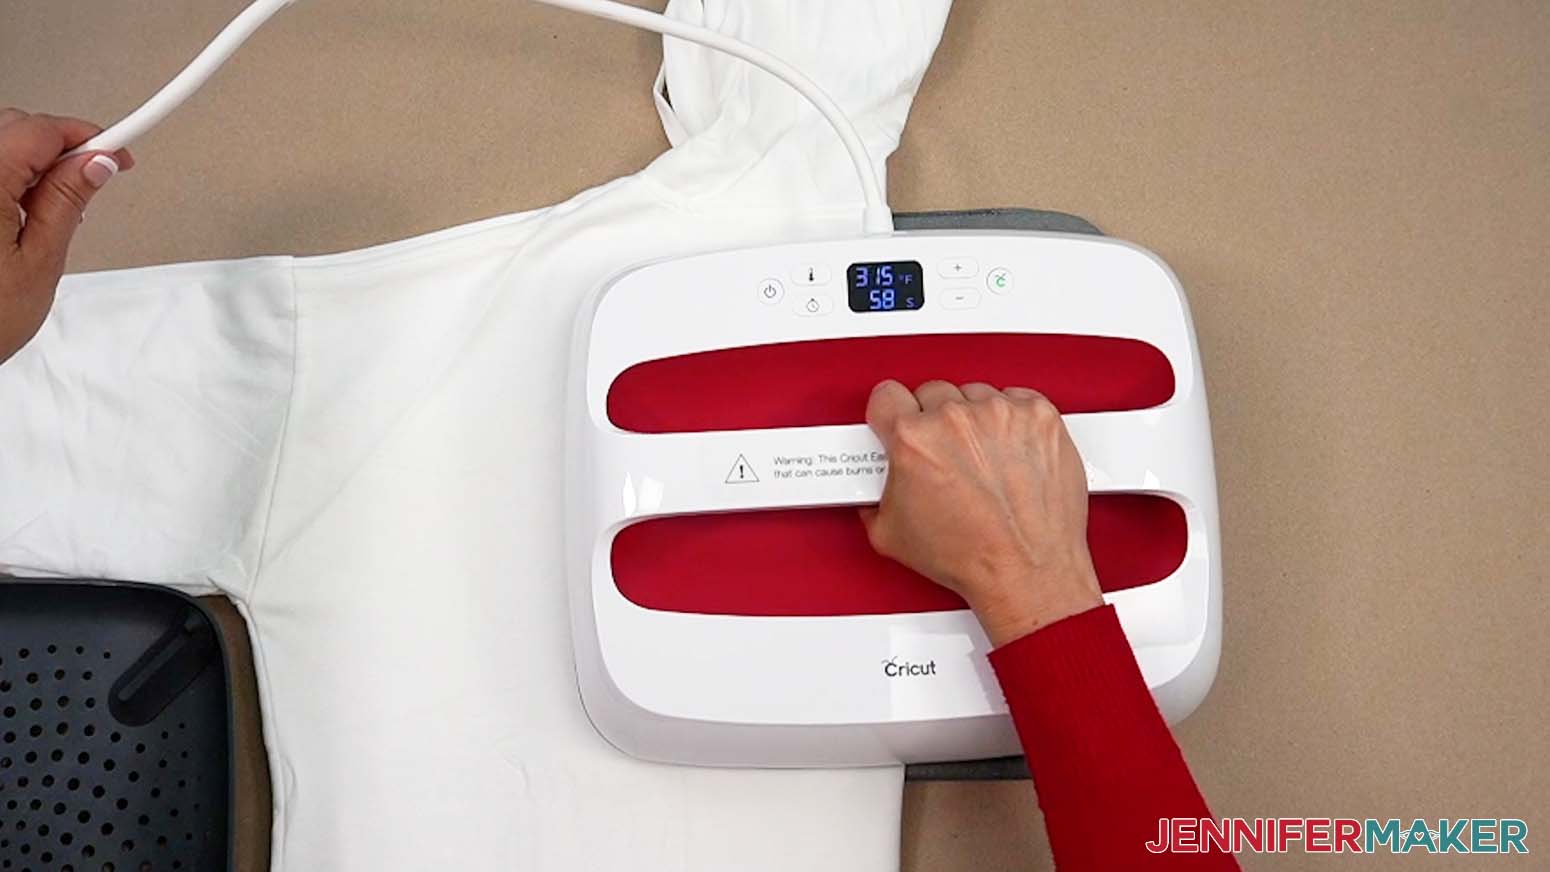
- If you’re using a Cricut EasyPress like me, set your heat press to 315° F (157° C) for 60 seconds so you’ll have enough time to preheat the entire area.
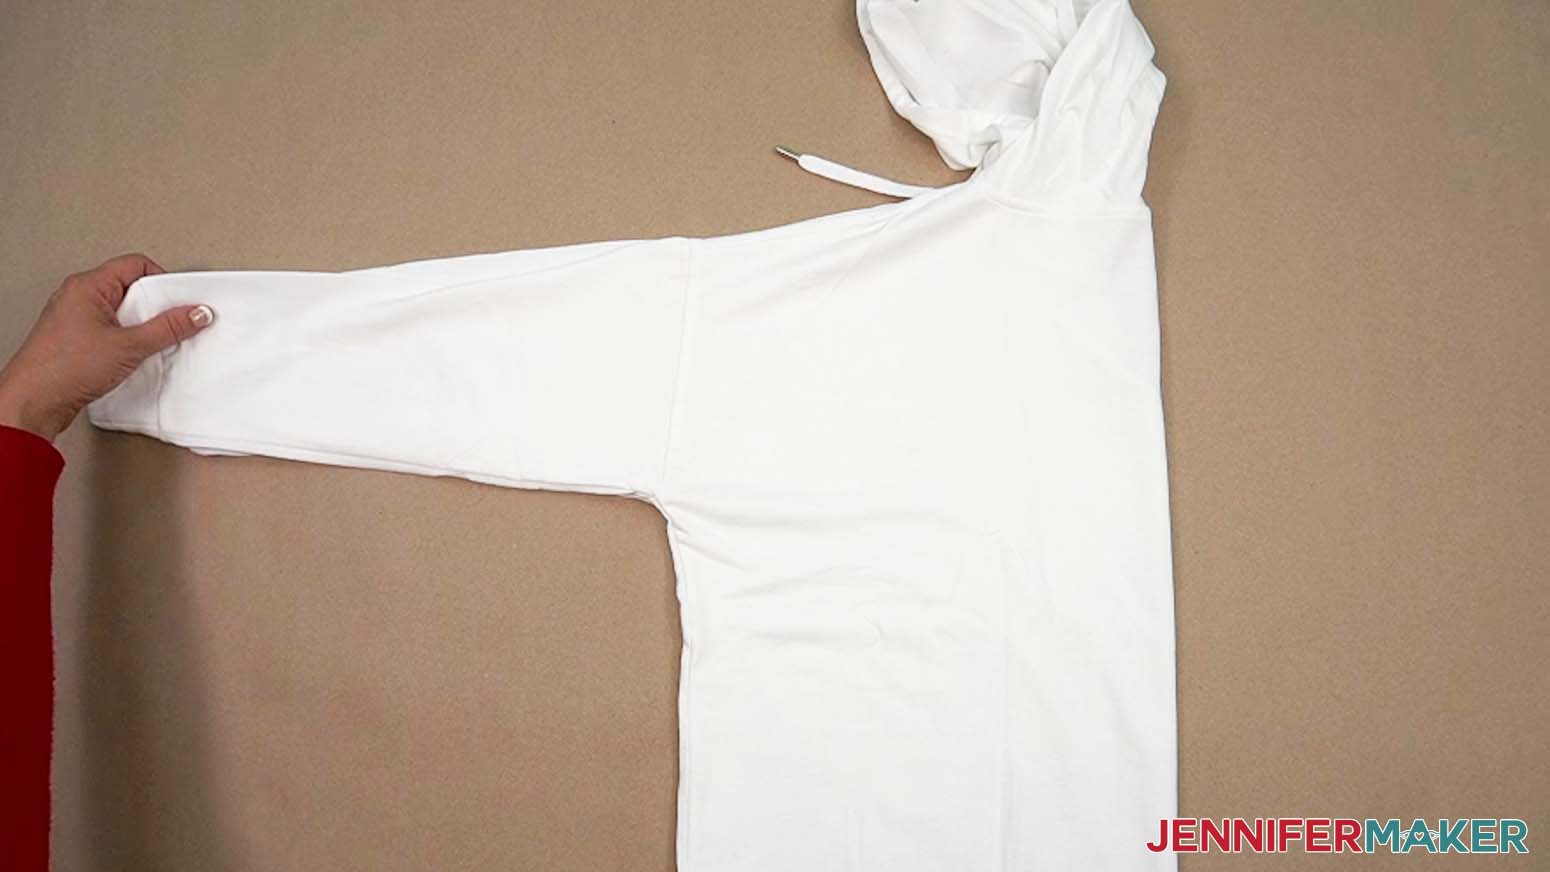
TIP: If you’re using a different heat press or HTV, my HTV Cookbook has references for many combinations! - Find the center of the hoodie’s back by folding the garment in half vertically, matching up shoulder seams to make sure the sides are even.

- Place the folded hoodie on a heat safe pressing pad with the crease at the right so the design area is also on the pad.
- Lightly press the folded hoodie in sections for approximately 10 seconds each to help set the center line, remove excess moisture from the material, and smooth out any extra wrinkles.
NOTE: If you’re using a thicker hoodie, you might need to carefully flip the garment to preheat the other half completely. - Unfold the hoodie and place it face down on your work surface with the hood up so the design area is as flat as possible.
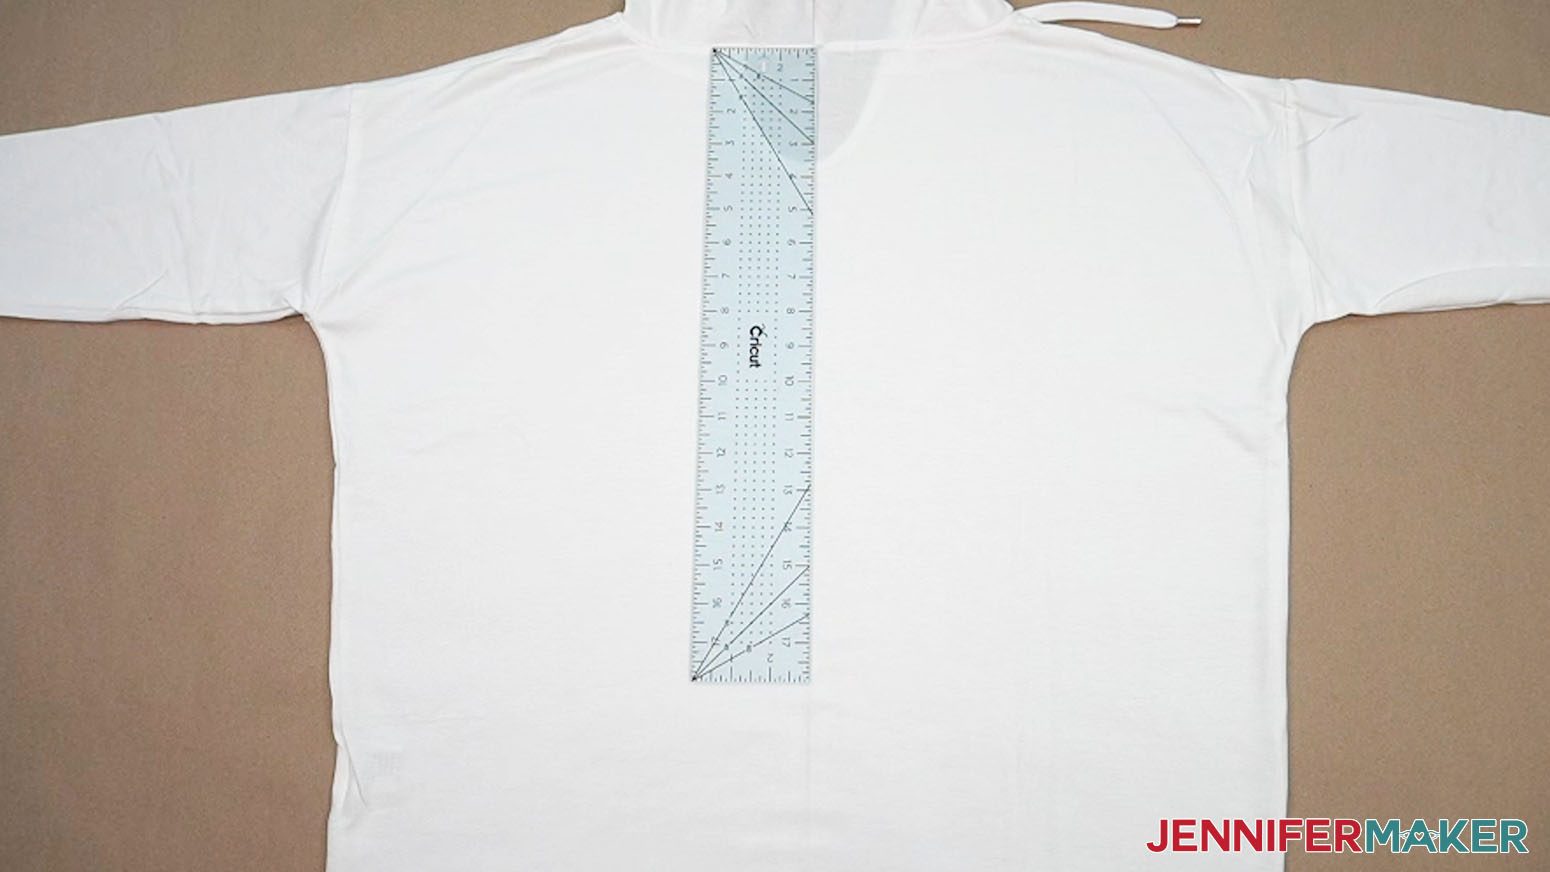
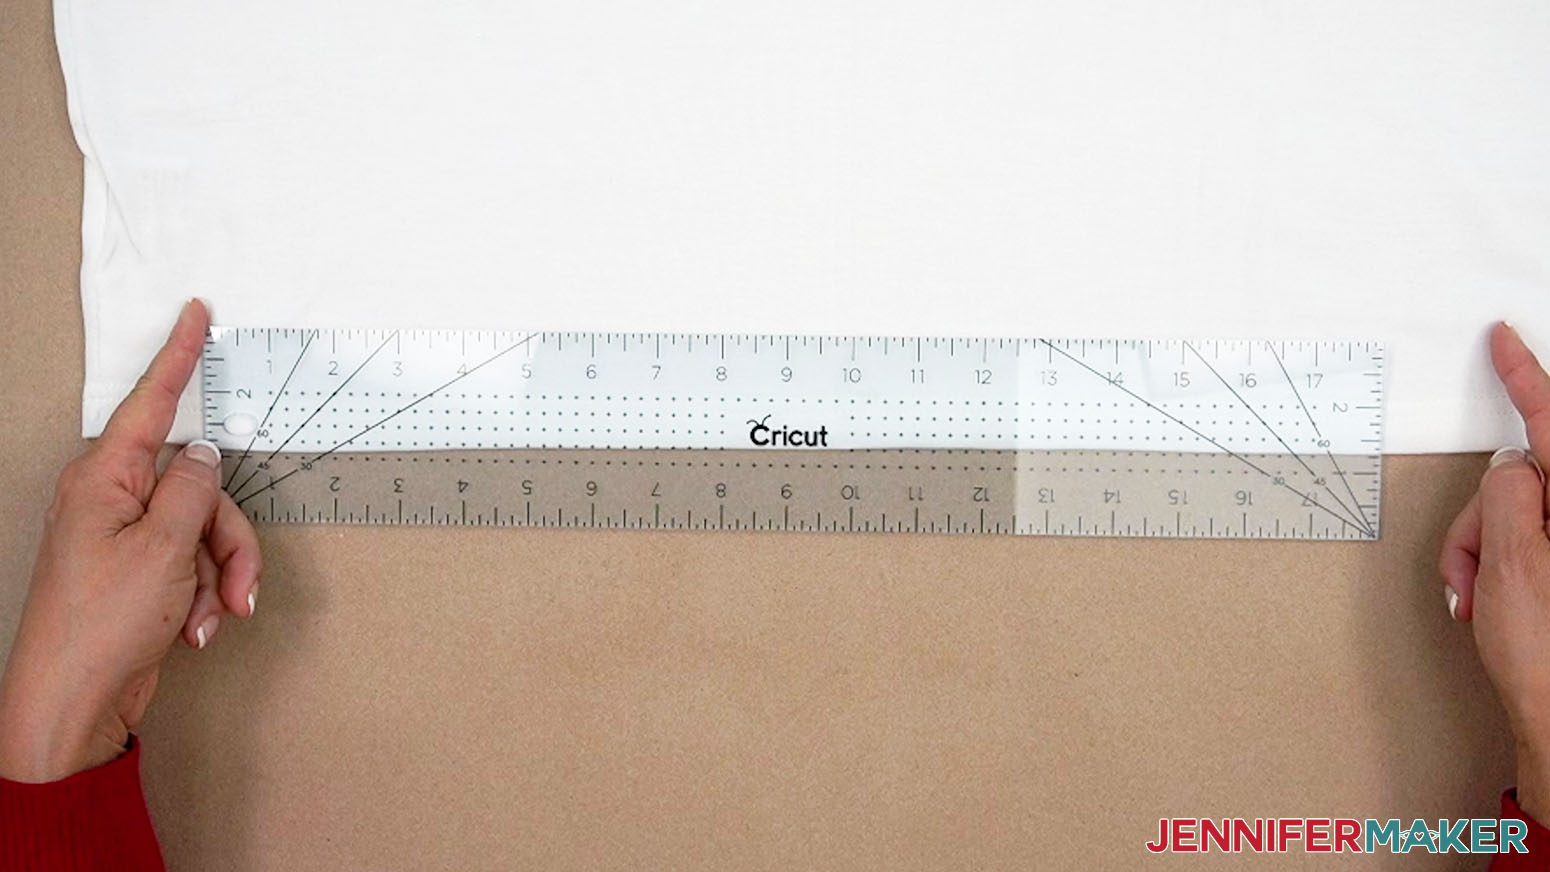
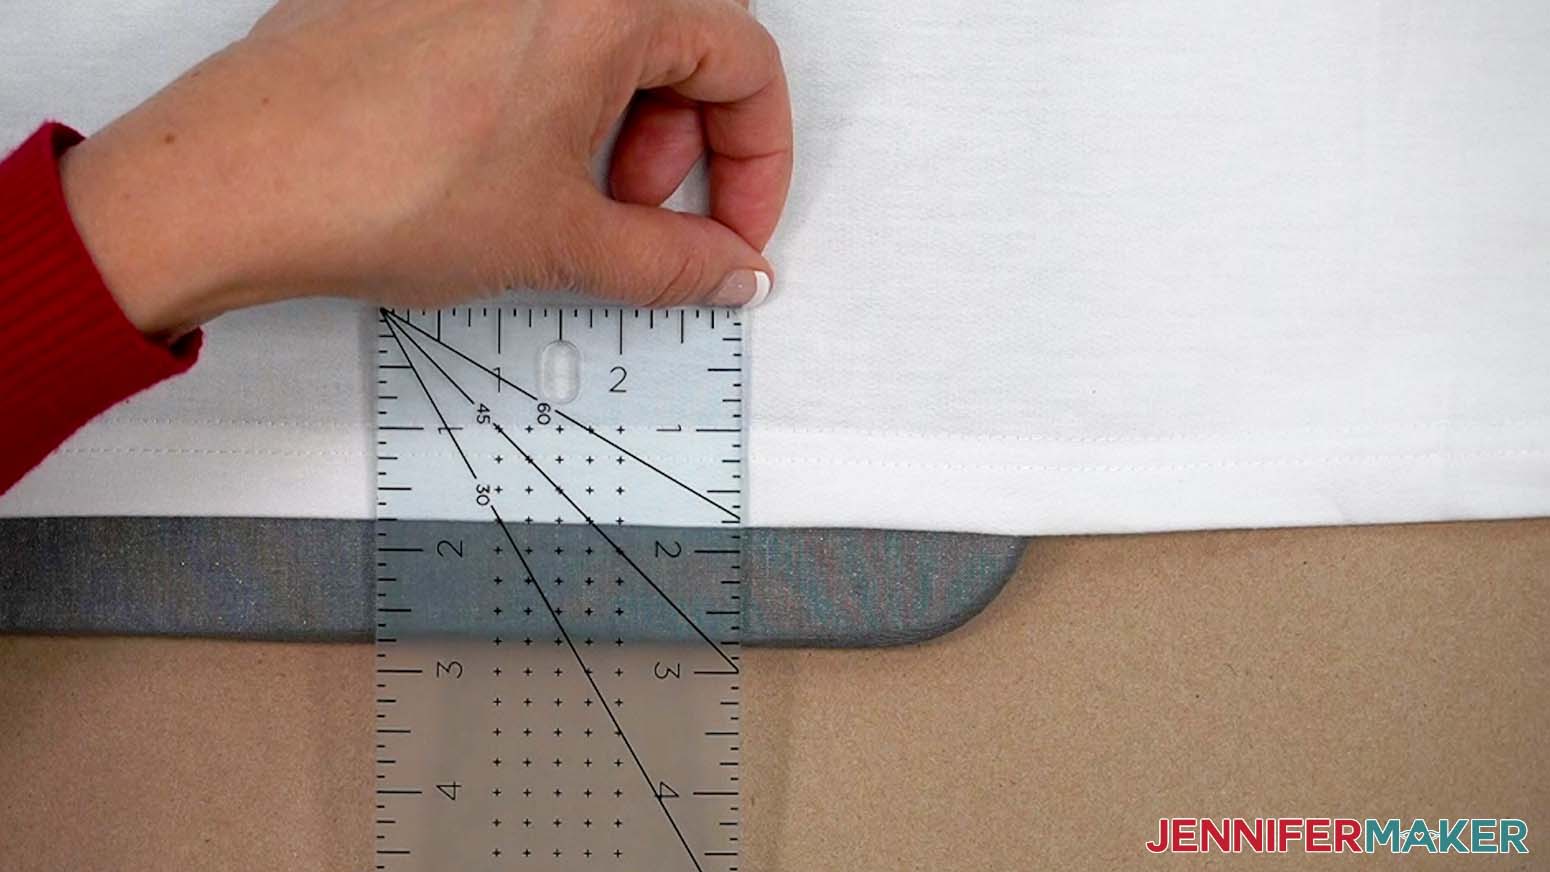
- Place your ruler vertically, measuring down from the hood seam at the middle.
- Lay the hood down on top of the ruler to see how much of the back will be covered by it, then determine where you want the design to start with that in mind.
NOTE: Most hoods will cover the top 5-6” of a sweatshirt’s upper back, so you can start the design wherever you prefer. I recommend starting 6” down from the hood seam. - Move your ruler down to the vinyl starting point.
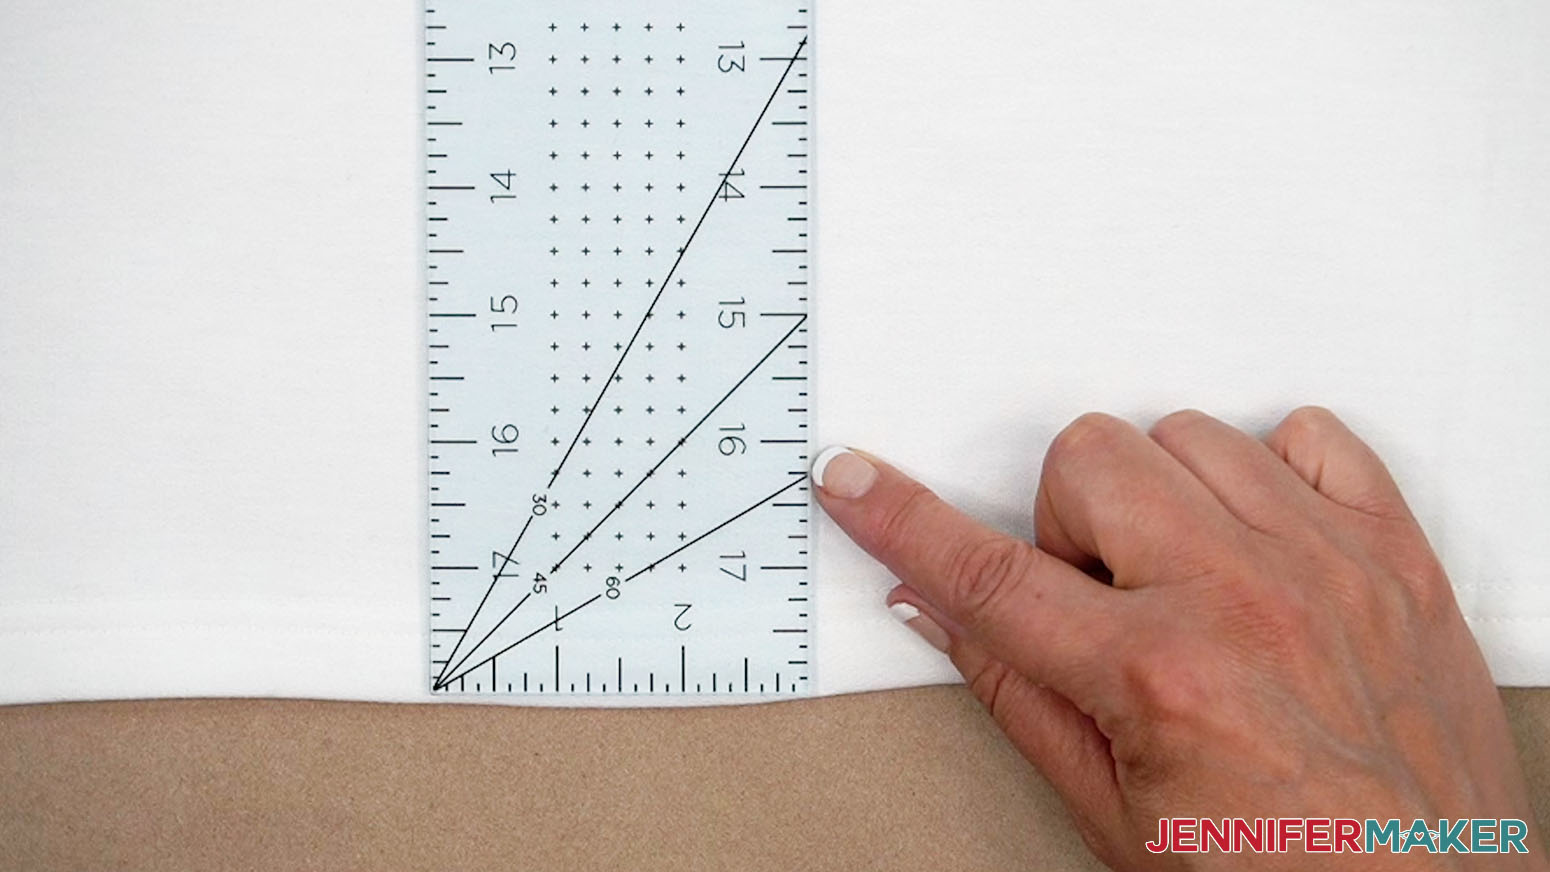
- Measure from where the design will start straight down to where you want the vinyl to end. That is your estimated maximum Height measurement.
NOTE: I recommend staying at least 1” away from the bottom hem seam so you can press on flat fabric. - Then hold your ruler horizontally near the shoulders to measure the width of the design area.
NOTE: If your hoodie style has shoulder seams, I recommend staying at least 1” away from them.
TIP: Some hoodies might have different widths between the shoulder seams and between the left and right sides at the bottom, so measure both areas. Stay about 2” away from either edge of the hoodie’s back to keep the design from wrapping around the body and getting distorted. If you get different numbers, use the smaller width as your maximum to avoid pressing on seams or skewing the design.
STEP 3: PREPARE AND CUT YOUR “BEACH MORE” BIG HTV DESIGN
CRICUT DESIGN SPACE
- Open Cricut Design Space and click “New Project.”
- Click “Upload” and then “Upload Image.”
- Click “Browse.”
- Select the SVG file of your choice. I’ll demonstrate with the “Beach More” design.
- Click “Open.”
- On the Upload Image screen, there will be a design preview. Click “Continue.”
- On the next screen, click “Upload.”
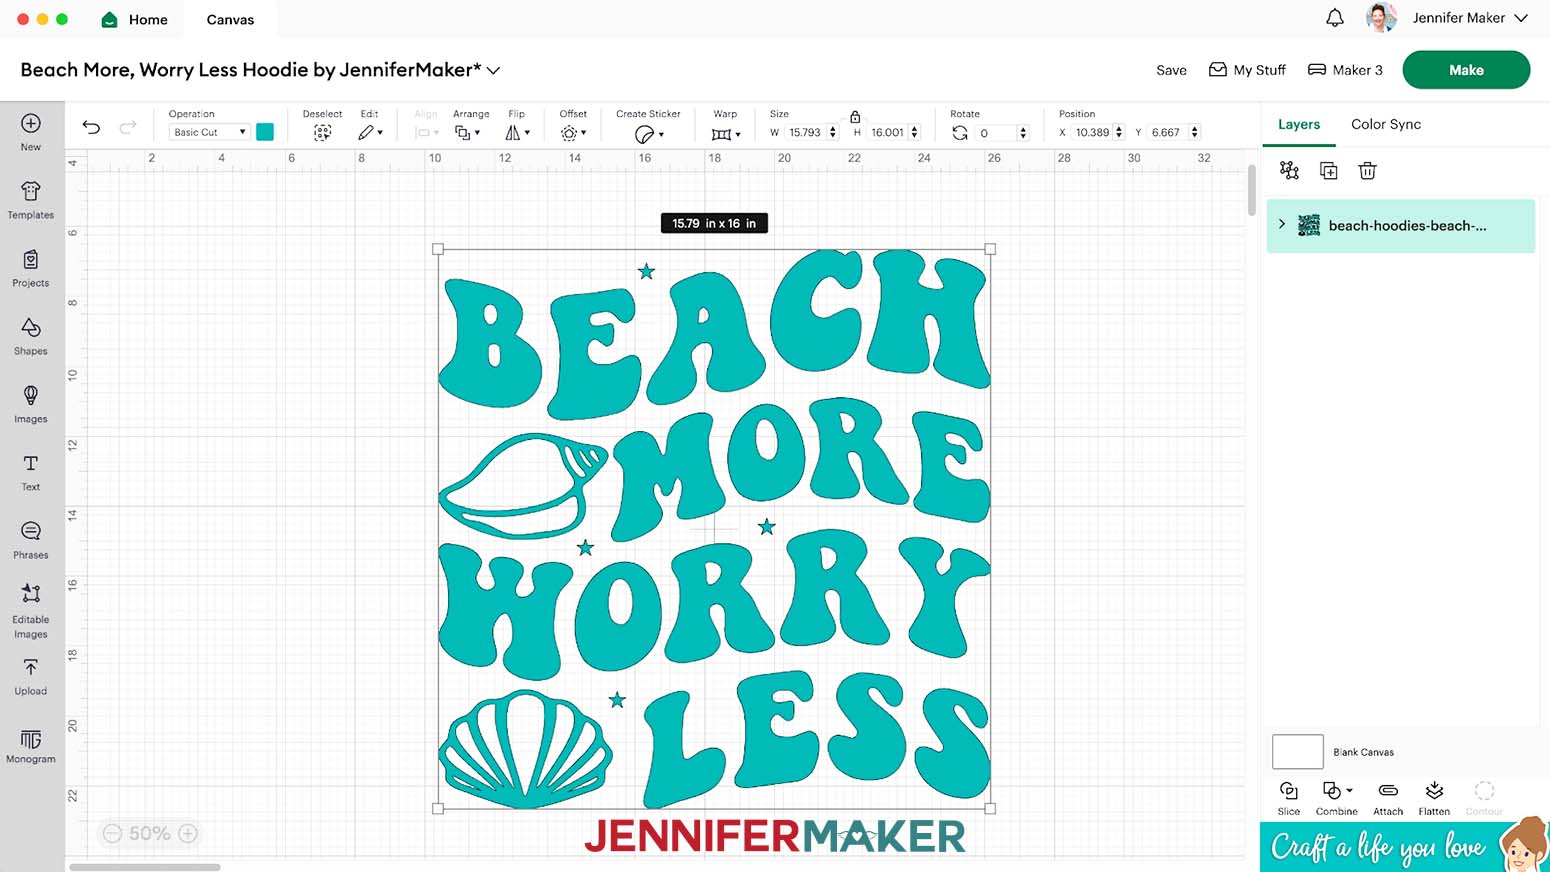
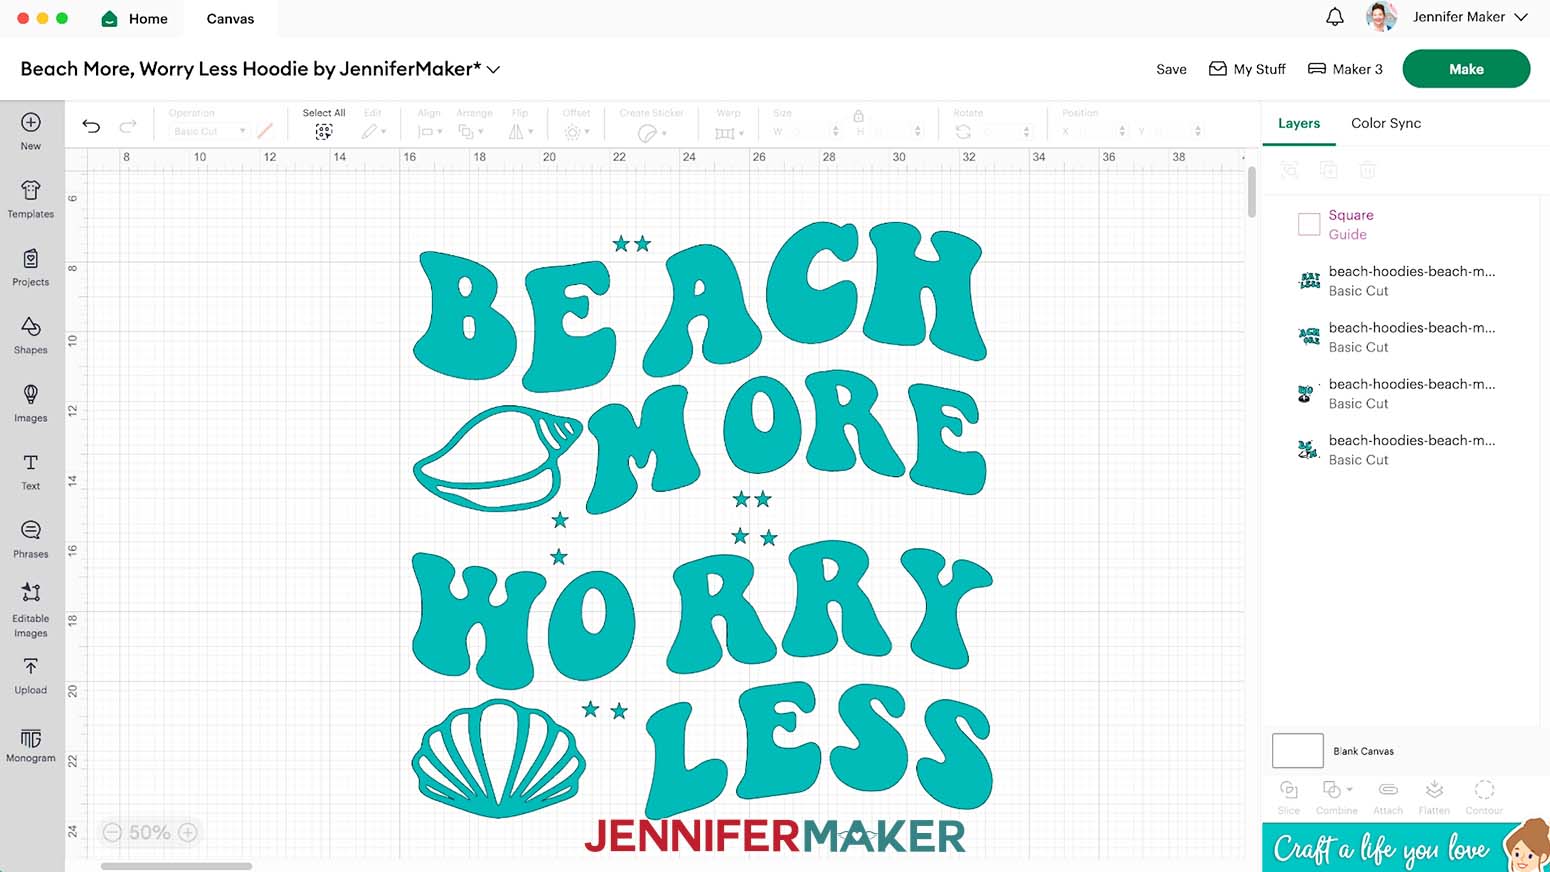
- The hoodie design is now on your Canvas.
- Click “Save” and give your project a name.
- Zoom out to see the entire design.
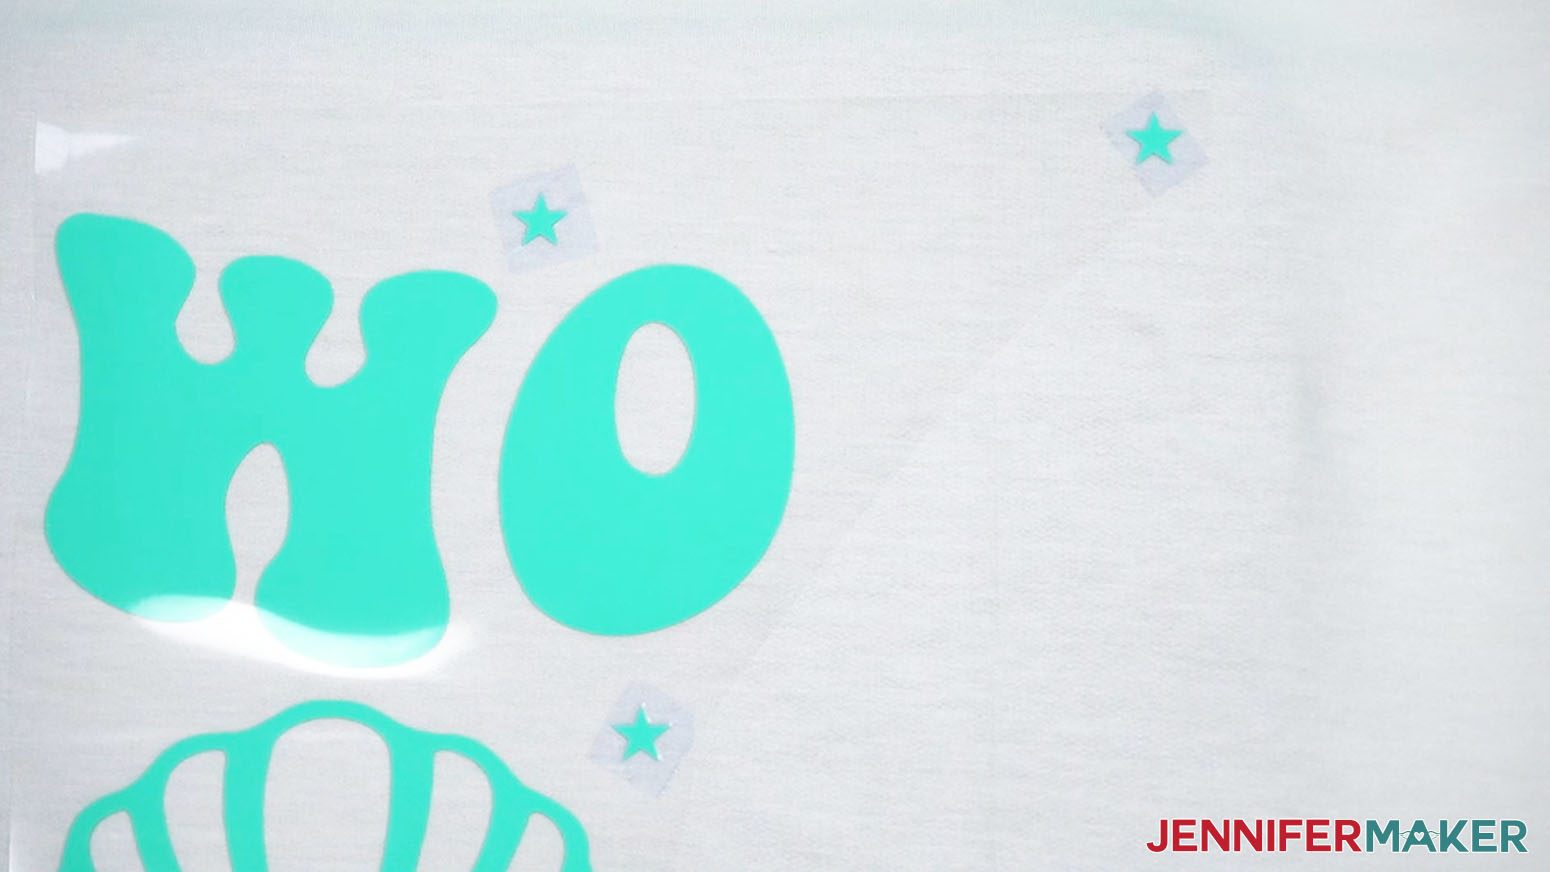
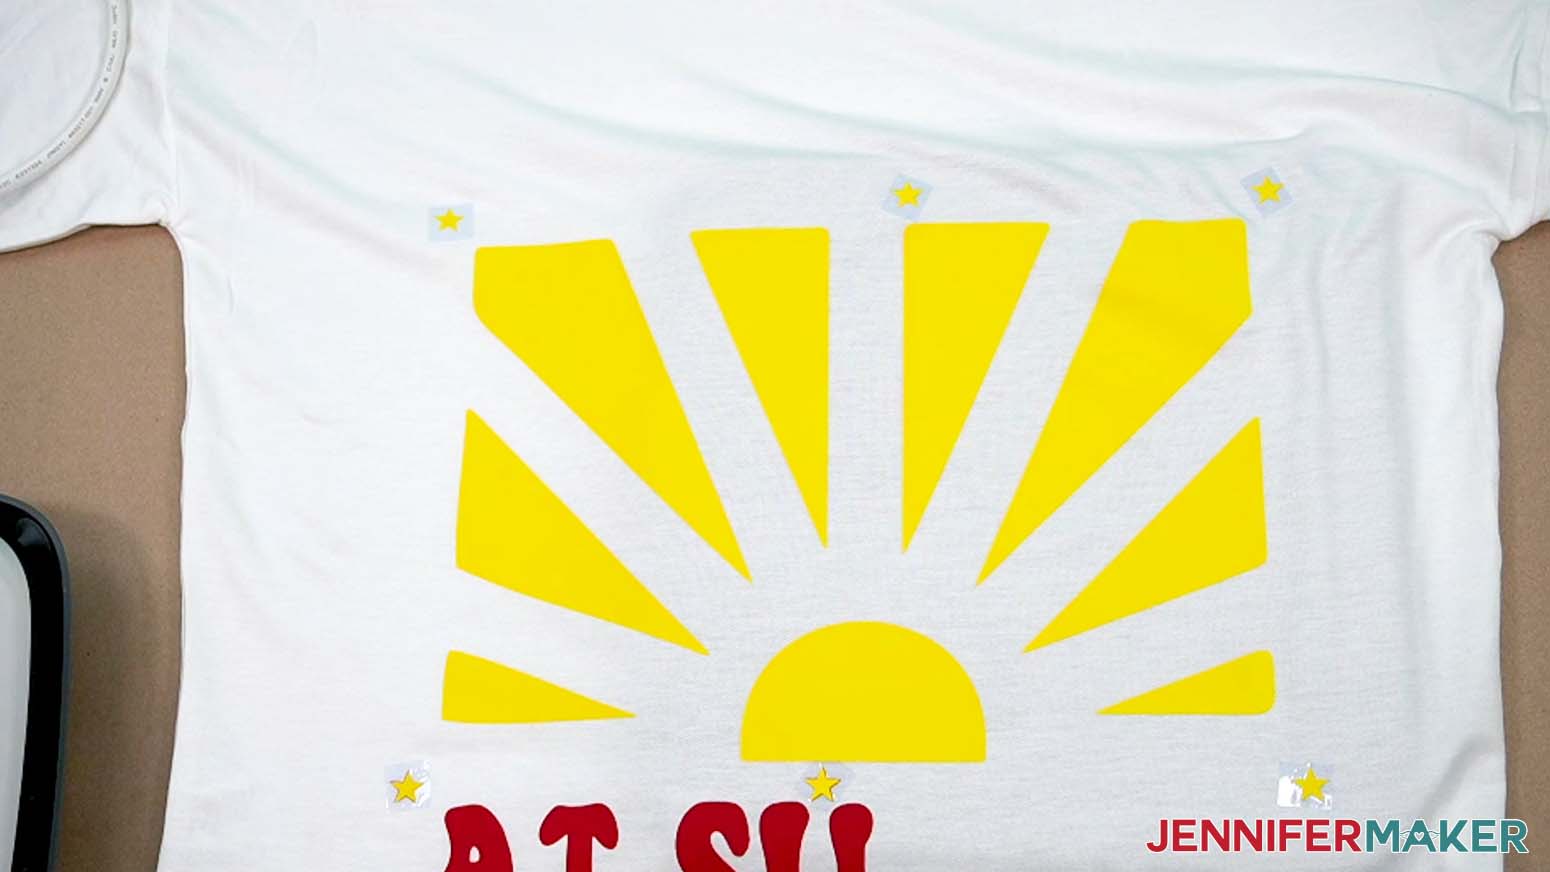
NOTE: The small stars that overlap are registration marks to help with alignment during pressing. Their placement minimizes vinyl use and allows the heat resistant tape to fit into the design easily to keep the registration marks from transferring to the final project. Stars are used because they have points that have to be lined up. - Resize the design if needed. You can reference my oversized hoodie design size chart to find the best dimensions for your design, or you can use the dimensions you measured above.
NOTE: Keep the Lock icon closed to maintain the design’s proportions.
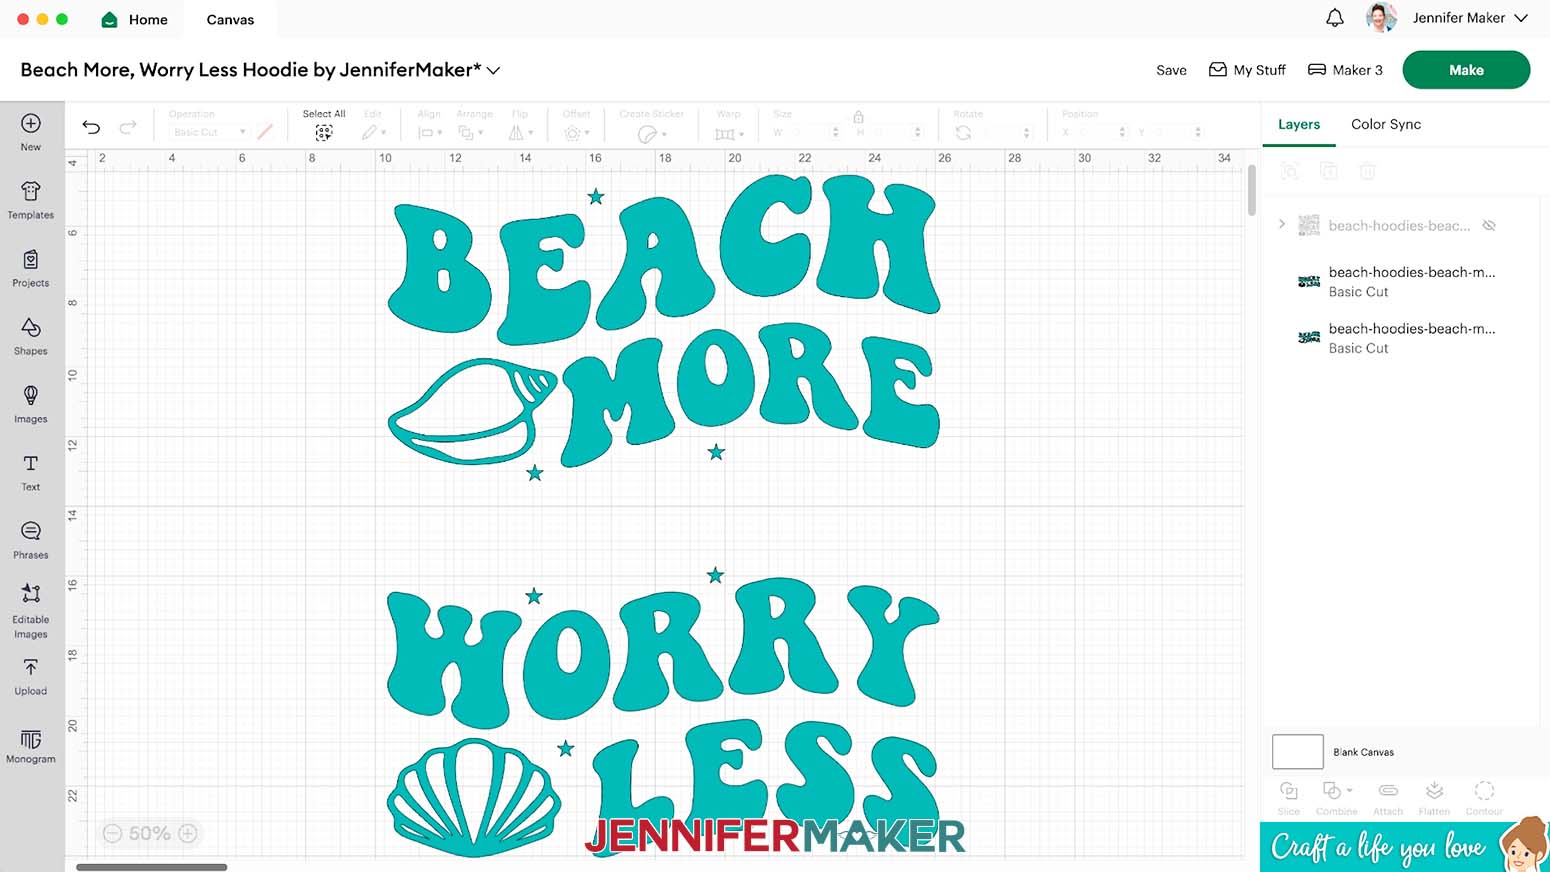
TIP: My design is nearly square, but if you’re using a rectangular design, use the larger dimension to resize the design so the smaller dimension will remain within the recommended area. - “Duplicate” the design so you have two working versions.
NOTE: If your design has even larger design elements, you may need to make more duplicates using these techniques. - Move the copies apart on the Canvas so you can see both.
- Select the design on the right and click the eye icon next to it in the Layers Panel to hide it for now.
- “Ungroup” the left design so you can see the elements on different layers.
- On the Canvas, drag the layers apart so you can see what each includes.
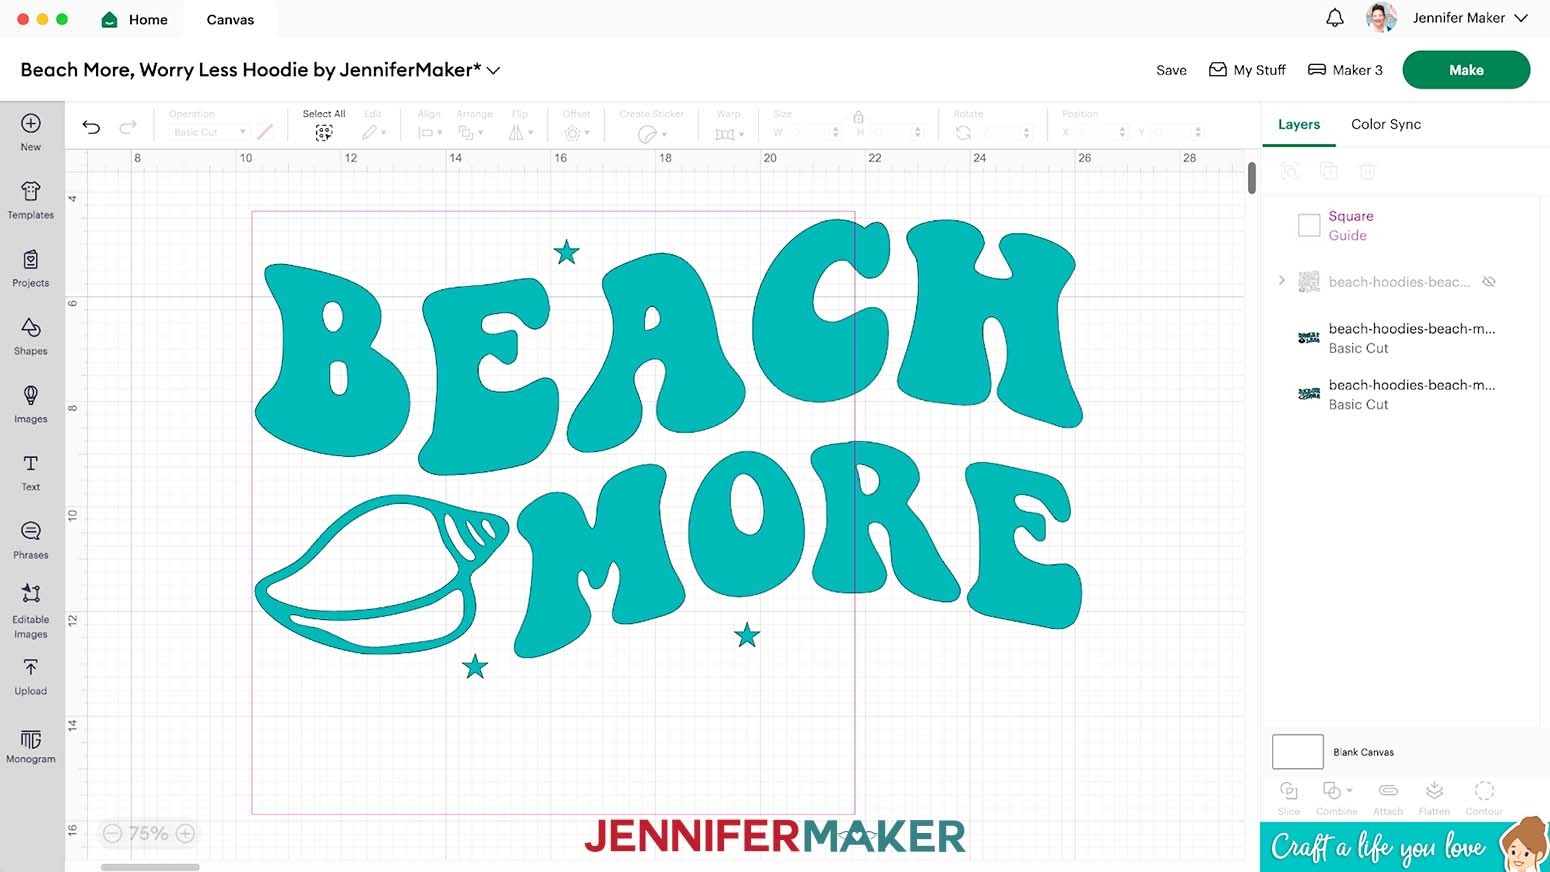
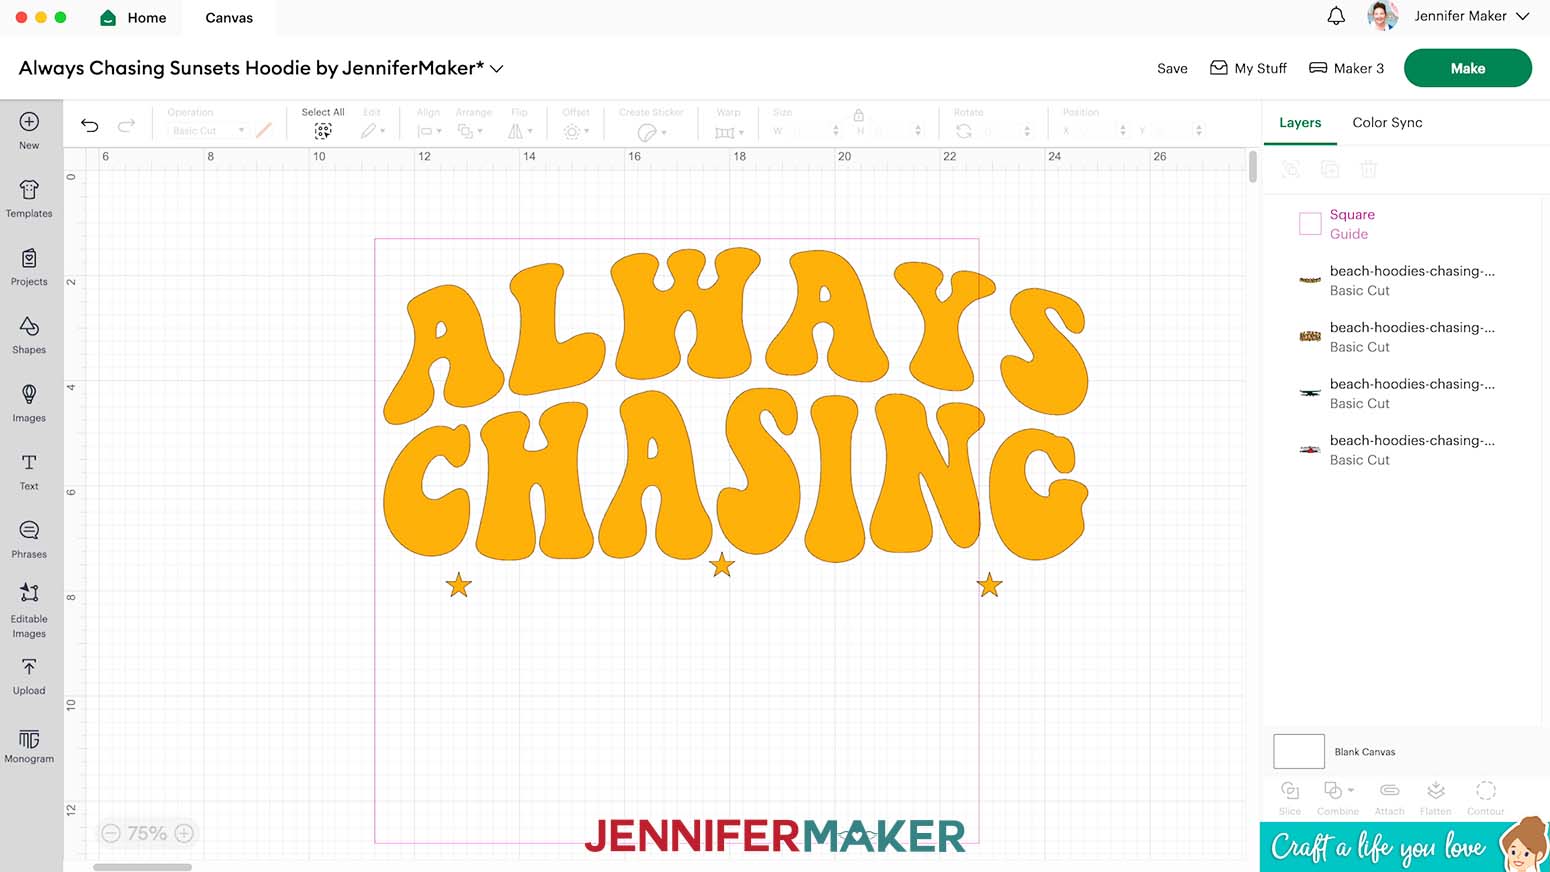
- Click the “Shapes” icon and select a free Square to add it to your Canvas.
- With the Lock icon closed to maintain the proportions, change the Square’s Width (W) to 11.5” to represent the available cutting area when using a 12” x 12” machine mat.
- Click the “Operation” drop-down and change the Square to a “Guide.”
TIP: Changing a Layer to the Guide Operation will turn it into a pink outline with an empty center and will keep the object from moving to the cutting process. - Drag the first left layer into the Guide so the top left corners closely align.
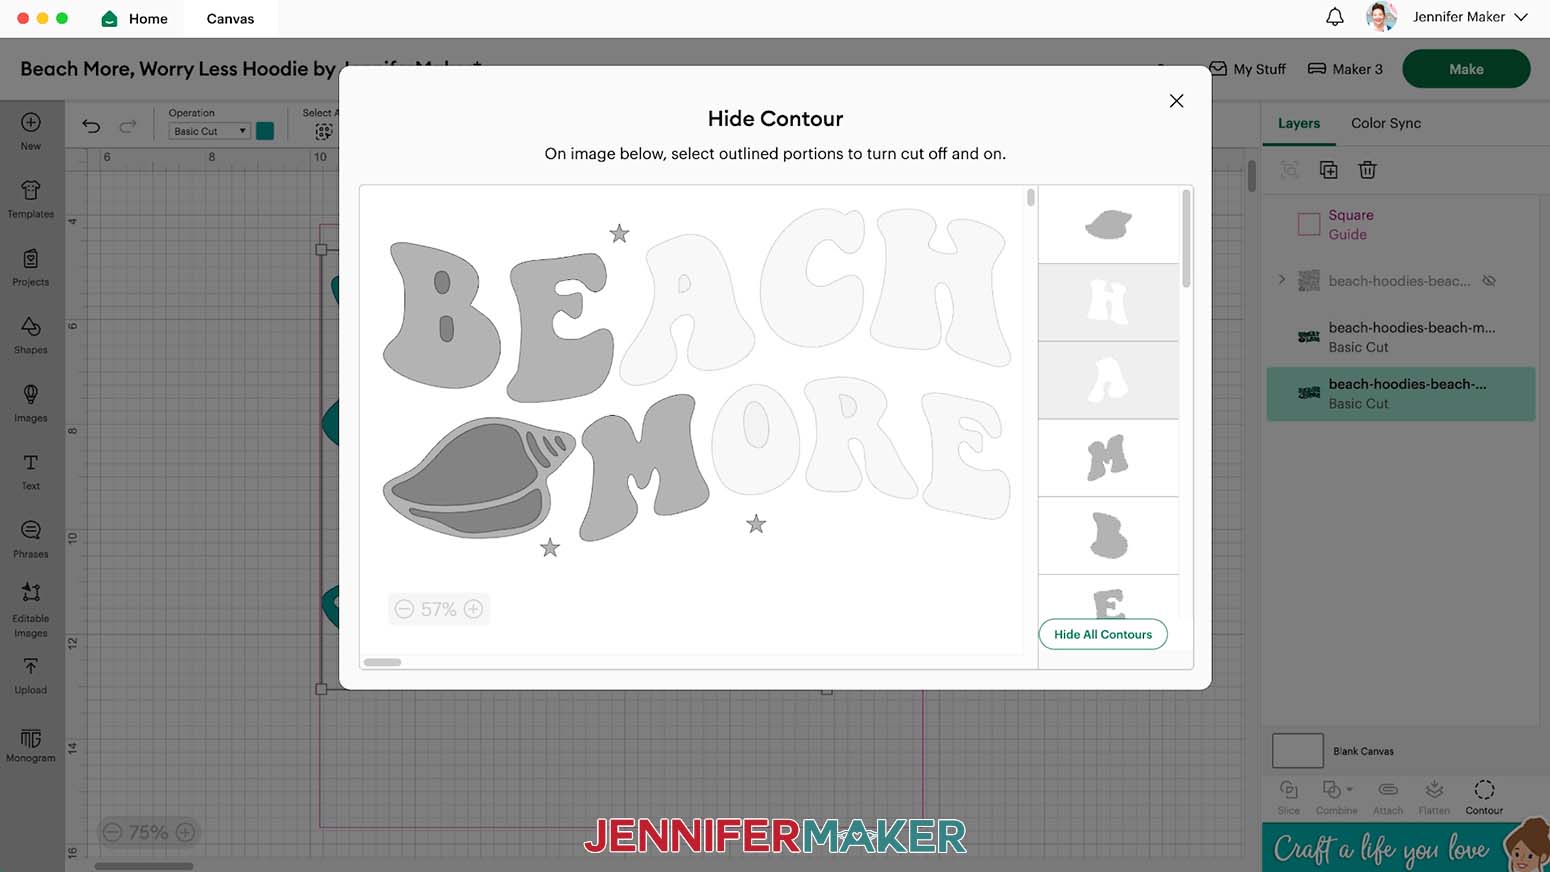
NOTE: Anything outside the Guide or touching it won’t fit on the 12” x 12” mat. - With just the design layer selected, click “Contour.”
- In the Contour pop-up, click the elements you want to remove from this copy so that the result will easily fit on your mat’s 11.5” x 11.5” cutting area.
TIP: I find it easiest to turn off the cuts for the right half of the design in this “left” layer.
NOTE: Don't forget to remove any counters inside of letters along with the letters themselves. - Leave at least two of the registration mark stars showing. Plan ahead so the other half of the design will also include at least two registration mark stars. Sometimes keeping more registration marks is worth the vinyl to make alignment easier.
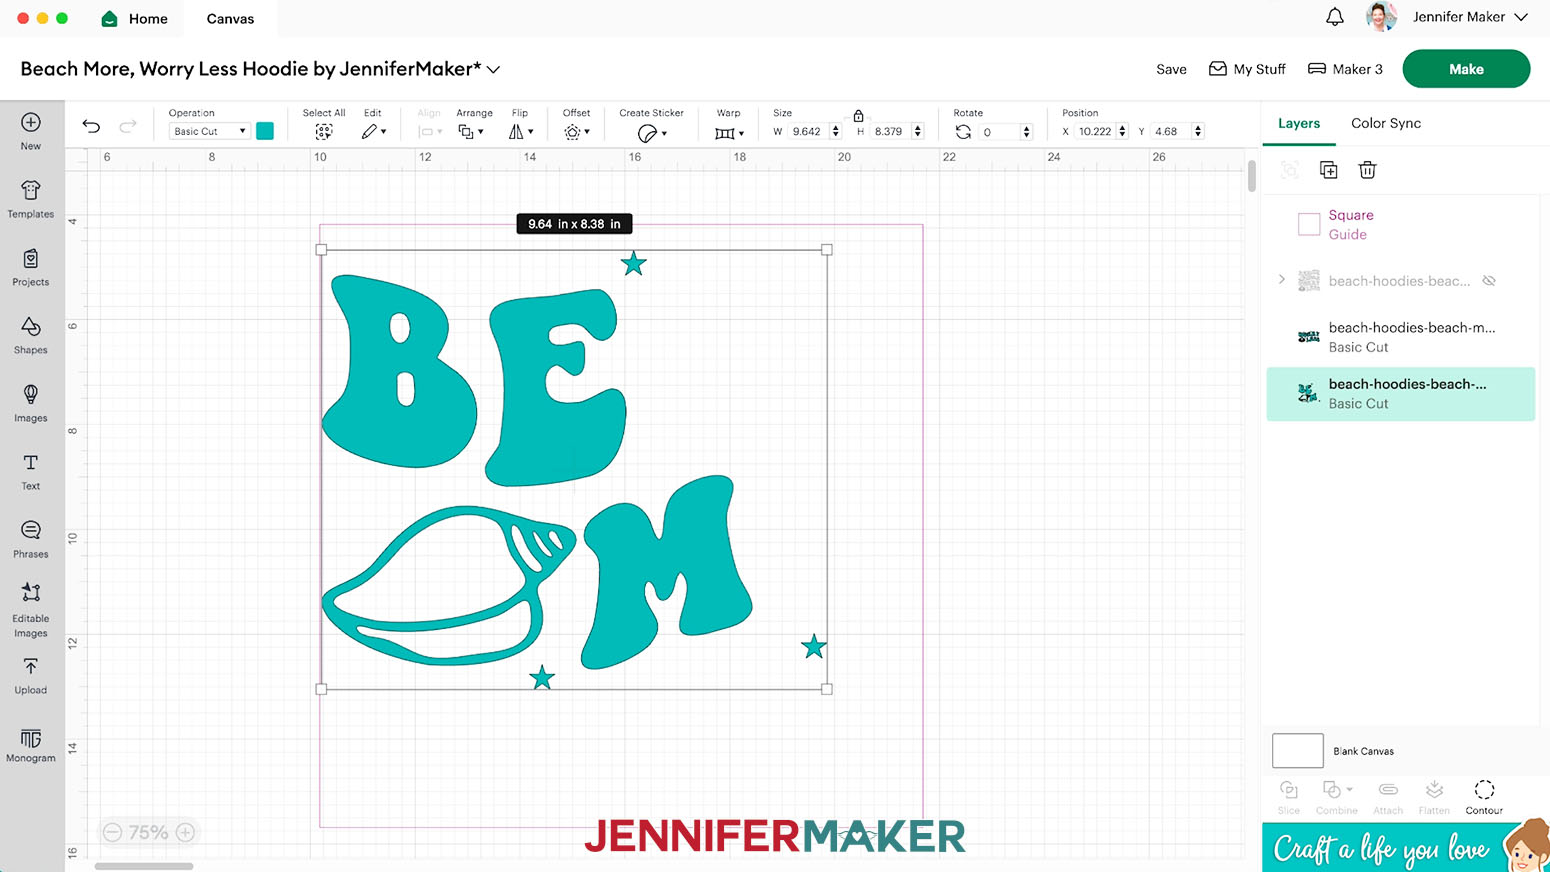
- Click the “X” to close the Contour pop-up and see the results.
- Repeat Steps 21-24 to Contour any other layers that can be split into two or more pieces the same way.
- Click the eye icon in the Layers Panel to unhide the grouped copy.
- Ungroup the design.
NOTE: You can work with the copied design grouped or ungrouped, but I ungrouped it to move pieces on the Canvas easier. - In the design copy, select the first layer that matches one of your contoured elements.
- Click “Contour.”
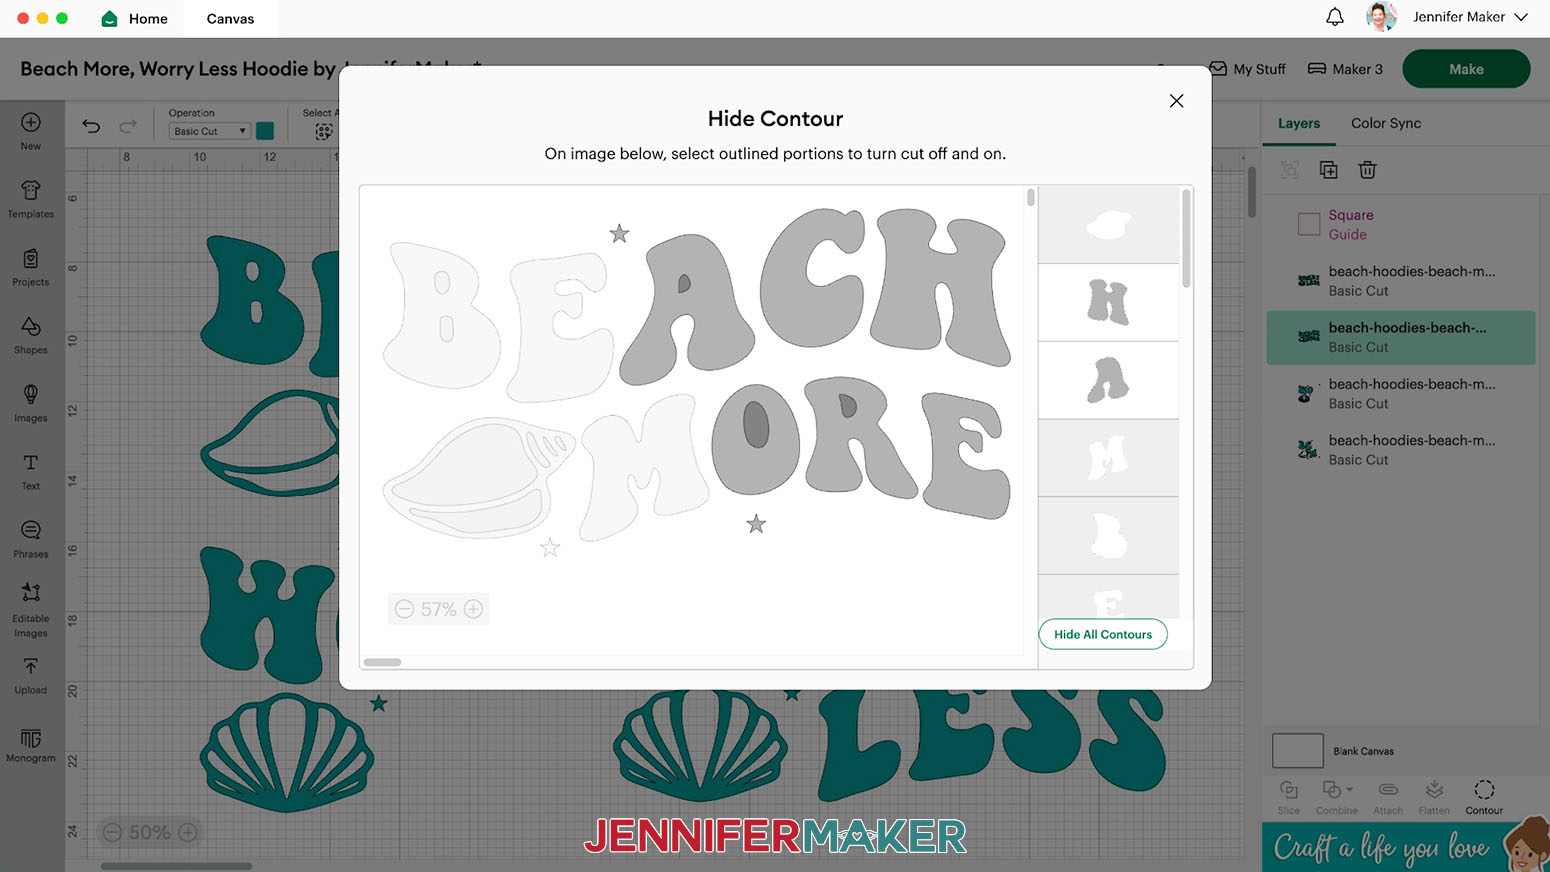
- This time, click the cuts that you left in the previous version to turn them off, so this copy includes the other half of the design.
NOTE: Again, make sure you keep two (or more) star registration marks, including at least one that is active on both versions of the design. - Click the “X” to close the Contour pop-up and see the results.
- Compare your results, making sure you have everything you need and there aren’t duplicate elements other than registration marks. Click “Contour” again to make any adjustments if needed.
- Repeat Steps 28-32 for the other design layers to complete adjusting the other half of your elements to fit on your machine mat.
- You’re ready to cut!
CUTTING
- Make sure the correct machine is selected.
- Click “Make.”
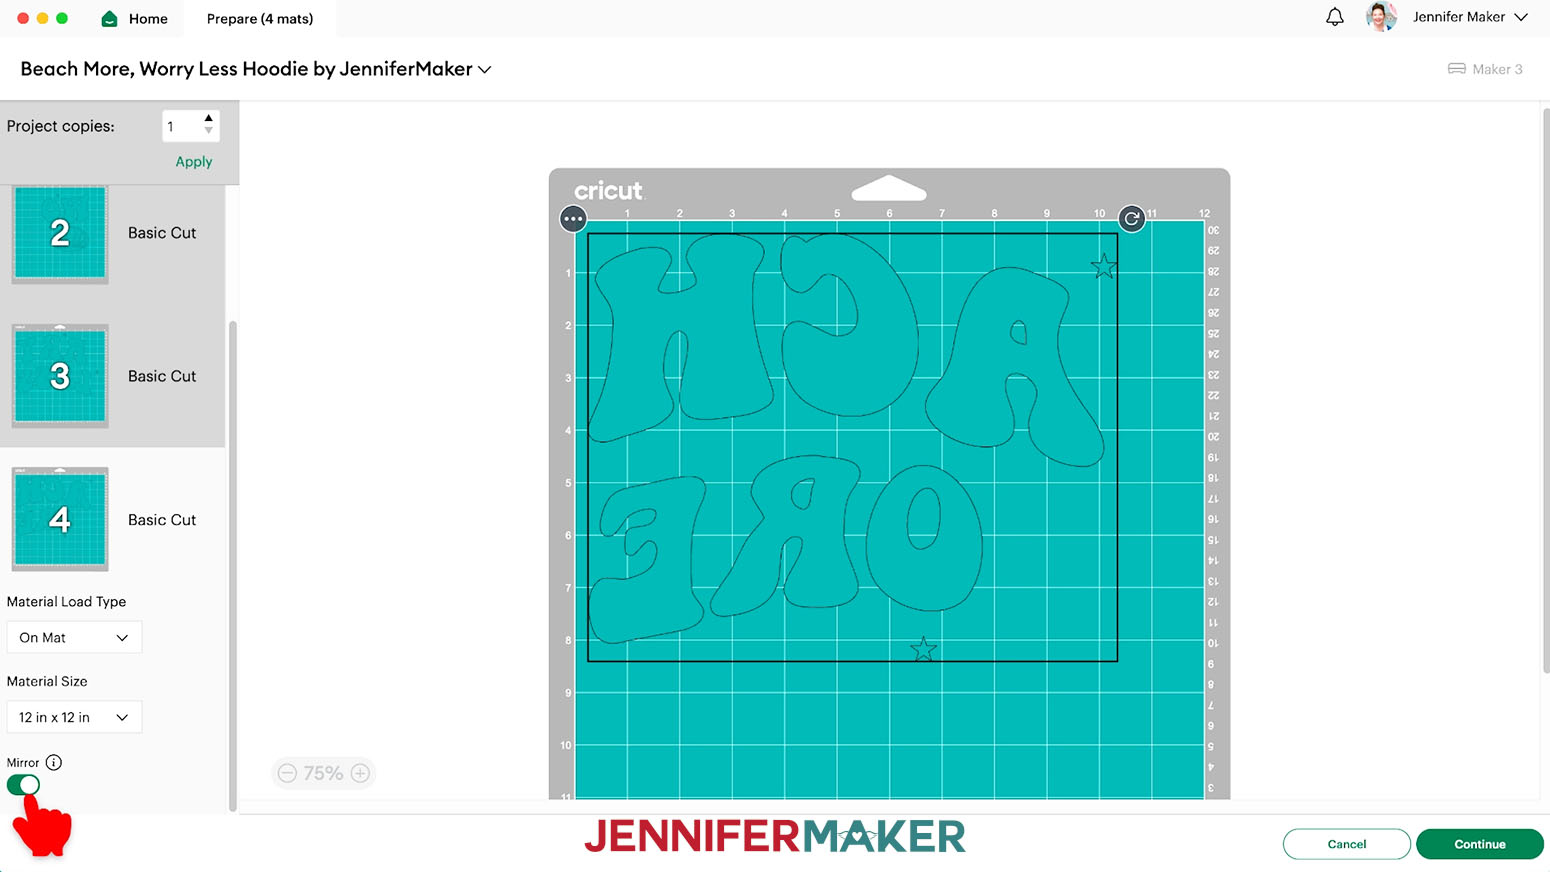
- On the Prepare Screen, set the Material Size to match your materials.
- Toggle on “Mirror” for each mat since we’re using iron-on vinyl.
- If mats have more than one element, drag them apart a little so you can easily cut between them later without removing registration marks.
- After all your mats are prepared, select the first mat again and click “Continue.”
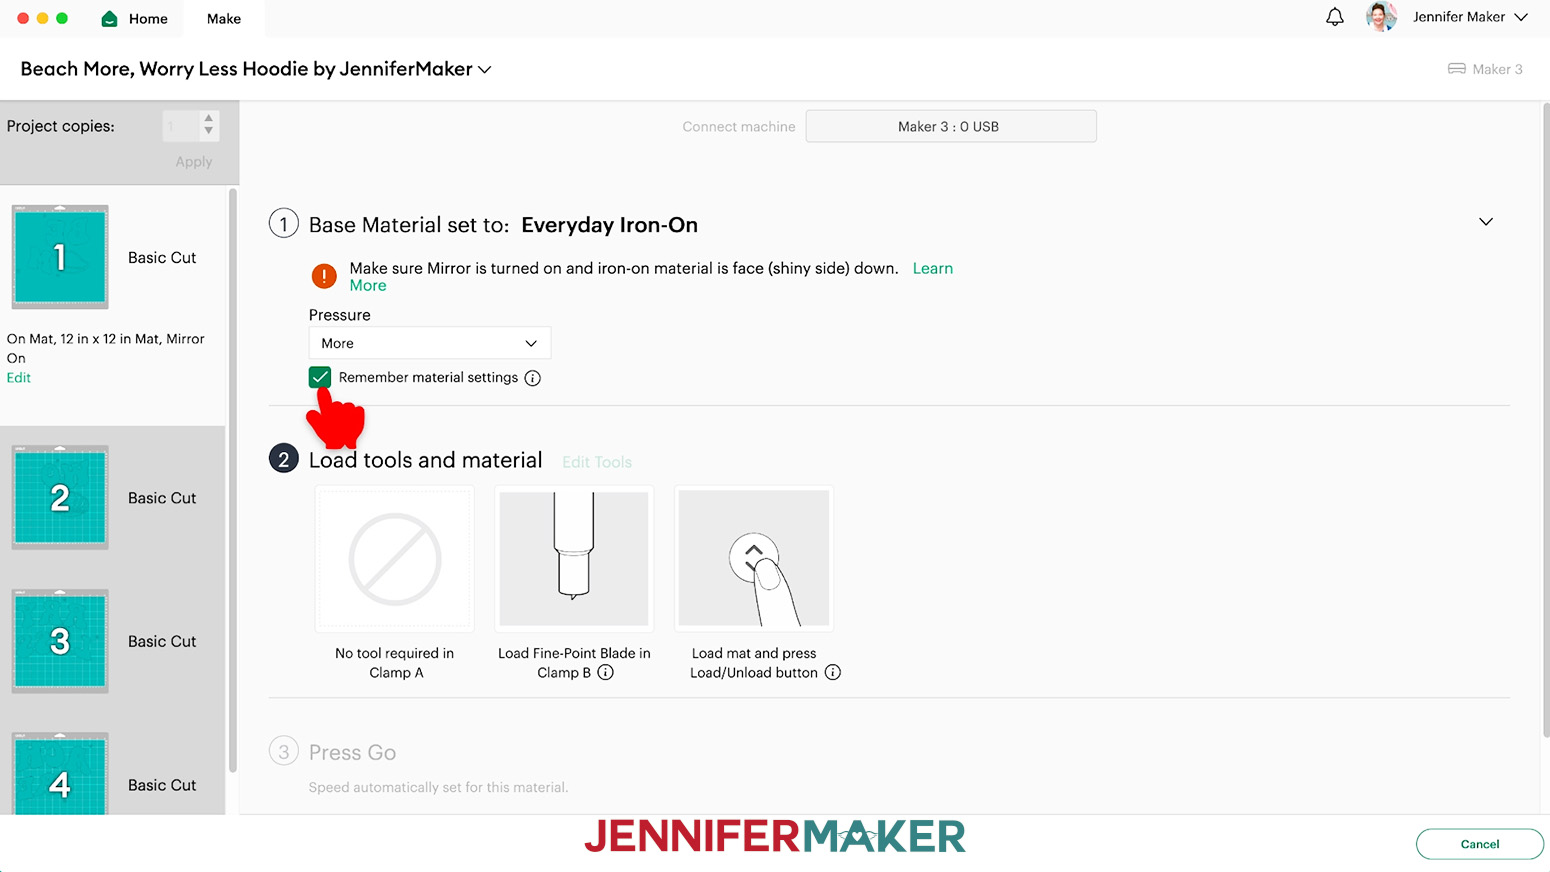
- On the Make Screen, click “Browse All Materials.”
- Search for and select the settings needed for the materials you’re using. I used "Everyday Iron-On" with “More” Pressure for my mats.
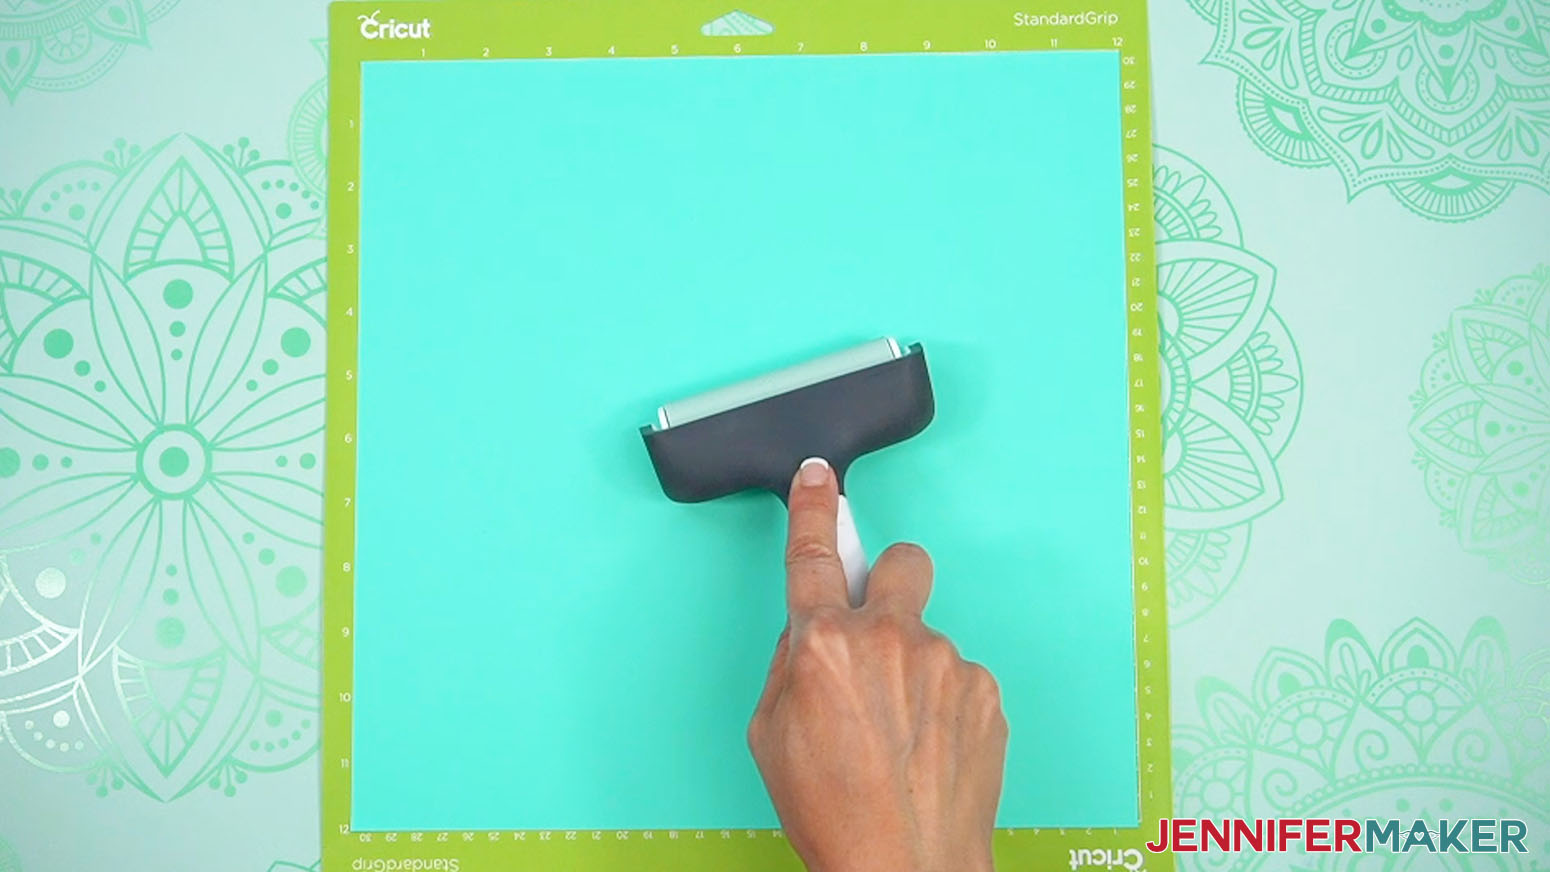
- Place your first mat’s vinyl shiny side down on a green StandardGrip machine mat so it covers the design area.
TIP: If the element doesn’t take up the entire mat, you can cut your vinyl piece slightly larger than the design area needed for each layer, instead of filling the whole mat, to save materials.
NOTE: HTV must be cut with the carrier sheet, usually the shinier side, on the mat. If you’re not sure which side is the correct cutting side, use a weeding tool to scratch a corner on each side. The one you can lift is the vinyl and needs to go face up! - Use a brayer to adhere it well.
- Check that your Fine-Point Blade is clean and in the clamp.
- Press the flashing “Load/Unload” button to load the prepared mat into your Cricut.
- Press the flashing “Go” button to begin cutting.
- When it has finished cutting, unload the mat, flip it over onto your work surface, and roll it back to release the vinyl.
- Use the same steps to prepare and cut your other layers.
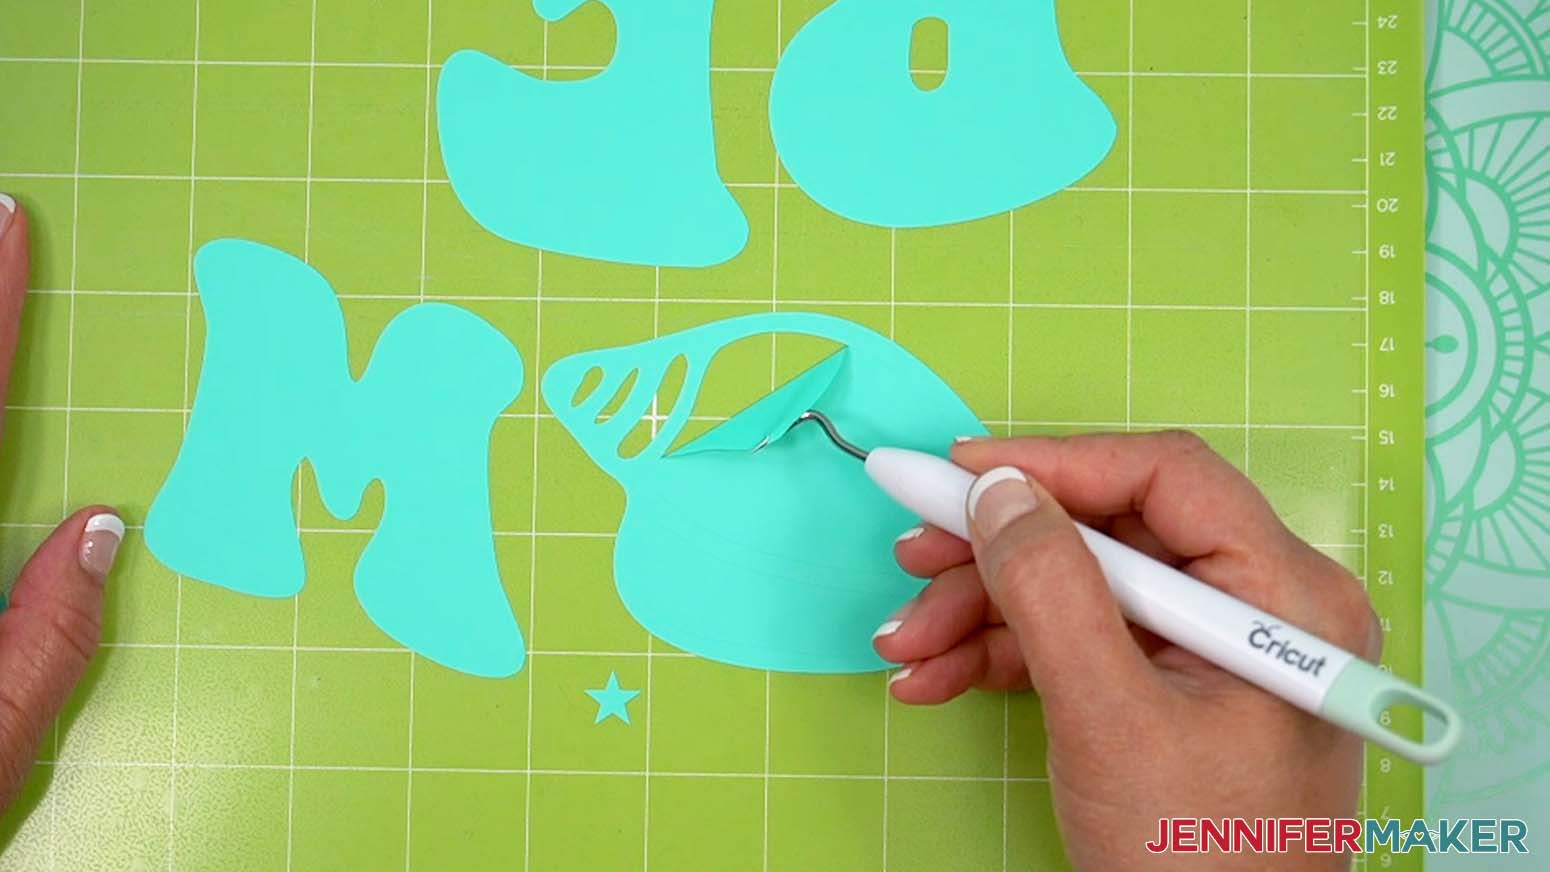
- When you’re ready to weed, use scissors to cut any elements on the same sheet apart, making sure the correct registration marks stay with each piece.
- Place the vinyl carrier sheet down on the machine mat again to keep it in place, then use a weeding tool to remove the excess vinyl starting at the edges.
TIP: Don’t forget to remove all the counters, or middles, of letters! - Repeat steps 16-17 for all layers of your iron-on vinyl design.
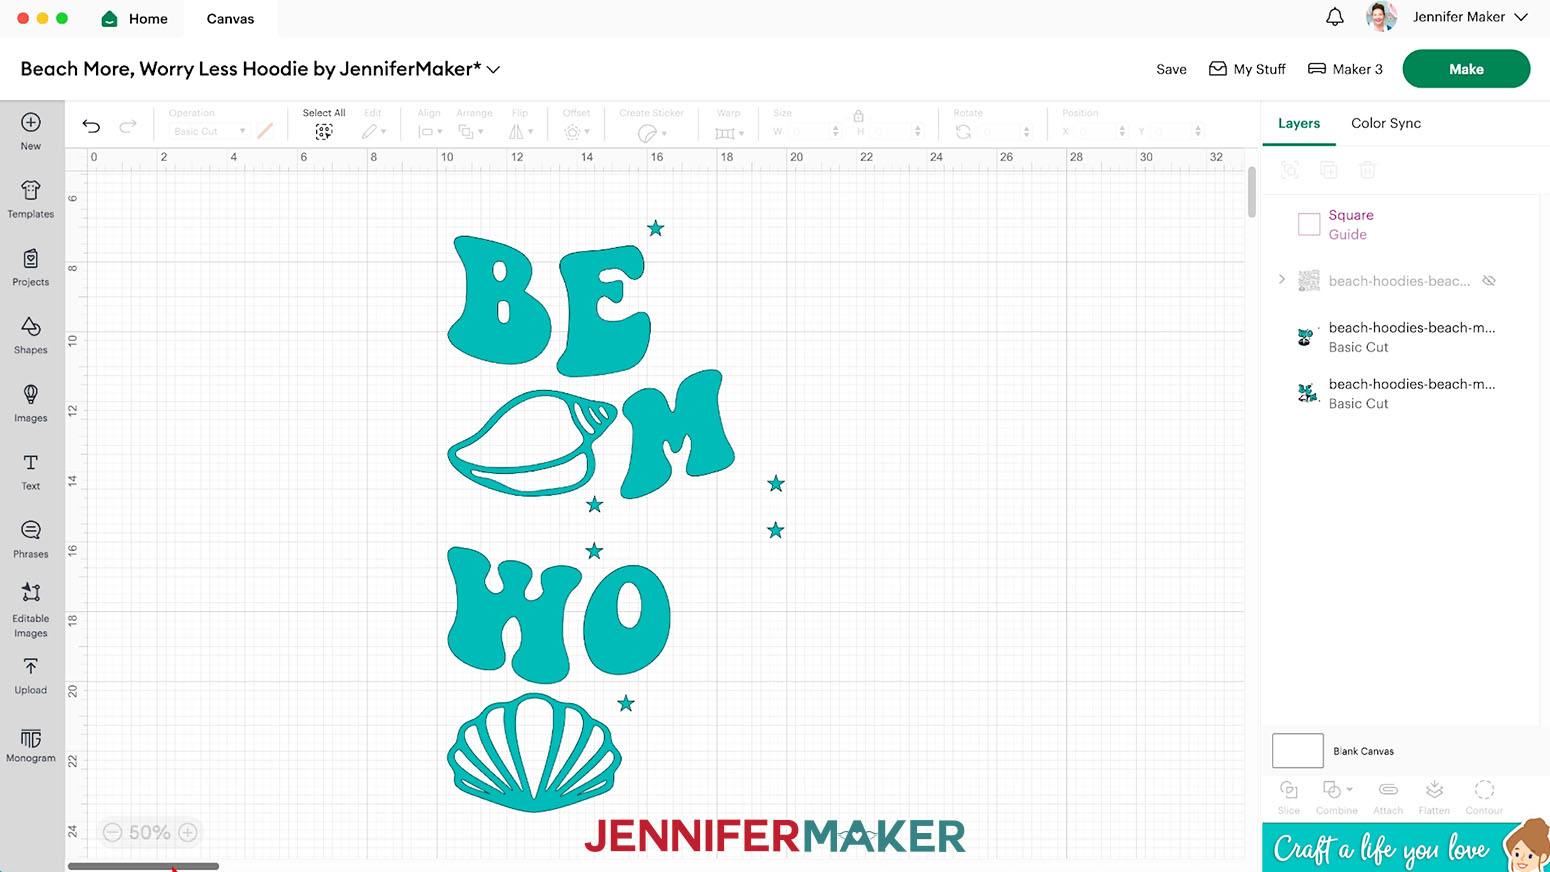
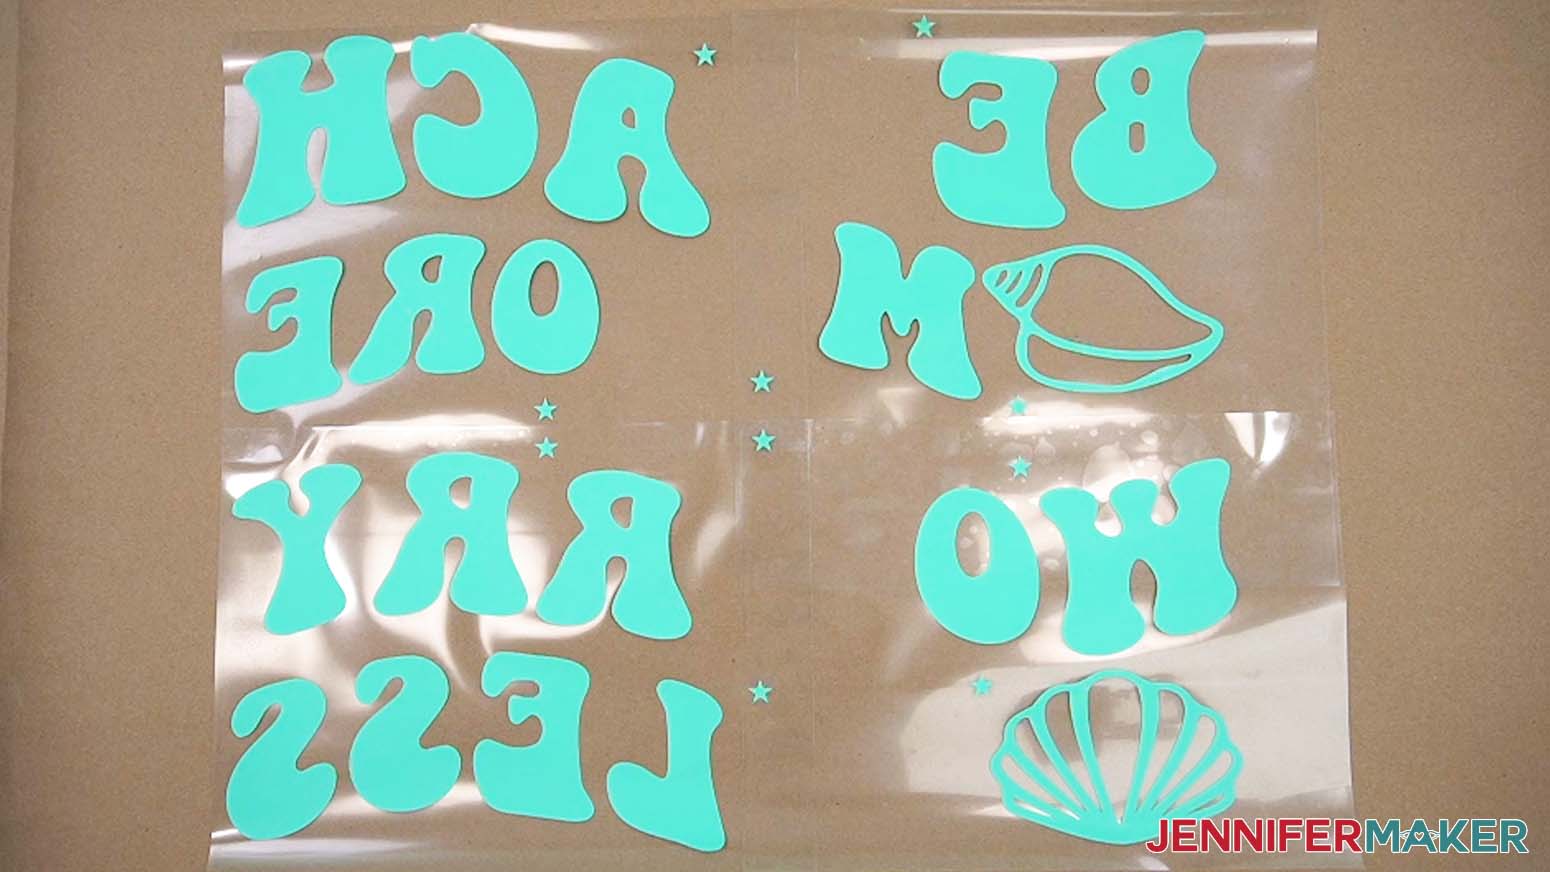
- Here are what my cut pieces for the “Beach More, Worry Less” design look like.
NOTE: Make sure all of your pieces have at least two registration marks intact.
STEP 4: TRANSFER YOUR BIG HTV DESIGN TO YOUR HOODIE
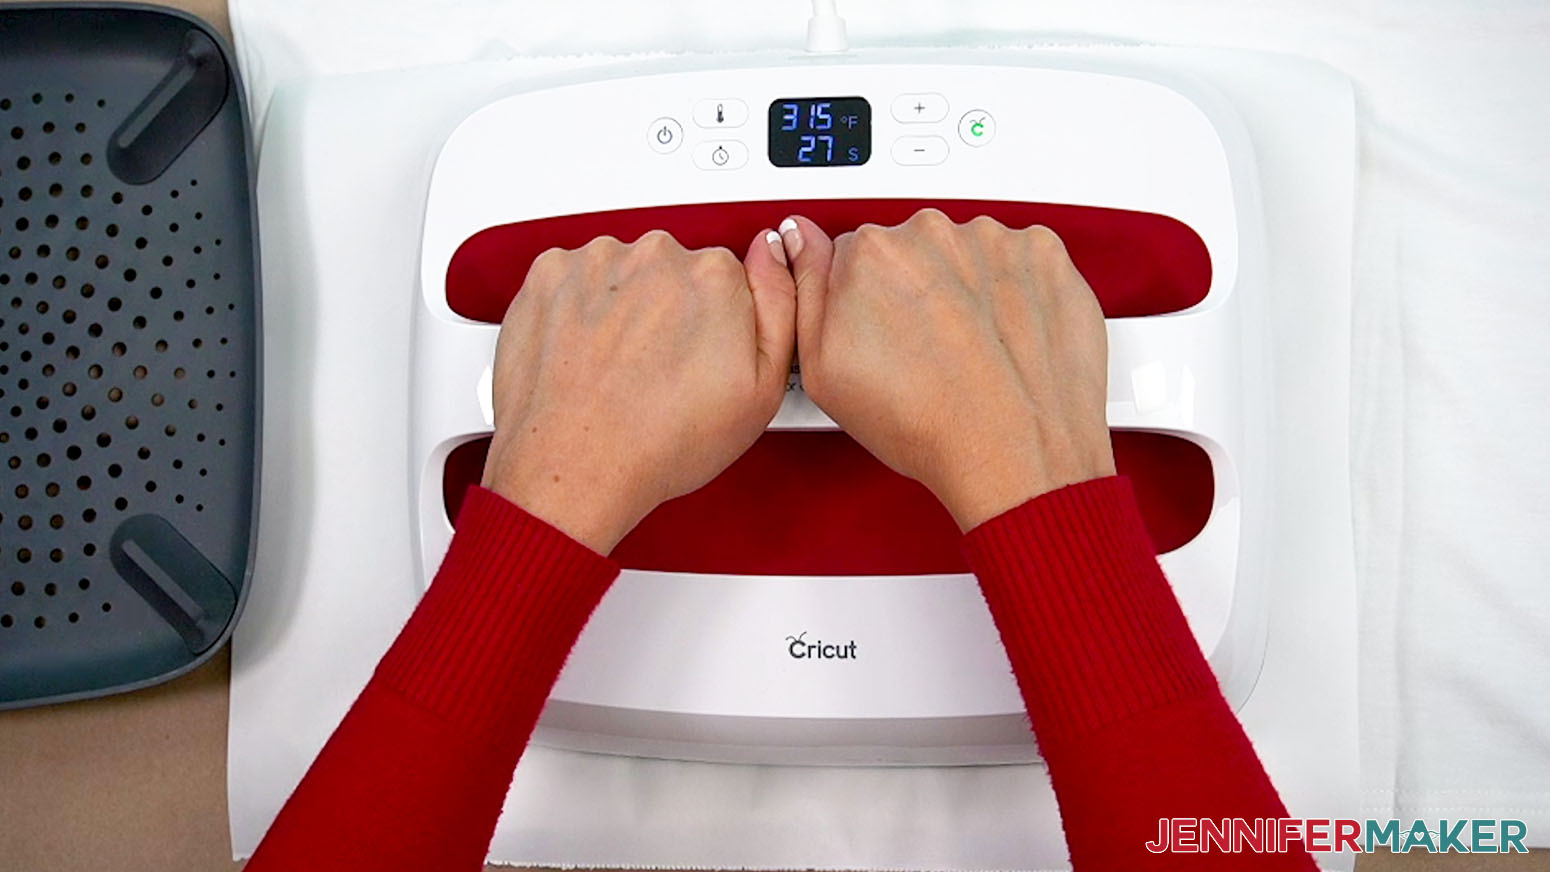
- If you’re using a Cricut EasyPress like me, set your heat press to 315° F (157° C) for 30 seconds.
- With the prepared hoodie flat on your work surface, lint roll the entire design area to remove any lint or debris that can interfere with the iron-on vinyl.
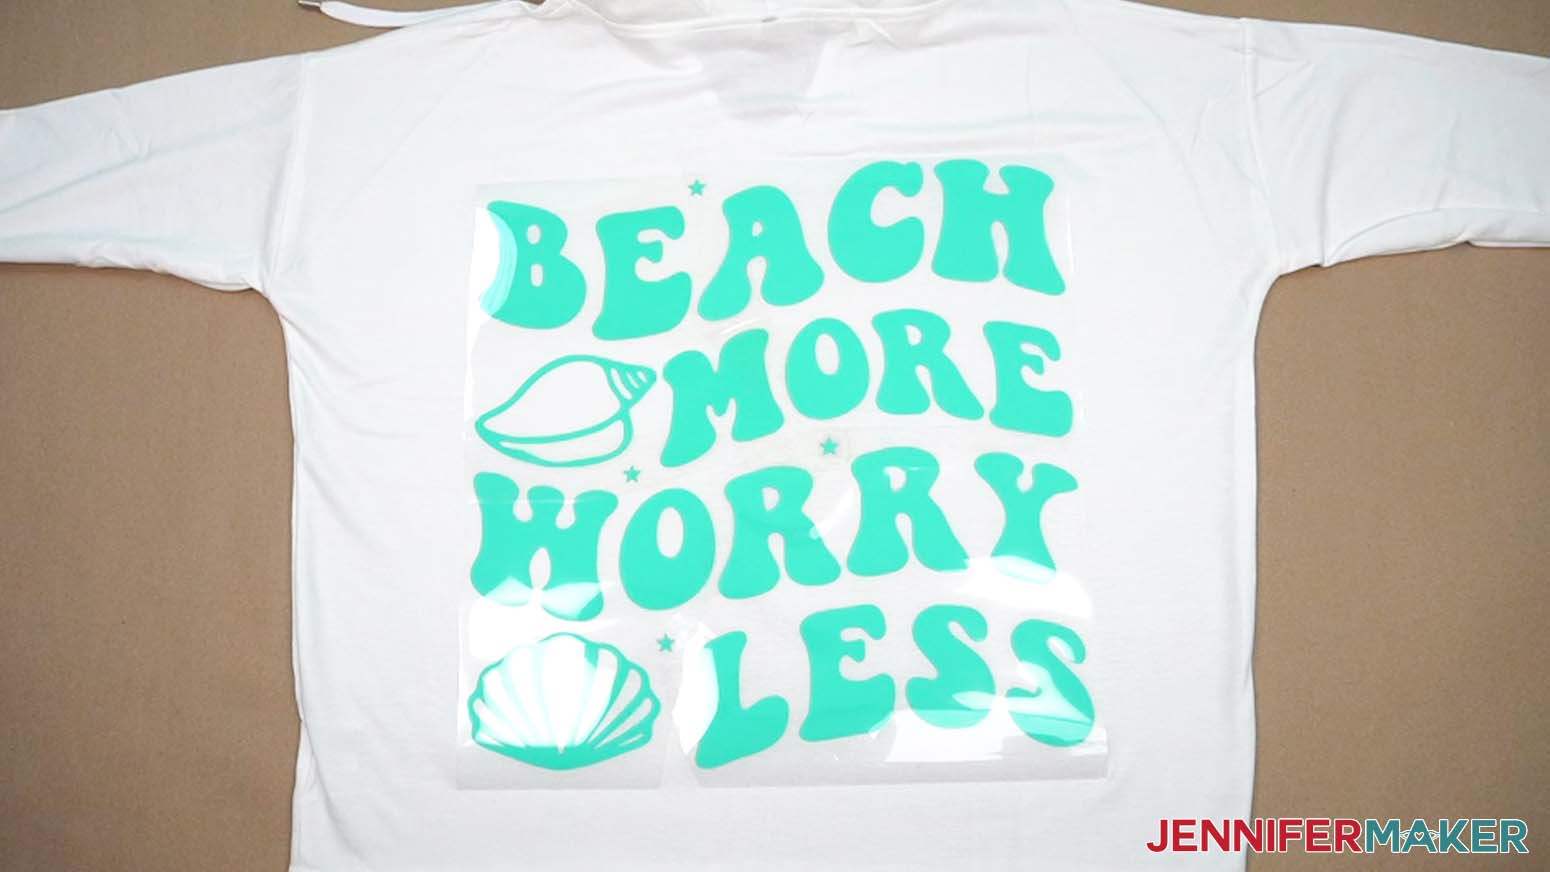
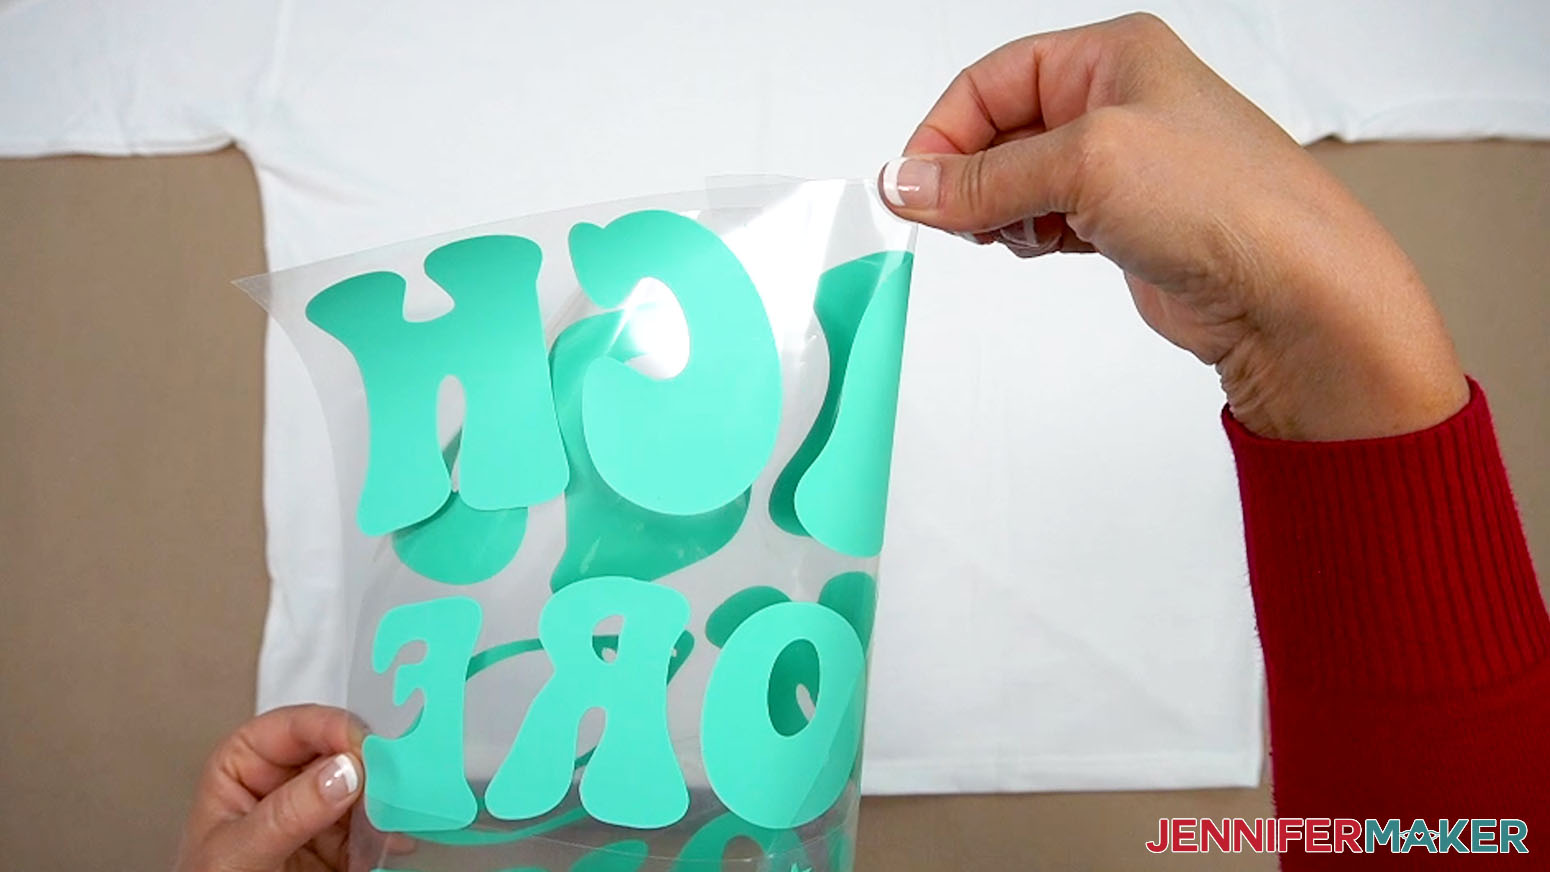
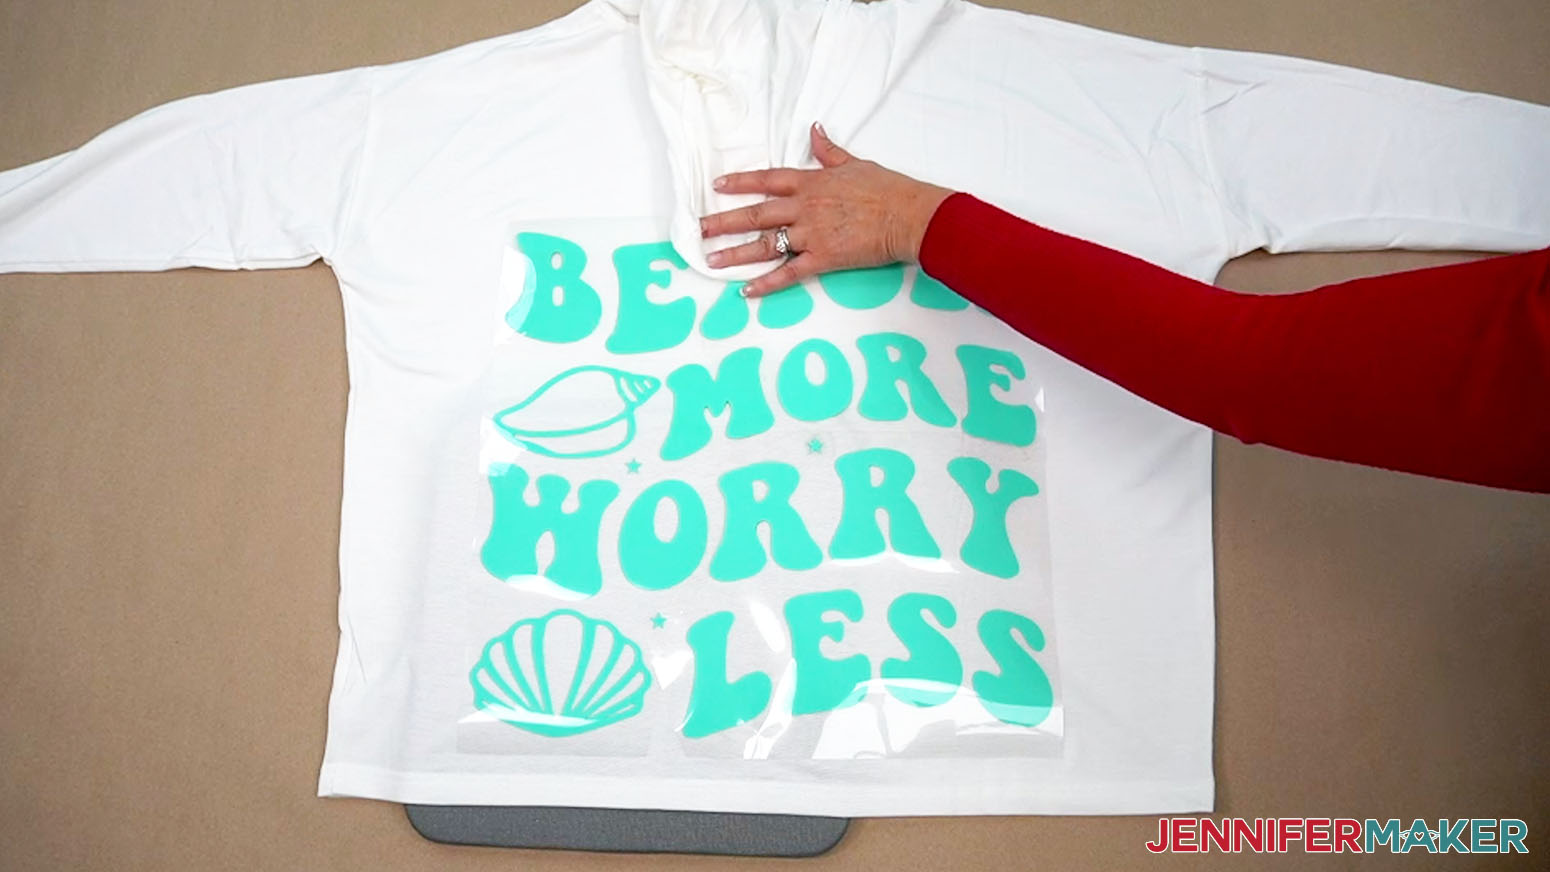
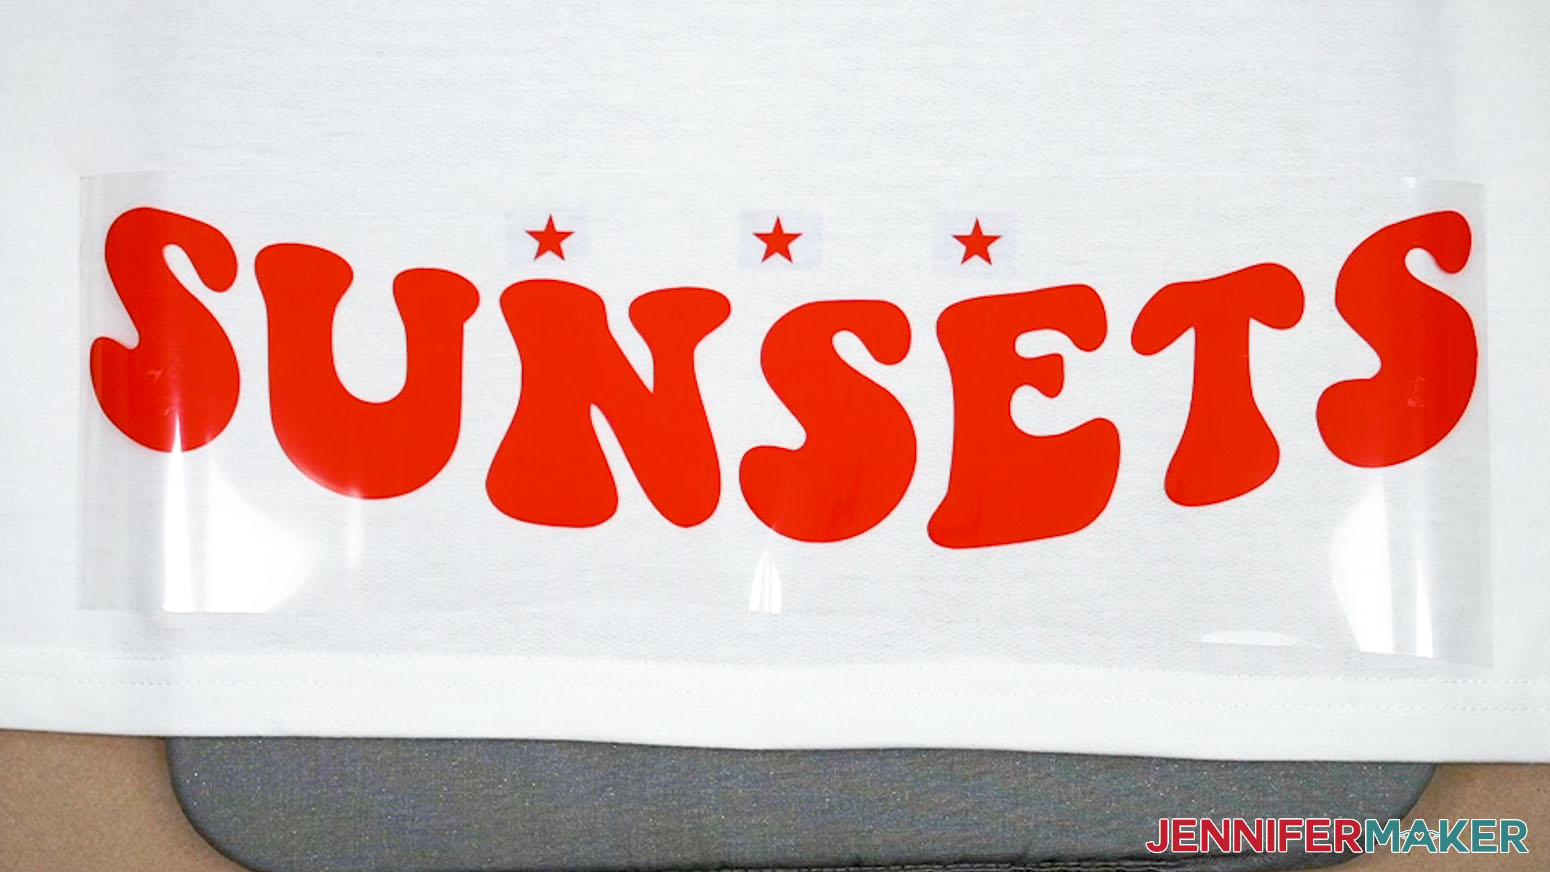
NOTE: We don’t need the layout to be perfect right now, but the clean hoodie makes a good spot to check your design. - Starting with the piece that will be at the bottom left when you’re done, gently lay the HTV elements carrier sheet up on the hoodie to make sure your design is complete and sized correctly.
NOTE: As you position pieces, use the star registration marks to get the spacing and alignment correct. - Once everything is aligned, gently lift the assembled vinyl using the carrier sheet.
- If the empty carrier sheet is much larger than the design or too uneven, trim away the extra.
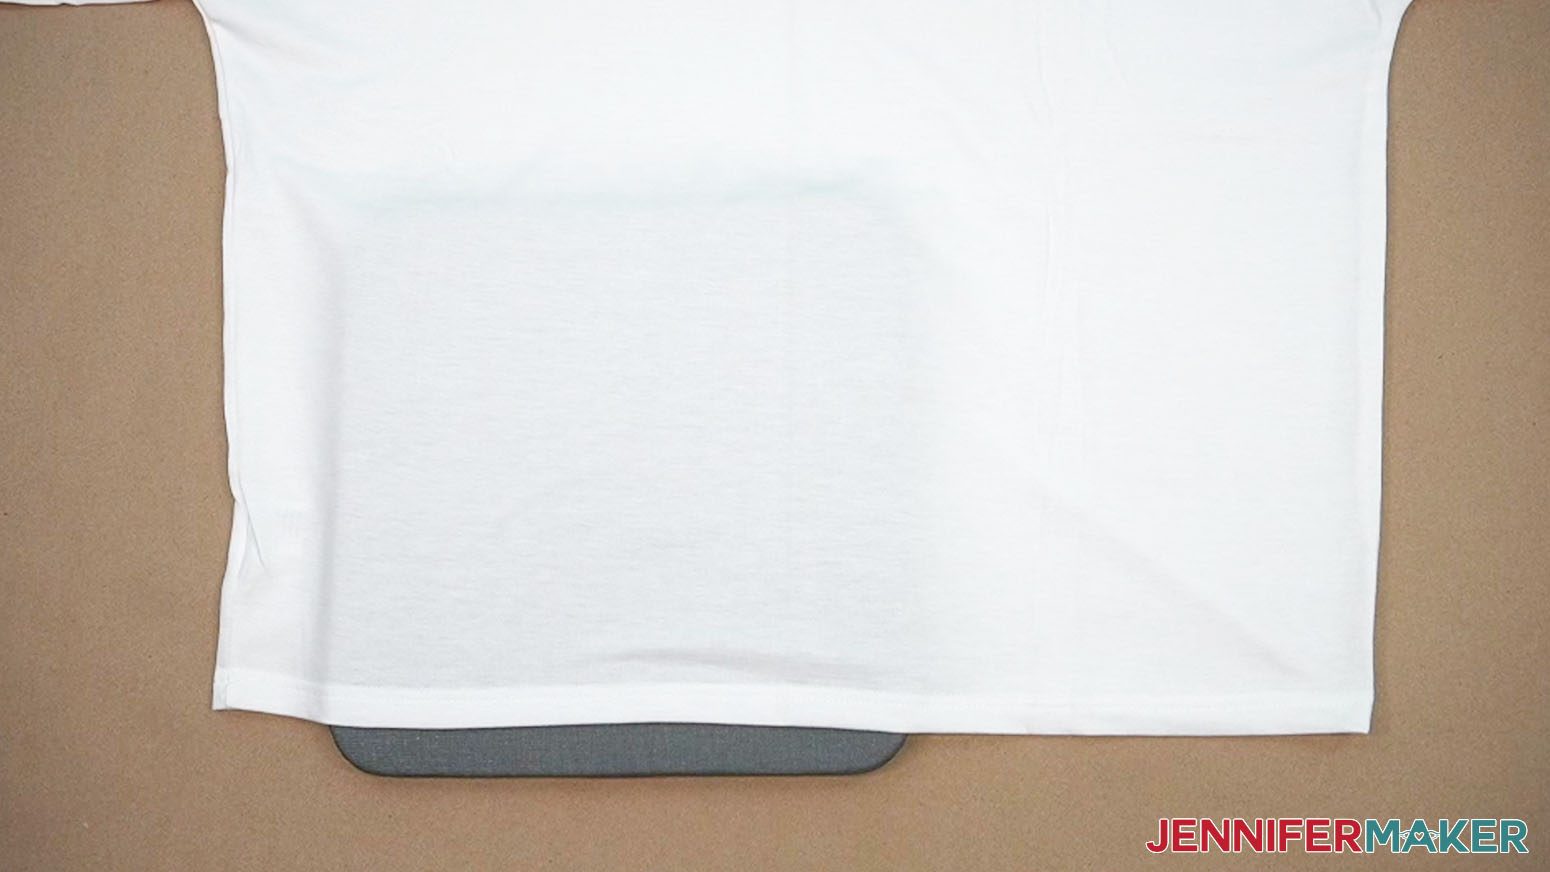
- Place your pressing pad inside the hoodie so the lower left section where your design will start is flat.
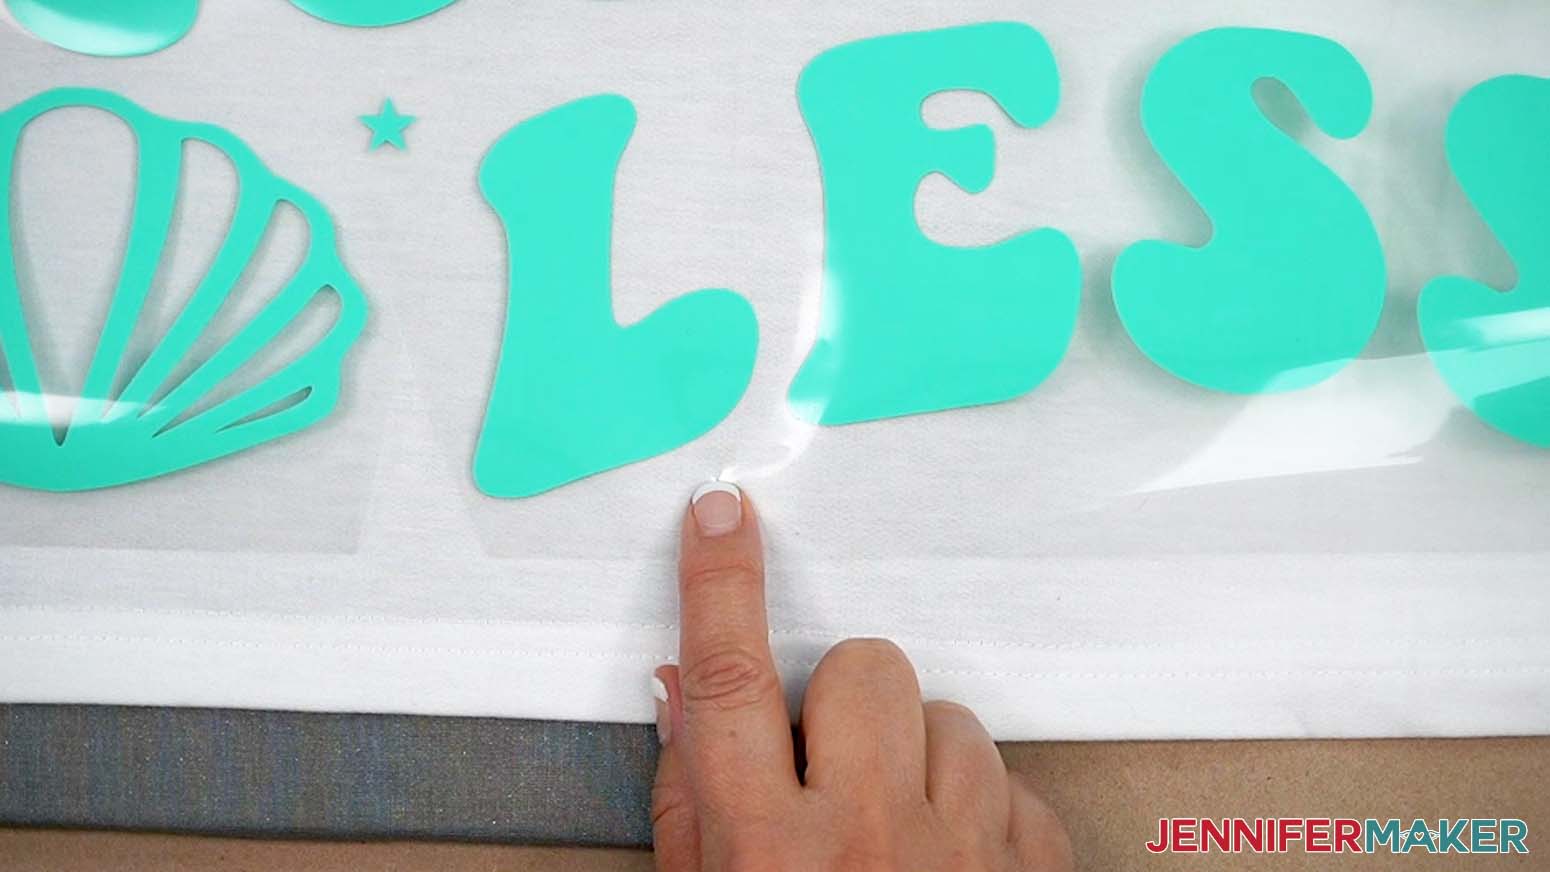
TIP: Keep the pressing pad at least 1” away from seams so it can raise the fabric up to create a flat surface. - On the hoodie’s crease, use a ruler to measure up from the bottom to find where you want the design to start and make a small indent with your finger.
NOTE: I wanted the design to start 1” up from the bottom hem. - Grab the assembled design and hold it sticky side down. Carefully fold its long edges up and together, lining up the vinyl instead of the carrier sheet, to find the middle of the design.
- Crease the very top and bottom edges of the carrier sheet to mark the design’s vertical middle.
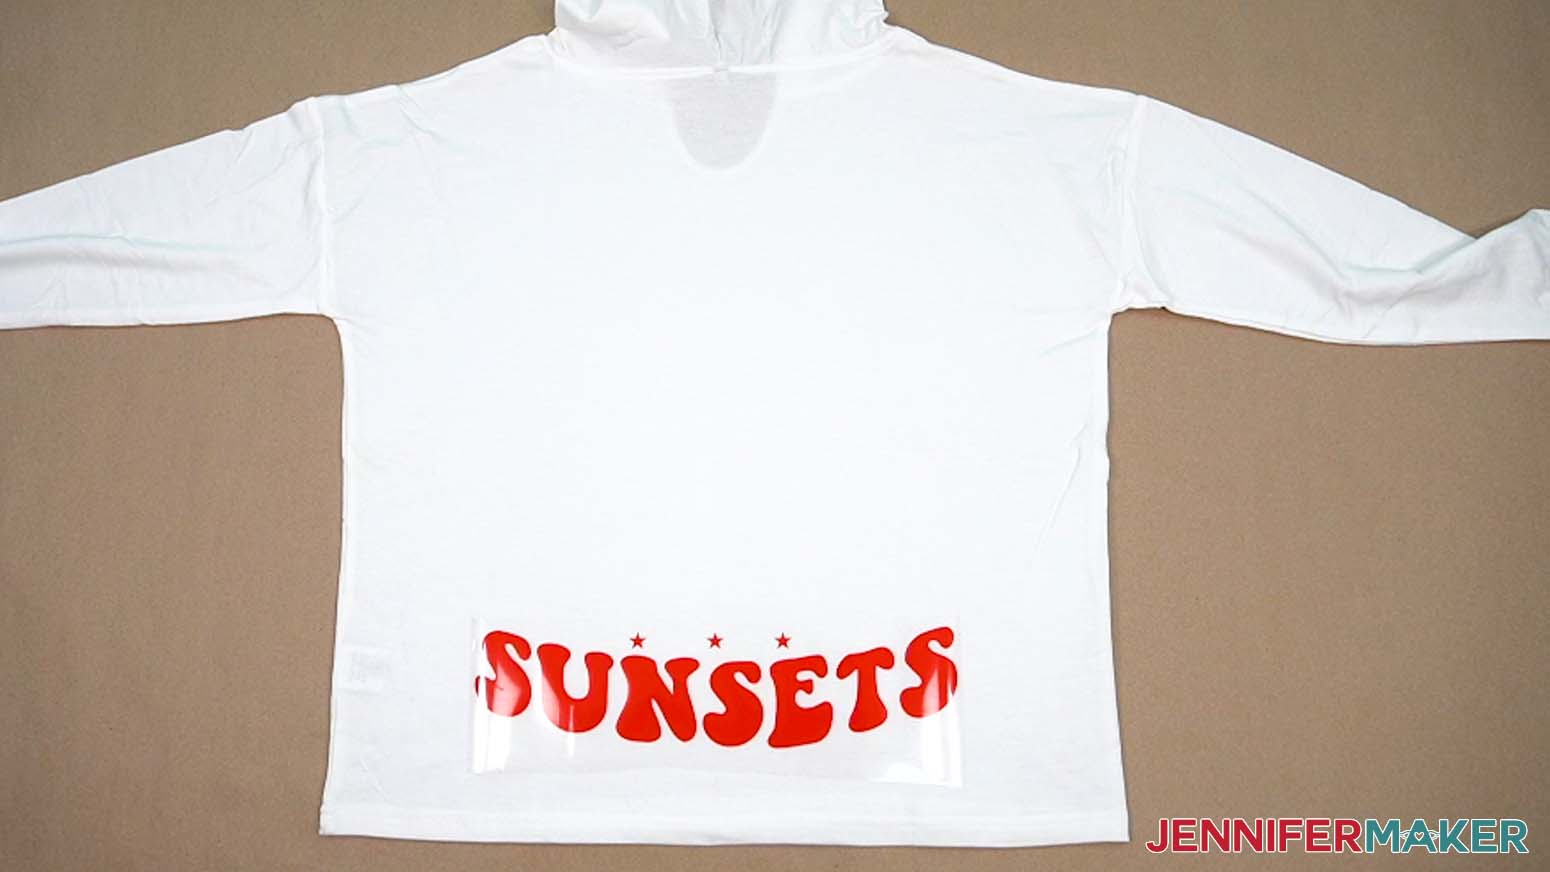
NOTE: Don’t crease the vinyl or it may get wrinkled. - Align the vertical creases and the bottom of the design on that mark to lightly position your design, sticky side down.
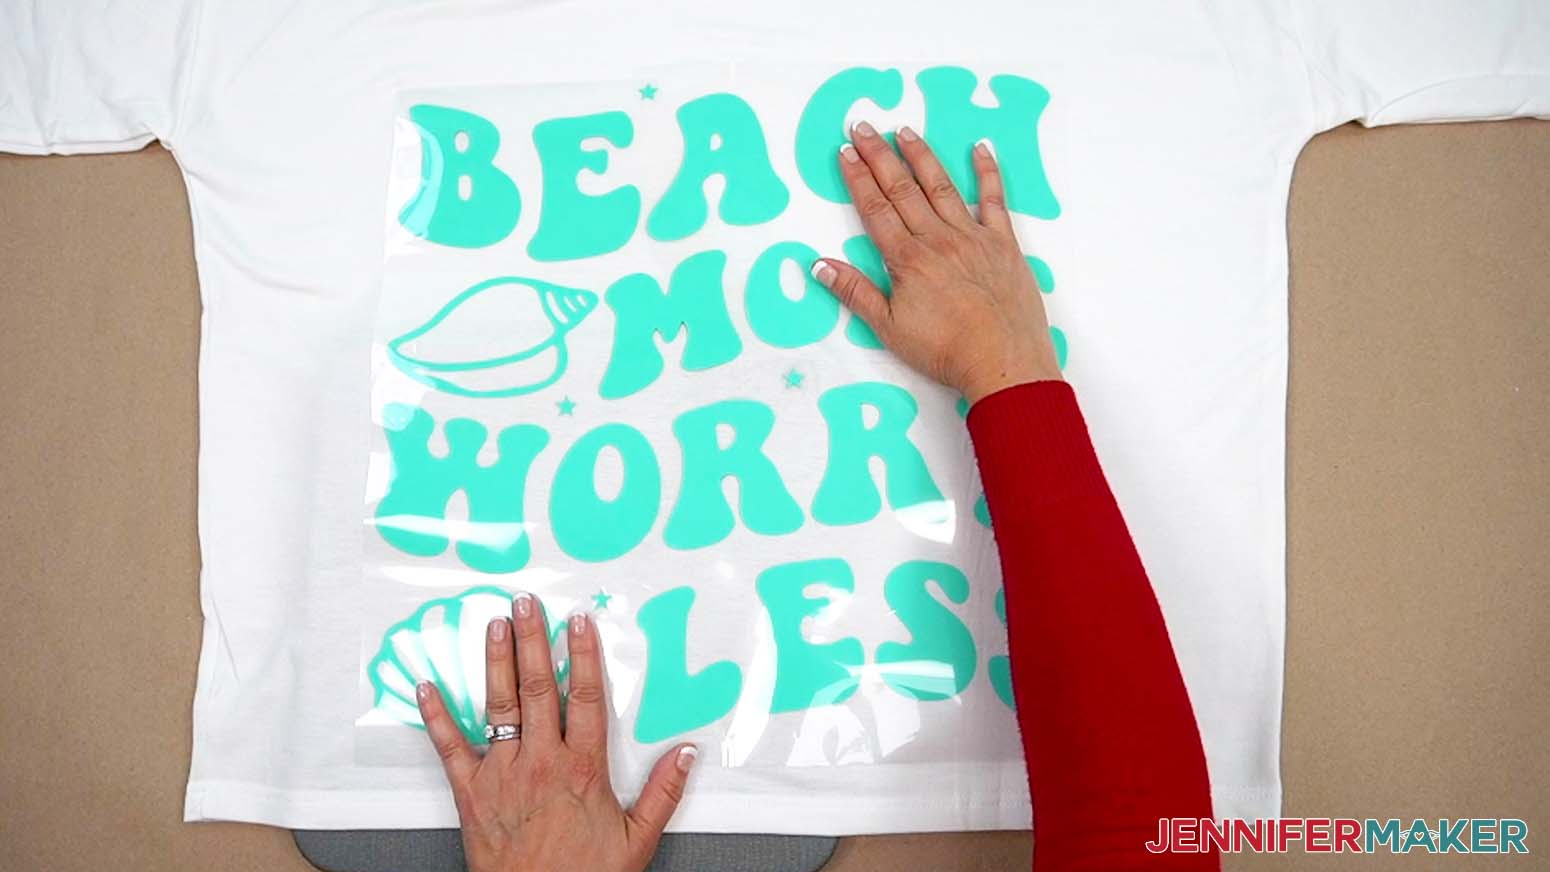
- Once the bottom is positioned correctly, hold it in place and use your other hand to gently smooth the rest of the design into position on the hoodie, making sure the creases match at the top.
TIP: Smooth the fabric as you go to keep wrinkles from moving your design. - Make sure you like the design’s positioning by bringing the hood down to see how much it will cover. You can gently lift and reposition the design if you like because only the carrier sheet is sticky, not the vinyl.
- Once you’re happy with the design, press down firmly on the bottom left piece to make sure it will stay in place, then gently remove the rest of the pieces.
TIP: Try not to shift or stretch the fabric while you remove the pieces.
NOTE: As long as this piece presses in the right spot and we use the registration marks correctly, the others will be positioned correctly. - If you don’t want the registration marks to transfer, carefully peel up just enough carrier sheet to access one, and add heat-resistant tape to cover it. Make sure the tape’s STICKY side touches the fabric. Don’t let the tape touch any other vinyl design elements.
- Then press the first design back in place to maintain the position.
- Make sure the pressing pad is under the entire first design section.
- Cover the project with clean butcher paper to protect the fabric from extra heat, and the press from any unprotected vinyl later on.
- Carefully place your heat press on the project, with the design element centered underneath.
- Press the HTV for 30 seconds with heavy pressure.
NOTE: If the design is larger than your press, press it in sections with a tiny overlap to make sure you press the design all evenly for the correct time. - When the time is up, carefully lift the heat press and return it to its base since it is still very hot.
- Remove the butcher paper and let the HTV sit until the carrier sheet is cool to the touch.
- Press down on the carrier sheet over each registration mark to make sure the heat-resistant tape is really secure to the fabric so they won’t shift.
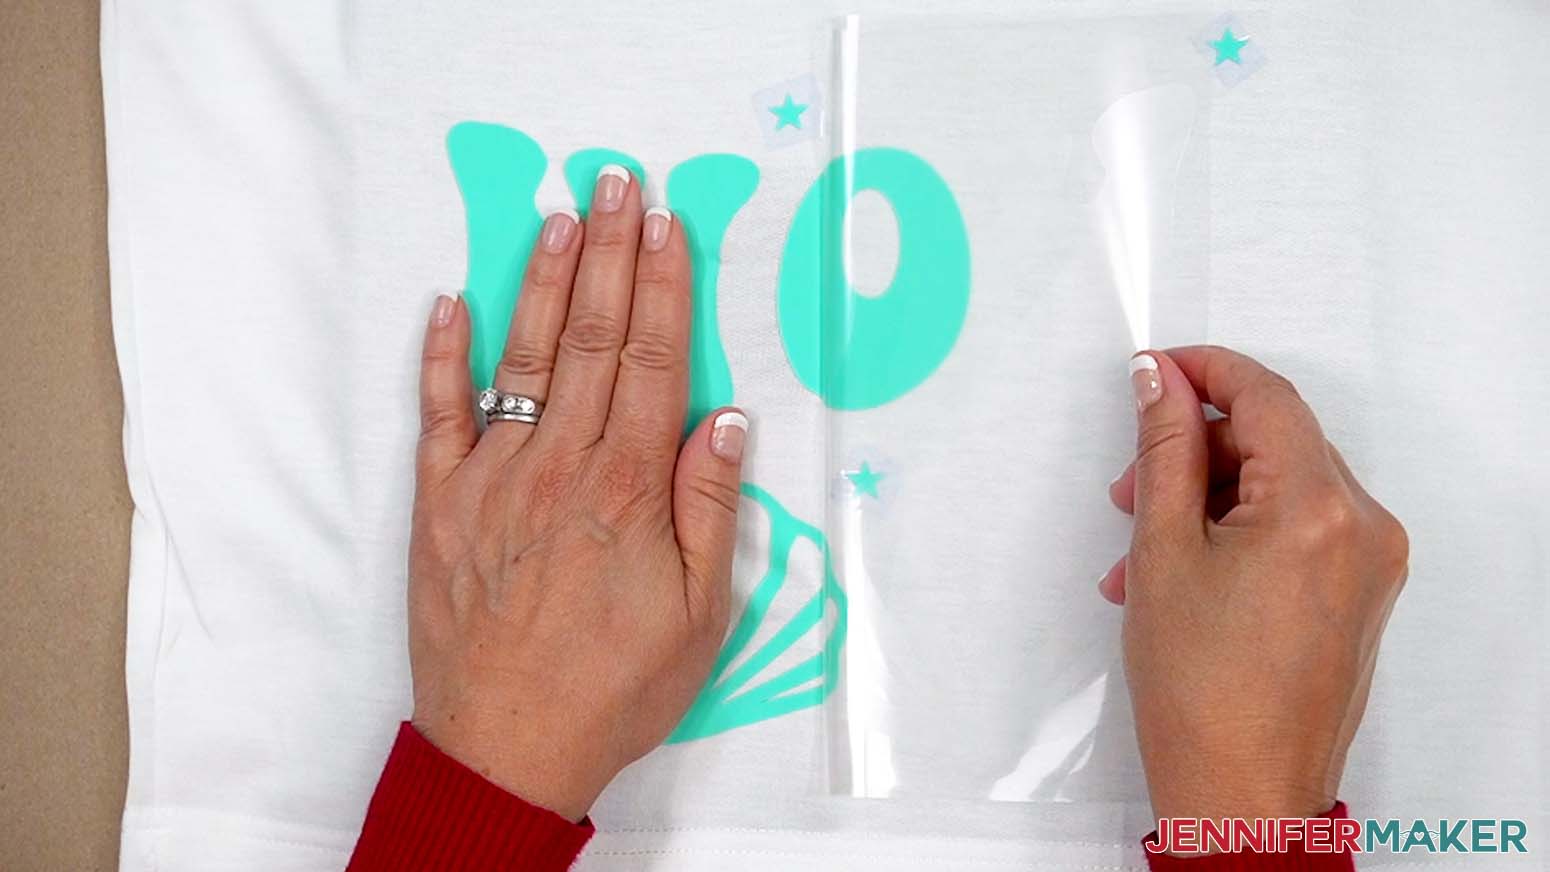
- Then hold the fabric in place and slowly peel up the carrier sheet in a smooth motion.
NOTE: Leave the star registration marks in place to help align the other layers.
TIP: If any design pieces didn’t completely bond to the fabric, cover them with the empty carrier sheet and try heating them again, keeping the press away from the sheet’s edges so it doesn’t imprint the vinyl. - If the registration stars look like they lifted at all, refer to your Cricut Design Space window to make sure the points are in the original orientation and press them back down with your fingers.
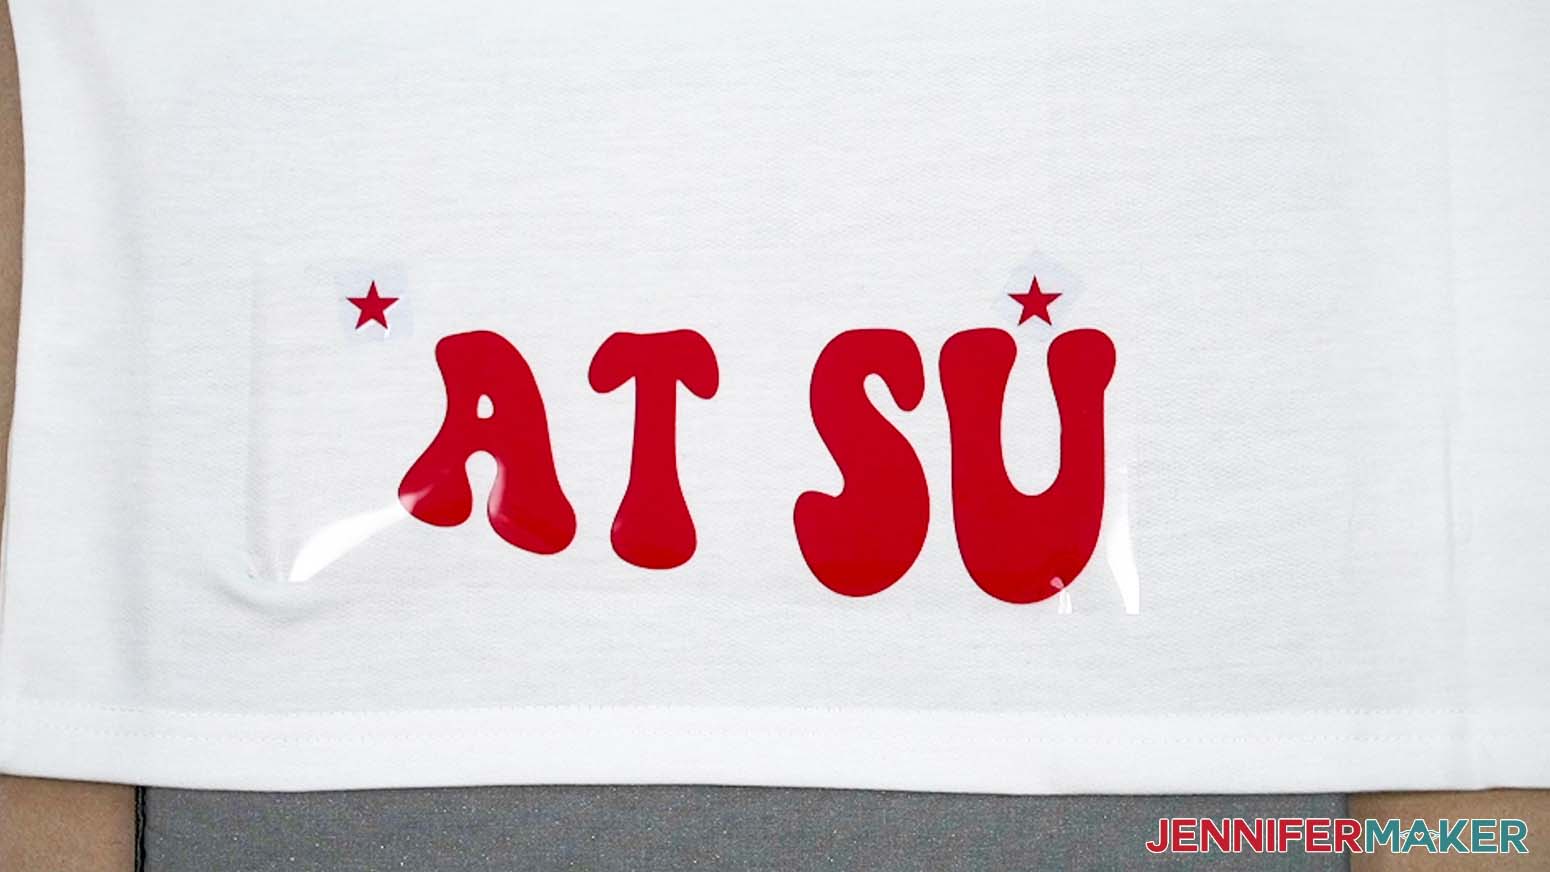
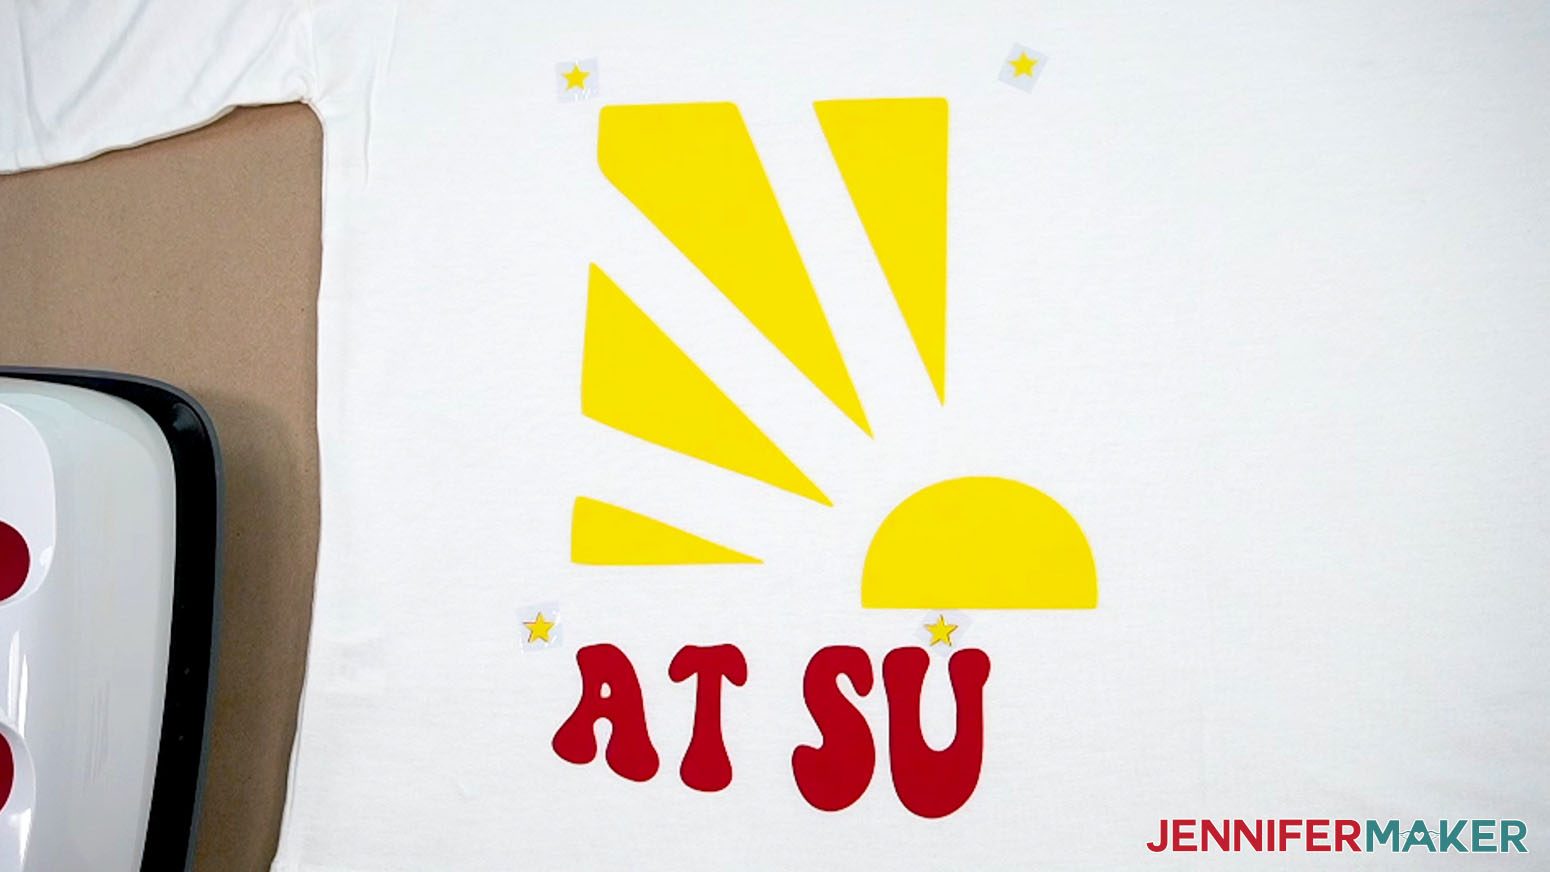
- Use the stars to align the next section of the design sticky side down and press it in place with your fingers.
TIP: If one star shifted, use the points from the other one and the elements will still be in the right spot. - If you don’t want any new stars to transfer, remember to add heat-resistant tape underneath them.
- Without shifting the fabric much, move the pressing pad so it’s under the new design area.
- Make sure your heat press won’t touch any uncovered vinyl when you press the new area. If it will, use pieces of used carrier sheet to protect the existing vinyl.
- Cover the project with butcher paper and press the new section for 30 seconds of heavy pressure.
- Follow Steps 17-22 to complete the new section.
- Continue placing and pressing the design’s sections until everything is in place and secure.
- If you used heat-resistant tape to keep the registration marks from transferring to the hoodie, peel it up to remove them.


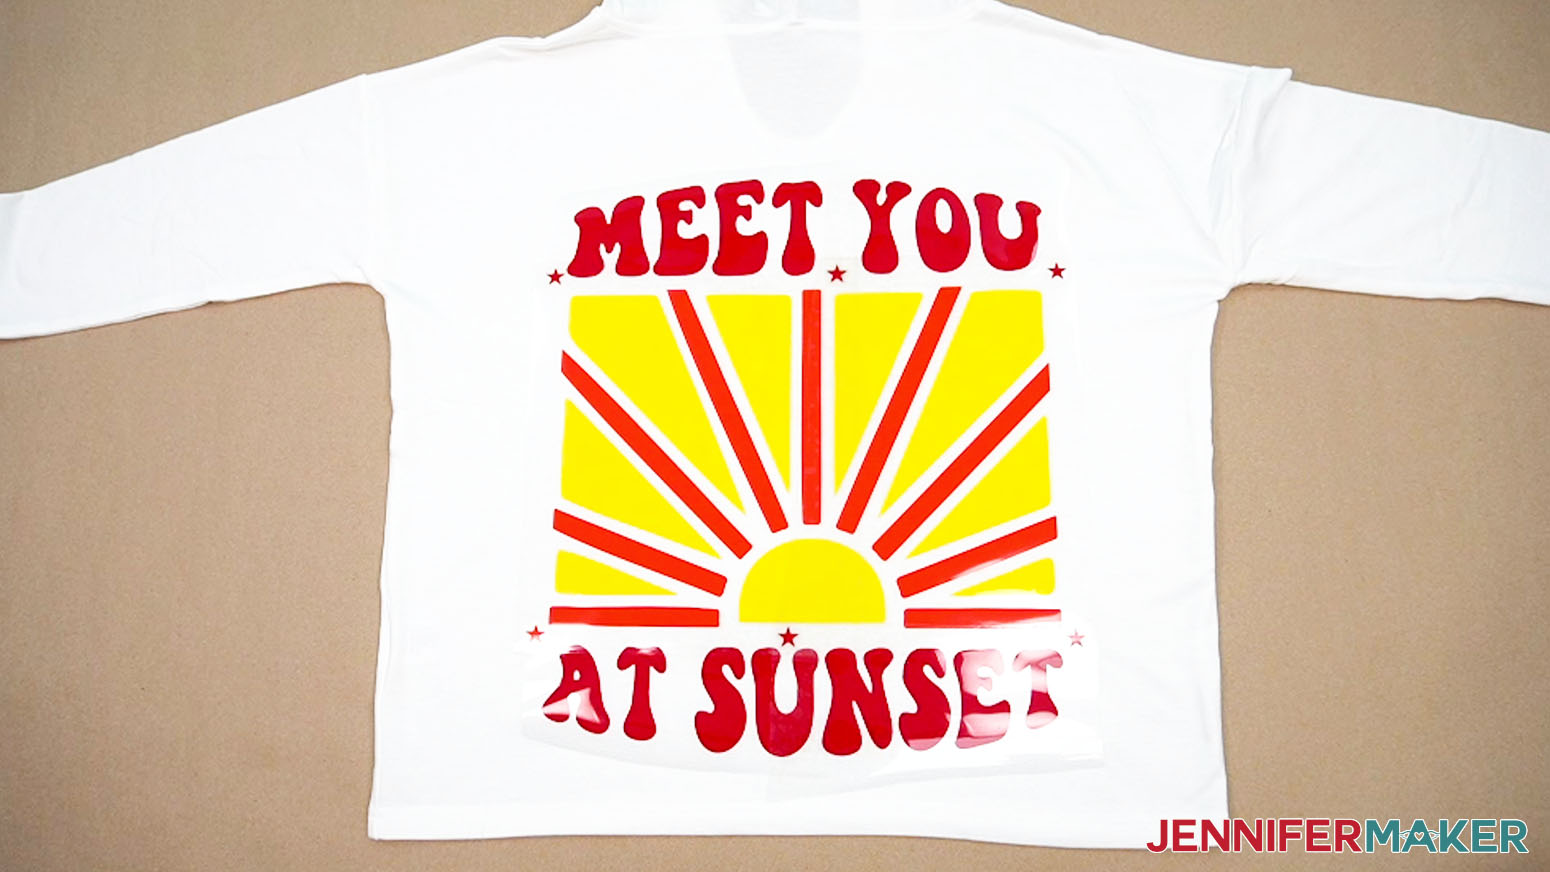
VARIATION 1: “MEET YOU AT SUNSET” BIG HTV DESIGN
CRICUT DESIGN SPACE
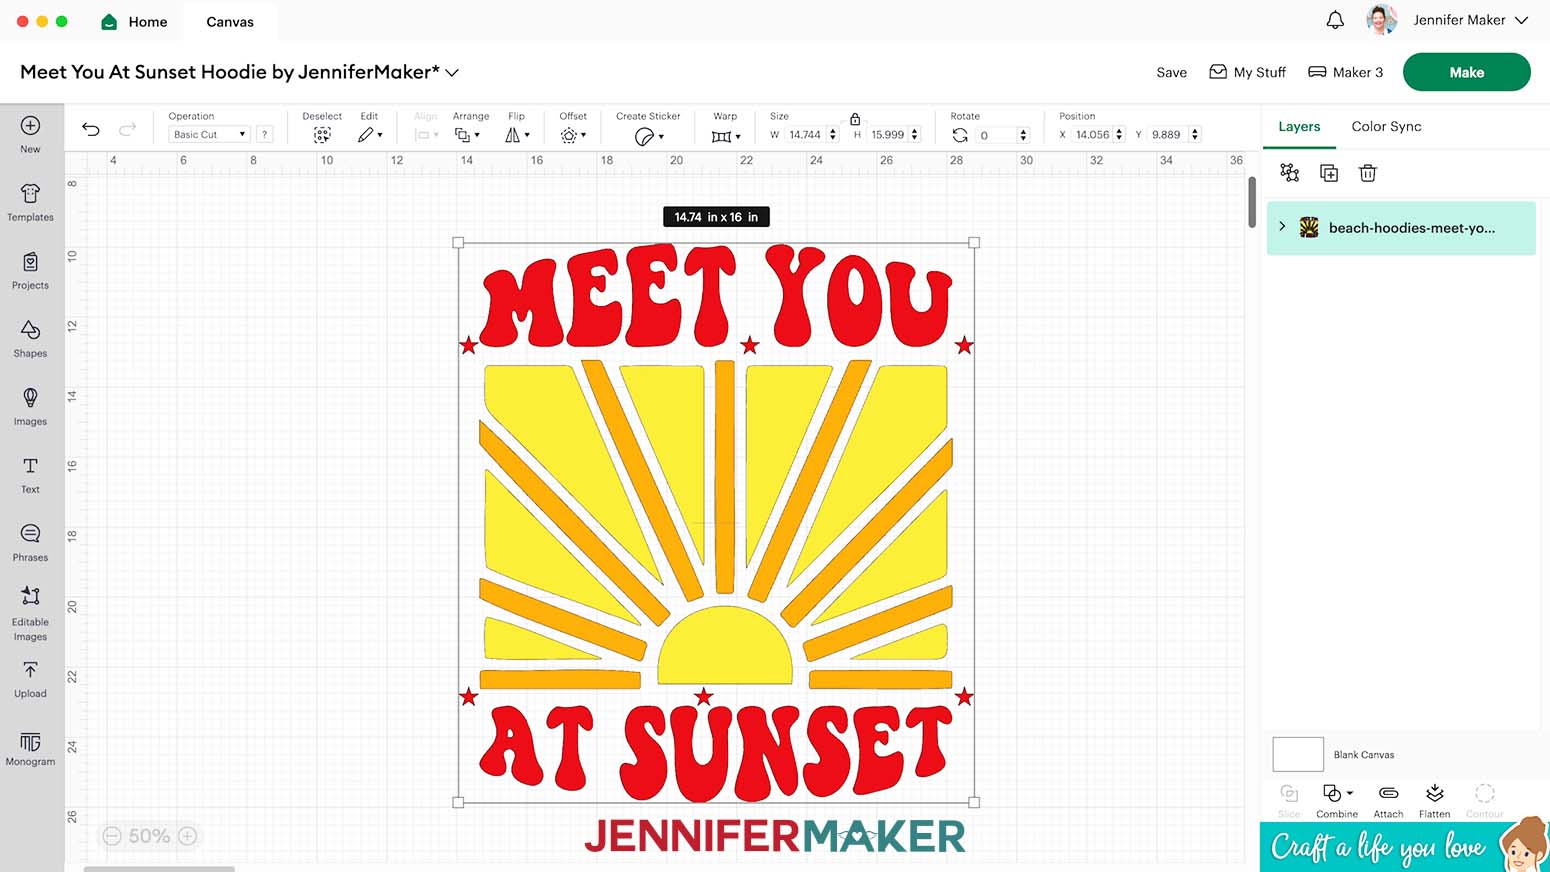
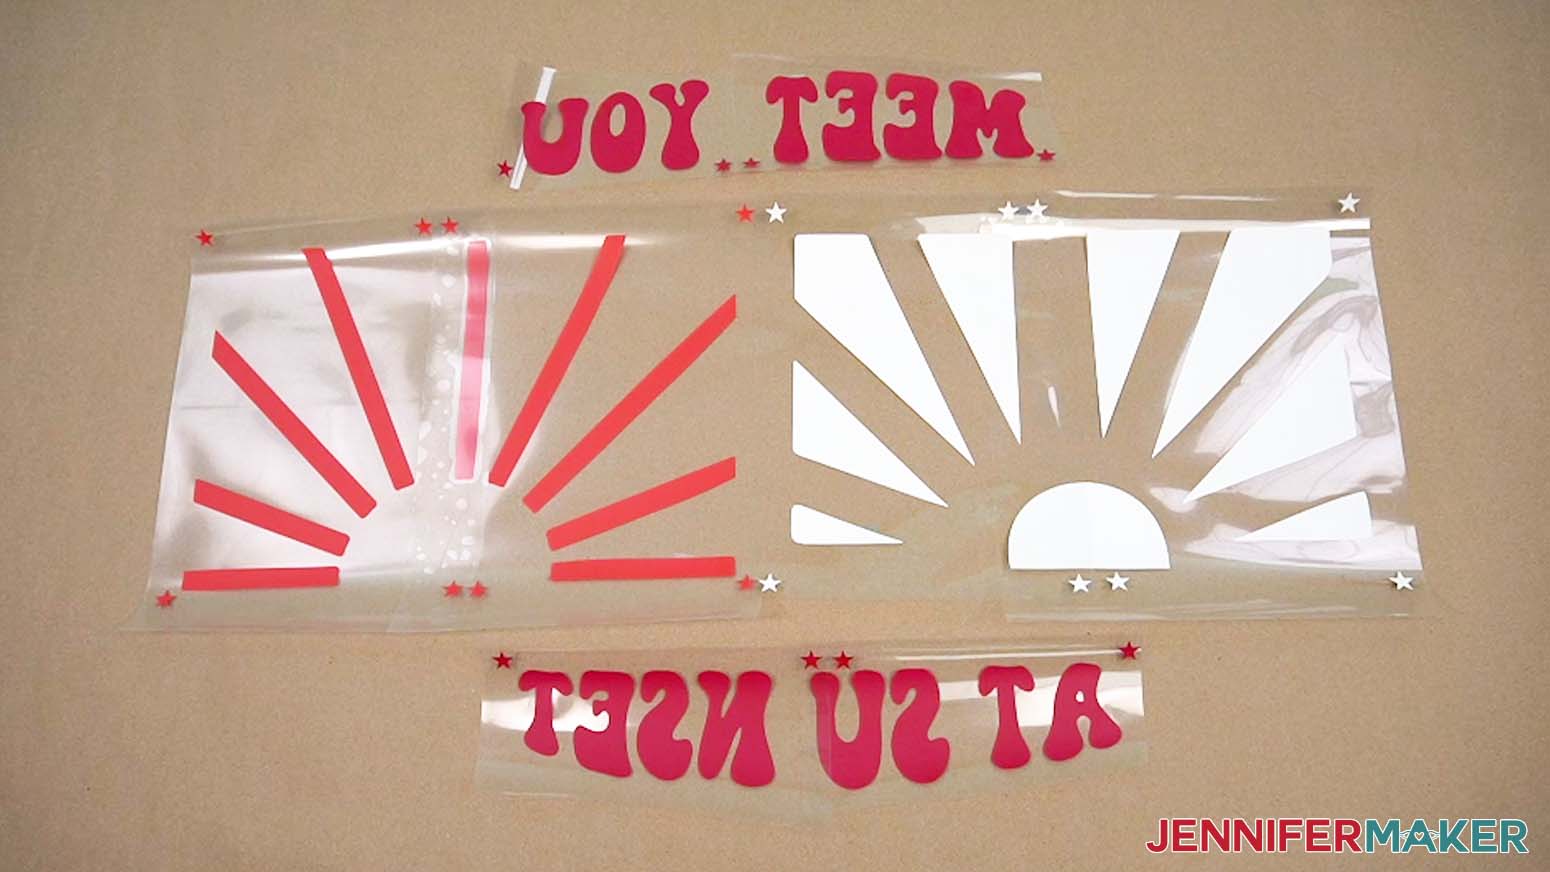
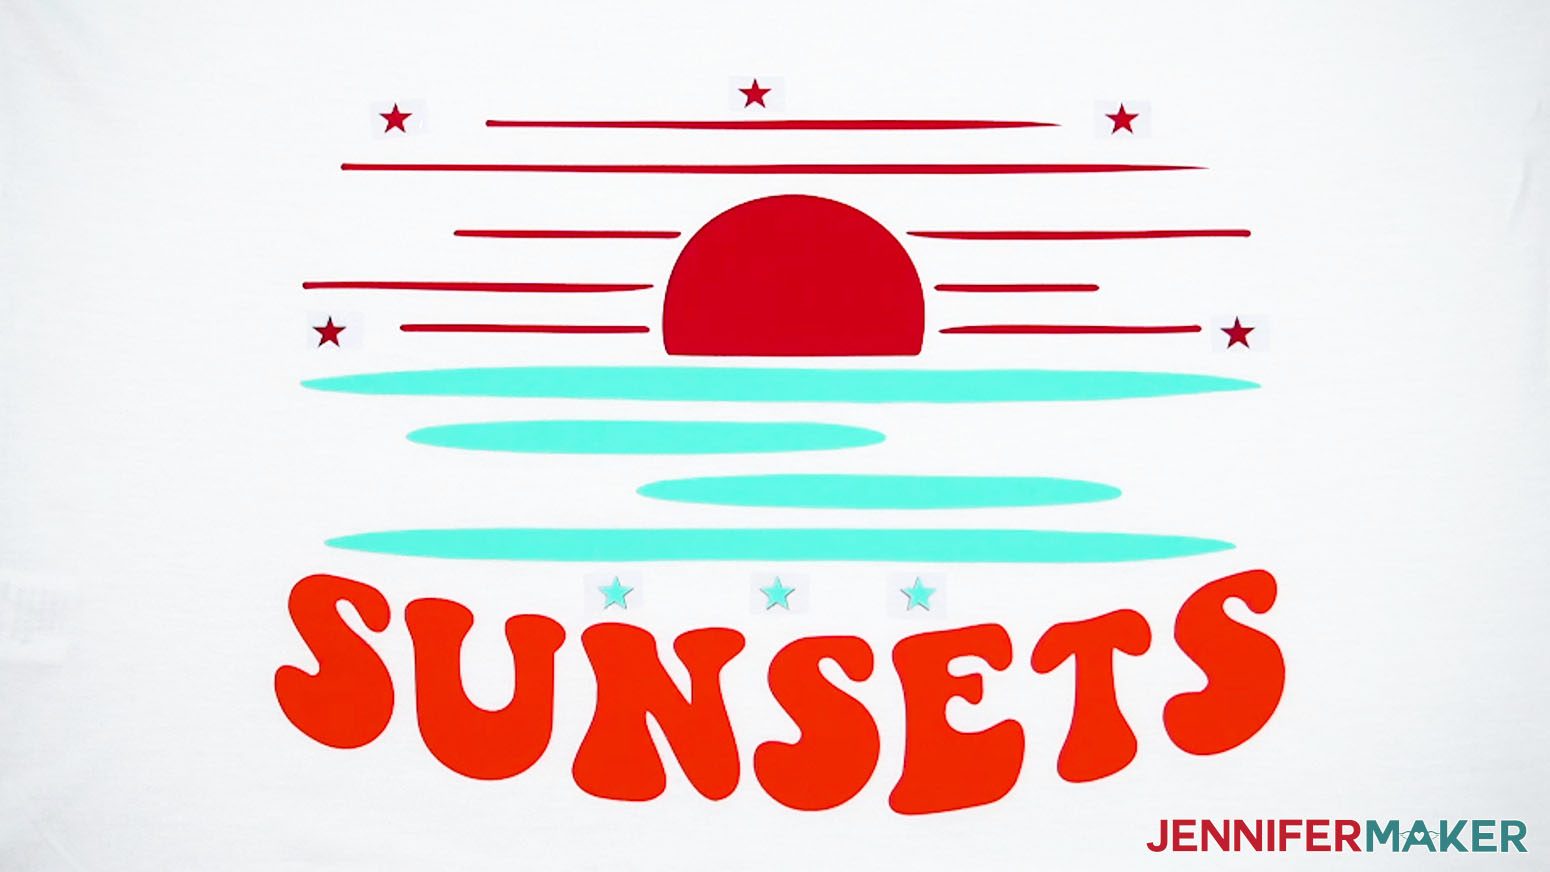
- Here’s what my “Meet You At Sunset” design looks like uploaded to my Canvas.
NOTE: This design is sized to fit a Large hoodie. - Follow the “Beach More, Worry Less” tutorial to prepare your design.
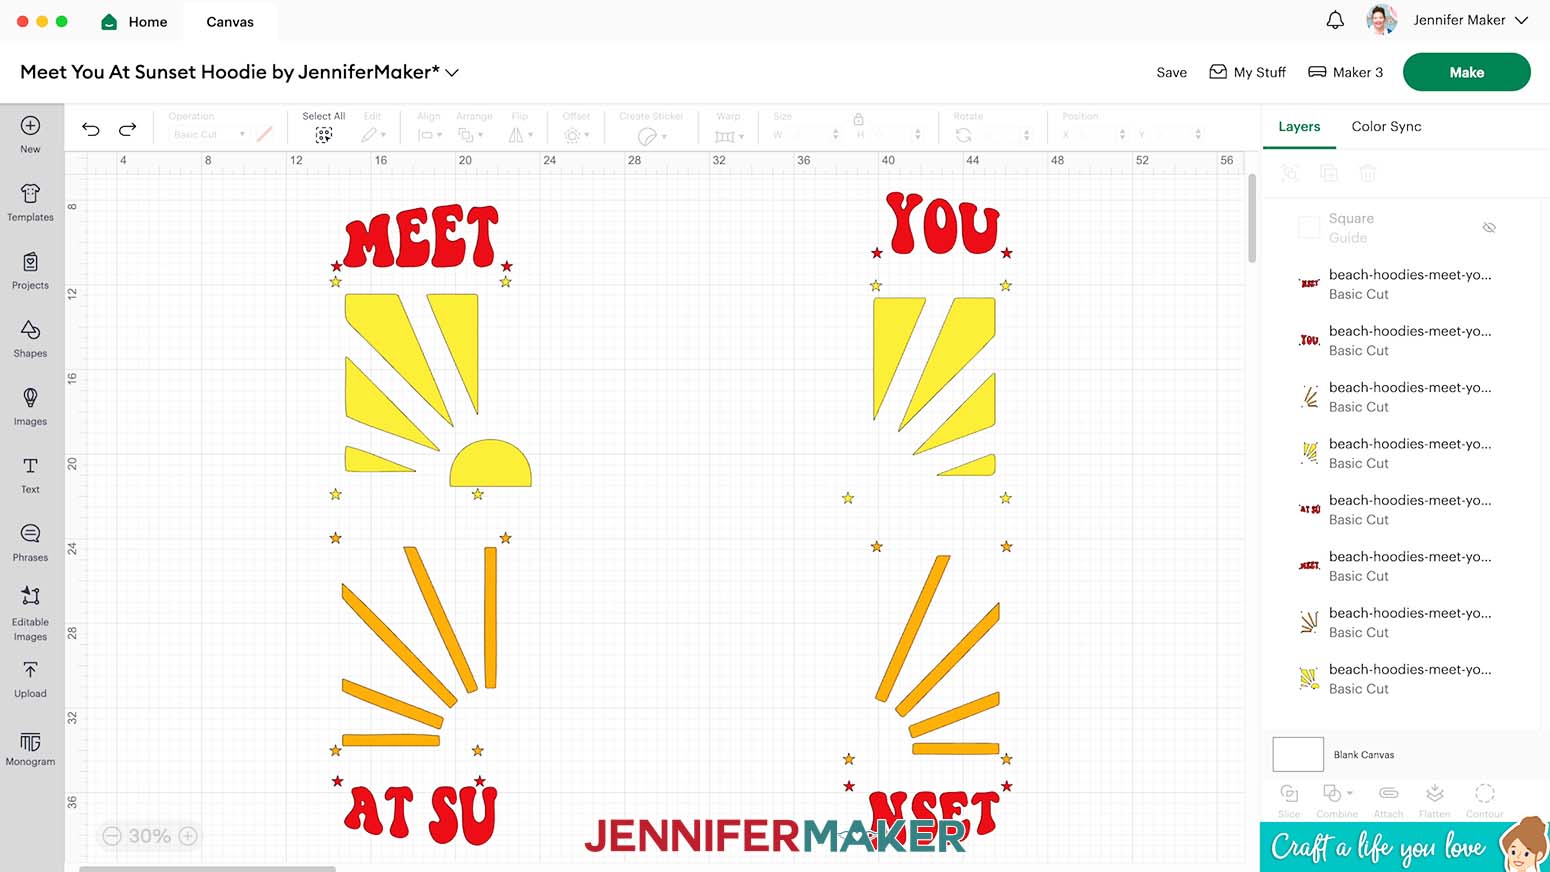
NOTE: Here is how I sliced the pieces apart using the same steps from the tutorial. - Follow the “Beach More, Worry Less” tutorial to cut and weed your pieces.
NOTE: Don’t forget to Mirror everything to work with the HTV and place the material shiny side down on each machine mat.
PRESS YOUR BIG HTV DESIGN
- Follow Step 4 from the “Beach More, Worry Less” tutorial to place your design on the prepared hoodie.
NOTE: Remember, use the star registration marks to determine the layout. - Then keep the bottom left section in place for your first press.
NOTE: Remember to cover the registration marks with heat-resistant tape if you don’t want to transfer them. - Follow the “Beach More, Worry Less” tutorial steps to press the piece.
- Use the steps from the “Beach More, Worry Less” tutorial to place and press the remaining sections, always using the star registration marks to maintain the layout.
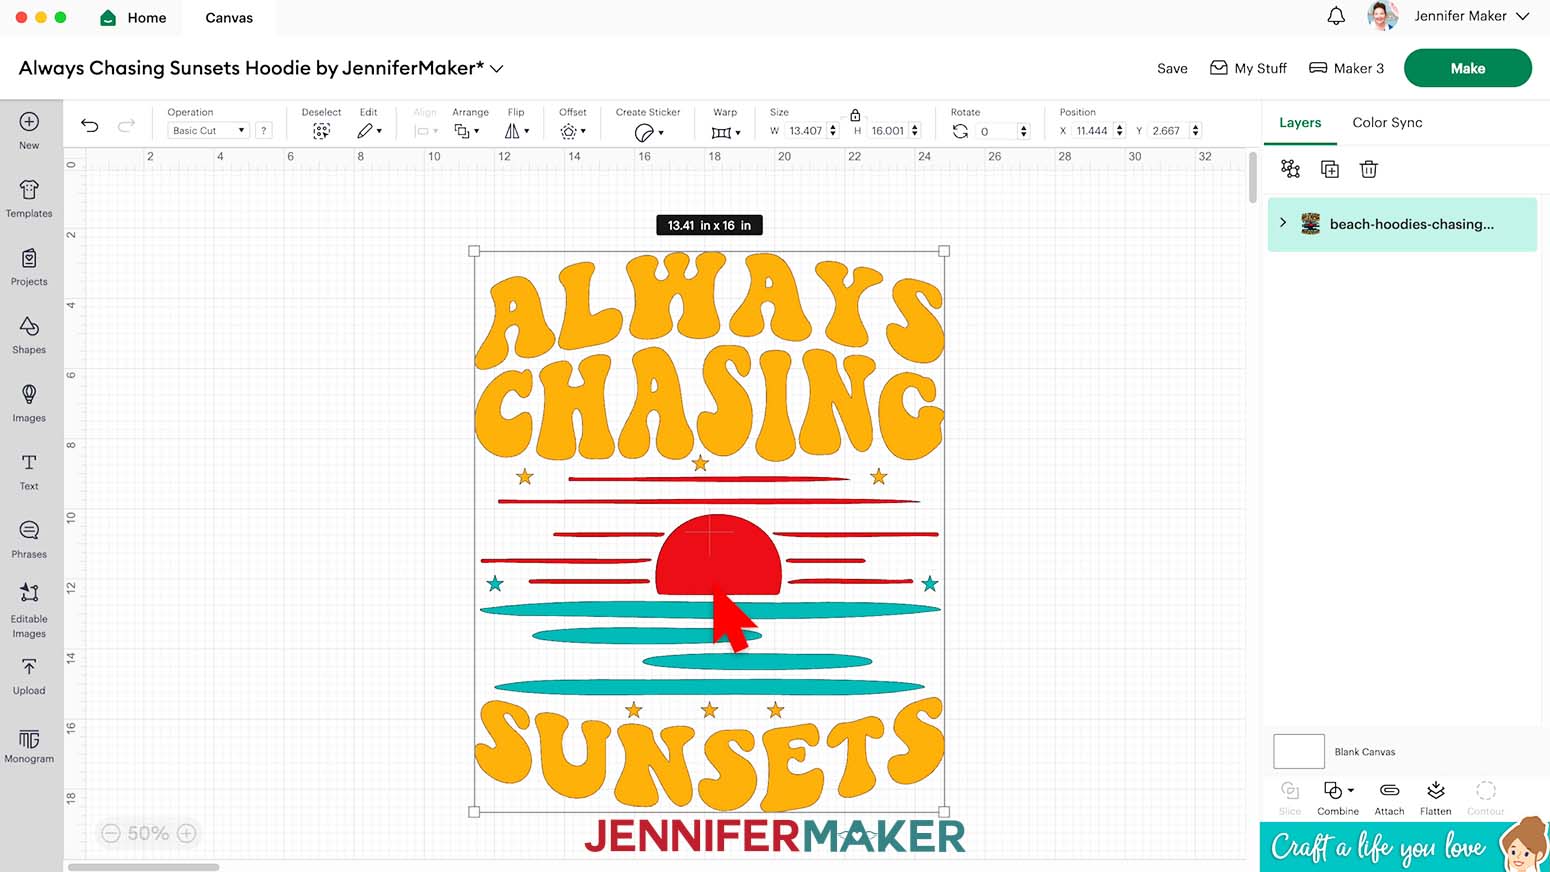
VARIATION 2: “ALWAYS CHASING SUNSETS” BIG HTV DESIGN
CRICUT DESIGN SPACE
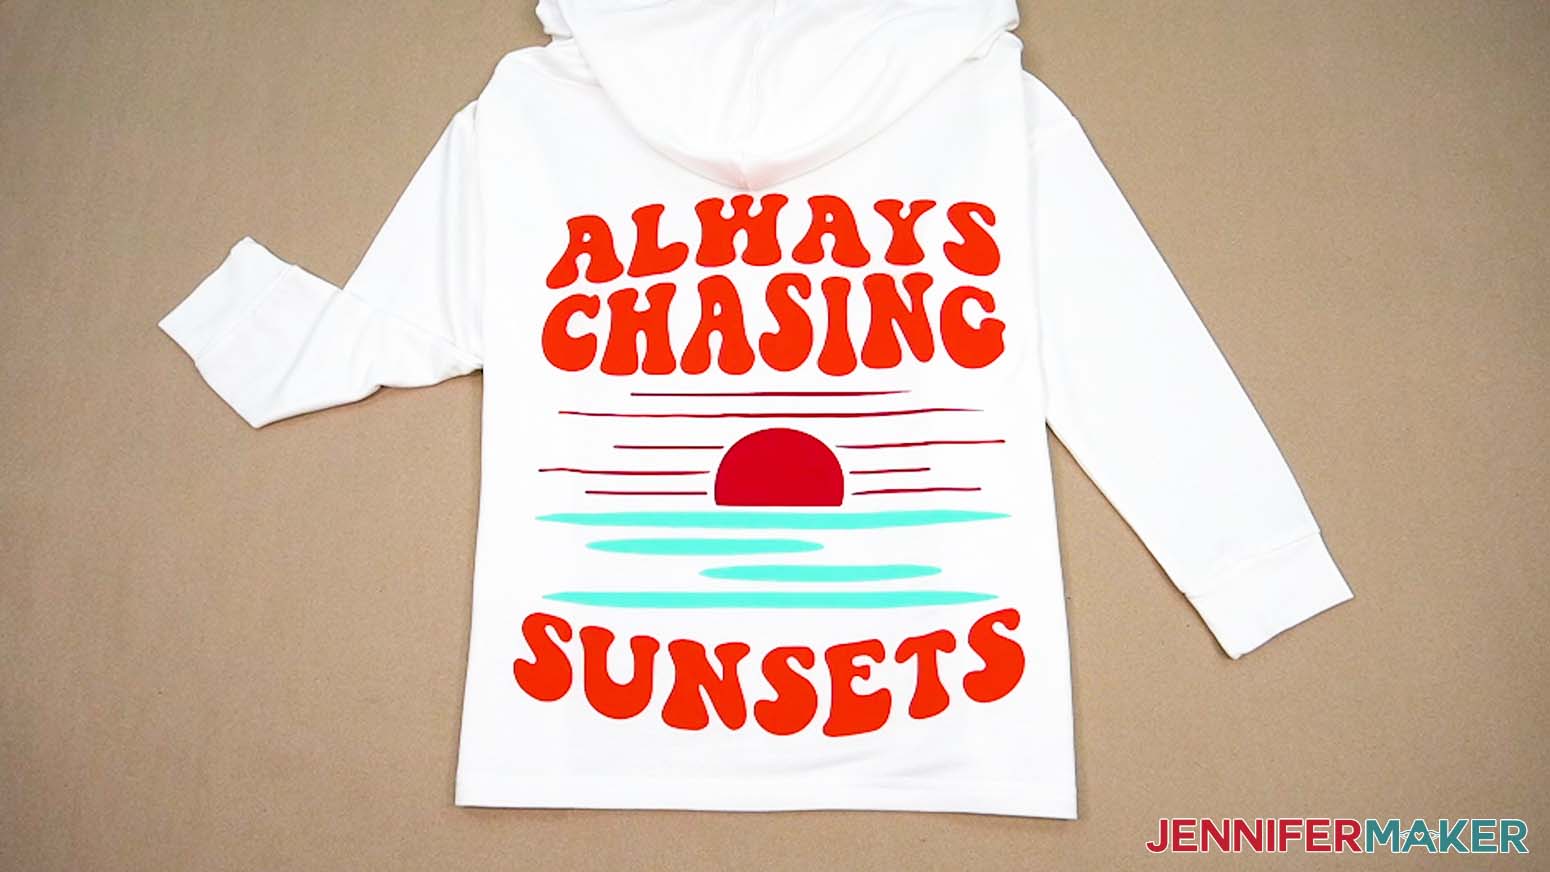
- Here’s what my “Always Chasing Sunsets” design looks like uploaded to my Canvas.
NOTE: This design is sized to fit a Large hoodie. - The text layers of this design could be Contoured to fit on a 12” x 12” mat, but the sun and water layers are too large to fit and would be difficult to adjust. Instead, I recommend using a 12” x 24” mat, which can fit the elements as they are.
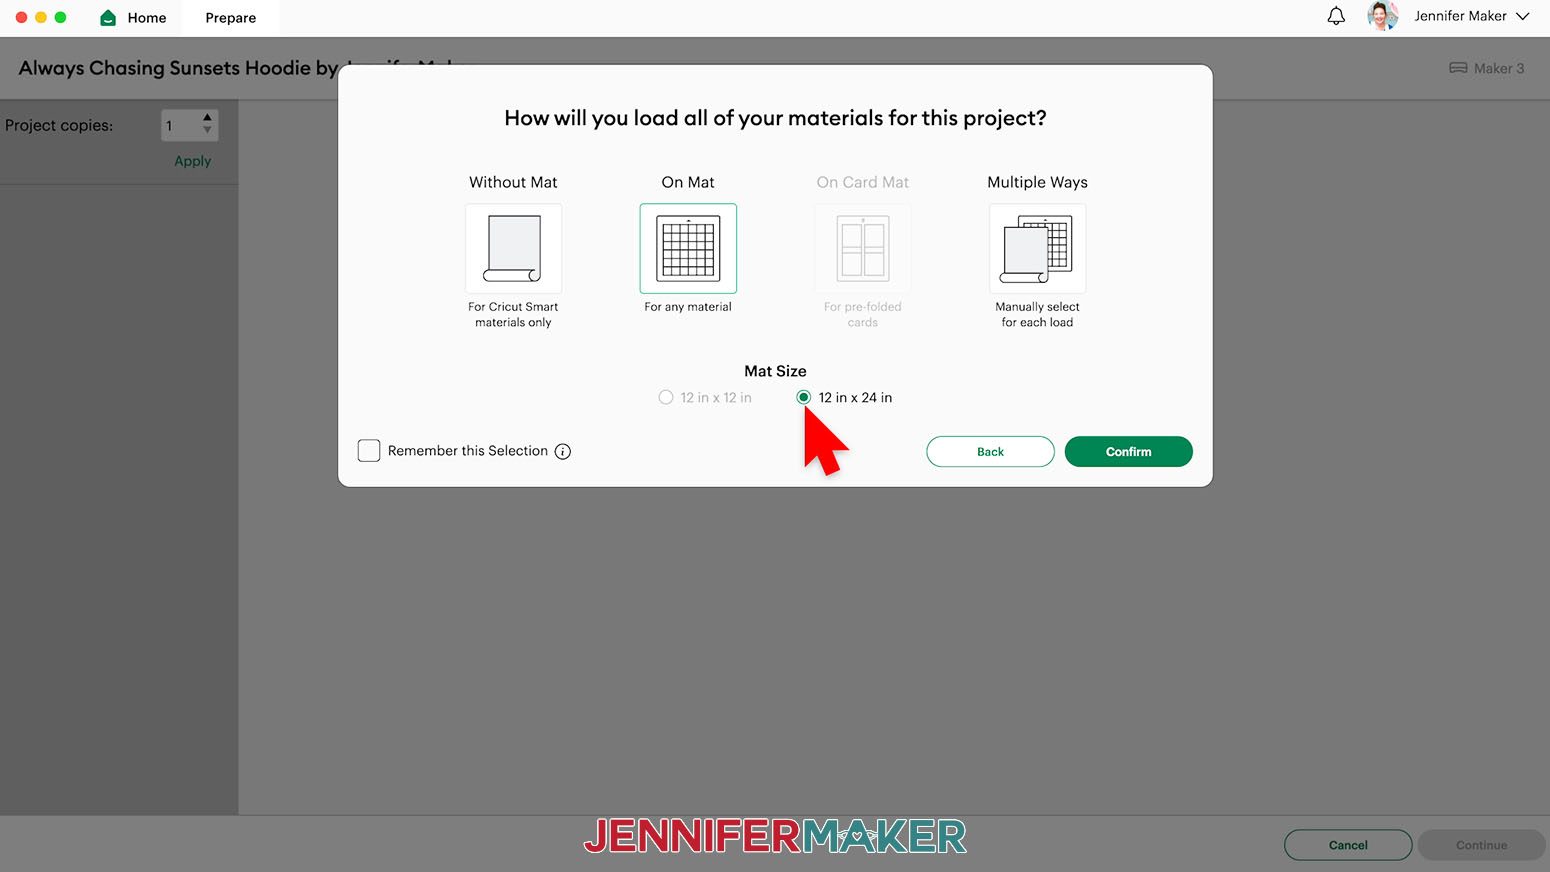
- When the design is ready, select the correct machine and click “Make.”
- In the pop-up window, select “On Mat” and click the circle for “12 in. x 24 in.”
- Click “Confirm.”
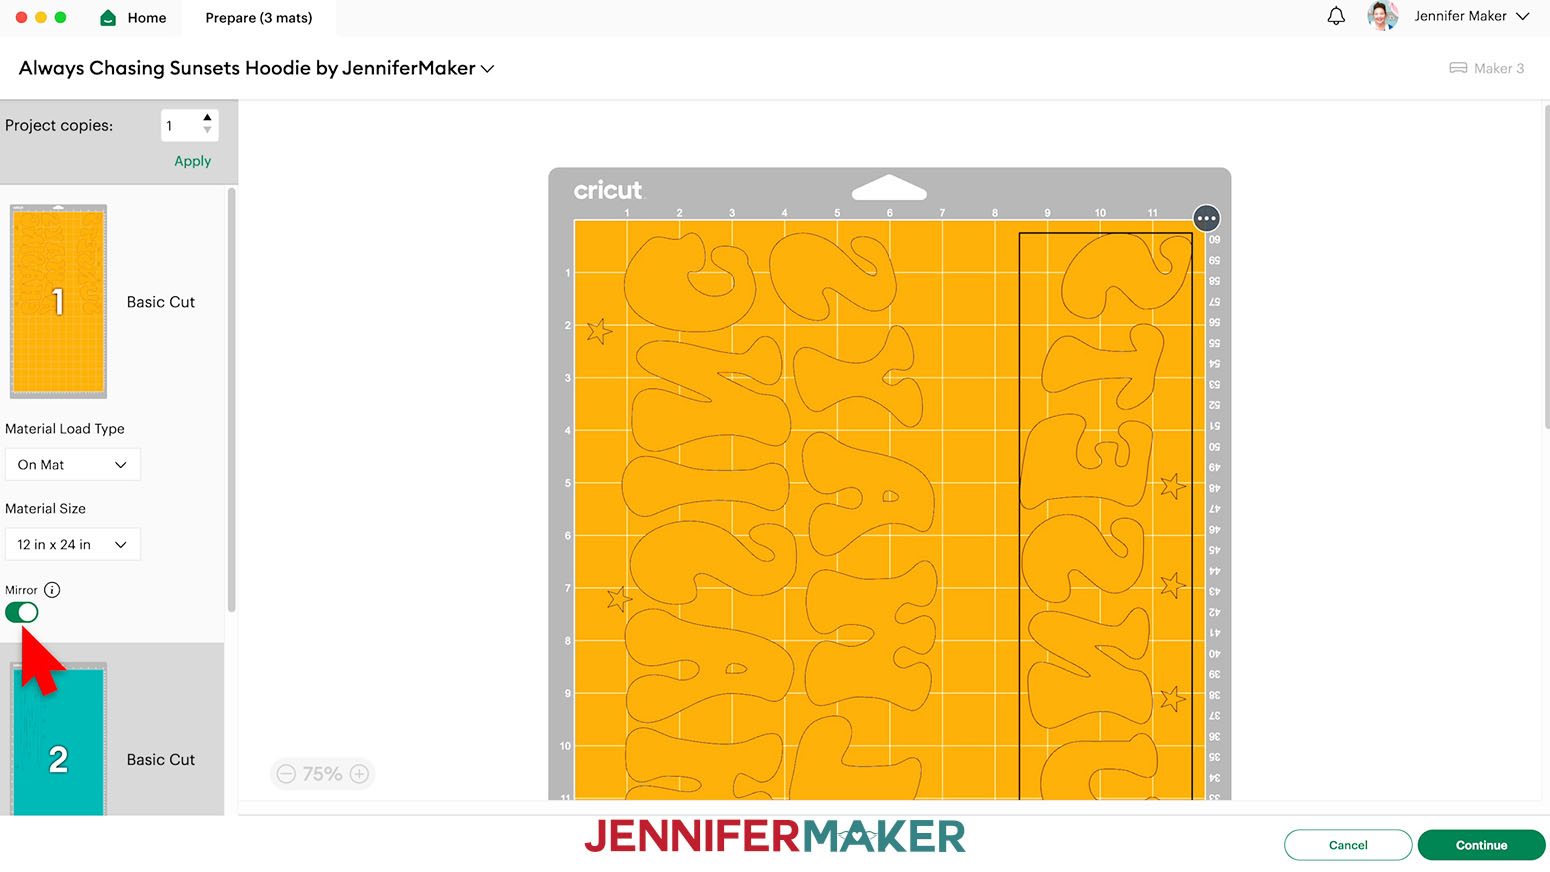
- On the mat with the text elements, drag them apart a little so they’ll be easier to separate after cutting.
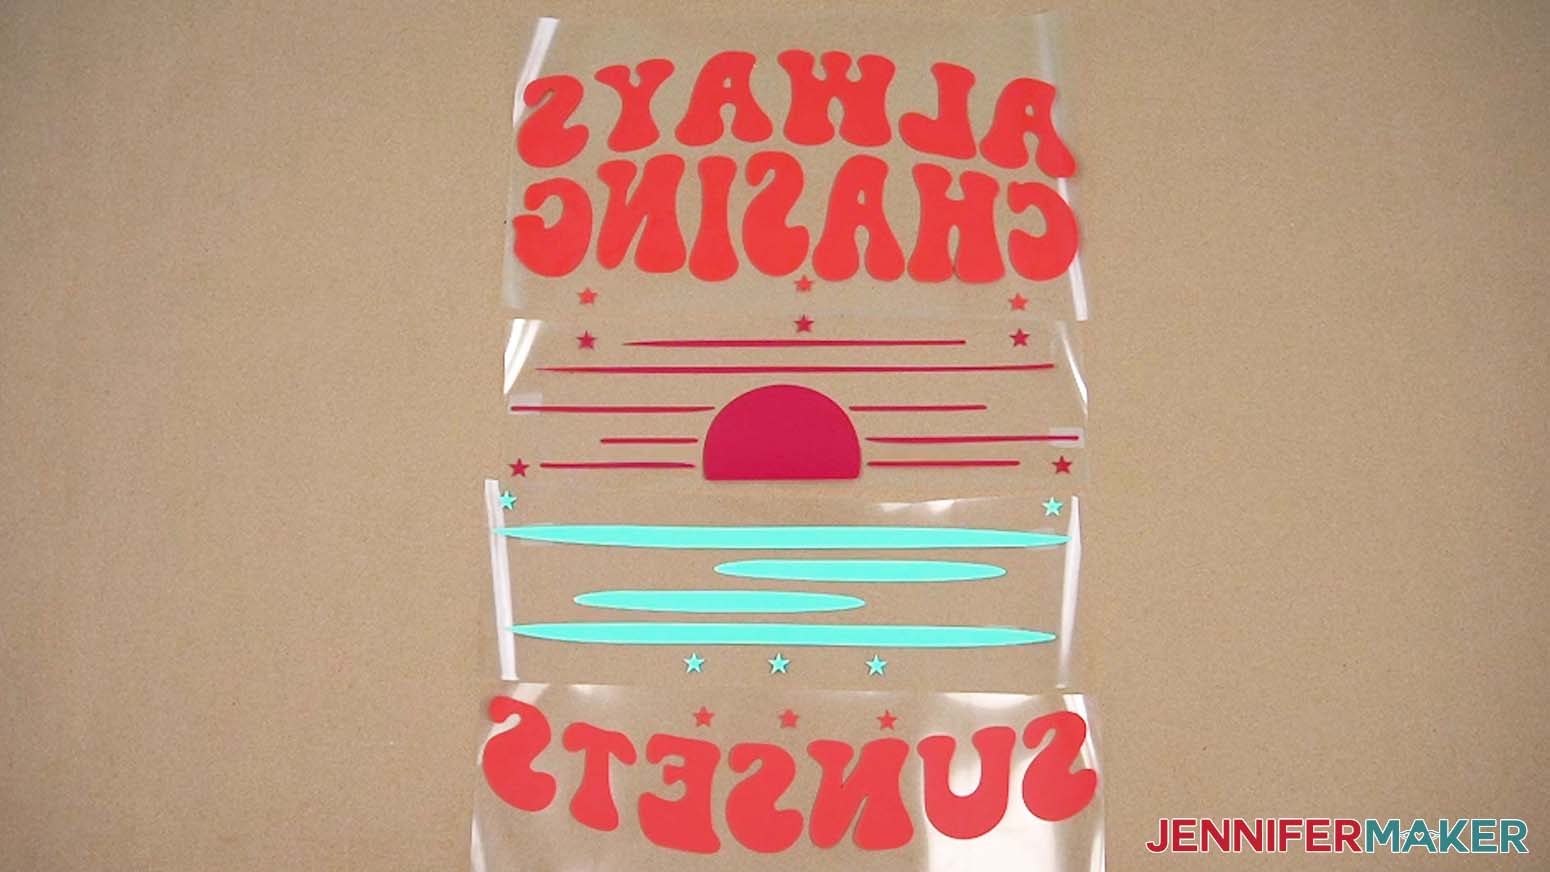
NOTE: Don’t forget to Mirror everything to work with the HTV and place the material shiny side down on each machine mat. - Follow the “Beach More, Worry Less” tutorial to cut your design using a green 12” x 24” StandardGrip machine mat, then weed your pieces.

PRESS YOUR BIG HTV DESIGN
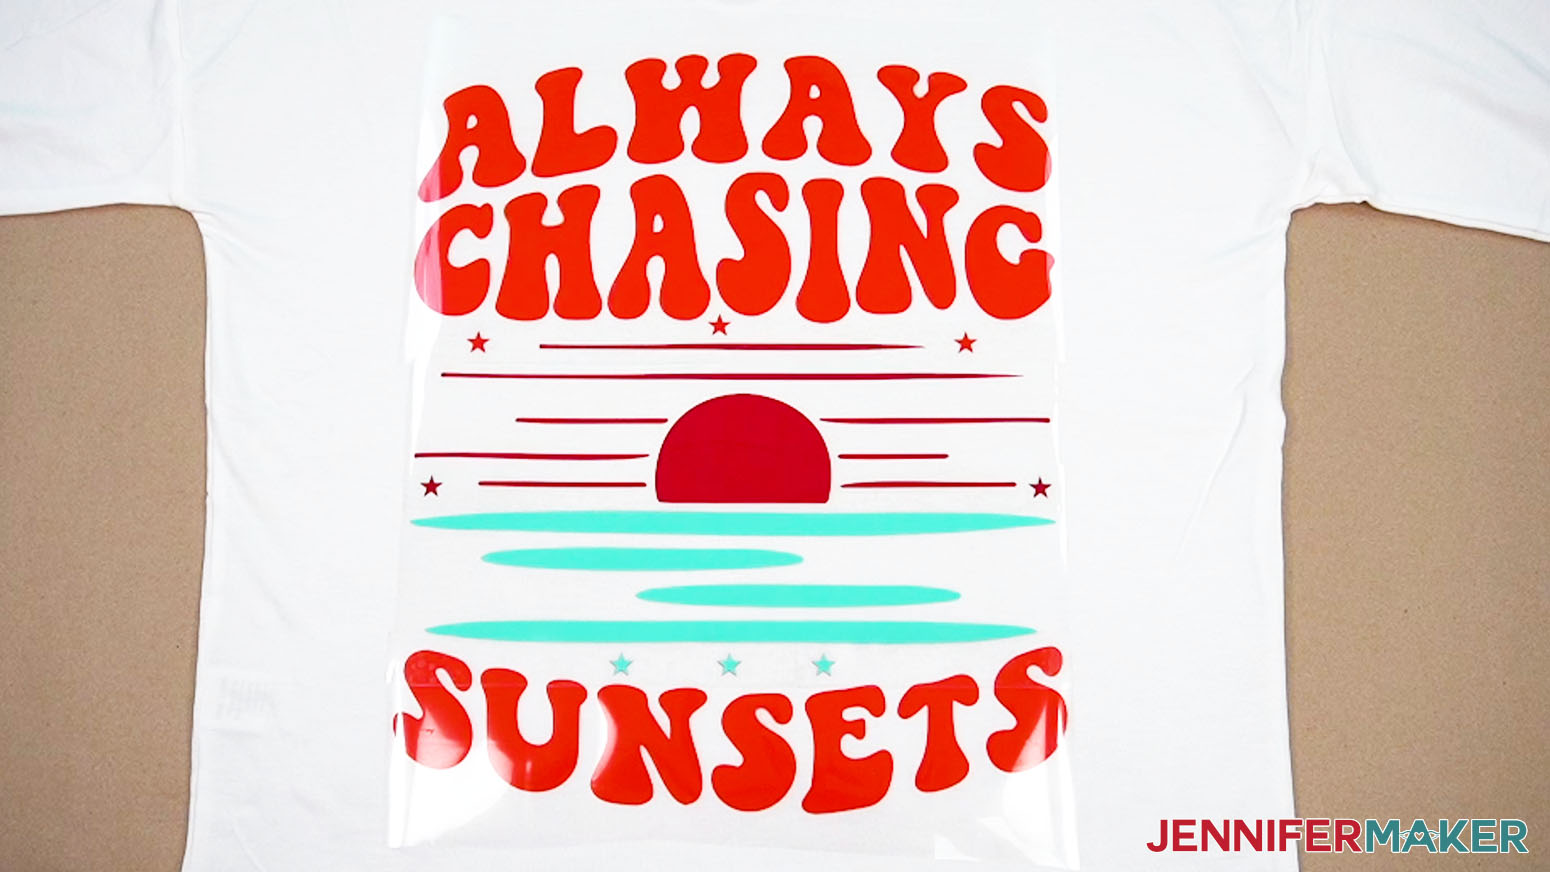
- Follow Step 4 from the “Beach More, Worry Less” tutorial to place your design on the prepared hoodie.
NOTE: Remember, use the star registration marks to determine the layout. - Then keep the bottom left section in place for your first press.
NOTE: Remember to cover the registration marks with heat-resistant tape if you don’t want to transfer them. - Follow the “Beach More, Worry Less” tutorial steps to press the piece.
- Use the steps from the “Beach More, Worry Less” tutorial to place and press the remaining sections, always using the star registration marks to maintain the layout.

STEP 5: SHOW IT OFF!
Your hoodies with big HTV designs are complete!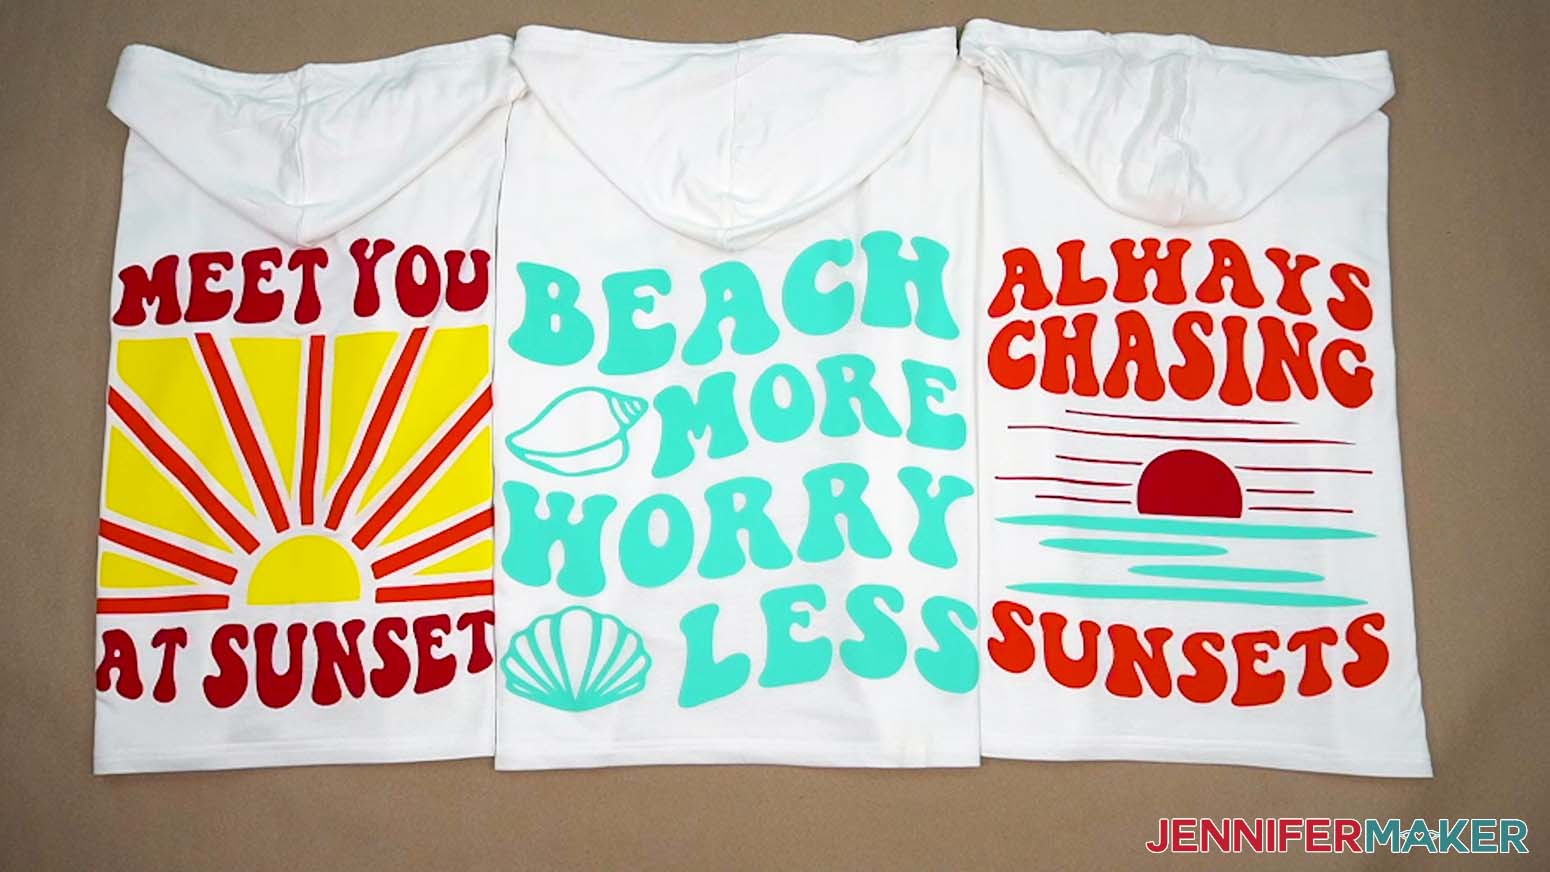
Notes
Finished Sizes for Large Hoodie Designs:
Beach More, Worry Less: 15.7" x 16"
Always Chasing Sunsets: 13.4" x 16"
Meet You At Sunset: 14.75" x 16"
Typefaces used: JM Groovy
Care: Let the vinyl sit for at least 24 hours. Then, wash your hoodie inside out in cold water and do not use any bleach. Tumble on low or hang to dry.
Answers to Your Questions About Making Hoodies With Big HTV Designs
Q: I want a different design. How do I make my own oversized hoodie design?
A: You can learn how to design your own oversized hoodies using free Canva tools in my ADVANCE program. Learn more about ADVANCE here!
Q: Which side of iron-on vinyl do I cut?
A: Place iron-on vinyl shiny side down on your cutting mat. The shiny side is the clear carrier sheet, which needs to stay intact to make transferring the design easier. It takes the place of transfer tape!
Q: Can I use a home iron with HTV?
A: Heat presses are easier and have a larger surface area for pressing — but yes, you can use a household iron to apply heat-transfer vinyl to surfaces. Just make sure to turn off the steam setting, as it can ruin the vinyl’s adhesive (and your hoodie or T-shirt)!
Q: Is a bigger heat press better?
A: If you only plan to ever transfer iron-on vinyl designs smaller than 9″ x 9″, the standard size Cricut EasyPress will work fine for you. Upgrading to the 10″ x 12″ size, however, will give you more freedom to more easily apply larger HTV and sublimation designs to T-shirts, hoodies, tote bags, blankets, and more.
Q: What size should a transfer be on a shirt?
A: Choosing the right size for your design depends on the blank you’re using. For example, if you’re decorating adult sizes, remember that adult shirts need larger HTV designs than youth blanks. You can also decorate shirts with left chest logos or designs, and those transfers will be even smaller. The easiest way is to measure the area you want to decorate and go from there. Don’t only rely on the T-shirt size and a guide to make the right size decal — use a template in Cricut Design Space to help visualize your final result before you cut your design.
Q: Why is my heat press leaving marks on my shirt? Do heat press marks wash out?
A: Your heat press can leave marks on your shirt if you used too much heat, time, or pressure — it’s called scorching. These marks will likely not completely wash out. This is why tests are a such good idea, especially if you’re a beginner crafter and it’s your first time using heat. Next time, be sure to test first. It’s the easiest thing, and it’ll save you so much time, materials, and headaches!
Q: How long does HTV last on a shirt?
A: Don’t wash your HTV shirt right away, instead wait 24 hours to give the vinyl and adhesive time to cure. Then wash it with a mild detergent, inside out, with no bleach. I like to hang my vinyl decorated T-shirts to dry, but you can tumble dry it on low. With proper care, your shirt should last quite a while!
Q: Can too much heat cause HTV not to stick?
A: Applying too much pressure, heat, or time on your HTV is a common issue that can cause the adhesive to separate from the vinyl, making it not adhere correctly to your T-shirt. Instead, reduce your pressure, temperature, or time for better results. Conversely, applying too low of heat, or not enough pressure can also cause your HTV to not stick. Adjust accordingly and make sure you’re using a high enough temperature (but not too high!) and the right time settings to make your vinyl stick for the long haul.
Q: Do you have any other HTV tutorials I can try?
A: I have lots of HTV tutorials to share with you! From printable heat transfer vinyl to puff vinyl and everything in between, there are SO many ways to make custom T-shirts, hoodies and other clothing and fabric items. You can search for them on my blog, check out this post with 100+ different ways to personalize your HTV projects, or check out some of these:
- Personalized Family HTV T-Shirts
- Personalized Vacation HTV T-Shirts
- Layered HTV T-Shirts
- Heart Mandala HTV T-Shirt
- Color-Changing HTV T-Shirts
- Printable HTV T-Shirts
- Sublimated HTV T-Shirts
- Iron-On T-Shirts with a Household Iron
- Puff Vinyl T-Shirts
- Metallic Puff Vinyl T-Shirts
Get my free SVG files to add big HTV designs to hoodies and more!
(If you do not see the signup form above, click here.)
I love seeing what you make with my designs and tips! Please share a photo of your big HTV designs in our Facebook group or tag me on social media with #jennifermaker.
Love,

Want to remember this? Save this Oversized Hoodies With Big HTV Designs Tutorial to your favorite Pinterest Board!