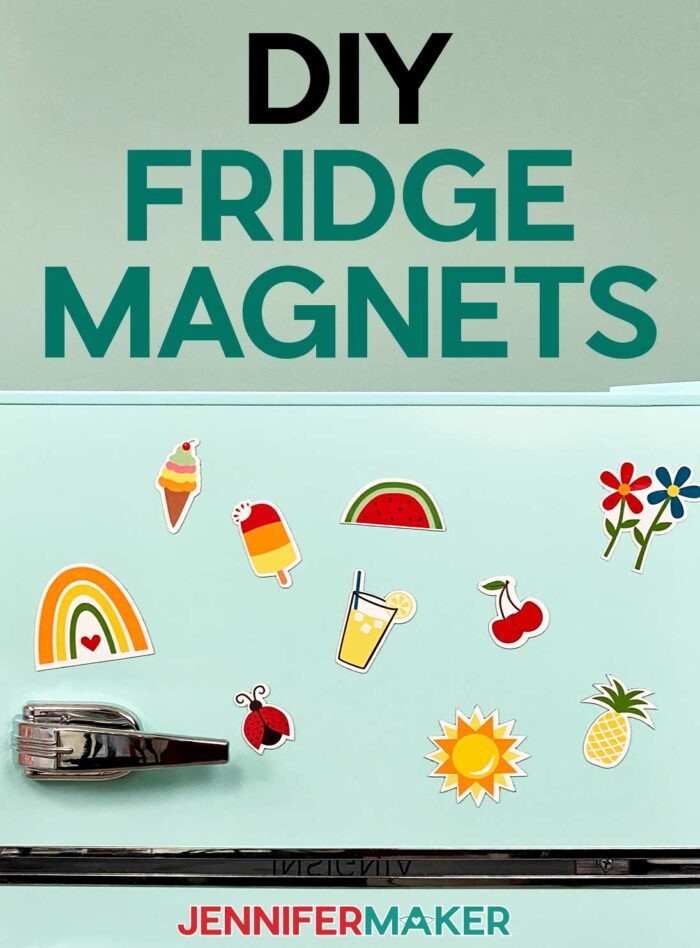
Learn two different methods for making DIY fridge magnets with Cricut Maker or Explore machines!
I really love Cricut DIY projects that combine different skills. Once you gain confidence in various techniques, you can mix and match, and apply what you know to create even more fun projects. Making DIY fridge magnets with Cricut machines is a perfect example. They combine Print then Cut techniques with different materials and are so fun to make. If you’ve learned how to make stickers, some of the steps will be familiar. And they’re a great addition to your family or business command center! I’ll show you my favorite tips for cute magnets for fridge decor and great projects.
Watch my step-by-step tutorial on how to make DIY fridge magnets with Cricut:

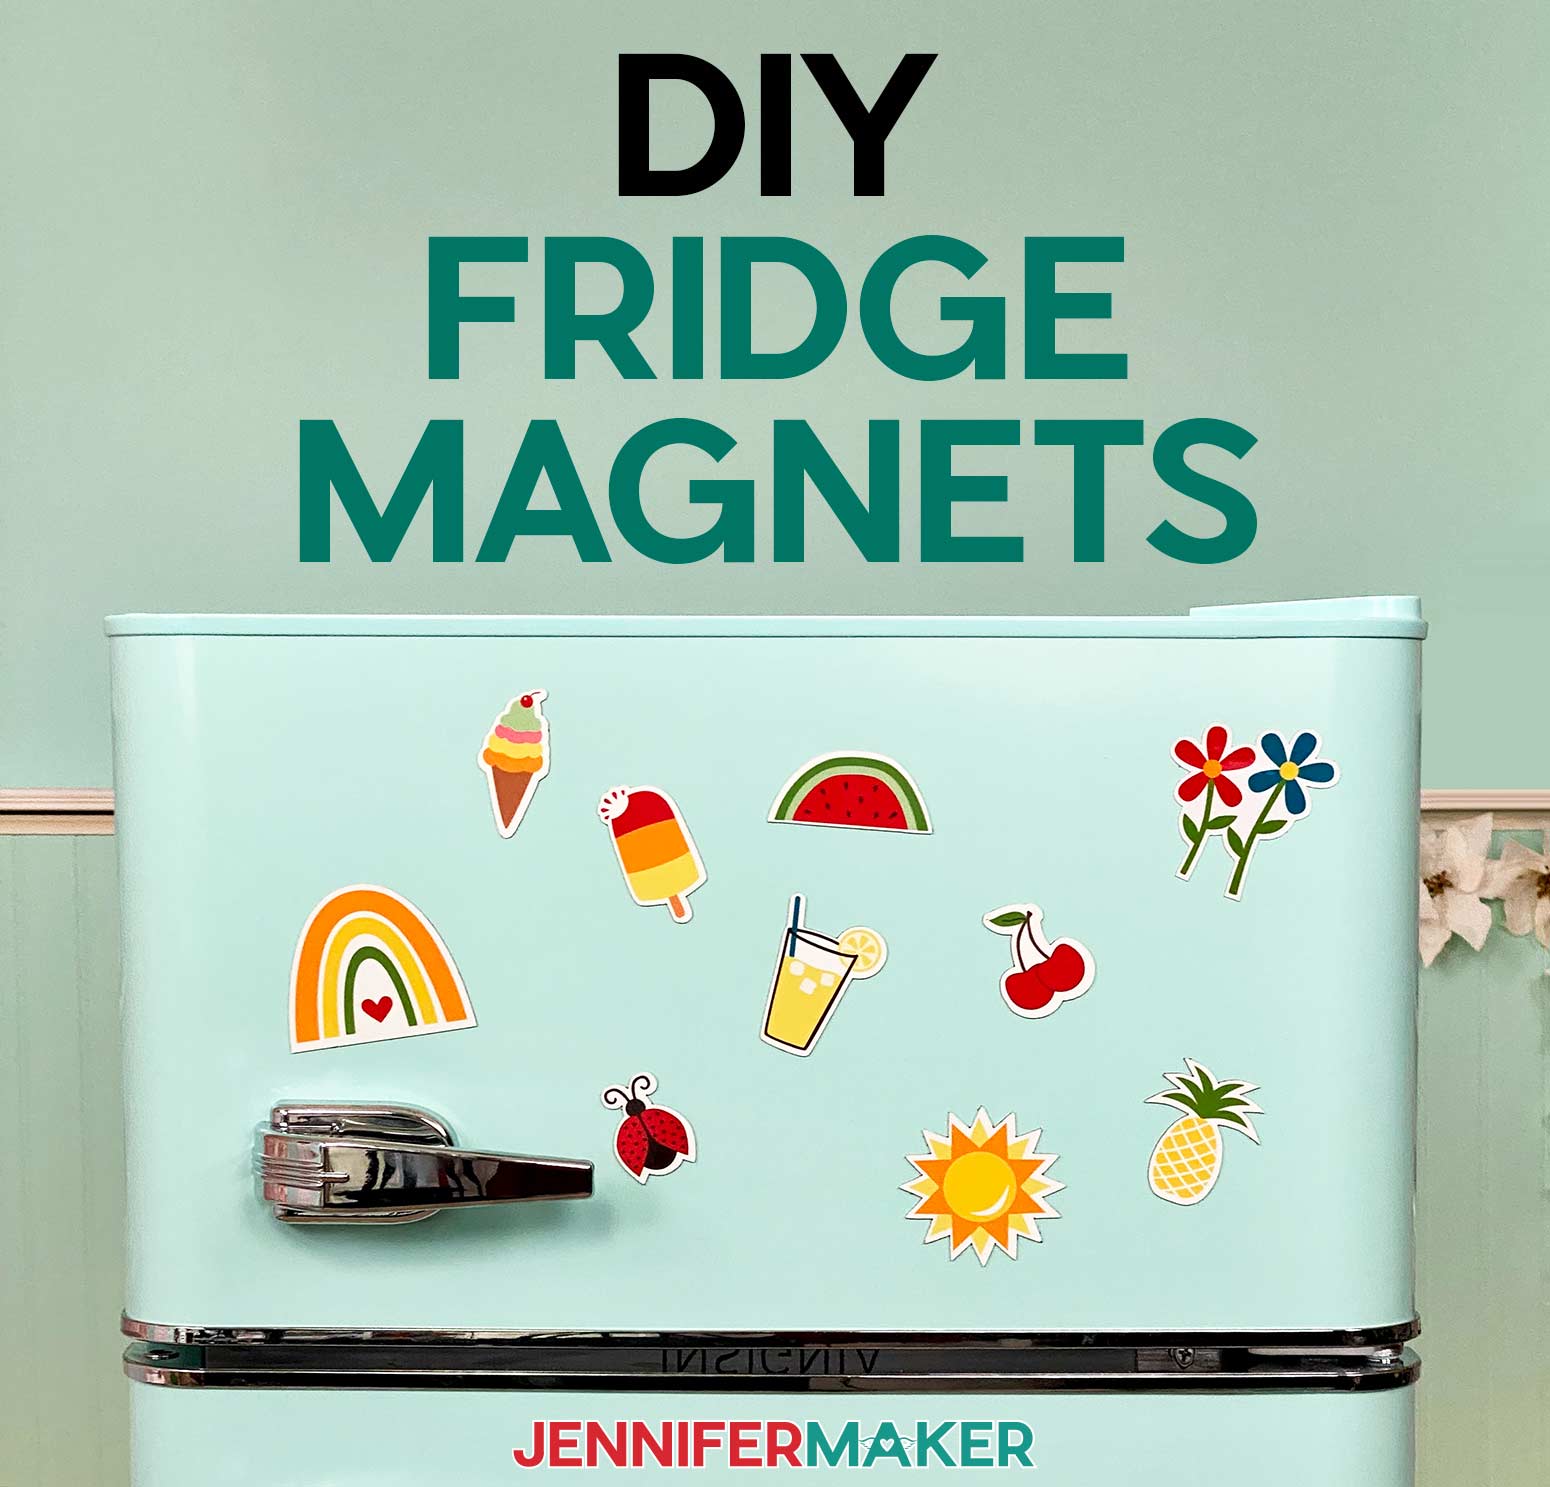
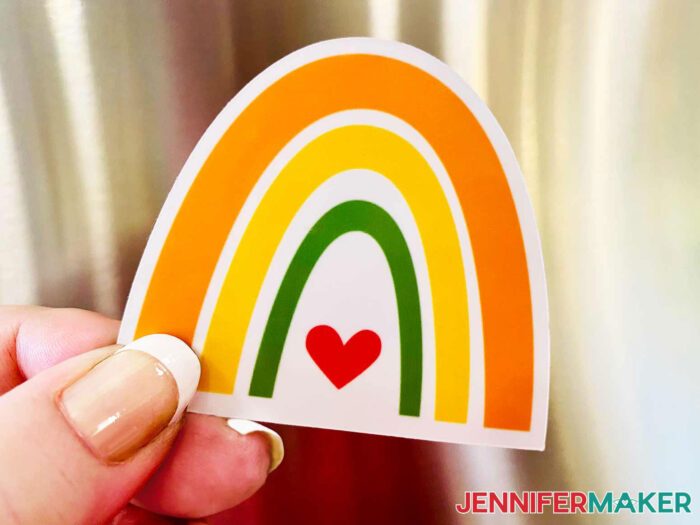
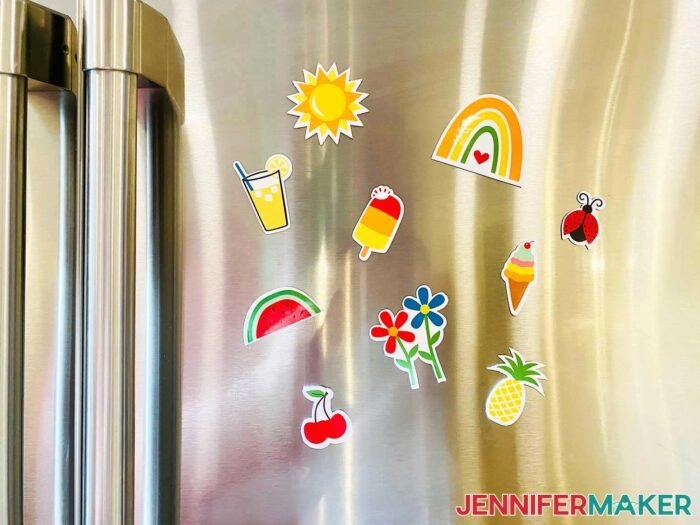
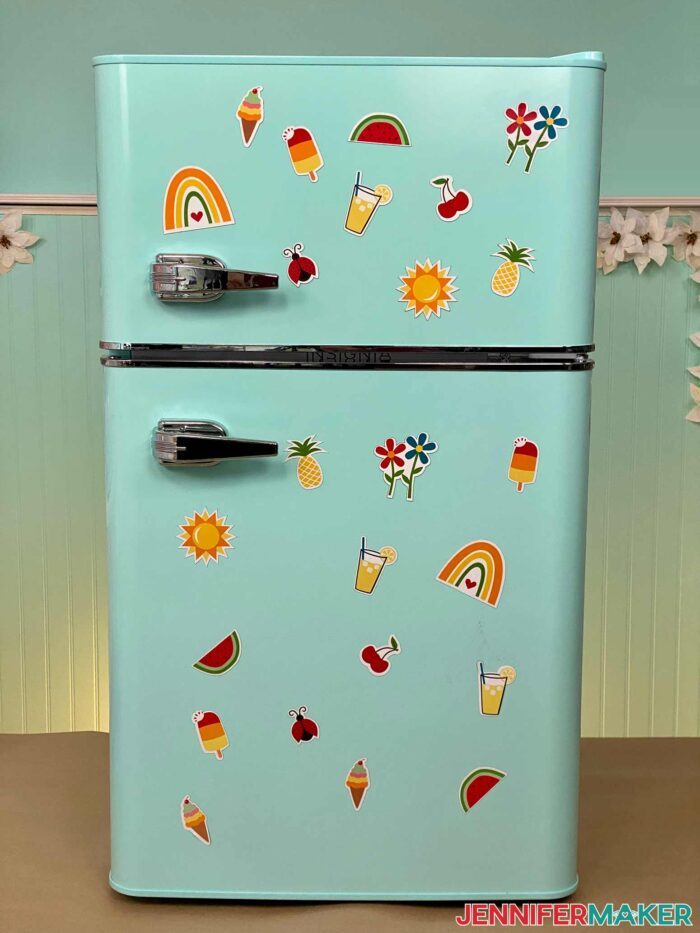
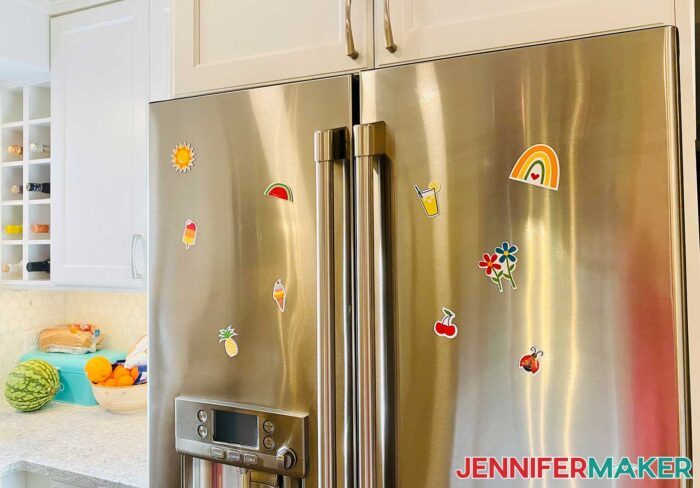
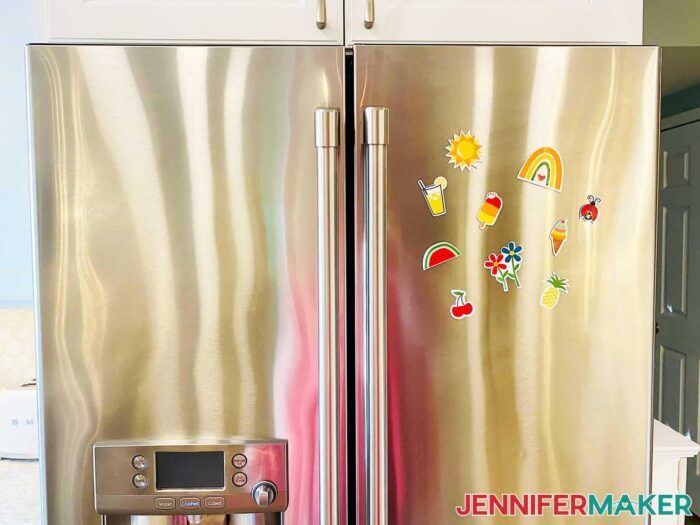
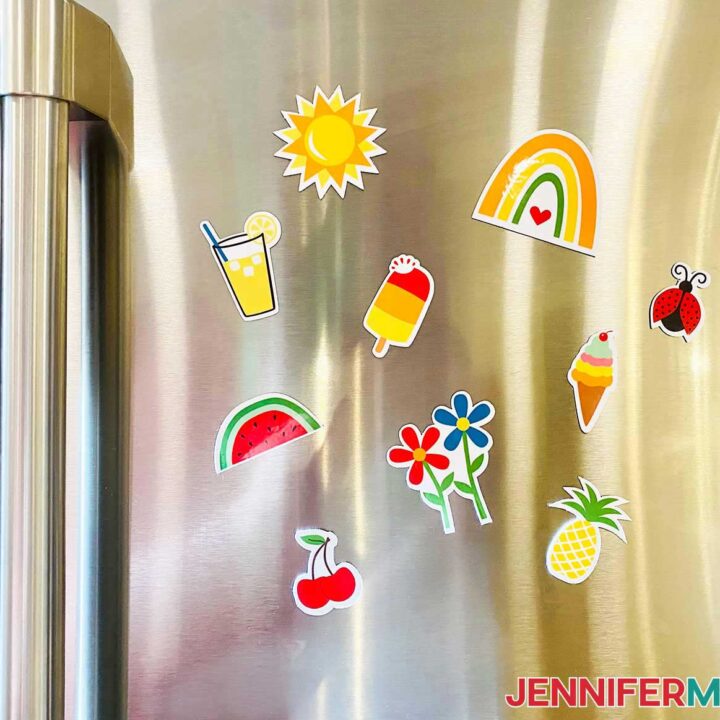
My new DIY fridge magnets feature adorable little fruits, a rainbow, flowers, and more! I wanted to share bright, cheery magnets to help you smile, whether they’re displaying a postcard or a long to do list. I hope these work!

I’ll show you how to make the whole collection at once, but I’ve also included the images as separate files so you can make larger versions if you’d like!

First of all, yes, you can make DIY fridge magnets on both Maker and Explore machines! Cricut’s Print then Cut method uses your printer to print images and registration marks on the same page. Then, the machine uses a light to find the registration box and calculates where to cut out the shapes using the black marks as reference points.
Both families of machines will Print then Cut images on white material easiest, but Makers and the Explore 3 can also handle backgrounds with some color. I stuck to white materials for this collection, though.
If you haven’t used the Print then Cut feature recently (or if it’s totally new to you!) I strongly recommend following the Calibration process to make sure your printer and Cricut create perfect cuts. It takes a few moments and some printer paper, but it’s worth it! Directions are below.
If you’ve made stickers before, you’re ready for magnets! One big difference between stickers and magnets is how you cut the final product and the tools. If you want to cut out stickers’ shapes while leaving them together on a backing sheet, you would use a kiss cut. Or, you can cut them all apart using die cut methods. Since we want our cute magnets for the fridge to be separate, we’ll cut all the way through the material. You can also make them as stickers following my sticker tutorial!
I tried two material combinations that use different tools to cut carefully through the DIY fridge magnets’ layers. You can cut through printable magnet sheets with a standard Cricut Fine-Point Blade. If you make the collection using printable vinyl applied to a magnet sheet, a Cricut Deep-Point Blade will do the trick! Check the full material list below for all the details on each approach.
It’s a good idea to add some extra depth to your DIY fridge magnets with Cricut machines. I’ve found my favorite method: laminating pouches! They’re really easy to work with (just trim them to fit inside the registration box) and will protect your refrigerator magnet from scuffs or smears. The extra layer makes them resist water and easier to move around, too.
You’ll also need a printer (I use a color inkjet type) with a compatible computer, a few machine mats, brayer, scraper, ruler, and Cricut trimmer.
And once you’ve picked the material you prefer, you can make custom magnets with your own designs. I love making DIY fridge magnets with Cricut because you can make letter magnets for events, little magnets as party favors, DIY photo magnets, whatever you want! These Cricut Maker cut magnets make great gifts from Mother’s Day to Christmas gifts.
Let me show you how easy it is to make DIY Fridge Magnets with Cricut using my free designs! This post contains some affiliate links for your convenience (which means if you make a purchase after clicking a link I will earn a small commission but it won’t cost you a penny more)! Read my full disclosure policy.
Materials for DIY Fridge Magnets With Cricut
View my Amazon shopping list with the exact items we used to make this project
- For the Printable Magnet Sheet method, you will need:
For the Printable Vinyl on an Adhesive Magnet Sheet method, you will need:
- One (1) Sheet Printable Vinyl Sticker Paper
- One (1) 8″ x 10″ Magnetic Adhesive Sheet
- Cricut StrongGrip Mat (12″ x 12″)
- Cricut Deep Point Blade with Housing
To make either version, you will also need:
- One (1) 9″ x 12″ Self-Laminating Sheet per sheet of magnets
- Color Inkjet Printer – I used the Epson EcoTank ET-2800
- Several sheets 8.5″ x 11″ white printer paper and a Cricut LightGrip Mat (12″ x 12″) – for Print then Cut calibration
- A way to cut your materials, I used the amazing Cricut Maker 3 but you can also use the Cricut Maker or the Cricut Explore machines with a Fine-Point Blade.
- Tools including a Brayer, Scraper, Ruler, and Paper Trimmer
- Design #396 (My free PNG design files are available in my free resource library – get the password by filling out the form at the bottom of this page)
How to Make DIY Fridge Magnets With Cricut
DIY Fridge Magnets with Cricut
Learn how to make cute DIY fridge magnets with Cricut in two ways!
Materials
- One (1) Sheet Matte Printable Magnet -OR-
- One (1) Sheet Printable Vinyl Sticker Paper -AND-
- One (1) 8" x 10" Magnetic Adhesive Sheet
- One (1) 9" x 12" Self-Laminating Sheet per sheet of magnets
- Several sheets 8.5" x 11" white printer paper
- Design #396 (My free PNG design files are available in my free resource library - get the password by filling out the form at the bottom of this page)
Tools
- A way to cut your materials, I used the amazing Cricut Maker 3 but you can also use the Cricut Maker or the Cricut Explore machines with a Fine-Point Blade for the Printable Magnet Sheet or a Deep-Cut Blade for the Printable Vinyl on Magnetic Sheet.
- Color Inkjet Printer - I used an Epson EcoTank 2700
- Cricut LightGrip Mat (12" x 12") - For Calibration
- Cricut StandardGrip Mat (12" x 12") - For Printable Magnet Sheets
- Cricut StrongGrip Mat (12" x 12") - For Printable Vinyl on Magnet Sheets
- Cricut Deep Point Blade with Housing - For Adhesive Magnet Sheets
- Cricut Brayer
- Ruler
- Cricut Trimmer
- Scaper
Instructions
STEP 1: PREPARE TO PRINT THEN CUT
When you're working with a new material or process, calibrating your machine's settings will save you time and money in the long run.
In a new Cricut Design Space window, click the three lines in the upper left corner, then select Calibration.
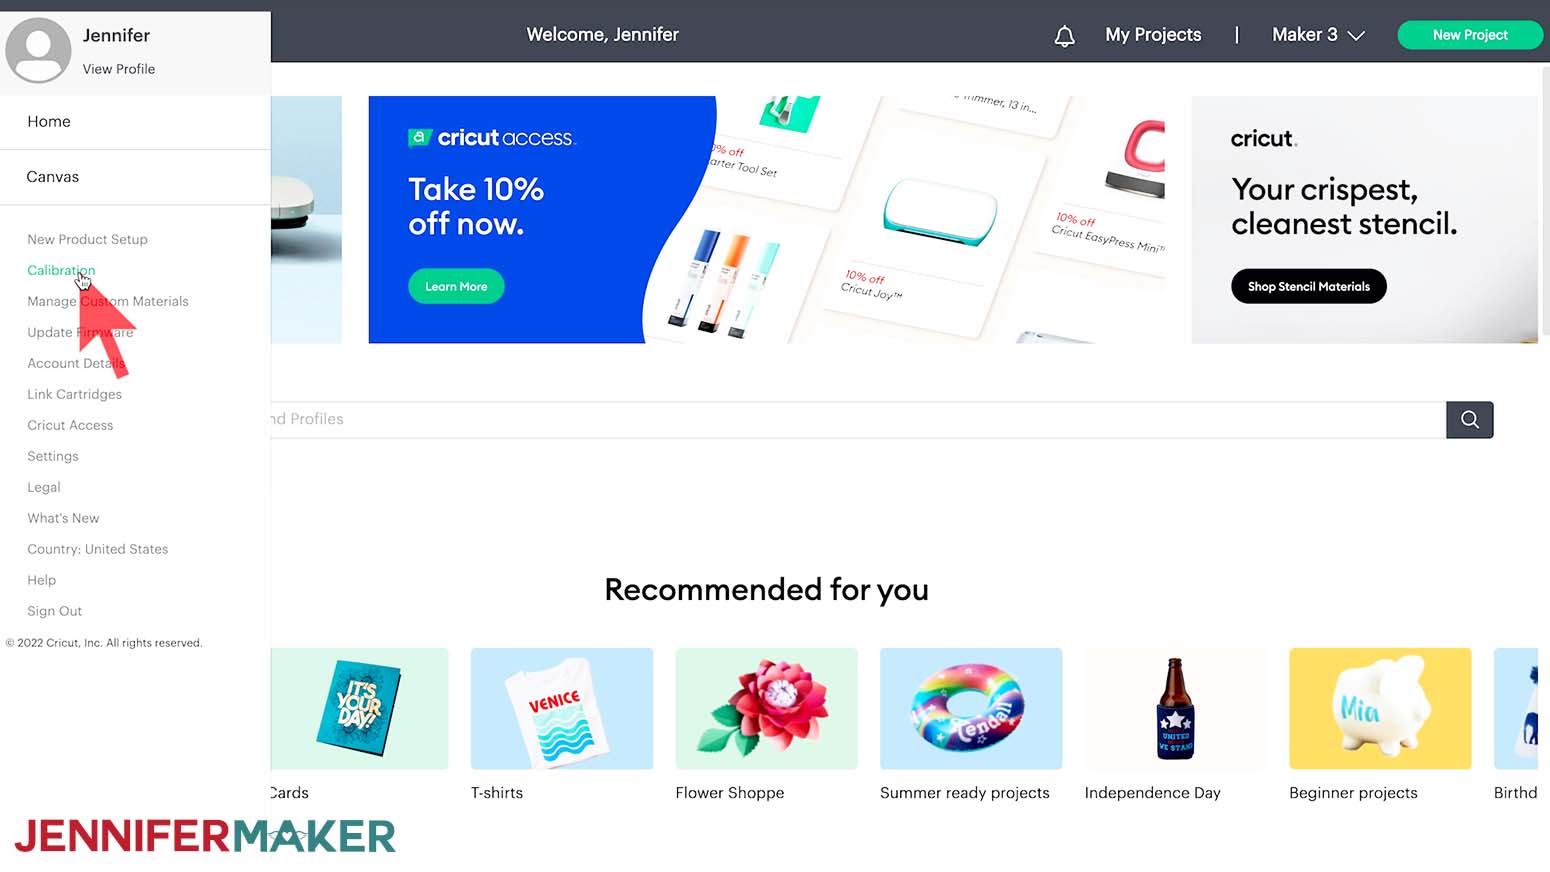
Select Print Then Cut. Then follow the prompts to select your printer and print a test sheet.
Follow the directions to place the test sheet on your LightGrip cutting mat and load it into your Cricut.
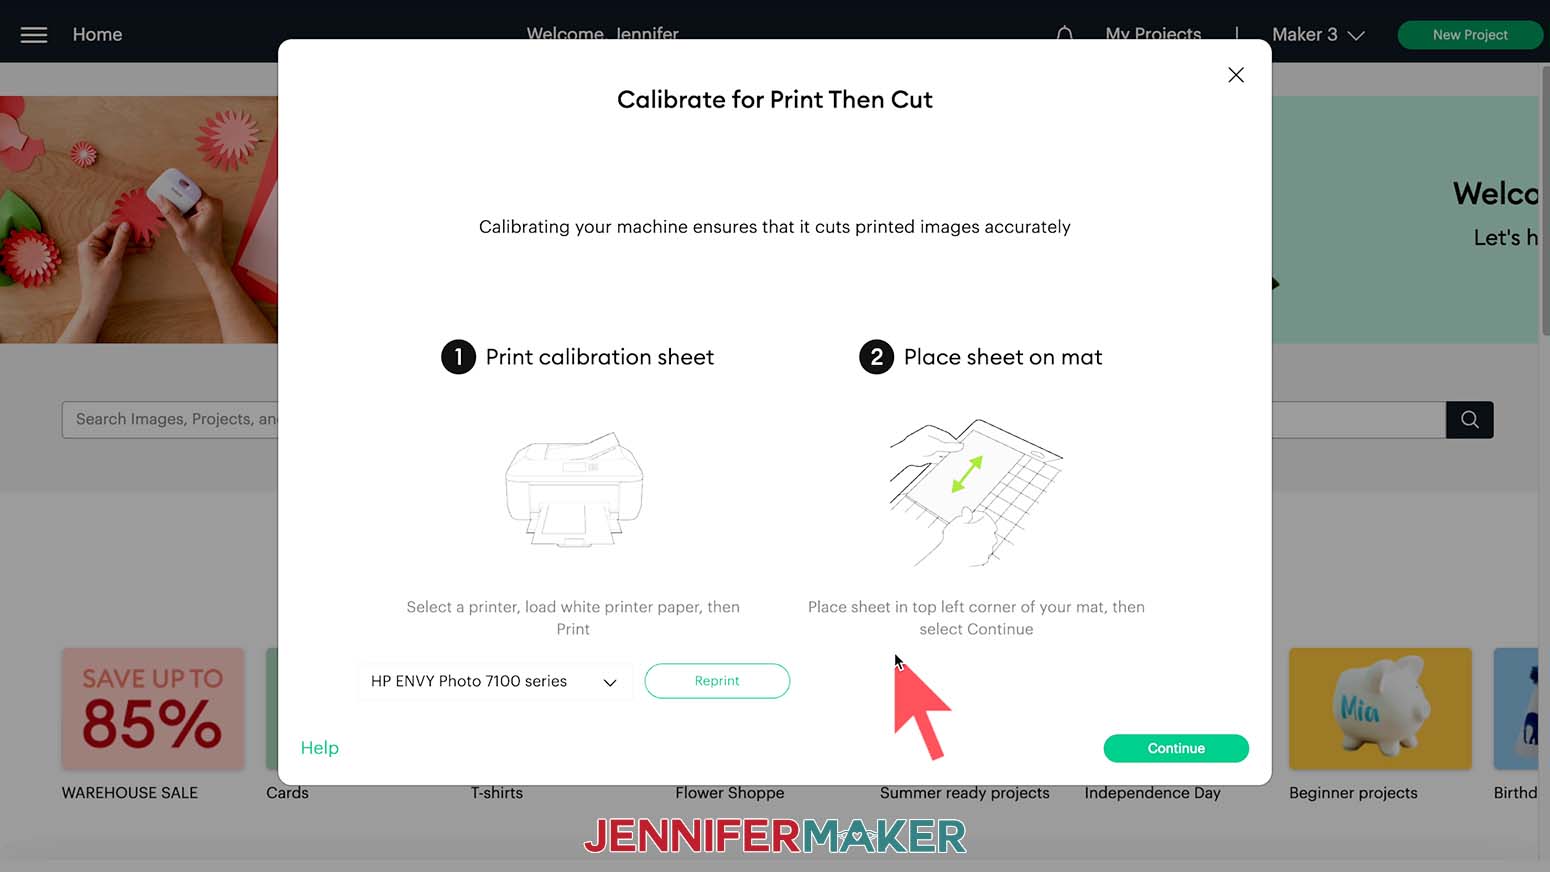
Your Cricut will perform many cuts that may or may not line up with the numbered lines.
IMPORTANT: Do NOT unload your mat until the Calibration test is complete.
Answer the questions in Design Space about the cut results. If the calibration was off, you may be asked to print another test sheet and check the settings once more. Once your Calibration is successful, your Cricut is ready!
Next, clean the print heads on your inkjet printer for the best print quality. Consult the printer's manual for the specific steps as they vary.
STEP 2: GET MY FREE DIY FRIDGE MAGNET DESIGNS
Next, download my free DIY Fridge Magnets PNG files, Design #396, from my free resource library. One file has the full collection sized to fit on one Print then Cut sheet. The folder has all ten designs in individual files so you can work with them individually.
I will show you how to make the file with all of the designs using two different material processes. The upload process for Print then Cut is different than a SVG.
Upload the image as normal until you reach a screen with the PNG on the left.
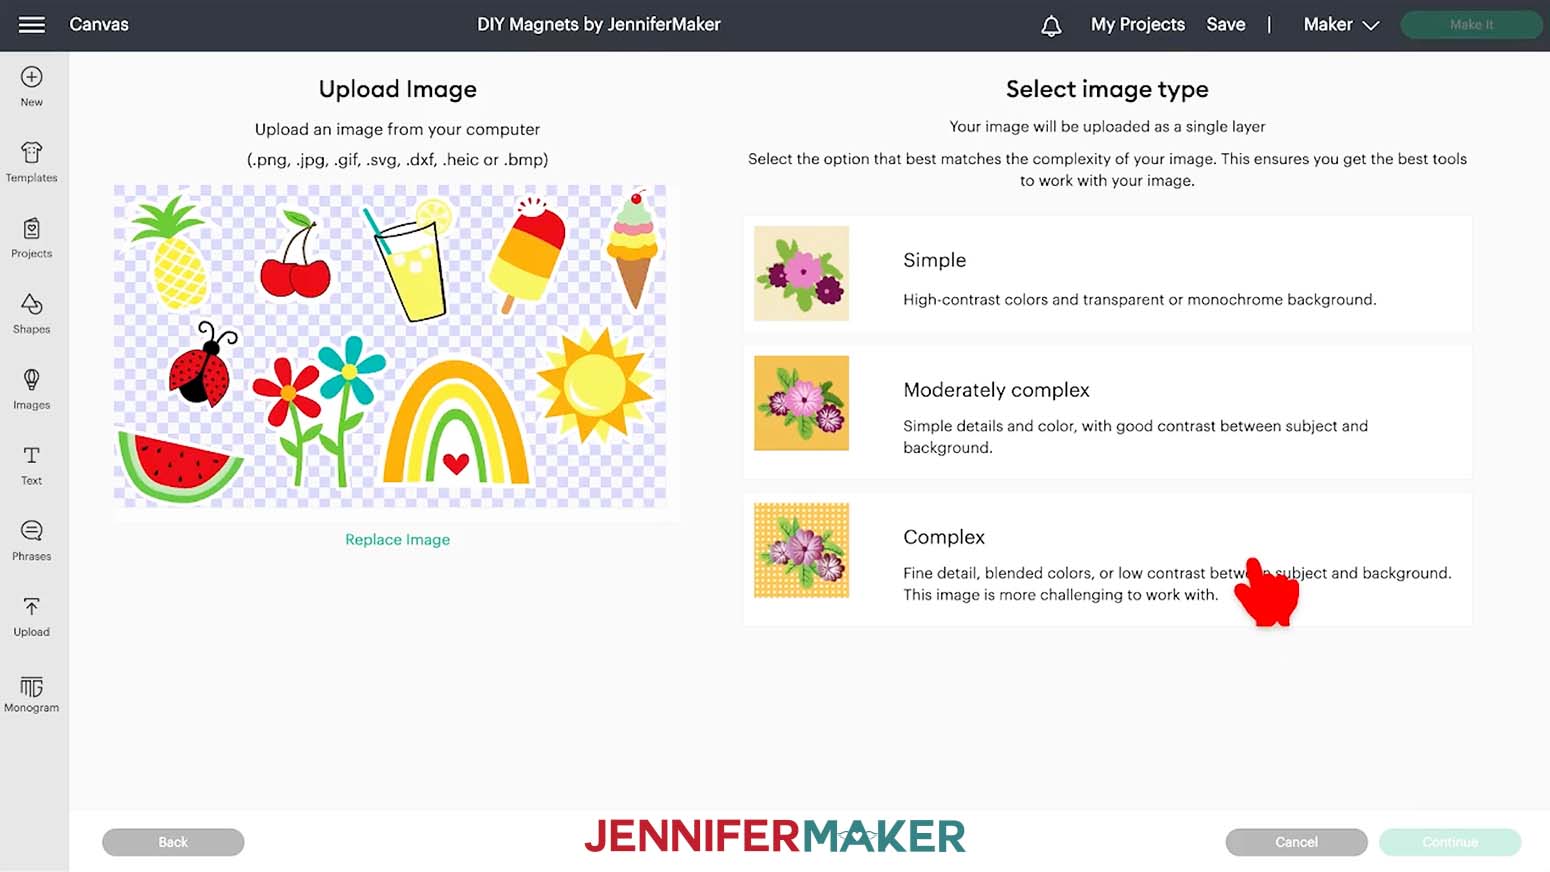
Select Complex for the image type and then click Continue in the lower right corner.
You do not need to do anything on the next screen, so click Apply & Continue.
For Upload Type, select Print Then Cut and click Upload.
You should now see your fridge magnet designs collection in your Recent Uploads. Select it and click Add to Canvas.
STEP 3: PRINT THEN CUT YOUR DIY FRIDGE MAGNETS
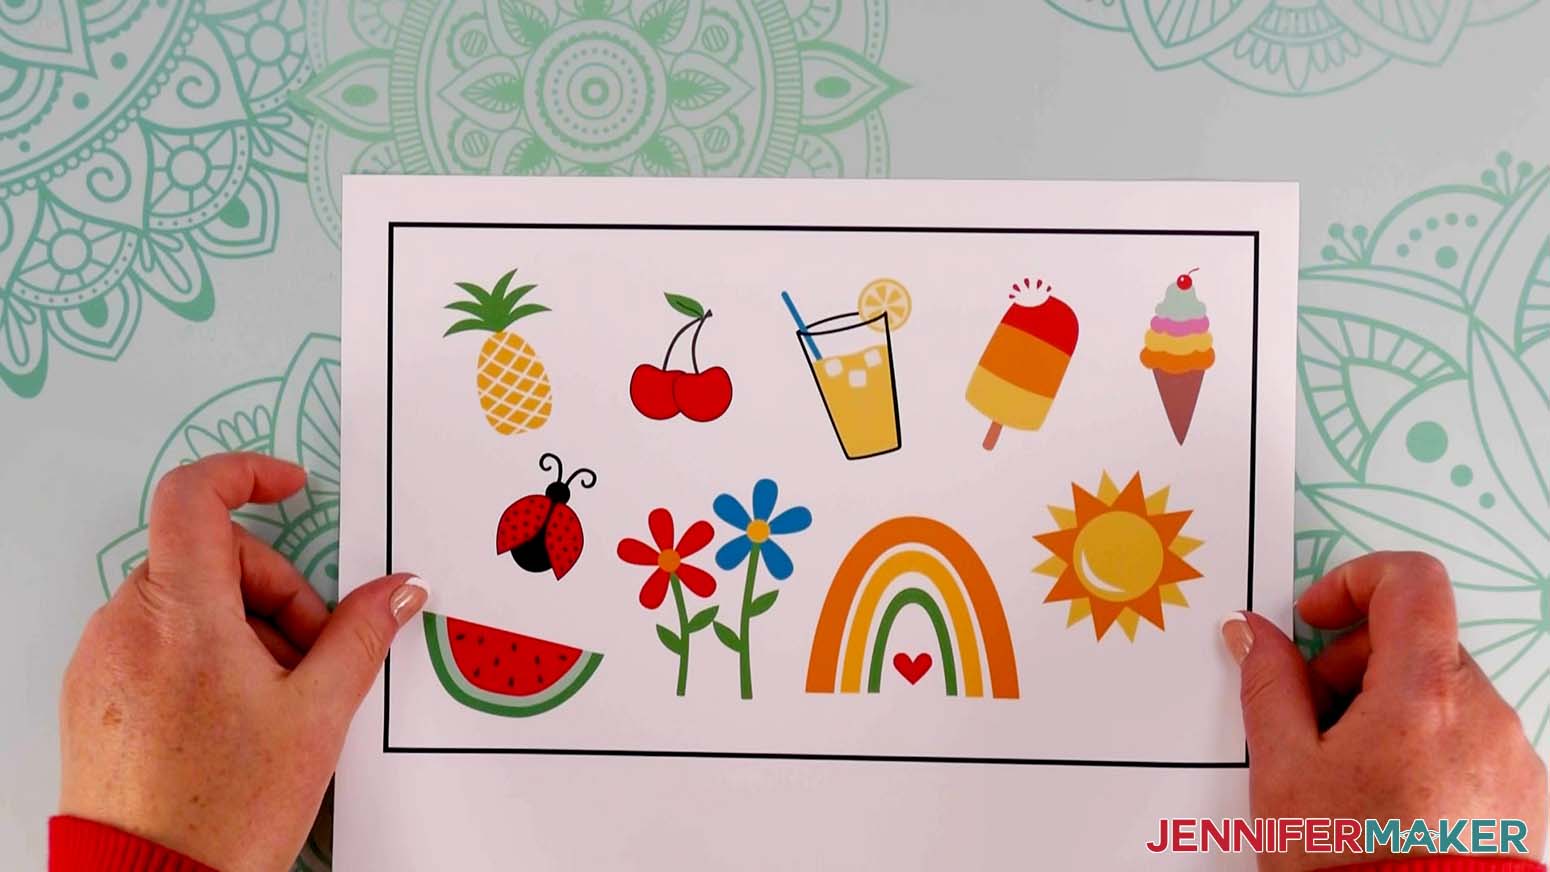
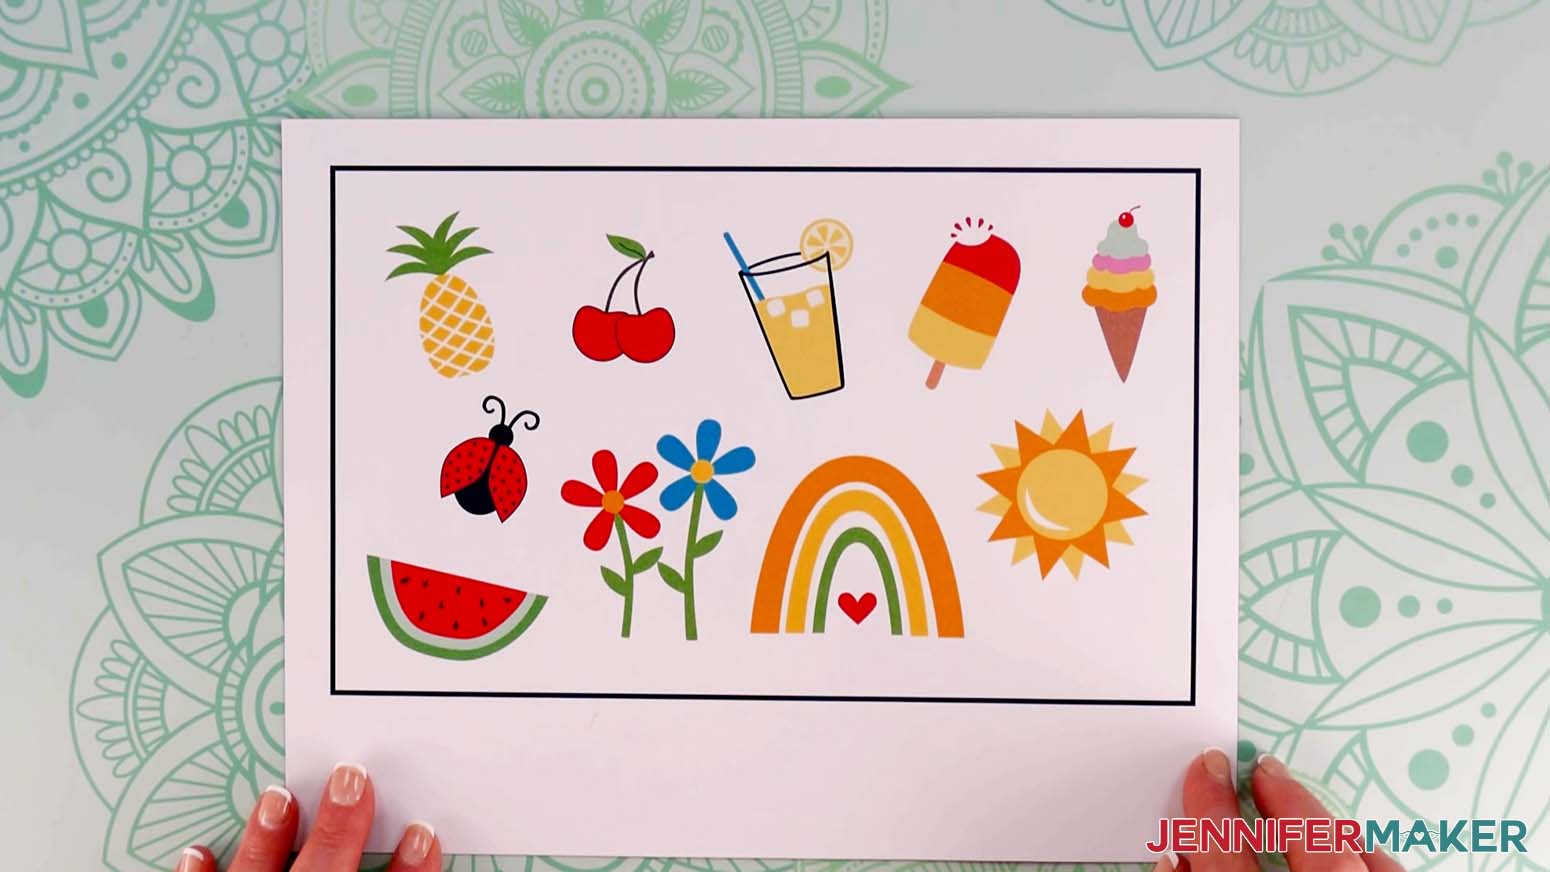
This is what the DIY Fridge Magnets collection looks like on my Canvas.
You can zoom out to see all of the design by clicking on the minus (-) sign on the lower left.
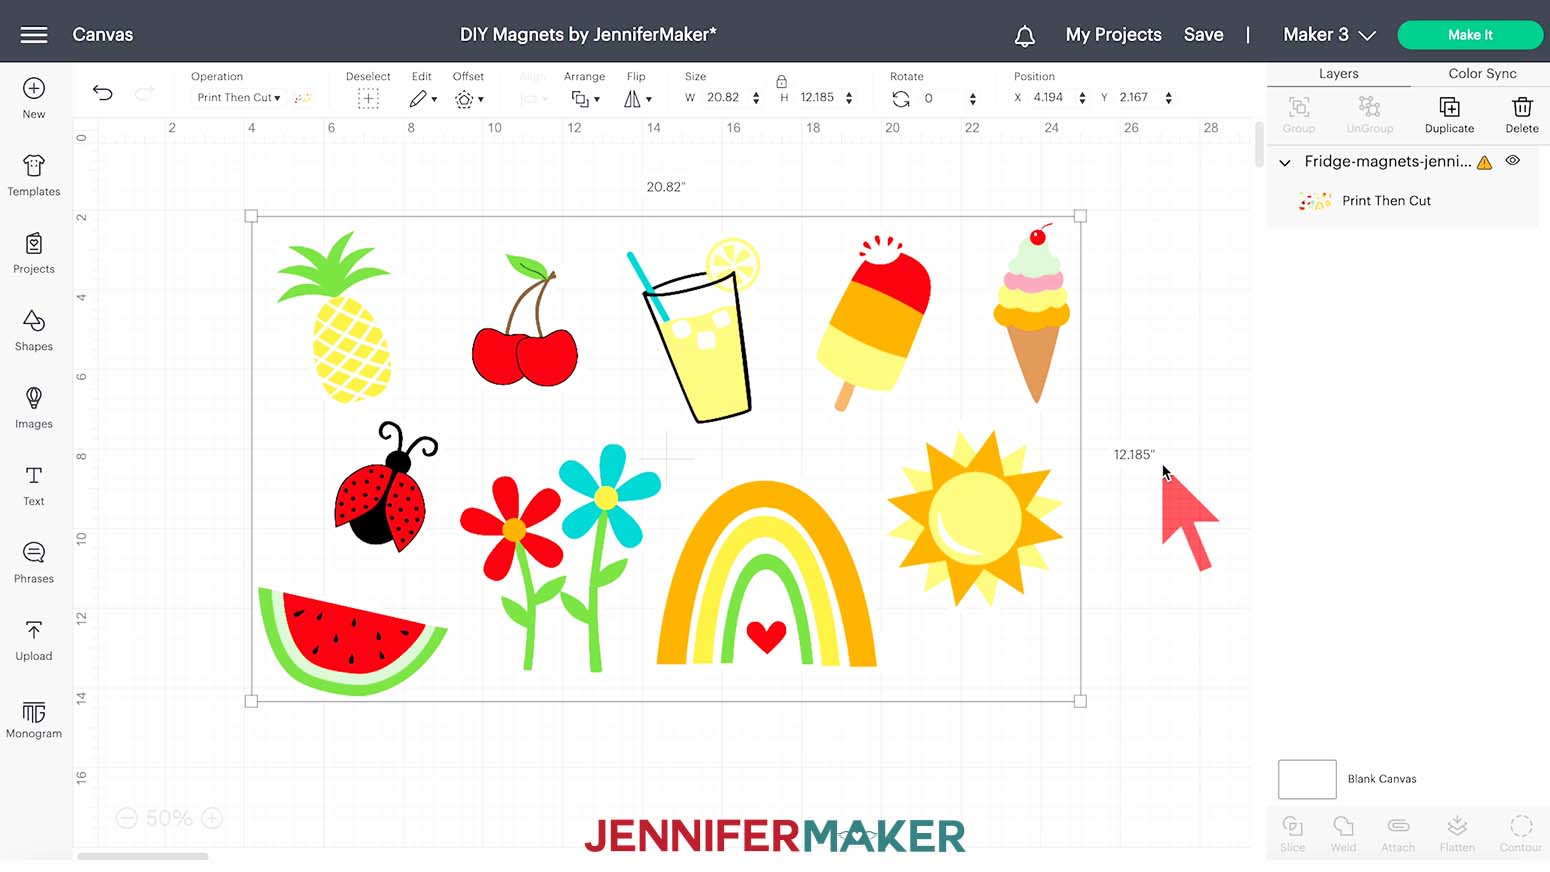
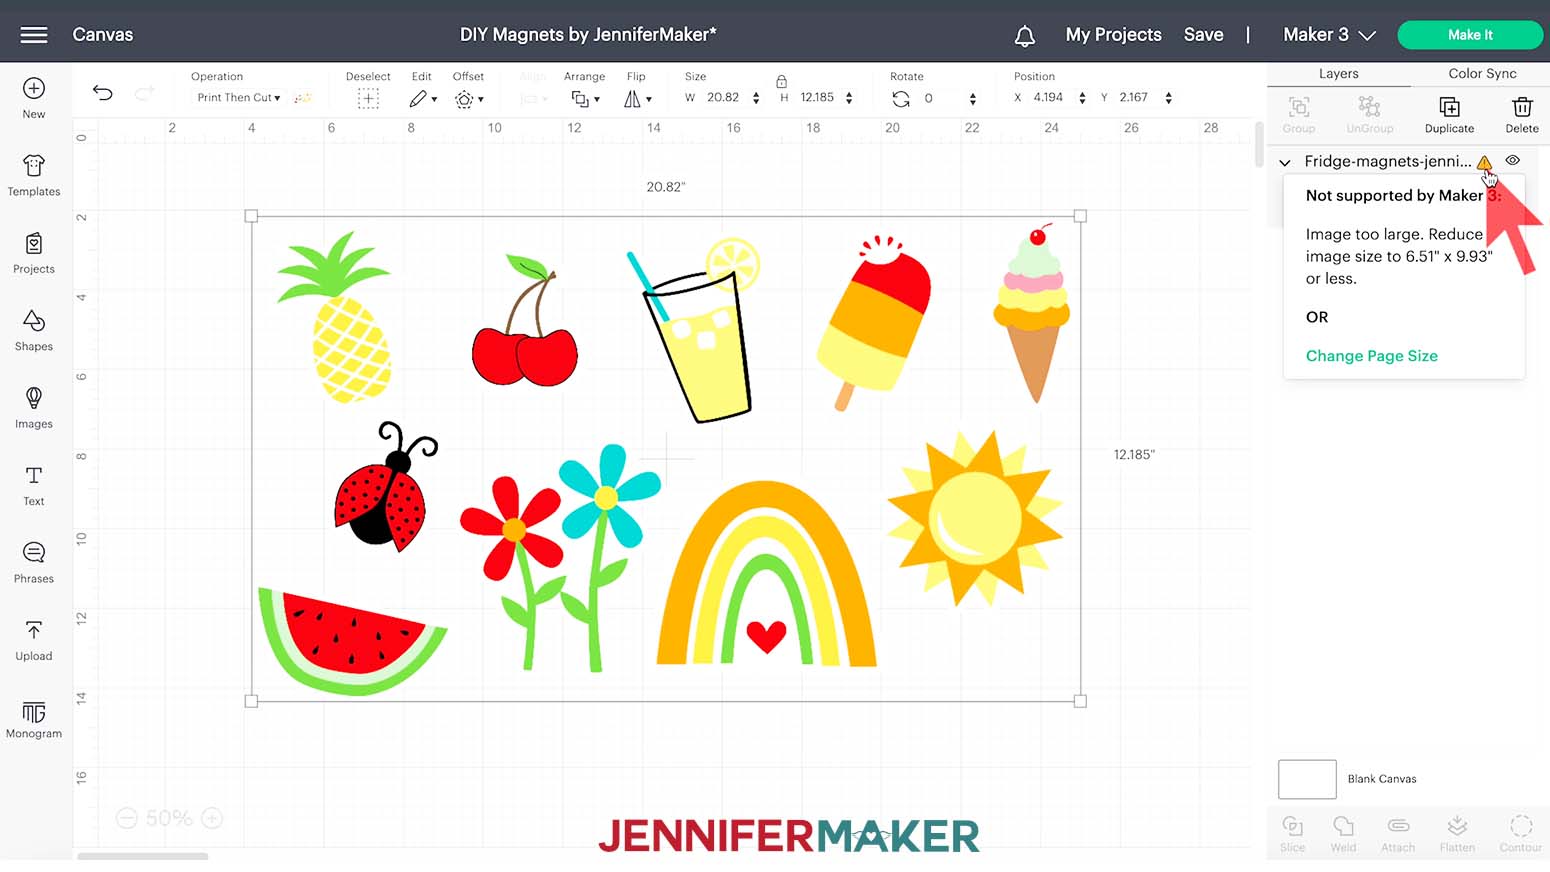
I have sized the PNG to be ready to cut on a single sheet. As of July 2022, the maximum Print then Cut size is 9.25" x 6.75". If you'd like to make your magnets smaller, click and drag the resize handle. If you'd like for the magnets to be larger and you get an error because of the print size, upload the designs as individual PNGs so that you can print them on multiple sheets.
They're ready to cut!
Make sure the correct machine is selected, then click "Make It" in the upper right corner.
There is nothing to change on the Prepare screen, so click Continue.
Some of the settings are different depending on the magnet materials you're using.
Click the green Send to Printer button to open the Print Setup window. Make sure your printer is listed and the sliders next to "Add Bleed" (a small border around each image that allows for more precise cutting) and "Use System Dialog" are green. Then click Print.
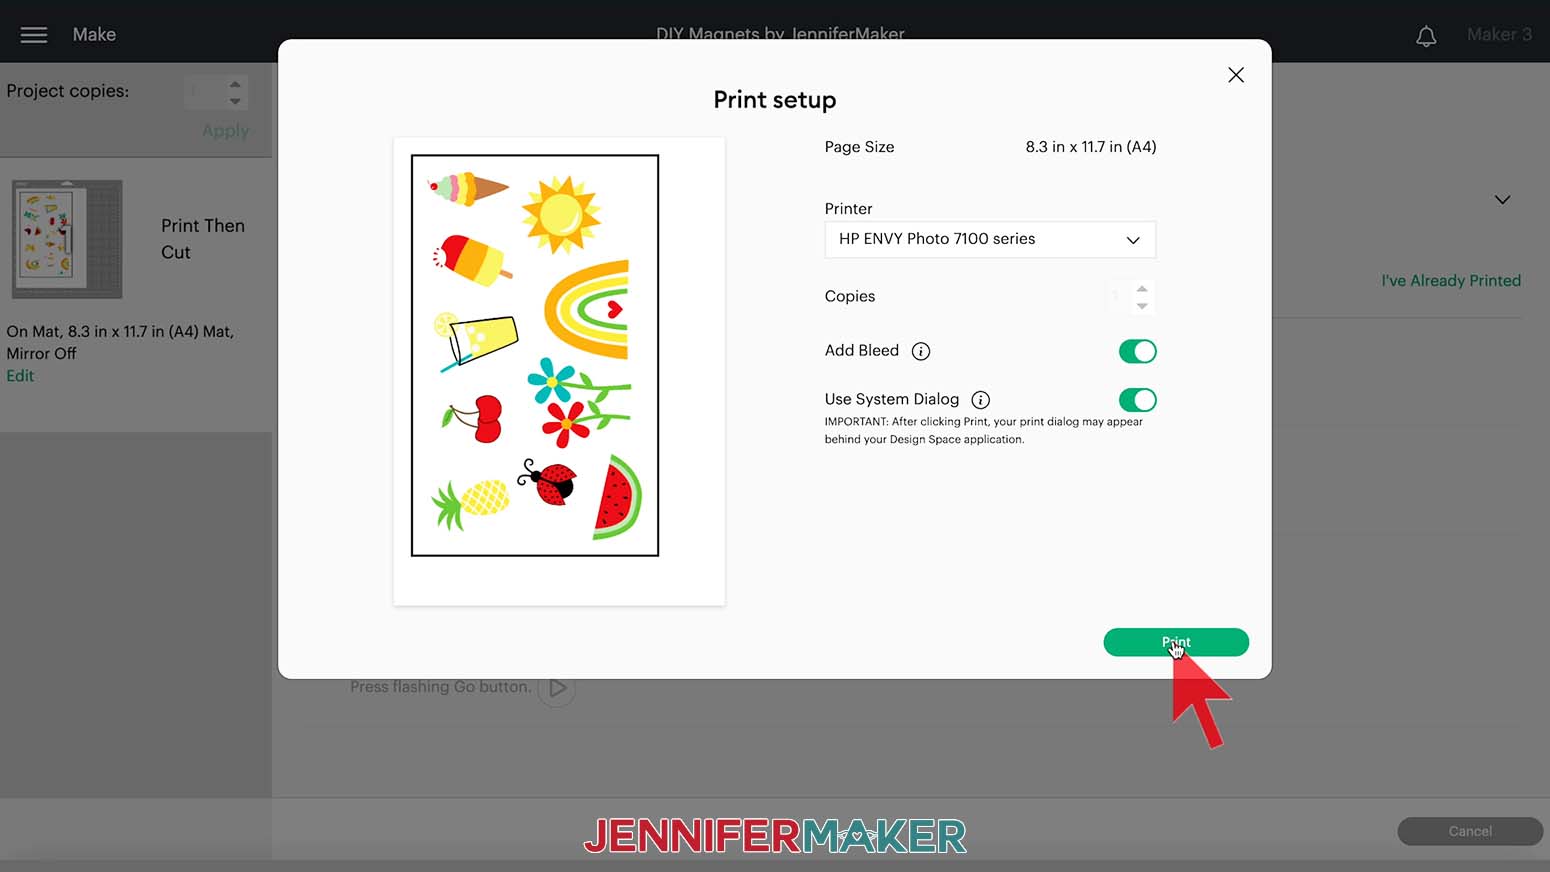
The print screen for your printer will appear, but it might be hidden behind Design Space. Minimize your Cricut window to see the print settings window.
Your window will look different depending on your computer and printer. Make sure your printer is listed in the window. For either material, set the paper type to "glossy photo" and print quality to "Best."
Since the materials we're using for the magnets are thicker and a different composition than traditional printer paper, I've had better results using the manual feed tray. Change the paper source if necessary.
After your magnet designs have printed, set them aside until the ink is completely dry to avoid any smears during the cutting process.
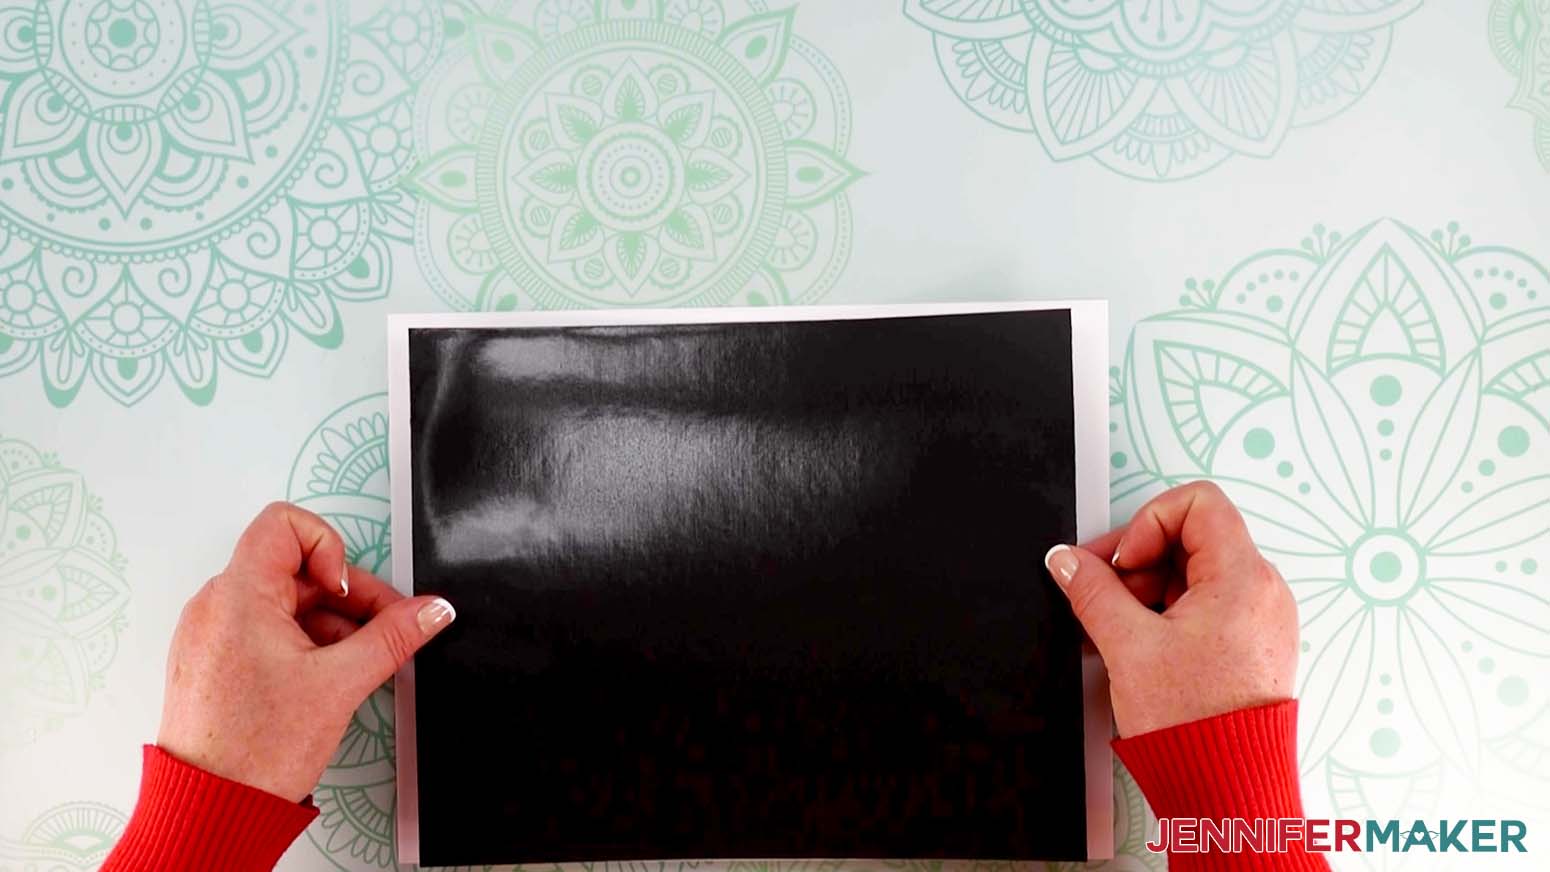
This is what my printed vinyl sheet looks like.
And this is what my printed magnetic sheet looks like.
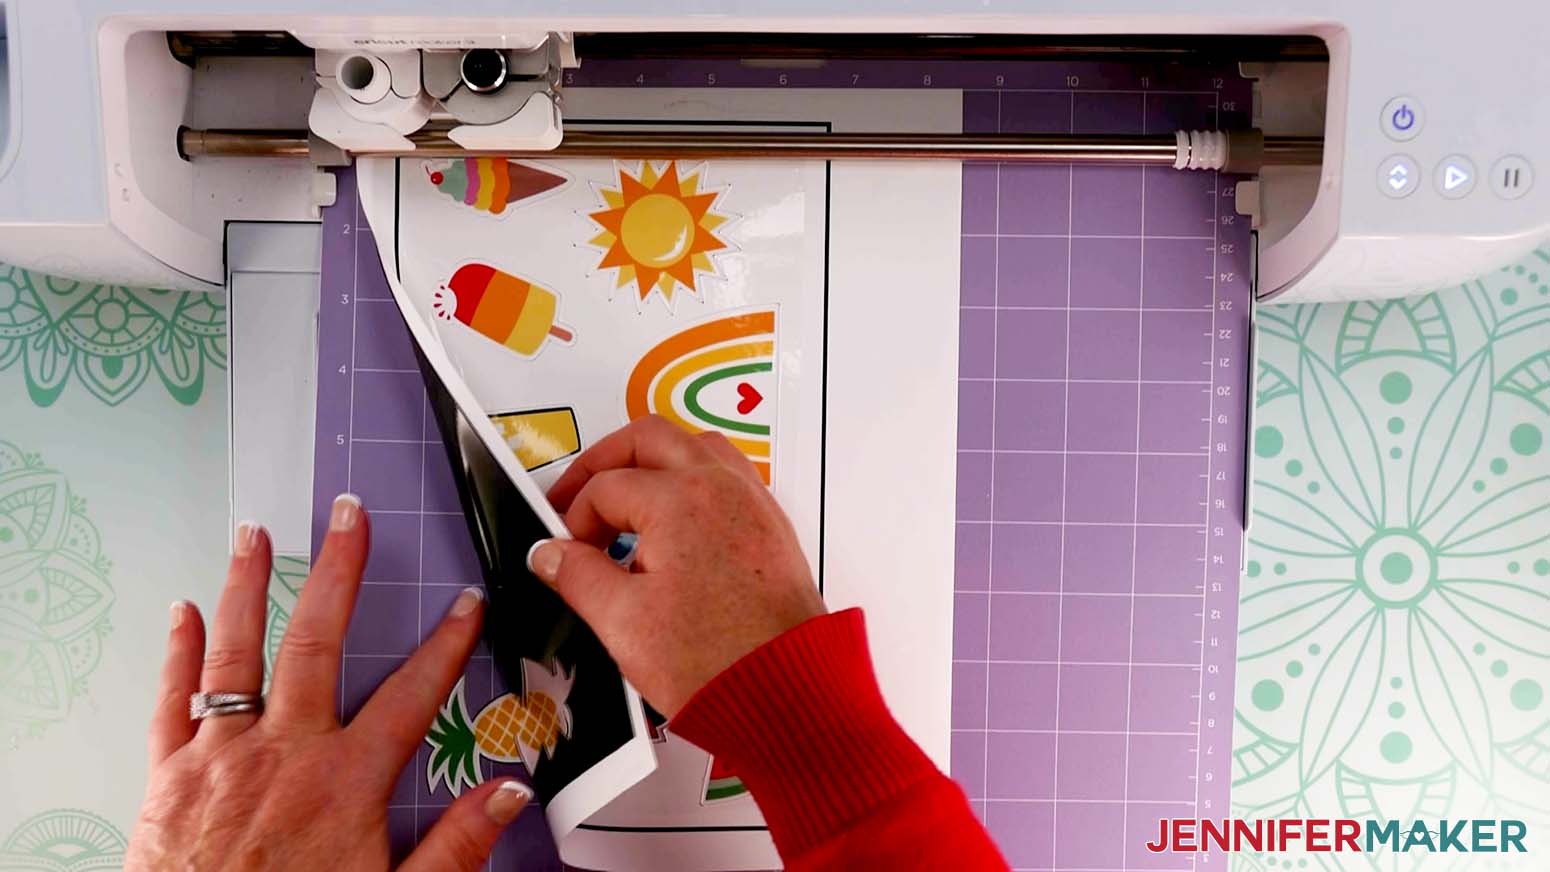
See the black box around my designs? This is called a registration box and is used by your Cricut cutting machine to tell it exactly where to cut your project.
Now, we need to apply the printable vinyl to a thicker magnet sheet. The printable vinyl sheet is larger than the magnet, so placement is important.
Remove the backing from the printable vinyl and lay it design-side down on your table. Remove the adhesive protective sheet from the magnet. Center the magnet over the back of the printable vinyl so that it will cover all of the designs. Press the sticky side of the magnet to the back side of the printable vinyl.
Flip over the layers and gently smooth out any bubbles.
You can cut either material as they are, or you can apply laminate to add a glossy finish and more strength. It also helps protect them from water!
I found it easiest to apply the laminate sheet with the magnets already placed on the machine mats. The printable vinyl on a magnet sheet goes on a StrongGrip Machine Mat and the printable magnet goes on a StrandardGrip Machine Mat.
Place the printed sheet on the correct mat, lining up the top left corner. We need to trim the laminate so that it doesn't cover the registration marks. The Cricut uses the registration marks to determine where to cut. If the laminate covers the registration marks it can interfere with that which might cause the cut to be way off.
Use a ruler to measure inside the registration box. The laminate just needs to cover the designs so I'm going to cut mine to 9.5" by about 5.75".
Remove the backing of the self laminate. Just like transfer tape, fold the edges up like a taco and place the bottom curve along the center of the magnet sheet. Gently let the sides down and use your scraper to smooth out any bubbles.
TIP: If you have any tricky bubbles, it is okay if they aren't completely gone, just make sure they are in an open white area and not over a design.
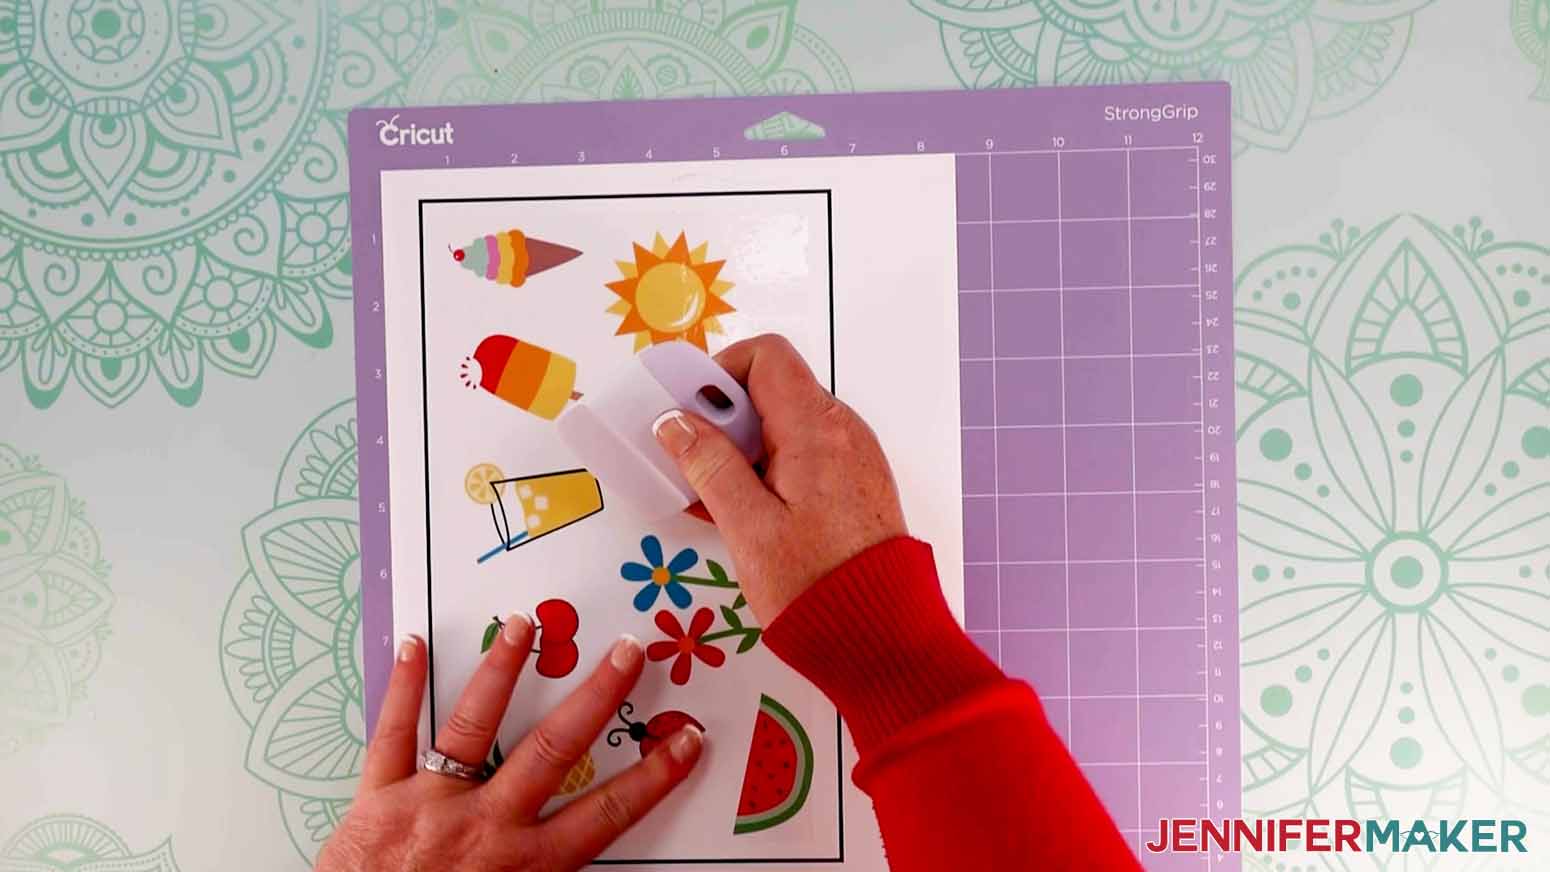
Use a brayer to make sure your sheet is really stuck well to the mat.
Now, they're ready to be cut by the machine. The settings and tools are different depending on which type of magnet you used.
Cutting Printable Magnets
Click "Browse All Materials” and select "Printable Magnet." Also, set the Pressure to "More."
Insert your Fine-Point Blade and press the flashing arrows to load your mat into your Cricut. Press the middle flashing button to cut the designs.
Cutting Printable Vinyl on Magnet Sheets
Click "Browse All Materials” and select "Magnetic Sheet 0.6mm." Also, set the Pressure to "More."
For this cut, you'll need the Deep-Point Blade in Clamp B. Press the flashing arrows to load your mat into your Cricut. Press the middle flashing button to cut the designs.
IMPORTANT: BEFORE unloading your mat, gently lift the edge of the magnet sheet to check the cut. If the design doesn't easily separate from the excess magnet, click the middle button on the Cricut to cut the material a second time. You may need to do this one or two times depending on the sharpness of your blade. As long as you don't unload the mat, the cut will be identical for each pass.
Once you're sure the magnets have cut all the way through, press the flashing arrows to unload your mat. Remove the magnets and excess magnet material from the mat. You're all done!
STEP 4: SHOW THEM OFF
Aren't they adorable! Remember, you can make the magnets larger by using the solo files, like I did with the flowers and glass.

Notes
These magnets can hold thinner paper items quite easily. If they get damp, wipe them off with a towel promptly.
Answers to Your Questions About How to Make DIY Fridge Magnets With Cricut
Q. Can you make fridge magnets with Cricut?
Yes! Thanks to printable magnetic sheets, printable vinyl, and Print then Cut features, it’s easy to make refrigerator magnets with Cricut cutting machines. If you use printable vinyl on top of magnetic sheets, remember to use the Deep Cut Blade!
Q. How do I make my own fridge magnets?
Making your own magnets with your favorite photos is a great way to display them. Simply edit the image to fit the shape you want using Design Space’s image editing tools and then follow my directions!
Q. Can Cricut Joy cut magnet sheets?
The Cricut Joy is so much fun, but it isn’t quite strong enough to cut DIY magnets. You can cut stickers and vinyl and transfer them to magnets, though!
Q. How do you apply vinyl to a magnet?
If you go slowly using my taco method, you can smoothly stick vinyl to a magnet and avoid air bubbles! If any form, gently push them to the edge using a scraper.
Q. How do you waterproof a Cricut magnet?
I’ve tried a few ways to add water protection, from Mod Podge to varnish, but I like using a laminating pouch. After adding your printed magnet sheet to the machine cutting mat, lay a piece of laminating material sticky side down over the designs. The magnets won’t be totally waterproof, but will be fine if they get sprayed or damp, just wipe them off when you notice the moisture.
Q. How thick are Cricut magnetic sheets?
There are a few options for magnetic sheets in Cricut crafting, but stick to materials less than 2.0 mm tall for Cricut Explore Air and Explores, and less than 2.4 mm for Makers.
Q: Can I change the design to make my own magnet design?
You are welcome to create a new project from scratch or change up my designs! You could add words or names using the text tool, or add to the collection for your own personal use.
Q: Can I sell these magnets on my Etsy shop/online store?
A: Yes, you can sell completed projects using these designs (with limitations) — please read about licenses here so you know what you can and cannot do. If you use them, please share photos with us!
Q: I can’t find the Print Dialog Box to customize my settings. What do I do?
You will need to minimize or move your Cricut Design Space window to see and use system dialog. The print dialog box pops up behind Design Space. There is a chance the system dialog box will not work on all printers. Each home printer is different so consult your printer’s user guide for additional support.
Q: Can I make magnets with glass marbles?
Yes! Check out my fun emoji marble magnets tutorial here!
Get my free designs to make DIY Fridge Magnets With Cricut!
I love seeing what you make with my designs and how you use them! Please share a photo of your DIY fridge magnets with Cricut in our Facebook group or tag me on social media with #jennifermaker.
Love,

Want to remember this? Save this How to Make DIY Fridge Magnets With Cricut tutorial to your favorite Pinterest Board!