Will sublimation ink reactivate? Learn how to sublimate a color-fast oven mitt!
Sometimes art and science go hand in hand, especially when it comes to the sublimation process. I’ve sublimated on soft materials such as polyester fabric (like my sublimated garden flags), hard surfaces with special coatings (like my sublimated wind spinners), and everything in between. It’s a trial and error process almost every time, but I always come away learning something new! My sublimation oven mitts are no exception. This time, I’ve learned a lot about how temperature affects sublimation, and I’m excited to share my findings!
Watch the full step-by-step tutorial on how to sublimate an oven mitt:

With sublimation, special inks are used to create sublimation prints, which are then transferred onto various materials, often by pressing with a heat press machine. The high temperature transforms the dye sublimation inks into a gaseous state, allowing the printed image to be absorbed and creates a final product with vibrant colors and long-lasting results.
Now, sublimation only occurs within a recommended temperature range that depends on the material used, typically between 350 and 400 degrees Fahrenheit. Lower temperatures won’t activate the ink at all, and since household appliances such as dishwashers and clothes dryers don’t get that hot, we can wash sublimated mugs and shirts without worry. But what about higher temperatures, like an oven mitt would be exposed to? Will sublimation ink reactivate on a sublimated oven mitt if it’s hot enough?

I just had to know if setting a hot pizza pan on one of my mitts would cause the sublimation design’s bright color to fade! So, I came up with an experiment to test the color-fastness of sublimation transfers with this set of four fun oven mitts! First, I used an AI Art generator and image editing software to make these retro-inspired designs. Then I pressed the images onto some oven mitt blanks. If you want to learn how to create your own one-of-a-kind item using AI images, be sure to check out my AI Art Design Workshop.
After that, it was time to do the actual testing, so I covered the mitts with butcher paper to catch any ink that might transfer. Next, I placed a dish of water that had been heated to 450 degrees on top. Then came the hard part–waiting for the dish to cool! I reveal the results of my “Will Sublimation Ink Reactivate? test in my video for this project, so make sure to watch it if you want to see how the experiment turned out!
Sublimating the oven mitts was its own science experiment as working with the blanks was very challenging! The first blank I tried out had some quality issues, so the transfers didn’t have the best results. Even the blanks I settled on had some problems with bunching and wrinkling, especially around the thumb area, just due to their nature and shape.
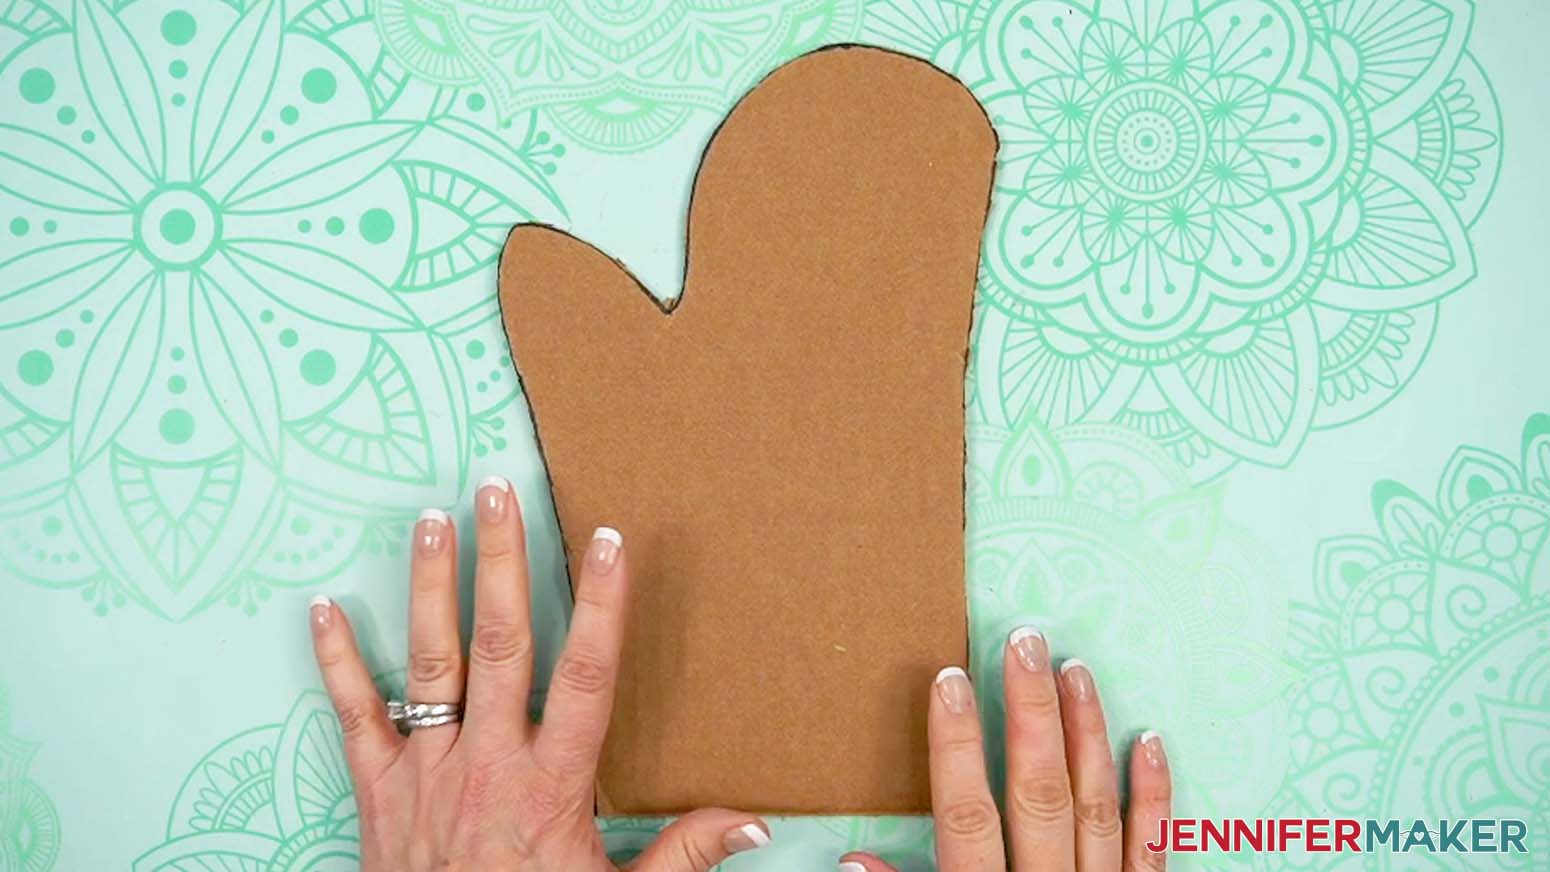
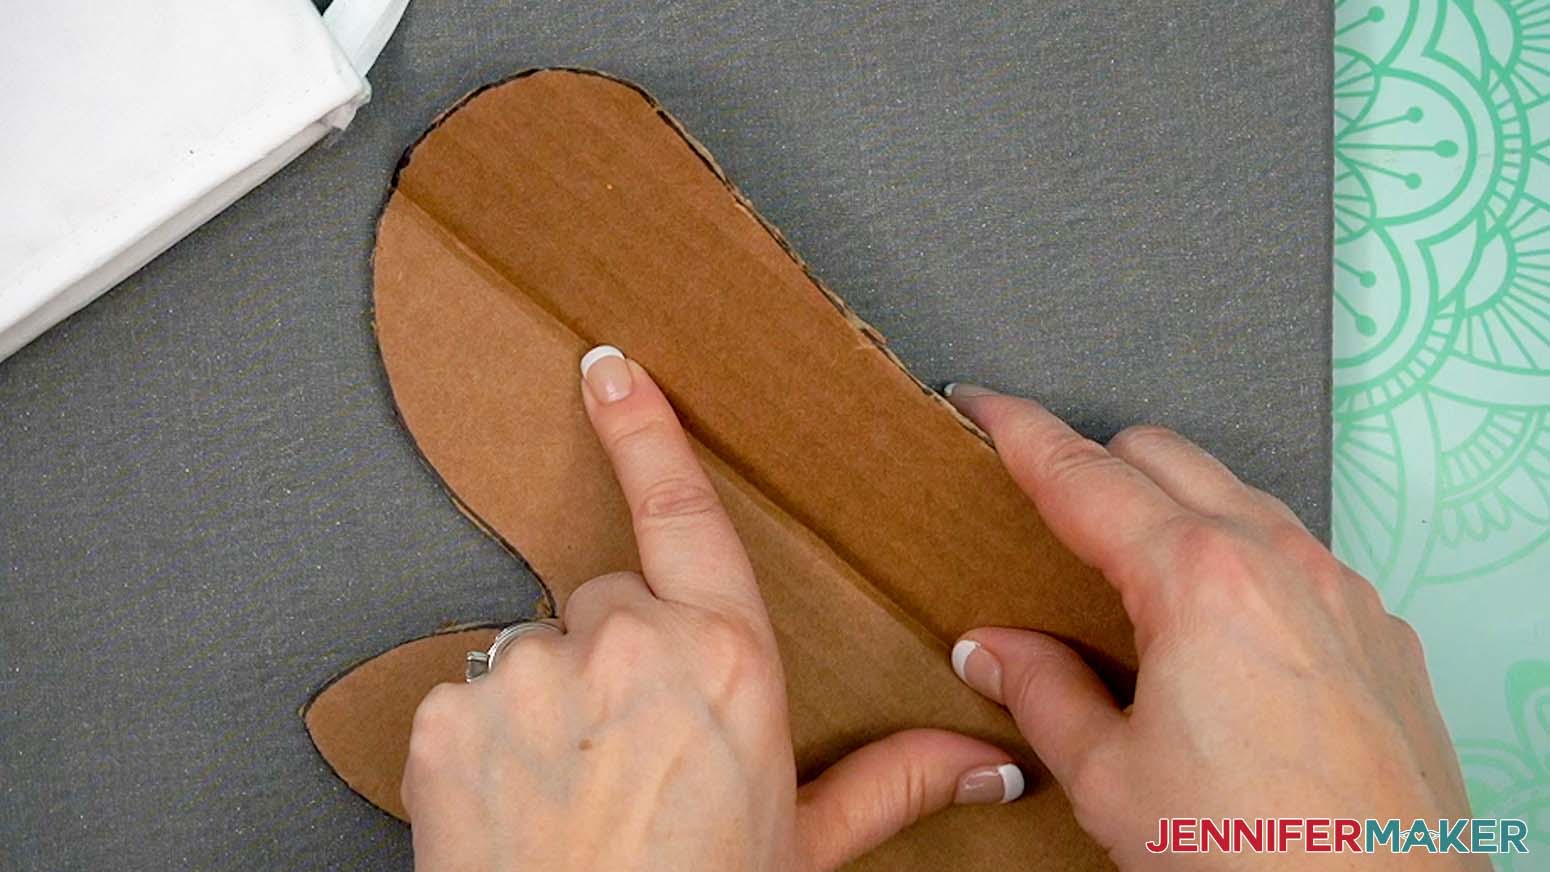
Luckily I found a way to get rid of those pesky wrinkles: a cardboard insert! I have a template you can print and trace onto cardboard and cut with scissors, but I’ve also provided SVG files so you can cut the insert with a Cricut, if you like. I definitely recommend using the insert because it will help you get the flattest surface for your blank.

I’ve found the best way to address common issues when sublimating an oven mitt is to have the right equipment. First, make sure you have the right type of printer, ink, and paper. There are special dye sublimation printers that are made just for printing images using sublimation ink, but you can also convert certain inkjet printers into sublimation printers.
My converted Epson EcoTank works great for sublimation! Just remember that if you convert a regular printer for sublimation, you shouldn’t mix different ink types in an ink tank. And when it comes to sublimation ink, Hiipoo is my go-to brand! You also need special sublimation paper for high-quality results, as regular copy paper won’t produce the vibrant prints you’re aiming for. A-SUB sublimation transfer paper is a popular choice, and I use it all the time with great success!
And of course, a proper heat source is necessity for sublimation. I actually used two different presses for this project! First, I use my EasyPress Mini to remove as many wrinkles as I can from my oven mitt blank. You can use a small household iron to prepare your blank instead, but I prefer the Mini because its small size makes it easy to maneuver. Whichever you decide to use, work carefully and wear heat-resistant gloves so you don’t burn yourself! And for transferring the image onto my oven mitt, I used my 12″ x 10″ EasyPress 2 with a heat-resistant mat. I was able to cover my entire design with my press, ensuring that I evenly applied the right amount of pressure to the blank for optimal results.

Now, my step-by-step guide includes the instructions for working with the oven mitt blank in my materials list, but if you use a different blank, make sure to check the packaging for specific settings. White polyester works best for sublimation. Or take a look at my Sublimation Cookbook for different times and temperatures for a variety of materials. It has tons of useful information ready for you, whether you’re new to sublimation or a seasoned veteran!
So, will sublimation ink reactivate? Let me show you how easy it is to sublimate an oven mitt and we’ll find out together! This post contains some affiliate links for your convenience (which means if you make a purchase after clicking a link I will earn a small commission but it won’t cost you a penny more)! Read my full disclosure policy.
Materials to Sublimate an Oven Mitt
View my Amazon shopping list with the exact items I used.
- Sublimation Oven Mitts
- 125g 8.5” x 14” Sublimation Paper
- One (1) Sheet of 12” x 12” Cardboard (for pressing insert)
- Two (2) Sheets of 8.5″ x 11″ Copy Paper (optional for printing the insert pattern)
- White, Uncoated Butcher Paper
- One (1) Sheet of 12” x 12” White Cardstock
- A Sublimation Printer – I used a converted Epson EcoTank ET-2800 Inkjet Printer
- Sublimation Ink
- A very small iron for removing creases – I used the Cricut EasyPress Mini
- Heat Press – I used the 12” x 10” Cricut EasyPress 2 (for sublimating the design)
- Fan (for ventilation)
- Heat-Resistant Tape
- Heat-Resistant Gloves
- Cricut EasyPress Heat-Resistant Mat
- An Inkjet Printer – I used my Epson EcoTank Inkjet Printer (optional for printing the insert pattern)
- Measuring Tape
- Scissors
- Marker (optional to trace the outline of the insert)
- Lint Roller
- Lint-Free Cloth (for pressing the thumb of the oven mitt)
- Design #721 (My free SVG/DXF/PDF/PNG design files are available in my free library – get the password by filling out the form at the bottom of this page)

How to Make a Sublimation Oven Mitt

Sublimation Oven Mitt
Will sublimation ink reactivate? Learn how to make a color-fast sublimation oven mitt!
Materials
- One (1) Sublimation Oven Mitt
- One (1) Sheet of 125g 8.5” x 14” Sublimation Paper
- One (1) Sheet of 12” x 12” Cardboard (for pressing insert)
- Two (2) Sheets of 8.5" x 11" Copy Paper (optional for printing the insert pattern)
- White, Uncoated Butcher Paper
- One (1) Sheet of 12” x 12” White Cardstock
- Design #721 (My free PNG/SVG/DXF/PDF design files are available in my free resource library - get the password by filling out the form at the bottom of this page)
Tools
- A Sublimation Printer - I used a converted Epson EcoTank ET-2800 Inkjet Printer
- Sublimation Ink
- A very small iron for removing creases - I used the Cricut EasyPress Mini
- Heat Press - I used the 12” x 10” Cricut EasyPress 2 (for sublimating the design)
- Fan (for ventilation)
- Heat-Resistant Tape
- Heat-Resistant Gloves
- Cricut EasyPress Heat-Resistant Mat
- An Inkjet Printer - I used my Epson EcoTank ET-3830 Inkjet Printer (optional for printing the insert pattern)
- Measuring Tape
- Scissors
- Marker (optional to trace the outline of the insert)
- Lint Roller
- Lint-Free Cloth (for pressing the thumb of the oven mitt)
Instructions
STEP 1: GET MY FREE SUBLIMATION OVEN MITT DESIGNS
First, download my Sublimation Oven Mitt files from my free library – look for Design #721. Alternatively, you can use the Save This Project form near the top of this post and the design link will be emailed to you.
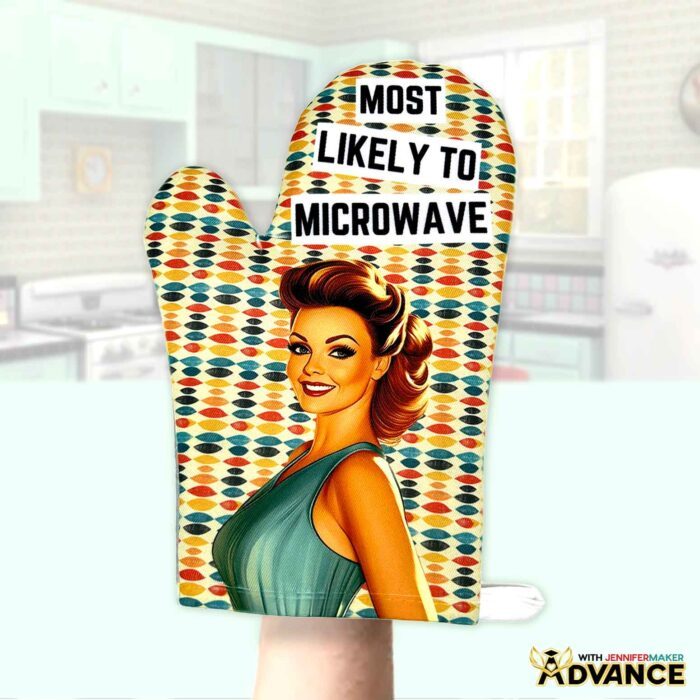
In the PNG folder, you’ll find right- (“rt”) and left- (“lft”) handed versions of four vintage-style cooking-themed designs with fun phrases. I made these designs with the help of AI art generation and adjusted them with image editing software. You’ll also find a printable pattern for an oven mitt insert to help the blank stay flat so your sublimation ink transfers better.
The PDF folder contains an alternate version of the insert that you can print and cut by hand. The SVG and DXF folders contain versions of the insert that you can use on cutting machines.
I’ll show you how to use these files to create the insert and press the sublimation image onto an oven mitt.
TIP: If you’re not sure how to upload, go to jennifermaker.com/svgs to learn how to unzip and upload files.
STEP 2: PRINT AND CUT THE OVEN MITT INSERT
NOTE: SVG and DXF files are provided and can be used if you choose to cut cardboard on a cutting machine. See my How to Cut Cardboard with a Cricut tutorial for more information.
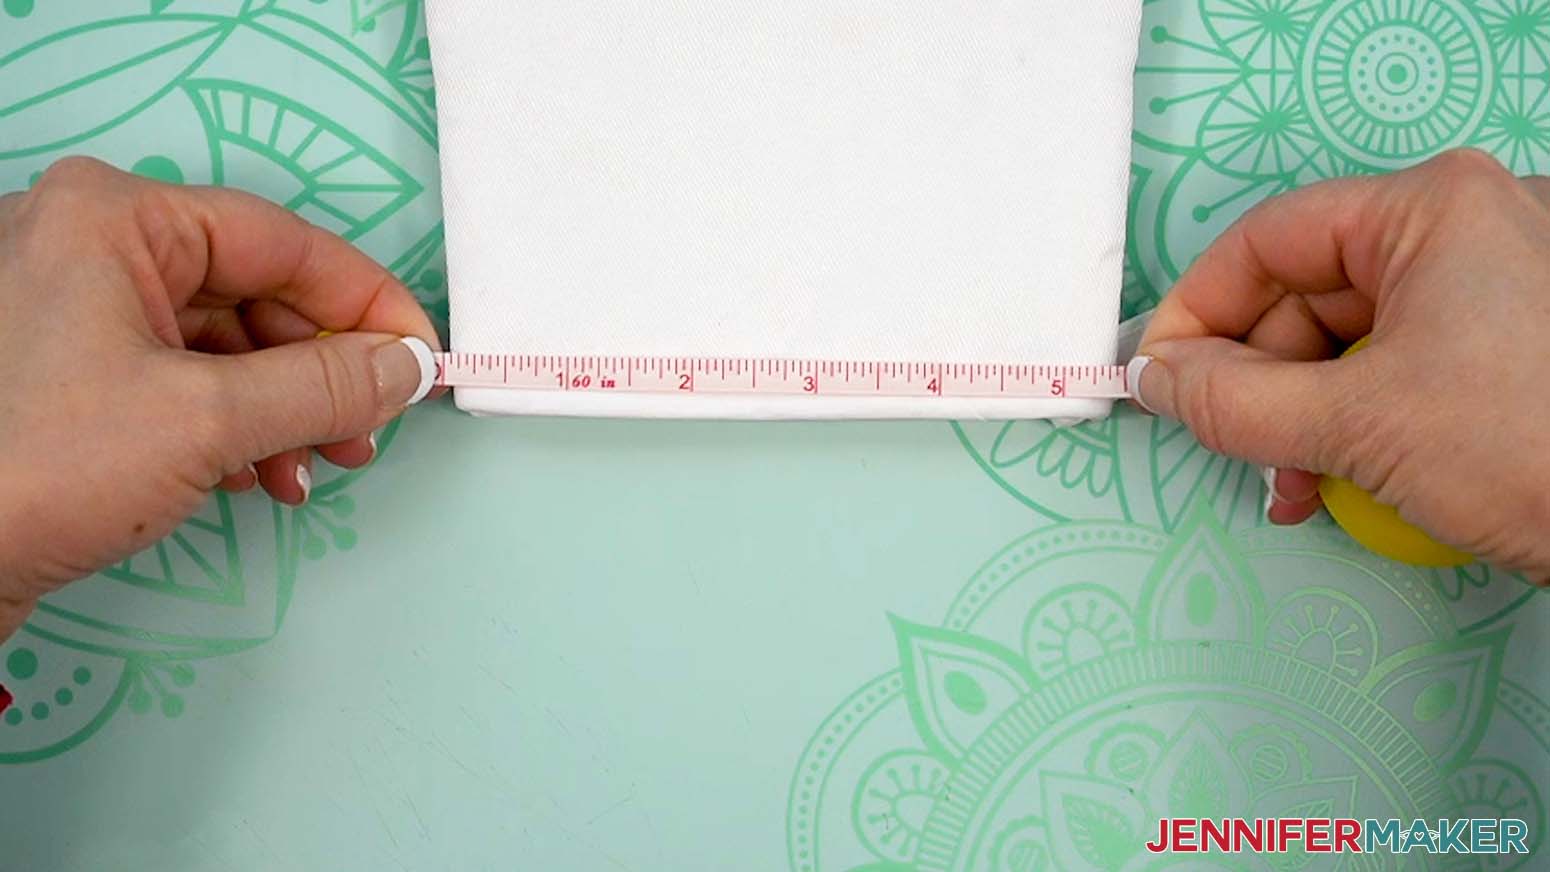
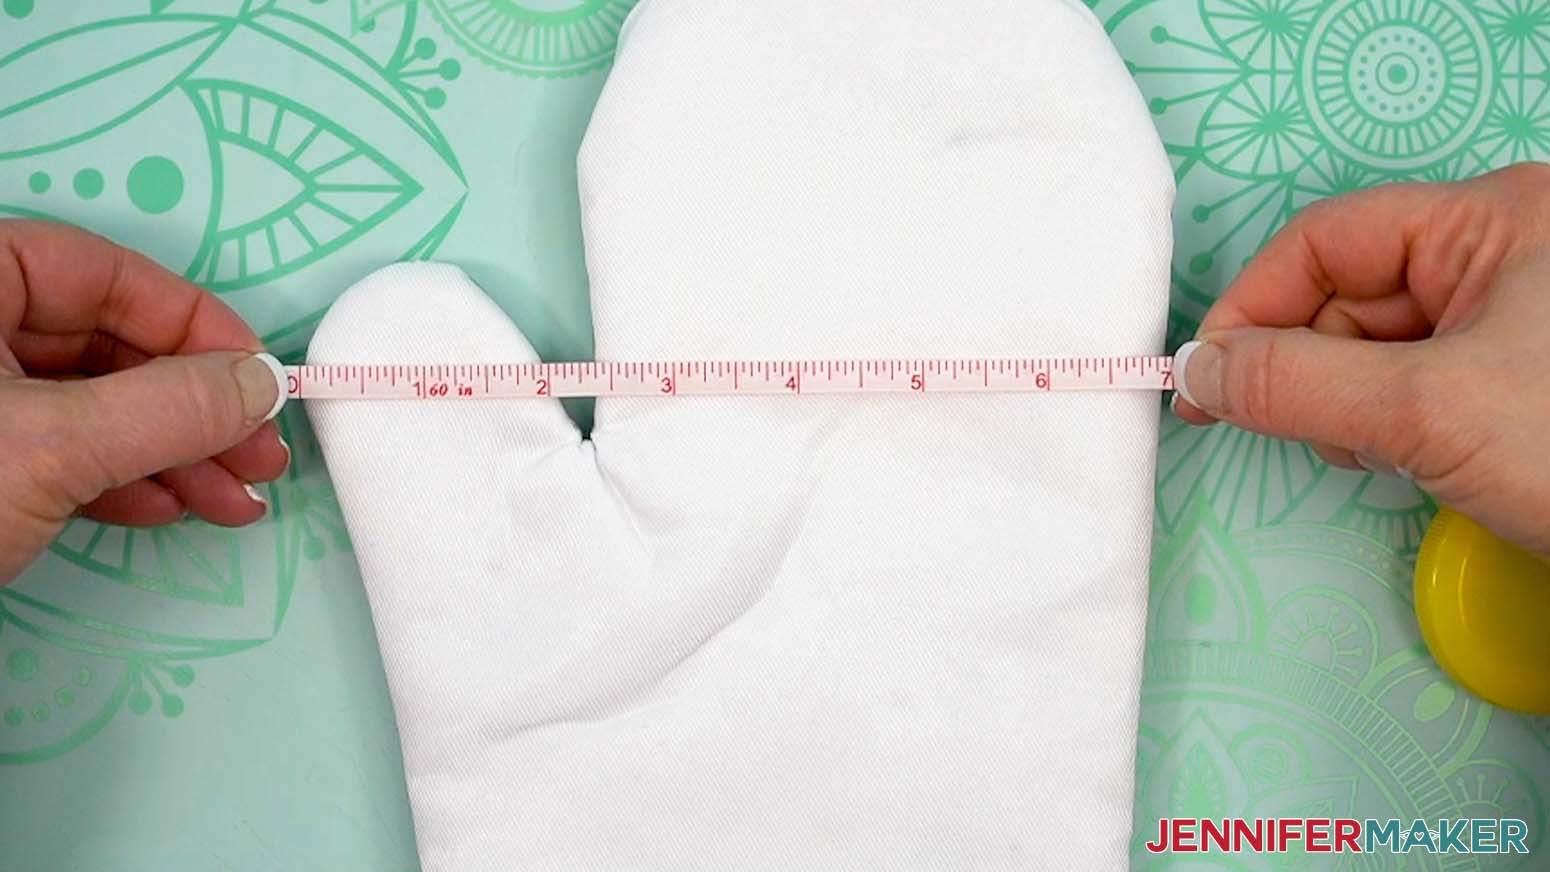
- If your oven mitt blank is different from the one in my list, use a tape measure to measure its width at the base and at the widest part (thumb area).
NOTE: The oven mitt I’m using measures 5.5” at the base and 7” at the widest part.
TIP: Even if you use the blanks in my supplies list, it’s always a good idea to verify that the size matches.
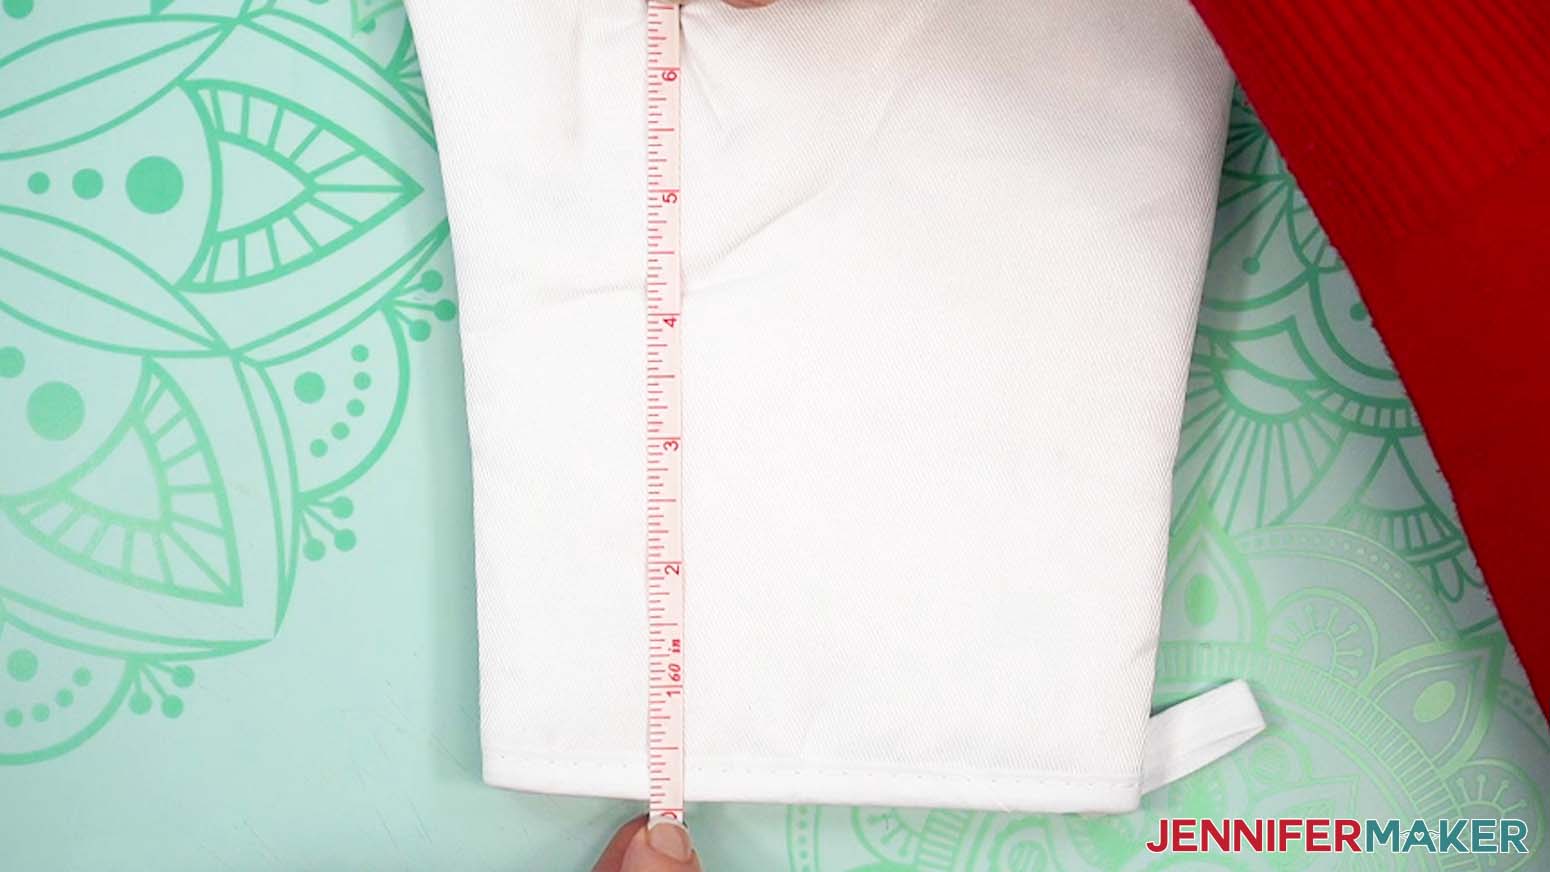
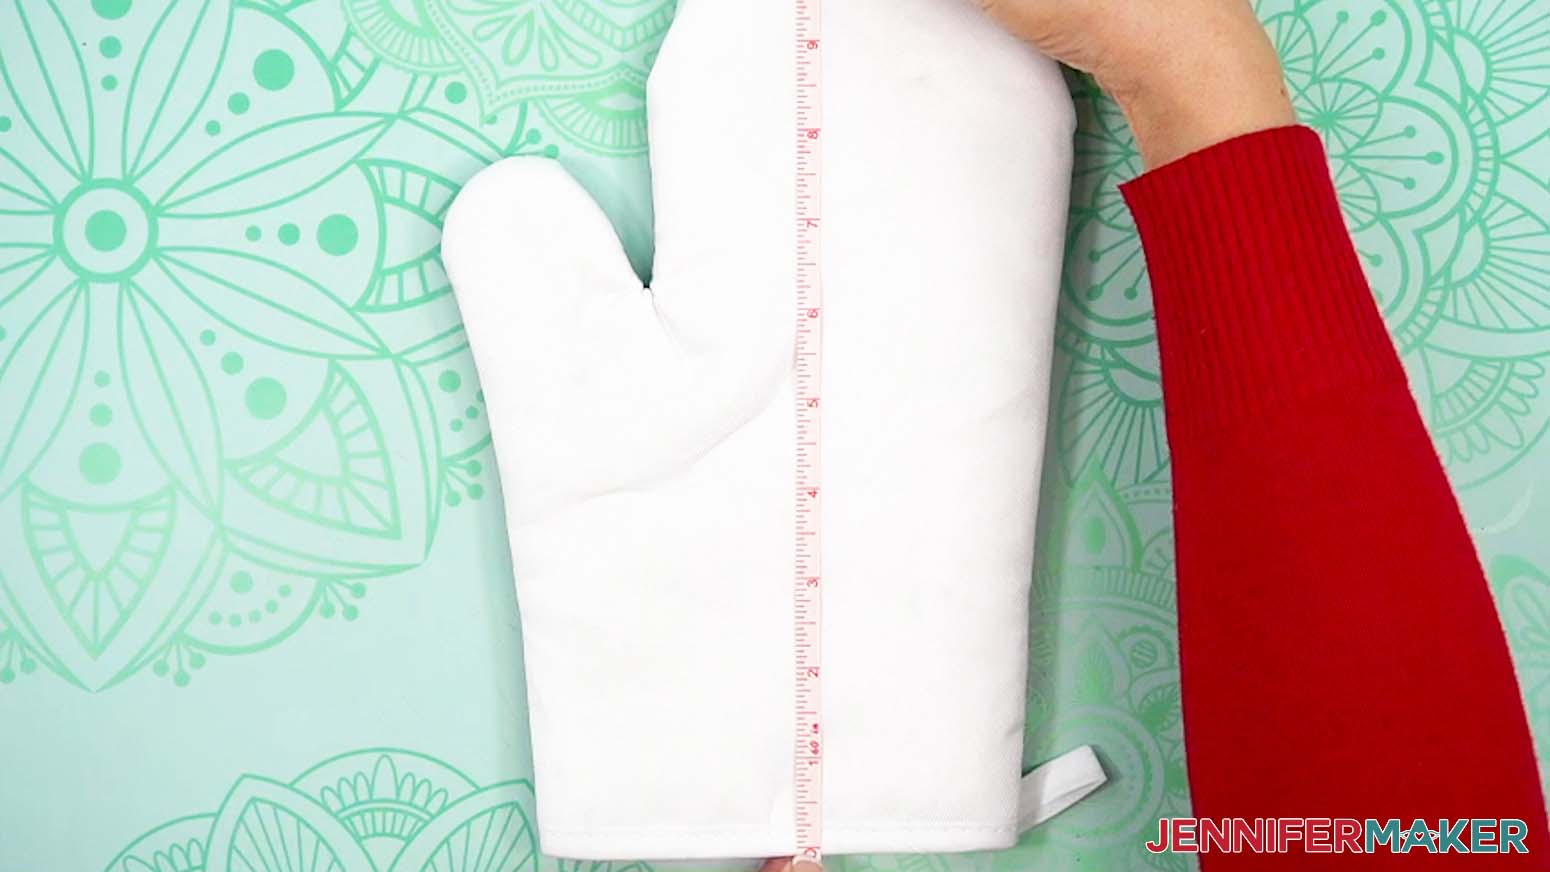
- Then measure the height from the base to the point where the thumb and hand meet, as well as the total height of the oven mitt.
NOTE: The oven mitt I’m using is 6.5” from the base to the thumb and 10.25” from the base to the top. - Open Google Docs in the Google Chrome web browser on your computer.
NOTE: You will need a free Google account to use the free Google Docs software.
TIP: You can also download and open the Google Docs app, but you won’t be able to install or access any printer profiles from a mobile device, and you’ll also have limited access to features, so I do not recommend it on a mobile device. - Click “Blank document” at the top left to open a new document.
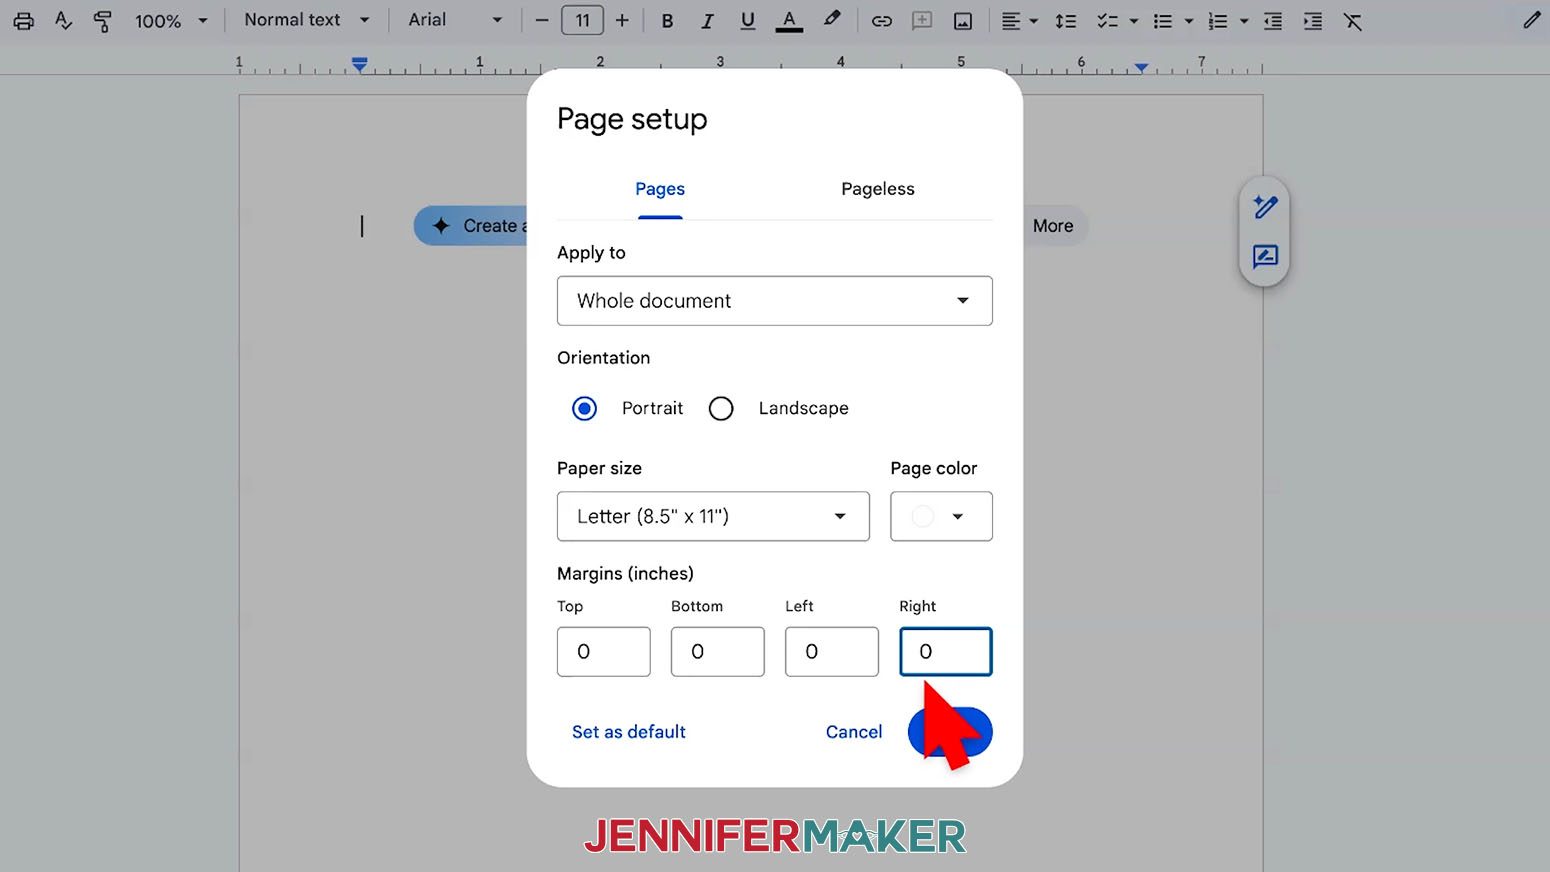
- Go to the “File” menu and select “Page setup.”
- Make sure the bubble next to “Portrait” is selected to better fit the mitt’s orientation.
- Change your “Paper Size” to match your copy paper size. I’m using 8.5” x 11” or letter-size paper.
- Change your margins to “0” to use more of the page.
- Click “OK” to apply the settings.
- Click the area that says “Untitled document” at the top and type a name for the file.
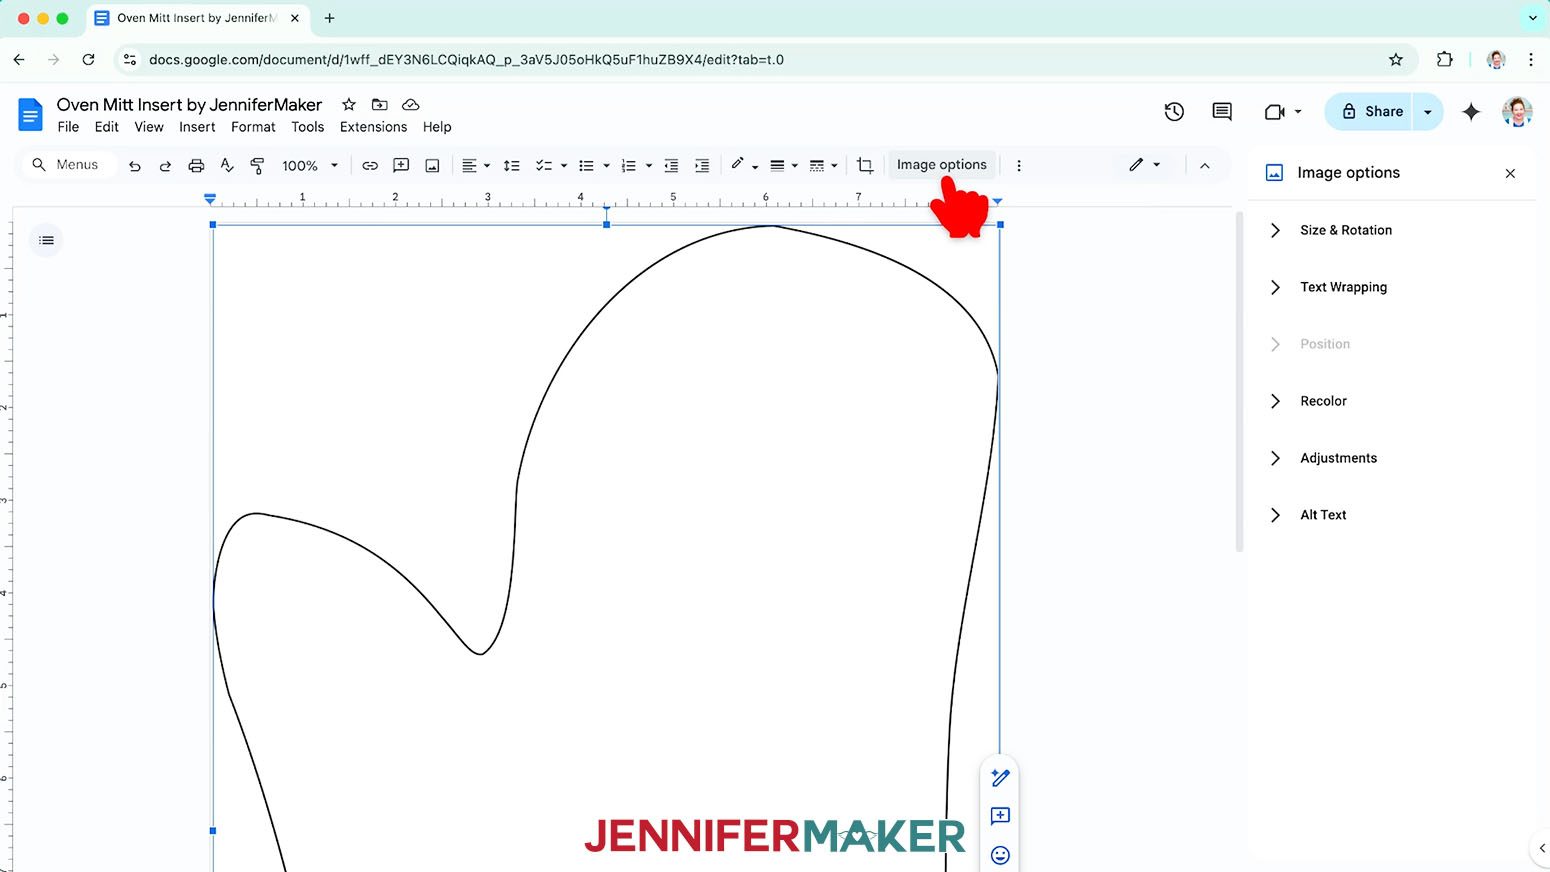
- Go to the “Insert” menu, select “Image,” and select “Upload from Computer.”
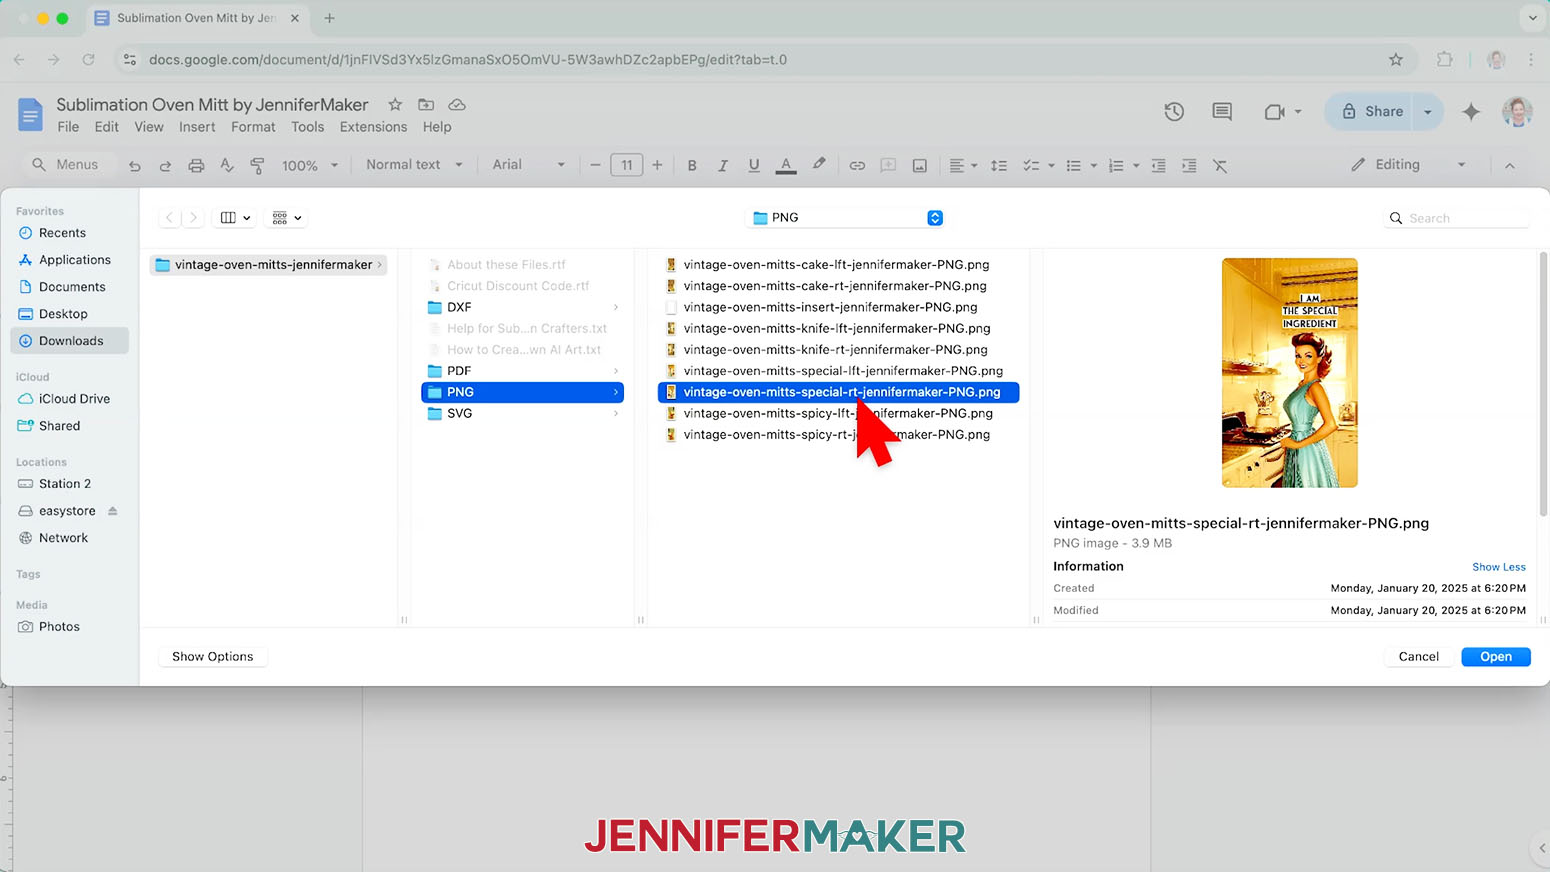
- Select the “oven-mitts-insert” PNG file.
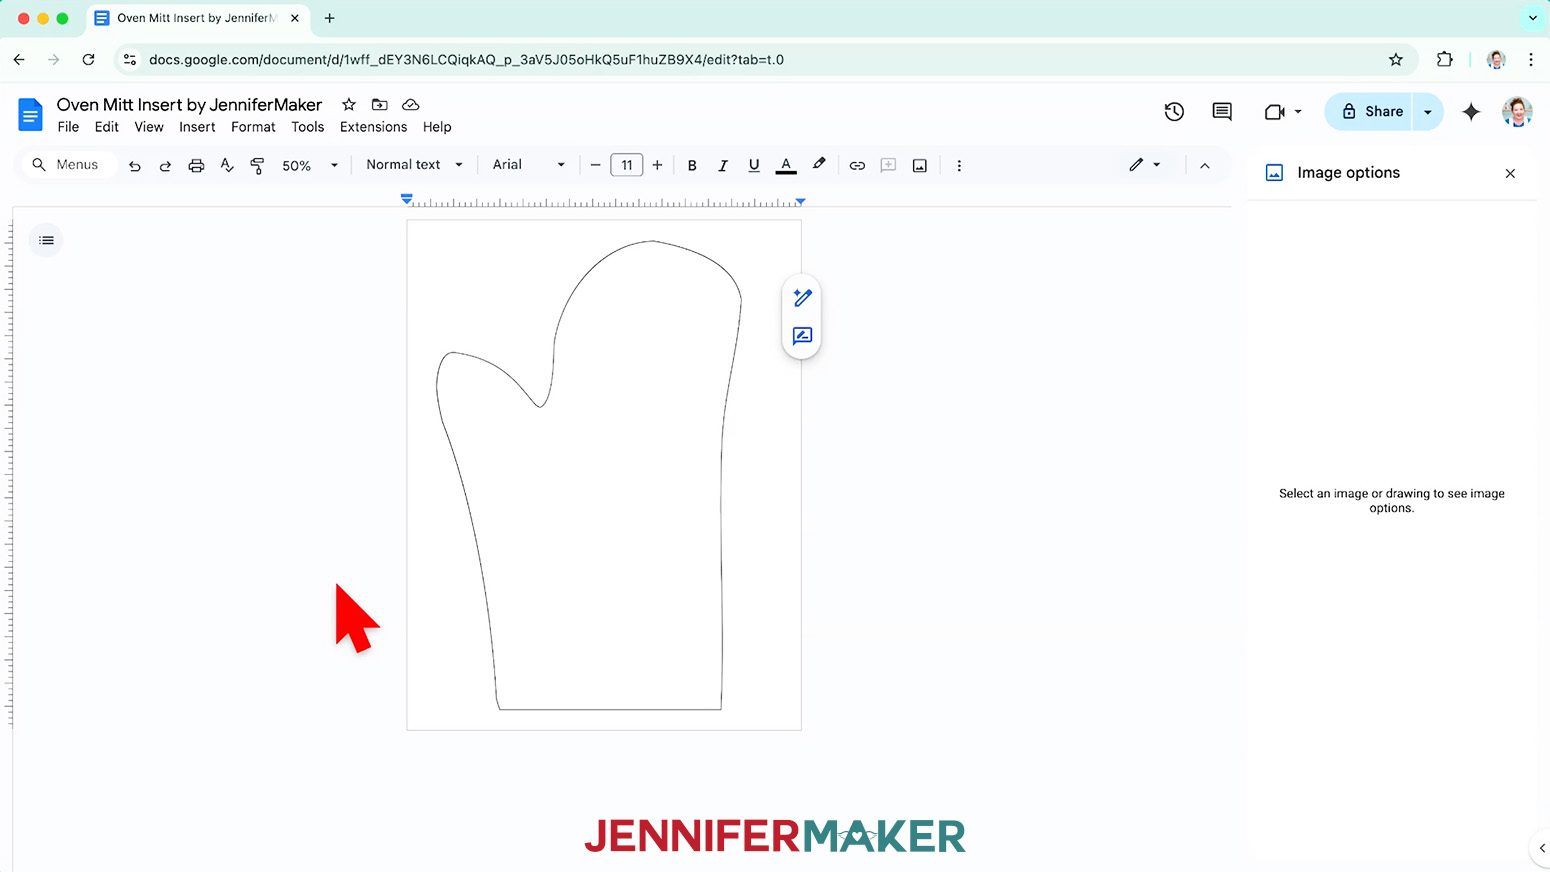
TIP: You’ll most likely find it in your Downloads folder. - To make sure the image prints at the correct size for the insert, select it and click “Image Options” at the top of the canvas.
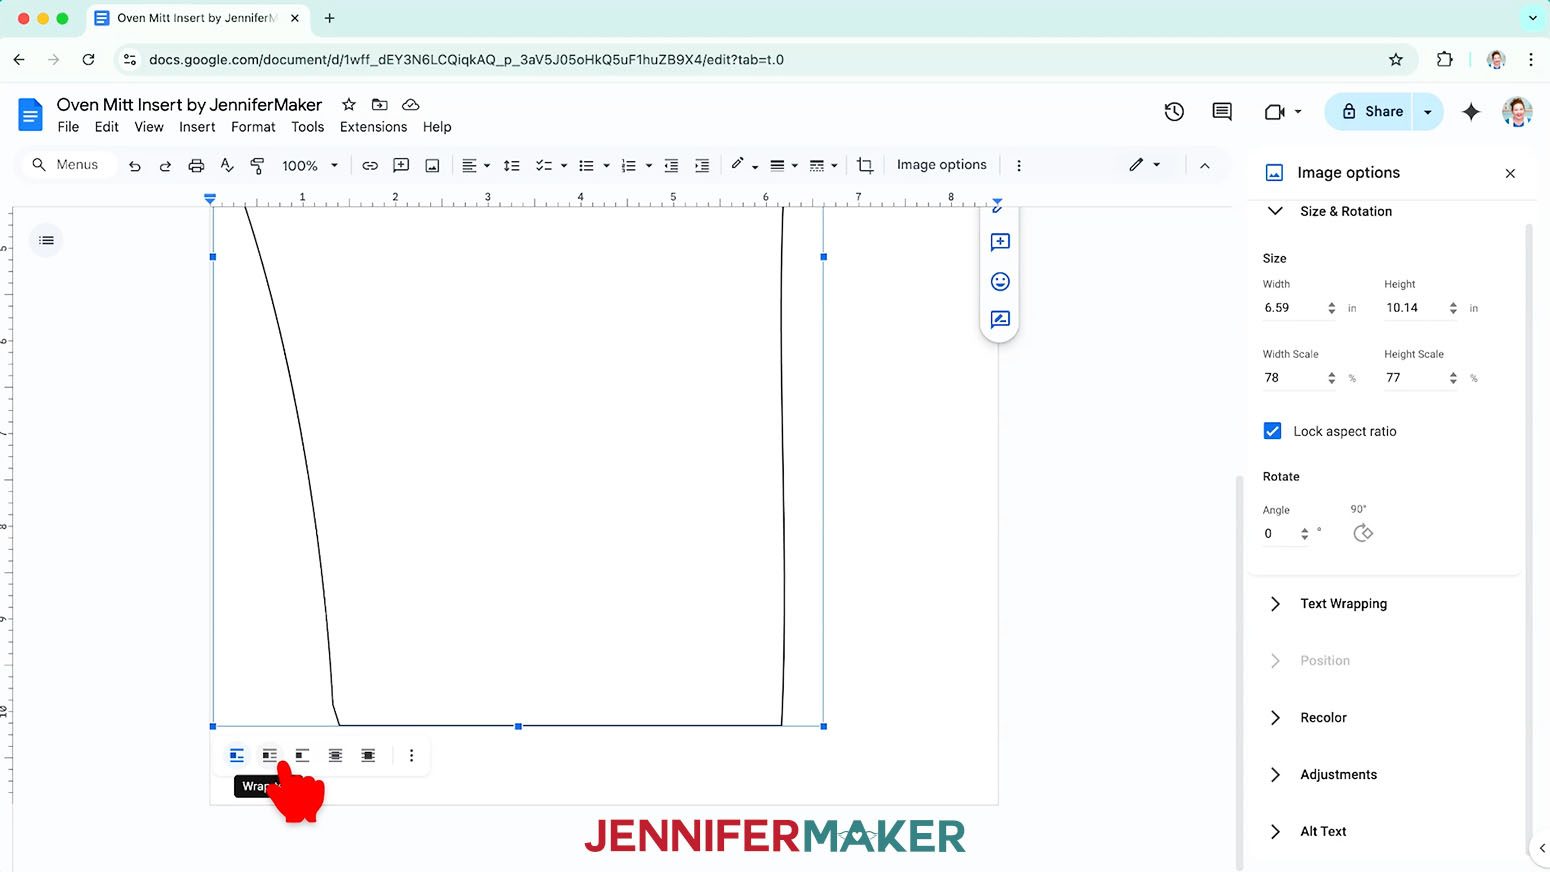
- Select “Size & Rotation.”
- Keep the “Lock aspect ratio” box checked to maintain the design’s proportions.
- Change the “Width” field to 6.59”. The “Height” field will automatically adjust proportionately to 10.14”.
NOTE: If your blank’s measurements are different from mine, you may need to adjust the sizing of your insert here. I recommend starting with a larger size than you think you’ll need – you can trim away any excess if necessary. - Click the image and select the “Wrap text” icon from the menu that appears below it.
NOTE: This setting lets you move the design anywhere on the page. - Click and drag the image to the center of your page to ensure it doesn’t get cut off at the edges.
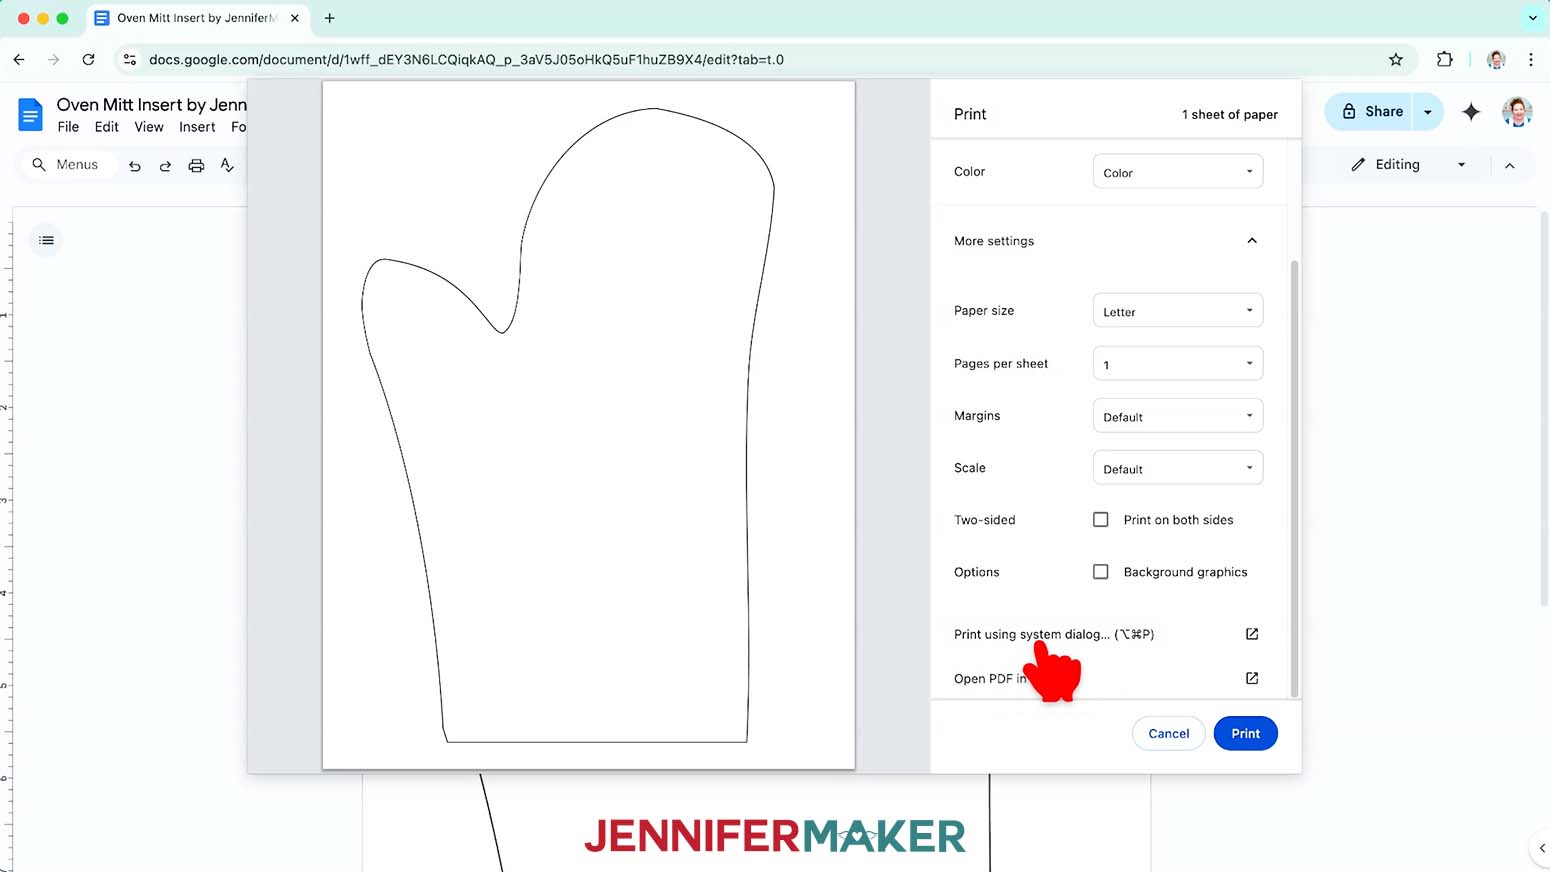
- Go to the “File” menu and choose “Print.”
- Select your inkjet printer under “Destination.”
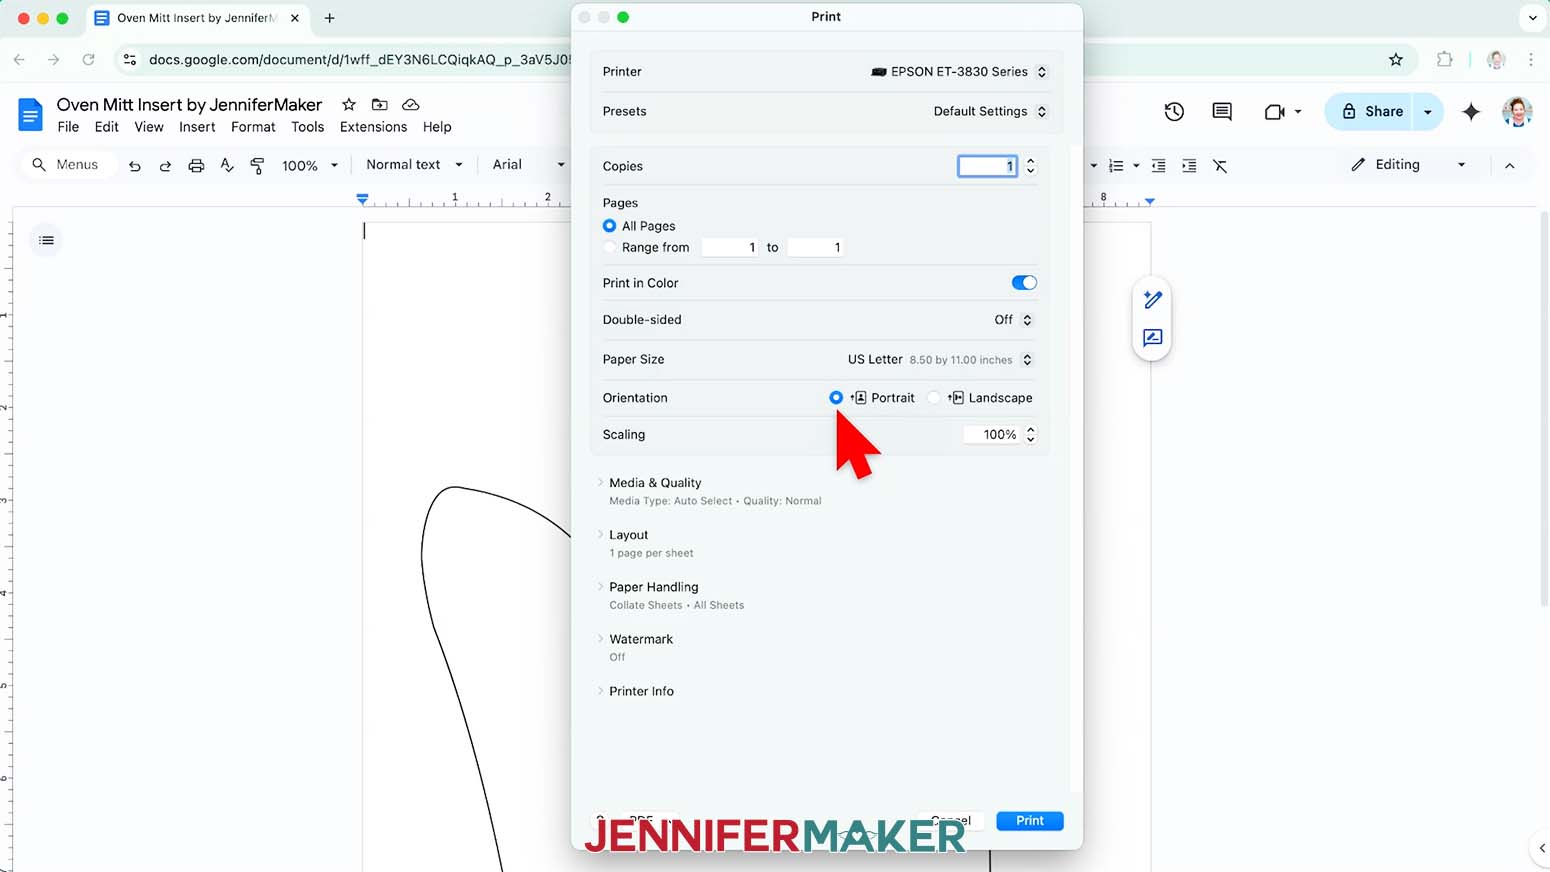
- Click the arrow beside “More Settings,” and then click “Print Using System Dialog.”
- Your print menu may look different - just make sure the inkjet printer is selected, and that your paper size and orientation match your copy paper.
NOTE: If your printer has a “Draft” quality, I recommend switching to that to save ink. - Load the copy paper correctly into your inkjet printer.
NOTE: Check the packaging for information on how to load the paper. - Click “Print.”
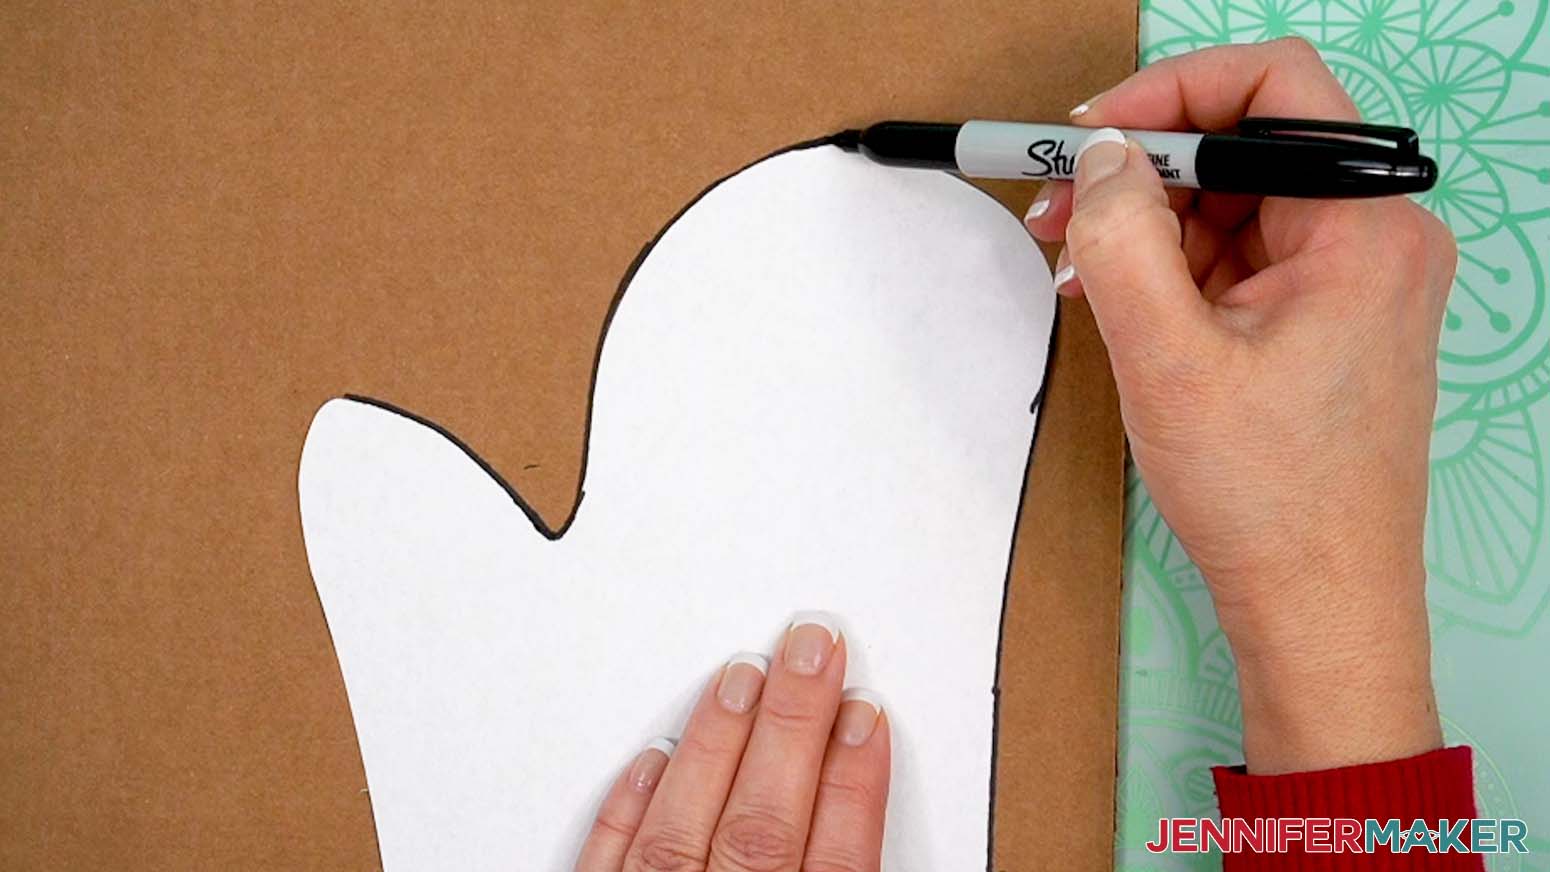
- Use scissors to cut out the printed template.
- Use a marker to trace the template on a sheet of cardboard.
- Use scissors to cut the cardboard to the right shape.
- Your insert is ready for use in right-handed and left-handed mitts!

STEP 3: PRINT YOUR SUBLIMATION OVEN MITT DESIGN
- Follow Steps 3-10 from the “STEP 2” section of this tutorial. Be sure to change your paper size to match your sublimation paper. I’m using 8.5” x 14” or legal-size paper.
- Go to the “Insert” menu, select “Image,” and select “Upload from Computer.”
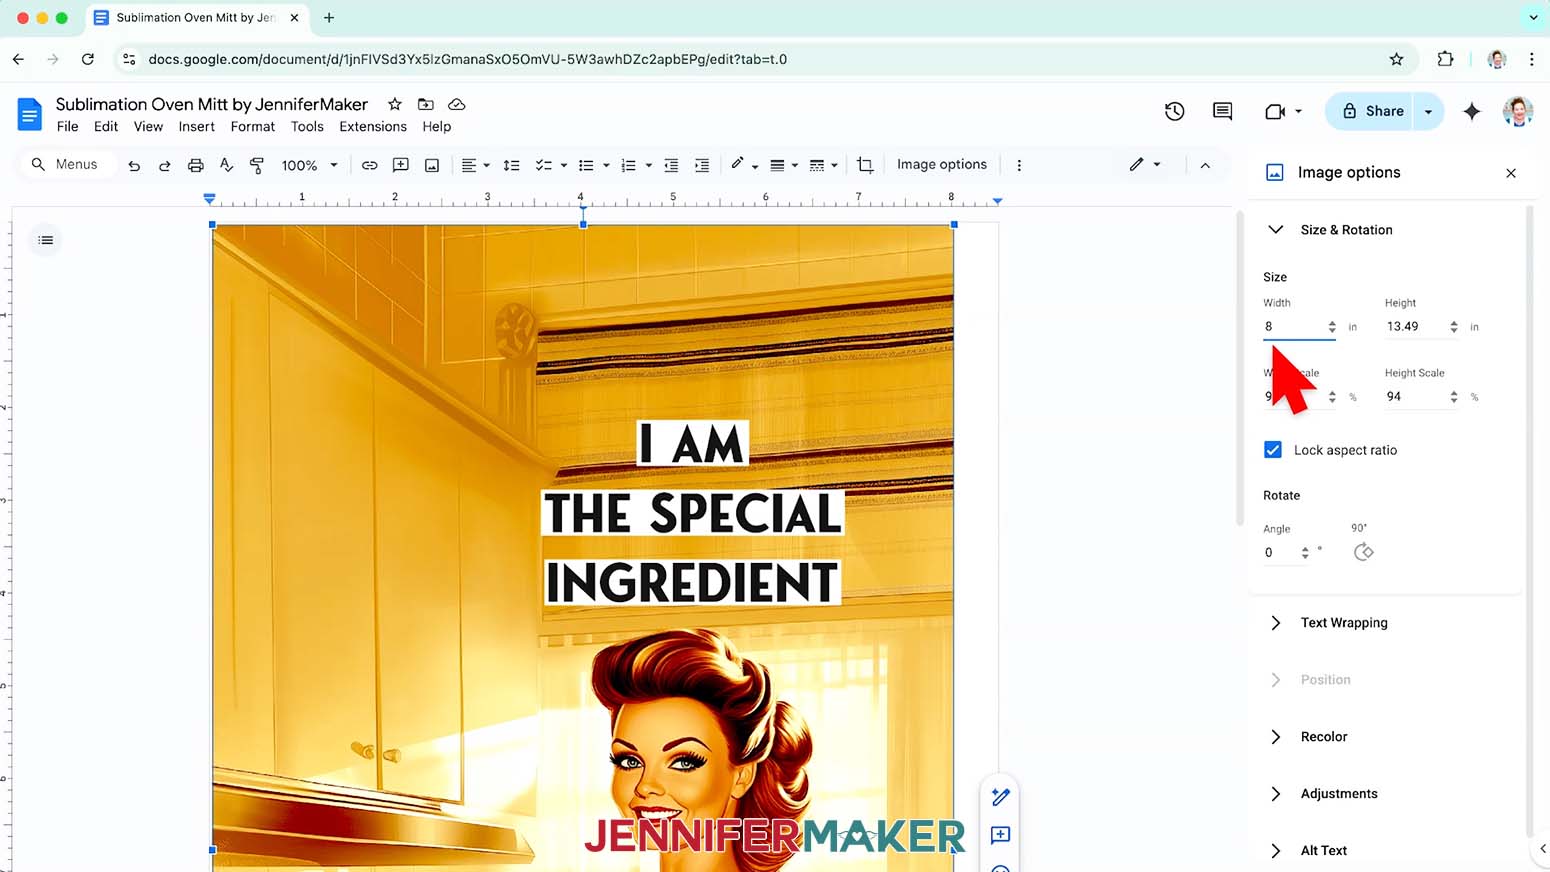
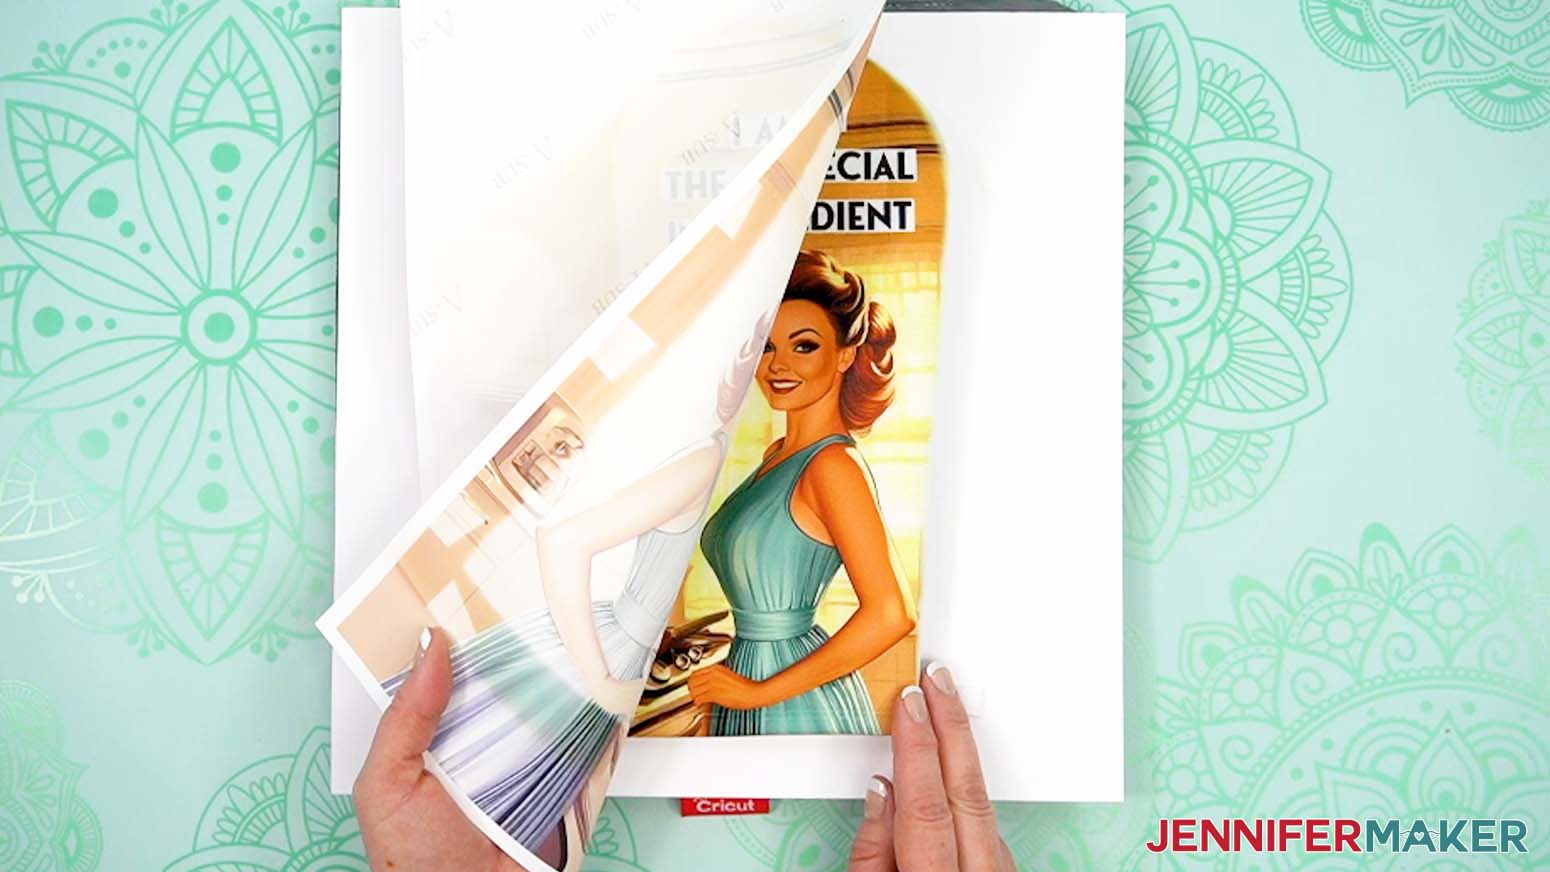
NOTE: If you’re using a Windows computer, see my tutorial on printing sublimation designs from Google Docs for specific steps. - Select the sublimation design you want to use. I’ll demonstrate with the “special-rt” PNG to sublimate the “I Am The Special Ingredient” design on a right-handed mitt.
- Click “Open.”
- With the image selected and the “Image Options” menu open, change the “Width” field to 8” so it takes up most of the paper while leaving space for a white border around the image. The “Height” field will automatically adjust proportionately.
NOTE: If your oven mitt is a different size, you may need to adjust your print size so the image’s text fits on the blank. Make sure the print is at least ¼” larger than the oven mitt on all sides for best results. - Click the image and select the “Wrap text” icon from the menu that appears below it.
- Click and drag the image to the center of your page to ensure it doesn’t get cut off at the edges.
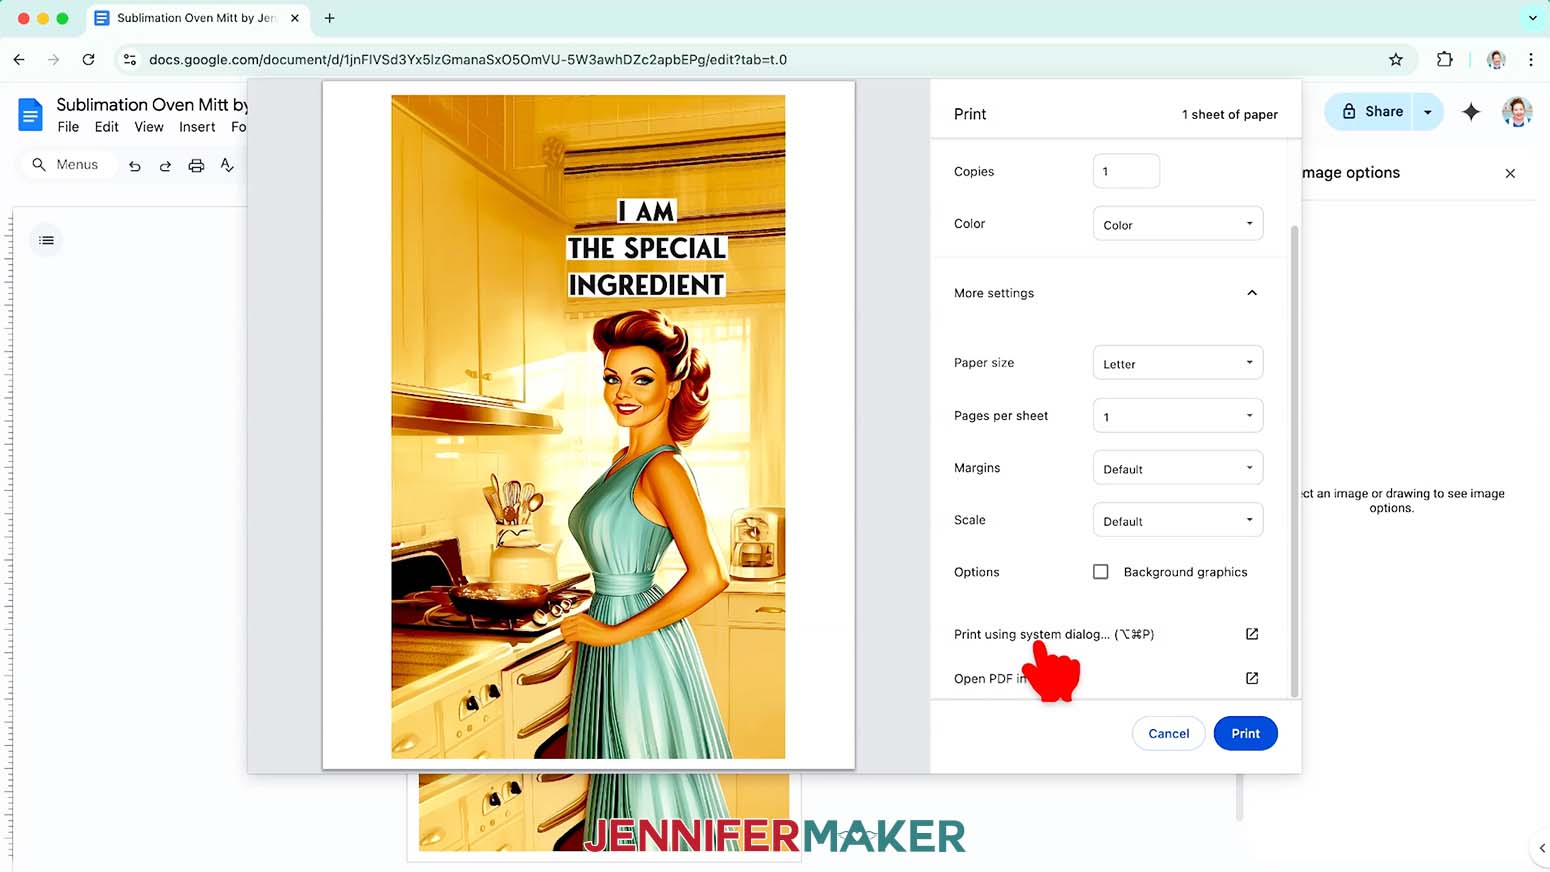
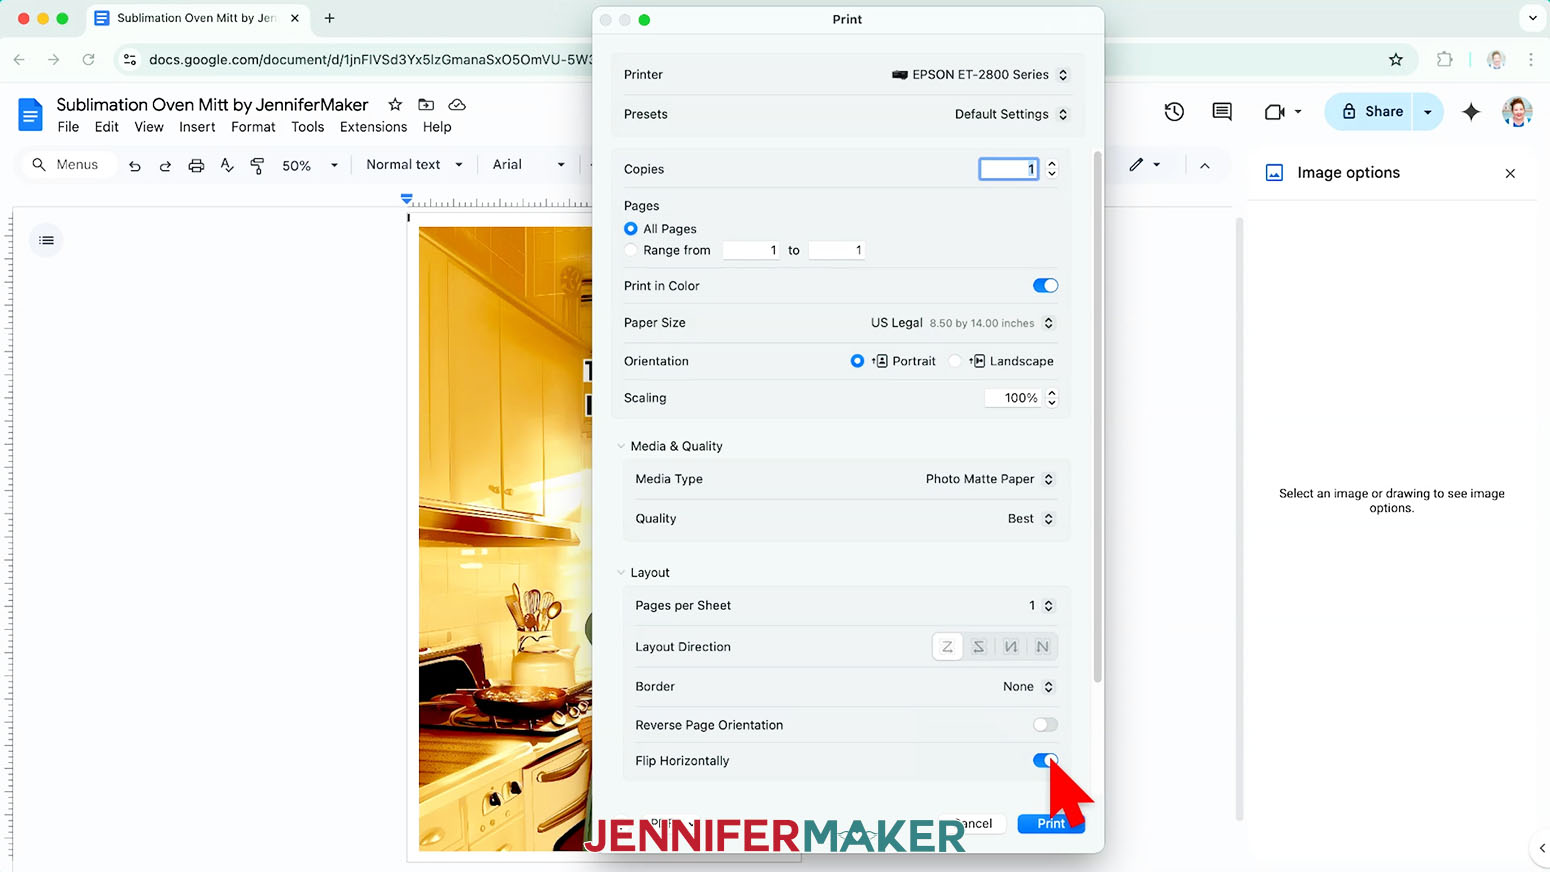
- Go to the “File” menu and choose “Print.”
- Select your sublimation printer under “Destination.”
- Click the arrow beside “More Settings,” and then click “Print Using System Dialog.”
- Your print menu may look different - just make sure the sublimation printer is selected, that you “mirror” the print if you haven’t already, that your paper size and orientation match your sublimation paper, and that you select the highest quality matte paper setting.
NOTE: The “Mirror” option is sometimes labeled as “Flip Horizontally.” If you’re having trouble finding these options, they are sometimes found under a “Layout” section or tab. - Load sublimation paper correctly into your sublimation printer.
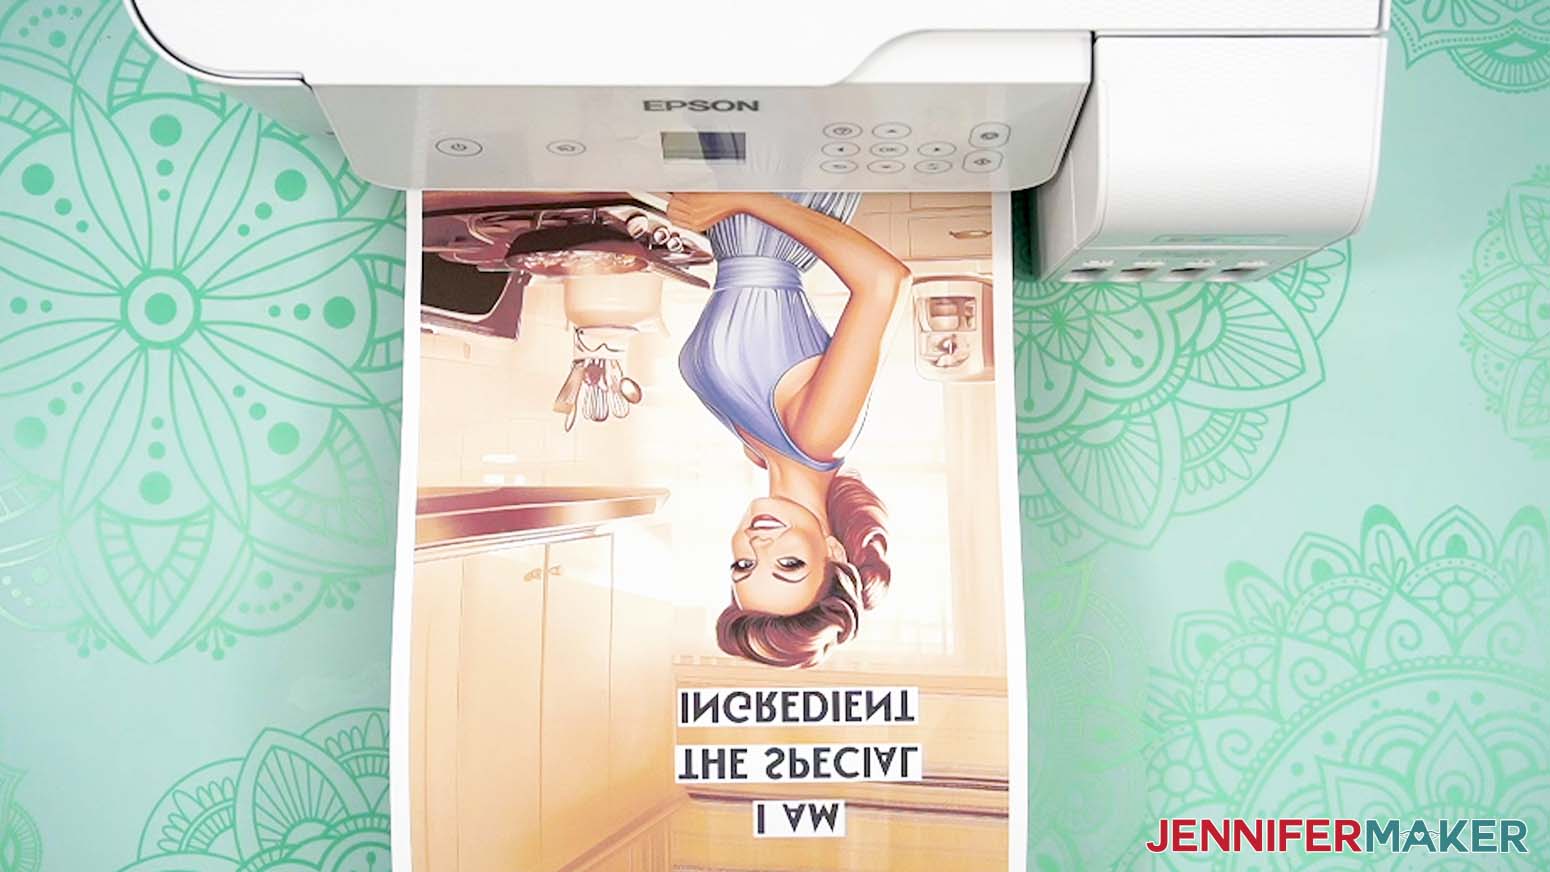
NOTE: Check the packaging for information on how to load the paper. - Click “Print.”
- Allow the print to dry before handling it, as the ink can smear.
NOTE: The printed design will appear lighter before pressing. - Your print is ready to press!
STEP 4: SUBLIMATE YOUR OVEN MITT
PREPARE THE OVEN MITT AND INSERT
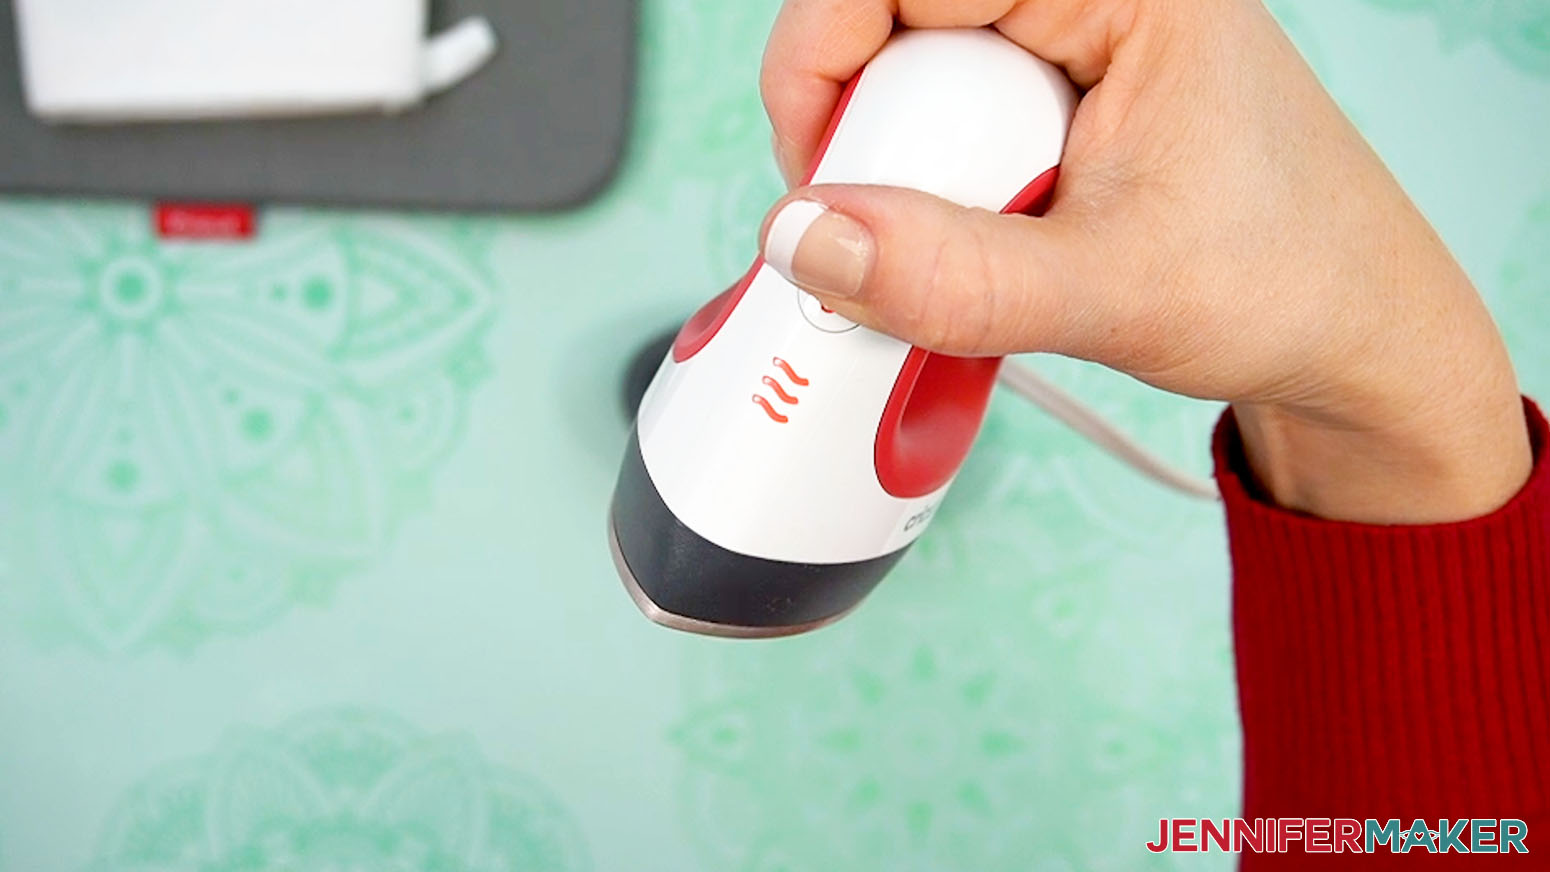
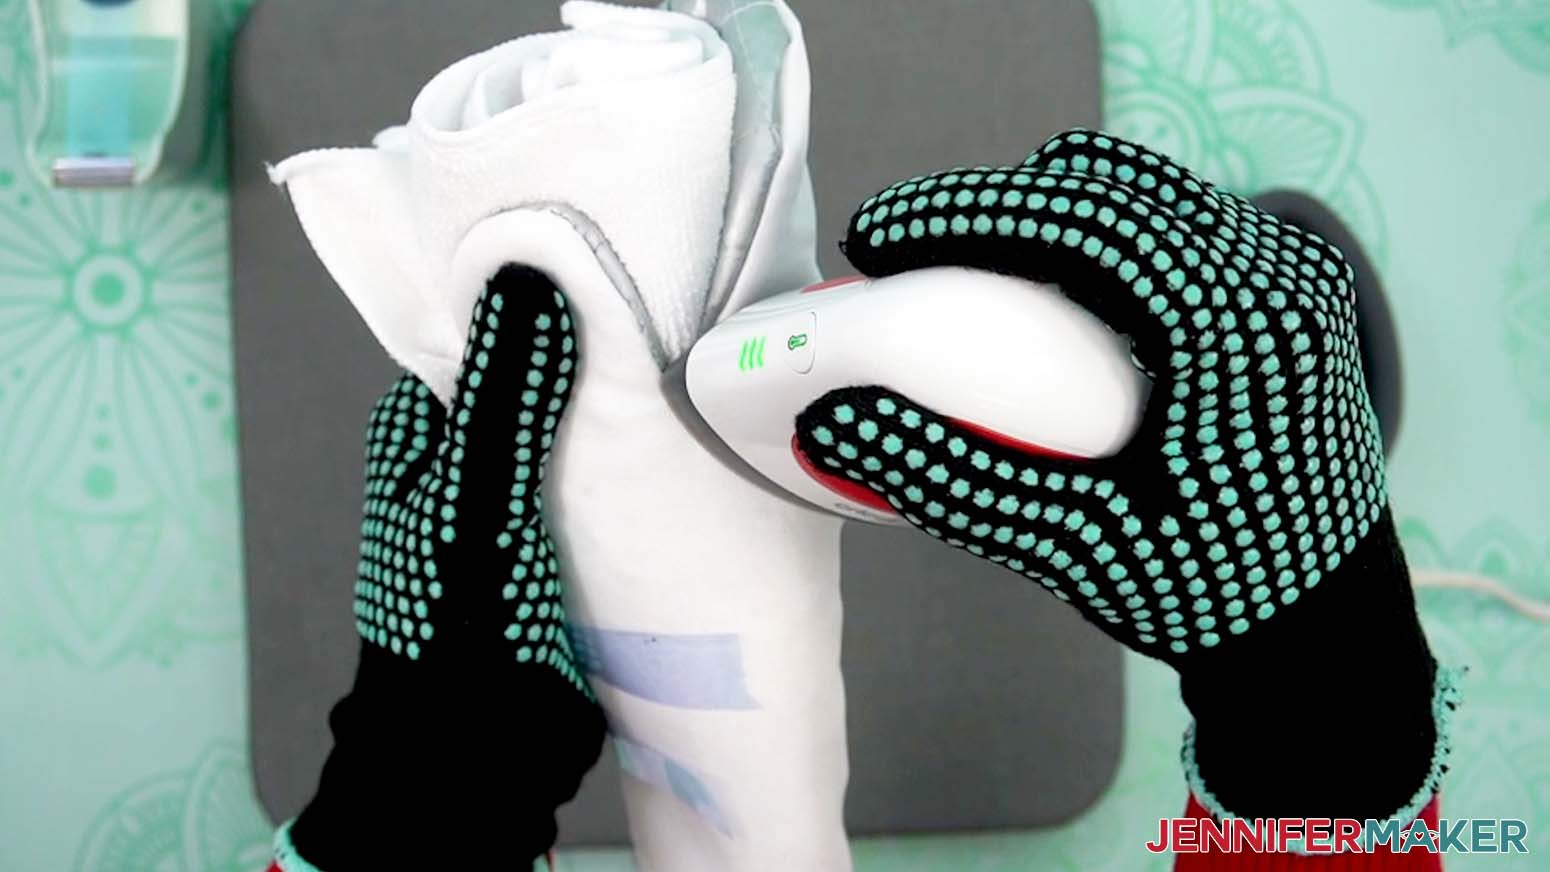
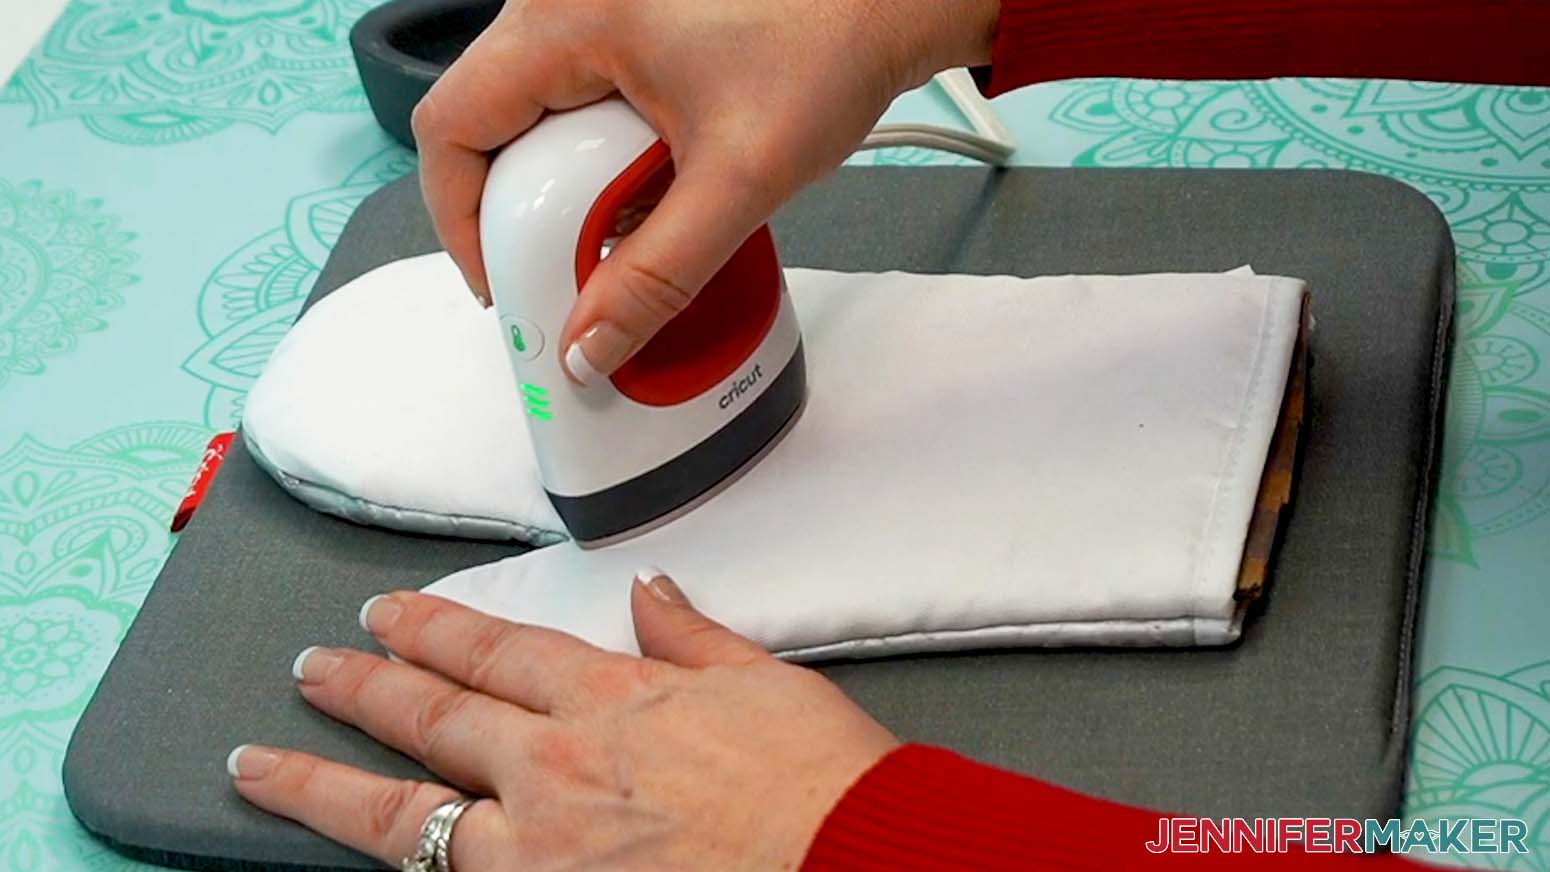
- Creases can interfere with your transfer, so I’m going to use an EasyPress Mini to remove them before sublimating. First set the temperature of your EasyPress Mini to High.
NOTE: I recommend preparing your blank using the EasyPress Mini for safety and maneuverability, but a small household iron can also work if you’re very careful with it!
TIP: High-quality oven mitts have fewer stubborn creases and poorly sewn seams, so I recommend purchasing a good blank, like the one in my list. They still might have creases, so always check. - Place your pressing pad on your work surface.
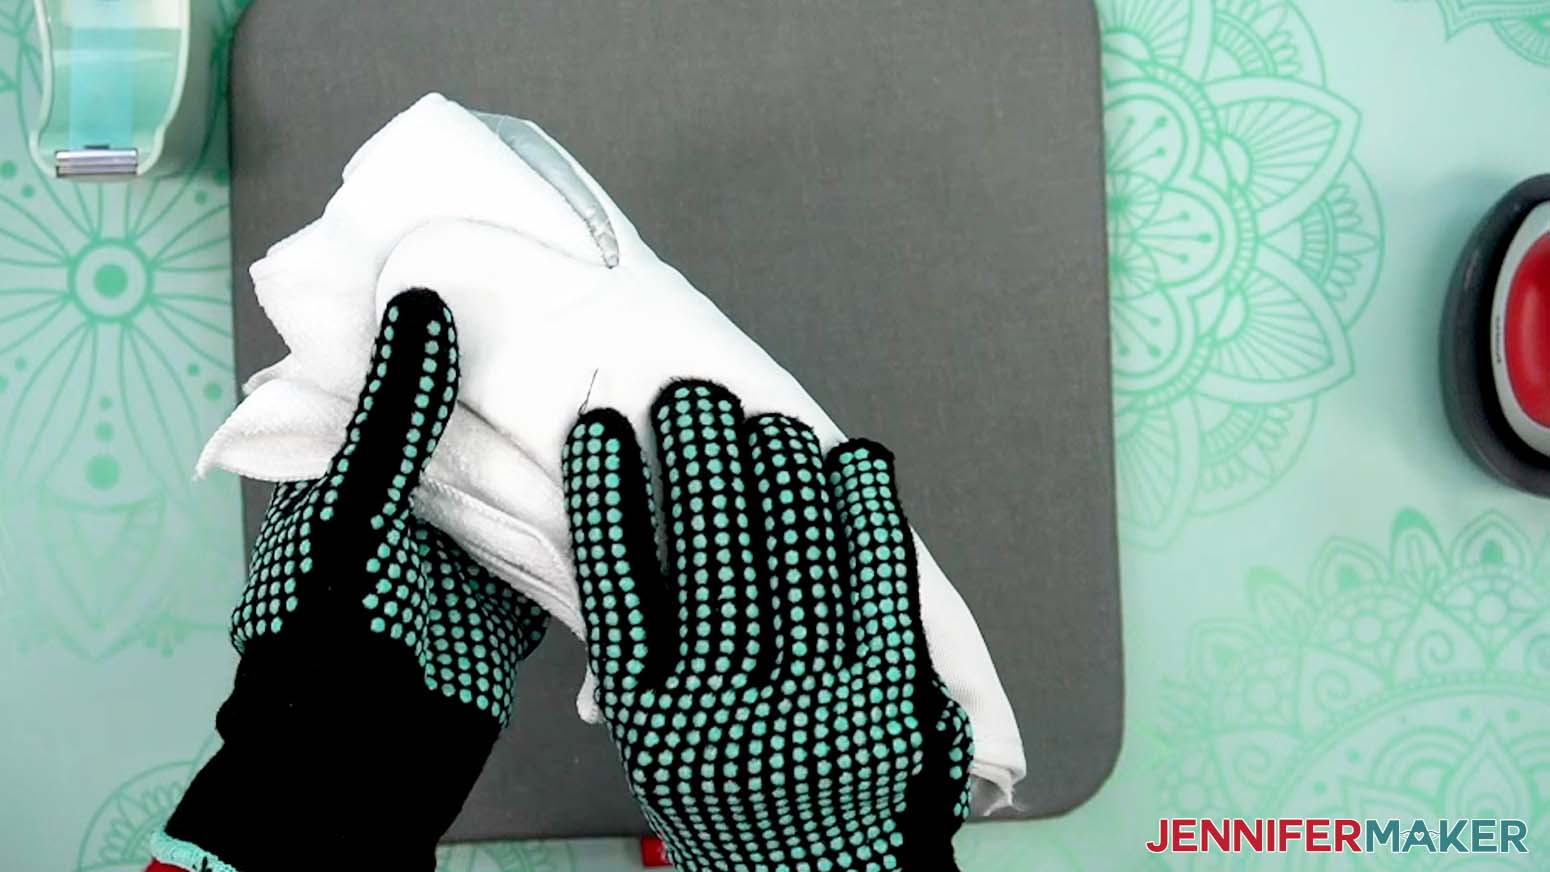
- Put on heat-resistant gloves to protect your hands.
- Roll up a lint-free cloth and place it against the joint where the thumb meets the hand on the non-sublimation side of the oven mitt.
- Stretch the mitt around the cloth to flatten the creases as much as you can, and use heat-resistant tape to hold it in place.
- Very carefully use the Mini press to flatten the creases in that area, about 10-15 seconds per press.
NOTE: Always place your Mini press back on the base after using. - Unwrap the mitt and lay it with the white sublimation side face up.
- Set aside the cloth and remove your gloves.
- Press the mitt’s bottom seam with the Mini press to remove any wrinkles.
- Adjust the edges so the white side of the mitt doesn’t hang over the seam, or you might still have white areas after sublimation. Use the Mini press to crease the edges if needed.
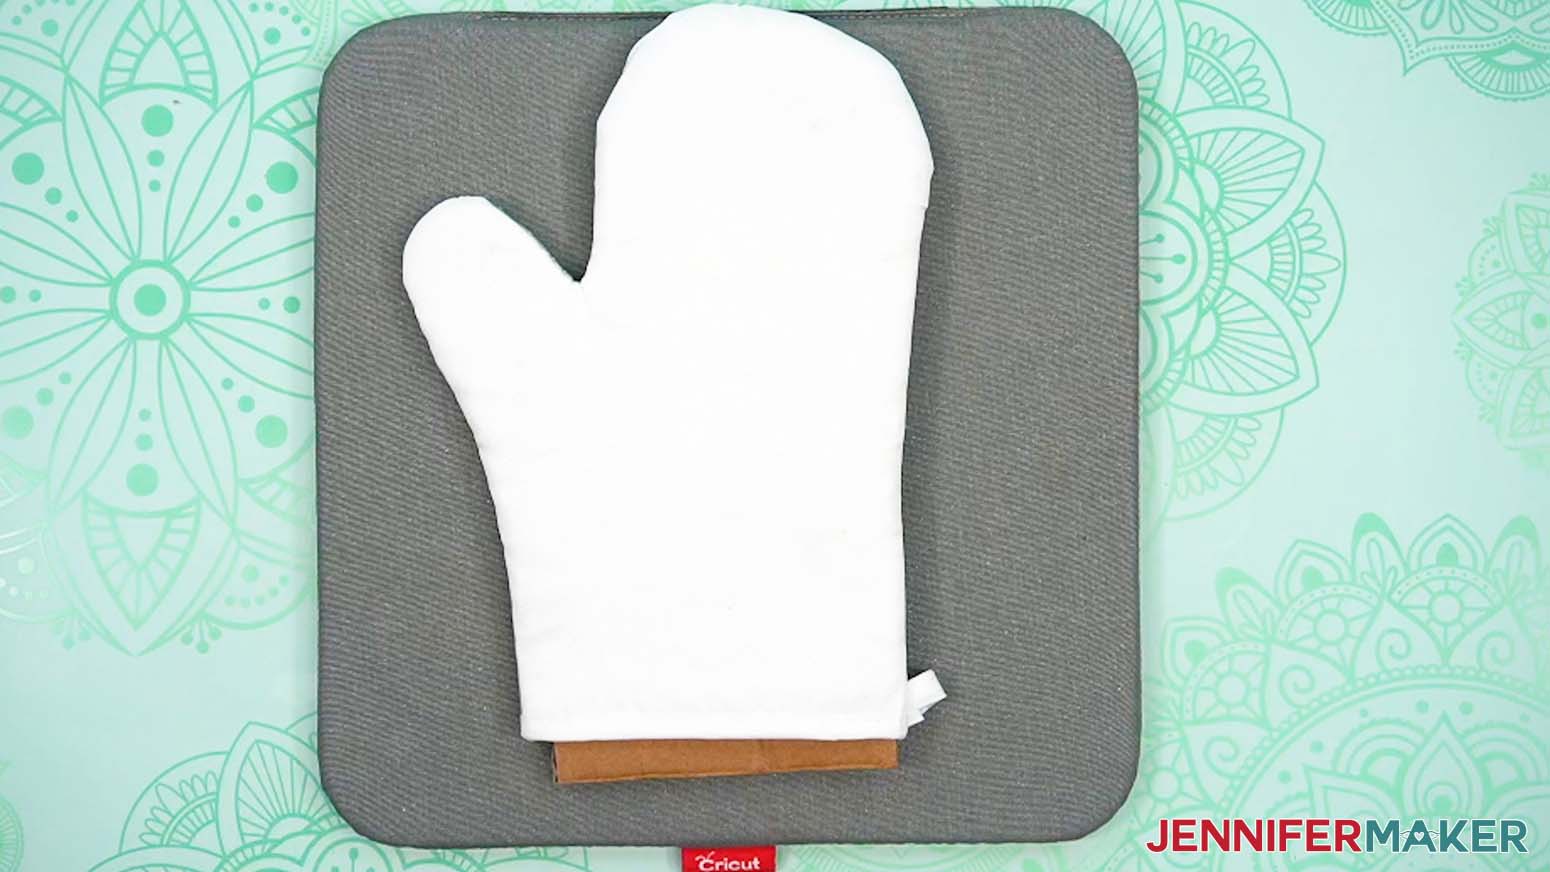
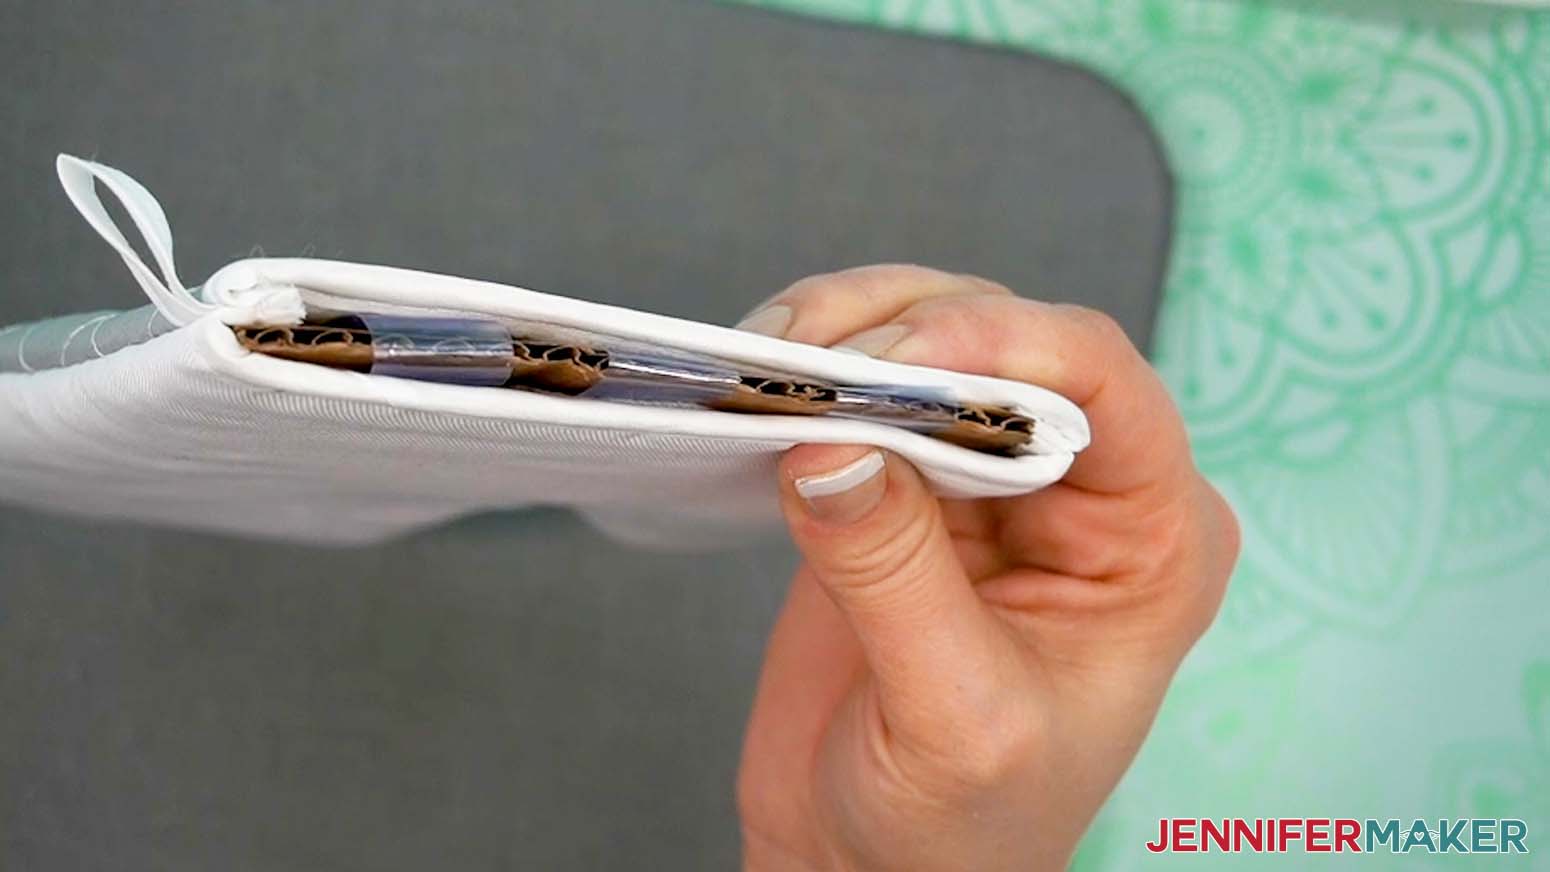
NOTE: For the best press, you want as much of the white sublimation side to be face up and flat as possible. - Slightly bend the larger half of the oven mitt insert lengthwise, and then slide the insert into the oven mitt.
NOTE: Because the top of the mitt is wider than the base of the mitt, you won’t be able to insert the cardboard without bending slightly. DO NOT fold at the thumb joint or the cardboard won’t lie flat and you’ll end up with un-sublimated spots or wrinkles in your final press. - Unfold the insert as you slide it into the mitt, pushing it against the seam and pulling the fabric as flat as possible.
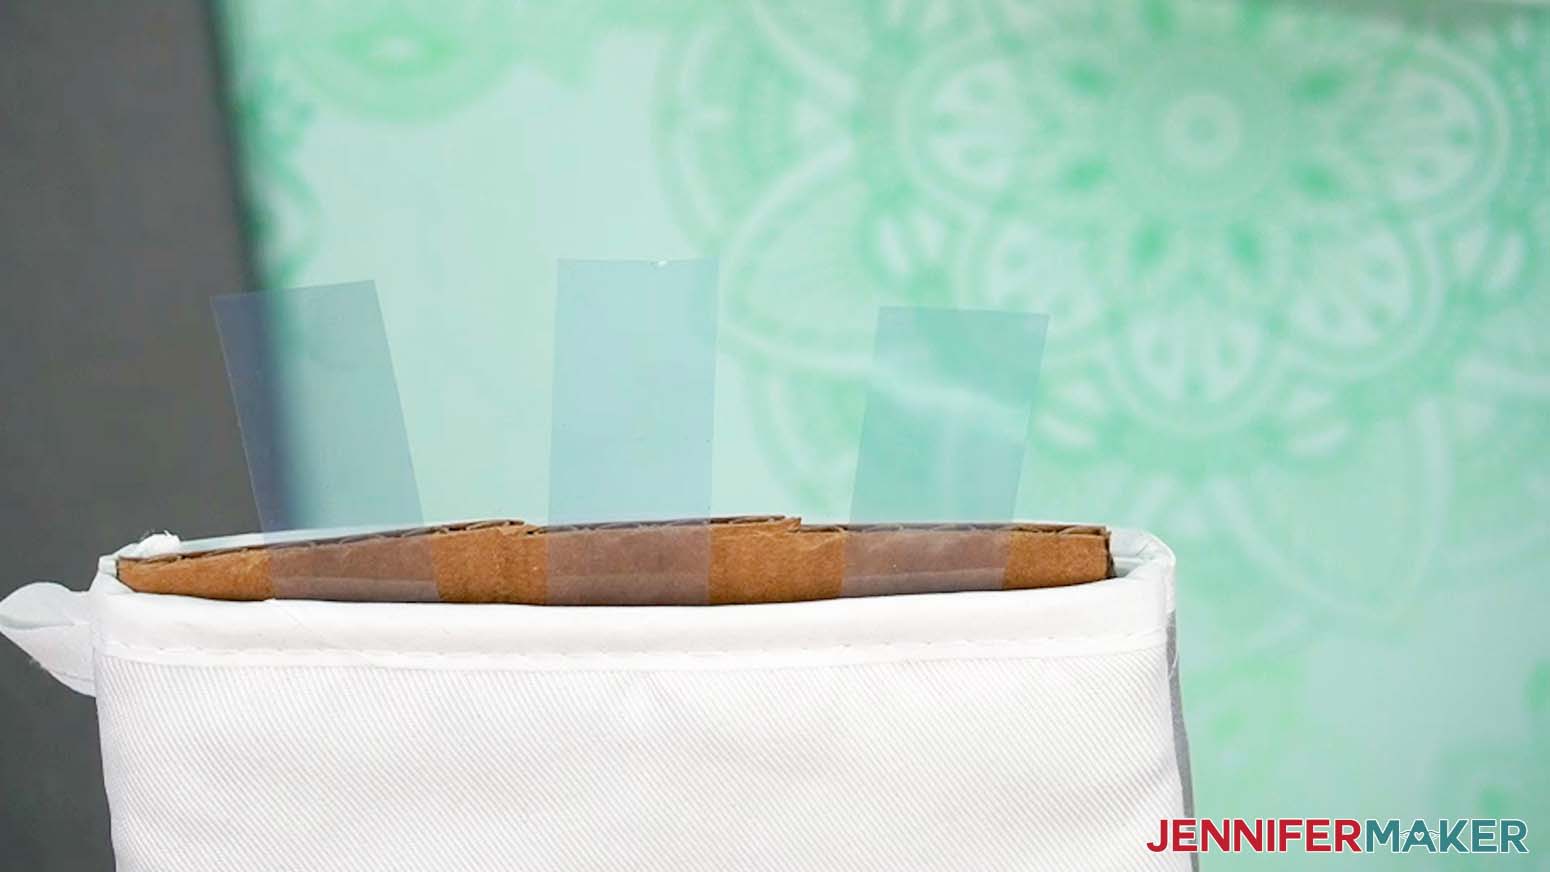
- Take three pieces of heat-resistant tape about 3" long and attach them to the inner lining at the mitt’s opening, evenly spaced, between the mitt and the insert. Leave half of each piece of tape sticking out, sticky sides facing up. DO NOT place the tape against the sublimation side, or ink will not transfer to those areas.
- Stretch the mitt flat against the insert, then tuck each piece of tape down the other side of the insert, so the sticky side faces down. Press the other side of the mitt against the sticky tape to secure it in place.
- Use the Mini press to flatten any remaining wrinkles or creases along the seams.
- Turn off your EasyPress Mini and set it aside.
SUBLIMATE THE DESIGN ONTO YOUR OVEN MITT
IMPORTANT: As with all sublimation projects, turn on a fan and open a window to improve your ventilation before beginning.
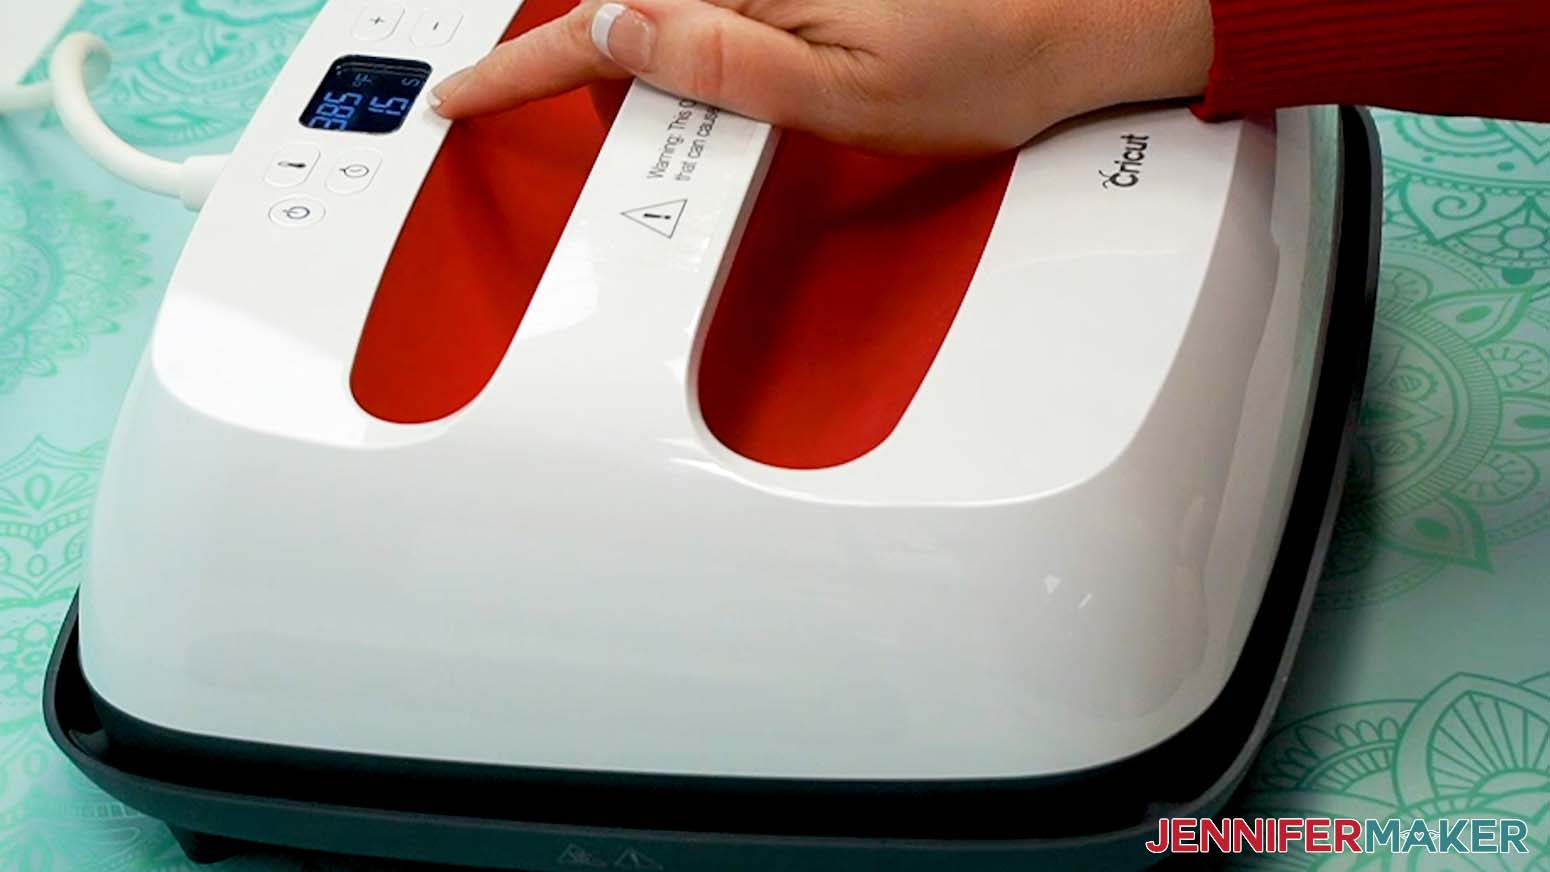
- Set the temperature of your EasyPress to 385°F (196°C) and the timer to 15 seconds.
TIP: I’ll use the settings that I’ve found work the best for this type of project, but if you’re not sure where to start, check out my Sublimation Cookbook to get time and temperature settings for tons of sublimation projects! - Use a lint roller to remove any dust or debris from your oven mitt blank.
- Place the oven mitt sublimation-side up on your pressing pad, then cover it with a sheet of white, uncoated butcher paper.
- Cover the entire area of your oven mitt with the EasyPress and preheat the blank for 15 seconds to remove moisture.
NOTE: If your EasyPress doesn’t cover the whole mitt, press one end at a time for 15 seconds, overlapping in the middle to make sure you’ve pressed the entire surface of the blank. - Lift the EasyPress straight up.
NOTE: Always place your press back on the base after using. - Carefully lift away the butcher paper and set aside the preheated oven mitt to cool.
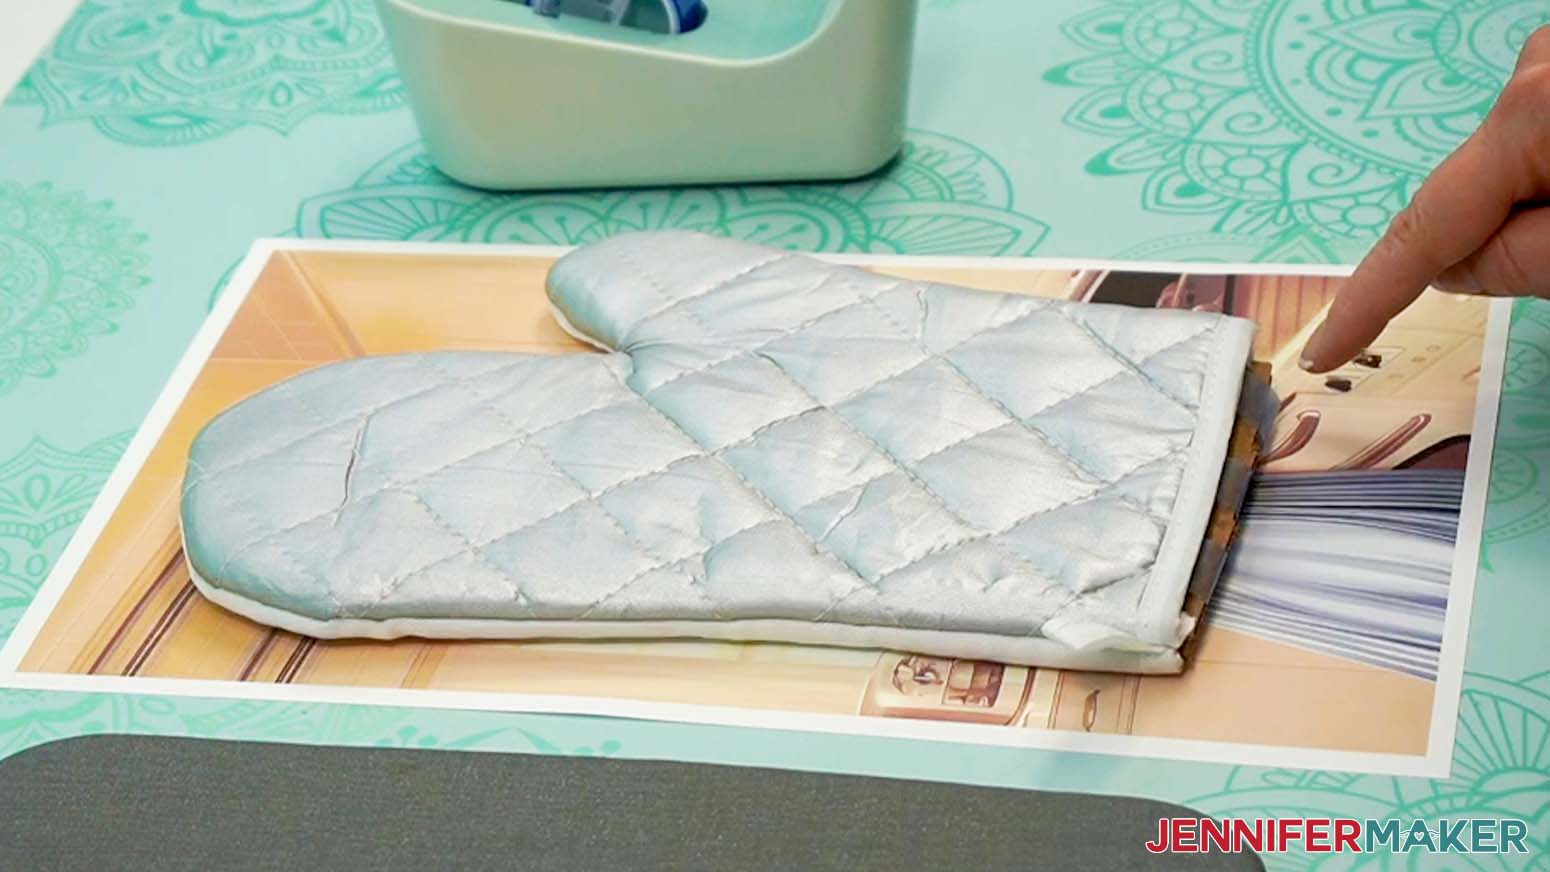
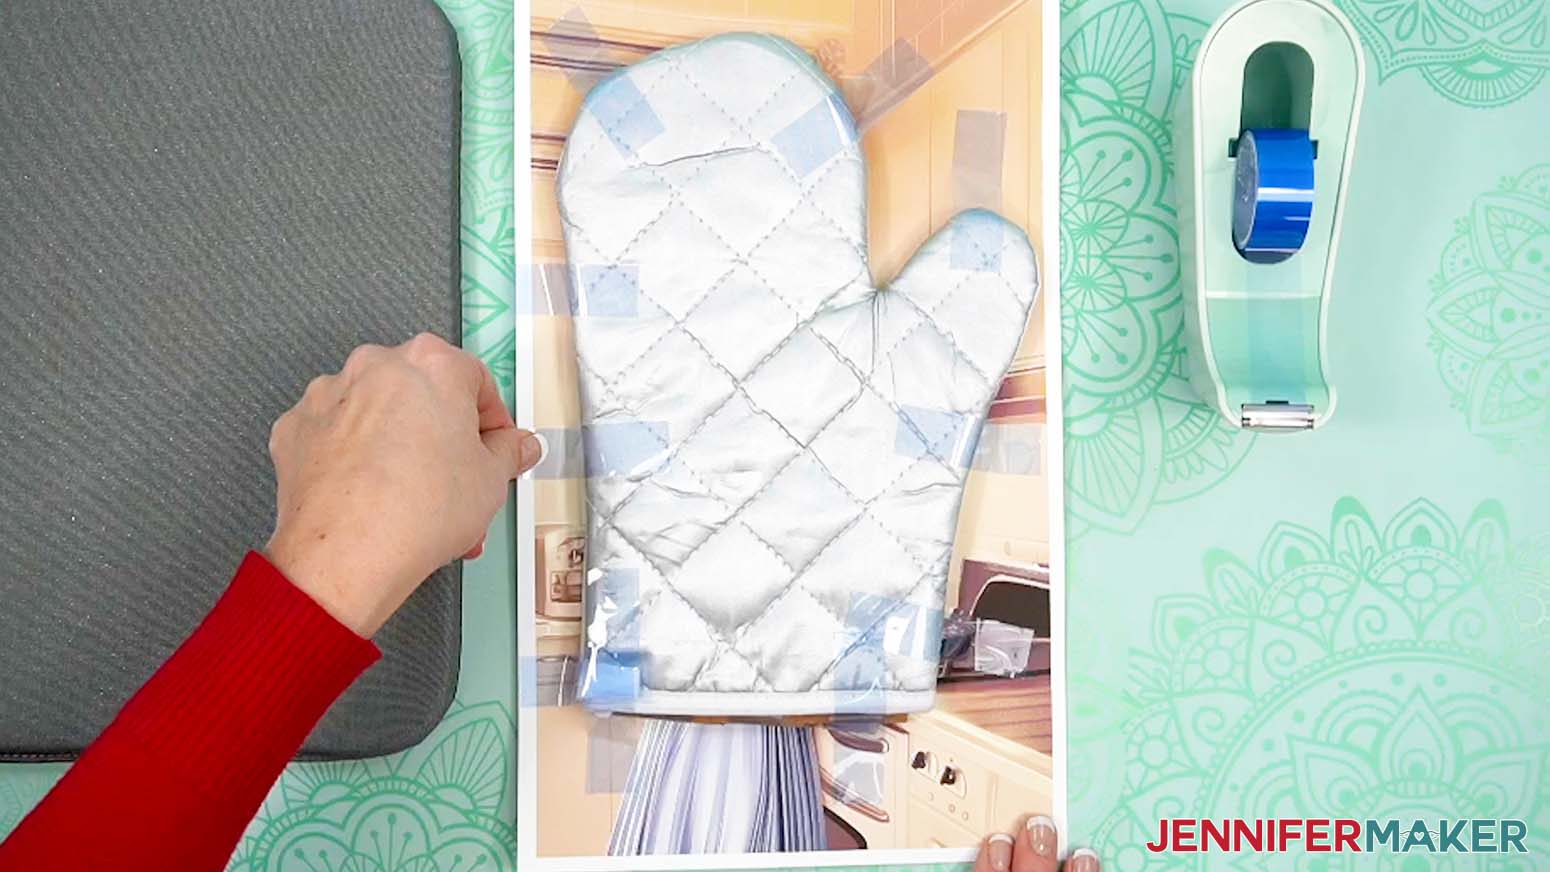
- Place your print face-up on your work surface.
- Hold your oven mitt blank-side down and position it on top of your print so it covers the area you want to transfer, leaving a border of ink around the oven mitt to ensure full coverage.
NOTE: Make sure the words are fully covered and positioned correctly. - Place heat-resistant tape around the sides of the oven mitt to secure it to the print. DO NOT tuck the tape under the mitt or ink will not transfer in those areas.
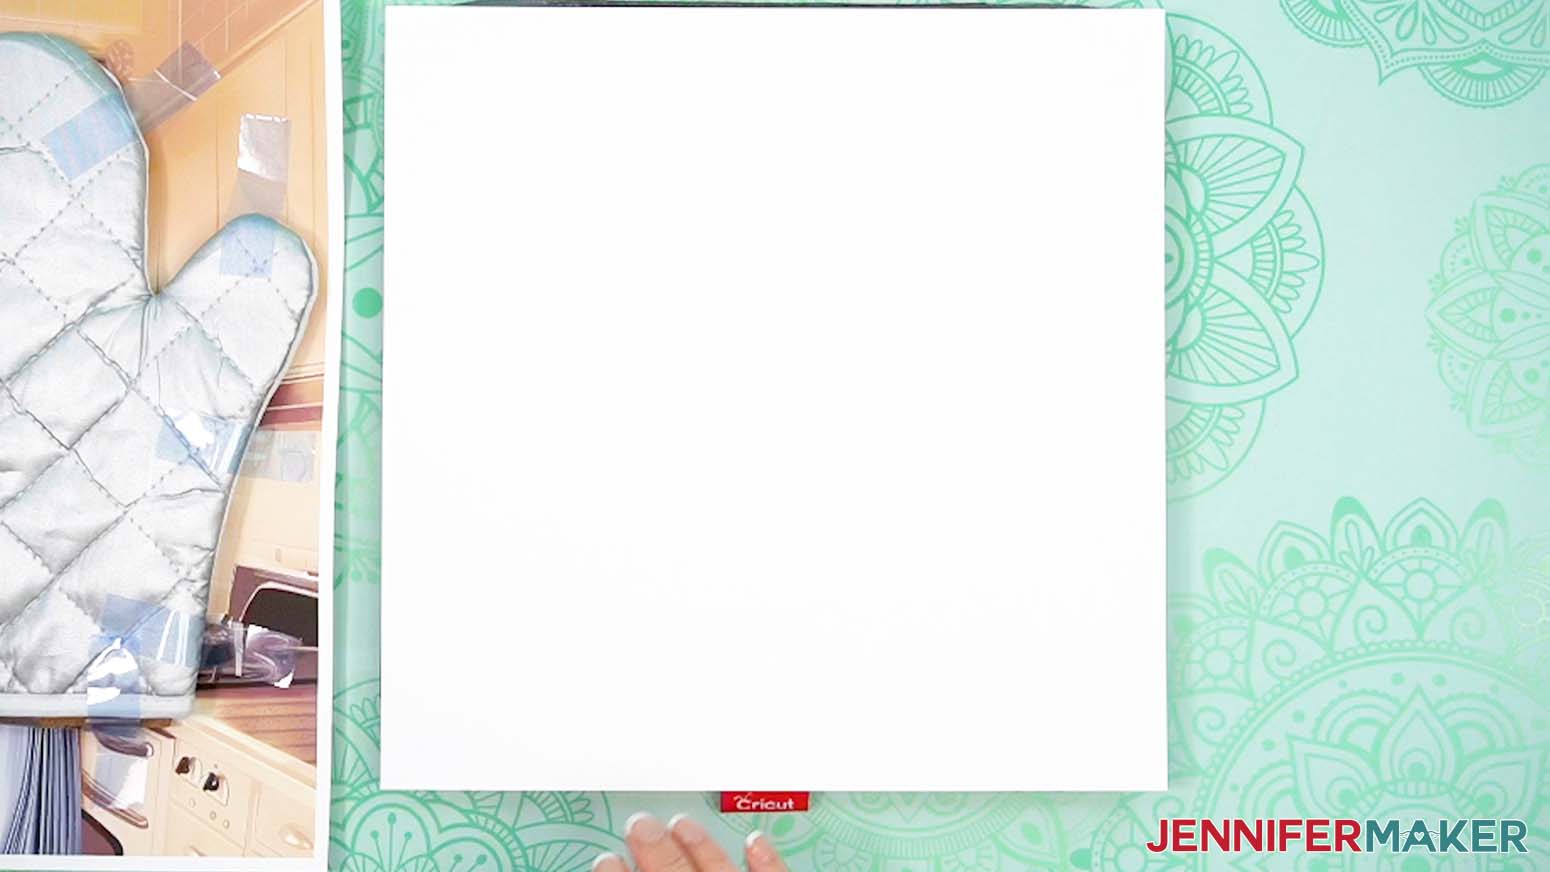
- Place a sheet of white cardstock onto your pressing pad to protect it from any ink that may escape during the sublimation process.
TIP: The cardstock should be clean and free of any ink or other marks that could transfer to your blank during sublimation. - Flip your oven mitt so the print is on top and place it on top of the cardstock. Make sure the cardstock is under the entire design.
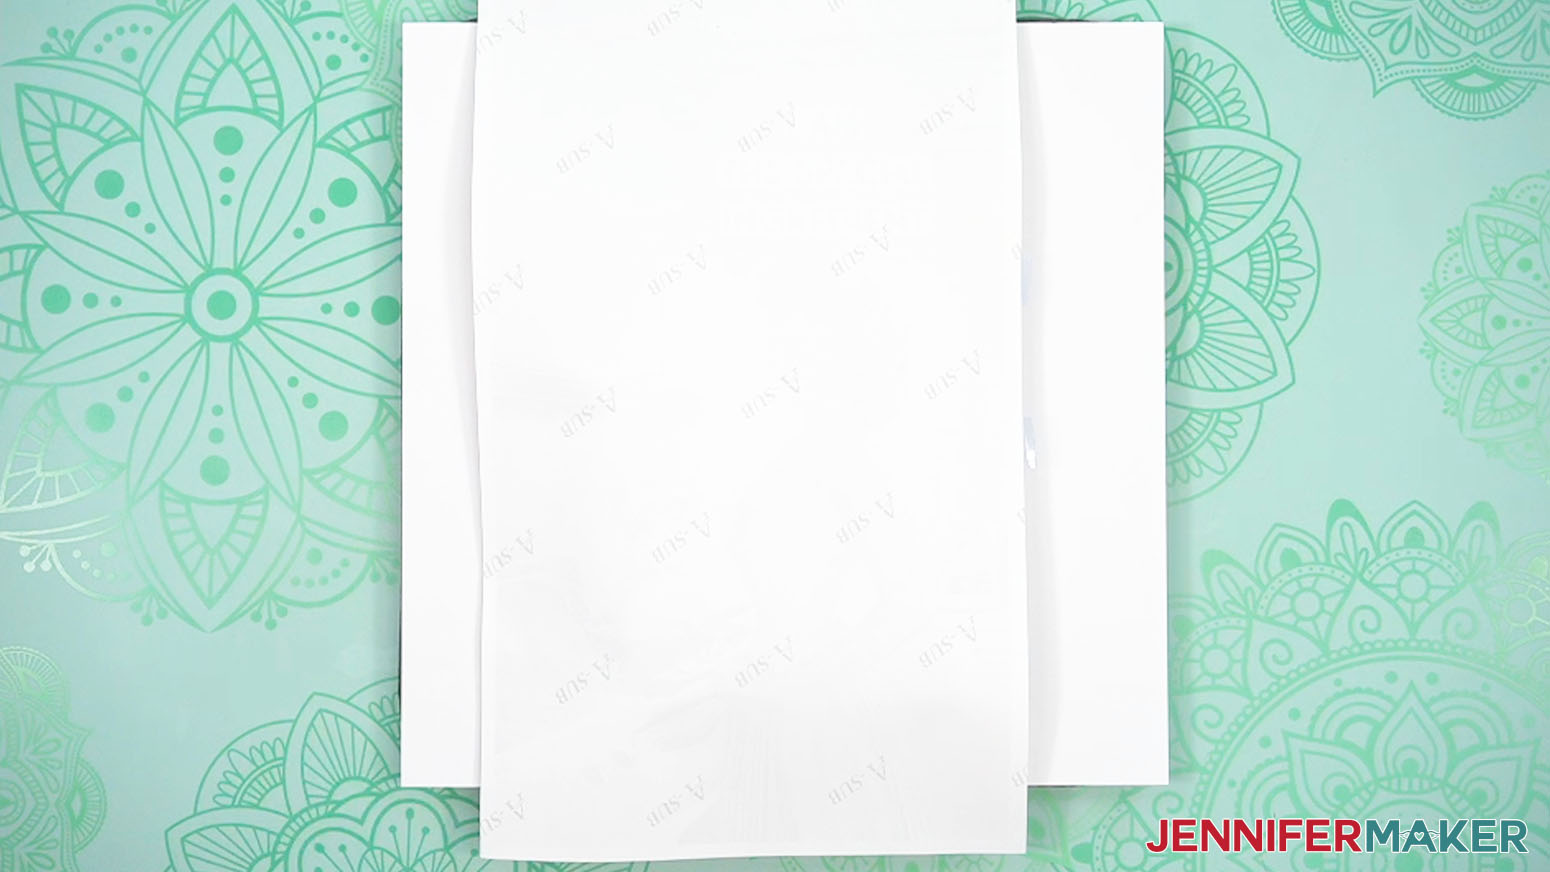
- Place a fresh piece of white, uncoated butcher paper on your oven mitt to completely cover it.
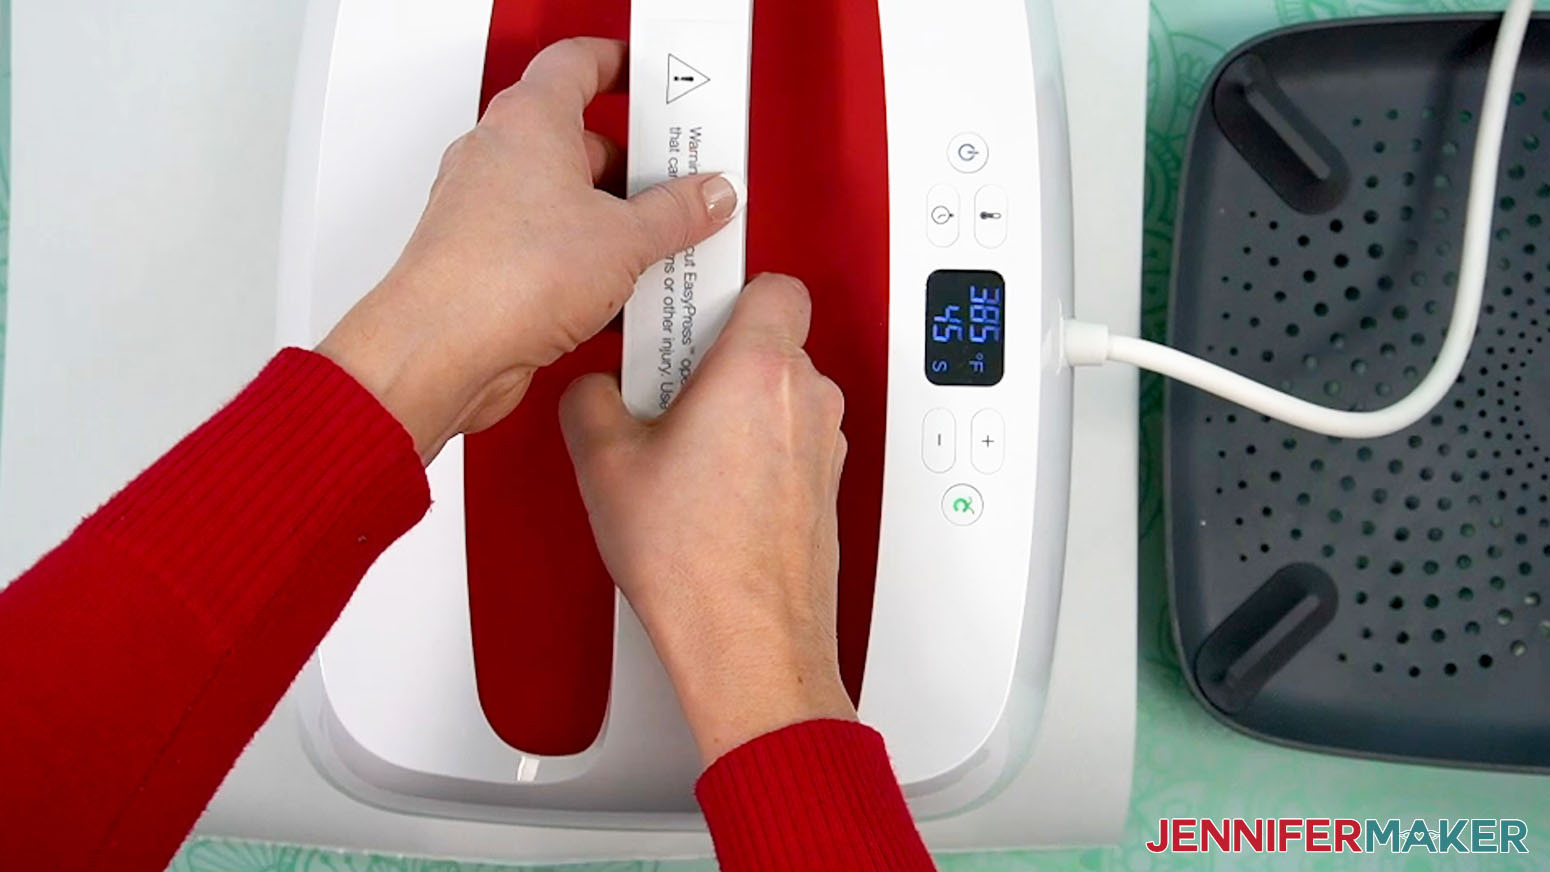
- Make sure the EasyPress has come up to temperature, and set the timer for 45 seconds.
- If your EasyPress is larger than your blank, cover the entire area of the oven mitt with the EasyPress and heat it with heavy pressure for 45 seconds to sublimate the print.
TIP: Keep even pressure on both sides of the press for best results. - If your EasyPress is smaller than your blank, press one end with heavy pressure for 45 seconds, then lift your EasyPress straight up and move it to the other end and heavily press for another 45 seconds.
TIP: While pressing the first end, use a non-sublimation ink pen or marker to draw a guide mark next to the press to show which area has been covered. Use the guide mark to make sure you slightly overlap the covered area when pressing the other end. - Lift the EasyPress straight up to avoid ghosting or blurring.
- Allow the mitt to cool slightly, then remove the protective paper.
- Allow your oven mitt to cool completely.
- Once the mitt is cool, peel the tape from the mitt to release and remove the sublimation paper.
- Your image is sublimated onto the oven mitt and ready to be used!
STEP 5: SHOW IT OFF
You now have a fun design sublimated on an oven mitt! You can use it as decoration, or to protect your hands from burns.

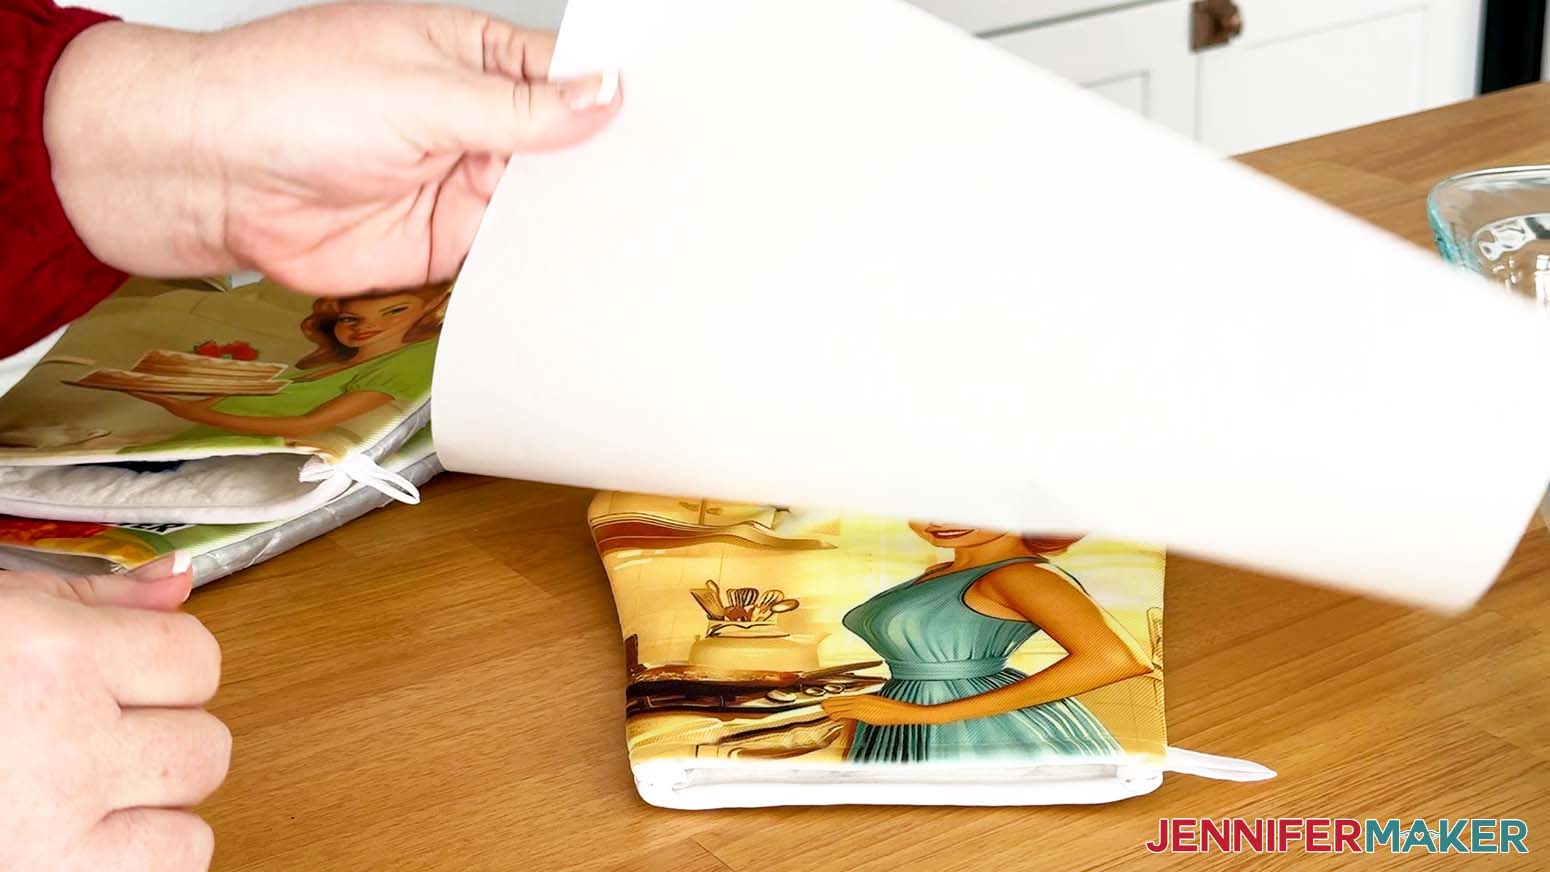
I’ve tested the sublimated oven mitts on hot dishes up to 450°F (232°C) with no ink reactivation.
So you can safely use your mitt to handle items straight from the oven without worrying about fading!
Notes
Print Size: 8.5” x 14.33”
Oven Mitt Size:
Height from base to thumb “V”: 6.5”
Total Height: 10.25"
Width of Base at wrist: 5.5"
Width at widest point (thumb area): 7"
Insert Size:
Height from base to thumb "V": 6.25"
Total Height: 10"
Width of Base at wrist: 4.75"
Width at widest point (thumb area): 6.5"
Fonts Used: Puerto Bold (Free Alternate: Nexa)
Care Instructions
Machine wash with cold water and a mild detergent. Air dry or tumble dry on low heat.
Answers to Your Questions About Making a Sublimation Oven Mitt
Q: I want to make an oven mitt with different text and images. How do I design my own oven mitt?
A: You can learn how to design your own custom oven mitt using Canva in my ADVANCE program. Learn more about ADVANCE here!
Q: How do I find images for my custom oven mitt?
A: You can use any of the images included in the project files, or find more in our library! You can also use your own photos and designs, images created through AI generators, graphics from Canva or other online sources, or stock photos for your custom oven mitt.
Q: What temperature do you sublimate an oven mitt at? How long do you sublimate an oven mitt?
A: I’ve included the temperature settings in my tutorial, or you can check out my Sublimation Cookbook to learn the settings for these and tons of other sublimation projects! It’s available here.
Q: Can I sublimate both sides of my oven mitt?
A: Only the blank side of the oven mitt can be sublimated, which is also the back side of the mitt.
Q: Will sublimation ink reactivate on projects that aren’t mitts?
A: Under normal circumstances, no, sublimation ink should not “reactivate” once it has undergone the sublimation process. However, there is always a chance the dyes could reactivate when subjected to extremely high temperatures, so it’s important to test your projects (especially kitchen items!) just to be sure. The quality of your sublimation blanks, materials, and tools can also affect ink reactivation, so make sure to use high-quality supplies for optimal results. Don’t test your projects in a normal oven because any dye that reactivates is not food safe.
Do you mirror an image for sublimation on an oven mitt?
A: Yes, you do! Always mirror your sublimation images so they transfer correctly onto your blank, especially if there are words or numbers in the design.
Q: Do you let your sublimated oven mitt cool before peeling?
A: As with most sublimation projects, you want to let your oven mitt blank cool a bit before removing the cardstock, tape, and design to avoid ghosting or smearing of the print.
Q: Can I use the same sublimation print twice?
A: You may think you can, but you shouldn’t. After pressing, your sublimation transfer print may look like it has plenty of ink left in it for another pressing. Don’t be deceived! If you use the print again, your transfer will not turn out the way you expect, and you may end up wasting a perfectly good blank. A new print costs less time (and frustration) than a ruined blank, so just print another.
Q: Can I wash and dry sublimated dishes and clothing using my appliances, or will sublimation ink reactivate due to the high temperatures?
A: Household (and even most commercial) dish washers and dryers don’t reach temperatures high enough to start the sublimation process, so your colors should remain vibrant for a long time!
Q: Do you have other crafts like this one I can make?
A: I love making crafts for my kitchen! Get inspired by these cooking, baking, and food-related projects:
- Etched Slate Coasters & Cheeseboard
- DIY Kitchen Boa
- Kitchen Conversions Chart Decal
- Vinyl Decals for Kitchen Appliances
- Cute Flour Sack Towels
- DIY Pantry Labels
- DIY Drawer Dividers
- Etched Casserole Dishes
Check out my free videos and tutorials to learn useful and popular crafting techniques, and take advantage of my unlimited downloads of SVG and PNG design files to create your own incredible crafts!
Q: Can I make and sell these oven mitt designs?
A: If you want to use my designs and projects for commercial use, please familiarize yourself with my important licensing information before selling your crafts.
Get my free PNG files to sublimate your own oven mitts!
(If you do not see the signup form above, click here.)
I love seeing what you make with my oven mitt designs, and how you use them! Inspire others and share a photo of your sublimated oven mitt in our Facebook group or tag me on social media with #jennifermaker.
Love,

Want to remember this? Save this Sublimation Oven Mitt Tutorial to your favorite Pinterest Board!