Share the love!
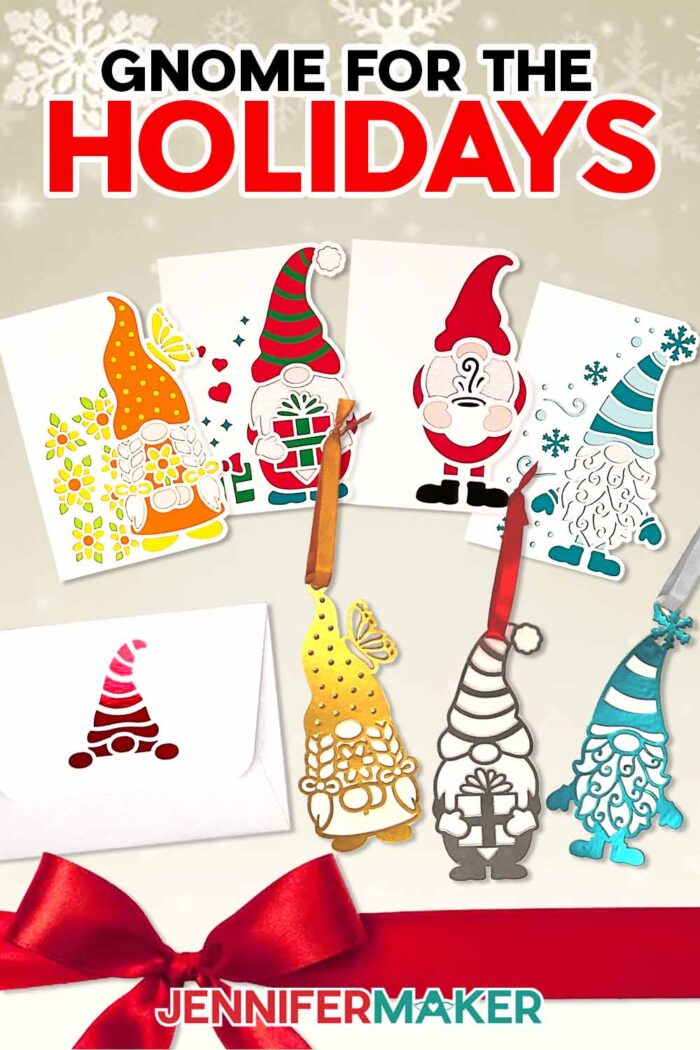
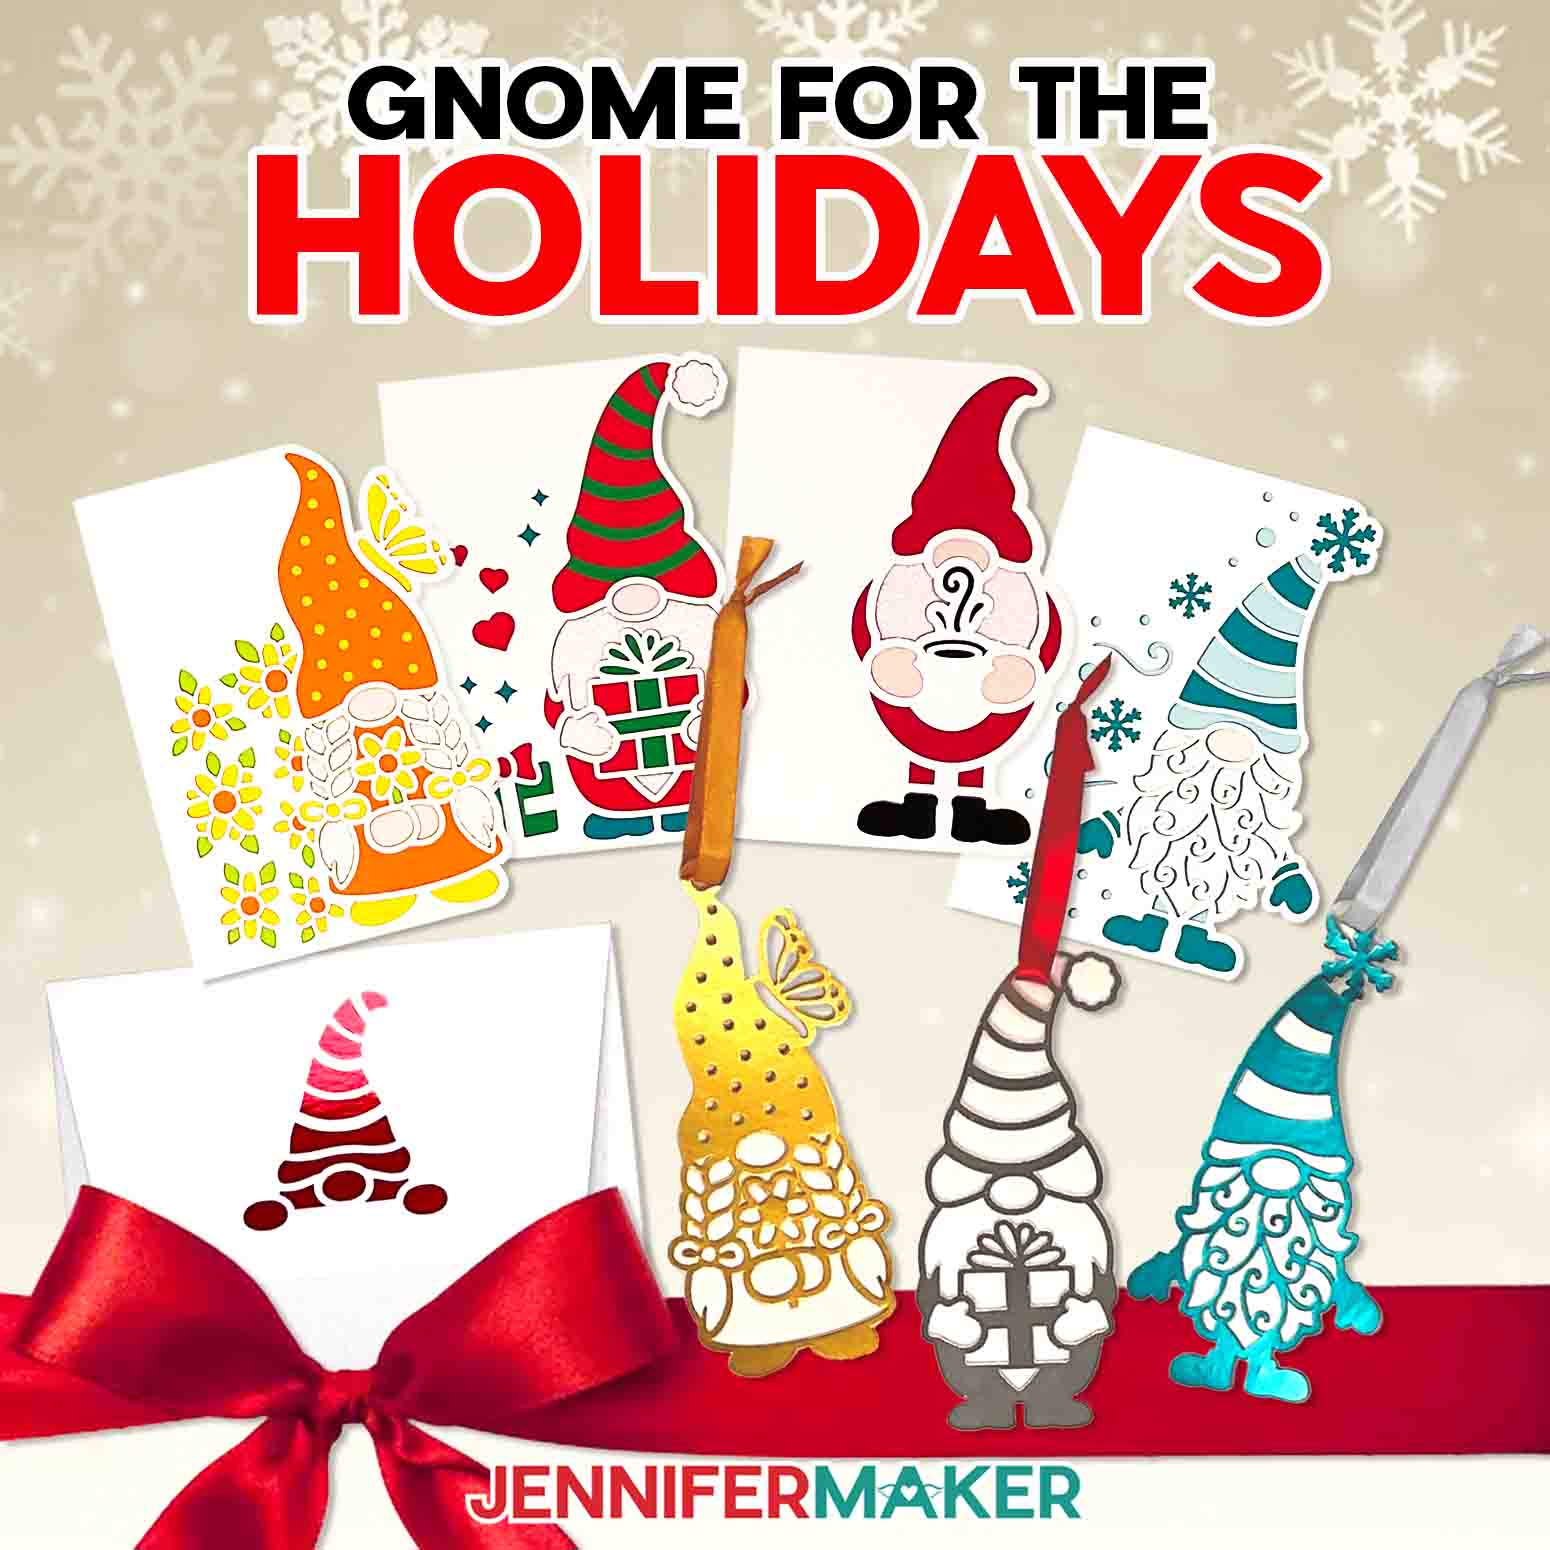
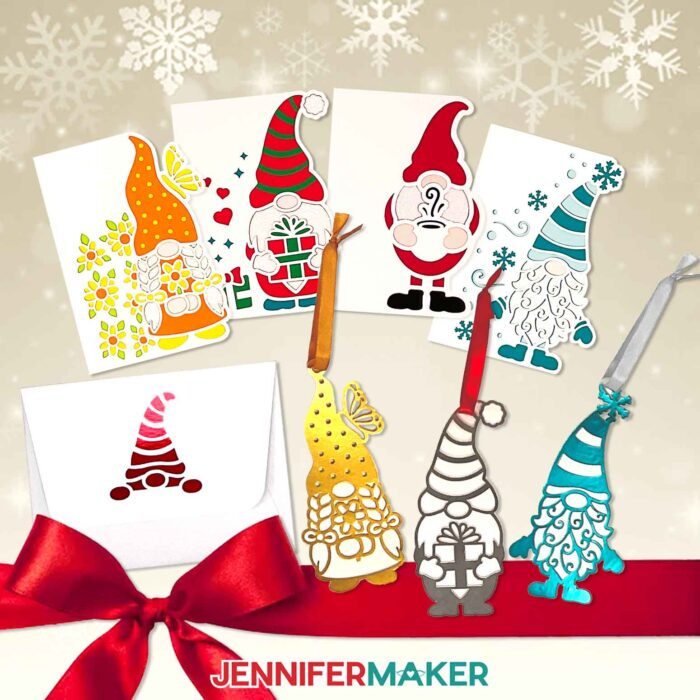
Learn how to make a gnome gift set for two-in-one holiday gifting!
Well hello there, ADVANCE member! You have special access to this project, including an exclusive workshop to help you learn how to design a customized gnome gift set. You can also just click here to get your files quick and easy!
When the holidays roll around, it’s easy to feel the pressure of finding thoughtful ways to show you care, especially when your list seems to grow longer every year. Between shopping, wrapping gifts, and mailing cards, even the most organized crafter can start to feel overwhelmed. That’s why I adore simple projects that let you send something personal without the stress, like this gnome gift set. It’s an adorable card and ornament duo that you can make in batches, personalize for everyone on your list, and send off with love and good cheer. Each tiny gnome is a small reminder that even the simplest handmade project can warm a heart and spread a smile during the busy holiday season!
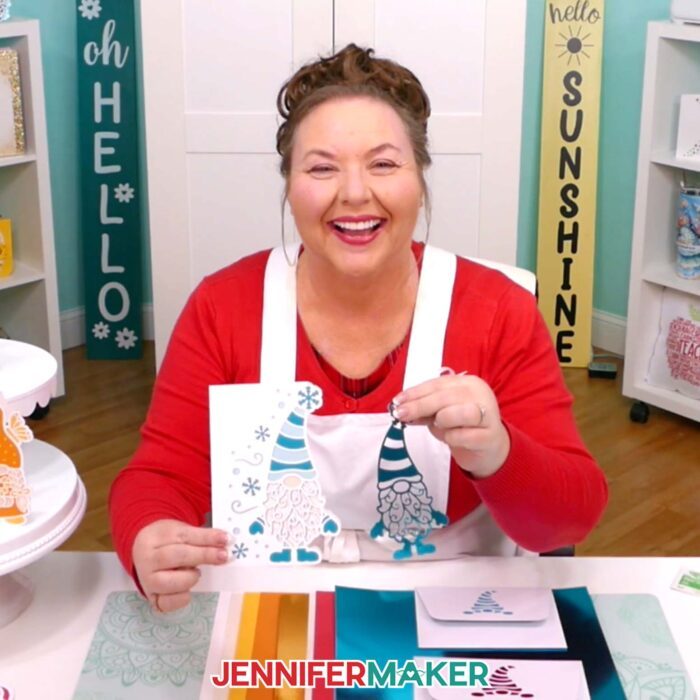
See the full step-by-step video tutorial on how to make a gnome gift set:

What makes this gnome gift set so special is how it combines whimsical charm with the practicality of a two-in-one gift. The design includes a layered card and matching ornament that nest together beautifully! It’s a ready-made keepsake that feels like the perfect gift for friends, teachers, or family near and far!
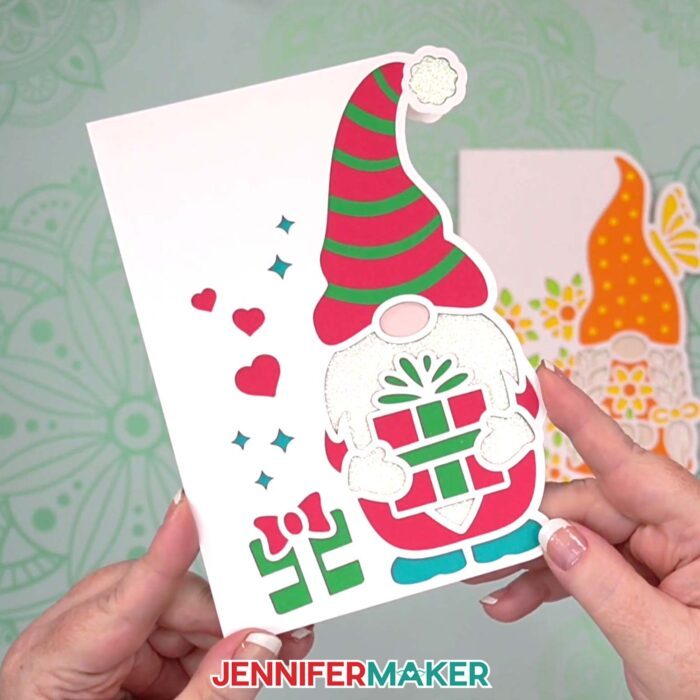
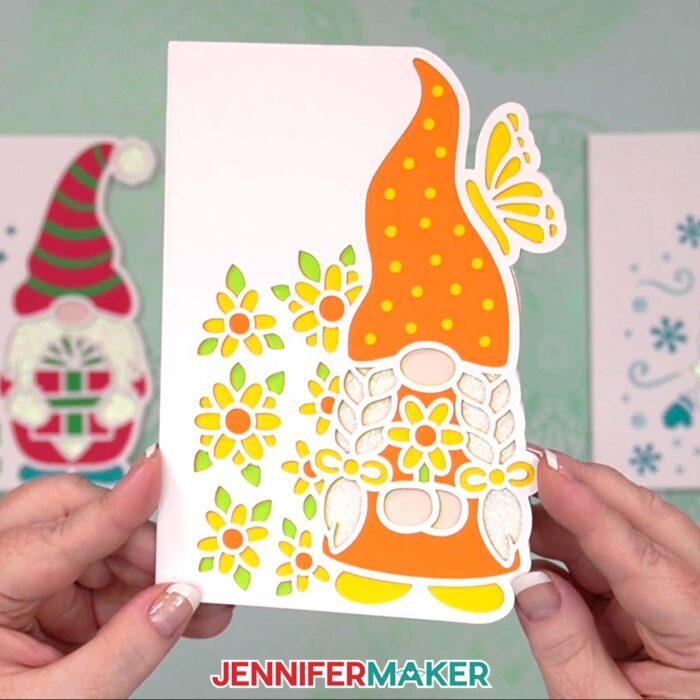
These handmade gnomes feature intricate details that make them look polished and oh-so-adorable, yet they’re surprisingly easy to make with your Cricut and a few basic materials. Each one has its own personality, from a cozy Christmas gnome holding a present to a winter gnome bundled in a hat. Plus, when the ornaments are tucked inside their matching cards, they make such delightful gifts to share.
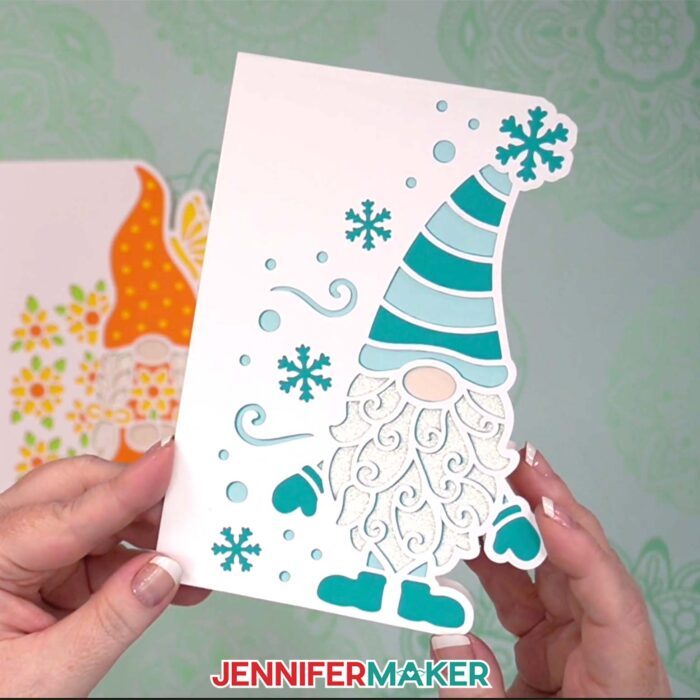
Each gnome card comes together like a little puzzle, layer by layer, with every piece revealing more color and texture. The card’s cutout design reveals the gnome’s layers underneath, but still gives you tons of space inside for a sweet message. These small touches can turn a simple paper card into something deeply personal!
Pair it with the matching paper ornament, and you’ve created something that’s both fun and functional. The finished ornament looks wonderful hanging from a tree, or tied to a package as a festive tag.
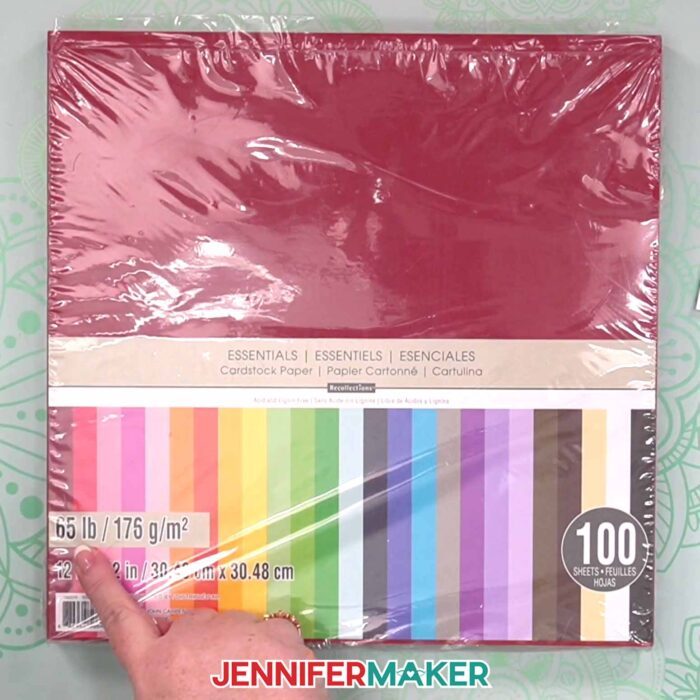
Let’s talk materials. High-quality 65 lb cardstock creates crisp, clean cuts that layer beautifully without tearing, while metallic poster board and glitter cardstock add shimmer and shine for that extra touch of magic. I recommend a high quality craft glue with a precision tip, which lets you add glue exactly where it’s needed for neat, smooth results. These little details make all the difference, making your finished pieces sturdy enough to last for years.
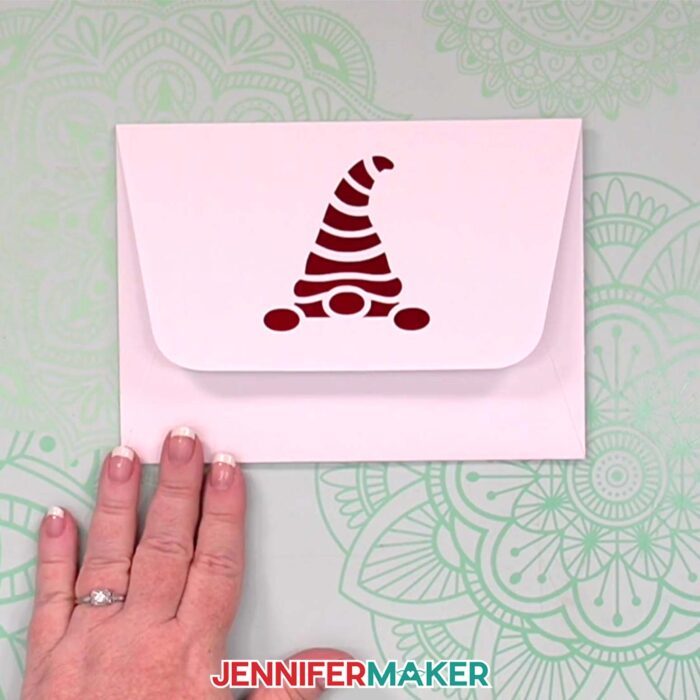
The matching envelope, cut from heavier cardstock like 80 lb., completes the set so it’s ready to send or gift immediately!
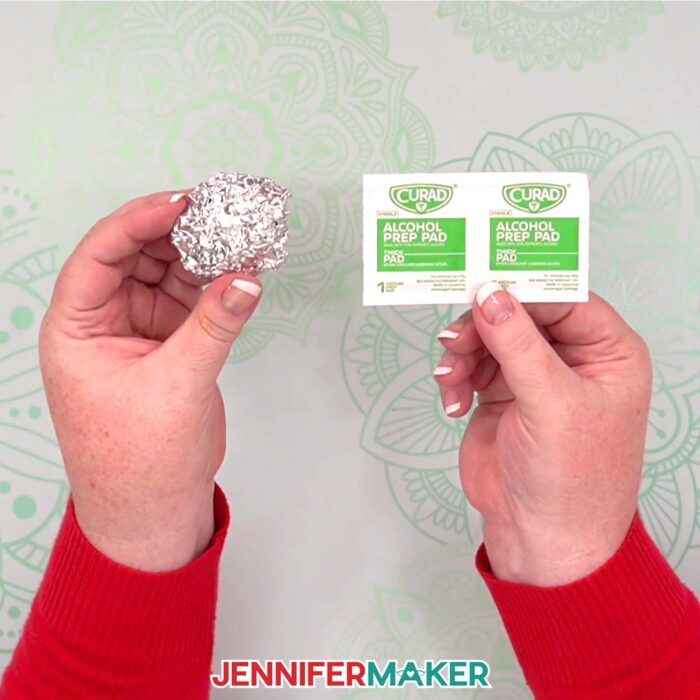
When you’re working with designs that have lots of tiny cuts like these gnomes, a clean blade makes all the difference. Even a little bit of paper dust or glitter can cause tearing or fuzzy edges, especially on those intricate details. I like to clean my Fine-Point Blade after every few cuts. It only takes a minute! Just poke the blade gently into a ball of aluminum foil a few times to knock off any residue, or wipe it carefully with a bit of rubbing alcohol and a lint-free cloth. Keeping your blade clean helps it glide through cardstock smoothly, so every little swirl, curve, and cut in your gnome gift set turns out crisp and perfect.
One of the best things about this gnome gift set is how customizable it is. You can create multiple versions, from a shiny metallic Christmas gnome to a pastel gnome that’s perfect for spring birthday cards, all using the same set of files. Switch up your colors and papers to suit the season or the recipient, and each finished project will feel new and original.
And if you’re ready to take your customization even further, I’d love to invite you to my ADVANCE with JenniferMaker program. Inside this members-only community, I share exclusive design workshops and templates, including a Build-a-Gnome kit that lets you design your own custom gnome in Cricut Design Space! You can create a Christmas gnome holding a candy cane, a baker gnome for your cookie-loving friend, or even one holding a coffee cup for a cozy touch. Members also receive printable cheat sheets, exclusive templates, and access to a creative, supportive crafting community filled with joyful hearts who love learning together. It’s the best way to expand your skills while making projects that truly express your creativity — and it’s a ton of fun! Learn more about ADVANCE with JenniferMaker here!

When you make your first gnome gift set, you’re going to fall in love with this sweet project. They’re perfect for mailing out to friends across the miles, leaving as surprises for neighbors, or even turning into a whimsical advent calendar full of paper gnome ornaments for every day of December. Each one you make feels a little different, and that’s the beauty of handmade crafts: they carry both creativity and care in every cut and fold.
Be sure to join me for the full video tutorial where I’ll walk you step-by-step through making your own gnome gift set. You’ll learn how to cut, layer, and assemble each piece, as well as tips for getting crisp cuts and perfect folds. By the end, you’ll have a table full of delightful gnomes ready to share! Whether you make them for the holiday season or create variations for birthdays, thank-yous, or just-because moments, these little gnomes will be sure to fill mailboxes with joy.
It’s not just paper and glue, it’s the love, time, and creativity you pour into every little detail. And when that love shows up in someone’s mailbox tucked inside a handmade card or ornament, it’s such a sweet reminder that even the simplest things can bring the biggest smiles!
Let me show you how to make a gnome gift set! This post contains some affiliate links for your convenience (which means if you make a purchase after clicking a link I will earn a small commission but it won’t cost you a penny more, there is no additional cost)! Read my full disclosure policy.
Quick Links to Information in this Post
ToggleMaterials to Make a Gnome Gift Set with Card and Ornament
View my Amazon shopping list with the exact items I used.
- One (1) Sheet of 8.5″ x 11″ or 12″ x 12″ Metallic Poster Board (for ornament) -OR-
- One (1) Sheet of 8.5″ x 11″ Kraft Cardstock
- One to Three (1-3) Sheets of 8.5″ x 11″ or 12″ x 12″ 65 lb. Cardstock (for layered ornament and side edge card liners)
- One (1) Sheet of 8.5″ x 11″ or 12″ x 12″ White Glitter Cardstock (optional for side edge card beard liner)
- One (1) Sheet of 8.5″ x 11″ or 12″ x 12″ 65 lb. Peach Cardstock (optional for side edge card gnome nose liner)
- One (1) Sheet of 8.5″ x 11″ or 12″ x 12″ 65 lb. Metallic Cardstock (optional for envelope liner)
- One (1) Sheet of 12″ x 12″ 80 lb. White Cardstock (optional for envelope base if you want to make it sturdier)
- A way to cut your cardstock – I’m using the Cricut Maker 4, but you can use any Cricut Maker series machine, any Cricut Explore series machine, the Cricut Venture, the Cricut Joy, or the Cricut Joy Xtra
- Green StandardGrip Machine Mat 12″ x 12″
- Brayer
- Spatula
- Scraper
- Weeding Tool (optional for popping out small cutouts from intricate areas)
- Tweezers
- 10″ of Ribbon (for ornament)
- Scoring Stylus (optional for files with score lines) -OR-
- Single Scoring Wheel (optional for files with score lines)
- Craft Glue (I used Bearly Art Precision Craft Glue)
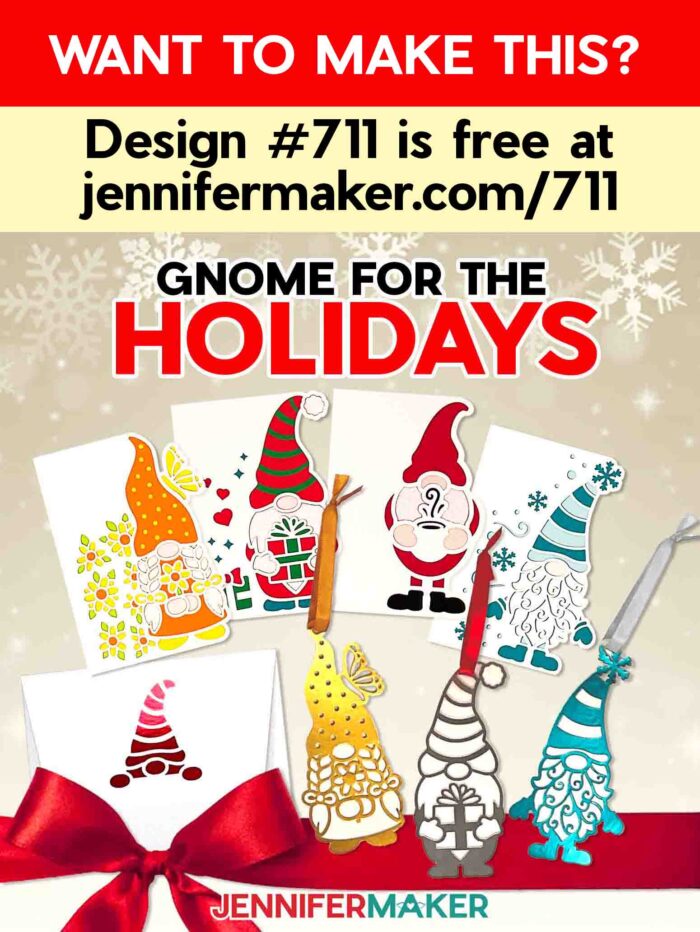
- Design #711 (My free SVG/PDF/DXF design files are available in my free resource library – get the password by filling out the form at the bottom of this pageDesign #711 in your member area
How to Make a Gnome Gift Set!

Gnome Ornament Gift Set
Learn how to make a gnome gift set with an ornament and shaped edge card!
Materials
- One (1) Sheet of 8.5" x 11" or 12" x 12" Metallic Poster Board (for ornament) -OR-
- One (1) Sheet of 8.5" x 11" or 12" x 12" 65 lb. Cardstock (for layered ornament)
- 10" of Ribbon (for ornament)
- One or Two (1-2) Sheets of 8.5" x 11" or 12" x 12" 65 lb. White Cardstock (for side edge card and envelope bases)
- Several Sheets of 8.5" x 11" or 12" x 12" 65 lb. Plain Cardstock (various colors for side edge card liners)
- One (1) Sheet of 8.5" x 11" or 12" x 12" White Glitter Cardstock (optional for side edge card beard liner)
- One (1) Sheet of 8.5" x 11" or 12" x 12" 65 lb. Peach Cardstock (optional for side edge card gnome nose liner)
- One (1) Sheet of 8.5" x 11" or 12" x 12" 65 lb. Metallic Cardstock (optional for envelope liner)
- One (1) Sheet of 12" x 12" 80 lb. White Cardstock (optional for envelope base if you want to make it sturdier)
- Design #711 (My free SVG/PDF/DXF design files are available in my free resource library – get the password by filling out the form at the bottom of this page)
Tools
- A way to cut your materials - I’m using the Cricut Maker 4, but you can also use any Maker series machine, any Explore series machine, the Venture, the Joy, or the Joy Xtra.
- Cricut Green StandardGrip Machine Mat, 12" x 12"
- Scoring Stylus (optional for files with score lines) -OR-
- Single Scoring Wheel (optional for files with score lines)
- Brayer
- Scraper
- Bearly Art Precision Craft Glue
- Scissors
- Weeding Tool (optional for popping out small cutouts from intricate areas)
- Spatula
Instructions
Project 1: Paper Gnome Ornaments
STEP 1: GET MY FREE GNOME ORNAMENT DESIGNS
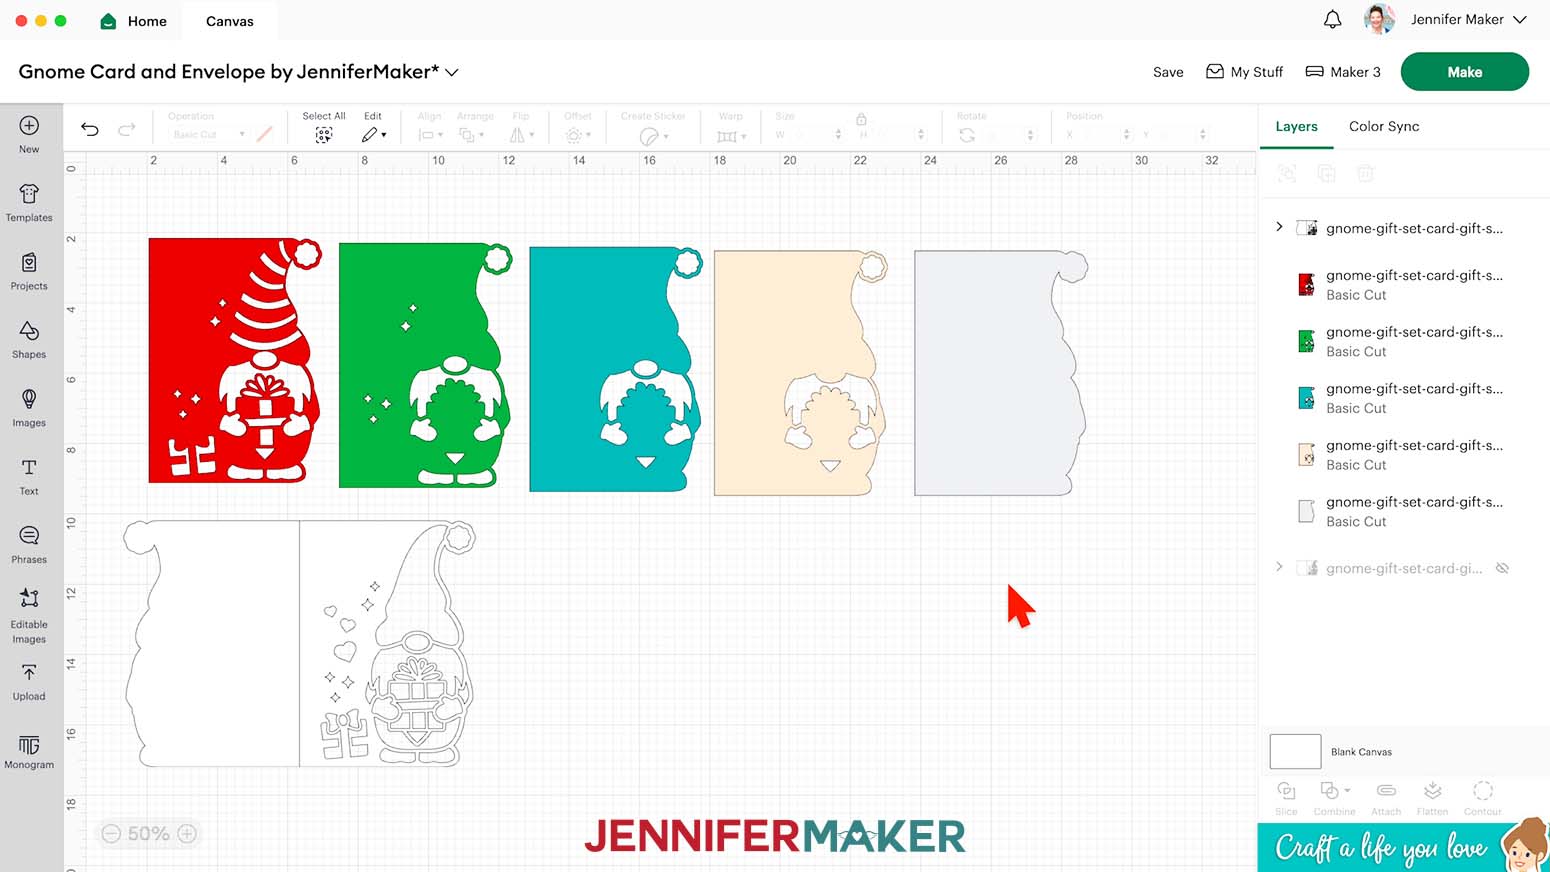
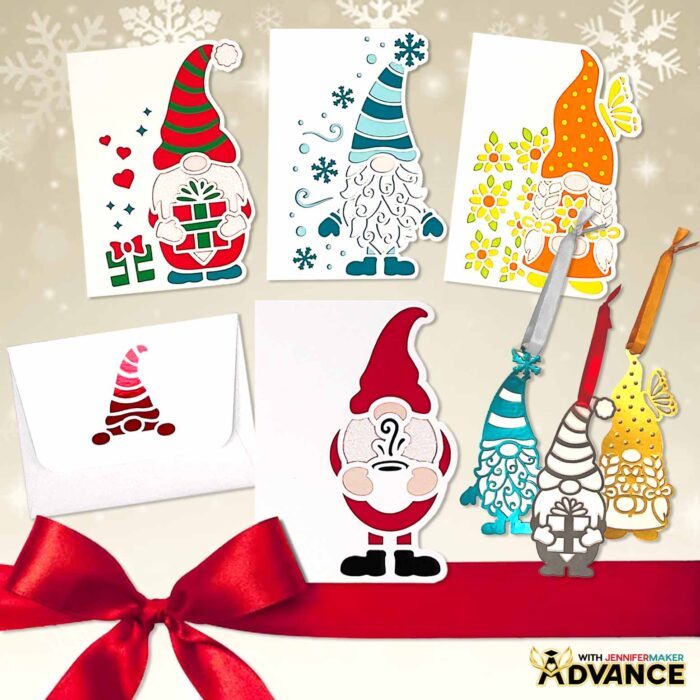
First, download my Gnome Ornament Gift Set files from my free library – look for Design #711. Alternatively, you can use the Save This Project form near the top of this post and the design link will be emailed to you. In the SVG folder, there are six card options, and three ornament options. We’ll cover the cards in the second section of this tutorial.
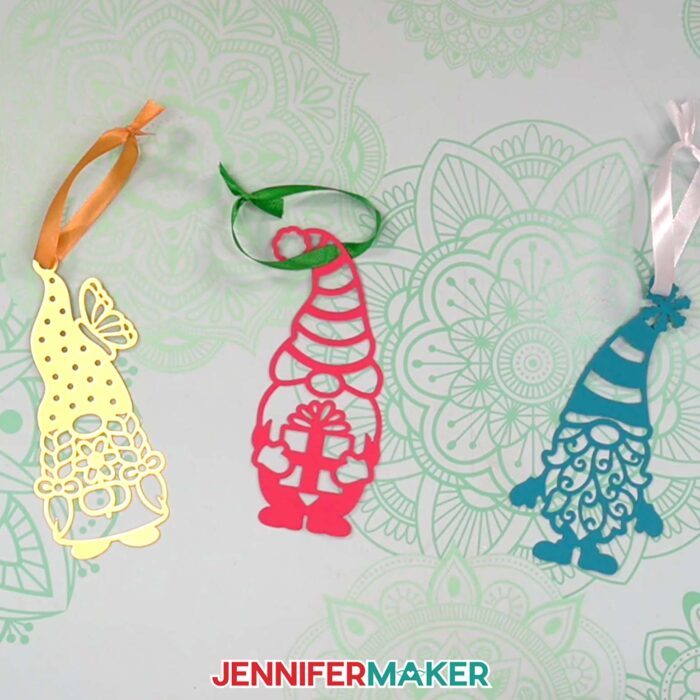
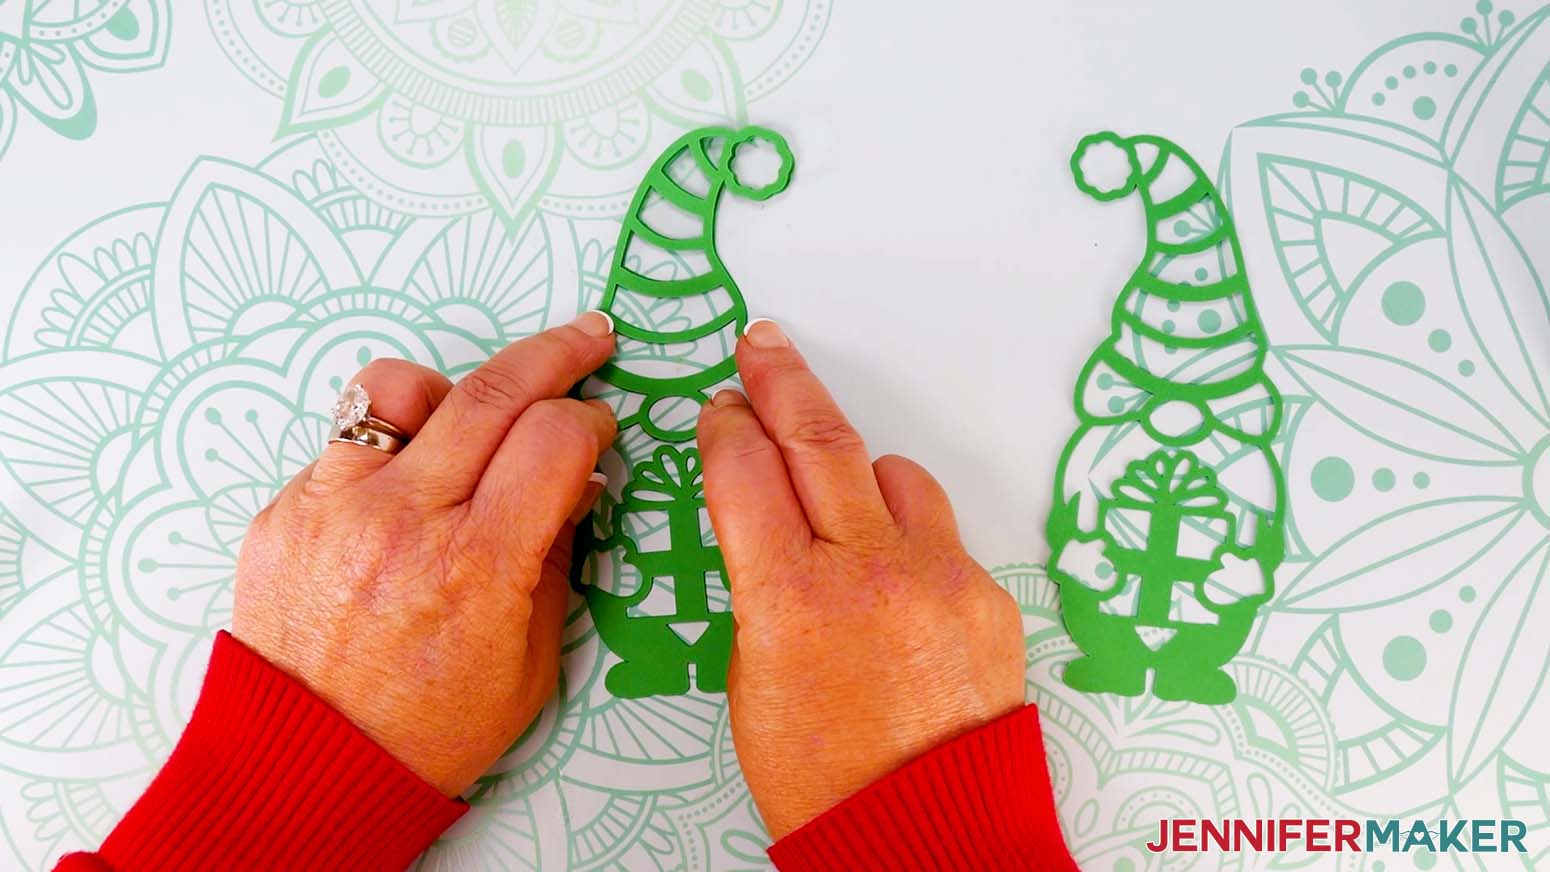
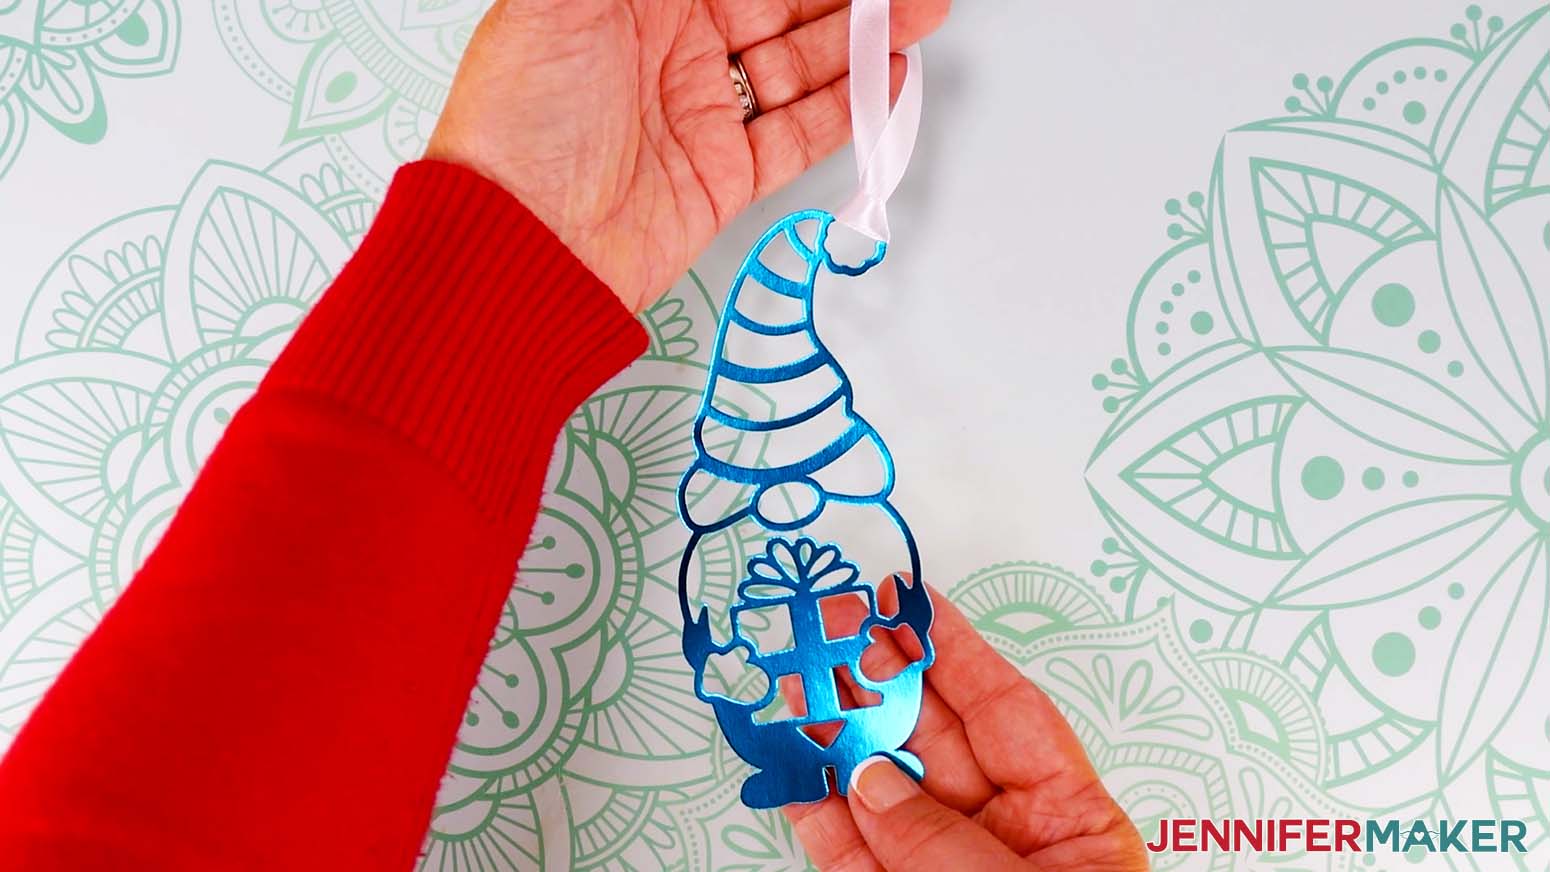
There are three ornament designs you can make: one with a flower, one with a present, and another with a winter theme.
TIP: If you’re not sure how to upload, go to jennifermaker.com/svgs to learn how to unzip and upload SVG files.
STEP 2: PREPARE AND CUT YOUR GNOME ORNAMENT DESIGN
CRICUT DESIGN SPACE
- In Cricut Design Space, open a blank Canvas.
- Click “Upload” and then “Upload Image.”
- Click “Browse.”
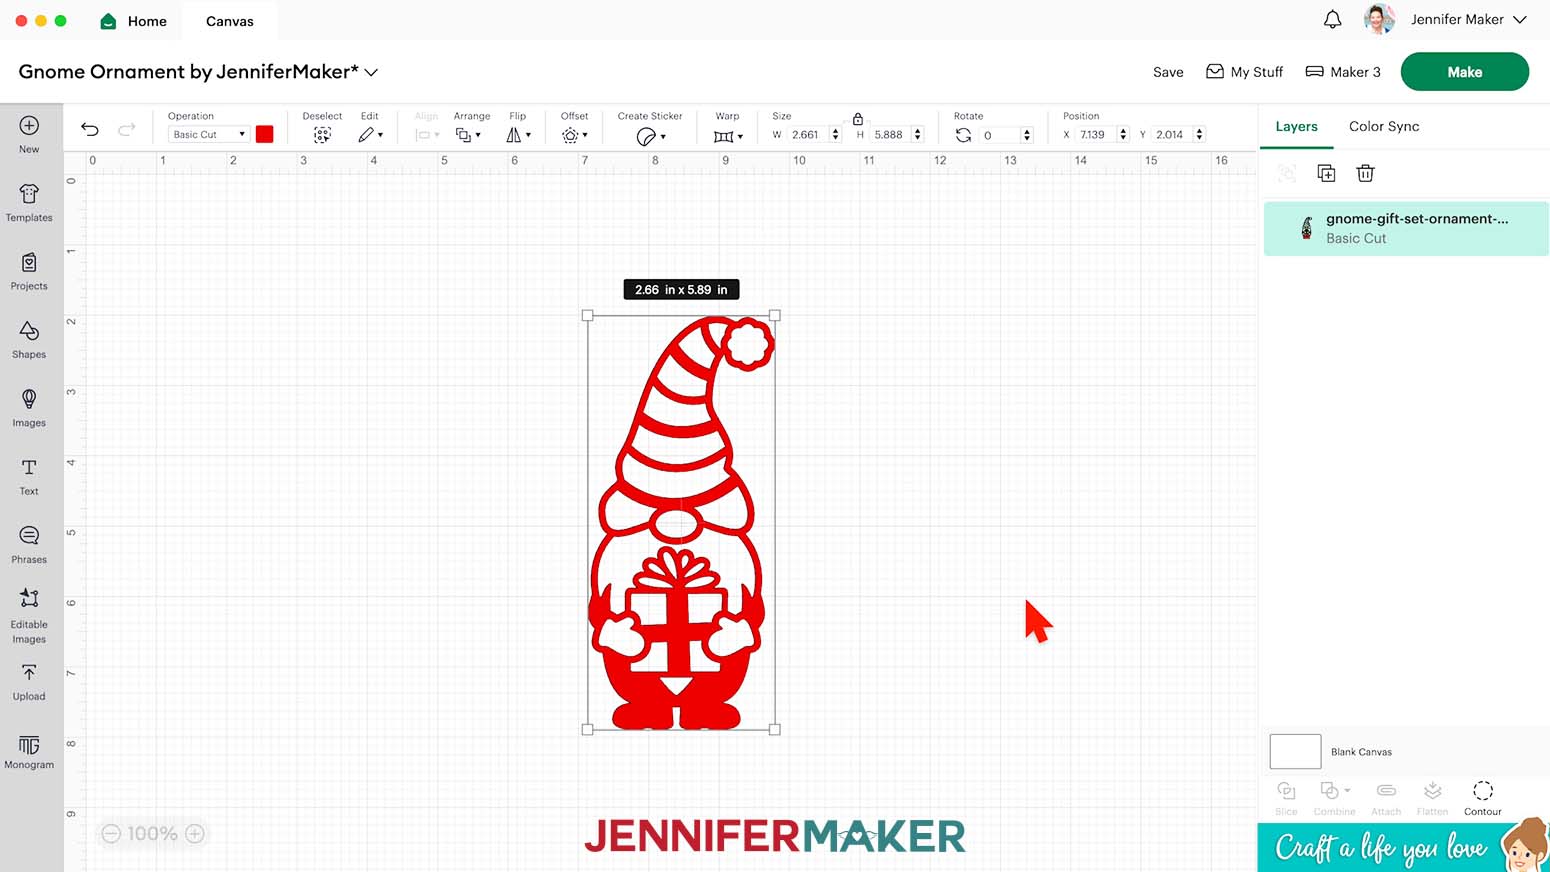
- Select the "ornament" SVG file of your choice. I’ll demonstrate with the gnome holding a gift.
- Click “Open.”
- On the “Upload Image” screen, there will be a design preview. Click “Continue.”
- On the next screen, click “Upload.”
- The gnome design is now on your Canvas.
- Click “Save” and give your project a name so you can find it easily.

- If you want to make an ornament using metallic poster board and don’t mind the back being white, you’re ready to cut!
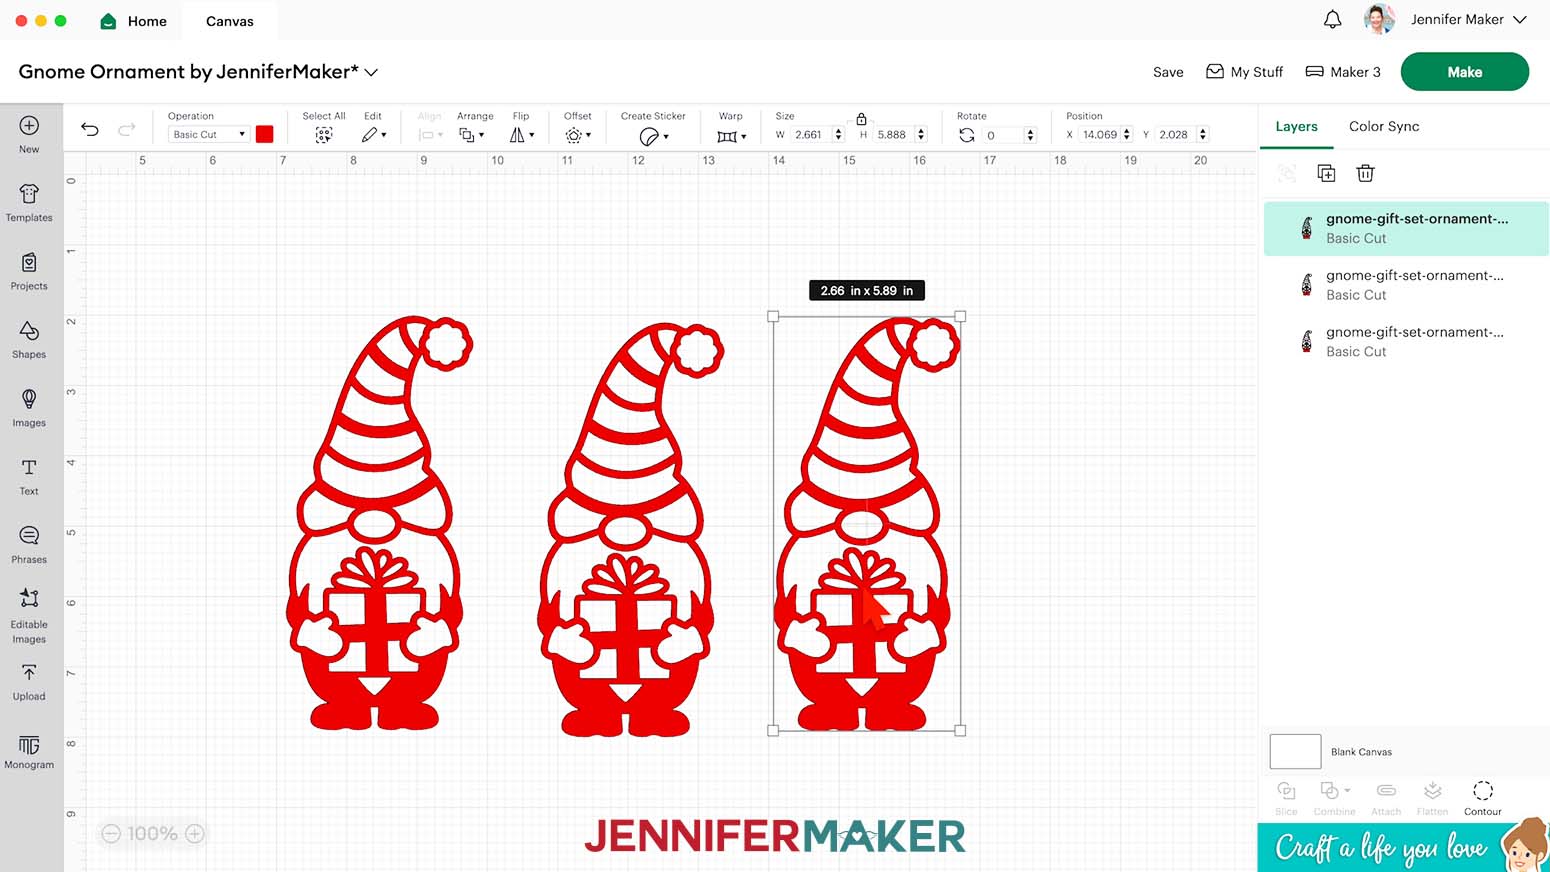
- If you want to have the metallic color on both sides, click “Duplicate.”
- Then, click “Flip” and select “Flip Horizontally” to create a mirrored version to sandwich with the original during assembly.
- If you want to use medium cardstock instead of metallic poster board, duplicate the design twice so you can cut and glue three layers together.
TIP: If you want to cut multiple ornaments at once, select the layers for one, then use the Color Box next to “Operation” to set them to a new color. That way, the Cricut will put the piece(s) for each ornament on a new mat.
 TIP: If you want to cut multiple ornaments at once, select the layers for one, then use the Color Box next to “Operation” to set them to a new color. That way, the Cricut will put the piece(s) for each ornament on a new mat.

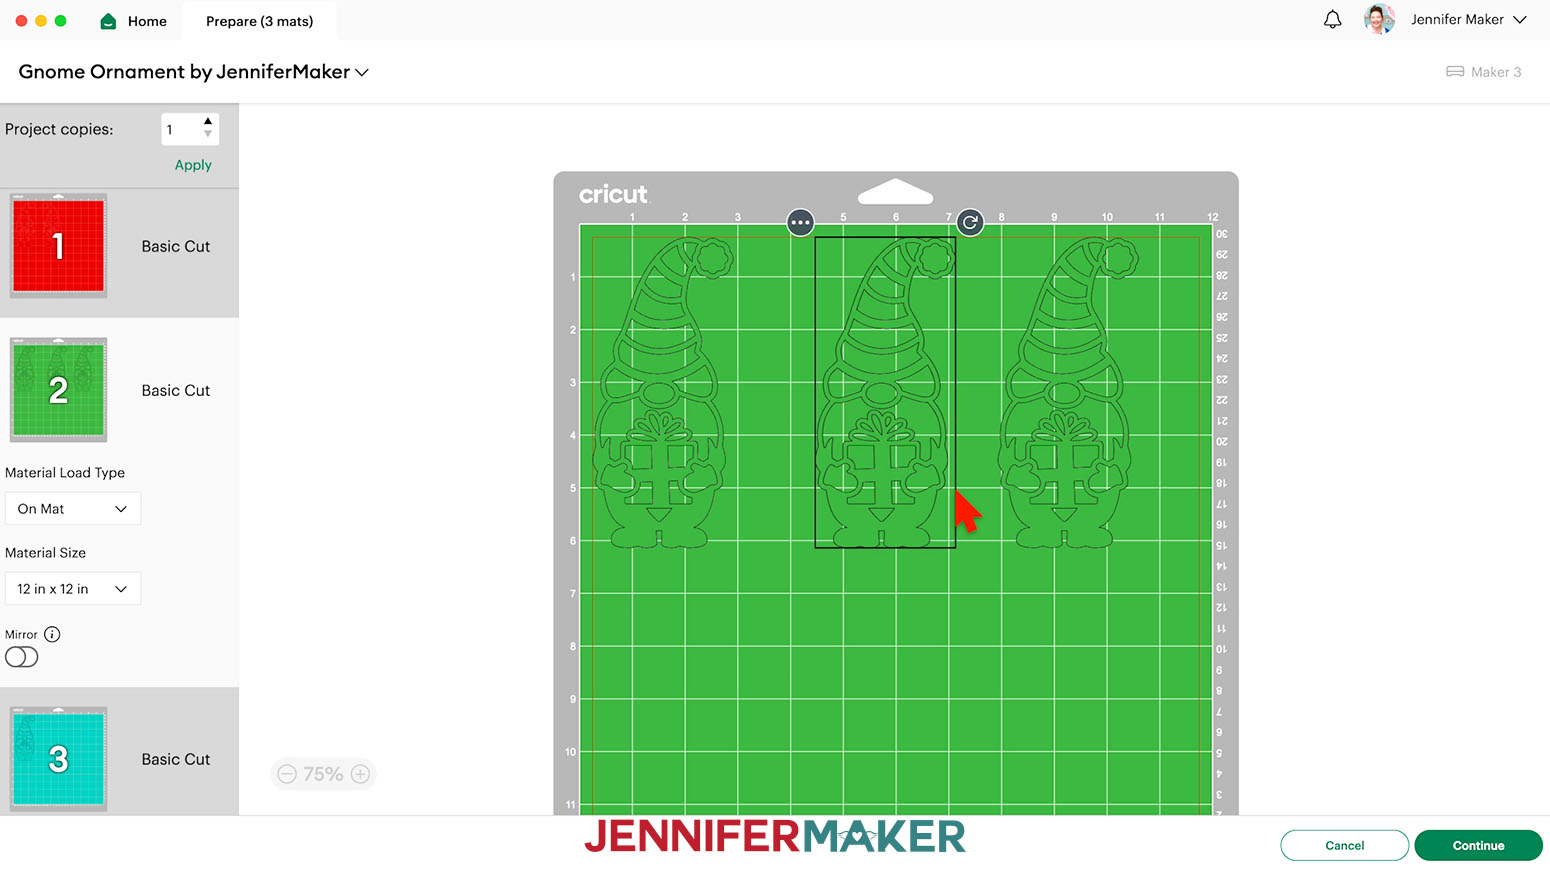
CUTTING
- Make sure the correct machine is selected in the top right.
- Click “Make.”
- On the Prepare Screen, make sure the “Material Size” matches the poster board or cardstock you’re using for each color.
- Select the first mat again and click “Continue.”
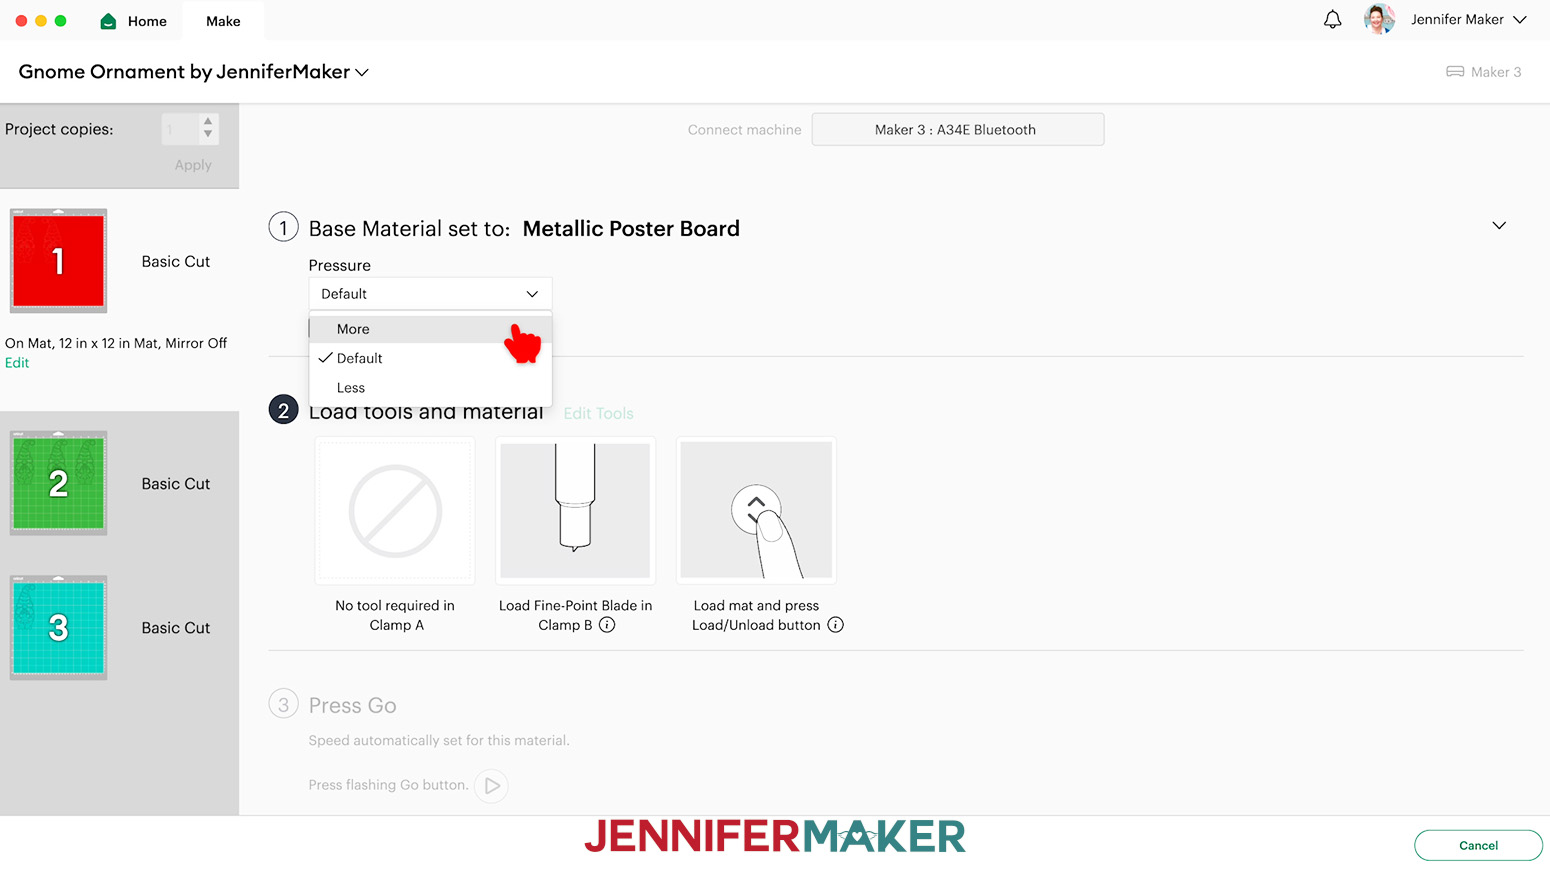
- On the Make Screen, click “Browse All Materials.”
- Search for and select the settings needed for the materials you’re using. These are the settings you can use for each material:
Metallic Poster Board - “Metallic Poster Board” with “More” Pressure on a green StandardGrip machine mat
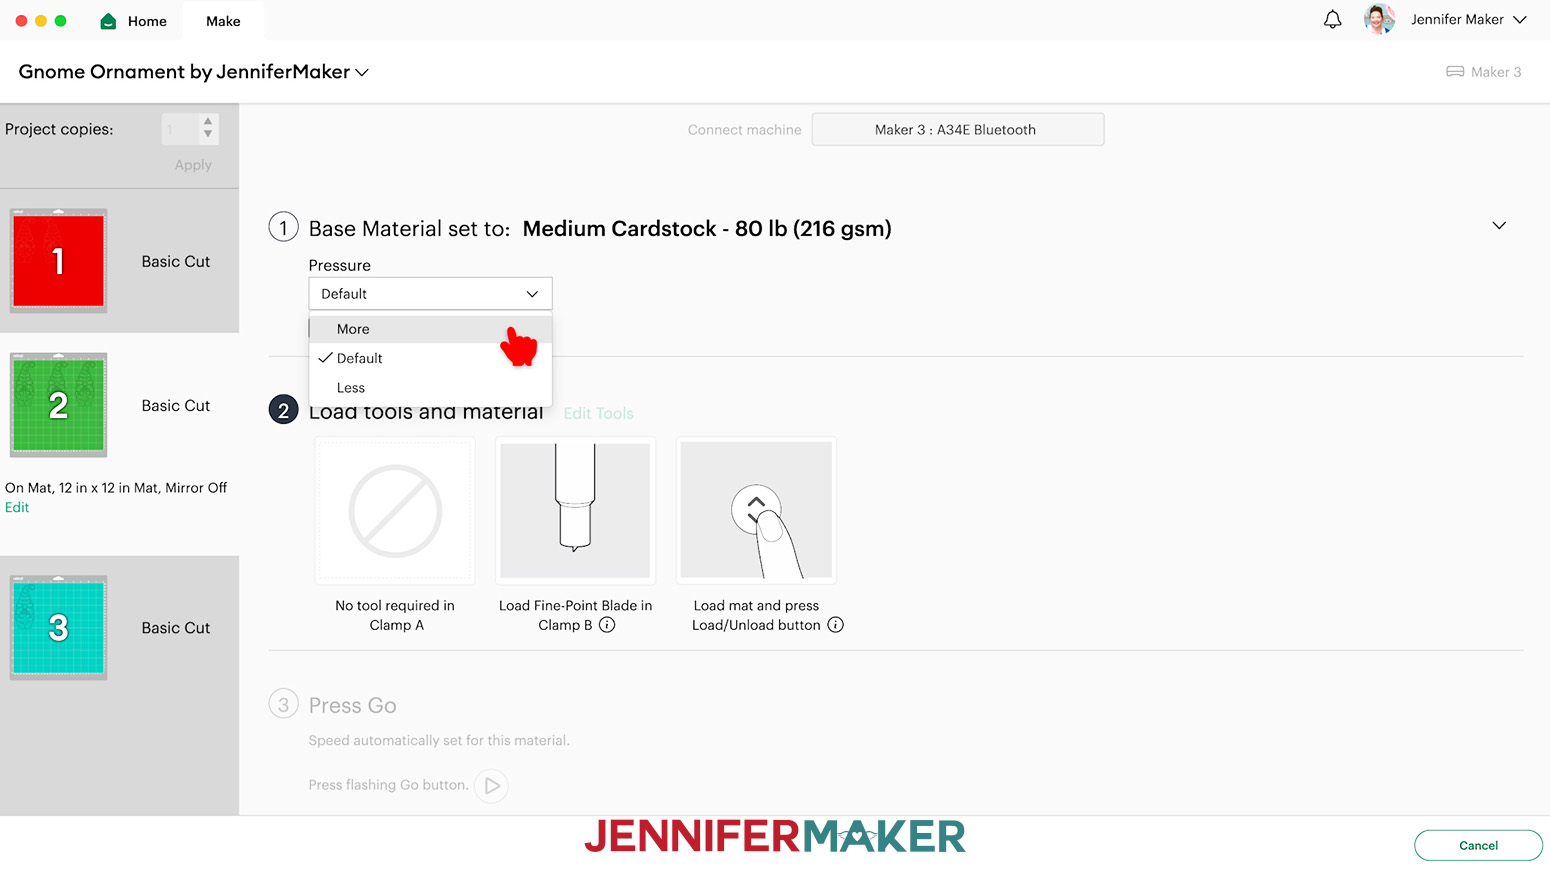
65 lb. Cardstock - “Medium Cardstock - 80 lb (216 gsm)” with “More” Pressure on a green StandardGrip machine mat
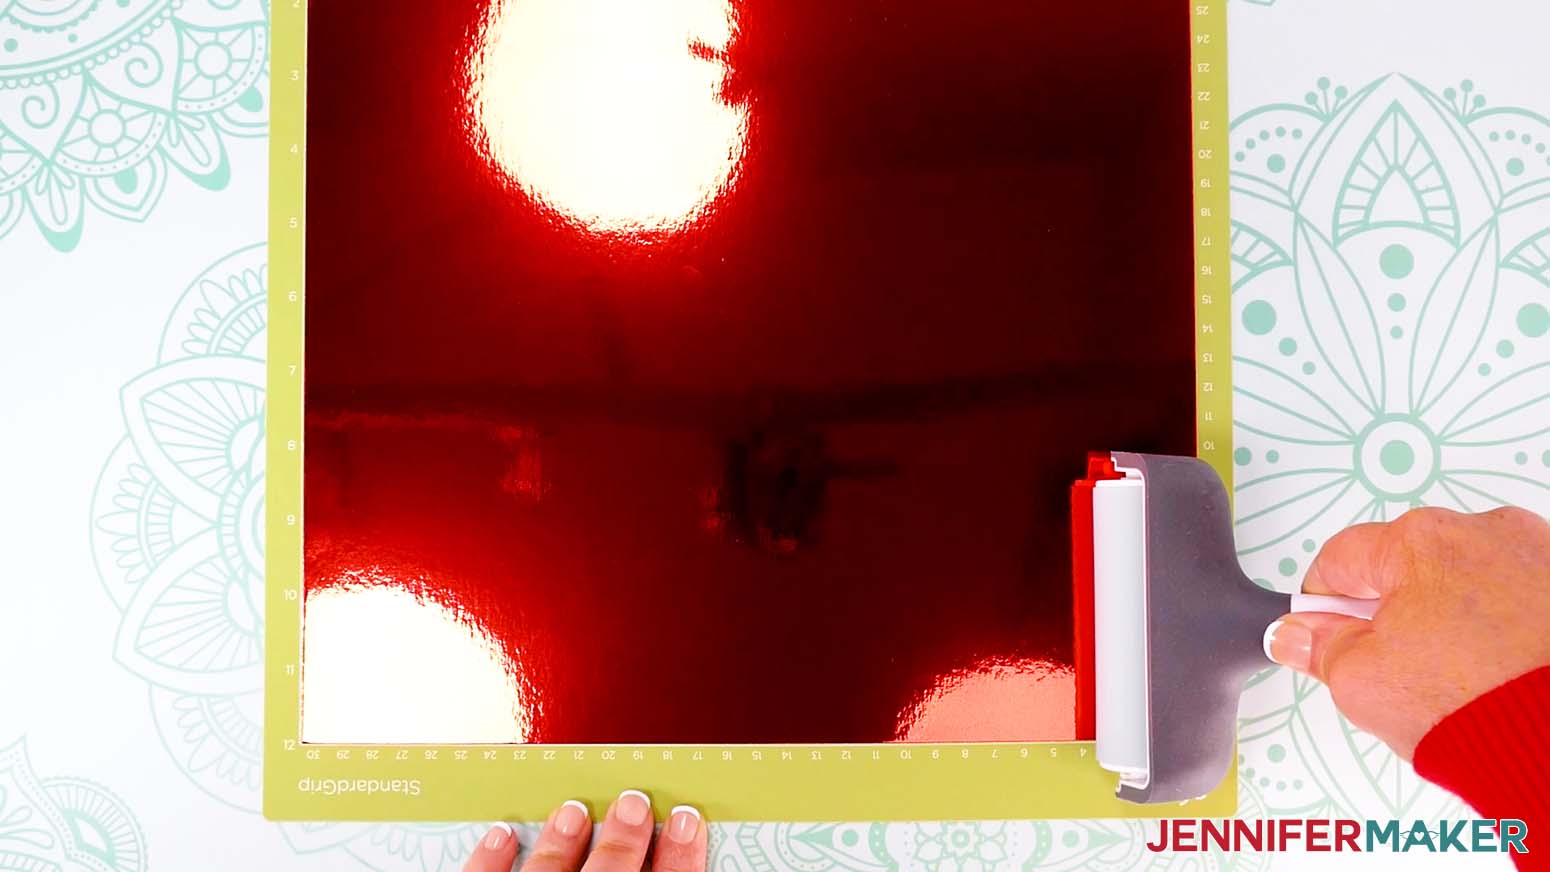
- Place your first mat’s paper face up on a green StandardGrip machine mat.
- Use a brayer to make sure it’s fully adhered.
- Check that your Fine-Point Blade is clean and in the clamp.
- Press the flashing “Load/Unload” button to load the prepared mat into your Cricut.
- Press the flashing “Go” button to begin cutting.
- Before unloading the mat, gently lift a corner of the paper to make sure the cuts went all the way through. If not, press the “Go” button again to make a second cut pass in the same spot.
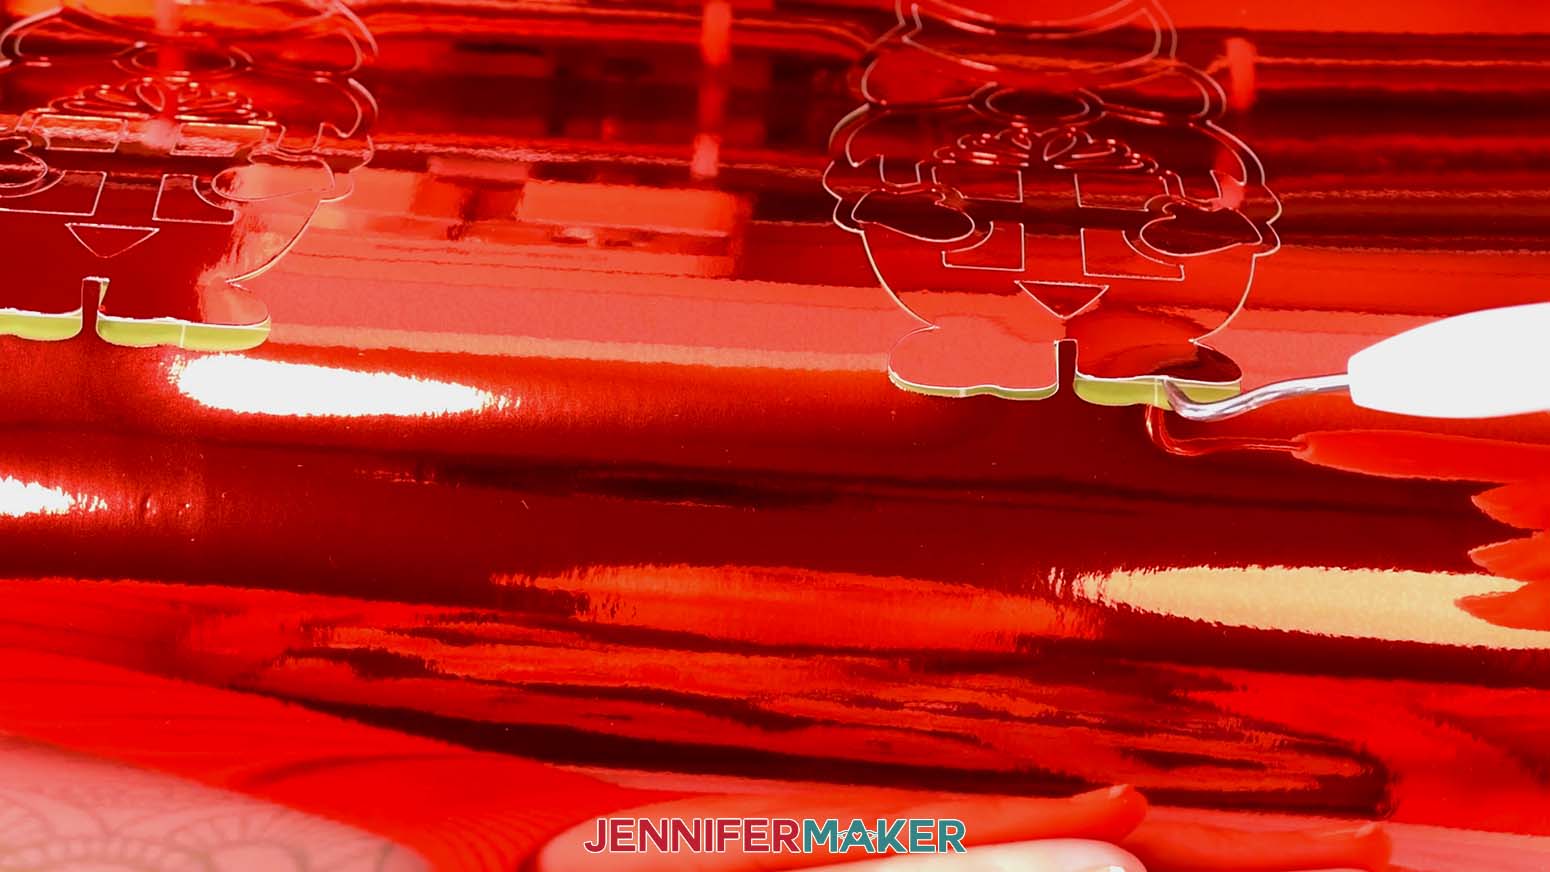
- When it has finished cutting completely, unload the mat, flip it over onto your work surface, and roll it back to release the paper. TIP: Be careful when removing intricate pieces. Use a spatula to carefully remove any intricate parts and a weeding tool to pop out any small pieces. If you have trouble with any of your cuts, check out my Cricut Tips & Tricks for Cleaner Cuts.
- Cut the rest of your mats using the same process and appropriate material settings.
 65 lb. Cardstock - “Medium Cardstock - 80 lb (216 gsm)” with “More” Pressure on a green StandardGrip machine mat
STEP 3: ASSEMBLE YOUR GNOME ORNAMENT
SINGLE-SIDED POSTER BOARD ORNAMENT
- Cut a piece of ribbon about 10” long.
- Loop it through the ornament’s hanger spot and tie it closed.
DOUBLE-SIDED POSTER BOARD ORNAMENT
- Place the cut ornament pieces pretty side down.
- Add small dots of glue to the back of one face down piece, but don’t get too close to the edges.
- Gently flip the glued piece and hold it over the face-down piece to make sure it will align, then lower it in place.
- Press the two layers together.
- Let the ornament dry completely.
- Use the Single-Sided Poster Board Ornament steps to add the ribbon hanger.
CARDSTOCK ORNAMENT
- Add small dots of glue to the back of one piece, but don’t get too close to the edges.
- Flip over the glued piece and lightly place it on a face-up layer.
- Before pressing it down, gently adjust the layers so they’re perfectly aligned.
- Press the two layers together.
- Let the glue dry for at least 15 seconds.
- Use the same process to glue the third layer on top of the previous one.
- Let the ornament dry completely.
- Use the Single-Sided Poster Board Ornament steps to add the ribbon hanger.
Project 2: Shaped Edge Gnome Card
Follow Step 1 from the Paper Gnome Ornaments tutorial above to get my free design files.
The SVG folder (in addition to the ornament designs covered in the first section) has three card designs with gnomes featuring flowers, presents, and winter elements.
Each card has a “noscore” option that uses dashed cut lines to create creases, and a “score” option that uses a scoring tool instead. You can use either option depending on your machine, tools, and preferences.
NOTE: The Cricut Joy does not have Score capabilities.
STEP 2: PREPARE AND CUT YOUR SHAPED EDGE GNOME CARD
CRICUT DESIGN SPACE
- In Cricut Design Space, open a blank Canvas.
- Click “Upload” and then “Upload Image.”
- Click “Browse.”
- Select the "card" SVG file of your choice. I’ll demonstrate with the “score” version of the gnome holding a gift.
- Click “Open.”
- On the “Upload Image” screen, there will be a design preview. Click “Continue.”
- On the next screen, click “Upload.”
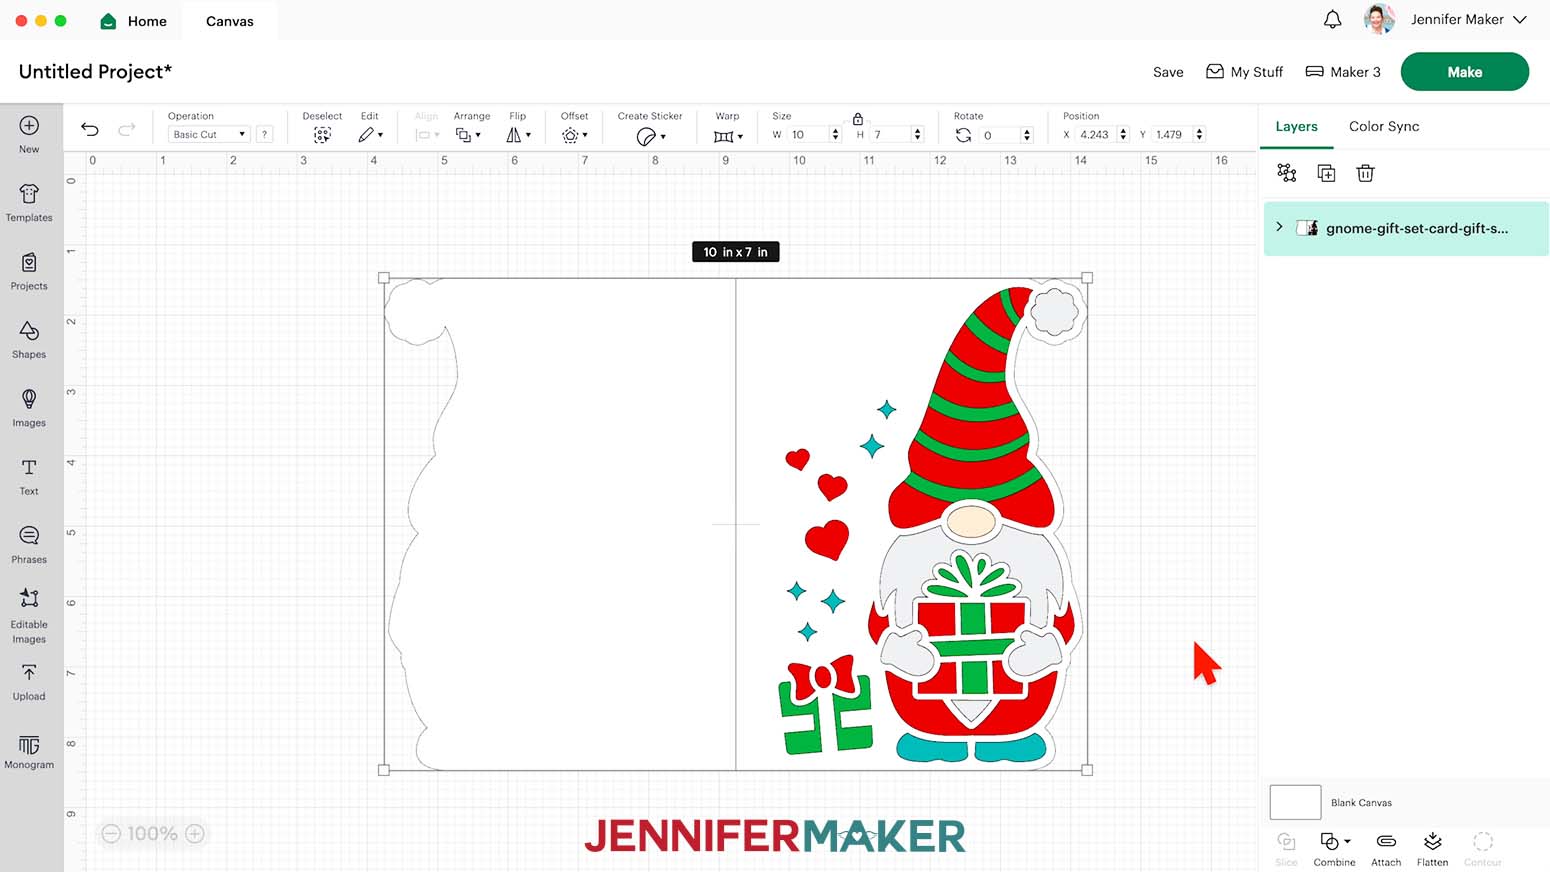
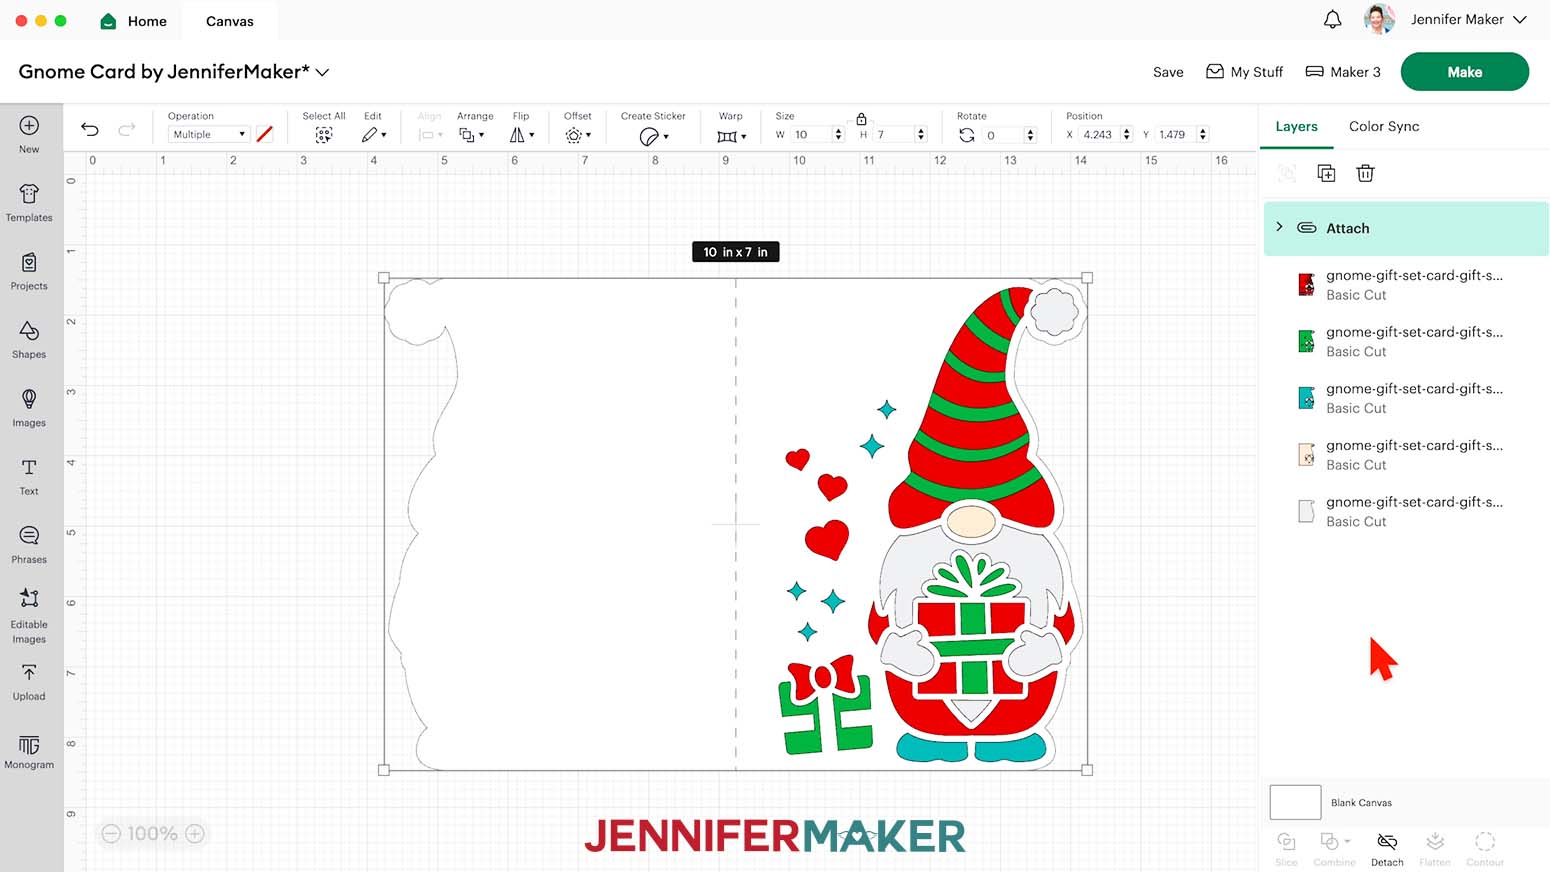
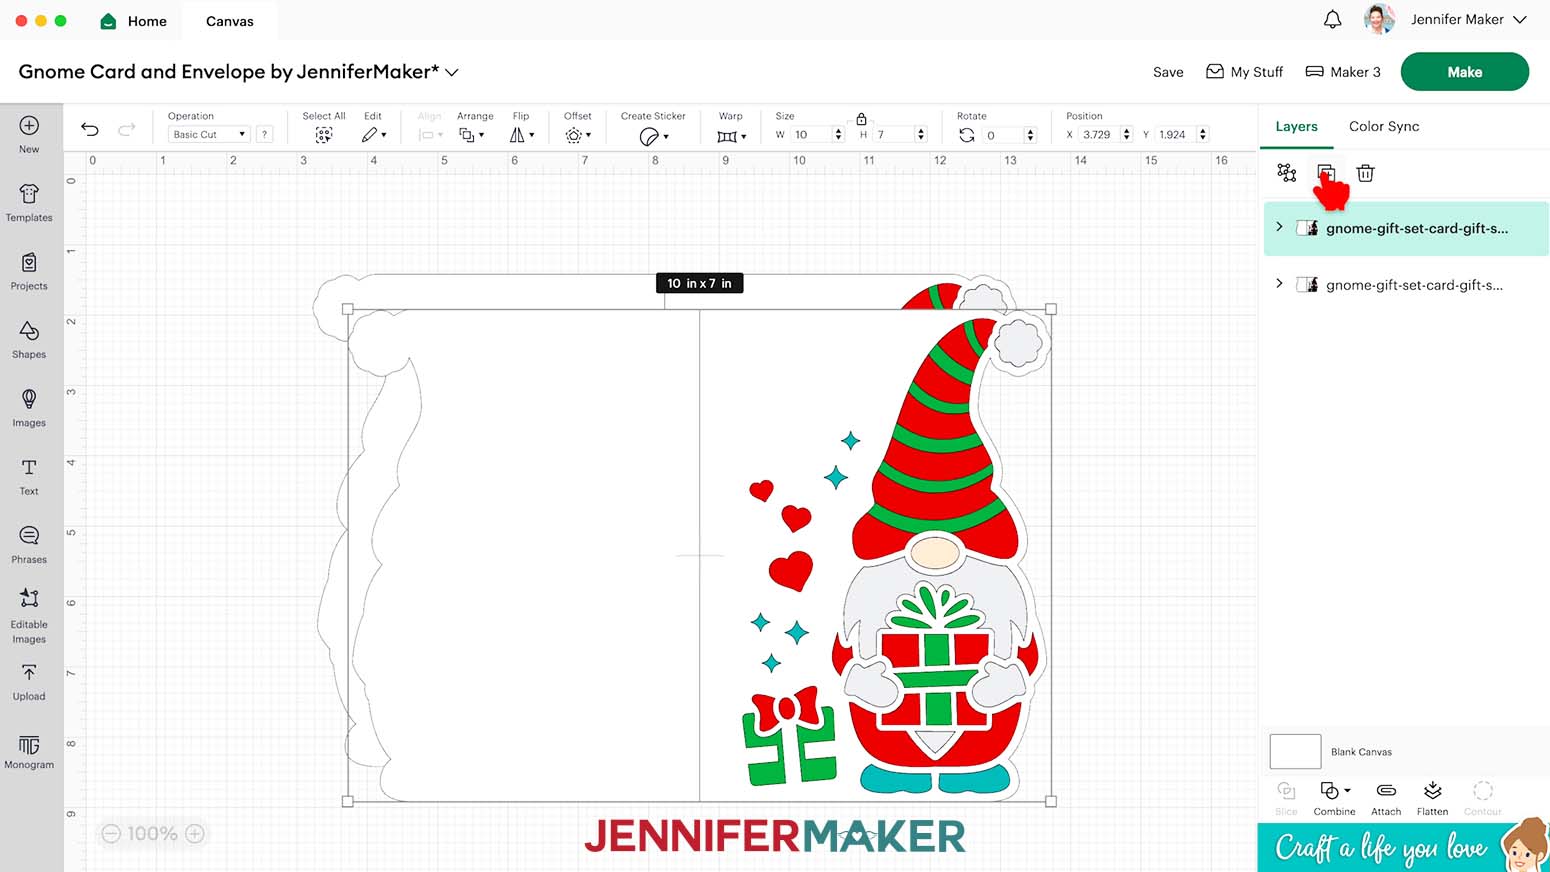
- The card with a gnome holding a gift design is now on your Canvas.
- Click “Save” and give your project a name so you can find it easily.
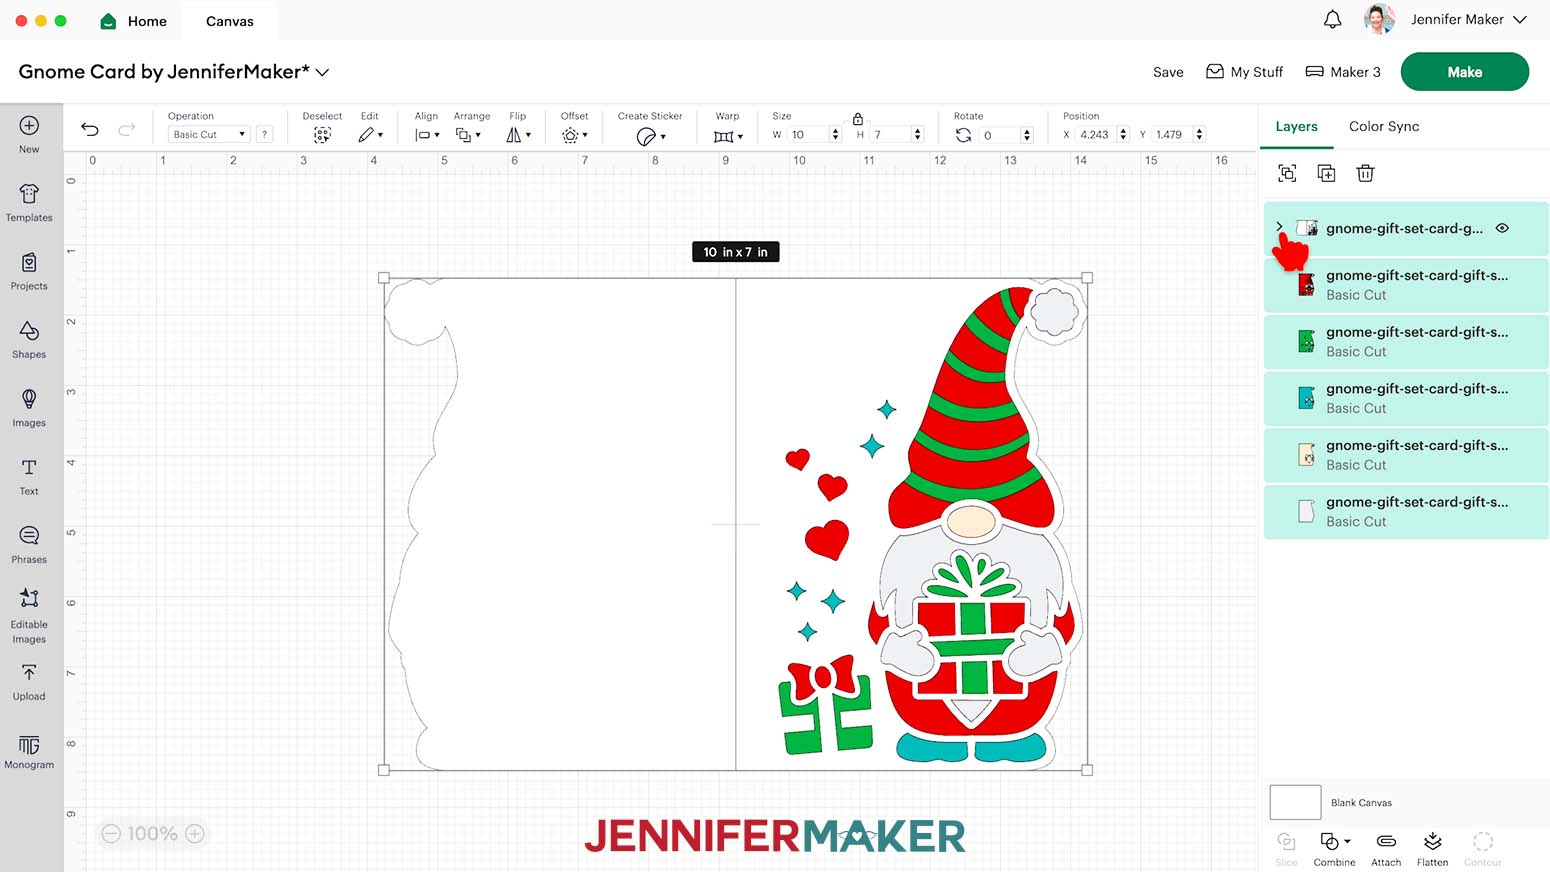
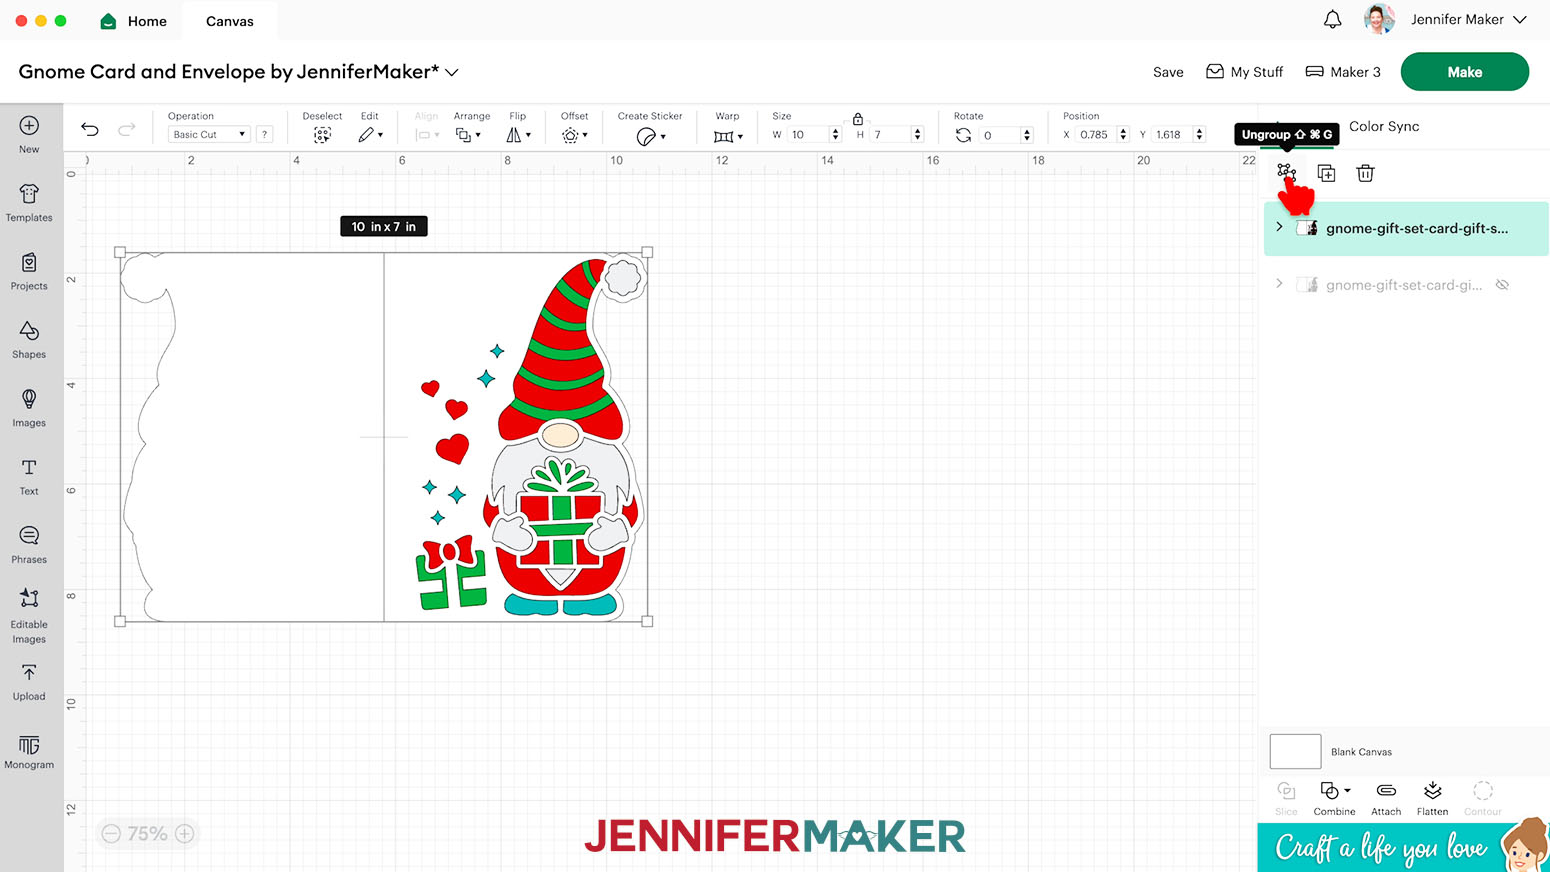
- Select the card and click “Ungroup” to work with the elements separately.
NOTE: In the Layers Panel, one layer has an arrow to its side, meaning it has grouped layers.
- Click the arrow to expand the grouped layers.
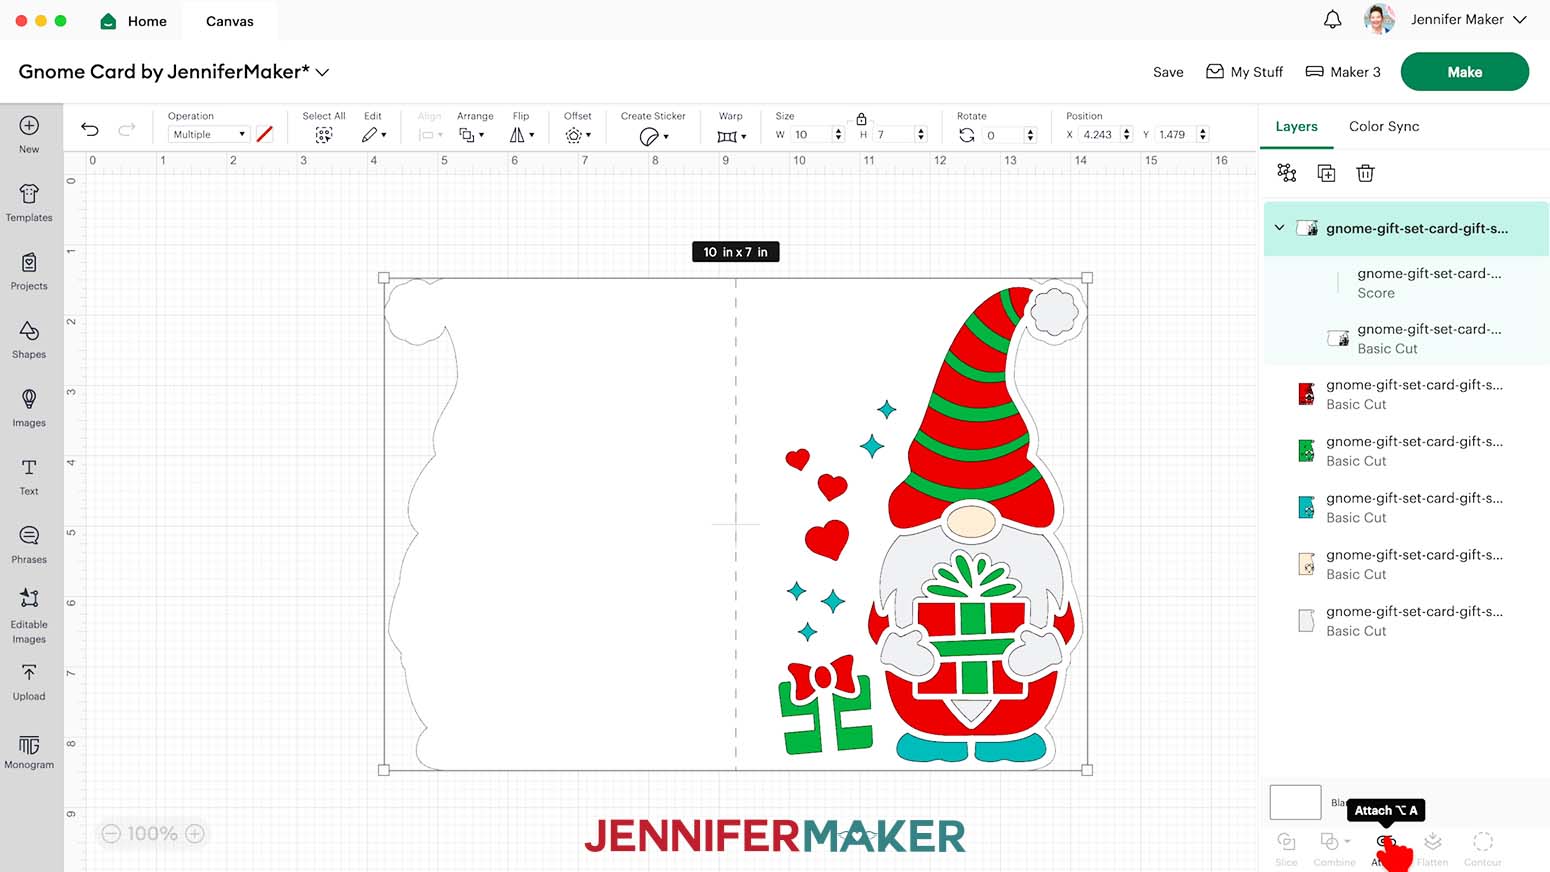
- Click the layer in the group that just has a line and is colored red in the Color Box. TIP: I make my intended Score lines red so they’re easier to identify.
- Click the “Operation” drop-down menu and select “Score” to convert the layer to a Score line.
- Click the layer with the arrow to select both grouped layers.
- Click “Attach” to keep the “Score” and “Basic Cut” layers together.
- You’re ready to cut!

CUTTING
- Make sure the correct machine is selected in the top right.
- Click “Make.”
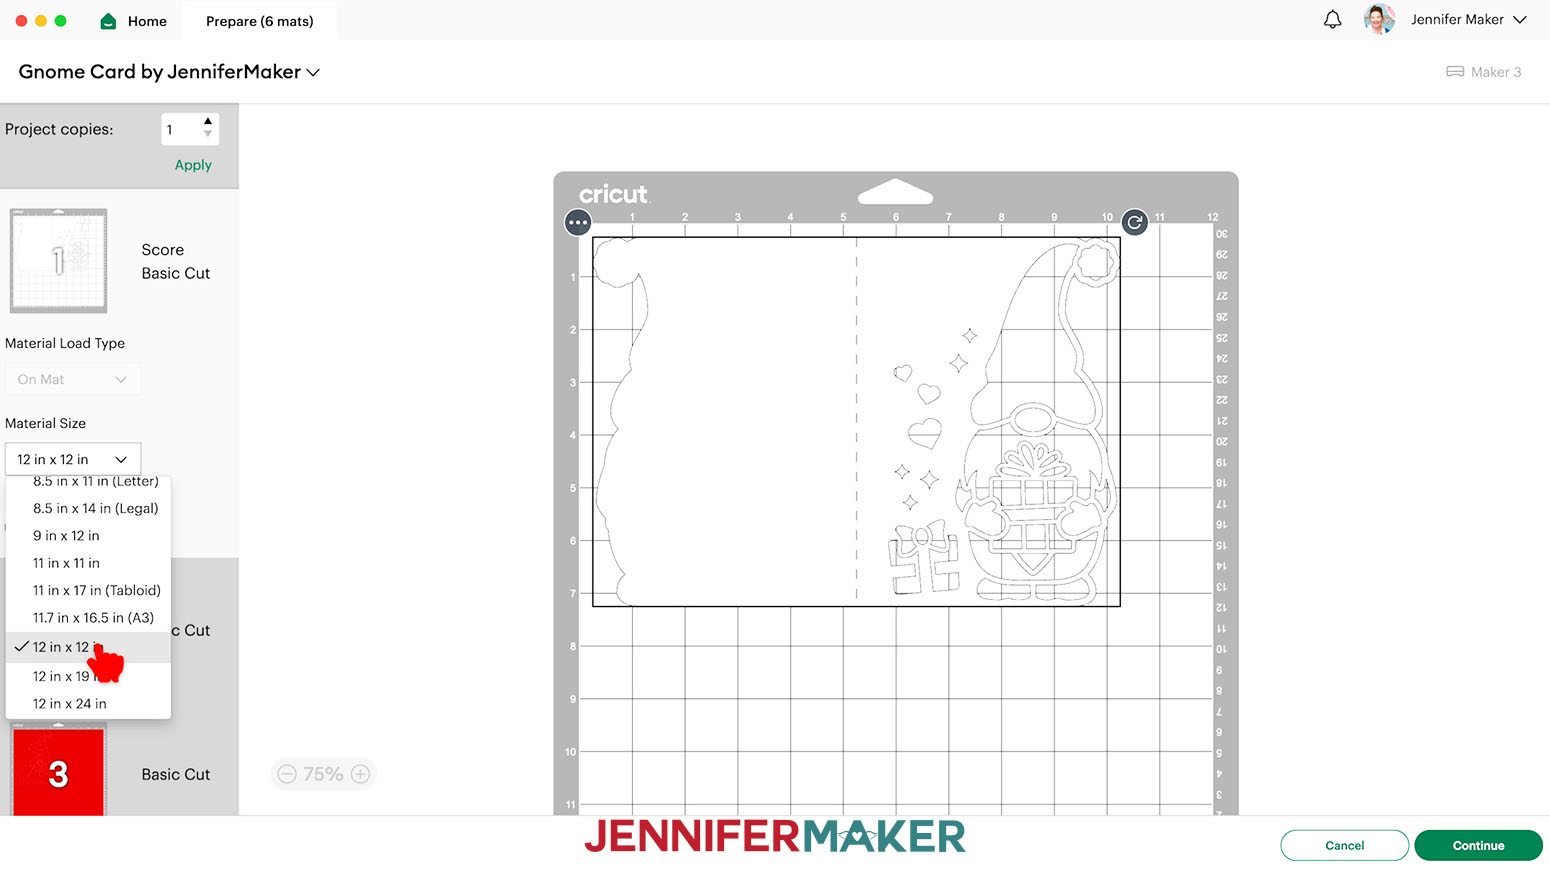
- On the Prepare Screen, If needed, change the Material Size to match each paper you’re using.
NOTE: I’m using 12” x 12” material for everything.
- Select the first mat and click “Continue.”
- On the Make Screen, click “Browse All Materials.”
- Search for and select the settings needed for the materials you’re using. These are the settings you can use for each material: 65 lb. Cardstock - “Medium Cardstock - 80 lb (216 gsm)” with “More” Pressure on a green StandardGrip machine mat 80 lb. Cardstock - “Medium Cardstock - 80 lb (216 gsm)” with “More” Pressure on a green StandardGrip machine mat Glitter Cardstock - “Glitter Cardstock” with “More” Pressure on a green StandardGrip machine mat
- Place your first mat’s paper face up on a green StandardGrip machine mat.
- Use a brayer to make sure it’s fully adhered.
- Check that your Fine-Point Blade is clean and in the clamp.
- Press the flashing “Load/Unload” button to load the prepared mat into your Cricut.
- Press the flashing “Go” button to begin cutting.
- Before unloading the mat, gently lift a corner of the paper to make sure the cuts went all the way through. If not, press the “Go” button again to make a second cut pass in the same spot.
- When it has finished cutting completely, unload the mat, flip it over onto your work surface, and roll it back to release the paper. TIP: Be careful when removing intricate pieces. Use a spatula to carefully remove any intricate parts and a weeding tool to pop out any small pieces. If you have trouble with any of your cuts, check out my Cricut Tips & Tricks for Cleaner Cuts.
- Cut the rest of your mats using the same process and appropriate material settings.
STEP 3: ASSEMBLE YOUR GNOME SHAPED EDGE CARD
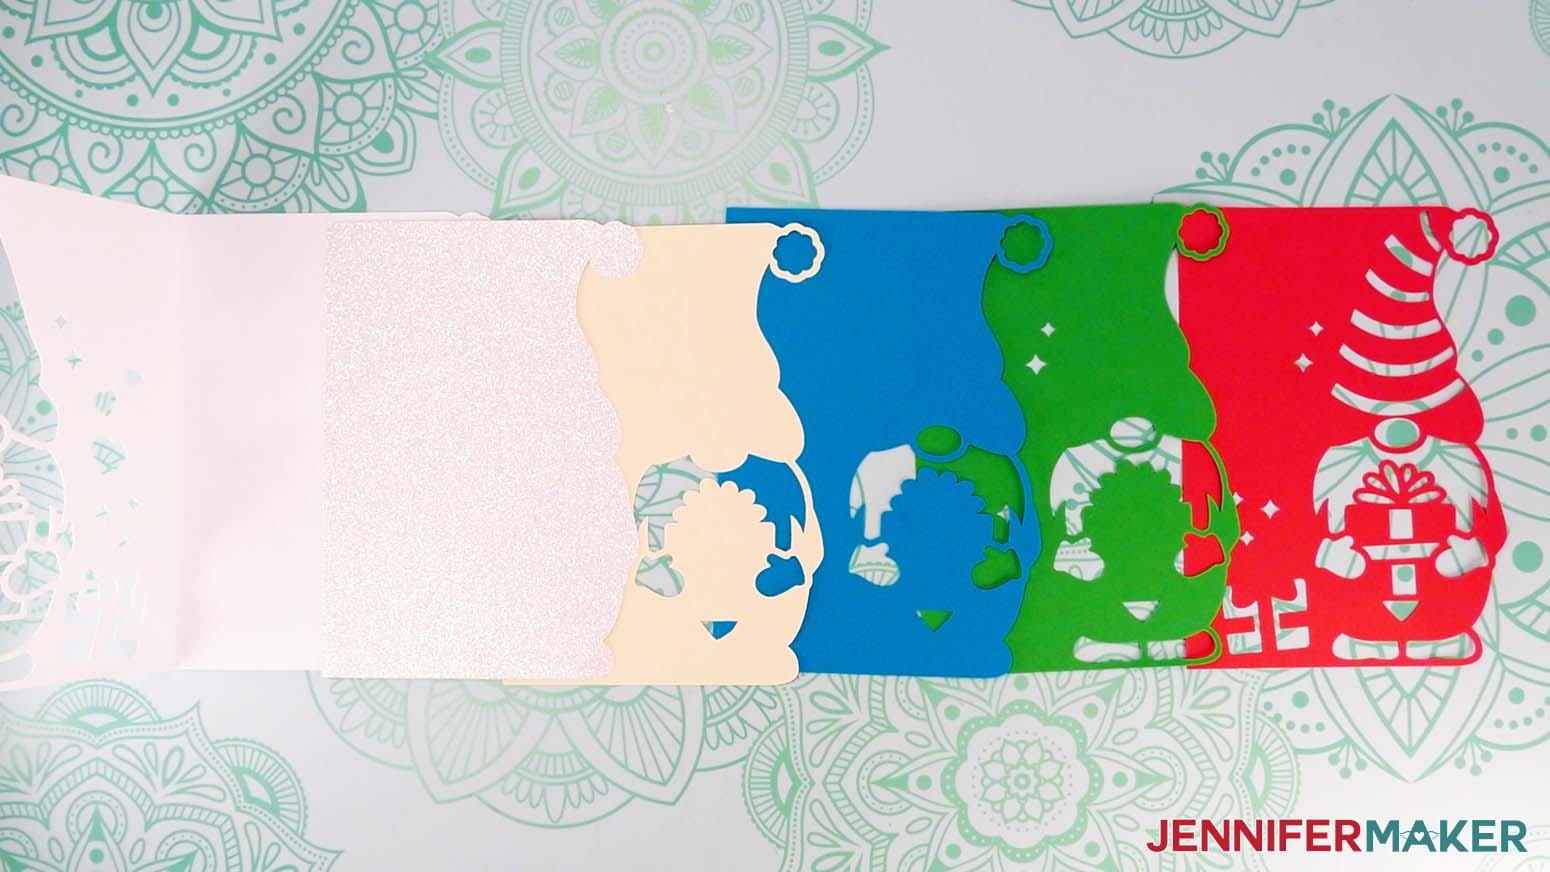
- Gather your Gnome Card pieces.
NOTE: For the large 5" x 7" gift design, there is one large base card piece and five smaller liner pieces.
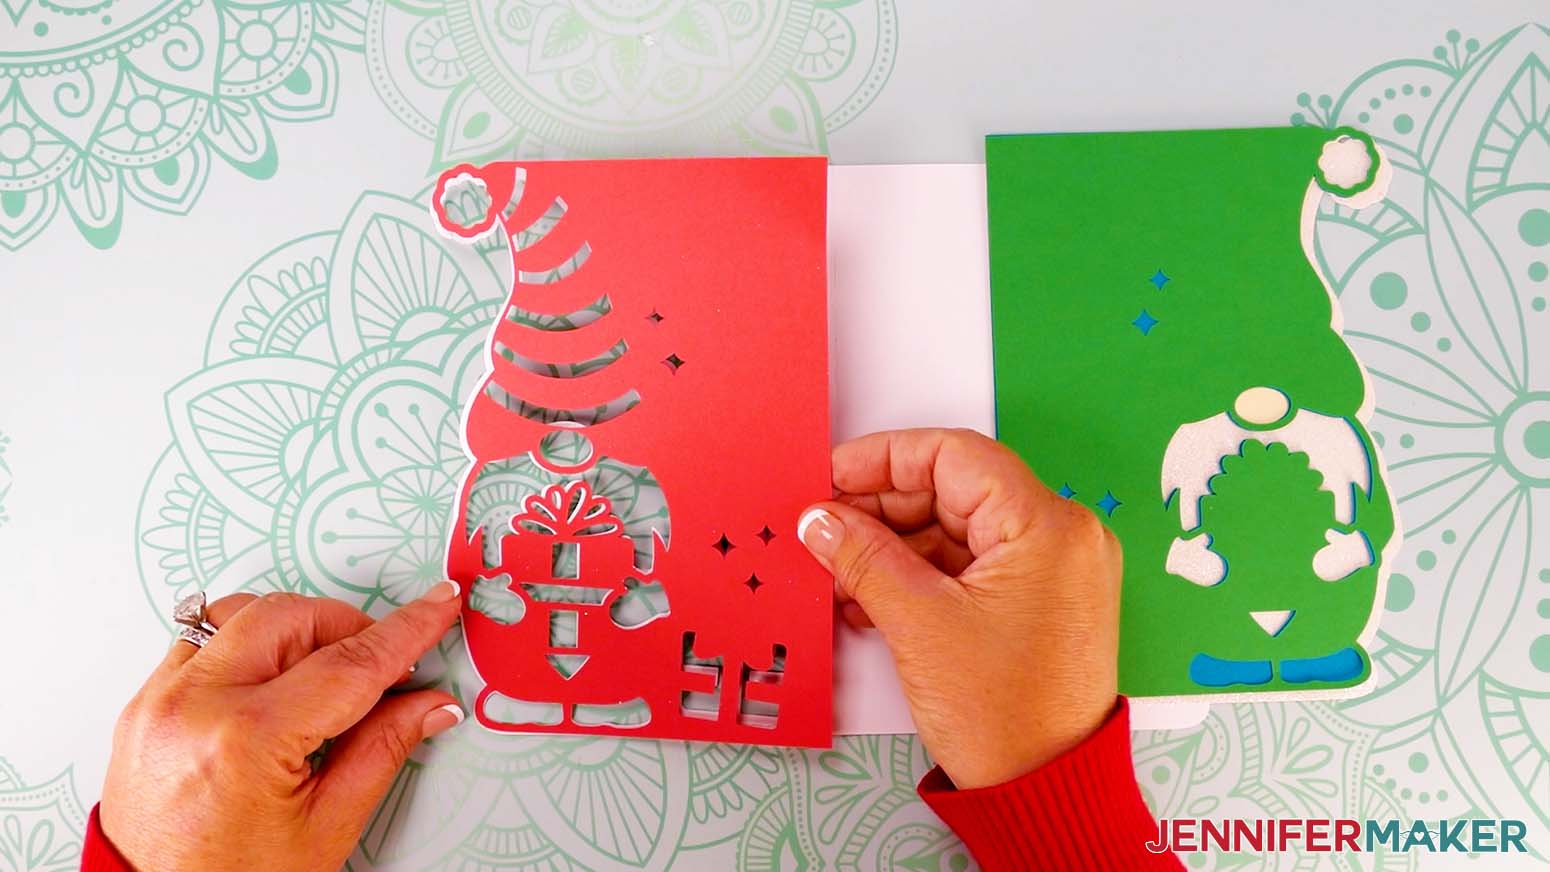
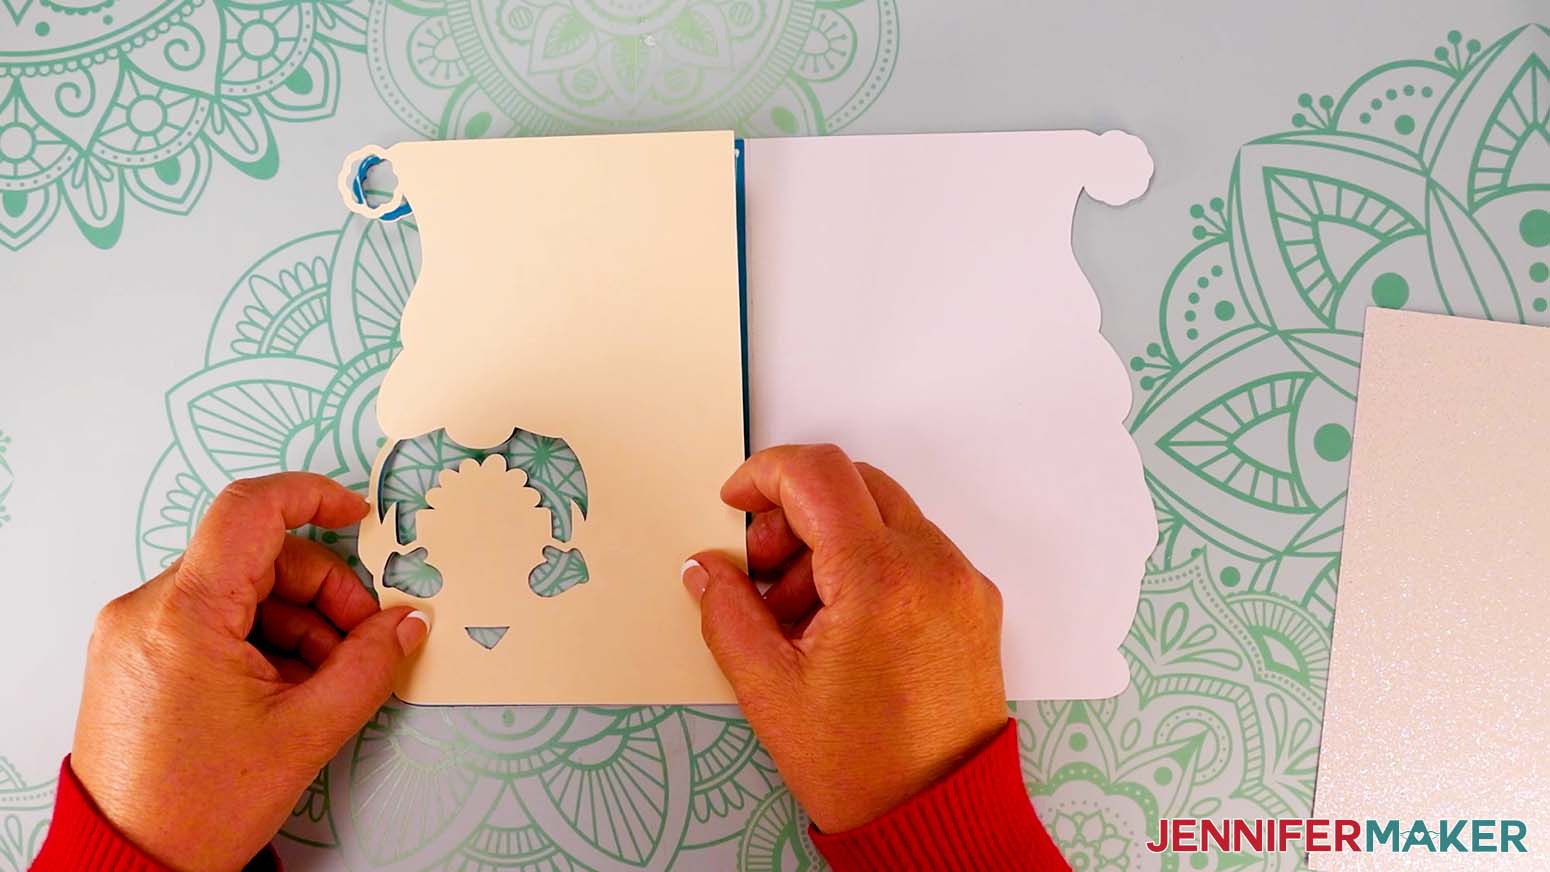
- Place the base on your work surface, pretty side down if you’re using one-sided cardstock, with the gnome shapes on the left.
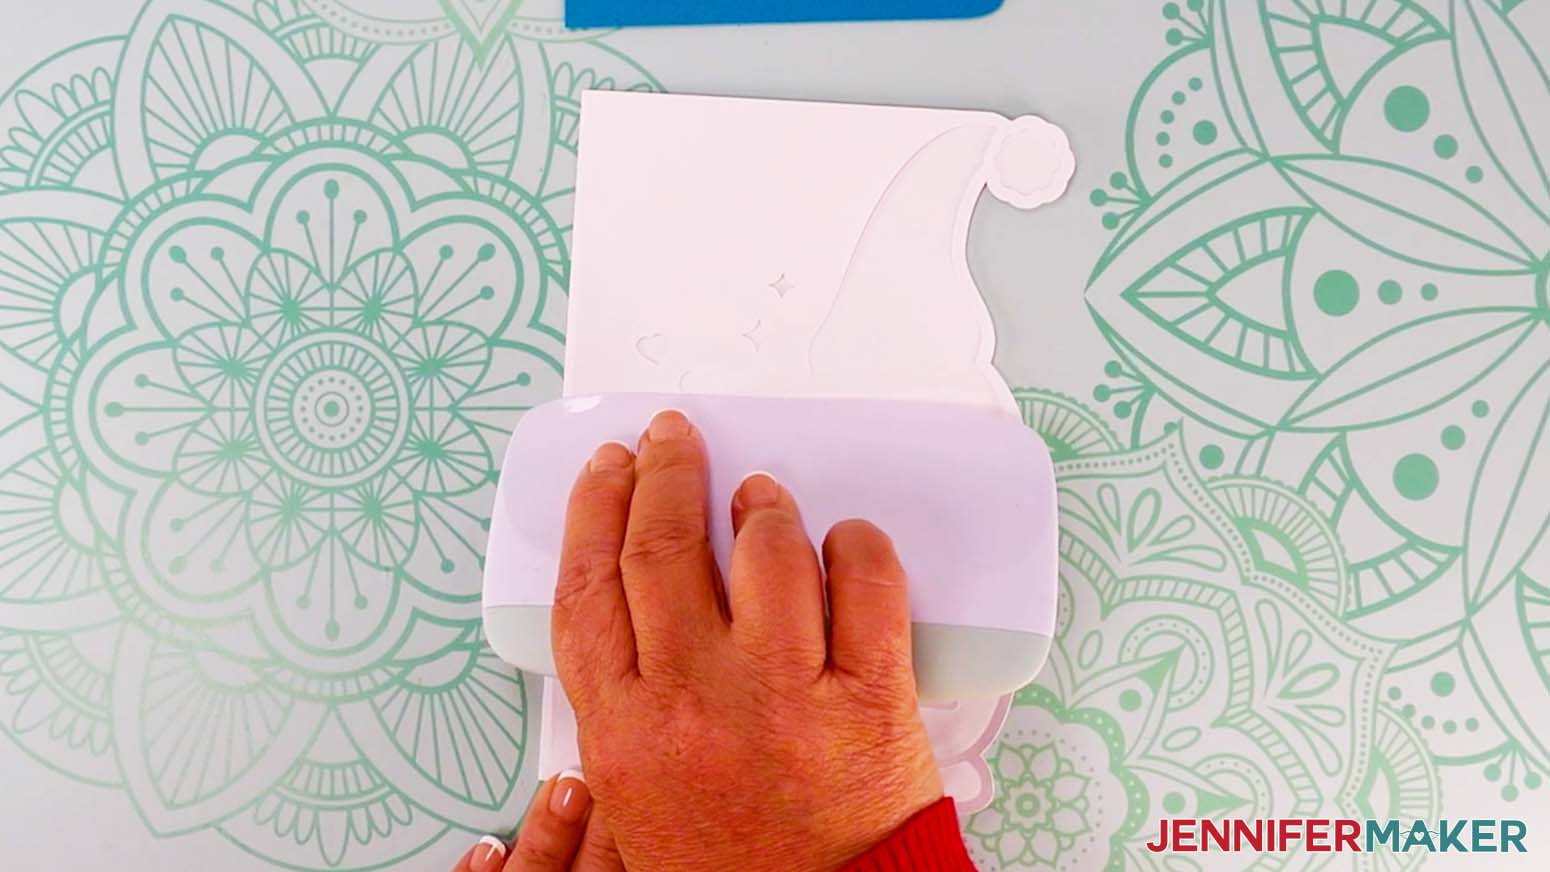
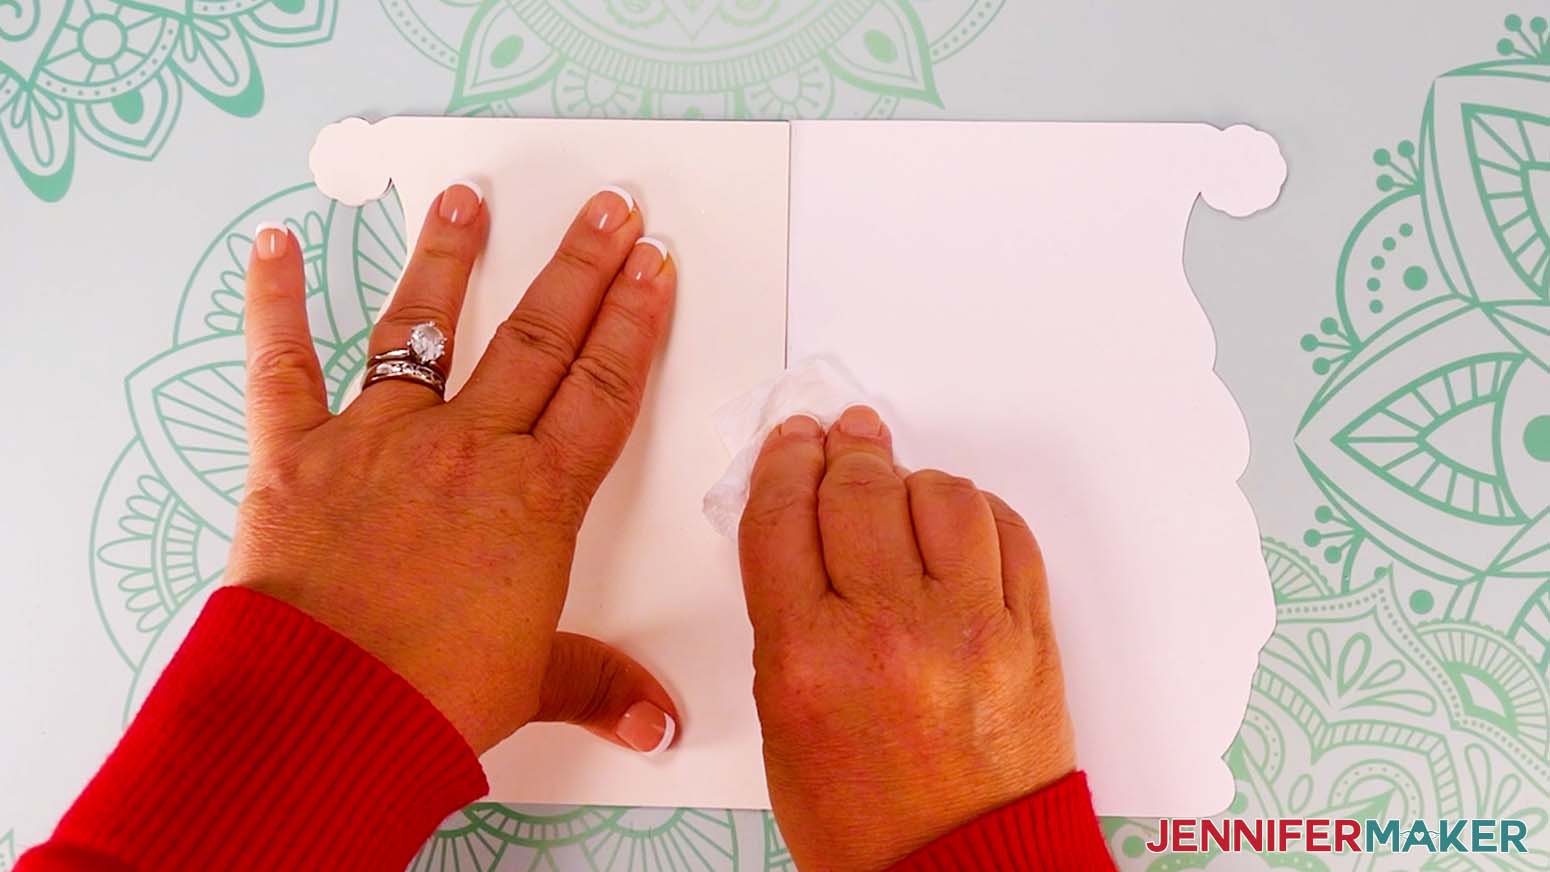
- Fold the gnome side over at the crease.
- Use a scraper tool to sharpen the crease.
- Open the card face down so the cutout designs are on the left.
- Stack your liner pieces in order so the design looks complete (minus the white top layer). NOTE: If you’re not sure on the order, refer back to your Cricut Design Space Canvas.
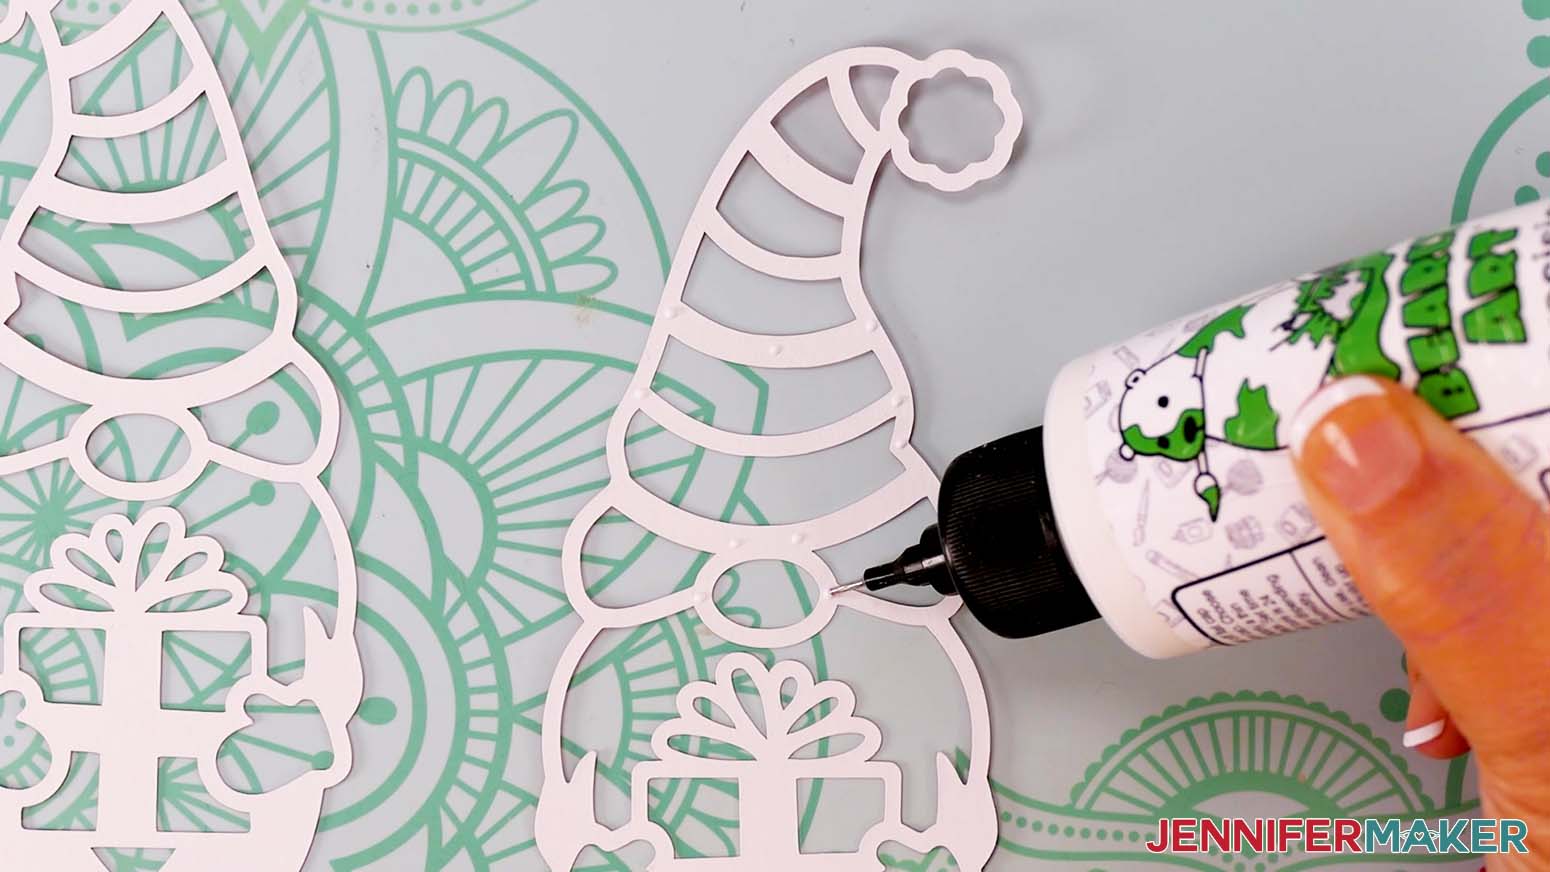
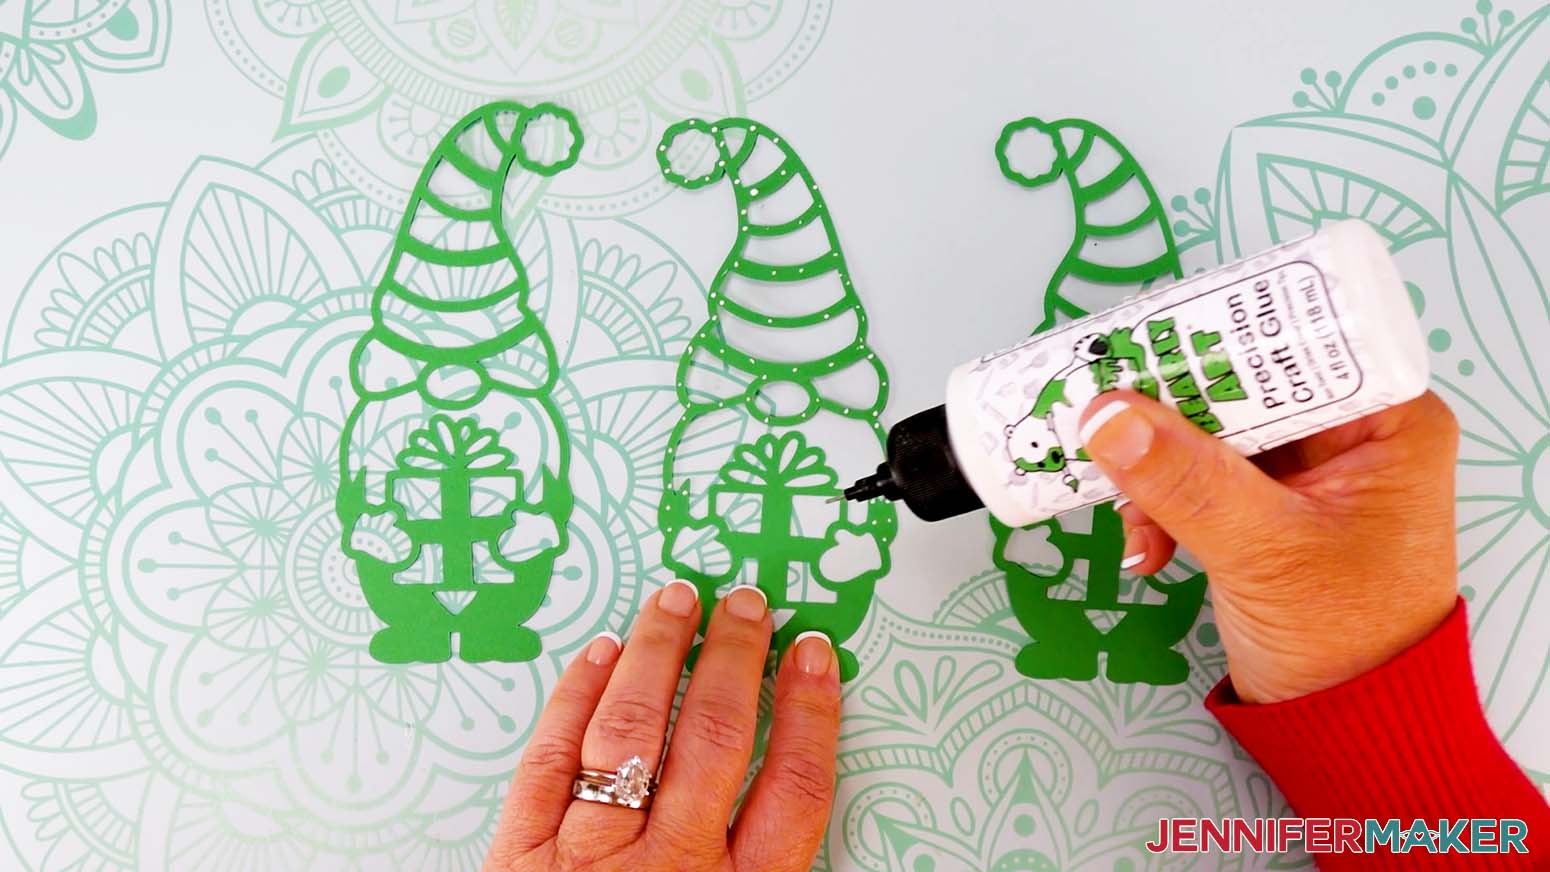
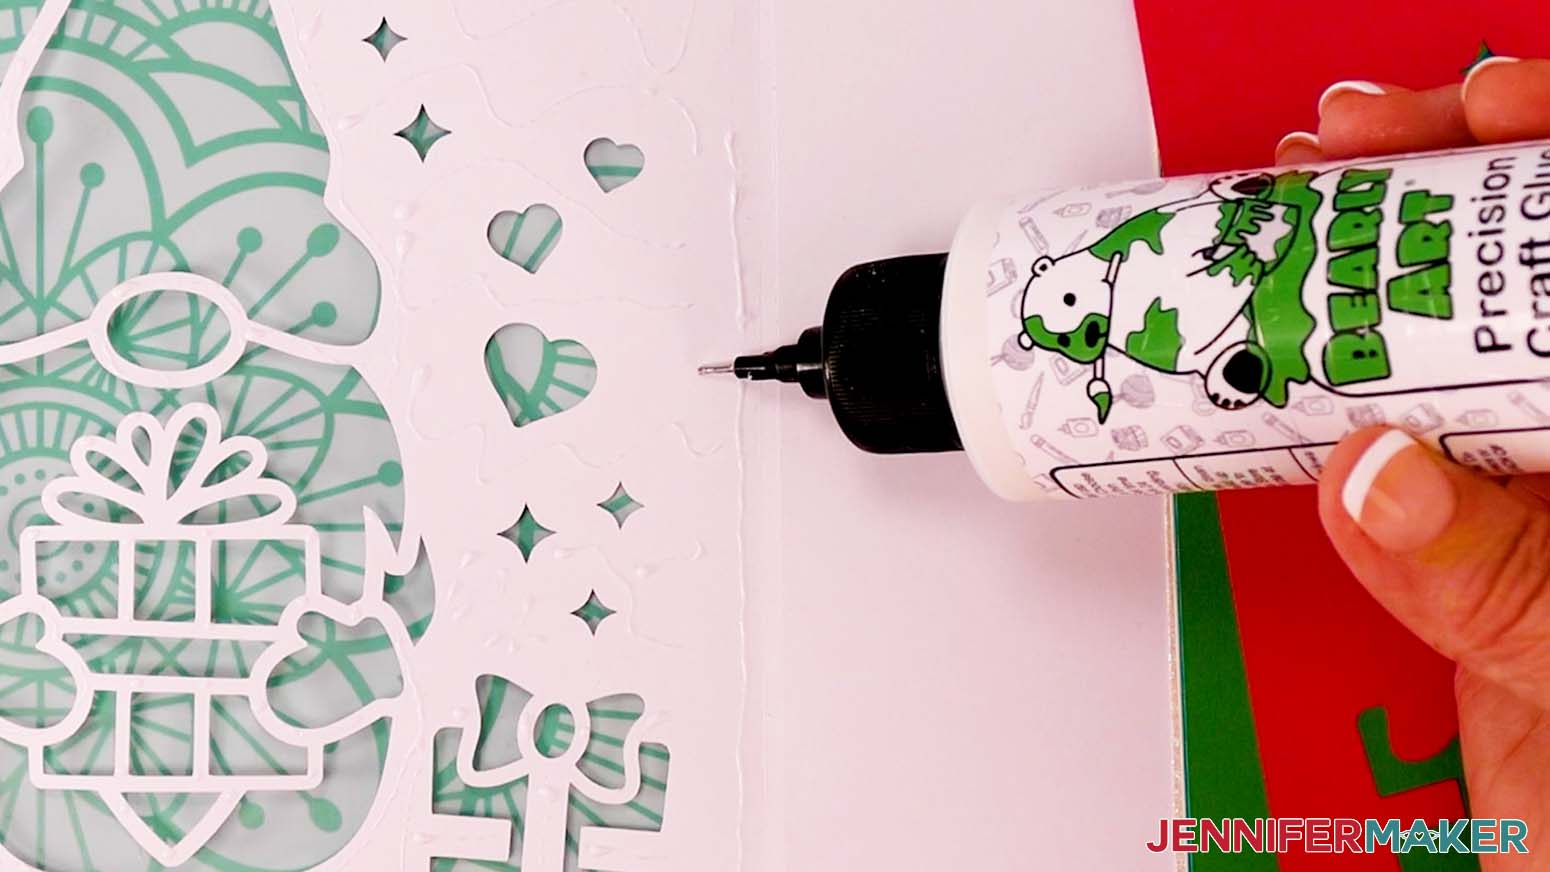
- Apply craft glue to the inside of the card base on the side with the cutouts. Be sure to apply glue all around the edges and add thin lines to the delicate sections.
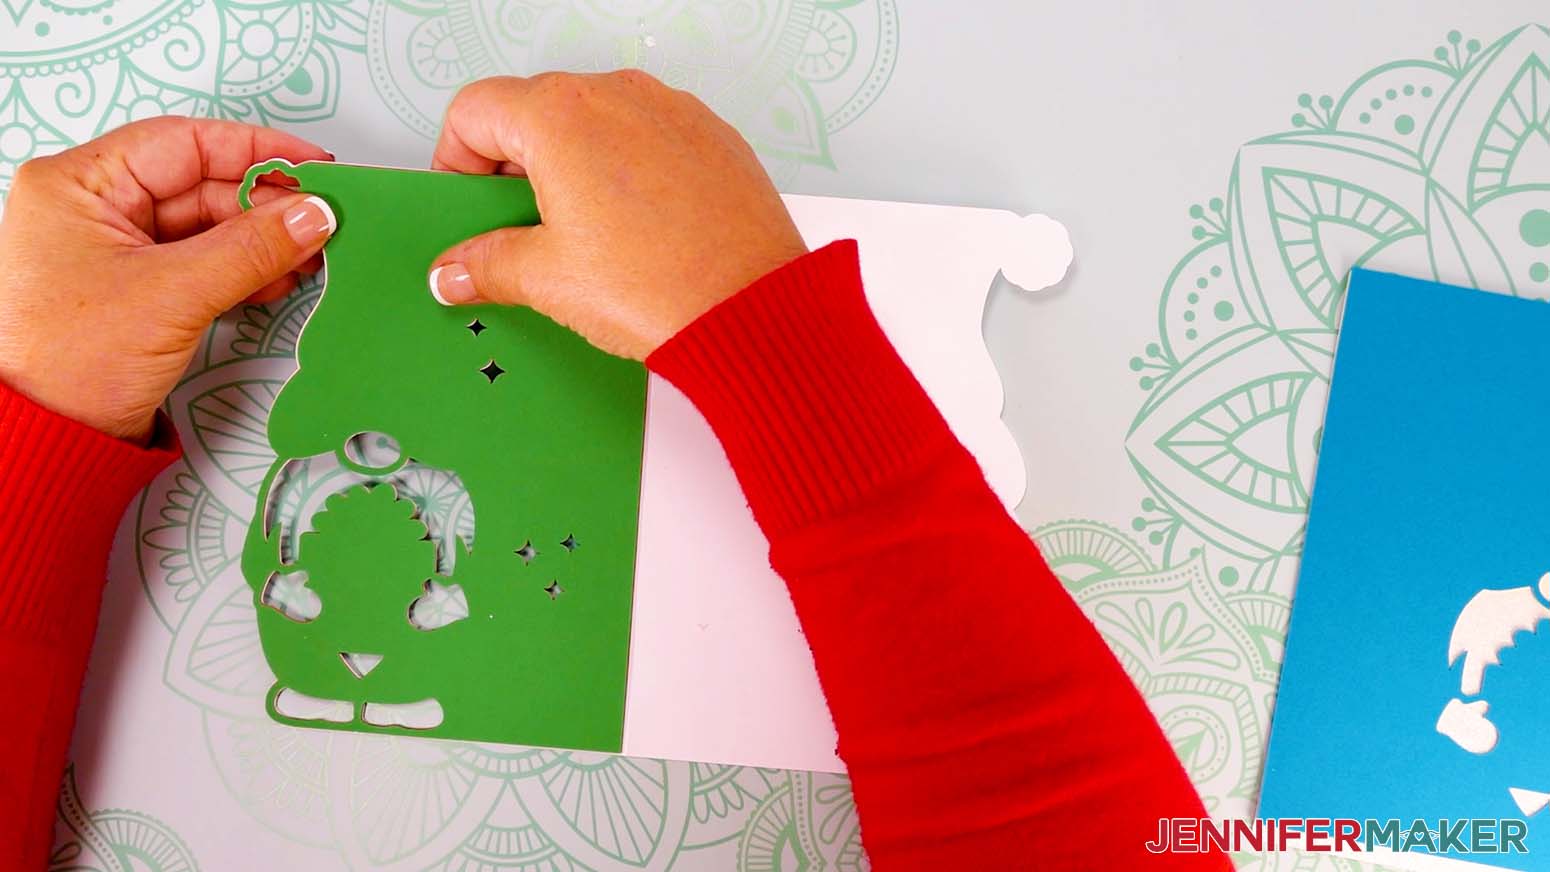
- Grab the top liner piece with the most cutouts, and hold it over the glued base piece. Line up the edges and cutouts.
NOTE: The cutout liner is slightly smaller than the base layer, so there will be a thin edge of the base layer showing around the liner when the layers are correctly aligned.
- With the two layers aligned, press them together to adhere them. NOTE: Make sure the edges are flush and adjust the liner if needed before the glue dries.
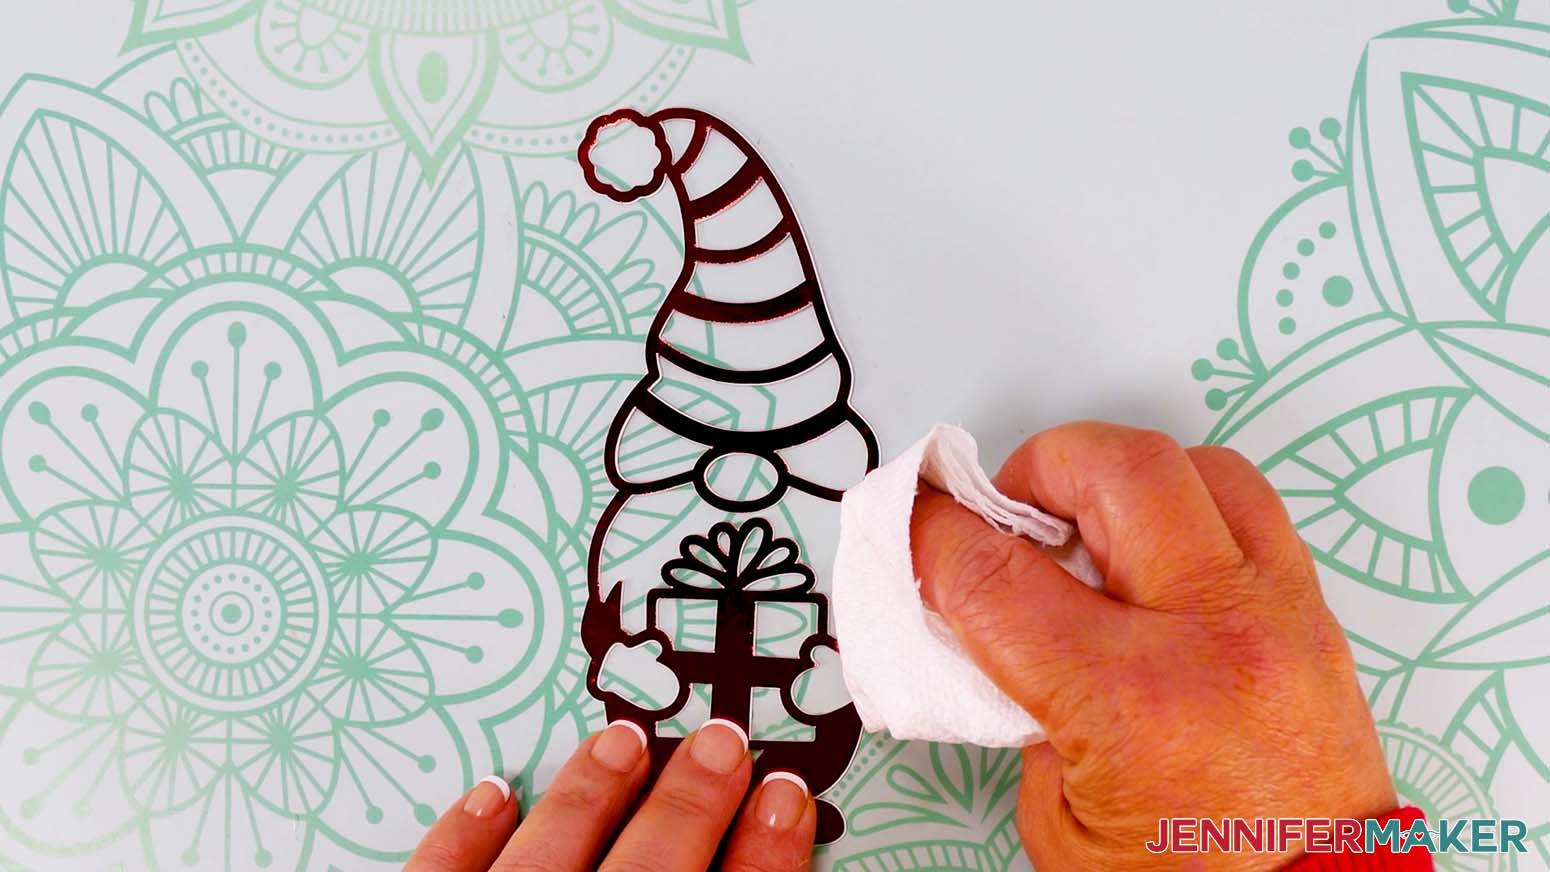
- If any excess glue seeps out from inside, use a paper towel to dab it away.
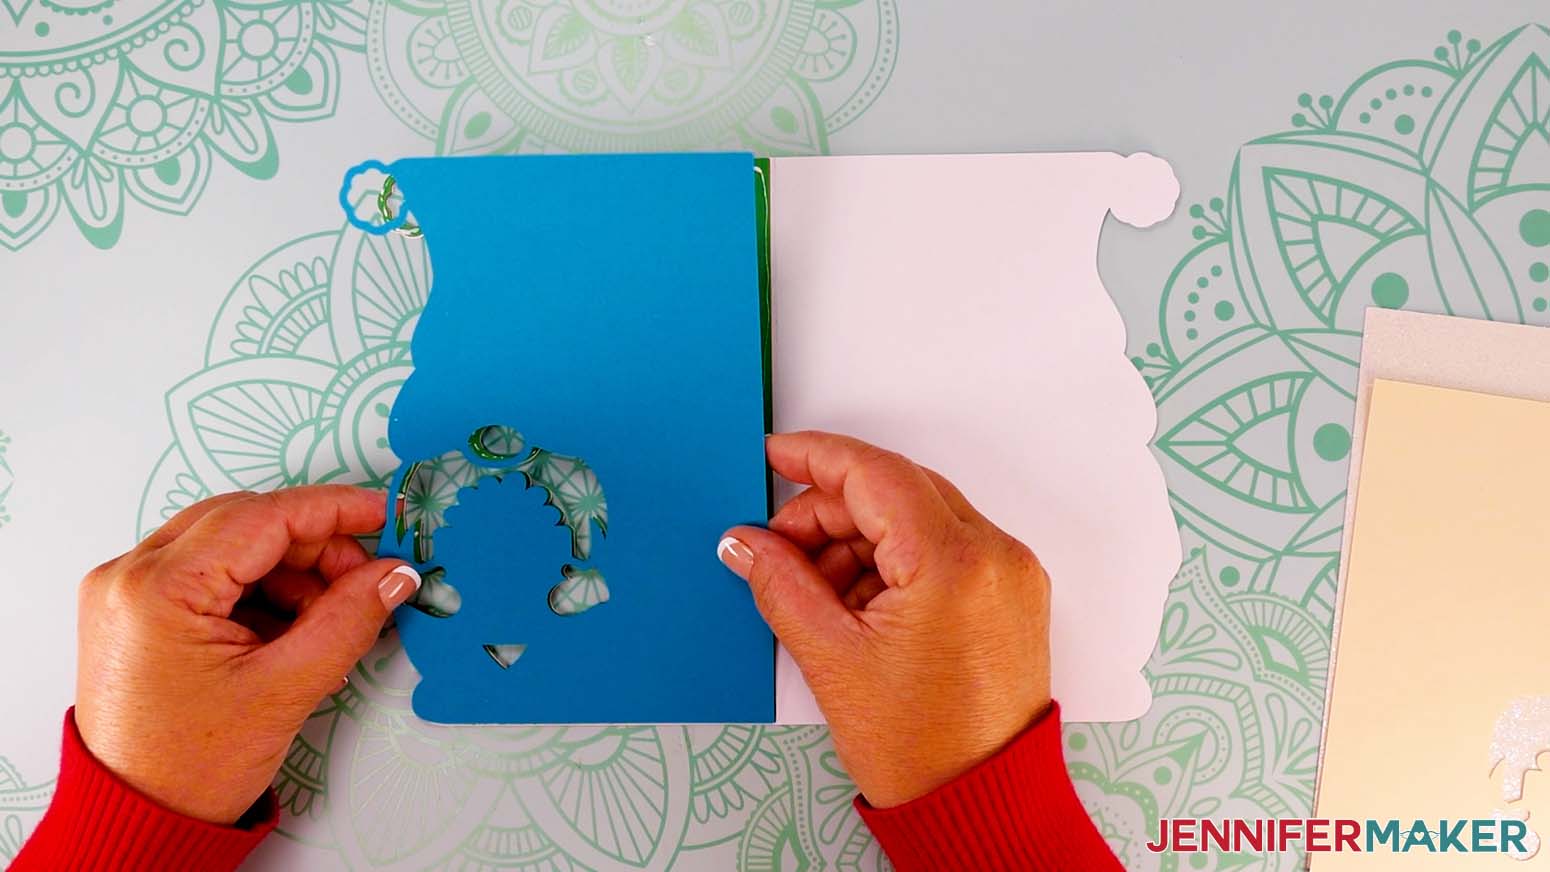
- Use Steps 7-10 to carefully glue the rest of the liners in place, including the final solid piece.


VARIATION: 3-COLOR CARD
- Use Steps 1-9 in the main card tutorial to add the card SVG you want to your Canvas. NOTE: I’ll use the “score” version of the gnome with a gift again.
- Click “Duplicate” to make a copy of the card as a reference in case you need it.
- In the Layers Panel, click the eye icon next to the bottom design to hide it.
- Select the remaining card design and click “Ungroup” to work with the layers.
- Click the card’s exterior and move it away from the liners.
- Drag the inner liner layers apart so the top one with the most cutouts is on the left and the solid liner is on the right.
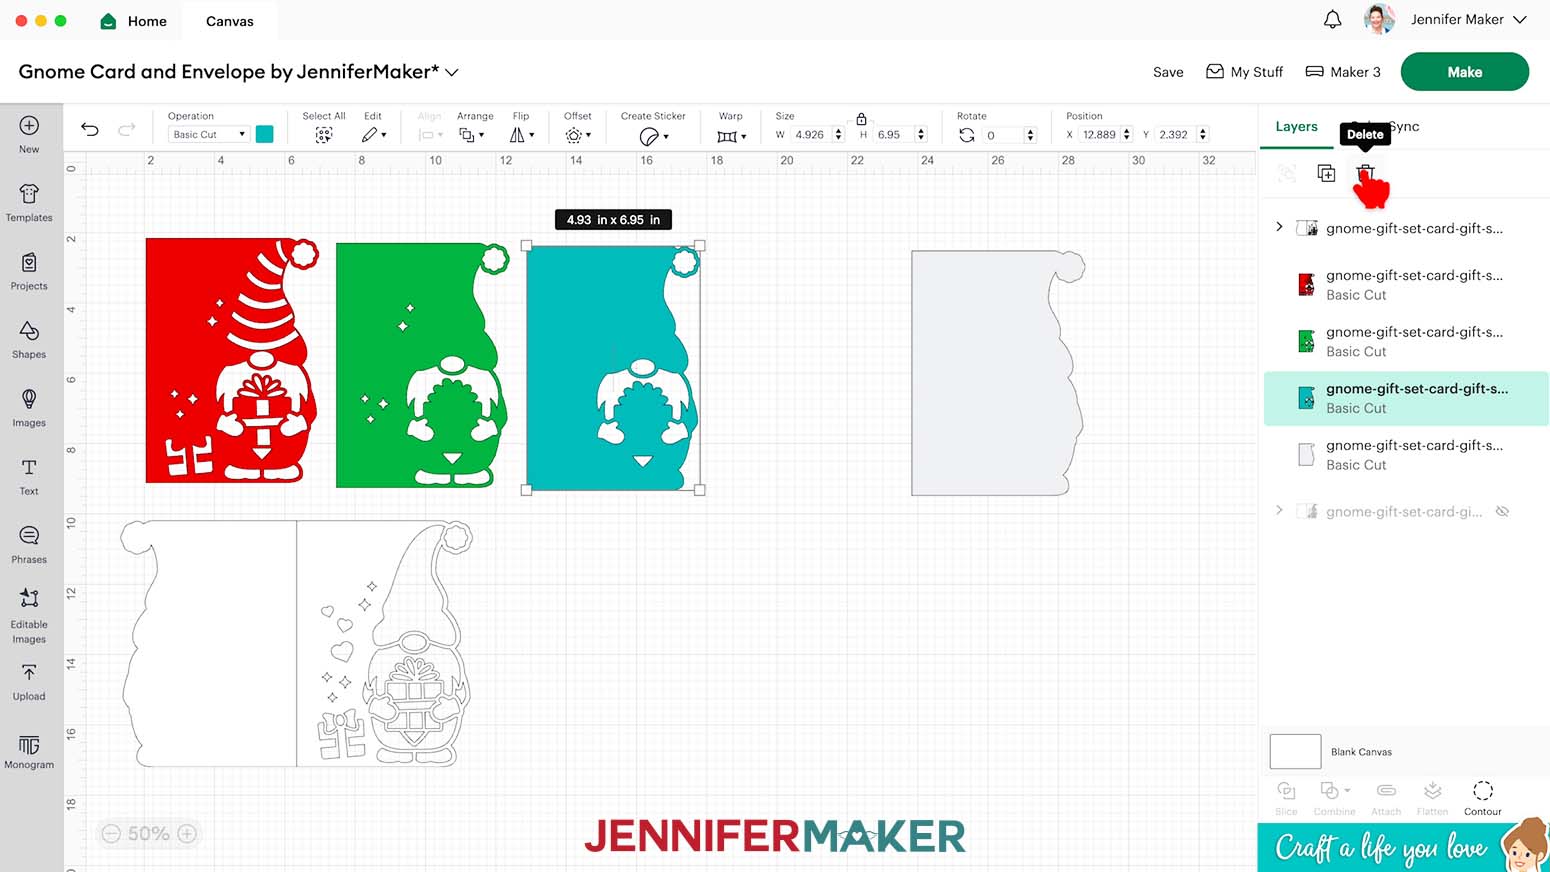
- We only need the top liner with the most cutouts and the solid liner, so select the middle liners and delete them.
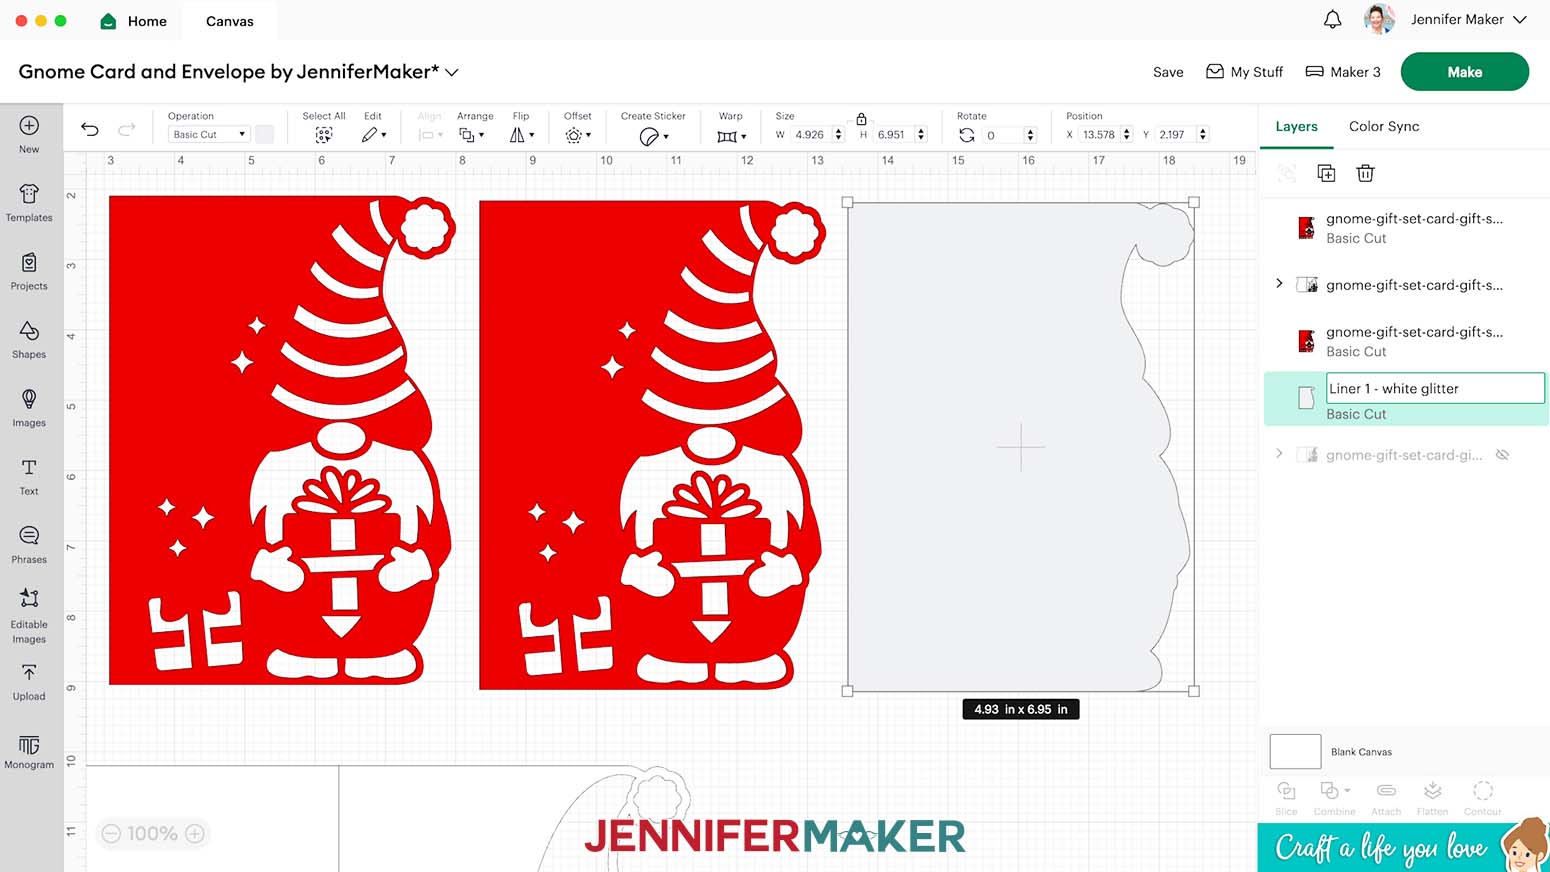
- Decide how many colors you want to use for liners and Duplicate the top intricate piece until you have the same number of pieces, including the solid liner. NOTE: I’ll use red, green, and white glitter (represented as light gray) cardstock, so I’ll have two of the liners with cutouts and one solid liner.
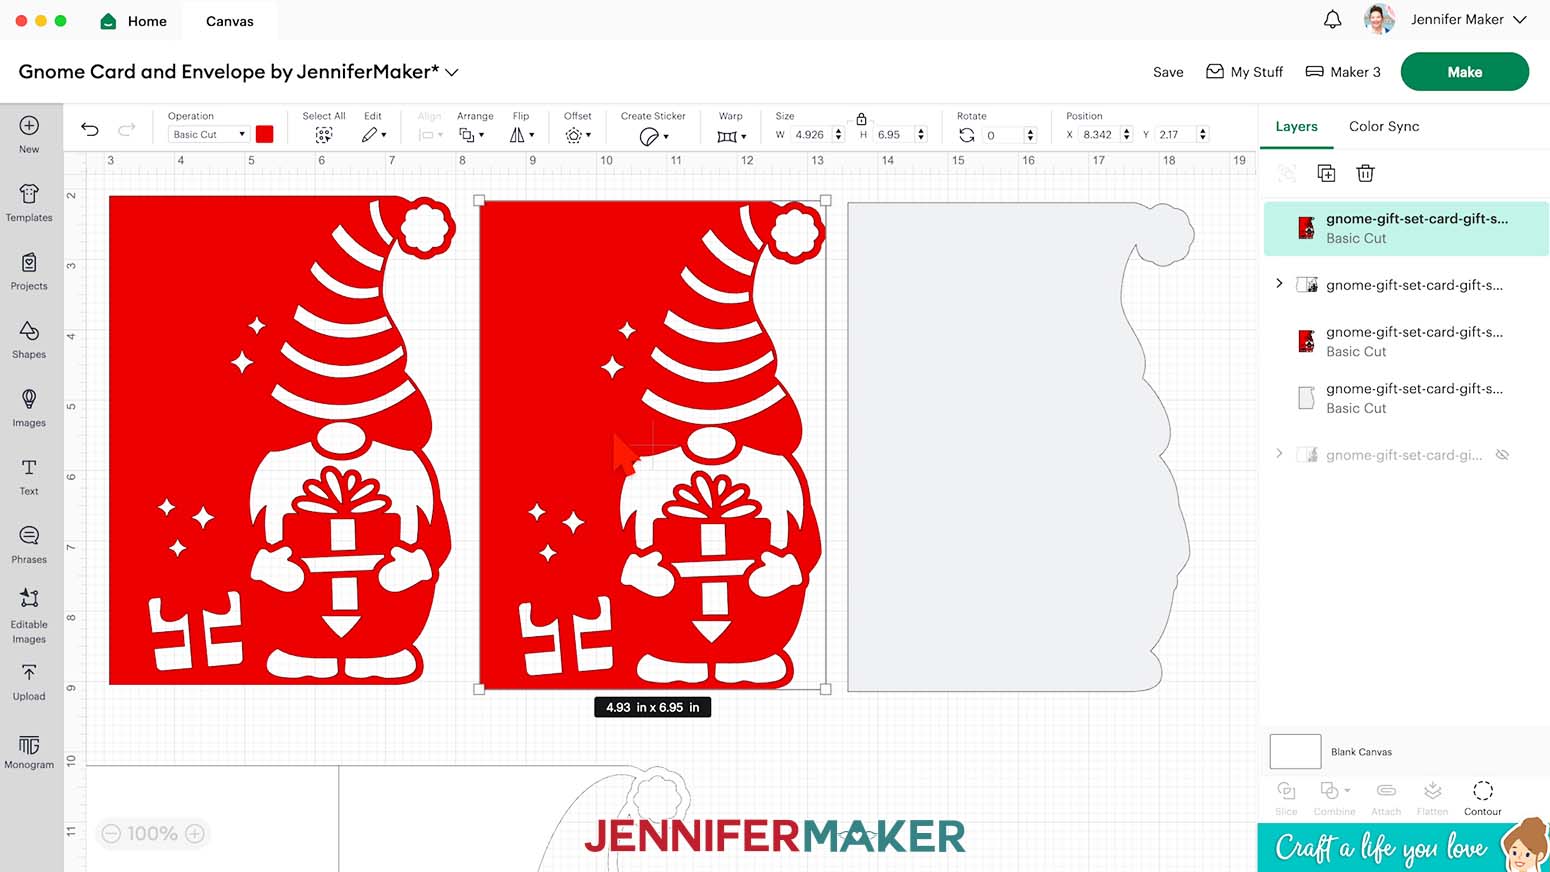
- Spread the liners out on your Canvas.
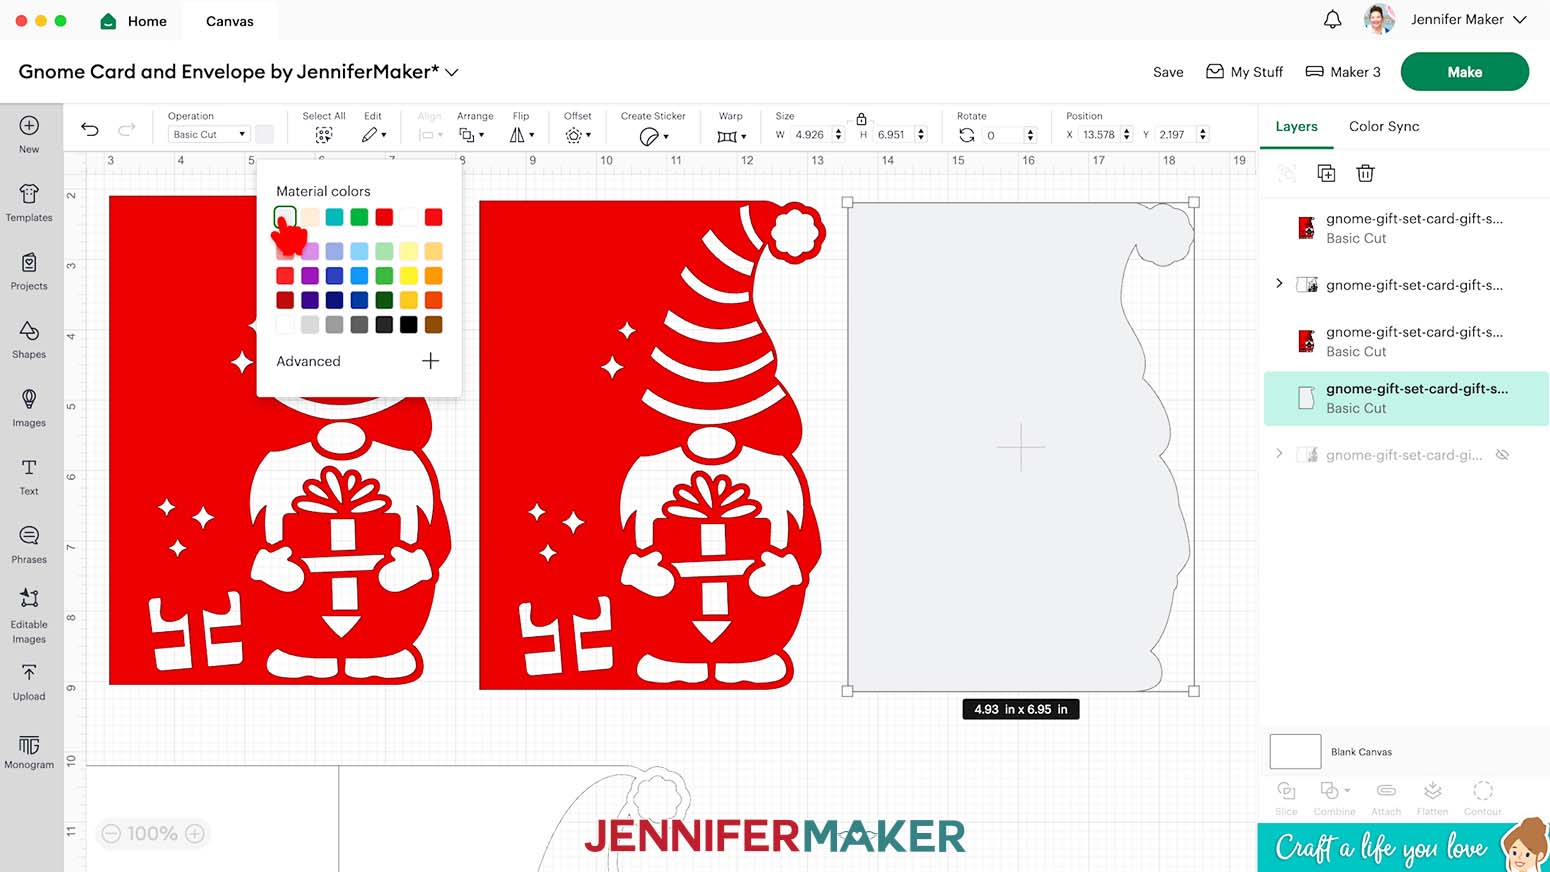
- Select the solid liner.
- Click the Color Box next to “Operation” and set the bottom liner to the color you want to use for the smallest amount of details in the finished card.
NOTE: I’ll keep this layer light gray and cut it from white glitter cardstock.
- In the Layers Panel, double-click on the name of the bottom solid liner to edit the text.
- Type “Liner 1 - white glitter” or the color and material you plan to use for it to rename the layer.
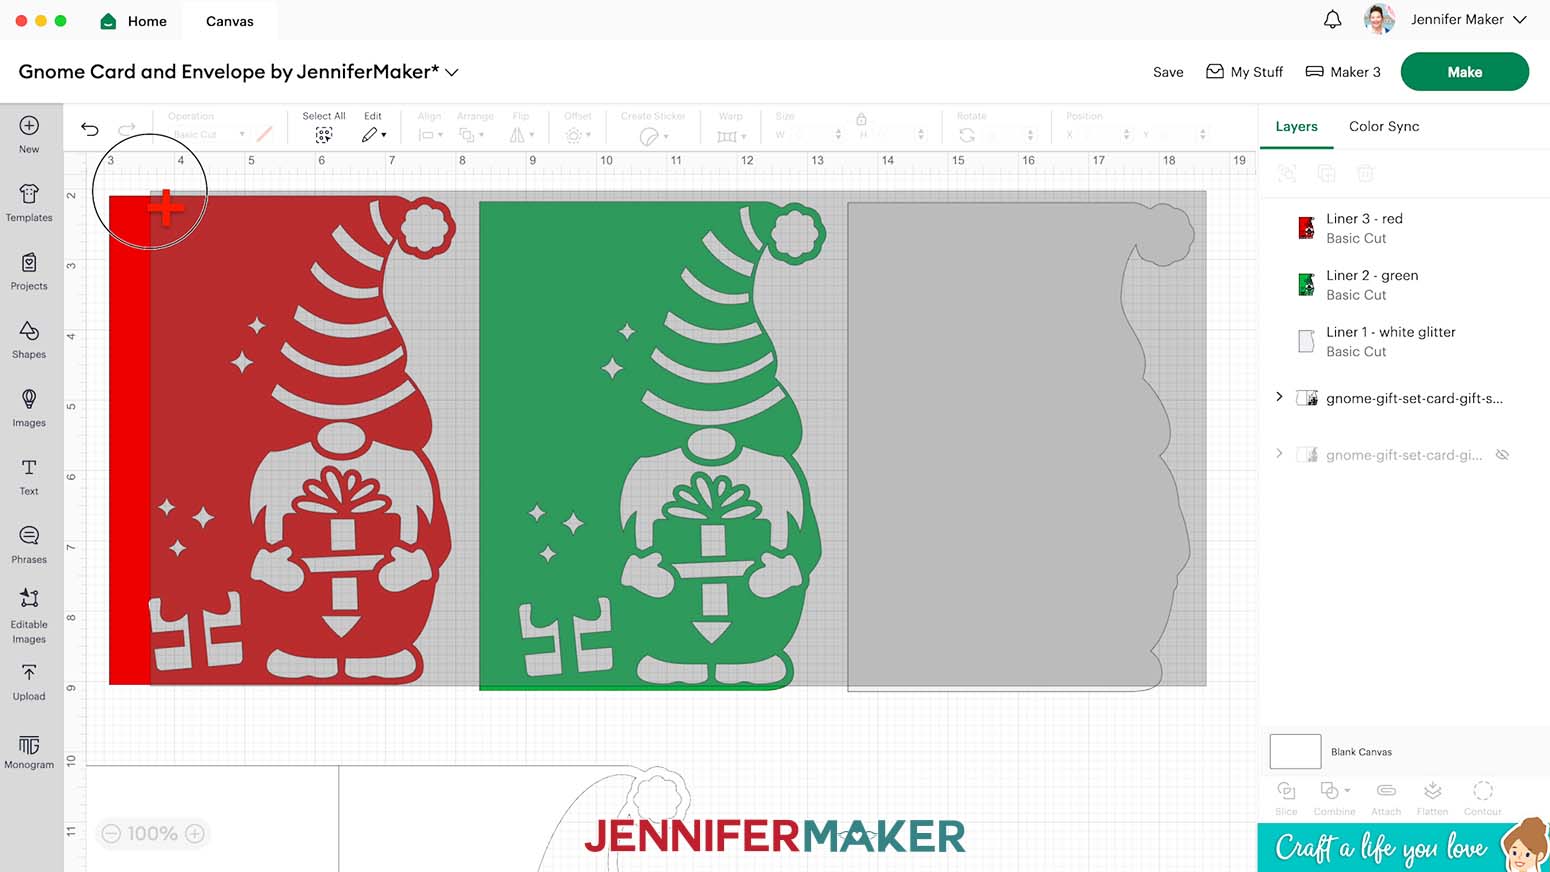
- In the Layers Panel, select the next liner up.
- Use Steps 11-14 to set the color and rename each liner layer appropriately. TIP: Depending on the design, it’s likely that you’ll see more of each liner layer as you move higher in the order NOTE: I’ll make my middle liner green and rename it “Liner 2 - green” and my top layer red, renamed “Liner 3 - red.”
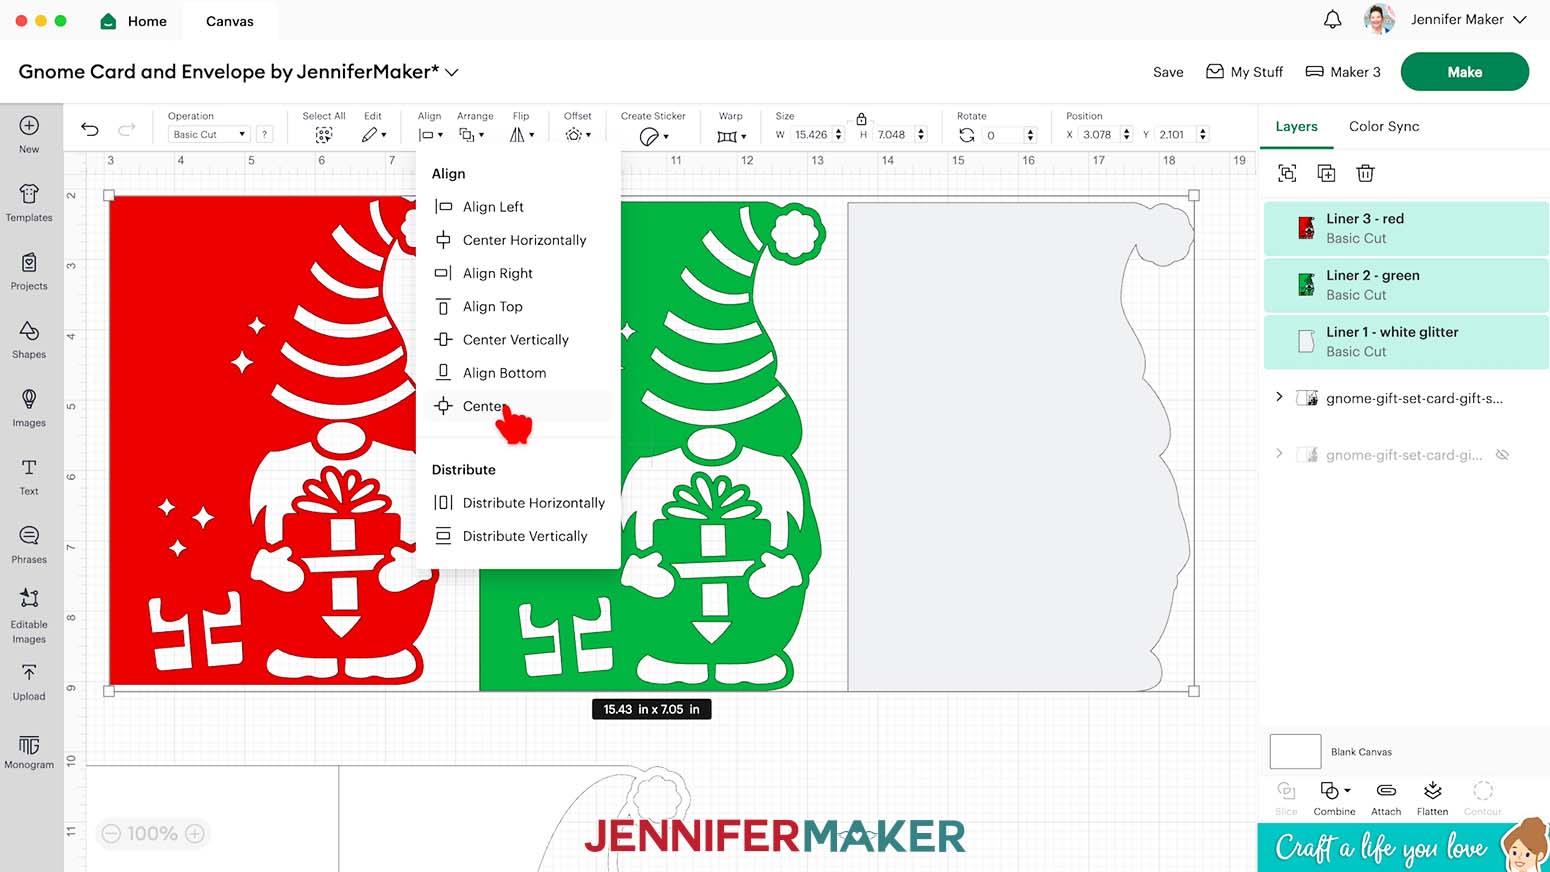
- Drag a bounding box over all the liner layers.
- Click “Align” then “Center” to make the liners' edges match since they have the same exterior shape.
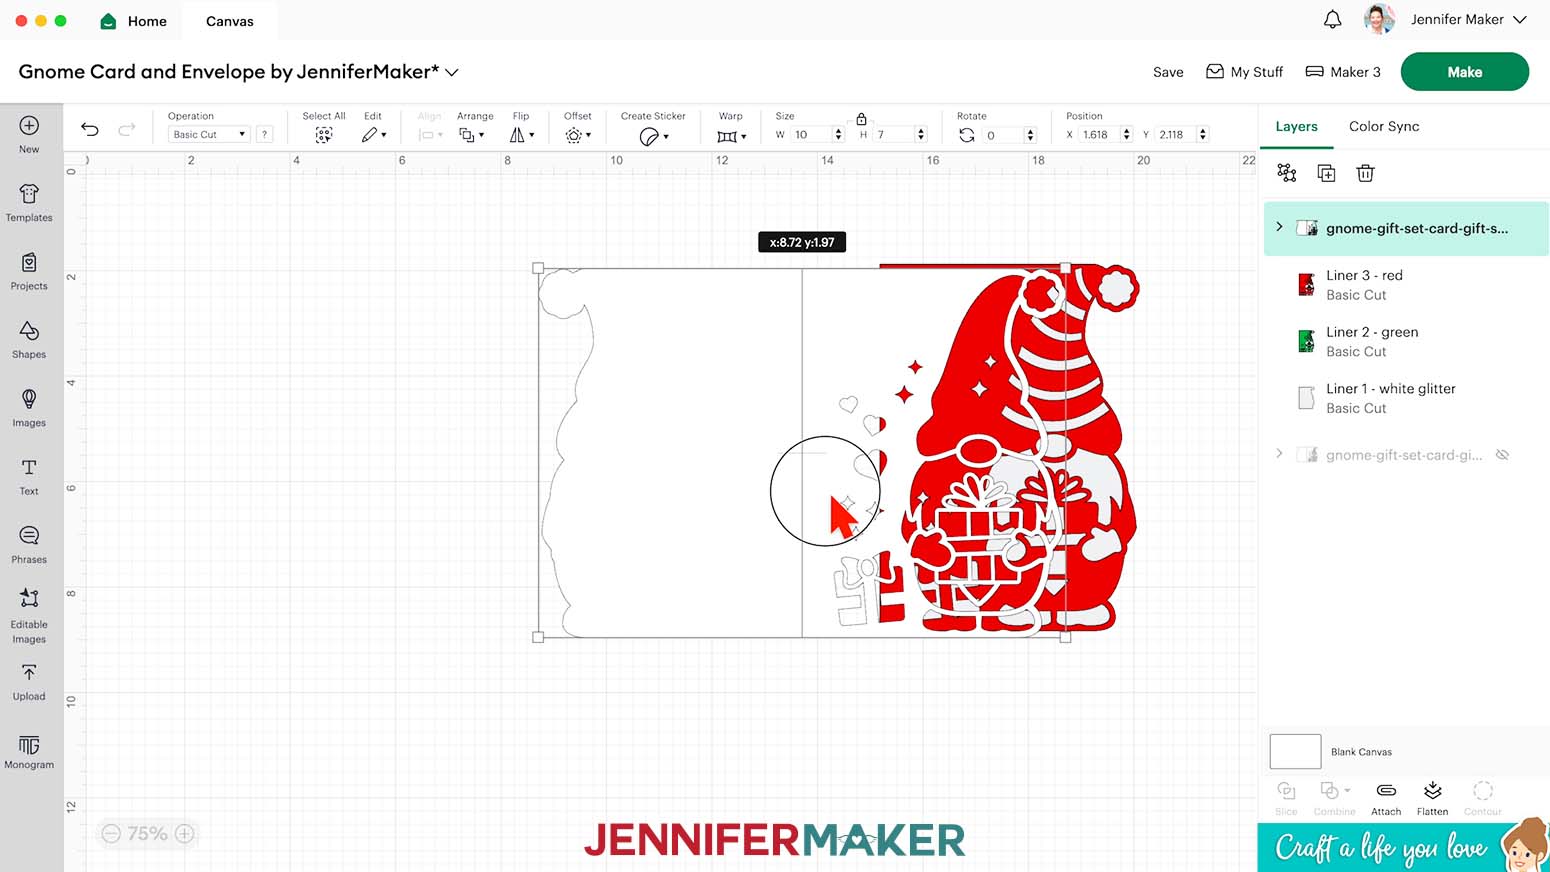
- Select the card exterior and click “Arrange” then “Bring to Front” so it is visible above any other overlapping pieces.
- Move the card exterior over to align with the edge details of the liners as well as you can.
TIP: You can click the plus icon (“+”) to zoom in and see the details better.
NOTE: The design won’t look correct yet since at least two of the liners have matching cutouts.
- To begin filling in some cutouts with your second liner from the bottom, select your “Liner 2” in the Layers Panel, then click “Contour.”
NOTE: The pop-up Contour window shows the cuts that create this layer in a preview and in a list of single cuts.
- To remove a cutout from this liner and make the color visible through the upper layers, click it in either the preview or list.
NOTE: I’ll click the sparkles, hat stripes, middle gift ribbon pieces, and boots.
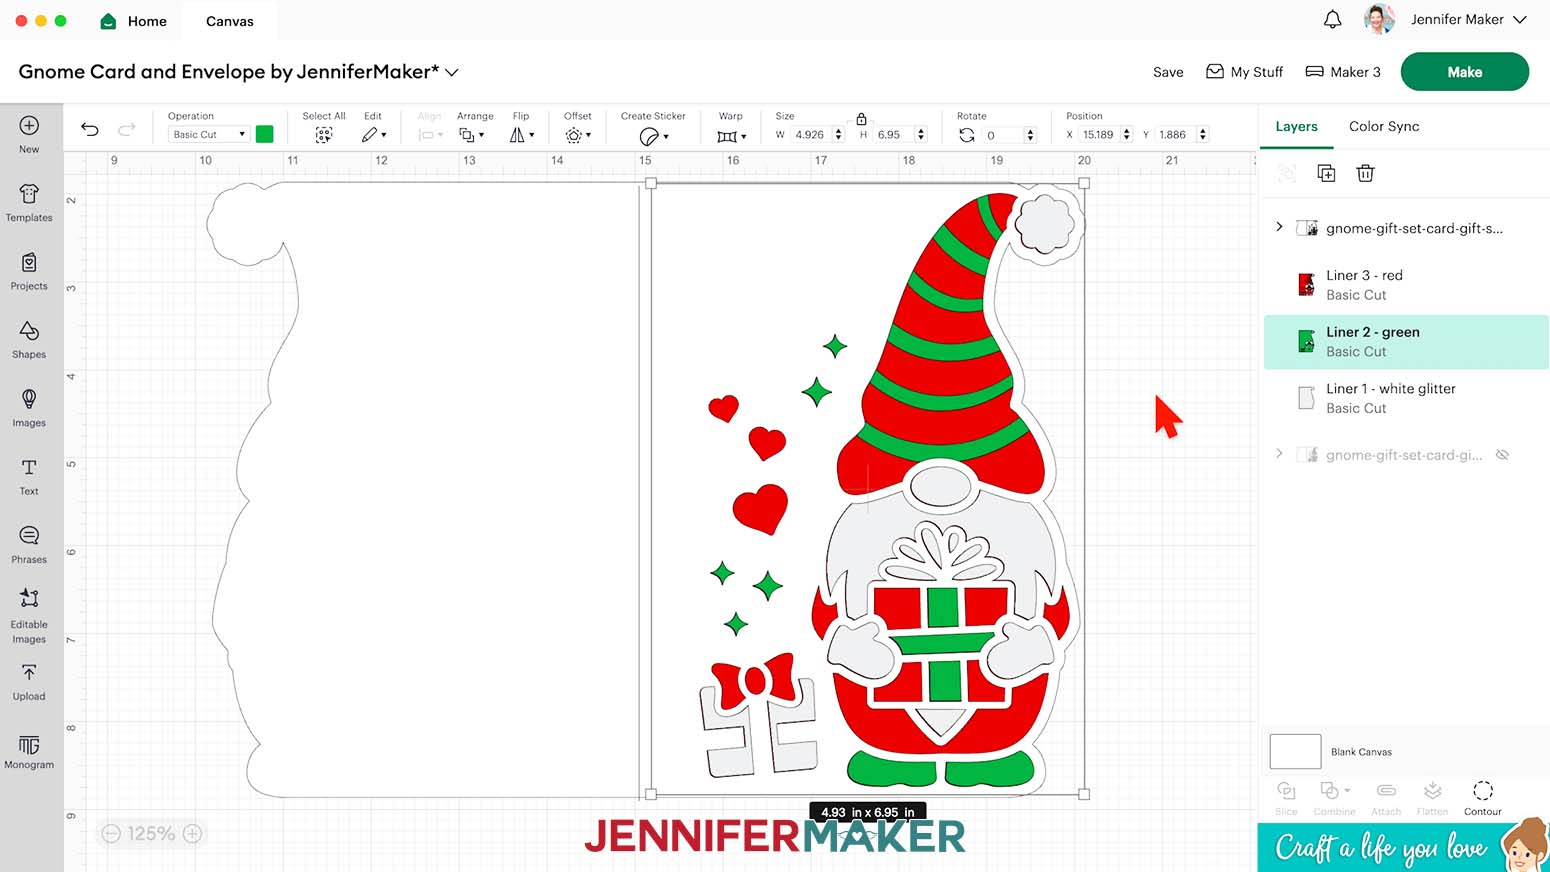
- Click the “X” to return to the Canvas and see the results so far.
NOTE: You should now see more of the second liner’s color through the cutouts.
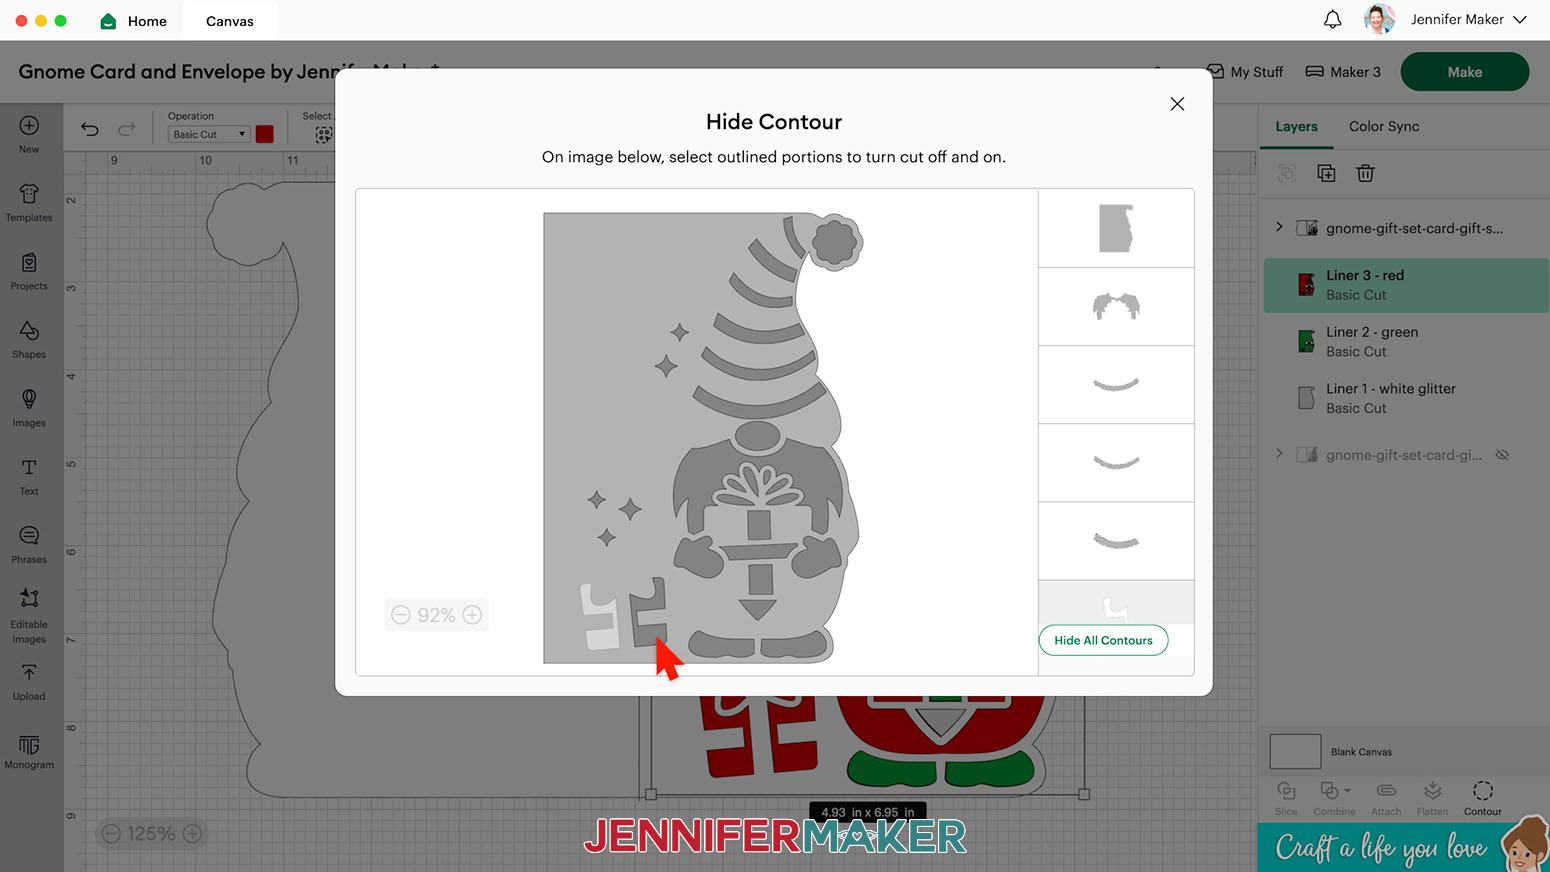
- Use Steps 20-22 to Contour the remaining liner layers in order.
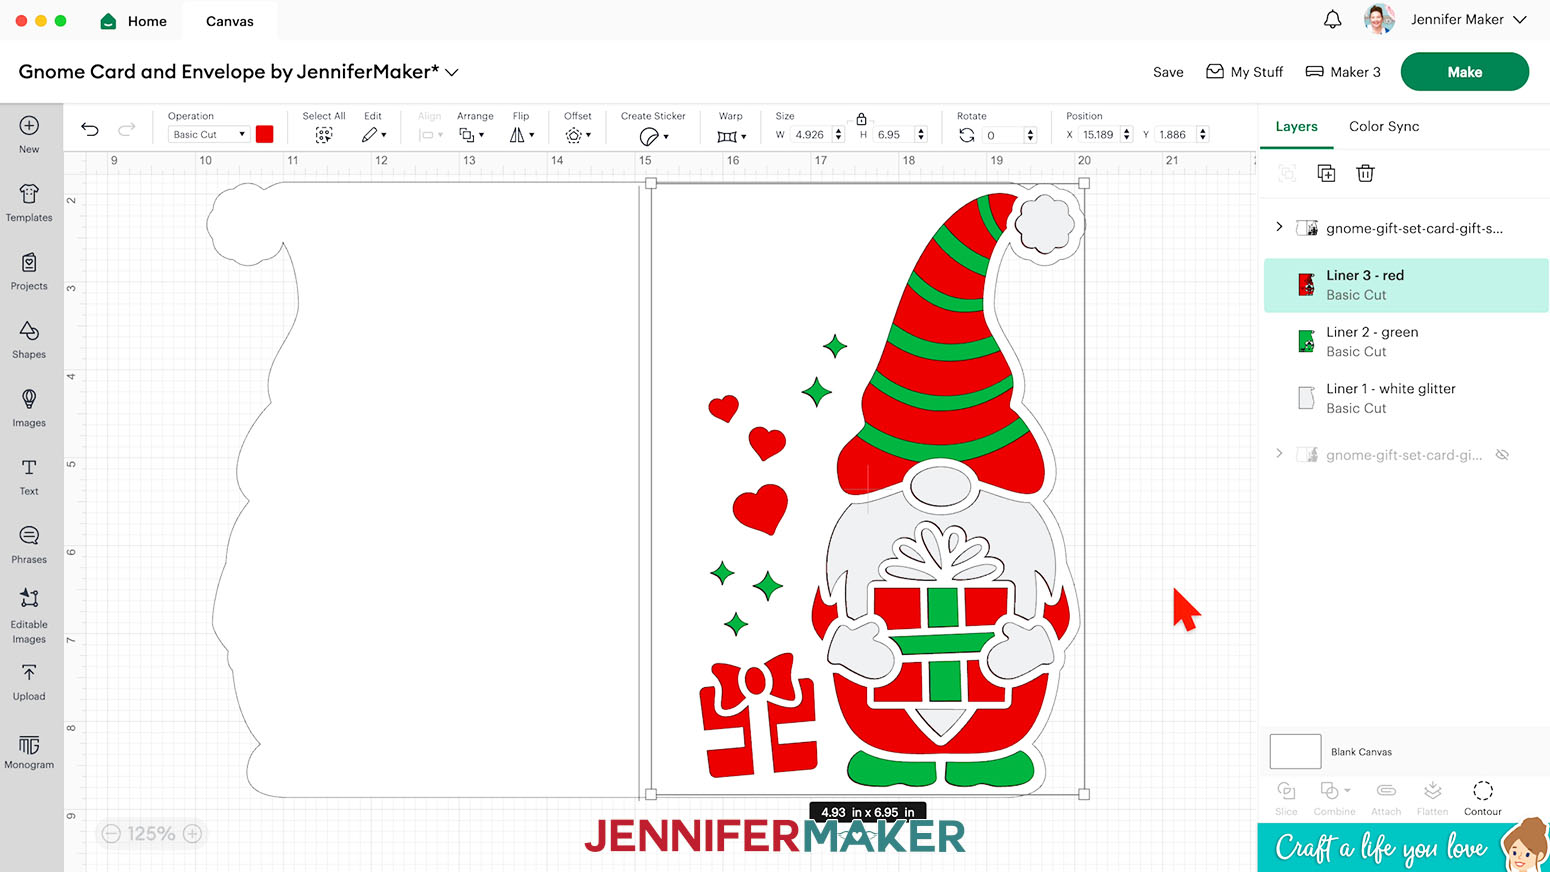
NOTE: In the “Liner 3 - red” layer, I clicked the pieces for the present on the left so they will be filled in red.
- In the Layers Panel, click the eye icon next to the original design to compare your results and make adjustments as needed.
- Once you’re happy with the simplified design, delete the original reference.
- If you used the “score” version, click the arrow next to the card’s exterior in the Layers Panel to expand the grouped layers.
- Click the layer that just has a line and is colored red in the Color Box.
- Click the “Operation” drop-down menu and select “Score” to convert the layer to a Score line.
- Click the layer with the arrow to select both grouped layers.
- Click “Attach” to keep the “Score” and “Basic Cut” layers together.
- Your simplified side edge card is ready!
 NOTE: I’ll keep this layer light gray and cut it from white glitter cardstock.
 TIP: You can click the plus icon (“+”) to zoom in and see the details better.
NOTE: The design won’t look correct yet since at least two of the liners have matching cutouts.
TIP: You can click the plus icon (“+”) to zoom in and see the details better.
NOTE: The design won’t look correct yet since at least two of the liners have matching cutouts.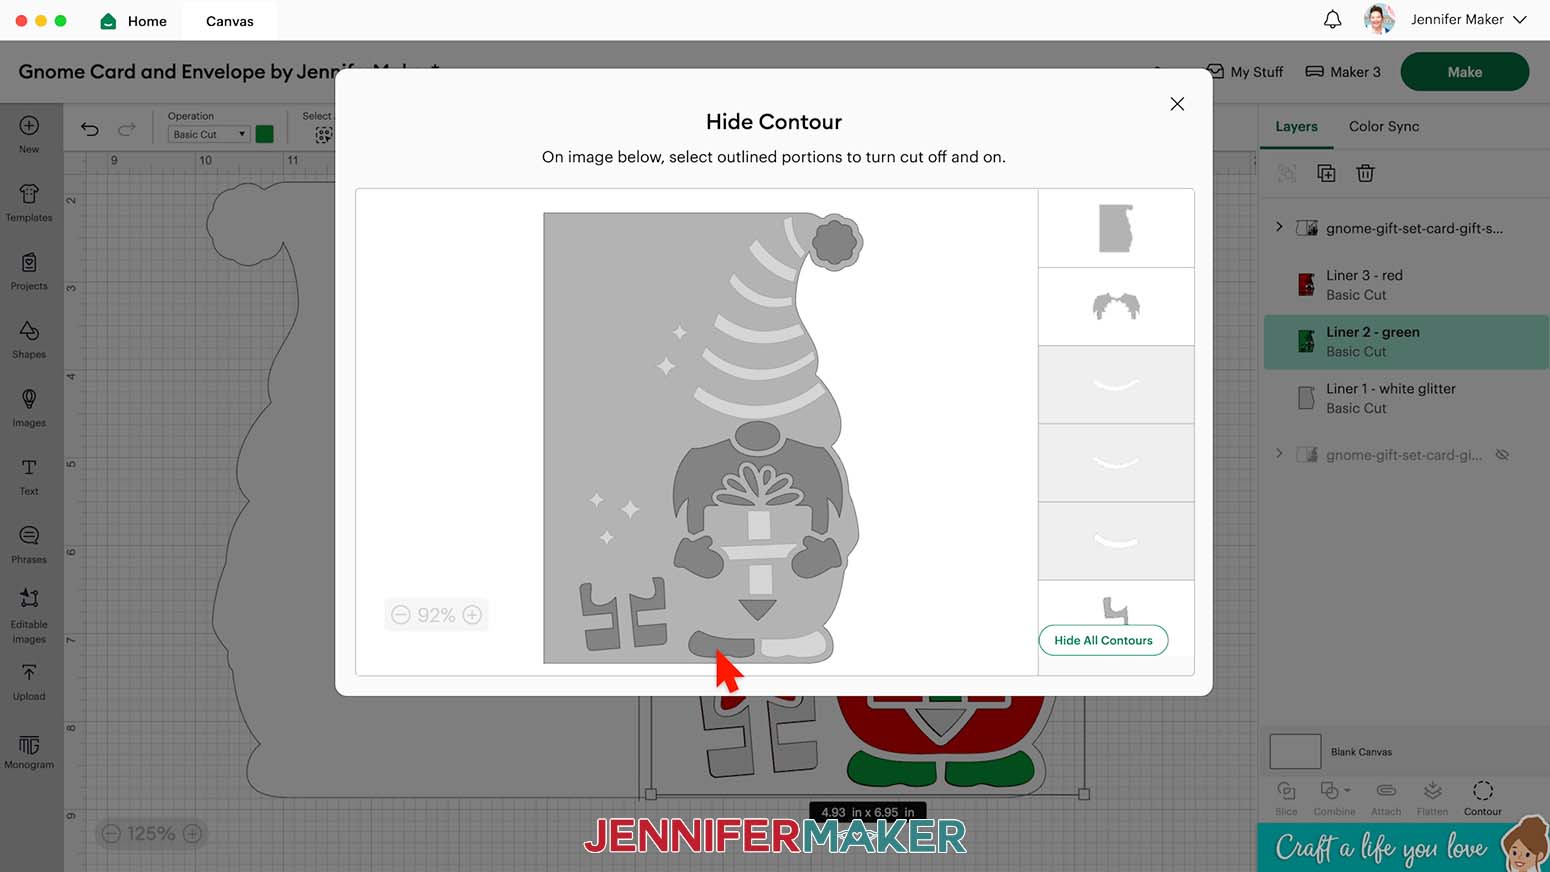
BONUS ENVELOPE
I also made you a special envelope just for your cute gnome card as a bonus! You can get the files by using this form.
NOTE: The files with “a6” in them will fit a 4" x 6" card (like the versions in the folder “For Joy Users”) and the files with “a7” will fit a 5" x 7" card, which are in the main SVG folder.
Each envelope has a “noscore” option that uses dashed cut lines to create creases, and a “score” option that uses a scoring tool instead. You can use either option depending on your machine, tools, and preferences.
- Use the same steps I showed you earlier with the card to add the matching envelope to your Canvas. I’ll use the “noscore” version of the A7 envelope to show you how the crease lines differ.
- In the Layers Panel, select the envelope.
- Click “Ungroup.”
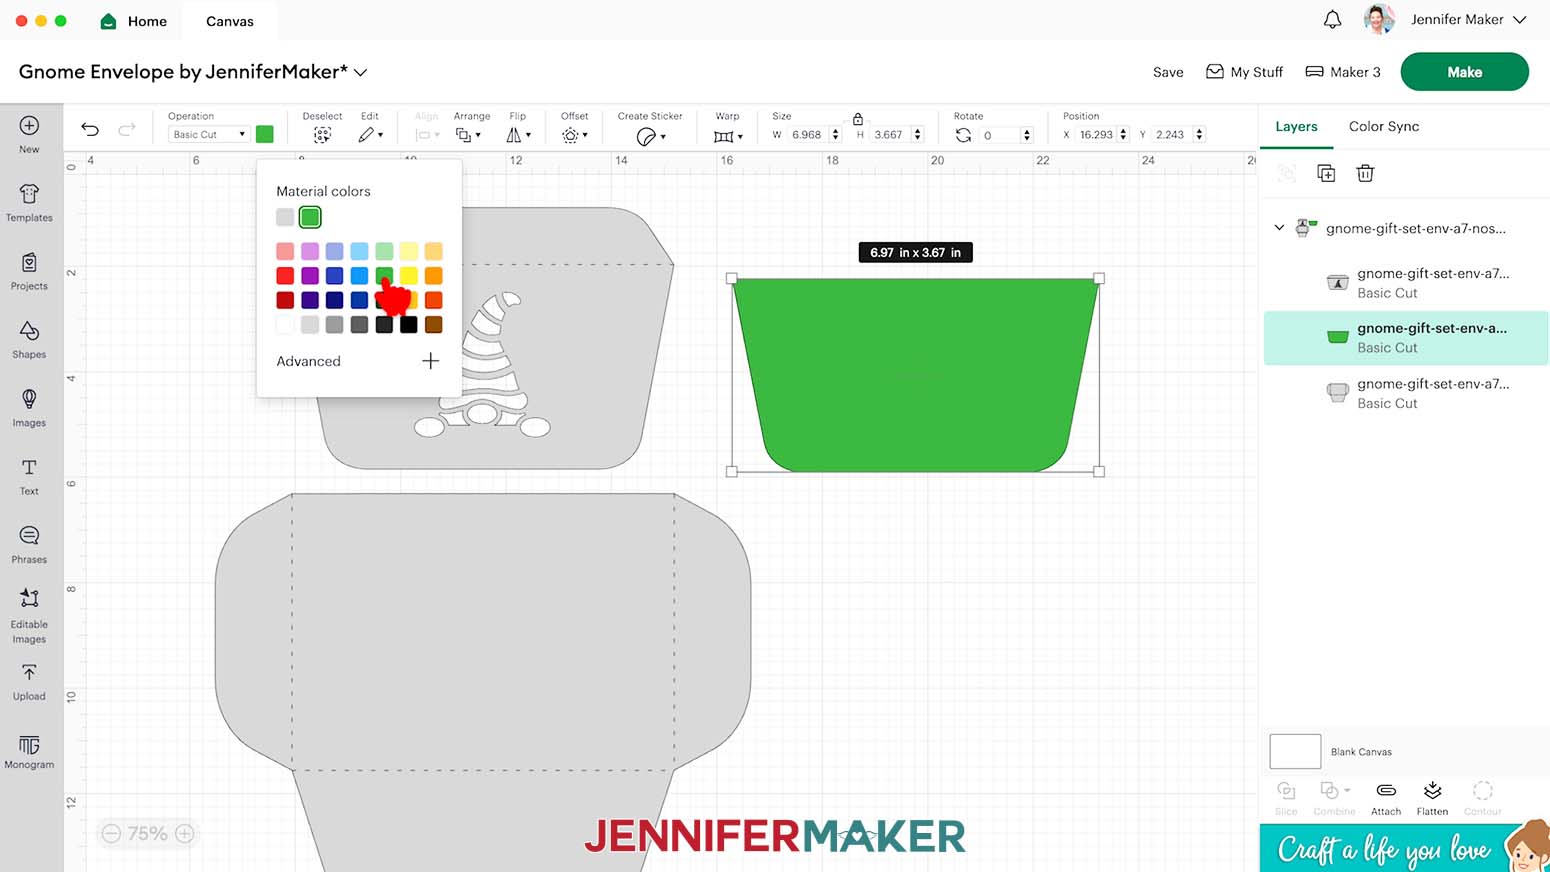
- If you want to cut the envelope’s exterior out of heavier cardstock, use the Color Box to change the white pieces to another unused color. NOTE: I’ll use a darker gray.
- If you want to make the liner match a different color in the card, select that layer in the Layers Panel. Then click the Color Box and select a new color.
NOTE: I’ll make my liner the same green as my gnome holding a gift card layer.
- Follow the steps I showed you earlier to cut this envelope from cardstock. NOTE: I used 80 lb. cardstock, but I was still able to use the “Medium Cardstock - 80 lb (216 gsm)” with “More” Pressure on a green StandardGrip machine mat.
- To assemble the A7 envelope, there is a large main piece, the flap, and the liner.
- Place the flap face down and add thin lines of craft glue around the cutouts and along the edges, avoiding the tab for now.
- Hold the liner face up and align it over the glued flap, then press it in place. Make sure it doesn’t overlap the crease line.
- Wipe away any excess glue that seeps into the cutout areas.
- Once the flap is dry, place it face up and add thin lines of glue to the front of the tab.
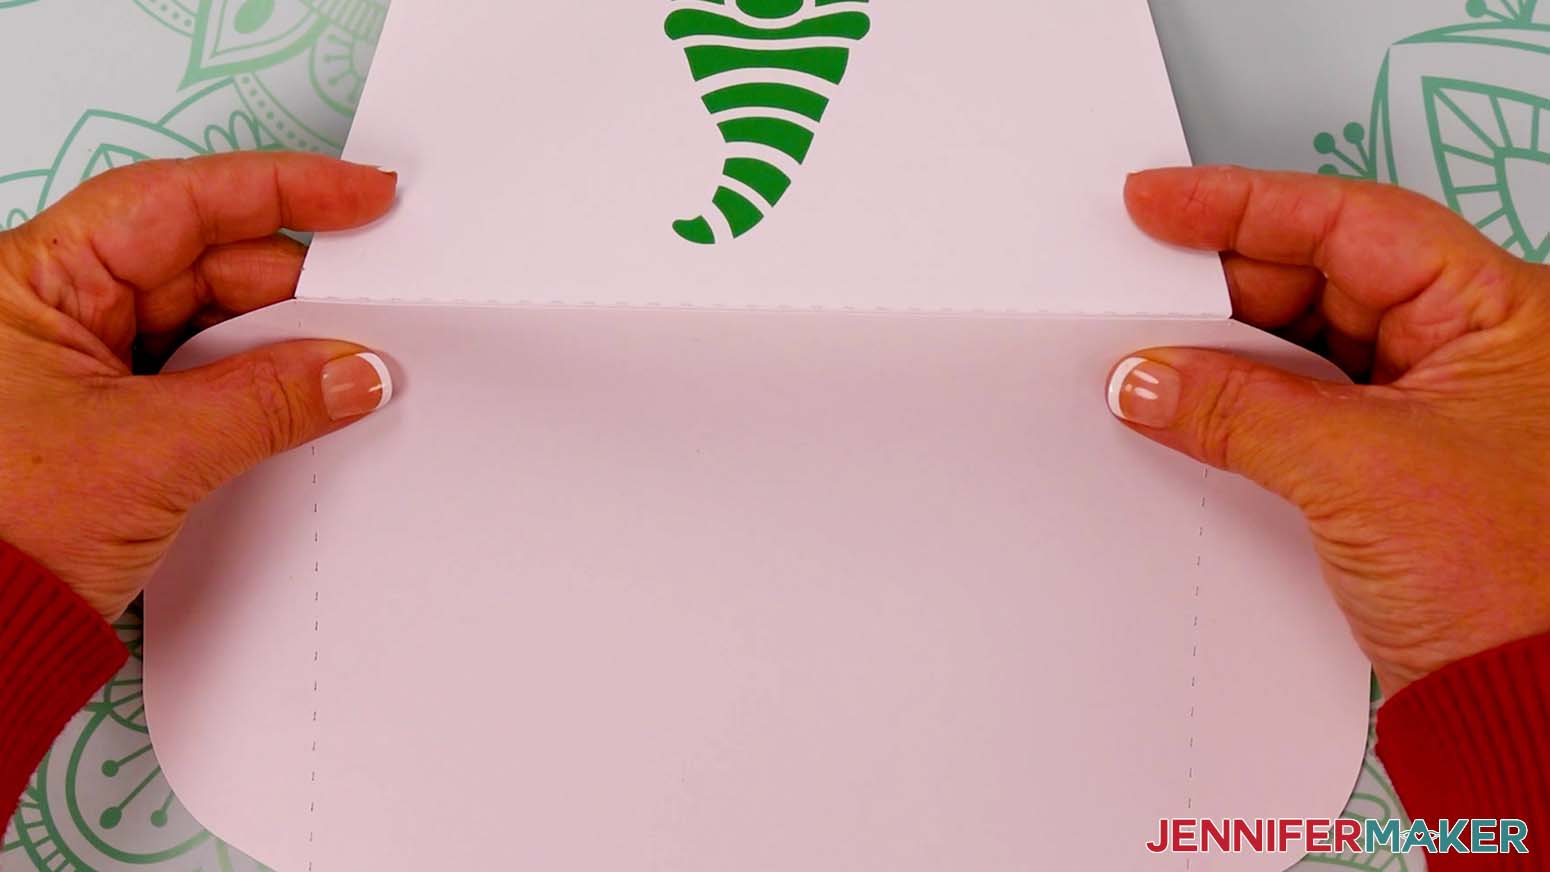
- Hold the large main envelope piece face up over the glue with its long straight edge aligned just barely below the flap’s crease. That way it will still fold smoothly.
- Gently press the pieces together. Check that the flap can easily move and adjust the pieces if you need to before the glue dries.
- Once the assembled envelope is dry, place it face down.
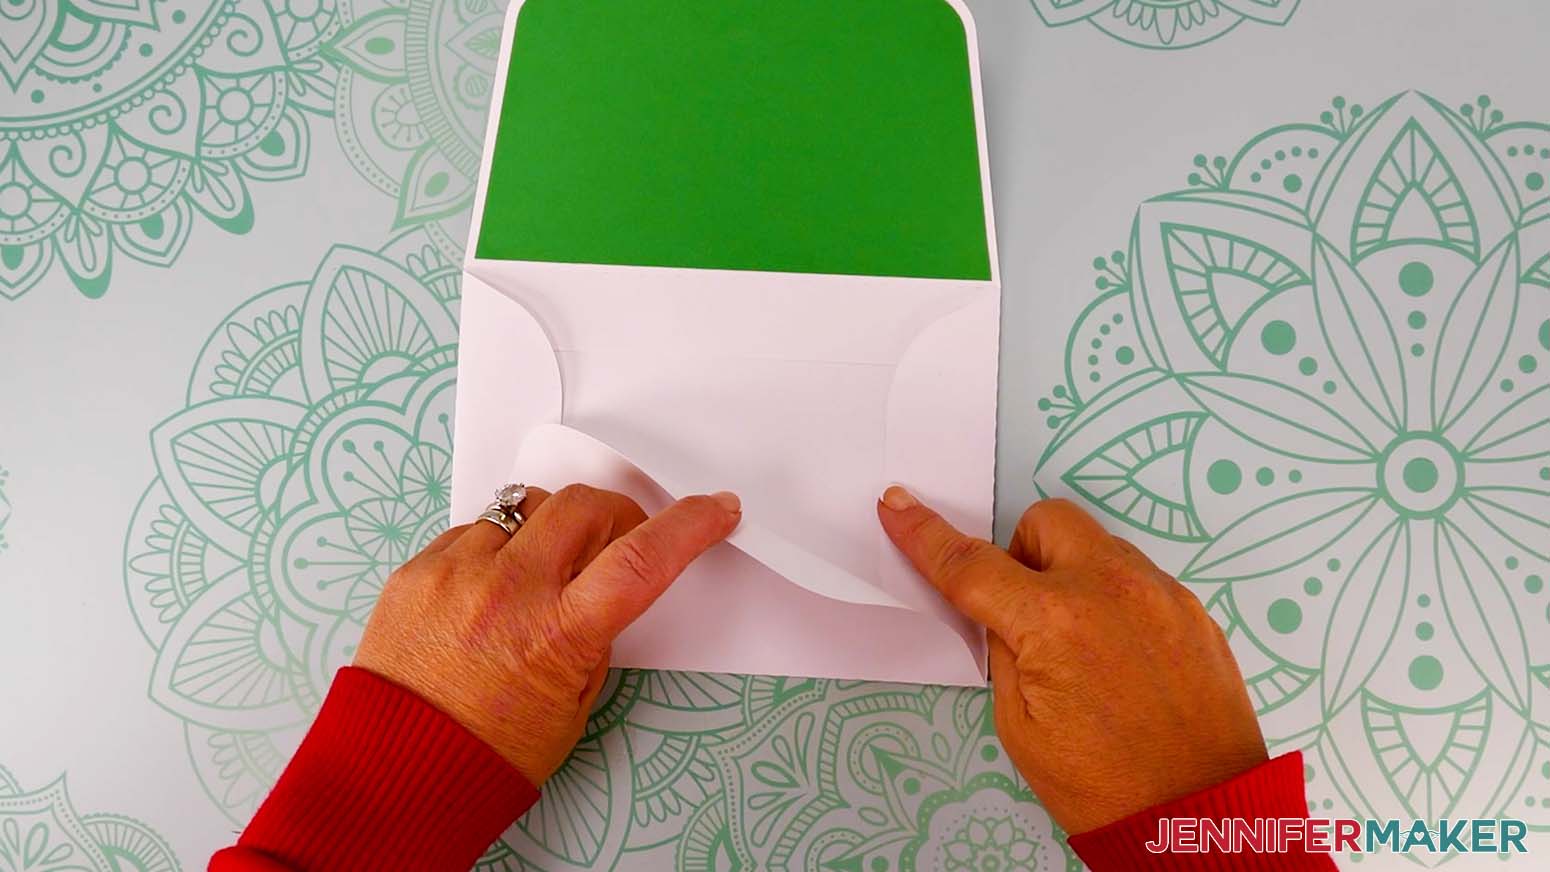
- Fold up along the creases to see where the bottom piece will overlap the side sections.
- Fold the bottom back down and leave the sides folded in.
- Then, add thin lines of glue to the side sections where the pieces will overlap.
- Fold the bottom piece back up and hold it on the glue until it sets. Let the assembled envelope dry.
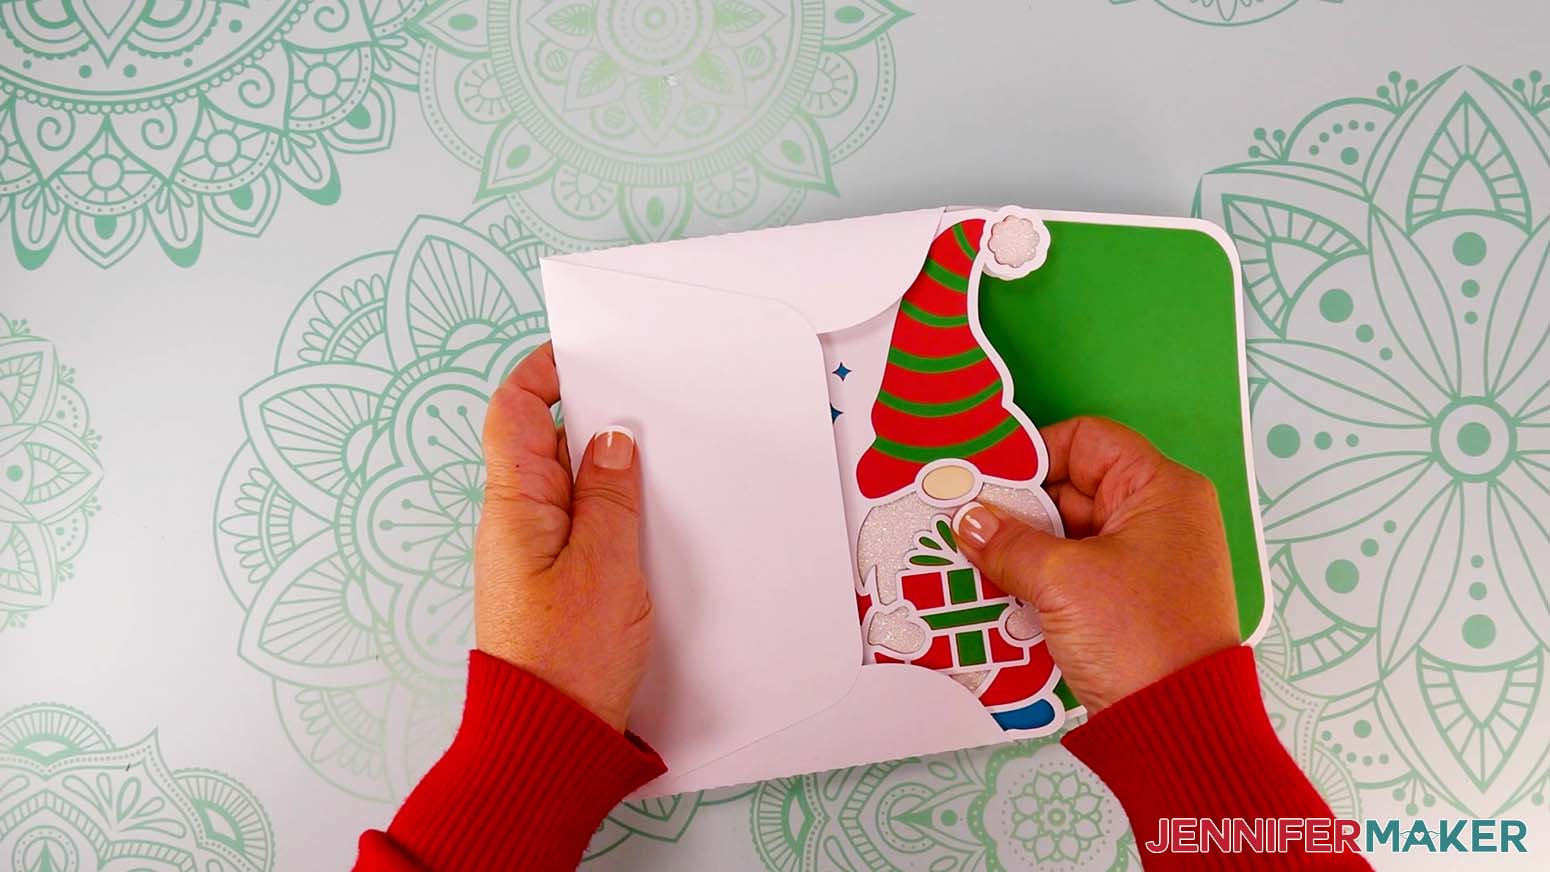
- If you want to send a set to a friend, just place the ornament inside the card and slip them in the envelope together. Since it’s the same size as a normal envelope, you can mail it just like any other card!
 NOTE: I’ll make my liner the same green as my gnome holding a gift card layer.
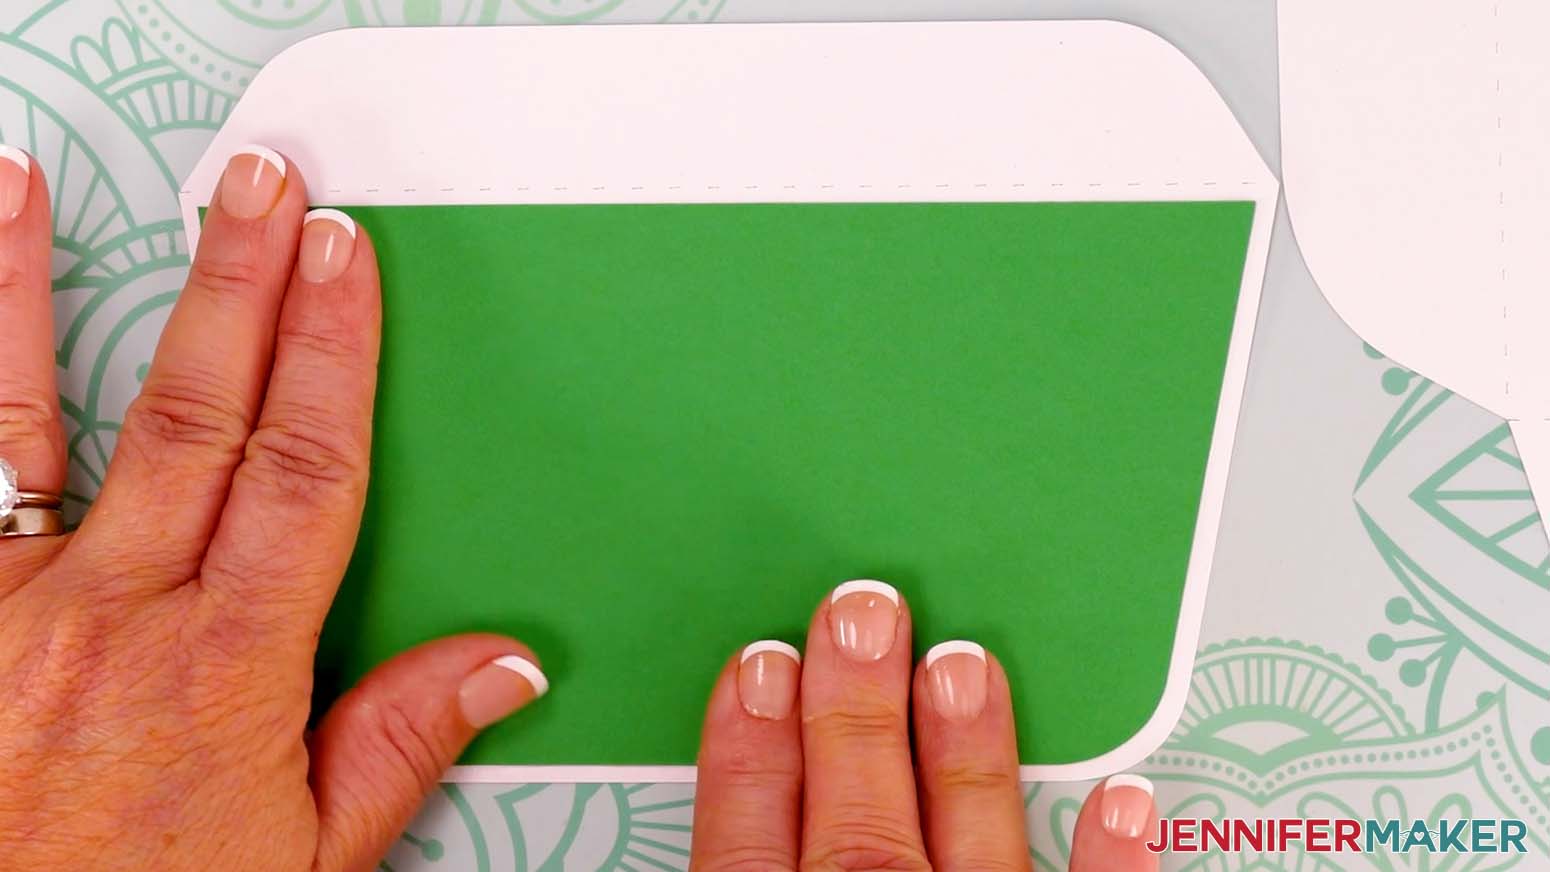

STEP 4: SHOW IT OFF!
Here is what my finished gnome gift set looks like!

Notes
Finished Sizes:
Side Edge Cards (full size): 5" x 7" when folded
Side Edge Cards (Joy size): 4" x 6" when folded
Ornaments: Approximately 3" x 6"
A7 Envelope (for 5" x 7" cards): 7.25" x 5.25"
A6 Envelope (for 4" x 6" cards): 6.5" x 4.75"
Answers to Your Questions About Making a Gnome Gift Set
Q: I want to customize a gnome gift set. How do I do that?
A: The exclusive workshop to design a custom gnome card and ornament is in your ADVANCE member area.
A: You can learn how to design a custom gnome card and ornament in my ADVANCE program. Learn more about ADVANCE here!
Q: What materials do I need to make the gnome gift set?
A: You’ll need cardstock (65 lb. for the card and ornament layers, and 80 lb. for the envelope), metallic poster board or glitter cardstock for extra sparkle, craft glue with a precision tip applicator, ribbon or twine for the ornament loop, and of course your Cricut cutting machine, a StandardGrip mat, and a couple of other supplies you’ll find in my materials list above.
Q: Can I cut the gnome designs without a Cricut?
A: Absolutely! The download folder includes PDF versions of the designs, so you can print it and use it to cut your pieces by hand using scissors or a craft knife. Just be careful!
Q: How do I keep my intricate cuts from tearing?
A: A clean mat, sharp Fine-Point Blade, and the right material setting make all the difference. And don’t forget to clean your blade to keep it cutting smoothly!
Q: What’s the best cardstock weight for each part of the project?
A: Use 65 lb cardstock for most of the layers on the card and ornament. It cuts beautifully and layers well. For the envelope, go with something heavier, like 80 lb cardstock, so it holds its shape and protects your project in the mail.
Q: What machines can cut these designs?
A: The gnome gift set cuts beautifully on Cricut Maker, Explore, Venture, and Joy Xtra. There are also special smaller versions for Cricut Joy users in the “For Joy Users” folder.
Q: Can I mail the ornament inside the card?
A: Yes! The envelope design was made to fit the card and ornament snugly. Just make sure your glue is completely dry before sealing. You can use a standard stamp if your envelope stays pretty flat.
Q: Can I make and sell these gnome gift set designs?
A: I love supporting creative entrepreneurs! If you want to use my designs and projects for commercial use, please familiarize yourself with my important licensing information before selling your crafts.
I do not permit sale of my digital items, but you can sell the creative goods you make with them — as long as you follow my licensing requirements. That means you cannot sell the gnome gift set SVG files, but you can sell cards, envelopes, and ornaments that you made with the files within the guidelines linked above.
Get my free SVG files to make a gnome gift set with card & ornament!
(If you do not see the signup form above, click here.)
I love seeing what you make with my tutorials and how you customize them! Please share a photo of your gnome gift set in our Facebook group or tag me on social media with #jennifermaker.
Love,

Want to remember this? Save this Gnome Gift Set tutorial to your favorite Pinterest Board!