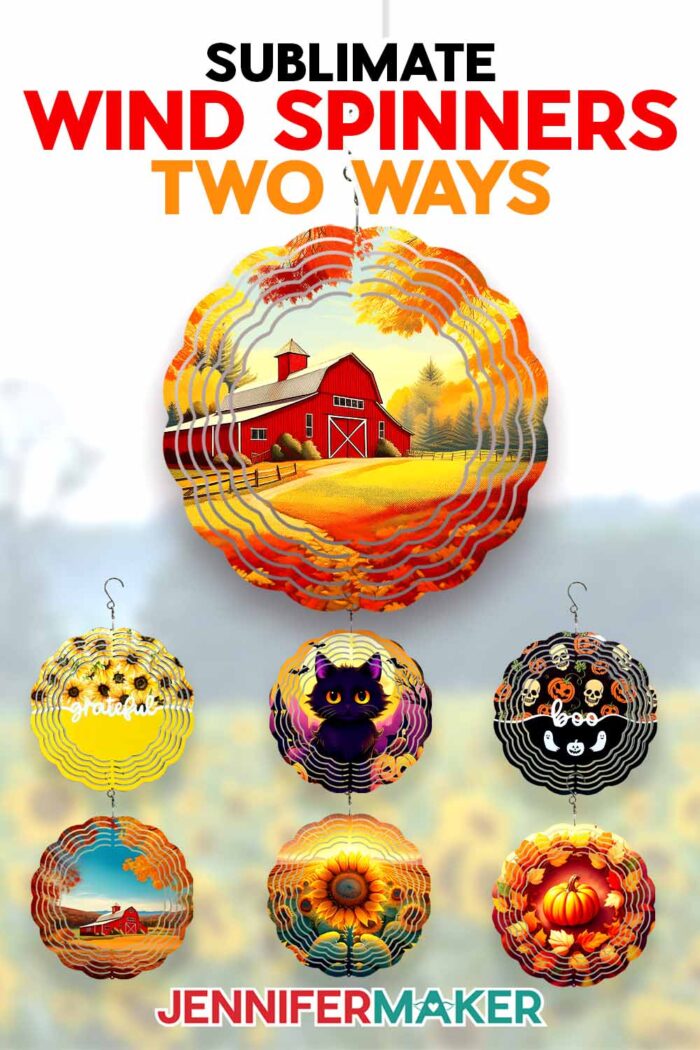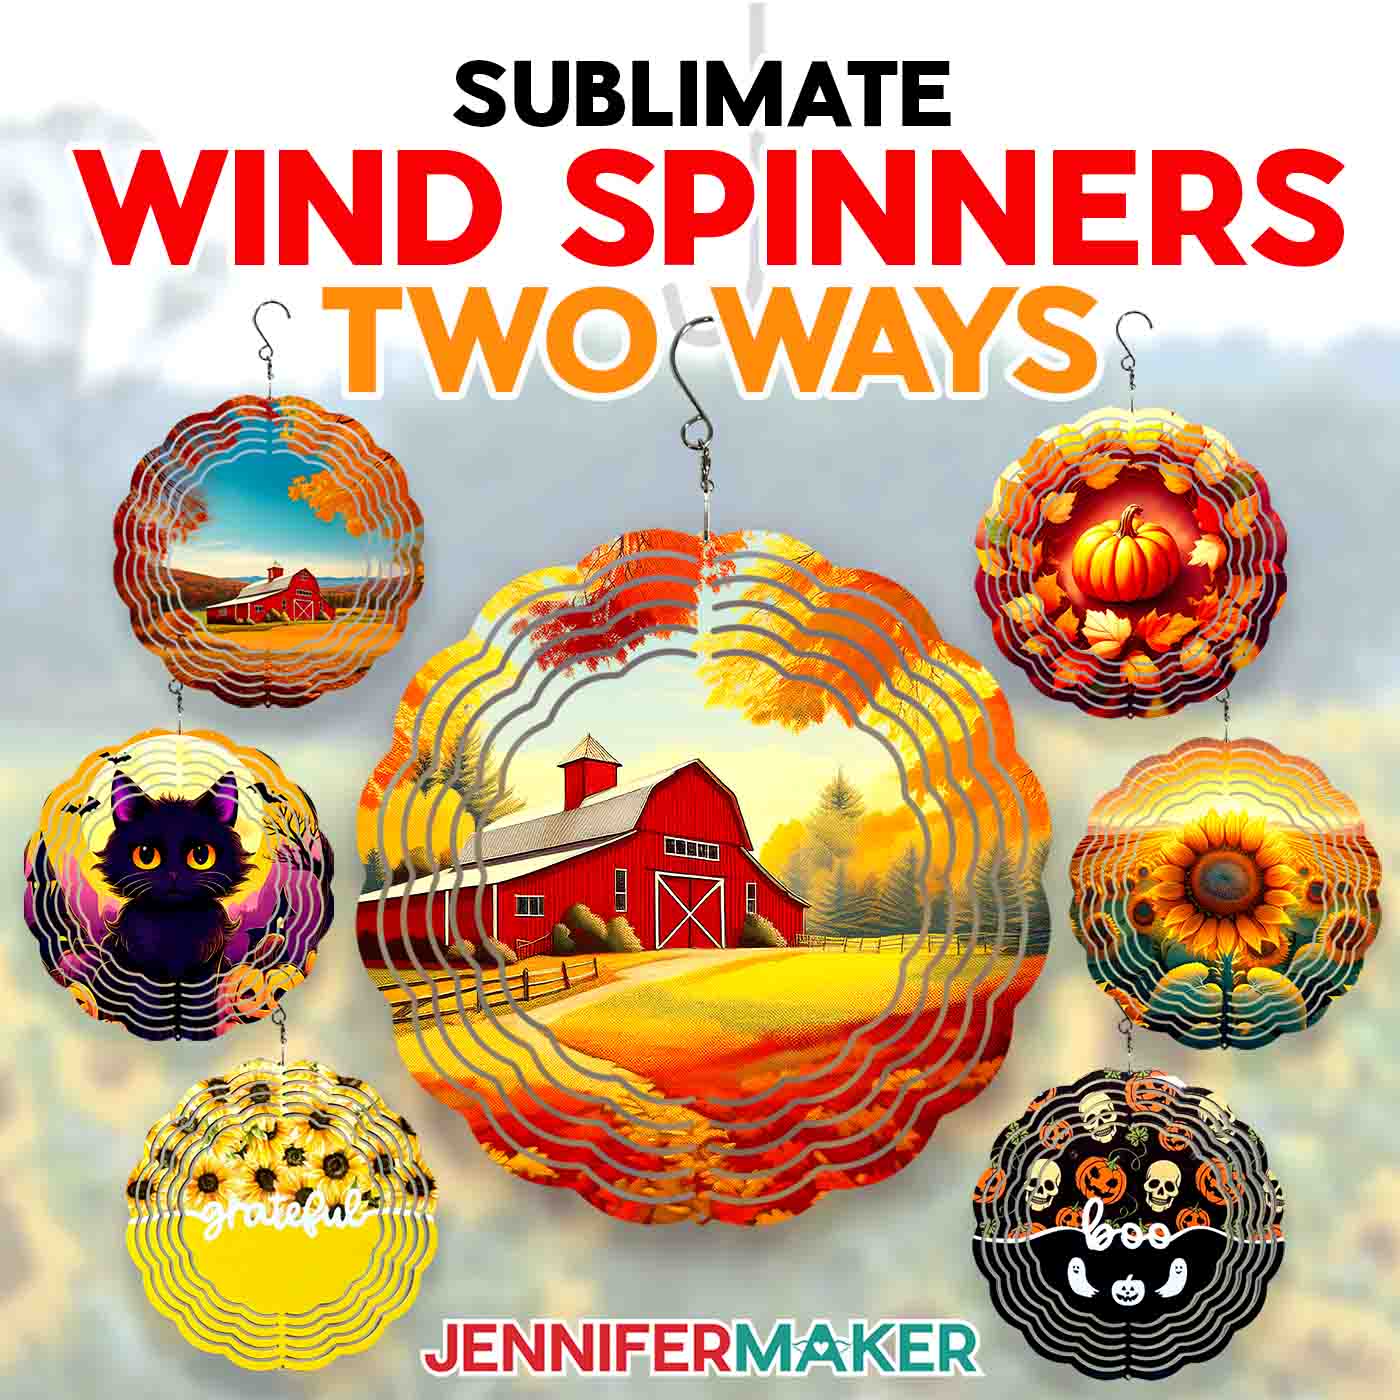
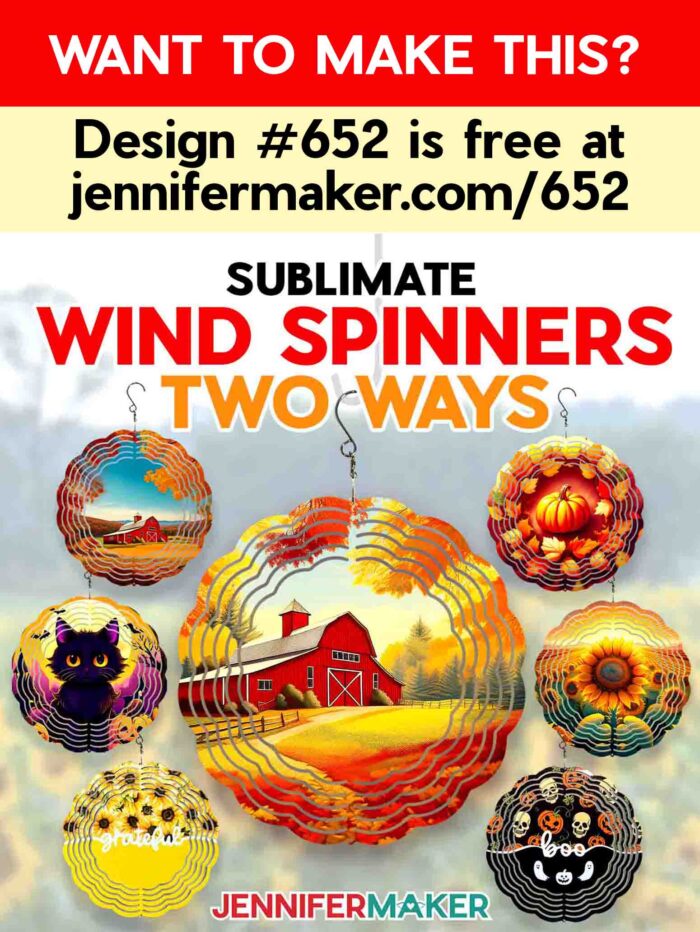
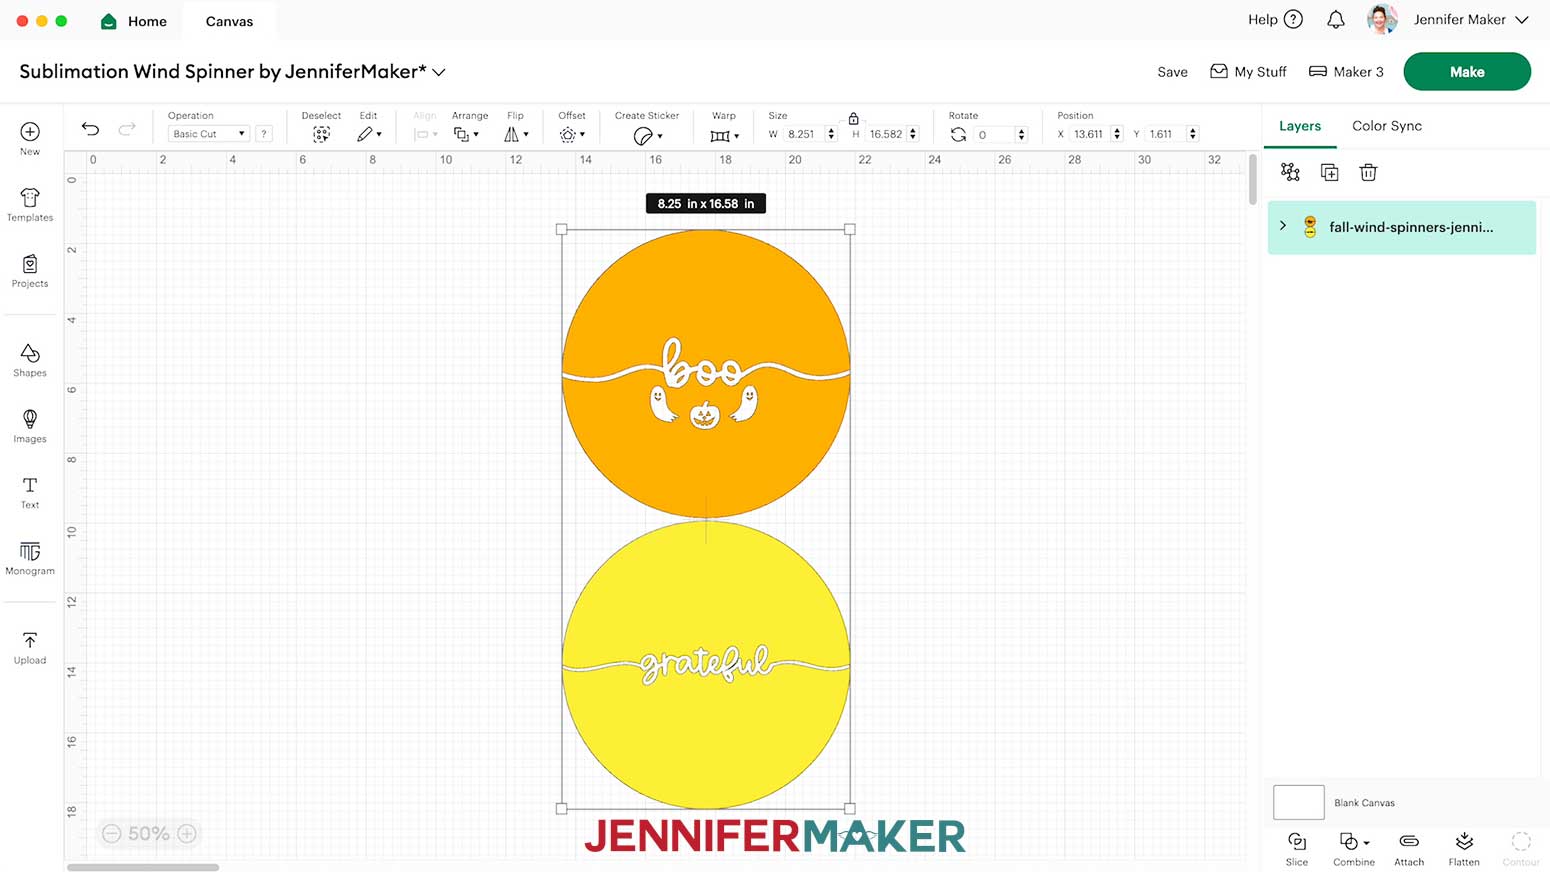
Learn how to sublimate a wind spinner using different methods!
Ever since I started decorating wind spinners, I want to hang them all year round! They bring color and movement to my front porch, and are the perfect craft for sublimation newbies. But, what if you don’t have a sublimation printer yet? That’s okay, because I’ll teach you how to sublimate a wind spinner not one, but two different ways! Even without a printer, you can still create beautiful, full-color sublimated projects. I’ll give you the full rundown, so you can choose the best method for you!
Watch the full step-by-step tutorial on how to sublimate a wind spinner:

When a wind spinner spins, it doesn’t only add color and whimsy to your garden — it repels pests like bugs and squirrels, too! I like to hang multiple wind spinners from my front porch to deter insects from getting too close for comfort. In the tutorial I’ll show you how to prepare and sublimate designs two different ways: One way uses Infusible Ink transfer sheets, and the other uses a printed sublimation transfer design. I’ll show you how to apply the designs to both sides of the wind spinner so it looks lovely twirling in your garden!
For the sublimated version which uses a print, you’ll need a sublimation printer with the right kind of ink. I like to use a converted Epson EcoTank, but you may find that another sublimation printer works best for you. You’ll also need some good-quality sublimation paper — I have my favorite kind linked below.
I’ve created some PNG images you can print and use to sublimate onto your wind spinner. They’re in my free download file for this project, and include cute autumn and Halloween images I made with the help of AI image generating software. To learn all about how to make your own AI-generated images for crafting, check out my AI Art Playbook! I’ll show you how to prepare and print them using free Google Docs software online.
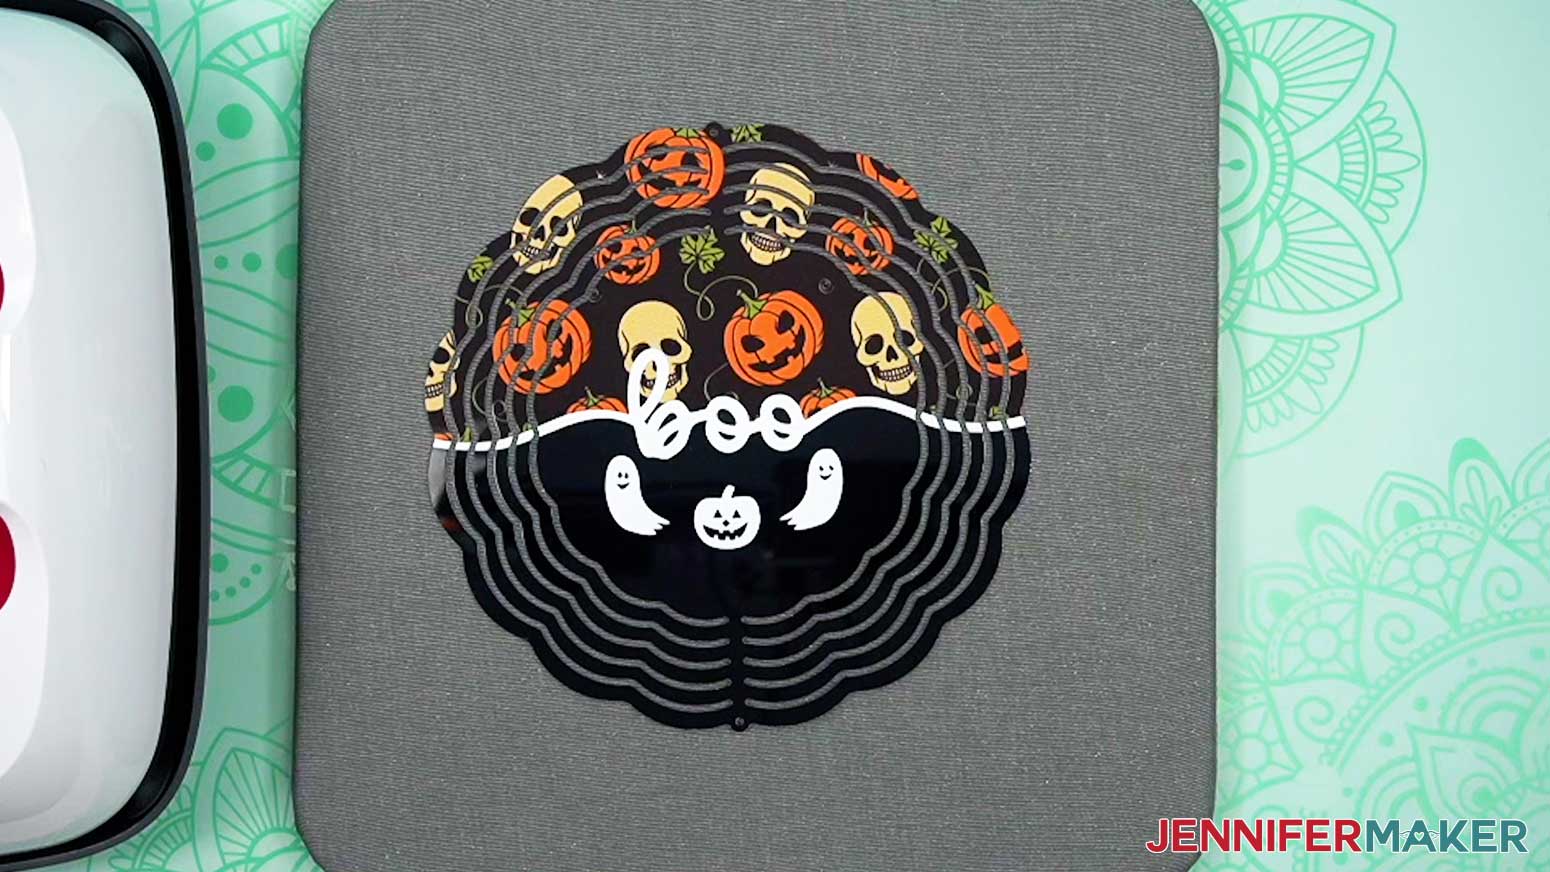
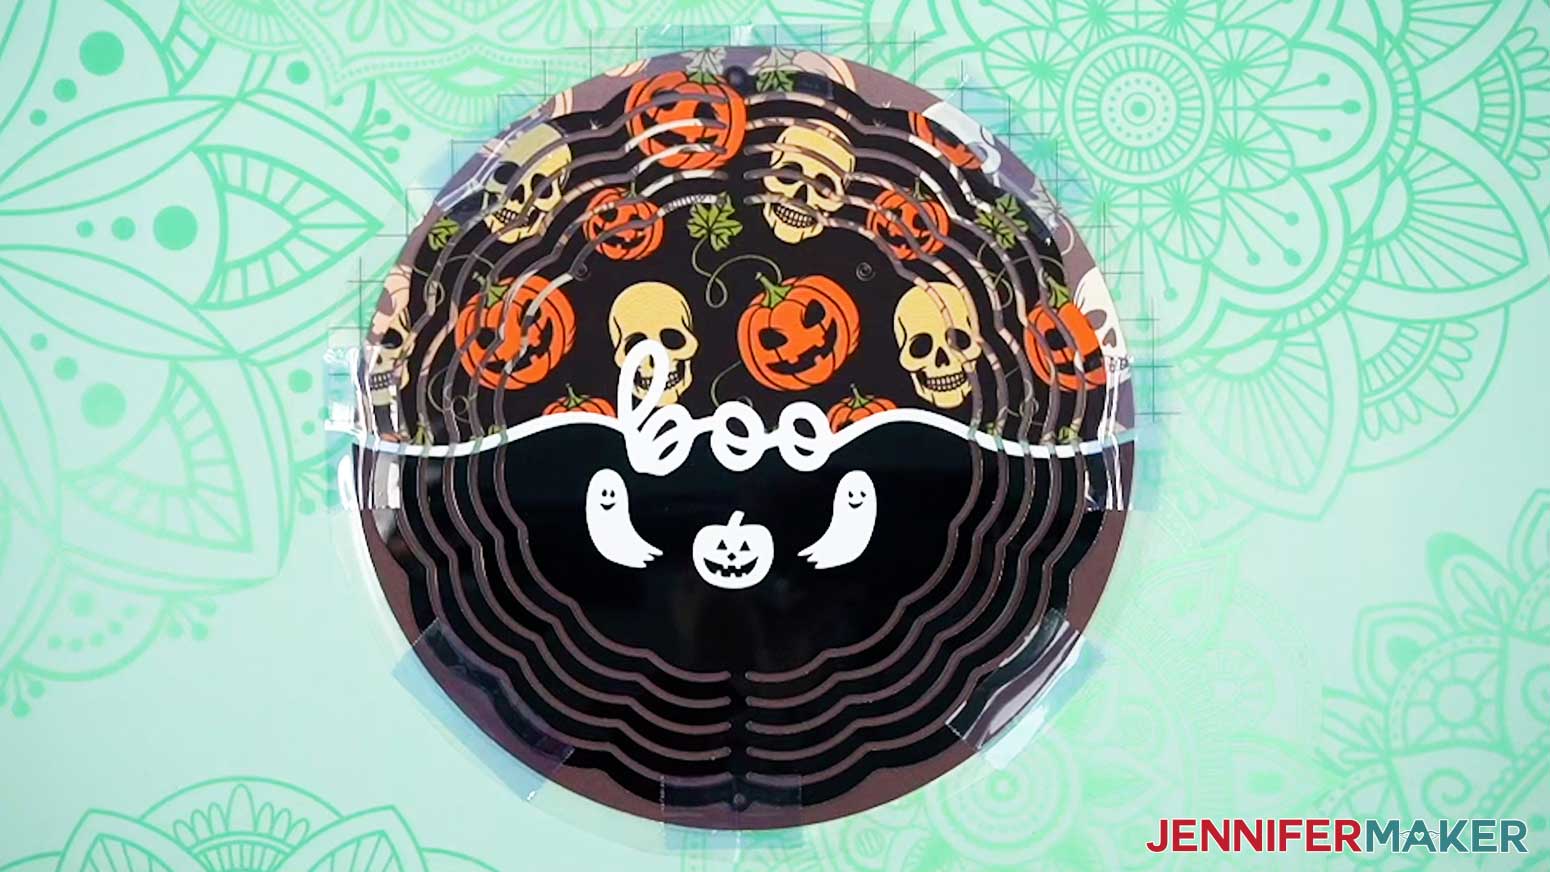
If you don’t have a sublimation printer, you can still sublimate a wind spinner! I’ve included an Infusible Ink sheets version of the project in the tutorial that you can prepare in Cricut Design Space and cut with a cutting machine. In my free download, there are two word designs: One that says “boo” with some cute ghosts and a pumpkin, and a simpler design that says “grateful.” I’ll show you how to prepare the bottom half with a solid colored Infusible Ink sheet, and a patterned sheet on the top half. Then I’ll walk you through cutting the Infusible Ink transfer sheets with a Cricut Maker 3, but you can also use another cutting machine.

For both methods, you’ll need an aluminum wind spinner designed for sublimation. If you’re not sure if one is meant for sublimation, you can purchase the one linked in my materials list or be sure to check the listing for the words “sublimation blank.” The spinners in my materials list come with hanging holes on top and bottom for easy hanging, and you can even attach multiple wind spinners together for a super fun garden feature!
Some wind spinners come with a protective film over them. If yours has one, be sure to remove it from the front and back before sublimating.
To sublimate your wind spinner, you’ll need some basic sublimation tools and materials, like white cardstock, butcher paper, and a fan for good ventilation. You’ll also want to use heat tape to secure your blank wind spinner to the center of your print before pressing. You can find a full list of materials (and links to where to find them) in my supply list below.
To press your sublimation design (whether it’s printed or Infusible Ink) onto your wind spinner, you’ll also need a heat press. The heat press brand doesn’t matter much (I used a Cricut EasyPress 2), nor do the styles of heat press — a handheld press works just as well as a Cricut Auto Press or “clamshell” style press for this project. Just be sure to use a heat press and not a home iron, as it won’t reach the high temperature necessary for a successful sublimation transfer. And make sure to use caution and have some heat-resistant gloves handy if you need to touch the spinner before it’s cool! I’ll share my recommended settings for best results in the tutorial.

Once the wind spinner is sublimated and cool to the touch, you can apply a light coat of UV resistant clear coat spray over the design to protect it from fading in the sun. Be sure to follow the safety advice in the tutorial and spray the sealant in a well-ventilated outdoor space.
Then it’s time to bend the wind spinner rings into shape. Start with the outermost ring and bend it perpendicular to the middle of the spinner. Go a little less on the next smaller ring bend, and so on until you’ve bent all of the rings an equal distance on one side. Then repeat on the other side, with the bends going in the opposite direction. Check out the video to see what your rings should look like when they’re bent correctly.
I hope you’ll take what you learned in the tutorial and sublimate wind spinners for your yard! They make wonderful gifts, too, and your recipient will love the special project you made just for them. Follow the detailed step-by-step video or the written tutorial below with photos for more detailed information on creating and pressing your own wind spinners, and experiment with different Infusible Ink patterns, other PNG images, and most of all — have fun!
Let me show you how easy it is to sublimate a wind spinner! This post contains some affiliate links for your convenience (which means if you make a purchase after clicking a link I will earn a small commission but it won’t cost you a penny more)! Read my full disclosure policy.
Materials to Sublimate a Wind Spinner
View my Amazon shopping list with the exact items I used.
For both methods:
-
- One (1) 7 7/8″ Sublimation Wind Spinner
- Heat Press – I used the 12″ x 10″ Cricut EasyPress 2
- Cricut EasyPress Mat
- Fan (for ventilation)
- Heat Resistant Gloves
- Two (2) 12″ x 12″ Pieces of White Cardstock
- White Butcher Paper
- Heat Resistant Tape
- Ruler or Measuring Tape (optional for measuring wind spinner)
- Scissors -OR-
- Paper Trimmer
- Lint Roller
- Optional: UV-Resistant Clear Coat Sealant
For print sublimation method:
-
- Sublimation Printer – I used a converted Epson EcoTank ET-2800 Inkjet Printer -AND-
- Sublimation Ink
- Two (2) Sheets of 8.5″ x 11″ A-Sub Sublimation Paper 125g
For Infusible Ink method:
-
- Two (2) 4.5″ x 12″ Halloween Infusible Ink Sheets -AND-
- One (1) 12″ x 12″ Black Infusible Ink Sheet -OR-
- One (1) 12″ x 10″ Sunflower Infusible Ink Sheet -AND-
- One (1) 12″ x 12″ Yellow Infusible Ink Sheet
- A way to cut your materials – I’m using the Cricut Maker 3, but you can also use the Cricut Maker, a Cricut Explore Series machine, the Cricut Venture, or the Cricut Joy Xtra
- Cricut Green StandardGrip Machine Mat 12″ x 12″
- Brayer
- Weeding Tool
- Tweezers
- Design #652 (My free SVG/DXF/PDF/PNG design files are available in my free resource library – get the password by filling out the form at the bottom of this page
How to Sublimate a Wind Spinner

Sublimate a Wind Spinner
Learn how to sublimate a wind spinner!
Materials
- Two (2) Sheets of 8.5” x 11” A-Sub Sublimation Paper 125g -OR-
- Two (2) 4.5” x 12” Halloween Infusible Ink Sheets -AND-
- One (1) 12" x 12" Black Infusible Ink Sheet -OR-
- One (1) 12" x 10" Sunflower Infusible Ink Sheet -AND-
- One (1) 12" x 12" Yellow Infusible Ink Sheet
- One (1) 7 7/8" Sublimation Wind Spinner
- Two (2) 12" x 12" Pieces of White Cardstock
- White Butcher Paper
- Design #652 (My free SVG/DXF/PNG/PDF design files are available in my free resource library - get the password by filling out the form at the bottom of this page)
Tools
- Sublimation Printer - I used a converted Epson EcoTank ET-2800 Inkjet Printer
- Sublimation Ink
- Scissors -OR-
- Paper Trimmer
- A way to cut your materials - I’m using the Cricut Maker 3, but you can also use the Cricut Maker, a Cricut Explore Series machine, the Cricut Venture, or even the Cricut Joy Xtra
- Cricut Green StandardGrip Machine Mat 12" x 12”
- Brayer
- Weeding Tool
- Tweezers
- Heat Press - I used the 12” x 10” Cricut EasyPress 2
- Cricut EasyPress Mat
- Fan for Ventilation
- Heat Resistant Gloves
- Heat Resistant Tape
- Ruler or Measuring Tape (optional for measuring wind spinner)
- Lint Roller
- Optional: UV-Resistant Clear Coat Sealant
Instructions
STEP 1: GET MY WIND SPINNER DESIGNS
First, download my Wind Spinner designs from my free library – look for Design #652. Alternatively, you can use the Save This Project form near the top of this post and the design link will be emailed to you.
I made these designs with the help of AI art generation and adjusted them with image editing software.
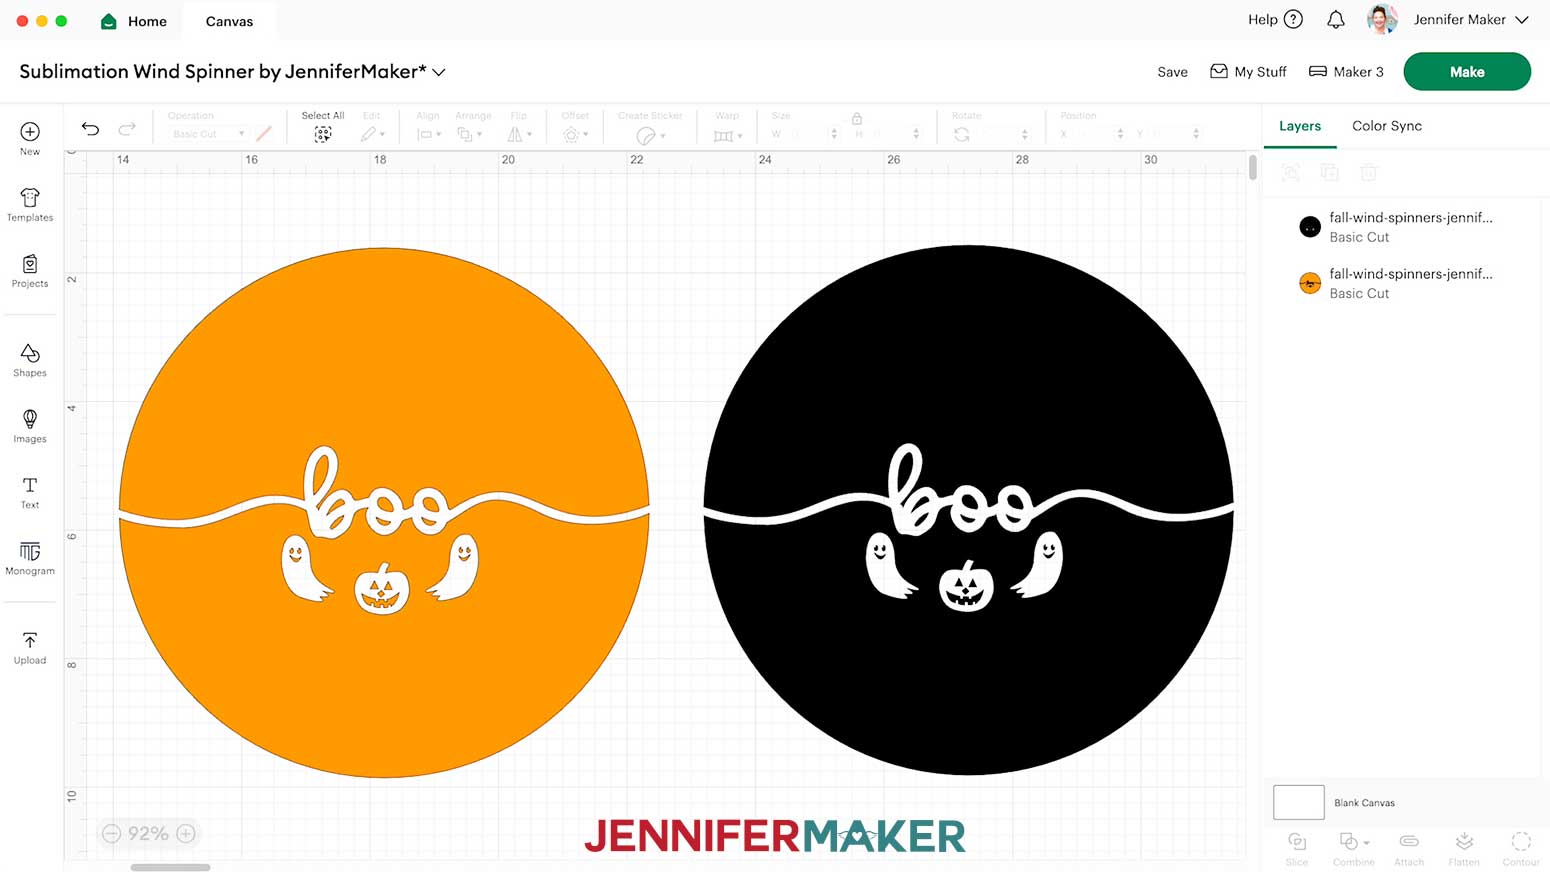
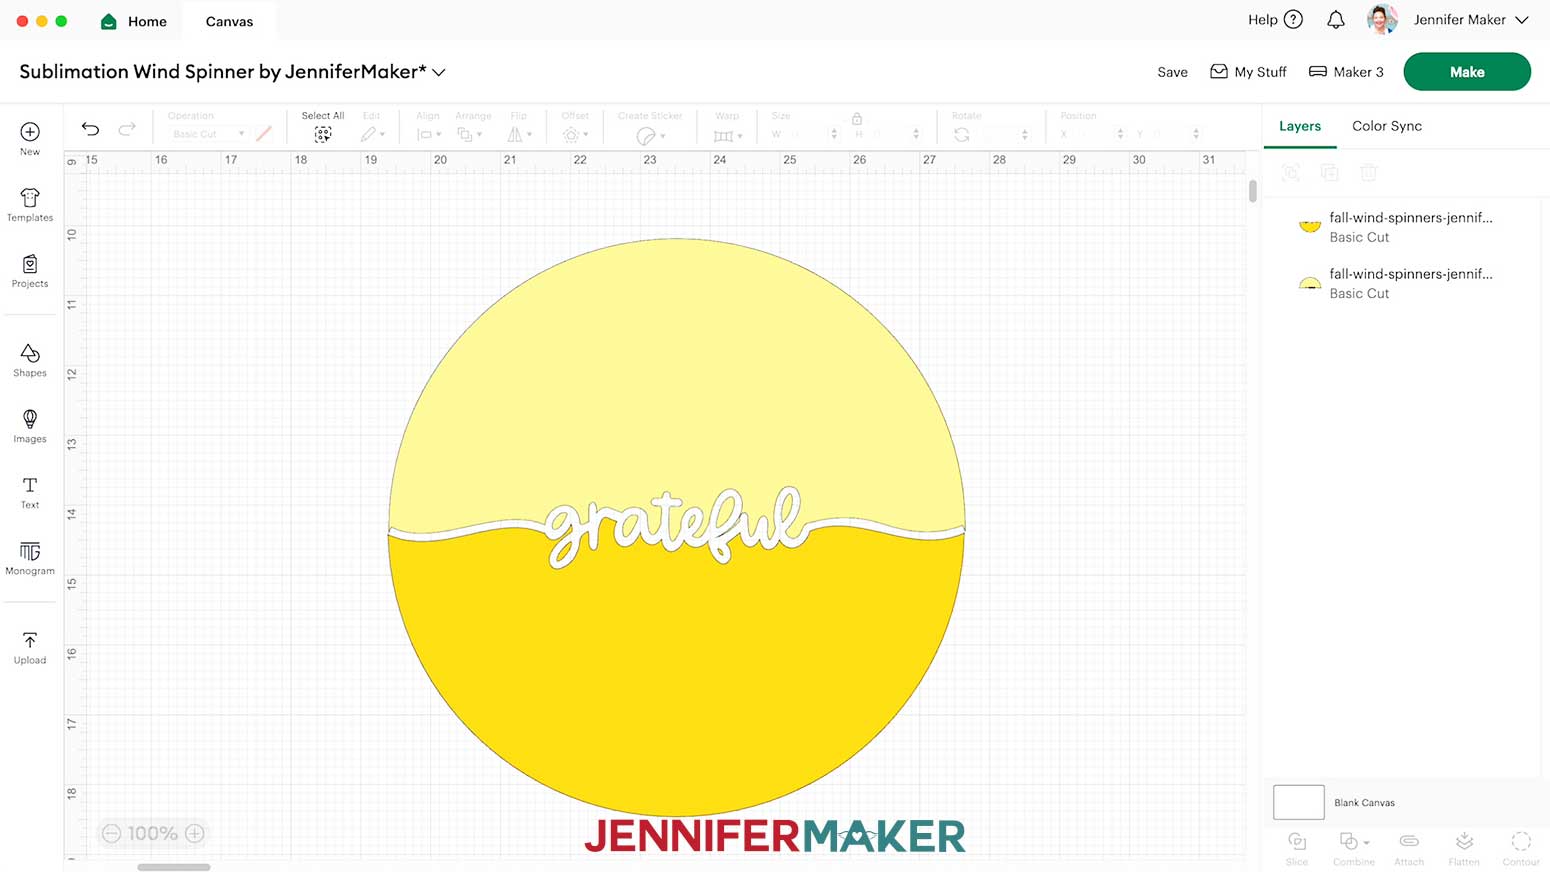
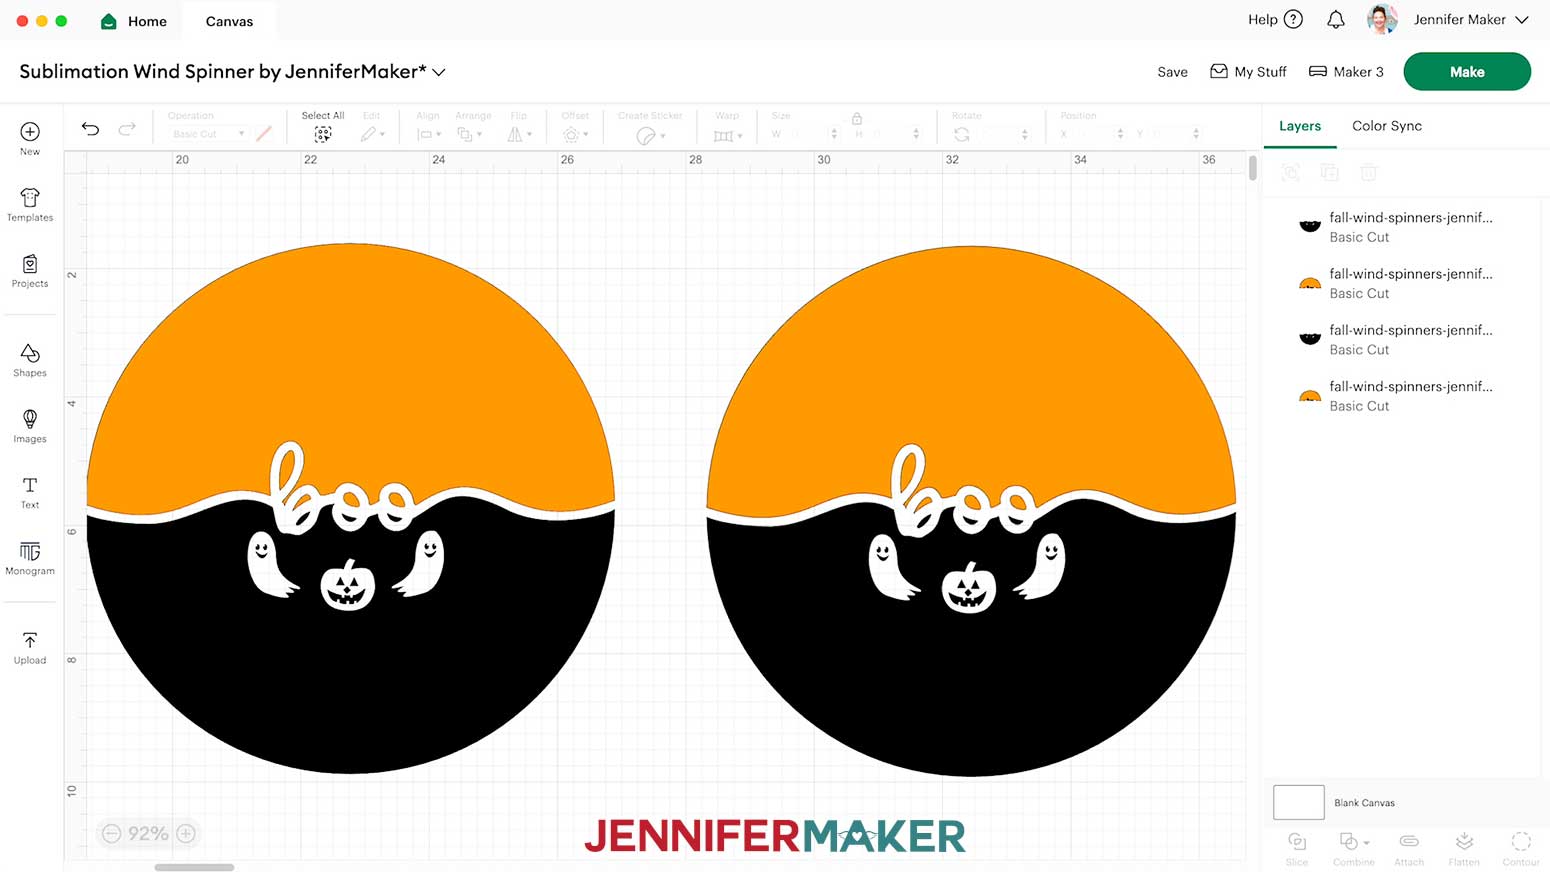
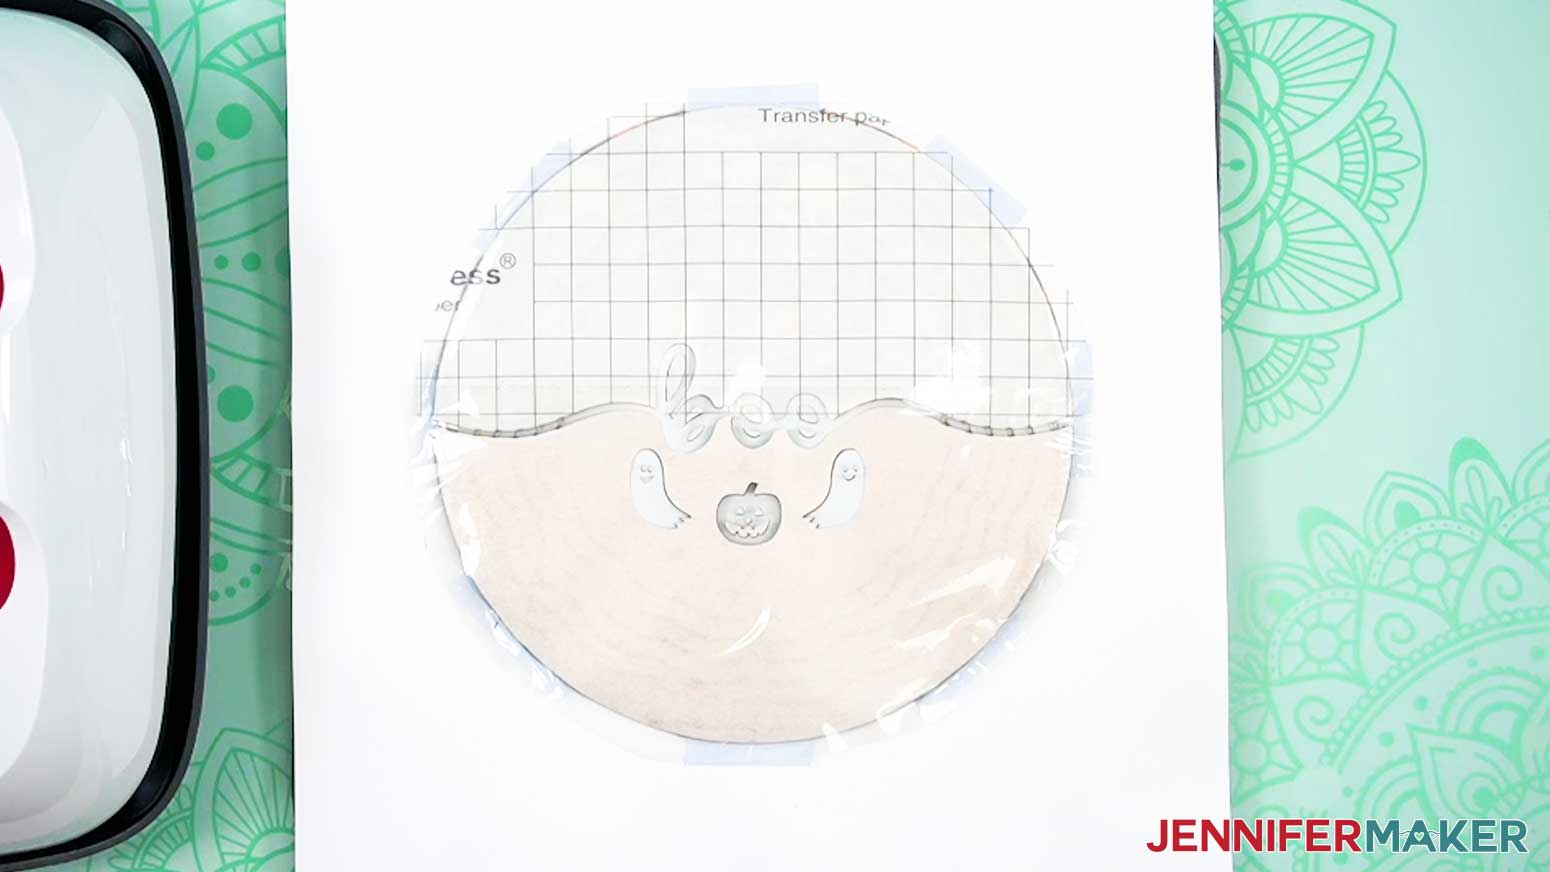
The SVG and DXF files contain patterns you can cut out of Infusible Ink transfer sheets, which I’ll show you how to do using a Cricut cutting machine. Inside each folder, you’ll find one file that contains two designs to cut from Infusible Ink transfer sheets: a “Boo” design with ghosts and a jack-o-lantern, as well as a simple “Grateful” design.
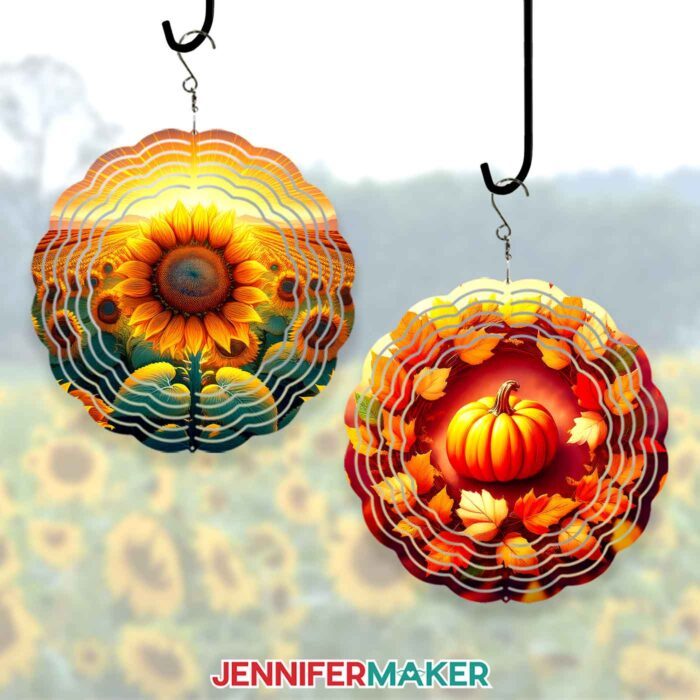
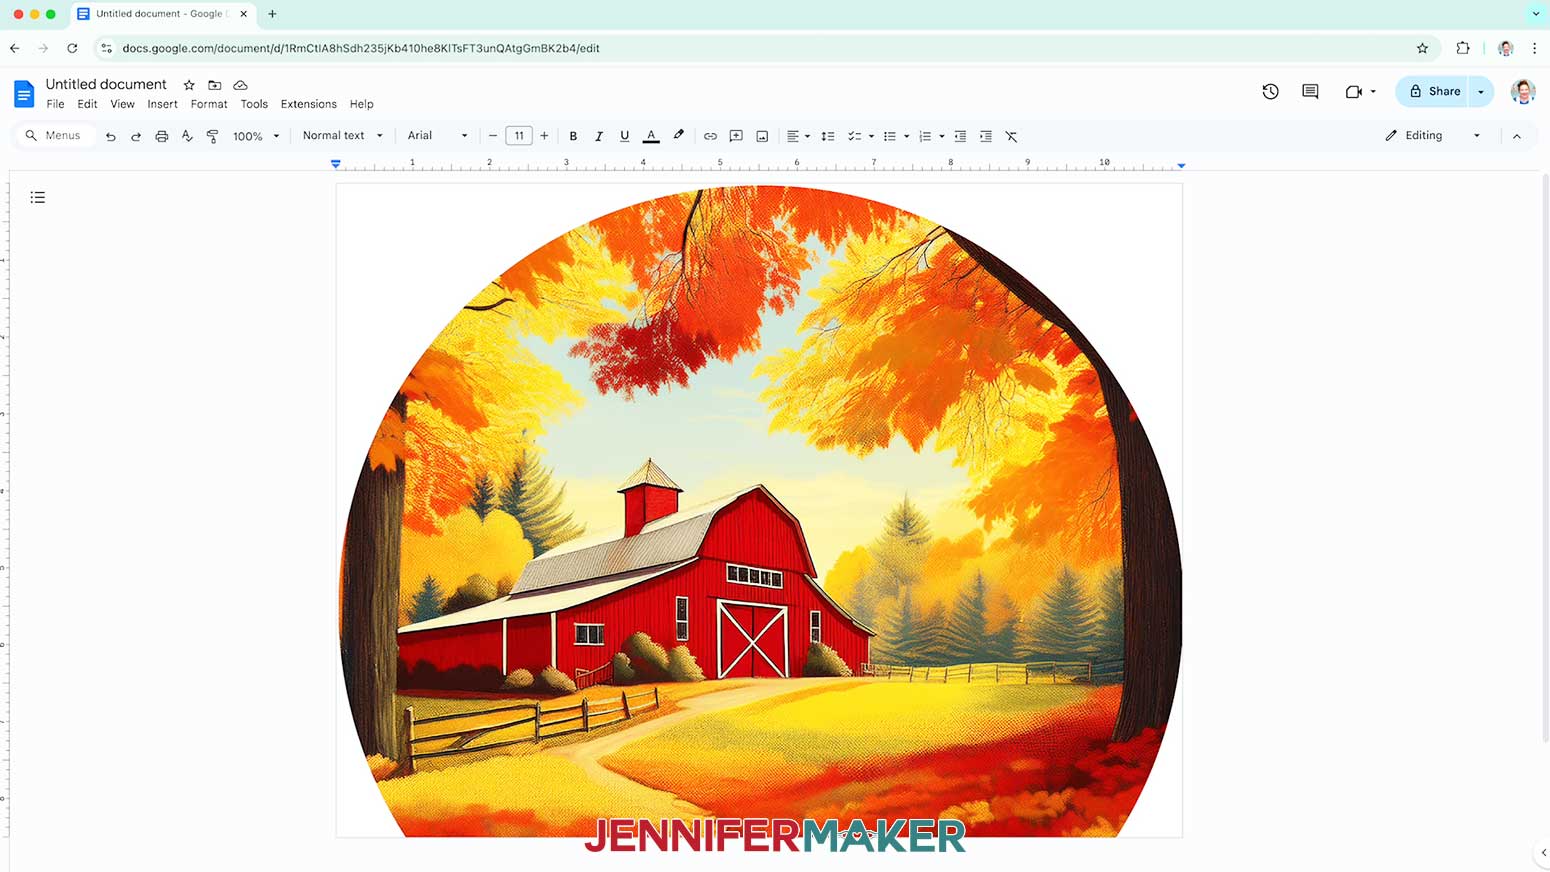
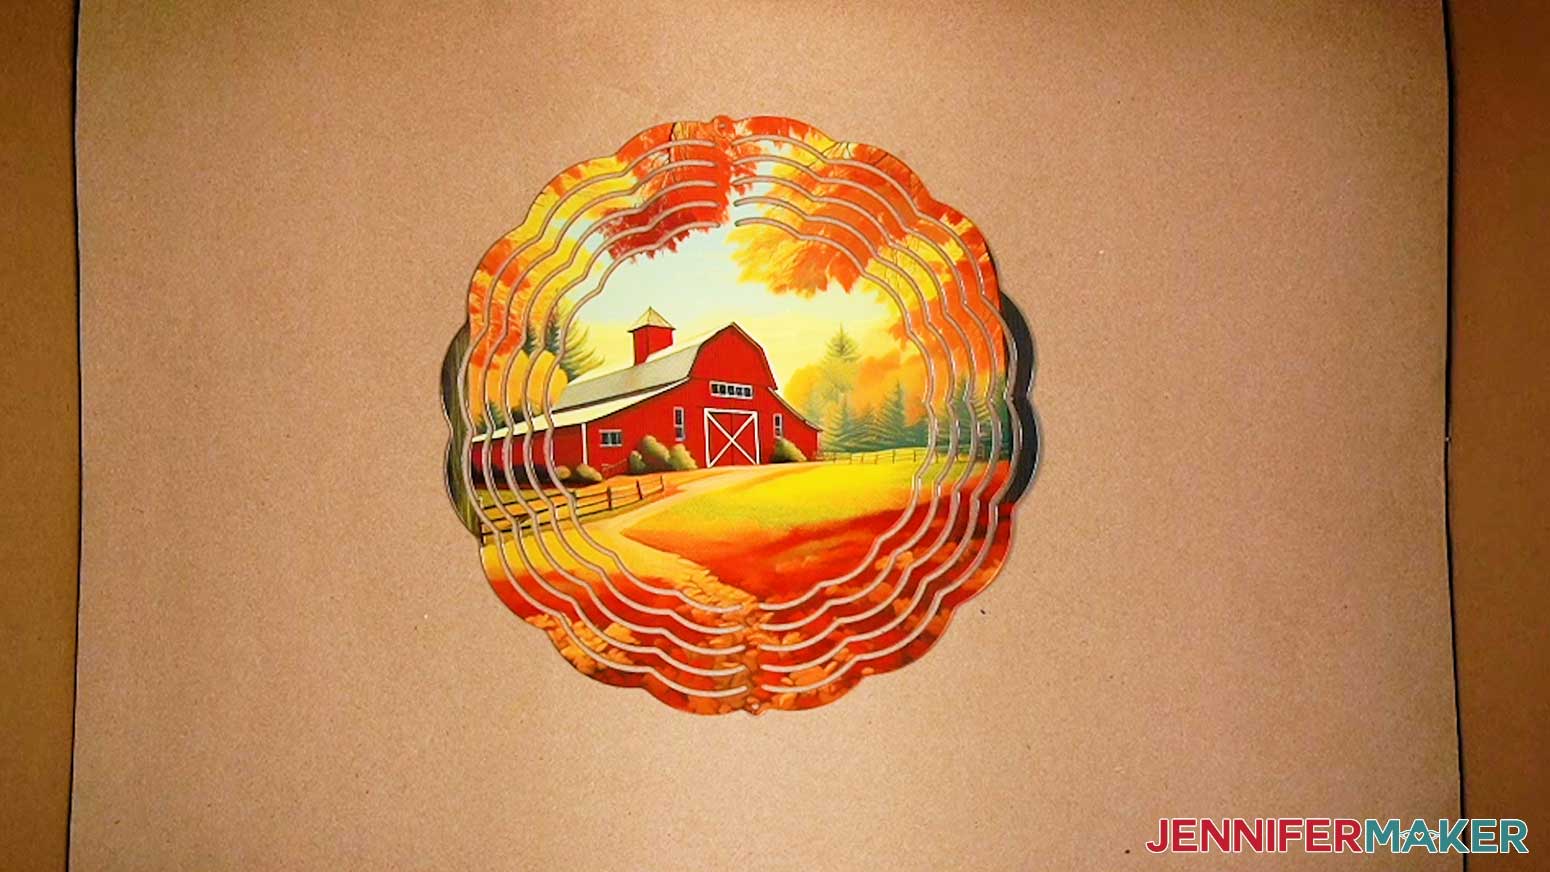
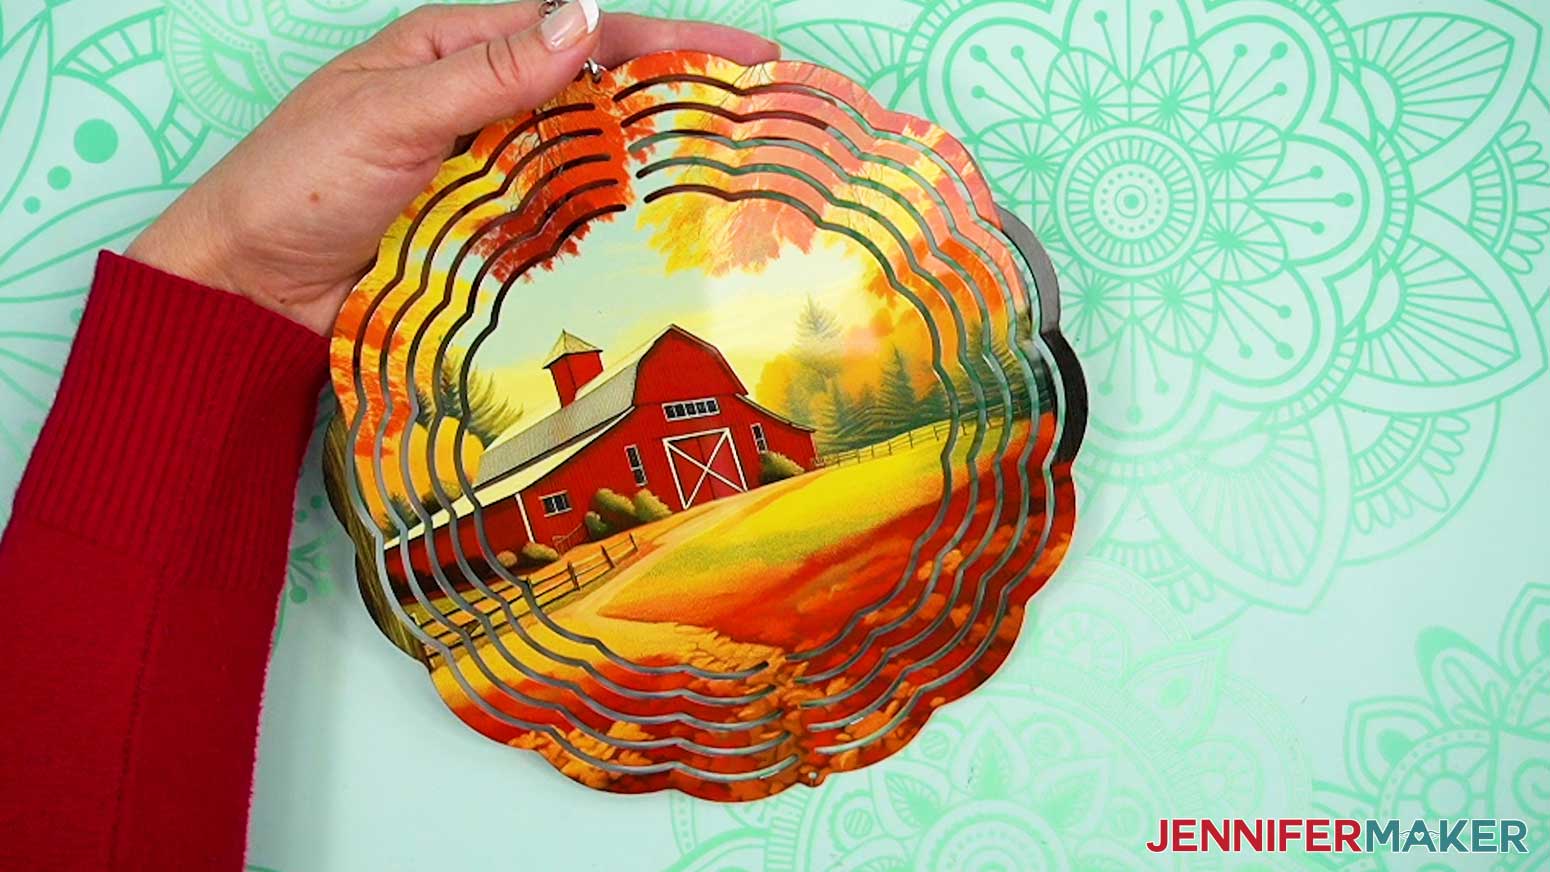
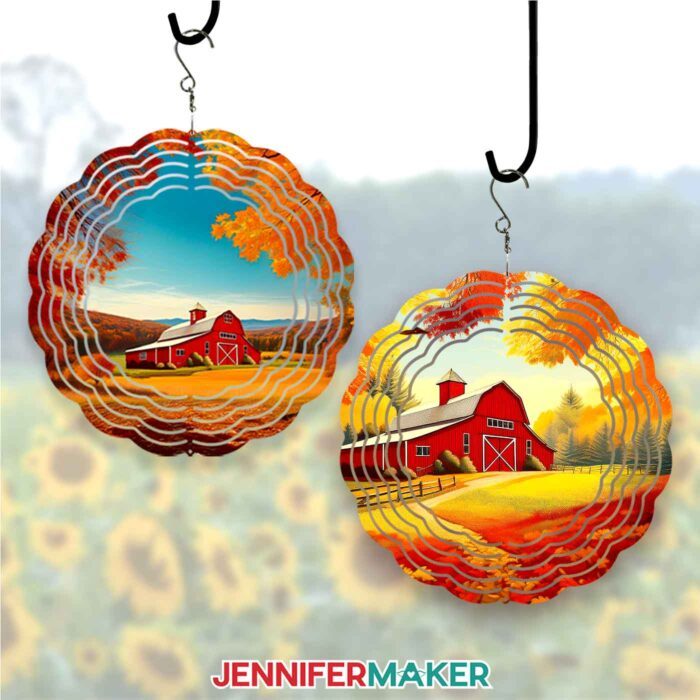
In the PNG folder, you’ll find four designs for print sublimation: a Barn, a spooky Halloween Cat, a Pumpkin with Leaves, and a Sunflower Field.
TIP: If you’re not sure how to download Zip files and upload designs, go to jennifermaker.com/svgs. The steps are similar for PNGs and Google Docs.
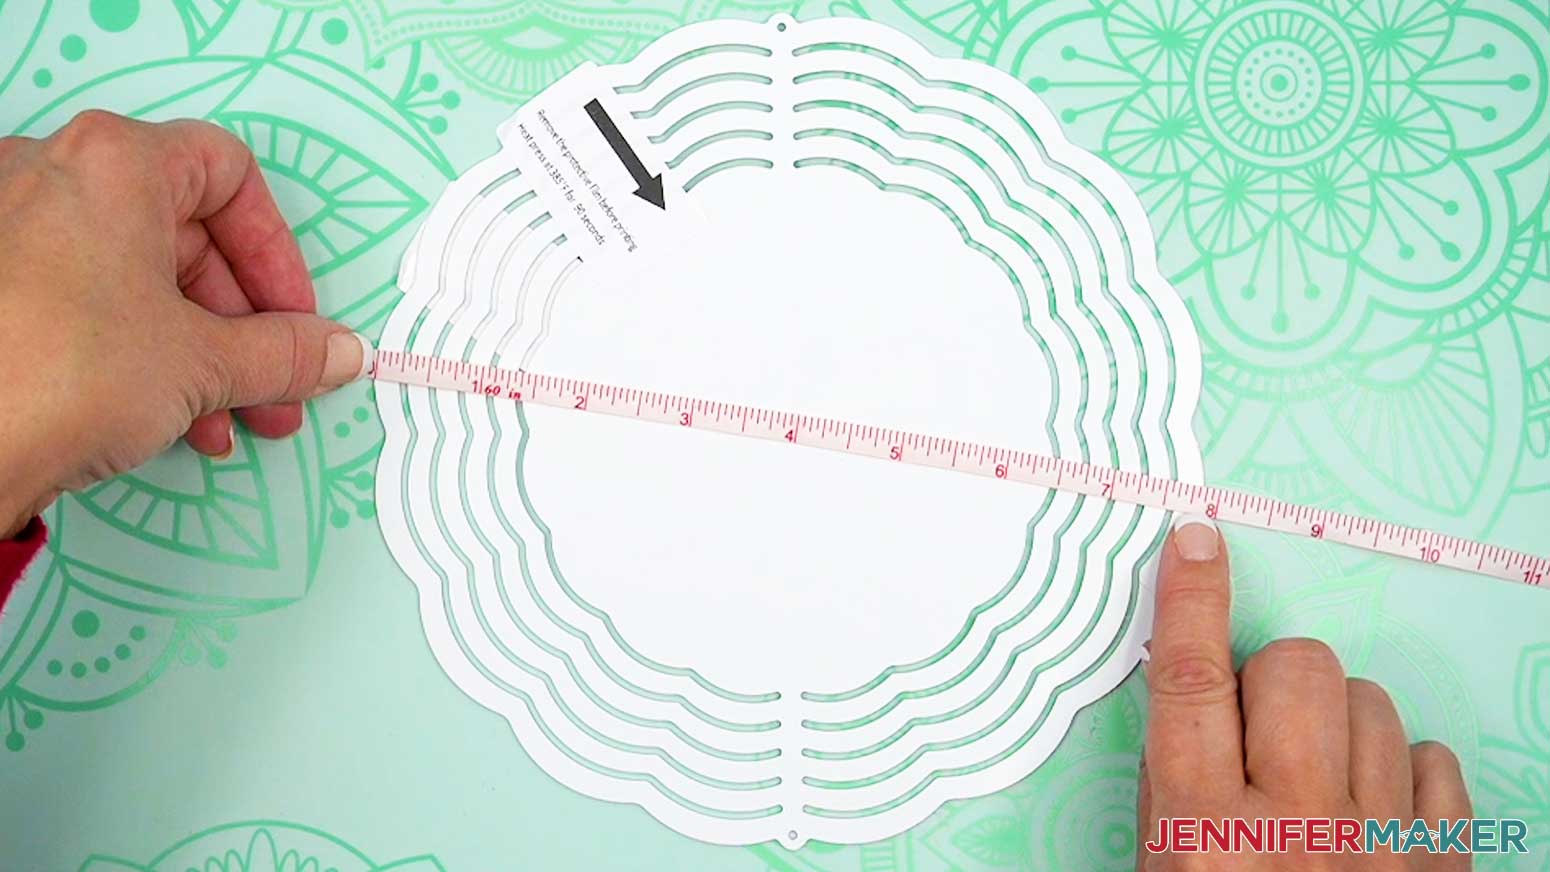
MEASURE YOUR WIND SPINNER BLANK
- First, remove your wind spinner blank from the plastic wrapper. If yours came with a hanger, set it aside until later.
- Lay your wind spinner blank flat on your work surface.
NOTE: Use caution to not bend the aluminum wind spinner until you’re ready to shape it at the very end after sublimating. - With a ruler, measure the width from left edge to right edge.
NOTE: Mine measures 7 7/8" wide. Your sizing might be different even if you use the blank I recommend, so always be sure to measure.
TIP: To ensure an accurate measurement, make sure your ruler is at the widest part of the shape, and that it goes through the center of your blank. - Now measure your blank from top to bottom to find the height. Mine measures 7 7/8" this way, too.
NOTE: If your blank is a perfect circle, the height should be the same as the width, but always check just in case there are discrepancies. - Record your measurements, and set aside your notes for now.
OPTION 1: PRINT SUBLIMATION WIND SPINNER
STEP 2: PREPARE AND PRINT YOUR WIND SPINNER DESIGN
Let’s make a printed sublimation design first, then the Infusible Ink version.
GOOGLE DOCS
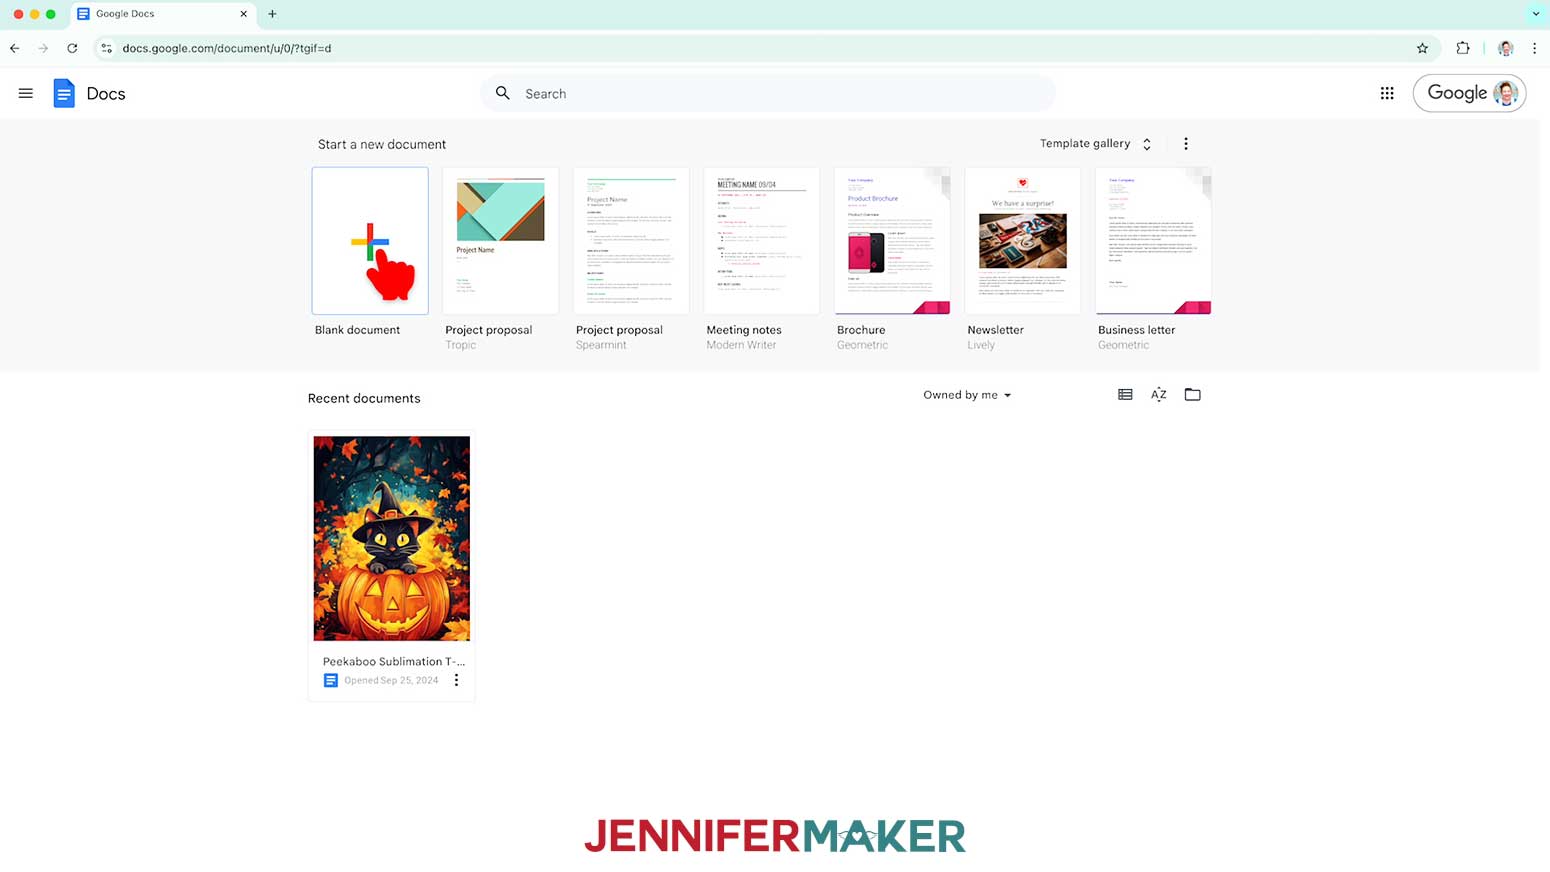
- Open Google Docs in the Google Chrome web browser on your computer.
NOTE: You will need a free Google account to use the free Google Docs software.
TIP: You can also download and open the Google Docs app, but you won’t be able to install or access any printer profiles from a mobile device, and you’ll also have limited access to features, so I do not recommend it on a mobile device. - Click “Blank document” at the top left to open a new document.
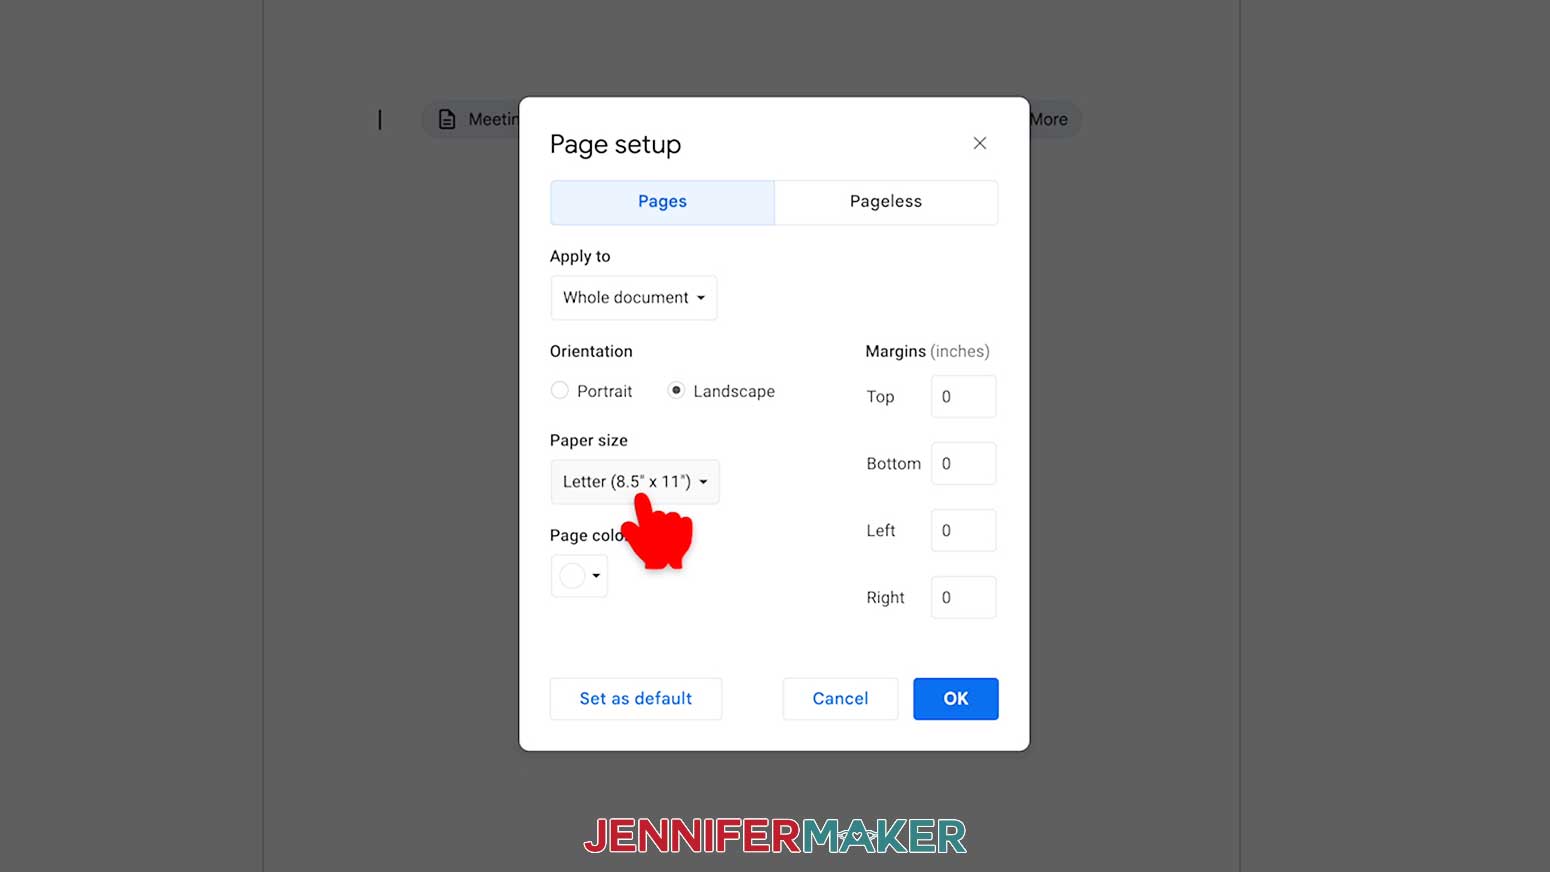
- Go to the File menu and select “Page setup.”
- Check the box next to “Landscape.”
- Change your margins to “0” to use more of the page.
- Make sure your Paper Size matches your sublimation paper size. I’m using 8.5” x 11” or letter-size paper.
- Click “OK” to apply the settings.
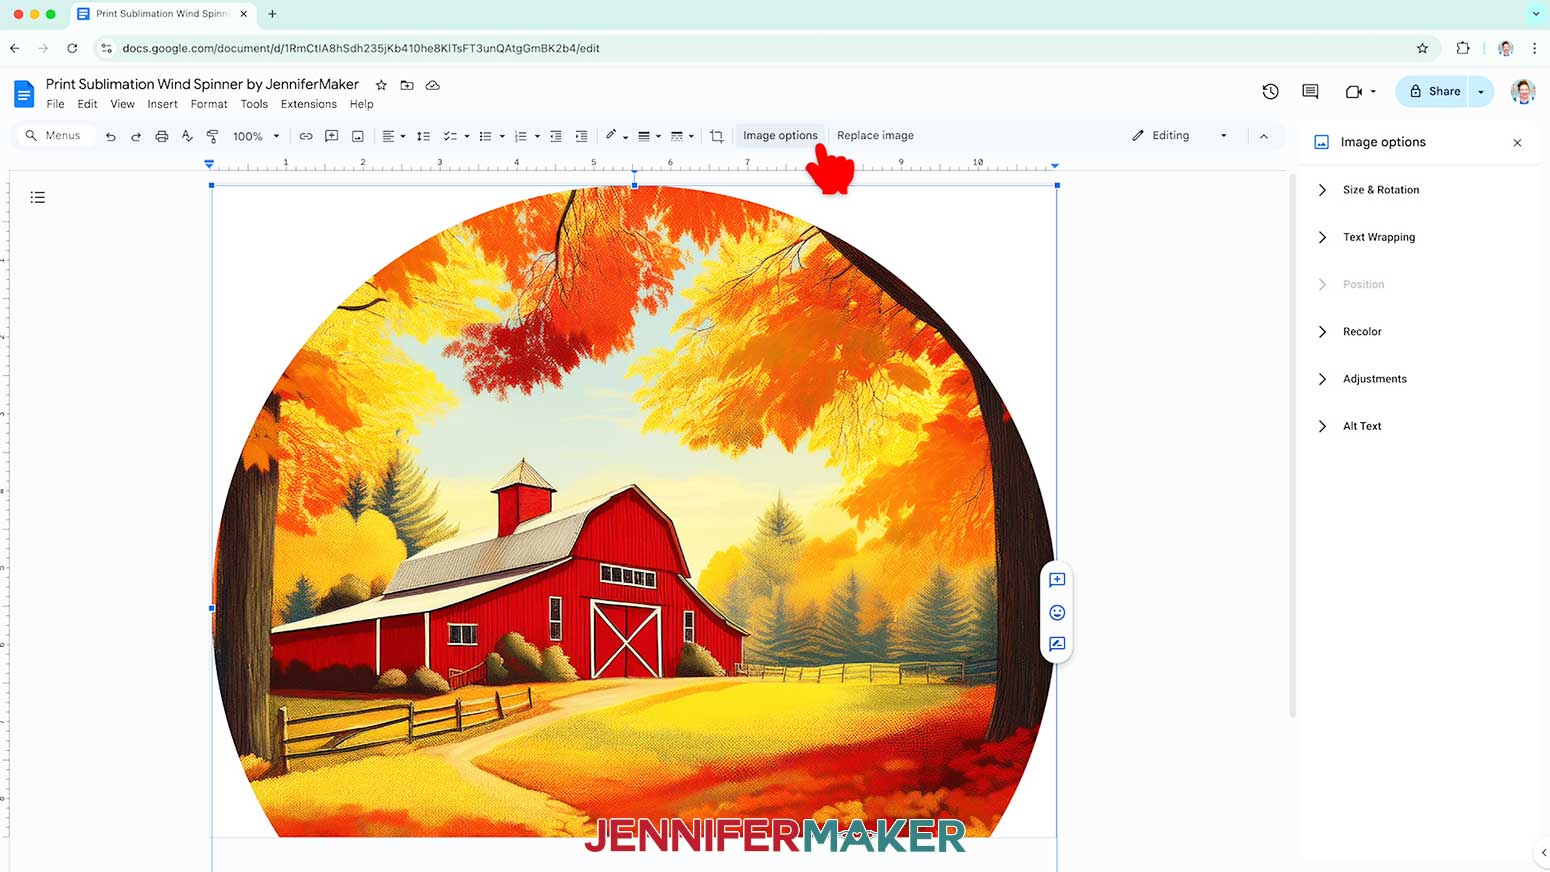
- Go to the Insert menu, select “Image,” and select “Upload from Computer.”
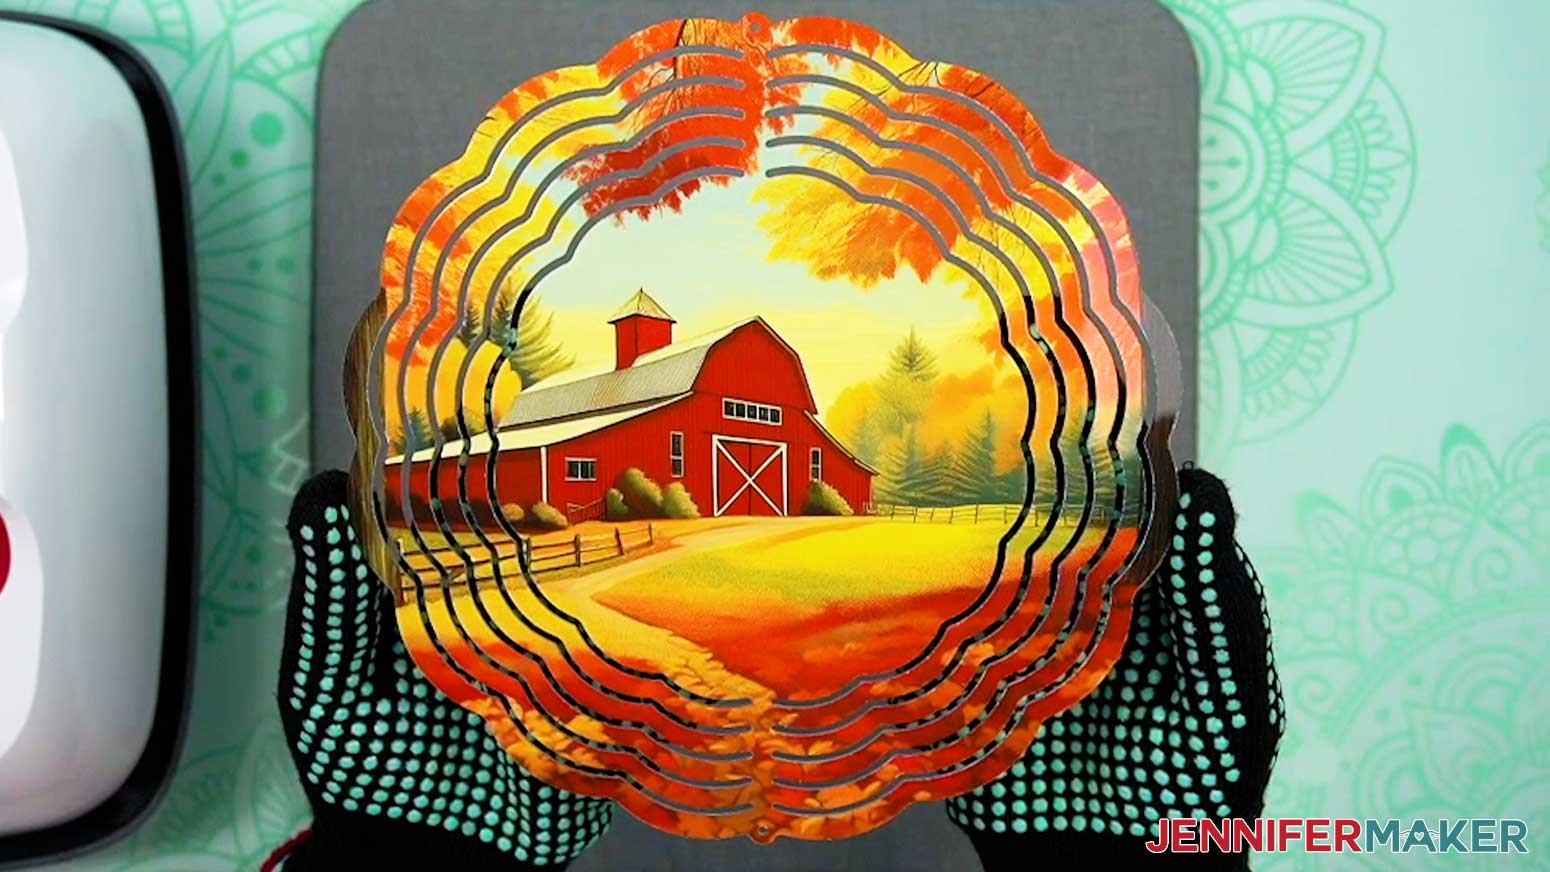
- Select the sublimation design you want to use. I’ll demonstrate with the Barn design.
TIP: You’ll most likely find it in your Downloads folder. - Click “Open.”
- Click the area that says “Untitled document” at the top and type a name for the file.
- Click “Image Options” at the top of the canvas.
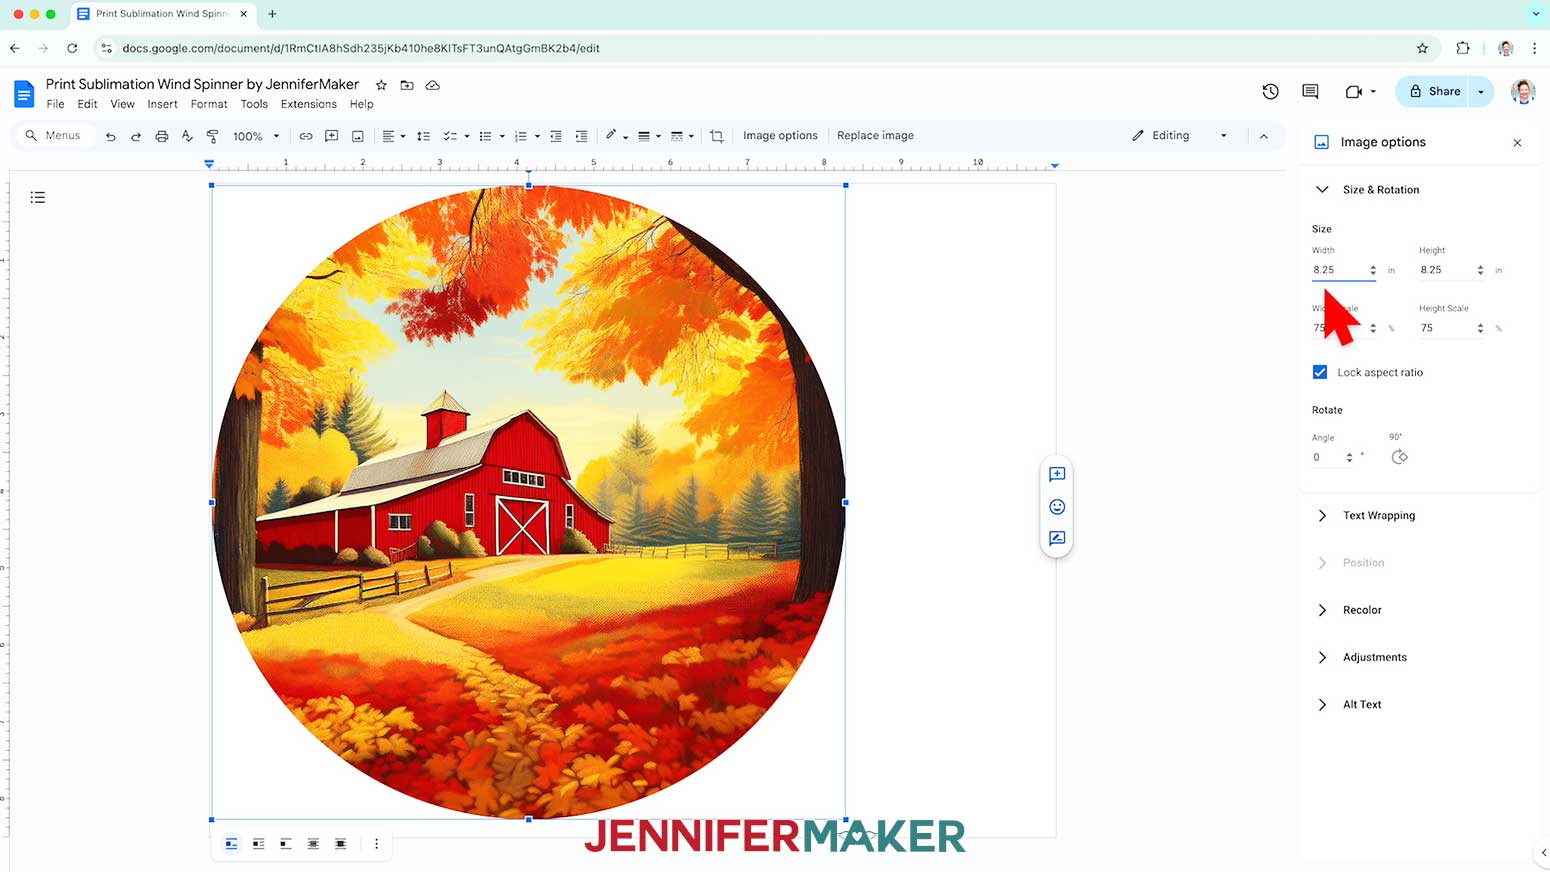
NOTE: You can also open the menu by going to “Format,” “Image,” and “Image Options.” - Select “Size & Rotation.”
- Keep the “Lock aspect ratio” box checked to maintain the design’s proportions.
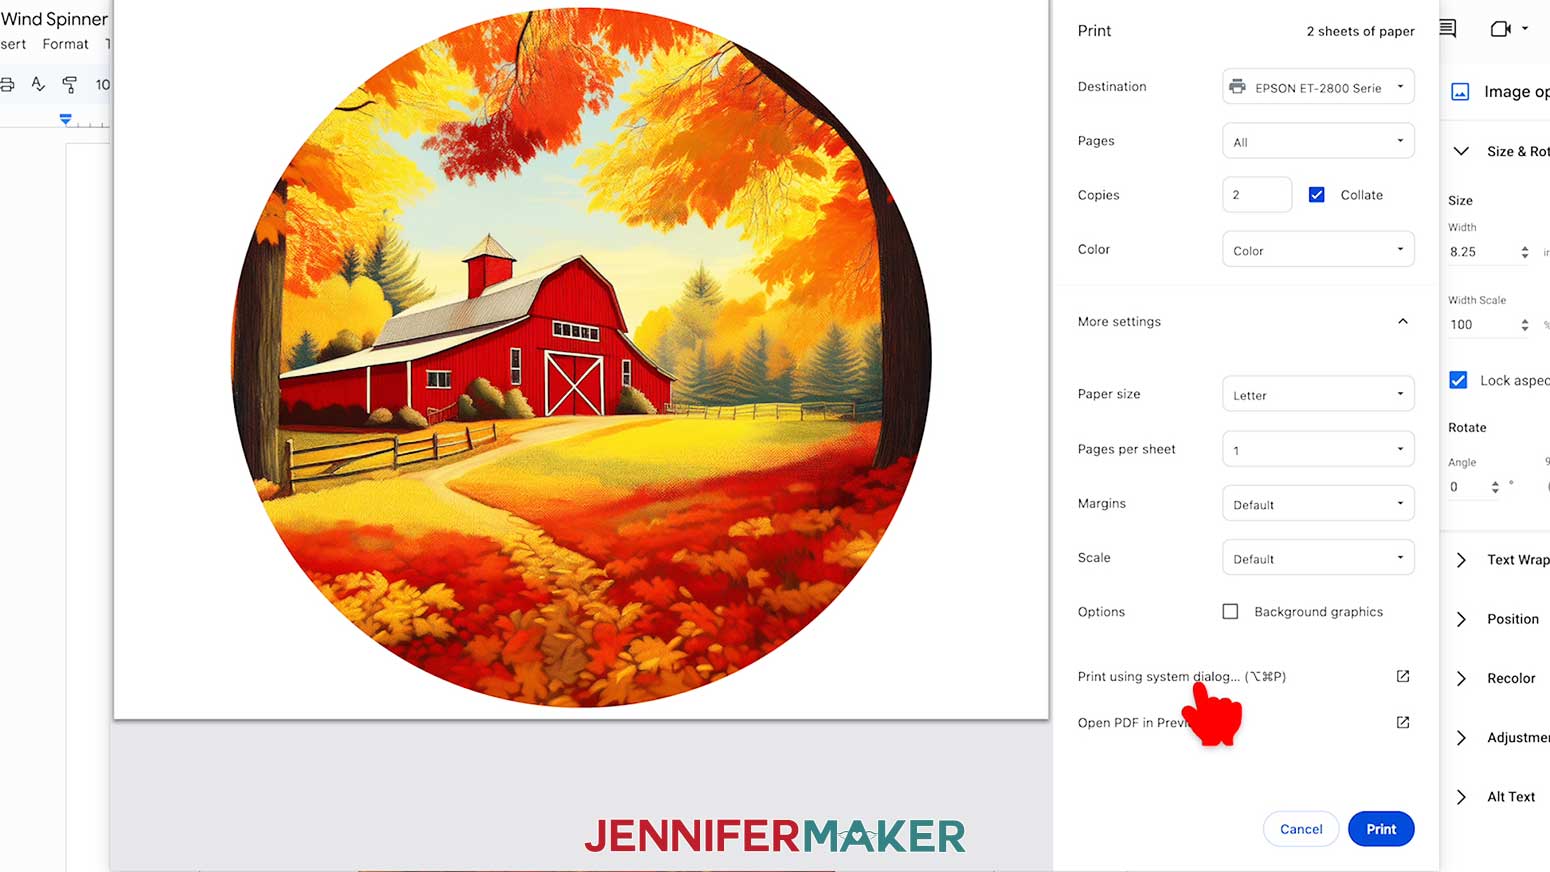
- Change the “Width” field to be slightly larger than the width you recorded earlier. Since my blank is 7 7/8" , I’ll make my design 8.25” wide.
NOTE: It is best to make the print a little larger than the blank. This also makes it easier to tape the blank in position. I sized my design 8.25" wide so that the 7 7/8" wind spinner can fit inside, and we can sublimate all the way to the edges. Make sure to purchase wind spinners that are no larger than 8” if using standard 8.5" x 11" paper to print and sublimate. - The “Height” field will automatically adjust proportionately.
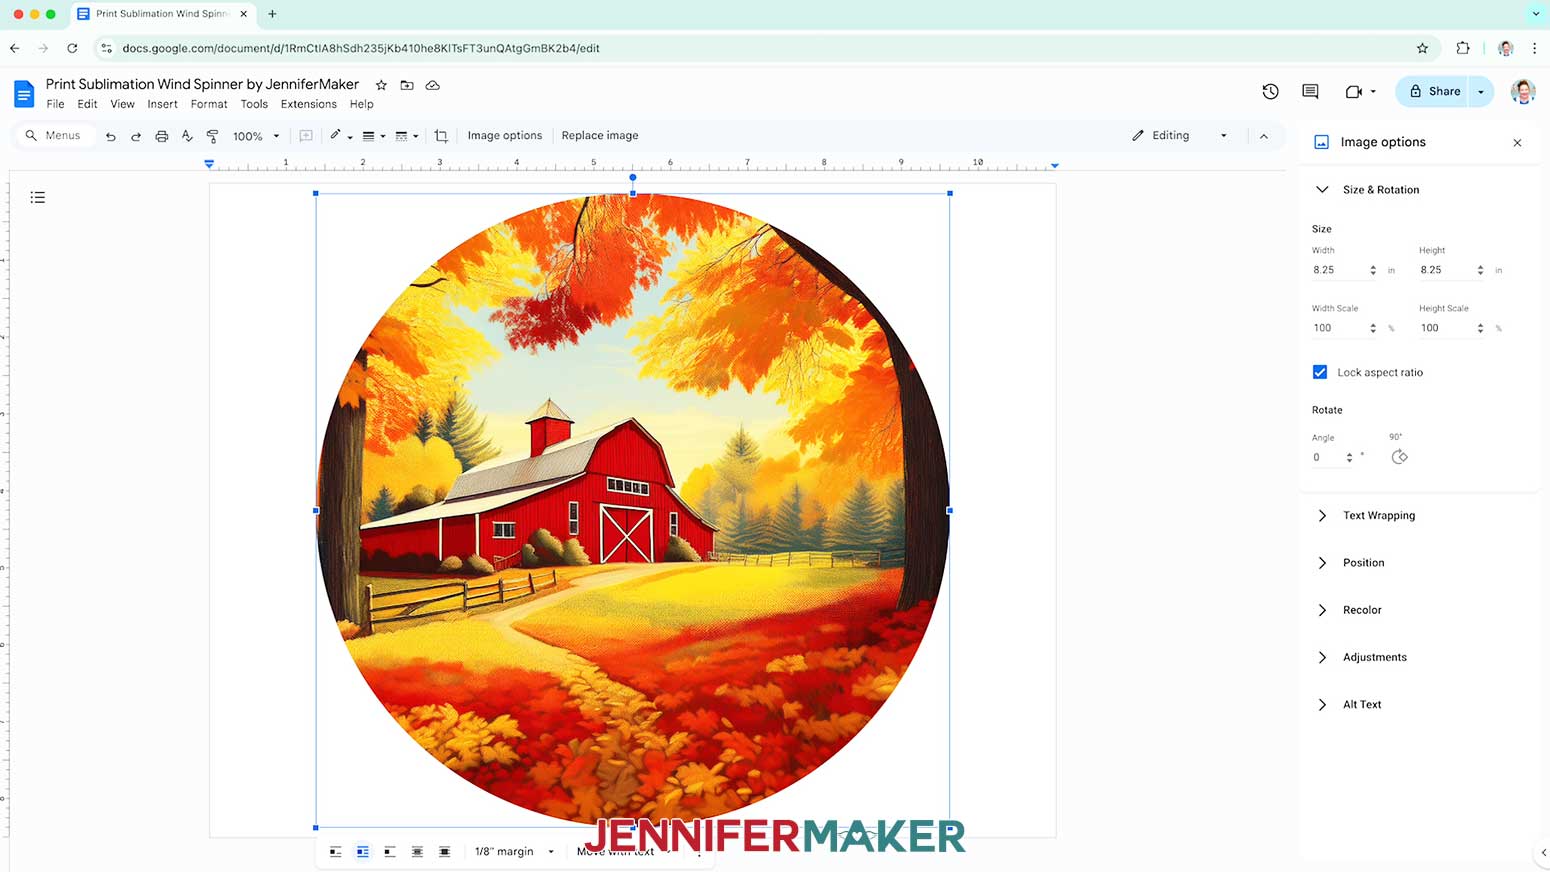
- Click the image and select the “Wrap text” icon from the menu that appears below it.
NOTE: This setting lets you move the design anywhere on the page. - Click and drag the image to the center of your page, as that ensures it won’t get cut off at the edges.
- Go to the File menu and choose “Print.”
- Select your sublimation printer under “Destination.”
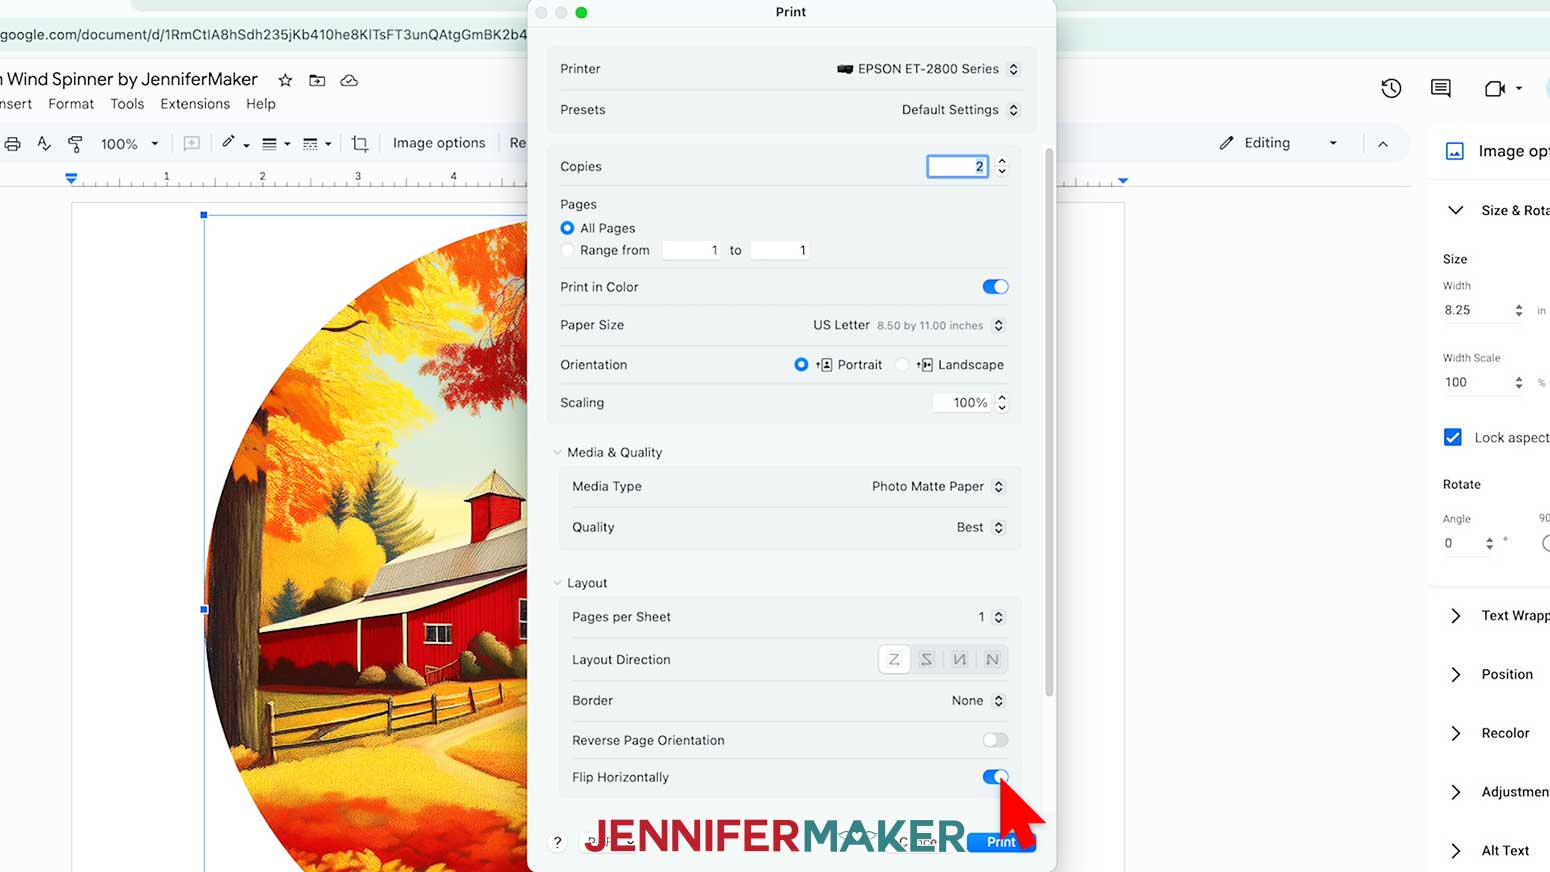
- Change the “Copies” to “2” so you can sublimate both sides, and click the arrow beside “More Settings” to select “Print Using System Dialog.”
- Your print menu may look different - just make sure the sublimation printer is selected, that you “flip horizontally,” and select the highest quality matte paper setting.
NOTE: If you need help printing for sublimation please check out my Sublimation T-Shirts for Beginners tutorial for more detailed information on printing using Google Docs. - Load two sheets of sublimation paper correctly into your sublimation printer.
NOTE: Check the packaging for information on how to load the paper. - Click “Print.”
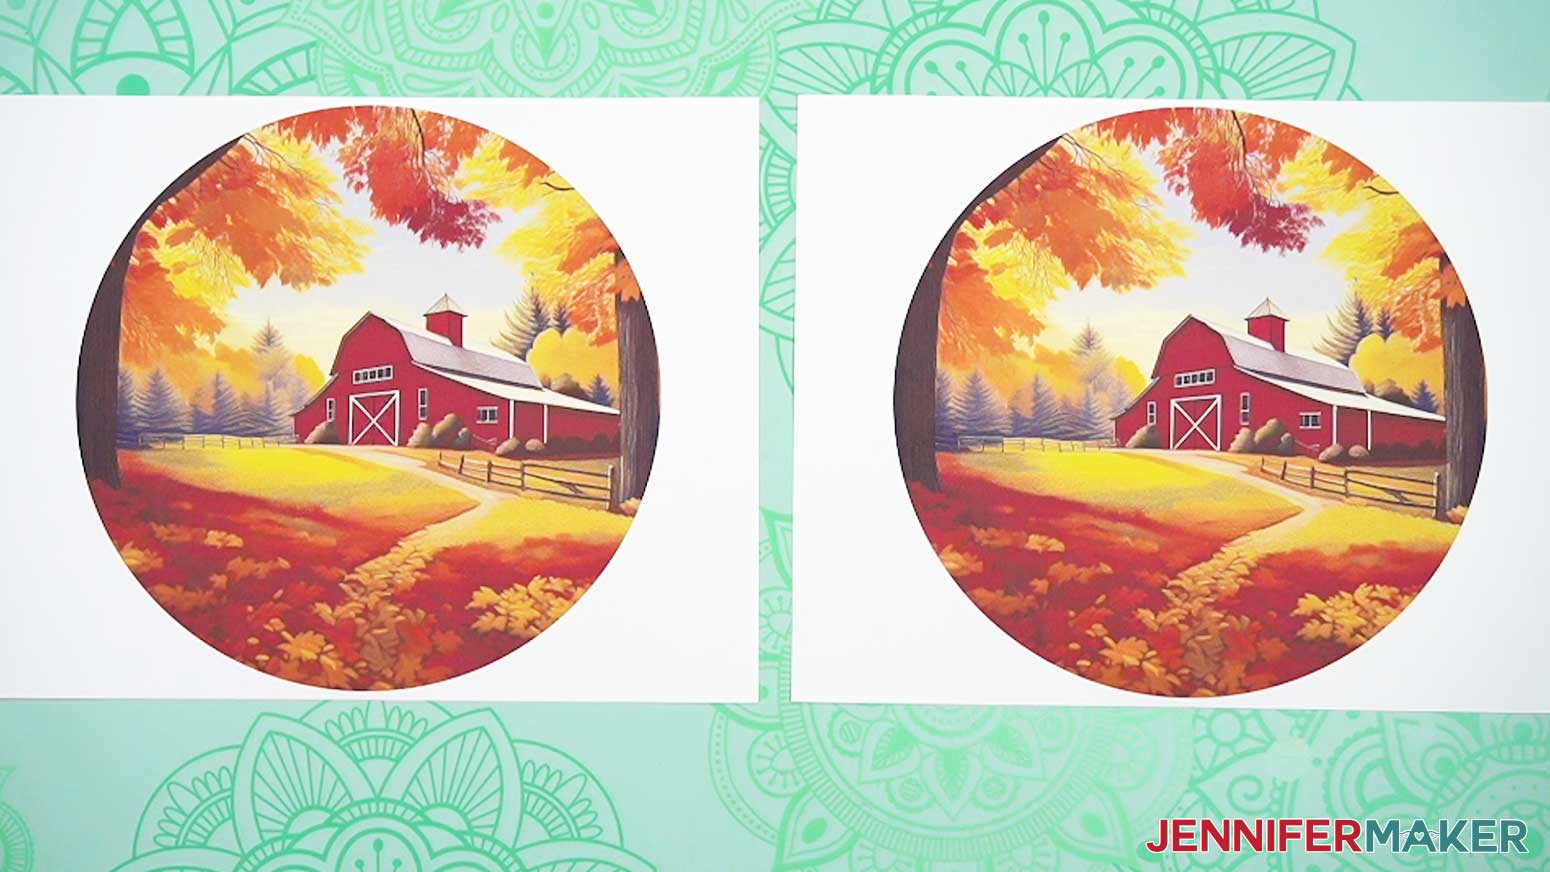
- Allow the prints to dry before handling them, as the ink can smear.
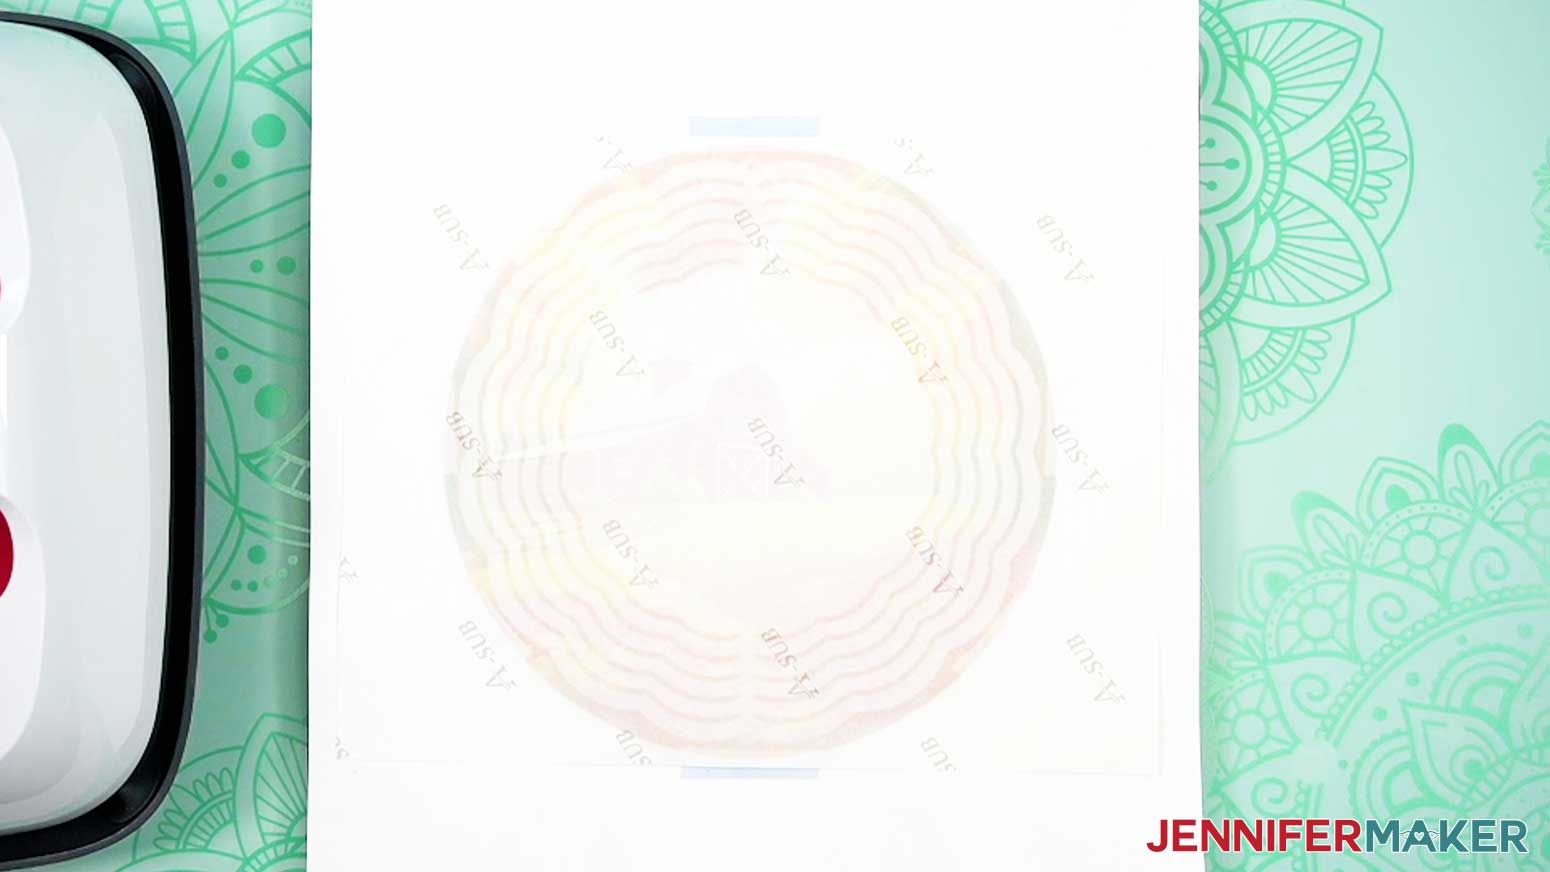
NOTE: The printed design will appear lighter before pressing. - Your project is ready to press!

STEP 3: SUBLIMATE YOUR WIND SPINNER
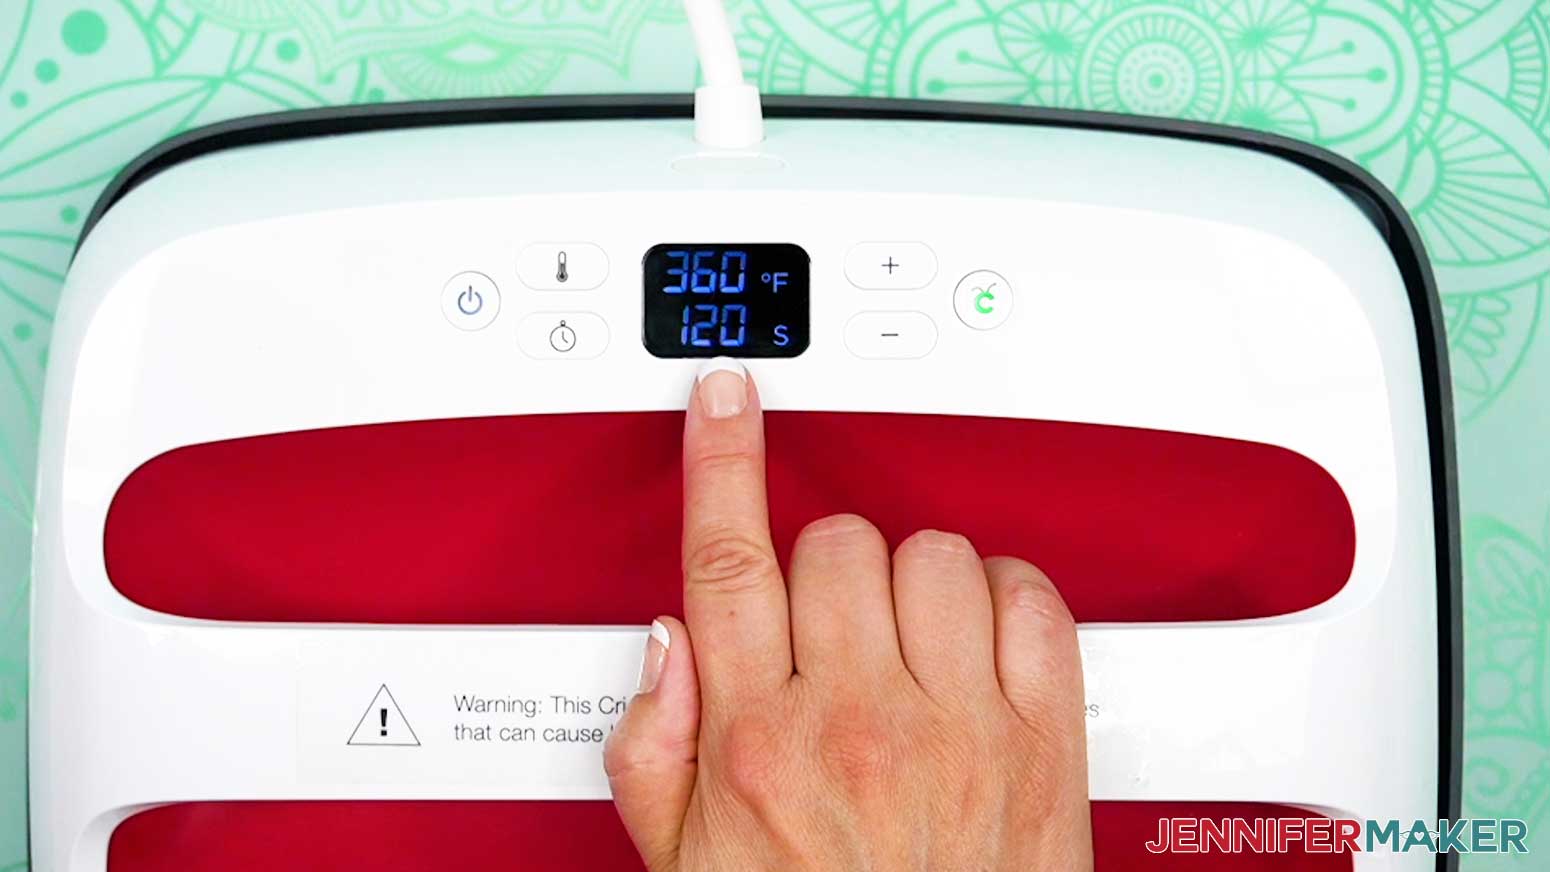
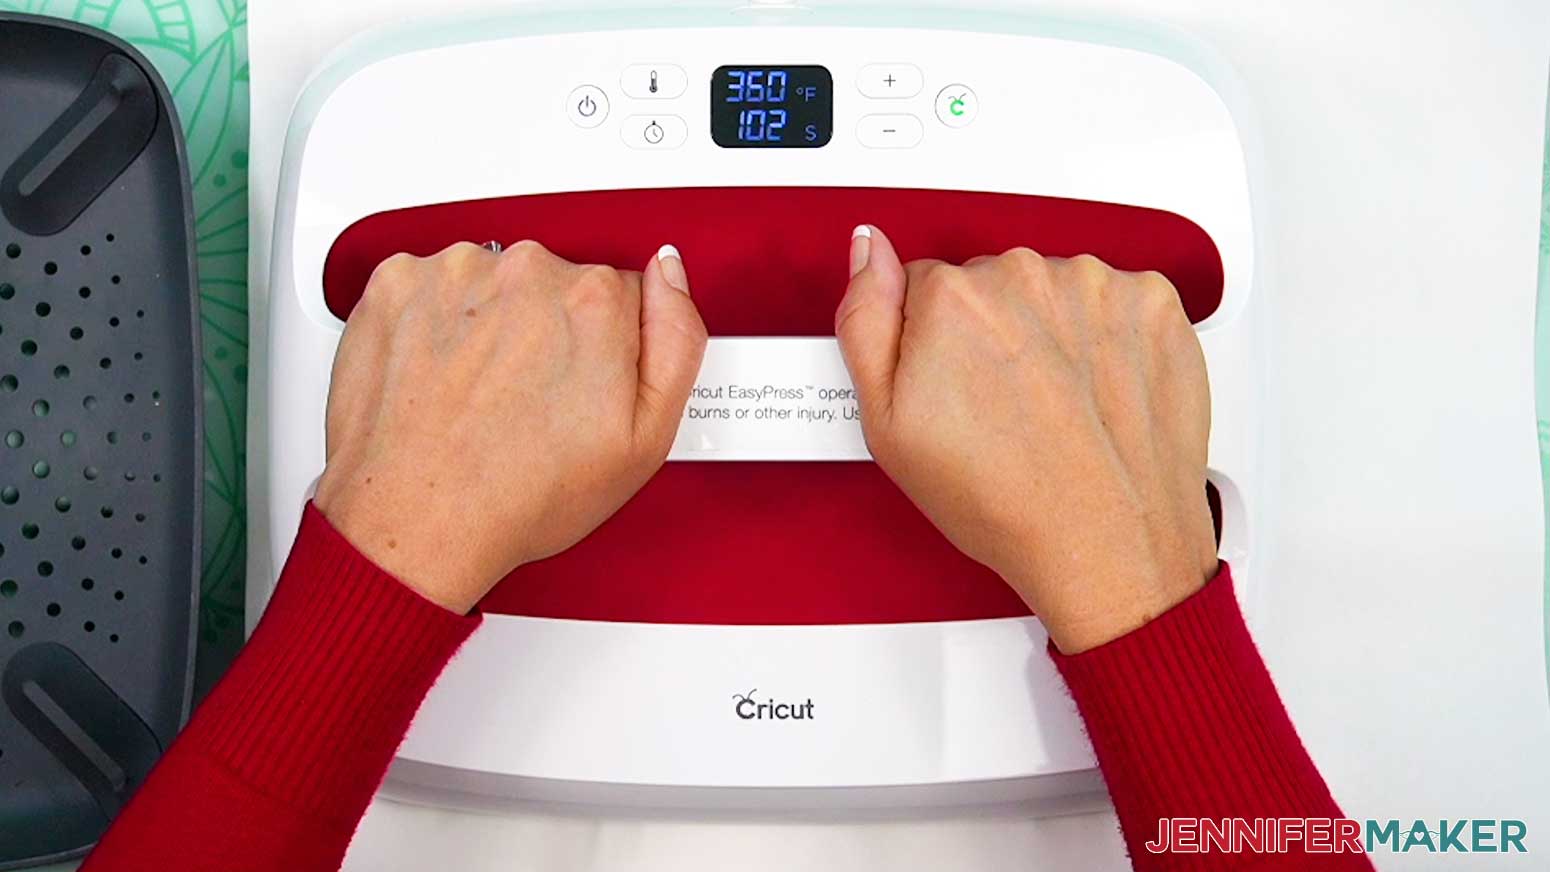
IMPORTANT: As with all sublimation projects, turn on a fan and open a window to improve your ventilation before beginning.
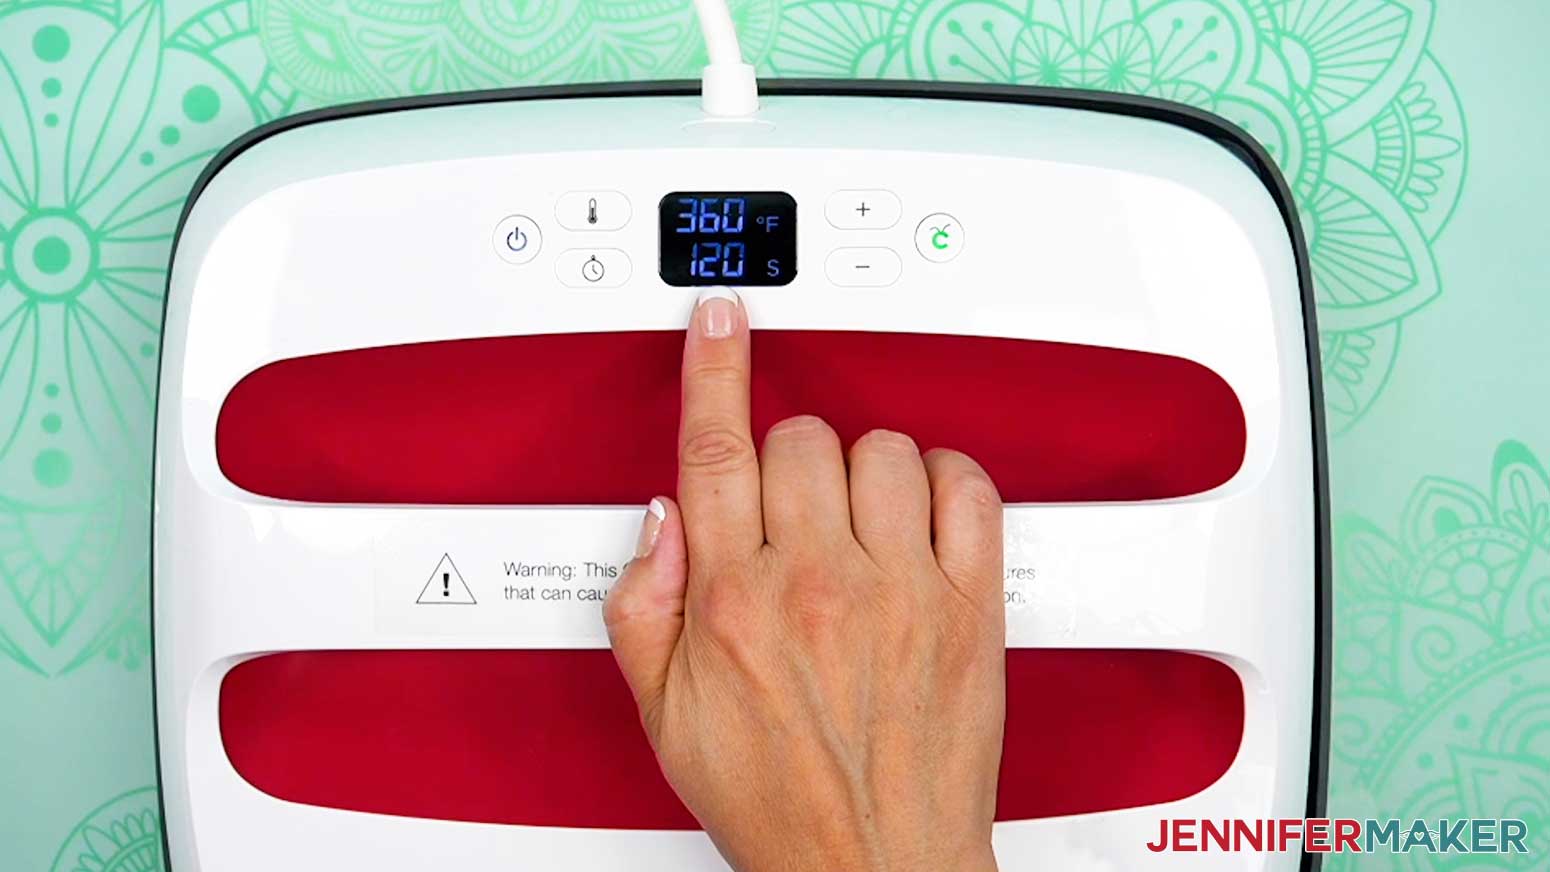
- Set the temperature of your EasyPress to 360℉ (192℃), and set the timer for 120 seconds.
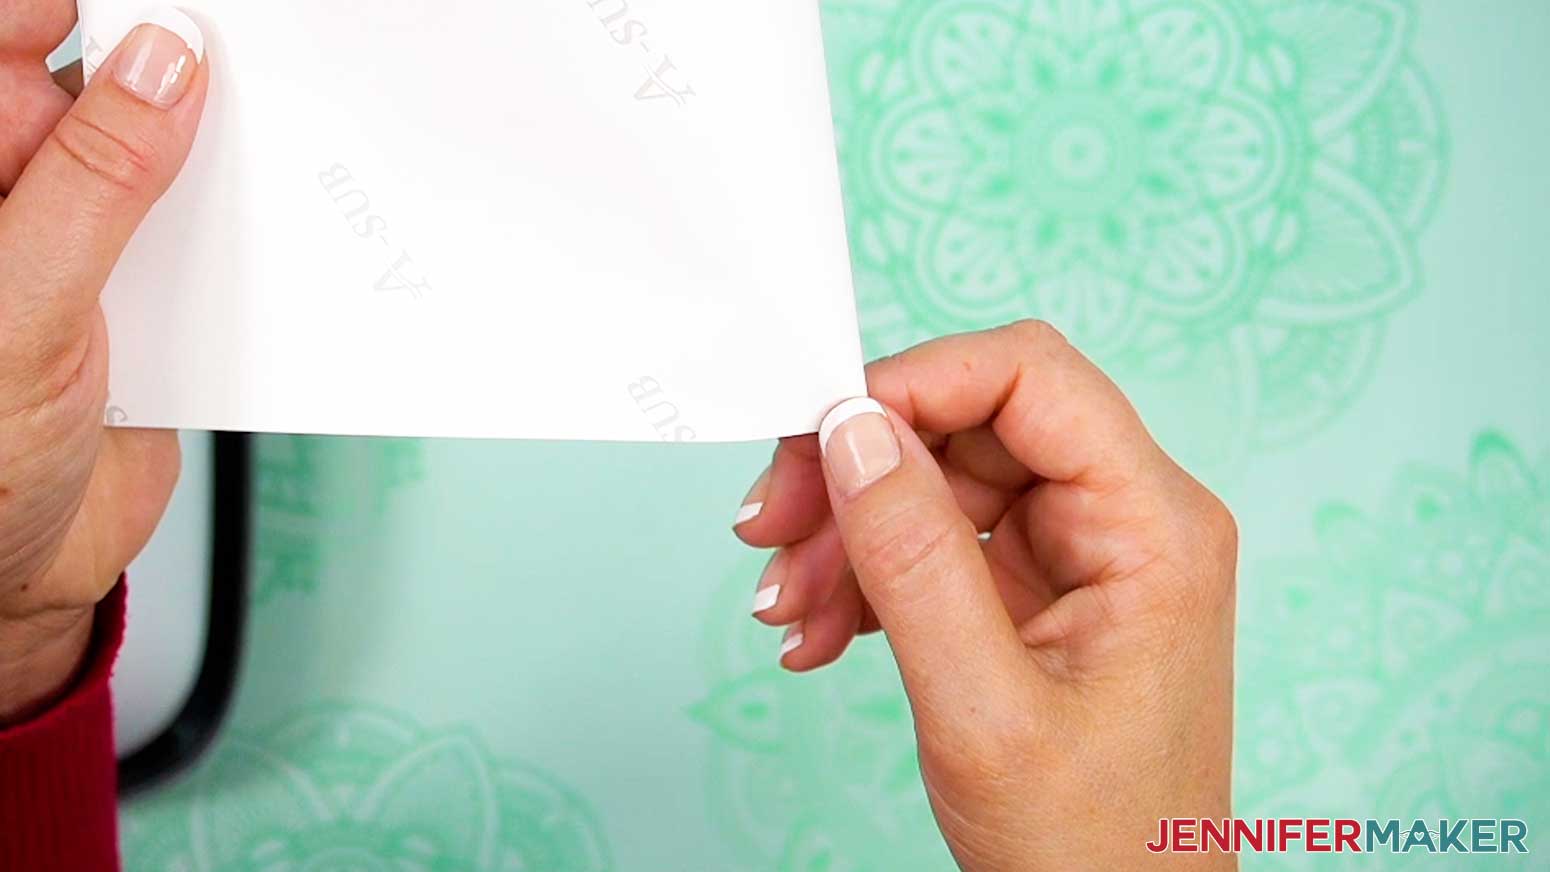
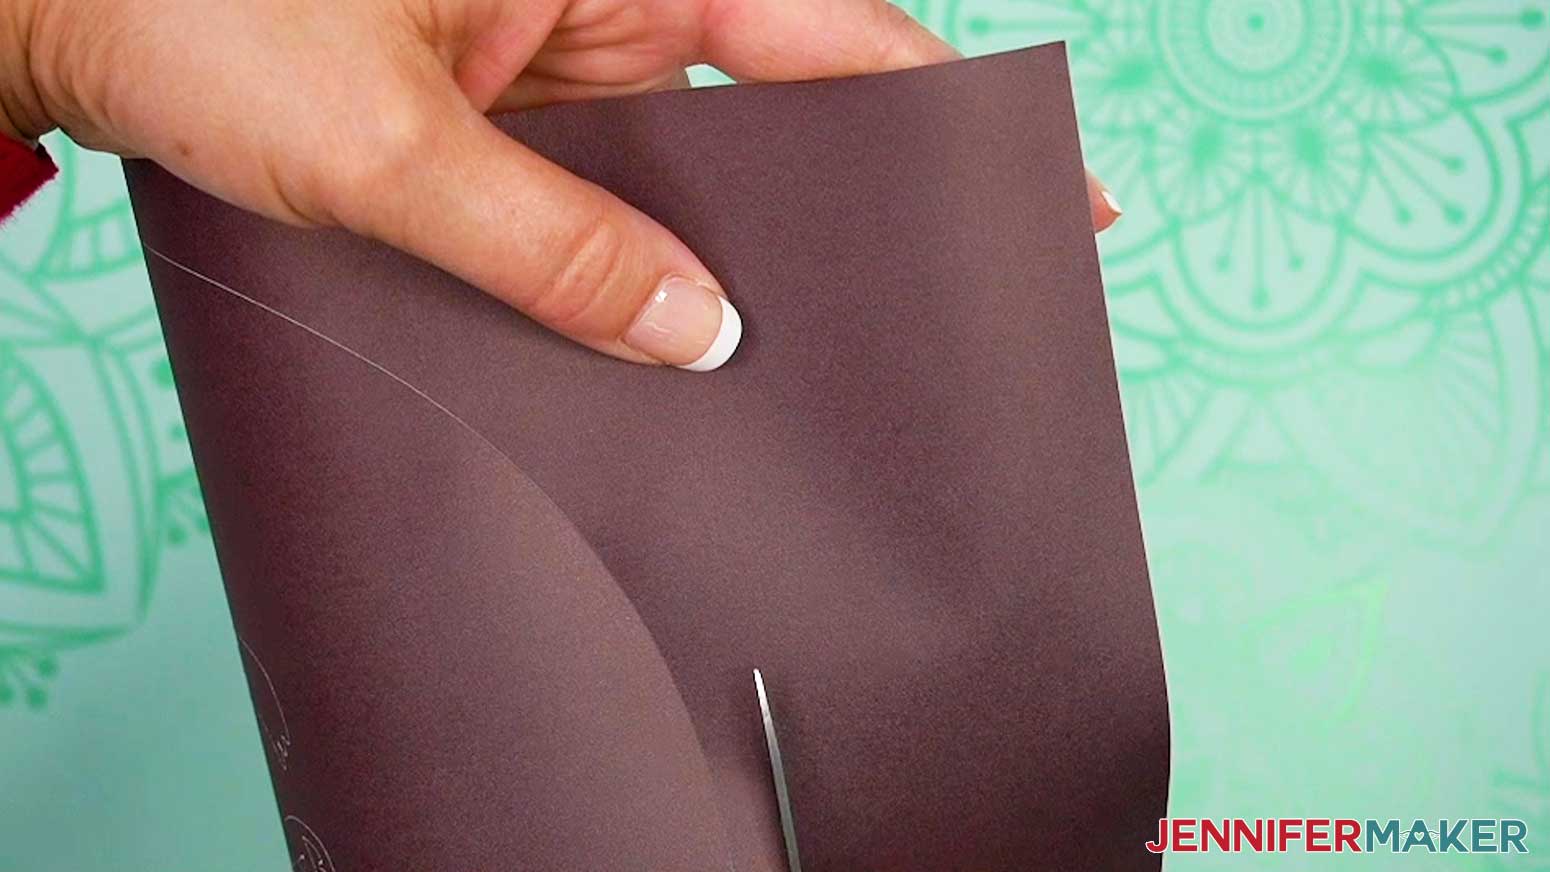
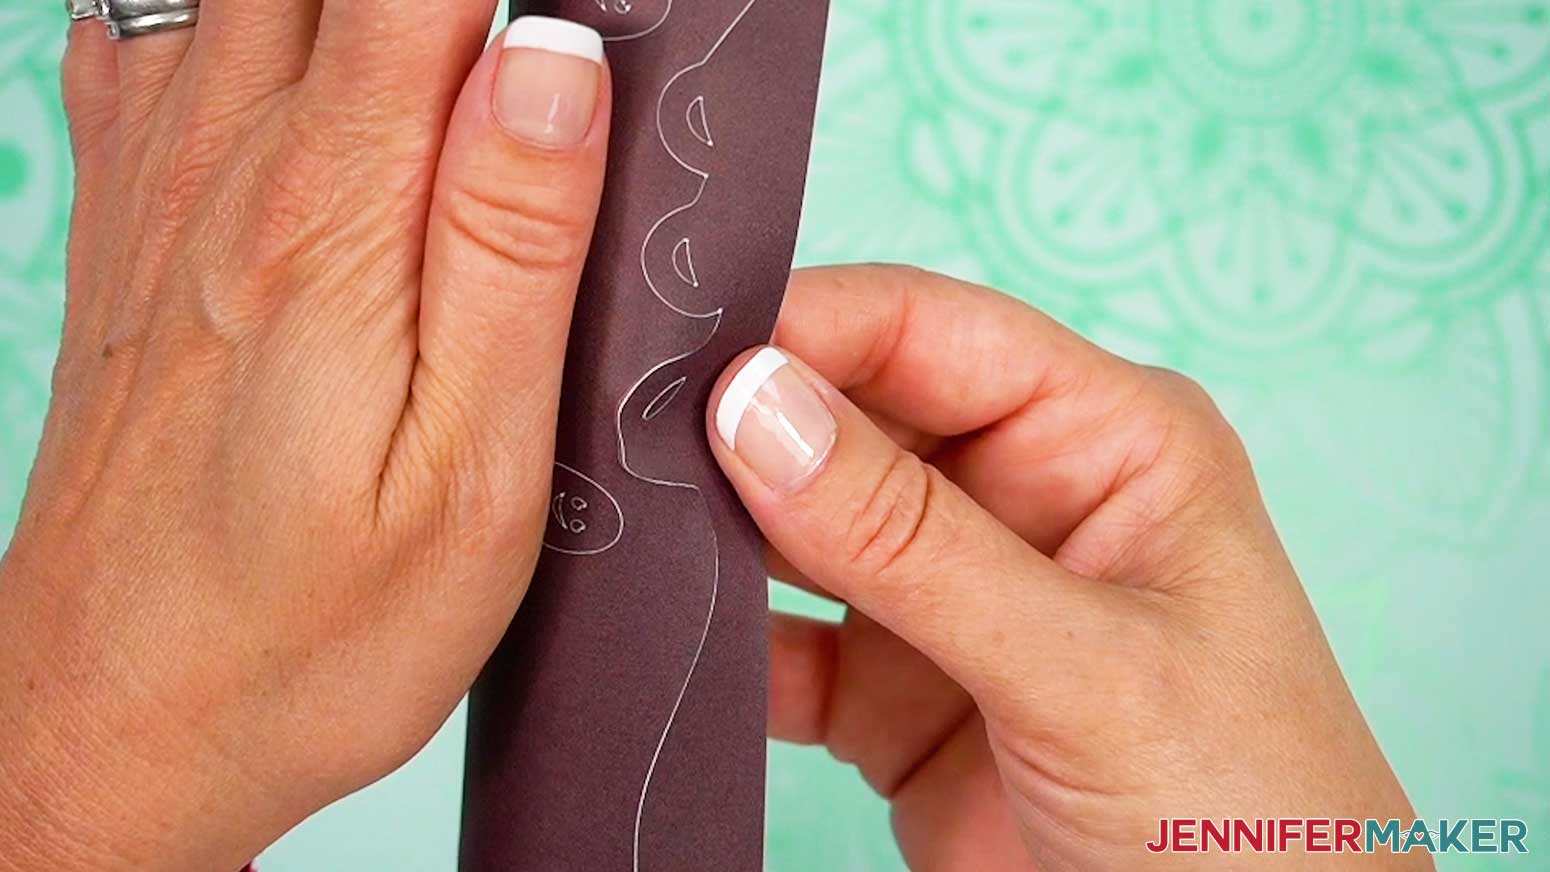
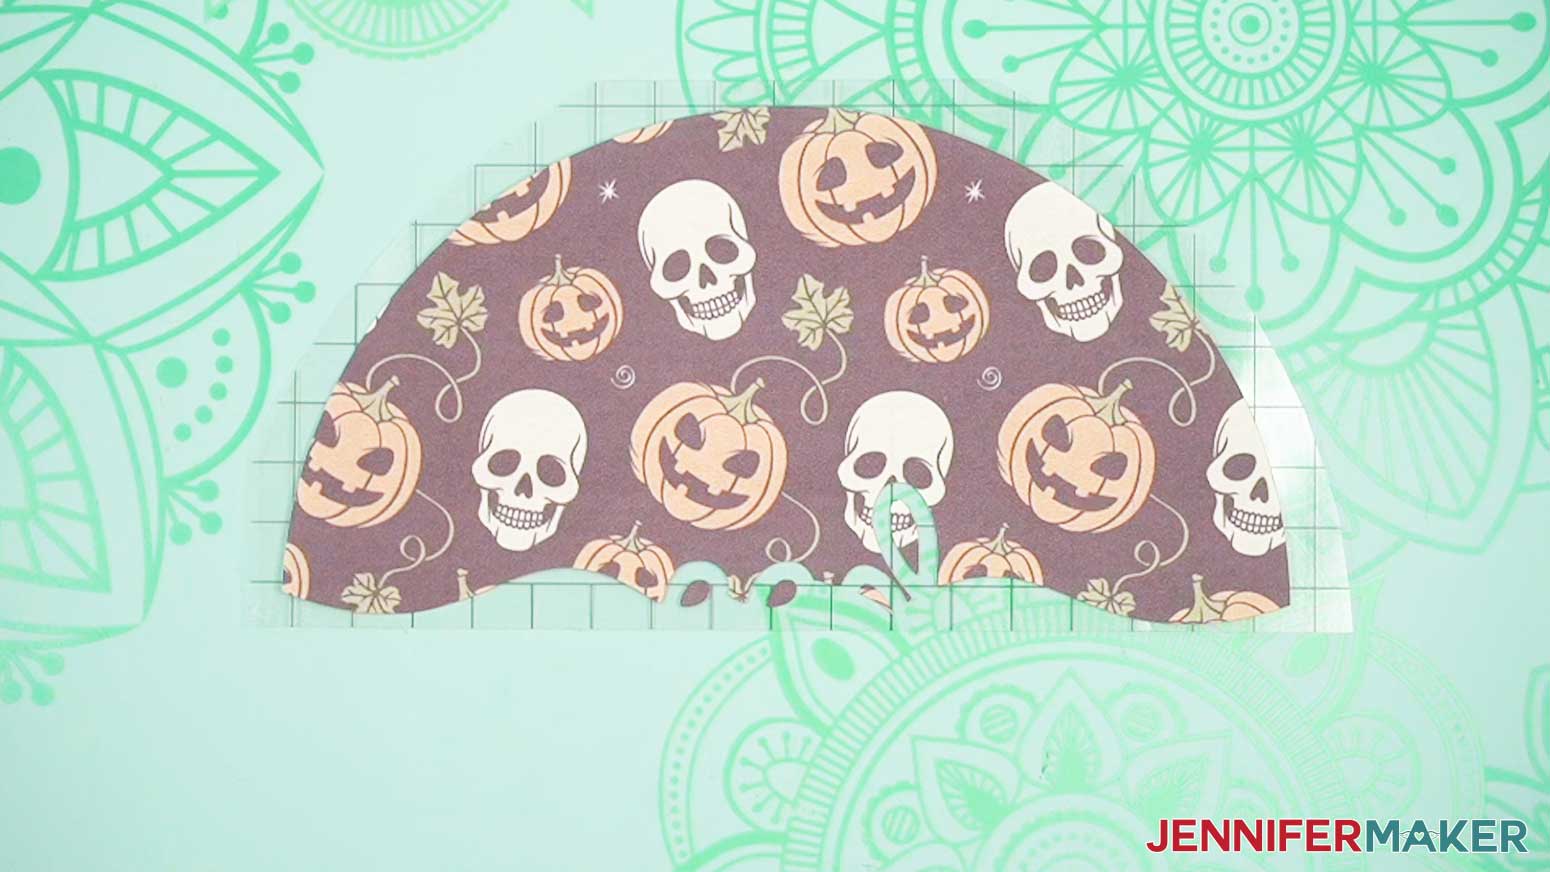
TIP: I followed the time and temperature settings for wind spinners in my Sublimation Cookbook. Inside, you can find the settings for tons of other sublimation projects, too! - Grab your design and gently curl it in half from side to side.
- Pinch the very top and bottom of the border (not on the design) to create a crease that will mark the center.
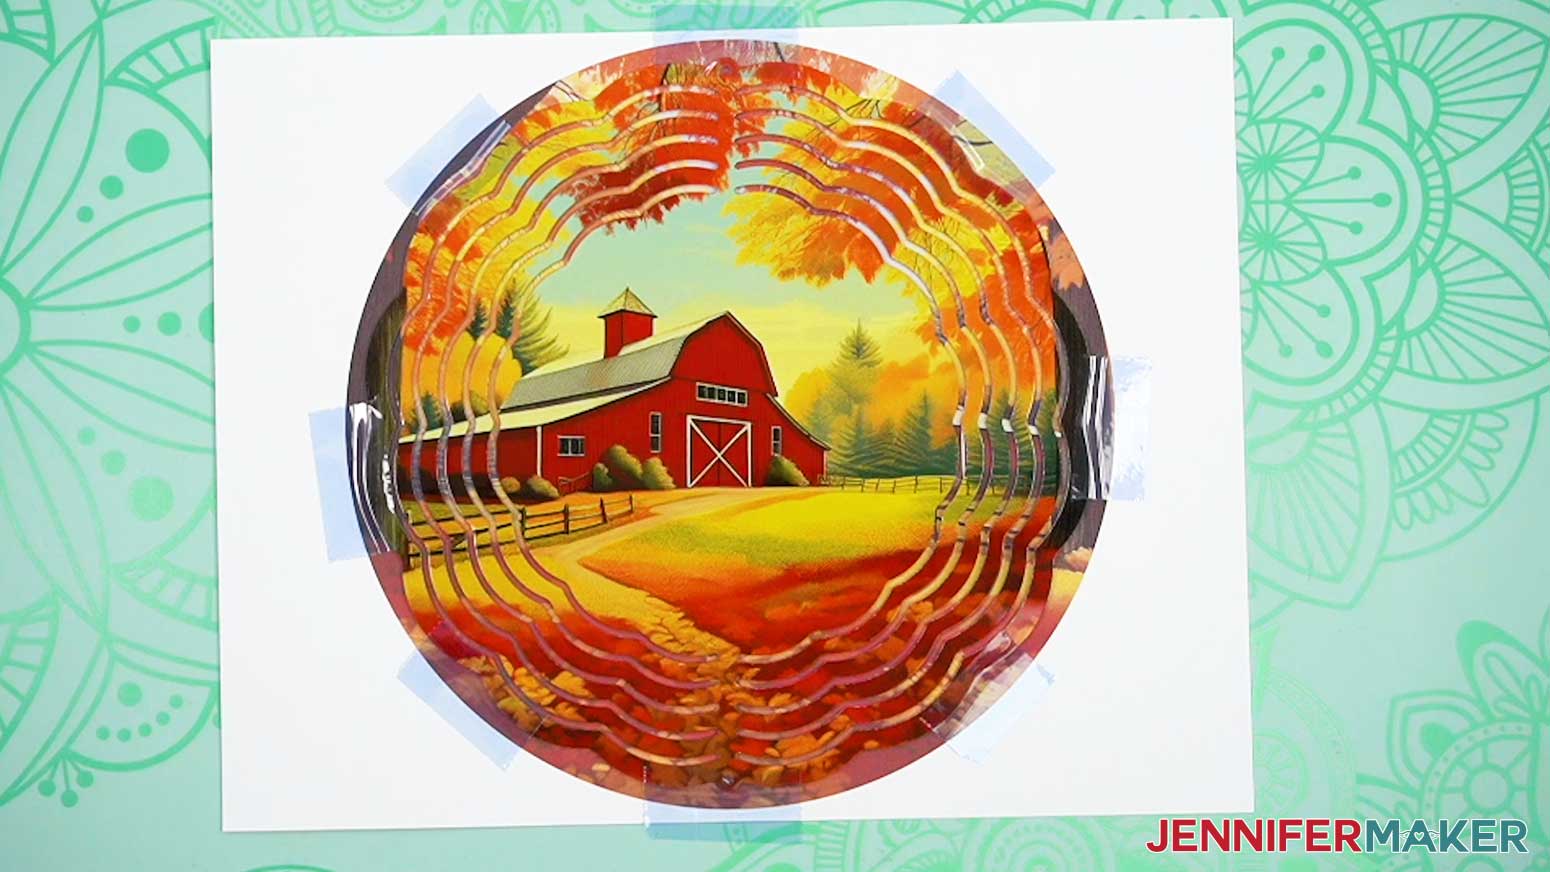
- Place one of the printed designs face up on your work surface.
TIP: If your wind spinner blank came with a protective film, be sure to remove it from both sides. You can use tweezers or a weeding tool to carefully lift the film if it’s really stuck. - Use a lint roller to clean any dirt or debris off of both sides of the blank.
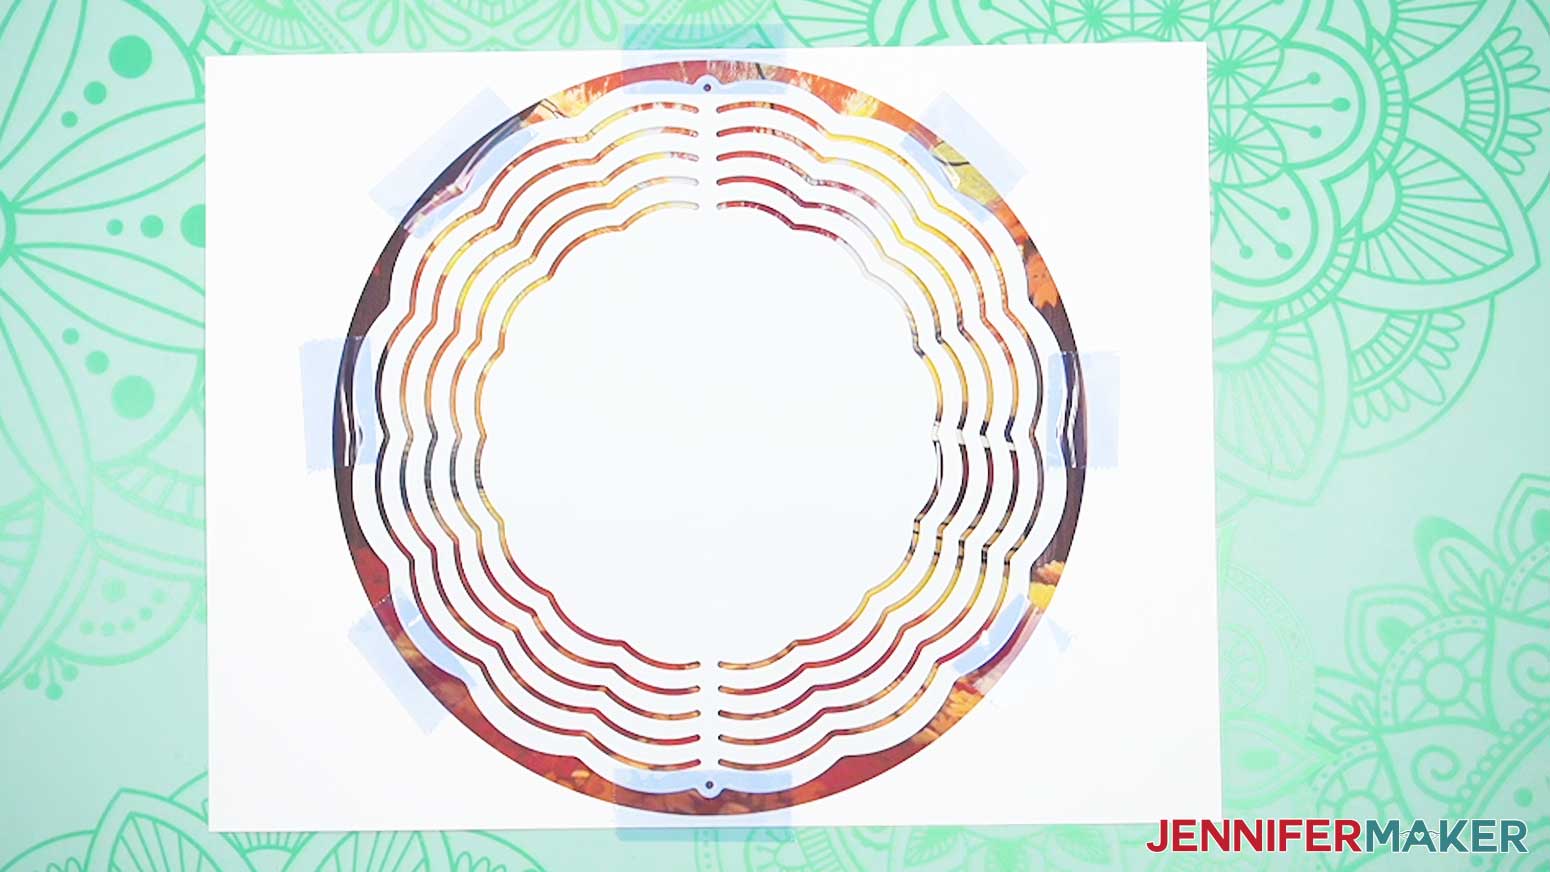
NOTE: Don't forget to lint roll the second side after the first is pressed, as more debris can be introduced while pressing the first side. - Center the clean wind spinner blank on the printed design with the hanger holes at the top and bottom.
TIP: If the ink showing is even around the blank, your design is centered. - Thinking of the blank like a compass, use heat-resistant tape to secure it to the paper (or carrier sheet if you’re using Infusible Ink transfer sheets) at North, South, West, and East so the wind spinner can’t shift. For extra security, add more tape between those pieces, too.
- Place your pressing mat on your work surface.
- Place a piece of white cardstock onto your mat to protect it from any ink that may escape during the sublimation process.
TIP: Your cardstock should be clean and free of any ink or other marks that could transfer to your blank during the sublimation process. - Carefully flip the blank over onto the cardstock so the print is face down.
- Place a fresh piece of white uncoated butcher paper on your blank to completely cover it.
- Make sure the temperature of your EasyPress is at 360℉ (192℃), and the timer is set for 120 seconds.
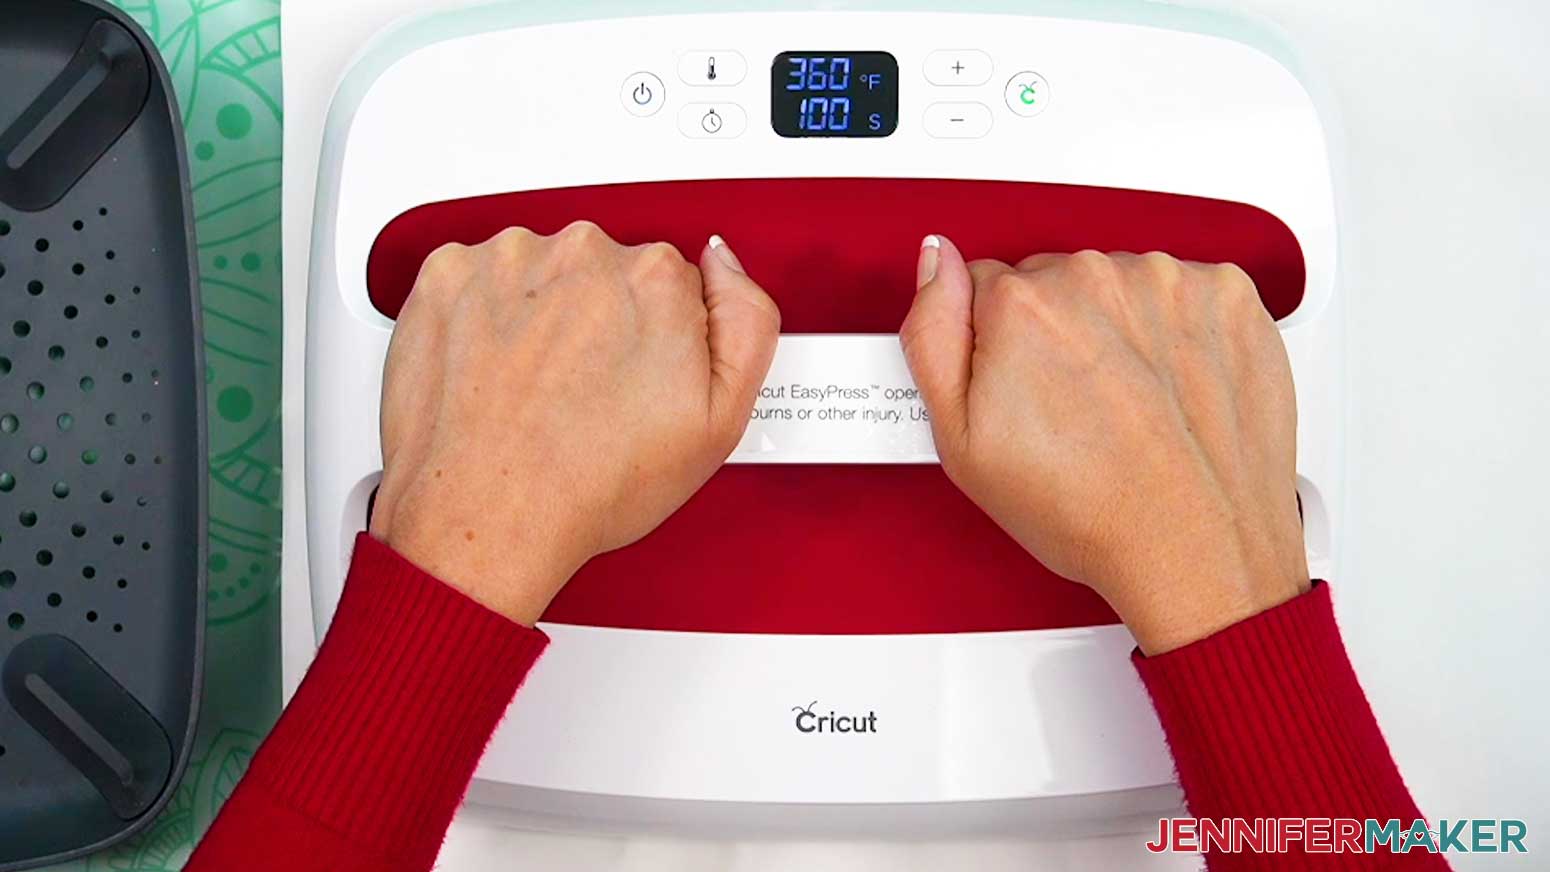
- Cover the entire area of your wind spinner with the EasyPress and hold it in place to prevent it from slipping around on the blank’s slick surface. Press with medium pressure for 120 seconds.
TIP: Keep pressure even on both sides of the press for best results. - When the time is up, lift the EasyPress straight up to avoid ghosting.
NOTE: Always remember to place your press back on the base after using. - Let the project cool for about a minute.
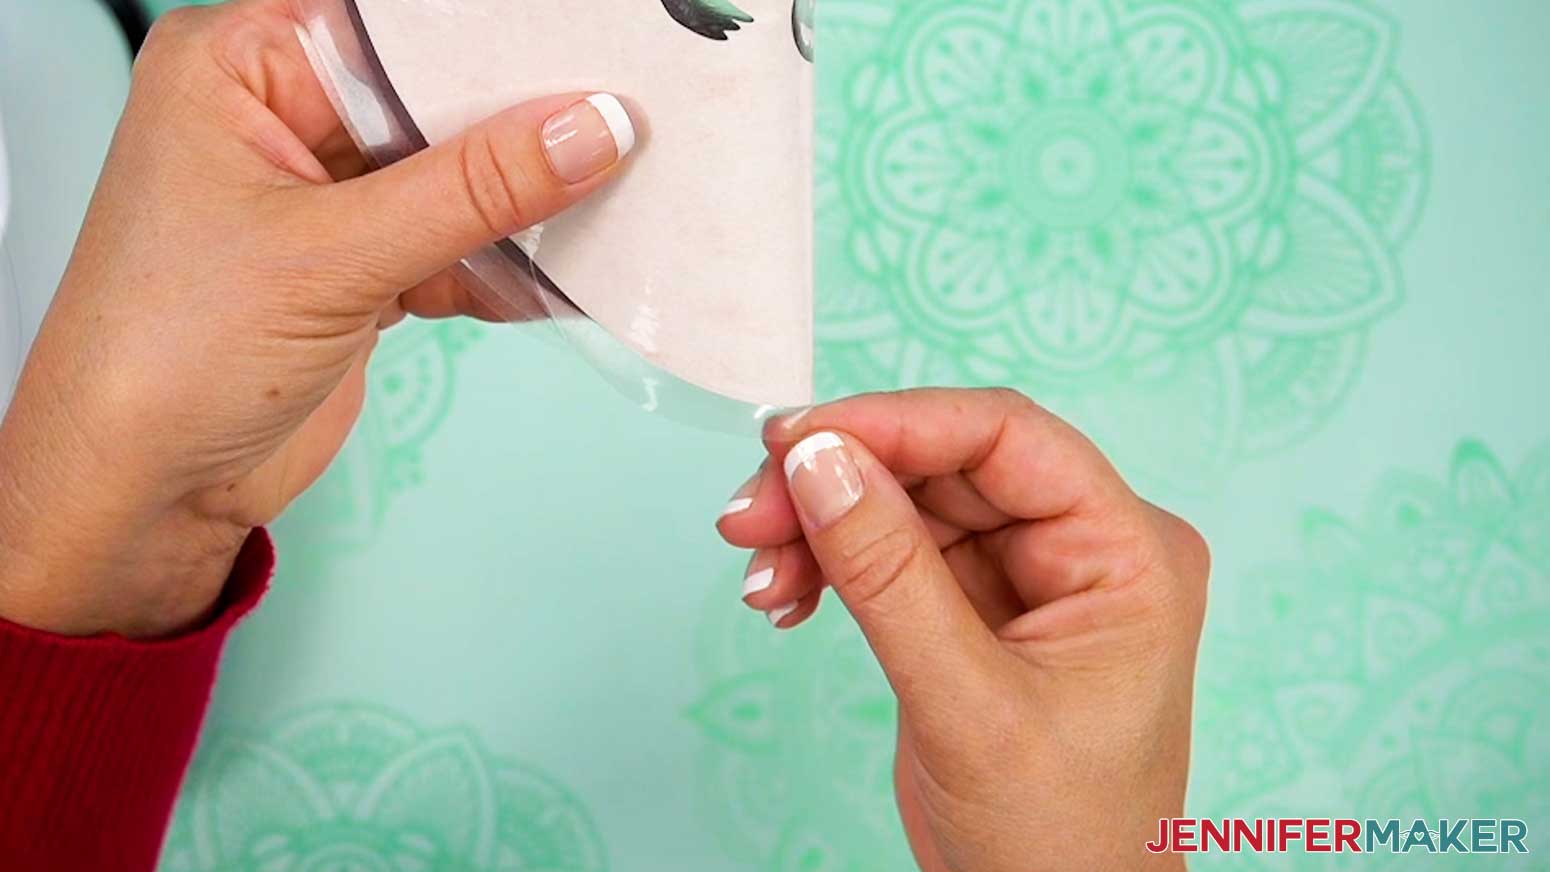
- The metal blank will still be a little hot, so put on your heat-resistant gloves and then remove the butcher paper.
- Once the blank is cool enough, remove the tape and design, then let it cool completely.
- To press the second side, follow the same steps, making sure you position the spinner so the designs will match.

OPTION 2: INFUSIBLE INK WIND SPINNER
STEP 2: PREPARE AND CUT YOUR WIND SPINNER DESIGN
CRICUT DESIGN SPACE
- On a blank Canvas in Cricut Design Space, click “Upload.”
- Click “Upload Image.”
- Click “Browse.”
- Find and select the SVG.
- Click “Open” and then “Continue.”
- Click “Upload” to add the SVG to your Canvas.
- Here is how the SVG looks on my Canvas.
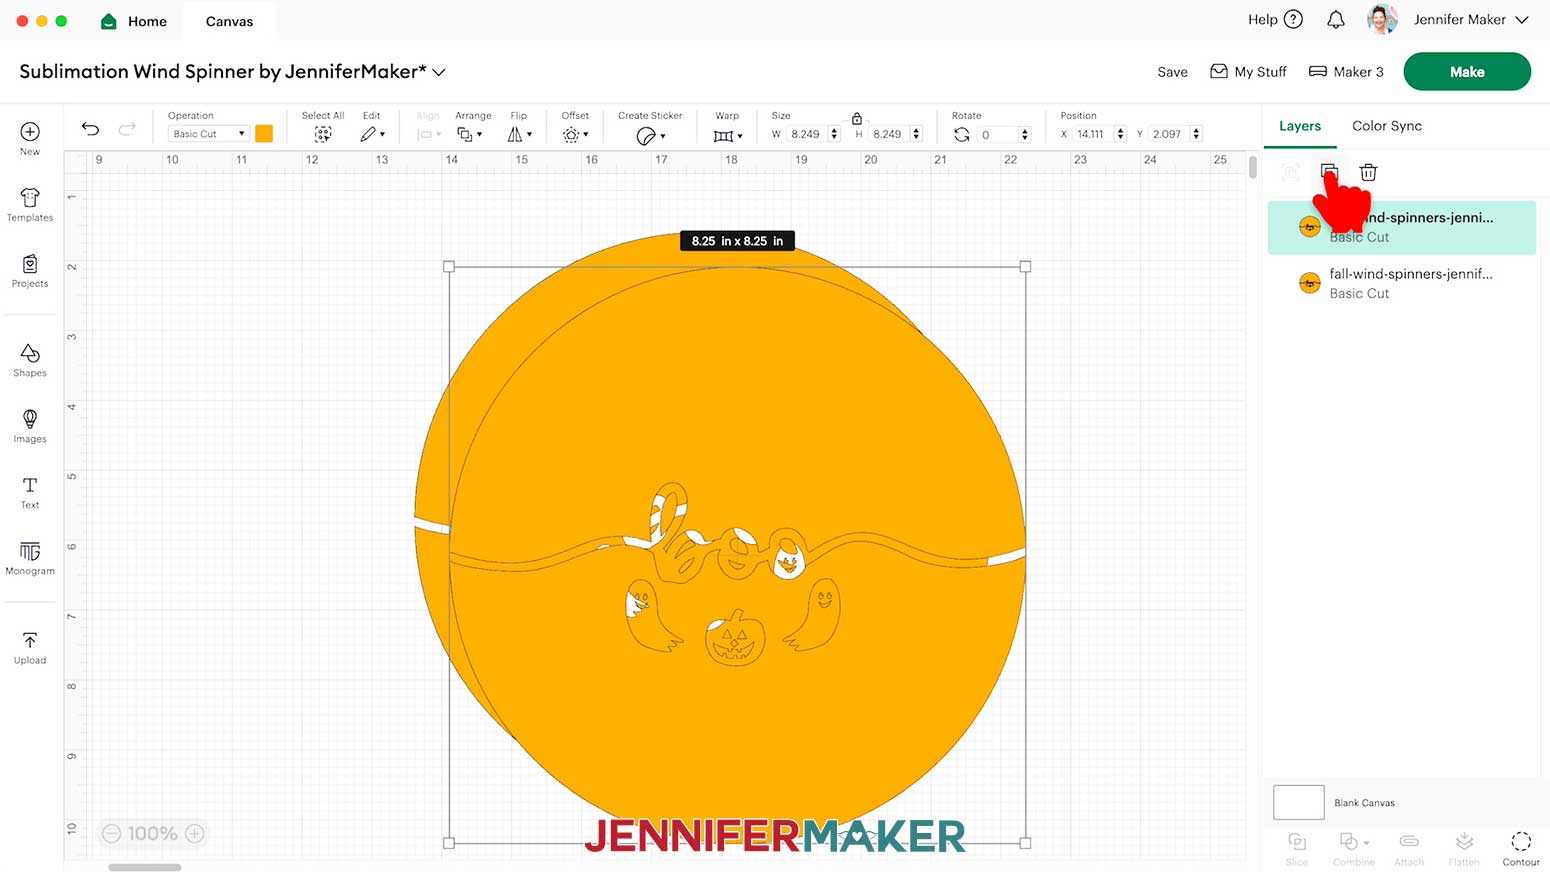
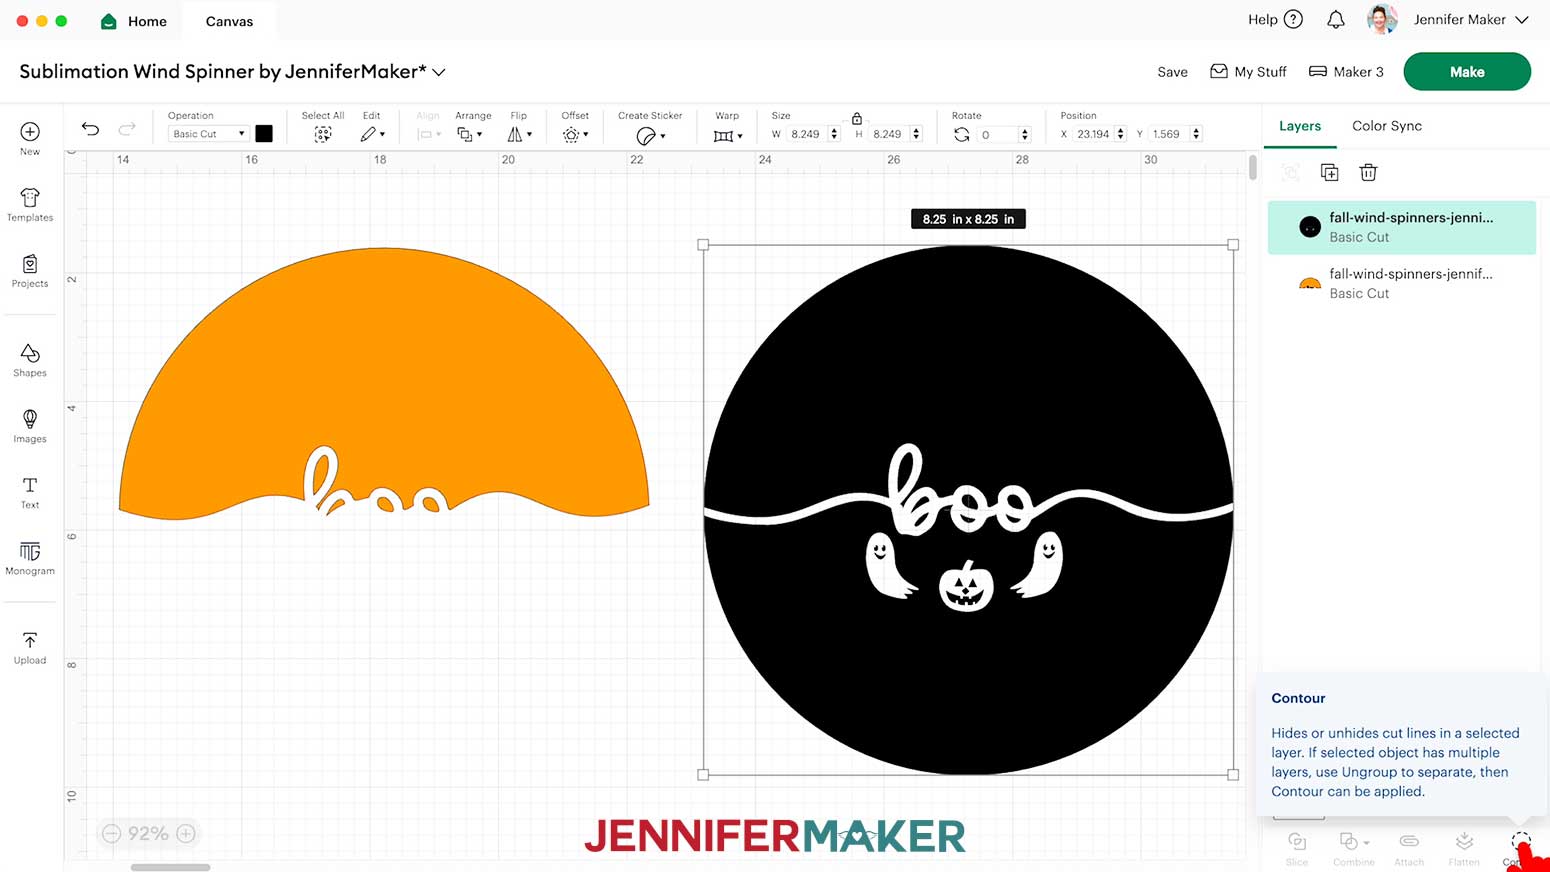
- “Ungroup” the designs and delete the one you won’t use.
NOTE: I’ll demonstrate with the “Boo” design, because it has elements under the word, and the preparation process has a few extra steps to prepare. - With the Lock icon closed, resize the design to “8.25” or .25” larger than your blank’s measured width.
- “Duplicate” the design layer and drag the copies apart on the Canvas.
- Select the first version and change its color in the Color Box to match the Infusible Ink you want to use on the top half of your design so you can remember which type to use during cutting.
- Repeat step 11 with the duplicated design, changing its color to match the Infusible Ink you’ll use on the bottom half of the design.
- Select the top half design and click “Contour.”
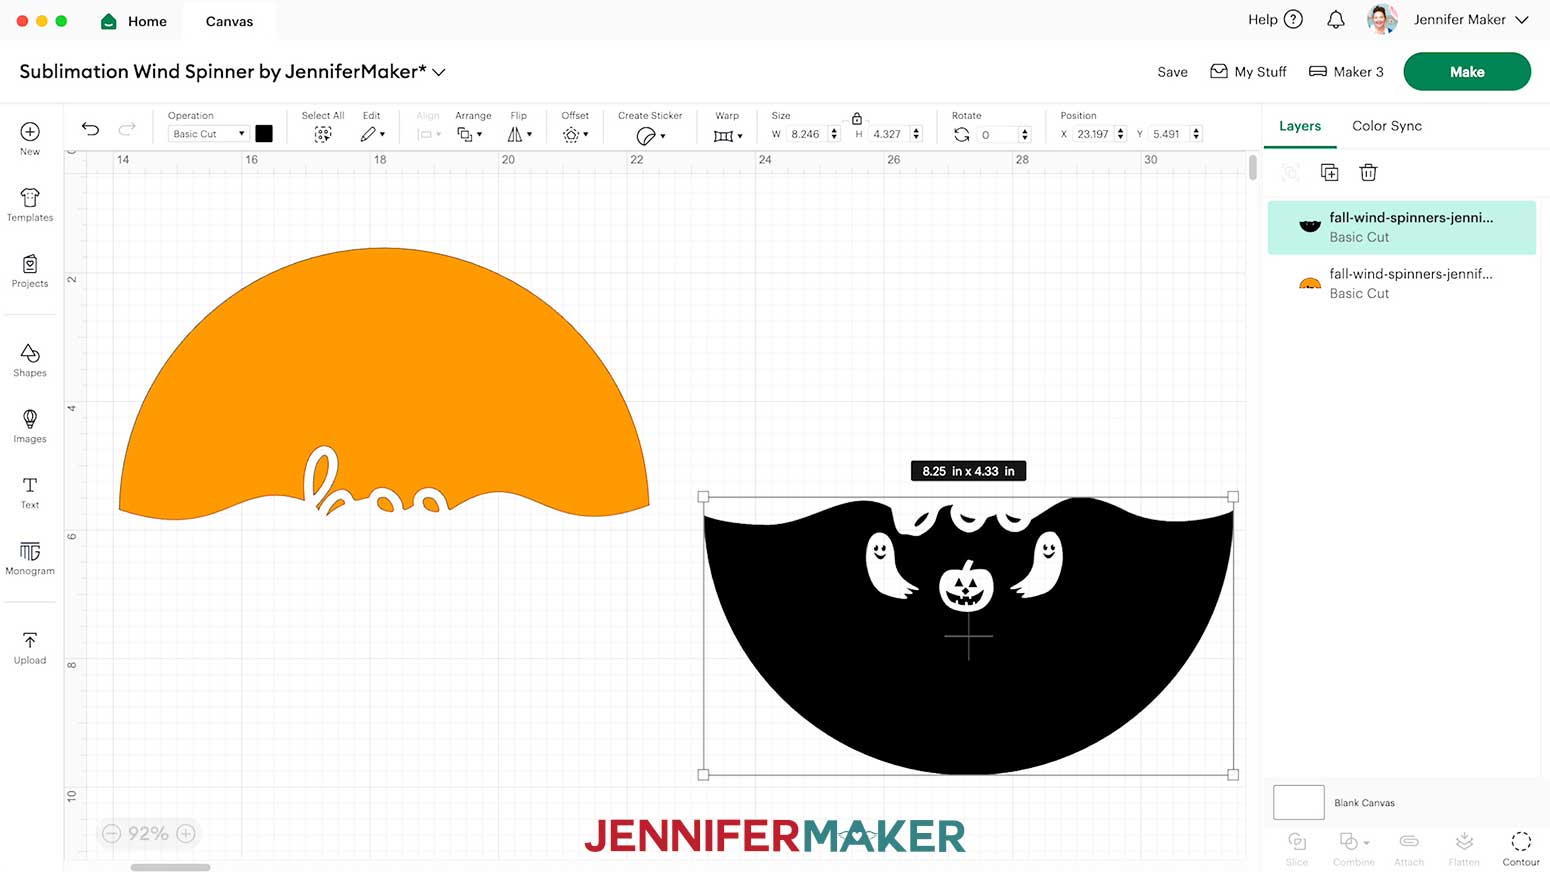
- This half of the design will be the top, above the top of the text, so we want to keep the cuts that create the upper section. Click the lower cuts, or the ones below the text’s top line, to turn them off.
NOTE: Click the plus (+) sign to zoom in and click each shape you want to remove. If your design has counters or islands in letters, make sure you keep them all with one half or the other so the word is still legible on the finished wind spinner. - Click the “X” to return to the Canvas and check your work.
- Use Steps 13-15 on the duplicated version to Contour out the cuts for the top half, leaving the lower half of the design in place.
- Click the “X” to return to the Canvas and check your work.
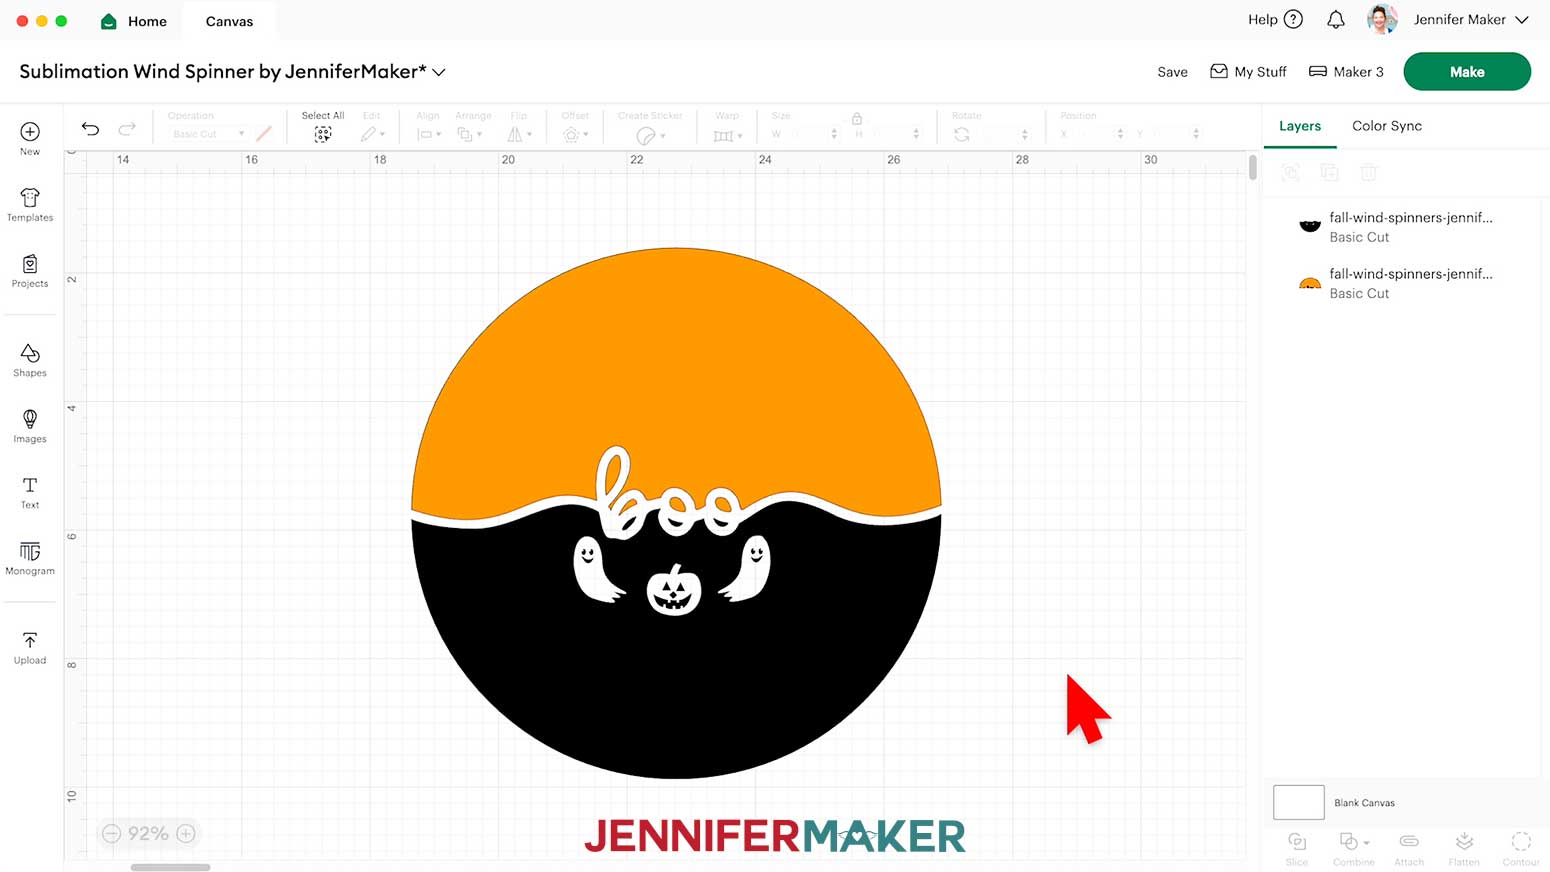
- Select both halves, then click “Align” and “Center Horizontally” to see how they look together. Adjust the pieces up or down using the arrows on your keyboard if needed to make sure the design looks correct.
NOTE: Make sure you didn’t accidentally contour out any counters you didn’t mean to. If one is missing, select the layer, then “Contour,” and click the piece to add it back to your top or bottom design. - Drag a bounding box around the entire design, then click “Duplicate” to make a copy for the other side of your wind spinner.
- Your designs are ready to cut!
CUTTING
- Make sure the correct machine is selected.
- Click “Make” in the upper right corner of the screen.
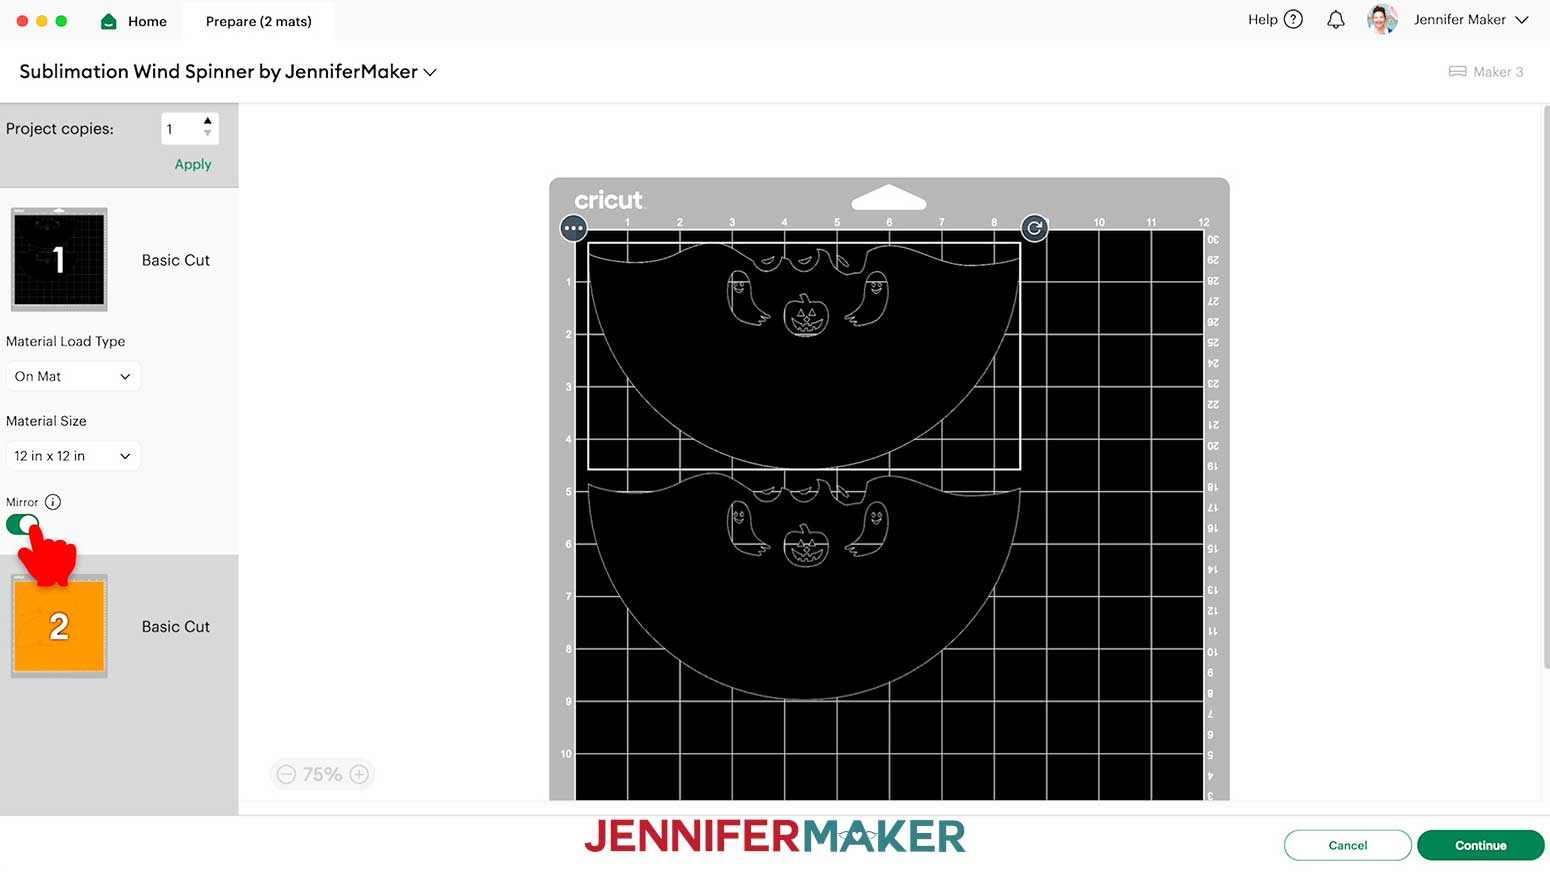
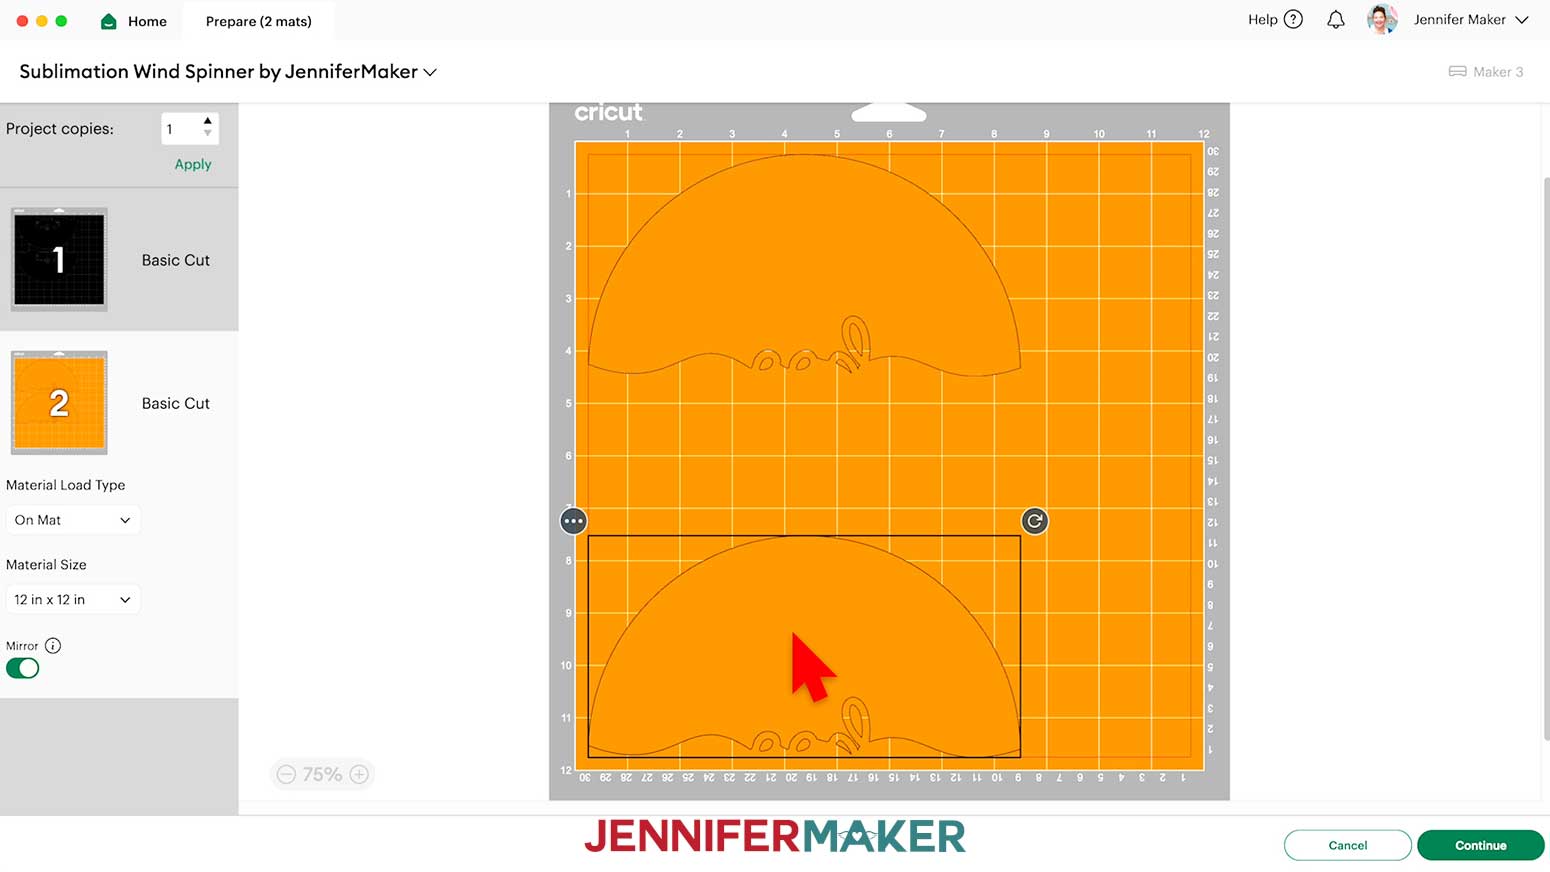
- On the Prepare screen, make sure that “On Mat” and “12 in x 12 in” are selected, and toggle “Mirror” ON so the design will transfer correctly.
NOTE: If you’re using different sizes of Infusible Ink transfer sheets, be sure to place the Infusible Ink sheet onto the mat in the same orientation as the design on the mat in Design Space, and make sure the sheet covers the entire design area. - Since I’m using patterned Infusible Ink for these pieces, which comes in this smaller 4.5" x 12" size, we’ll need to use two pieces. Drag the bottom half down to the very bottom left of the mat. Now when we add the two sheets of Infusible Ink to the mat, we can be sure they’ll cut correctly.
- Select the first mat, then click “Continue.”
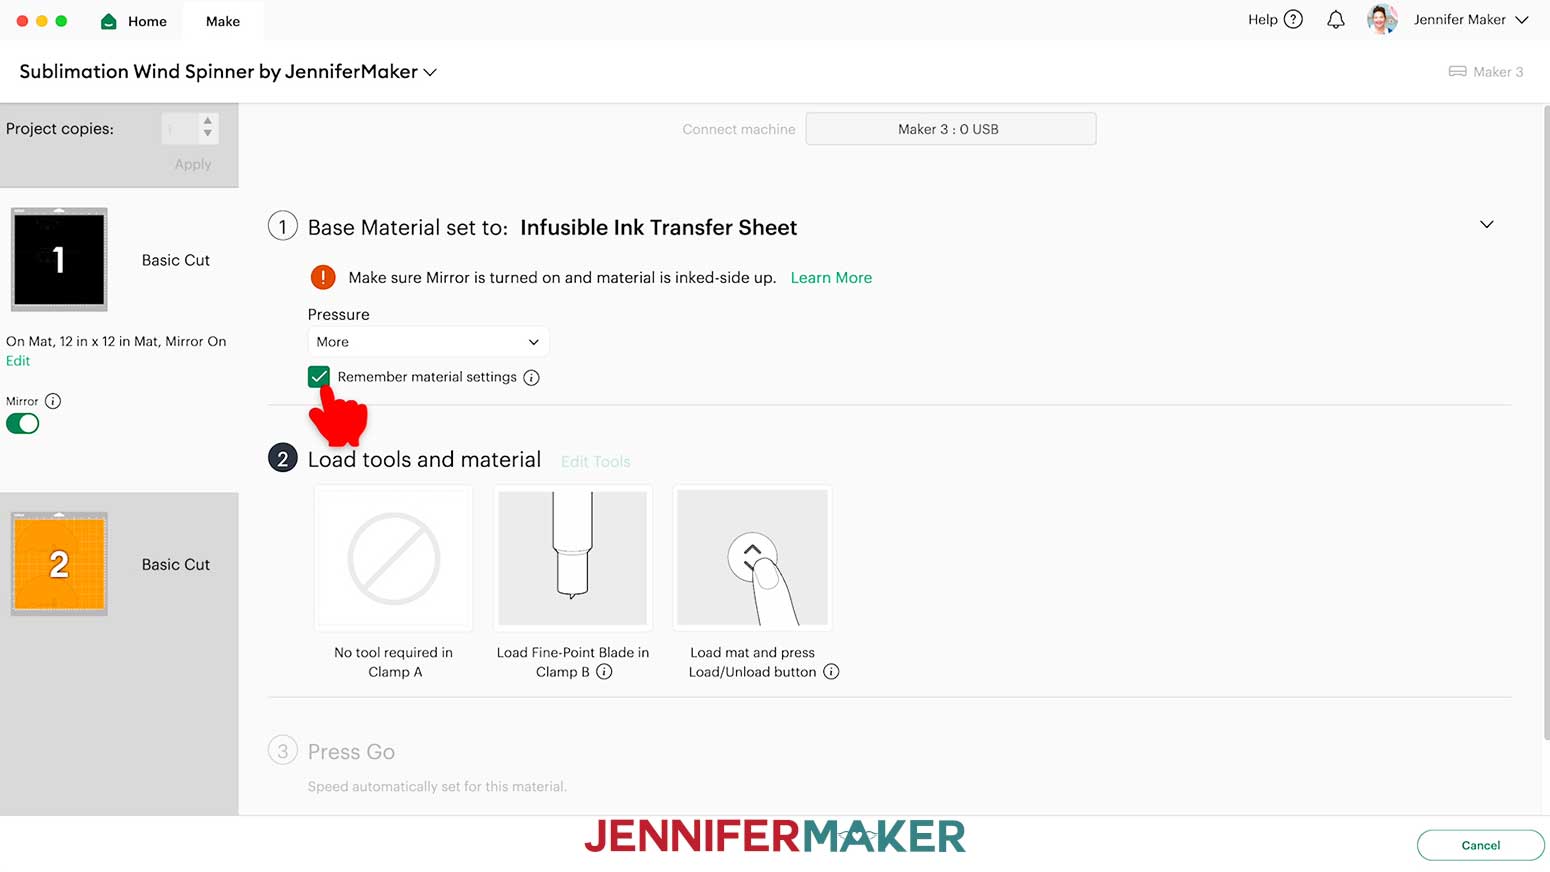
- On the Make screen, choose “Infusible Ink Transfer Sheet” as the material and select “More” pressure.
- If you touch the Infusible Ink, your skin oils can interfere with the transfer, so wash and dry your hands well before handling the transfer sheets.
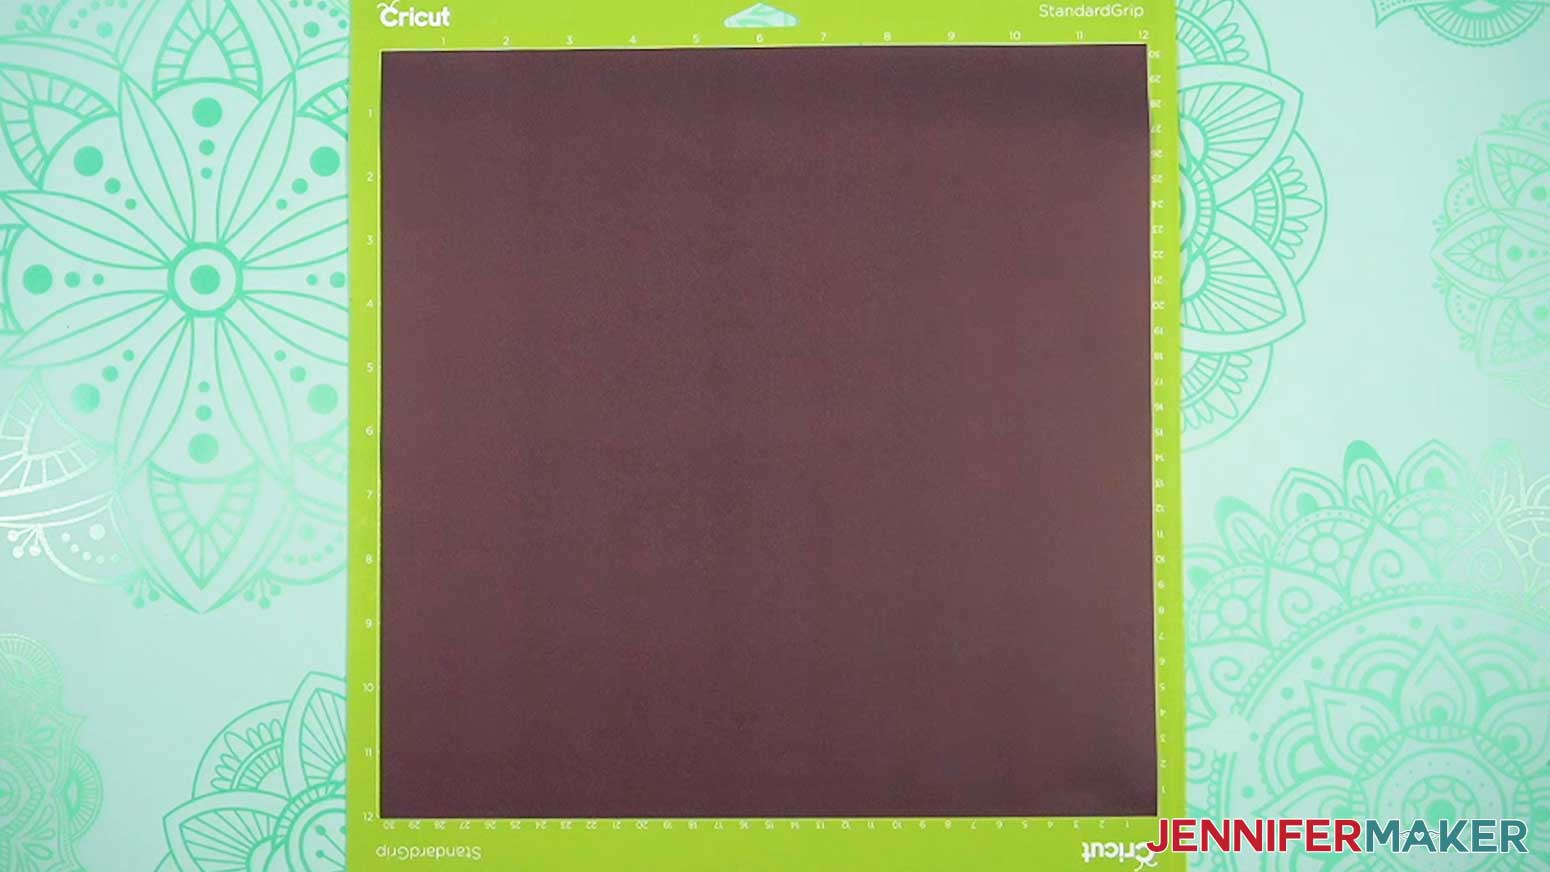
- Place your first Infusible Ink sheet pretty side up on a green StandardGrip machine mat so it covers the design area on the screen.
NOTE: If you’re using 4.5” x 12” sheets of Infusible Ink, place the sheet very slightly lower (about ⅛”) than the top line of the machine mat so the entire design cuts correctly. - Use your brayer to smooth the sheet down and make sure it’s adhered well.
- Insert your mat into your cutting machine so it matches the screen’s orientation, and press the flashing button to load it.
- Press the flashing “Go” button to begin the cuts.
- When it has finished cutting, don’t unload the mat just yet. Instead, use your weeding tool to gently lift a corner of the sheet to see if the cut went all the way through the sheet.
- If it’s not cut through, smooth the material back down and press the “Go” button again so your Cricut can go back over the cuts one more time.
- When the cut is finished, press the flashing button to unload the mat.
- Flip your mat over and peel it away from the Infusible Ink Sheet.
- Cut your other mats the same way.
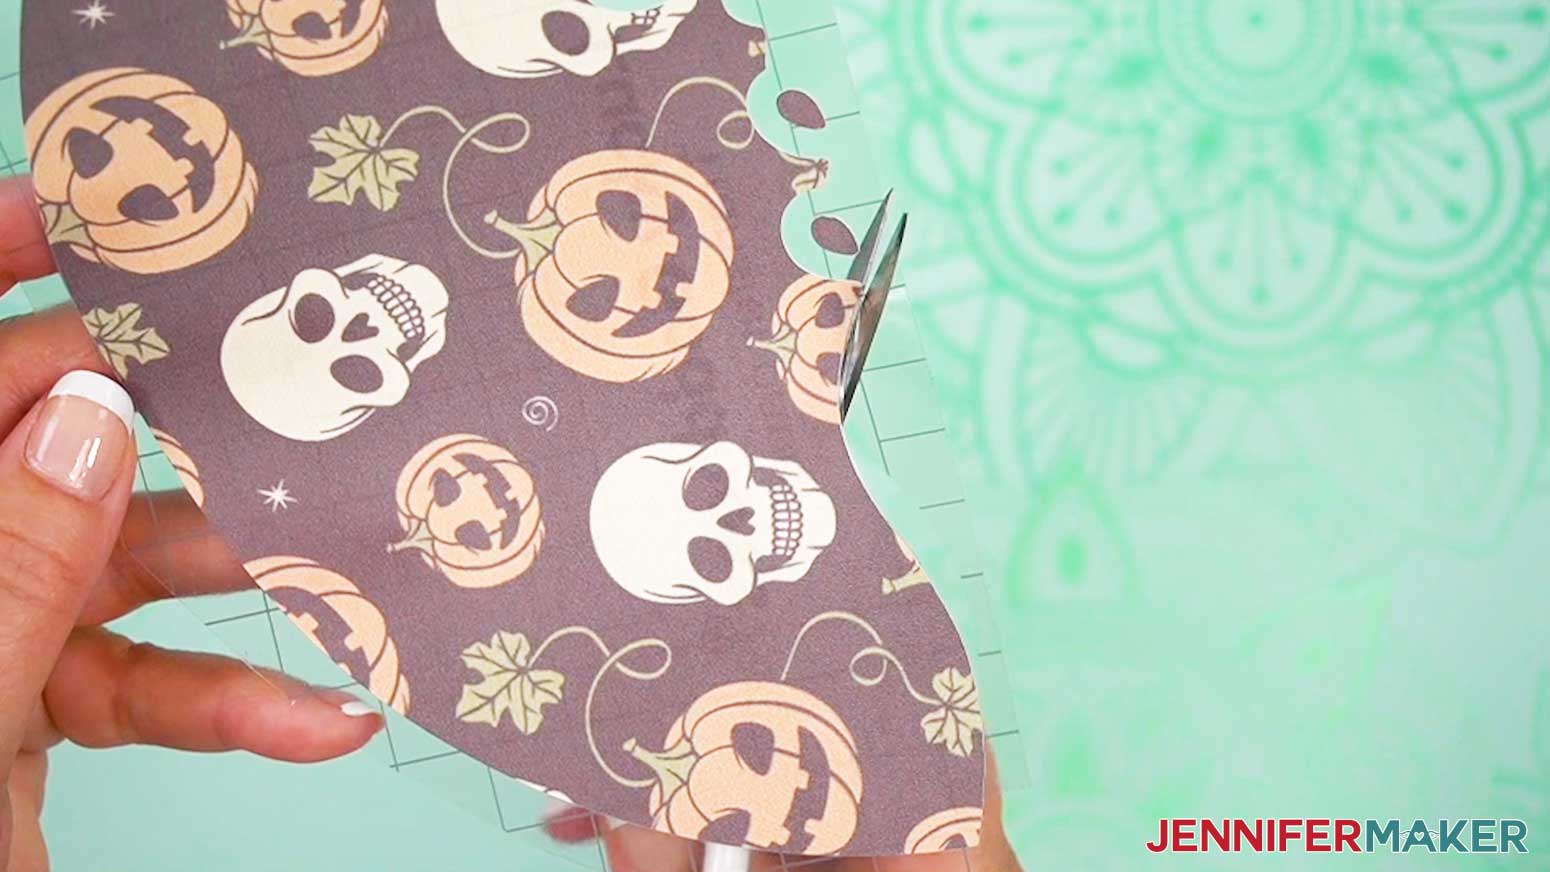
- If there is a lot of extra Infusible Ink transfer sheet uncut next to your design, use scissors or a paper trimmer to cut it off and put it back in the original packaging to save it for smaller projects.
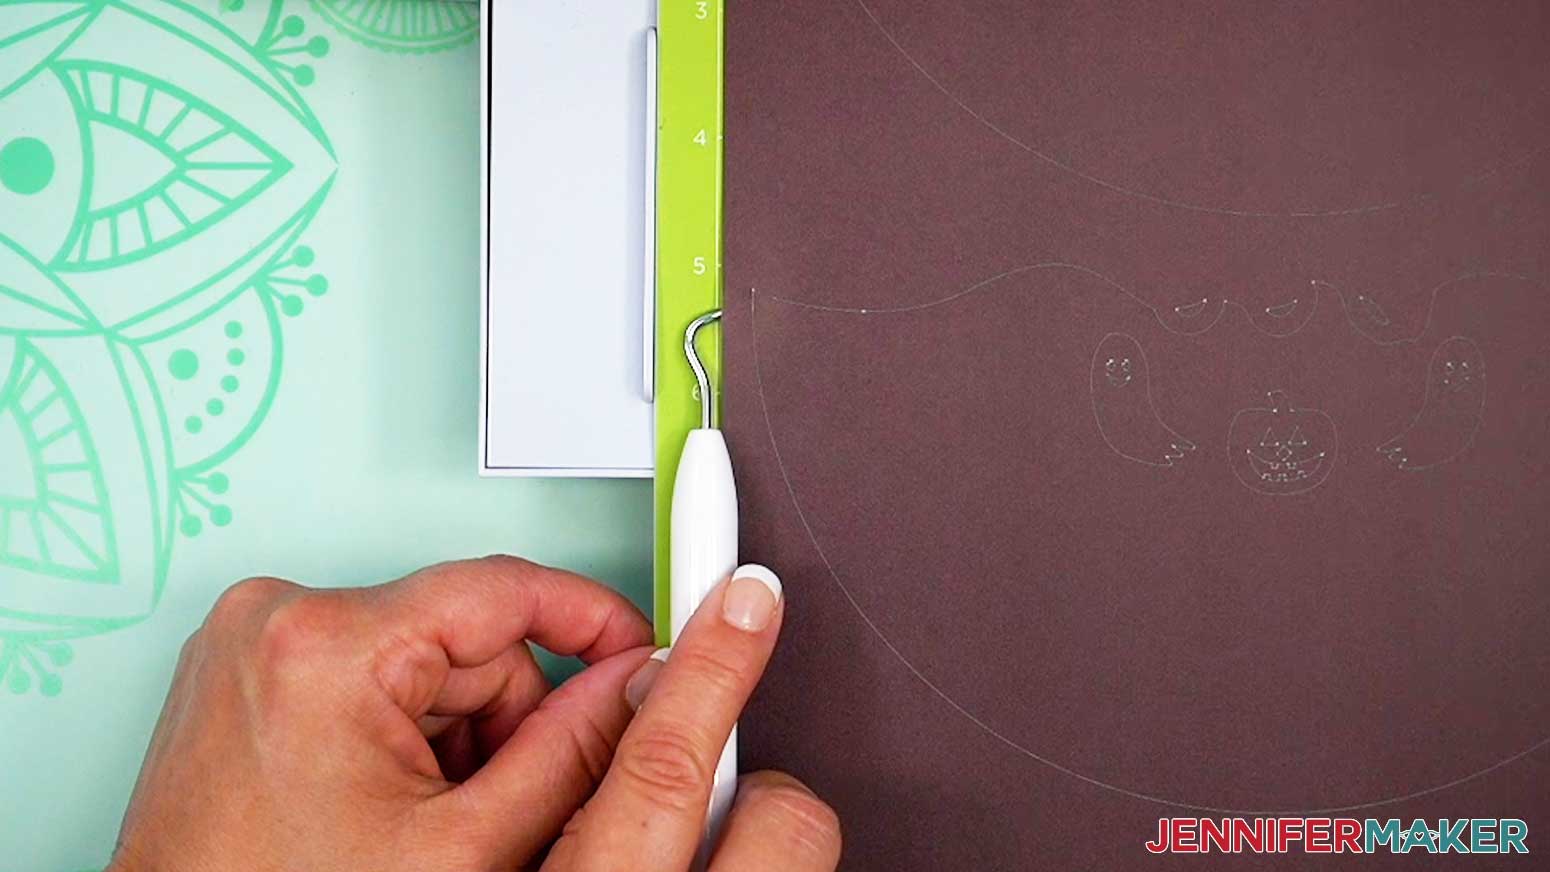
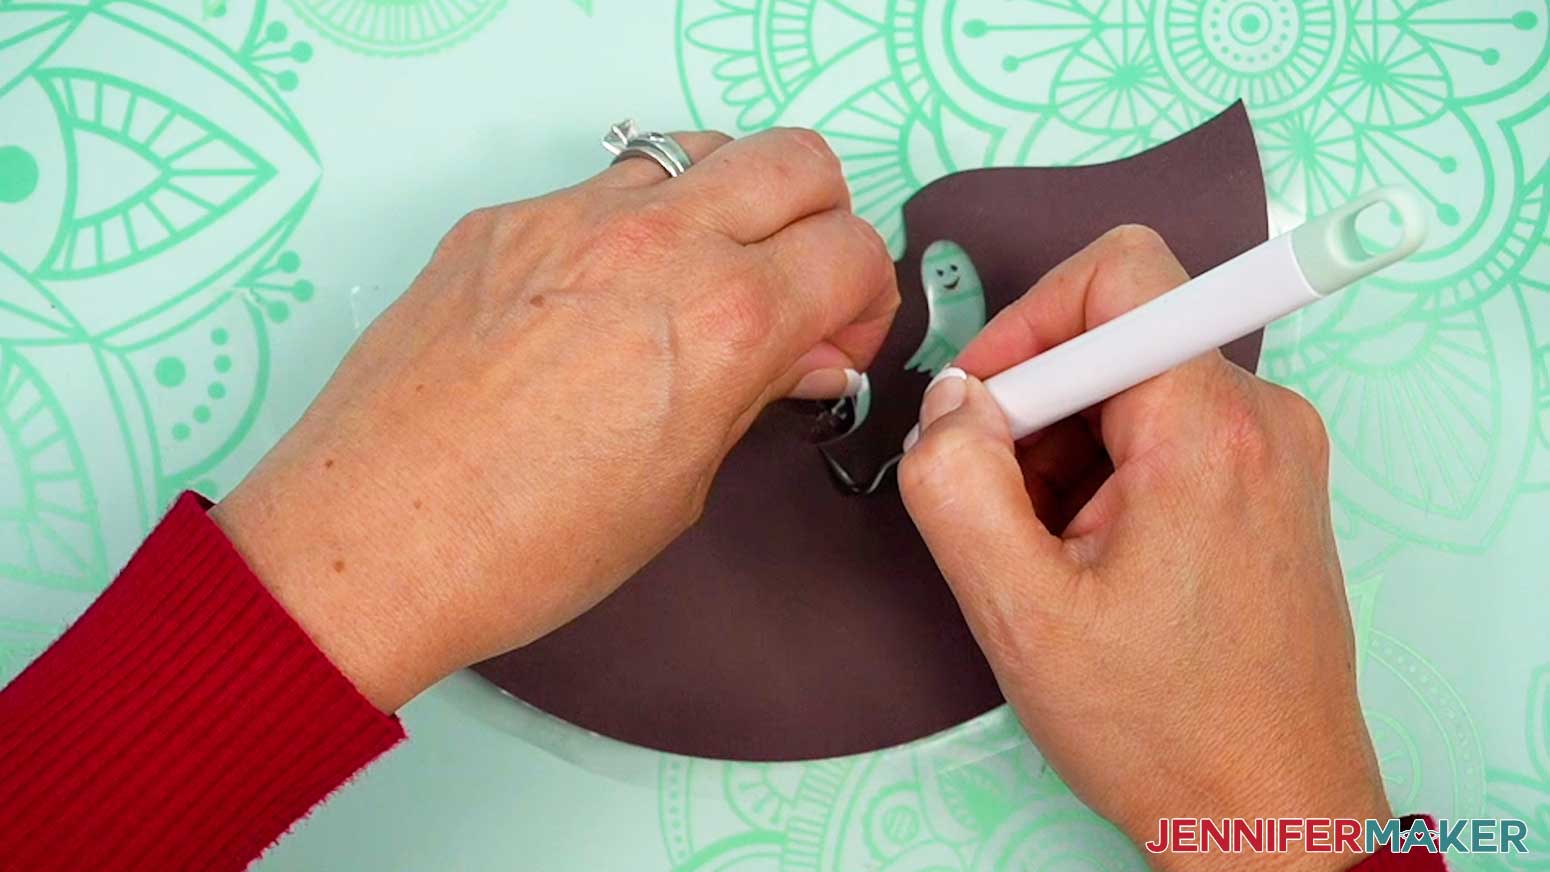
NOTE: Keep about ½” of border around the design. This will help with centering it later. - To weed Infusible Ink transfer sheets, gently roll and bend the cut areas until the edges of the design start to lift up from the carrier sheet.
TIP: You might hear some cracking noises, but don’t worry, this is normal. - Use your fingers to gently bend the carrier sheet and pull the extra ink pieces off of it.
TIP: You can use a weeding tool to help lift sections you don’t want, or hold design elements in place on the carrier sheet while removing extra sections. - Be sure to remove all of the extra pieces that aren’t part of your design, and pay close attention to not accidentally remove any of the counters.
NOTE: Try to keep your fingers off of the carrier sheet to keep it as clean as possible. - Once your Infusible Ink sheet is completely weeded, flip it over and look at it from the back. This is how your design will appear on your wind spinner. Do the same with the rest of the design pieces.
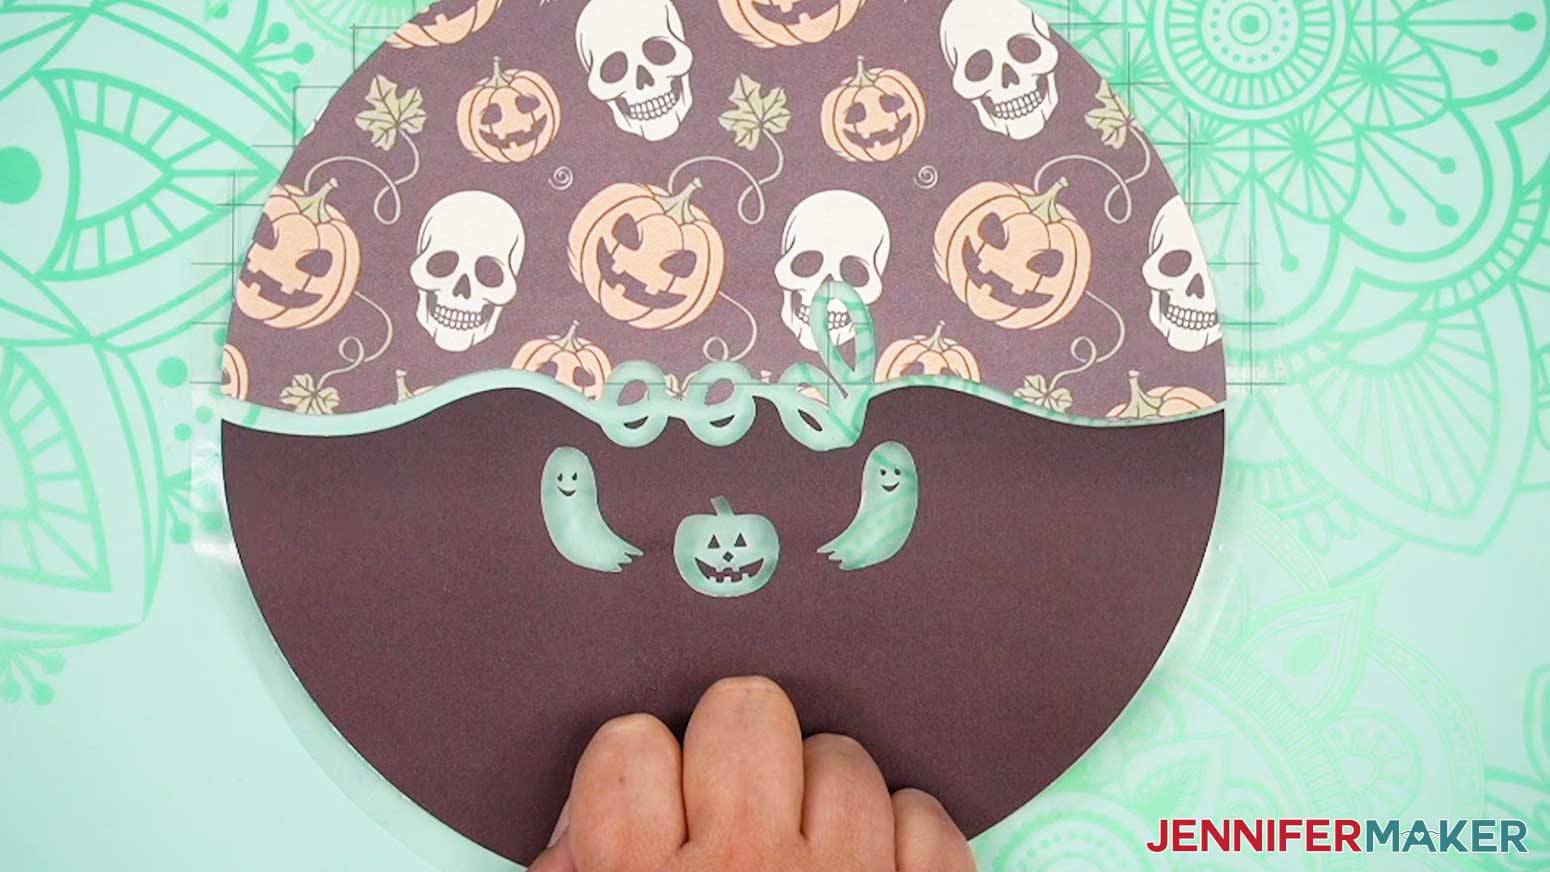
NOTE: Make sure that you didn’t miss any extra bits when you weeded. - We can only press once, so we'll need to combine the layers. Pick the one with a less detailed edge where it will meet the other section.
- Use scissors to trim the carrier sheet on the less-detailed edge as close as possible to the ink.
NOTE: Your goal is to make the empty carrier sheet thin enough that it will sit in the negative space between the two Infusible Ink sections. - To check the alignment, place the more detailed half of the design ink-side up on your work surface. The carrier sheet should be on the bottom.
- Grab the other half of the design, and place it ink-side up. Use your Design Space Canvas for reference, and align the section where you just trimmed the carrier sheet with the other half of the design.
- Once it’s aligned, gently lay the rest of the half down to stick to the bottom carrier sheet. Make sure to leave space for the word to appear in the negative space. The other end should match up! If not, gently peel up the half you just applied and try again.
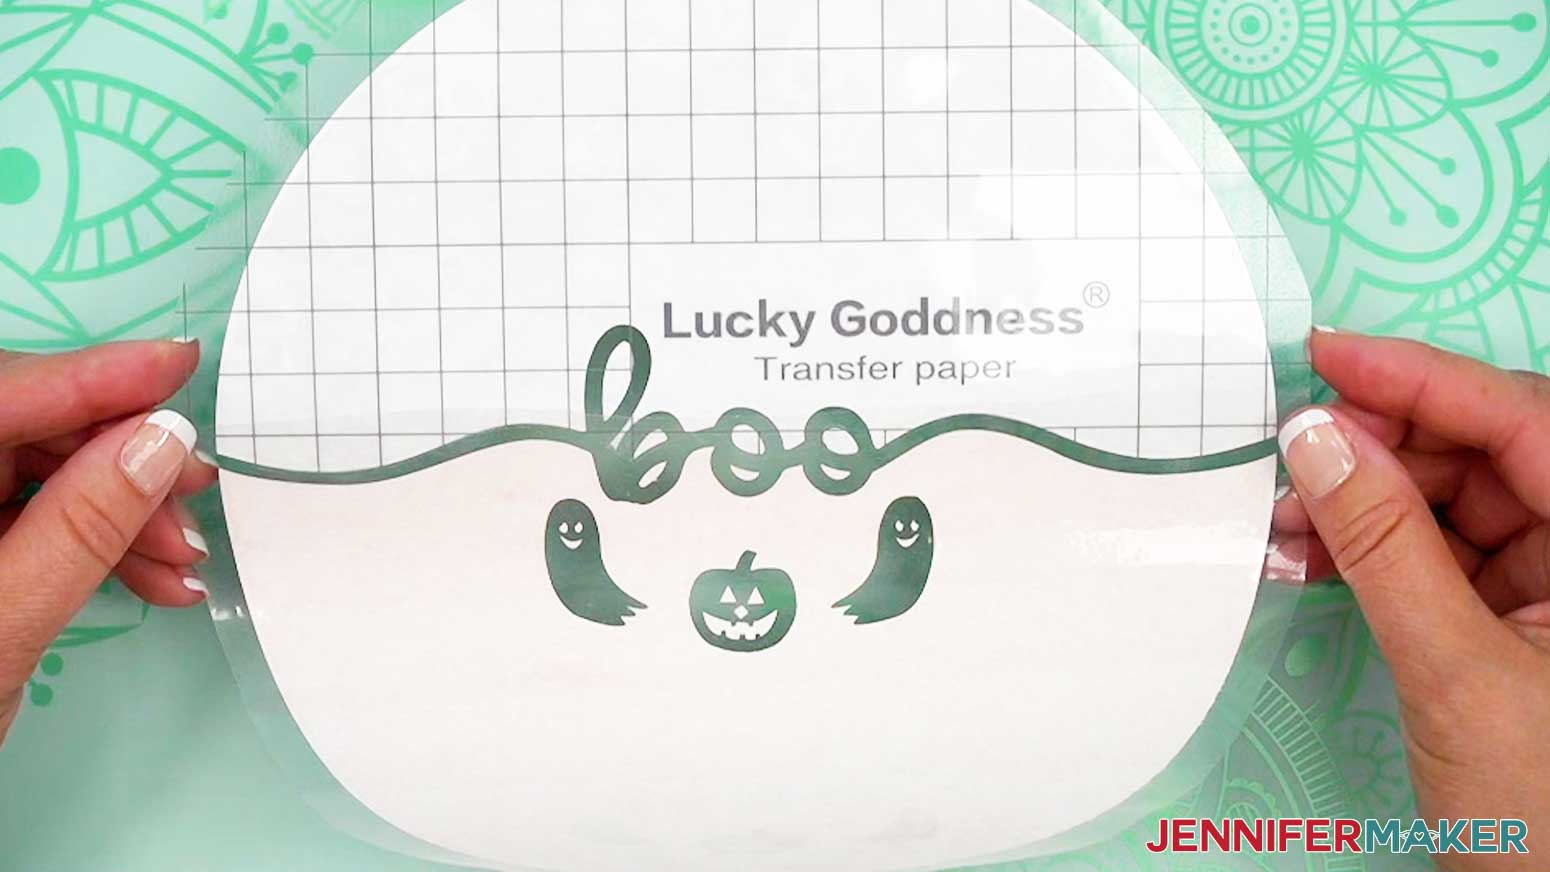
TIP: If any small pieces of Infusible Ink pop off of the carrier sheet, gently use tweezers to reposition them and pat them in place, ink-side up. Again, use the Design Space Canvas or slight cut indents on the carrier sheet to help with correct placement. - Hold the two pieces together and flip them over to check the design from the other side.
- Look closely where you trimmed the design edge and make sure none of the carrier sheet overlaps the other ink sections, because that will block the ink from transferring. If you missed a spot, gently separate the design pieces and trim it closer.
TIP: You may also be able to carefully lift and trim extra carrier sheet pieces using your weeding tool and scissors with the sheets in place. - Then put the halves back into place.
- Repeat the same steps to assemble the design for the other side of the wind spinner.
STEP 3: SUBLIMATE YOUR INFUSIBLE INK WIND SPINNER
IMPORTANT: As with all sublimation projects, turn on a fan and open a window to improve your ventilation before beginning.
- Set the temperature of your EasyPress to 360℉ (192℃), and set the timer for 120 seconds.
TIP: I followed the time and temperature settings for wind spinners in my Sublimation Cookbook. Inside, you can find the settings for tons of other sublimation projects, too! - Grab your design and gently curl it in half from side to side.
- Pinch the very top and bottom of the border (not on the design) to create a crease that will mark the center.
- Place one of the Infusible Ink designs face up on your work surface.
TIP: If your wind spinner blank came with a protective film, be sure to remove it from both sides. You can use tweezers or a weeding tool to carefully lift the film if it’s really stuck. - Use a lint roller to clean any dirt or debris off of both sides of the blank.
NOTE: Don't forget to lint roll the second side after the first is pressed, as more debris can be introduced while pressing the first side. - Center the clean wind spinner blank on the design with the hanger holes at the top and bottom.
TIP: If the ink showing is even around the blank, your design is centered. - Thinking of the blank like a compass, use heat-resistant tape to secure it to the paper (or carrier sheet if you’re using Infusible Ink transfer sheets) at North, South, West, and East so the wind spinner can’t shift. For extra security, add more tape between those pieces, too.
- Place your pressing mat on your work surface.
- Place a piece of white cardstock onto your mat to protect it from any ink that may escape during the sublimation process.
TIP: Your cardstock should be clean and free of any ink or other marks that could transfer to your blank during the sublimation process. - Carefully flip the blank over onto the cardstock so the design is face down.
- Place a fresh piece of white uncoated butcher paper on your blank to completely cover it.
- Make sure the temperature of your EasyPress is at 360℉ (192℃), and the timer is set for 120 seconds.
- Cover the entire area of your wind spinner with the EasyPress and hold it in place to prevent it from slipping around on the blank’s slick surface. Press with medium pressure for 120 seconds.
TIP: Keep pressure even on both sides of the press for best results. - When the time is up, lift the EasyPress straight up to avoid ghosting.
NOTE: Always remember to place your press back on the base after using. - Let the project cool for about a minute.
- The metal blank will still be a little hot, so put on your heat-resistant gloves and then remove the butcher paper.
- Once the blank is cool enough, remove the tape and carrier sheet, then let it cool completely.
- To press the second side, follow the same steps, making sure you position the spinner so the designs will match.


OPTIONAL: SEAL YOUR WIND SPINNER
- If the wind spinner will be hung in a sunny spot, use a cardboard box that will fit the wind spinner inside, and place it on the ground outside.
NOTE: The cardboard box can protect the spinner from debris, and also protect your grass or patio from sealant. - Place the wind spinner inside the box.
- Spray a light coat of sealant onto the wind spinner.
- Let it dry for at least 10 minutes.
- Once it’s totally dry, flip it over.
- Spray a light coat of sealant onto the other side.
- Let it dry for at least 10 minutes.
- Remove the wind spinner and discard the box.
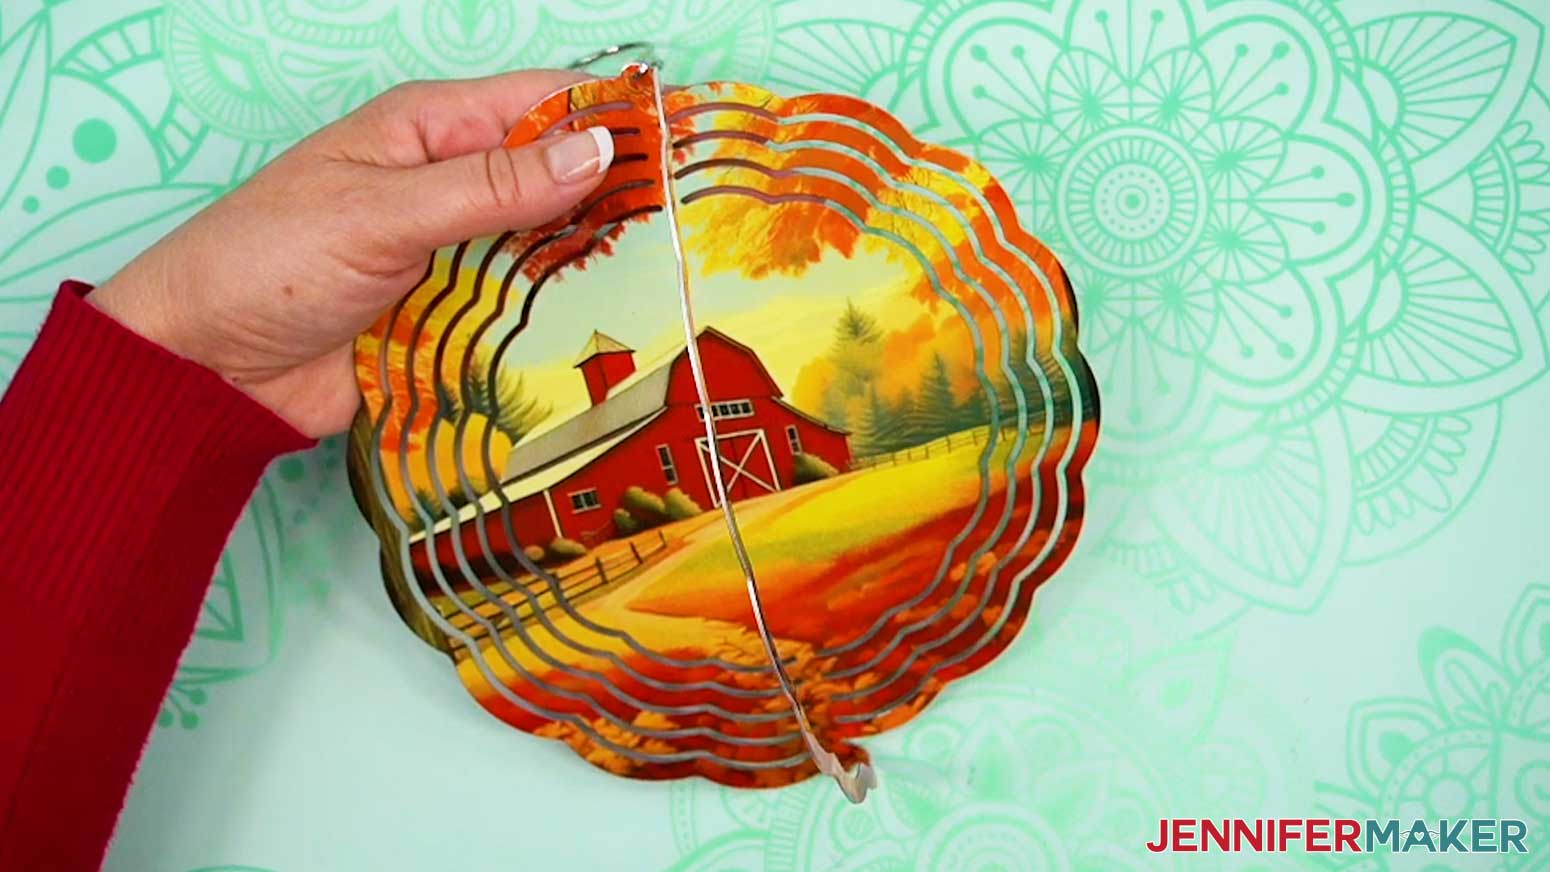
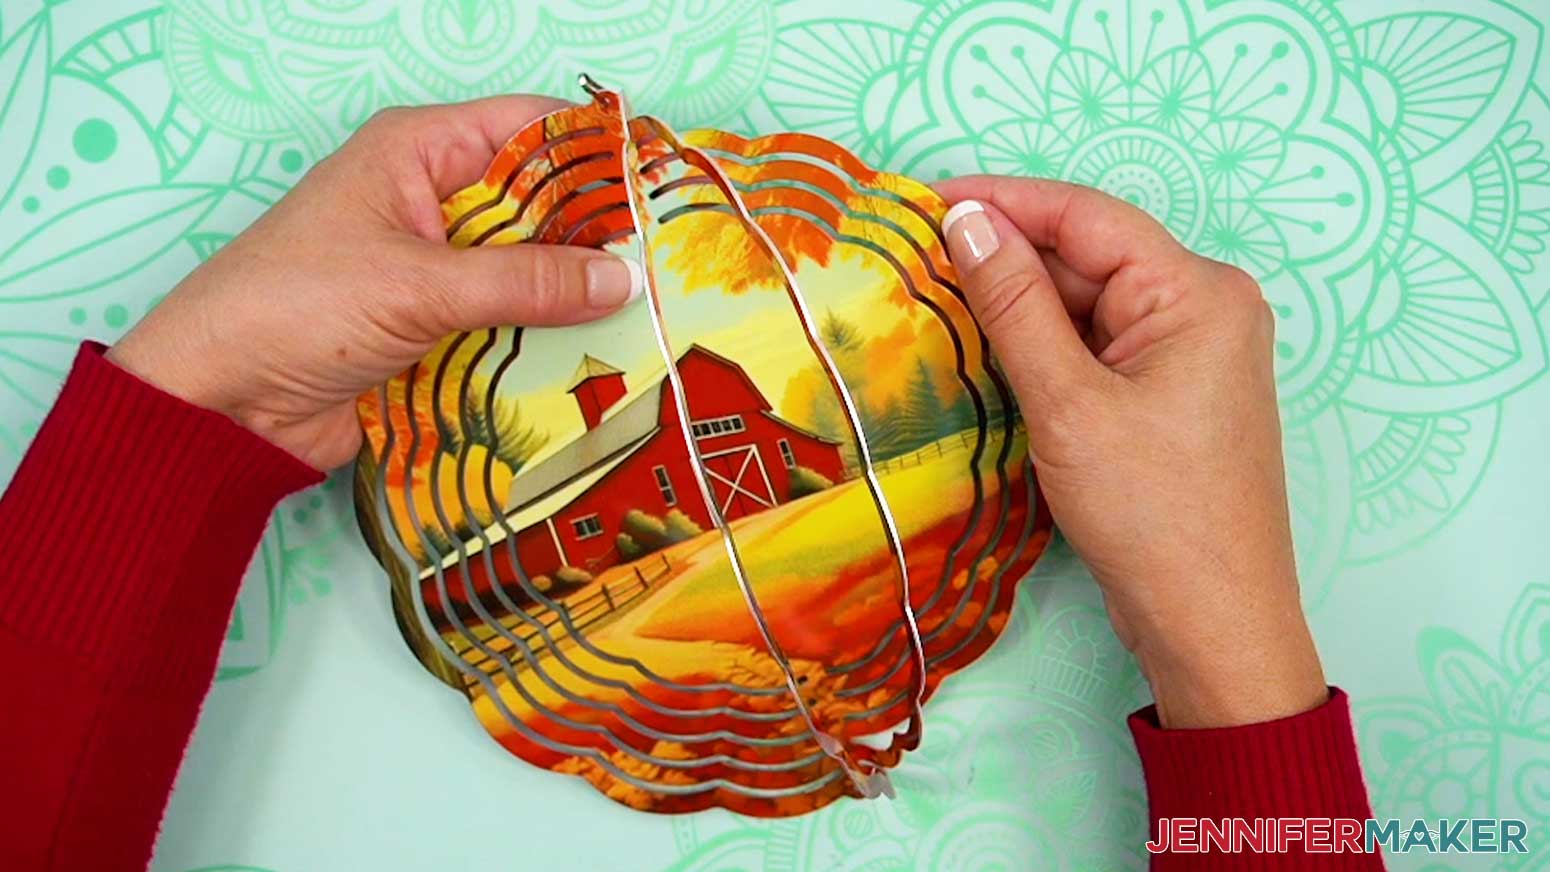
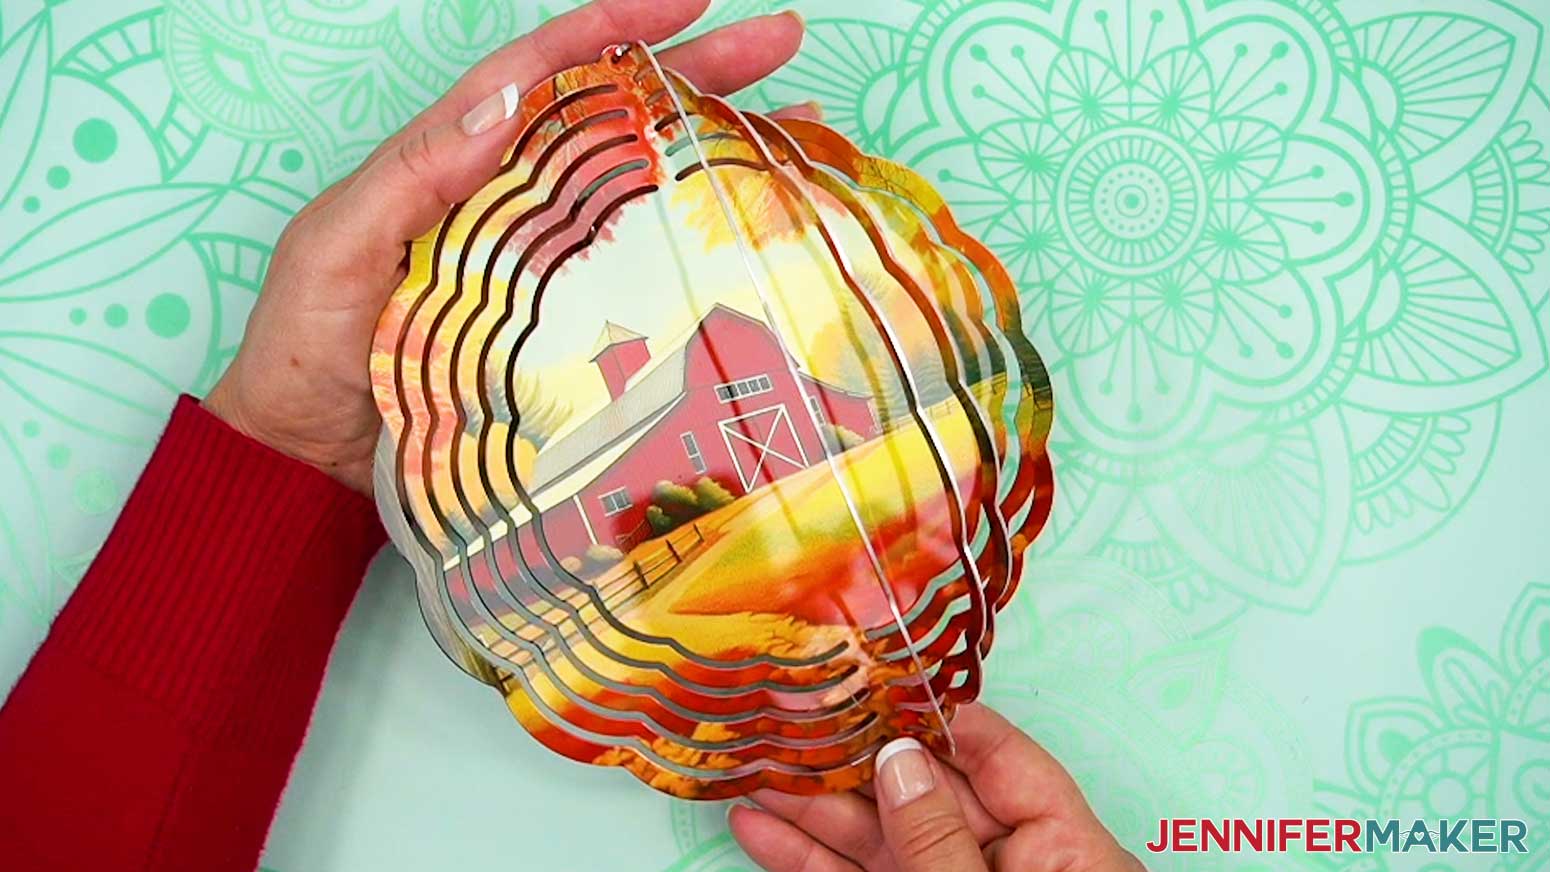
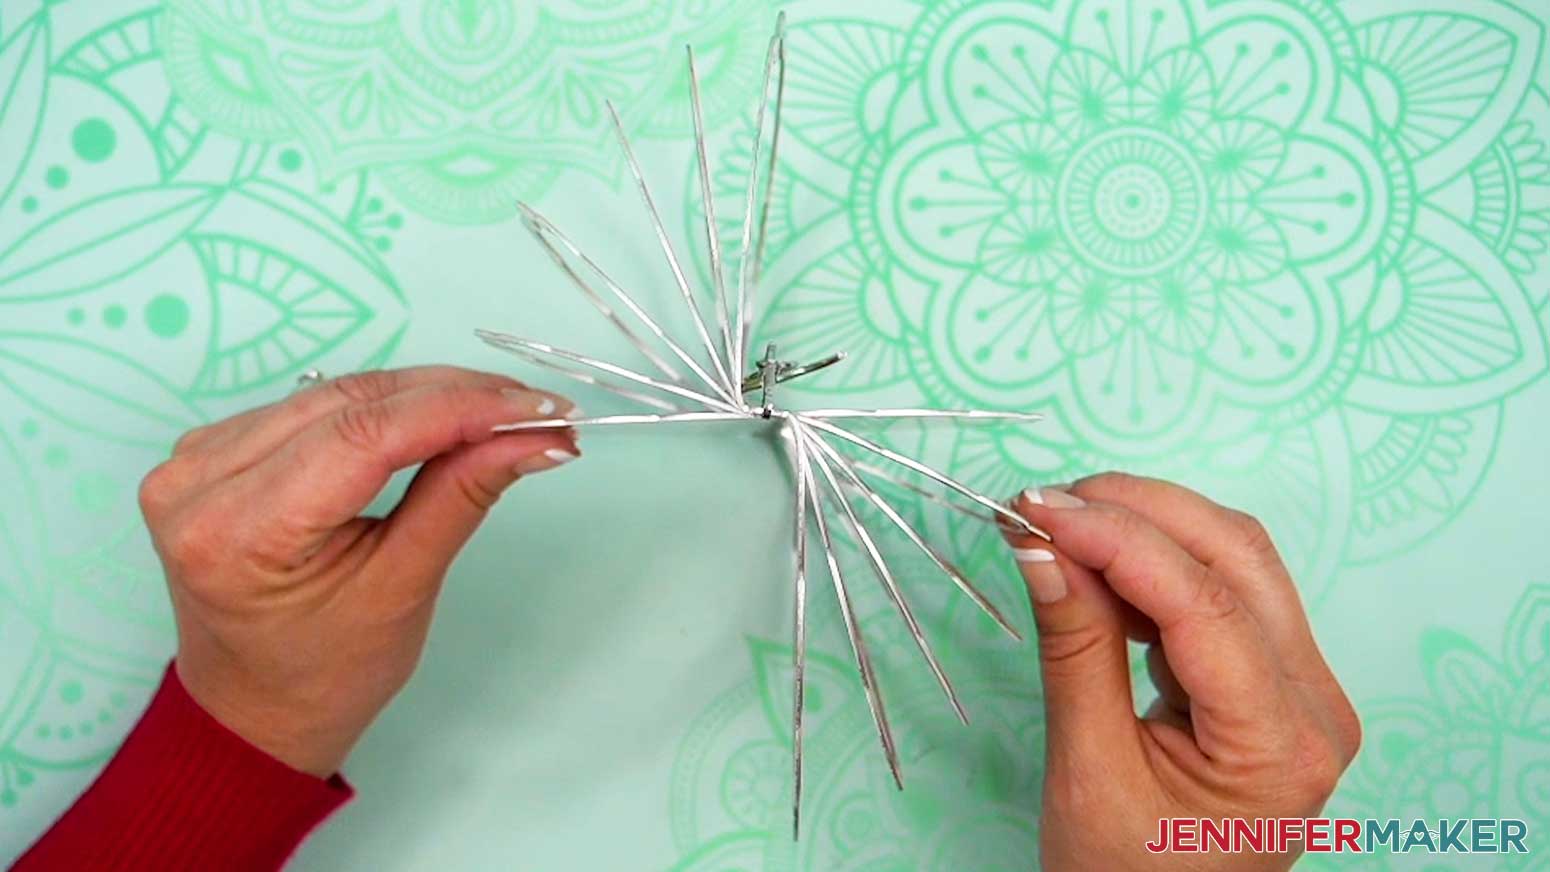
STEP 4: BEND YOUR WIND SPINNER
- Hold the wind spinner with the hanger at the top and the bottom resting on the work surface.
NOTE: You don’t need to put on gloves or protect your hands because the edges aren’t as sharp as they look. Still, be careful. - Starting with the side of your dominant hand, bend the outermost ring about 90° toward you.
- Move to the next smaller ring on that side and bend it toward yourself but not quite as much as the first one.
- Continue moving in toward the spinner’s middle, evenly spacing the rings out by bending them.
- Then, flip the wind spinner over so the flat section is on your dominant hand side and repeat the process for those rings.
- When you’re done, look straight down on the spinner from the top and gently adjust any rings that aren’t even.
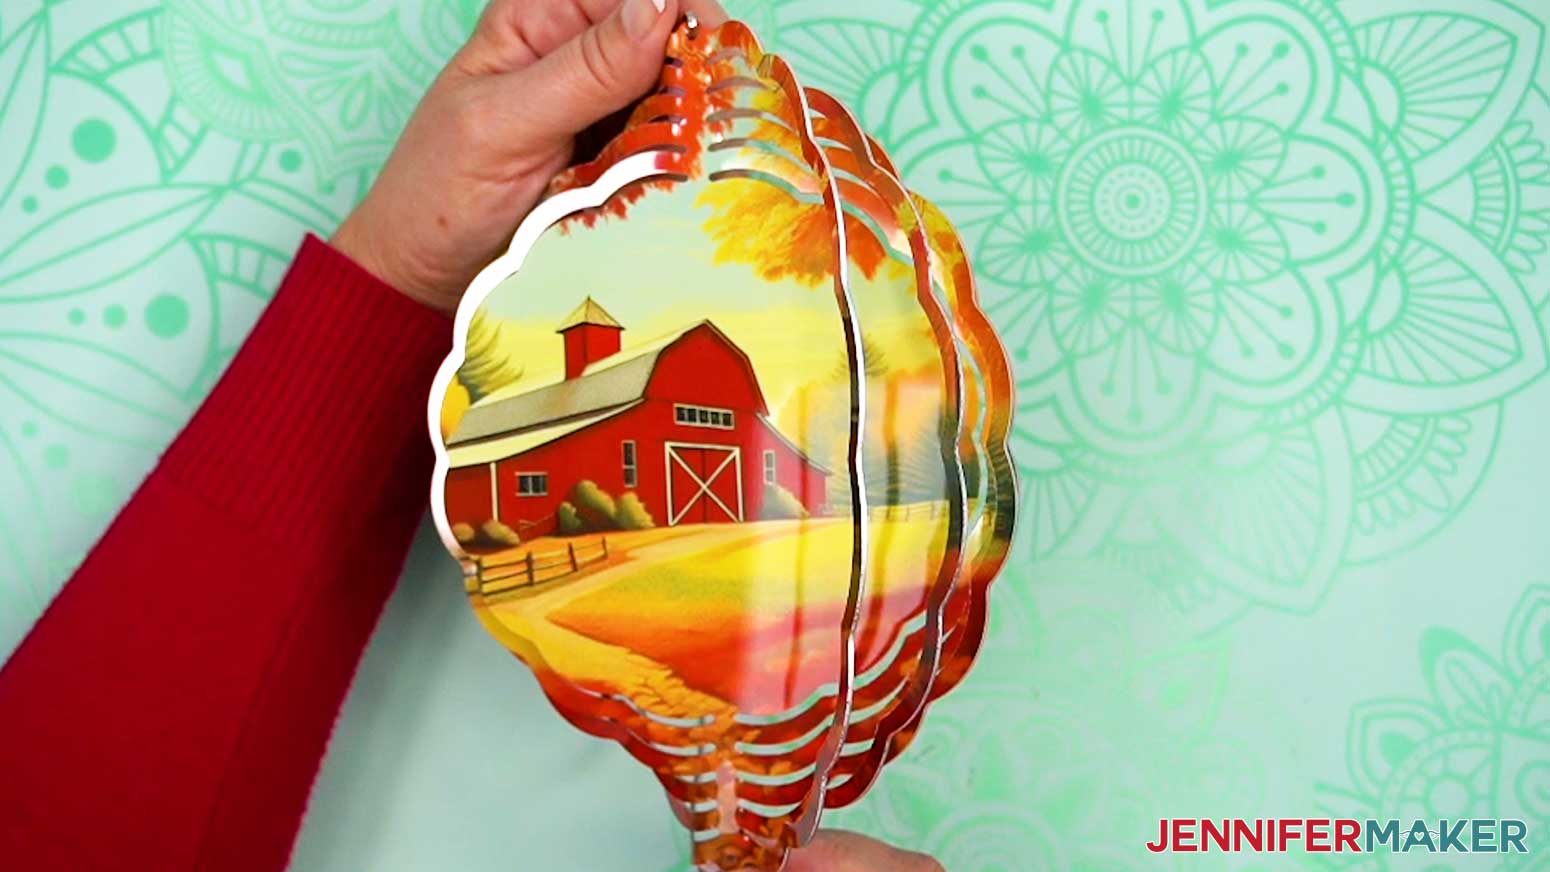
STEP 5: SHOW IT OFF
Here are the finished wind spinners using both methods!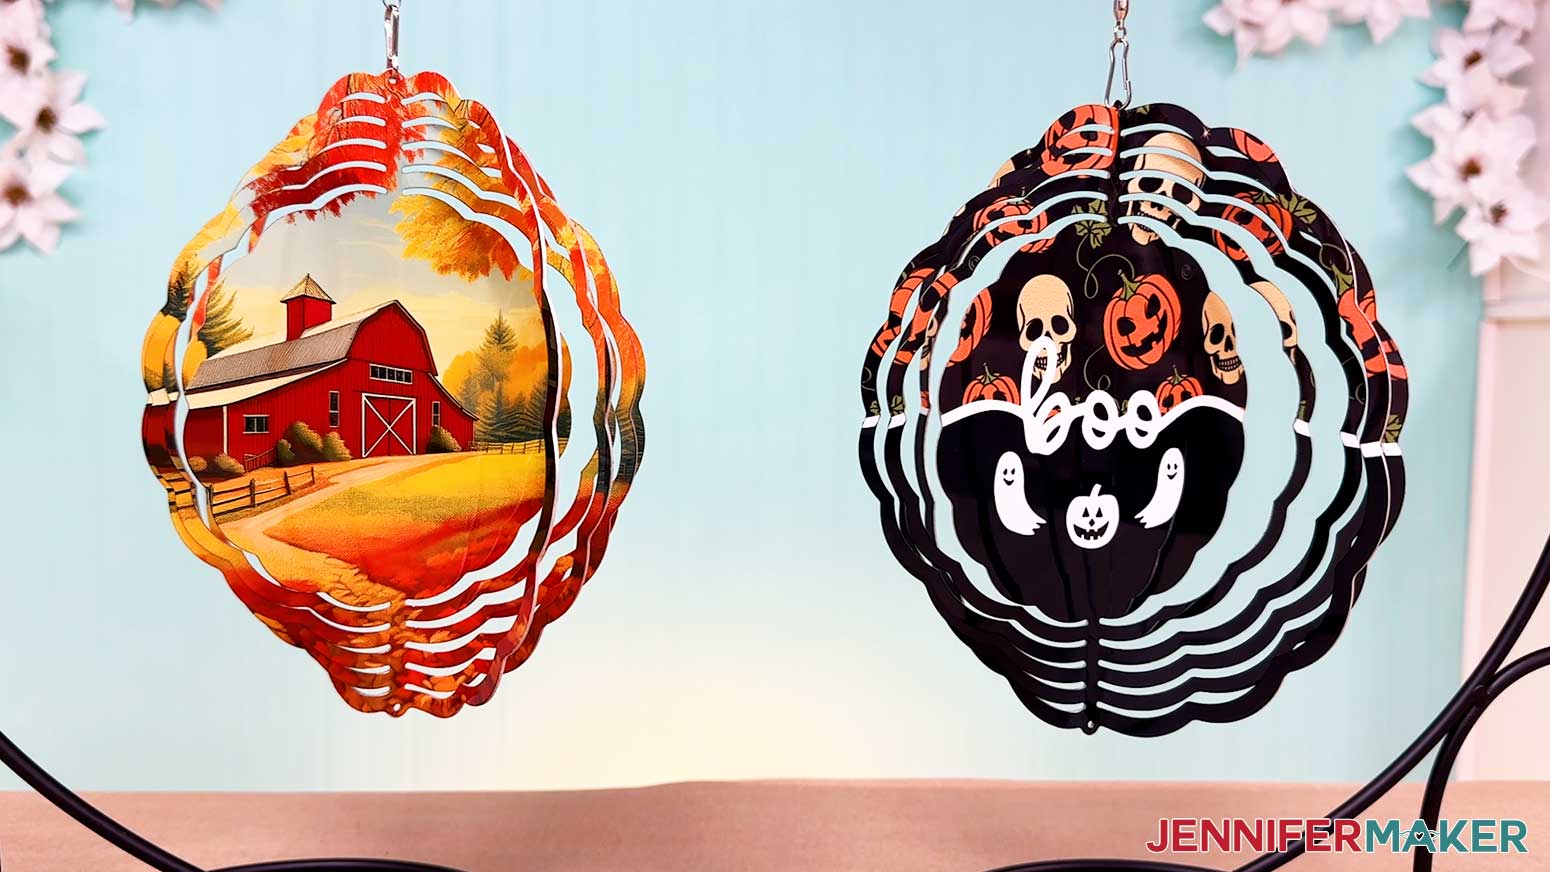
Notes
Finished Wind Spinner Size: 7 7/8" x 7 7/8" circle
Print Size: 8.25” x 8.25” print on an 8.5” x 11” piece of sublimation transfer paper
Care Instructions: Seal sublimated wind spinner with clear coat following the directions in Step 4 to protect from UV damage. Wipe sublimated wind spinner with a soft, damp cloth as needed.
Answers to Your Questions About Sublimating Wind Spinners
Q: I want to make my own wind spinner design. How do I design my own wind spinner?
A: You can learn how to design your own custom wind spinner design using Canva in my ADVANCE program. Learn more about ADVANCE here!
Q: How do I find images for my custom wind spinner?
A: You can use any of the images in my free library! You can also use your own photos and designs, images created through AI generators, graphics from Canva or other online sources, or stock photos for your wind spinner.
Q: What temperature do you sublimate a wind spinner at? How long do you sublimate a wind spinner?
A: I’ve included the temperature settings in my tutorial, or you can check out my Sublimation Cookbook to learn the settings for these and tons of other sublimation projects! It’s available here.
Q: Can I sublimate both sides of a wind spinner at the same time?
A: Each side of the wind spinner needs to be fully heat pressed to transfer the sublimation image, so I recommend sublimating each side of the wind spinner separately to ensure a quality transfer onto your blank.
Q: Does your tutorial cover how to open sublimation wind spinner rings?
A: It does! I cover a little bit of it in the blog post, but if you’re a visual learner you can find photos in the written tutorial above, or check out the video tutorial for step-by-step instructions.
Q: Do you mirror an image for sublimation on a wind spinner?
A: Yes you do! Always mirror your sublimation images so they transfer correctly onto your blank, especially if there are words or numbers in the design.
Q: Do you let sublimation cool before peeling?
A: As with most sublimation projects, you want to let your wind spinner blank cool a bit before removing the cardstock, tape, and design to avoid ghosting or smearing of the print. The metal will be hot, so be careful!
Q: Can I use the same sublimation print twice?
A: You may think you can, but you shouldn’t. After pressing, your sublimation transfer print may look like it has plenty of ink left in it for another pressing. Don’t be deceived! If you use the print again, your transfer will not turn out the way you expect, and you may end up wasting a perfectly good blank. A new print costs less time (and frustration) than a ruined blank, so just print another.
Q: Do you have other crafts like this one I can make?
A: I love making crafts for my garden! Get inspired by these backyard projects:
- Autumn and Winter Wind Spinner Designs
- Patriotic Wind Spinner Designs
- Spring Wind Spinner Designs
- Painted Garden Stepping Stone
- Floral Quote Garden Flags
- Stained Glass Inspired Garden Flags
- DIY Garden Retaining Wall
- DIY Gutter Garden on a Deck
- Repainted Garden Planters
- Custom Family Sign Post
Check out my free videos and tutorials to learn useful and popular crafting techniques, and take advantage of my unlimited downloads of SVG and PNG design files to create your own incredible crafts!
Q: Can I make and sell these wind spinner designs?
A: If you want to use my designs and projects for commercial use, please familiarize yourself with my important licensing information before selling your crafts.
Get my free PNG files to sublimate your own wind spinners!
(If you do not see the signup form above, click here.)
I love seeing what you make with my wind spinner designs, and how you use them! Inspire others and share a photo of your puzzle in our Facebook group or tag me on social media with #jennifermaker.
Love,

Want to remember this? Save this Sublimate a Wind Spinner Tutorial to your favorite Pinterest Board!