Learn how to make a perfectly-prepped layered garden lantern!
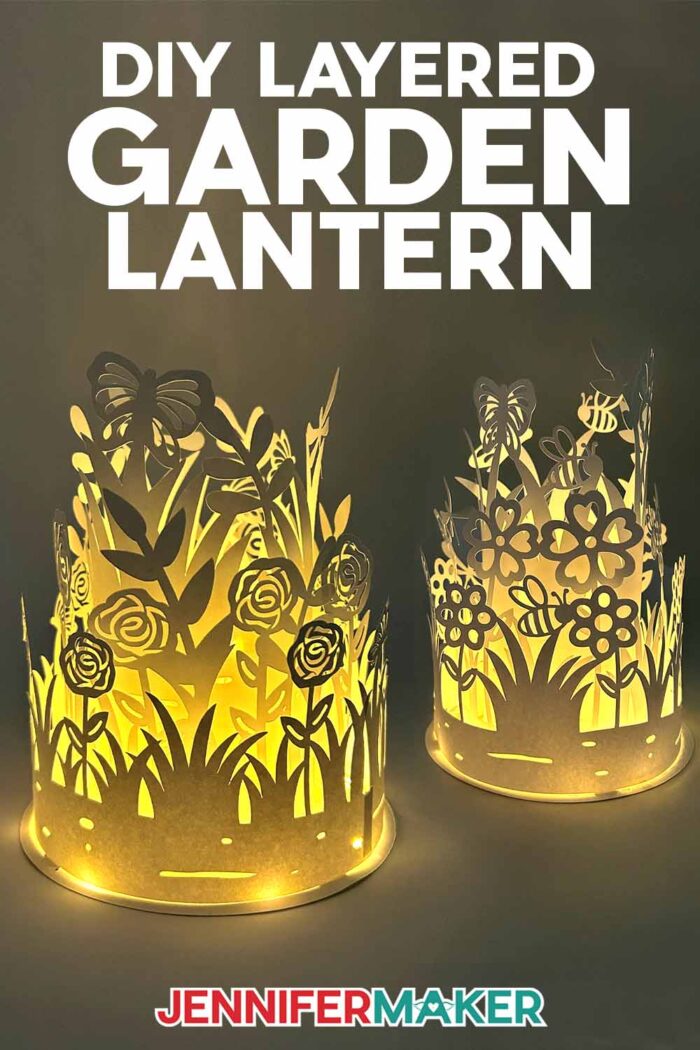
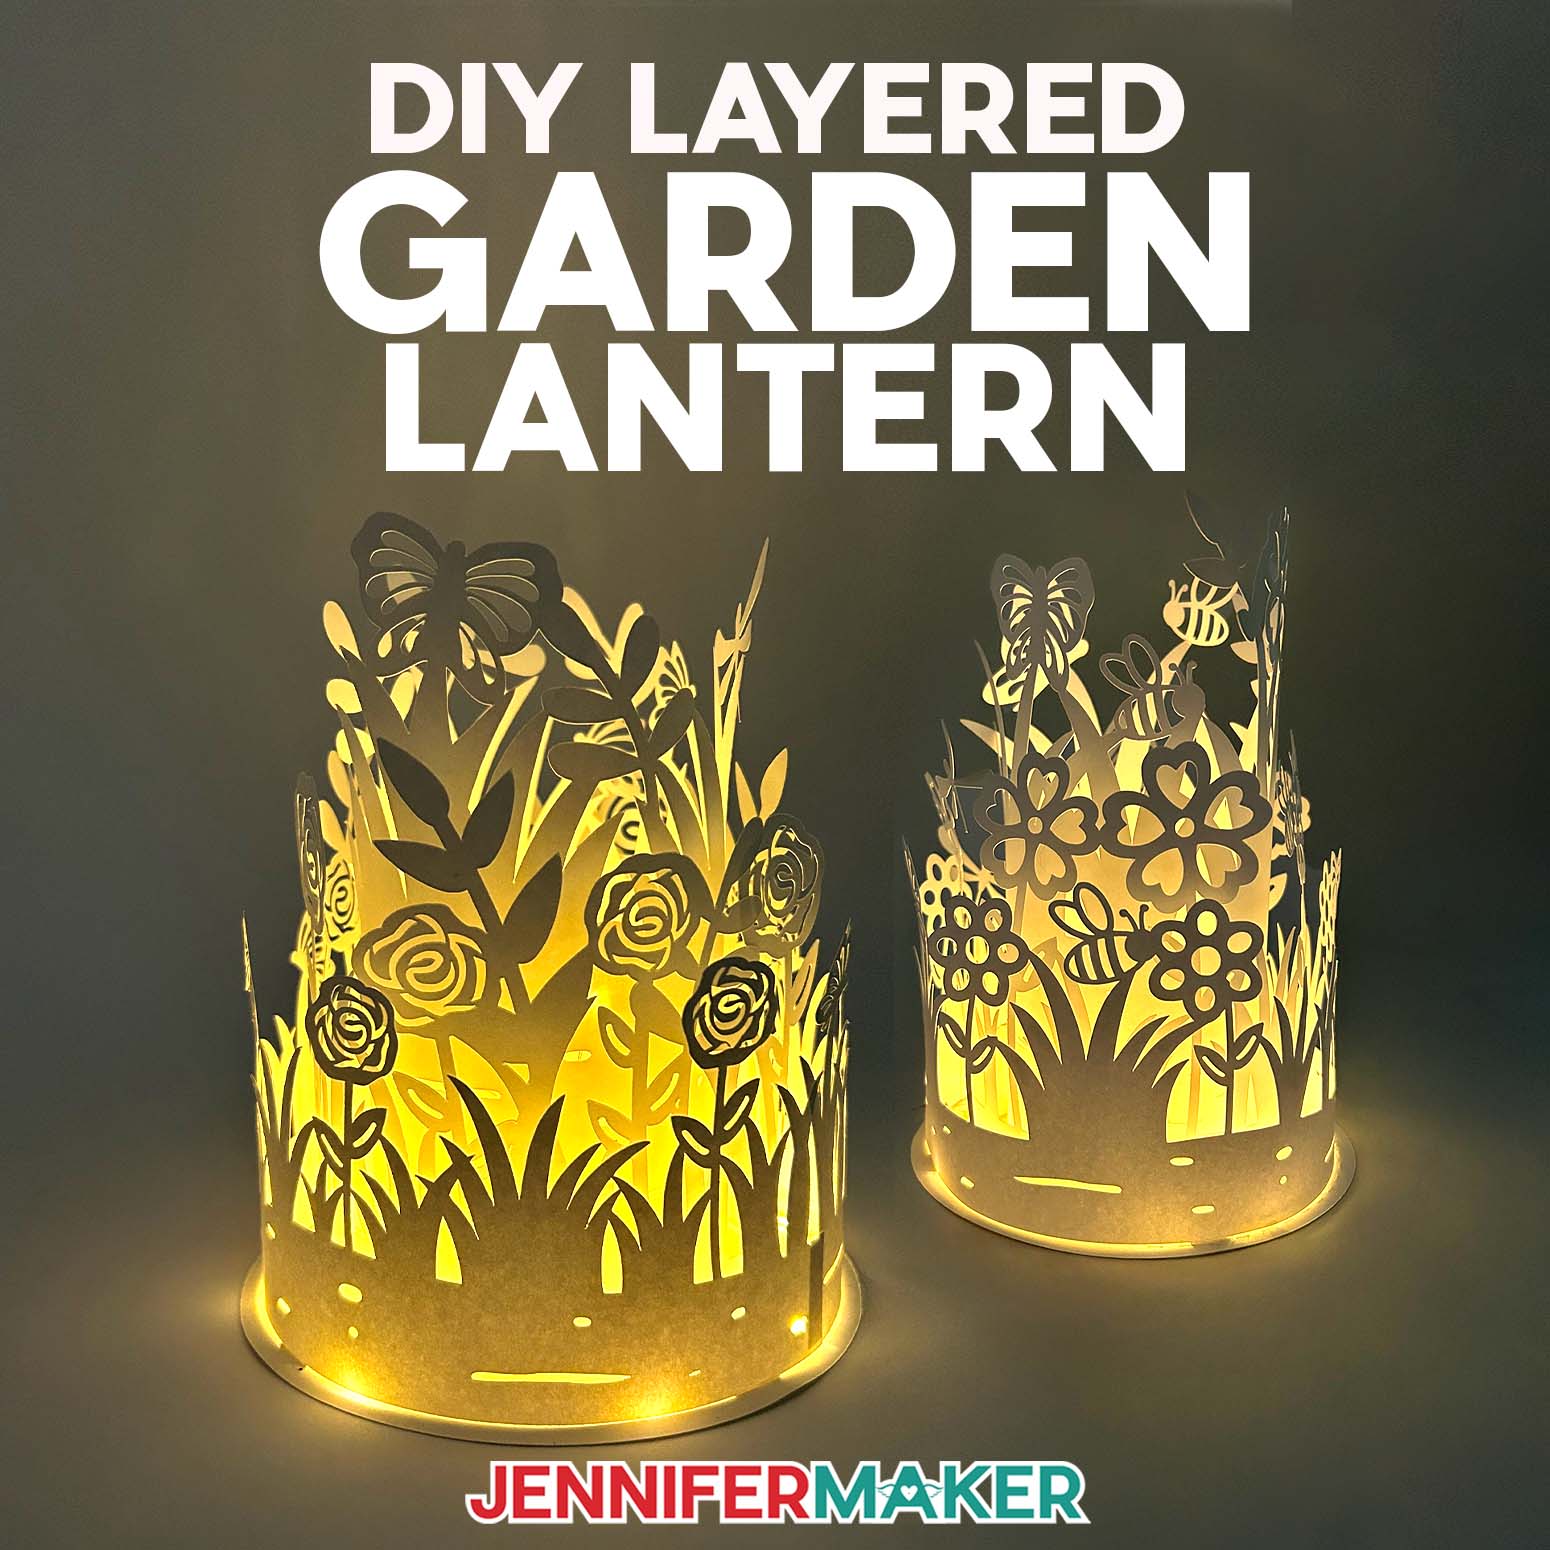
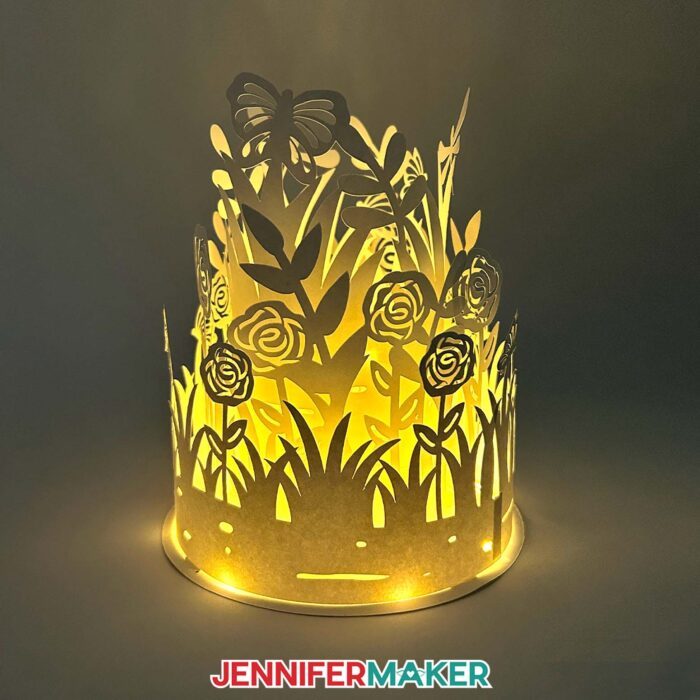
Want to make something stunning for spring? Check out my newest design: a dreamy layered garden lantern! It’s made of cardstock that glows from within using soft LED lighting, casting amazing shadows and bringing depth to the intricate garden scene! But do you know how to get the layers aligned so the lantern looks its best? If you love paper lanterns that double as whimsical décor, you are going to adore this project as much as I do – especially when I share my best assembly secrets!
Watch the full step-by-step video tutorial on how to make a layered garden lantern:

Some light-colored or white cardstock, a short strand of LED fairy lights, high-quality craft glue, and a few basic Cricut tools are the key ingredients you need to bring your layered garden lantern to life! Plus, I’ll show you how to create guide lines on the lantern’s base to make aligning the layers a breeze.
I’ll demonstrate how to make lines with a Cricut Pen, a scoring tool, and the fine-point blade that came with your Cricut. Then we’ll compare how they all look on a finished lantern, so you can learn which method works best for you.
I’ve included two versions of the design, so you have options for how you’d like to create the lines on your lantern base. If you want to use a scoring tool or a Cricut Pen to help with placement, go with the “score” file. If you’d rather skip that and just use your fine-point blade for dashed cut lines, choose the “no-score” version.
I’ll walk you through exactly how to assemble the lantern first so you can see the magic happen right away. The three cut layers fit around each other, with the tallest layer in the center. Creating beautiful depth and shadows with paper crafts like this feels like magic! The guide lines will help keep everything aligned, and your layered garden lantern will look amazing once it is lit. I just love making cozy spaces even more inviting using ambient lights with a warm, peaceful glow. There are paper lanterns … and then there are statement pieces like these!
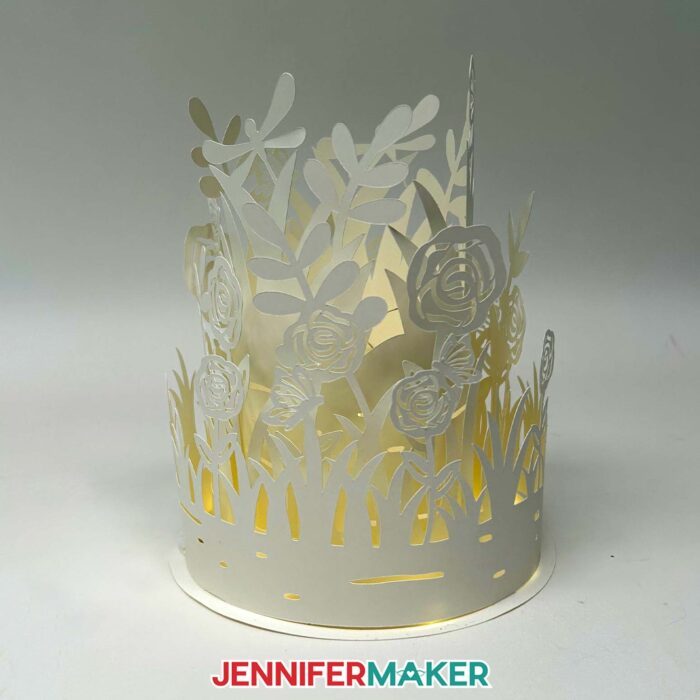
I used white cardstock to get that soft, dreamy light effect, but any light color cardstock will work beautifully to let light through. Think soft blush, buttery cream, or even a pastel green for a springy garden vibe! And if you’ve ever had trouble cutting white cardstock, don’t worry – I’ll share my best tips for the cleanest results, especially with intricate designs like my flower, leaf, and bug shapes.

My layered garden lantern design is sized for cutting machines like the Cricut Maker series, Explore series, or Venture. While it’s a bit too detailed for the Cricut Joy, you can size it down to cut on the Cricut Joy Xtra using 8.5″ x 11″ cardstock.
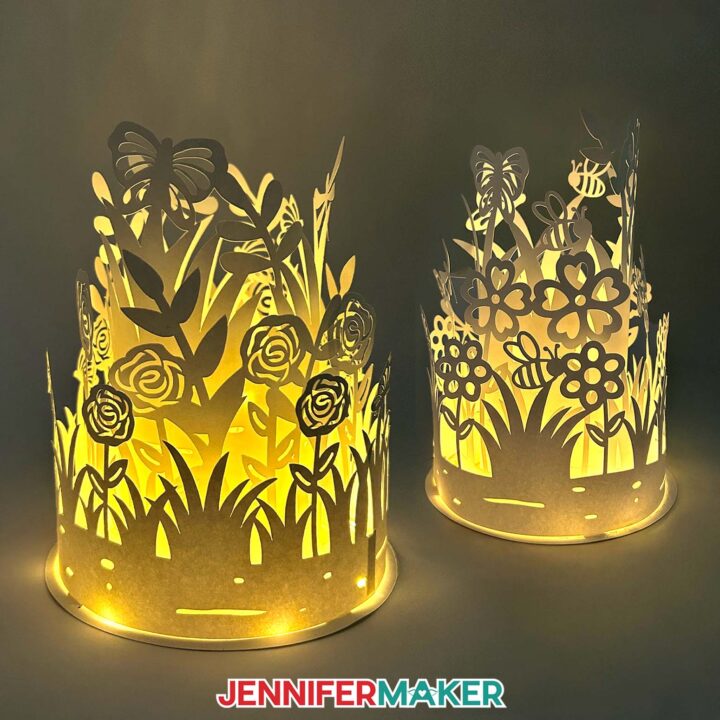
This layered garden lantern makes a perfect addition to your spring decor, glowing away in a cozy indoor nook. I love using them as table lamps for special gatherings or even as a permanent fixture on a bookshelf to give a little ambient lighting charm. You can even use them as a pretty outdoor light in your outdoor space for an evening get-together! Just bring them inside when you’re done. There’s nothing quite like watching the gentle garden lights gleam, and play off of the delicate shapes and shadows. I can’t wait to see how your lantern turns out!

If you’d like to create your own garden lantern with customized layer designs, I have a workshop just for you in my ADVANCE program. Learn more about ADVANCE with JenniferMaker here!
Let me show you how to make a layered garden lantern! This post contains some affiliate links for your convenience (which means if you make a purchase after clicking a link I will earn a small commission but it won’t cost you a penny more, there is no additional cost)! Read my full disclosure policy.
Materials to Make A Layered Garden Lantern
View my Amazon shopping list for the items I used to make this project!
- Three (3) Sheets of 12″ x 12″ 65-80 lb. White Cardstock
- One (1) Strand of 3.3′ LED Fairy Lights -OR-
- One (1) 7″ Round Wood Base (optional, for display)
- A way to cut your cardstock – I’m using the Cricut Maker 4, but you can also use another Cricut Maker series machine, a Cricut Explore series machine, the Cricut Venture, or the Cricut Joy Xtra
- Cricut Green StandardGrip Machine Mat 12″ x 12″
- Scoring Stylus (optional for creating the guidelines on the circular base) -OR-
- Single Scoring Wheel (optional for creating the guidelines on the circular base) -OR-
- Cricut Fine Point Pen in a Light Color (optional, for drawing the guidelines on the circular base)
- Craft Glue (I used Bearly Art Precision Glue)
- Small 3/16″ Zots Glue Dots (optional, for attaching the tabs and lights to the base)
- Brayer
- Spatula
- Scraper (optional to scrape cut cardstock off of the mat)
- Weeding Tool (optional for poking out small cutouts)
- Reverse-Action Tweezers (optional for placing lights)

How to Make a Layered Garden Lantern!
Layered Garden Lantern
Make a paper cut layered garden lantern to display!
Materials
- Three (3) Sheets of 12" x 12" 65-80 lb. White Cardstock
- One (1) Strand of 3.3' Fairy Lights
- One (1) 7" Round Wood Base (optional, for display)
- Small 3/16" Zots Glue Dots (optional, for attaching the tabs and lights to the base)
- Design #738 (My free SVG/PDF/DXF design files are available in my free resource library - get the password by filling out the form at the bottom of this page)
Tools
- A way to cut your cardstock - I’m using the Cricut Maker 4, but you can also use a Cricut Maker Series machine, a Cricut Explore Series machine, the Cricut Venture, or the Cricut Joy Xtra for smaller files without score lines.
- Cricut Green StandardGrip Machine Mat 12" x 12"
- Scoring Stylus (optional, for files with score lines) -OR-
- Single Scoring Wheel (optional, for files with score lines) -OR-
- Cricut Fine Point Pen in a Light Color (optional, for drawing guidelines on the circular base -- I used the color "Candy Corn")
- Craft Glue (I used Bearly Art Precision Craft Glue)
- Brayer
- Spatula
- Weeding Tool
- Scraper Tool (optional to scrape cut cardstock off of mat)
- Reverse-Action Tweezers (optional to place lights)
Instructions
STEP 1: GET MY FREE LAYERED GARDEN LANTERN DESIGNS
First, download my free layered garden lantern design from my free library – look for Design #738. Alternatively, you can use the Save This Project form near the top of this post and the design link will be emailed to you..
TIP: If you’re not sure how to upload, goto jennifermaker.com/svgs to learn how to unzip and upload SVG files.
Inside the SVG folder, you’ll see two versions of the design depending on the method you want to use to make the base’s placement guides. If you want to use a scoring tool or Cricut pen, use the “score” file. If you want to use dashed cut lines without a score tool, use the “no-score” file. I’ll cover when to use which method.
For this tutorial, I’ll show you how to make the version with score lines using a Fine-Point Blade, a Cricut Scoring Stylus, and a Cricut Pen, all with my Cricut Maker 4.
STEP 2: PREPARE AND CUT YOUR LAYERED GARDEN LANTERN DESIGN
CRICUT DESIGN SPACE
- In Cricut Design Space on a blank Canvas, click “Upload.”
- Click “Upload Image.”
- Click “Browse.”
- Find and select the SVG of your choice from the main SVG folder.
NOTE: I’ll demonstrate with the “score” version of the layered garden lantern design. - Click “Open” and then “Continue.”
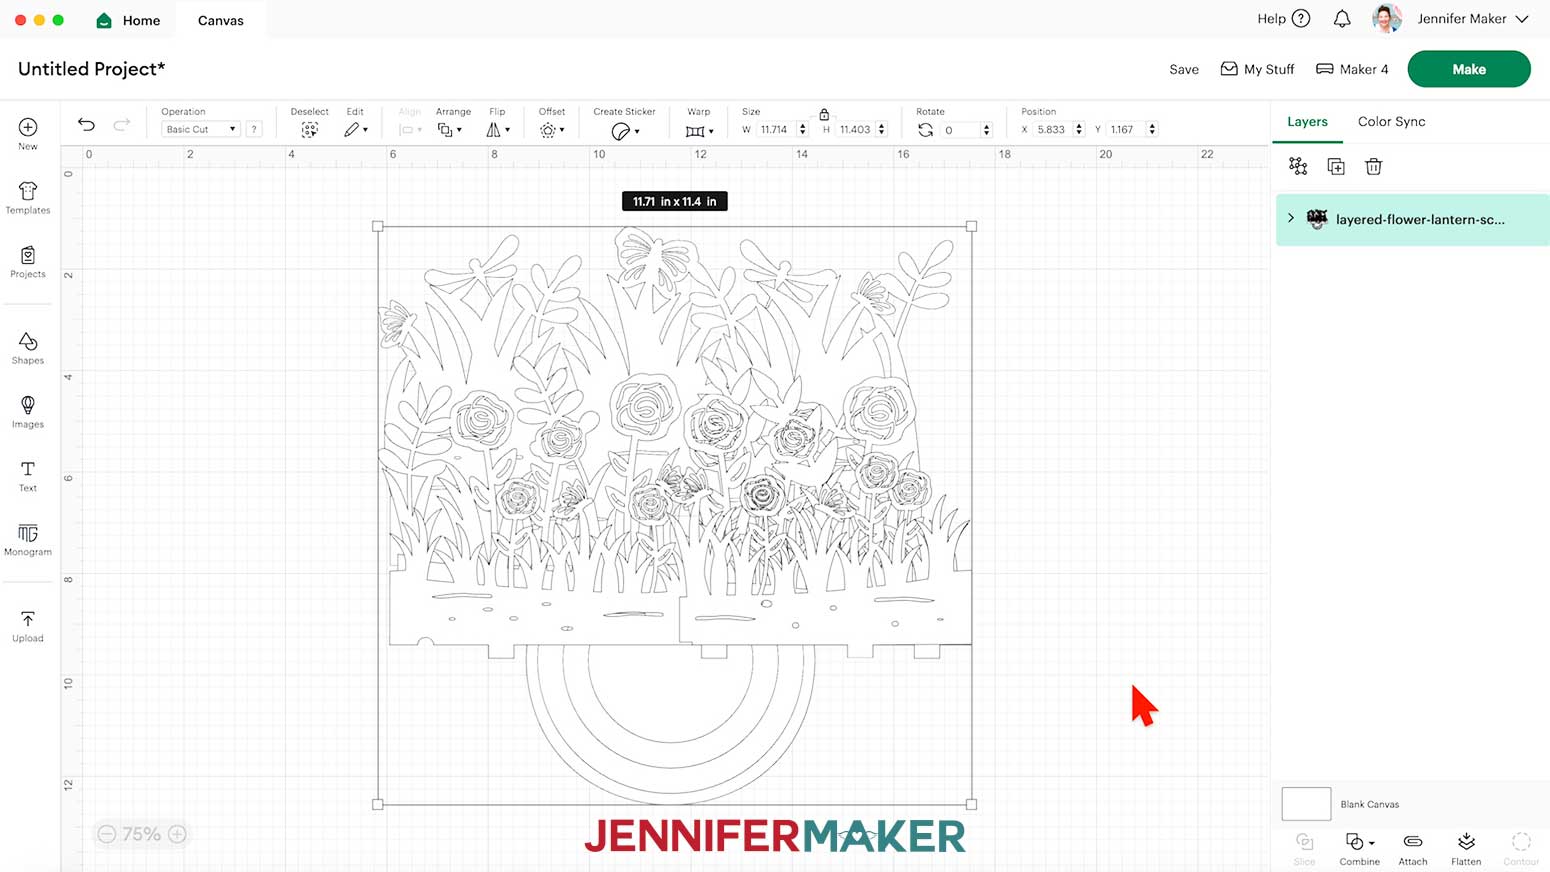
- Click “Upload” to add the design to your Canvas.

- Click “Save” and give your project a name.
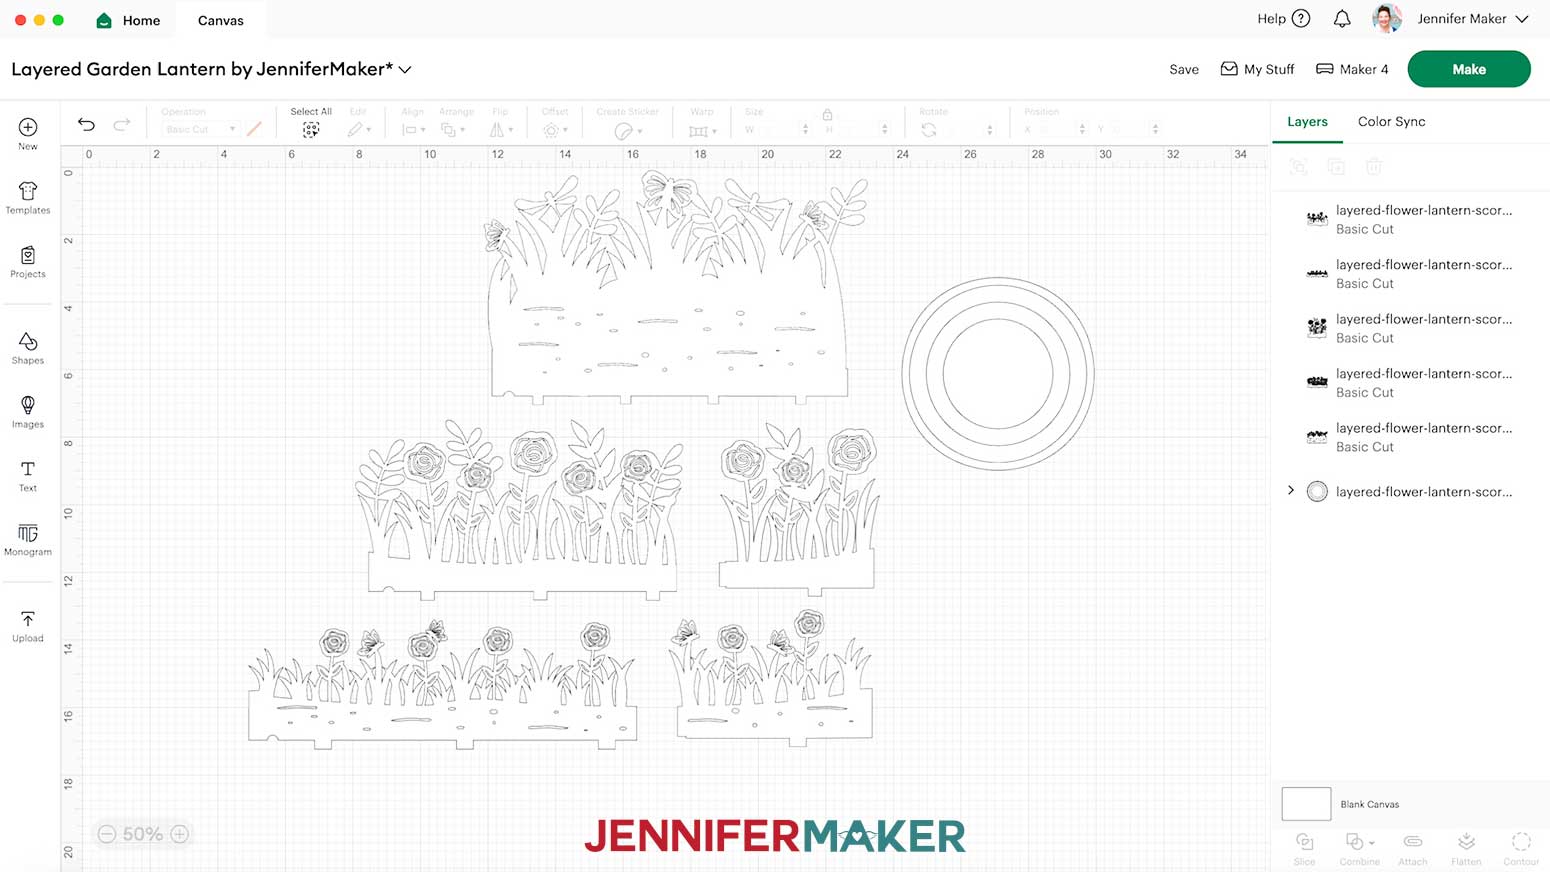
- “Ungroup” the design.
- Drag the layers of the design apart so you can see them all.
- To create the guidelines on the base layer, click the arrow next to the base in the Layers Panel to expand the group.
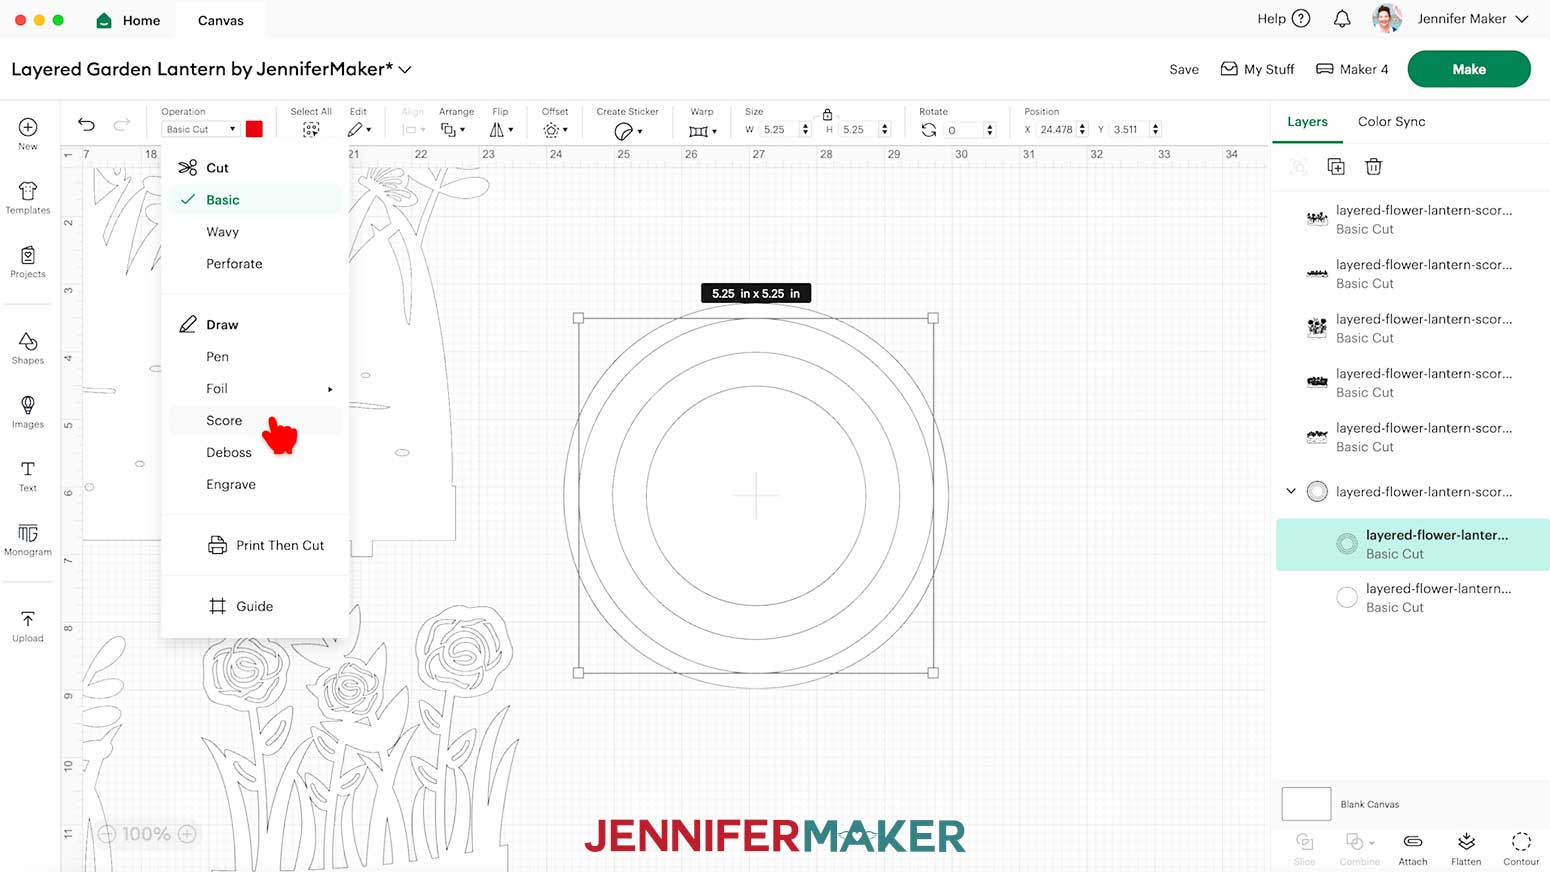
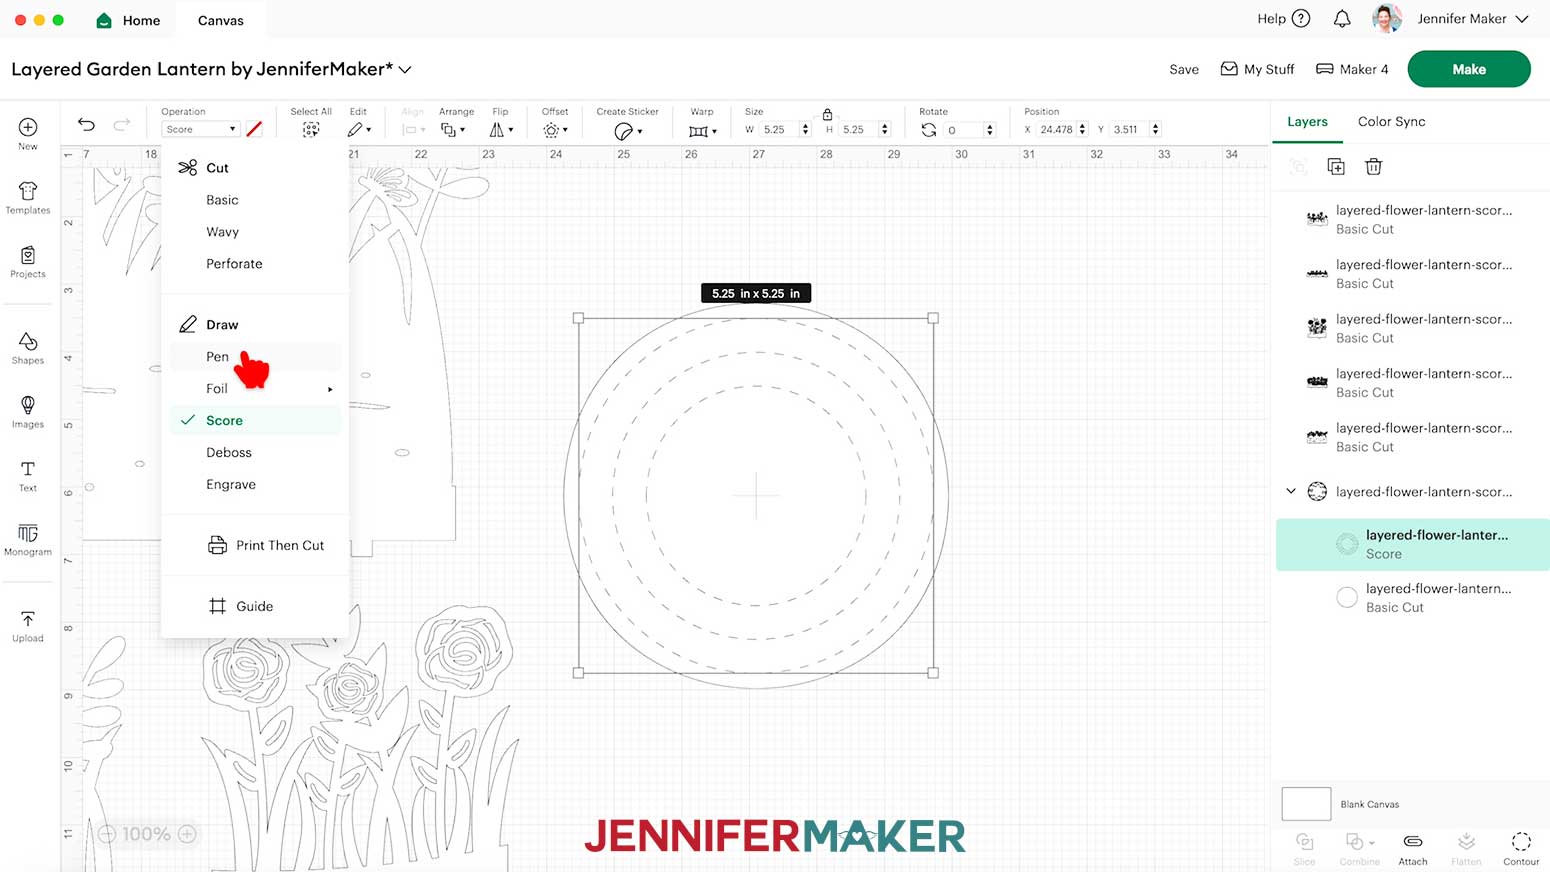
TIP: I’ll demonstrate by using the “score” version of the lantern design with a Cricut Pen. You can also use the “score” version of the design with a Scoring Stylus or Single Scoring Wheel. If you don’t have a scoring tool or Cricut Pen, use the no-score version of the file to create the guidelines. - If you’re using the no-score version of the design, skip to step 14. If you’re using the score version of the design, select the layer that looks like three concentric circles, then click the Operation drop-down menu. If you’ll use a scoring tool, select “Score.” If you’ll use a Cricut pen, select “Pen.”
- Click the square next to the menu, and select a color and size for your pen. Pick a color that will be subtle but visible on your lantern’s color. I used a 0.4 millimeter pen in the color "Candy Corn."
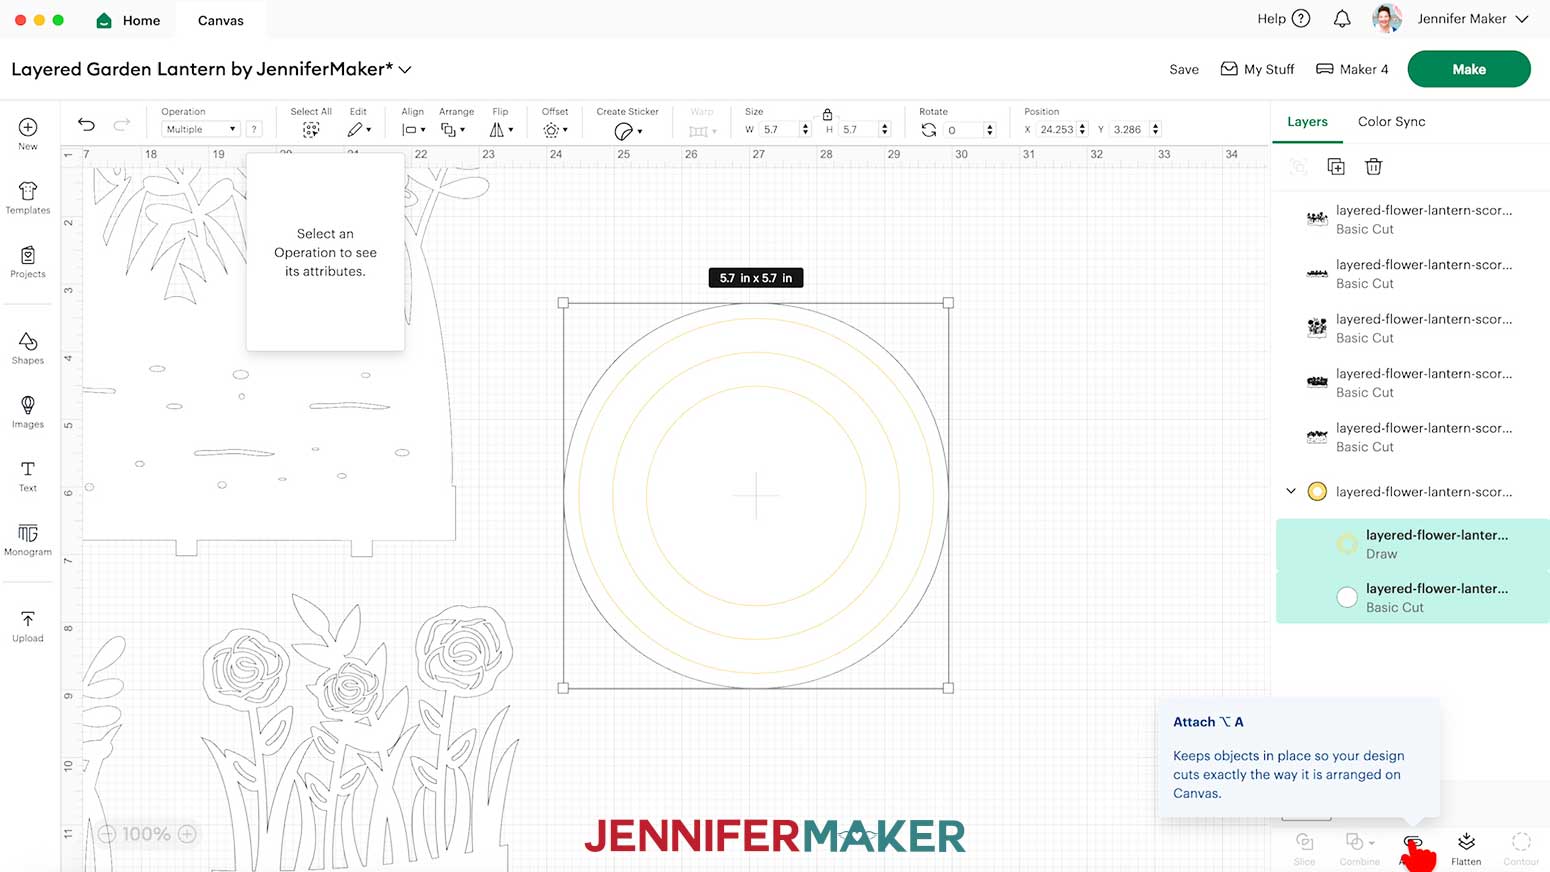
- Hold your “Shift” key on your keyboard, then select the new score or draw layer and the base’s solid circle layer, and click “Attach.”
- If you want to use different color cardstock for the pieces, select the appropriate layer in the Layers Panel and use the Color Box at the top to adjust it.
- Your lantern is ready to cut! Click “Make.”
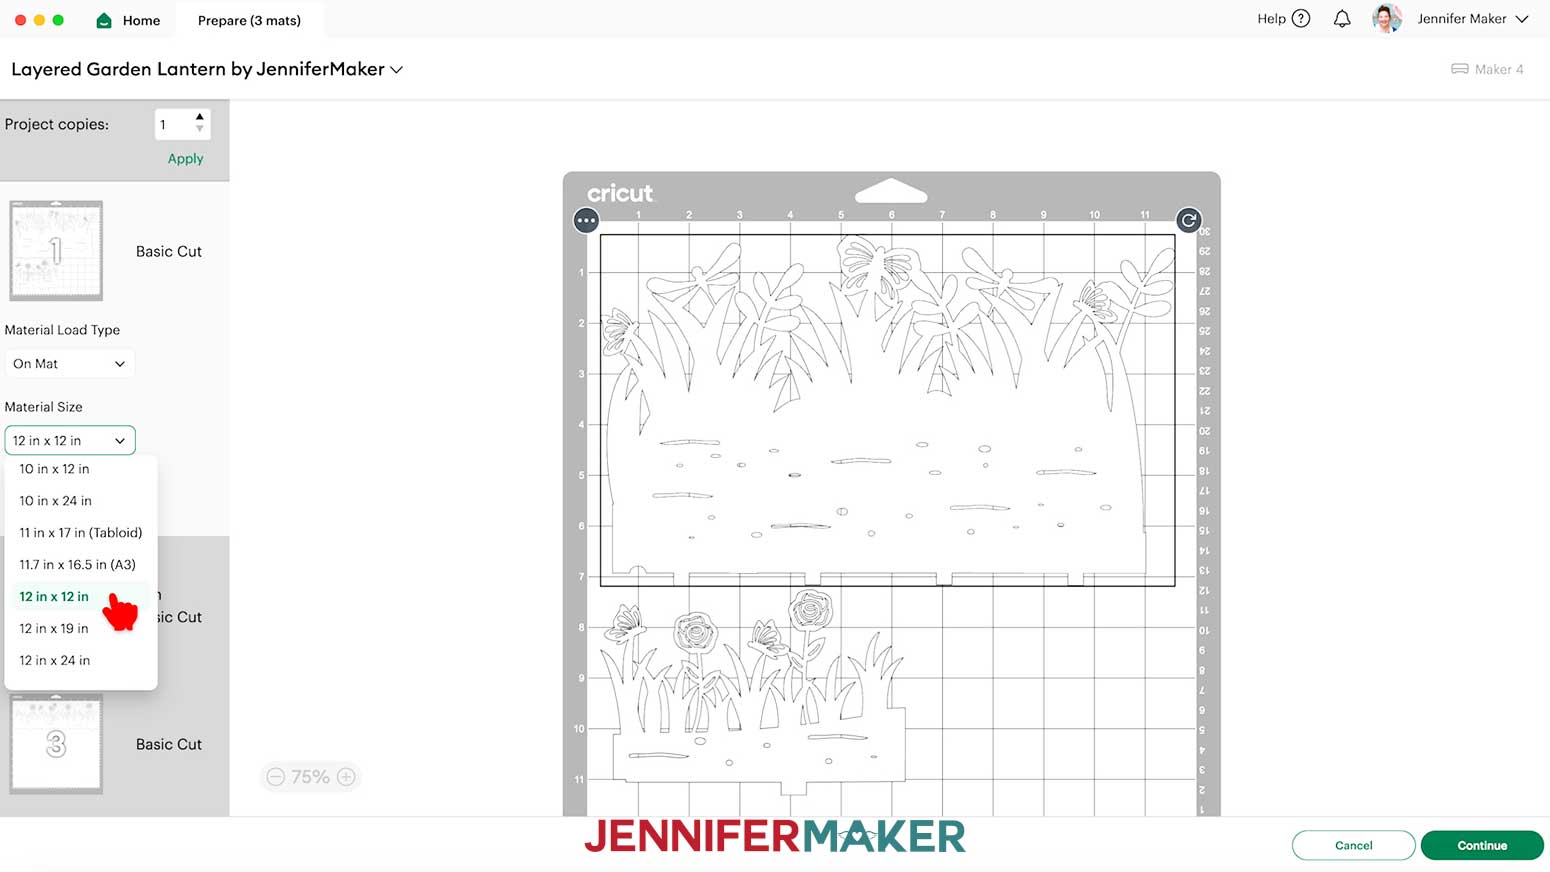
- If prompted, click "On Mat," choose your mat size, and click “Confirm.”
On the Prepare screen, make sure the correct Material Size is selected for each of your materials. - Select the first mat again and click “Continue.”
CUTTING
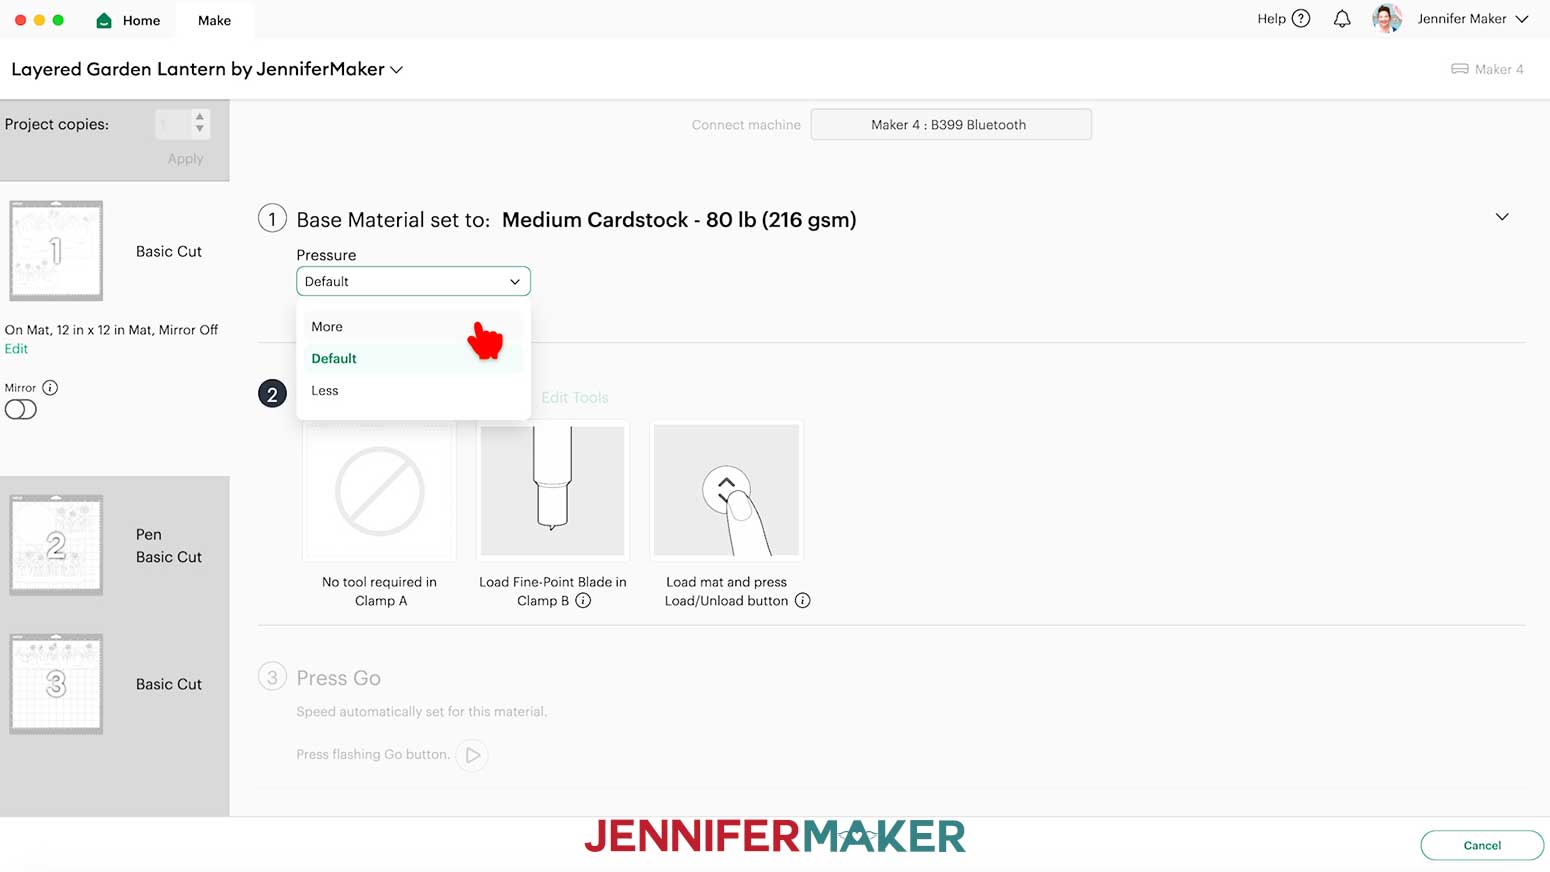
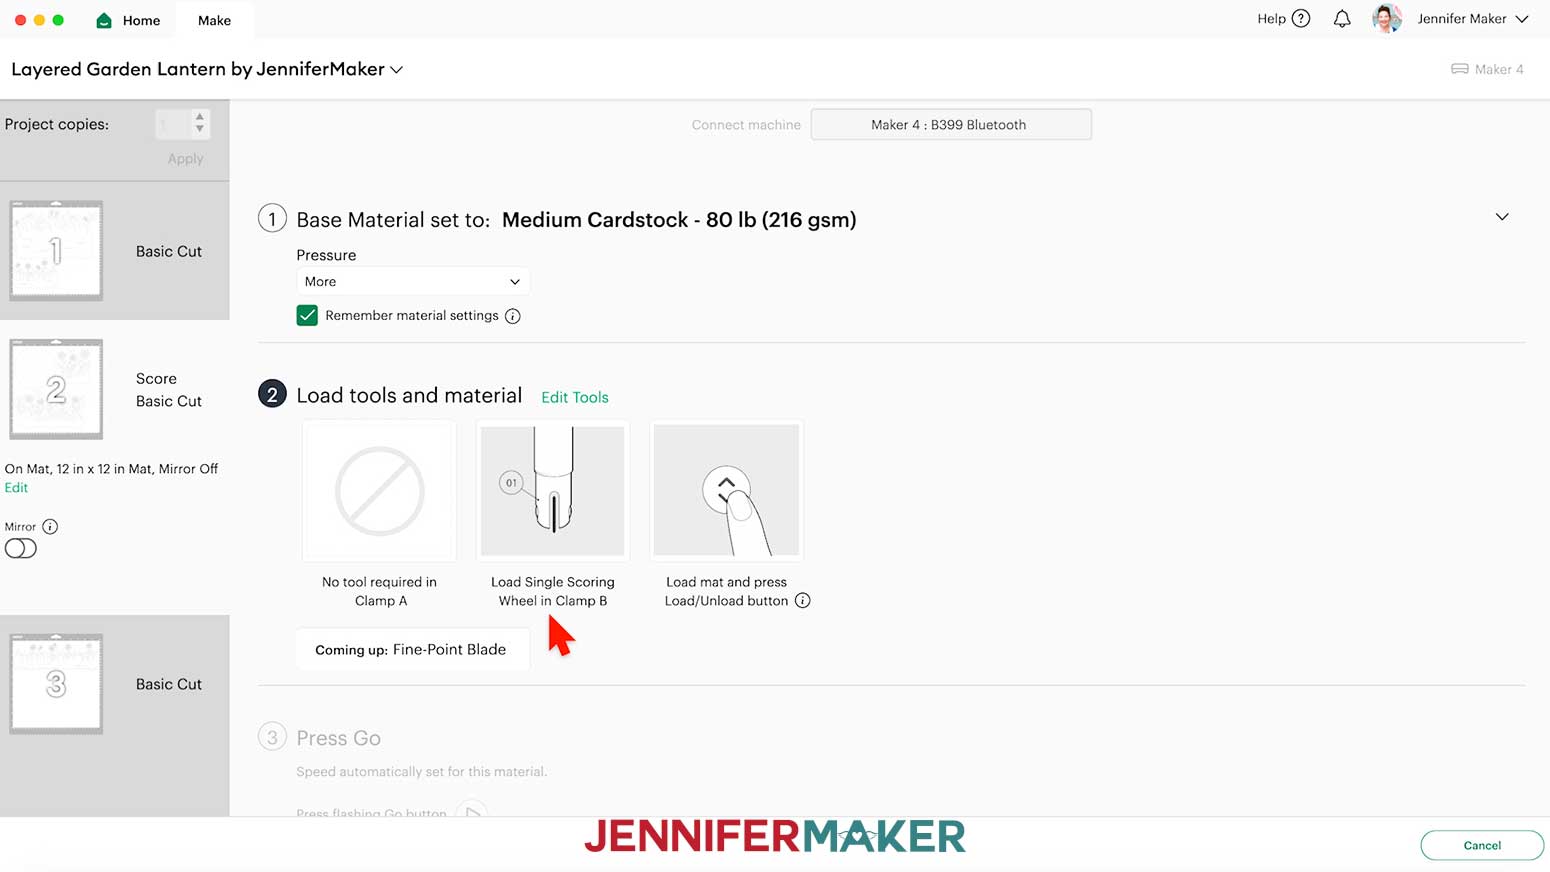
- On the Make screen, I used the “Medium Cardstock - 80 lb (216 gsm)” setting with “More” Pressure for my white 65 lb. cardstock.
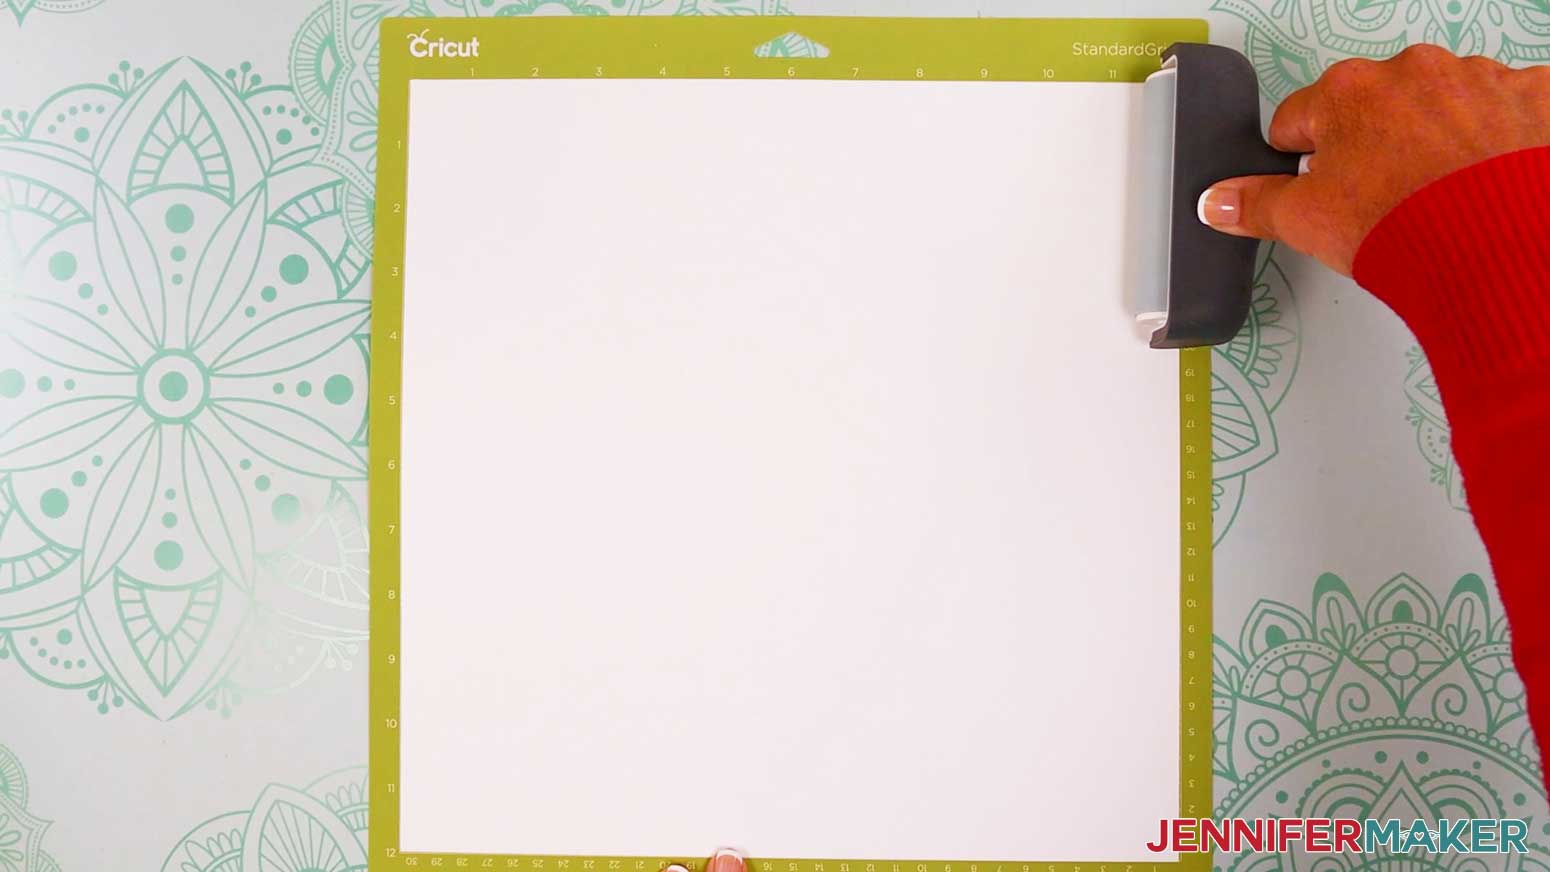
TIP: Check the “Remember material settings” box to save time between cuts. - Place your first mat’s material pretty-side up onto a green StandardGrip machine mat.
- Use a brayer to make sure it’s fully adhered.
- Check that your Fine-Point Blade is clean and in the clamp.
- Load your mat into your Cricut and press the flashing middle button to begin cutting.
- Before unloading the mat, use your weeding tool to peel back a corner of the material to make sure the cut went all the way through. If it didn’t, smooth the material back down into place and press the middle button again for another pass.
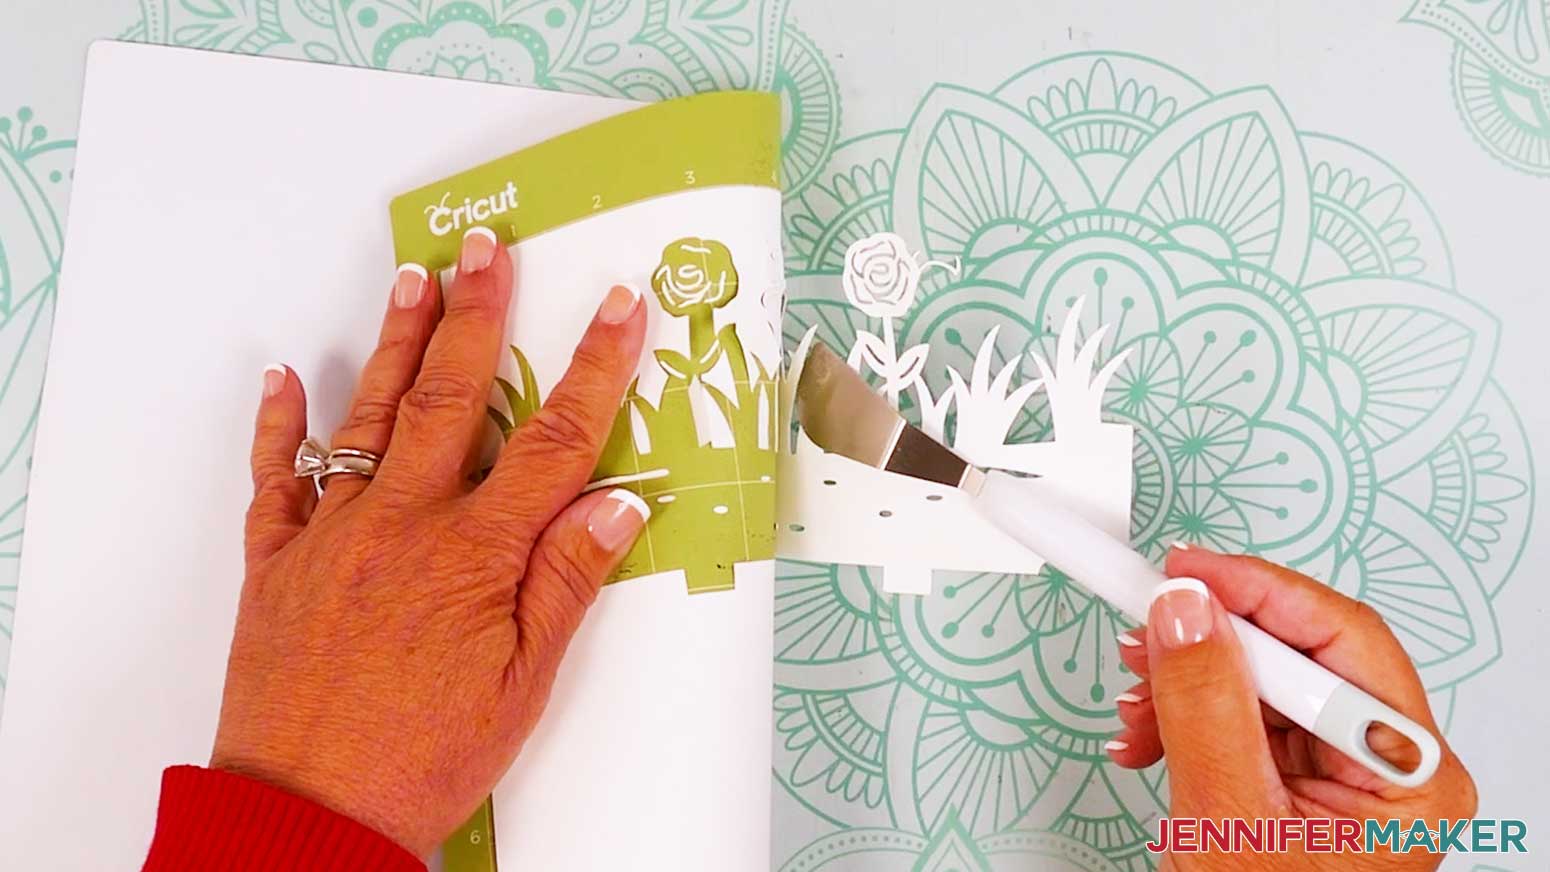
- Once the material is cut all the way through, unload the mat, flip it over onto your work surface, and roll it back to release the material.
NOTE: If you have any issues with your cuts, check out my Intricate Cuts tutorial. - Use a spatula to carefully remove delicate areas.
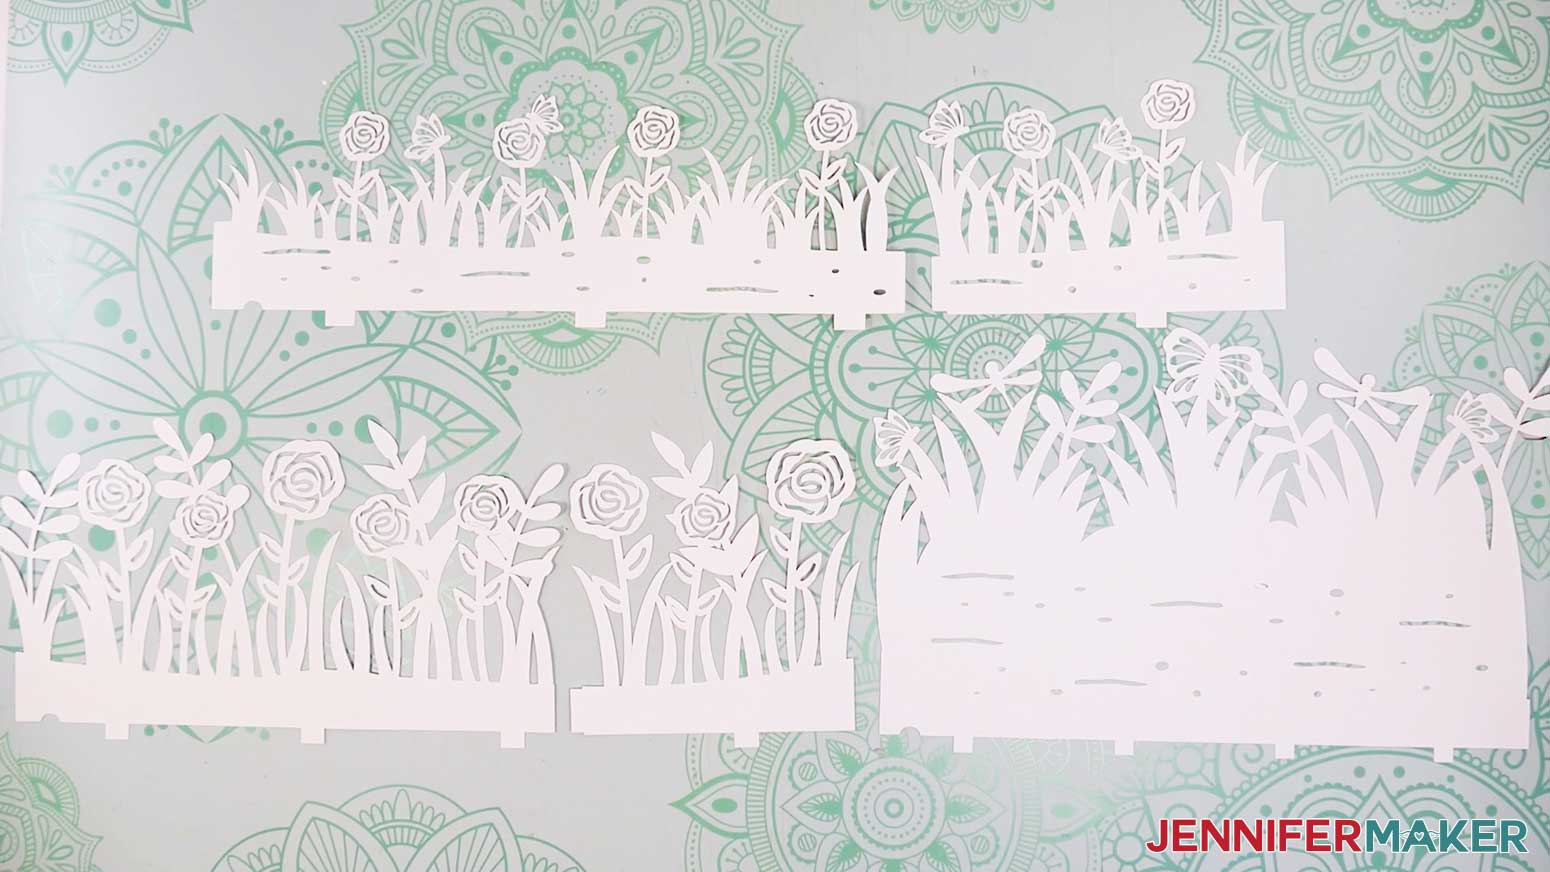
TIP: If any stubborn cardstock pieces stay attached to the cut pieces, use a weeding tool to carefully poke them out. - Place the cut pieces face up on your work surface. Use your Canvas in Cricut Design Space as reference if needed.
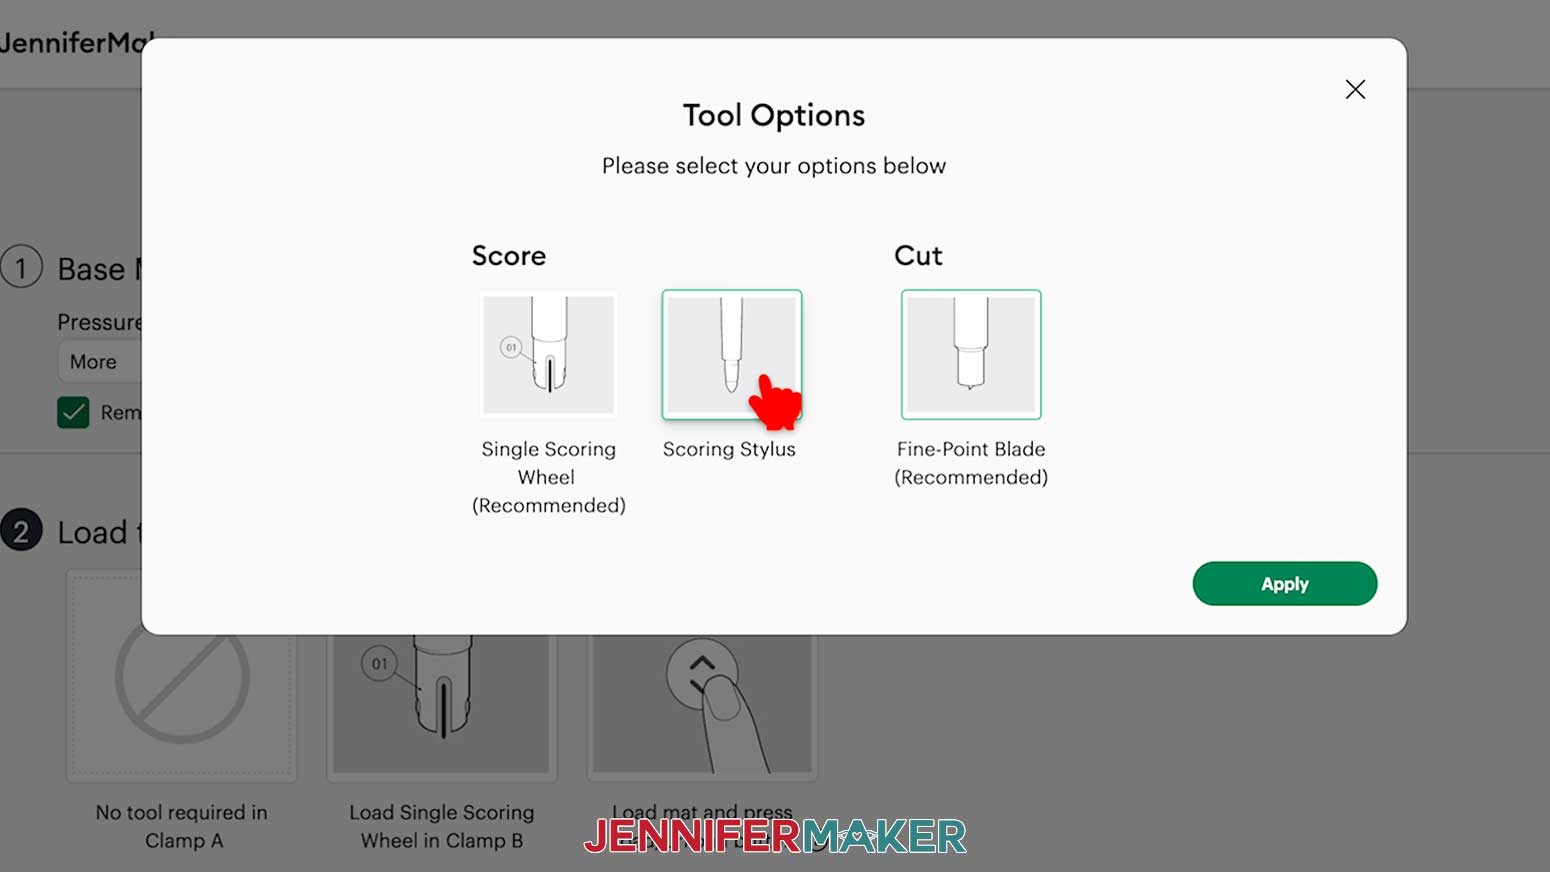
TIP: Use a scraper tool to push the remaining cardstock pieces off of your machine mat. - If you’re using the “score” file and marking the base’s placement guidelines with a scoring tool, the Single Scoring Wheel will be selected by default. If you’re using one, follow the prompts to insert it into the correct clamp when your Cricut is ready. If you’re using a Scoring Stylus, click “Edit Tools,” select it, then insert your Scoring Stylus into the correct clamp now.
- Or, if you’re drawing the guidelines with a Cricut Pen, test your chosen pen on scrap paper, put the cap on the back, and insert it into the correct clamp now.
- Follow steps 2-11 to continue cutting the rest of your mats.
STEP 3: ASSEMBLE YOUR LAYERED GARDEN LANTERN
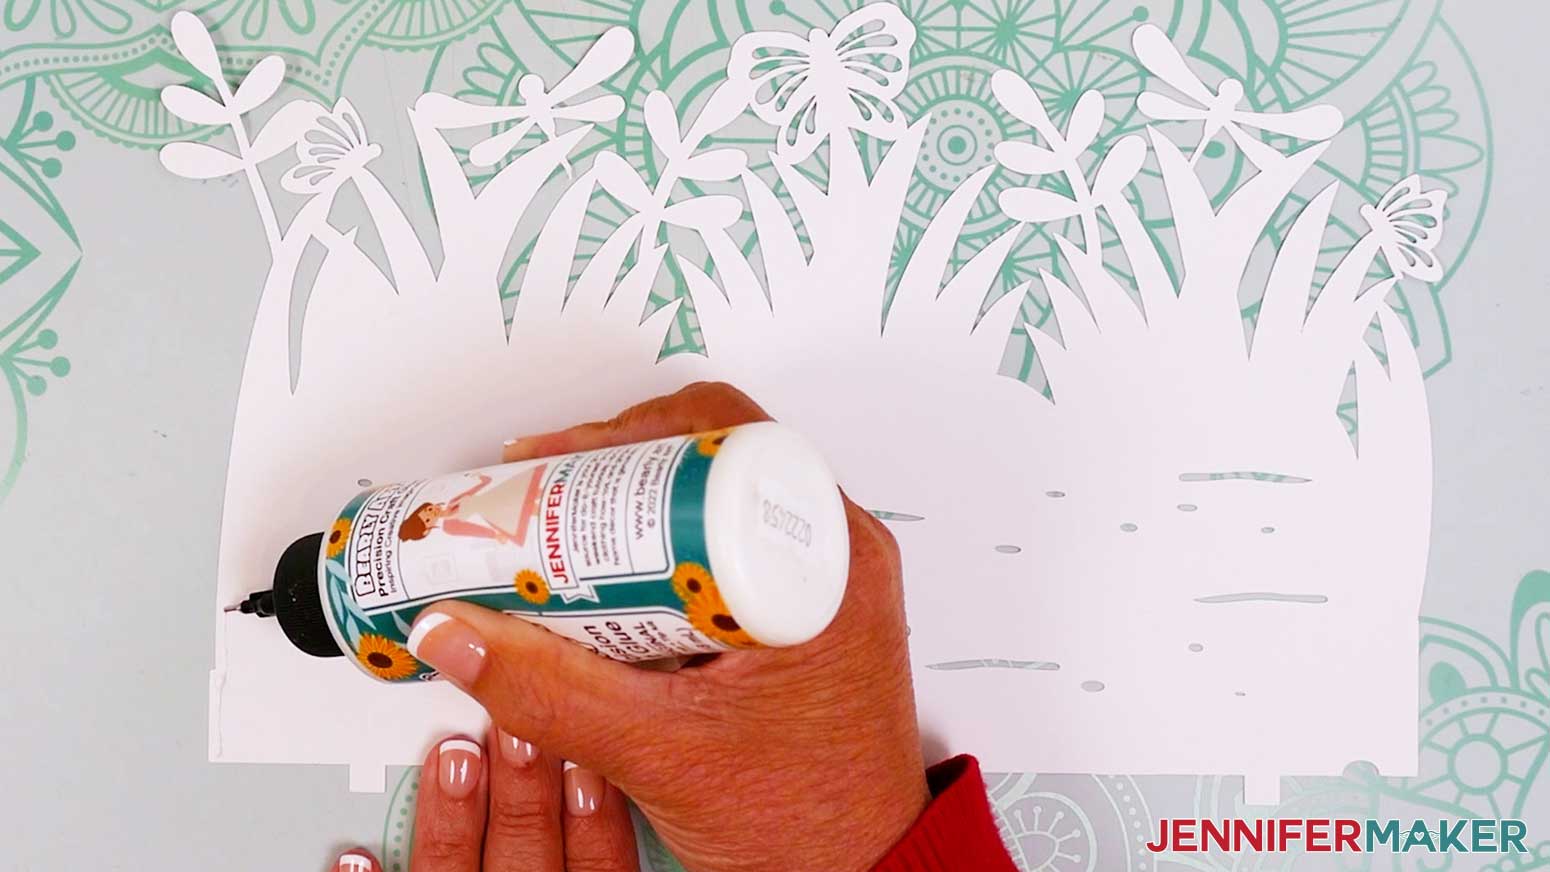
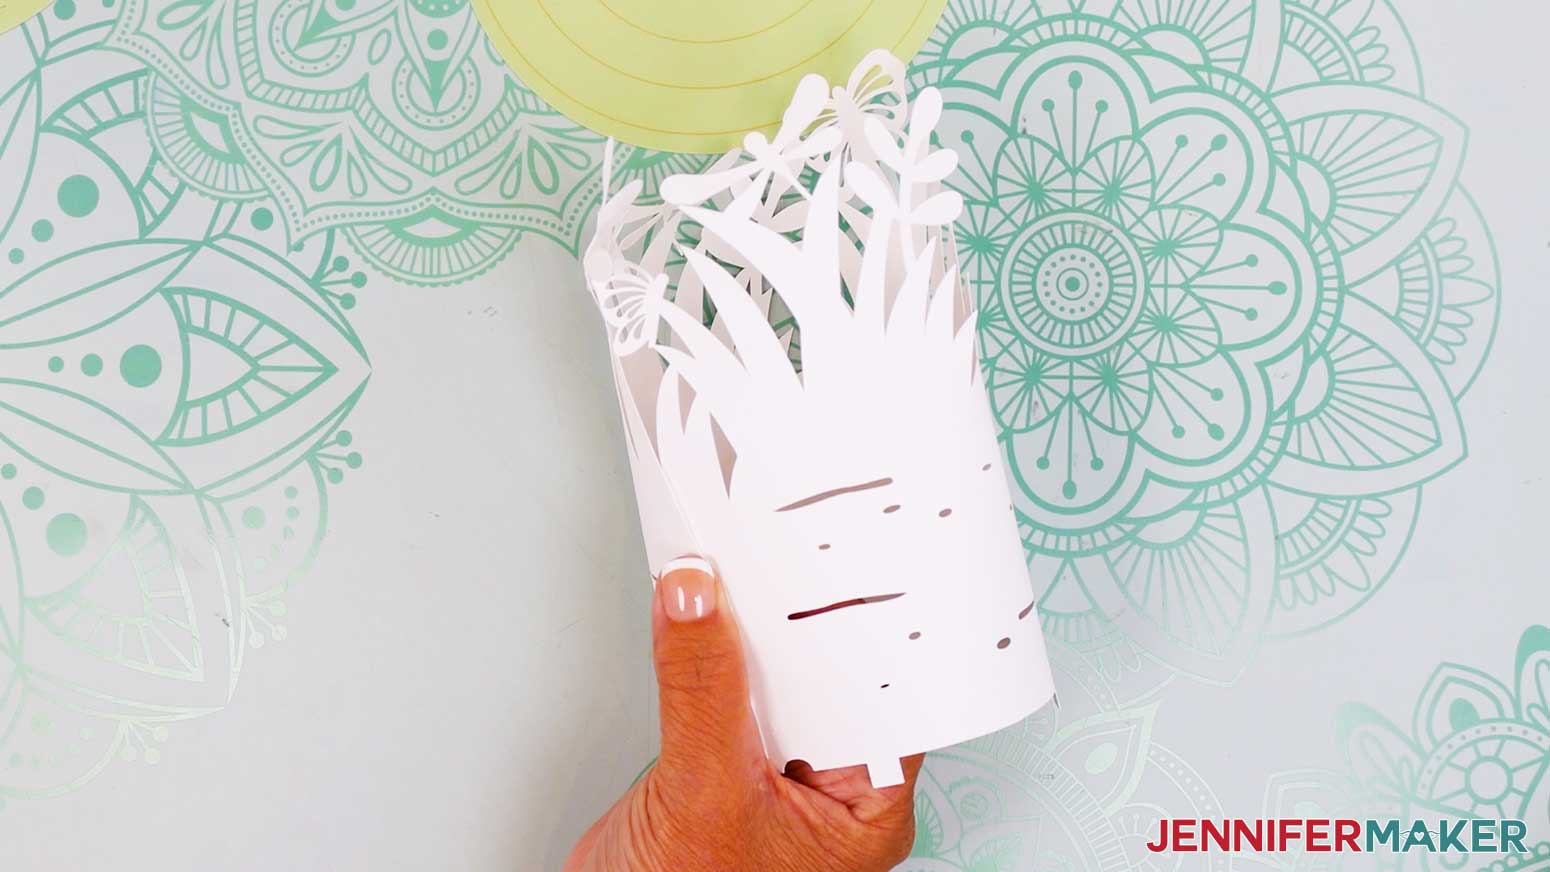
- The inner layer (with dragonflies and butterflies) is only one piece. Turn it face down, then apply a line of glue vertically along one end of the layer’s side tab.
- Curve the piece into a ring or cylinder shape so the tab overlaps with the other end about 0.25”. Keep the semicircle notch along the bottom clear. Hold the glued section until it sets.
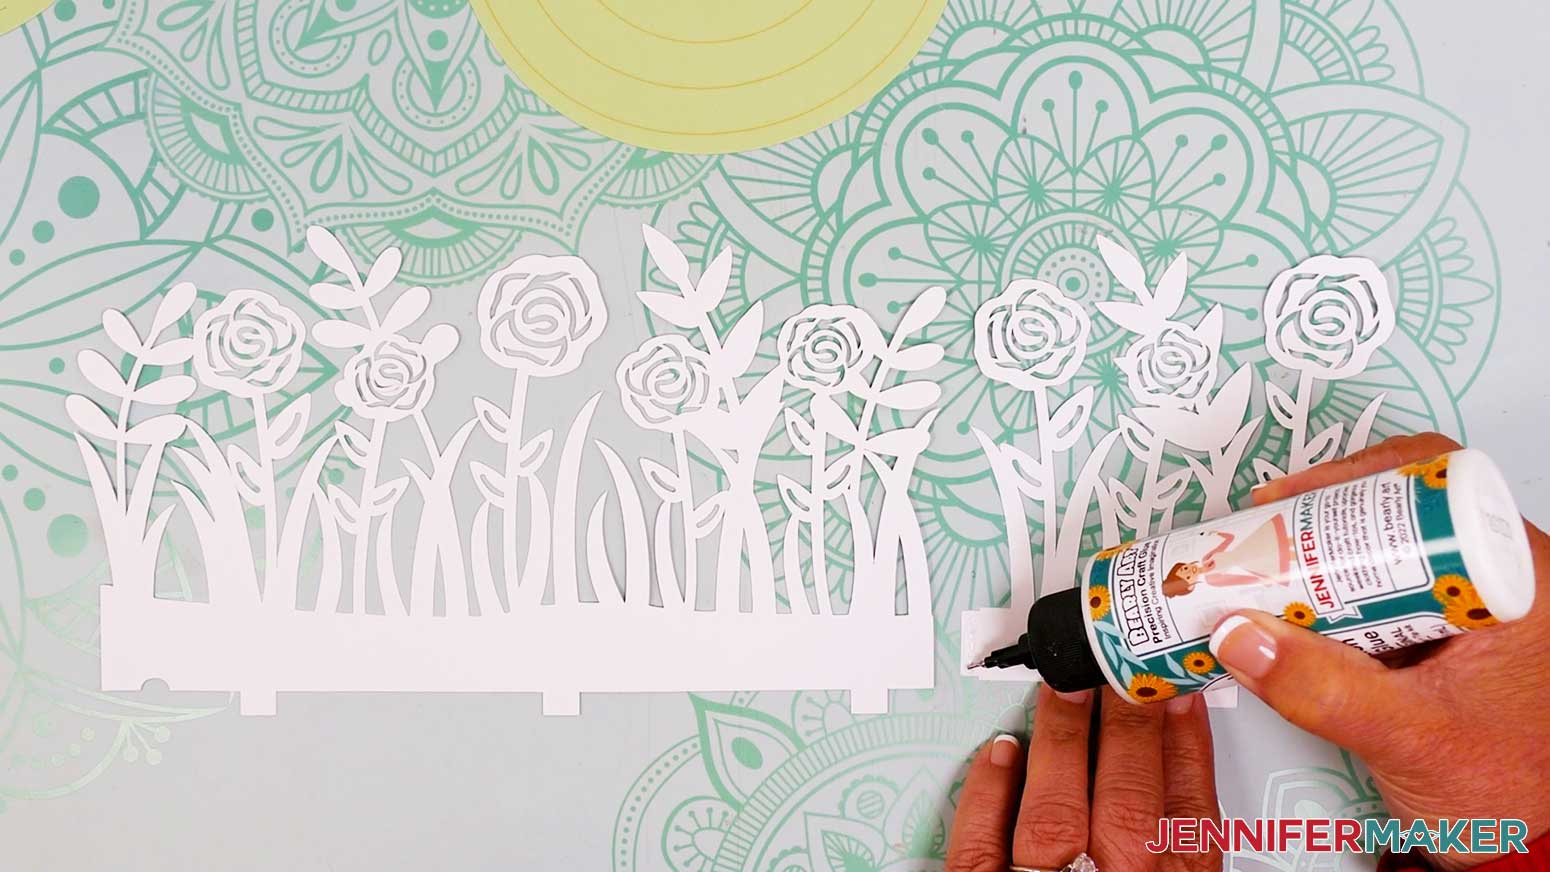
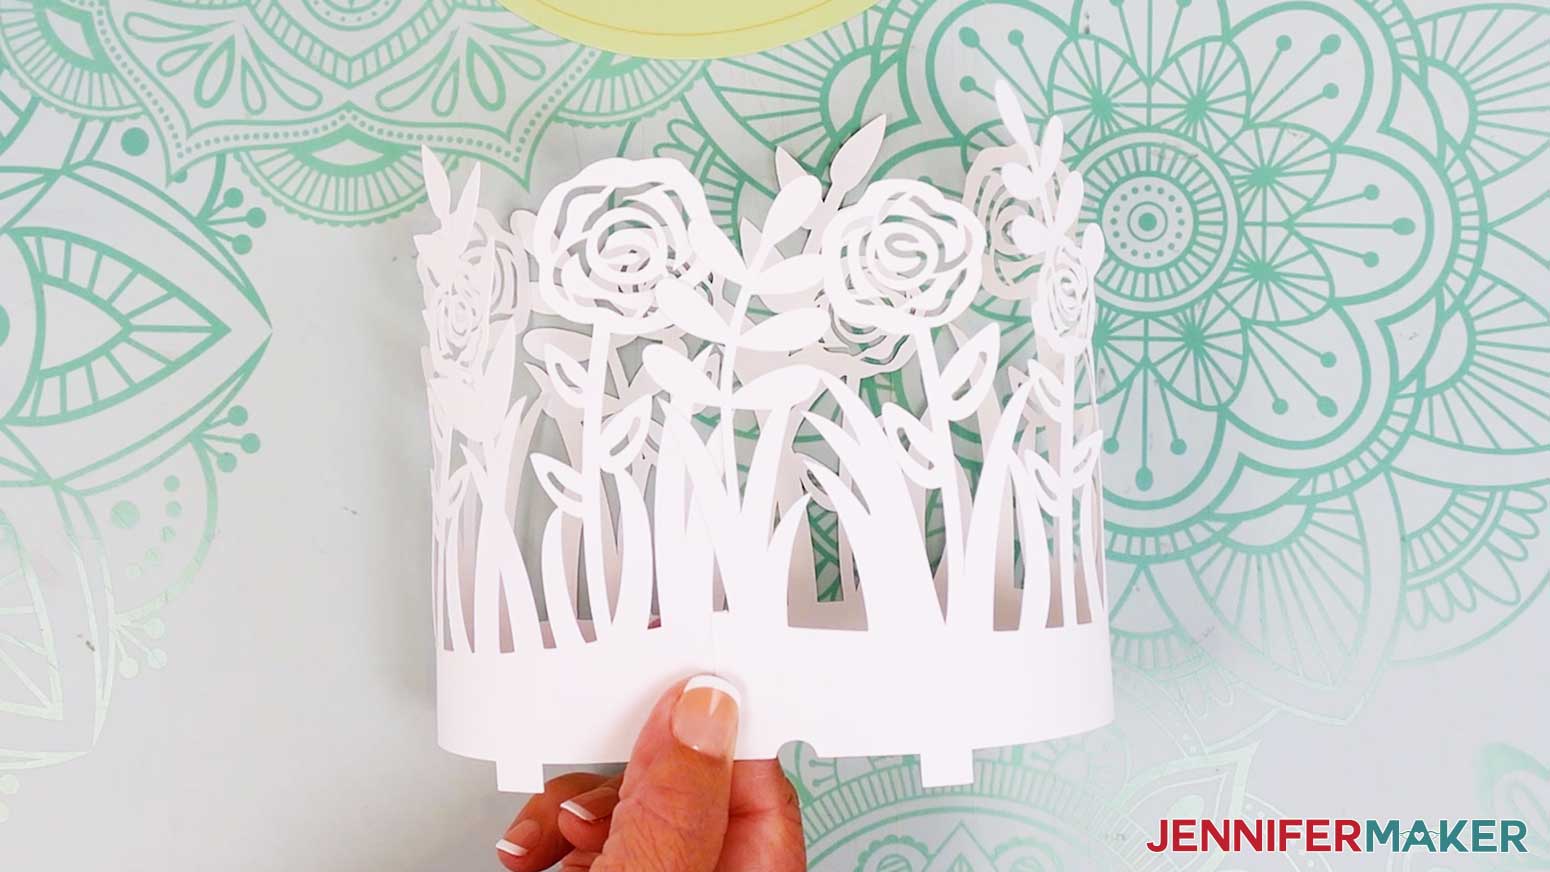
NOTE: The cut details at the top may not curve along with the shape of the bottom yet – don’t worry, we’ll shape them later. - Find the two pieces for the middle layer (with large roses, grass, and leaves) and make sure they’re face up on your work surface.
- One piece has a tab on one end. Apply a line of glue to the front of the tab.
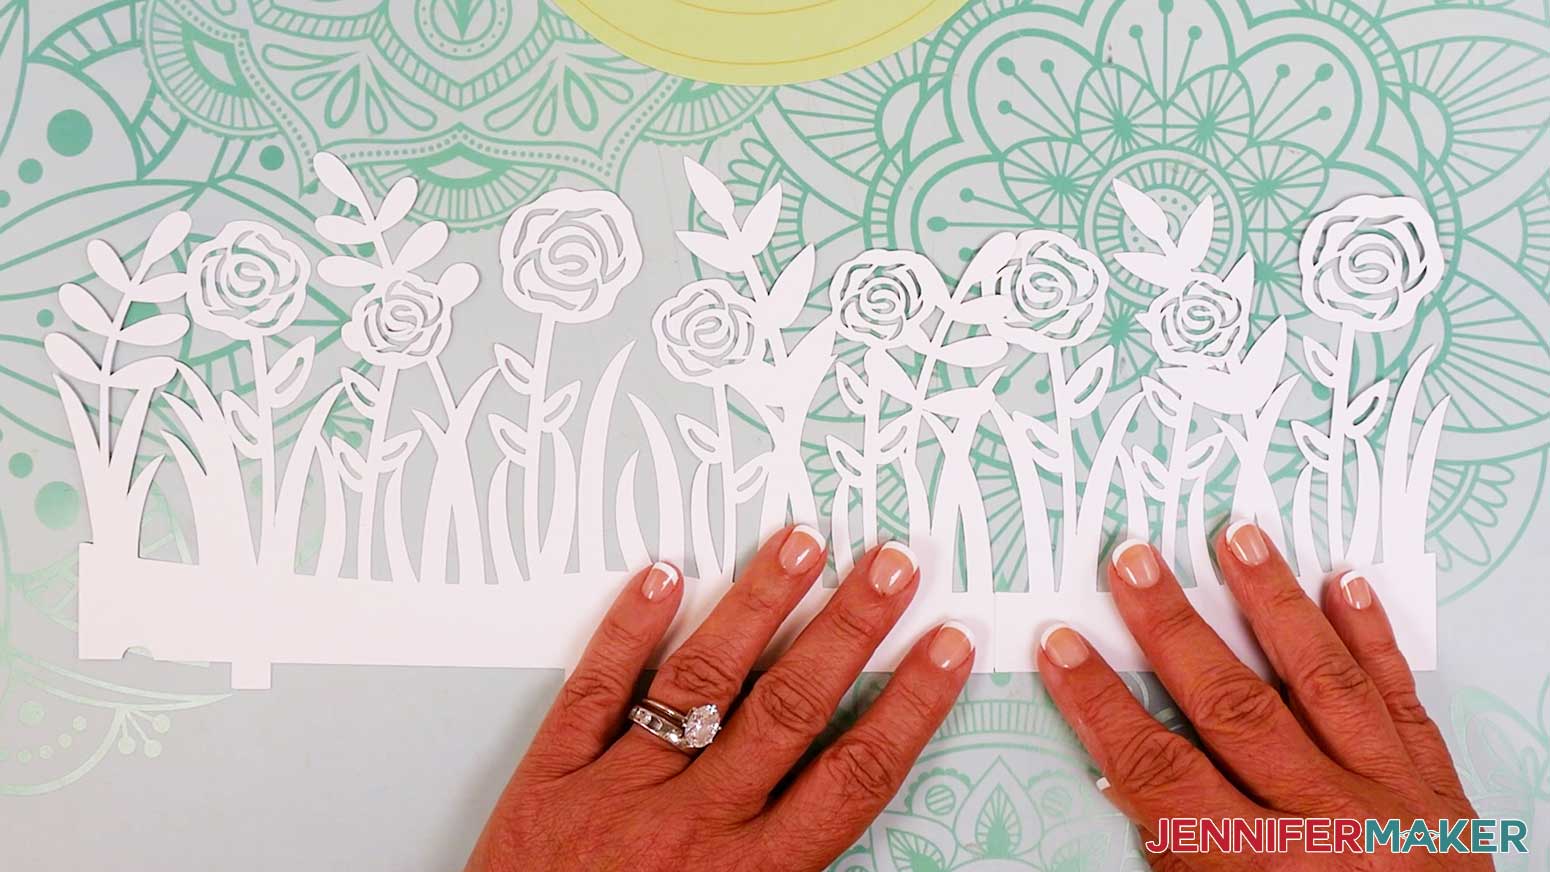
- Overlap the glued tab with the piece’s other end about 0.25”. Be sure the bottom edges align, then press the ends together. The glued joint needs to be really dry to avoid popping open when you glue it into a ring, so let it sit for a few minutes.
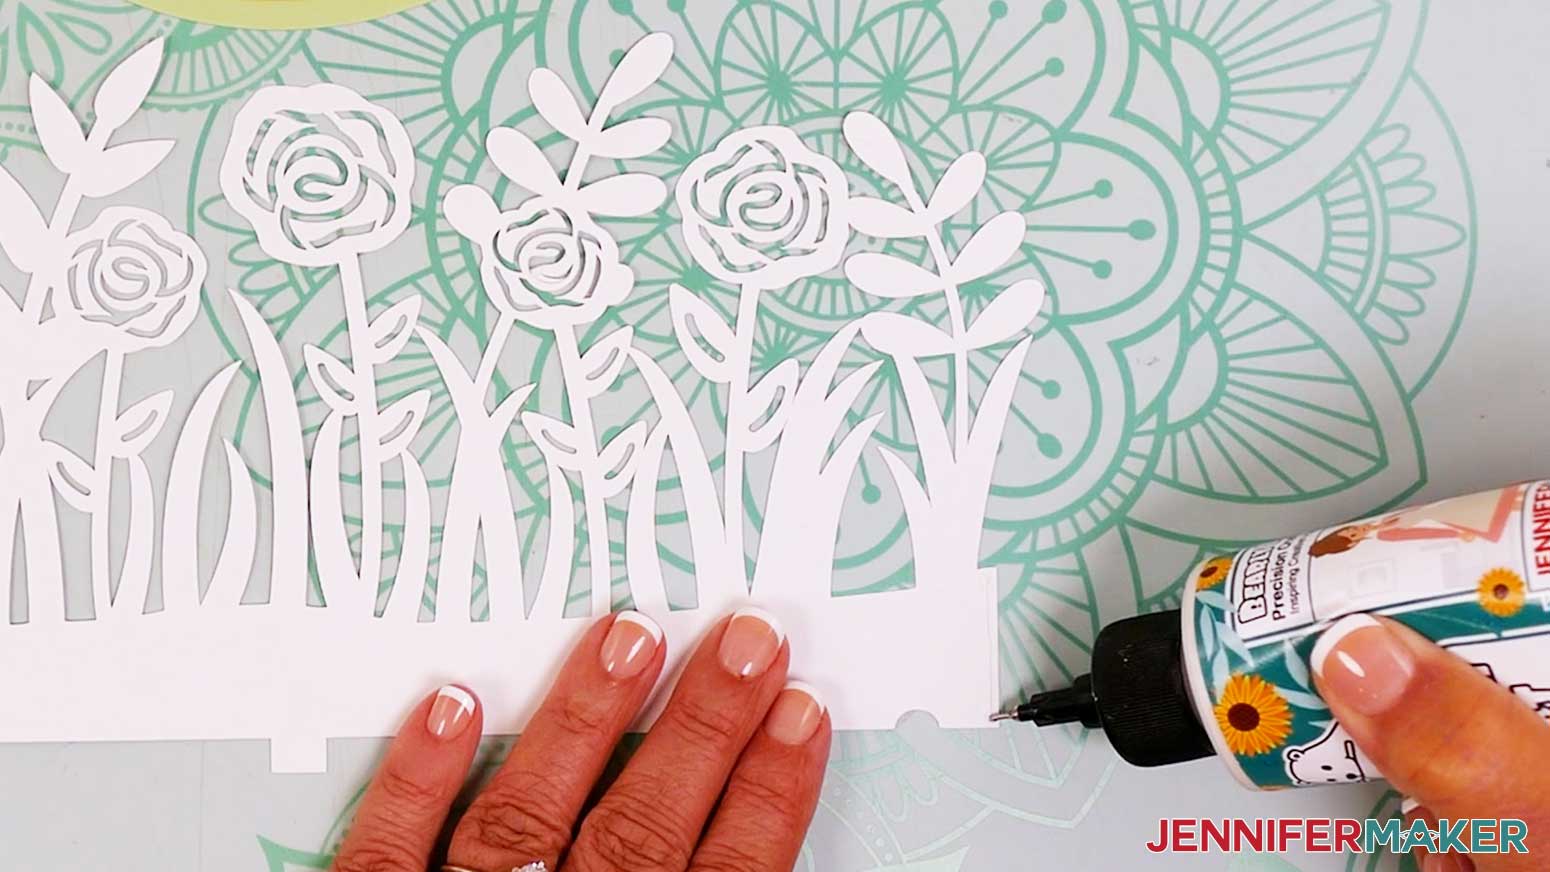
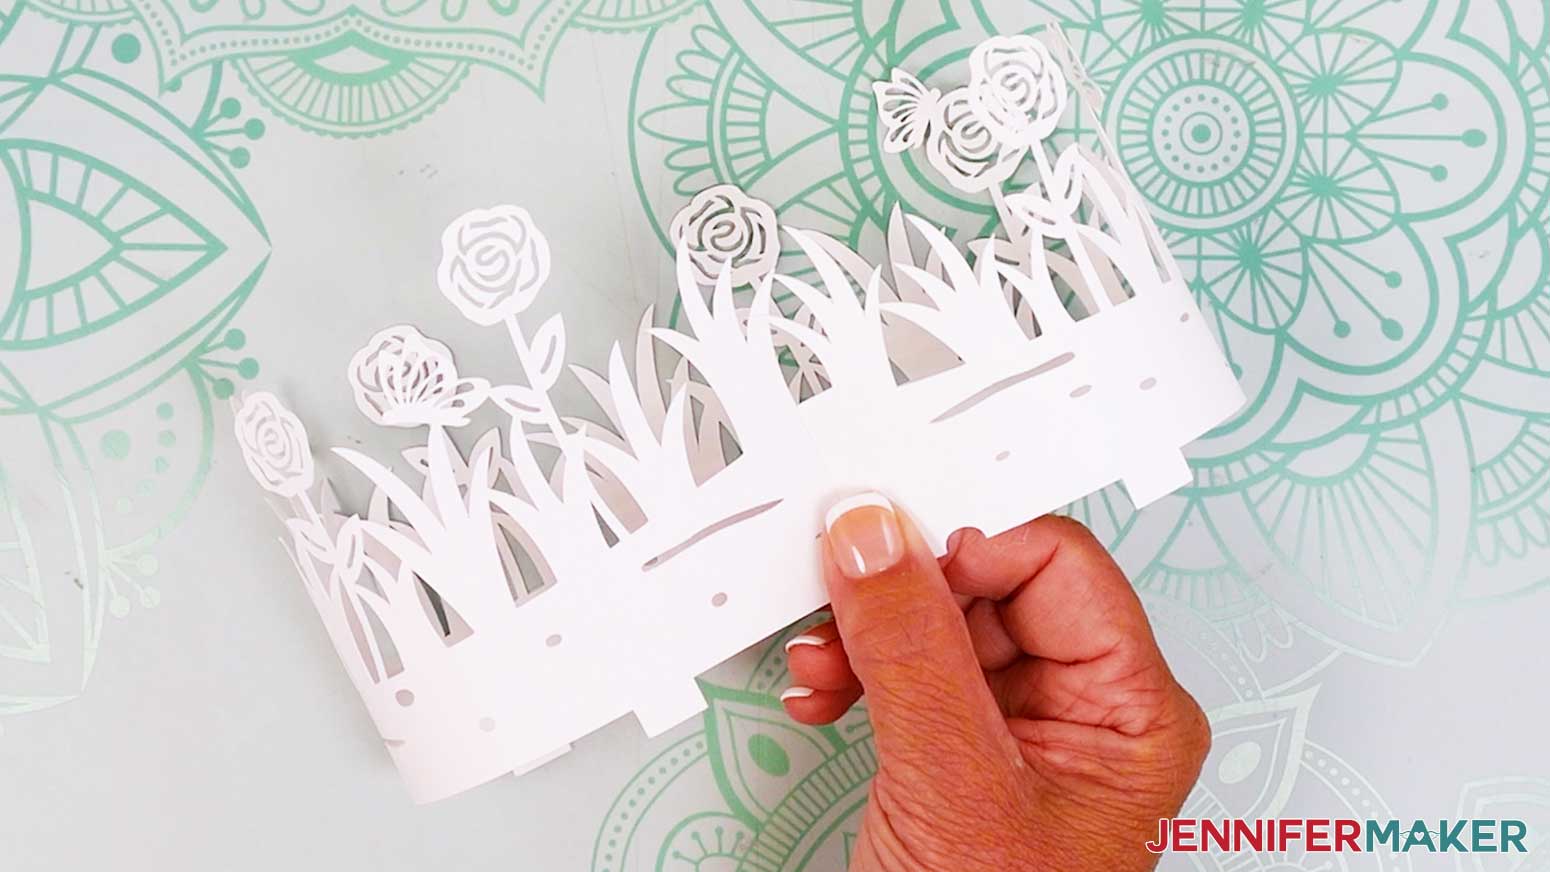
- Repeat steps 3-5 to attach the two pieces for the outer layer (the layers with the small roses and grass) and let them dry completely.
- Turn the assembled middle and outer layers face down.
- Apply a line of glue vertically along one end of the middle layer.
- Attach the glued end to the other end to form a ring or cylinder shape. Overlap the ends by about 0.25”. Be sure to keep the semicircle-shaped notch along the bottom clear.
- Repeat steps 8-9 for the outer layer.
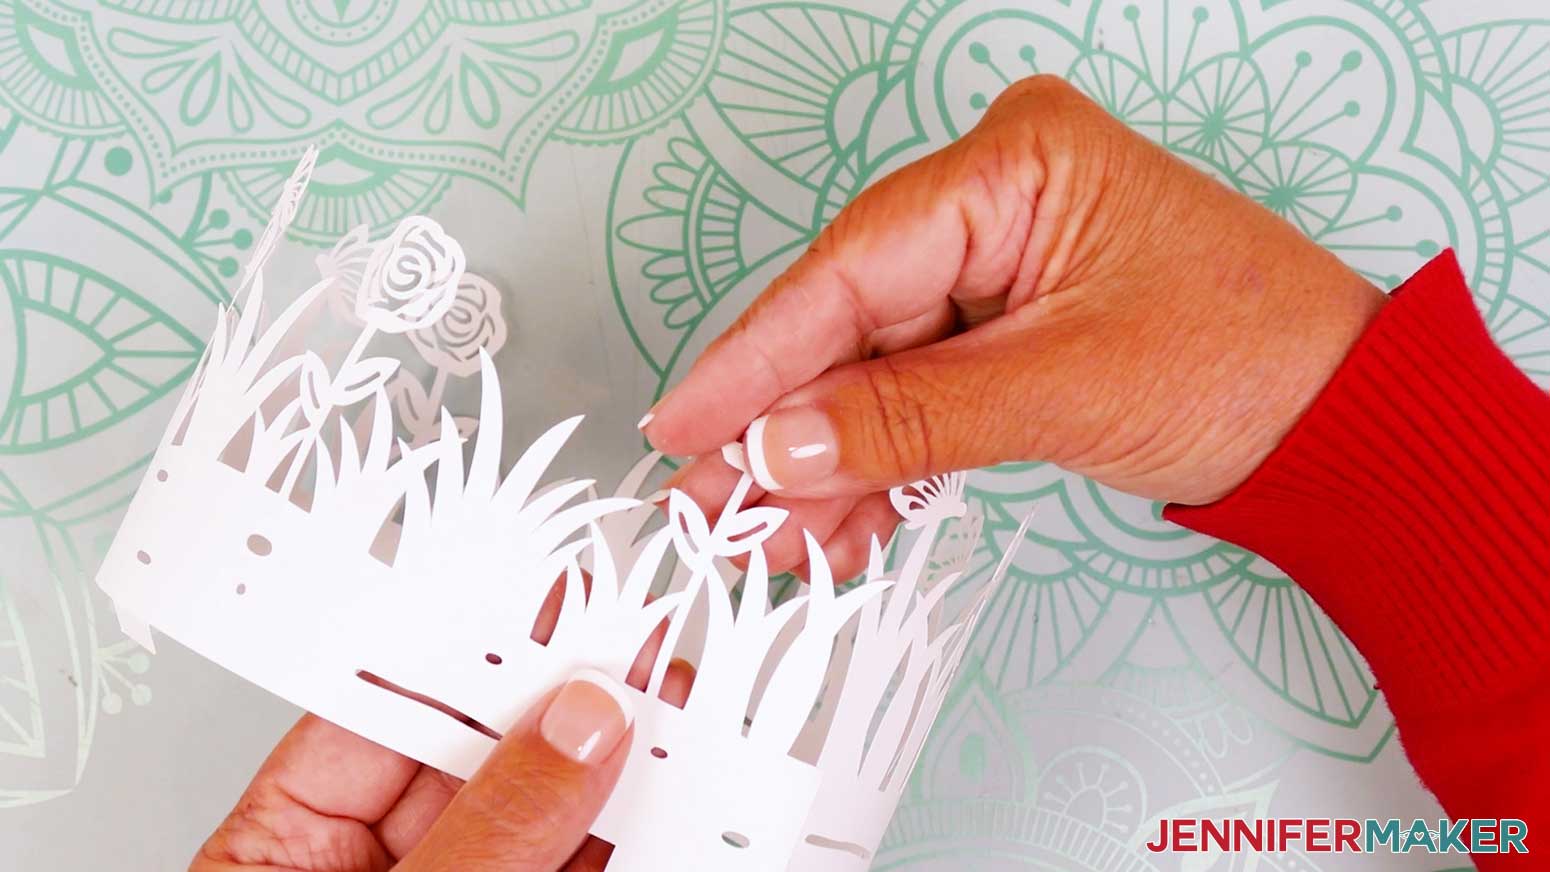
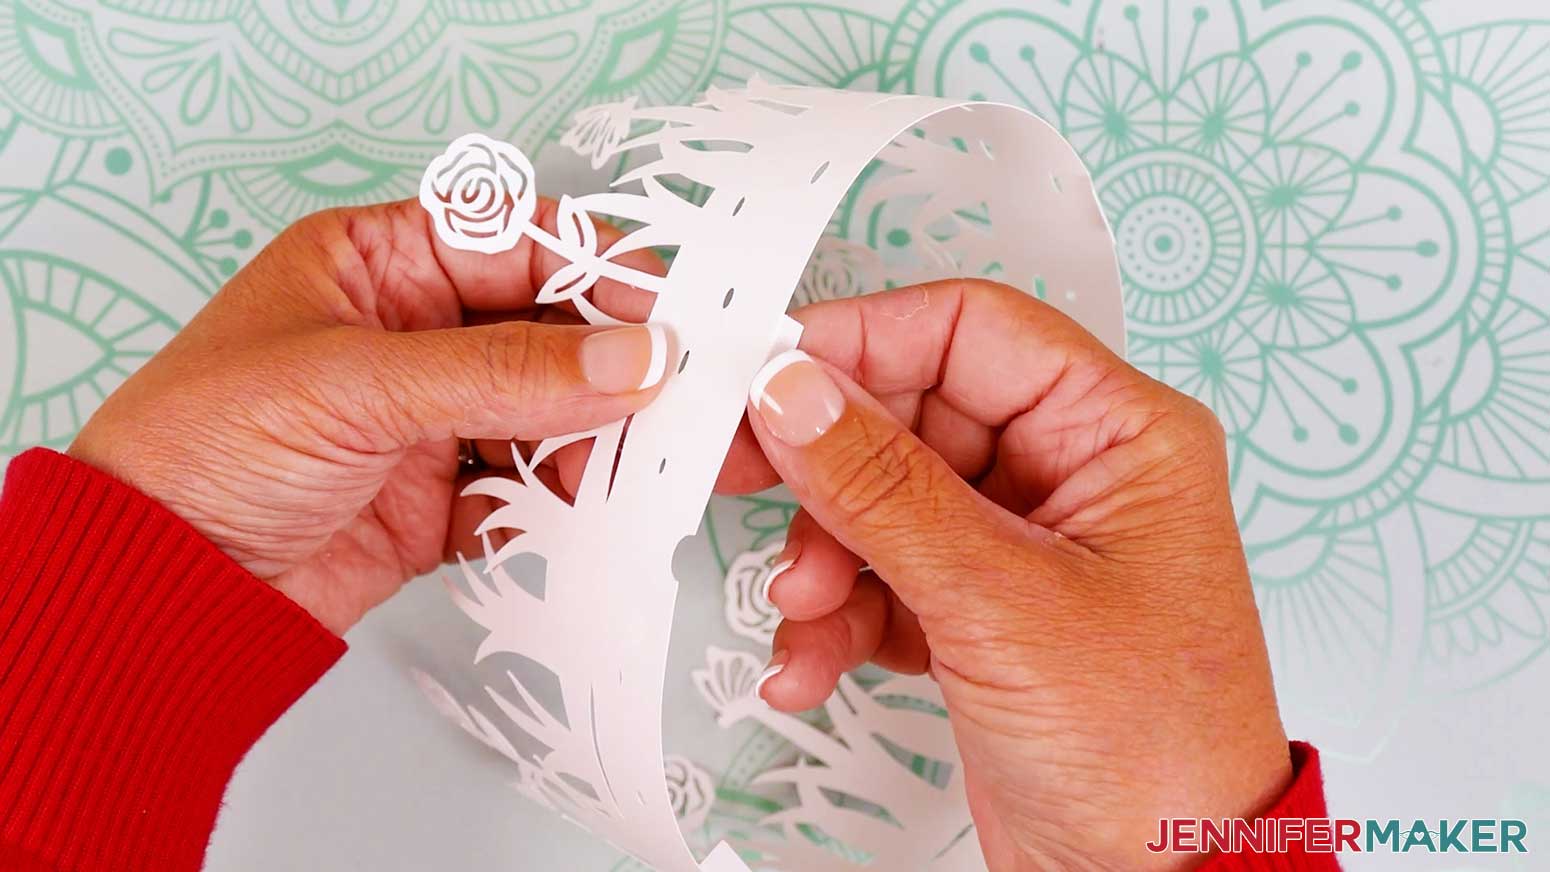
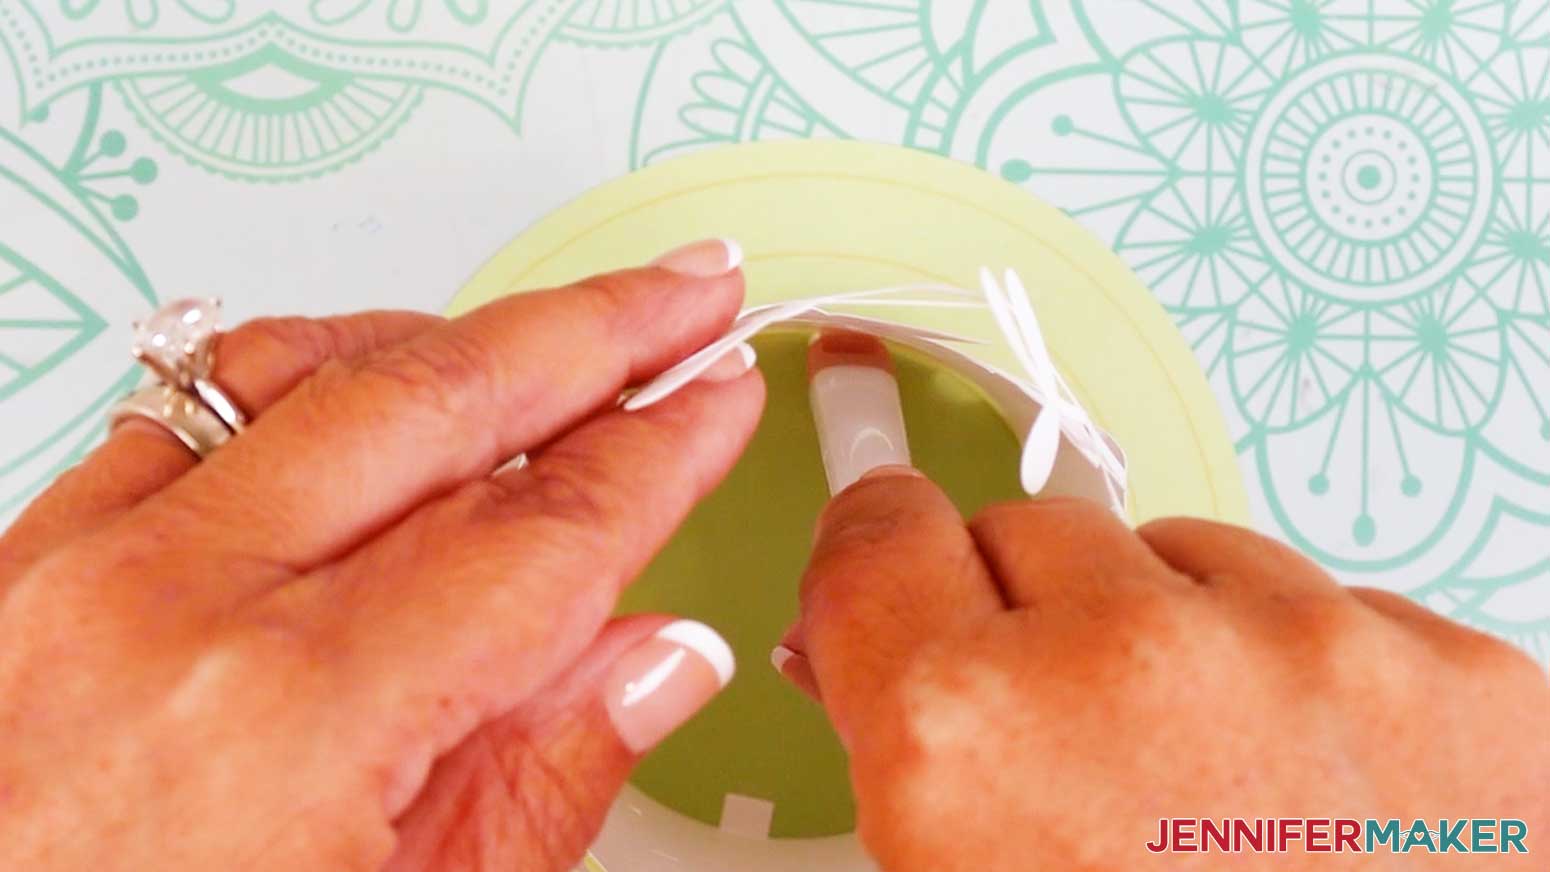
- Use your fingers to gently curve the cutouts along the tops of each layer so they follow the curved shape of the lantern.
- Fold the bottom tabs on each layer inward toward the center of each cylinder, making sure the folds are flush with the bottom of the pieces.
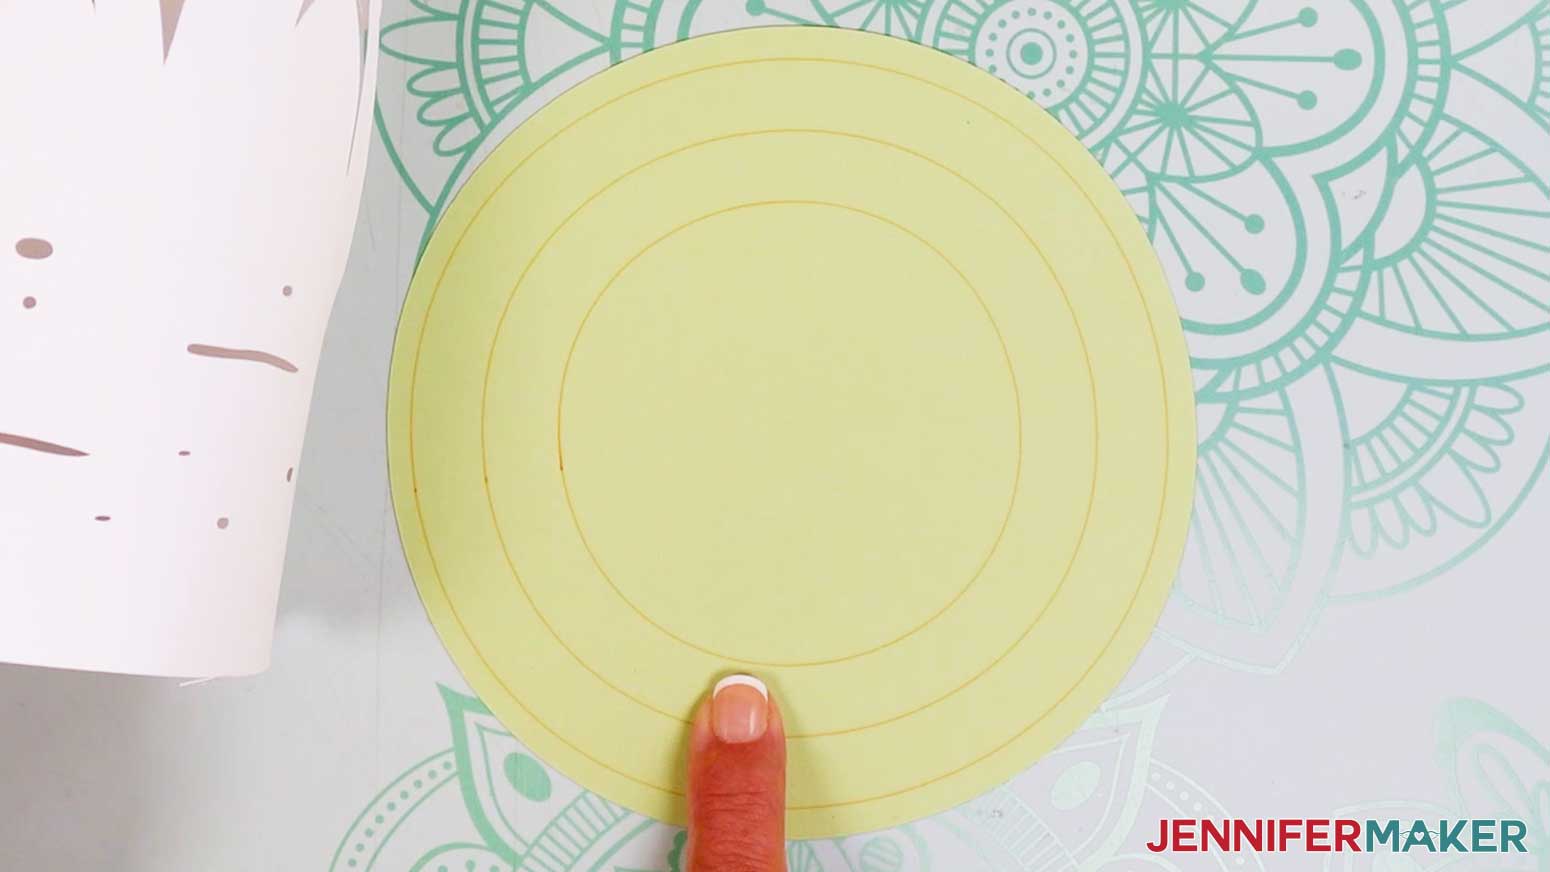
- On the circular base piece, use the three scored (or dashed or drawn) circles as guides for the approximate placement of each layer.
- Each layer has a small notch cutout at the bottom for feeding the lights through. It’s best to position these so they’re close to each other.
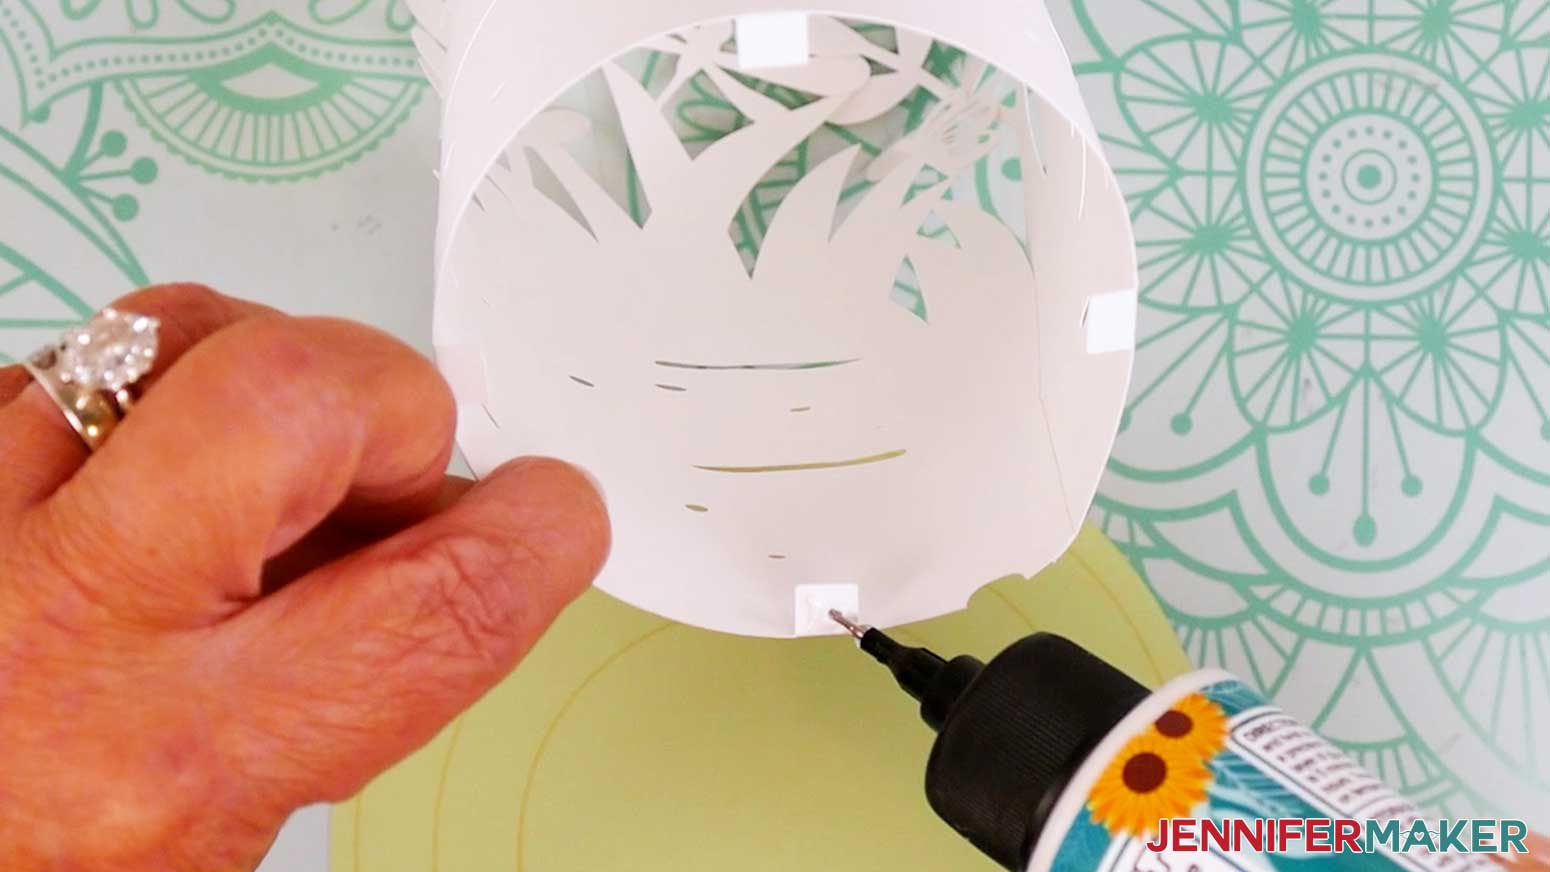
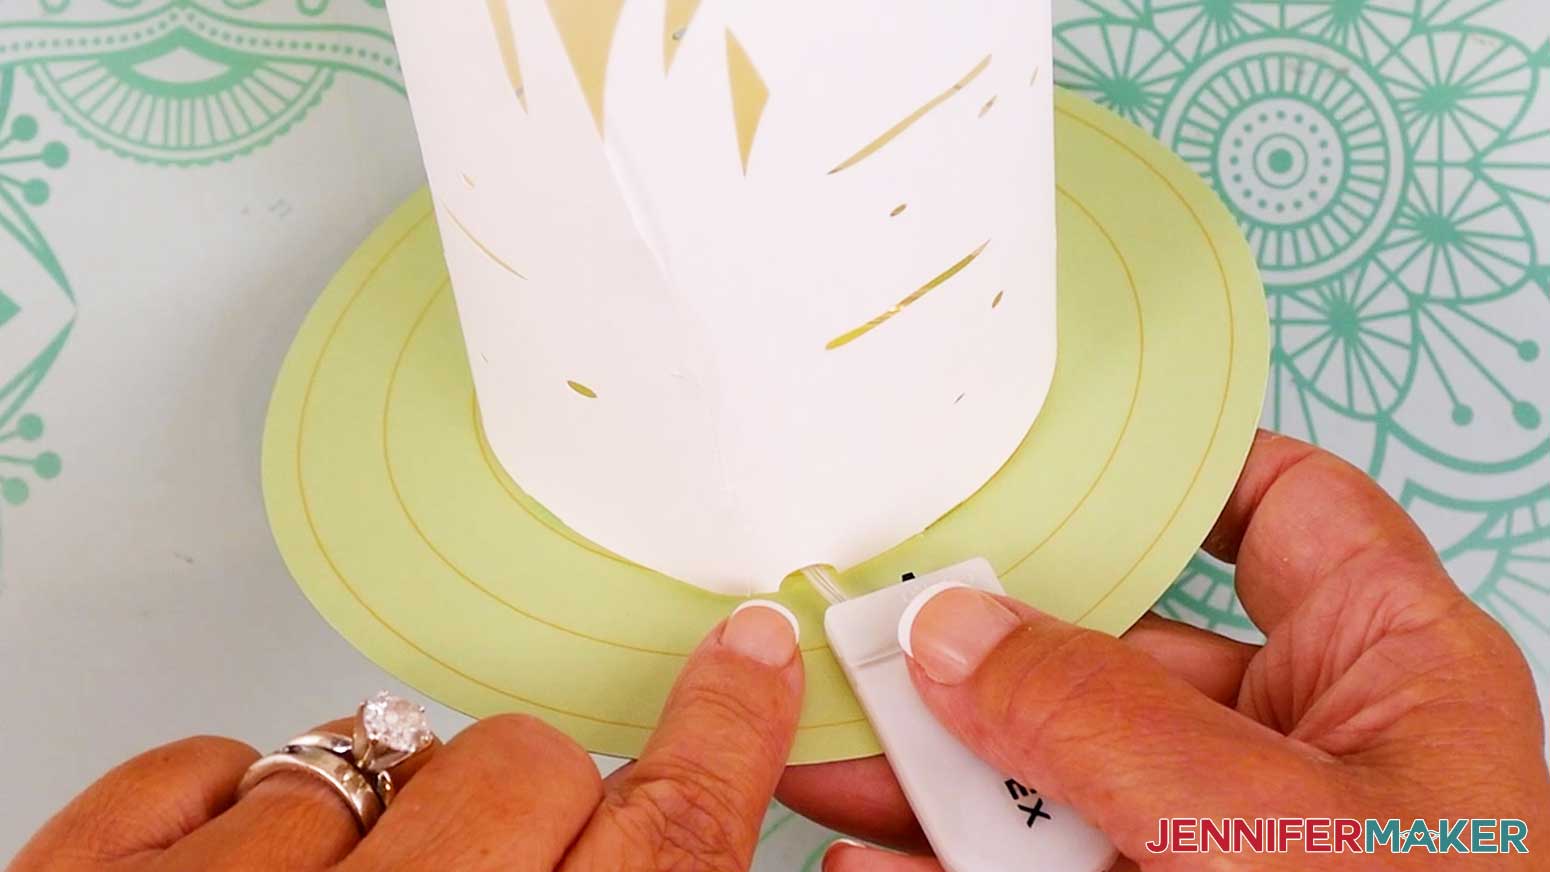
- Add glue to the bottom of one folded tab on the inner layer. Leave the other tabs without glue for now.
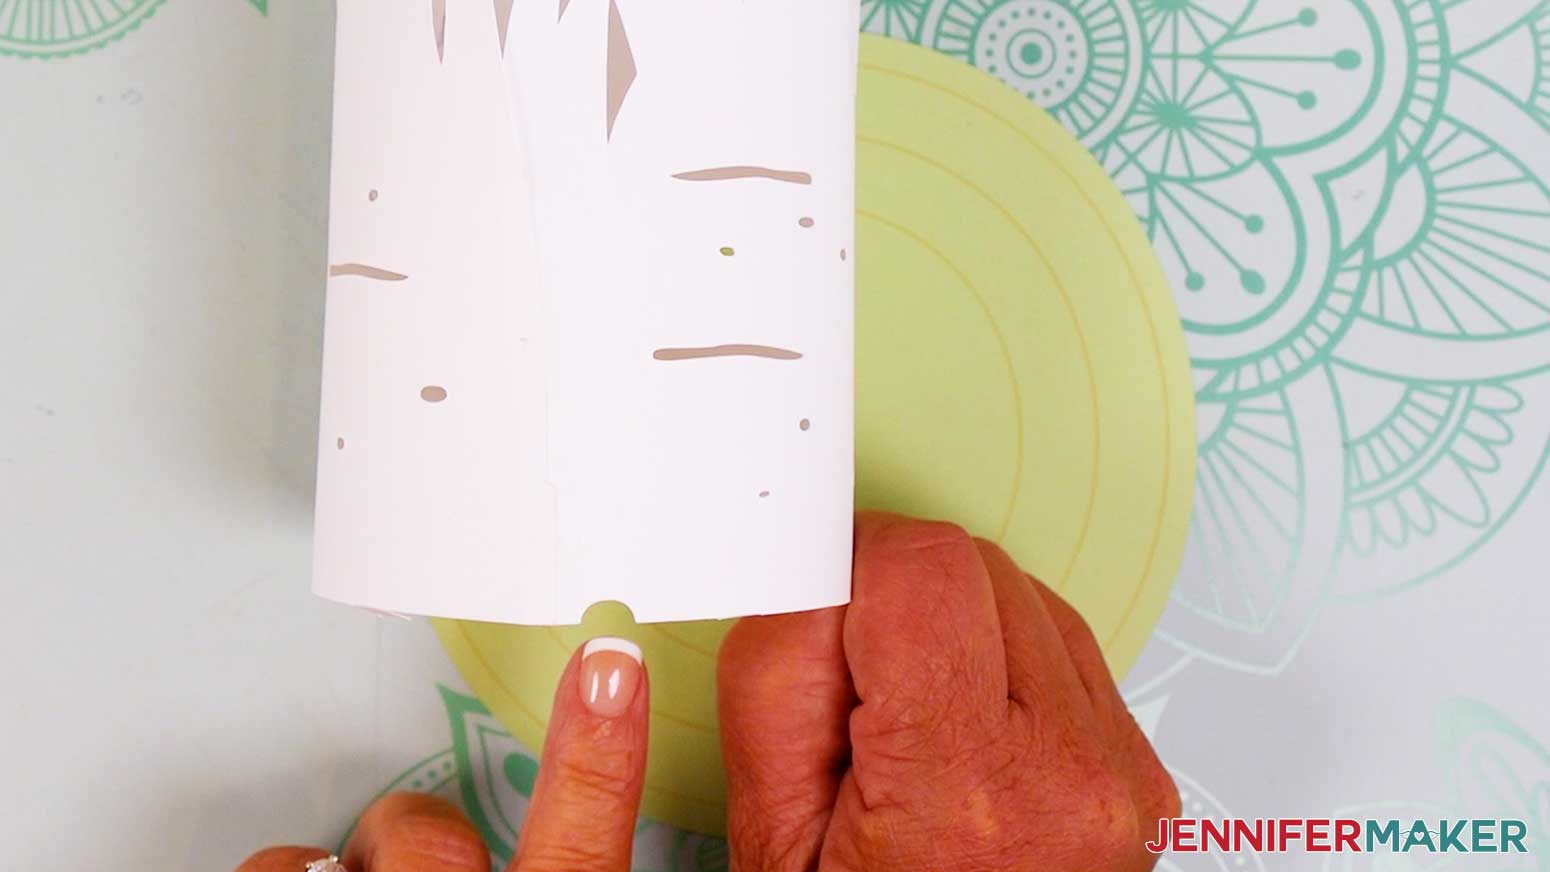
- Carefully place the inner layer onto the face up circle base, with the tabs on the bottom. The shape of the layer should follow the shape of the innermost placement line on the base.
- Use a thin object with a blunt end, like the handle end of your spatula or weeding tool, to press the glued tab down onto the base.
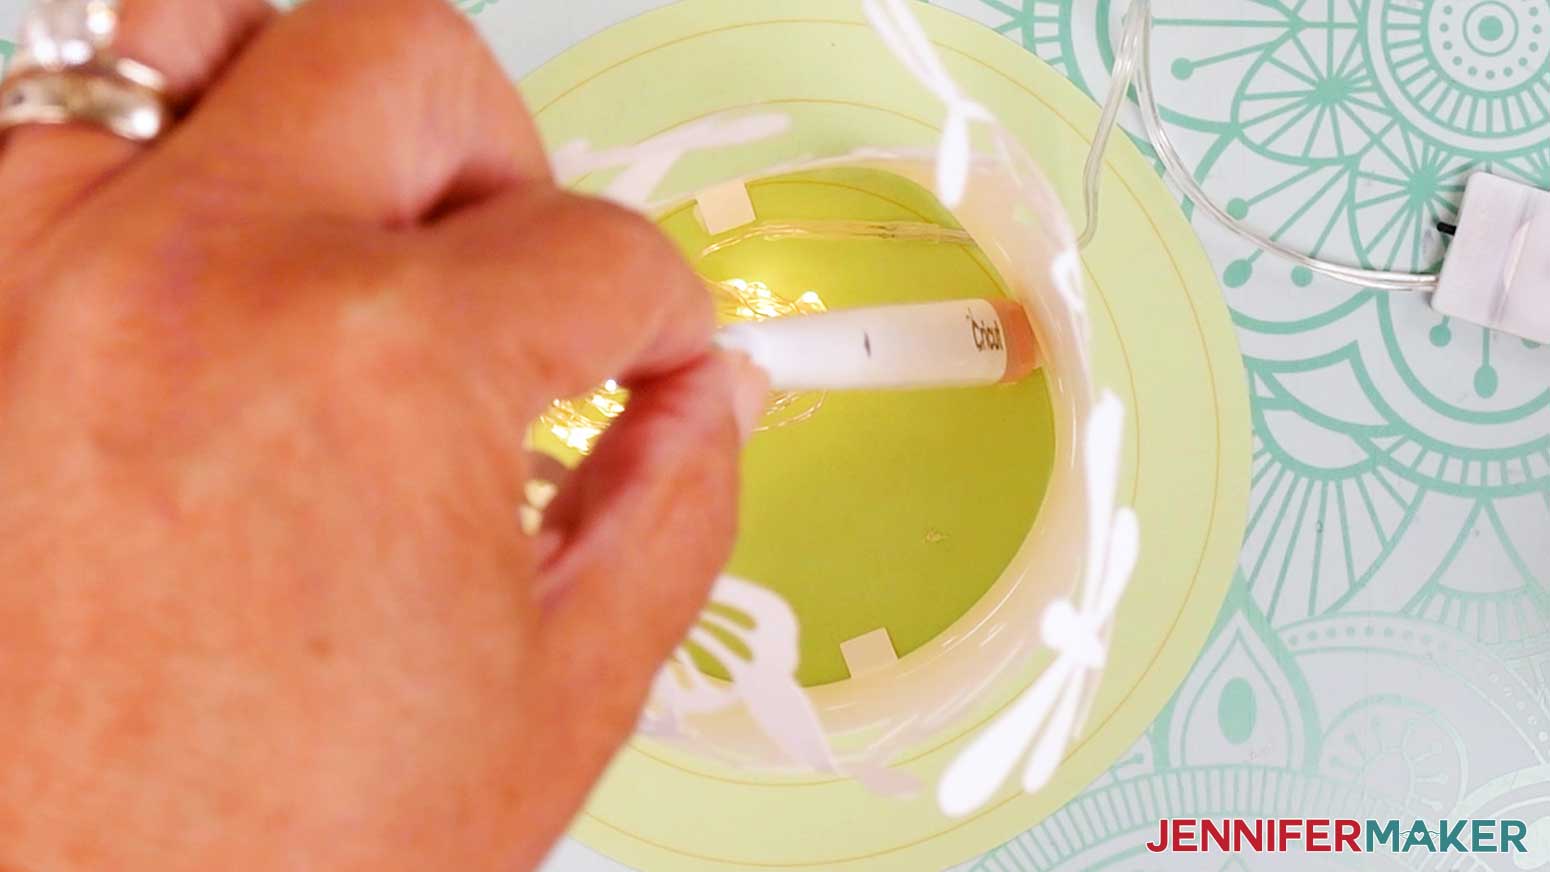
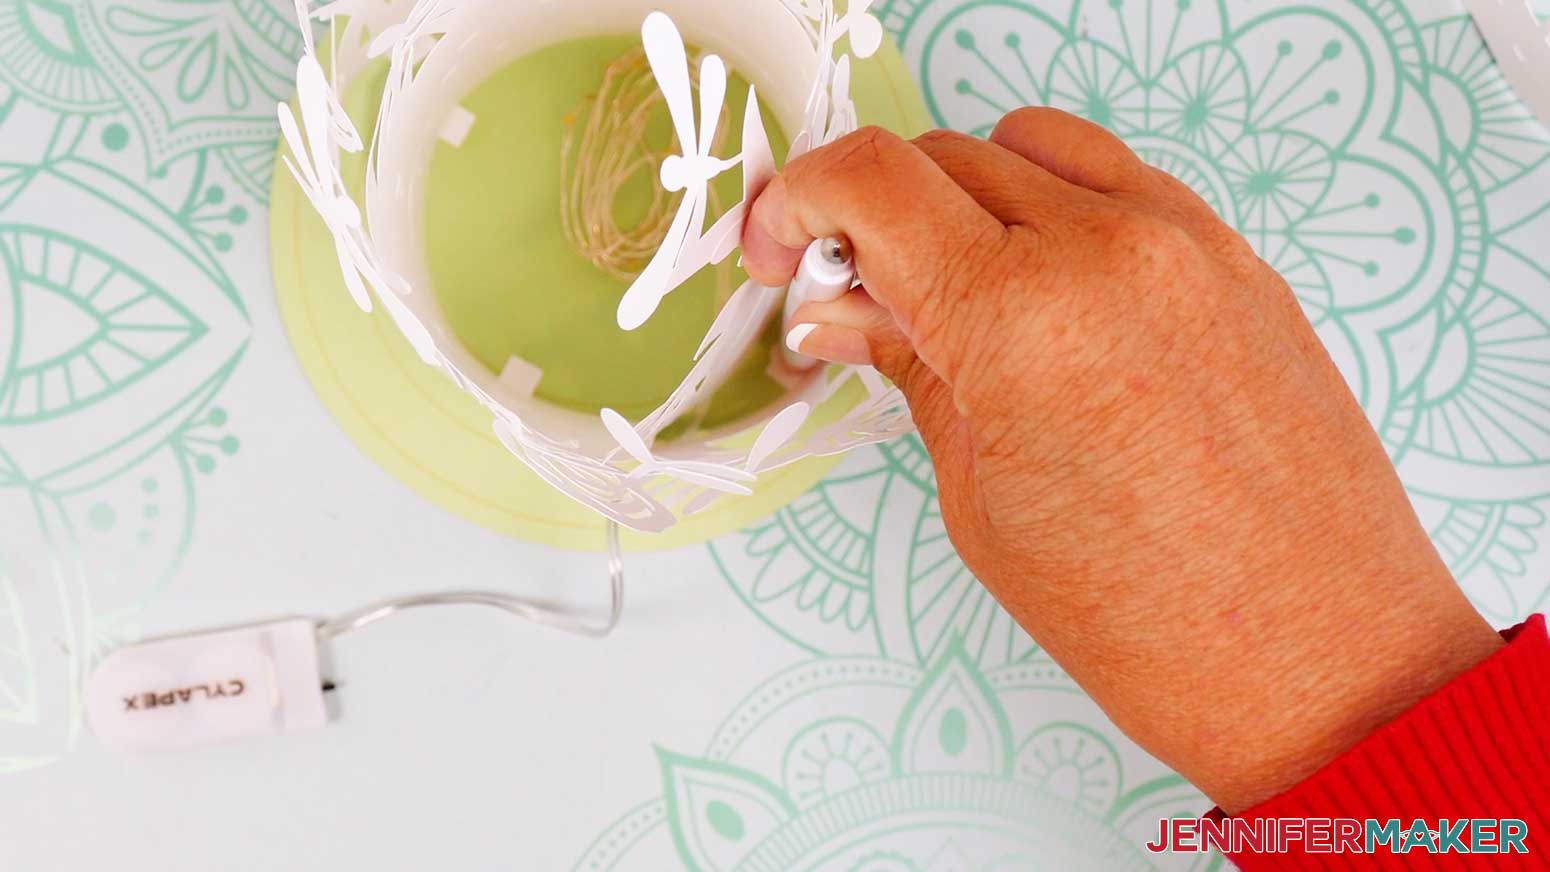
- Keep the fairy lights in a coil, but remove any packaging, a battery protector if present, and make sure they work by turning them on and off.
- Place the still-wound lights on the circular base inside the inner layer.
- Feed the fairy lights battery pack and wire out underneath the unattached side of the inner layer so the wire goes through the notch.
- Apply glue to the outside of one remaining unglued tab.
- Align the bottom of the inner layer to the innermost circle guide.
- Press down on the glued tab to secure it to the base.
- Repeat steps 21-23 with the remaining tabs.
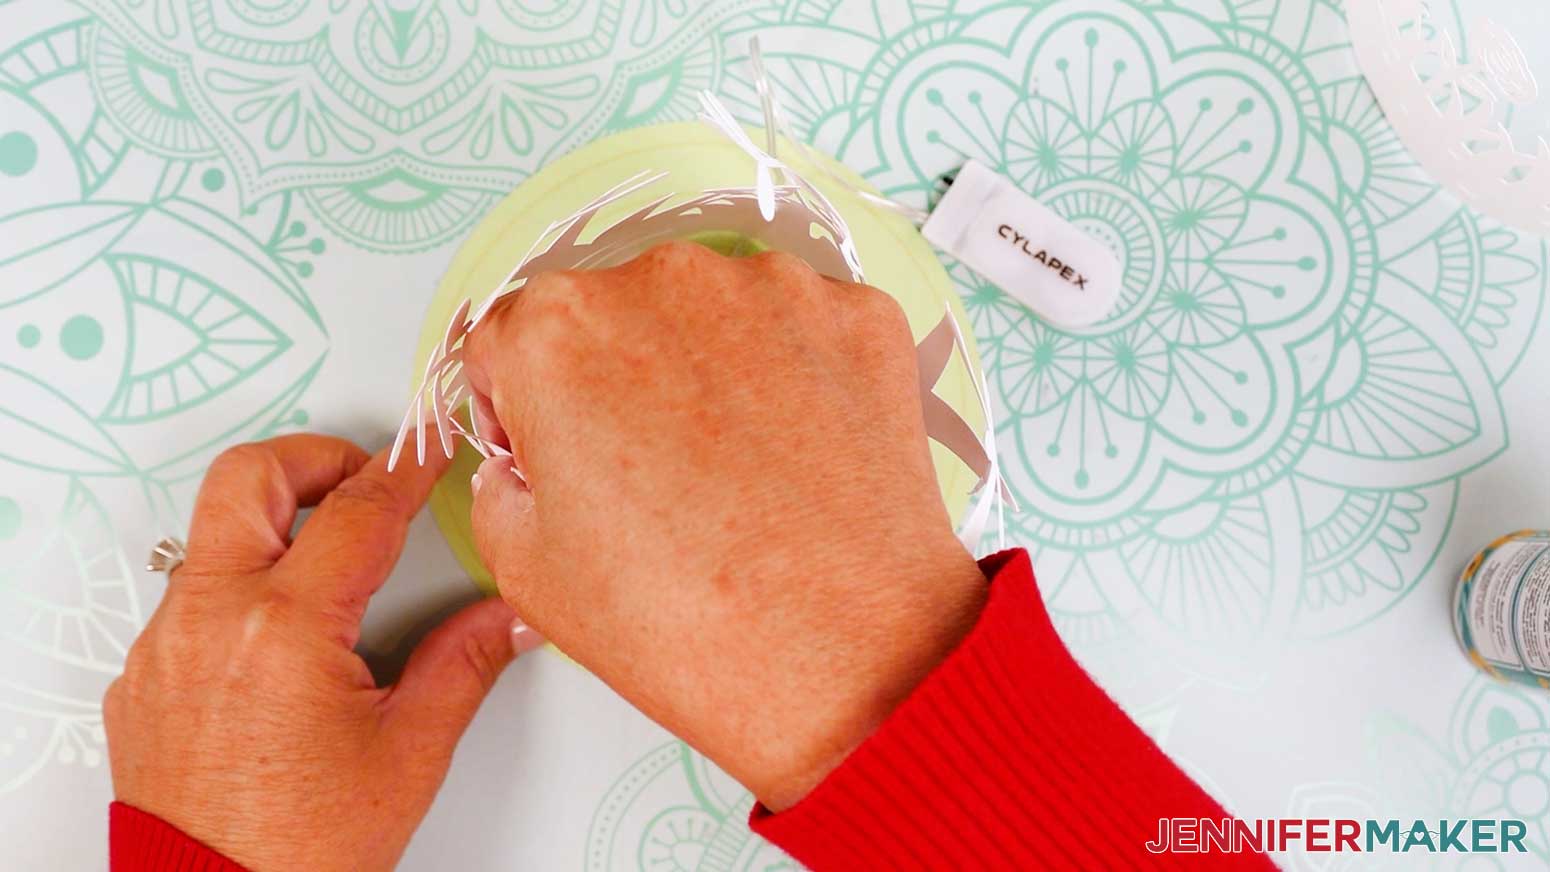
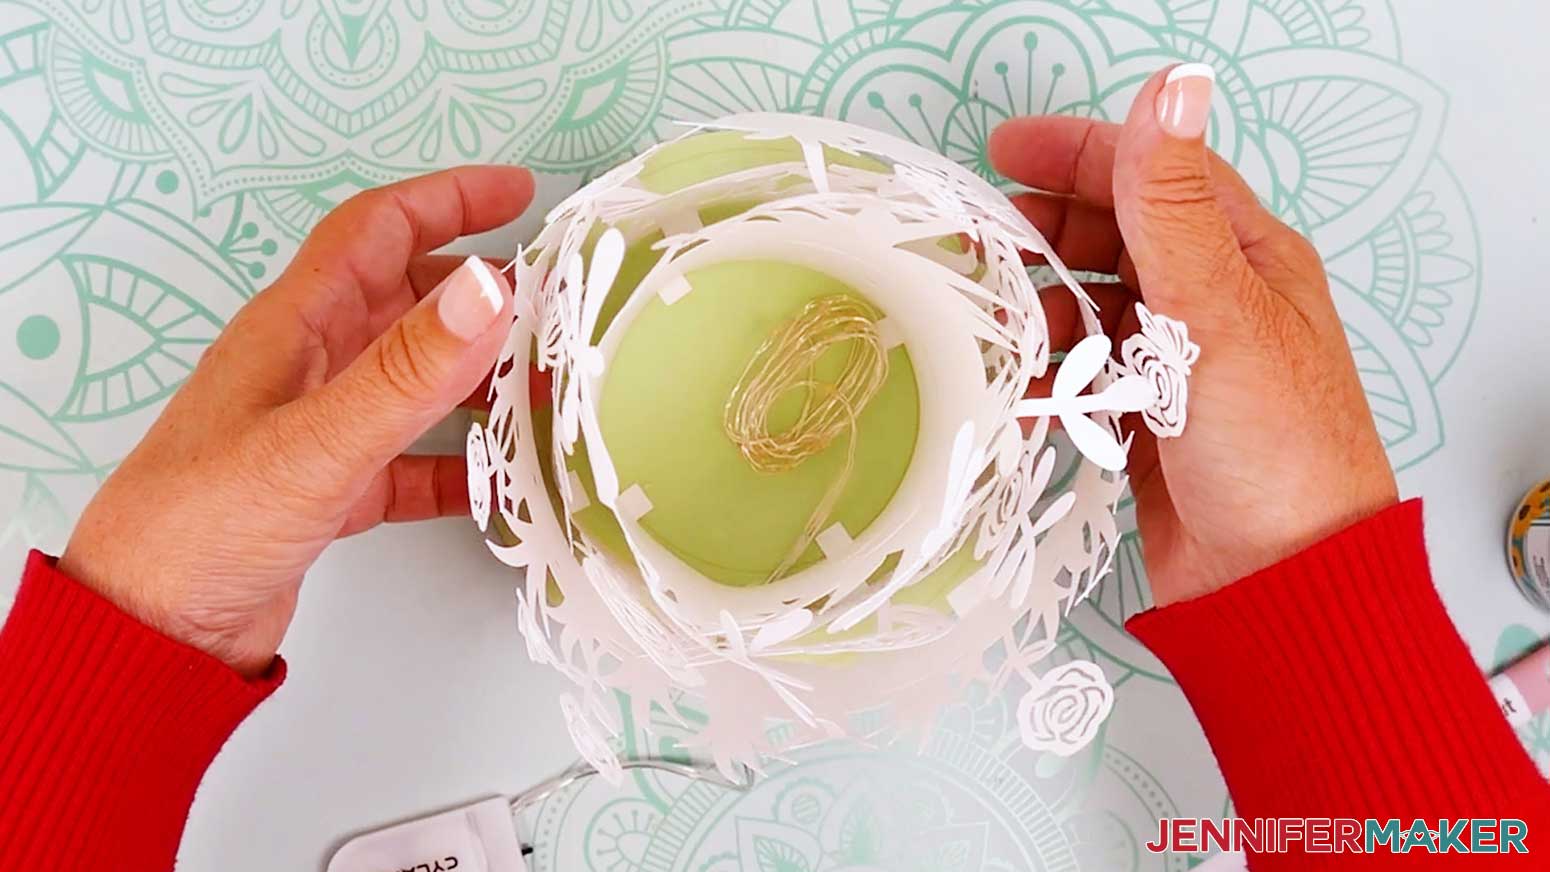
NOTE: The layers may not line up perfectly with their guides, and that’s OK! Just try to keep each one from extending outside of its corresponding guide. - Slide the middle layer down over the inner layer and coiled lights. Align the notch on the middle layer with the notch on the inner layer so the wire on the fairy lights can pass through.
- Slightly lift up the bottom opposite edge of the middle layer and add glue to the outside of a tab.
- Align the bottom of the middle layer with the middle circle guide. Press down on the glued tab to secure it to the base.
- Make sure the wire is feeding through the notch, and repeat steps 26-27 with the remaining tabs on the middle layer.
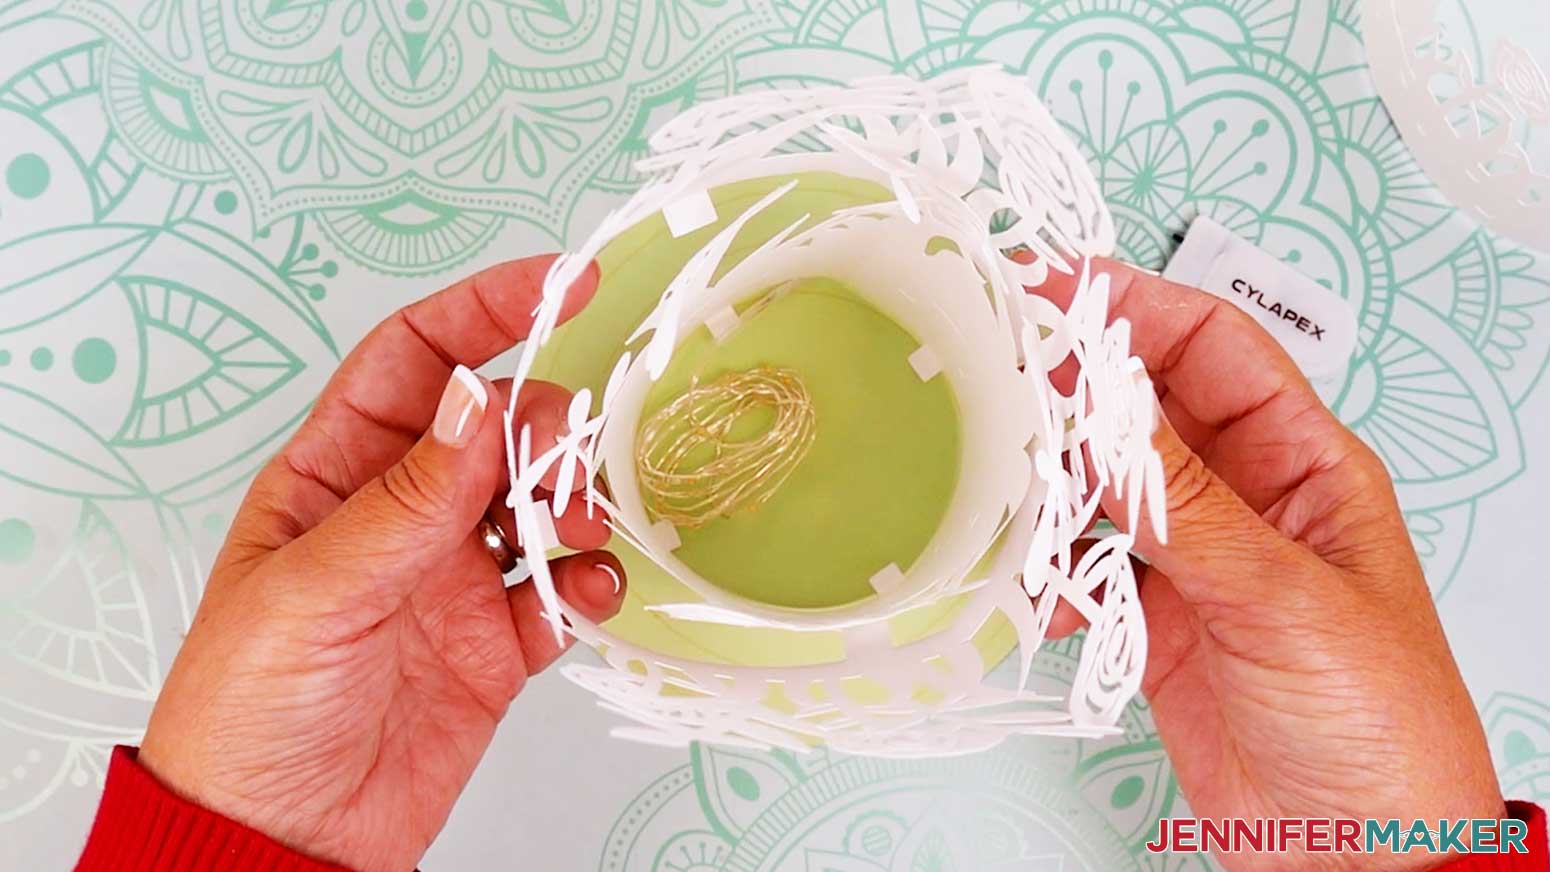
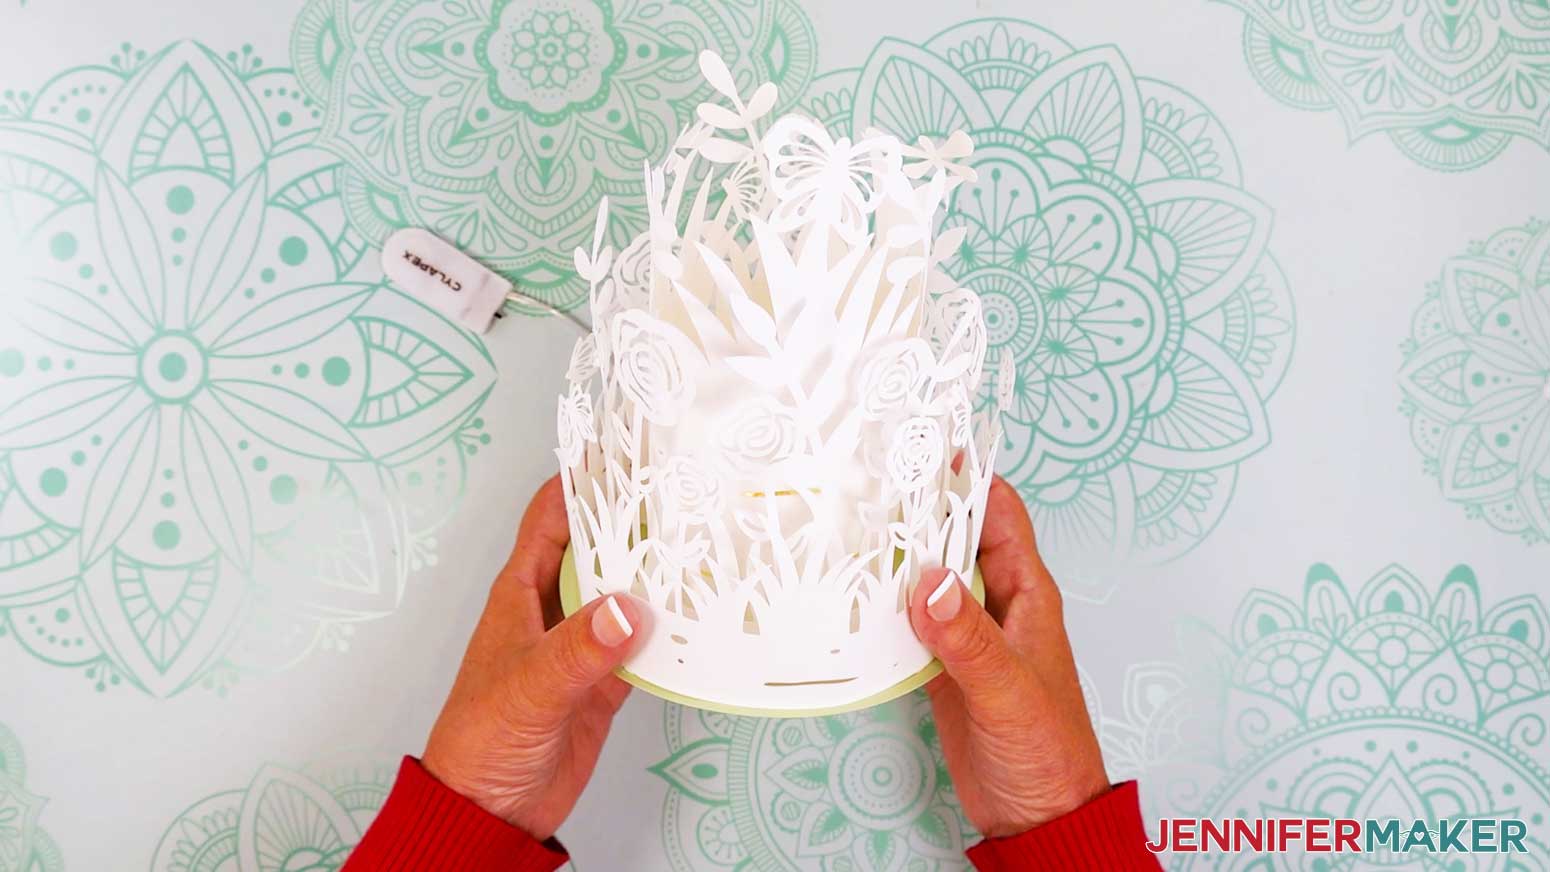
- Slide the outer layer down over the first two layers. Align the notch on the outer layer with the notch on the middle layer so the wire passes through.
- Lift up the bottom edge of the outer layer and add glue to the outside of a tab.
- Align the bottom of the outer layer with the outer circle guide. Press down on the glued tab to secure it to the base.
- Make sure the wire is feeding through the notch, and repeat steps 30-31 with the remaining tabs on the outer layer.

STEP 4: SHOW IT OFF!
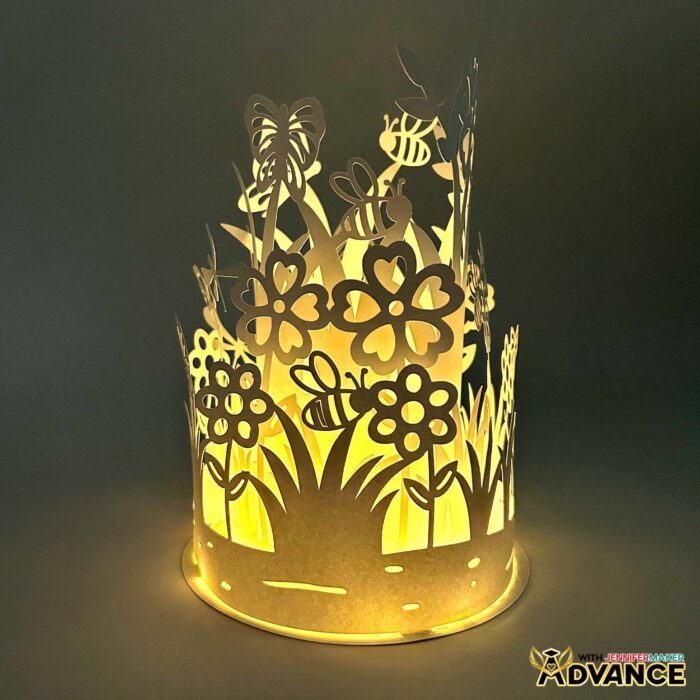
Here is what my finished Layered Garden Lantern looks like! 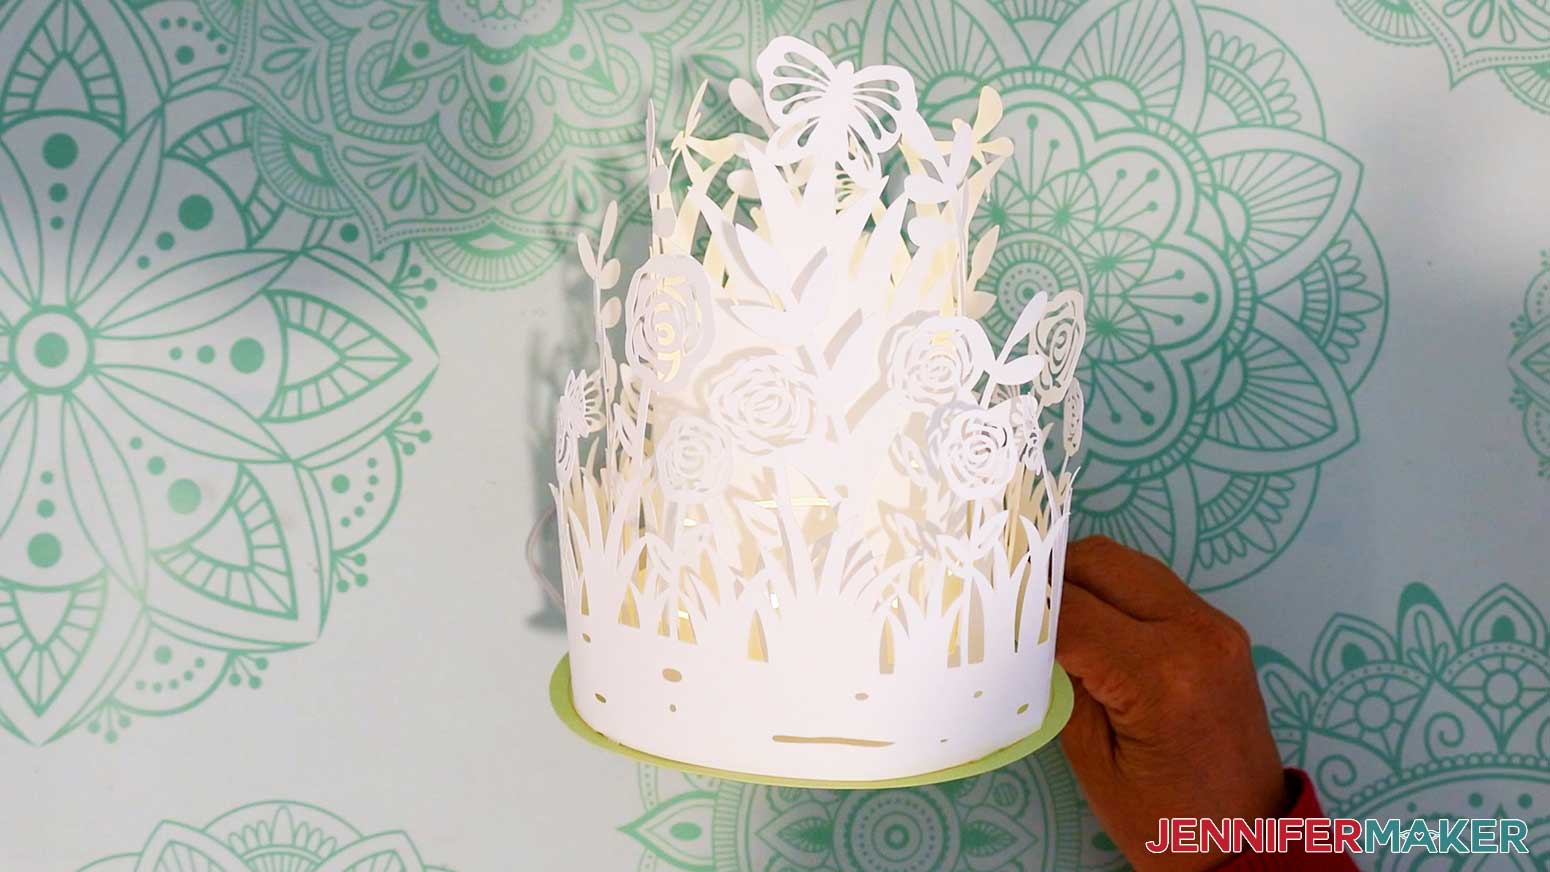
If your battery pack is outside your lantern, you can attach it to the back with an adhesive glue dot.
Notes
Finished Size: 5.75” W x 11” H
Answers to Your Questions About How to Make a Layered Garden Lantern
Q: I want to customize my own layered garden lantern design. How do I do that?
A: You can learn how to make customized layered garden lantern in my ADVANCE program. Learn more about ADVANCE here!
Q: What kind of paper do I use?
A: I recommend using 65 or 80 lb. cardstock for your layered garden lantern because it’s sturdy enough to hold the lantern details up but pliant enough to curve the paper easily into the right shape.
Q: How do I attach the layers to the base?
A: Be sure to create guide lines for your base (follow the tutorial to learn how), then attach your layers along the guide lines using craft glue (my favorite is Bearly Art Precision Glue) in order to get the best results.
Q: Help! My Cricut Design Space screen looks different from yours!
A: If you’re using the latest version of Cricut Design Space, your screen may have slight variations than the screen you see on the video tutorial. Good news: All of the same functions are there, but they may just be in different spots or have new icons. Pause the video if you need, or follow along with the written tutorial. If you get stuck, ask for expert support in our Facebook group. Our group is a fun and friendly place to share your projects, ask questions, and find inspiration! Plus, you can catch the latest news on JenniferMaker projects, files, tutorials and more.
Q: Can I make and sell my layered garden lanterns?
A: I love supporting creative entrepreneurs! If you want to use my designs and projects for commercial use, please familiarize yourself with my important licensing information before selling your crafts.
I do not permit sale of my digital items, but you can sell the creative goods you make with them — as long as you follow my licensing requirements. That means you cannot sell the layered garden lantern SVG, PDF, or DXF files, but you can sell lanterns that you made with the files within the guidelines linked above.
Q: Where can I find the supplies and tools to make layered garden lanterns?
A: My layered garden lanterns can be made with simple supplies like cardstock and glue you may already have in your crafting stash. I like to find LED lights and other supplies and tools on Amazon — here’s my shopping list.
Q: Can I resize my layered garden lantern?
A: You can resize your layered garden lantern file down to fit on 8.5″ x 11″ paper (which fits in a Cricut Joy Xtra, but I don’t recommend sizing it down further than that, or the LED lights may not fit side and the details will be too intricate to cut well.
Q: I love paper projects like these for spring! Do you have other garden-inspired crafts I can make?
A: I love garden-inspired crafts, too! Here are some of my favorites:
- Sublimation Garden Flags
- Garden Trellis Card
- How to Make Birdhouses
- Easy Paper Butterfly Wreath
- DIY Faux Terrarium with Succulents
Get my free SVG/DXF/PDF files to make your own layered garden lantern!
(If you do not see the signup form above, click here.)
I love seeing what you make with my designs and how you use them! Please share a photo of your layered garden lantern in our Facebook group or tag me on social media with #jennifermaker.
Love,

Want to remember this? Save this Layered Garden Lantern tutorial to your favorite Pinterest Board!