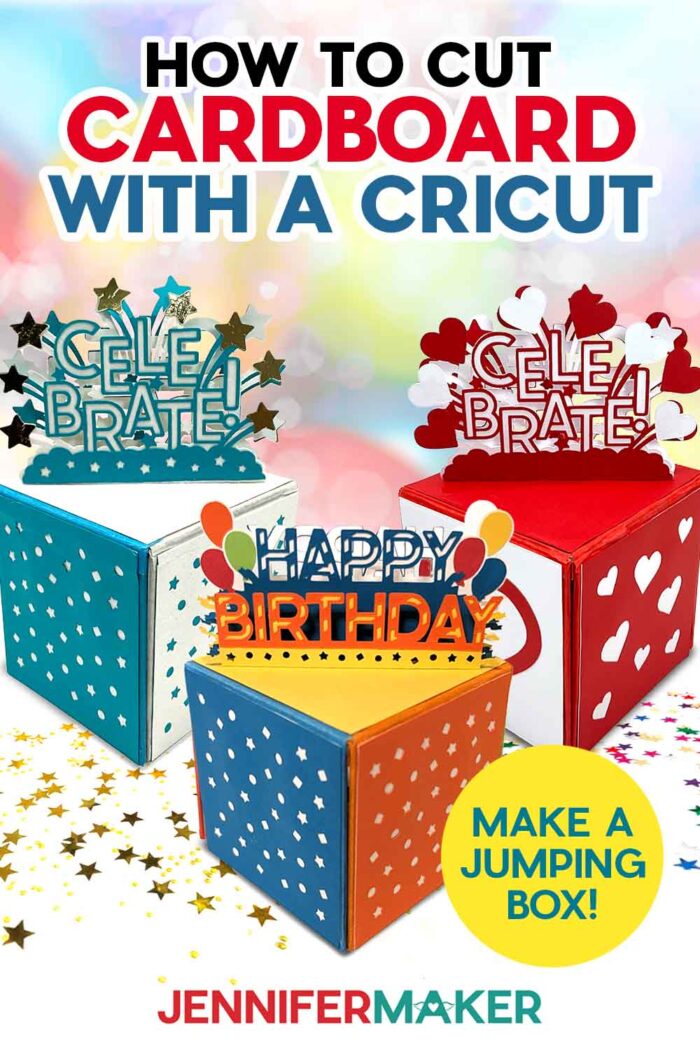
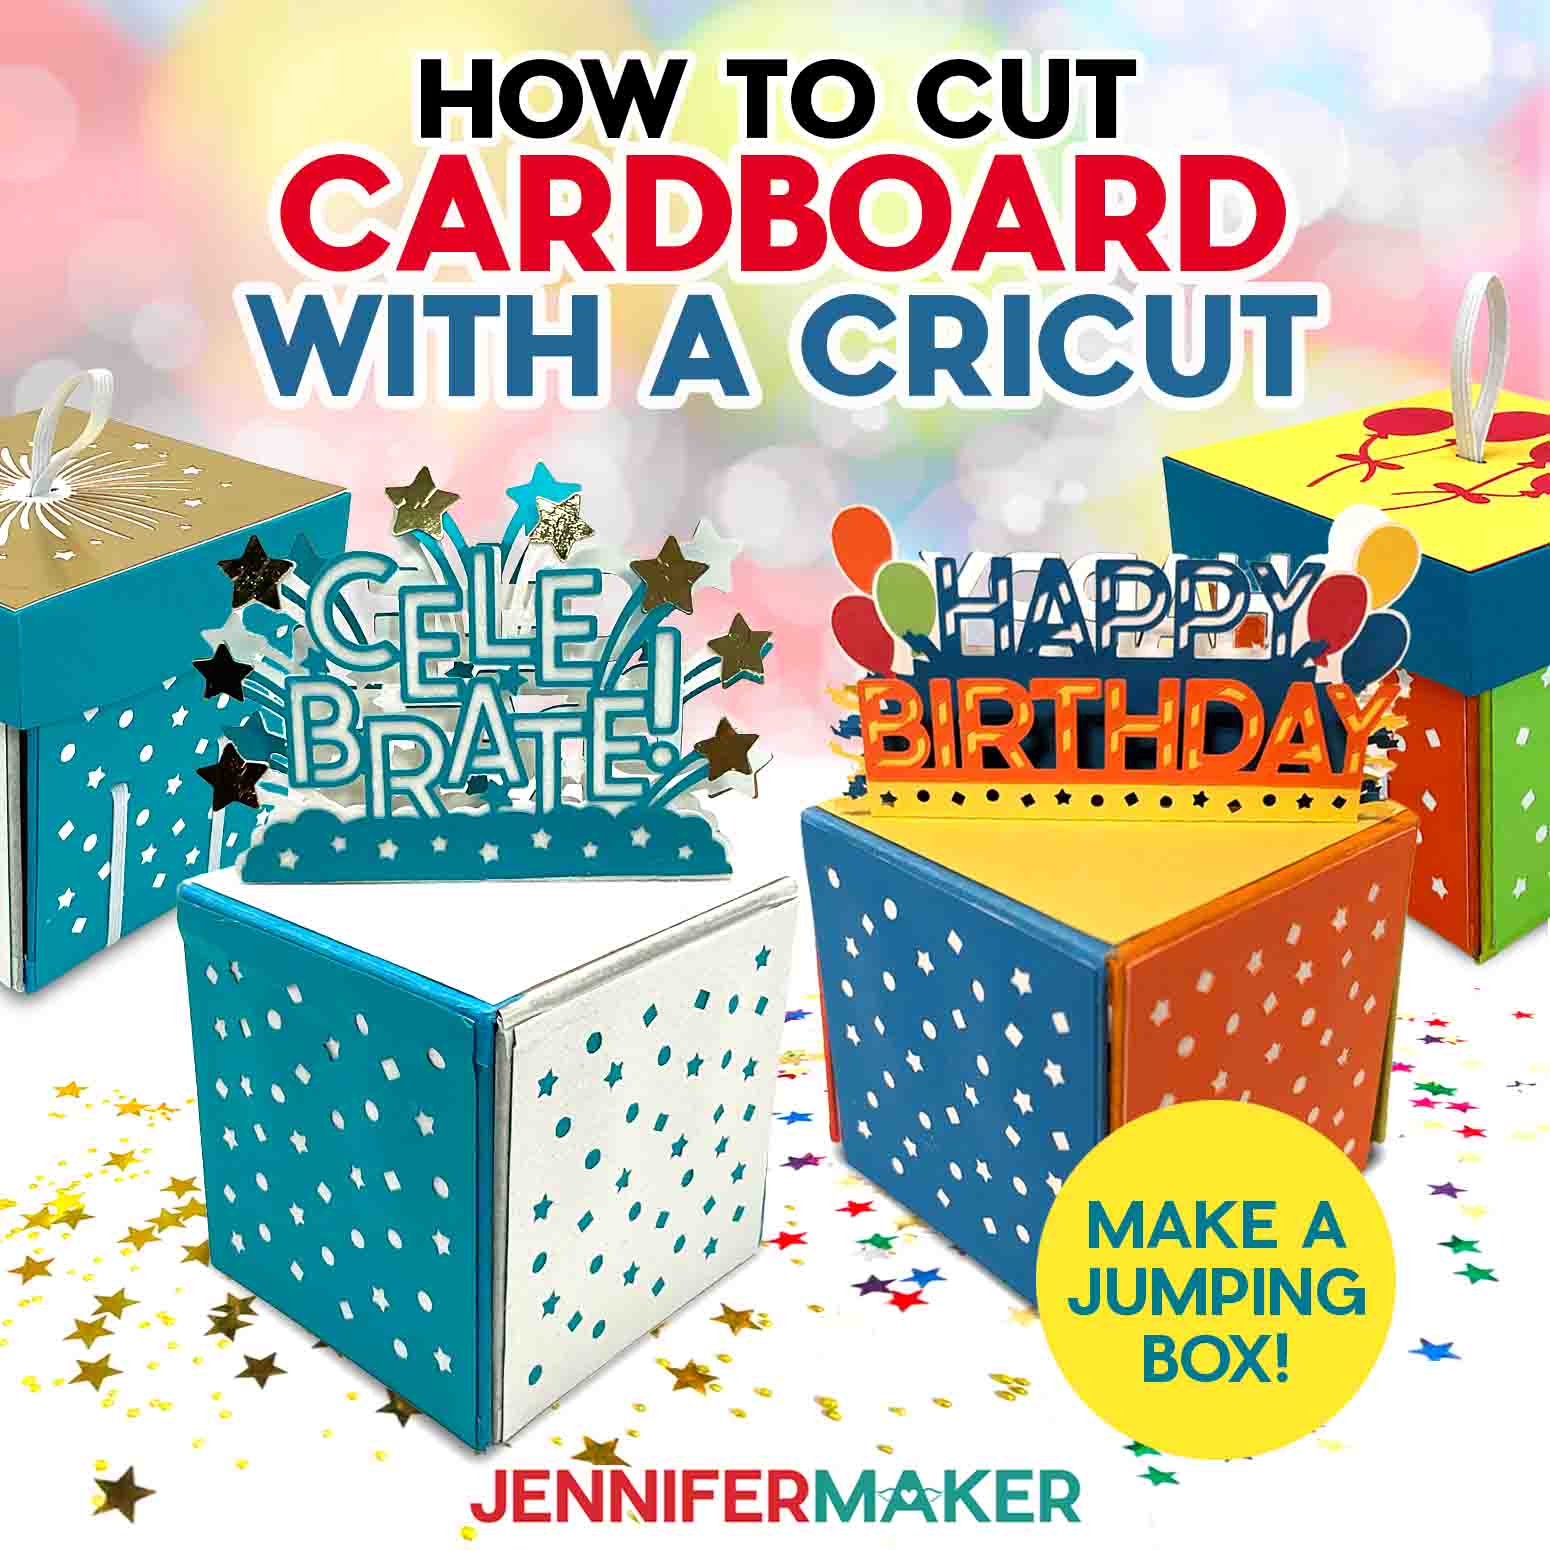
Learn how to cut cardboard with Cricut and make a cardboard jumping box!
I love testing the capabilities of my crafting tools, especially my Cricut cutting machines. Did you know that the Cricut Maker and Explore series machines can cut thicker materials with the right blades? As long as it’s the right thickness, your Cricut Maker or Explore can cut it! Learning to cut cardboard with Cricut allows you to make all sorts of things — like these super awesome cardboard jumping boxes I designed!

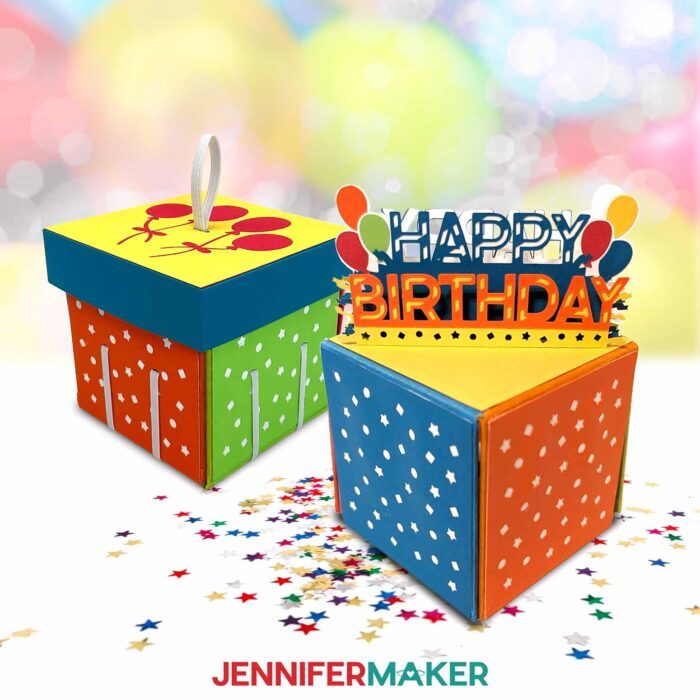
What a surprise it is to lift the lid on a gift box and have it burst open with confetti and a sweet sentiment surprise! The box jumps and explodes because of elastic bands and metal washers, but requires a material much more rigid than regular cardstock to work right. That’s where the cardboard comes into play! But how can your Cricut cut it?
I’ll show you how to cut cardboard with a Cricut using a Knife Blade and a Maker 3, but you can also cut cardboard on an original Maker, an Explore 3, and an Explore Air 2. Be sure to follow the tutorial to get the right cut settings — they may not be the settings you expect!
If you’re an Explore user, you might be thinking, “But the Explore machines can’t use Knife Blades!” And you’re totally right, they don’t. However, through all my testing, I found a workaround that you won’t want to miss. Anyone with an Explore or Maker machine can use it to make a cardboard jumping box with the right blade.
Learning to cut new materials with your cutting machine is a valuable skill that’ll open up a whole new world of possibilities in your crafting! Be sure to read the step-by-step guide in this blog post or watch my video tutorial to get all the details.
To demonstrate these new skills, I’ll walk you through how to cut cardboard with a Cricut to make your own cardboard jumping box. You’ll need a sheet of cardboard cut to 11 x 12 inches. Why such a specific size? So it fits correctly into your Cricut! Your cardboard should be no more than 2mm thick, or else it may not fit into your Cricut. I show you a really easy way to check in my video tutorial.
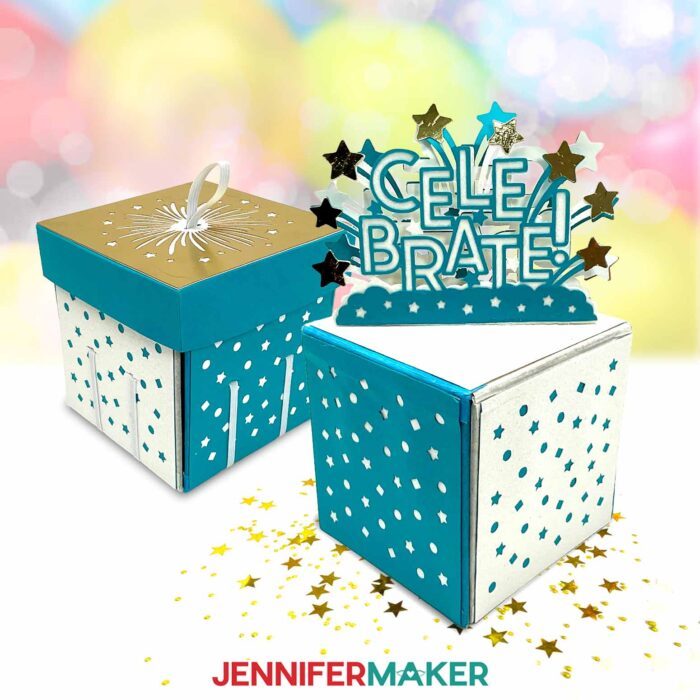
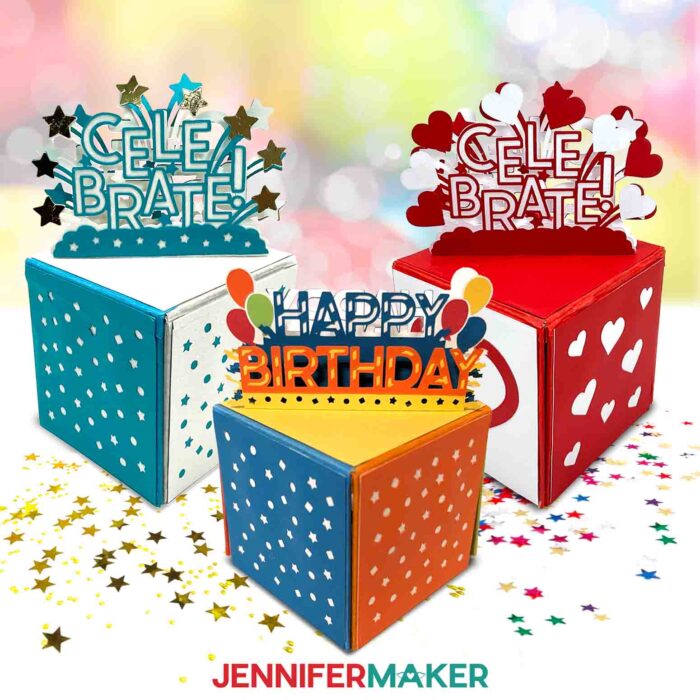
But cardboard is kind of boring, don’t you think? That’s why I designed not one, but two different sets of panels and sentiments you can use to decorate your cardboard jumping box and lid: A “Happy Birthday” set and a “Celebrate!” set. If you’re curious about customizing the designs for this jumping box for different occasions, be sure to check out the video to learn about an exciting new way to learn!
I’ll show you how to set the score lines in Cricut Design Space so you can use a scoring tool to make folding your box lid and flaps much easier and more precise. No scoring tool? No problem. My download file for this project includes a helpful PDF for help in creating those fold lines yourself.

There’s a complete list of tools and materials below for making my cardboard jumping box design, including metal washers, hot glue, and washi tape — be sure to watch my video tutorial to find out how I used them!
Learning to cut cardboard with Cricut is easy when you learn the right techniques and have the right materials for the job! Then you can flex your new skills and make a super fun cardboard jumping box for someone special.
Ready to learn how to cut cardboard with Cricut? This post contains some affiliate links for your convenience (which means if you make a purchase after clicking a link I will earn a small commission but it won’t cost you a penny more)! Read my full disclosure policy.
Materials And Tools to Make a Cardboard Jumping Box
See my Amazon shopping list with exactly what I used!
- One (1) Sheet of 11″ x 12″ Corrugated Cardboard (2mm thick or less)
- Several Sheets of 12″ x 12″ 65 lb. Cardstock (various colors)
- Five (5) 8″ Long, 1/4″ Wide Elastic Bands
- Colored Masking Tape or Washi Tape
- Eight (8) 3/4″ Metal Washers
- Confetti (optional)
- A way to cut your materials – I’m using the Cricut Maker 3, but you can also use the Cricut Maker or a Cricut Explore Series machine.
- Cricut Knife Blade with Housing (for use with a Cricut Maker or Maker 3) -OR-
- Cricut Deep Point Blade with Housing
- Cricut Purple StrongGrip Machine Mat 12″ x 12″ (for cardboard)
- Cricut Green StandardGrip Machine Mat 12″ x 12″ (for cardstock)
- Scoring Stylus -OR- Single Scoring Wheel (optional for files with score lines)
- Painter’s Tape or Masking Tape
- Hot Glue Gun and Glue Sticks
- Hot Glue Finger Protectors
- Scissors
- Cricut TrueControl Knife (for cutting slits for elastic and finishing cardboard cuts) -AND-
- Self-Healing Cutting Mat
- Brayer
- Spatula
- Scraper
- Weeding Tool (for popping out small pieces from intricate areas)
- Tweezers (optional for handling delicate areas)
- Bearly Art Precision Craft Glue (optional for the star pieces)
- Metal Ruler (optional)
- Design #581– My free SVG/DXF/PDF design files are available in my free resource library – get the password by filling out the form at the bottom of this page
How to Cut Cardboard with Cricut!

Cut Cardboard With Cricut
Learn how to cut cardboard with a Cricut to make a gift box that jumps open with a message when you remove the lid.
Materials
- One (1) Sheet of 11" x 12" Corrugated Cardboard (2mm thick or less)
- Several Sheets of 12" x 12" 65 lb. Cardstock (various colors)
- Five (5) 8" Long, 1/4" Wide Elastic Bands
- Colored Masking Tape or Washi Tape
- Eight (8) 3/4" Outer Diameter Metal Washers
- Confetti (optional)
- Design #581 (My free SVG/PDF/DXF design files are available in my free resource library - get the password by filling out the form at the bottom of this page)
Tools
- A way to cut your cardboard - I’m using the Cricut Maker 3 but you can also use the Cricut Maker or a Cricut Explore Series machine.
- Cricut Knife Blade with Housing (for use with a Cricut Maker or Maker 3) -OR-
- Cricut Deep Point Blade with Housing
- Scoring Stylus -OR-
- Single Scoring Wheel
- Cricut Purple StrongGrip Machine Mat 12" x 12" (for cardboard)
- Cricut Green StandardGrip Machine Mat 12" x 12" (for cardstock)
- Brayer
- Spatula
- XL Scraper
- Painter's Tape or Masking Tape
- Hot Glue Gun and Glue Sticks
- Hot Glue Finger Protectors
- Craft Glue (I used Bearly Art Precision Glue)
- Scissors
- Cricut TrueControl Knife (for cutting slits for elastic and finishing cardboard cuts) -AND-
- Self-Healing Cutting Mat
- Weeding Tool
- Tweezers
- Metal Ruler (optional for preparing your cardboard base without a Cricut)
Instructions
STEP 1: GET MY FREE CARDBOARD JUMPING BOX DESIGNS
First, download my Cut Cardboard With Cricut designs from my free library – look for Design #581. Alternatively, you can use the Save This Project form near the top of this post and the design link will be emailed to you.
TIP: If you’re not sure how to upload, go to jennifermaker.com/svgs to learn how to unzip and upload SVG files.
In the download folder, there are two designs: a jumping box with a Happy Birthday sentiment and one with a Celebrate sentiment. In this tutorial, I will show you how to make the Happy Birthday design.
STEP 2: PREPARE YOUR CARDBOARD JUMPING BOX DESIGN
CRICUT DESIGN SPACE
1. Open Cricut Design Space and click “New Project.”
2. Click “Upload” and then “Upload Image.”
3. Click “Browse.”
4. Select the SVG file you want to make.
5. On the Prepare to Upload screen, it will say “Cut image” with the design preview.
6. Click “Upload.”
7. Find your design in Recent Uploads and add it to the Canvas.
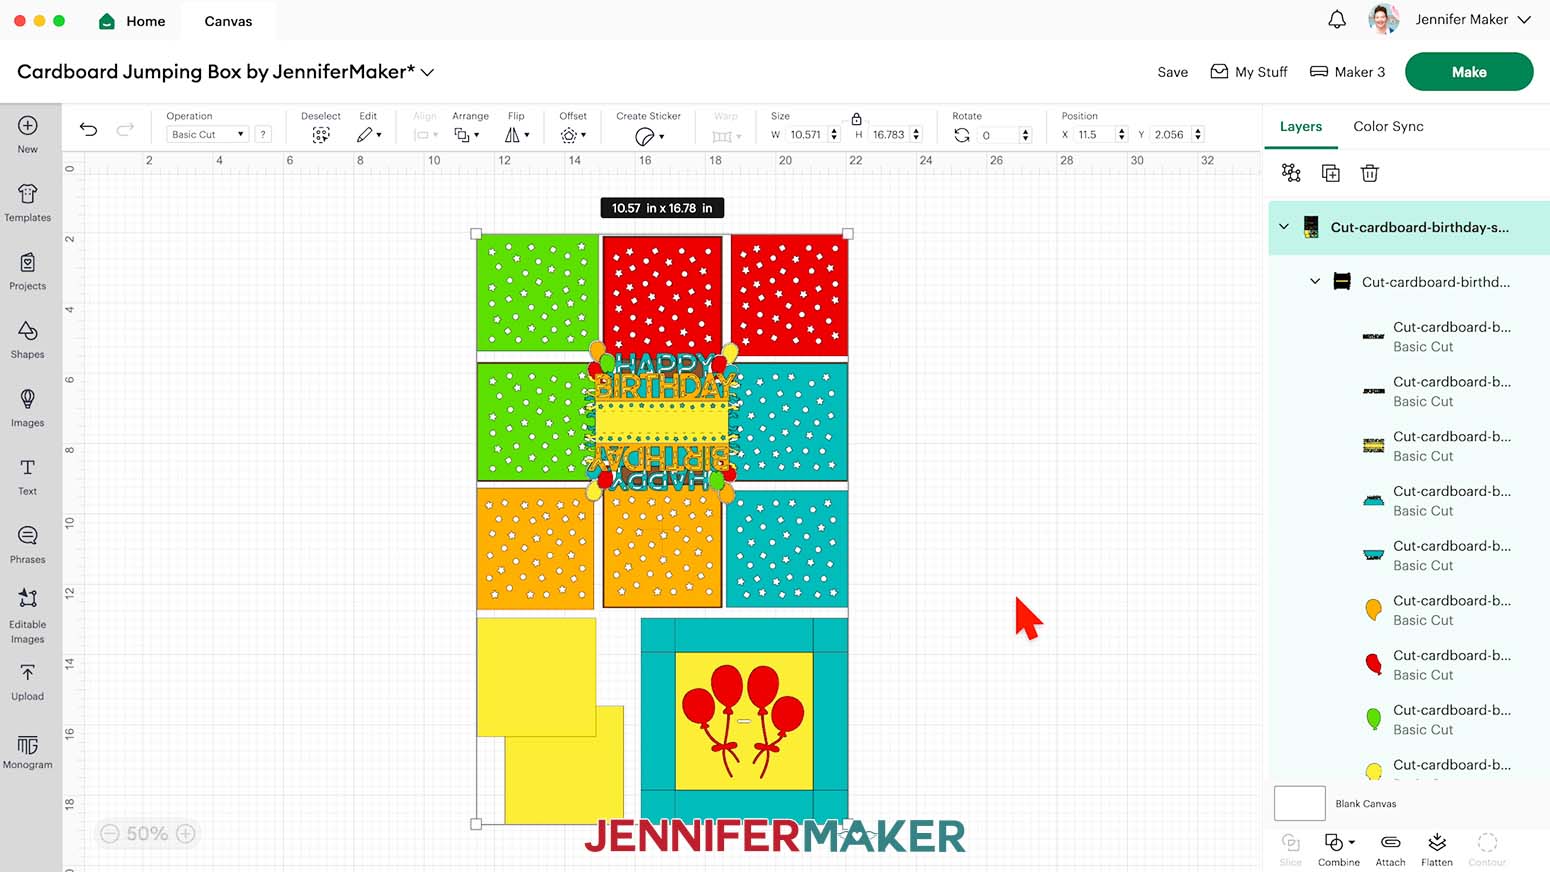
8. Ungroup the design.
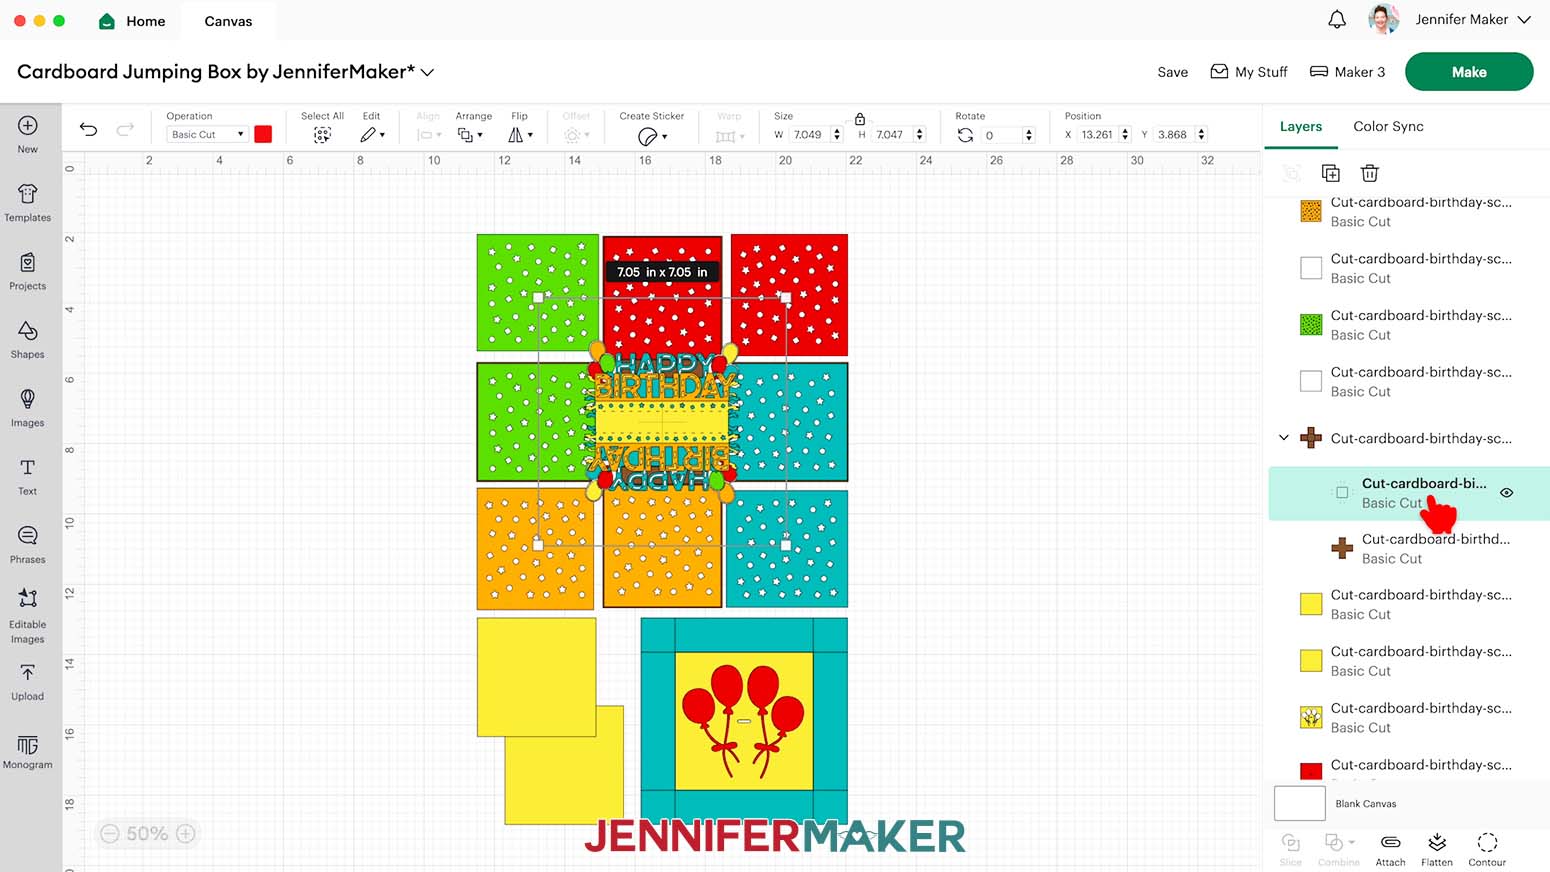
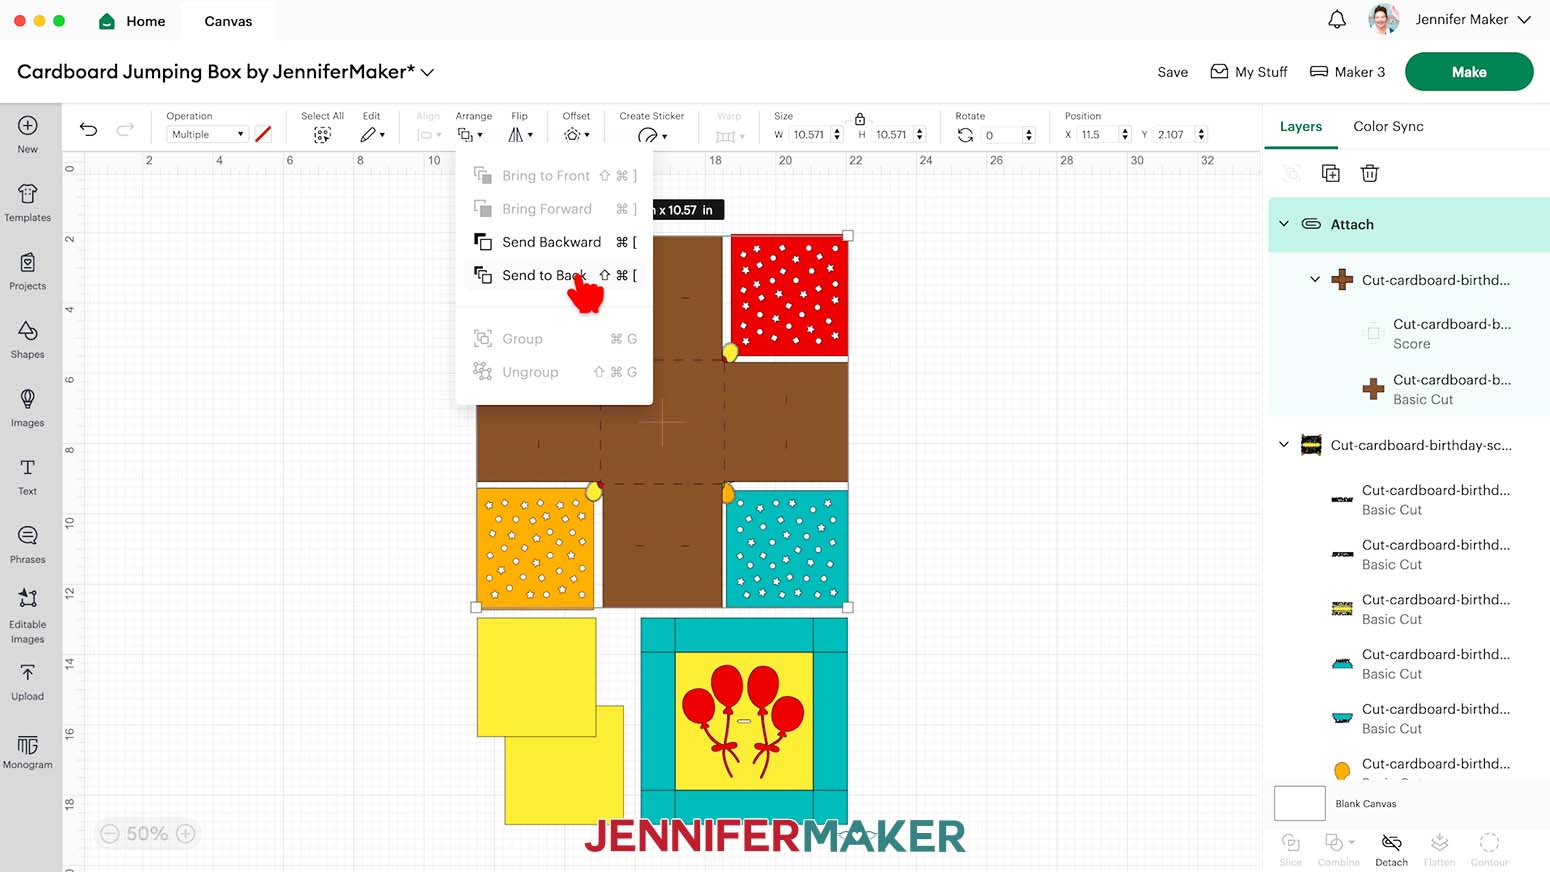
9. In the Layers Panel, find the first group of two layers for the box's base: the bottom is a large brown shape, the top is just lines. Select the layer with just lines. It will be colored red.
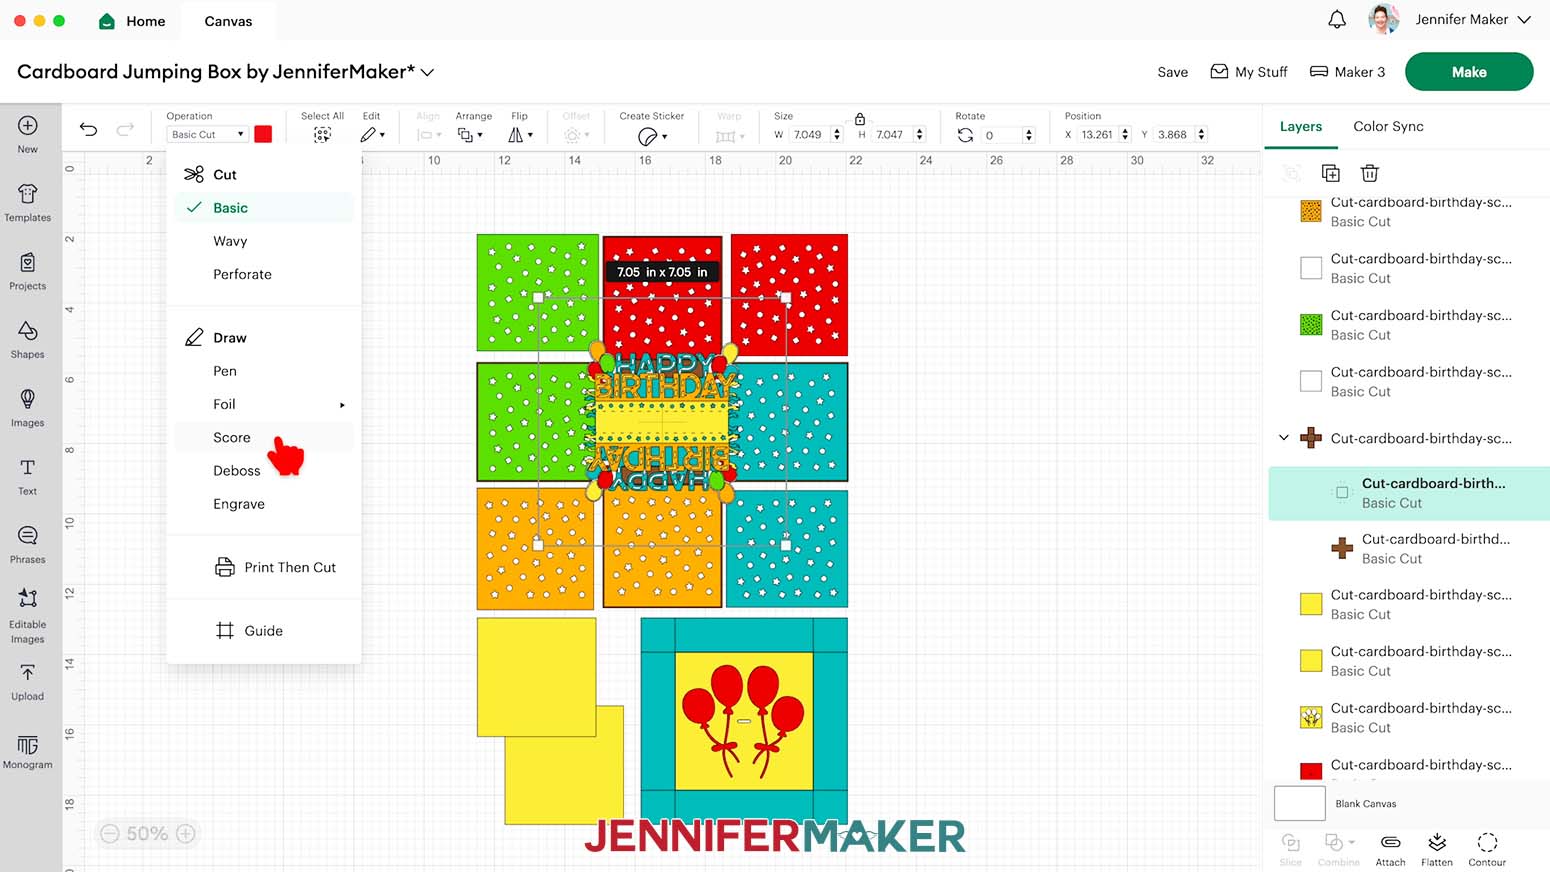
10. Use the Operation menu to change the layer to “Score.”
11. Click the layer group to select both the brown Cut layer and the Score layer, then click “Attach.”
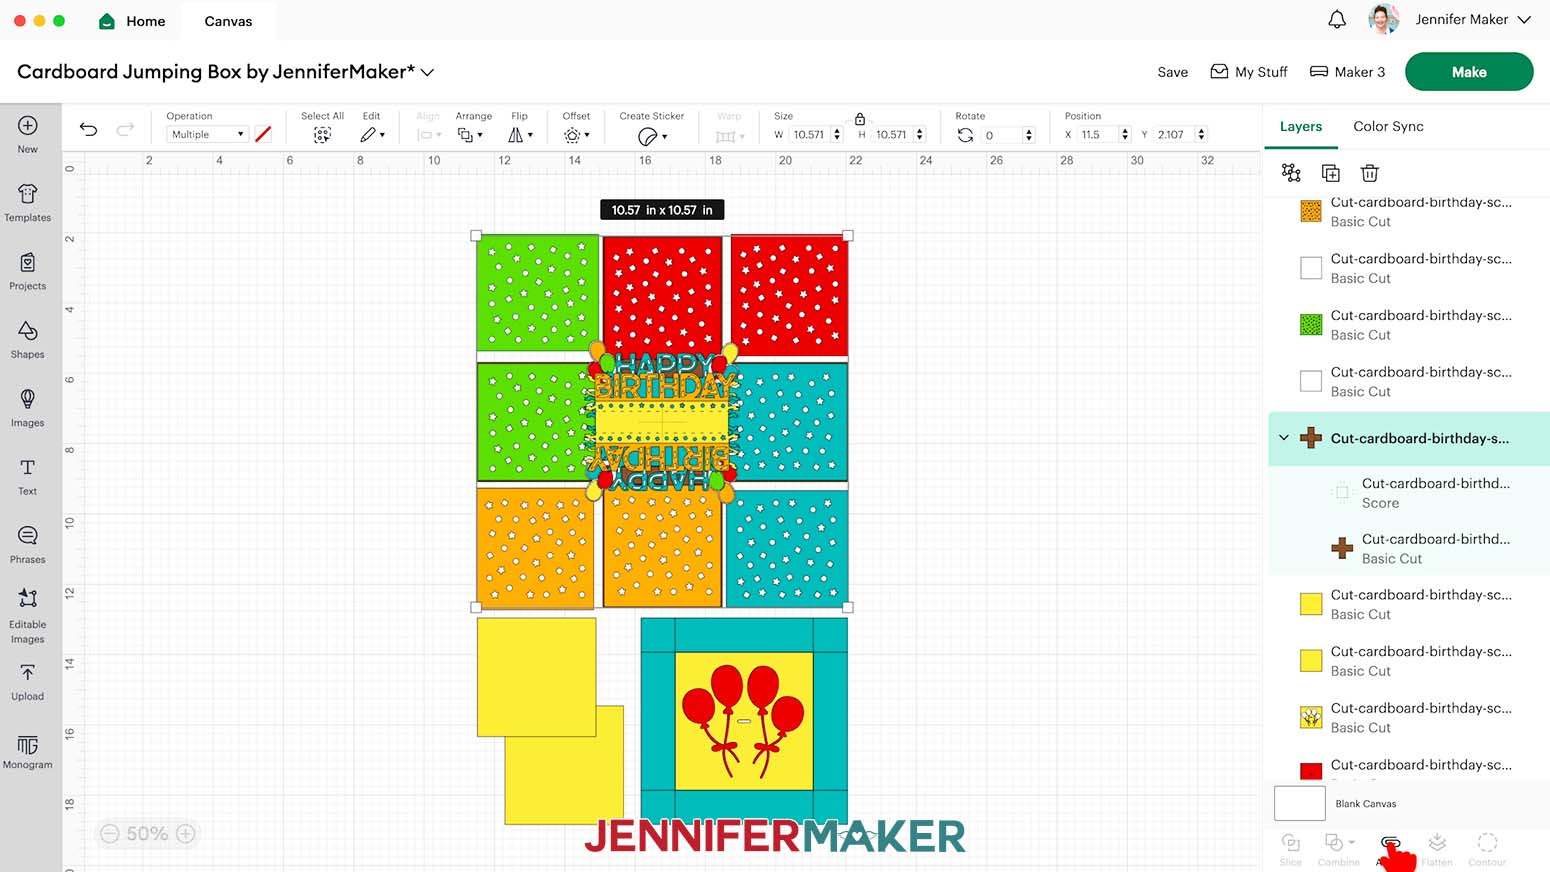
TIP: The attached layers will jump to the top of the Layers Panel. If you want to see the layers underneath, just click the attached group and select “Arrange” and “Send to Back.”
12. Repeat Steps 9-11 to convert and attach the score lines for the second group of two layers for the box’s lid.
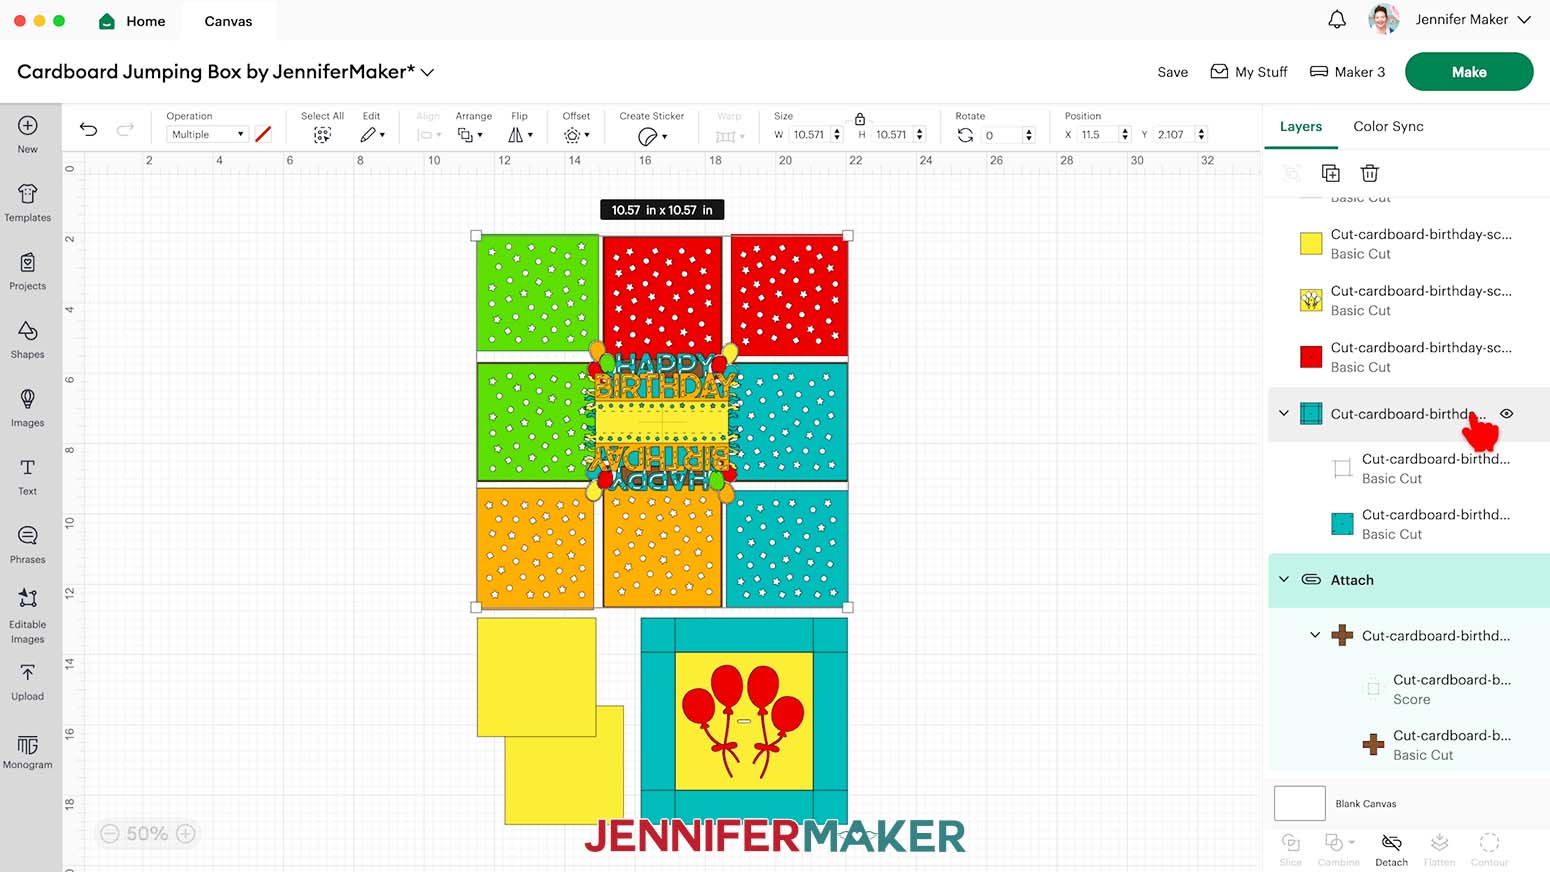
13. If you’d like to use different colors for any of your pieces, select the piece you want to change, then use the Color Box at the top to pick a new color.
NOTE: The brown layer is intended to be cut on cardboard. The rest of the layers can be cut on any color 65 lb. cardstock.
14. Your jumping box is ready to cut!
15. Make sure the correct machine is selected in the top right.
16. Click “Make.”
17. If prompted, click "On Mat," choose your mat size, and click “Confirm.”
18. On the Prepare Screen, you will have 8 mats if you’re using the same colors as me.
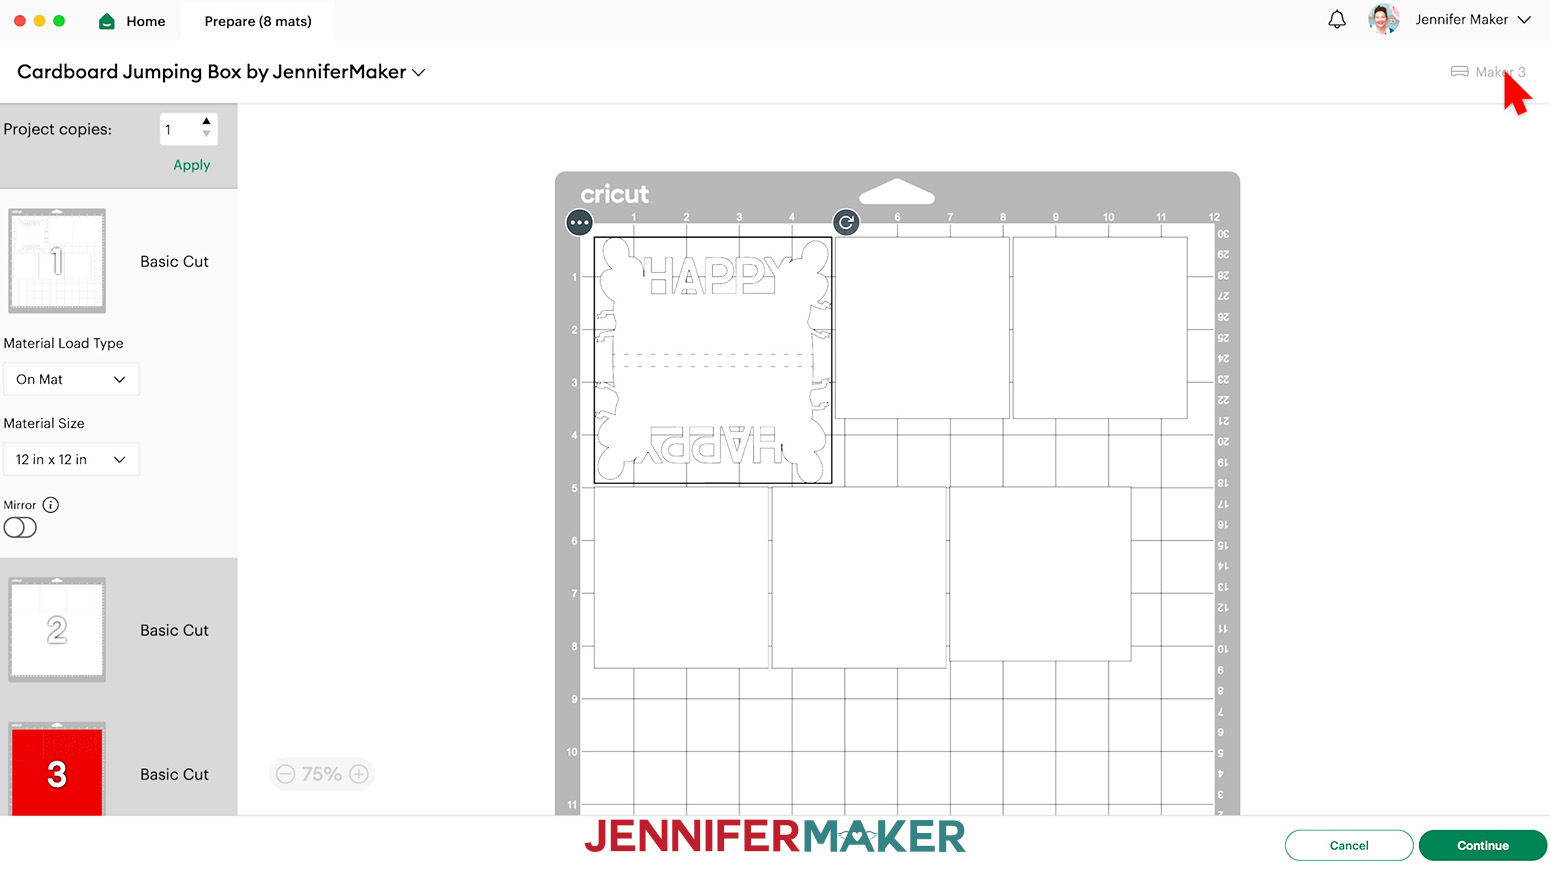
19. If needed, change the Material Size to match each paper you’re using.
20. Select the brown mat to cut the cardboard first, then click “Continue.”
CUTTING
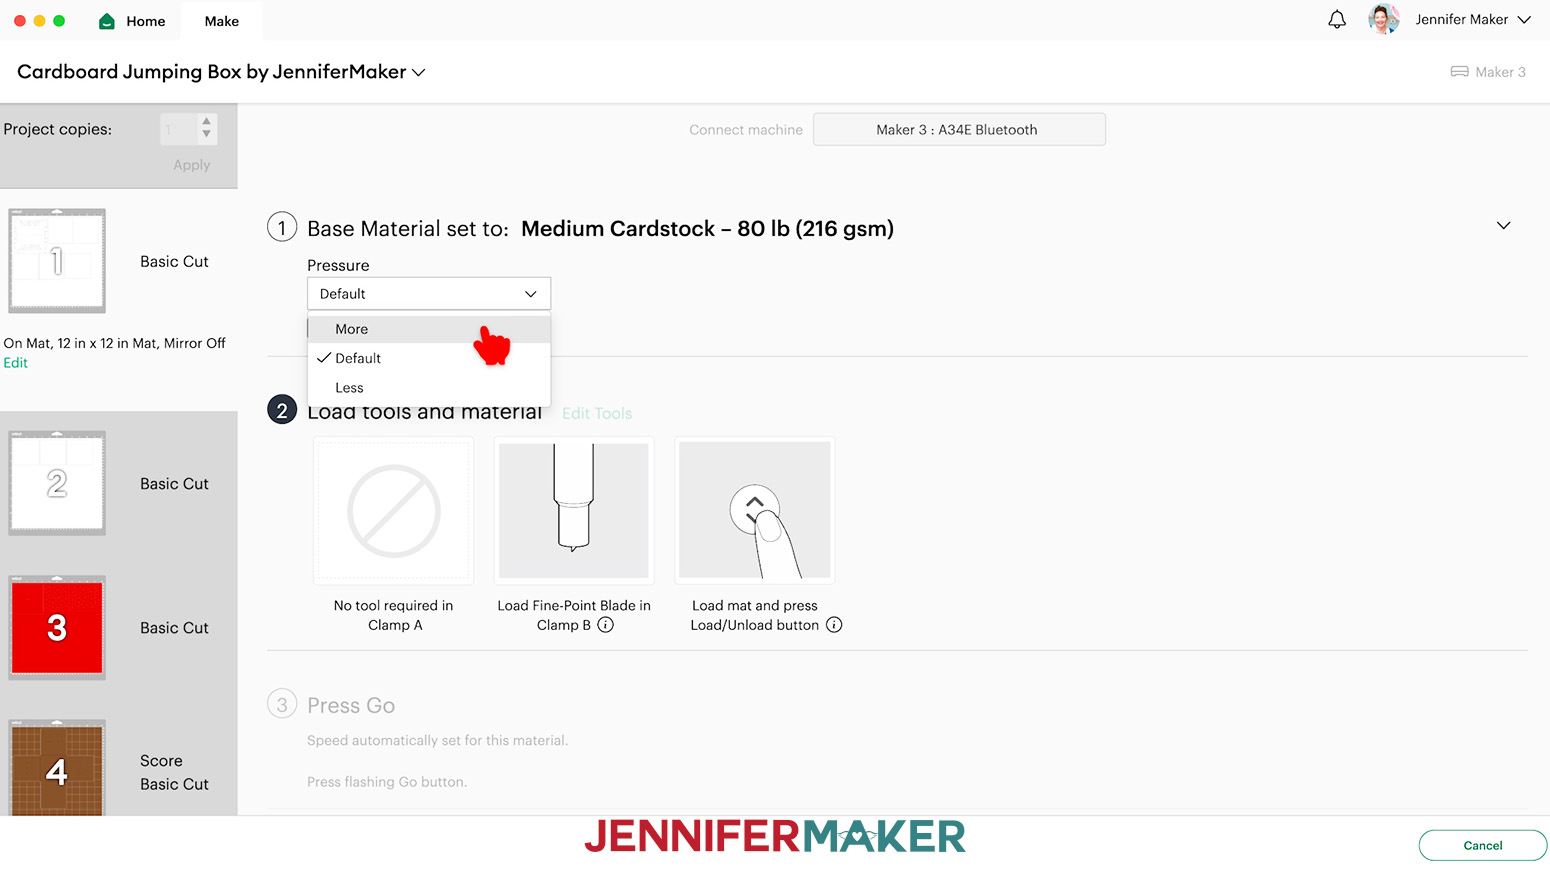
1. On the Make Screen, click “Browse All Materials.”
2. Set the brown mat to “Chipboard (1.5 mm)” with “Default” Pressure.
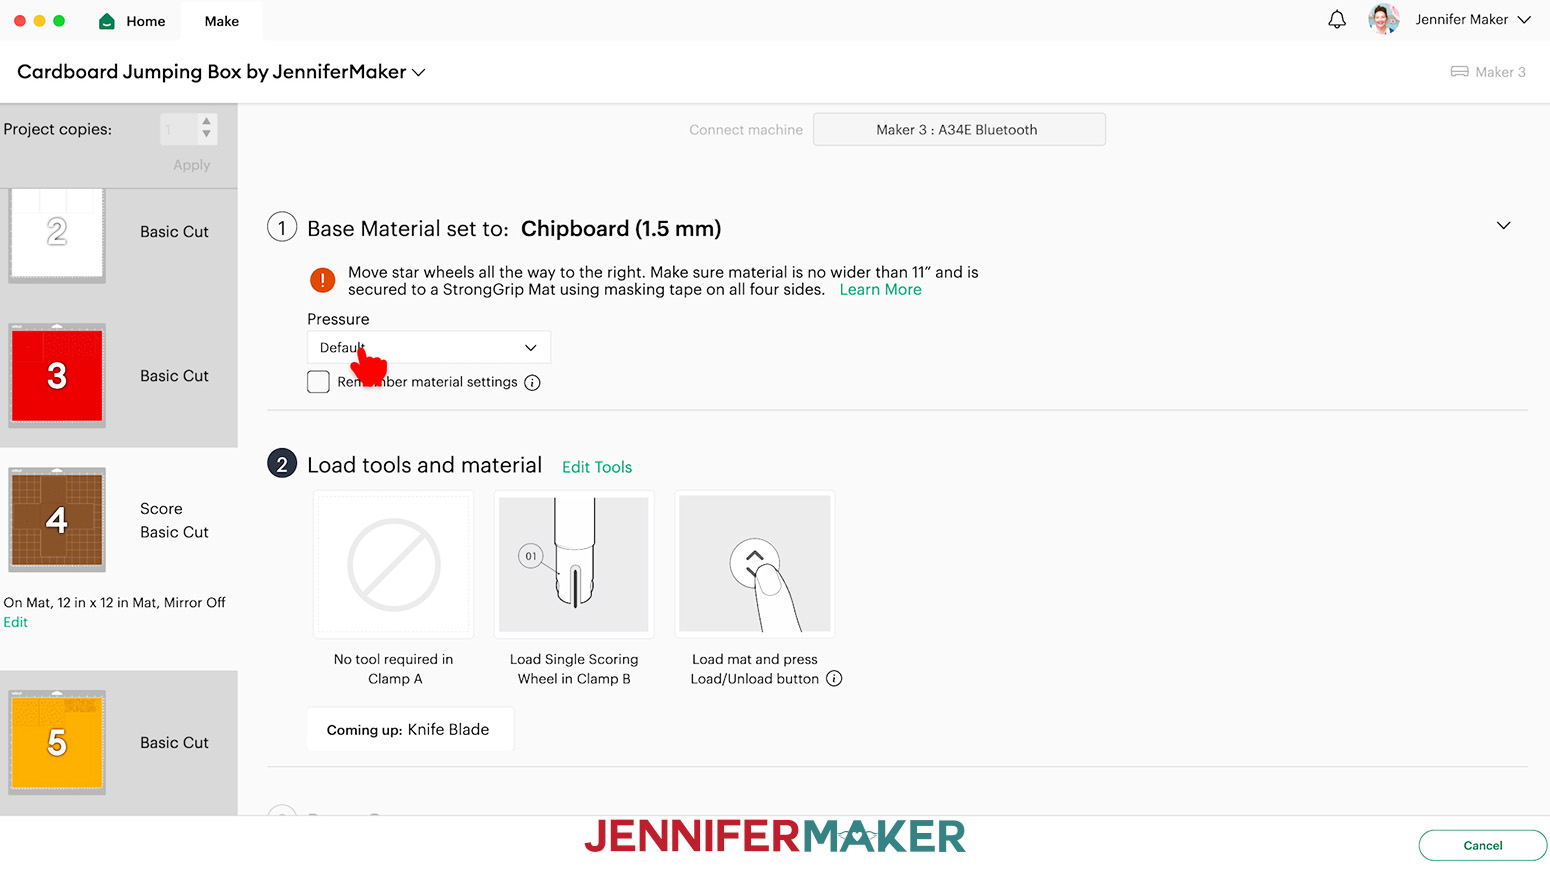
NOTE: If you’re using an Explore Series machine, or if you don’t have a Knife Blade for your Maker, I’ve found that the Deep Point Blade works well using the “Corrugated Cardboard” setting with “Default” Pressure.
3. Change the score tool if you want.
4. Move the white star wheels on your machine all the way to the right.
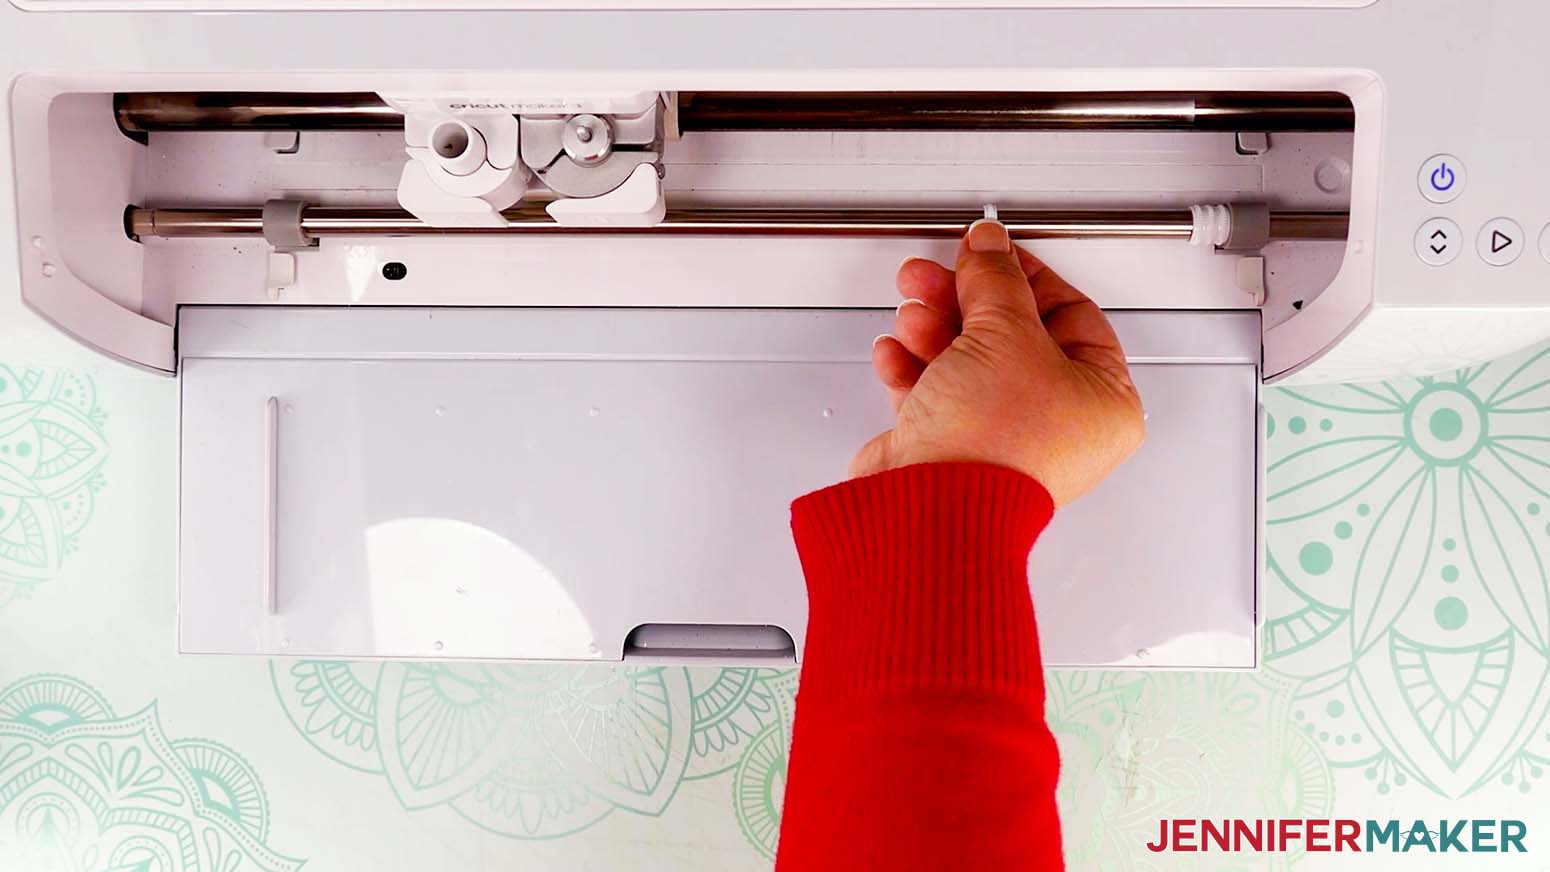
5. Use scissors to cut your cardboard to approximately 11” wide and 12” tall.
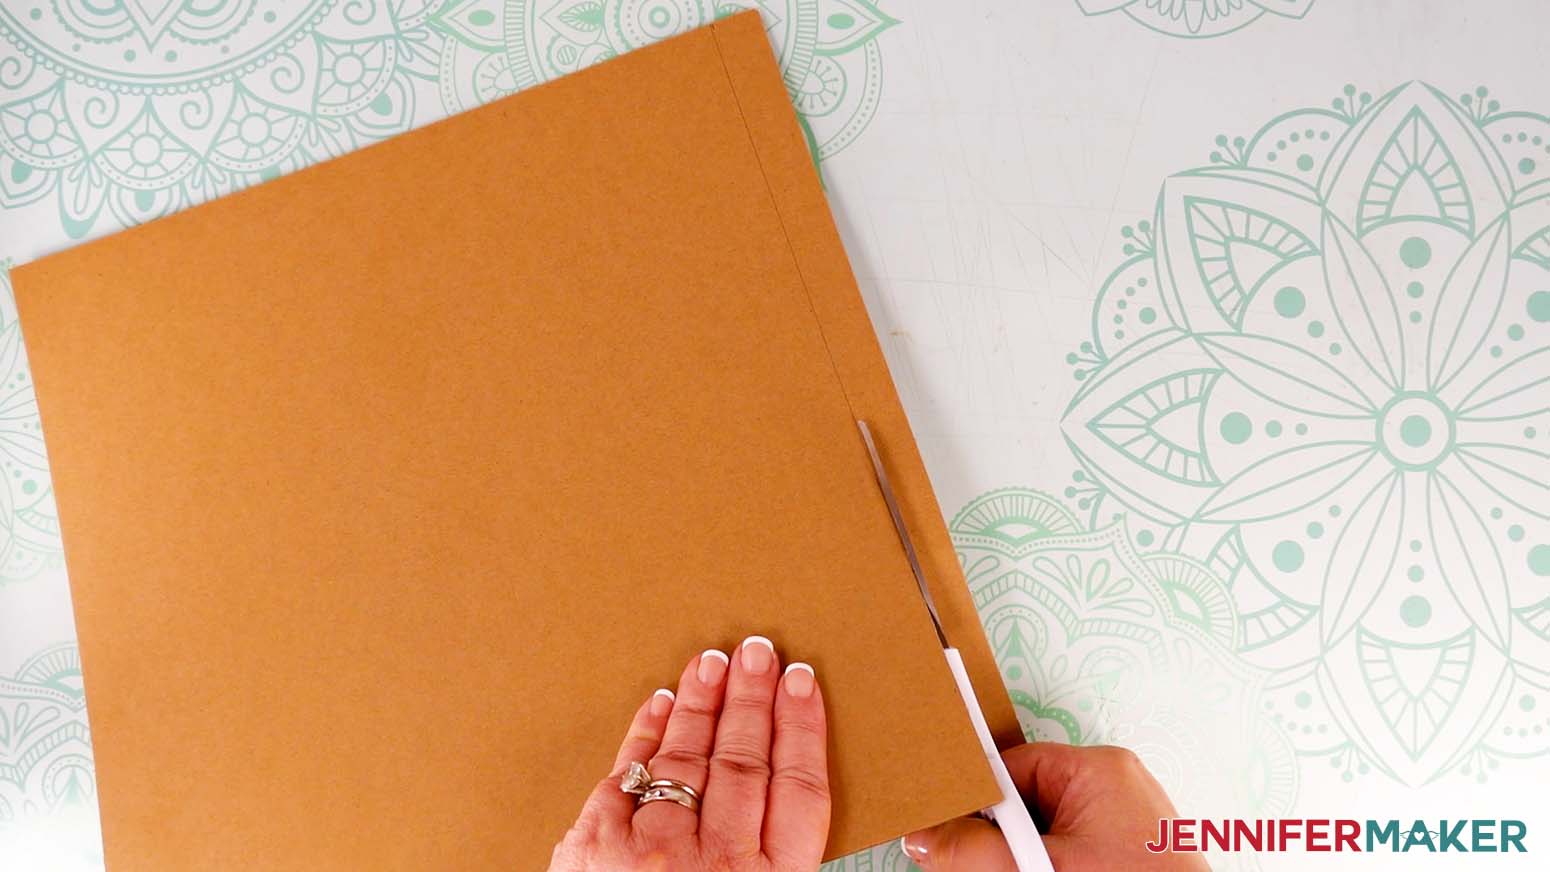
NOTE: If you’re using the cardboard sheets from my materials list, make sure you don’t cut off more than an inch, as that could cause part of the design to get cut off. If your cardboard is a little wider than 11", that's OK -- we just want to make sure it doesn't interfere with the star wheels on the right.
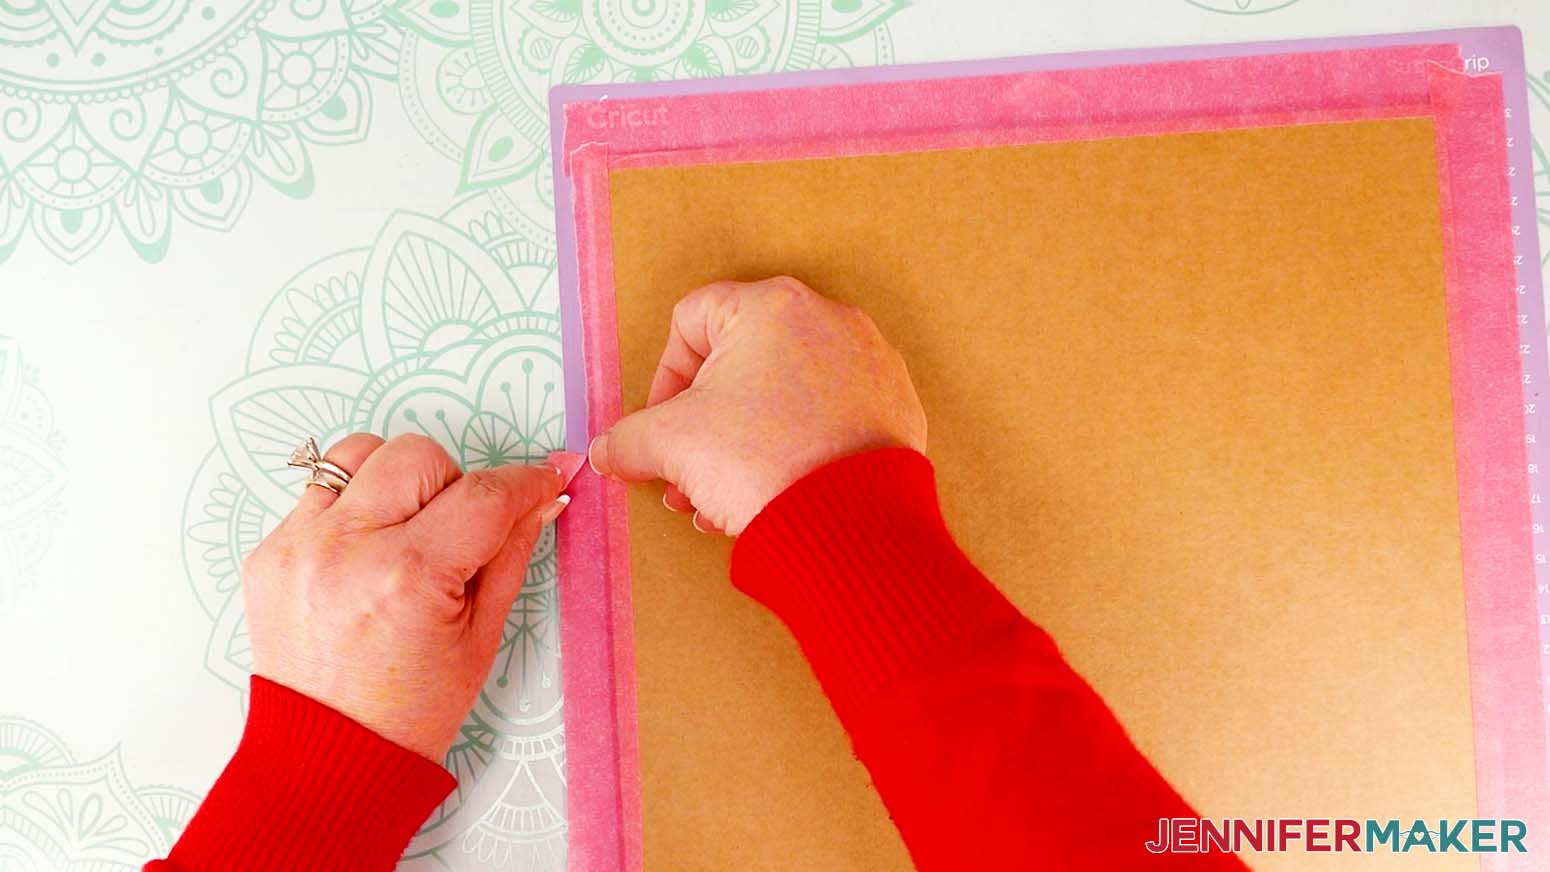
6. Place it on a purple StrongGrip machine mat, aligning it with the top left.
7. Use a brayer to adhere it well.
8. Test your cardboard’s thickness to make sure your machine will cut it by sliding the machine mat with the cardboard attached under the bar on your Cricut. If it won’t fit under the bar, it’s too thick.
NOTE: The cardboard you use should be about 2mm or less in thickness. If your cardboard is thicker, use the PDF template to cut it by hand with a craft knife.
9. Secure all four edges of the cardboard with painter's tape. Place the tape no more than about ¼” over the cardboard’s edges to make it easier to remove later.
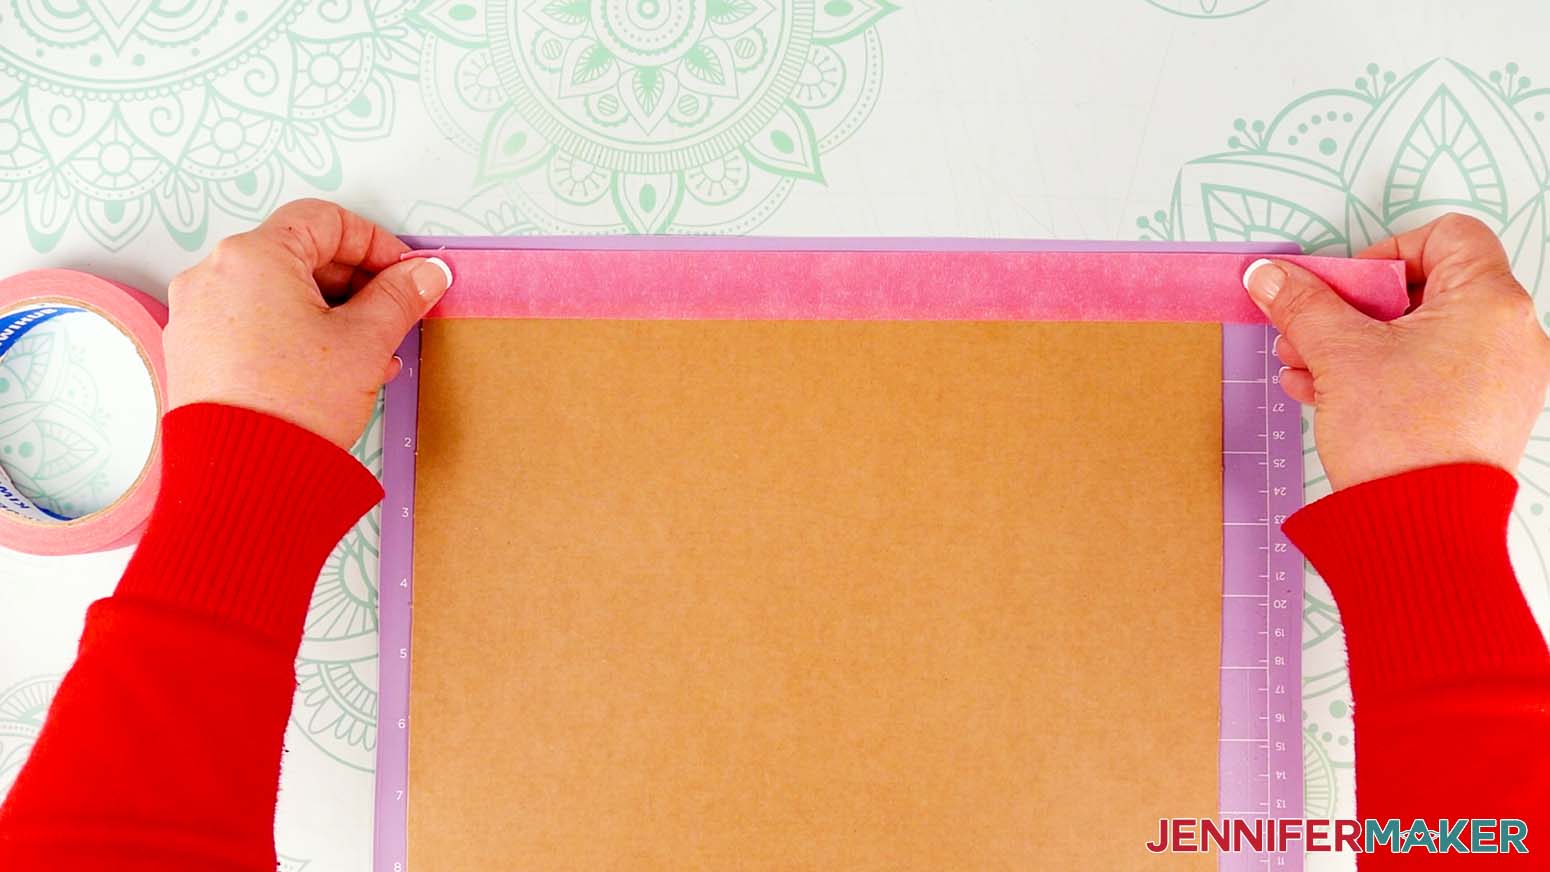
10. Cut or tear away any excess tape that extends past the left side of the mat so it doesn’t interfere with the rollers or machine guides during cutting.
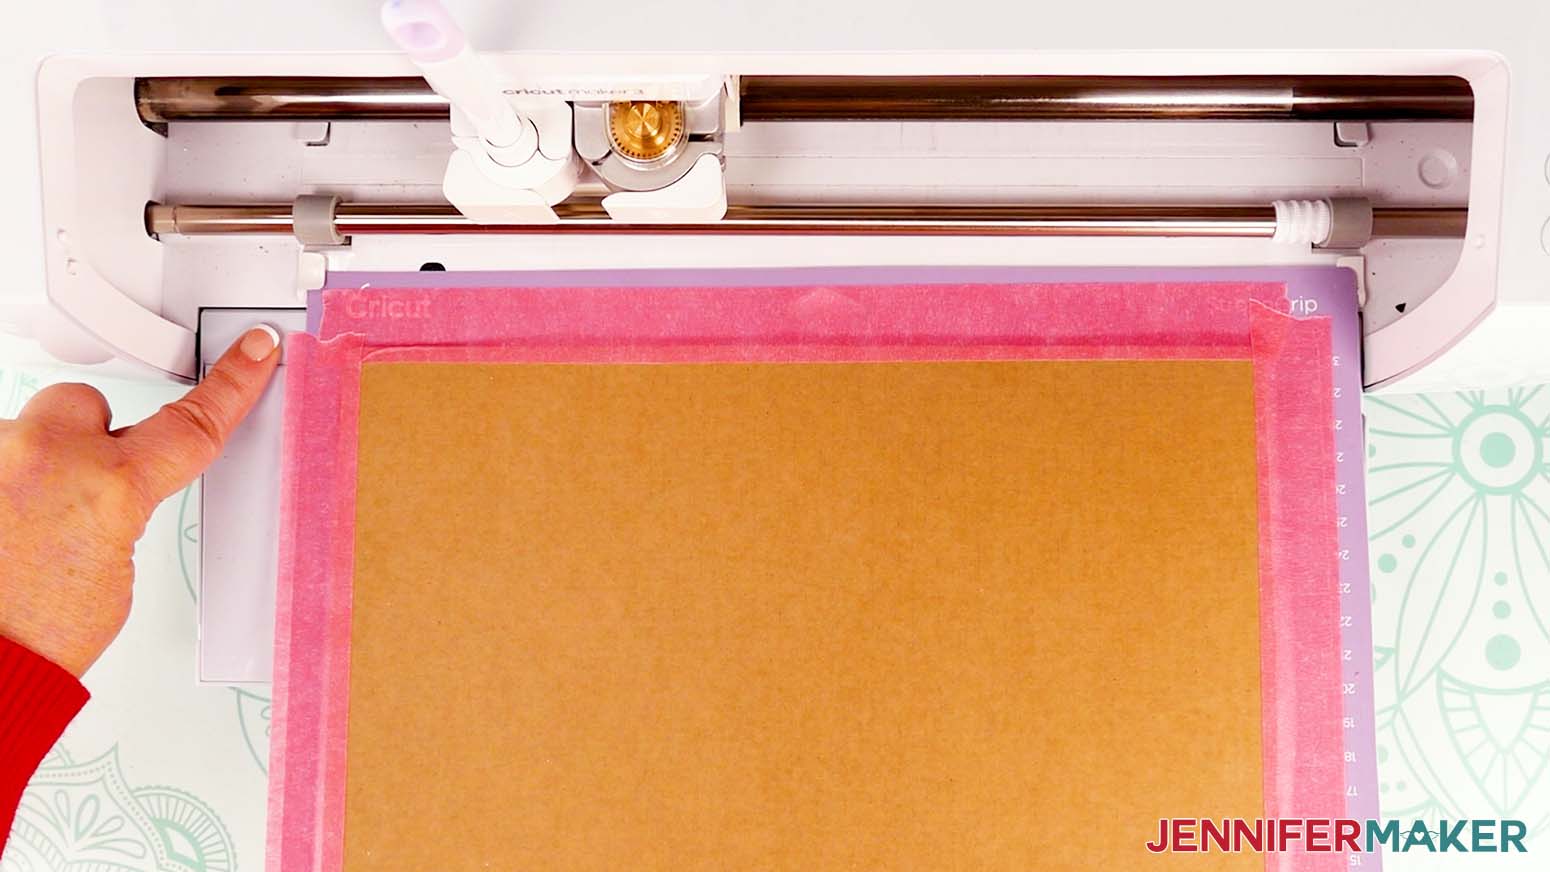
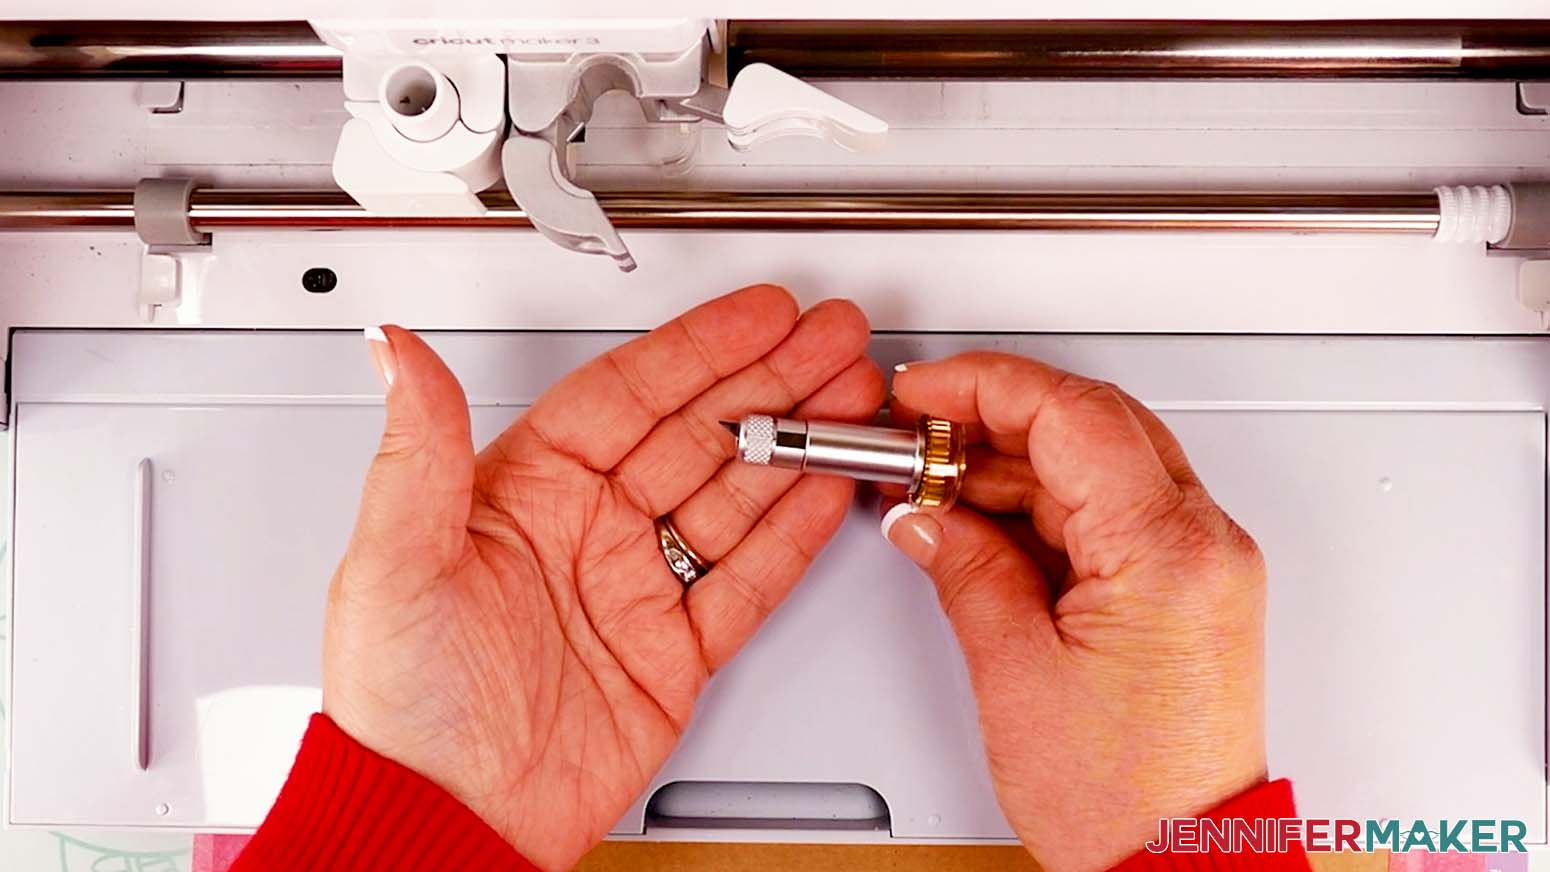
11. Load the Knife Blade in Clamp B and the Scoring Stylus in Clamp A.
NOTE: If you’re using a Scoring Wheel instead, load it into the appropriate clamp when prompted.
12. Press the flashing “Load/Unload” button to load the prepared mat into your Cricut.
13. Press the flashing “Go” button to begin cutting.
14. The cutting process will take 4-5 passes. Stay with your Cricut and watch the cut.
NOTE: If you're using a Deep Point Blade, it still takes 4-5 passes to cut all the way through the cardboard. To cut another pass in the same spot, just press the "Go" button again instead of unloading your mat.
15. After 4 passes, press the “Pause” button to check if it has cut all the way through. If not, press the “Go” button to keep going.
16. When it has finished cutting, press the “Load/Unload” button to unload the mat, remove the painter’s tape, flip your mat over, and pull the mat away from the cardboard.
17. To cut the rest of your 65 lb. cardstock pieces, use the “Medium Cardstock - 80 lb (216 gsm)” setting with “More” Pressure in Design Space.
18. Place your cardstock face up on a StandardGrip machine mat and use a brayer to make sure it’s fully adhered.
19. Remove the Knife Blade from the clamp, and move the four star wheels back into place.
20. Check that your Fine-Point Blade is clean, and insert it into the clamp.
21. Press the flashing “Load/Unload” button to load the prepared mat into your Cricut.
22. Press the flashing “Go” button to begin cutting.
TIP: Before unloading the mat, gently lift a corner of the paper to make sure the cuts went all the way through. If not, press the “Go” button again to make a second cut pass in the same spot.
23. When it has finished cutting, unload the mat, flip it over onto your work surface, and roll it back to release the paper.
TIP: Be careful when removing intricate pieces. Use a spatula to carefully remove any intricate parts and a weeding tool to pop out any small pieces. If you have trouble with any of your cuts, check out my Cricut Tips & Tricks for Cleaner Cuts.

24. Follow steps 17-23 to cut and remove your remaining cardstock pieces.
TIP: Save the confetti cutout pieces from the colored panels instead of throwing them away. You can use them as confetti inside your assembled box later!
25. Place your pieces face up on your work surface. Here are what my cut pieces look like.
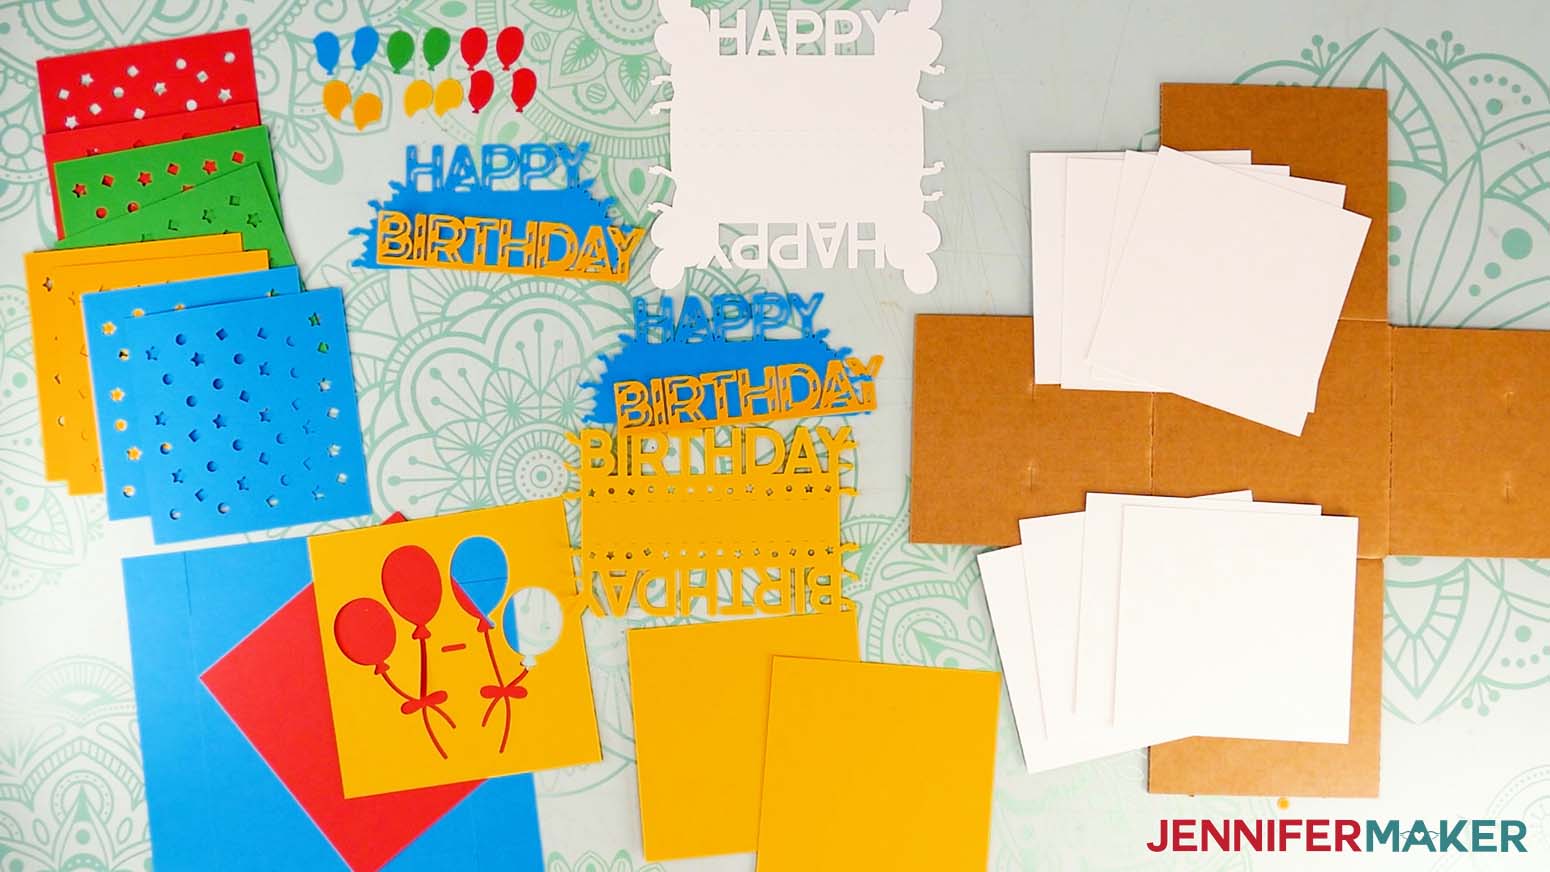
STEP 3: ASSEMBLE YOUR CARDBOARD JUMPING BOX
Cut the Elastic Slits and Attach the First Set of Accent Panels
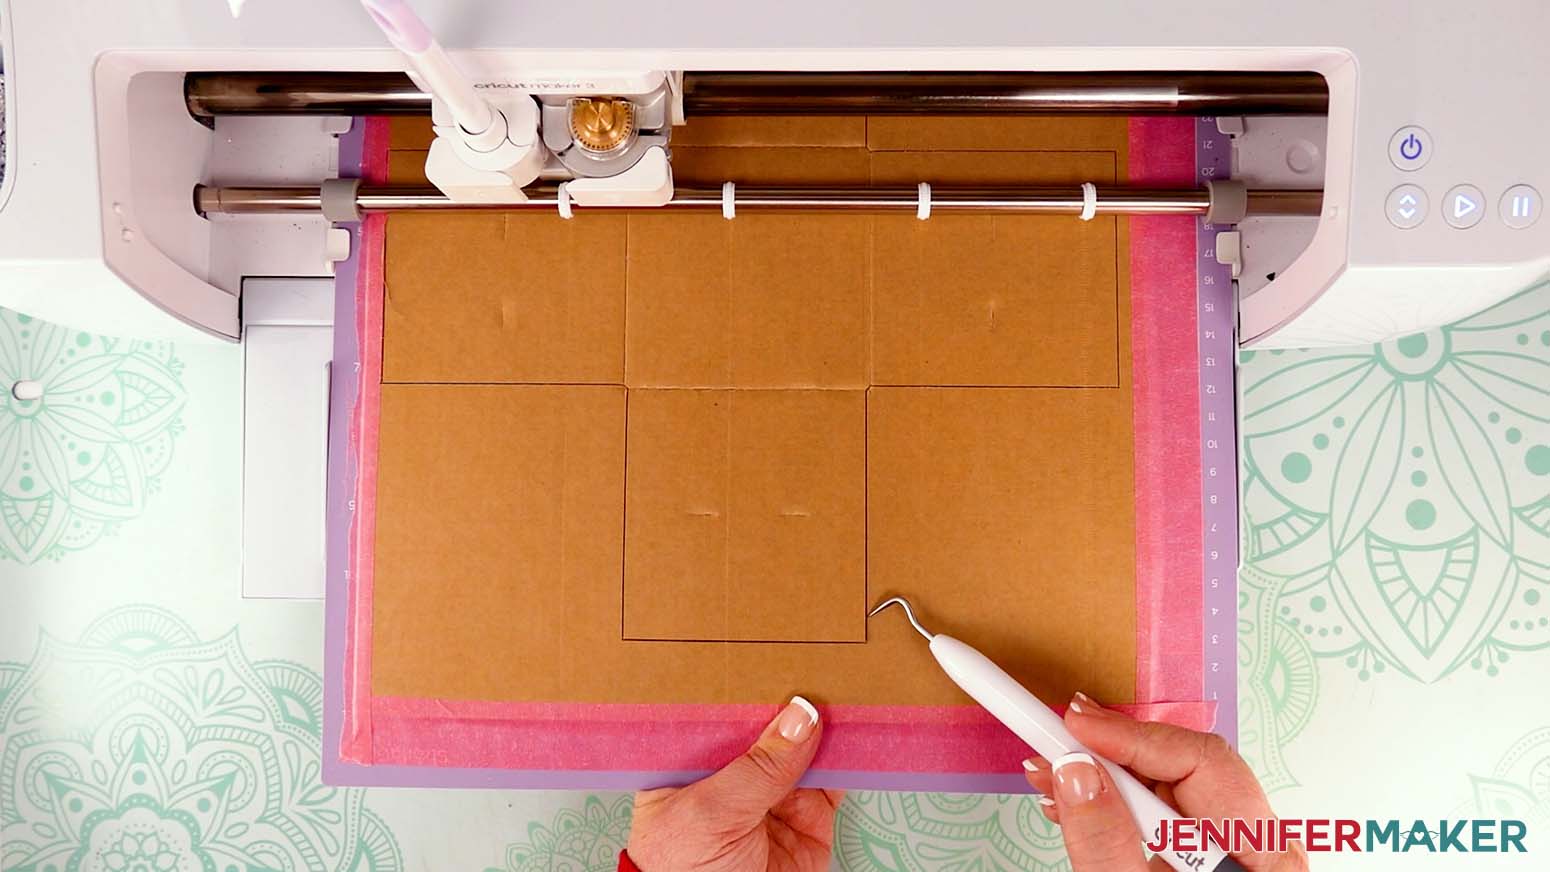
1. Remove any excess painter’s tape from your box base and use a craft knife and self-healing cutting mat to cut away any stuck pieces of cardboard.
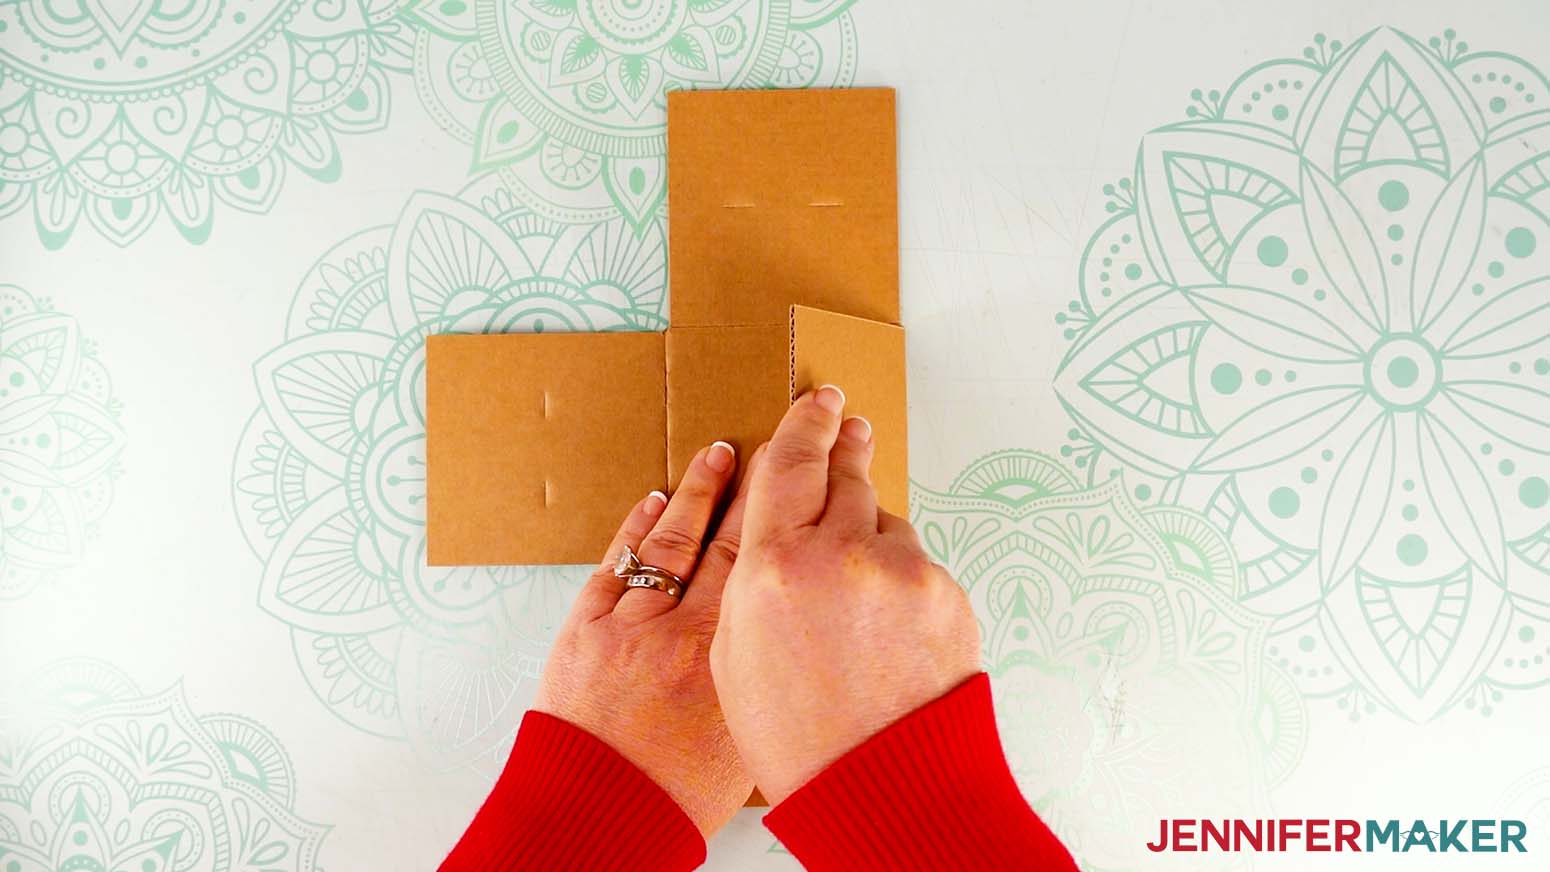
2. Fold the cardboard flaps back and forth at their creases several times so they move easily.
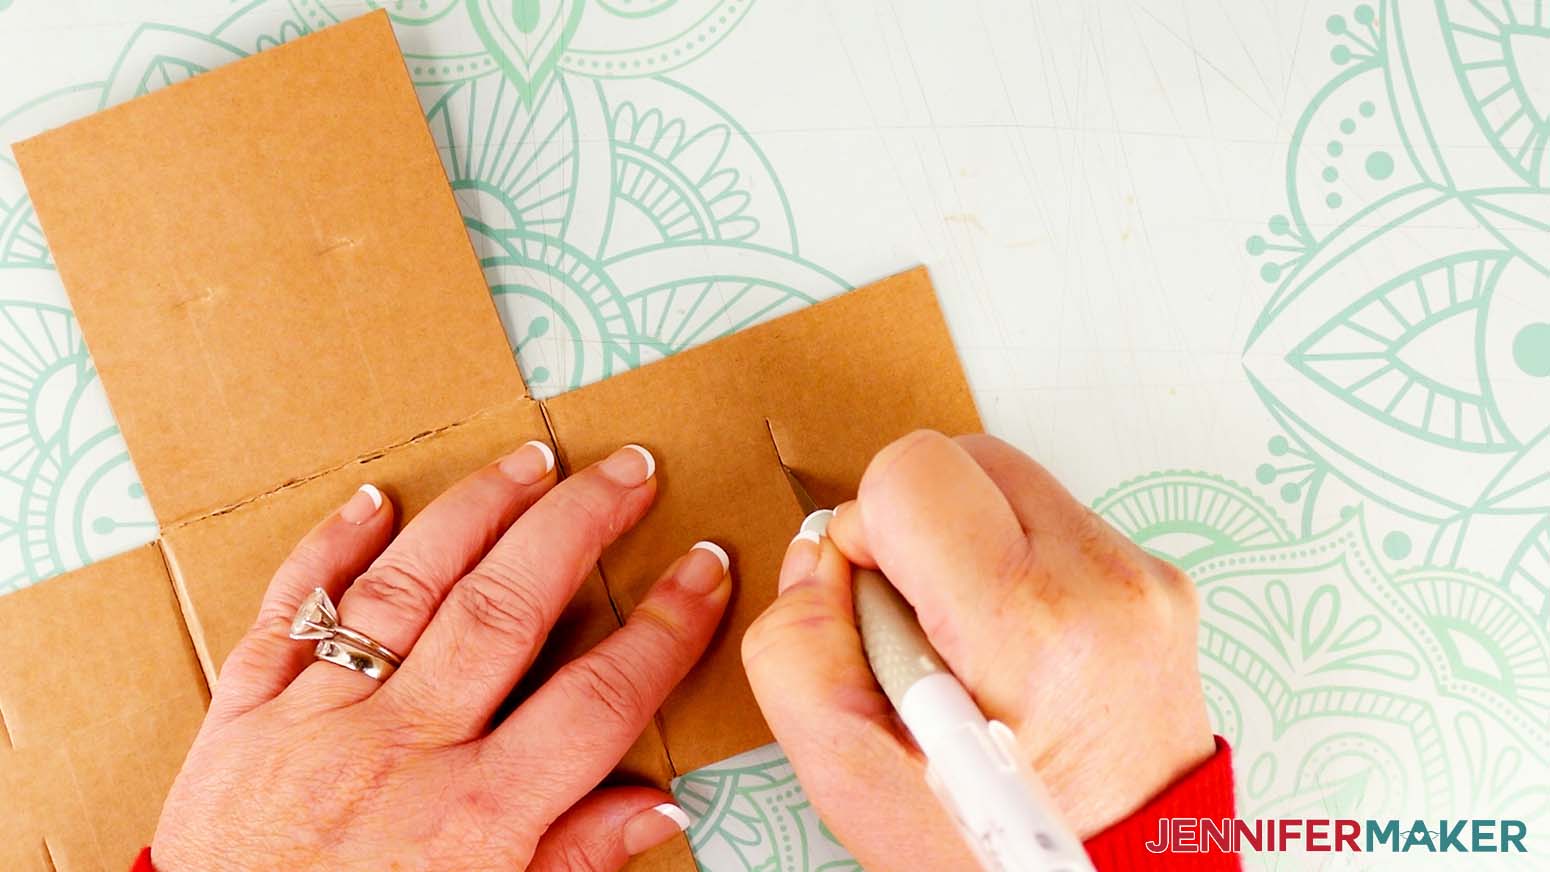
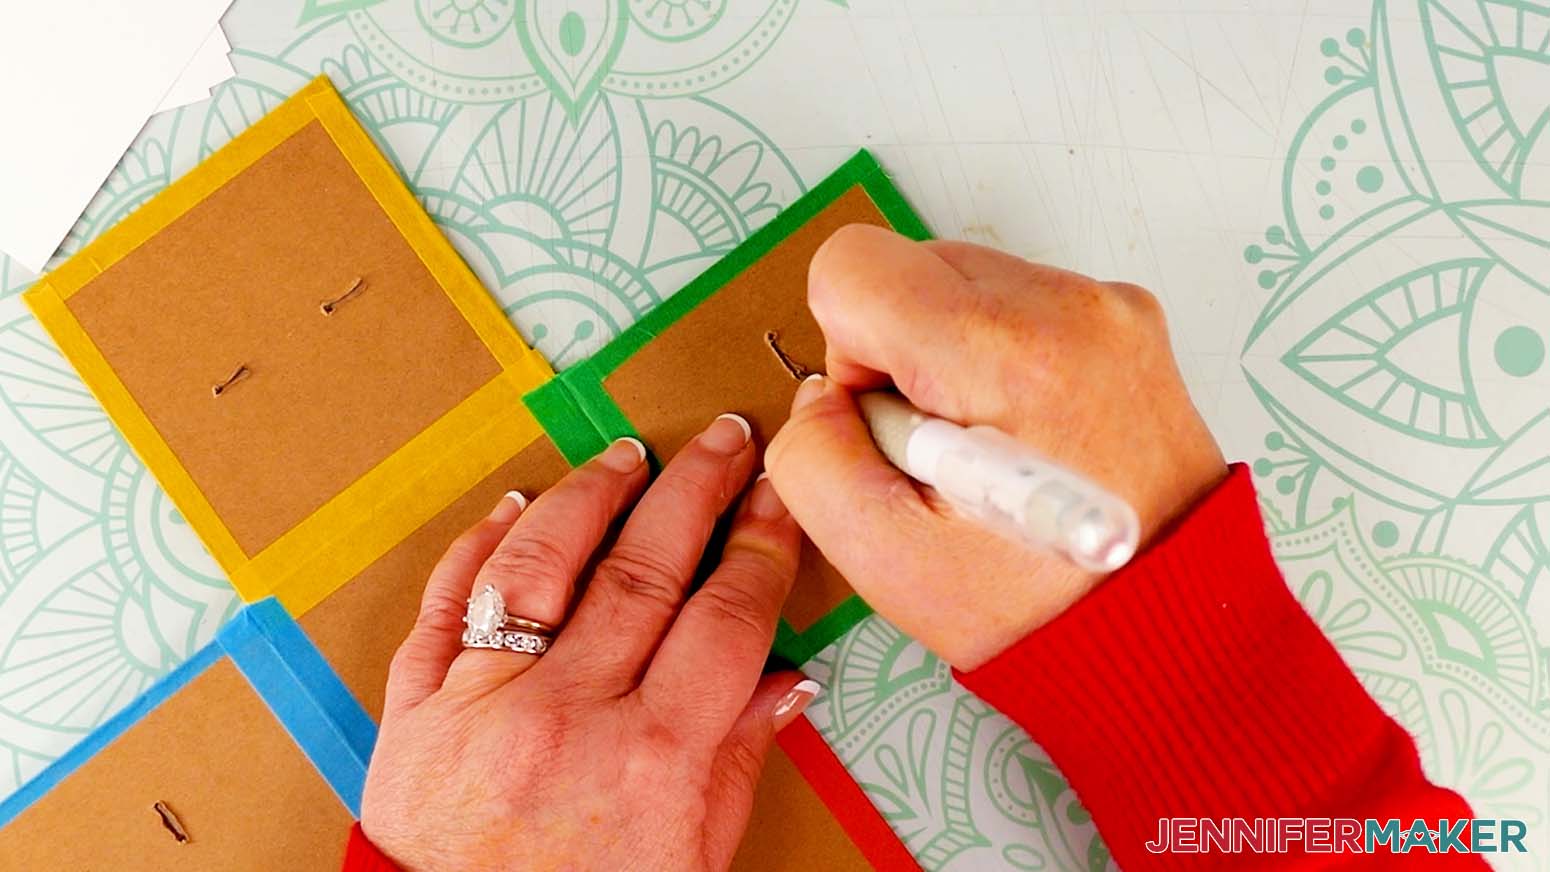
3. Place the cardboard score-side-up on a self-healing mat.
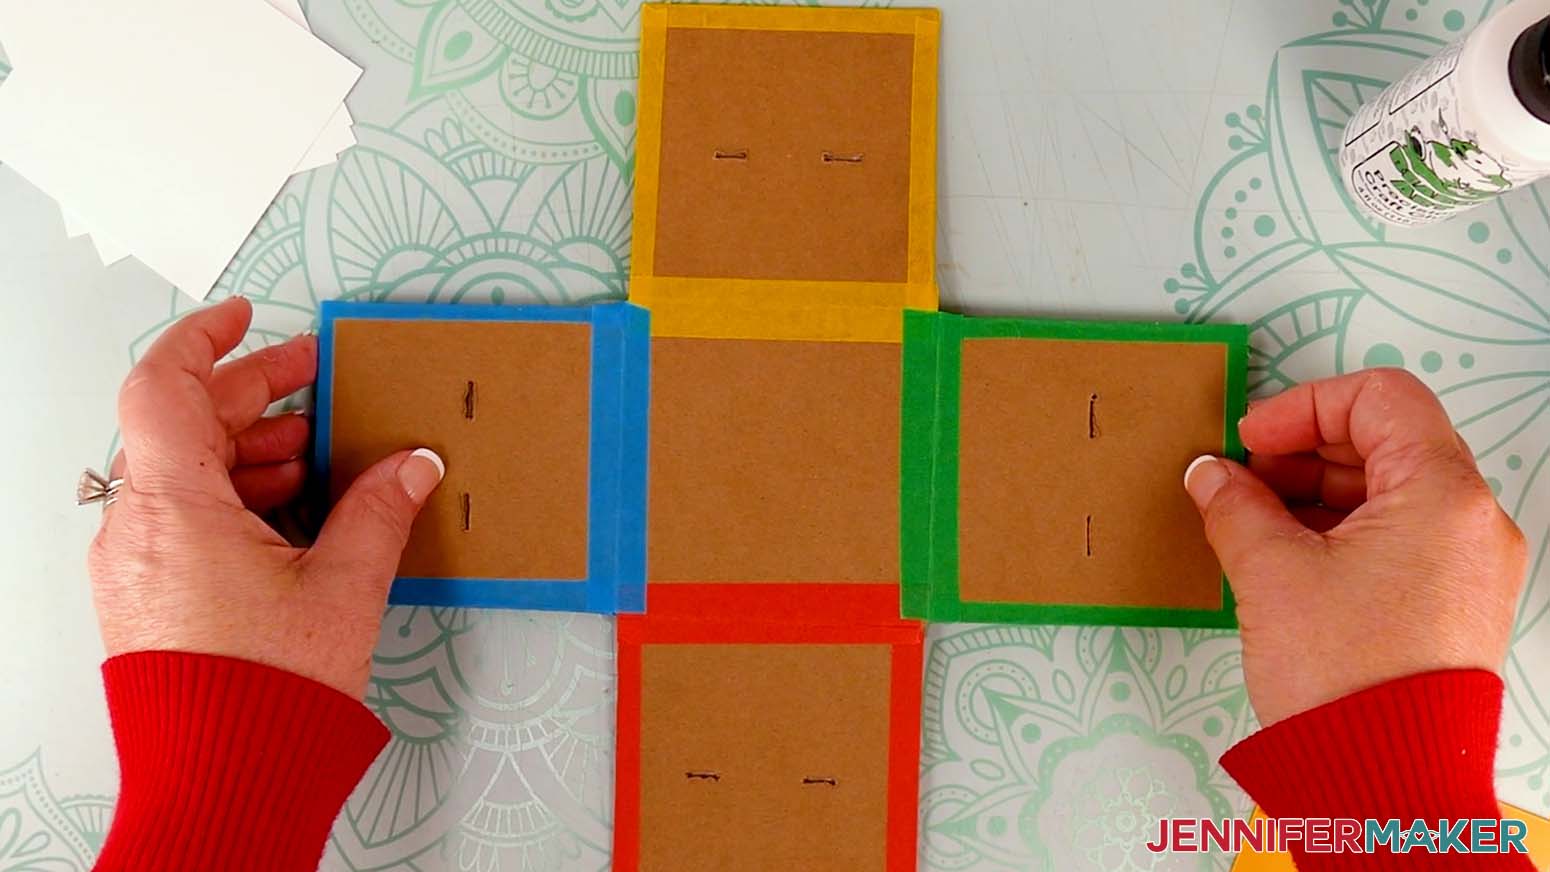
4. Use a craft knife to carefully cut through the ¼” score lines in each flap to create eight slits.
5. Pick up the cardboard and poke your weeding tool through one end of one of the slits.
CAUTION: Keep your fingers out of the way in the back.
6. Then use the weeding tool to poke through the other end of the slit.
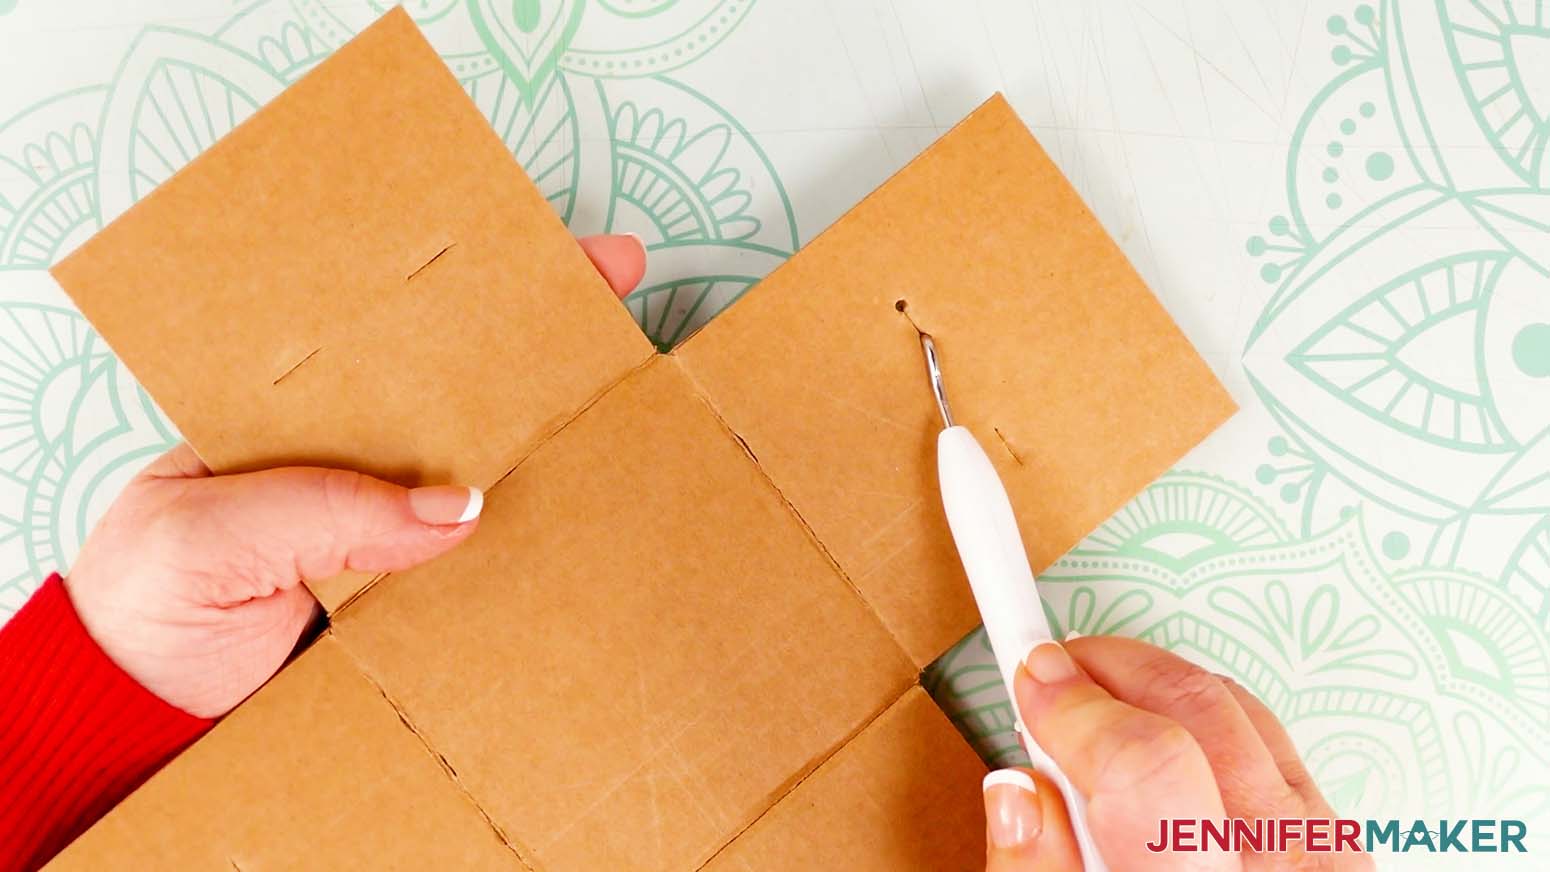
7. Drag the weeding tool between the holes to complete the slit.

8. Repeat steps 5-7 on the other seven slits.
9. Place the cardboard on your work surface.
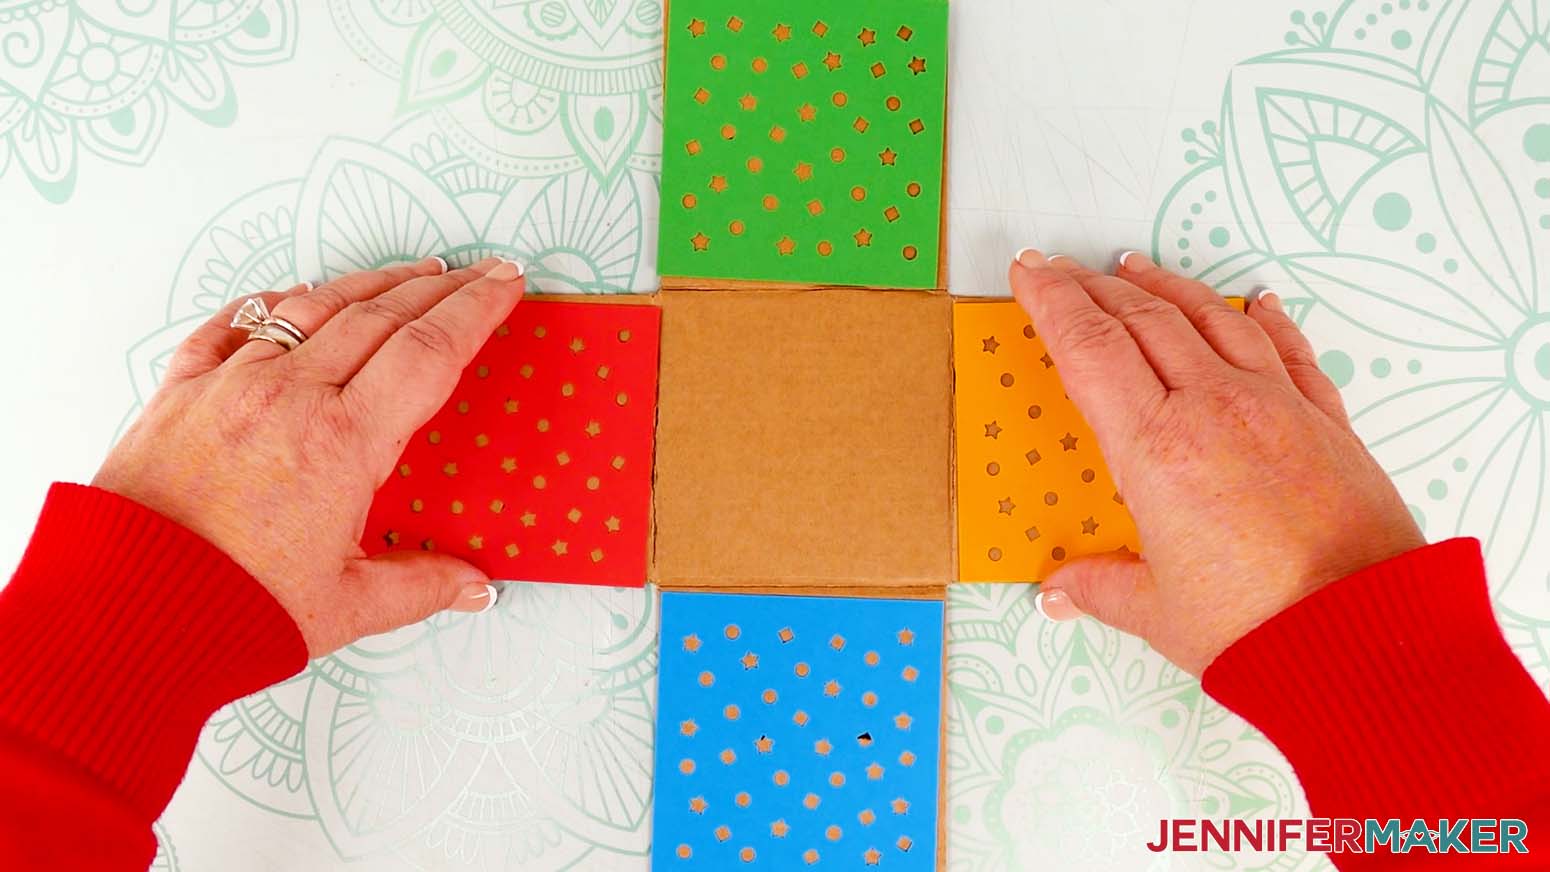
10. Find four of the different-colored confetti panels.
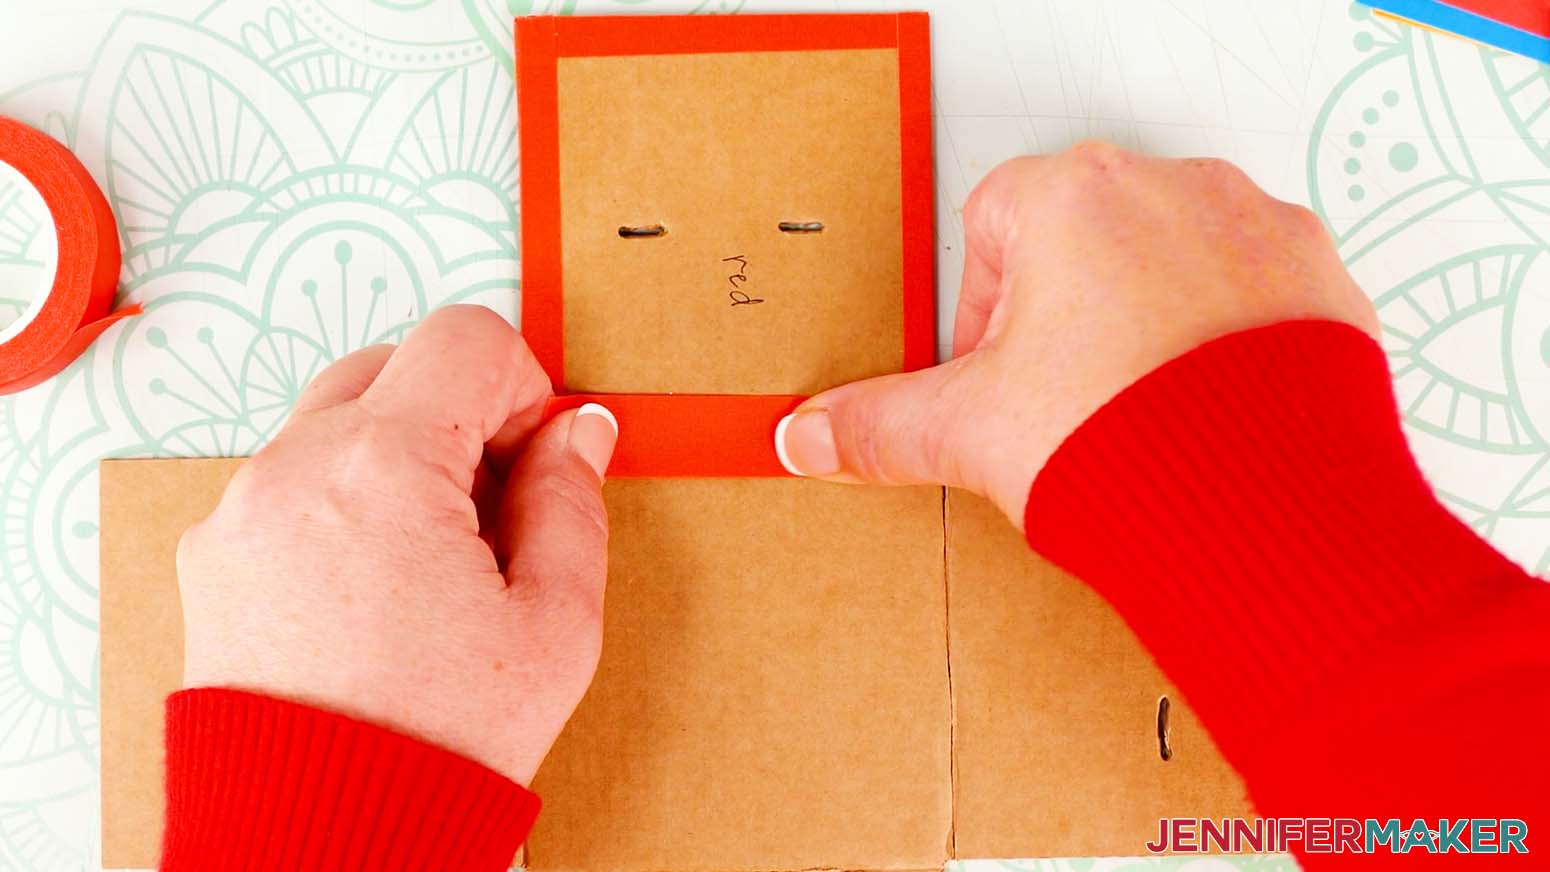
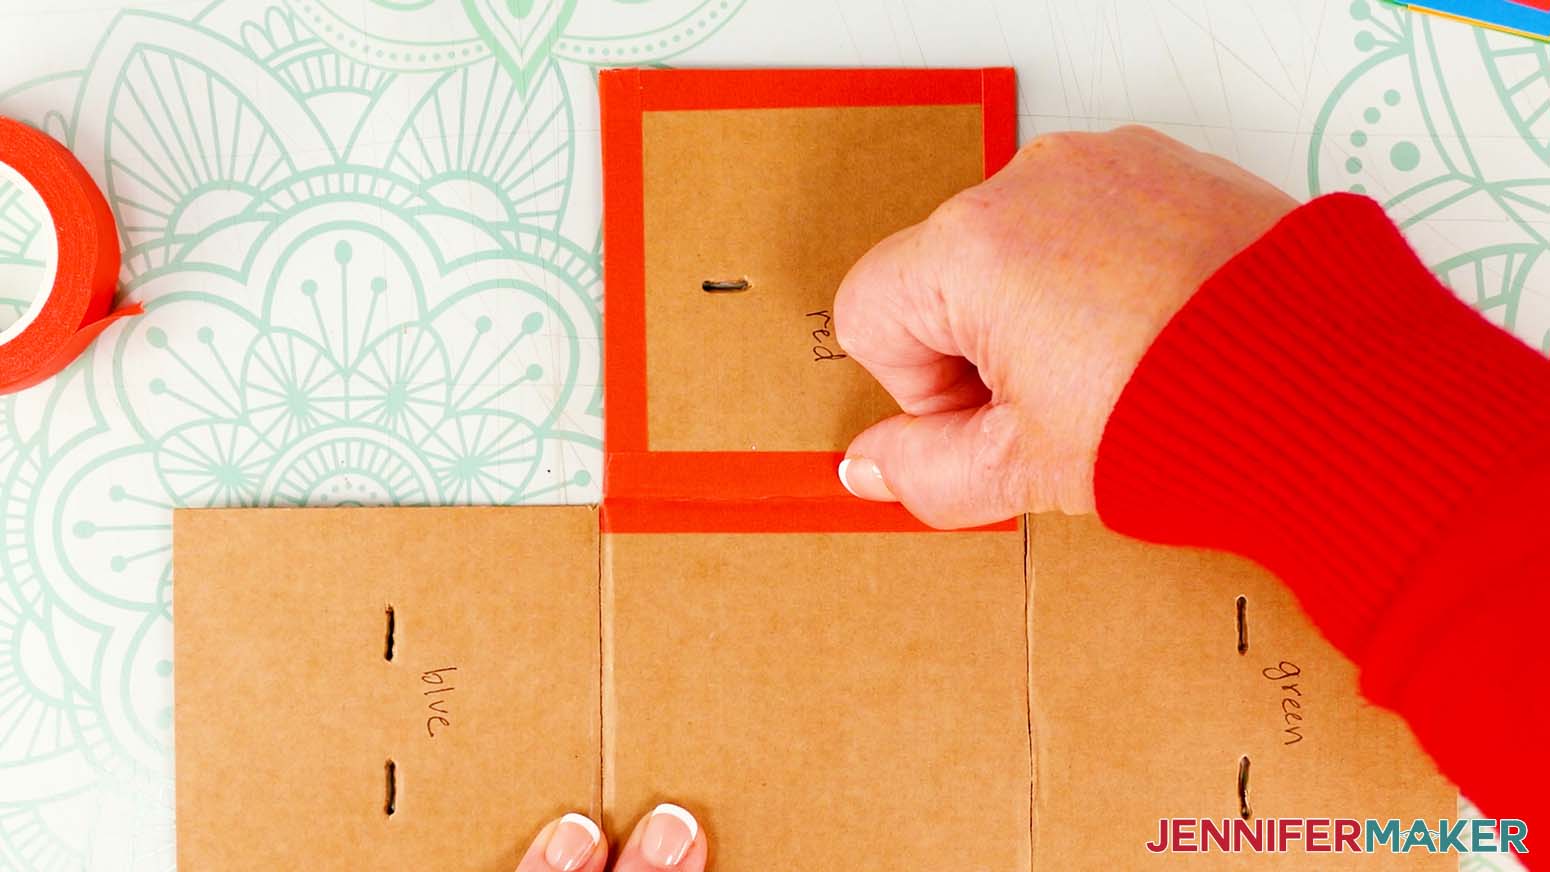
11. Lay one on top of each flap in whatever order you like. Then mark what color is on each panel with a pen or pencil (you won’t see these marks after the box is assembled).
12. Cut a piece of colored masking tape or washi tape the length of one side of a box flap in a color that matches one of the panels.
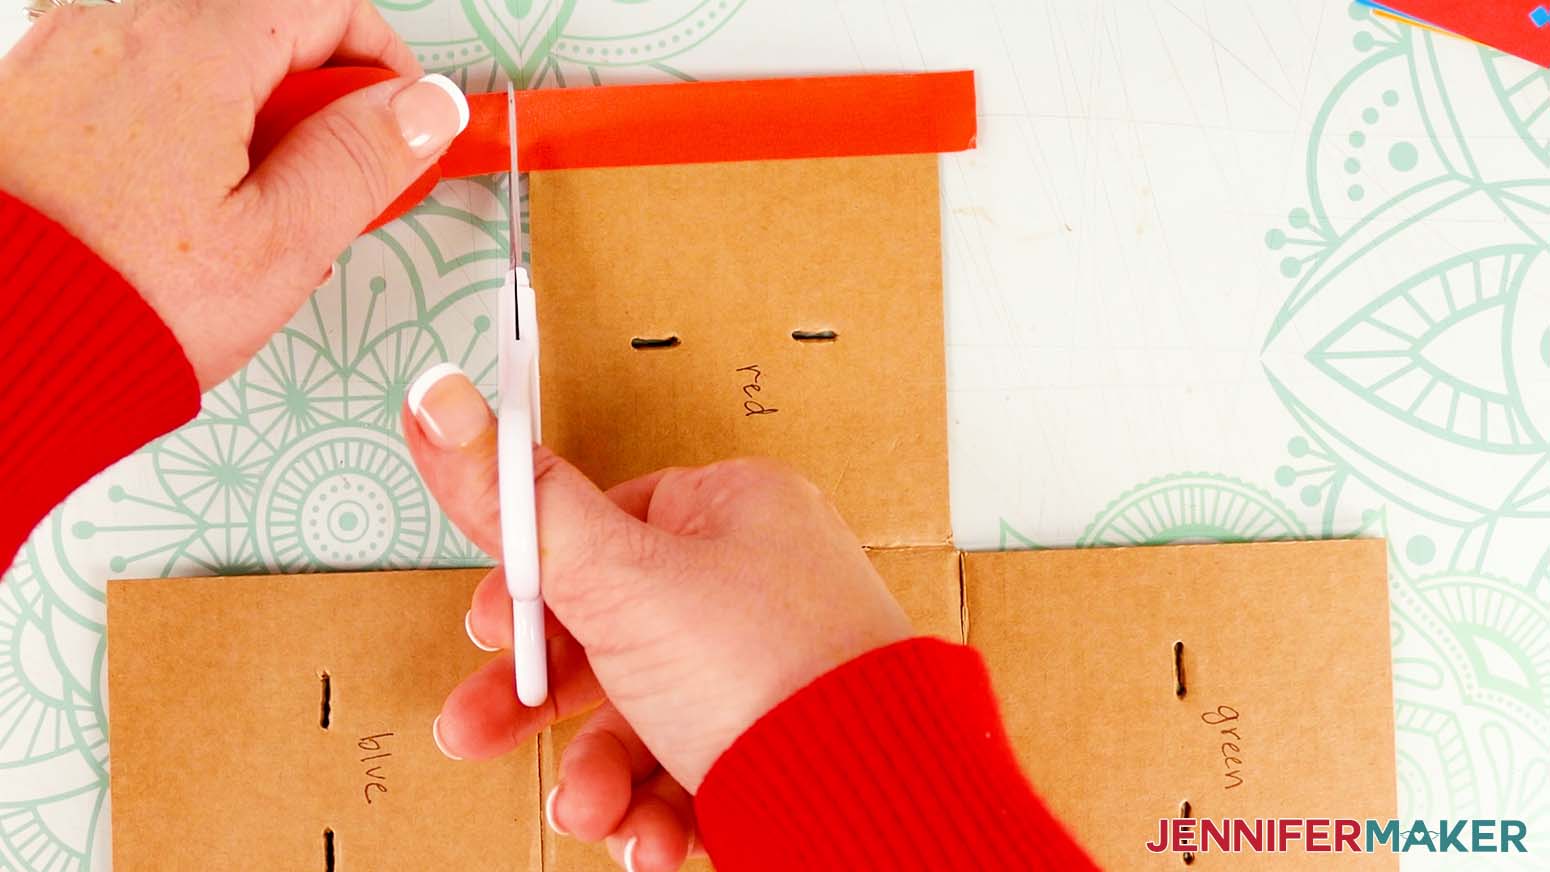
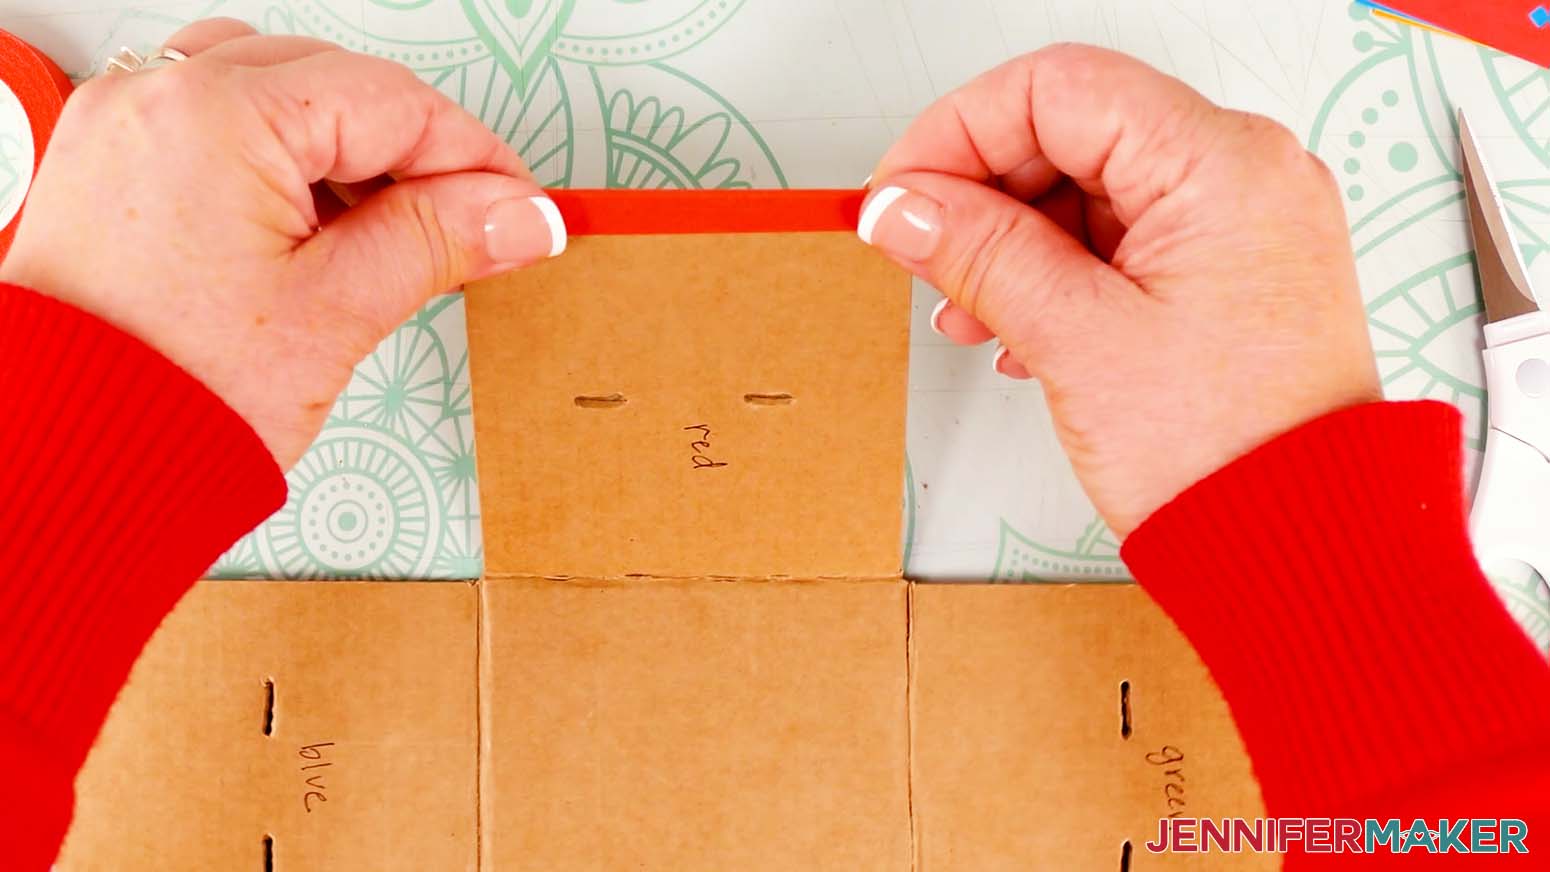
13. Apply the tape to the edge of that flap, wrapping it around to the other side and pressing down to adhere it evenly on both sides of the flap.
NOTE: If there’s any excess tape, just cut it off with scissors.
14. Repeat steps 12-13 with the other two sides of the flap, covering all three edges with washi tape.
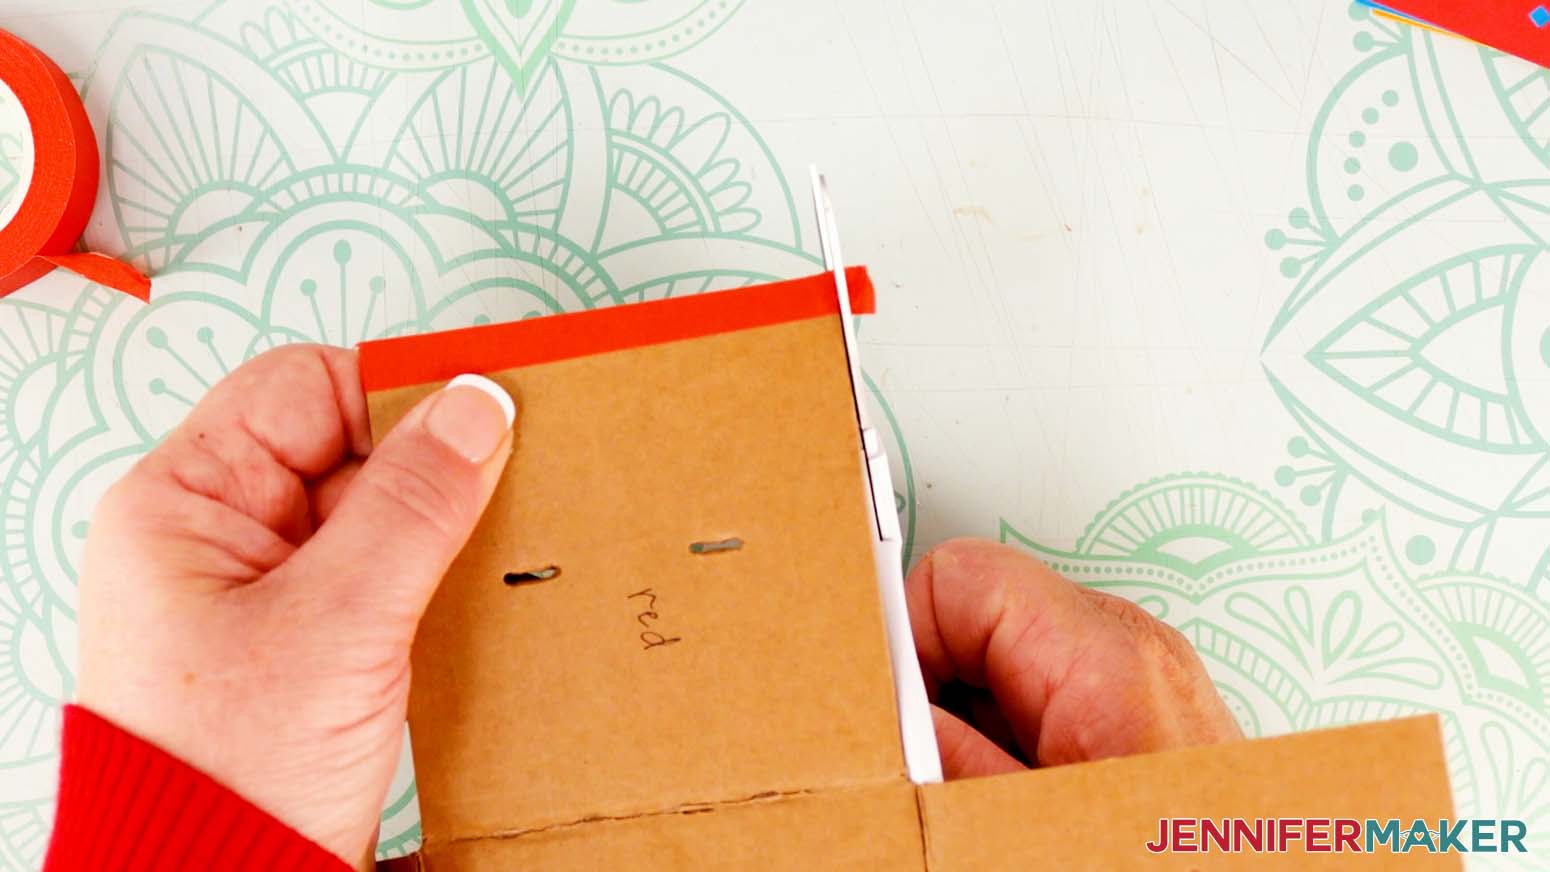
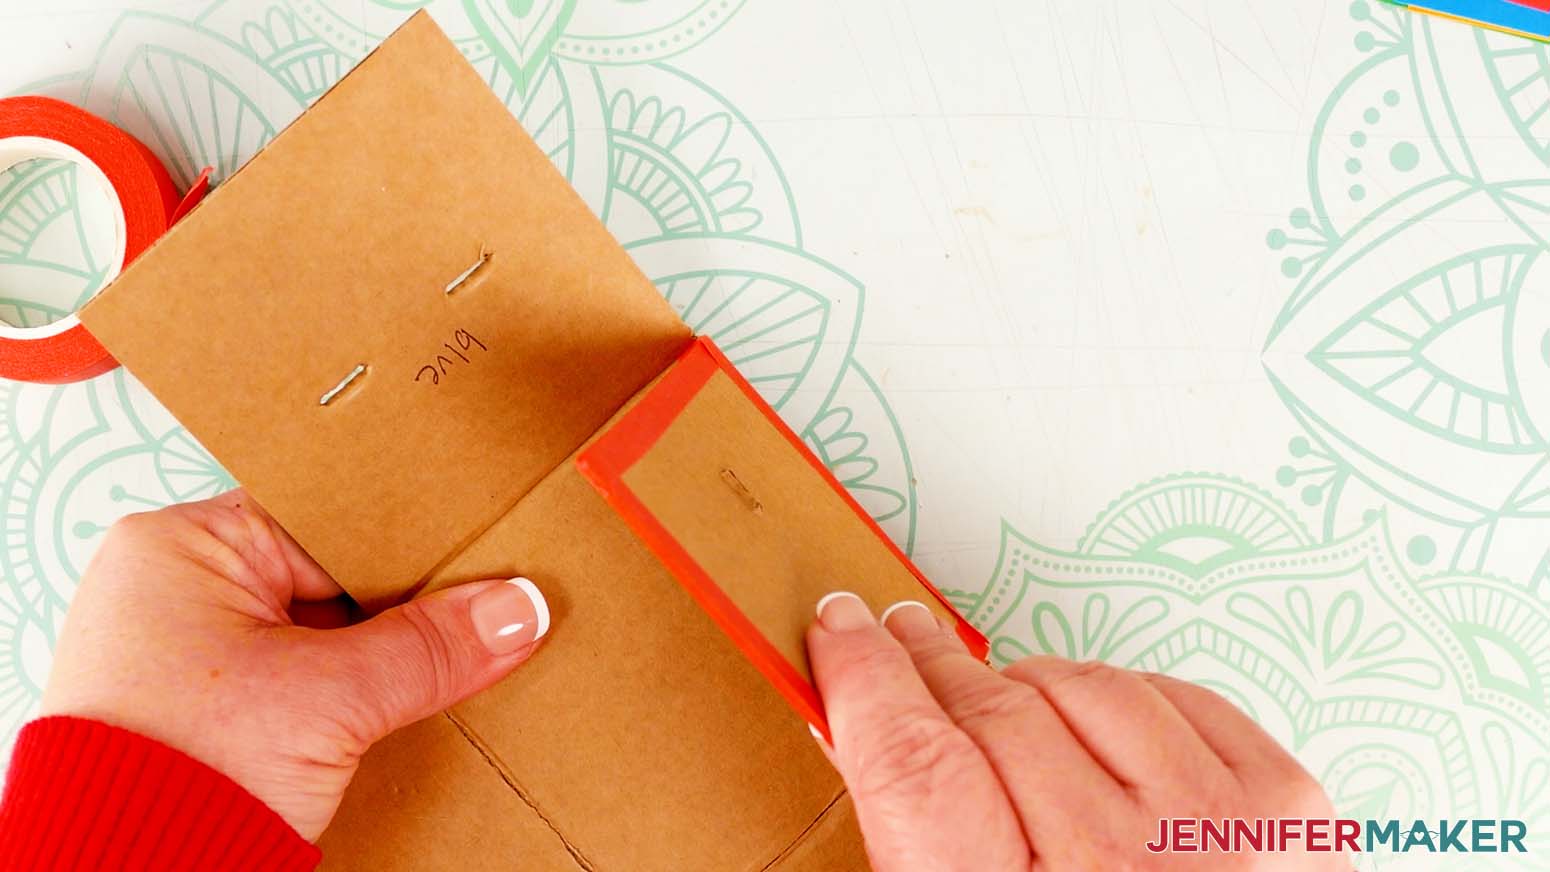
15. Cut another piece of washi tape in the same color, and adhere it over the crease.
16. Firmly press the tape into the crease with your fingertip.
17. Repeat steps 15-16 for the crease on the back.
18. Test the flap by bending it back and forth. It should move freely.
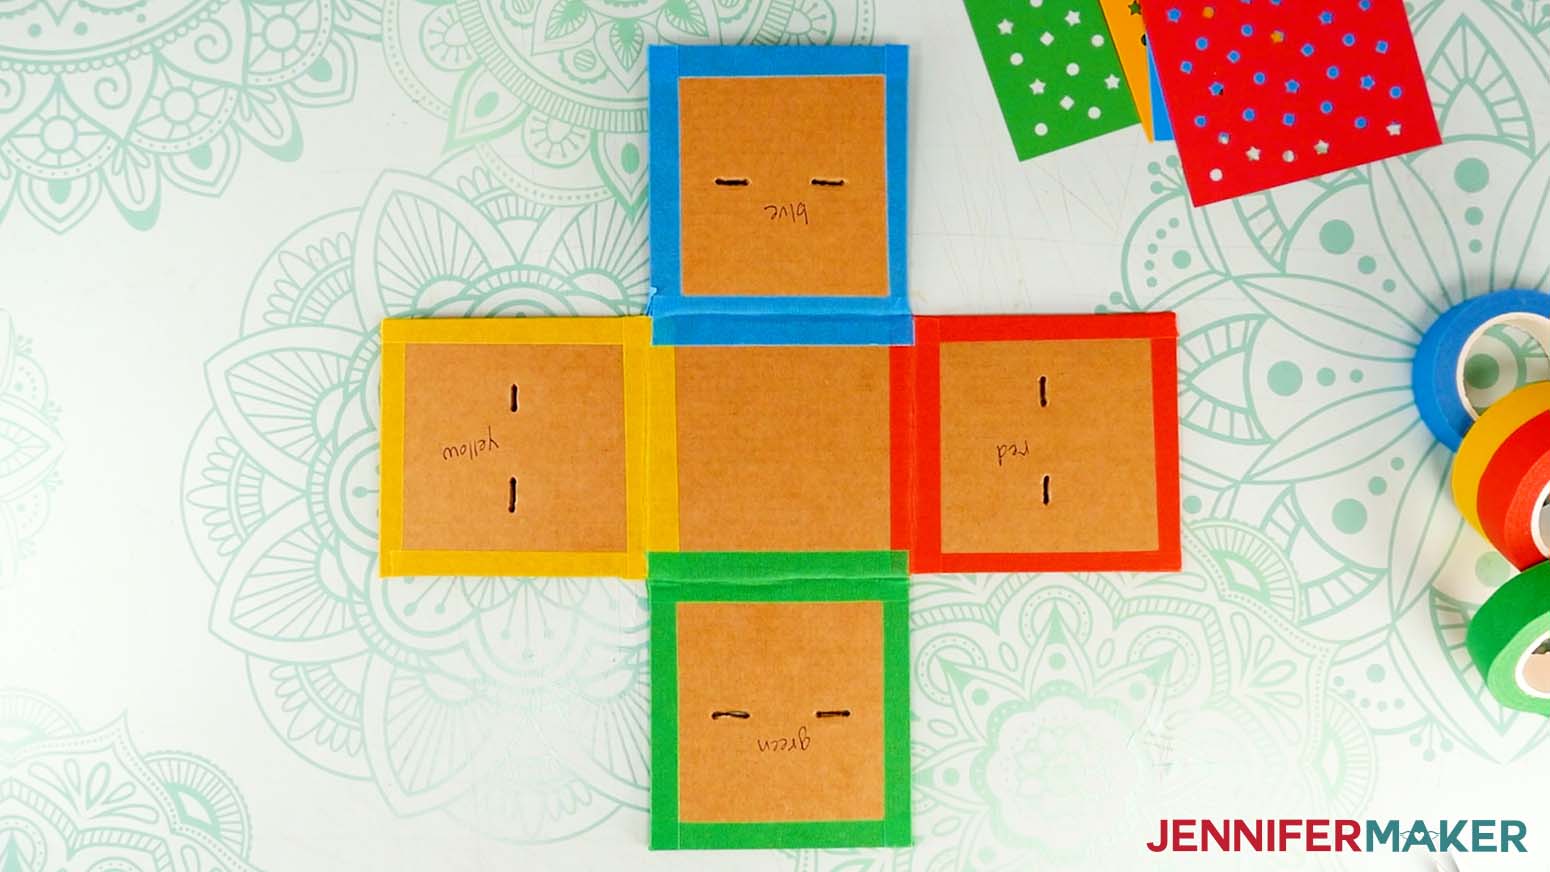
19. Repeat steps 12-18 to add masking tape or washi tape to the edges and both creases of the other three box flaps, matching the tape color to the confetti panels.
20. Add craft glue to one of the flaps, over the brown cardboard and the washi tape, avoiding the slits.
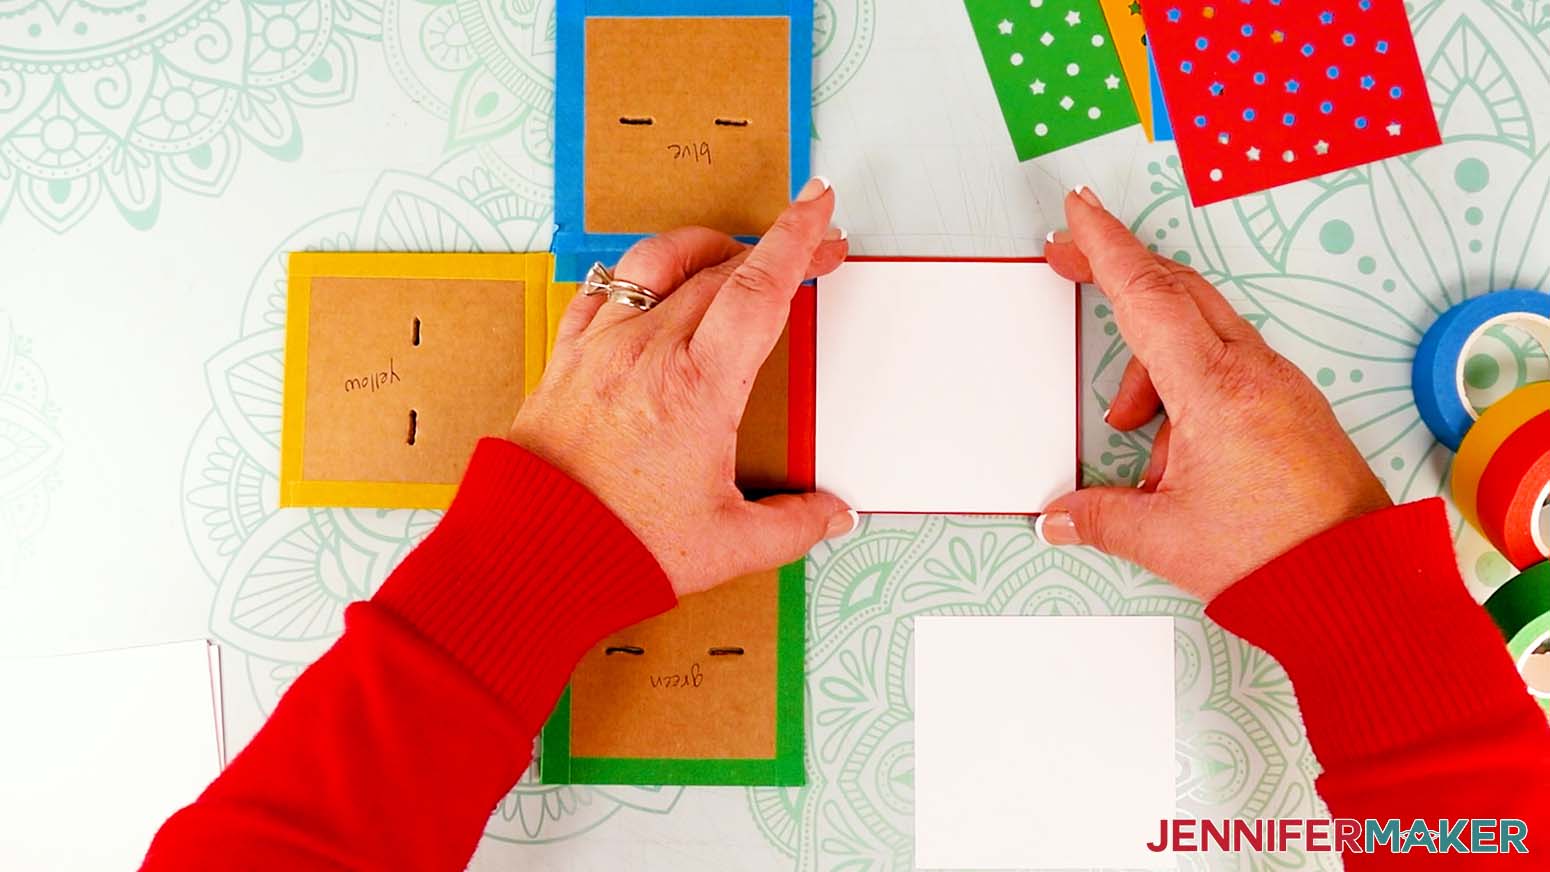
21. Grab four of the white square panels and four of the colored confetti panels. Place a white square on the glue-covered flap and press down to adhere it.
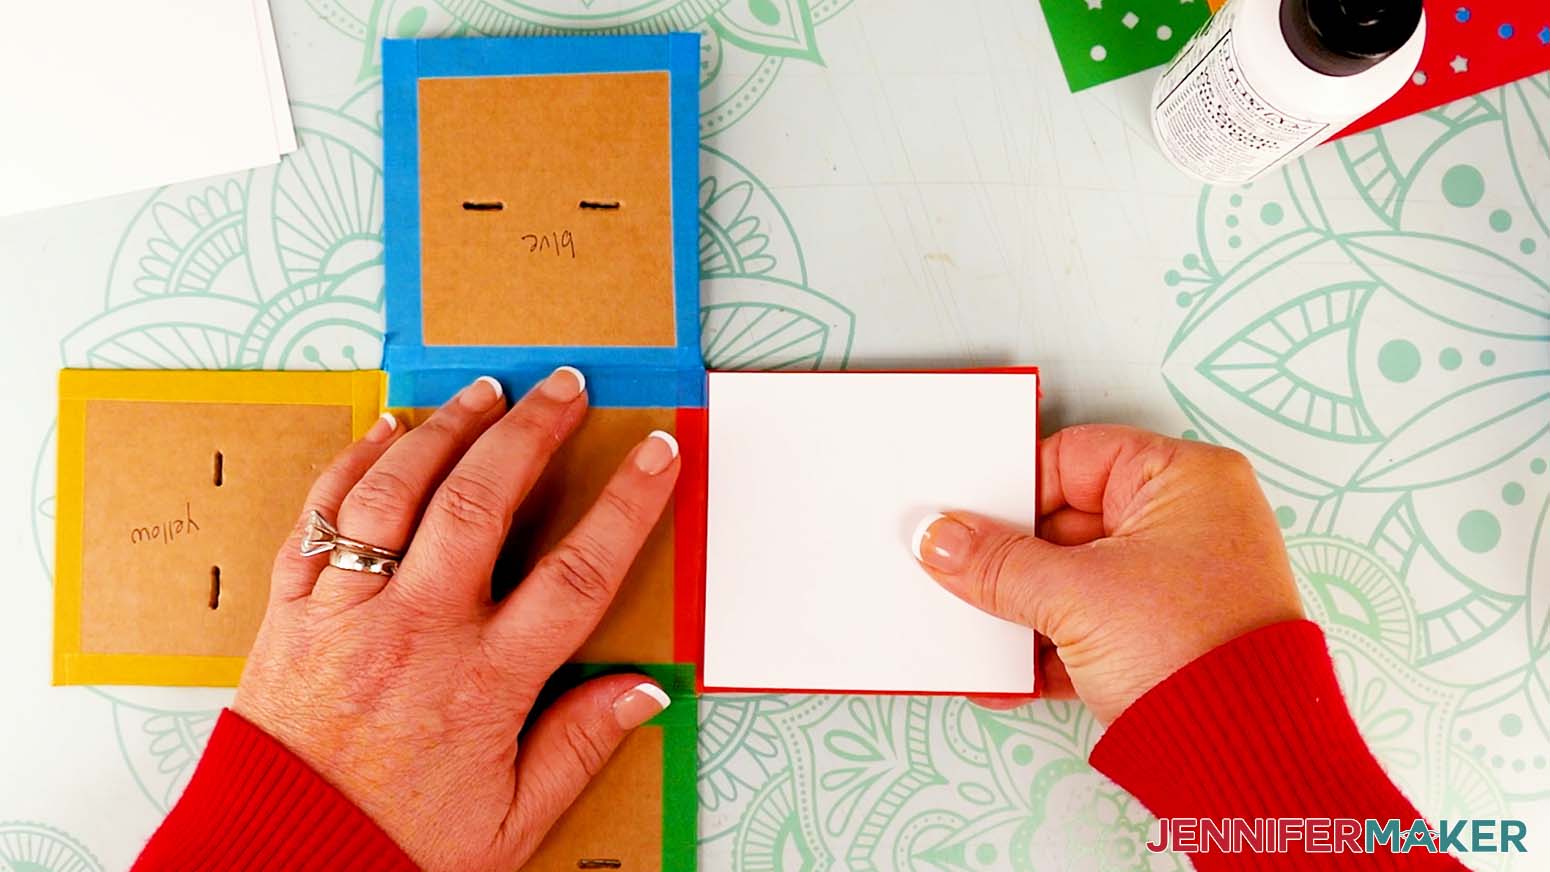
NOTE: The white and confetti panels are not perfectly square, so align them to the flaps to make sure they’re oriented correctly.
22. Fold the flap up and adjust the placement of the white panel, if needed, so it doesn’t interfere with the crease and the flap can move easily.
23. Repeat steps 20-22 on the other three flaps.
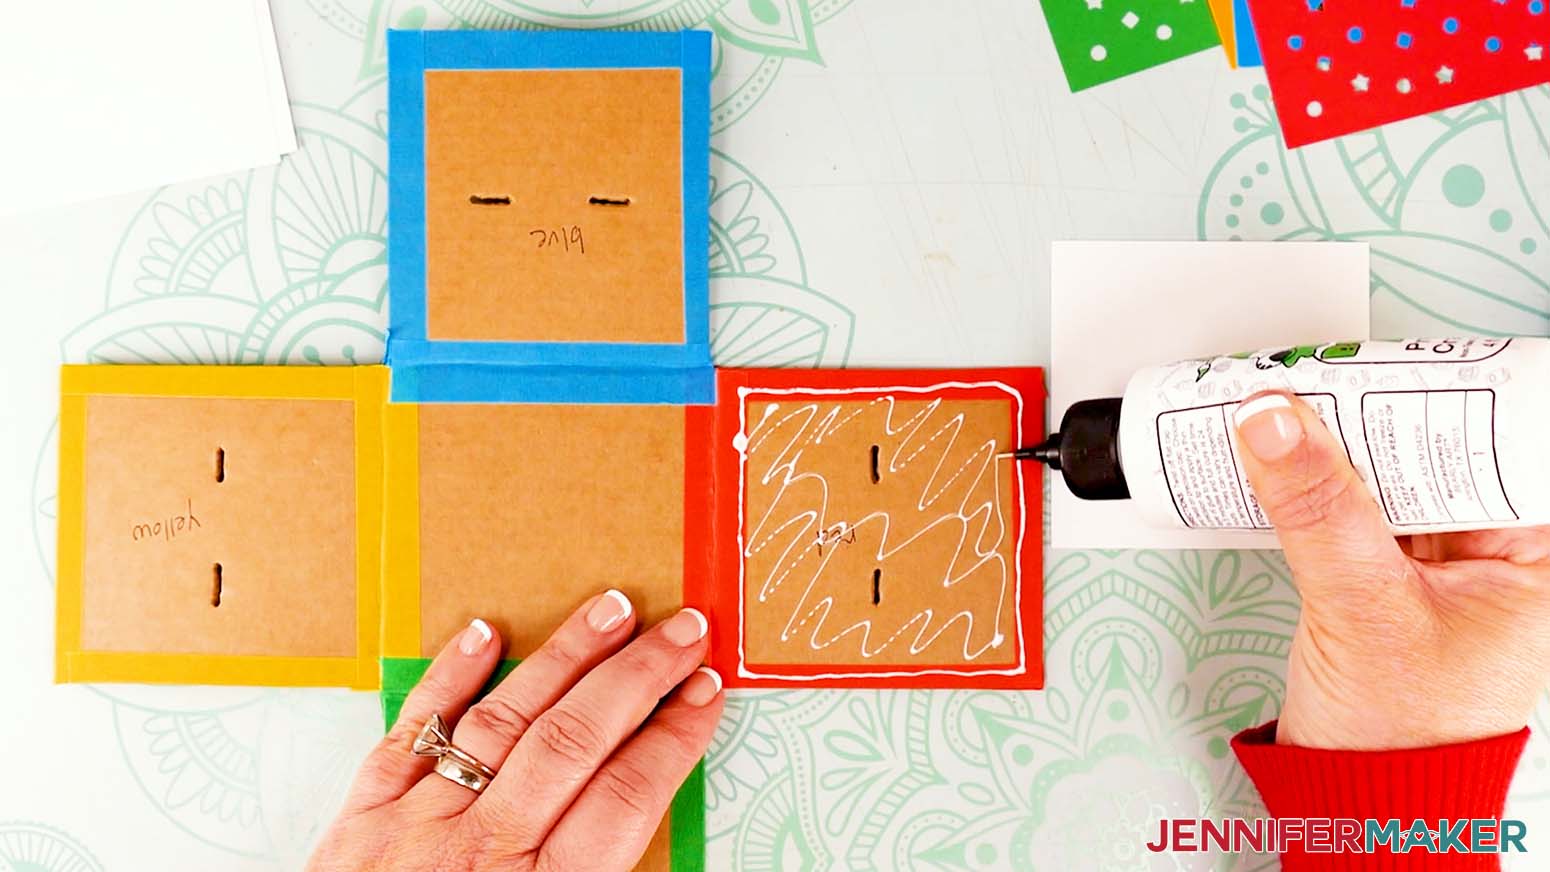
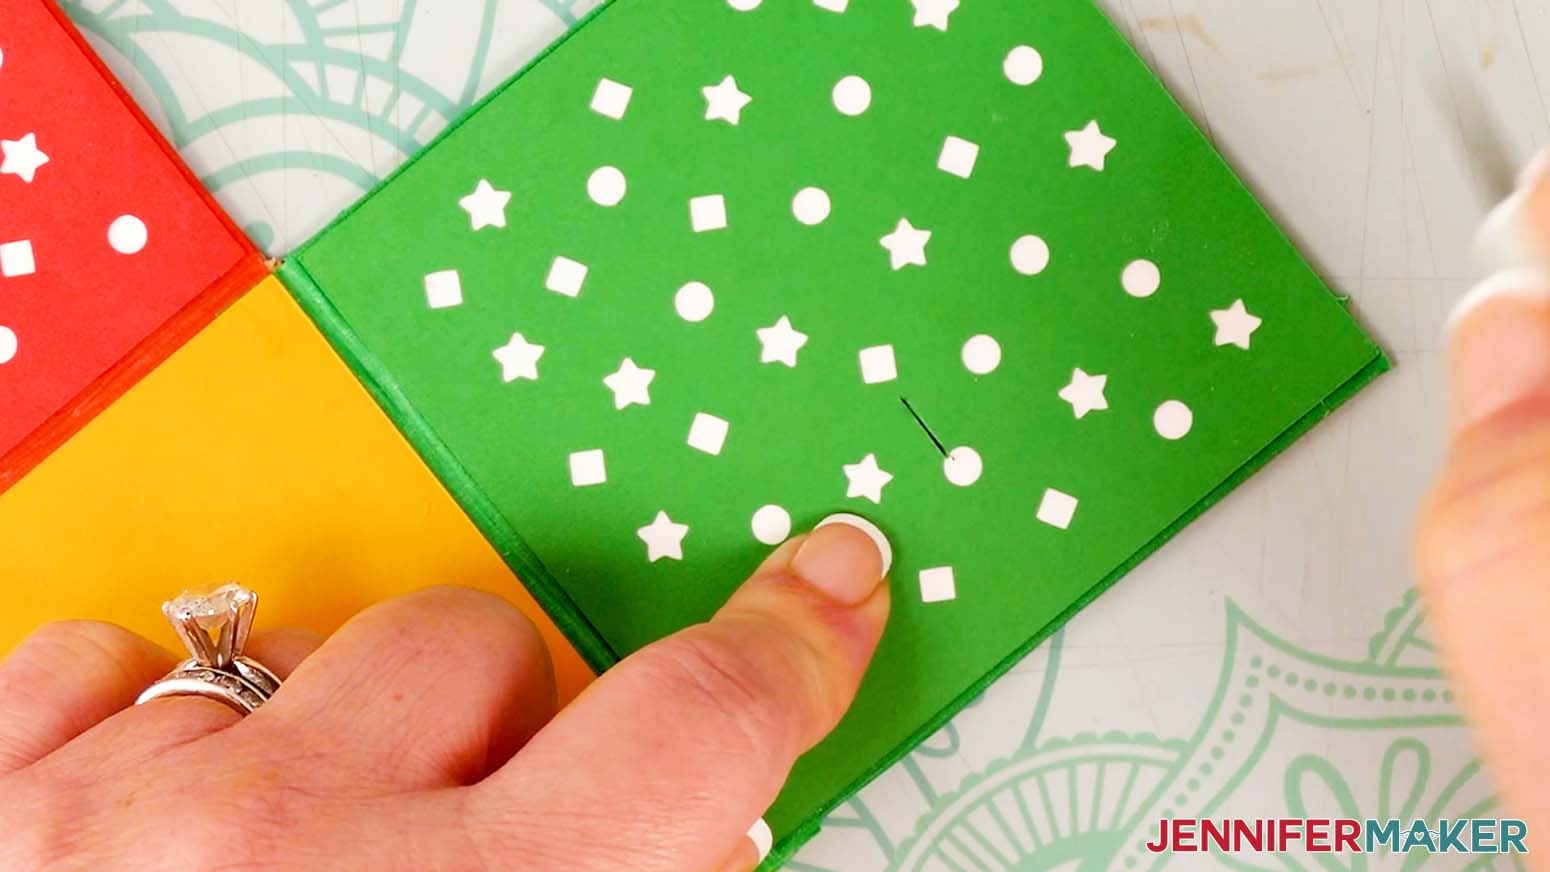
24. Put a thin line of glue around the back edge of one colored confetti panel, then a few lines or dots in between the cutouts.
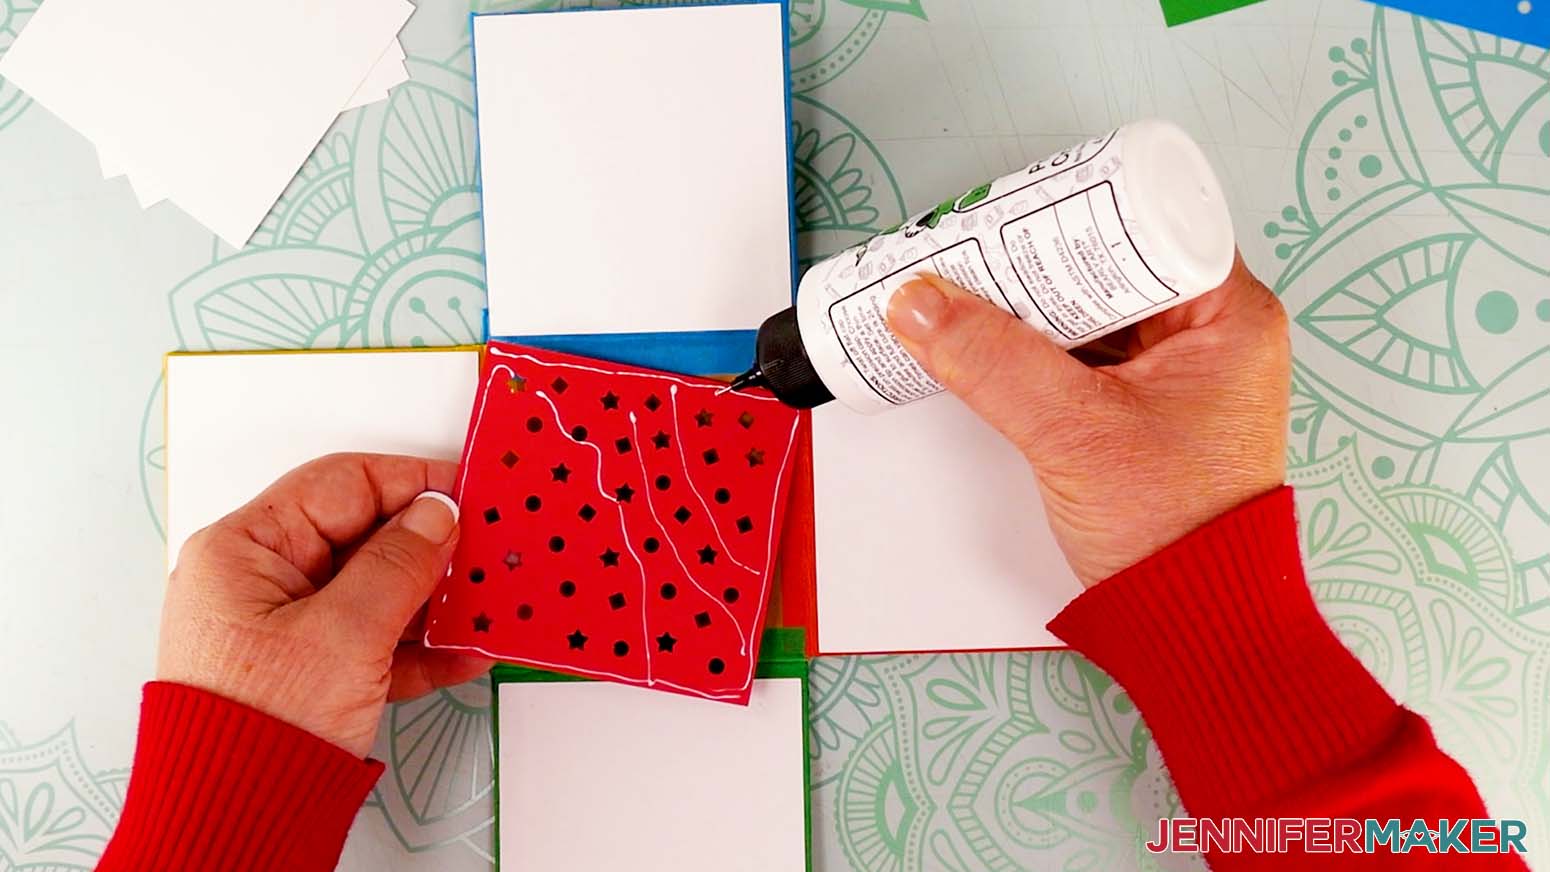
25. Place it glue side down on the flap with the matching colored tape, then immediately fold the flap up to make sure the bottom edge doesn’t interfere with the crease. Adjust the placement if needed before the glue dries.
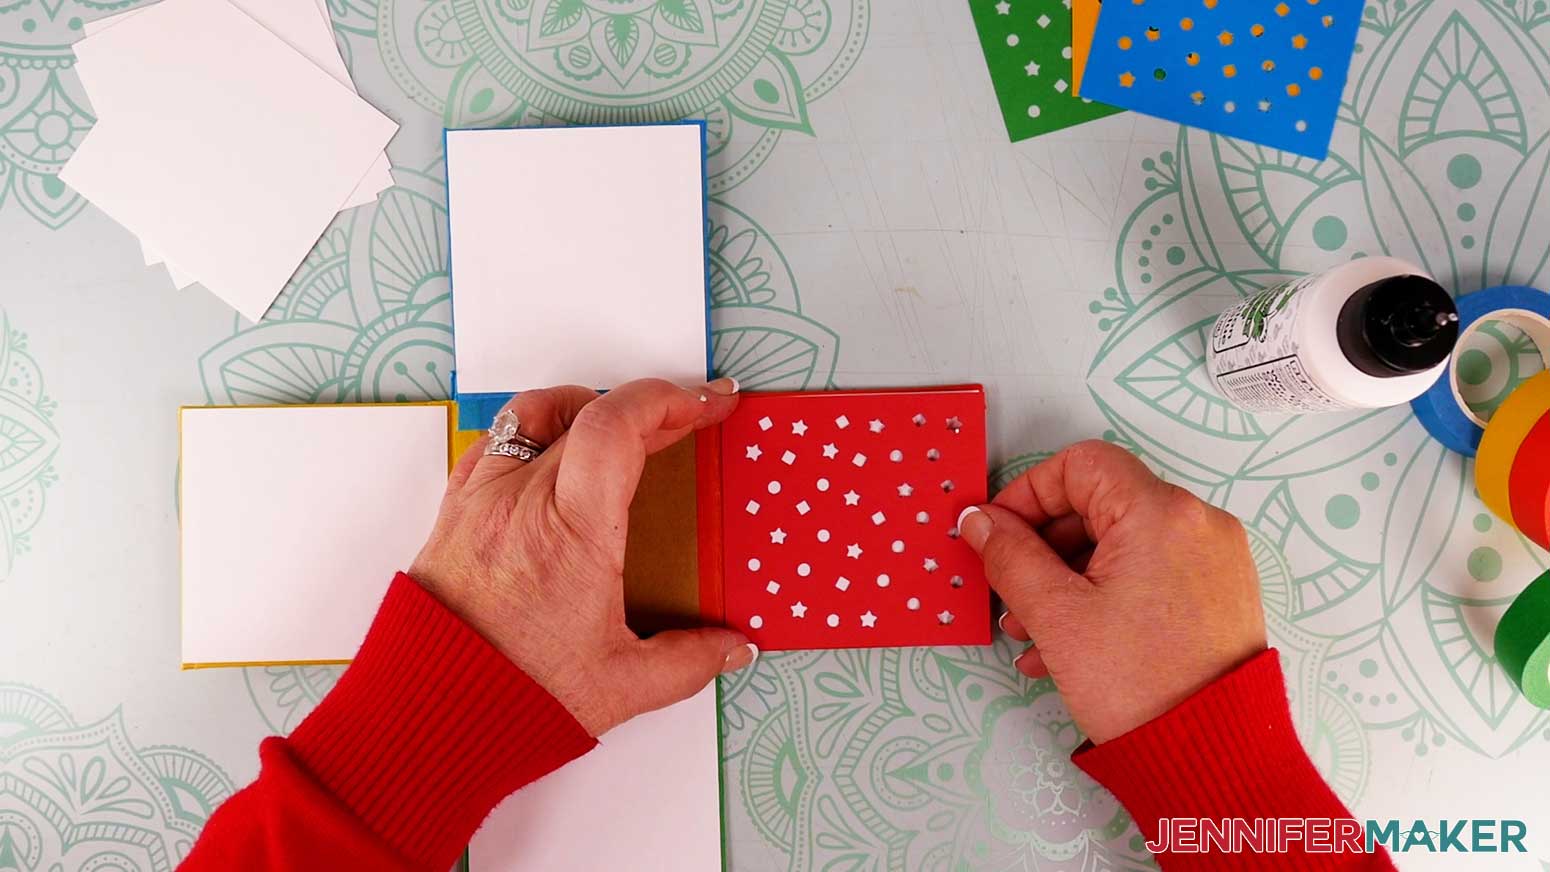
26. Smooth the cardstock down with your fingers.
27. Repeat steps 24-26 on the other three panels.
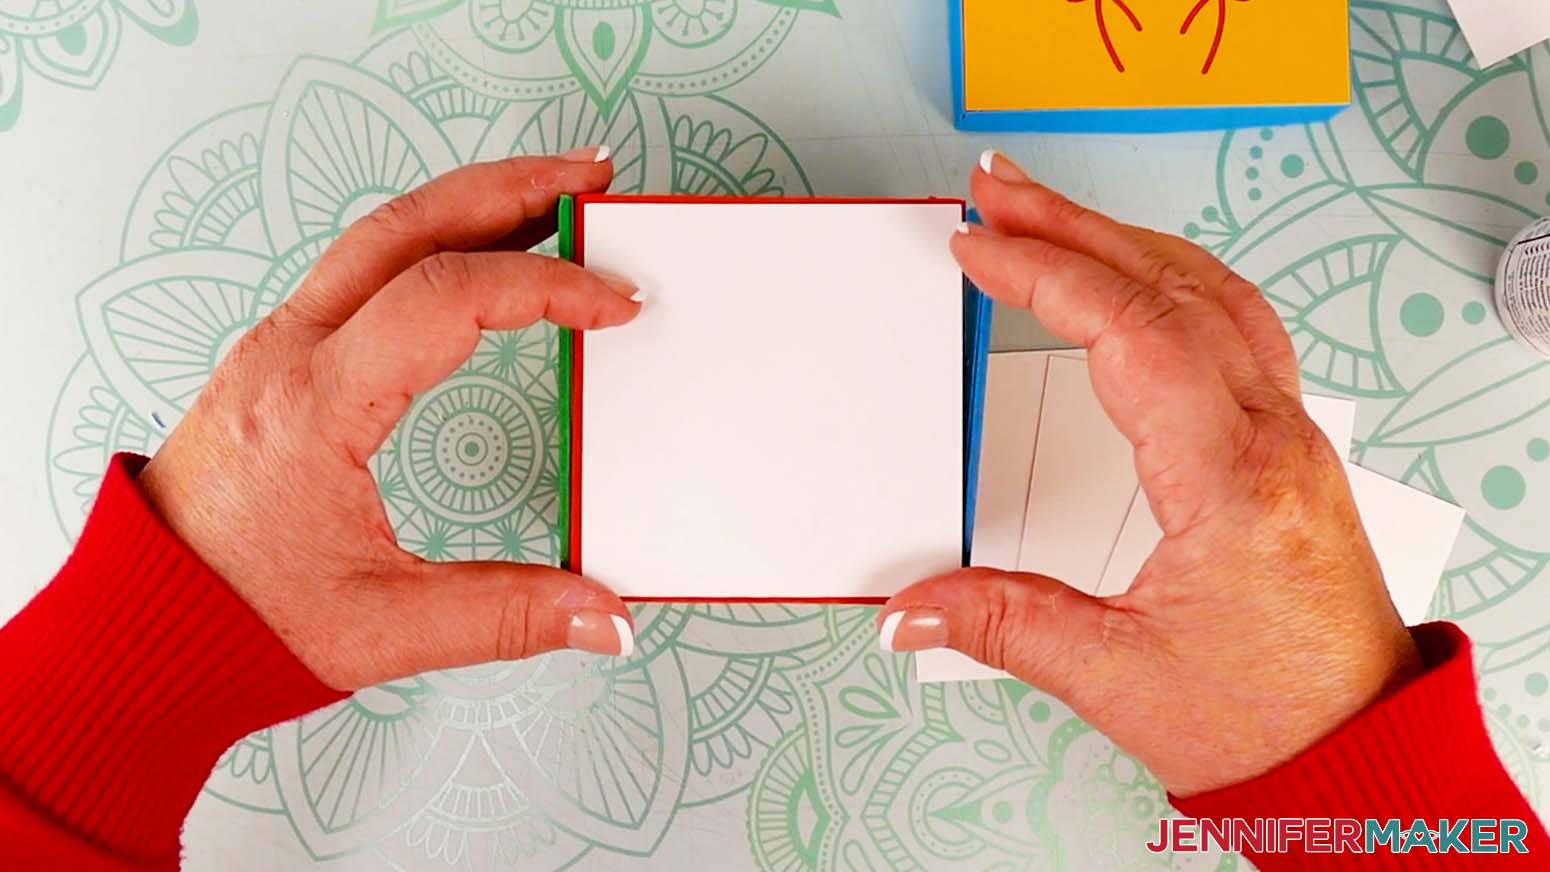
28. Find one of the solid colored squares without any confetti cutouts (mine is yellow) and apply glue to one side.
29. Press it down into place in the very center of your cardboard.
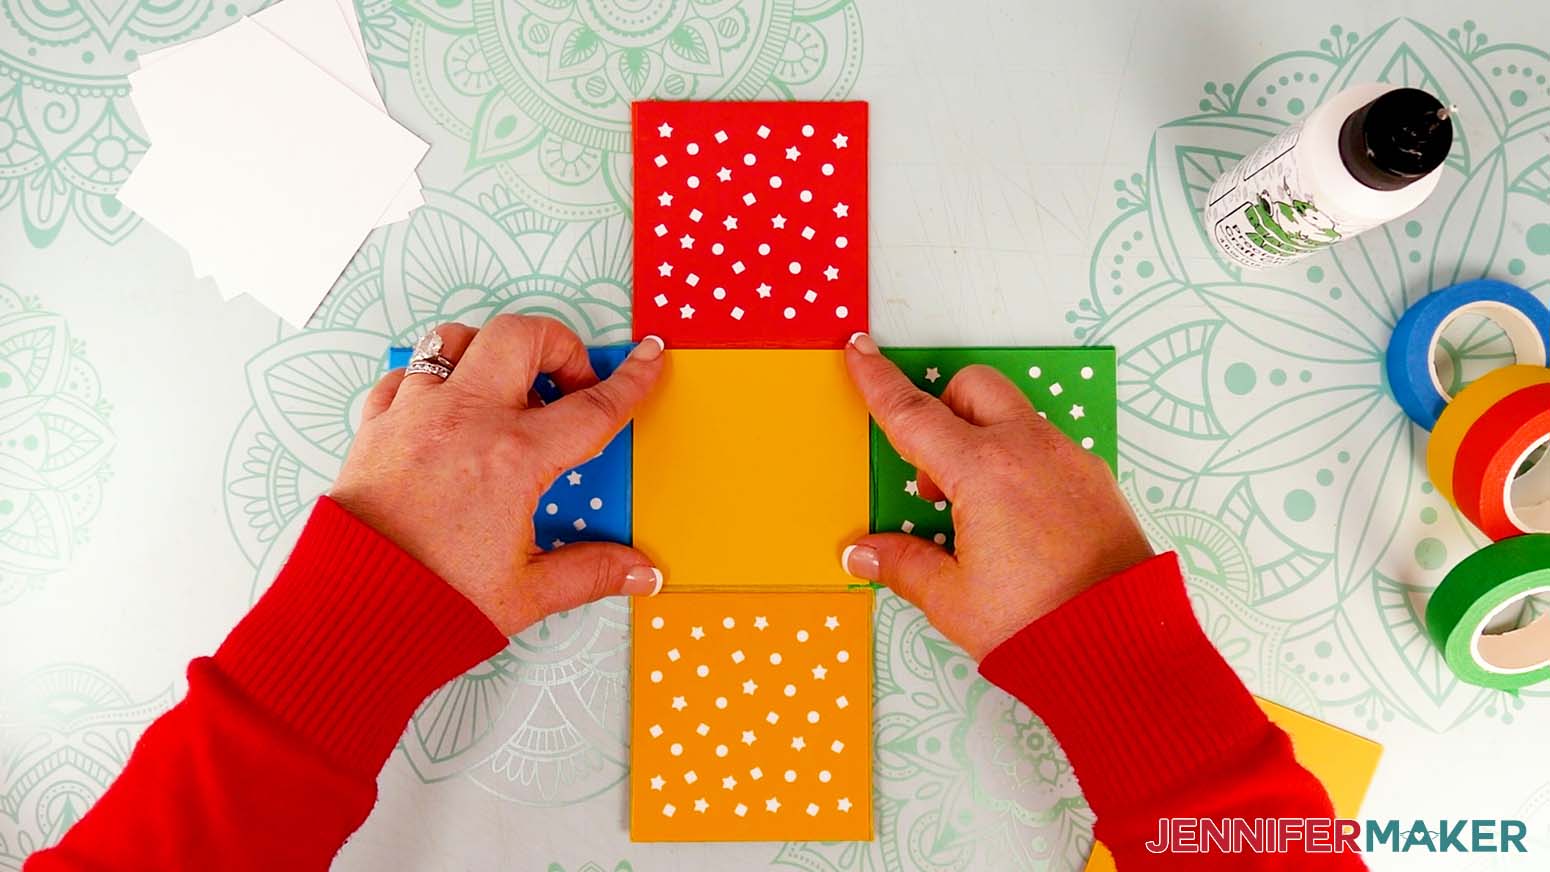
30. Before the glue dries, lift up the four flaps into a box shape to make sure the center square is perfectly centered and doesn’t interfere with the flaps moving.
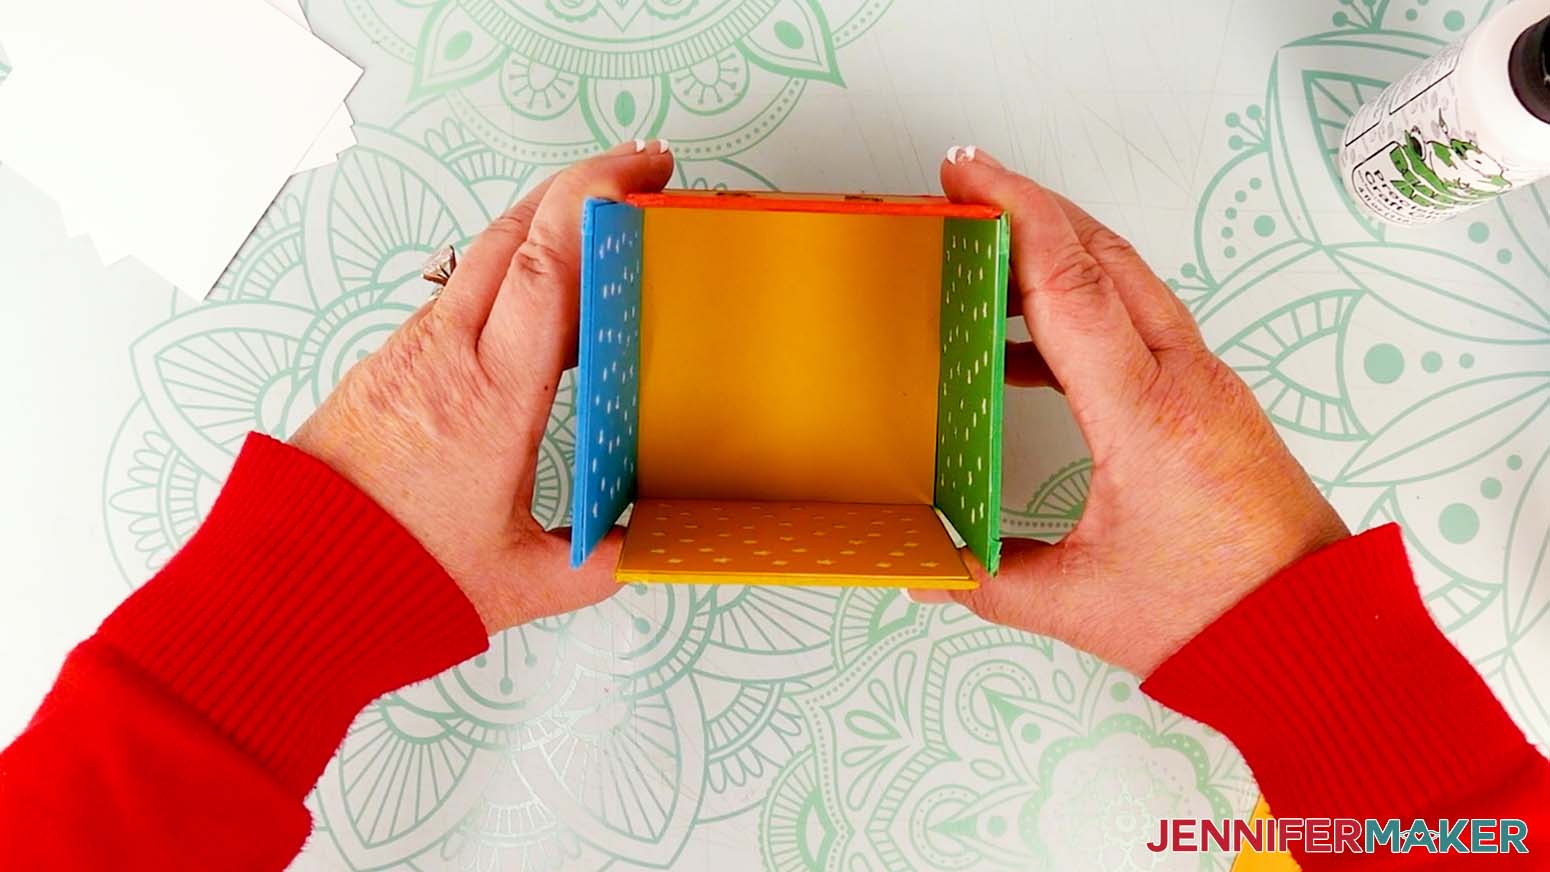
31. Turn the box over on the self-healing mat so the colorful panels are facing down.
32. Using a craft knife, carefully follow the cut of one slit so it goes through the two new layers of cardstock on the other side.
33. Flip it over and you should see a cut or score of the slit on the cardstock.
34. Use the craft knife to carefully cut along this line so the slit goes all the way through both layers of cardstock.
35. Repeat steps 32-34 for the other seven slits.
Attach the Elastic Bands
1. Cut four pieces of elastic, each about 8” long.
2. Use your tweezers to push one end of an elastic piece through one of the slits, then use your fingers to pull it through so about 1” shows on the other side.
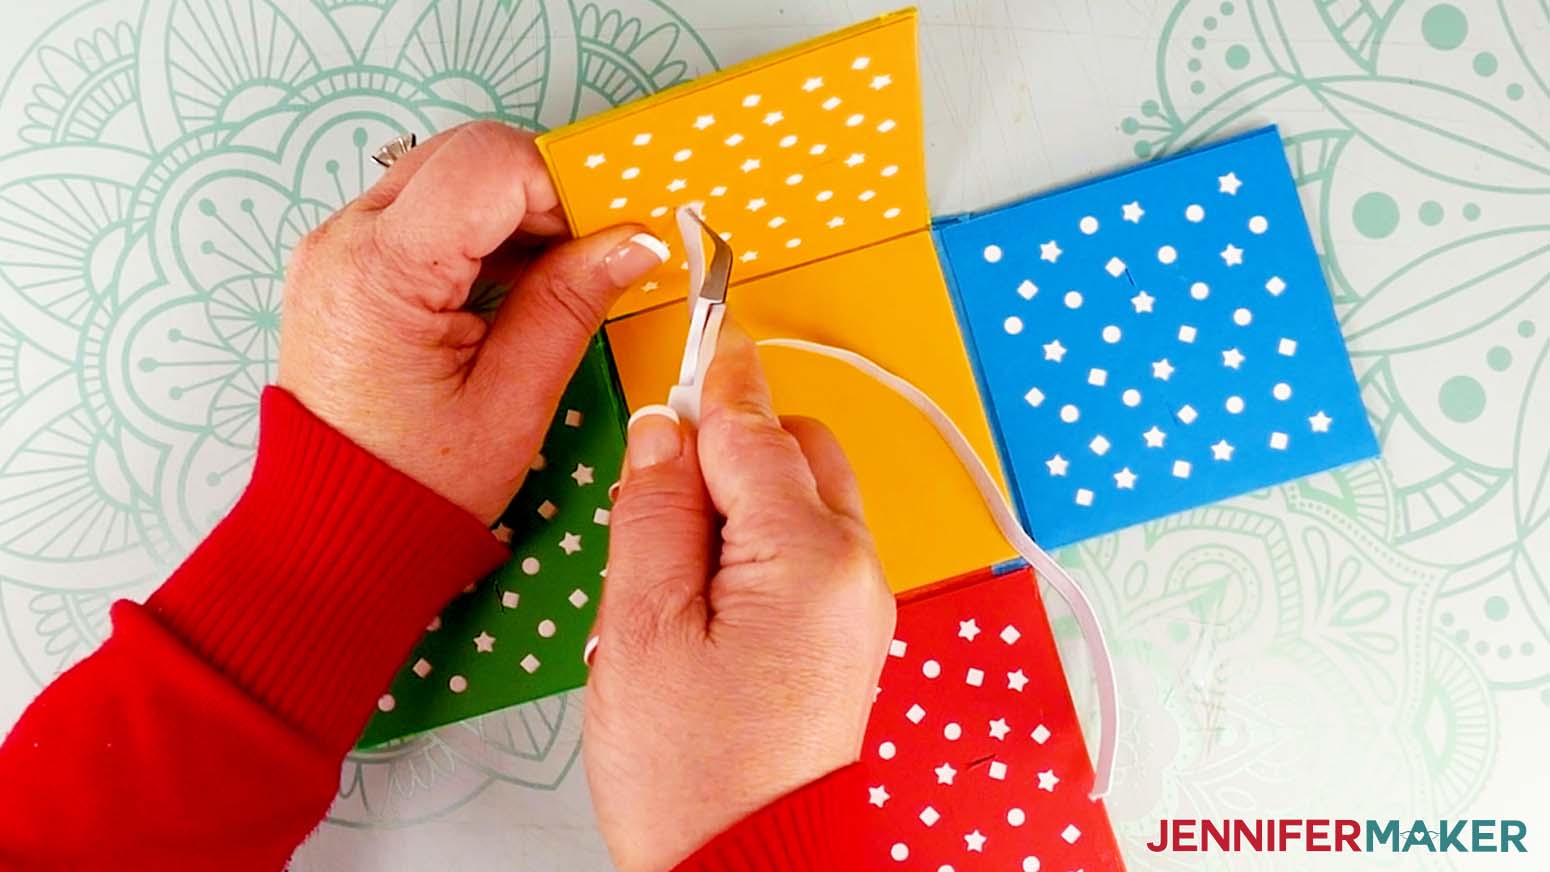
3. Use your tweezers to push a second piece of elastic through the slit next to it on the same panel.
4. Plug in and heat up your hot glue gun. Put on hot glue finger caps.
5. Apply a line of hot glue onto the cardboard under where the end of an elastic piece lies.
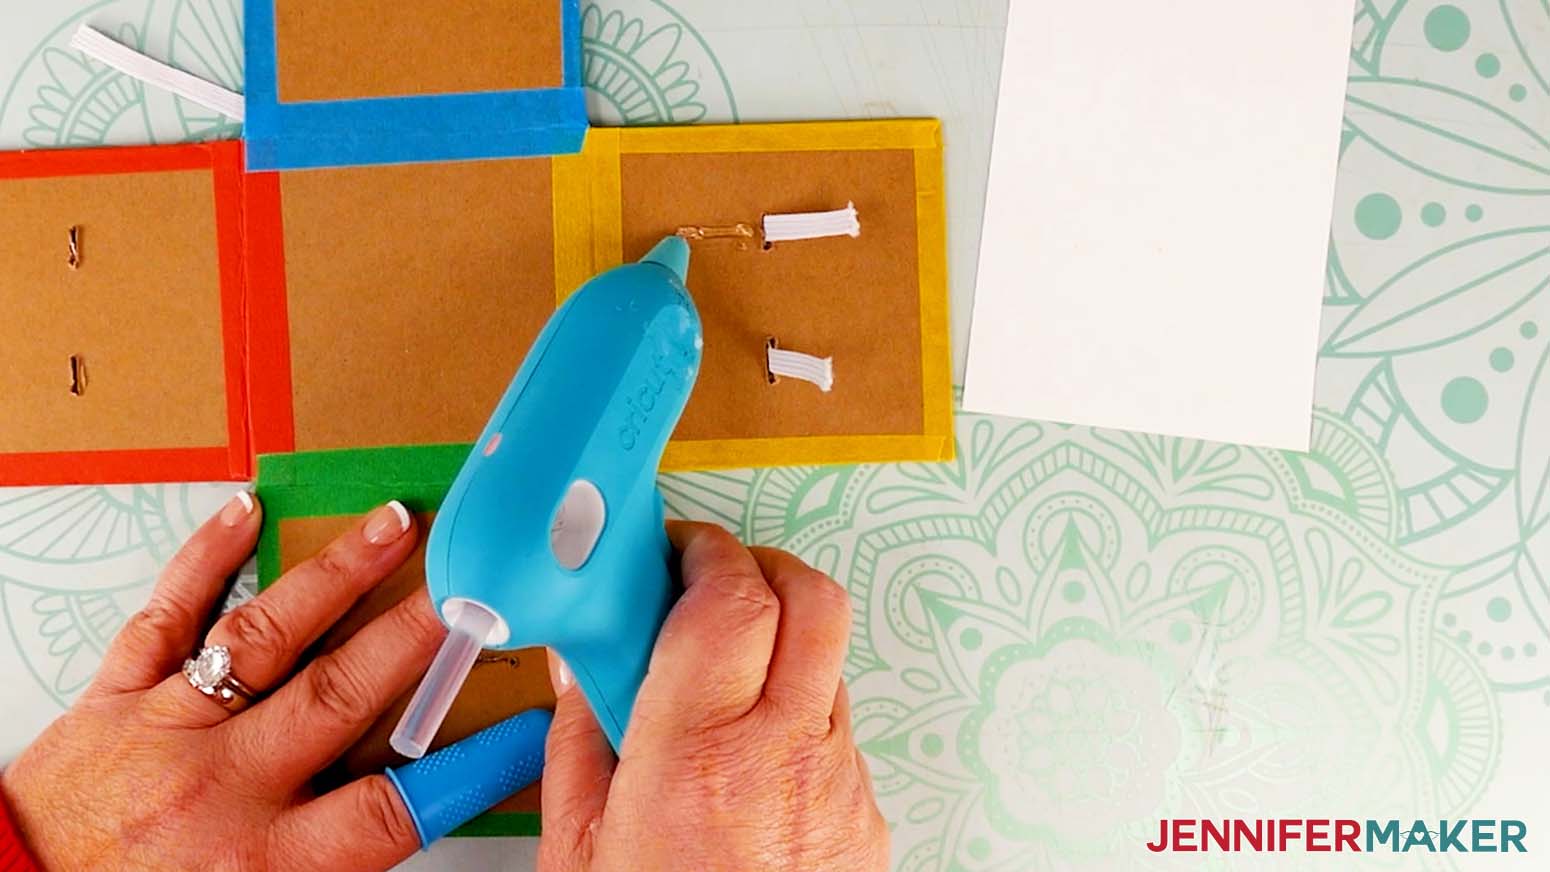
6. Press the elastic down onto the glue to adhere it to the cardboard.
7. Repeat steps 5-6 to glue the other elastic end in place.
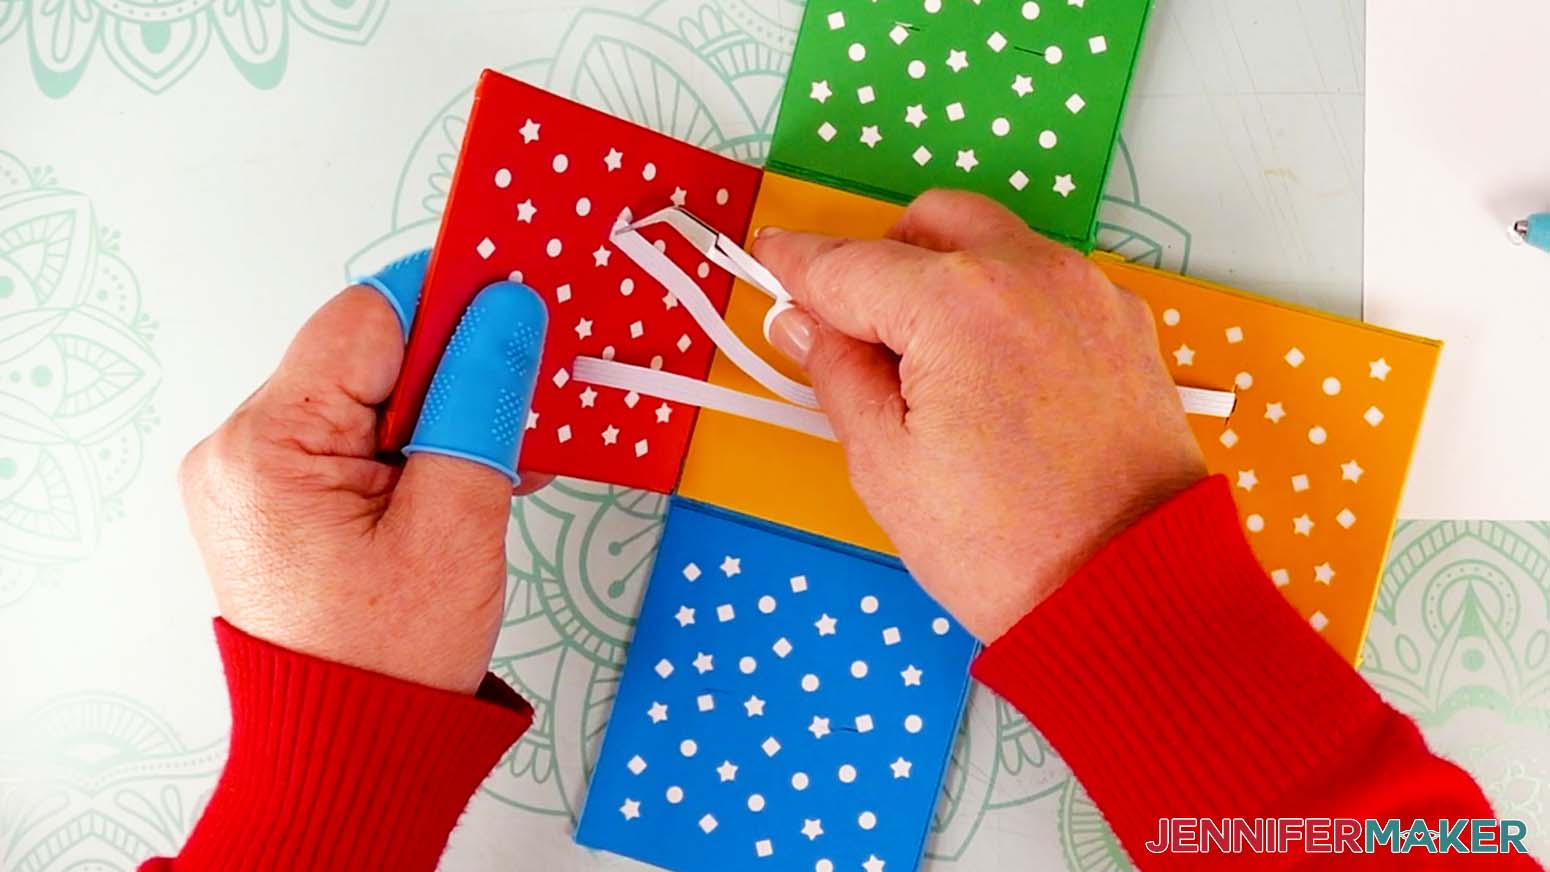
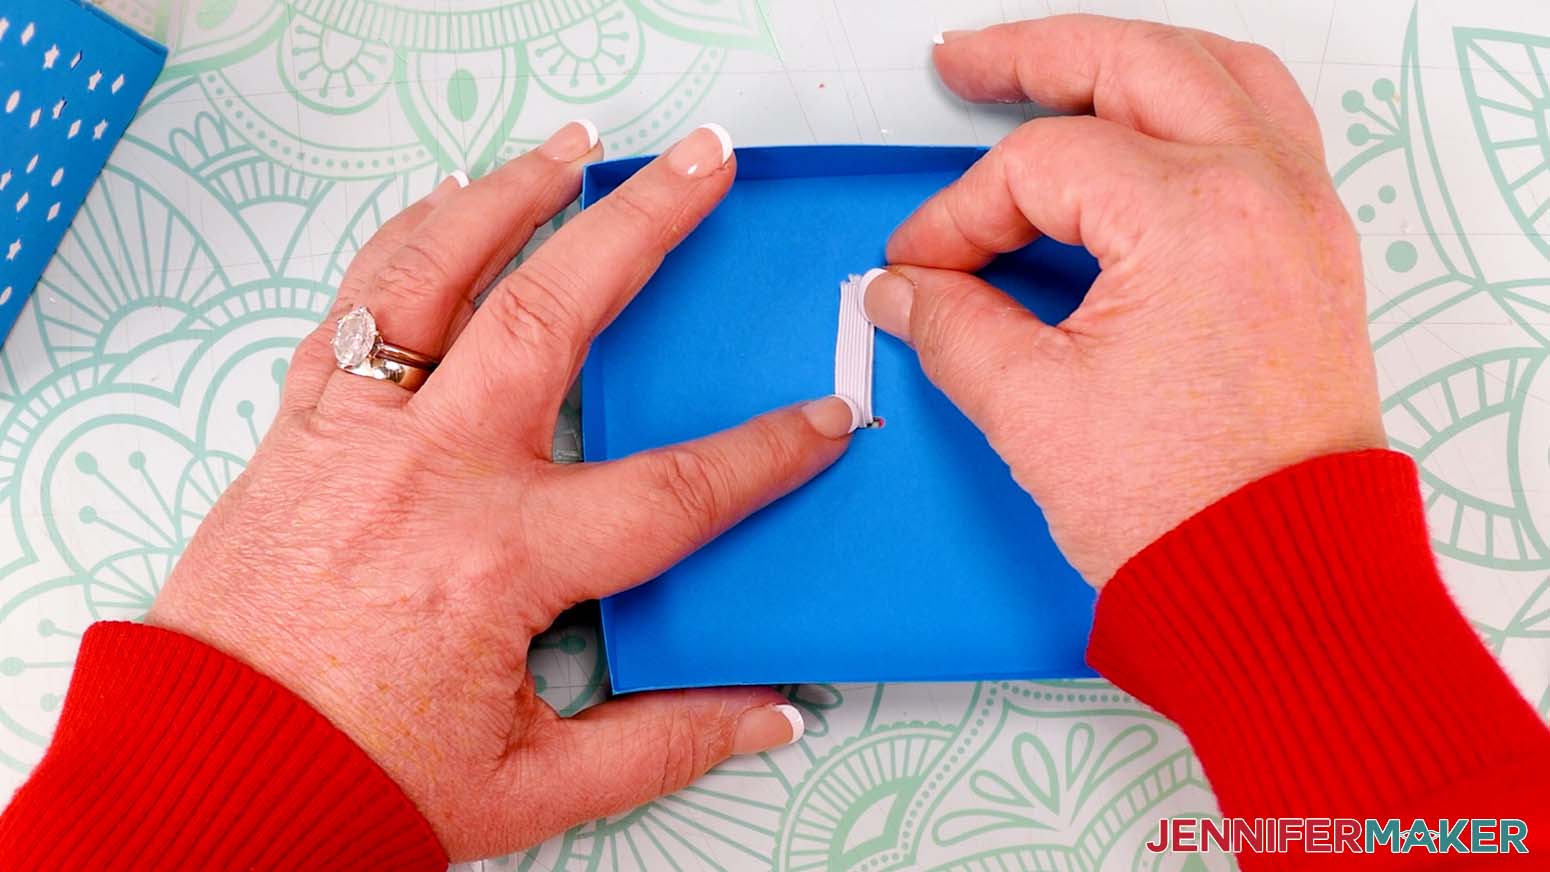
8. Pull the other end of one elastic through the slit on the opposite flap across from it.
9. Use your tweezers to push it through the slit, then pull it through the other side with your fingers.
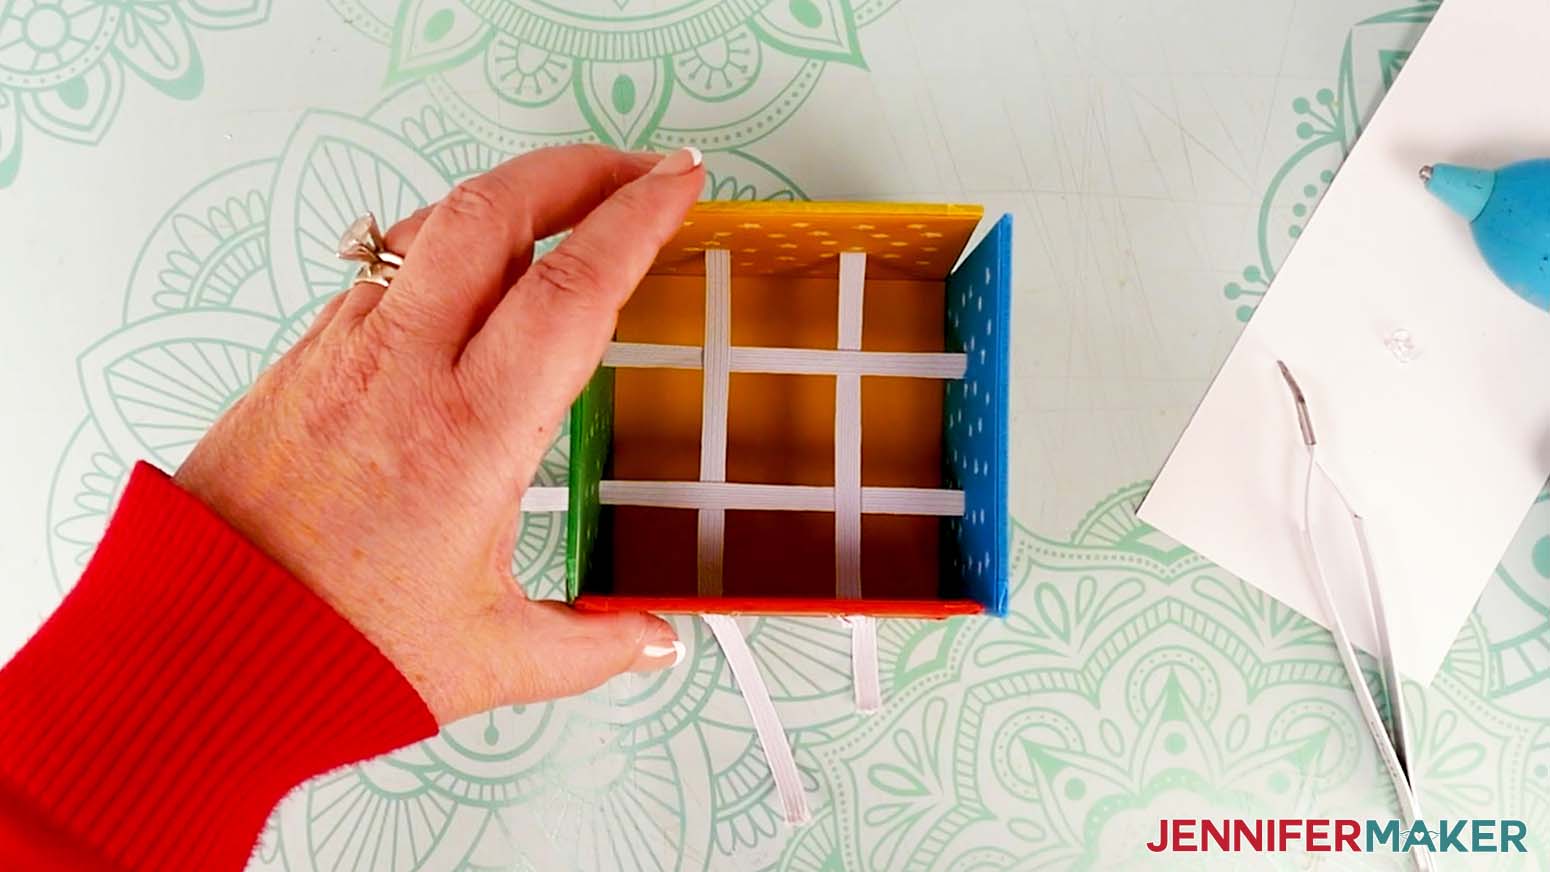
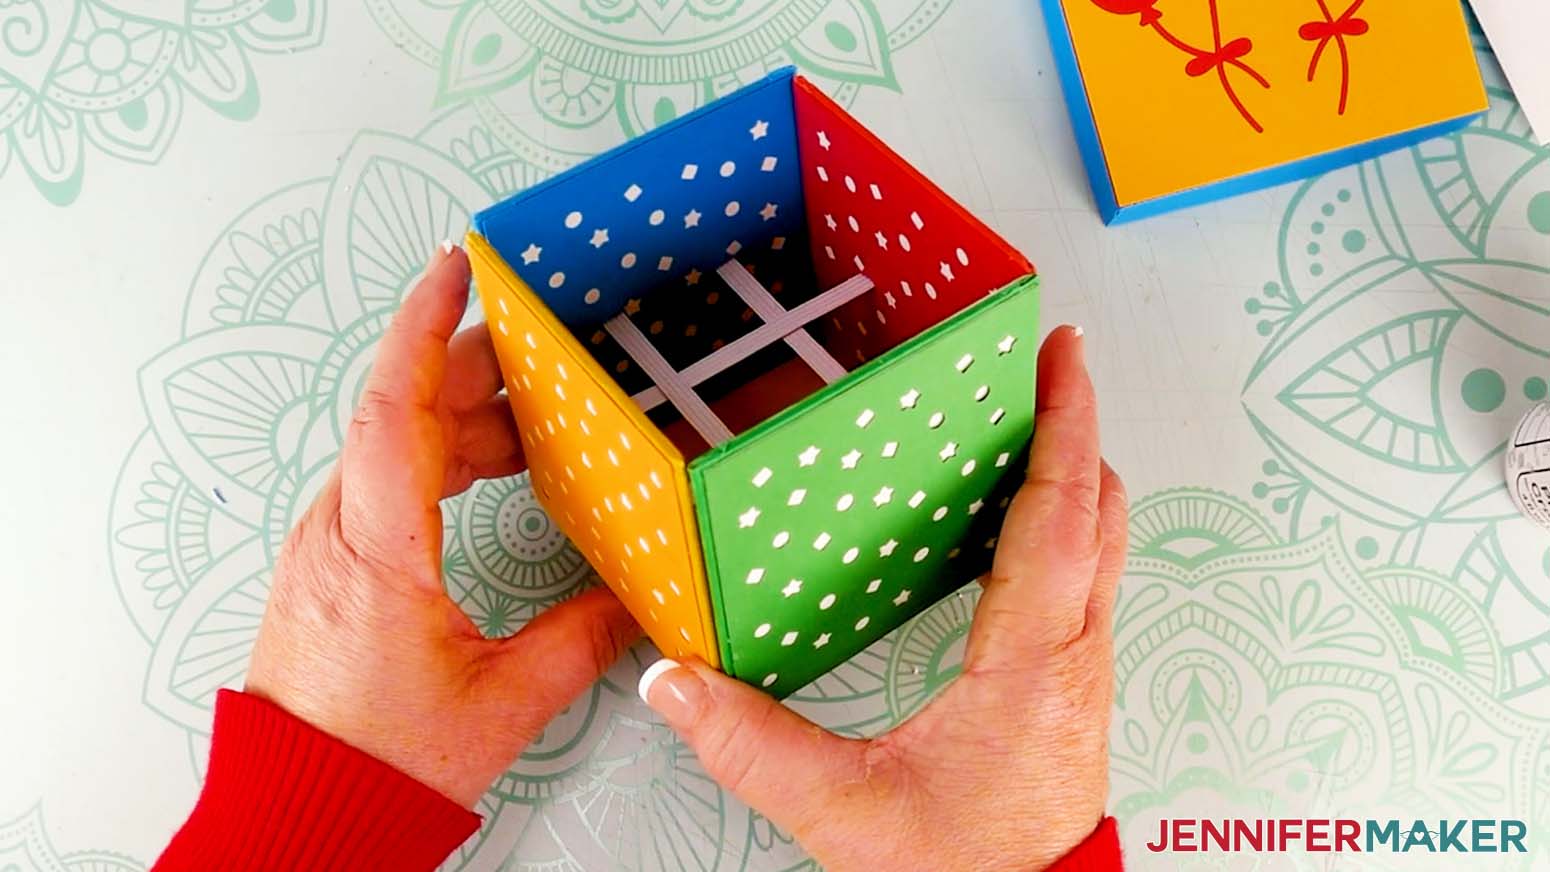
10. Repeat steps 8-9 with the other elastic piece, creating two parallel lines of elastic across the box base.
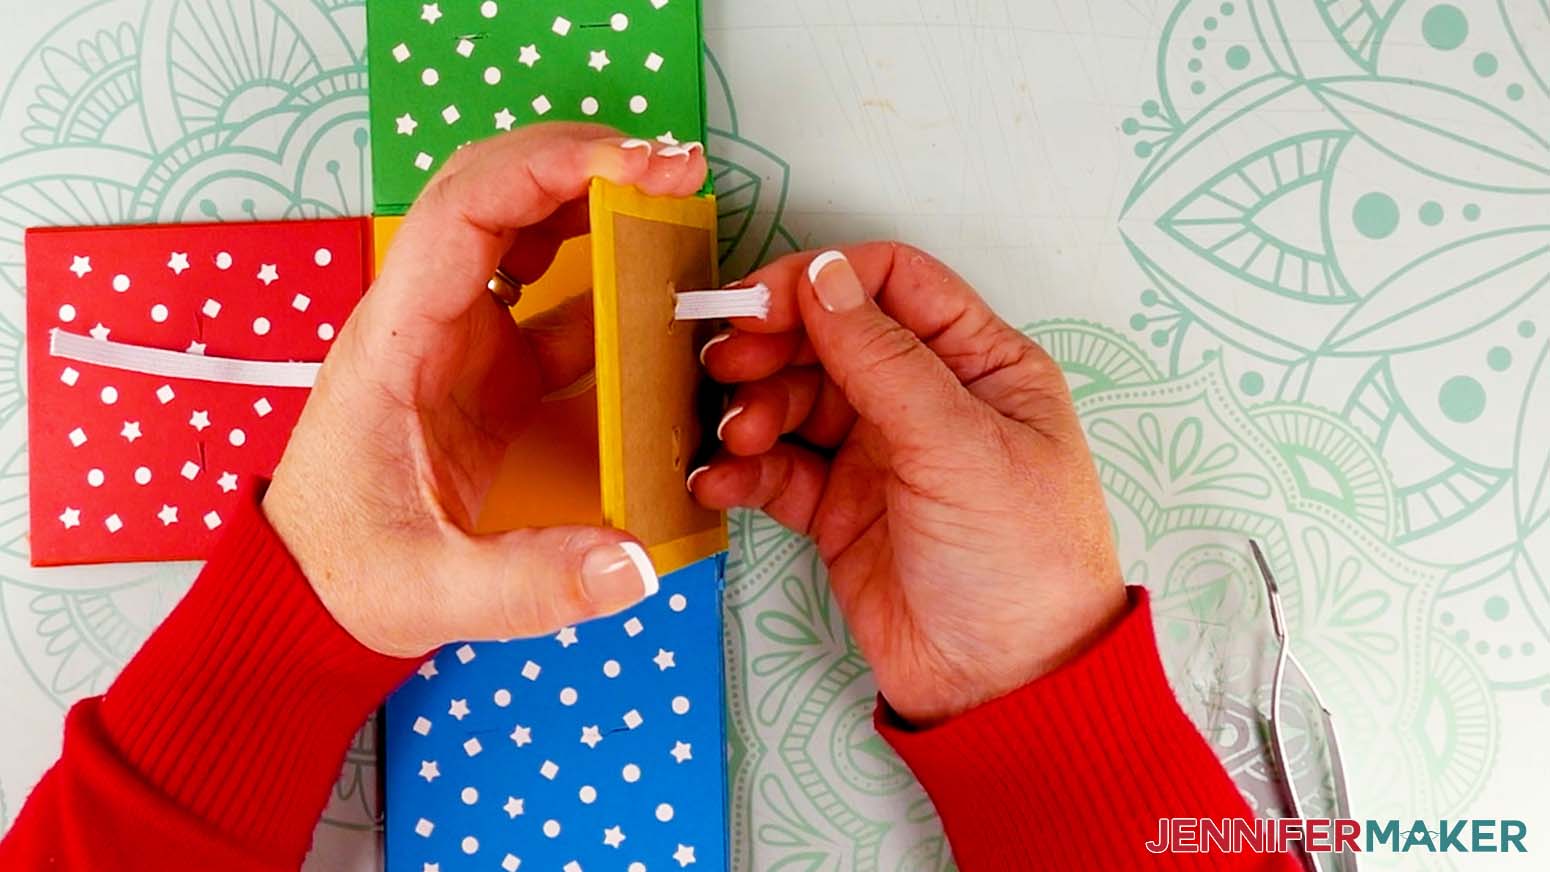
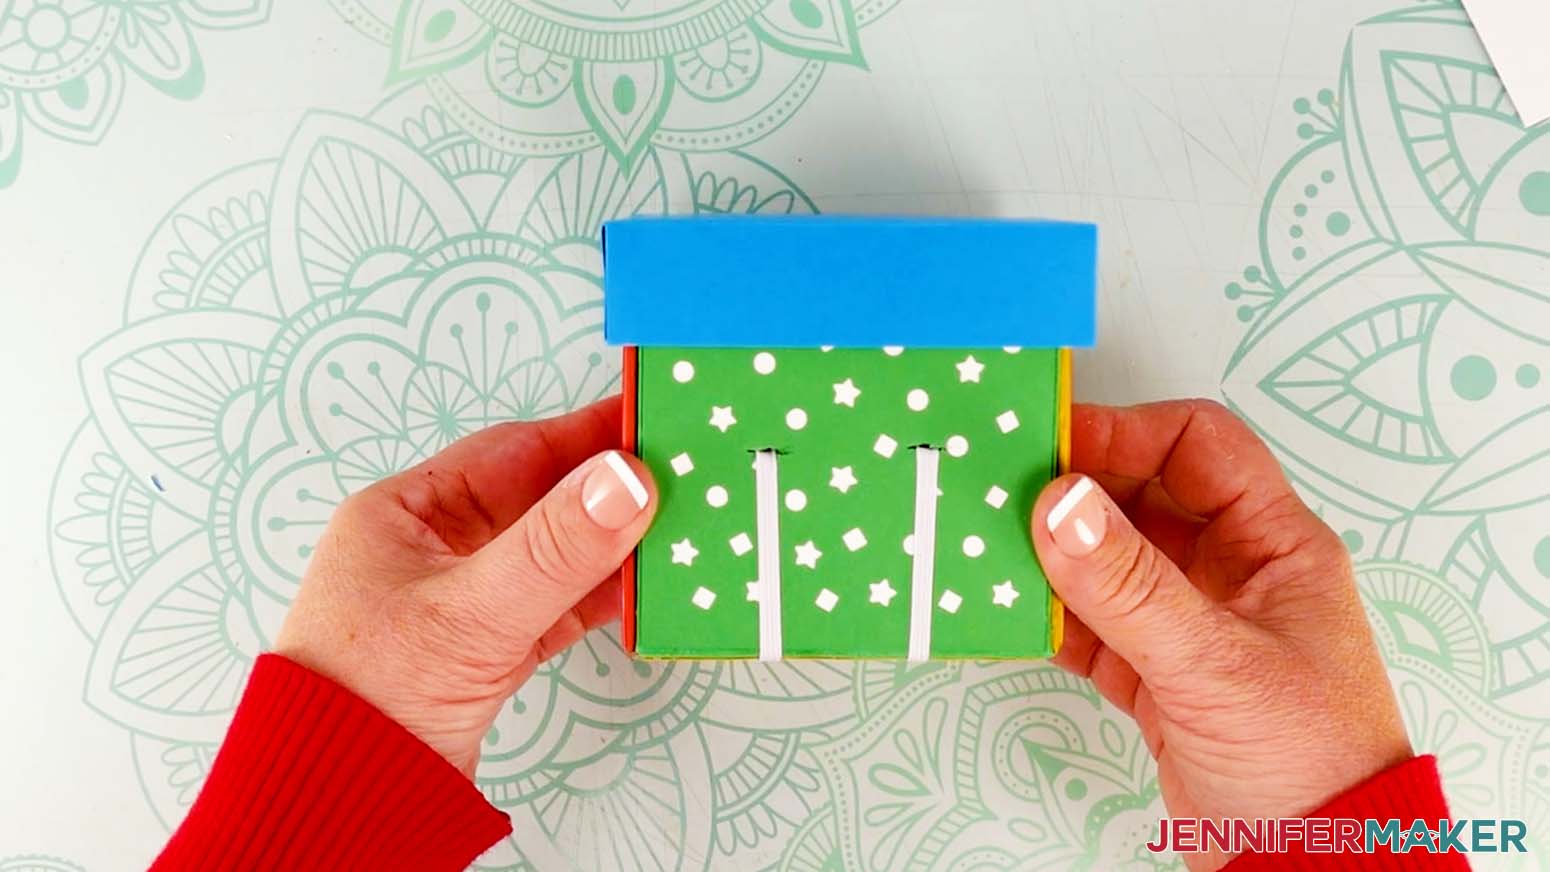
11. With both flaps pointing straight up and parallel to each other, pull the elastic pieces through the slits from the back to make them taut.
TIP: Pull the elastic so it’s tight but not so much that the box flaps fold inward. Keep the flaps perpendicular to your work surface and the elastic taut.
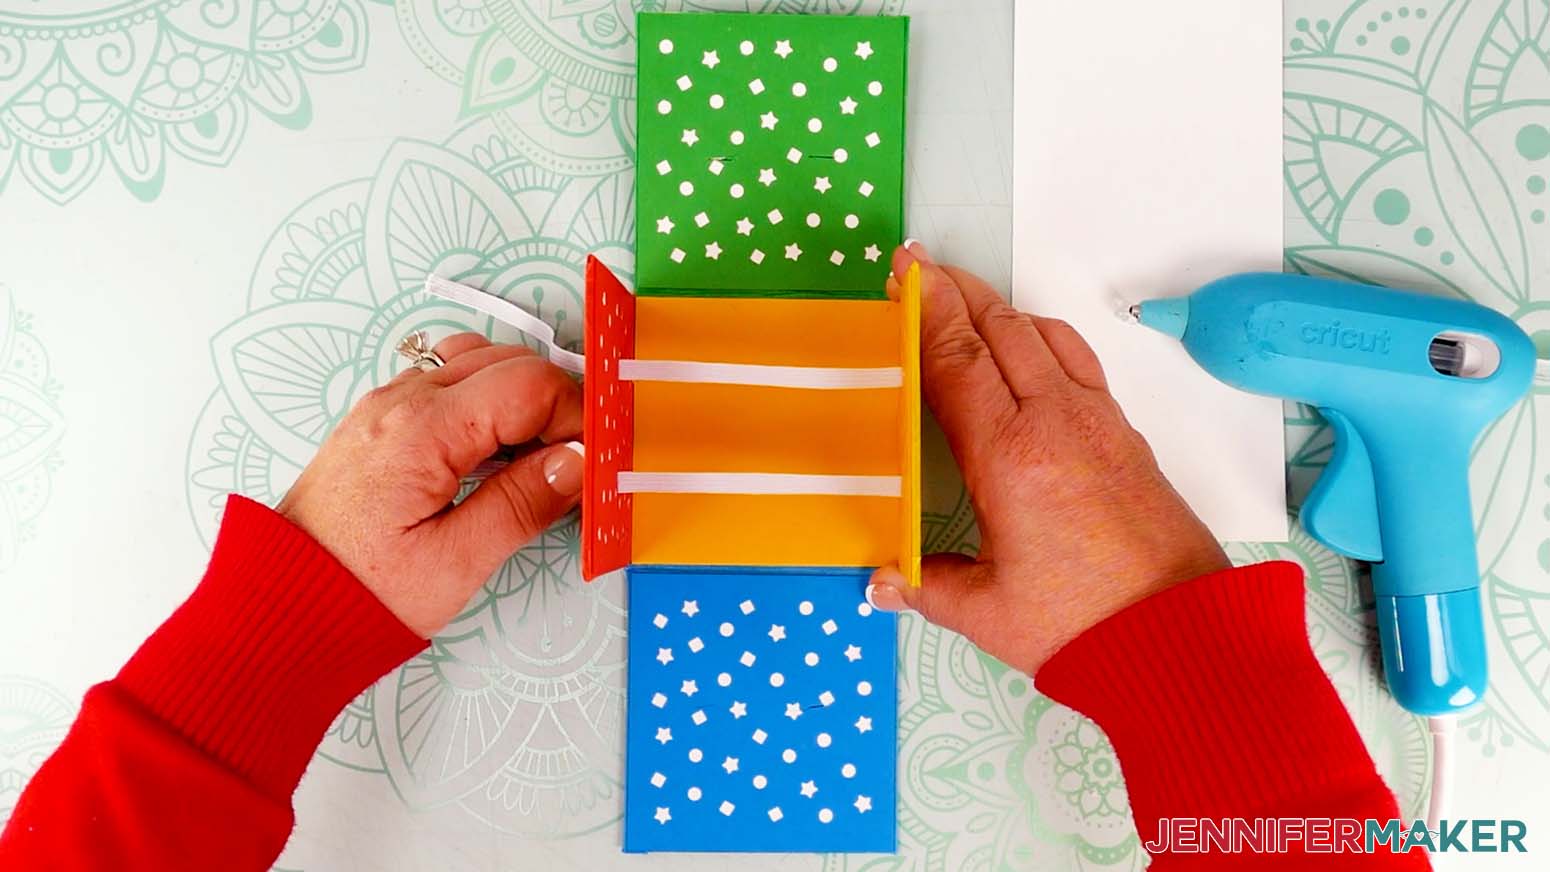
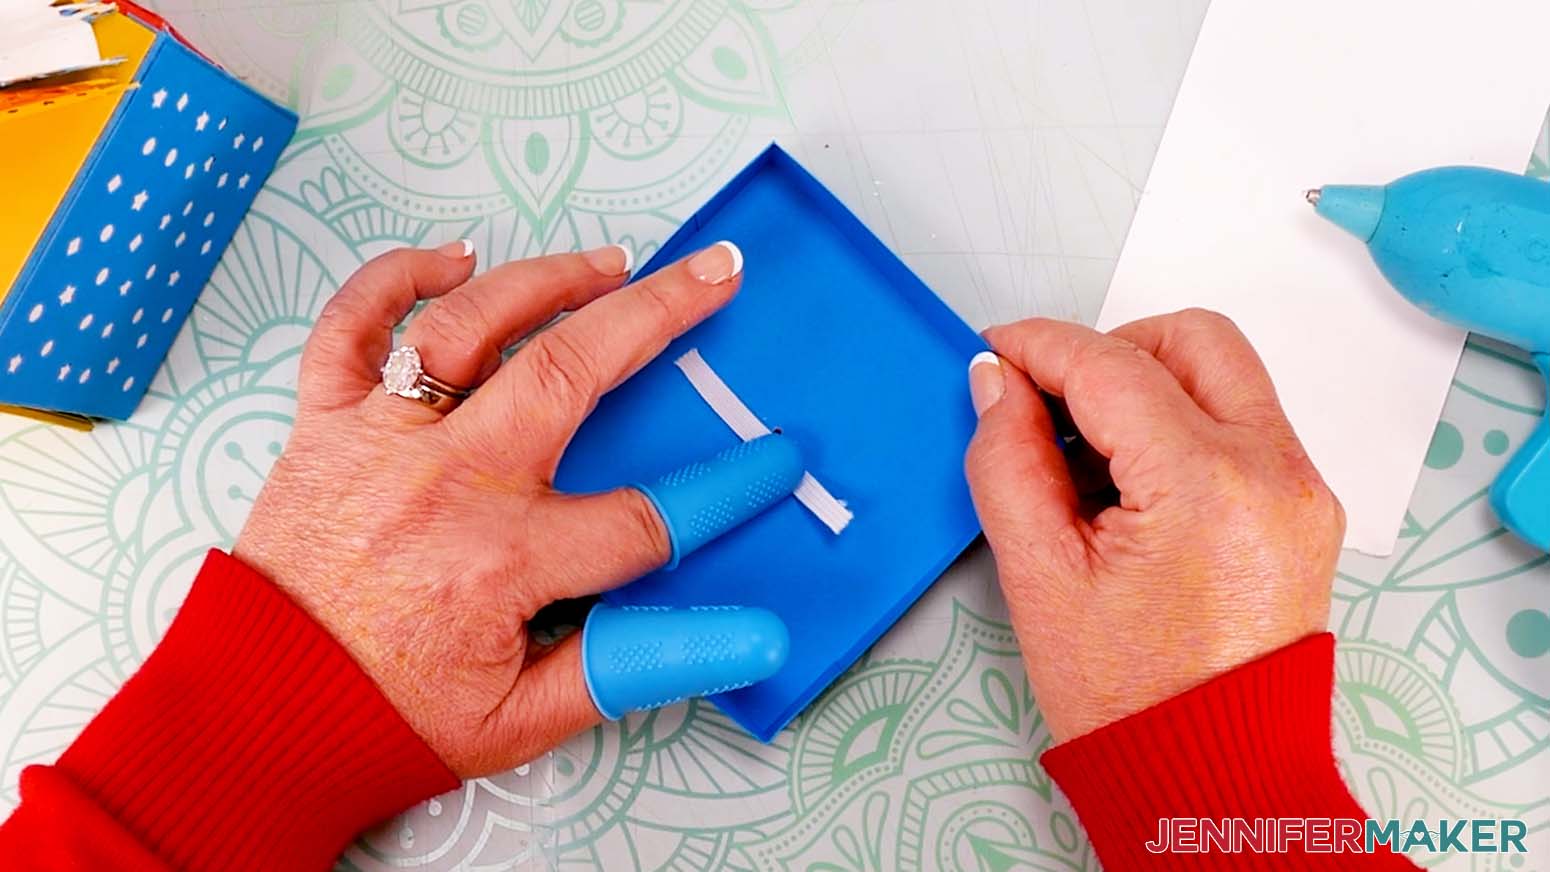
12. Put your hot glue finger caps on and glue the first inch of each elastic end down, one at a time. Try not to move the flaps. After the glue is dry, cut off the excess elastic.
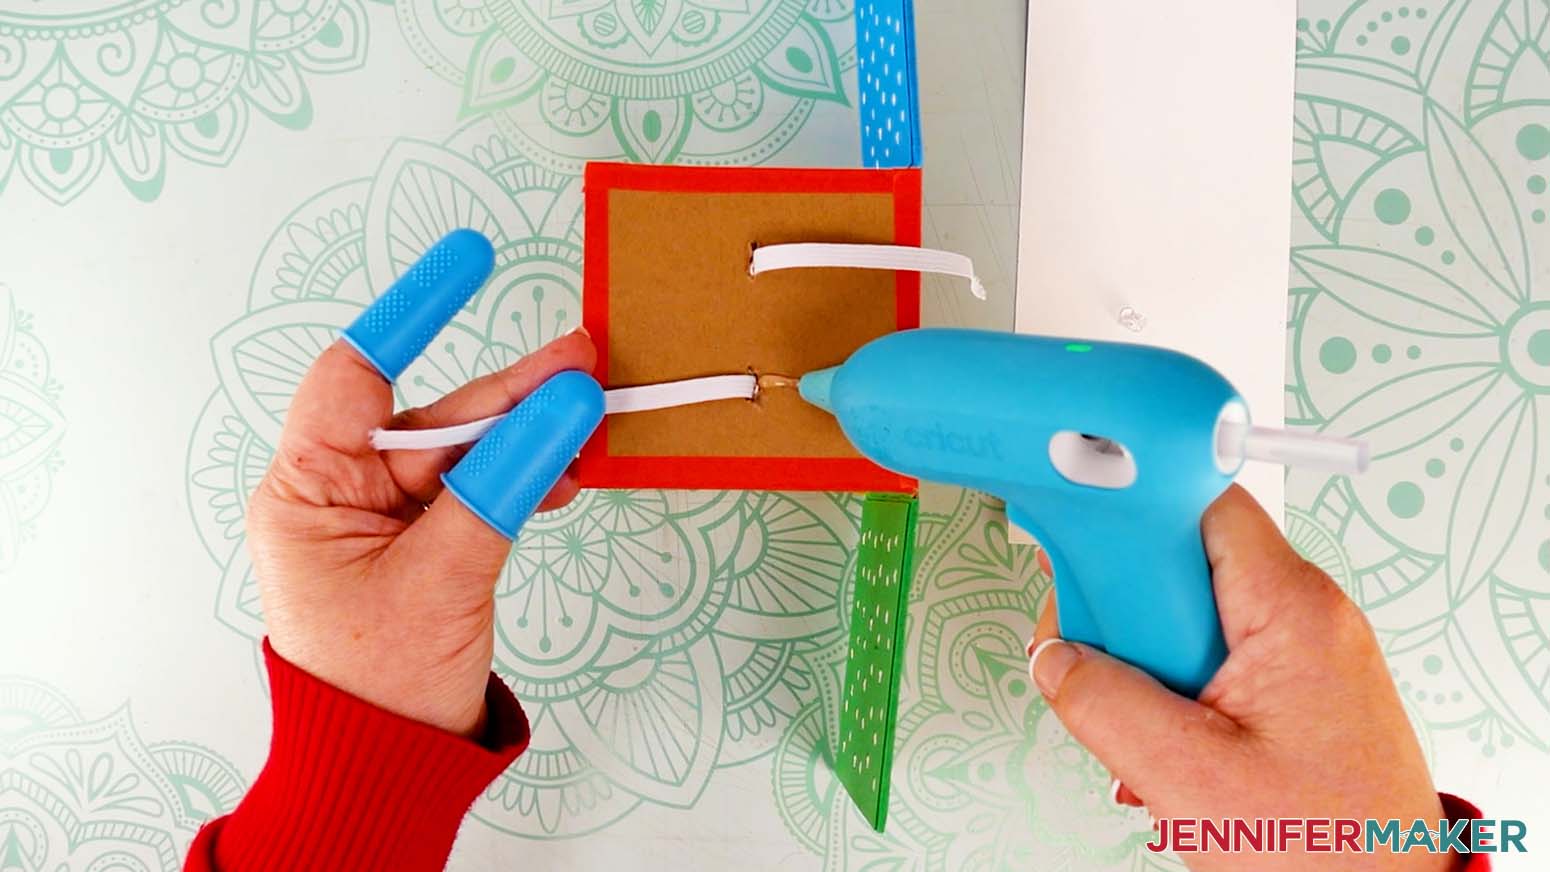
13. Repeat steps 2-12 with the other two elastics connecting the other two flaps.
IMPORTANT: After the second two elastic pieces are glued to one panel, weave their loose ends through the first two pieces like you’re weaving a basket (one will go over then under the first pieces, and the other will go under then over).
Assemble the Lid
1. On the cardstock lid piece, fold along the score lines and crease them with the scraper.
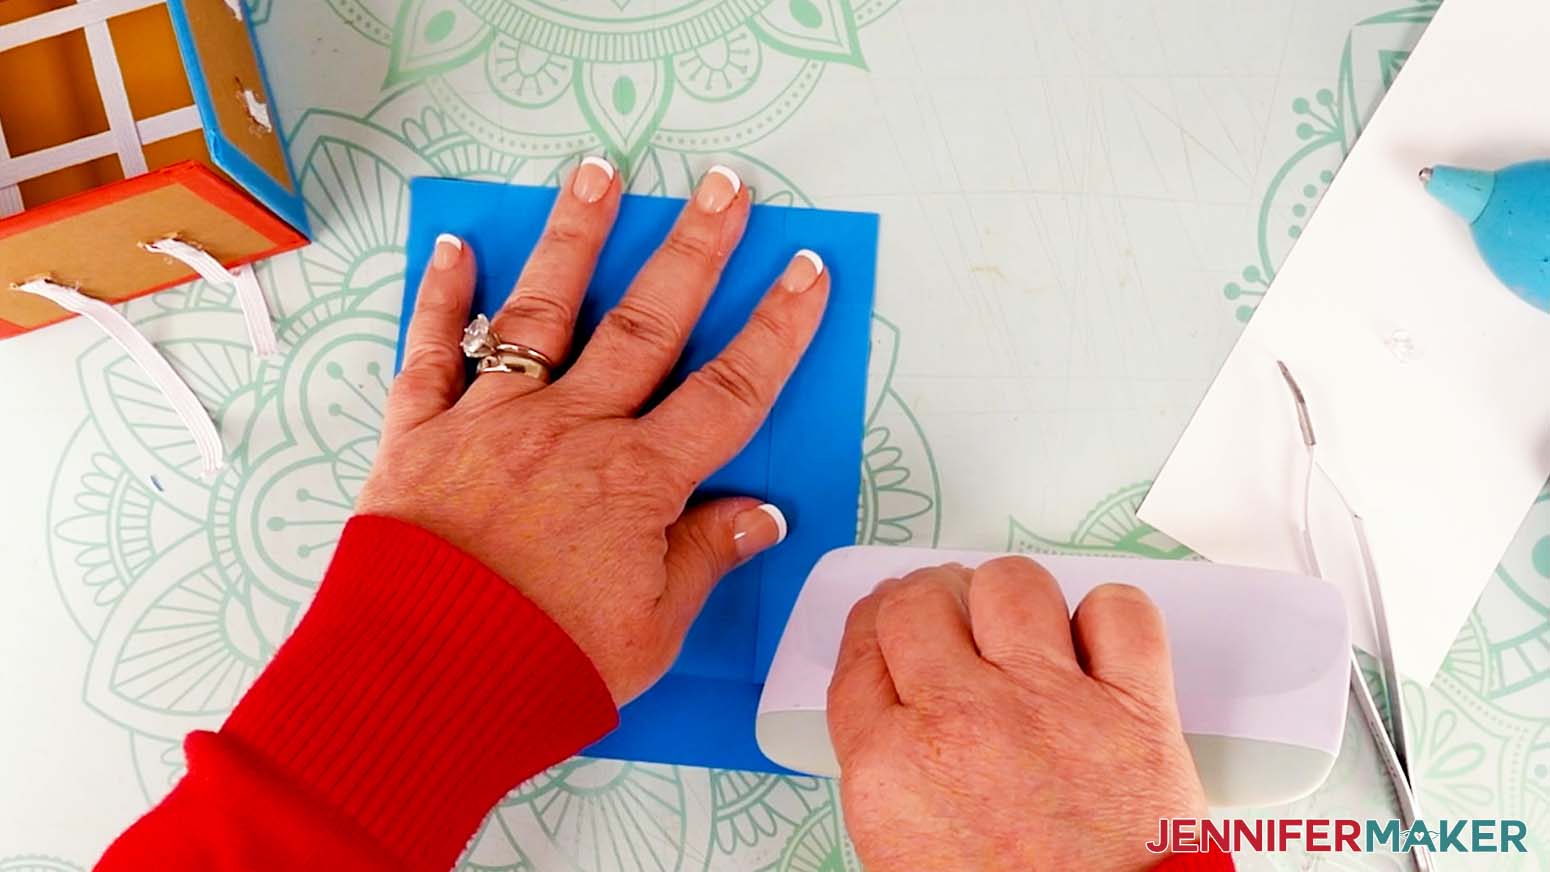
2. Fold the sides into place.
3. Apply craft glue to the outside of a flap.
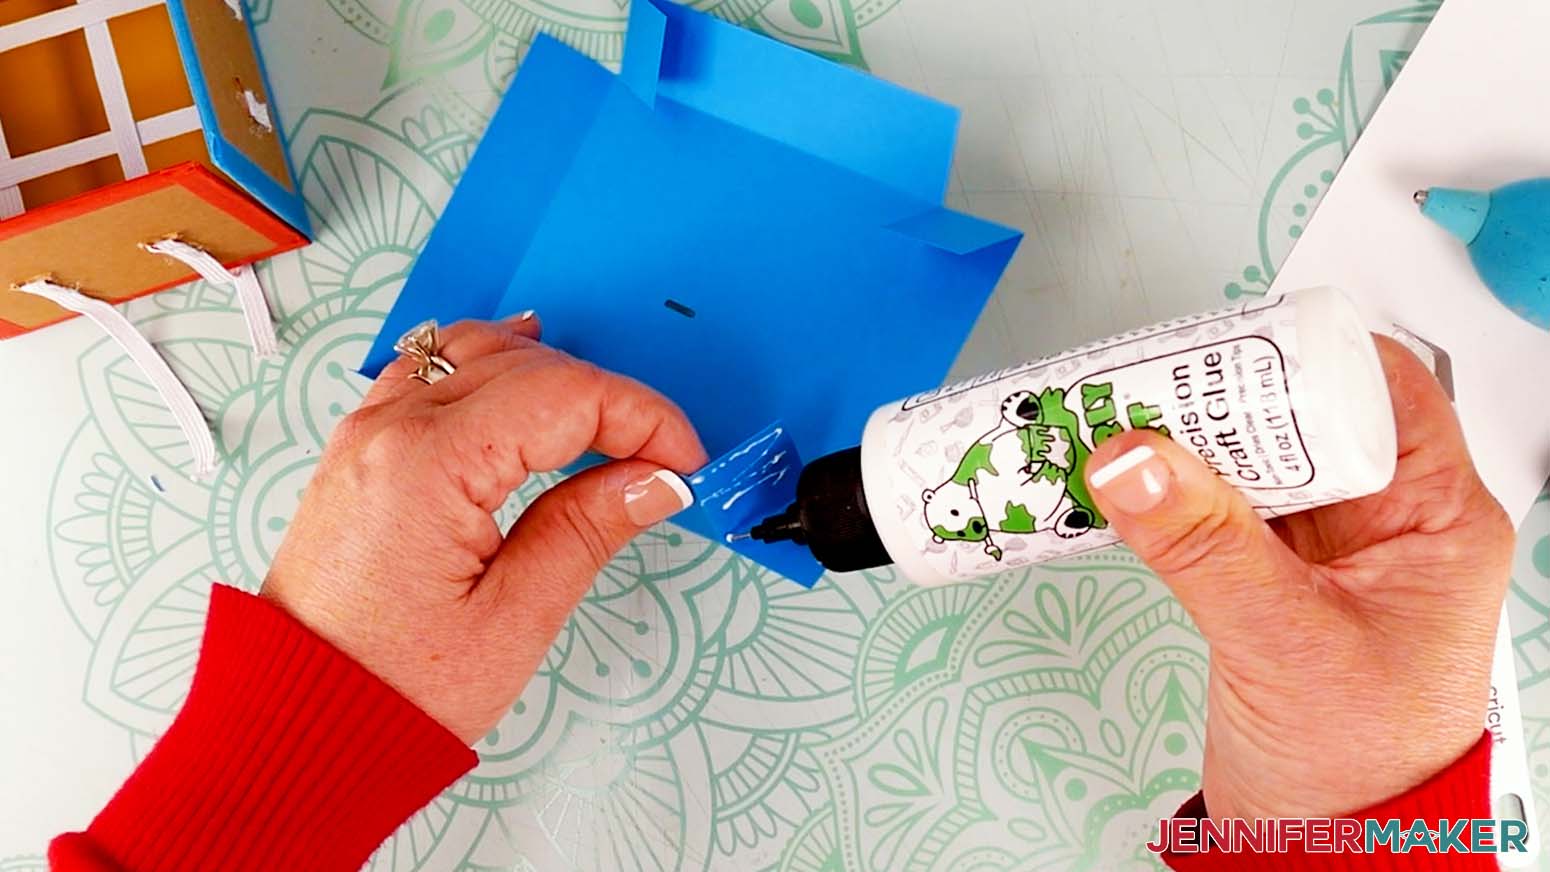
4. Using your fingers, pinch the flap and the side of the lid together to adhere them.
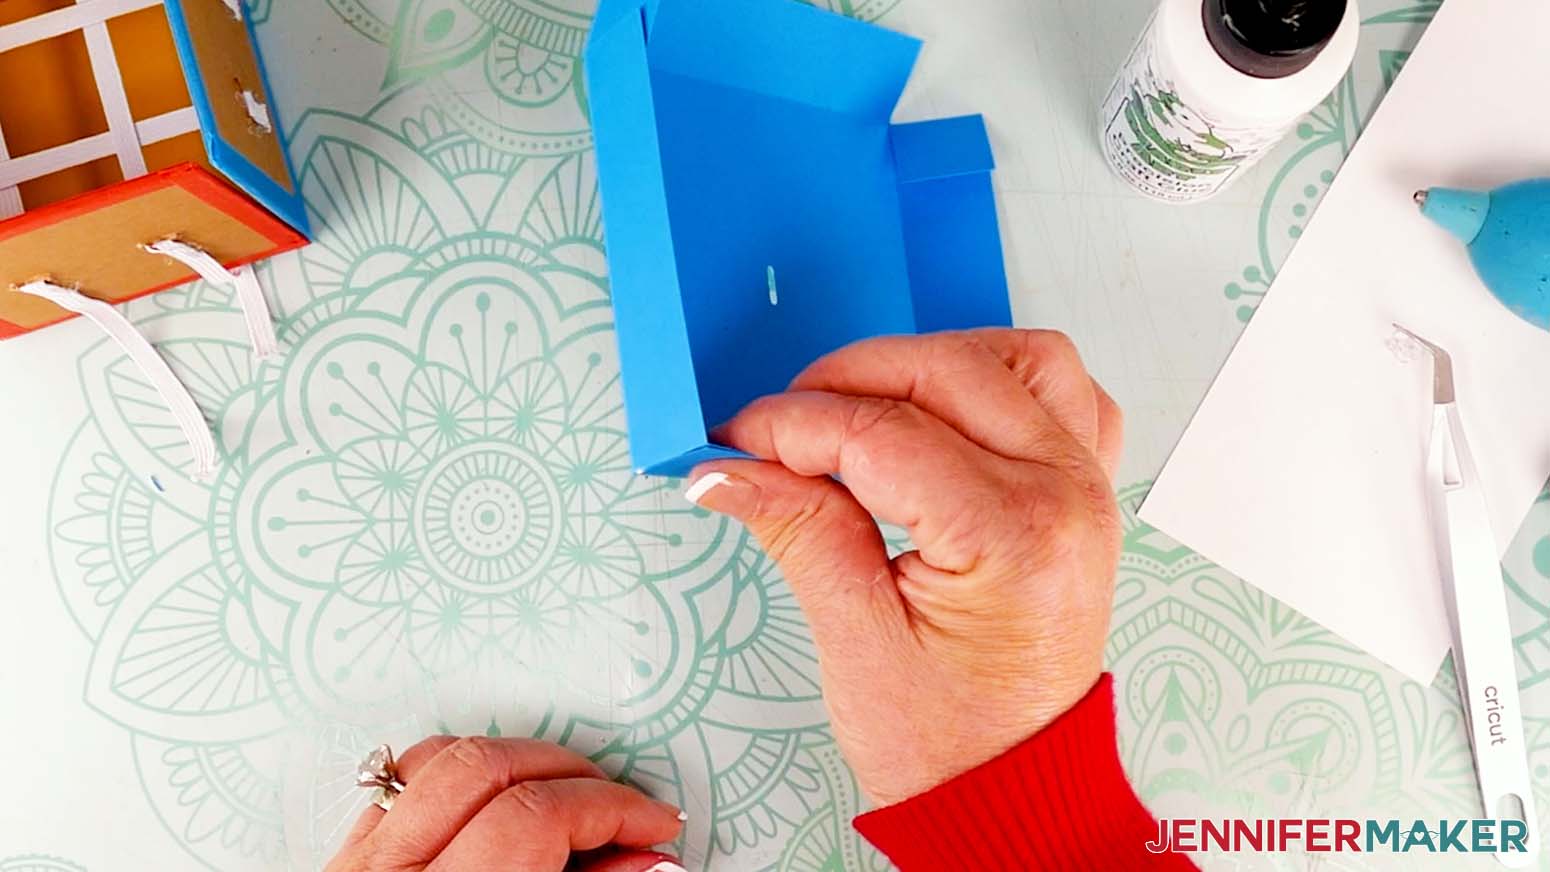
5. Repeat steps 3-4 with the other flaps and sides.
6. Once the lid is completely dry, put it on the box and test the jumping box function. If it doesn’t jump open, make adjustments to the elastic tension as needed.
NOTE: Don’t worry if it doesn’t land face up, we’ll fix that later.
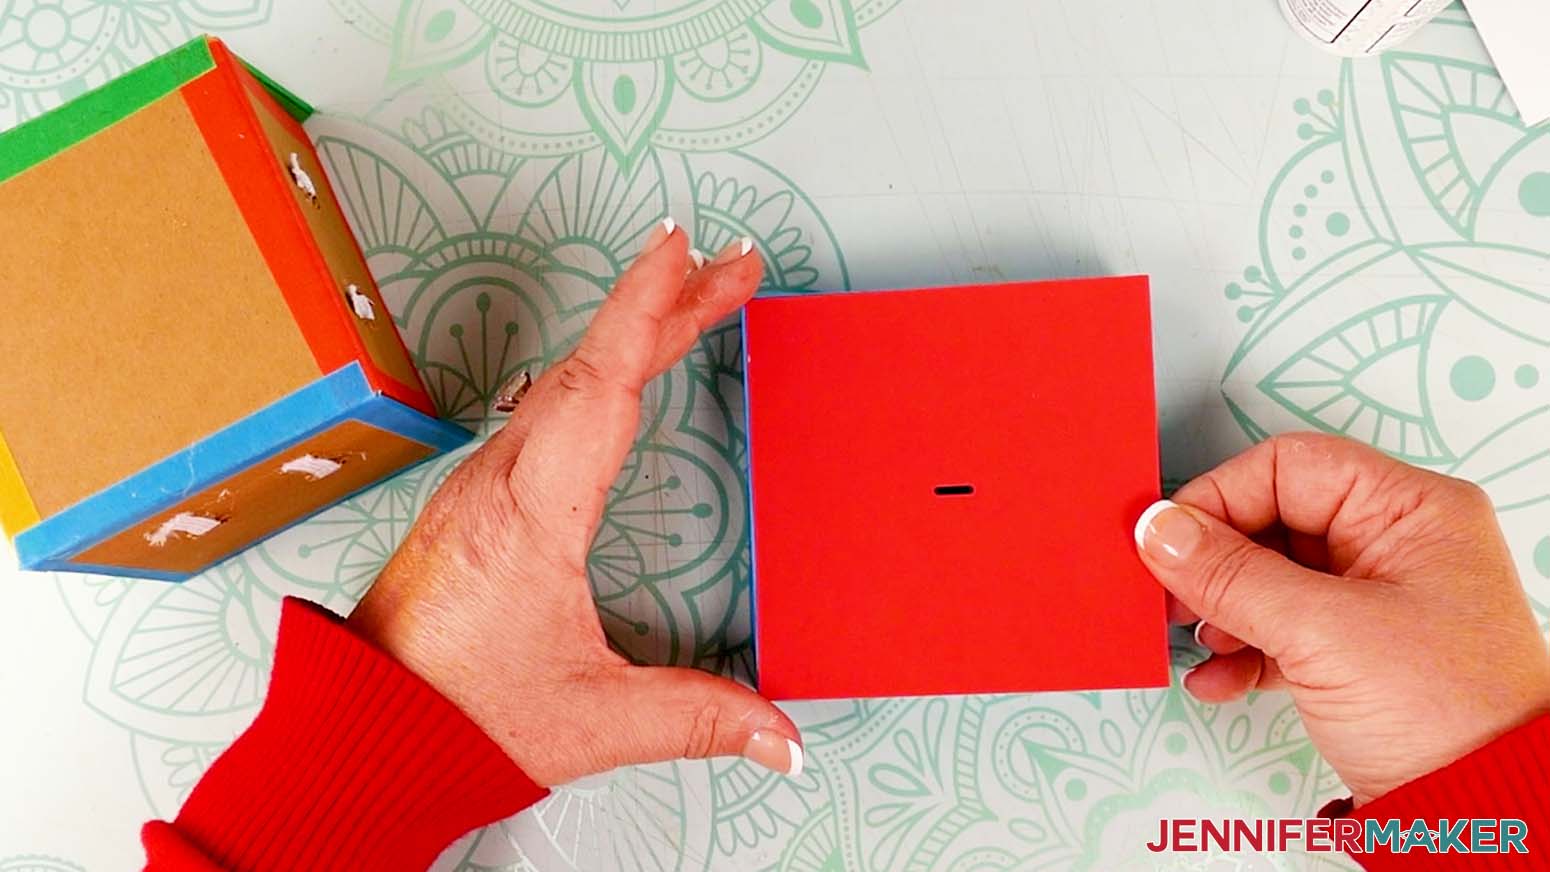
7. Take the cardstock square with the small slot in the middle and apply craft glue to one side, avoiding the slot.
8. Adhere the piece to the top of the lid. Make sure the slots are aligned and press down on both sides so it’s adhered well.
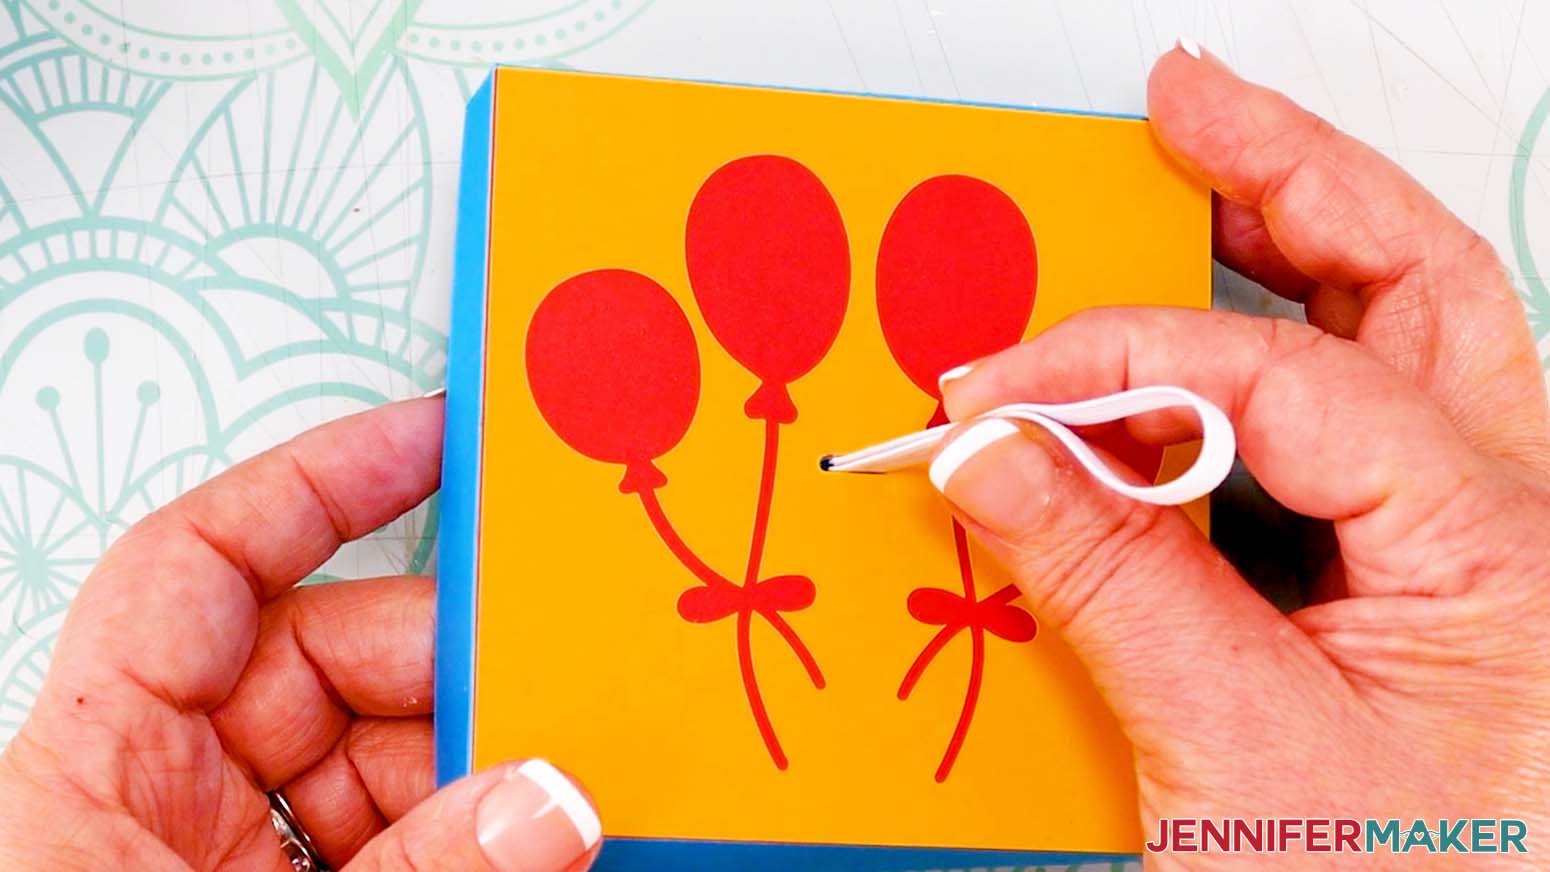
9. Apply craft glue to the back of the square piece with balloon cutouts, avoiding the cutouts.
10. Adhere it to the top of the lid, on top of the layer you just attached.
TIP: Be sure to glue down any smaller bits, like the cardstock between the balloons and around the ribbons.
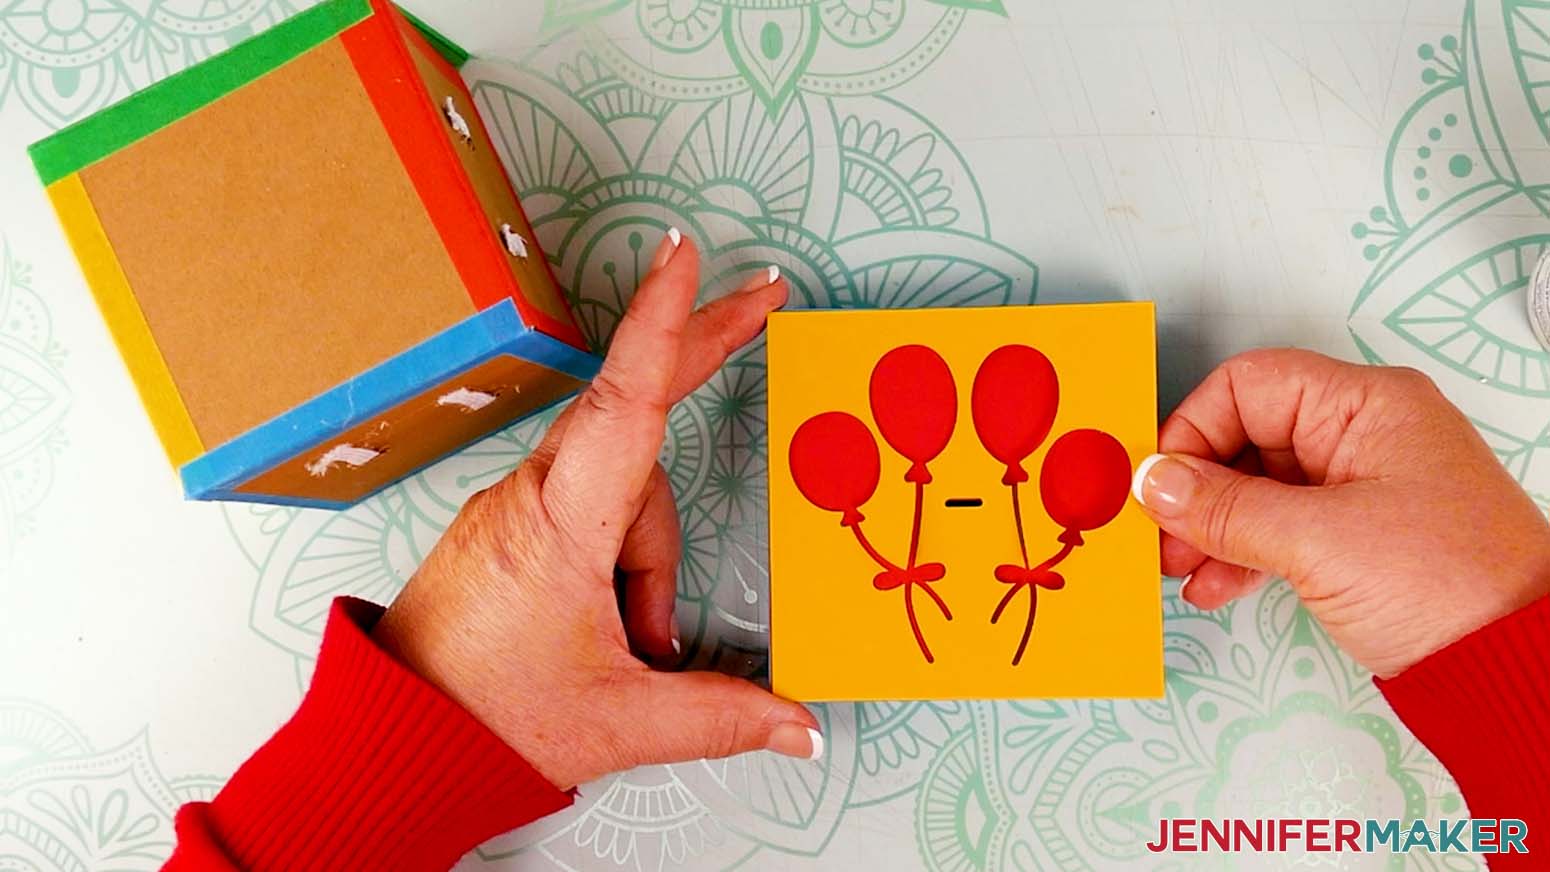
11. Use your fingers to press the layers together on both sides to adhere them well.
Attach the Second Set of Accent Panels
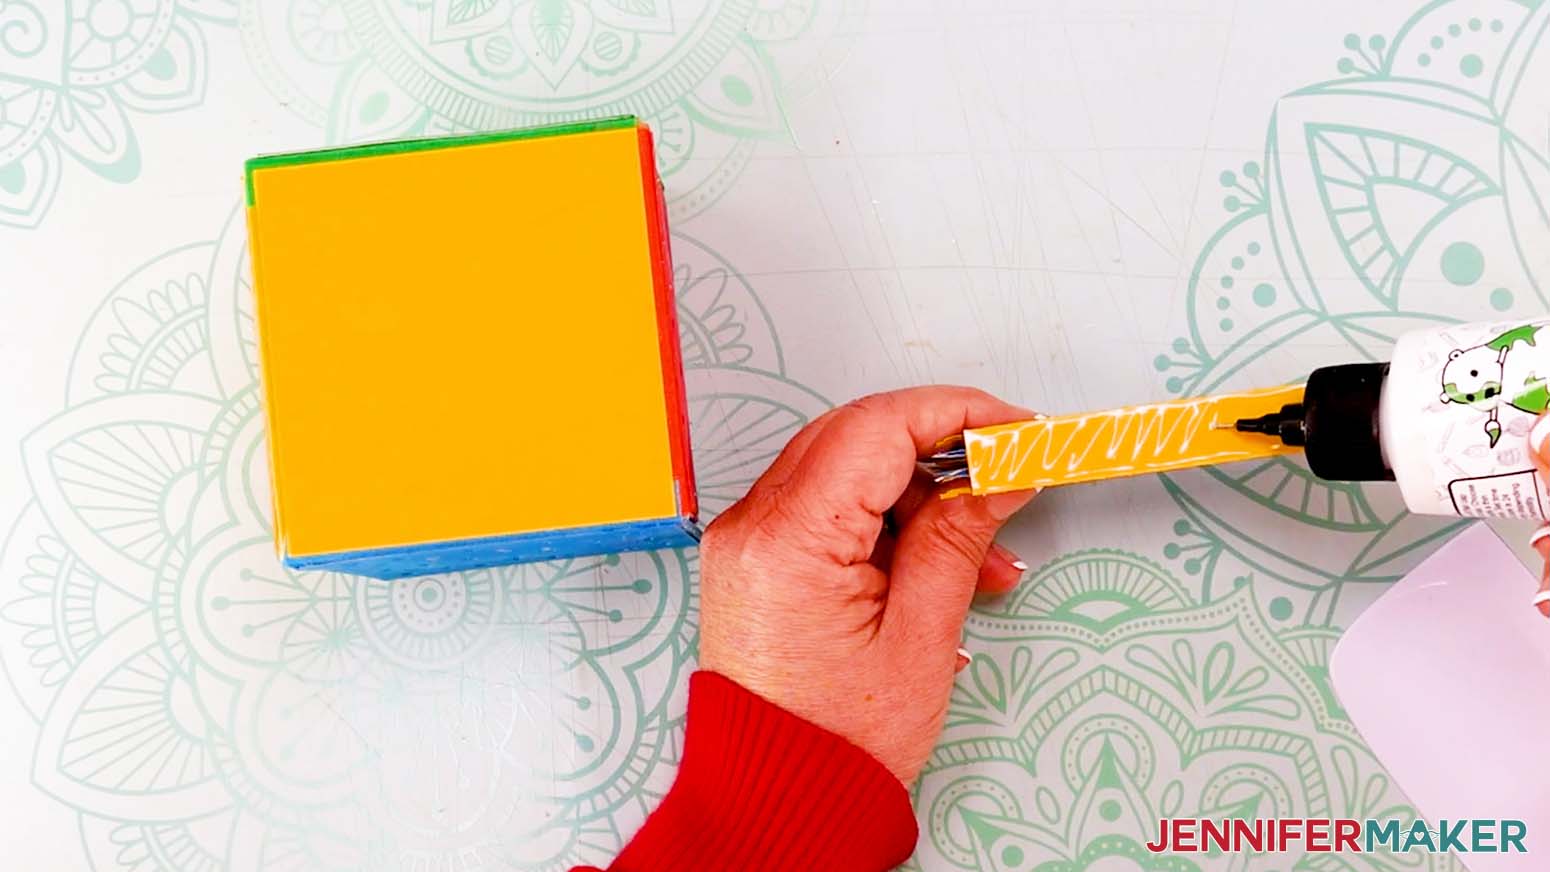
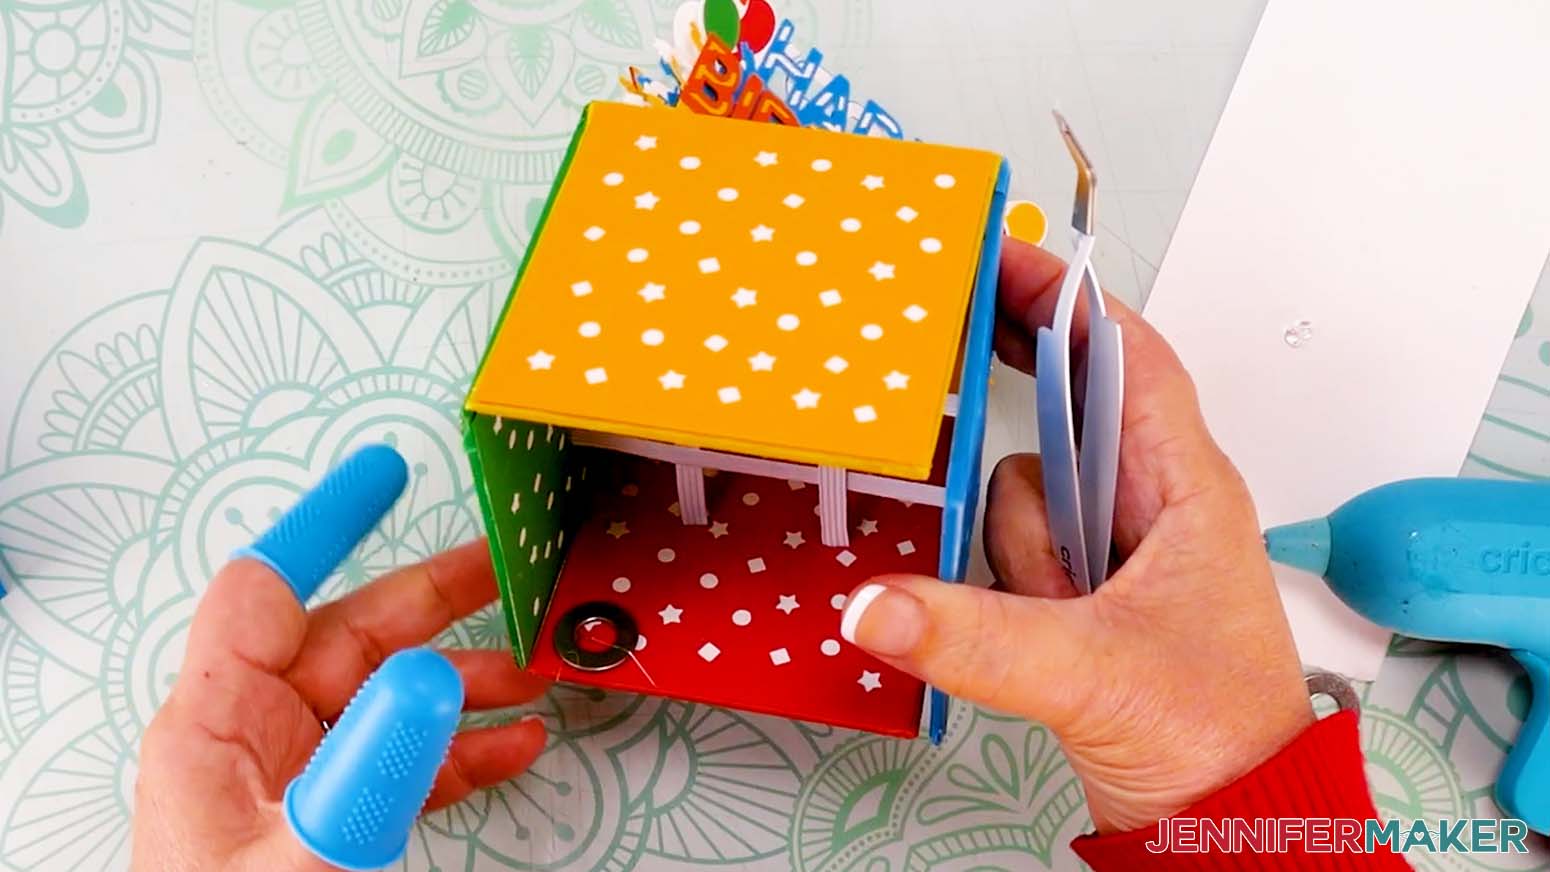
1. Fold the box so the plain cardboard is on the outside.
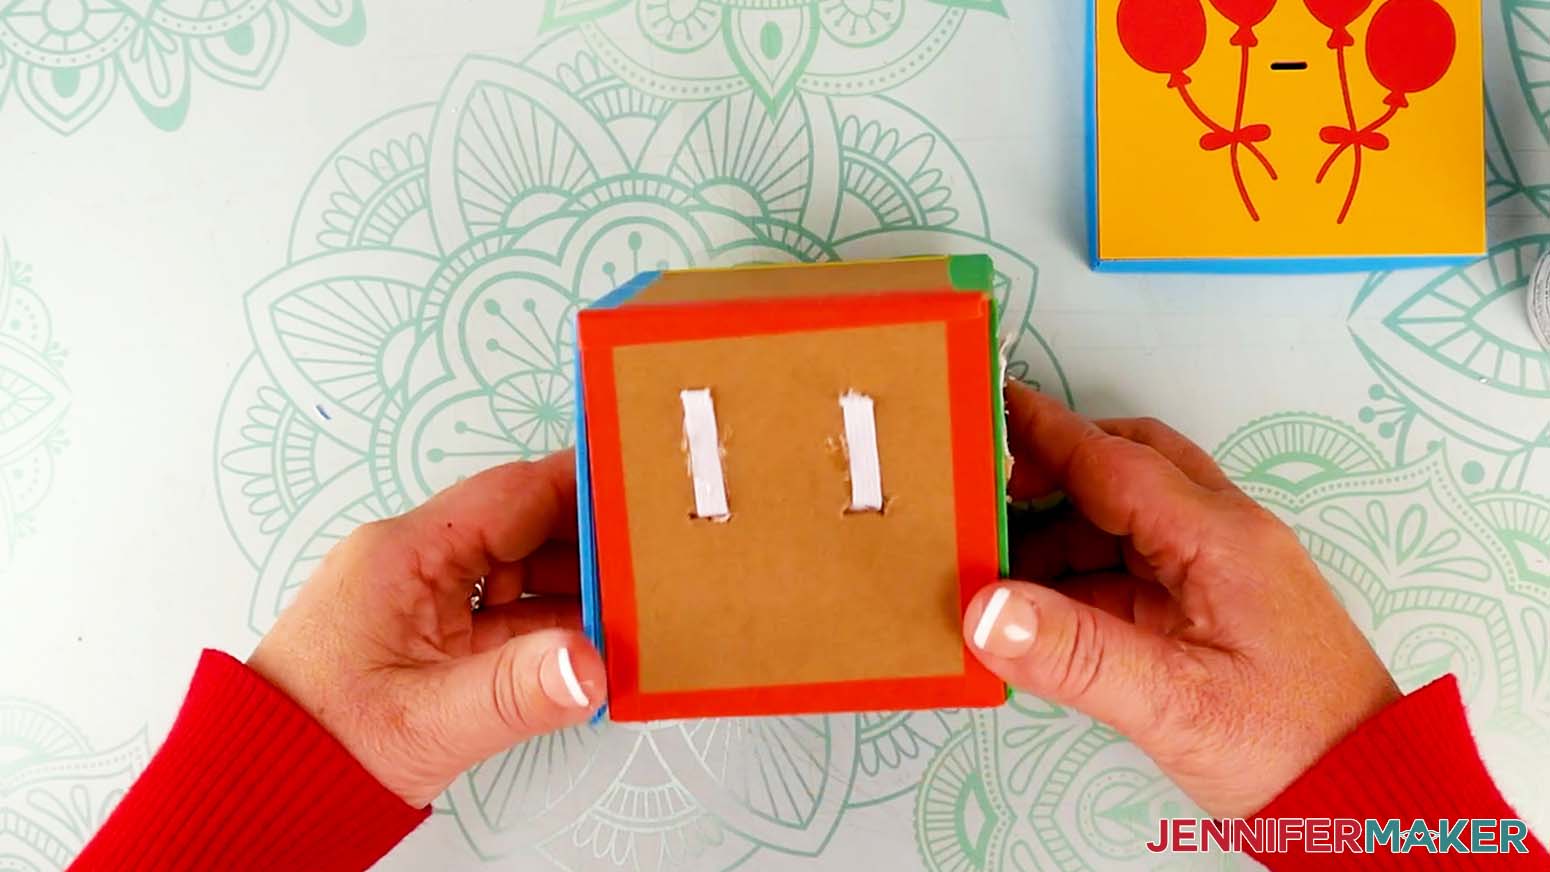
2. Apply a generous amount of craft glue to one side of the box, including on top of the elastic, then adhere one of the remaining white panel squares to it.
NOTE: Make sure not to position the white square too close to the crease, so the flap can still freely bend both ways.
3. Use your fingers to press down all over the square to really adhere it well to the cardboard and elastics.
4. Repeat steps 2-3 for the other three white squares.
5. Follow the same directions to add the colored confetti squares to each of their corresponding panels (the panel color should match the tape color on the box flap).
6. Apply craft glue to one side of the other solid square, and attach it to the middle that still has cardboard exposed.
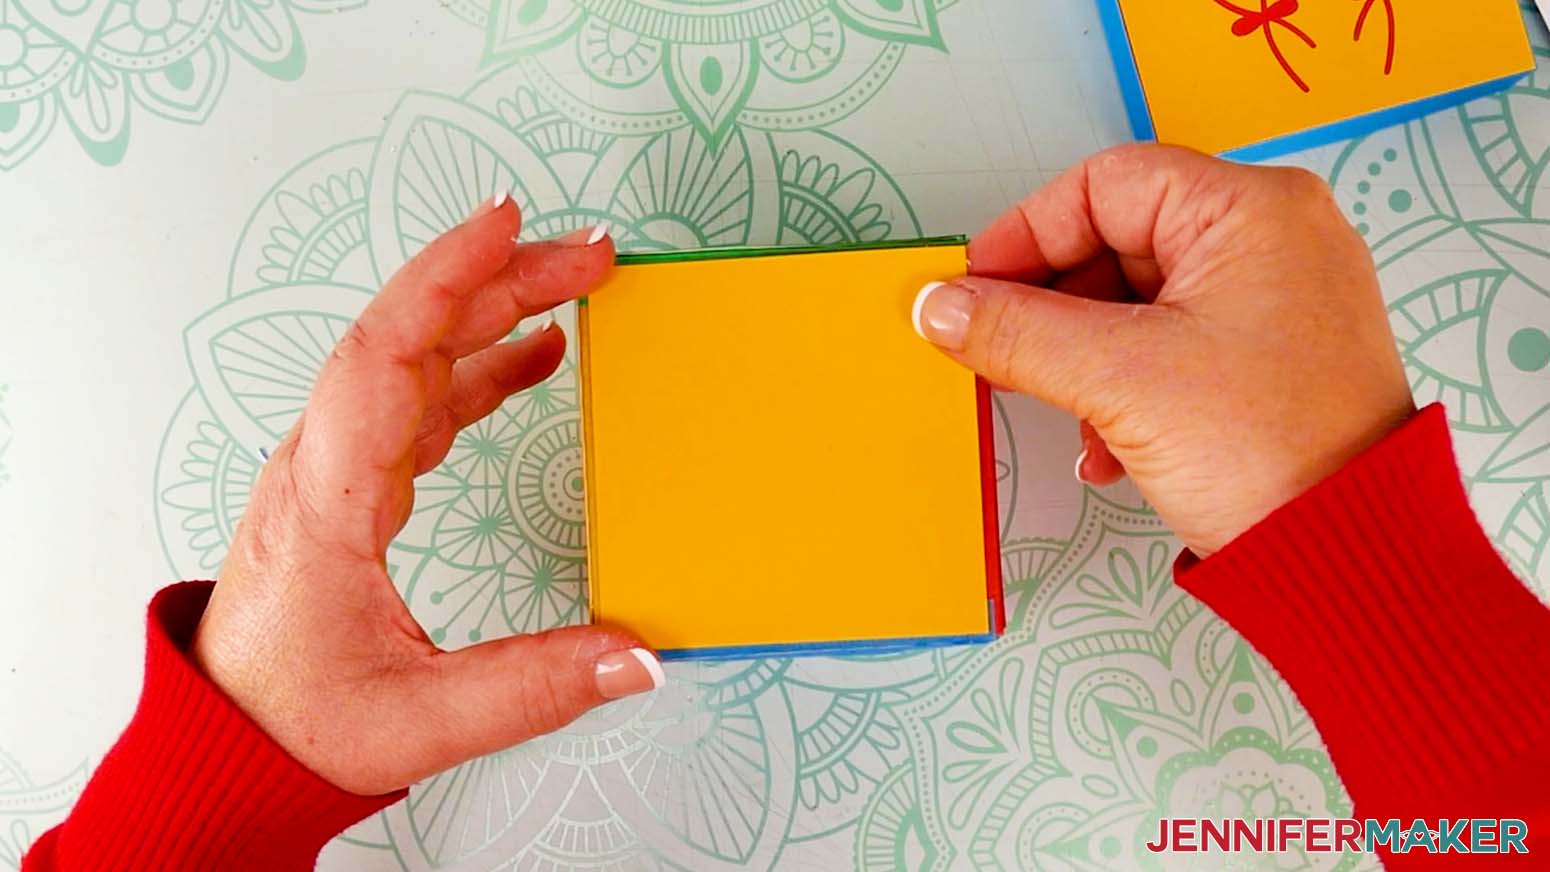
TIP: Fold up the box sides before it dries to make sure it's perfectly centered and doesn't interfere with the flaps moving.
Assemble the "Happy Birthday" Sentiment
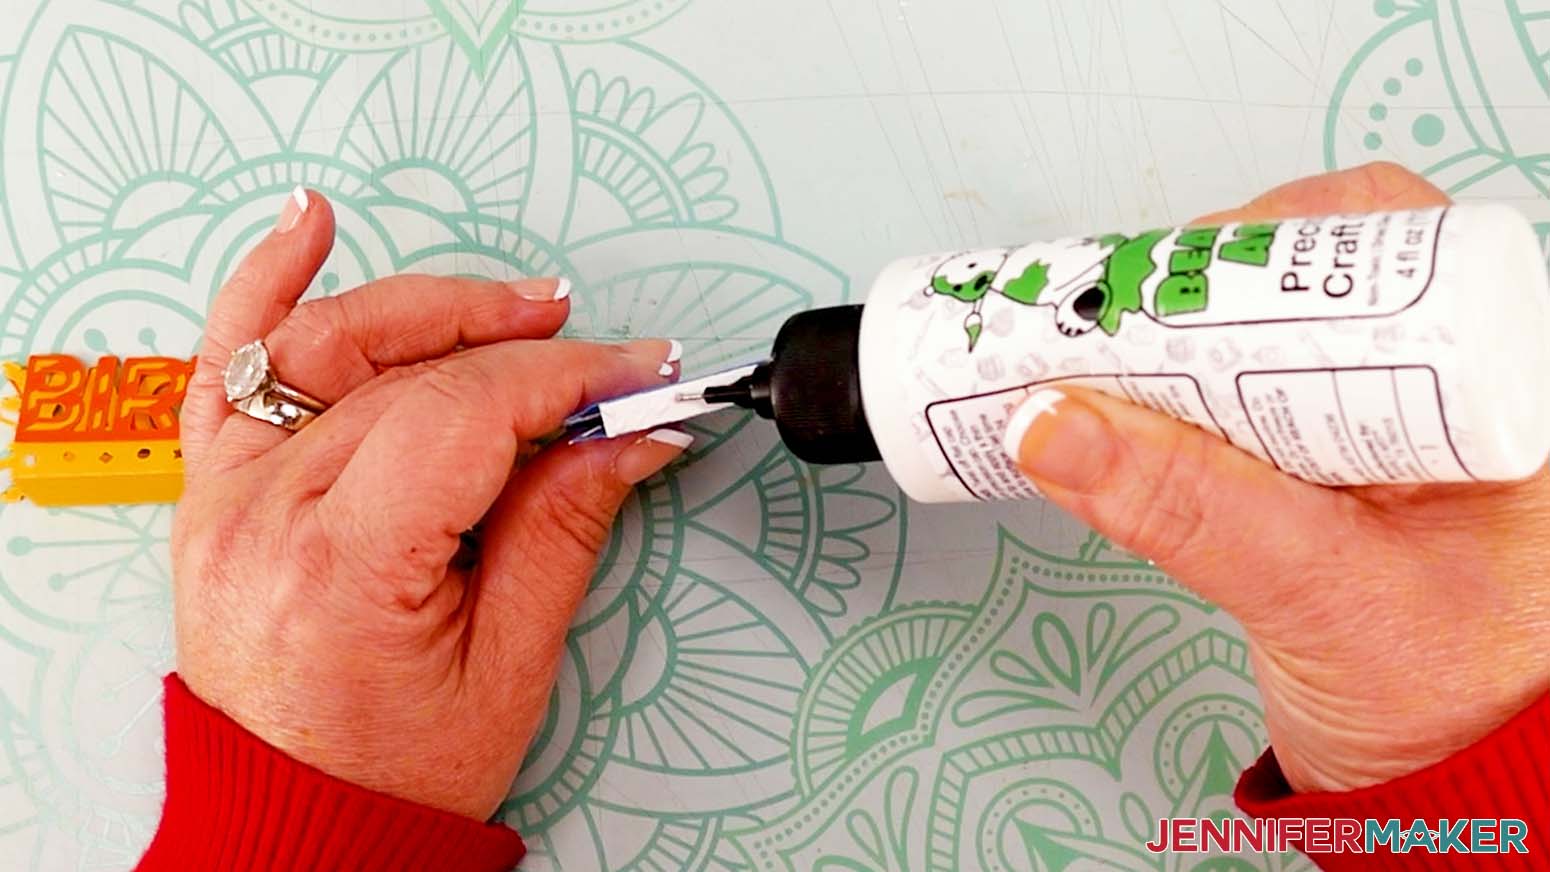
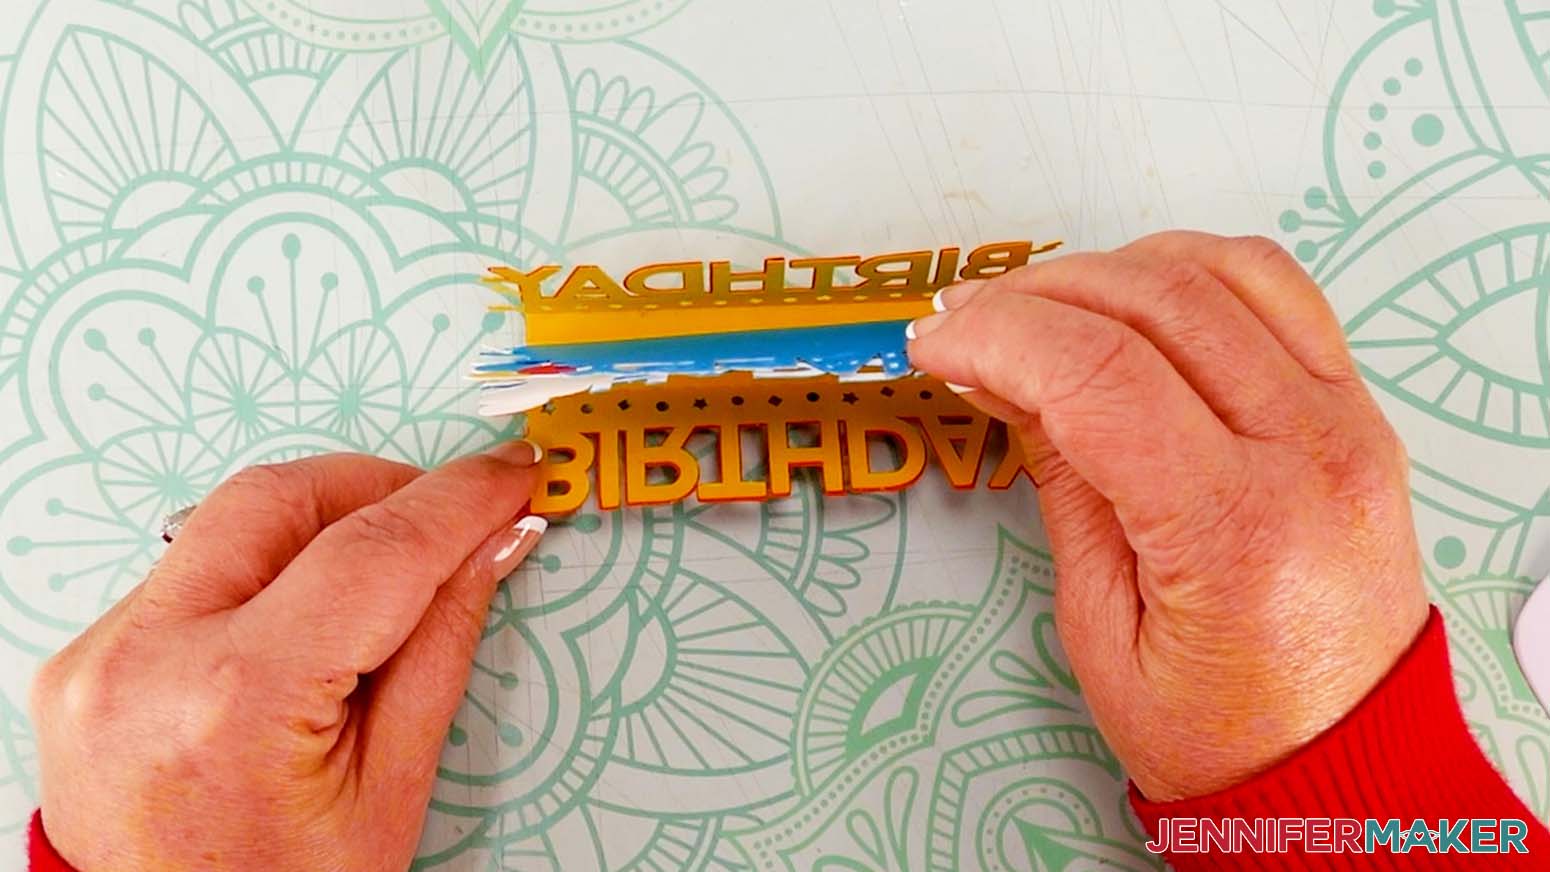
1. Apply craft glue to the back of one orange “birthday” piece, avoiding the cutouts in the letters. (The letters will be backward on the back side.)
2. Attach it on top of a “birthday” section on the yellow layer.
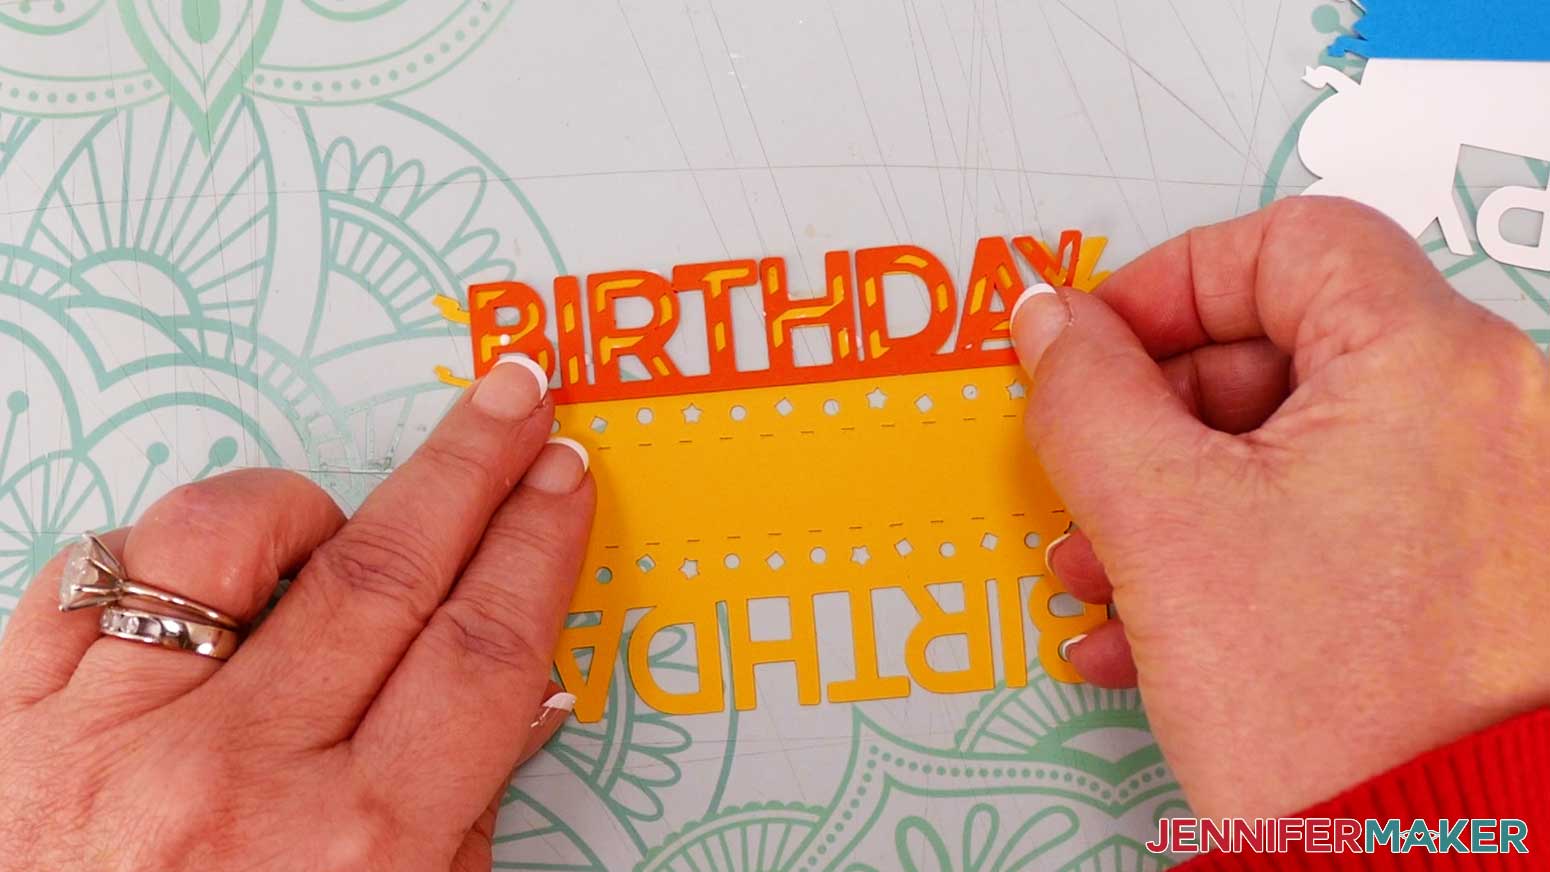
3. Repeat steps 1-2 with the other orange “birthday” piece, layering it on top of the other yellow “birthday” section.
4. Fold and crease along the dashed lines on the assembled “birthday” piece, so the word reads correctly from the outside.

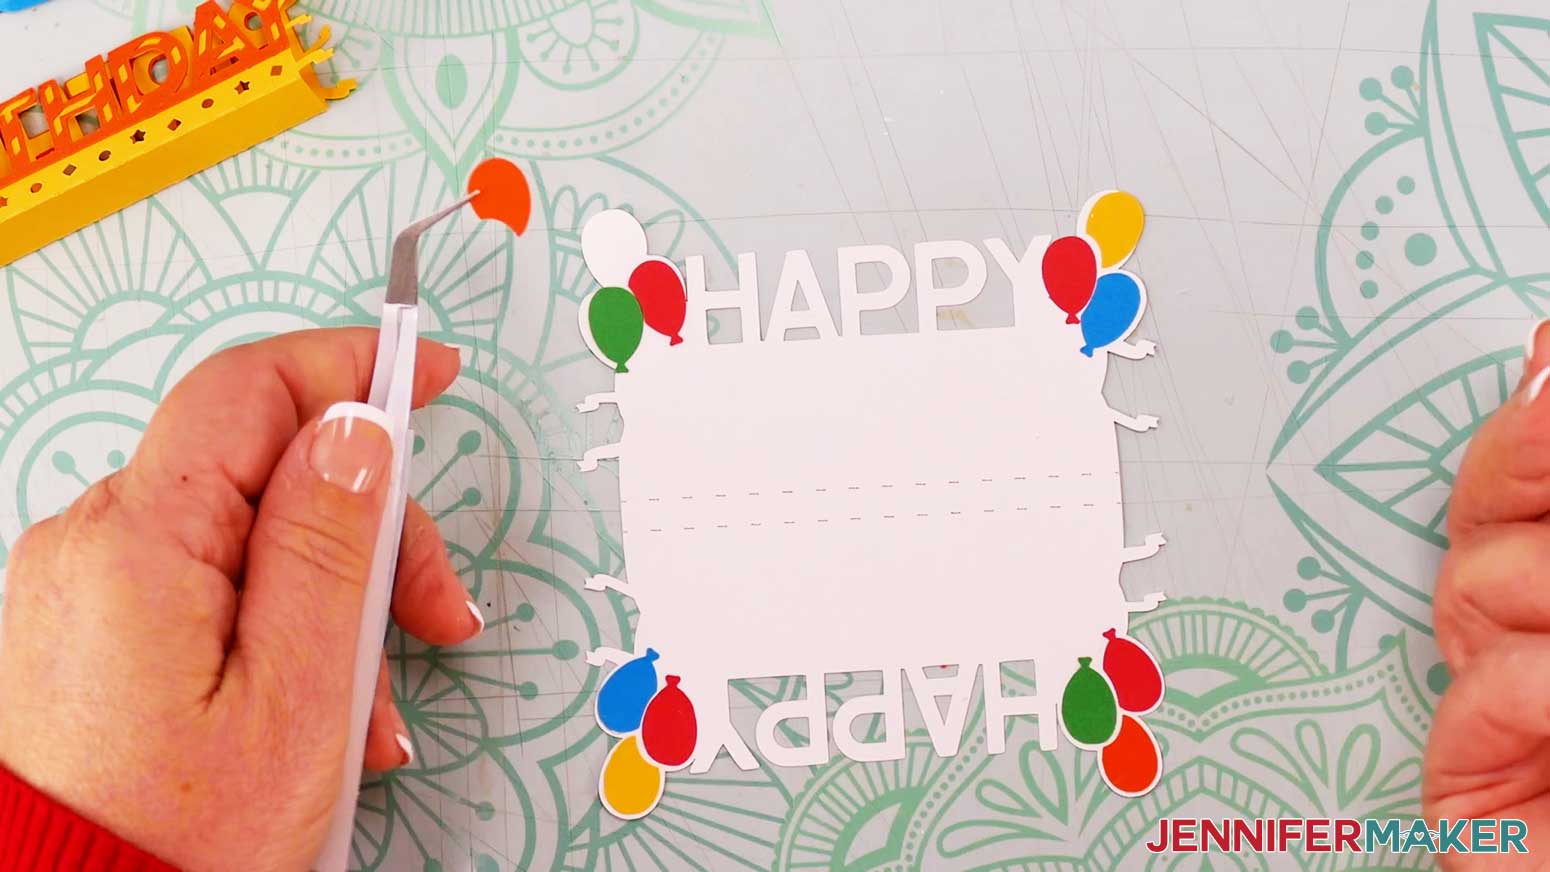
5. Get the twelve balloon pieces and place them in the correct spots on the white “happy” piece.
TIP: Refer to your Cricut Design Space screen for help with placement.
6. Apply craft glue to the back of each balloon piece and press them into place.
TIP: Tweezers can help with placing small pieces.
7. Apply craft glue to the back of one of the blue “happy” pieces, avoiding the cutouts, then adhere it to a white “happy” section.
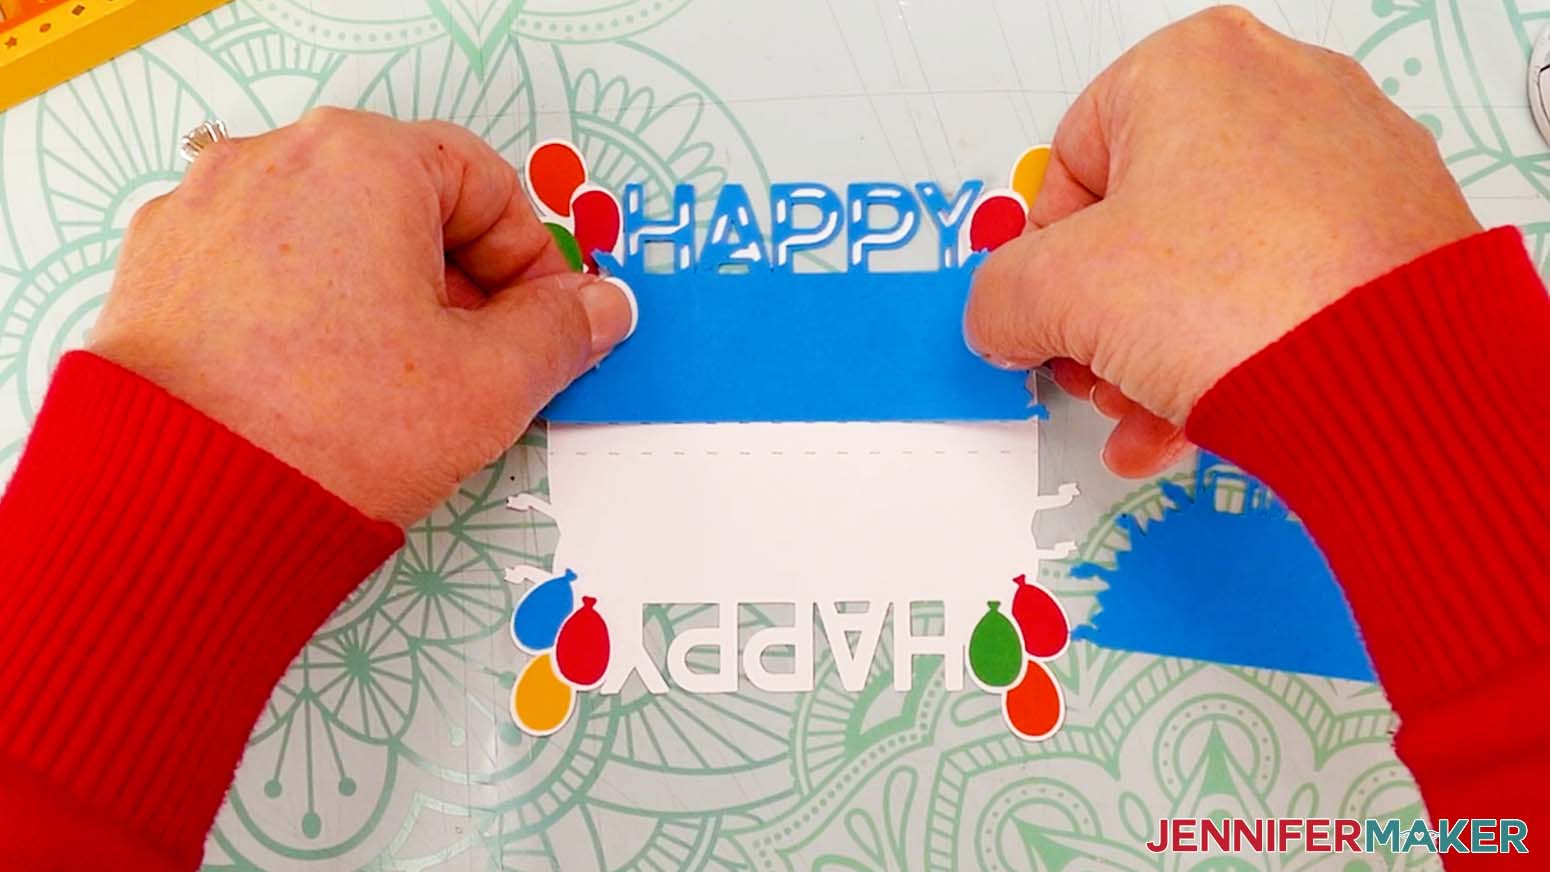
8. Repeat step 7 with the other blue “happy” piece, layering it on top of the other white “happy” section.
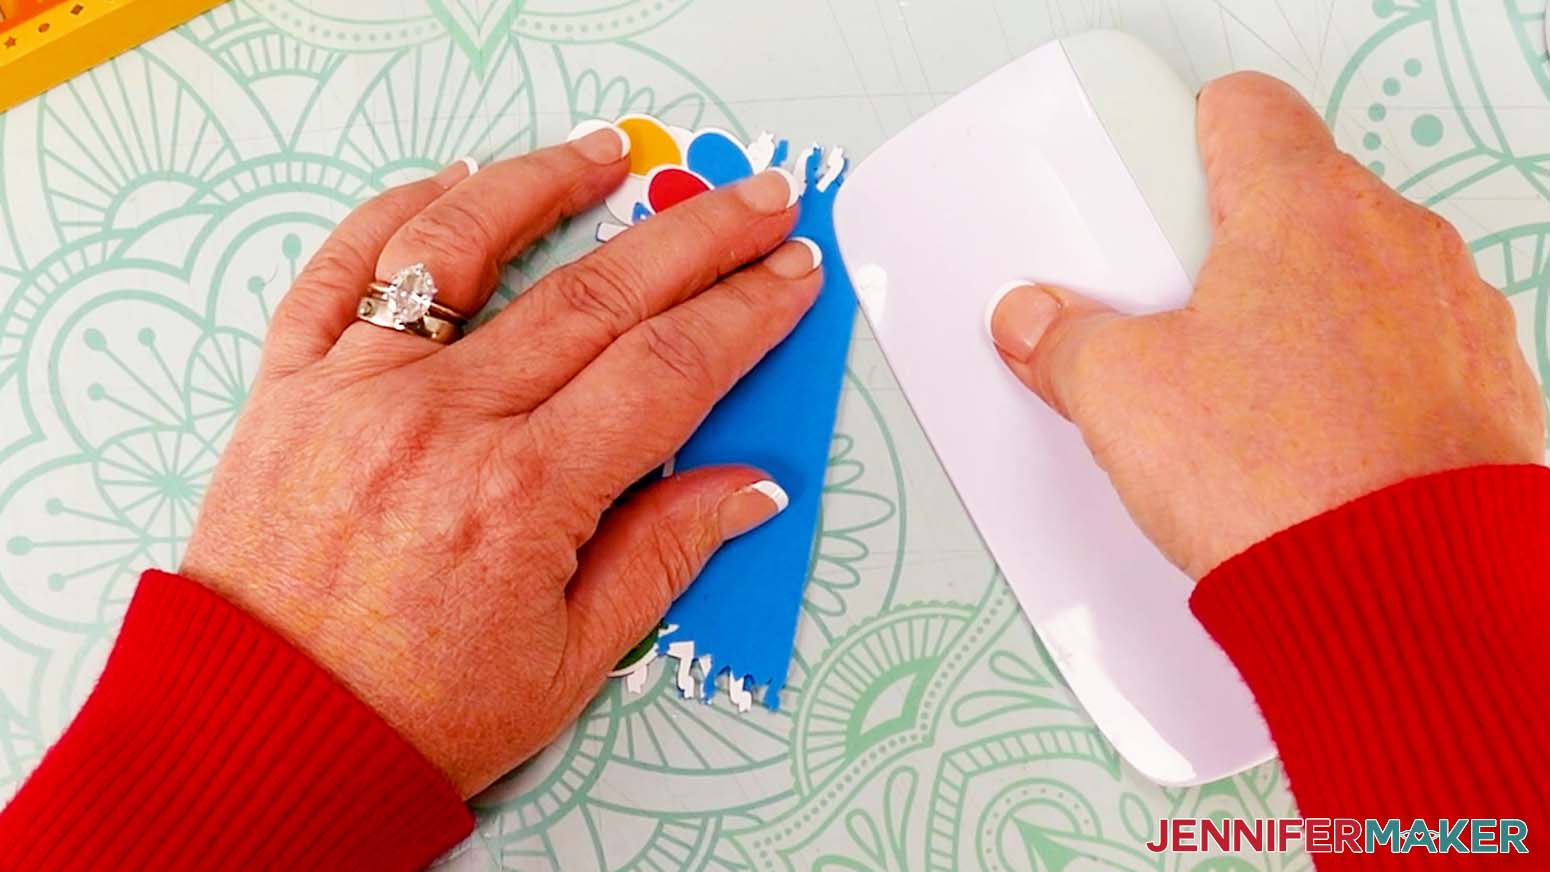
9. Fold and crease along the dashed lines on the assembled “happy” piece, so the word reads correctly from the outside.
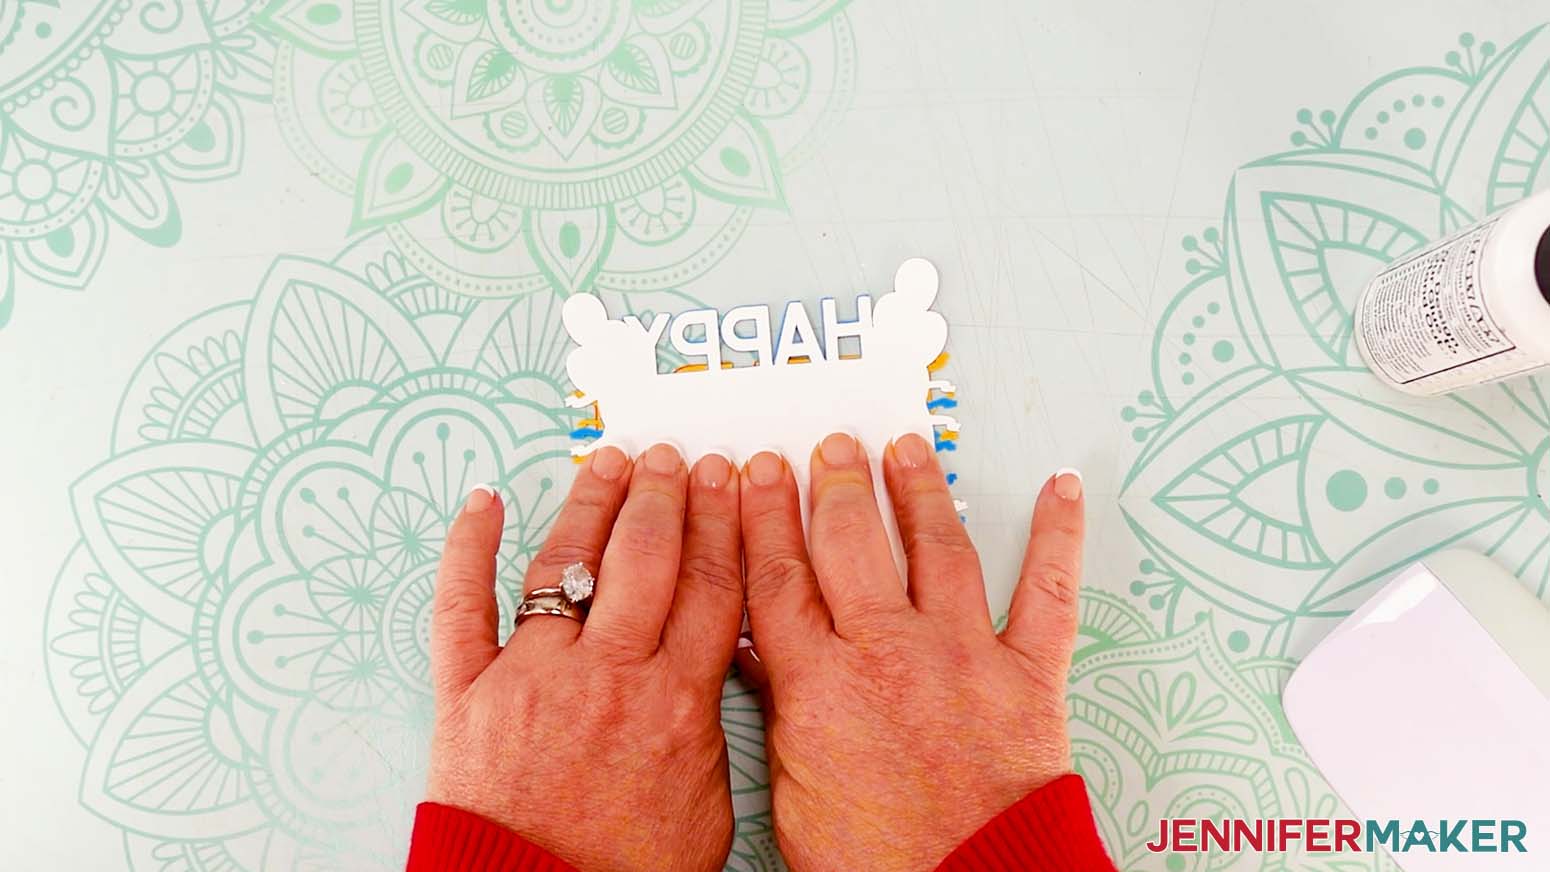
10. Apply craft glue along the bottom of the assembled “happy” piece.
11. Insert it into the middle of the assembled “birthday” piece.
12. Press down to adhere the glue.
TIP: Unfold the “happy” and “birthday” pieces so you can really press them together, then fold them back into place.
13. Place your assembled box on your work surface with the center panel face up and elastic face down inside.
14. Apply glue to the bottom of the assembled “happy birthday” sentiment.
15. Press it down diagonally onto the middle square of the box. Make sure it’s centered and the edges of the balloons and confetti pieces don’t get bent when the box sides are folded up.

VARIATION: “Celebrate!” Sentiment
1. Lay the white base piece down on your work surface.
2. Apply craft glue to the back of one blue piece, avoiding the cutouts and the backs of the star areas.
3. Align the blue piece over the white base piece, then press down to adhere.
4. Without picking up the white base piece, repeat steps 1-3, attaching the other blue piece to the white piece.
5. Apply glue to the back of a star piece and adhere it to one of the blank blue or white star areas.
NOTE: There are eight smaller stars and eight larger stars.
6. Repeat step 5 for the remaining stars.
TIP: Use tweezers for easier placement.
7. Once the glue is dry, fold along the dashed lines, using your scraper for sharp creases.
8. Apply glue to the bottom of the assembled sentiment piece.
9. Place the sentiment piece diagonally across the top of the box, then press down to adhere while the glue dries.
Add the Finishing Touches
1. Cut a piece of elastic about 5” long.
2. Fold the elastic over into a loop, matching up the ends.
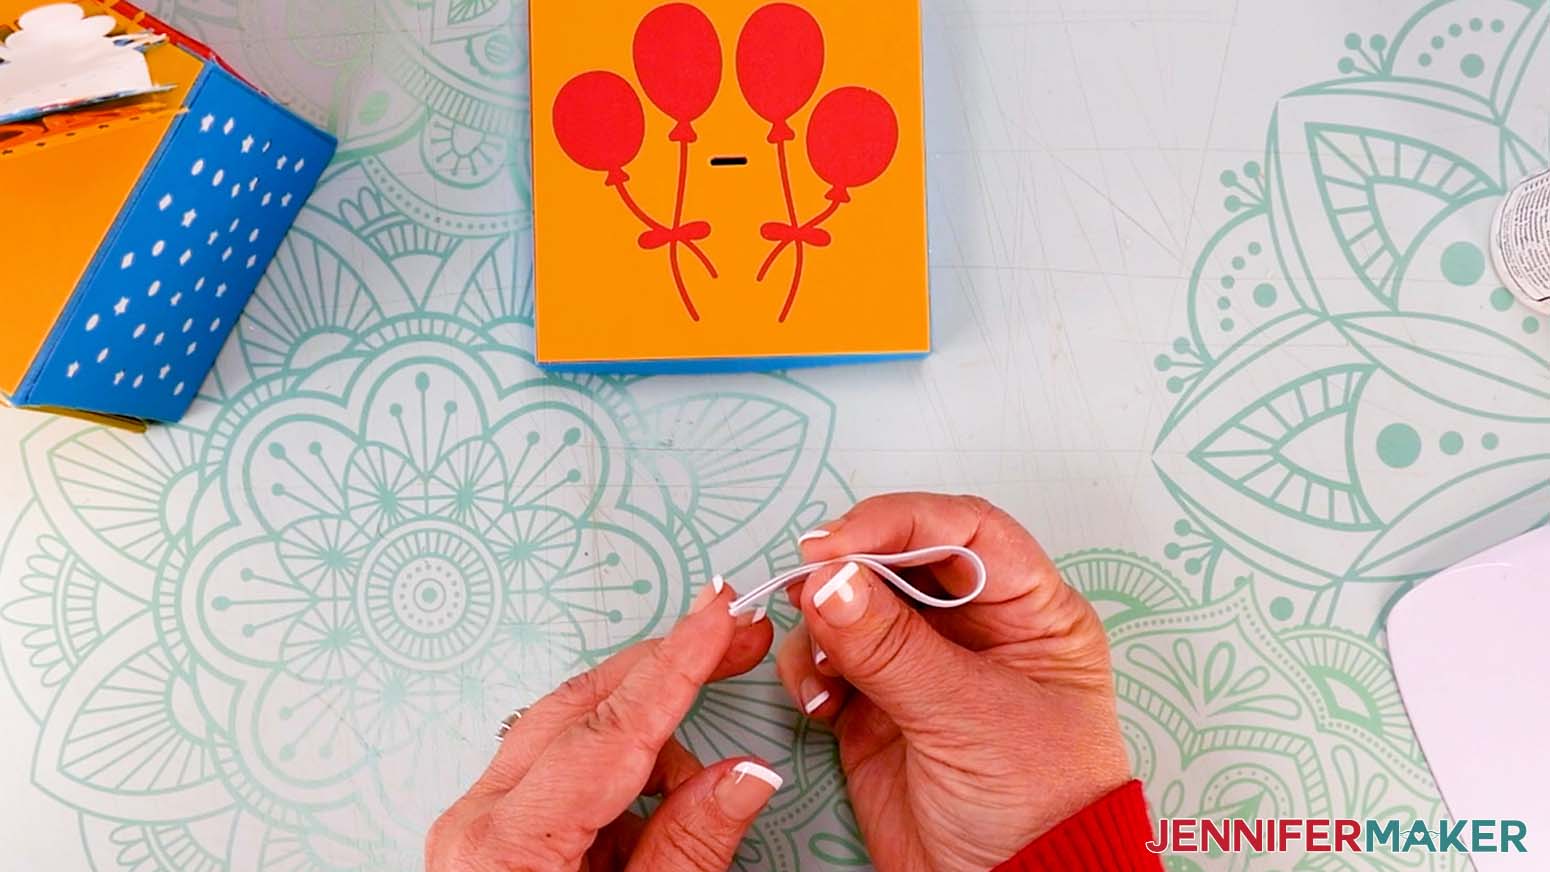
3. Insert the ends through the slot on the top of the lid piece.
4. Pull the elastic ends through about 1”.
5. Put on your hot glue finger caps.
6. Use hot glue to secure the ends of the elastic into place on the underside of the lid, opposite from one another.
7. Grab eight washers.
NOTE: If you don't want the washers to be visible, you add them under the cardstock.
8. With the box on your work surface with the sentiment face out, and your finger caps still on, apply hot glue to a washer and attach it to the inside bottom corner of a panel.
TIP: If there’s a flatter side of the washer, apply the glue to that side for a smoother attachment.
9. Hot glue one more washer on the other bottom corner of the same box panel.
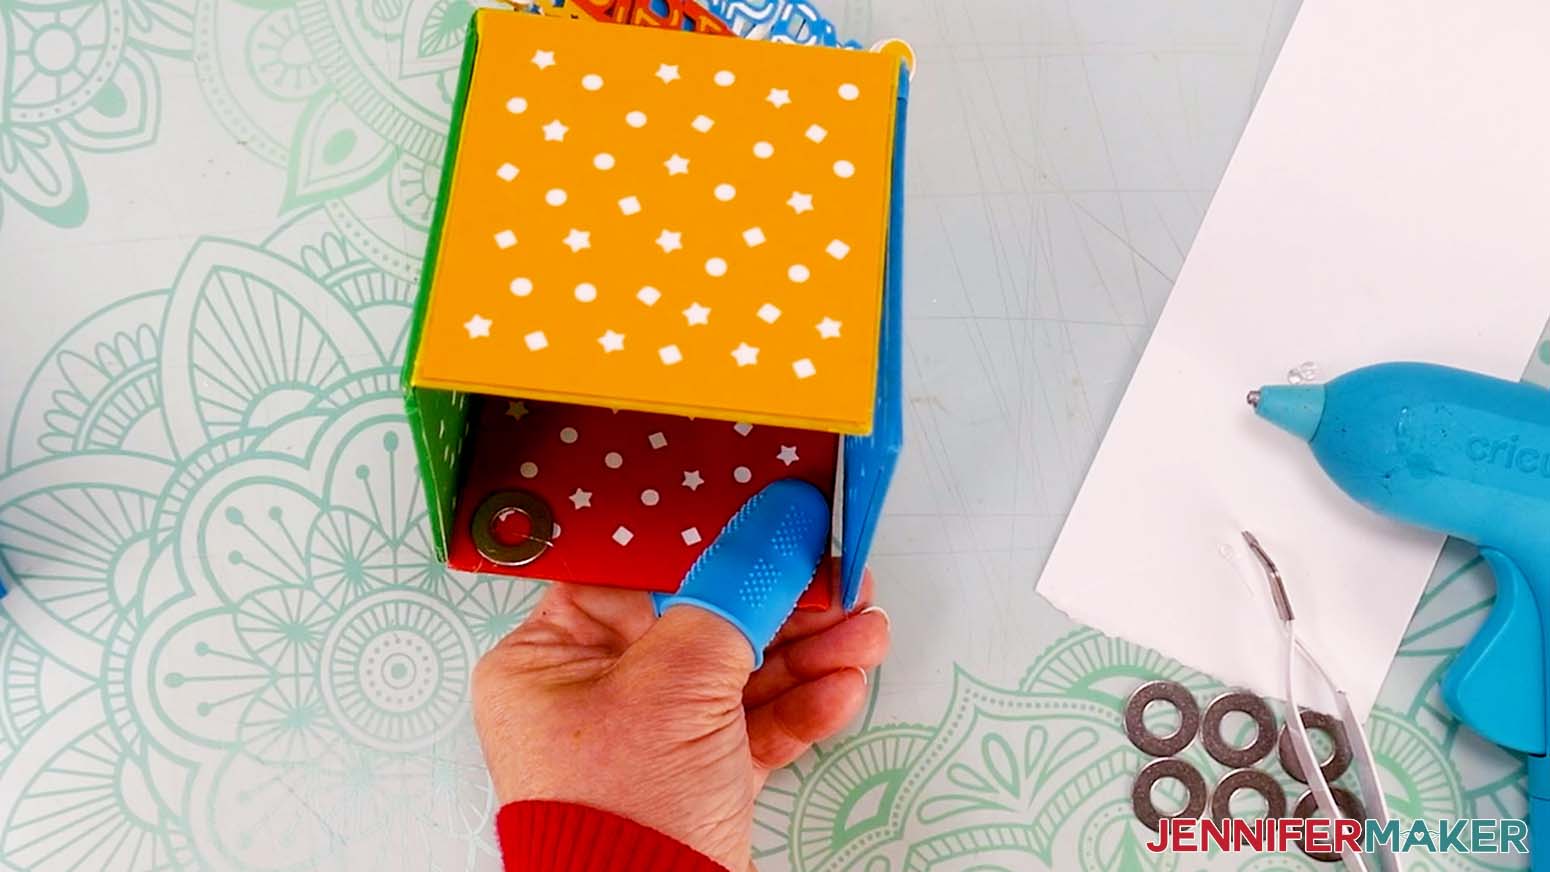
10. Repeat steps 8-9 to add two washers to each of the other three box panels.
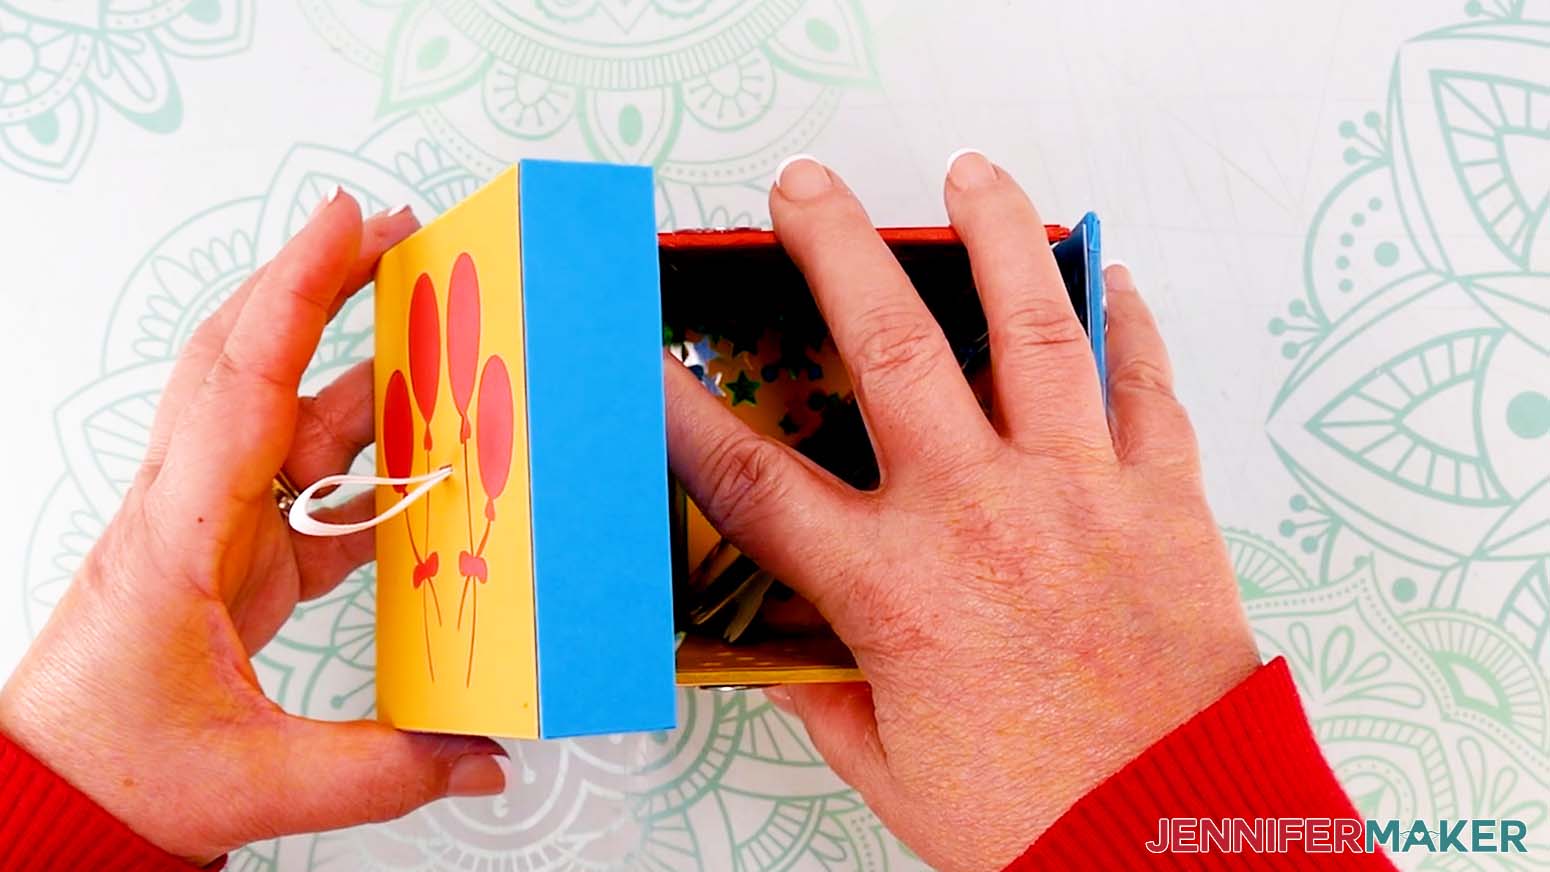
11. Once they’re dry, turn the box right side out, pulling the elastic tight, and add the lid to keep it shut.
STEP 4: SHOW IT OFF!
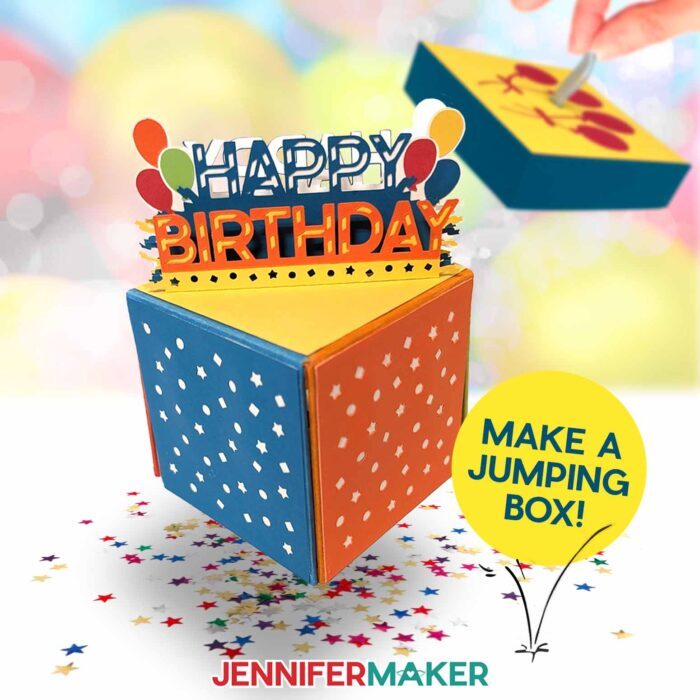
Here is what my finished cardboard jumping box looks like!
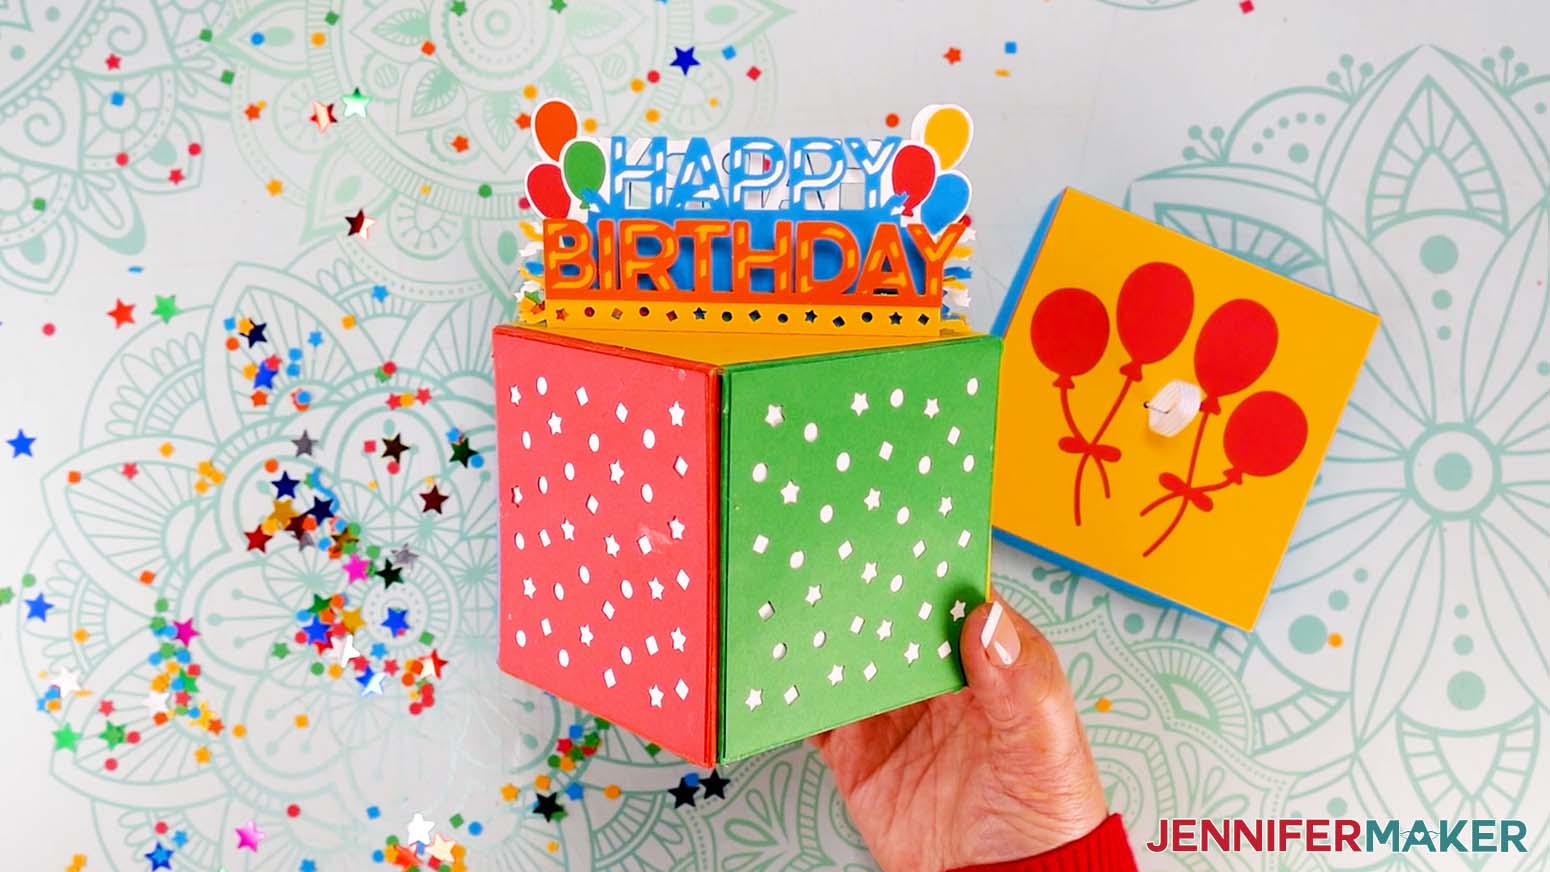
Now you can surprise a friend or family member with a fun personalized box you made. To open it, just pull the lid straight upward quickly using the elastic loop. You can even add confetti inside before closing the box.
To store your box, put it in a larger box or container with the sentiment showing and the lid off so the elastic doesn’t get too stretched out.
Notes
Typeface Used: Crafty Font
Finished Size: Approximately 4" W x 3.75" H x 4" D when closed
Answers to Your Questions About How to Cut Cardboard with Cricut
Q: What blade cuts cardboard on Cricut?
A: I’ve cut cardboard with Cricut successfully using the Knife Blade on the Maker and Maker 3, and Deep Point Blade on all Explore series and Maker machines. Cardboard is easiest cut with the Knife Blade, but the Deep Point Blade is still a great option if you don’t have one, or if you have an Explore series machine (since the Knife Blade is not compatible with those). Be sure to follow the tutorial to get the right material settings and cut pressure settings — they may not be the settings you expect!
Q: Can Cricut Fine Point Blade cut cardboard?
A: In my tests, I did not have success getting my Cricut Premium Fine-Point Blade to cut cardboard. However, there are two Cricut blades that work great for cutting cardboard: The Deep Point Blade and the Knife Blade. The Premium Fine Point blade can, however, cut a variety of materials like Kraft board (or cereal boxes), faux leather, adhesive removable or permanent vinyl, specialty vinyl, iron-on vinyl, and other materials of similar thickness.
Q: What is the thickest material a Cricut can cut?
A: You may be wondering, how thick of cardboard can Cricut Explore Air 2 cut? What about the Explore 3, or the Maker series machines? How thick of materials can they cut? According to Cricut, the Maker and Maker 3 are capable of cutting material with a maximum thickness of 3/32″ or 2.4mm, and the Explore is capable of cutting material up to 2mm. However, in my experience, each machine is different and there can be slight variances. To check if your material will fit into your Cricut, attach it to your machine mat, slide the star wheels in your machine all the way to the right, and attempt to slide the loaded mat under the bar in your machine, between the mat guides. If it fits, proceed with the cut.
Q: How do you smooth out cardboard edges?
A: A great way to cover the rough edges of your cut cardboard with Cricut is to use washi tape or masking tape! In this project, I used coordinating washi tape to decorate the edges of the box flaps. It gives a really nice, polished look to your cardboard box.
Q: What Cricut blade should I use for cardstock?
A: The Cricut Fine Point Blade is my favorite blade for cutting cardstock and a long list of materials like most other paper projects, glitter cardstock, poster board, vinyl, and most other popular materials used in many craft projects. It’s versatile, comes standard with your Cricut machine, and gives the best results on these basic materials time and time again — especially when you keep your blade clean for a nice, clean cut!
Q: What is the Cricut Knife Blade for?
A: The Cricut Knife Blade is great for cutting dense, thick materials like any type of cardboard, cardboard boxes, thick cardstock, mat board, chipboard, leather, foam, and balsa wood. Just make sure your material fits underneath the bar on your cutting machine before attempting to cut it.
Q: What Cricut materials use the Deep Point Blade?
A: The Cricut Deep Point blade and housing is great for cutting cardboard, thick cardstock, chipboard, magnet material, rubber sheets, foam sheets, and other thicker materials. Just make sure your material fits underneath the bar on your cutting machine before attempting to cut it.
Q: Should I get a Knife Blade or Deep Point Blade for Cricut?
A: If you have medium-weight materials, the Deep Point Blade may be great for you. It’s compatible with the Maker and Explore series Cricut machines. It’s good for cutting more intricate designs, while the Knife Blade is better for cutting less intricate cuts into heavy-weight materials up to 2mm thick. It’s also only compatible with the Cricut Maker and Maker 3. Either blade works well to cut pieces for your cardboard jumping box.
Get my free SVG files to make a Cardboard Jumping Box!
I’d love to see YOUR amazing cardboard jumping boxes and other projects when you learn how to cut cardboard with Cricut! Please share a photo in our Facebook group or on social media and tag me with #jennifermaker.
Love,

Want to remember this? Save this tutorial on How to Cut Cardboard with Cricut to your favorite Pinterest Board!