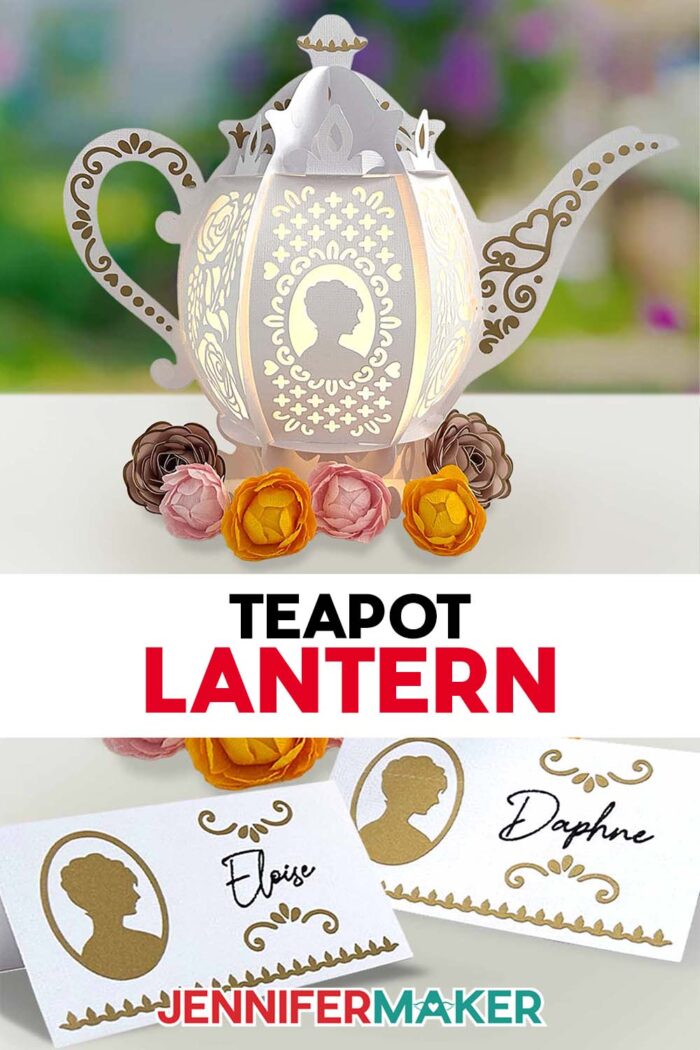
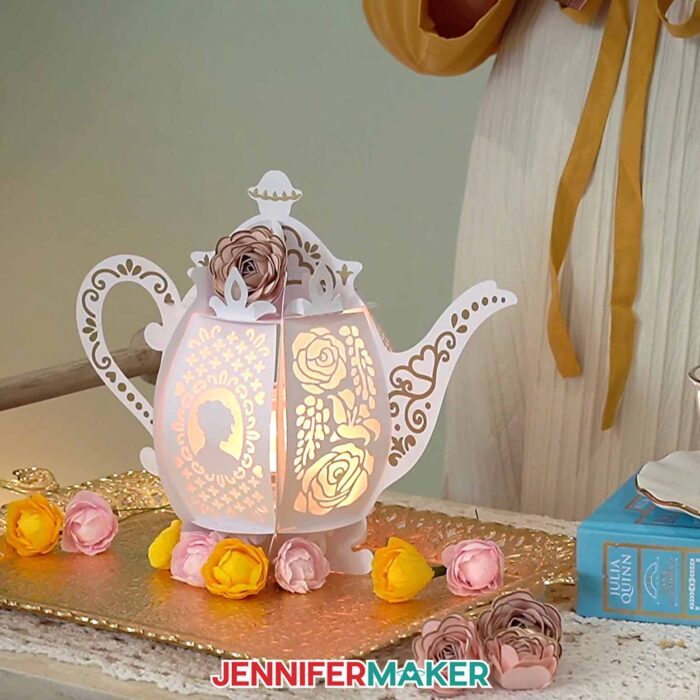
Learn how to make a romantic teapot lantern to light up your next Bridgerton watch party!
Dearest gentle reader, allow me to confess a most embarrassing folly. Not long ago, I attempted to set a proper tea at home — cups aligned, sweets arranged, napkins folded with care. Yet, the moment evening crept in, my “occasion” fell rather flat. For all my efforts, the room lacked that one ingredient required to truly set the mood: a warm, inviting glow. And that is precisely why my imagination led me to this paper teapot lantern. It is not a teapot meant for pouring, but a teapot meant for enchanting: an illuminated little treasure that seems as though it has wandered off a Bridgerton tea tray and into your craft room, determined to make romance of the ordinary.
Watch the full step-by-step tutorial on how to make a teapot lantern:

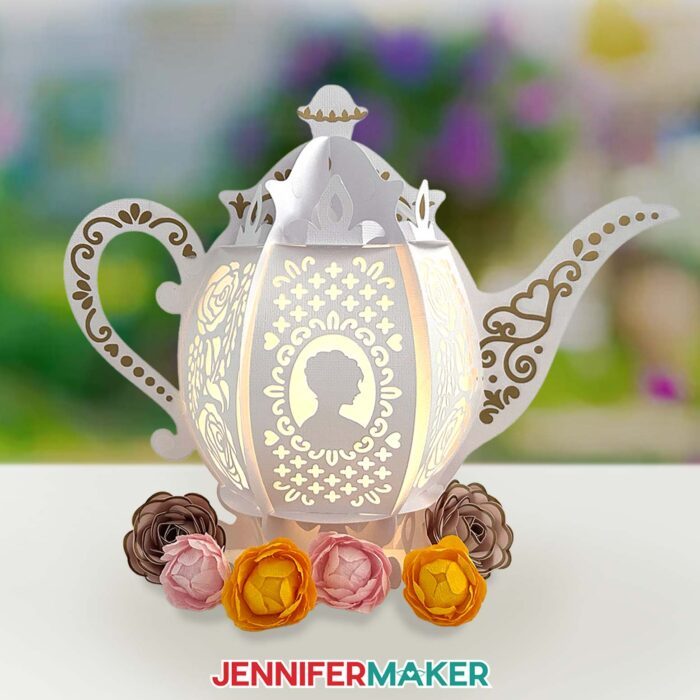
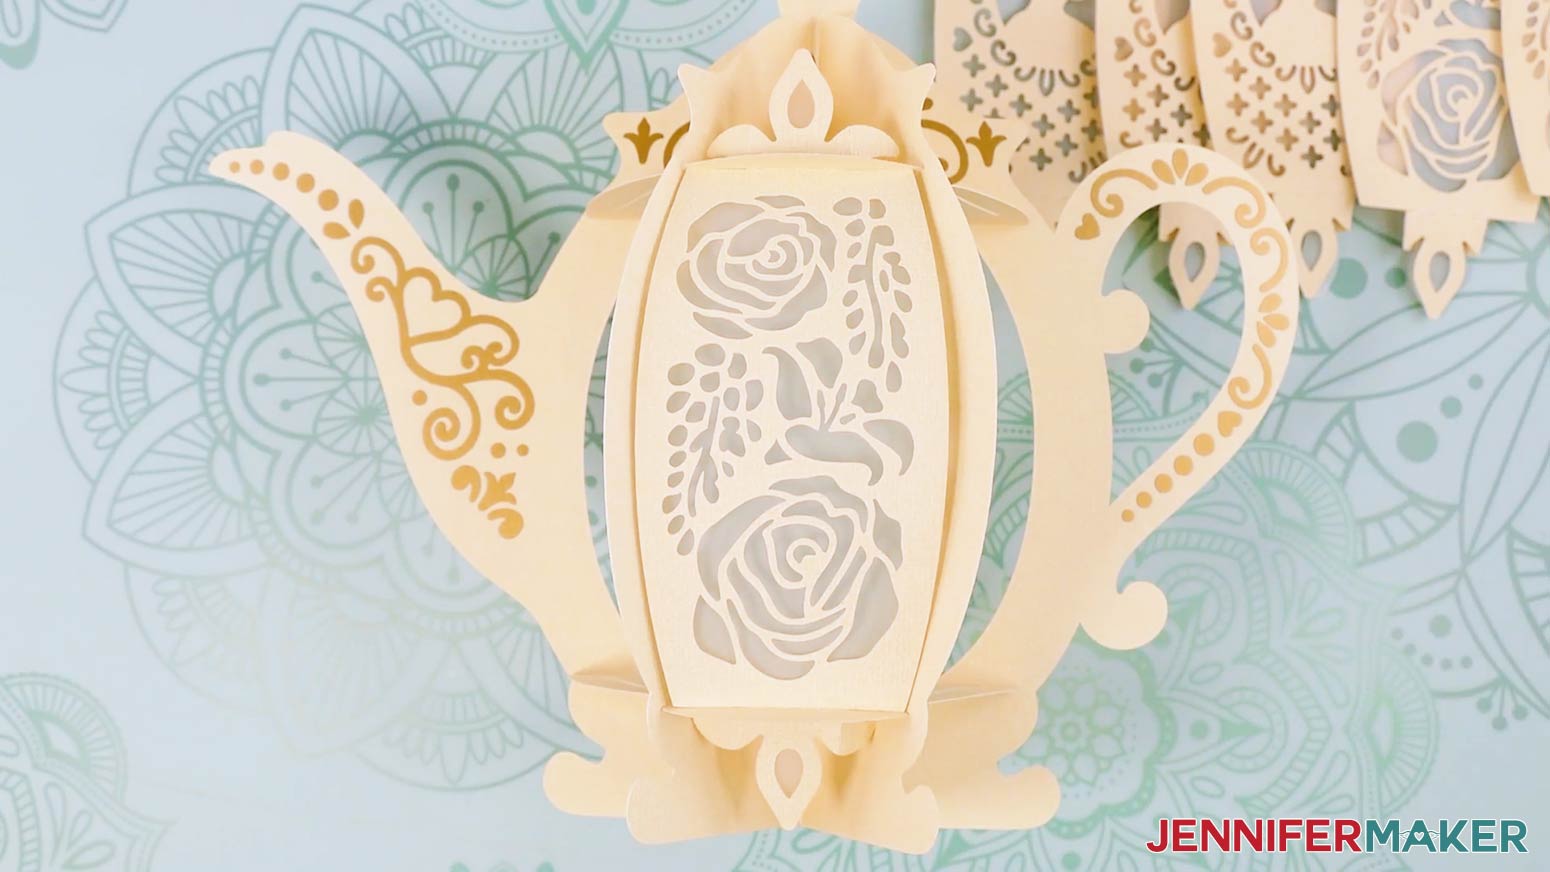
This Cricut teapot lantern is the very picture of candlelit charm, with delicate panels that let the light shine from within to awaken a dreary night. The secret, of course, lies in the vellum diffusers — six translucent inserts that soften the brightness and transform simple illumination into swoon-worthy radiance. When lit, your DIY teapot lantern glows with a gentle warmth that feels positively poetic, perfect for a Bridgerton watch party, a bridal shower dressed in pearls, or an evening spent lingering over a well-loved novel while the world outside grows quiet.
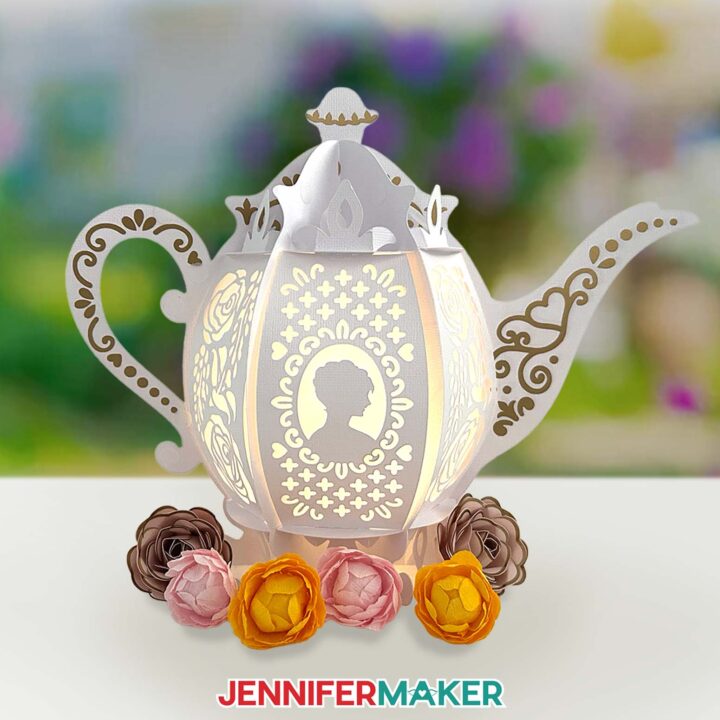
And yet, what makes this paper teapot lantern truly worthy of admiration is its fine detail. A lady may wear fine silk and yet still be overlooked without her jewels; likewise, this teapot is not complete without its golden adornments. The intricate gold vinyl decals — placed upon the lid, handle, and spout — give the entire piece a rare Regency sparkle. With the proper use of StandardGrip transfer tape and a steady hand, each detail settles into place, lending your lantern that “diamond of the season” air.

And while it may appear skillfully extravagant, the truth is, this romantic teapot lantern is crafted from delightfully straightforward materials. The frame and base are cut from 80 lb textured cream cardstock, chosen for its vintage elegance and sturdy posture. The vellum light diffusers lend softness and mystery to the panels, while Cricut Value Vinyl in gold provides the sort of gleam that makes one want to declare it “positively splendid.” As for the light within, fairy lights are particularly suited to this creation, as they offer a gentle, twinkling glow far more romantic than a night sky full of stars. Puck lights and tea lights may also be used, but fairy lights truly bring whimsical charm and magic.
If you are determined to have your own teapot lantern stand proud and proper, I strongly encourage you to reference the full video tutorial while you craft. It shows you exactly how to prepare the design files, choose between score lines or dashed cut lines for folding, and assemble the frame so it holds itself with the confidence of a debutante at her first ball. You will be guided through applying vinyl to cardstock without tearing, locking each panel neatly in place, and tucking your lights inside so the glow distributes evenly — no harsh hotspots or awkward shadows, only soft romance.
You may, of course, obtain the free design files from my Resource Library by searching for Design #800. Then follow along as your Cricut teapot lantern comes together piece by piece, like all the bells and whistles of a grand ball.
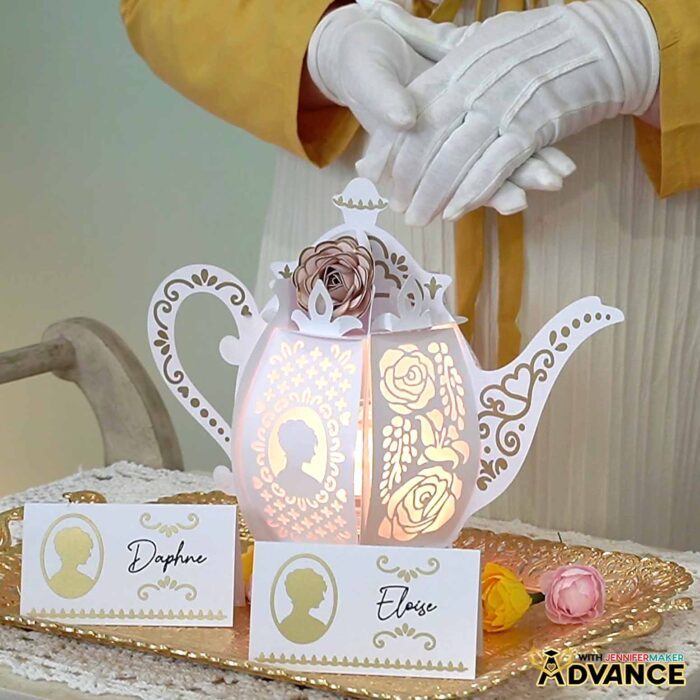
And should you wish your table to feel even more enchanting (because what is a tea party without the finest little courtesies?) I have a most fitting companion craft. Inside my Advance with JenniferMaker membership program, you will find a workshop that teaches you how to create a custom name place card for a tea party, perfectly suited to pair with your glowing teapot lantern. Learn more about ADVANCE here!
When at last your DIY paper teapot lantern is complete and glowing sweetly on your table, do not be surprised if you linger nearby, pretending to tidy while secretly admiring it. For this is not merely a craft — it is atmosphere, romance, and a little bit of Regency magic you made with your own hands.
Do you want to learn how to make a Bridgerton-worthy teapot lantern? Let me show you how fun and easy it is! This post contains some affiliate links for your convenience (which means if you make a purchase after clicking a link I will earn a small commission but it won’t cost you a penny more)! Read my full disclosure policy.
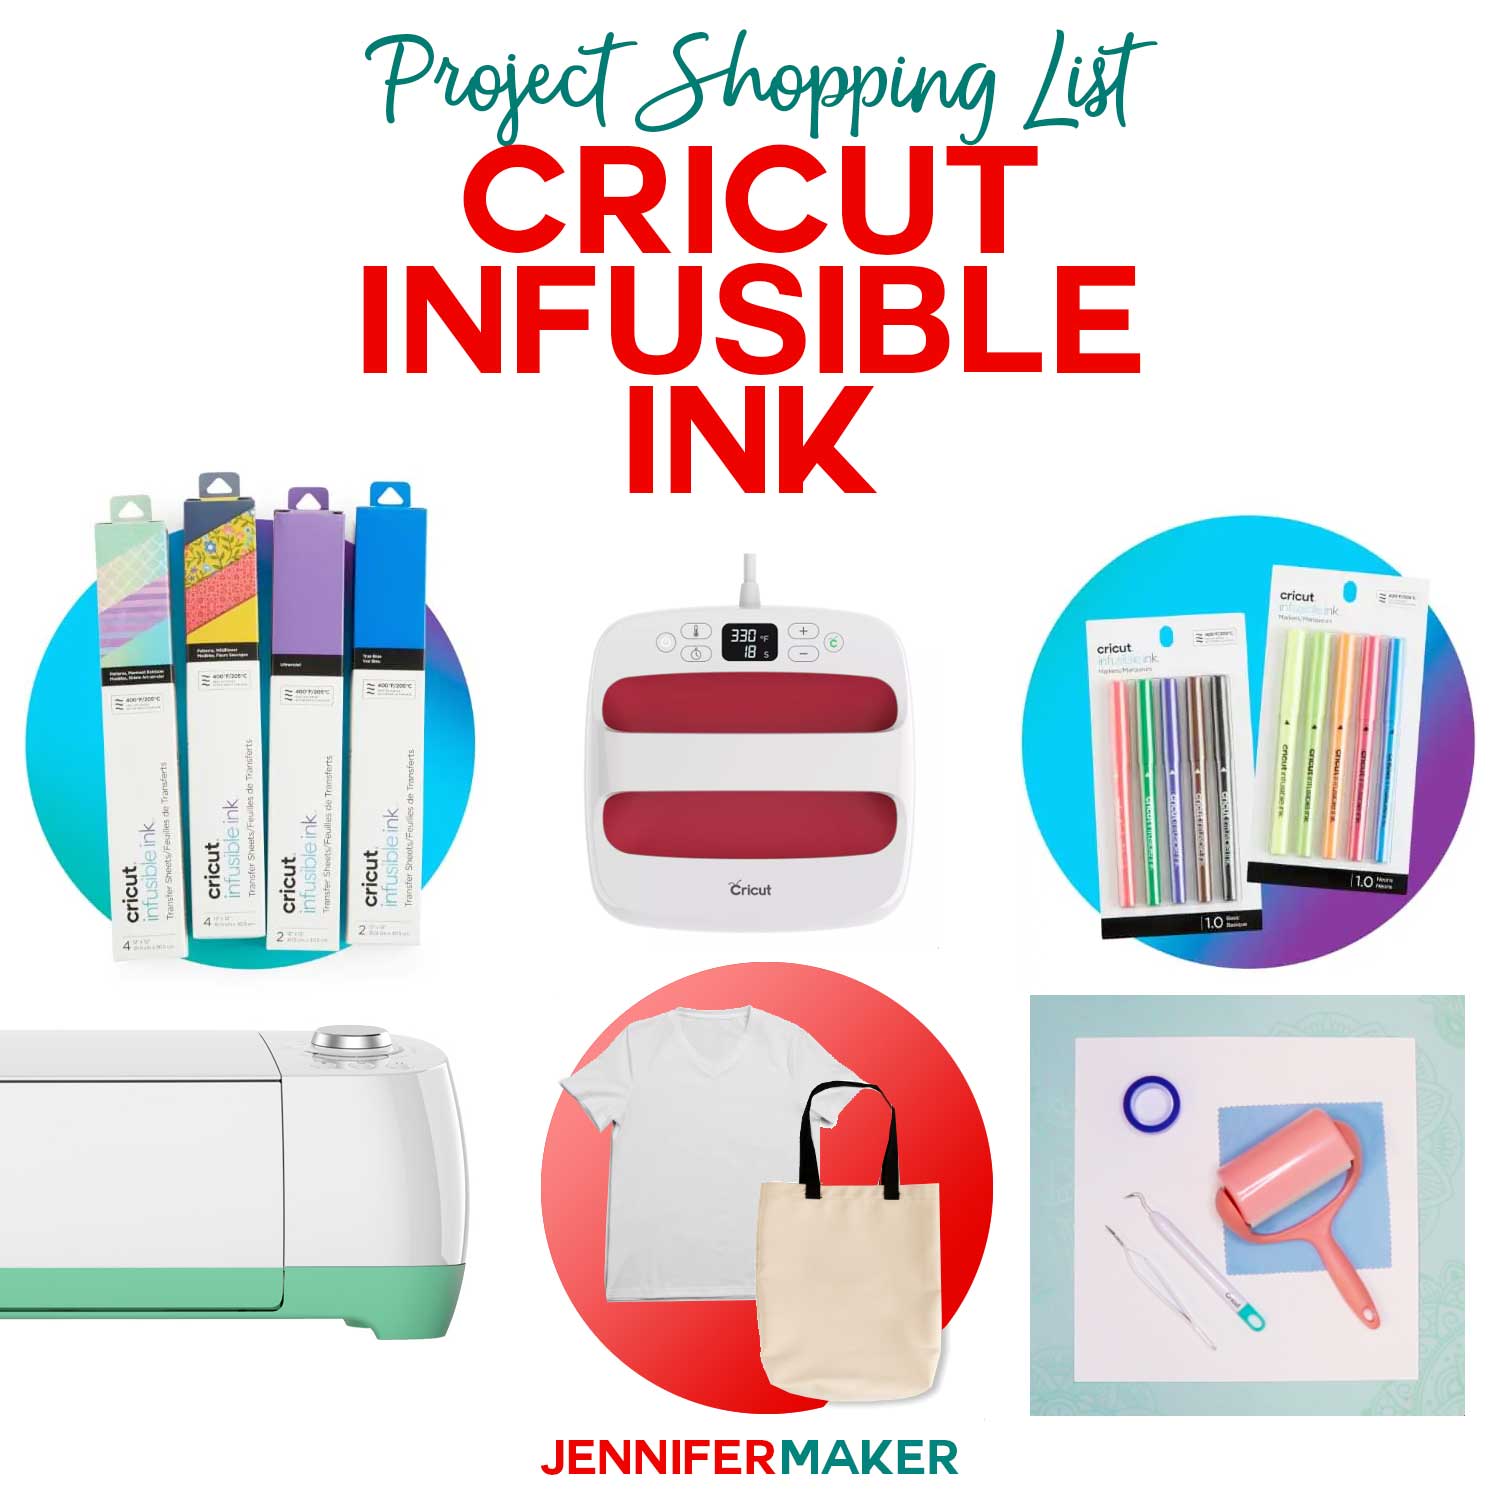
Materials to Make a Teapot Lantern
View my Amazon shopping list with the exact items I used.
- Three to Five (3-5) Sheets of 12″ x 12″ 80 lb. Solid Core White or Cream Cardstock -OR-
- Three to Five (3-5) Sheets of 12” x 12” 80 lb. Solid Core Neutrals Cardstock
- One to Two (1-2) Sheets of 12″ x 12″ Vellum (any color for optional diffuser panels)
- Gold Permanent Vinyl (I used Cricut Value Vinyl)
- Cricut StandardGrip Transfer Tape
- One (1) Strand of LED Fairy Lights -OR-
- One (1) Remote-Controlled LED Tea Light -OR-
- One (1) Remote-Controlled LED Puck Light -AND-
- Three (3) AAA Batteries (for LED puck light)
- OPTIONAL: Crepe Paper (any colors for DIY flower embellishments)
- OPTIONAL: 8.5″ x 11″ 65 lb. Solid Core Cardstock (any colors for DIY flower embellishments)
- A way to cut your materials – I’m using the Cricut Maker 4, but you can use any Cricut Maker Series machine, a Cricut Explore Series machine, or the Cricut Venture
- Cricut Green StandardGrip Machine Mat 12″ x 12″
- Cricut Blue LightGrip Machine Mat 12″ x 12″ (optional for diffuser pieces)
- Scoring Stylus (optional for files with score lines) -OR-
- Single Scoring Wheel (optional for files with score lines)
- Craft Glue (I used Bearly Art Precision Craft Glue)
- Brayer
- Spatula
- Scraper
- Weeding Tool
- Tweezers
- Scissors
- Paper Trimmer (optional for cutting the vinyl to size)
- OPTIONAL: Cricut Rotary Blade with Housing (optional for cutting DIY crepe paper flowers on a Maker)
- OPTIONAL: Wire Cutters (for cutting the wire stems for DIY crepe paper flower embellishments)
- OPTIONAL: Hot Glue Gun & Glue Sticks (for gluing the DIY cardstock flower embellishments)
- OPTIONAL: Silicone Finger Protectors (for use with hot glue)
- Design #800 (My free SVG/DXF/PDF design files are available in my free library – get the password by filling out the form at the bottom of this page)

How to Make a Teapot Lantern
Teapot Lantern
Learn how to make an intricate teapot lantern out of cardstock, vinyl, and vellum!
Materials
- Three to Five (3-5) Sheets of 12" x 12" 80 lb. Solid Core White or Cream Cardstock -OR-
- Three to Five (3-5) Sheets of 12” x 12” 80 lb. Solid Core Neutrals Cardstock
- One to Two (1-2) Sheets of 12" x 12" Vellum (any color for optional diffuser panels)
- Gold Permanent Vinyl (I used Cricut Value Vinyl)
- Cricut StandardGrip Transfer Tape
- One (1) Strand of LED Fairy Lights -OR-
- One (1) Remote-Controlled LED Tea Light -OR-
- One (1) Remote-Controlled LED Puck Light -AND-
- Three (3) AAA Batteries (for LED puck light)
- OPTIONAL: Crepe Paper (any colors for DIY flower embellishments)
- OPTIONAL: 8.5" x 11" 65 lb. Solid Core Cardstock (any colors for DIY flower embellishments)
- Design #800 (My free SVG/PDF/DXF design files are available in my free resource library - get the password by filling out the form at the bottom of this page)
Tools
- A way to cut your materials - I’m using the Cricut Maker 4, but you can use any Cricut Maker Series machine, a Cricut Explore Series machine, or the Cricut Venture
- Cricut Green StandardGrip Machine Mat 12" x 12"
- Cricut Blue LightGrip Machine Mat 12" x 12" (optional for diffuser pieces)
- Scoring Stylus (optional for files with score lines) -OR-
- Single Scoring Wheel (optional for files with score lines)
- Craft Glue (I used Bearly Art Precision Craft Glue)
- Brayer
- Spatula
- Scraper
- Weeding Tool
- Tweezers
- Scissors
- Paper Trimmer (optional for cutting the vinyl to size)
- OPTIONAL: Cricut Rotary Blade with Housing (optional for cutting DIY crepe paper flowers on a Maker)
- OPTIONAL: Wire Cutters (for cutting the wire stems for DIY crepe paper flower embellishments)
- OPTIONAL: Hot Glue Gun & Glue Sticks (for gluing the DIY cardstock flower embellishments)
- OPTIONAL: Silicone Finger Protectors (for use with hot glue)
Instructions
STEP 1: GET MY FREE TEAPOT LANTERN DESIGNS
First, download my Teapot Lantern files from my free library – look for Design #800. Alternatively, you can use the Save This Project form near the top of this post and the design link will be emailed to you.
In the SVG folder, you’ll find “score” and “no-score” versions of my teapot lantern design. The “score” version requires a Scoring Stylus or Single Scoring Wheel to create smooth lines for folding and alignment. If you don’t have a scoring tool, or if you prefer dashed cut lines, you can use the “no-score” version instead.
There is also a DXF folder with cut files, and a PDF folder with versions you can print and cut by hand.
TIP: If you’re not sure how to upload, go to jennifermaker.com/svgs to learn how to unzip and upload SVG files.
STEP 2: PREPARE AND CUT YOUR TEAPOT LANTERN DESIGN
CRICUT DESIGN SPACE
- In Cricut Design Space, open a blank Canvas.
NOTE: If you’re new to using Cricut Design Space, go to cricutkickoff.com for my introductory tutorial on Design Space basics. - Click “Upload” and then “Upload Image.”
- Click “Browse” and select the lantern SVG file you want to use.
NOTE: I’ll demonstrate with the “no-score” version of the file. If you’re cutting the “score” version, follow the steps from my scoring tool tutorial to adjust your file. - Click “Open,” and then “Continue.”
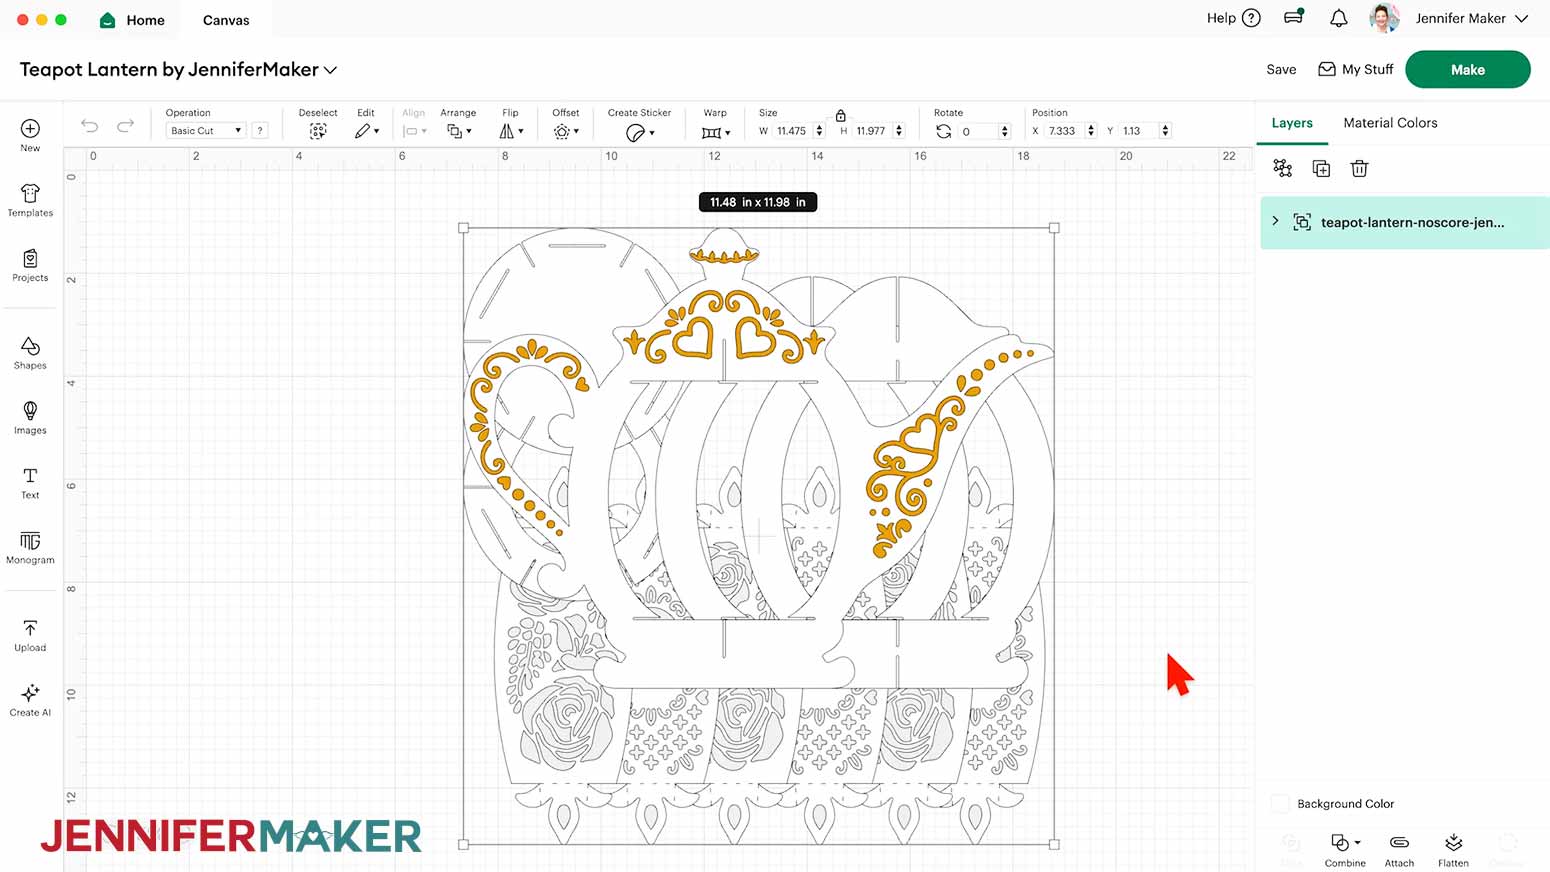
- Click “Upload” to add the design to your Canvas.
TIP: You can click the minus (-) icon in the lower left corner to zoom out and see everything on your canvas.
- Click “Save” and give your project a name so you can find it easily.
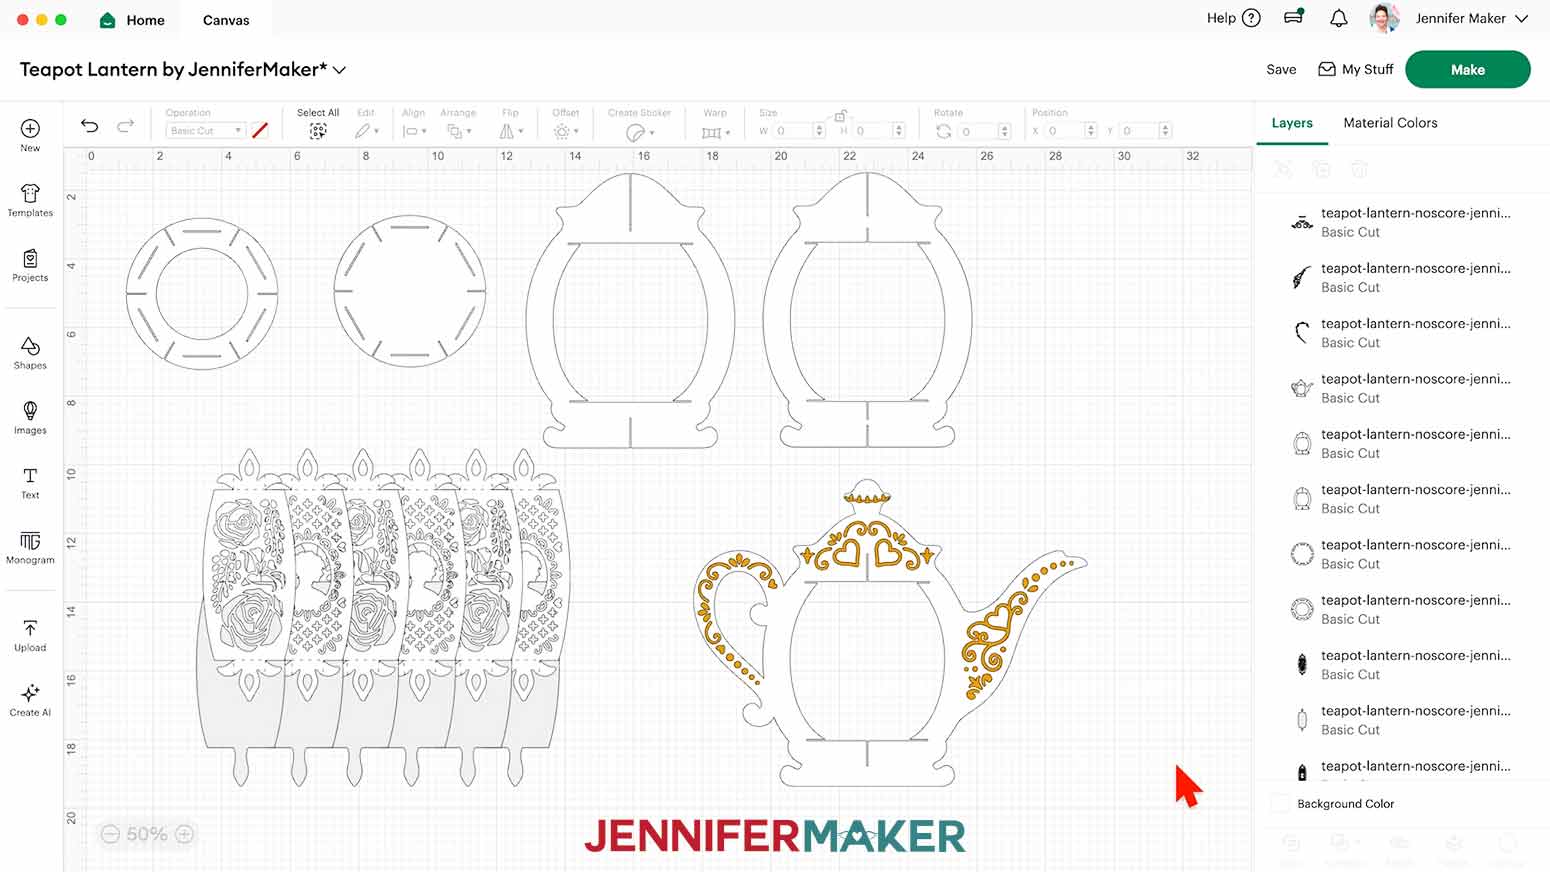
- “Ungroup” the design to work with the elements separately. You can drag them apart to see everything as needed.
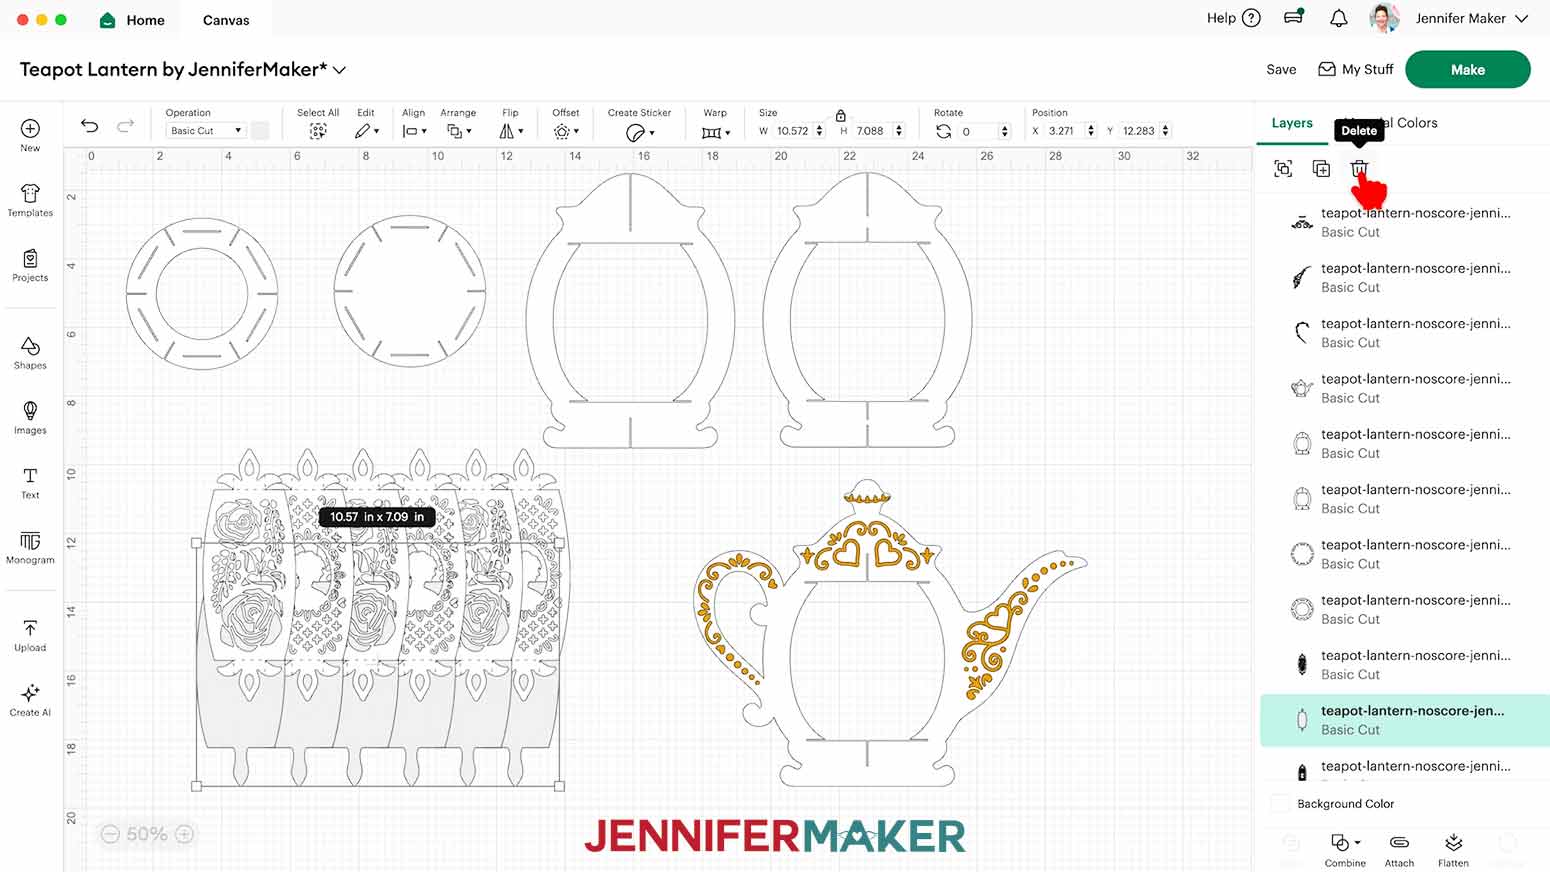
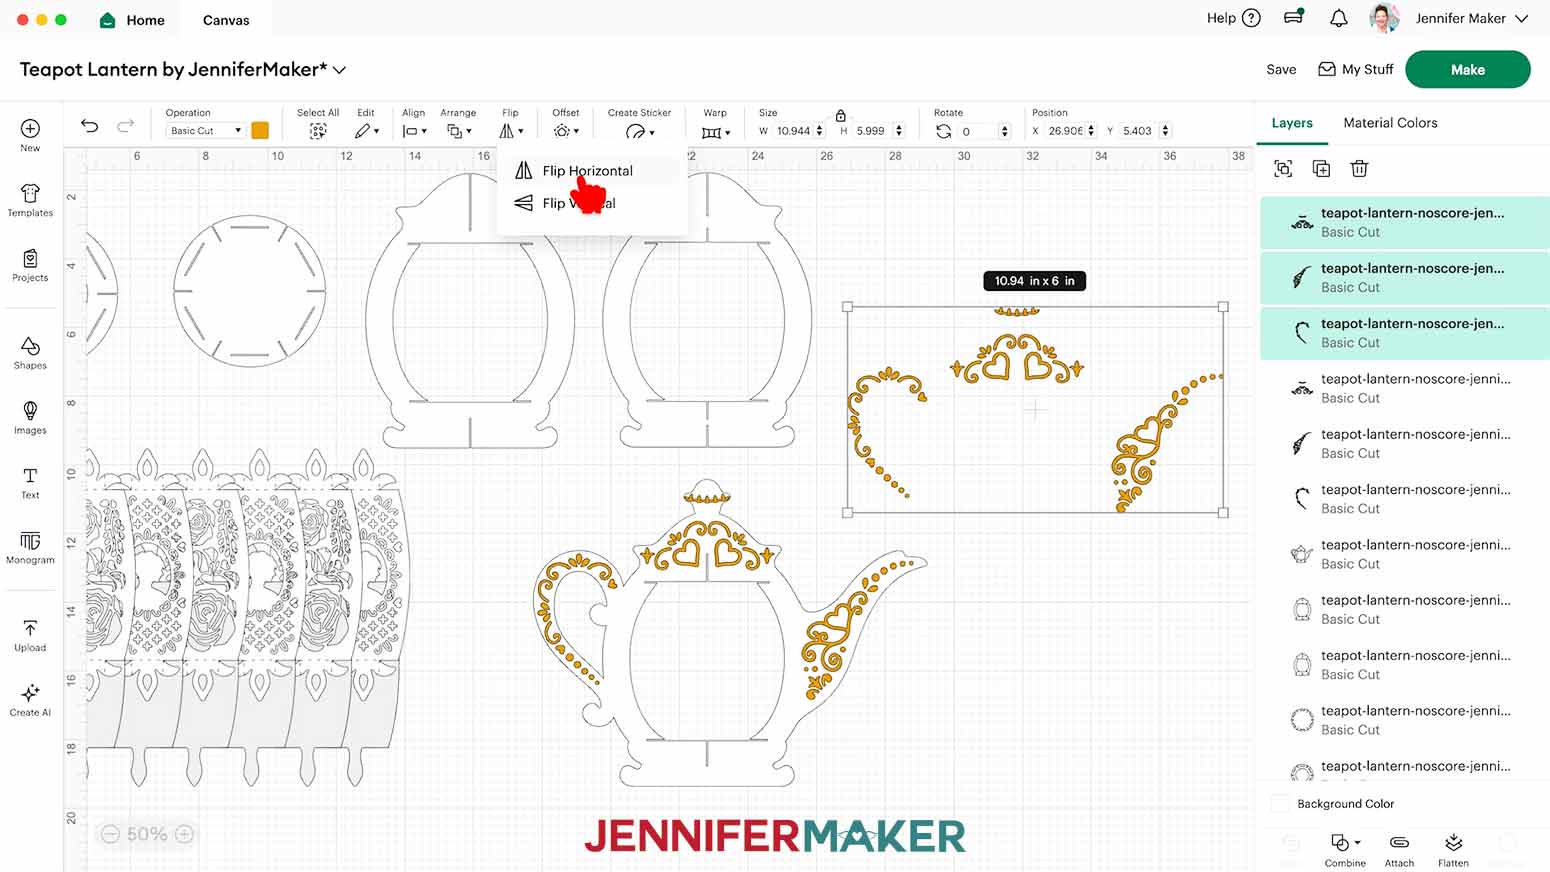
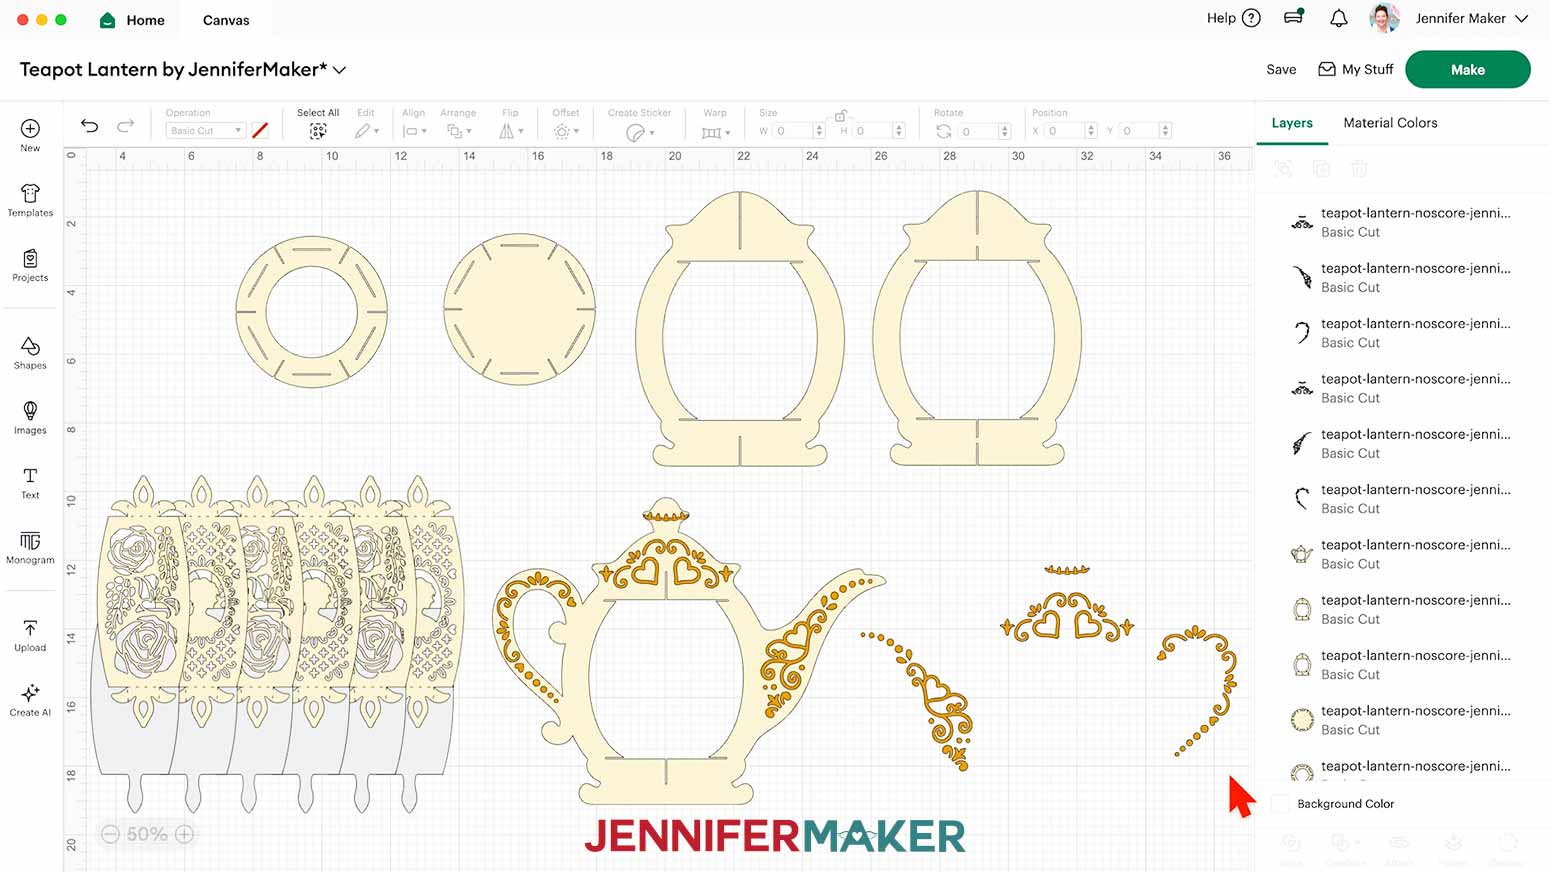
NOTE: On your Canvas, you'll have three white frame pieces (one in the shape of a teapot), two white circular base pieces, six white panels for the lantern base, and six optional gray diffuser panels. The teapot frame also has gold decorative pieces for its lid, handle, and spout, which we’ll cut from permanent vinyl. - If you don’t want to cut the diffuser pieces, drag the decorative panels away to expose the gray diffuser layers. Select the diffuser pieces and click the “Trash” icon to delete them.
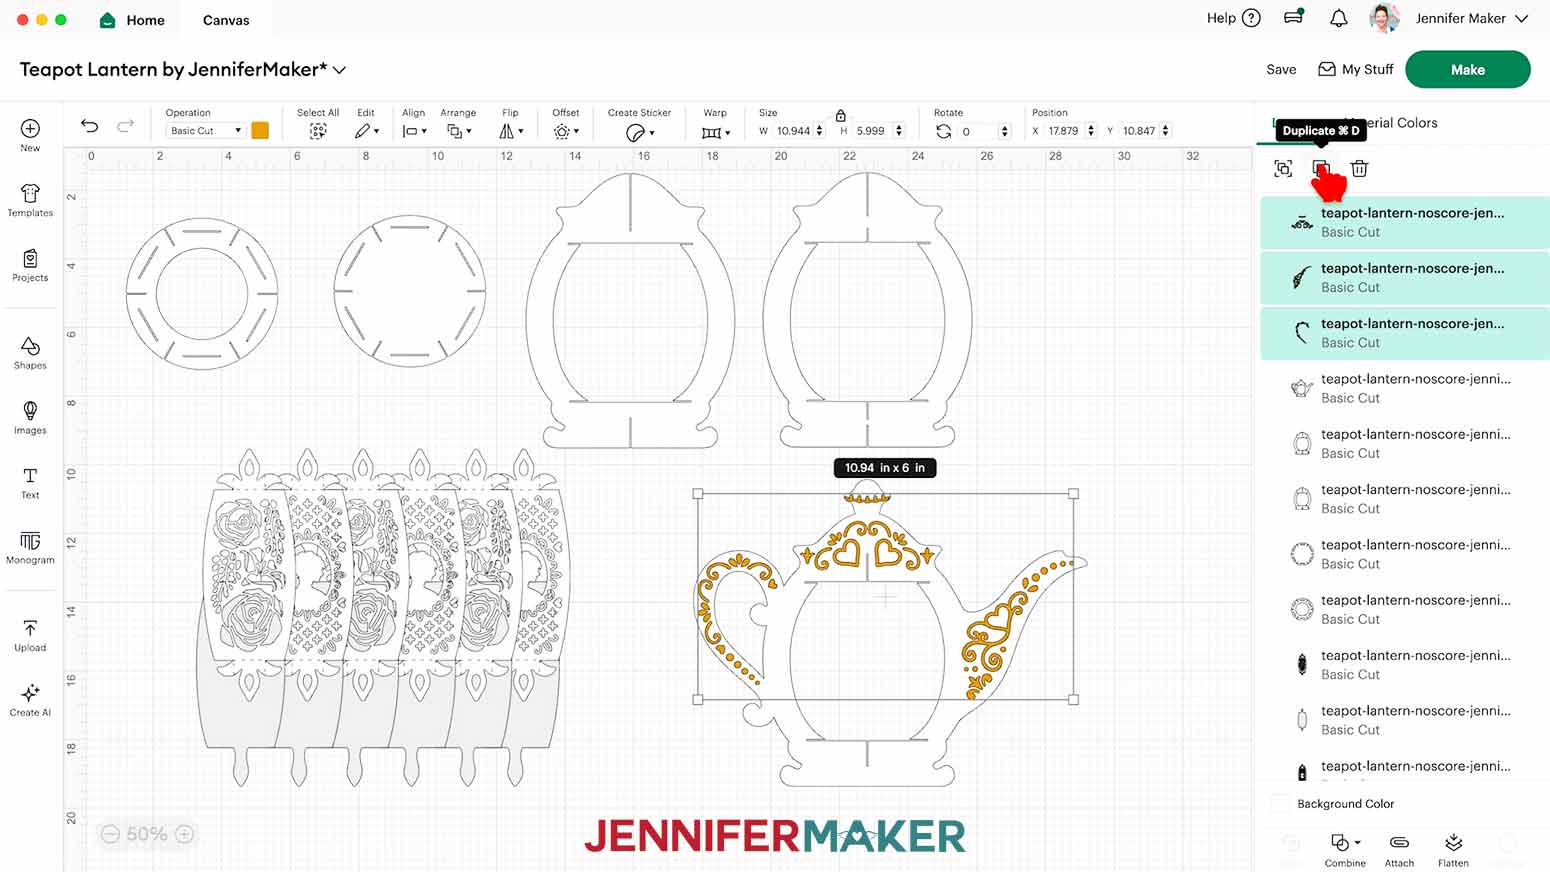
NOTE: I’ll keep my diffuser pieces. - If you’d like your lantern to have decorations on the back of the teapot as well, hold down the “Shift” key on your keyboard and click each of the three gold detail pieces at the top of the Layers Panel to select them all at the same time.
- Click the “Duplicate” icon to create a copy of all three pieces, then move them to the side.
- Then, with the duplicated elements still selected, click “Flip” and “Flip Horizontal” so the pieces will match the orientation correctly on the back side of the teapot frame piece.
NOTE: You may have a “Flip Horizontal” icon on your toolbar. - To change the color of a piece to match the cardstock you’ll cut it from, select the piece in the Layers Panel, click the Color Box next to “Operation,” and choose a new option.
NOTE: If the piece is in a grouped layer, click the small arrow to expand the group and then select the single piece you want to change. - If you’re cutting the “no-score” version of the lantern, your project is ready to cut!
CUTTING
- Make sure the correct machine is selected in the top right.
- Click “Make.”
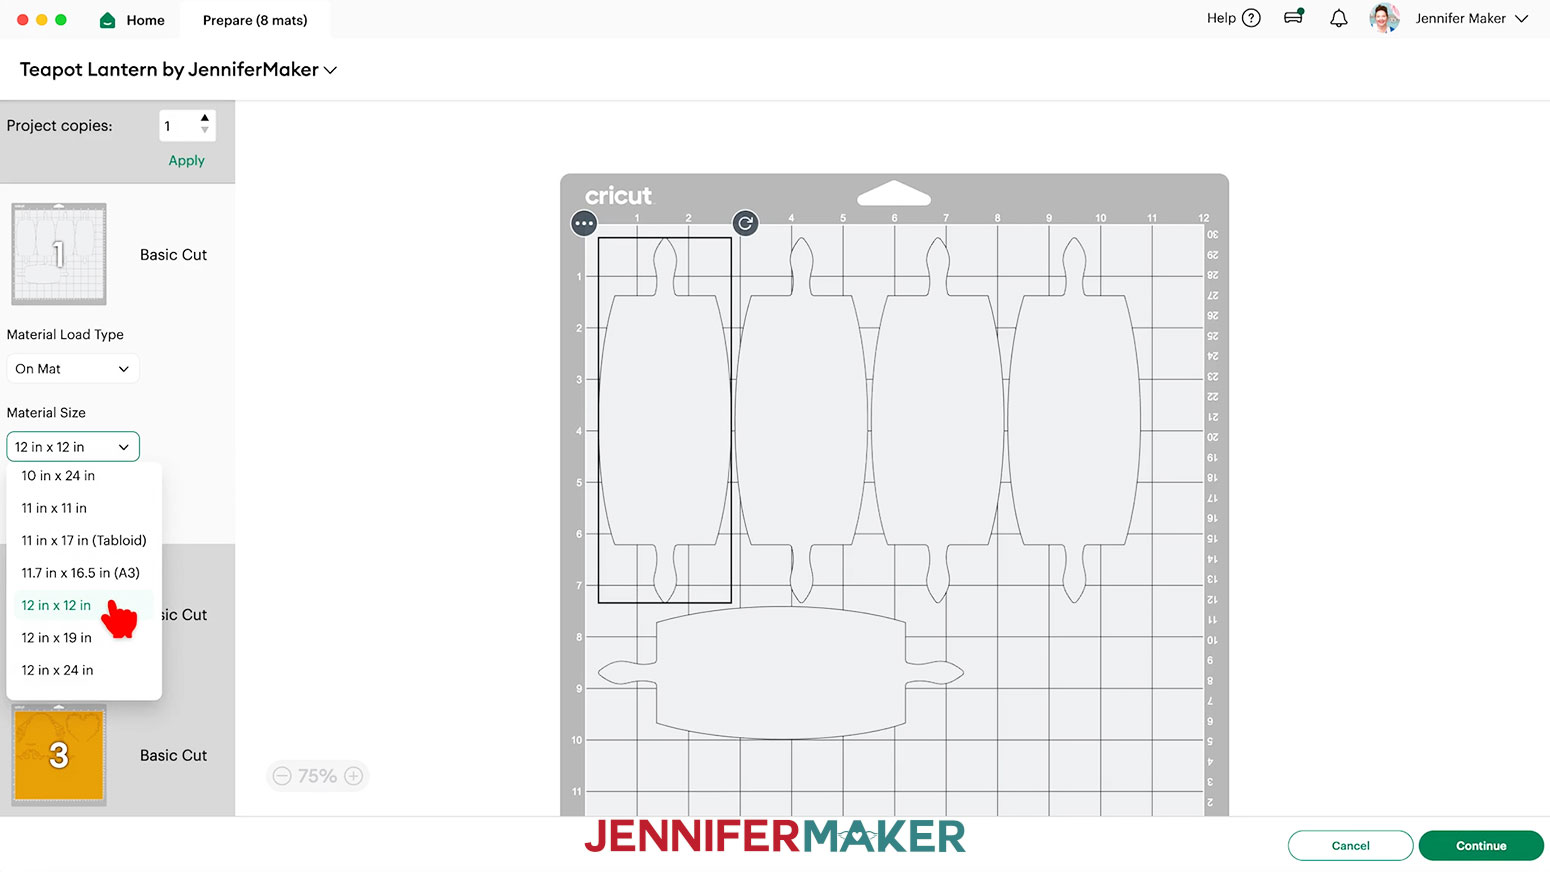
- On the Prepare screen, make sure the correct Material Size is selected for your materials.
NOTE: I’m using “12 in x 12 in” for all my mats.
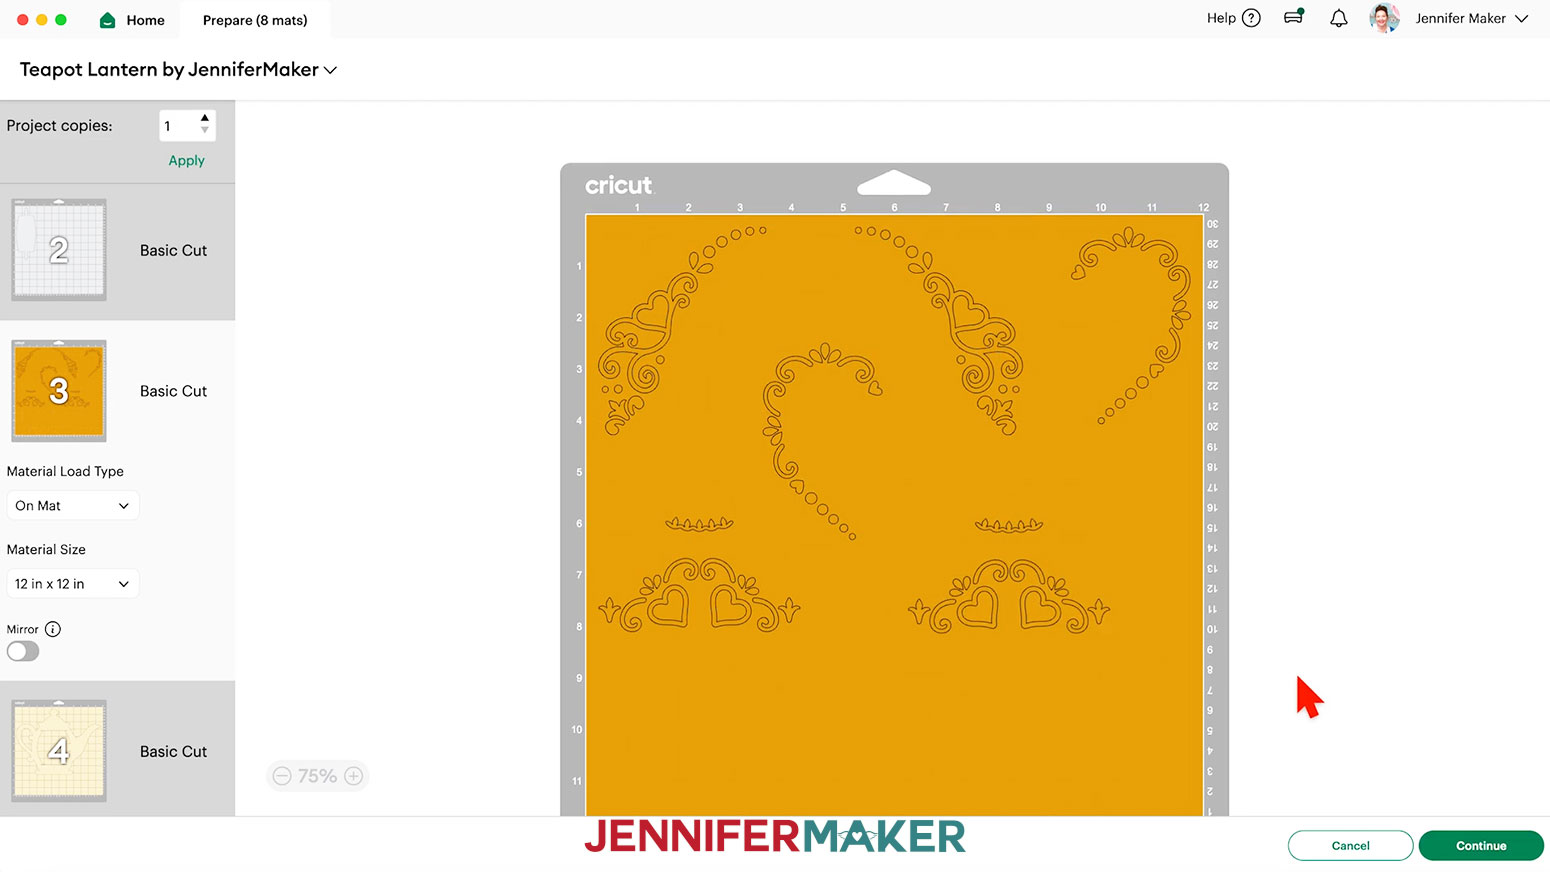
NOTE: For the "score" file, a mat that shows only lines means a score layer isn’t attached. Click "Cancel" to return to the Canvas and reattach the layers if needed. - Select the mat with your decorative vinyl pieces and drag the objects apart so you have room to trim them into separate decals.
NOTE: If you’re only decorating one side, you’ll have three designs instead of six. - Once you are satisfied with your mat layouts, select the first mat again and click “Continue.”
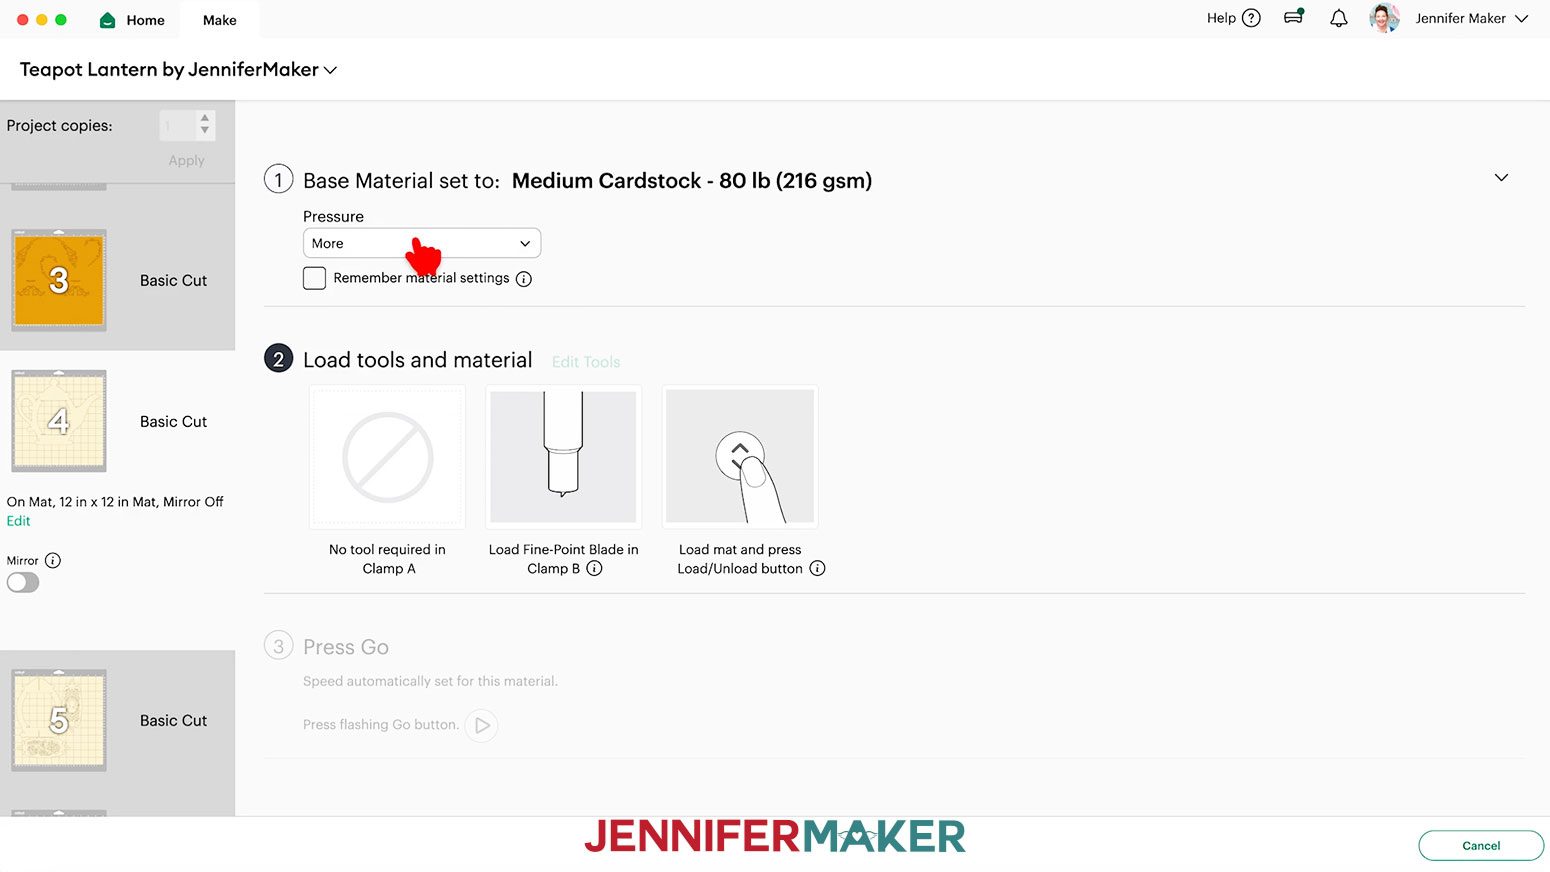
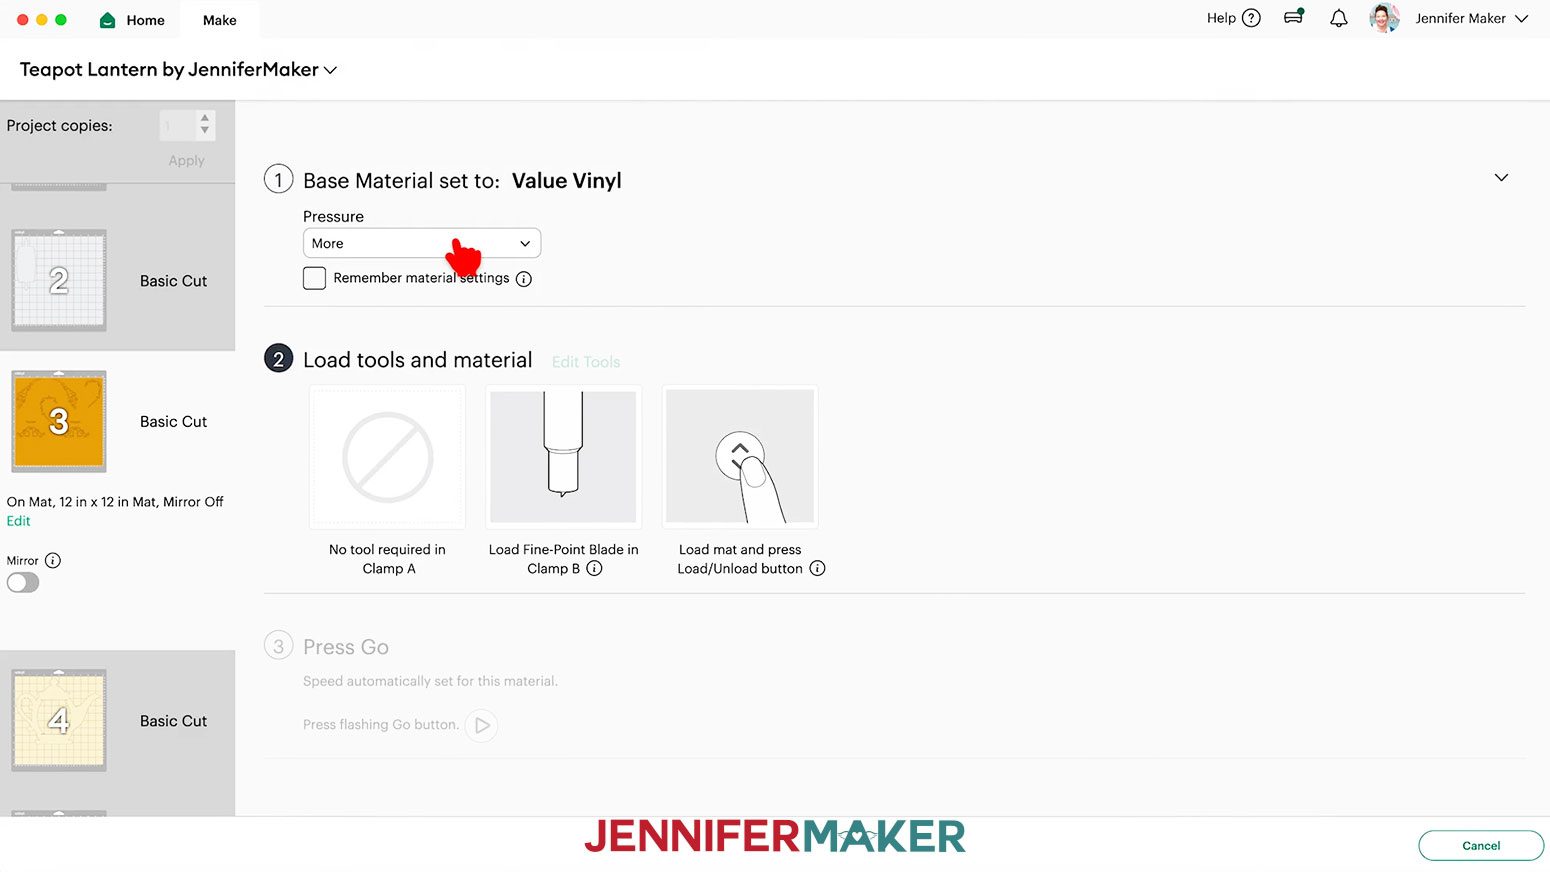
NOTE: Your first mat may be different than mine if you have changed some colors. - On the Make screen, set the Base Material for your first mat.
NOTE: I'll cut my lantern pieces first, and I'll use 80 lb. cream cardstock. I used the “Medium Cardstock - 80 lb (216 gsm)” material setting with “More” pressure for cleaner cuts. - Check that the correct tool (or tools) is listed.
NOTE: If your mat has score lines, follow the screen prompts to select and add your scoring tool. Click “Edit Tools” and select the Scoring Stylus to load both the scoring tool and the blade at the same time. Or you can select the Scoring Wheel and switch tools when prompted. Click “Apply” to close the “Edit Tools” window.
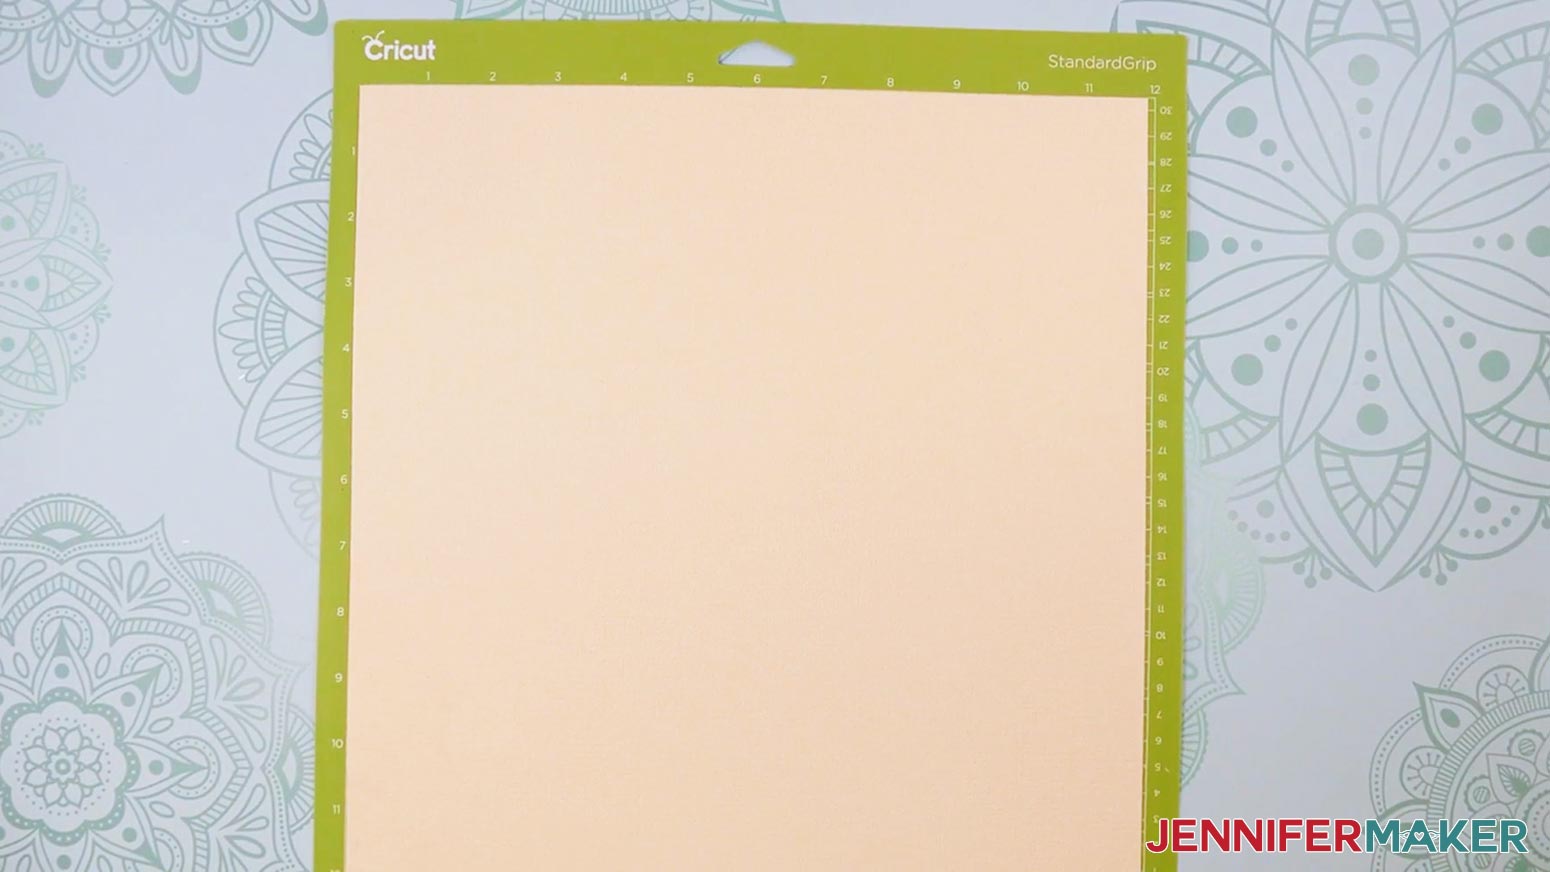
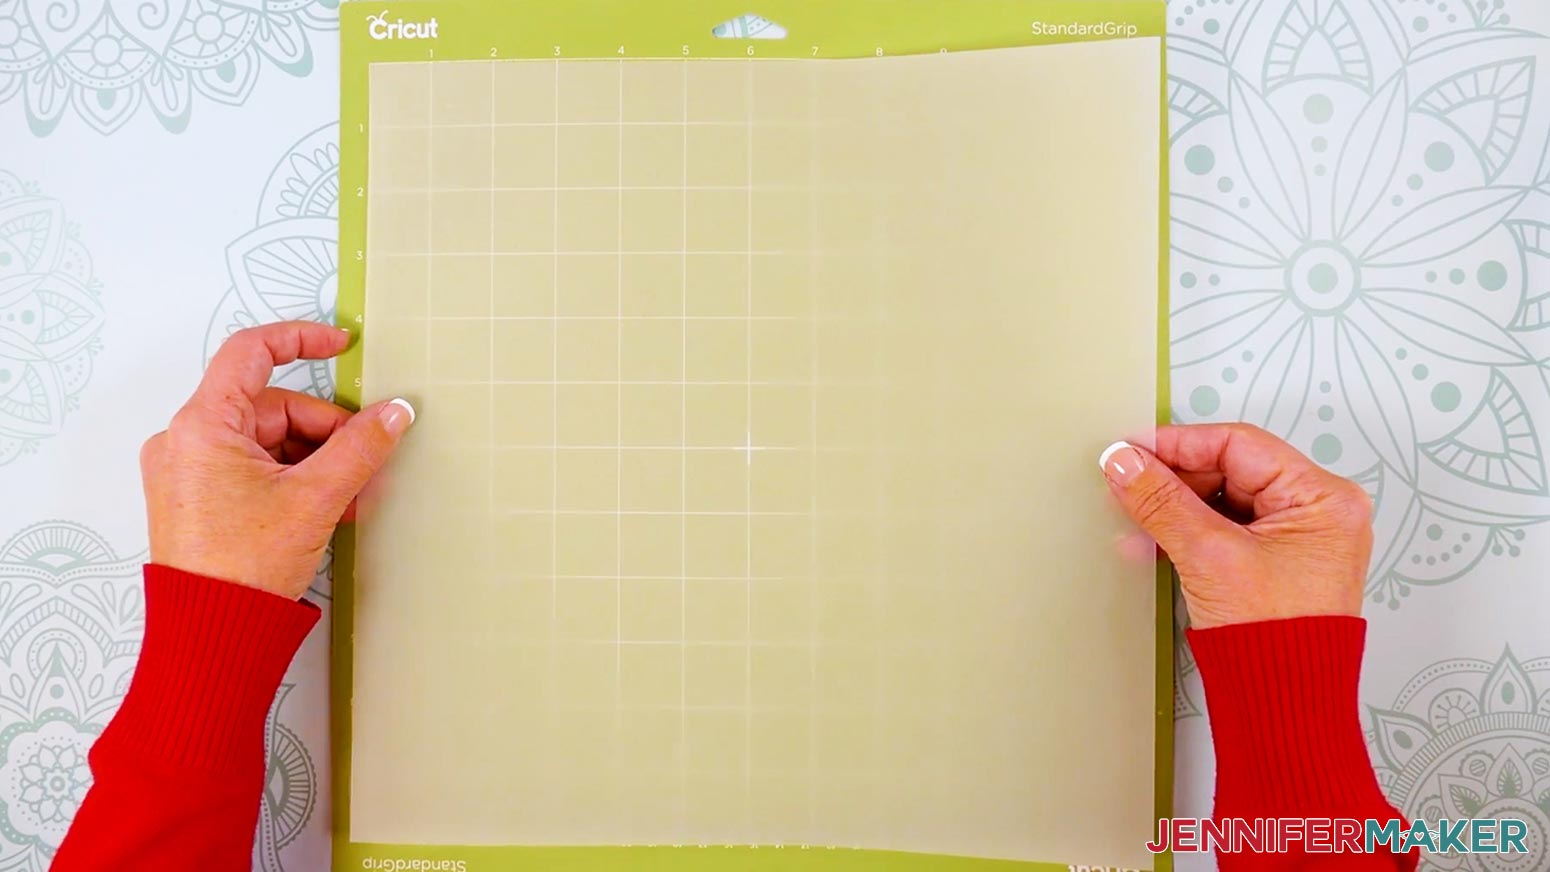
TIP: If you’re using the “no-score” version, you won’t see the Scoring Tool prompts since the dashed lines are cuts. - Place the cardstock face up on a green StandardGrip machine mat.
- Use a brayer to make sure it’s fully adhered.
- Check that your Premium Fine-Point Blade is clean and in the clamp, and that your Scoring Stylus is loaded if needed.
- Press the flashing “Load/Unload” button to load the prepared mat into your Cricut.
- Press the flashing middle button to begin cutting.
- When it has finished cutting, don’t unload the mat right away. Gently lift a corner of the material to make sure the cuts went all the way through. If not, press the middle button again to make a second pass of cuts in the same spots.
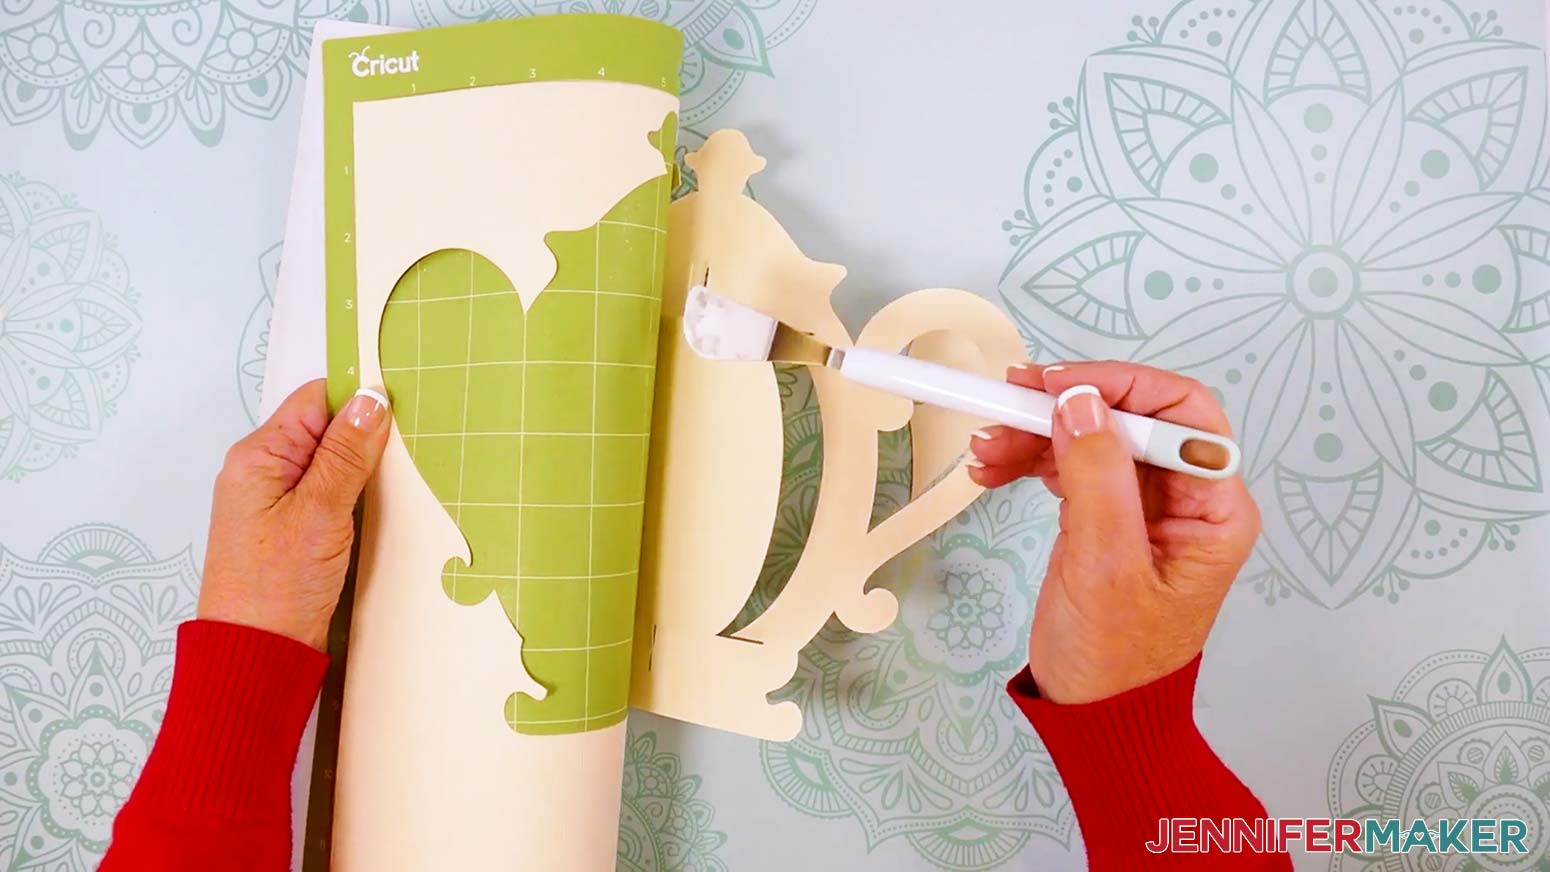
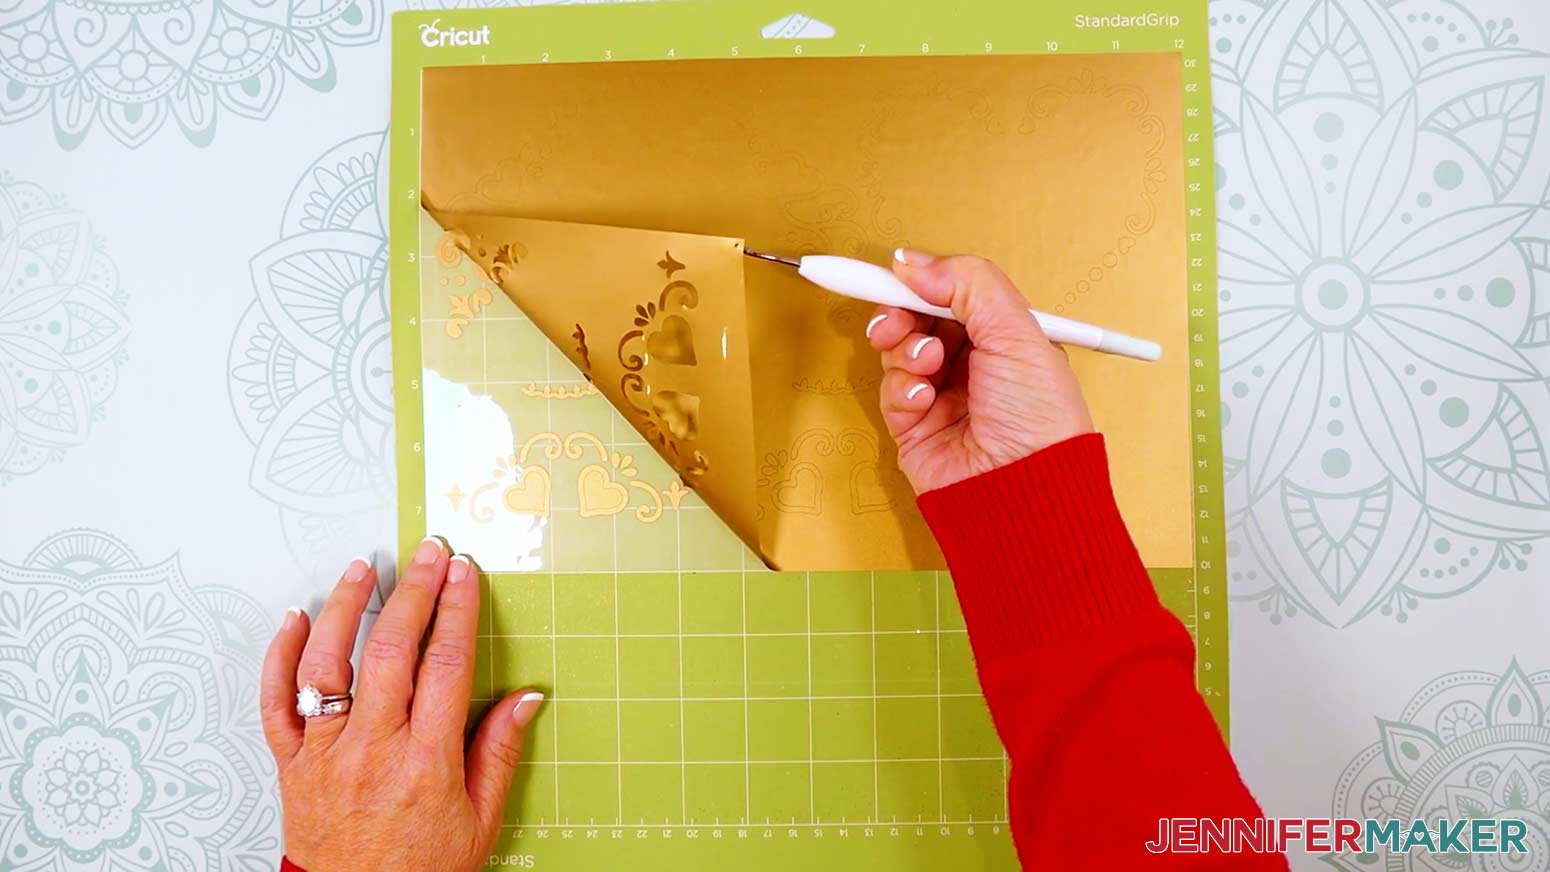
- When the cuts are complete, unload the mat, flip it over onto your work surface, and roll it back to release the cardstock.
- Use the spatula to help lift delicate parts, and your weeding tool to poke out small bits of cardstock that may have been left behind. If you have any issues with your cuts, go to jennifermaker.com/cleaner-cuts.
- Use a scraper tool to remove the small bits left on your mat after you remove the cut pieces.
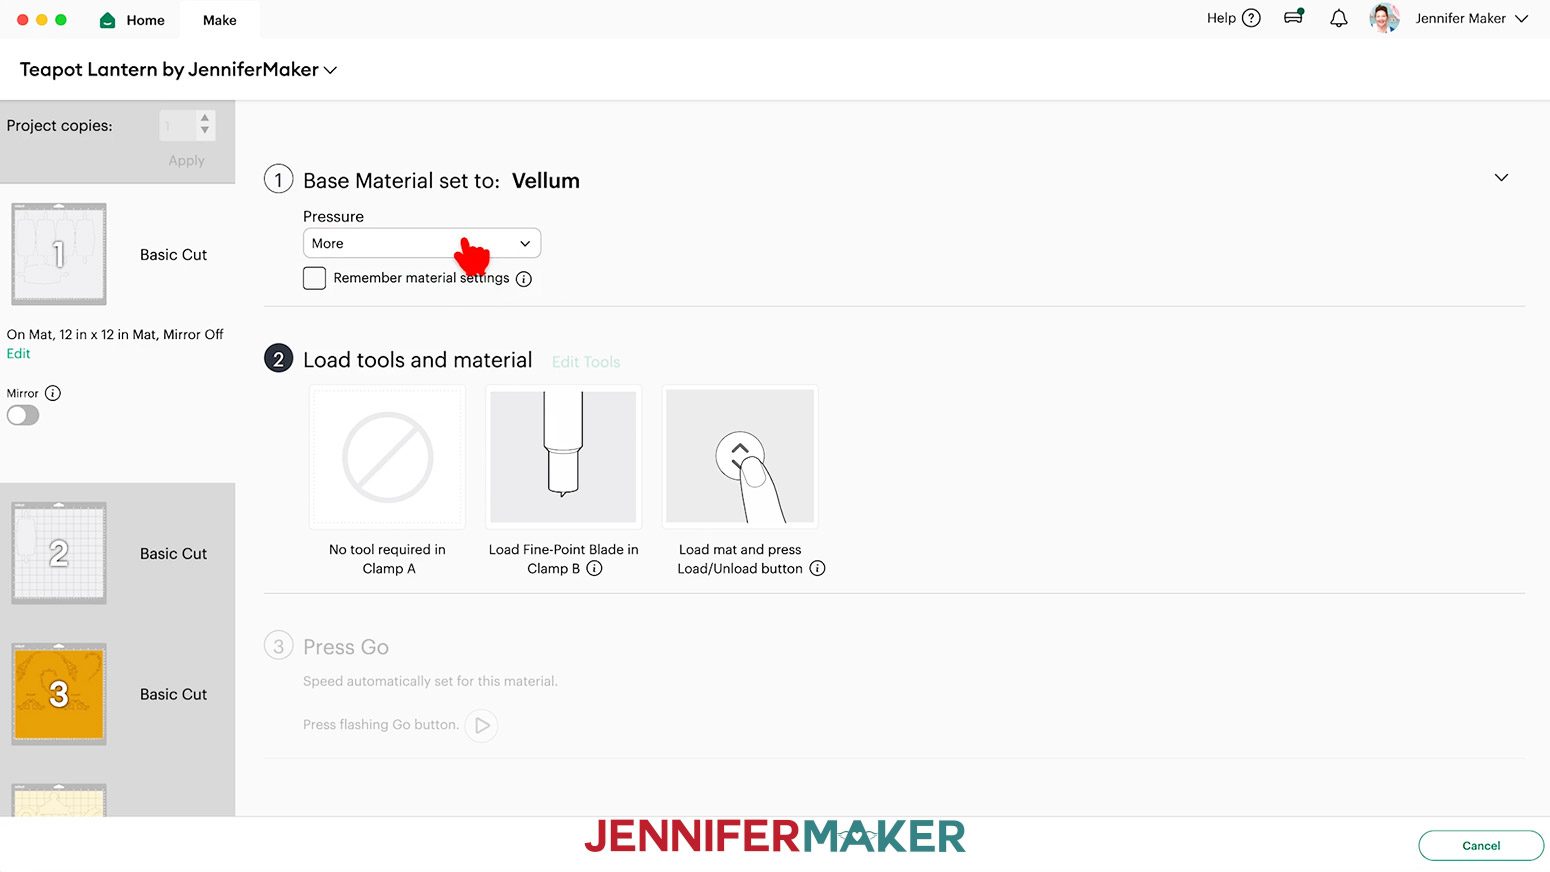
- For the optional lantern diffusers, I used the “Vellum” setting with “More” pressure.
- Place the vellum face up on a less sticky green StandardGrip machine mat.
TIP: You can also use a blue LightGrip machine mat. - Use a brayer to make sure it’s fully adhered.
- Repeat Steps 10-16 to cut and unload your vellum diffuser pieces.
- For the mat with the decorative lid, handle, and spout pieces, I used the “Value Vinyl” material setting with “More” pressure for my gold Cricut Value vinyl.
NOTE: I don’t recommend cutting your decals from glitter or metallic vinyl since using StrongGrip transfer tape to apply them can damage the cardstock. - Use a paper trimmer or scissors to trim your vinyl to cover the design area shown on the screen, plus an inch or so of buffer.
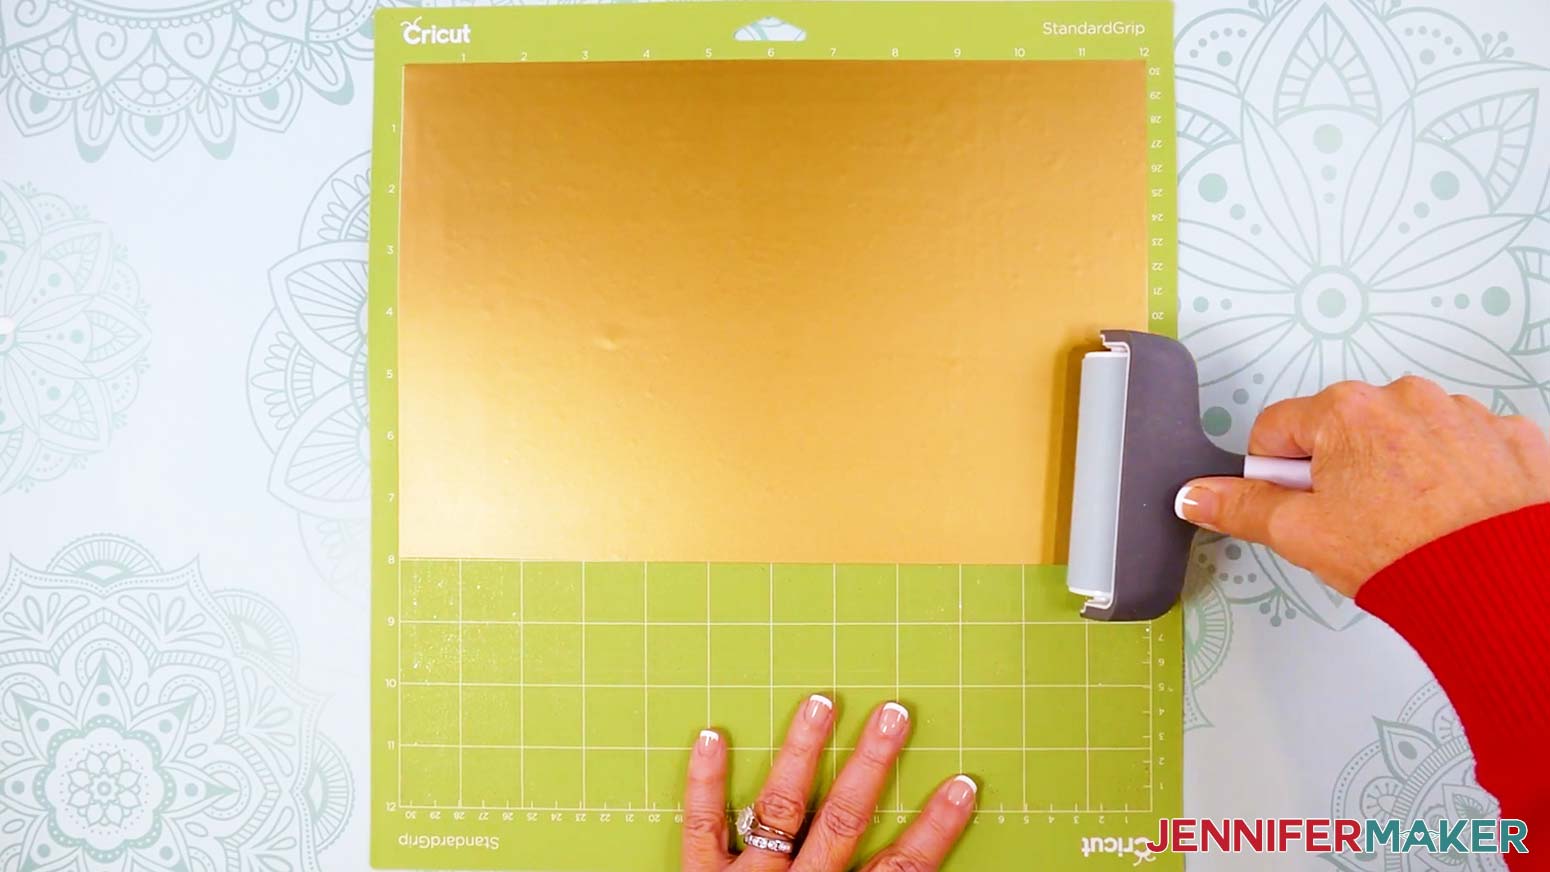
TIP: You can save smaller pieces of vinyl for other projects. - Place your vinyl pretty side up on a green StandardGrip machine mat so it covers the design area on your screen.
- Use a brayer to make sure it’s fully adhered.
- Repeat Steps 10-13 to cut your vinyl pieces.
- When the cuts are complete, unload the mat but leave the vinyl in place.
- Use your weeding tool to remove the larger pieces of vinyl, trimming with scissors as you go to prevent the vinyl from sticking to your decal.
- Use your weeding tool to remove smaller sections inside the cut pieces.
- Cut the six vinyl designs apart into individual decals. Don’t separate any elements that are part of a design!
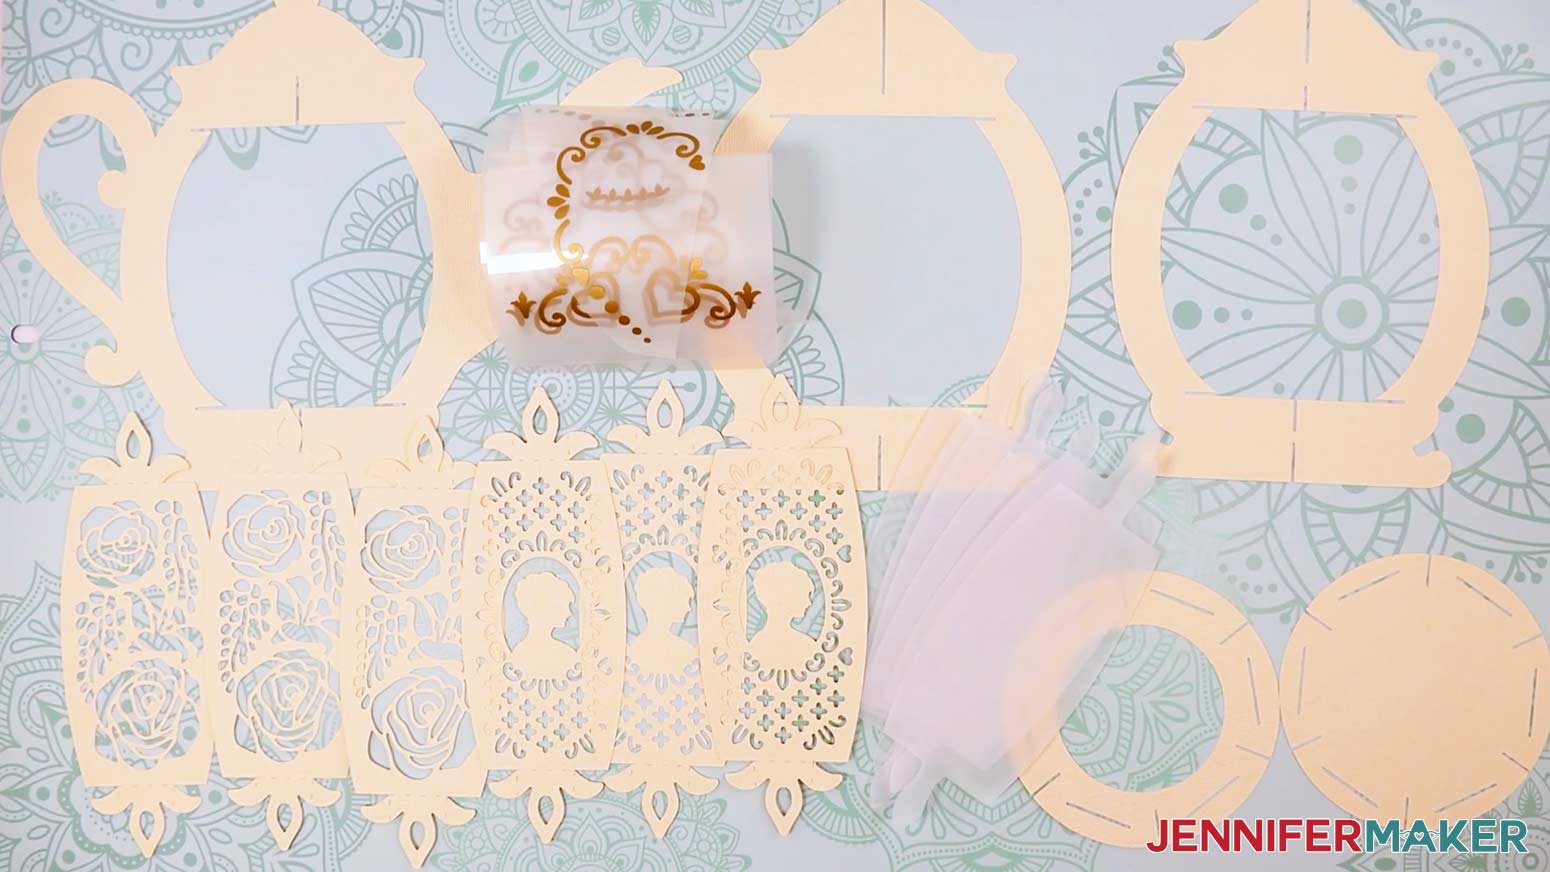
- Lay out all of the pieces face up in organized piles. You should have:
For the teapot: One teapot main frame piece, two vinyl lid decals, two vinyl handle decals, and two vinyl spout decals.
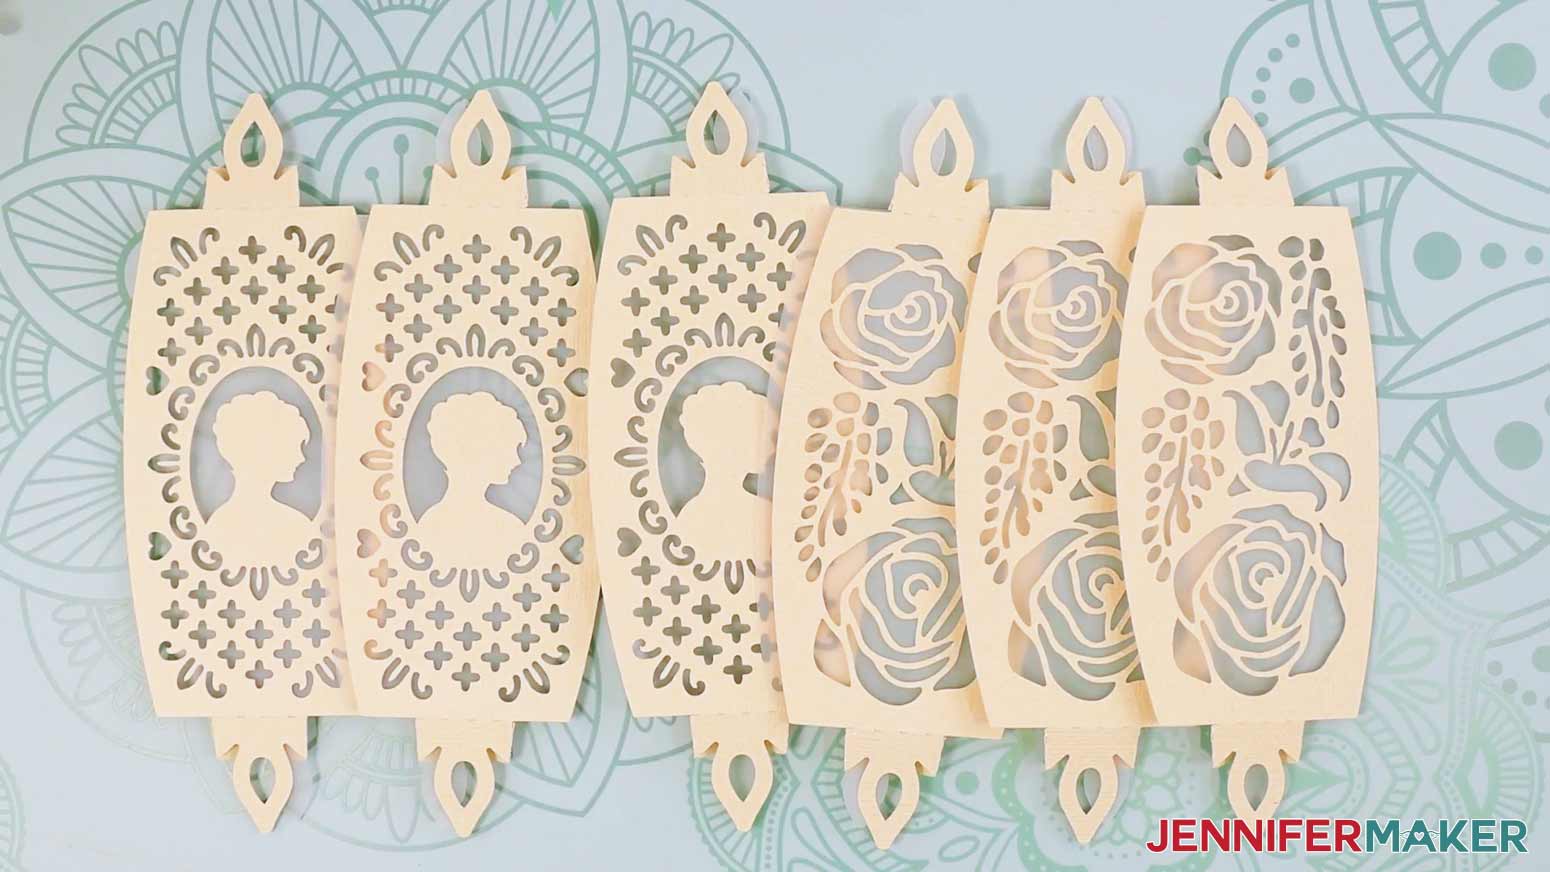
For the lantern base: One frame piece with two slits at the top, one frame piece with a single slit at the top, two circular base pieces, six decorative panels, and six diffuser panels (if you cut them).
TIP: Refer to the Design Space screen if you’re not sure about some pieces’ orientation.
STEP 3: ASSEMBLE YOUR TEAPOT LANTERN
ADD VINYL TO THE MAIN TEAPOT FRAME
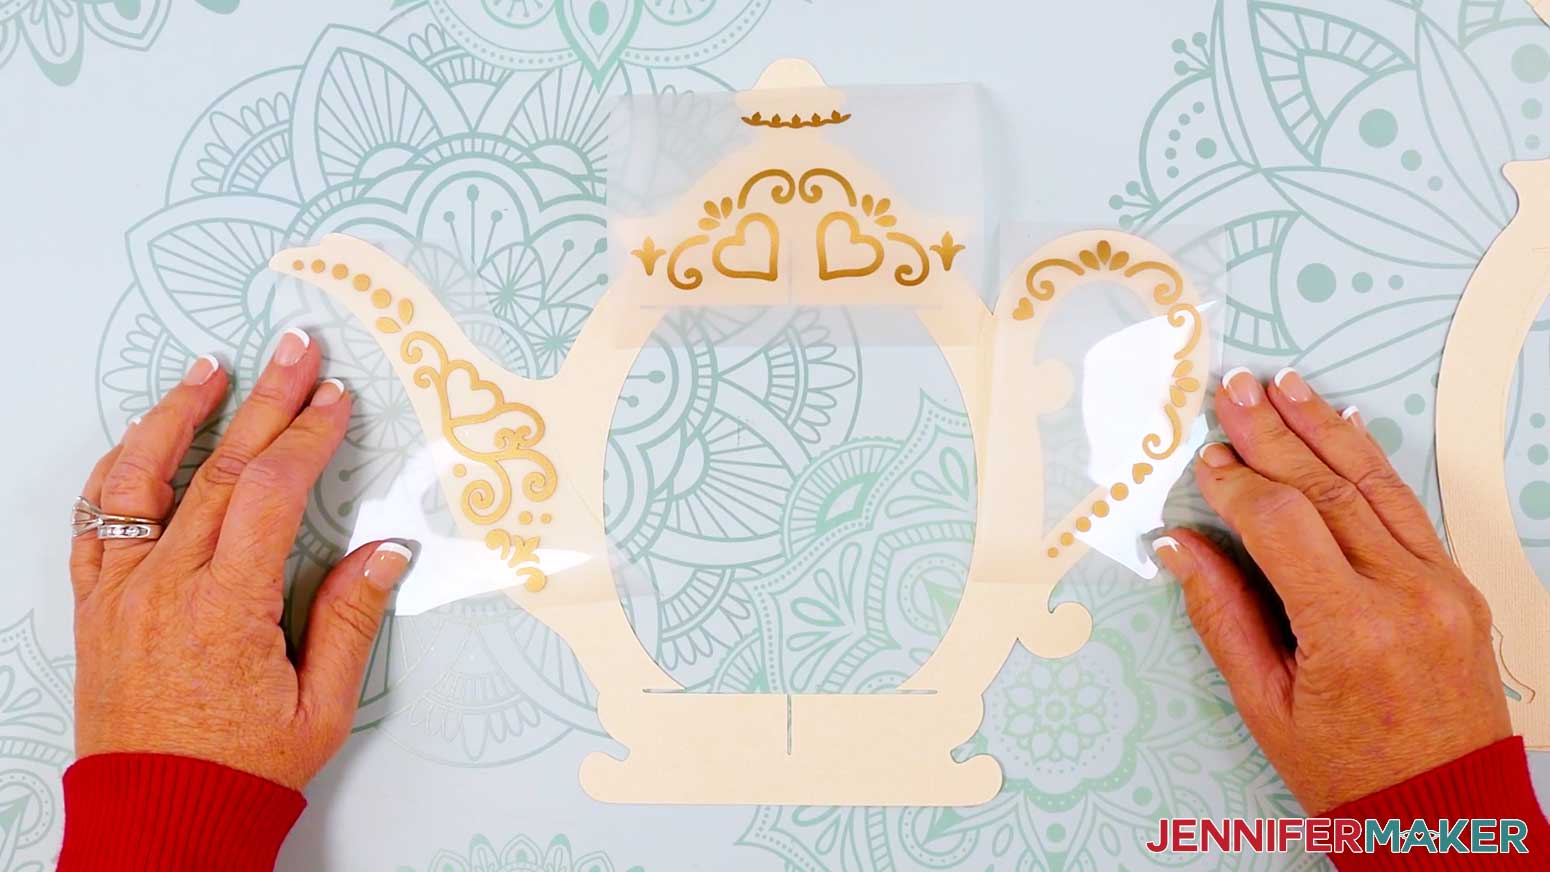
- Lay the teapot main frame piece face up in your work area.
- Place the first set of lid, handle, and spout decals, vinyl side up, on the teapot to make sure they’re oriented correctly. Set aside the second set of decals for now.
NOTE: You’ll only have one set if you’re decorating just one side. - Move the vinyl decals off the teapot, but keep their direction the same.
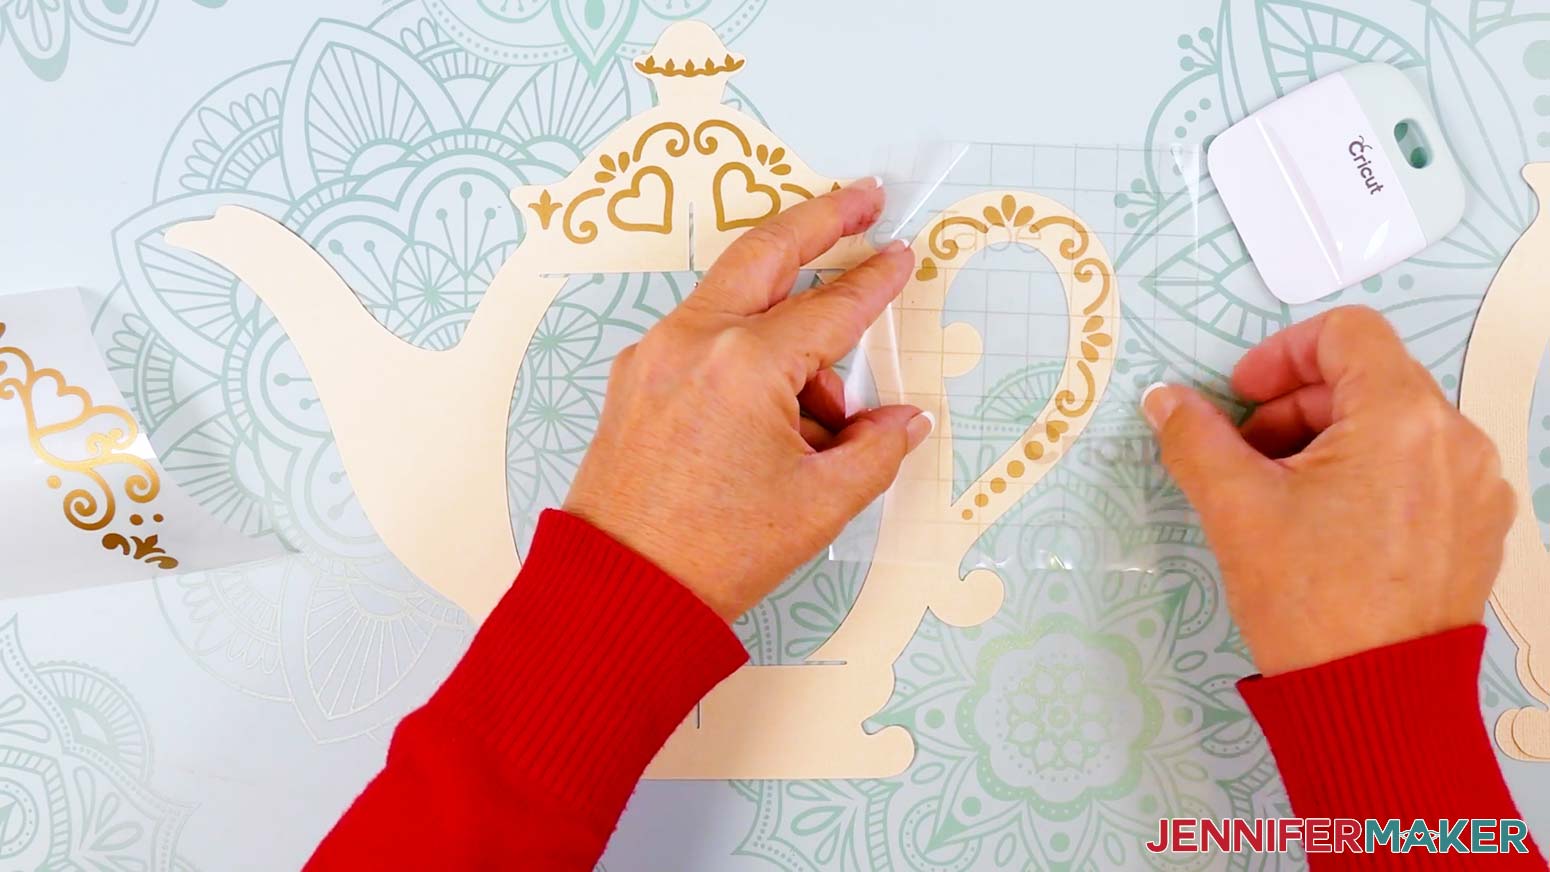
- Cut a piece of StandardGrip transfer tape large enough to cover each of the individual decals.
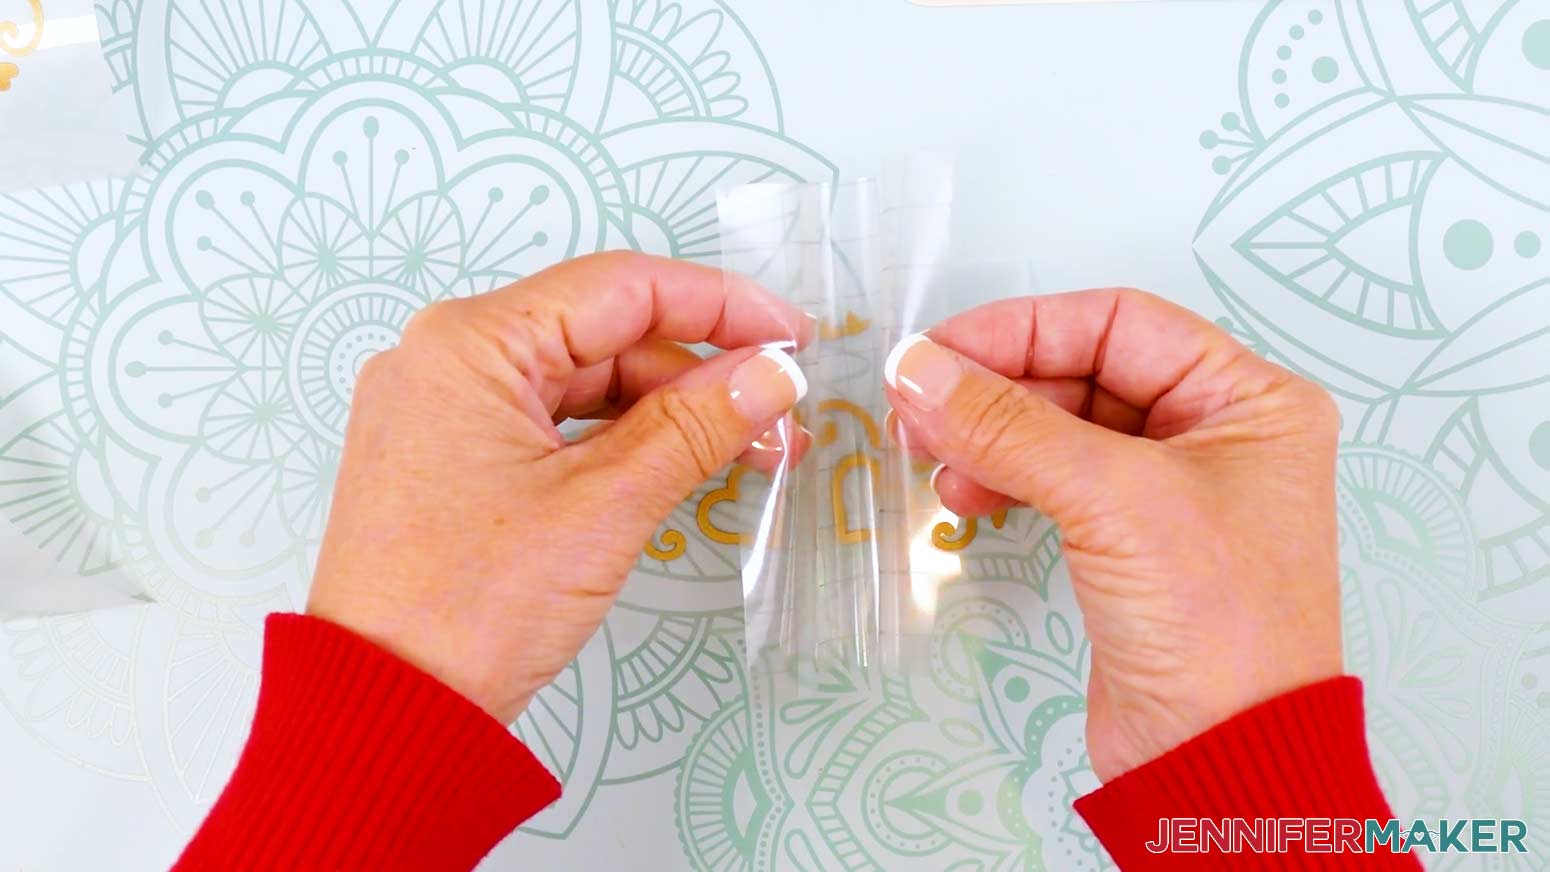
- Remove the backing from the transfer tape, then pat your fingers on its adhesive side to lessen its stickiness and prevent damage to your cardstock.
TIP: You can also stick the transfer tape to a cloth or your clothing and peel it back up several times to lessen the stickiness. - Hold your transfer tape in the shape of a “taco,” sticky side down, then center the bottom of the “taco” onto the middle of the lid decal.
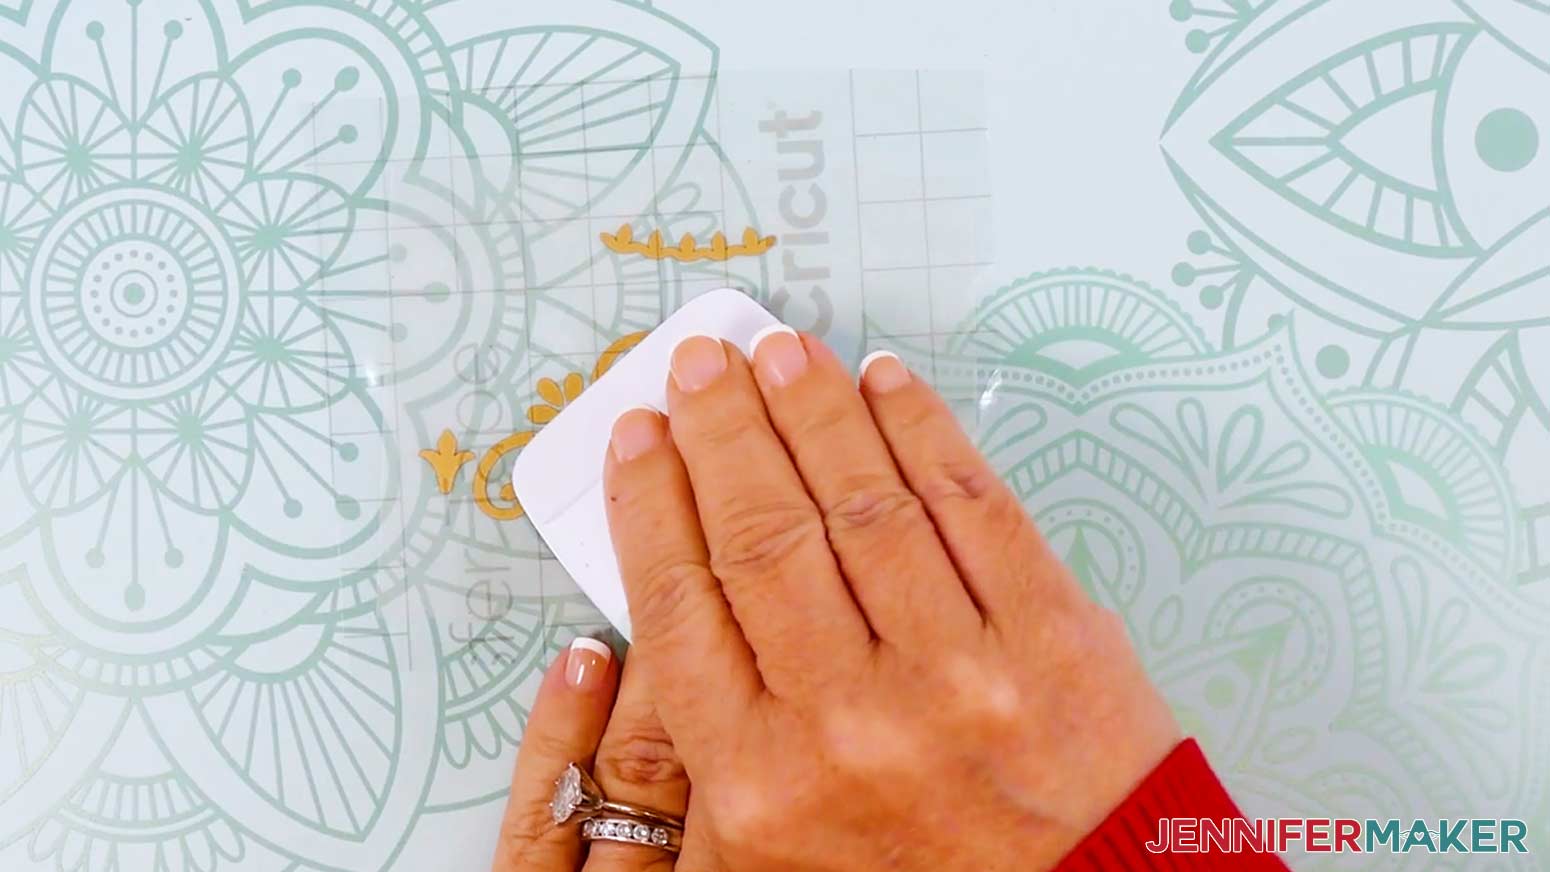
- Smooth the transfer tape over the decal from the center outward and burnish it down using the scraper tool.
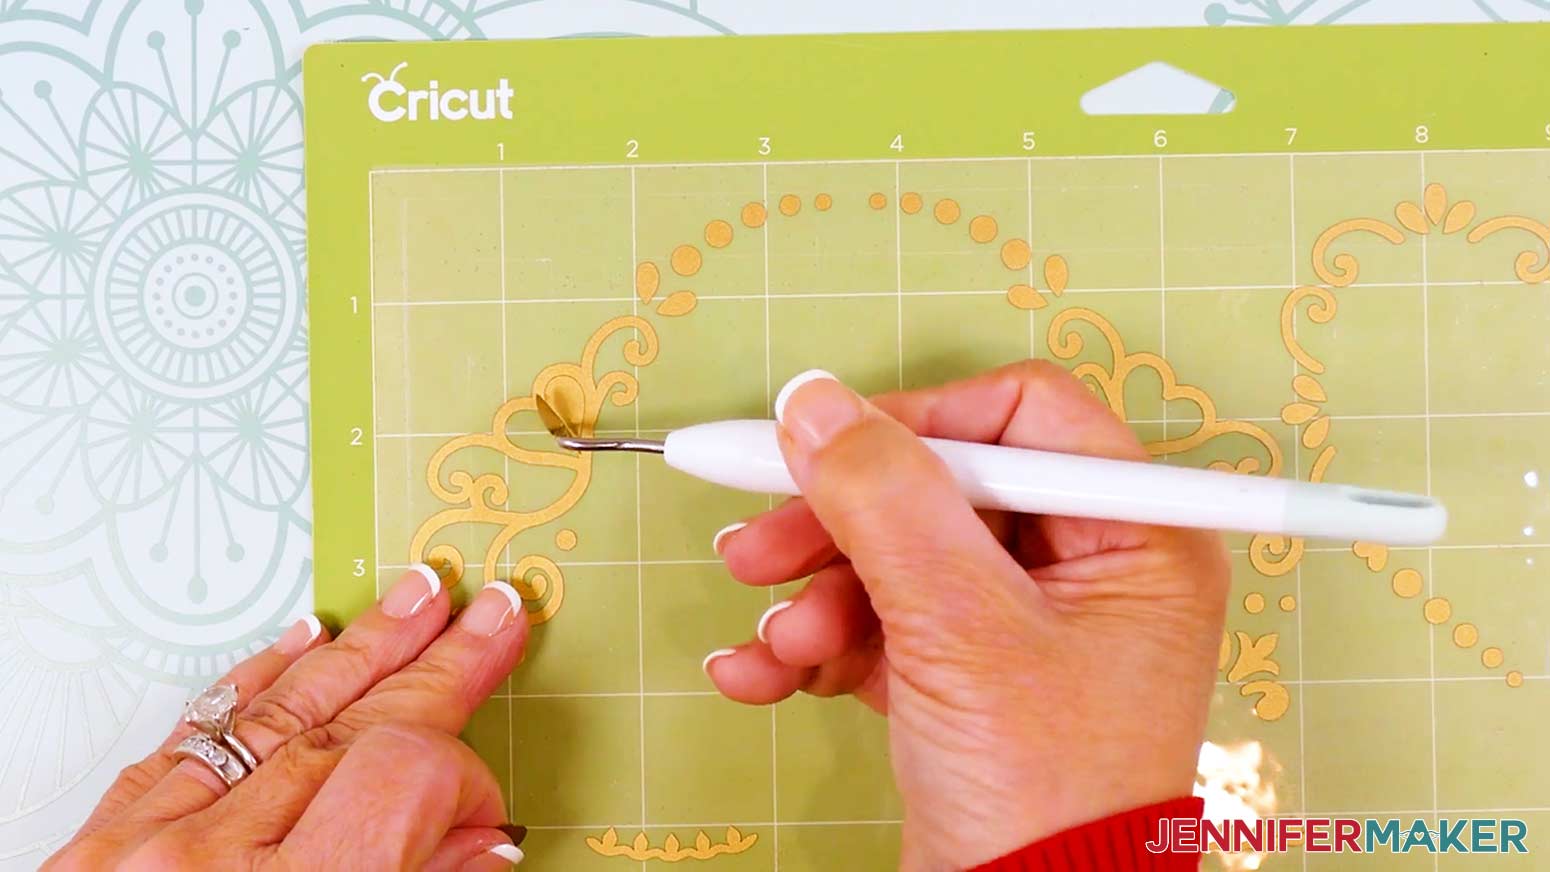
- Flip your vinyl over and burnish the other side, then gently peel away the vinyl’s carrier sheet.
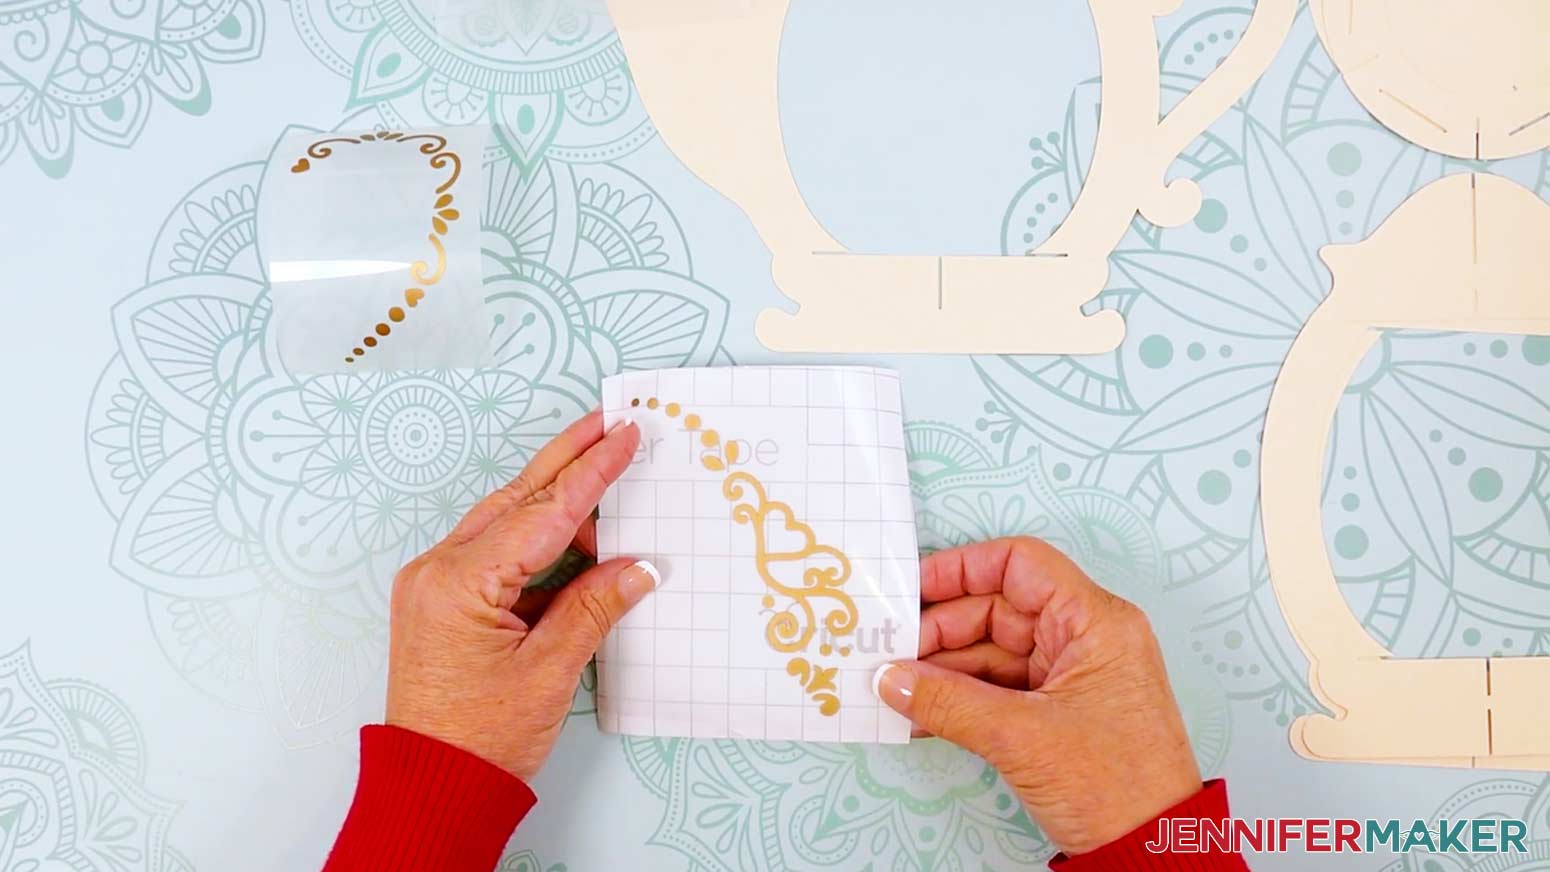
TIP: If any pieces of the decal cling to the carrier sheet instead of transferring to the tape, lay the sheet back down, burnish the area with your scraper, and carefully try again. - Hold your transfer tape sticky side down.
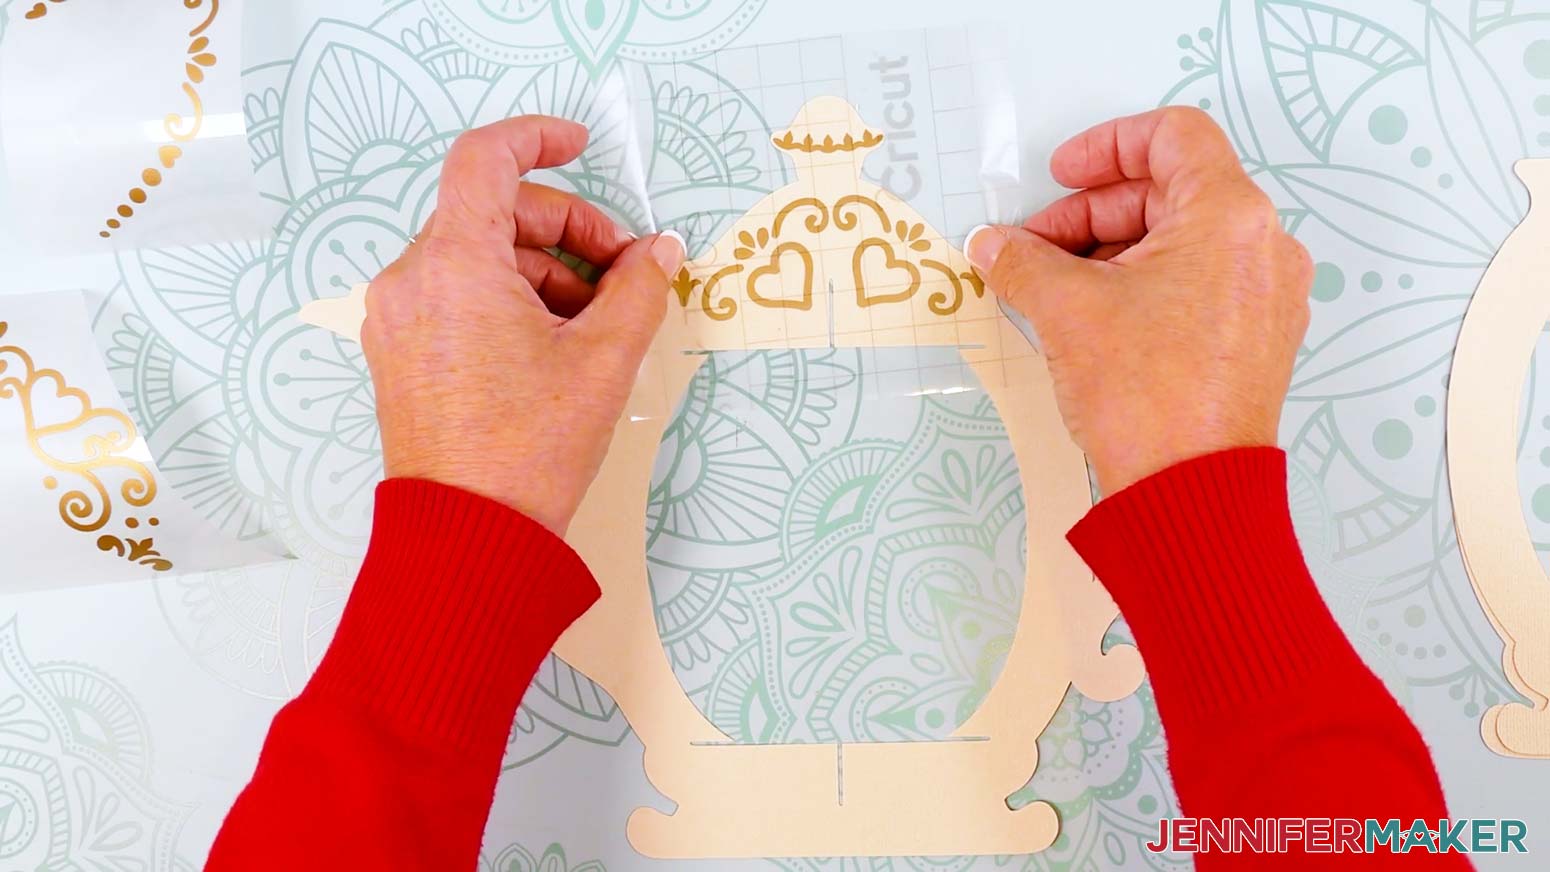
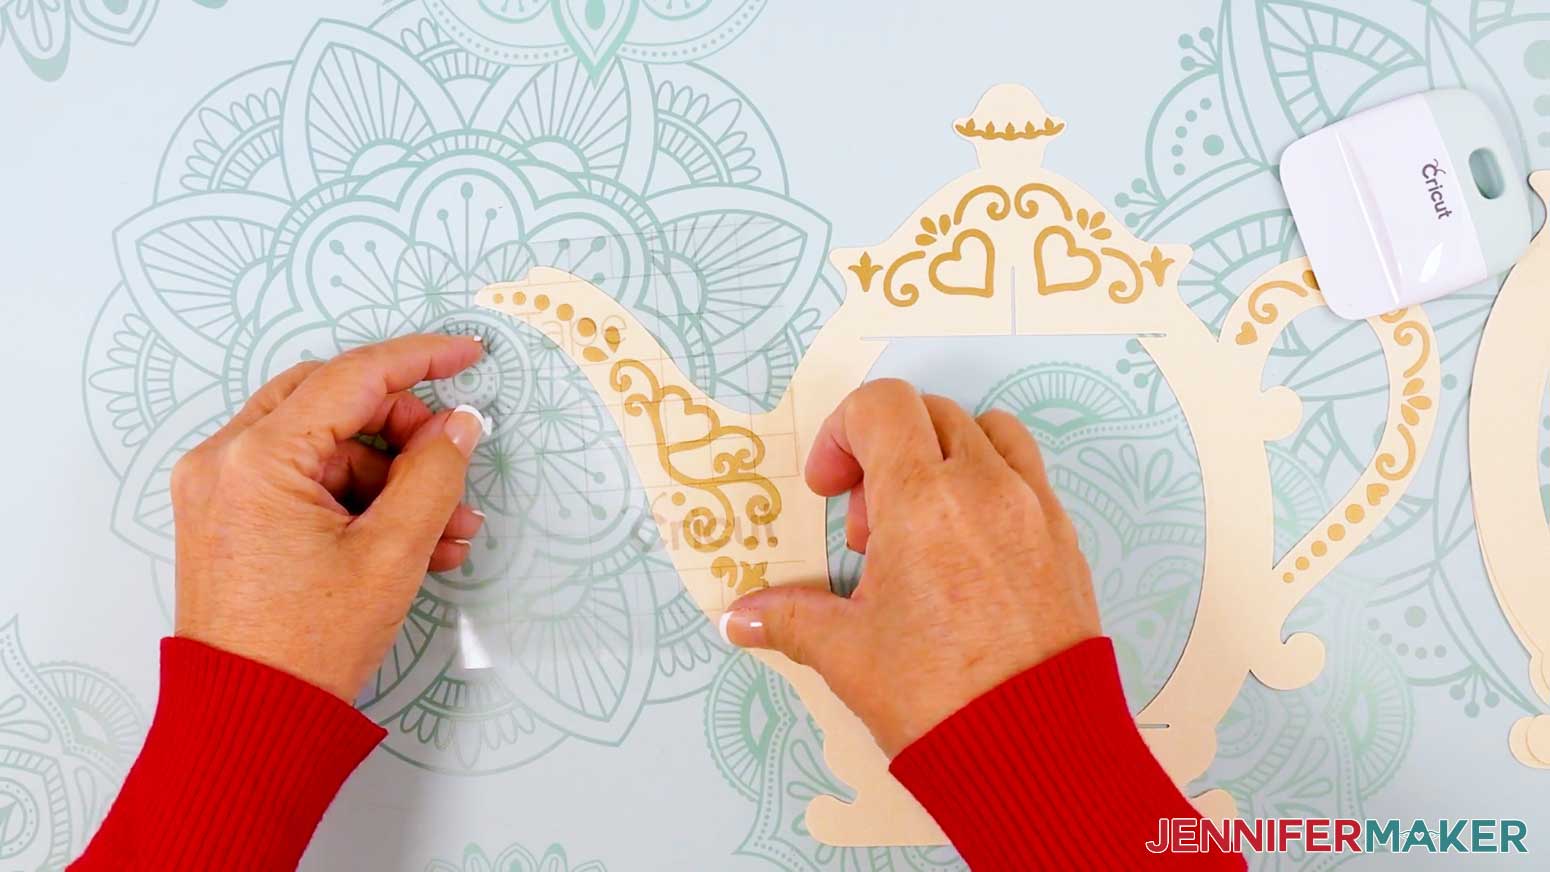
- Position the decal over the lid area. The small top piece should fit the widest part of the lid’s knob. Gently lower it onto the cardstock.
TIP: Don’t press down on the decal until it’s positioned just where you want it. You can lift and reposition parts that aren’t aligned properly as long as they haven’t been pressed down yet. - Once the decal is in place, use a scraper to burnish down just the areas where the vinyl touches the cardstock, starting in the center of the design and working your way out.
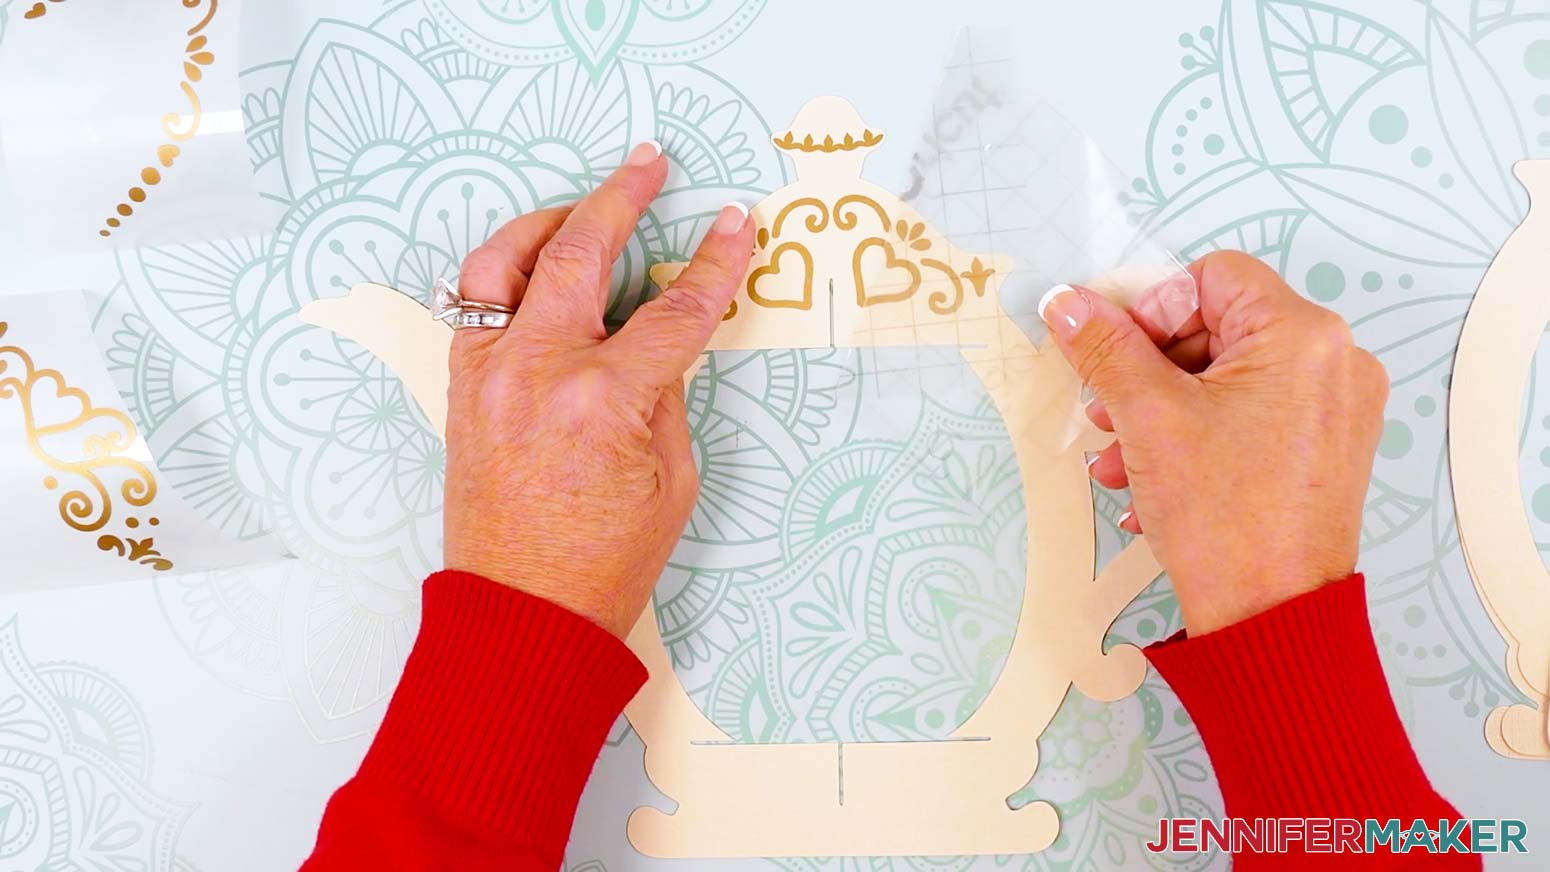
- Starting in a corner, slowly and carefully peel the transfer tape away from the lid piece, burnishing down any vinyl that lifts from the surface as you go.
TIP: It can be helpful to pull your transfer tape parallel to the cardstock while peeling it away.
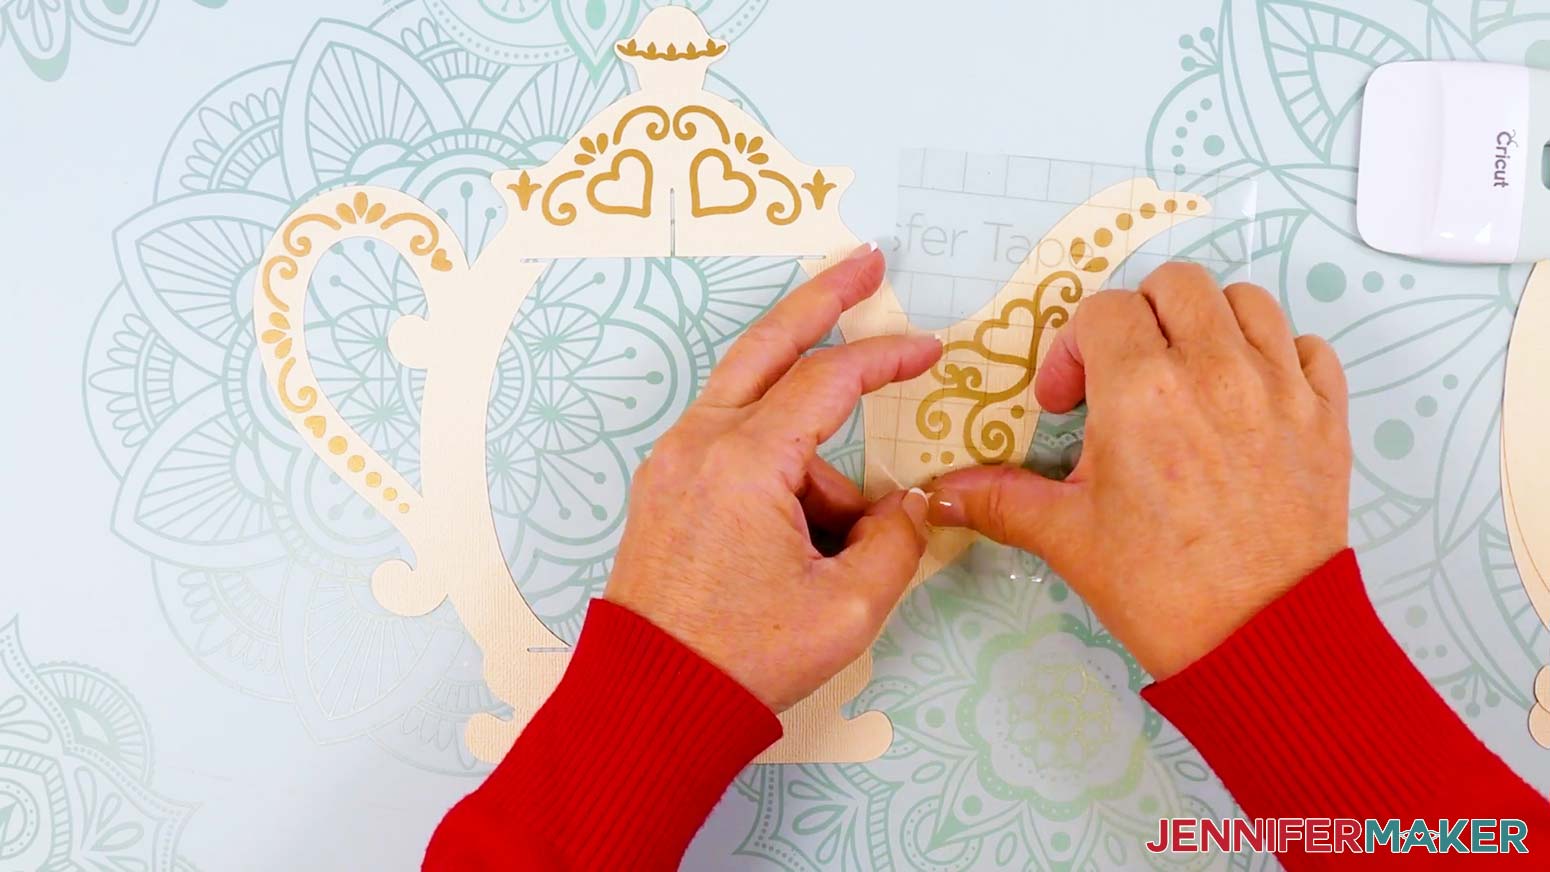
TIP: If the cardstock starts to rip, try peeling the transfer tape from a different direction. - Using the same piece of transfer tape, repeat Steps 6-12 to apply the handle and spout decals to their corresponding areas.
- Flip over the teapot main frame piece so the spout and handle are on opposite sides.
- Repeat Steps 6-13 to apply the second set of decals to the back of the teapot.
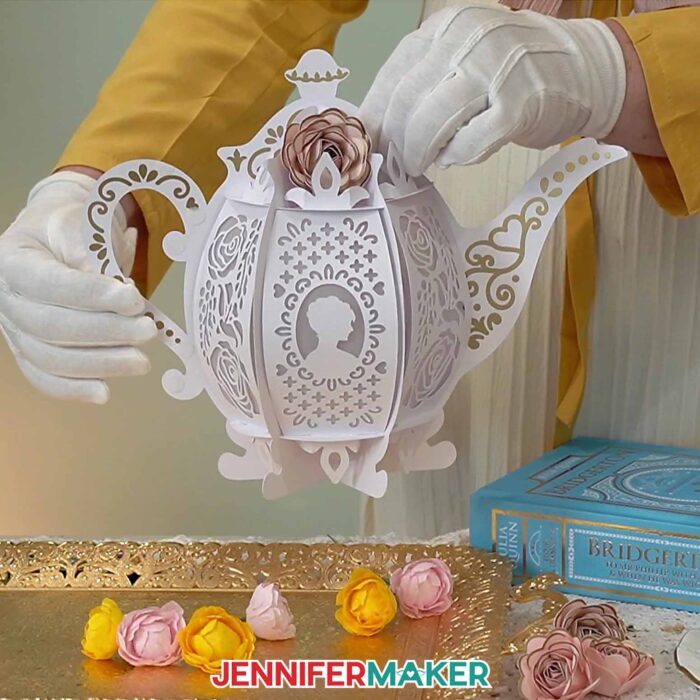
ASSEMBLE YOUR LANTERN
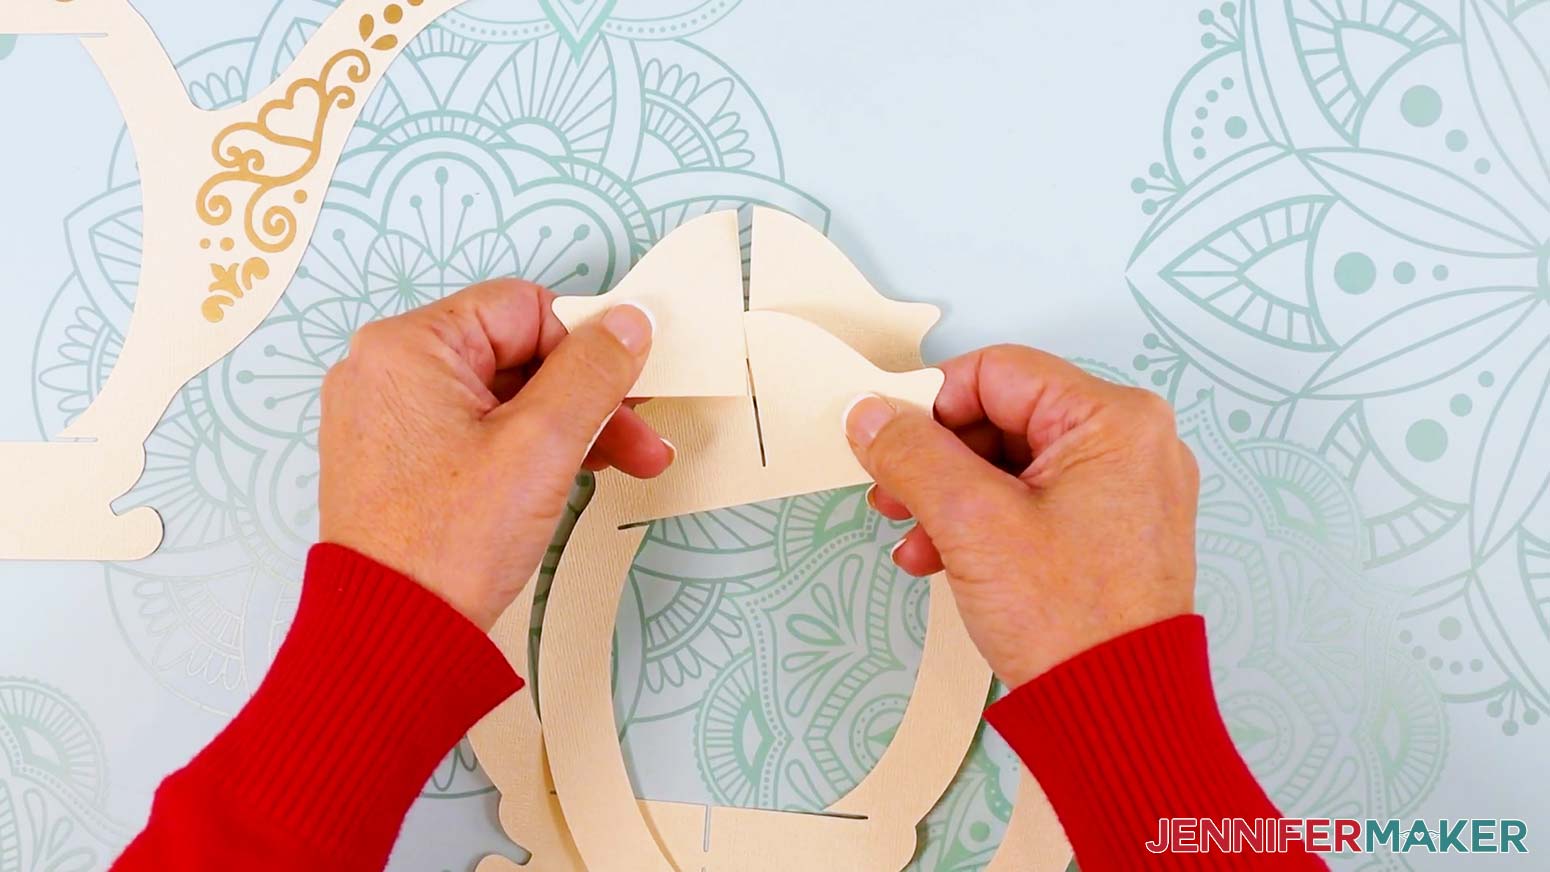
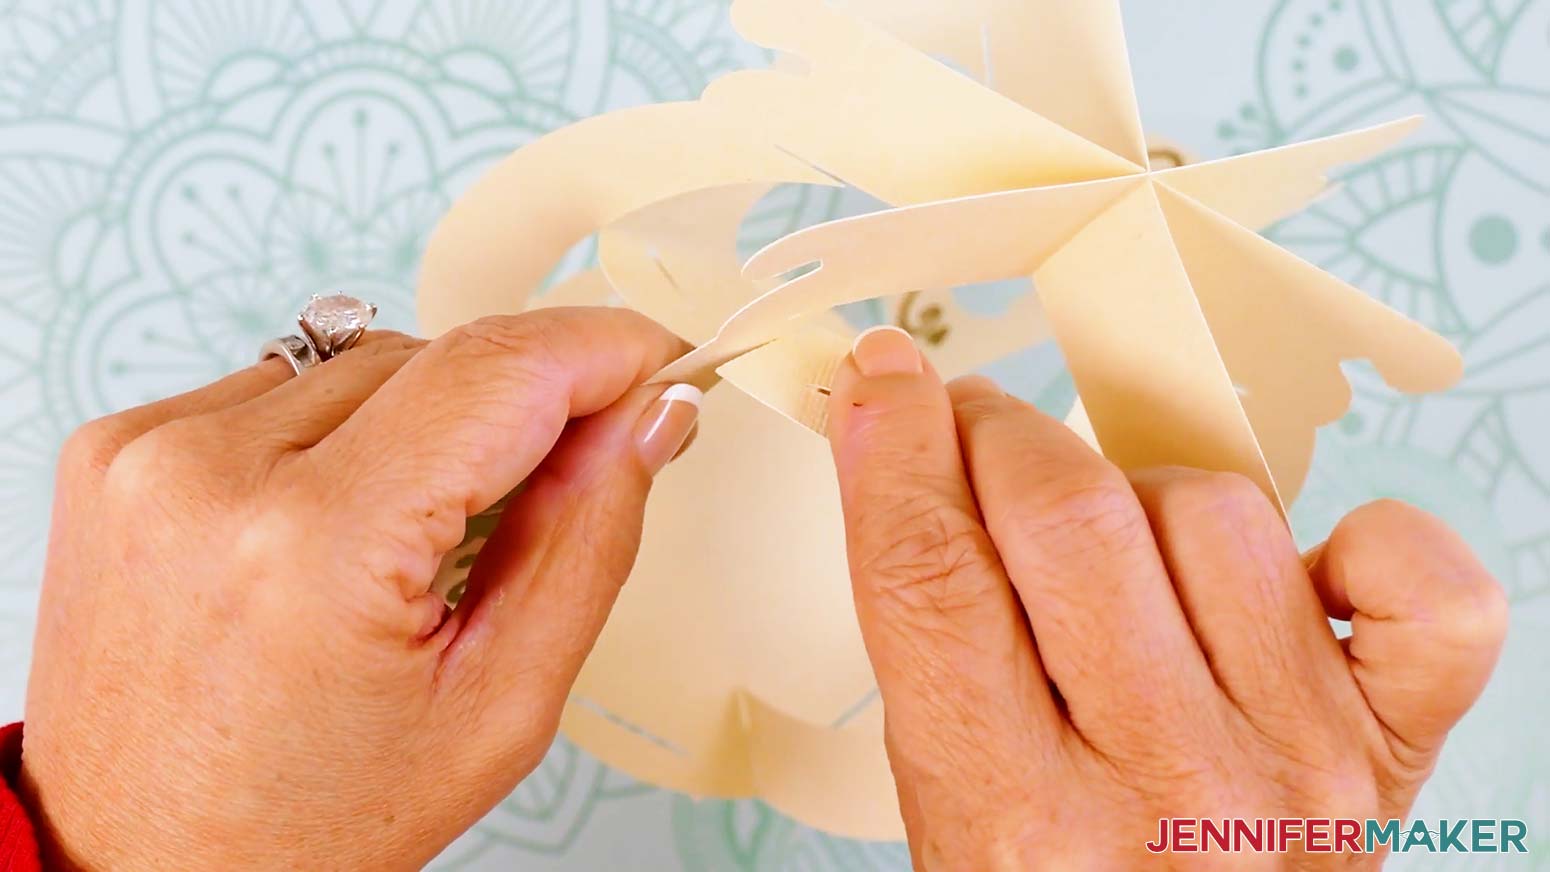
- Take the lantern frame piece with a single slit at the top and slot it inside the frame piece with two slits at the top.
- Lay the two frame pieces flat against each other, then slot them into the teapot-shaped frame piece.
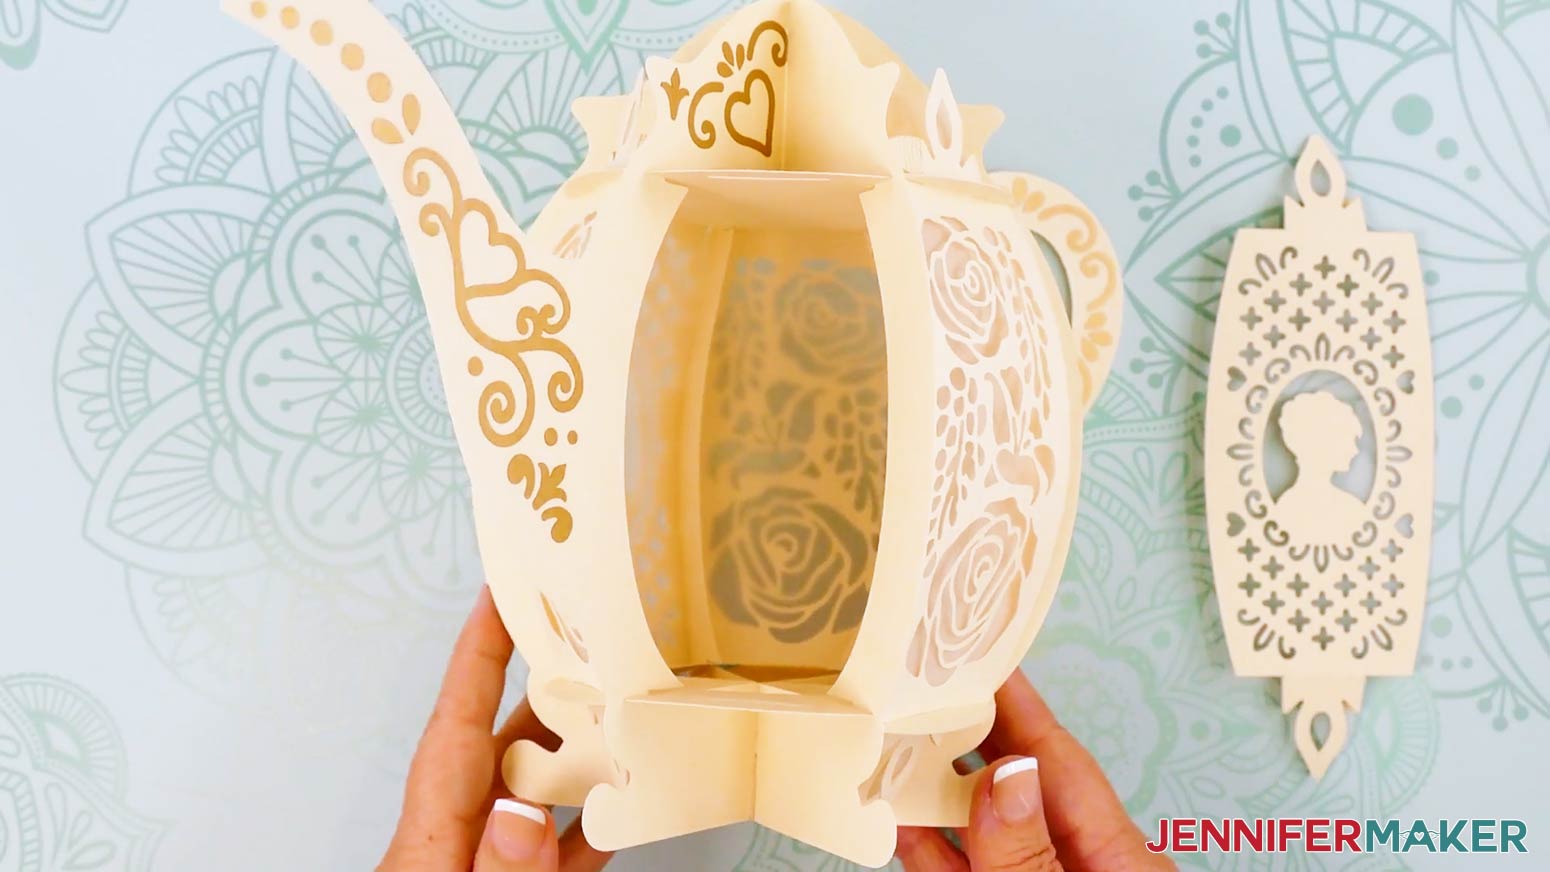
- Spread out the frame pieces, and stand the constructed frame upright.
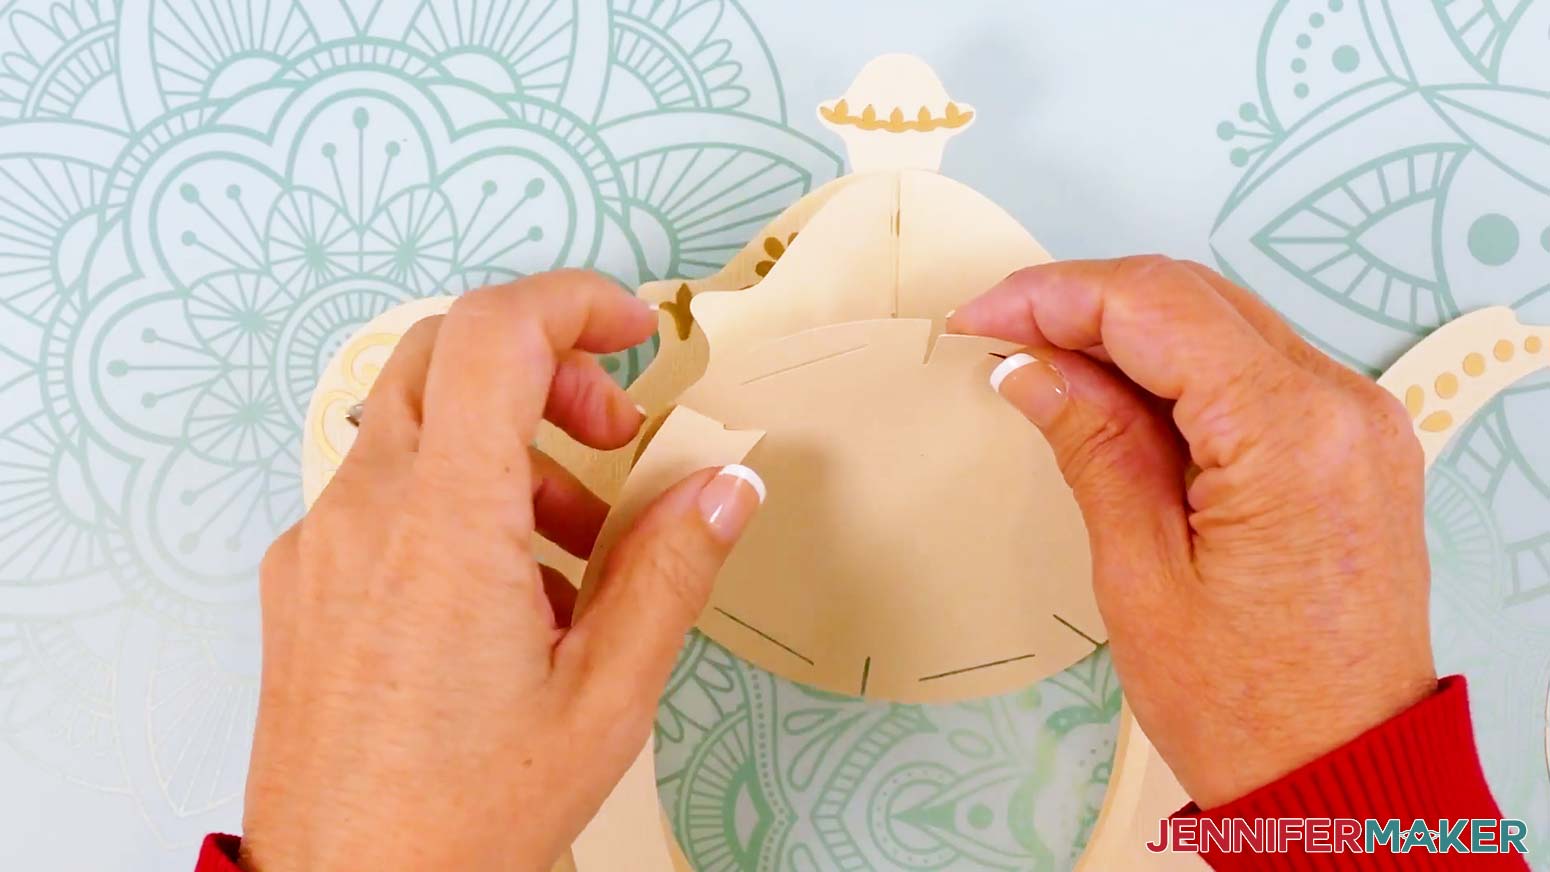
- Insert the solid circular top base piece’s six outer slits into the three frame pieces’ top slits.
TIP: Curve the inner frames slightly if needed to fit them into the top base piece’s slits. - Insert the circular bottom base piece’s six outer slits into the three frame pieces’ bottom slits.
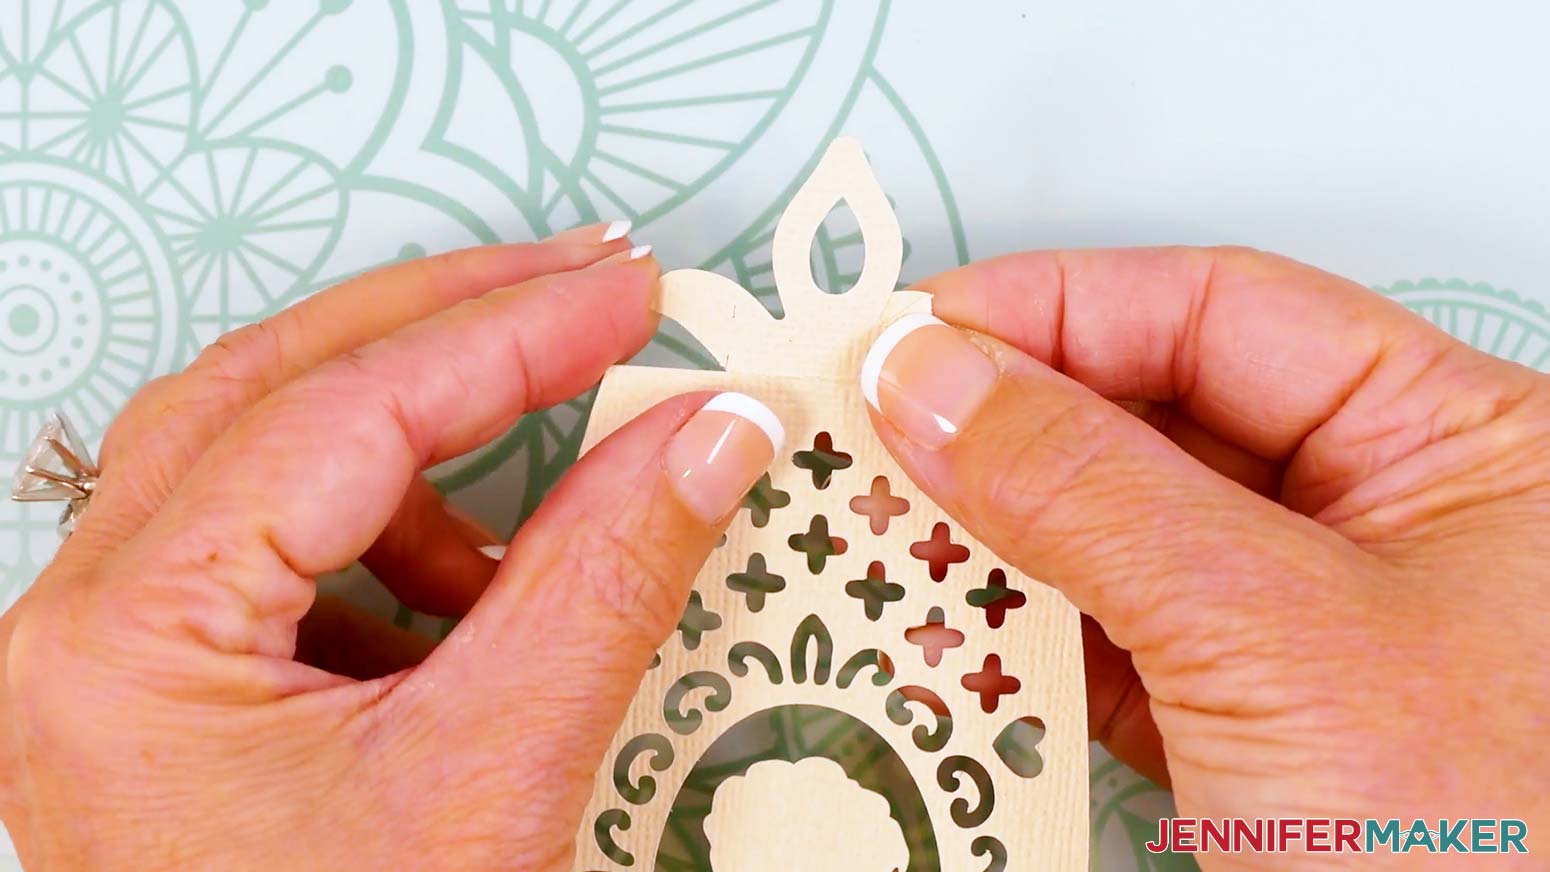
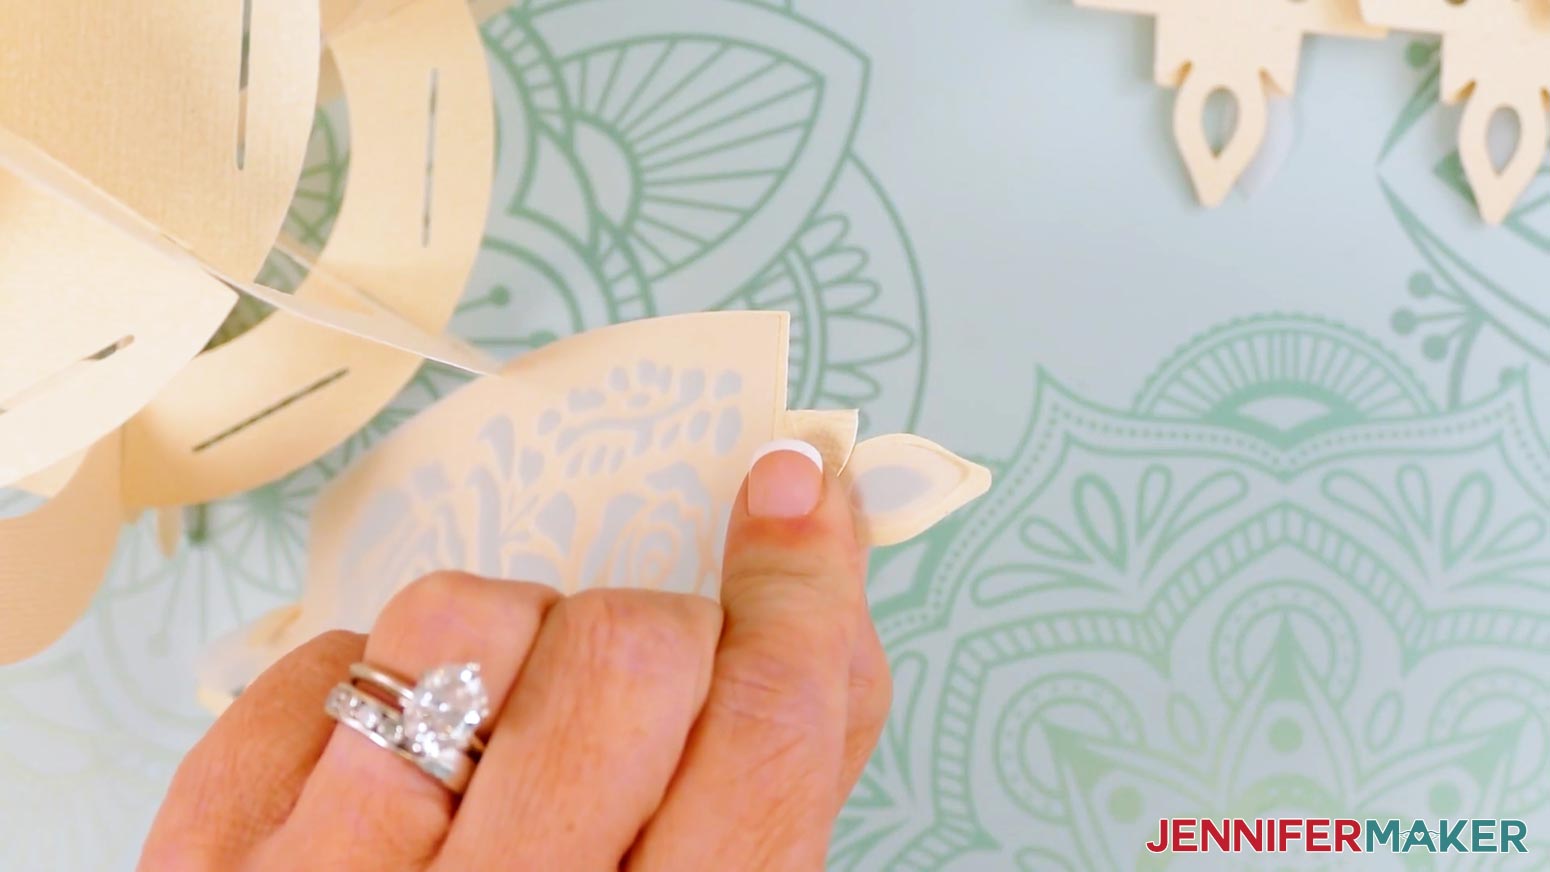
NOTE: The bottom base has a hole in the center for access to the lights in the assembled lantern. - Take the first panel piece and fold back along the top and bottom horizontal score or dashed cut lines.
- Fold back the top tab’s two wings along the vertical score or dashed cut lines, then do the same for the bottom tab wings.
NOTE: Make sure your panel’s design is facing the correct direction when you fold the tabs back. Refer back to your Design Space screen if needed. - If using the vellum diffuser pieces, insert one onto the back of your folded panel, using the wings to hold it in place.
- Repeat Steps 6-8 for the five remaining panels and diffusers.
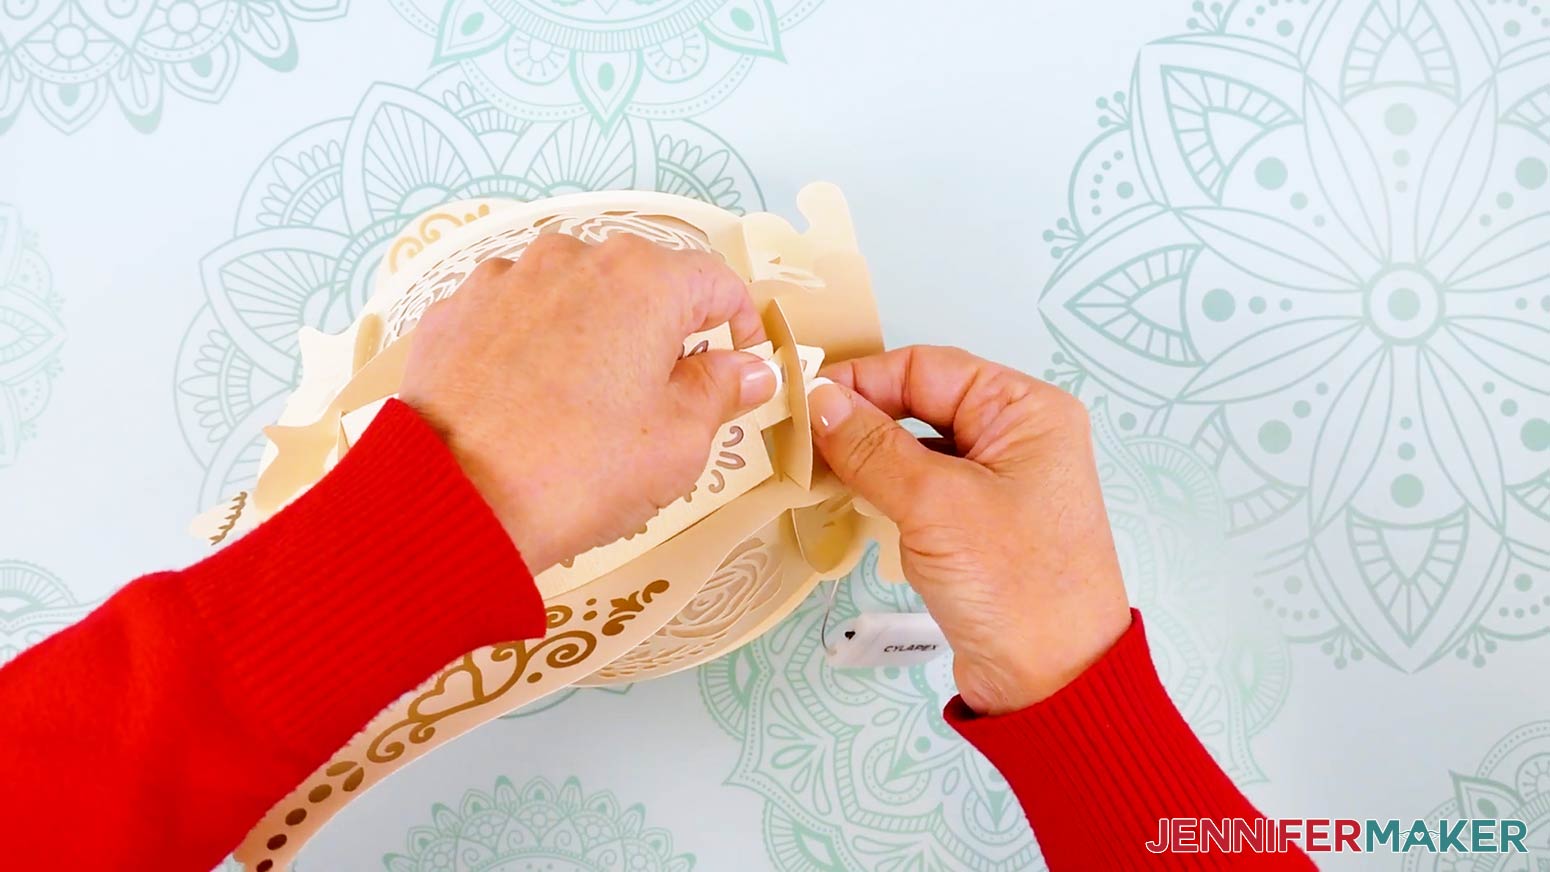
- Insert a panel’s top and bottom tabs into the first section of the frame’s top and bottom base slots.
TIP: Pinch the wings and the tip of the panel when inserting it into the slot to make sure the vellum goes through the slot, as well. - After each tab is inserted, unfold the tab’s wings to lock the panel in place.
- Repeat Steps 10-11 to insert the next four panels.
TIP: I like to alternate the two different panel designs around the lantern base.
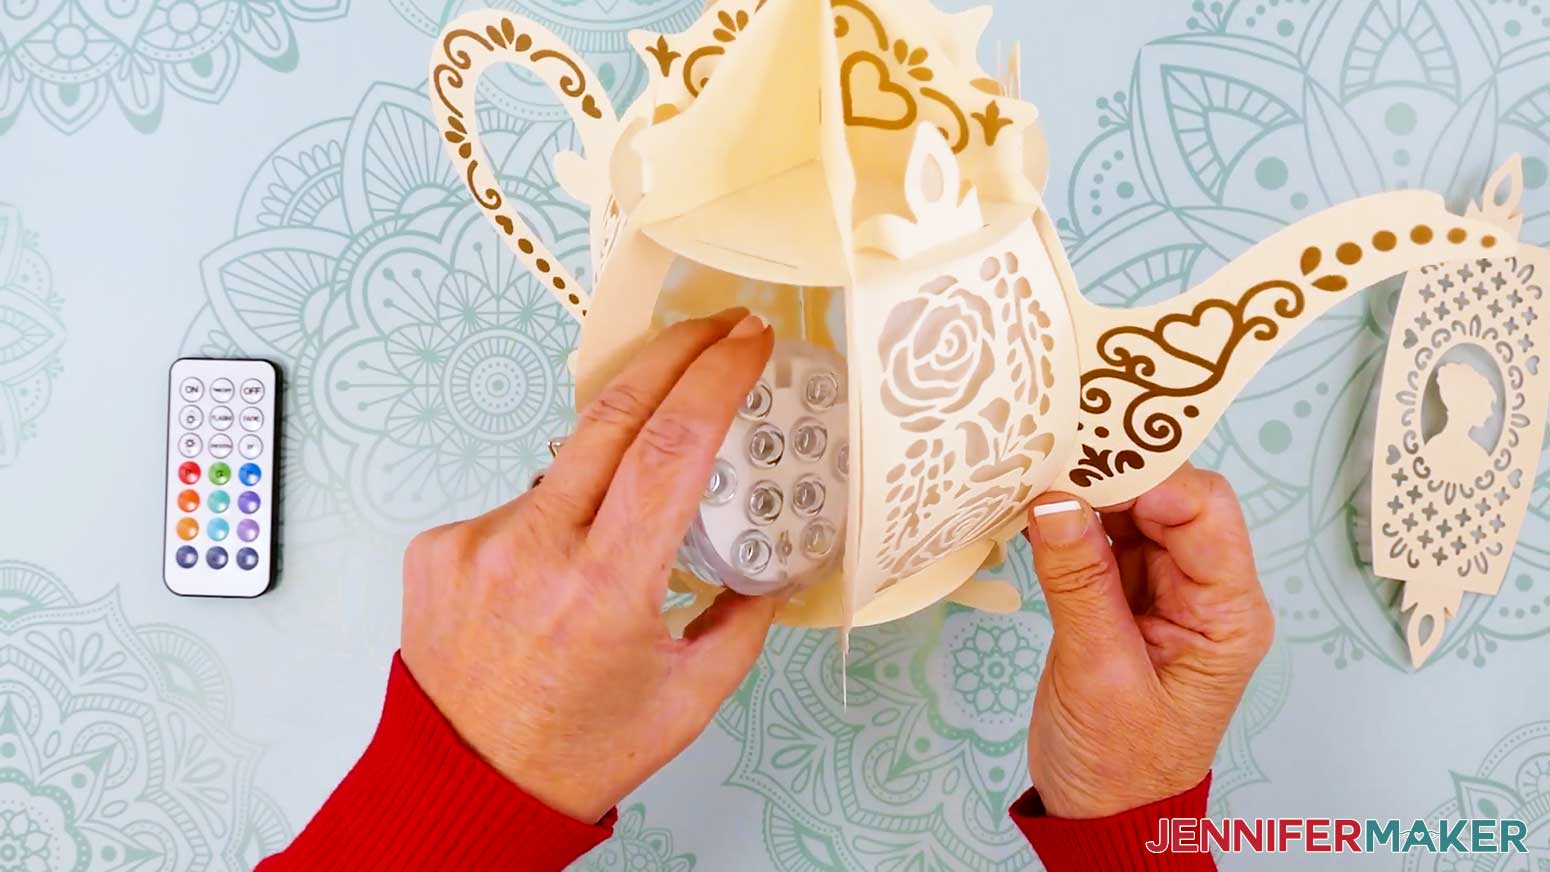
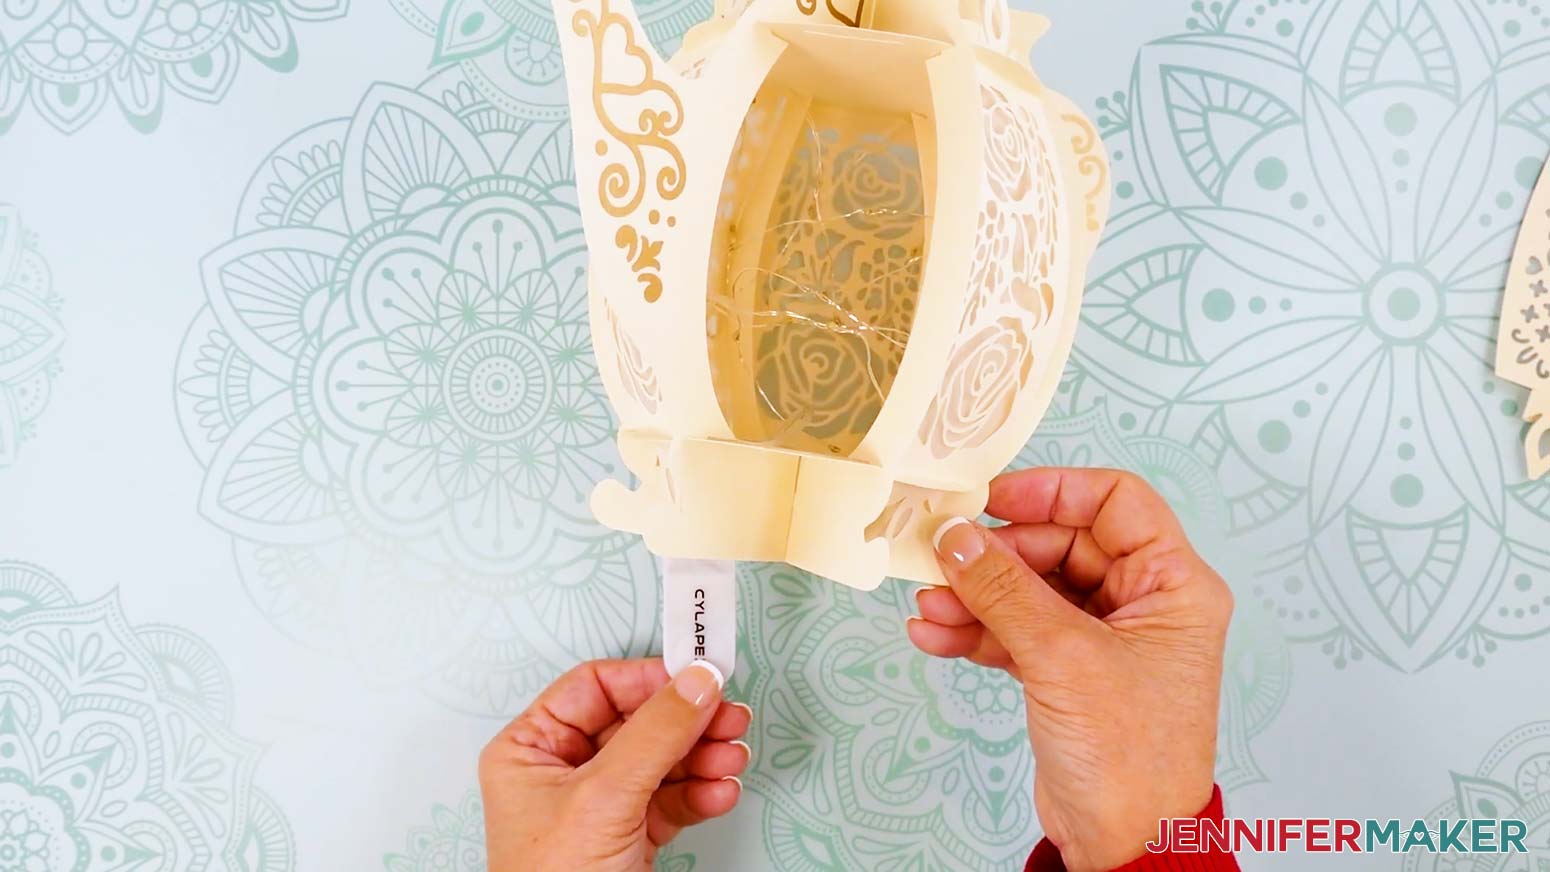
NOTE: We will insert the last panel after we put the lights inside. - Test your lights to make sure they work, including any remotes. You may have to remove a battery protector tab first.
- If you’re using an LED tea light or puck light, place it in the bottom of the lantern base.
- If you’re using fairy lights, remove any twist ties, and then unwind the lights.
- Loosely wrap the wire around your fingers to make a coil to evenly distribute the lights.
- Place the coil of lights and the battery pack inside the lantern.
TIP: Position the battery pack so the power switch is easily accessible via the openings in the bottom of the lantern. OR, to keep the battery pack accessible without having to reach inside the lantern, slide the battery pack through a bottom opening and keep it hidden behind the lantern while on display. - Once your lights are inserted, follow Steps 10-11 to slot in the final panel.
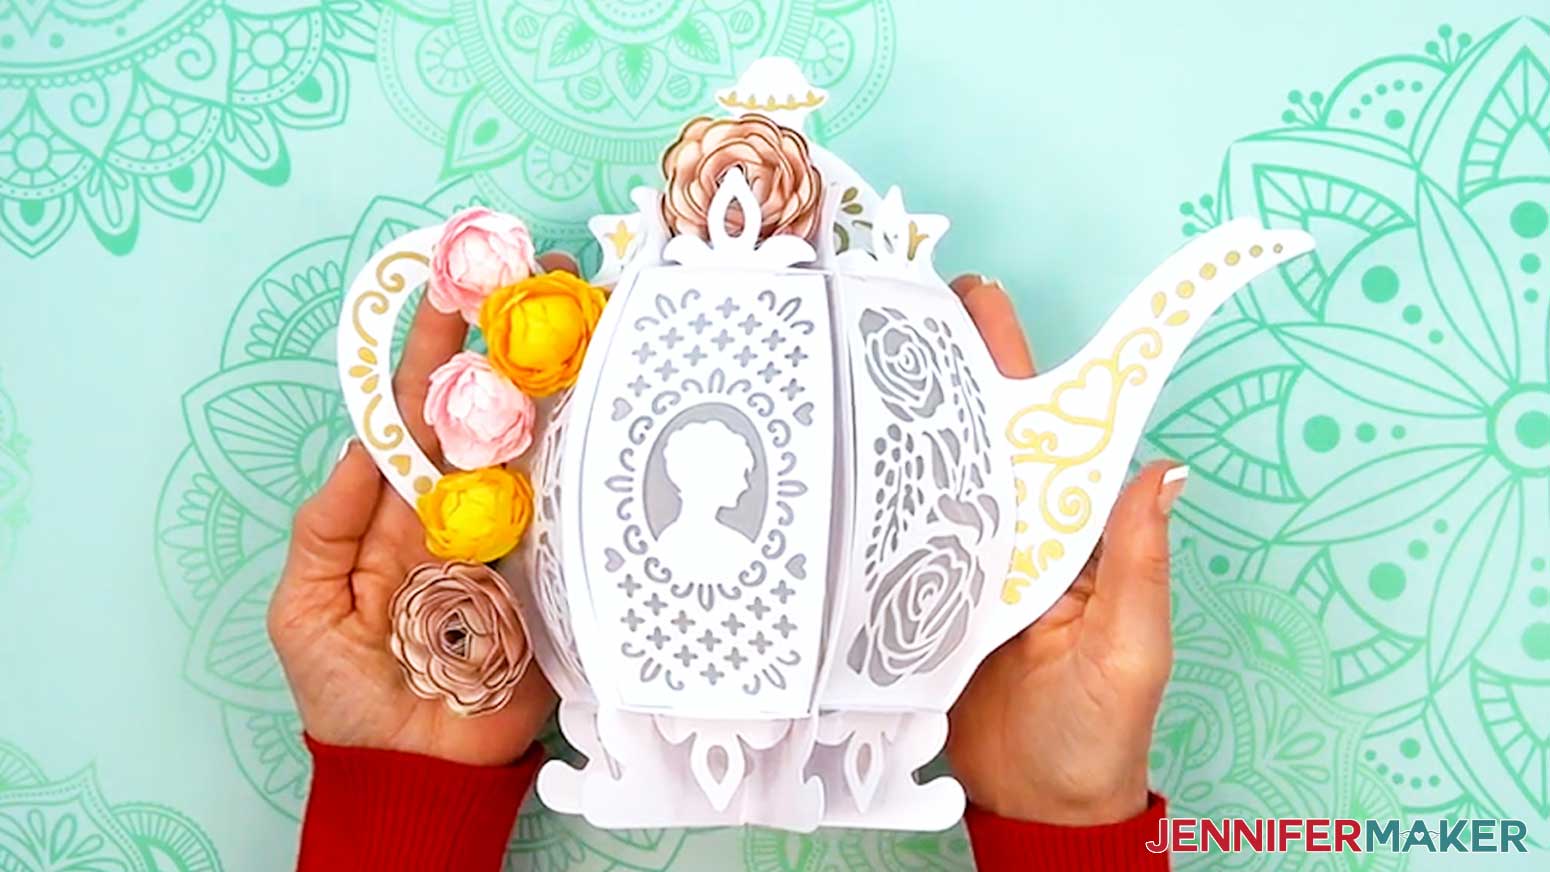
- Your teapot lantern is ready for display!


STEP 4: SHOW IT OFF
You now have a beautiful teapot lantern for your next Bridgerton watch party! To add an elegant finishing touch, attach mini crepe paper peonies or mini cardstock roses!
Notes
Finished Size: Approximately 11.5" W x 9" H x 5.5" D
Answers to Your Questions About Making a Teapot Lantern
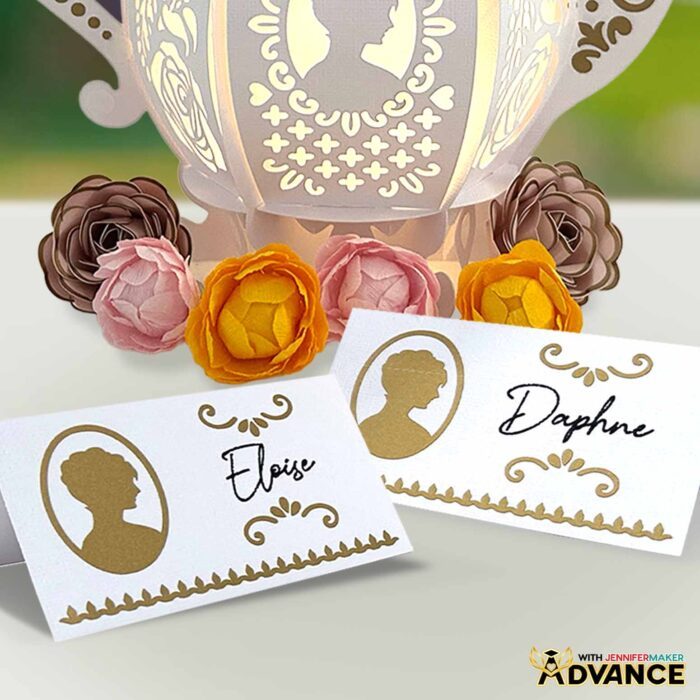
Q: Is there a way to create an accessory to go along with my teapot lantern?
A: You can learn how to create your own custom tea party name cards just like below in my ADVANCE program. Learn more about ADVANCE here!
Q: Do you have other Bridgerton crafts?
A: Yes! I also made a fun family birthday sign with all of my Bridgerton favorites!
Q: How do I craft a lantern?
A: Start by cutting your pieces from cardstock, vinyl, and vellum using a Cricut machine or by hand with the free design files. Then apply your decorative vinyl elements onto the main frame. Assemble the base and frame pieces, slot in the vellum panels, and finally add safe lights (like an LED tea light or fairy lights, never fire!) inside to bring your lantern to life. I guide you through the whole process in my free tutorial!
Q: What materials are best for DIY lanterns? What paper should I use?
A: For a sturdy frame with a vintage feel, I recommend 80 lb. textured cardstock. For details, permanent adhesive vinyl works beautifully, and vellum makes great diffuser panels that soften and spread the light. And, of course, you’ll also need a safe lighting option such as LED tea lights, fairy lights, or puck lights.
Q: Can I make a lantern without a Cricut?
A: Yes! It is much easier to cut the shapes precisely with a cutting machine, but along with the SVG files for Cricut Design Space, I’ve included a PDF version in the free design folder so you can cut the pieces by hand with scissors or a craft knife.
Q: What kinds of lights work best in a paper lantern?
A: Since this project is made from cardstock, you should never use an open flame. Instead, use safe lights like LED tea lights for a flickering effect, fairy lights for a twinkly look, or puck lights if you want bold colors and remote control options. I prefer fairy lights for this project for a real turn-of-the-century glow!
Q: Can I decorate both sides of the lantern?
A: Absolutely! In the tutorial, I show you how to duplicate and flip your decorative vinyl pieces so your lantern looks just as elegant from the back as it does from the front.
Q: How can I make my teapot lantern look more unique?
A: Just have fun with it! You can add rhinestones or extra embellishments for extra flair. Or, experiment with colors of cardstock, vinyl, vellum, and LED lights to make your lantern uniquely yours. And for a truly enchanting setting, add rolled flowers like these small cardstock roses and crepe paper peonies!
Q: Where can I buy the supplies and tools to make a teapot lantern?
A: I have a list above with links to all of the materials I used to make it super easy for you to find what you need. I love shopping for craft supplies and deals on Amazon with my Prime membership for fast, free shipping!
Q: Do you have other paper lanterns I can make?
A: I sure do! Light up your life with these fun home illumination designs:
- Flower Bouquet Lantern
- 3D Easter Egg Lantern
- Layered Garden Lantern
- Love Paper Lantern
- 3D Paper Animal Lantern
- Hanging Fall Paper Lantern
- Paper Witch Lantern
- Hanging Paper Snowflake Lantern
Q: Can I make and sell paper teapot lanterns using your design?
A: If you want to use my teapot lantern designs and project for commercial use, please familiarize yourself with my important licensing information before selling your crafts.
Q: Help! My Cricut Design Space screen looks different from yours!
A: If you’re using the latest version of Cricut Design Space, your screen may have slight variations from the screen you see on the video tutorial. Good news! All of the same functions are there, they may just be in different spots or have new icons. Pause the video if you need, or follow along with the written tutorial. Additionally, if you get stuck, feel free to ask for expert support in our Facebook group.
Q: Where can I get help if I get stuck?
A: If you want quick troubleshooting or you want to show off your finished cards afterward, my Cricut Facebook group can be a helpful place to compare notes and see what others are doing.
Get my free SVG/DXF/PDF files to make your own teapot lantern!
(If you do not see the signup form above, click here.)
I absolutely love seeing your handmade crafts! Once you’ve learned how to make a teapot lantern, inspire others and share photos of your project in our Facebook group or tag me on social media with #jennifermaker.
Love,

Want to remember this? Save this tutorial on How To Make a Teapot Lantern to your favorite Pinterest Board!