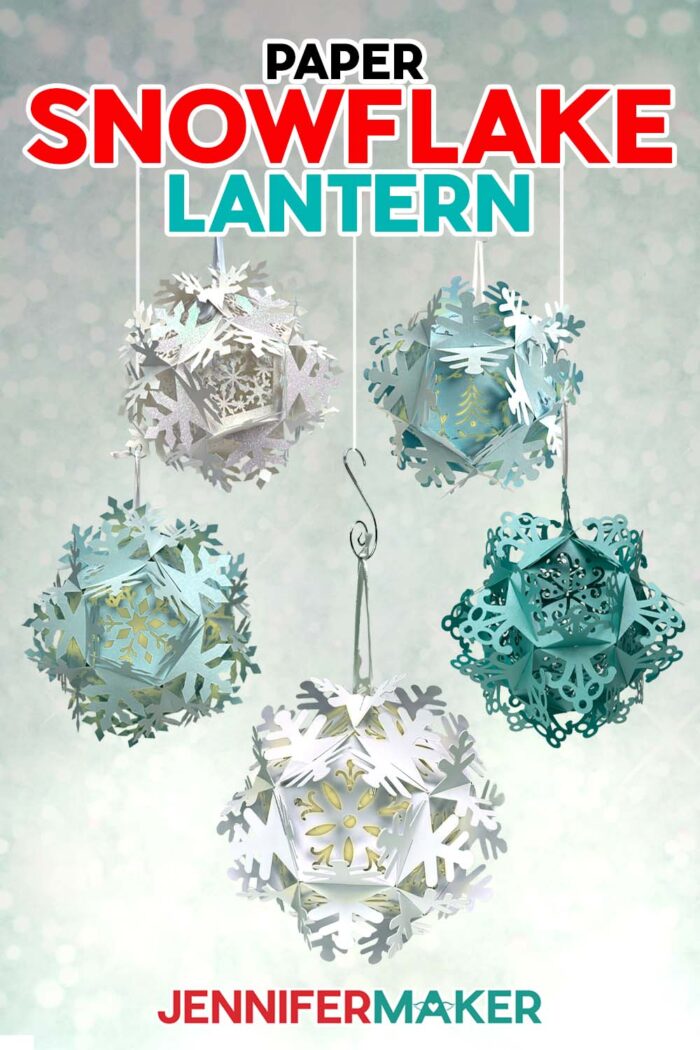
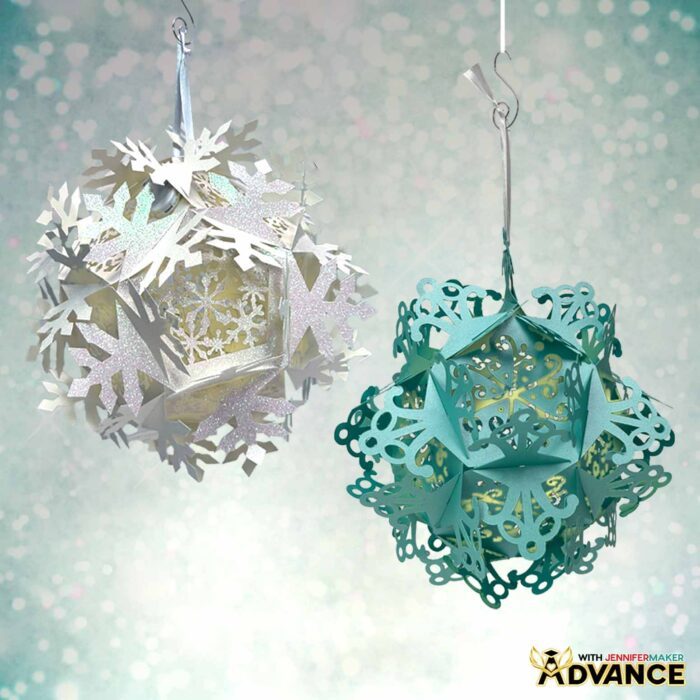
Learn how to make a whimsical paper snowflake lantern!
I learned how to make traditional paper snowflakes (you know, the ones where you fold paper into a wedge and cut shapes, then unfold it to see the result?) at a young age and still love them to this day. Including some extra fancy styles with different techniques! But sometimes I want my holiday decorating to really POP like these 3D paper snowflake lantern ideas! I’ll show you how to get the perfect intricate cuts and put them together in no time at all!
Watch the full step-by-step video tutorial on making a paper snowflake lantern:

I really love paper lanterns! Over the years, I’ve made many different kinds, but these new snowflake paper lanterns may be my new favorites!
They may look intimidating, but with the right materials and some patience, you can absolutely add them to your home decor this winter!
Since the snowflake lanterns are nearly 100% paper material (plus some lights and ribbon!) it’s really important to use high-quality paper, like the cardstocks and Kraft board I’ve linked below. Cheap paper uses shorter fibers, which can tear rather than cut cleanly, like the longer fibers in better quality paper. While the higher-quality paper can be more expensive initially, you’ll save yourself time, materials, and stress by investing in it instead of struggling to make really inexpensive cardstock work. If you have your eye on a certain pack of paper, I recommend watching for sales, a coupon code, and low prices to make it fit your budget. It’s worth the extra expense! I have full details on how to get the best cuts with your Cricut in the tutorial and video.

If you want to make the assembly a little easier to follow on your first paper snowflake lantern, consider using one-sided cardstock so you can tell which side should face out. And you don’t have to stick to white for your paper lantern colors. Blue lanterns would add a pretty icy hue to your holiday decorating! You can also make it a little easier by skipping the vellum diffuser panels as you’re learning!
I used my Cricut Maker 3 to cut out the paper snowflake lantern pieces, but you can use an original Maker, an Explore series machine, the Cricut Venture, or the Cricut Joy Xtra. The panels are a little too detailed to cut perfectly on an original Cricut Joy.
Using the correct kind of lights in very important when making a paper lantern. Never use real candles with paper projects because it’s a huge fire risk! Incandescent lights can also heat up and lead to damage or fire, so only use LED lights since they stay the same temperature (which is very low). Puck lights might weigh the paper snowflake lantern down, so I had the best results with LED fairy lights. You can hide the battery pack in a less visible spot to still access it when you need to switch the lights on and off or replace the batteries!
After you’ve put so much work into this delicate design, you’ll certainly want to display it year after year! I’ll show you a few easy storage tips to keep it safe in between winter wonderland seasons!
Of course, you don’t need to use your paper snowflake lanterns just for Christmas and holiday decorations! They’re so pretty, these lanterns wouldn’t look out of place at cool-weather special occasions like baby showers or weddings!
If you want to learn how to customize the inner section of your paper snowflake lantern panels, you can learn how in my Advance with JenniferMaker program and a few tricks in Cricut Design Space!
Let me show you how to make a paper snowflake lantern! This post contains some affiliate links for your convenience (which means if you make a purchase after clicking a link I will earn a small commission but it won’t cost you a penny more, there is no additional cost)! Read my full disclosure policy.
Materials to Make A Paper Snowflake Lantern
View my Amazon shopping list for the exact items I used!
- Three to Twelve (3-12) Sheets of 12″ x 12″ 65 lb. White Cardstock -OR-
- Three to Twelve (3-12) Sheets of 12″ x 12″ White Kraft Board -OR-
- Three to Twelve (3-12) Sheets of 12″ x 12″ White Glitter Cardstock -OR-
- Six to Twelve (6-12) Sheets of 8.5″ x 11″ 105 lb. Lagoon Teal Metallic Cardstock
- One to Three (1-3) Sheets of 12″ x 12″ Vellum (optional)
- One (1) Strand of Fairy Lights
- Medium 3/8″ Zots Glue Dots
- 12″ to 24″ White Ribbon (optional, for hanging)
- A way to cut your materials – I’m using the Cricut Maker 3 but you could also use the Cricut Maker, a Cricut Explore Series machine, a Cricut Venture, or a Cricut Joy Xtra,
- Cricut StandardGrip Machine Mat 12” x 12”
- Cricut LightGrip Machine Mat 12″ x 12″ (optional for vellum diffusers)
- Brayer
- Spatula
- Scraper
- Weeding Tool (optional for poking out tiny cutouts)
- Scissors
- Craft Glue (I used Bearly Art Precision Craft Glue)
How to Make a Paper Snowflake Lantern!

Paper Snowflake Lantern
Learn how to make a beautiful paper snowflake lantern!
Materials
- Three to Twelve (3-12) Sheets of 12" x 12" 65 lb. White Cardstock -OR-
- Three to Twelve (3-12) Sheets of 12" x 12" White Kraft Board -OR-
- Three to Twelve (3-12) Sheets of 12" x 12" 65 lb. White Glitter Cardstock -OR-
- Six to Twelve (6-12) Sheets of 8.5" x 11" 105 lb. Lagoon Teal Metallic Cardstock
- One to Three (1-3) Sheets of 12" x 12" Vellum (optional)
- One (1) Strand of Fairy Lights
- Medium ⅜” Zots Glue Dots
- 12"-24" White Ribbon (optional, for hanging)
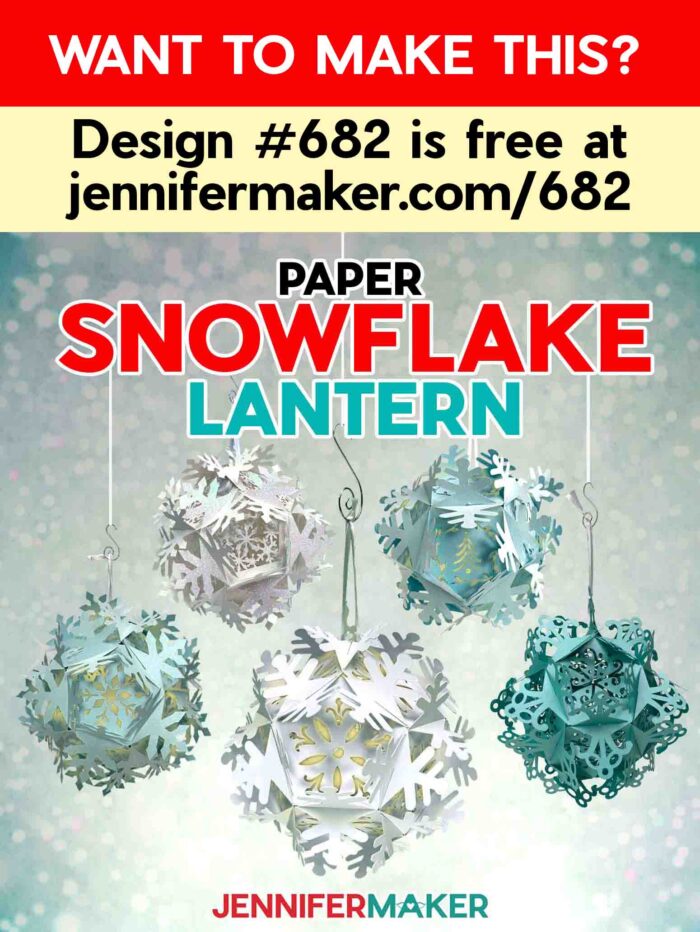
- Design #682 (My free SVG/PDF/DXF design files are available in my free resource library - get the password by filling out the form at the bottom of this page)
Tools
- A way to cut your materials - I’m using the Cricut Maker 3, but you can also use the Cricut Maker, a Cricut Explore Series machine, the Cricut Venture, or even the Cricut Joy Xtra
- Cricut Green StandardGrip Machine Mat 12" x 12”
- Cricut Blue LightGrip Machine Mat 12" x 12” (for optional vellum diffusers)
- Brayer
- Scraper
- Spatula
- Weeding Tool (optional to poke out tiny cutouts)
- Scissors
- Craft Glue - I used Bearly Art Precision Glue (for vellum only)
Instructions
STEP 1: GET MY PAPER SNOWFLAKE LANTERN DESIGNS
First, download my Paper Snowflake Lantern designs from my free library – look for Design #682. Alternatively, you can use the Save This Project form near the top of this post and the design link will be emailed to you.
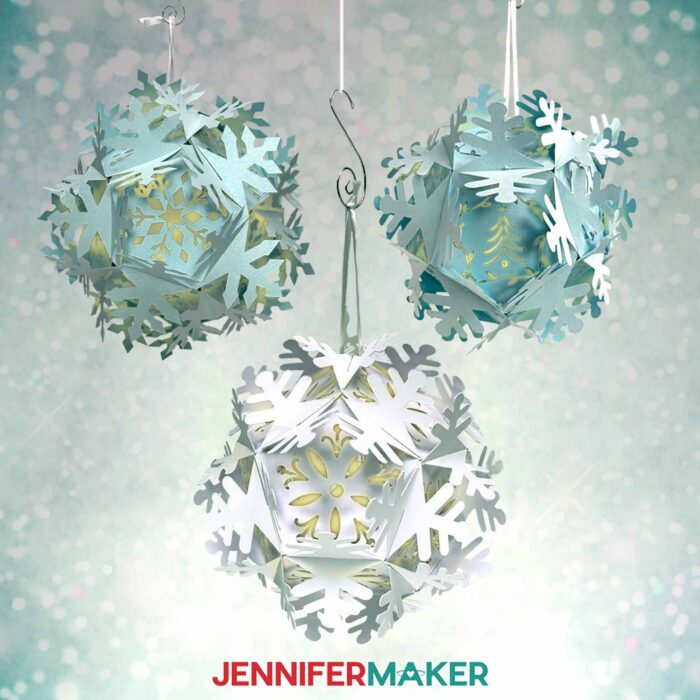
In the SVG folder, you’ll find three snowflake lantern designs:
- One with an ornate panel design.
- One with pointed panel designs.
- And one with rounded panel designs.
There is also a DXF folder with cut files, and a PDF folder with versions you can print and cut by hand.
I’ll demonstrate with the “ornate” version of the snowflake lantern, but you can use these steps to make any of the designs.
TIP: If you’re not sure how to upload, go to jennifermaker.com/svgs to learn how to unzip and upload SVG files.
STEP 2: PREPARE AND CUT YOUR SNOWFLAKE LANTERN
CRICUT DESIGN SPACE
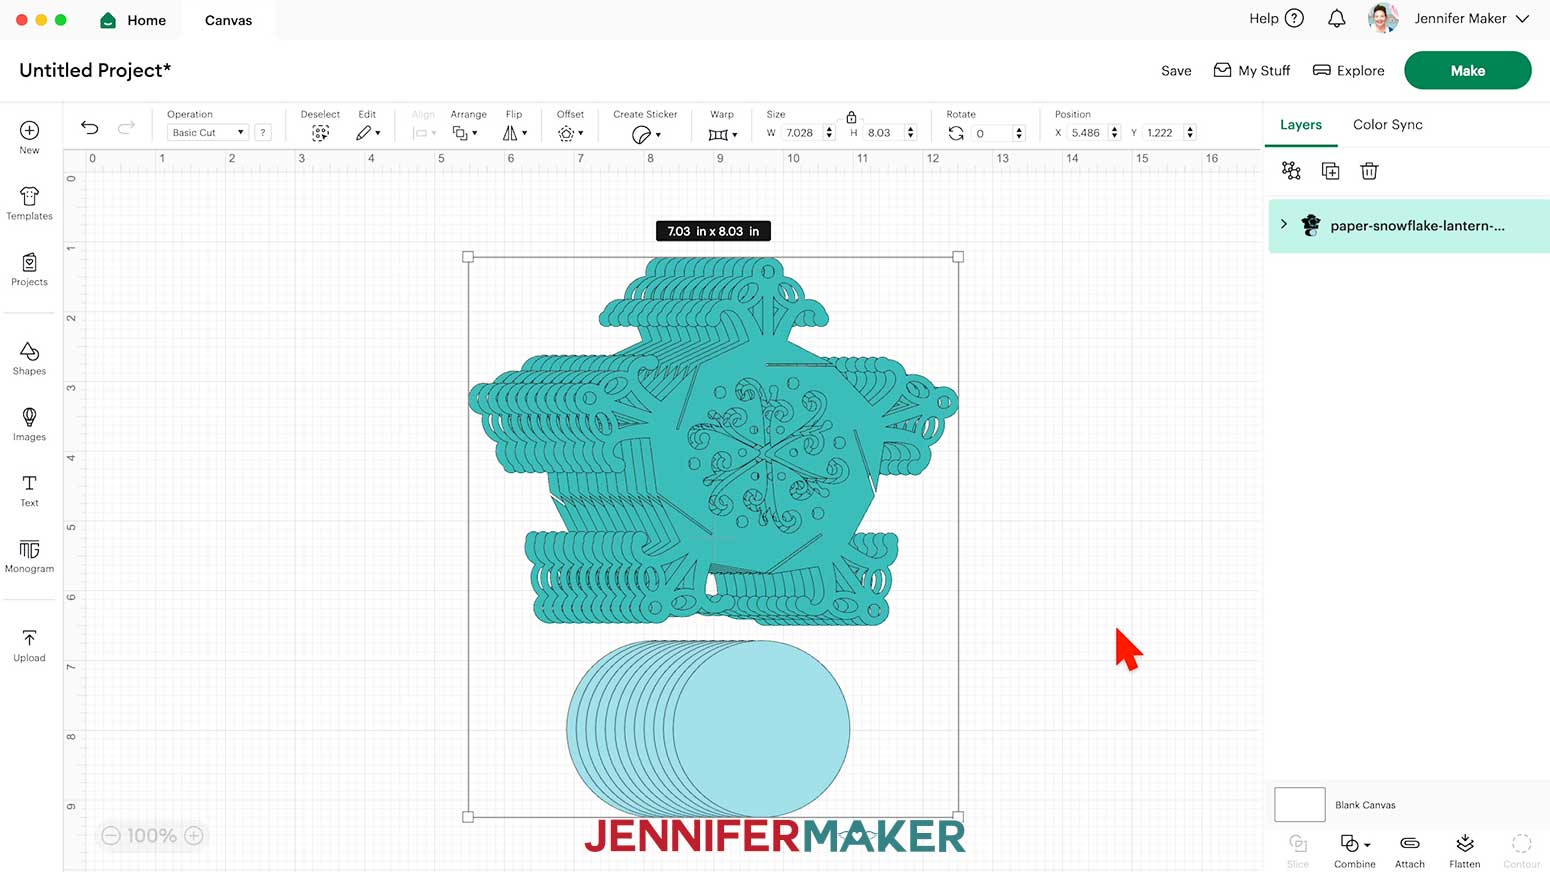
- In Cricut Design Space, open a blank Canvas.
- Click “Upload” and then “Upload Image.”
- Click “Browse” and find your downloaded design files.
- Select the snowflake lantern SVG file you want to use. NOTE: I’ll use the “ornate” file.
- Click “Continue.”
- Click “Upload” to add the file to the Canvas.
- The snowflake shapes will be the structure of the lantern, and the smaller circle or hexagon shapes will be the optional diffuser pieces.

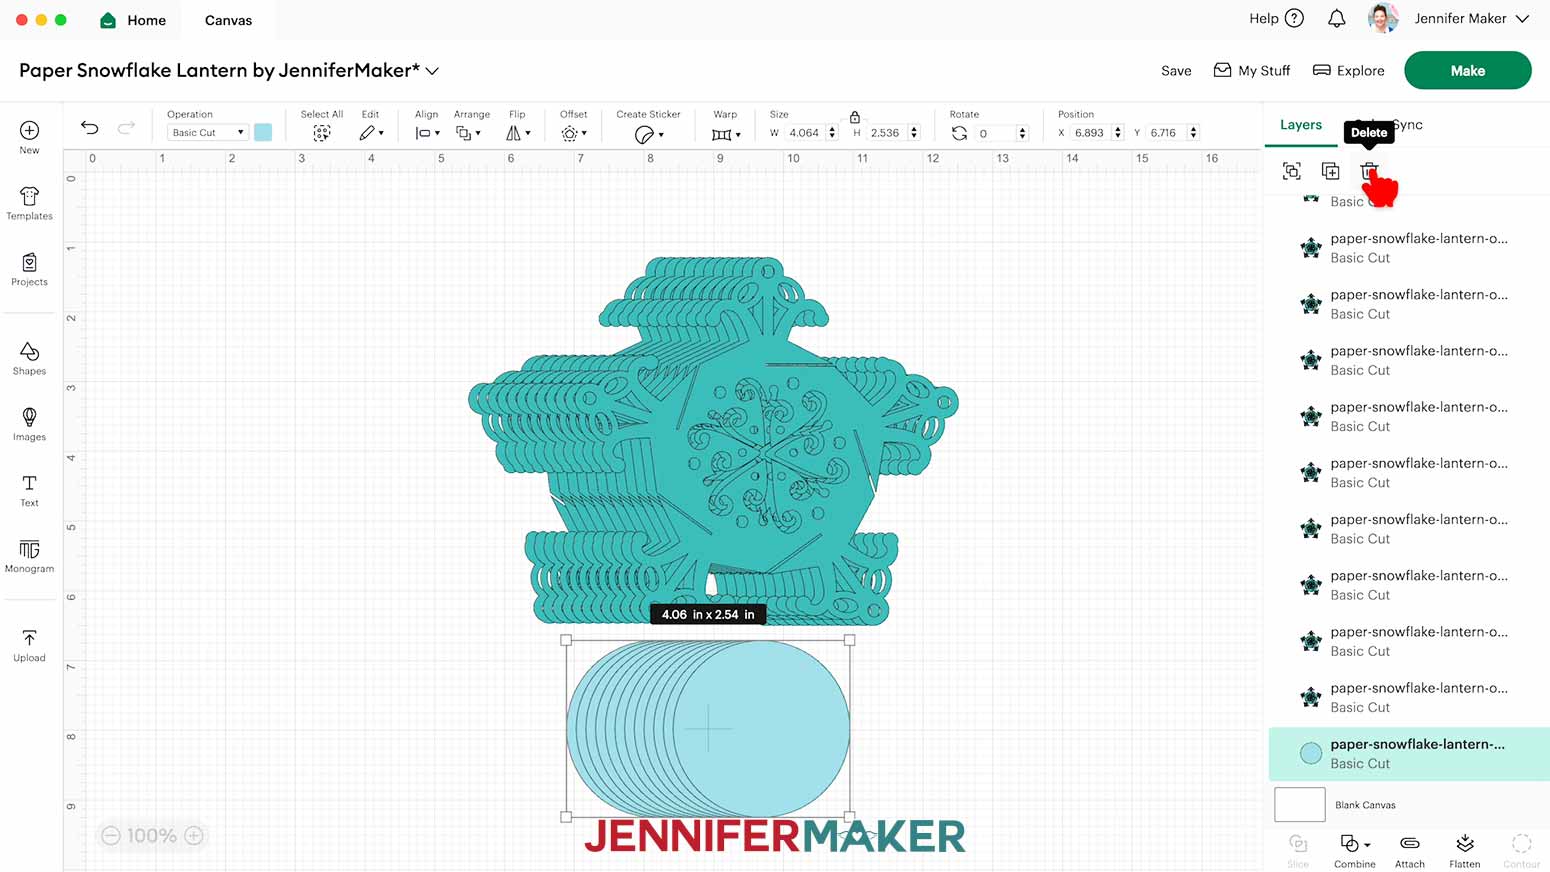
- Click “Save” and give your project a name so you can find it easily.
- Click “Ungroup” the design and spread the pieces out to work with the elements separately.
- The solid circles are optional diffuser panels, which you can delete if you want the light to shine through the panels without diffusion.
NOTE: I’ll keep mine and show you how to cut them out of vellum.
- As designed, the panels create a roughly 5” tall lantern. If you want to make a larger 8” tall lantern, select all the panels and optional diffusers, then click “Align” and “Center.”
- With the Lock icon closed, set the Width (W) to 8” which will also resize the diffusers to fit if you’re using them.
- You’re ready to cut!
 NOTE: I’ll keep mine and show you how to cut them out of vellum.
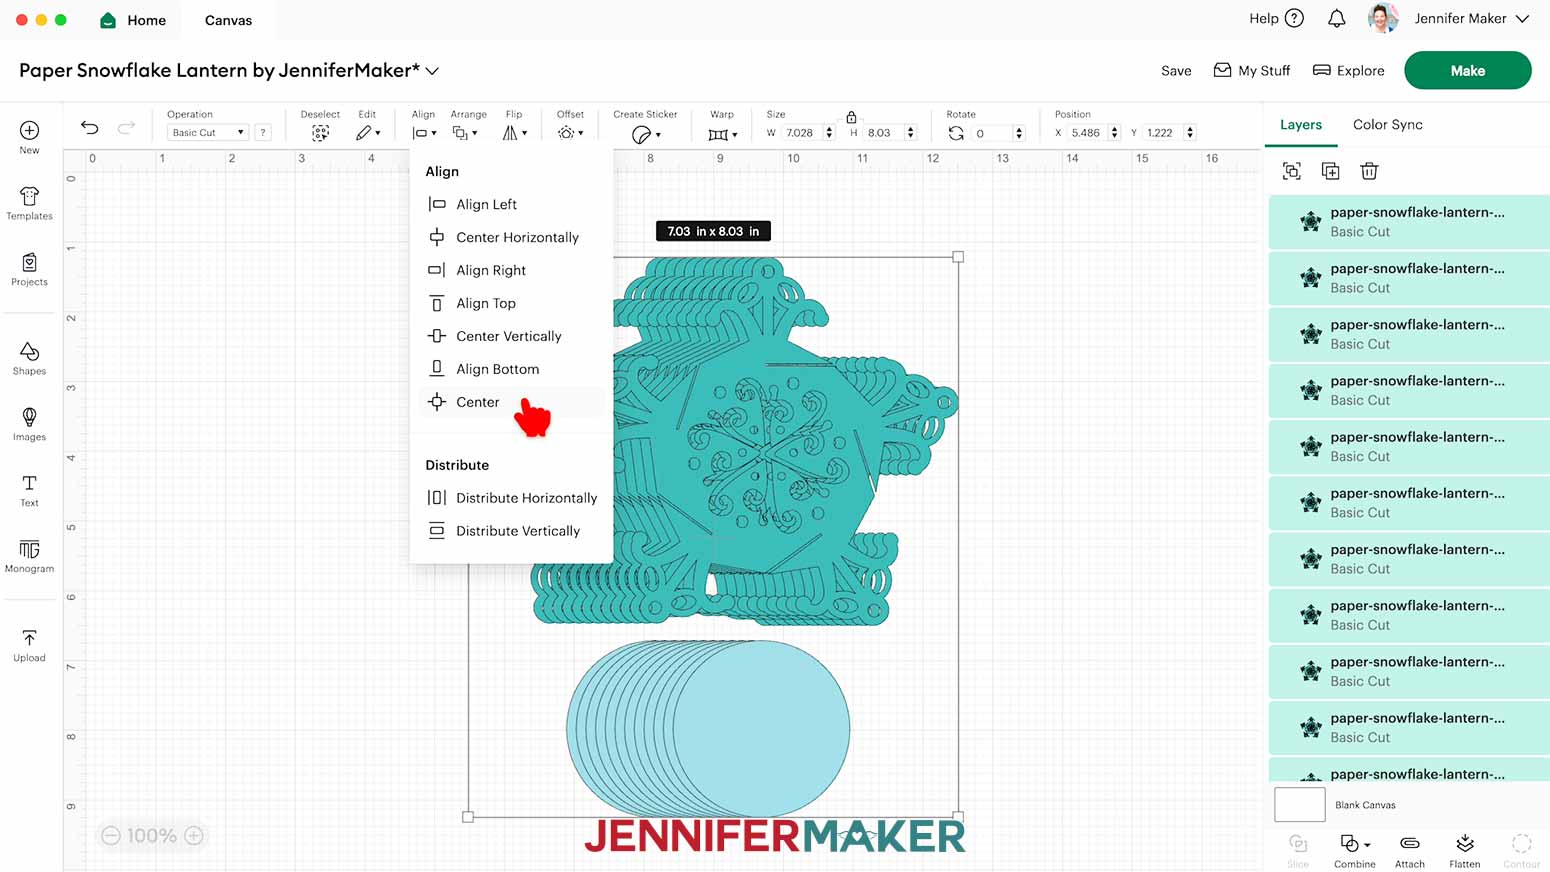

CUTTING
- Make sure the correct machine is selected in the top right.
- Click “Make.”
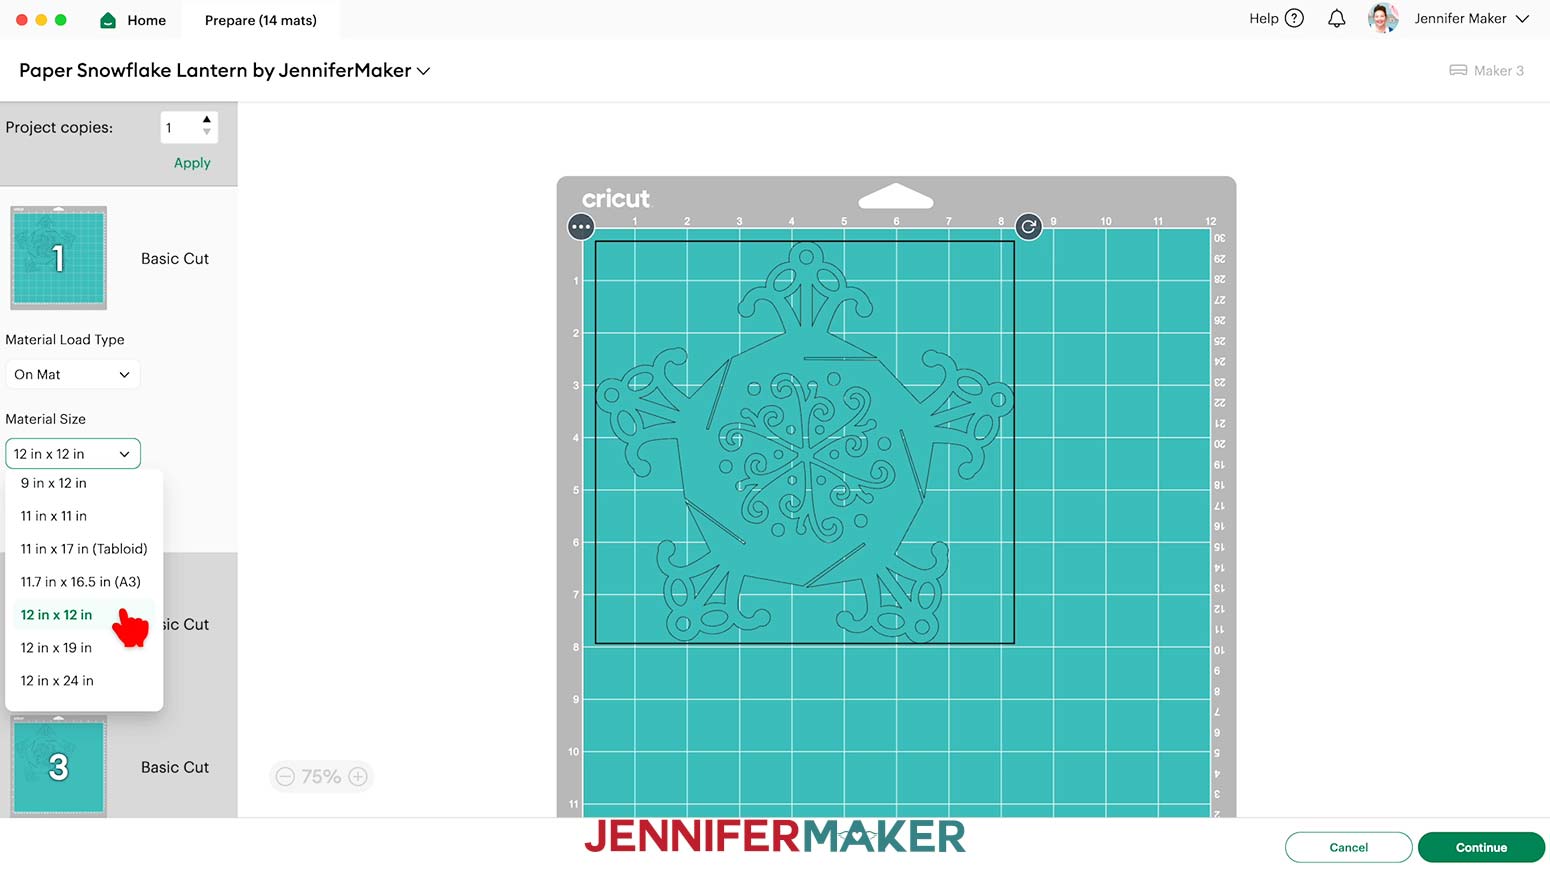
- On the Prepare screen, make sure the correct Material Size is selected for your materials.
NOTE: I’ll keep mine set to 12” x 12”.
- Click back on the first lantern panel mat so it loads first on the next page.
- Click “Continue.”
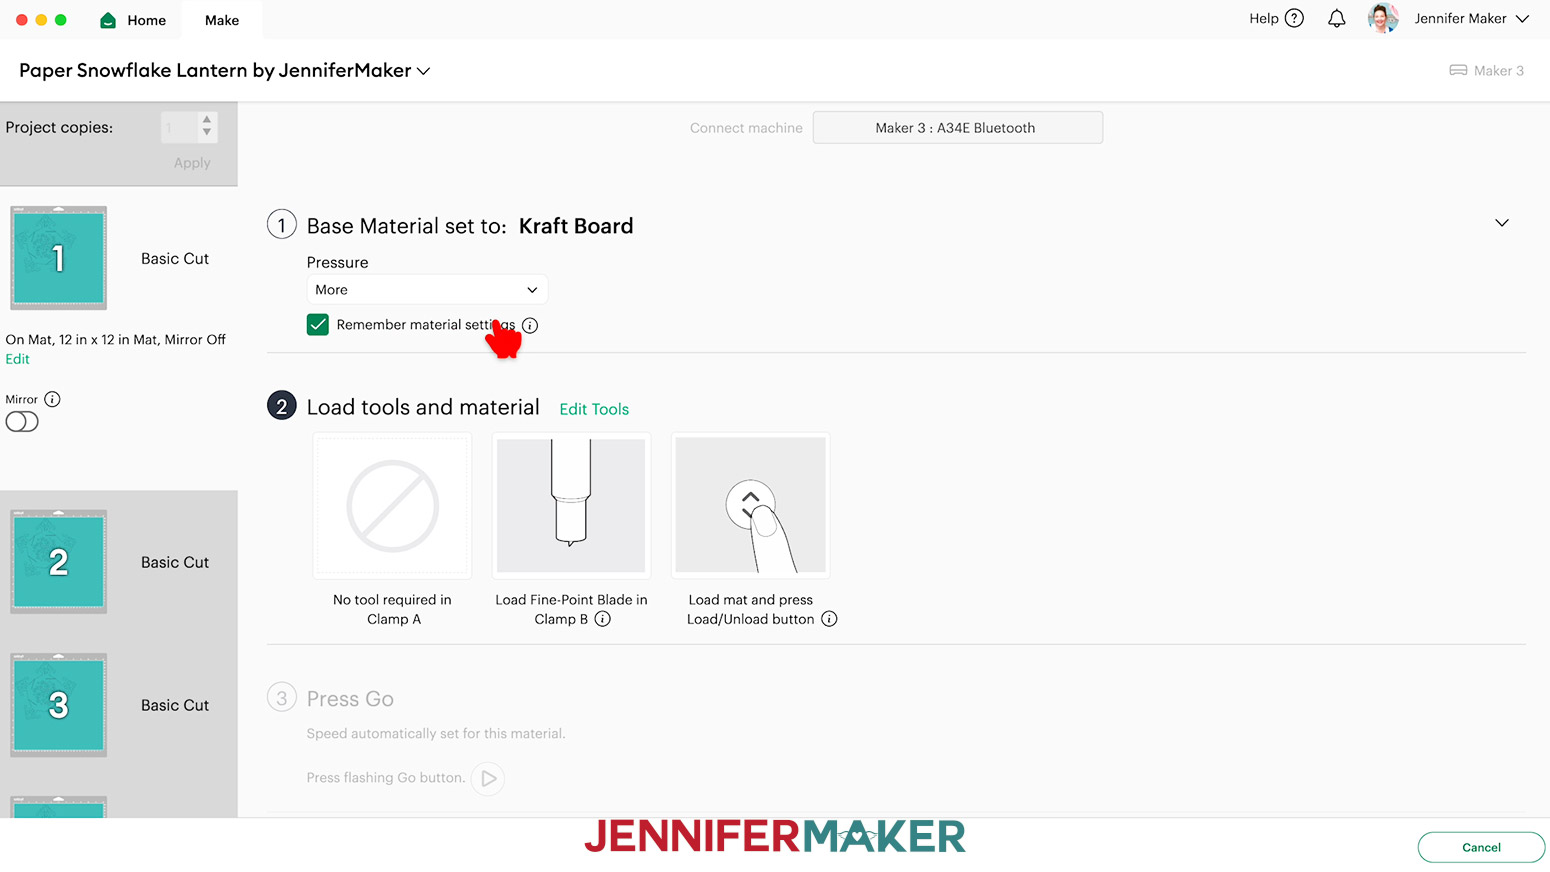
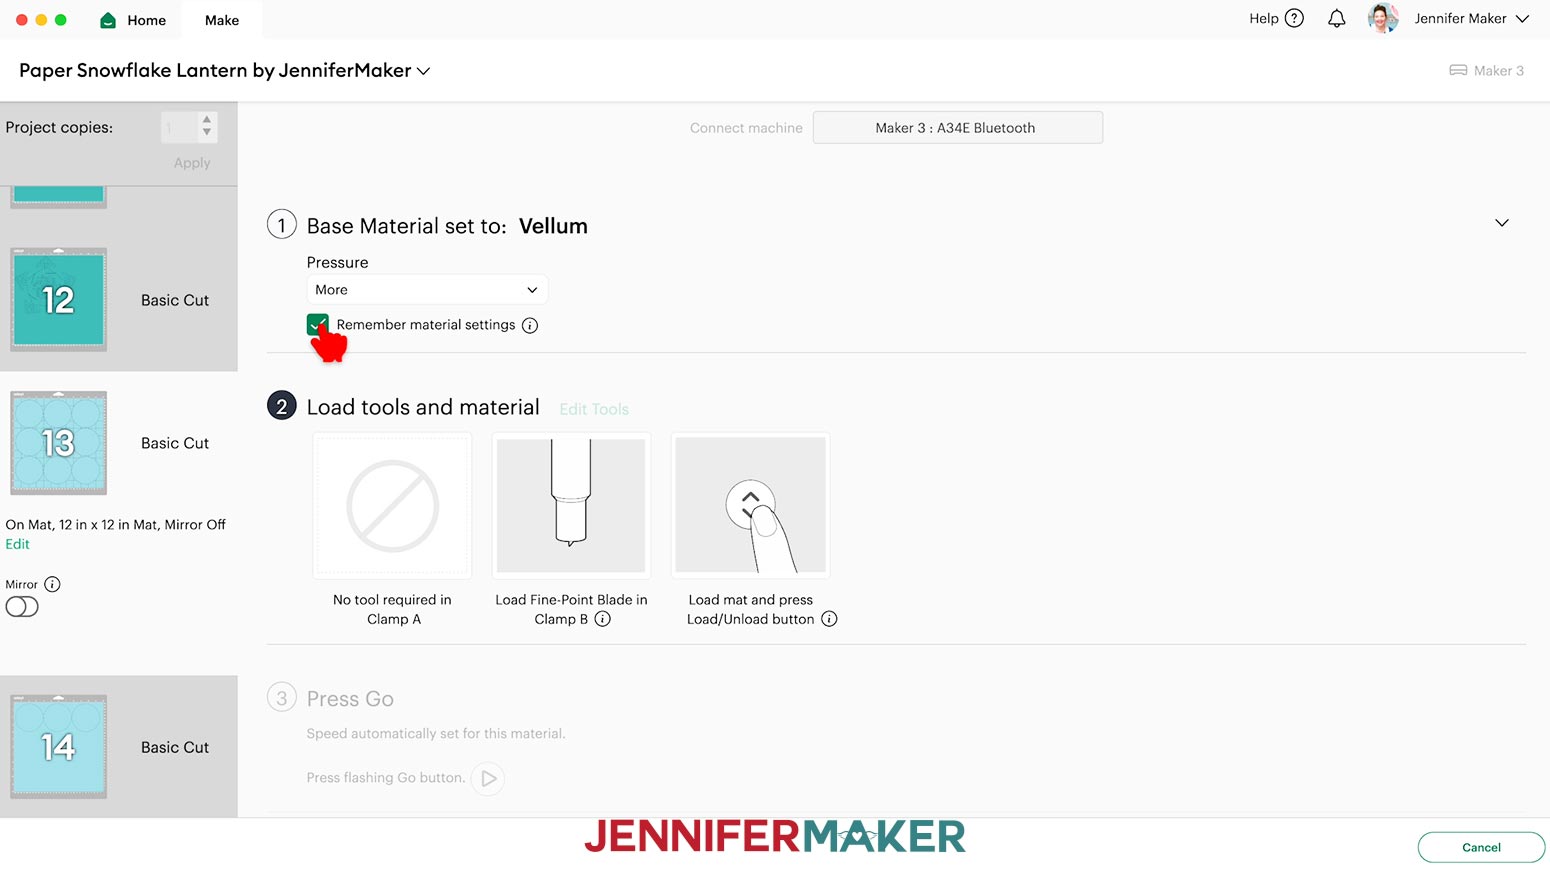
- On the Make screen, set the Base Material for your first lantern panel mat to the “Kraft Board” setting and change the Pressure to “More.” Then check the box for “Remember Material Settings” to save time between mats.
NOTE: Not all machines cut the exact same way, but I got the best results with these settings.
TIP: Changing the Pressure to “More” results in a cleaner cut.
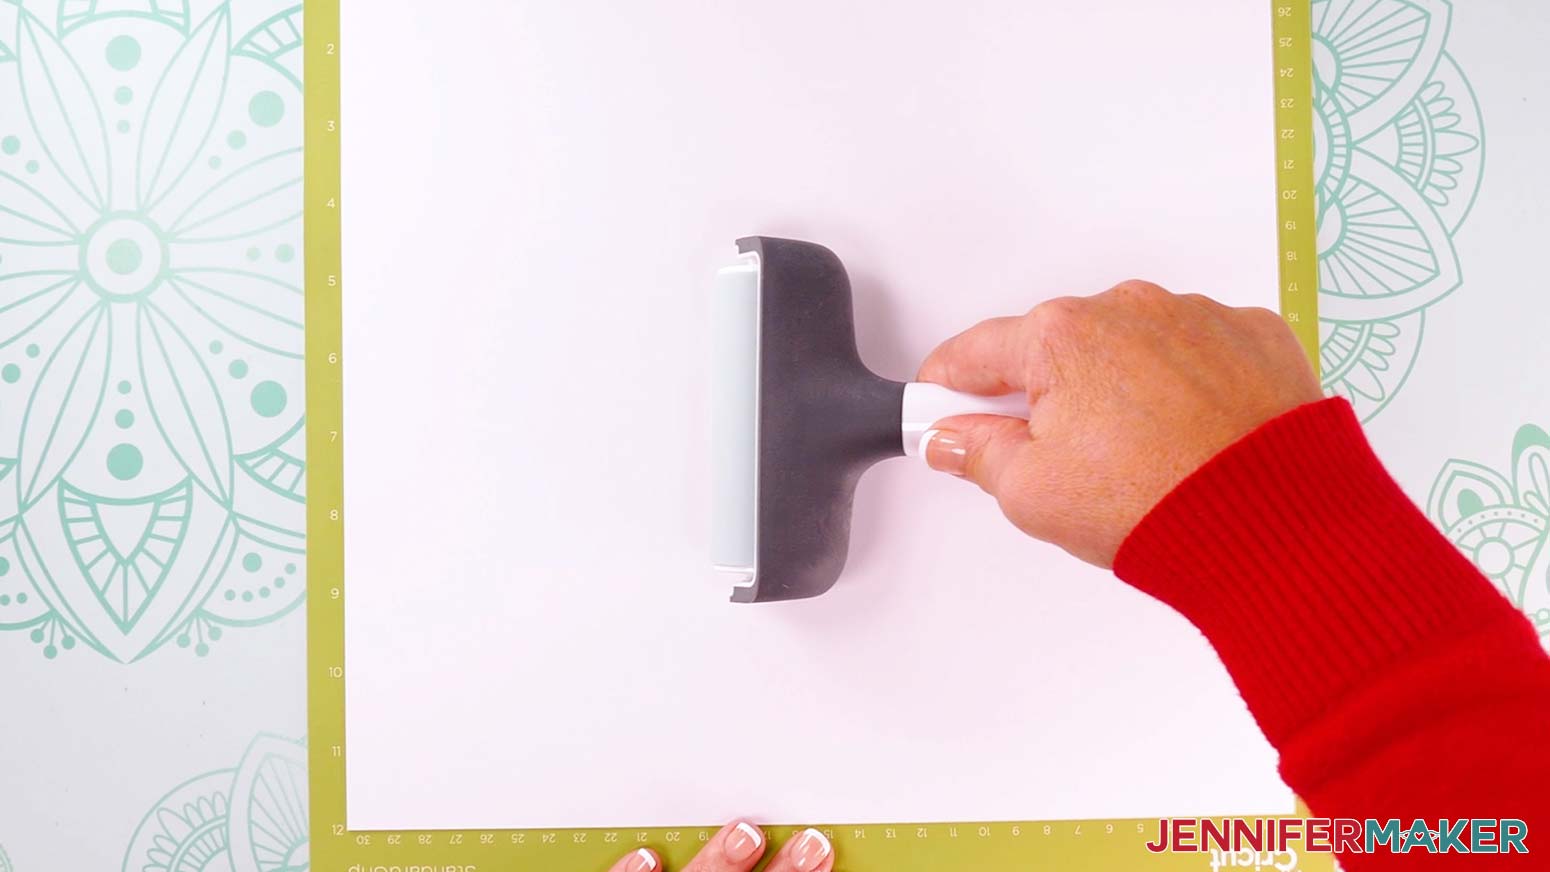
- Place your kraft board face up on a green StandardGrip machine mat.
- Use a brayer to make sure it’s fully adhered.
- Check that your Premium Fine-Point Blade is clean and in the clamp.
- Press the flashing “Load/Unload” button to load the prepared mat into your Cricut.
- Press the flashing “Go” button to begin cutting.
- When the cuts finish, don’t unload the mat right away. Gently lift a corner of the material to make sure the cuts went all the way through. If not, press the “Go” button again to make a second pass of cuts in the same spots.
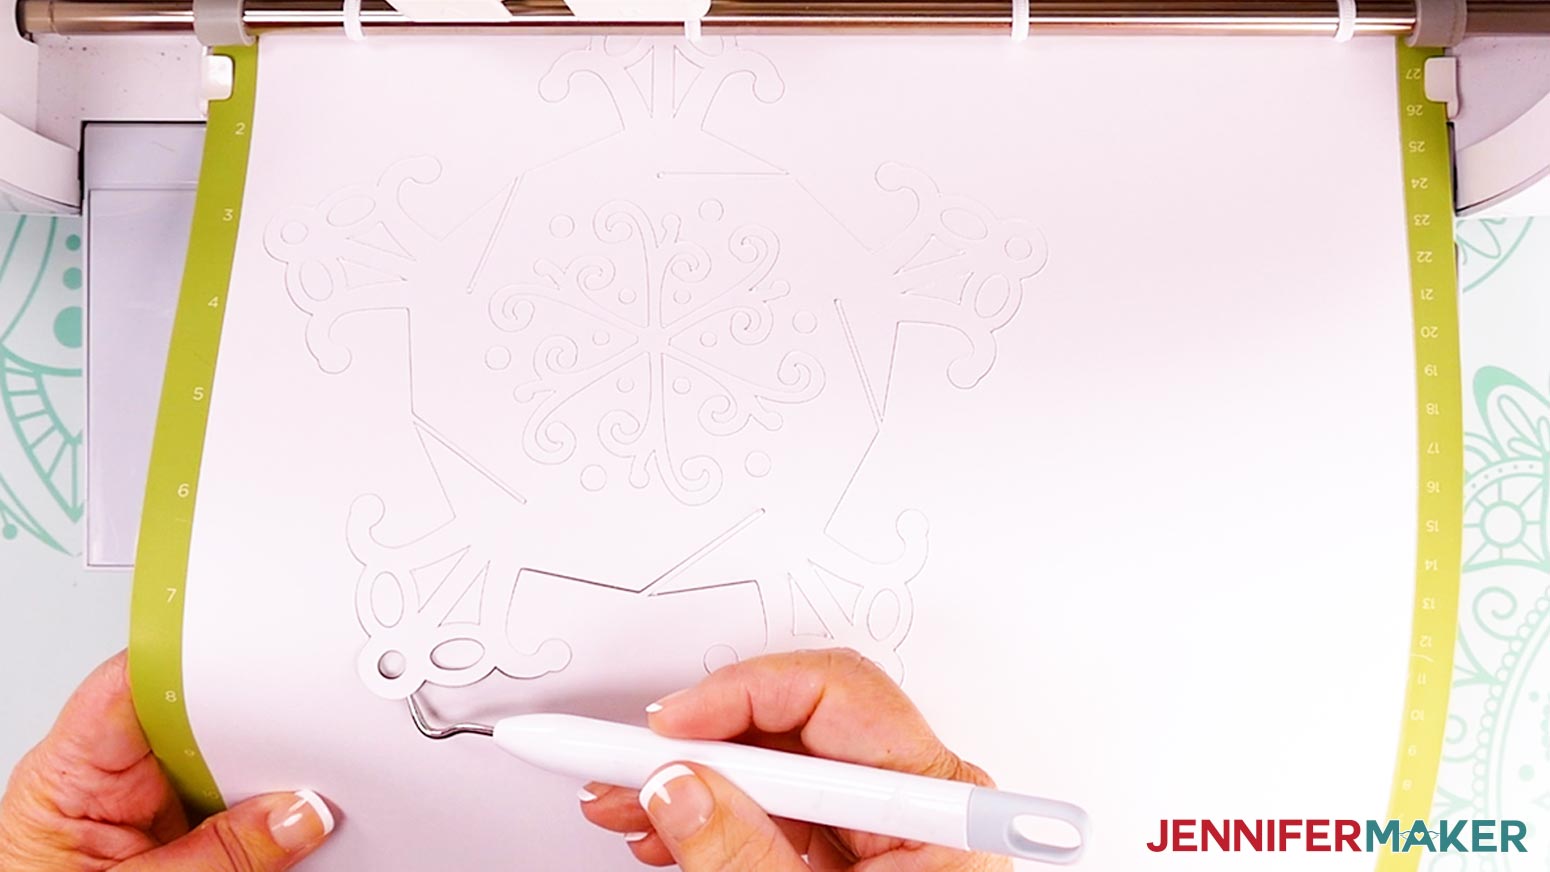
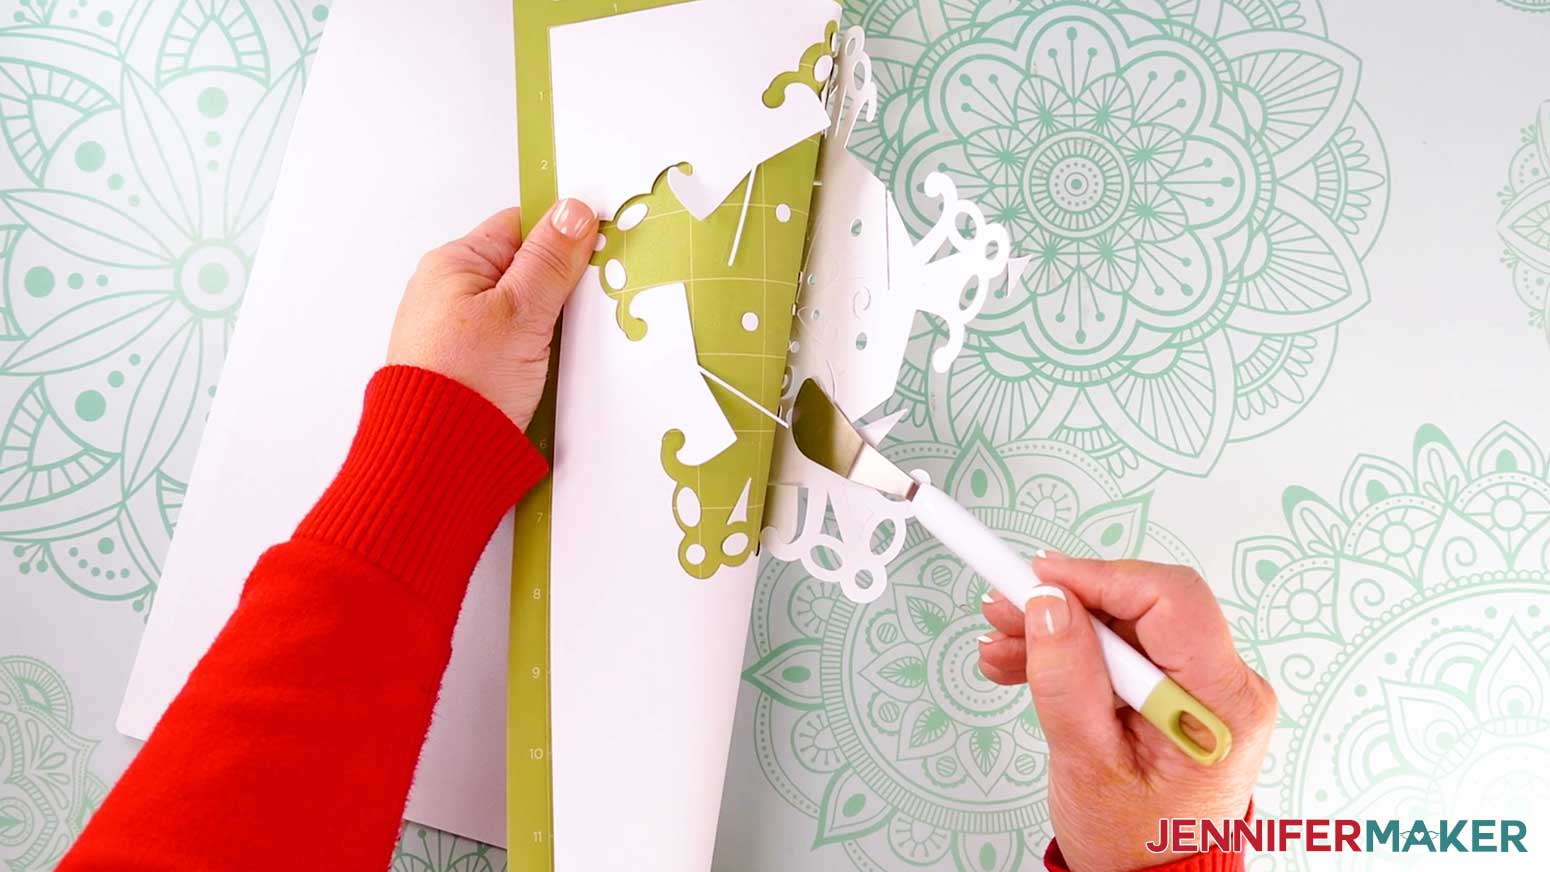
- When the cuts are complete, unload the mat, flip it over onto your work surface, and gently roll it back to release the cardstock. TIP: If you have any issues with your cuts, go to jennifermaker.com/cleaner-cuts.
- Use a spatula to help lift delicate areas and a weeding tool to pop out small cuts from intricate areas.
- Place the cut pieces face up in the correct orientation so assembly is easier later.
- Use a scraper to remove cutouts left on the mat.
- Continue cutting the rest of the cardstock, aligning the panels face up as you go.
- If you’re making the optional vellum diffuser panels, use Steps 6-13 with the “Vellum” setting and “More” Pressure and place the material on a Blue LightGrip Machine Mat.
NOTE: Remember to check the box to “Remember Material Settings” for your vellum mats.
STEP 3: ASSEMBLE THE PAPER SNOWFLAKE LANTERN
NOTE: There are 12 identical panels, so try to do this in one sitting to avoid confusion or losing your place.
OPTIONAL: ADD DIFFUSER PANELS
- If you’re using the diffuser panels, stack your lantern panels so the top points are pointing away from you, and the slits open to the same direction. Then flip over your stack of lantern panels. NOTE: If you’re left-handed, the panels may be easier to assemble if the slits open to the left. Since I’m right-handed, I’ll make sure the slits are open to the right.
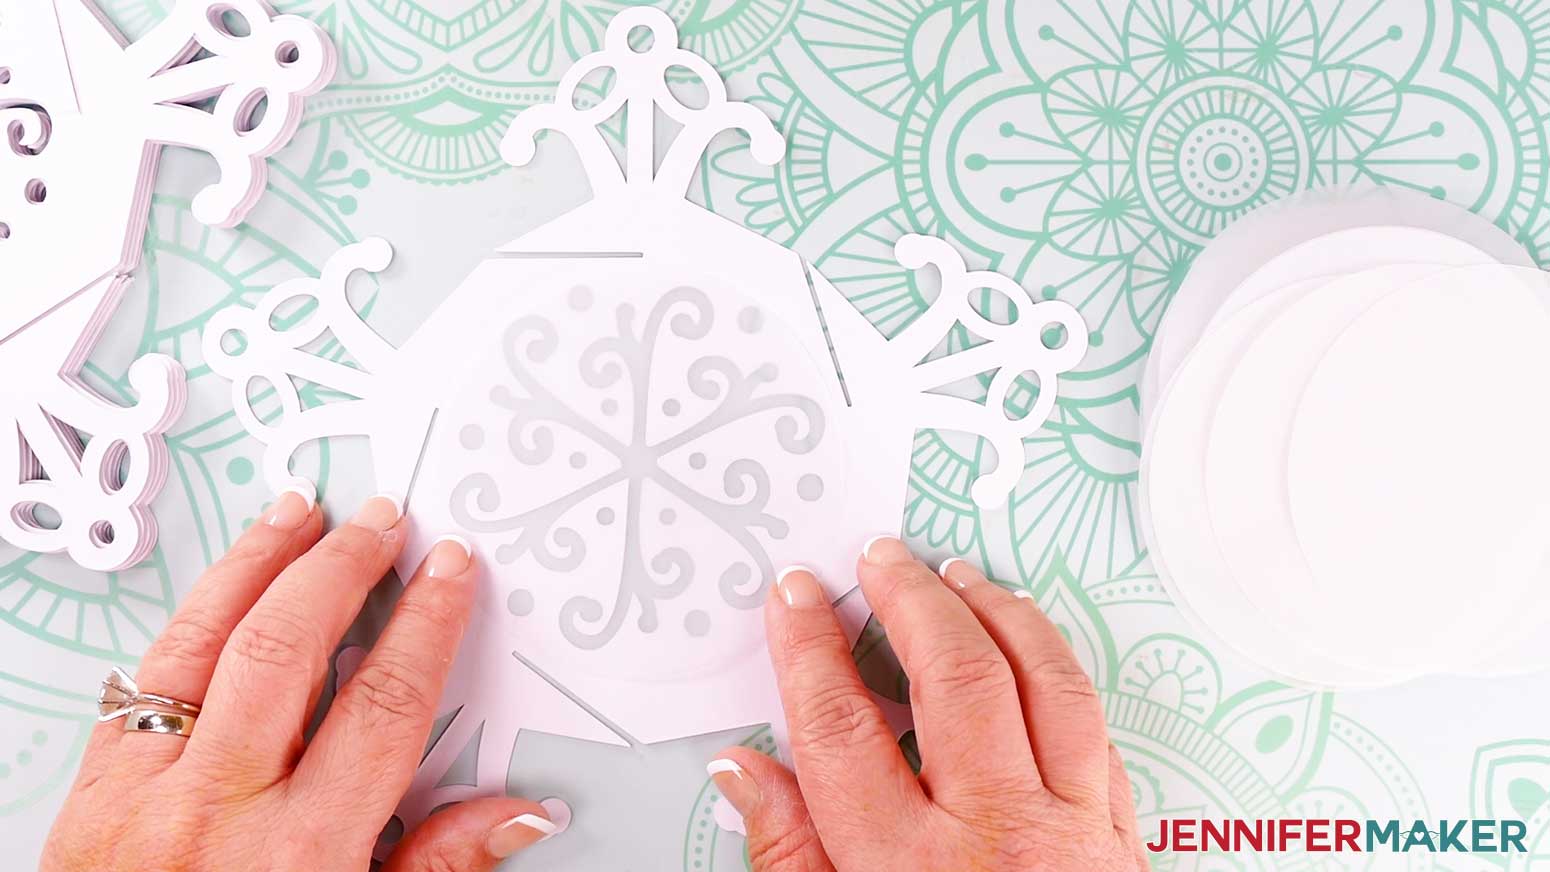
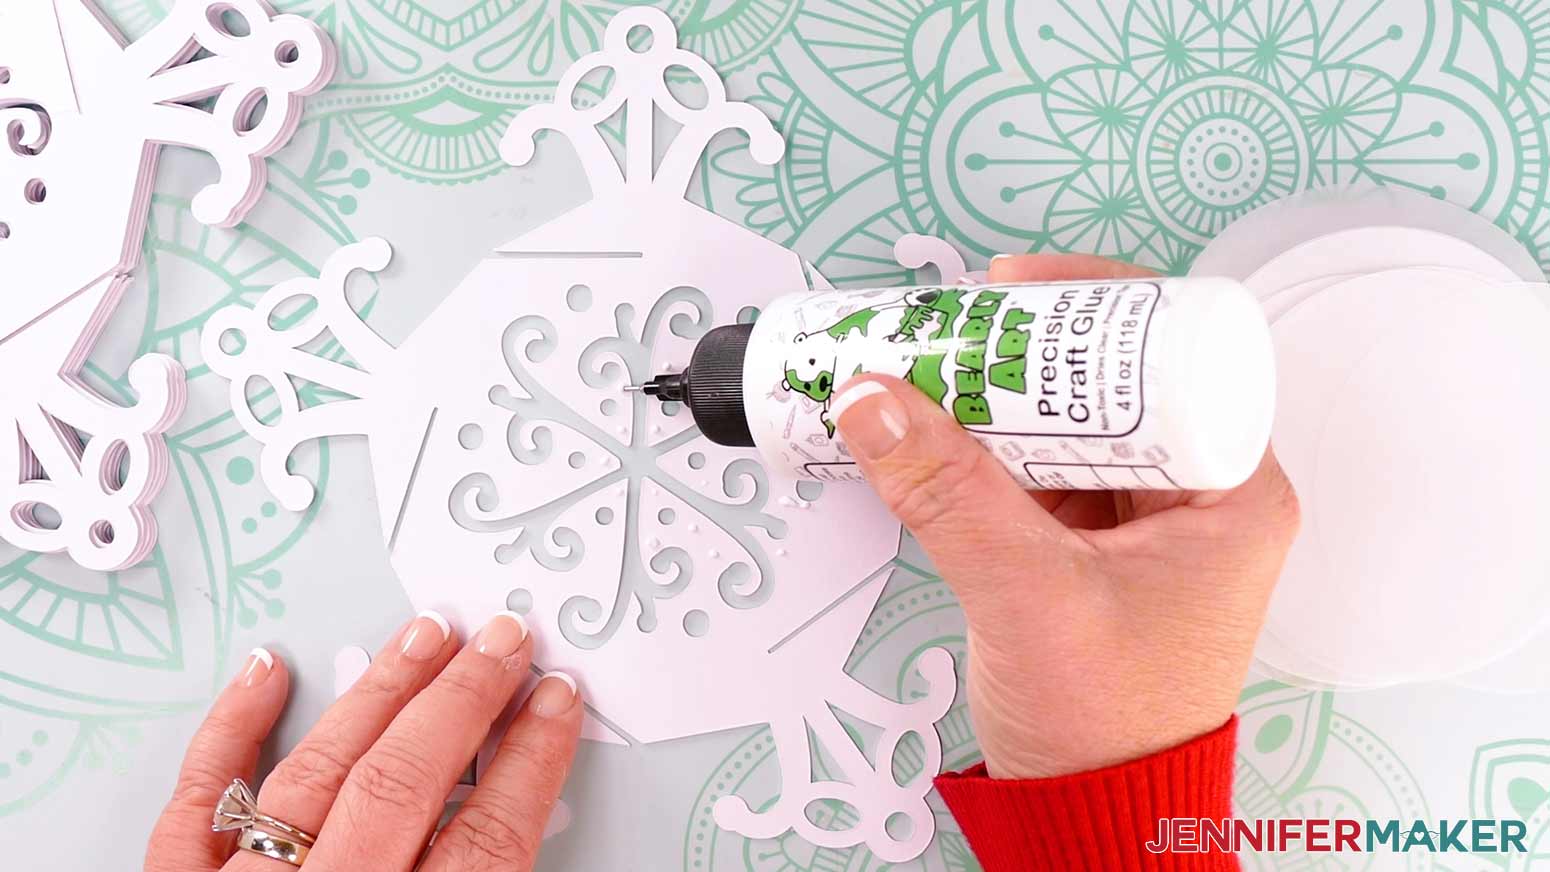
- Lay your first panel in front of you, then place a vellum piece over the panel’s cutouts to see where you can add glue to keep it in place.
- Remove the vellum and add dots and thin lines of good quality craft glue to those spots on a face-down panel piece.
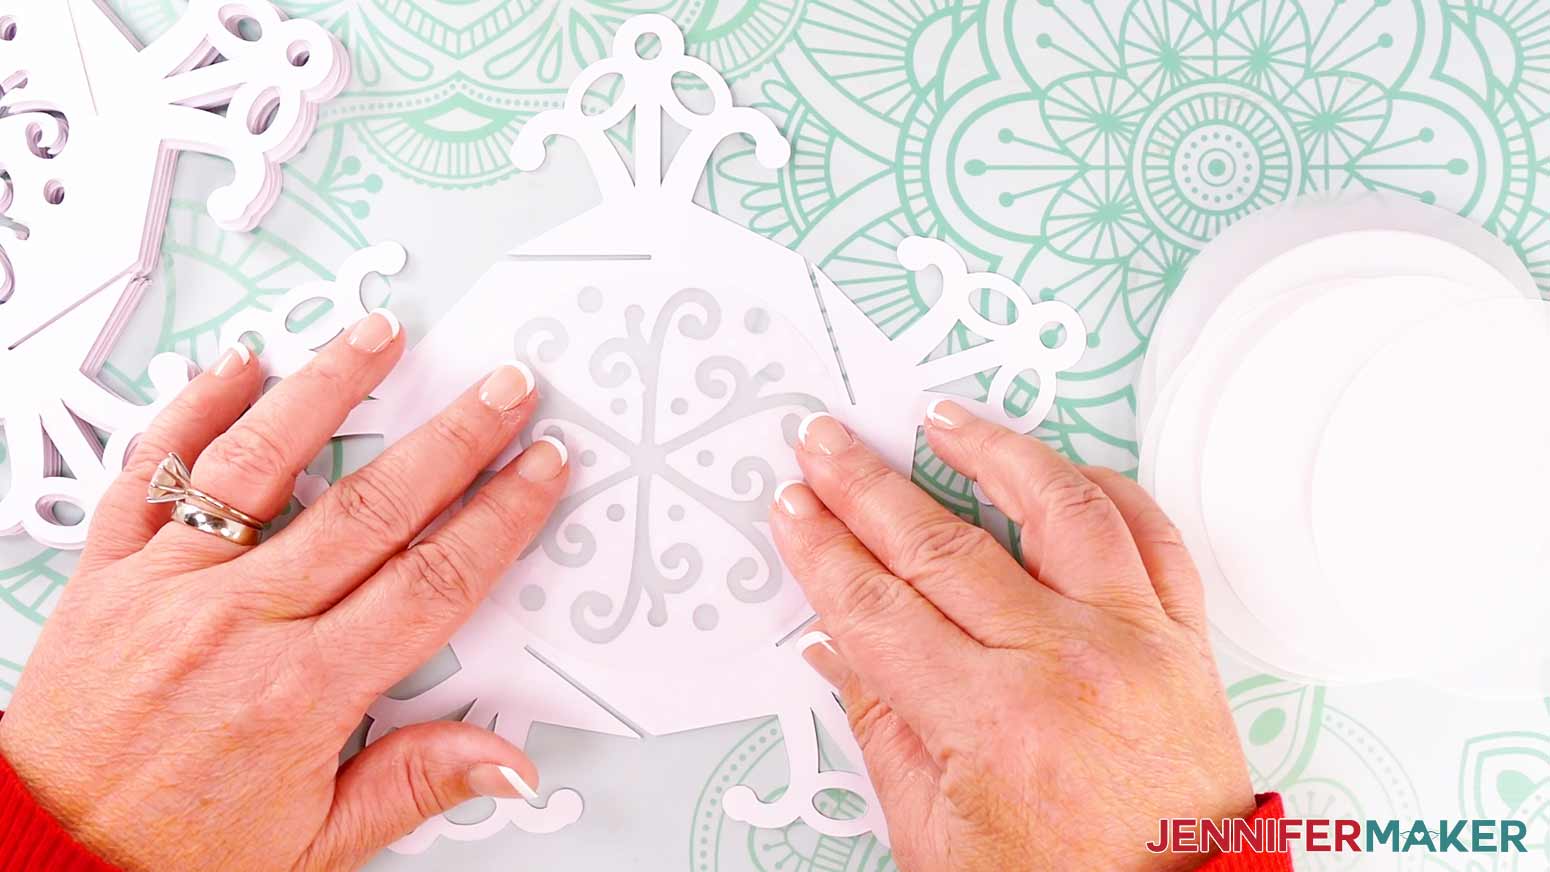
- Lower the vellum onto the glue and make sure all the cutouts are covered before pressing it into place to dry.
- Repeat Steps 2-4 to glue vellum pieces to the remaining panels, and make sure they’re completely dry before beginning assembly.
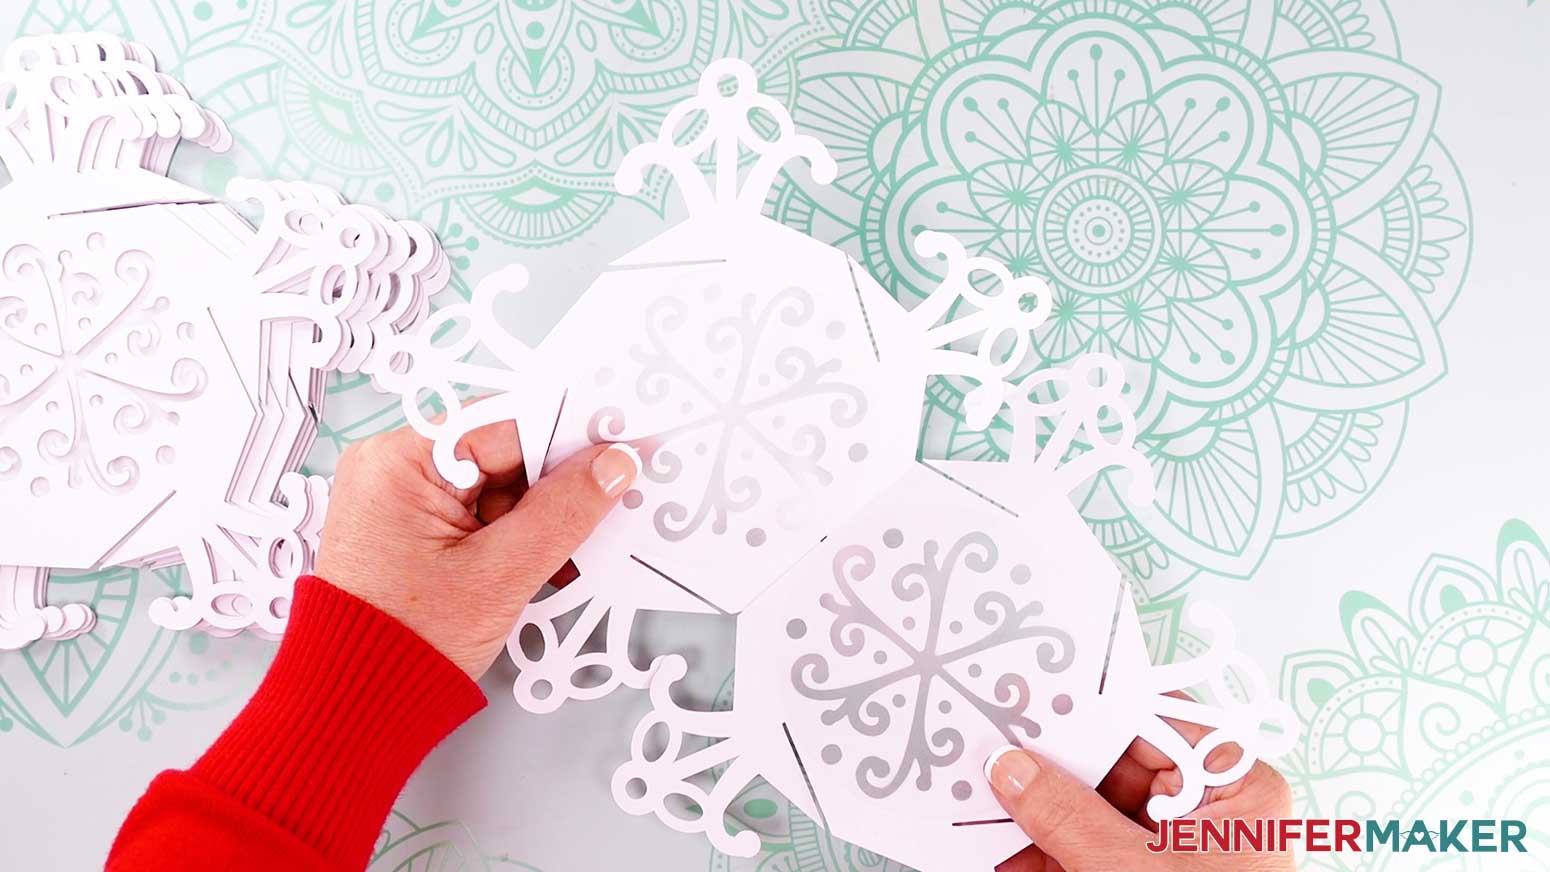
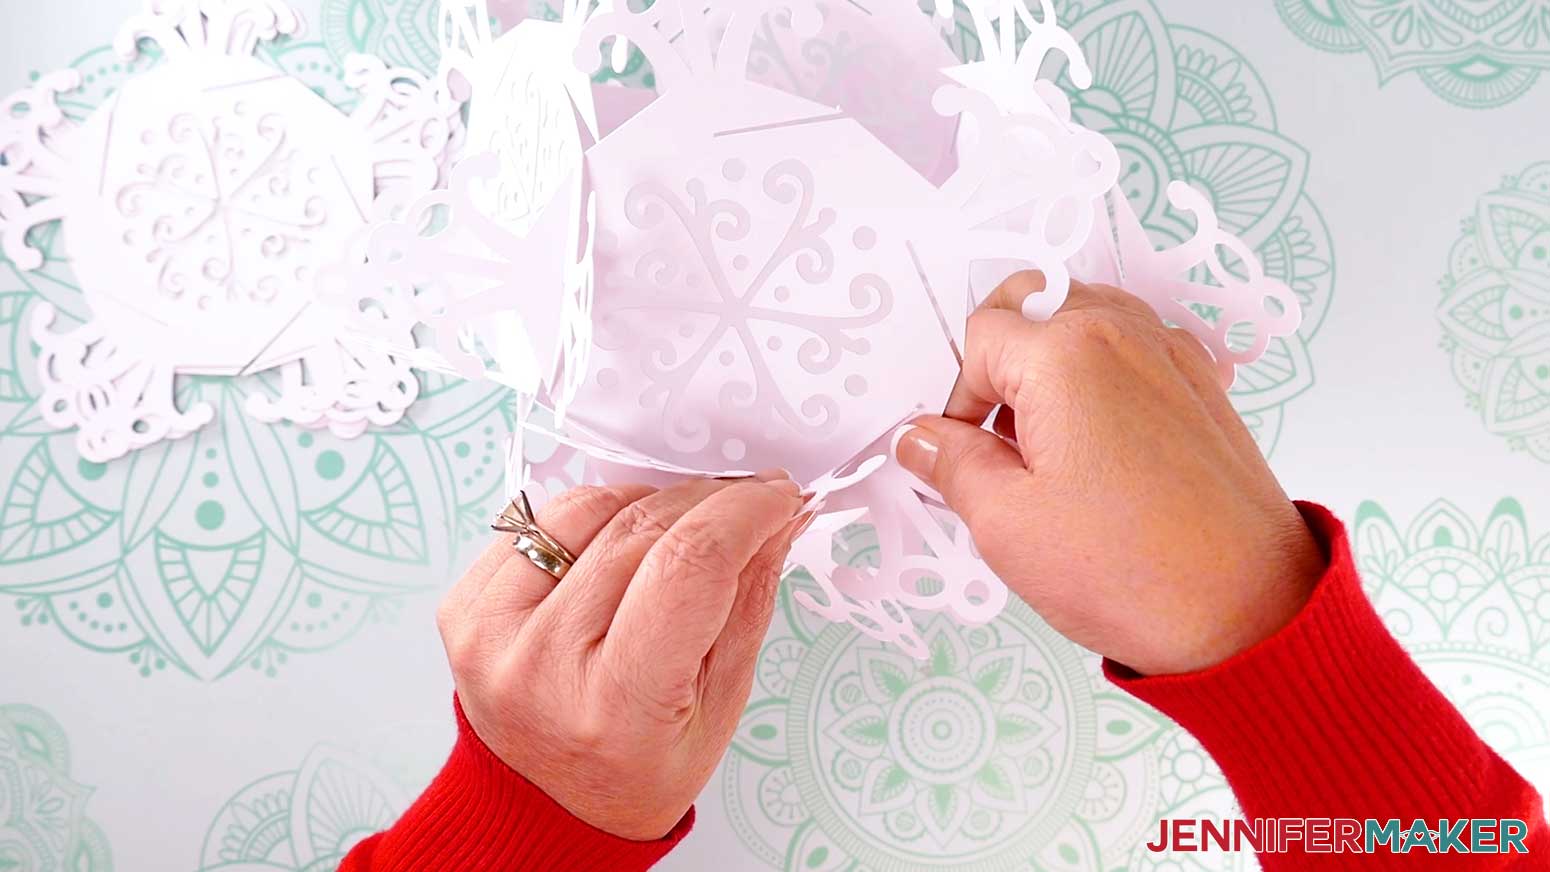
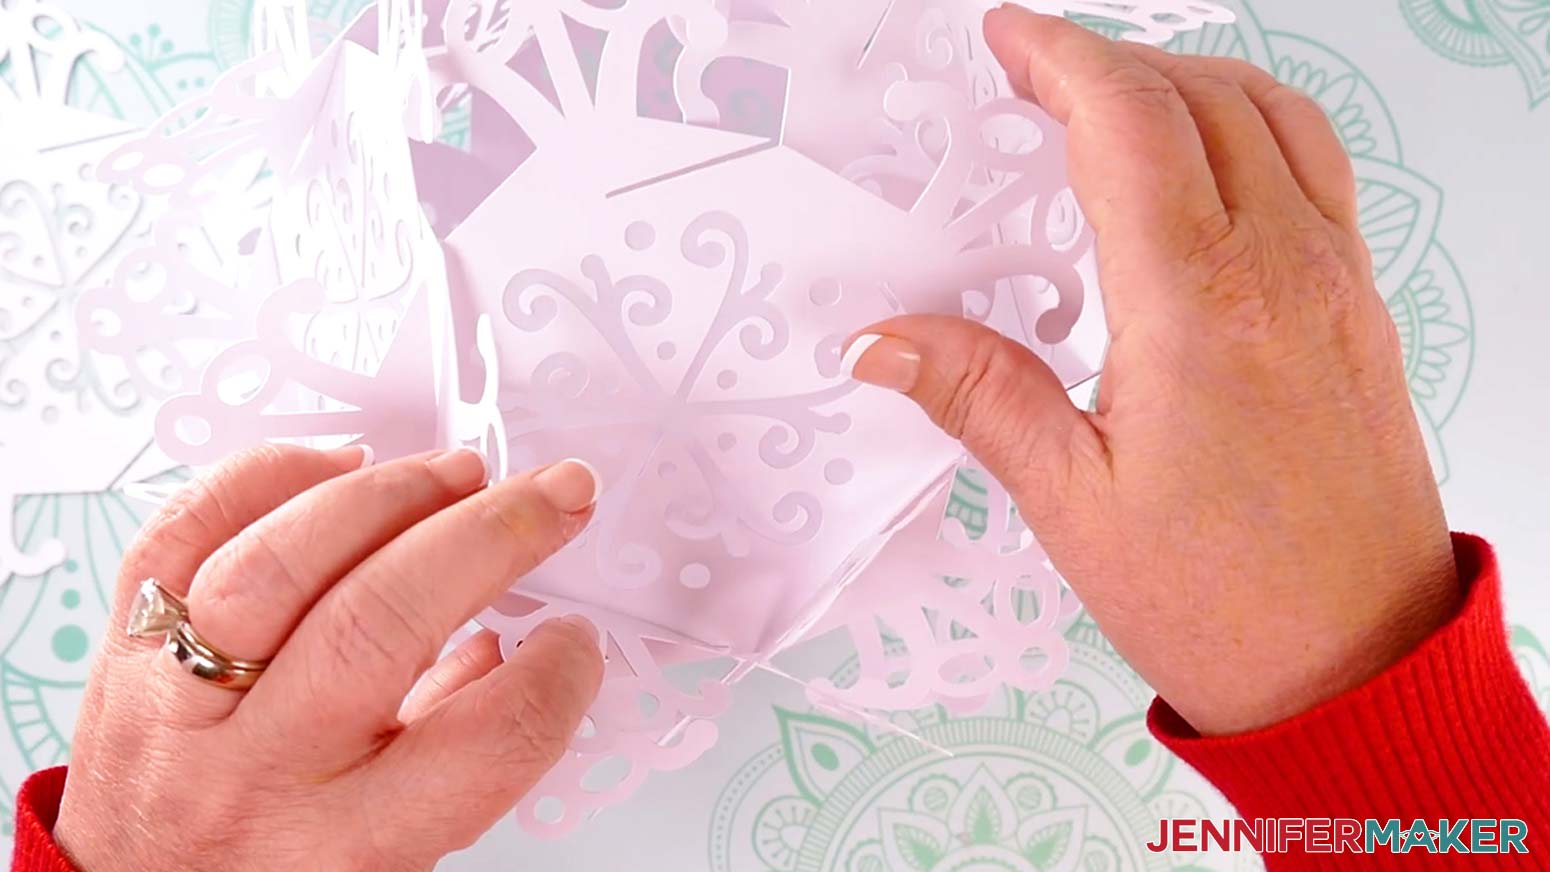
PUT THE LANTERN PANELS TOGETHER
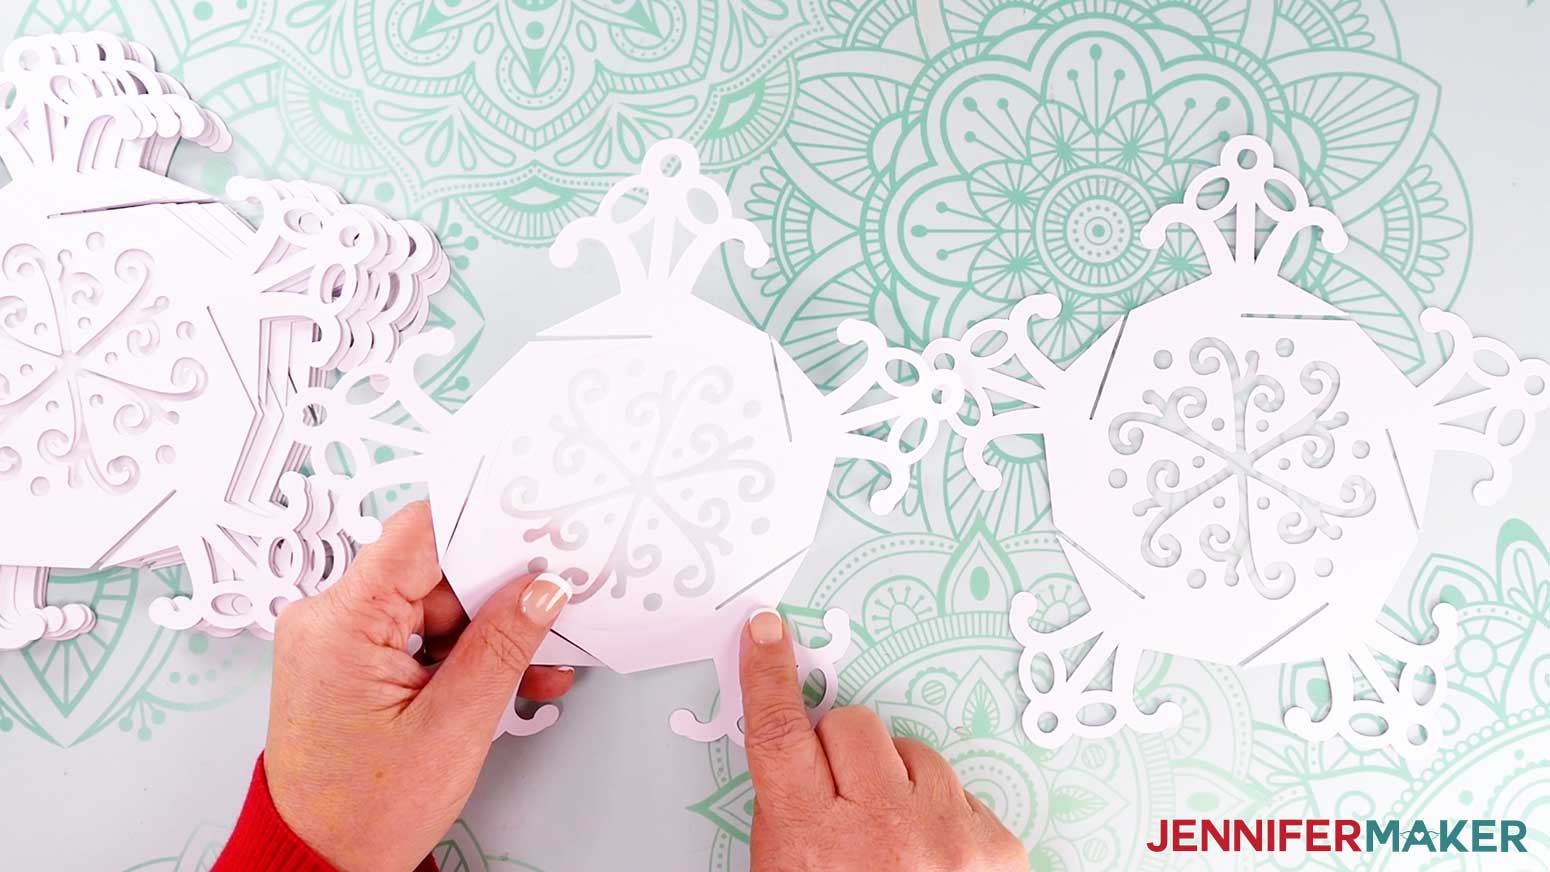
- Decide which panel will be the base panel (Panel 1) and hold it in your left hand with its bottom arm pointing toward you, its bottom slit opening to the right, and the inside (the diffuser side) face up.
- Hold the first side panel (Panel 2) in your right hand with its bottom arm pointing straight down, its slit opening to the left, and the inside (the diffuser side) facing away from you.
- Then line up the slits on the two bottom arms so they’re facing each other.
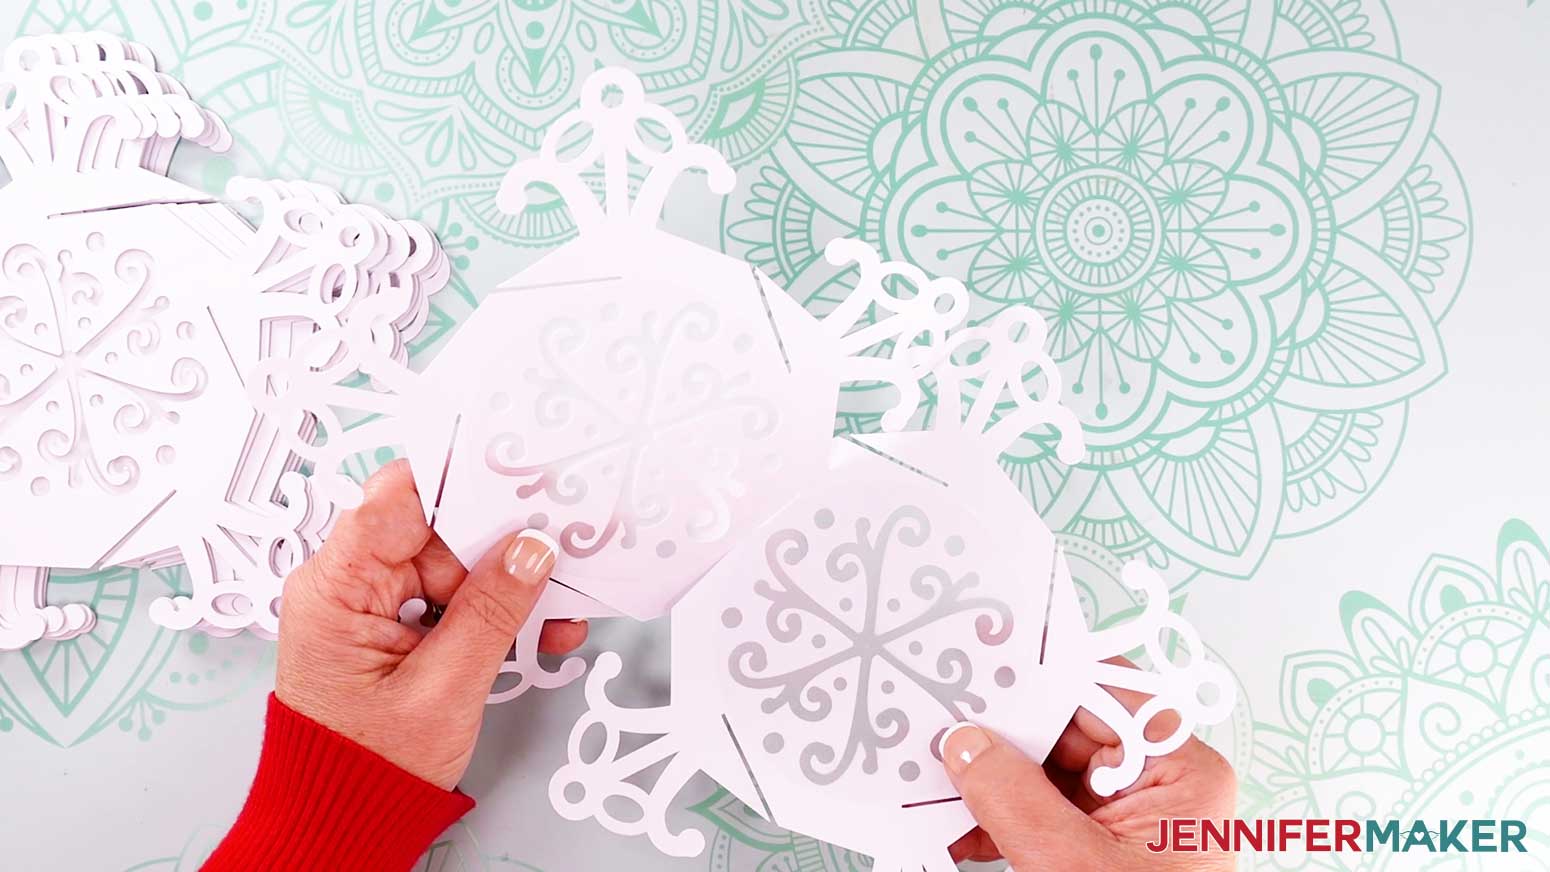
- Gently slot the cuts in the base and Panel 2 together until the panels are all the way in.
NOTE: When the panels are properly oriented, the diffusers will face the inside of the lantern.
NOTE: This first connection uses one set of slits, which is one less than you’ll use for the next three side panels.
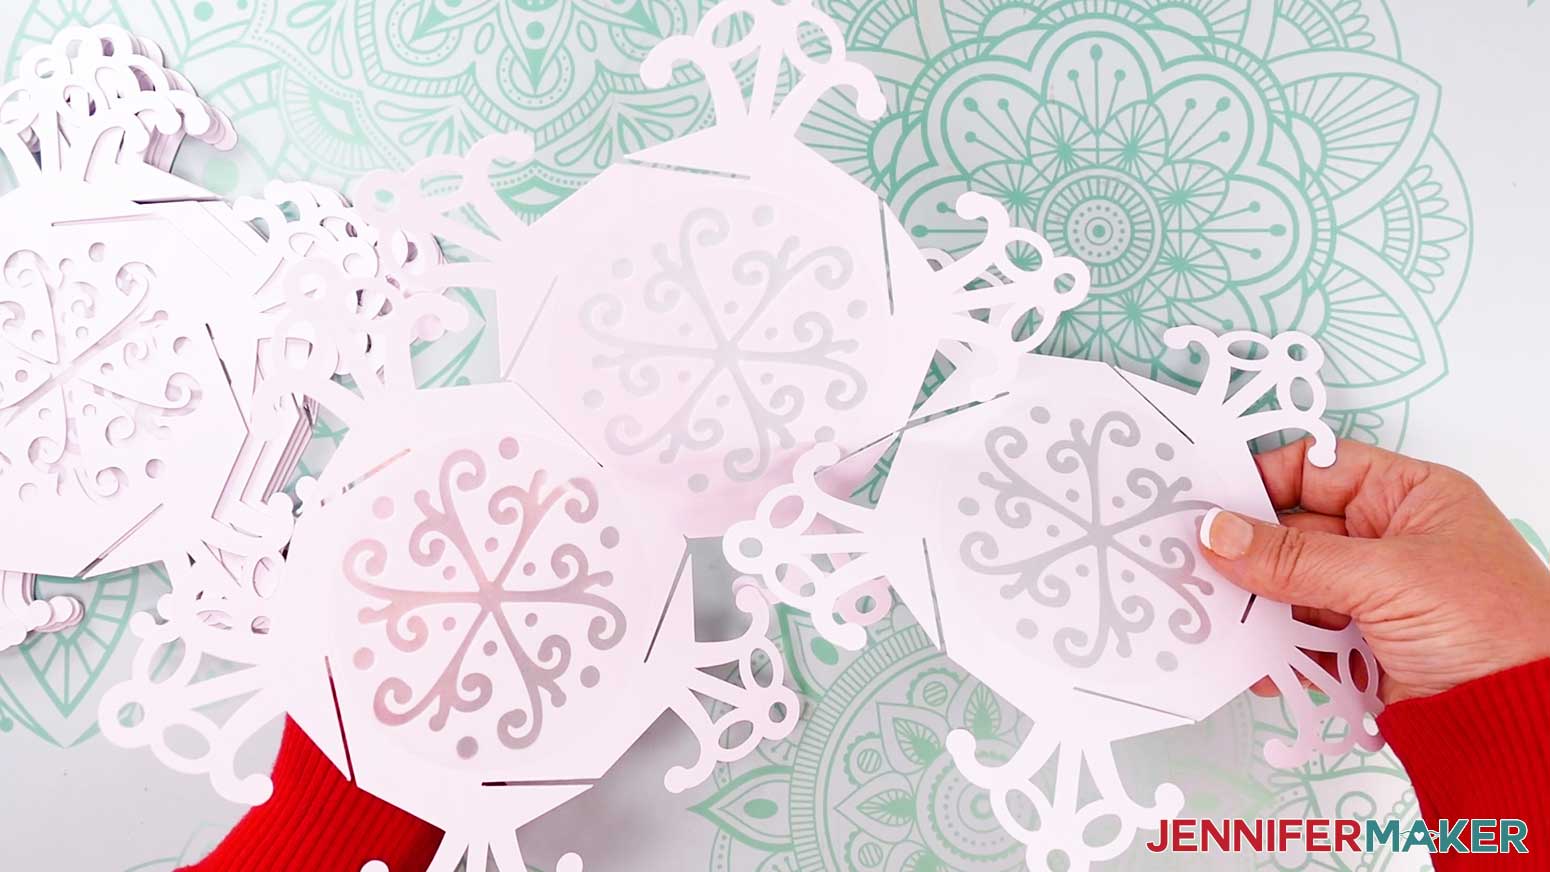
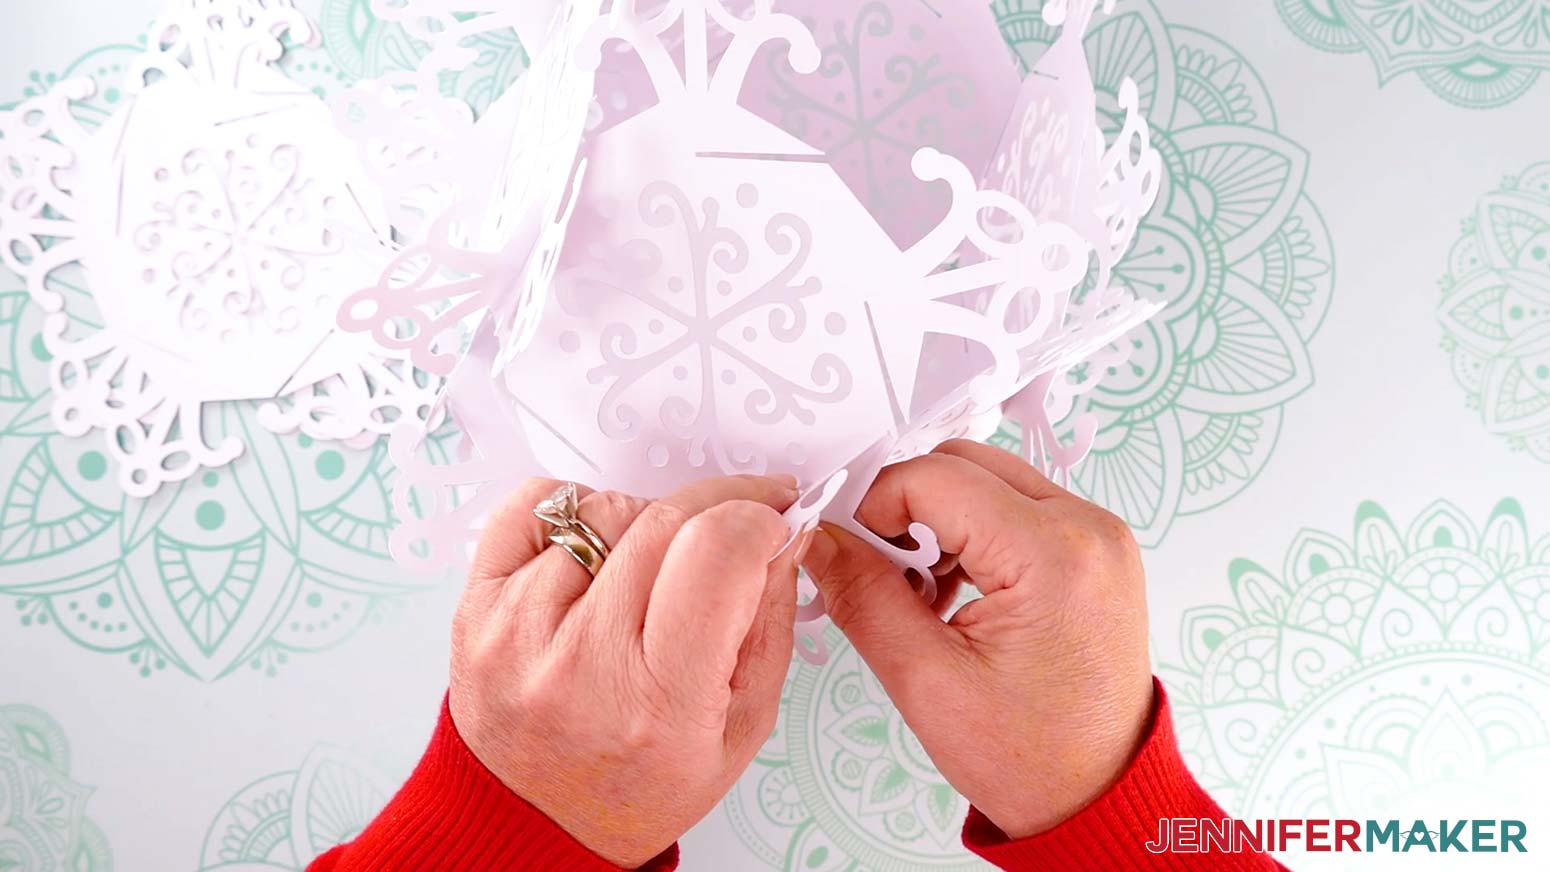
- Hold the panels together with your left hand so you don’t lose your progress, and rotate the base so the first panel moves to the left side. NOTE: I find it easiest to assemble the lantern with the bottom panel facing me so I don’t lose track of it, but you may find another method more comfortable.
- Take Panel 3 and hold it the same way you did Panel 2, with an arm pointing straight down.
- Line up Panel 3’s left-facing slit with the next right-facing slit on the lantern’s bottom panel and slot them in all the way.
TIP: Keep the previous side panel (Panel 2) connected!
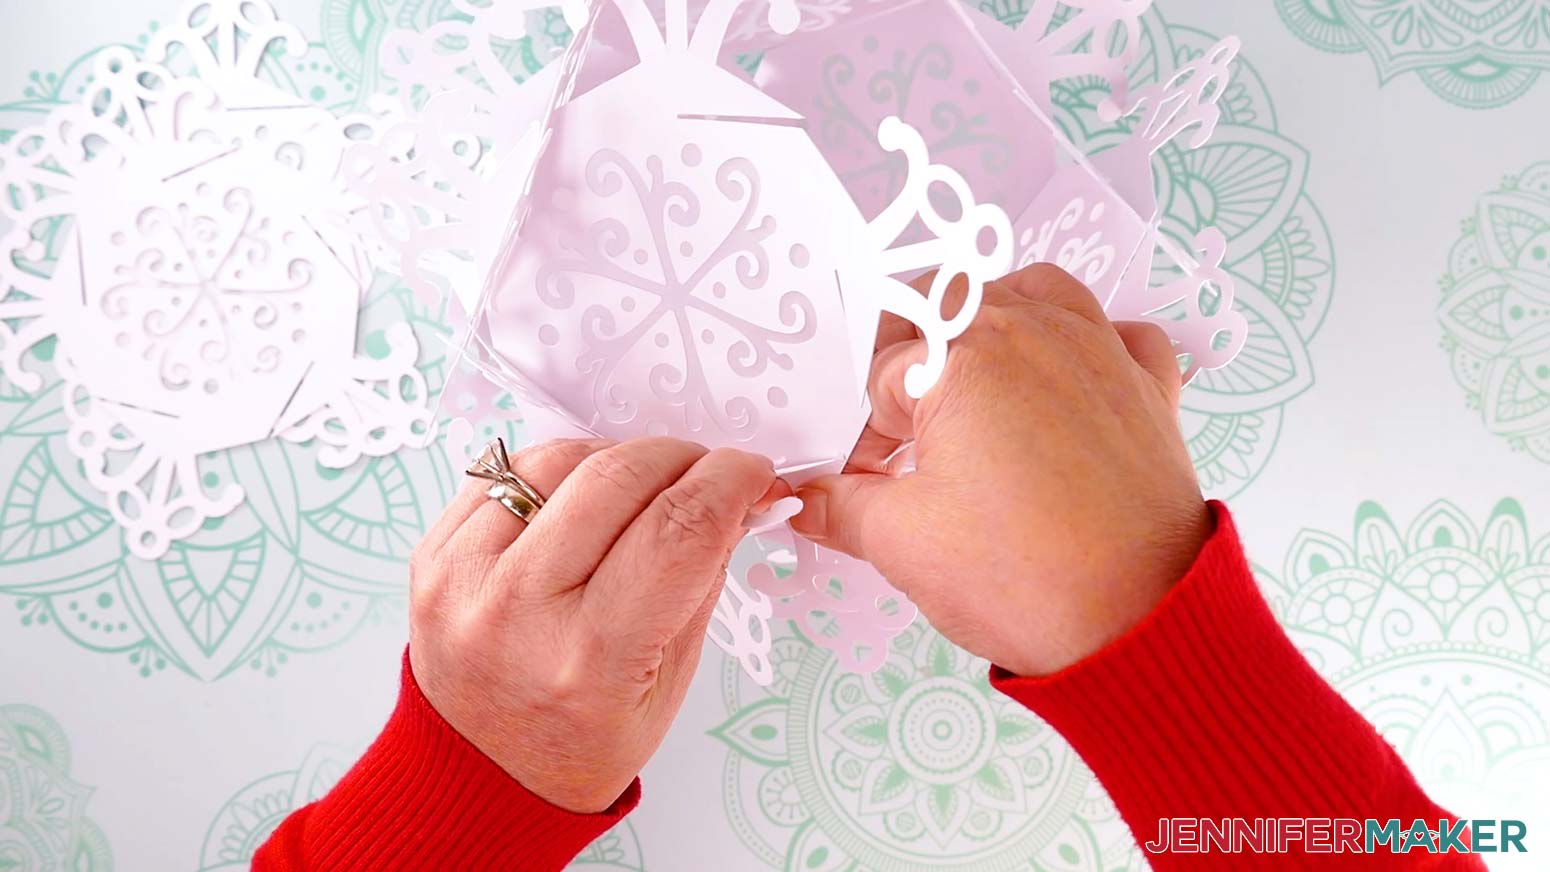
- When Panel 3 is connected to the base and in position, the arms at the corner between Panels 2 and 3 are a little tricky to slot together, so carefully guide them into place.
NOTE: Make sure the slits on the two side panels fit together and won’t disengage, but don’t worry about locking anything in place just yet. It will be easier to slot the pieces together if there is a little wiggle room now.
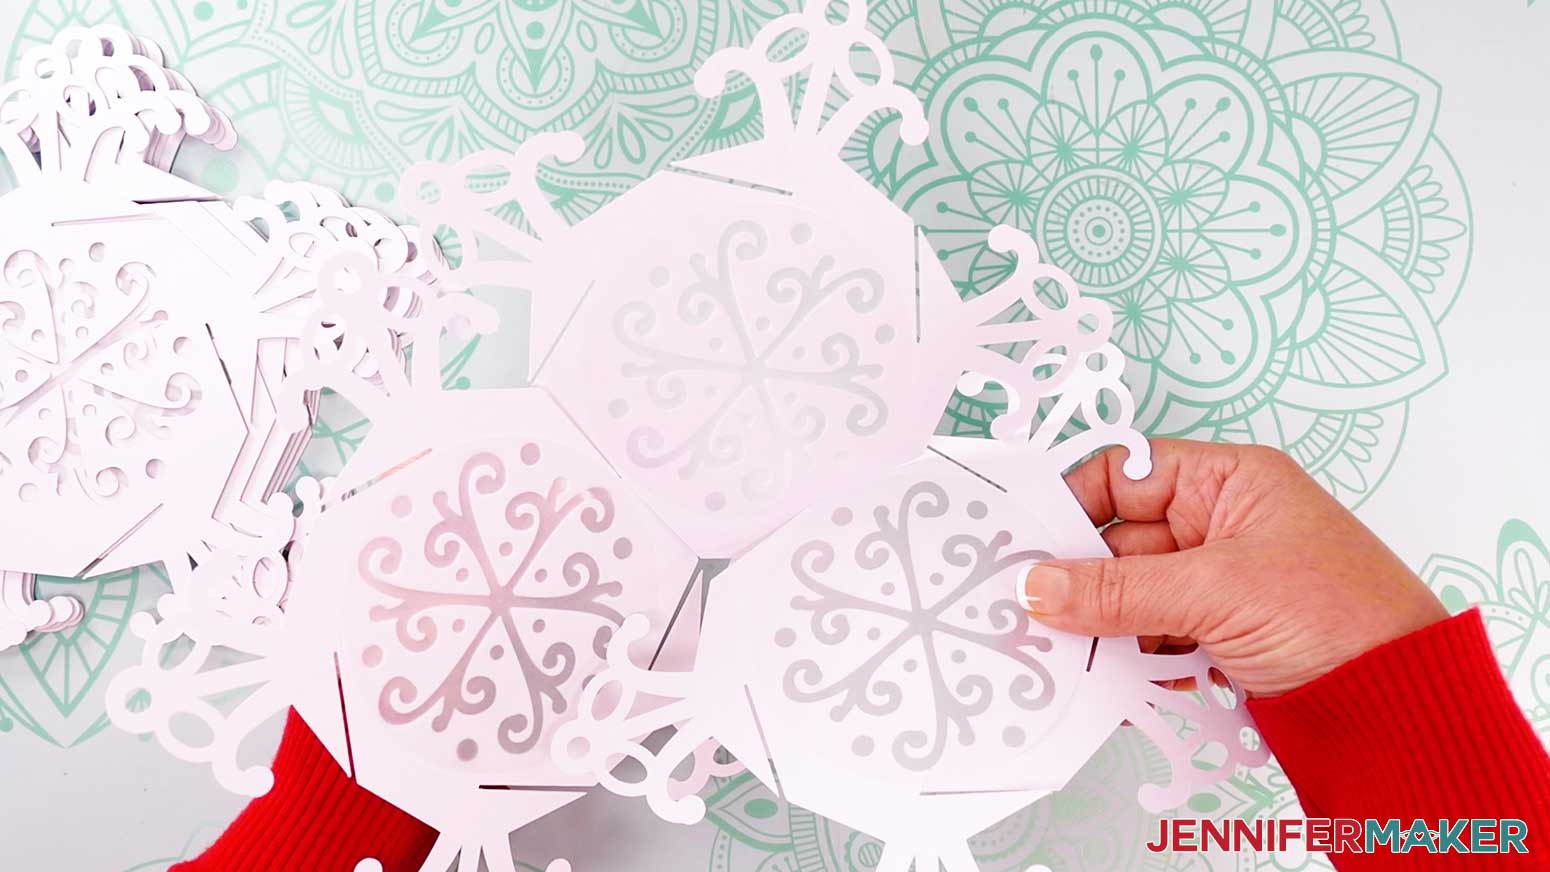
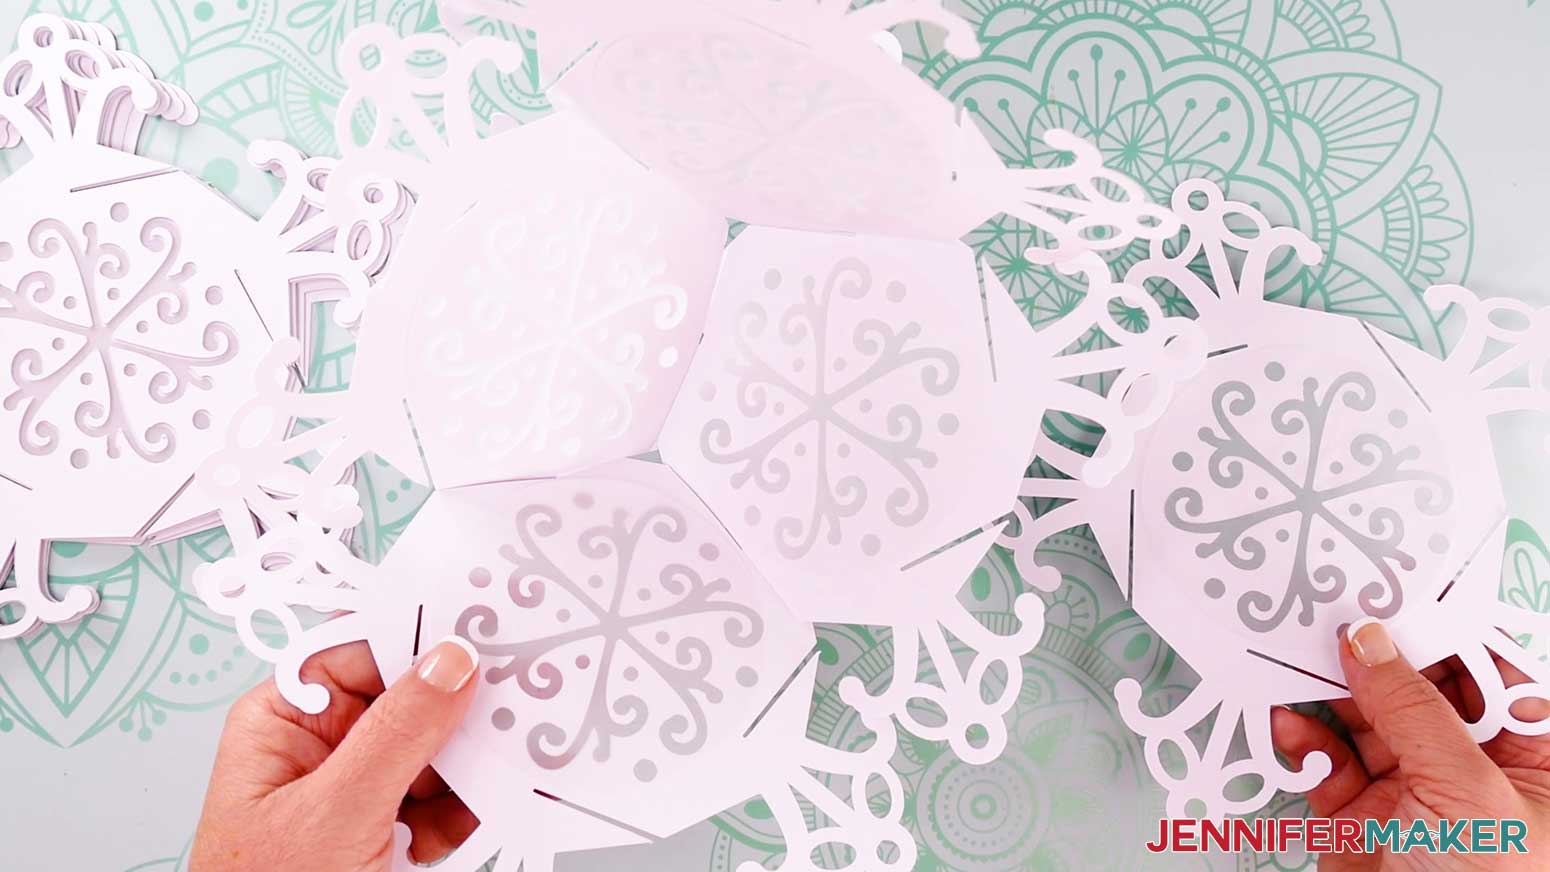
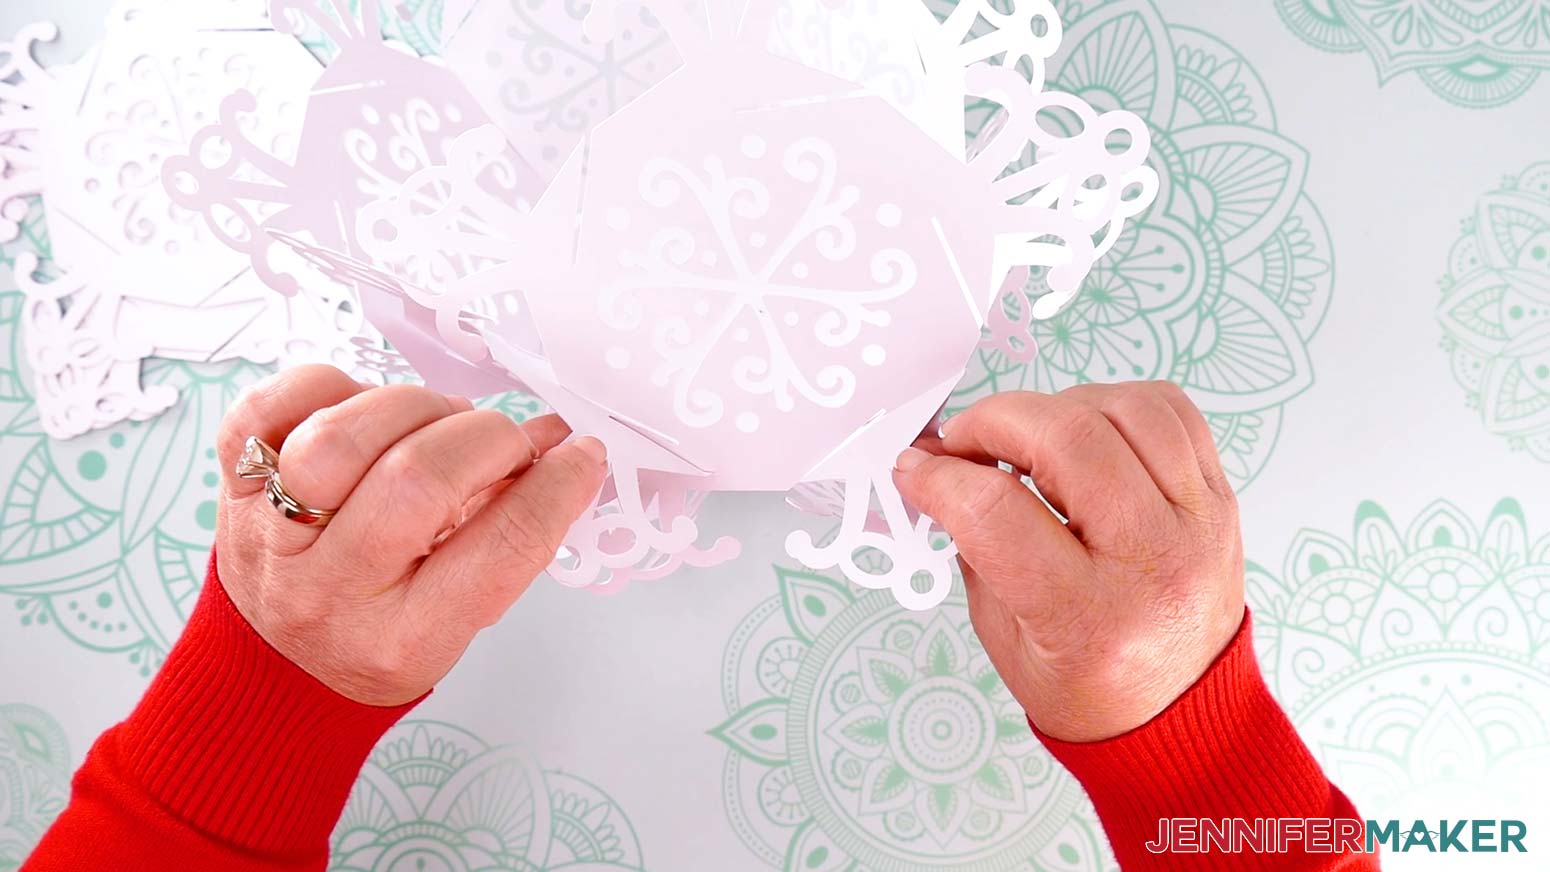
- Add two more side panels (Panel 4 and Panel 5) the same way.
TIP: Remember, make sure your already-assembled panels are staying connected before moving to the next one.
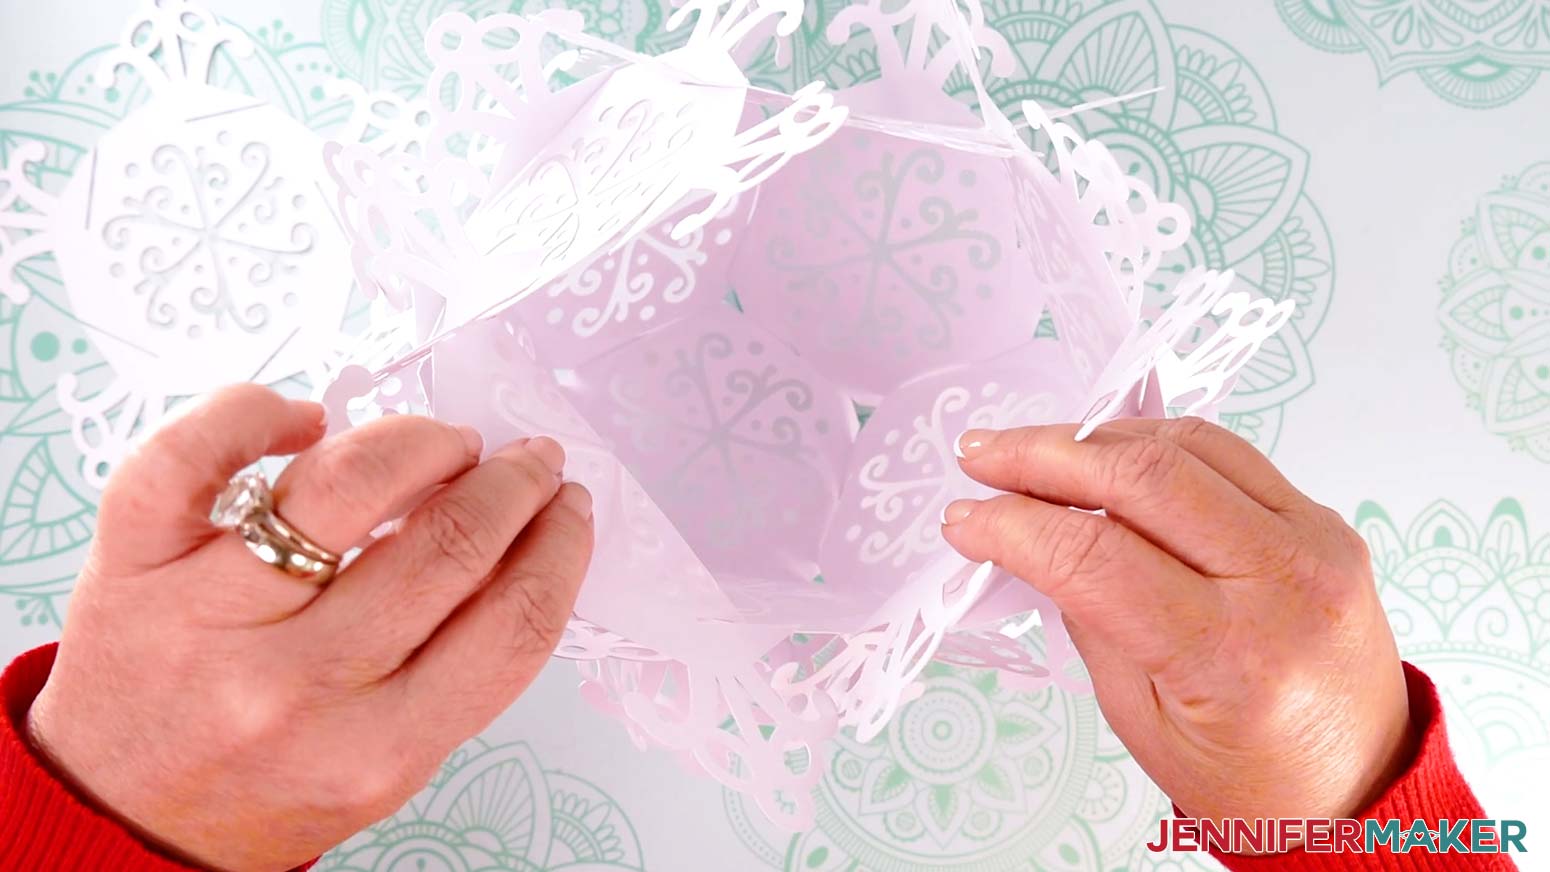
NOTE: As you add side panels, the lantern’s shape will become more visible.
TIP: If you ever get disoriented, adjust the assembled panels until the base (the panel with the most connections to other panels) can rest on your work surface. Find the panel that sticks up and doesn’t have a panel to its right. That’s the panel you should add to next.
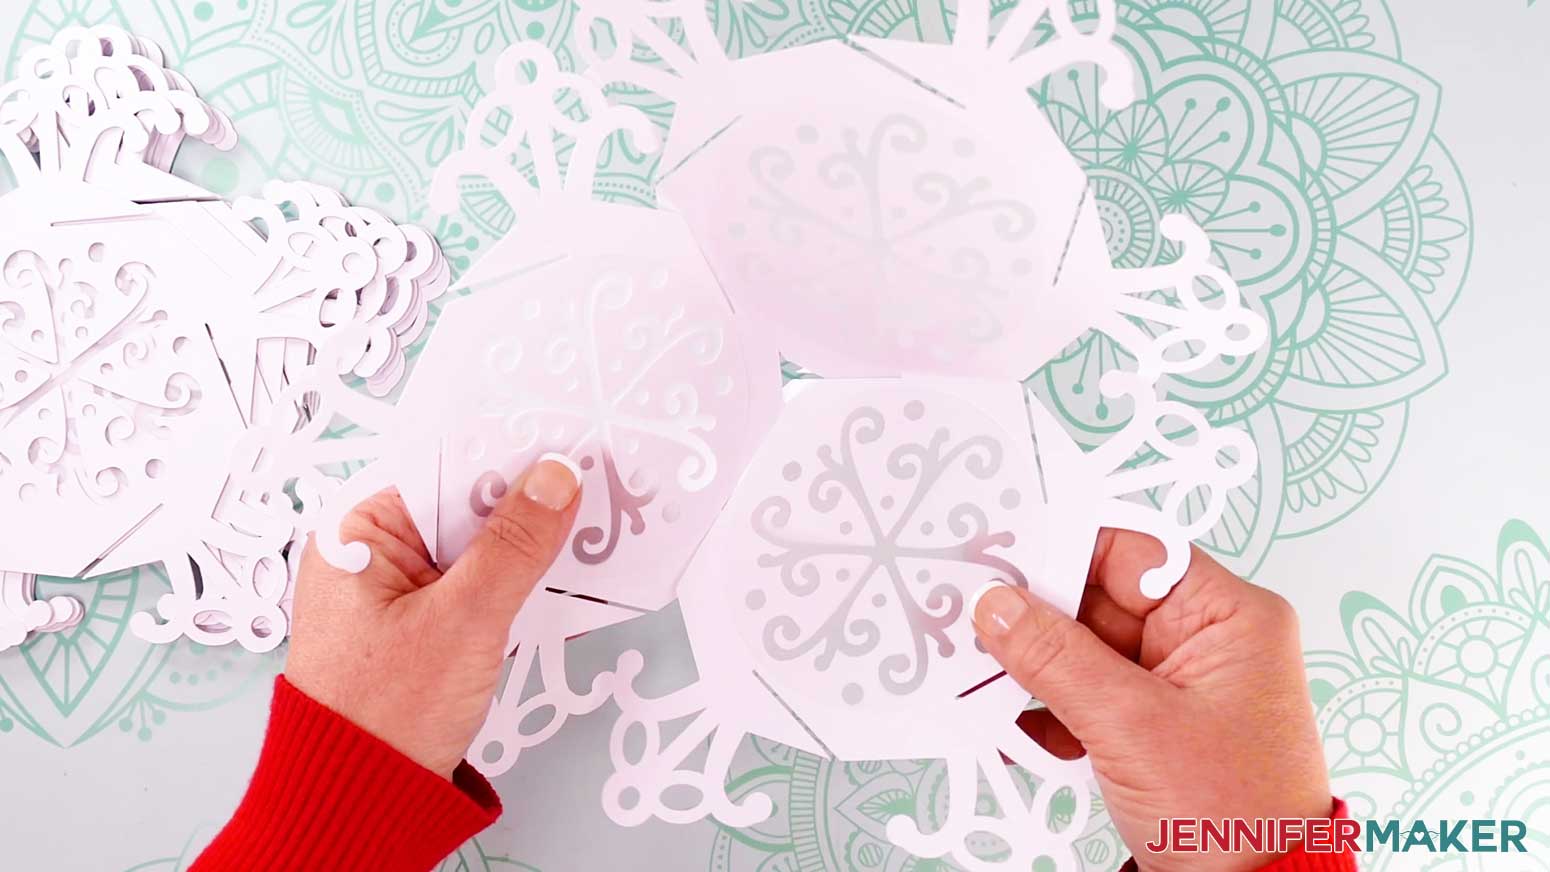
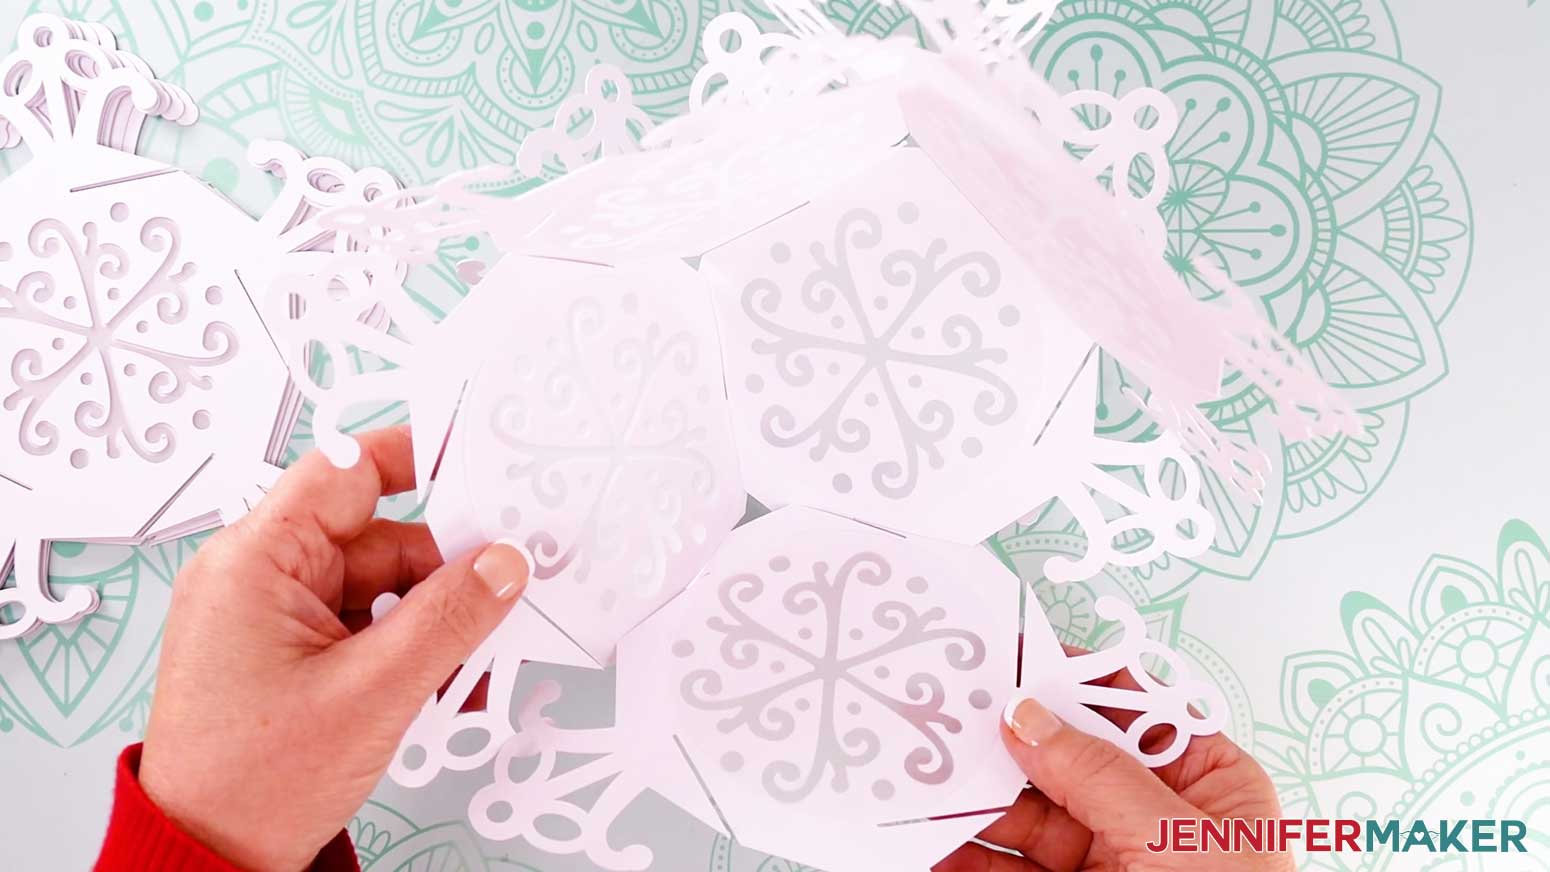
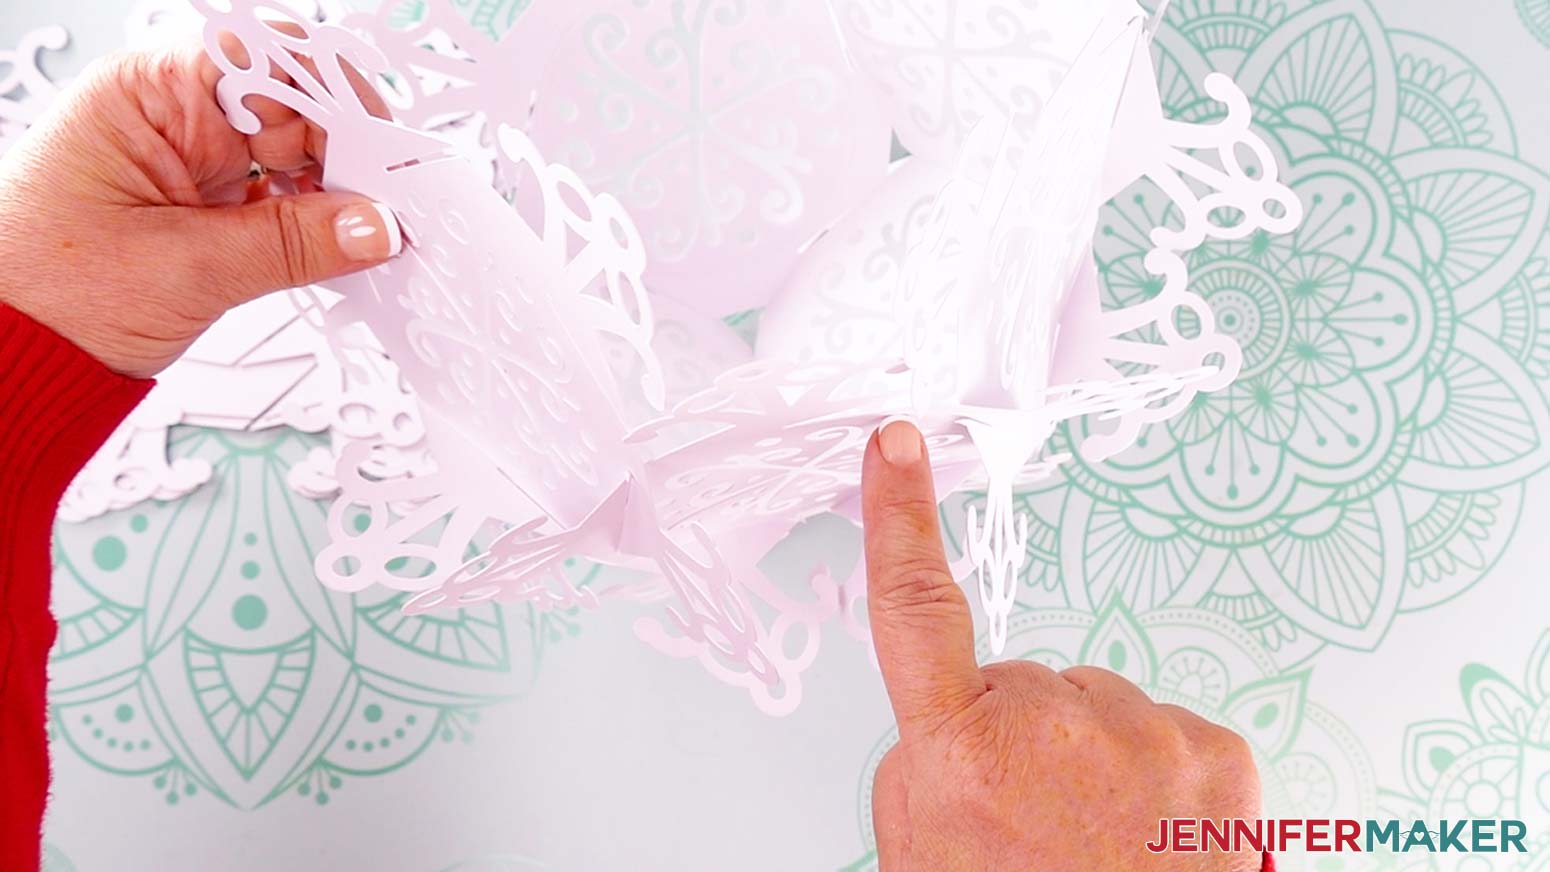
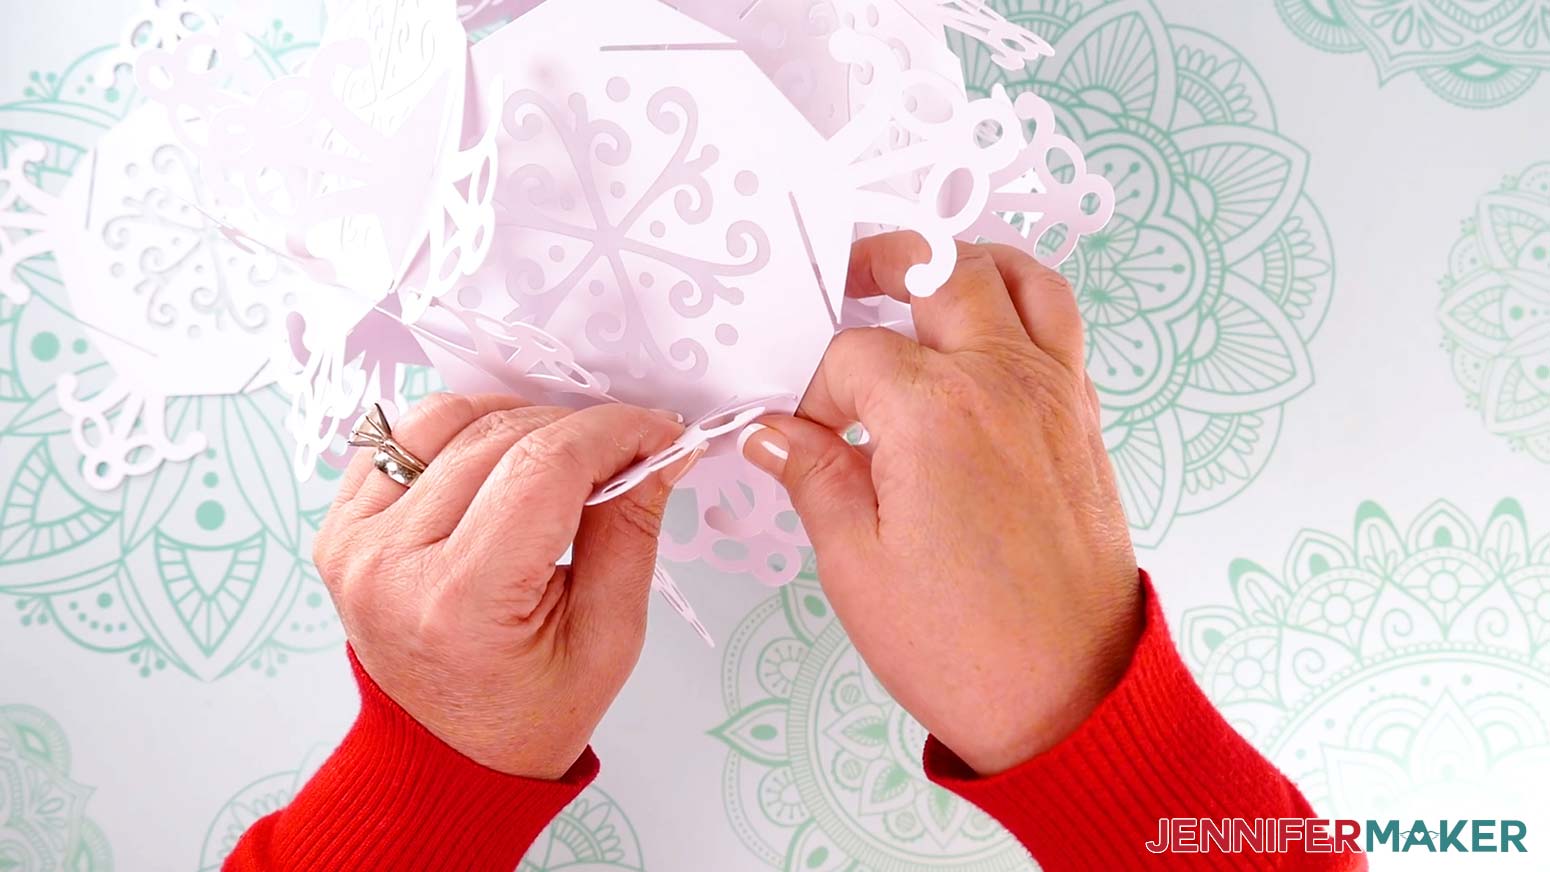
- When you’re ready to add Panel 6, you'll also need to attach it to the open side slit on Panel 2 to complete the lower side panels. I found it easiest to first align the bottom slit with Panel 5, then the side, and end with the connection to Panel 2.
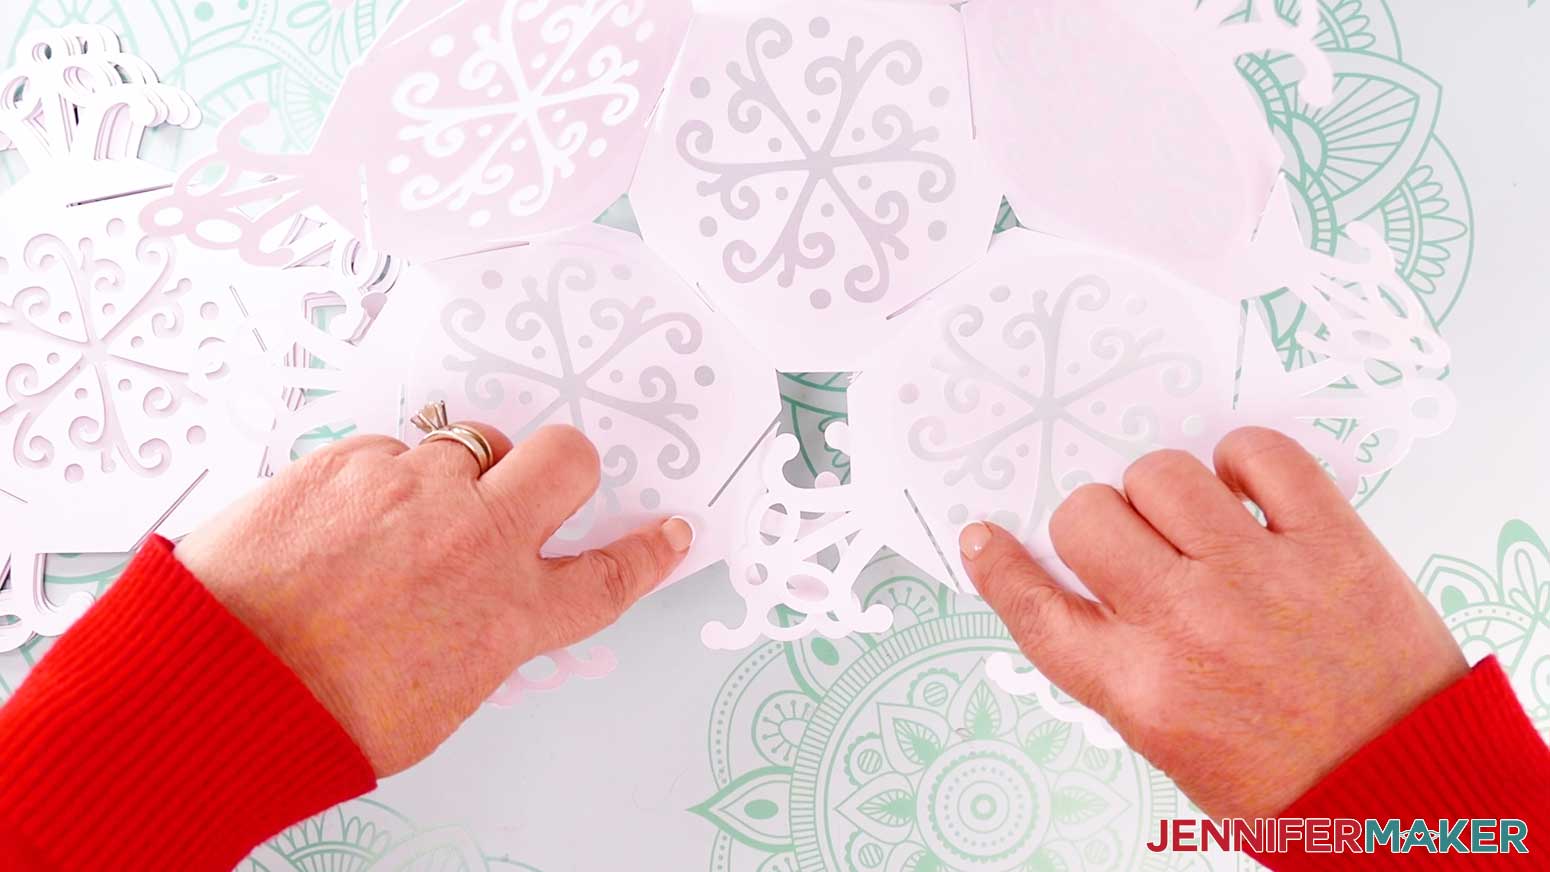
TIP: Take your time and be gentle to avoid ripping any of the delicate details. You can gently curve the arms to make the slits easier to access. Once everything is in place, the panels will make a bowl.
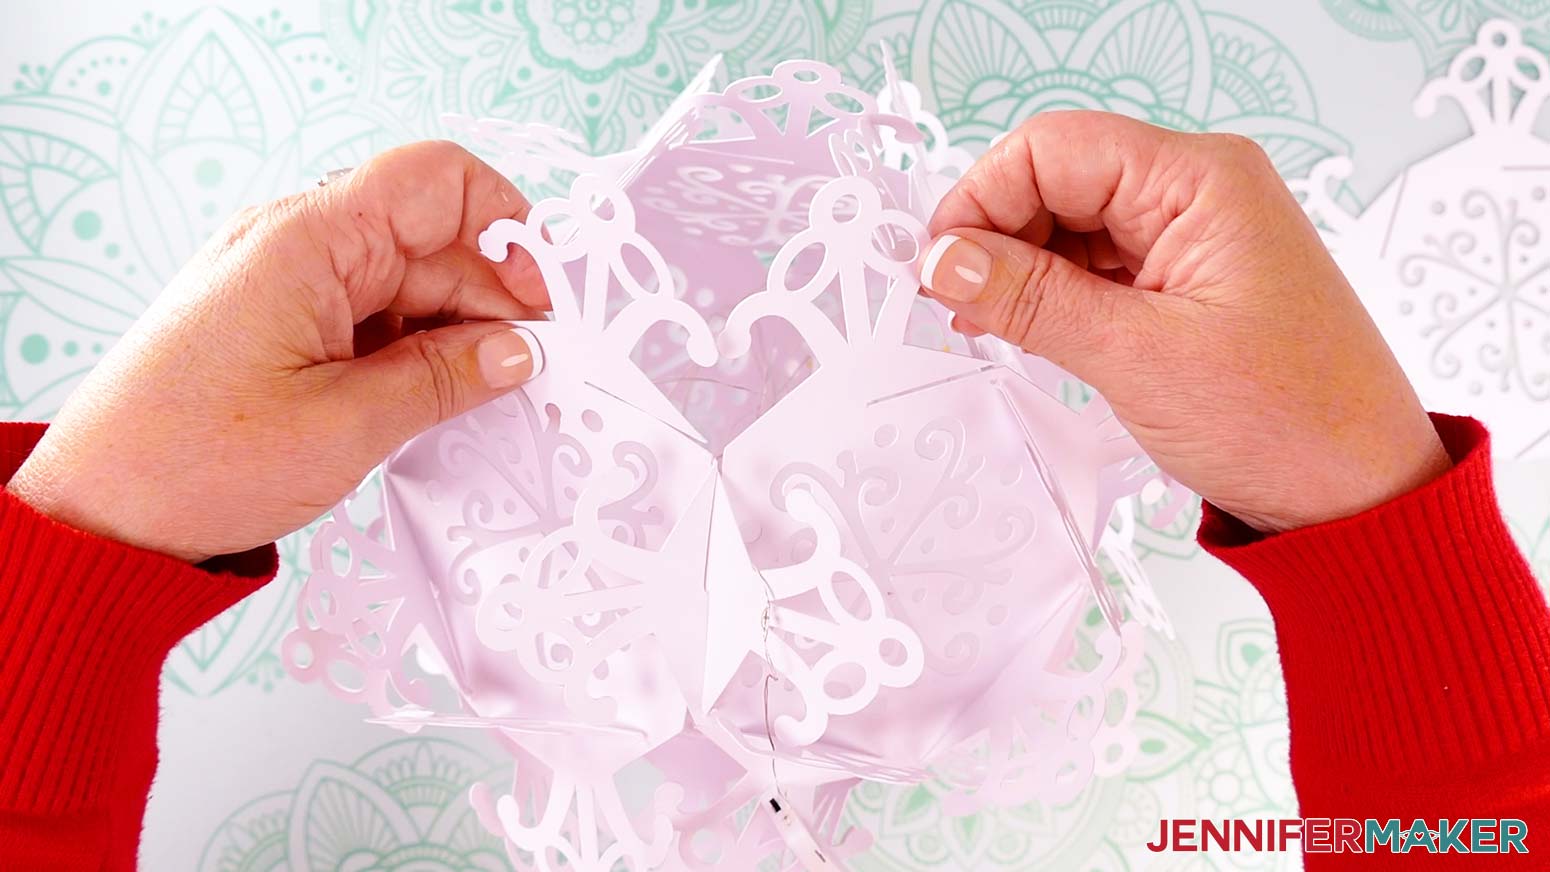
- To begin the upper sides, pick a V-shape between two of the lower side panels.
NOTE: There should be a right-facing slit angling down on the left-side panel’s arm, and a right-facing slit angling up on the other.
- Bring over a new panel to start the upper side section (Panel 7) and position it face up with an arm sticking straight down.
- Align the left-facing slit on Panel 7’s bottom arm with the slit on the left side of the lower section’s V-shape.
- Then, gently use the tips of the arms to align the right-side slits and slot them together.
- The first panel (Panel 7) for your top side section is secure! Just like the first connection on the lower section, this piece uses fewer slits than the remaining panels.
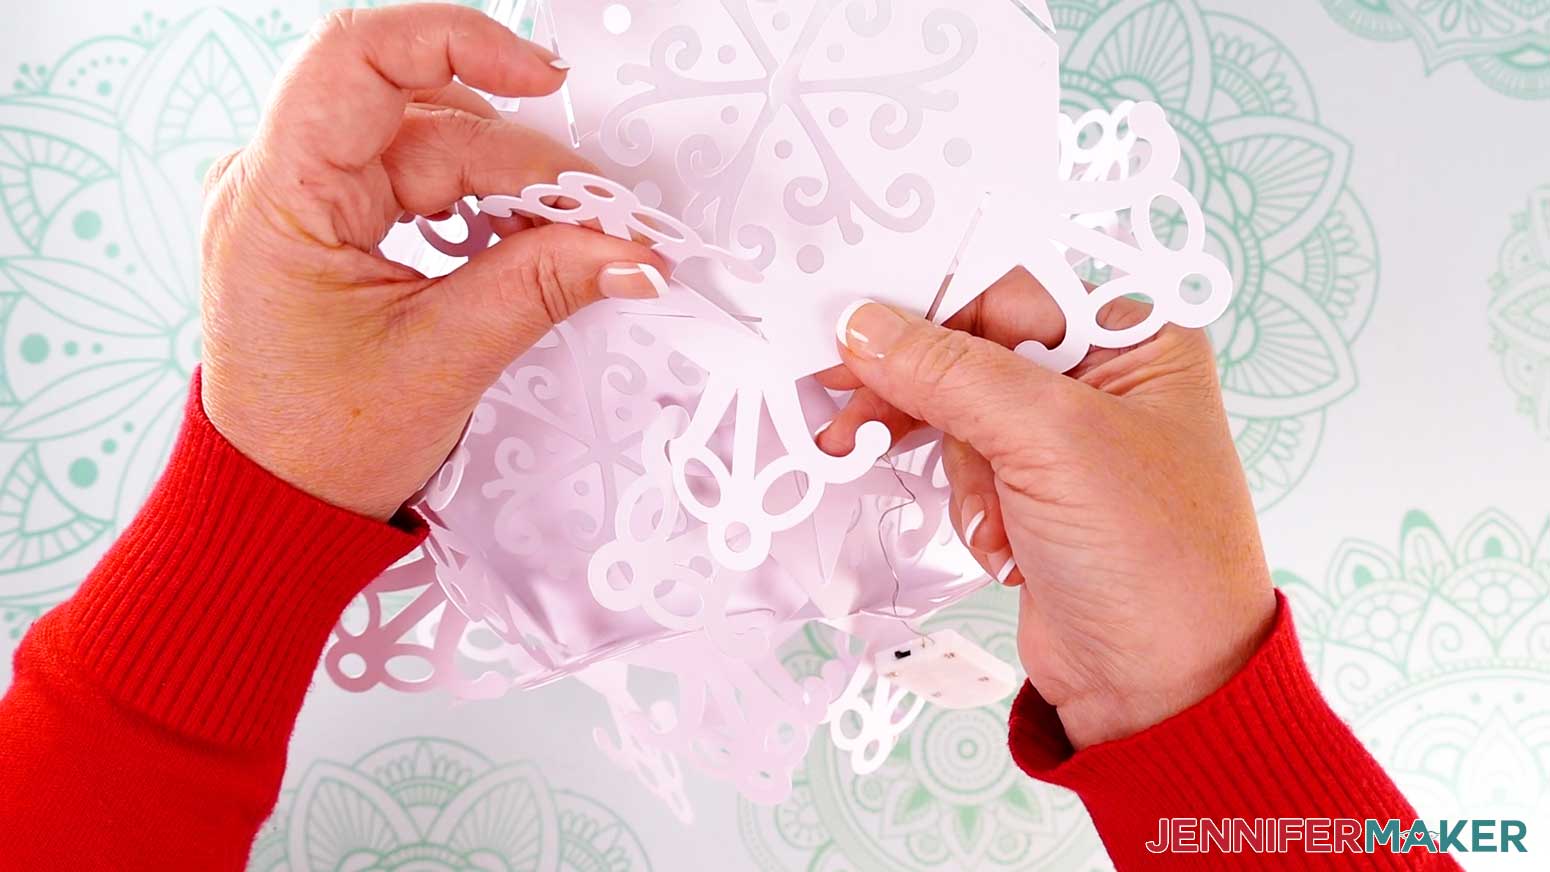
- To add the next upper side panel (Panel 8) you’ll need to align three sets of slits in a boxy U shape.
- Align the new panel’s bottom arm with a left-facing slit with the left side of the U, then its next arm with the bottom of the U, and finally the new panel’s third arm with the right side of the U.
- Add Panels 9, 10, and 11 the same way.
- Connect Panel 11 to the left, bottom, and right of the last U-shaped section. Then you can see that the next arm matches up with one on Panel 6 from the beginning of the upper side section.
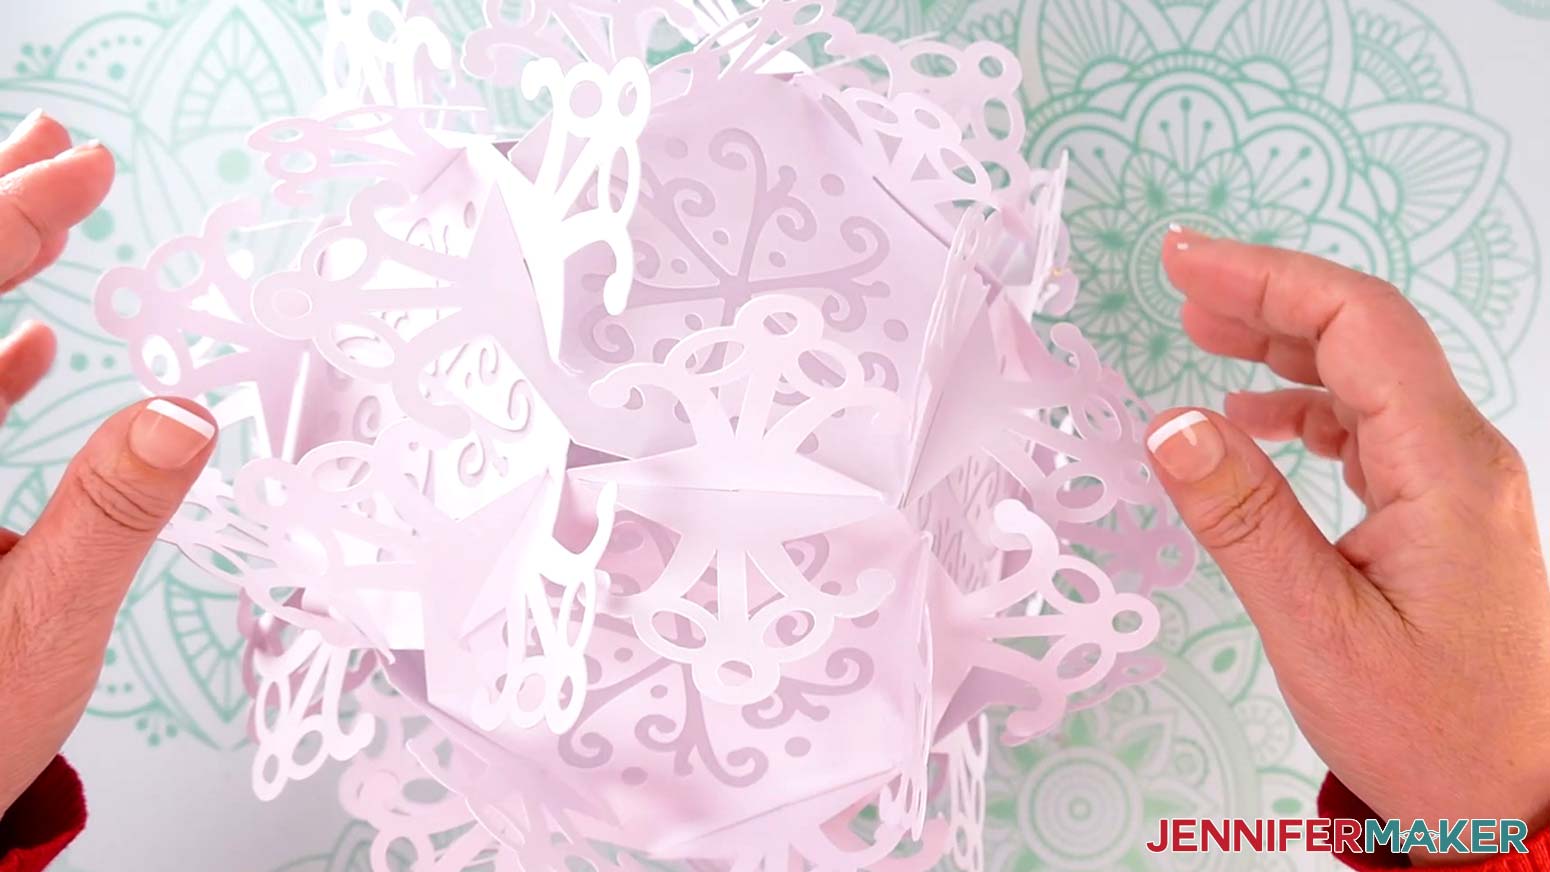
- Gently guide the last two arms together to complete the sides, leaving one section open at the lantern’s top.
- Place the lantern on your work surface so the opening is at the top.
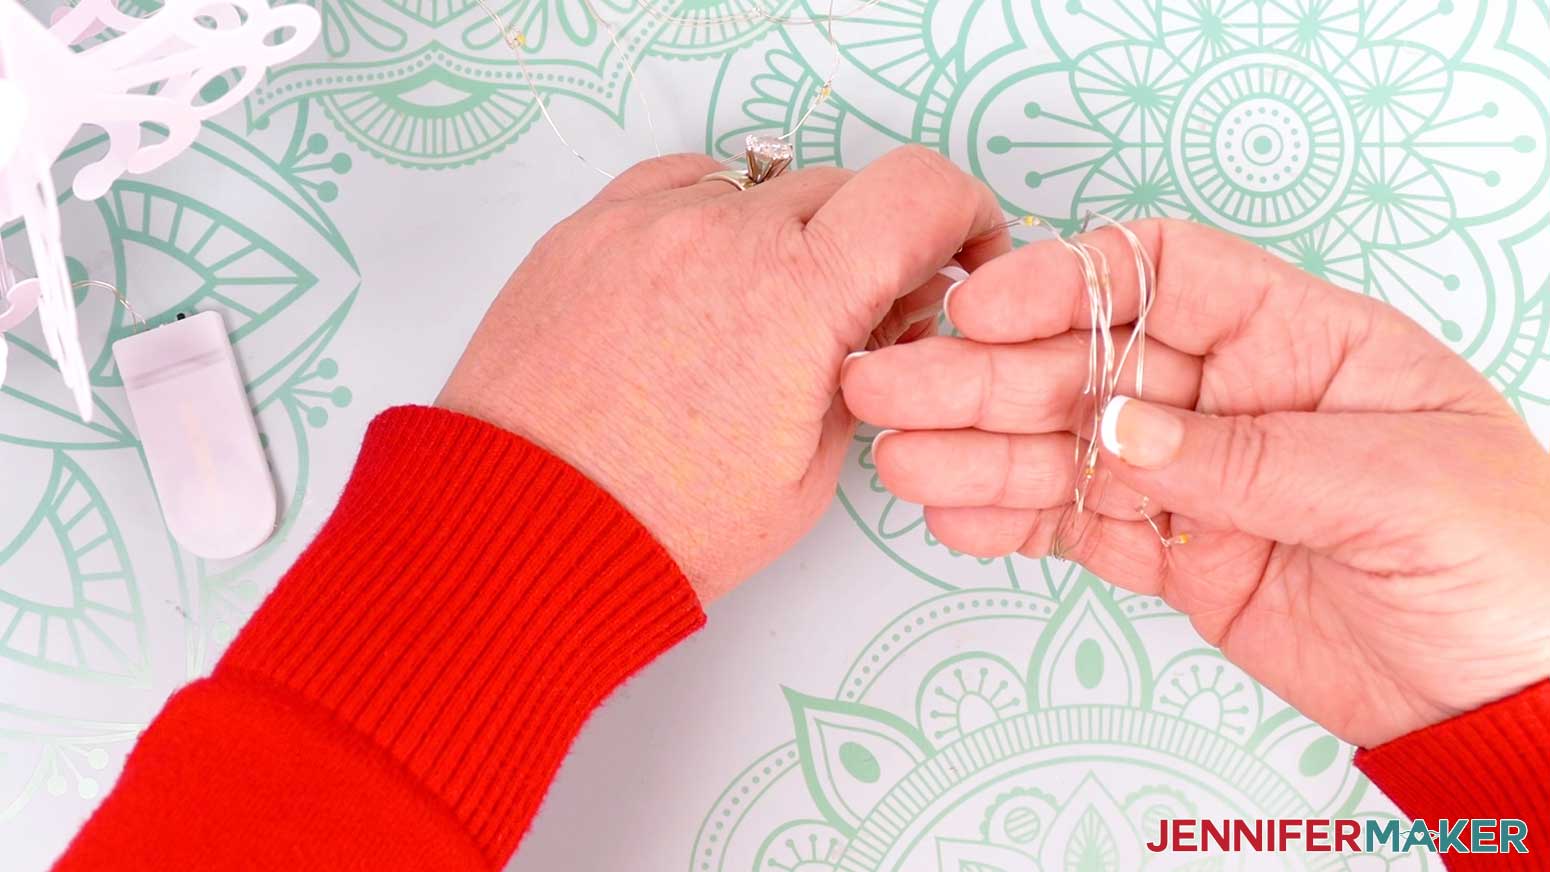
- Make sure your fairy lights work, then unwind them.
- Starting at the end furthest from the battery pack, loosely wrap the string of lights around your hand to make a loop small enough to fit in the top of the lantern.
NOTE: Keep the battery pack and a few inches of the wire near it hanging away from the lights.
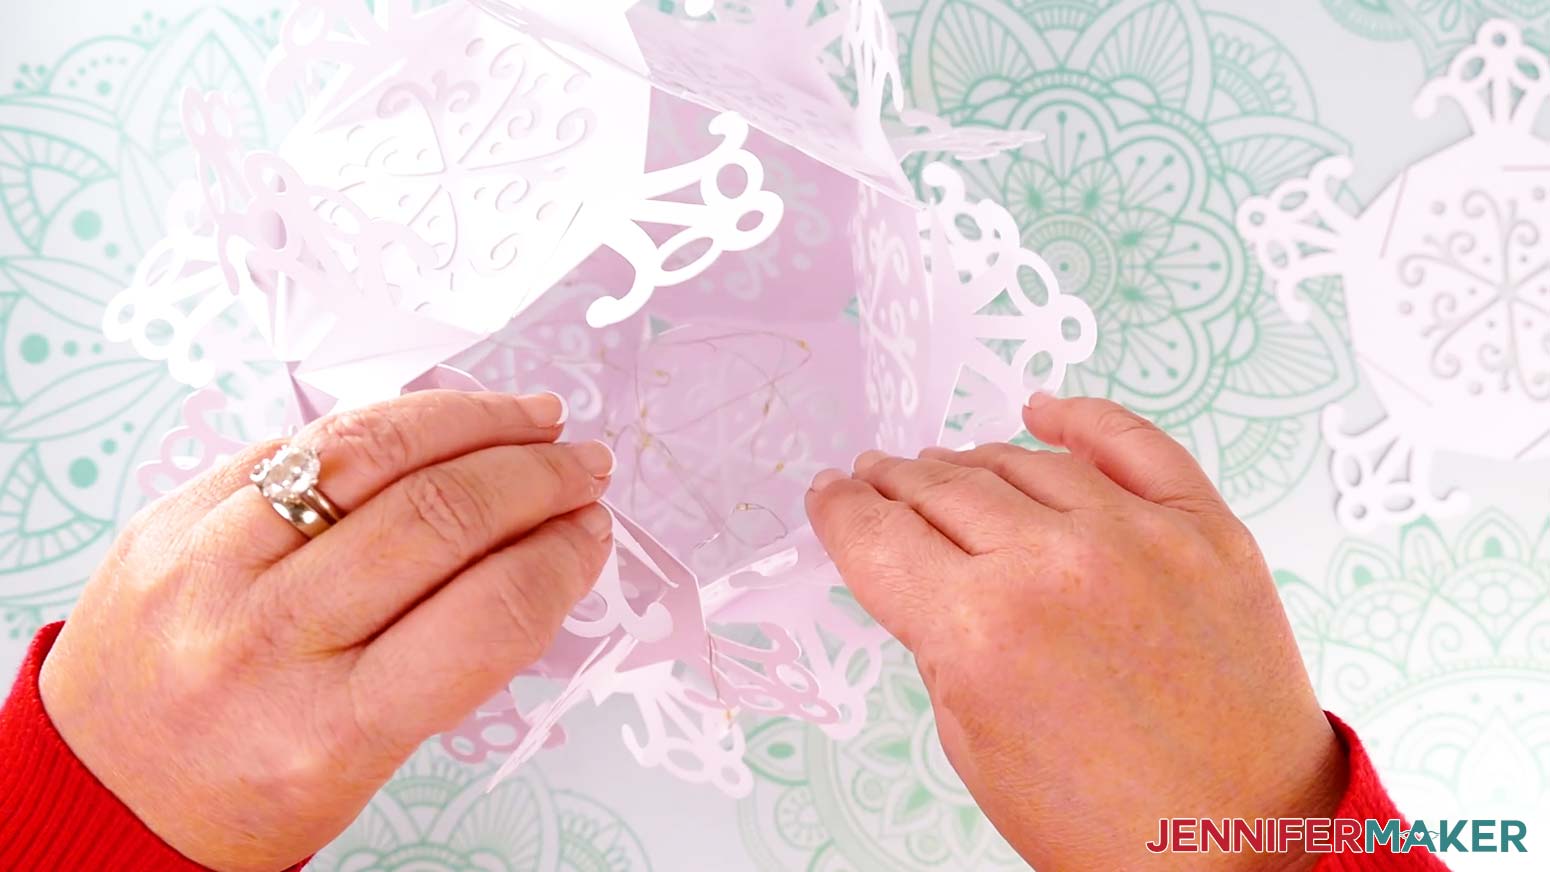
- Place the coiled lights into the lantern and gently loosen them a bit to better fill the inside.
- Keep the battery pack outside of the lantern and place its wire in a V-shape between two upper panels for now.
- Carefully tilt the assembled lantern so a V-shape between two upper side panels is easy to access.
- Hold the final panel (Panel 12) face up with an arm pointing down.
- Slot Panel 12’s left-facing slit with the right-facing slit on the the left of the V-shape and partially slot them together. TIP: Be extra careful to avoid ripping as you get to the really tight sections.
- Gently work around Panel 12, aligning and slotting together the slits that match up.
NOTE: If you have trouble aligning a section, check the connections all over the lantern to make sure the panels are slotted in all the way. If something is misaligned, it may be influencing other pieces.
- Once the top panel is in place, go over the lantern making sure all of the arms are fully slotted in to minimize any gaps between the panels where light can sneak out.
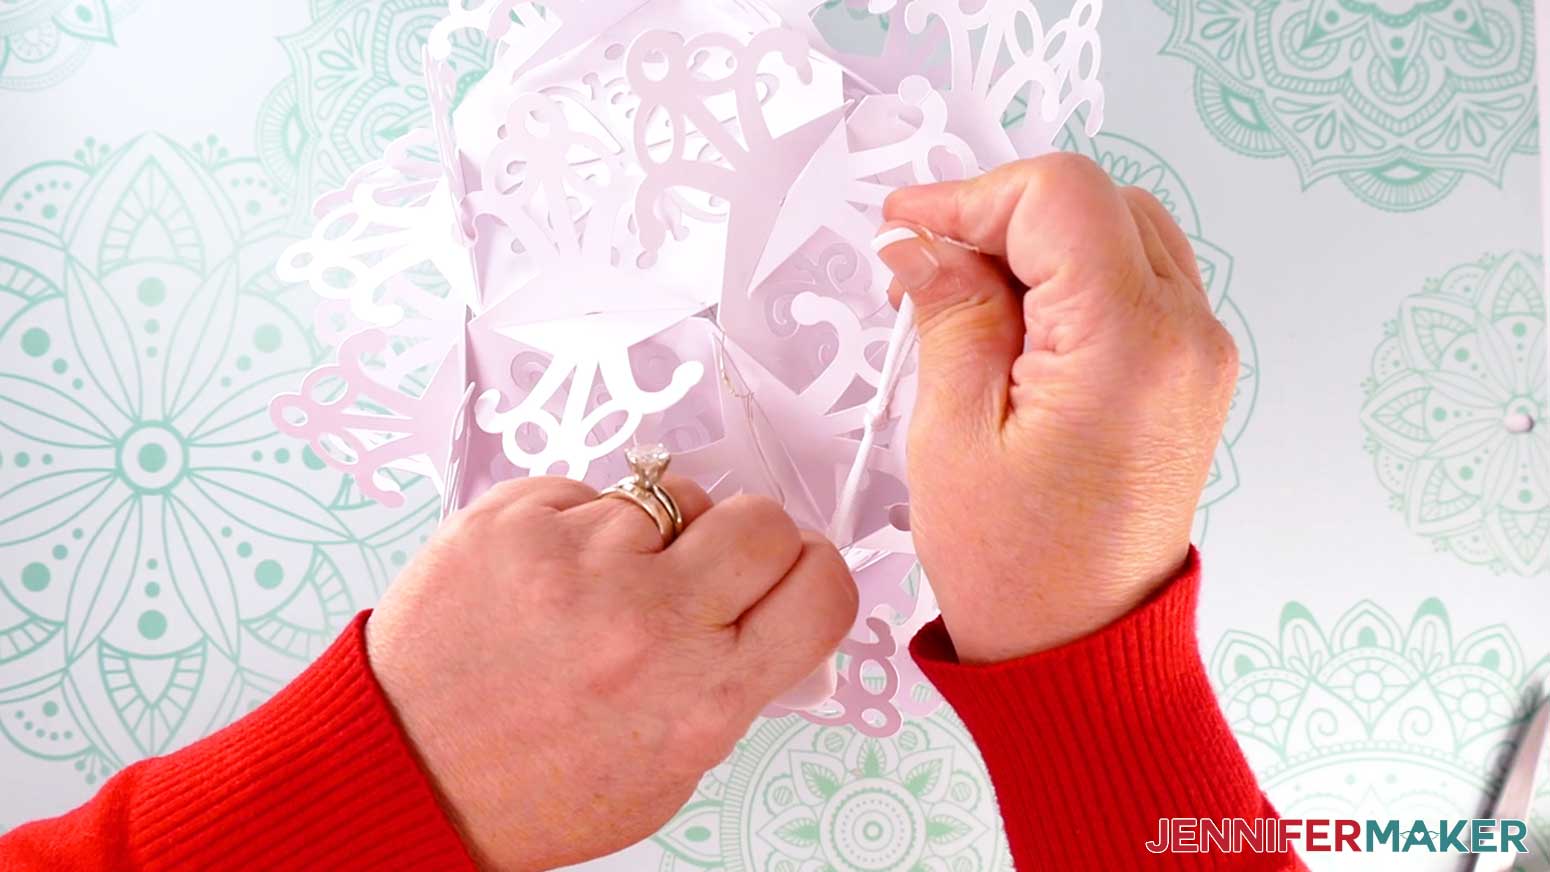
- Cut a piece of ribbon about twice the length you want the lantern to hang.
- Find the seam where the battery pack’s wire is sticking out of the lantern.
- Find the two small circle cutouts mirroring each other.
NOTE: If the diffusers are blocking the cutouts, you can tie the ribbon in a loop and gently wrap it around a branch instead.
- Feed an end of the ribbon in through one hole and out through the other.
- Tie the ends of the ribbon in a knot to create a hanging loop.
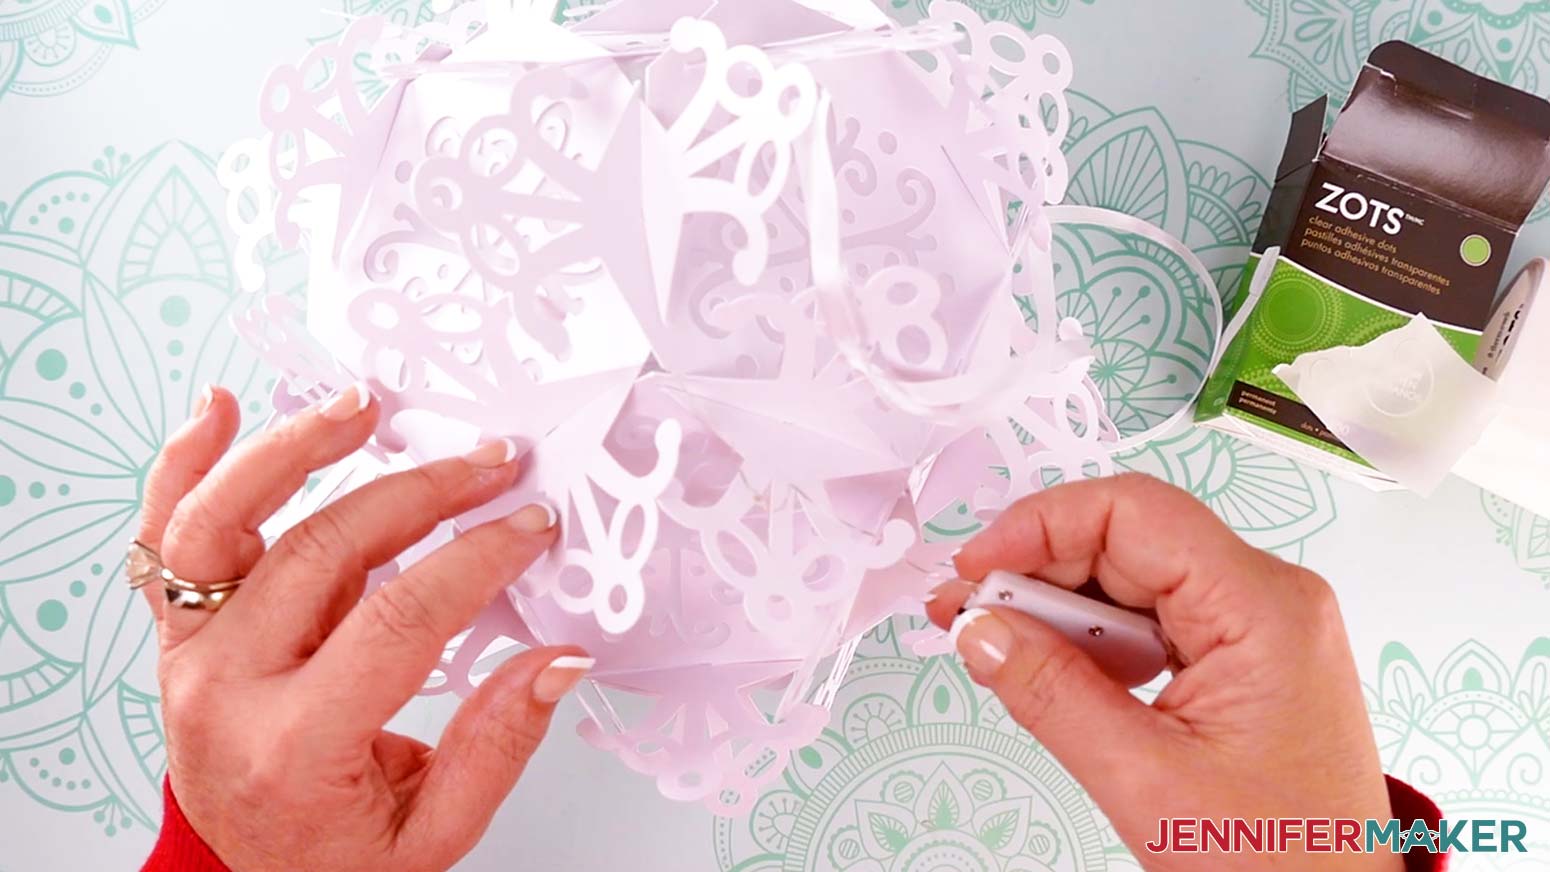
- Gently feed the wire near the battery pack into the lantern so the smooth plastic side can align with a snowflake arm next to the hanger.
NOTE: This position will be least visible if you’re hanging the lantern above peoples’ eyelines, like near a ceiling – but you’ll still be able to reach the battery pack to turn the lights on and off and to replace the batteries.
- Stick a flat glue dot to the smooth side of the battery pack and adhere it to the snowflake arm.
TIP: Make sure the switch and side with screws on the battery pack are facing out and accessible.
 NOTE: Make sure the slits on the two side panels fit together and won’t disengage, but don’t worry about locking anything in place just yet. It will be easier to slot the pieces together if there is a little wiggle room now.
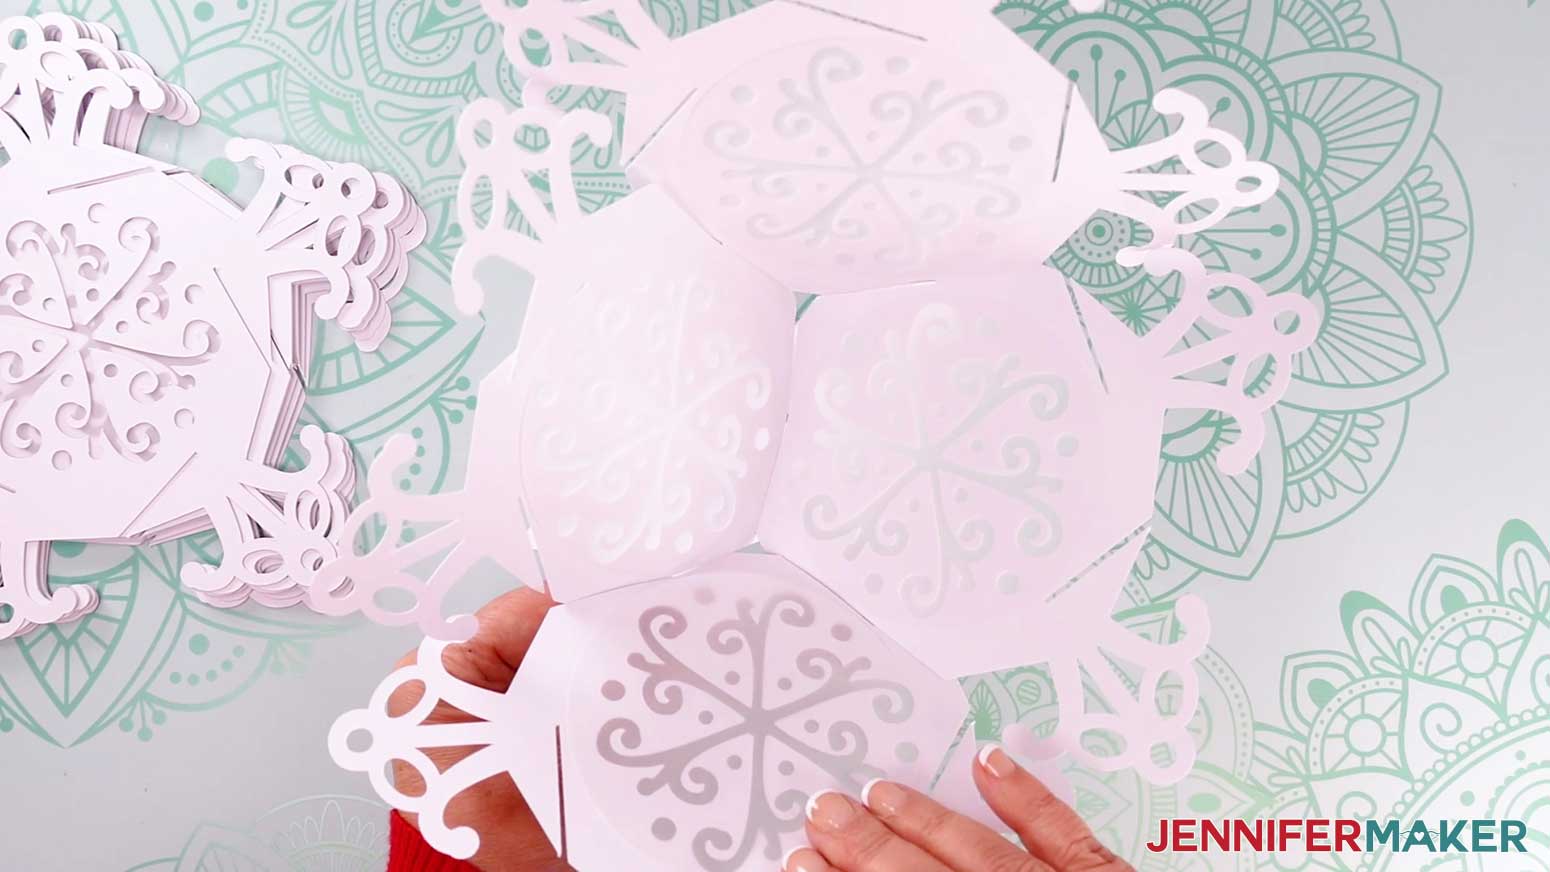
 NOTE: As you add side panels, the lantern’s shape will become more visible.
TIP: If you ever get disoriented, adjust the assembled panels until the base (the panel with the most connections to other panels) can rest on your work surface. Find the panel that sticks up and doesn’t have a panel to its right. That’s the panel you should add to next.
NOTE: As you add side panels, the lantern’s shape will become more visible.
TIP: If you ever get disoriented, adjust the assembled panels until the base (the panel with the most connections to other panels) can rest on your work surface. Find the panel that sticks up and doesn’t have a panel to its right. That’s the panel you should add to next.
 TIP: Take your time and be gentle to avoid ripping any of the delicate details. You can gently curve the arms to make the slits easier to access. Once everything is in place, the panels will make a bowl.
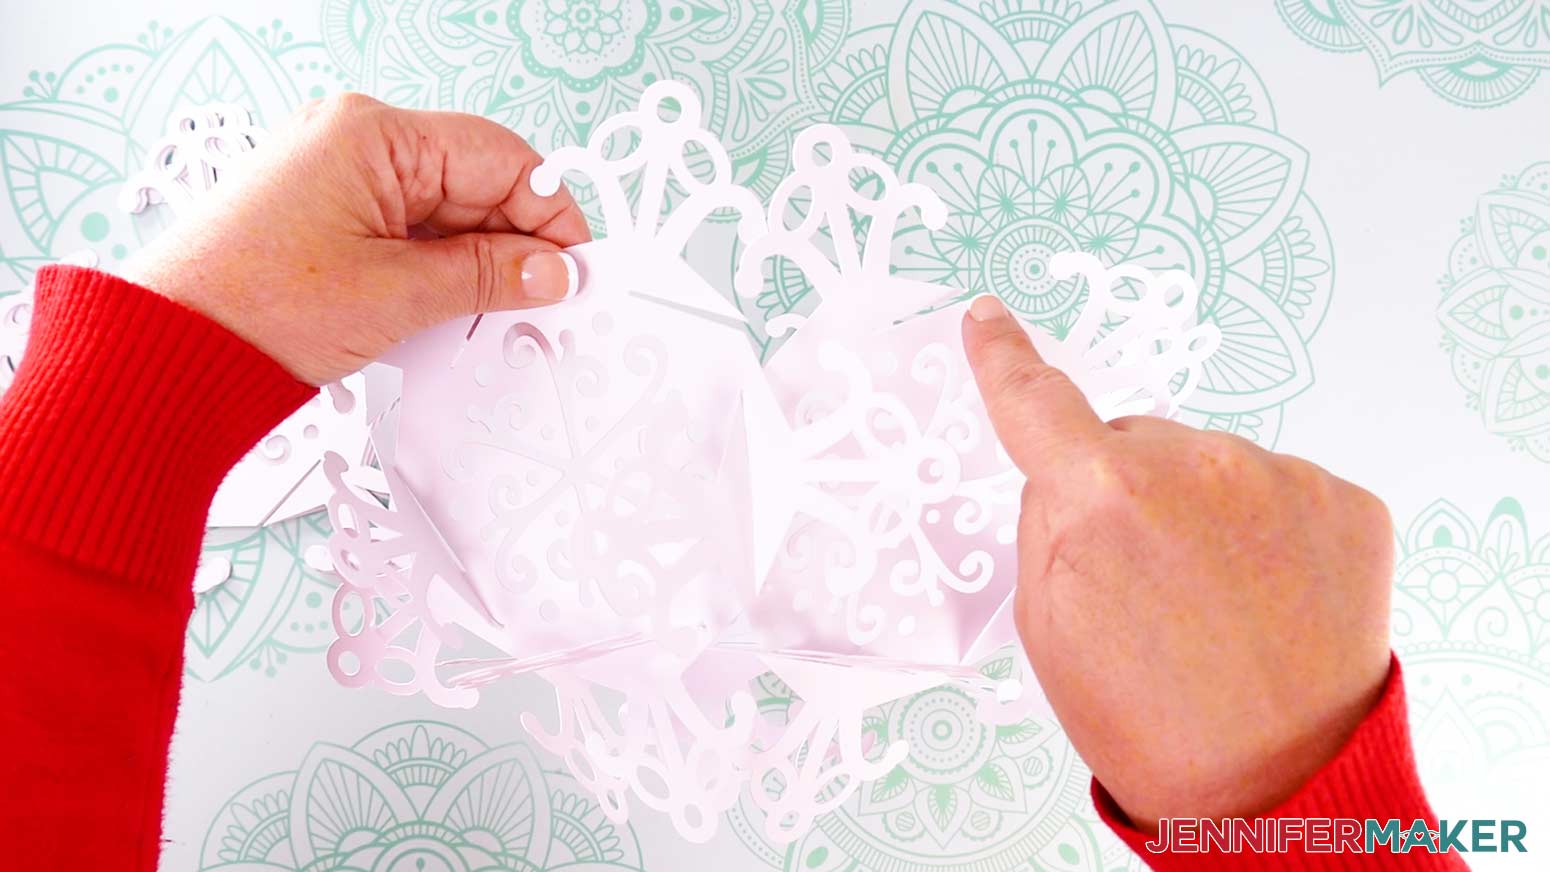 NOTE: There should be a right-facing slit angling down on the left-side panel’s arm, and a right-facing slit angling up on the other.
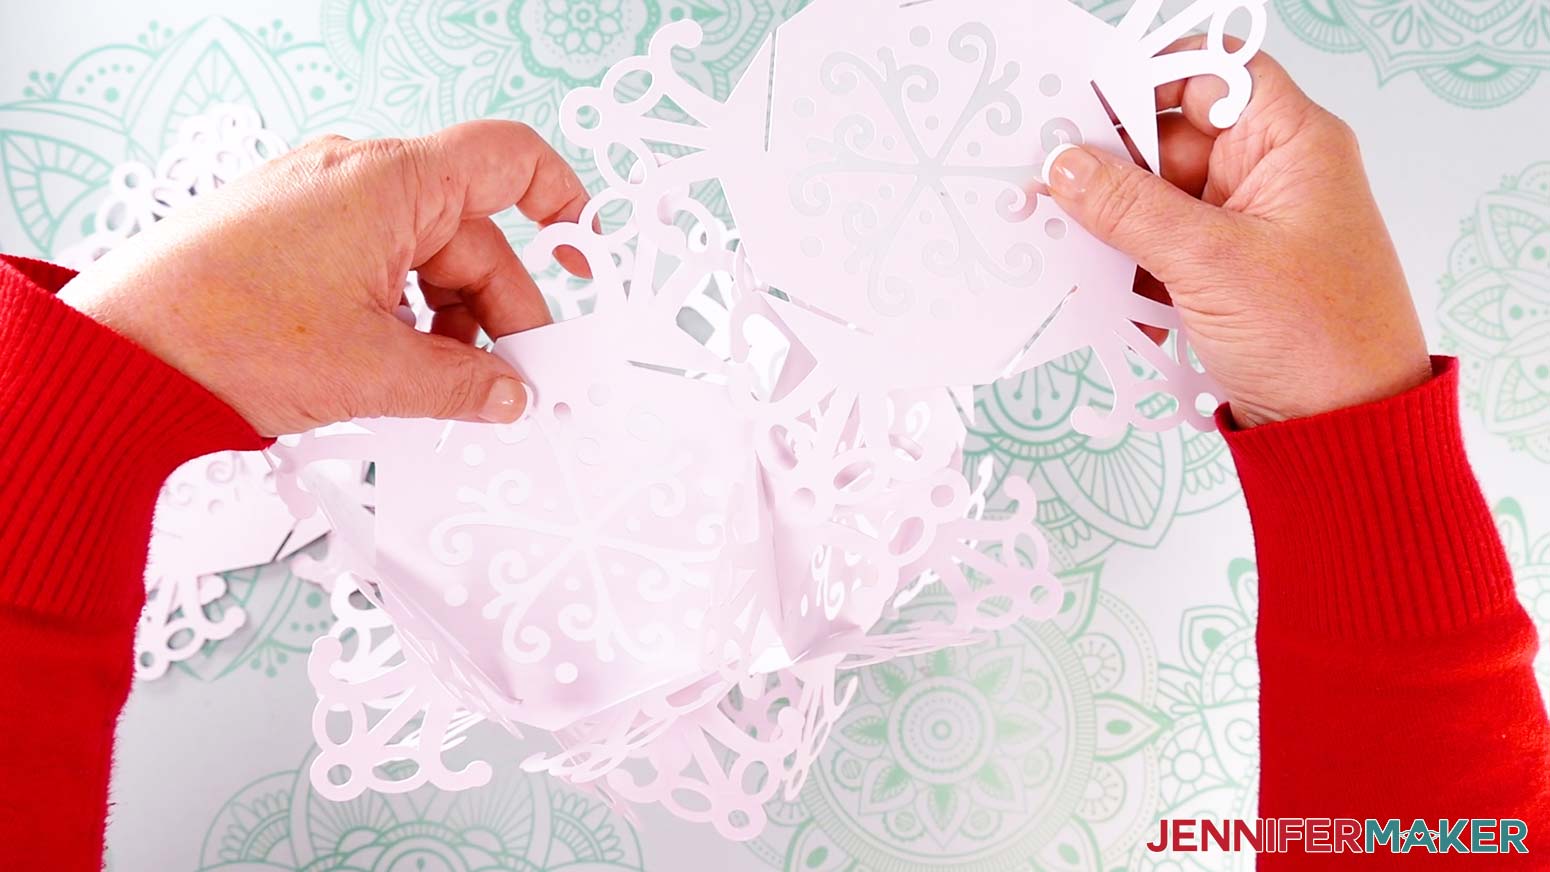
 NOTE: If you have trouble aligning a section, check the connections all over the lantern to make sure the panels are slotted in all the way. If something is misaligned, it may be influencing other pieces.
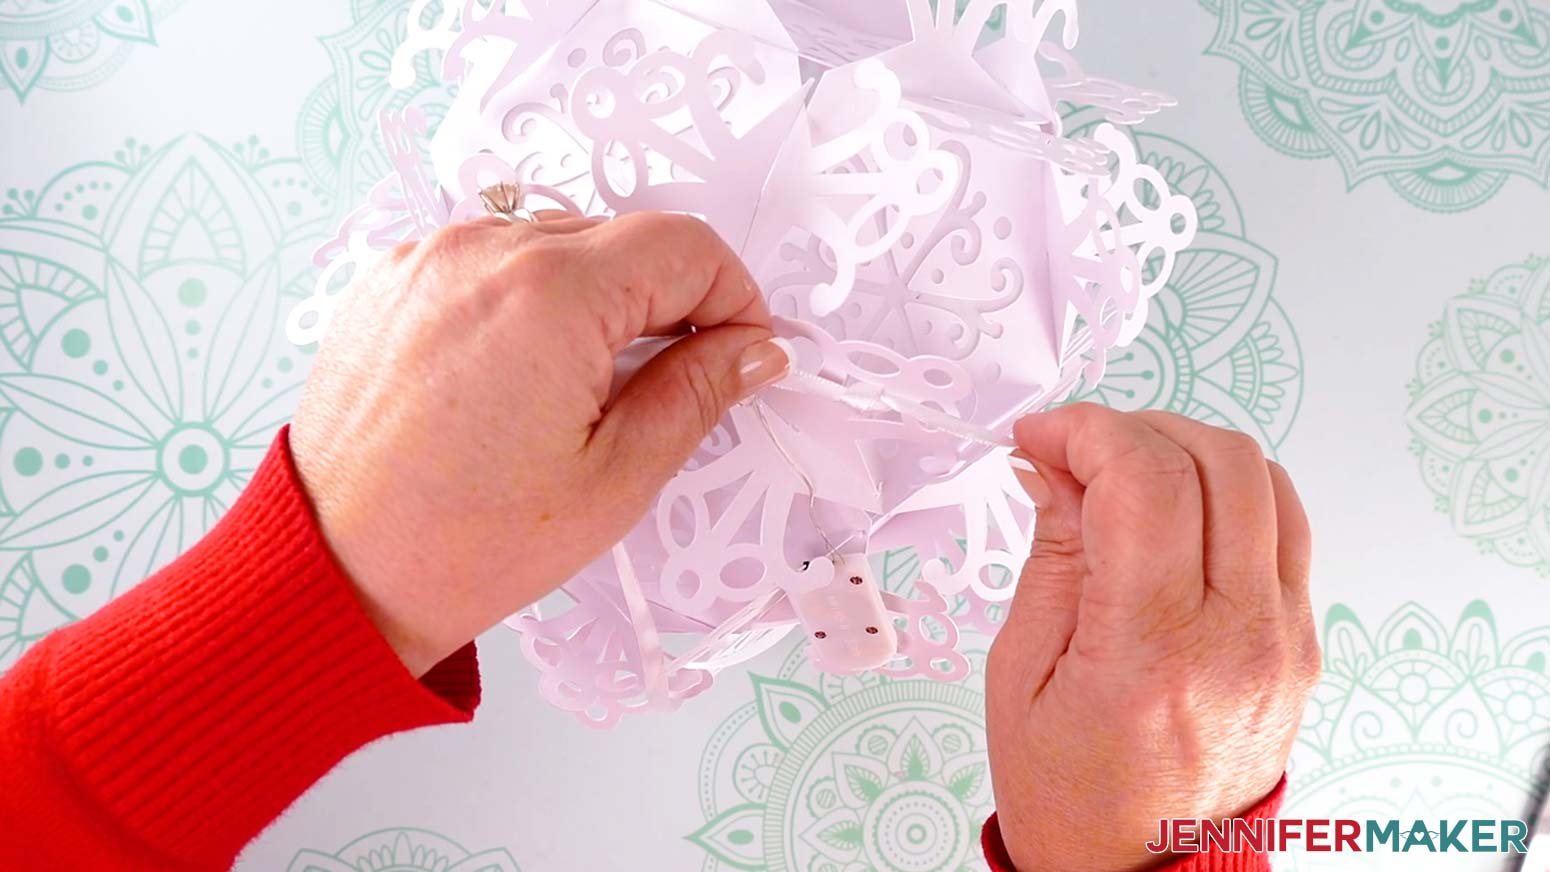
 NOTE: This position will be least visible if you’re hanging the lantern above peoples’ eyelines, like near a ceiling – but you’ll still be able to reach the battery pack to turn the lights on and off and to replace the batteries.
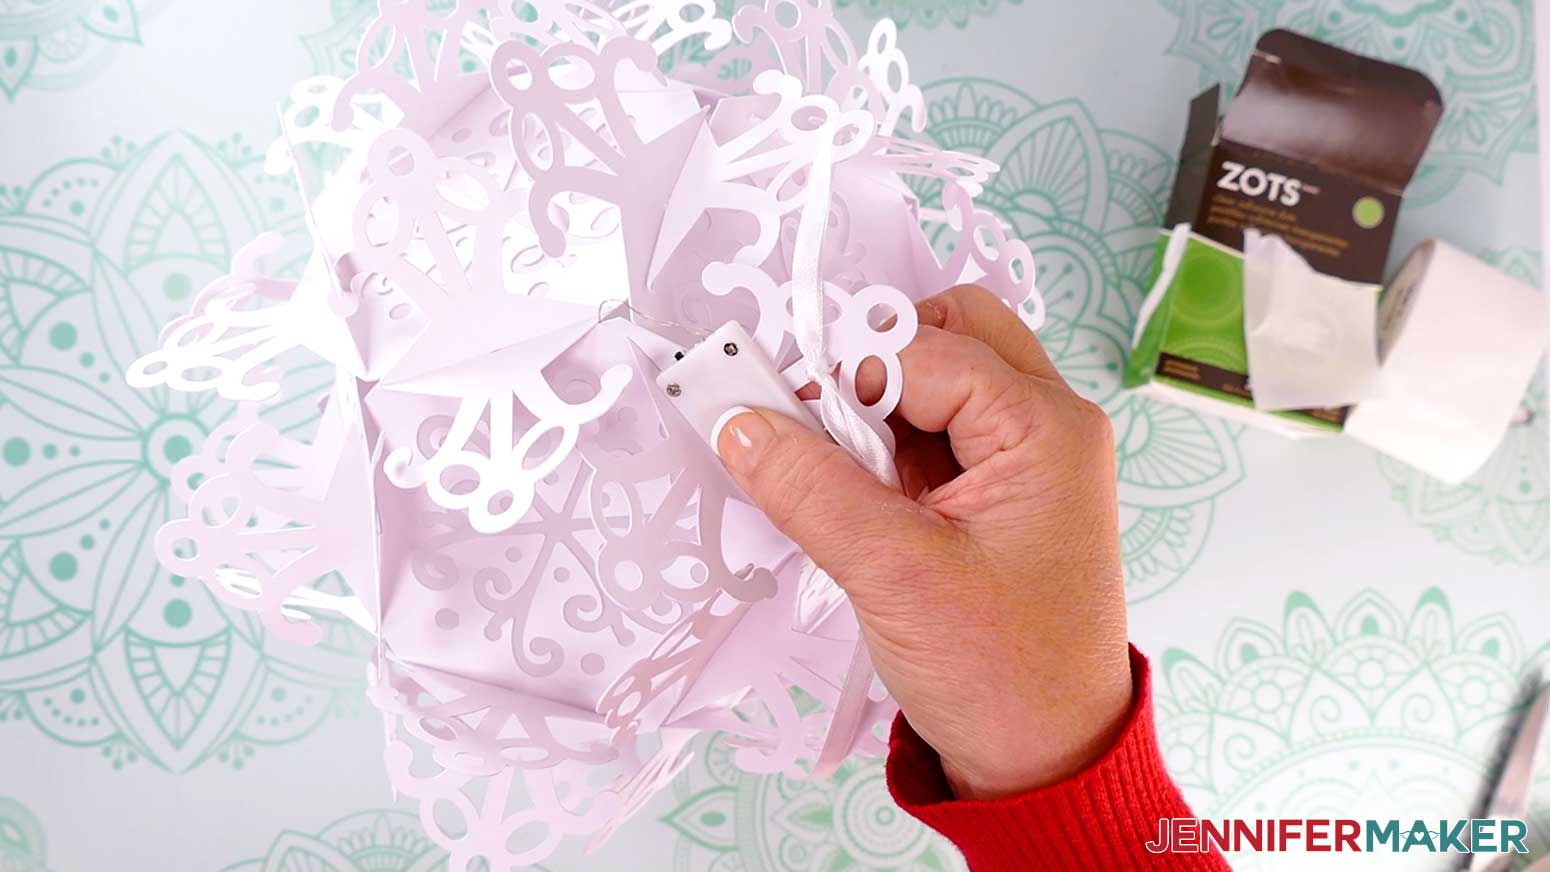
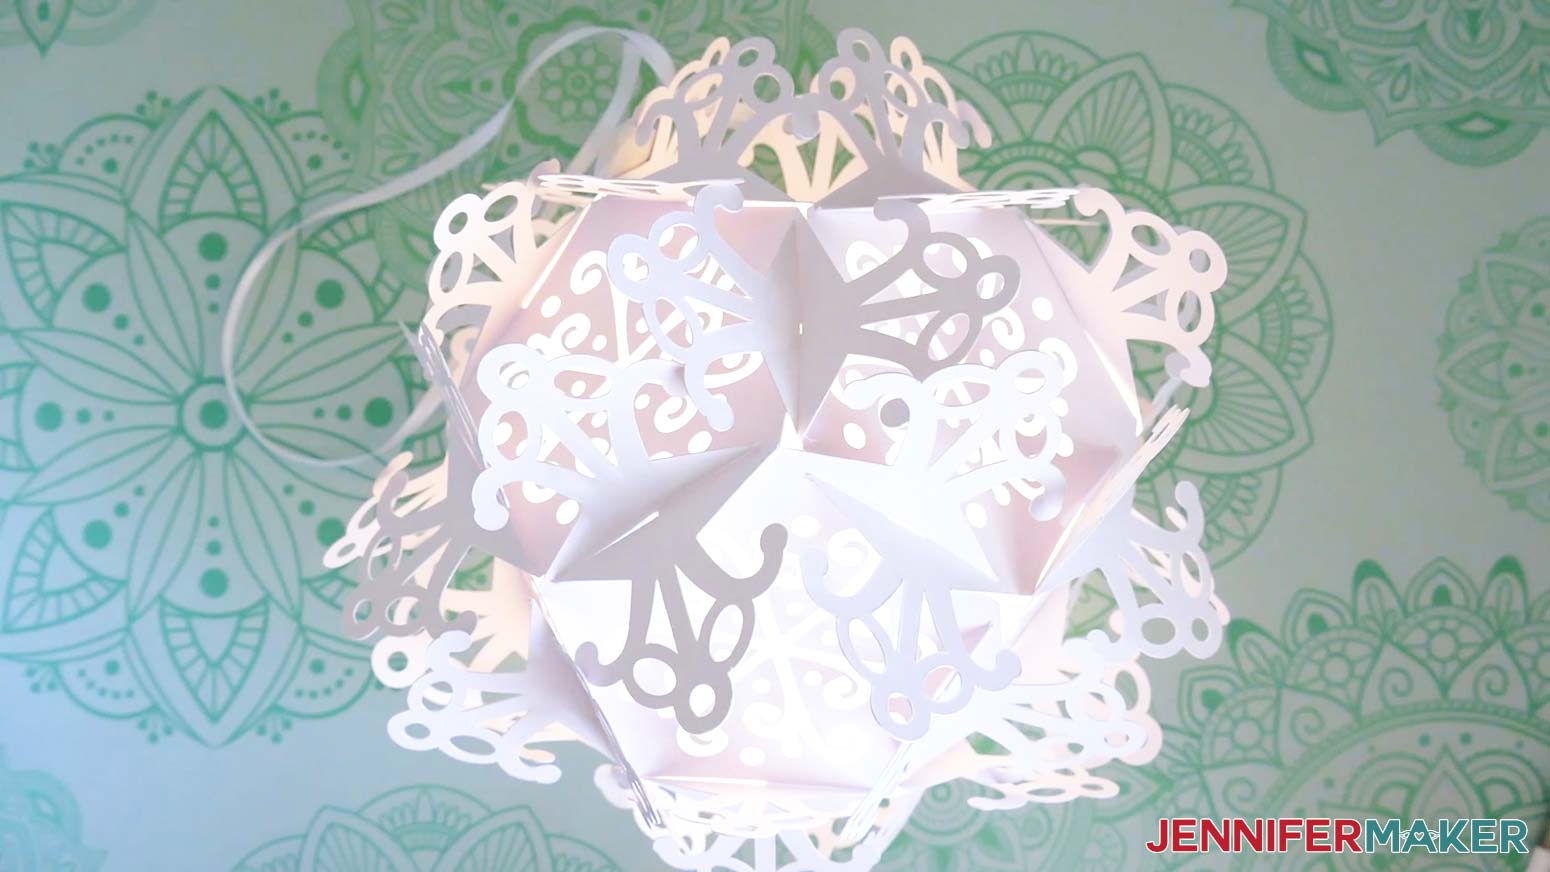
STEP 4: SHOW IT OFF
Your paper snowflake lantern is complete!
Notes
Assembled Size: Small Snowflakes: Approximately 7” wide Large Snowflakes: Approximately 10.5” wide
Answers to Your Questions About How to Make a Paper Snowflake Lantern
Q: I want to make a different style of snowflake. How do I design my own custom paper snowflake lantern?
A: You can learn how to design your own paper snowflake lantern in my ADVANCE program. Learn more about ADVANCE here!
Q: Can I cut these paper snowflake lantern SVG pieces on a Cricut Joy Xtra or original Cricut Joy?
A: The paper snowflake lantern SVG pieces in my free download file can be cut on a Cricut Joy Xtra, but they’re a little too detailed for the original Joy.
Q: Do I have to use a Cricut to cut my paper snowflake lantern SVG pieces?
A: No! You can make a snowflake lantern from paper or card stock that works with your equipment, or even just with scissors. We always include several versions of each free file in the free download ZIP file. If you have a Silhouette Cameo, which uses Silhouette Studio, you can use the DXF file in Silhouette Basic Edition. If you have upgraded to Silhouette Designer Edition, Designer Edition Plus, or Business, you can use the SVG format with your Silhouette machine to cut each intricate design. If you don’t have a cutting machine, you can print and then cut out my digital download PDF files, too! The ZIP archive in my resource library includes these file types and more!
Q: Help! My Cricut Design Space screen looks different than yours!
A: If you’re using the latest version of Cricut Design Space, your screen may have slight variations than the screen you see on the video tutorial. Good news: All of the same functions are there, they may just be in different spots or have new icons. Pause the video if you need, or follow along with the written tutorial. If you get stuck, ask for expert support in our Facebook group. Our group has become not just a help center, but also a vibrant community of real people and crafters! Plus, you can catch the latest news on JenniferMaker tutorials and more.
Q: What paper should I use for making a snowflake lantern?
A: In my tests, I had good results with 65 lb. cardstock, Kraft board, glitter cardstock, and 105 lb. metallic cardstock, all of which are linked in the materials list above. Remember, not all machines cut exactly the same way, so it’s a good idea to test your machine and material combination!
Q: Where can I find the supplies and tools to make a snowflake lantern?
A: My snowflake lantern SVG files can be made with simple supplies you may already have in your crafting stash. I like to shop on Amazon for their free shipping with my Amazon Prime membership (just make sure to look for sellers with 5-star reviews and check delivery times by business day if you’re short on time, especially if it’s a peak period for that material). You can also find most, if not all of the supplies and tools at your local craft store. If you sign up for their loyalty program, you can often get extra discounts!
Q: Do you have other paper lanterns I can make?
A: Yes! Here are some of my favorite paper lantern designs:
- Paper Star Lanterns
- Light Up Ornament Paper Stars
- Christmas Tree Lantern
- Hanging Lantern
- Round Lanterns
- Rectangle Lanterns
Q: Can I make and sell these paper snowflake lantern designs?
A: I love supporting creative entrepreneurs! If you want to use my designs and projects for commercial use, please familiarize yourself with my important licensing information before selling your crafts.
I do not permit sale of my digital items, but you can sell the creative goods you make with them — as long as you follow my licensing requirements. That means you cannot sell the paper snowflake lantern SVG files, but you can lanterns that you made with the files. I hope they become best sellers for you!
Get my free SVG files to make a paper snowflake lantern!
(If you do not see the signup form above, click here.)
I love seeing what you make with my designs and how you use them! Please share a photo of your paper snowflake lantern in our Facebook group or tag me on social media with #jennifermaker.
Love,

Want to remember this? Save this Paper Snowflake Lantern tutorial to your favorite Pinterest Board!