Learn how to make a 3D Easter Egg Lantern!
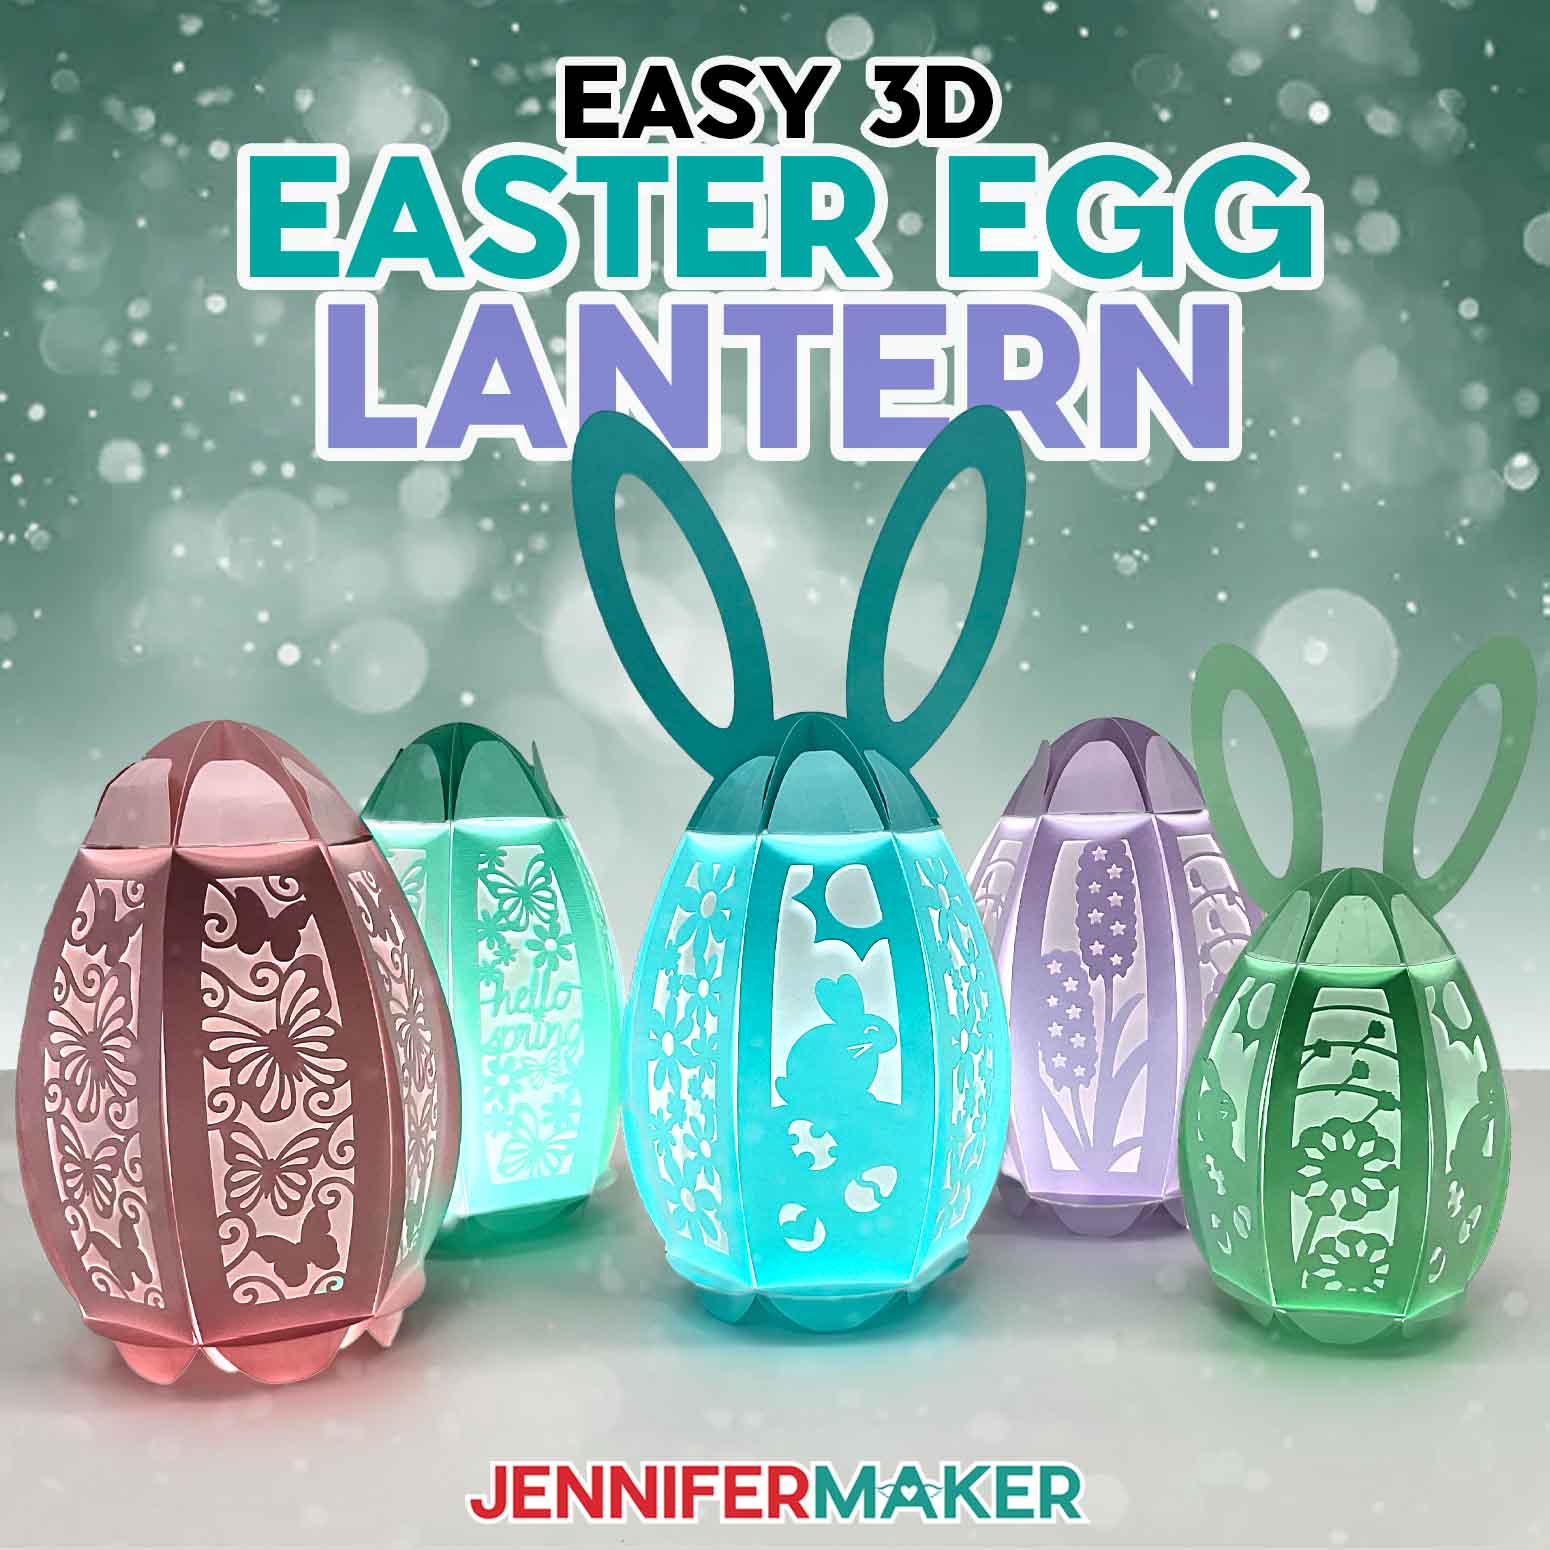
The weather is growing warmer, and it’s just about time to pull out those spring and Easter decorations. With my easy, no-glue fall and winter lanterns being so popular, I thought I’d design one for spring, too. But what shape would be best? How about an egg! My 3D Easter egg lantern is a fun and festive way to welcome some springtime or Easter magic into your home. And they’re so easy to make with just a couple of materials and tools!

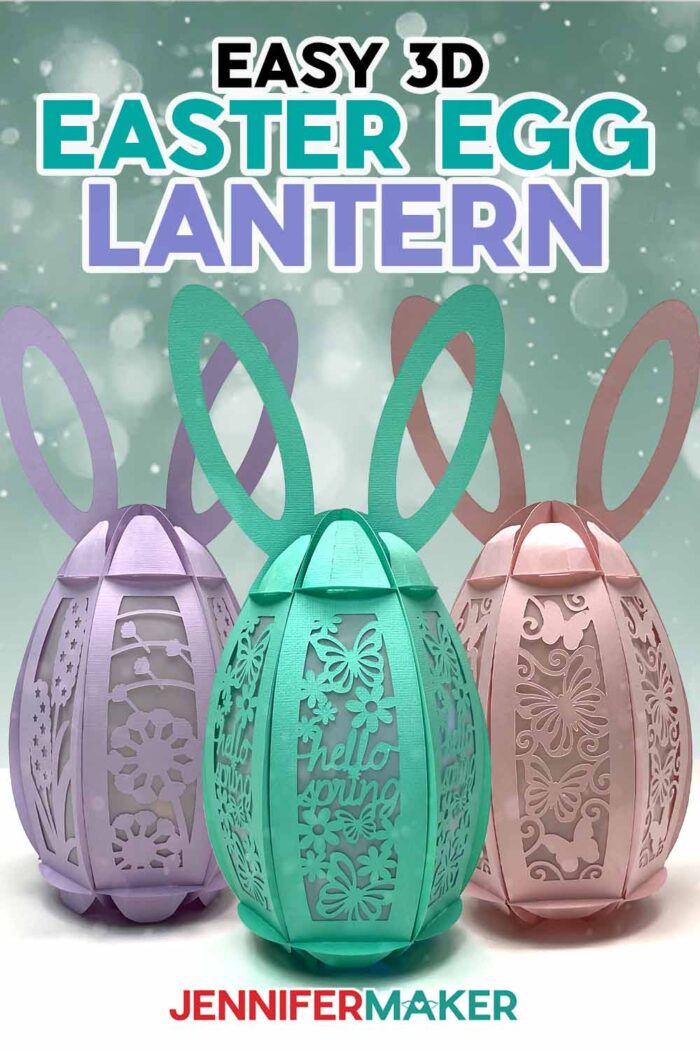
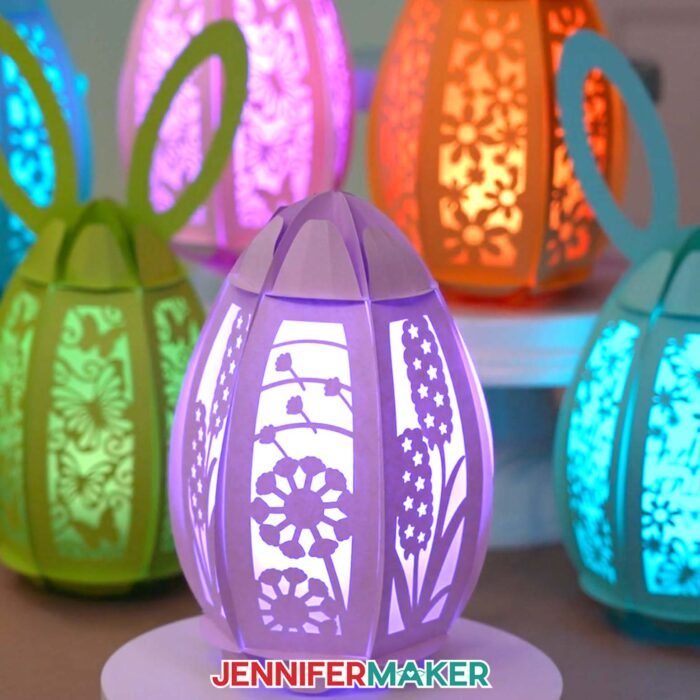
I’m always surprised at the amazing Cricut projects we can make with just a little paper, and lanterns are some of my favorites. Isn’t my 3D Easter Egg Lantern the cutest? I had a blast designing this whole set of them for Easter!
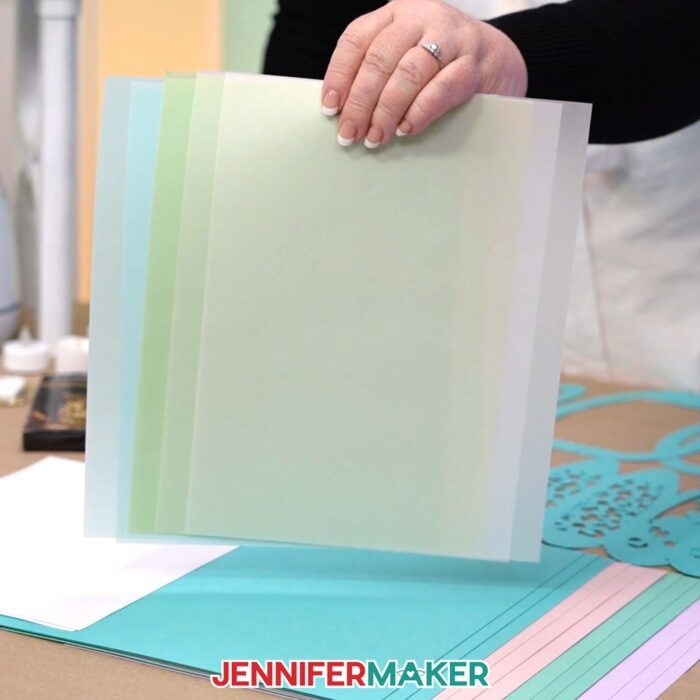
My paper egg lanterns come together easily with nothing but some cardstock and an LED light, plus some optional vellum, parchment paper, or even regular copy paper to diffuse the light for a softer glow.
In my free digital designs zip file, there’s a PDF file for each design to cut them by hand — but I’ll use a Cricut Maker 3 with SVG files for a bit more precision. You can also use an original Maker, a Cricut Explore series machine, a Cricut Venture, a Joy Xtra, original Joy, or other cutting machines (like the Silhouette Cameo) that use cut files.

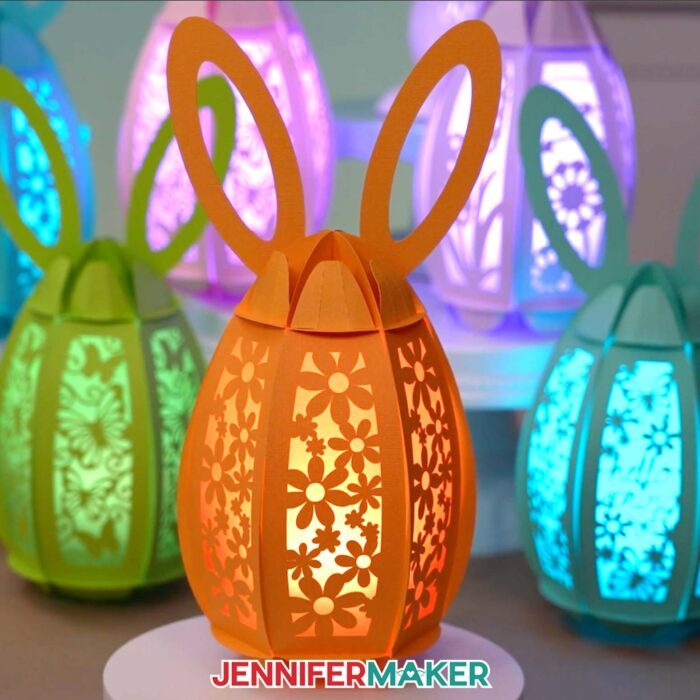
Inside the digital download file, you’ll find five lantern designs: a bunny, butterflies, dandelions, daisies, and hyacinths. I’ll demonstrate with the Easter bunny egg, but the same instructions work for all of the designs.

Cricut Joy users, I didn’t forget about you! There’s also a folder of the same digital designs, but sized to fit the Cricut Joy.
For the full size versions, I’ve included score versions of each design that you can use with a scoring tool (like a scoring stylus or single scoring wheel), as well as no-score versions that use dashed cut lines to make the creases. I’ll demonstrate with the no-score version so everyone can make it, but there are instructions for using the version with score lines in the written tutorial below.

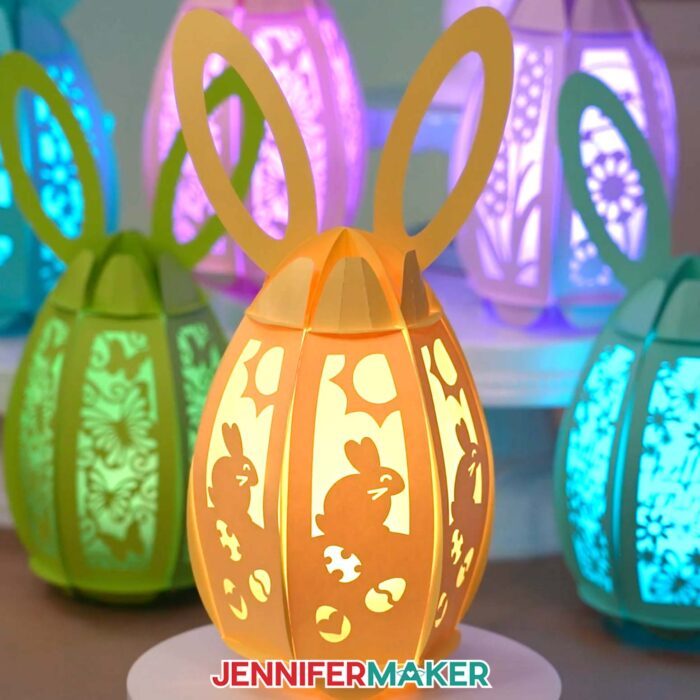
With every design, there are six optional diffuser panels you can use to filter the light and make your DIY Easter Egg Lantern truly glow! You can create a beautiful light effect by using different color paper or vellum. Mix and match your lantern and diffuser material colors for a fun color effect with each lantern you make!

To make matters cuter, there are optional bunny ears to decorate your Easter eggs included in each design, too.

Crafting an Easter egg paper cut lantern is a breeze with how easily these come together, and with the added bonus of no messy glue to deal with! These are truly my favorite types of craft projects: creating something beautiful and detailed with only a few supplies and tools.
My 3D Easter Egg Lantern makes a beautiful addition to your Easter table, and is lovely lit up on your desk at work, or creating a soft glow as a cute seasonal night light!
Ready to learn how to make a 3D Easter egg lantern? This post contains some affiliate links for your convenience (which means if you make a purchase after clicking a link I will earn a small commission but it won’t cost you a penny more)! Read my full disclosure policy.
Materials And Tools to Make a 3D Easter Egg Lantern
See my Amazon shopping list with exactly what I used!
- Three to Six (3-6) Sheets of 12″ x 12″ or 8.5” x 11” 65 lb. Solid Core Cardstock (any color) -OR-
- Three to Six (3-6) Sheets of 12” x 12” or 8.5” x 11” 80 lb. Solid Core Cardstock (any color) -OR-
- Three to Six (3-6) Sheets of 12” x 12” or 8.5” x 11” 100 lb. Solid Core Cardstock (any color)
- Two (2) Sheets of 8.5” x 11” Vellum (any color, optional for diffuser panels) -OR-
- Two (2) Sheets of 12” x 12” Wax Paper, or Parchment Paper (optional for diffuser panels) -OR-
- Two (2) Sheets of 8.5″ x 11″ Copy Paper (optional for diffuser panels)
- One (1) Battery-Operated LED Puck Light -OR-
- One (1) Strand of LED Fairy Lights -OR-
- One (1) Remote-Controlled LED Tea Light
- Three (3) AAA Batteries (for LED Puck Light)
- A way to cut your materials – I’m using the Cricut Maker 3, but you can also use the Maker, Explore series machines, Venture, Joy, or Joy Xtra
- Cricut Green StandardGrip Machine Mat 12″ x 12″
- Cricut Blue LightGrip Machine Mat 12″ x 12″ (optional for diffuser pieces)
- Scoring Stylus (optional for files with score lines) -OR
- Single Scoring Wheel (optional for files with score lines)
- Brayer
- Spatula
- Scraper
- Weeding Tool (optional for popping out small pieces from intricate areas)
- Tweezers (optional)
- Bearly Art Precision Craft Glue (optional for attaching diffuser panels)
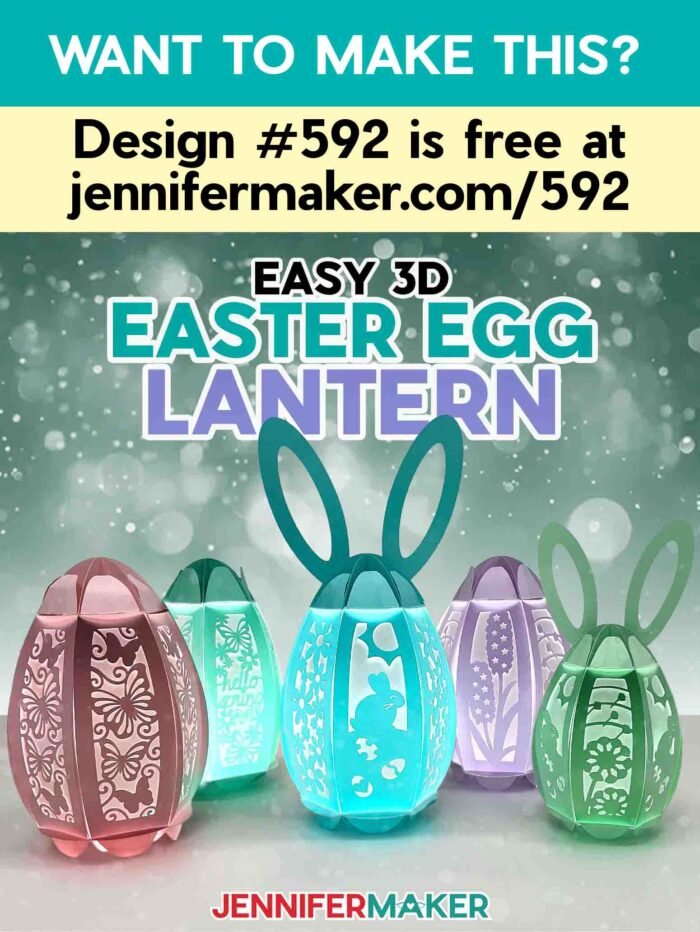
- Design #592 My free SVG/PDF/DXF design files are available in my free resource library – get the password by filling out the form at the bottom of this page
How to Create a DIY Easter Egg Lantern!

3D Easter Egg Lantern
Learn how to make a 3D Easter egg lantern from just cardstock - no glue or tape required!
Materials
- Three to Six (3-6) Sheets of 12" x 12" or 8.5” x 11” 65 lb. Solid Core Cardstock (any color) -OR-
- Three to Six (3-6) Sheets of 12” x 12” or 8.5” x 11” 80 lb. Solid Core Cardstock (any color) -OR-
- Three to Six (3-6) Sheets of 12” x 12” or 8.5” x 11” 100 lb. Solid Core Cardstock (any color)
- Two (2) Sheets of Vellum (any color, optional for diffuser panels) -OR-
- Two (2) Sheets of 12” x 12” Wax Paper or Parchment Paper (optional for diffuser panels) -OR-
- Two (2) Sheets of 8.5" x 11" Copy Paper (optional for diffuser panels)
- One (1) Battery-Operated LED Puck Light -OR-
- One (1) Strand of LED Fairy Lights -OR-
- One (1) Remote-Controlled LED Tea Light
- Three (3) AAA Batteries (for LED Puck Light)
- Design #592 (My free SVG/PDF/DXF design files are available in my free resource library - get the password by filling out the form at the bottom of this page)
Tools
- A way to cut your materials - I’m using the Cricut Maker 3, but you can also use the Maker, Explore series machines, Venture, Joy, or Joy Xtra
- Cricut Green StandardGrip Machine Mat 12" x 12"
- Cricut Blue LightGrip Machine Mat 12" x 12" (optional for diffuser pieces
- Scoring Stylus (optional for files with score lines) -OR-
- Single Scoring Wheel (optional for files with score lines)
- Brayer
- Spatula
- Scraper
- Weeding Tool(optional for popping out small pieces from intricate areas)
- Tweezers (optional)
- Bearly Art Craft Glue (optional for attaching diffuser panels)
Instructions
STEP 1: GET MY FREE 3D EASTER EGG LANTERN DESIGNS
First, download my 3D Easter Egg Lantern designs from my free library – look for Design #592. Alternatively, you can use the Save This Project form near the top of this post and the design link will be emailed to you.
In the SVG folder, you’ll find “score” and “no-score” versions of my five designs to cut on a cutting machine. You’ll also find a folder for Joy users that contains Joy-sized versions of all the designs. Back in the main folder, there’s a DXF folder with cut files, and a PDF folder with versions you can print and cut by hand.
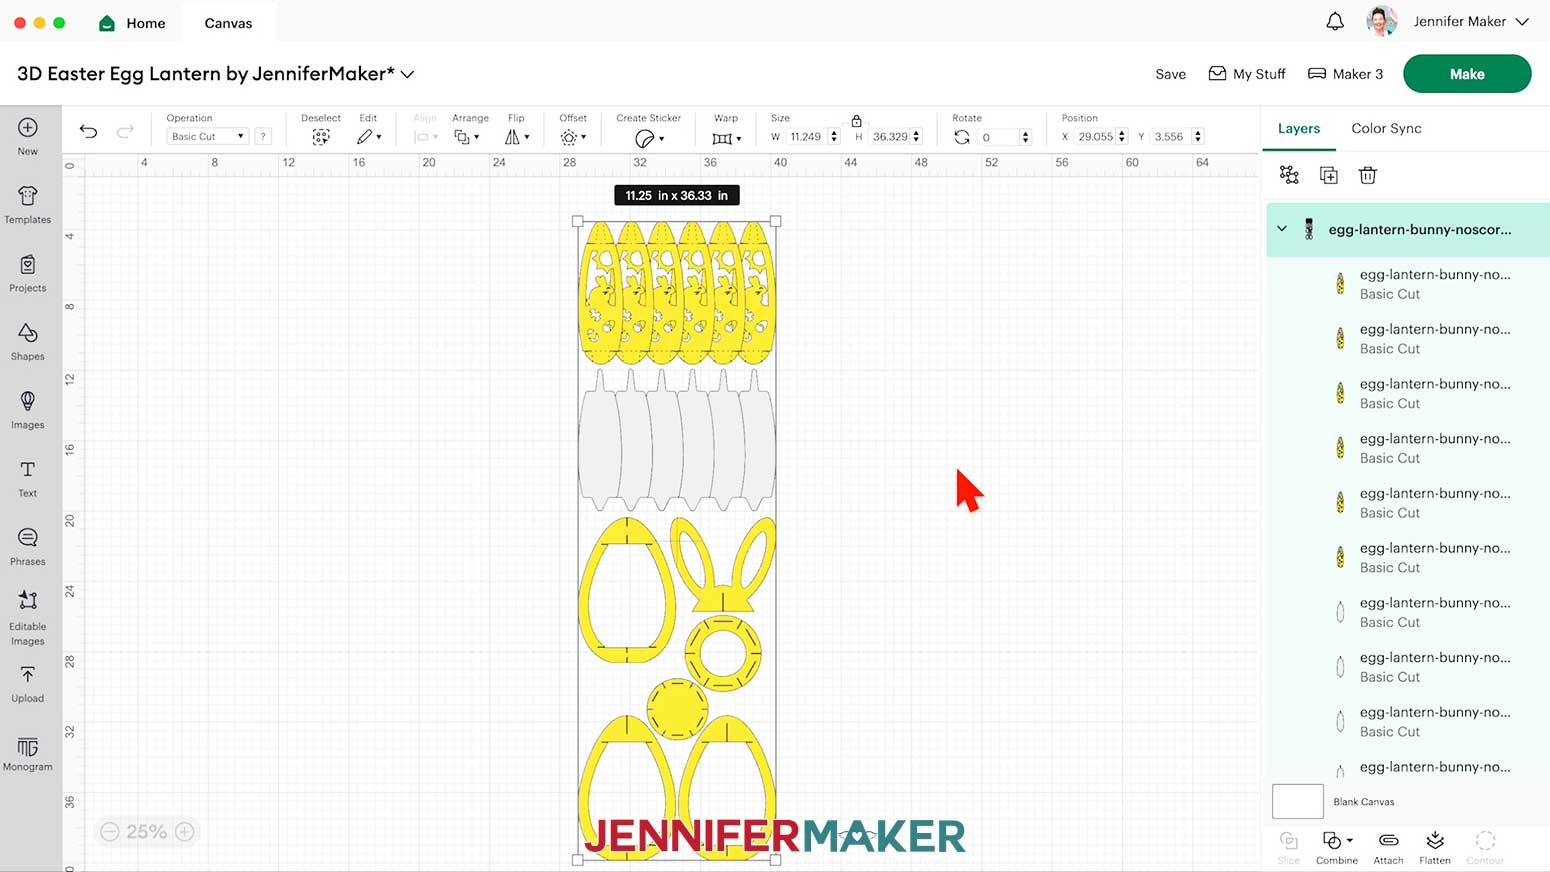
Upload the SVG file you need to Design Space to get started. I’ll demonstrate with the “no-score bunny” design.
TIP: If you’re not sure how to upload, go to jennifermaker.com/svgs to learn how to unzip and upload SVG files.
STEP 2: PREPARE AND CUT YOUR 3D EASTER EGG LANTERN DESIGN
CRICUT DESIGN SPACE
- Open Cricut Design Space and click “New Project.”
- Click “Upload” and then “Upload Image.”
- Click “Browse.”
- Select the SVG file of your choice.O
- n the Prepare to Upload screen, it will say “Cut Image” with the design preview.
- Click “Upload.”
- Find your design in Recent Uploads and add it to the Canvas.

- Ungroup the design.
- If you do NOT want to use the optional bunny ears piece or the diffuser panels, delete them now.
NOTE: If you're using the score version of the file that uses a scoring tool to create the foldable creases, each panel has a layer with faint lines and no fill color in the Layers Panel. Select it, then click the dropdown arrow under “Operation” and select “Score.” The lines will change from solid to dashed to show that the machine will score them. Select both the panel and score layers and then click “Attach.” Repeat these steps to set and attach the score lines to the other panels. Go to my 3D Pumpkin Lantern tutorial to watch the video if you need help setting and attaching score lines. - Make sure the correct machine is selected in the top right.
- Click “Make."
- If prompted, click “On Mat,” choose your mat size, and click “Confirm."
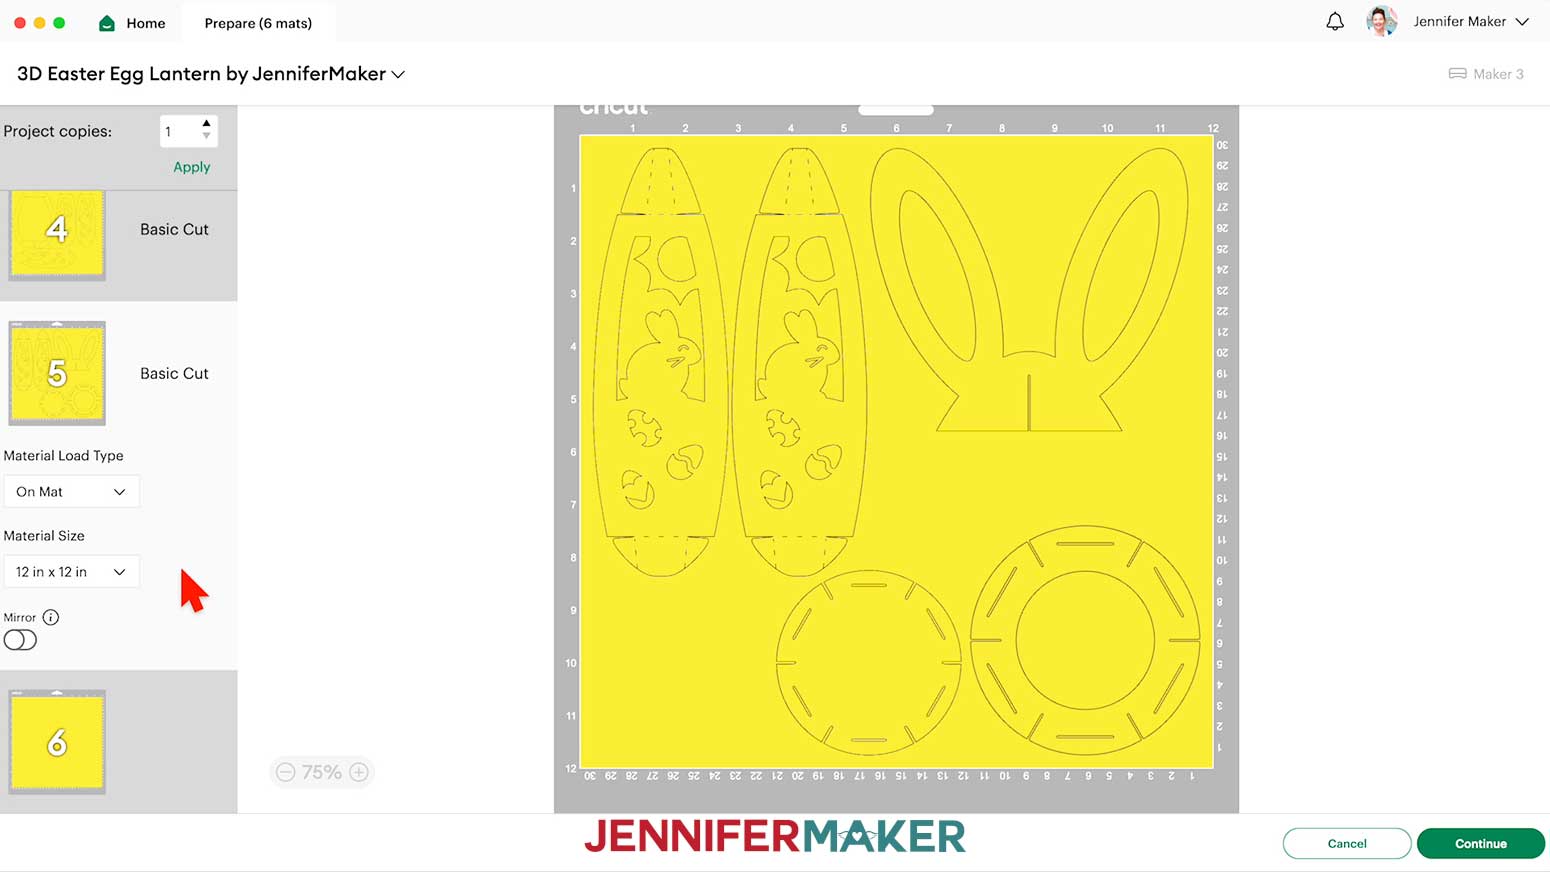
- On the Prepare screen, make sure the correct Material Size is selected for your materials, as your diffuser panels may cut from a different size material than your cardstock.
- You can combine mats to save materials if you want. Click the three dots on elements to move them and reduce your mats.
- Select the first mat again and click “Continue.
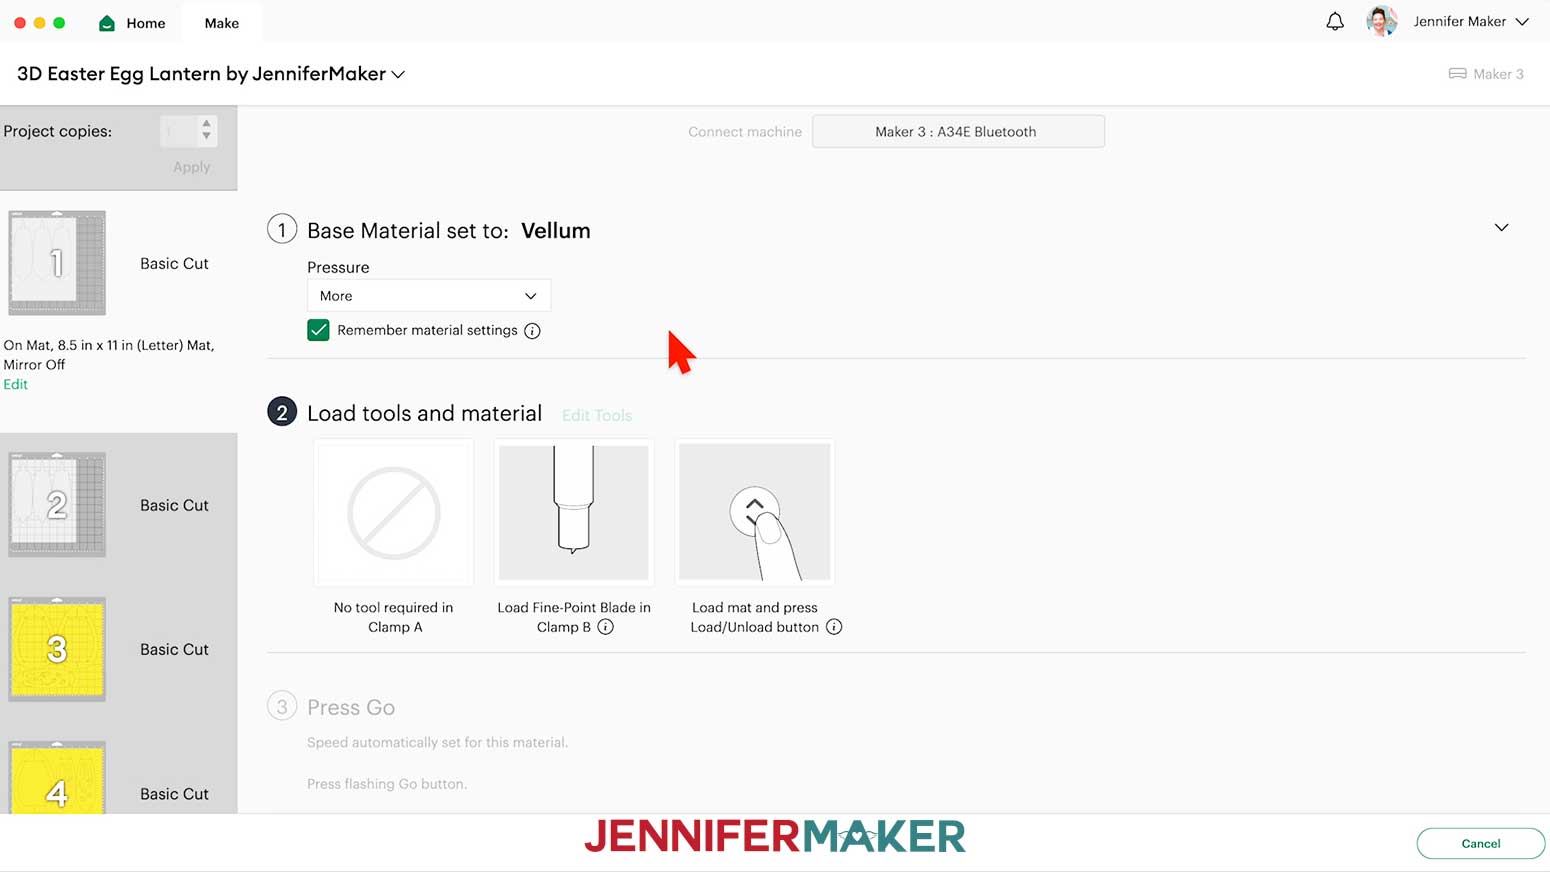
- On the Make screen, set the Base Material for your mats. I used:


- 65 lb and 80 lb cardstock: “Medium Cardstock - 80 lb (216 gsm)” setting with “More” Pressure
- 100 lb cardstock: “Heavy Cardstock - 100 lb (270 gsm)” setting for with “More” Pressure
- Vellum: “Vellum” setting with “More” Pressure
- Wax paper: “Wax Paper” setting with “More” Pressure
- Parchment paper: “Parchment Paper” setting with “More” Pressure
- Copy paper: “Copy Paper – 20 lb (75 gsm)” setting with “More” Pressure
TIP: Changing the Pressure to “More” results in a cleaner cut.
17. Place your first mat’s cardstock face up on a green StandardGrip machine mat.
NOTE: When cutting the diffuser panels, use a blue LightGrip machine mat or an older, less sticky green StandardGrip mat.
18. Use a brayer to make sure it’s fully adhered.
19. Check that your Premium Fine-Point Blade is clean and in the clamp.
20. Press the flashing “Load/Unload” button to load the prepared mat into your Cricut.
21. Press the flashing “Go” button to begin cutting.
22. When it has finished cutting, unload the mat, flip it over onto your work surface, and roll it back to release the paper.
TIP: Use the spatula to help lift delicate parts, and your weeding tool to poke out small bits of cardstock that may have been left behind. If you have any issues with your cuts, go to jennifermaker.com/cleaner-cuts. Use a scraper tool to remove the small bits left on your mat after you remove the cut pieces.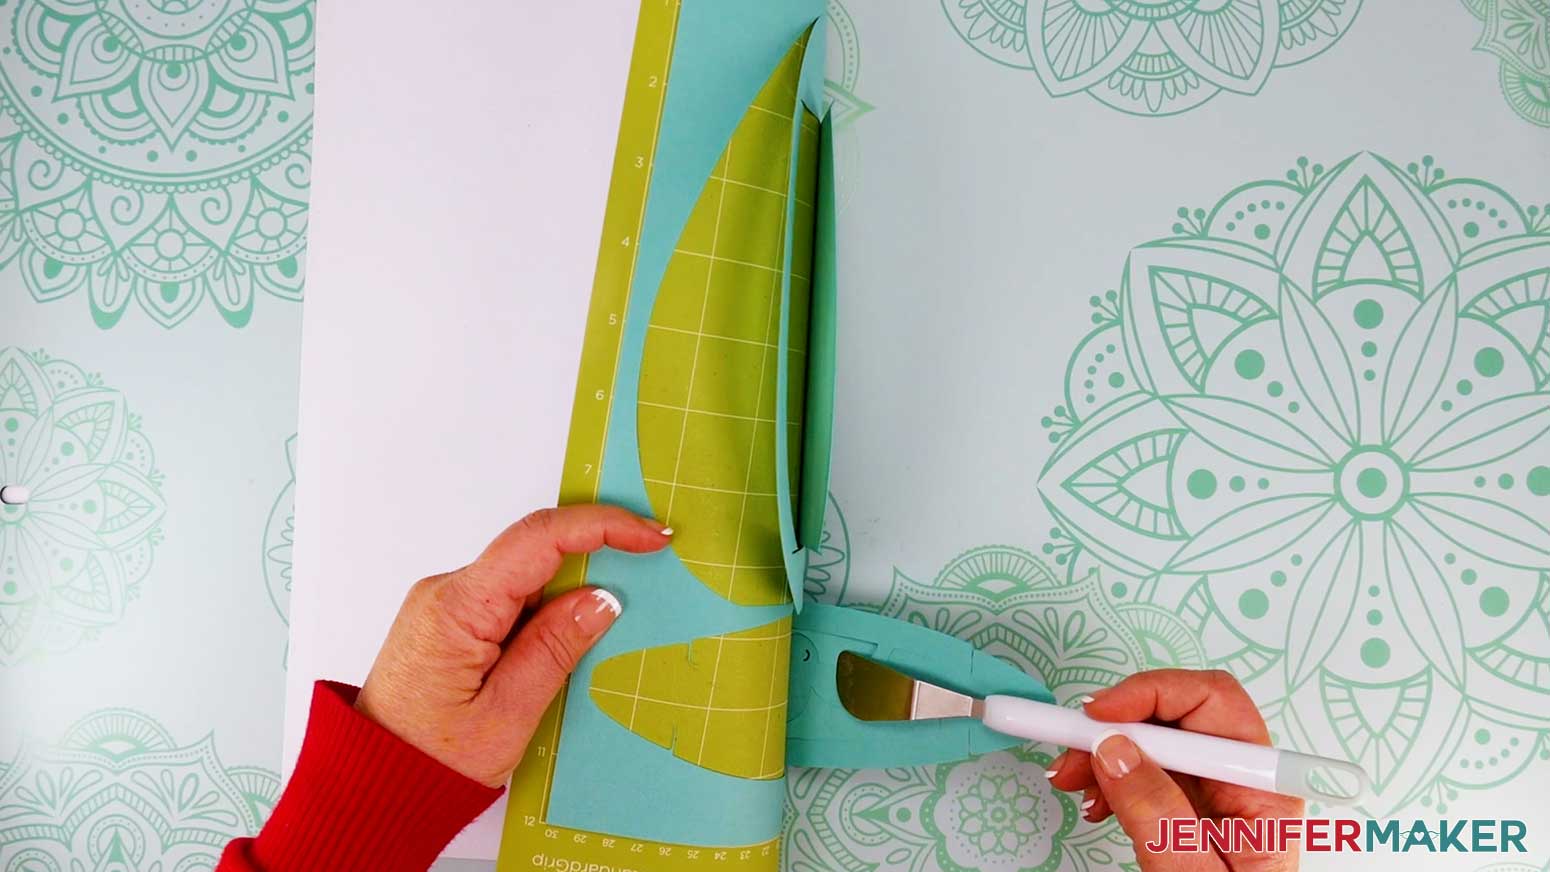
23. Follow steps 17-22 to continue cutting the rest of your mats.
24. Lay out all of the pieces face up. You should have three large frame pieces, six panel pieces, a large circular bottom base piece, and a smaller circular top base piece, all cut from cardstock. You may also have six diffuser pieces and cardstock bunny ears. Refer to the Design Space screen if you’re not sure on some pieces.
STEP 3: ASSEMBLE YOUR 3D EASTER EGG LANTERN
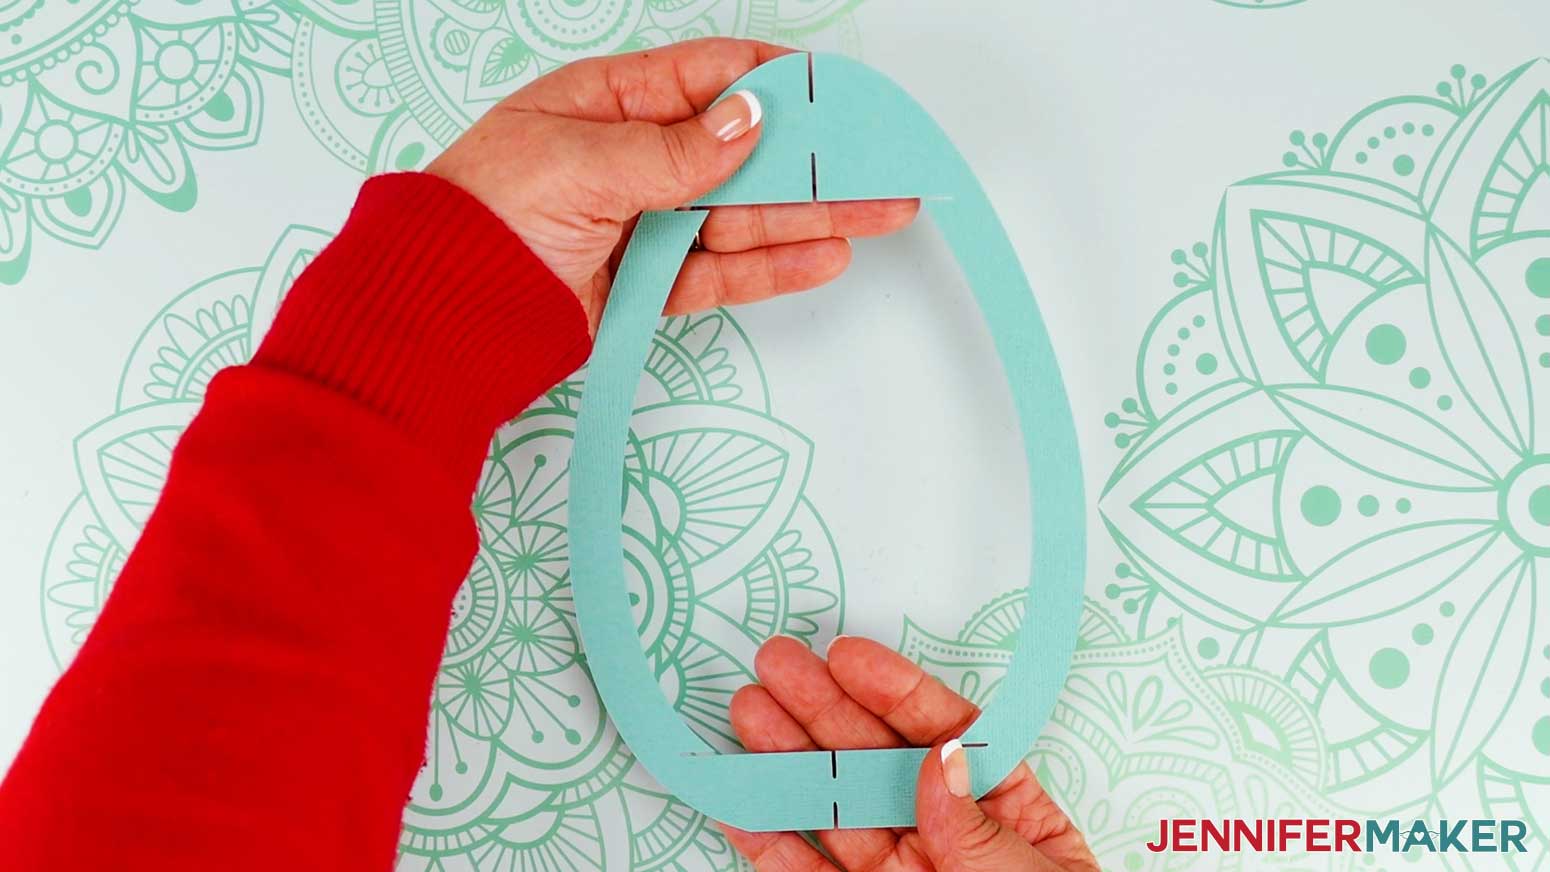
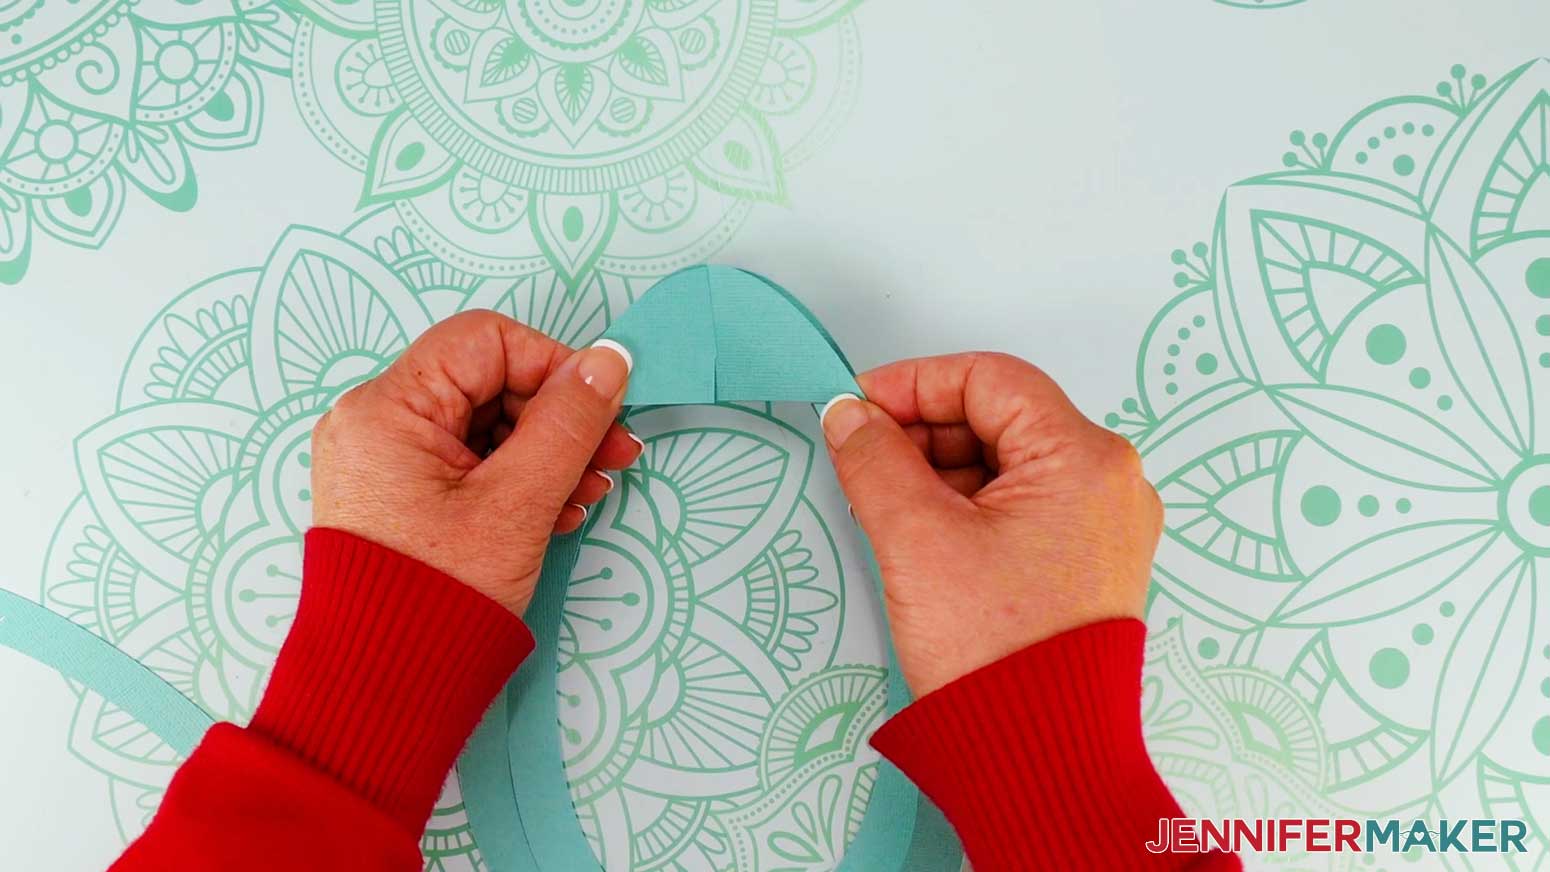
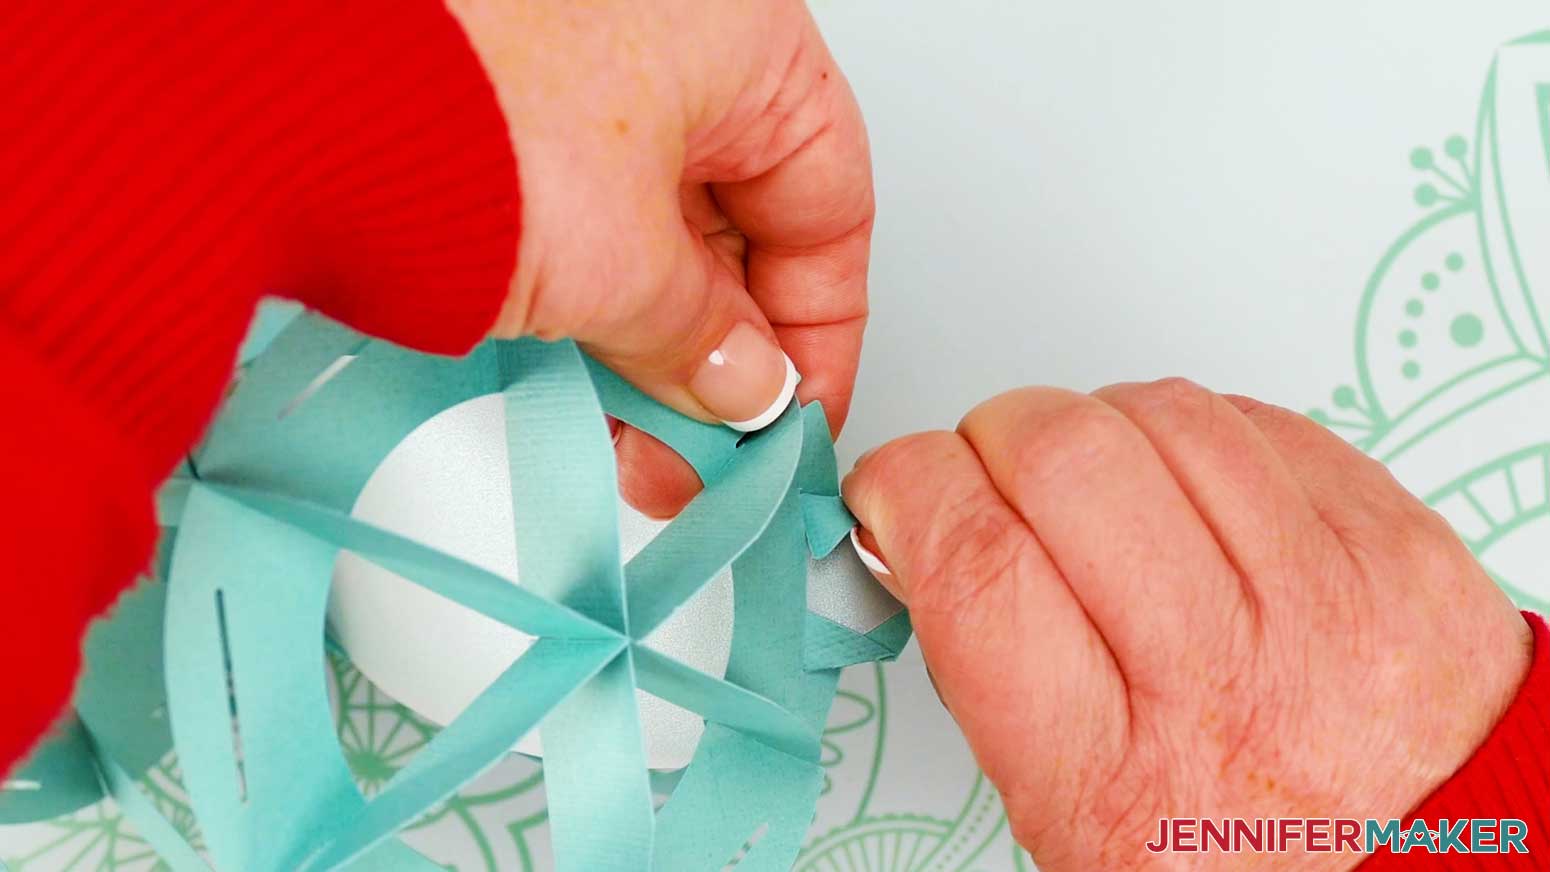
- Find the large frame piece that has two notches at the top and two at the bottom. Then find one of the other frames.
- Slot them together – first at the top, then at the bottom. Curve the cardstock to make them fit together.
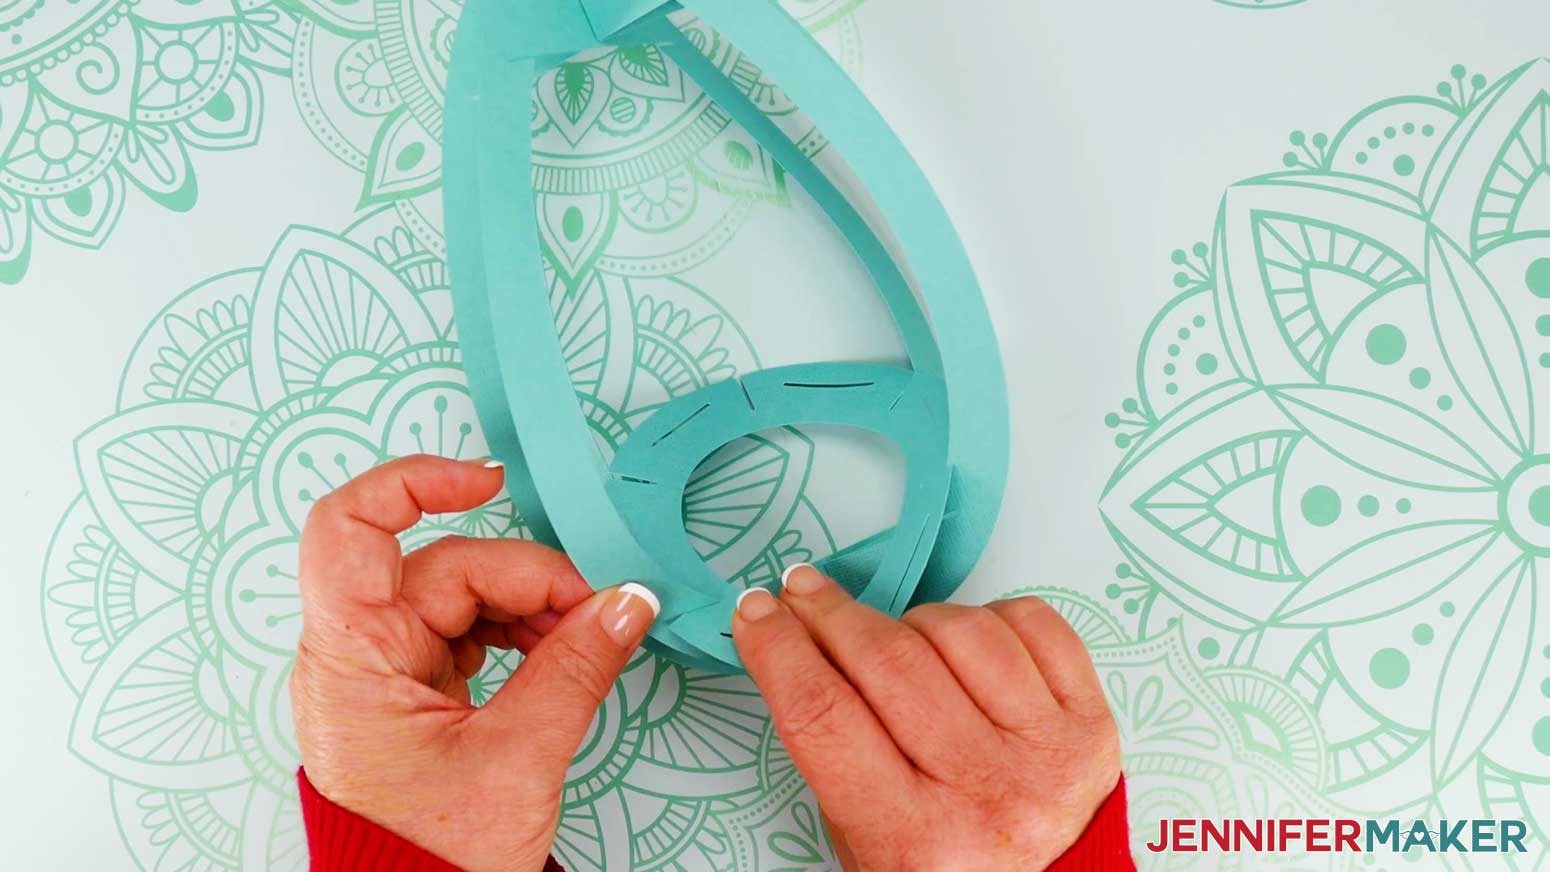
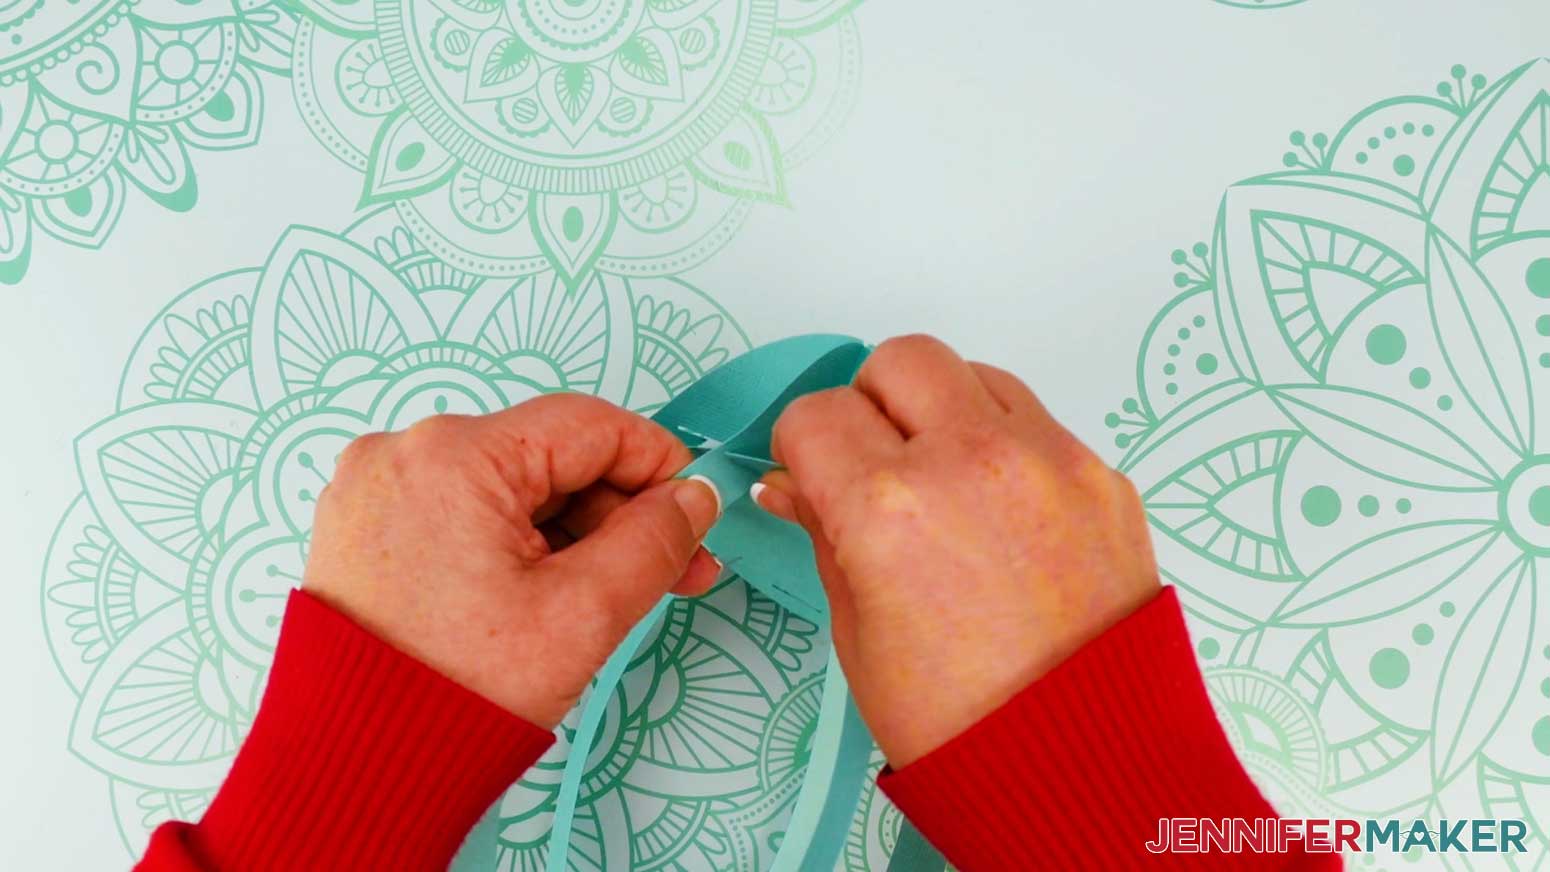
- Press the two layers flat, then grab the last frame piece and slot it into the other two - first at the top and then at the bottom.
- Once the three pieces are assembled, separate the layers to make the egg frame stand up.
- Find the large bottom base piece with a circular cutout in the center.
- Insert the notches on the outer edge of the bottom base piece into the notches at the bottom inside edges of the assembled egg frame, in order, one at a time. You’ll need to bend the cardstock, so be careful not to tear it.
- Find the small top base piece.
- Insert the notches on the outer edge of the top base piece into the notches at the top inside edges of the assembled egg frame, in order, one at a time. Slowly bend the base up into the slots, and be gentle with the paper so it doesn’t rip.
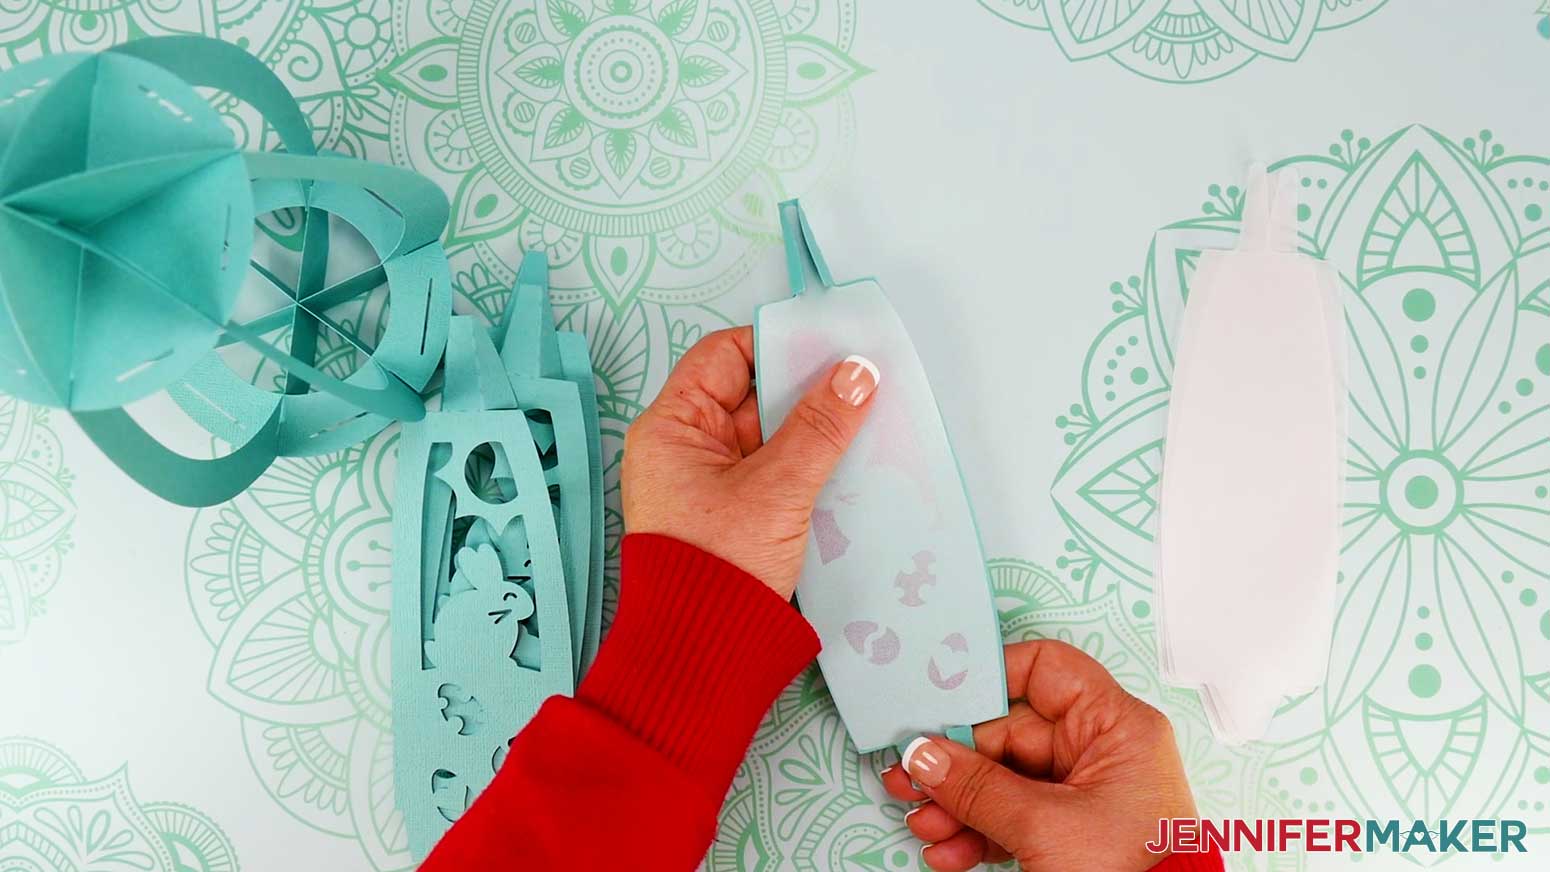
- Find the six panels and the six diffuser pieces, if you cut them.
- Lay out the panels so the designs are face up.
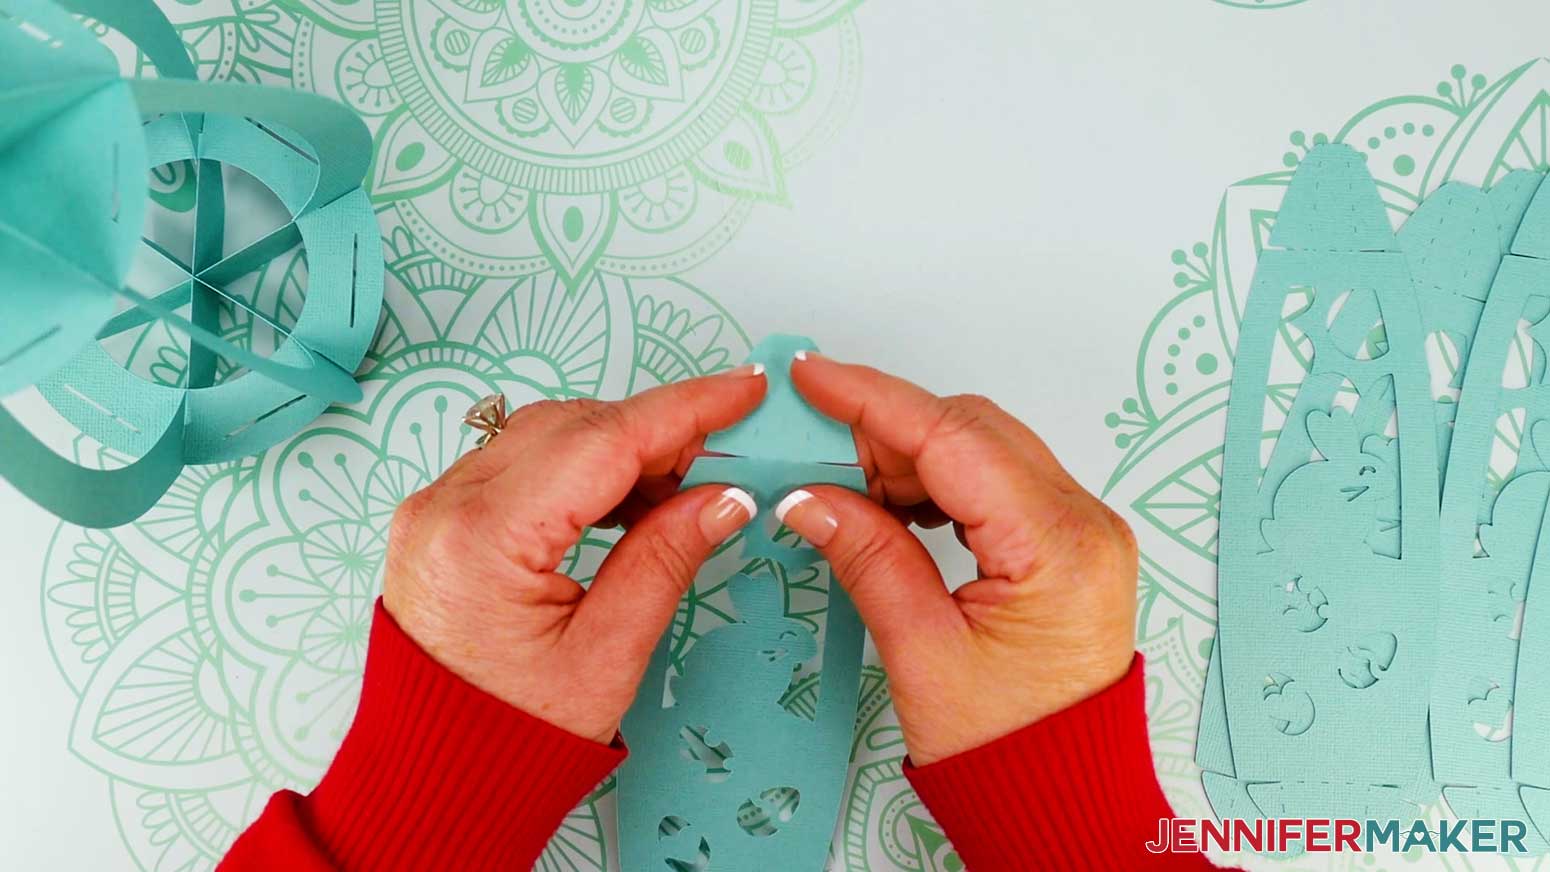
- Each panel has tabs with dashed cut lines (or score lines) at the top and bottom. Fold all of the tabs back, in the same direction.
- If you cut the diffuser pieces, lay one against the back side of one of the panels, making sure the longer tab on the diffuser piece is at the top of the cardstock panel. The diffuser tabs will fit snugly inside the folded panel tabs.
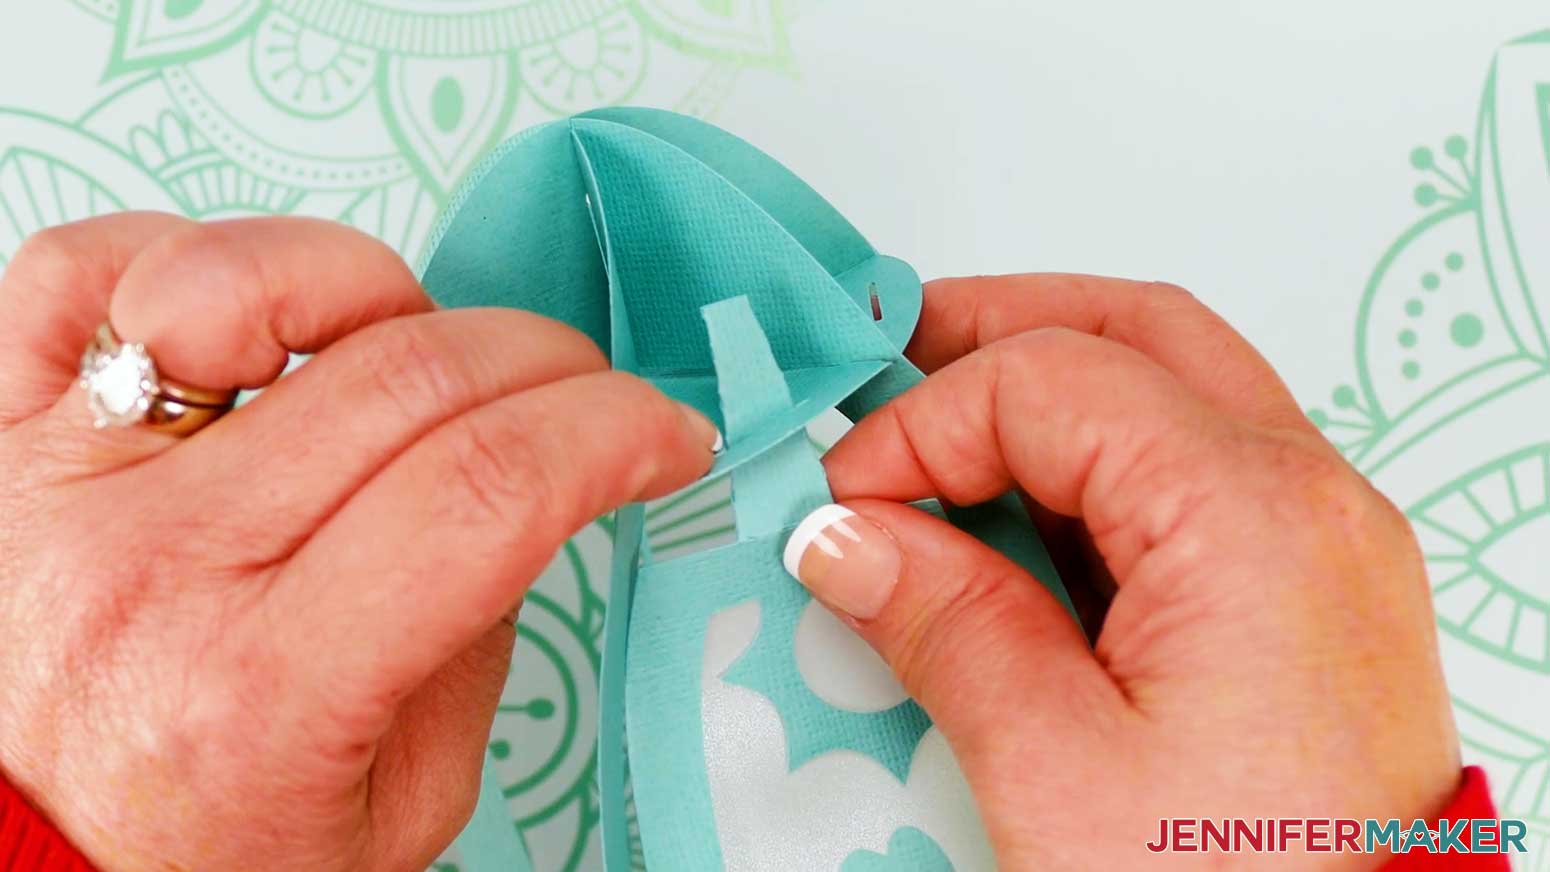
NOTE: No glue is necessary here, but if you’d like to add some you can. - Slide the panel’s large bottom tab, with its two small outer tabs folded inward and the diffuser’s tab pinched inside, into a slot on the bottom egg base.
NOTE: If you’d like to encourage your cardstock panel pieces to curve more naturally, you can gently wrap each one around something cylindrical, like a roll of vinyl, before inserting it into the lantern base. - Unfold the small outer tabs to lock the bottom of the panel into place.
- Slide the panel’s top tab into the corresponding slot on the top egg base. Just like with the bottom tab, keep the two small outer tabs and diffuser tab pinched together while inserting them through the slot.
- Unfold the small outer tabs to lock the top of the panel into place.
- If you used a diffuser piece, fold it over against the top base piece, then use your fingernail to crease it at the fold. This will help keep it from sliding out of the slot.
- On the top cardstock tab, you can either push it down against the diffuser layer, or use your fingers or a thin cylindrical object, like a pen, to gently curve the cardstock to follow the shape of the egg.
- Repeat steps 13-18 to add the next four panels to your egg. Leave one panel off for now.
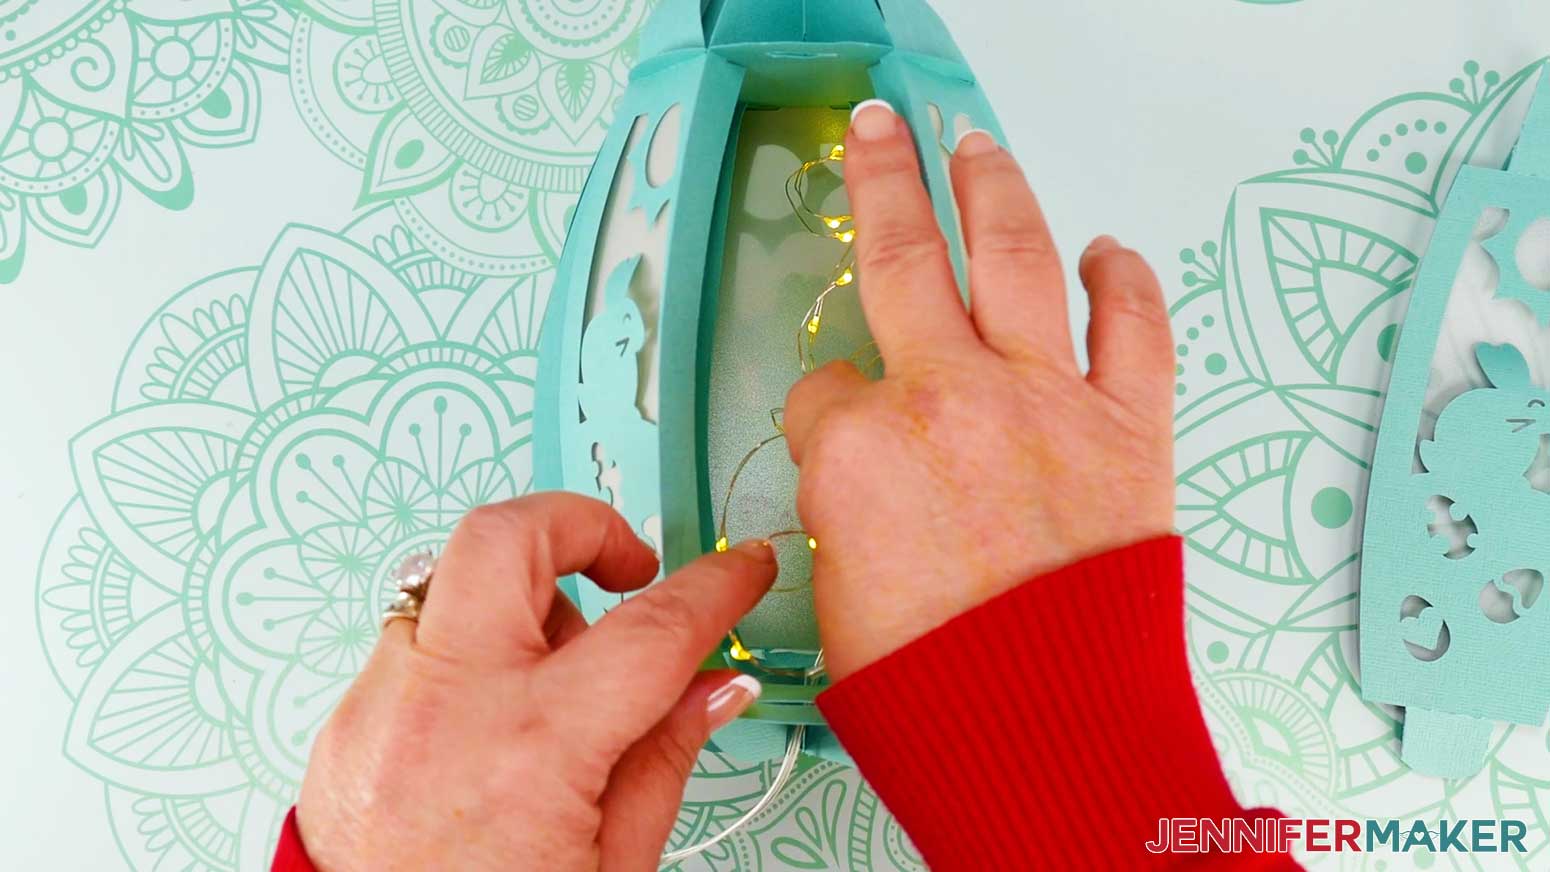
TIP: Because the egg is a little off-balance before all the panels are in, I found it easiest to insert the second panel opposite the first, then the fourth panel opposite the third, and so on to maintain the balance of the lantern. - Test your LED light to make sure it’s functioning properly. If your LED light requires batteries, put those in now.
- Insert your chosen LED light into the egg through the missing panel, making sure it’s centered.
If you’re using LED fairy lights, insert the battery pack into the lantern first, then out through a bottom opening. Insert the fairy lights, then tuck the battery pack back up inside, keeping the switch in a spot that’s easy to access from the bottom of the lantern. - Follow steps 13-18 to insert the last panel.
- If you did not cut bunny ears, your lantern is finished!
- If you did cut the bunny ear piece, decide where the “front” of your egg lantern is.
- Orient the bunny ear piece so it’s facing the front of your lantern.
- Slide the slot at the base of the bunny ears down onto the middle of the lantern’s top frame, making sure the ear piece is oriented so it can slot into one of the slots on the top frame.


STEP 4: SHOW IT OFF
Your 3D egg lantern is finished! Use the remote or the switch on the battery pack to control the LED light inside. 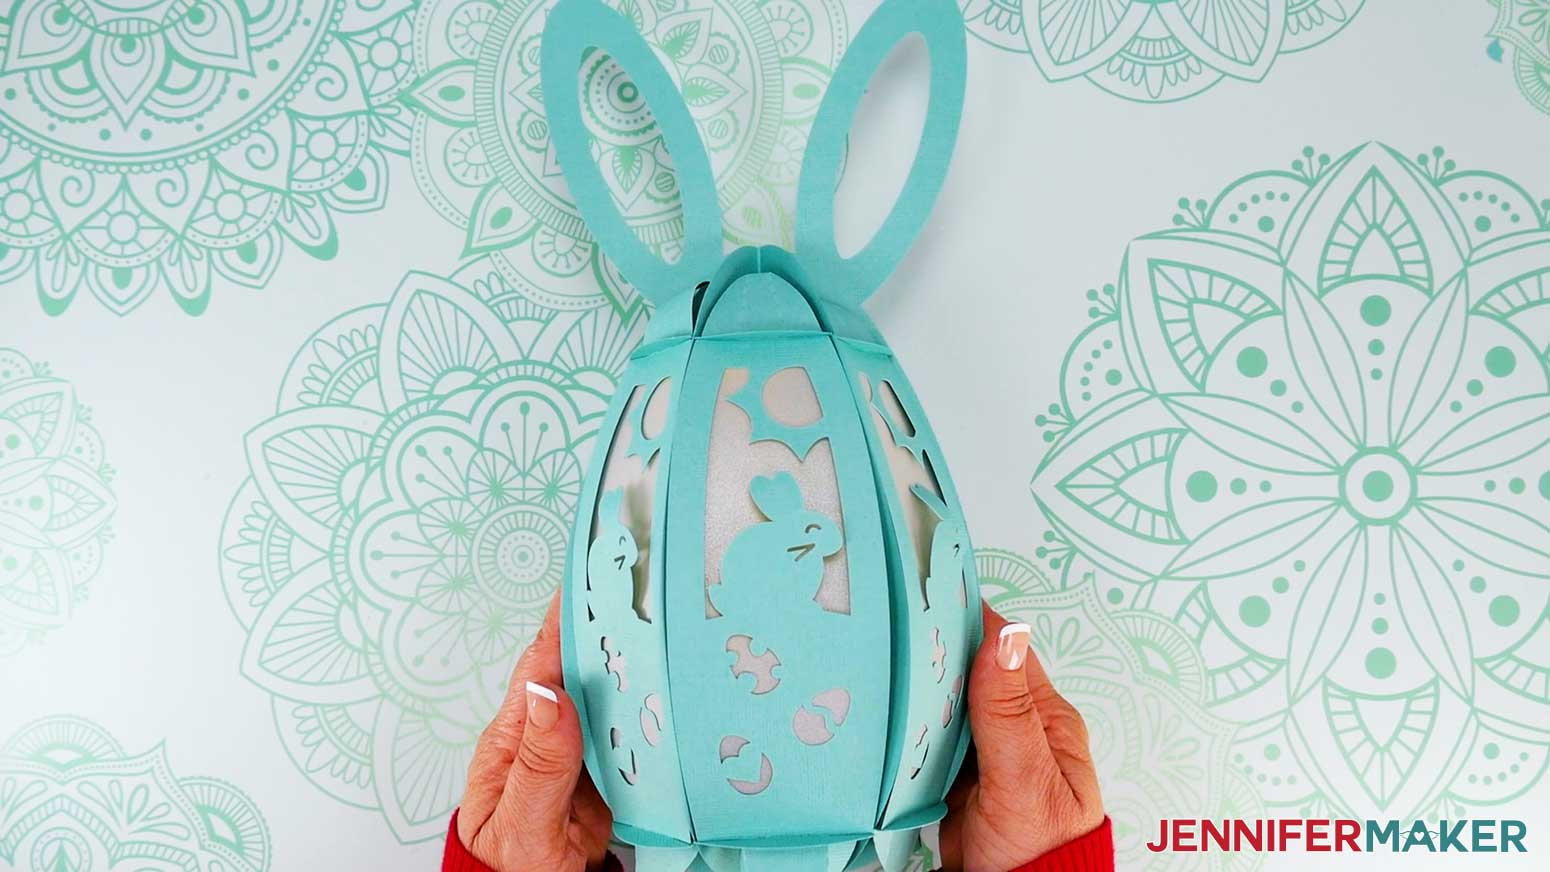
To replace the batteries on your lights later, fold the small outer flaps on one panel’s top tab inward, then slide the panel - and corresponding diffuser piece - down out of the slot. Replace the batteries in your light, then insert the panel’s tab back into the top slot and unfold the flaps again to lock it into place.

Notes
Assembled sizes:
Approximately 5" W x 5" D x 12" H (with ears)
Approximately 5" W x 5" D x 8.5" H (without ears)
Typeface used: JM Cursive
Be sure to use solid-core cardstock so the backs don’t show on the frame.
65 lb and 80 lb cardstock work well with small (lighter) LED tealights or fairy lights, while the larger (heavier) puck lights do better in 100 lb cardstock.
Answers to Your Questions About How to Make Your Own DIY Easter Egg Lantern
Q: Can you show me how to decorate a lantern for Easter?
A: I sure can! Just check out my materials list (this project only requires a few!), download the digital files, and watch my tutorial video to find out how to prepare, cut, and assemble a DIY Easter Egg Lantern. I’ve also included five different spring and Easter designs for you to turn into beautiful luminaries.
Q: What if I don’t celebrate Easter? Can you show me how to decorate a spring lantern?
A: Absolutely. Eggs are a symbol of fertility and new life, perfect for spring! Leave the bunny ears off your lantern and opt for the butterfly or one of the floral designs in my SVG bundle for more of a “springtime” feel than an Easter look for your lantern.
Q: What kind of paper should I use for a DIY Easter Egg Lantern?
A: I recommend using 65, 80, or 100 lb cardstock paper for making your egg lantern. Which weight cardstock is best for you? If you’re using a lightweight LED tea light or fairy lights in your 3D Easter Egg Lantern, 65 or 80 lb cardstock will work great for you. However, if you’re using a heavier LED light, like an LED puck light, you will have better results with a stronger, heavier weight cardstock like 100 lb.
The cardstock you use for your DIY Easter Egg Lantern should be solid core and double-sided, meaning it’s the same color all the way through, front and back. This is so no white edges or backs show when the lantern is assembled.
Q: Can you put tea lights in paper lanterns? What kind of lights do I use with a paper lantern?
A: Absolutely NOT! Never put tea lights, votive candles, or anything else with a real flame in or near a paper lantern. Don’t use incandescent lights either, as they can get hot and risk catching fire when used in a paper lantern. The ONLY lights that are safe to use in a paper lantern are made with LEDs like LED tea lights, LED votives, LED puck lights, and LED fairy lights.
Q: How do you style lanterns at home?
A: Paper lanterns make a beautiful addition to a table centerpiece, as a way to illuminate your bookshelf or fireplace mantel, or even as a unique night light. Because they’re made with battery-powered LED lights, you can put them anywhere!
Q: Do you have any other lantern designs I can make?
A: Besides my 3D Easter Egg Lantern, I have some beautiful springtime lanterns you can make! Check out my Japanese-inspired Paper Lantern with Cherry Blossoms, my easy Cylinder Paper Lantern with floral motif, my Birdhouse Luminary, and my beautiful Paper Gazebo Luminary. Each project comes with an SVG download you can use in Cricut Design Space or with another cutting machine’s software.
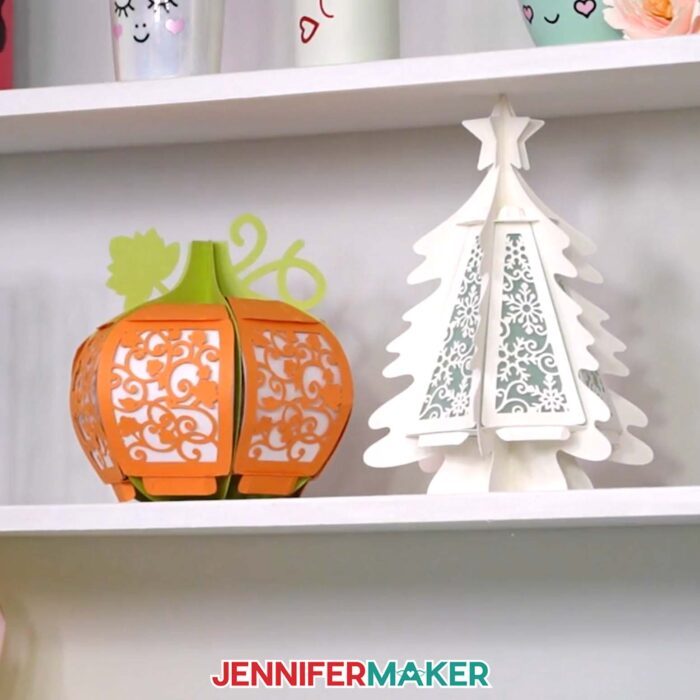
Looking for luminaries for other holidays? Check out my Christmas Tree Lantern, Pumpkin Lantern, or even my Heart Lantern for a fun and unique Valentine gift.
Q: Do you have any other light-up projects I can make?
A: I have lots of light-up projects you can make depending on the supplies you have on hand (like cardstock, foam spacers, RGB LED strips, and more).
Here are some of my favorite paper cut light box designs for spring:
- Find my Light-Up Dollar Tree bunny tutorial here
- Find my Cute Animal Etched Acrylic Night Light tutorial here
- Find my DIYPaper Frame tutorial here to use with your own spring, egg, or bunny lightbox design!
First, find the lantern or shadow box download files in my free library. Then, download the shadow box files, and upload the shadow box cut file to Cricut Design Space.
Search my blog for more!
Q: Can I sell my lanterns or other designs I downloaded from your blog and made?
A: Yes, you can sell completed projects using these designs (with limitations) — please read about licenses here so you know what you can and cannot do. If you use them, please share photos with us!
Get my free SVG files to make a 3D Easter Egg Lantern
I’d love to see YOUR 3D Easter egg lantern! Please share a photo in our Facebook group or on social media and tag me with #jennifermaker.
Love,

Want to remember this? Save this tutorial on How to Make a 3D Easter Egg Lantern to your favorite Pinterest Board!