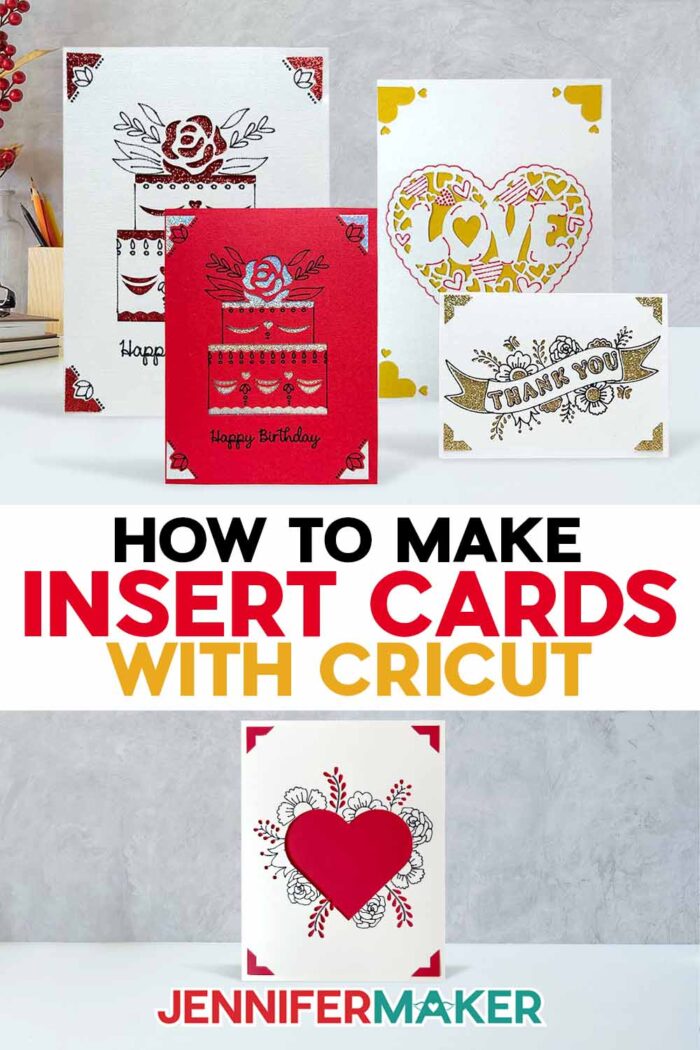
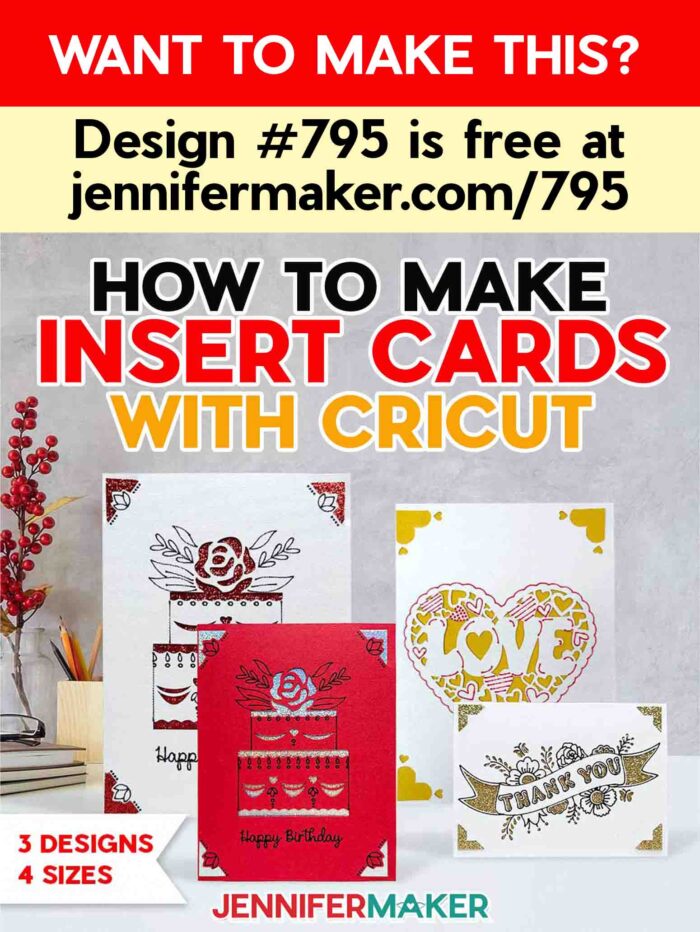
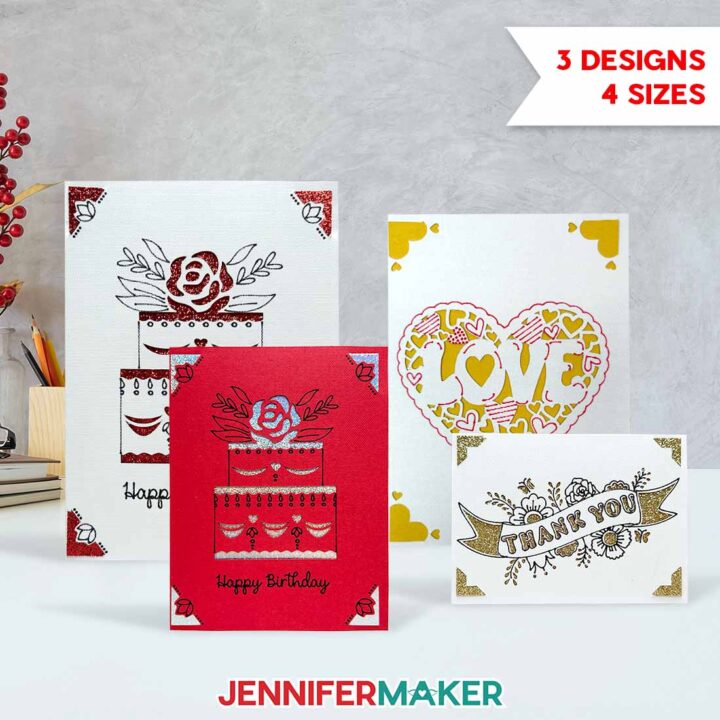
Learn how to make insert cards with Cricut for multi-layered greetings!
Nervous about the Cricut card mat, so you’re keeping insert cards on your “maybe someday” crafting list? You’re not alone! It can feel like a big hurdle, especially when you’re worried one wrong placement will ruin a card blank. In this tutorial, I’ll show you how to make insert cards with Cricut machines and the card mat with confidence. We’ll even learn how to resize a design for different cards. Soon, you can start making and mailing polished cards for birthdays, thank-yous, and everything in between.
Watch the full step-by-step tutorial on how to make insert cards with Cricut:

If you’ve tried insert cards and ended up with corners that don’t line up, pen lines that cut instead of draw, or an intimidating card mat gathering dust, you’re in the right place. Consider this project your reset button! I’ll show you all the steps to make your cards work every time.
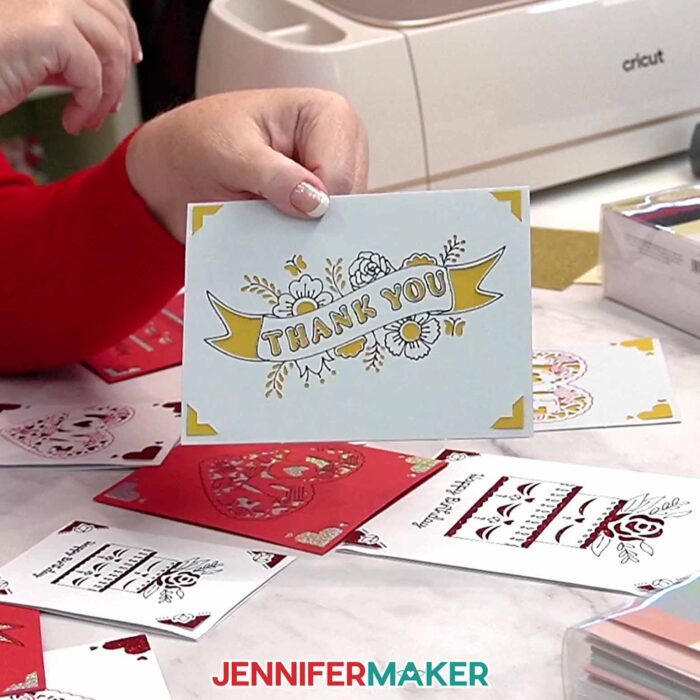
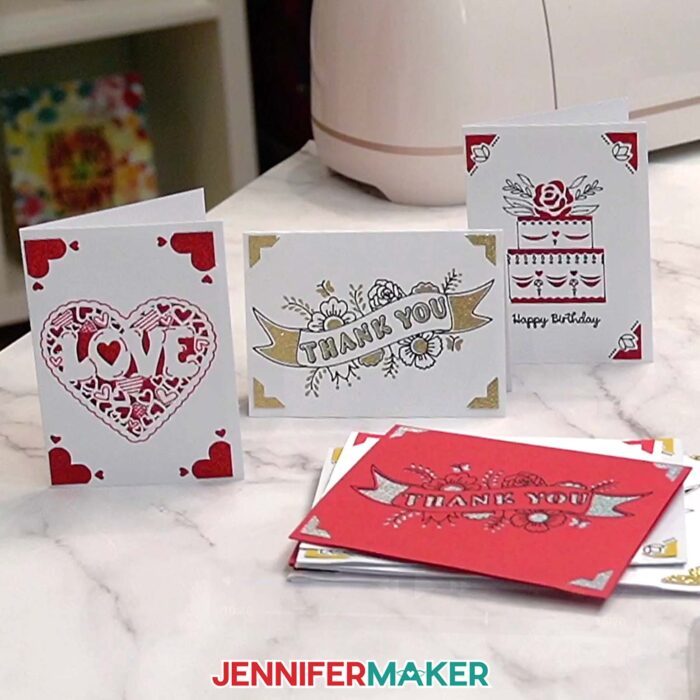
Insert cards are one of the fastest ways to get a “wow” card without the stress. In this tutorial, we’ll look at how insert cards work in Design Space, how the corner slots hold the insert in place, and how to get that crisp cutout look on the front of the card every time. I have three different designs to share so you can make birthday cards, Valentines, and thank you cards.
We’ll also review the basics of what you need to make them: insert card kits (or premade cards and inserts), a Cricut machine, and a Cricut card mat with the plastic divider that protects the inside of the card while you cut and add any pen details. No card mat or insert cards on hand? Try this tutorial to make your own insert-style cards using plain cardstock and a green StandardGrip machine mat.
You’ll also want a brayer to press the card down smoothly, a weeding tool or tweezers for lifting tiny cut pieces, and a scraper tool to help keep the mat clean.
And if your design includes drawn details, grab a Cricut-compatible pen and make sure it matches the line style you’re using. Finally, keep your Fine-Point Blade installed and ready, and have basic supplies nearby so you can assemble your card quickly once the cutouts are finished.
And since I know everyone learns differently, you can follow along in whichever format you like. Watch the video first to see the whole process in real time, including how to load the mat correctly, what “right side up” looks like at the top of the mat, and how to avoid the most common mistakes that mess up alignment.
Prefer to work quietly and check things off as you go? Use the written instructions with photos in this post. They’ll list the materials and tools, show you what to choose in Design Space, and keep you moving through the project without guessing.
Either way, you’ll finish with a clean card cutout, a brightly colored insert popping through your design, and a card you’ll be proud to share.
Want to learn how to design an insert card in Cricut Design Space? I have a customization workshop on that topic and dozens of other techniques ready for you in my membership program. Click here to learn more about the Advance program!
Do you want to learn how to make insert cards with Cricut? Let me show you how fun and easy it is with my card mat tutorial and designs! This post contains some affiliate links for your convenience (which means if you make a purchase after clicking a link I will earn a small commission but it won’t cost you a penny more)! Read my full disclosure policy.
Materials to Make Insert Cards with Cricut
View my Amazon shopping list with the exact items I used.
- One (1) Cricut Insert Card (R10) -OR-
- One (1) Cricut Insert Card (R20) -OR
- One (1) Cricut Insert Card (R30) -OR-
- One (1) Cricut Insert Card (R40)
- Cricut Fine Point (0.4mm) Pen -OR-
- Cricut Joy Fine Point (0.4mm) Pen
- A way to cut your materials – I’m using the Cricut Maker 4, but you can also use any Cricut Maker series machine, a Cricut Explore Series machine, the Cricut Venture, or the Cricut Joy Xtra
- Cricut 2×2 Card Mat (for Maker/Explore Series) -OR-
- Cricut Joy Xtra Card Mat -OR-
- Cricut Joy Card Mat
- Brayer
- Spatula
- Scraper
- Weeding Tool (optional for poking out small cutouts)
- Tweezers (optional)
- Design #795 (My free SVG/DXF/PDF design files are available in my free library – get the password by filling out the form at the bottom of this page)
How to Make Insert Cards with Cricut Card Mats
How To Make Insert Cards With Cricut
Learn how to make Cricut Insert Cards with the Cricut Card Mat!
Materials
- One (1) Cricut Insert Card - R10 -OR-
- One (1) Cricut Insert Card - R20 -OR-
- One (1) Cricut Insert Card - R30 -OR-
- One (1) Cricut Insert Card - R40
- Cricut Fine Point (0.4mm) Pen -OR-
- Cricut Joy Fine Point (0.4mm) Pen
- Design #795 (My free SVG/PDF/DXF design files are available in my free resource library - get the password by filling out the form at the bottom of this page)
Tools
- A way to cut your materials - I’m using the Cricut Maker 4, but you can use any Maker series machine, a Cricut Explore Series machine, the Cricut Joy Xtra, or the Cricut Joy.
- Cricut 2x2 Card Mat (for Maker/Explore Series) -OR-
- Cricut Joy Xtra Card Mat -OR-
- Cricut Joy Card Mat
- Brayer
- Spatula
- Scraper
- Weeding Tool (optional for poking out small cutouts)
- Tweezers (optional)
Instructions
STEP 1: GET MY FREE EASY INSERT CARDS DESIGNS
First, download my Easy Insert Card files from my free library – look for Design #795. Alternatively, you can use the Save This Project form near the top of this post and the design link will be emailed to you.
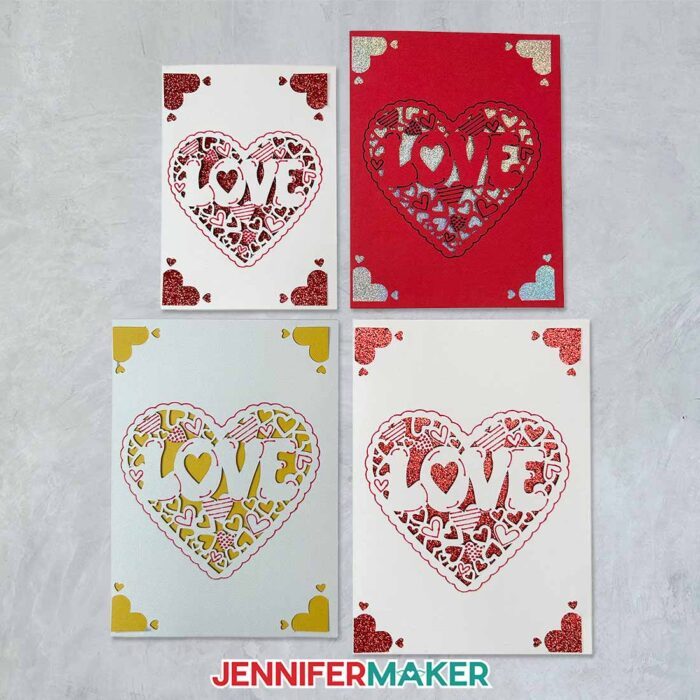
In the SVG folder, you’ll find files for my “birthday,” “love,” and “thanks” cards. They are sized to fit the R10 (3.5" x 4.9") Cricut Insert Cards, which are compatible with any machine and card mat. I’ll show you how to resize the designs to fit other Insert Cards.
There is also a DXF folder with cut files, and a PDF folder with versions you can print and cut by hand.
TIP: If you’re not sure how to upload, go to jennifermaker.com/svgs to learn how to unzip and upload SVG files.
STEP 2: PREPARE AND CUT YOUR INSERT CARDS
CRICUT DESIGN SPACE
1. In Cricut Design Space, open a blank Canvas.
NOTE: If you’re new to using Cricut Design Space, go to cricutkickoff.com for my introductory tutorial on Design Space basics.
2. Click “Upload” and then “Upload Image.” Click “Browse” and select the card SVG file you want to use.
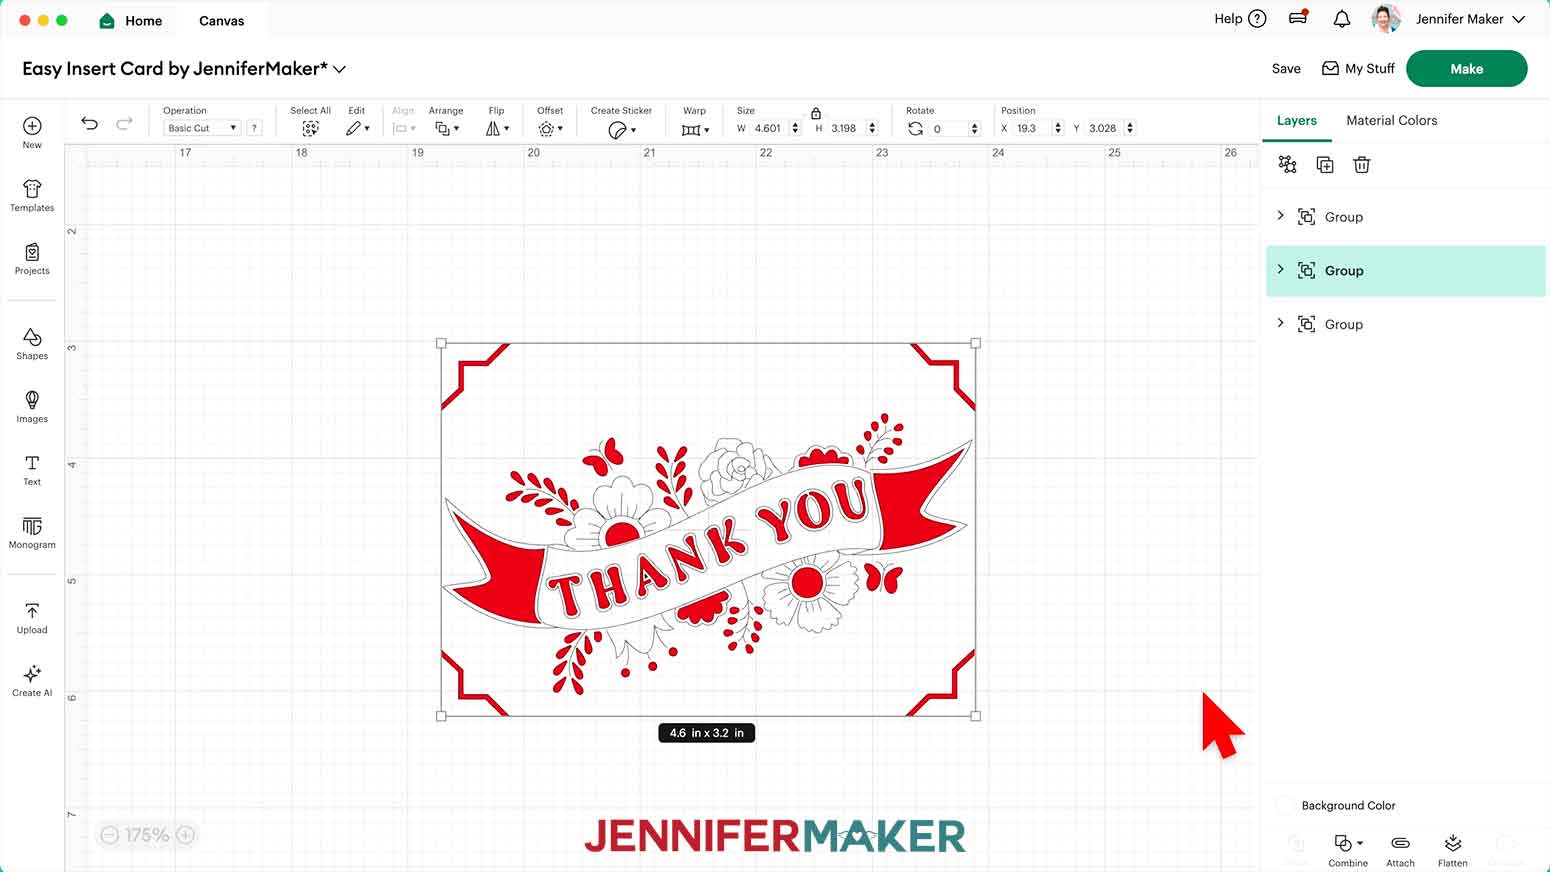
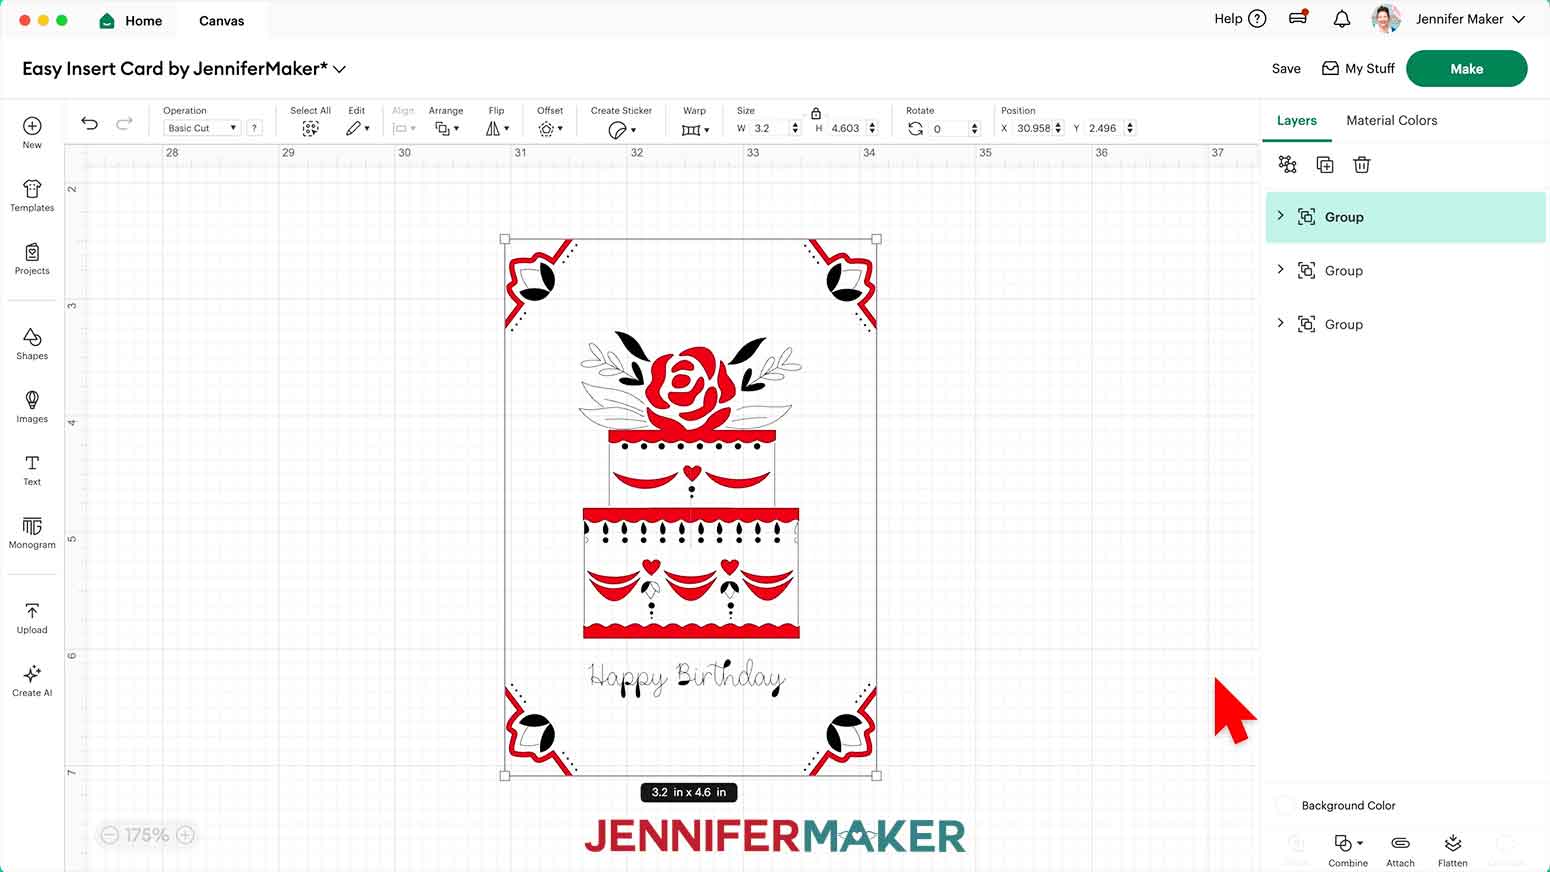
NOTE: I’ll demonstrate with the “love” card, which uses the same steps as the “thanks” design. The “birthday” card has an extra step I’ll point out.
3. Click “Open,” and then “Continue.”
4. Click “Upload” to add the design to your Canvas.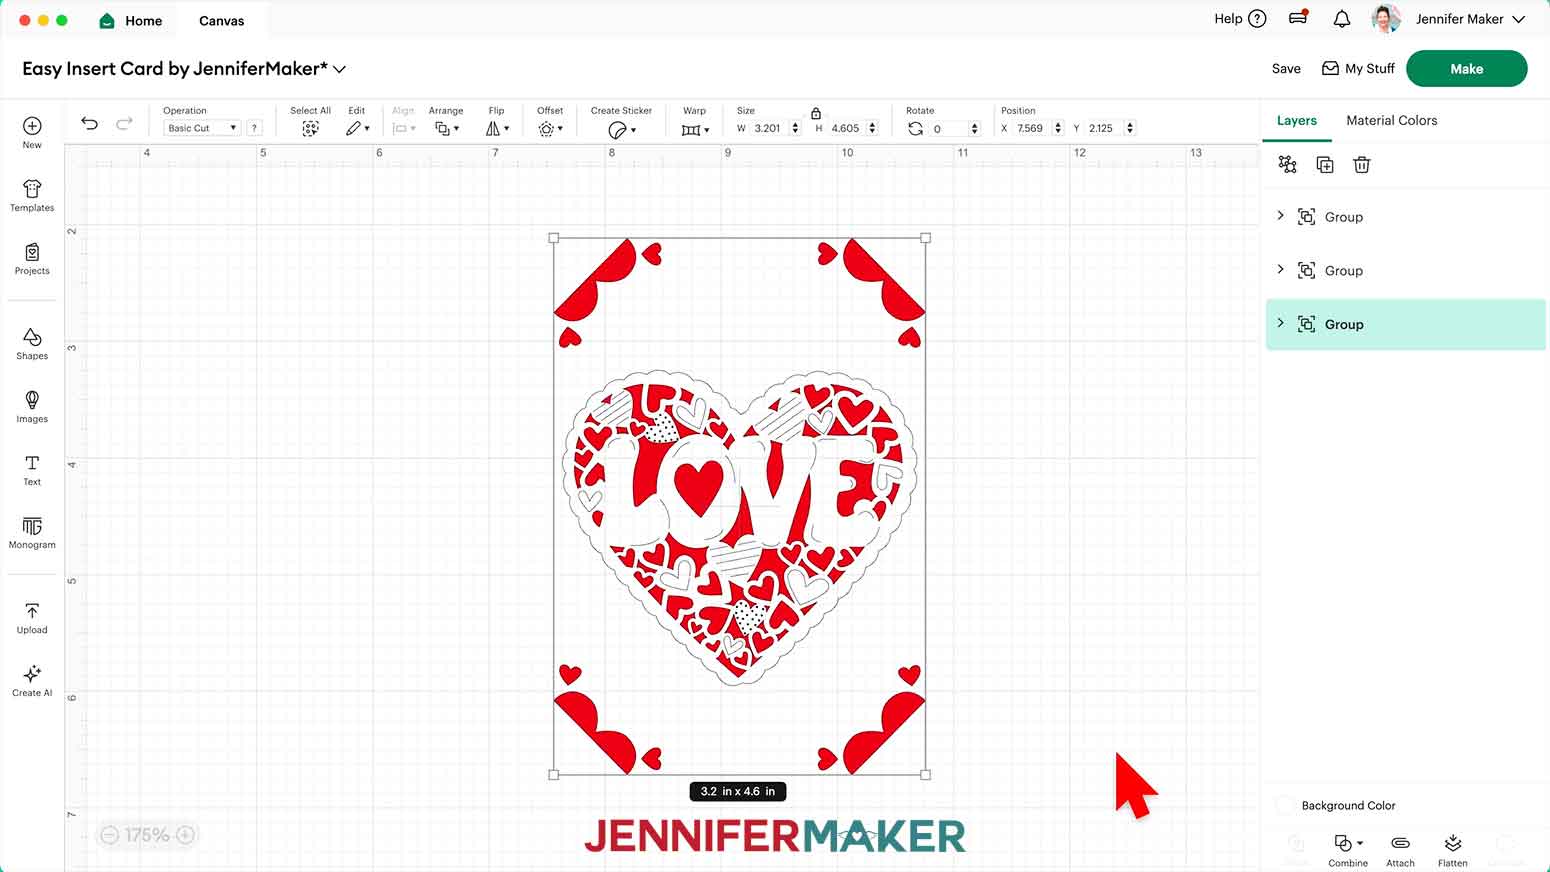
5. Click “Save” and give your project a name so you can find it easily.
6. “Ungroup” the design to work with the elements separately, but don’t move anything.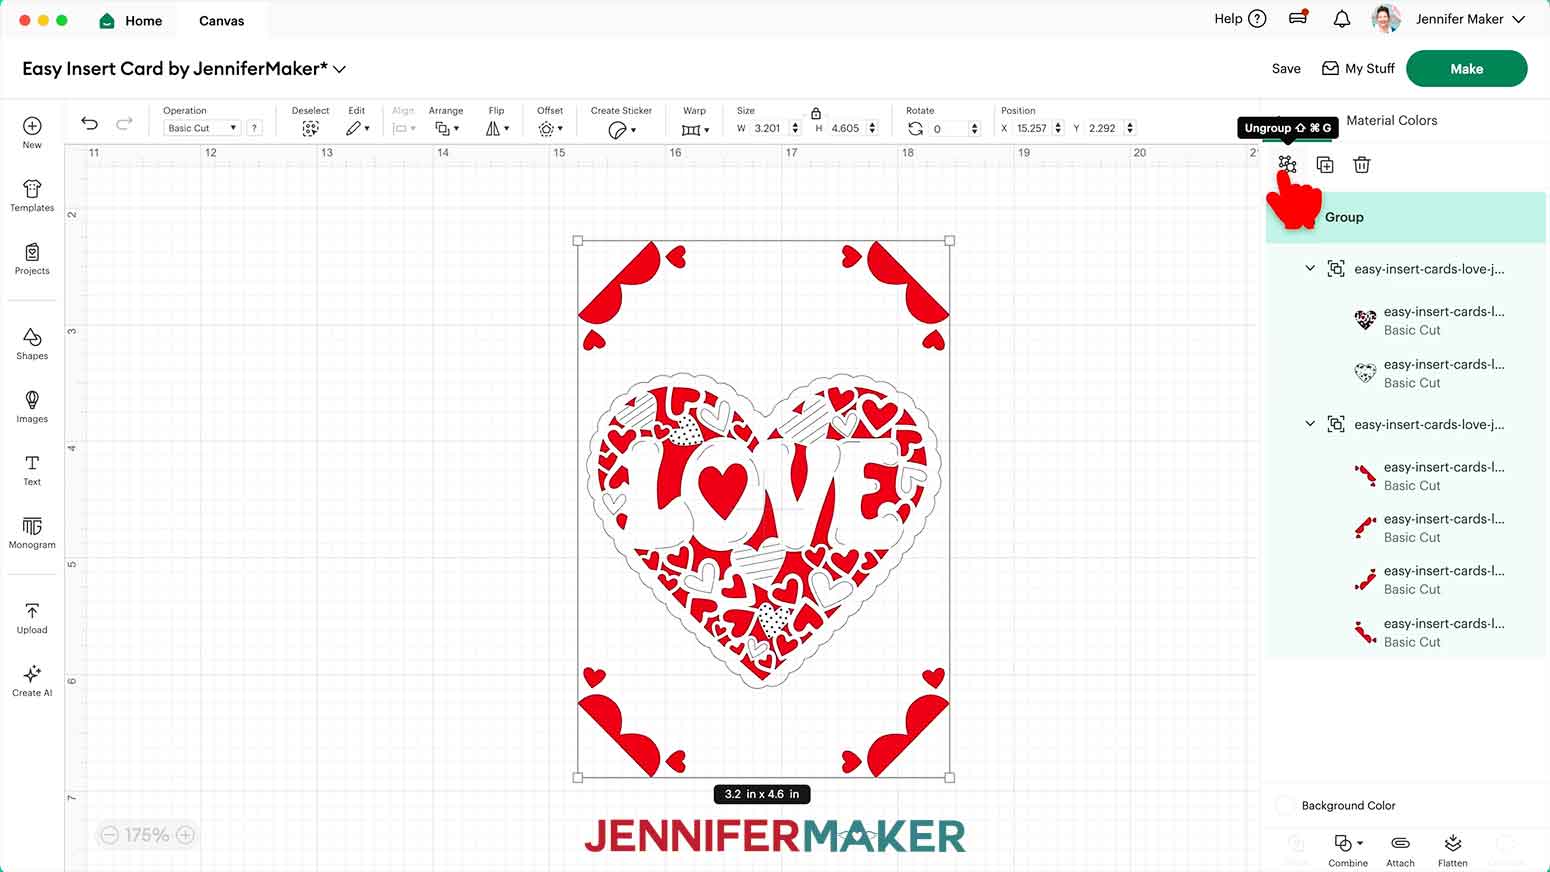
NOTE: On your Canvas, you have one grouped layer for the design’s middle, and another group for the corners.
7. In the Layers Panel, click the arrow next to the first group to expand it.
8. Select the bottom layer in the expanded view.
NOTE: This layer has the details we want to draw, while the other has the shapes to be cut.
9. Set the “Operation” to “Pen,” then select your preferred pen in the Color Box.
NOTE: I’ll keep “F - Fine Point (0.4mm)” selected in the menu and choose “Very Berry."
TIP: The fine point pens work best with delicate designs like these.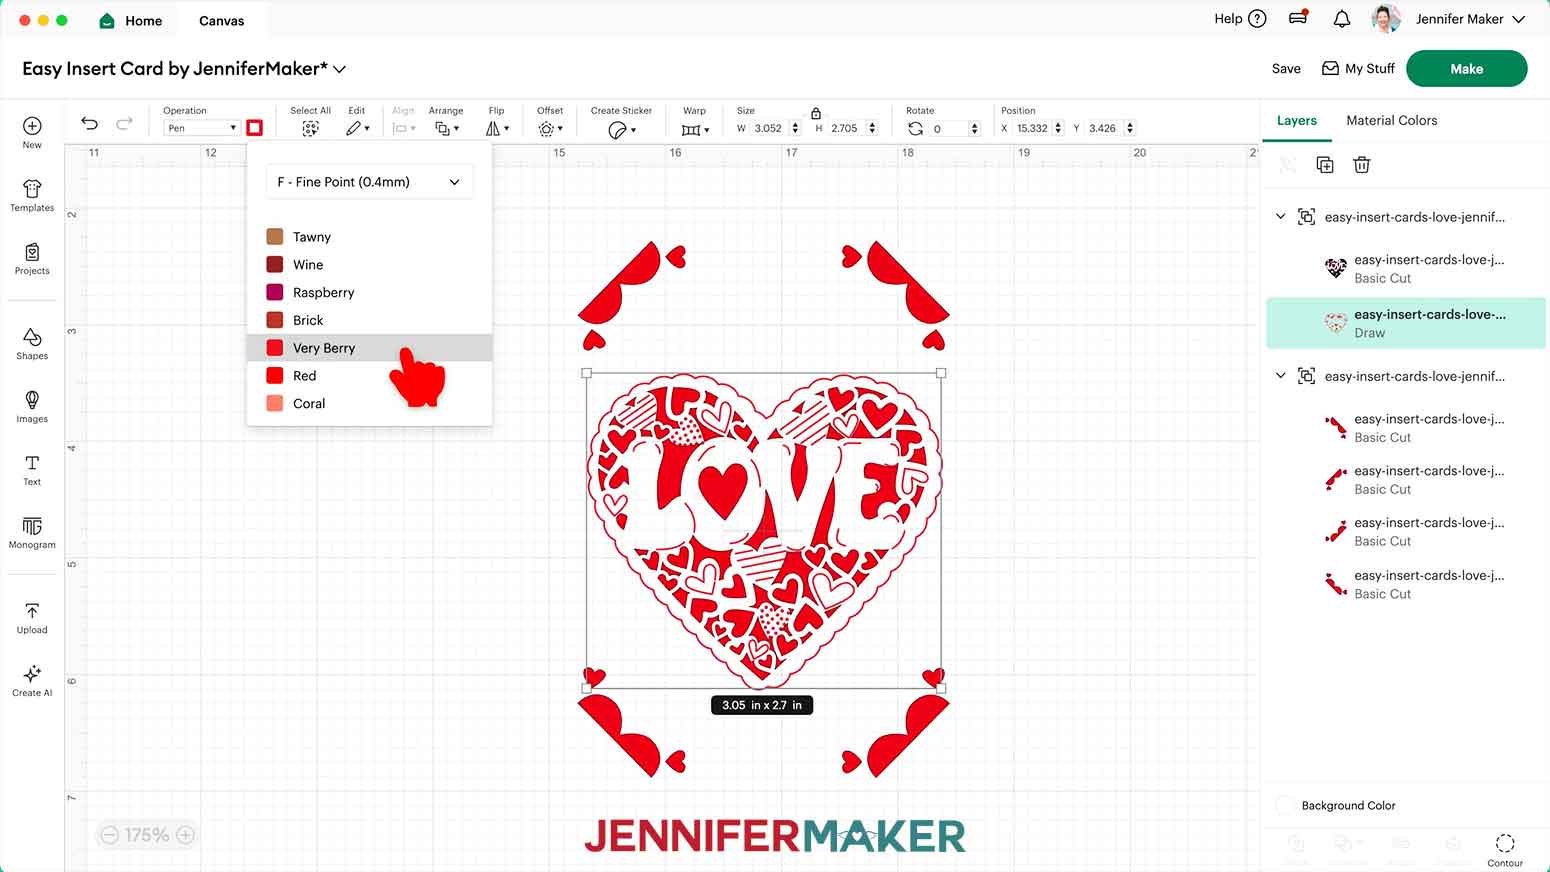
10. If you are making the “birthday” design, use Steps 7-9 to also adjust the “Operation” and colors for the corner decorations.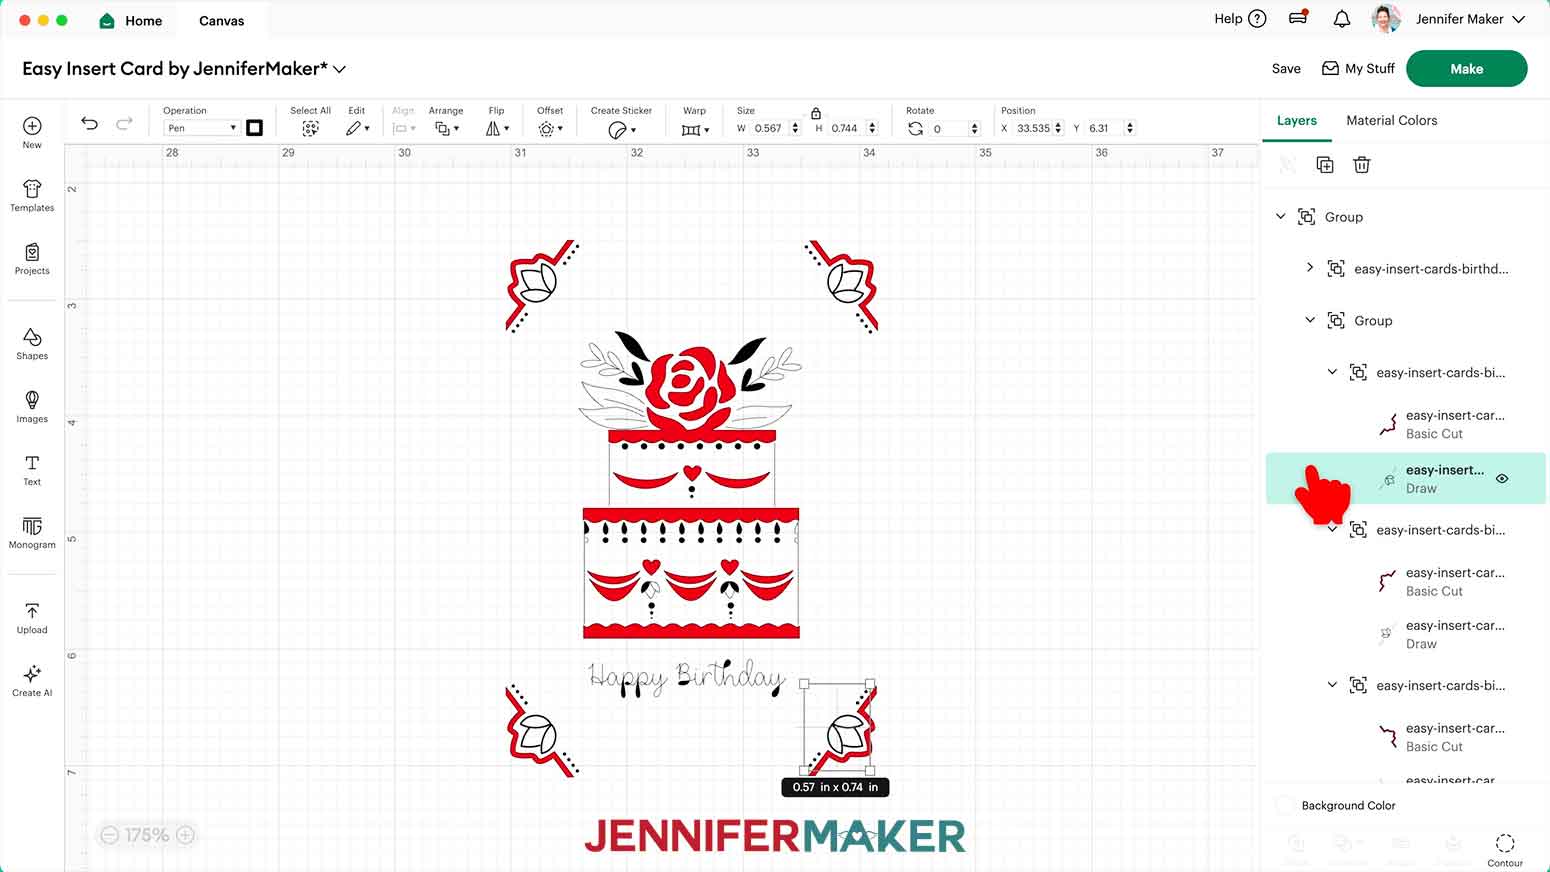
11. To make the design and corners fit another size card, use the “Shapes” icon to add a free Square to the Canvas and move it to an open area.
12. Change the Square’s “Operation” to “Guide” so it is just an outline and won’t be part of the design sent to the machine.
13. Click the “Lock” to unlock the Guide’s proportions, then resize it to match the insert of your chosen card.
NOTE: I’ll make mine 4.4” x 6.3” to fit the R40 card as an example. I’m using the card in portrait orientation, but you can also re-orient your design to use it in landscape.
TIP: The insert sizes for each card in portrait orientation are as follows. Reverse the dimensions to use them in landscape orientation:
R10: 3.2” x 4.6”
R20: 4” x 5.25”
R30: 4.25” x 6”
R40: 4.4” x 6.3”
14. In your design, “Ungroup” the lowest Grouped layers to separate the corner cuts.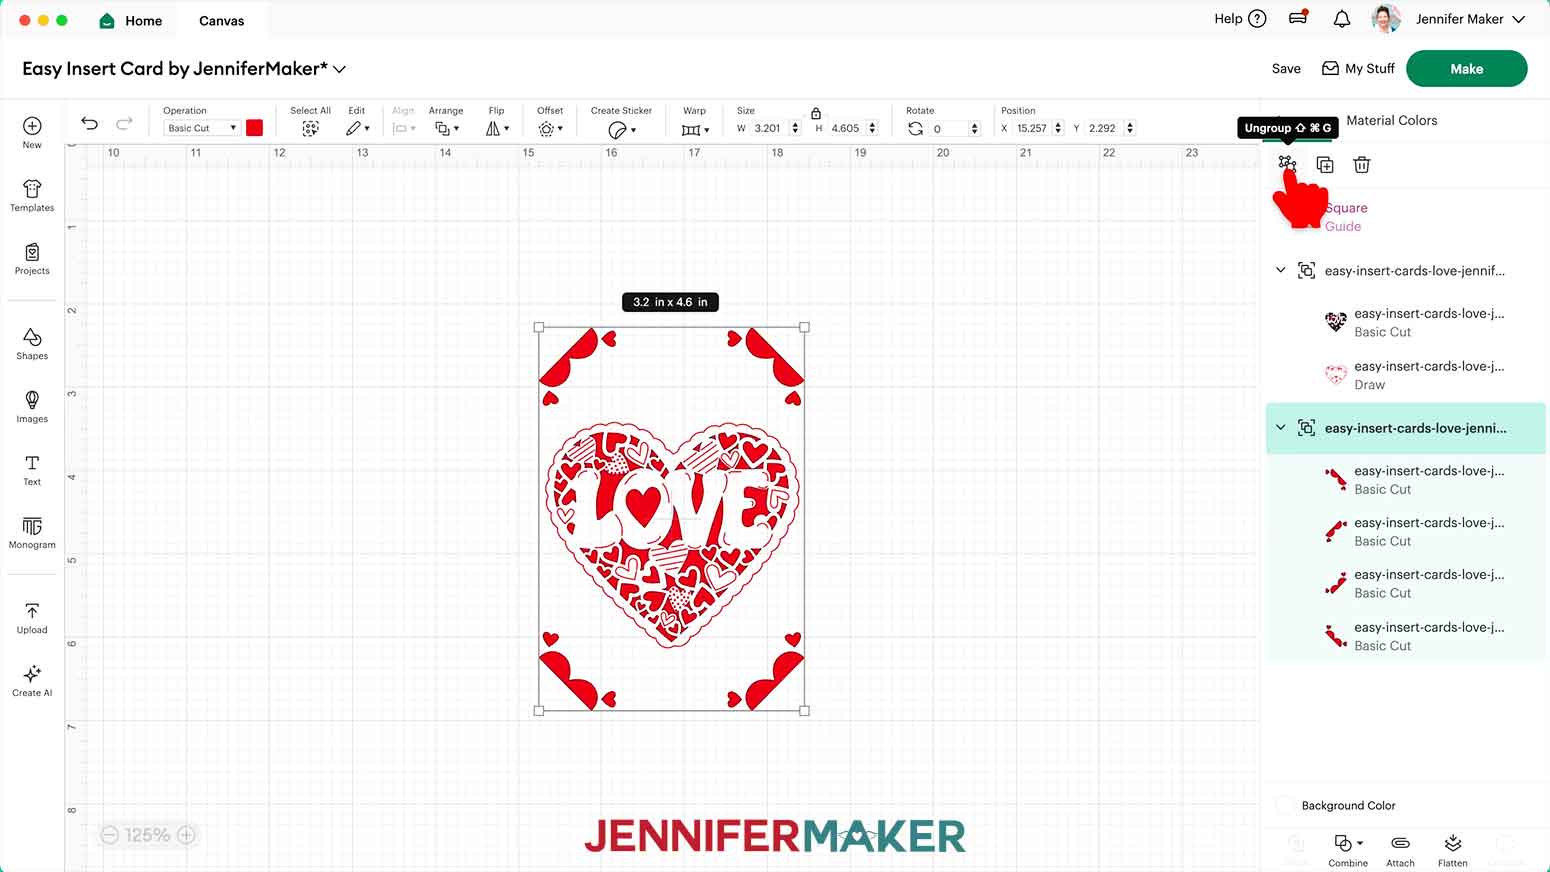
15. Move the top left cut corner roughly into the top left corner on the Guide.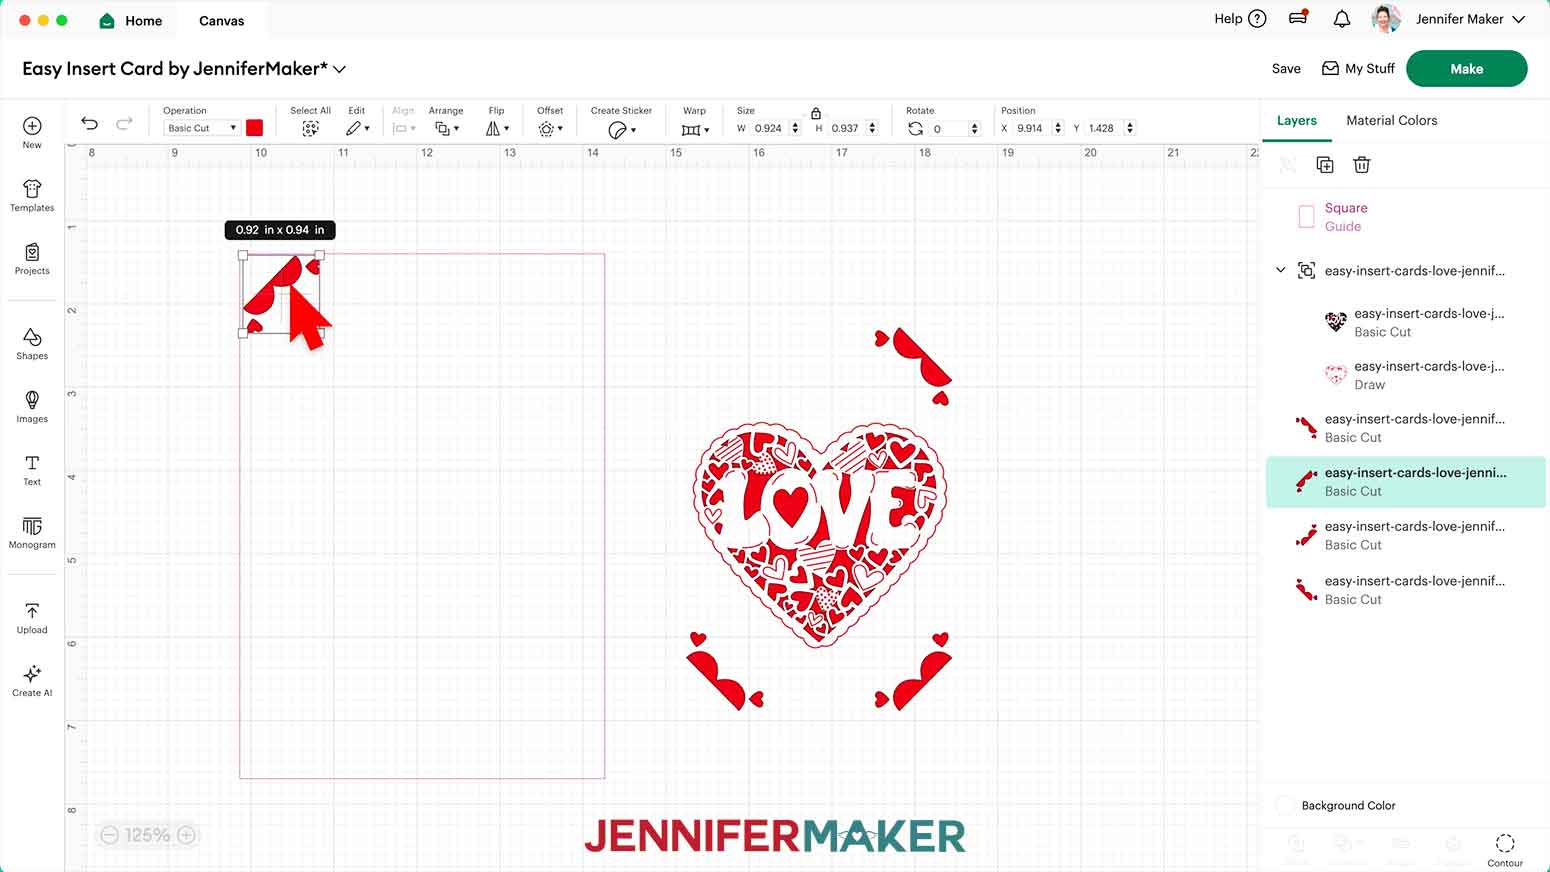
16. Select the top left corner cut and the Guide together.
17. Use the “Align” tool to pick “Align Top.”
NOTE: If you don’t see the “Align” menu, you may need to click the pencil icon first.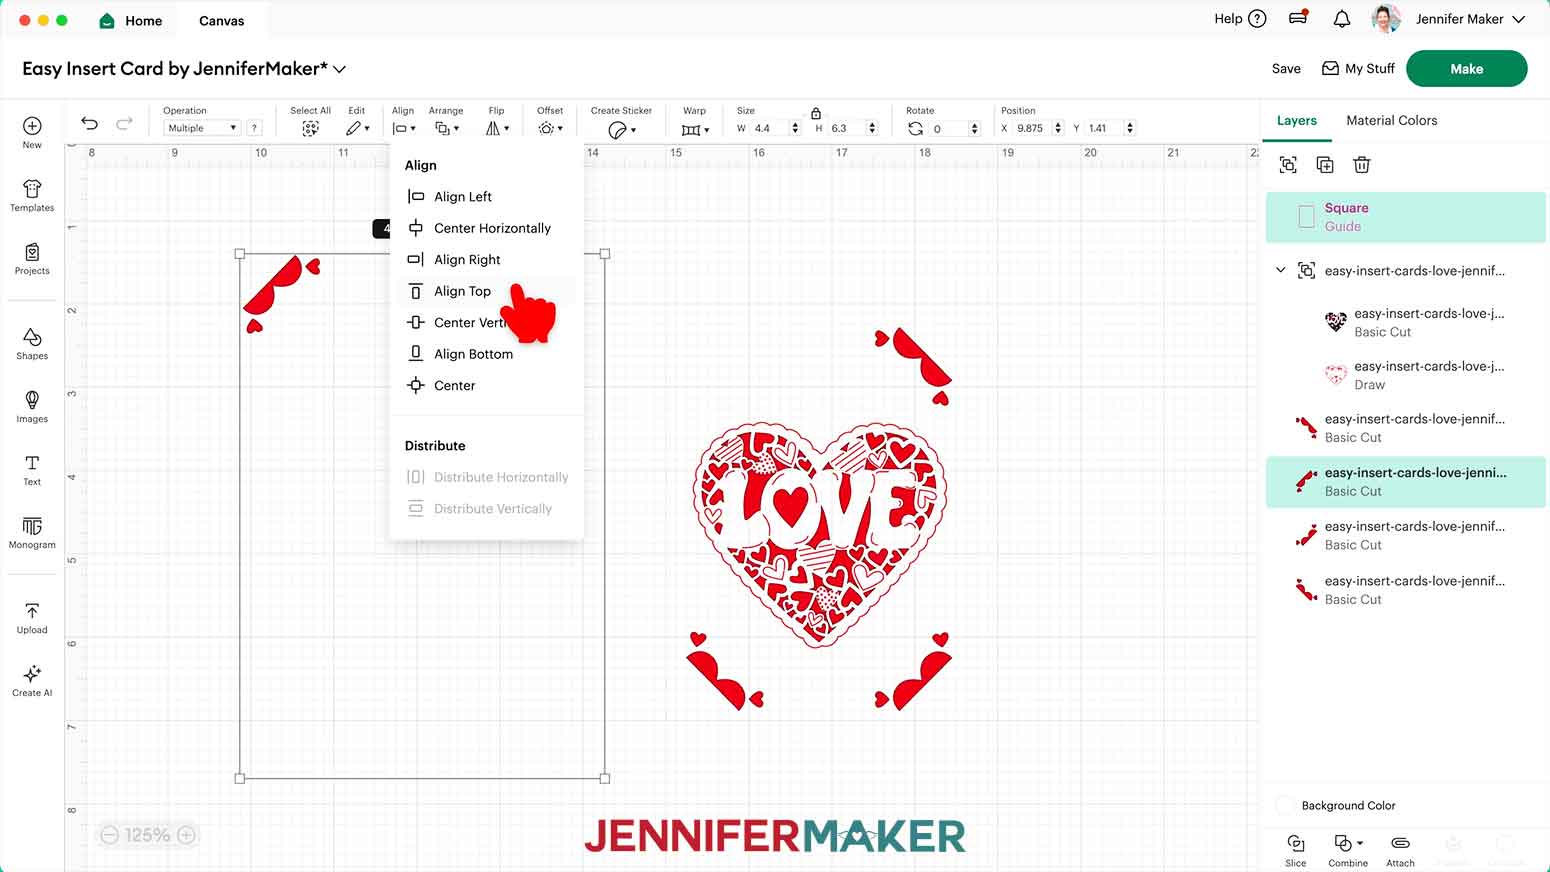
18. With both elements still selected, use the “Align” tool to pick “Align Left” to correctly place the first corner.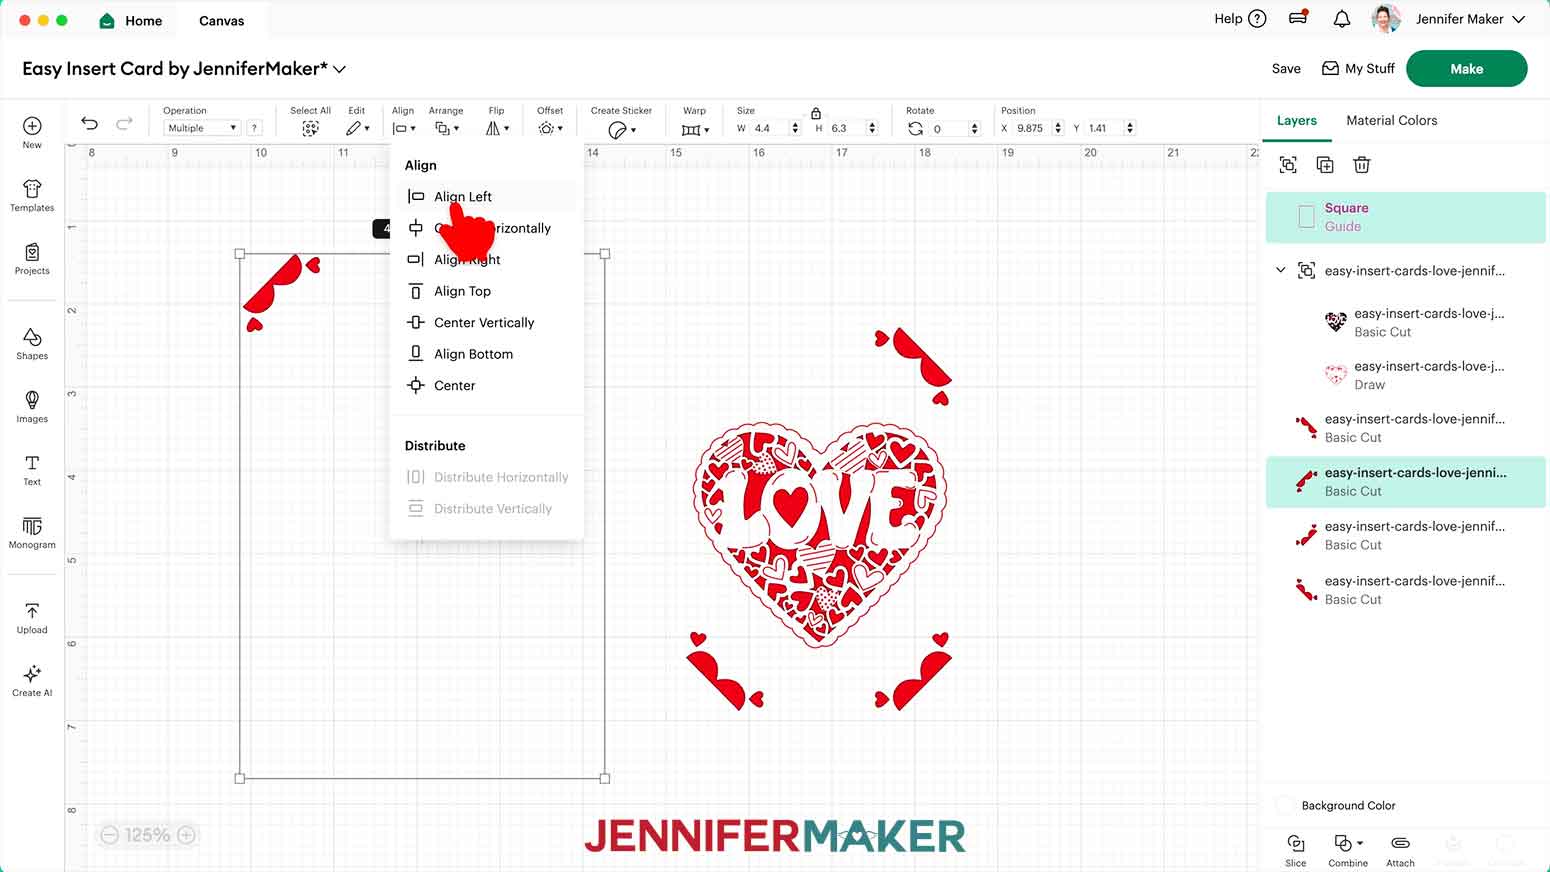
19. With both still selected, click “Group” to keep the corner in place on the insert during the next alignment phase.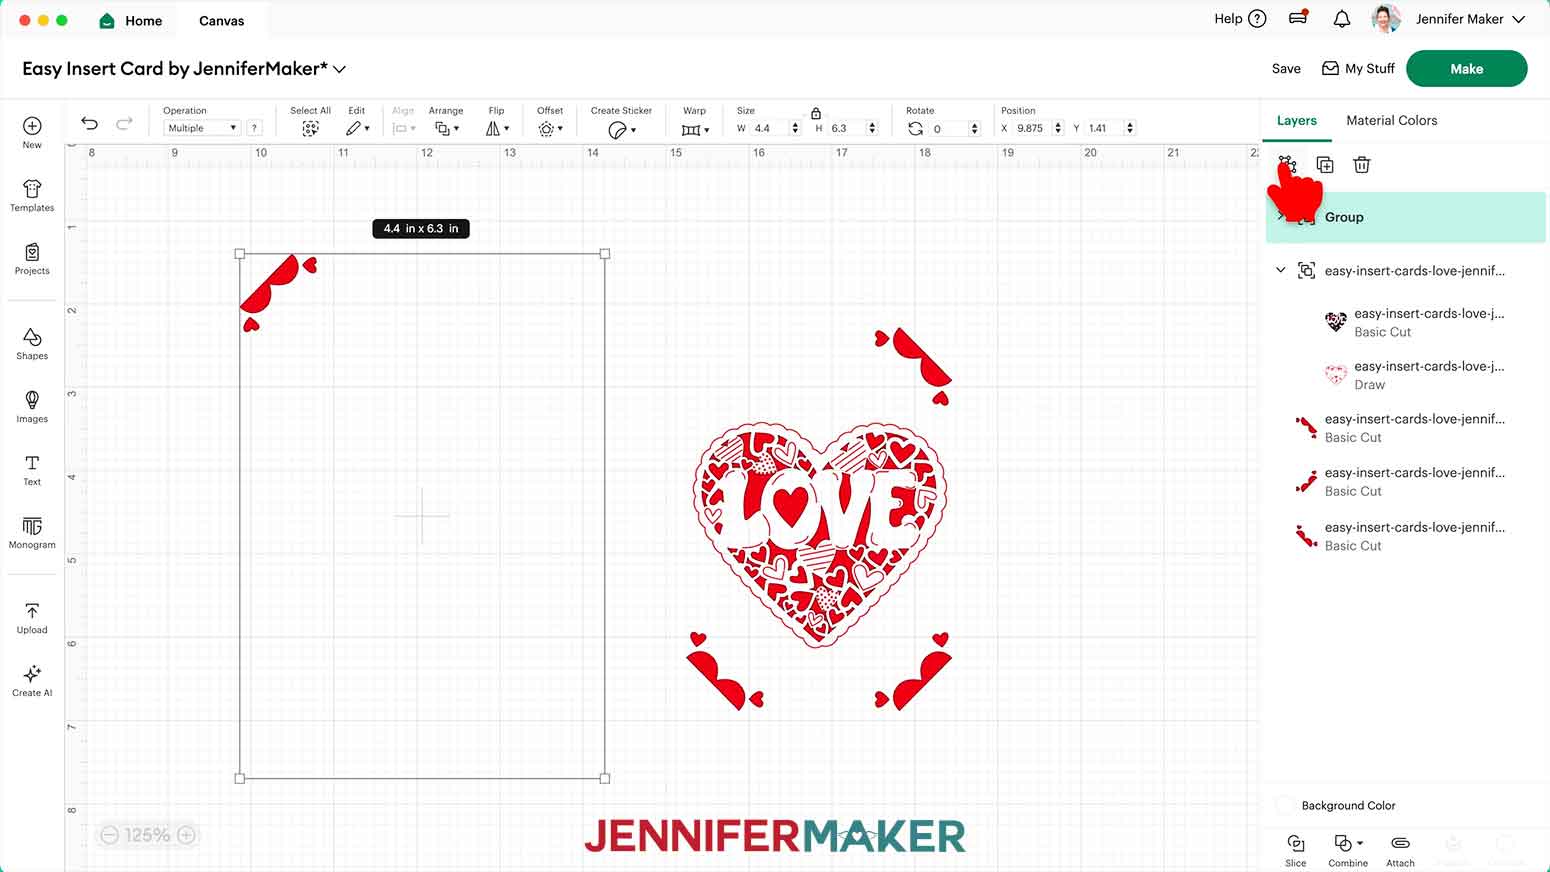
20. Use Steps 15-19 to align and group the remaining corner cuts on the Guide, adjusting your “Align” tool options as appropriate.
TIP: Make sure the diagonal line in each corner cut forms a triangle shape in each corner.
21. Move the grouped middle design layers onto the Guide, roughly in the center.
22. With the Lock icon closed, resize the middle design to fit the Guide shape, then adjust the placement as needed.
NOTE: I made mine about 4.11” W x 3.64” H for this size card insert in portrait orientation.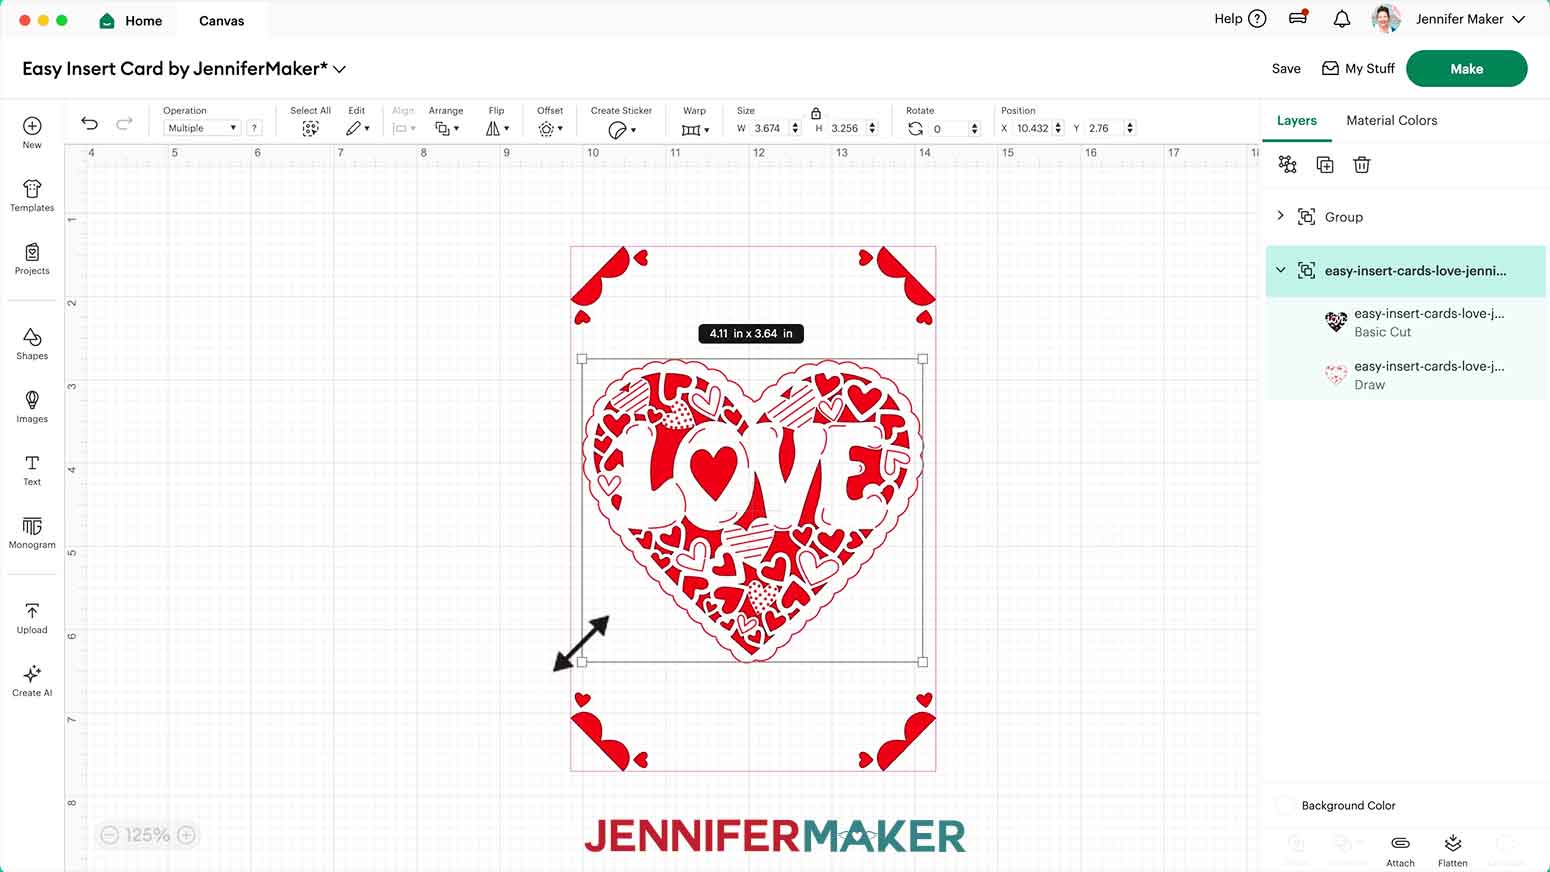
TIP: Many designs look best centered by eye instead of by the Align tools due to irregular shapes.
23. “Ungroup” the design elements until there are no Groups in the Layers Panel.
NOTE: Don’t move anything on the Canvas.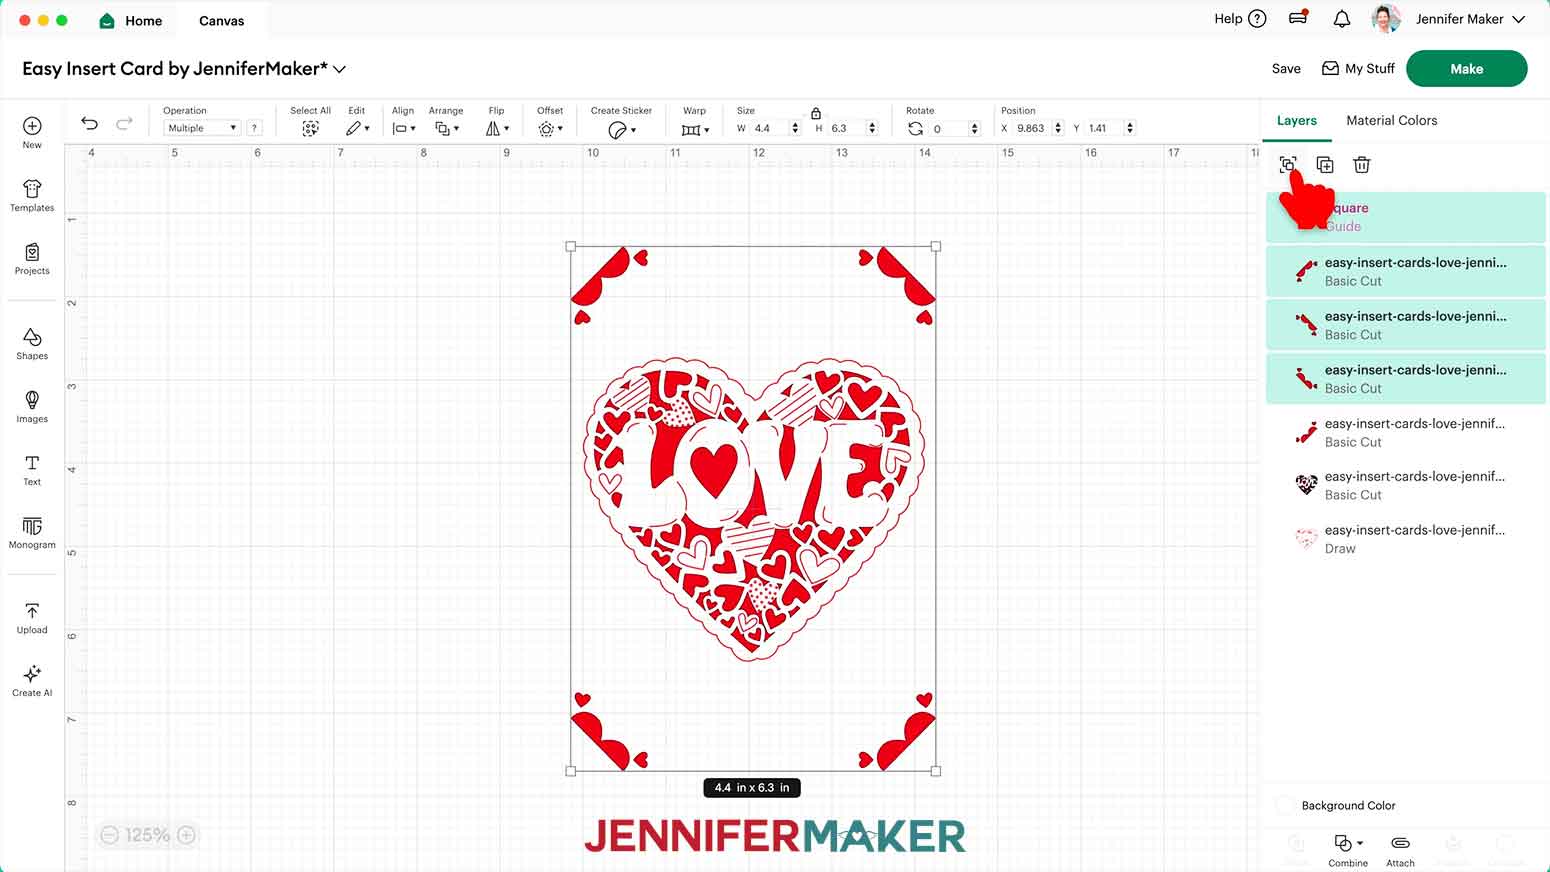
24. If you want to change the color to match your card base, change the “Basic Cut” layers using the Color Box.
NOTE: I’ll make my card front white and use a red insert.
25. Select the entire design and click “Attach” to keep the elements and operations together on the mat.
TIP: The Guide will not be part of the final design even if it is attached.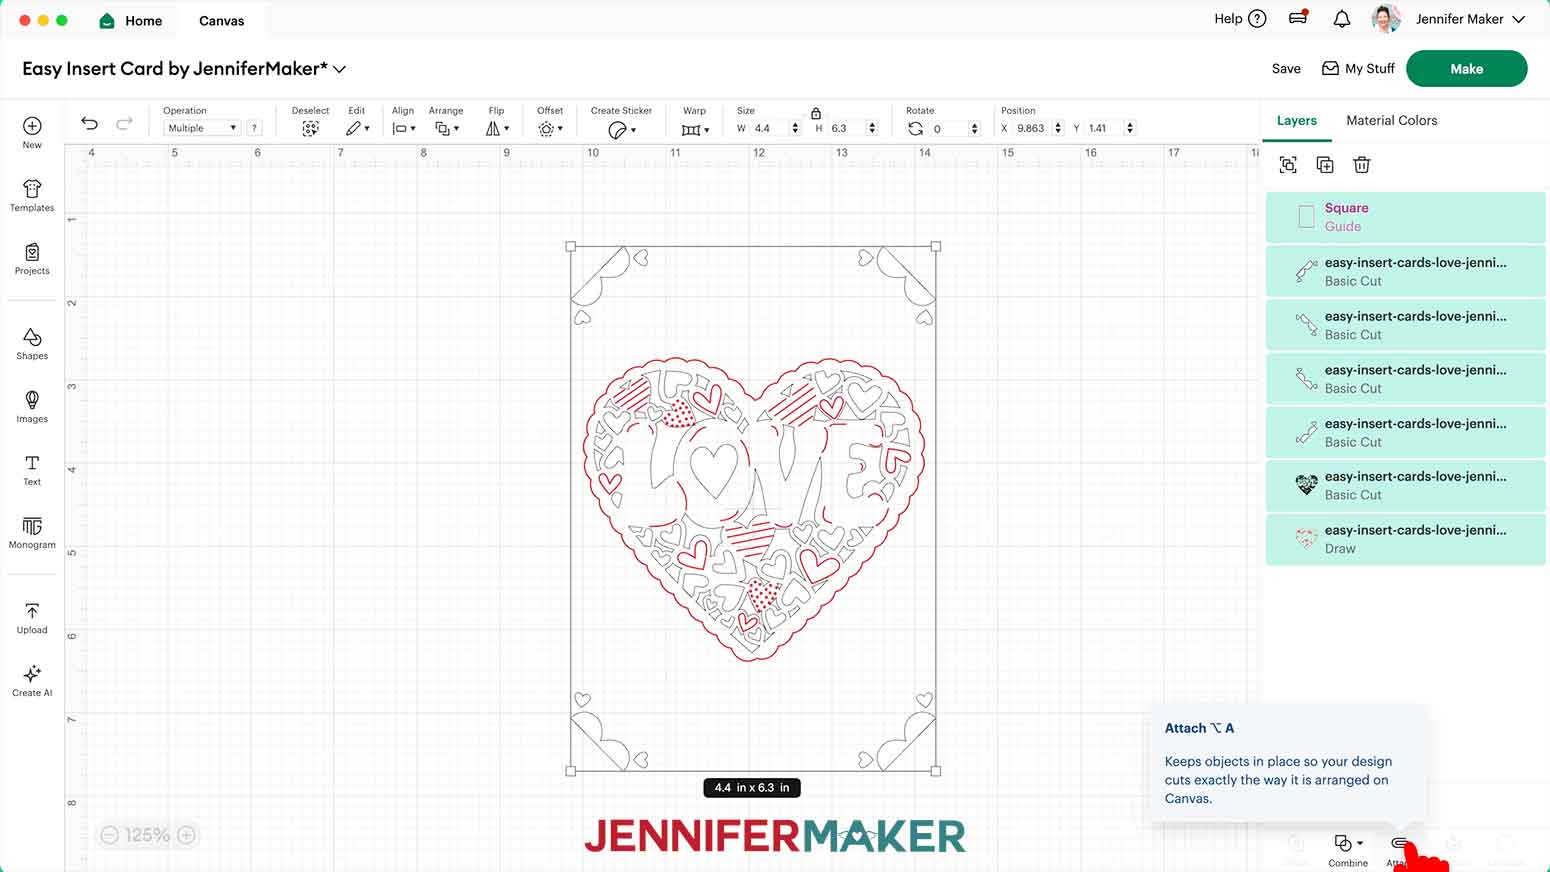
26. Your project is ready to cut!
CUTTING
1. Make sure the correct machine is selected in the top right.
2. Click “Make.”
3. On the “Prepare” screen, check that your design looks correct.
NOTE: If you see a mat with just lines, one or more of your layers may not have attached correctly, so click on “Cancel” to return to the Canvas to check and adjust as needed.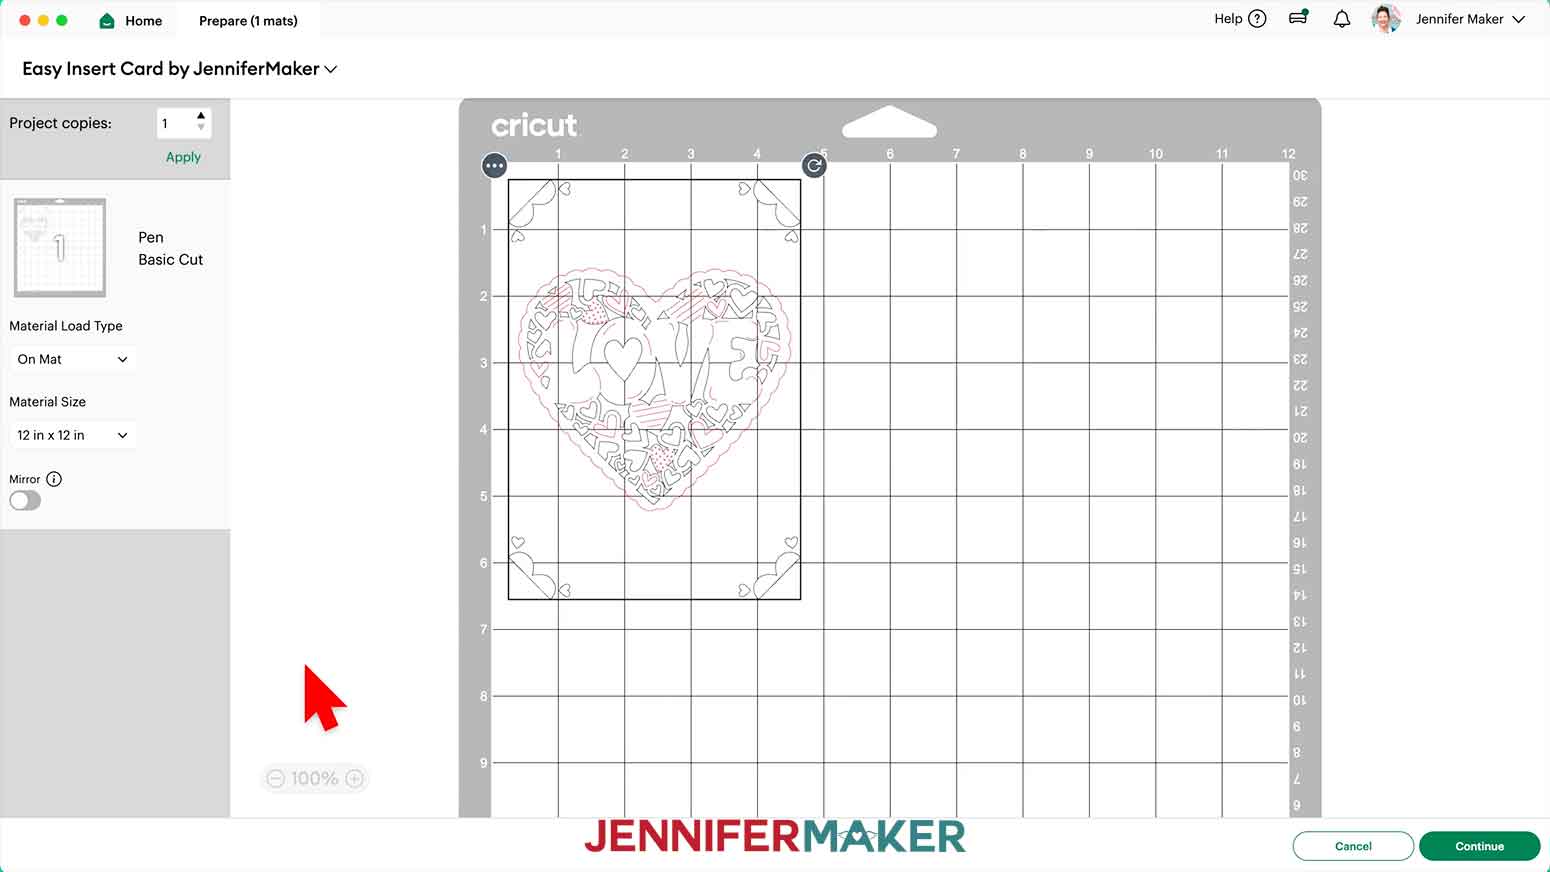
4. Click the drop-down menu under “Material Load Type” and select “On card mat” to reload the preview with the card mat view.
TIP: The Cricut automatically picks the size of the card based on the size of the artwork.
5. Make sure your “Material Size” matches the cards you’re using. If you pick a new one, the card will automatically re-center to fit it.
NOTE: If your design is not oriented correctly, select it, then hold your “Shift” key to click and drag the curved arrow icon to rotate the design. Remember that the card’s left edge is the fold.
TIP: If one section of your card mat starts to lose its stickiness, move the design to another area to use a fresh area.
6. Click “Continue.”
7. On the “Make” screen, set your Base Material.
NOTE: For the “birthday” and “thanks” designs, I got the best results using the “Heavy Cardstock” setting with “More” Pressure for Cricut Insert Cards. For the “love” design, I got the best results using the “Intricate Cuts” setting with “More” Pressure. All machines are different, so your results may vary.
USING THE CARD MAT
1. Remove the protective mat covers from both sides (even if you're just cutting one card), place the shiny sides together to avoid picking up dust, and set them to the side.
2. Make sure the mat is top-edge up, so you can read the word “Cricut.”
TIP: Unlike other machine mats, the 2x2 mat must be loaded top-first. Otherwise, your designs will not be properly aligned on the cards.
3. To add the folded card to the mat, gently poke a weeding tool under the divider's left edge and pull up just enough to slide the card's back underneath.
TIP: The surface you want to cut goes on top of the divider, so the other side goes under it, fed from the left.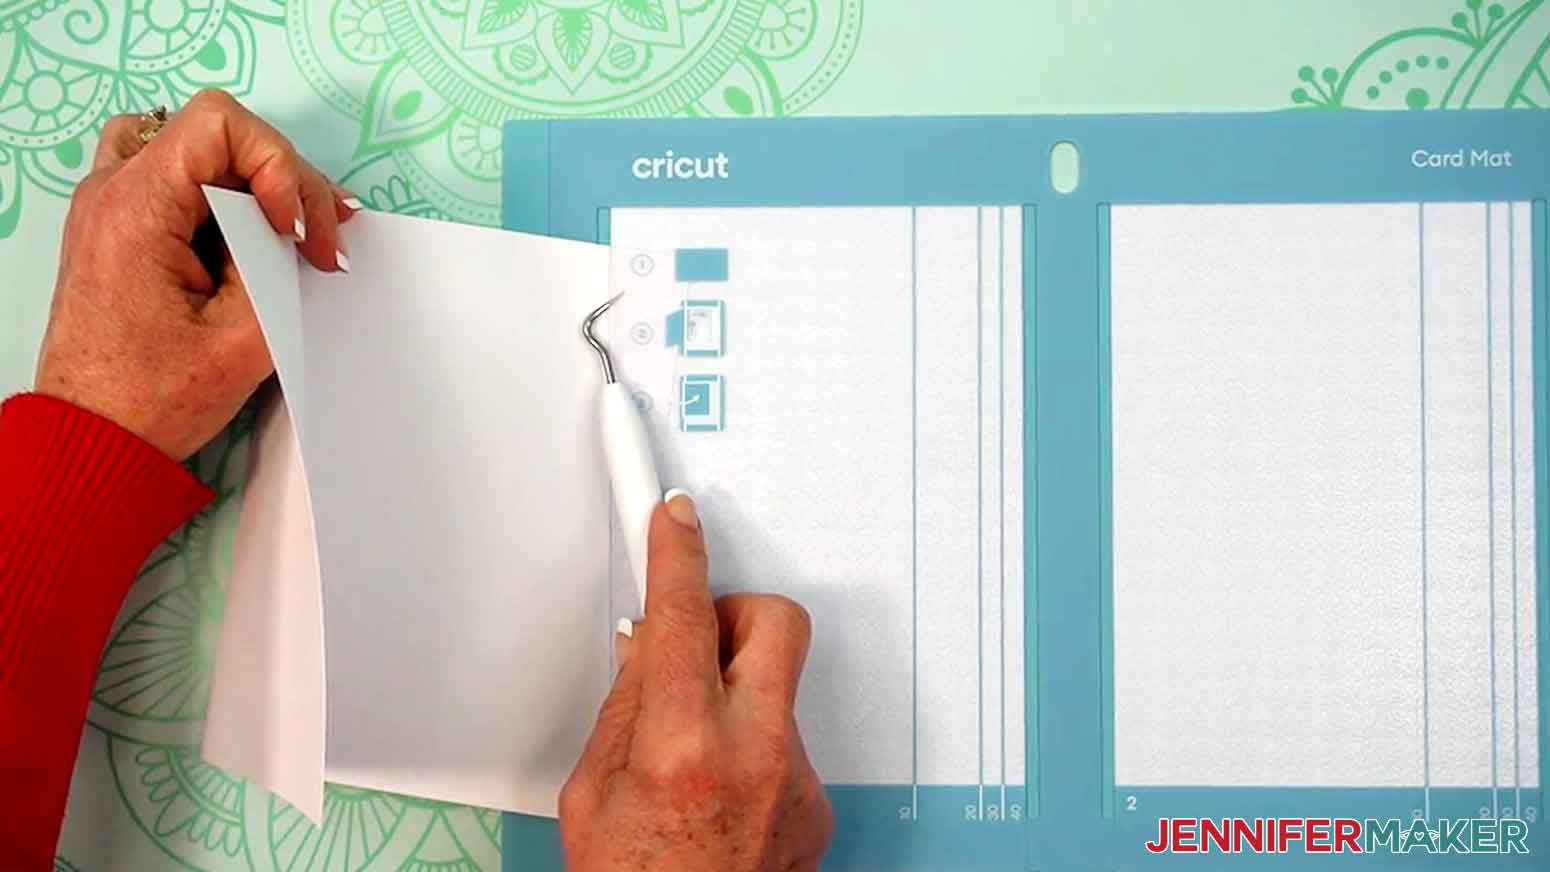
4. Make sure the card is aligned at the top left corner and tucked all the way so the crease touches the divider’s left side.
TIP: You can confirm you're using the correct card size by using the helpful guides on the divider.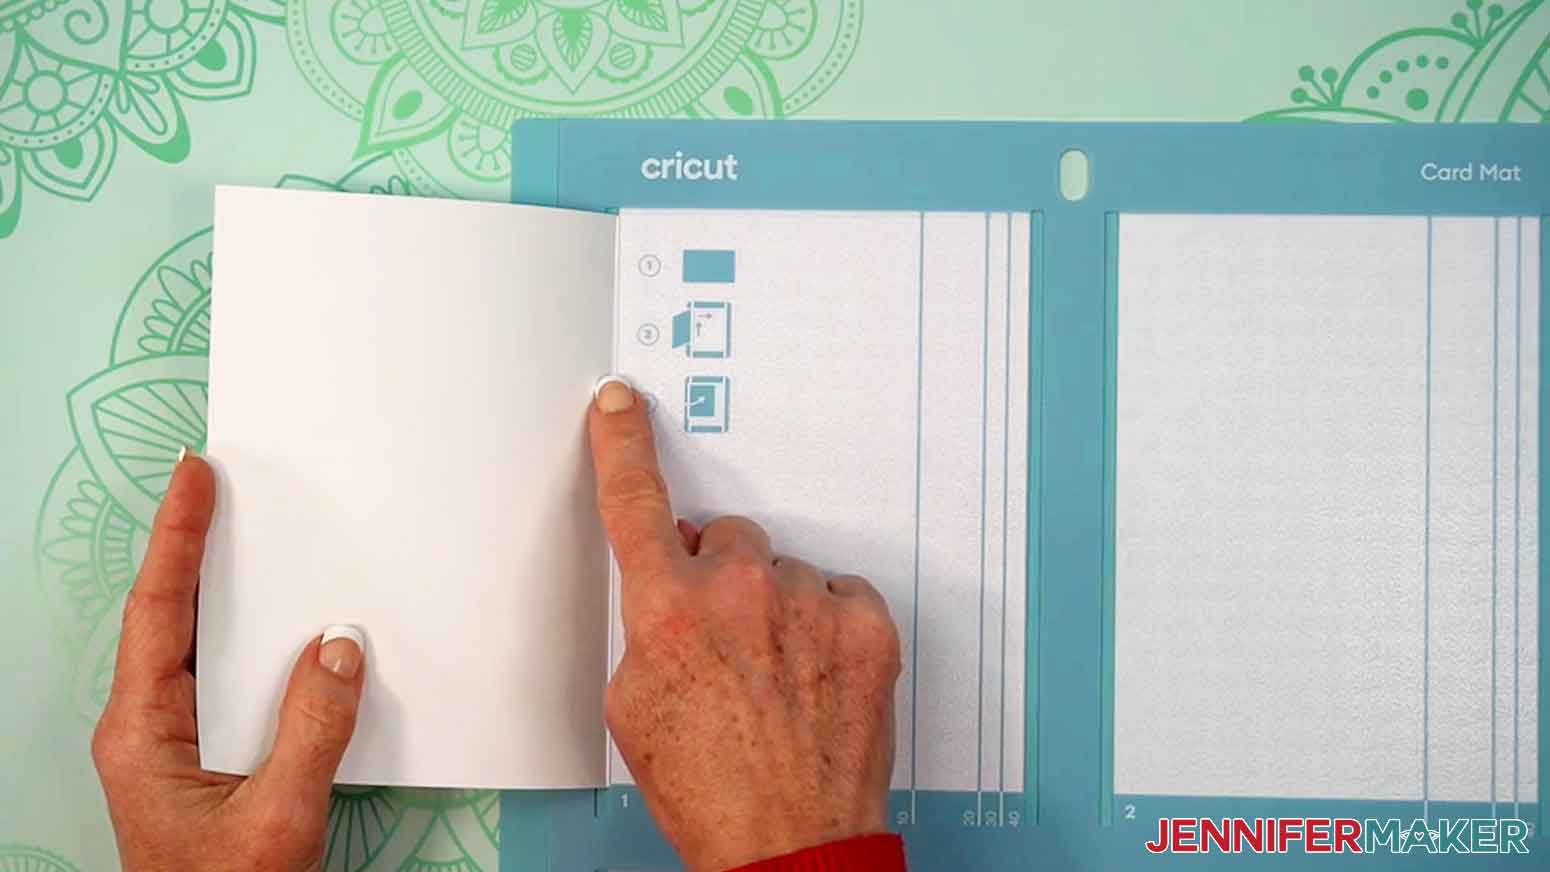
5. Press down on the card to make sure it sticks well to the top of the divider.
6. Use your brayer to press all over the card for better adhesion.
7. Make sure there’s plenty of space behind the machine for the mat to feed through.
8. Use your fingers to move all of the machine’s white star wheels into the center so they align with the middle column of the card mat.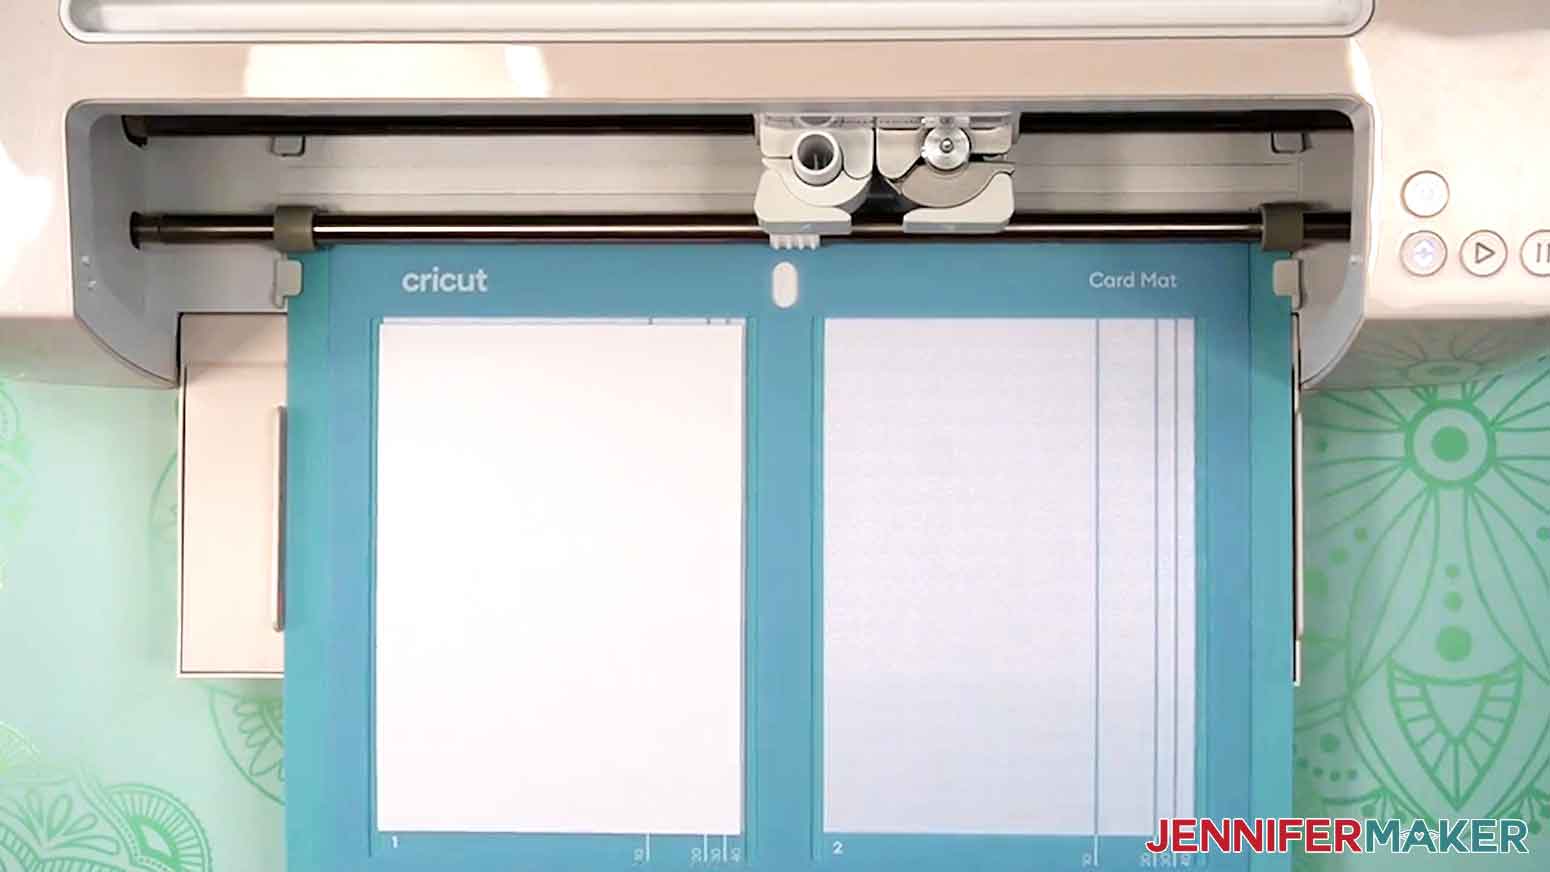
9. Load the mat matching the screen preview.
10. Follow the screen prompts to select and add your pen in the clamp indicated.
TIP: Remove the pen’s cap (put it on the back so you don’t lose it) and test it on scrap paper to make sure it flows well first.
11. Check that your Premium Fine-Point Blade is clean and in the clamp.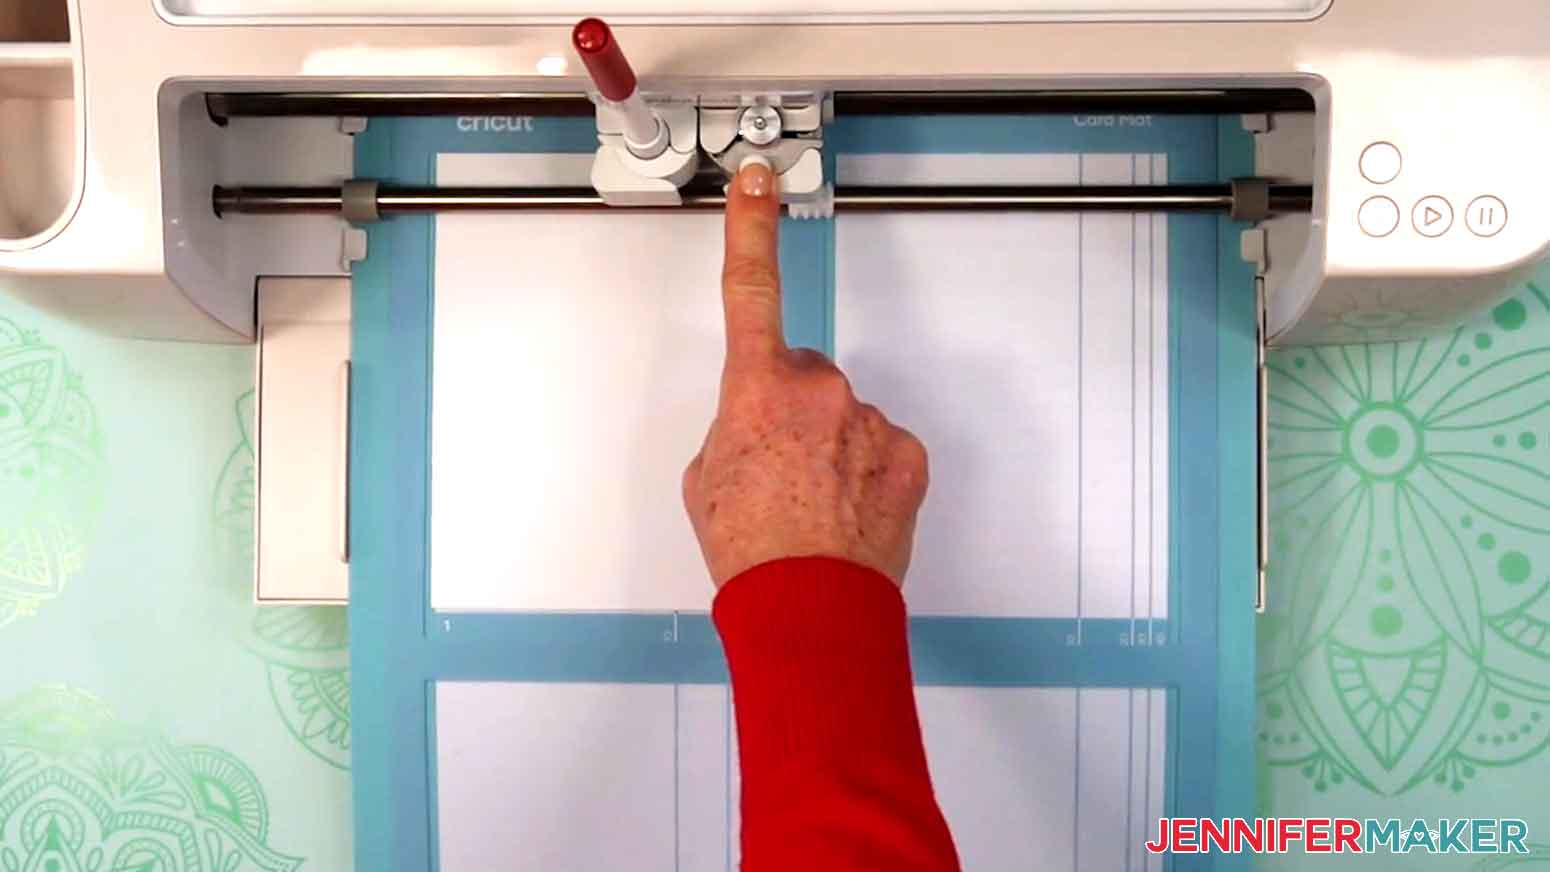
12. Press the flashing button to start drawing and cutting.
13. When the drawing and cutting are done, don’t unload the mat right away, but do remove the pen from the clamp and re-cap it.
14. With the mat still in place in the machine, gently lift a corner of the cardstock to see if the cuts went all the way through. If not, press the cut button to run the operations a second time in the same spots.
TIP: If you have three or more cards on the mat, the machine may have trouble with the second round of cuts.
15. Unload the mat but leave the card in place. 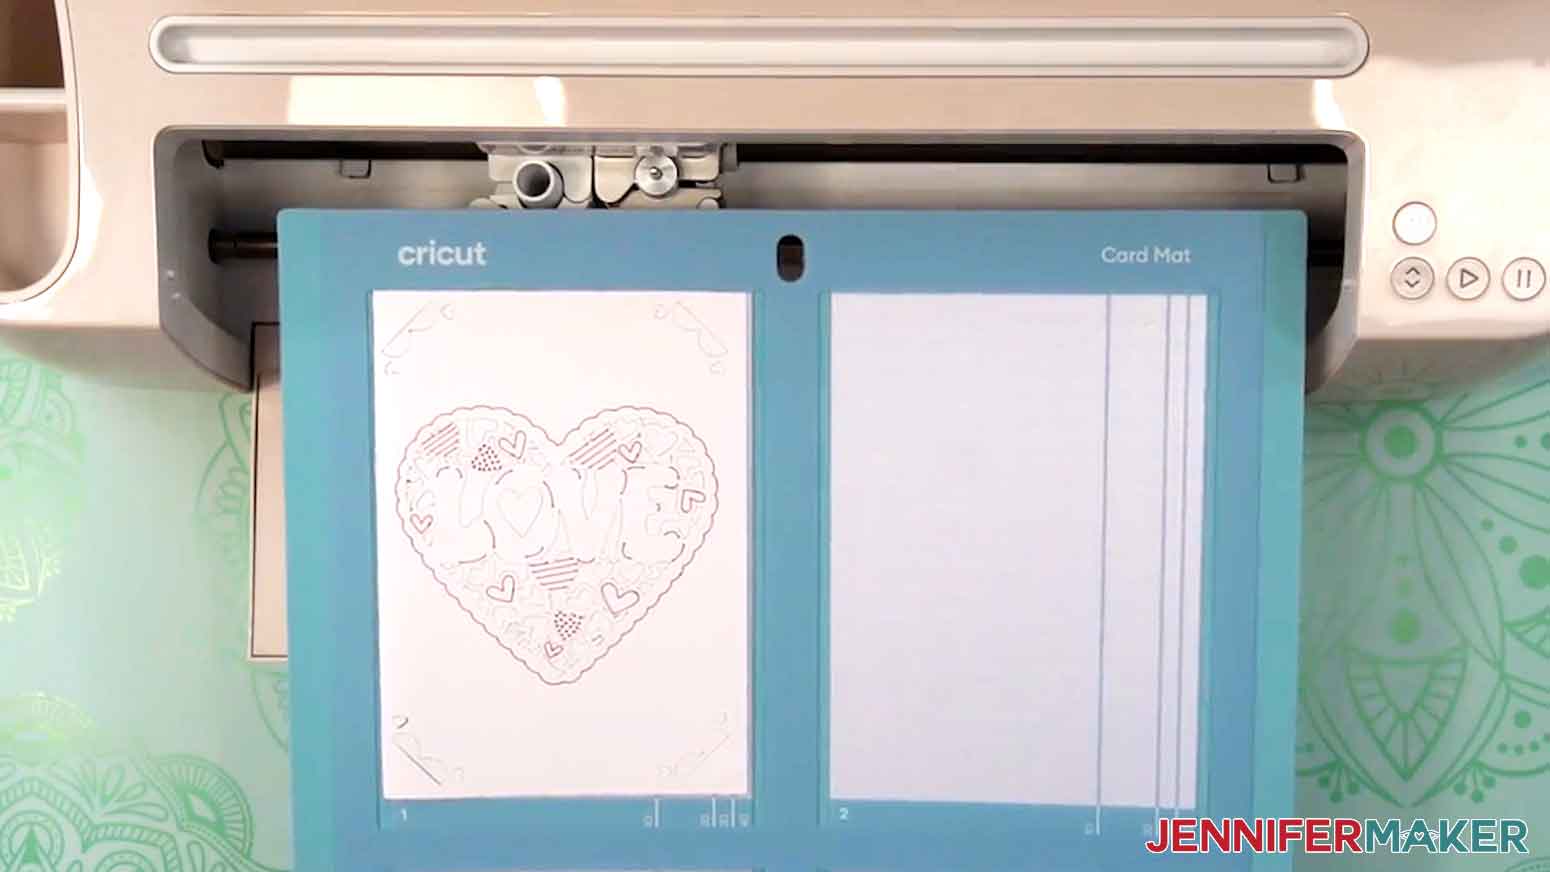
STEP 3: REMOVE THE CARD FROM THE MAT & ASSEMBLE
1. Instead of my usual tips to remove cardstock from a mat, leave it flat. Use a scraper or spatula tool to lift up the top, right, and bottom edges of the card first so it won’t rip, especially when the mat is super sticky.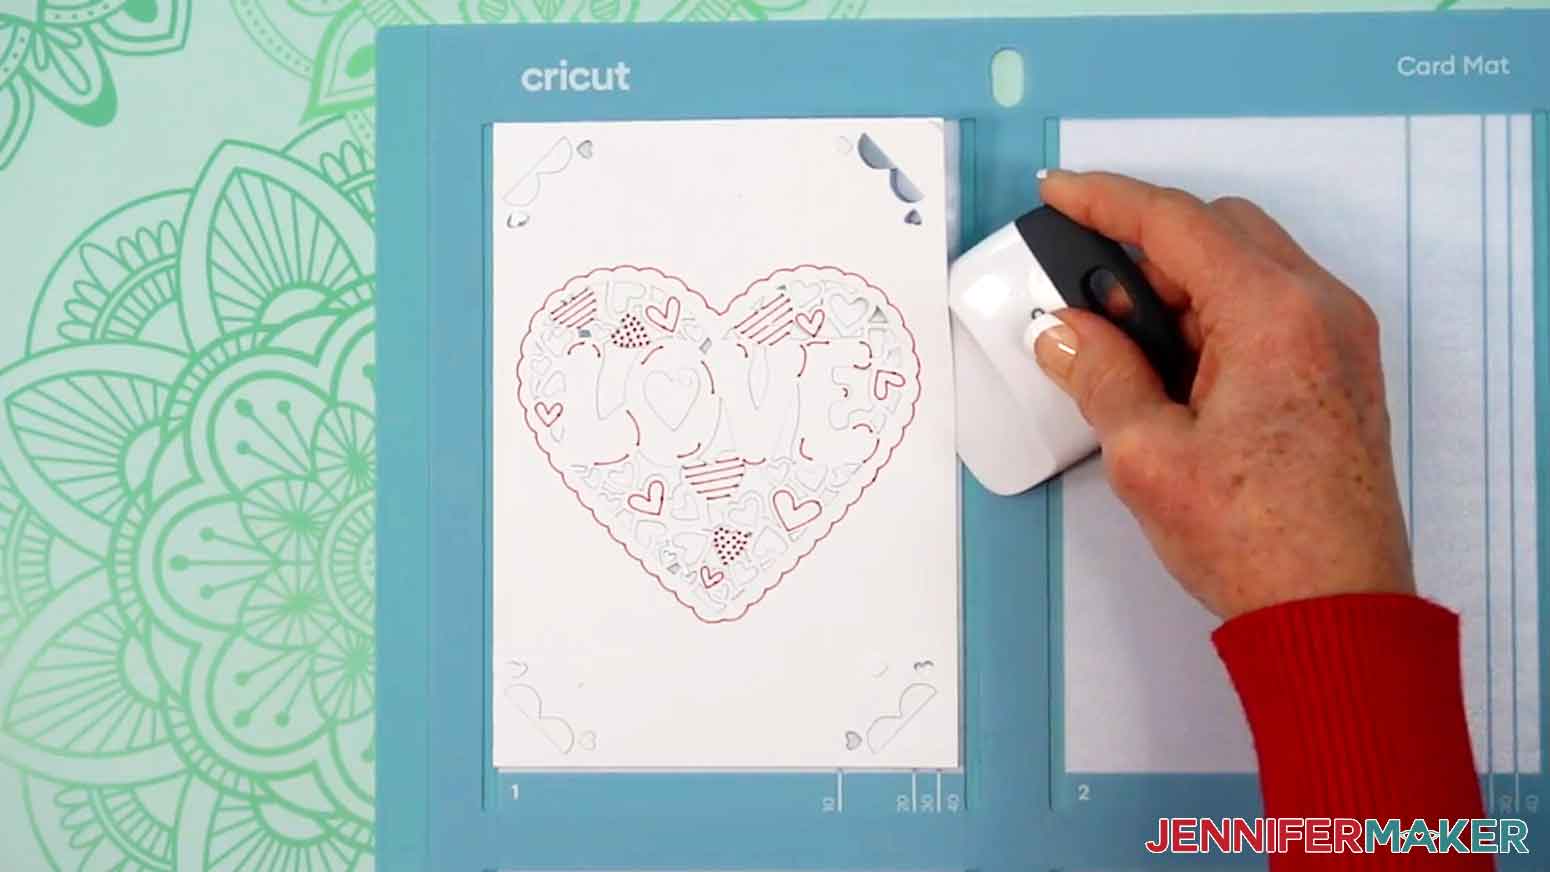
2. Once it’s lifted a bit, you can gently pull the rest of the card up from the divider. The rest of the pieces should stay stuck to the divider.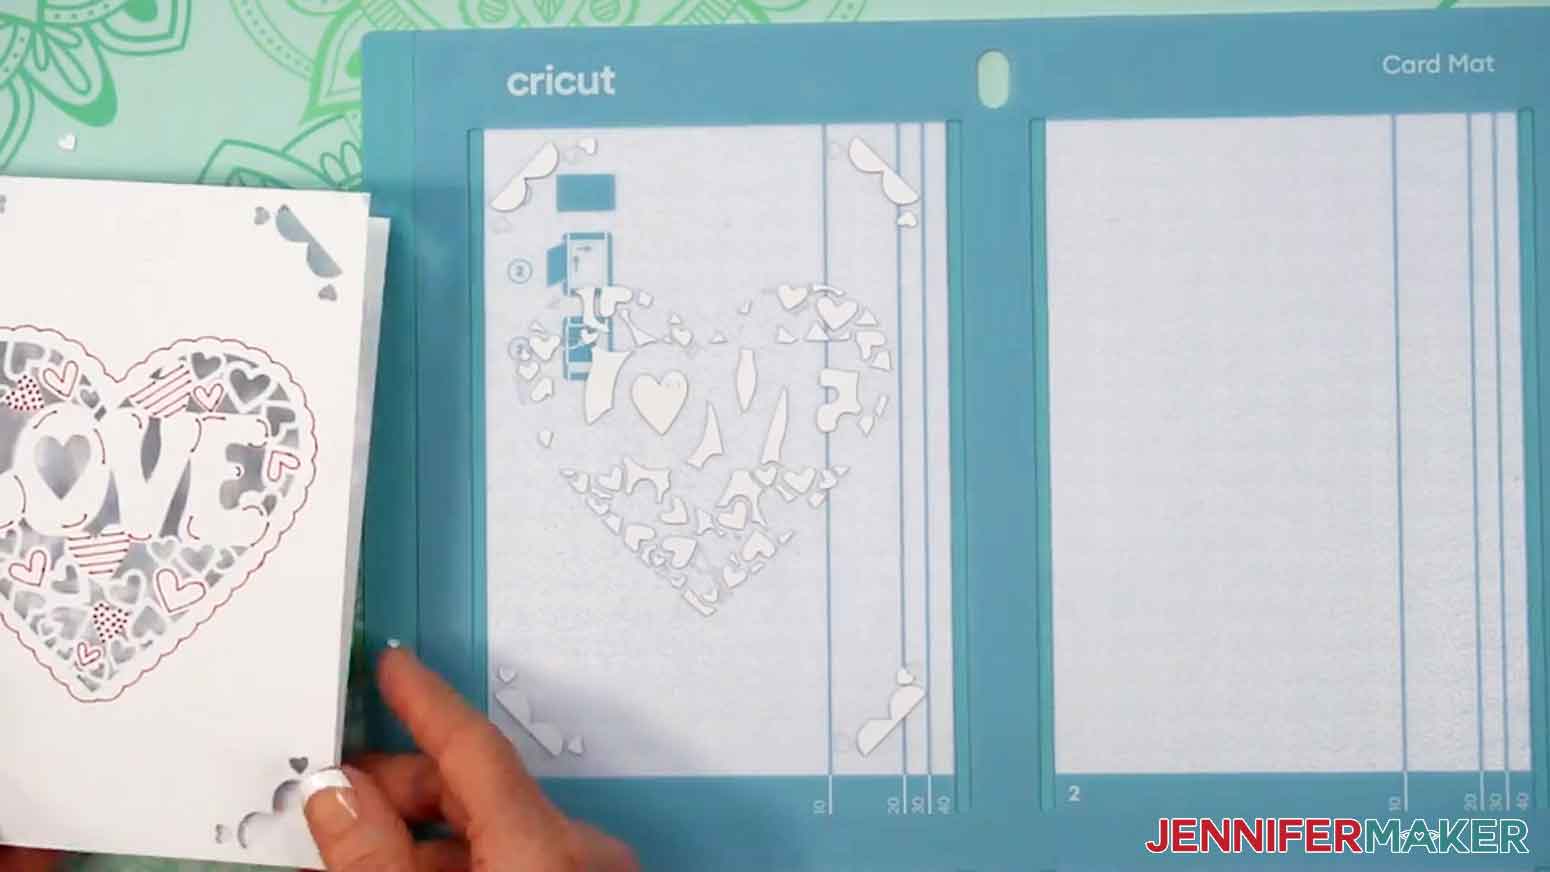
3. To remove the left-behind bits and pieces, use the scraper again, moving from top to bottom so the little bits don’t get stuck in the mat's crevices.
4. Tweezers and a weeding tool can help, too.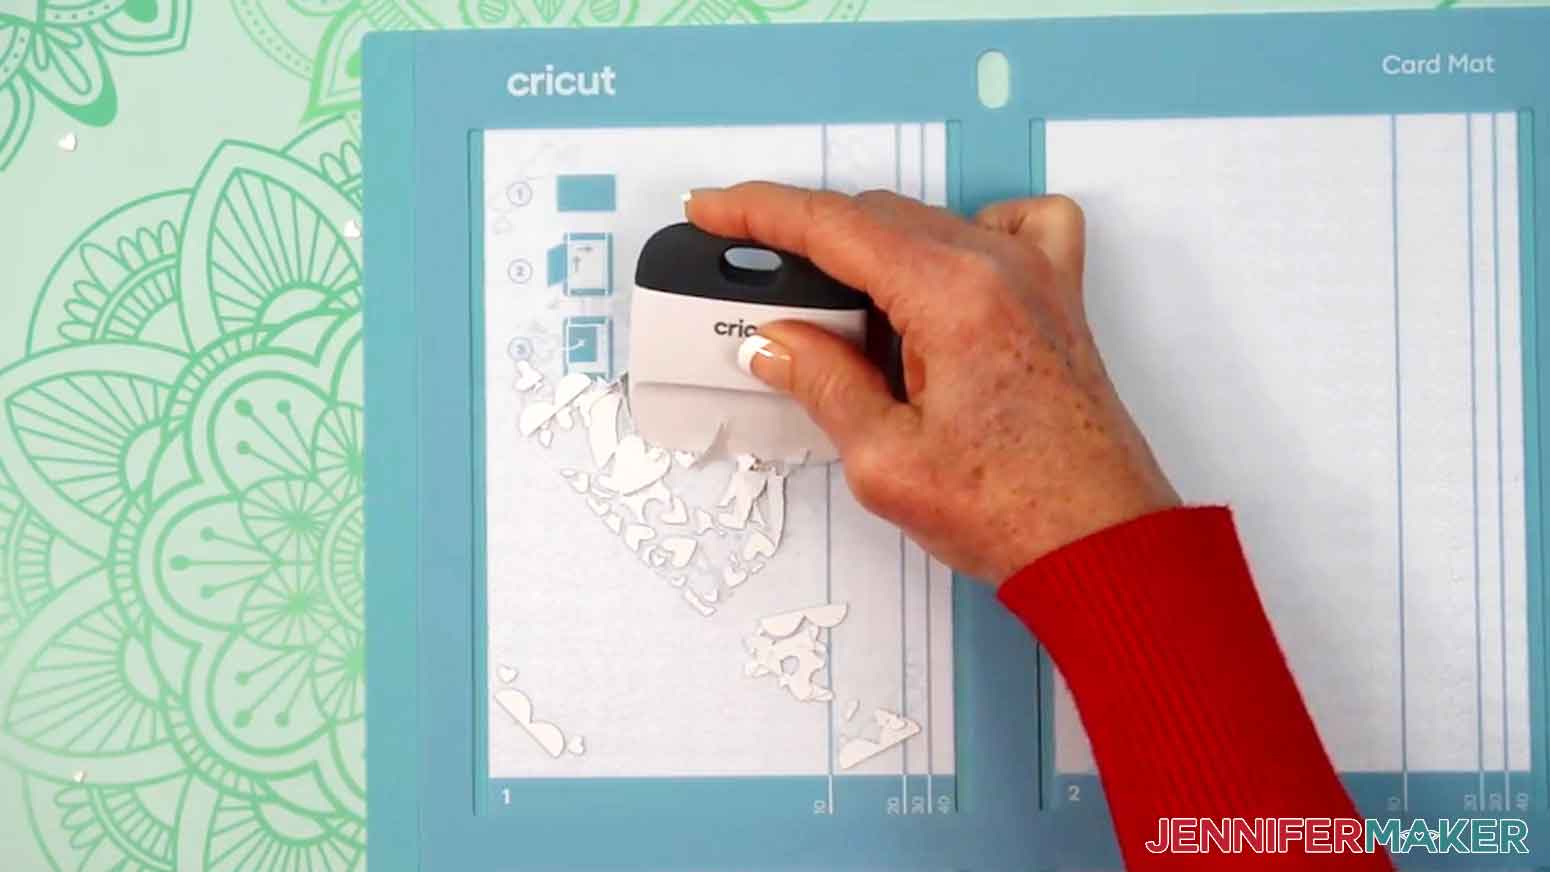
5. Place the mat protectors back in place, clean sides down.
6. Lay the card open and hold your insert face down.
NOTE: You might notice the design isn’t perfectly centered on the card front — that’s normal for the card mat since Cricut Design Space doesn’t always align cuts exactly in the middle.
7. Gently bend the insert so you can get the corners into the matching slits cut in the card's front.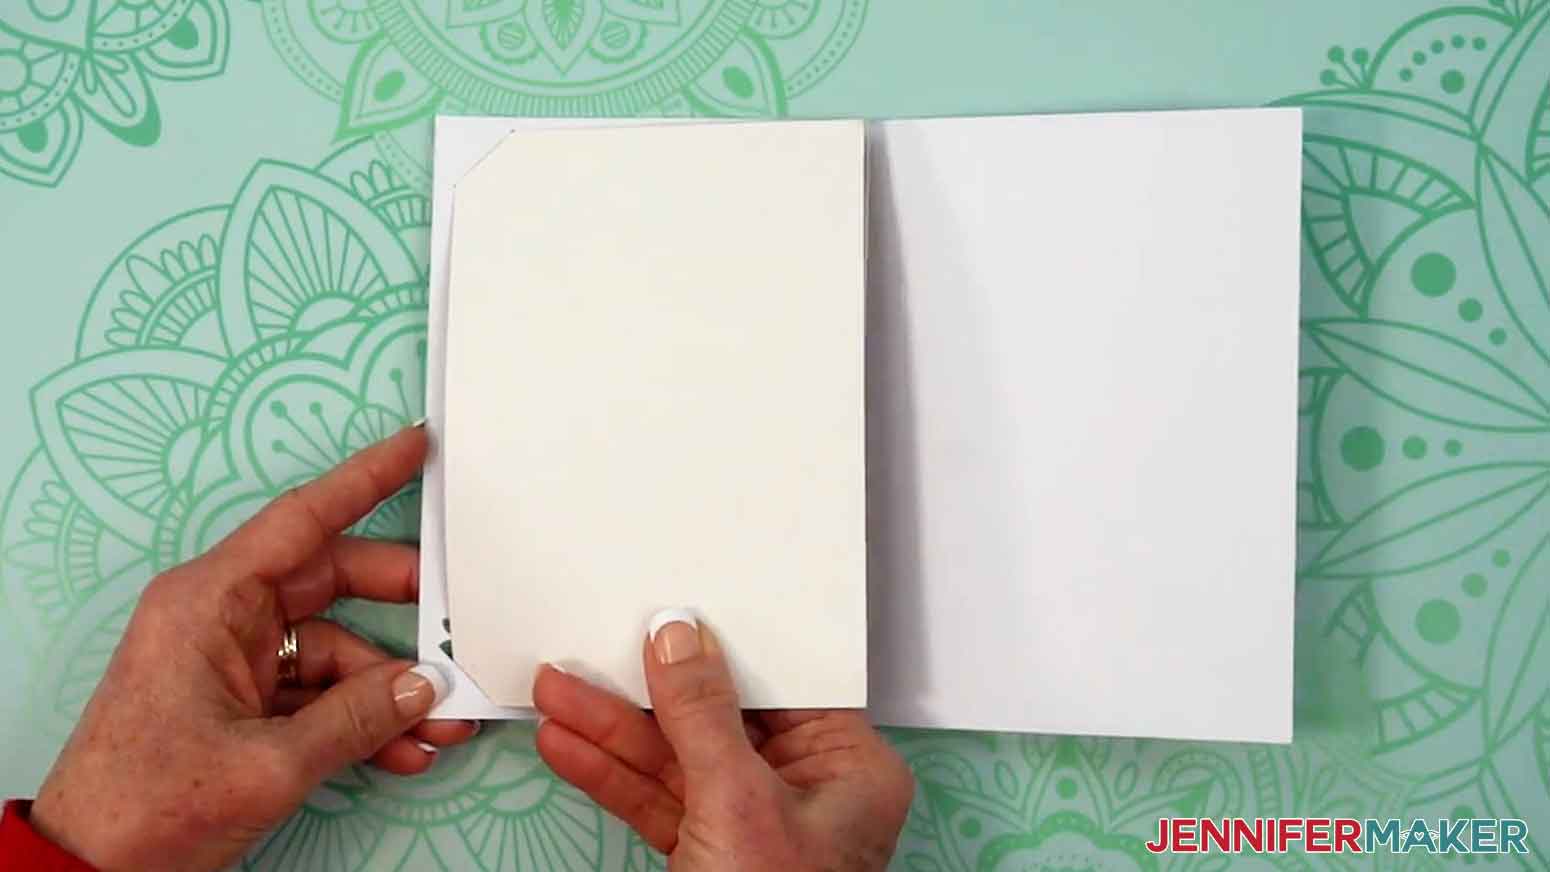
STEP 4: SHOW IT OFF
You now have a beautiful card to share!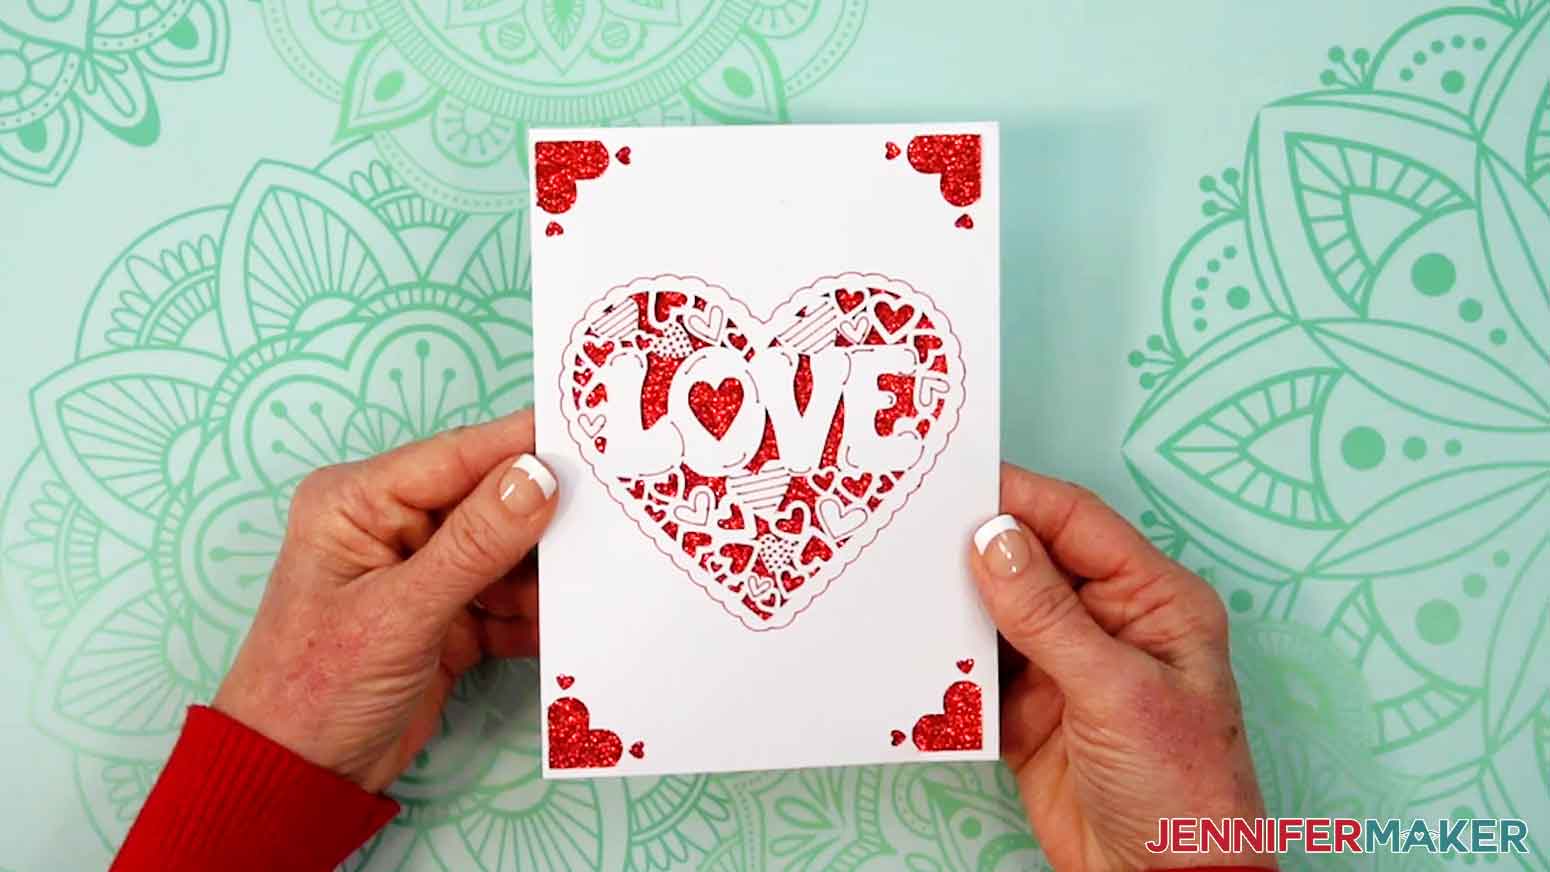
Notes
Finished Sizes
R10: 3.5” W x 4.9” H
R20: 4.25” W x 5.5” H
R30: 4.5” W x 6.25” H
R40: 4.75” W x 6.6” H
Inserts
R10: 3.2” x 4.6”
R20: 4” x 5.25”
R30: 4.25” x 6”
R40: 4.4” x 6.3”
Typefaces Used
Love card: Hippie Chick (free alternative: Super Maples)
Birthday card: Dear Agatha (free alternative: Better Together)
Thank You card: Foghe (free alternative: Sundori)
Answers to Your Questions About Making Insert Cards with Cricut
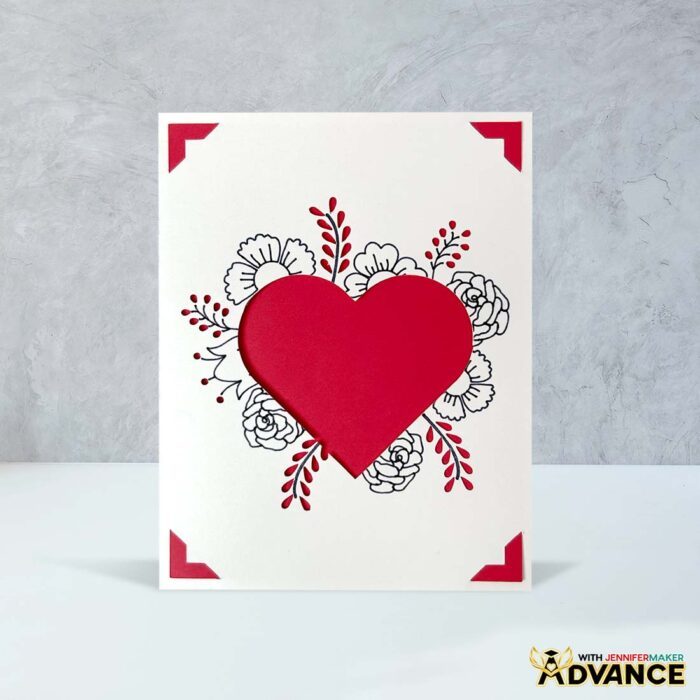
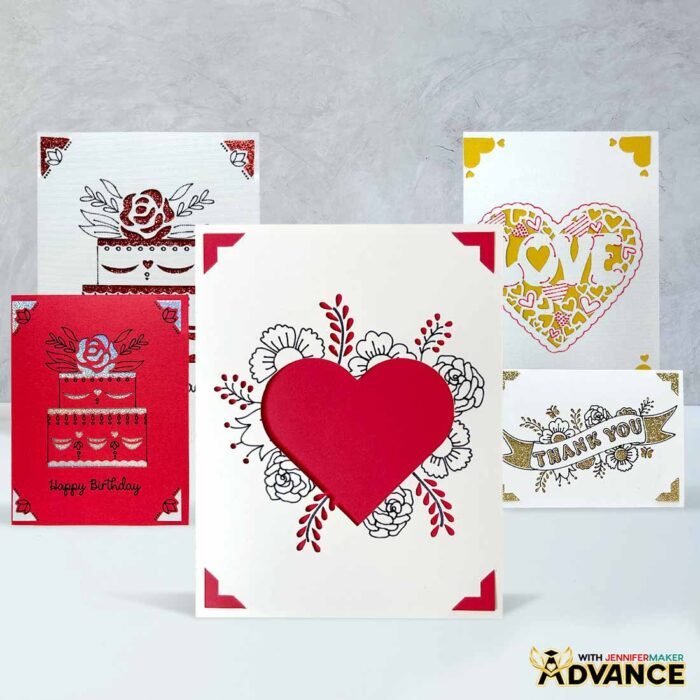
Q: Is there a way to create a custom insert card with Cricut?
A: You can learn how to create your own Cricut insert card like the floral heart design below in my ADVANCE program. Learn more about ADVANCE here!
Q: Help! My Cricut Design Space screen looks different from yours!
A: If you’re using the latest version of Cricut Design Space, your screen may have slight variations from the screen you see on the video tutorial. Good news! All of the same functions are there, they may just be in different spots or have new icons. Pause the video if you need, or follow along with the written tutorial. If you get stuck, ask for expert support in our Facebook group.
Q: Can I make and sell cards using your design?
A: If you want to use my insert card designs and project for commercial use, please familiarize yourself with my important licensing information before selling your crafts.
Q: What’s the difference between Cricut insert cards and cutaway cards?
A: Insert cards and cutaway cards can look similar at first glance, but they’re built differently.
Insert cards use corner slots on the card front. Your insert piece slides into those slots from behind, so the color shows through the cutouts. No adhesive is needed, and the alignment is forgiving because the corners help “lock” the insert into place.
Cutaway cards use an adhesive-backed layer. Instead of tucking an insert into corners, you stick the cutaway piece behind the opening. That can look beautiful, but it’s easier to get bubbles, crooked placement, or slight shifting, especially with intricate designs.
If you want the easiest, cleanest result with fewer variables, insert cards are usually the better starting point.

Q: What supplies do I need for Cricut insert cards?
A: At the simplest level, you need a Cricut machine, a Cricut card mat, and an insert card set. Many people start with insert card kits (sometimes labeled as Cricut card kits) because everything is already sized to work together.
The card mat also includes a plastic divider, which is the secret to keeping the inside of the card clean while the machine works on the front.
Q: Which Cricut machines work for insert cards?
A: Insert cards work great on Maker and Explore machines with the 13″ x 16.25″ card mat designed for them. If you have an Explore Air, you’re good to go with this larger card mat.
The Cricut Joy Xtra and the Cricut Joy machine also have card mats designed to fit them and the compatible card blanks.
Q: Do I need special paper, or can I use my own cardstock?
A: You can absolutely use your own cardstock, but premade insert cards are the easiest place to start because they’re made to match the designs and their corner slots perfectly.
If you use special paper or thicker cardstock, plan to test first. Some papers cut beautifully, and some papers want to tear at the corners if the pressure or blade isn’t quite right.
Q: Why did my card cut or draw on the inside?
A: This usually happens when the card isn’t seated correctly against the divider on the card mat.
When you load the card mat, the side of the folded card needs to sit snugly against the plastic divider, and the top of the mat needs to be oriented the way Design Space shows it. If the fold shifts or the card slides on the mat, the machine can accidentally mark the inside of your card instead of just the front.
Q: Why is my design not lining up on the front of the card?
A: I’ve found that the plastic protector on the Cricut card mat makes it a little difficult to perfectly center designs on your cards, but it’s only noticeable if you really look closely. If you’re having a more noticeable alignment issue, it may be due to sizing or placement.
First, make sure the design is made for the right card shape and card size. Then, confirm the card is placed consistently on the mat, especially at the top corner area.
Q: Can insert cards include drawing, or do they have to be cut-only?
A: While my designs include drawing and cutting, both are available. A cut-only design can look super clean, (like my cute animal card designs) but adding a drawing element is a great way to get a “finished” look fast.
If you’re making a quick card, a few pen details can make it feel more custom without adding more intricate cutting.
Q: Do I need a paper trimmer for insert cards?
A: Not required, but a paper trimmer is handy if you’re cutting custom inserts from your own cardstock, trimming scraps, or experimenting with new papers.
If you’re using the premade inserts from insert card kits, you can skip the trimmer entirely.
Q: Are insert cards more expensive than making cards from scratch?
A: Sometimes there’s a small extra cost up front for kits compared to cutting everything yourself, but they’re also faster and more predictable.
If you’re making a lot of DIY cards and you want the easiest path to clean results, kits can be worth it. If you love experimenting and you already have a paper stash, making your own inserts from cardstock can bring the cost down.
Q: Where can I get help if I get stuck?
A: If you want quick troubleshooting or you want to show off your finished cards, my Cricut Facebook group can be a helpful place to compare notes and see what others are doing.
Get my free SVG/DXF/PDF files to make your own insert cards with Cricut!
(If you do not see the signup form above, click here.)
I absolutely love seeing your cards! Once you’ve learned how to make insert cards with Cricut, inspire others and share photos of your project in our Facebook group or tag me on social media with #jennifermaker.
Love,

Want to remember this? Save this tutorial on How To Make Insert Cards With Cricut to your favorite Pinterest Board!