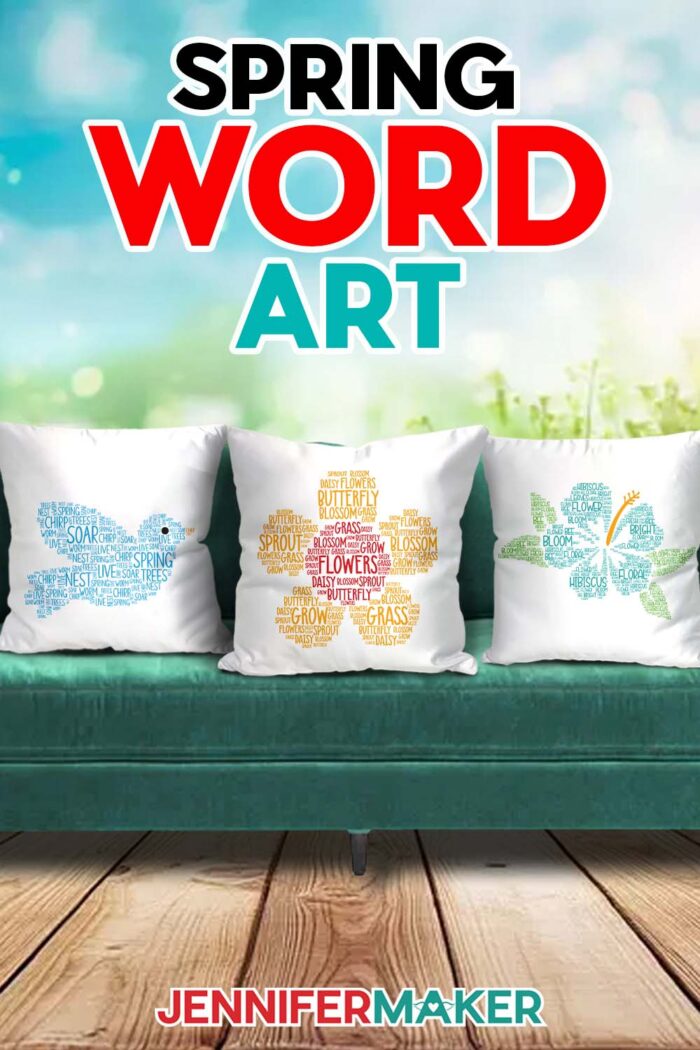
Learn how to make a spring word art for projects like pillows, T-shirts, stickers, and beyond!
When you think of spring, what words come to mind? Perhaps blossom, fresh, bloom, or grow? These words capture the essence of the season, with its blooming flowers, gentle breezes, and a sense of fresh possibilities. And with the right creative touch, these ideas can be transformed into beautiful Spring Word Art designs for your next DIY masterpiece! Whether you’re personalizing a sublimated pillow, crafting a custom tote bag, or making wall art to brighten your space, spring word art is the perfect way to bring new life to your craft projects!
Watch the full step-by-step video tutorial on sublimating word art pillows to make the original designs or my new additions:
Note: When I recorded the first project, it was possible to prepare and print a file using Cricut Design Space without having a machine registered, which is no longer possible. Now I use Google Docs to prepare sublimation designs, and you can use that process to print the pre-made files!

If you’ve seen those gorgeous word cloud creations full of colorful, happy words and wanted to craft with them or make your own, you’re in for a treat. Whether you want to create a pretty vinyl decal with your Cricut, print a design for a handmade card, or sublimate a cheerful message onto a cozy pillow, my new spring word art designs are perfect for the season!

The coolest thing about these spring word art designs is the huge number of crafts you can make with them! Whether you’re making Print Then Cut cards, stickers, home decor, or personalized gifts, my spring word art designs are versatile and look great on lots of different projects.
In my original word art tutorial, I sublimated them onto pillowcases — and with my new files, you can make cozy accents and so much more that say “Hello, Spring!” in the cutest way. If you want to learn how to sublimate your own pillow with word art, check out the video above or scroll down to see my step-by-step written tutorial with photos.

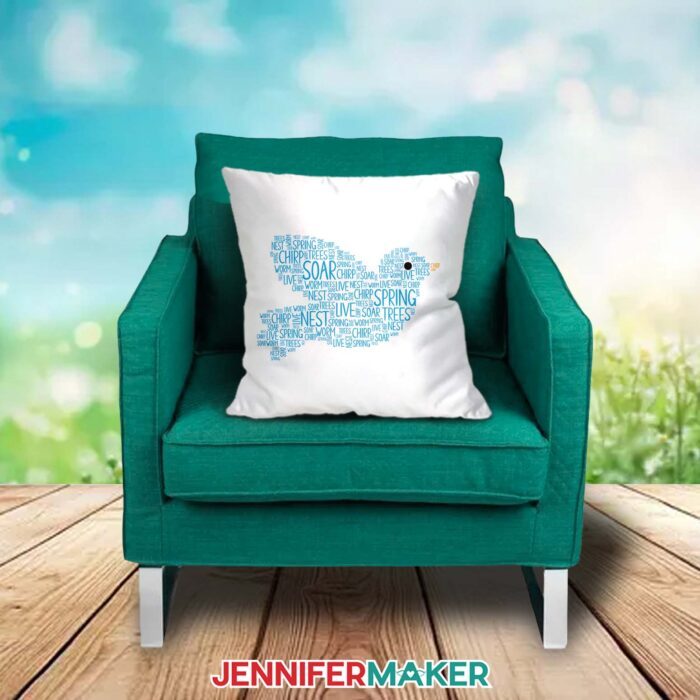
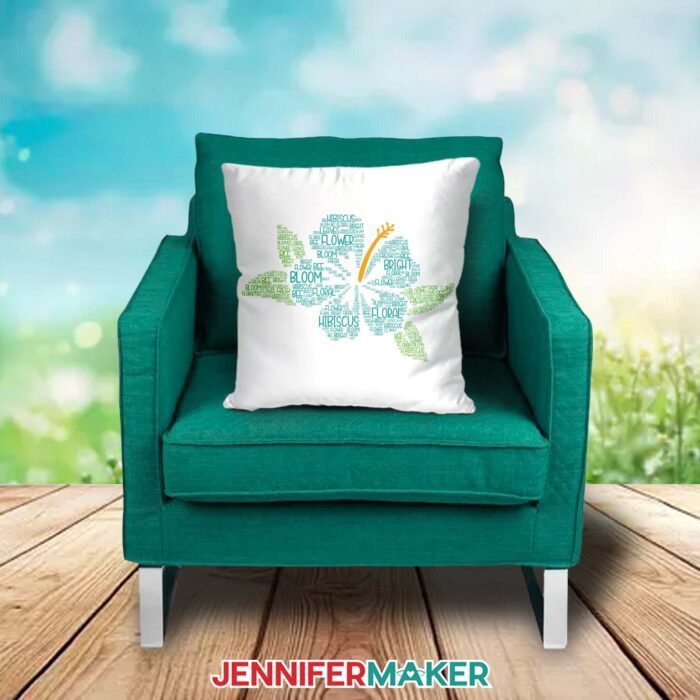
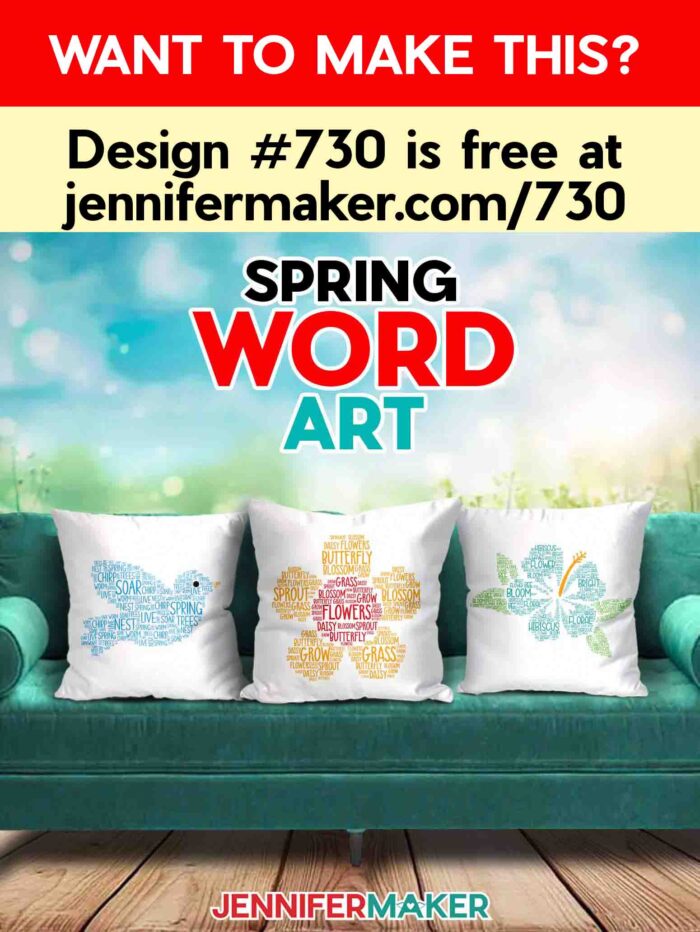
I’ve put together three pre-made spring word art designs in SVG and PNG format to share with you: a cheerful daisy, a tropical hibiscus, and a sweet little bird. I’ve also included easy-to-use outline templates so you can sprinkle in your own springtime words using Cricut Design Space. Be sure to the tutorial video to learn how to use the free outlines to make your unique piece of spring word art!
Creating your own spring word art is like planting a garden — choosing the right words to fill your shape makes all the difference! If you’re not sure where to start, my original tutorial walks you through making a word list, choosing the right typeface, and adjusting text layers to make everything fit just right.
The trick is to balance long and short words so the shape is filled in well, and it stays clear and recognizable when you remove the template outline. I’ll share a few of my favorite free fonts (and show you how to install them), plus my favorite typeface tips and a list of my go-to fonts for spring word art projects and beyond.
I’ll show you how to create stunning color gradients to add even more springtime magic to your word cloud shape! Then finally, I’ll show you how to sublimate a throw pillow with your beautiful design.
I promise that you don’t need to be a design pro to make a lovely spring word art project! You’ll be amazed at how easy it is to transform a simple shape into a work of art that’s bursting with personality and springtime charm!
If you love making sublimation crafts and enjoy creating your own spring decor, you’ll have a lot of fun with this project. If you make one, be sure to share it in my Cricut Crafters and Makers group – I’d love to see how you make yours!
Let me show you how to make spring word art projects! This post contains some affiliate links for your convenience (which means if you make a purchase after clicking a link I will earn a small commission but it won’t cost you a penny more, there is no additional cost)! Read my full disclosure policy.
Materials to Sublimate a Pillow with Spring Word Art
View my Amazon shopping list for the exact items I used!
- One (1) Polyester Pillowcase -AND-
- One (1) matching Pillow Insert
- A-SUB 125g Sublimation Paper 8.5″ x 11″
- Optional: White Polyester Material for Practice
- Sublimation Printer
- Sublimation Ink
- Sublimation Printer
- Butcher Paper
- White Cardstock
- Heat Press
- Pressing Pillows (optional but highly recommended!)
- Pressing Mat
- Heat Resistant Tape
- Lint Roller
- Scissors
- Fan
- Design #730 (My free SVG/PNG/DXF/PDF design files are available in my free resource library – get the password by filling out the form at the bottom of this page
How to Sublimate Spring Word Art Pillows!
How To Fill A Shape With Words
Learn how to fill a shape with words in Cricut Design Space!
Materials
- One (1) 15" x 15" Polyester Pillowcase
- One (1) Matching Pillow Insert
- A-SUB 125g Sublimation Paper 8.5" x 11"
- White Butcher Paper
- 12” x 12” White Cardstock
- Optional: White Polyester Material for Practice
- Design #585 (My free PNG/PDF design files available in my free resource library - get the password by filling out the form at the bottom of this page)
Tools
- Sublimation Printer - I used a converted Epson EcoTank ET-2800 Inkjet Printer
- Sublimation Ink
- Heat Press - I used the Cricut EasyPress 2
- Cricut EasyPress Mat -AND-
- Pressing Pillows
- Fan for Ventilation
- Heat Resistant Tape
- Lint Roller
- Tape Measure
- Scissors
Instructions
UPDATE: Cricut Design Space now requires crafters to have a Print Then Cut capable machine (so not an original Joy) registered to print from the program. However, you can print my premade PNG designs just as easily using Google Docs with my related tutorial on printing sublimation designs. The Epson printer steps are very similar for comparable brands.
STEP 1: GET MY FREE WORD SHAPE DESIGNS
First, download my Fill a Shape with Words designs from my free library -- look for Design #585. Alternatively, you can use the Save This Project form near the top of this post and the design link will be emailed to you.
In the download folder, there are heart cut files in the SVG and DXF folders.
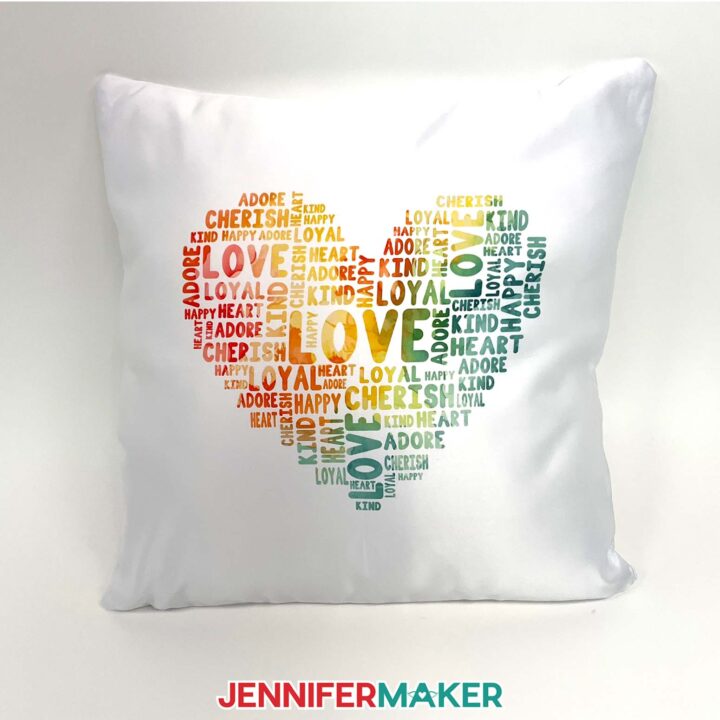
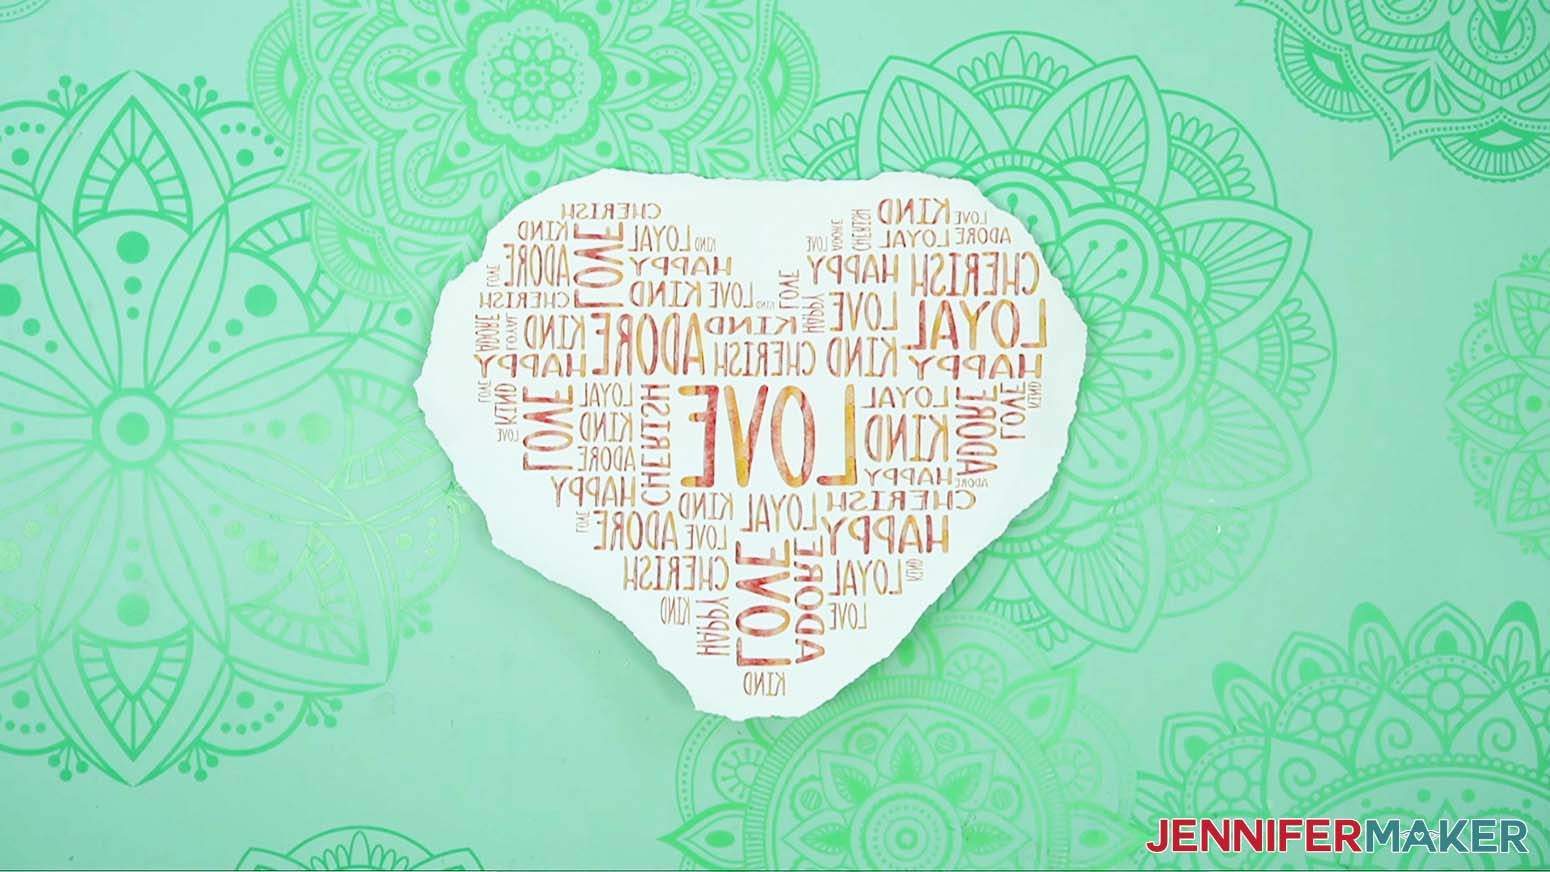
There are some pre-made designs in the PNG and PDF folders: a butterfly with a watercolor gradient, one with a solid rainbow gradient, and a heart with a watercolor gradient.
I’ll show you how to use the heart in the SVG folder to create similar designs in Cricut Design Space.
TIP: If you’re not sure how to upload, go to jennifermaker.com/svgs to learn how to unzip and upload files to Cricut Design Space.
STEP 2: PREPARE AND PRINT YOUR DESIGNS
MEASURE YOUR BLANK
You can check the pillowcase’s packaging for dimensions, but it’s always good to measure the height and width just in case. Mine is about 15.5” square, which works well for a design in the middle.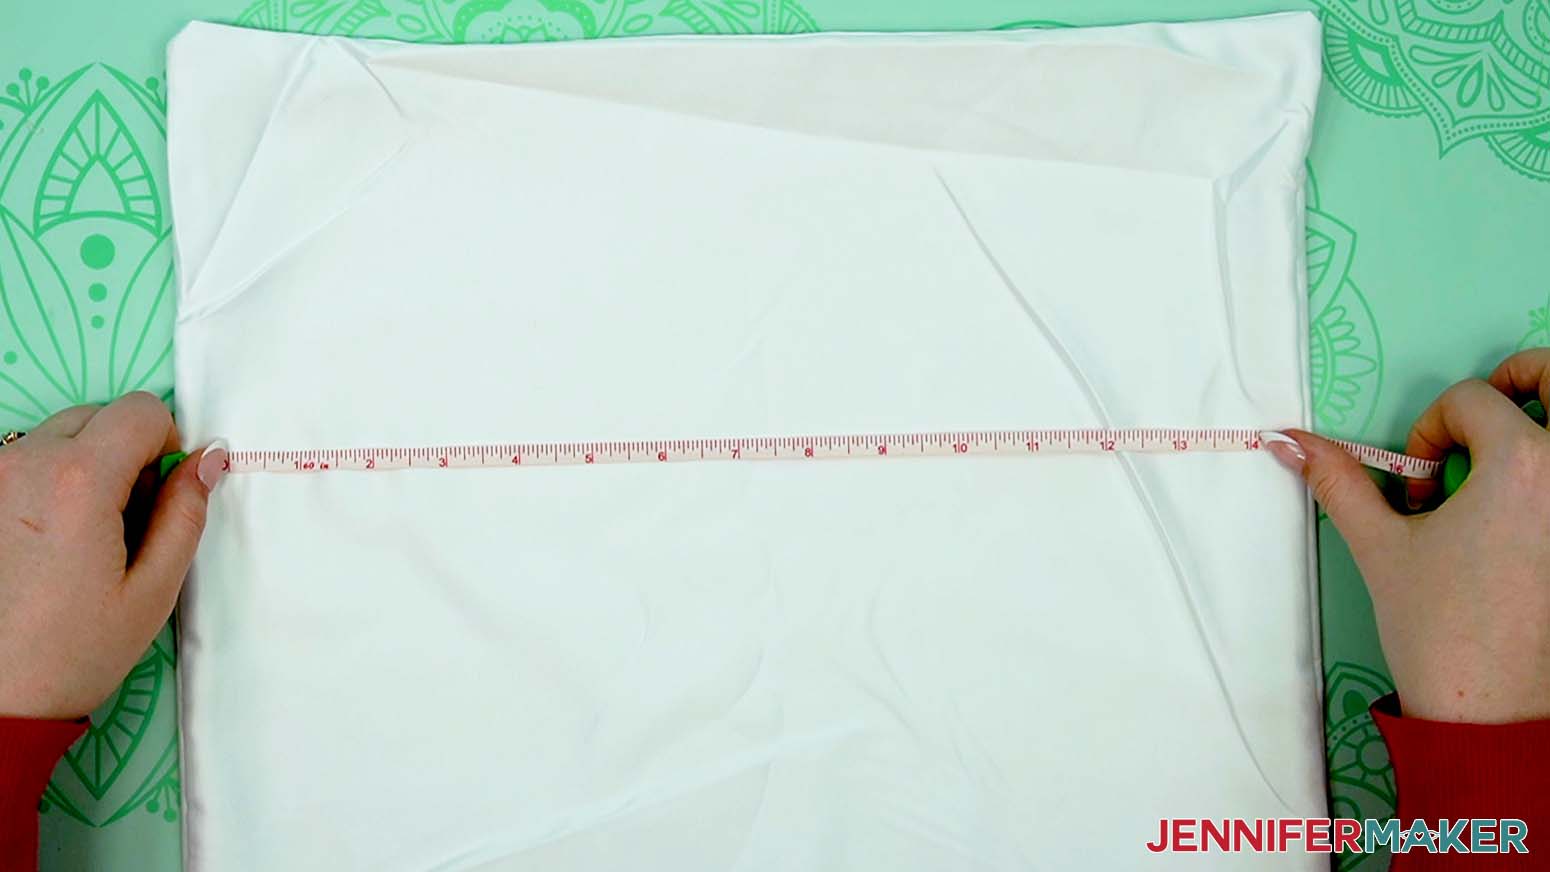
CRICUT DESIGN SPACE
- Open Cricut Design Space and click “New Project.”
- Click “Upload” and then “Upload Image.”
- Click “Browse.”
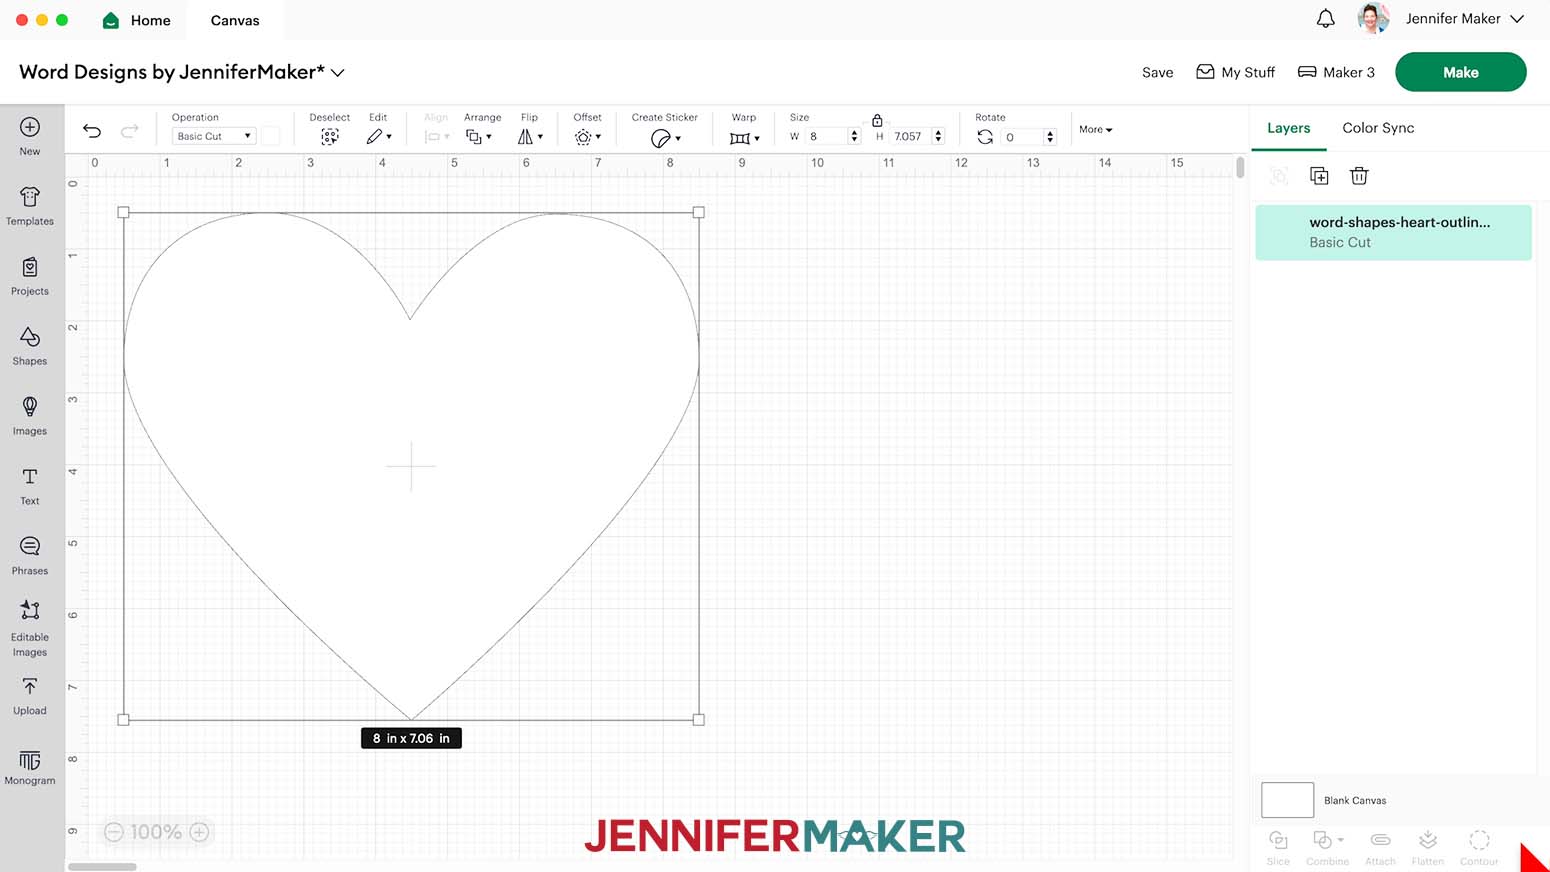
- Select the heart outline SVG.
- Click “Upload.”
- On the next screen, select your design and click “Add to Canvas.”

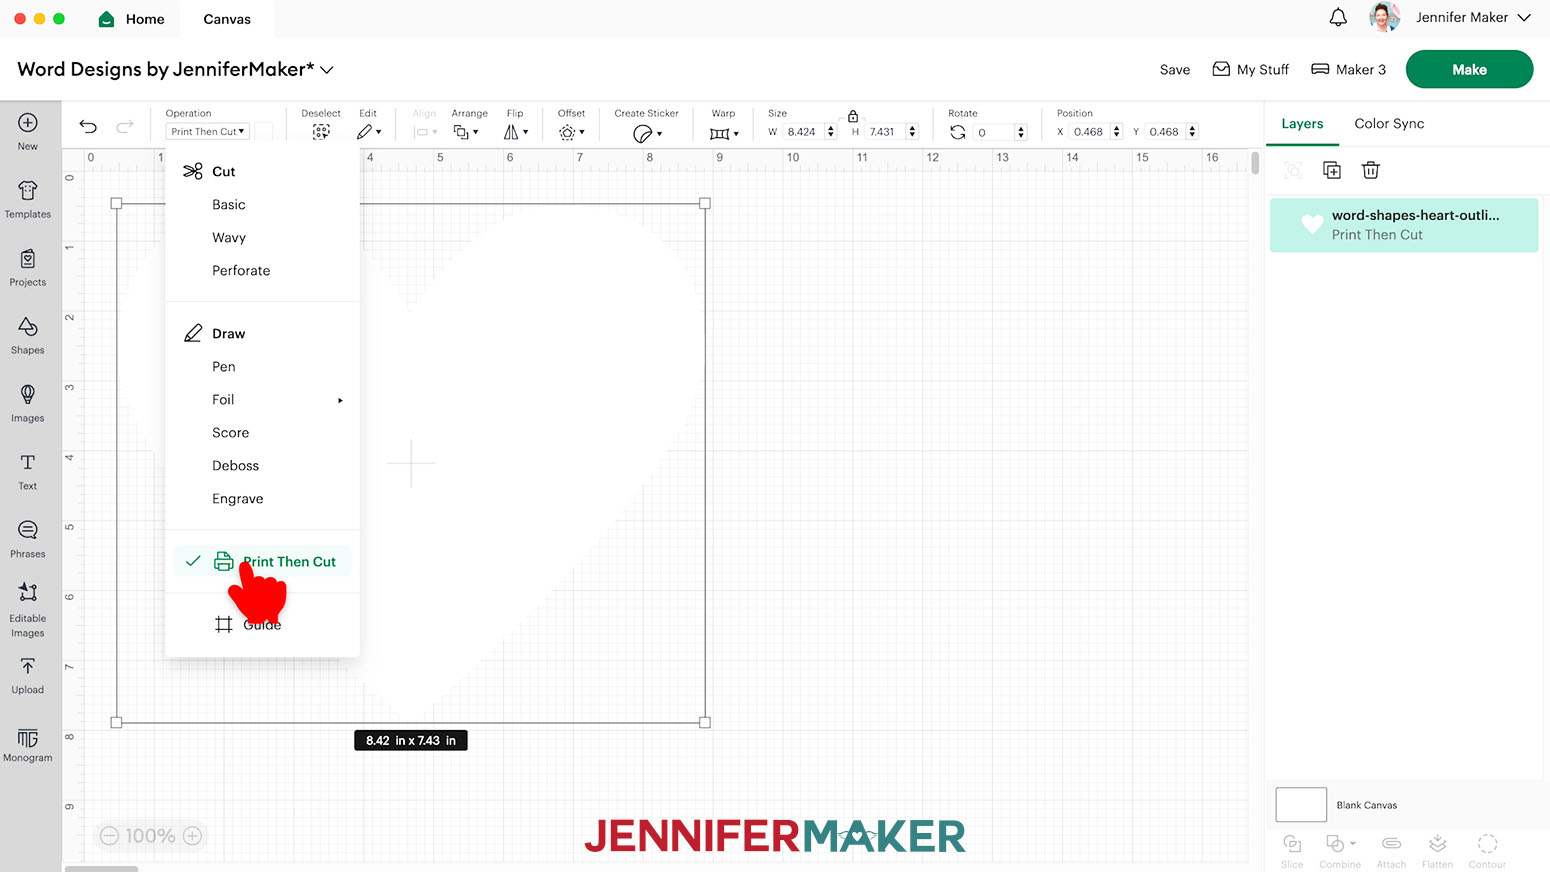
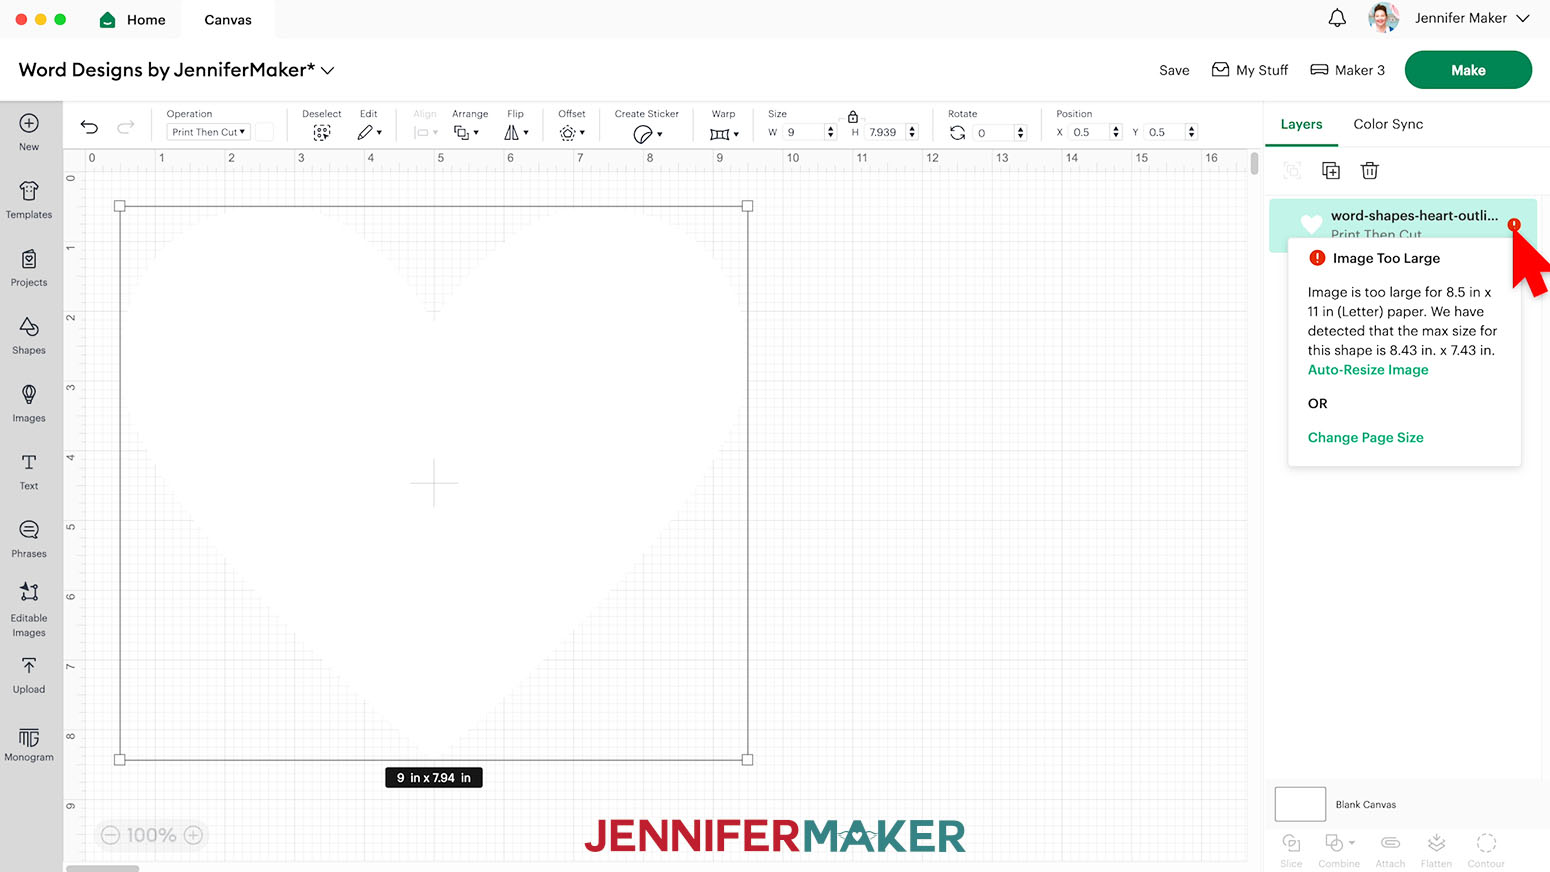
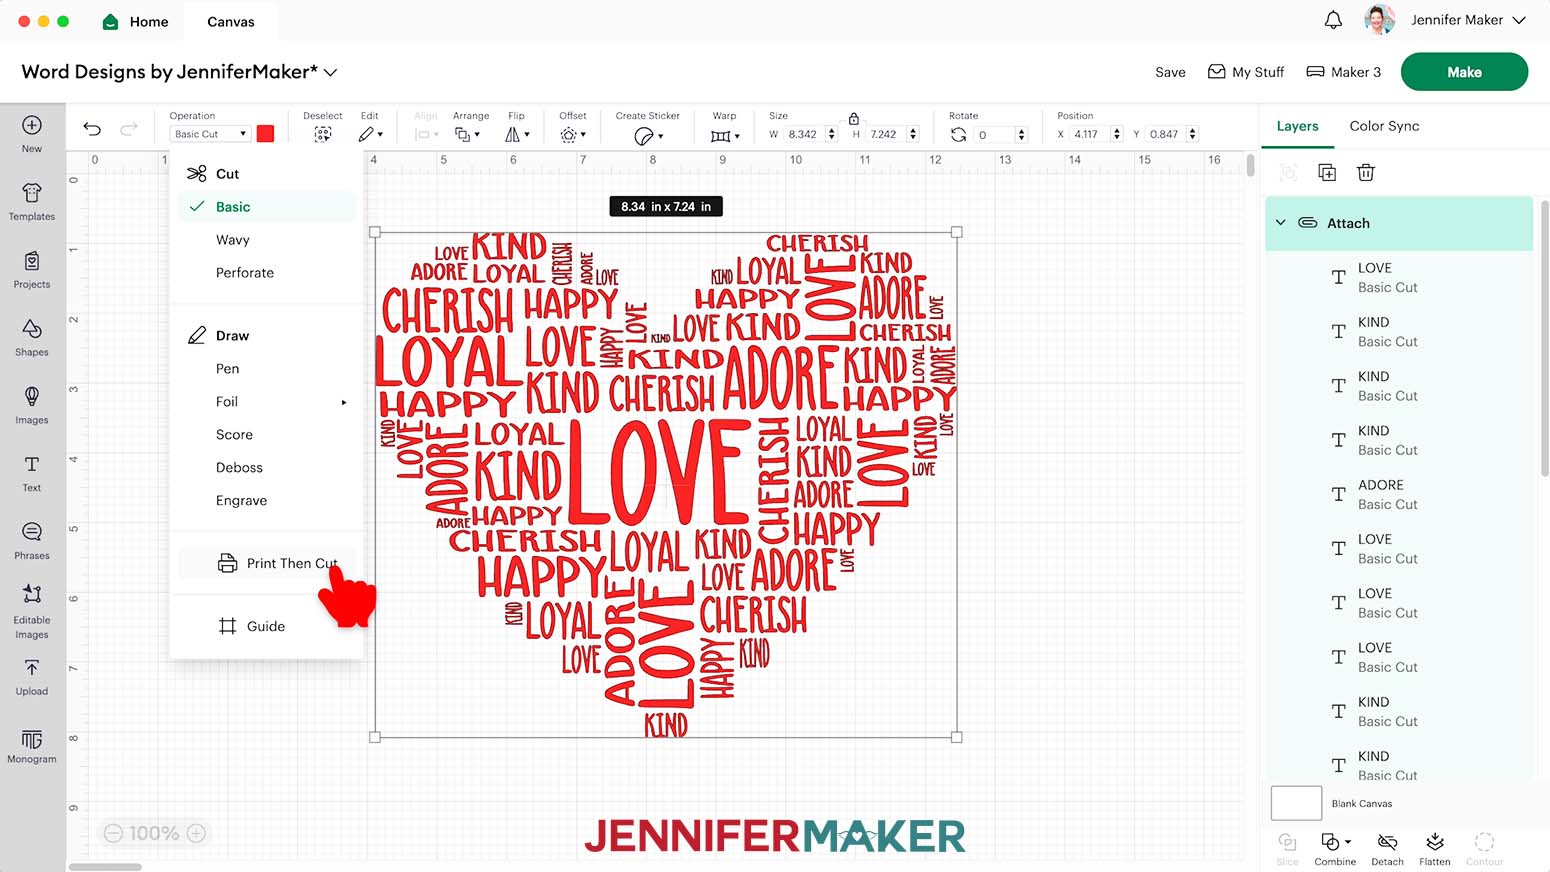
- The final design will be created using the print portion of Design Space’s Print Then Cut feature, which has size limitations. To make sure your design will print, click the “Operation” menu and select “Print Then Cut” from the dropdown options.
- With the Lock icon closed, adjust the design’s dimensions to fit the area you want to decorate.
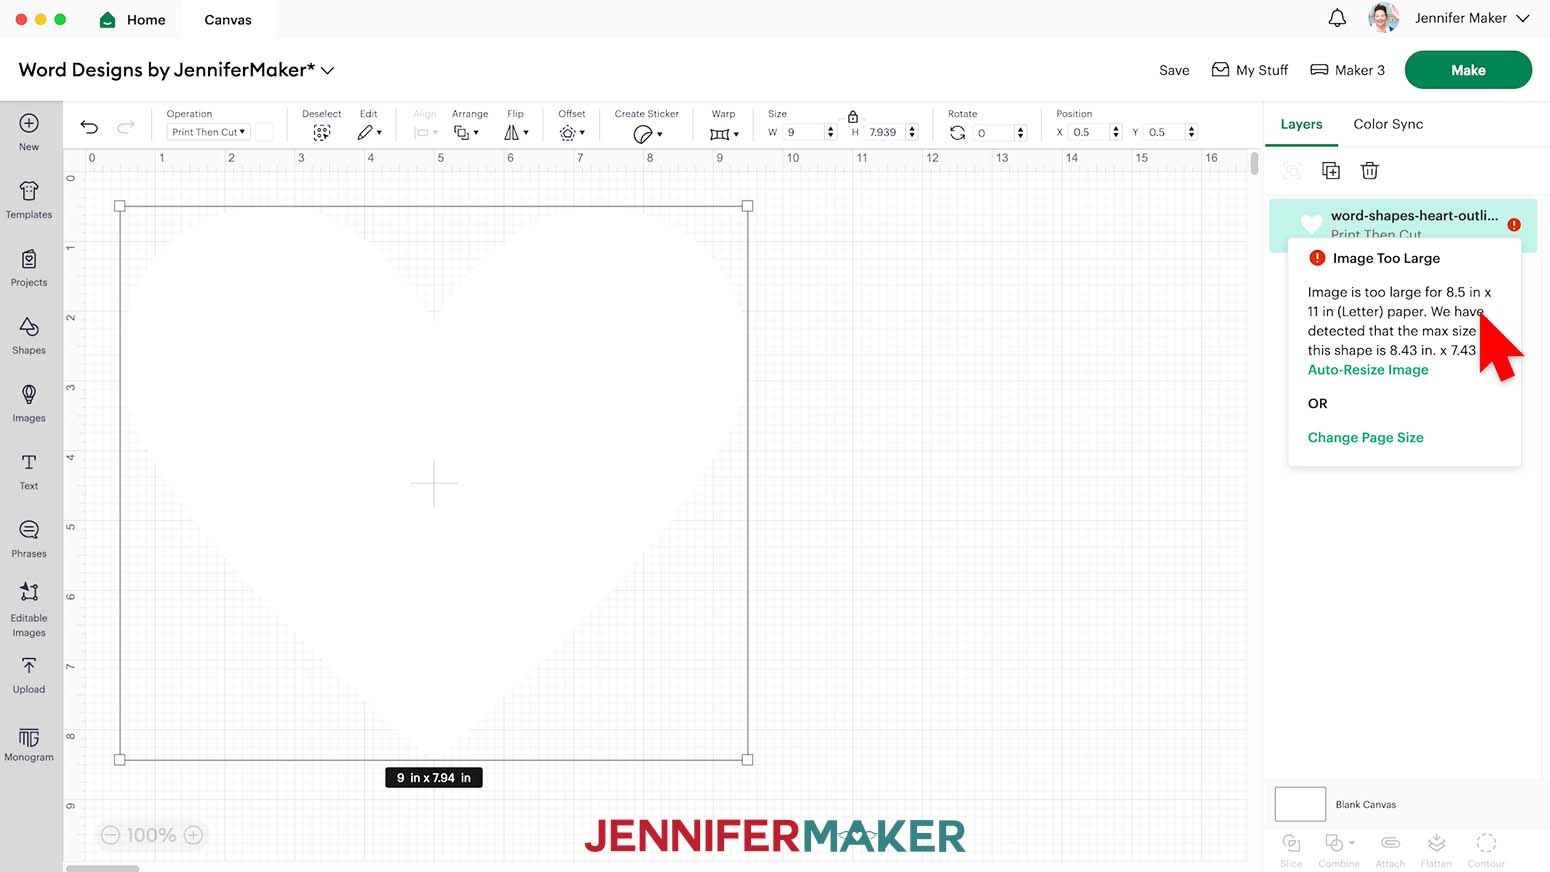
- If there is a red icon in the Layers Panel, click it and make sure the paper size mentioned matches your material. If not, click “Change Page Size” and adjust it. I’m using 8.5” x 11” paper.
- If the warning icon is still there, click it and select “Auto-Resize Image” to automatically make it the largest dimensions possible.
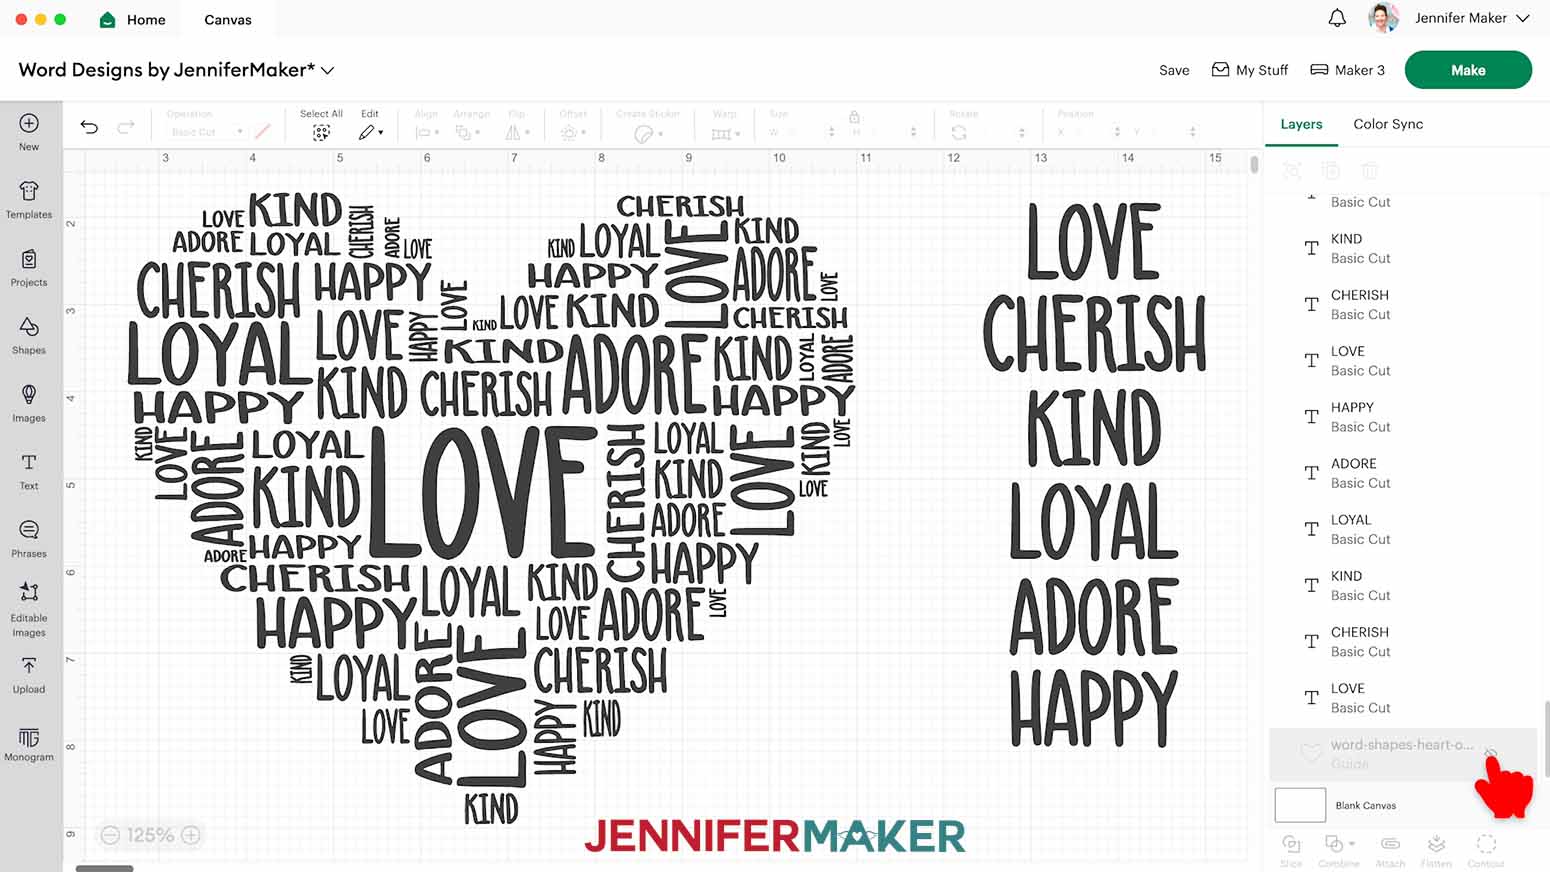
- Once the shape is the correct size, click the “Operation” menu and select “Guide,” so you’ll have a see-through shape that isn’t part of the final design.
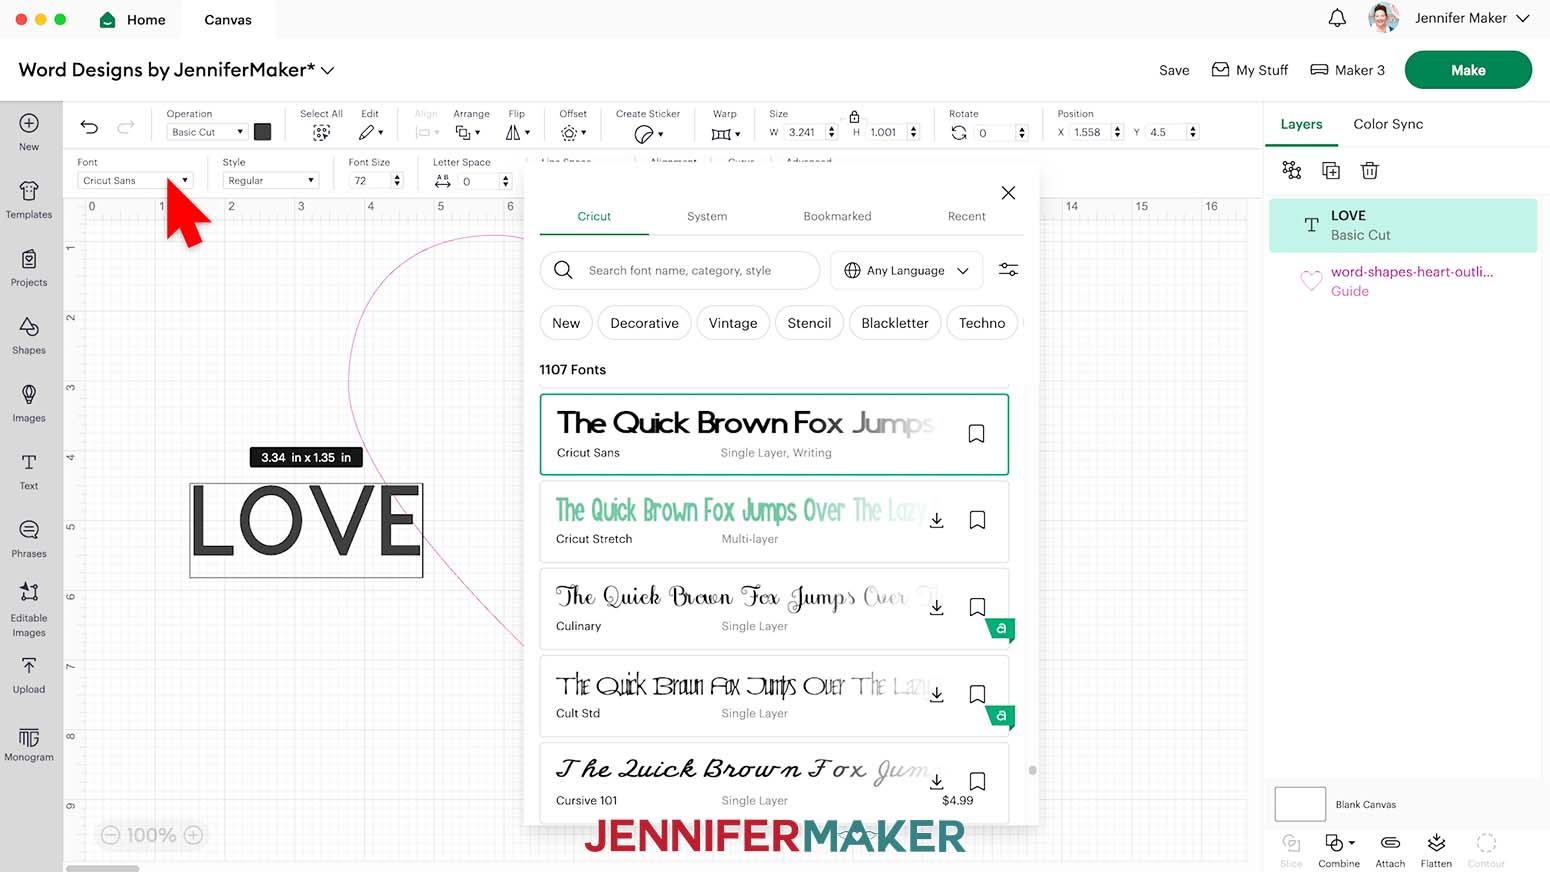
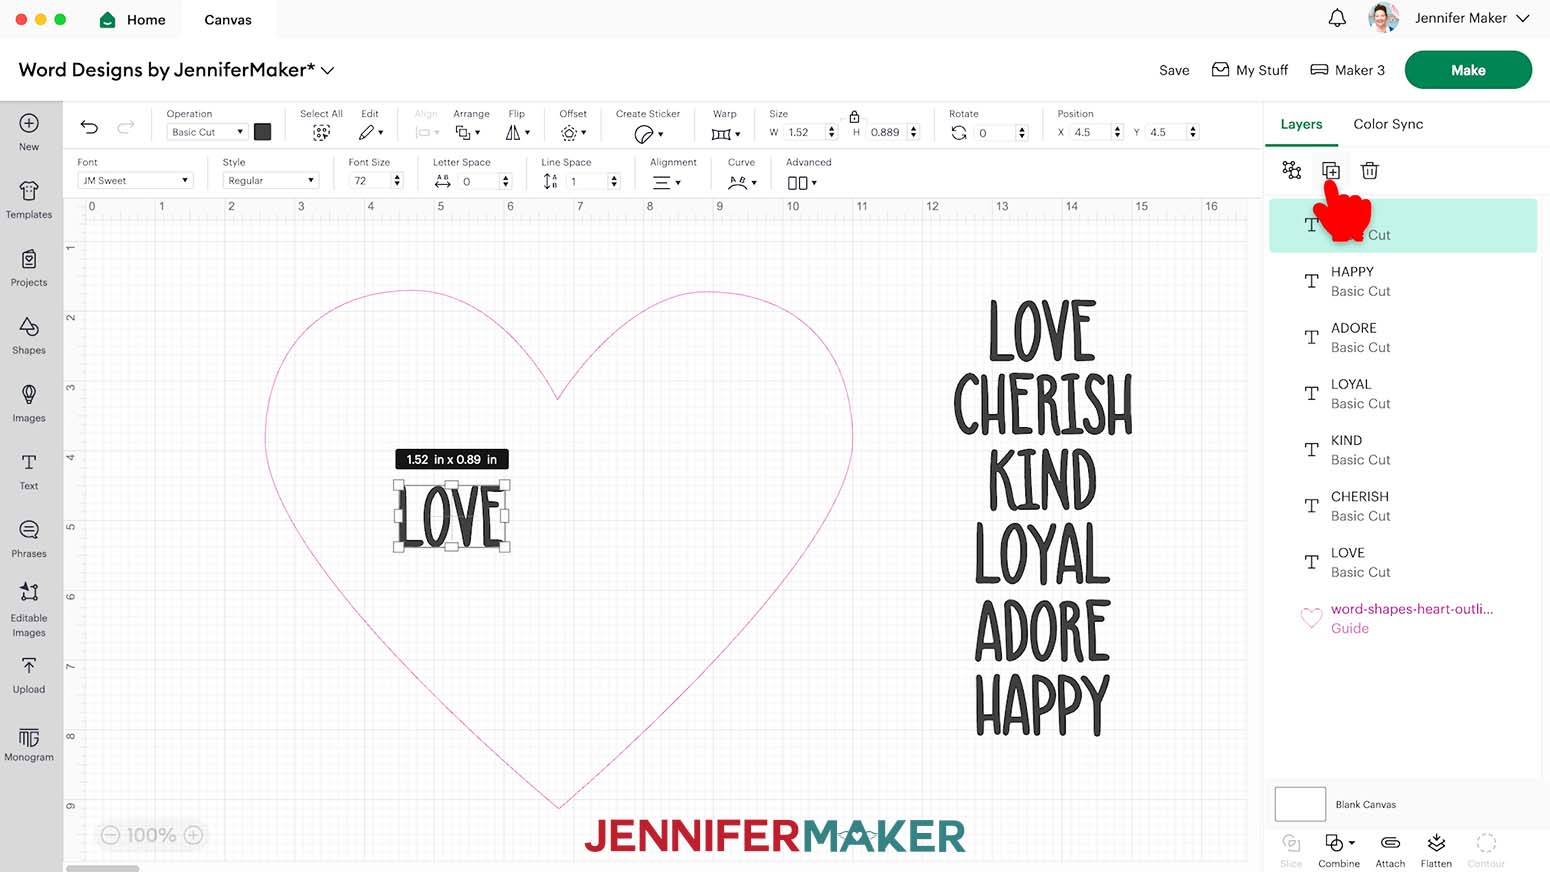
- Click the “Text” icon.
- Type the first word you want to use.
TIP: Depending on your typeface choice, using all caps might fill the rectangle of your word better. - Select the “Font” menu.
- Click “System” to see your added typefaces and search for “JM Sweet,” then click it.
- Close the Font pop-up.
- Drag the word to the side.
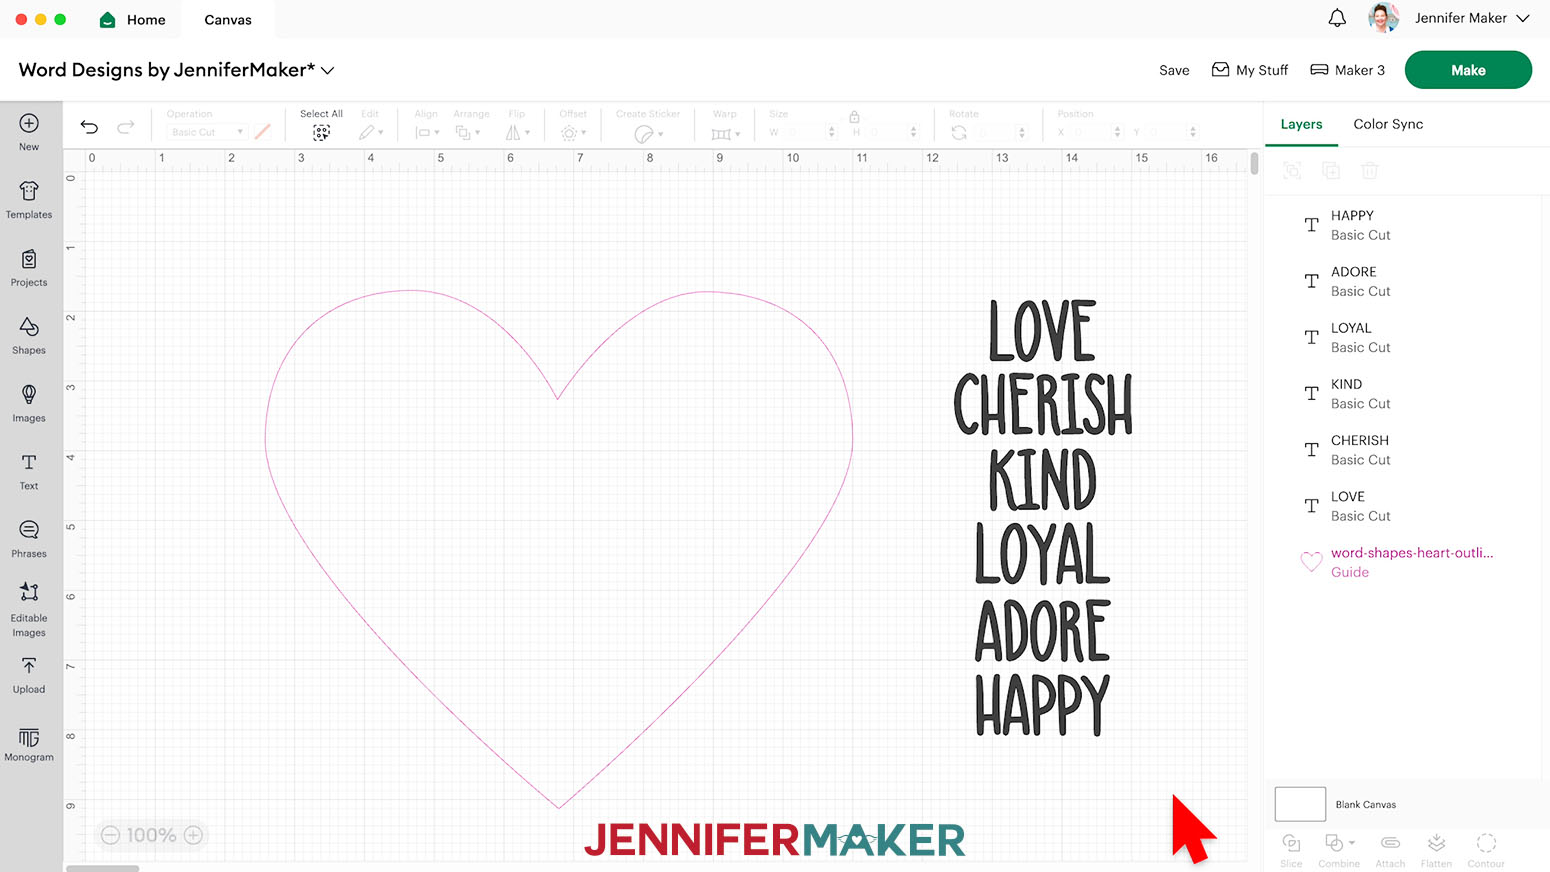
NOTE: Don’t worry about the text size yet. - Click “Duplicate” to make a new text box with the same settings.
- Double-click the new text box to activate editing mode, then type the next word.
TIP: It’s helpful to have a mix of words that have different lengths. A short word can help fill in small spots where you need just a little extra space to create the shape’s outline. - Drag the new word below the last one on the Canvas.
NOTE: You’ll use many copies of each word, so keep the originals at the side for future use. - Use Steps 18-20 to add all the words you want to use to the Canvas in a list.
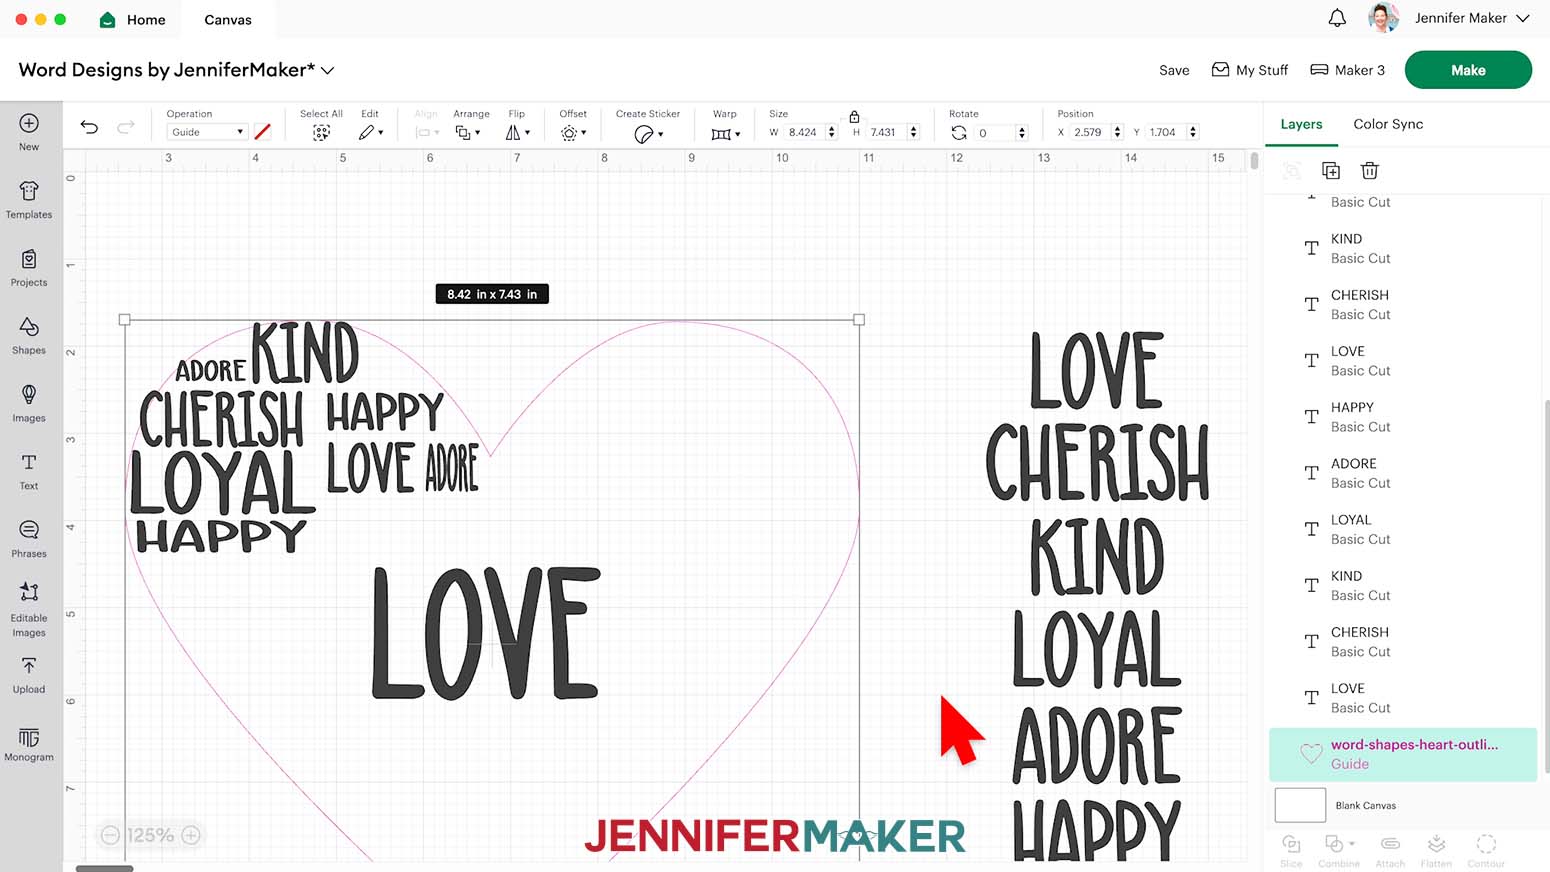
TIP: Check your spelling now! - Select the longest word, or the one you want to be the focus.
- Click “Duplicate” to make a copy to use in the design.
- Drag the main word to the largest section of the shape.
- With the Lock icon closed, drag a corner of the word’s bounding box to resize it to fit in the shape.
NOTE: You can make the word completely span the shape, or leave some space on either side to add more words later to fill in the space. - Use Steps 21-25 to place a copy of each word in your shape, varying their sizes as you prefer.
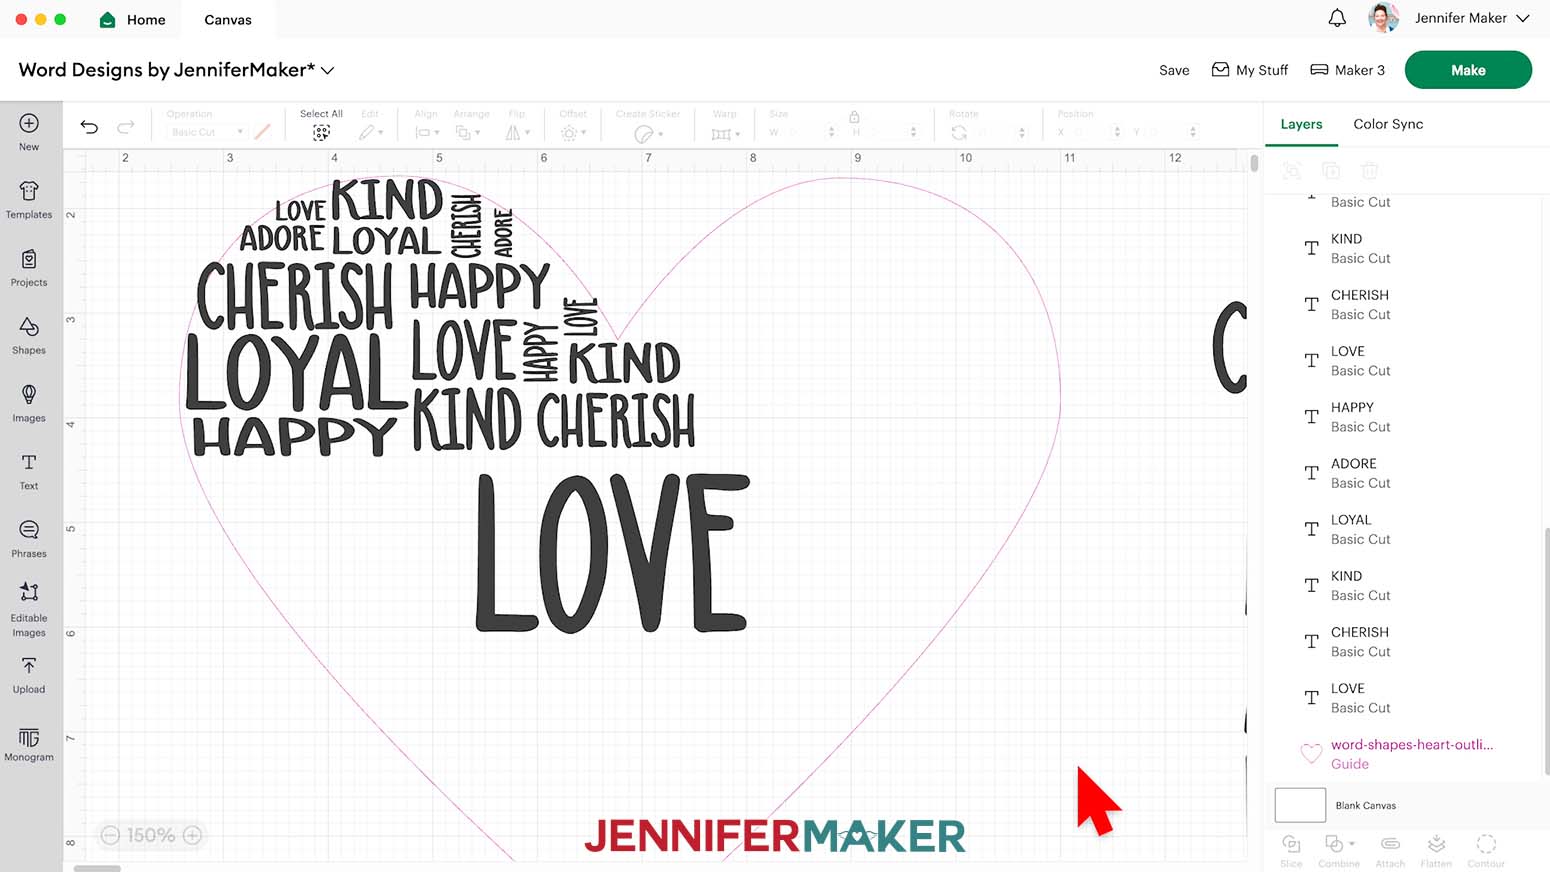
NOTE: If a word gets very close to the shape’s edge, it’s ok, you can fine tune the placement once you have more words in place. - Pick an open area between the Guide’s edge and a word you’ve positioned.
- Use Steps 21-25 to place smaller copies of each word in the open area, filling from an edge to the closest large word in place. Try to position your words to match the shape’s outline as much as possible. You can adjust each word’s dimensions as you go to fill in spaces, and move the existing text as needed to create the look you want.
TIP: As you get into filling smaller spaces, opening the Lock icon to adjust a word’s height and width independently can make it easier. - After you’ve filled in one section, move to the next open area and fill from that edge to a positioned word using the same techniques.
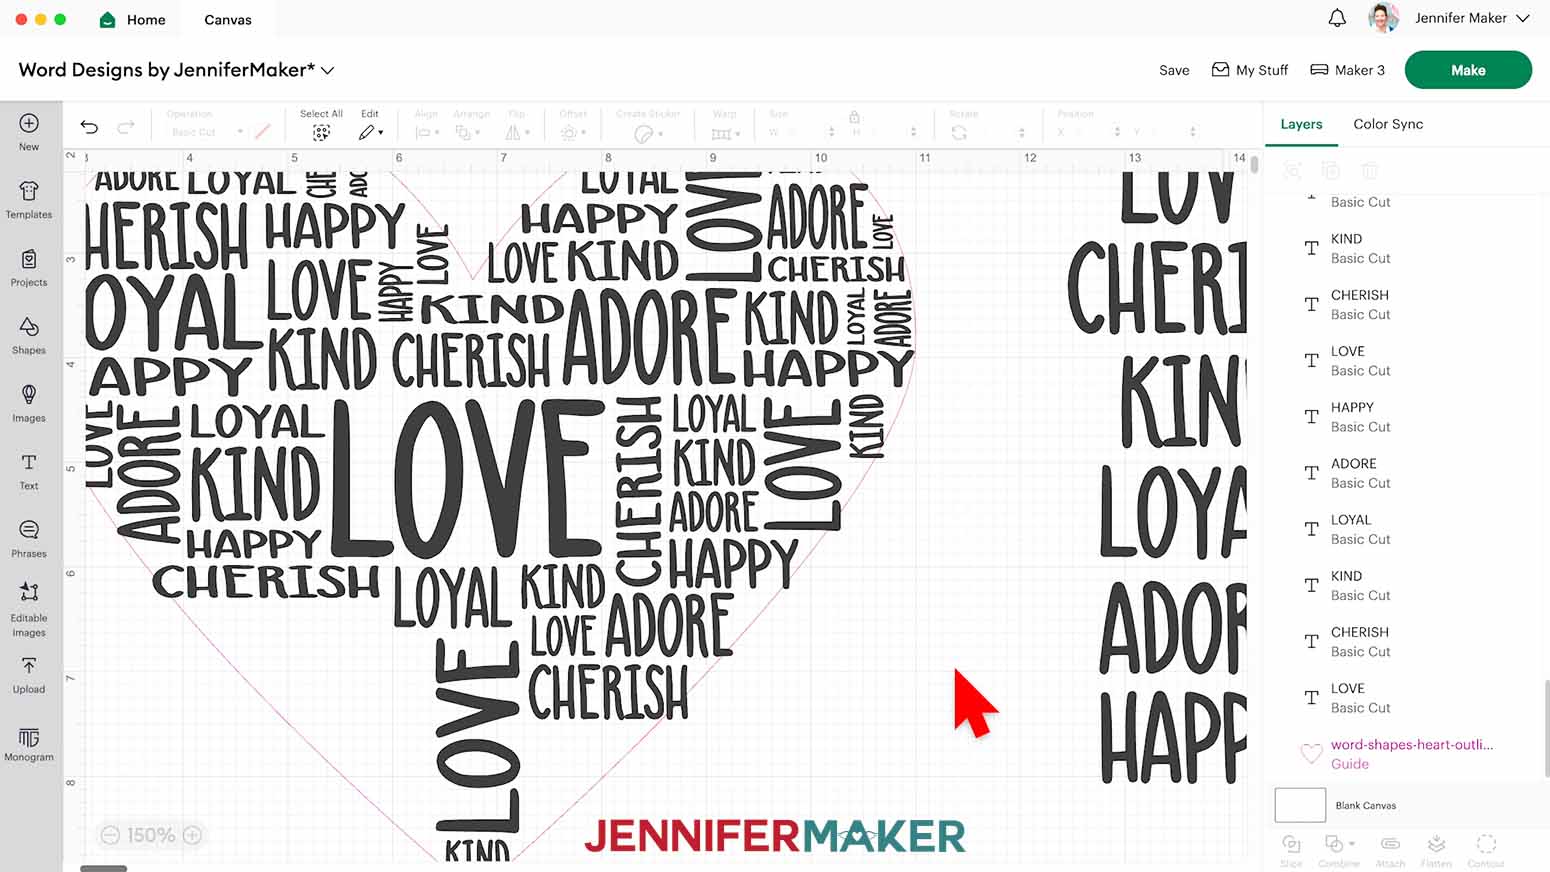
- Use the same technique to fill the rest of the Guide shape with words.
NOTE: You may need to adjust some words where the filling areas meet, so take your time! - Check that the shape’s edges are still recognizable when it’s made with the words by clicking the Eye icon in the Guide Layer to hide it. If the edges don’t look right, click the Eye icon again to show the shape and adjust the text in the problem area.
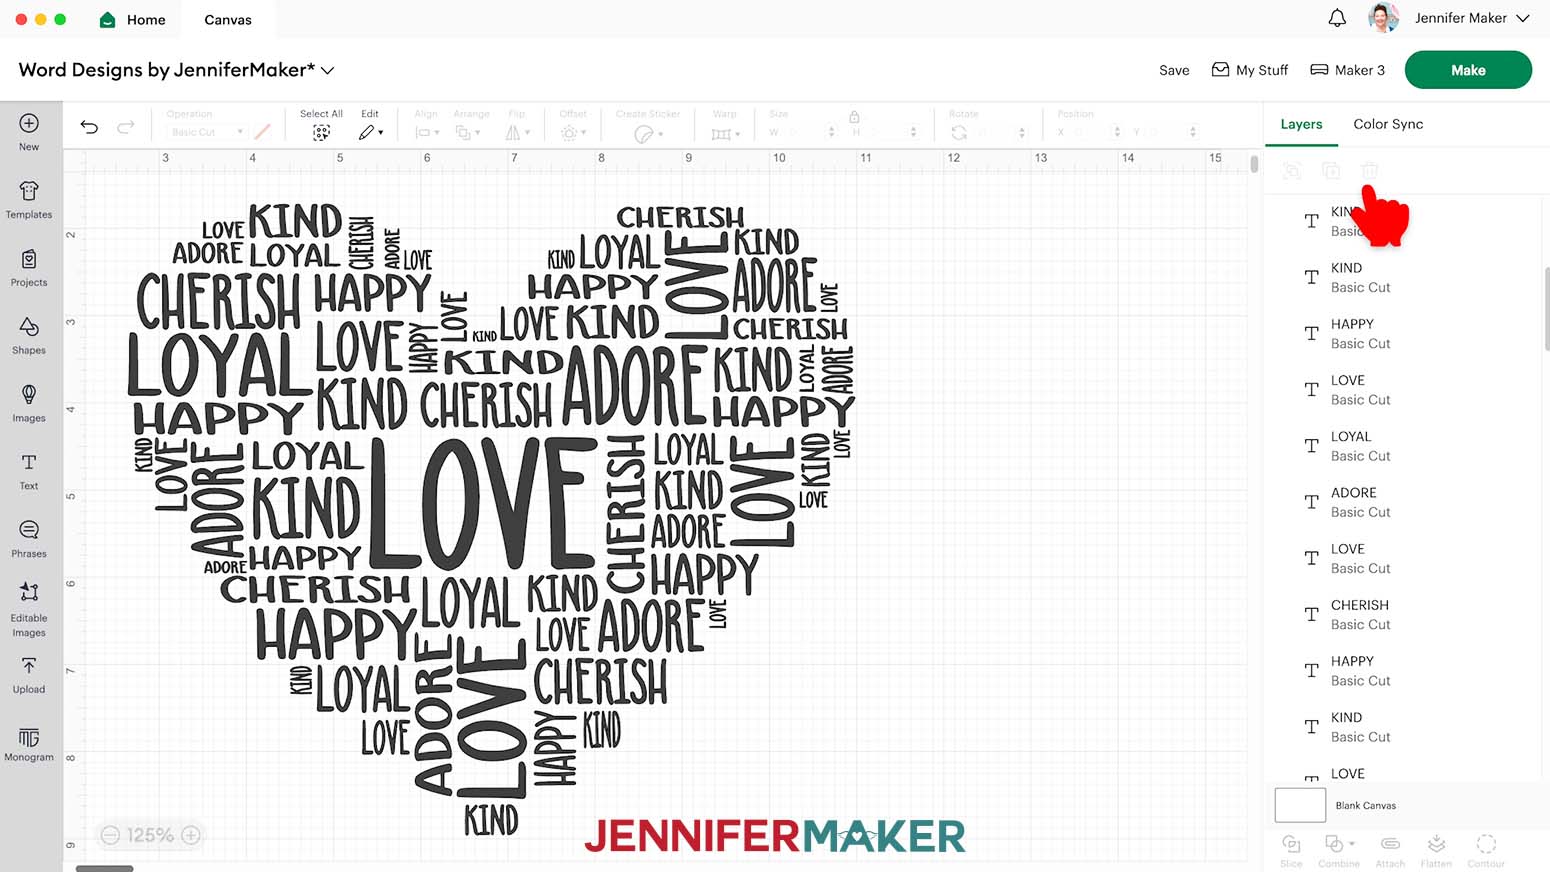
- When everything looks correct, delete the original list of words.
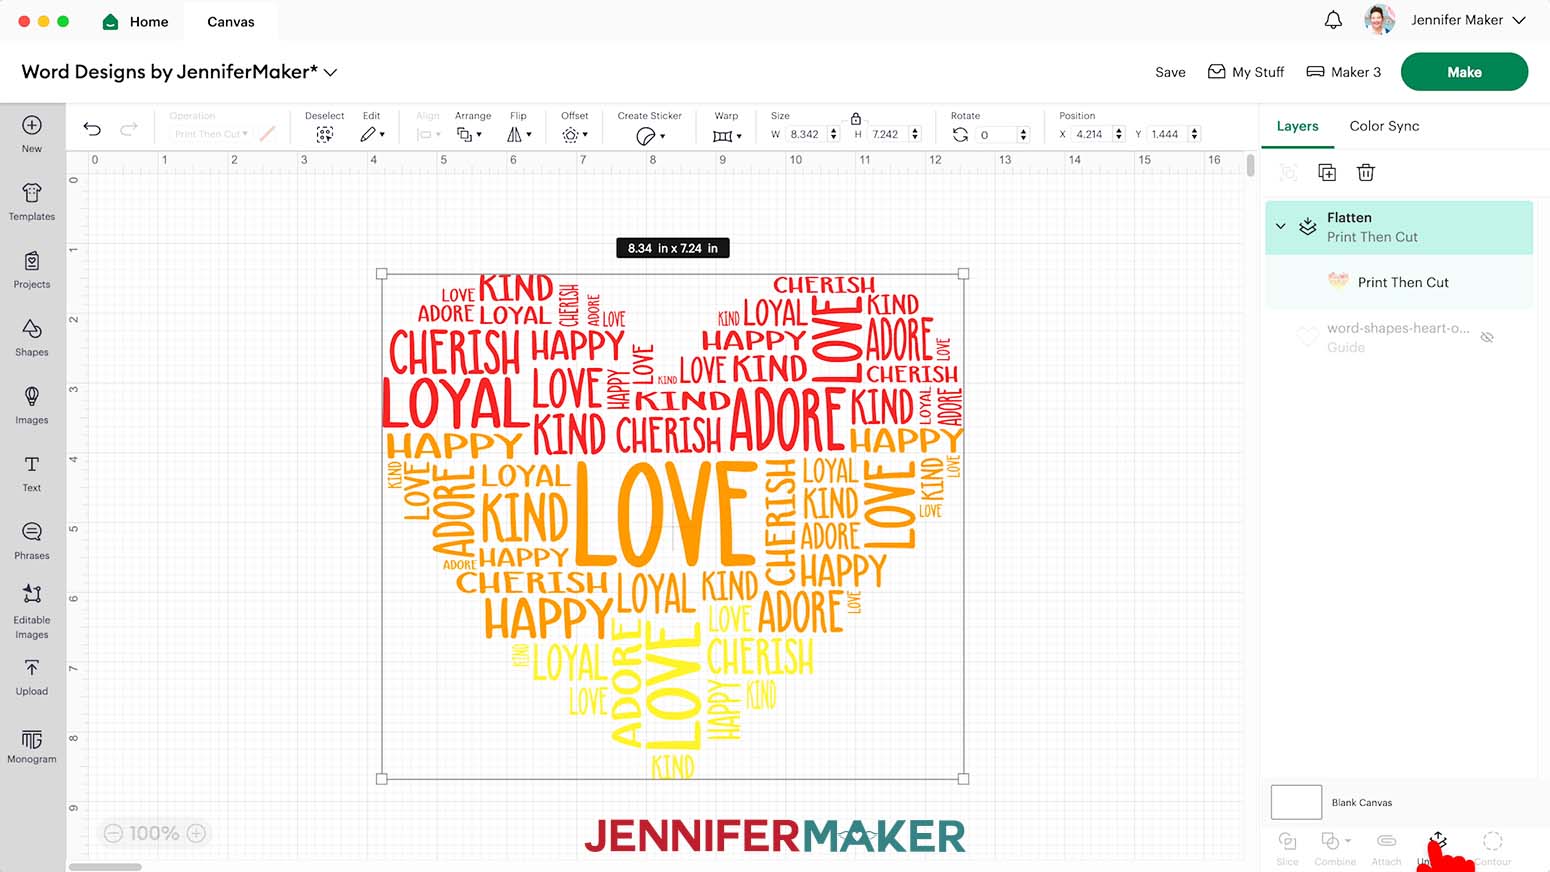
- Click the Eye icon for the Guide Layer to hide it.
- Your base design is almost ready, but you must pick a color fill option before making it a finished sublimation project.

OPTION 1: SINGLE COLOR
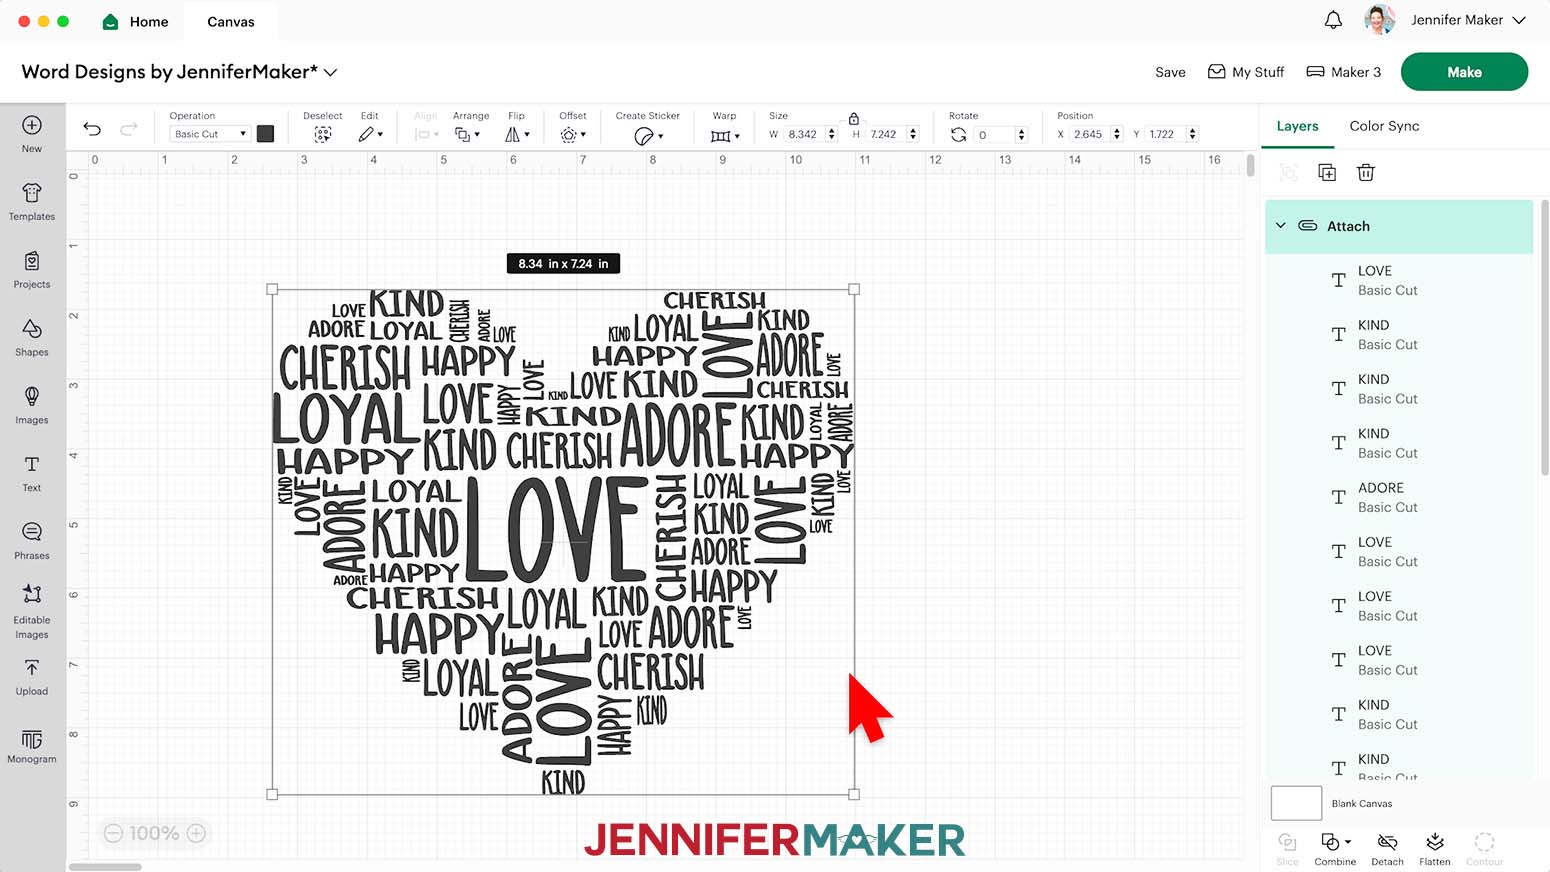
- If you want to make your design using a plain color, click “Select All” in the top menu.
- Click “Attach” to put all the words into a single Operation group.
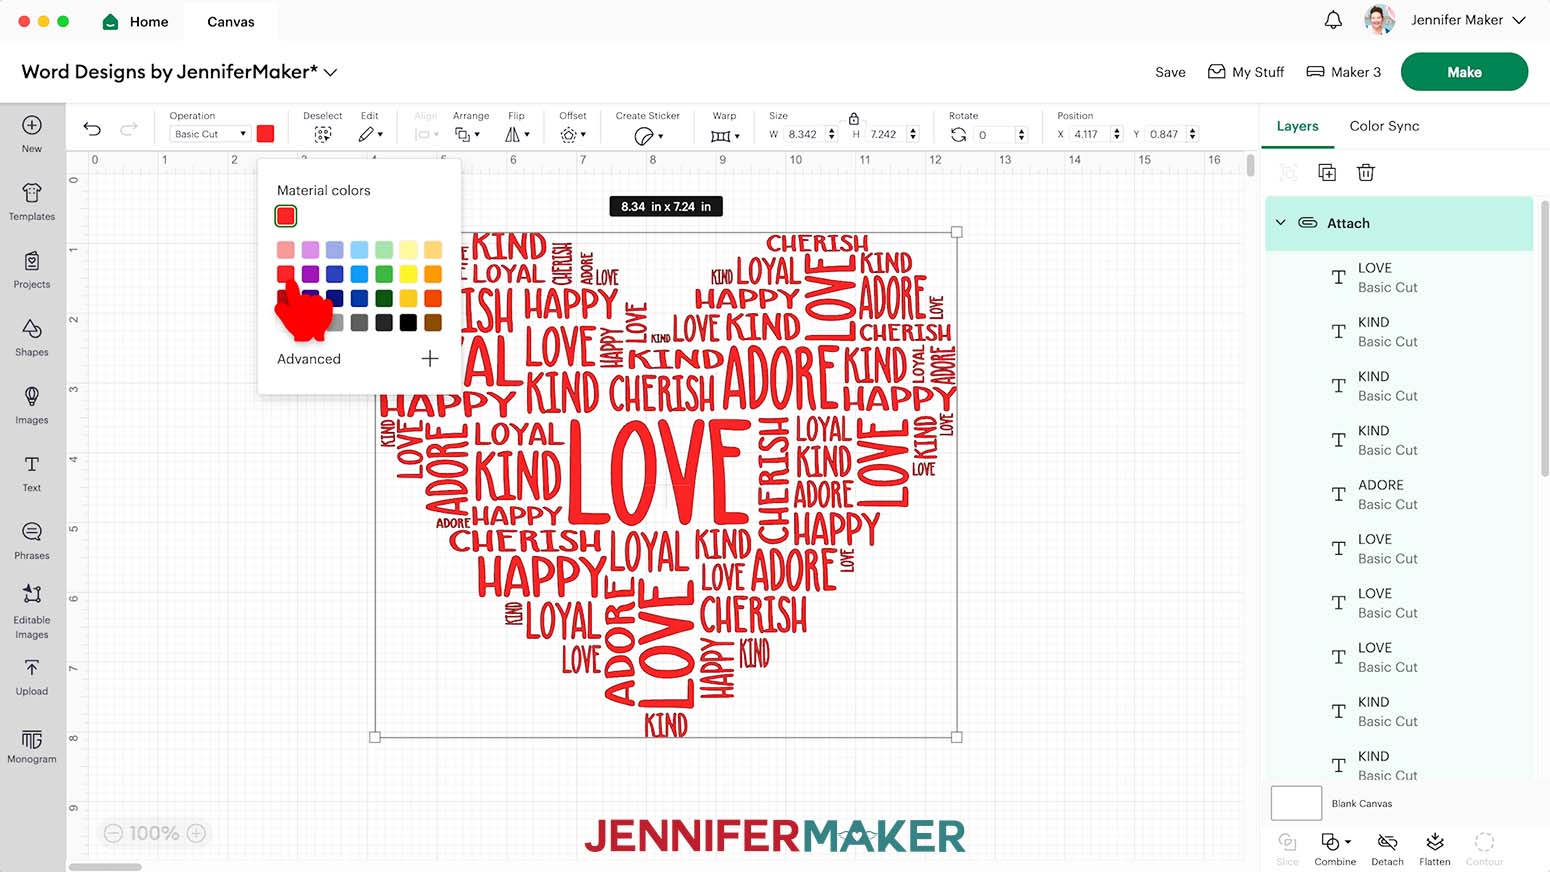
- Click the Color Box next to the “Operation” menu and select the color you want for your design.
- With the entire design selected, click the “Operation” menu and select “Print Then Cut.”
- If the red warning icon reappears in your Print Then Cut layer, some of your text may have gone outside the original design. Click the icon and select “Auto-Resize image” to make it fit on your printed sheet again.
- Your single color design is ready for printing.
OPTION 2: MANUAL GRADIENT COLORS
- Decide how many colors you want to use. That’s how many sections you’ll need to divide your design into. I’ll use three: red, orange, and yellow, so I’ll use a third of the design for each color.
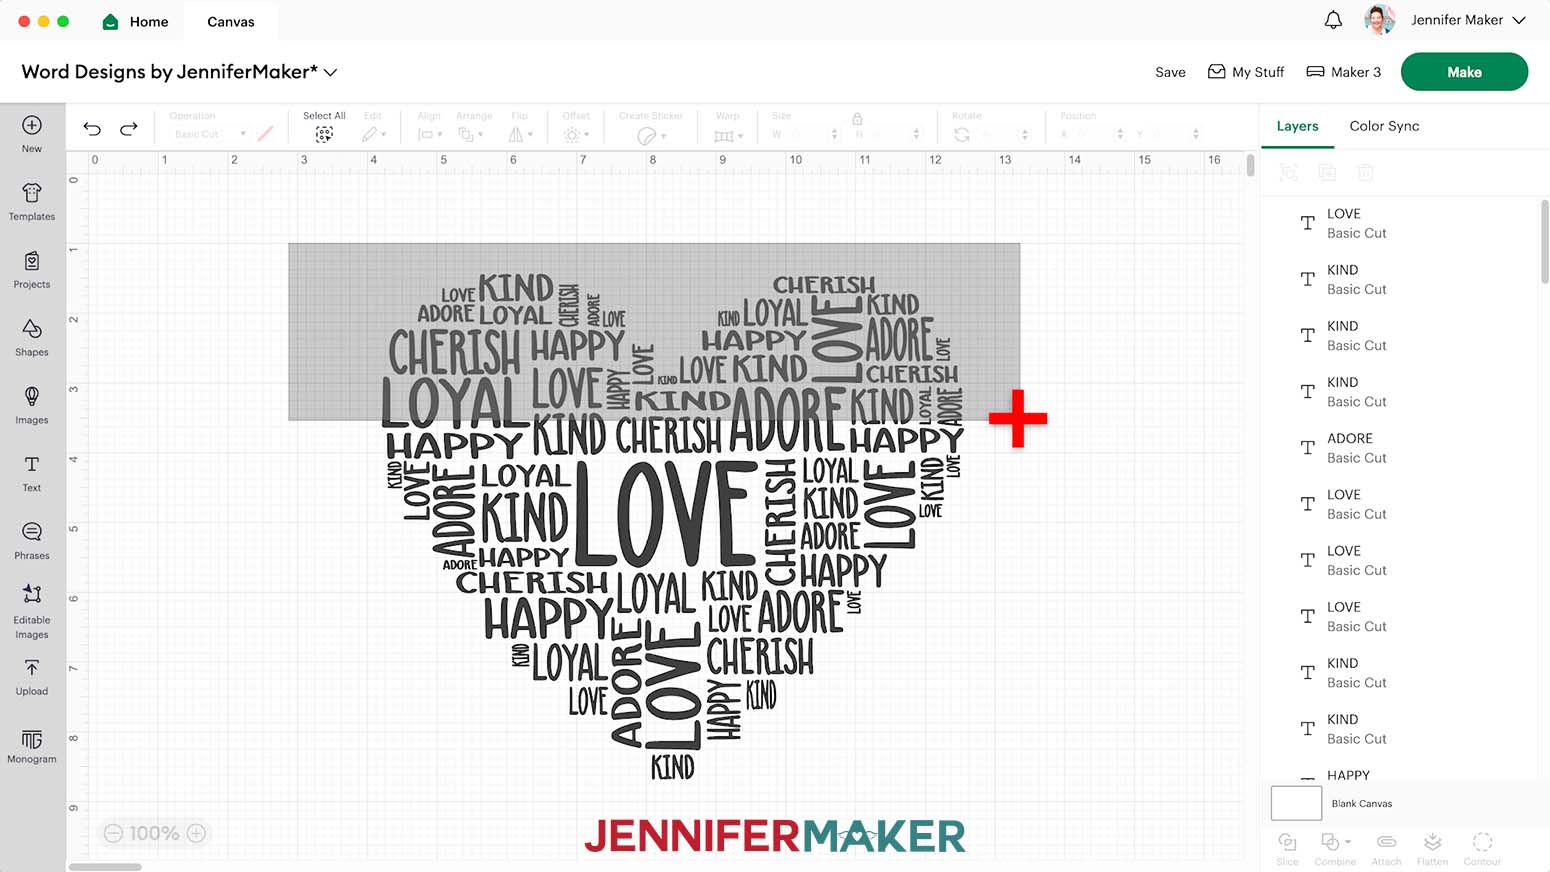
- Click and drag your cursor over the top third of the design, where the text area represents the first color for your gradient.
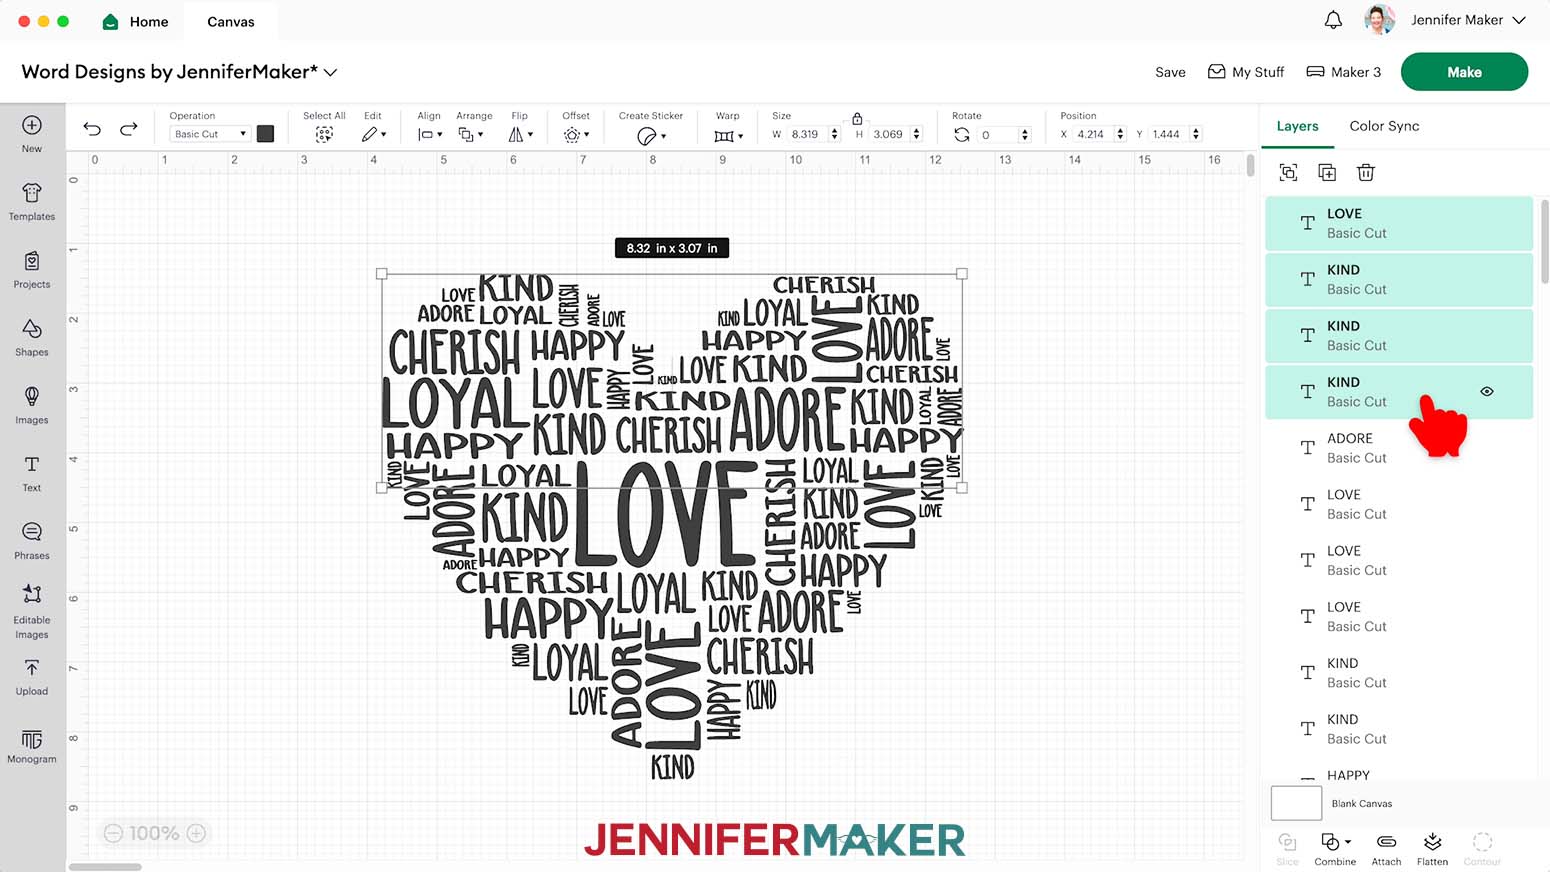
- If there are words selected that you want to make a different color, hold your Command key (Mac) or Control key (Windows) and select the layer in the Layers Panel that you want to remove from the selection.
- Or, if there’s a word you want to add, hold your Shift key and click it in the Layers Panel to add it to the selection.
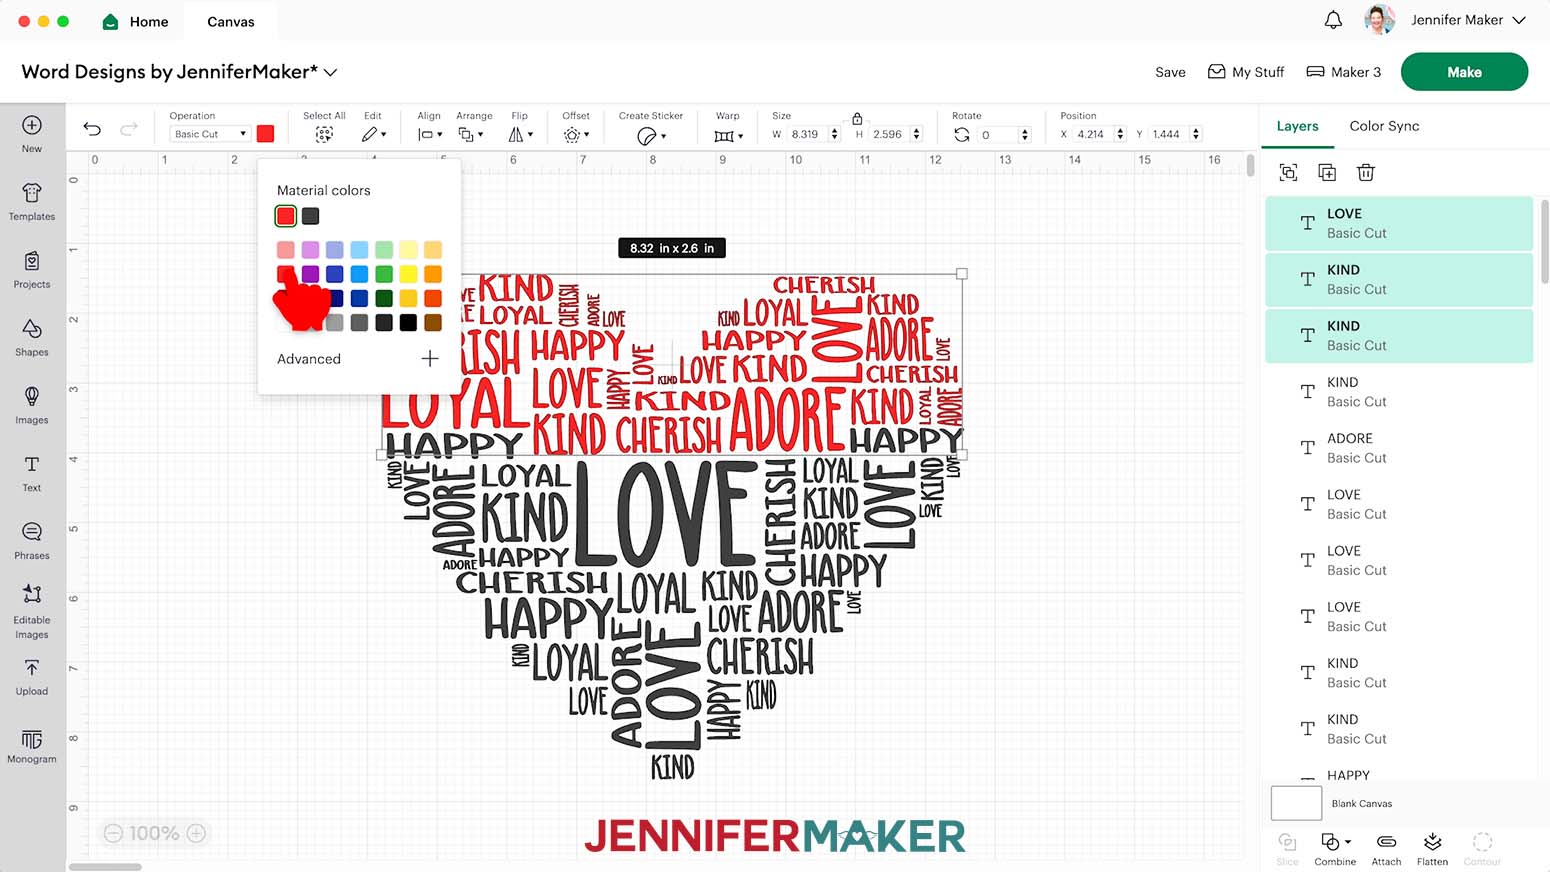
- Click the Color Box and select the first color you want to use. I’ll use red.
- Use Steps 2-5 to select the other sections for your gradient and change their colors. I’ll make the middle orange and the bottom a gold yellow.
- Click “Select All” in the top menu.
- Click “Flatten” to put all the words into a single Operation group.
NOTE: If the red warning icon reappears in your Print Then Cut layer, some of your text may have gone outside the original design. Click the icon and select “Auto-Resize image” to make it fit on your printed sheet again. - Your gradient design is ready for printing.
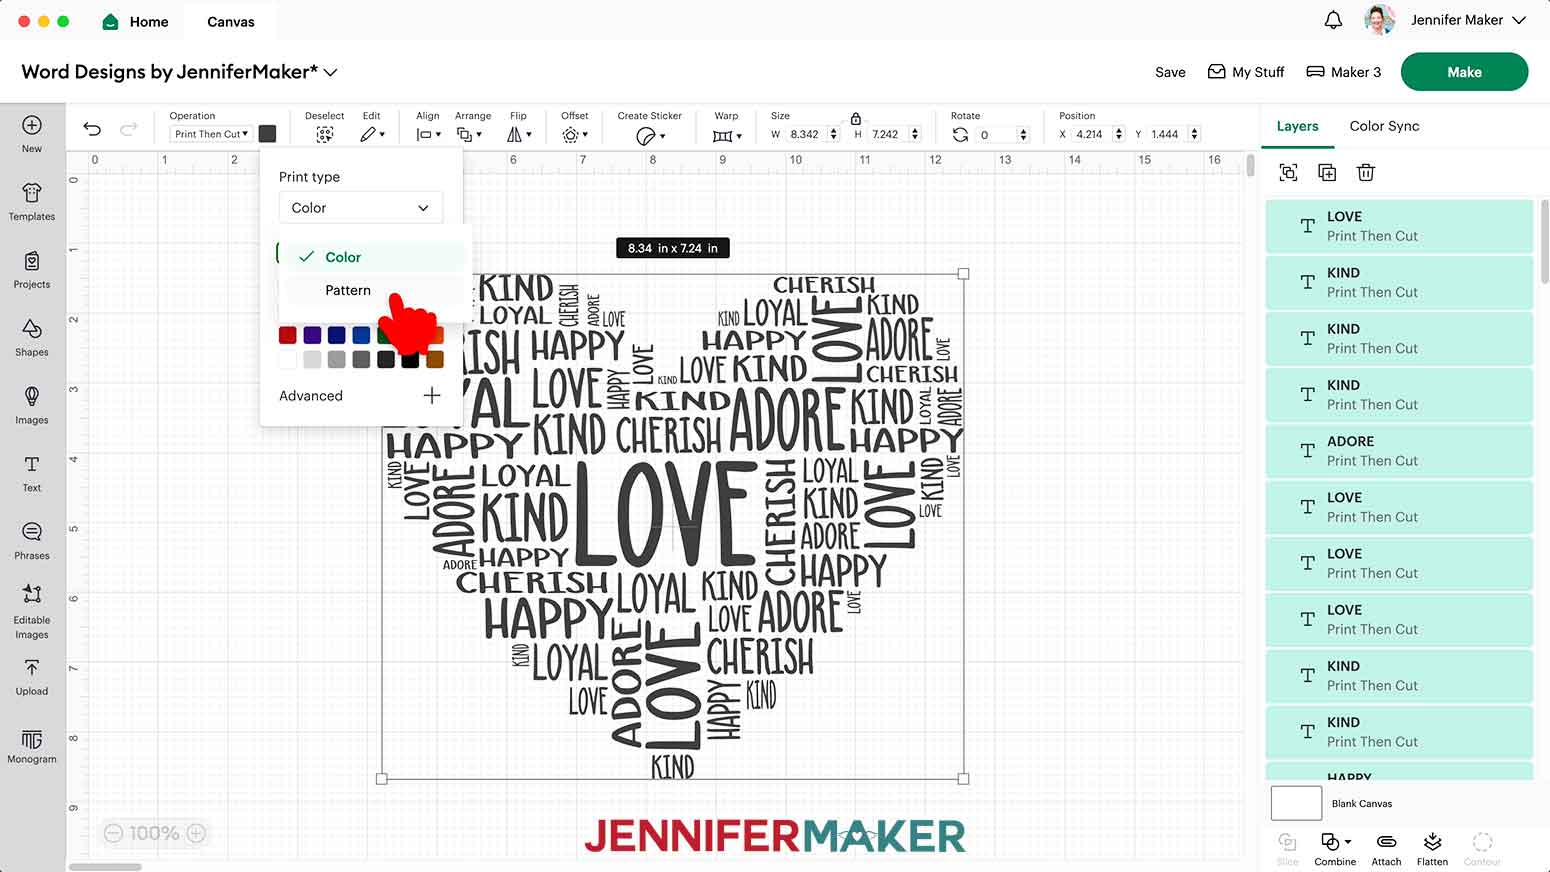
OPTION 3: PATTERN FILL
- Click “Select All” in the top menu.
- Click “Attach” to put all the words into a single Operation group.
- Click the “Operation” menu and select “Print Then Cut.”
- Click the Color Box next to Operation.
- Under “Print Type” select “Pattern.”
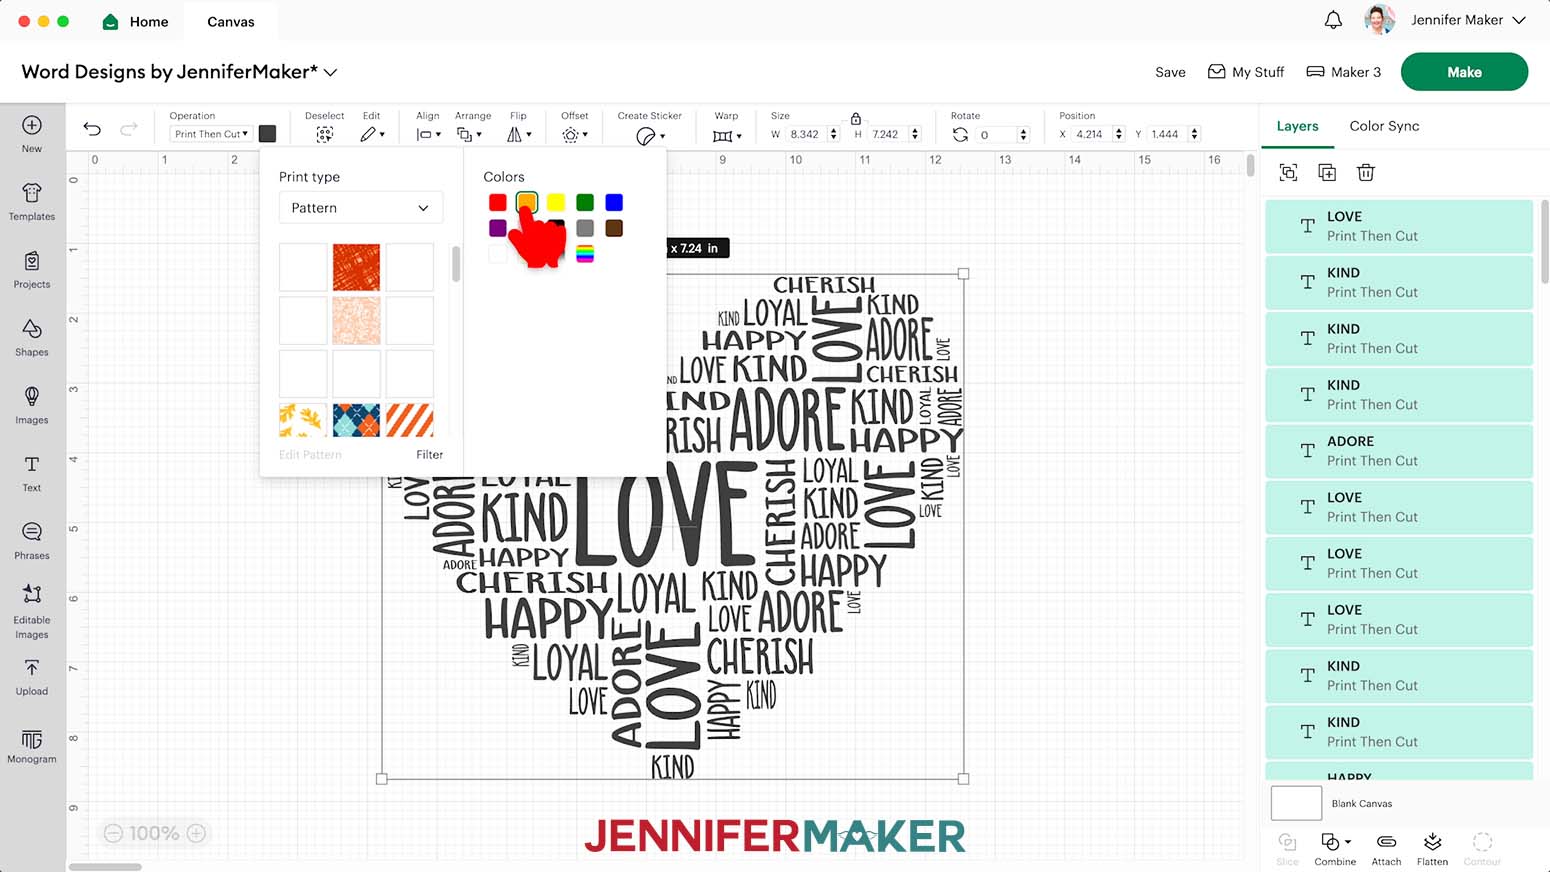
- Click “Filter” and pick a color to explore different Pattern options.
- Select a Pattern.
- Click off of the design so the Pattern can render.
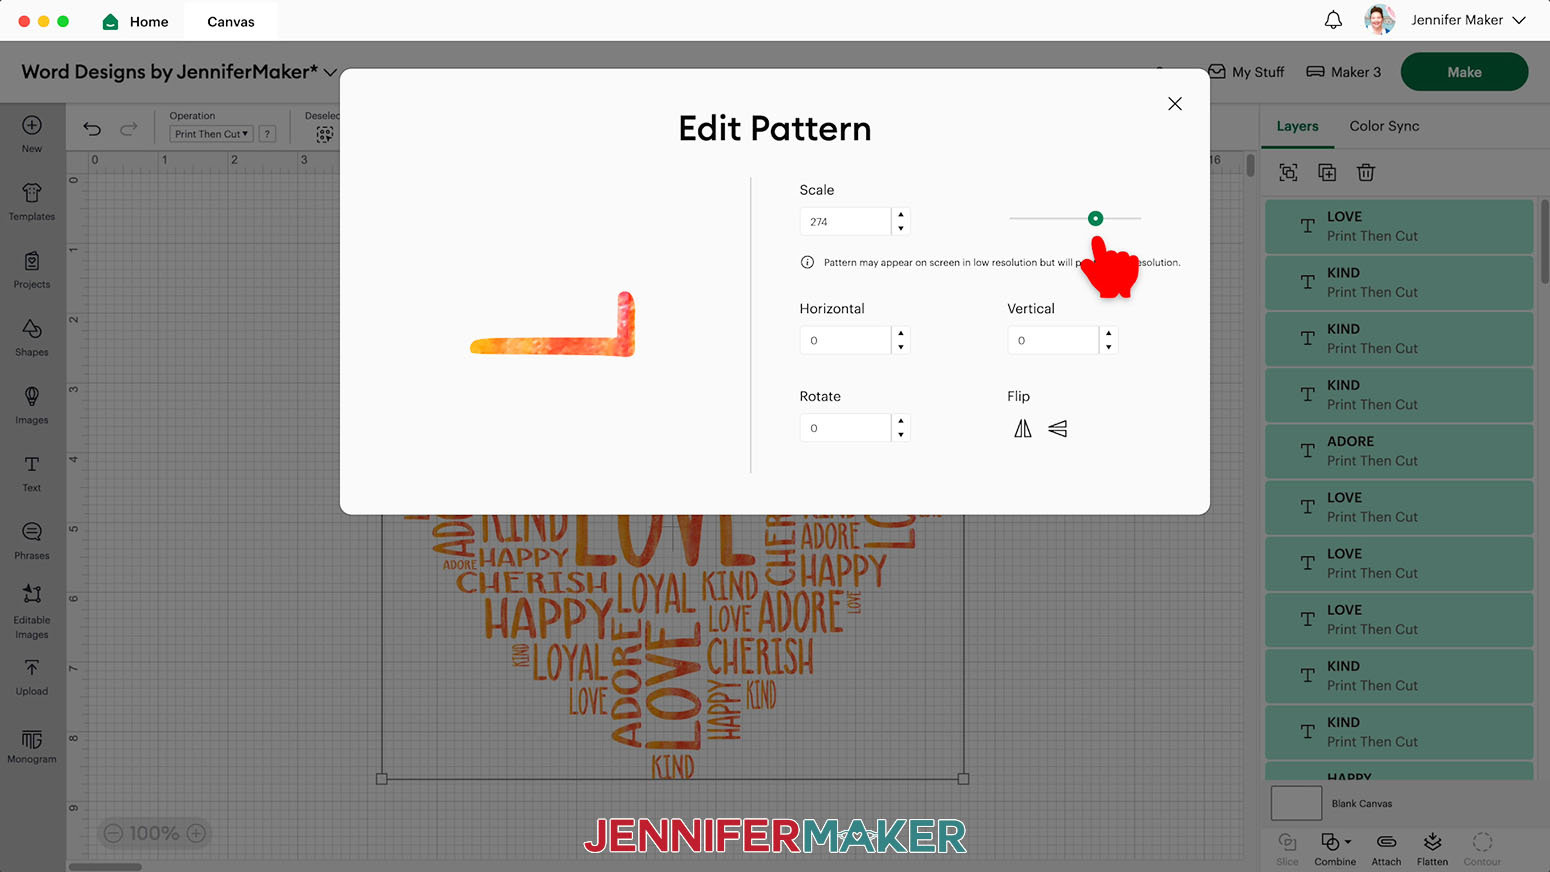
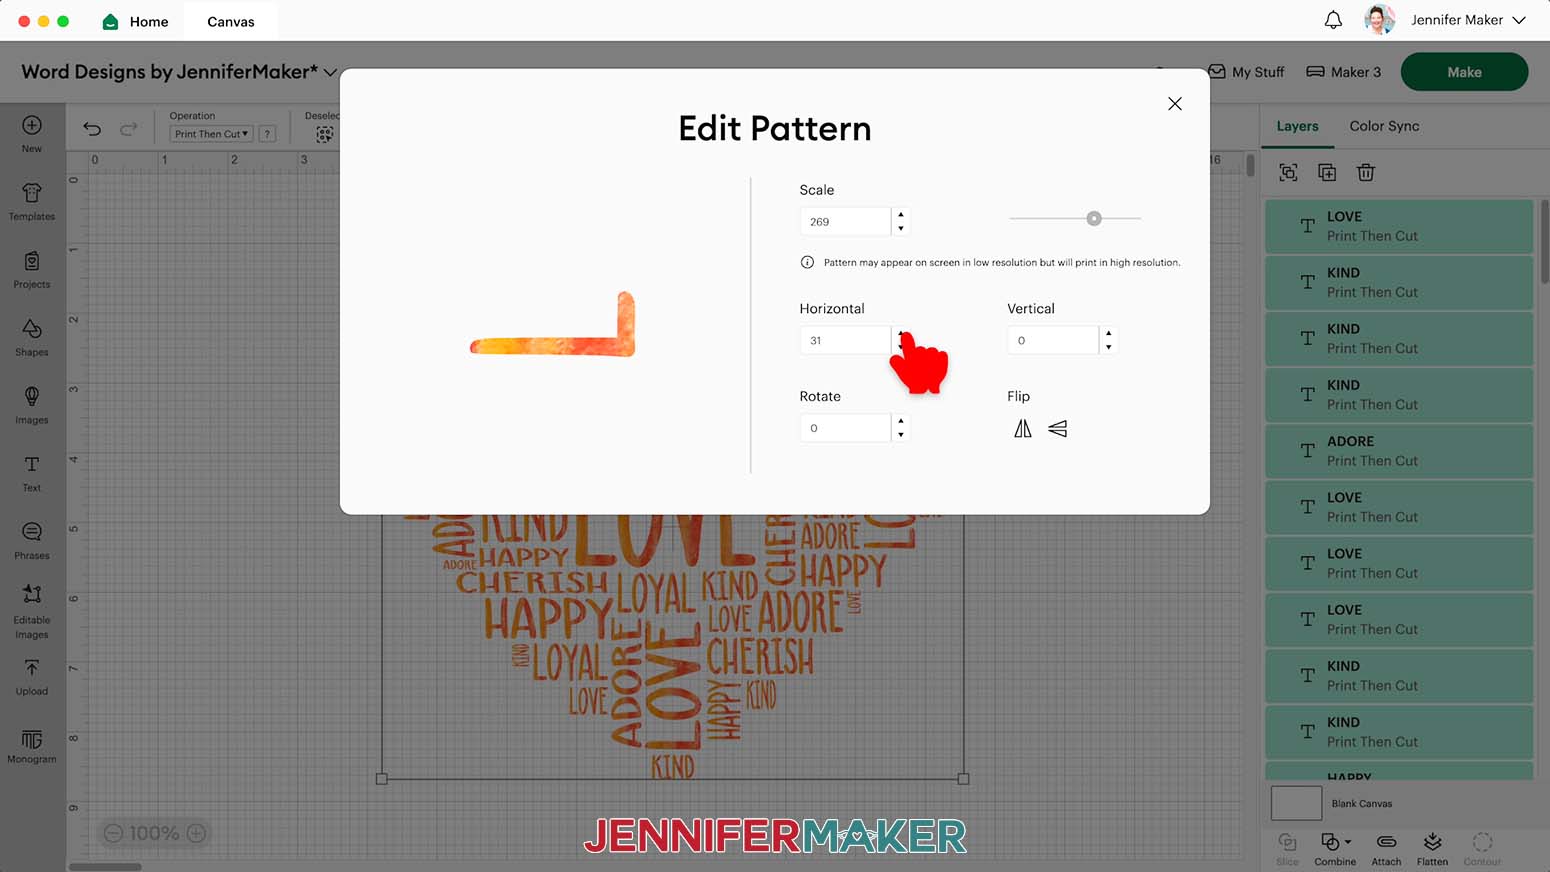
- To adjust the Pattern, click the design again, then click the Color Box and select “Edit Pattern.”
- You can use these tools to adjust the pattern and see the new results in the preview.
- “Scale” increases or decreases the size of the pattern on the shape. You can zoom in and out using the slider.
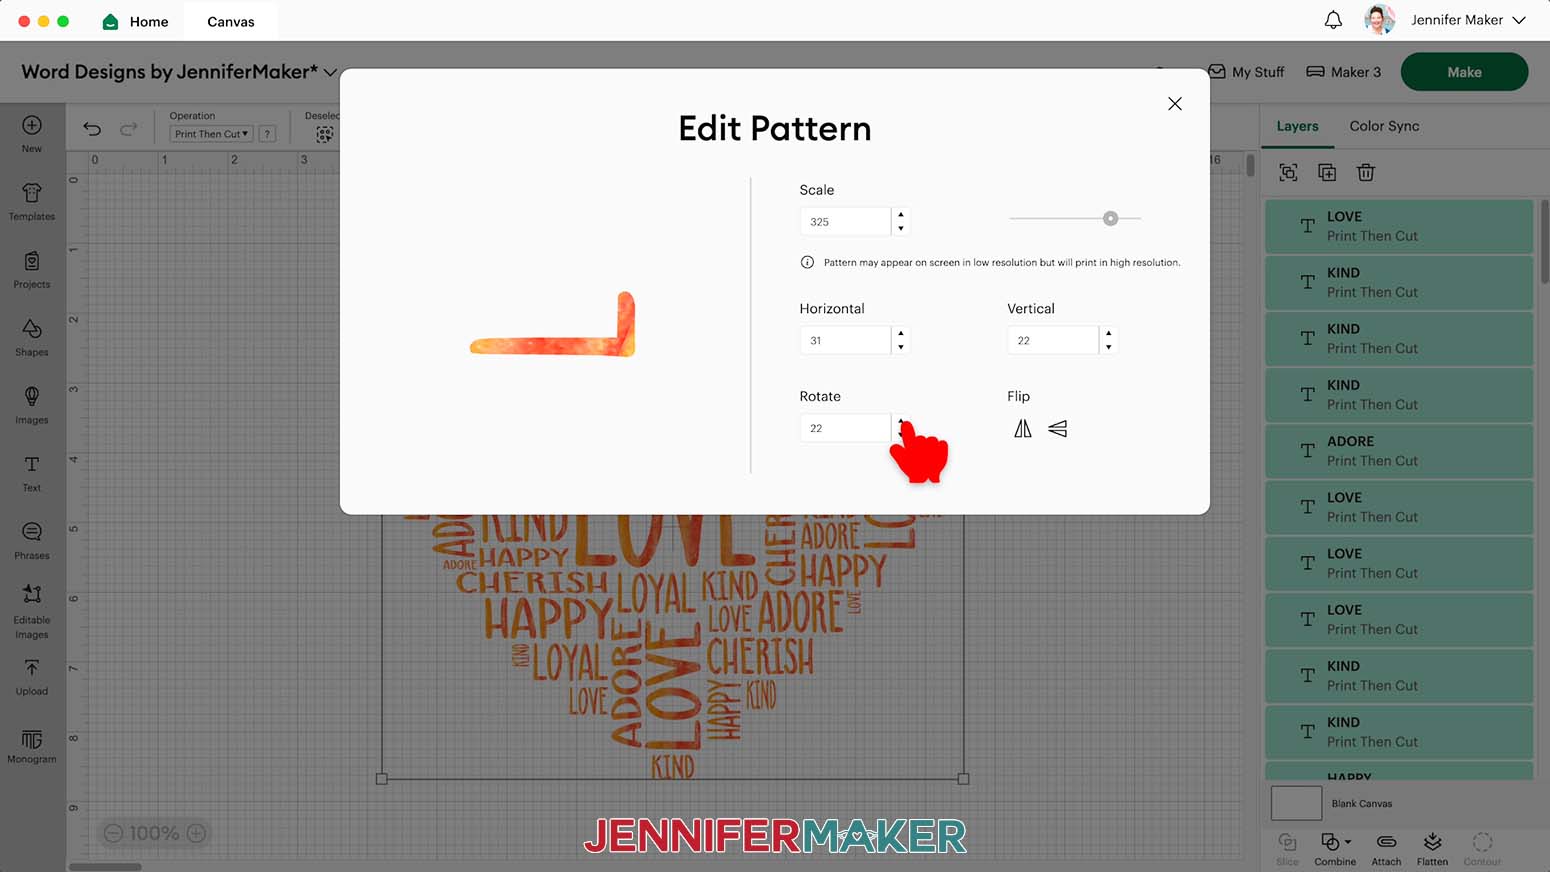
- “Horizontal” or “Vertical” moves the pattern side to side or up and down.
- “Rotate” rotates the pattern on the shape.
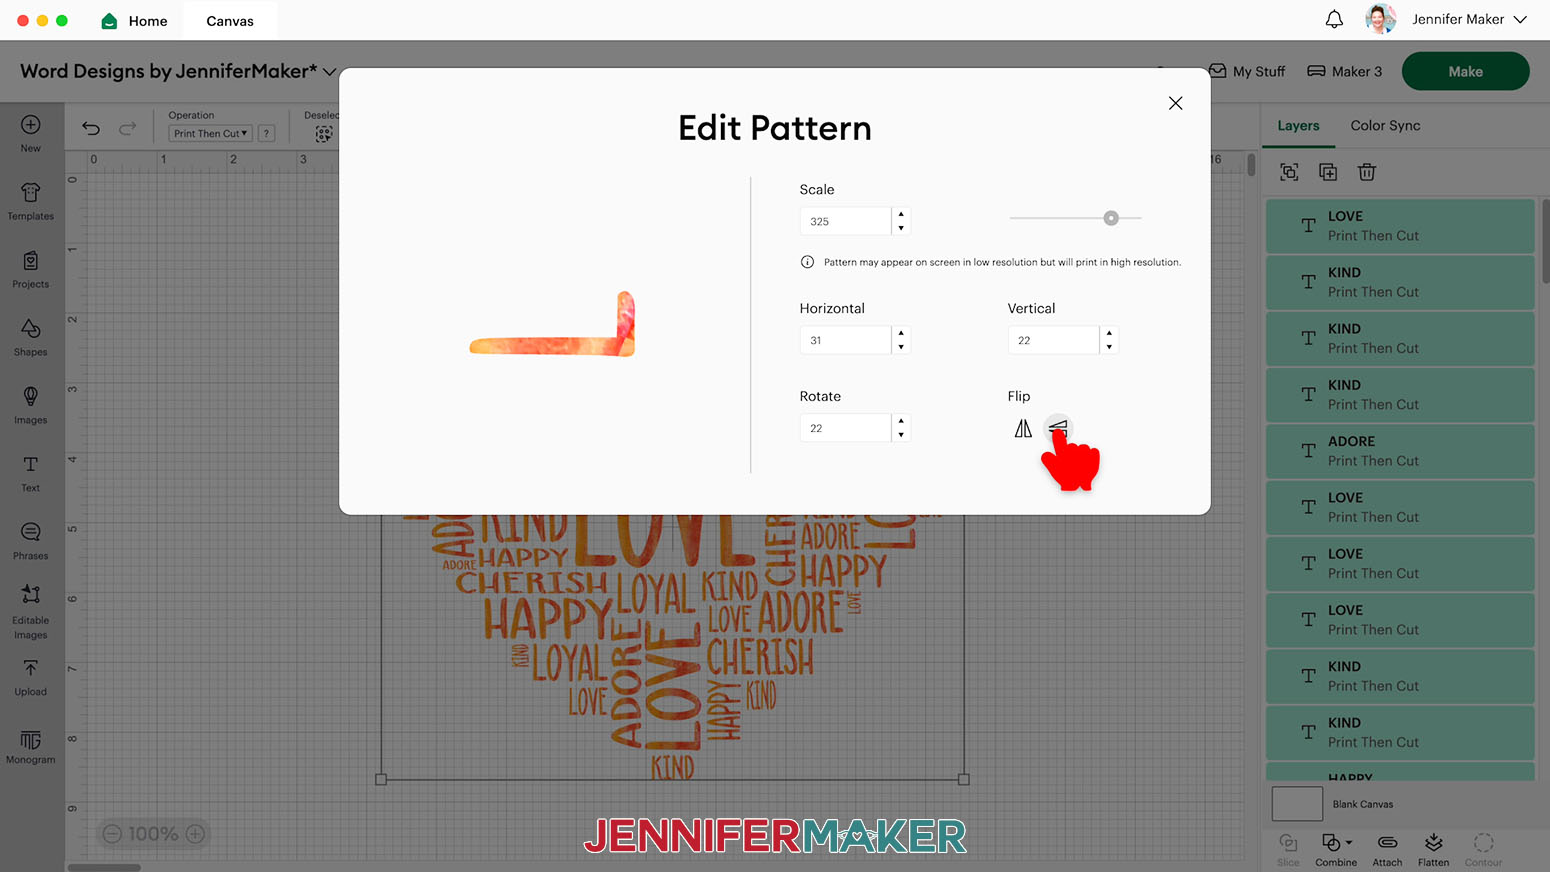
- And the left Flip icon flips the pattern horizontally, while the right icon flips it vertically.
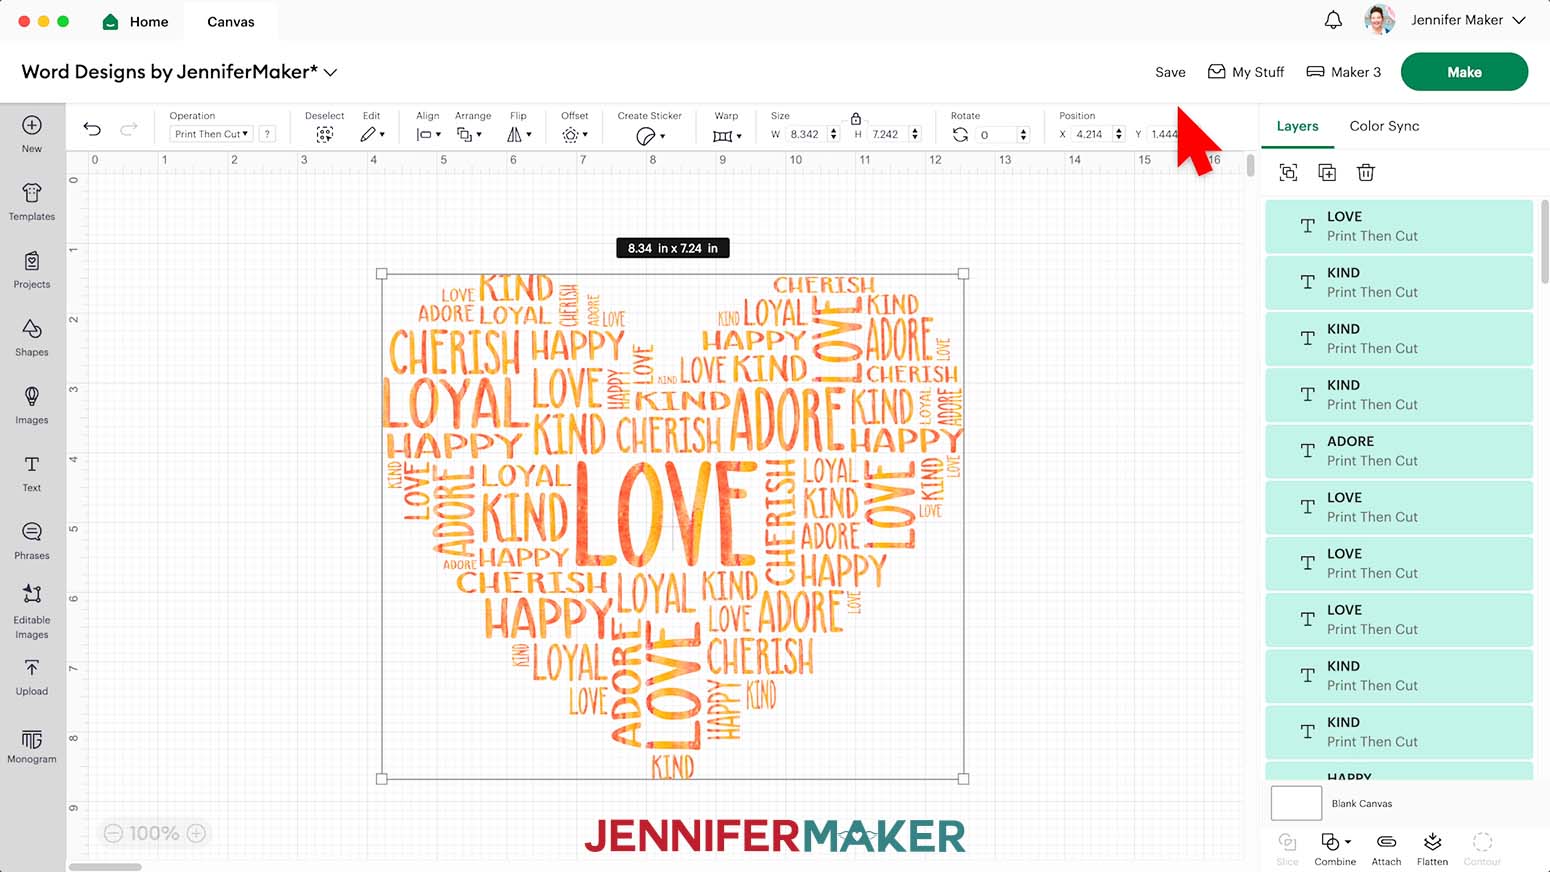
- Edit the Pattern until you like the result, then close the pop-up to see the final result.
- If the red warning icon reappears in your Print Then Cut layer, some of your text may have gone outside the original design. Click the icon and select “Auto-Resize image” to make it fit on your printed sheet again.
- If you see a yellow warning icon in the Layers Panel, it’s Design Space saying that the image has low resolution, or not enough detail in the file to make a nice-looking print at a big size. It will print just fine at the size needed for the project, I promise, but going much bigger won’t look as nice.
- Your pattern fill design is ready for printing.

FOR ANY COLOR OPTION
- Make sure the correct machine is selected in the top right.
- Click “Make.”
- If prompted, click "On Mat," choose your mat size, and click “Confirm.”
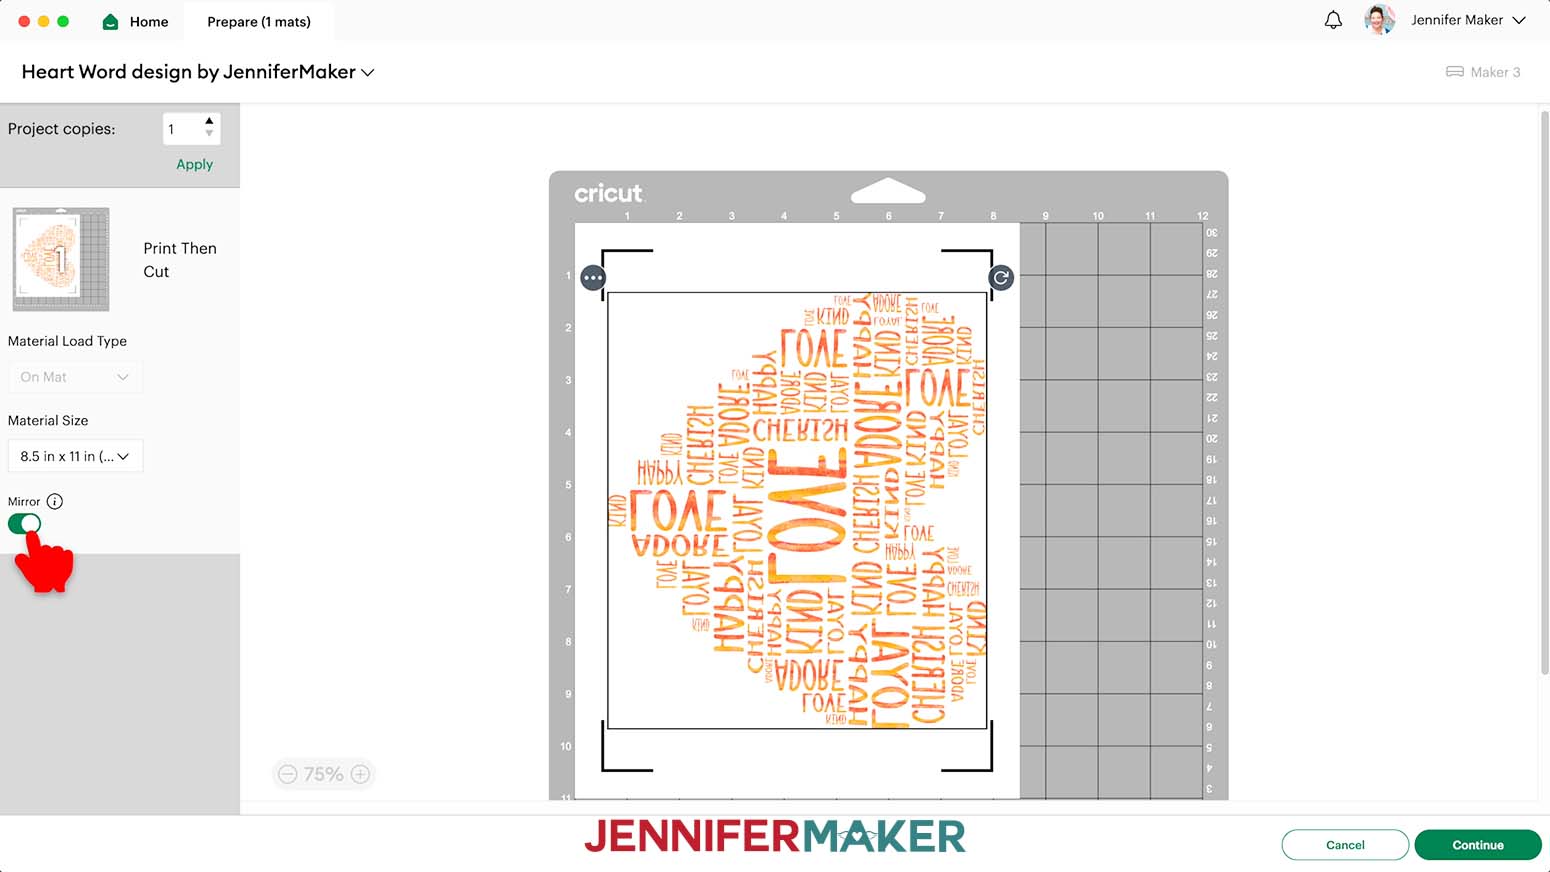
- On the Prepare Screen, make sure your Material Size is set to “8.5 in x 11 in (Letter).”
- Click “Mirror” since we’ll apply the design face down when sublimating.
- Click “Continue.”
PRINTING
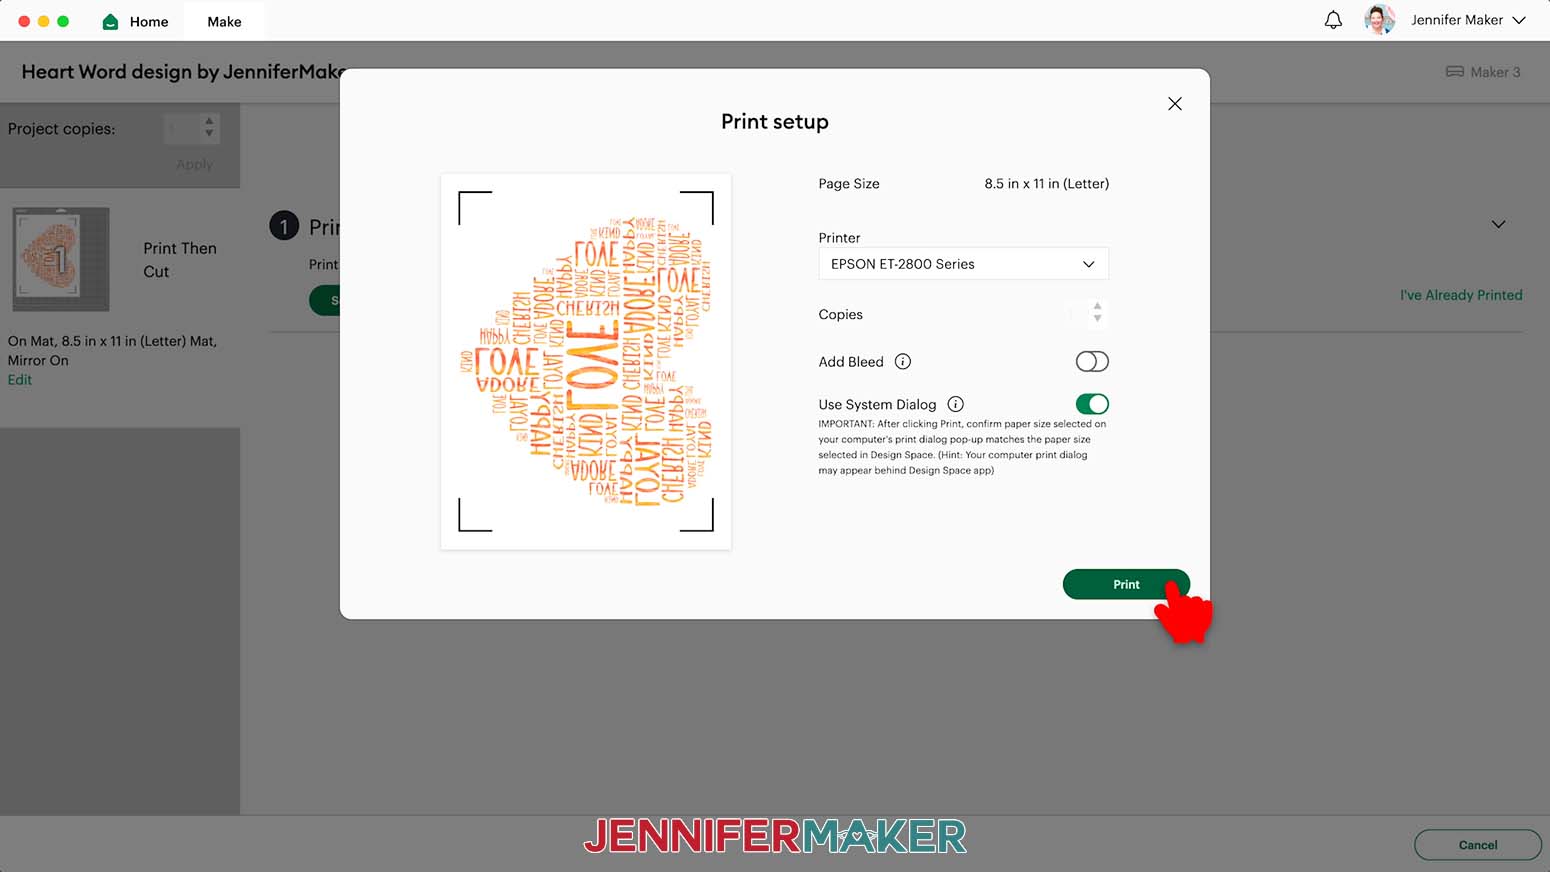
- On the Make Screen, click “Send to Printer.”
- Select your printer from the Printer dropdown.
- Toggle “Add Bleed” off since we don’t want extra ink around the design.
- Toggle “Use System Dialog” on.
- Click “Print.”
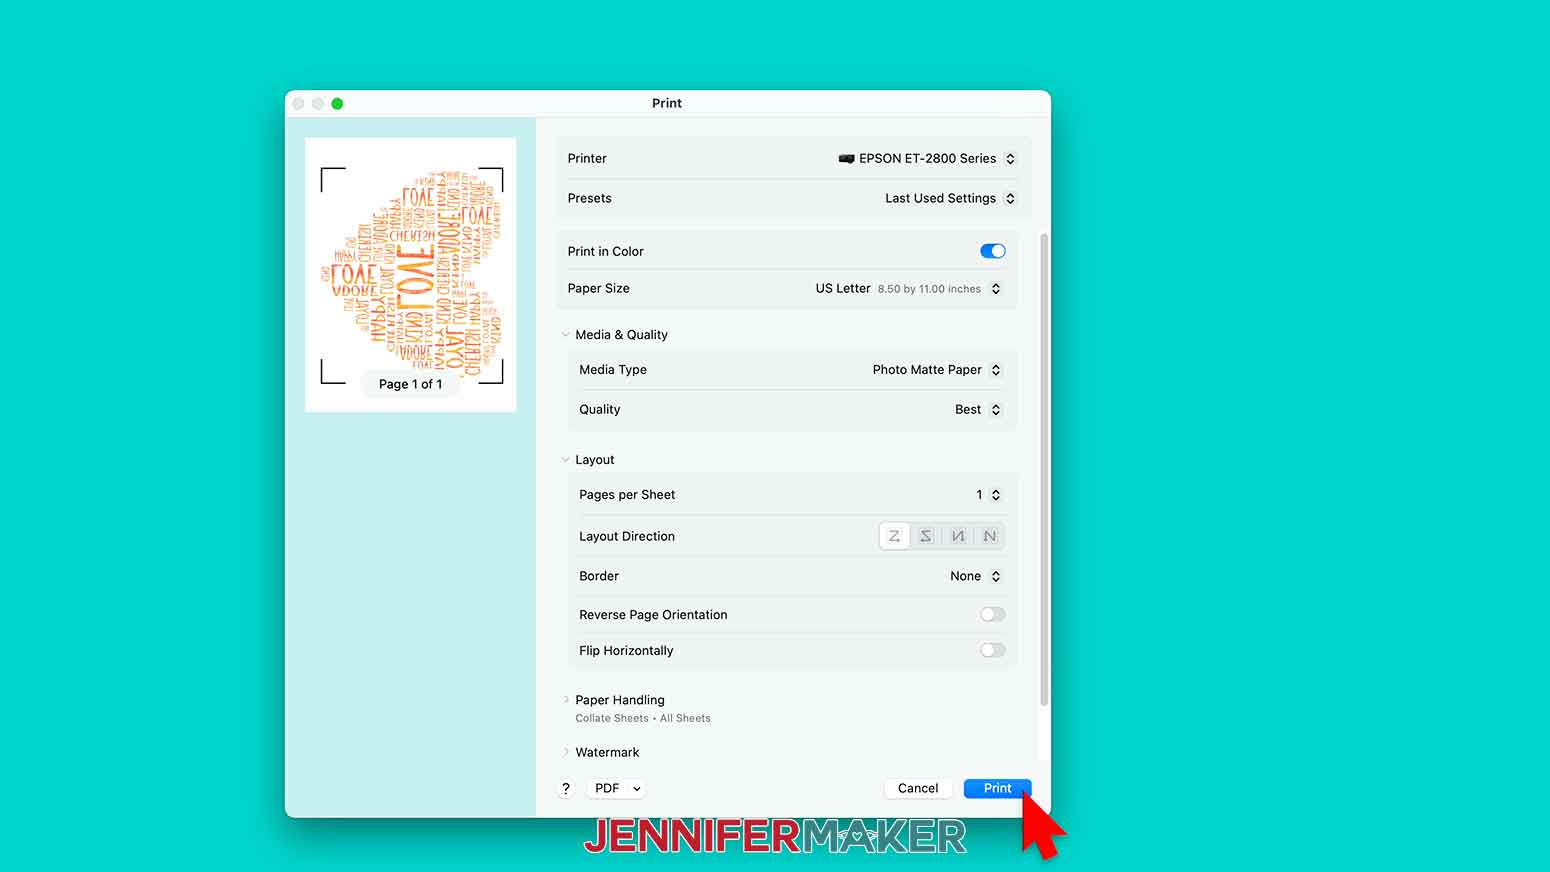
TIP: You may need to minimize or move your Design Space window to see the print dialog window. It sometimes appears behind Design Space. Each printer is different, so consult your printer's user guide for additional support. - The print dialog box should have the correct printer selected, the Media set to “Premium Photo Matte,” and the Quality set to “Best.” “Flip Horizontally” should be unchecked.
NOTE: Your screen and settings may look different, but use mine as a guide to pick the closest options you have available. - Make sure the sublimation paper is loaded correctly in your printer.
- Click “Print.”
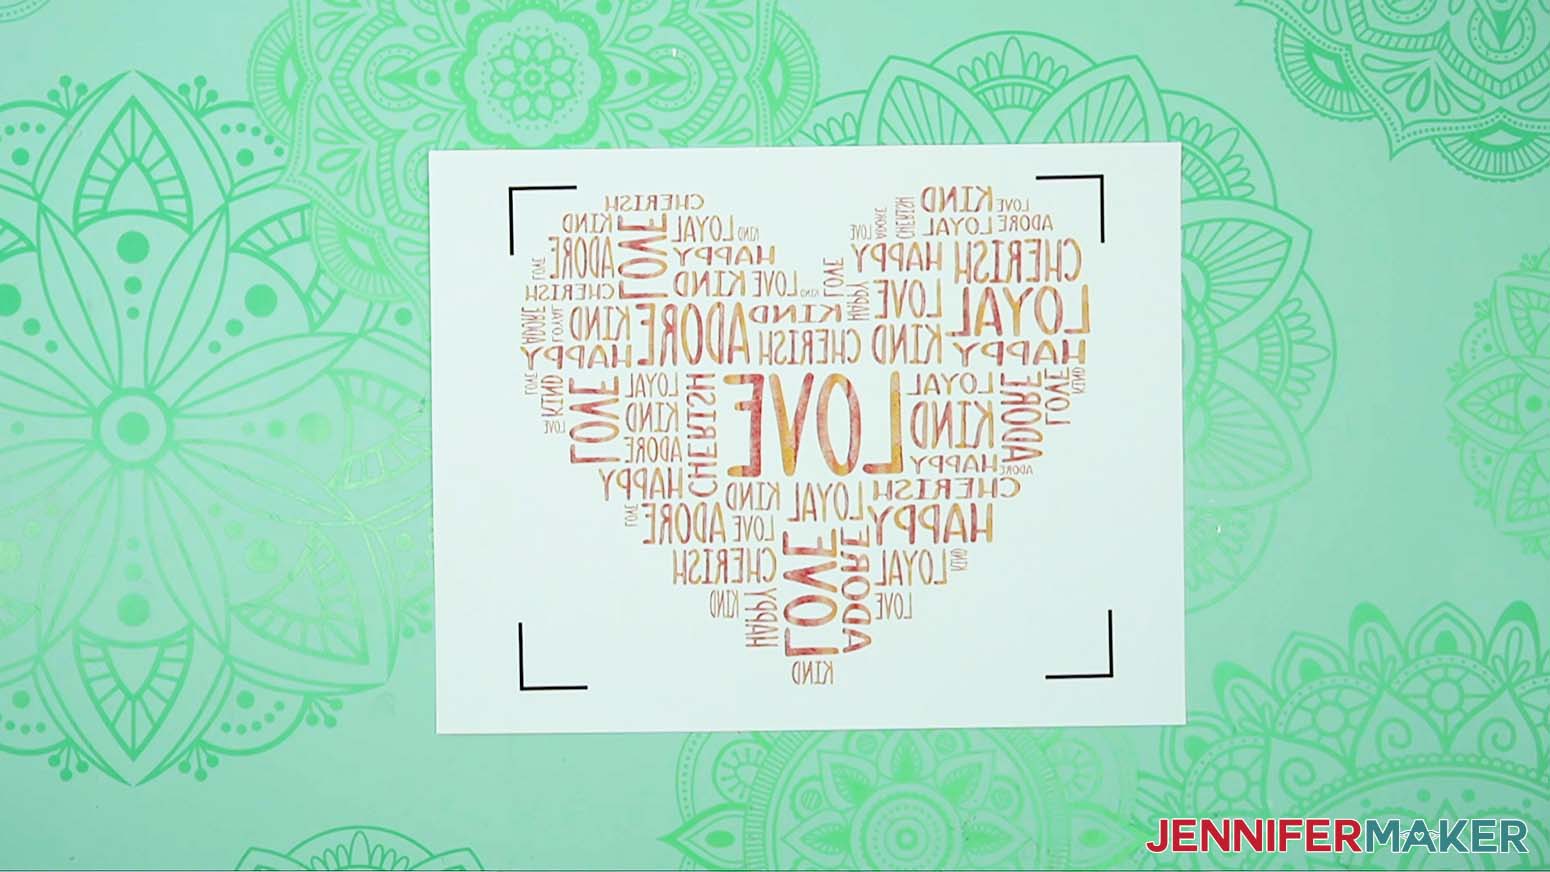
- Set the print aside to let it dry. Be careful not to smudge it.
- We’ll cut the pieces by hand, so you can close Cricut Design Space.
CUTTING
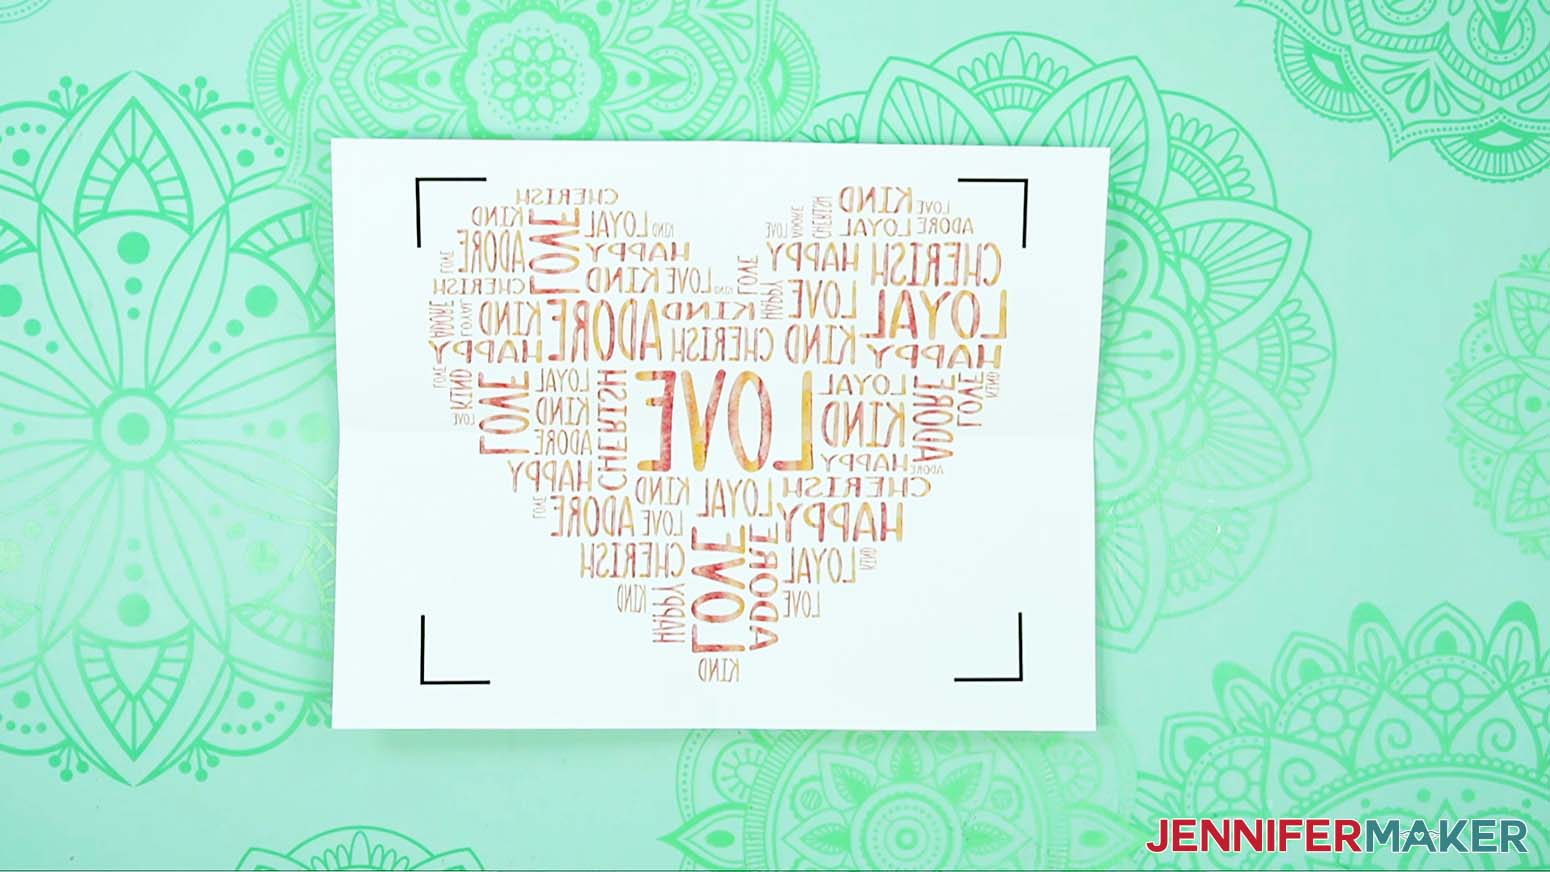
- For a normal Print Then Cut project, we’d put the printed image on a machine mat and use the Cricut to cut out the shape. But since we’re sublimating the design, just cut a square around the design.
NOTE: Leave about a quarter inch of white space around the design’s largest parts, but make sure you trim away the black registration marks.
TIP: Sometimes a blunt cut edge can leave an indent in the fabric after pressing, so tearing (called feathering) the paper makes it more gradual. - Fold the left edge to the right edge so the design’s widest section matches up, and crease just on the white paper at the top and bottom edge to mark the middle.
NOTE: Don’t crease the ink or the transfer may be damaged. - Repeat by folding the bottom edge to the top and creasing the sides to find the middle.
STEP 3: PREPARE AND SUBLIMATE YOUR PILLOW
CAUTION: Good ventilation is important any time you use sublimation. Have your windows open and a fan going to help the fumes dissipate quickly. And don’t breathe in very close to the project while it’s still warm.
NOTE: Your design’s colors will be influenced by the printer profile you use and will not exactly match what is on the printed paper. It’s a good idea to sublimate a test design on some scrap white polyester fabric using these steps before moving to your final project.
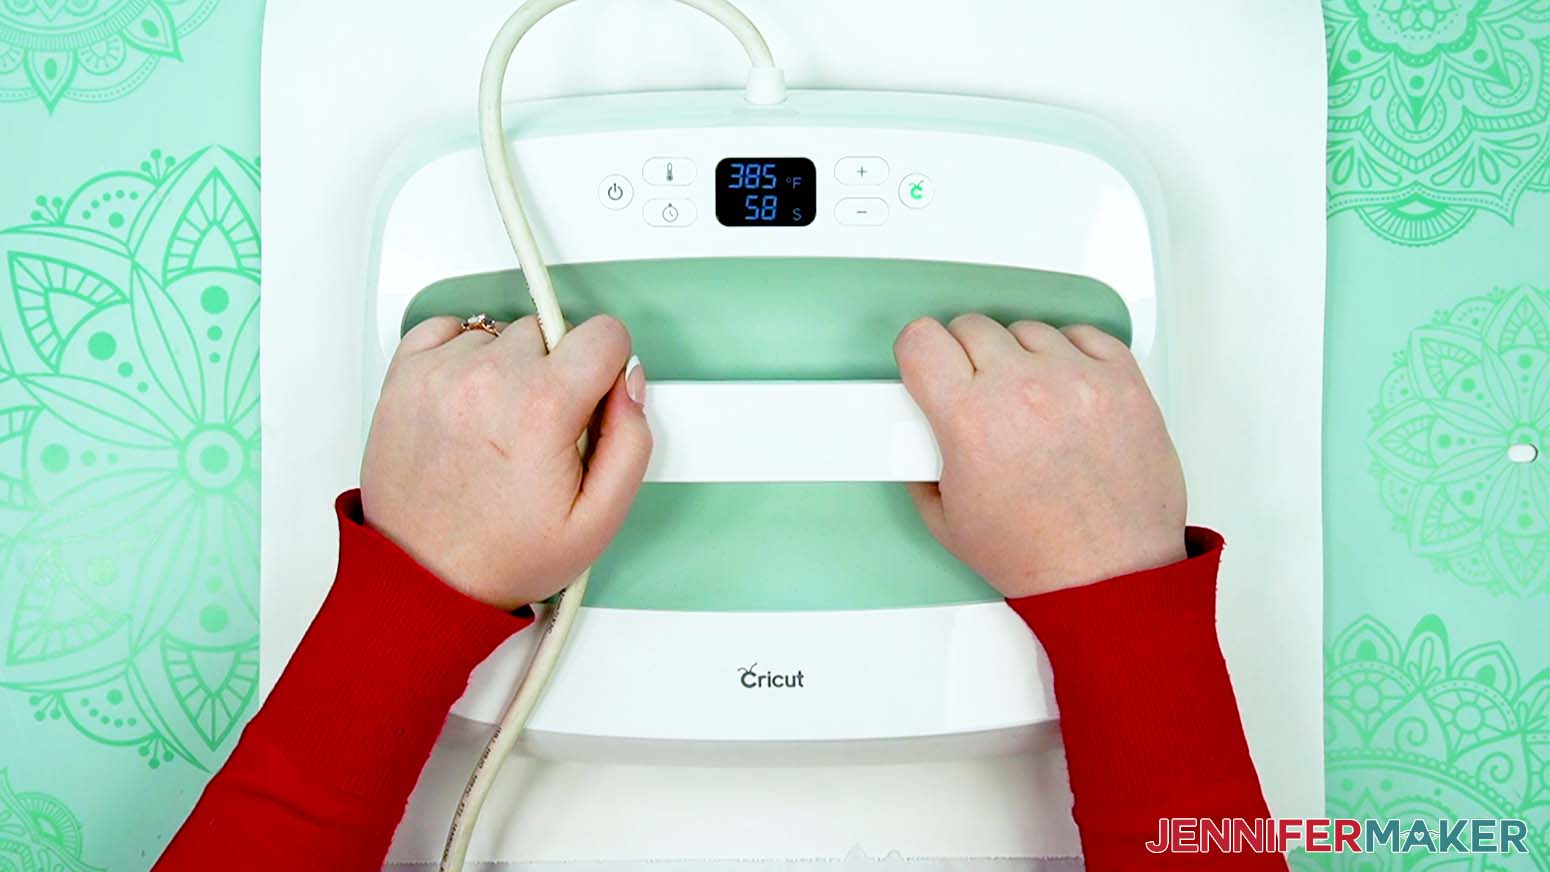
- Set your heat press to the correct temperature and time. According to my Sublimation Cookbook, the EasyPress 2 needs to be set at 385° F (196° C) for 60 seconds for a polyester pillowcase.
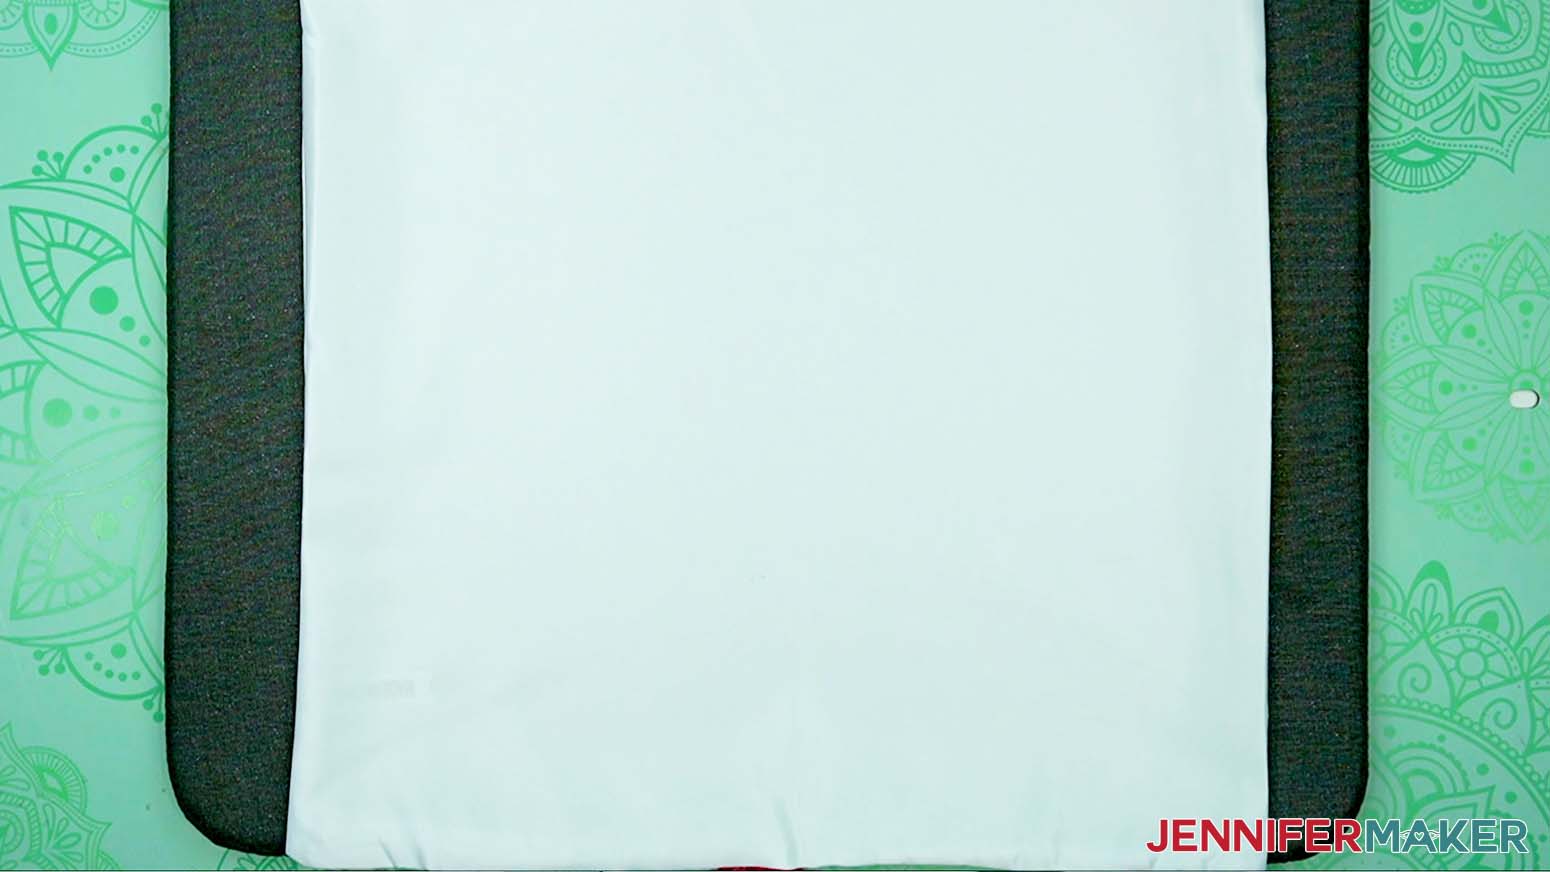
- Place your pressing mat on the pressing area.
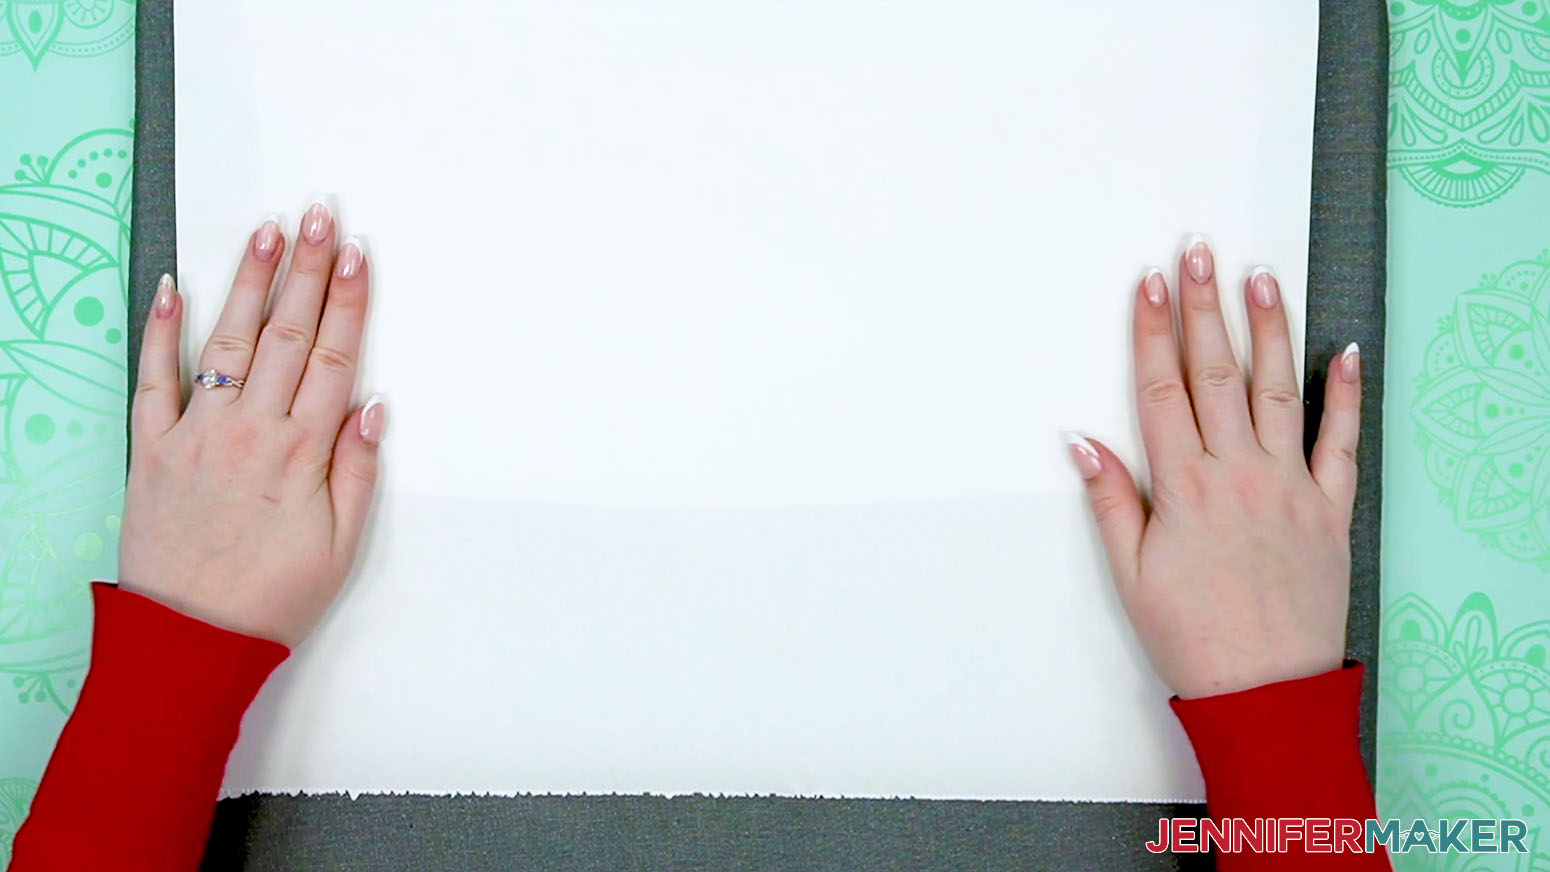
- Lay out the pillowcase face up, making sure it’s not stretched or wrinkly.
- Lint roll the design area to remove dust or debris.
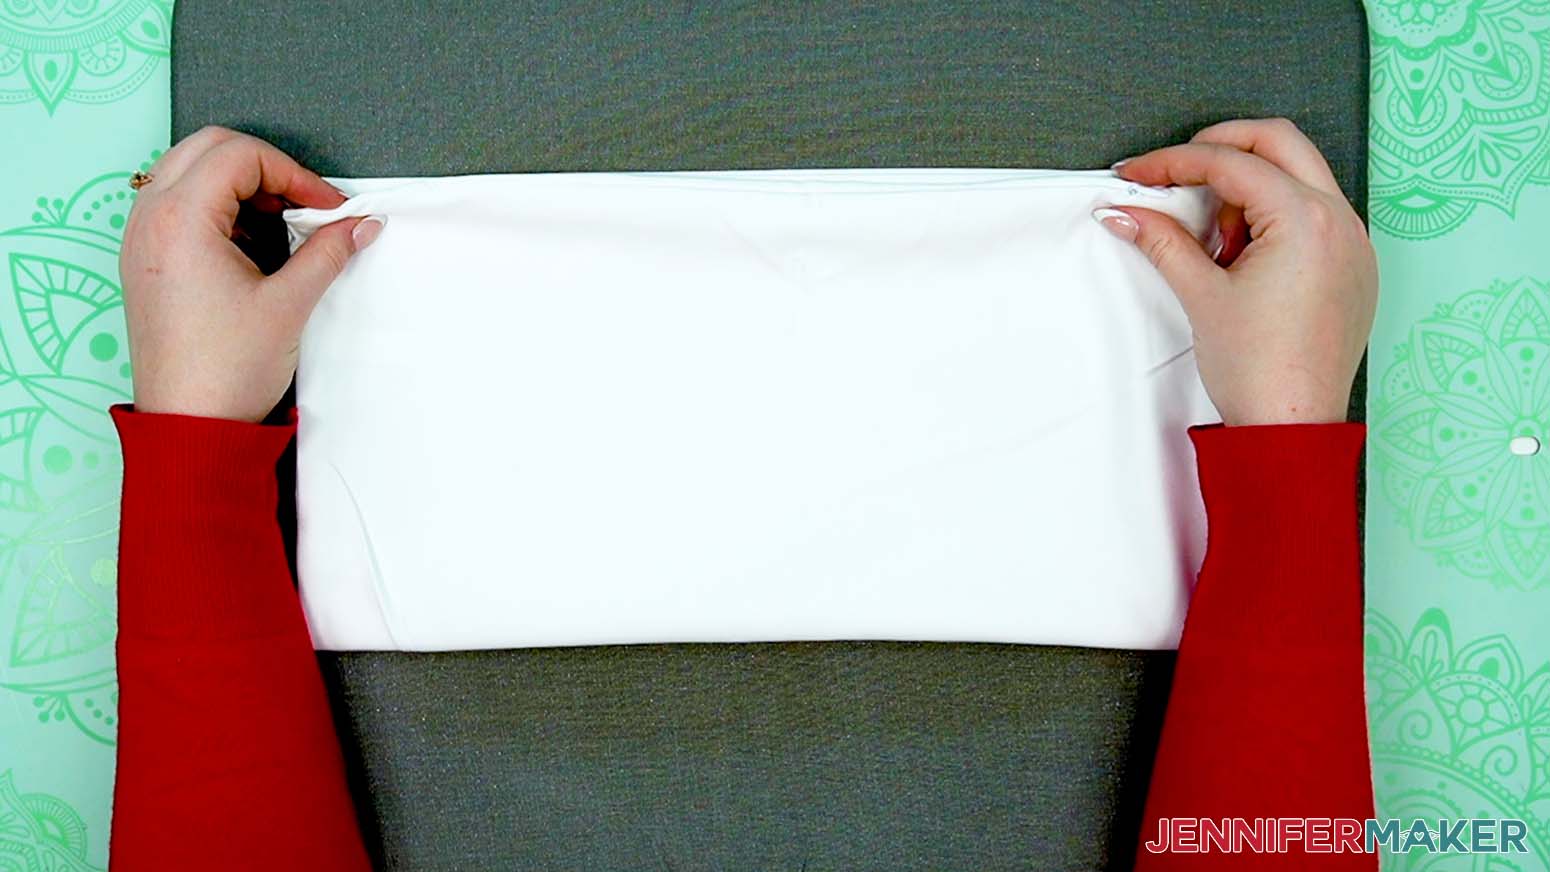
- Fold the bottom edge up to match the top, which creates a horizontal line at the center point.
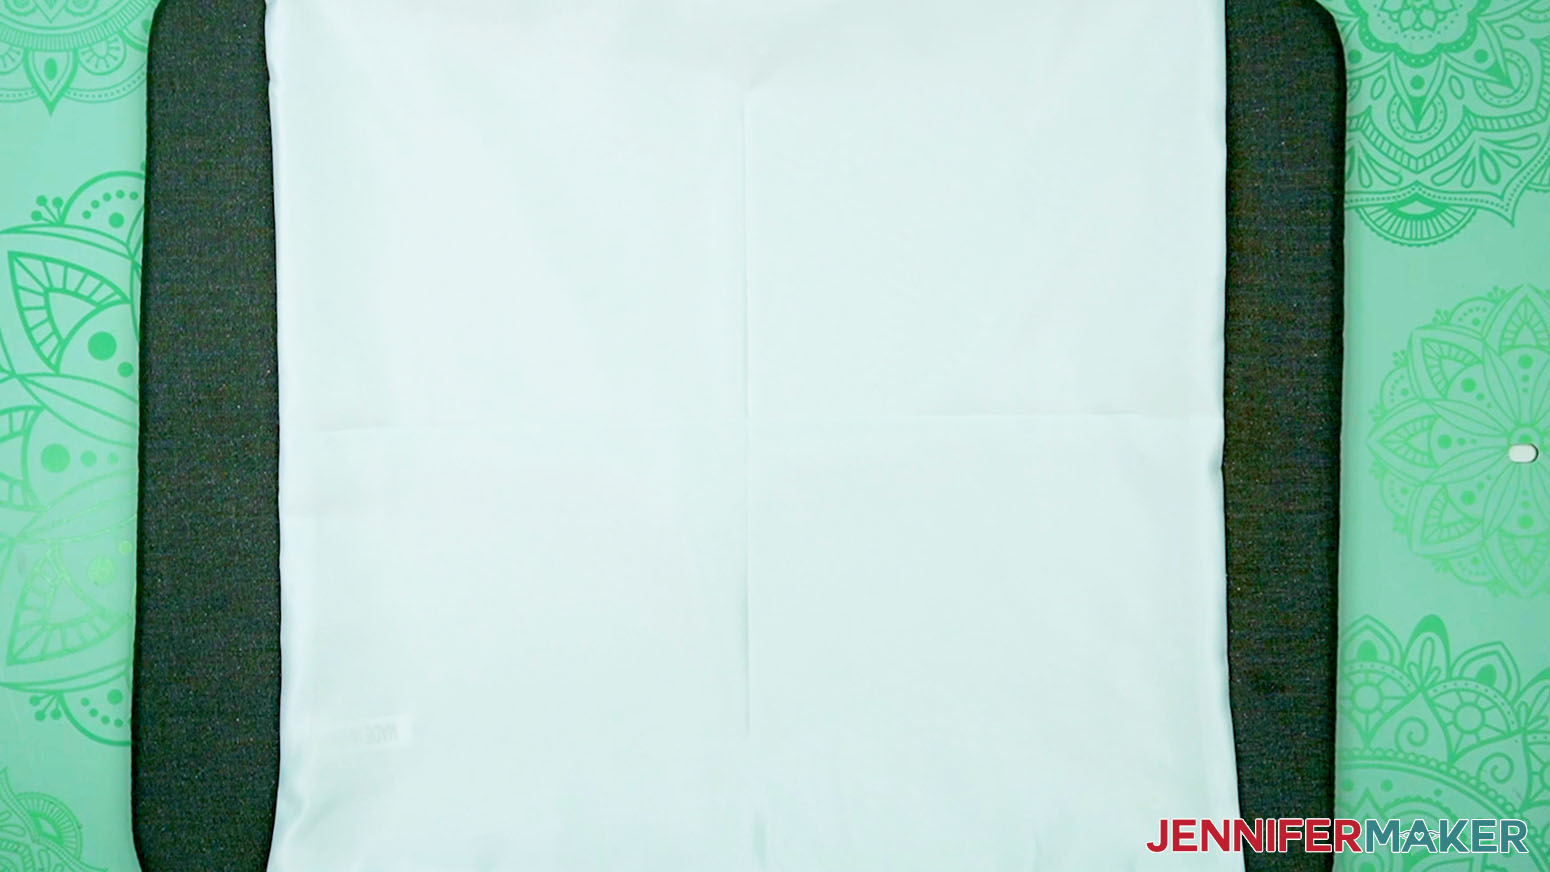
- Put fresh white butcher paper on top of the pillow case to protect it from direct heat.
- Lightly press the crease and design area for 10 seconds to remove excess moisture from the material, smooth out any extra wrinkles, and create the horizontal crease.
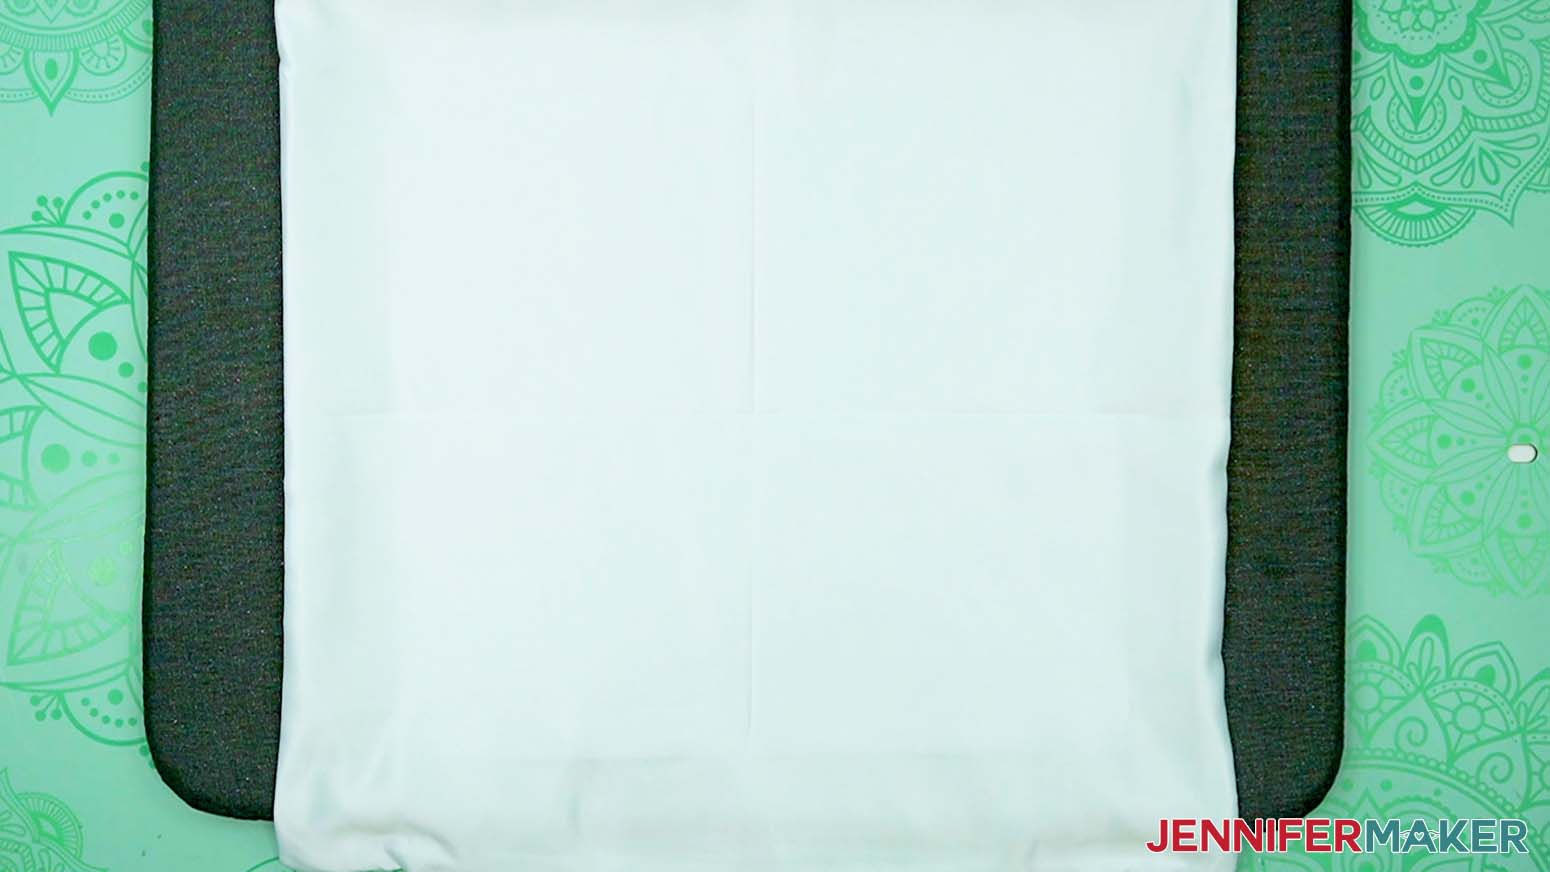
NOTE: If your press is larger than the pillowcase, make sure the zipper, especially the zipper head, is not under your heat press because it could get damaged. - Unfold the pillowcase to show the first crease.
- Use Steps 5-8 to add a vertical crease by folding and pressing the side edges together.
NOTE: The creases intersect at the pillowcase’s middle to help you position the design perfectly in the center. - If you only have a pressing pad, put clean white cardstock inside the pillowcase to protect the back layer from excess ink.
NOTE: Position the pillowcase on the pressing mat face up with the zippered edge closest to you so the opening will be at the least visible edge once the design is added. - Move the zippered edge down and off the pressing pad’s edge so the rest of the pillowcase is flat and you can press the design without issue.
- If you have a pressing pillow that will fit inside the case and is larger than your design, set the bottom pressing pad aside.
NOTE: Putting the pressing pillow inside the pillow case can lift the design area away from the zipper, making a better transfer. - Put the pressing pillow inside the pillowcase under the design area to lift the fabric away from the edges and zipper.
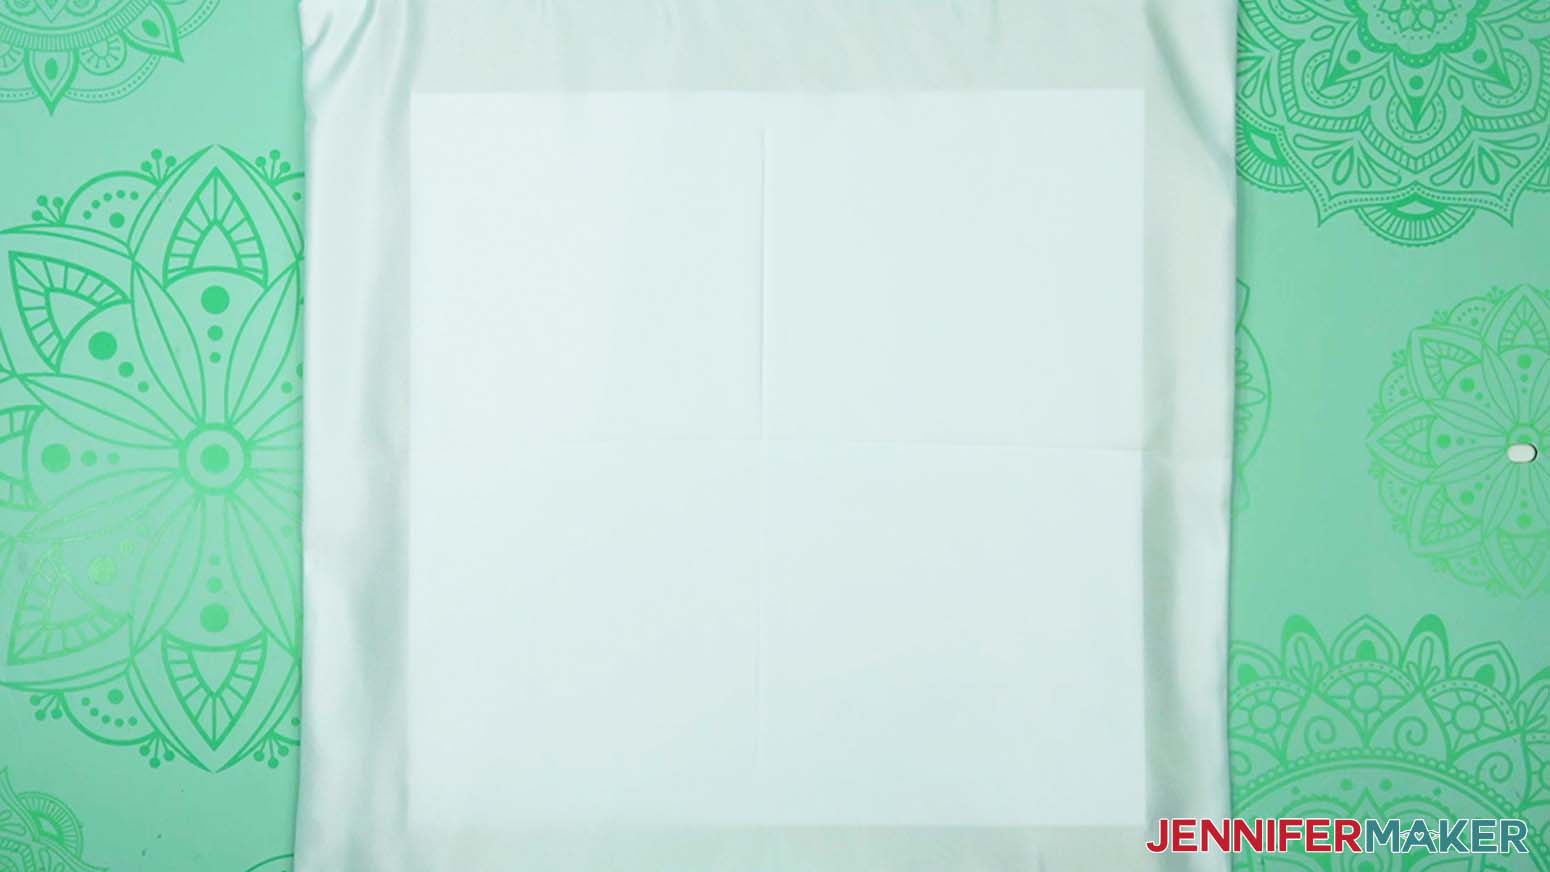
NOTE: Position the pillowcase face up with the zippered edge closest to you so the opening will be at the least visible edge once the design is added. - Add white cardstock inside the pillowcase on top of the pressing pillow to protect it and the back layer from excess ink.
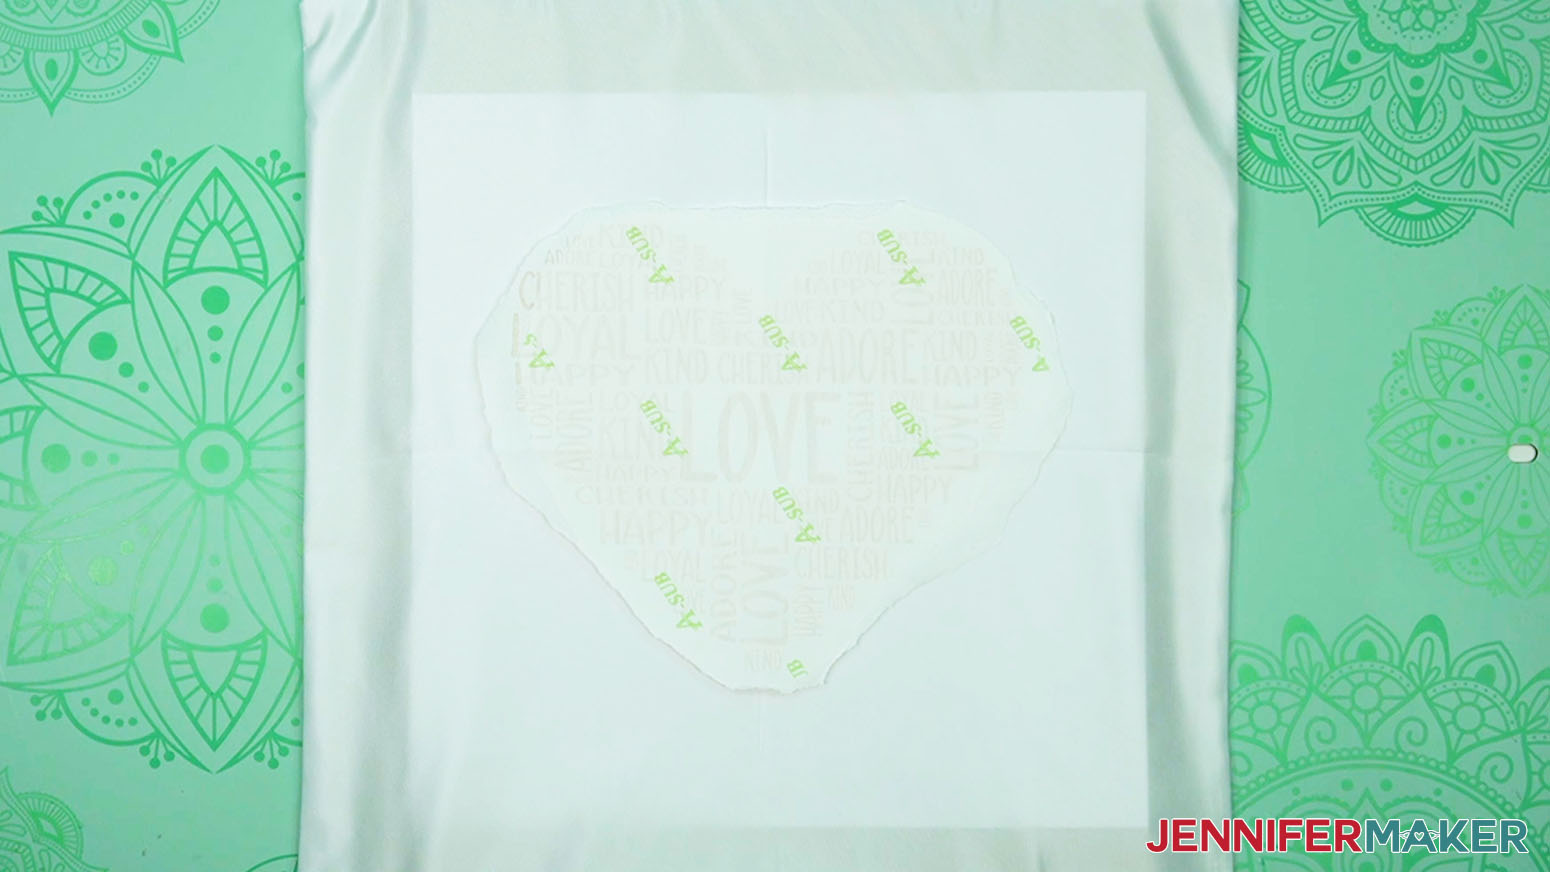
- Place the design face down on the pillowcase so the image is correctly oriented for the opening.
- Align the creases on the paper with those on the pillowcase to center it.
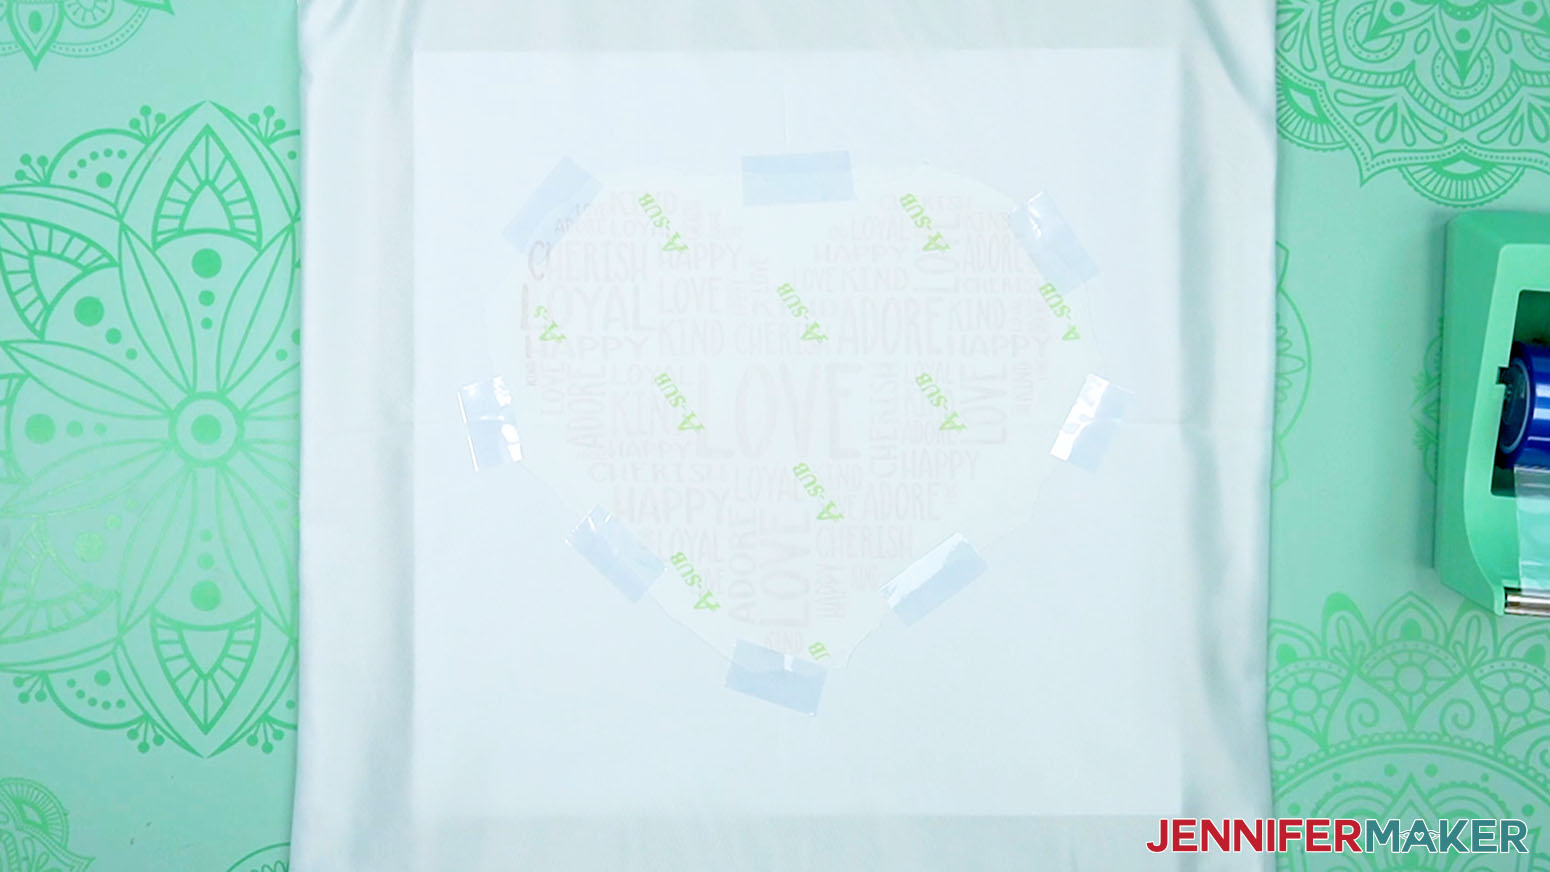
- Secure the design in place with heat-resistant tape.
- Place butcher paper on top of the pillowcase and taped design.
- Press the design with light pressure for 60 seconds at the correct temperature.
- When the time is up, lift the press straight up and return it to its base.
- After pressing, allow the design to sit for approximately 10 seconds to help prevent ghosting.
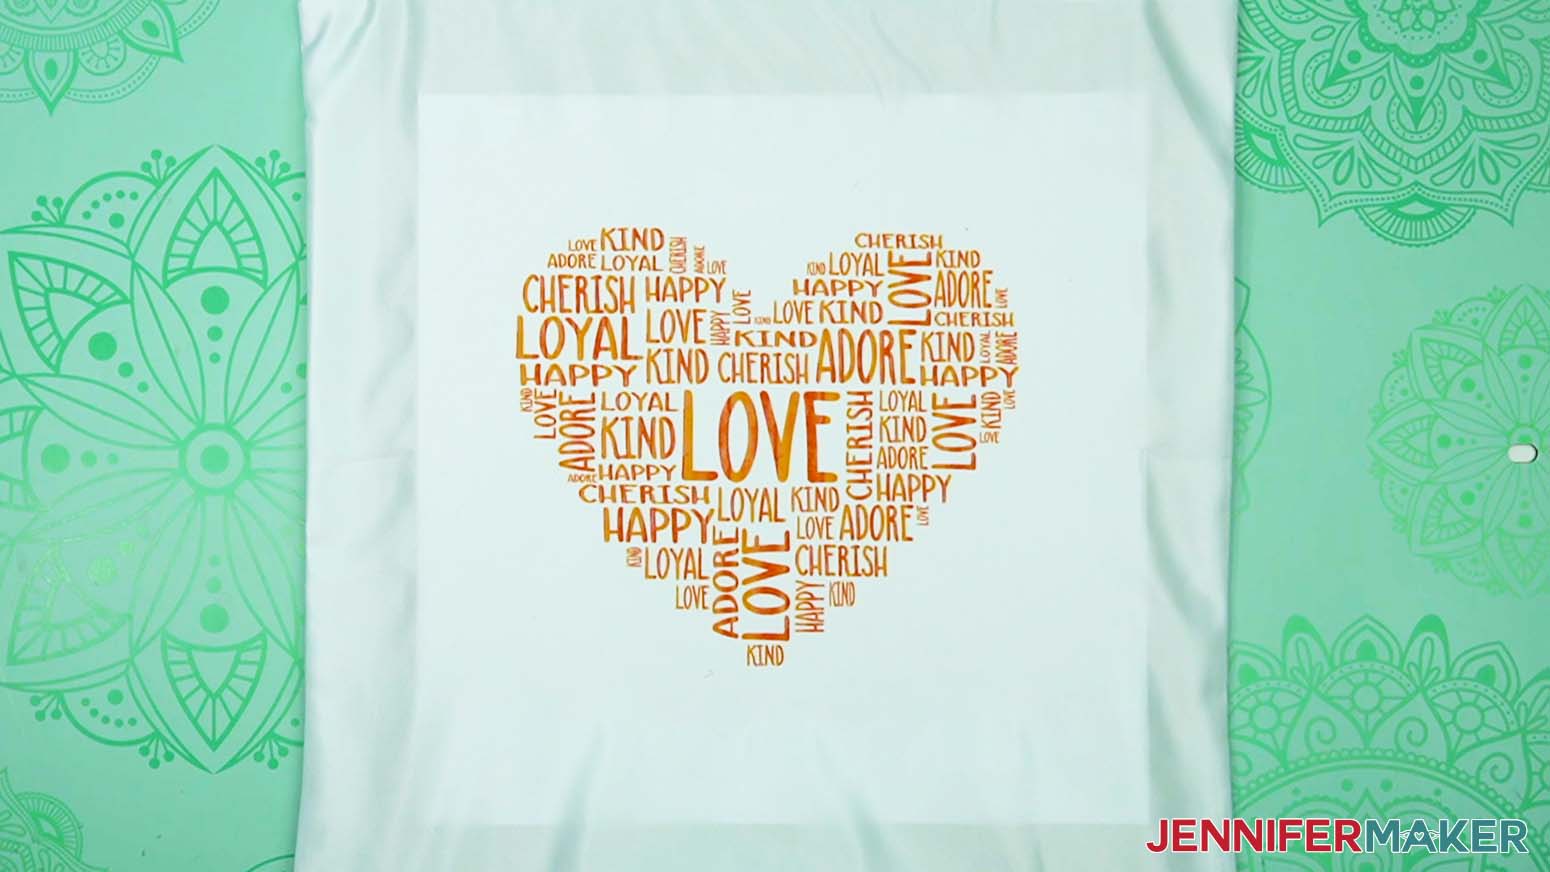
- Remove the butcher paper, tape, and transfer sheet to reveal the sublimated design.
- Insert the pillow form and zip the pillowcase closed.
STEP 4: SHOW IT OFF!
Here is what my finished sublimation pillow looks like!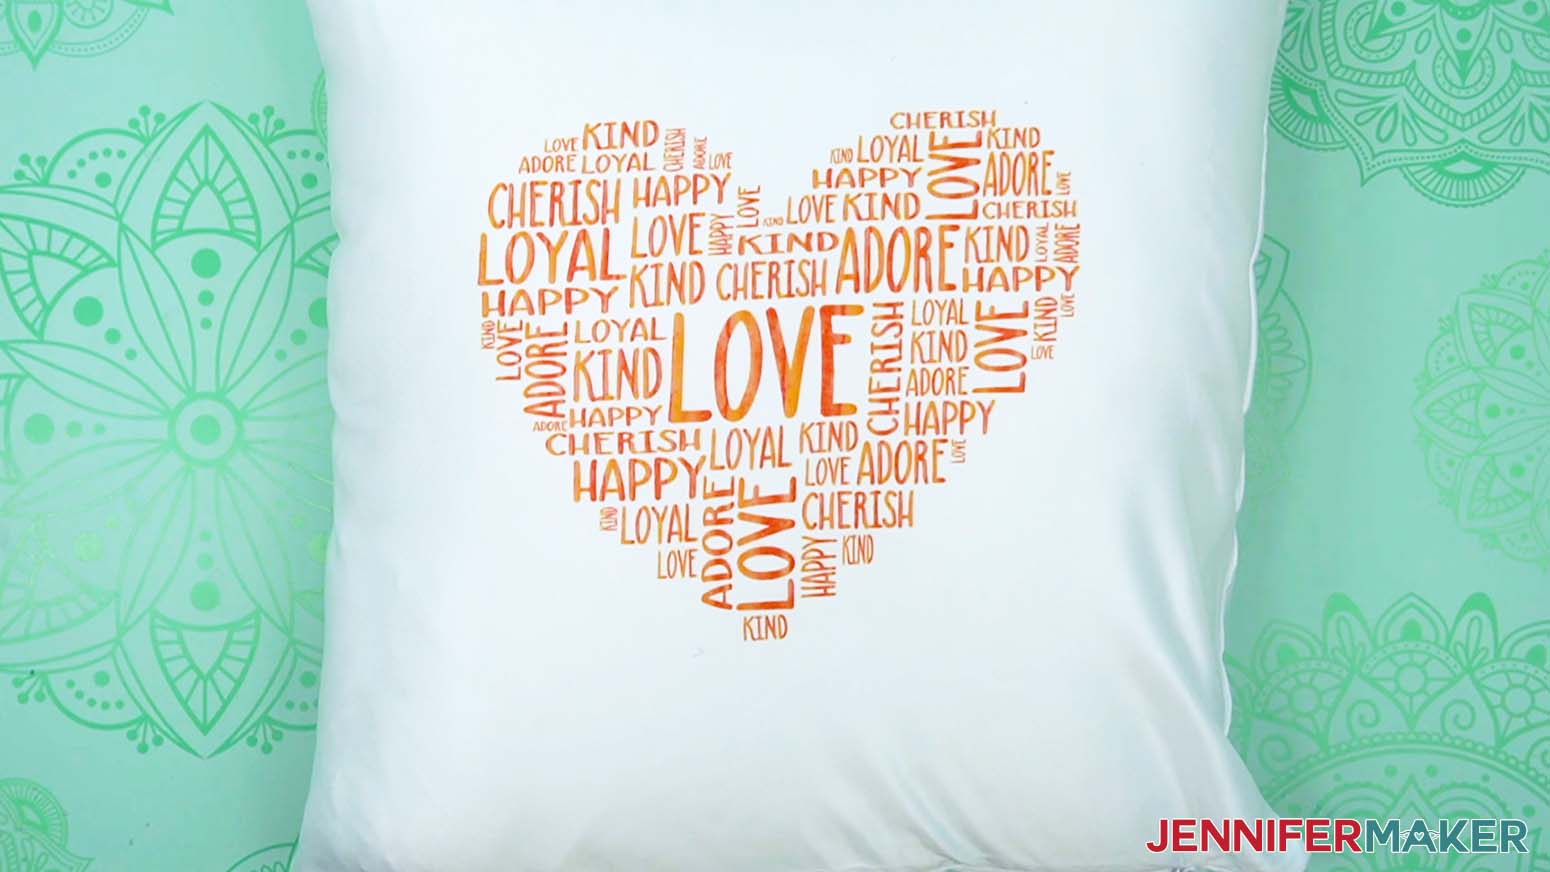
Notes
Finished Size: 15” x 15”
Care: Wait at least 24 hours before washing. If you need to wash the pillowcase, remove the insert and zip it closed. Machine wash with cold or warm water and a mild detergent. Hang dry or dry with low heat.
Typefaces Used
JM Sweet, JM Groovy, and JM Lemonade from Design #542
JM Block Caps from Design #565
Answers to Your Questions About Making Spring Word Art Pillows & Other Projects
Q: How do you turn words into art?
A: In Cricut Design Space, you can combine different font options, colors, patterns, and shapes to make fun word art like my daisy, hibiscus, and bird designs! Follow my original word art tutorial to learn how.
Q: How do I fill a shape with text?
A: Follow my original word art tutorial which covers how to select a typeface that will work well to fill a new shape and positioning the words inside my free template outlines to create word art designs.
Q: How do I change the color of text in Cricut Design Space?
A: Click the color picker box at the top menu to see the different options available. Then select select the color you want. Or if you want to, click “Pattern” to see the patterns you can also use in the drop-down menu. There are plenty of options, like gradient fill variations!
Q: How do I come up with a list of words?
A: You can use names, places, characteristics, anything you like! If you’re having trouble, try brainstorming words about different topics to see what you’re drawn to.
Q: What app turns words into shapes?
A: Cricut Design Space has apps for iPhones, Android phones, and iPads that do almost everything the desktop version offers, including helping you fill a shape with words. Follow the tutorial to learn how to do it!
Q: Can I make and sell word art projects made with these designs?
A: I love supporting creative entrepreneurs! My designs are free for personal use, but you want to use my designs and projects for commercial use, please familiarize yourself with my important licensing information before selling your crafts.
I do not permit sale of my digital files, but you can sell the creative goods you make with them — as long as you follow my terms of use and licensing requirements. That means you cannot sell the spring word art SVG, PNG, DXF, or PDF files, but you can sell a physical product that you made with the files within the digital content licensing agreement linked above.
Q: How do I know if my design is the right size?
A: Not sure if your design is uploading at the correct size or aspect ratio? If you are using Cricut Design Space Beta for Desktop, try switching to the Live version as this has worked in our testing. Here are the dimensions you should see for each design on your Canvas:
- spring-word-art-bird-jennifermaker-SVG: 9.8″ x 6.73″
- spring-word-art-bird-outline-jennifermaker-SVG: 9.98″ x 6.79″
- spring-word-art-daisy-jennifermaker-SVG: 9.81″ x 9.69″
- spring-word-art-daisy-outline-jennifermaker-SVG: 10″ x 9.73″
- spring-word-art-hibiscus-jennifermaker-SVG: 9.89″ x 6.87″
- spring-word-art-hibiscus-outline-jennifermaker-SVG: 10″ x 6.95″
- spring-word-art-bird-jennifermaker-PNG: 20.82″ x 14.31″
- spring-word-art-daisy-jennifermaker-PNG: 20.82″ x 20.56″
- spring-word-art-hibiscus-jennifermaker-PNG: 20.81″ x 14.45″
If you need help resizing your design, open my Resizing Guide in a new window.
Q: What kind of pillow case is best for sublimation?
A: Blank pillowcases (or ones with white areas) that are at least 65% polyester will work for sublimation.
Q: Can you sublimate on any pillow case?
A: The fabric should have at least 65% polyester content and be white so the translucent sublimation ink will show correctly.
Q: How do I care for a sublimation pillow?
A: Wait about 24 hours before cleaning your custom pillow case. Then wash it on gentle with mild detergent. Hang it to dry for the best results. Unlike screen printing, the design becomes part of the fibers, so the decoration should last as long as the item!
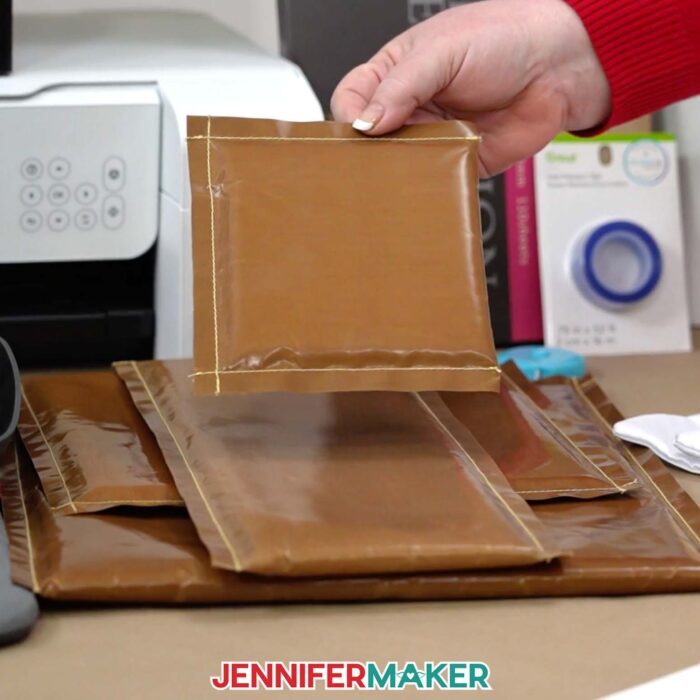
Q: What is a pressing pillow?
A: Pressing a design onto a pillow case is pretty easy, but you do need to keep the zipper and seams from causing rippling in the surface. That’s why I recommend having a few pressing pillows on hand. They sound like the pressing pad that works with your Cricut EasyPress (which is the heat press I used for the project!) but they’re slightly different. The heat-safe exterior is also non-stick and protects foam on the inside. They come in different shapes and sizes so you can place them just where you need to lift fabric away from seams to get a flat transfer area.
Q: What are some good arts and crafts ideas I can make with these spring word art designs?
A: My spring word art designs are versatile and can be used in a bunch of different crafts! Here are some projects that will really help them shine:
- Print Then Cut Magnets
- Permanent Vinyl Glass Can Wraps
- Bleached & Sublimated T-Shirts
- Engraved Acrylic Night Lights
- Permanent Vinyl Silhouette Lampshade
- Sublimated Cardstock Cake Toppers
- Big HTV Designs on Hoodies & T-Shirts
Get my free SVG/PNG/DXF/PDF files to make spring word art projects!
(If you do not see the signup form above, click here.)
I love seeing what you make with my designs and how you use them! Please share a photo of your spring word art project in our Facebook group or tag me on social media with #jennifermaker.
Love,

Want to remember this? Save this easy Spring Word Art tutorial to your favorite Pinterest Board!