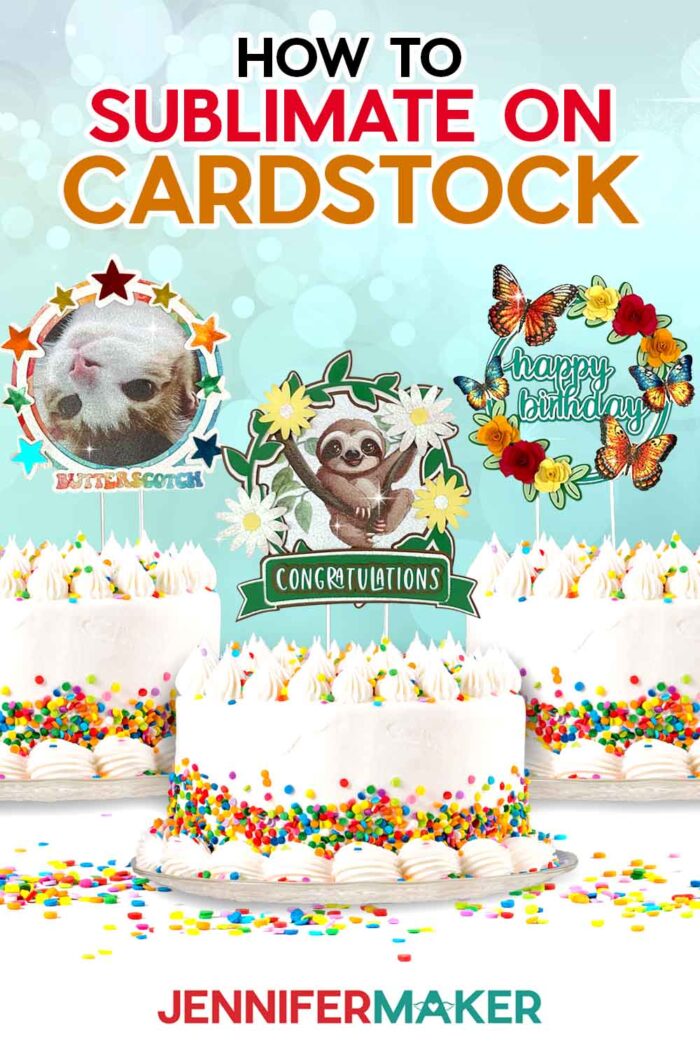
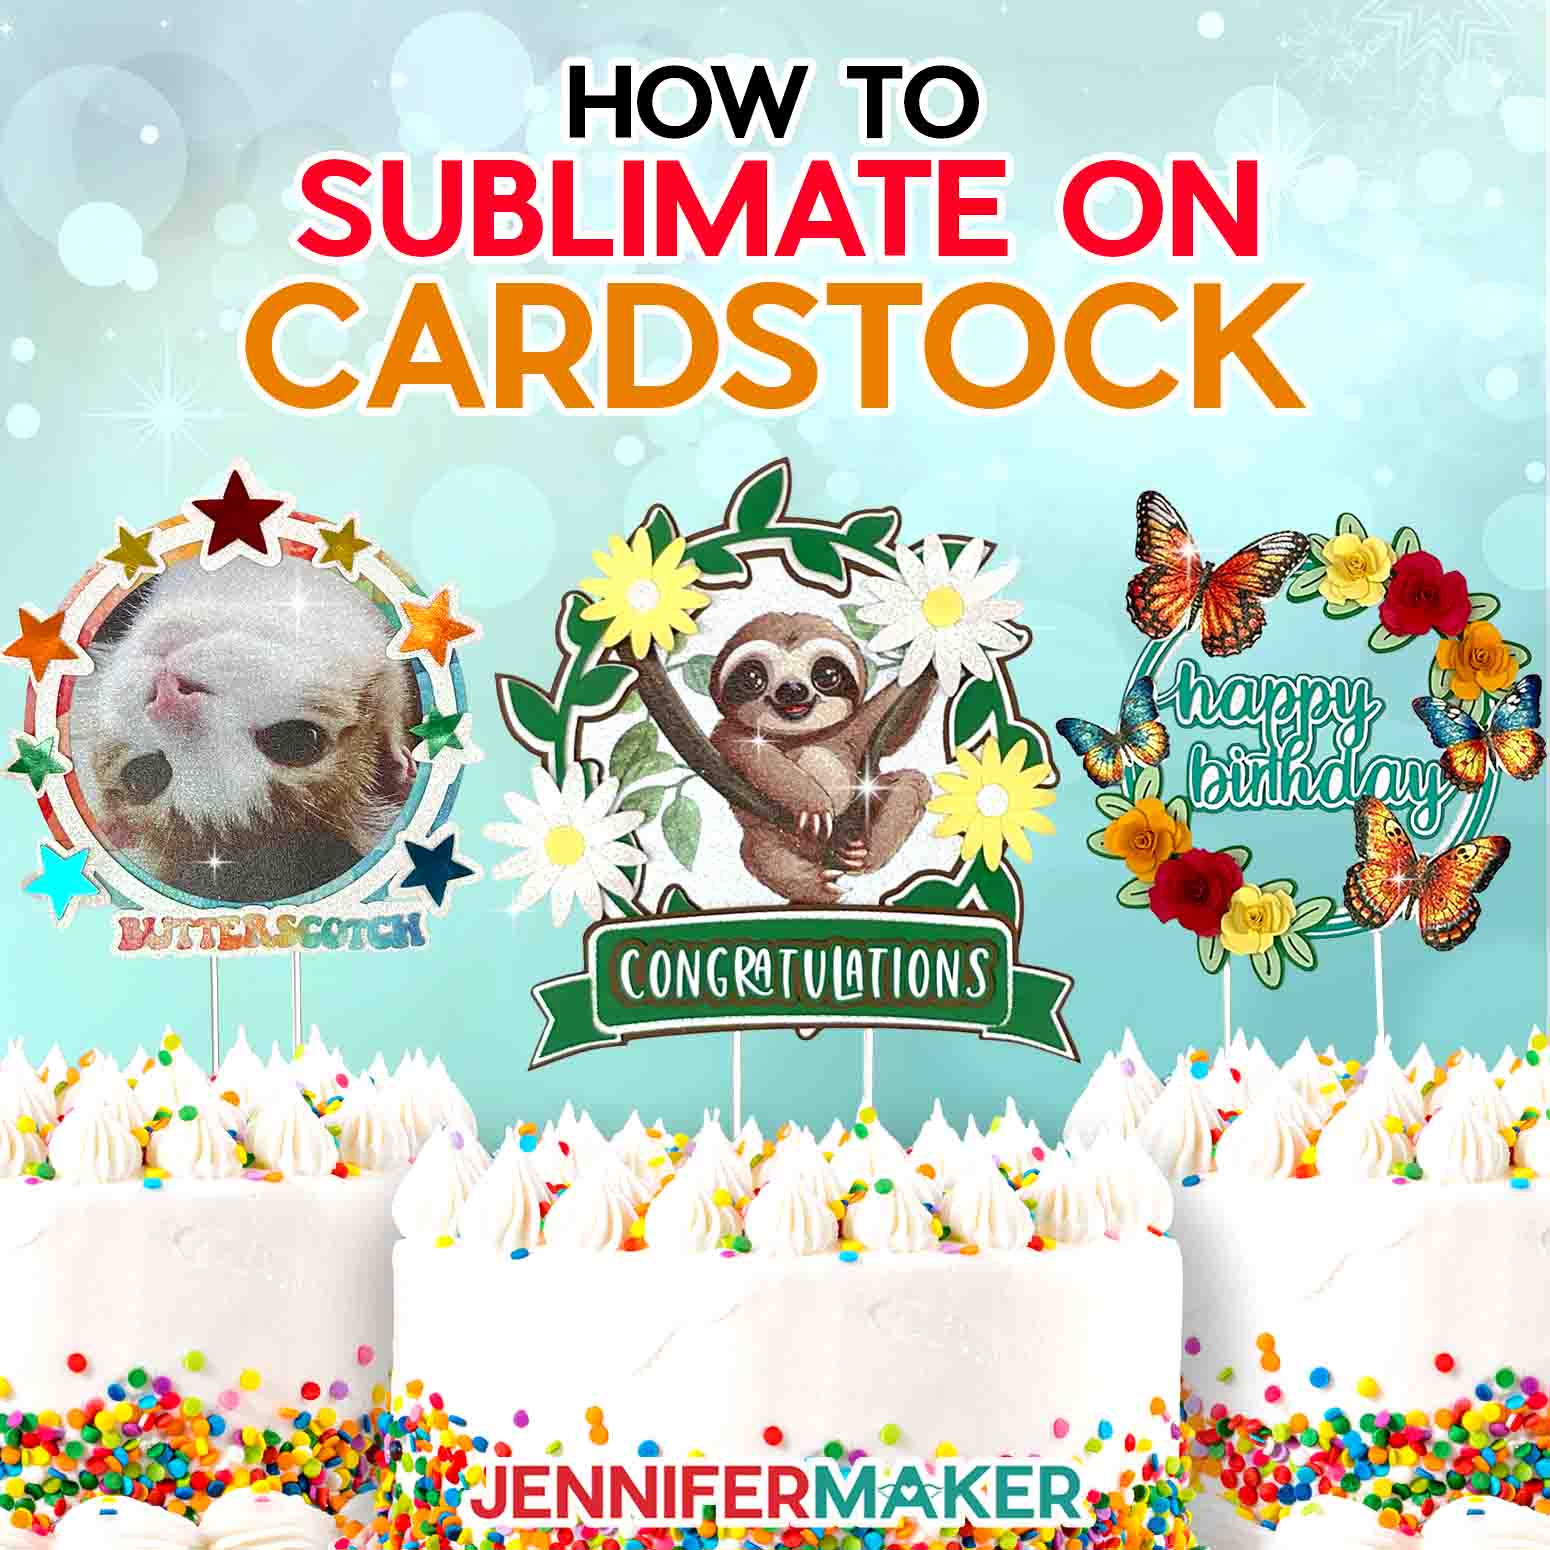
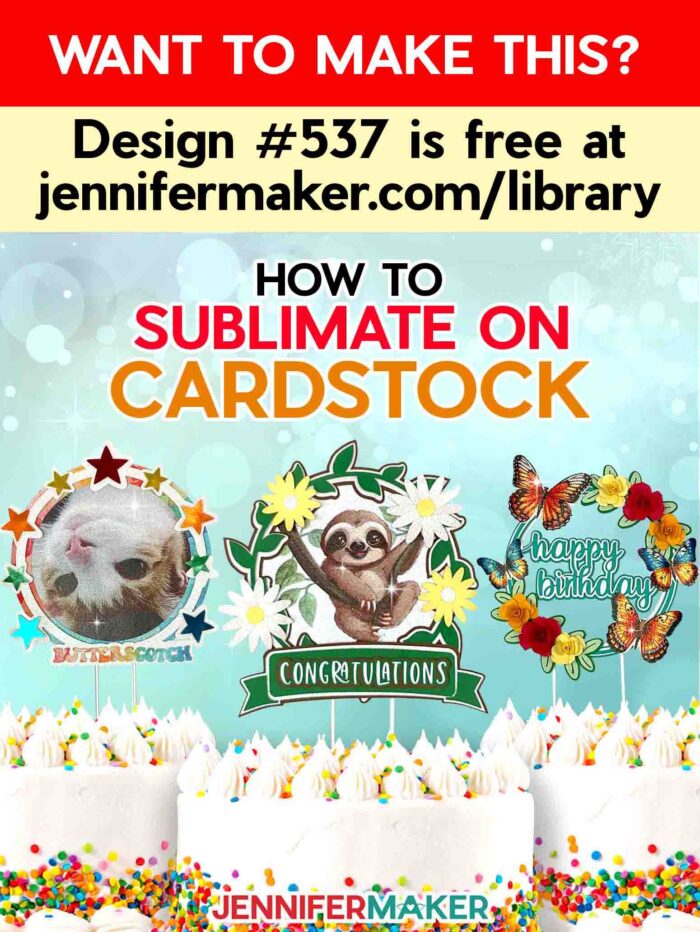
Learn how to sublimate on cardstock to make a 3D cake topper!
I love combining craft techniques to make really special projects! Lately, I’ve been really excited for sublimation, but I’ll always love papercrafting. So I wondered, “Can you sublimate on cardstock?” I’ll show you two ways to try it out and test some of the best (and worst) cardstock for these cake toppers. Plus, I tried a new material to create cake toppers with your own image if you don’t have sublimation materials!
Want to save this project? Enter your email below and we’ll send the project straight to your inbox.

If I asked you, “Can you sublimate on cardstock?” you’d probably say no. For most types of cardstock paper, you’re right! The sublimation process needs polymers (a type of plastic) to work correctly, and cardstock is paper, not plastic.
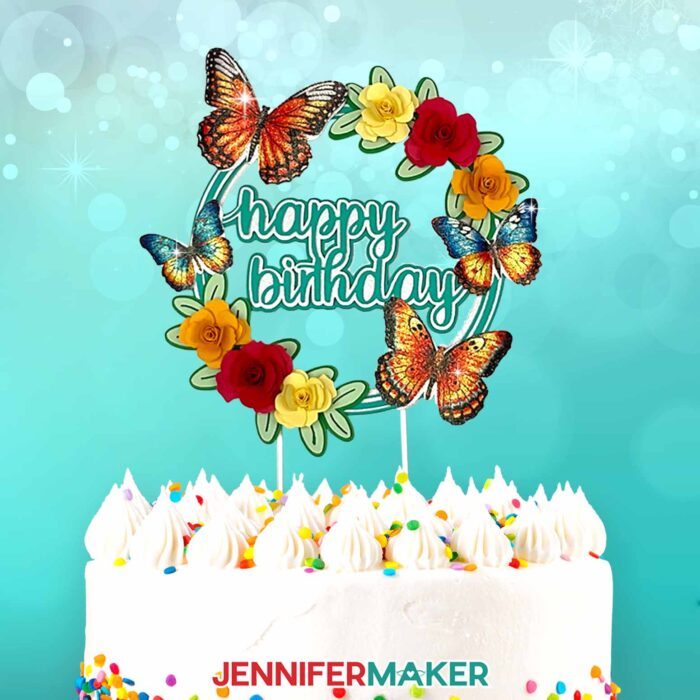
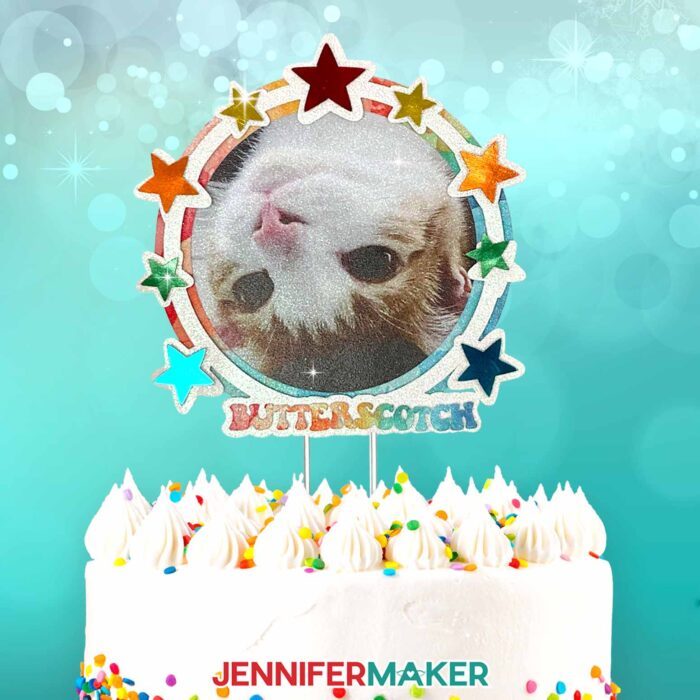
However, do you know what the glitter on most glitter cardstock is? Plastic! So that’s one type of cardstock I decided to try sublimating on! And check out the results on this cake topper!

I tested a few brands of white glitter cardstock to see how they held up to the high heat sublimation requires. One basically melted, but I do have results for the best paper options!
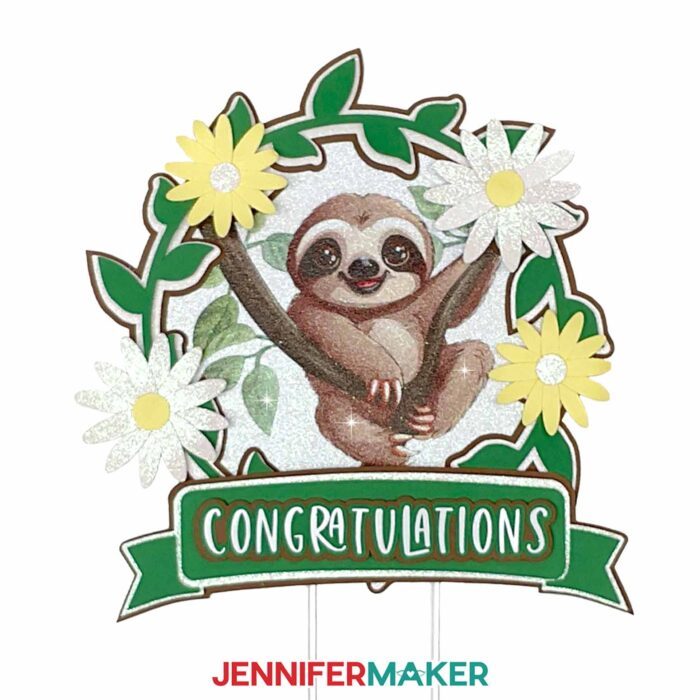
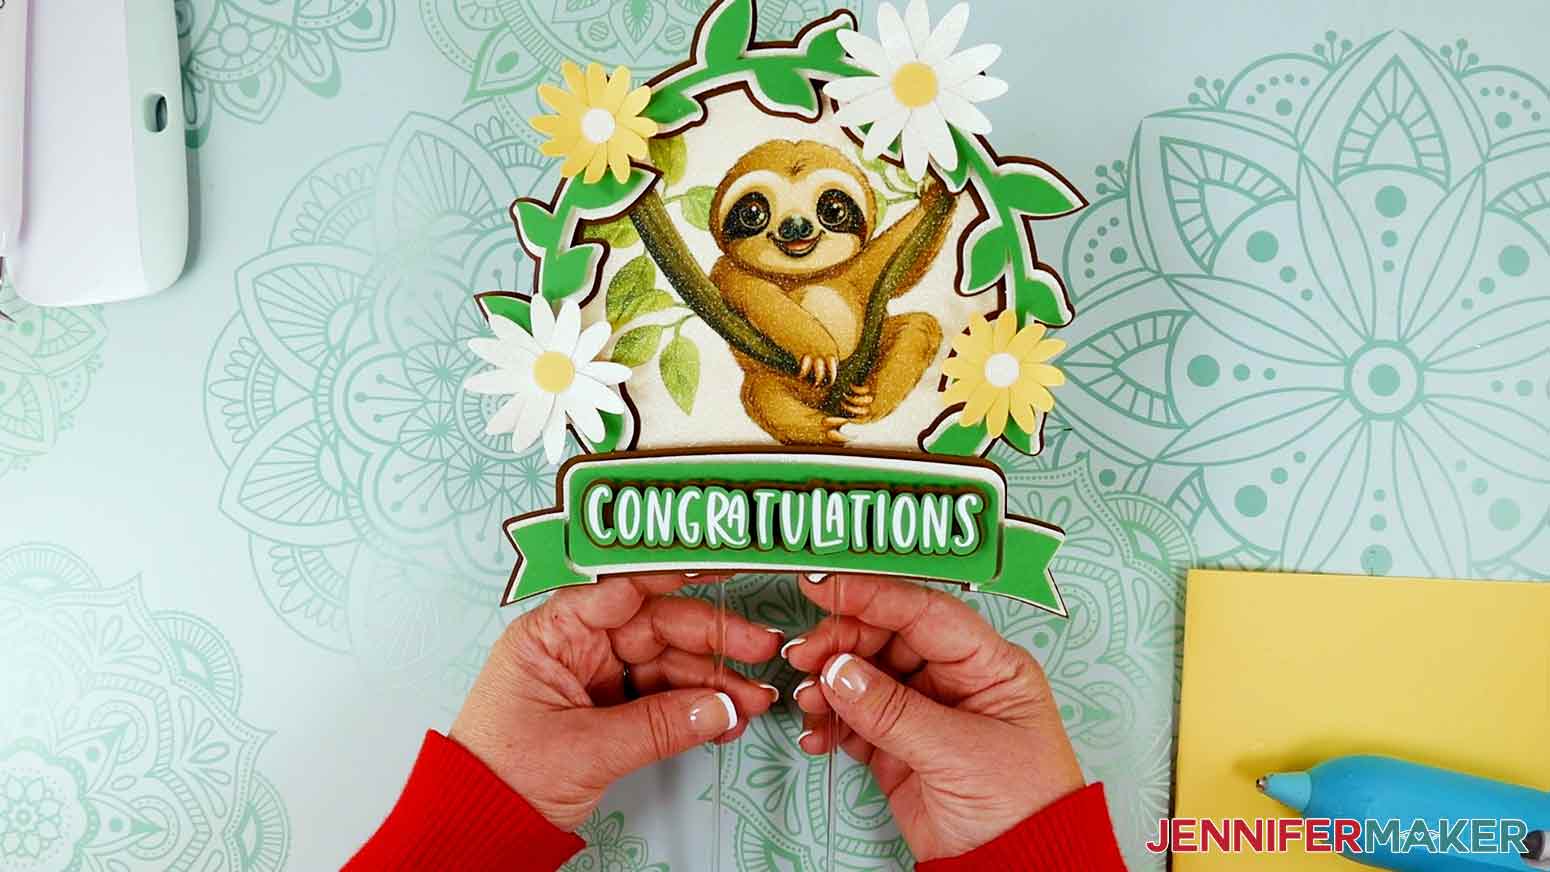
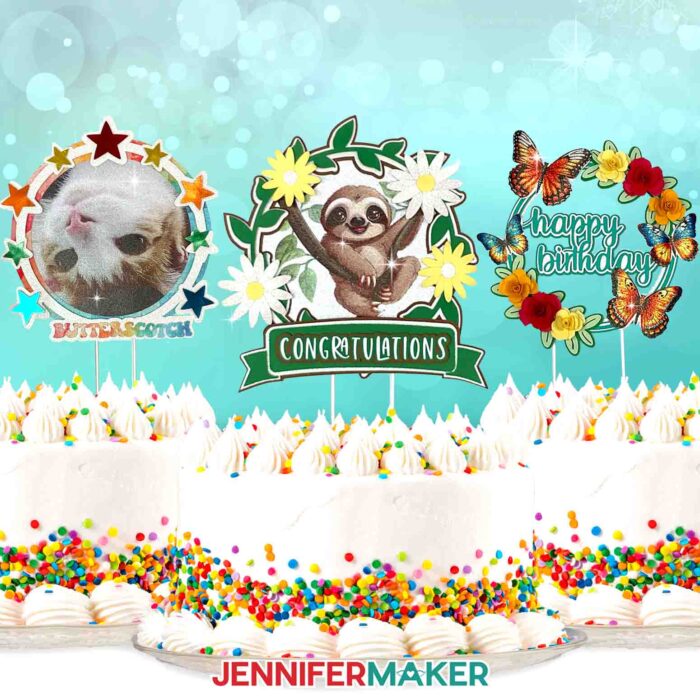
I made my butterfly design with one high quality brand and my cute sloth with another. Can you tell the difference?
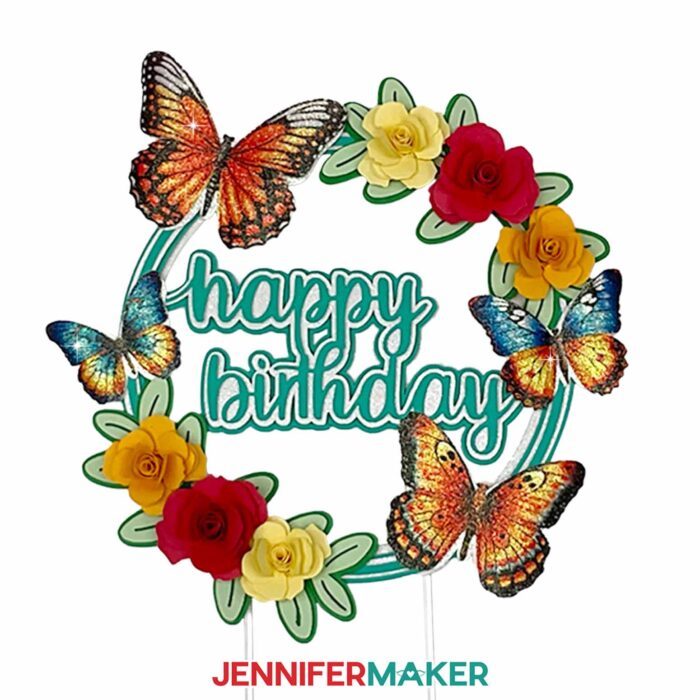
The sublimation process worked beautifully on both!
To make these adorable personalized cake toppers, you will need several pieces of cardstock. Other than needing white glitter cardstock for the sublimation layer, you can use whatever paper you want to fit your theme. I used 65 lb. cardstock in several colors and glitter cardstock for most of the layers.
I tested two methods to make my cake toppers using a Cricut machine. You can use the Print then Cut method with a Cricut Maker 3, Cricut Maker, Cricut Explore, Cricut Explore Air 2, Cricut Explore 3, Cricut Venture, or Cricut Joy Xtra. If you have a Cricut Joy or another machine without Print then Cut capabilities, try the second method to sublimate on cardstock!
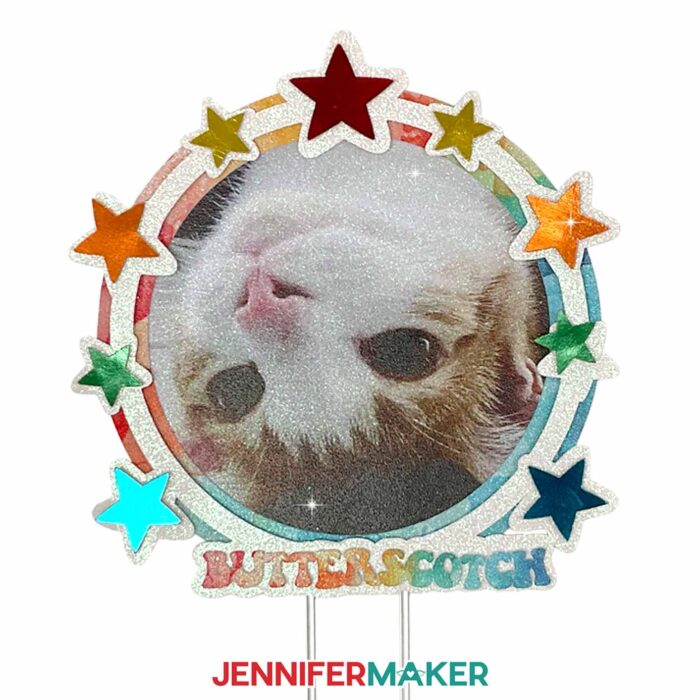
Or, if you don’t want to sublimate on cardstock, I tested out printable glitter cardstock, too! It worked well with my inkjet printer with regular ink. And no, the glitter didn’t come off at all in the printing process! Phew! Look how handsome Butterscotch looks on this paper!
So, can you sublimate on cardstock? Here’s a supply list of what you need to find out and sublimate on cardstock! This post contains some affiliate links for your convenience (which means if you make a purchase after clicking a link I will earn a small commission but it won’t cost you a penny more)! Read my full disclosure policy.
Materials to Sublimate Cardstock Cake Toppers
- 12” x 12” Honey Plum White Glitter Cardstock -AND-
- One (1) Sheet of 8.5″ x 11″ 125g A-SUB Sublimation Paper -OR-
- 8.5” x 11” Printable Inkjet Glitter Cardstock – for Regular Print Then Cut instead of sublimation
- 12” x 12” White Cardstock for the design bases and protective paper for your press
- 8.5” x 11” 65 lb. Teal Cardstock for the Happy Birthday design or stars
- 8.5” x 11“ 65 lb. Cardstock in various colors for design elements and rolled paper roses. I used light green, dark green, orange, yellow, brown, and red cardstock
- Cricut White Permanent Vinyl – optional for sloth sentiment
- Cricut StandardGrip Transfer Tape – if you use vinyl for sloth sentiment
- Two (2) 8” Acrylic Sticks per cake topper
- White Butcher Paper as blowout paper to protect your press. I don’t recommend parchment paper or Teflon sheets.
- Sublimation Printer or Printer Converted for Sublimation – I used my converted Epson printer, but Sawgrass printers or other models also work well.
- Sublimation Ink – I used HIIPOO ink
- A way to cut your printed design and cardstock – I’m using the Cricut Maker 3 but you can also use the original Maker, an Explore series machine, the Venture or Joy Xtra. You can use the Joy with the non-Print then Cut option or the printable glitter cardstock!
- Heat Press – any flat press large and hot enough to sublimate on cardstock
- Cricut EasyPress Mat
- Cricut Green StandardGrip Machine Mat, 12″ x 12″
- Proper Ventilation – I like to use this fan
- Heat Resistant Tape
- Brayer
- Foam Adhesive Dots
- Bearly Art Precision Craft Glue
- Flowtool or quilling tool for optional rolled flowers
- Hot Glue Gun and Glue Stick
- Silicone Finger Covers
- Weeding Tool
- Scraper
- Lint Roller
- Design #537 (My free design files are available in my free resource library – get the password by filling out the form at the bottom of this page)
How to Sublimate Cardstock And Customize Cake Toppers

Can You Sublimate on Cardstock
Learn how you can sublimate on cardstock to make cake toppers!
Materials
- Three (3) Sheets of 12” x 12” Honey Plum White Glitter Cardstock (for Sublimation)
- One (1) Sheet of A-Sub Sublimation Paper
- Three (3) Sheets of 8.5” x 11” Printable Inkjet Glitter Cardstock (for Regular Print Then Cut)
- Two (2) Sheets of 12” x 12” White Cardstock (for the Designs)
- Two (2) Sheets of 8.5” x 11” 65 lb. Teal Cardstock
- One (1) Sheet of 8.5” x 11“ 65 lb. Light Green Cardstock
- One (1) Sheet of 8.5” x 11” 65 lb. Dark Green Cardstock
- Six (6) Sheets of 8.5” x 11” 65 lb. Colored Cardstock (for Rolled Paper Roses)
- Cricut White Permanent Vinyl
- Cricut StandardGrip Transfer Tape
- Two (2) 8” Acrylic Sticks
- White Butcher Paper
- Design #537 (My free design files are available in my free resource library – get the password by filling out the form at the bottom of this page)
Tools
- Sublimation Printer or Printer Converted for Sublimation
- Sublimation Ink
- A way to cut your printed design and cardstock - I’m using the Cricut Maker 3 but you can also use the original Maker, an Explore series machine, the Venture or Joy Xtra.
- Heat Press - I used my Autopress, but you can also use an EasyPress or a traditional heat press
- Cricut EasyPress Mat
- Cricut Green StandardGrip Machine Mat, 12" x 12"
- Proper Ventilation - I like to use this fan
- Heat Resistant Tape
- Brayer
- Foam Adhesive Dots
- Bearly Art Precision Craft Glue
- Hot Glue Gun and Glue Stick
- Silicone Finger Covers
- Flowtool
- Weeding Tool
- Scraper
- Lint Roller
Instructions
STEP 1: GET A SUBLIMATION CAKE TOPPER DESIGN
First, download my Can You Sublimate Cardstock designs from my free library - look for Design #537. Alternatively, you can use the Save This Project form near the top of this post and the design link will be emailed to you.
TIP: If you're not sure how to upload, go to jennifermaker.com/svgs to learn how to unzip and upload SVG files.
There are three SVG designs in my collection: butterfly birthday, sloth congratulations, and a watercolor birthday design that can be personalized.
There are also eight PNG files to accompany each of the SVG designs: four butterflies, a sloth, a watercolor birthday sentiment, a watercolor frame, and a square watercolor image you can use for customization.
In this tutorial, I’ll show you how to make all three designs with or without Cricut’s Print Then Cut feature to sublimate on white glitter cardstock. I will also show you how to prepare a personalized cake topper with the watercolor files in Design Space. These cake toppers are perfect for a standard 8” - 10” round or sheet cake.
PROJECT 1: SLOTH CAKE TOPPER WITH PRINT THEN CUT
STEP 2: PREPARE YOUR DESIGN
There are two ways to prepare your design. Option 1 includes using Print then Cut while Option 2 does not. You can try both and see which you prefer.
If you have not recently used your Cricut’s Print Then Cut feature, you may want to calibrate your machine for the most precise cuts. If you aren’t sure how to calibrate for Print Then Cut, check out this helpful video.
1. Click “Upload” and then “Upload Image.”
2. Click “Browse.”
3. Select the sloth SVG file.
4. On the next screen, click “Upload.”
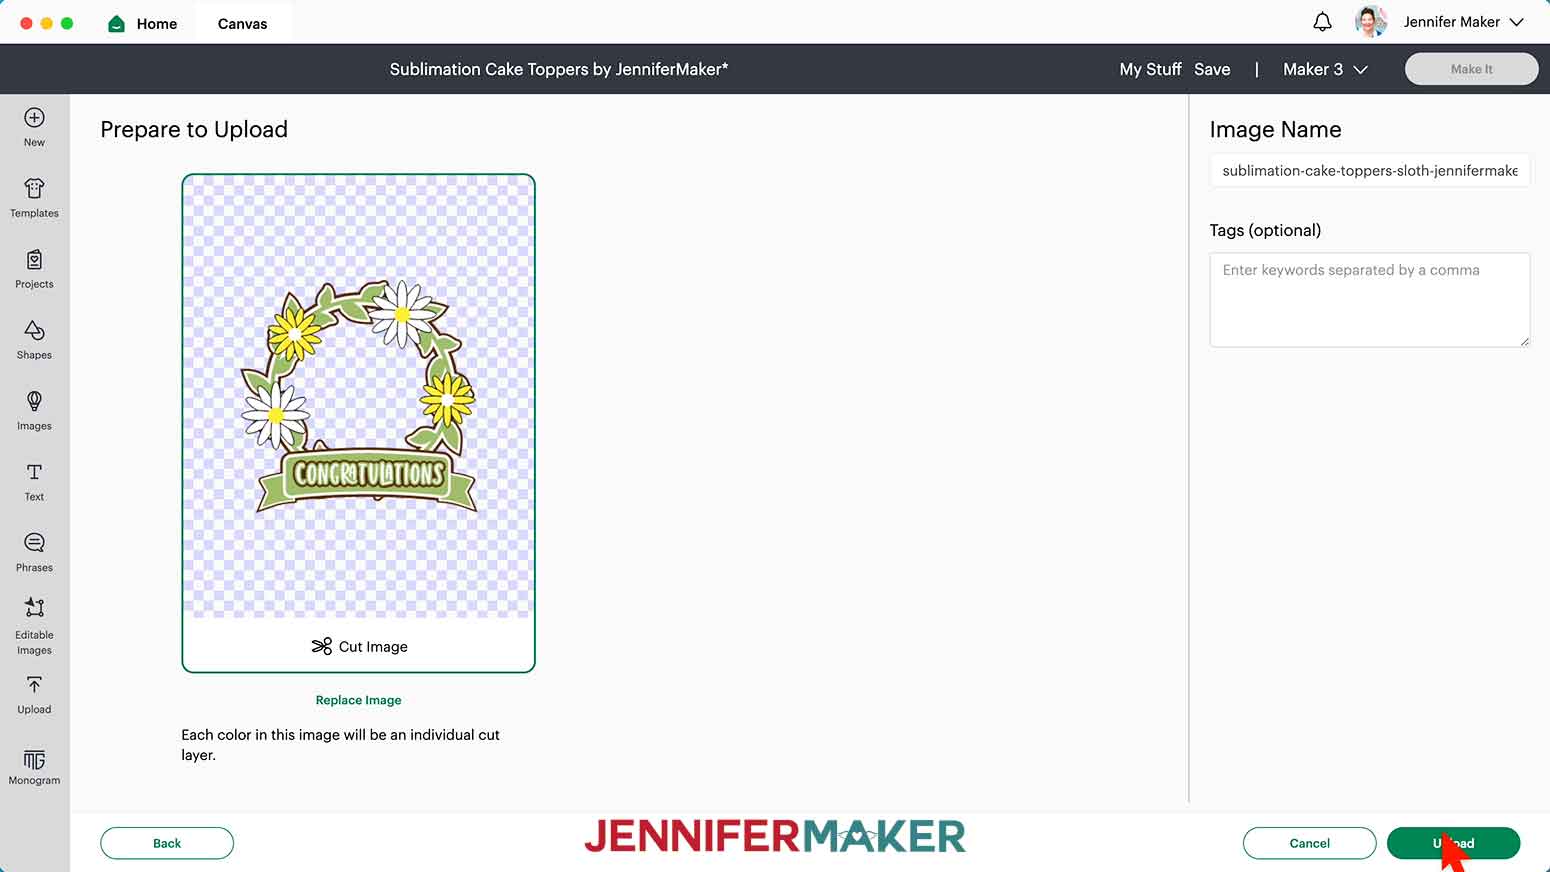
5. Repeat steps 1-3 to upload the sloth PNG.
6. On the Upload Image screen, select “Complex” and click “Continue.”
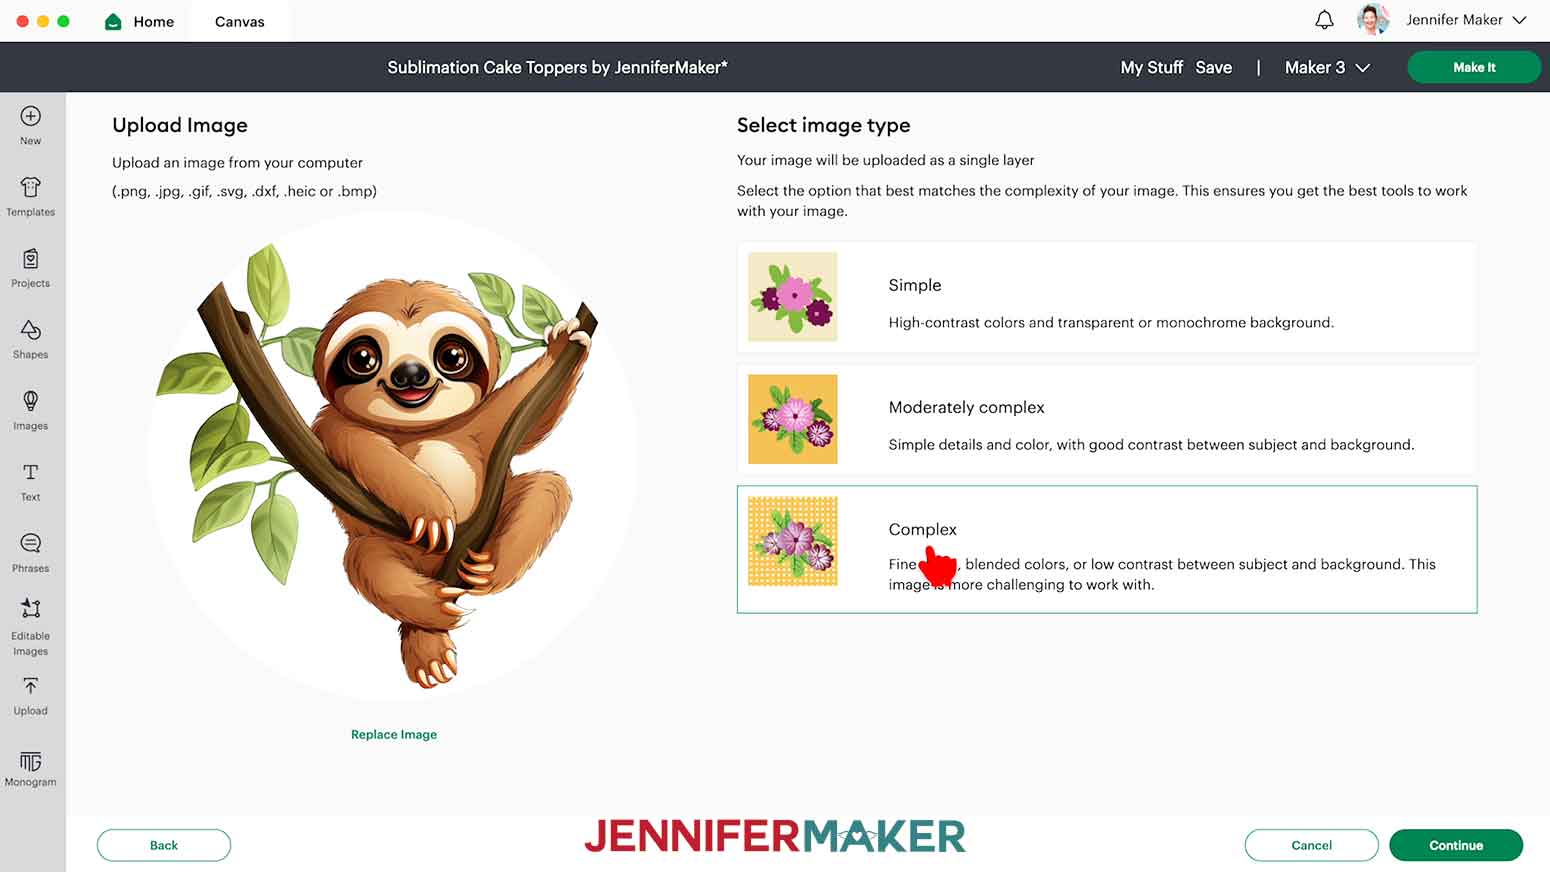
7. No changes are needed on the next screen. Click “Apply & Continue.”
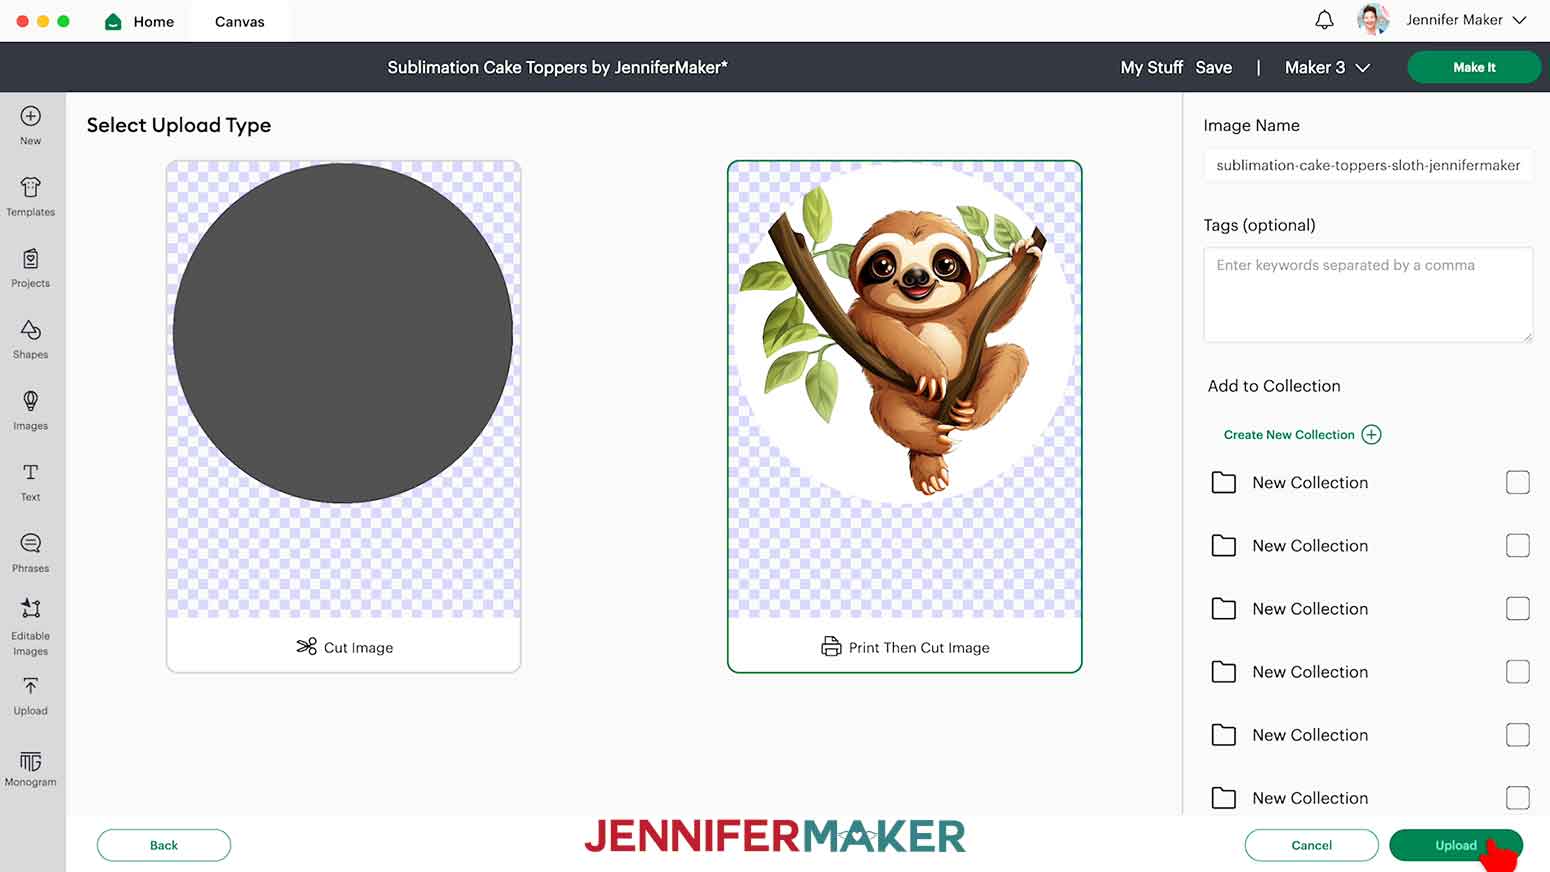
8. On the next screen, select “Print Then Cut Image” and click “Upload.”
9. Find your designs in Recent Uploads and click each one to select it.
10. Click “Add to Canvas.”
11. Click the minus (-) icon in the lower left corner to zoom out. 50% works well for now.
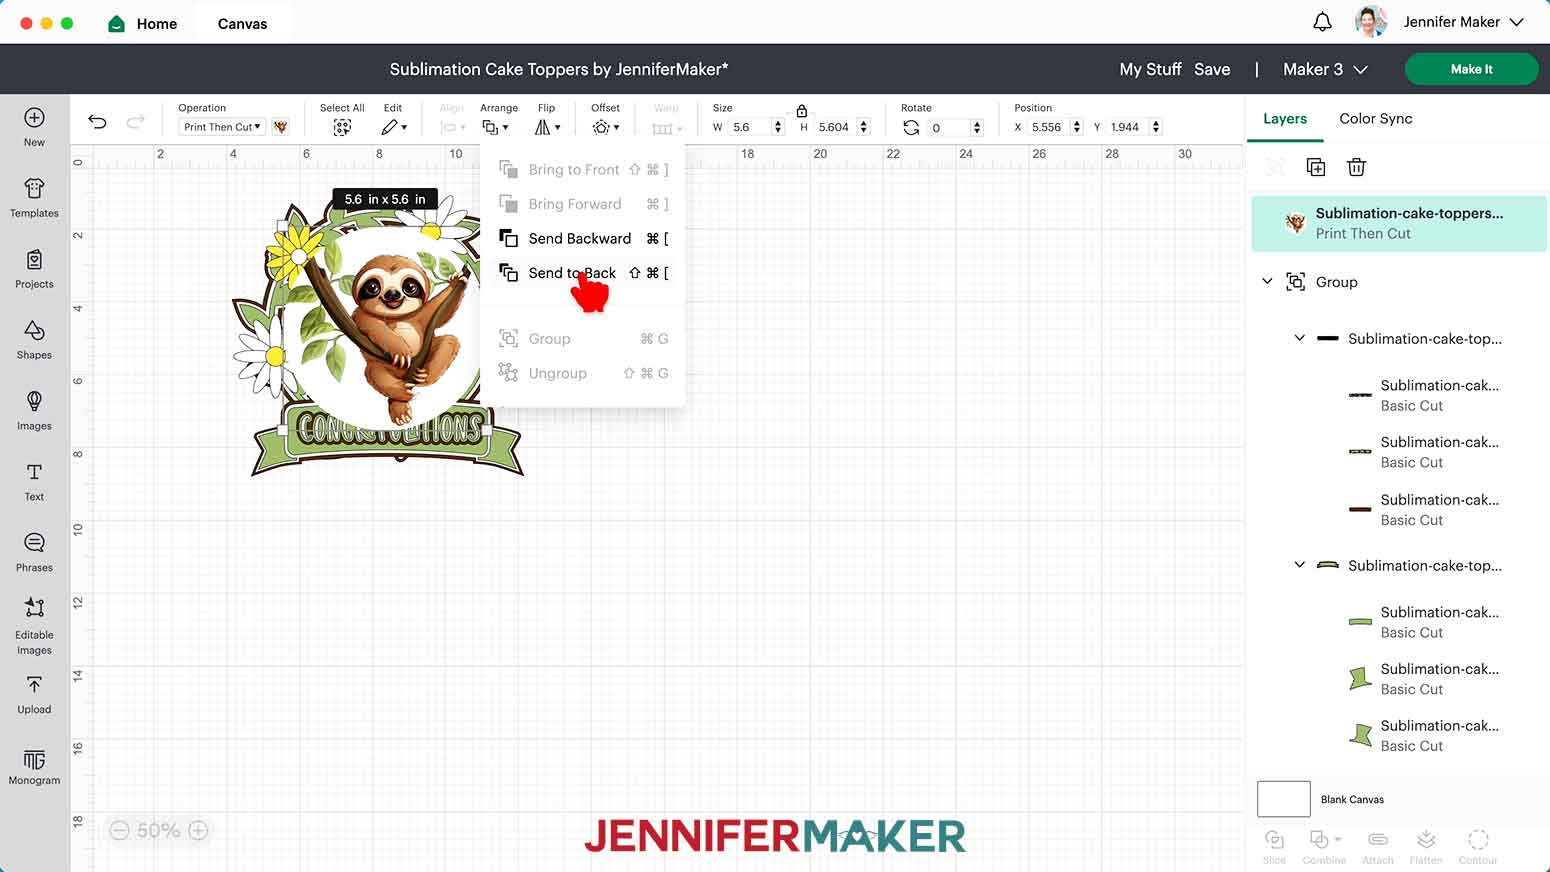
12. The PNG comes in big, so with the lock icon closed, change the sloth’s width to 5.6”

13. Drag it over the topper design, then click “Arrange” and “Send to Back”
14. I want to cut the “congratulations” from adhesive vinyl, so I’ll select the word in the Layers Panel. Use the Color Box to change it to light gray. Now it will cut on a different mat.
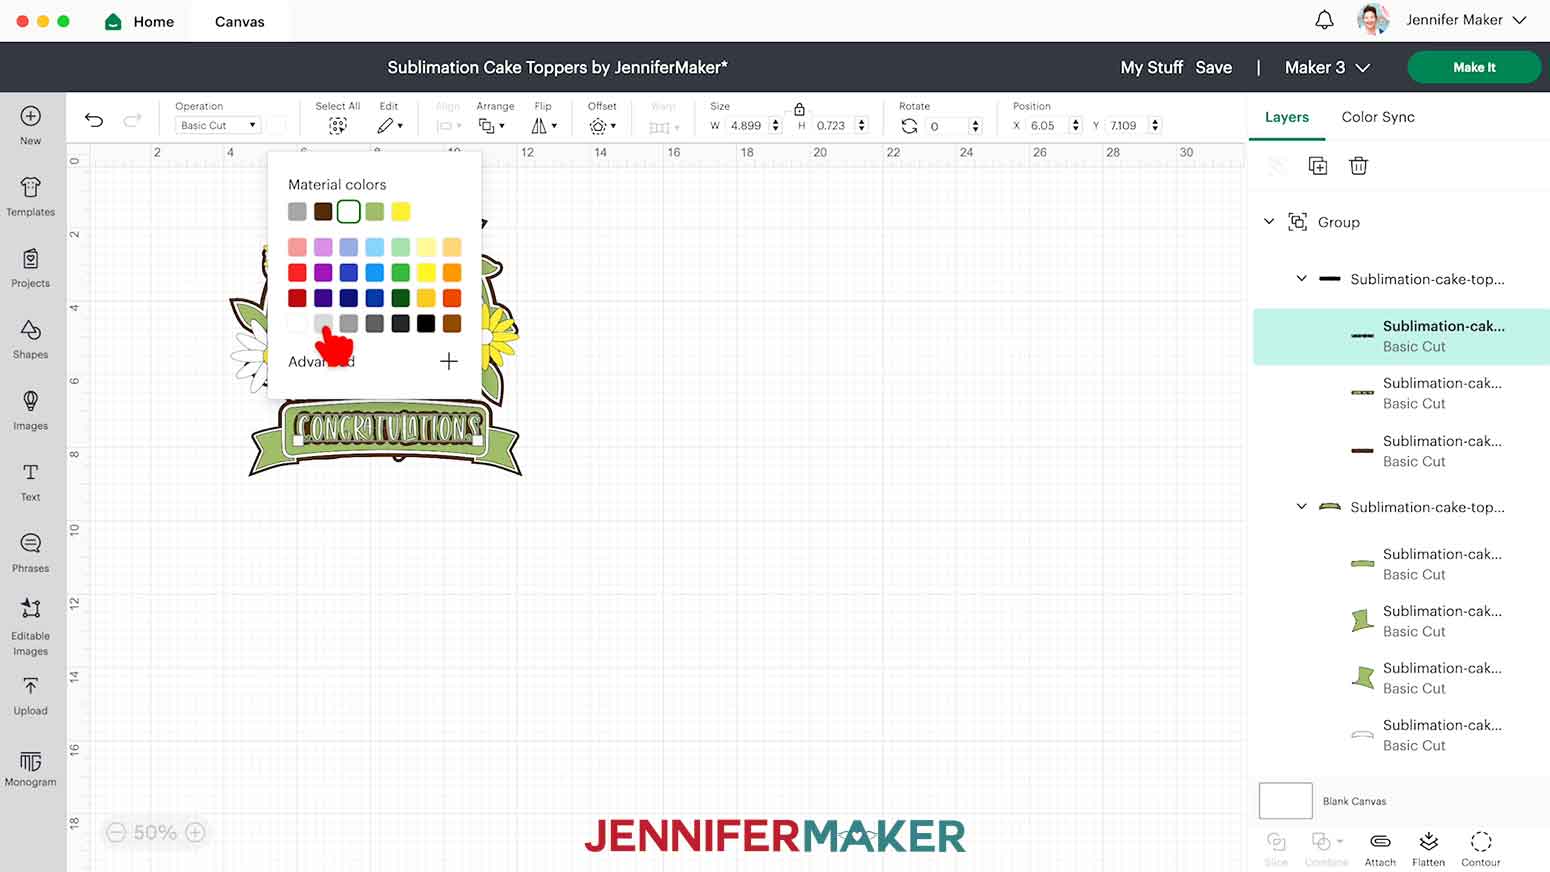
NOTE: You can also leave the sentiment white and cut it out of cardstock if you’d like.
STEP 3: PRINT, SUBLIMATE, AND CUT YOUR DESIGN
PREPARING
1. Make sure the correct machine is selected
2. Click “Make It”
3. If prompted, click “On Mat,” choose your mat size, and click “Confirm.”
4. On the Prepare Screen, make sure your Print Then Cut mat’s paper size is set to 8.5” x 11”
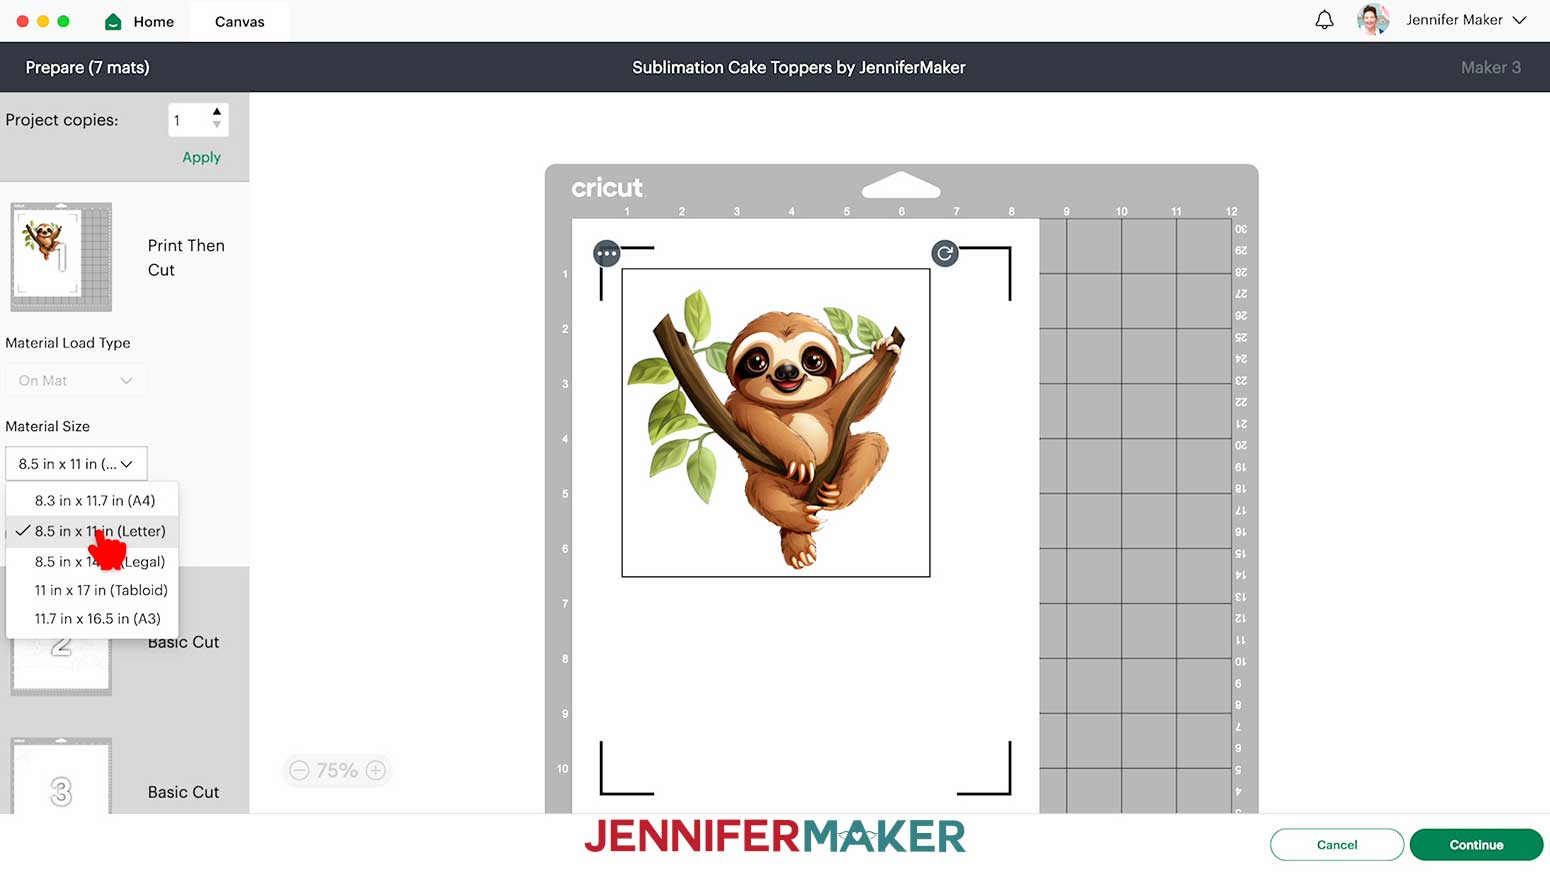
5. Turn on the “Mirror” toggle for the Print Then Cut mat.
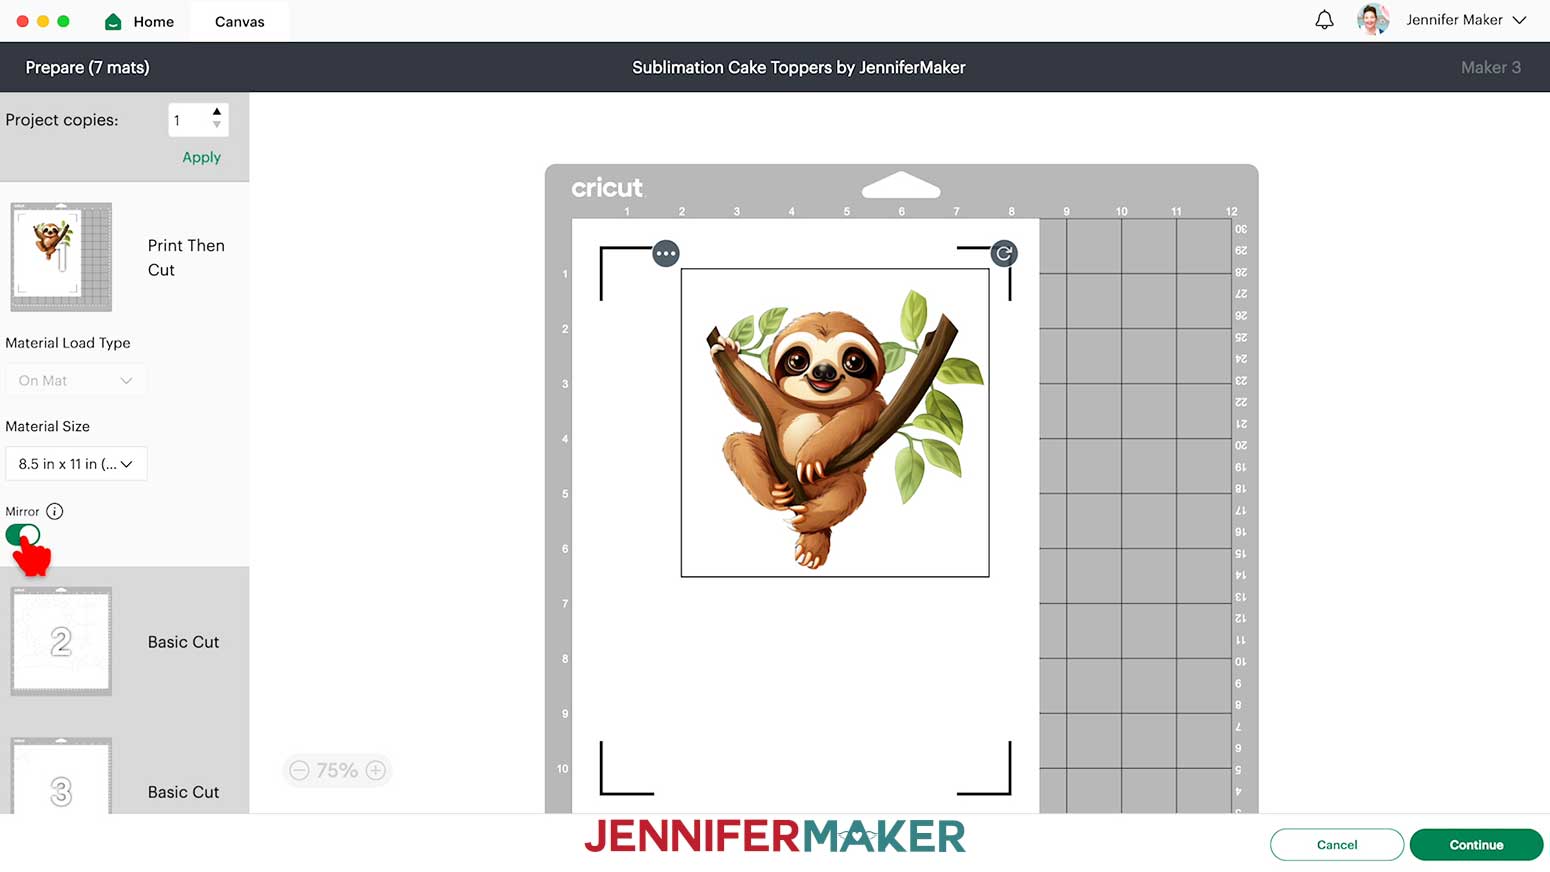
6. Change the material size for your mats to match the size of the materials you're using.
7. Click back on the first mat and click “Continue.”
PRINTING
1. On the Make Screen, click “Send to Printer.”
2. Select your sublimation printer from the Printer dropdown.
3. Toggle “Add Bleed” on.
4. Toggle “Use System Dialog” on.
5. Click “Print.”
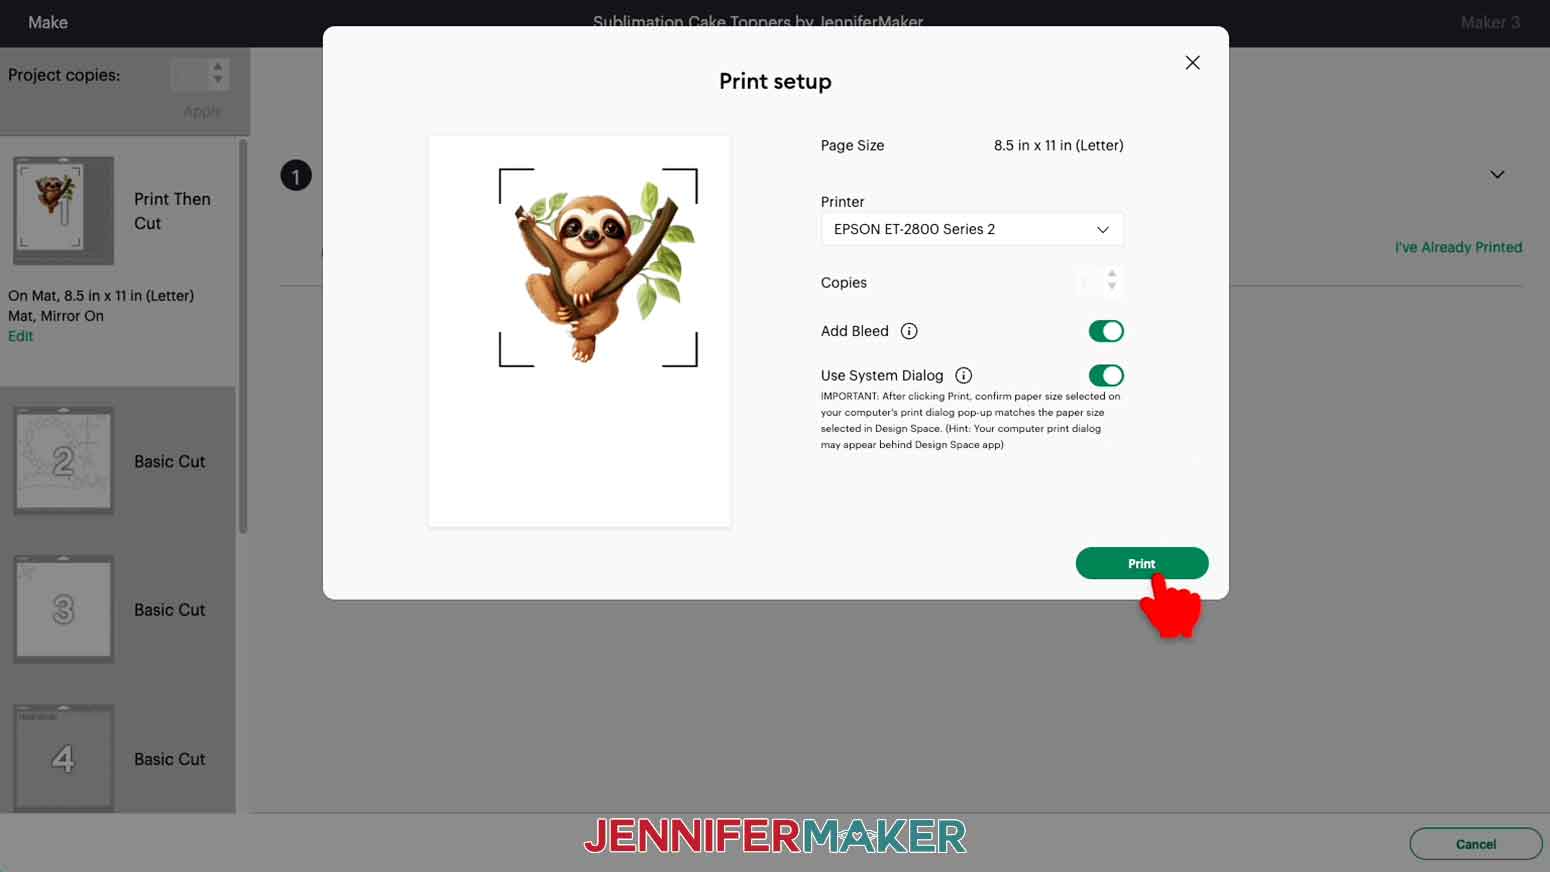
NOTE: You may need to minimize or move your Design Space window to see the print dialog window. It sometimes appears behind Design Space. There is a chance the system dialog box will not work on all printers. Each printer is different, so consult your printer's user guide for additional support.
6. Set the Media to “Photo Matte Paper” and the Quality to “Best.” “Flip Horizontally” should be unchecked.
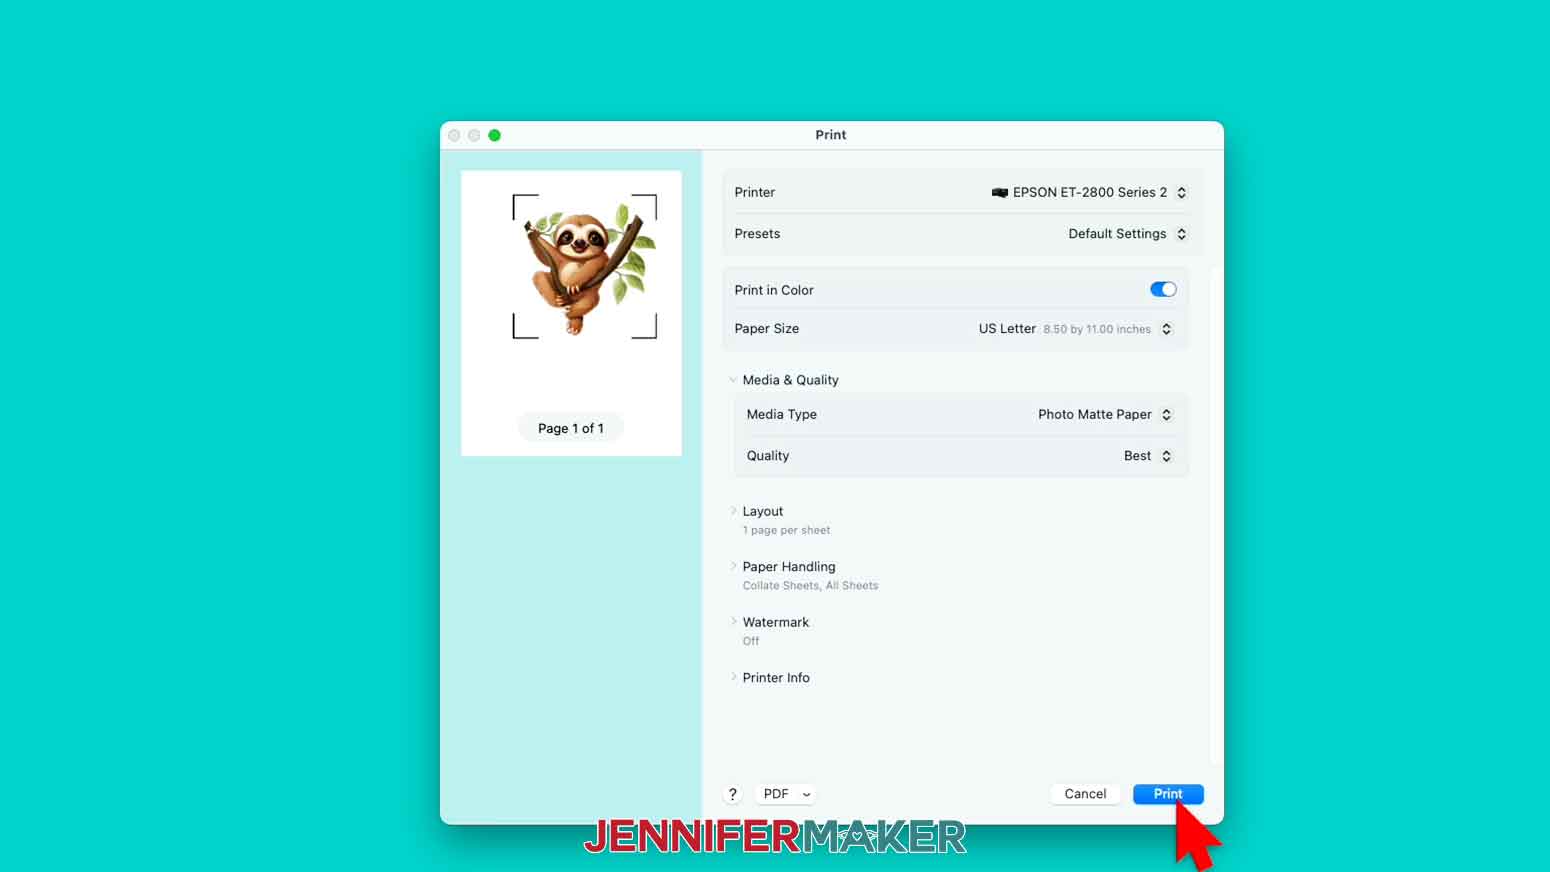
7. Make sure the sublimation paper is loaded correctly.
8. Click “Print.”
SUBLIMATING
Before you begin, make sure you are in a well-ventilated area with a fan on or a window open.
1. Preheat the Autopress or EasyPress to 400° Fahrenheit (204° Celsius) and set the time to 45 seconds.
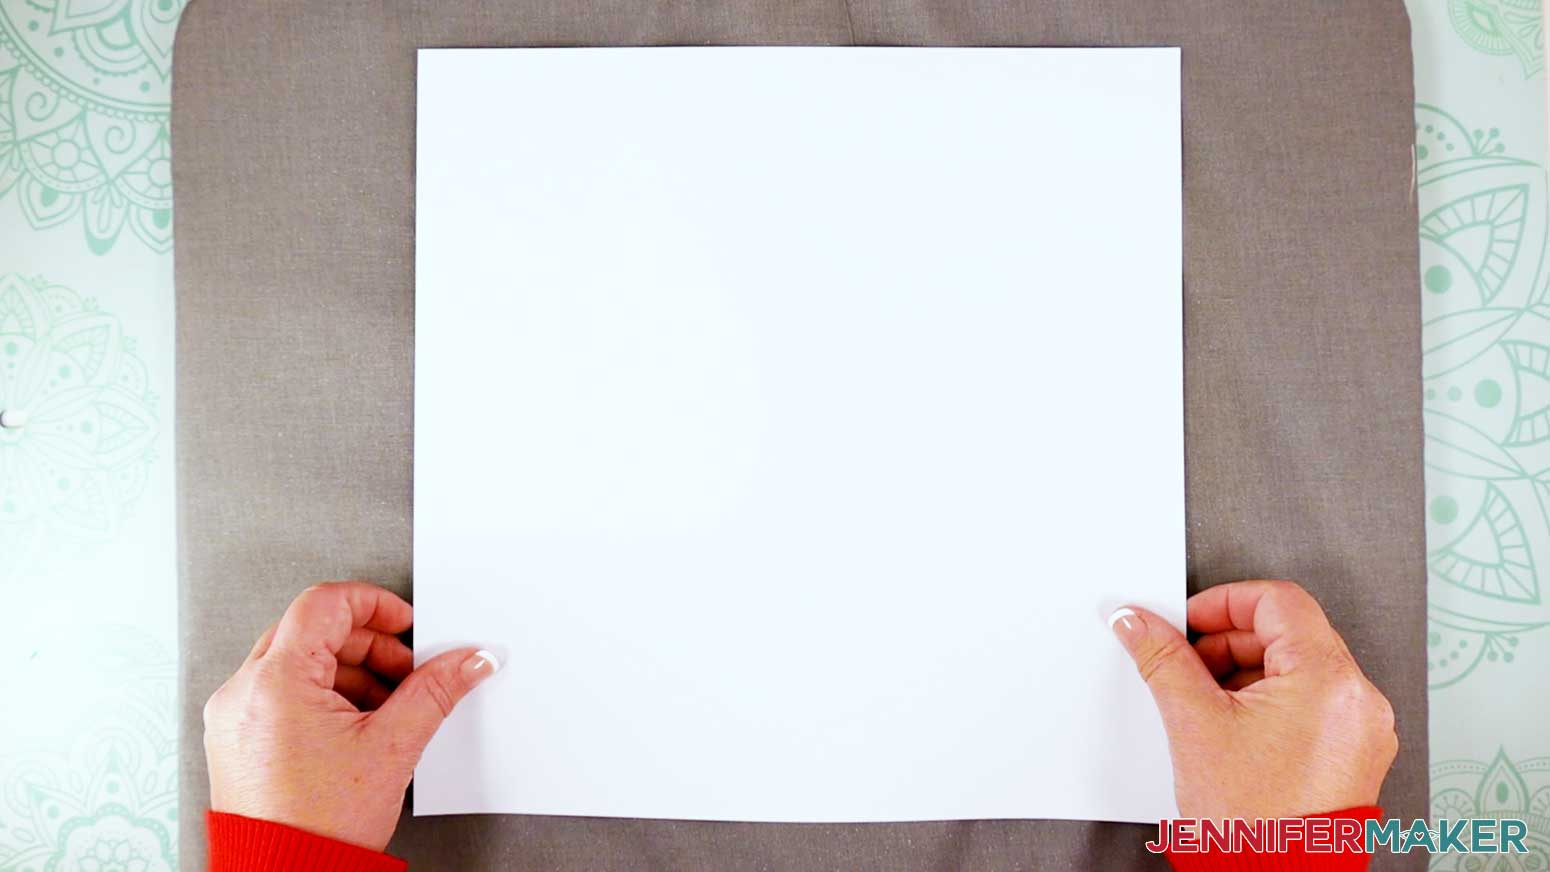
2. Place a piece of 12” x 12” plain white cardstock on the pressing mat.
3. Place a piece of white glitter cardstock face up on top of the plain white cardstock.
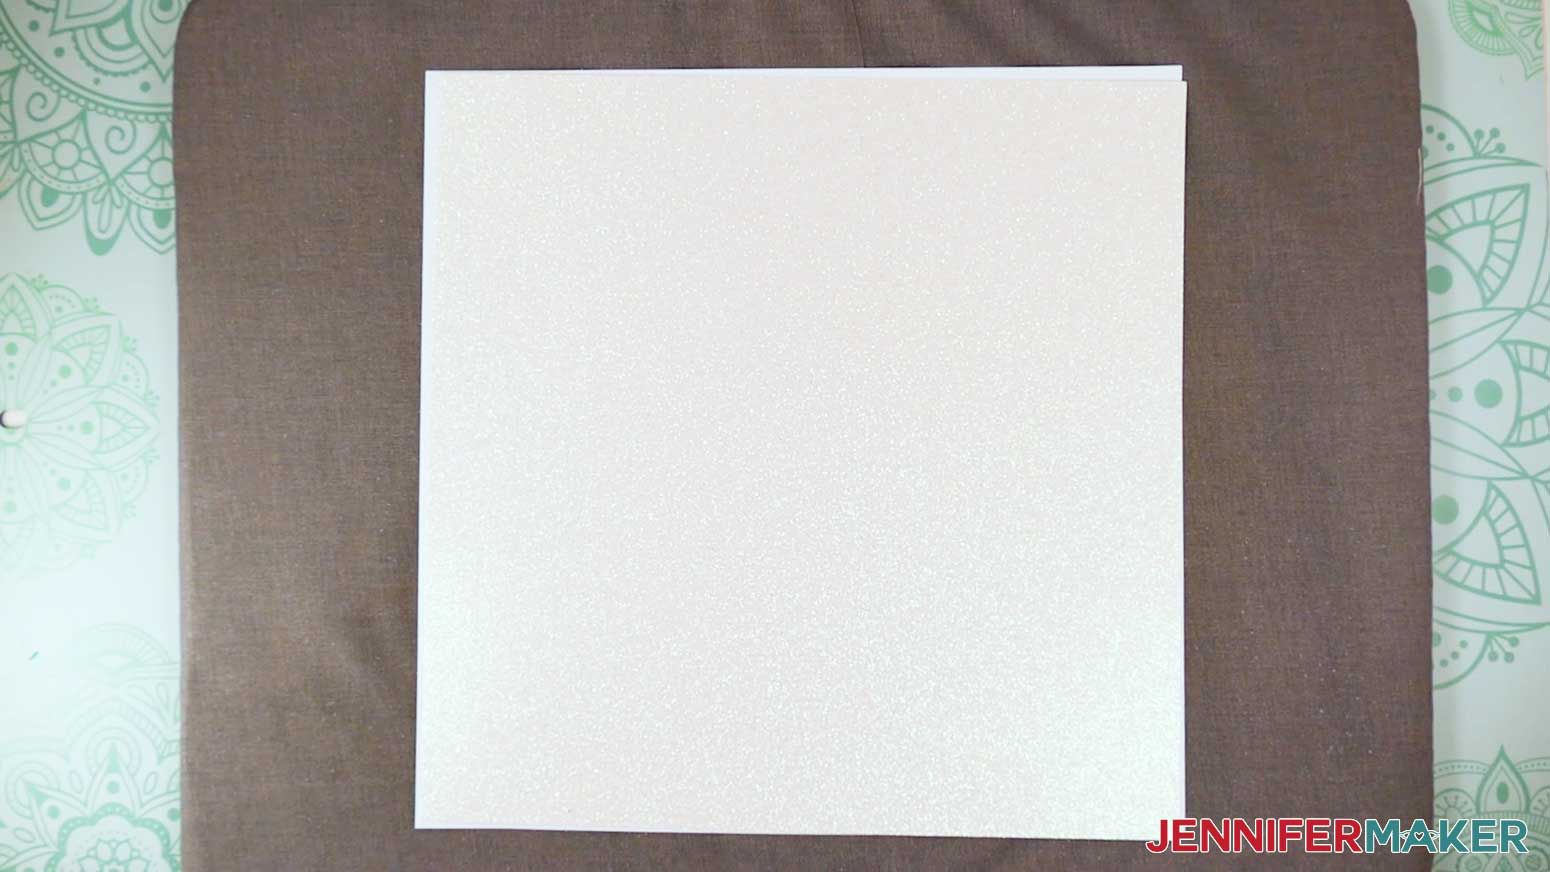
4. Use a lint roller on the glitter cardstock to remove any excess glitter bits.
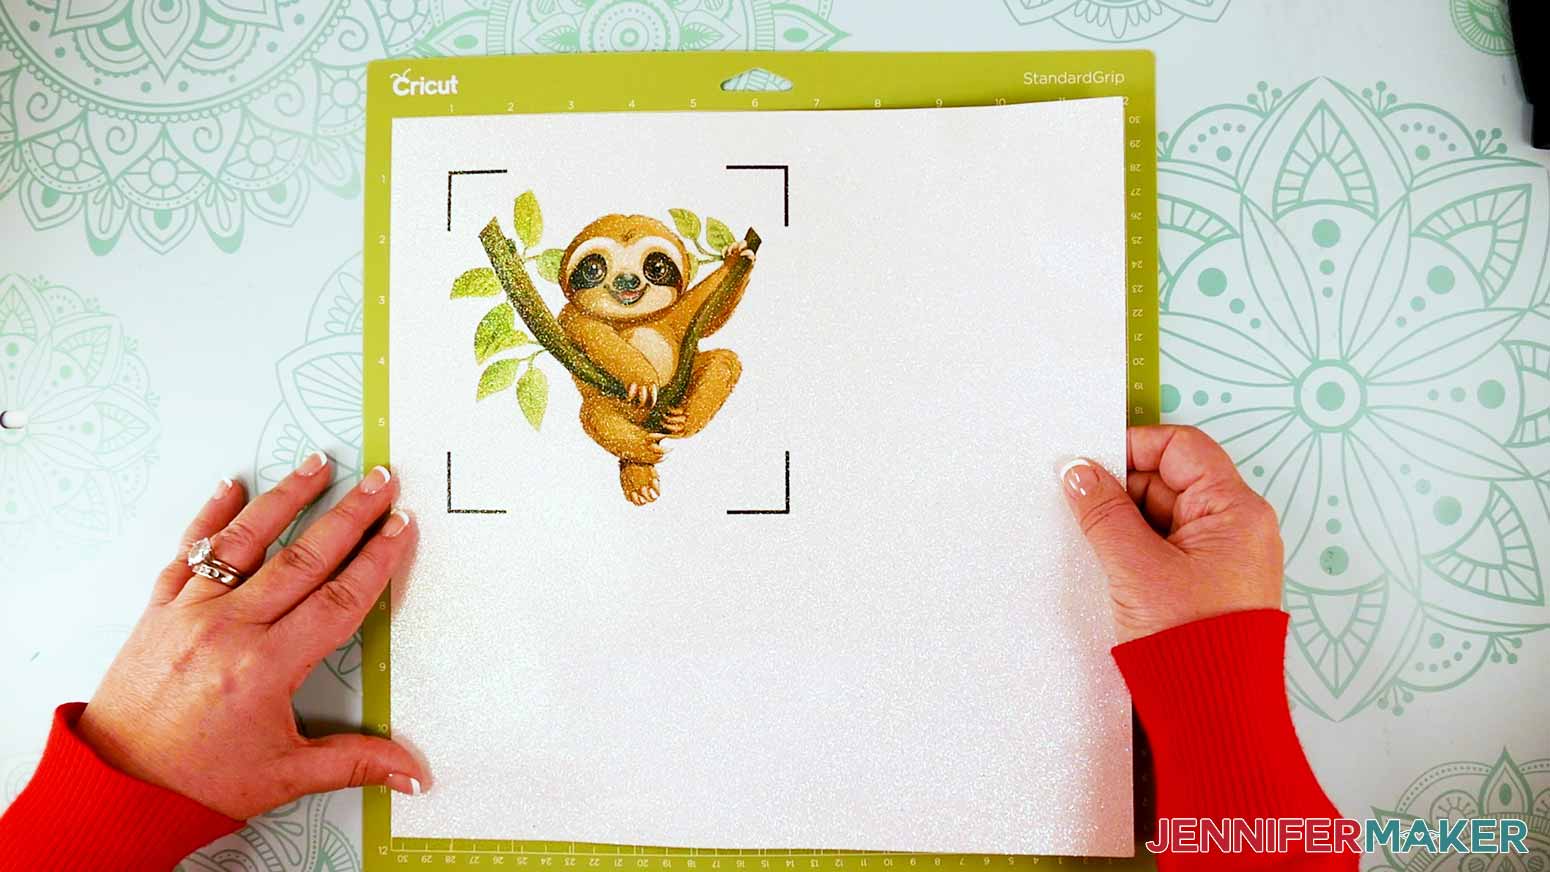
5. Place the sublimation print face down on the cardstock and align the top and left edges.
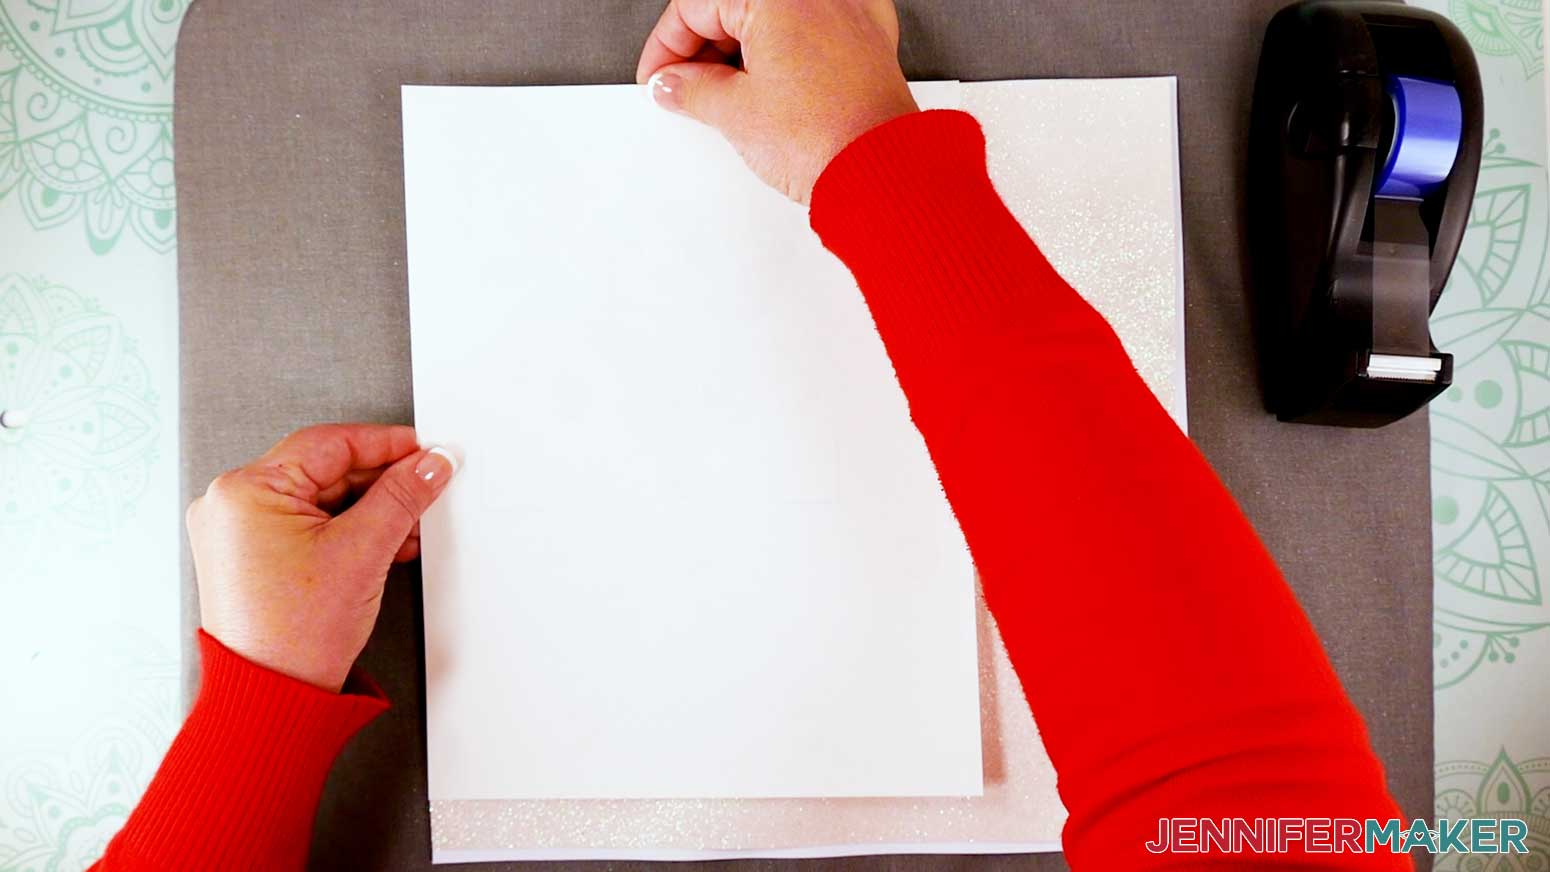
NOTE: It is important to align the print along the left side of the cardstock so that your Cricut can accurately read the registration marks when the sublimated design is on the machine mat.
6. Place heat-resistant tape on all edges of the sublimation print to hold it in place on the glitter cardstock. It is okay if you have to tape the print to the white cardstock or pressing mat.

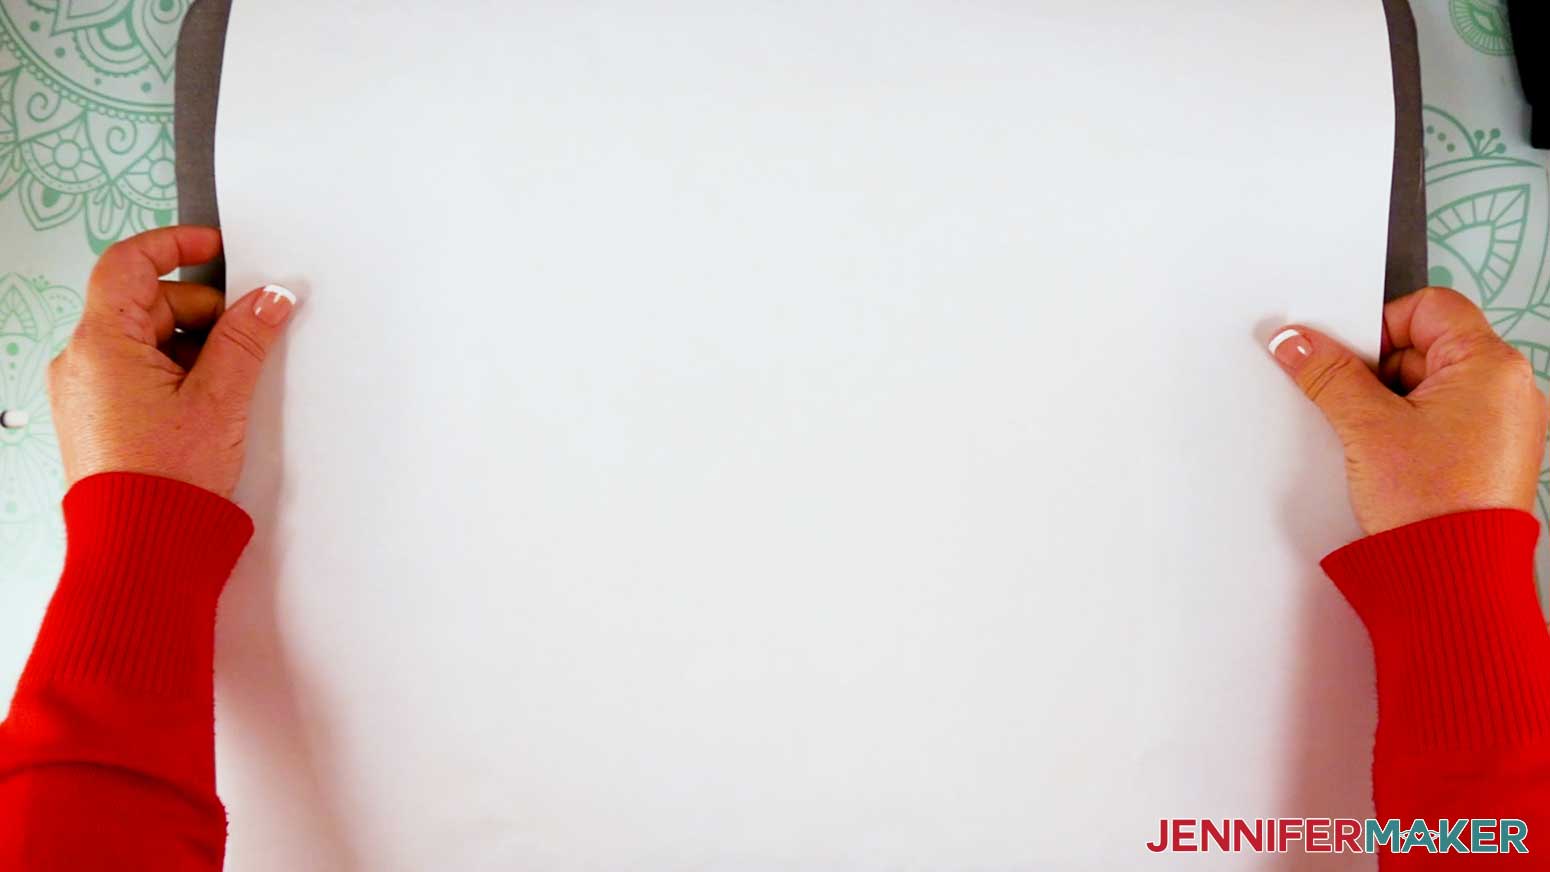
7. Place a piece of plain white butcher paper on top of the sublimation paper.
8. Press at 400° Fahrenheit for 45 seconds.
9. When the time is up, remove the press by lifting it straight up.
10. Allow the cardstock to cool for a couple of minutes, and then remove the blowout paper, tape, and printed sheet to reveal the design.
CUTTING
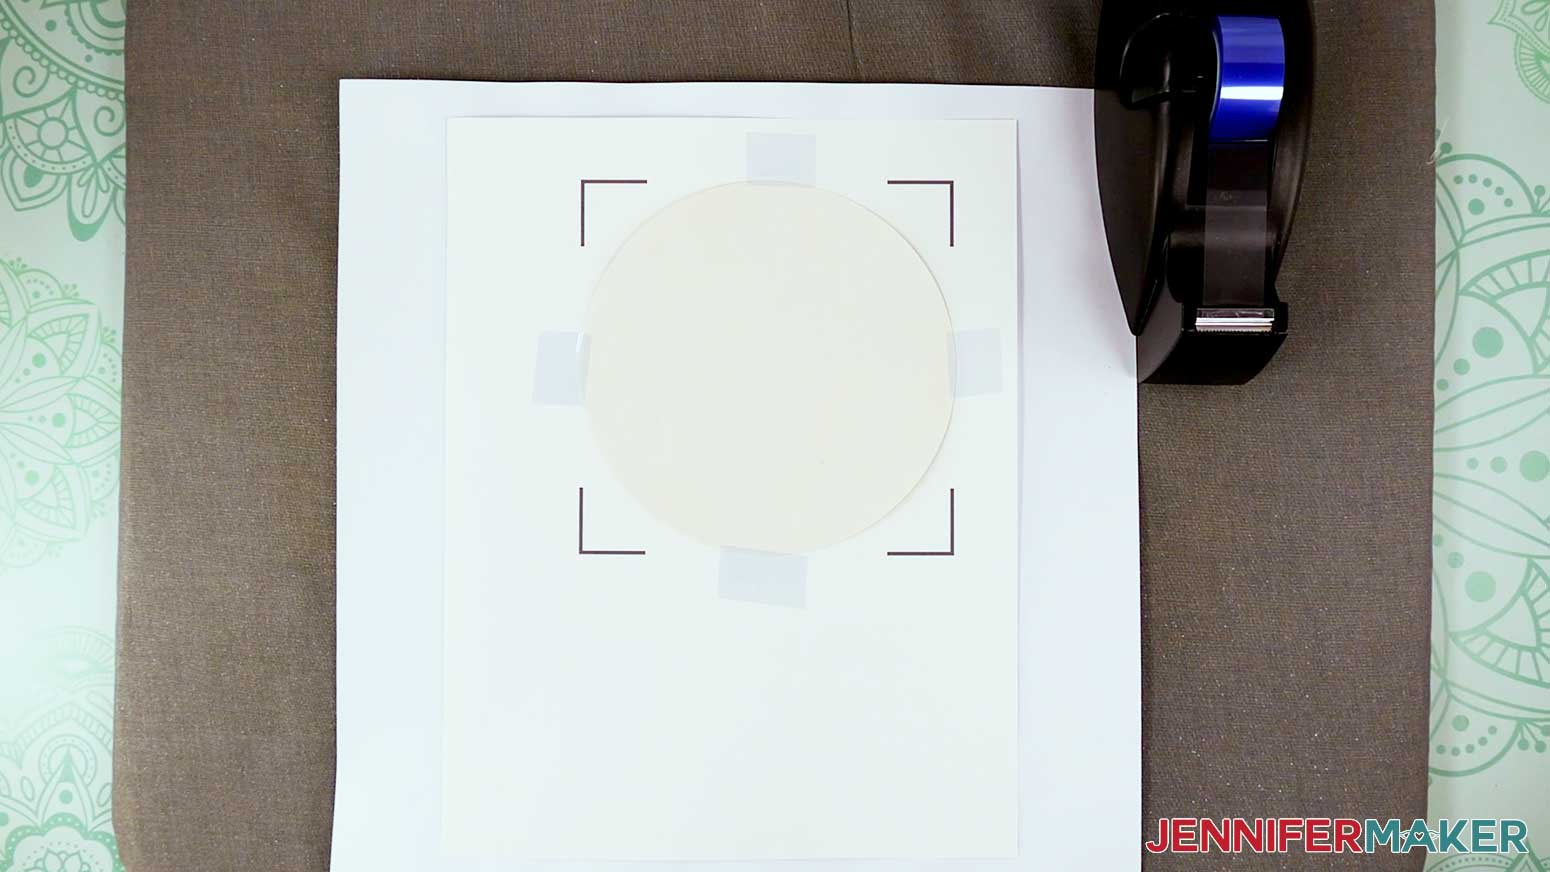
1. Place the sublimated glitter cardstock face up, with the top and left edges aligned along the guide, on a green StandardGrip machine mat.
2. Put a piece of copy paper on top of the sublimation print and use a brayer to secure the print to the mat.
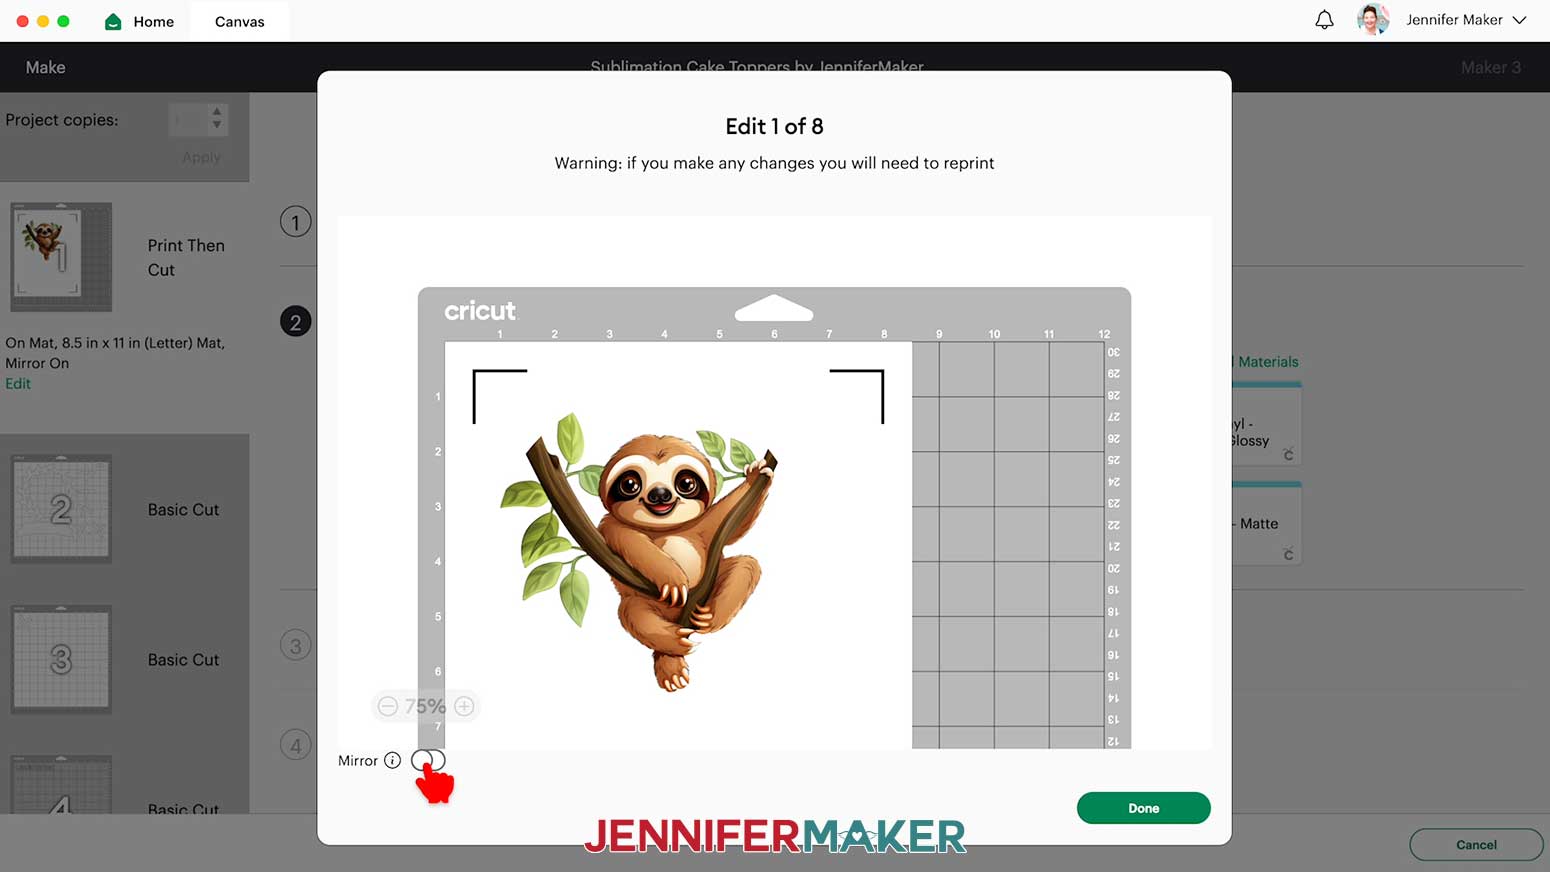
3. In Design Space, click “Edit” under the Print Then Cut mat preview on the left side of the screen
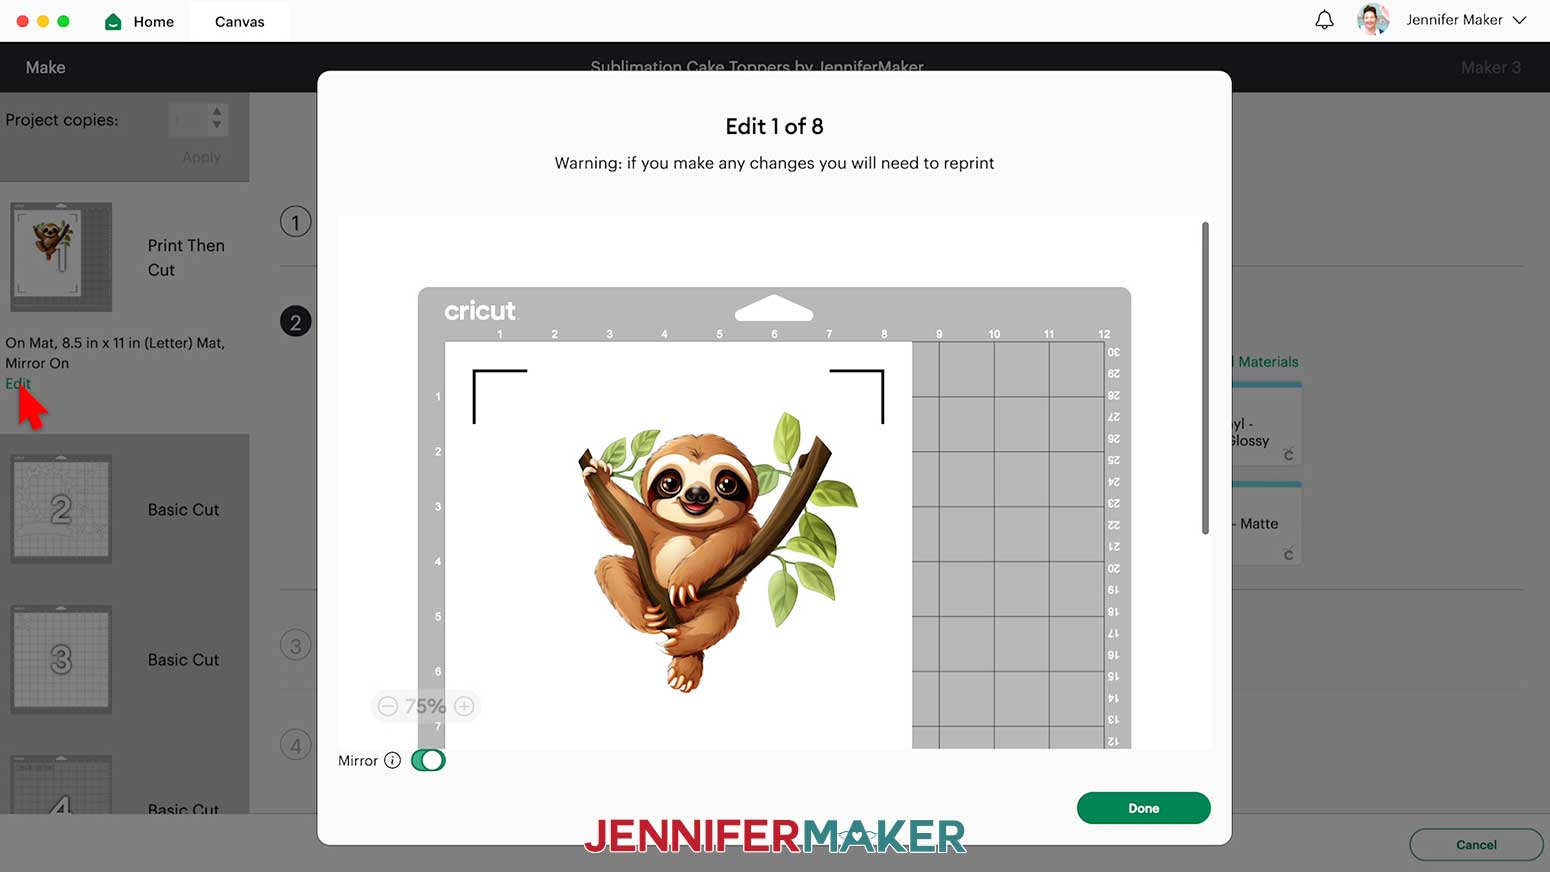
4. Toggle “Mirror” to be in the off position and click “Done.”
5. Select the “Glitter Cardstock” setting and change the Pressure to “More.”
6. Load the mat into your Cricut and make sure the Fine-Point Blade is clean and in the clamp.
7. Press the flashing button to begin cutting.
8. Before unloading your mat, check to see if the cut went all the way through. If not, press start for another pass.
9. If everything cuts smoothly, unload the mat, flip it over onto your work surface, and gently roll the glitter cardstock off of the mat.
10. For the remaining white mats, also select the “Glitter Cardstock” setting in Design Space and set the Pressure to “More.”
11. Repeat steps 6-9.
12. For the vinyl mat, use the “Premium Vinyl” setting with “More” Pressure and adhere it to the mat face up.
13. For the remaining mats, use the “Medium Cardstock - 80lb” material setting and set the Pressure to “More” for a cleaner cut.
STEP 4: ASSEMBLE YOUR SUBLIMATION CAKE TOPPER
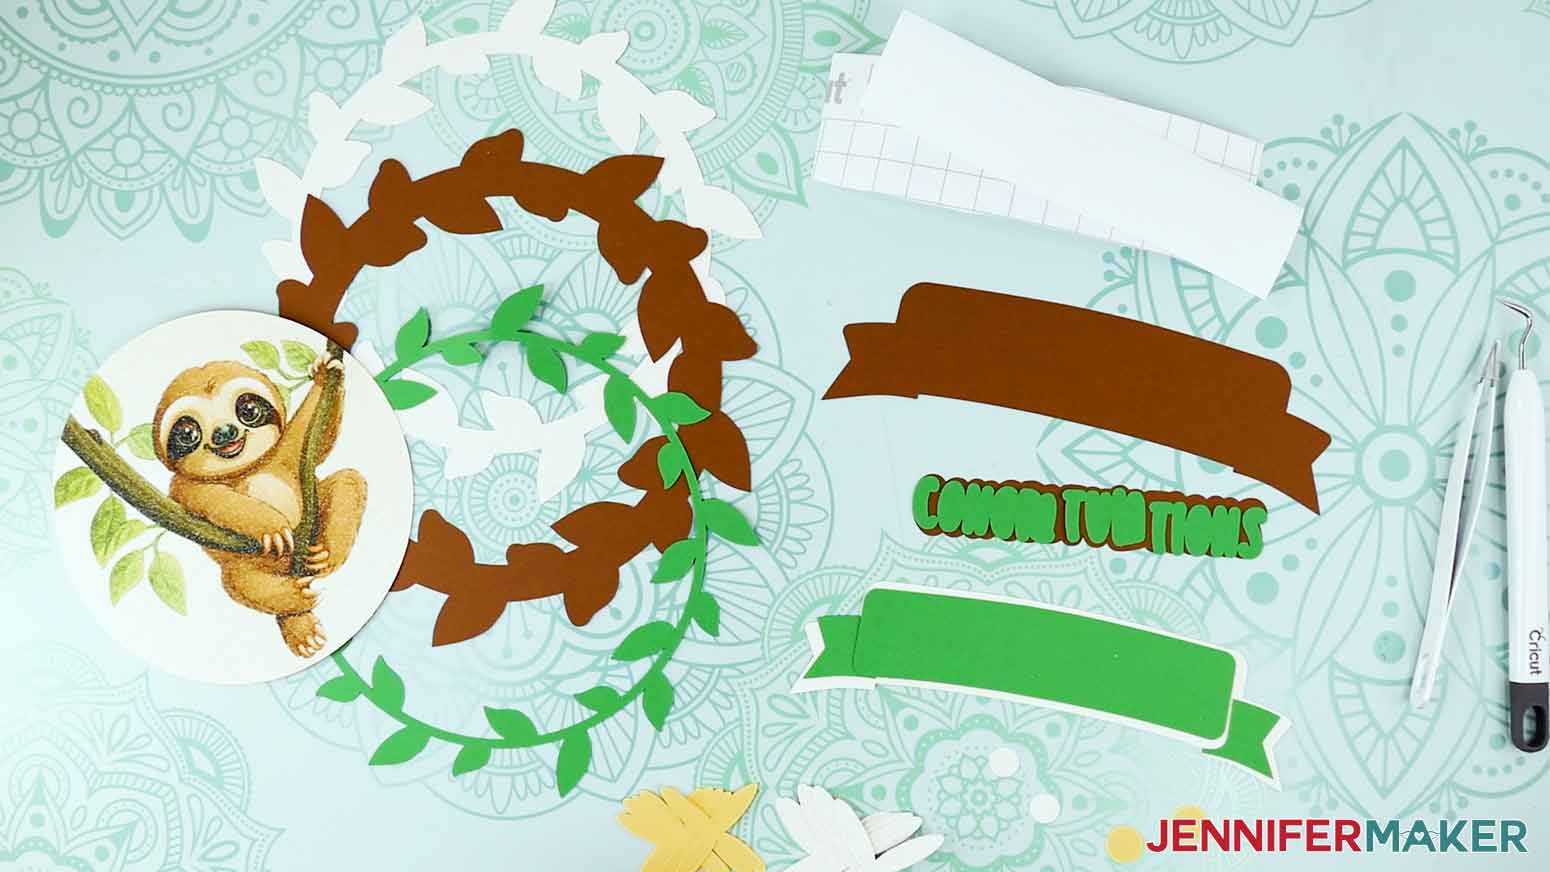
1. These are the cut pieces for the sloth cake topper.
2. Use your fingernail to slightly curl the white and yellow petals upward
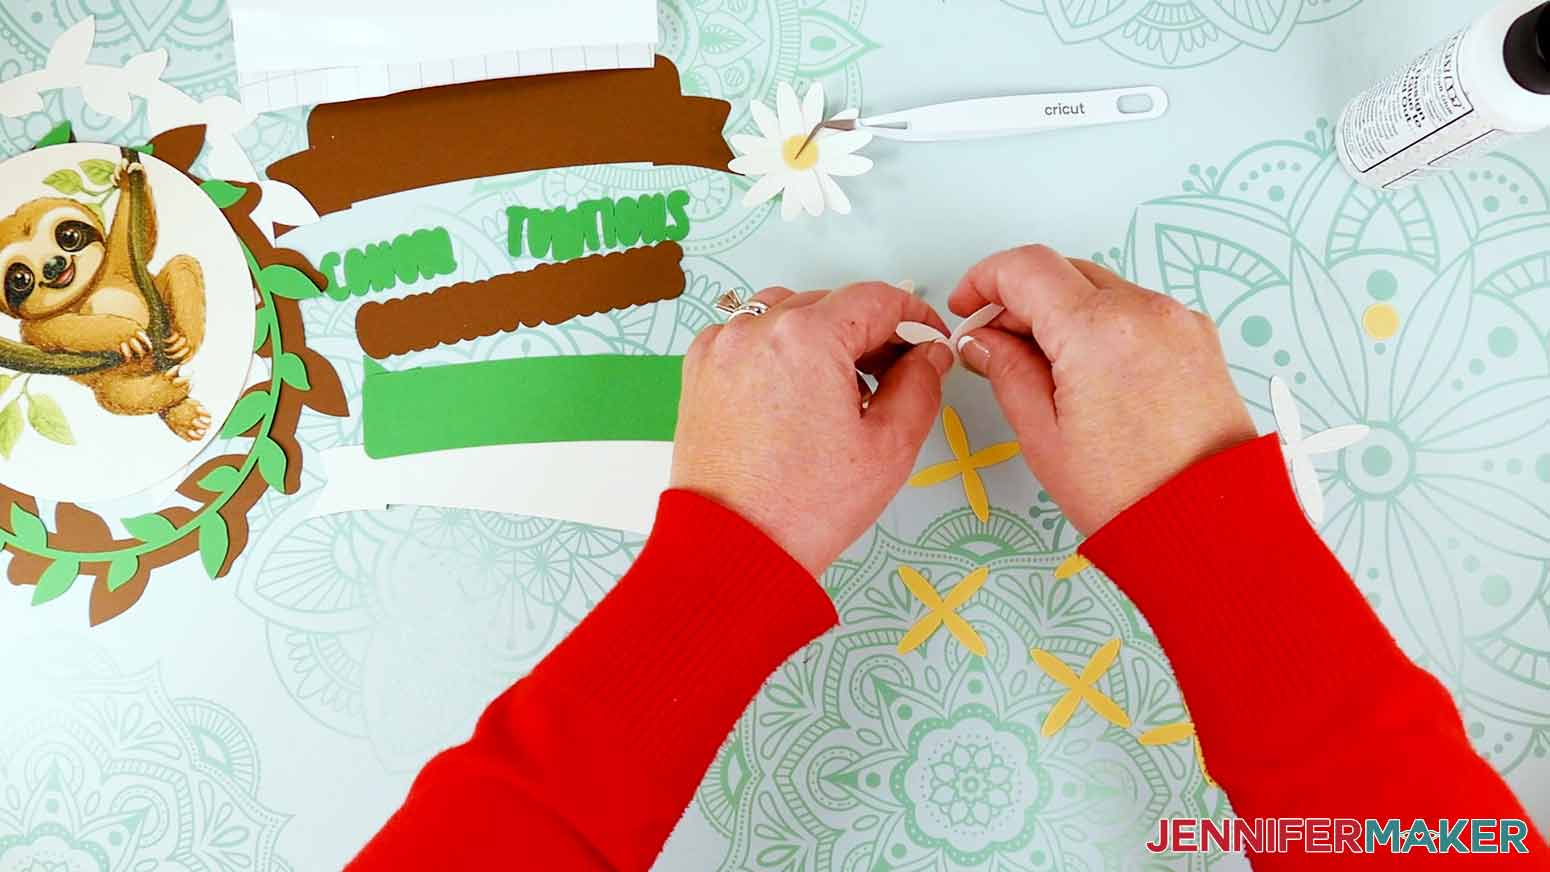
3. Stack together and stagger three petal pieces to make a flower. Place a small dab of craft glue between the center of the petals to hold them together.
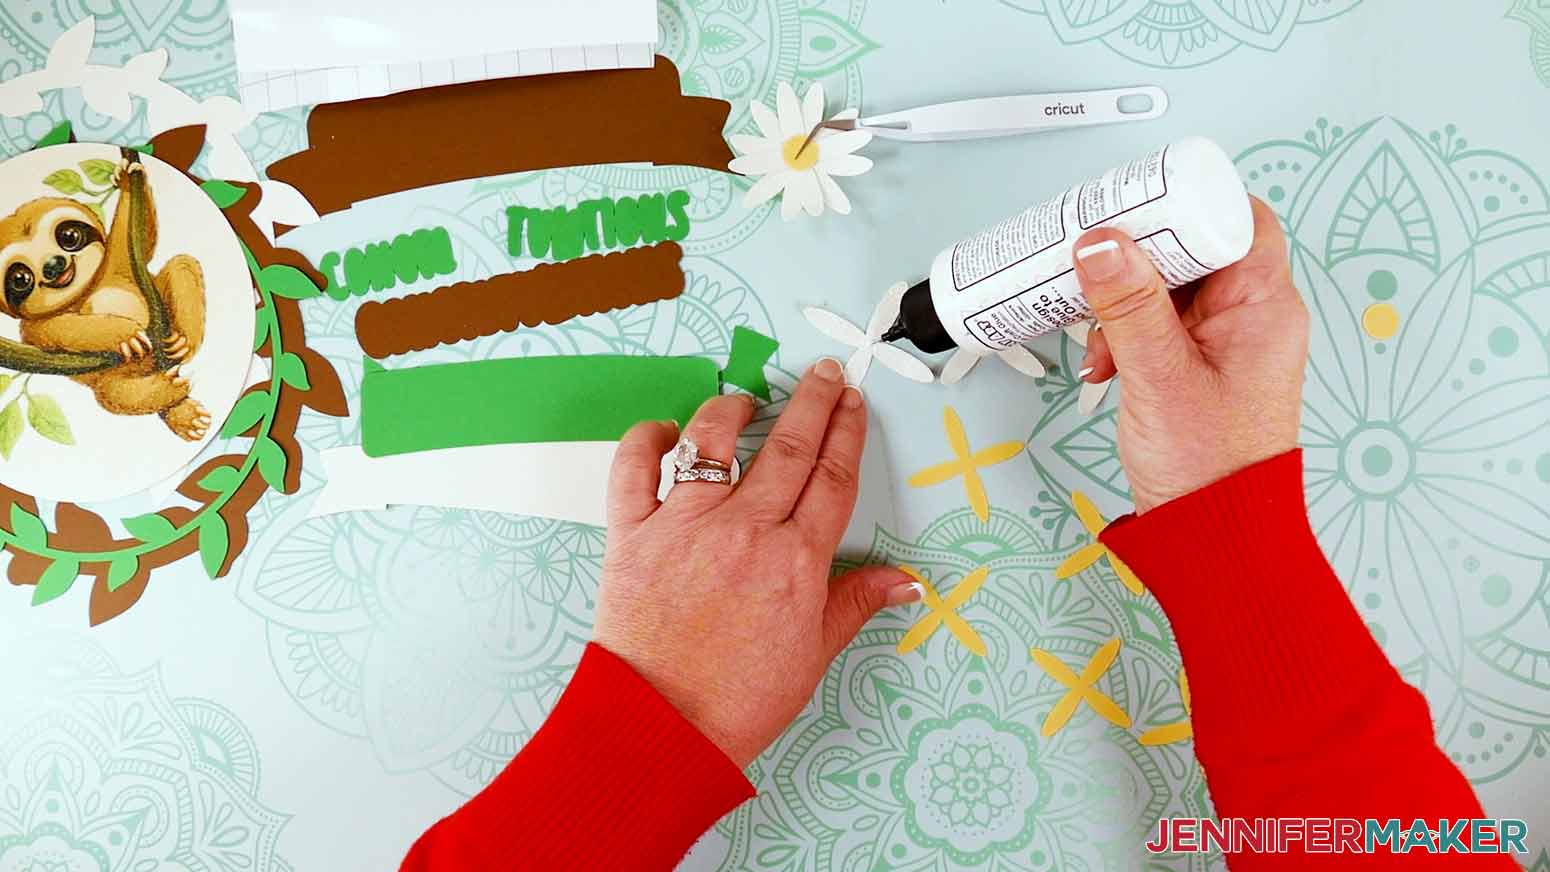
4. Place a small dab of craft glue on the back of the circular flower center and place it on the center of the flower. Yellow circles go on white flowers and white circles go on yellow flowers.
5. Repeat steps 3 and 4 to assemble the rest of the flowers. Set them aside.
6. Place adhesive foam squares on the back of the white circular leaf layer.
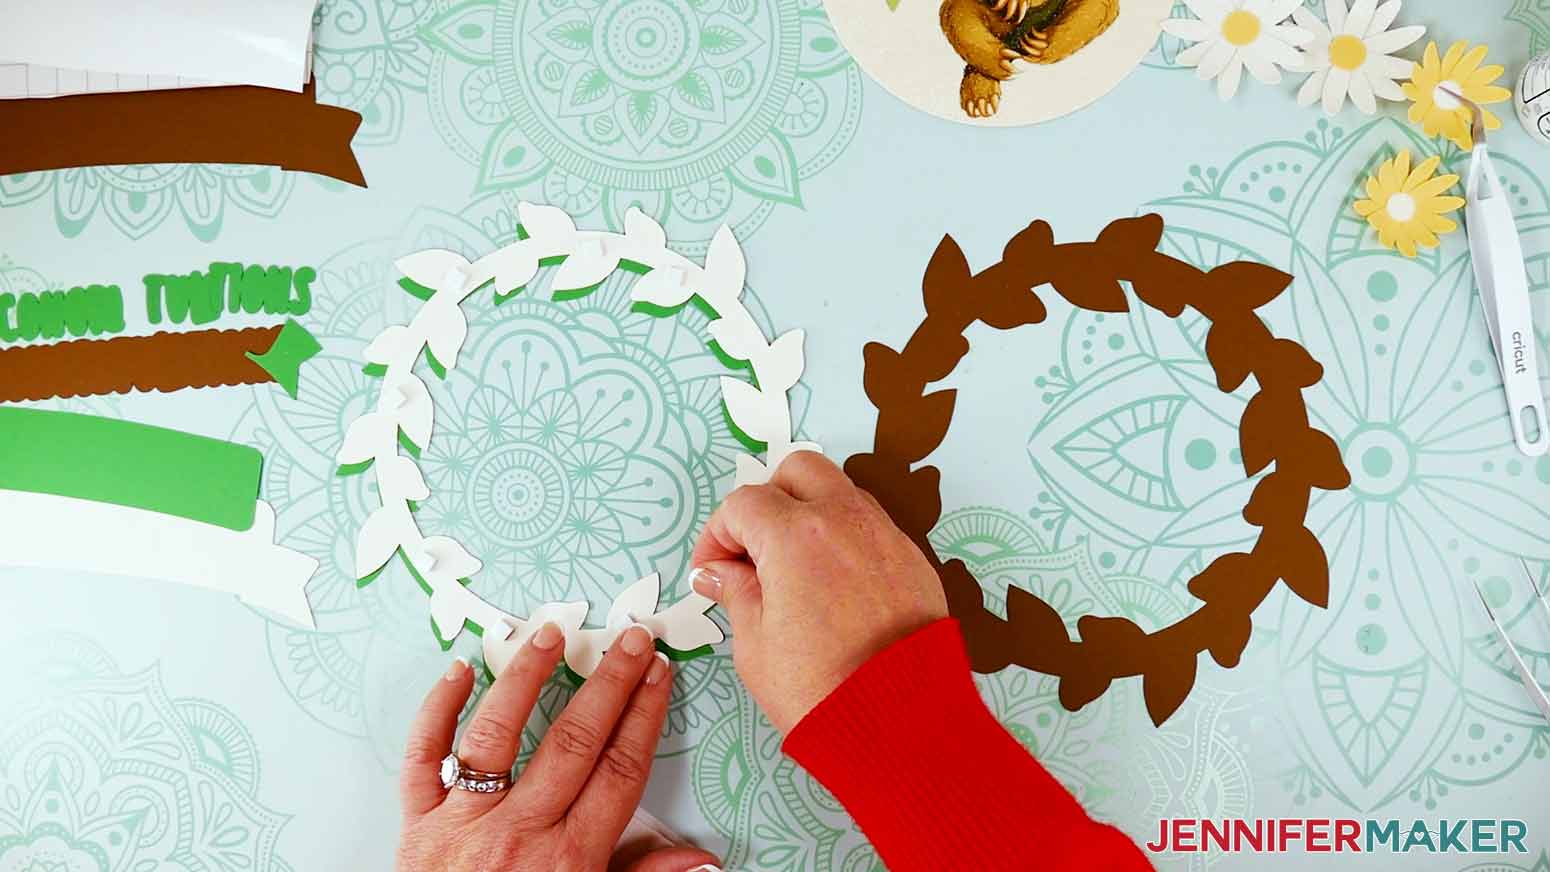
7. Align the white leaf shapes with the leaf shapes on the brown circle layer and press in place.
8. Place foam adhesive on the back of the green circular leaf layer.
9. Align the leaf shapes of the white and green layers and press in place.
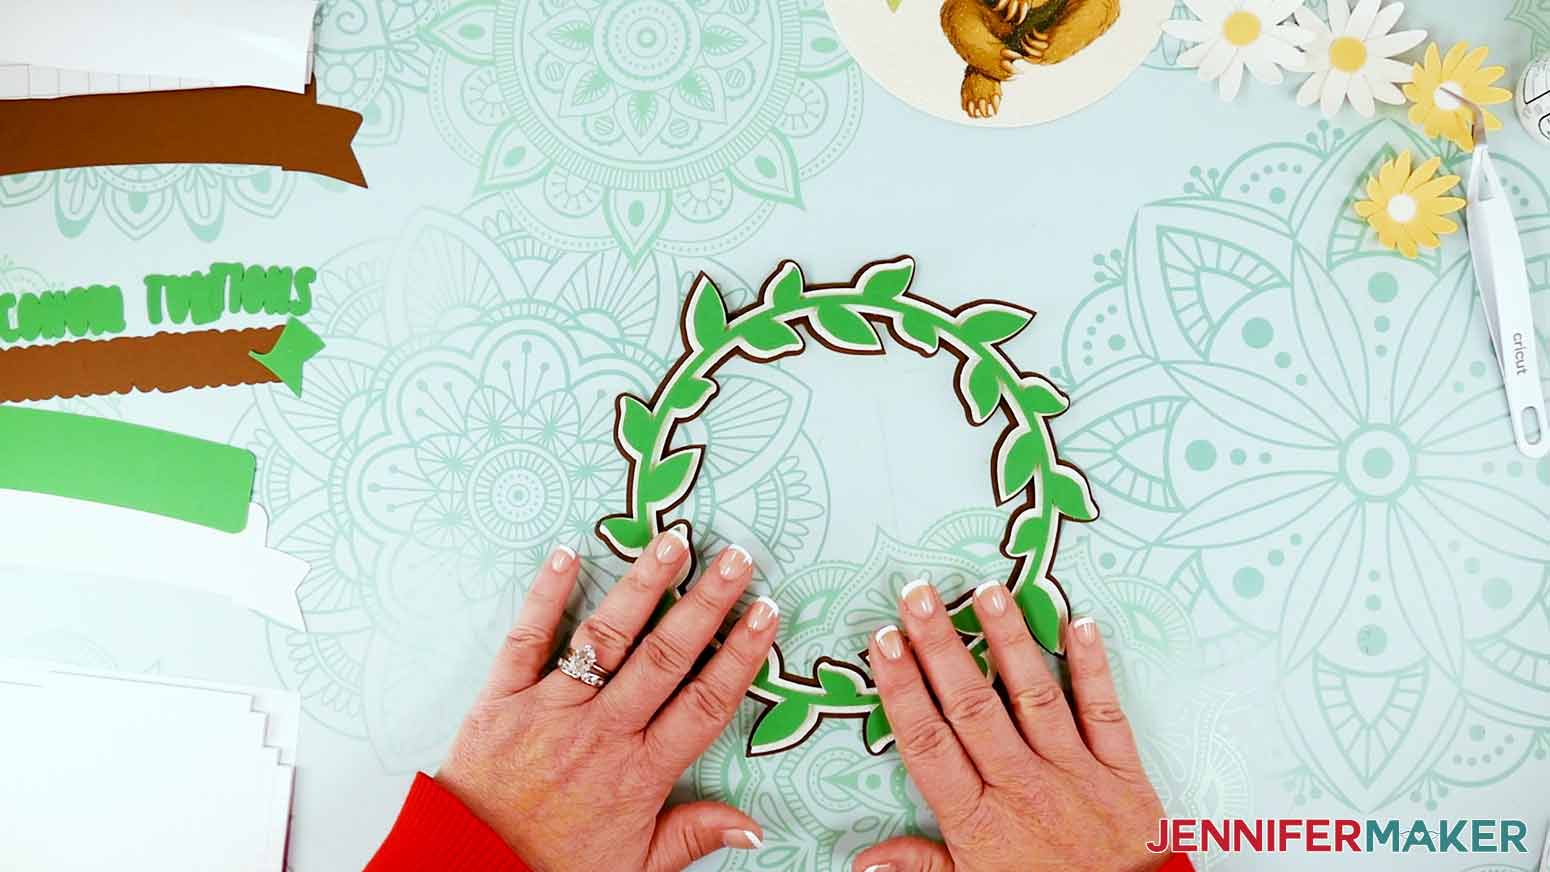
10. Turn over the attached frame layers.
11. Place craft glue on the brown leaf sections that are inside the circle opening
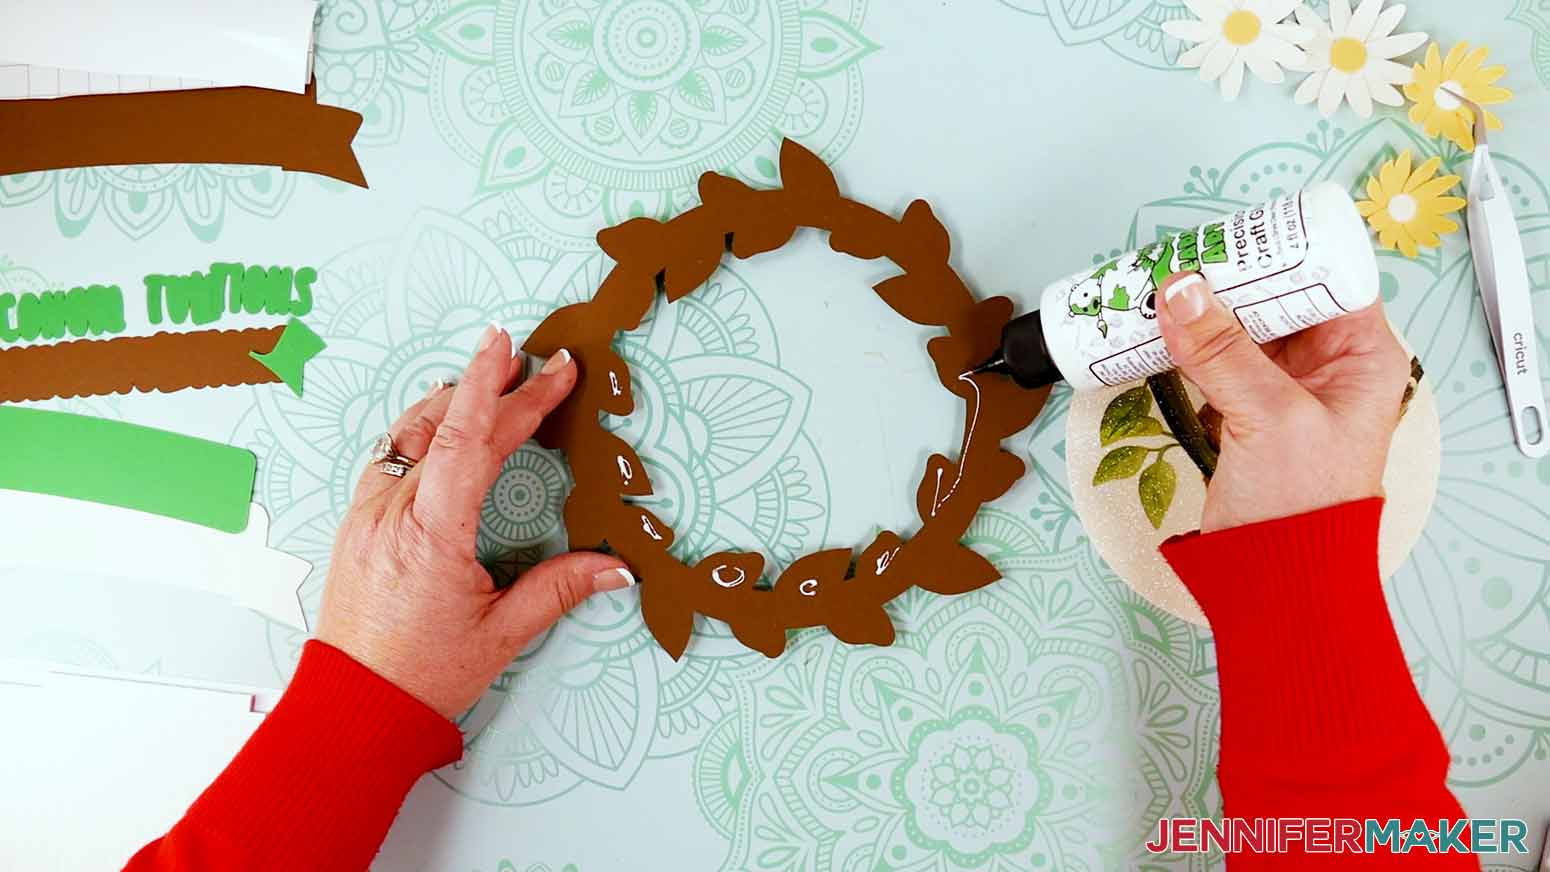
12. Press the sublimated sloth design face down on the back of the glue
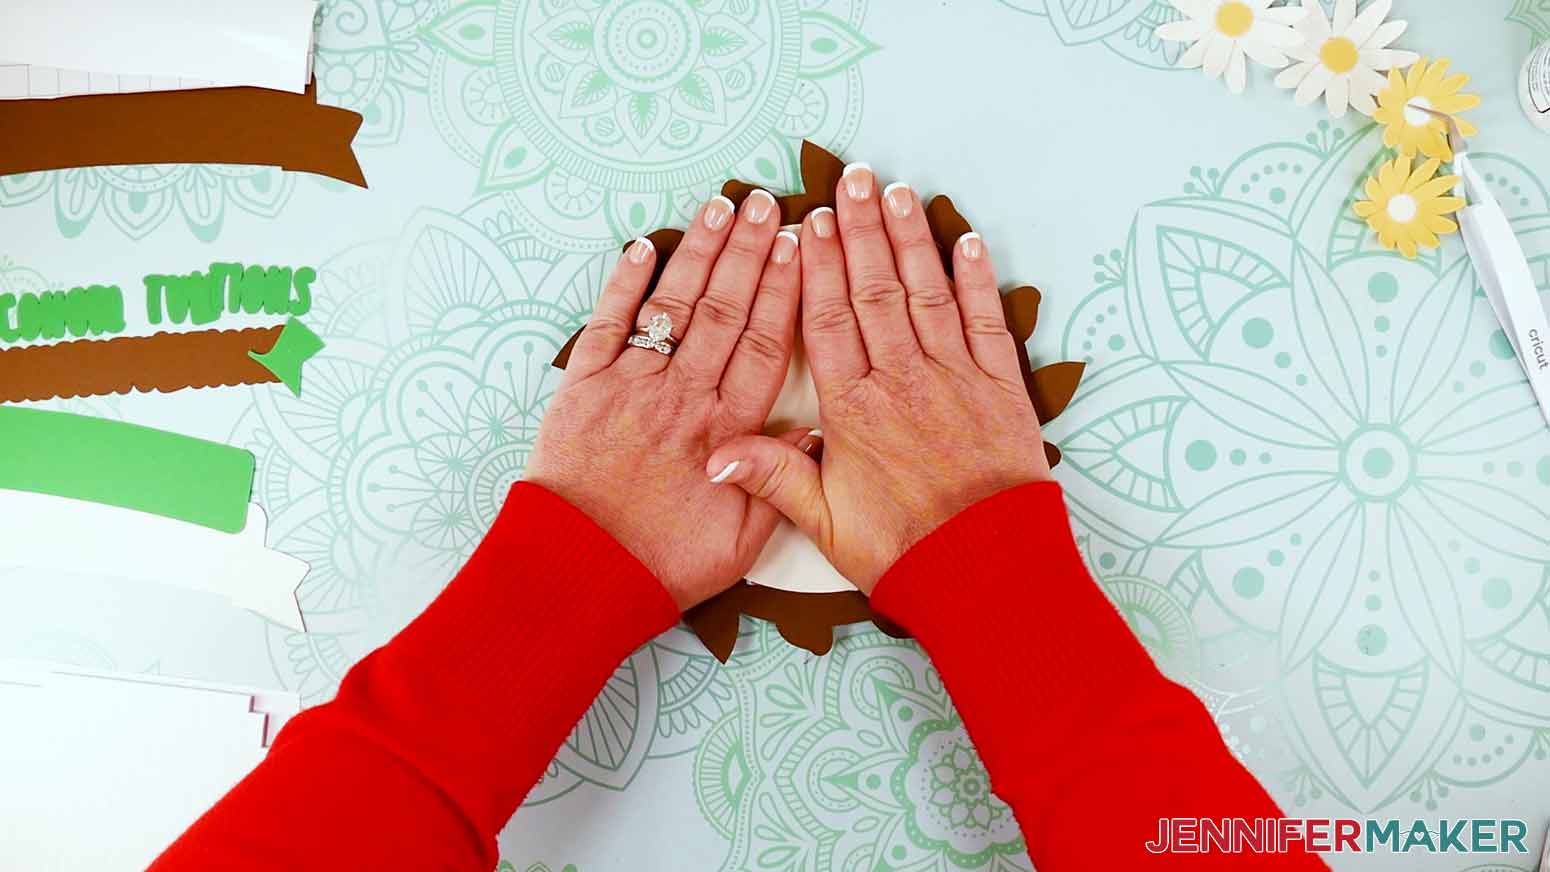
13. Turn the leaf and sloth layers over and set them aside.
14. Place several adhesive foam squares on the back of the white banner piece.
15. Press the white banner piece onto the brown banner piece.

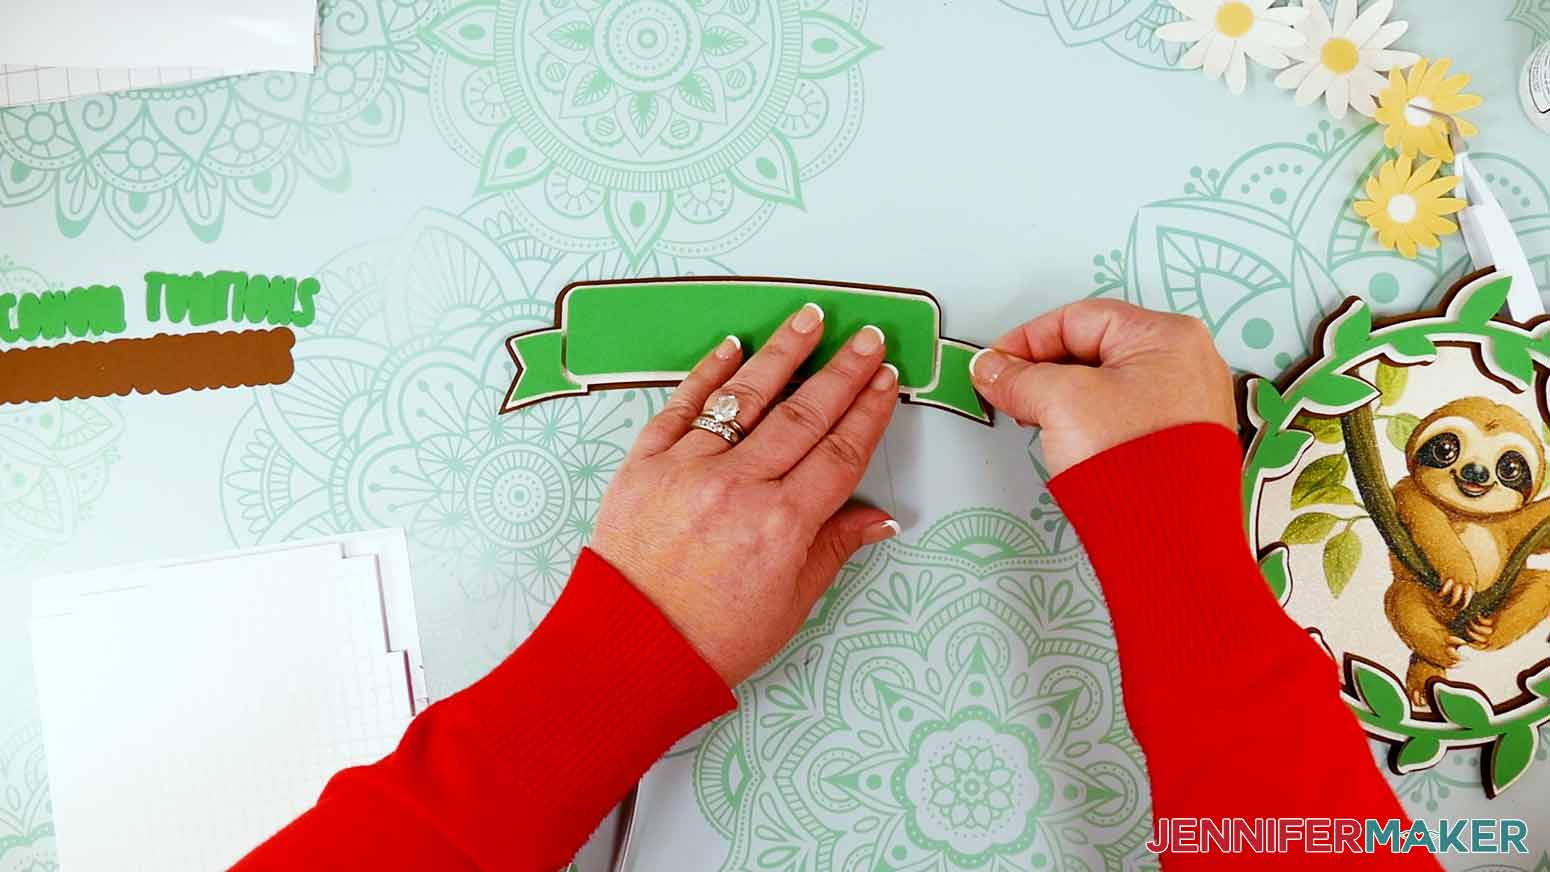
16. Place foam adhesive on the back of the three green banner pieces.
17. Press the green banner pieces into place on the white banner piece. The green banner pieces should have a slight space between them.
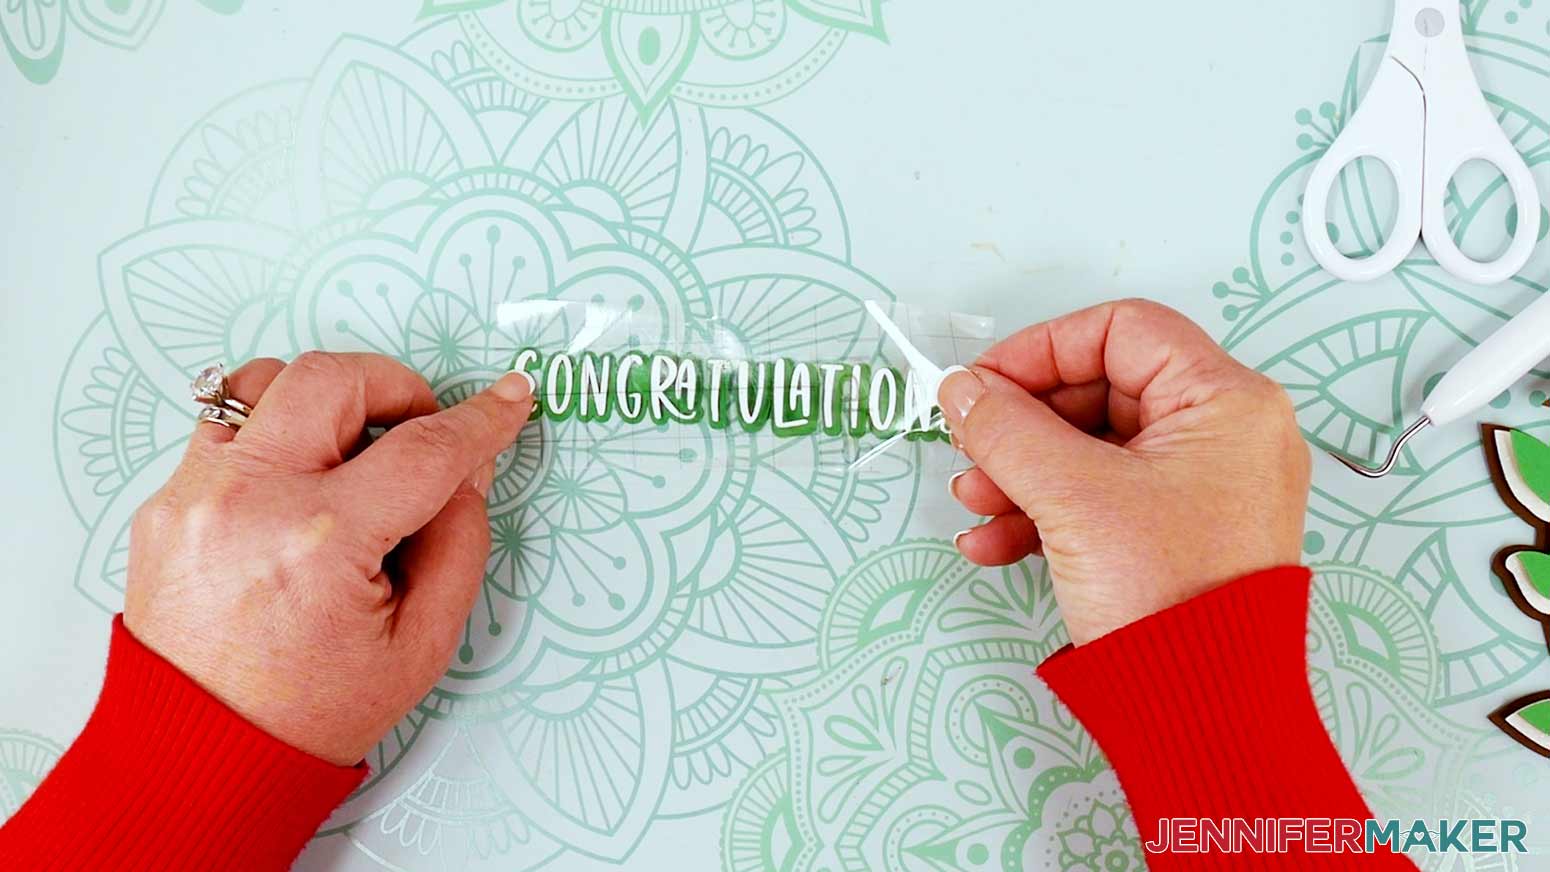
18. Use a weeding tool to remove excess vinyl from “Congratulations.”
19. Cut a piece of transfer tape slightly larger than the vinyl design. Fold the sides up to make a taco shape and place it on the vinyl.
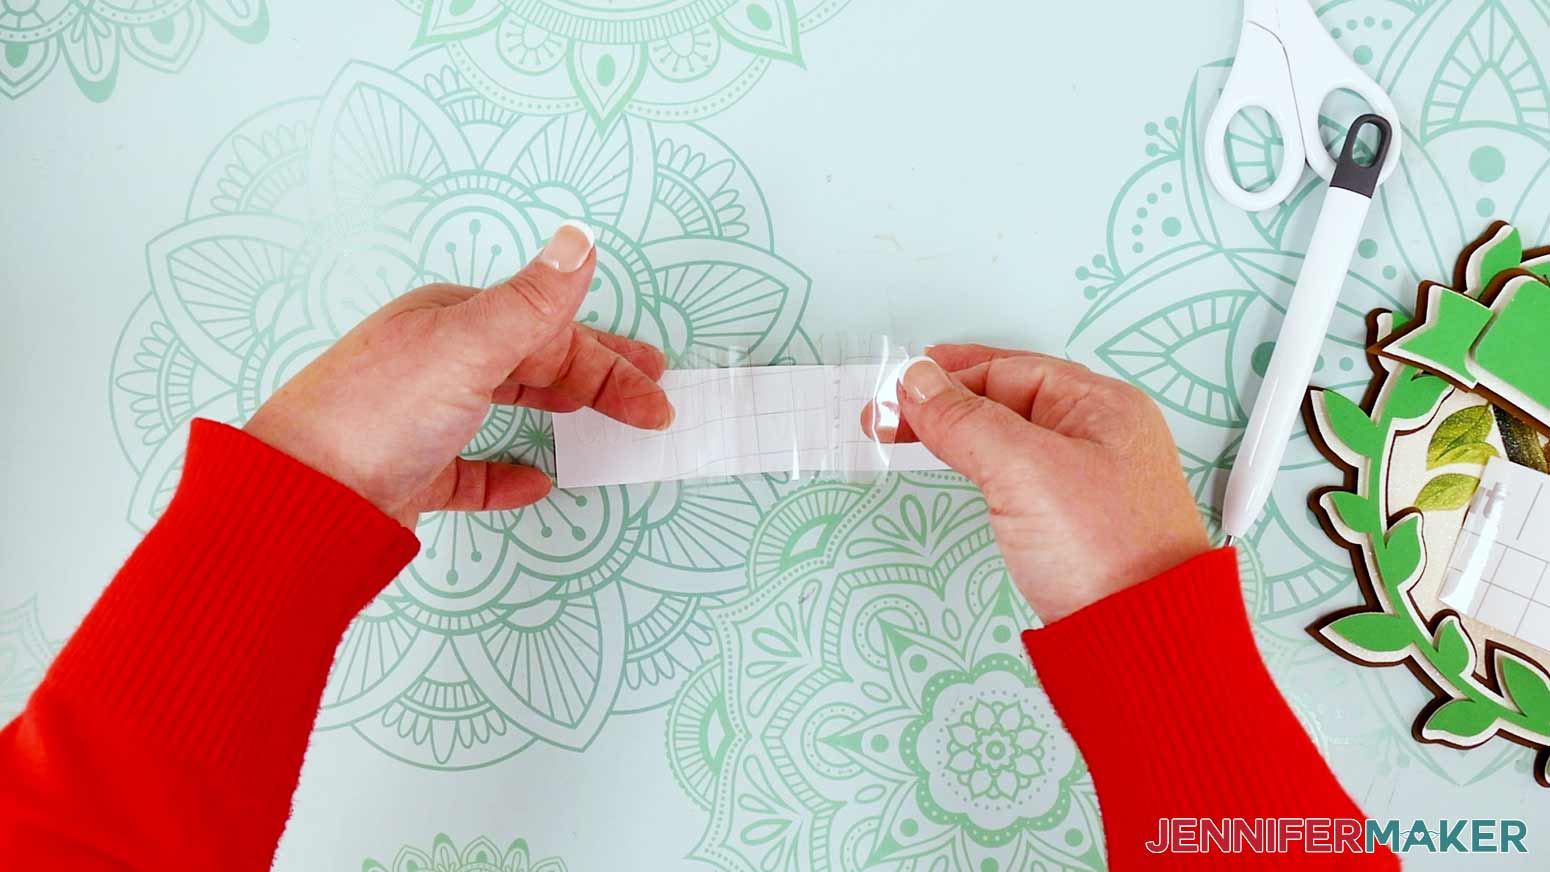
20. Use a scraper to burnish the transfer tape to the vinyl.
21. Remove the vinyl backing.
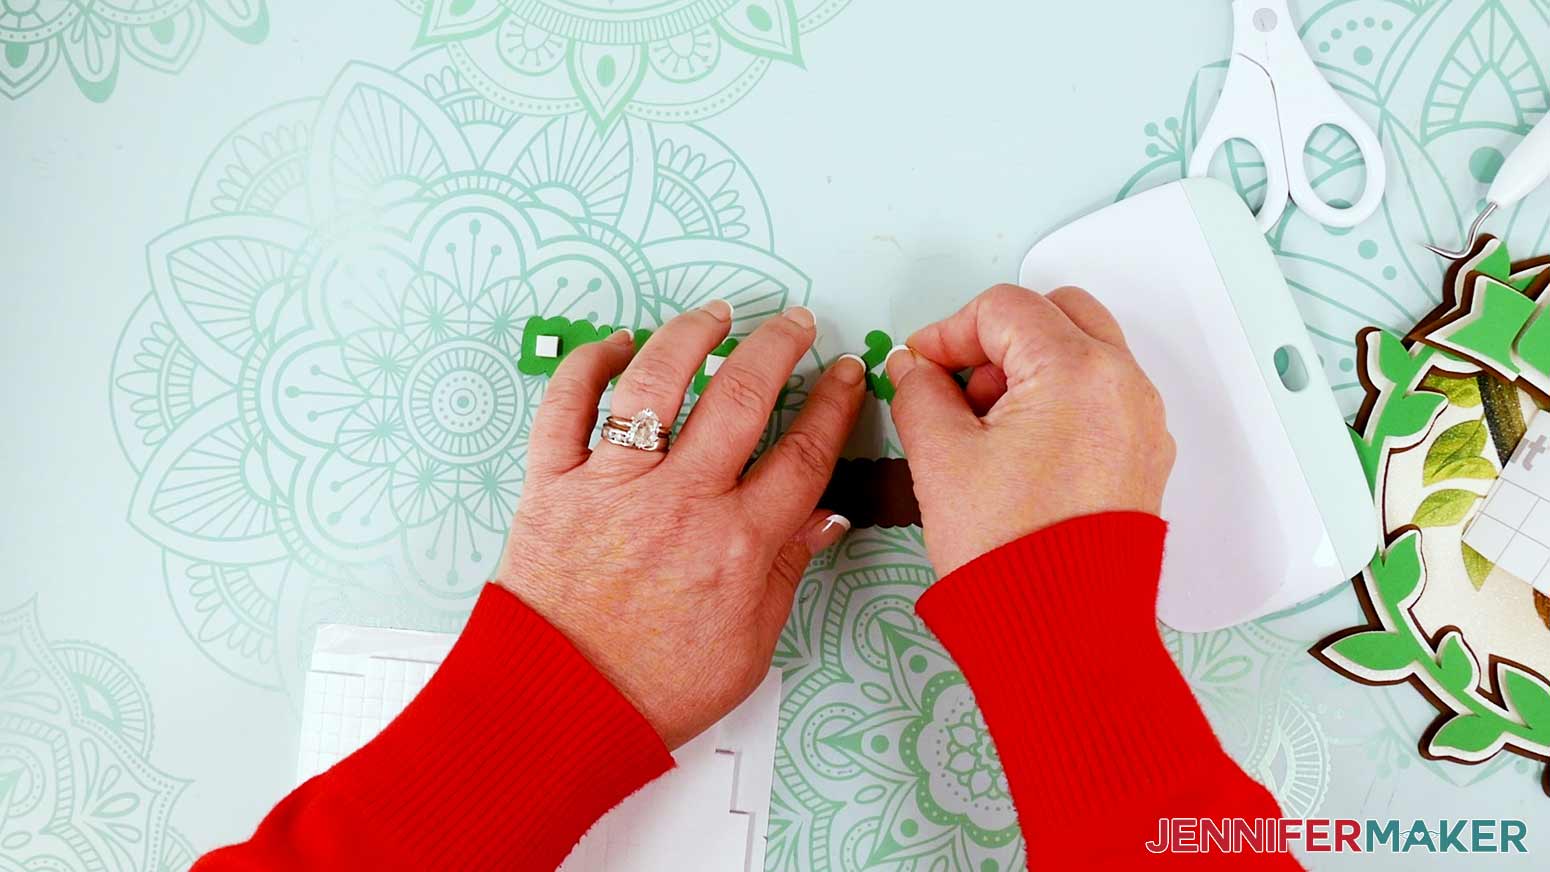
22. While holding the vinyl, carefully align and attach the three green offset cardstock pieces to it.
23. Place the attached vinyl and cardstock pieces on your work surface and burnish the vinyl to the cardstock.
24. Carefully remove the transfer tape.
25. Place a few adhesive foam pieces on the back of the green offset words and press them onto the brown offset layer.
26. Place adhesive foam on the back of the brown offset layer and attach the sentiment to the banner.
27. Apply craft glue to the back of the banner and press it on the lower middle section of the circular leaf layer.
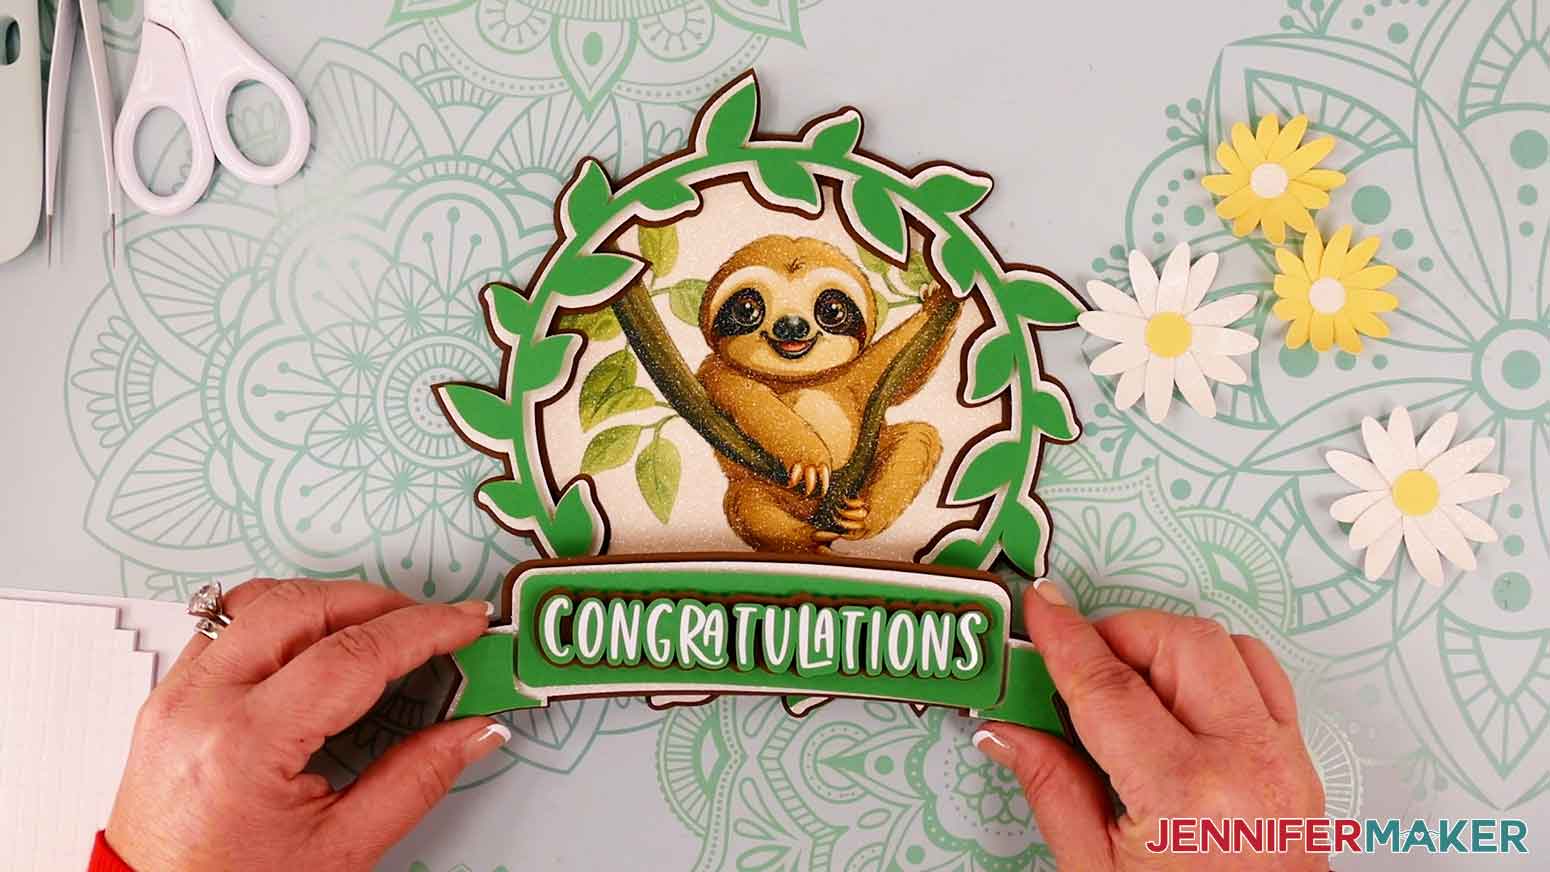
28. Apply craft glue to the back of the white and yellow flowers and attach them around the leaf frame of the cake topper.
29. Apply hot glue to two acrylic sticks. Press them in place on the back of the cake topper. They should be about 2 inches apart.
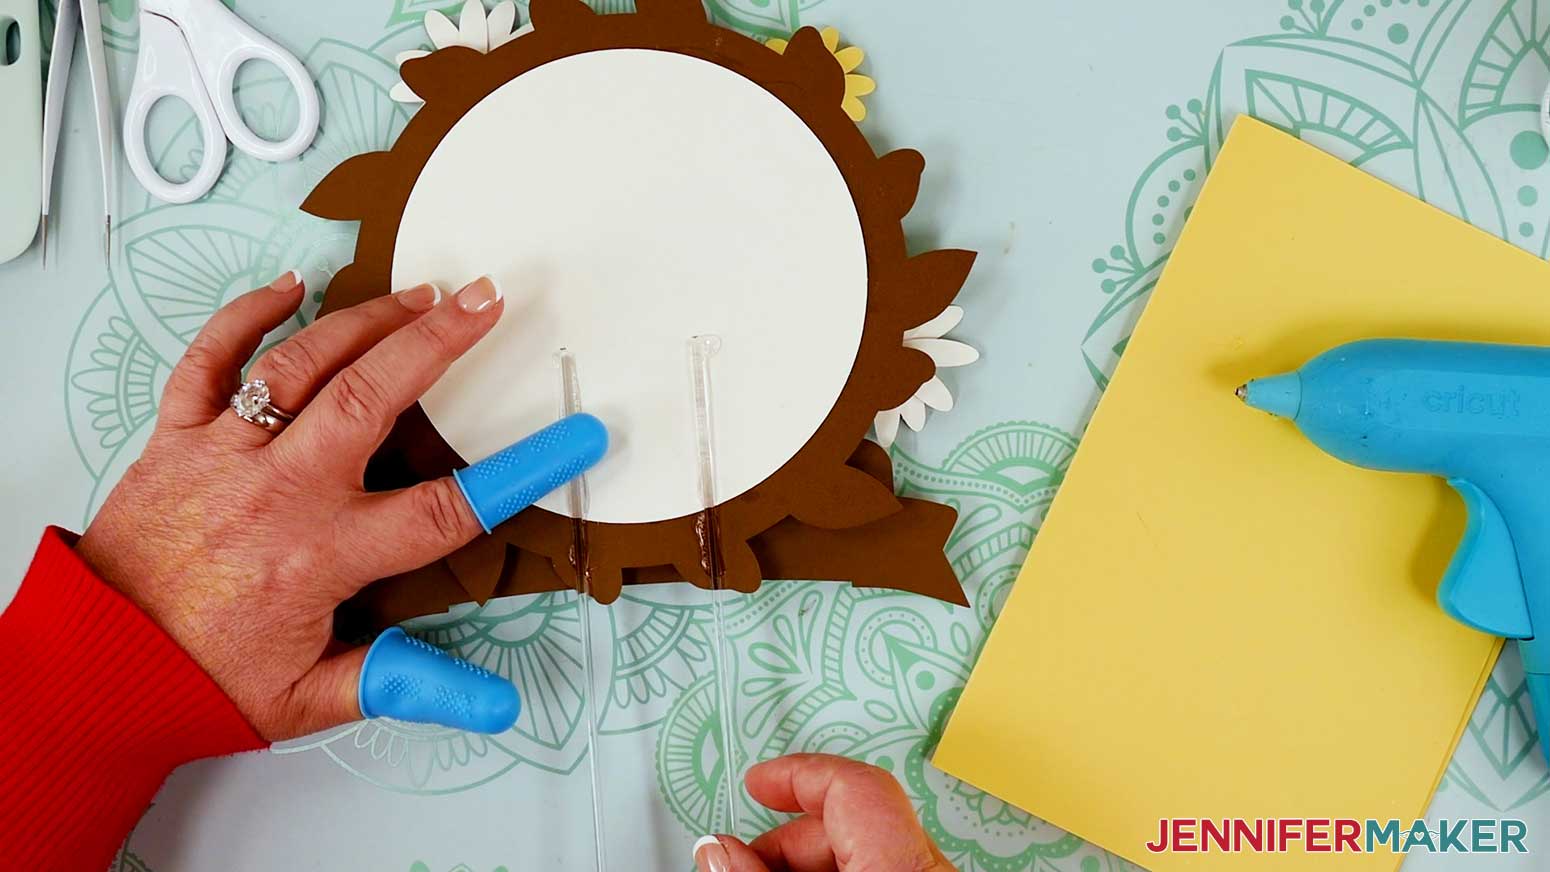
30. Your sloth cake topper is complete!
STEP 5: VARIATIONS
VARIATION 1: SLOTH WITHOUT PRINT THEN CUT
PREPARING
1. Follow the same preparation process as the main tutorial so you have the SVG cake topper, resized PNG, and light gray Congratulations sentiment.
2. Select the sloth PNG layer.
3. Click “Duplicate.”
4. Use the “Operation” menu to change it to a “Basic Cut” piece.
5. Use the color box to change it to white so it will cut from the white glitter cardstock.
PRINTING
1. Use the same steps as the main tutorial, but keep “Add Bleed” toggled off
CUTTING
1. Cut the next two mats from white glitter cardstock using the “Glitter Cardstock” setting with “More” Pressure.
2. Cut the rest of your mats using the matching directions from the main tutorial.
SUBLIMATING
Before you begin, make sure you are in a well-ventilated area with a fan on or a window open.
1. Preheat the Autopress or EasyPress to 400° Fahrenheit (204° Celsius) and set the time to 45 seconds.
2. Place a piece of 12” x 12” white cardstock on the pressing mat.
3. Put the white glitter cardstock circle face up on top.
4. Use a lint roller on the glitter cardstock to remove any excess glitter bits.
5. Put white butcher paper on top and pre-heat the piece for 10 seconds.
6. Remove the protective sheet and move the piece over to let it cool a little.
7. Put your printed design face up on the cooled white cardstock.
8. Place the shape face down on the design and line up the edges.
9. Add heat-resistant tape to secure the cardstock to the paper.
TIP: Don’t tape over the main design area if possible. Sometimes the tape can interfere with the transfer.
10. Flip the project over.
TIP: If you are unsure about your placement, you can hold the print and circle up to the light to make sure it is aligned. Make sure to place it back on the pressing mat with the glitter cardstock facing up and the sublimation print facing down.
11. Place a piece of plain white butcher paper on top of the sublimation paper.
12. Press at 400° Fahrenheit for 45 seconds.
13. When the time is up, remove the press by lifting it straight up.
14. Remove the butcher paper.
15. Allow the cardstock to cool for a couple of minutes and then remove the tape and paper to reveal the design.
VARIATION 2: BUTTERFLY CAKE TOPPER
STEP 2: PREPARE YOUR DESIGN
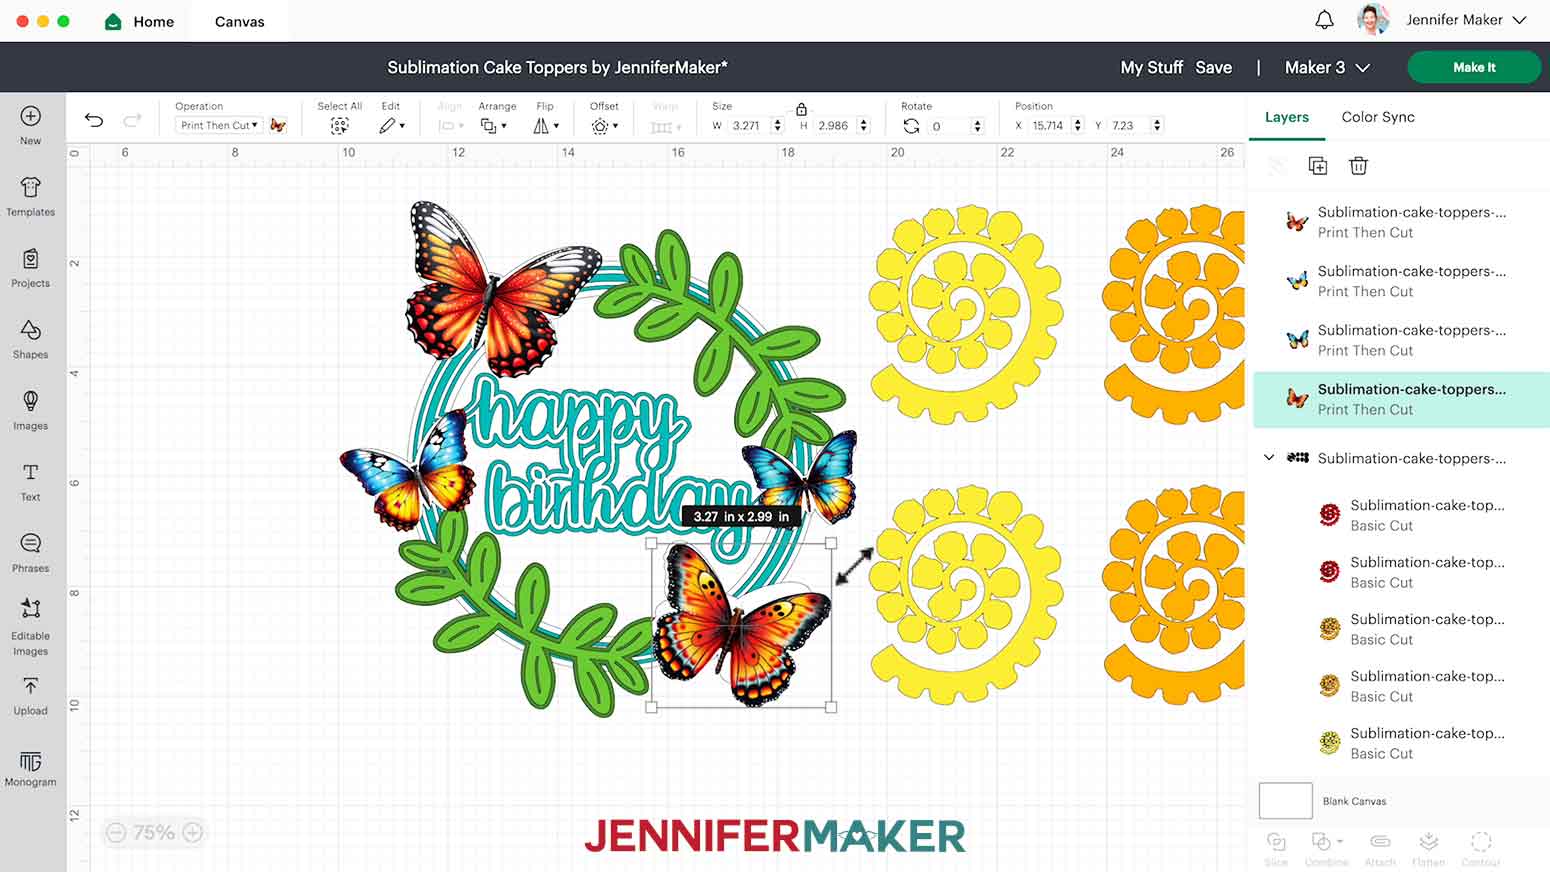
1. Follow steps 1-10 in "Project 1" to upload the butterfly topper SVG and the butterfly PNG files.

2. Click the minus (-) icon in the lower left corner to zoom out. 50% works well for now.
3. In the Layers panel, select only the group with the cake topper and flower layers. Click “Arrange” and “Send to Back.”
4. The butterfly PNGs will be too large. We will individually resize them using the white butterfly silhouette shapes on the cake topper as a guide.
5. Select the first butterfly and drag it to the silhouette shape that matches it.
6. Click and drag the corner of the butterfly to resize it to the same size as the silhouette. These are the approximate sizes for each butterfly:
Top left red: 3.25” tall
Bottom right red: 3” tall
Left blue: 2.5” tall
Right blue: 1.85” tall
STEP 3: PRINT, CUT, AND SUBLIMATE YOUR CAKE TOPPER
Follow your preferred steps from the options above. You can Print Then Cut or follow the Variation 1 directions to cut the shapes and then sublimate your design onto them.
STEP 4: ASSEMBLE YOUR SUBLIMATION CAKE TOPPER
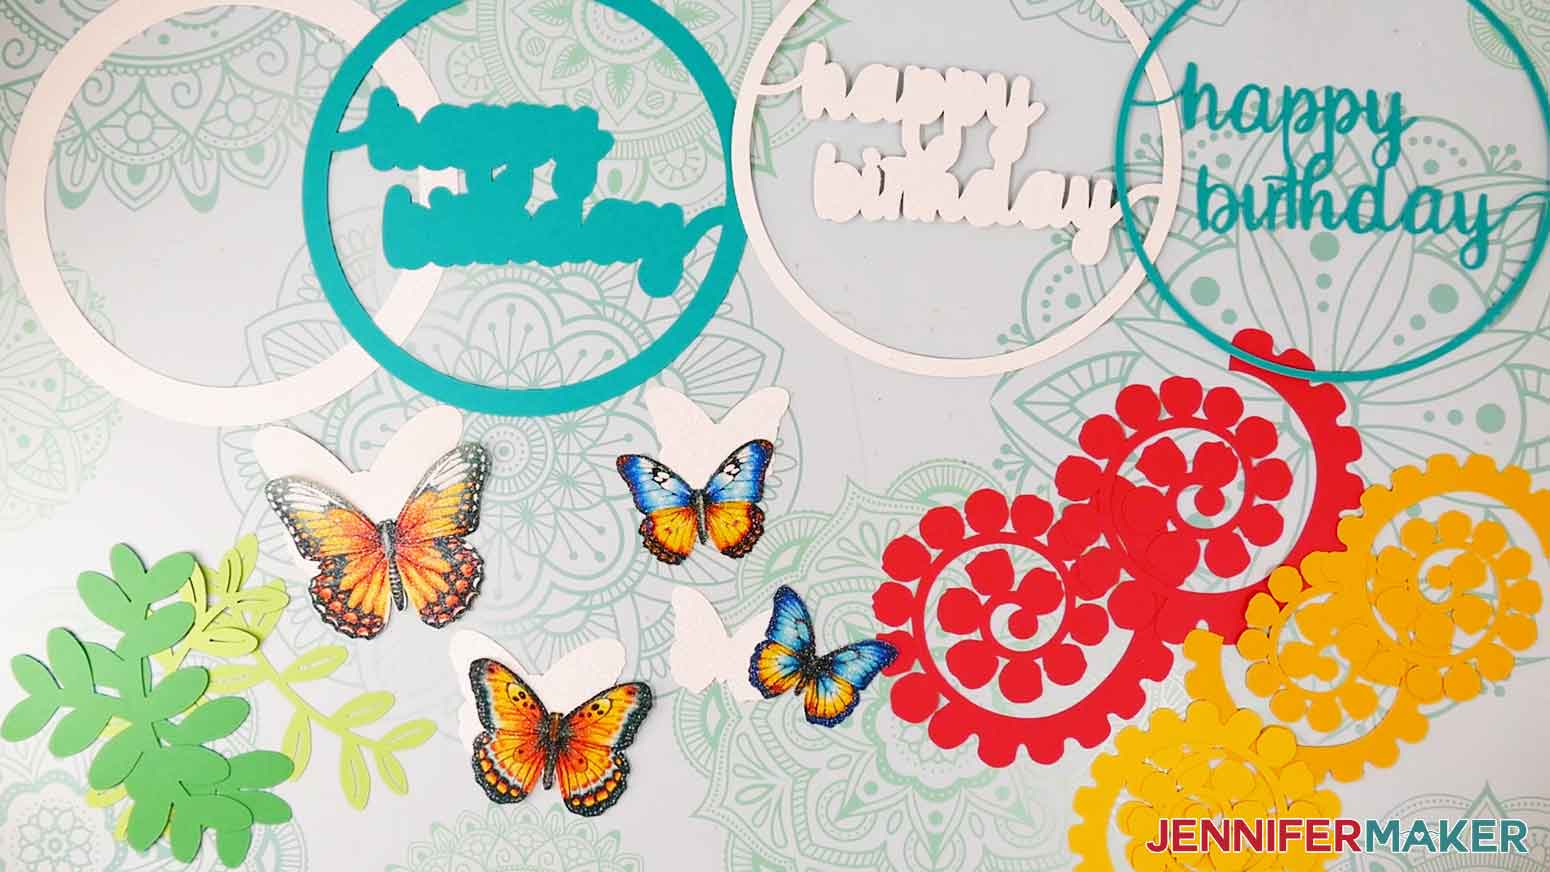
1. These are the cut pieces for the butterfly cake topper.
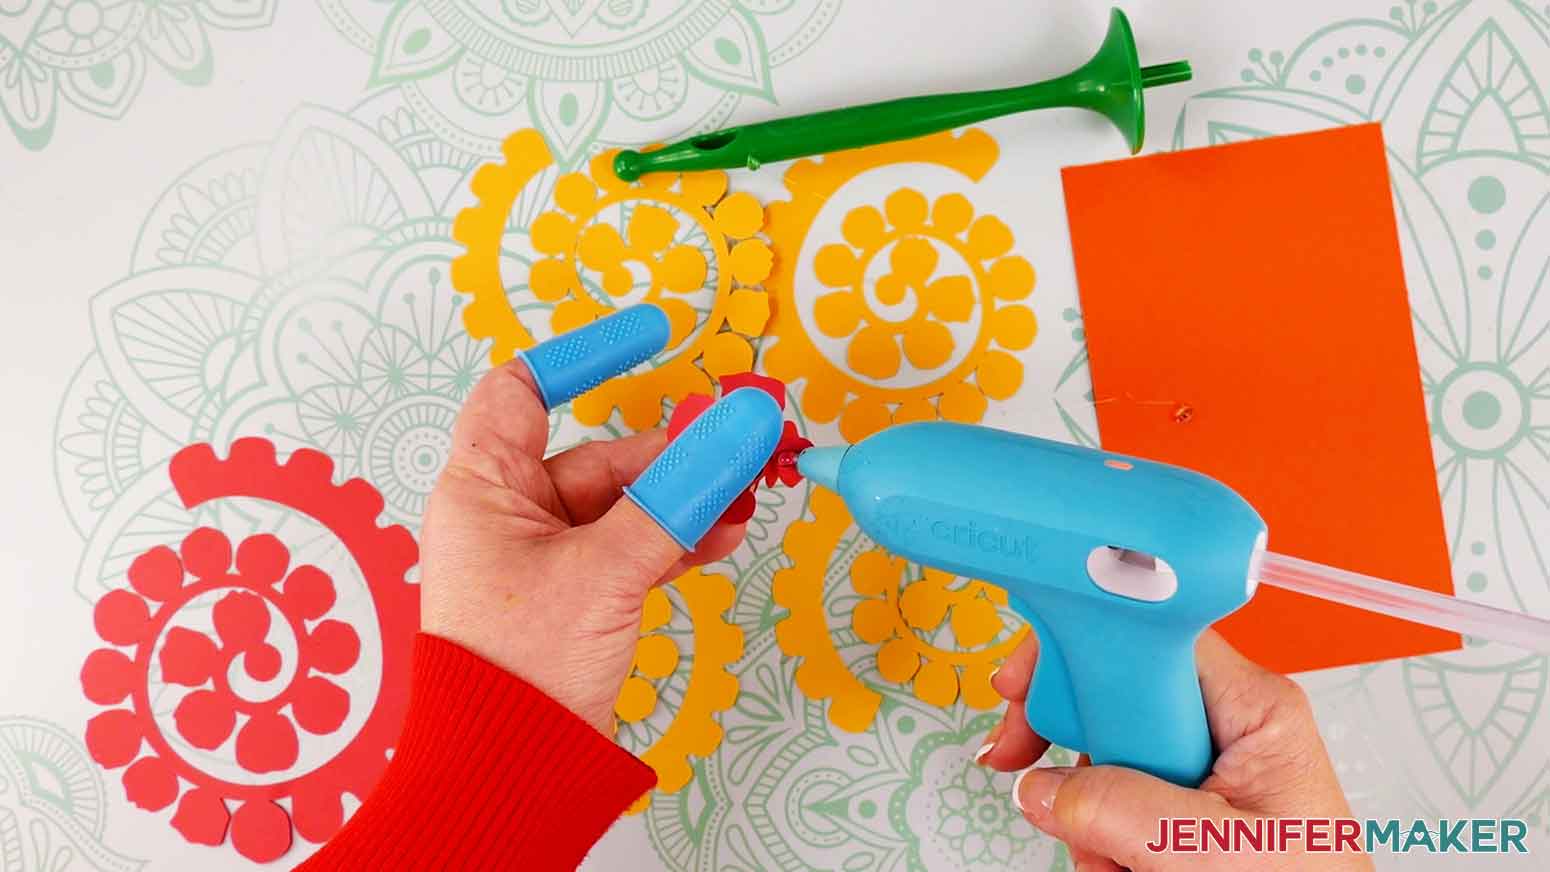
2. First, use the Flowtool or quilling tool to roll the paper flowers.
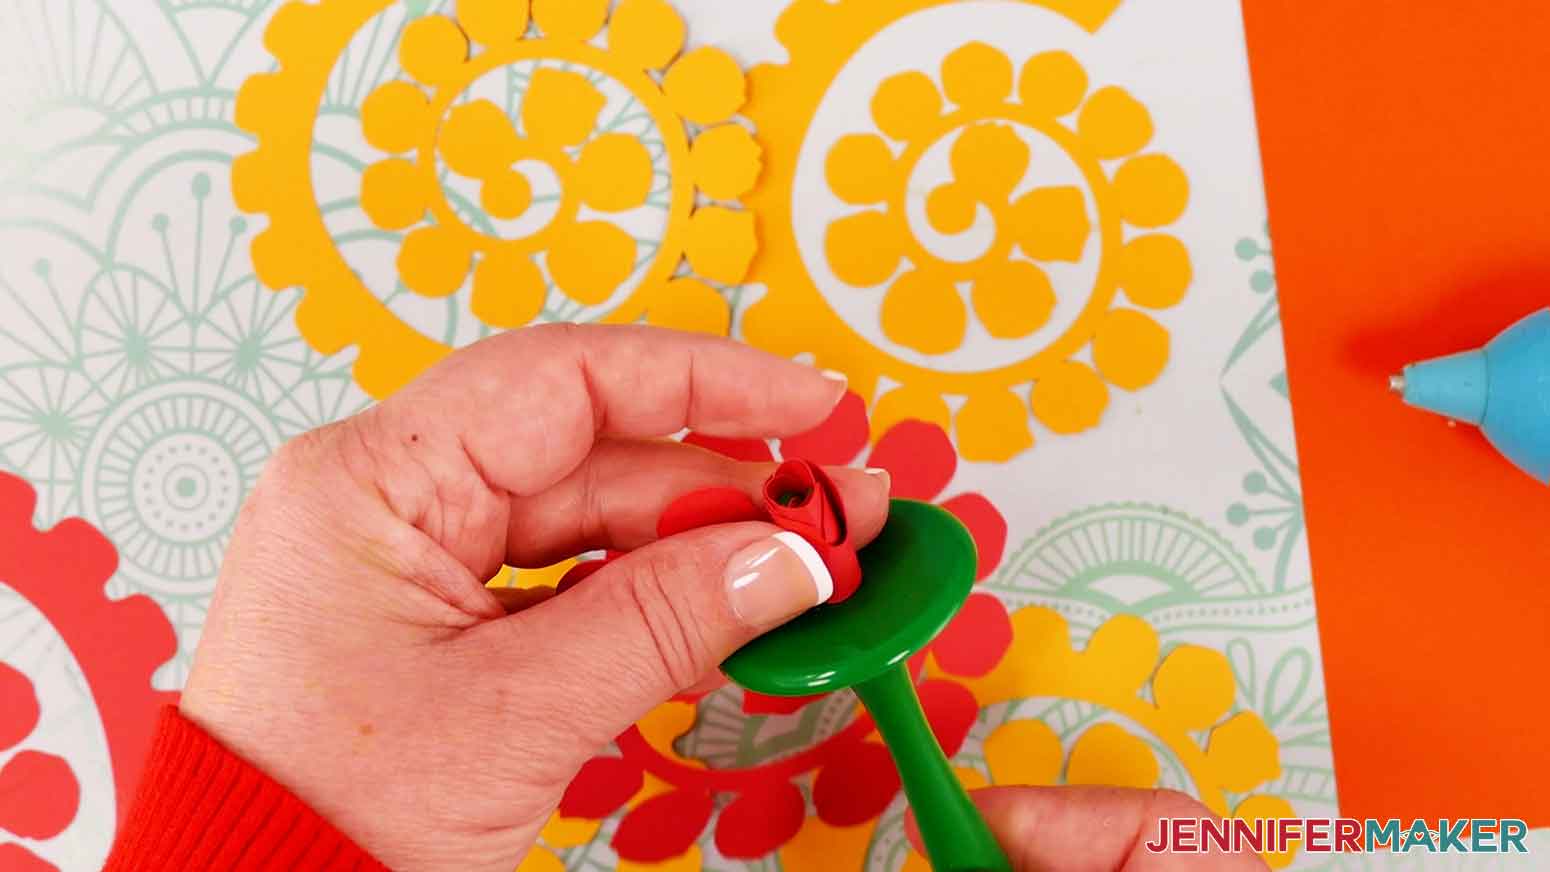
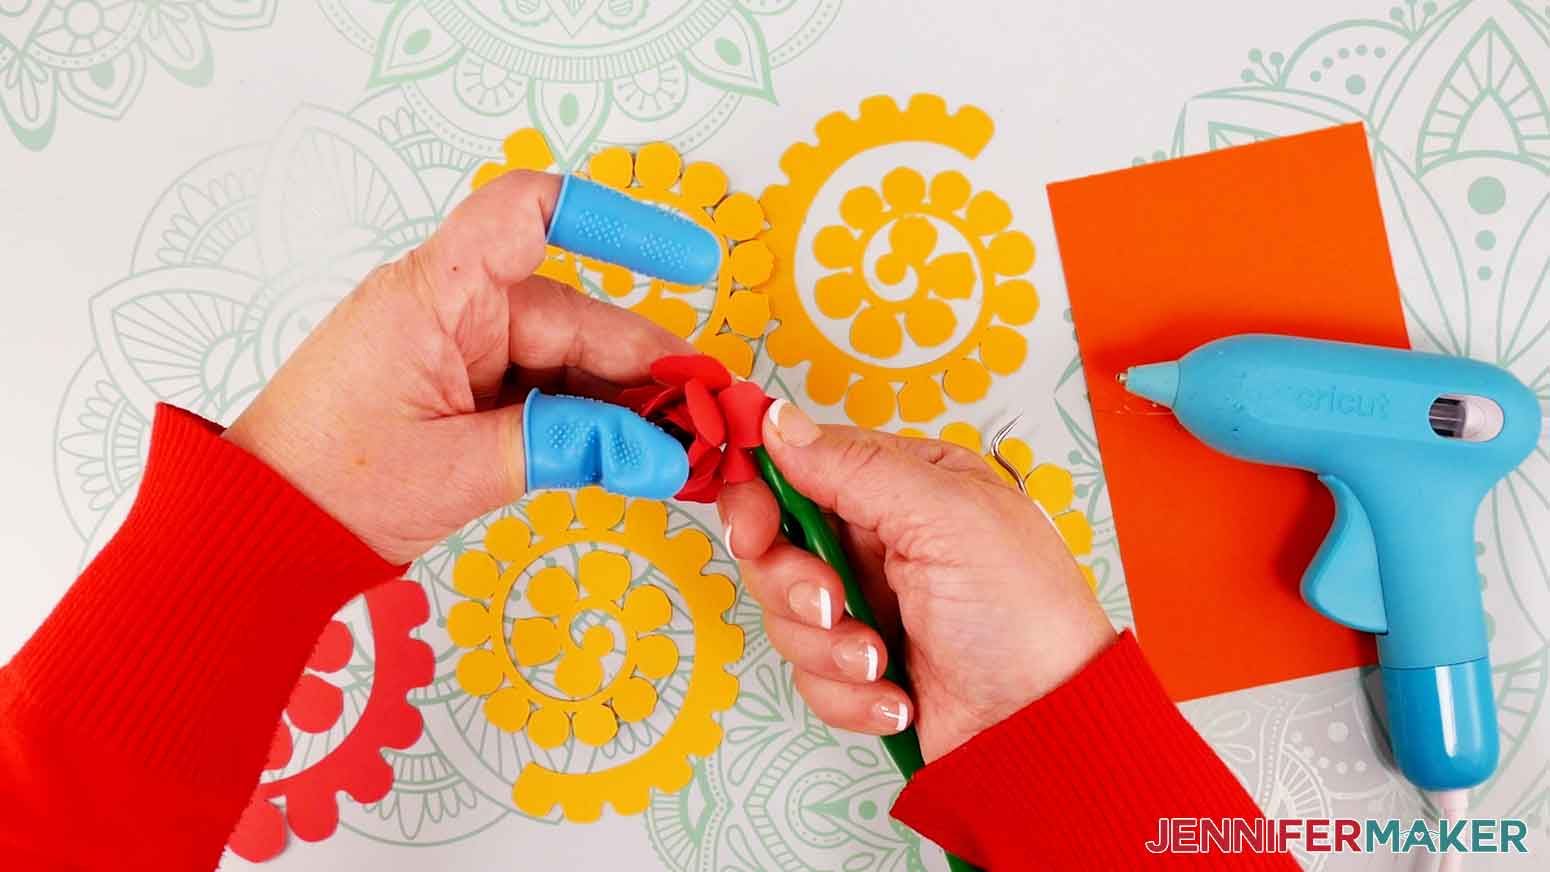
3. With silicone finger protectors, secure the bottoms of the flowers with hot glue
4. Use the handle of a weeding tool or any other tool of similar style to curl the flower petals.
5. Set the flowers aside.
6. Start with the largest white glitter circle and the largest teal offset circle. Place foam adhesive around the back side of the teal circle.
7. Remove the adhesive covers and press the teal circle onto the middle of the white glitter circle.

8. Place foam adhesive on the back of the smaller white glitter circle and press it on the teal offset circle.
9. Place foam adhesive on the back side of the top teal layer and press it on the white layer.
10. Place foam adhesive on the back side of the light green leaf layers and press them onto the dark green leaf layers.
11. Apply craft glue to the upper right area of the teal circle and press one set of leaves in place.
12. Apply craft glue to the lower left area of the teal circle and press the second set of leaves in place.
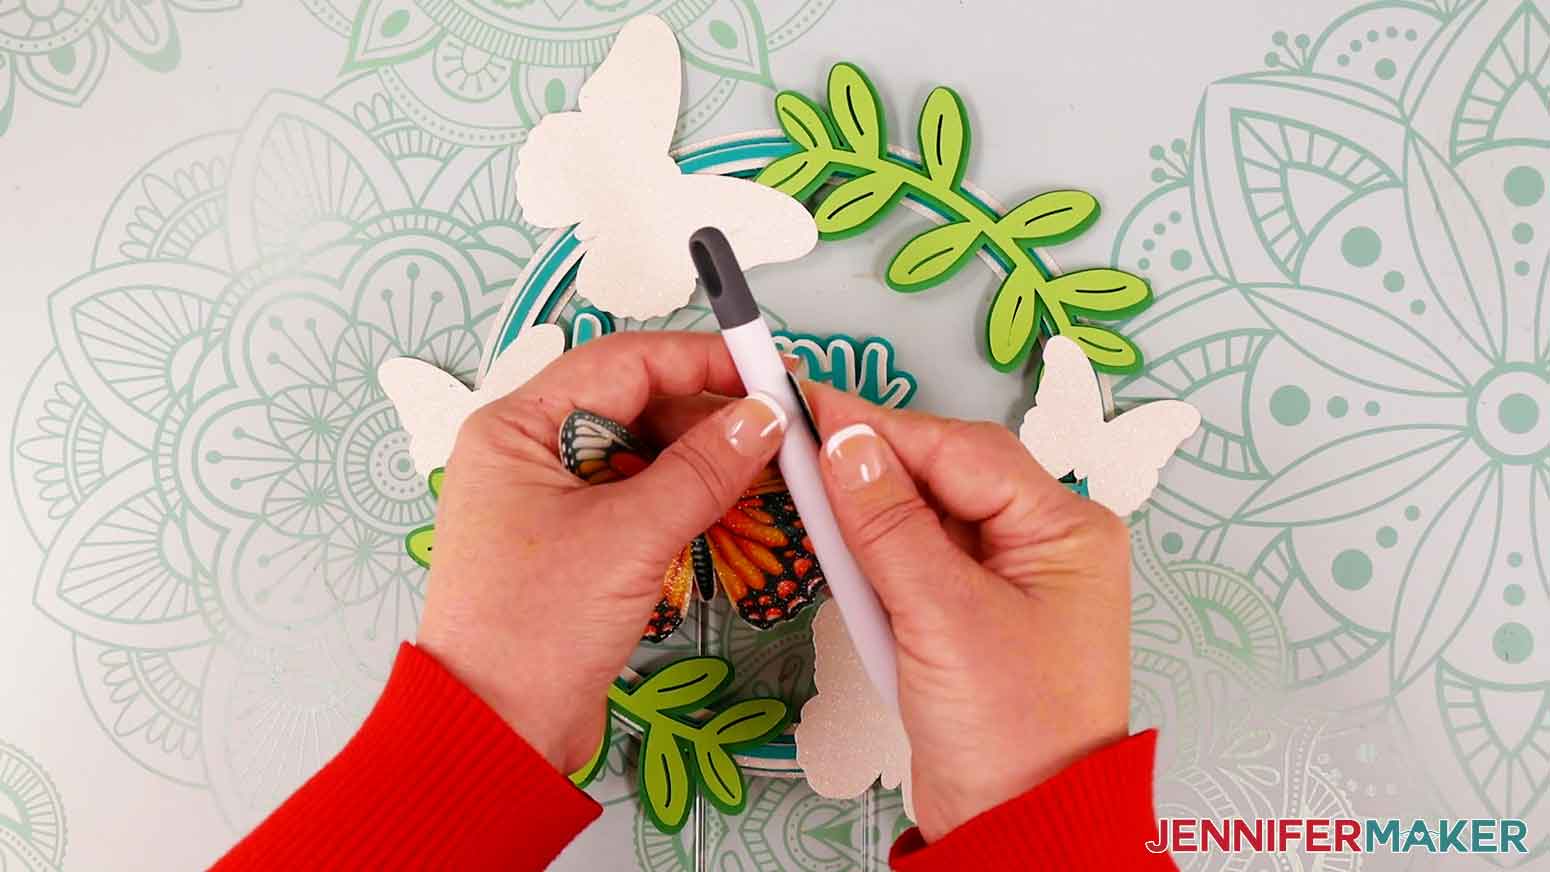
13. Apply small dabs of craft glue around the teal circle and press the white butterfly silhouette pieces in place. You can refer back to the design on your Design Space Canvas for placement.
14. Turn the cake topper over and use hot glue to attach two acrylic sticks – behind the lower leaves and behind the lowest butterfly silhouette, no higher than the word “birthday.”

15. When the hot glue is dry, turn the cake topper back over.
16. Use your fingers to shape the sublimated glitter butterfly wings. The weeding tool handle may also be helpful in curling the cardstock.
17. Apply glue to the underside center of each of the butterflies and press them on their corresponding white silhouette.
18. Apply craft glue to the bottom of the rolled paper roses and press them in place on the leaves.
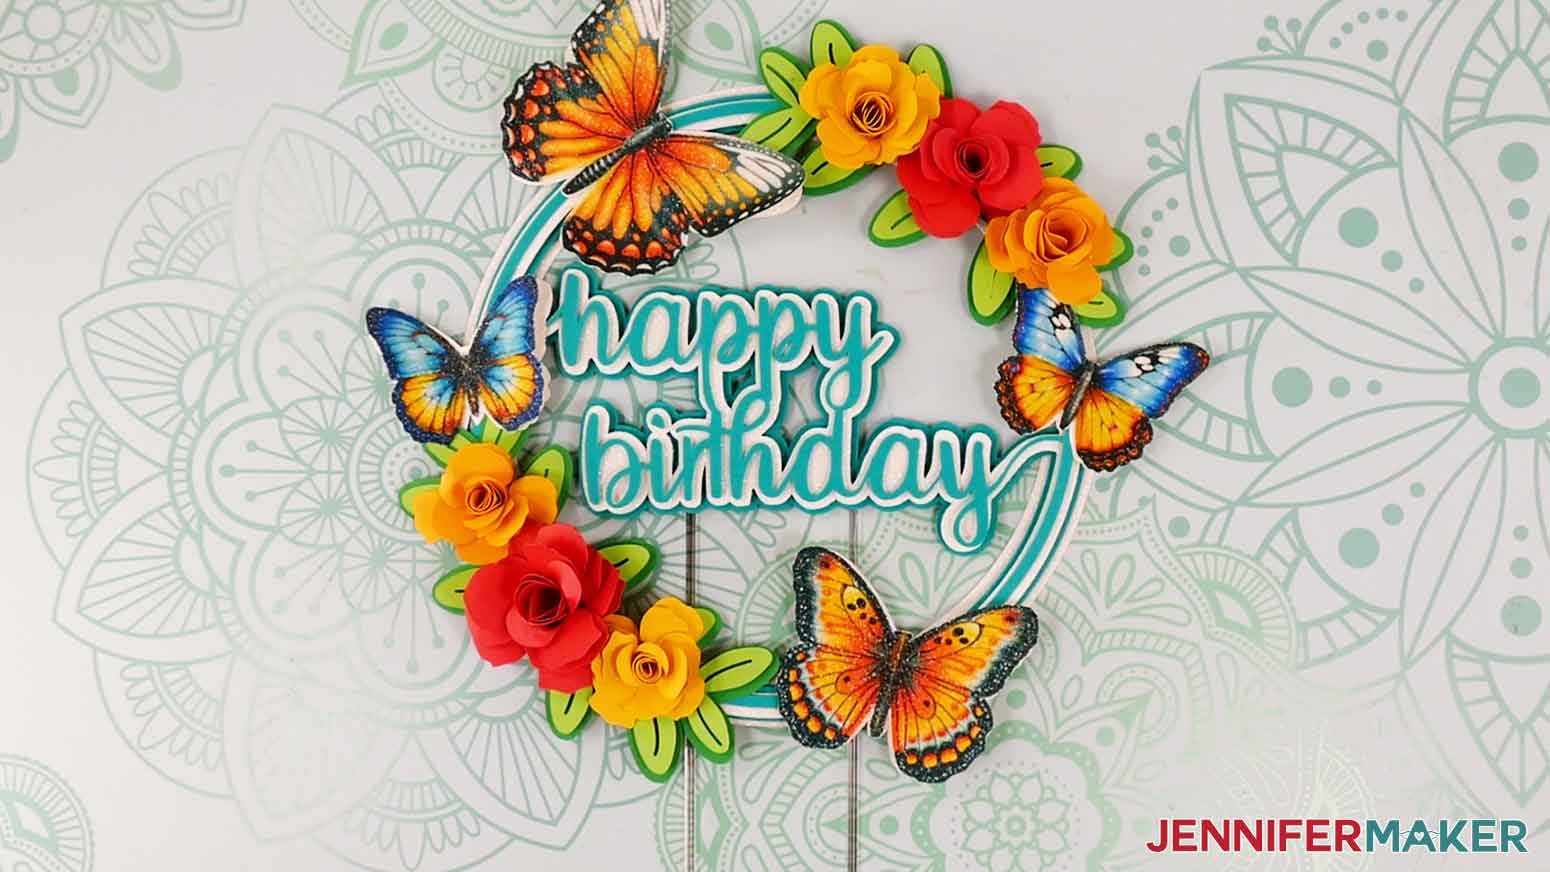
19. Your butterfly cake topper is complete!
VARIATION 3: PERSONALIZED WATERCOLOR CAKE TOPPER
STEP 2: PREPARE YOUR DESIGN
1. Follow steps 1-10 in "Project 1" to upload the happy birthday SVG, the watercolor frame PNG, and the watercolor square PNG.
NOTE: If you would like to make the watercolor birthday cake topper as it is, you can also upload the watercolor birthday sentiment PNG.
2. Select the watercolor frame and enter 7.32” for the width (W) in the Size menu.
3. With the frame still selected, click “Arrange” and “Send to Back.”
4. Select the “Happy Birthday” offset layer and click the Delete icon.
5. Click the Text icon on the left side of the Canvas.
6. Click the Font menu dropdown arrow.
7. Click “System” and search for the font you’d like to use. I’m going to use JM Groovy.
TIP: If you need help downloading and installing fonts to use in Cricut Design Space, check out this helpful tutorial.
8. Click on the Canvas to close the Font menu.
9. Type the personalization you want to use. I’ll type "Butterscotch."
10. I’m going to move the letters closer together so they are touching. This will make it easier to cut and assemble the cake topper. Click “Advanced” and “Ungroup to Letters.”

11. Select each letter individually and use the left and right arrow keys on your keyboard to move the letters so they’re slightly overlapping.
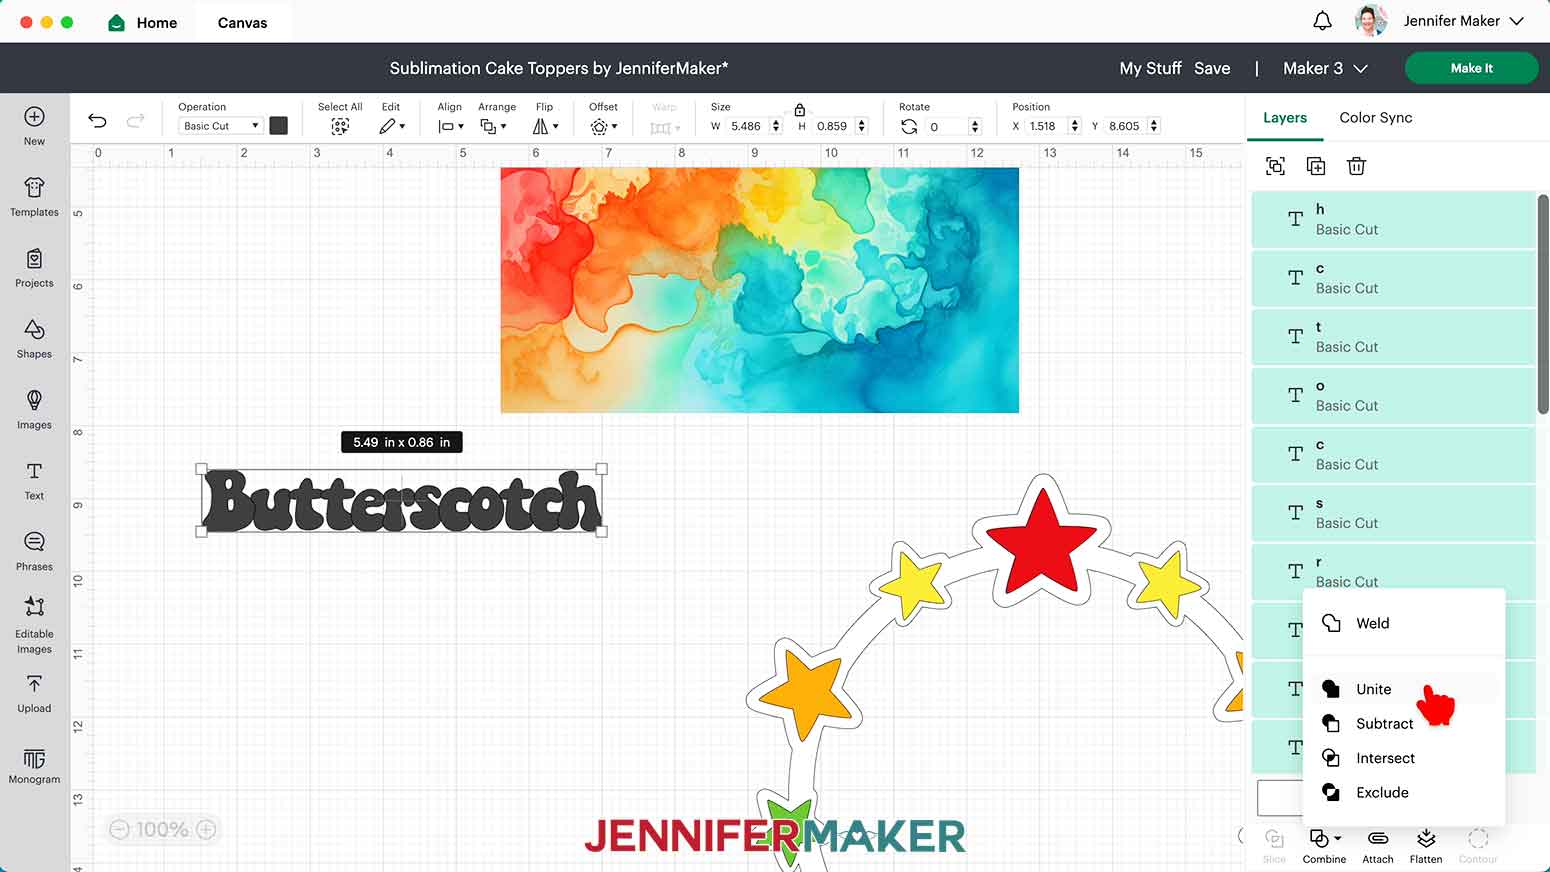
12. When the letters are all overlapping, use your mouse to click and drag the cursor over all of the letters.
13. Click the “Combine” icon at the bottom of the Layers Panel and select “Unite."
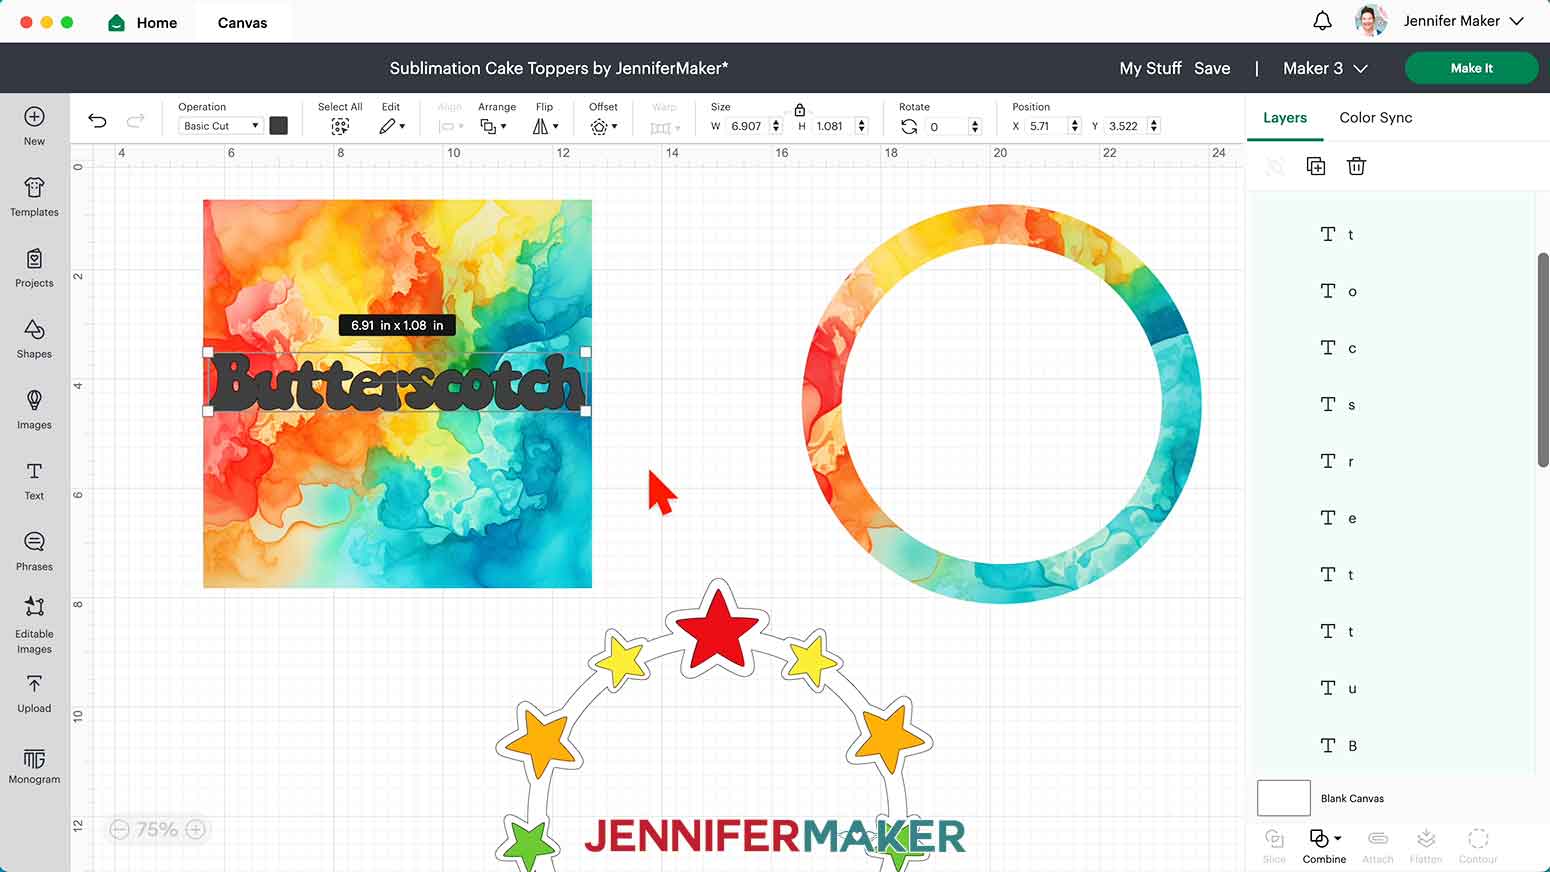
14. Drag the personalization over to the watercolor square.
15. Click and drag a corner of the text layer to resize it to fit within the watercolor square.
NOTE: Use any size to cover the colors you want. We will resize the personalization to fit the cake topper in a few steps.
16. Place the personalization anywhere over the square. The colors that the personalization overlaps are the colors that will be on your text.
17. Hold Shift and select both the text layer and the watercolor square.
18. Click “Slice” at the bottom of the Layers panel.
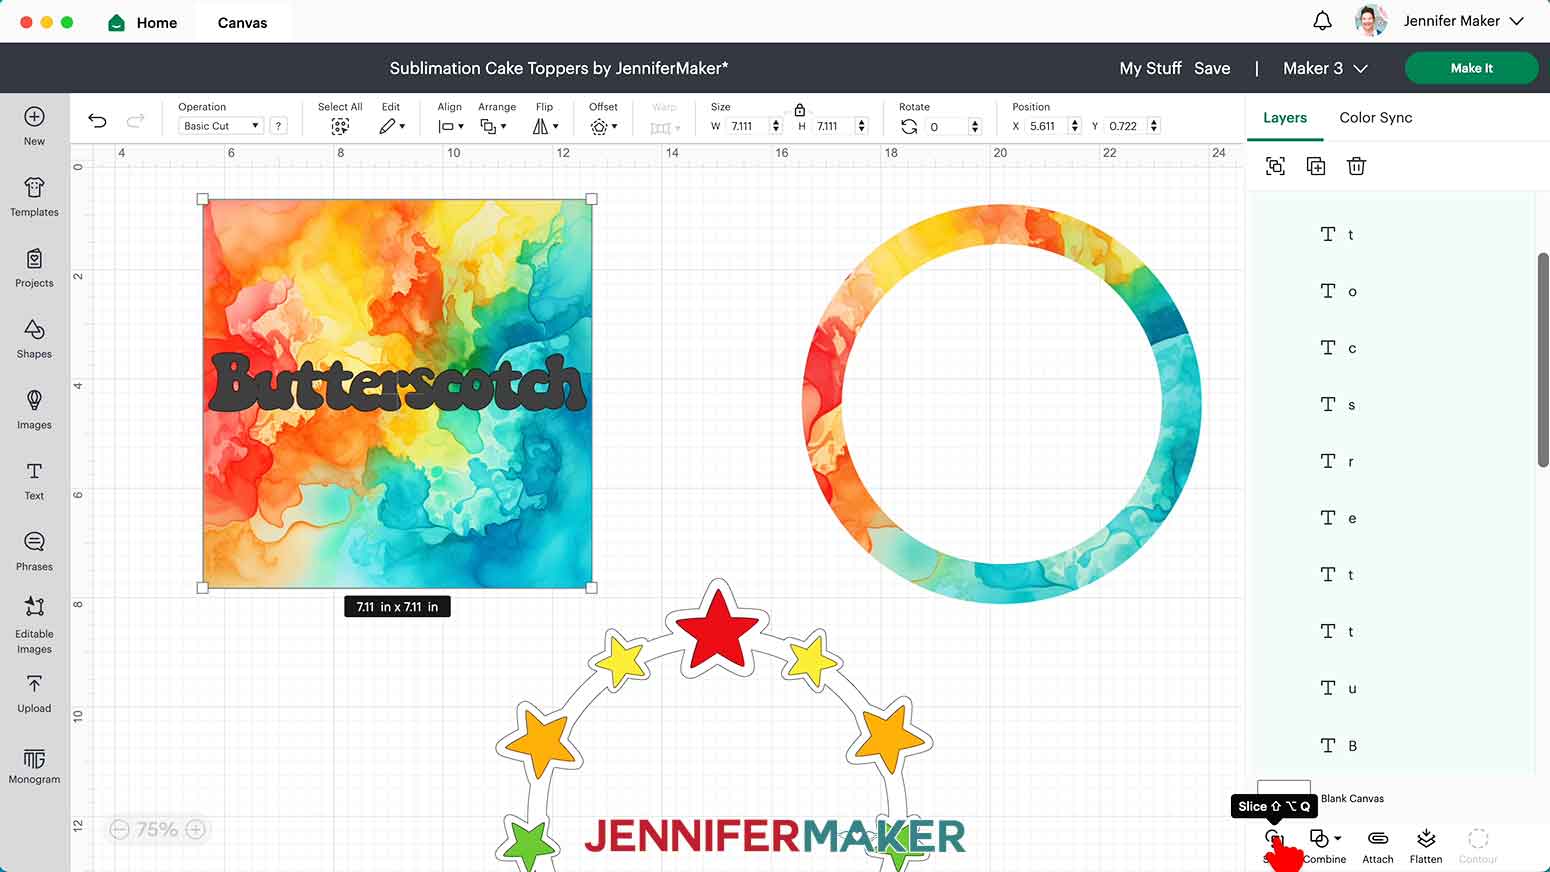
19. Delete the extra layers with the watercolor square and the dark gray text. You will be left with the watercolor personalization.
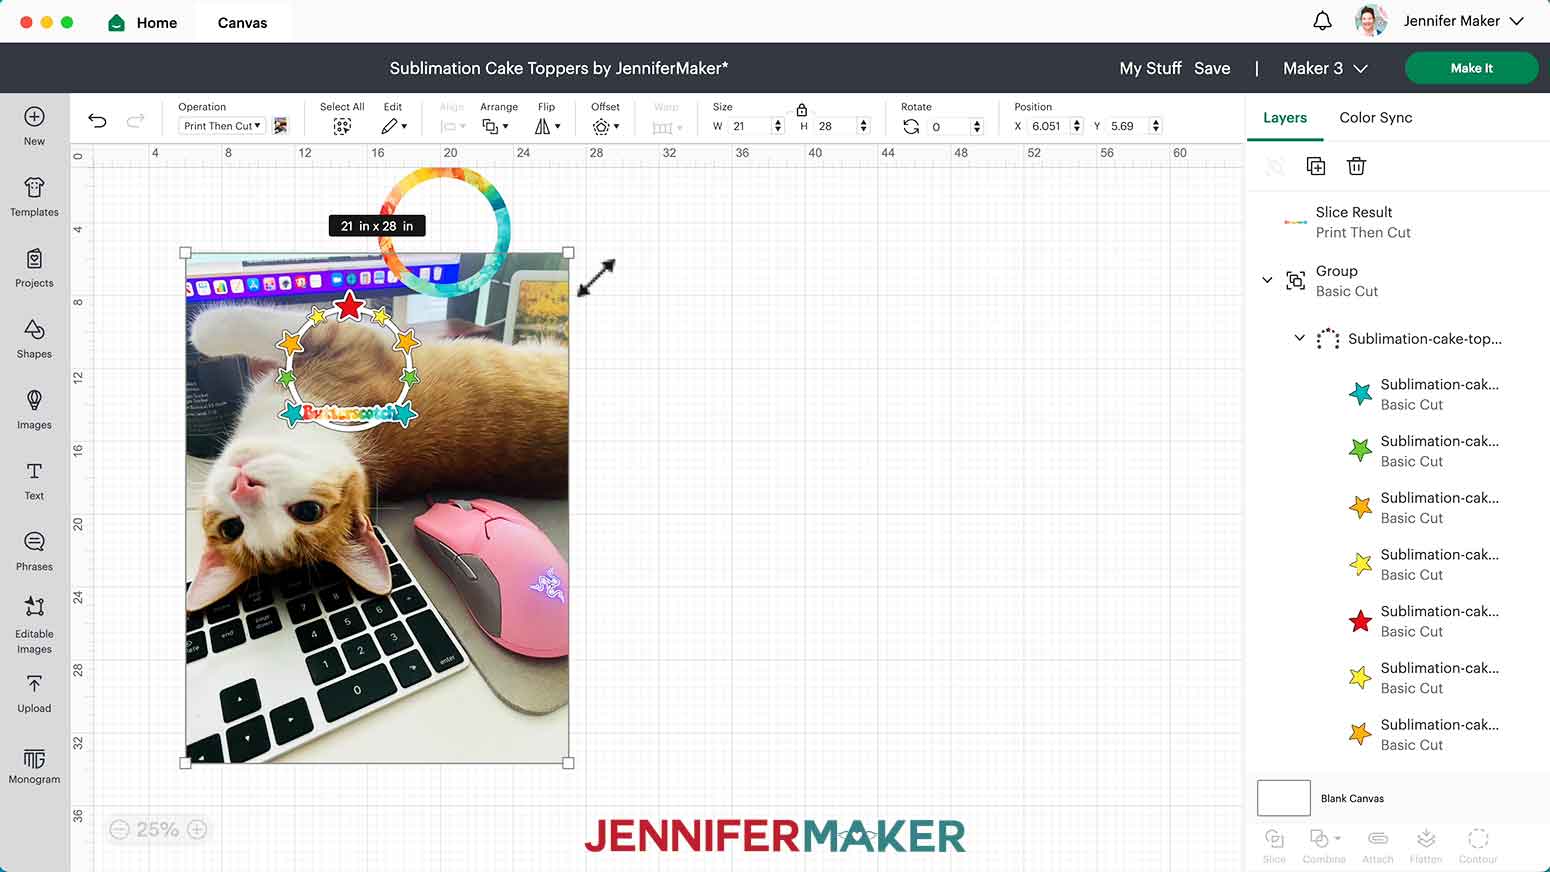
20. Click and drag the personalization over the circular frame design. Use the corner handles to resize your text to fit between the teal stars.
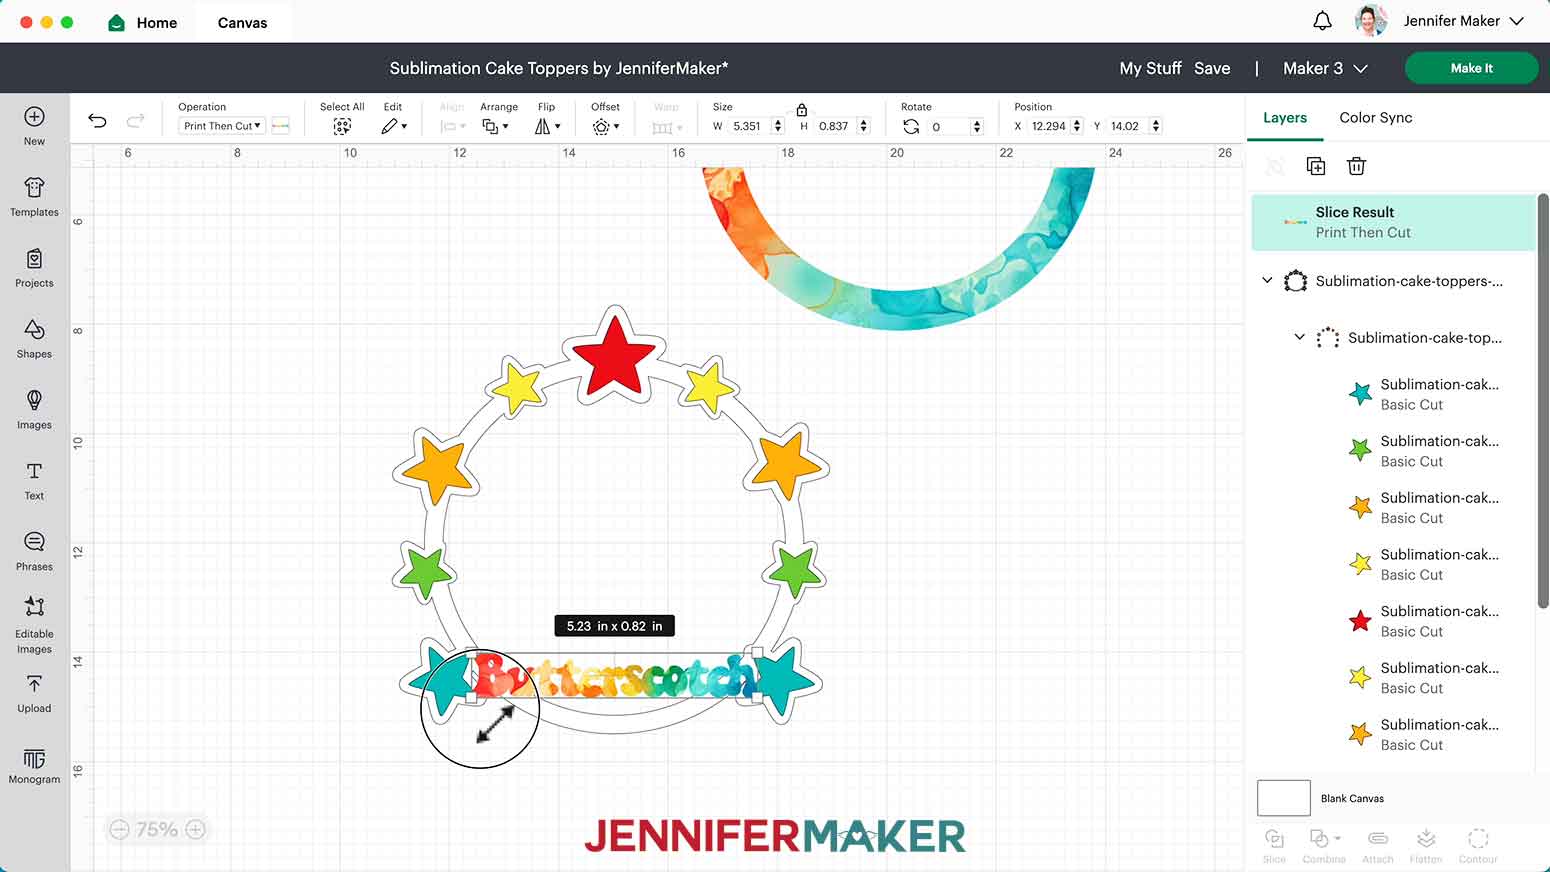
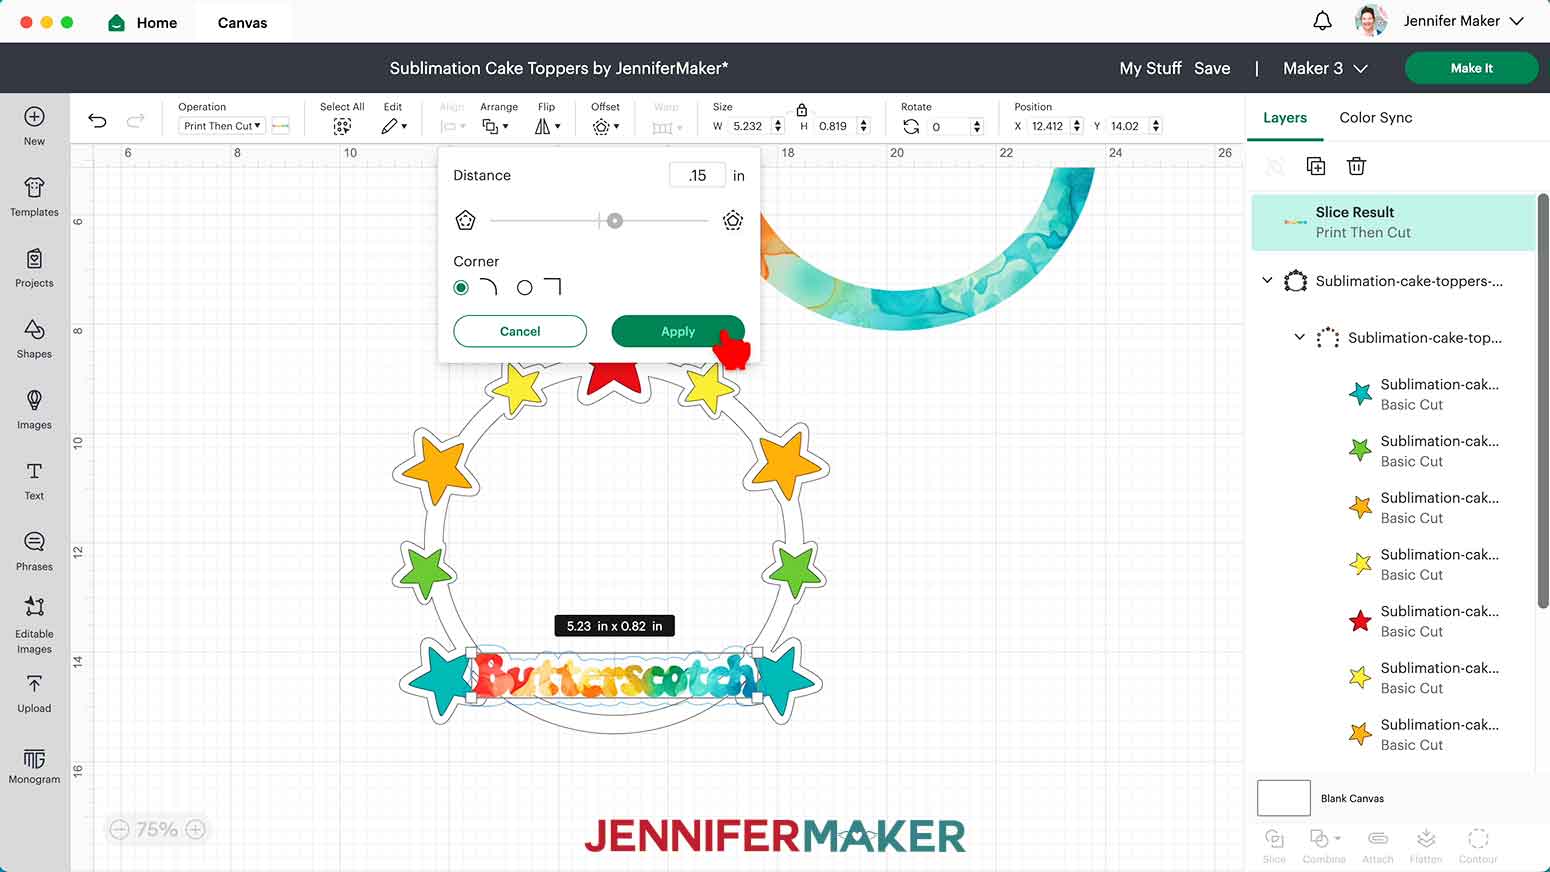
21. With the text still selected, click “Offset.”
22. Enter “0.15” for the distance with rounded corners. Click “Apply.”
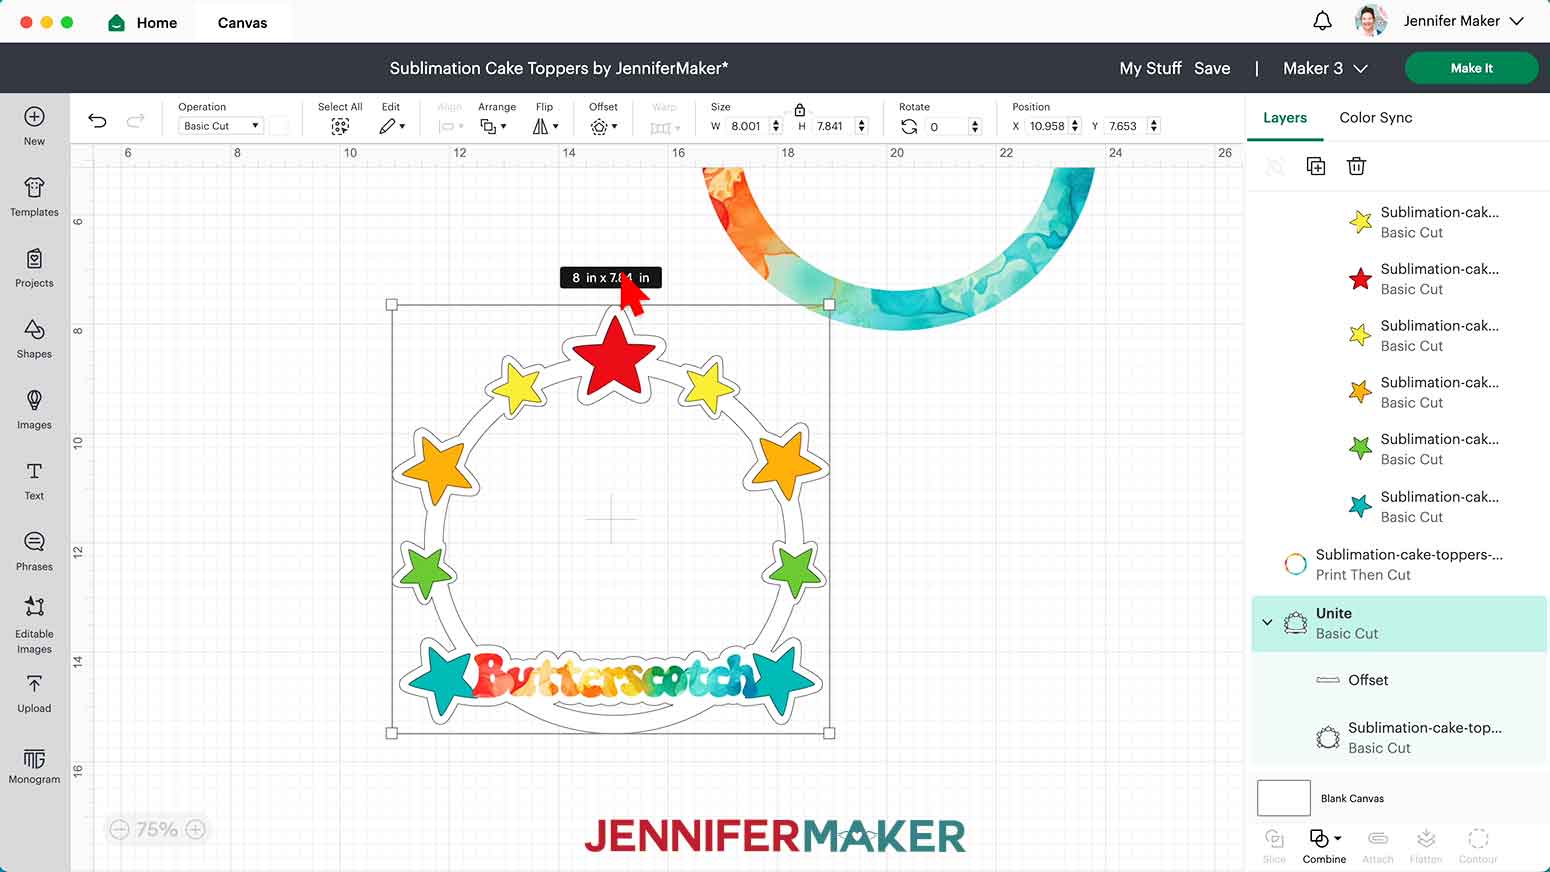
23. With the offset layer selected, hold Shift and select the white circular frame layer. Click “Combine” and “Unite.”
24. The stars and personalization will disappear when the united layers move to the top. Click “Arrange” and “Send Backward” to see the personalization again.
25. Repeat step 24 if needed to see the stars again.
26. You can leave the cake topper as it is or add a photo. Follow the “Project 1” steps 1-10 above to upload a photo.
27. With the photo selected, click “Arrange” and “Send to Back.”
28. Use the corner handles to resize the image to fit in the open area of the cake topper frame.
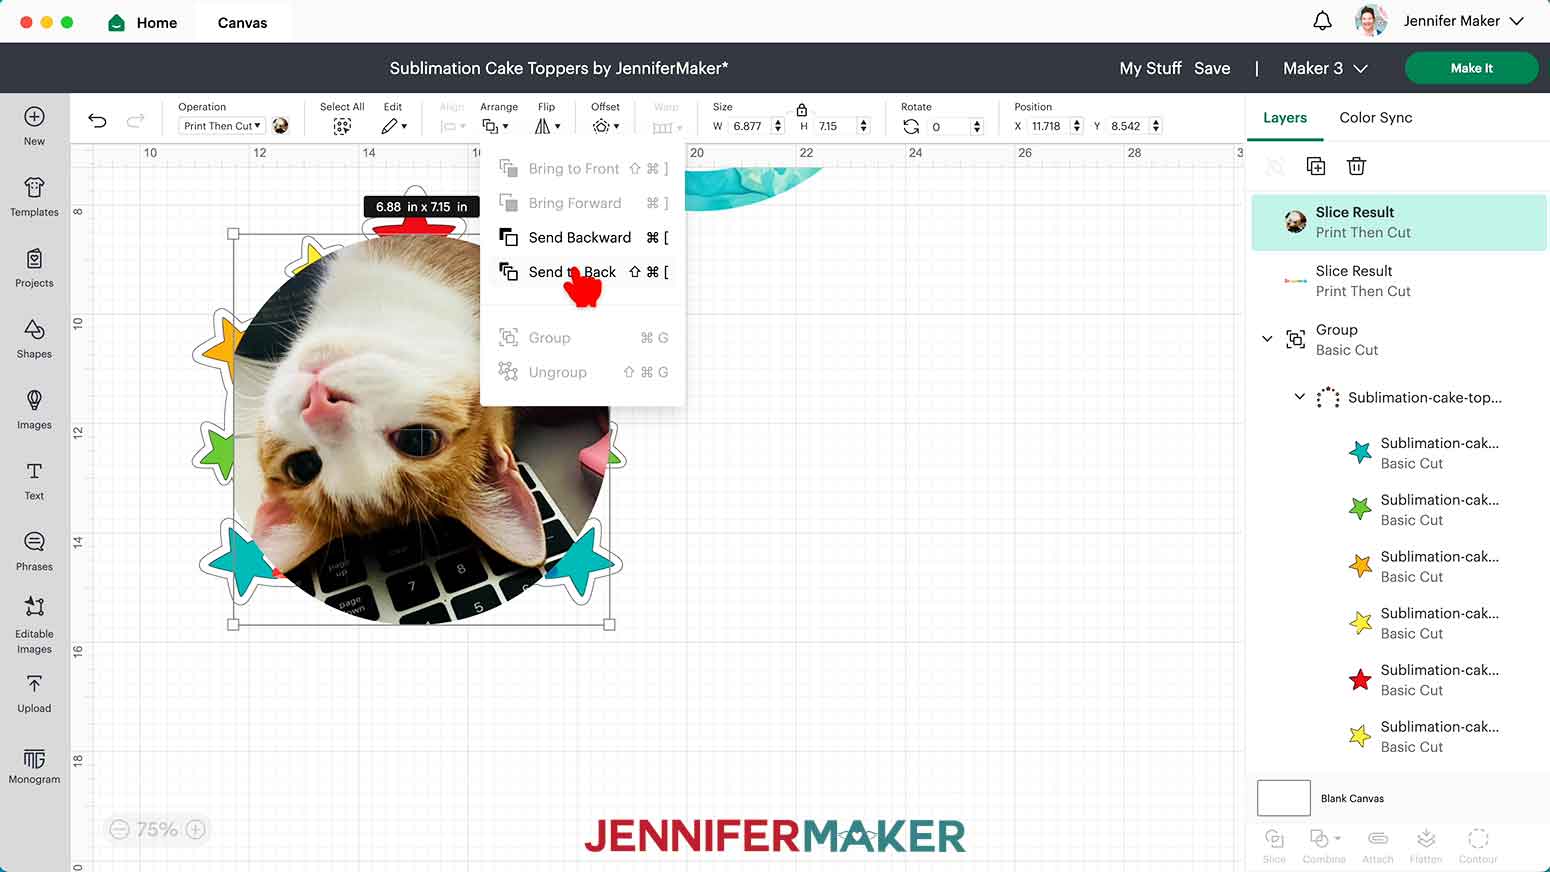
29. Click “Shapes” in the left menu and select the Circle.
30. Resize the circle to 7.15” wide in the Size Menu.
31. Move the circle over the design so it is mostly centered over the cake topper opening.

32. Hold Shift and select both the circle and the image. Click “Slice.”
33. Delete the dark gray layers and the excess photo layer.
34. Select the circular photo and click “Arrange” and “Send to Back.”
STEP 3: PRINT, CUT, AND SUBLIMATE YOUR CAKE TOPPER
Follow your preferred steps from the options above. You can Print Then Cut or follow the Variation 1 directions to cut the shapes and then sublimate your design onto them.
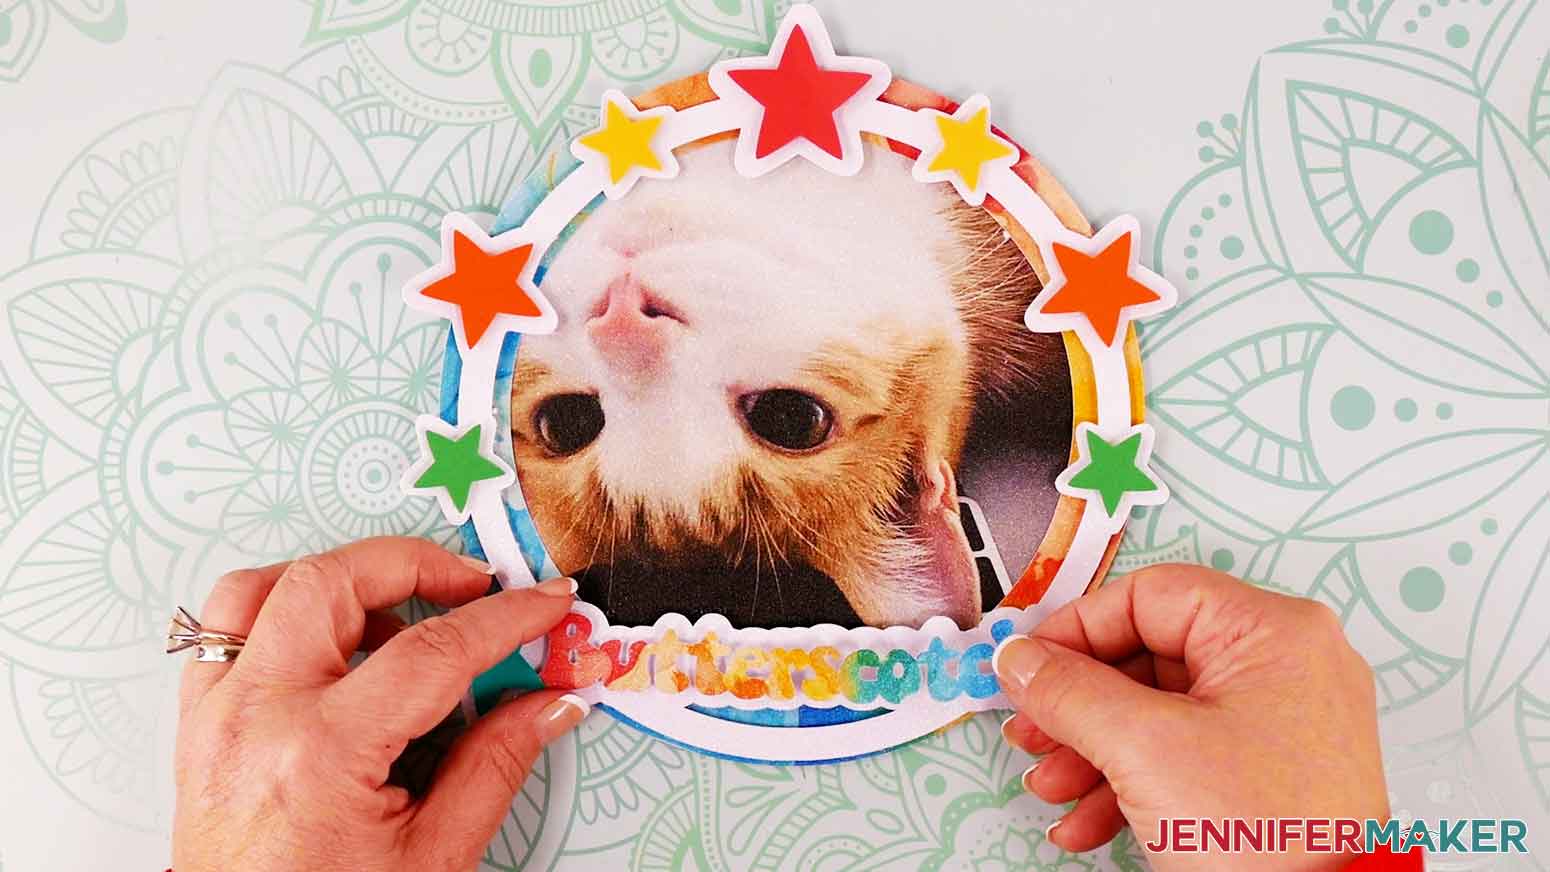
STEP 4: ASSEMBLE YOUR CUSTOM SUBLIMATION CAKE TOPPER
1. These are the cut pieces for the personalized watercolor cake topper.

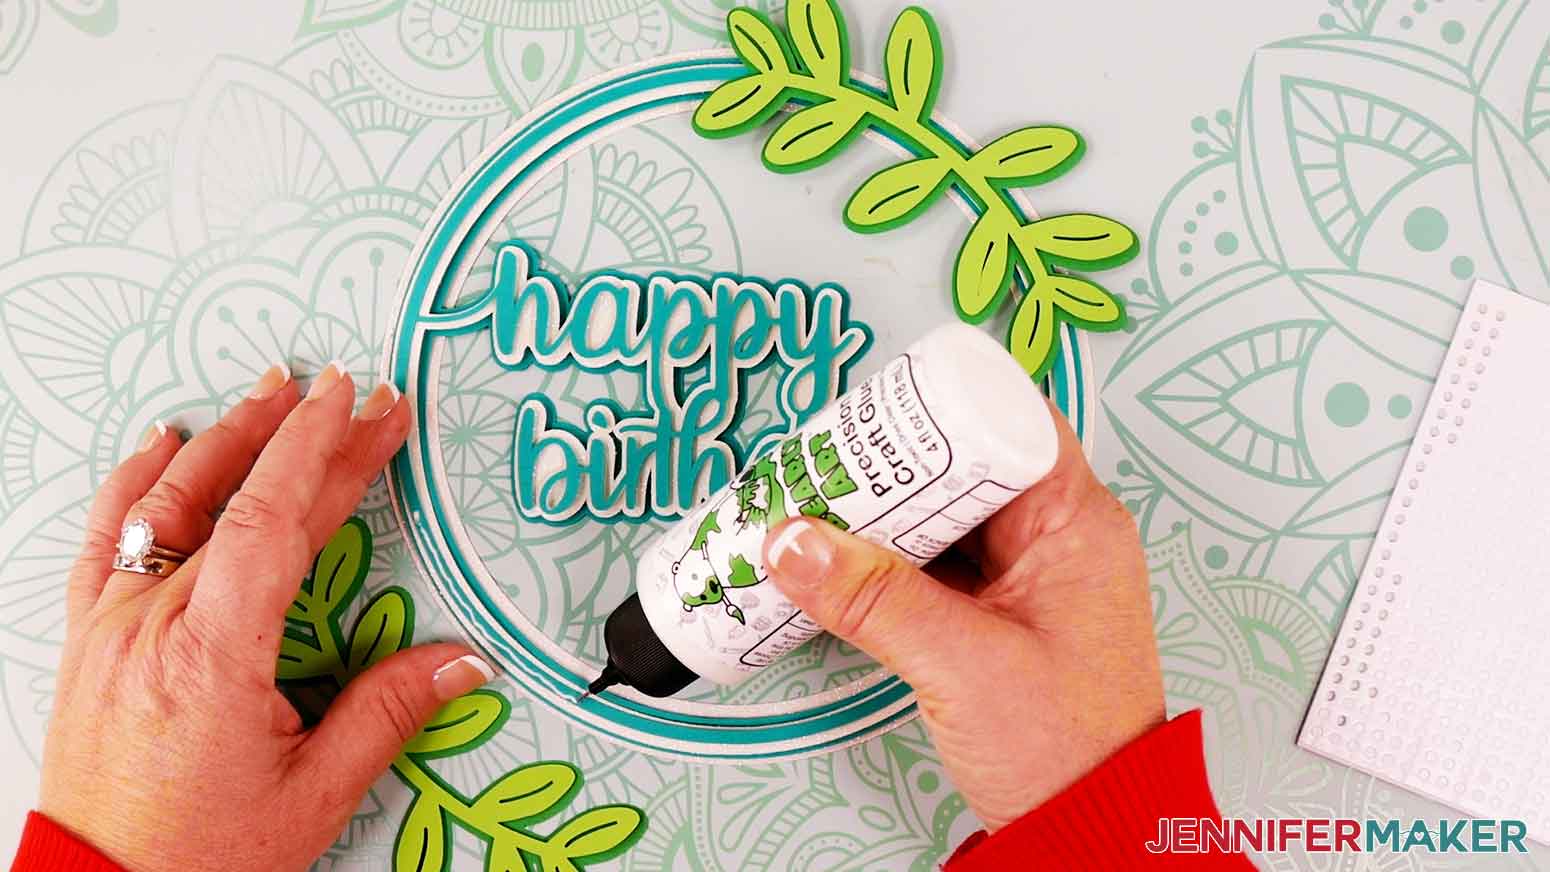
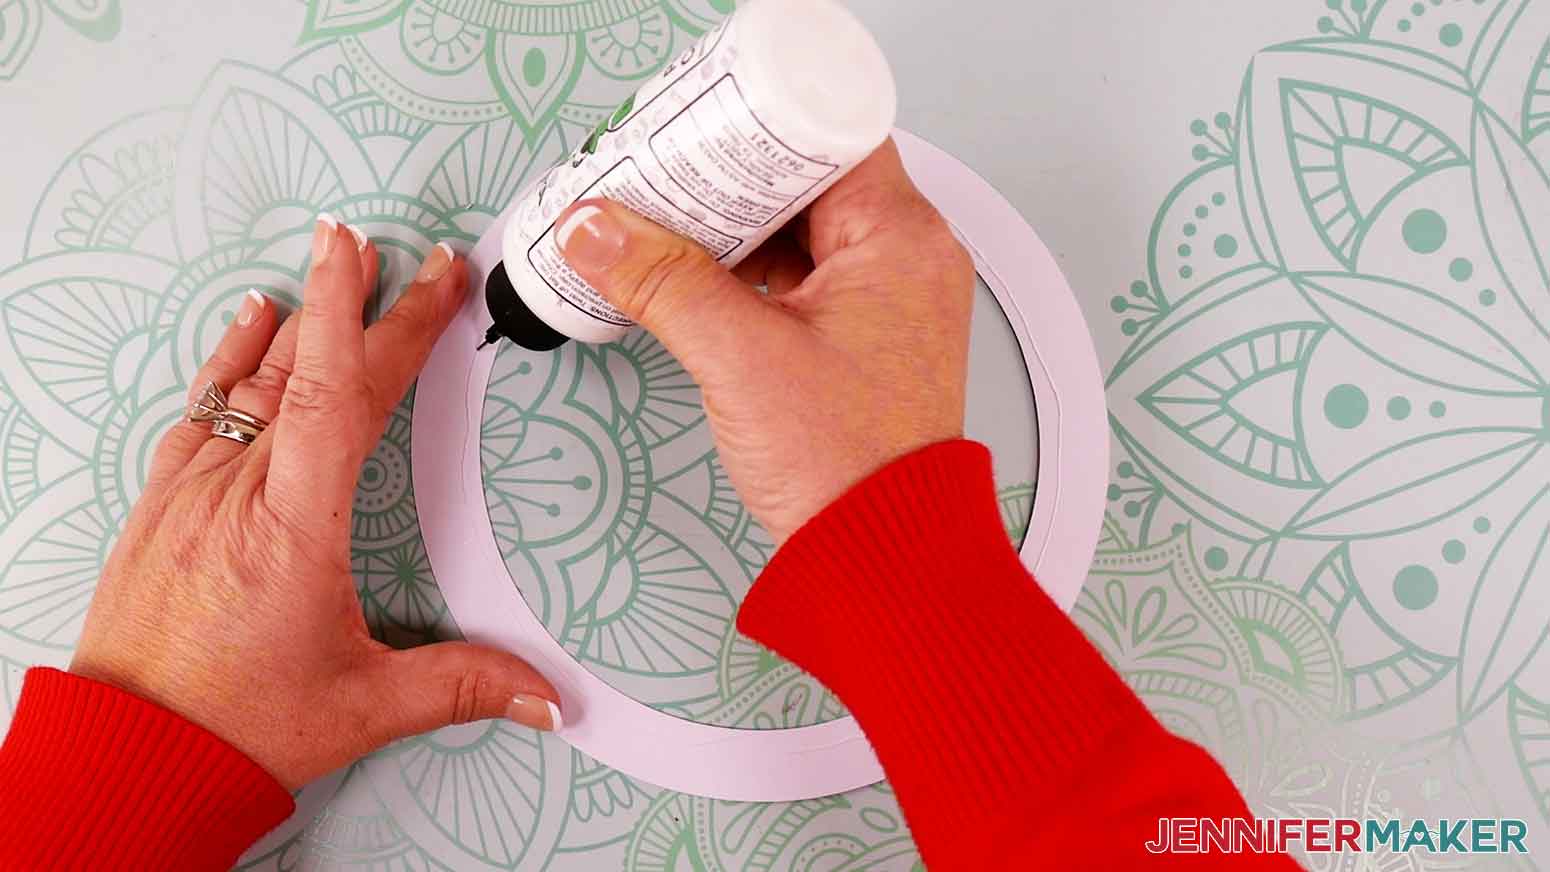
2. Turn over the watercolor frame piece and apply a thin layer of craft glue around the inner edge of the circle.
3. Press the sublimated photo face down to attach it to the frame.
4. Flip the frame back over to the front. Add adhesive foam pieces to the back of the white frame with stars, then attach it to the sublimated pieces.
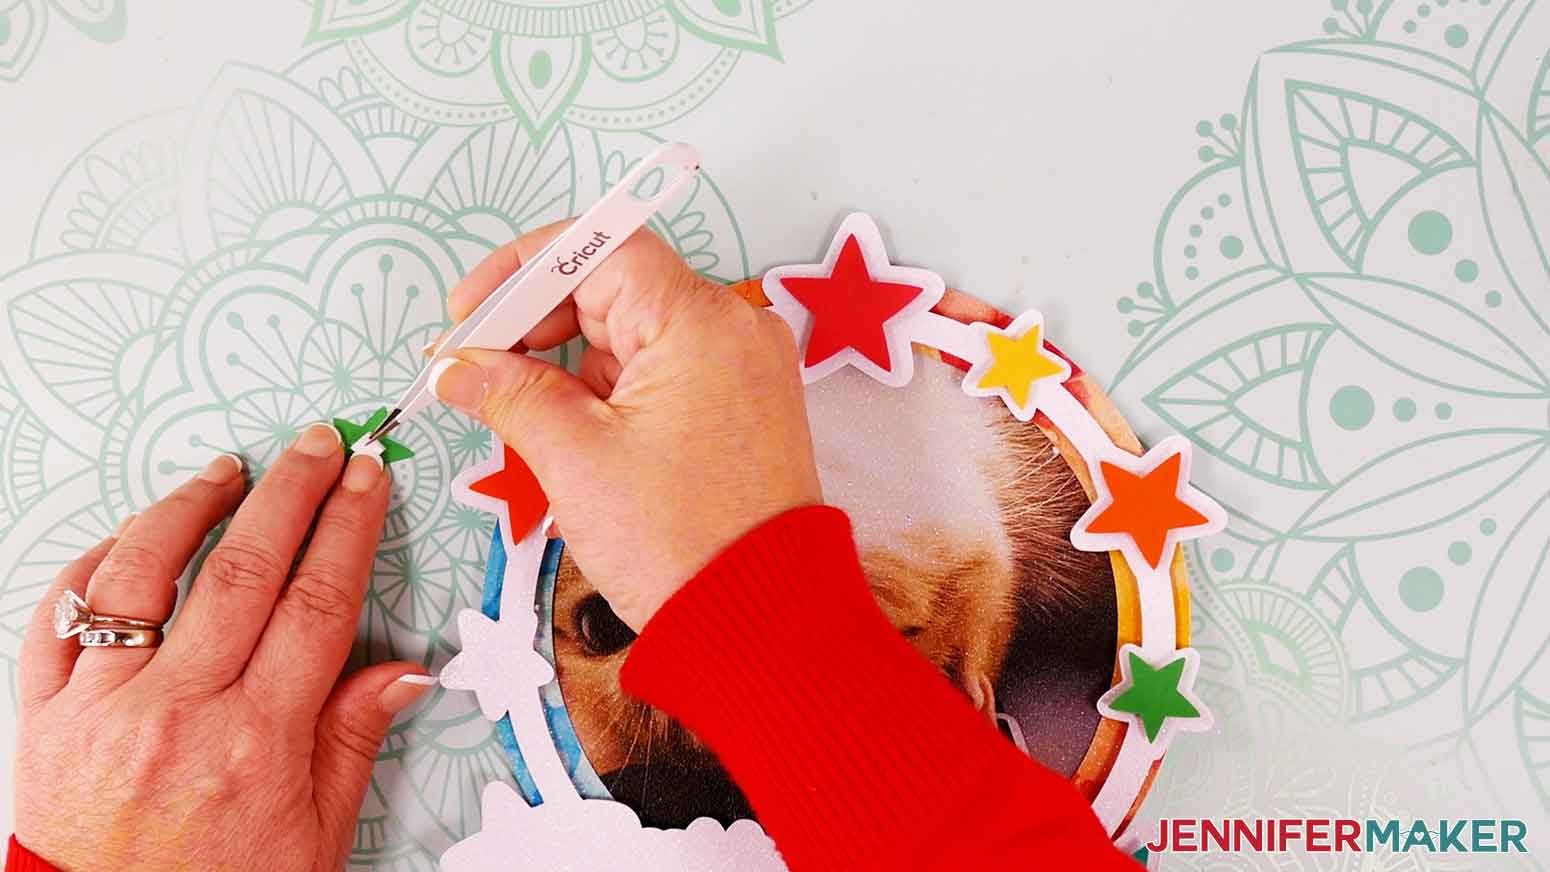
5. Place a foam adhesive square on the back of the red star and press it in place at the top of the white frame.
6. Apply foam adhesive to the back of the remaining stars and press them in place around the frame.
7. Place foam adhesive on the back of the watercolor personalization and press it in place at the bottom of the frame.
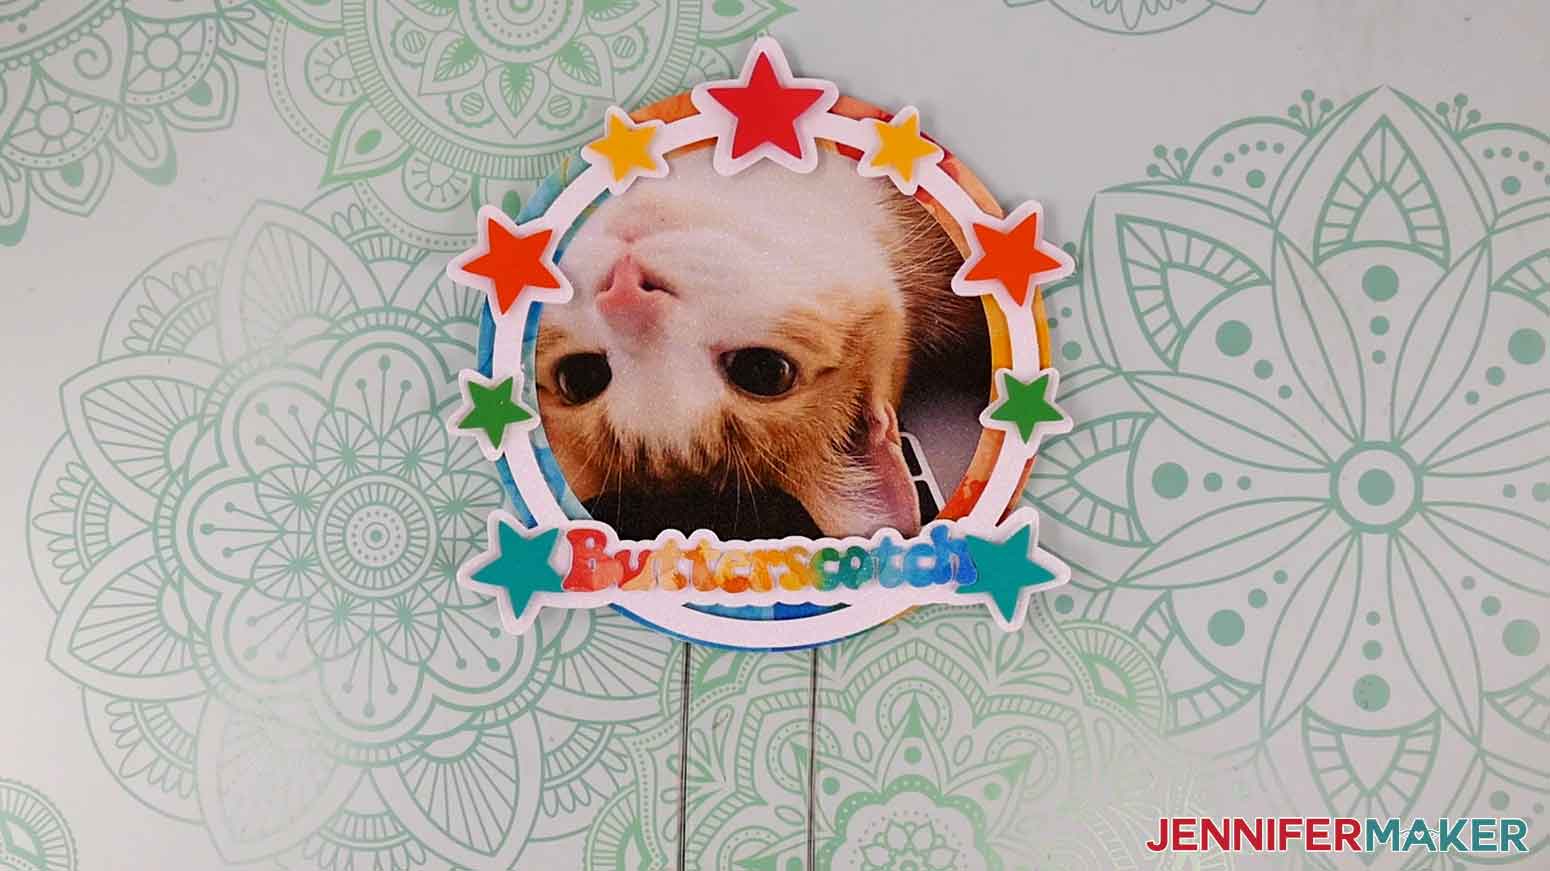
8. Turn the cake topper over and apply hot glue to two acrylic sticks. Press them in place on the back of the cake topper. They should be about 2 inches apart.
9. Your watercolor cake topper is complete!
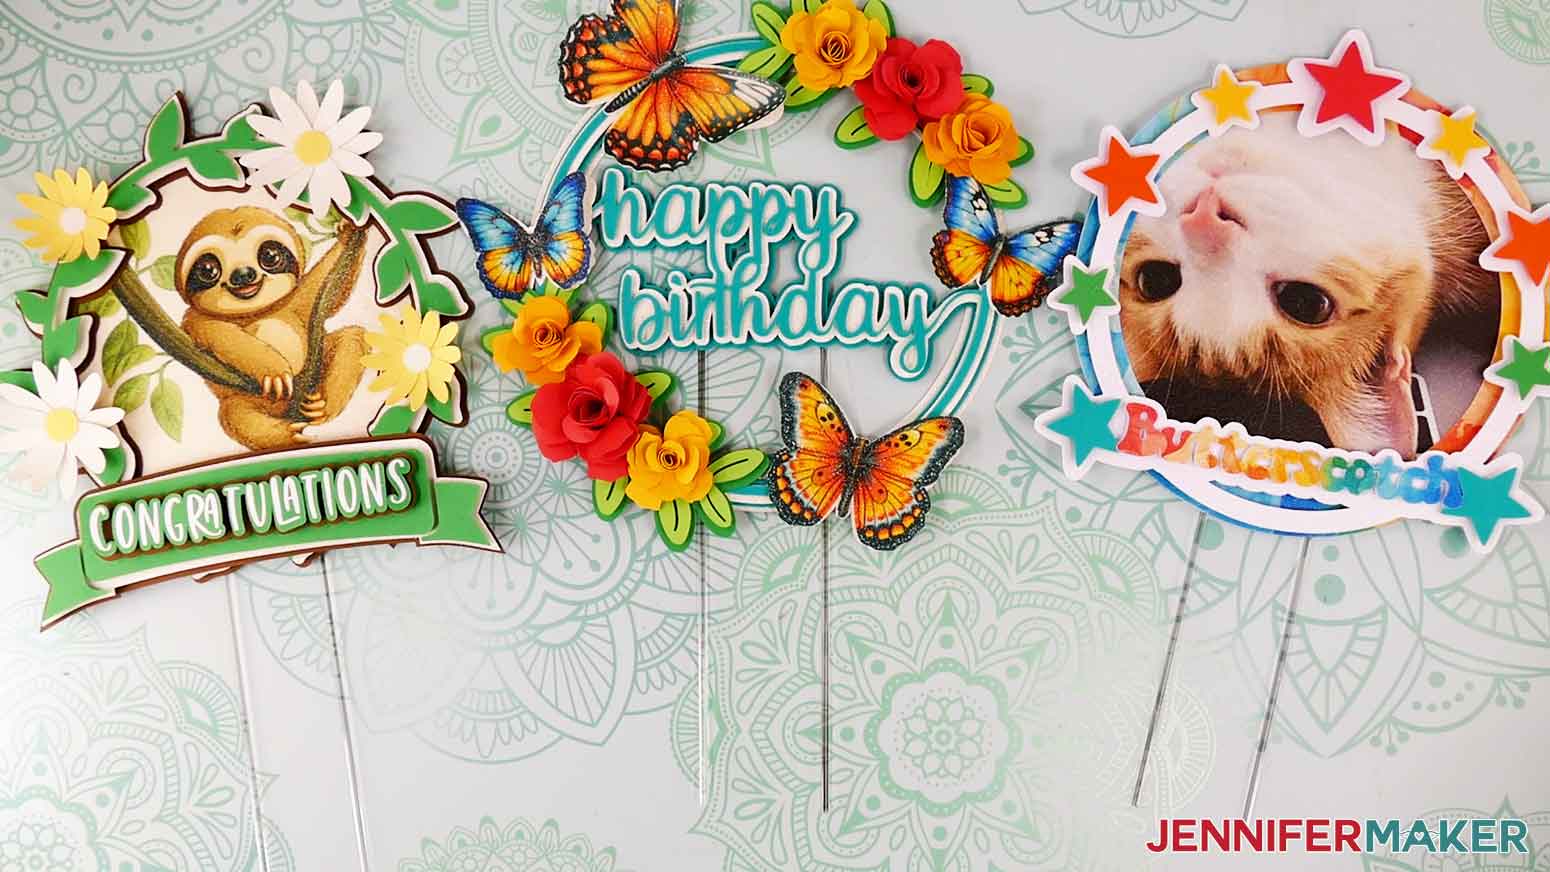
STEP 6: SHOW IT OFF
Here are what my finished sublimated cardstock cake toppers look like!
Notes
The finished cake toppers are about 8” wide and 8” - 9” tall.
Typefaces used: JM Sweet, Breethy, Market Street
Answers to Your Question: Can You Sublimate On Cardstock?
Q: Can you use cardstock in a sublimation printer?
A: While you might be technically able to put cardstock in a sublimation printer, transfers will work much better if you print them on sublimation paper. Cardstock could jam you printer or not release the ink well, so I don’t recommend trying it.
Q: What kind of paper can you sublimate on?
A: The type of paper is very important because it needs to have polymers to accept the special sublimation ink in its gaseous state. White glitter cardstock has worked best for me.
Q: Can you sublimate onto cardboard?
A: Most cardboard doesn’t have a polymer coating, so it wouldn’t accept sublimation ink well. It’s possible that adding glitter or a special coating could work, but I haven’t tried it yet!
Q: Can you sublimate on dollar store items?
A: I’ve had great results sublimating on many items from Dollar Tree and other budget stores when the products are sublimation-friendly and can withstand high temperatures. Unfortunately, the Dollar Tree glitter cardstock didn’t sublimate well.
Q: Can you print sublimation on any paper?
A: For the best results, only print sublimation designs on sublimation paper. While some people use regular copy paper, it will not create high-quality prints or sublimation crafts with vivid colors.
Q: What materials can you sublimation print onto?
A: You can sublimate on polyester fabric, phone cases with a heat safe back, various materials with a polyester coating, and so much more! Sublimation is a great way to customize so many materials.
Q: What can you not sublimate on?
A: Among other materials, you can’t sublimate on plain cardstock because it doesn’t contain polymers to accept the ink.
Q: What material is used for custom cake toppers?
A: The best material for basic cake toppers is cardstock! I used regular cardstock for most of the layers and glitter cardstock for some layers and the sublimated image. If you want to get fancy, you can use foil cardstock, too. Other than that, all you need acrylic sticks or bamboo skewers to stick the topper in your cake. No sticks or skewers? Use paper straws!
Q: How do you make a cake topper with Cricut?
A: The Cricut makes it so easy to cut out cake topper layers of card stock that you can assemble with craft glue and adhesive foam. I show you how in my step-by-step guide above.
Q: How big are your finished cake toppers?
A: The entire design size of my cake toppers are about 8″ wide and will fit nicely on a cake of the same size. If you’re decorating a larger cake, you can increase the width to 10″. If you have a small cake, I don’t recommend cutting my toppers smaller than their original size.
Get my free SVG and PNG files to create your own sublimation cardstock cake toppers!
(If you do not see the signup form above, click here.)
Are you excited to sublimate on cardstock? I love seeing what you make with my designs and how you use them! Please share a photo of your custom cake toppers in our Facebook group or tag me on social media with #jennifermaker.
Love,

Want to remember this? Save this Tutorial on How to Sublimate on Cardstock to your favorite Pinterest Board!