Learn how to ink cardstock edges and add depth to your cards!
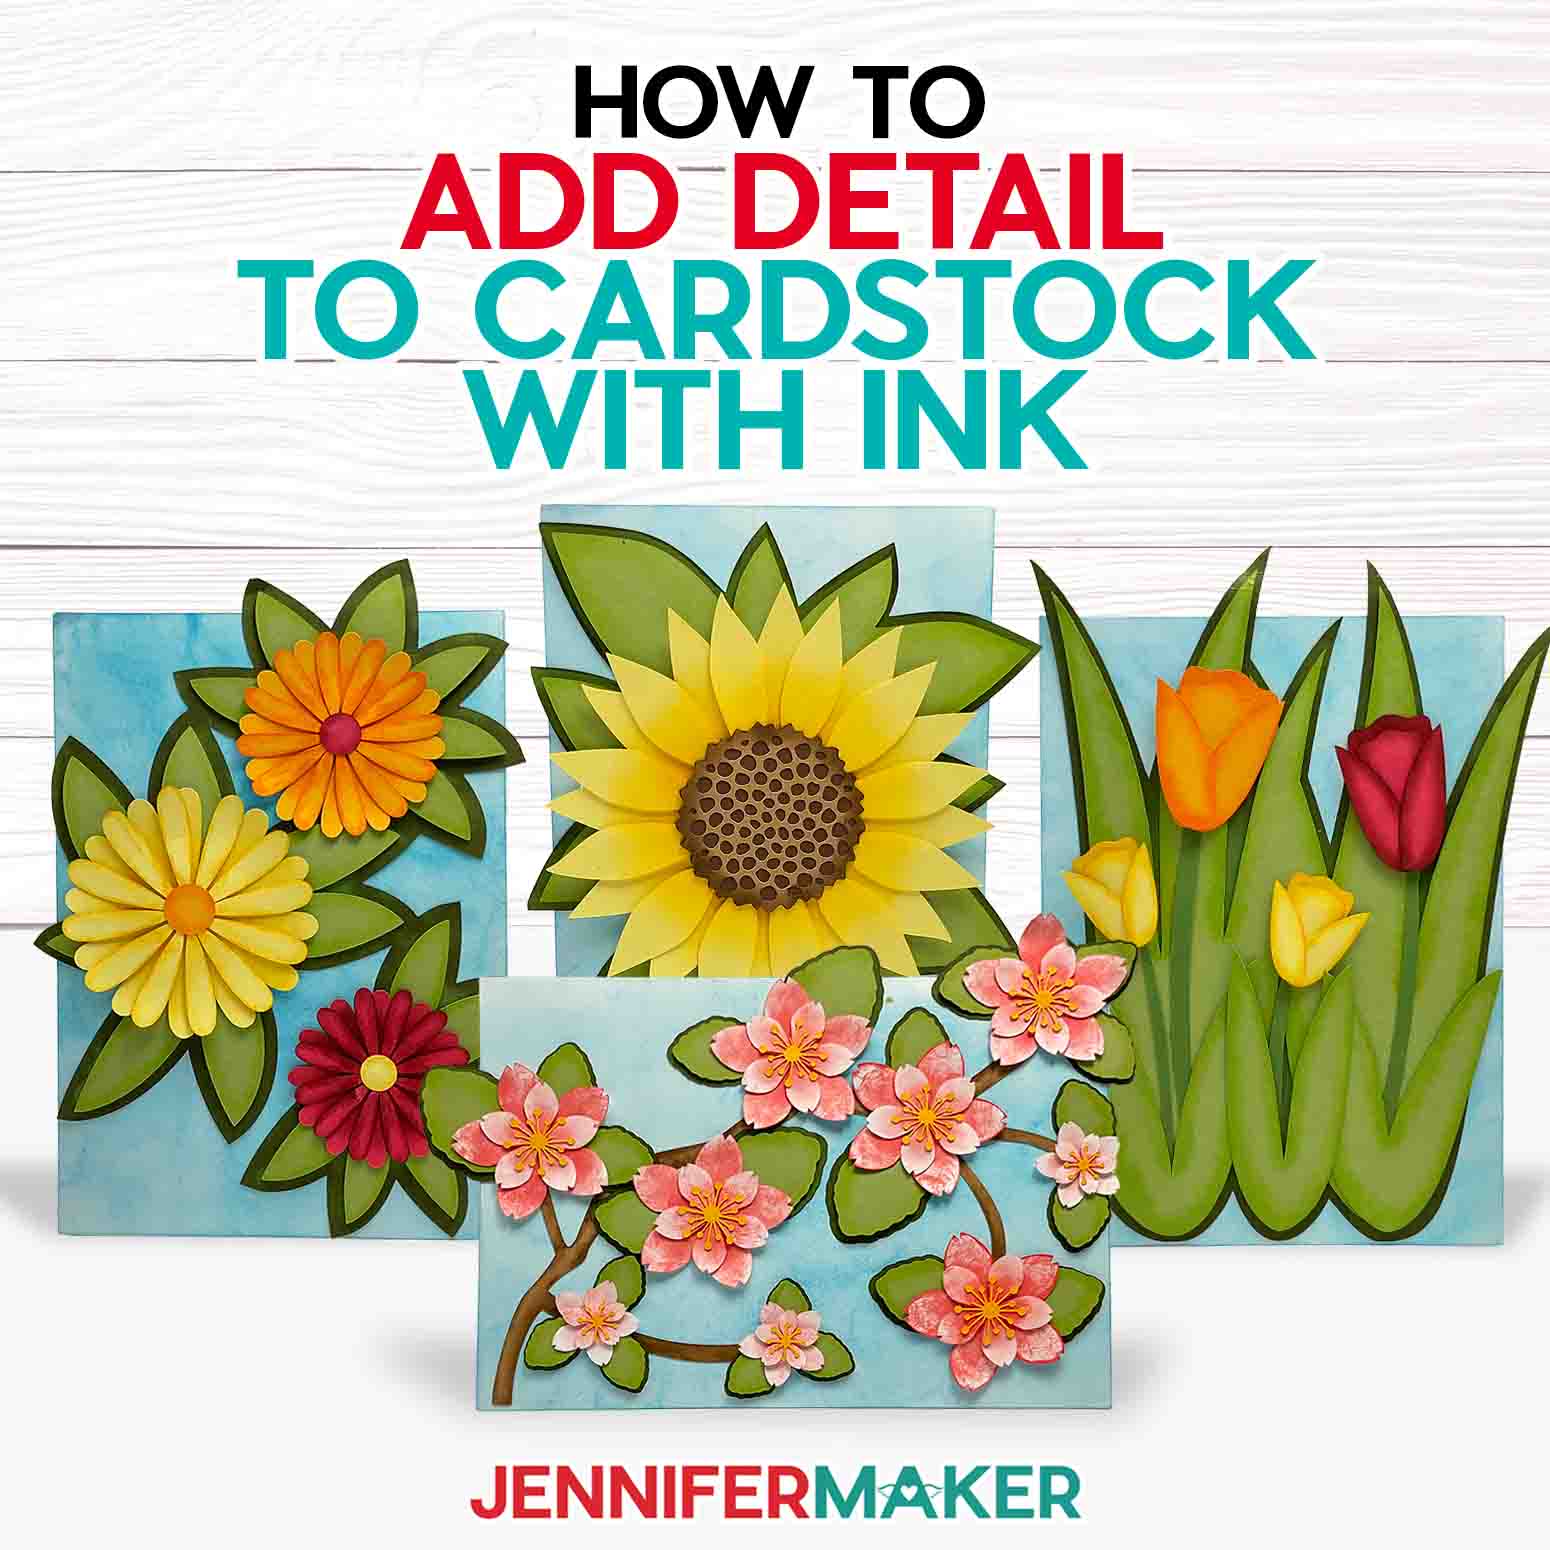
Do you ever feel like your cardstock projects look a little… flat? Cardstock comes in so many colors, patterns, and styles these days, but what if you want to add a custom touch? Or add depth to layers? Learning how to ink cardstock edges will really elevate your cardstock capabilities! I tested out two popular types — distress oxides and distress inks — on my new layered flower cards to show you the steps!

Using my Cricut to make cards for my friends and family is one of my favorite ways to use it. I haven’t purchased money on a store-bought card in … I don’t know how long! But sometimes, mixing things up with a different look is fun. Like creating the illusion of dimension! I can show you how to do this by adding a few new tools and materials to your usual stash of card-making supplies.
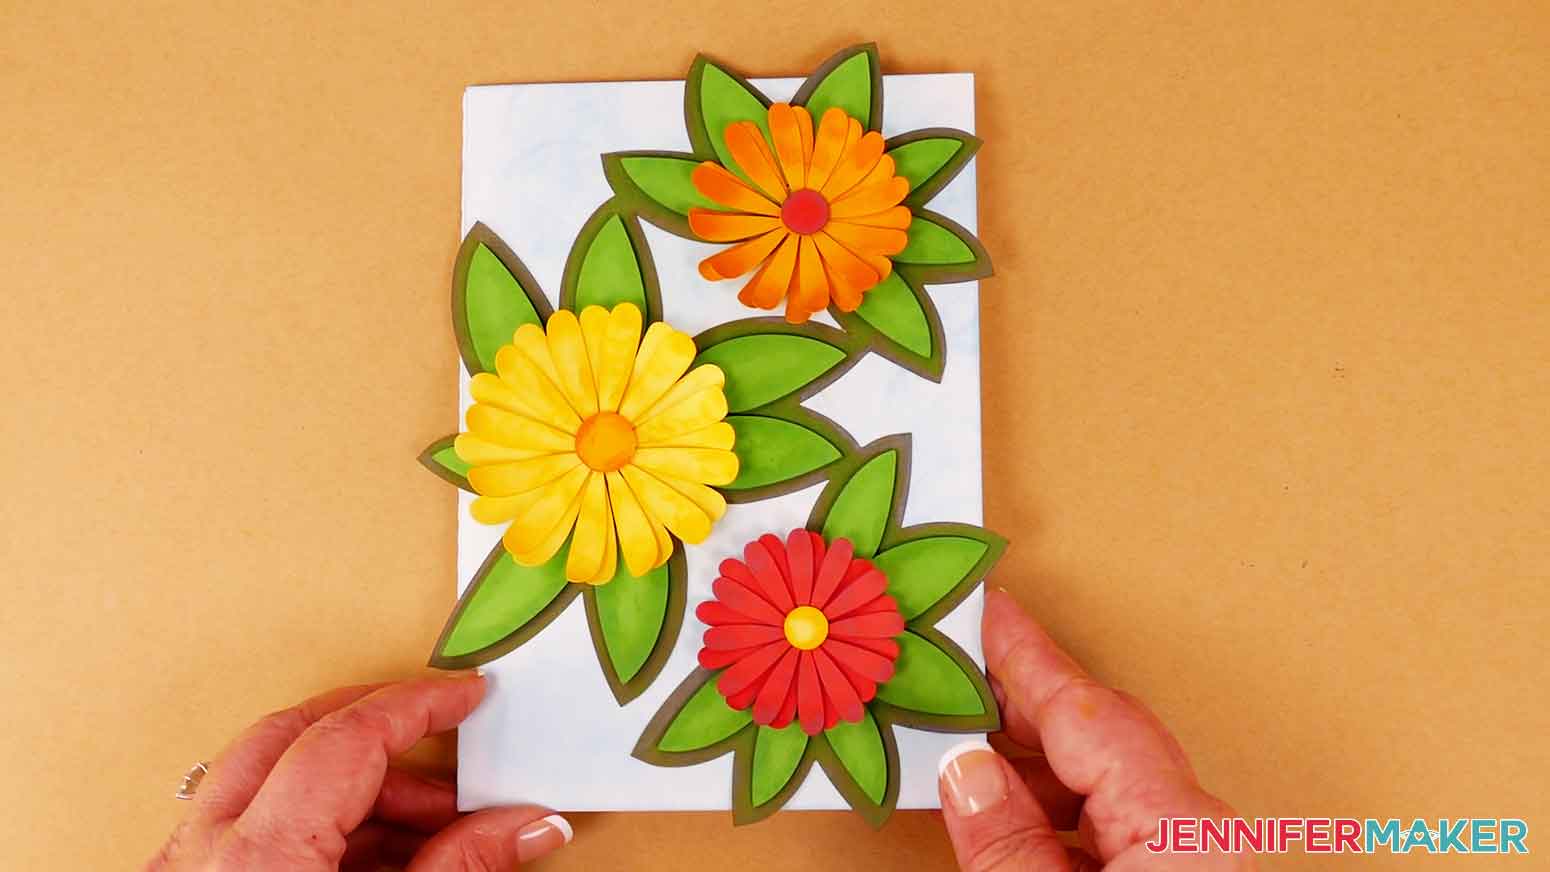
See the depth, and how the flowers and leaves almost look 3-D? That’s what I’m going to show you how to recreate on your OWN cards! Today, I’ll show you how to add the illusion of depth to the cardstock using not one, but two different types of ink.
But what is the best ink to use for a project like this? And … how do you use it?
Let’s find out together!

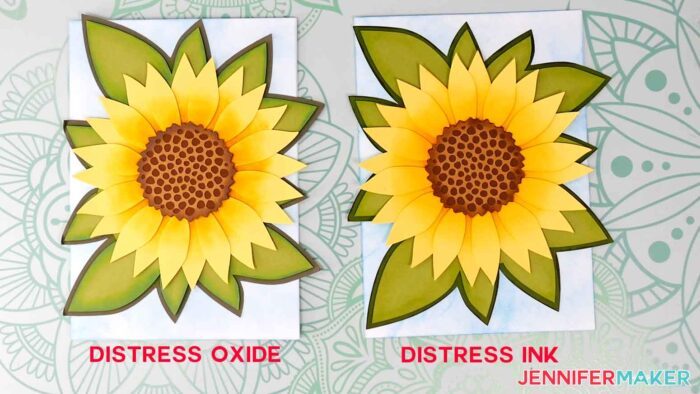
Today I’ll demonstrate how to apply TWO types of ink to cardstock to get these fun, multidimensional effects – Tim Holtz distress oxide and distress ink.
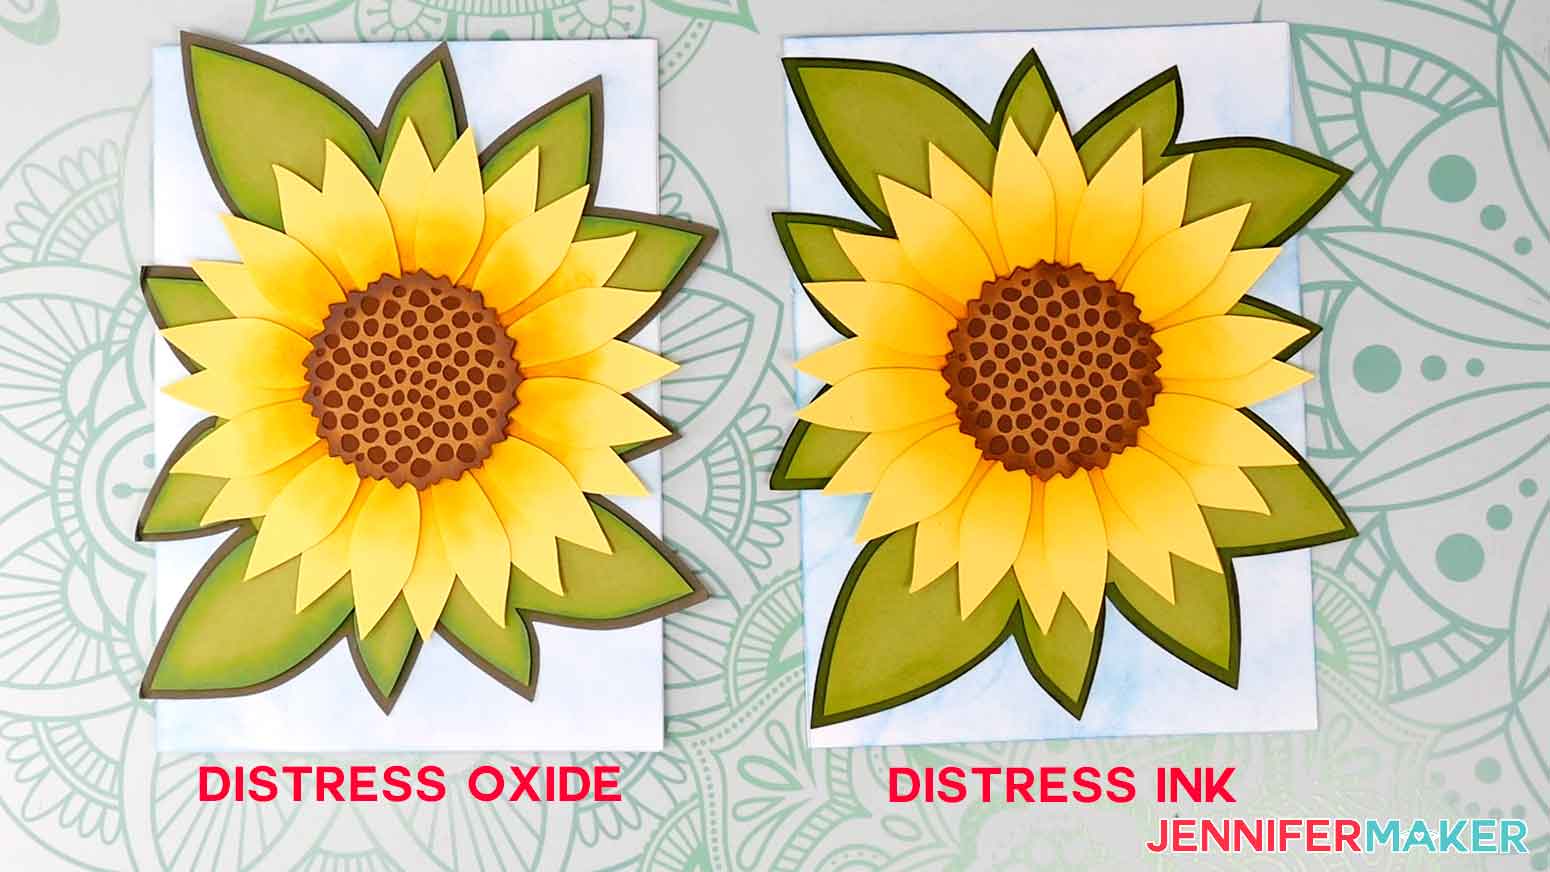
The distress oxides (which are are pigment-based) had a heavy color payoff, and kind of “sit” on top of the cardstock. Distress inks (which are dye-based), on the other hand, have a lighter color payoff than the oxides, which allows some of the cardstock’s color to show through. For the final verdict on which one gave the better result, you’ll need to watch my video tutorial.
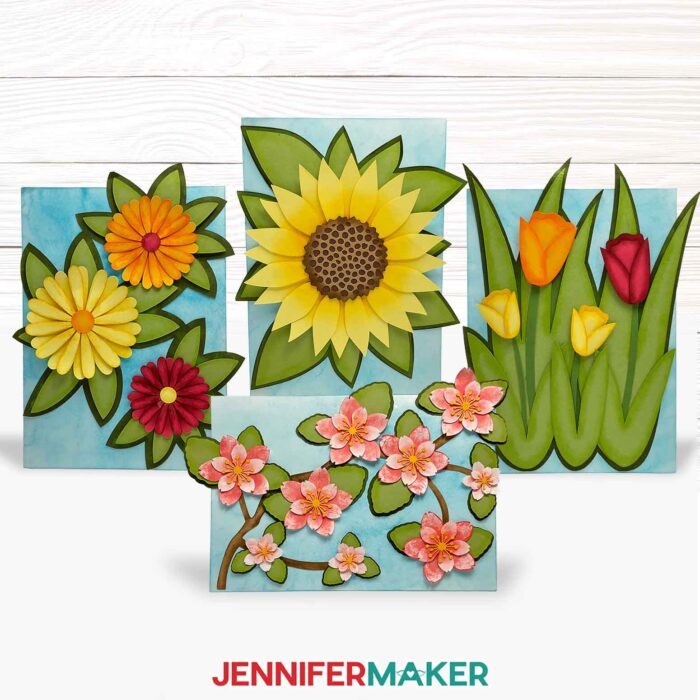
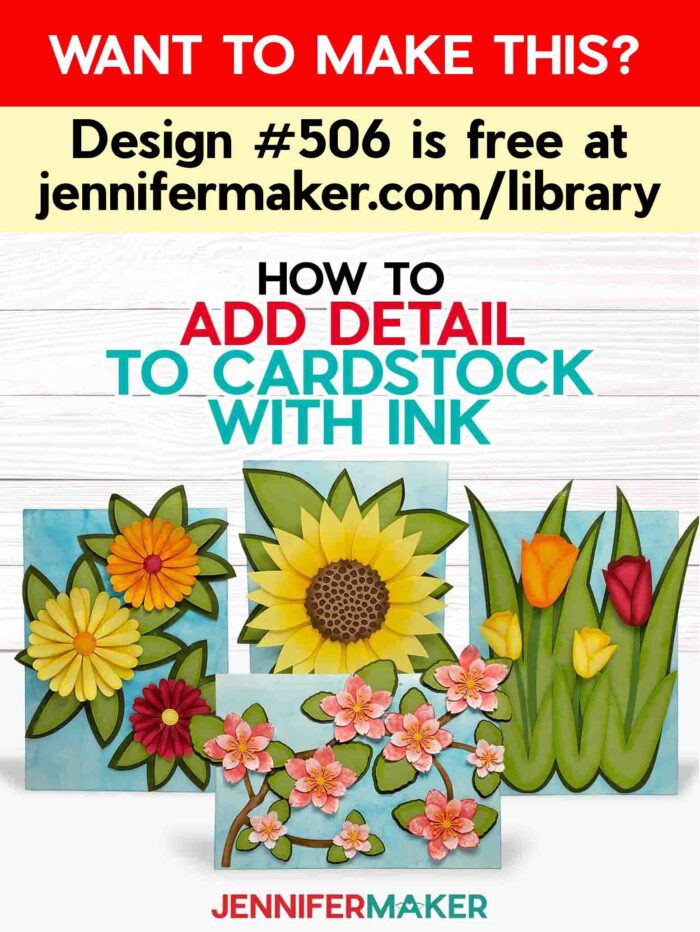
For this project, I’ve got four fun and pretty floral card designs to share with you. Inside the download folder, you’ll find SVG and DXF files for cutting your cards on a cutting machine, as well as a PDF for cutting them by hand. You can cut many of the design elements by hand, but some of them (like the center of the sunflower) will be pretty tricky, so I really recommend using a cutting machine.
I’ll be using my Cricut Maker 3, but you can cut these cards using the original Maker, any of the Explore model machines, the Venture, and the Cricut Joy Xtra.
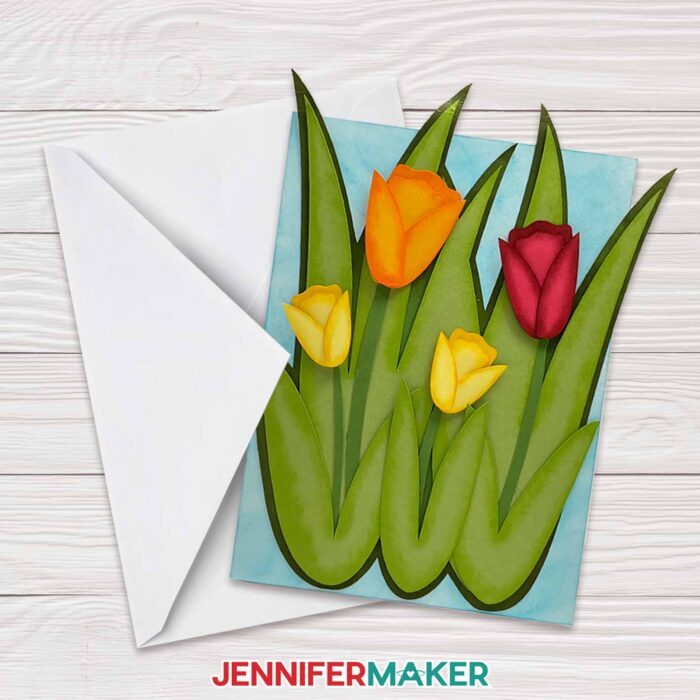
Each card has a 5” x 7” rectangle for an attached background. There is also a 5” x 7” card base that works with any style.
Simple layered cards are cute, but look at the difference inking the edges makes!
Tips To Ink Cardstock Edges
Practice! Learning how to ink cardstock edges takes some trial and error. If your first card goes like mine, it won’t be perfect, and that’s ok! It’s a good idea to cut a few copies as backups, especially if this is your first time using this fun technique.
You’ll want to put down some butcher paper to protect your work surface from stains. A scrap of paper (copy paper works) or white cardstock will help with testing your colors and practicing the techniques, and disposable gloves will keep your hands clean! Experiment with different effects on the scrap paper before you start inking your card pieces.
There are many inking tools available, but I found the Tim Holtz Ranger’s Ink Blending Tool and Detail Ink Blending Tool most helpful. The larger one comes with 1” round foam pieces and is good for covering more area, like the sky backgrounds. The smaller detail tool offers much more control, so we’ll use that for most of the pieces.
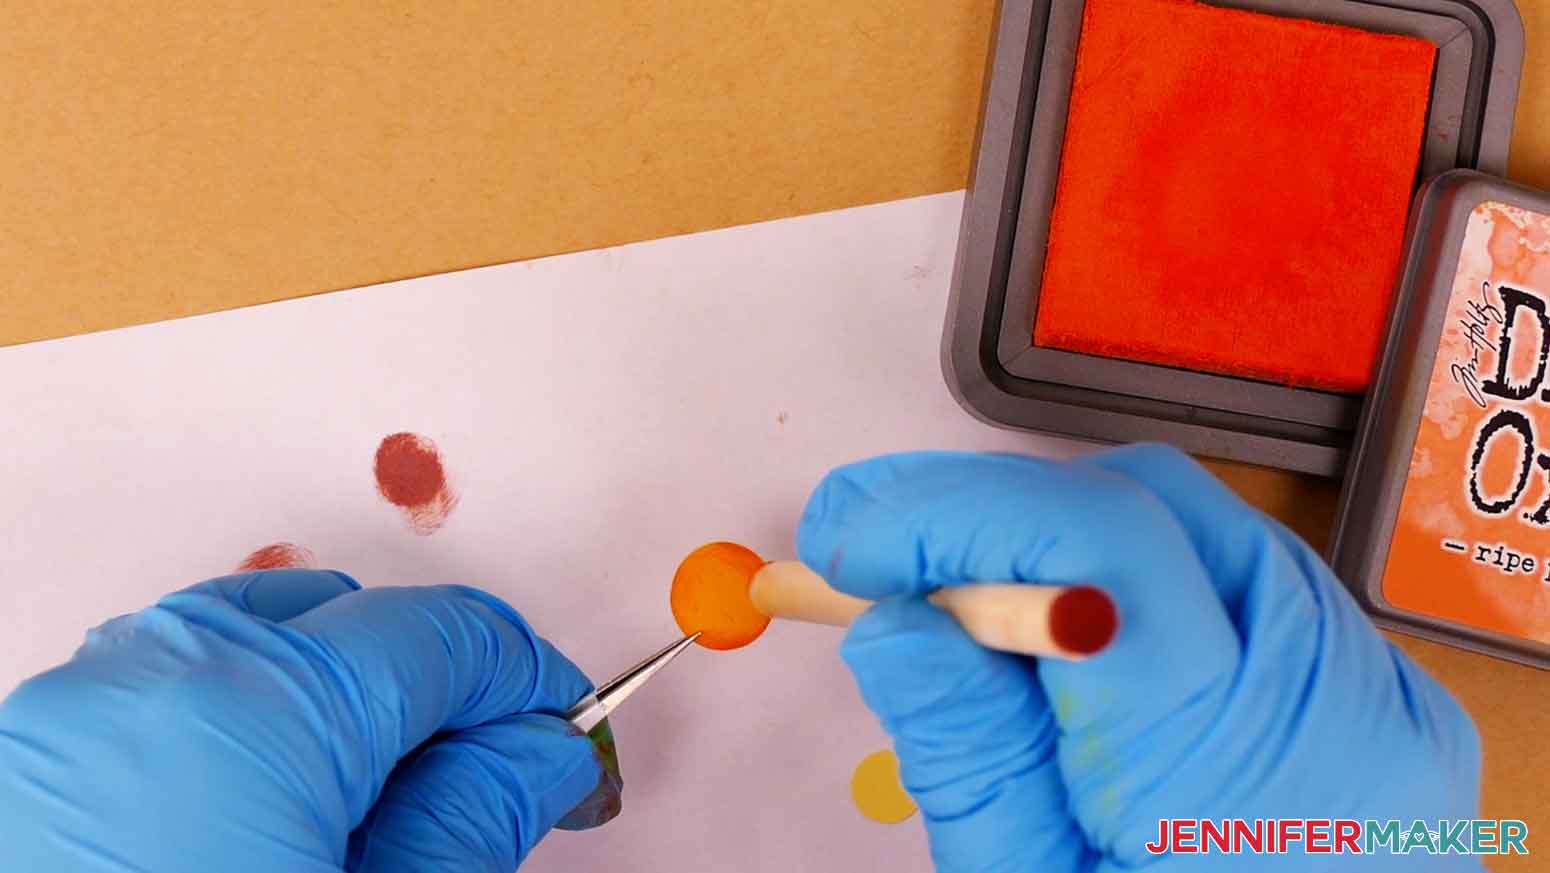
First we’ll swirl our sponge daubers on the ink pad to pick up color, then swirl some more on scrap paper. That will even out any excess ink on the tool.
Then I’ll show you my best techniques for adding the distress ink and distress oxide to the edges of the paper floral elements. This is a process you should really see in action, so be sure to watch my video tutorial before beginning.
Your mantra for this project? Build and blend. Careful not to use too much ink. If you want a softer look, less is more. You can always add more — but once it’s on the cardstock, you can’t take it away!
Curious about which colors and types of ink I decided to apply and to which cards? Here’s what I used:
Sunflower distress inks:
Mermaid Lagoon (blue) – sky
Forest Moss (dark green) – all lower leaf layers
Twisted Citron (light green) – all top leaf layers
Fossilized Amber (yellow) – sunflower
Ground Espresso (brown) – sunflower center
Sunflower distress oxides:
Tumbled Glass (blue) – sky
Forest Moss (dark green) – lower leaf layers
Mowed Lawn (light green) – top leaf layers
Mustard Seed (yellow) – sunflower
Ground Espresso (brown) – sunflower center
Cherry Blossoms distress inks:
Mermaid Lagoon (blue) – sky
Forest Moss (dark green) – lower leaf layers
Twisted Citron (light green) – top leaf layers
Abandoned Coral (pink) – cherry blossoms
Ground Espresso (brown) – cherry blossom branch
Cherry Blossoms distress oxides:
Tumbled Glass (blue) – sky
Forest Moss (dark green) – lower leaf layers
Mowed Lawn (light green) – top leaf layers
Abandoned Coral (pink) – cherry blossoms
Ground Espresso (brown) – cherry blossom branch
Tulips distress inks:
Mermaid Lagoon (blue) – sky
Forest Moss (dark green) – lower leaf layers
Twisted Citron (light green) – top leaf layers
Aged Mahogany (dark red) – red tulip
Carved Pumpkin (orange) – orange tulip
Fossilized Amber (yellow) – yellow tulip
Tulips distress oxides:
Tumbled Glass (blue) – sky
Forest Moss (dark green) – lower leaf layers
Mowed Lawn (light green) – top leaf layers
Aged Mahogany (dark red) – red tulip
Ripe Persimmon (orange) – orange tulip
Mustard Seed (yellow) – yellow tulip
Daisies distress inks:
Mermaid Lagoon (blue) – sky
Forest Moss (dark green) – lower leaf layers
Twisted Citron (light green) – top leaf layers
Aged Mahogany (dark red) – red daisy
Carved Pumpkin (orange) – orange daisy
Fossilized Amber (yellow) – yellow daisy
Daisies distress oxides:
Tumbled Glass (blue) – sky
Forest Moss (dark green) – lower leaf layers
Mowed Lawn (light green) – top leaf layers
Aged Mahogany (dark red) – red daisy
Ripe Persimmon (orange) – orange daisy
Mustard Seed (yellow) – yellow daisy
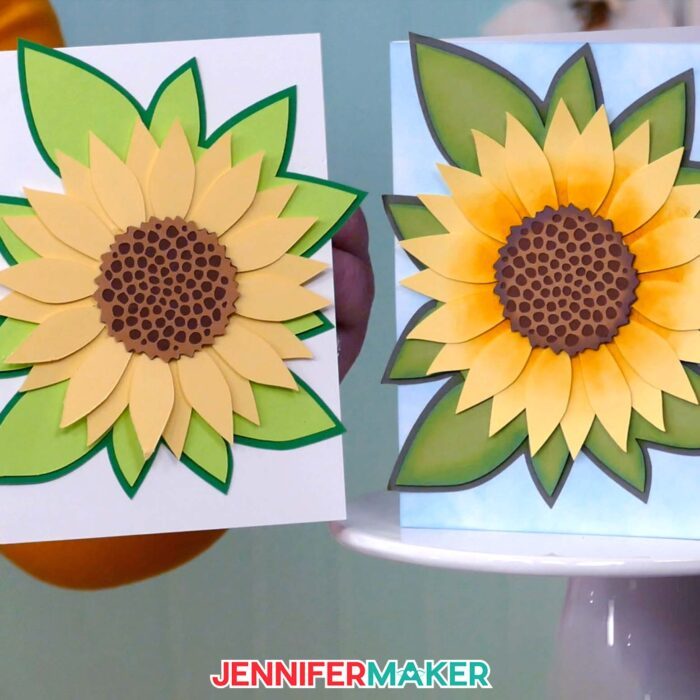
These photos show the results of distress oxide on the left, distress ink on the right:
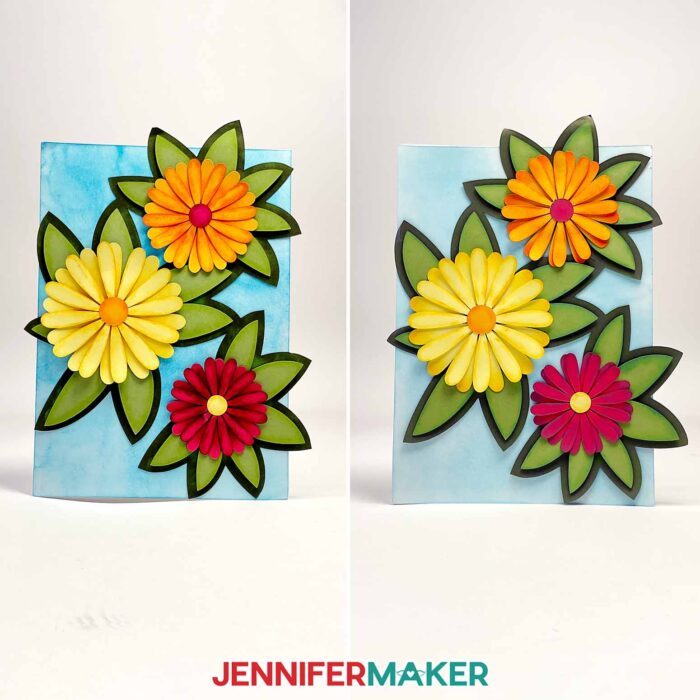
Look at the difference adding the ink makes! It takes a flat card to fabulous.
After the pieces are all inked, then it’s time to assemble the card. I’ll show you how using tiny adhesive foam dots, which add an additional three-dimensional effect to our already lifelike flower designs!
So, which type of ink did I like working with best? Which type gave the best results and made our flowers pop with a the absolute coolest multidimensional look? Watch my tutorial video to find out!
Think of all the ways you can use this new skill on your papercraft projects! Now you can use ink to add some beautiful depth to your greeting cards, wedding invites, shadow box projects, and so much more!
Ready to learn how to ink cardstock edges? This post contains some affiliate links for your convenience (which means if you make a purchase after clicking a link I will earn a small commission but it won’t cost you a penny more)! Read my full disclosure policy.
Materials And Tools to Ink Cardstock Edges
See my full and complete Amazon shopping list for the exact items used in this project!
- Several sheets 8.5” x 11” 65 lb Solidcore Cardstock – I used white (card base), orange, red, pink, dark brown, light brown, and light yellow from the Essentials Pack depending on the flower as well as light green and dark green from this Forest Pack
- Distress Oxide Ink Pads -OR-
- Distress Ink Pads
- Foam Adhesive Dots
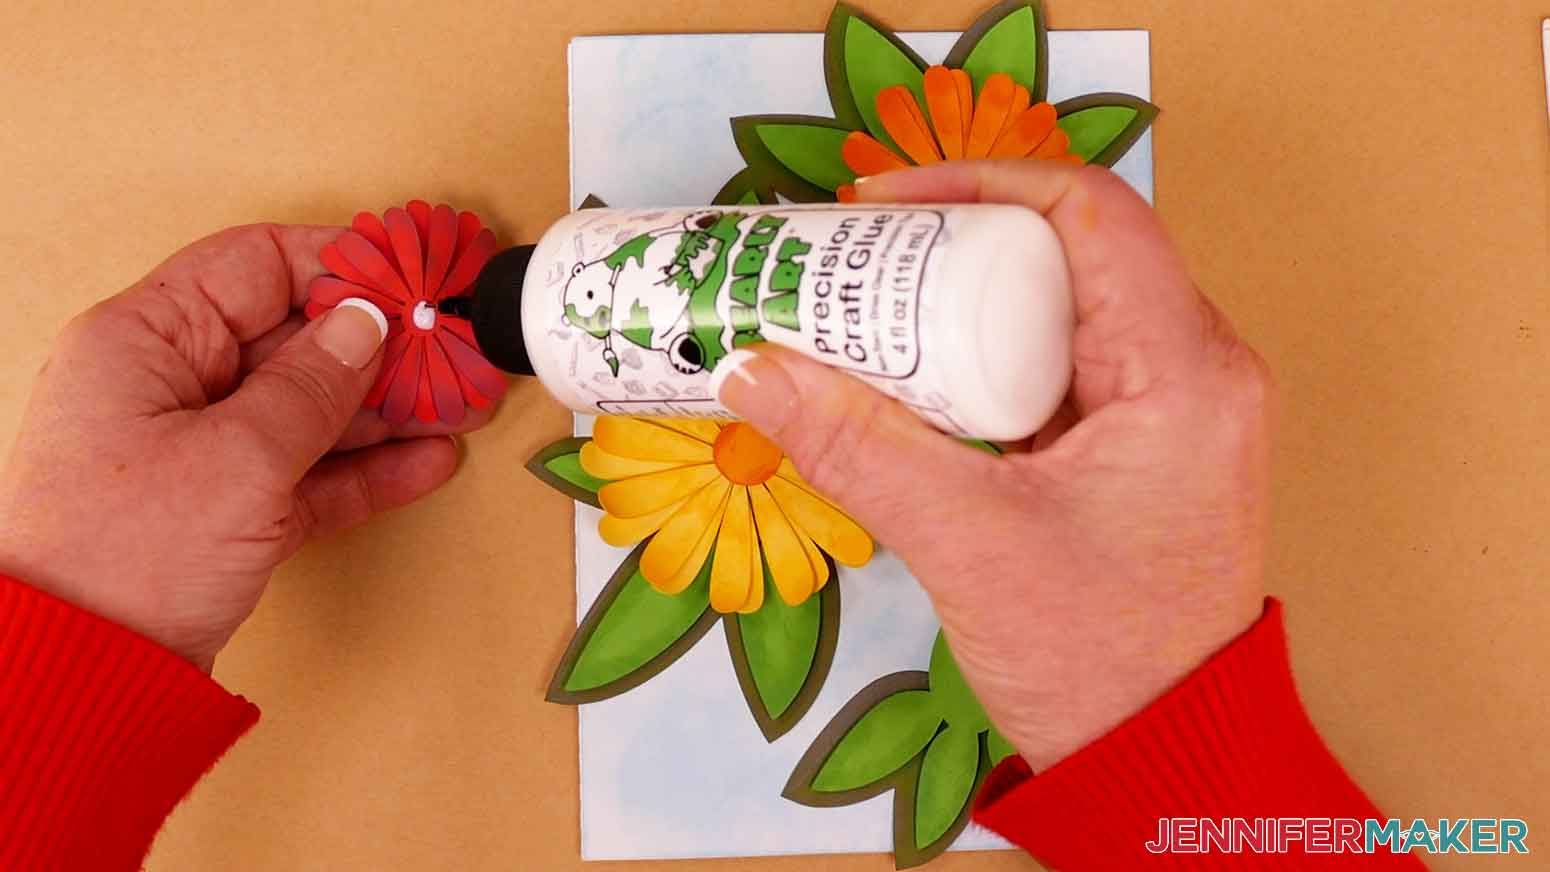
- Good craft glue – like Bearly Art Precision Craft Glue
- A method to cut your cardstock: I’m using the Maker 3 but you can also use a Cricut Maker series, Explore series, the Venture, or the Joy Xtra for this project!
- Cricut Green StandardGrip Machine Mat 12” x 12”
- Brayer
- XL Scraper
- Ink Blending Tool
- Detail Ink Blending Tool
- Weeding Tool
- Butcher Paper
- Copy paper or scrap white paper
- Disposable Gloves
- Design #506 – My free SVG/DXF/PDF design files are available in my free resource library – get the password by filling out the form at the bottom of this page
How to Ink Cardstock Edges on a Card!

Ink Cardstock Edges
Learn how to use Distress Oxides and Distress Inks to ink cardstock edges!
Materials
- Recollections 65 lb. 8.5” x 11” Cardstock (Variety Pack) - I used two sheets of white, one dark brown, one light brown, and one light yellow
- Recollections 65 lb. 8.5” x 11” Cardstock (Forest Pack) - I used one sheet of lighter green and one sheet of darker green
- Distress Oxide Ink Pads -OR-
- Distress Ink Pads
- Foam Adhesive Dots
- Bearly Art Precision Craft Glue
- Design #506 (My free SVG/DXF/PDF design files are available in my free resource library – get the password by filling out the form at the bottom of this page)
Tools
Instructions
STEP 1: GET MY INK CARDSTOCK EDGES DESIGNS
First, download my Ink Cardstock Edges designs from my free resource library - look for Design 506. Alternatively, you can use the Save This Project form near the top of this post and the design link will be emailed to you.
TIP: If you're not sure how to upload, go to jennifermaker.com/svgs to learn how to unzip and upload SVG files.
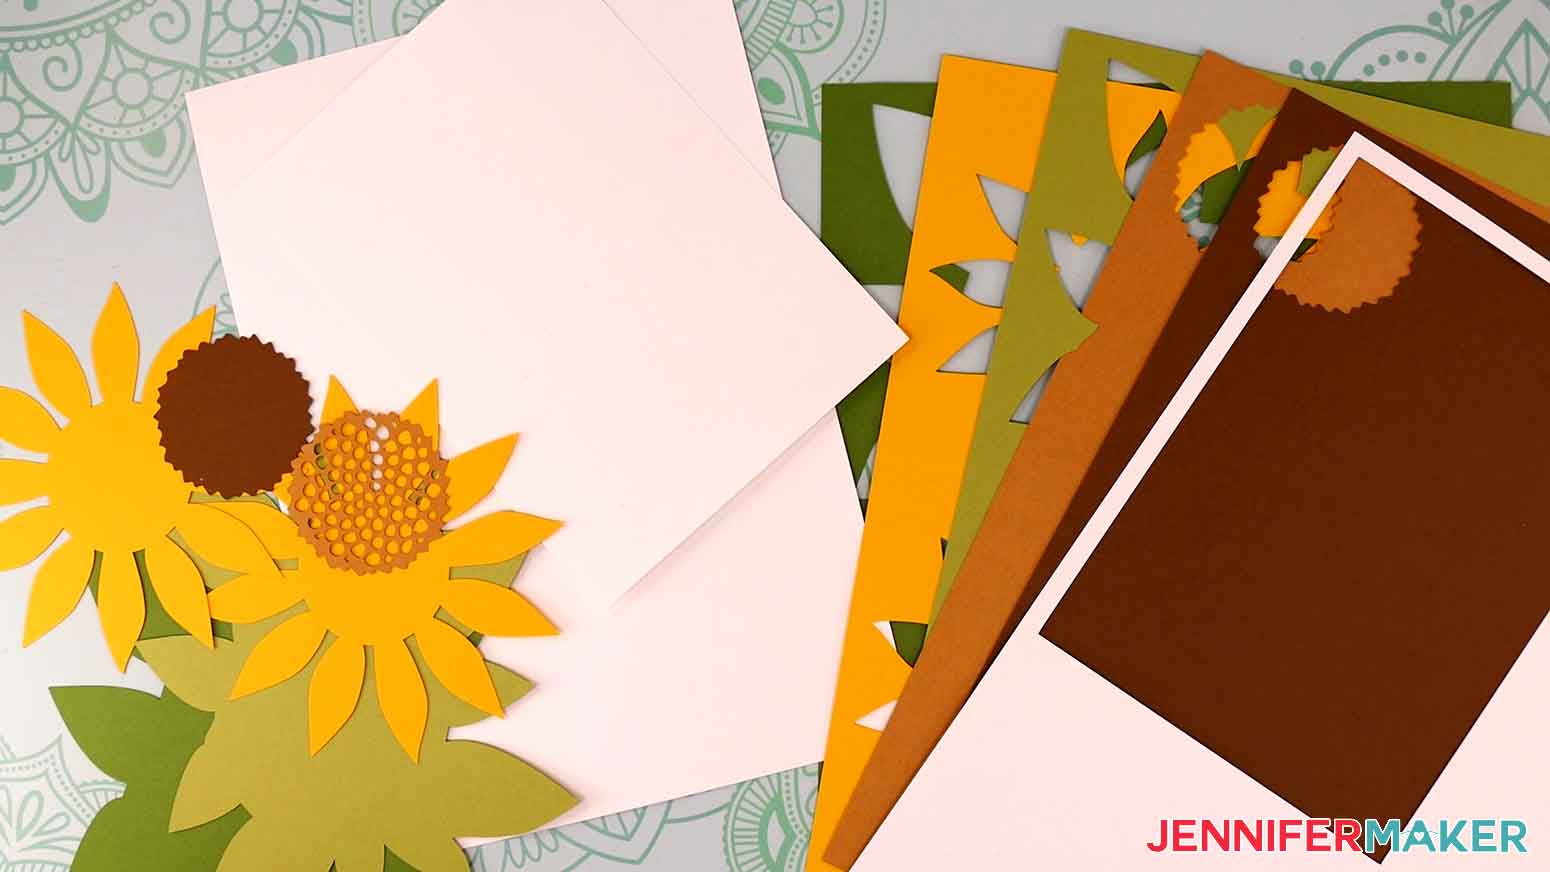
There are four SVG designs in my collection: Daisies, Tulips, a Sunflower, and Cherry Blossoms. There is also a blank card to cut and attach your design. You’ll find a helpful reference PDF in the zip file to help identify all of the design pieces. You can choose the score version, which requires a scoring wheel or stylus, or the no-score version that only needs the Fine-Point Blade.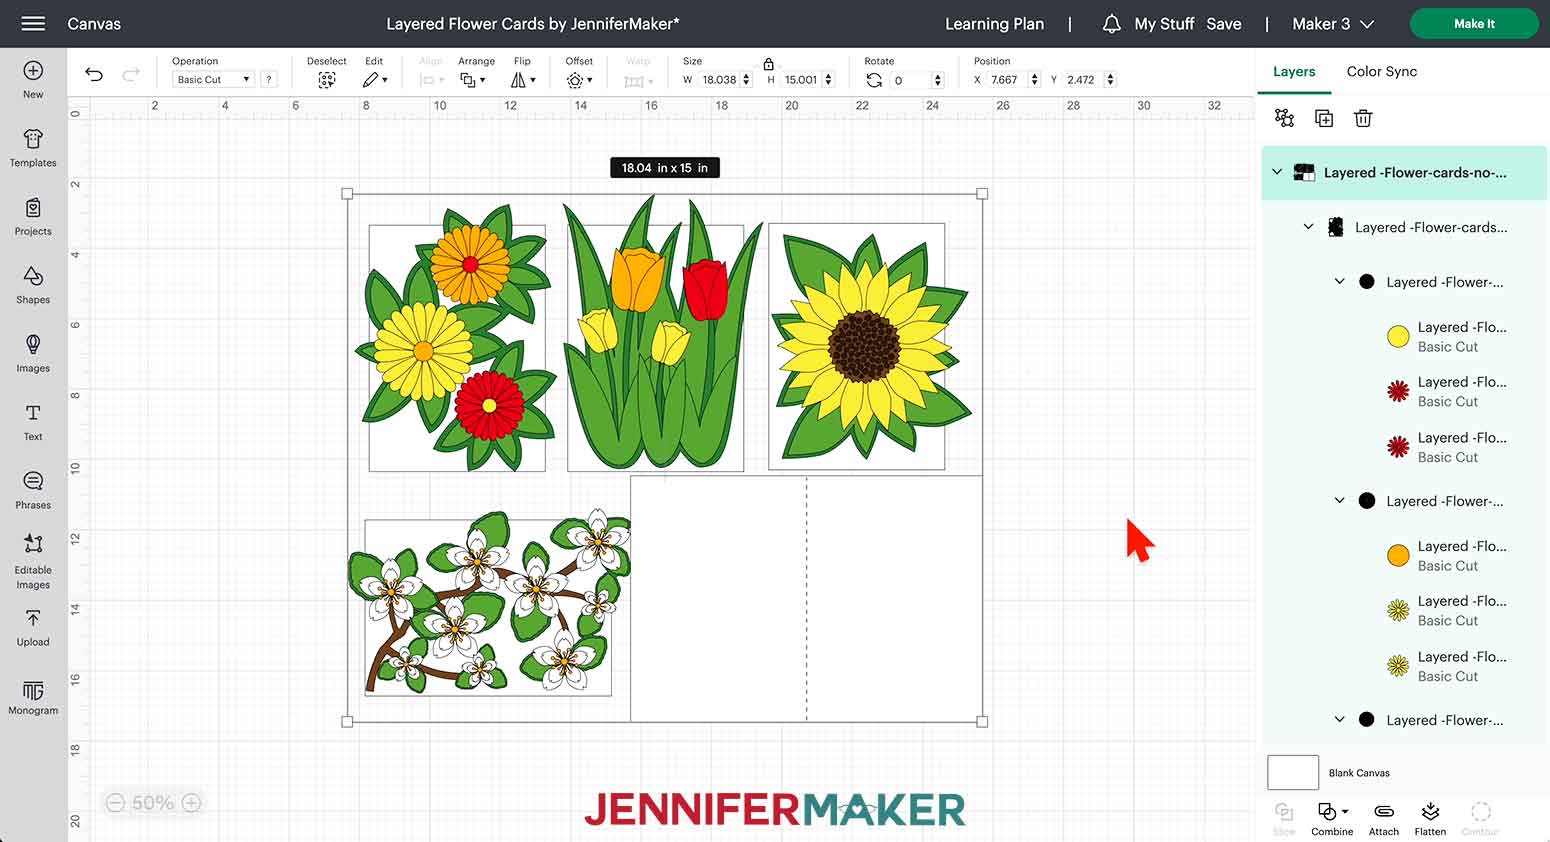
In this tutorial, I’ll show you how to cut the no-score sunflower card design and apply ink to the edges of the design to add depth to the cardstock.
STEP 2: PREPARE YOUR DESIGN
CRICUT DESIGN SPACE
1. Open Cricut Design Space
2. Click “Upload”
3. Click “Browse”
4. Select the SVG file
5. On the Prepare to Upload screen, it will say “Cut image” with the design preview.
6. Click “Upload”
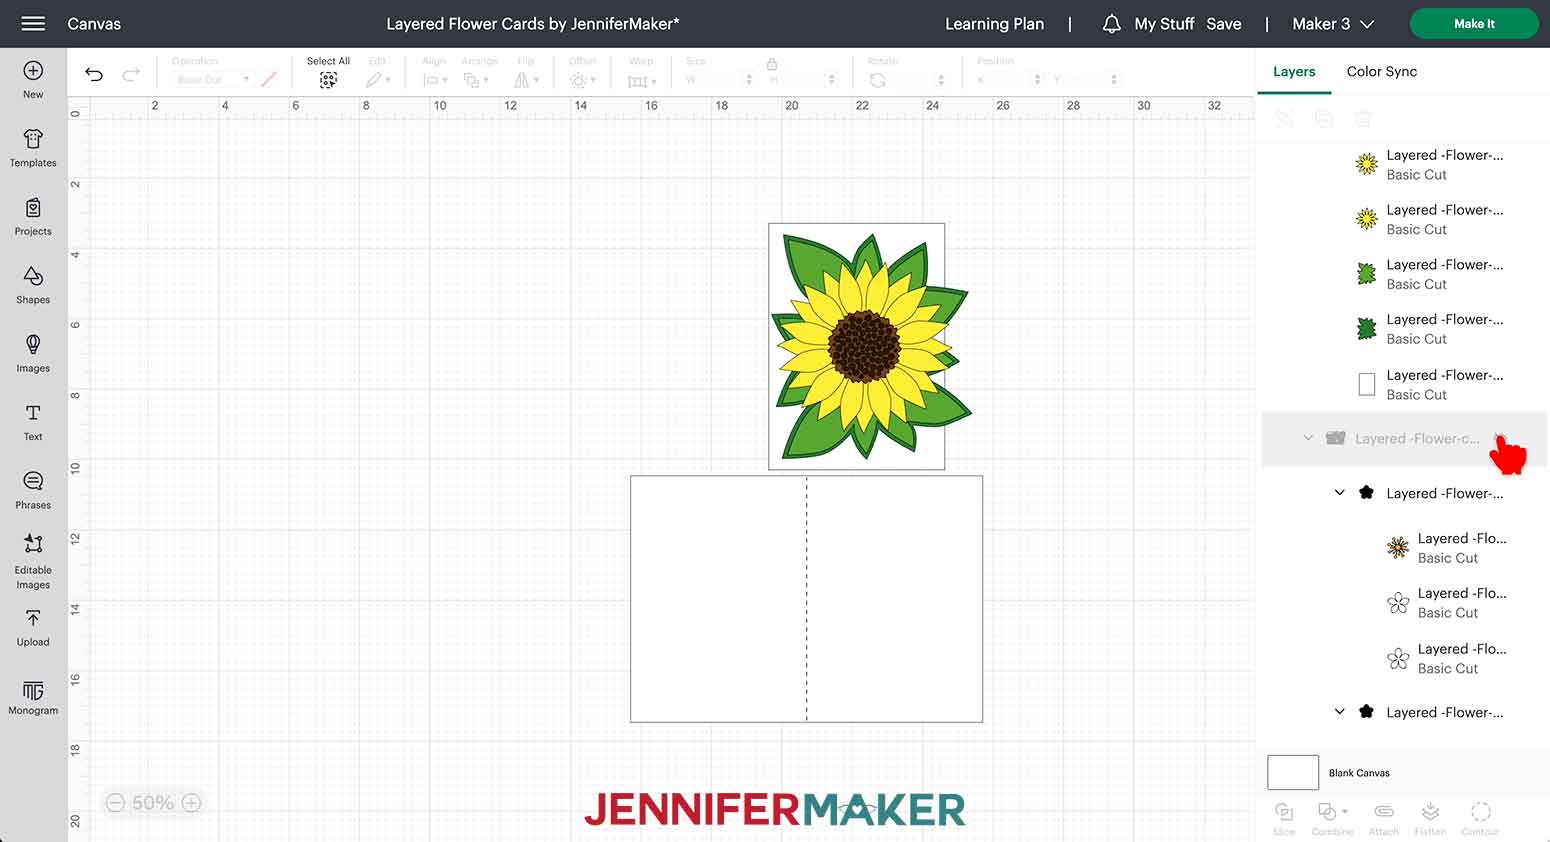
7. Find your design in Recent Uploads and add it to the Canvas
8. Click the minus (-) sign to zoom out (75% works).
9. Click the Ungroup icon.
10. Hide or delete all card designs except the sunflower and the blank card.
11. Make sure the correct machine is selected in the top right
12. Click “Make It”

13. If prompted, click "On Mat," choose your mat size, and click “Confirm.”
14. On the Prepare Screen, there should be 7 mats.
15. Change your material size to 8.5” x 11” for all the mats if using the same cardstock selections as me.
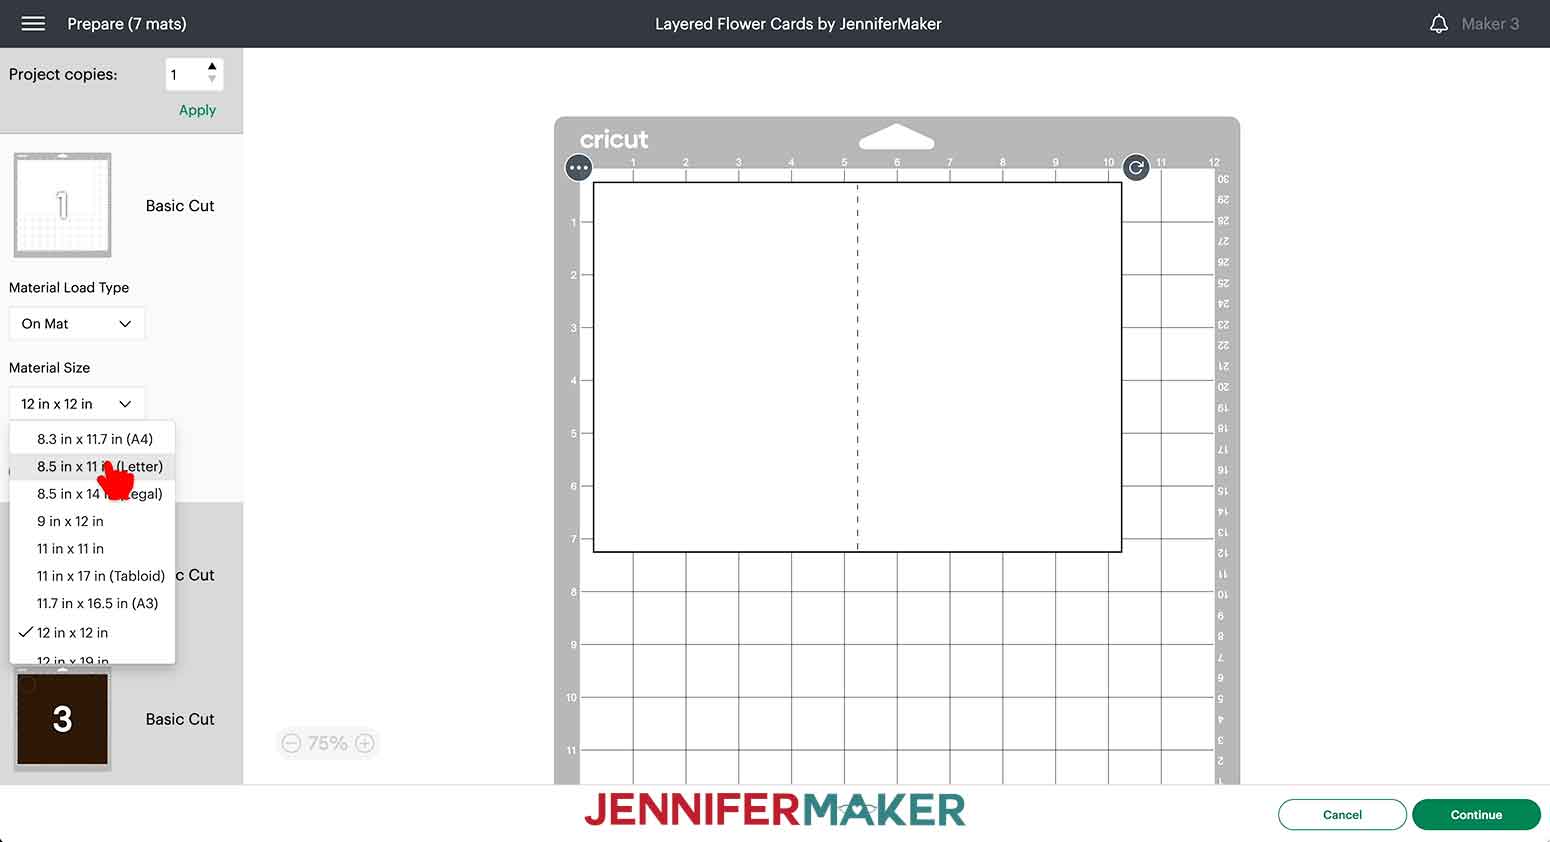
16. Select the first mat again and click “Continue”
CUTTING
1. On the Make Screen, click “Browse All Materials”
2. Search for and select the “Medium Cardstock - 80 lb” setting
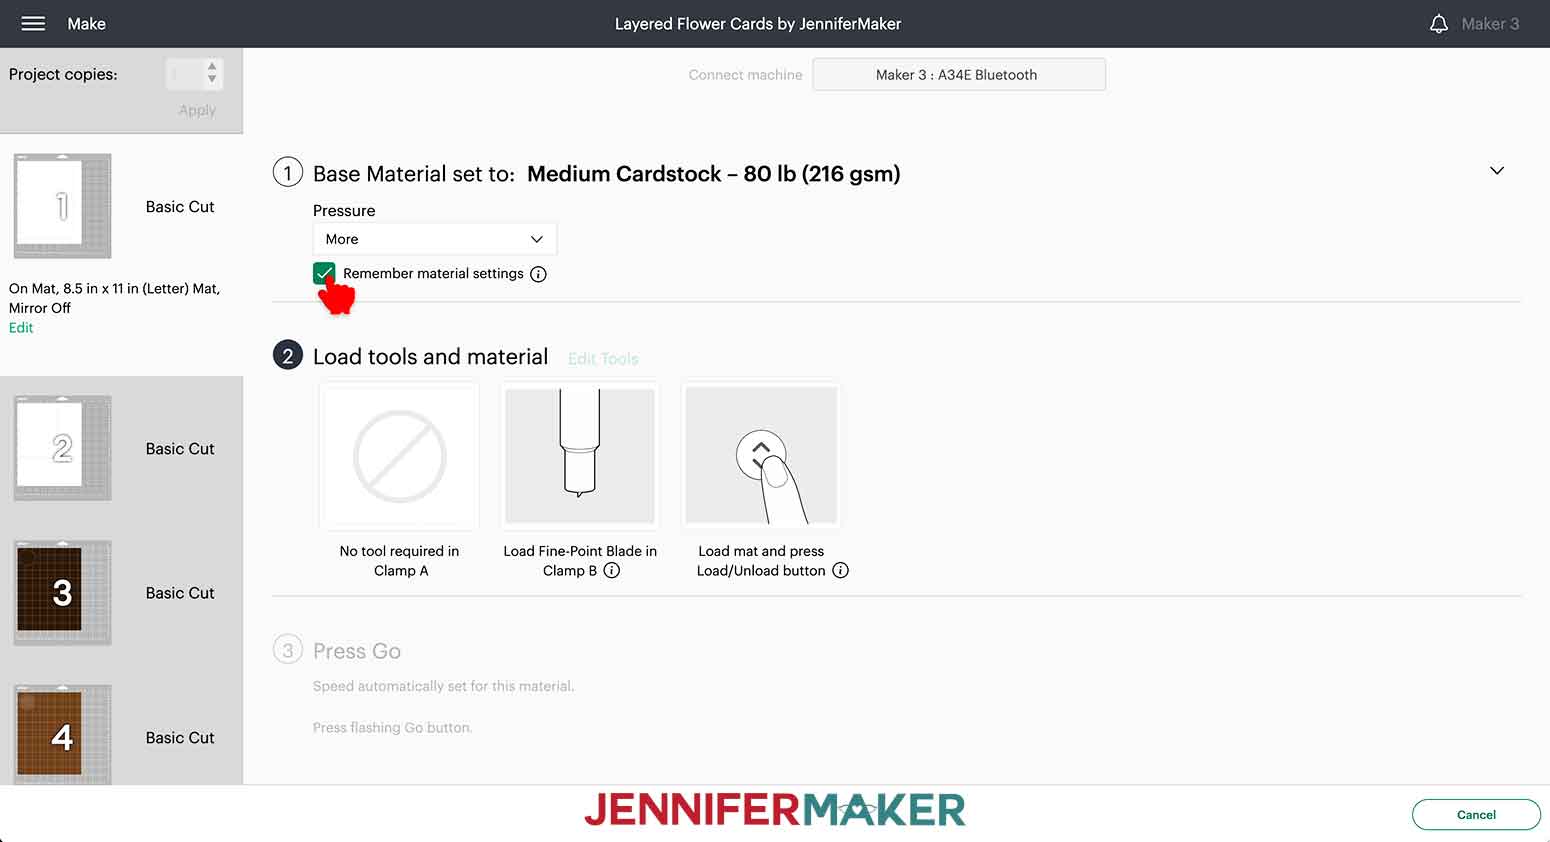
3. Select “More” for the Pressure.
4. Click the “Remember material settings” box.
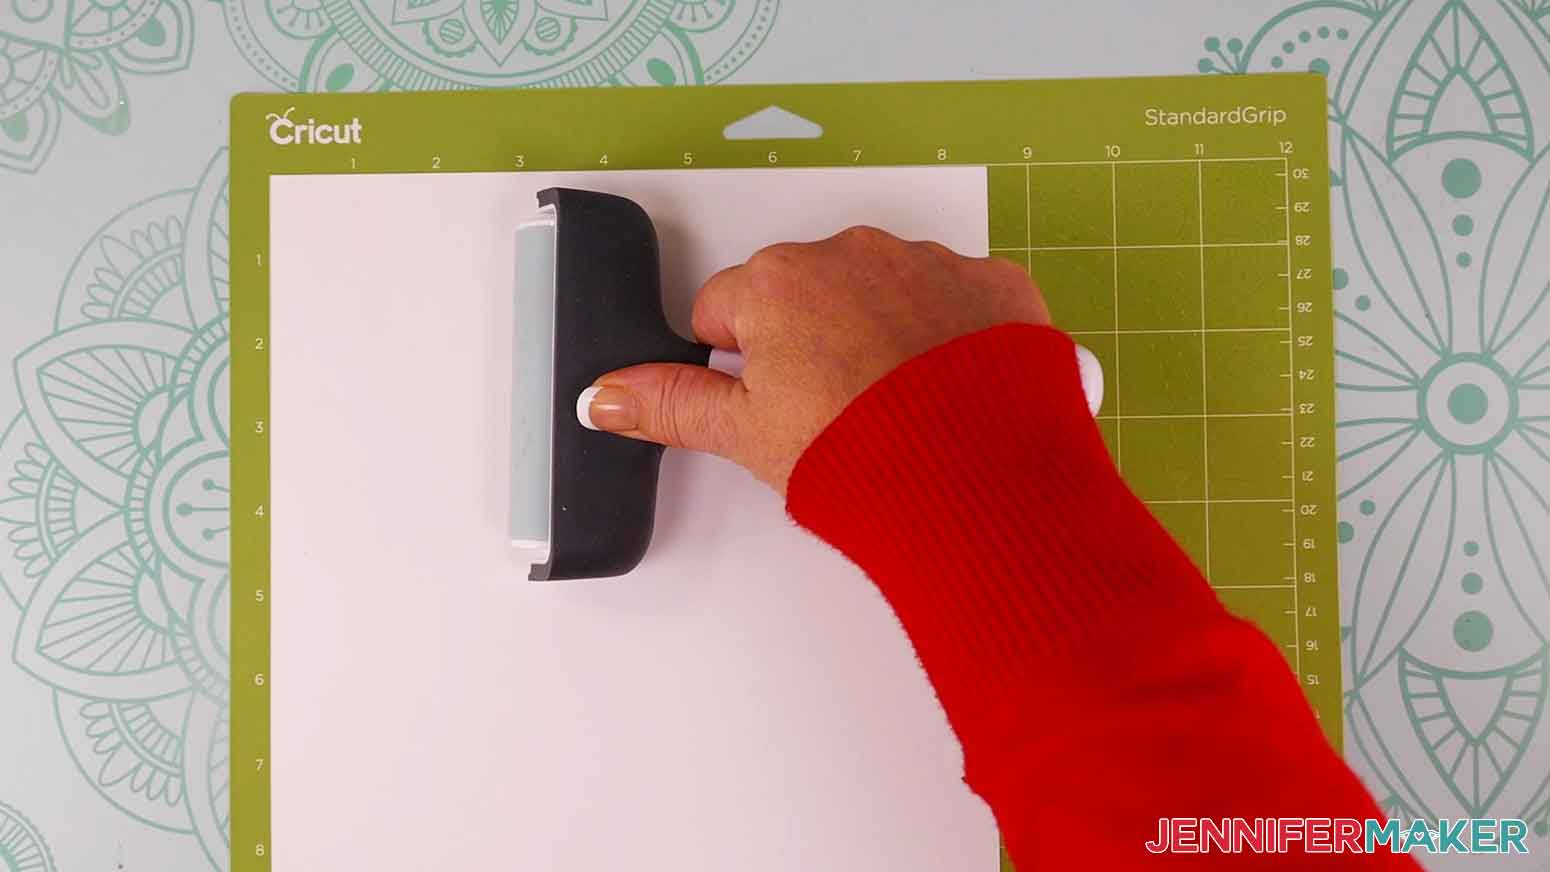
5. Place the first sheet of cardstock face up on a green StandardGrip machine mat.
6. Use a brayer to adhere the cardstock.
7. Press the flashing arrows to load the mat into your Cricut
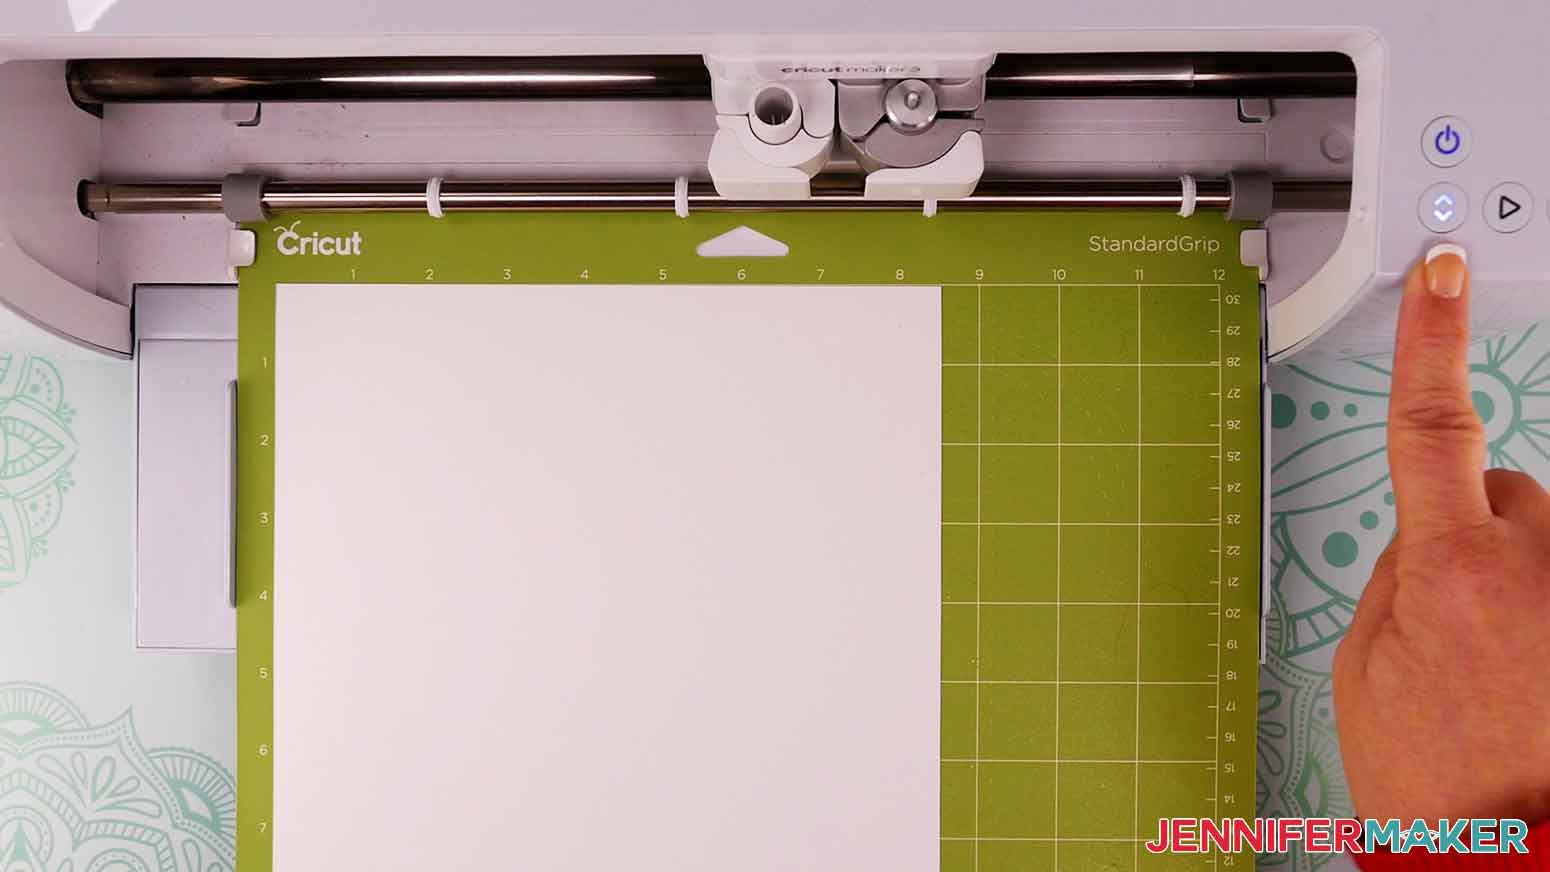
8. Press the flashing “Go” button to begin cutting
9. When it has finished cutting, press the flashing arrows to unload the machine mat.
10. Flip the mat over onto your work surface and gently pull the mat away from the cardstock.
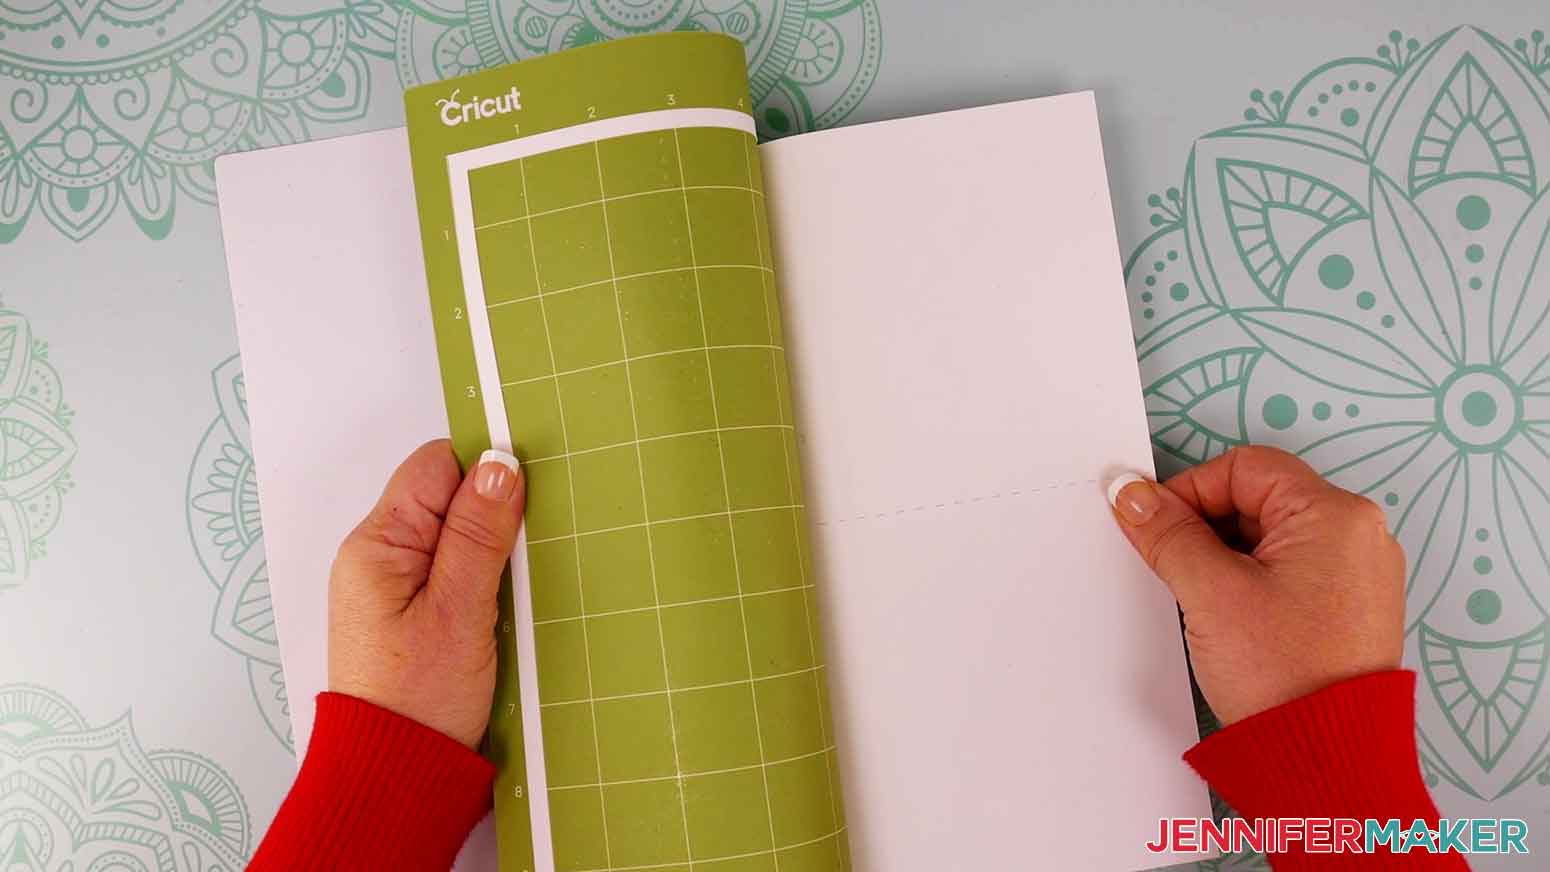
11. Repeat steps 5-10 for the remaining mats.
STEP 3: INK YOUR CARDSTOCK DESIGNS
NOTE: The ink application is the same for both types of ink. If this is your first time using distress oxides or distress ink, I recommend practicing on a blank sheet of paper to familarize yourself with the pressure and amount of ink you’ll want to use on your designs.
SKY BACKGROUND AND LEAVES (ALL CARDS)
1. Place butcher paper on work area.
2. Select complimentary distress ink or distress oxide colors that are similar to your cardstock designs.
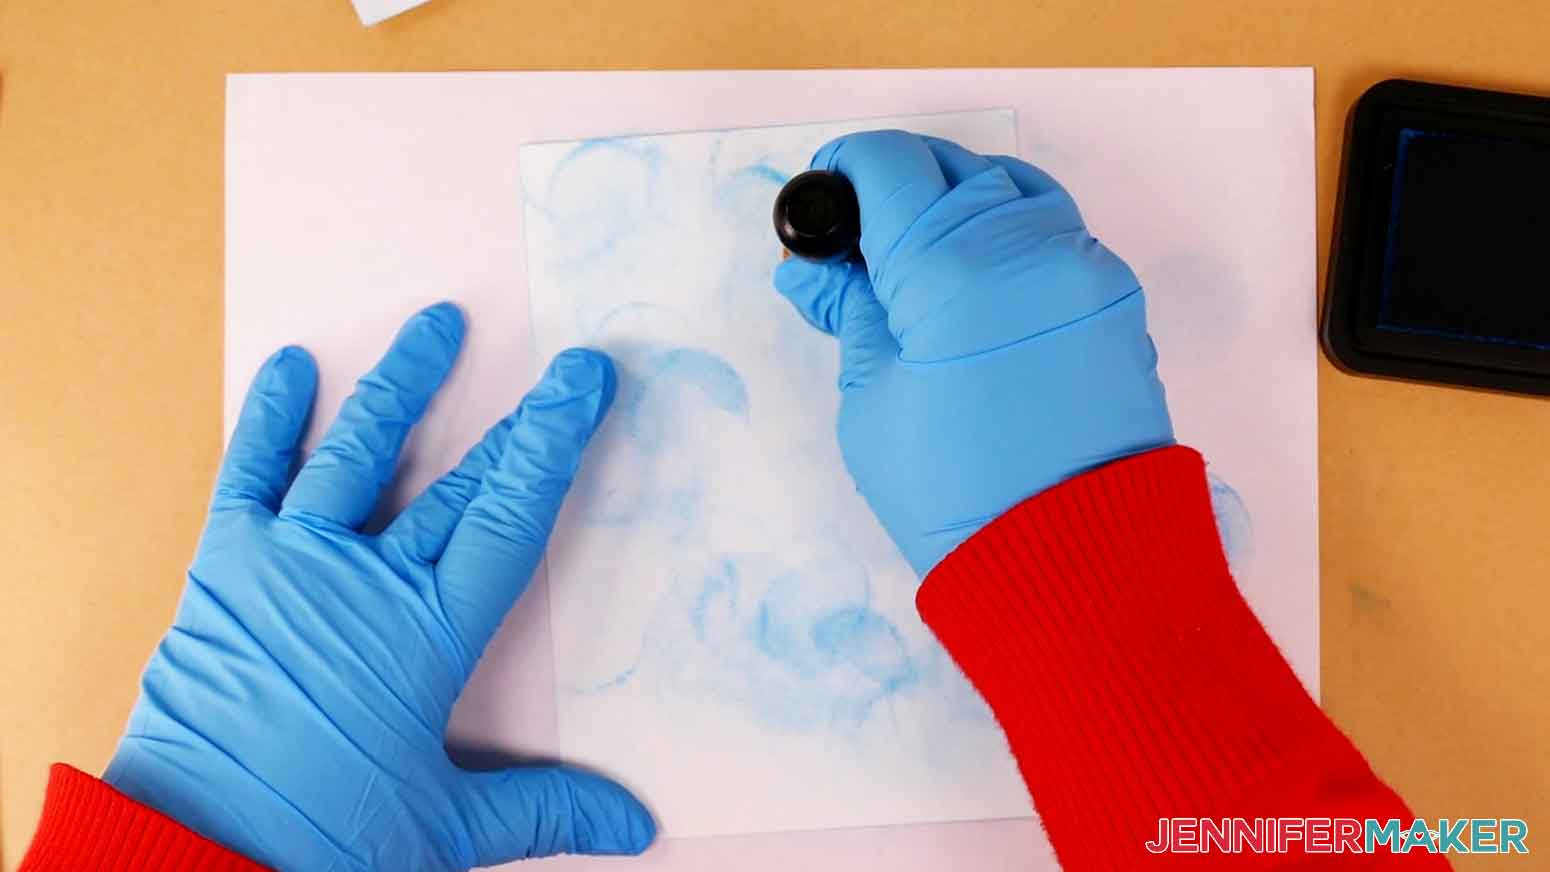
3. Inks may stain skin so I recommend wearing disposable gloves.
4. For the sky background, I will use the ink blending tool.
NOTE: The leaves and all of the flowers will use the smaller detail ink blending tool.
5. Swirl a blending tool in the blue ink (see Notes section for the specific color I used) and apply it to the 5” x 7” white rectangle for the sky layer. Use light pressure and circular motions.
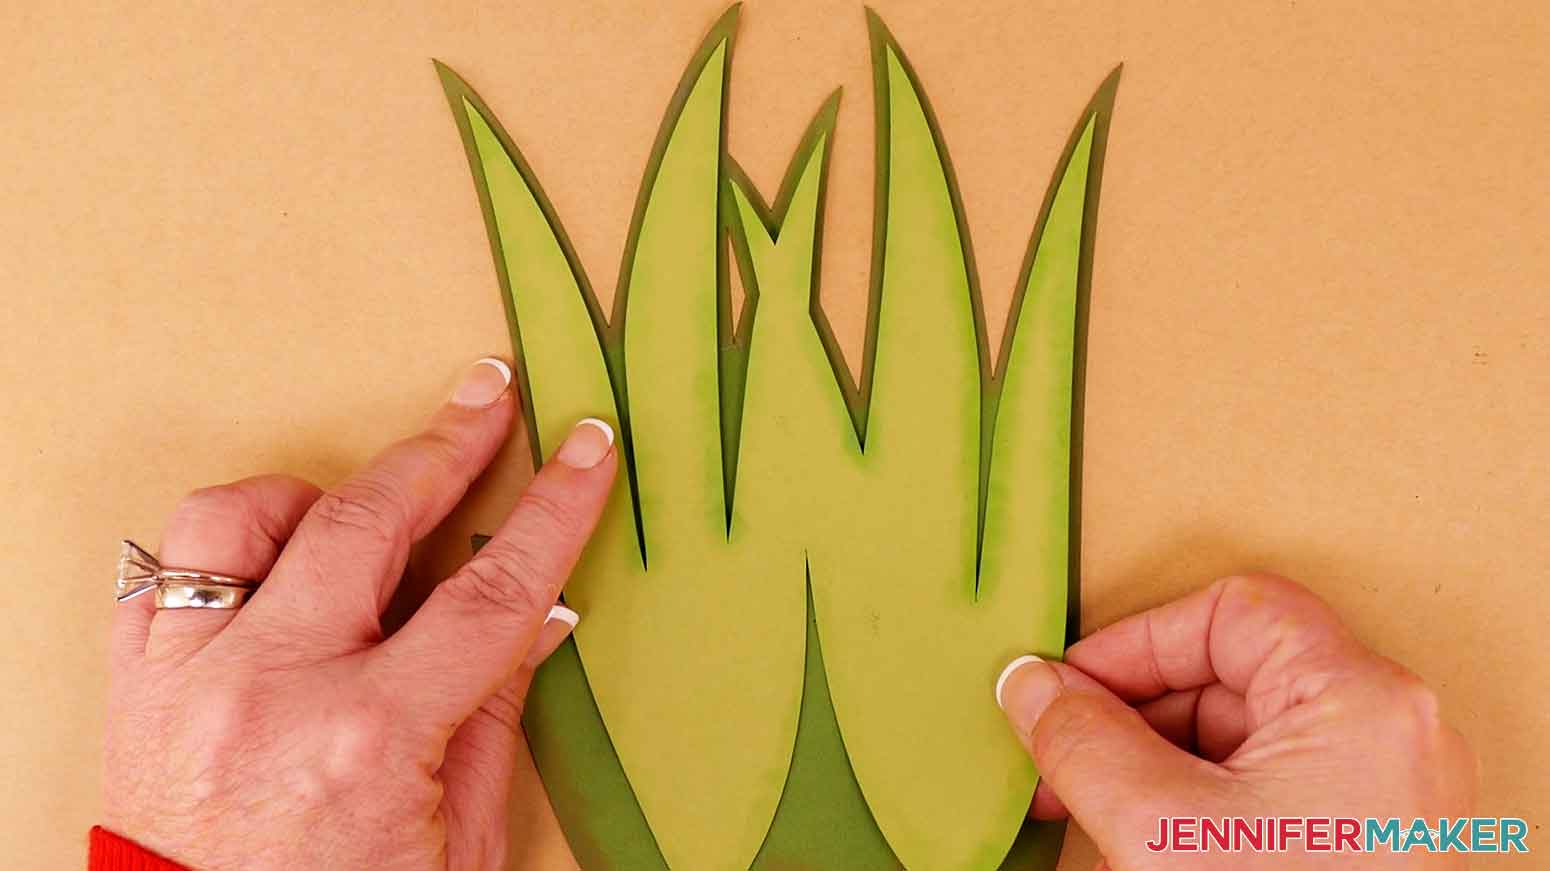
6. All of the designs will use the same technique for the leaves. Start with the lighter green, top layer of leaves.
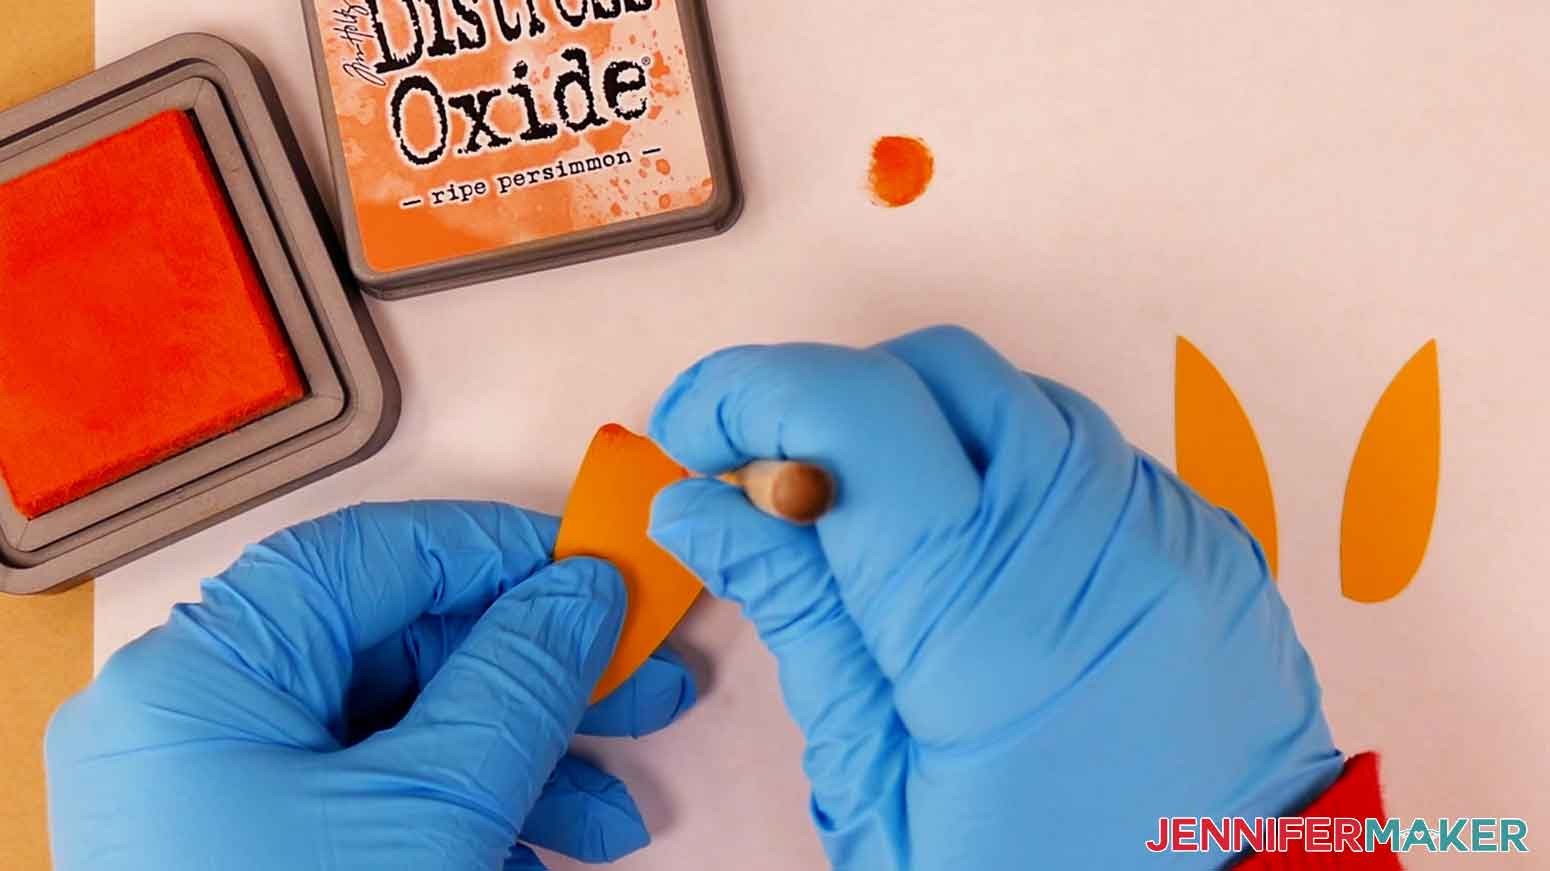
7. Use a detail blending tool. Rub the end of the tool in the light green ink. Hold the light green layer and apply the ink to the outer edge of the entire light green layer. Add more ink to the tool as necessary.
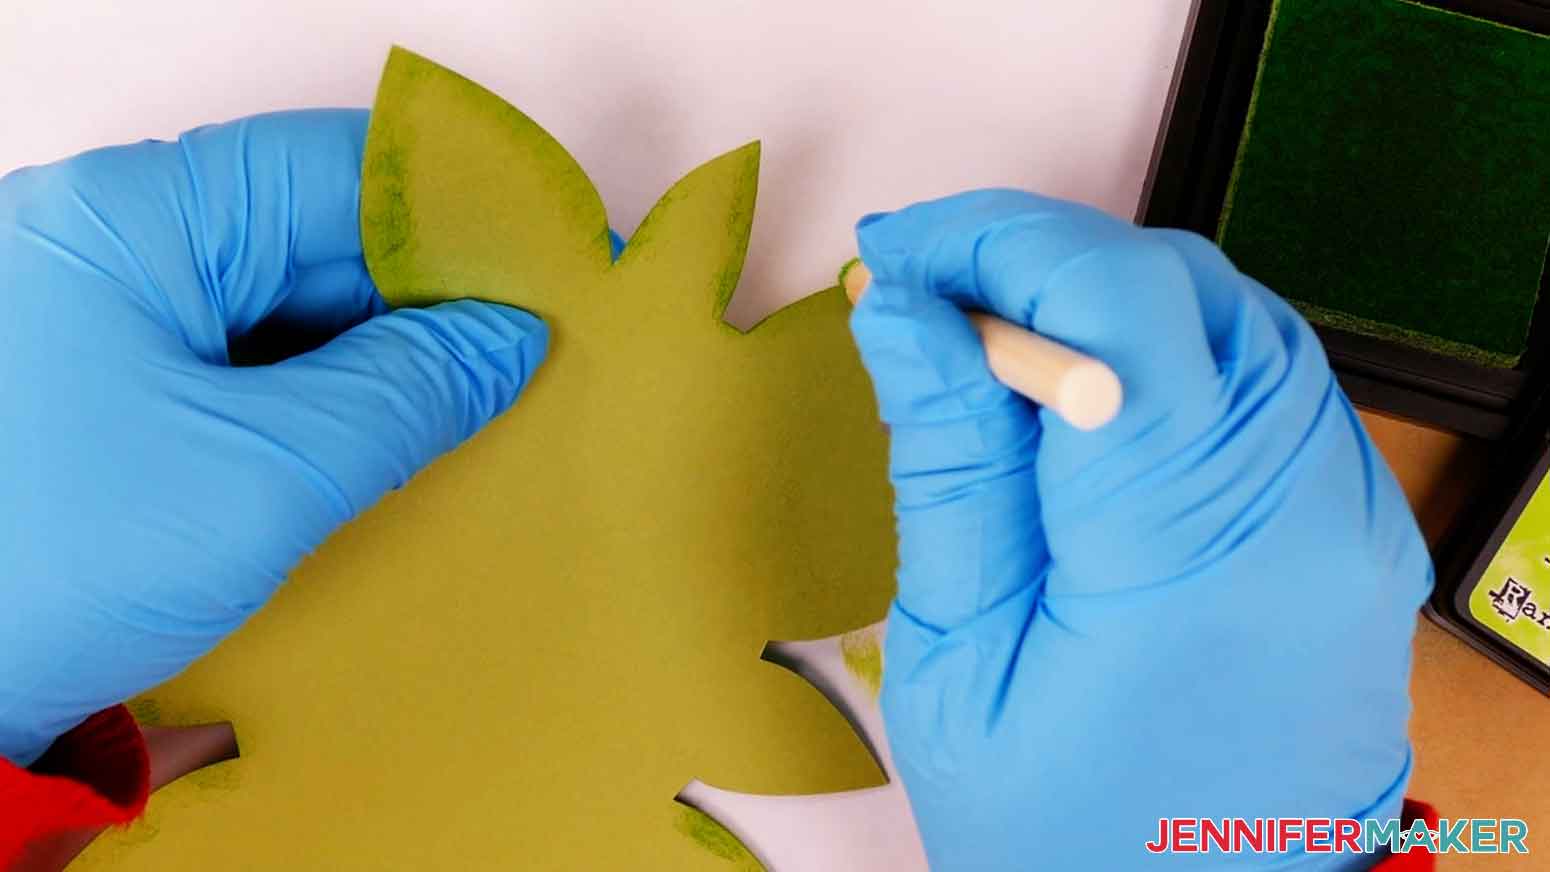
8. After inking the edges, we need to blend the ink in from the edge towards the center of the leaves.
9. Place the light green layer on your work surface. Use a light circular motion to gently and gradually spread the ink towards the center of the leaves.
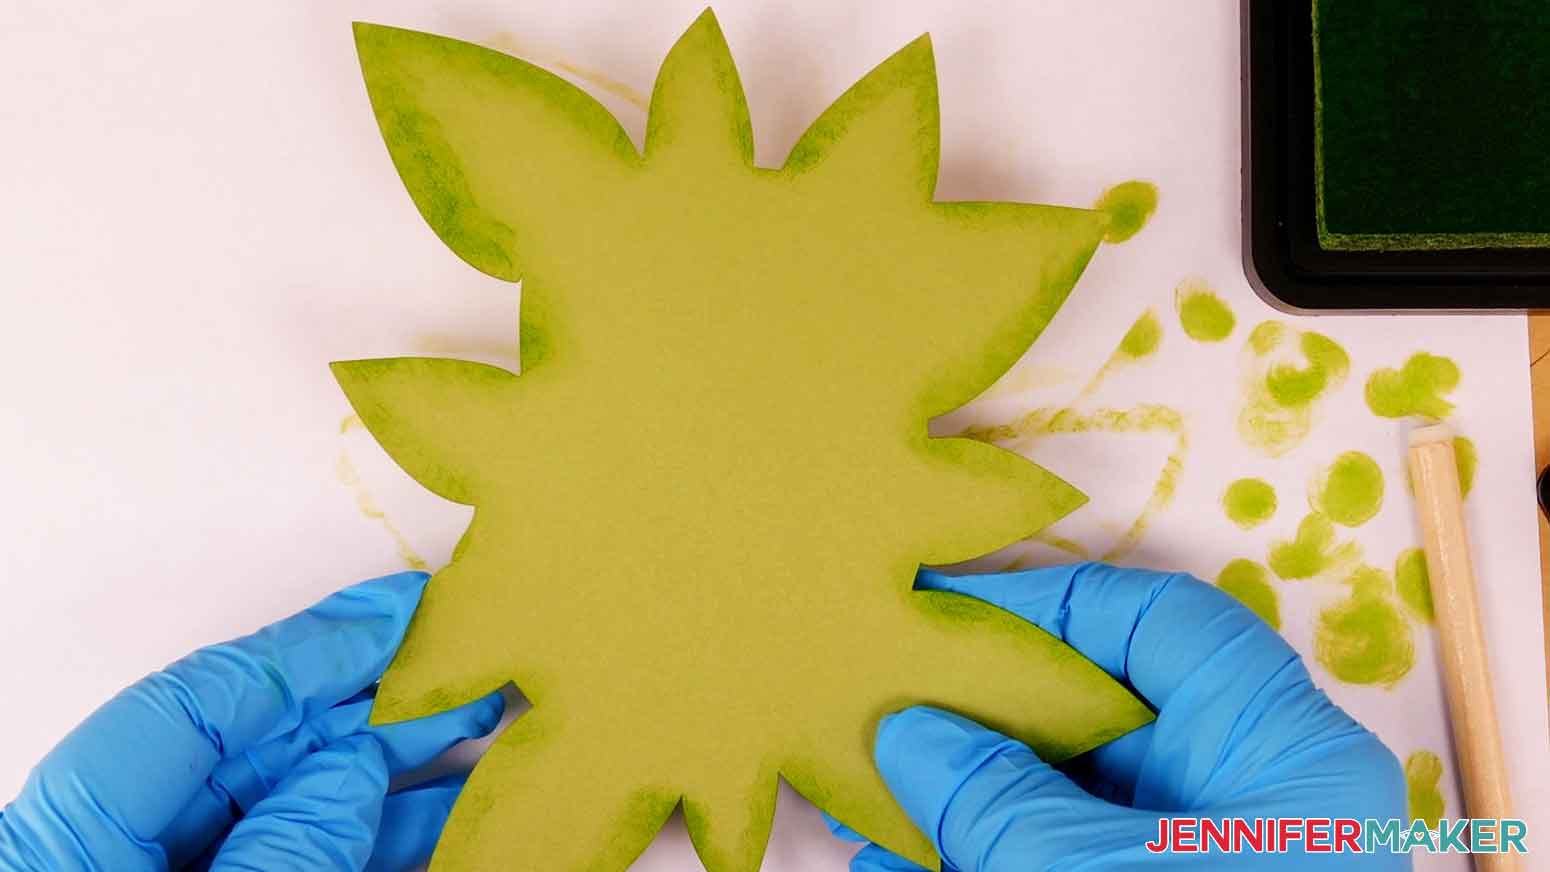
10. Repeat steps 7-9 for the darker green leaf layer.

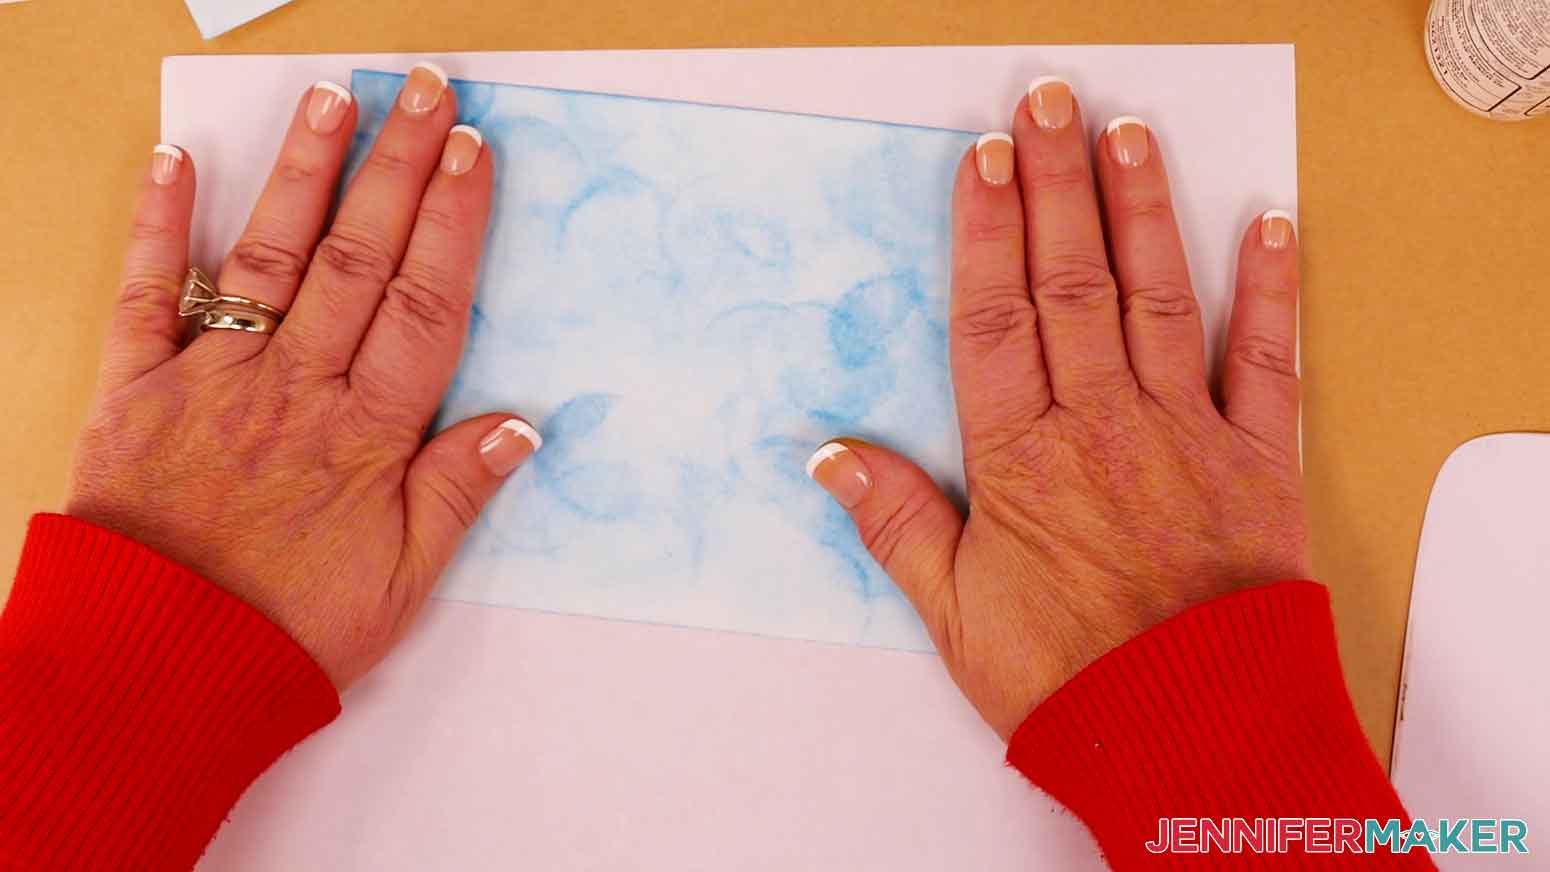
11. Fold your base card in half along the scored or dashed line. Use a scraper tool to crease the center

12. Apply glue to the back of the blue sky layer and place the sky layer on the front of the white card. Press it in place.
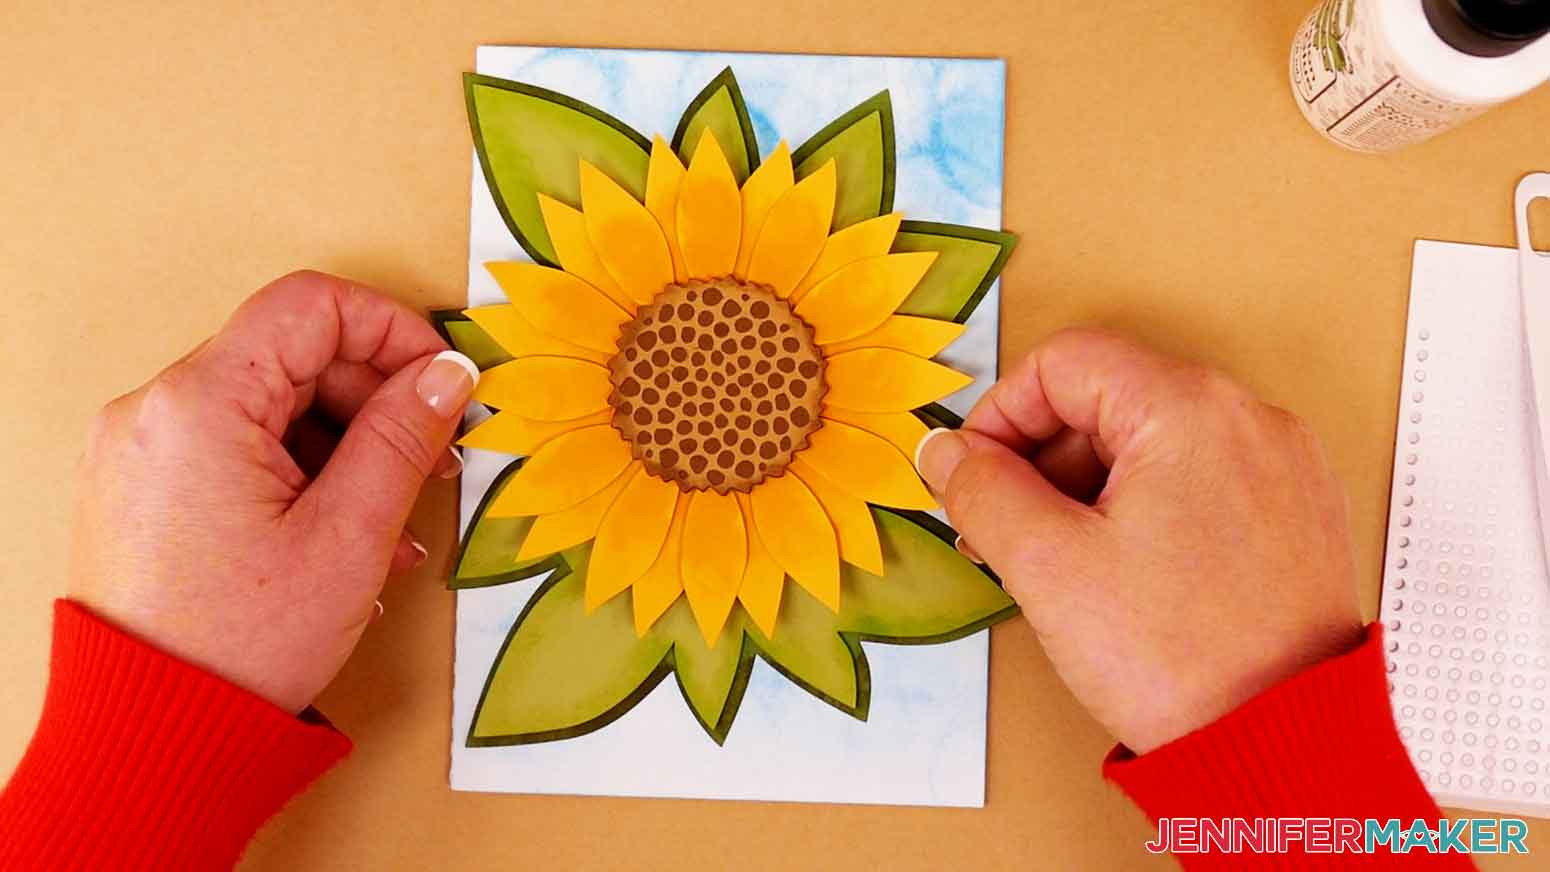
SUNFLOWER
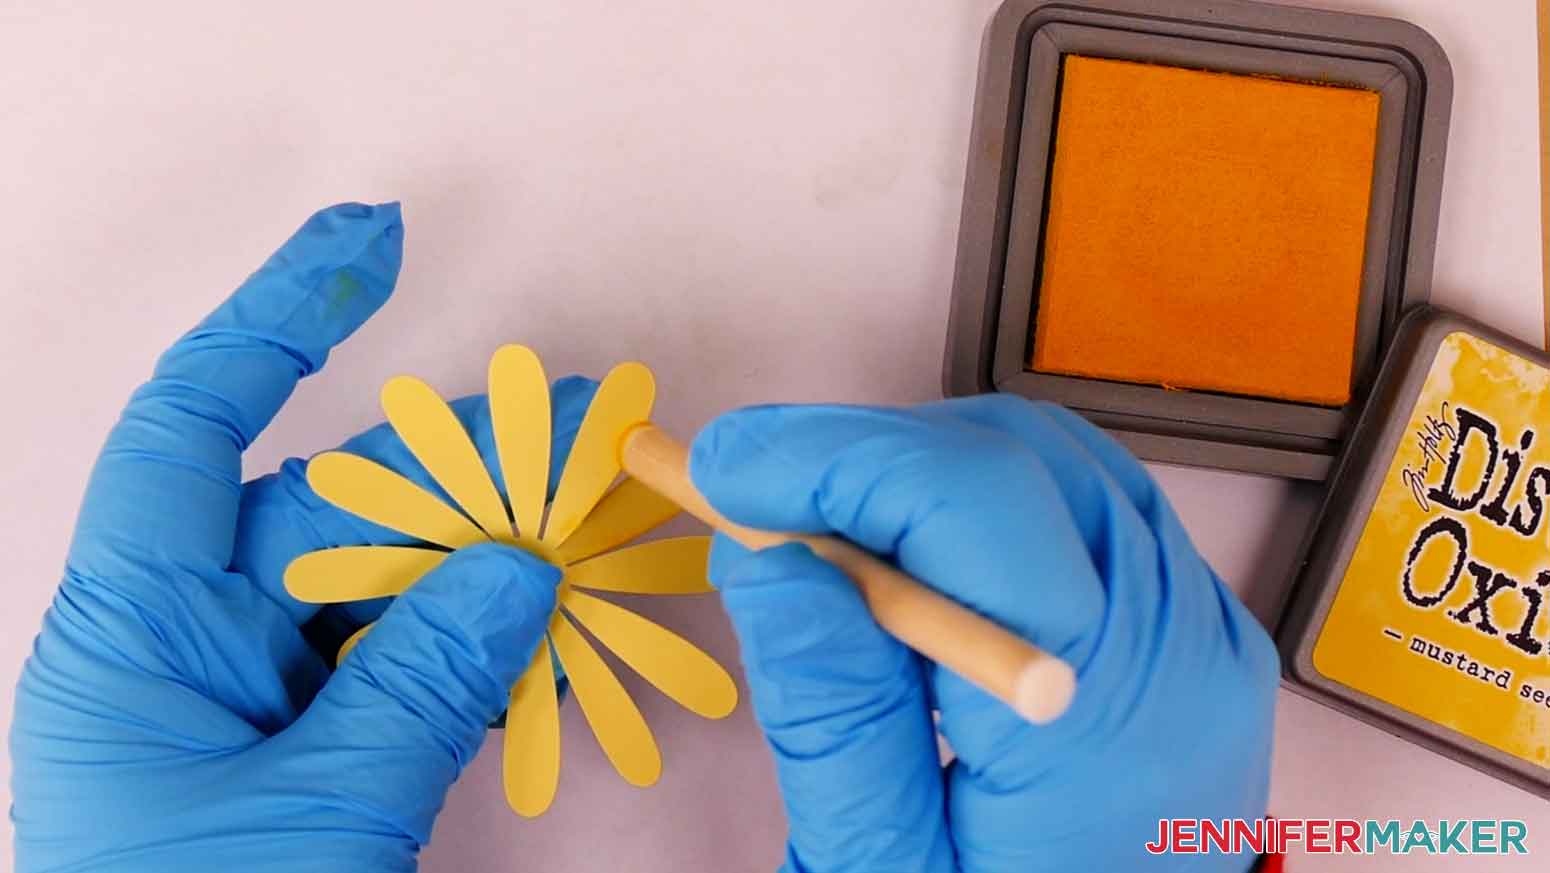
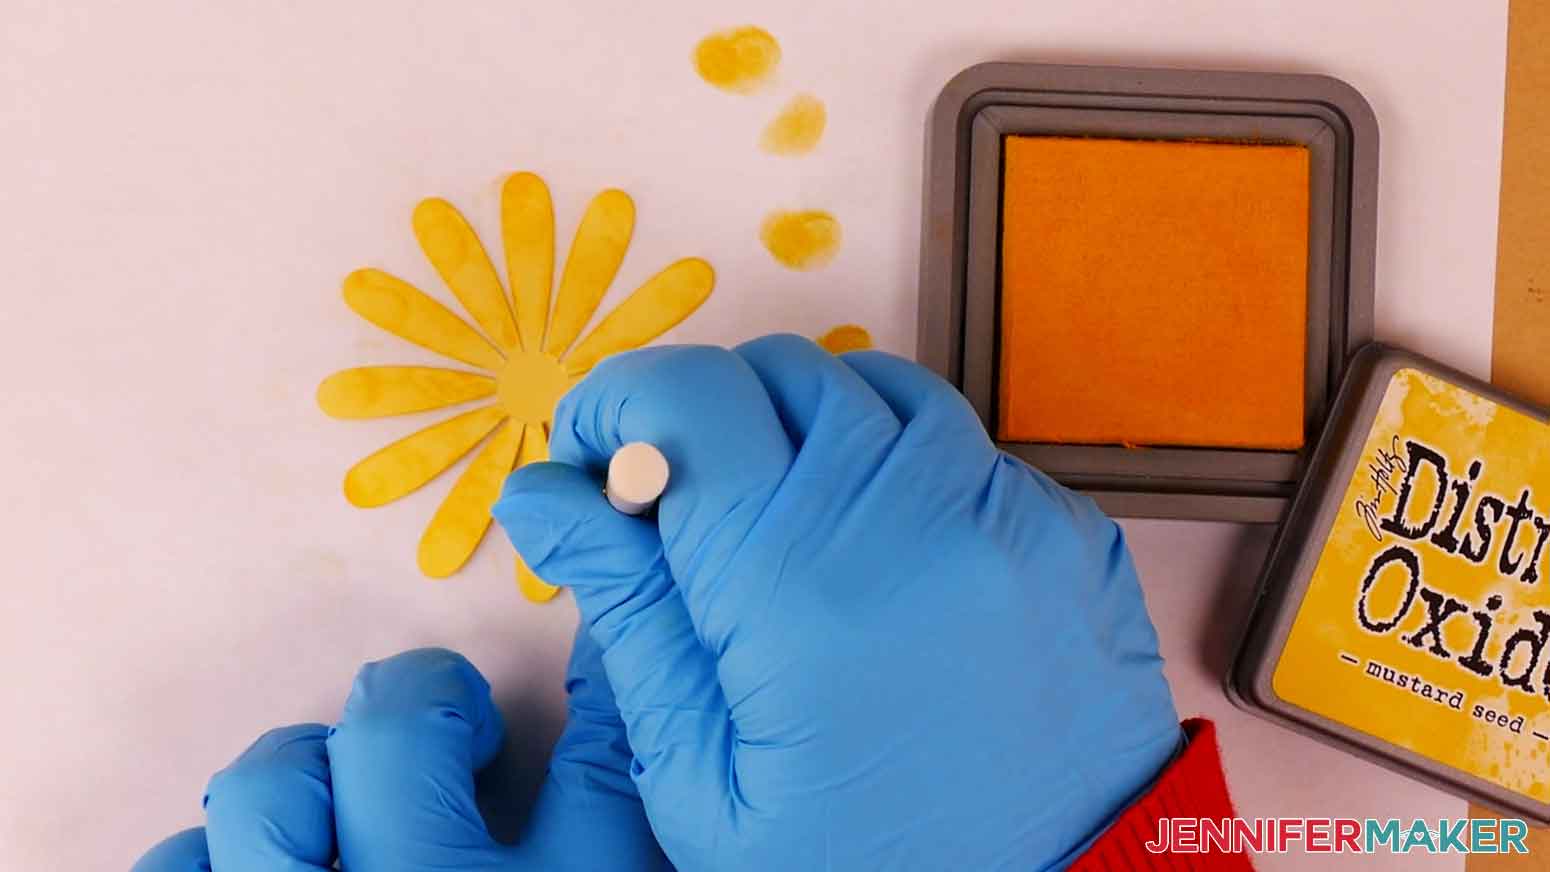
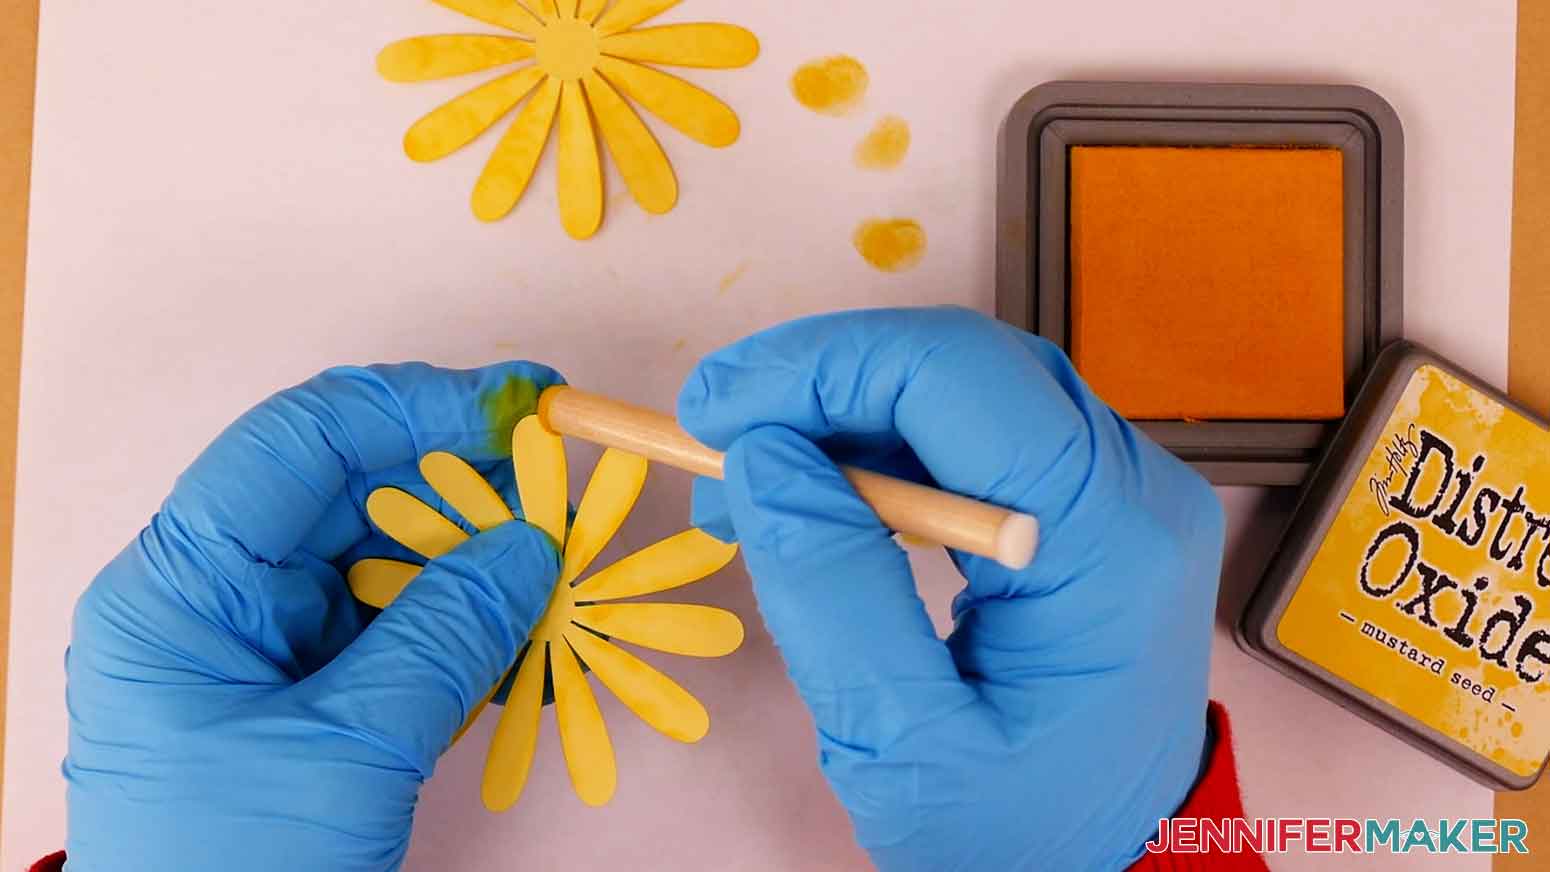
1. For the sunflower petals (piece C), use the detail blending tool and begin in the center of the petals.
2. Apply the yellow ink (see Notes section for the specific color I used) in a circular motion with lighter pressure as you move to the outer edges of the petals. Repeat for both petal layers.
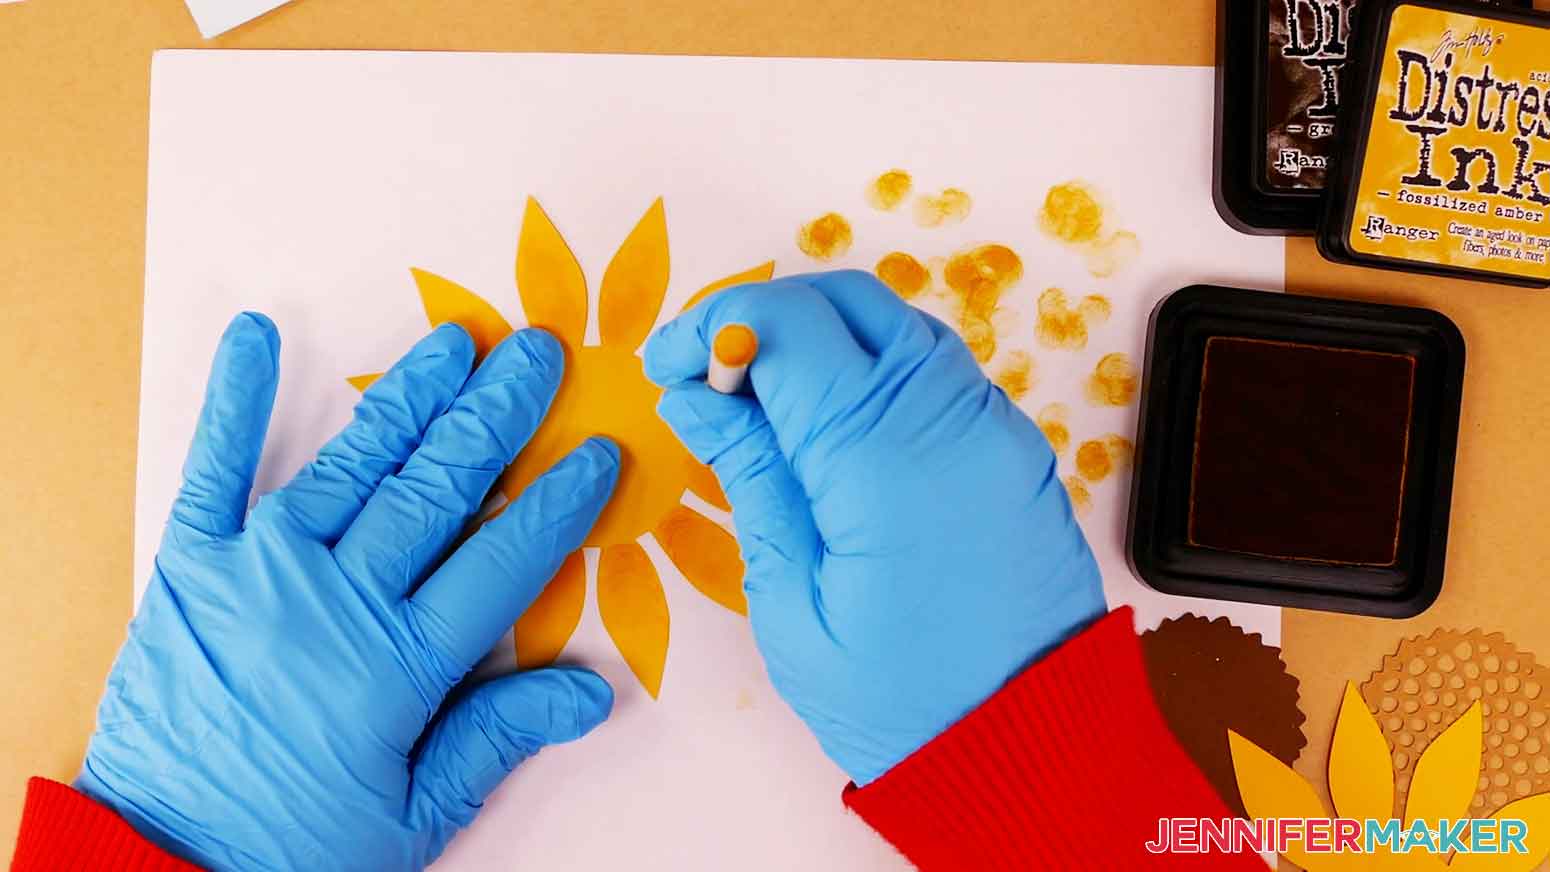
3. Apply a light layer of brown ink (see Notes section for the specific color I used) to the edges of the light brown center layer (piece A).
4. Apply with light pressure and circular motions.
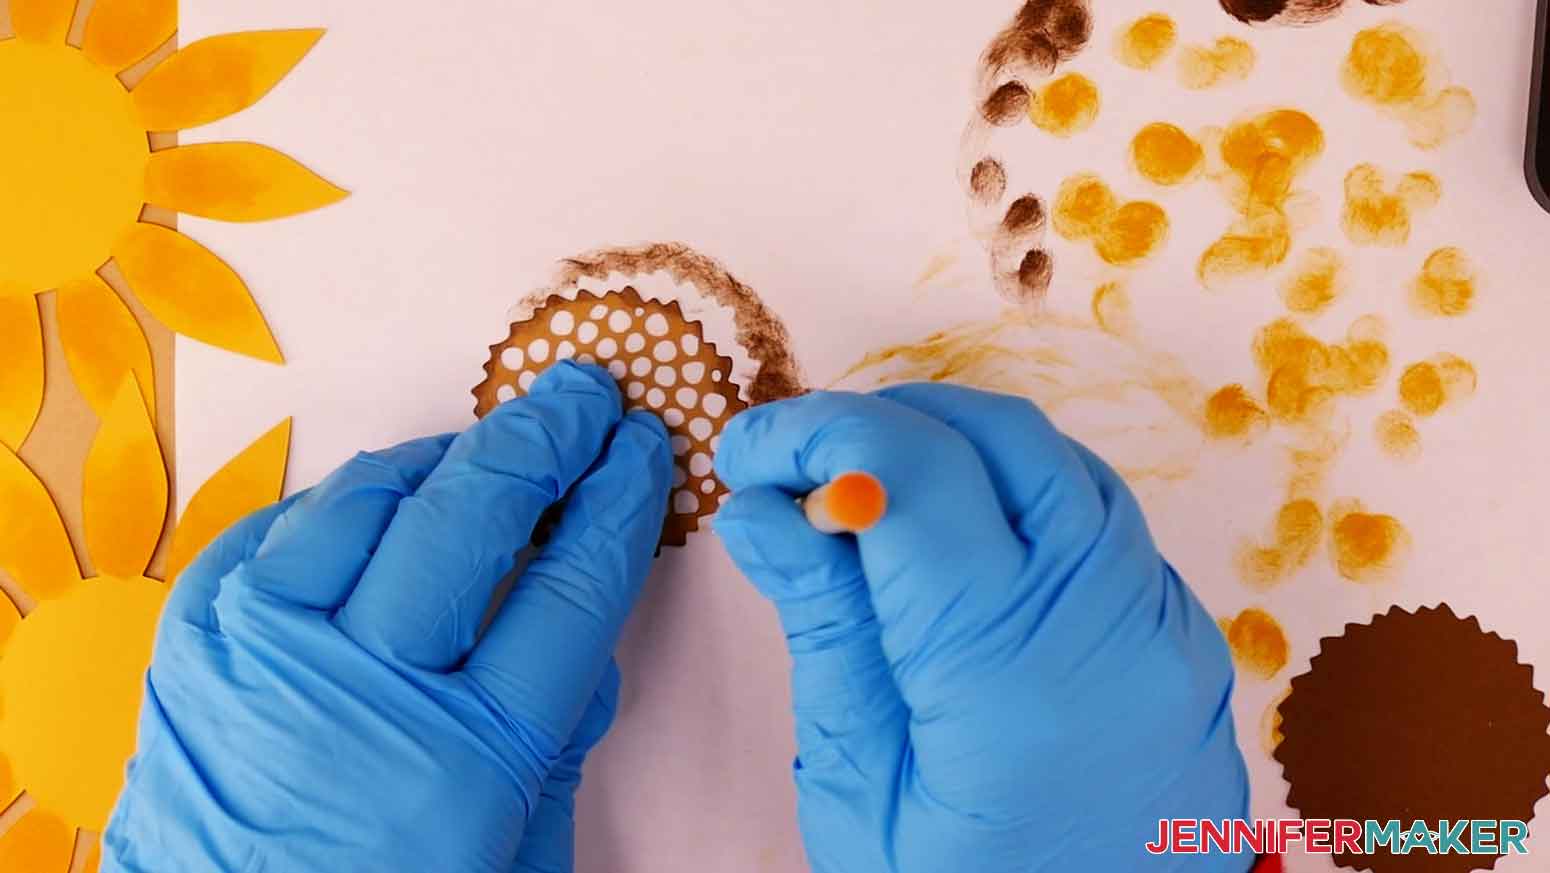
5. The dark brown layer (piece B) will not have any ink.
DAISIES
NOTE: The flower petals will have a different ink application for the top and bottom layer.
1. Start with the bottom layer of one flower - I started with the yellow flower (piece C). Rub your blending tool in the yellow ink and apply it around all the petal edges.
TIP: It helps to gently fold back the neighboring petals as you apply the ink to each petal.
2. Apply ink to the petal tips using a light circular motion.
3. Blend the ink toward the center of the flower using less pressure as you move inward. This will create a gradient effect that lightens toward the center.
4. For the top petal layer (piece C), ink the edges like you did in step 1. Then, use a gentle circular motion to spread the ink around the edges of each petal and blend it inward toward the petal's center. Use lighter pressure as you move towards the center. When you're finished, the petal should have darker edges that gradually lighten toward the center.
5. Repeat steps 1-4 for the other two daisies (pieces A and B - mine were red and orange).
6. Apply a small amount of ink to the edges of the small circle flower centers (pieces D, E, and F).
7. Use ink colors that match each circle color.
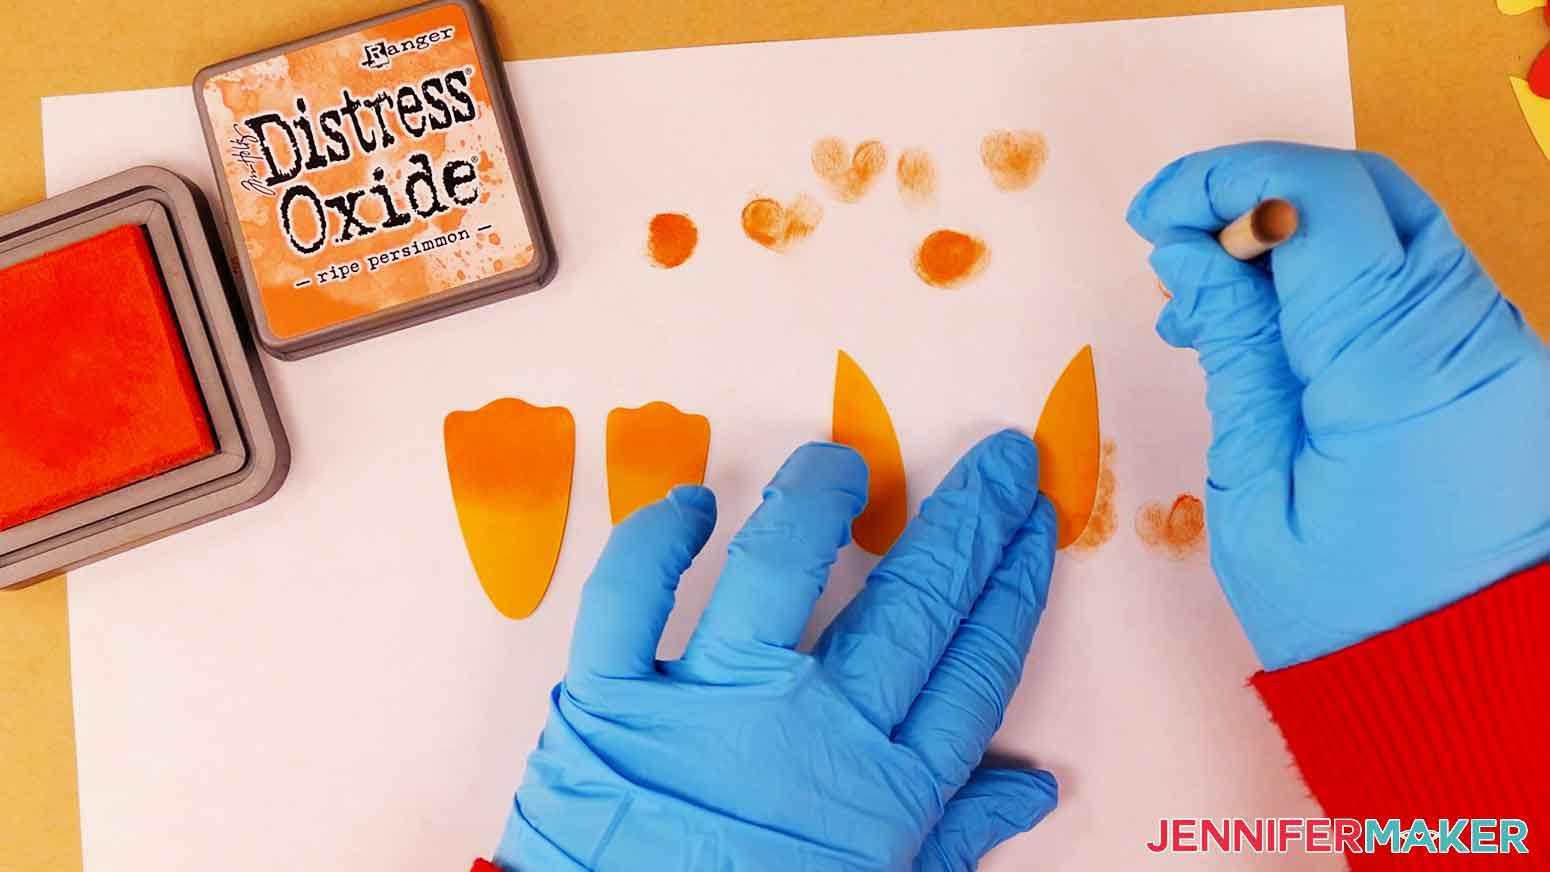
TULIPS
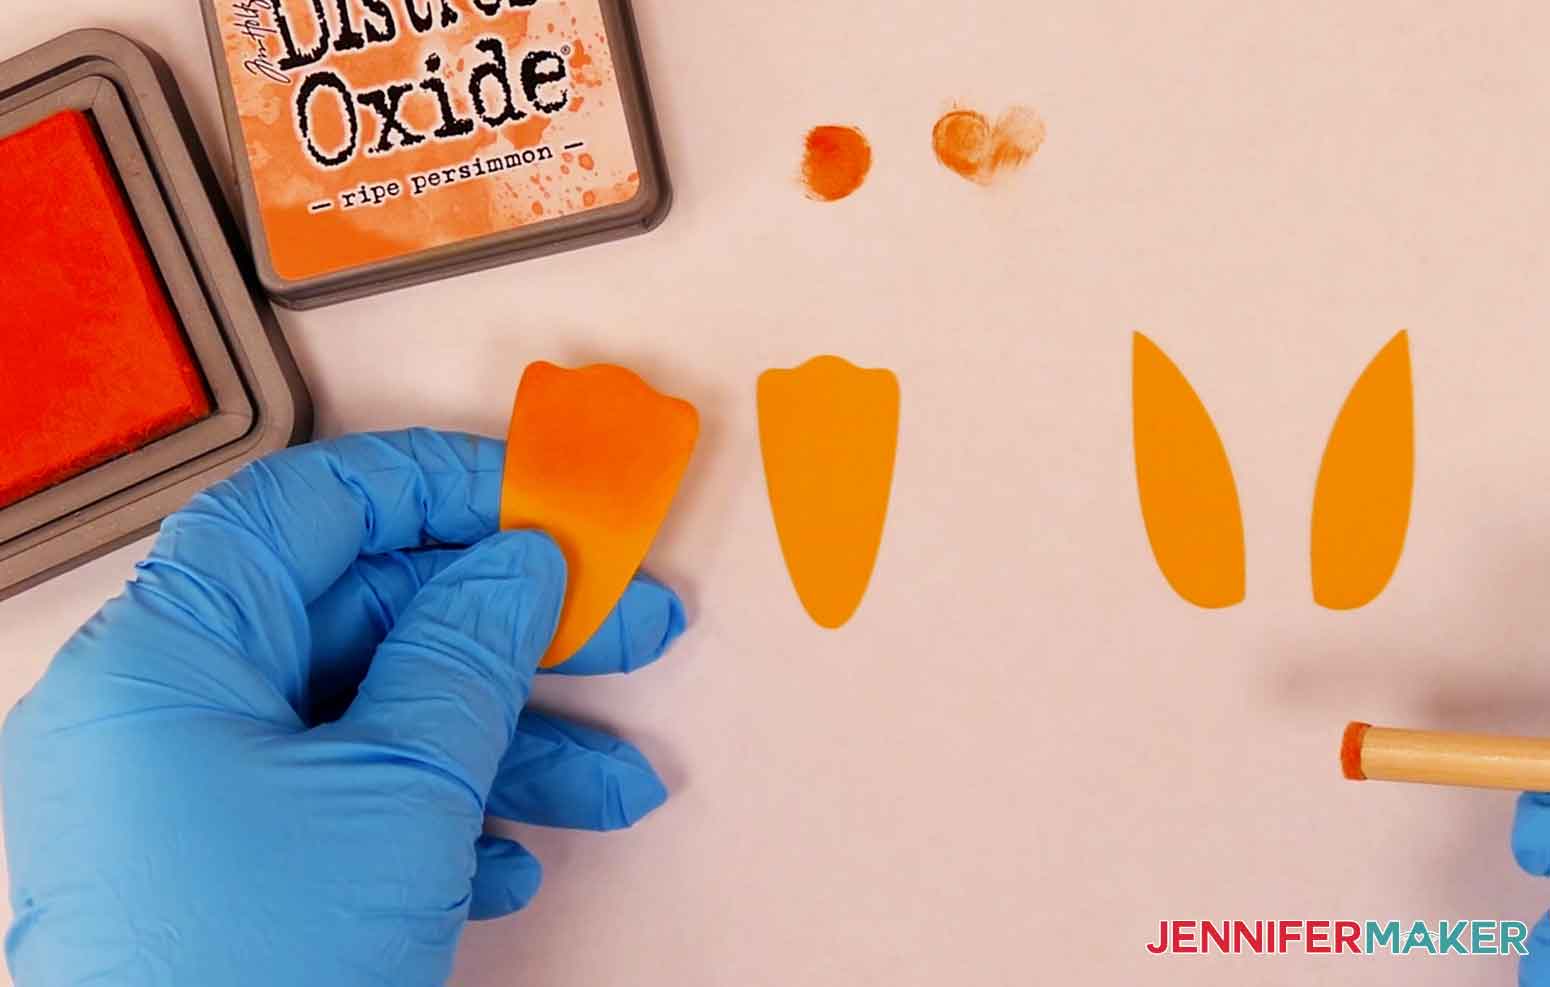
1. The tulips have two petals and two center pieces per flower. Apply ink to the edges of all tulip flower pieces.
2. Blend the ink on each piece. I started with the large tulip. On the back center piece (piece A), use a circular motion to blend the ink from the top of the center petal to towards the middle of it.
3. Use lighter pressure for a lighter shading on the front center petal (piece B). Apply ink from the top of the center petal towards the middle.
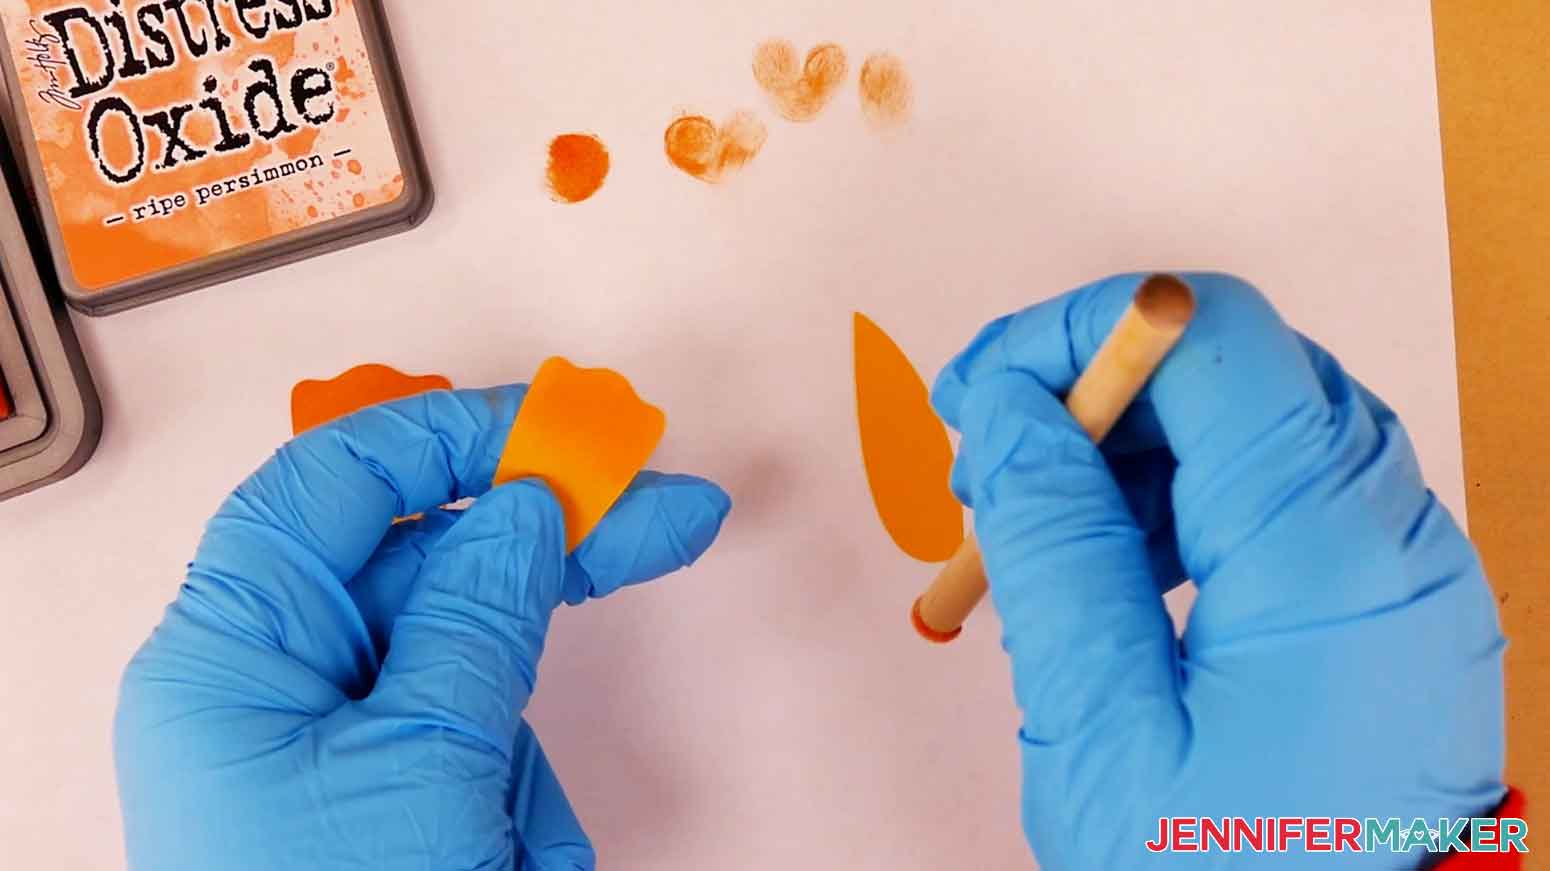
4. For the left and right petals (pieces C and D), use a circular motion and spread the ink from the outer edge towards the center of the petals. Use lighter pressure towards the center for a gradual fading.
5. Repeat steps 1-4 for all remaining tulip pieces (pieces E-L).
6. The stems (pieces M-P) will not have any ink.
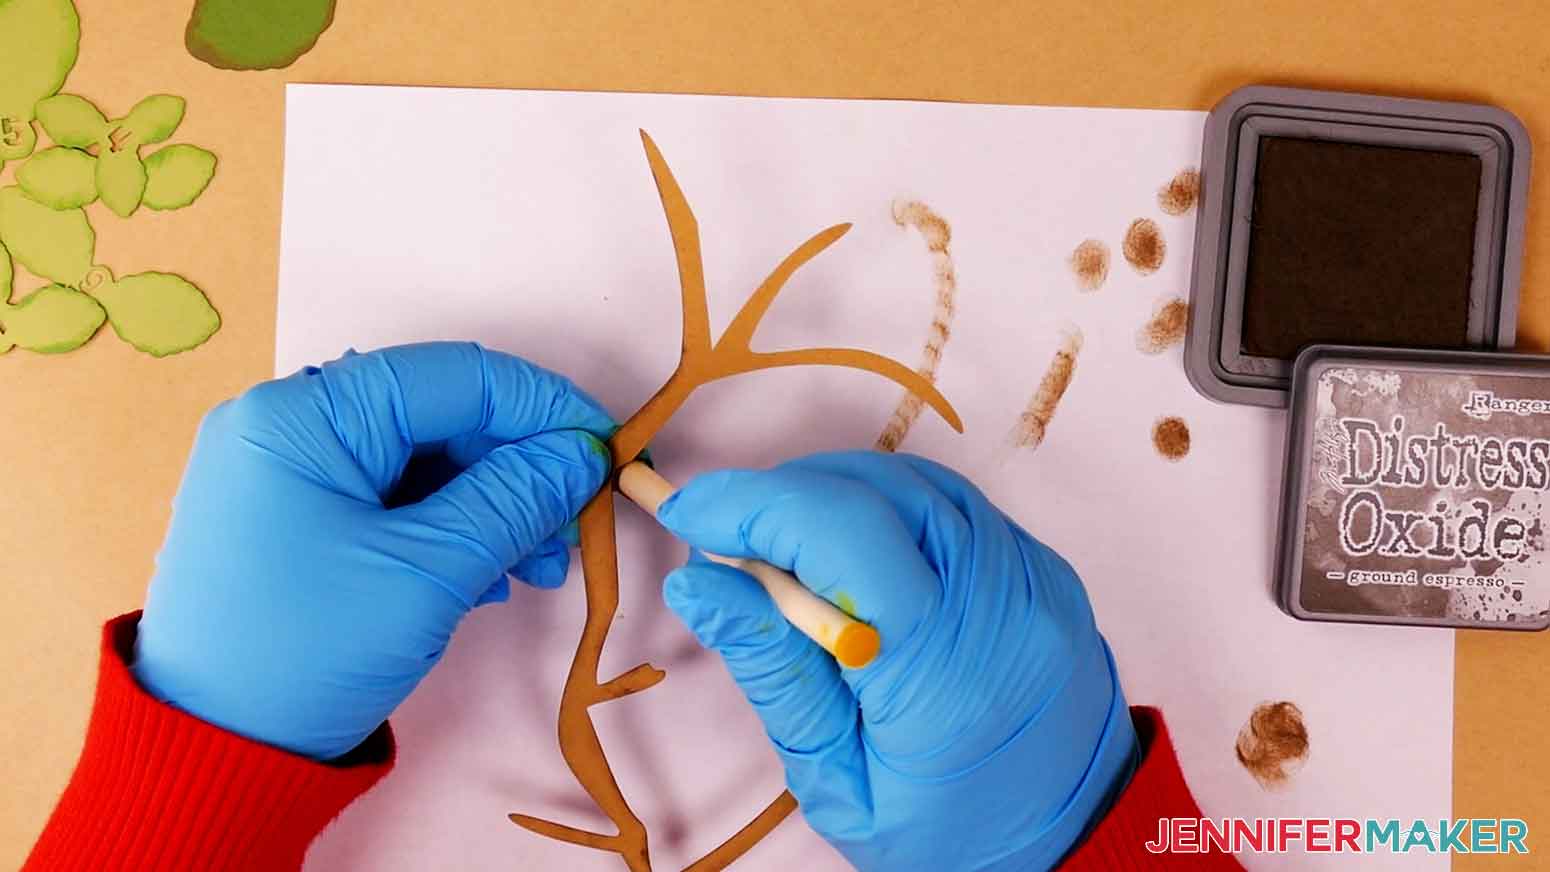
CHERRY BLOSSOMS
1. Using the same technique used for the leaves, lightly apply brown ink to the edges of the branch (piece I).
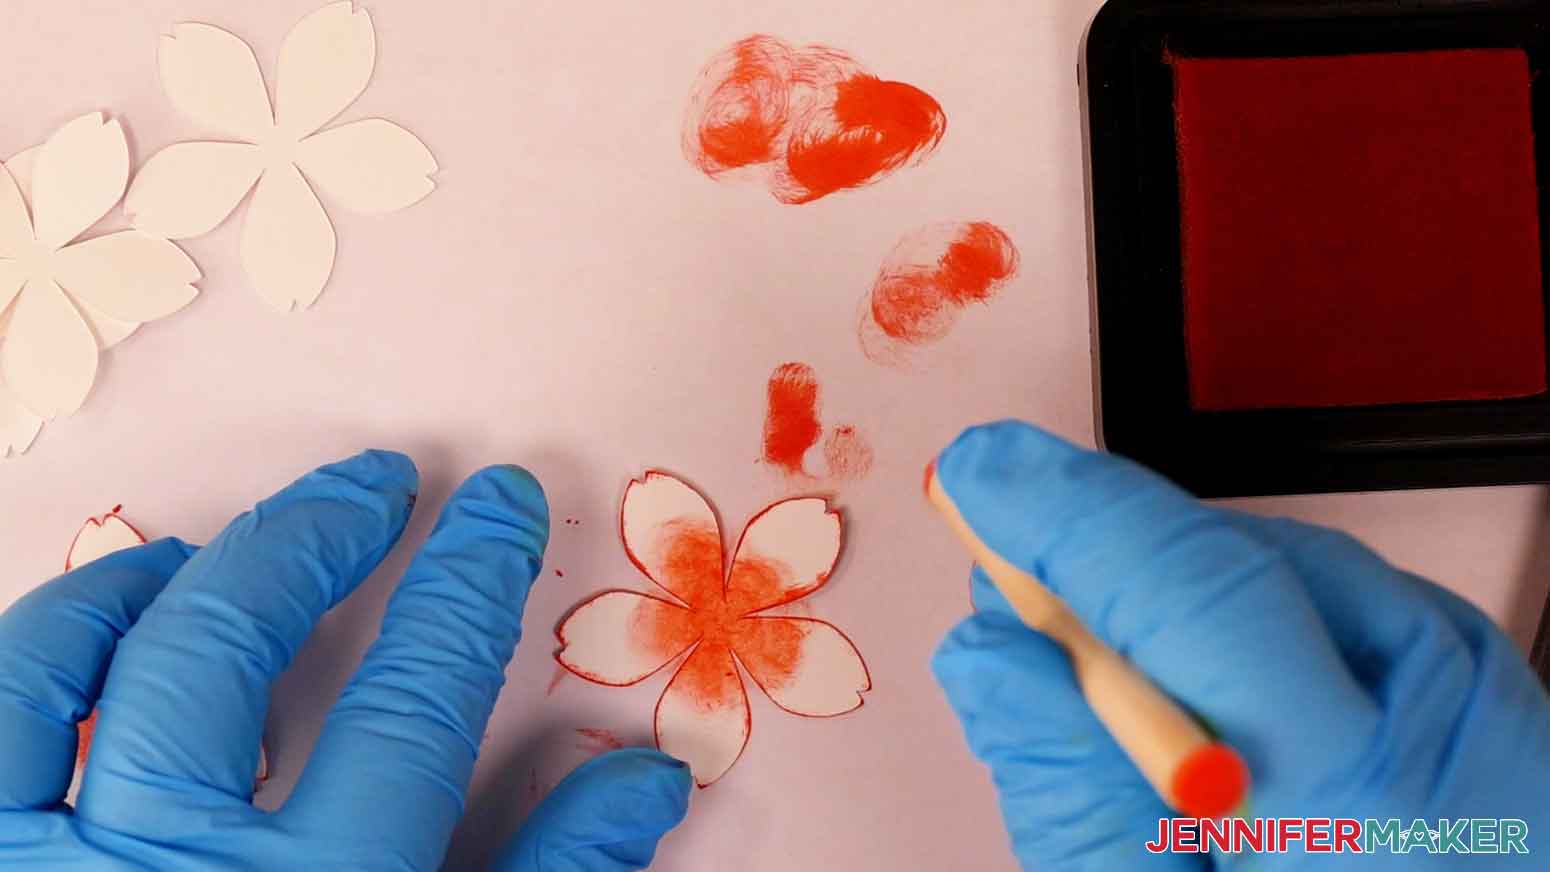
2. All cherry blossom petals are inked the same way. Apply coral ink to the edges of the flower petals (pieces A, B, D, and E). The tips of the petals will remain white, so use patience when inking the edge of the petals. This provides a slight accent of the color.
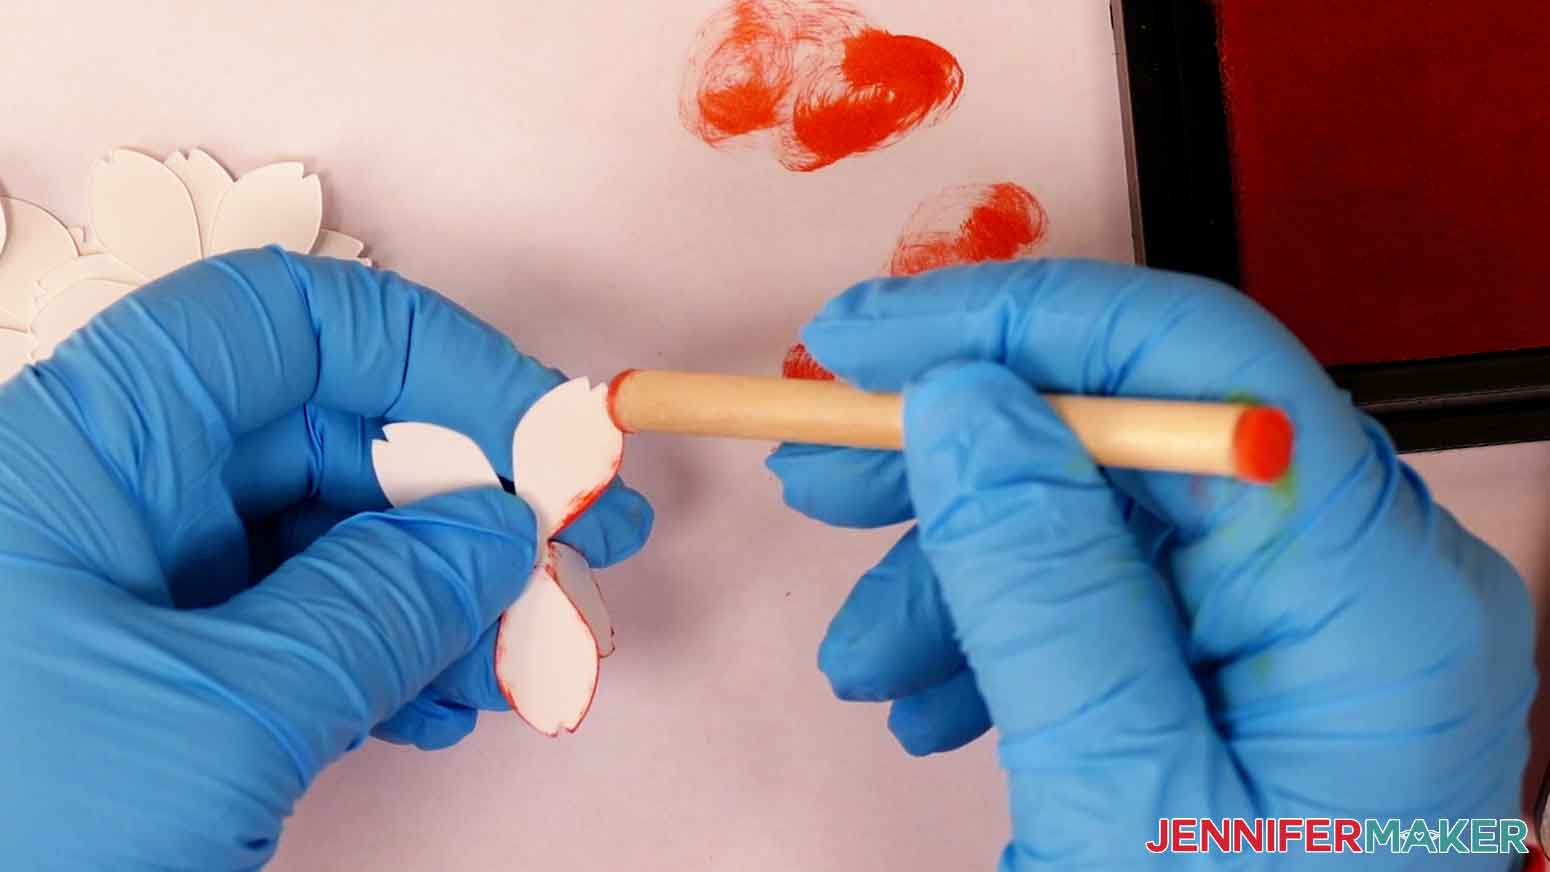
3. Start in the center of the flower petal layer and work from the middle outward toward the petal edges. Use a circular motion to spread ink from the center of the petal and lighten the pressure towards the edges of the petals.
STEP 4: ASSEMBLE YOUR INKED CARD
SUNFLOWER
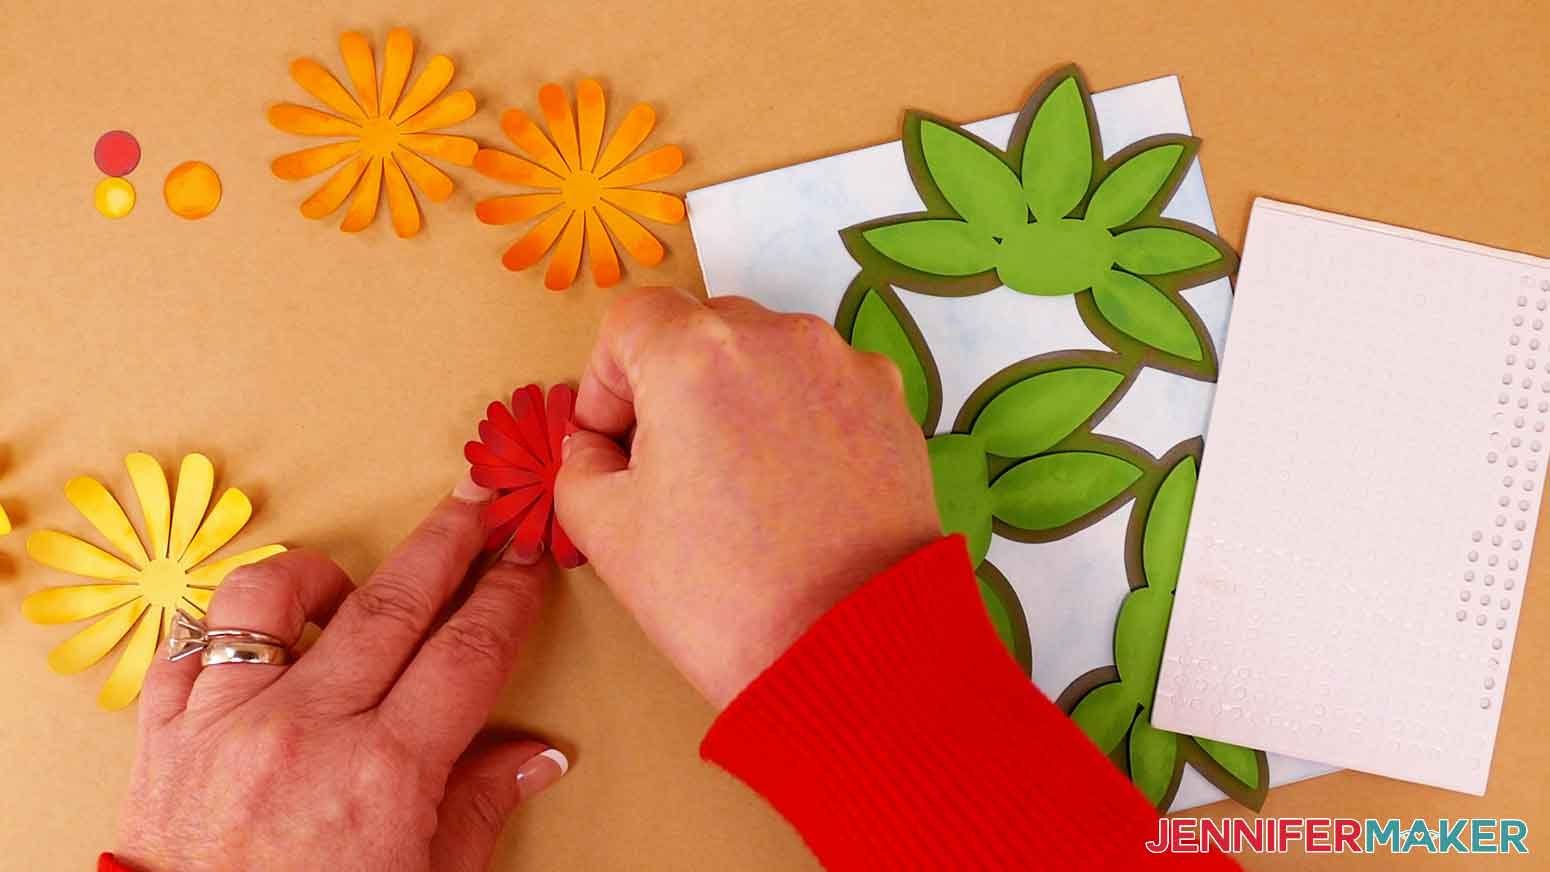
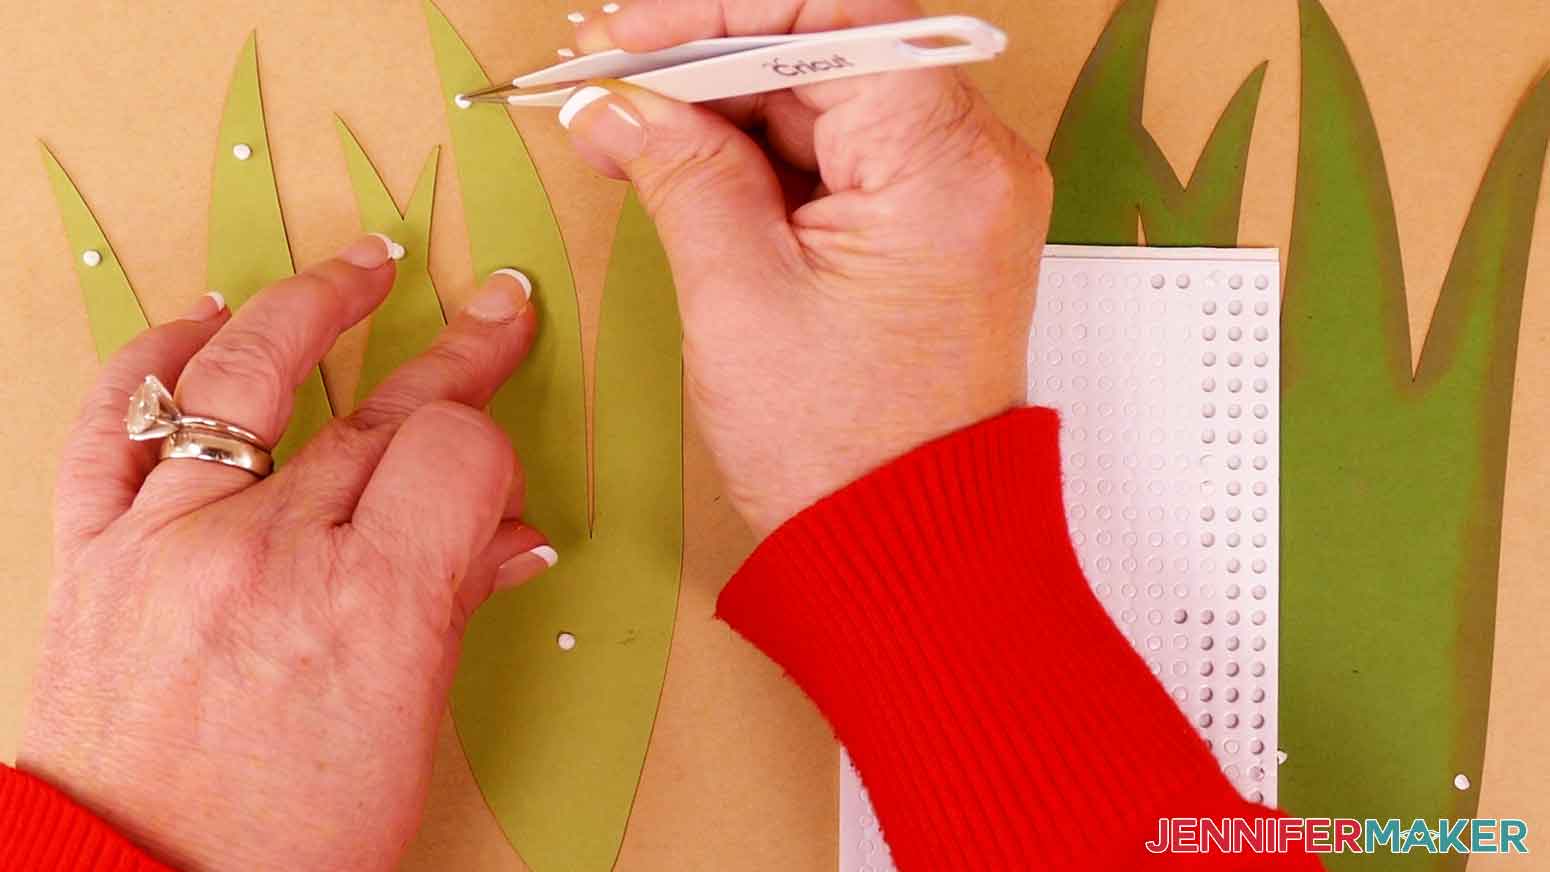
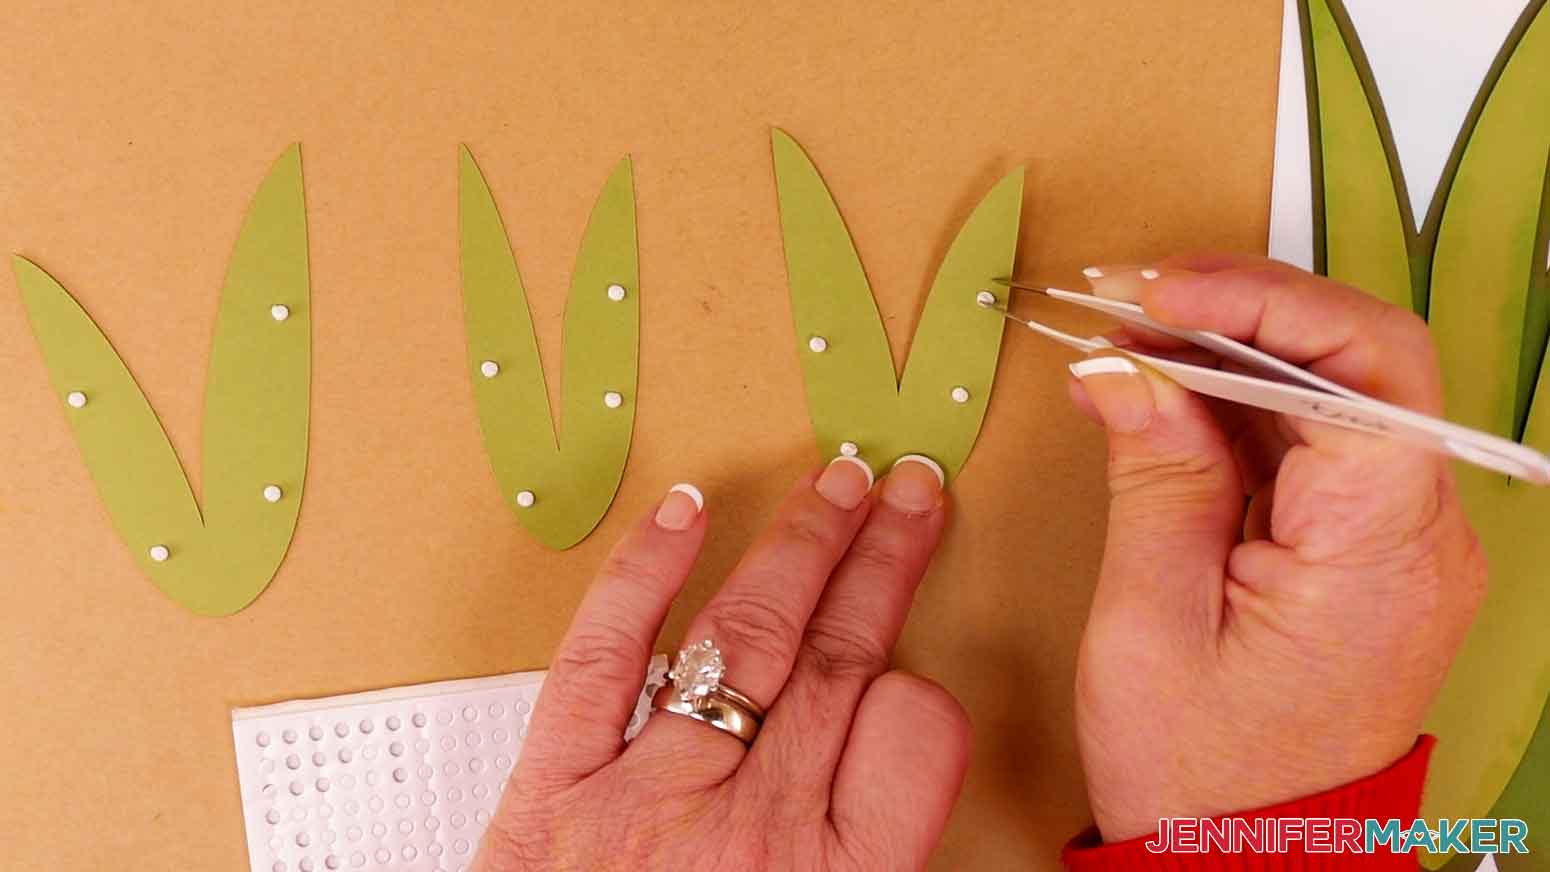
1. Place foam adhesive circles on the back of the light green top leaves layer (piece D). I placed one near the tip of each leaf and a few in the center to secure the layer.
TIP: A weeding tool is helpful in removing the adhesive covers.
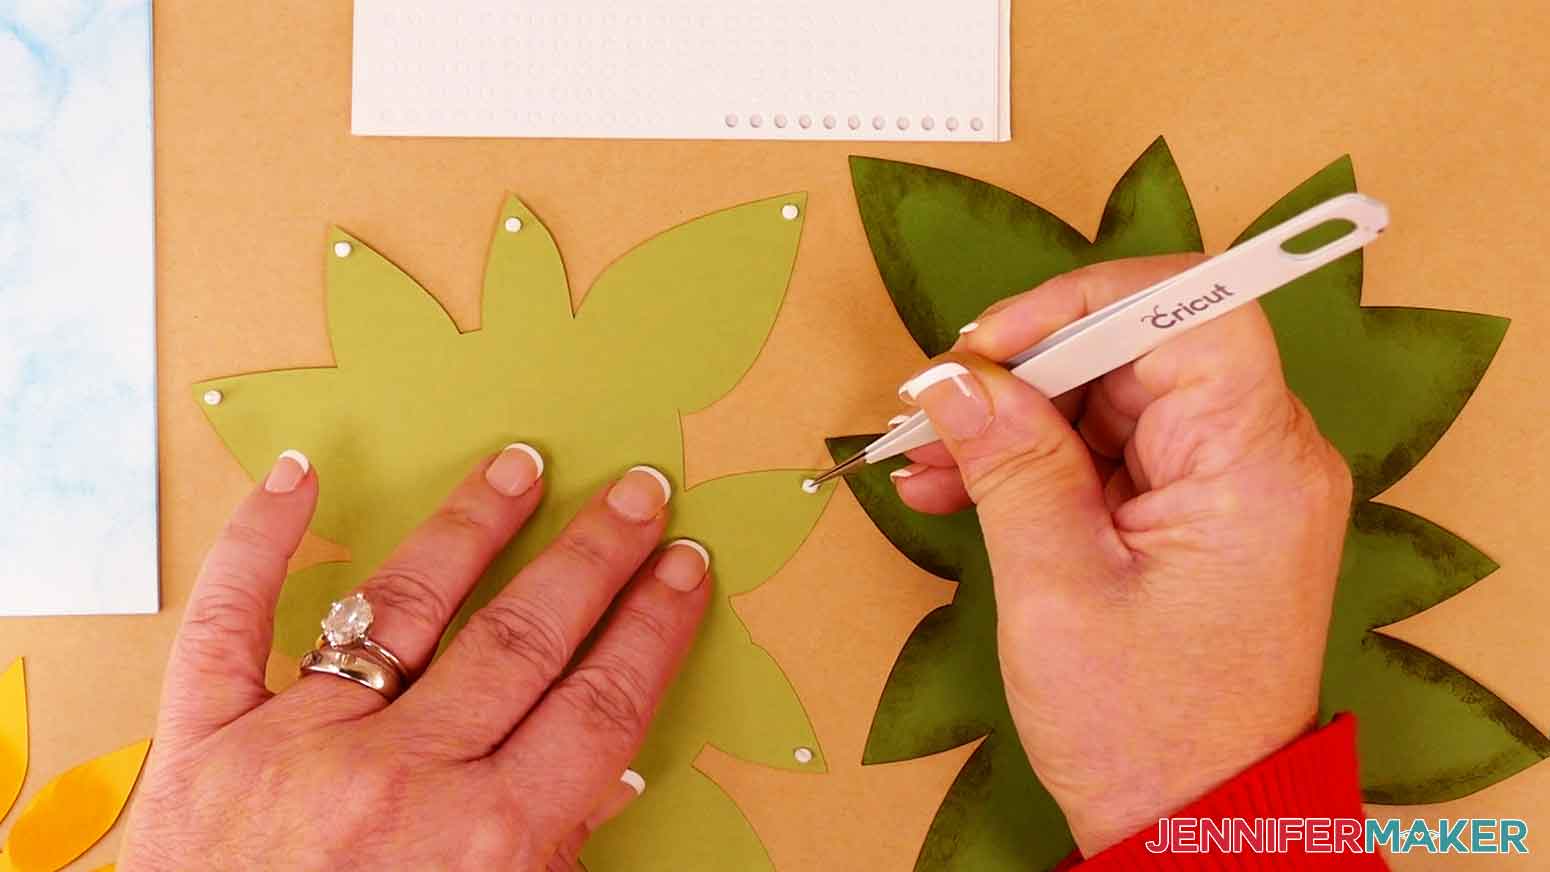
2. Place the top leaves (piece D) on to the front of the dark green bottom leaves layer (piece E).

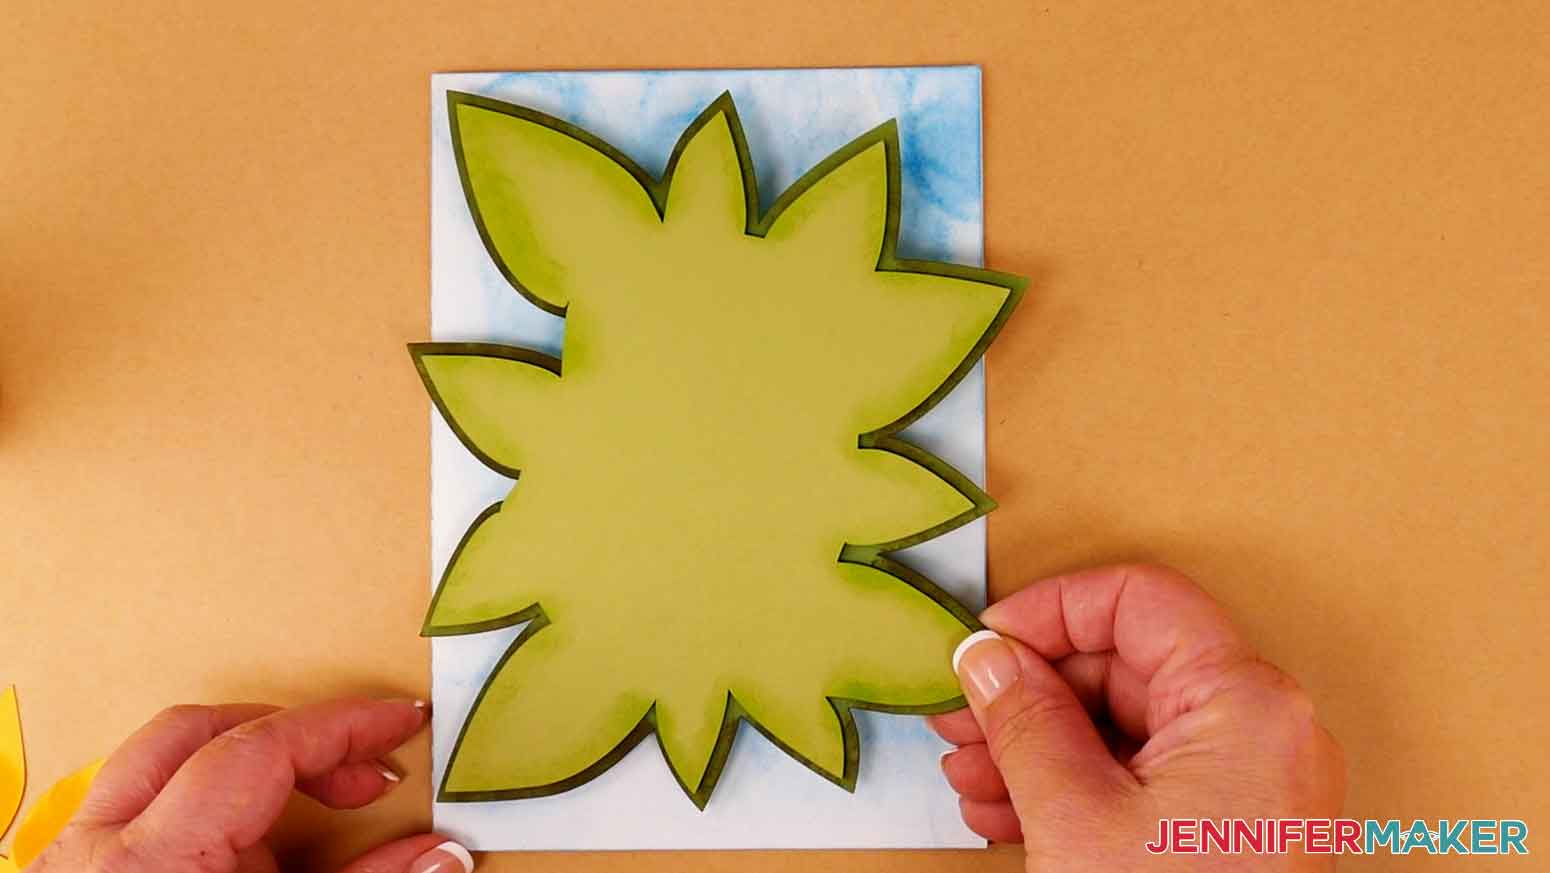
3. Apply glue to the back of the bottom leaves (piece E). Press it on to the front of the sky layer.
4. Use your nails or fingers to gently shape the sunflower petals (piece C) to slightly curve upward.

5. Place several foam adhesive pieces around the back center of the top petal layer - only within the center circle area, not on the actual petals.
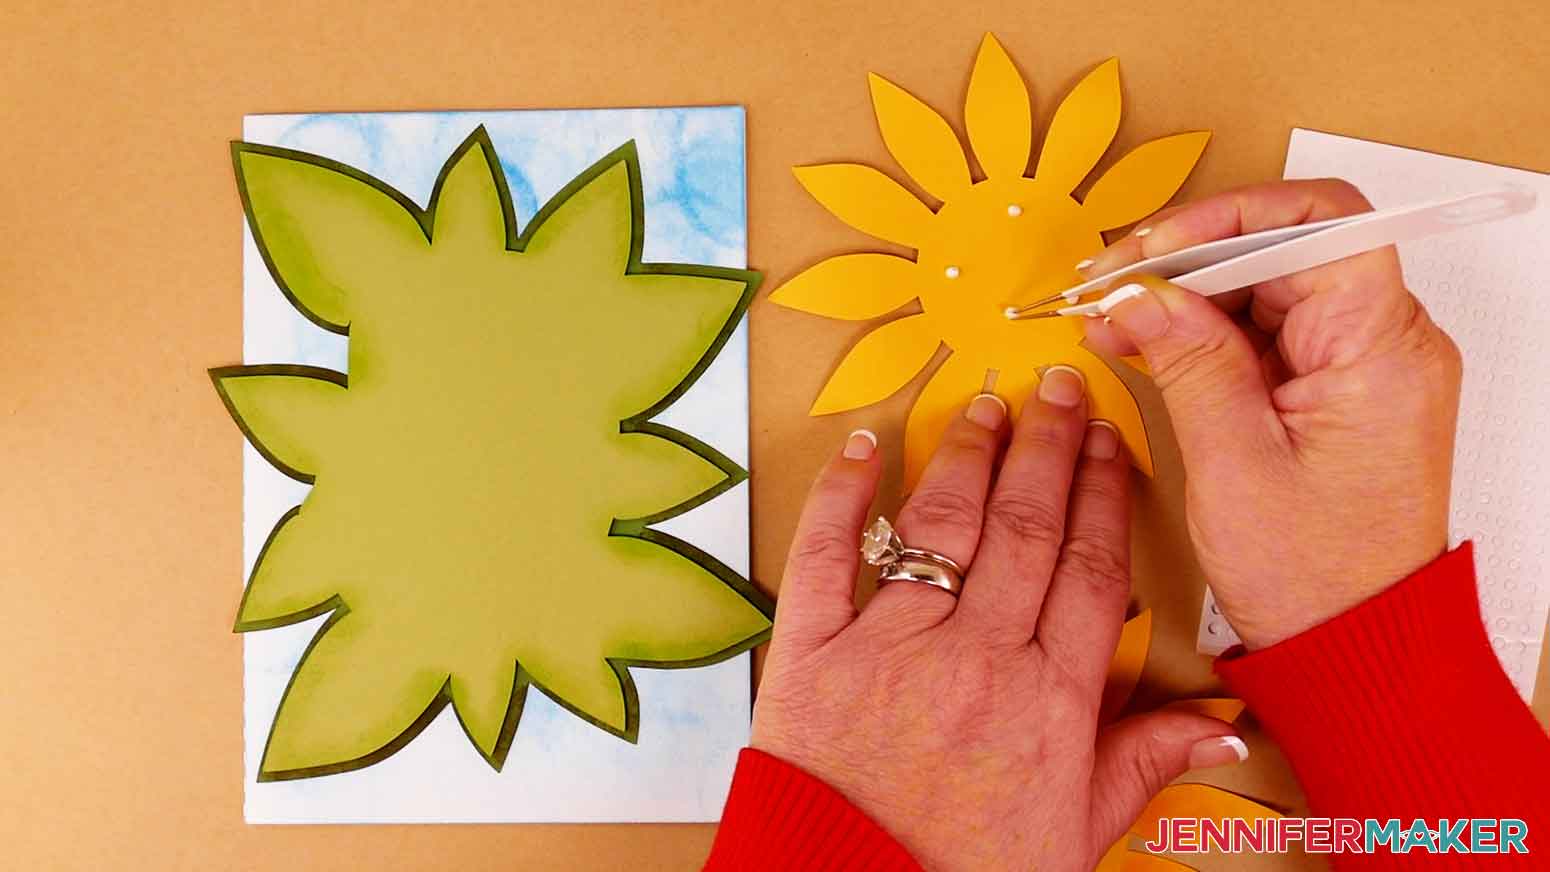
6. Press the top petal layer onto the bottom petal layer with the petals staggered between each other.

7. Align the light brown center top layer (piece A) on top of the dark brown center bottom layer (piece B). Use a few small dabs of glue to adhere the two pieces together.
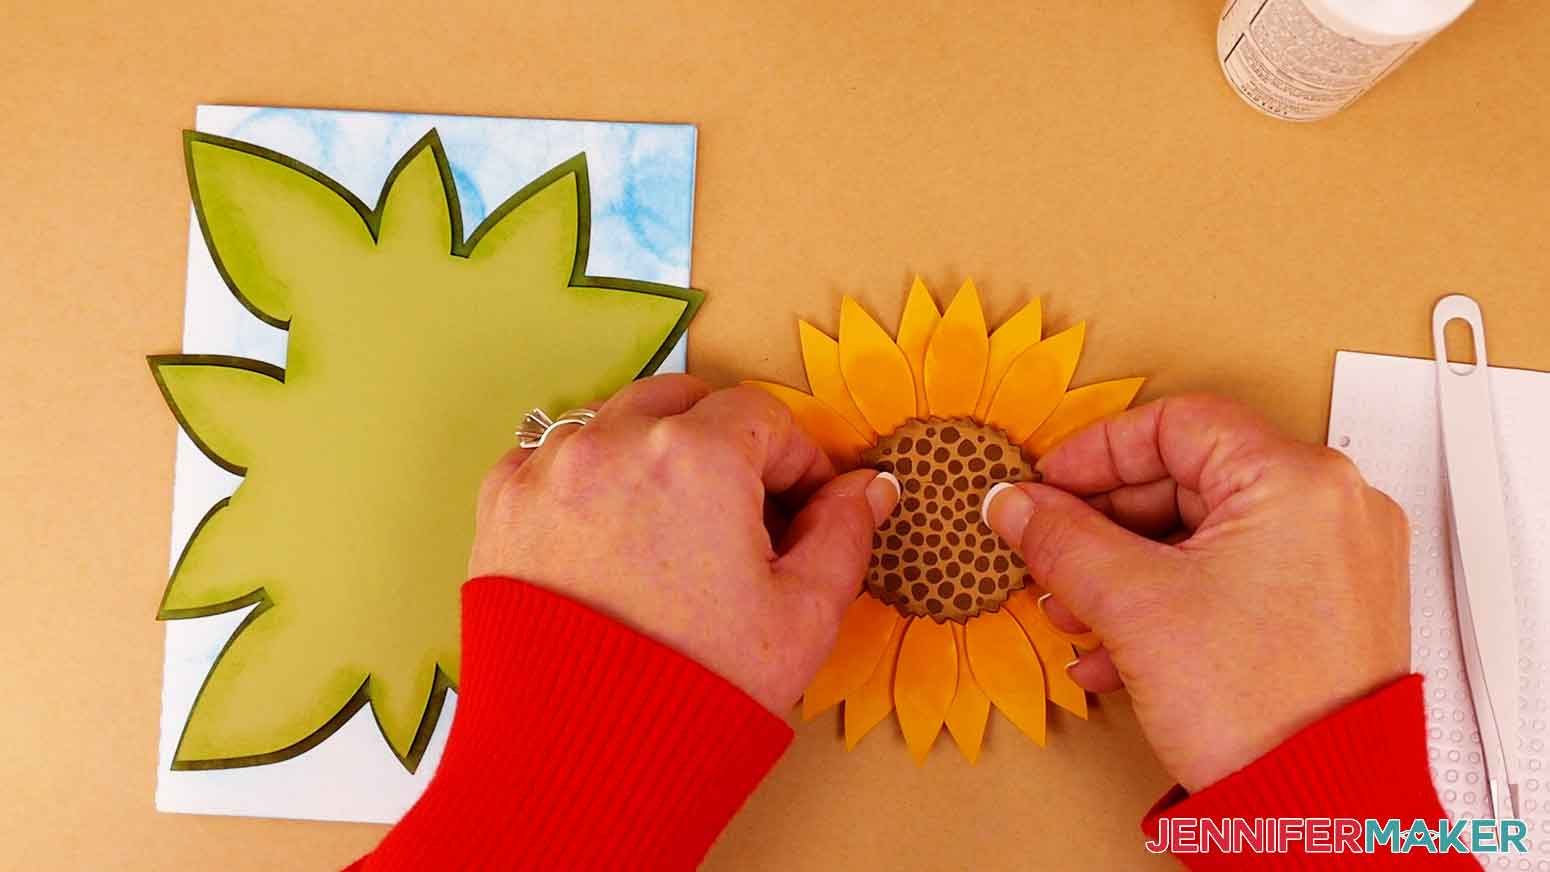
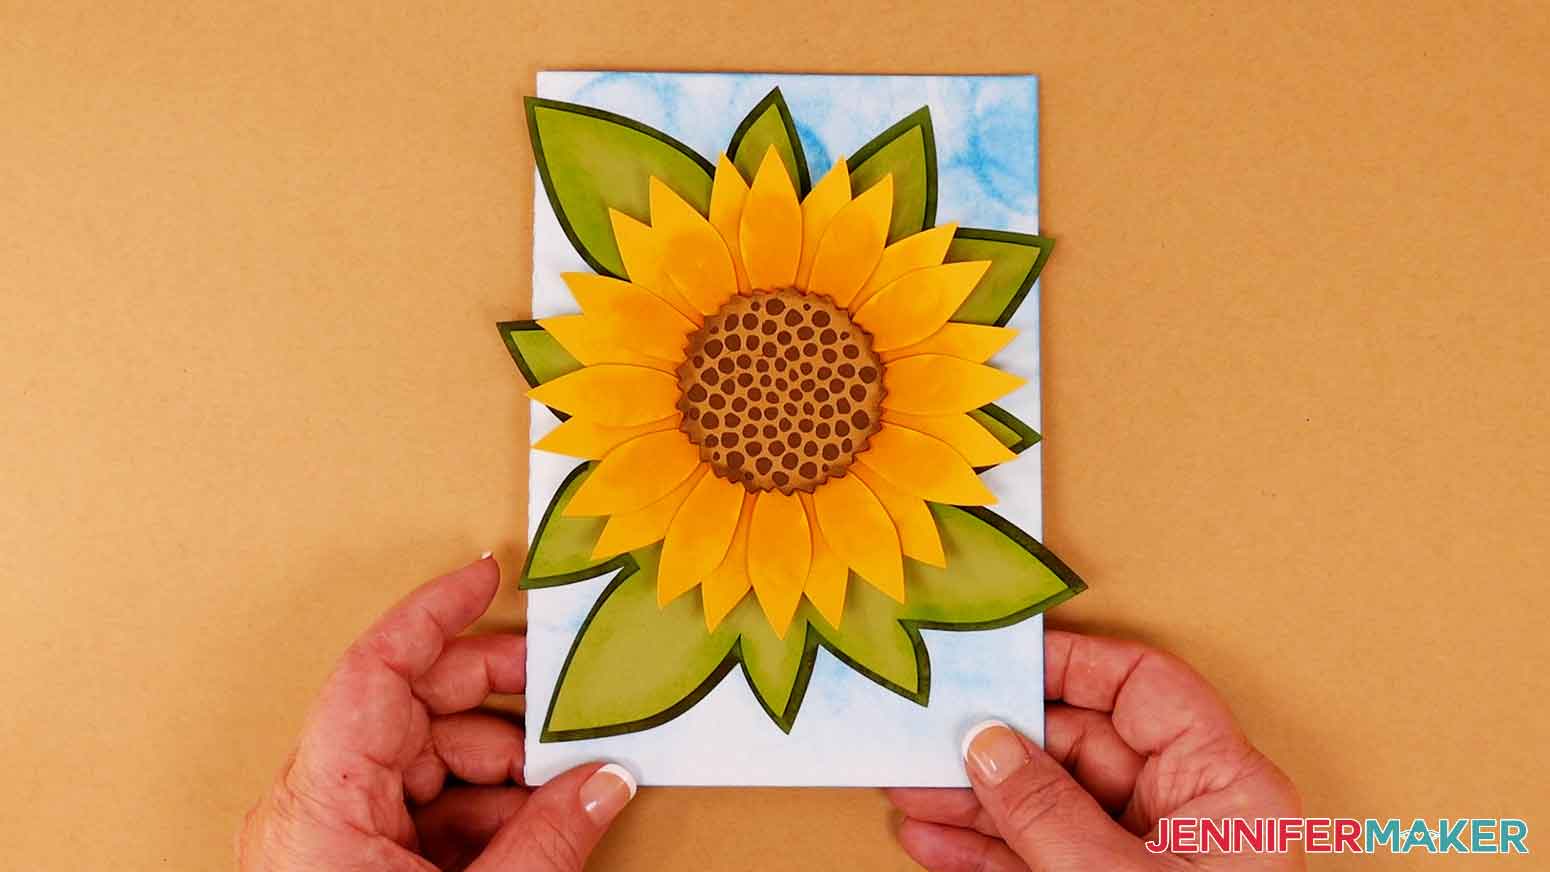
10. Apply glue to the back of the sunflower and press it on to the leaves.
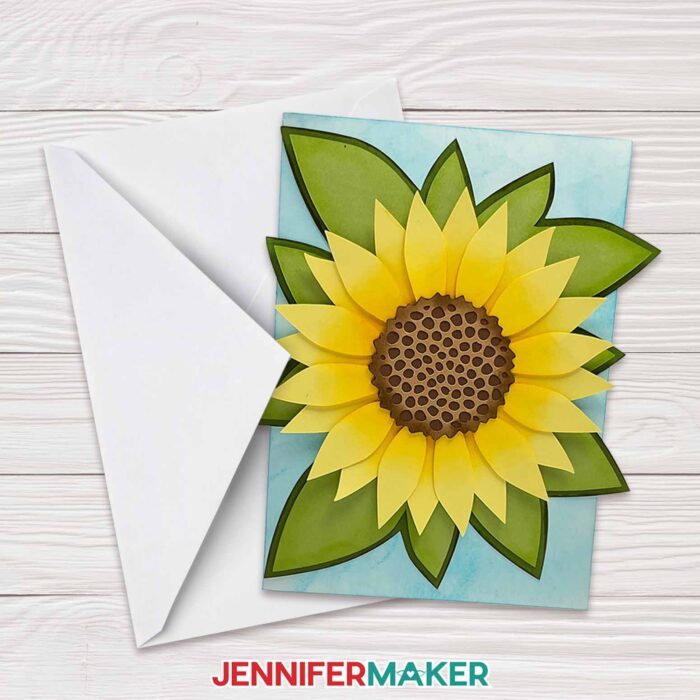
11. Your sunflower card is complete!
DAISIES
1. Use foam adhesive on the back of the light green top leaves (pieces H and I). I placed one near the tip of each leaf and a couple in the center to secure each layer.
TIP: A weeding tool is helpful in removing the adhesive covers.

2. Place the top leaves (pieces H and I) on to the bottom leaves (piece G). The two smaller pieces go on the top and bottom and the larger piece goes in the center.
3. Apply glue to the back of the bottom leaf layer. Press it on to the front of the sky layer.
4. Use your fingers or nails to gently shape the daisy petals (pieces A, B, and C) with an upward curve.

5. Attach three foam adhesive circles to the back center of the top petal layers.
6. Remove the adhesive covers and press each top petal piece on its matching bottom petals. Stagger the petals so the bottom petals show through the spacing of the top petals.
7. Place a dab of glue on the back of each petal center (pieces D, E, and F) and press it in the center of its corresponding flower.

8. Apply glue to the back of each flower and glue them on to the leaves. The largest flower (mine is yellow) goes in the middle of the card, the medium flower (mine is orange) goes on the top, and the smallest (mine is red) goes on the bottom.
9. Your daisy card is complete!
TULIPS
1. Put foam adhesive on the back of the largest light green leaf layer (piece T). I placed one near the tip of each leaf and a few in the center to secure the layer.
TIP: A weeding tool is helpful in removing the adhesive covers.
2. Place the largest light green layer (piece T) on to the front of the dark green bottom leaves layer (piece U).
3. Apply glue to the back of the bottom leaves layer (piece U). Press it on to the front of the sky layer.

4. Place foam adhesive on the back of the small, light green, top leaf layers (pieces Q, R, and S). Place the foam around the leaves’ outer edges but not in the center. We’re going to need space to insert the stems.
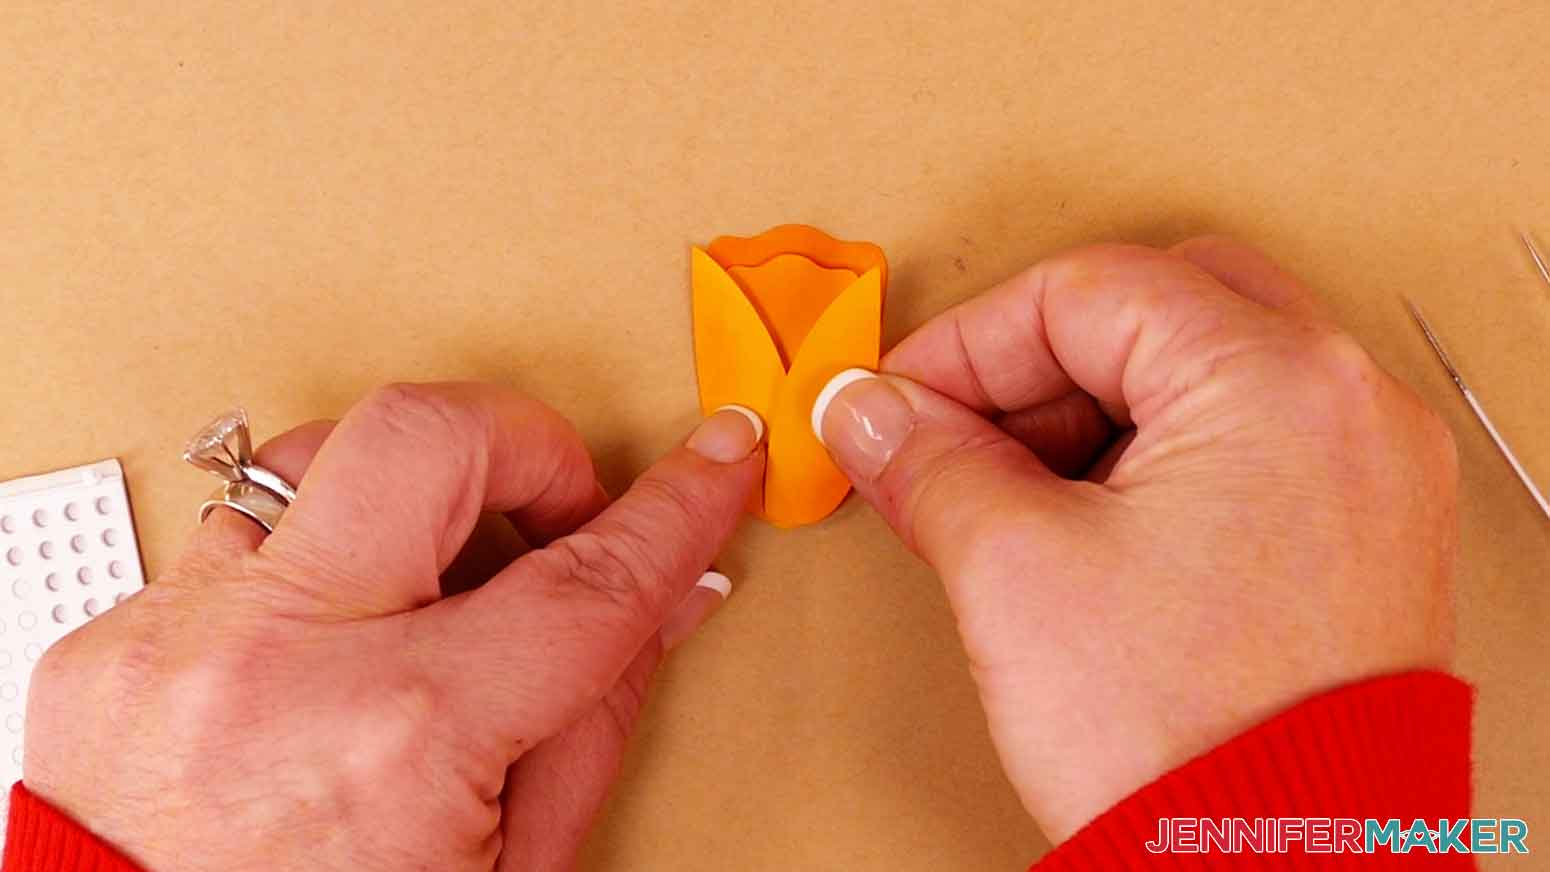
5. To assemble the flowers, we’ll start with the large tulip. Place a couple foam adhesive circles on the back of the front center piece (piece B) and attach it to the front of the back center piece (piece A).
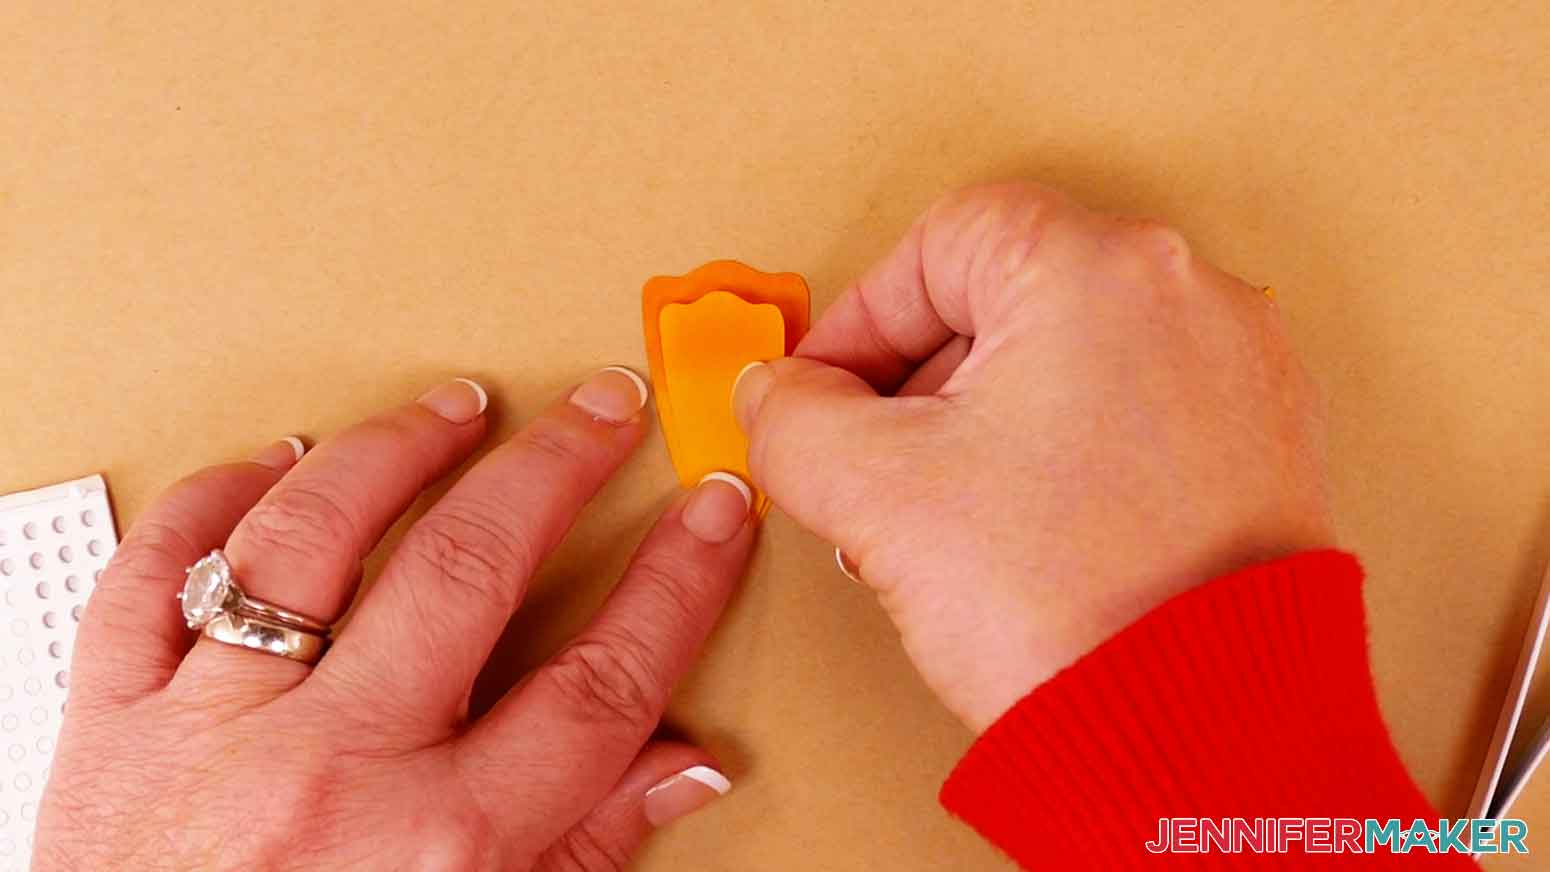
6. Place foam adhesive on the back of the petal pieces (pieces C and D) and attach them to the flower centers. One will be placed on the left and one on the right, with their edges overlapping slightly in the center.
7. Repeat steps 5 and 6 to assemble the other tulips using pieces E-L.
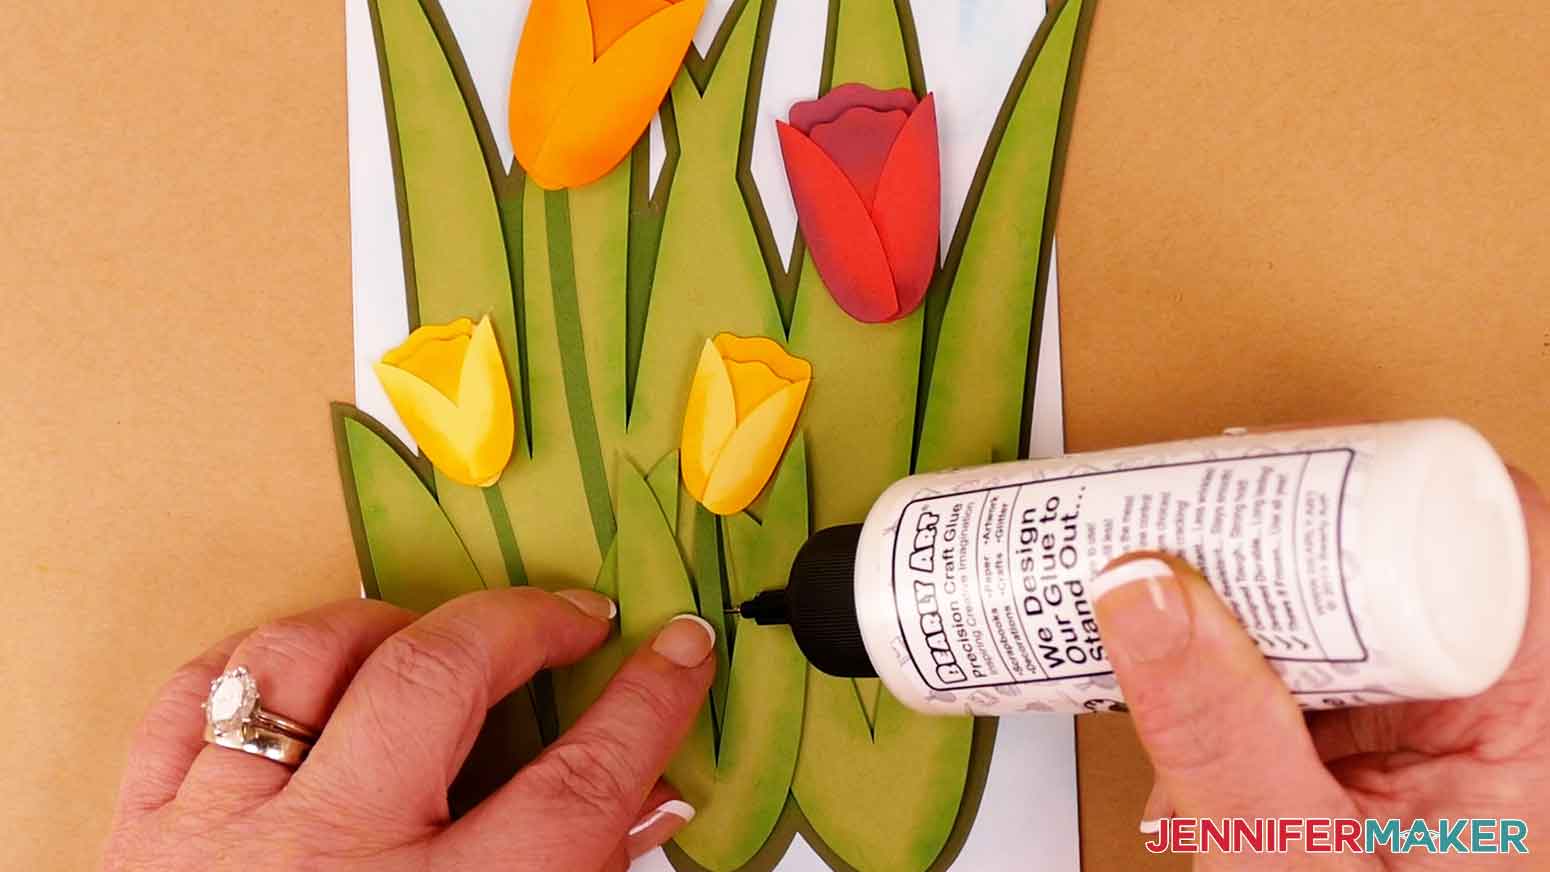
8. Apply some glue on the back of each tulip but not directly at the bottom of the flower so we have room to slip the stem under the flower.
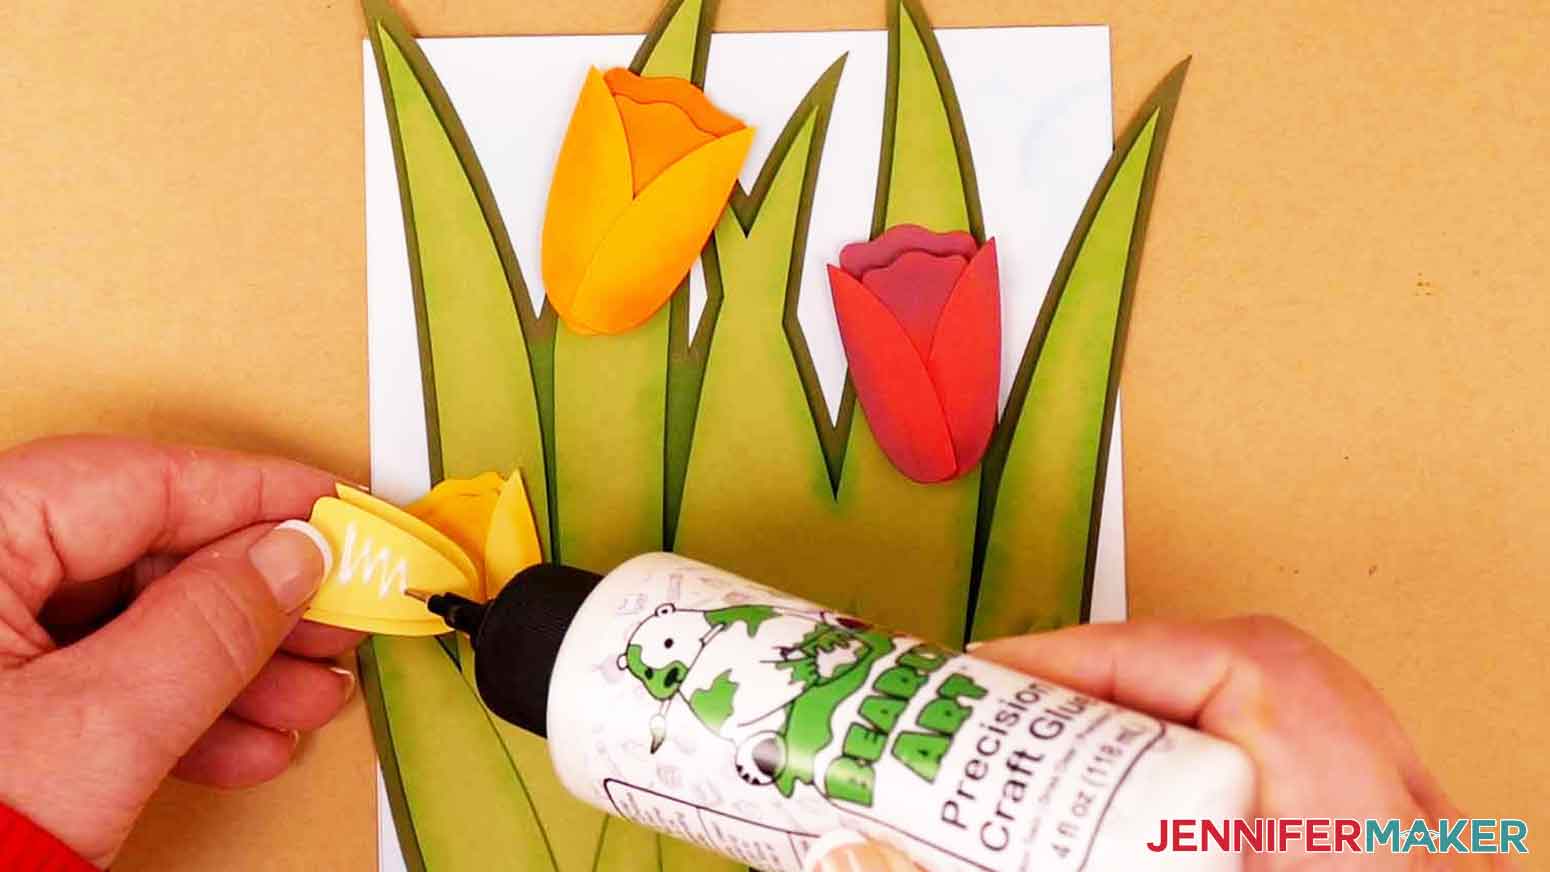
9. The large tulip (mine is orange) will go on the upper left of the card. The medium tulip (mine is red) will go in the upper right area. The smaller two tulips (mine are yellow) are identical and will stagger under the other flowers. Refer to the SVG on your Canvas for placement.
10. Place the edges of the stems (pieces M, N, O, and P) under each flower and angle them appropriately into the leaves below. Apply a few drops of glue along the back of the stems and secure them in place. The top and bottom of the stems will be under the flowers and under the front leaves.
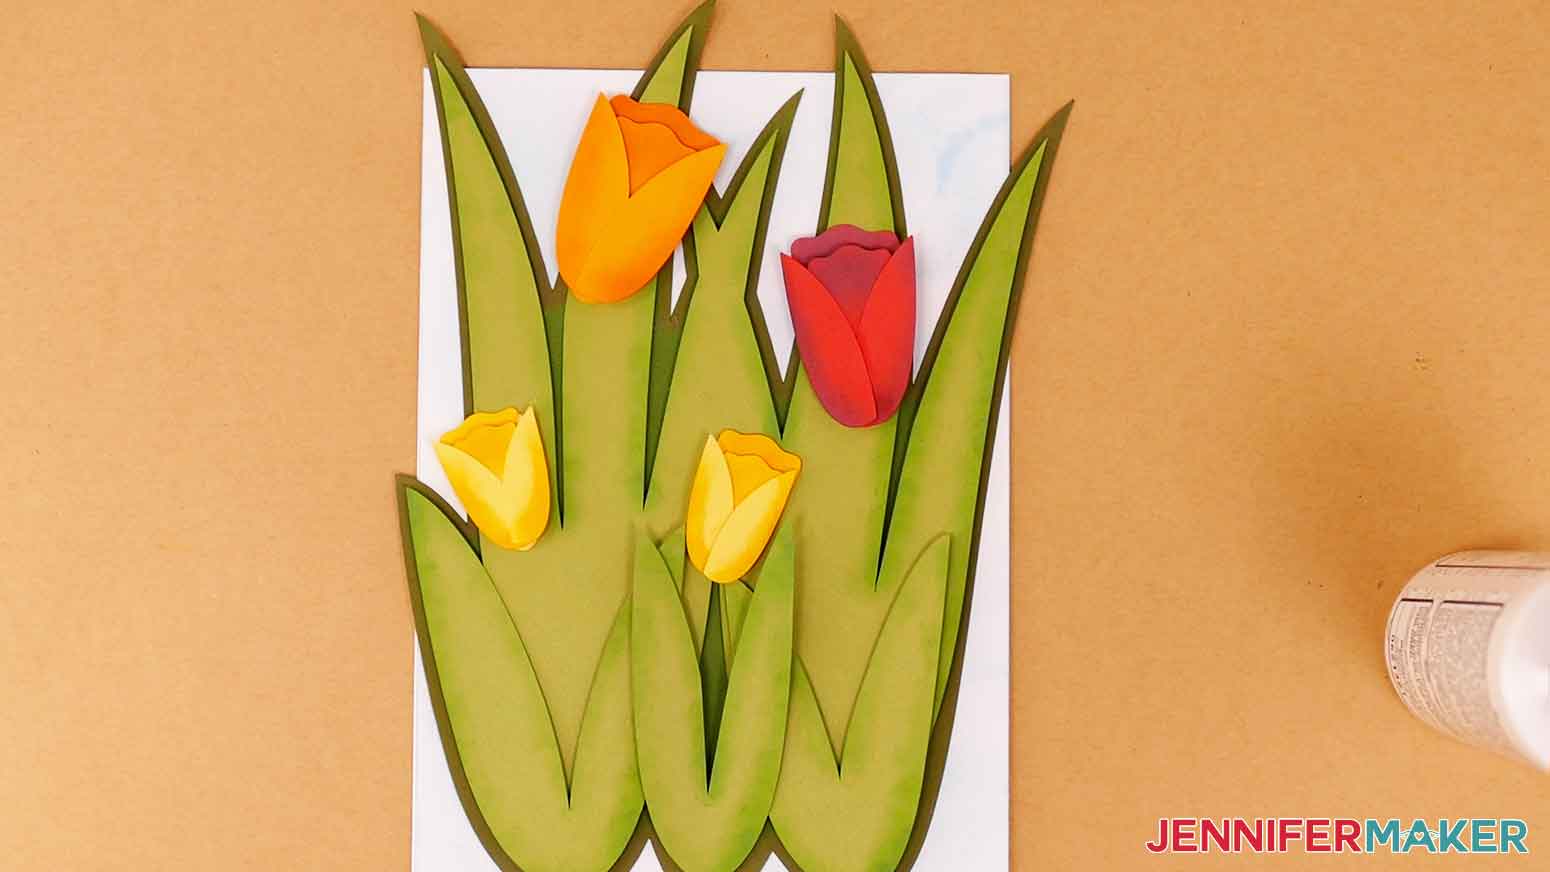
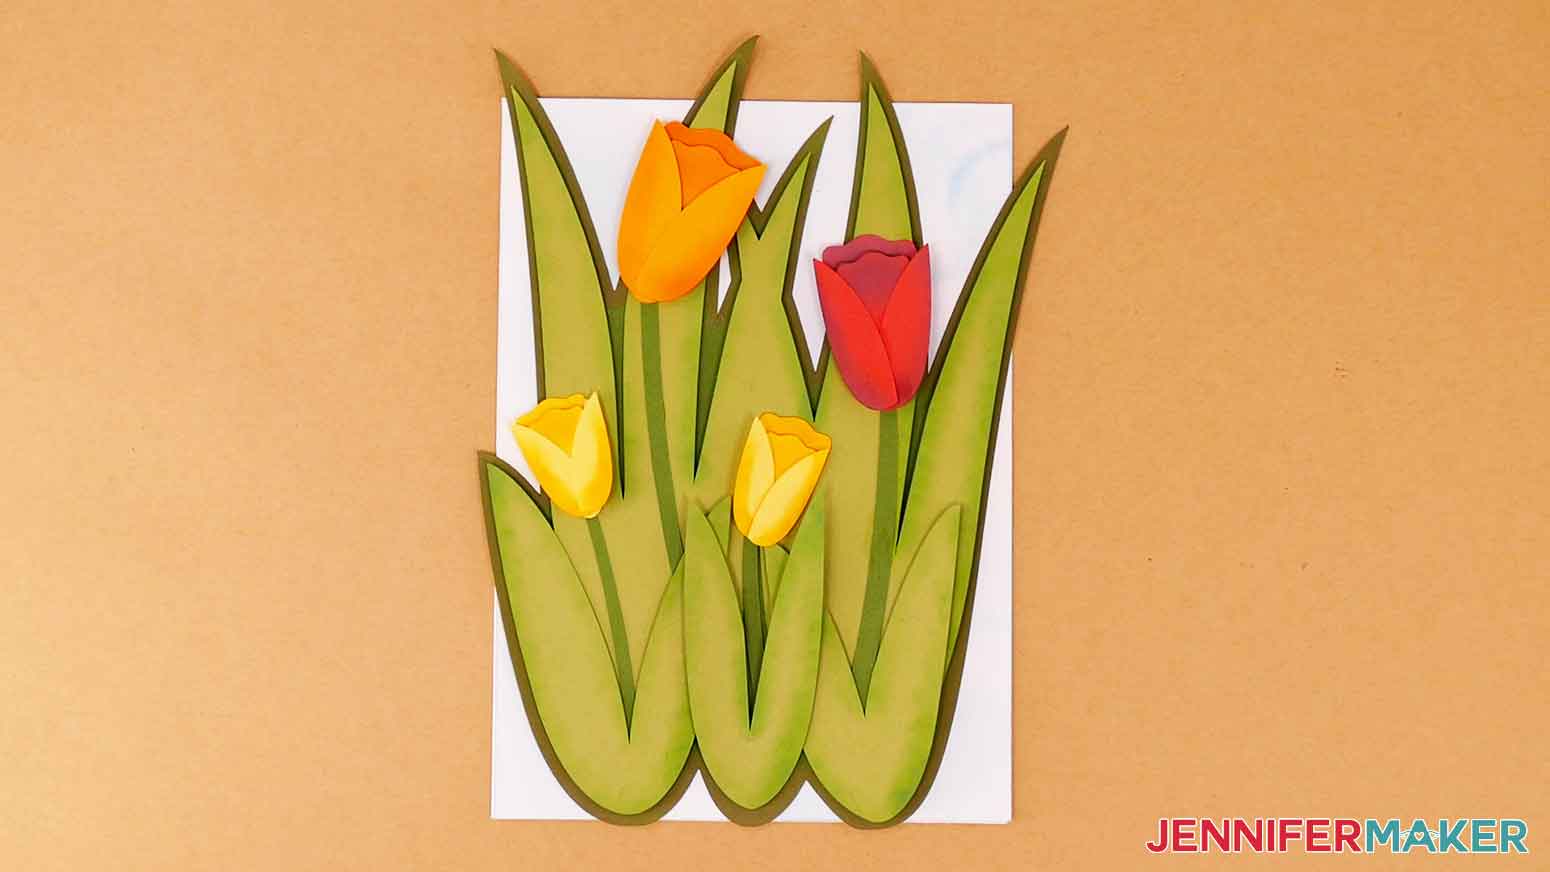
11. Your tulip card is complete!
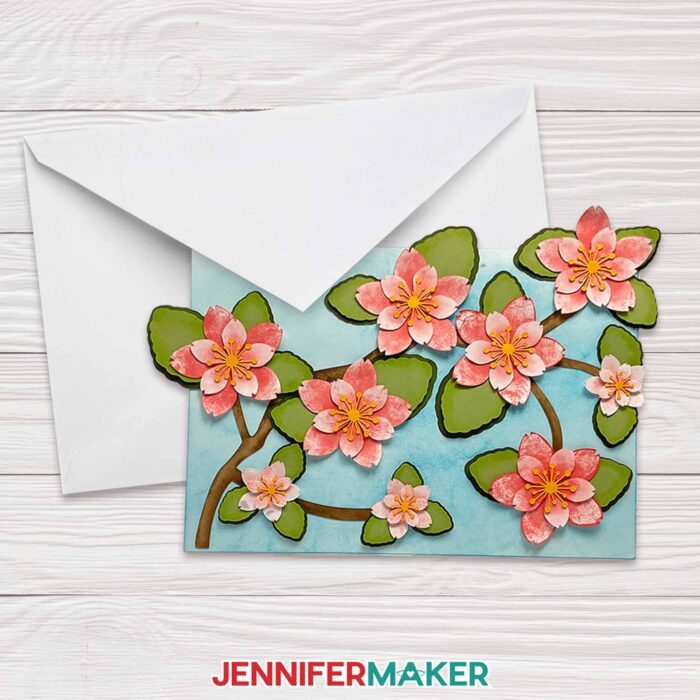
CHERRY BLOSSOMS
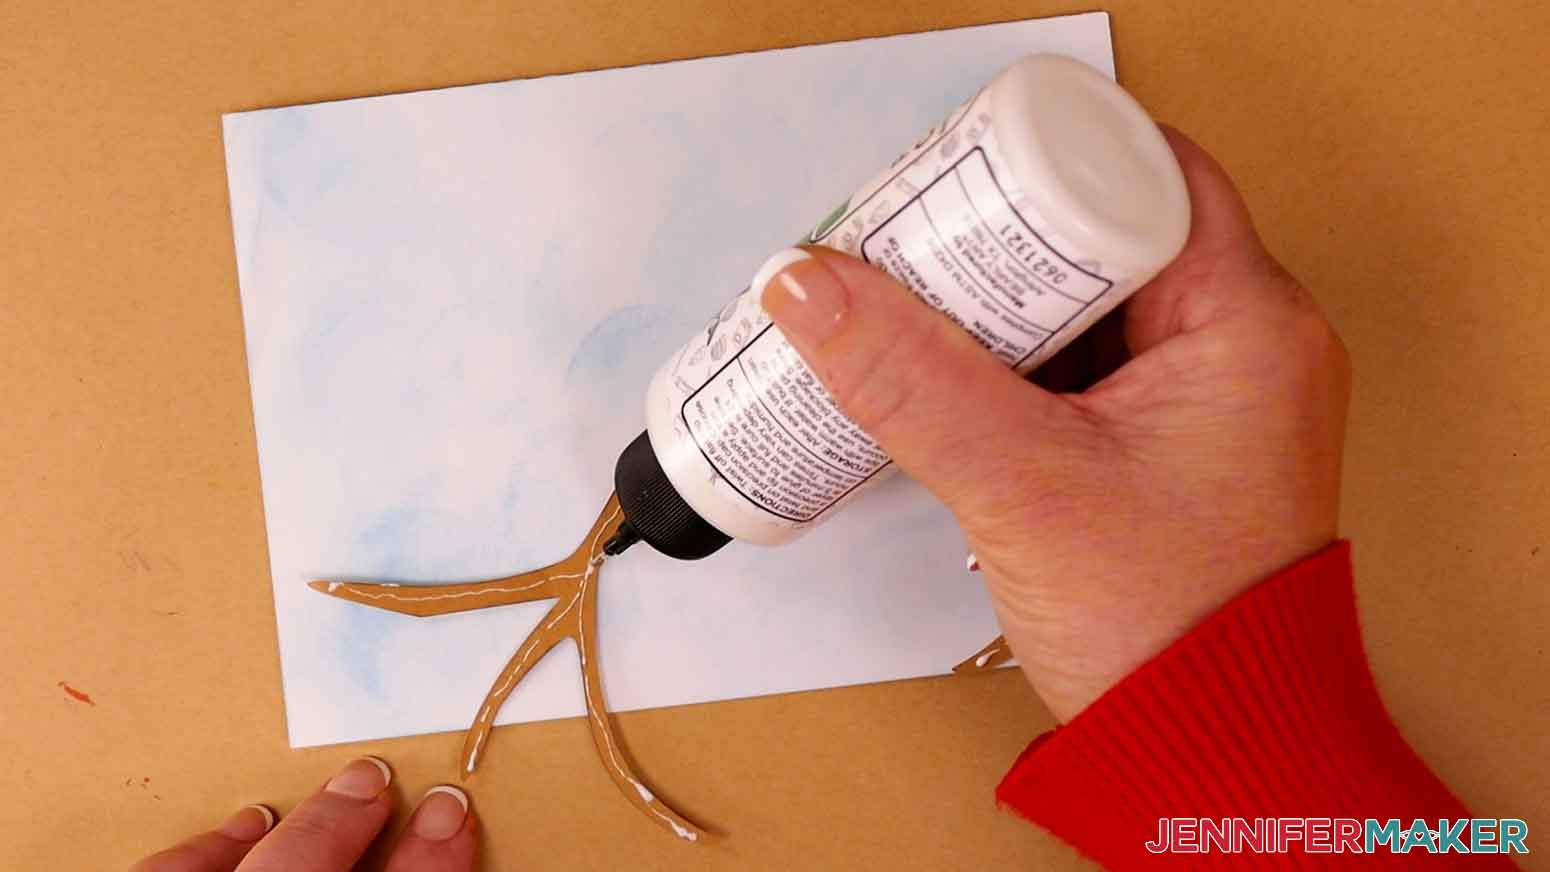
1. Place small dots of glue along the back of the branch (piece I) and secure it to the front of the sky layer.
2. Put foam adhesive on the back of the light green top leaf pieces (pieces G). I put one adhesive circle on each leaf.
TIP: A weeding tool is helpful in removing the adhesive covers.

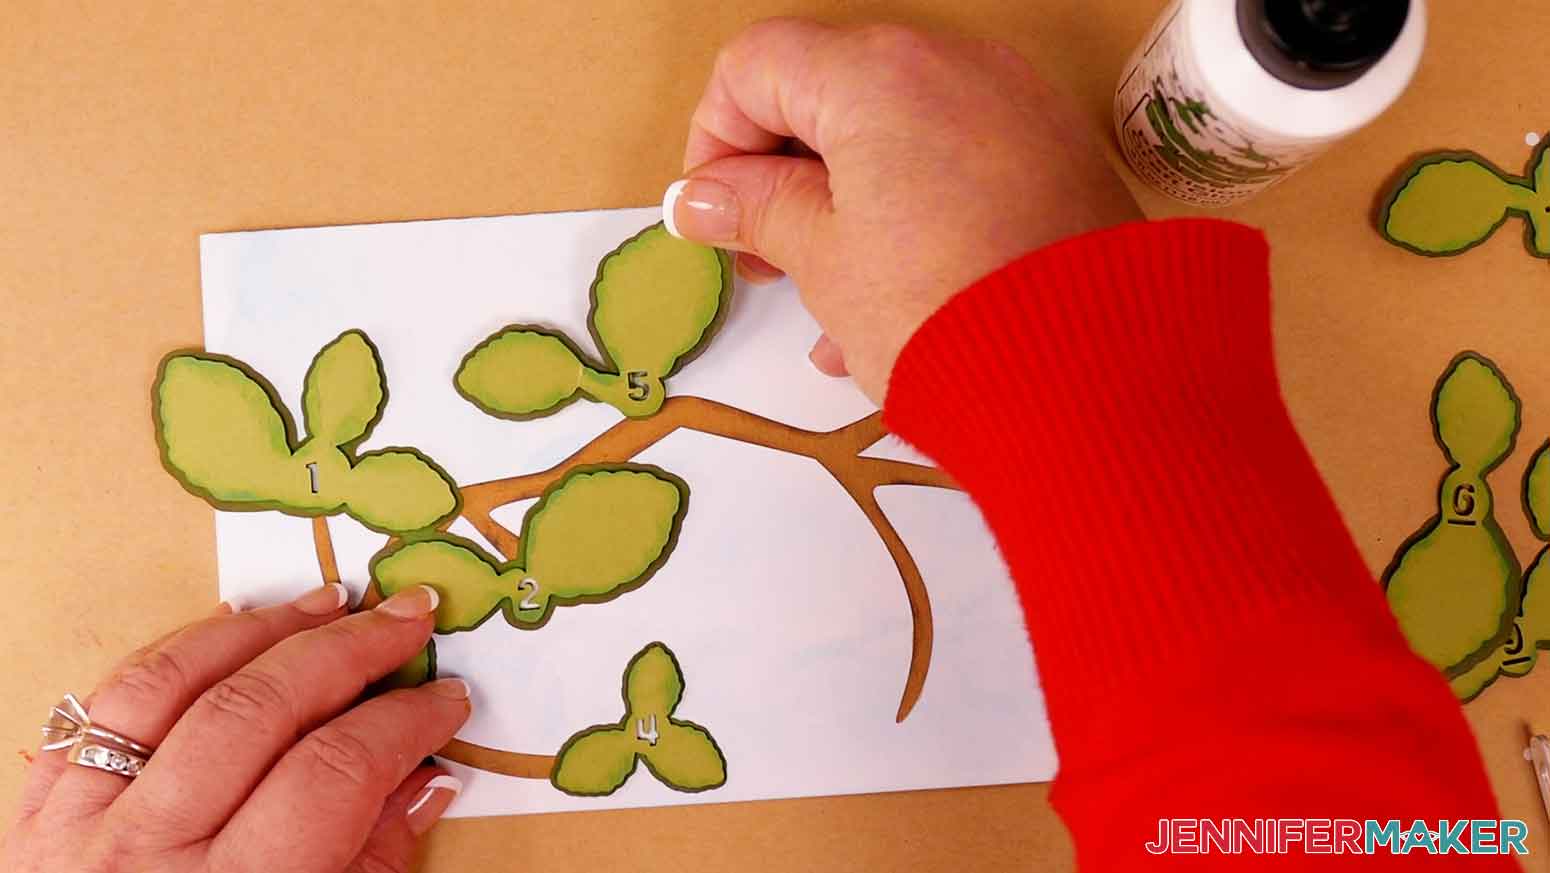
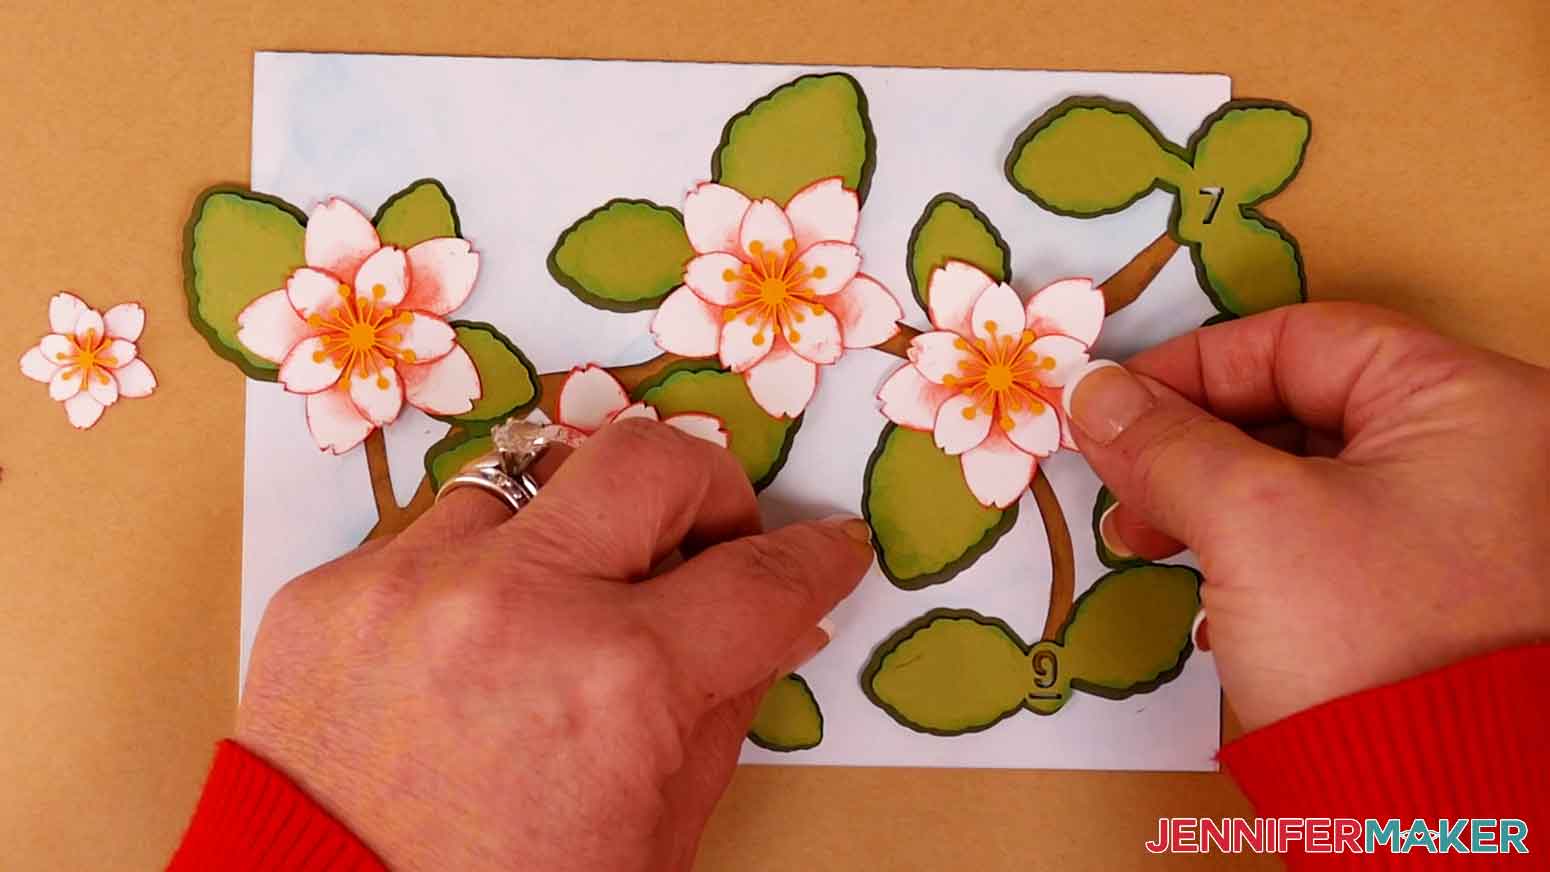
3. Place the light green top leaves (pieces G) on to the dark green bottom leaves (pieces H). Align the numbers for correct placement.
4. Apply glue to the back of each of the dark green bottom leaves. Press them on to the branch. Refer to page 5 in the reference PDF for leaf placement.
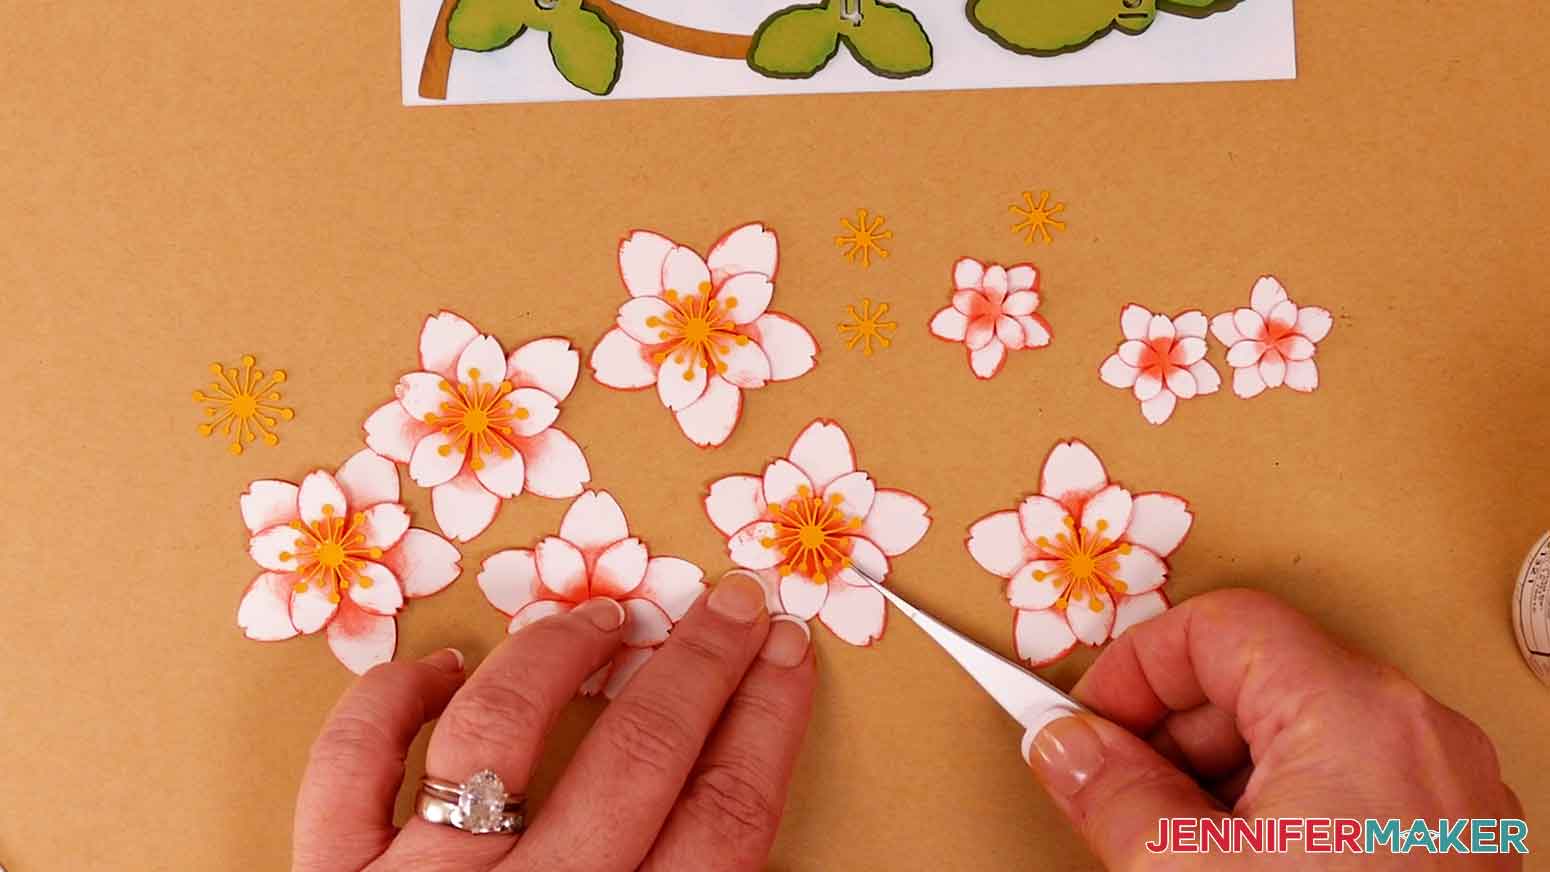
5. There are four sizes of cherry blossom petals. The two largest pieces (pieces A and B) will be attached in pairs to make six large flowers. The two smallest pieces (pieces D and E) will be attached in pairs to make three small flowers.
6. Place one foam adhesive circle on the back side of the top petals (pieces B and E) and attach them to the front of the bottom petals (pieces A and D). Stagger the petals between each other.

7. Place a small dab of glue on the back of each stamen (pieces C and F) and attach it to the center of the petals.
8. Place glue on the back of each flower and attach them to the leaves. Small flowers go on leaves 3, 4, and 8. Large flowers go on leaves 1, 2, 5, 6, 7, and 9.
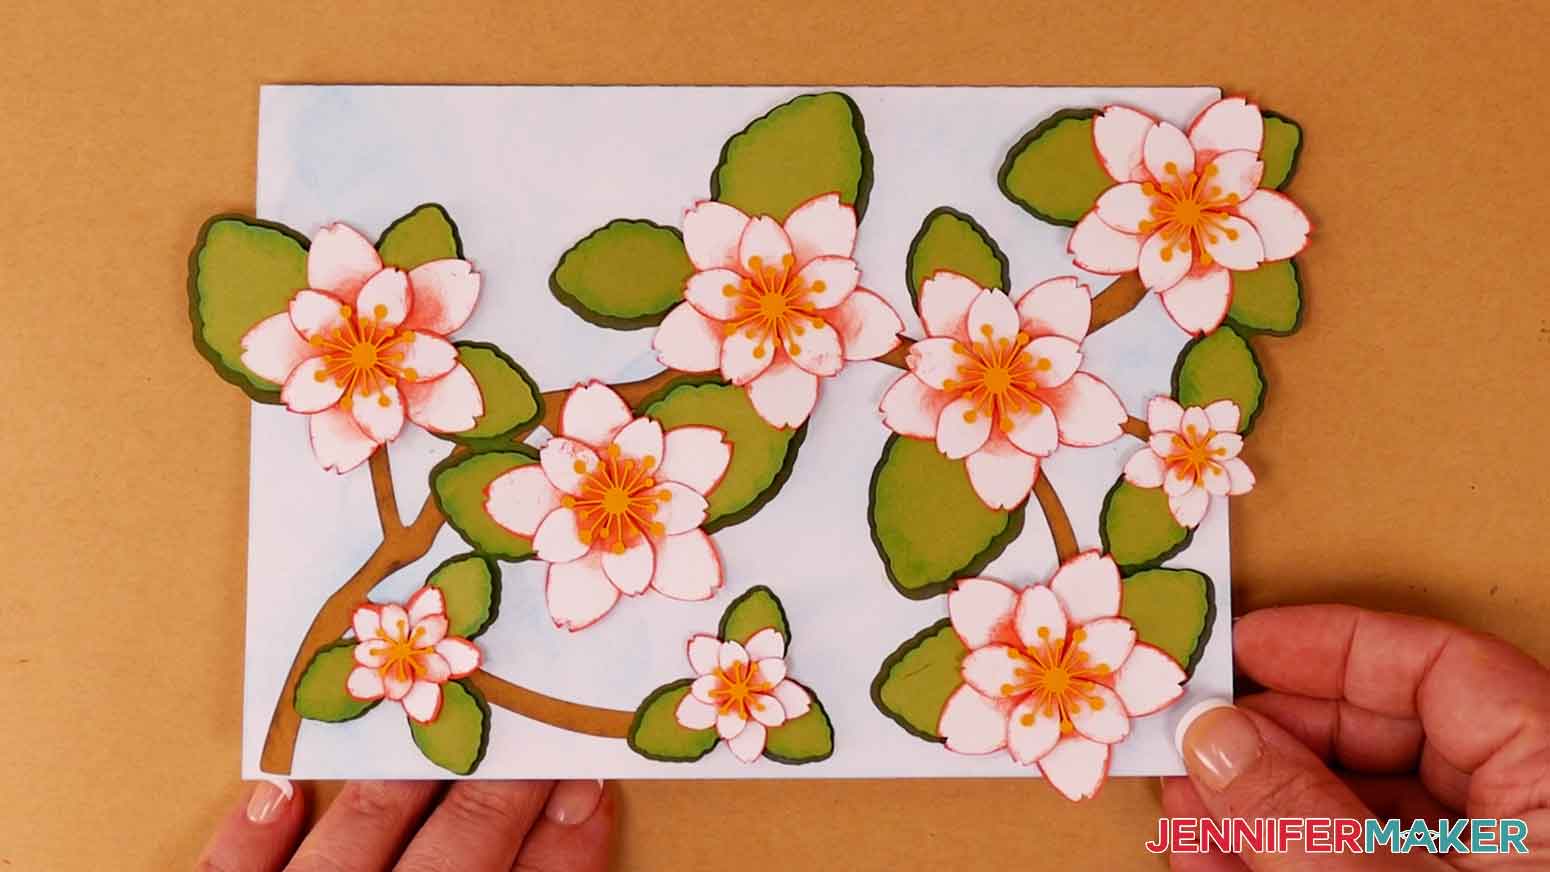
9. Your cherry blossom card is complete!
STEP 5: SHOW IT OFF!
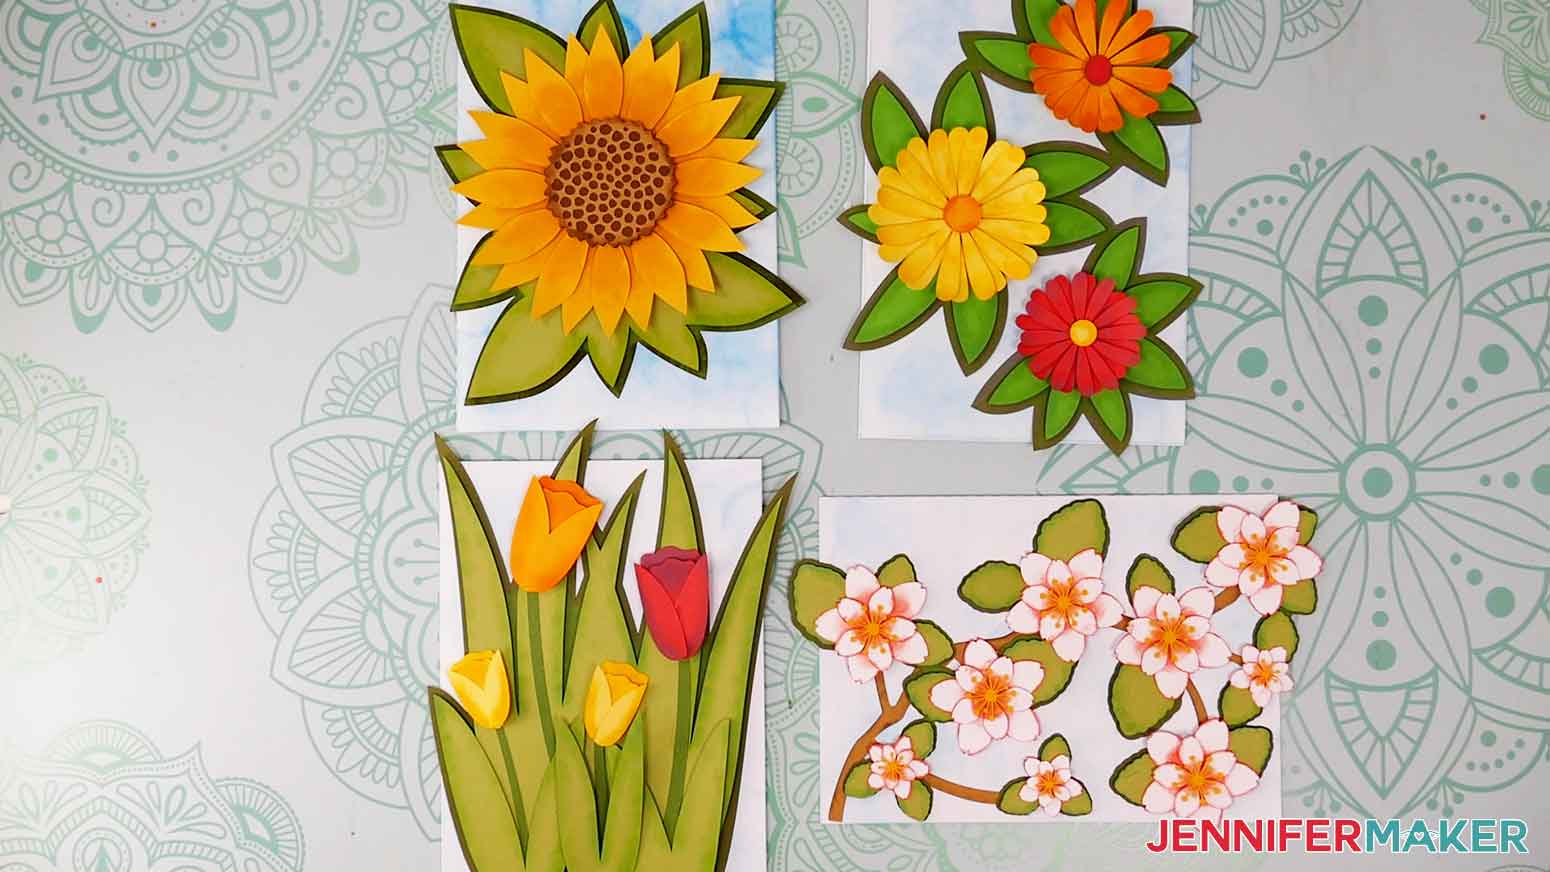
Here is what all of my finished inked cardstock cards look like!
Here is a comparison of my sunflower cards with both types of ink.
Notes
Distress Inks:
Mermaid Lagoon (blue) - all skies
Forest Moss (dark green) - all lower leaf layers
Twisted Citron (light green) - all top leaf layers
Aged Mahogany (dark red) - red daisy, red tulip
Carved Pumpkin (orange) - orange daisy, orange tulip
Fossilized Amber (yellow) - yellow daisy, yellow tulip, sunflower
Abandoned Coral (pink) - cherry blossoms
Ground Espresso (brown) - sunflower center, cherry blossom branch
Distress Oxides:
Tumbled Glass (blue) - all skies
Forest Moss (dark green) - all lower leaf layers
Mowed Lawn (light green) - all top leaf layers
Aged Mahogany (dark red) - red daisy, red tulip
Ripe Persimmon (orange) - orange daisy, orange tulip
Mustard Seed (yellow) - yellow daisy, yellow tulip, sunflower
Abandoned Coral (pink) - cherry blossoms
Ground Espresso (brown) - sunflower center, cherry blossom branch
Finished Sizes
The card bases are 5” x 7” but will be larger with the leaf overhang. These are the fully assembled finished sizes:
Daises - 5.8” x 7.6”
Tulips - 5.7” x 7.9”
Sunflower - 6” x 7”
Cherry Blossoms - 8” x 5.3”
Answers to Your Questions About How to Ink Cardstock Edges
Q. What can I use to apply distress ink?
A. The daubers in my materials list are really easy to use, and come in a variety of sizes to cover small or larger areas. I’ve also experimented with makeup sponges and those work great too.
Q: How do you ink the edges of cardstock using distress oxide? How do you use distress ink on edges?
A: The process for using distress ink or distress oxide on cardstock edges is very similar. I highly recommend you watch my video tutorial to get a visual of my technique. First, pick up some color on the tool, then even it out by swirling on some copy paper. Apply the ink to the outer edge of the cardstock with little swirls. If it looks dark or harsh, don’t worry — you can blend it!
Q: What is ink blending? How do you blend distress inks?
A: Watch my video tutorial to see my technique! Pick up more color on your dauber (or makeup sponge) as needed. Gently blend the ink towards the center of the cardstock using a soft, circular motion. Remember, you can always add more but you can’t take it away!
Q: Which is better distress ink or oxide?
A: I share my opinion on which is better in the video, but I will say that they are different materials that can be used in different (or similar) ways. Distress oxide is more bold and vivid, while distress ink gives a similar effect but with a slightly more muted look, a kind of transparent effect. Which, depending on the project, you may like one over the other. In short — it’s really personal preference.
Q. How do you make creases in cardstock?
A. To make sharp creases in your cardstock like when making cards and other papercrafts, first use a bone folder or a ruler to make the fold with a nice, straight edge. Then use a large scraper tool, to run over the crease and make it nice and crisp. Voila! Perfect creases!
Q. Do you have any other card designs I can ink?
A. I sure do! Some projects that come to mind are my holiday manor pop-up card, tea bag holder card, pop-up heart rainbow card, autumn owl shadow box card, Christmas tree shadow box card, and so many more that you can find on my blog!
Get my free SVG files to make layered flower cards!
I’d love to see YOUR amazing inked cardstock creations! Please share a photo in our Facebook group or tag me on social media with #jennifermaker.
Love,

Want to remember this? Save this tutorial on How to Ink Cardstock Edges to your favorite Pinterest Board!