
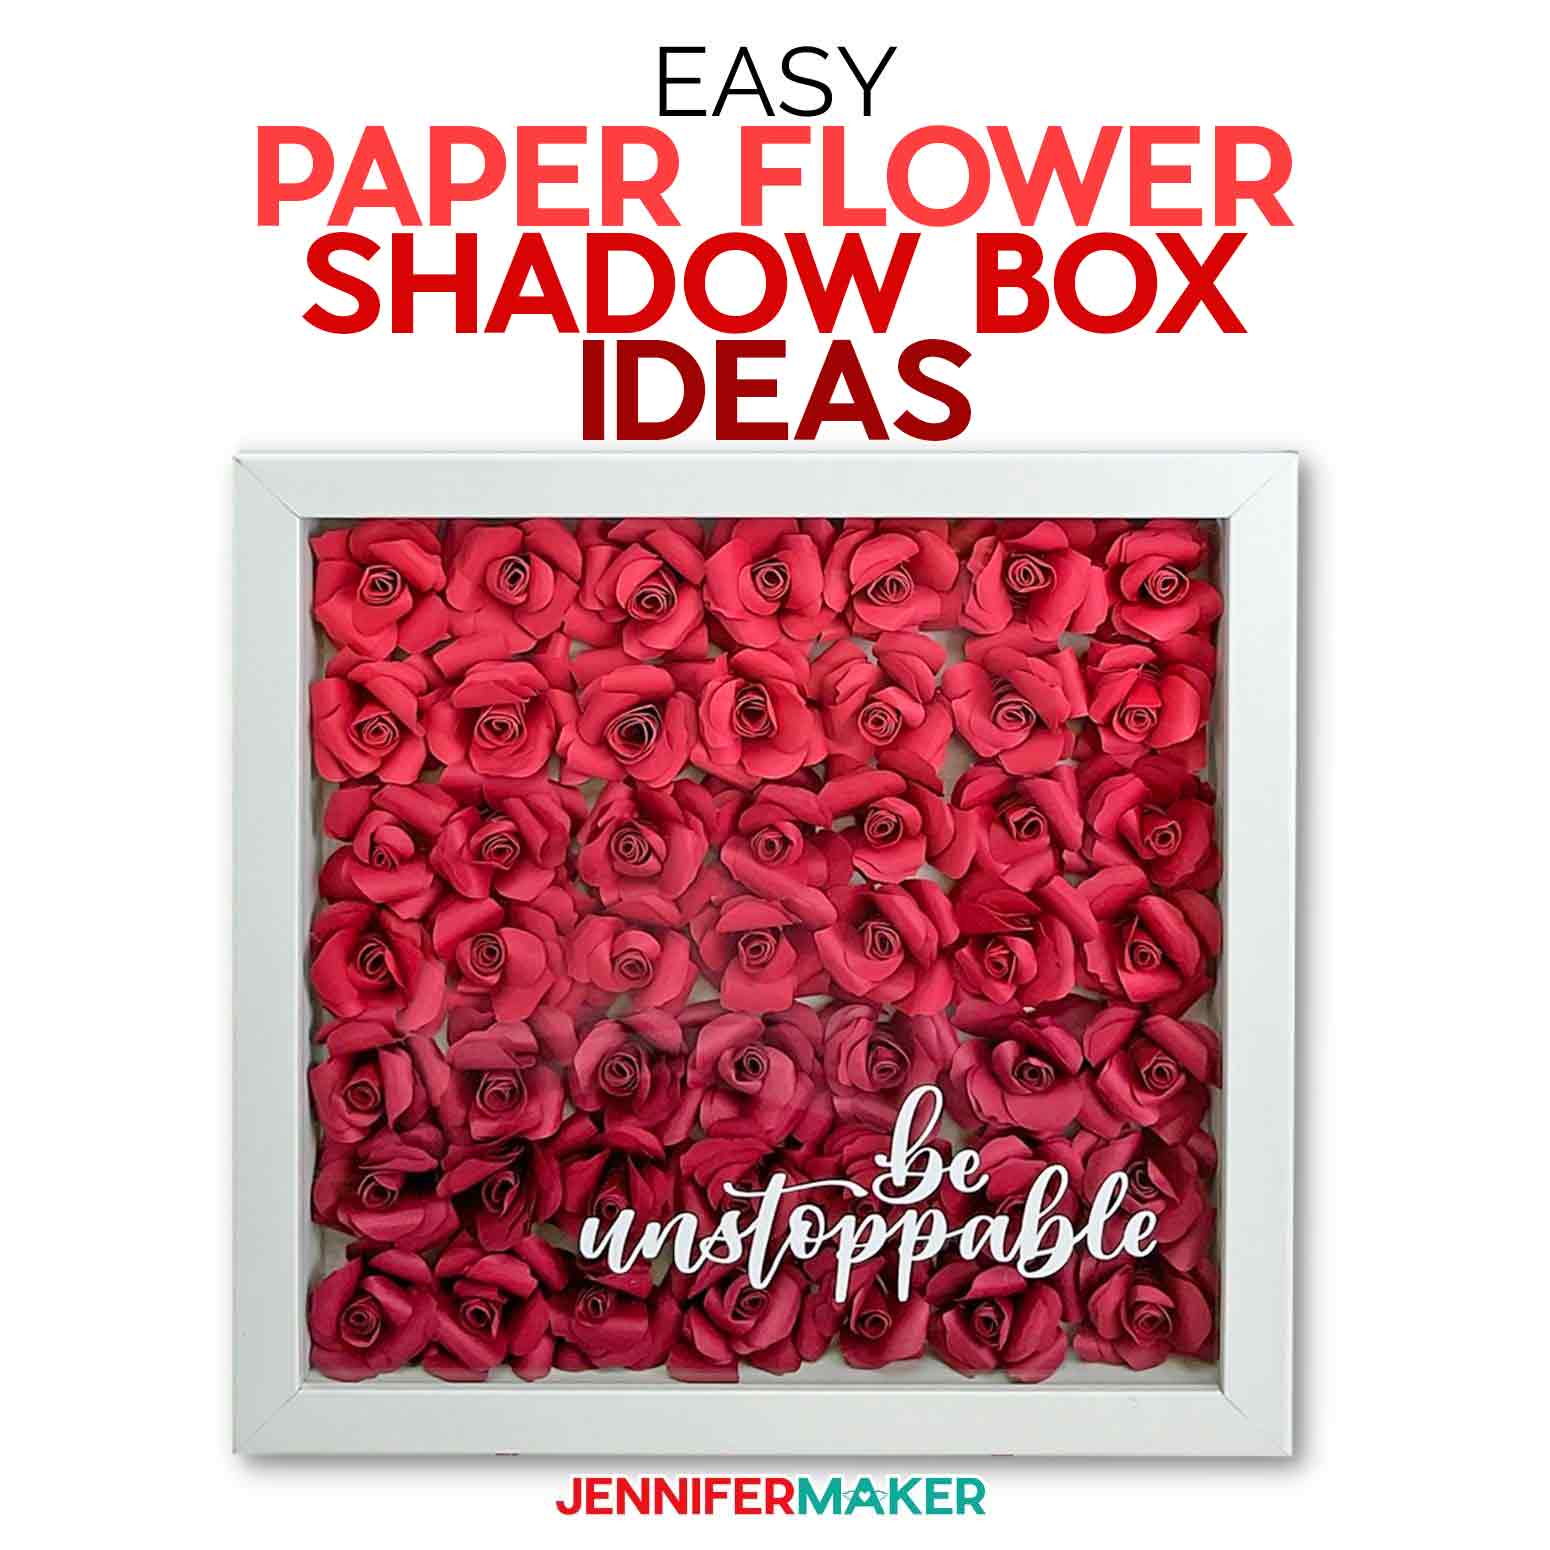
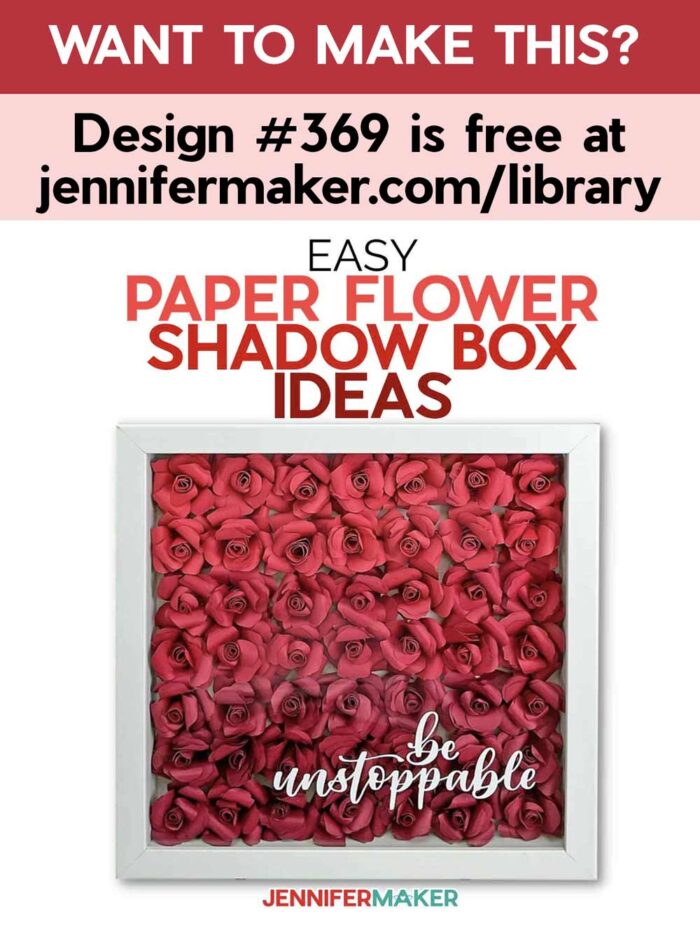
Get the most amazing paper flower shadow box ideas with our step-by-step tutorial and designs!
One of the first things I ever made with my Cricut was a paper flower. I fell in love with these pretty paper creations and began to design paper flowers myself. I picked a rose from the bush beside my house, pulled off the petals and traced them one at a time to use as a template in my design software. I wanted to make my rose as realistic as possible. From there I was hooked and since then I’ve made all kinds of paper flower and projects to go with them, and today I’m showing you how to make one of my favorite and sharing some of my best paper flower shadow box ideas!
Want to save this project? Enter your email below and we’ll send the project straight to your inbox.
Watch the full step-by-step tutorial video on my paper flower shadow box ideas:

Paper flower shadow boxes are one of THE most popular paper flower projects! And they can be made with just a few supplies. It’s really super simple, but oh so beautiful.
Paper flower shadow boxes remind me of those beautiful high-end boxes of roses. They are just as beautiful BUT there’s one BIG difference! The real ones are really pricey, selling for anywhere from one-hundred dollars to upwards of more than a thousand dollars! Can you imagine?
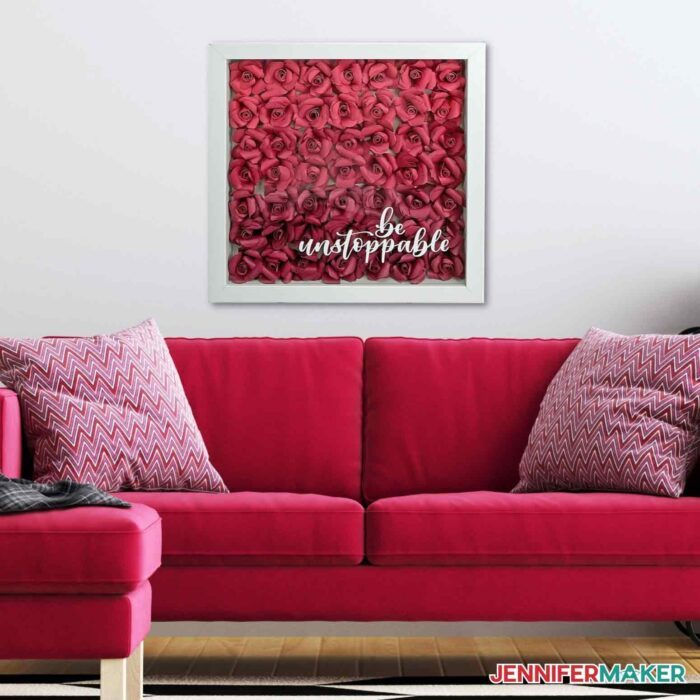
These paper flower shadow box ideas are just as stunning, in my opinion, but so much less expensive!
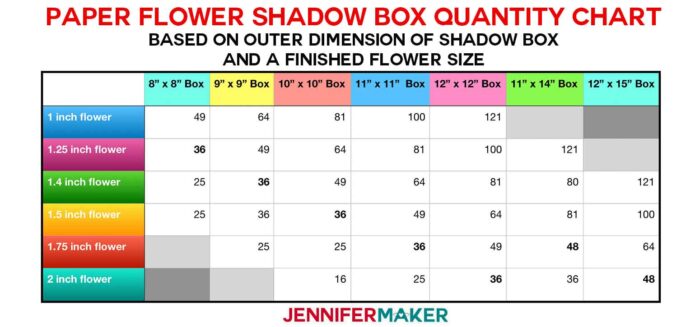
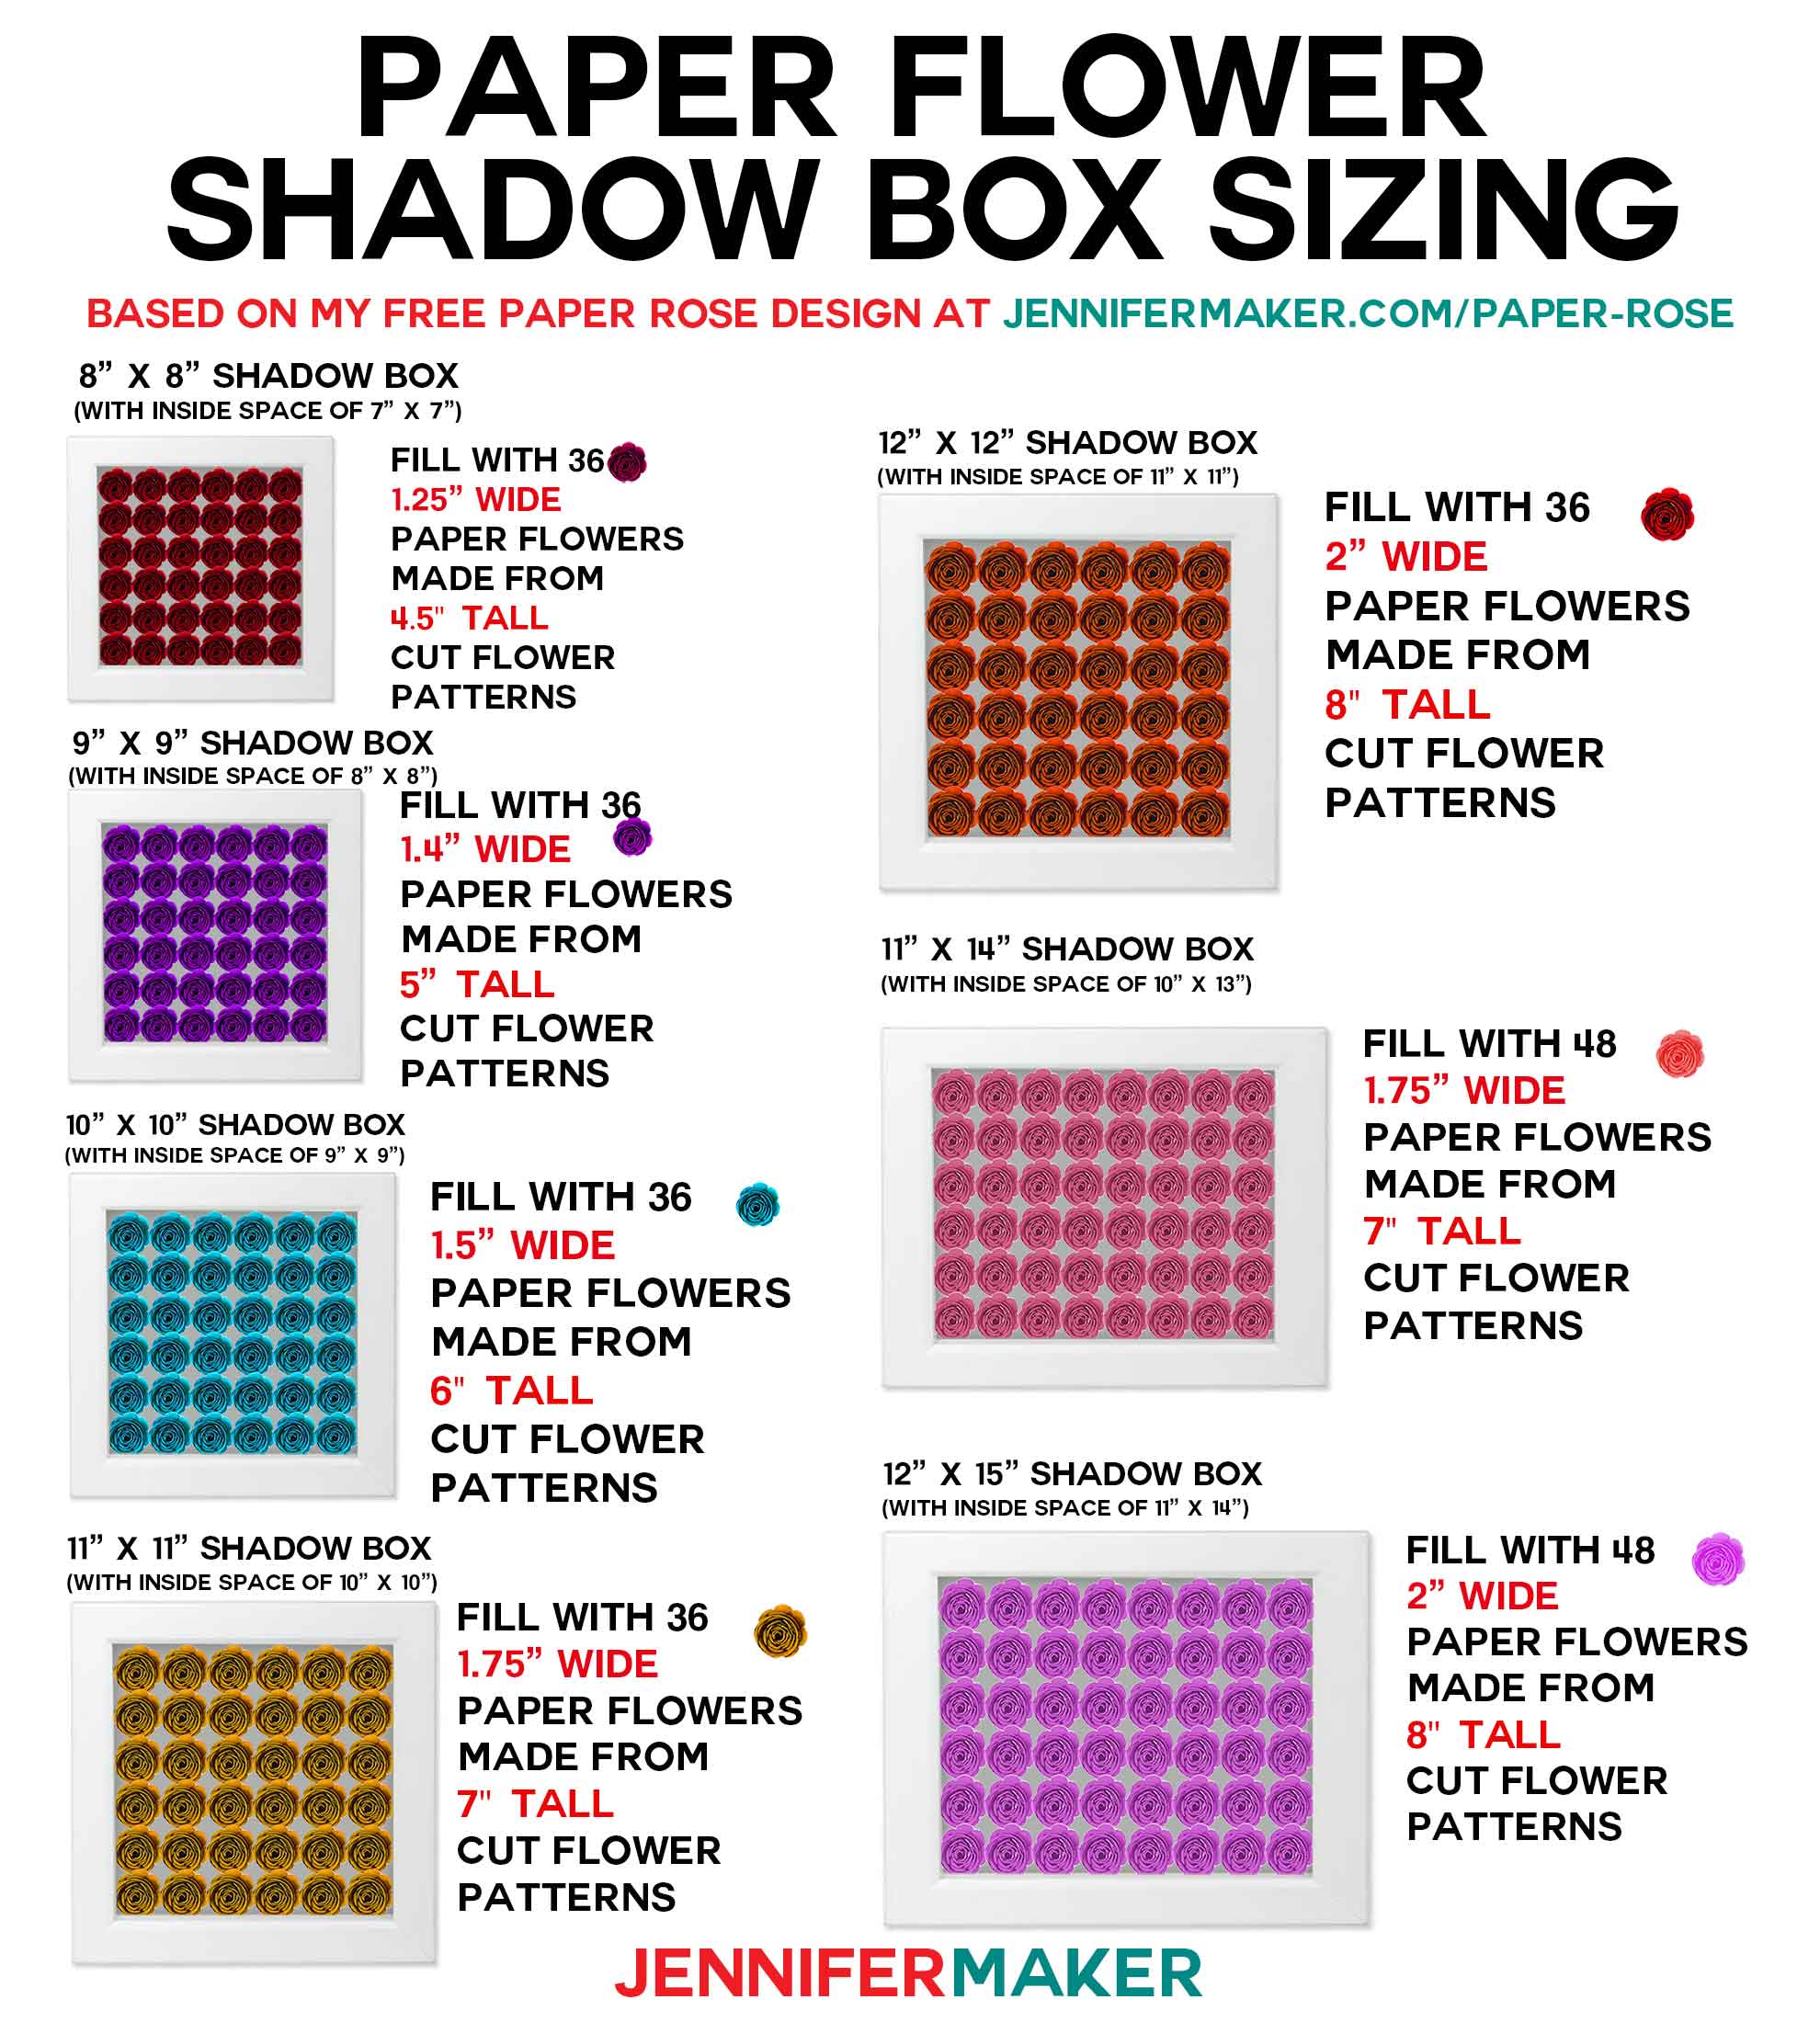
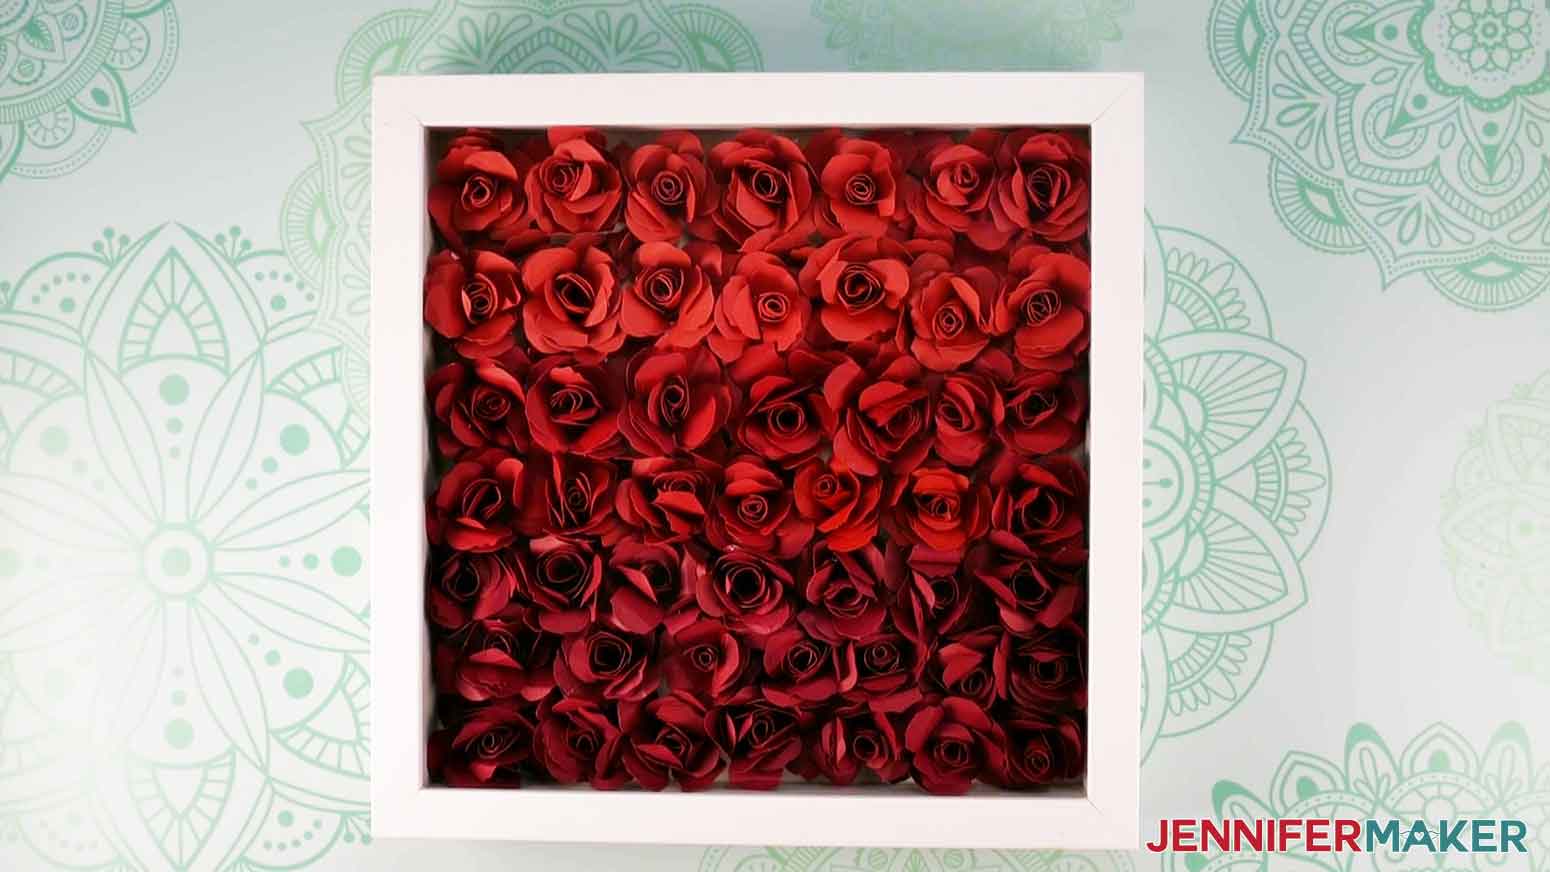
The frameI used to make my paper flower shadow box is 10″ x 10″, but you can really use any size. I’m sharing a really handy cheat sheet with this tutorial that will show you exactly how many roses you will need for a variety of shadow box sizes.

You’ll also need some good quality card stock — I recommend 65 lb. cardstock that is solid core, not white core. Solid core means it’s the same color through and through. If the packaging doesn’t say what color its core is, just turn the paper on its side and check to see if it appears to be the same color or if it looks white. If it’s the same color, it’s solid core!
You’ll also want a quilling tool to wrap your flowers and a dowel to shape the petals, along with a hot glue gun.
I cut my paper roses on a Cricut cutting machine, and I’ll show you how to do that too in this tutorial. For that, you’ll a green machine mat and brayer.
And if you’re going to add a pretty sentiment to your shadow box as I did, you will need some permanent vinyl, transfer tape and a weeding tool.
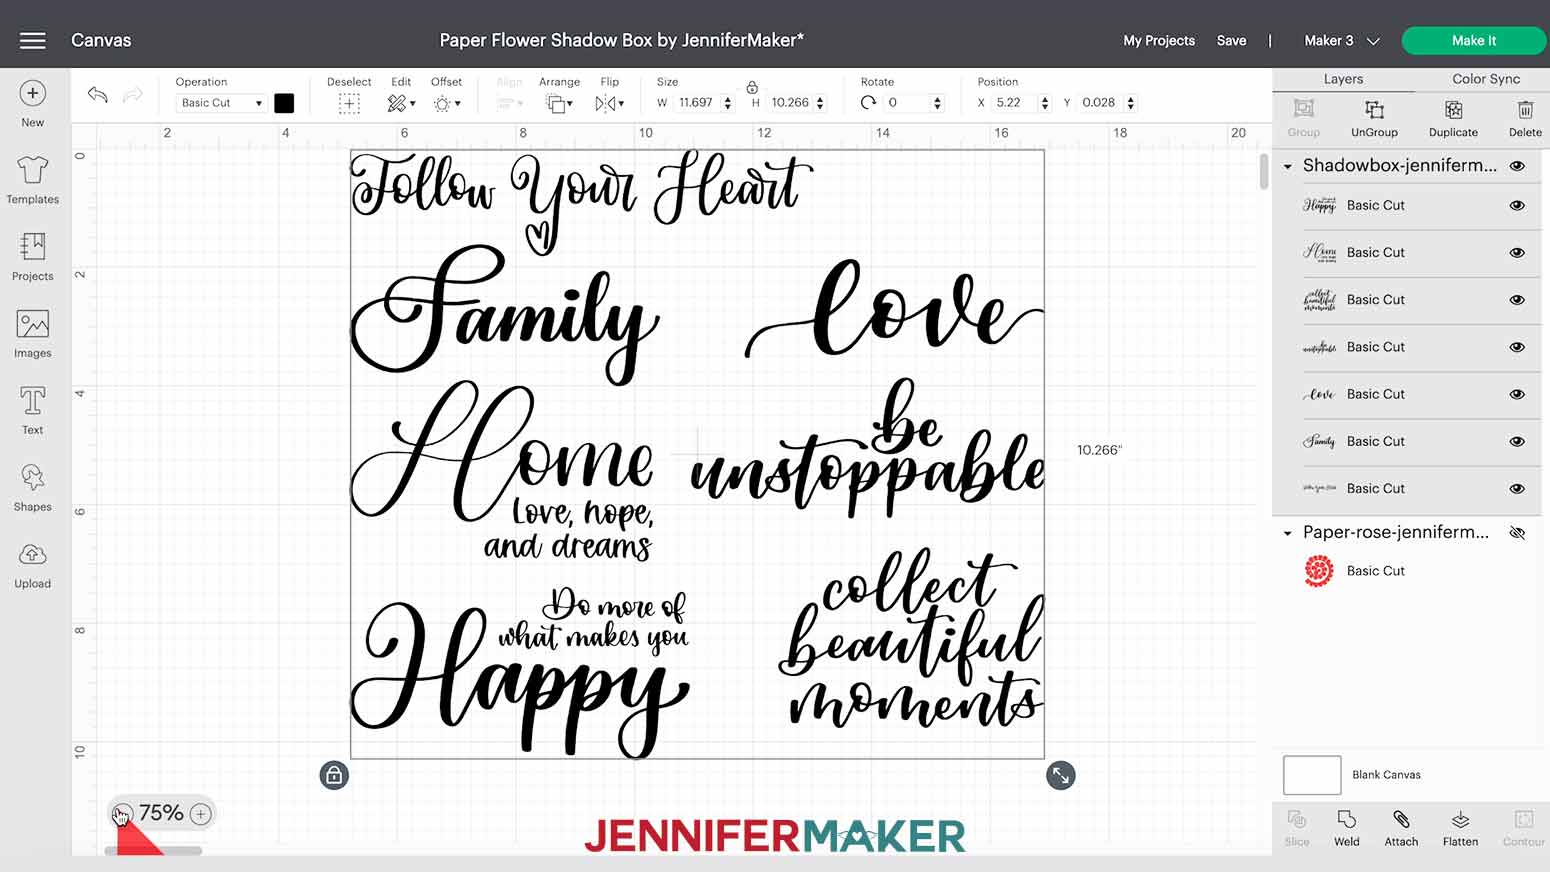
I’ve included some beautiful hand-lettered designs that I think you’ll love putting on your shadowboxes, too!
The full step-by-step tutorial for a 10″ x 10″ shadow box is in my video and on this page, but I know that won’t help everyone, because if you decide to use a different paper flower, you’ll be back at the drawing board. Some paper flowers will roll up tighter or looser than others. What I recommend you do cut out your paper flower of choice using the sizing recommendation in the chart above, then measure the width of the FINISHED paper flower. Now use this chart to see how many flowers you need for a specific size shadow box. Just keep in mind that you may want to move up or down a line based on how tightly or loosely packed you want YOUR paper flower shadow box. I think this will give you a great starting point, though!
And if you’re not familiar with how to roll paper flowers, I have a quick video that explains how to do that here:
Ready to make your own paper flower shadow box? I’m super excited to show you how! This post contains some affiliate links for your convenience (which means if you make a purchase after clicking a link I will earn a small commission but it won’t cost you a penny more)! Read my full disclosure policy.
Materials to Make a 10″ x 10″ Paper Flower Shadow Box
View my Amazon shopping list with the exact items we used to make this project!
- One (1) 10” x 10” Shadowbox Frame
- Twenty-Five (25) Sheets of 65 lb. Cardstock (8.5″ x 11″) — I used different shades of red — if you use 12″ x 12″ paper, you need fewer sheets
- Permanent Vinyl – I used White Smart Vinyl
- Standard Grip Transfer Tape
- A method to cut your cardstock and vinyl – I used the Cricut Maker 3 but you can also use a Maker series, Explore series, Joy series, or Venture cutting machine
- Blue LightGrip Machine Mat or Green StandardGrip Machine Mat (the 12″ x 12″ size)
- Quilling Tool to Roll Flowers (you can also make your own DIY quilling tool with my tutorial)
- One (1) 1/8” Wooden Dowel (to shape petals)
- Hot Glue Gun and three (3) Hot Glue Sticks
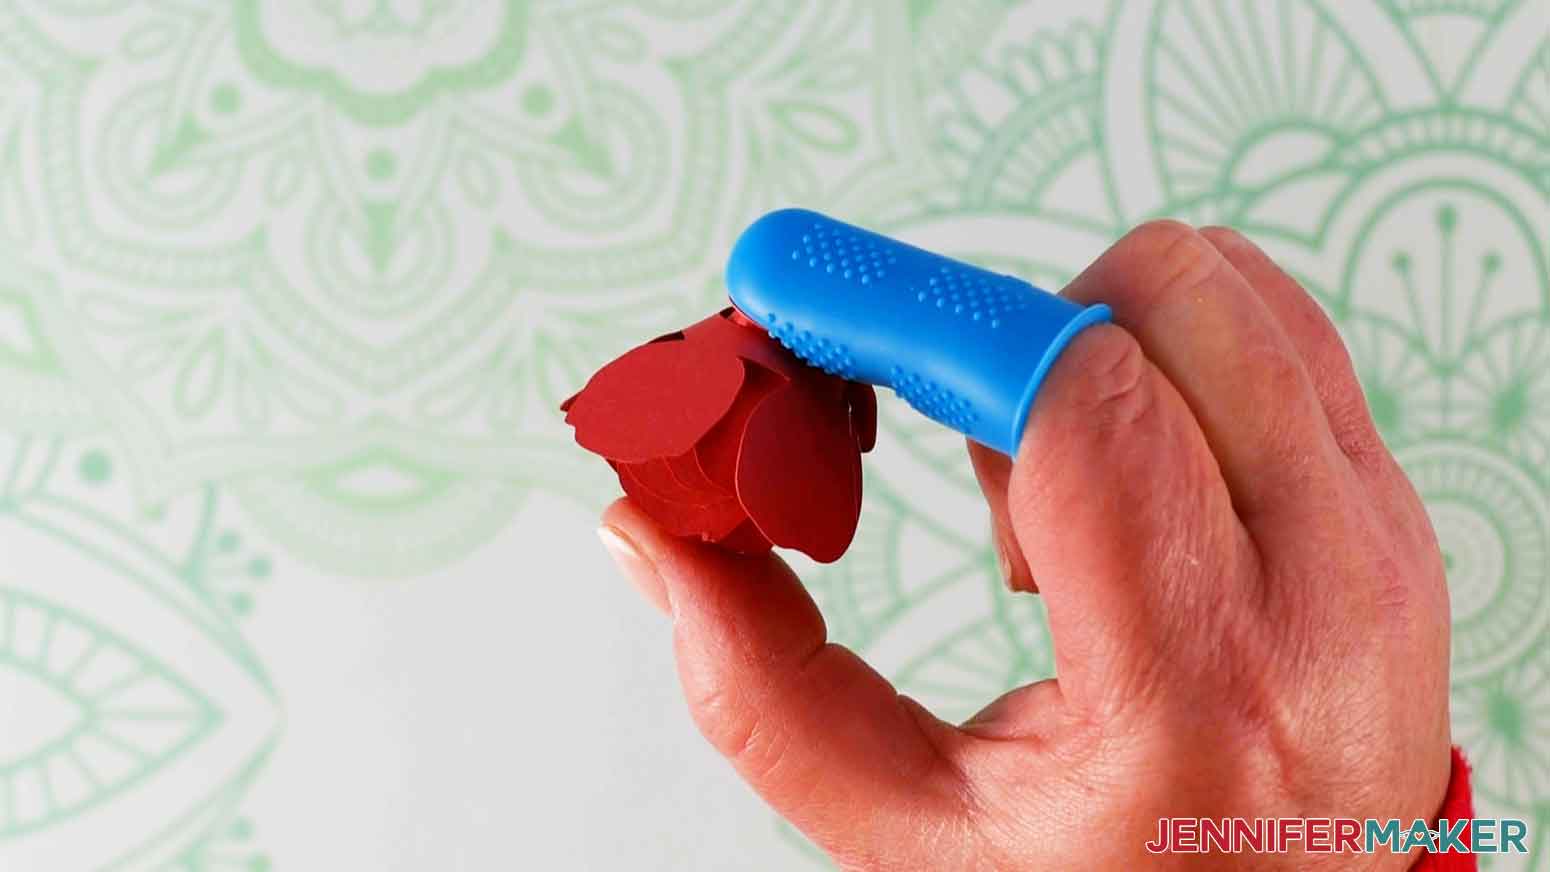
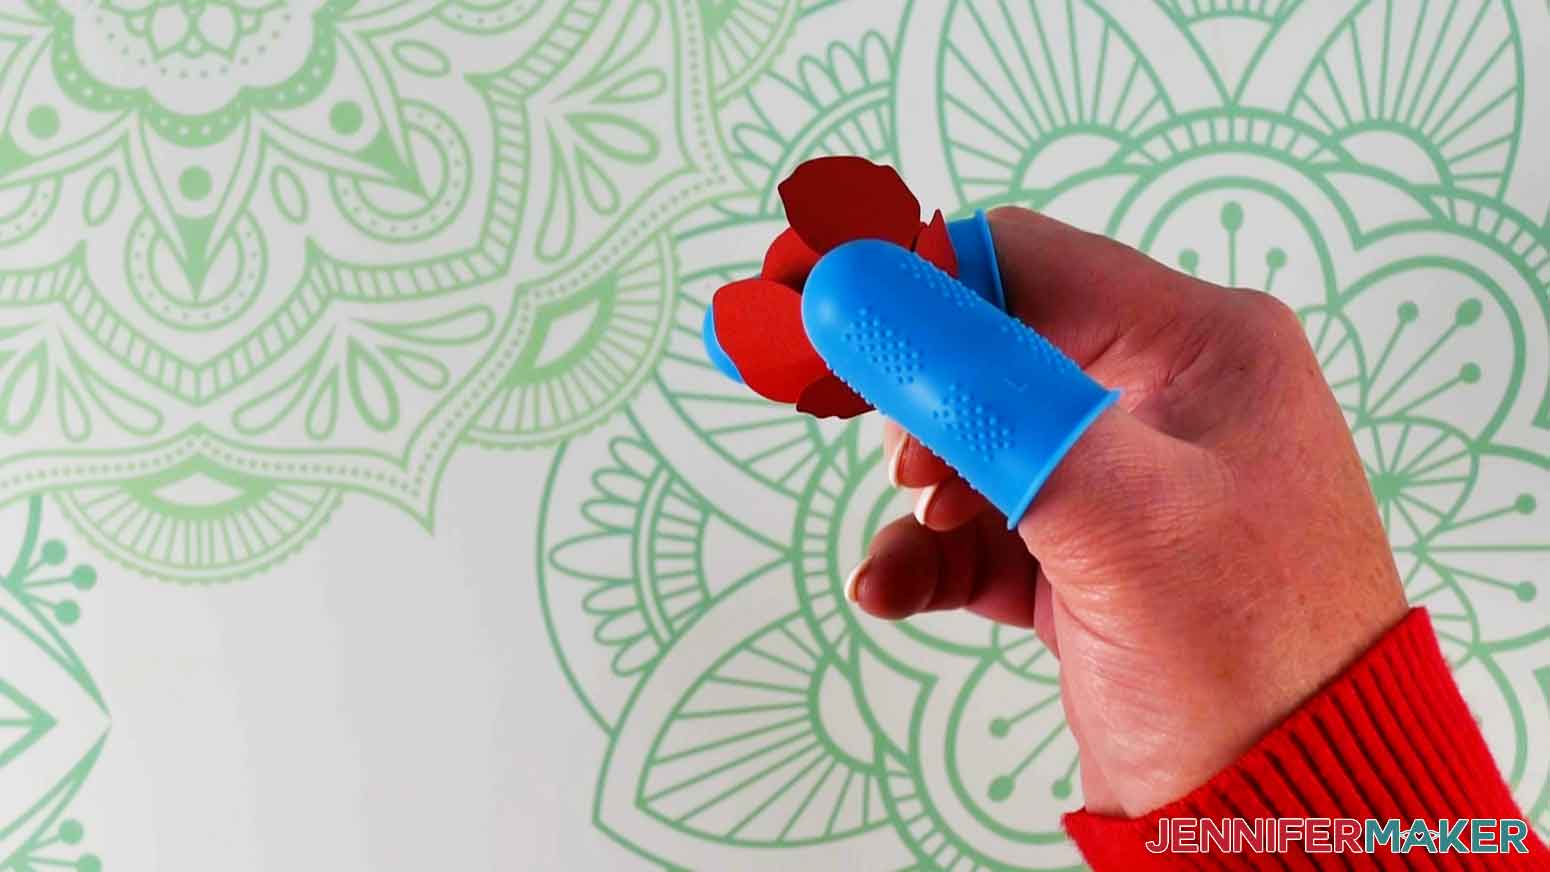
- Finger Guards (optional, to protect your fingers from the hot glue)
- Ruler
- Isopropyl Alcohol
- Coffee Filter or lint free towel
- Scraper Tool
- Brayer (optional)
- Design #369 – My free SVG design files (available in my free resource library—get the password by filling out the form at the bottom of this page)
How to Make a Paper Flower Shadow Box of ANY Size!
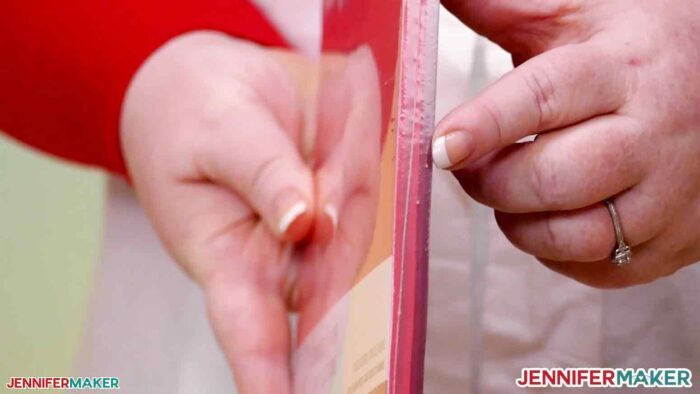
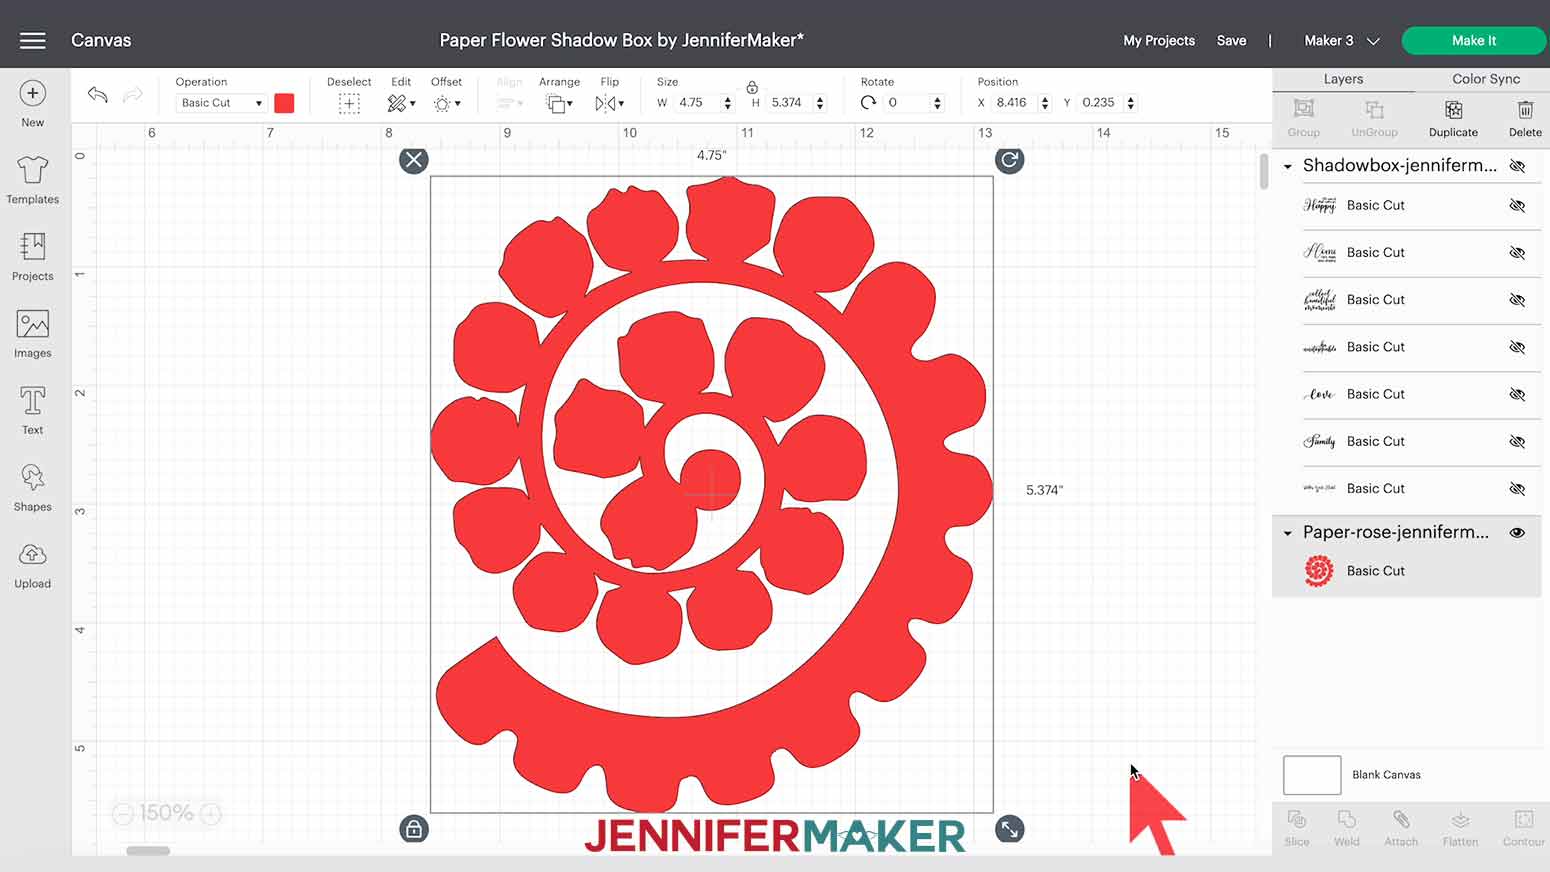
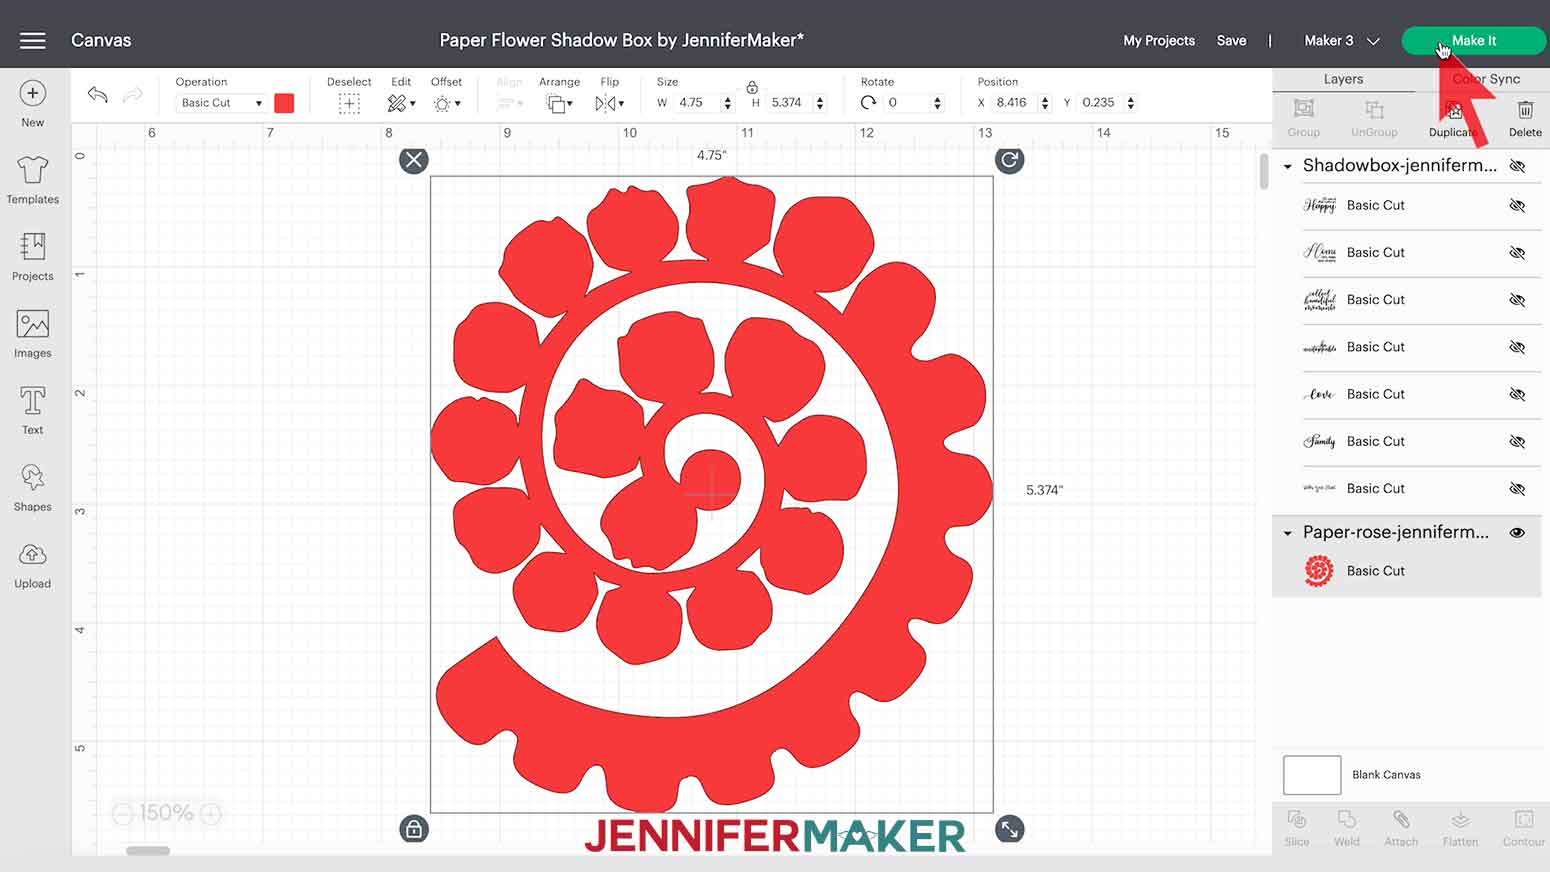
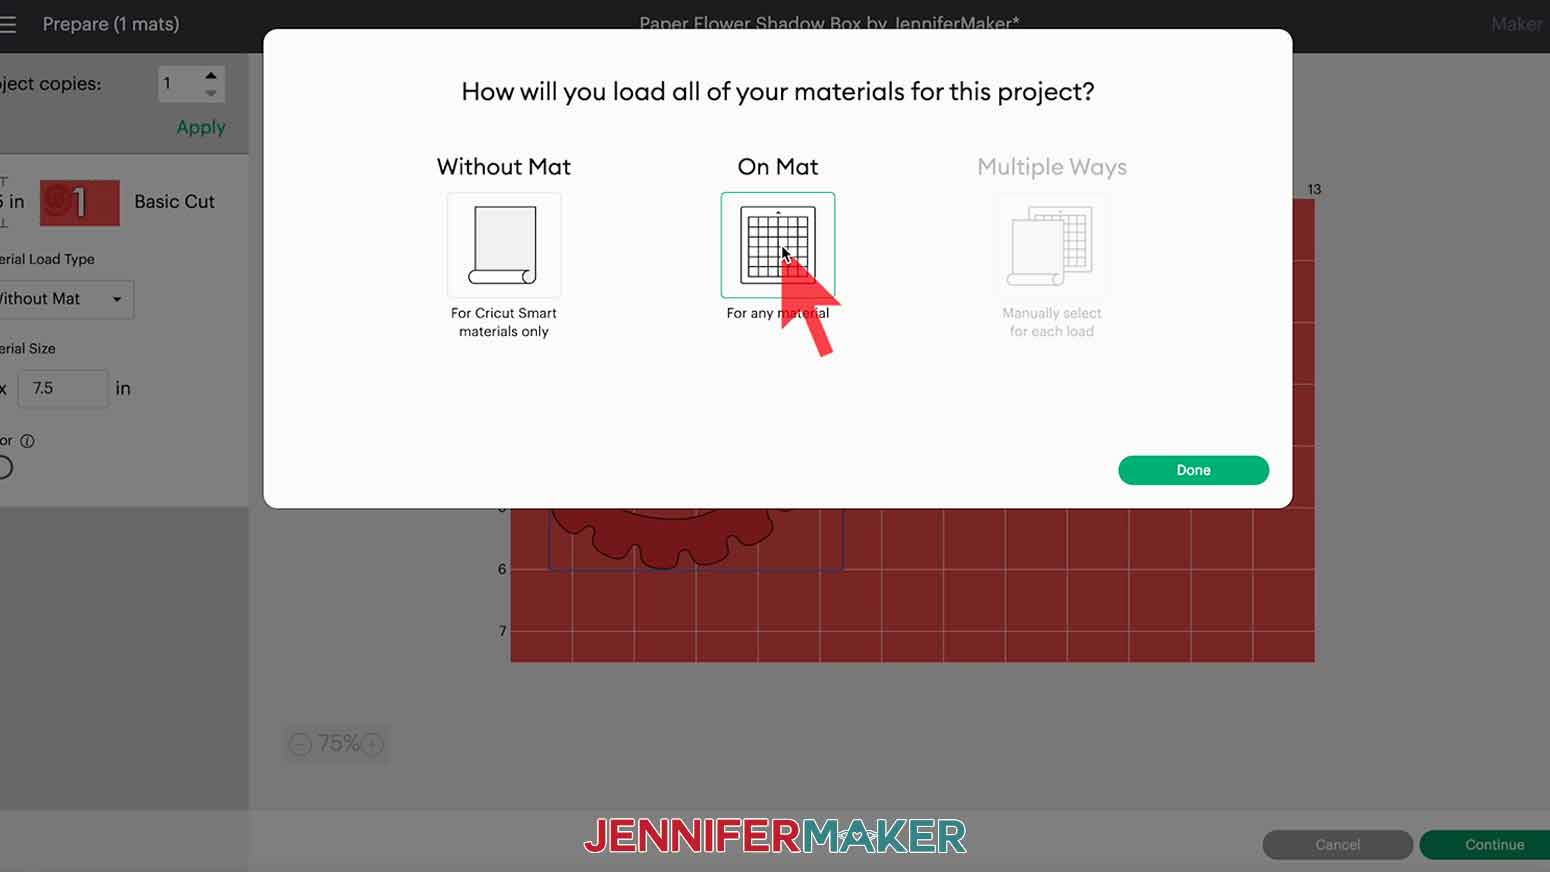
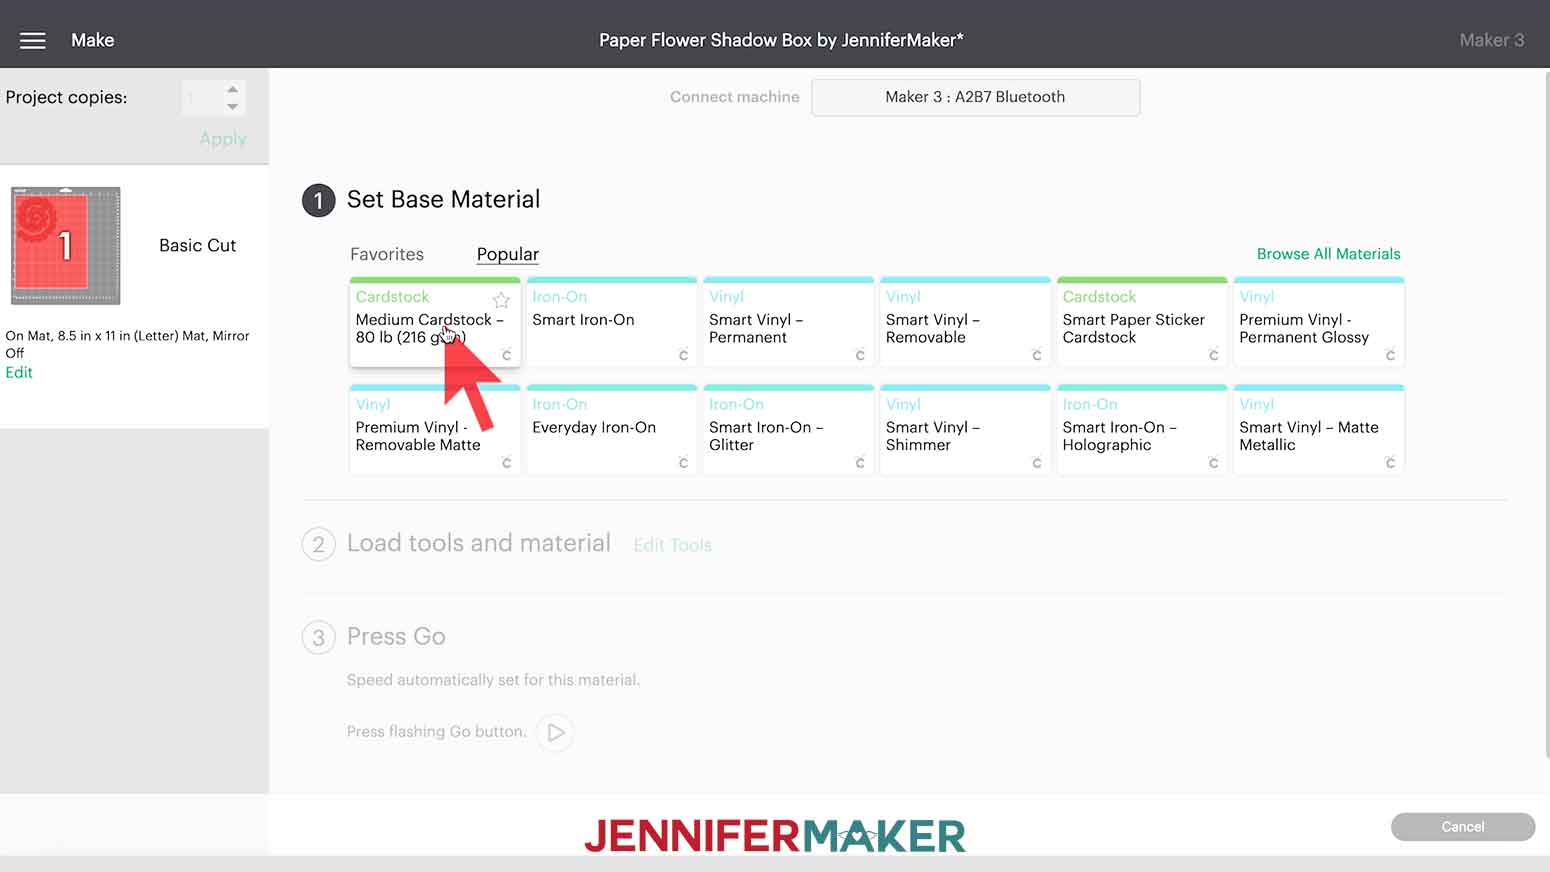
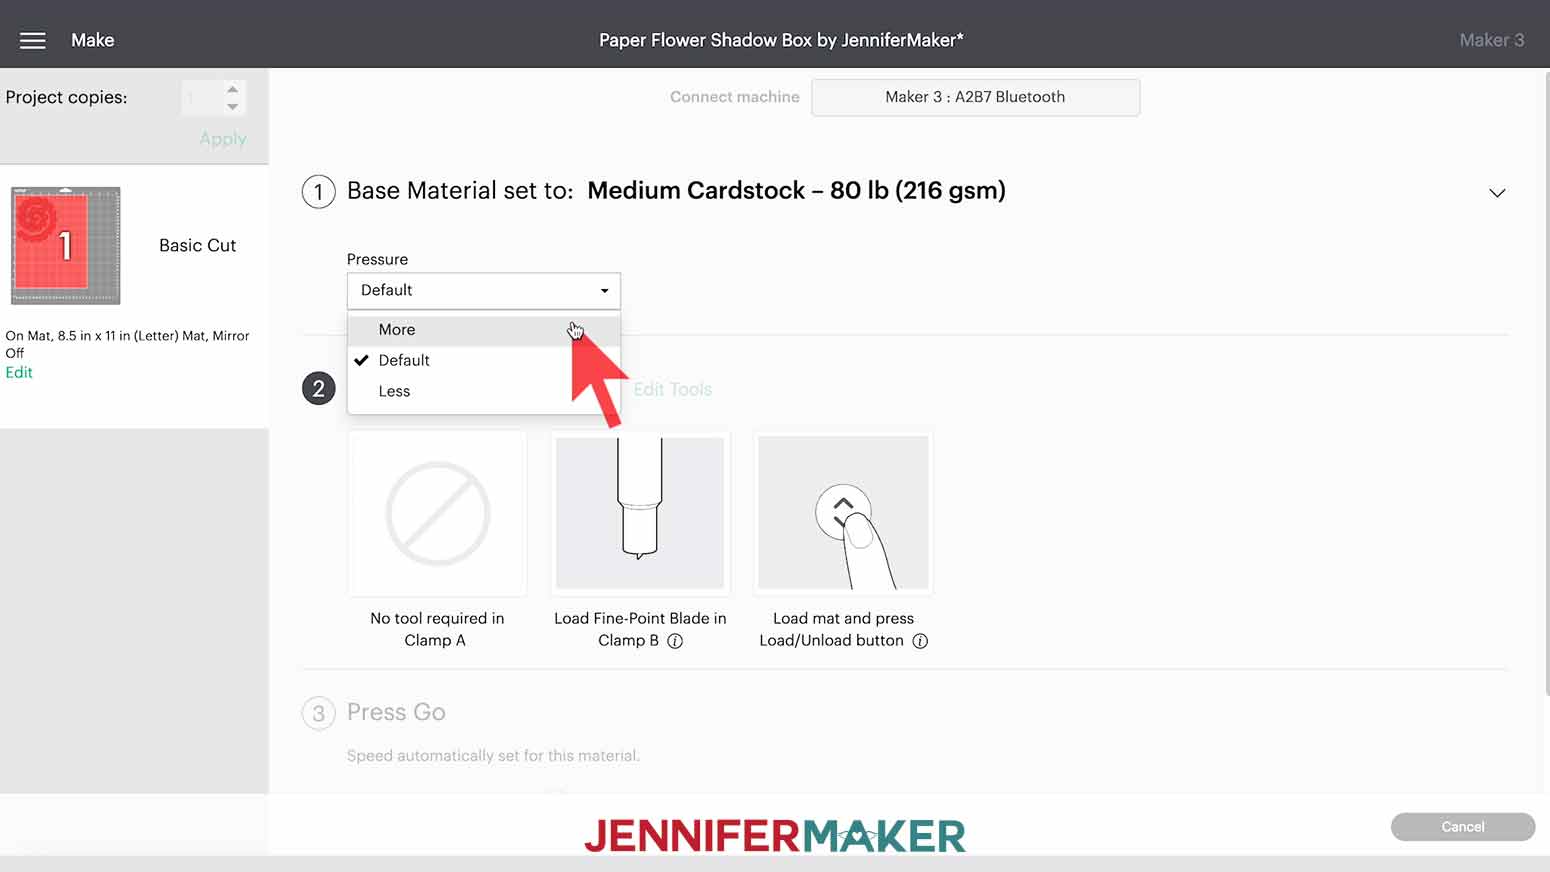
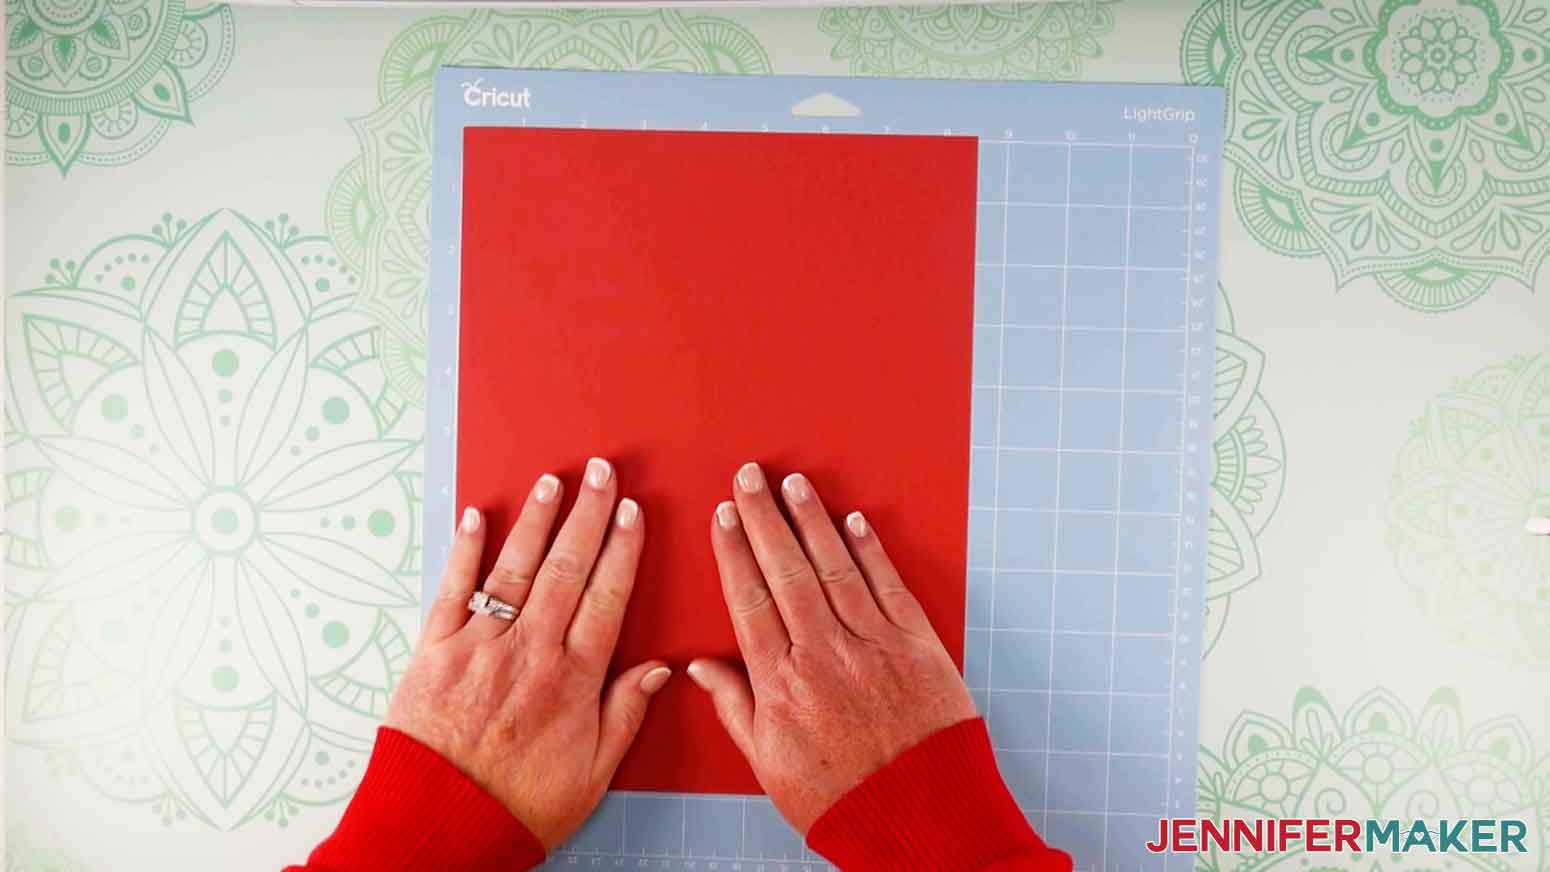
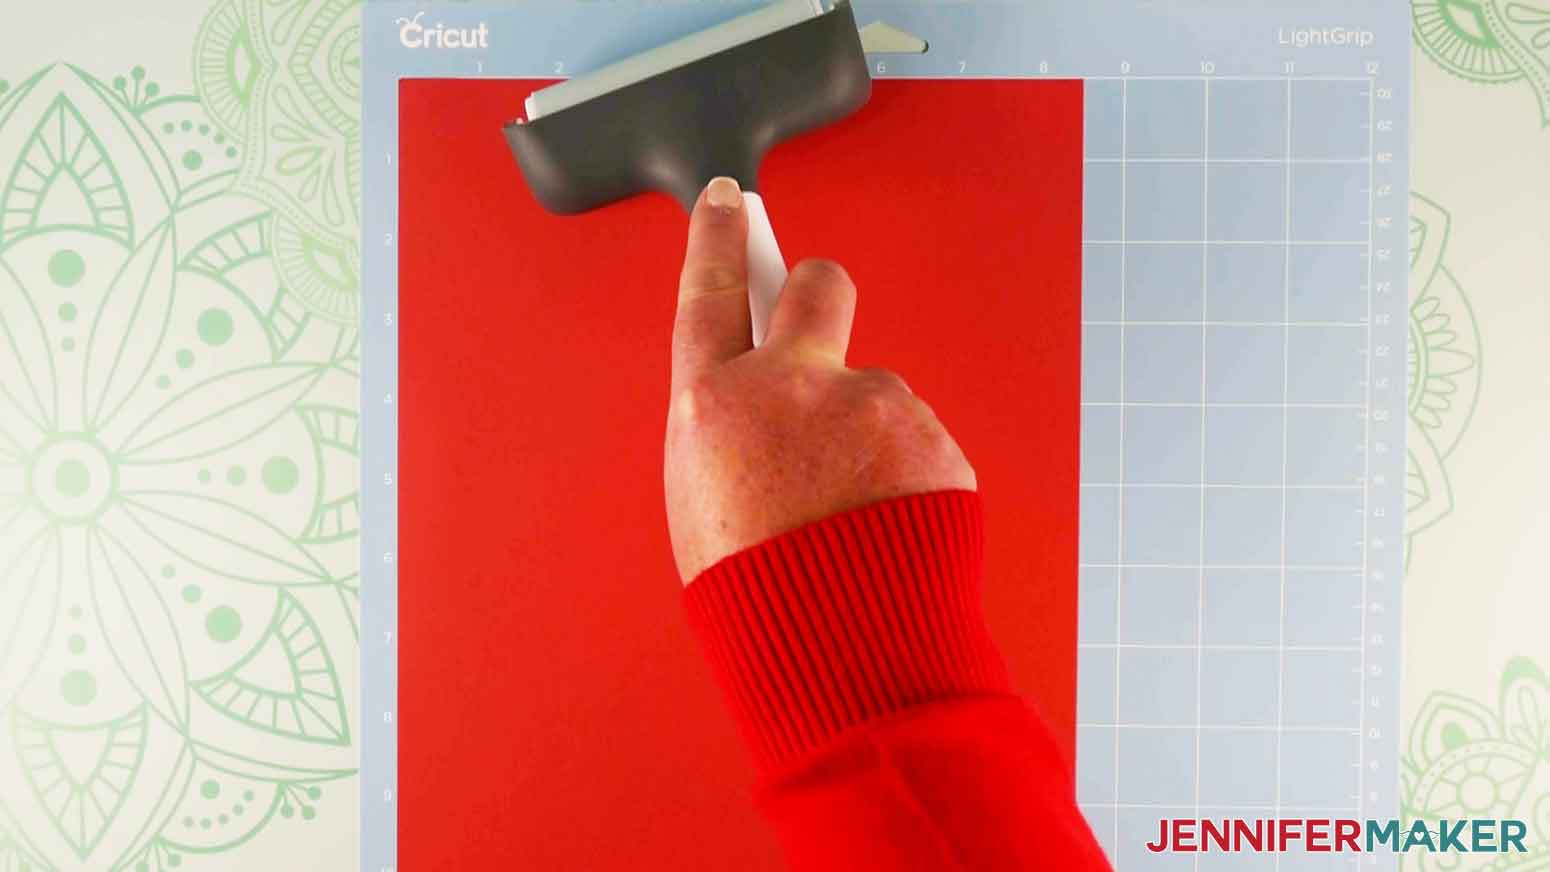
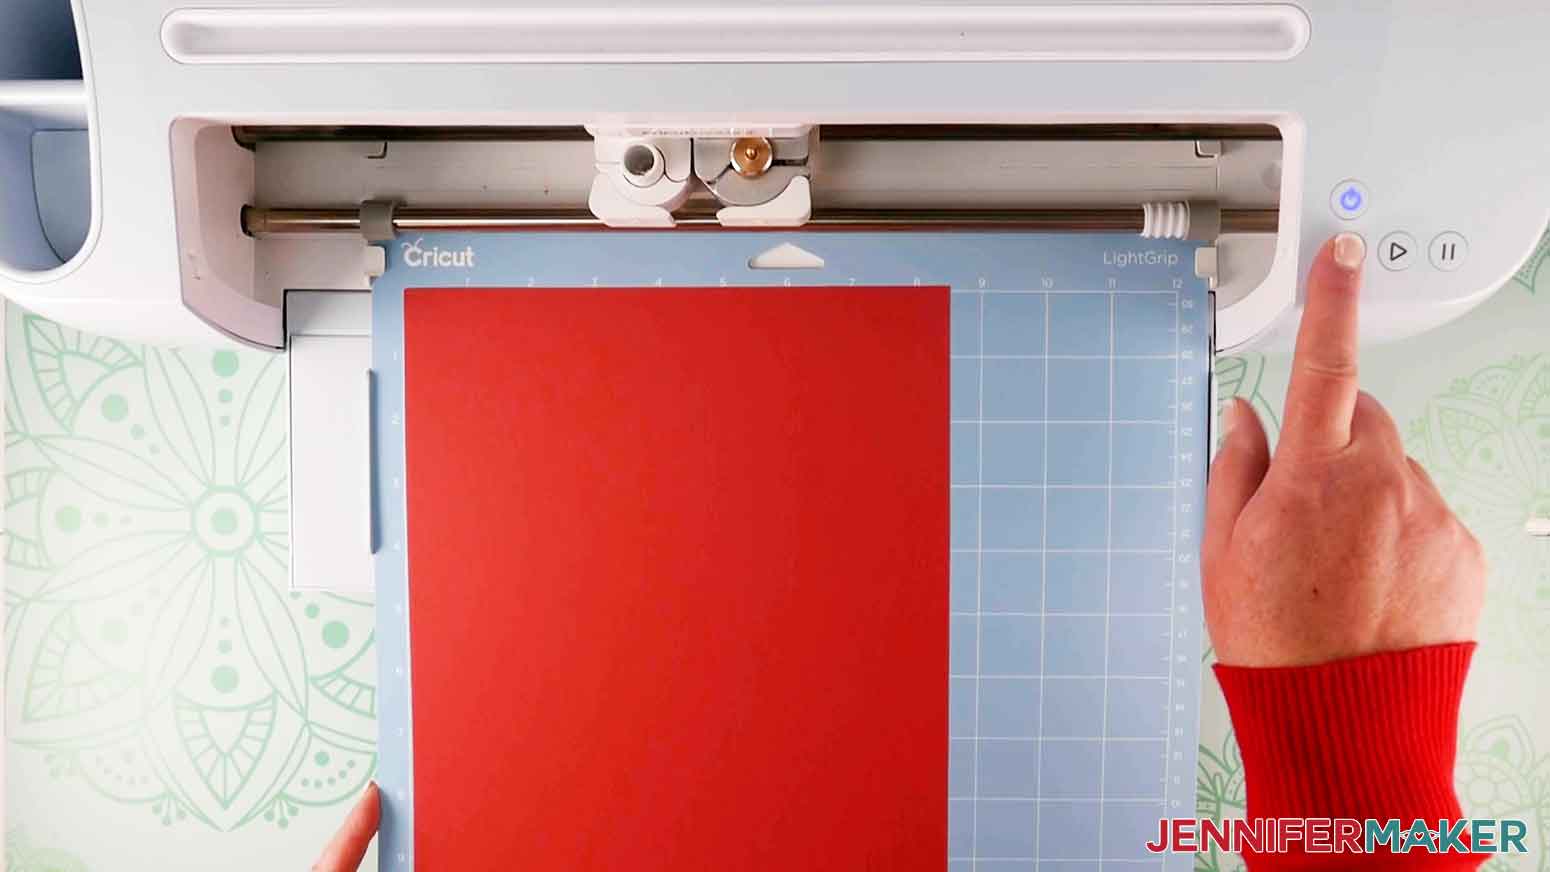
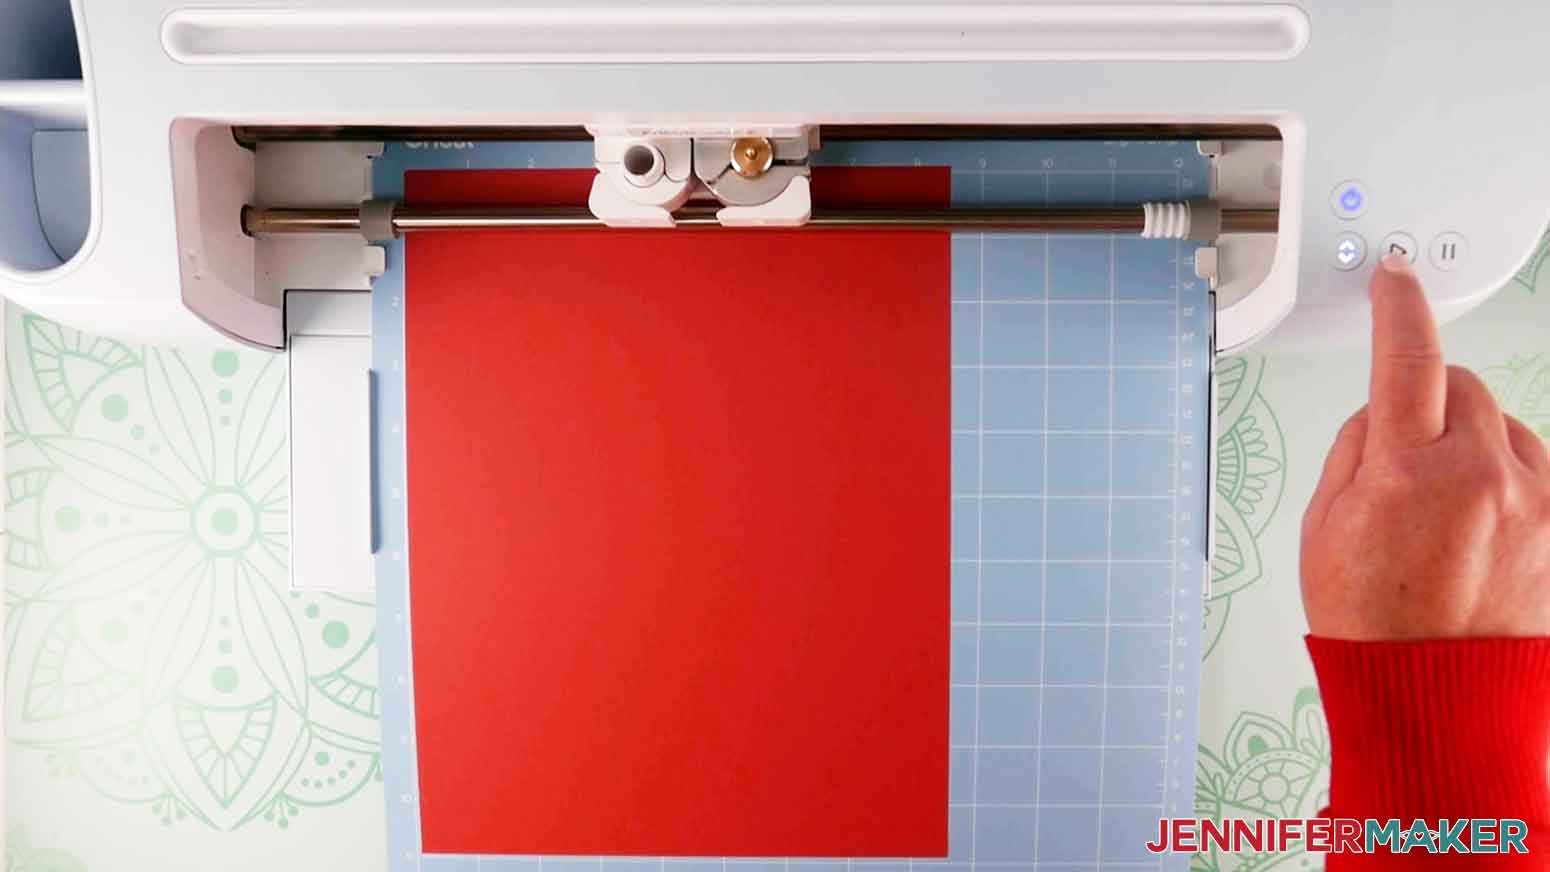
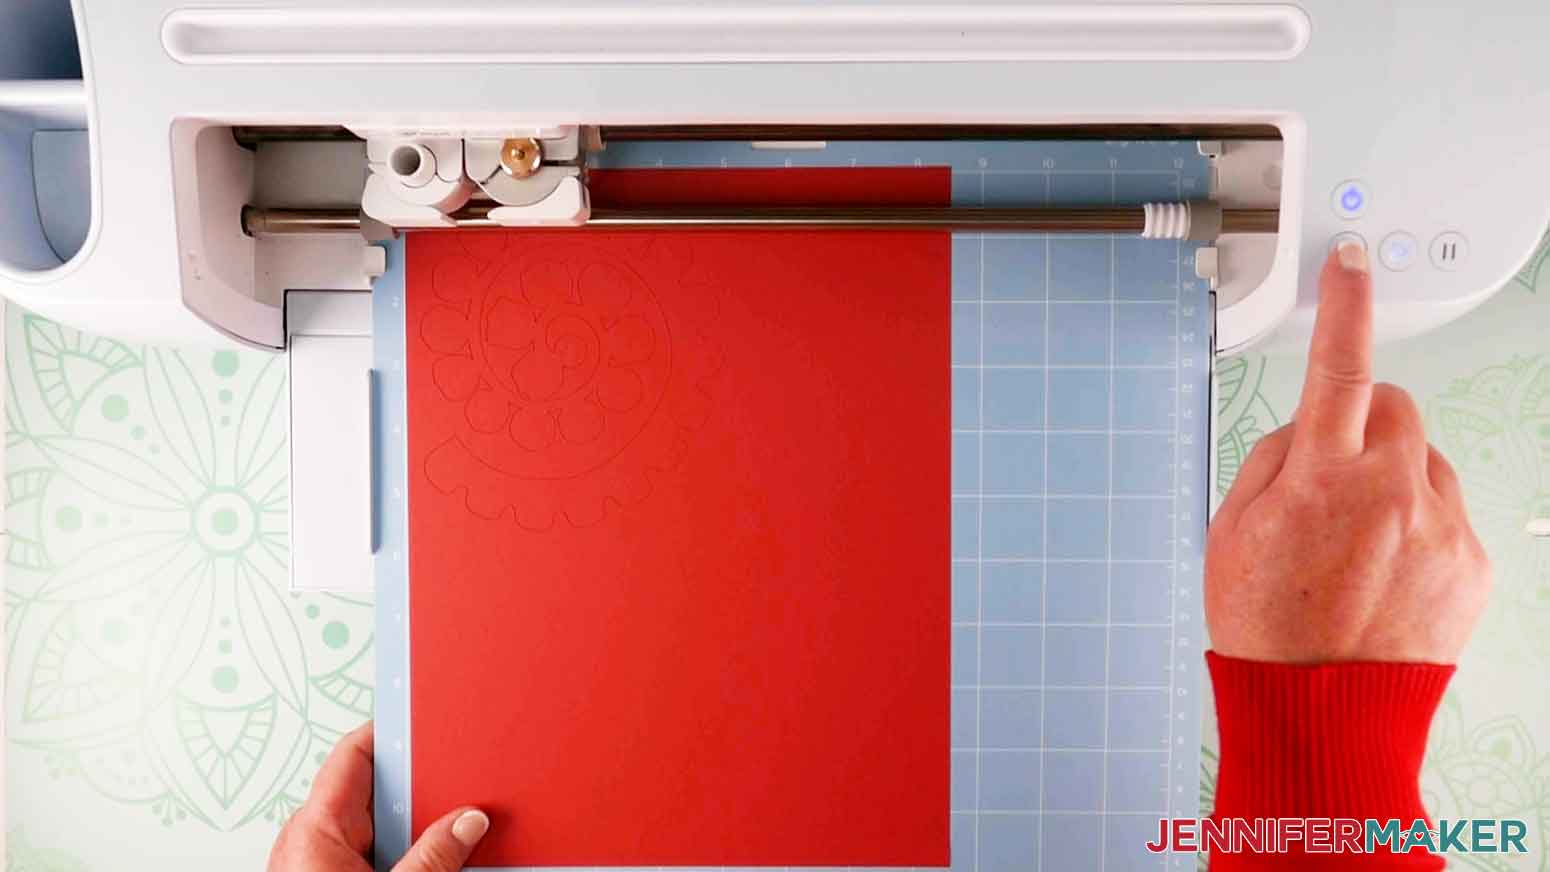
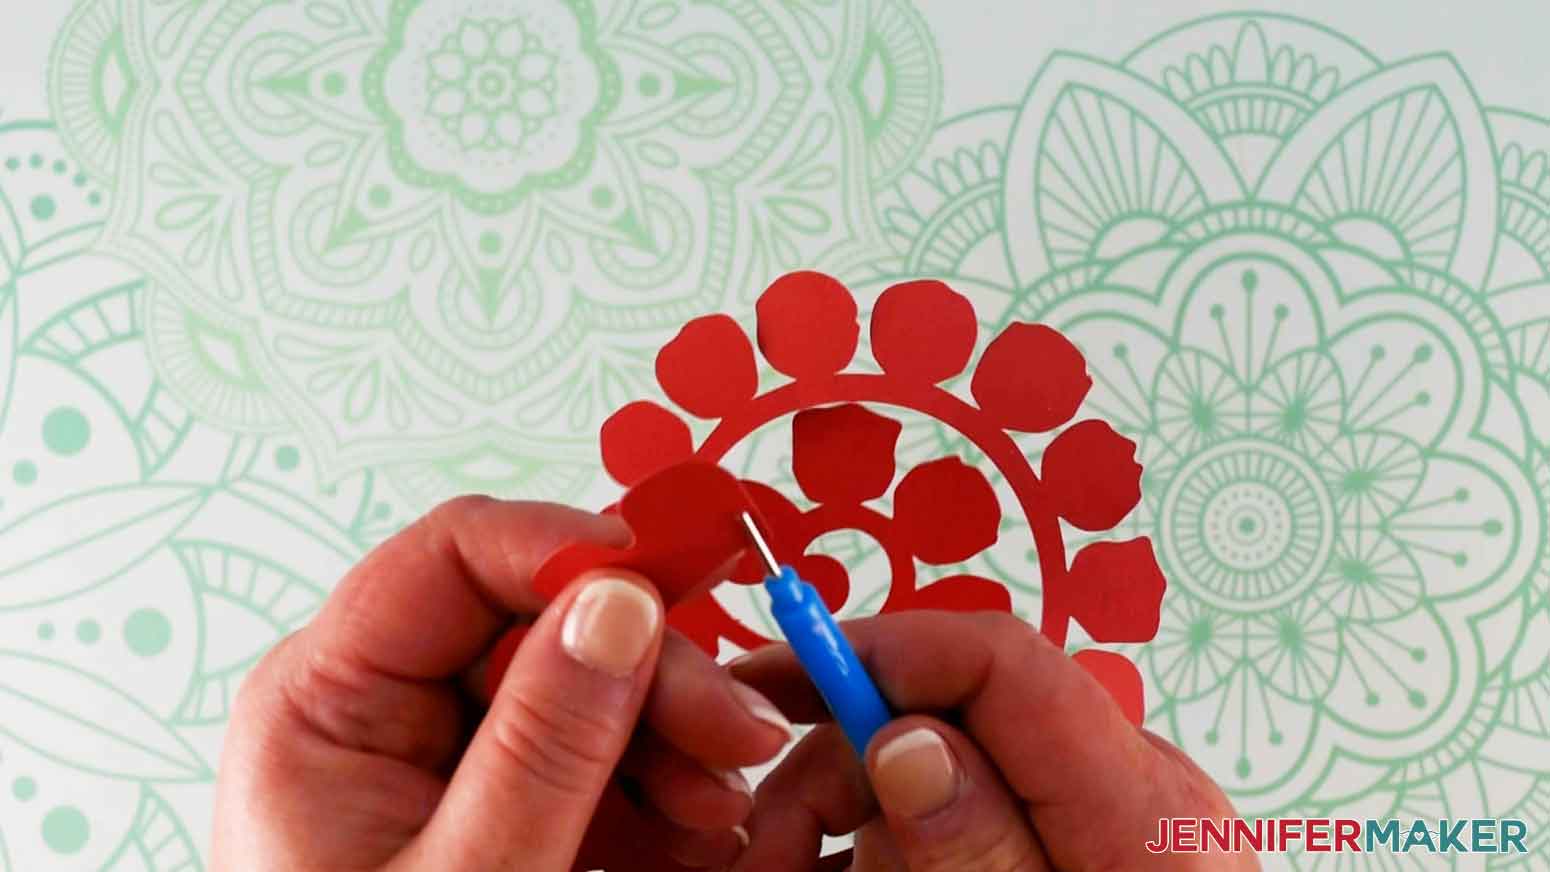
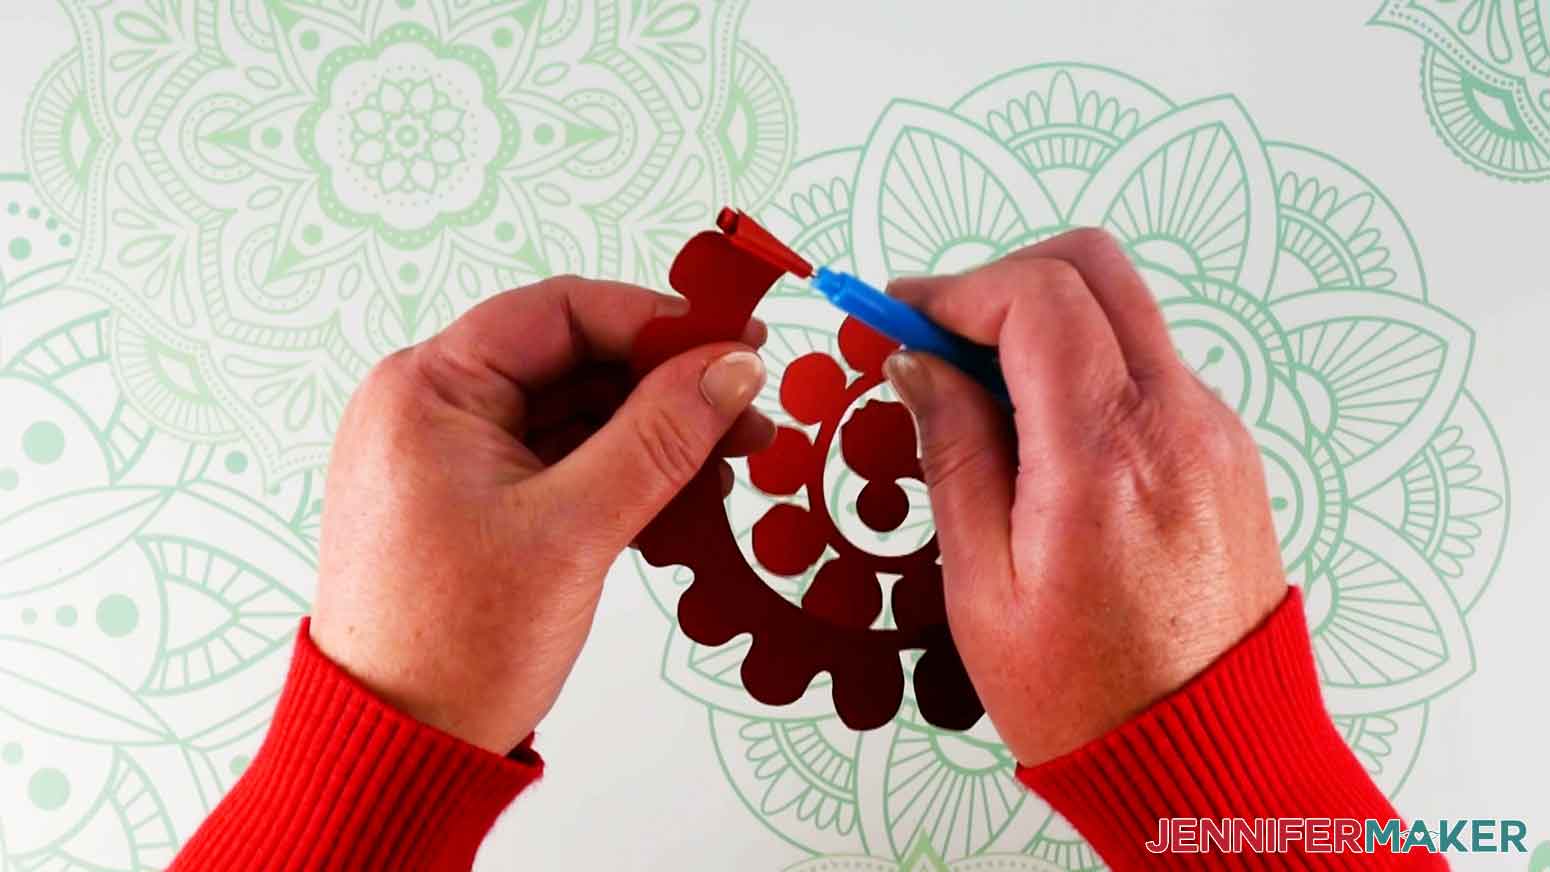
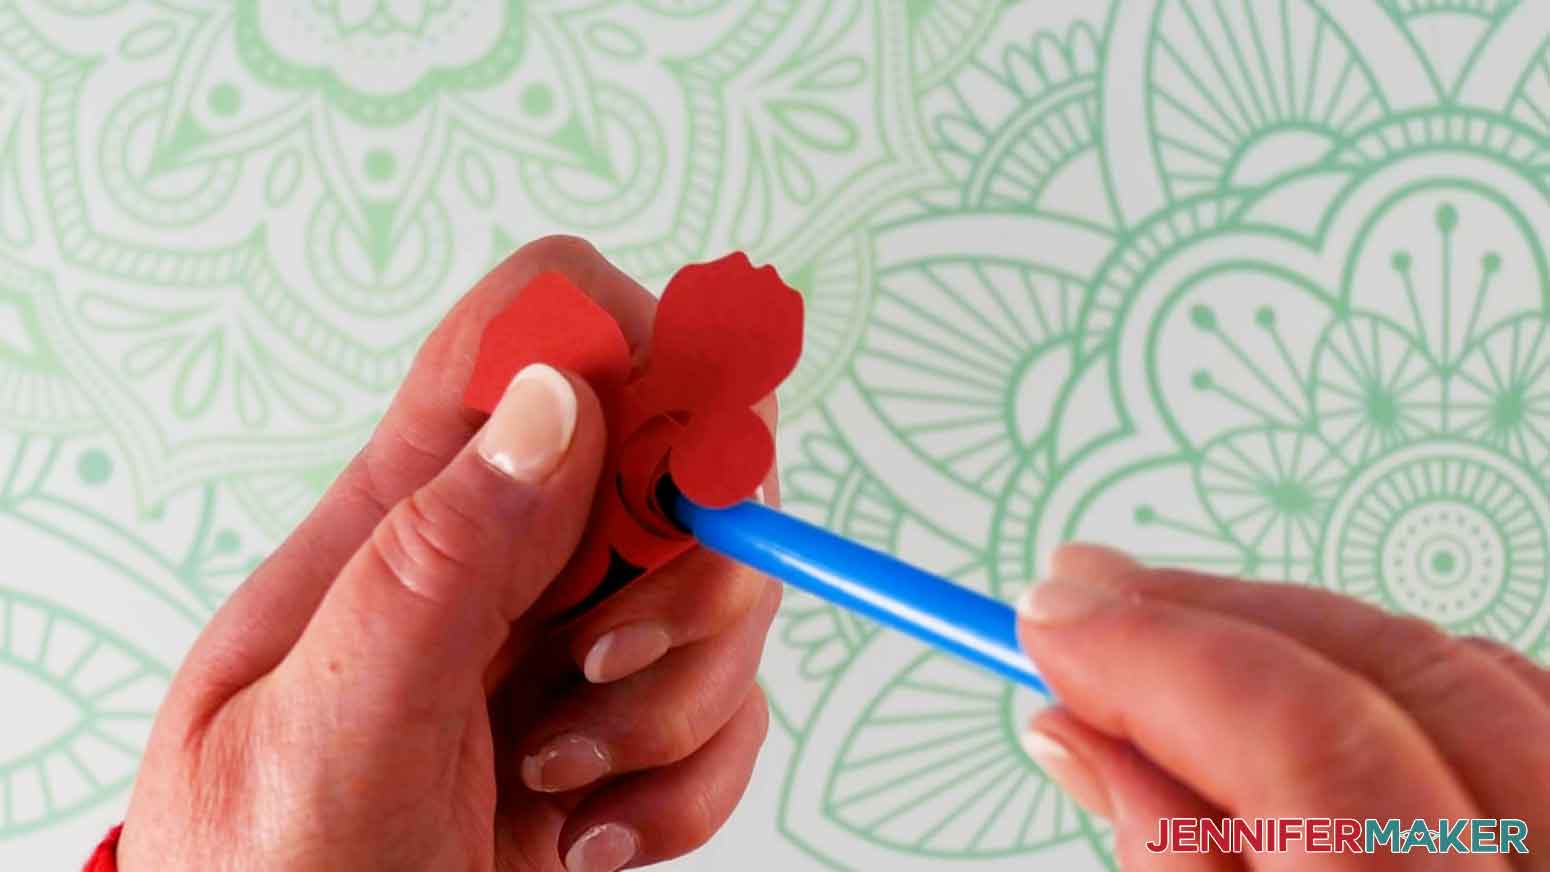
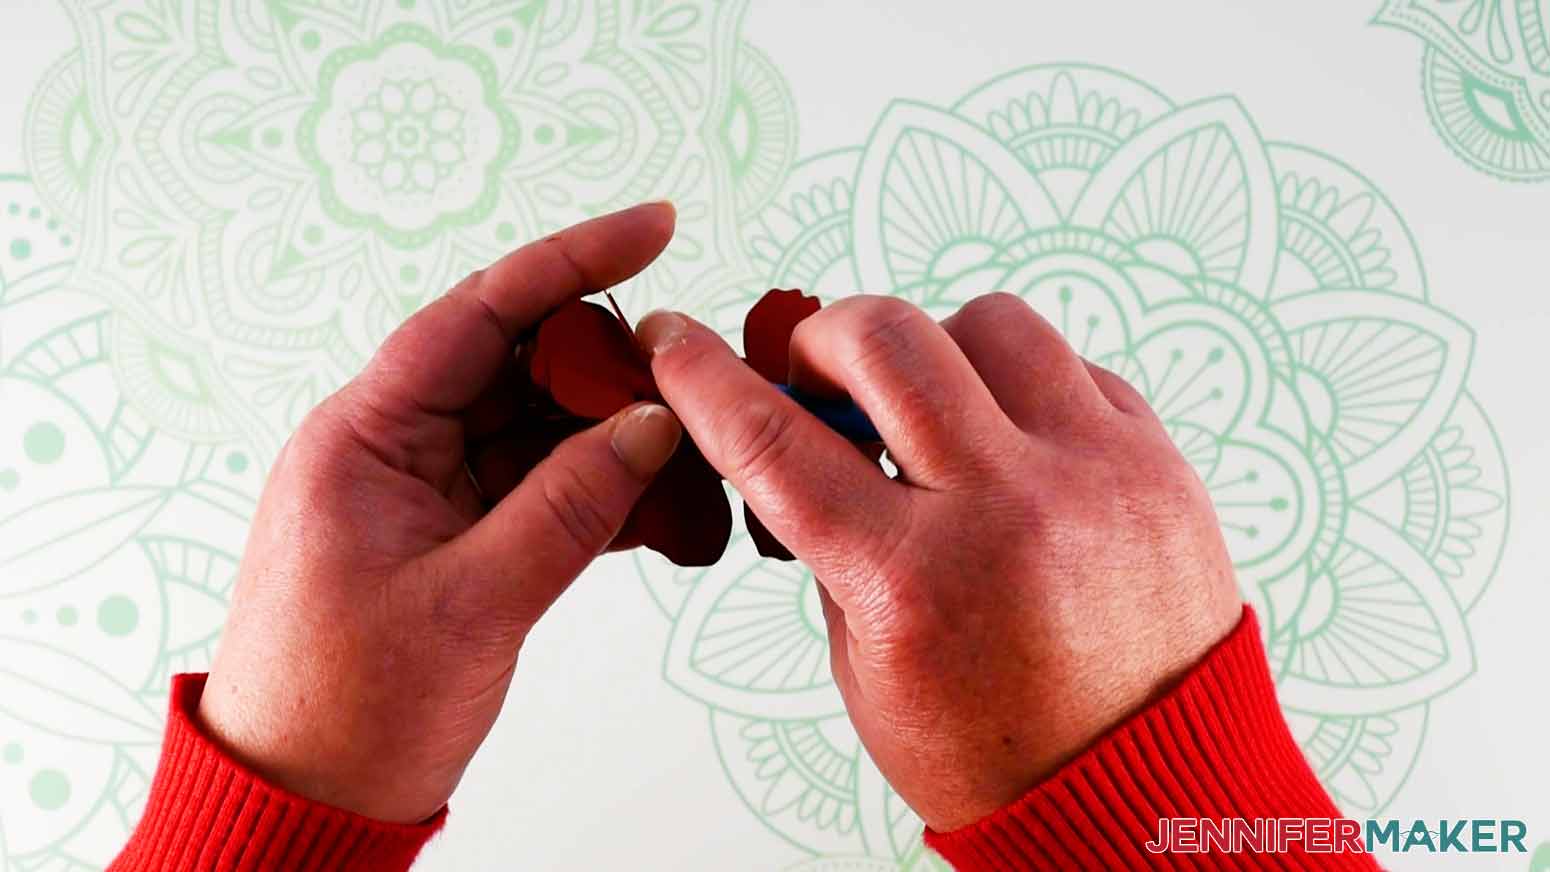
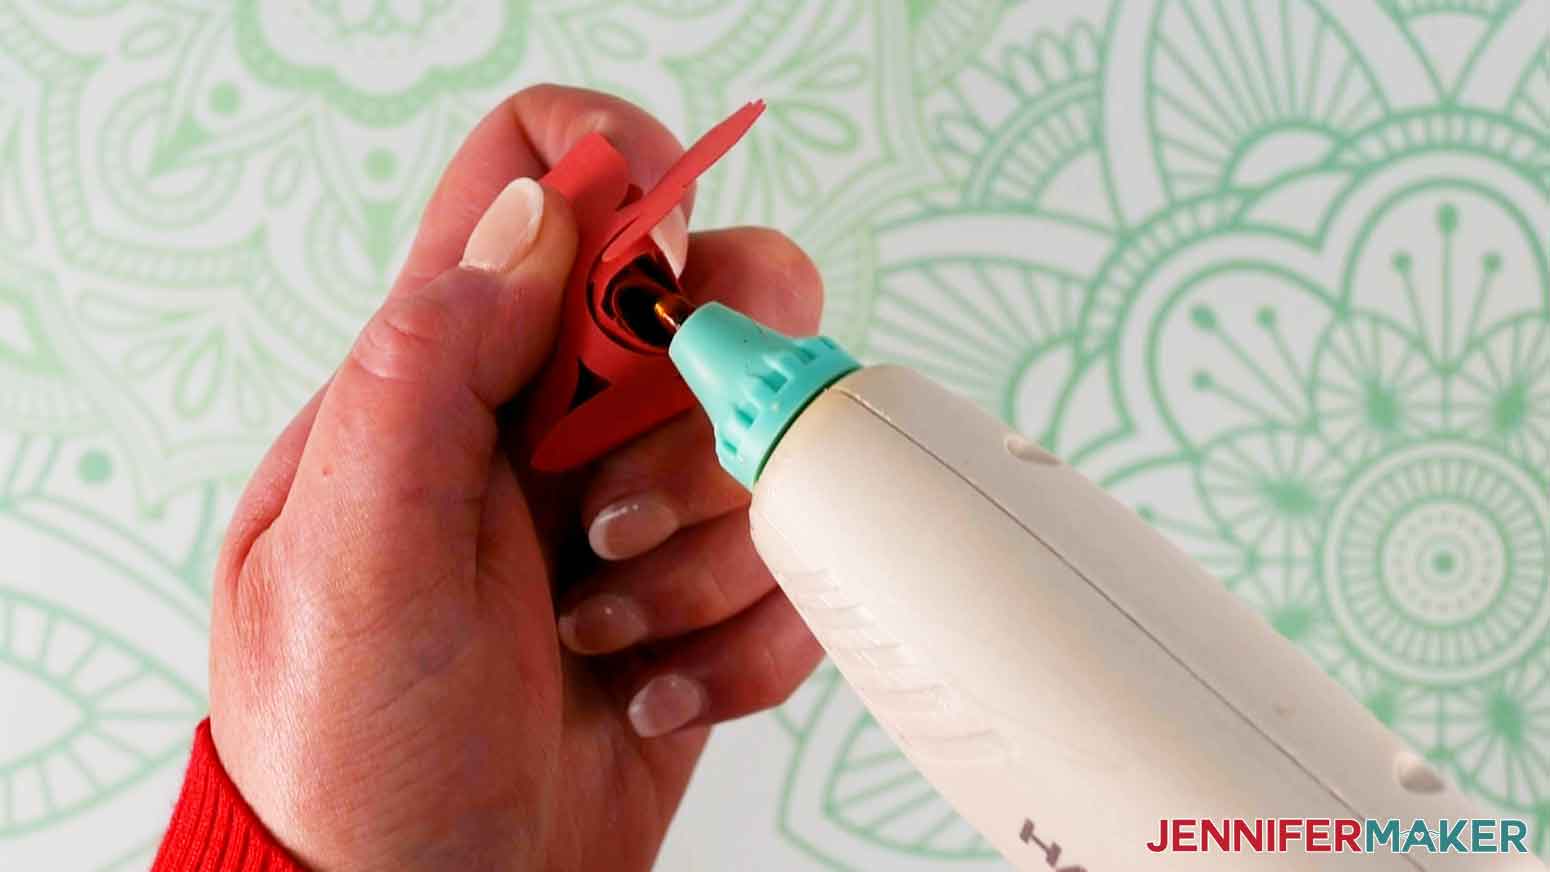
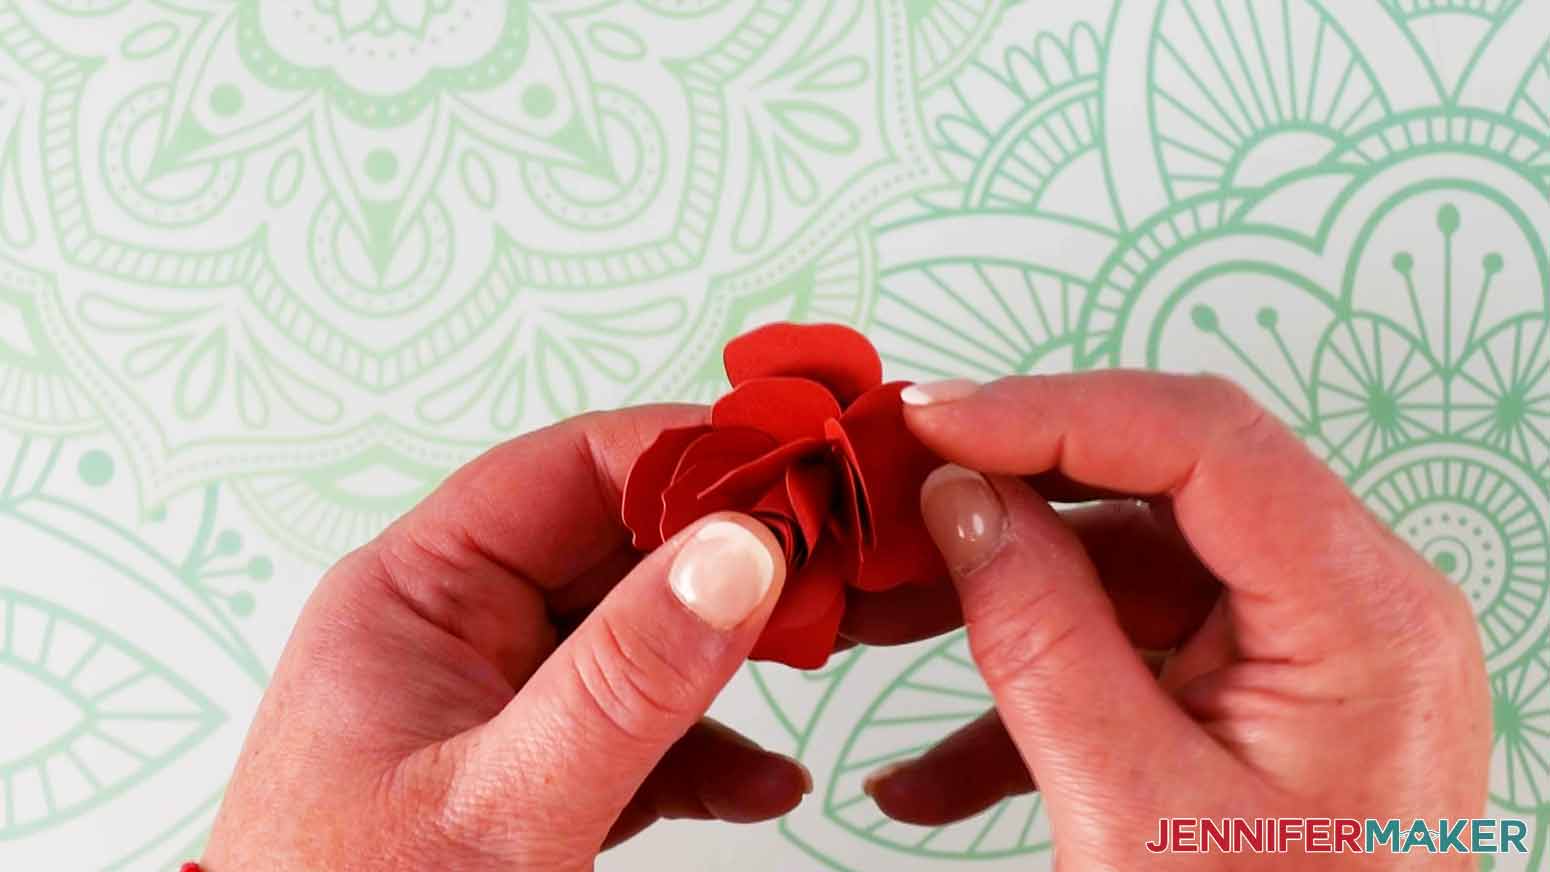
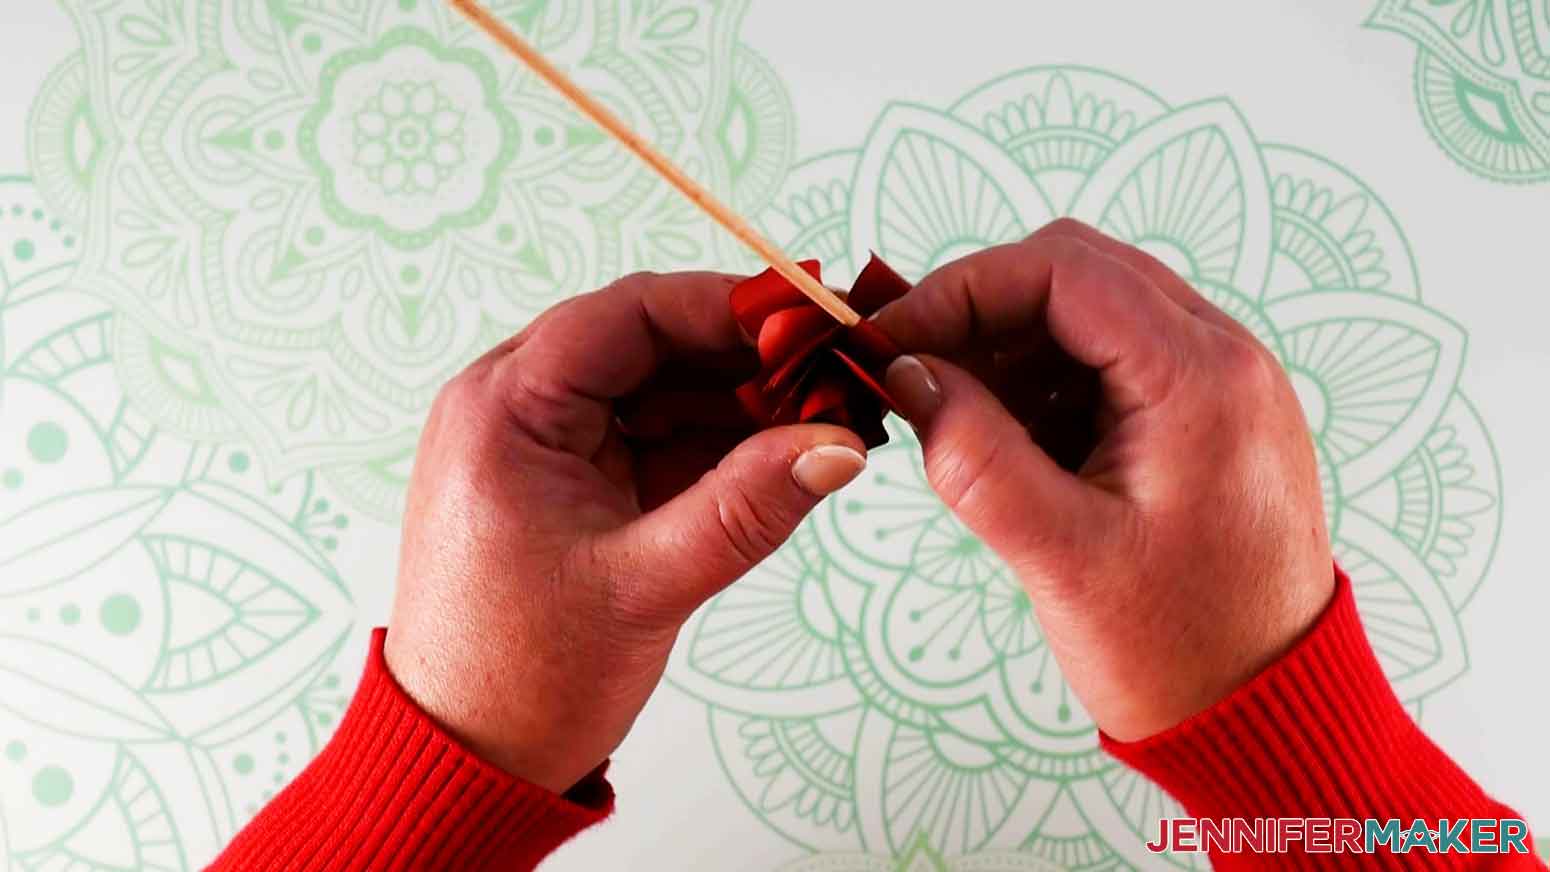
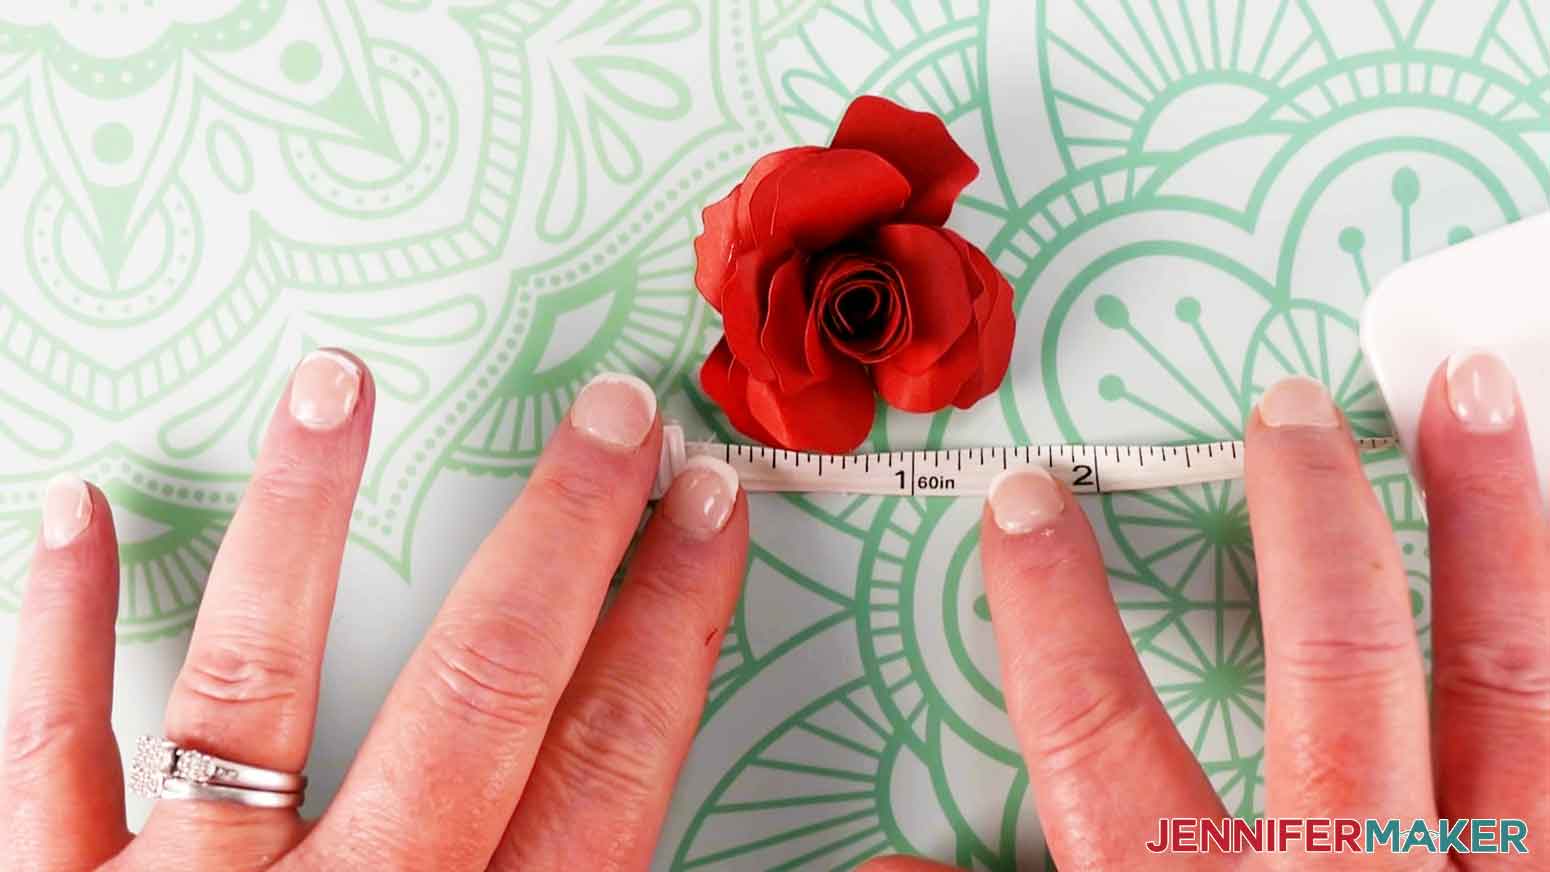
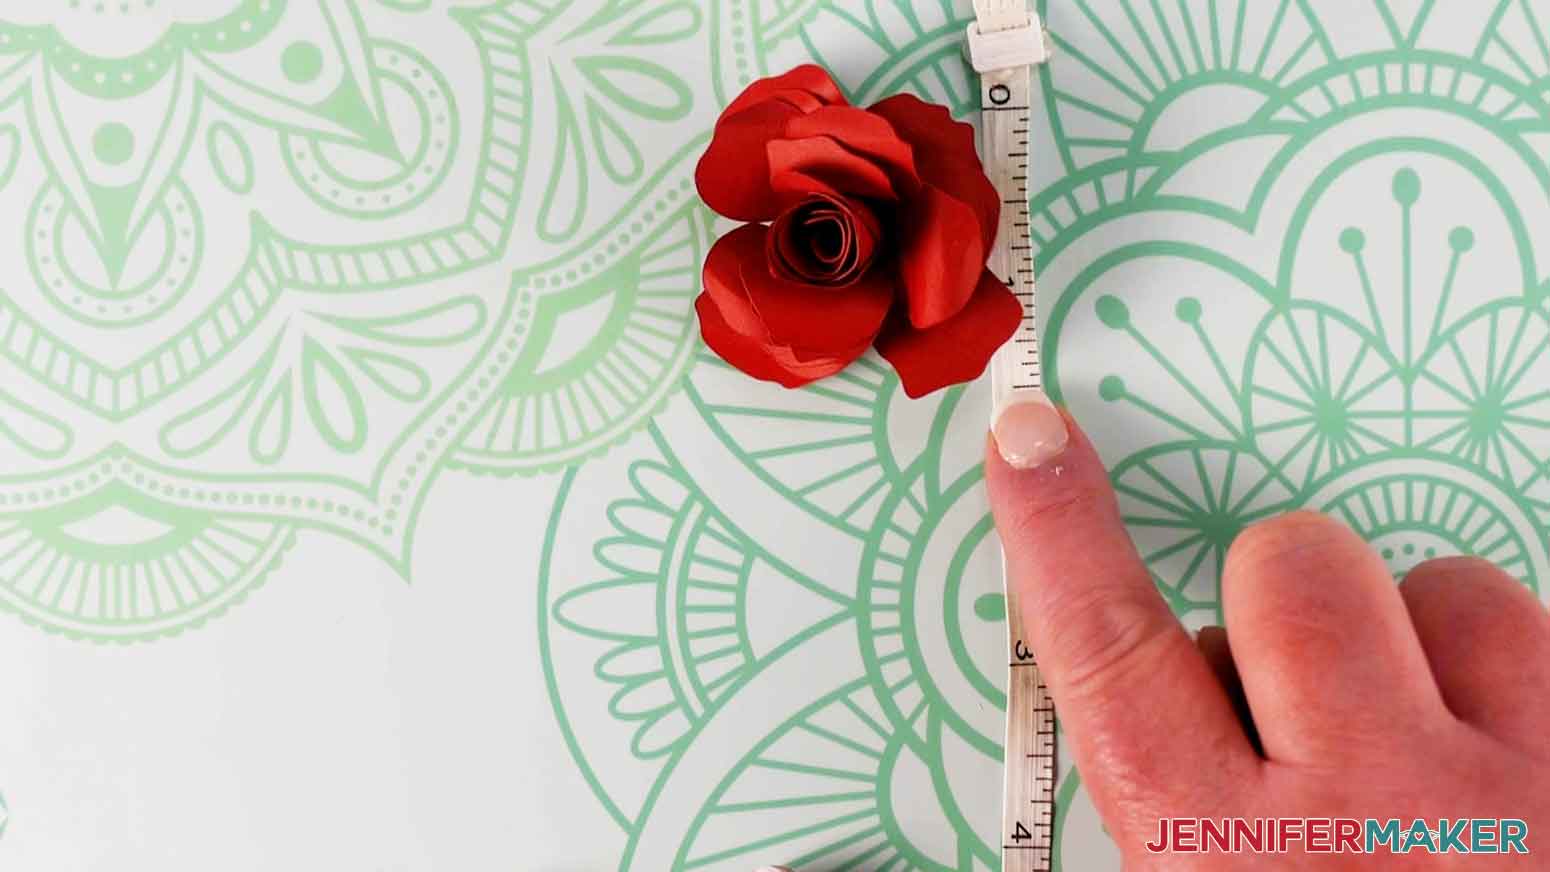
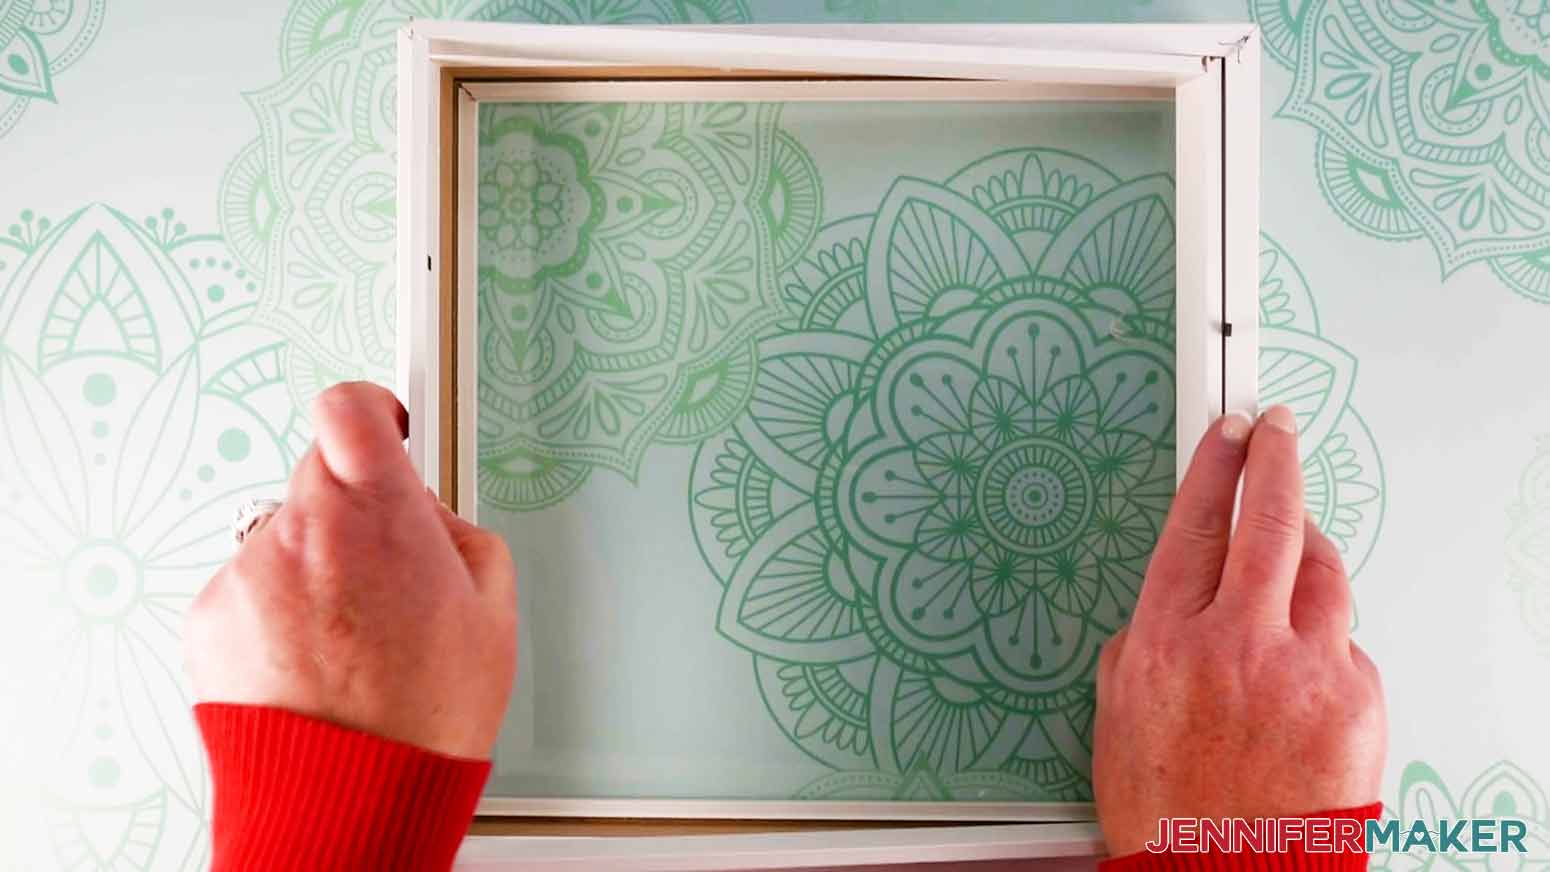
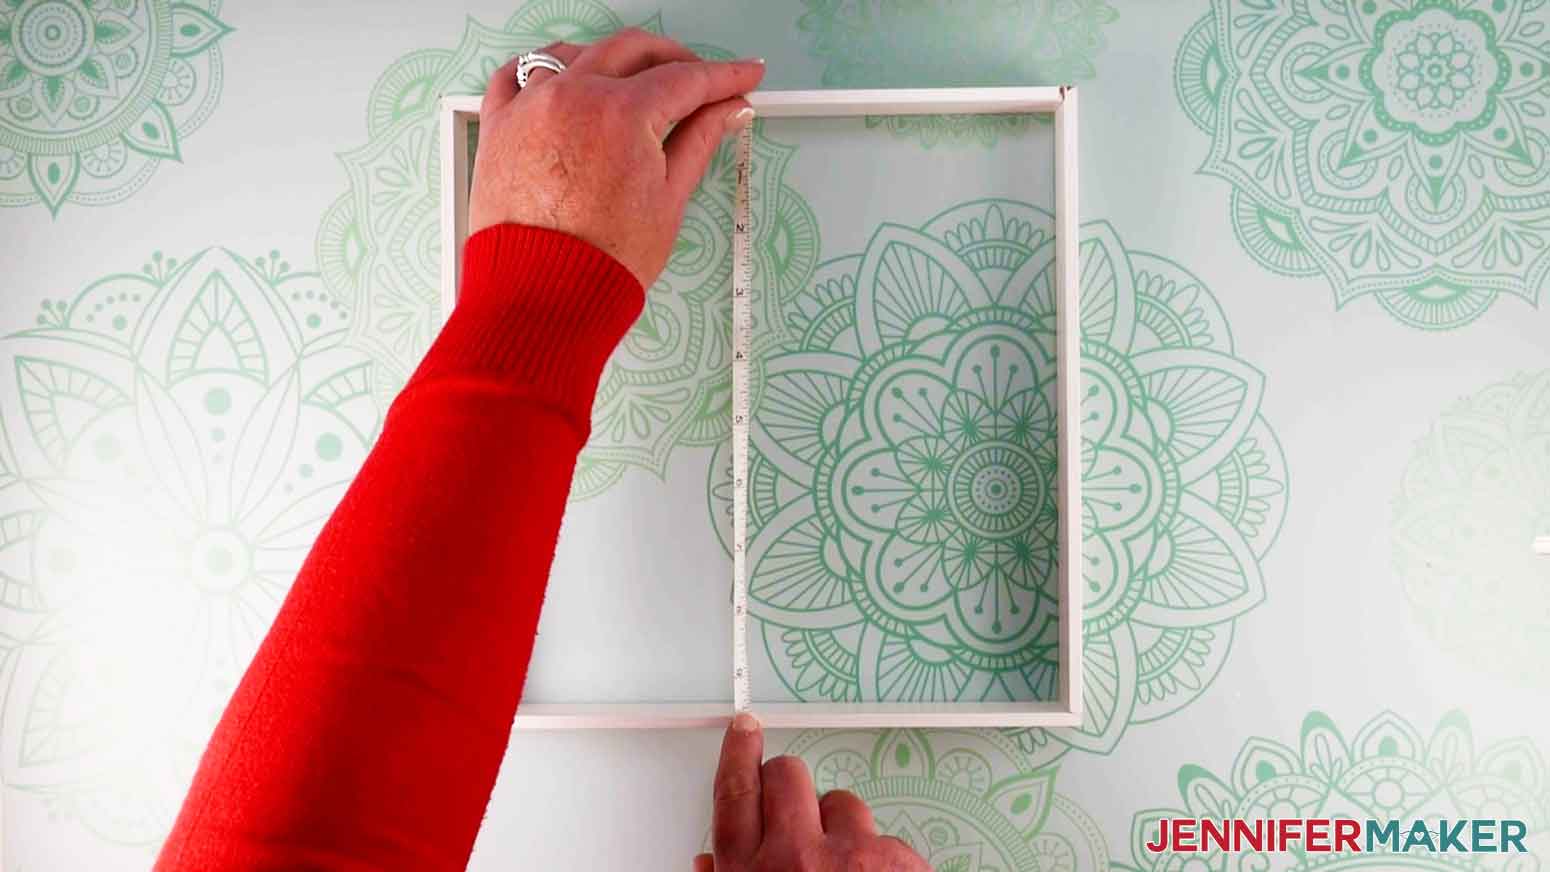
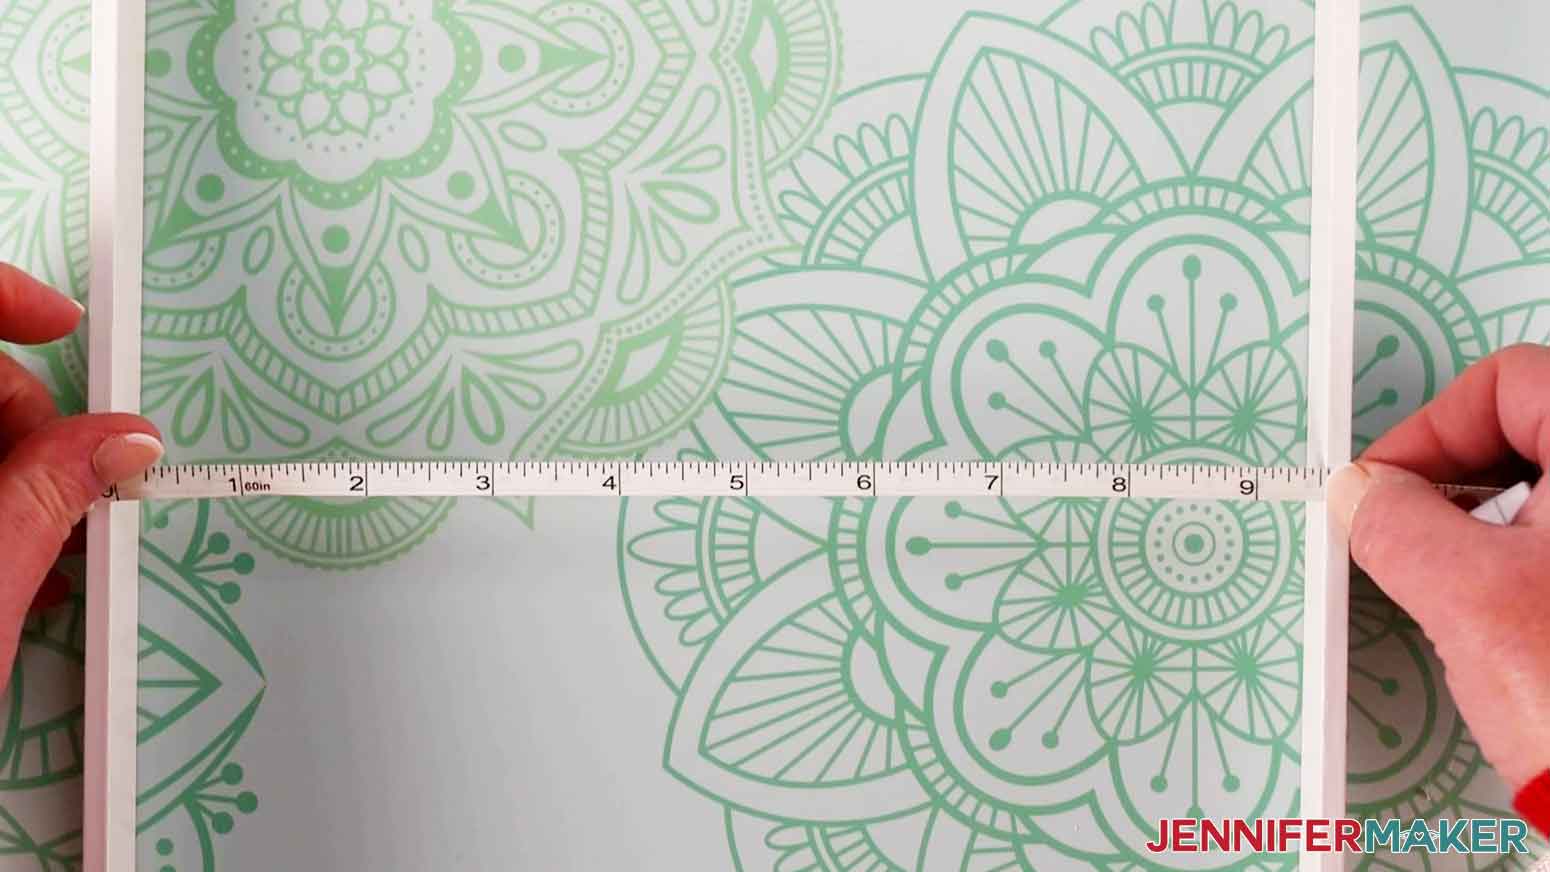
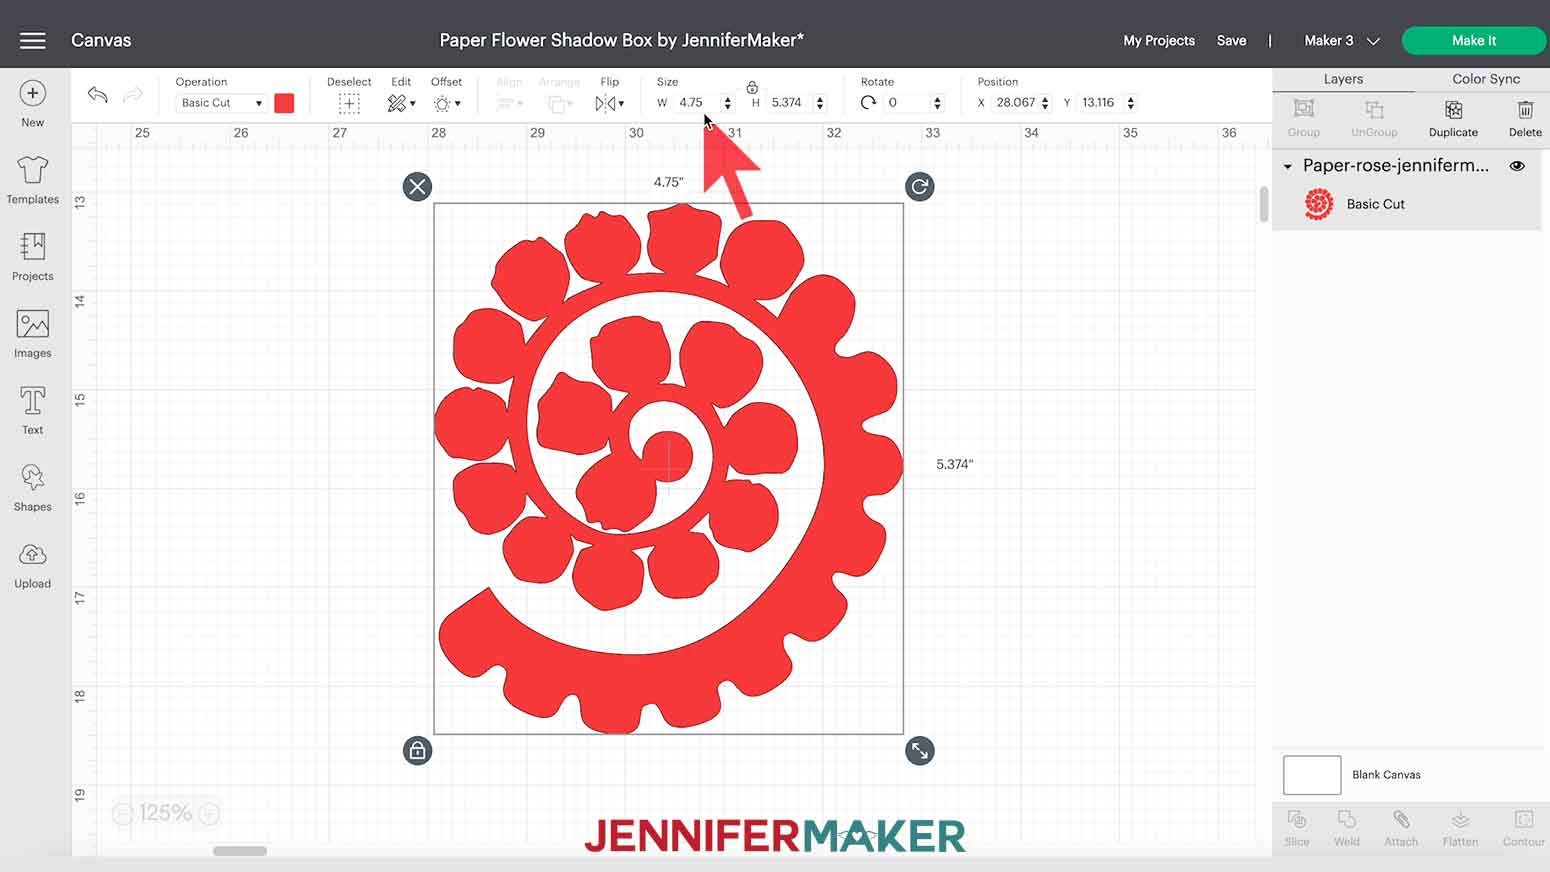
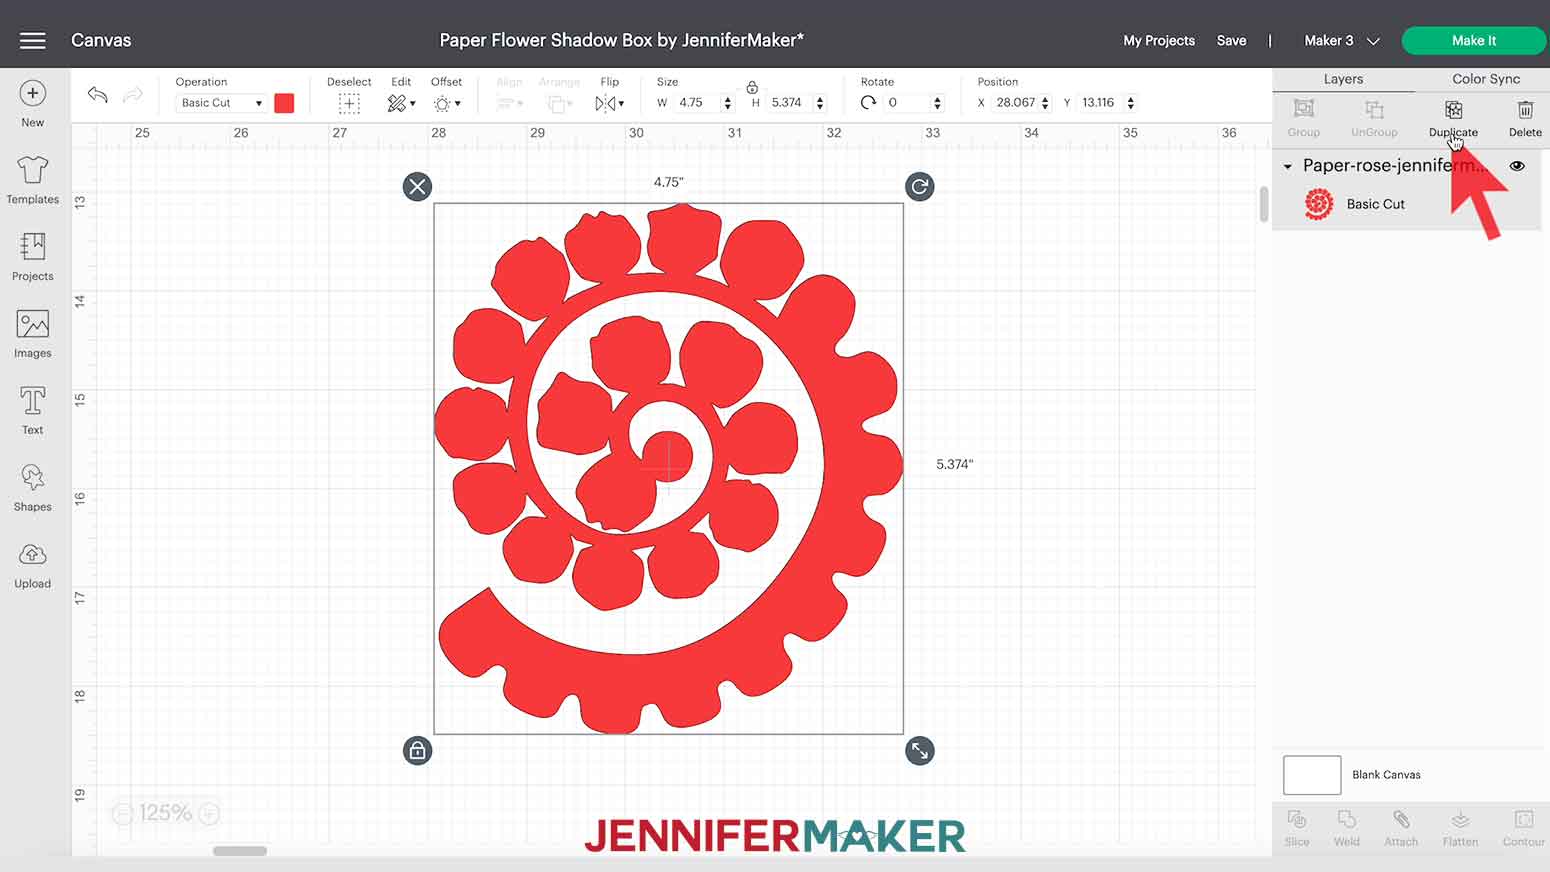
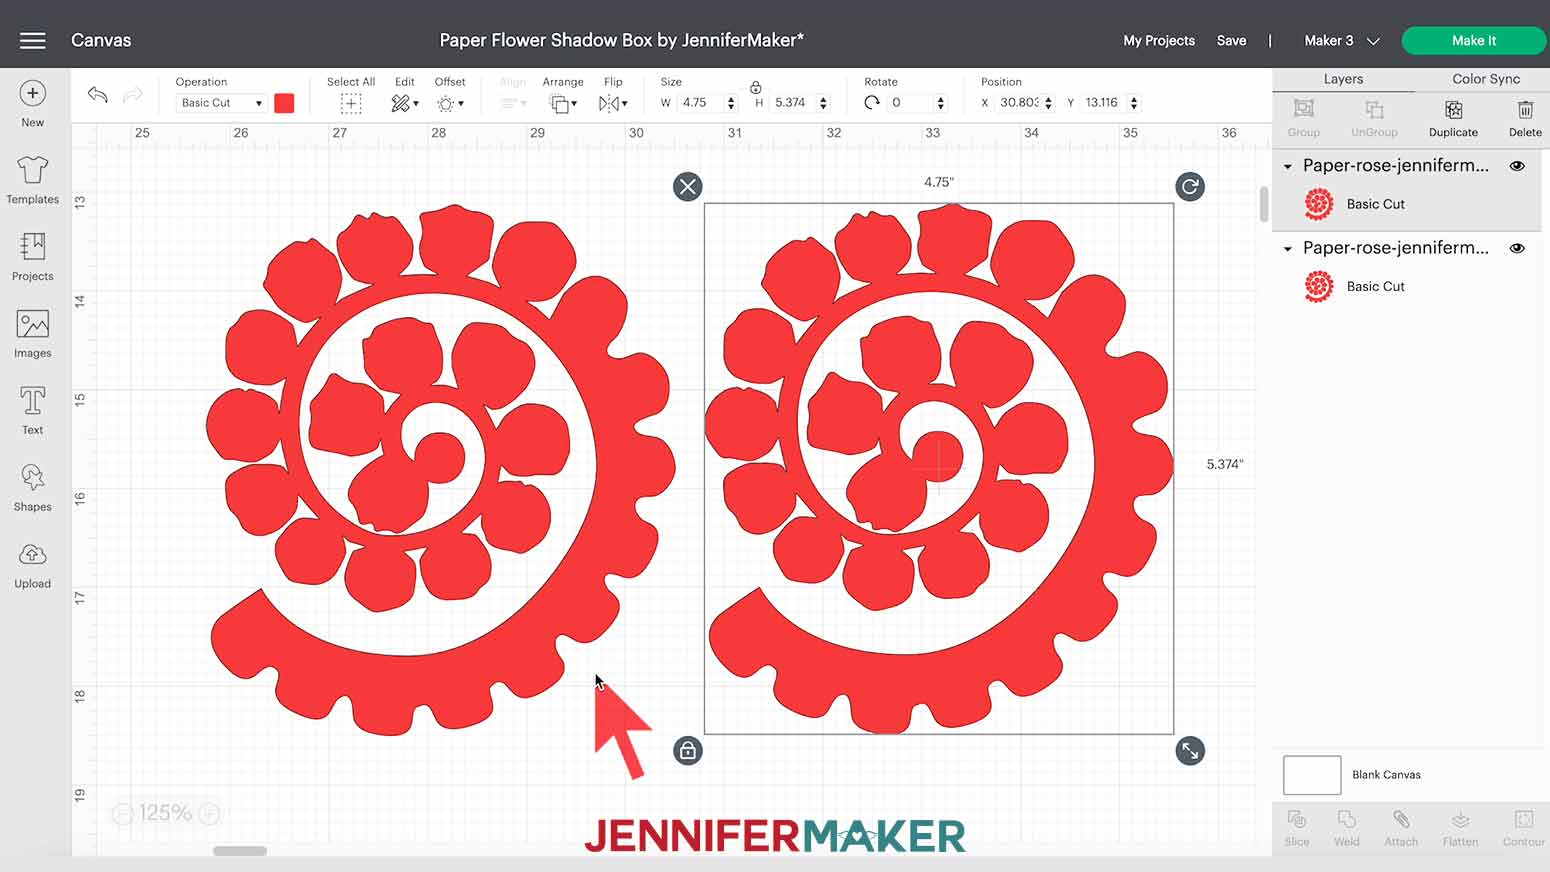
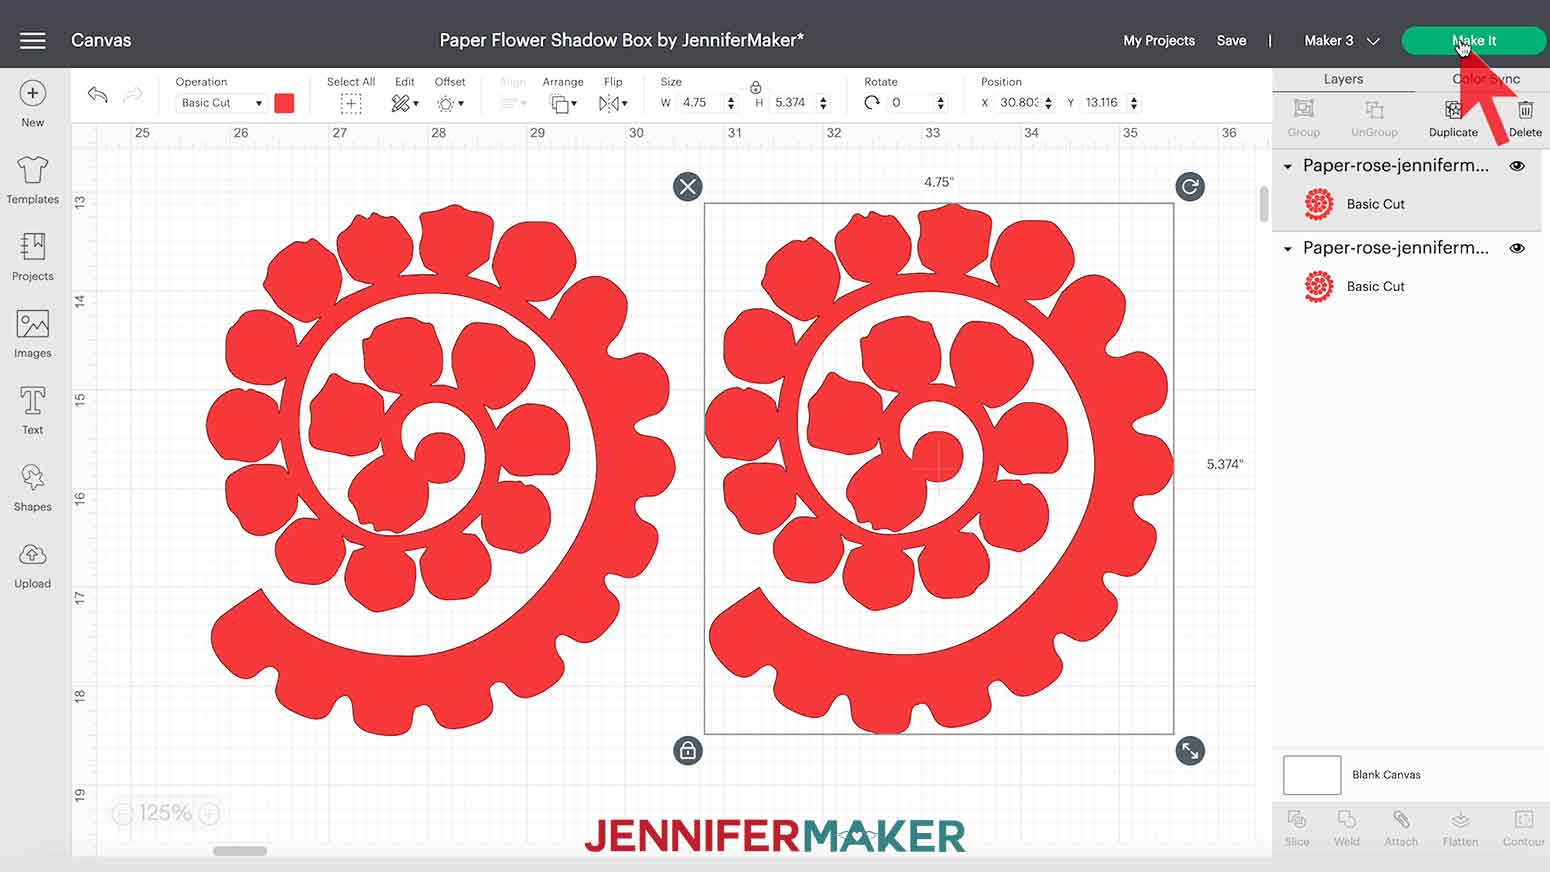
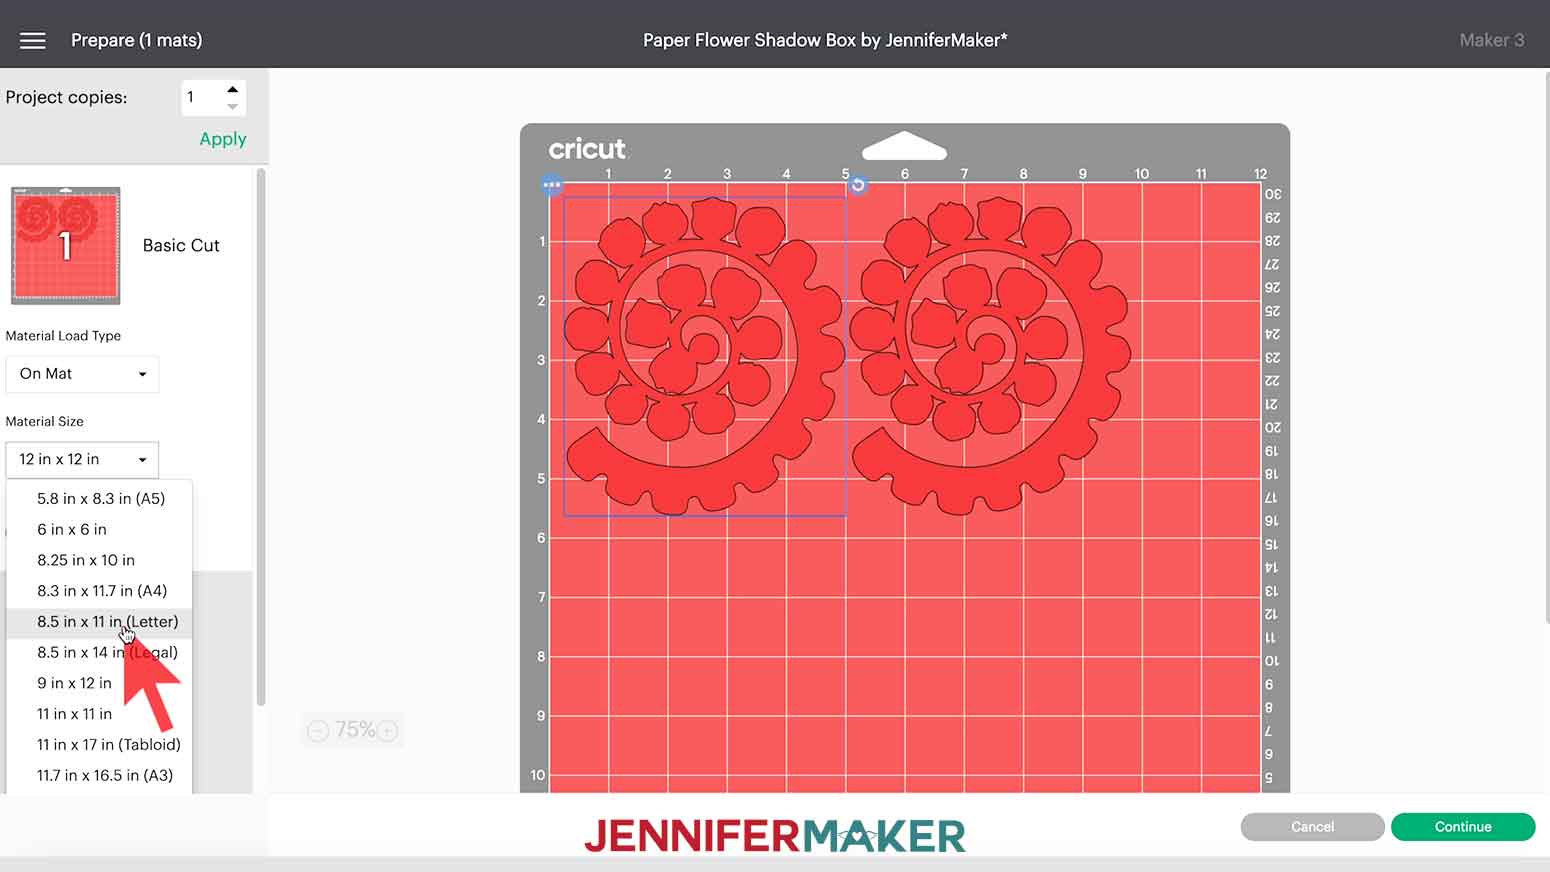
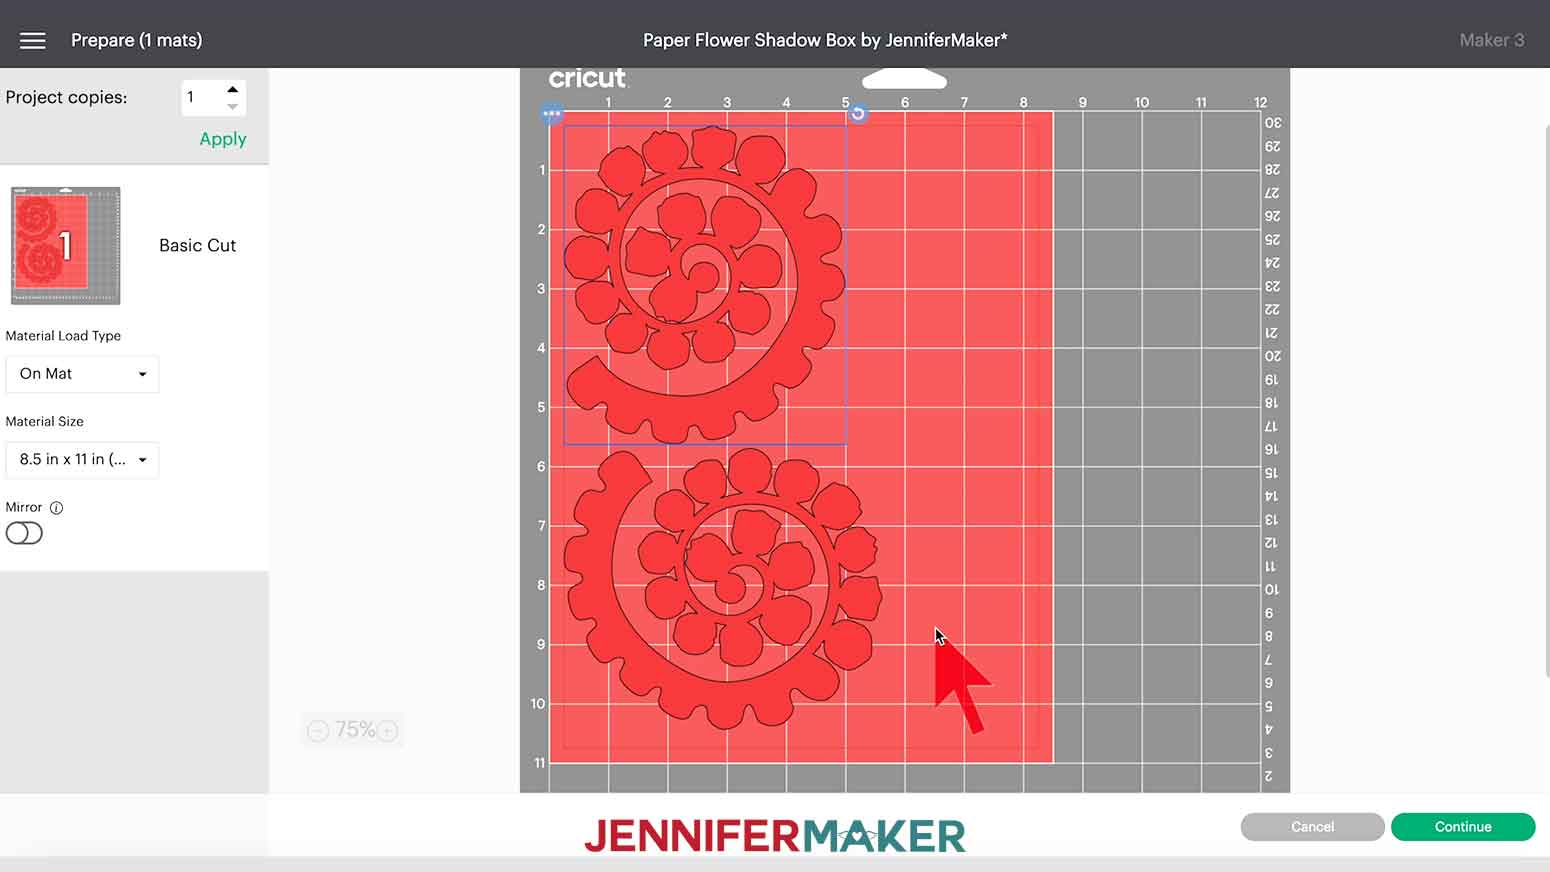
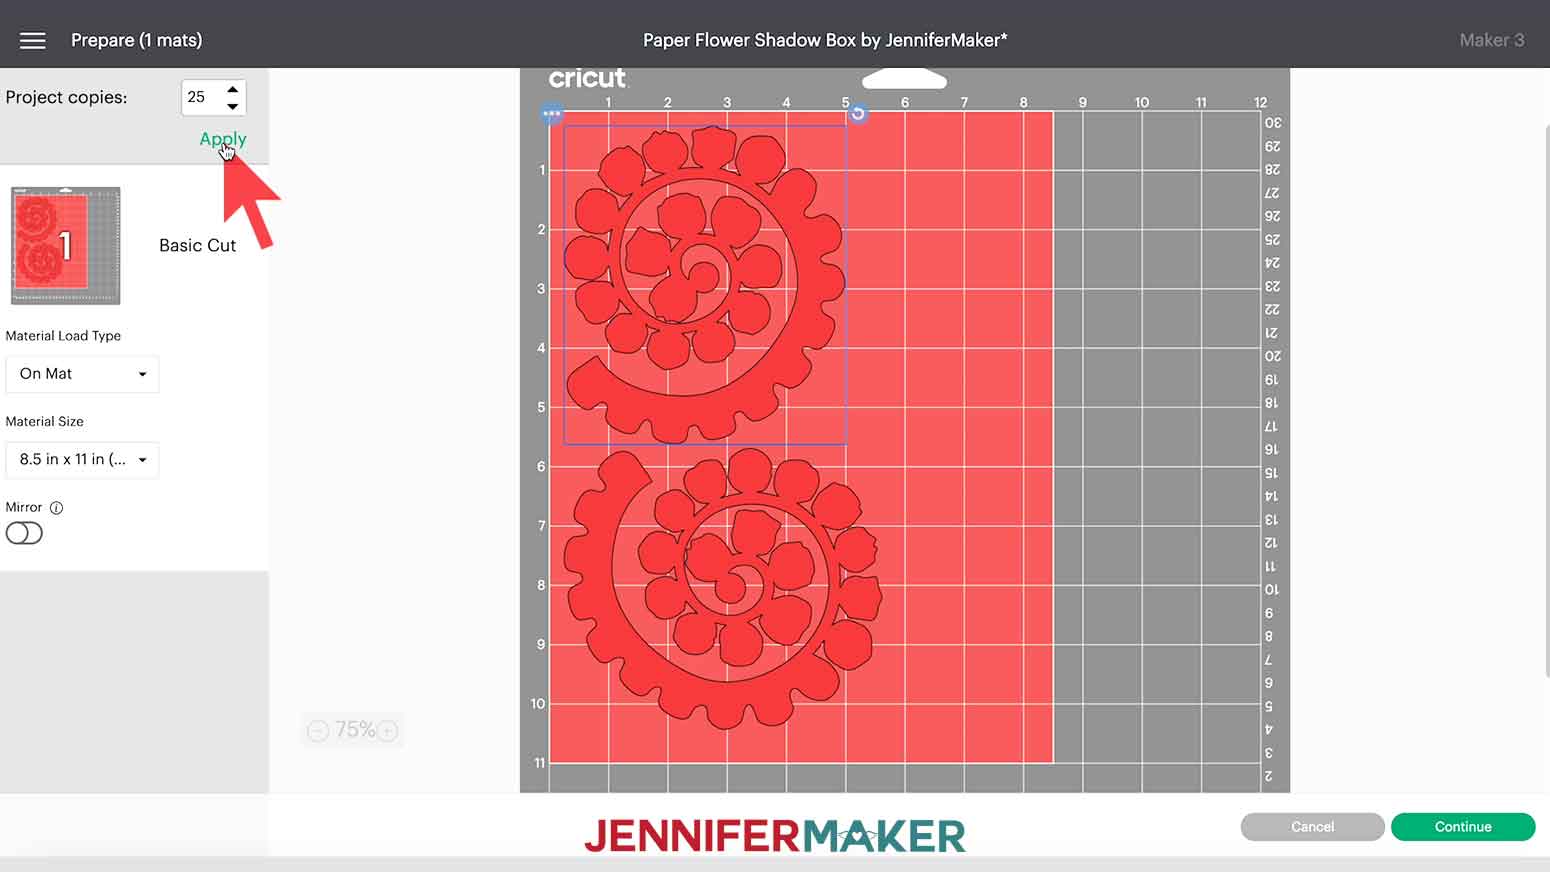
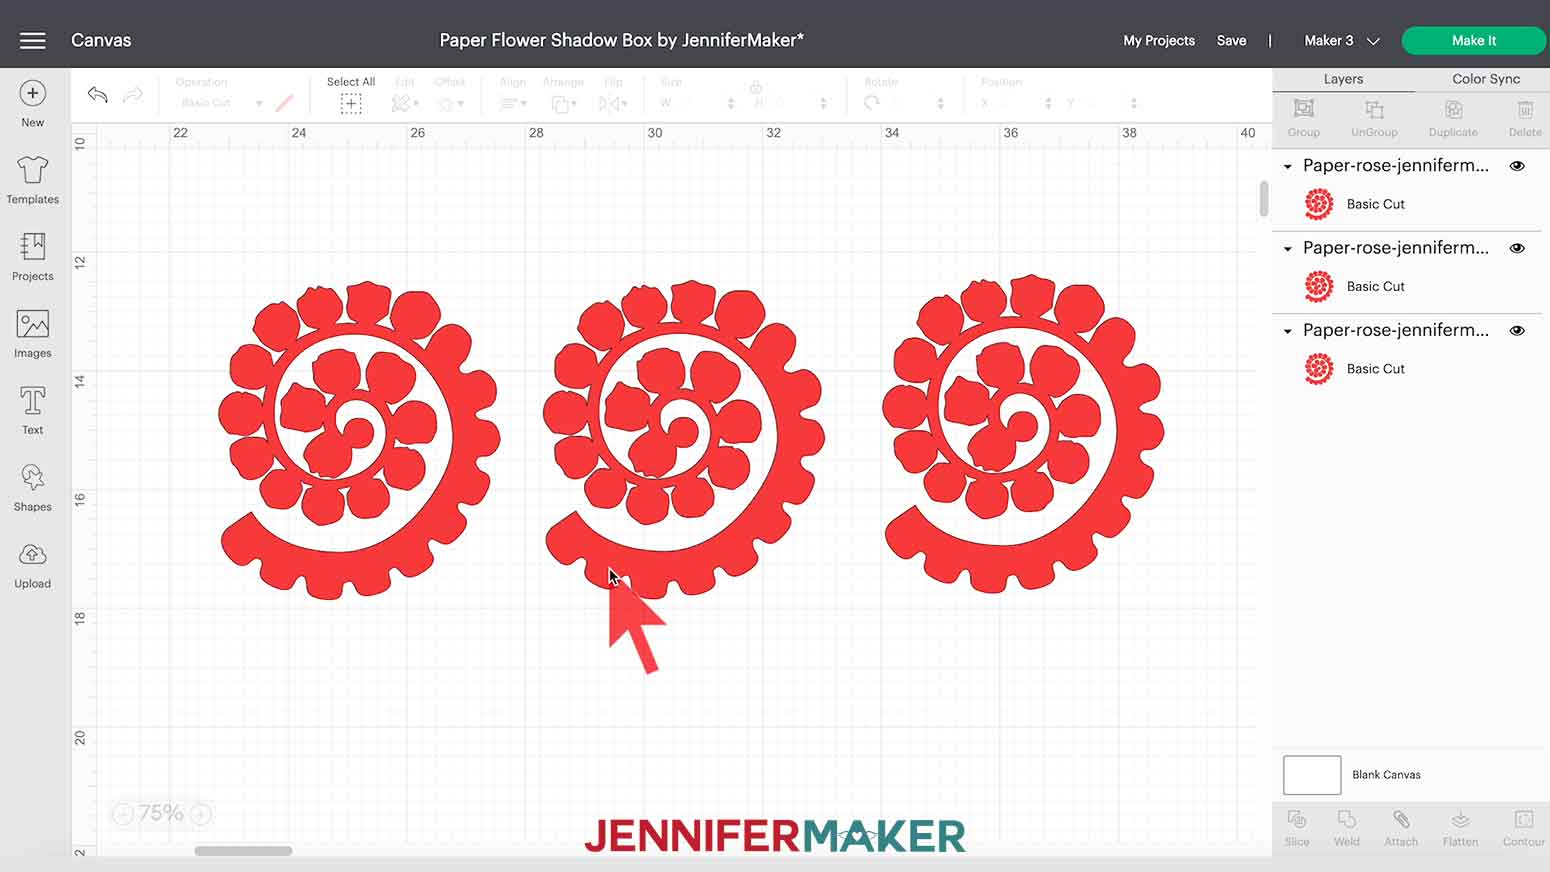
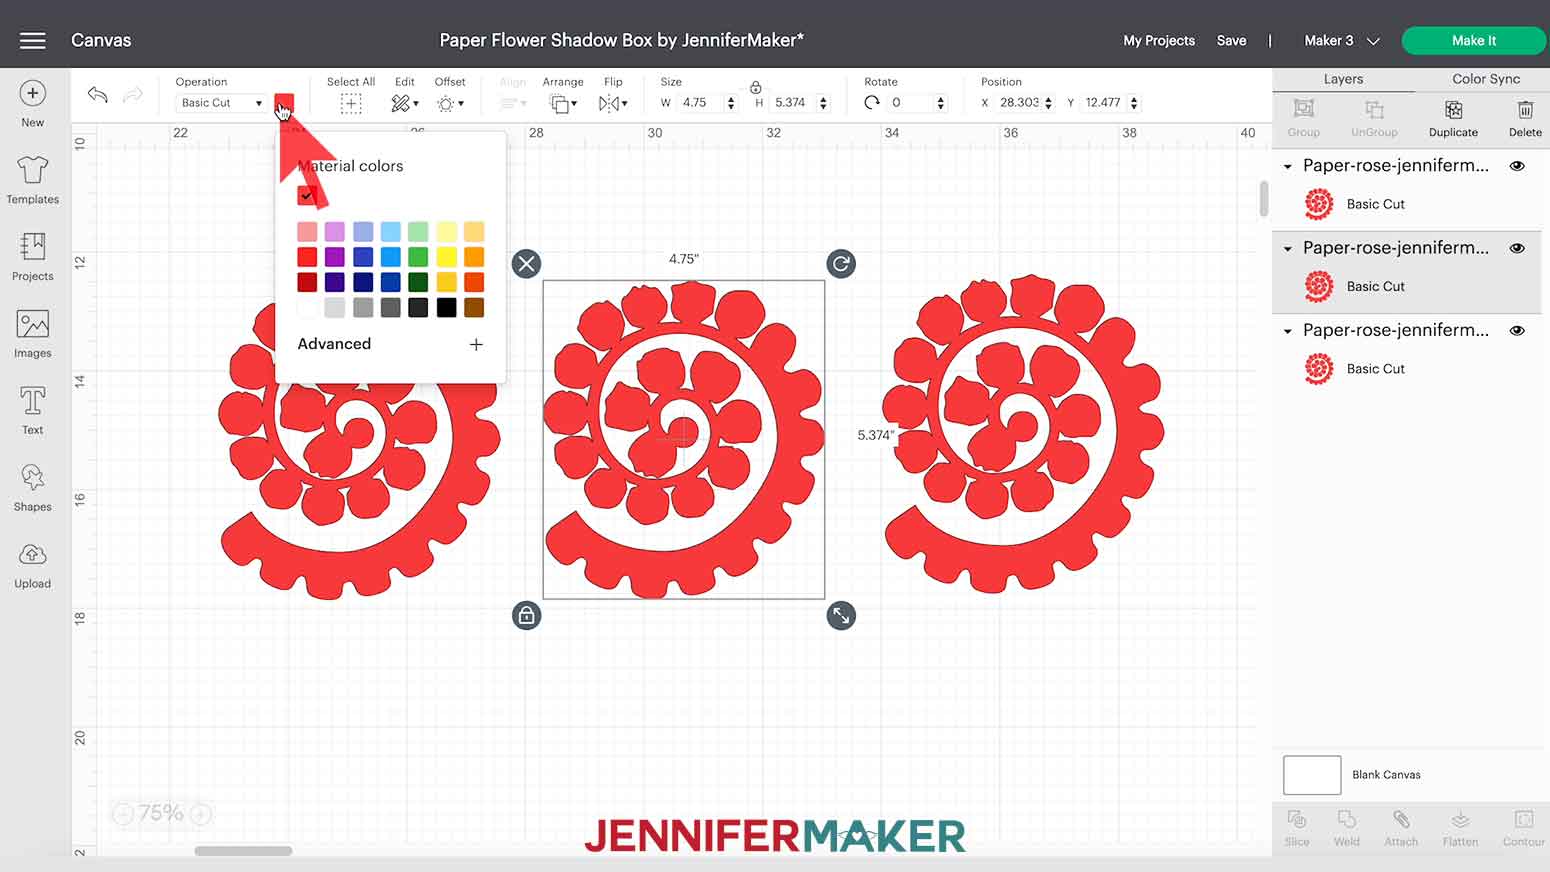
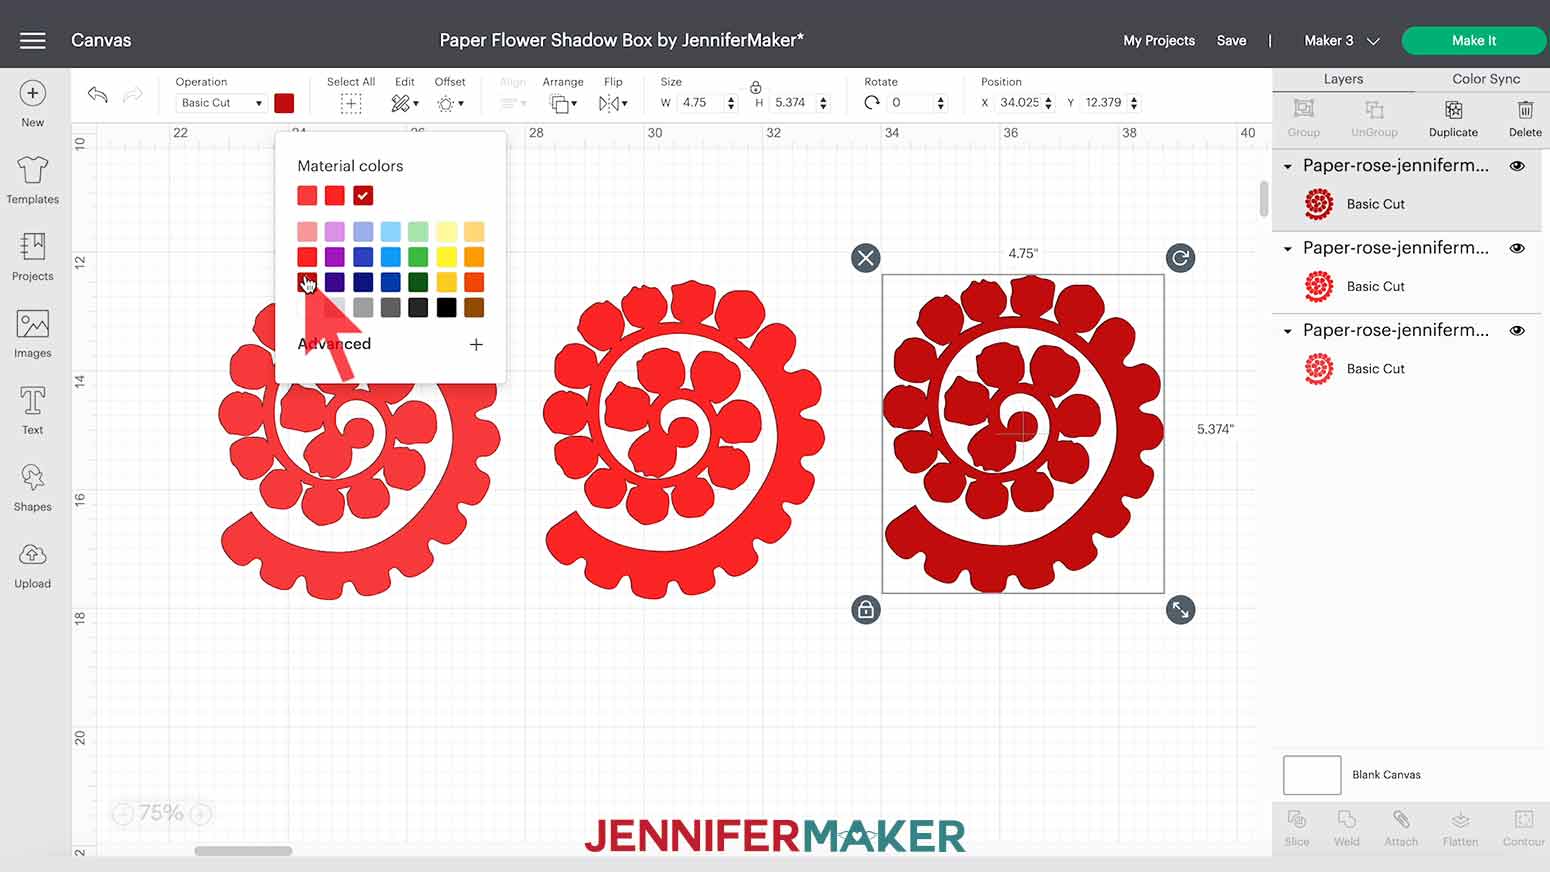
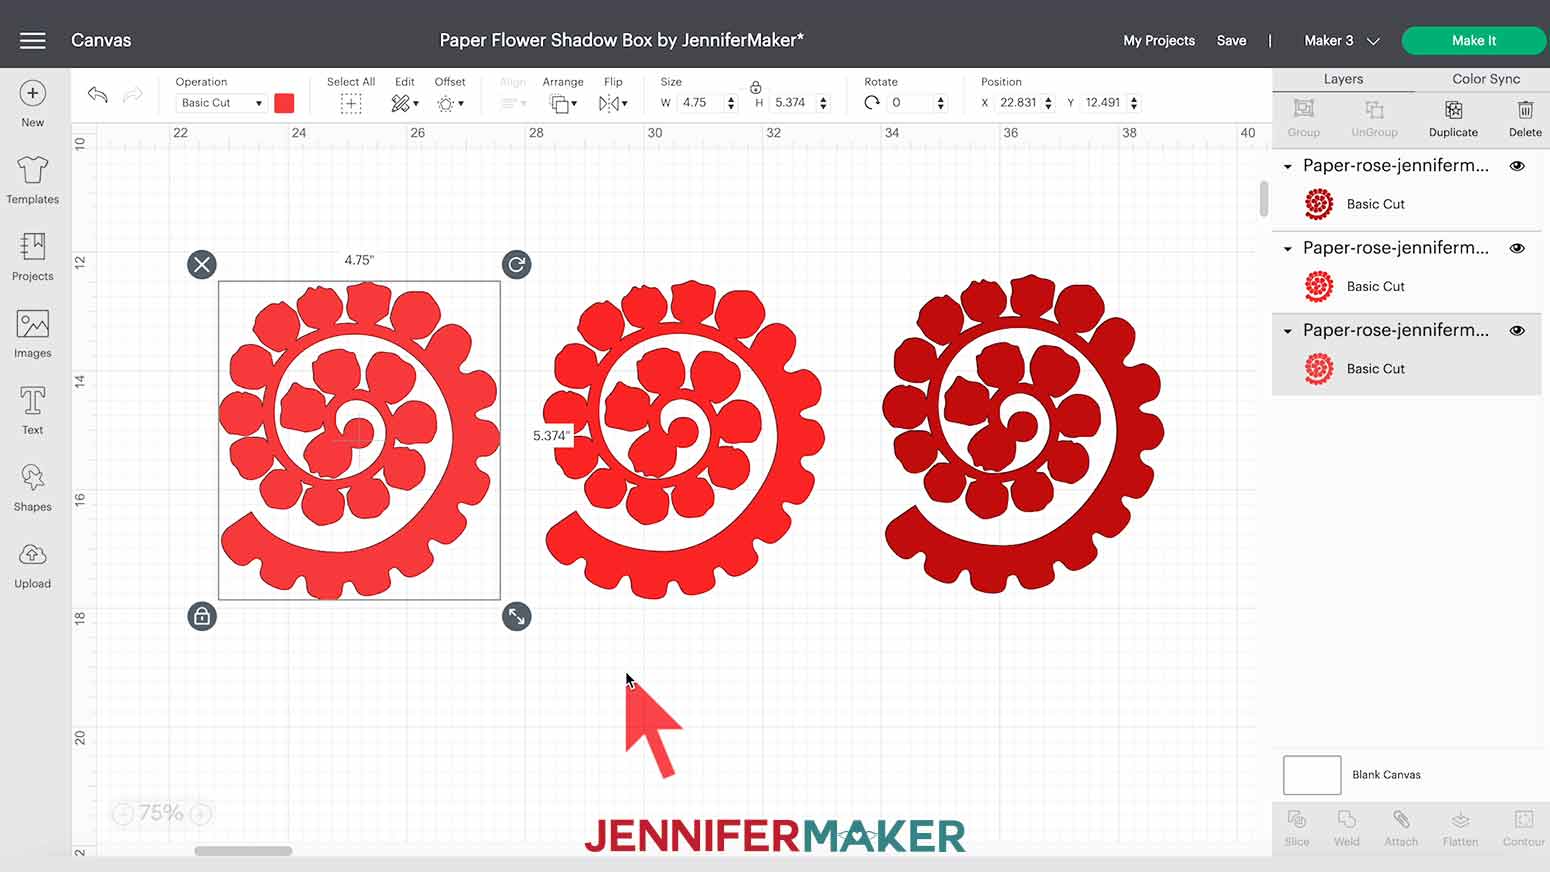
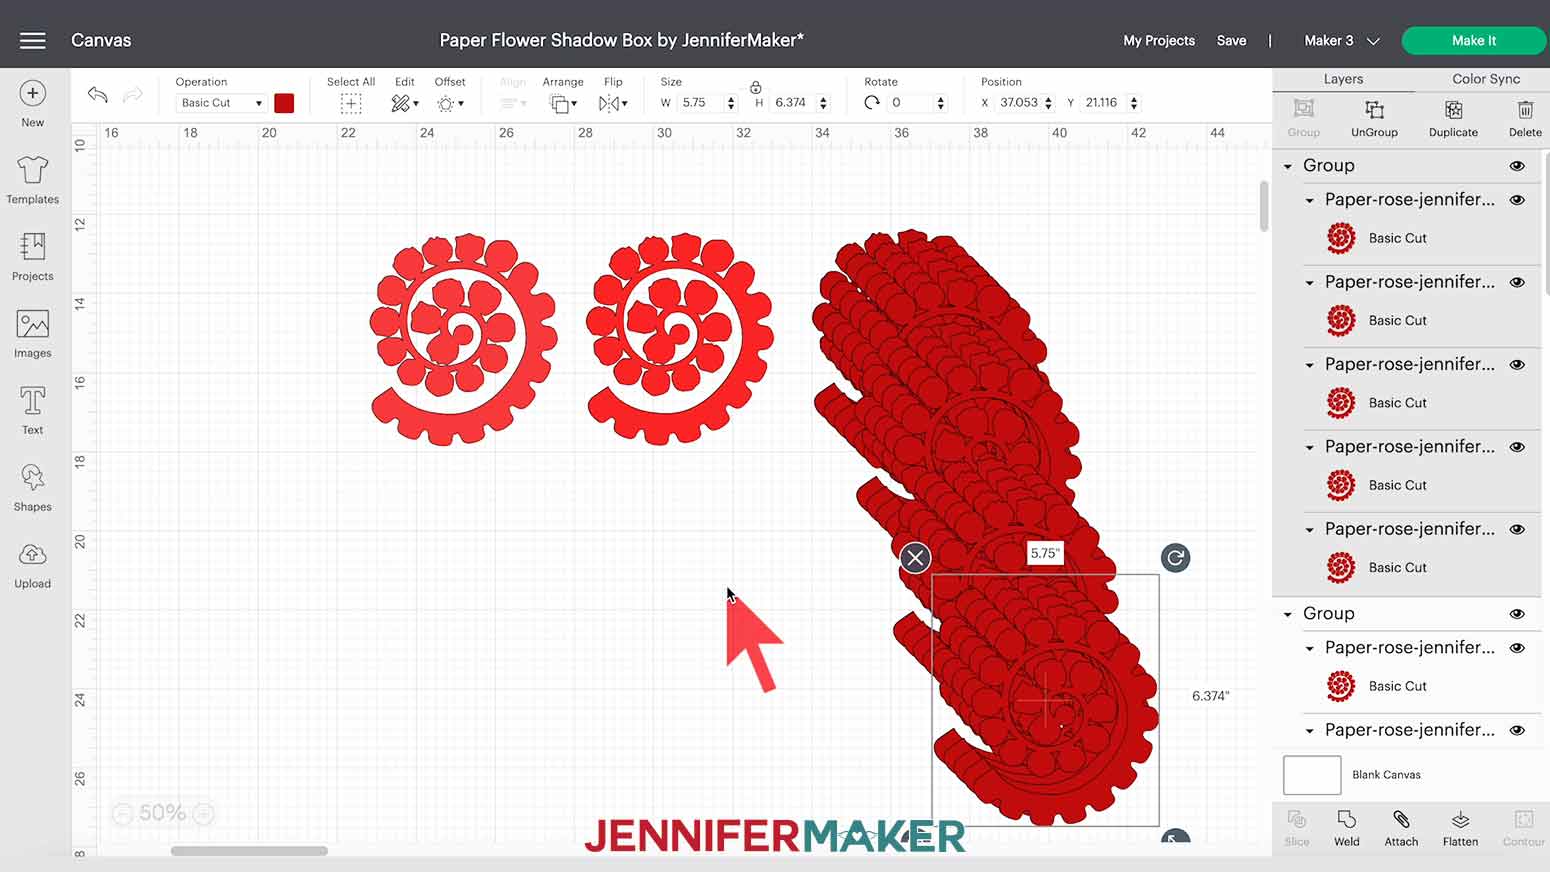
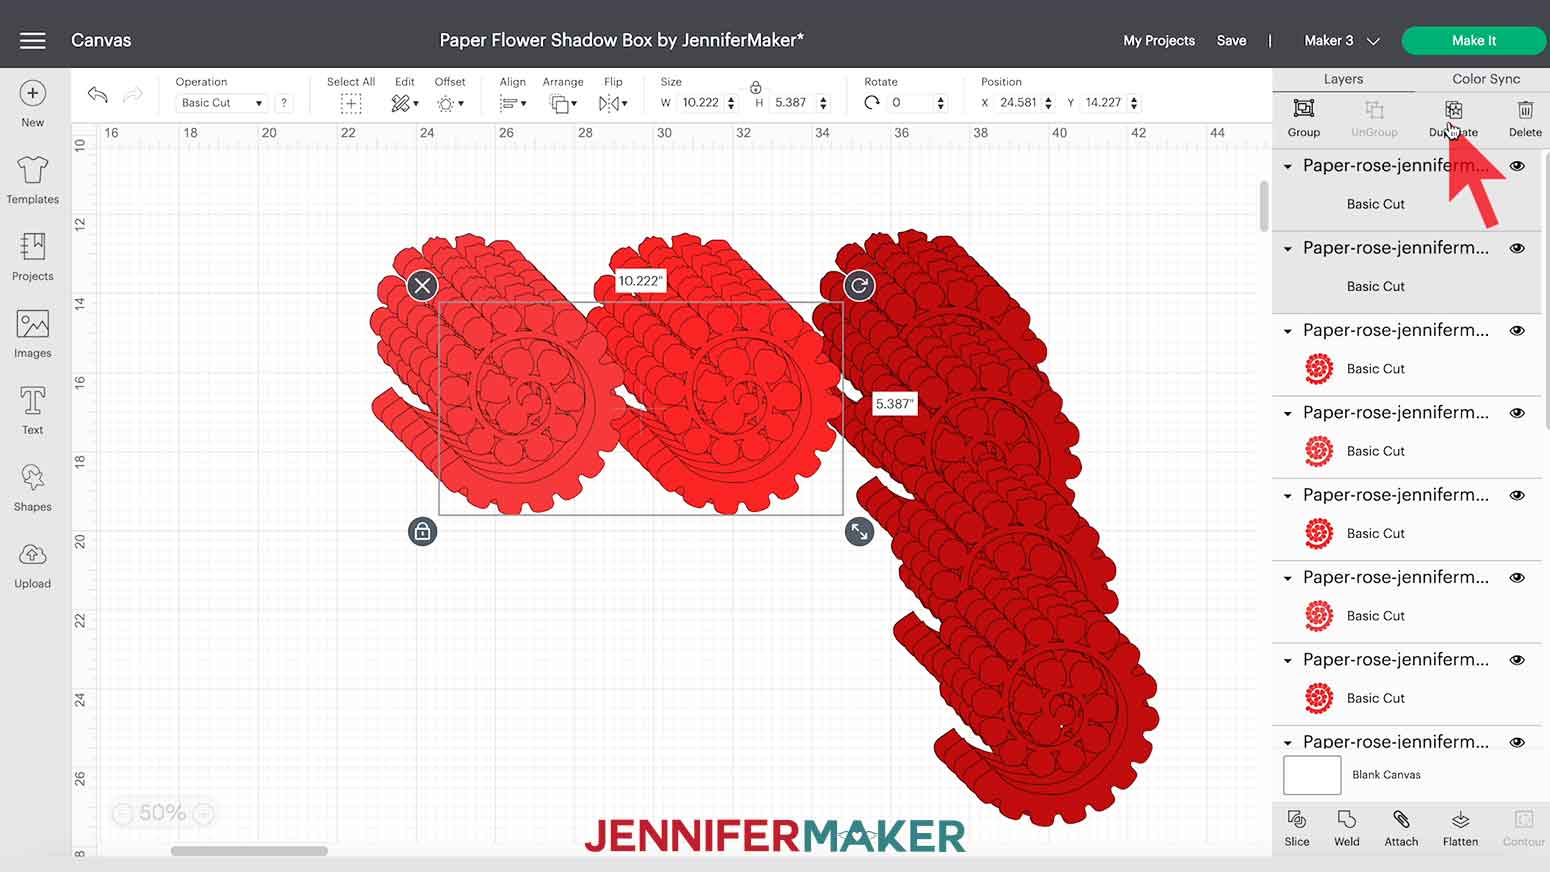
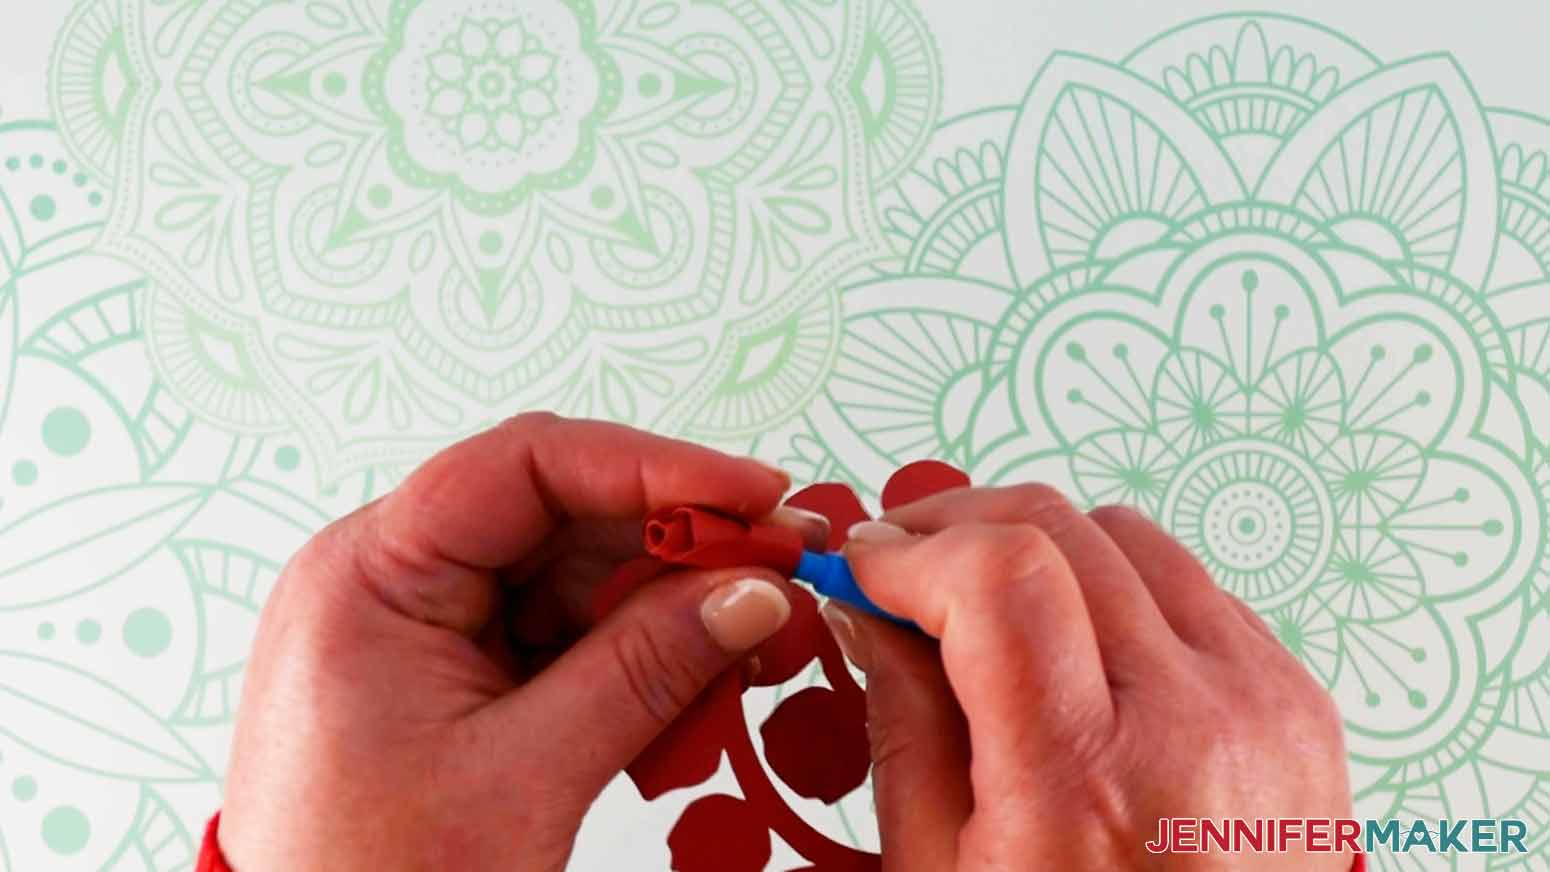
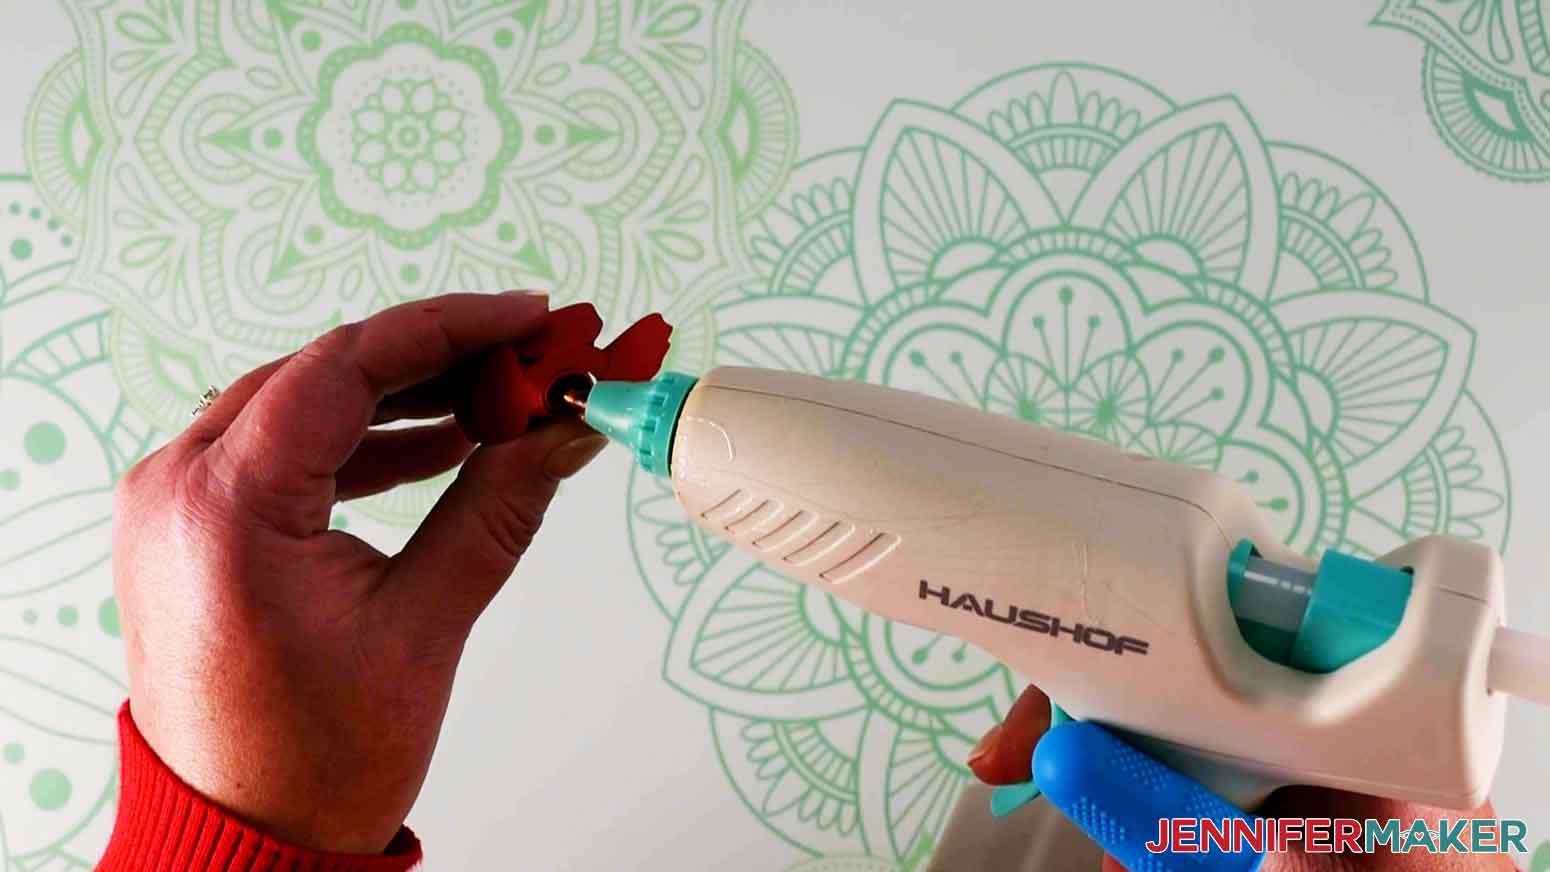
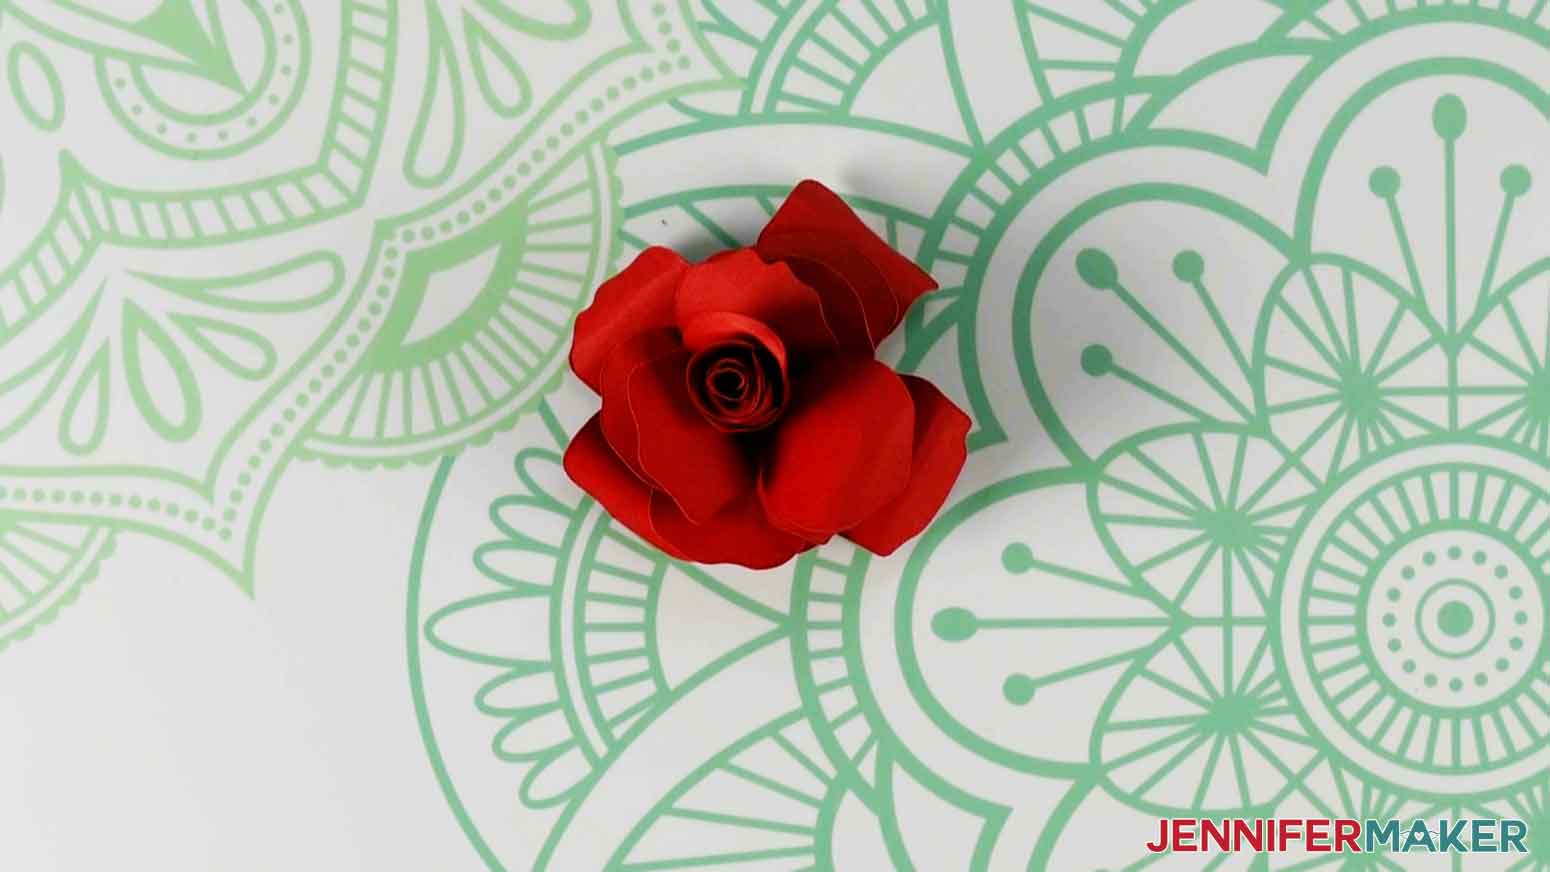
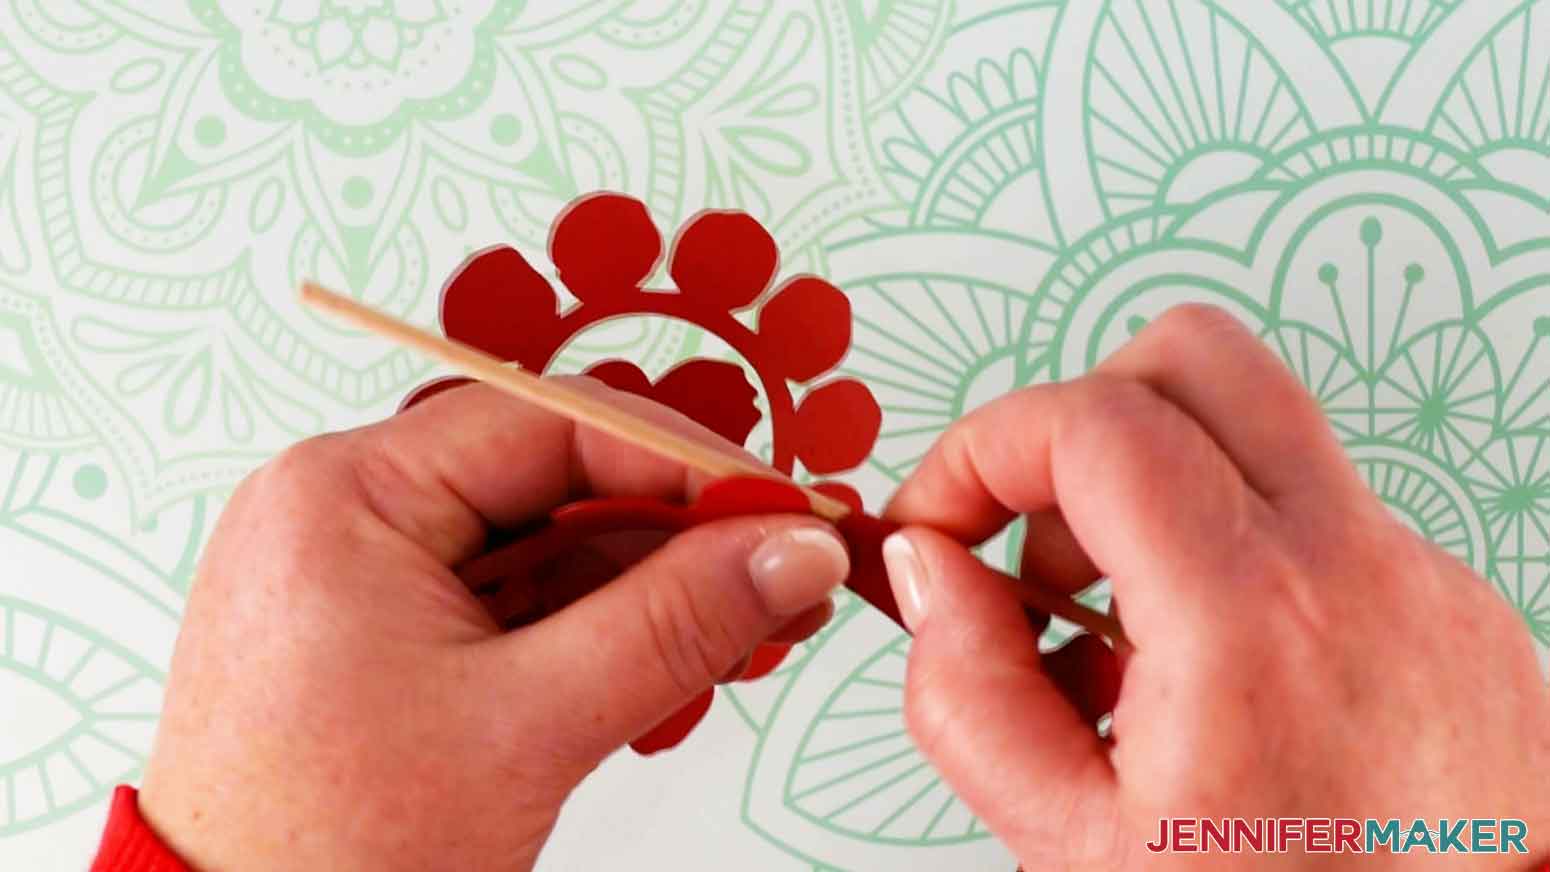
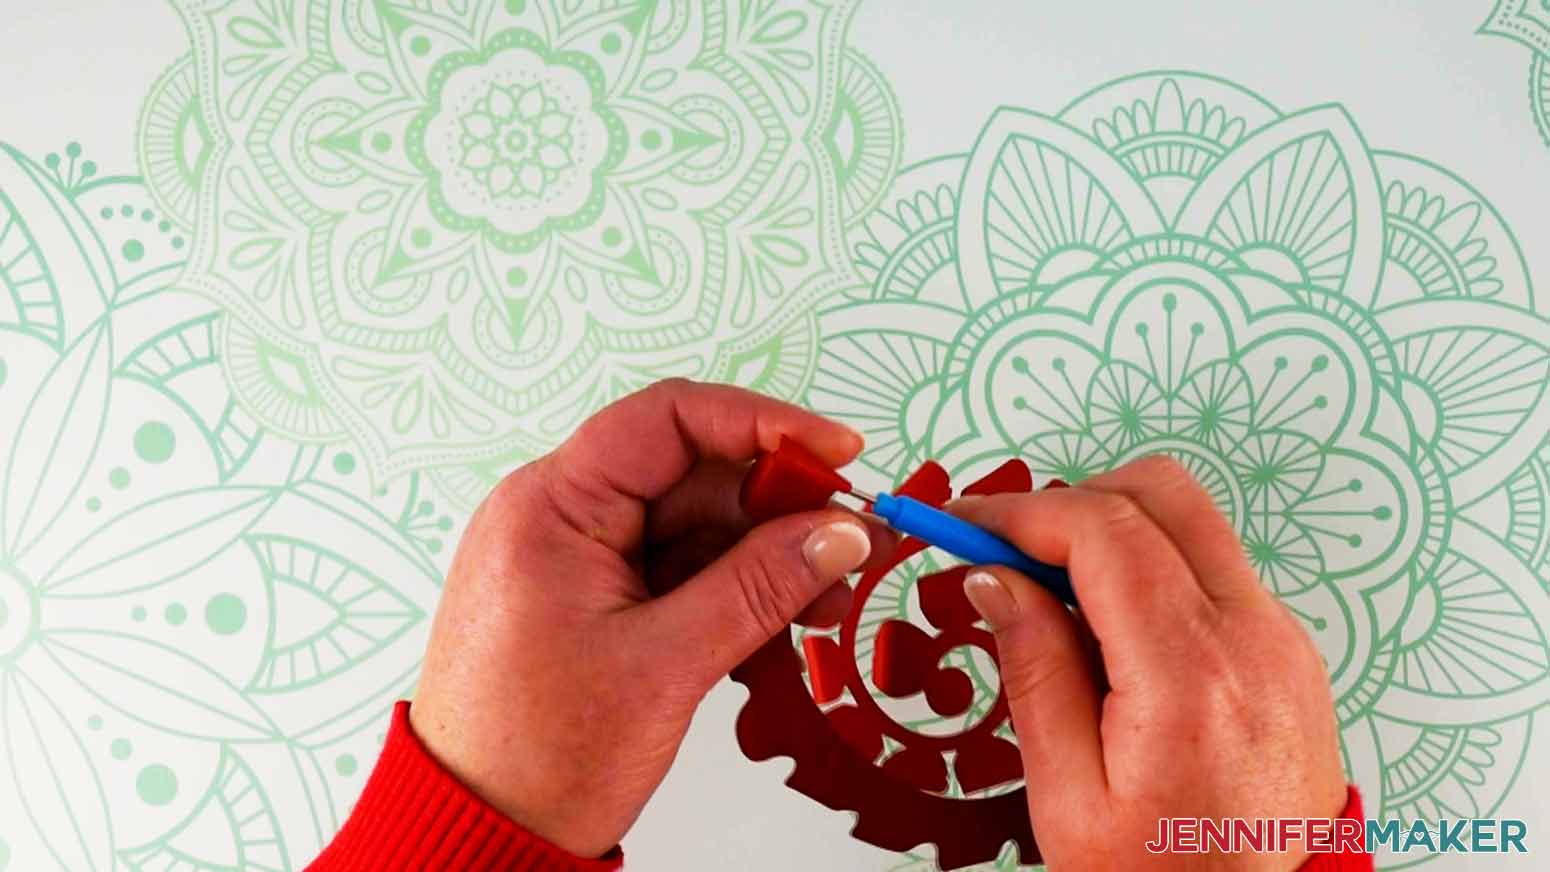
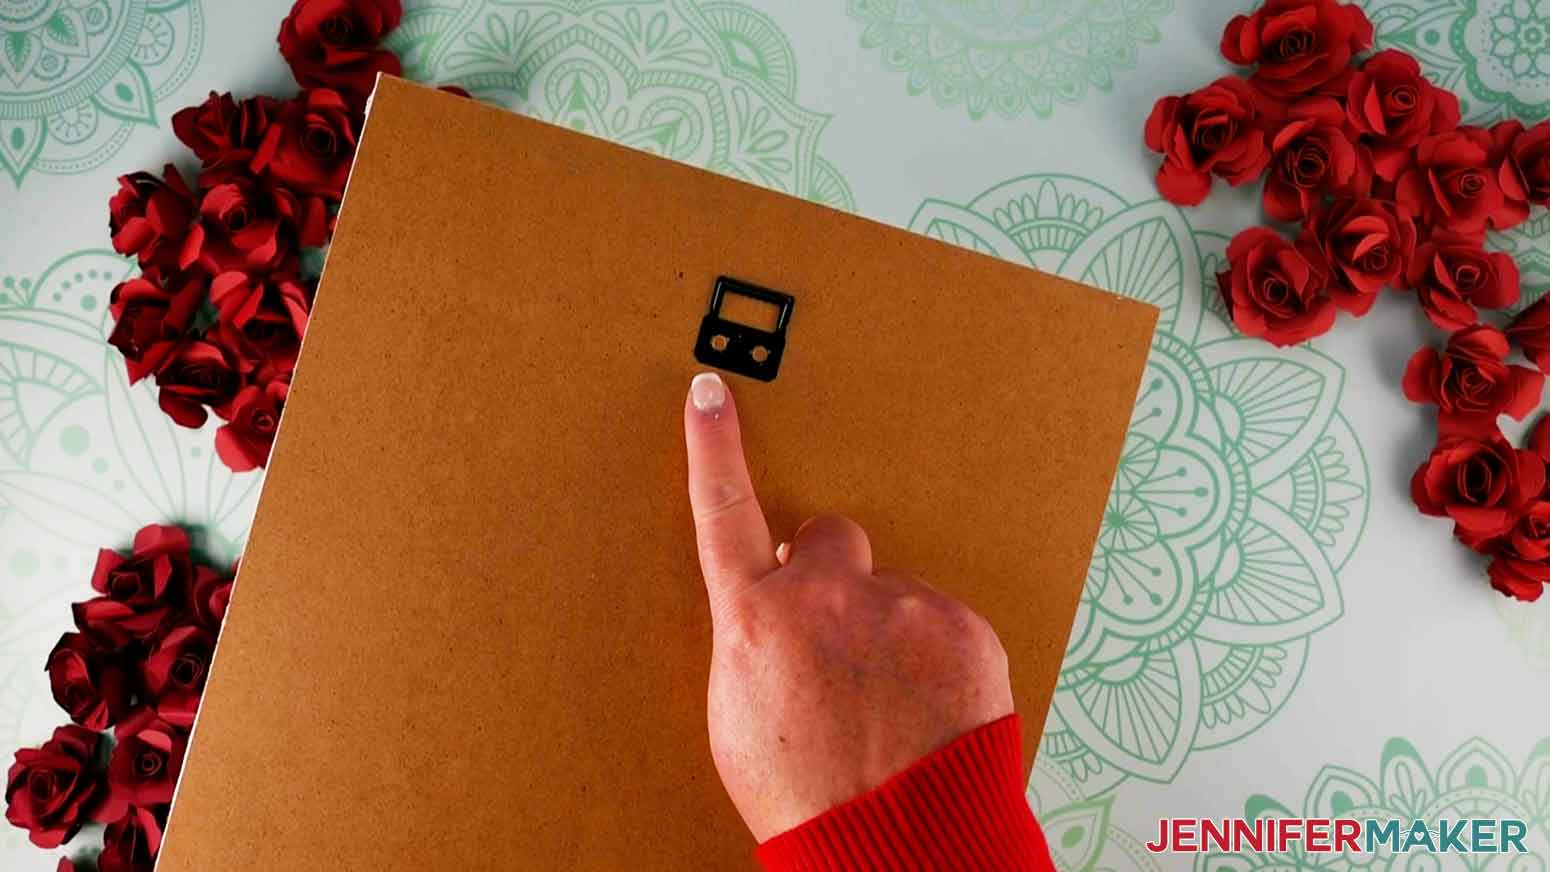
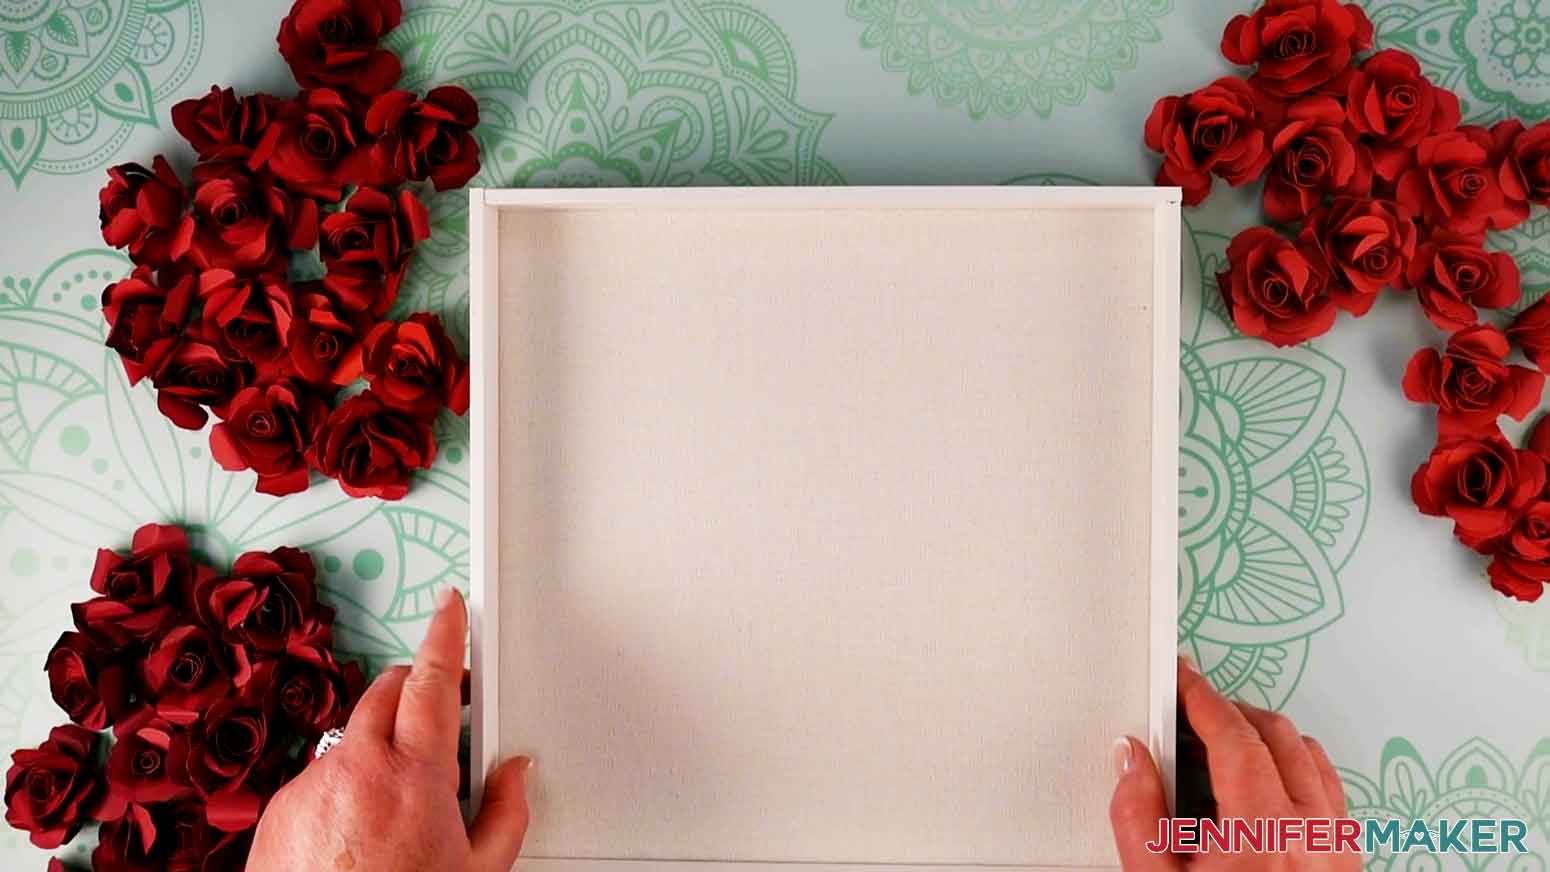
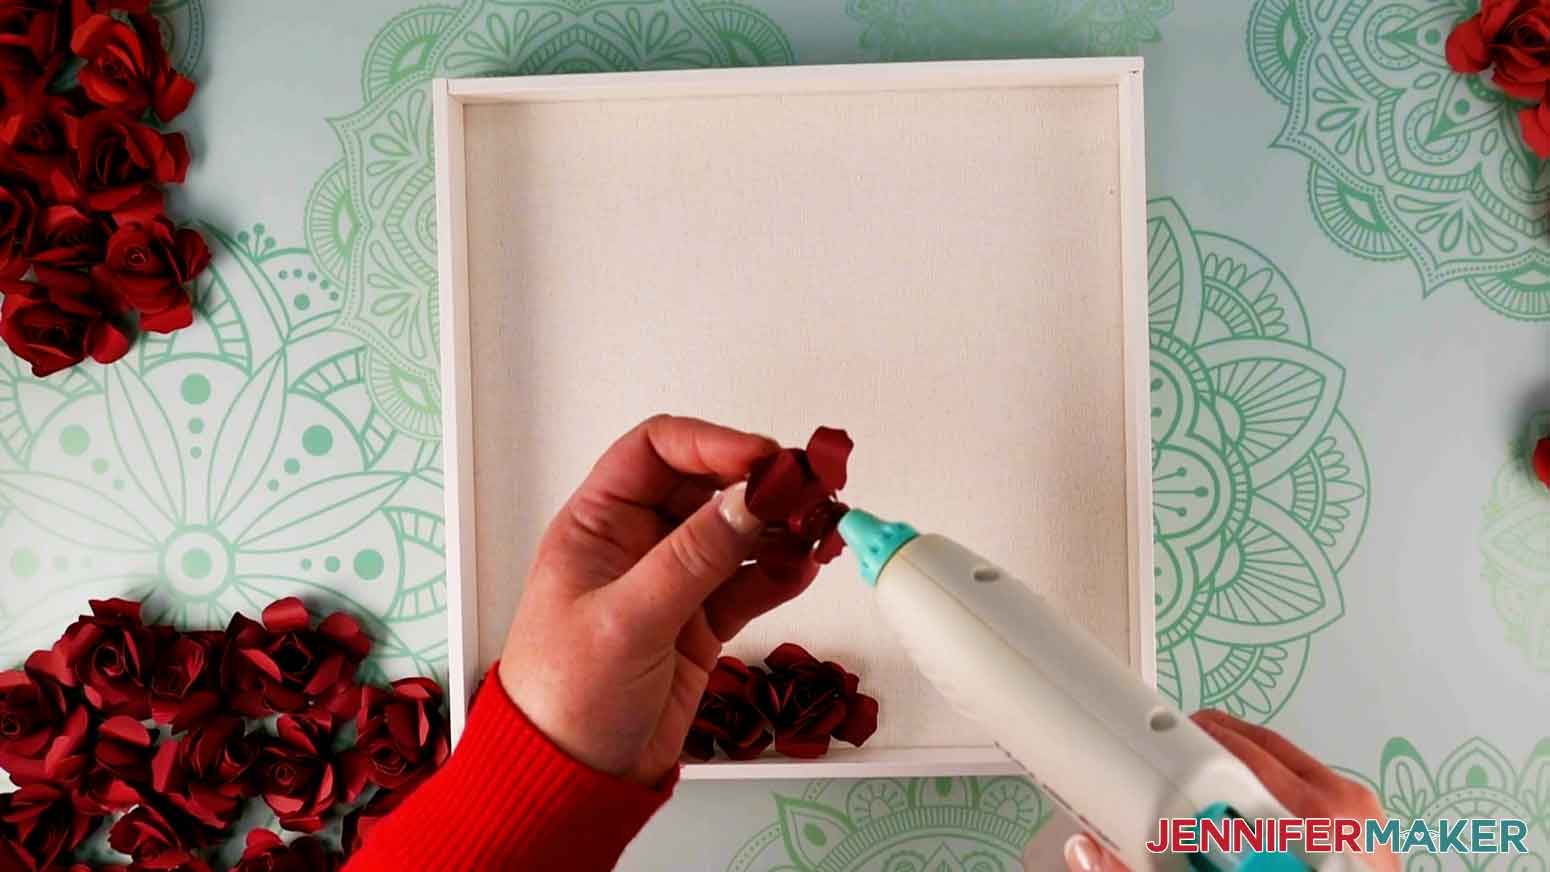
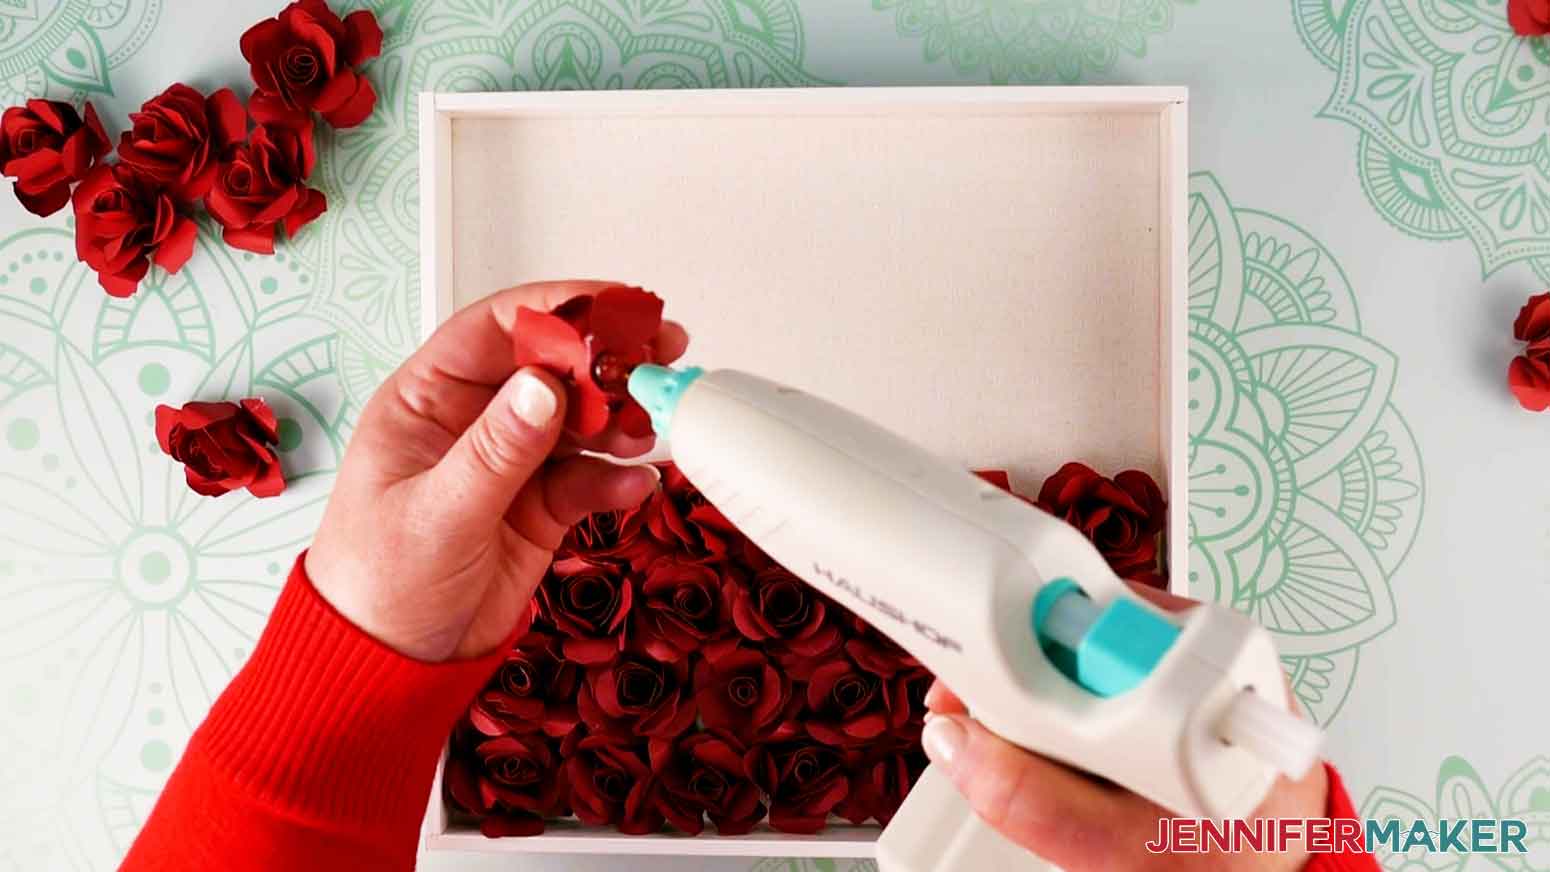
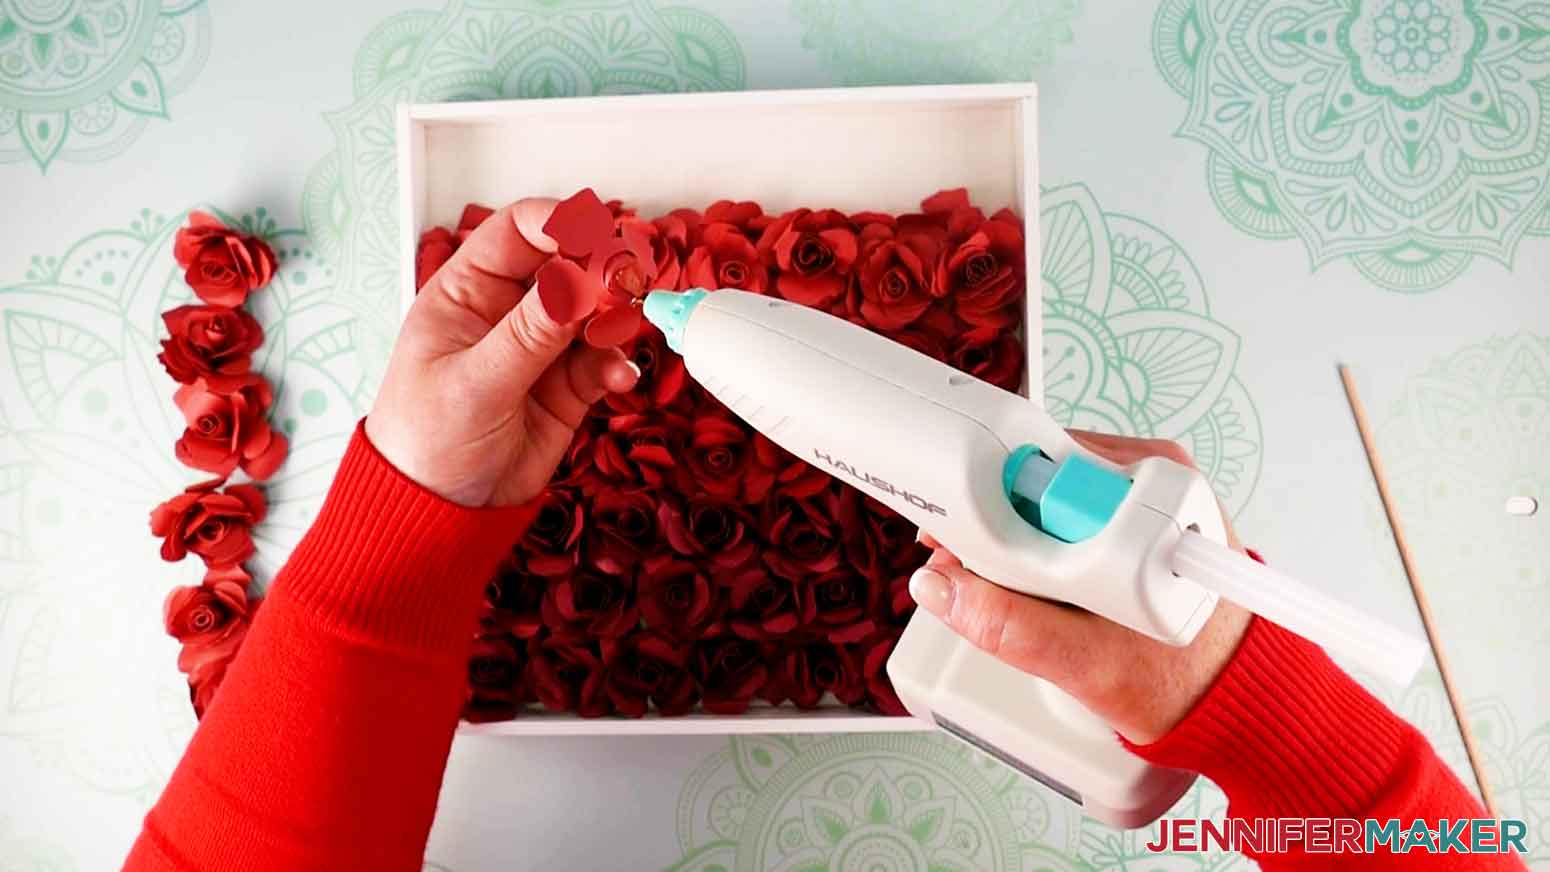
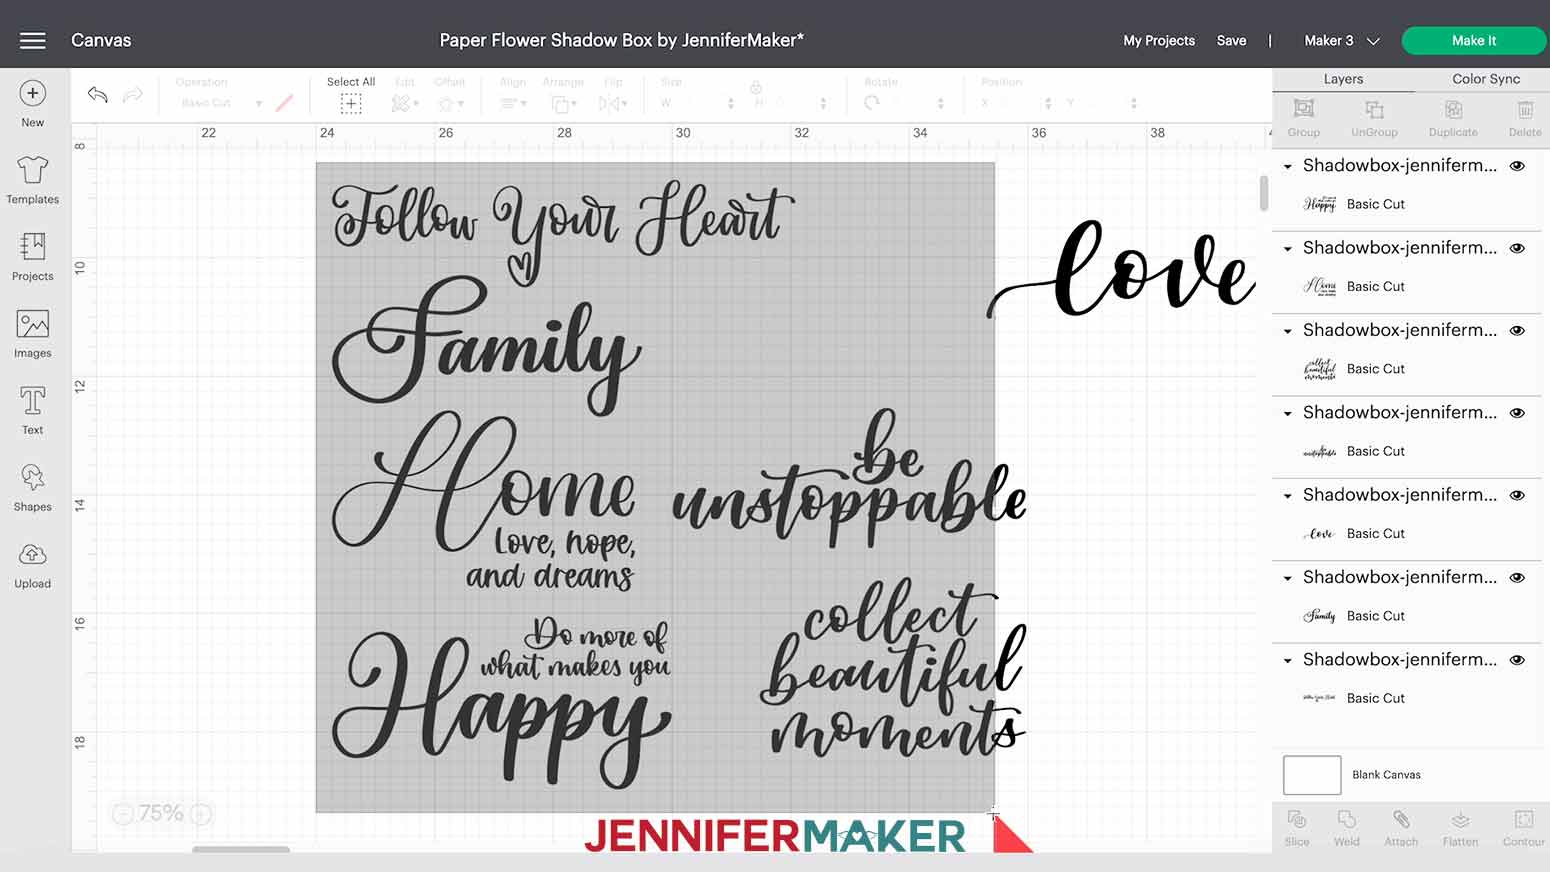
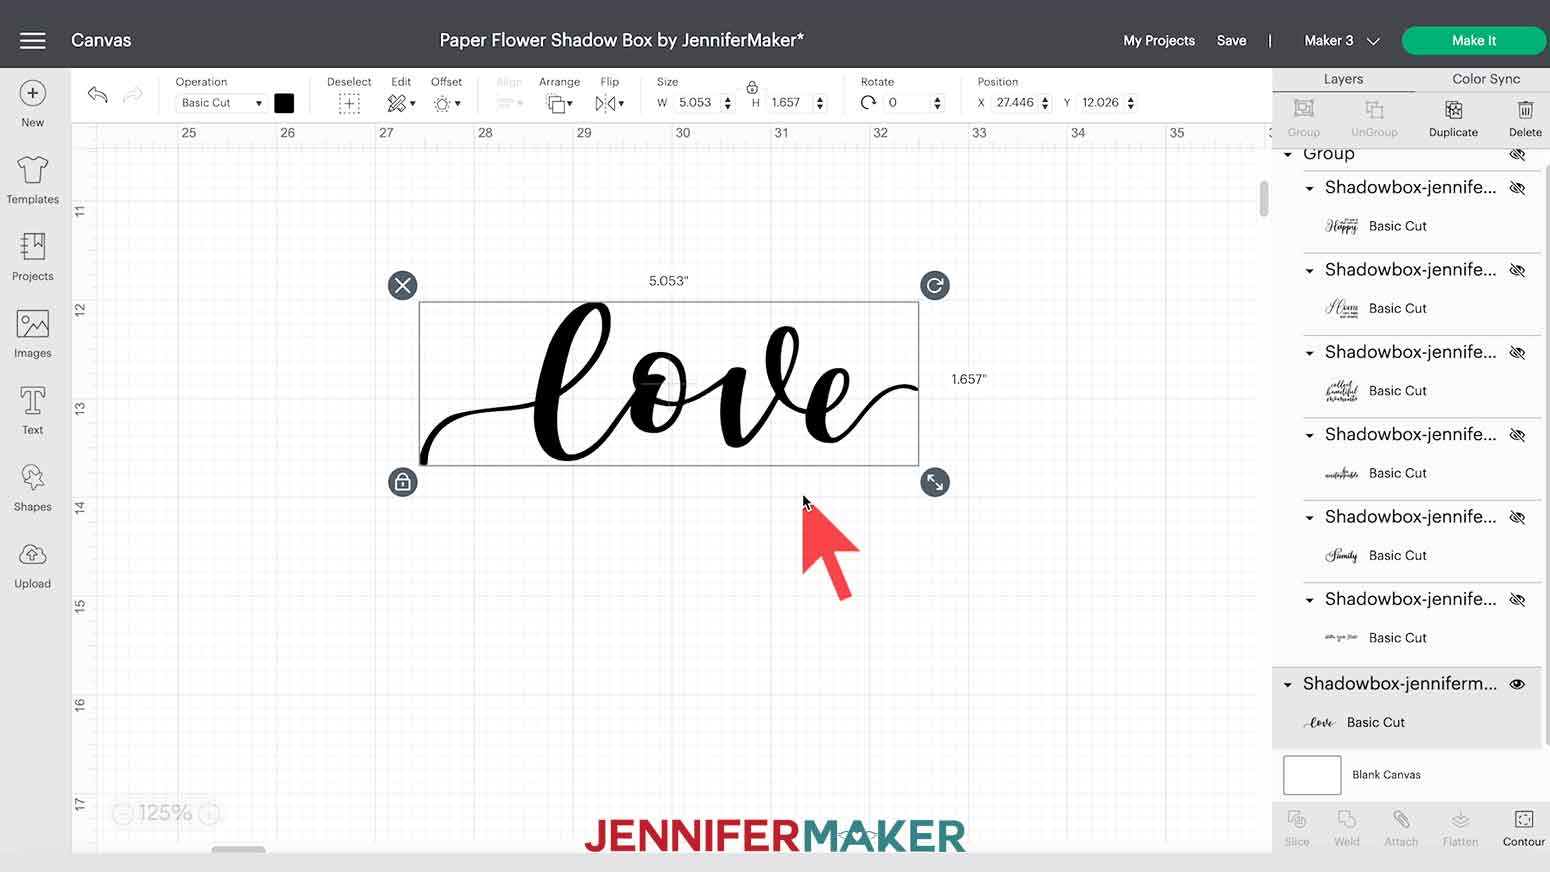
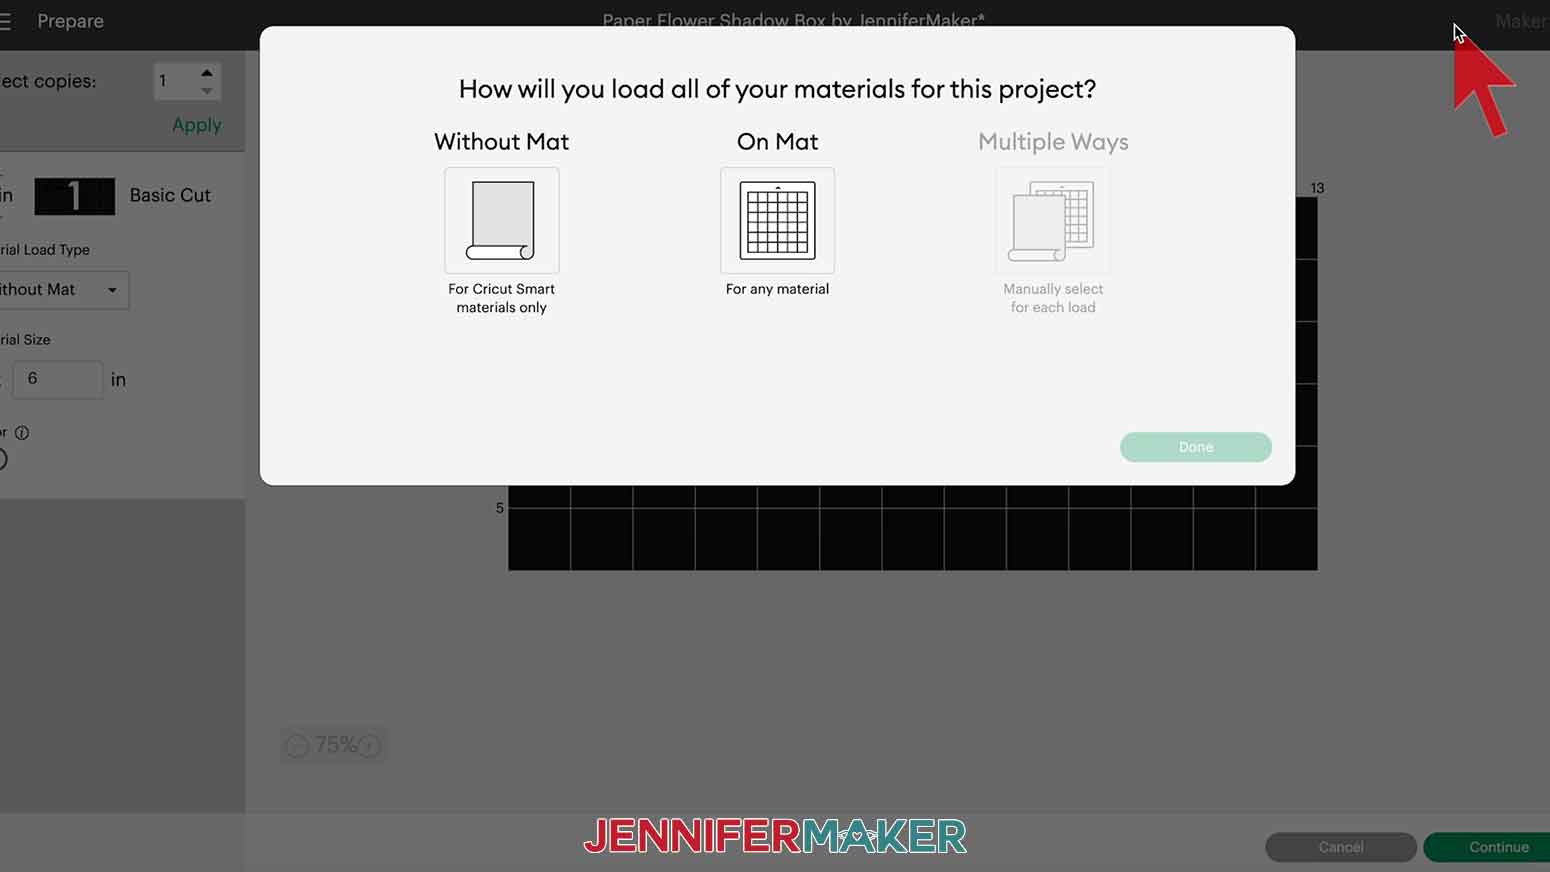
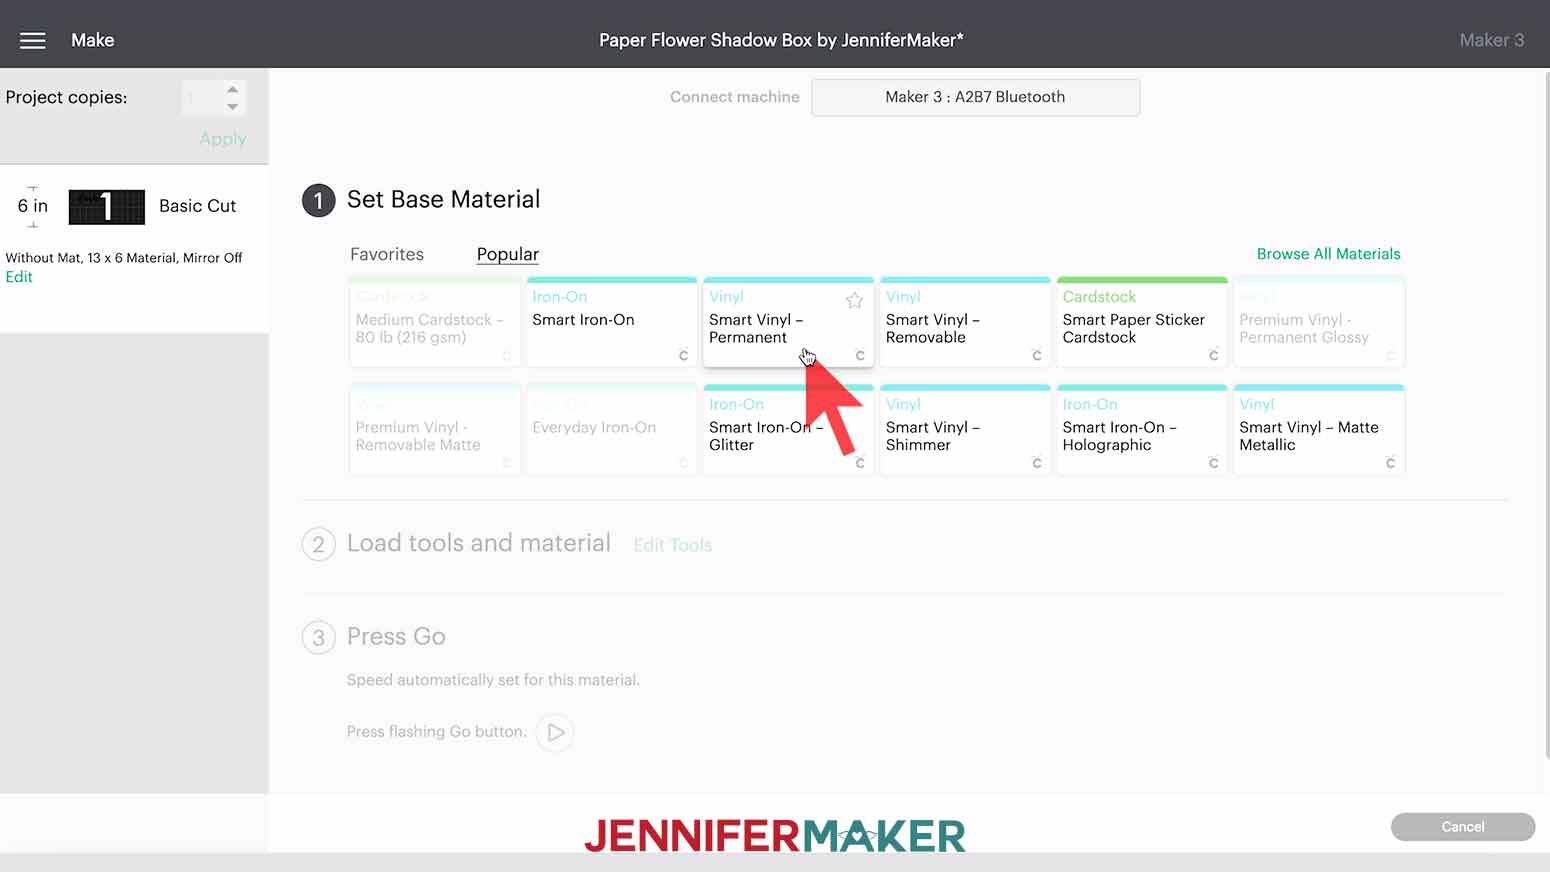
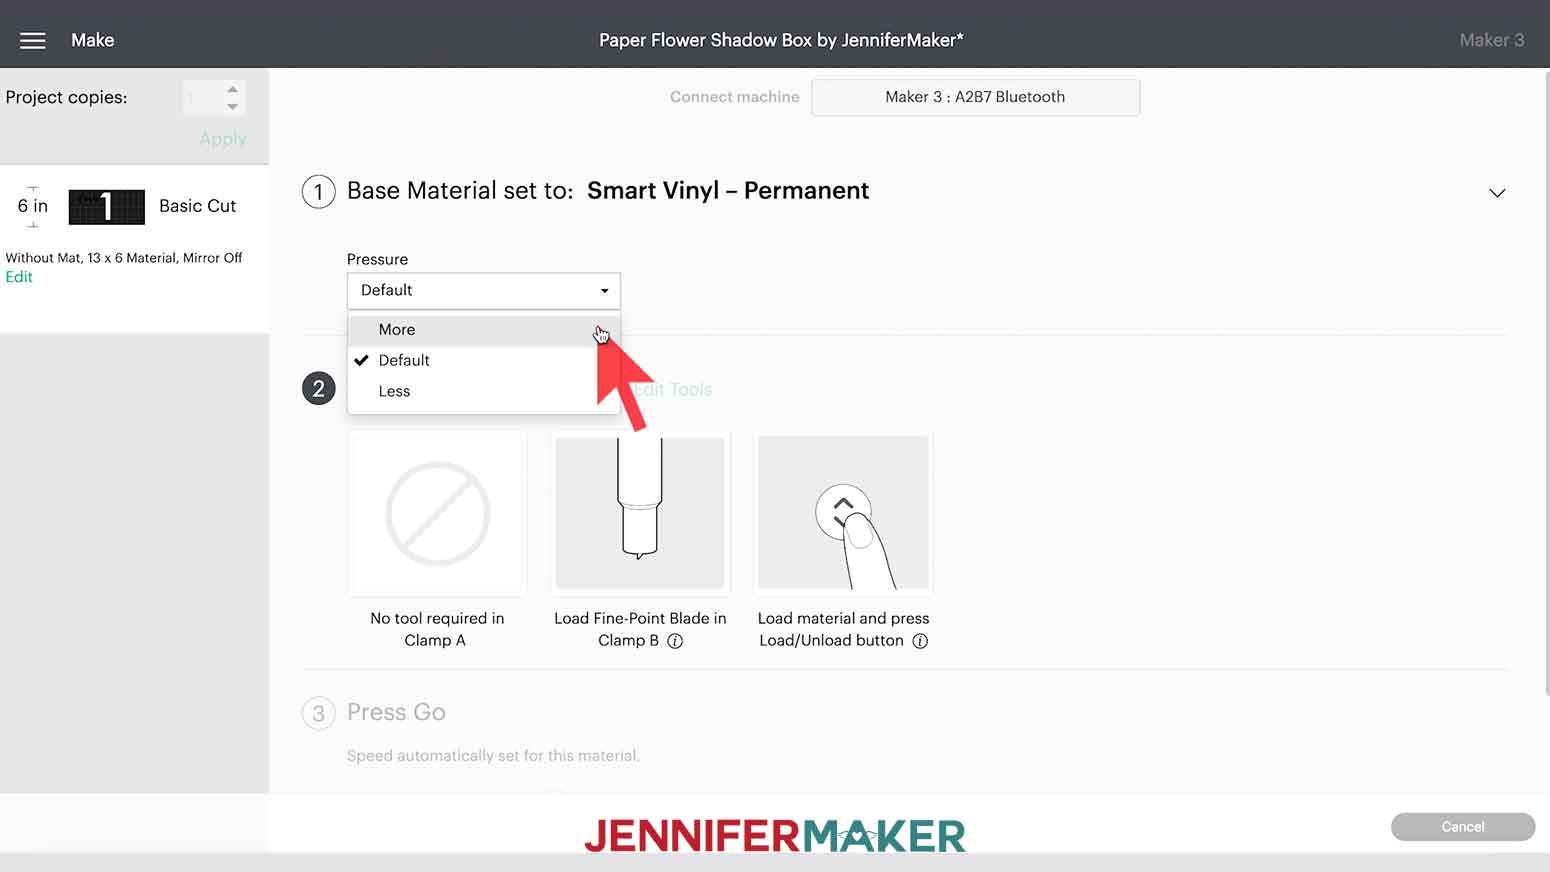
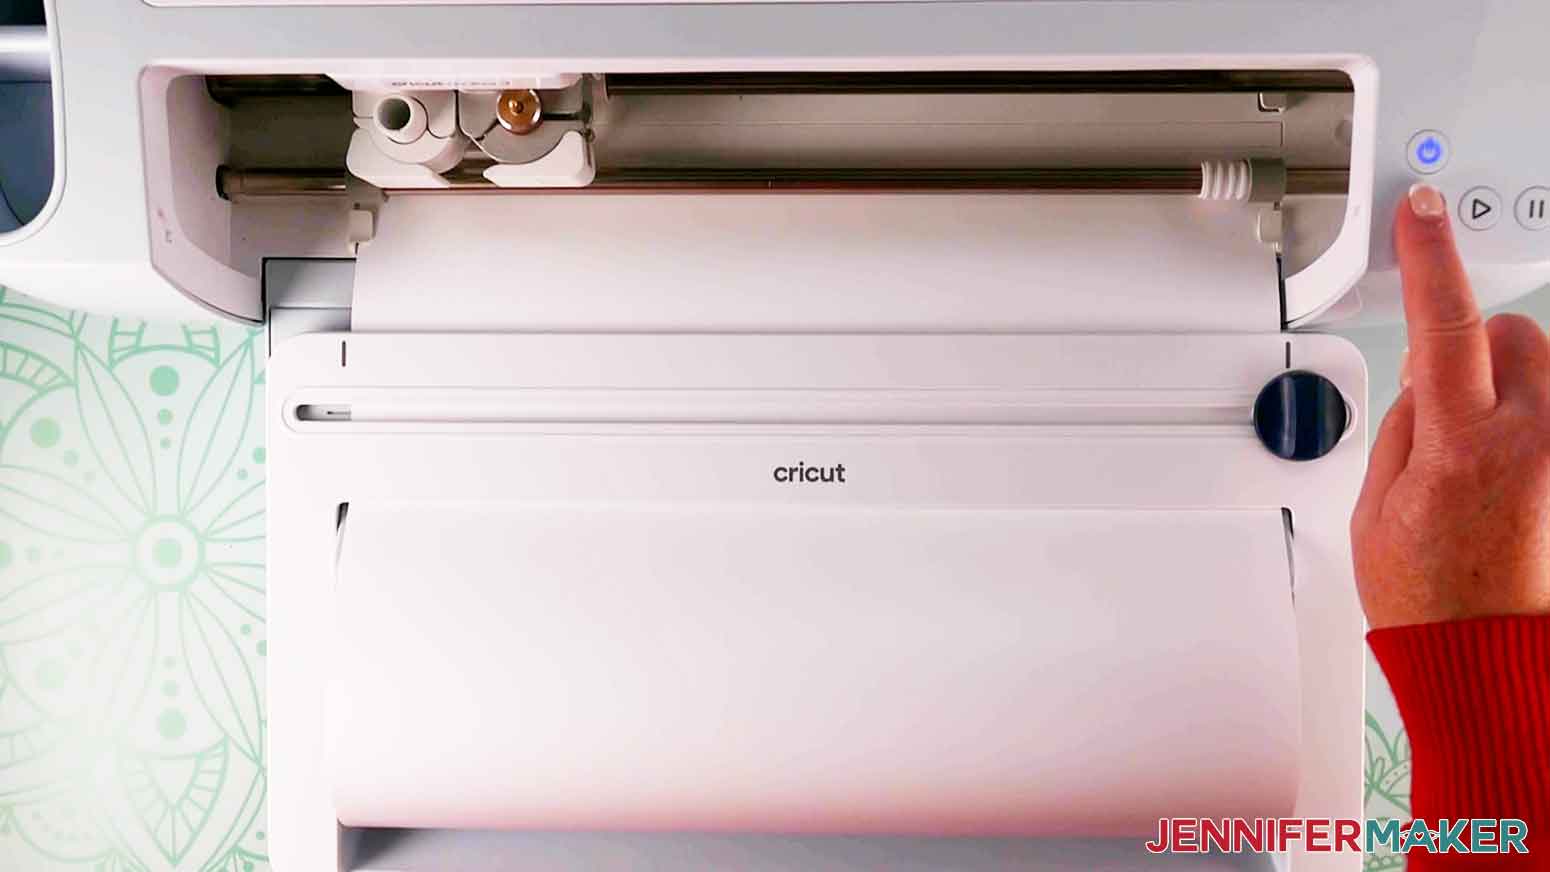
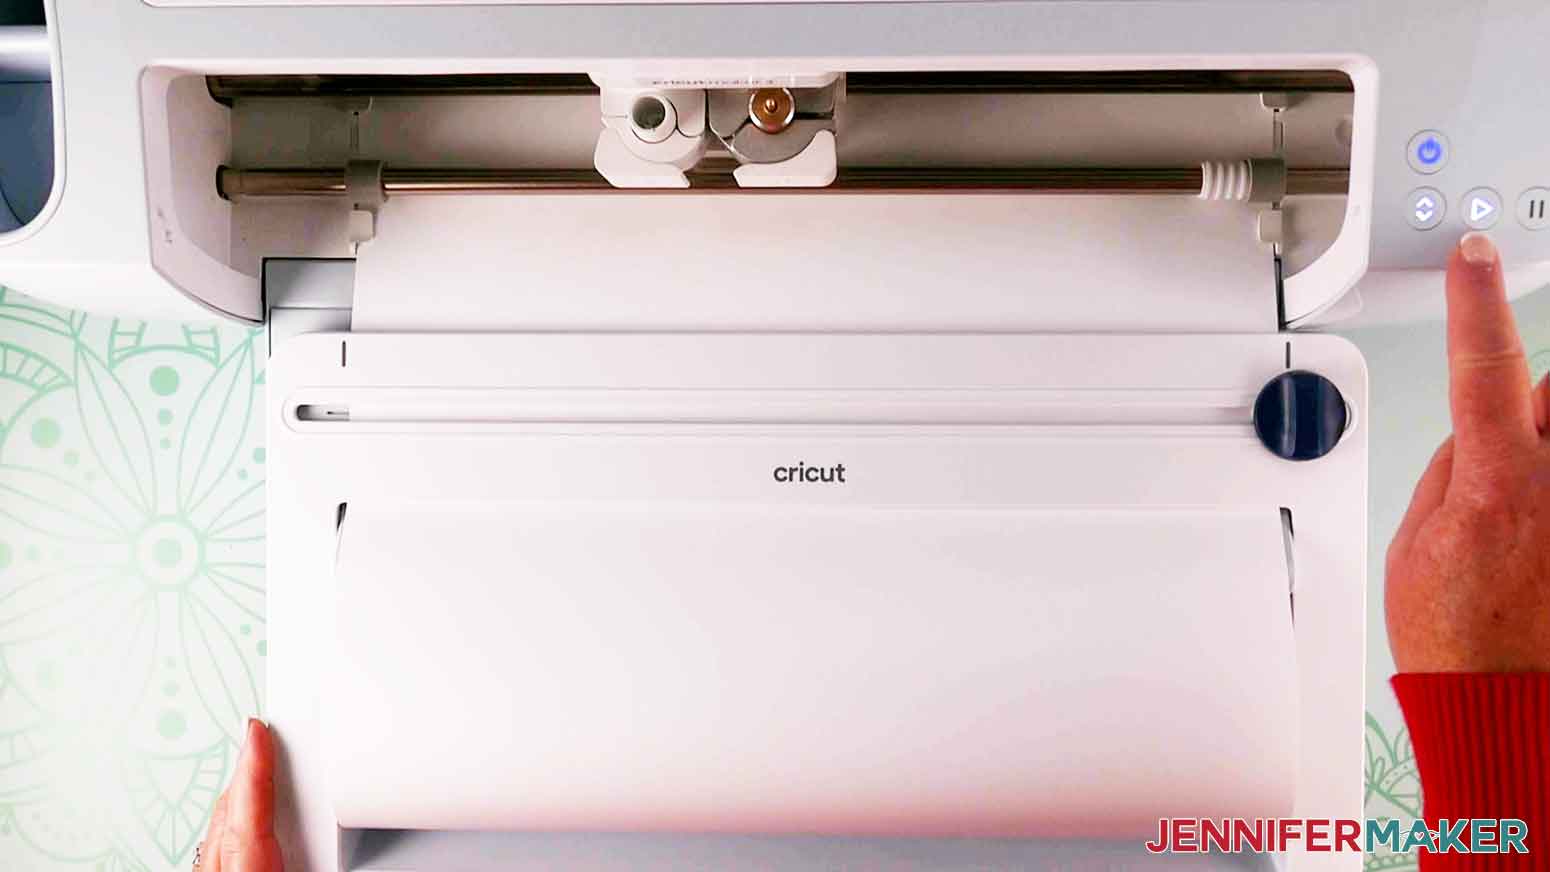
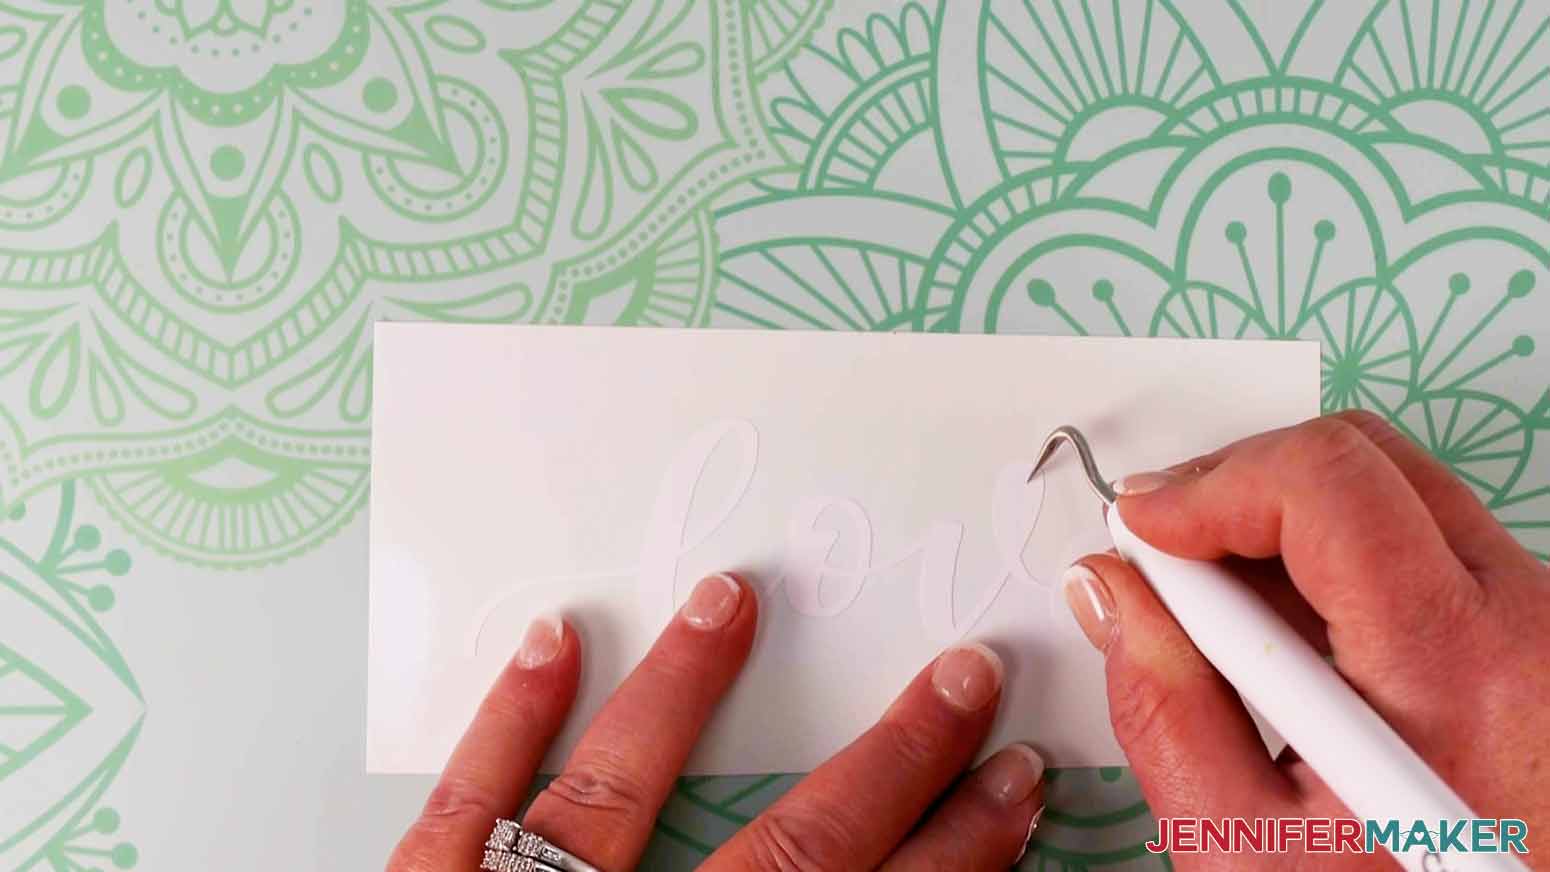
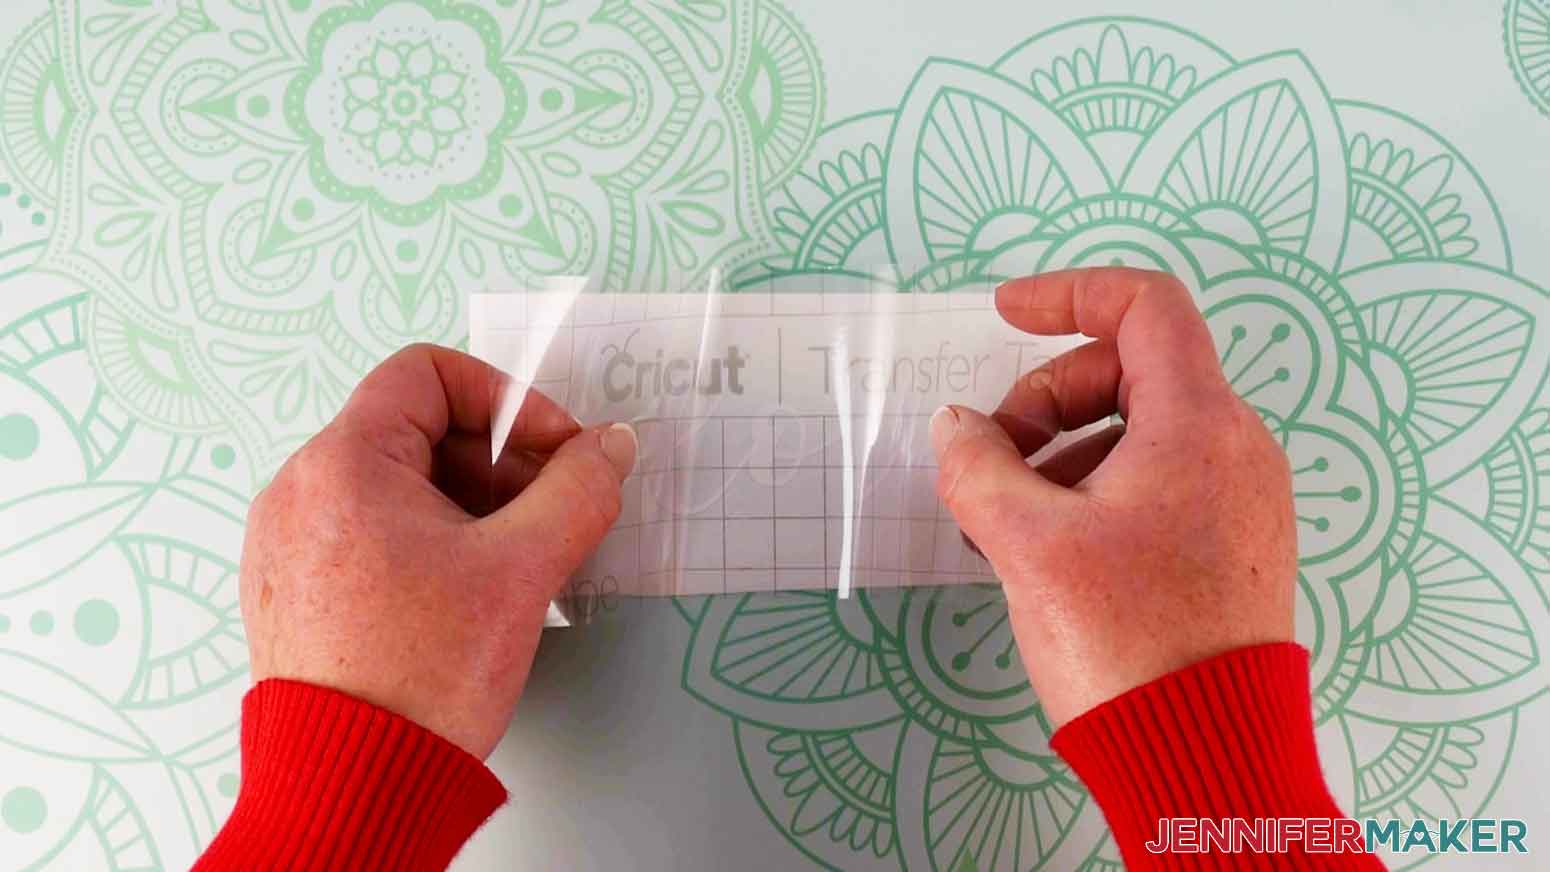
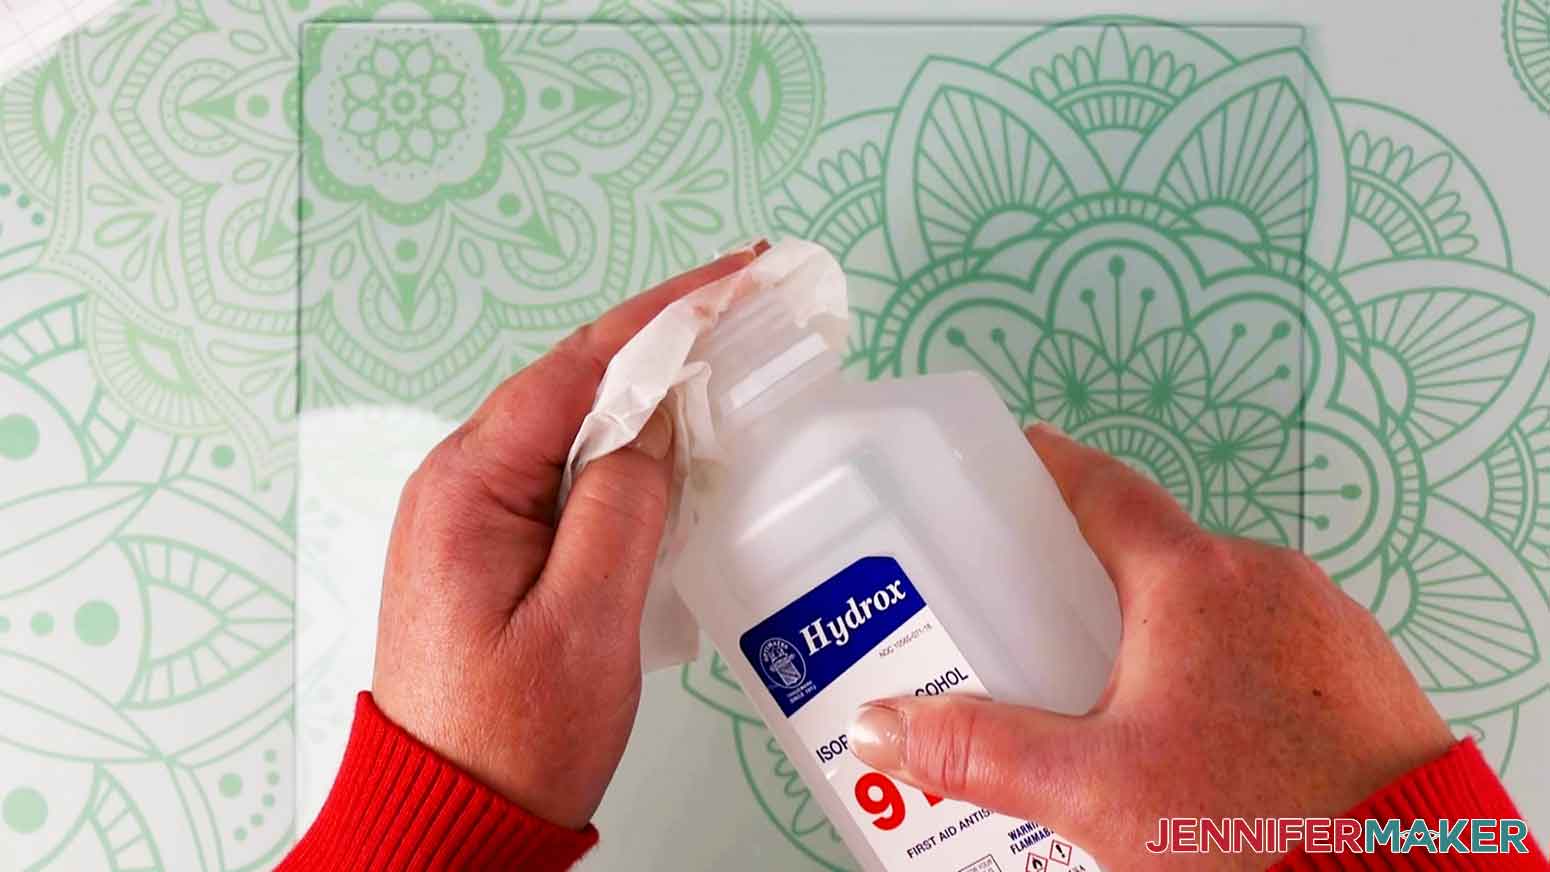
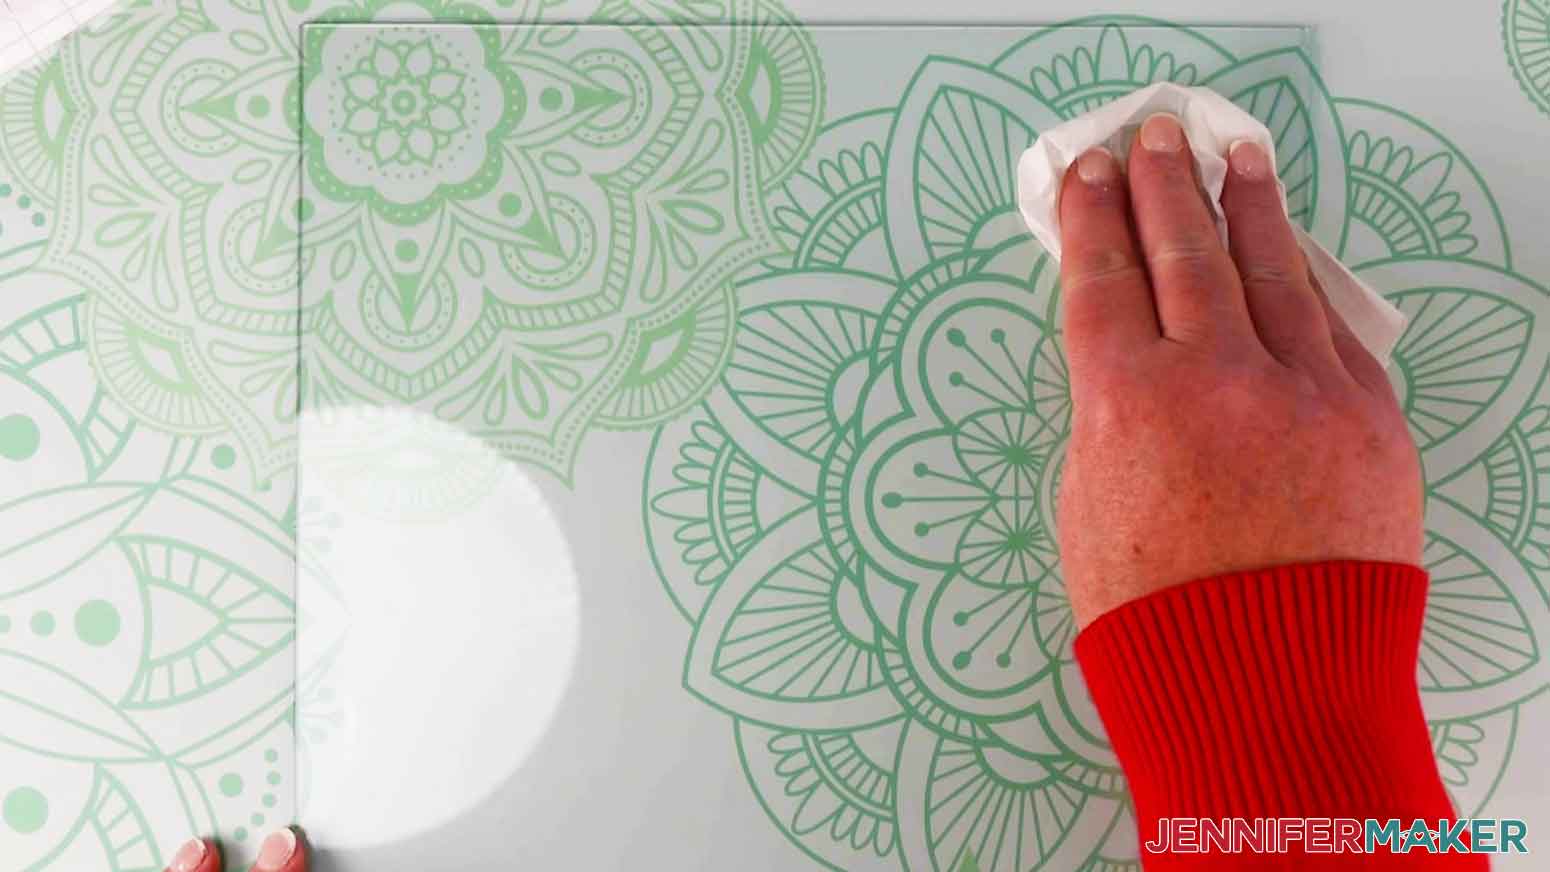
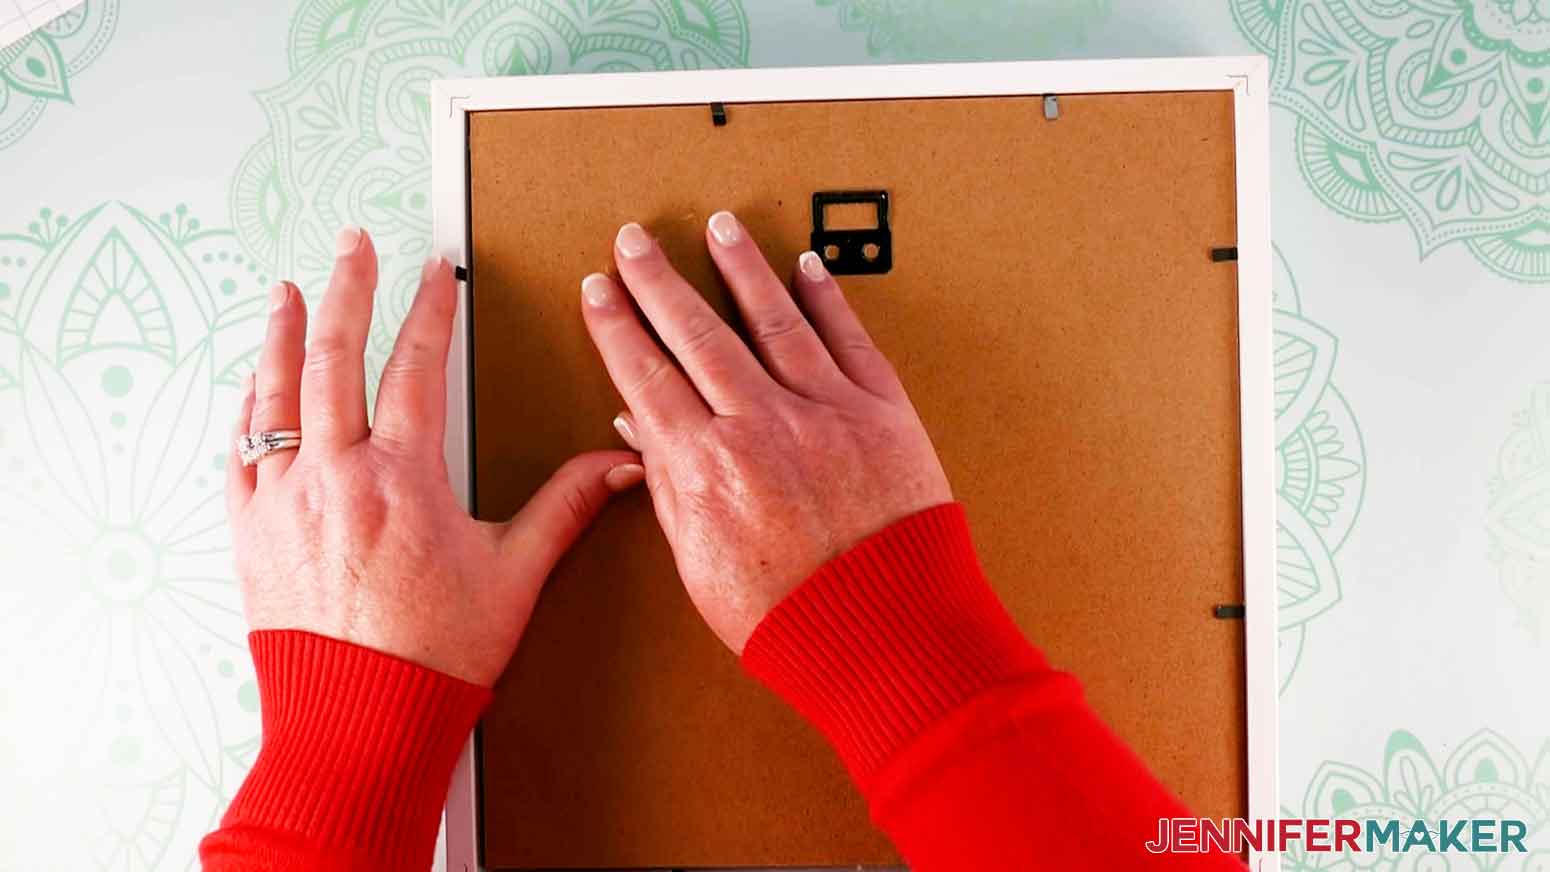
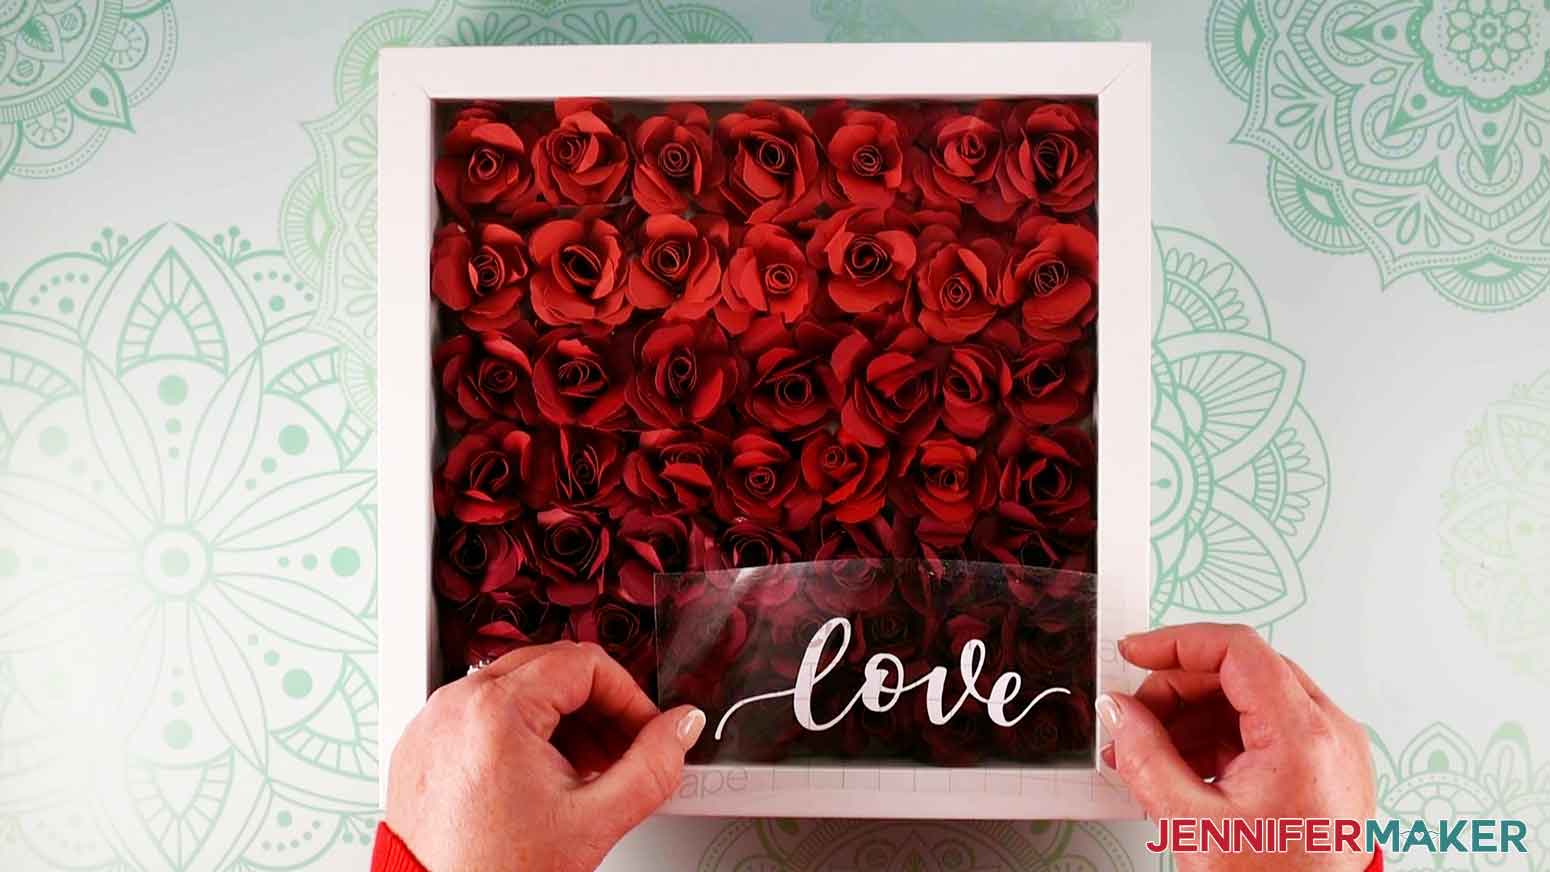
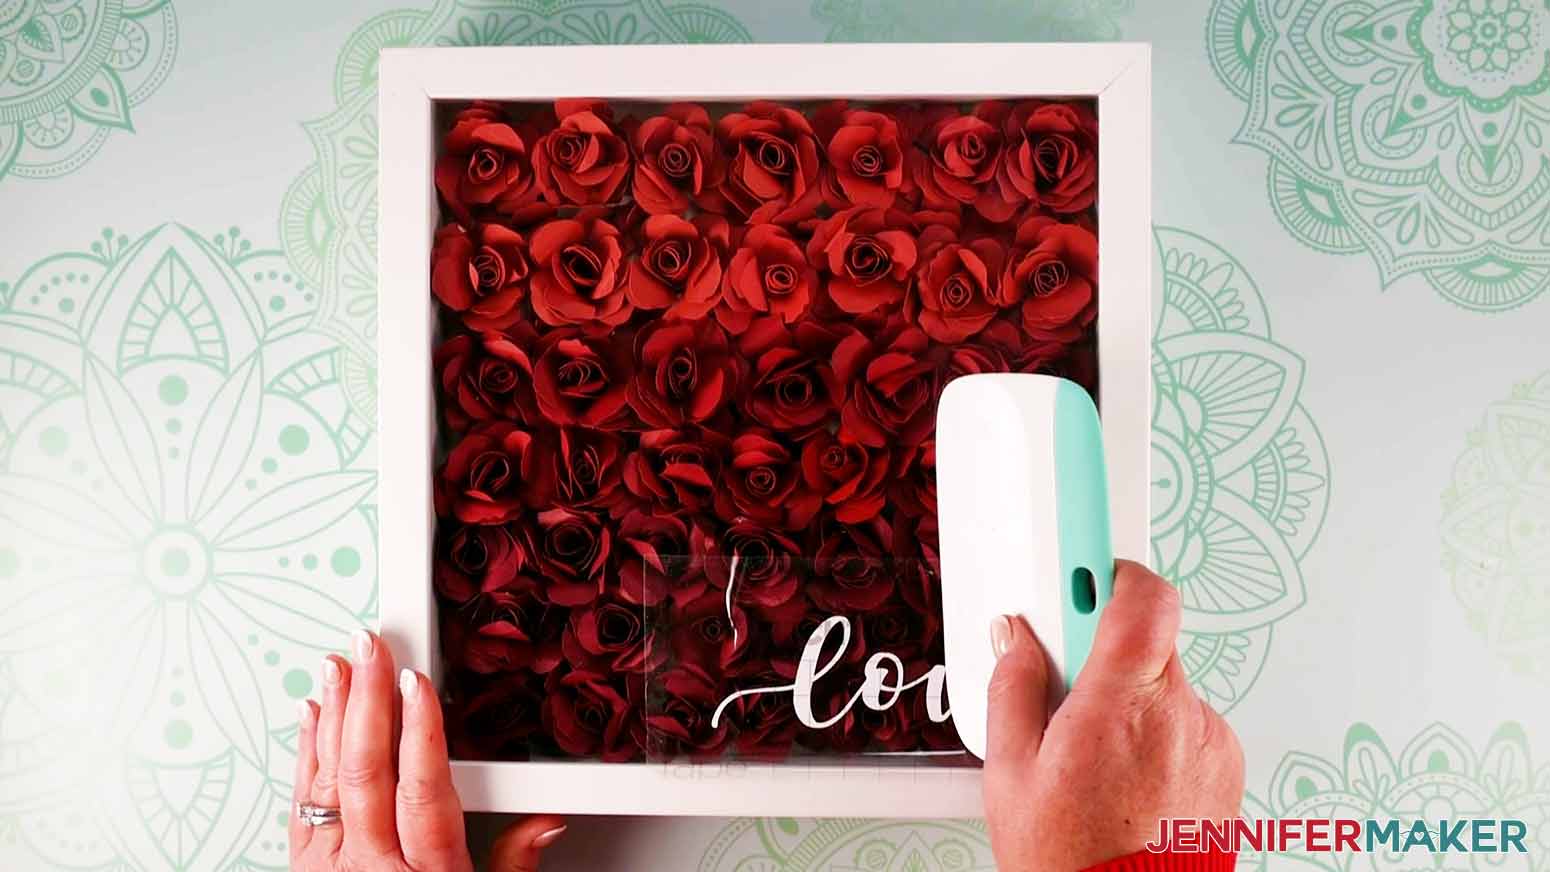
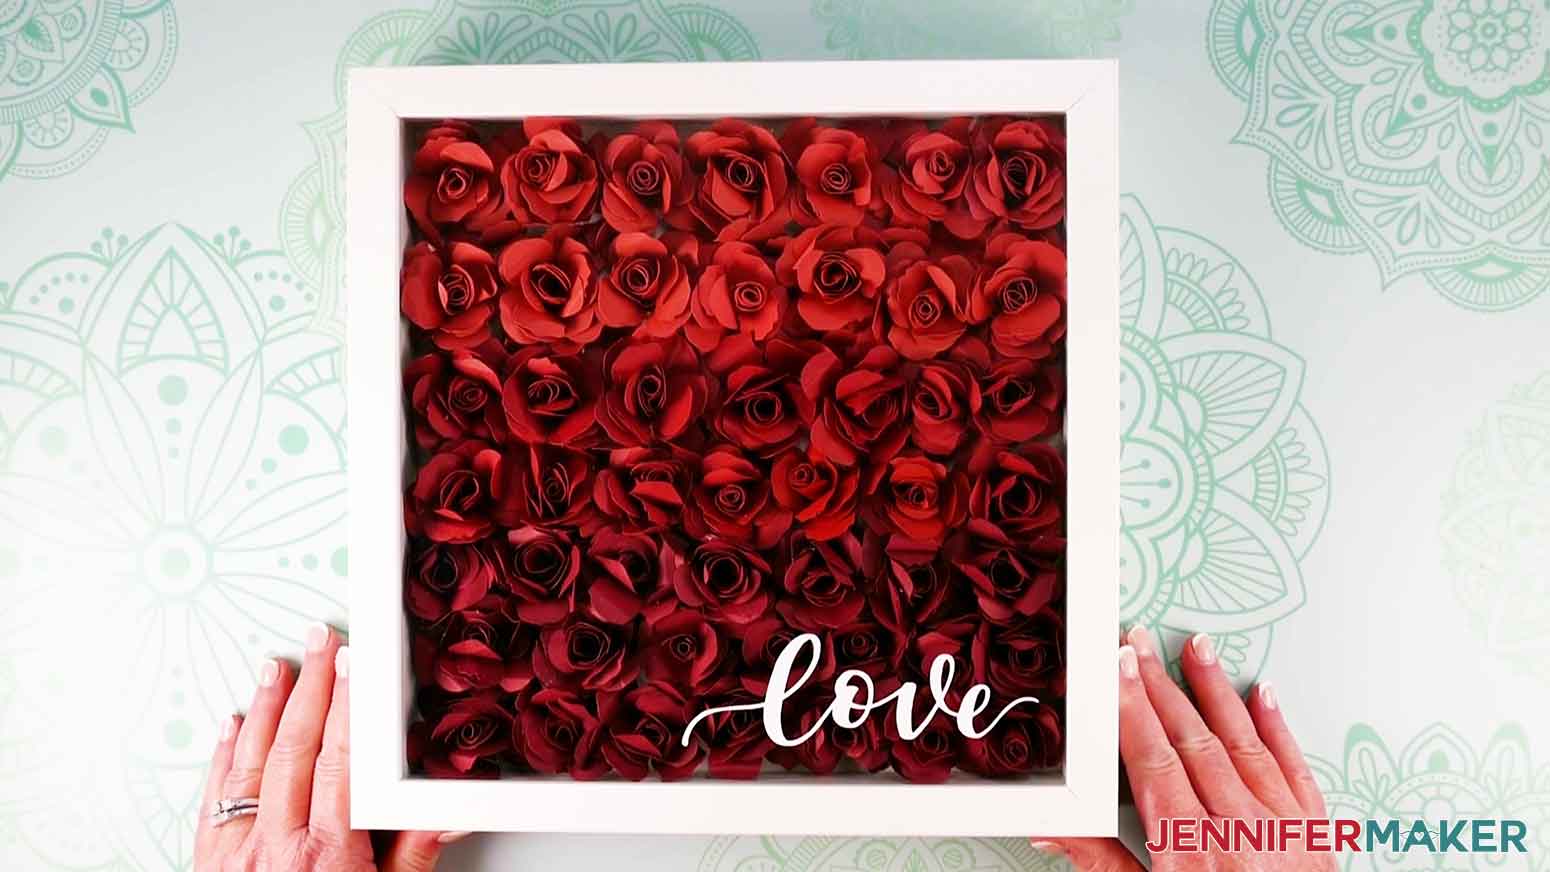
Remove the guesswork of determining how many paper flowers you need to make to fill your paper flower shadow box frame with this step-by-step tutorial! First, download my free Paper Flower Shadow Box design from my free resource library, it's design #369. My design file includes some hand-lettered quotes you can apply to the glass of your shadow box frame as well as my popular paper rose design, which I will be using in this tutorial. This is what my hand-lettered quotes look like in Design Space. This is what my paper rose design looks like in Design Space. If you rather use a different paper flower design, I have many free paper flower designs that you can use to make your paper flower shadow box. TIP: If you are not sure how to upload an SVG cut file to Cricut Design Space, watch this helpful video training series I made. If you're on an iPhone or iPad, here's how to download and upload an SVG file to the Cricut Design Space app. One of the most popular questions I get from crafters is “How many paper flowers should I make to fill my shadow box frame?” Well I am going to walk you through my fool-proof method for determining the number of paper flowers you need to make to fill any size shadow box. To do this, I am going to start by cutting and assembling one paper rose. After you have uploaded my paper rose design in Design Space, click “Make It.” If you are using a Maker 3 or Explore 3 machine, you will be asked if you are cutting on mat, off mat, or a combination of both. Select “On Mat.” On the Preview screen, change the paper size to 8.5" x 11", which is the size of cardstock I purchased for this project, then click “Continue." Select "Medium Cardstock - 80 lb" for your base material. For the pressure I always select “More” to get a nice, clean cut. Load your fine-point blade into clamp B of your machine. Place a piece of cardstock on a LightGrip (blue) Machine mat. You can also use a StandardGrip (green) Machine mat. Use your hands or a brayer to secure the cardstock to the mat. Load the mat into the machine and press the load/unload button. Press the “go” button when it begins to blink. After your paper rose has finished cutting, press the load/unload button to remove the mat. To remove the cardstock from the mat, flip the mat over and slightly bend the mat back to release the cardstock. Using a paper quilling tool, or my DIY Quilling Tool, place the outside end of the paper rose into the quilling tool. Begin rolling the paper rose around the quilling tool until you get to the end. Pull the rolled paper rose off the quilling tool to remove it. Add hot glue to the bottom of the rolled paper flower then place the circle piece on top the hot glue. To avoid burning any fingers, I highly recommend wearing hot glue finger protectors. Manipulate the petals by spreading them out. You can also use a small wooden dowel to curl the petals. I am using a 1/8’ wooden dowel to curl my petals by rolling the petals around the wooden dowel. NOTE: Some crafters find it easier to curl the petals before rolling the paper flower on the quilling tool. Either way is fine. And here is my pretty paper rose. Now I am going to measure the width and length of my flower. My paper rose measures 1.5” x 1.5”. Grab your shadow box frame and open the back. Measure the height and width of the interior of the frame. Notice that my shadow box frame has a removable interior frame. You want to measure the height and width inside this frame. The interior of my frame measures 9.5” x 9.5”. To determine the amount of flowers I need for the width, I will divide the interior measurement of the frame width, which is 9.5”, by the width of the paper rose, which is 1.5. So 9.5 divided by 1.5 equals 6.33, which I am going to round up to 7. I’m going to do the same thing to determine the number of roses I need for the height. Divide the interior frame height by the height of the flower. Since the height of my rose and frame is the same as the width, I know I will need 7. Now take the number of paper roses for the width and multiply it by the number of paper roses needed for the height. For my frame, multiplying 7 x 7 gives me 49. This is the number of roses I am going to cut for my paper flower shadow box. I bet you didn’t think you would be doing some math today. If you find that your assembled paper flower looks too small or too large for the size frame you are using, go back to Design Space and change the size. To change the size of the paper rose design, click on the design then use your mouse to adjust the size by dragging the double ended arrow icon on the lower right side of the bounding box, also known as the resize handle. You can also type a new height or width measurement in the tool bar at the top of the canvas. But make sure to keep the lock locked to maintain the aspect ratio of the design. Cut the new size you created for your paper flower, assemble, and measure just like we did earlier. If you are using a different size frame, below are quantities of paper roses you will need for different frames. The "wide" measurement is how wide your paper rose will be assembled. The "tall" measurement is the height you need to change your paper rose design to in Design Space. NOTE: Everyone rolls paper flowers differently. These quantities are estimates based on the finished width size of the flower. It is also important to note that the larger the flower, the taller it will be. For example, a paper rose that is 8" tall in Design Space will need a shadow box frame with a height of 2". Now that I know the quantity of the paper flowers I need to make for my paper flower shadow box, I am going to return to Design Space to cut the remaining roses. Based on the size of my paper rose design, I can fit two rose designs onto one sheet fo 8.5" x 11" cardstock. I know this because the height of the flower measures just over 5.3" and my cardstock is 11". So 5.3" multiplied by 2 equals just under 11" or 10.6" to be exact. I am going to duplicate my rose design to make sure. To duplicate the paper rose design, select the design and click duplicate at the top of the layers panel. Now I'm going to click "Make It" to see if two roses will fit onto one sheet of cardstock. Click "On Mat" on the next screen. On the Prepare screen, change the paper size to 8.5" x 11" on the left side of the screen. Notice that the design has been moved and rotated to fit our new paper size. I can definitely fit two paper roses on one sheet of cardstock. To cut 50 flowers, I can change the number of “project copies” in the upper left corner from one to 25 and then click "Apply." Make sure your paper size remains 8.5" x 11". OMBRE EFFECT What if you want to create an ombre effect with your paper flower shadow box? If you don’t already know, an ombre effect is the visual gradation from a light color to a dark color or vice-versa. I think it’s really pretty, so let me show you how! Back in Design Space let’s start with three roses. Select one rose and click duplicate like we did to make two more roses. If you recall, my shadow box takes seven rows of roses, top to bottom. Well three doesn't divide equally into seven. Therefore, I am going to make the bottom three rows a dark red, the middle two rows a medium red, and the top two rows a lighter red. Select one of the paper rose designs then click on the red next to Basic Cut in the Operation section of the tool bar at the top of the Canvas. Now let's change that to the medium red from the drop down material color choices. Click on a different paper rose design and change the color of this rose to the lightest red from the material color choices. You should have three rose designs with three different shades of red like mine. We will start with the darkest rose design. We need 21 of these. So instead of duplicating it 20 times, I'll show you an easier way. Duplicate it four times, then group those four flowers and duplicate the group four times to get 25, It never hurts to have extra flowers in case of mistakes along the way. Next, we will duplicate the other two shades of red. We need 14 of each. So we will select them both by dragging a bounding box over them. Then we will duplicate them six times, which gives us seven of each shade. Now group all of those together and duplicate once and now we have 14 of each color. We are now ready to cut our paper flowers. You will need seven sheets of card stock for the lightest red rose and seven sheets for the medium red rose. You will need 11 sheets of the darkest red rose. To cut the roses, follow the same steps I walked you through to cut our single paper rose. NOTE: Cutting all my paper roses took me approximately 1 hour and 30 minutes. This time can vary depending on your speed and if you have more than one mat to cut with. If you run into any issues cutting your cardstock I've got you covered. Check out my Cricut Tips & Tricks for Cleaner Cuts, a handy guide to ensure you get the cleanest and best cuts from your Cricut. Now that we have all our paper roses cut, it is time to assemble them. Curling the paper rose petals is completely optional. I think it makes the roses look much more realistic. I am going to show you what my paper rose looks like when I curl the petals before rolling the flower versus after rolling the flower. First we will roll the flower then curl the petals. Grab your quilling tool and take the outer end of the cardstock and slide it into the slot of your quilling tool. Begin rolling the cardstock around the quilling tool. When you come to the end of the strip, gently pull the rolled cardstock off the quilling tool. Turn the paper rose over and add hot glue to the bottom. Flip the round circle tab on top of the hot glue. Use hot glue finger protectors to avoid burning your fingers. Continue holding until the hot glue has cooled. Using a small wooden dowel, roll the end of the petals around the dowel to give them shape. My dowel measures one-eighth-of-an-inch. This is what my paper rose looks like. Now let’s curl the petals before we roll the flower. Just like we did before, use a wooden dowel and roll the petals over the dowel to give them some shape. Once that’s done, place the outside end of the paper flower into the quilling tool. Begin wrapping the paper rose around your quilling tool until you get to the end. Add hot glue to the bottom of the paper rose. Flip the round circle tab on top of the hot glue. Use hot glue finger protectors to avoid burning your fingers. Continue holding until the hot glue has cooled. Once all your flowers are assembled, it is time to lay them out and begin gluing them to the inside back of the shadow box frame. Remove the back of the frame. Make sure you lay the back of the frame on your work surface the hook is toward the top. Take the inner frame and place it on top the frame back. You can apply some hot glue to keep it from moving if you want. I am going to begin by using my hot glue gun to add three rows of the darkest red color roses at the bottom of the frame. Now I'm going to take the medium red color roses and glue two rows. And finally, I'm gluing in two rose of light red to finish off the frame. I love adding a happy or encouraging quote to my paper flower shadow boxes. You can choose from one of my hand-lettered quotes included in this project or make your own. The quotes included in my design file are sized for the 10" x 10" shadow box frame in my supply list but you can resize them to fit your frame. For this frame, I am going to use the word "love" and hide the other layers in the design file. I will drag "love" off to the right, select everything I want to hide and click "Group", then click on "eye icon" next to the new "Group" layer in the layers panel to hide it. Click "Make It." Since I am using my Maker 3, and I am cutting with Smart Vinyl, I am going to select "Without Mat." NOTE: If your vinyl is the same color on the front and back (sticky side), you can choose to apply your quote to the top of your glass or the inside of your glass. Some vinyl has a different color on the sticky side (back) so double-check prior to cutting for an inside glass application. If you apply the quote to the inside of your glass, make sure to mirror your project on the Prepare screen. Click "Continue." For my base material, I am selecting "Smart Vinyl - Permanent." For the pressure I am changing it to "More." For Smart Vinyl, simply load the vinyl into the machine like you would a cutting mat. Make sure the backing is facing down. If you have an optional Cricut Roll Holder for Smart Vinyl, attach it to your machine and feed your vinyl through the guides. Click the load/unload button. Press the "go" button when it begins to flash. When your vinyl has finished cutting, use the built-in trimmer on your roll holder to trim the vinyl, then remove it from the machine. Weed your vinyl quote. Apply transfer tape to the top of the weeded design using my taco method. This is where I curl the transfer tape like a taco and apply the center first. Use a scraper tool transfer the vinyl to the transfer tape. Before adding the vinyl clean the glass with rubbing alcohol and a lint-free cloth or coffee filter. I use coffee filters because they are lint-free. Wipe the coffee filter on the glass to remove any residue. Do this to both sides of the glass. Place the glass back in the frame and add the paper flowers then close the frame. NOTE: If you are applying your quote to the inside of your frame, apply the vinyl to the glass before putting it back in the frame. Turn the frame over and decide on the best placement for your quote. Remove the backing from the vinyl and place the quote on the glass. Use a scraper tool to transfer the vinyl to the glass. And this is what my finished paper flower shadow box looks like. Isn't is beautiful? It looks just as beautiful without a quote as well. My paper flower shadow box can be used for practically any occasion. They make a wonderful gift. I am going to give my paper flower shadow box to my daughter to reminder her of how much I love her. The finished size of this project is 10" x 10". All of the sentiments in my design are hand lettered.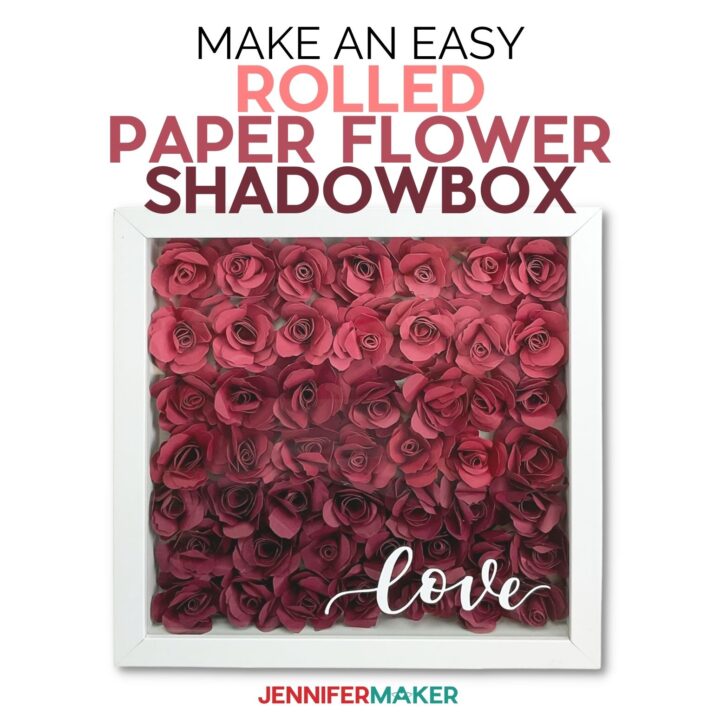
Paper Flower Shadow Box
Materials
Tools
Instructions
STEP 1: GET MY FREE PAPER FLOWER SHADOW BOX DESIGNS
STEP 2: SIZE YOUR PAPER FLOWERS


![]()
STEP 3: CUT YOUR PAPER FLOWERS

STEP 4: ASSEMBLE THE PAPER ROSES
ROLLING FLOWER THEN CURLING PETALS
CURLING PETALS THEN ROLLING FLOWER
STEP 5: ARRANGE YOUR FLOWERS IN A SHADOW BOX
STEP 6: CHOOSE AND CUT A QUOTE FROM VINYL

STEP 7: SHOW IT OFF
Notes
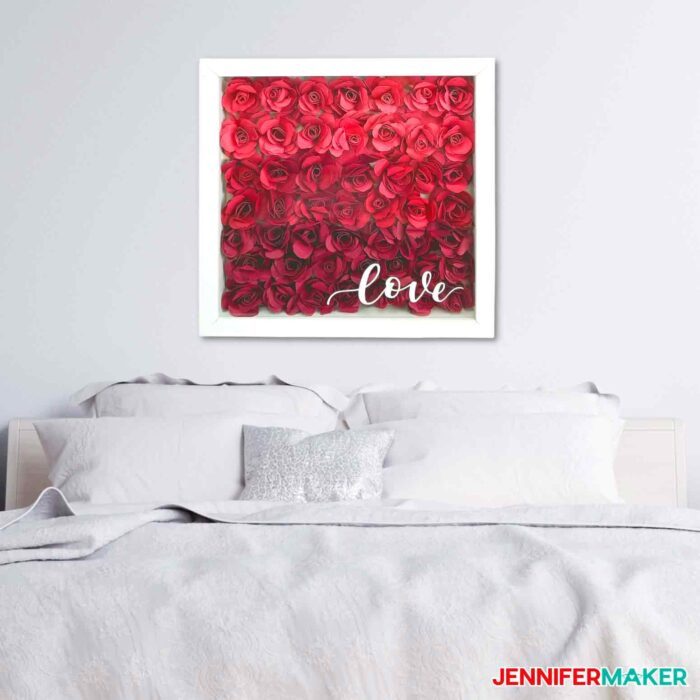
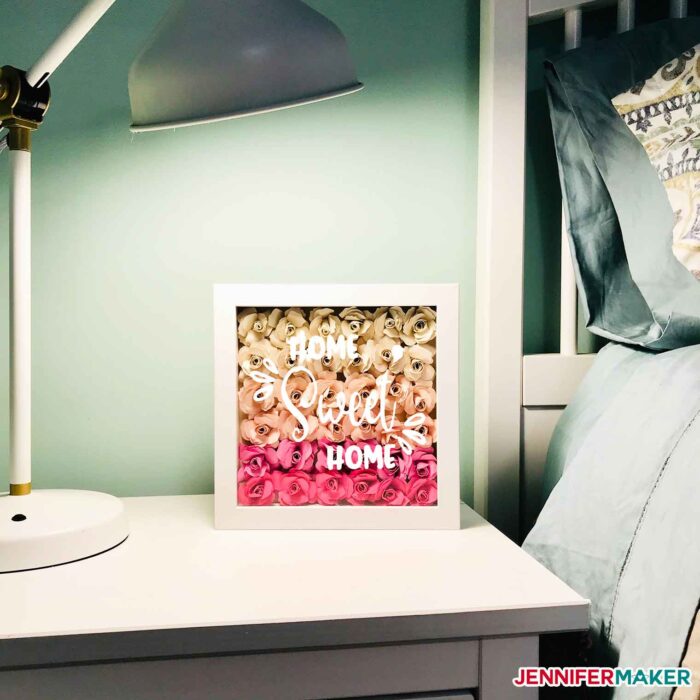
I keep a paper shadow box shadow box right next to my bed because it is just so cheerful and happy!
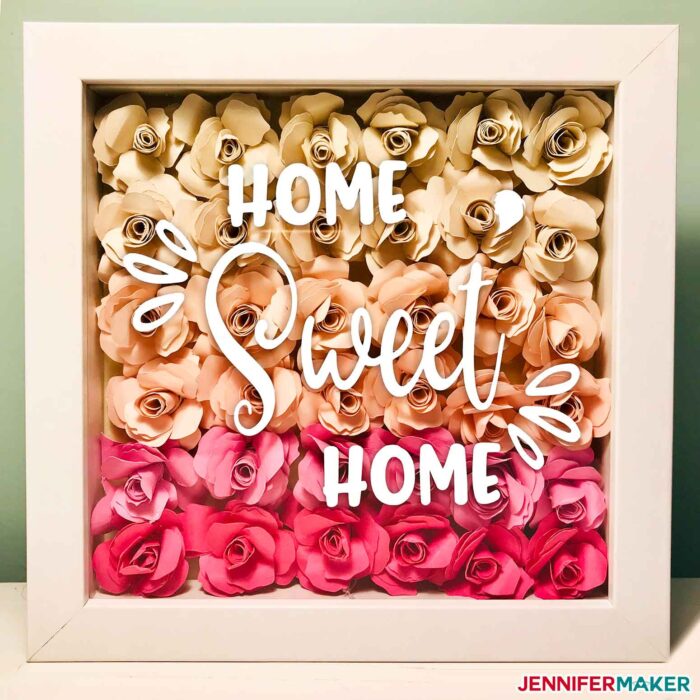
You can get the files for this shadow box in design #187 in my free resource library.
Get my free SVG files for your own Paper Flower Shadow Box Ideas!
I’d love to see your paper flower shadow box ideas! If you make a shadow box, please share a photo in our Facebook group, email it to me at [email protected], or tag me on social media with #jennifermaker.
Love,

Want to remember this? Save the Paper Flower Shadow Box Ideas to your favorite Pinterest Board

![DIY Cake Toppers with Custom Names and Sentiments Cut on a Cricut ] Free SVG Cut File #cricut #cakedecorating #birthday](https://jennifermaker.com/wp-content/uploads/diy-cake-toppers-custom-f.jpg)