Learn how to add custom vinyl designs to lampshades!
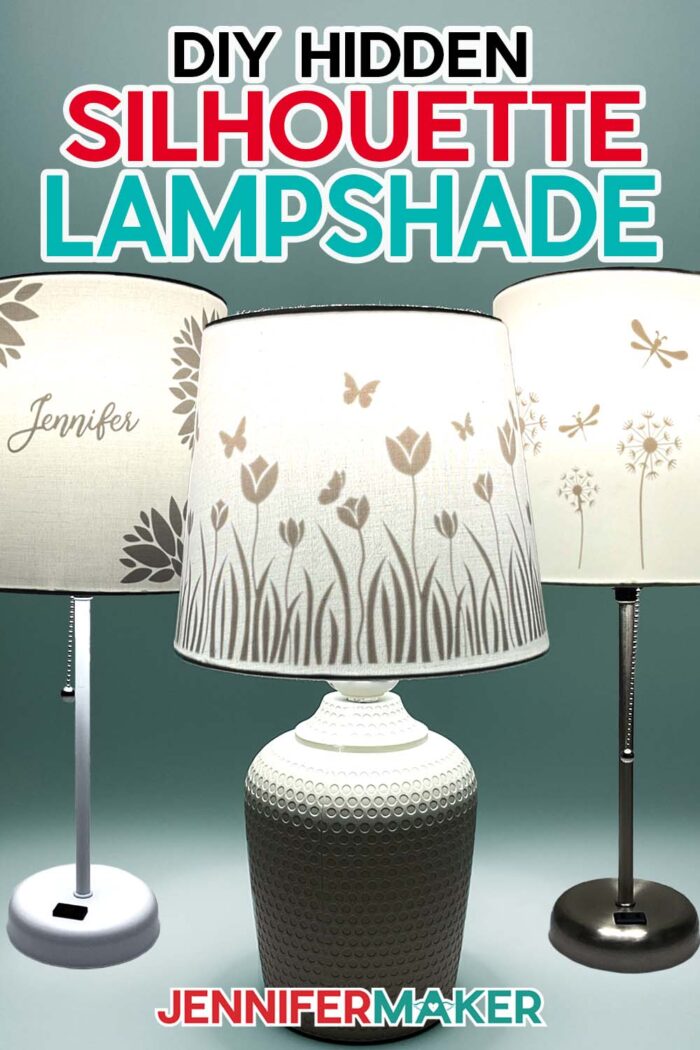
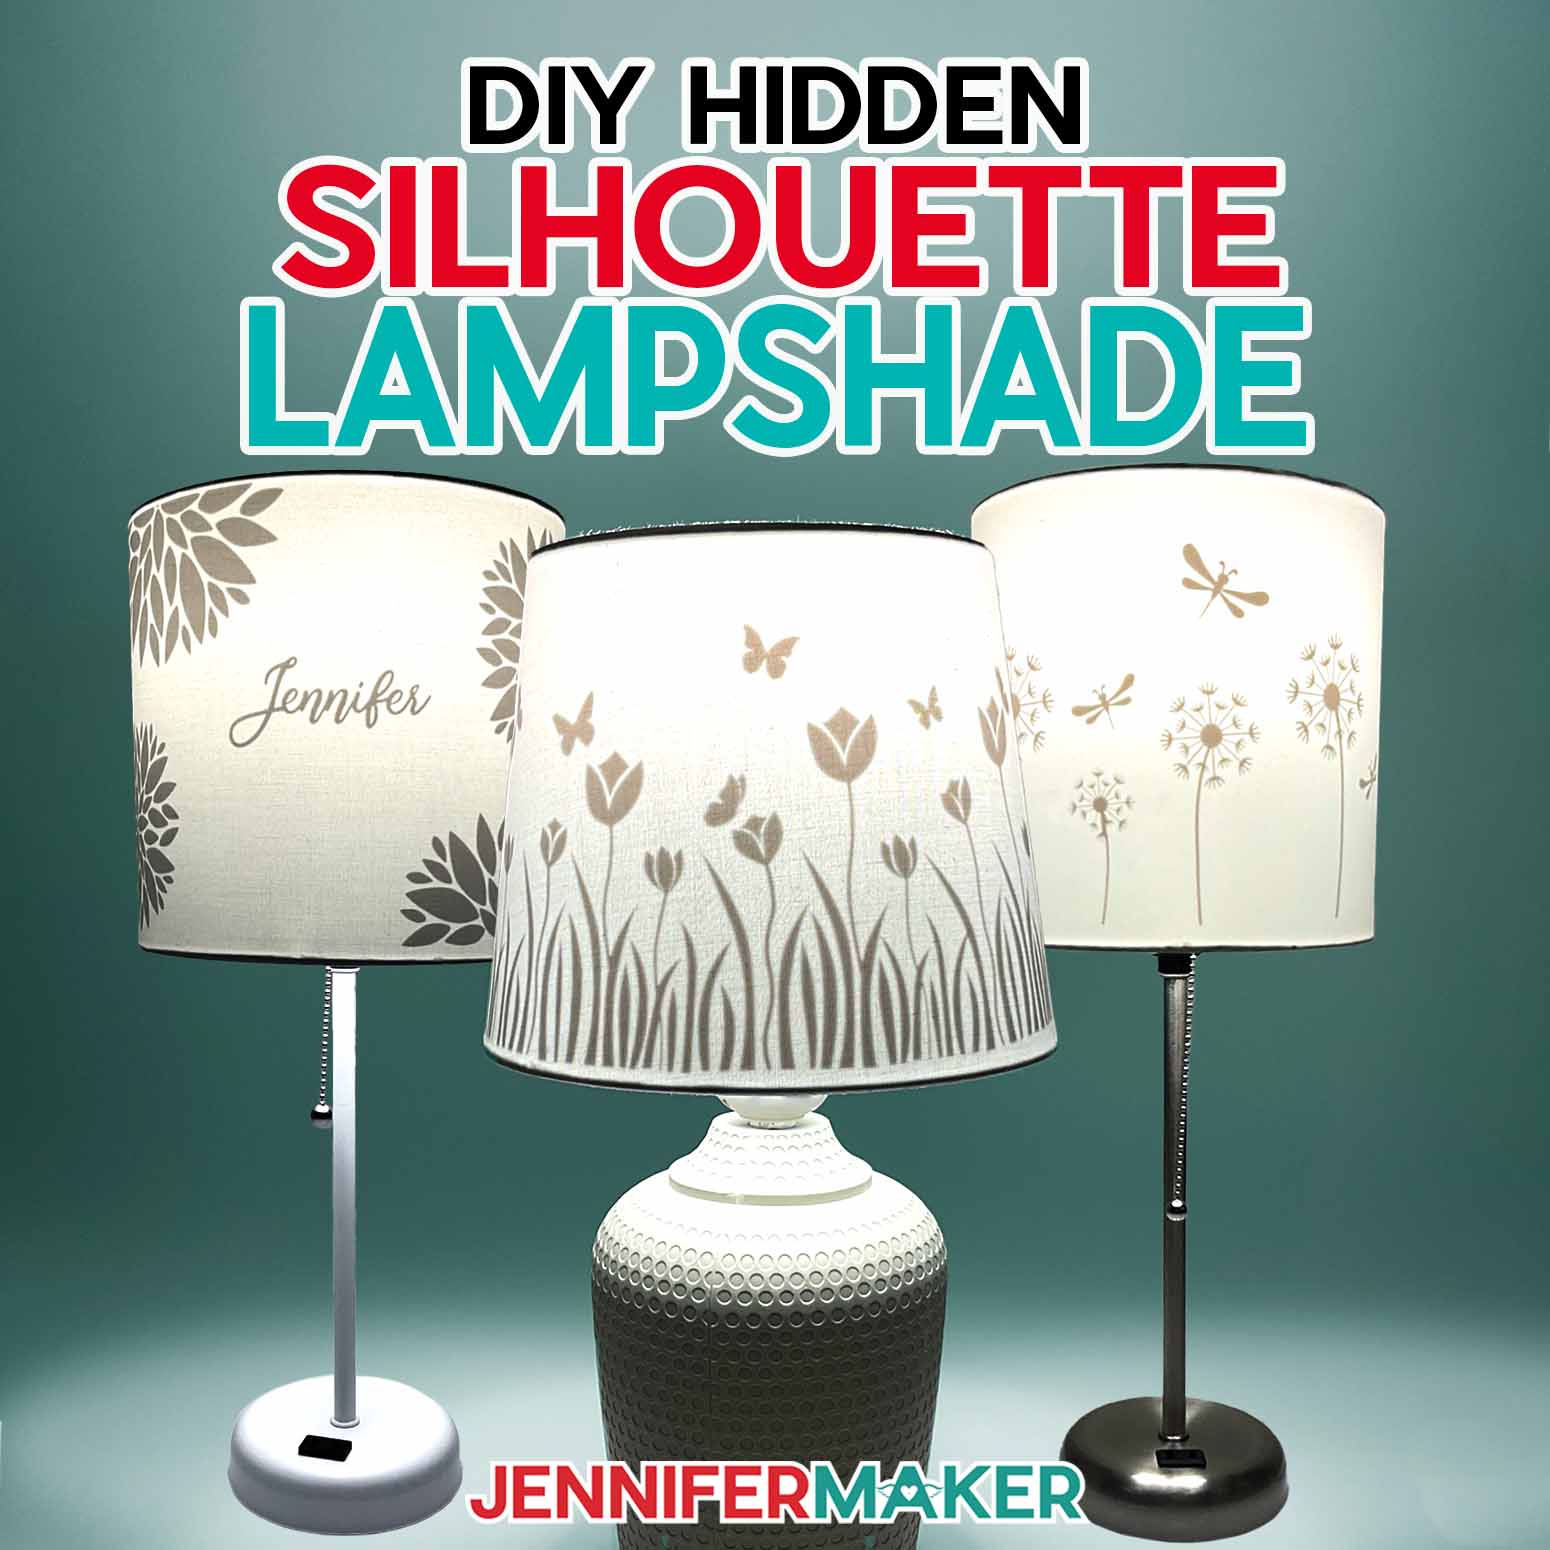
Love surprising guests with your DIY home decor skills? Give them a real surprise with these silhouette lampshades that only become visible with light! Today I’ll show you how to create amazing lampshade silhouettes by using permanent vinyl on the inside of the shade. This fun project will transform your regular lamp into a surprise scene when you turn it on. These are really cute for events and holidays, but fun for every day use in a bedroom or living room, too!

While the silhouette may be a mystery til you turn the light on, learning how to make them won’t be, because I’m going to walk you through every step. Whether you have new lamps you want to zhuzh up or an old lamp in need of a makeover, I can help!
To create our silhouettes, we’ll prepare a decal with white permanent vinyl, then apply it to the inside of two types of lamp shades. First, we’ll do a straight-sided shade where the sides are a straight line up and down.
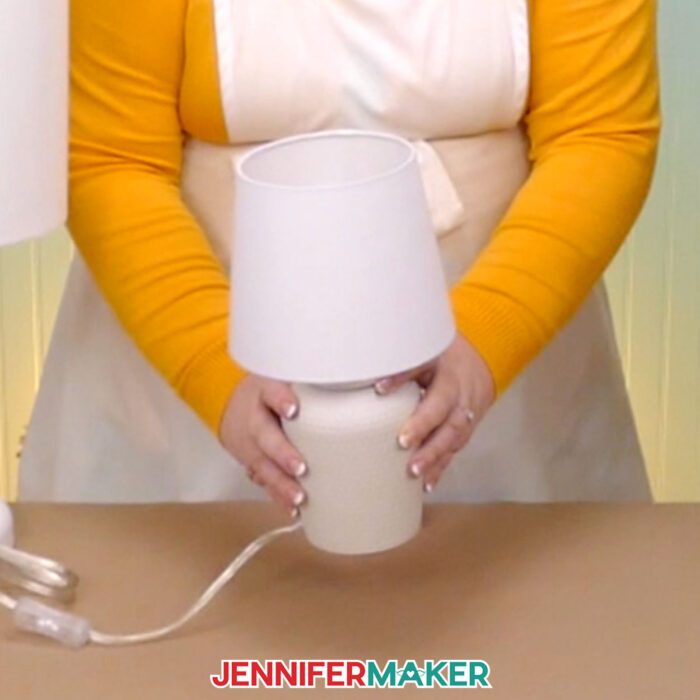
Then I’ll show you how to prepare and apply a decal to a tapered shade. A tapered lampshade has a top ring and bottom ring that are different sizes, so the sides of she shade are slanted.
Whether your lampshade is straight-sided or tapered, tiny or oversized, I’ll show you how to measure and size your decal so know how to decorate multiple different types of lampshade. Don’t skip measuring and rely on what the original packaging of your lampshade says — this is probably the vertical height of the lampshade, and not the circumference that you need.
So, why white vinyl instead of another color? When I did my tests I found that white was the only color that looked hidden when the lights were off. If you’d like a less hidden and more colorful look when the lights are off, play around with colored vinyl if you like. Combine it with different colored light bulbs for a really creative look!
I’ll cut my vinyl with a Cricut Maker 3 – but you can also use the original Maker, any of the Explore models, and the Venture for this project – or if you have a smaller shade, the new Joy Xtra, or even the original Joy would work.
Along with my Maker 3, I’ll show you first how to cut your vinyl on a 12″ by 24″ green StandardGrip machine mat. But what if you don’t have one of those? Don’t worry, because later on I’ll show you how to modify the design to fit a 12″ by 12″ mat.
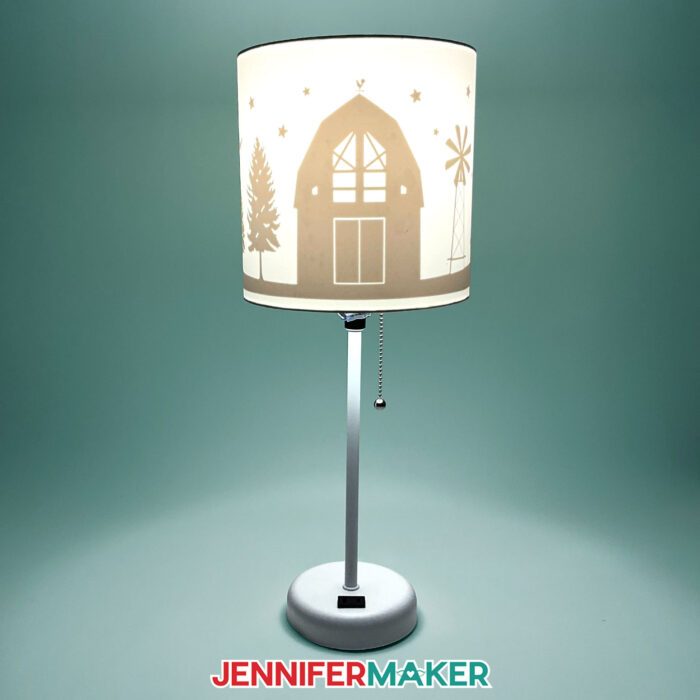
First, I’ll demonstrate how to prepare and apply this cute barn scene with a ground at the bottom. The design wouldn’t look right on a tapered lampshade because of the ground, so I’ll apply that one to a straight-sided shade instead.
But what if you have a tapered lampshade? Preparing designs for tapered shades does require a few more steps, but I’ll walk you through the entire process for that, too. Included in the download folder is a version of the barn design without the straight ground, so it’ll work with a tapered shade! In the tutorial, though, I’ll decorate a tapered shade using this pretty dahlia design — which we’ll also personalize with a name!
The steps to decorate a tapered lampshade also apply to any lampshade that’s different than an average, straight-sided shade — that means, if you’re using a tiny lampshade, a really big lampshade, or a shade that’s perhaps an odd shape, the tapered lampshade part of the tutorial is for you!
What if your lampshade is huge and the decal doesn’t have enough pieces to go all the way around? I’ve included another file with extra elements you can add! You can even use these to customize your own lampshade scene. Have fun with it!
Since this is a little different than a “typical” vinyl project because we’re applying vinyl to the inside of our lampshades rather than a flat surface, there are some things to consider that I’ll tell you about my video tutorial. But don’t let it stress you out! I have some really useful tips and tricks that will make for an easy application.
For example, this project uses a different transfer tape technique than most vinyl decals, and requires an additional material you may already have in your kitchen. That’s right, not craft room, kitchen! I’ll show you exactly how to use it, and where to align the decal for the best application around the inside of the shade.
I recommend working in a well-lit area for this project. It makes it easier to see and weed the white vinyl, as well as easier to align the vinyl inside your lampshade when it comes time to apply it.
These were so much fun to design and make, and even more fun to flip on once they were finished! It’s so neat turning on the light to reveal the concealed silhouette design. I love how the hidden design of the interior lining shines through, but it’s completely inconspicuous when the lamp is turned off. Think of all the cool decals you could make for lampshade silhouettes for themed decor, Halloween, Christmas, and more!
Ready to learn how to make a silhouette lampshade? This post contains some affiliate links for your convenience (which means if you make a purchase after clicking a link I will earn a small commission but it won’t cost you a penny more)! Read my full disclosure policy.
Materials And Tools to Make a Silhouette Lampshade
See my full and complete Amazon shopping list for the exact items used in this project!
- One (1) White Table Lamp with Straight Lampshade -OR-
- One (1) White Table Lamp with Tapered Lampshade
- Cricut White Permanent Vinyl
- Cricut StandardGrip Transfer Tape (Up to 24” per design)
- One (1) A19 LED 60W Light Bulb
- A method to cut your vinyl: I’m using the Maker 3 but you can also use a Cricut Maker series, Cricut Explore series, or Cricut Venture for this project!
- Cricut Green StandardGrip Machine Mat 12” x 24” -OR- Cricut Green StandardGrip Machine Mat 12” x 12”
- Brayer
- Weeding Tool
- Scissors
- XL Scraper
- Parchment Paper
- Measuring Tape
- Microfiber Cloth
- Isopropyl Alcohol
- Design #509 – My free SVG/DXF/PDF design files are available in my free resource library – get the password by filling out the form at the bottom of this page
How to Make a Silhouette Lampshade!

Silhouette Lampshade
Learn how to make a beautiful Silhouette Lampshade with permanent vinyl!
Materials
- One (1) White Table Lamp with Straight Lampshade -OR-
- One (1) White Table Lamp with Tapered Lampshade
- Cricut White Permanent Vinyl (Up to 24” per design)
- Cricut StandardGrip Transfer Tape (Up to 24” per design)
- One (1) A19 LED 60W Light Bulb
- Design #509 (My free SVG/DXF/PDF design files are available in my free resource library – get the password by filling out the form at the bottom of this page)
Tools
- A method to cut your vinyl: I’m using the Maker 3 but you can also use the Cricut Maker, Cricut Explore Series, and Cricut Venture for this project!
- Cricut Green StandardGrip Machine Mat 12” x 24” -OR-
- Cricut Green StandardGrip Machine Mat 12” x 12”
- Brayer
- Weeding Tool
- Scissors
- XL Scraper
- Parchment Paper
- Measuring Tape
- Microfiber Cloth
- Isopropyl Alcohol
Instructions
STEP 1: GET MY SILHOUETTE LAMPSHADE DESIGNS
First, download my Silhouette Lampshade designs from my free resource library - look for Design 509. Alternatively, you can use the Save This Project form near the top of this post and the design link will be emailed to you.
TIP: If you're not sure how to upload, go to jennifermaker.com/svgs to learn how to unzip and upload SVG files.
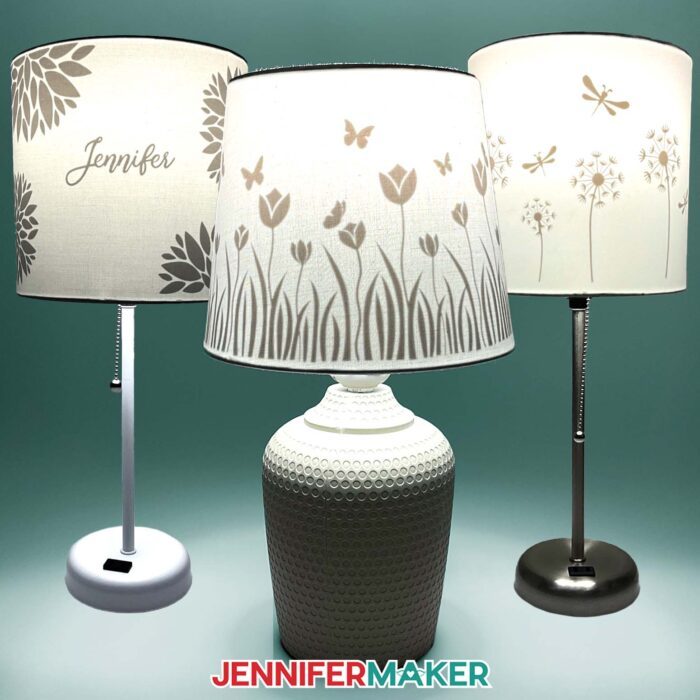
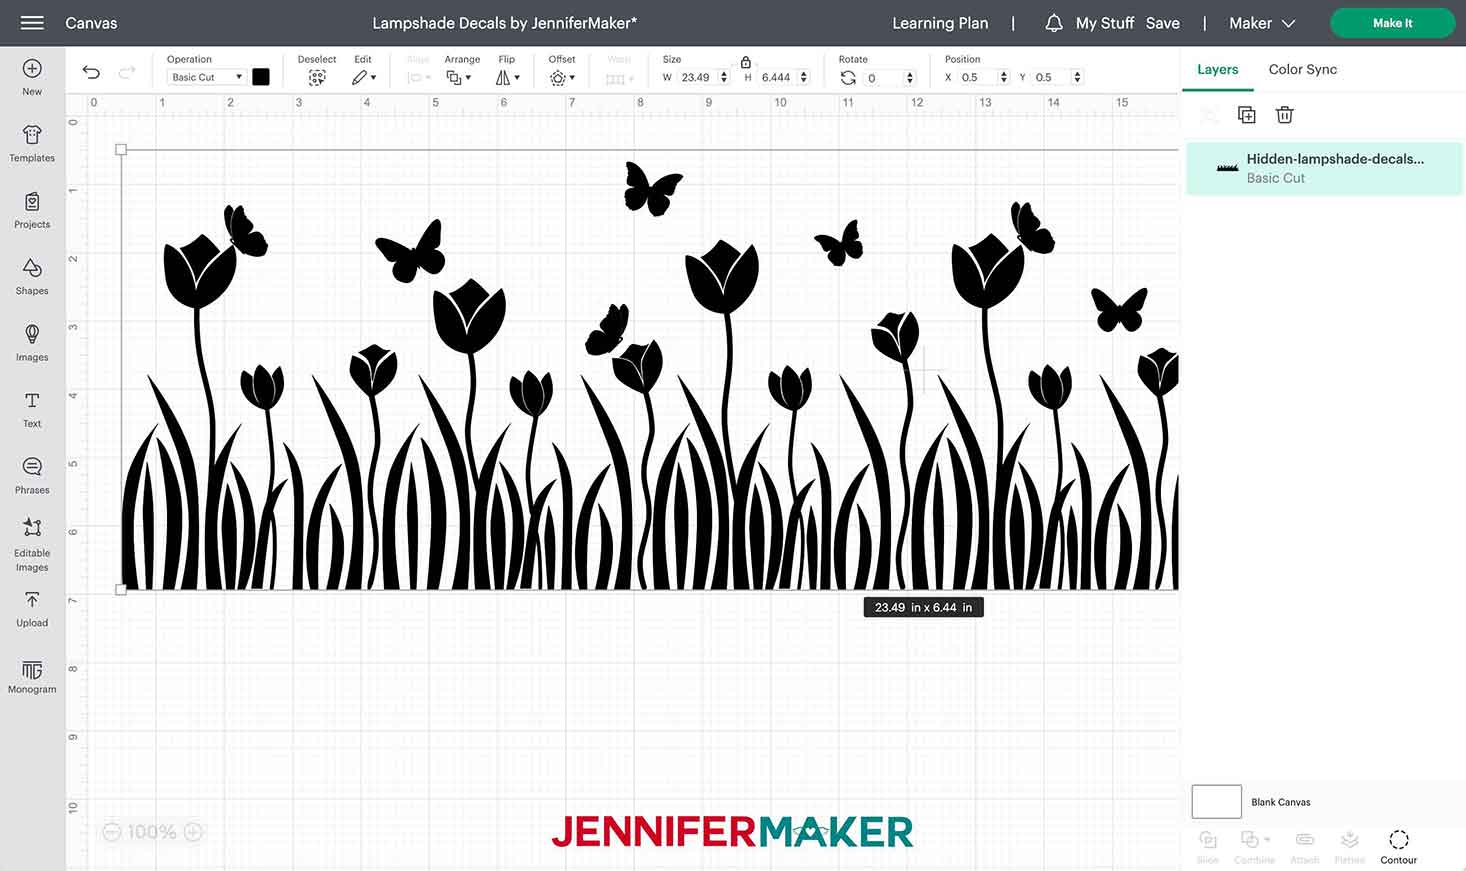
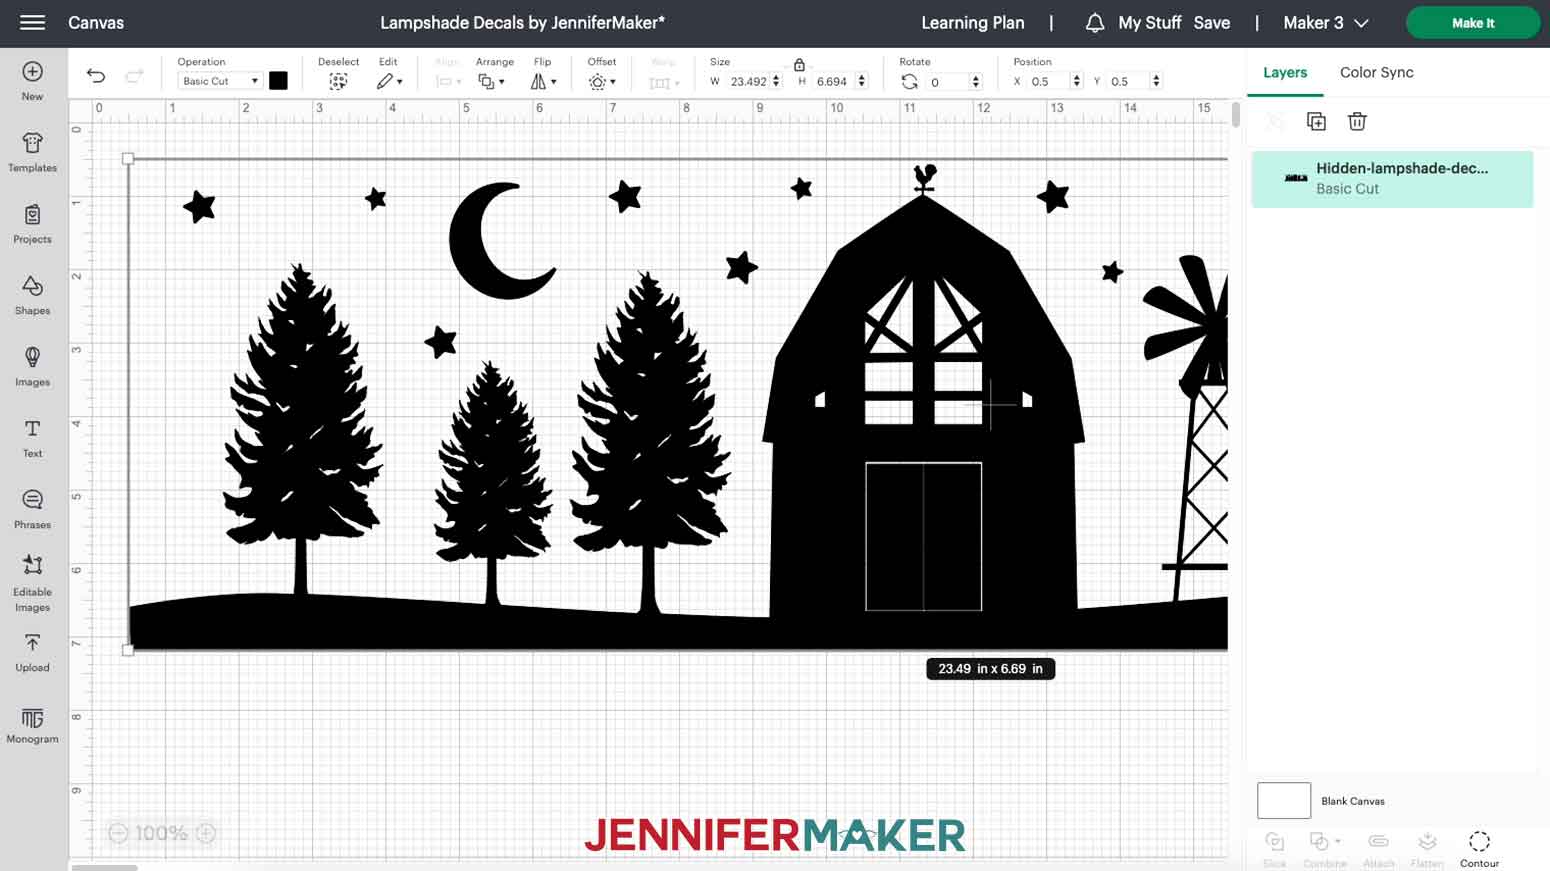
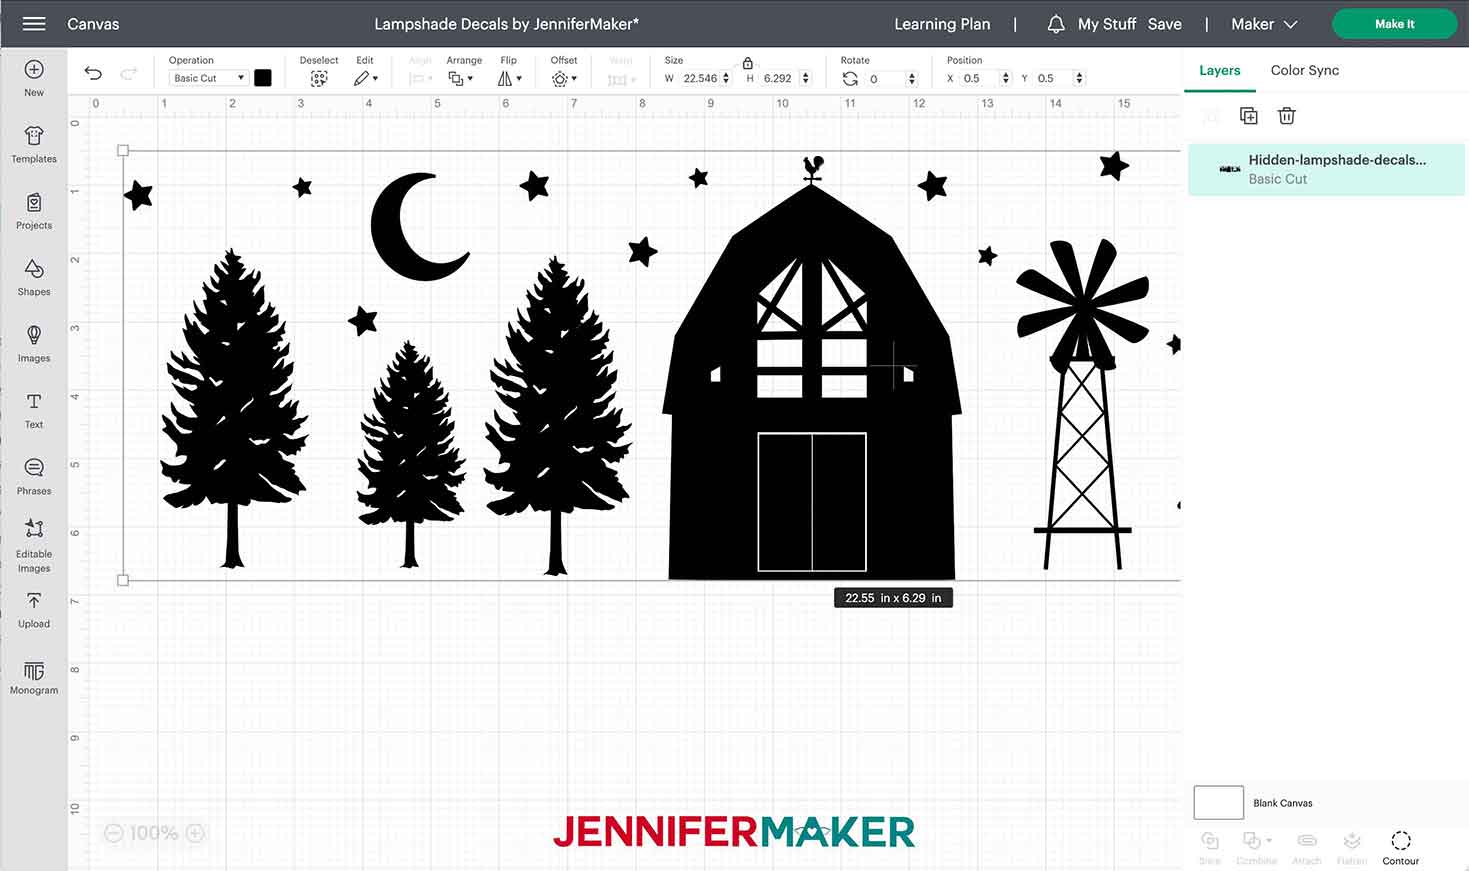
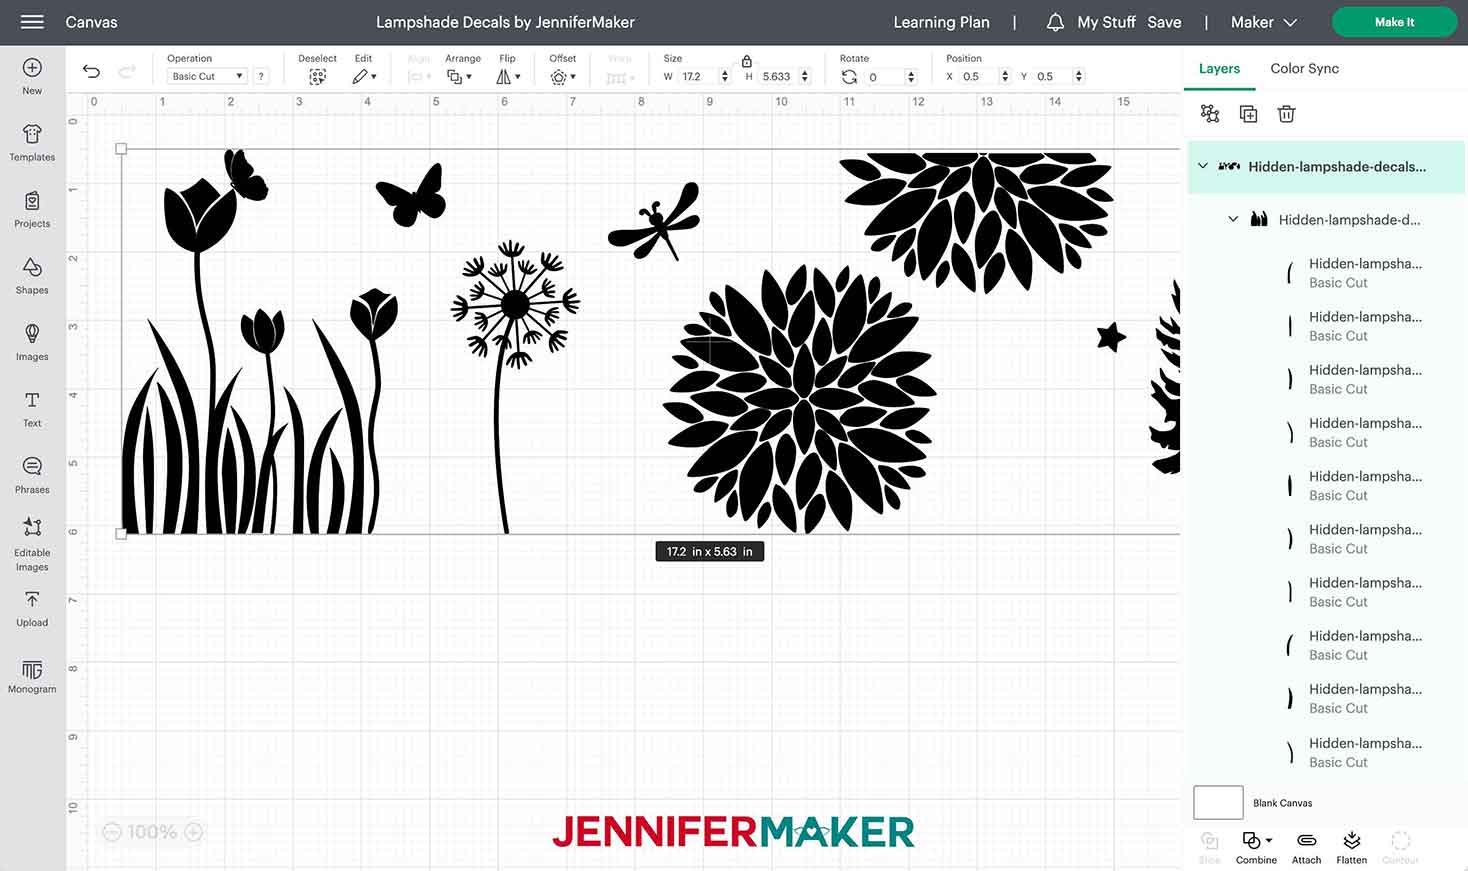
There are five designs in my collection: dandelions, tulips, dahlias, a barn scene with a ground layer, and a barn scene without a ground layer. I’ve also included a toolbox with extra elements if you need to expand a design for your lampshade.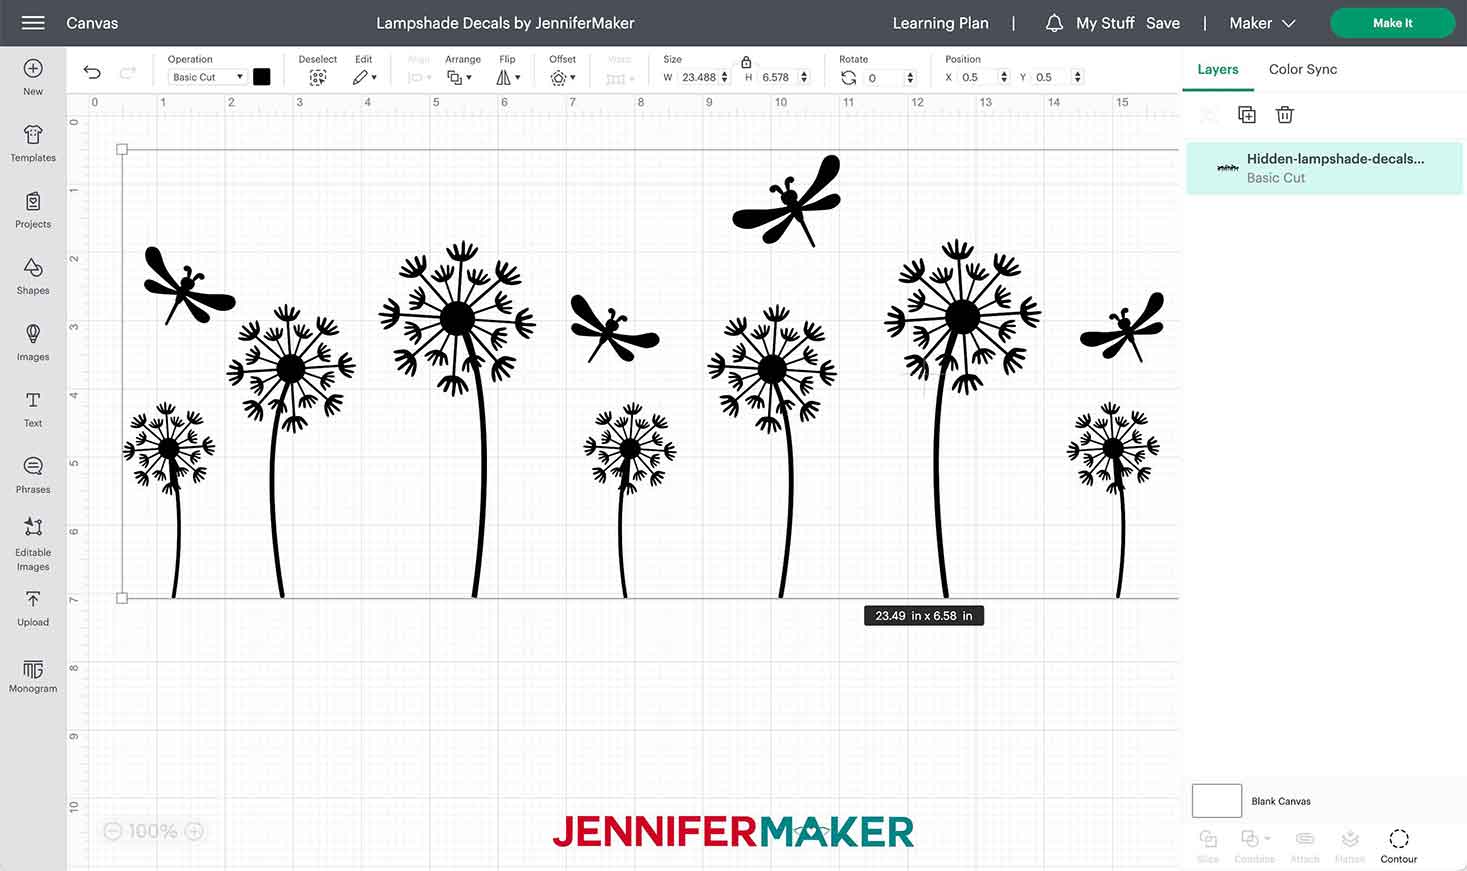

In this tutorial, I’ll show you how to personalize and apply the dahlia design to a tapered lampshade and how to apply the barn scene with a ground layer to a straight lampshade.
PROJECT 1: BARN SCENE WITH GROUND ON A STRAIGHT LAMPSHADE
STEP 2: PREPARE YOUR DESIGN
NOTE: If using different lampshades than me, use a measuring tape to measure the inside circumference of your lampshade. Hold the tape measure just above the lower inside seam and wrap it along the inside of the lampshade. Keep that measurement handy, as you will need it for the width of your design.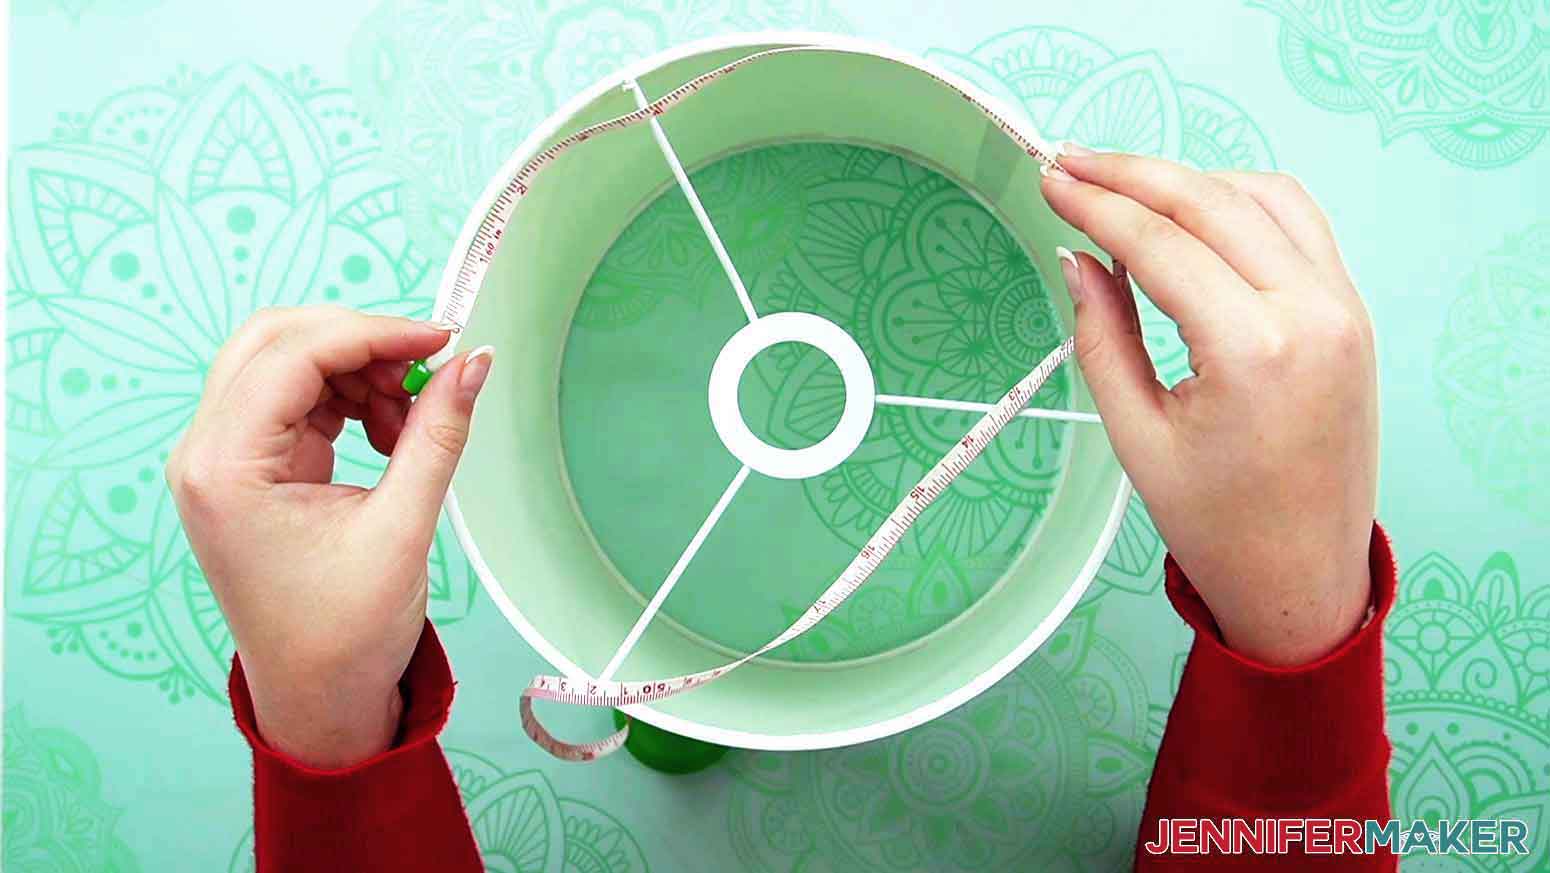
CRICUT DESIGN SPACE
1. Open Cricut Design Space.
2. Click “Upload.”
3. Click “Browse.”
4. Select the SVG file you want. I’ll use the barn scene design with ground.
5. On the Prepare to Upload screen, it will say “Cut image” with the design preview.
6. Click “Upload.”
7. Find your design in Recent Uploads and add it to the Canvas.
8. Click the minus (-) sign to zoom out (50% works well).
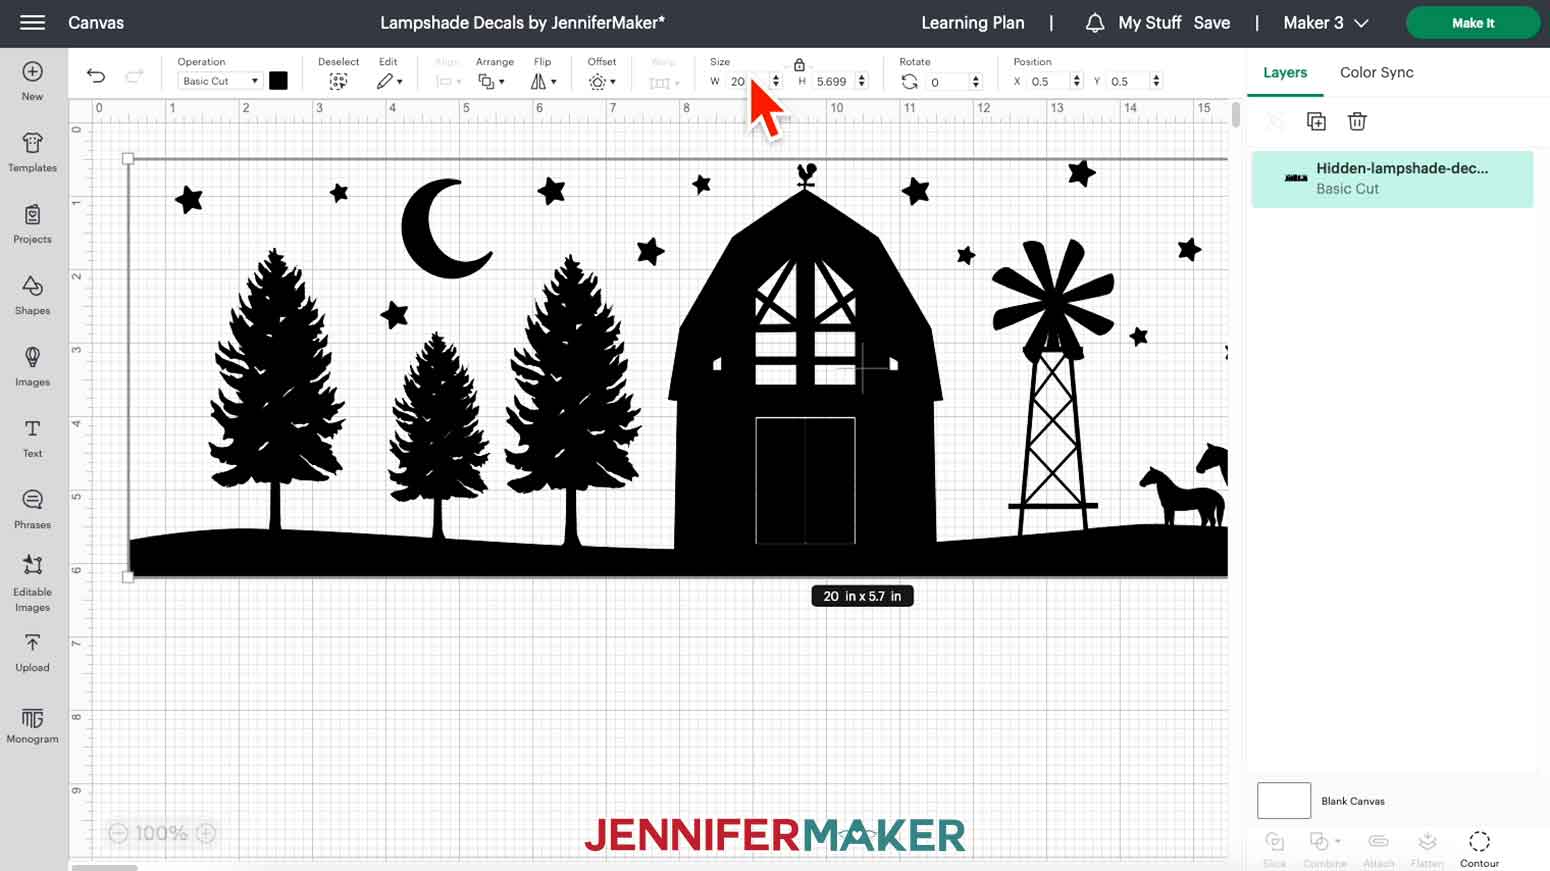
9. The barn scene is sized for the straight lampshade in my materials list and is ready to cut.
10. If you are using a different-sized lampshade, you may need to resize the design. Refer back to your measurements of the inside of the lampshade. Make sure the lock icon is closed above the size fields.
11. Click and drag the corner of the design to resize it or enter the measurements in the size fields. I recommend leaving at least 1” of margin around the design.
NOTE: The barn scene with ground will need to be sliced if the design needs to be larger than 23.5” since that is the maximum design length for a 12” x 24” machine mat.
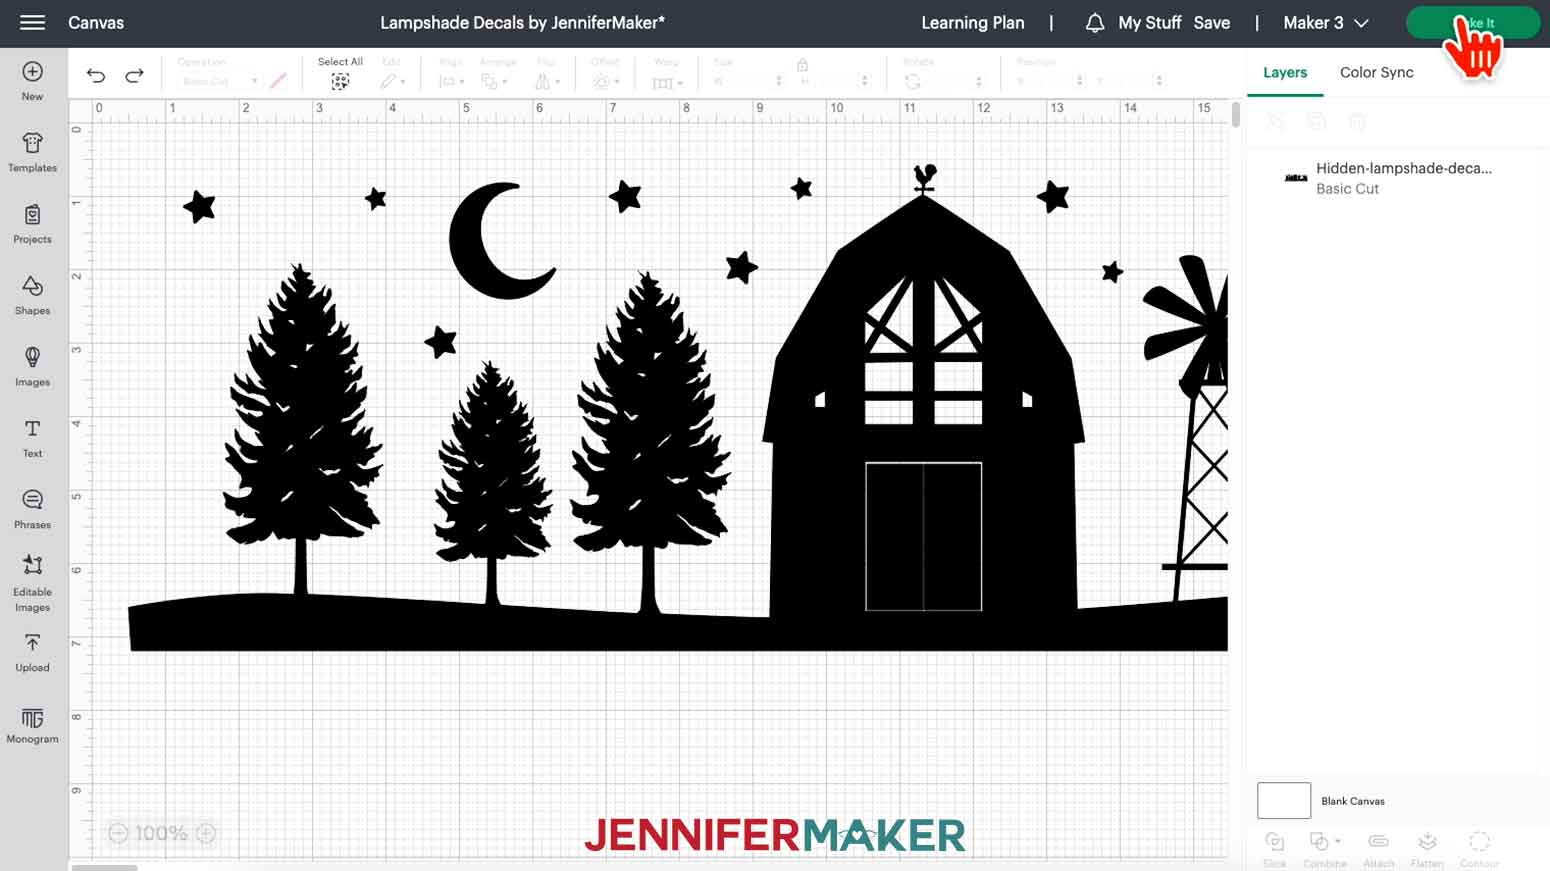
12. Make sure the correct machine is selected in the top right.
13. Click “Make It.”
14. If prompted, click "On Mat," choose your mat size, and click “Confirm.”
NOTE: If prompted, select “OK” to use a larger machine mat. If you do not have a 12” x 24” mat, see the “Modify Design to Fit 12” x 12” Machine Mat” directions in Project 2 below to slice and contour your design to fit on a 12” x 12” machine mat.
15. On the Prepare Screen, click the “Mirror” toggle to the ON position.
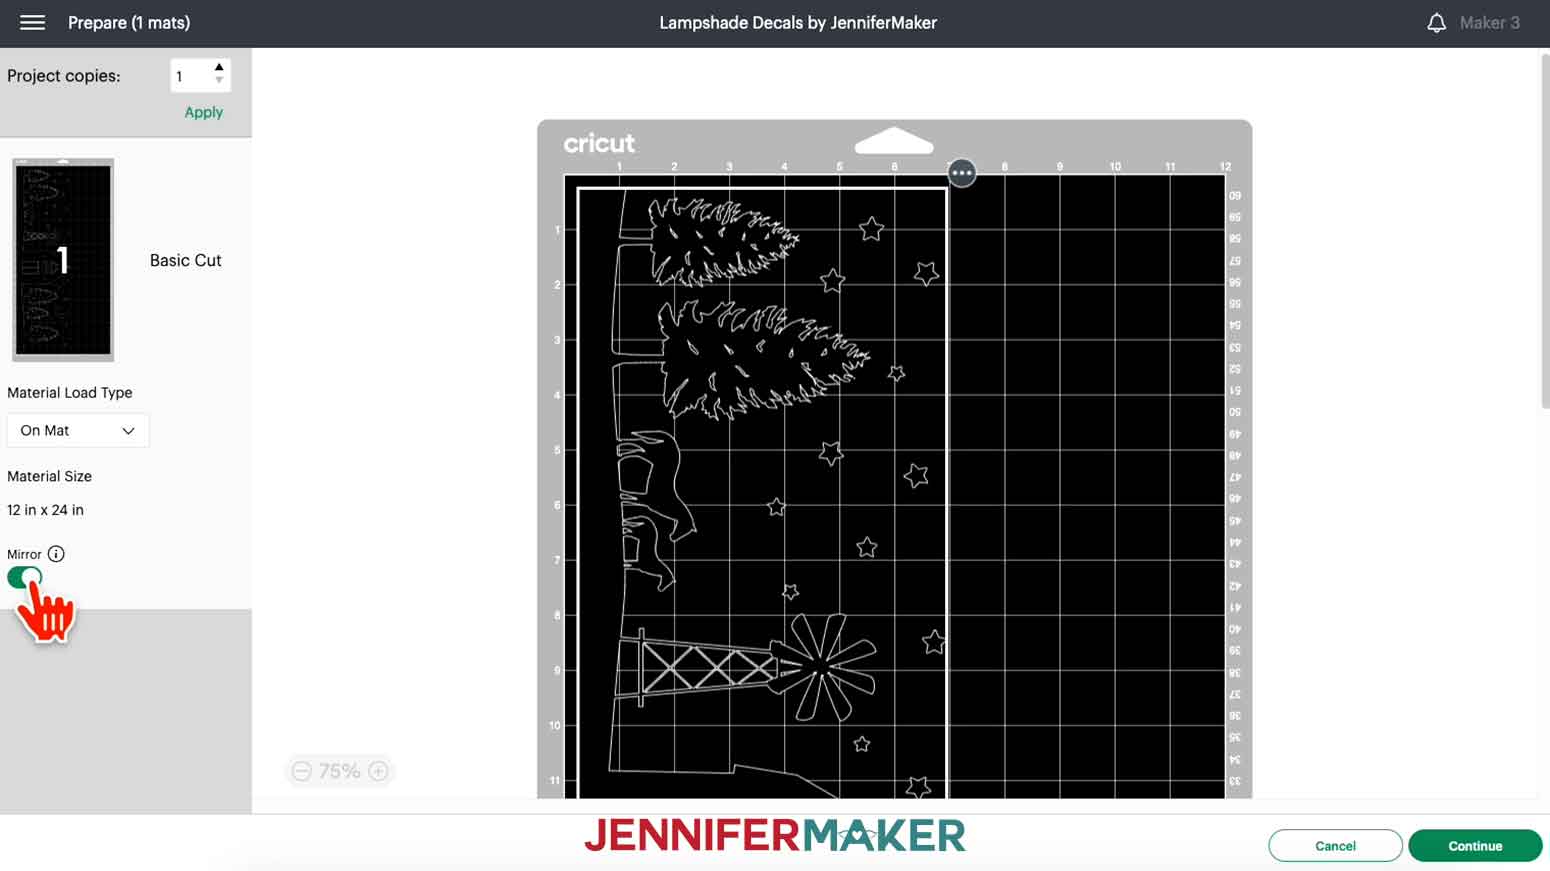
16. Click “Continue”
CUTTING
1. On the Make Screen, click “Browse All Materials.”
2. Search for and select the “Premium Vinyl - Permanent Glossy” setting.
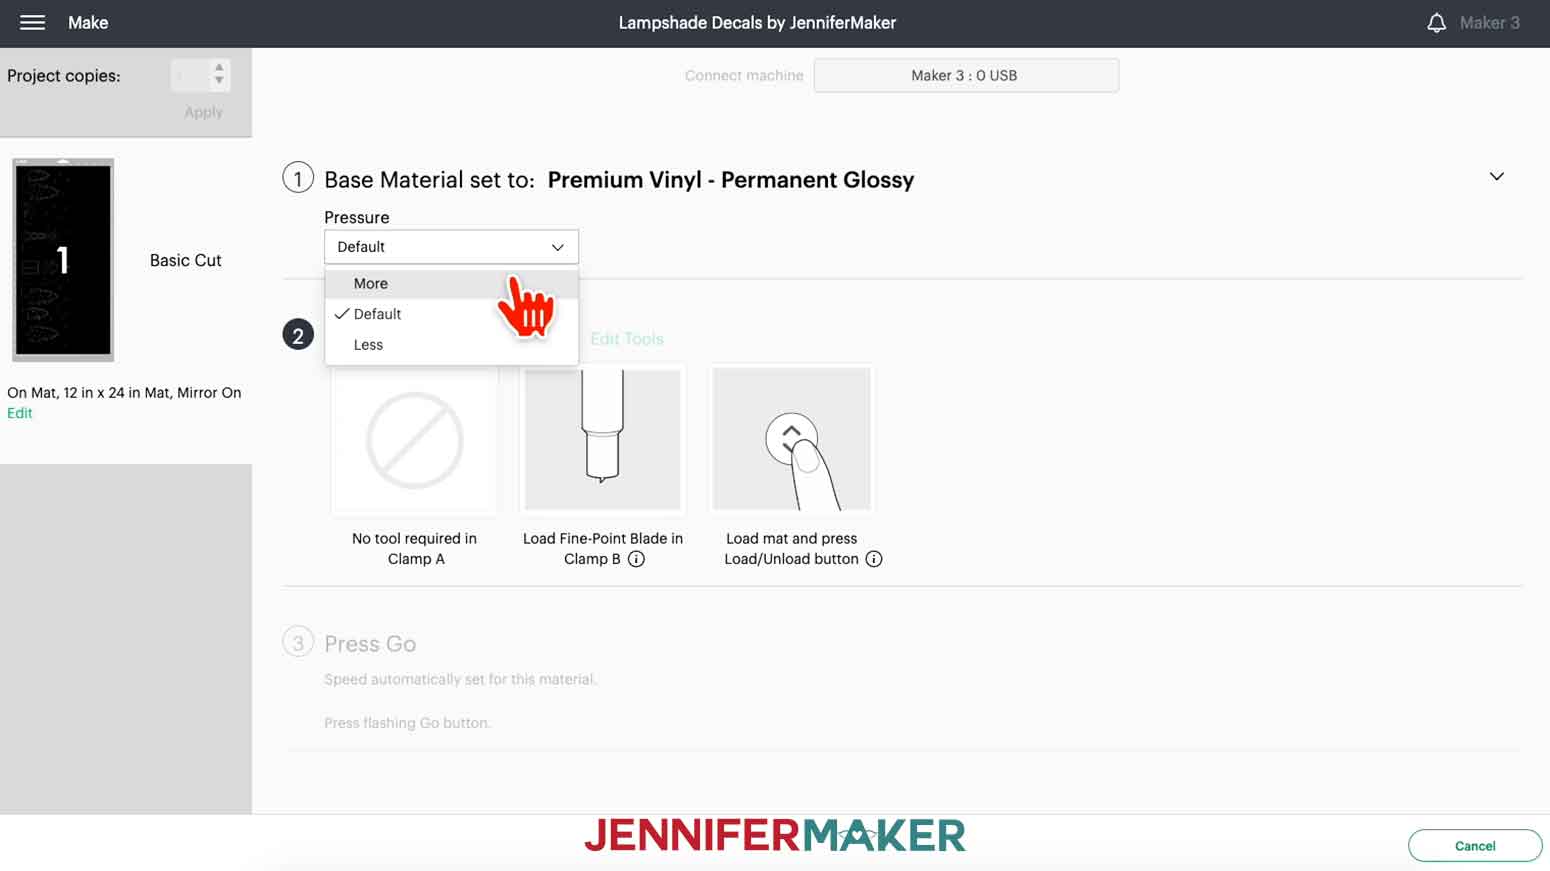
3. Select “More” for the Pressure.
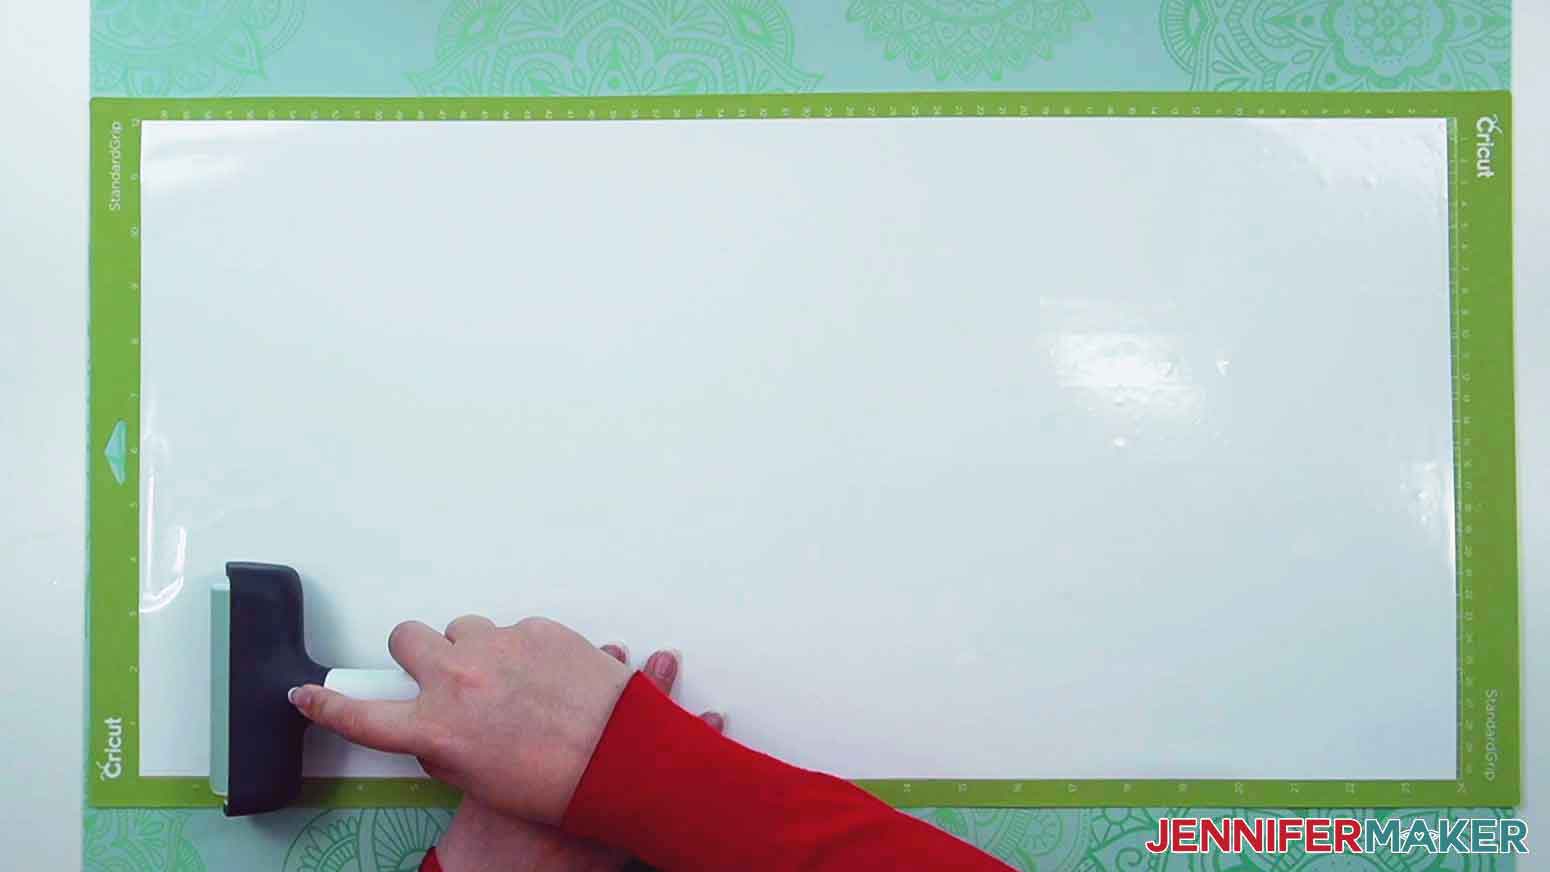
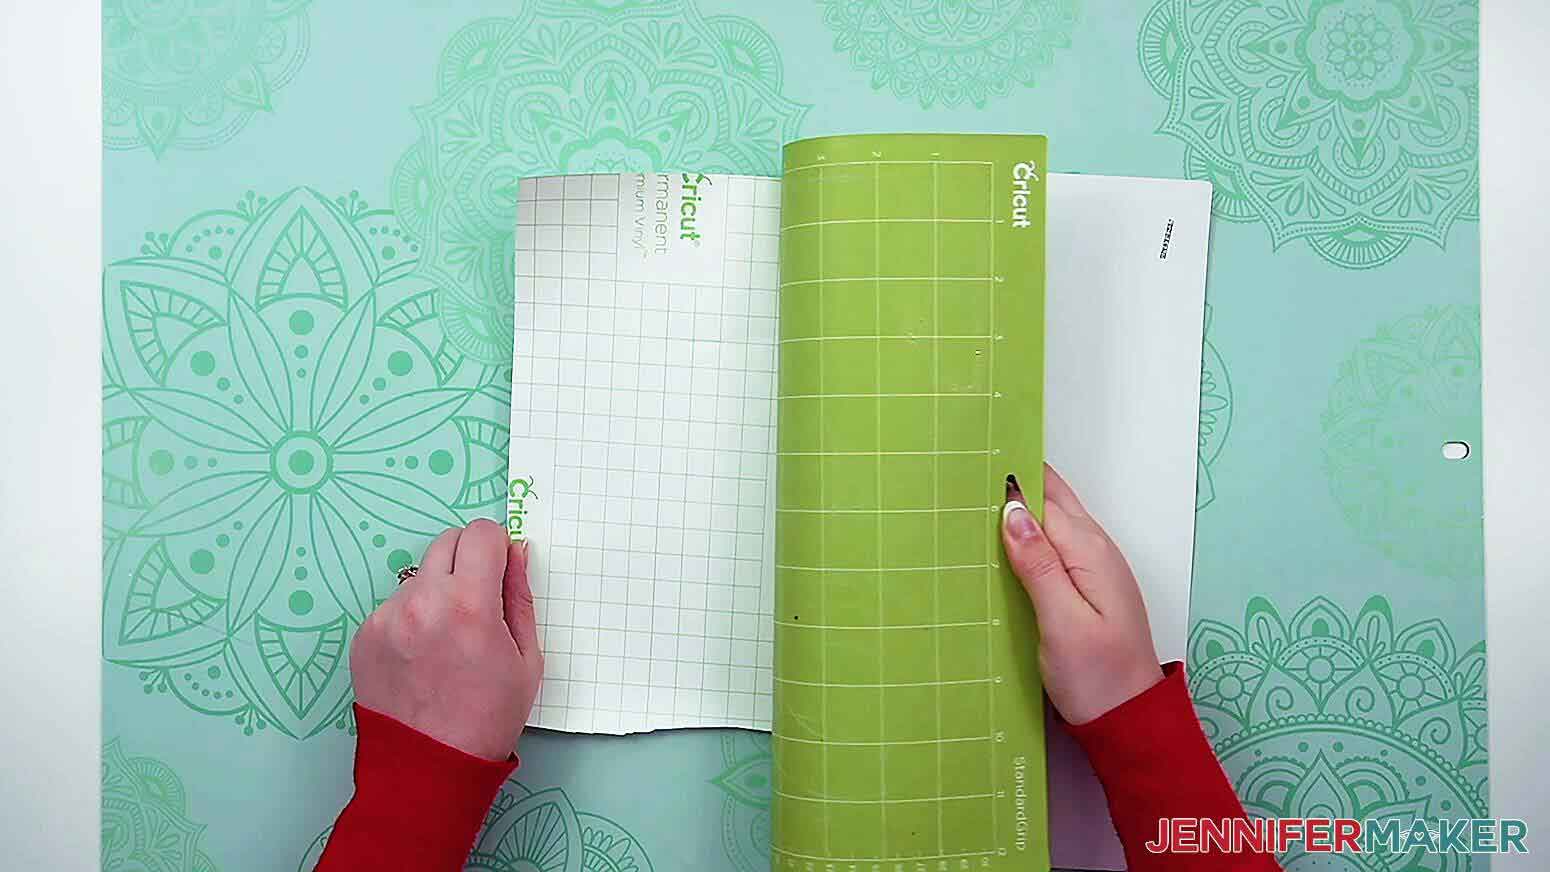
4. Place the first piece of vinyl shiny side up on a green StandardGrip 12” x 24” machine mat.
5. Use a brayer to adhere the vinyl.
6. Press the flashing arrows to load the mat into your Cricut
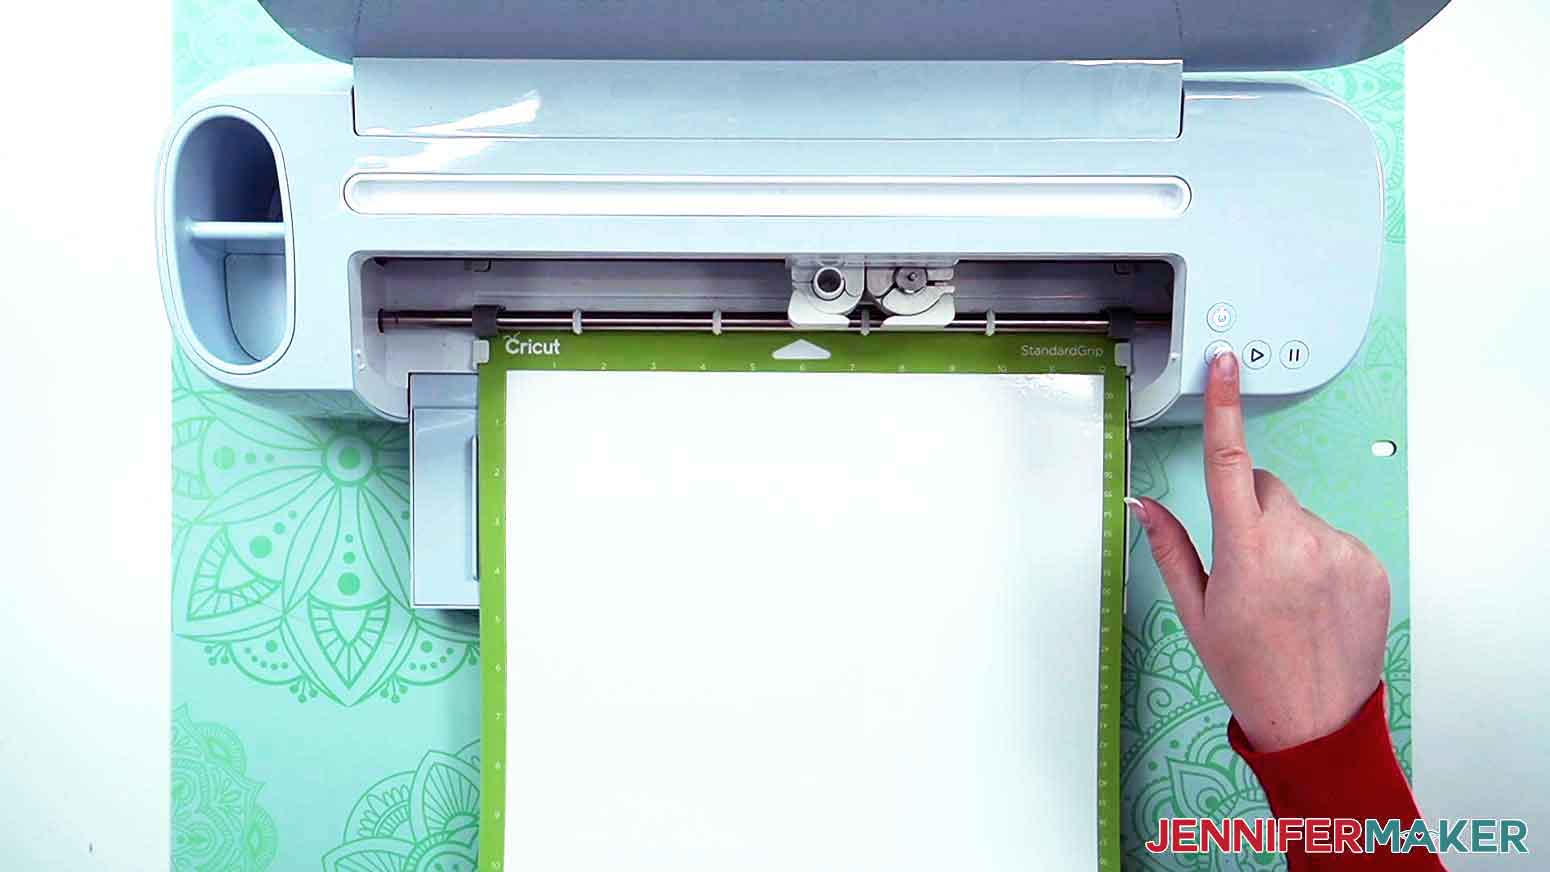
7. Press the flashing “Go” button to begin cutting
8. When it has finished cutting, unload the mat, flip it over onto your work surface, and pull the mat away from the vinyl.
STEP 3: APPLY YOUR CUT DESIGN TO THE STRAIGHT LAMPSHADE
NOTE: Applying one continuous design to the inside of the lampshade takes a lot of patience so that the vinyl does not stick to itself as you try to align it.
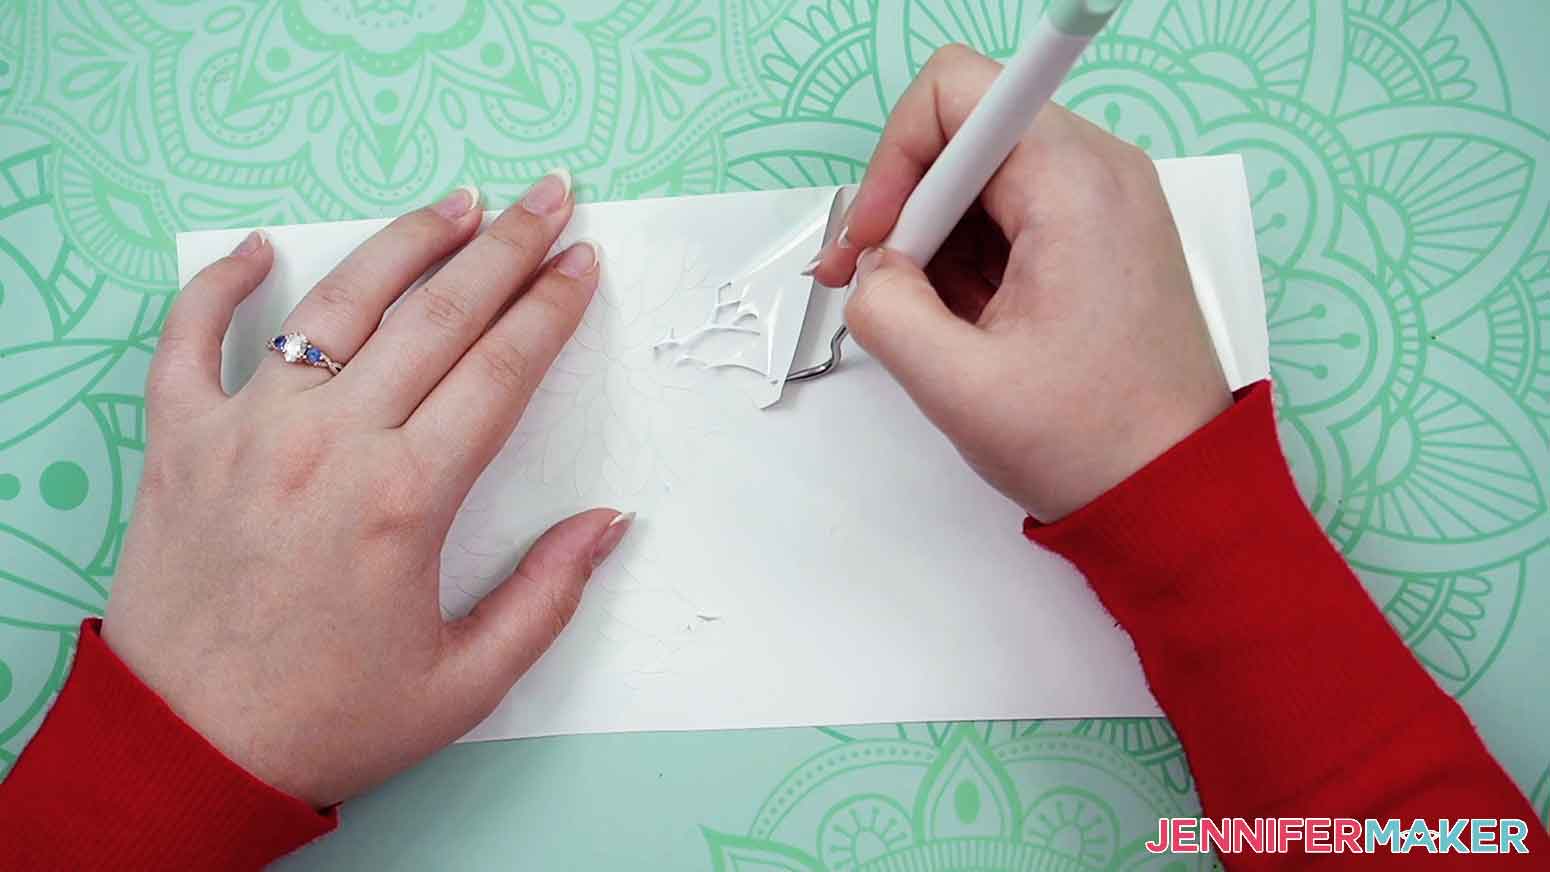
1. Use a weeding tool to remove the excess vinyl from your cut design.
TIP: The excess vinyl can become a lot and hard to handle. It helps to trim excess away as you weed the design so that it does not stick to itself.

2. Remove any packaging from the lampshade. Use a small amount of rubbing alcohol and a microfiber cloth to remove any dust or debris on the inside of the lampshade.
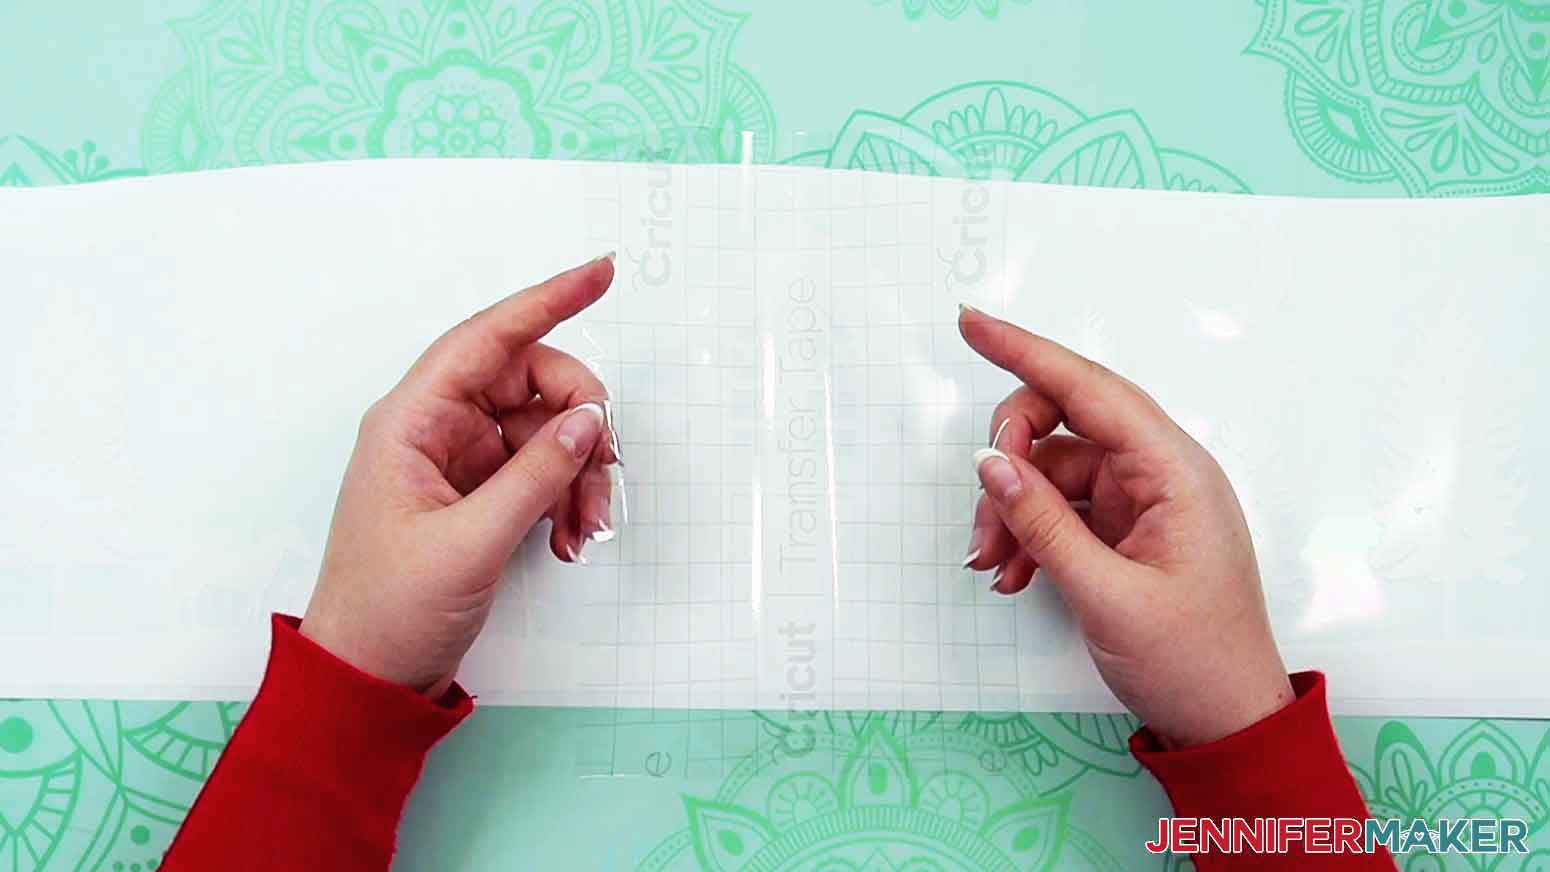
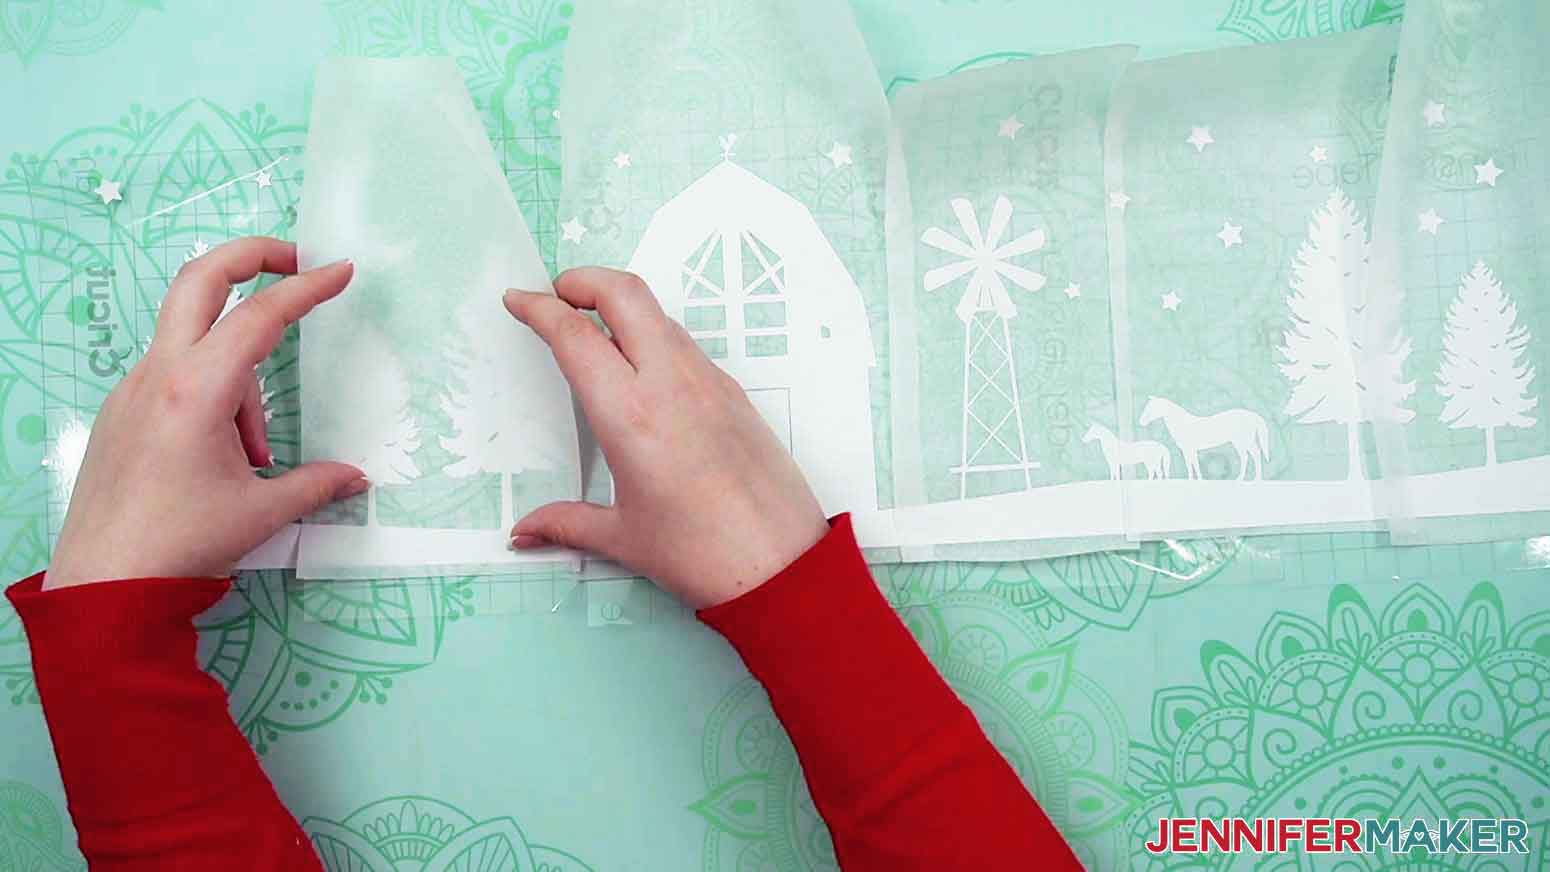
3. Cut five pieces of StandardGrip transfer tape about 8” tall and about 4.5” wide.
4. Cut five pieces of parchment paper approximately the same size as the transfer tape.
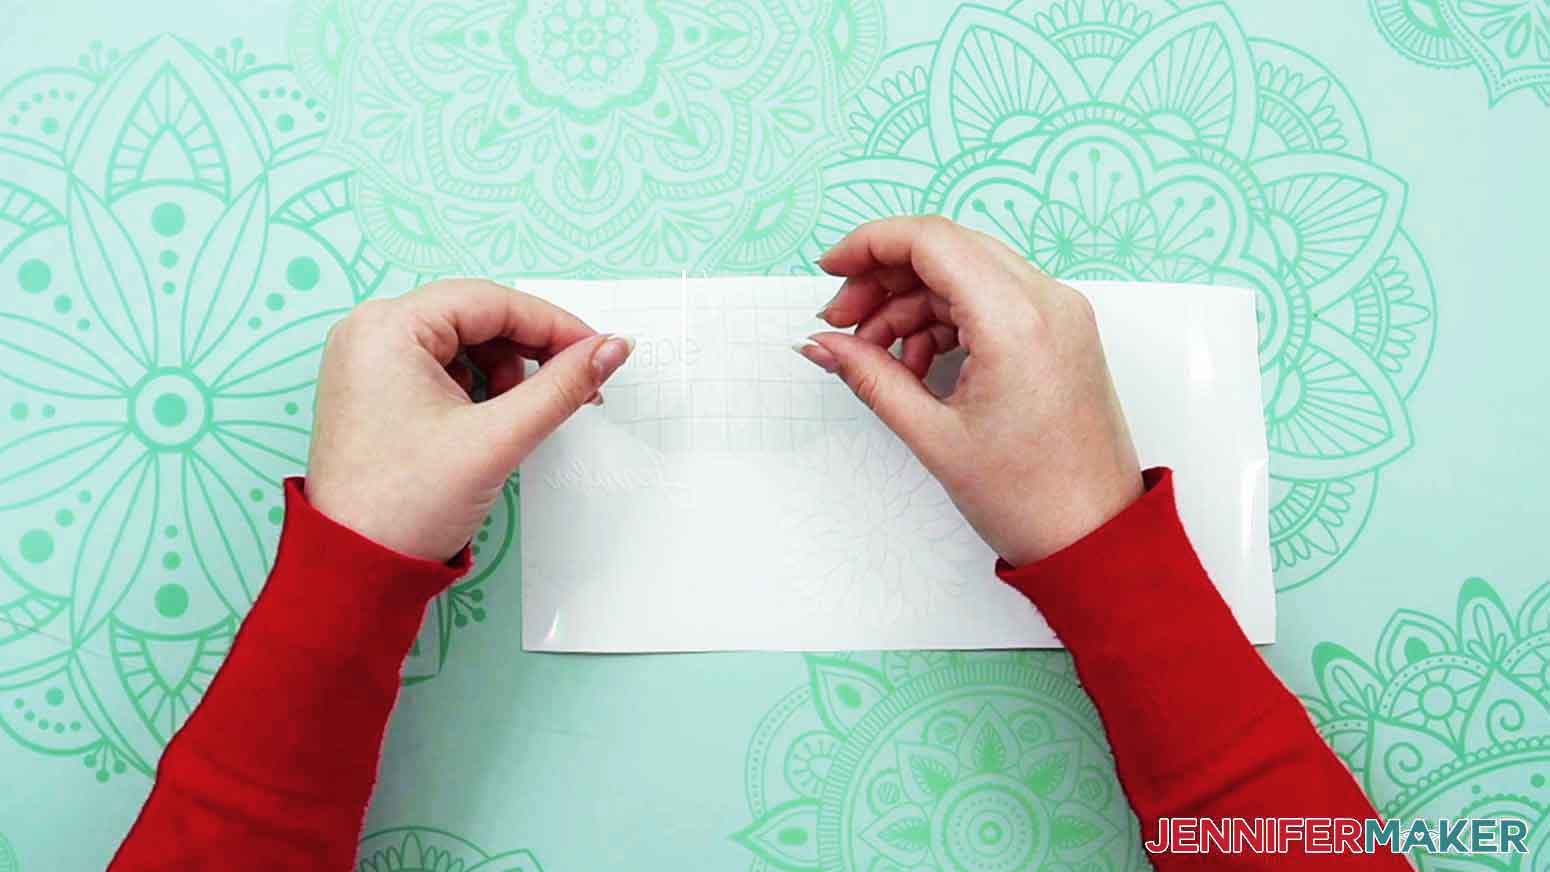
5. Remove the backing from the first piece of transfer tape and place the transfer tape on the center barn section of vinyl. Make sure you have at least an inch of transfer tape below the bottom of the vinyl design.
NOTE: Leaving an inch of transfer tape below the vinyl will help with placing the design inside the lampshade.
6. Remove the backing from the next piece of transfer tape and apply it next to your first piece (you can place it on either side). Make sure the tape covers the whole section of the design, including anything in the sky.
TIP: Try not to place the transfer tape so that it only partially covers part of a design element, like a tree. If needed, you can use scissors to trim the transfer tape so that it only covers full sections of the vinyl objects.
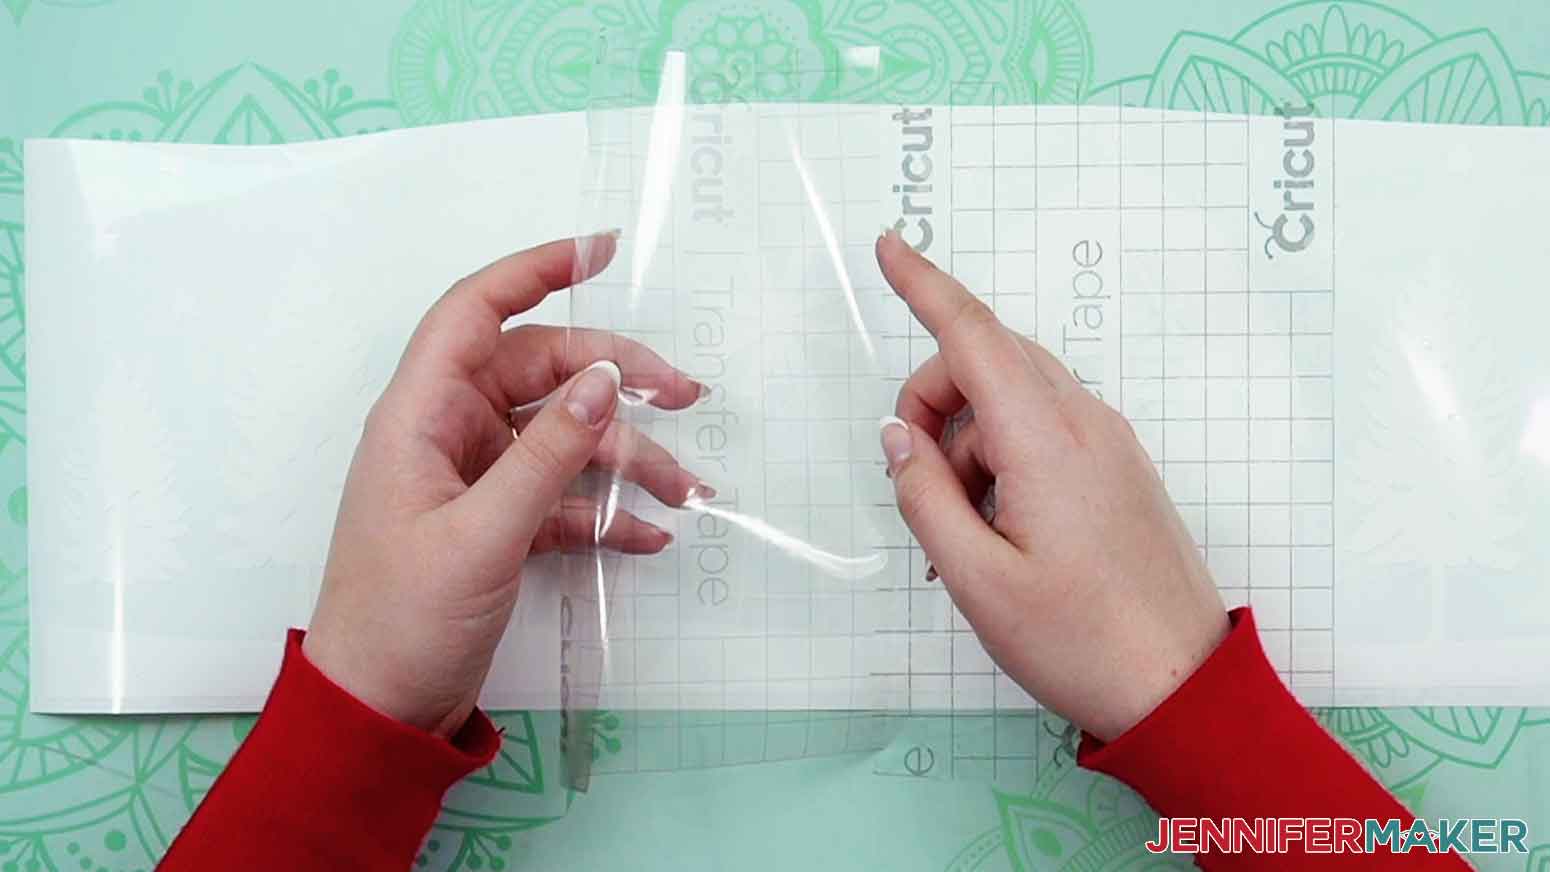
7. Place the remaining pieces of transfer tape over the design.
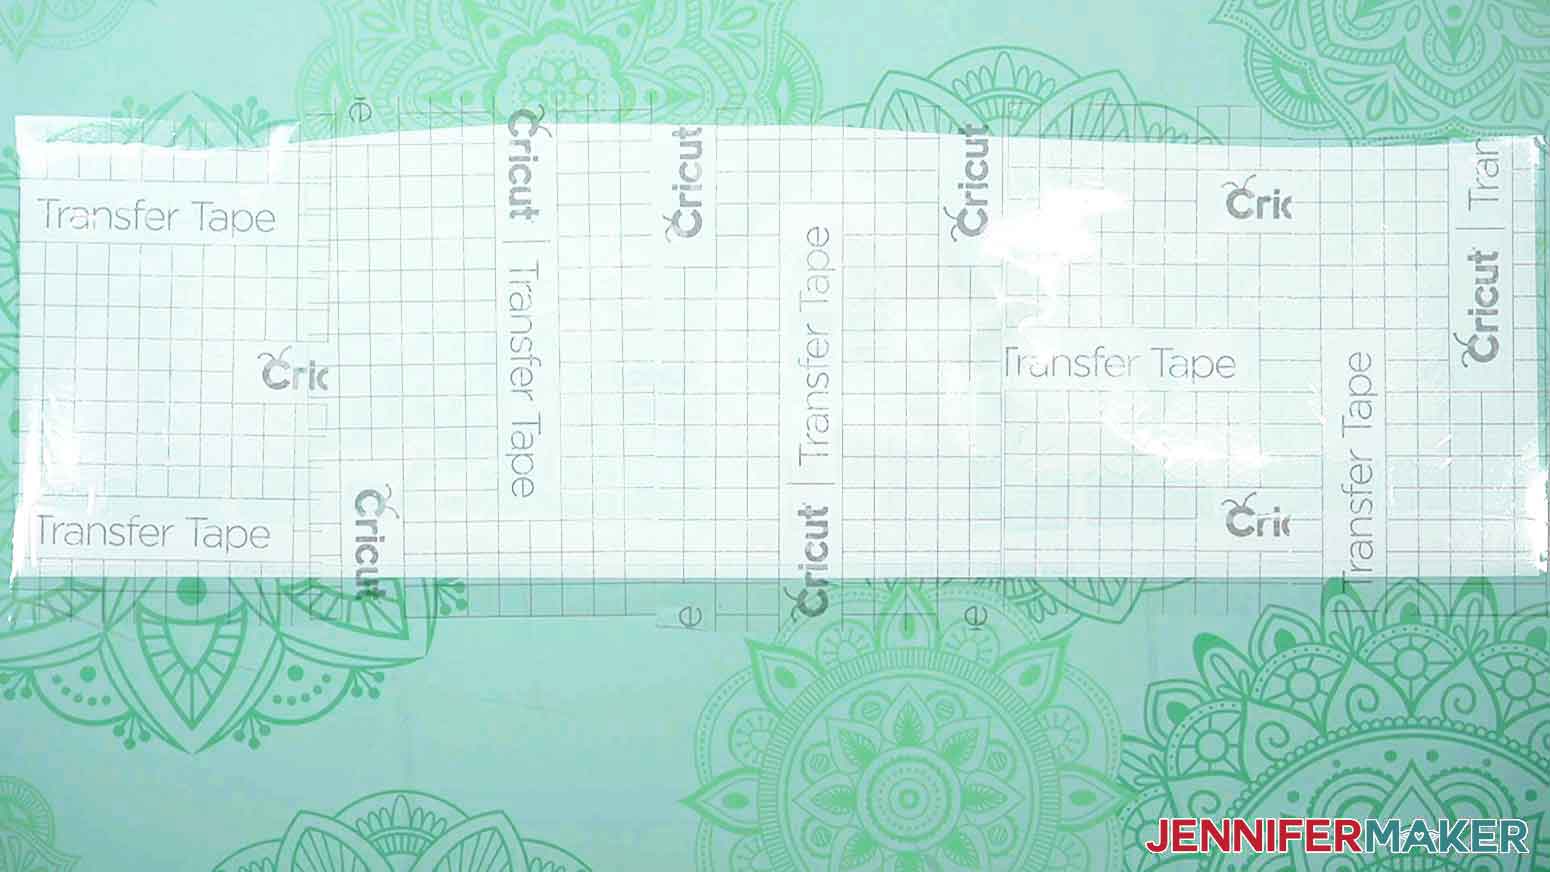
8. Burnish the transfer tape to the vinyl.
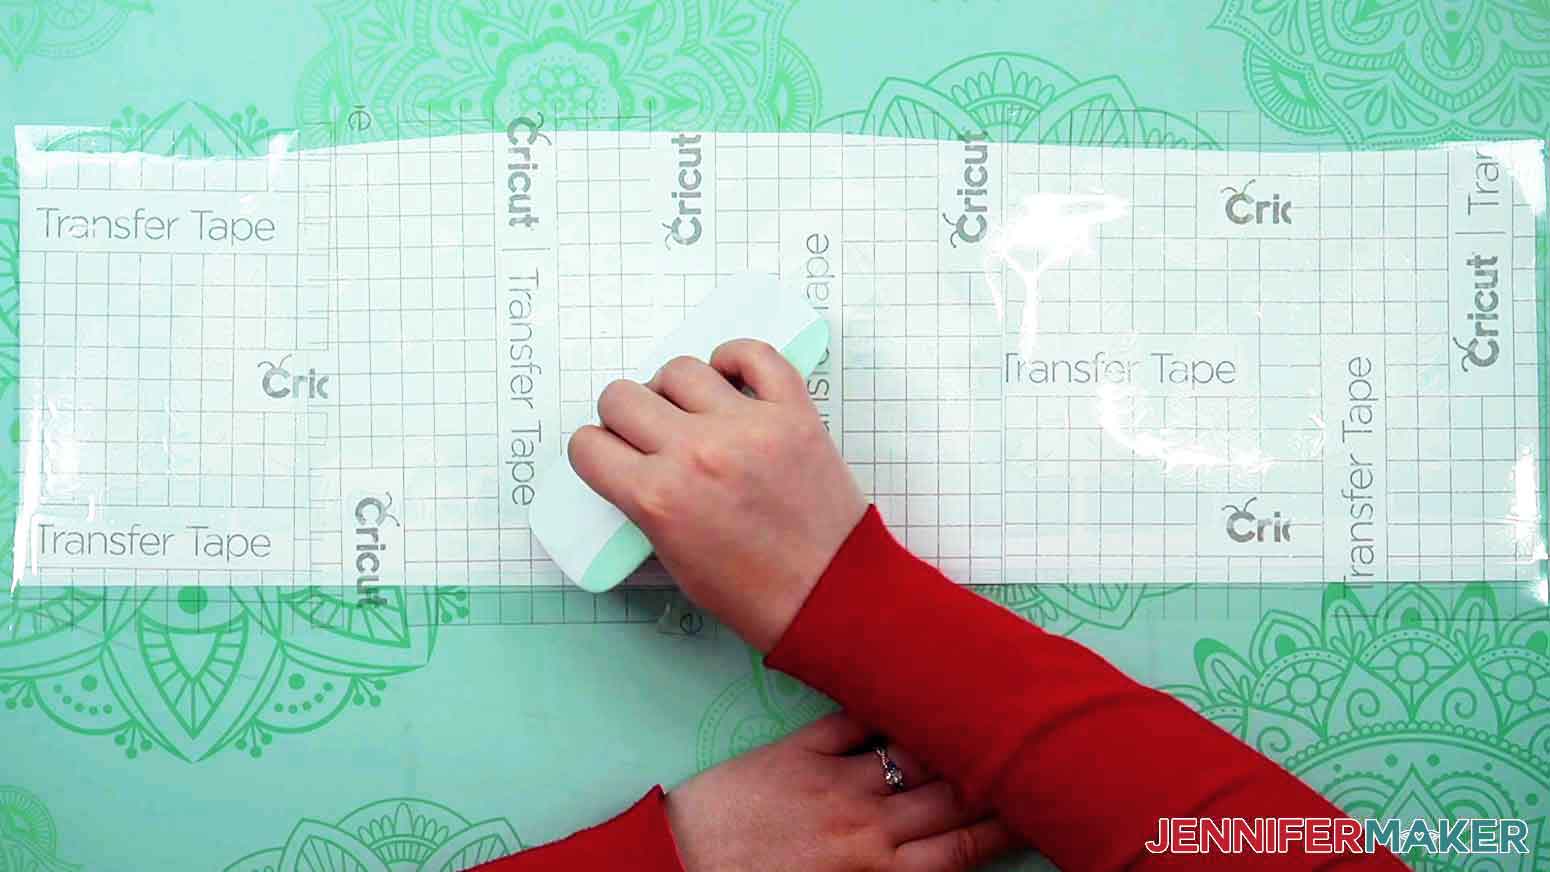
9. Turn the design over and remove the vinyl backing.
TIP: If the vinyl backing becomes too large to work with, you can use scissors to trim it away from the design.
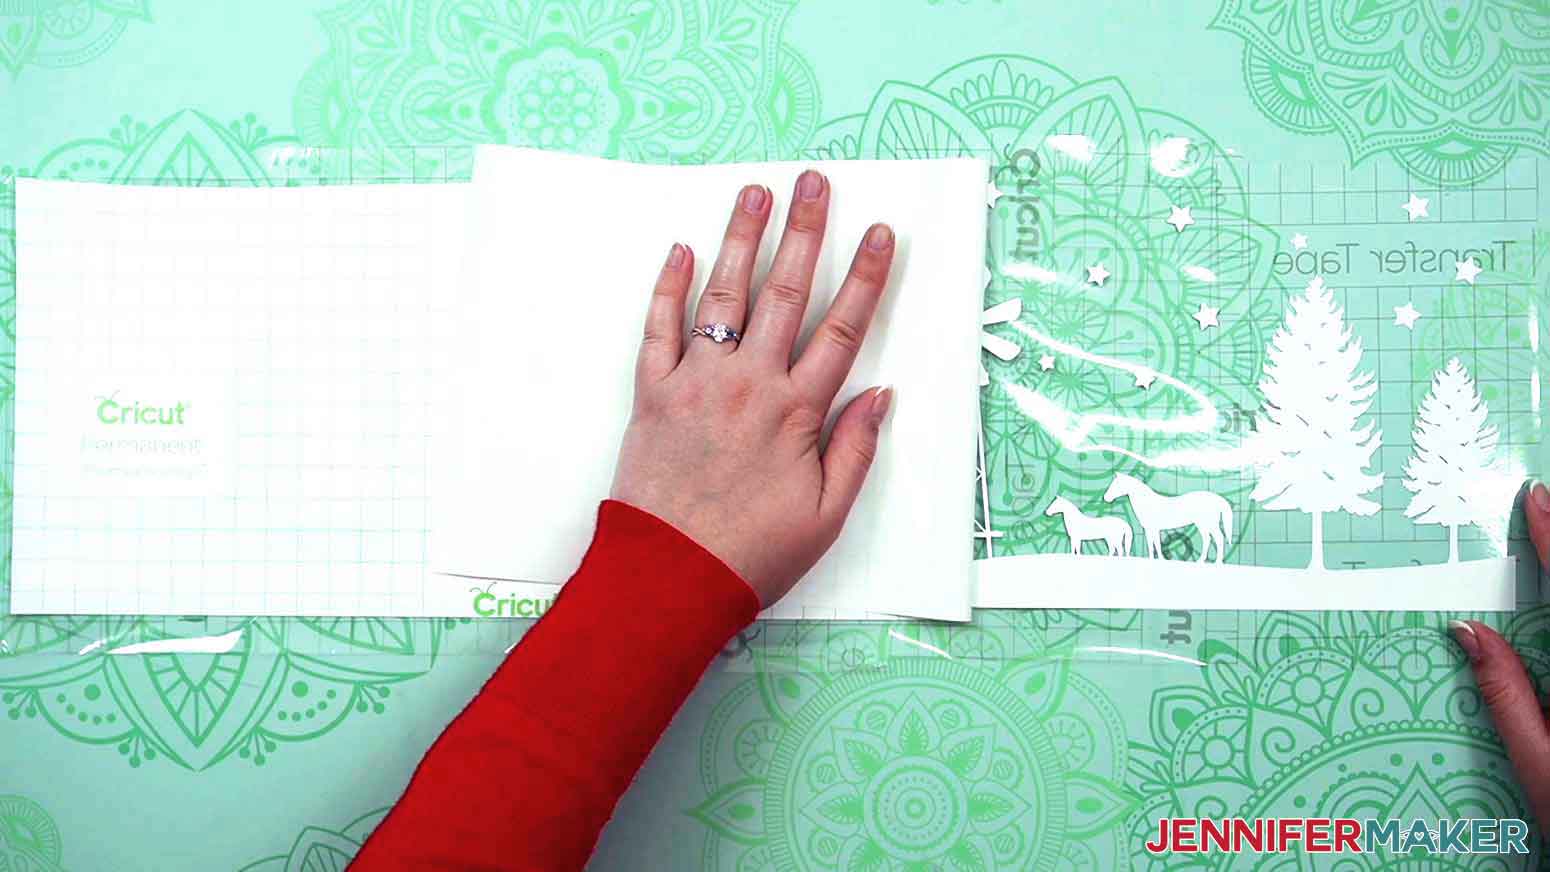
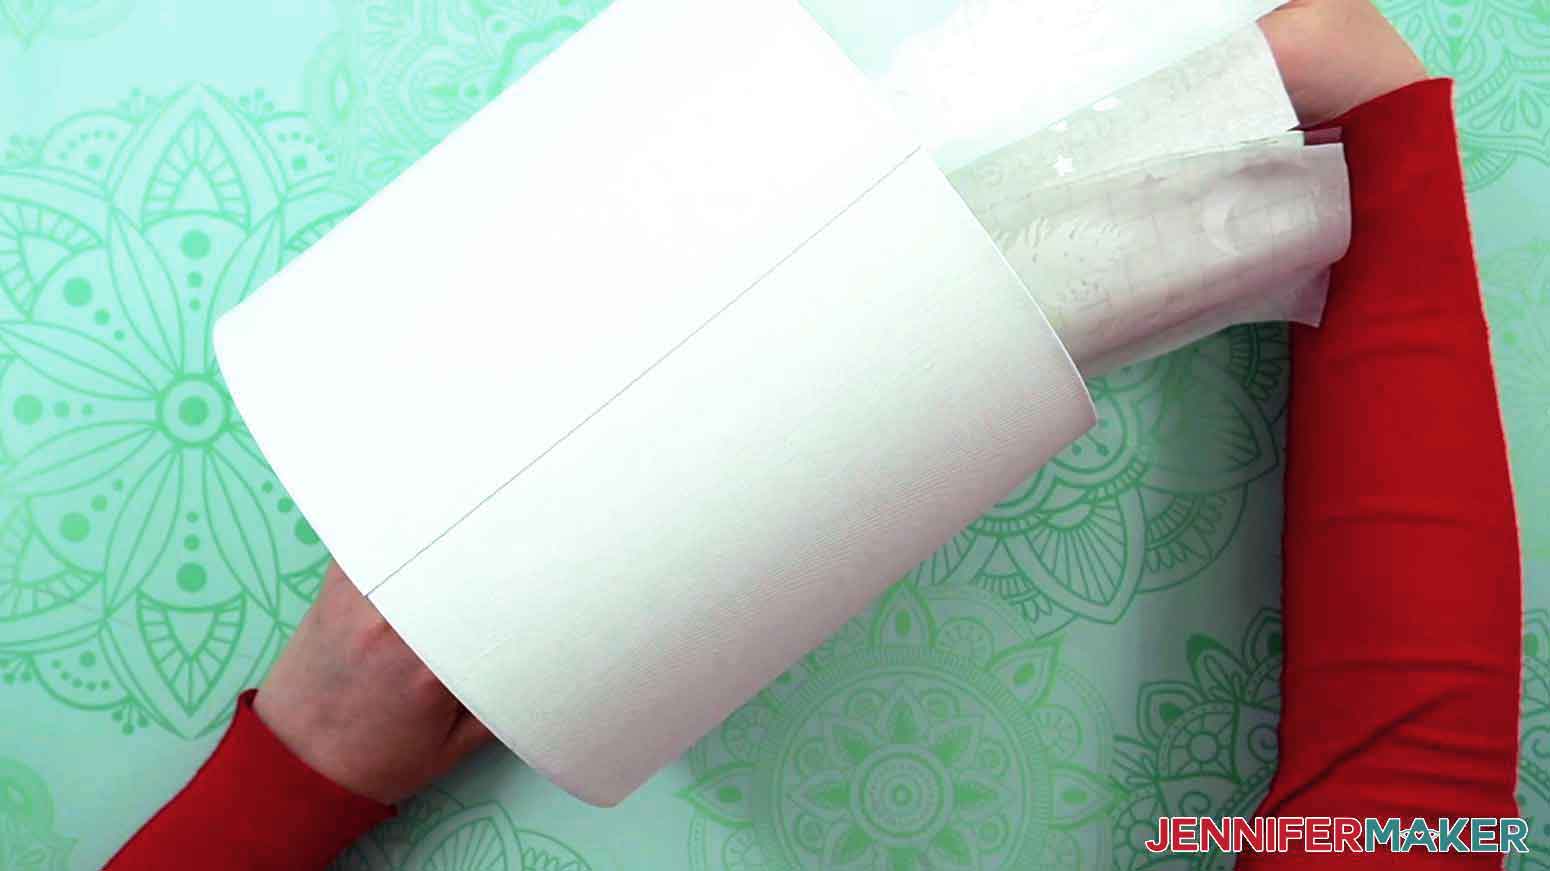
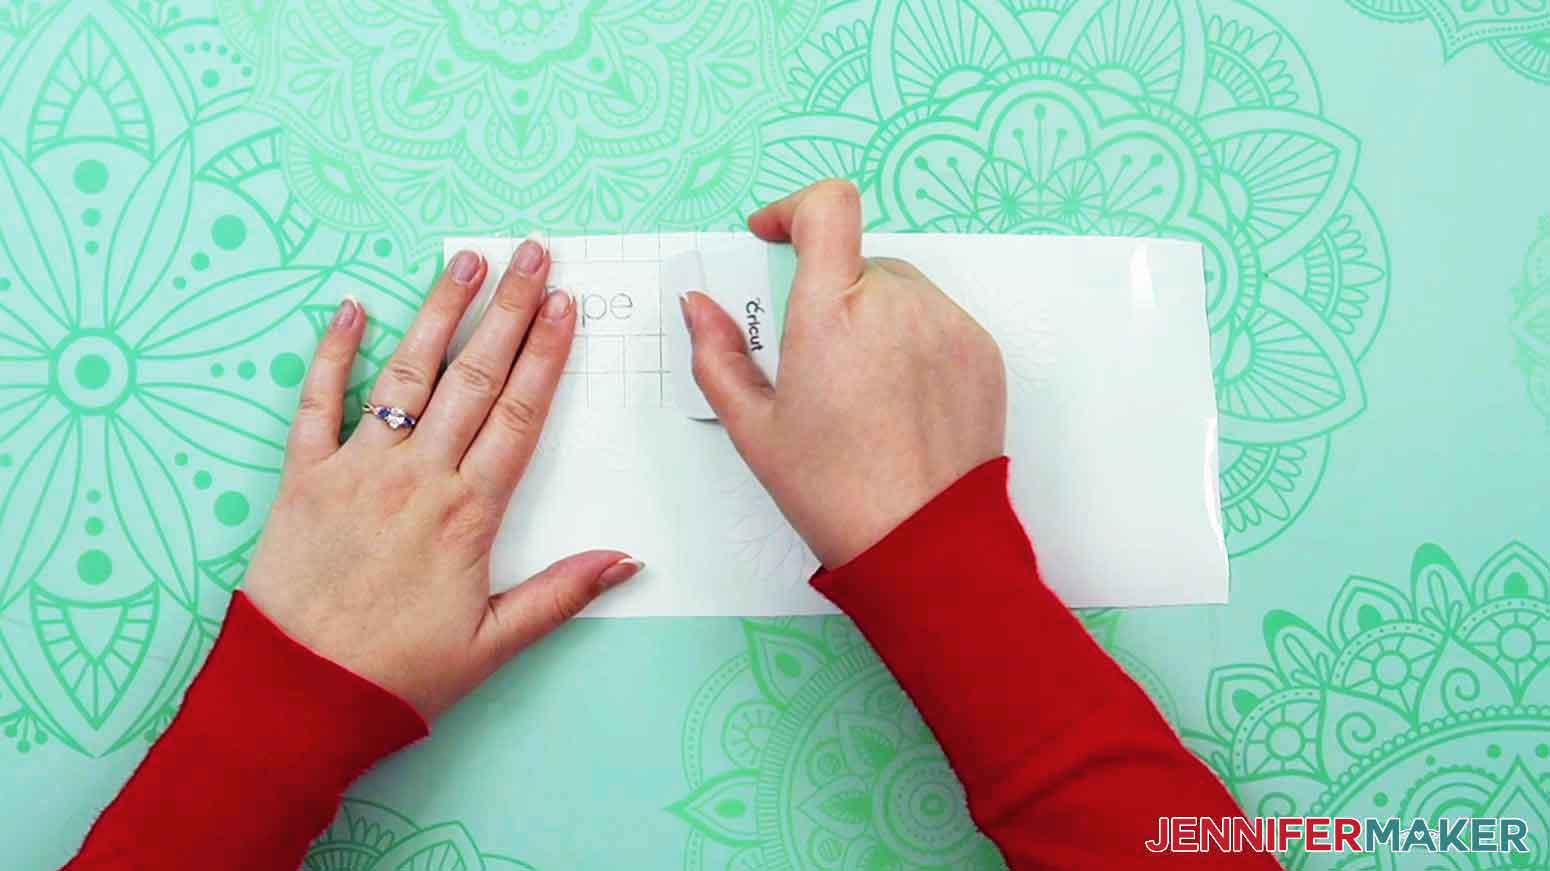
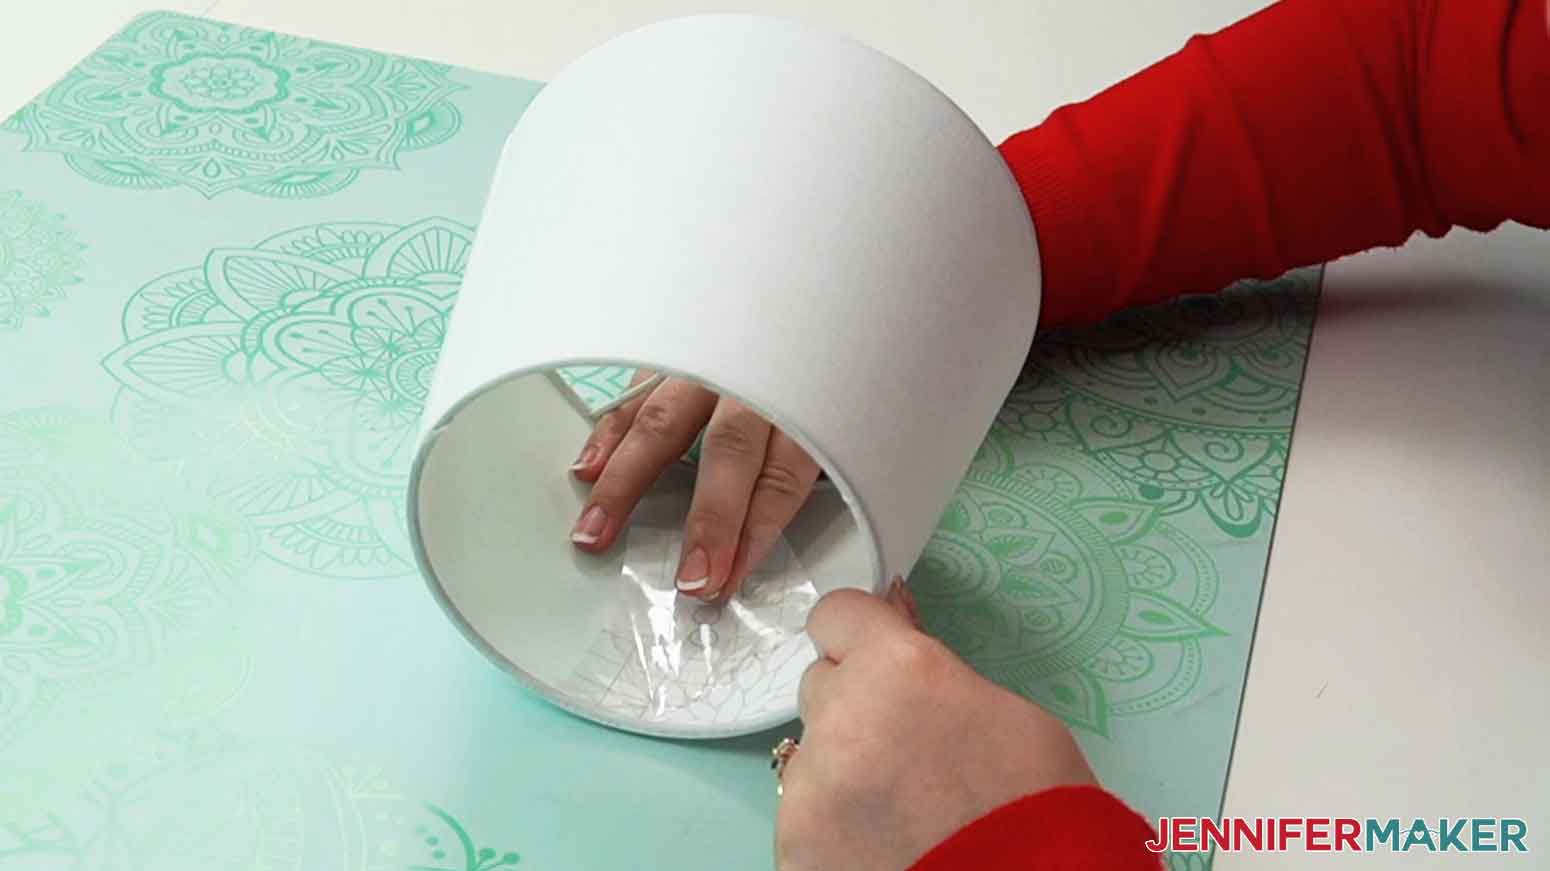
10. Place the sections of parchment paper over the vinyl, the same way you applied the transfer tape. Make sure the vinyl is covered, but leave the bottom of the transfer tape showing. This will allow us to position the transfer tape and tack that blank part in place before the vinyl sticks to the inside of the lampshade.
11. Make sure the lampshade is upright in the correct direction so that your decal isn’t upside down.
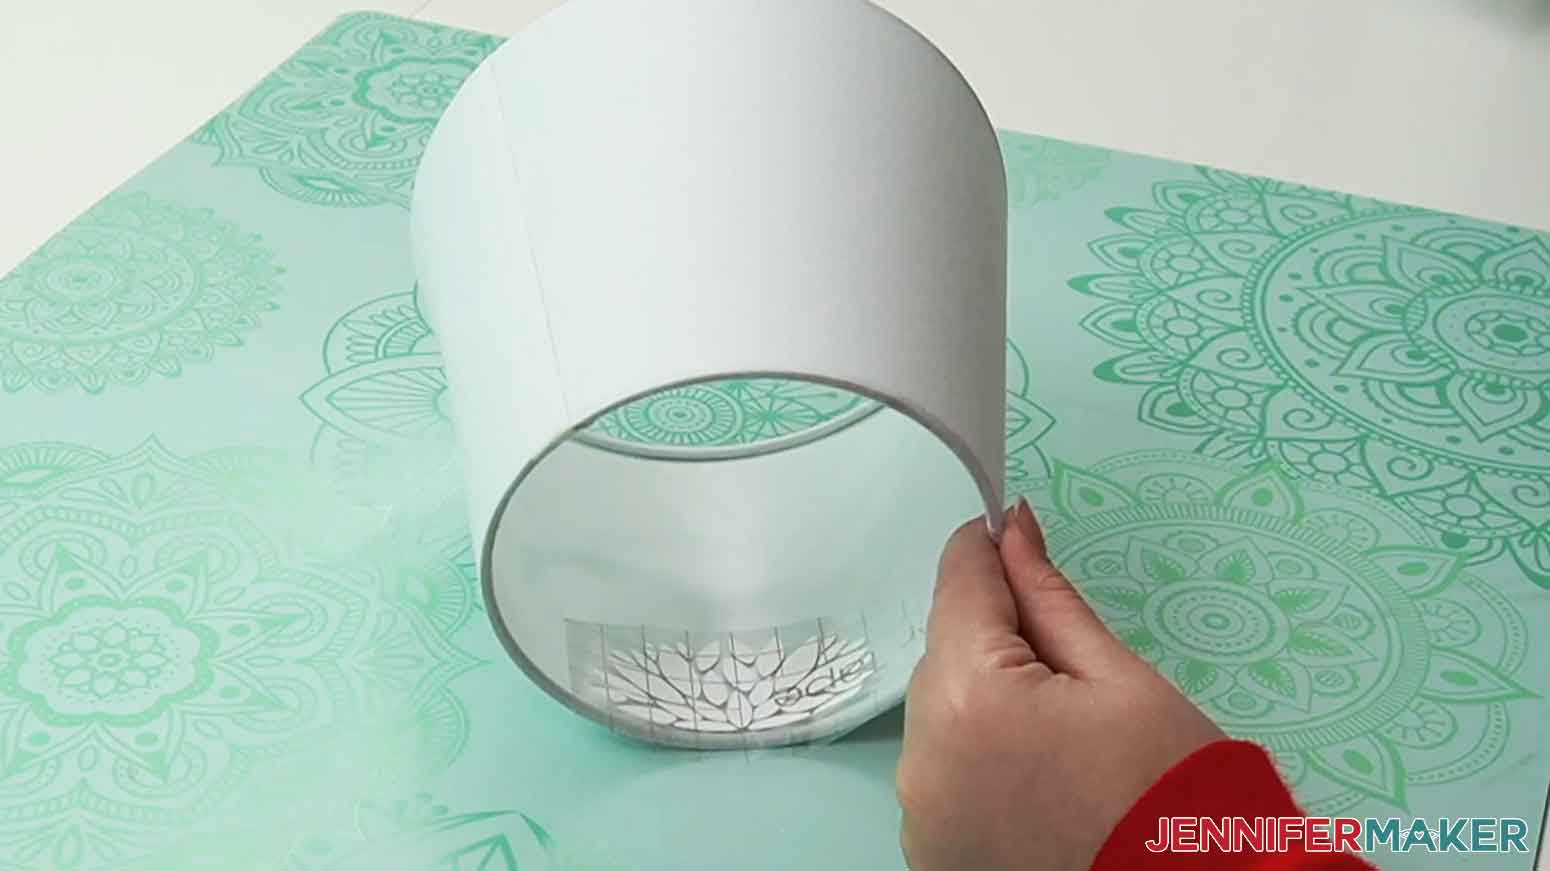
TIP: Work in a well-lit area to make it easier to see the vinyl design through the lampshade.
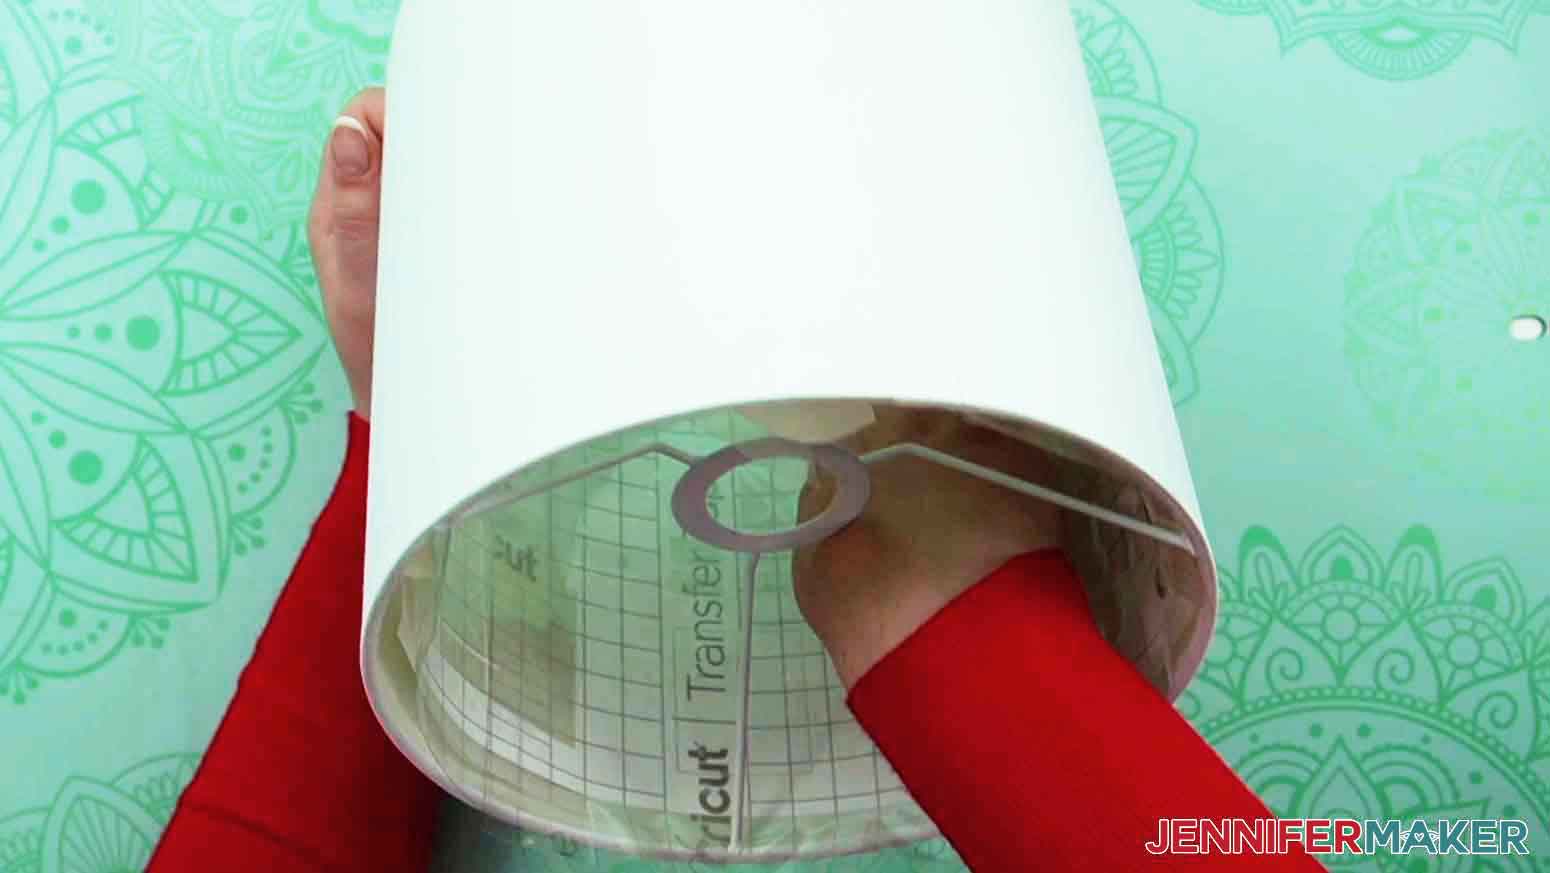
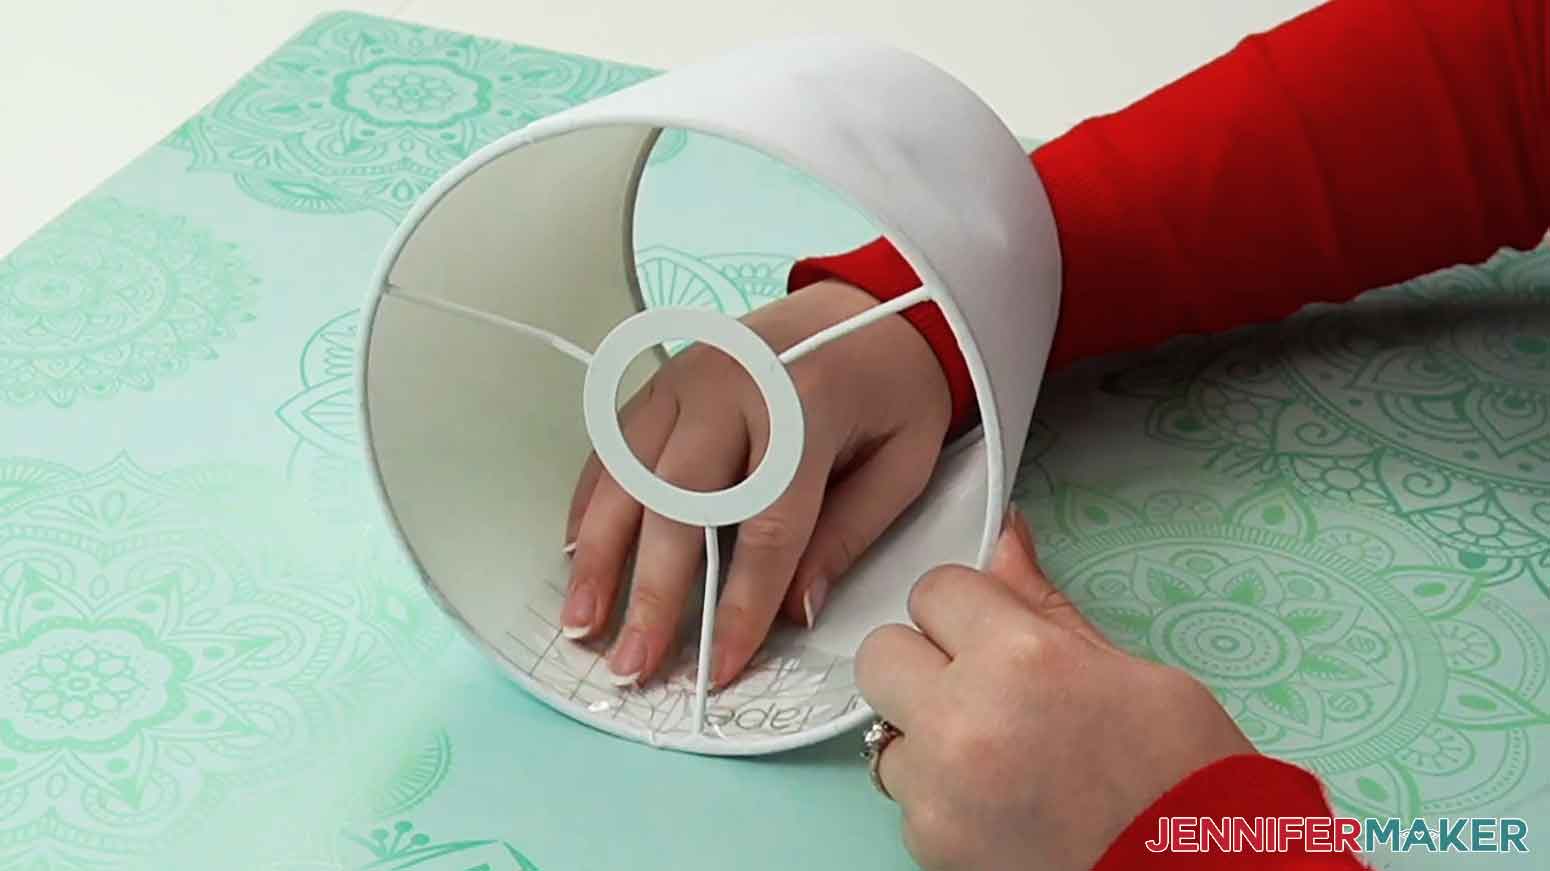
12. Gently roll the design into a circular shape with the transfer tape on the inside and parchment paper facing out, and position the design inside the lampshade.
13. Center the barn in the front center of the lampshade. The bottom of the ground in the design will be your guide. It will align along the bottom seam of the lampshade.
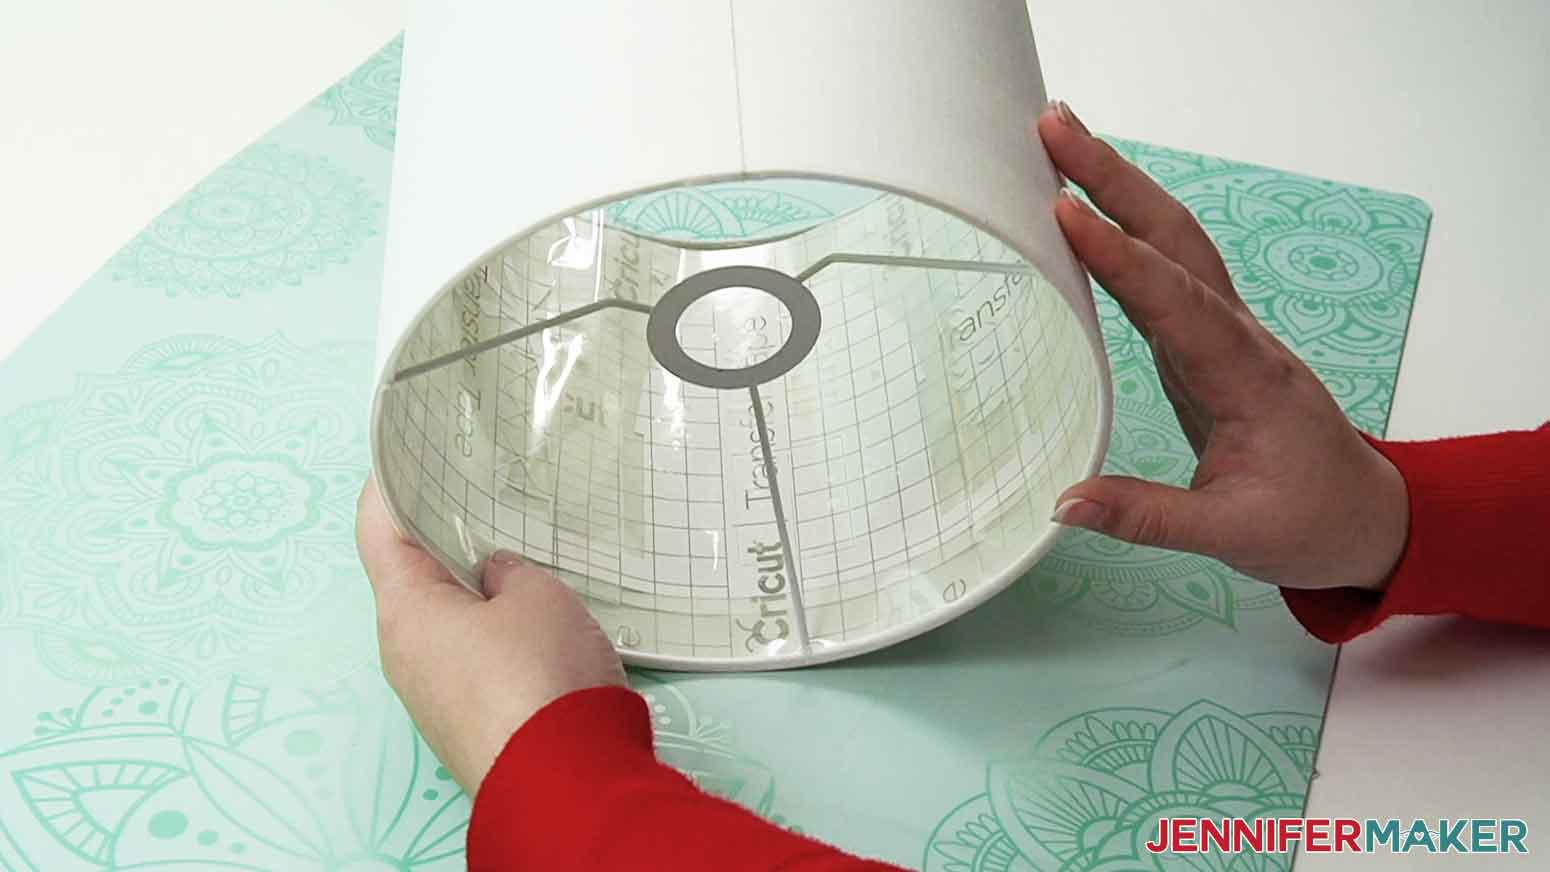
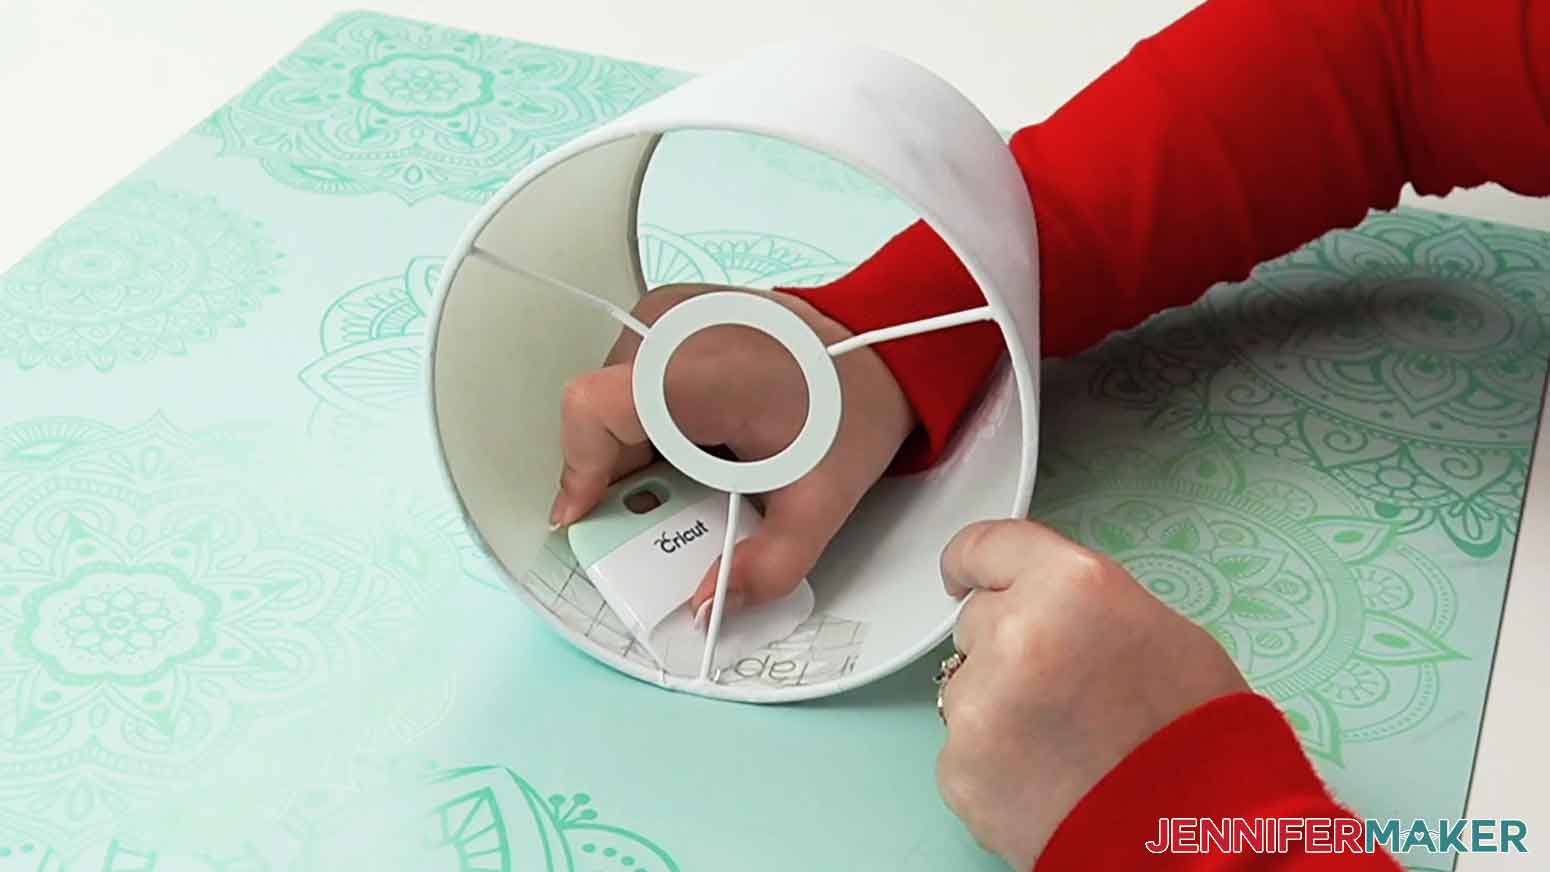
14. When the ground looks even with the bottom seam, press the transfer tape into place and hold its edge down with one hand.
TIP: The section of transfer tape that is on the lampshade is more of a guide at this point. If you don’t help secure it in place, the transfer tape may move when you remove the parchment paper and the design will be crooked. 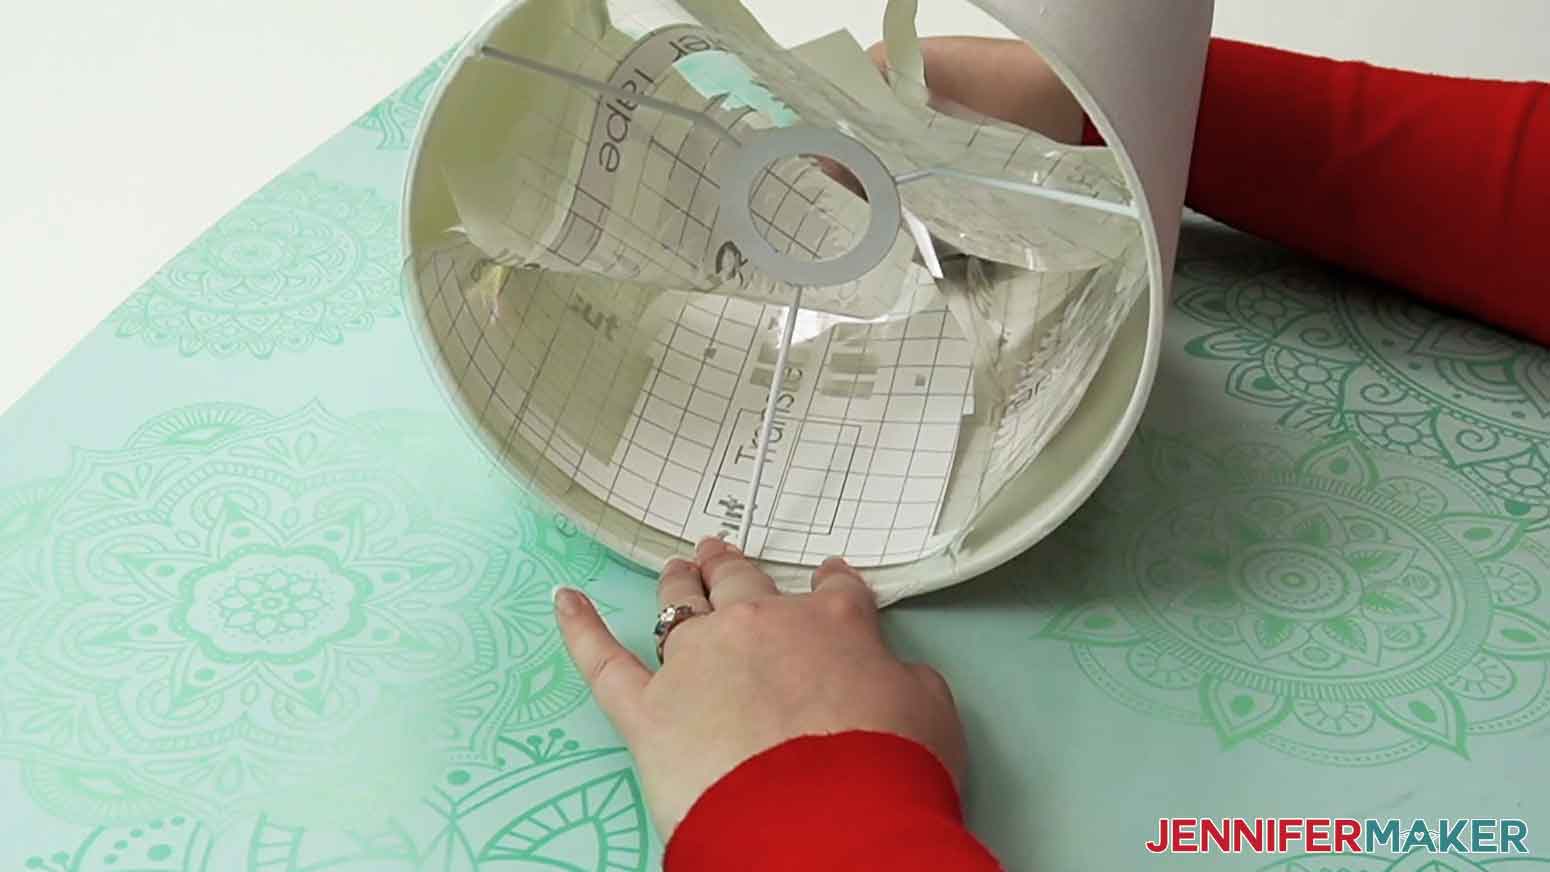
15. With the your other hand, gently wiggle out the parchment paper covering the barn.

16. Make sure the design looks straight and use your fingers to press the exposed vinyl into place on the shade.
17. Carefully remove that section of transfer tape.

18. Now, move to either side section. Again, align the ground layer along the bottom seam, keeping it even with the first piece.
19. Press and hold the edge of the transfer tape in place and remove the parchment paper.
20. Press the vinyl onto the lampshade in that area.

21. Remove that section of transfer tape.
22. Repeat steps 18-21 to finish applying the rest of the design to the shade.
NOTE: Do not worry about small bubbles in the vinyl. The lampshades are very forgiving and any small bubbles will not be noticeable when the lamp is lit.
PROJECT 2: DAHLIAS WITH PERSONALIZATION ON A TAPERED LAMPSHADE
STEP 2: PREPARE YOUR DESIGN
CRICUT DESIGN SPACE
1. Open Cricut Design Space.
2. Click “Upload.”
3. Click “Browse.”
4. Select the SVG file you want. I’ll demonstrate the dahlias.
5. On the Prepare to Upload screen, it will say “Cut image” with the design preview.
6. Click “Upload”
7. Find your design in Recent Uploads and add it to the Canvas.
8. Click the minus (-) sign to zoom out (50% works well).
9. If you want, you can personalize the design by adding text. Click the Text icon on the left
![]()
10. Click the Font menu dropdown.
11. If you’re using a downloaded font, click “System.”
12. Search for the font you want to use. I’m using Biosha Script.

NOTE: If you need help downloading and installing fonts to use in Cricut Design Space, check out this helpful tutorial.
13. Double-click on your text box on the Canvas.
14. Type the word or name you want - I’ll use “Jennifer” in the default font size of 72.
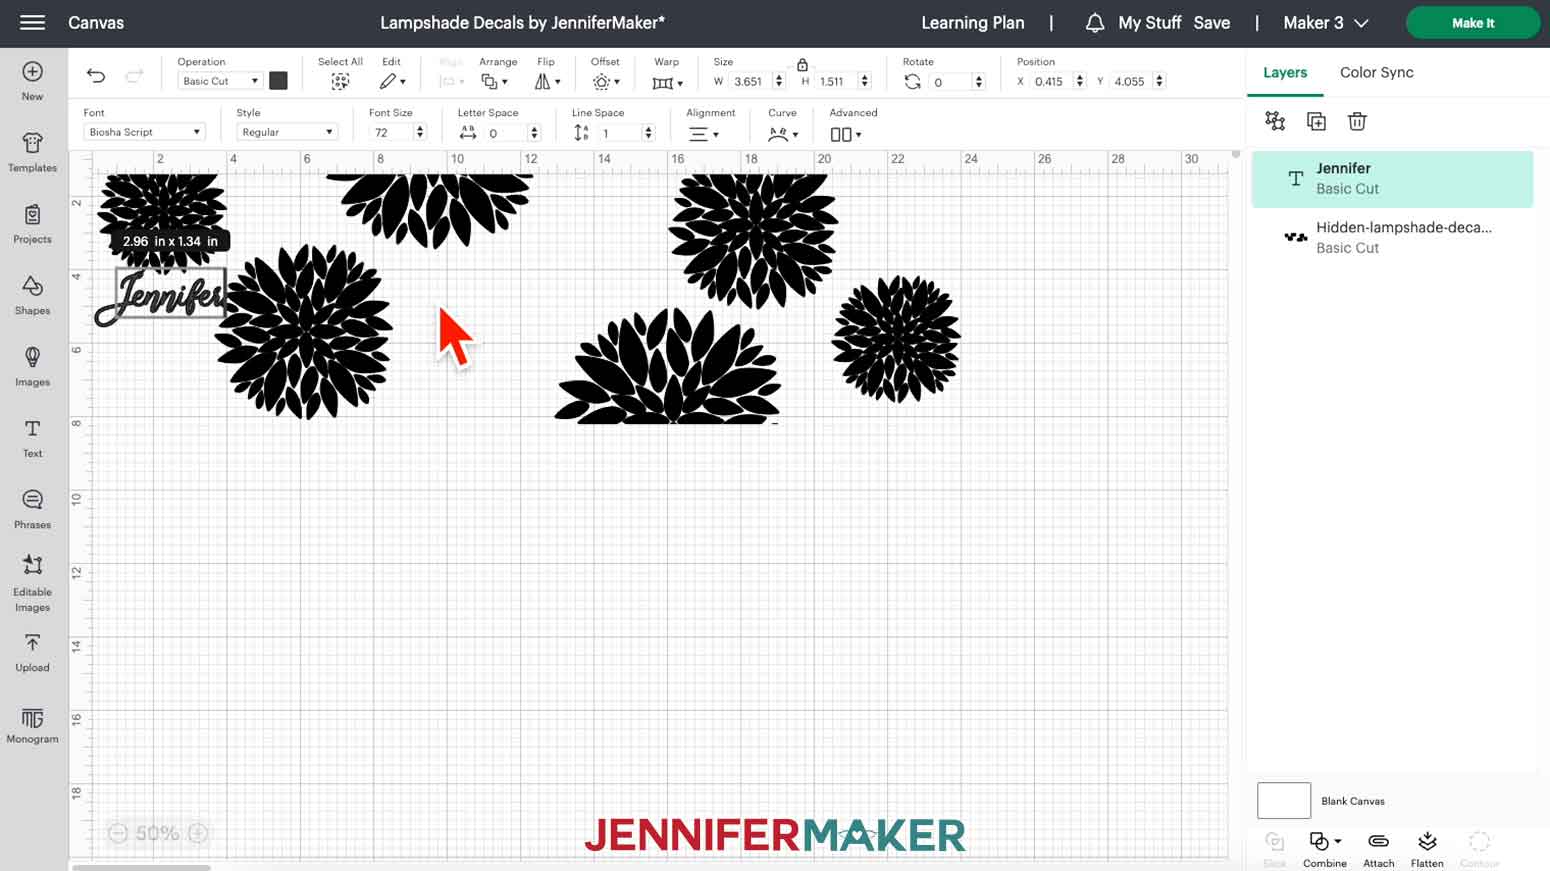
NOTE: If the personalization is too small or too big, you can select the Text layer and click and drag the corner to resize the text.
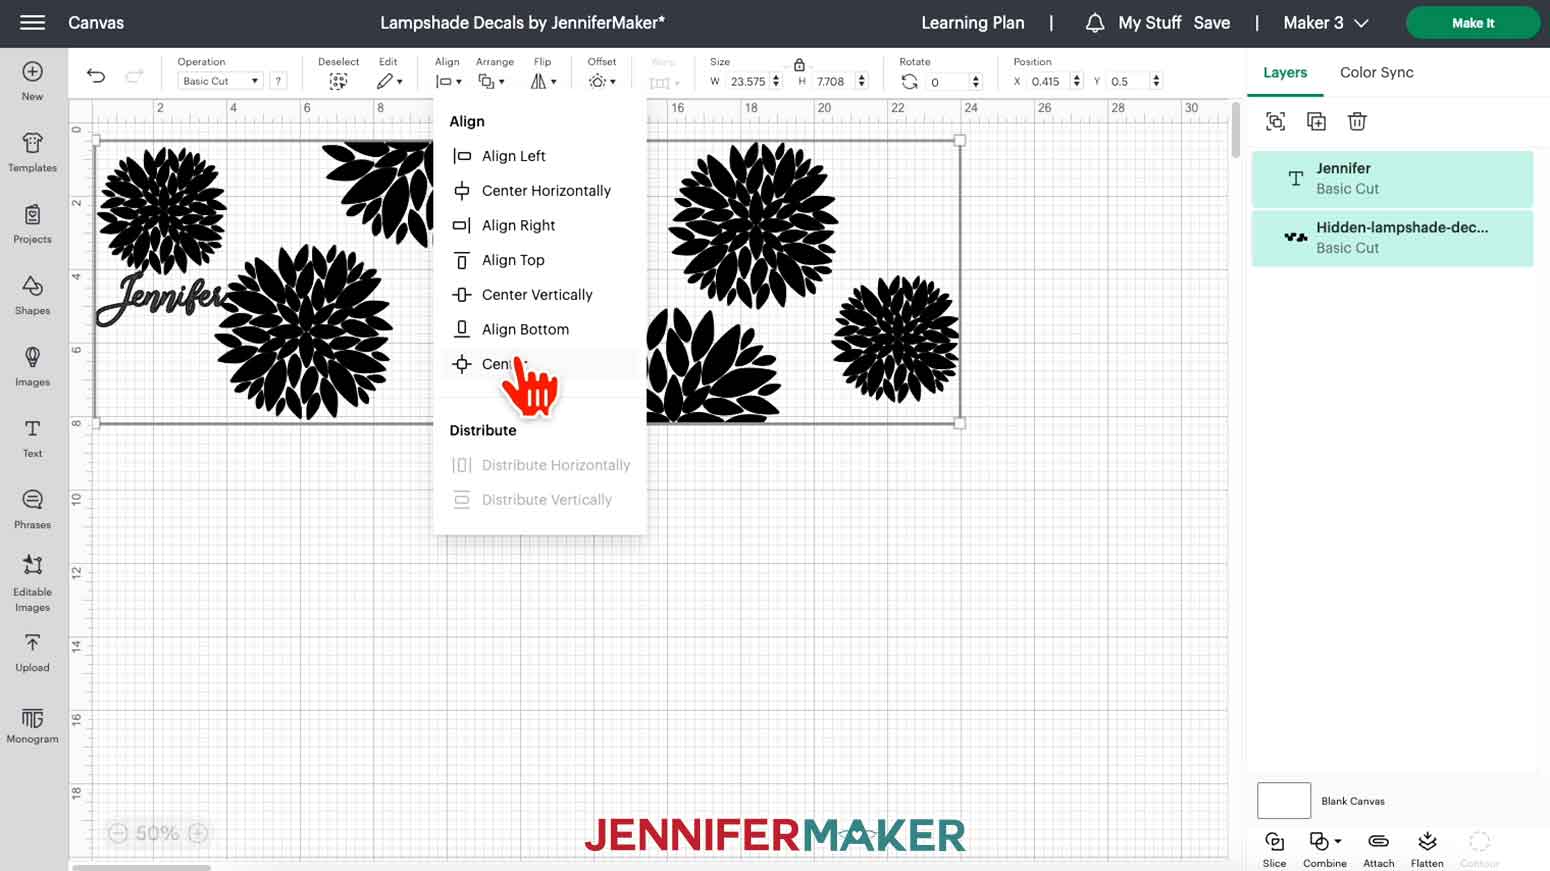
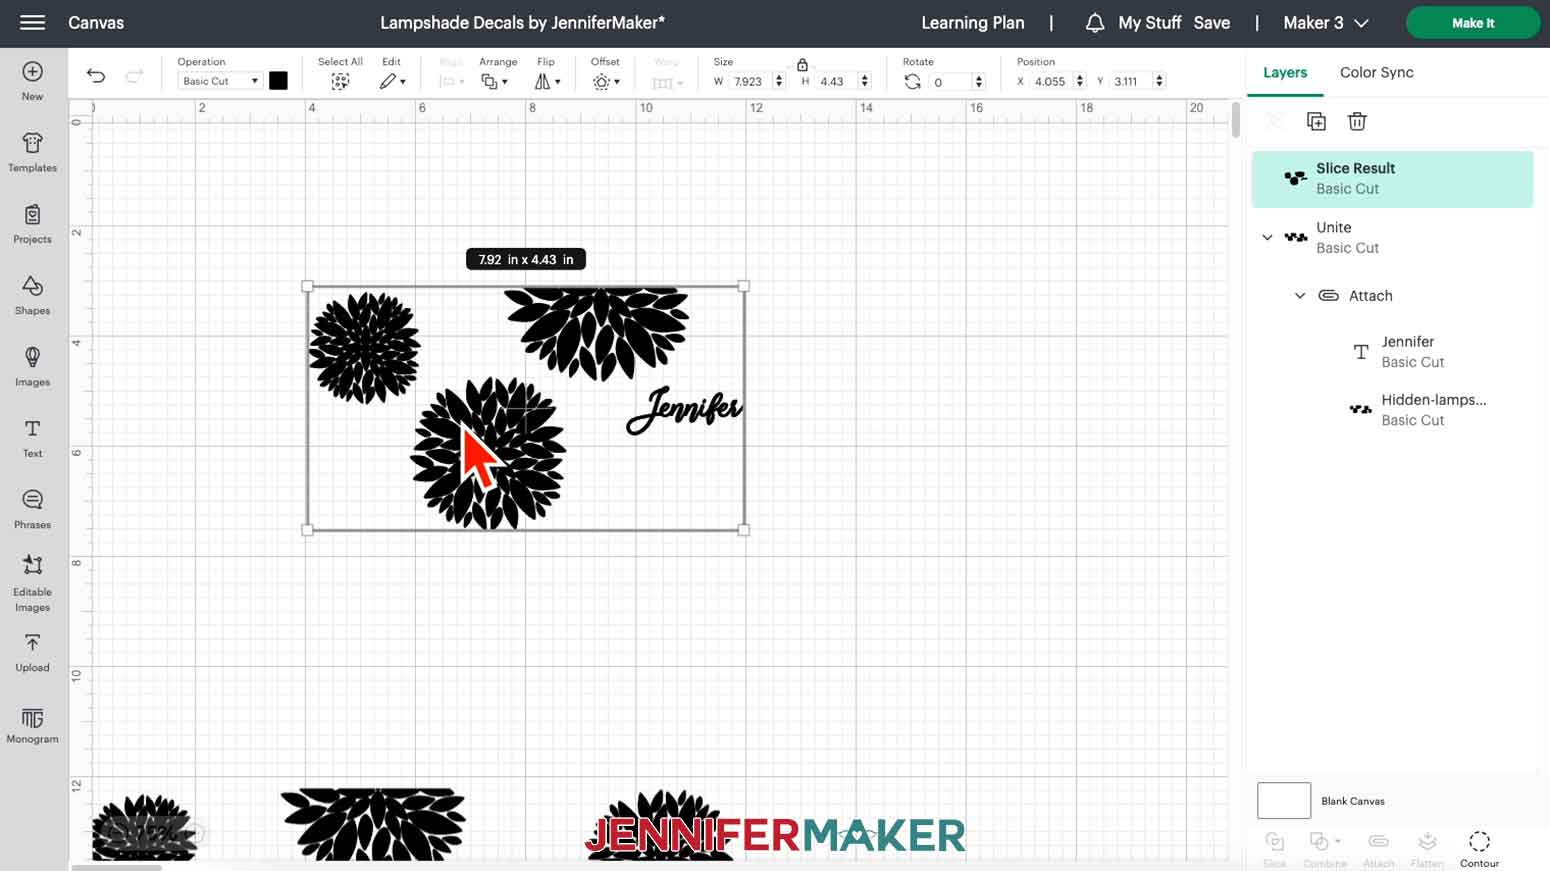
15. Select the dahlia layer and text layer.
16. Click “Align and “Center.”
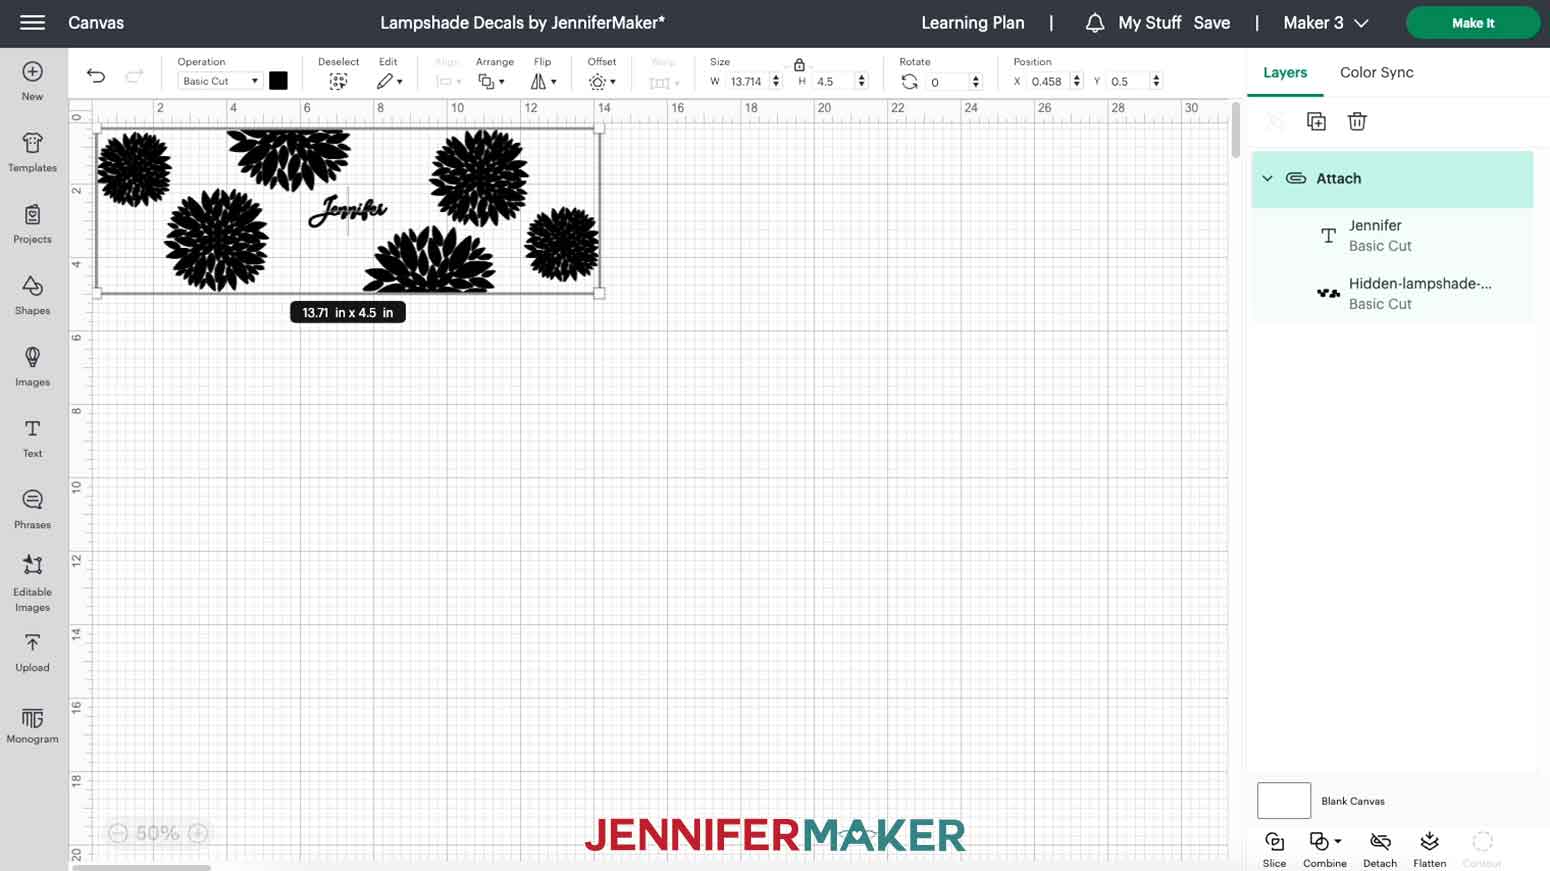
17. With both still selected, click “Attach.”
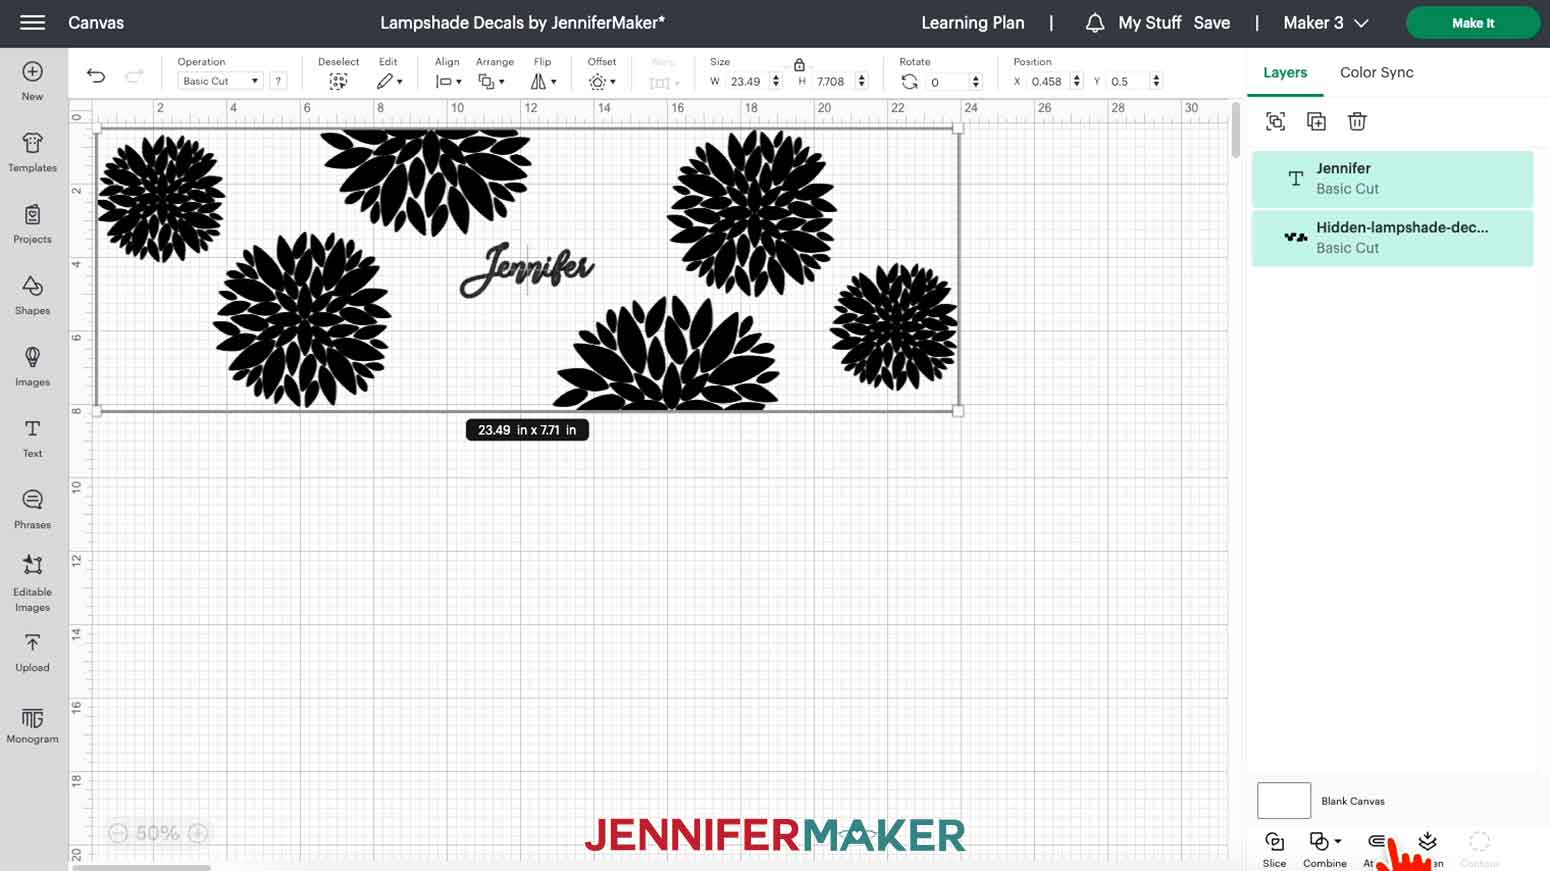
18. If you need to resize a design, click the layer to select it and enter the dimensions in the size menu. I need to change the dahlia design height to 4.5” since the tapered lampshade is a little smaller. This will make the width about 13.7”. It helps to leave a margin at the top and bottom of the lampshade.
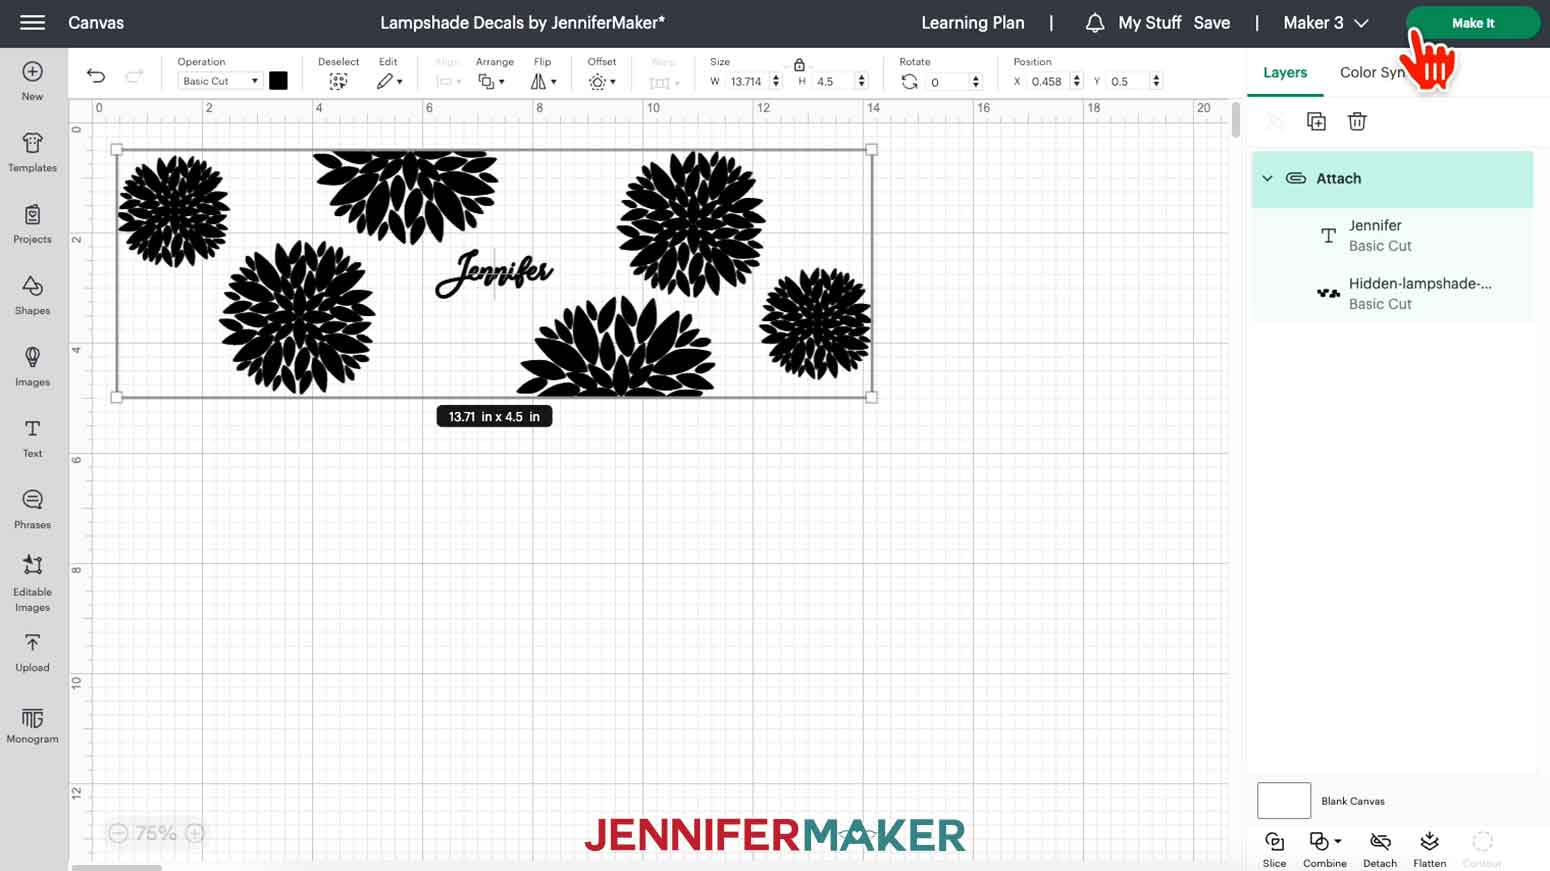
19. Make sure the correct machine is selected in the top right.
20. Click “Make It.”
21. If prompted, click "On Mat," choose your mat size, and click “Confirm.”
NOTE: If prompted, select “OK” to use a larger machine mat. If you do not have a 12” x 24” mat, see below to slice and contour your design to fit on a 12” x 12” machine mat.
22. On the Prepare Screen, click on the “Mirror” toggle for both mats.
23. Click “Continue.”
MODIFY DESIGN TO FIT 12” X 12” MACHINE MAT
All design elements must measure 11.5” or smaller to fit on a 12” x 12” machine mat. To show how to do this, I will use the dahlia design that we just personalized.
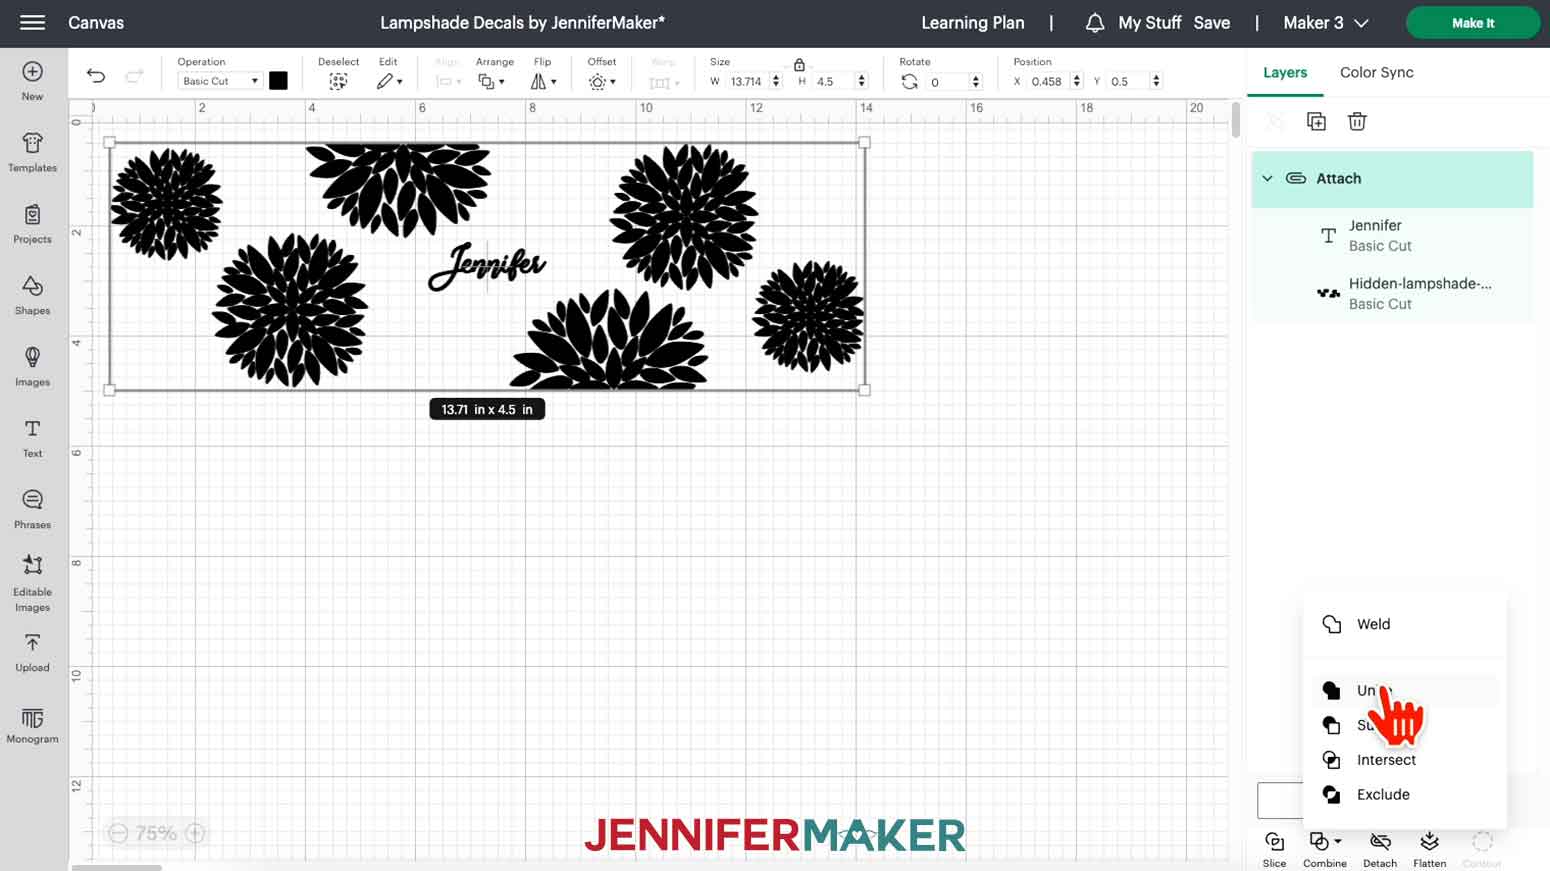
1. With the personalized dahlia on your Canvas, select the dahlia design and personalization, which are attached, and click “Combine” and “Unite.”
2. With the united design selected, click the “Duplicate” icon.
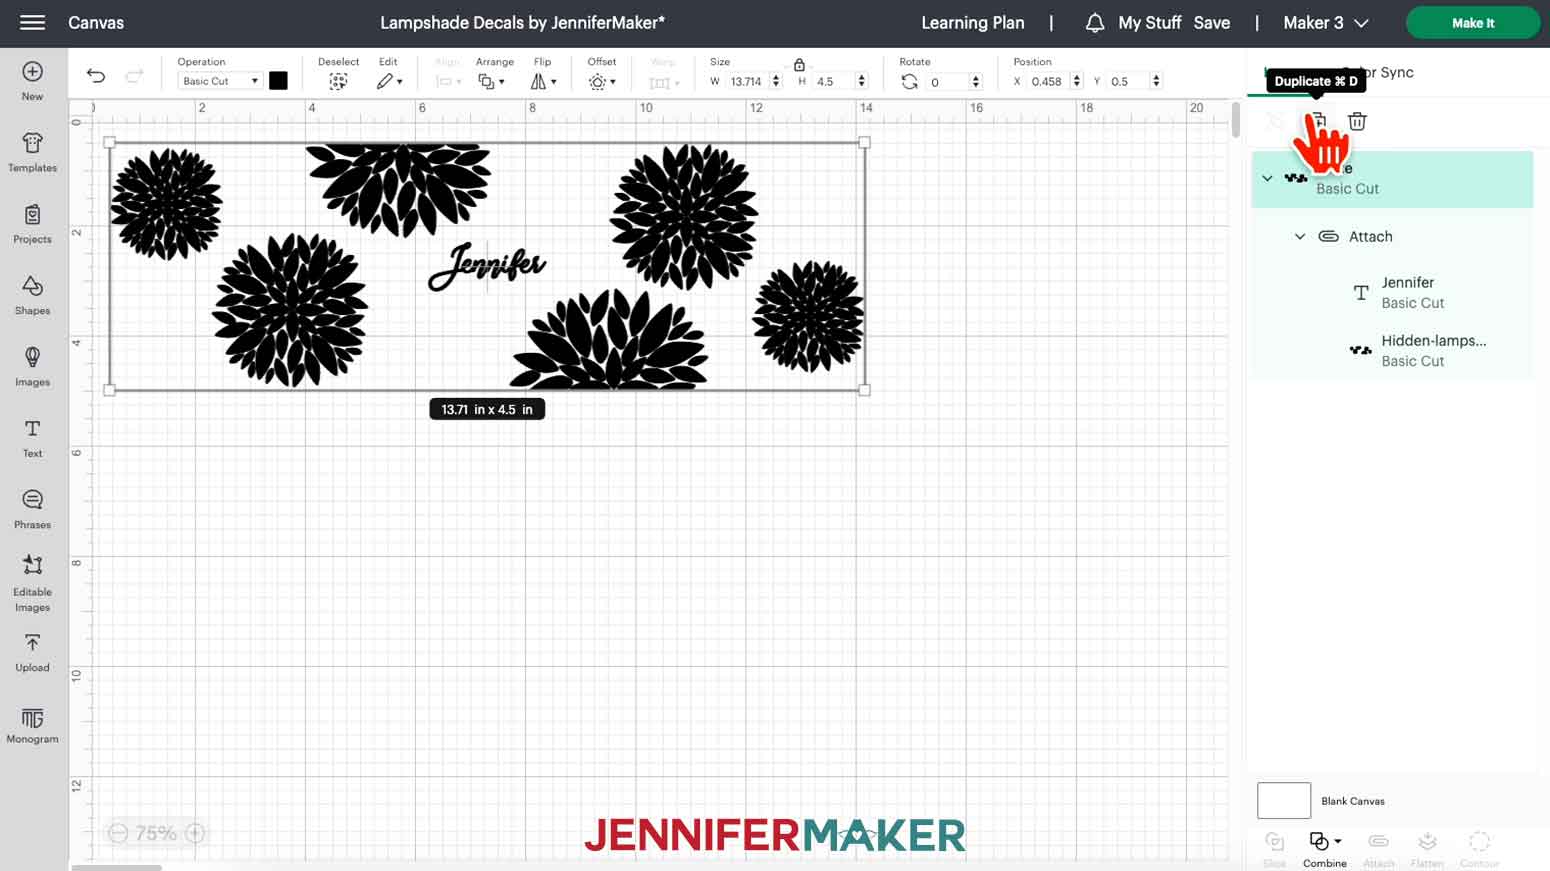
3. Click and drag the duplicate layer to move it away from the first layer.
4. Click the Shapes icon on the left and select the Square.
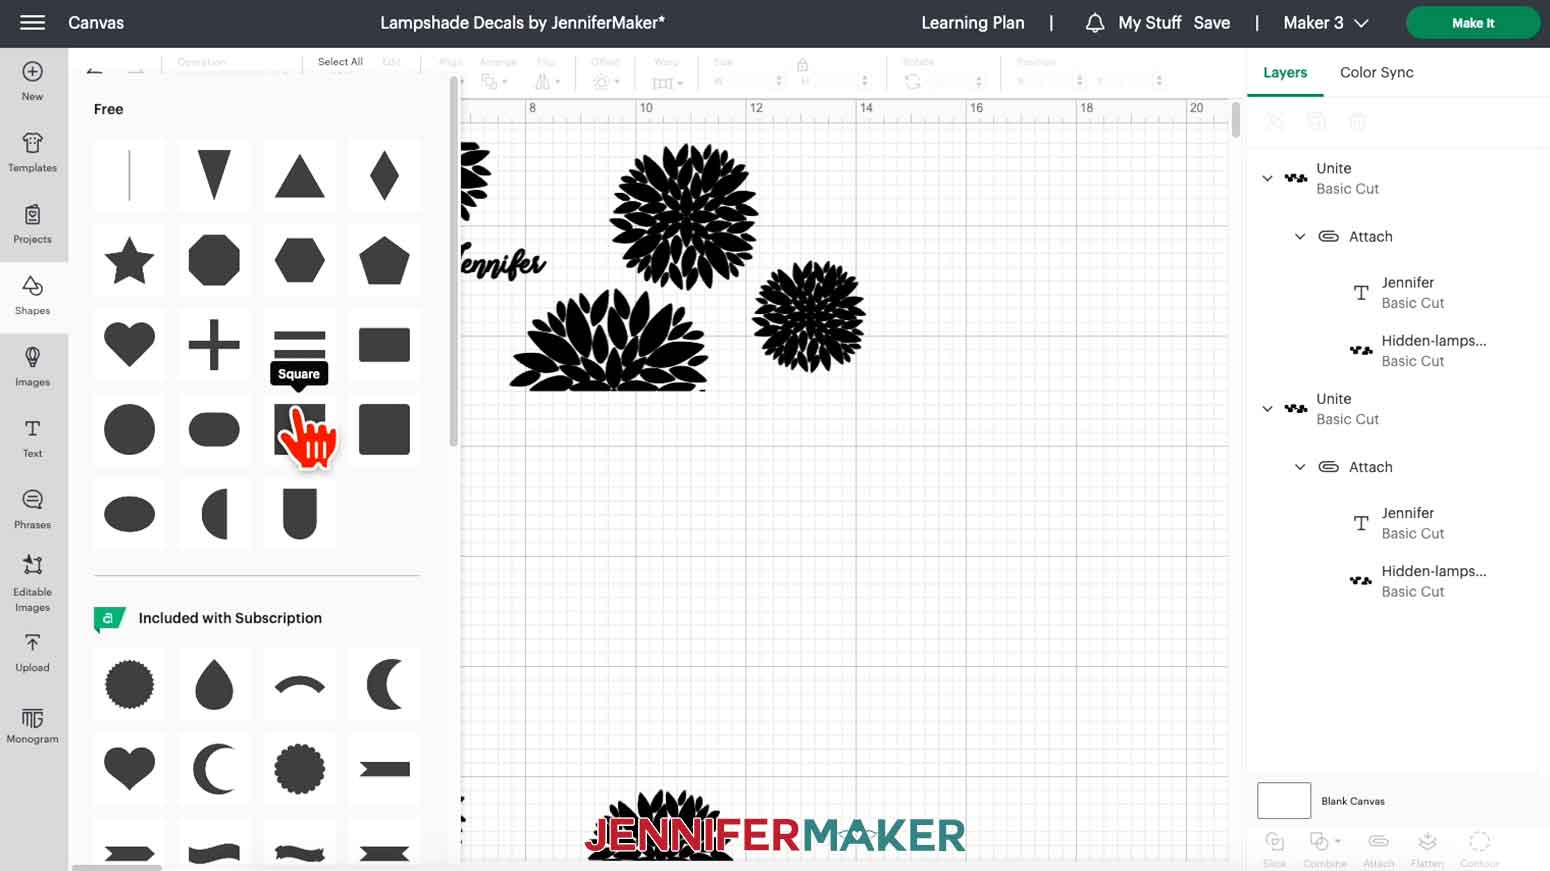
5. Since we are cutting down a smaller design for the tapered lampshade, I’m going to resize my square to 9” W x 9” H. You can click and drag the corner of the square to resize it or enter the dimensions in the size fields.
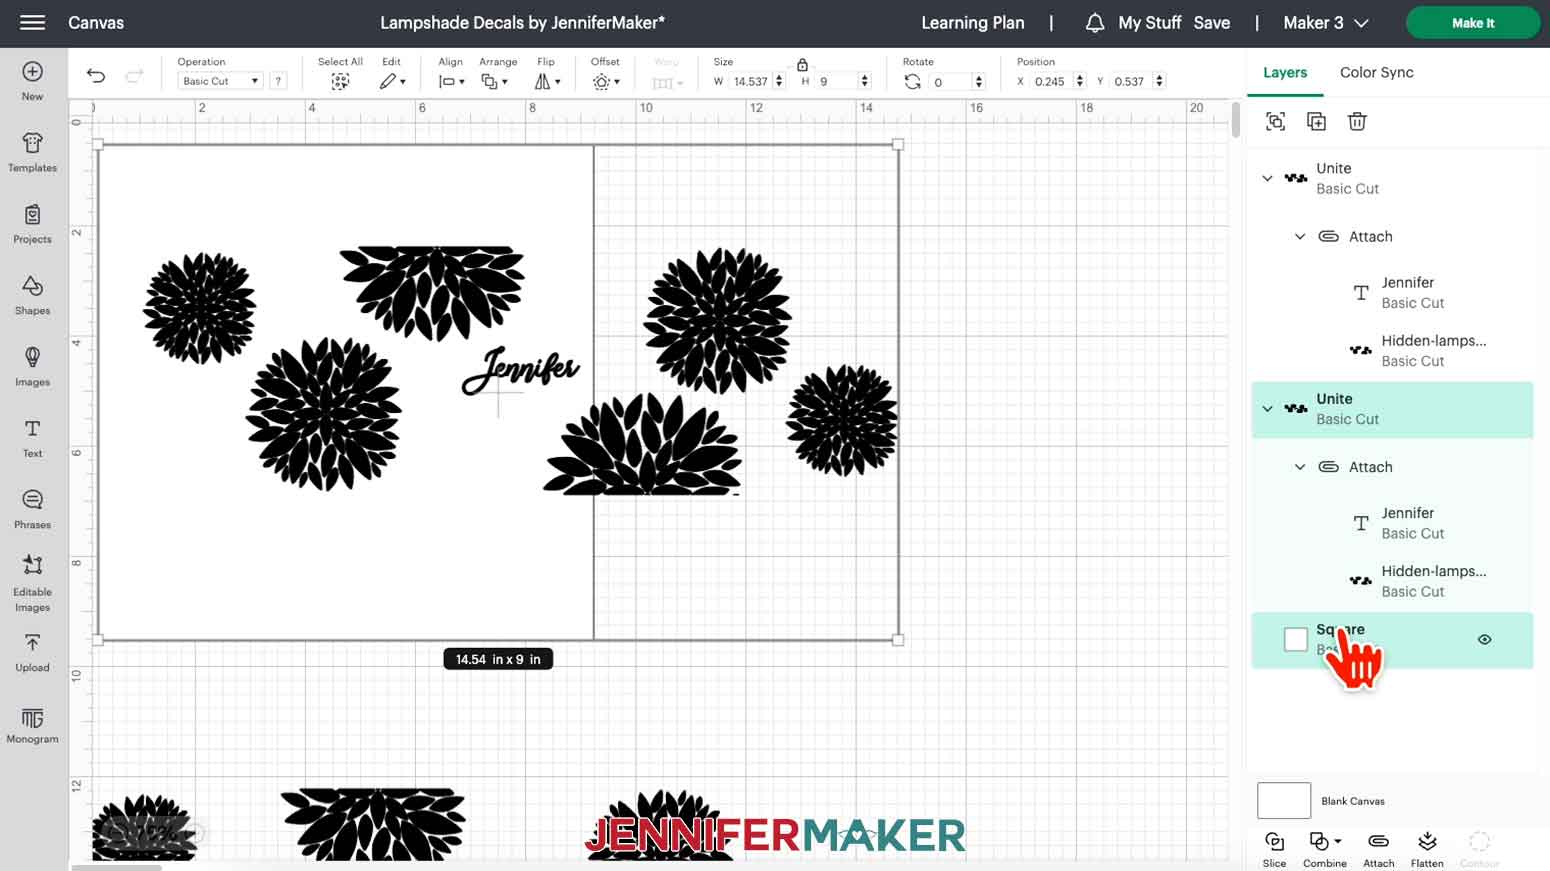
6. With the square selected, click the Color menu and select white.
7. With the square still selected, click “Arrange” and “Send to Back”

8. Place the first dahlia design over the square. One edge of the square should go through a mostly-blank area in the design. The other edge should be outside the design. I’ll position my square so that the right side of the square covers the left three dahlias and the personalization.
NOTE: It is okay if you cannot get the entire edge of the square along a blank area in the design - just get it as close as possible. You can use the Contour tool to remove any partial sections of the design later.
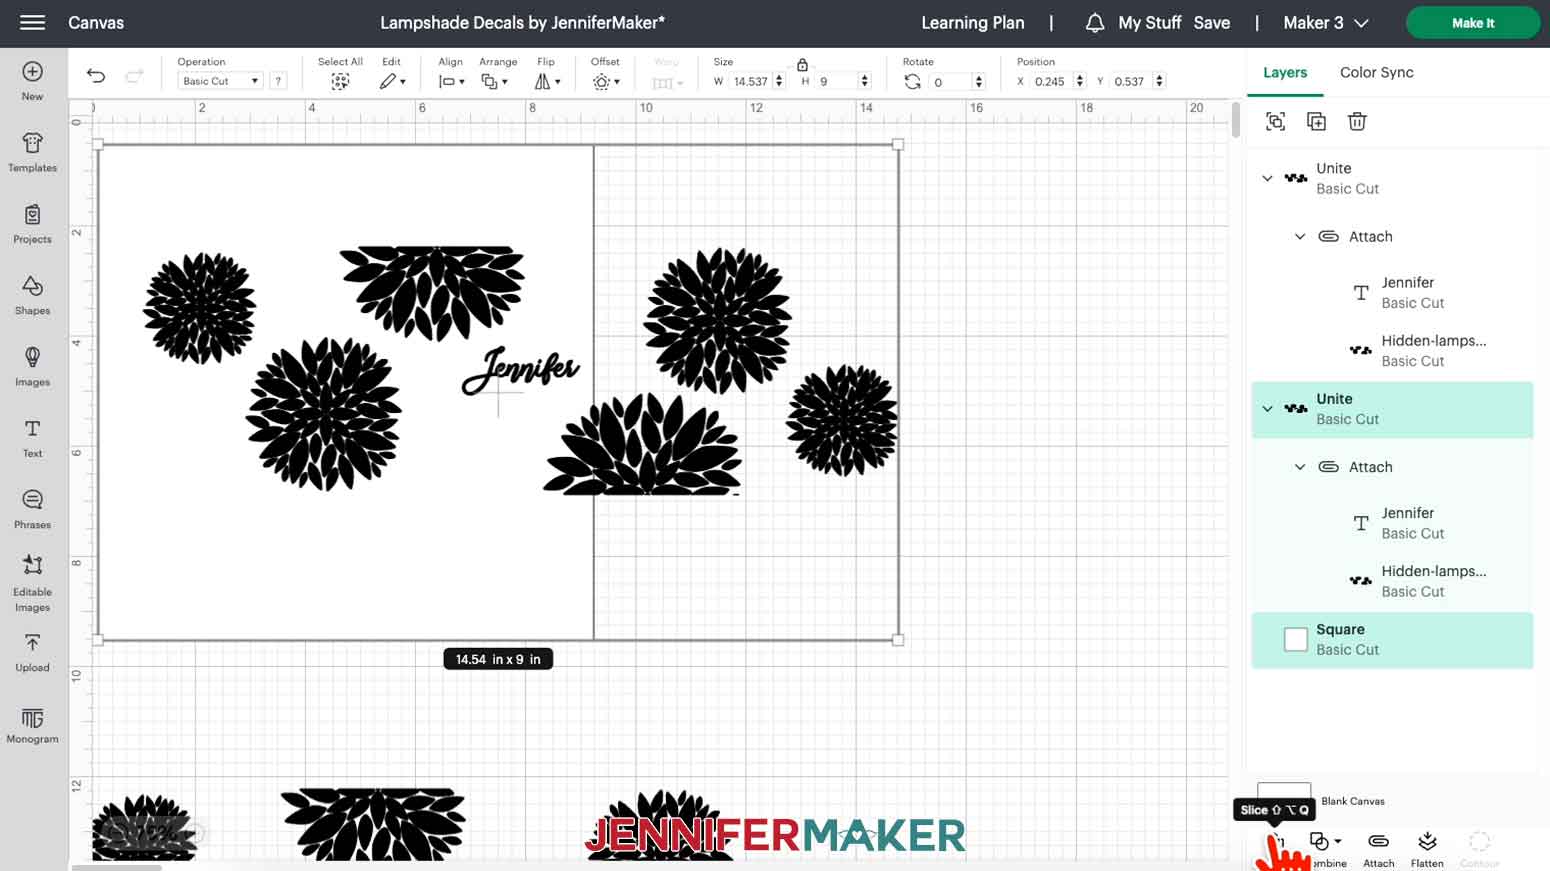
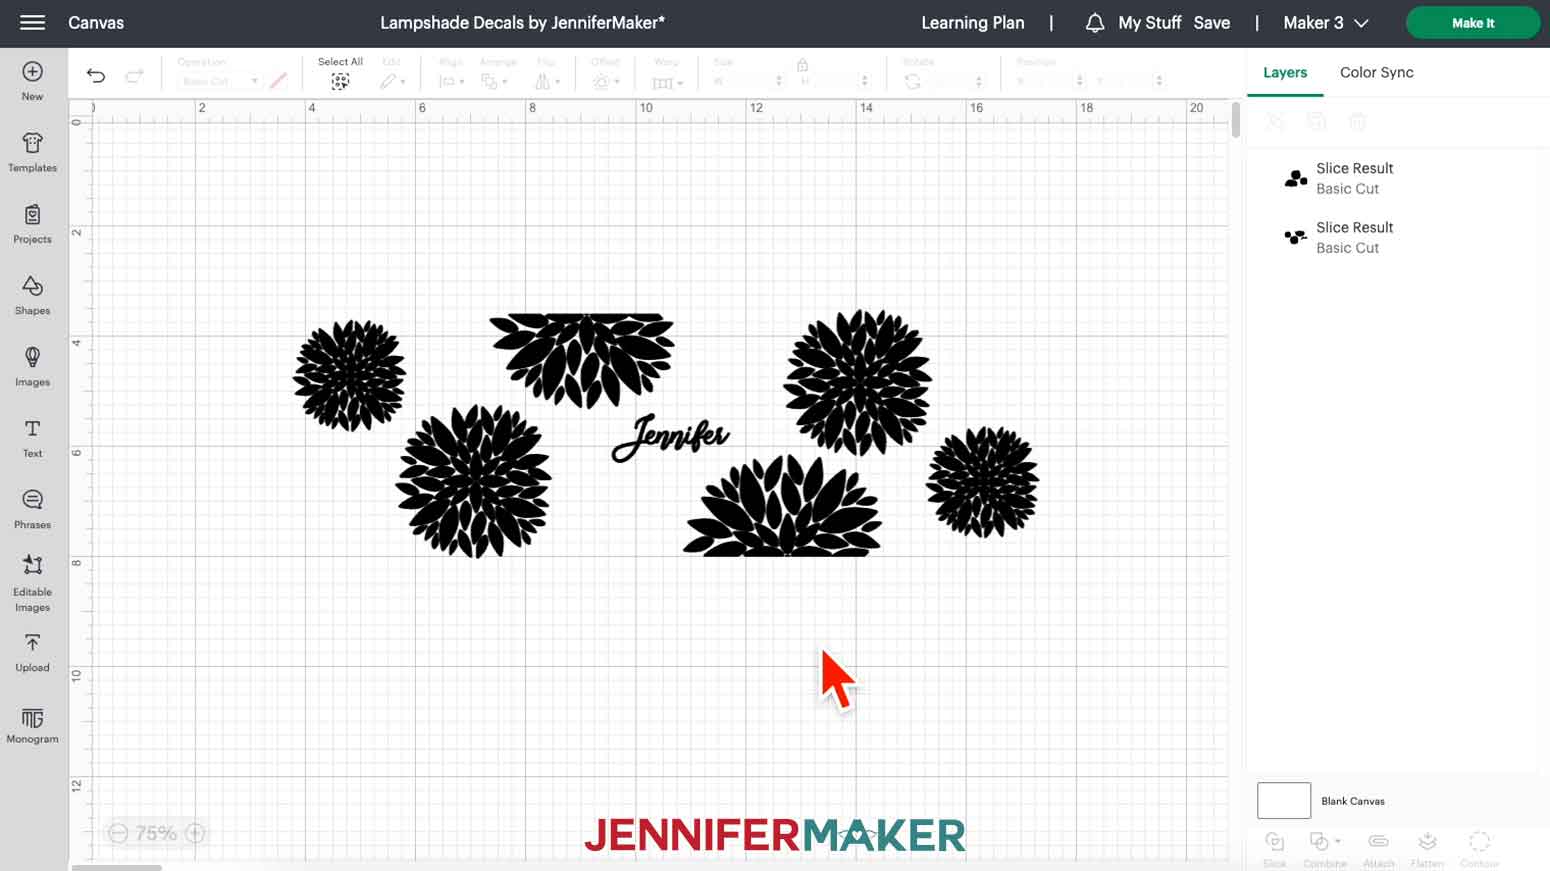
9. Select both the square and the dahlia layers and click “Slice.”
10. Delete the sliced square layer, the duplicate white dahlia layer, and the section of the dahlias on the right side of the design. My remaining sliced section is a little over 8” wide.
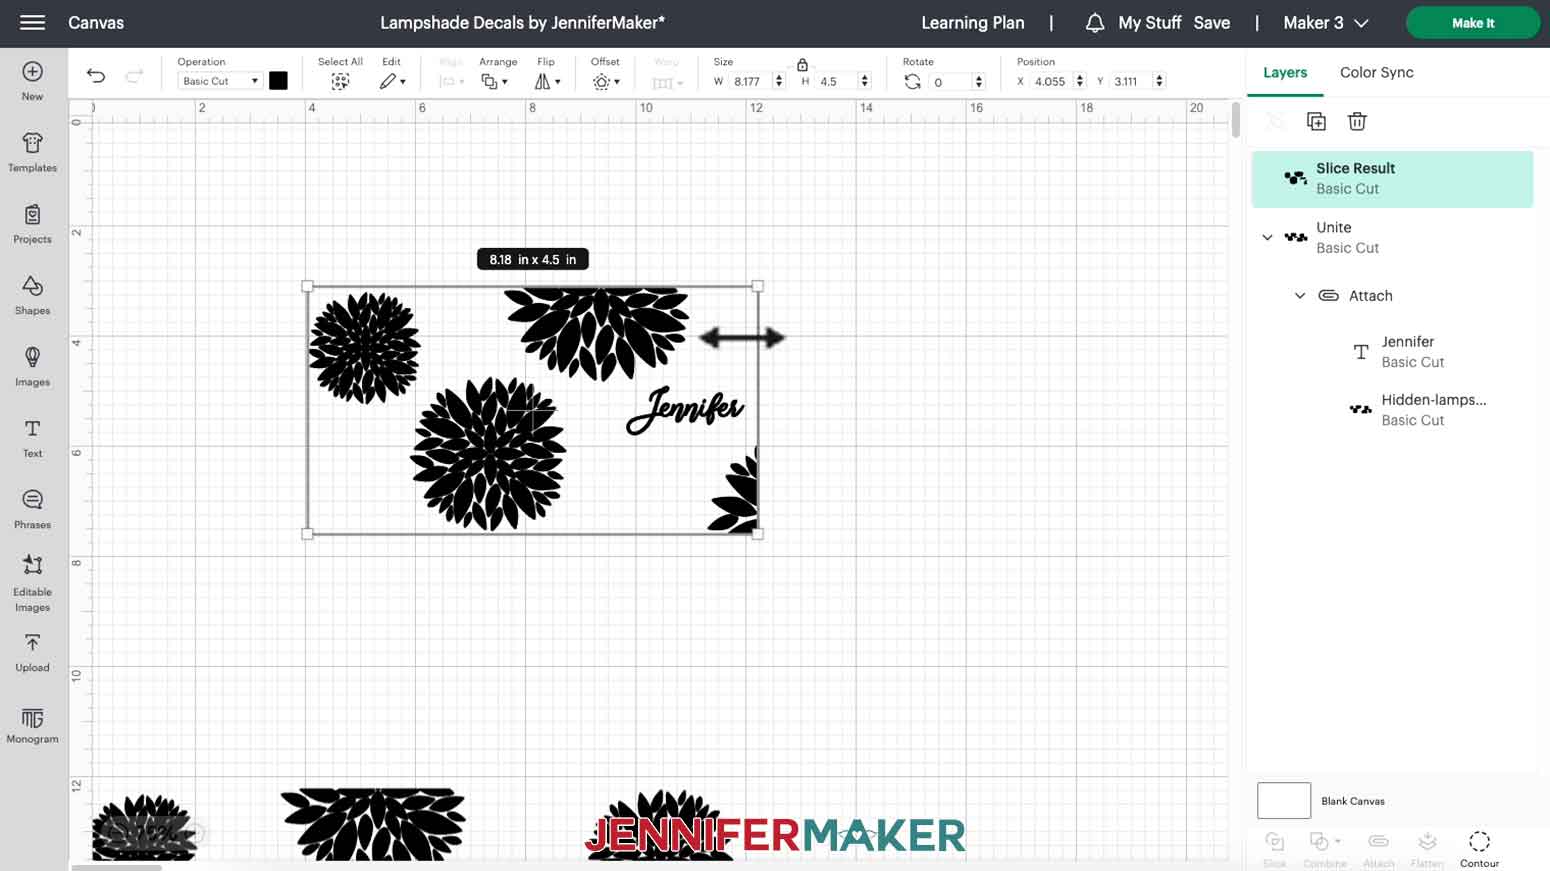
11. You’ll notice a partial dahlia on the lower right of the design. We only want to work with complete design elements, so select the new layer and click “Contour.”

12. Click on the sections of the partial dahlia to hide them. Then click the “X” in the upper right to close the Hide Contour window.
NOTE: If you notice that you missed any pieces, you can click on the “Contour” tool again to go back in and hide any other bits of the design.
13. Repeat steps 4-10 to create a square and slice the three right dahlias in the second design that you duplicated.
14. Use the Contour tool to hide any parts of the personalization that are in the slice result.
NOTE: If you remove part of a design that you can not slice cleanly, you can always upload the design again to cut it apart from a different angle. You can piece the design together any way that works for you.
NOTE: If you need to add additional design elements to fit the full size of your lampshade, upload the Toolbox SVG and add it to your Canvas. You’ll find elements for each design that you can add if needed.
15. Once your design is prepared, follow Cricut Design Space steps 20-23 to proceed to the Make screen.
CUTTING
1. On the Make Screen, click “Browse All Materials.”
2. Search for and select the “Premium Vinyl - Permanent Glossy” setting.
3. Select “More” for the Pressure.
4. Place the first piece of vinyl shiny side up on a green StandardGrip 12” x 12” machine mat.
5. Use a brayer to adhere the vinyl to the machine mat.
6. Press the flashing arrows to load the mat into your Cricut.
7. Press the flashing “Go” button to begin cutting.
8. When it has finished cutting, unload the mat, flip it over onto your work surface, and pull the mat away from the vinyl.
9. Repeat for the second mat, if you have one.
STEP 3: APPLY YOUR CUT DESIGN TO THE TAPERED LAMPSHADE
NOTE: Although we’re placing the Dahlia design in this tutorial, I used this technique for all of the designs. You will apply the vinyl in sections to accommodate the taper and curve of the lampshade. If applying the barn scene, make sure you are using the SVG without the ground for an easier application on the tapered lampshade.
1. Use a weeding tool to remove the excess vinyl from your cut design.
TIP: The excess vinyl can become a lot and hard to handle. It helps to trim excess away as you weed the design so that it does not stick to itself.
2. Remove any packaging from the lampshade. Use a small amount of rubbing alcohol and a microfiber cloth to remove any dust or debris on the inside of the lampshade.
3. Cut a piece of transfer tape slightly larger than the largest, top center dahlia.
4. It works best and is most forgiving if we work from the center of the design, which will be on the front of the lampshade.
5. Remove the backing from the transfer tape and place it over the top center dahlia.
6. Burnish the transfer tape onto the vinyl with your scraper.
7. Remove the vinyl backing away from the transfer tape.
8. Place the flower on the inside of the lampshade, slightly to the left of the front’s center, with the flat edge along the top edge.
NOTE: Remember that your lampshade designs are mirrored. You can place the pieces wherever you’d like but if you need guidance, you can always refer back to the SVG on the Design Space Canvas.
9. Burnish the vinyl to the lampshade with a scraper tool.
10. Remove the transfer tape.
11. Next, repeat the steps above to place the bottom center dahlia slightly to the lower right of the shade’s center.
NOTE: Be sure to leave enough space to add the personalization between the two center flowers.
12. Repeat steps 3-10 to apply the personalization to the center of the inside of the lampshade.
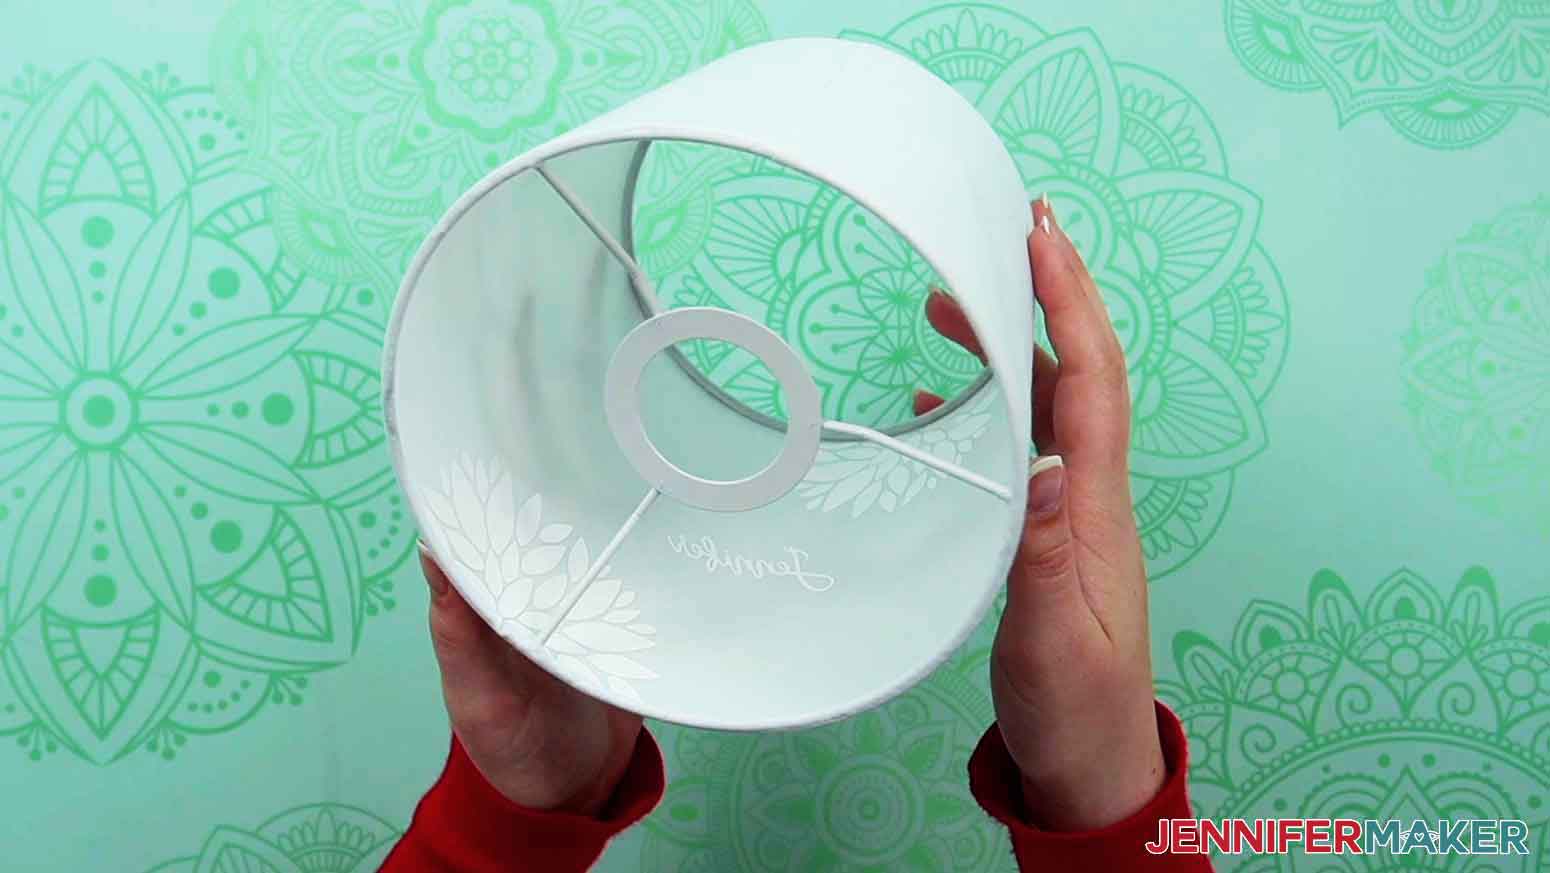
13. Continue to apply the remaining dahlia pieces staggered around the lampshade.
NOTE: For the dandelions, tulips, and barn scene, cut a piece of transfer tape that is slightly taller than your design and about 4.5” wide. This size works well if you made your decals the same size I did. Apply the vinyl in sections, starting from the center of all designs and work to the sides.
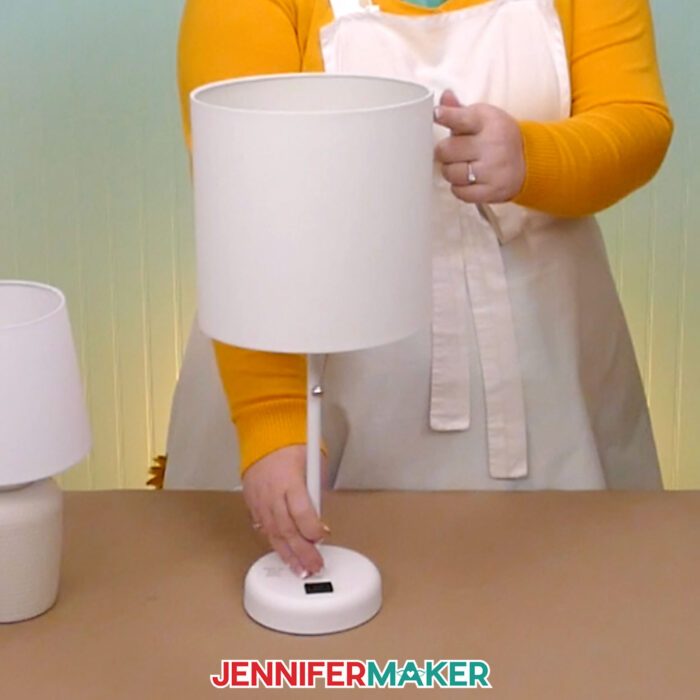
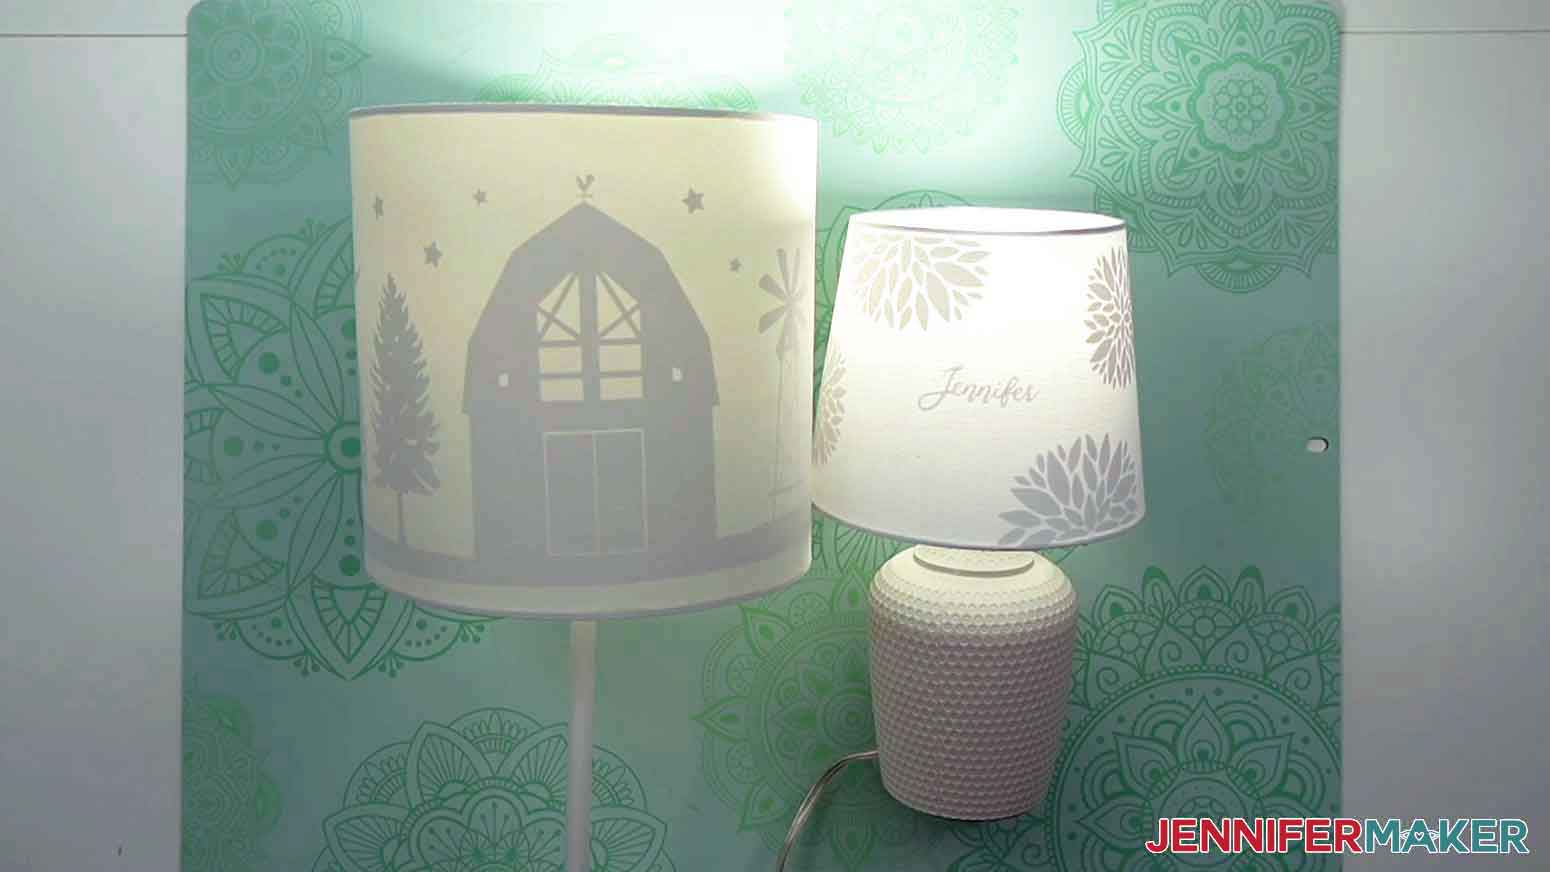
STEP 4: SHOW IT OFF!
Place the lampshade on its base, add a light bulb, and set it on display!
Here are what both of my finished silhouette lampshades look like!
Notes
The lamp with the straight shade measures 8.5"D x 8.5"W x 19.5"H.
The lamp with the tapered shade measures 6.6”D x 6.6”W x 11.8”H.
The dahlia design measures 23.49”W x 7.71”H
The dandelion design measures 23.49”W x 6.58”H
The tulip design measures 23.49”W x 6.44”H
The barn with ground design measures 23.49”W x 6.69”H
The barn without ground design measures 22.55”W x 6.3” H
Care instructions: Clean with a damp cloth as needed.
Typefaces used:
Biosha Script
Free Alternative: Joseph Sophia
Answers to Your Questions About How to Make a Silhouette Lampshade
Q: What is the best shape for a lampshade?
A: This is entirely personal preference! The design of your lamp and the design of the shade should suit your decor, and completely depends on the look you like. Though if you’re looking for a super easy lampshade silhouette project, you may find it easier to use a straight-sided shade as it’s fewer steps.
Q. What is the rule for lampshades?
A: While personal preference is the most important “rule,” professional interior decorators recommend that a lampshade should be wider than the base of the lamp, the bottom diameter of the shade should be roughly the same size as the height of the base, and the height of the shade should be around 2/3 as high as the base. Ultimately, it’s your house, your style — the design of your lamp is up to you.
Q: Do you measure lampshades at the top or bottom?
A: The method of measuring lampshades is going to differ depending on what you’re measuring them for! For this project, you’ll want to measure the circumference of the shade (bottom circumference if your shade is tapered). Make sure to take this measurement INSIDE the shade, rather than the outside, for the most accurate read.
Q: What type of lamp shade gives the most light?
A: White lampshades using clear translucent bulbs tend to give off the most light. These are a great option for making silhouette lampshades because even though some of the shade will be covered by vinyl, it will still emit a good amount of light. A lampshade with a a darker color or fabric pattern will not give off as much light as a plan white lampshade.
Q: Why does my white lamp shade look yellow when lit?
A: If it’s crisp, white light you’re after, be sure you’re using a translucent white daylight bulb instead of a warm white lightbulb, which will give off more of a yellow, warm light.
Q. Do you have any other projects with lamps or light?
A. For some more “bright” ideas, check out my tutorials for an engraved acrylic nightlight, hanging heart lantern, easy hanging lamp, paper cut lamp, puzzle lamp, light-up Dollar Tree snowman, and lighted shadow boxes!
Get my free SVG files for silhouette lampshade designs!
I’d love to see YOUR amazing lamp shade creations! Please share a photo in our Facebook group or tag me on social media with #jennifermaker.
Love,

Want to remember this? Save this tutorial on How to Make a Silhouette Lampshade to your favorite Pinterest Board!