
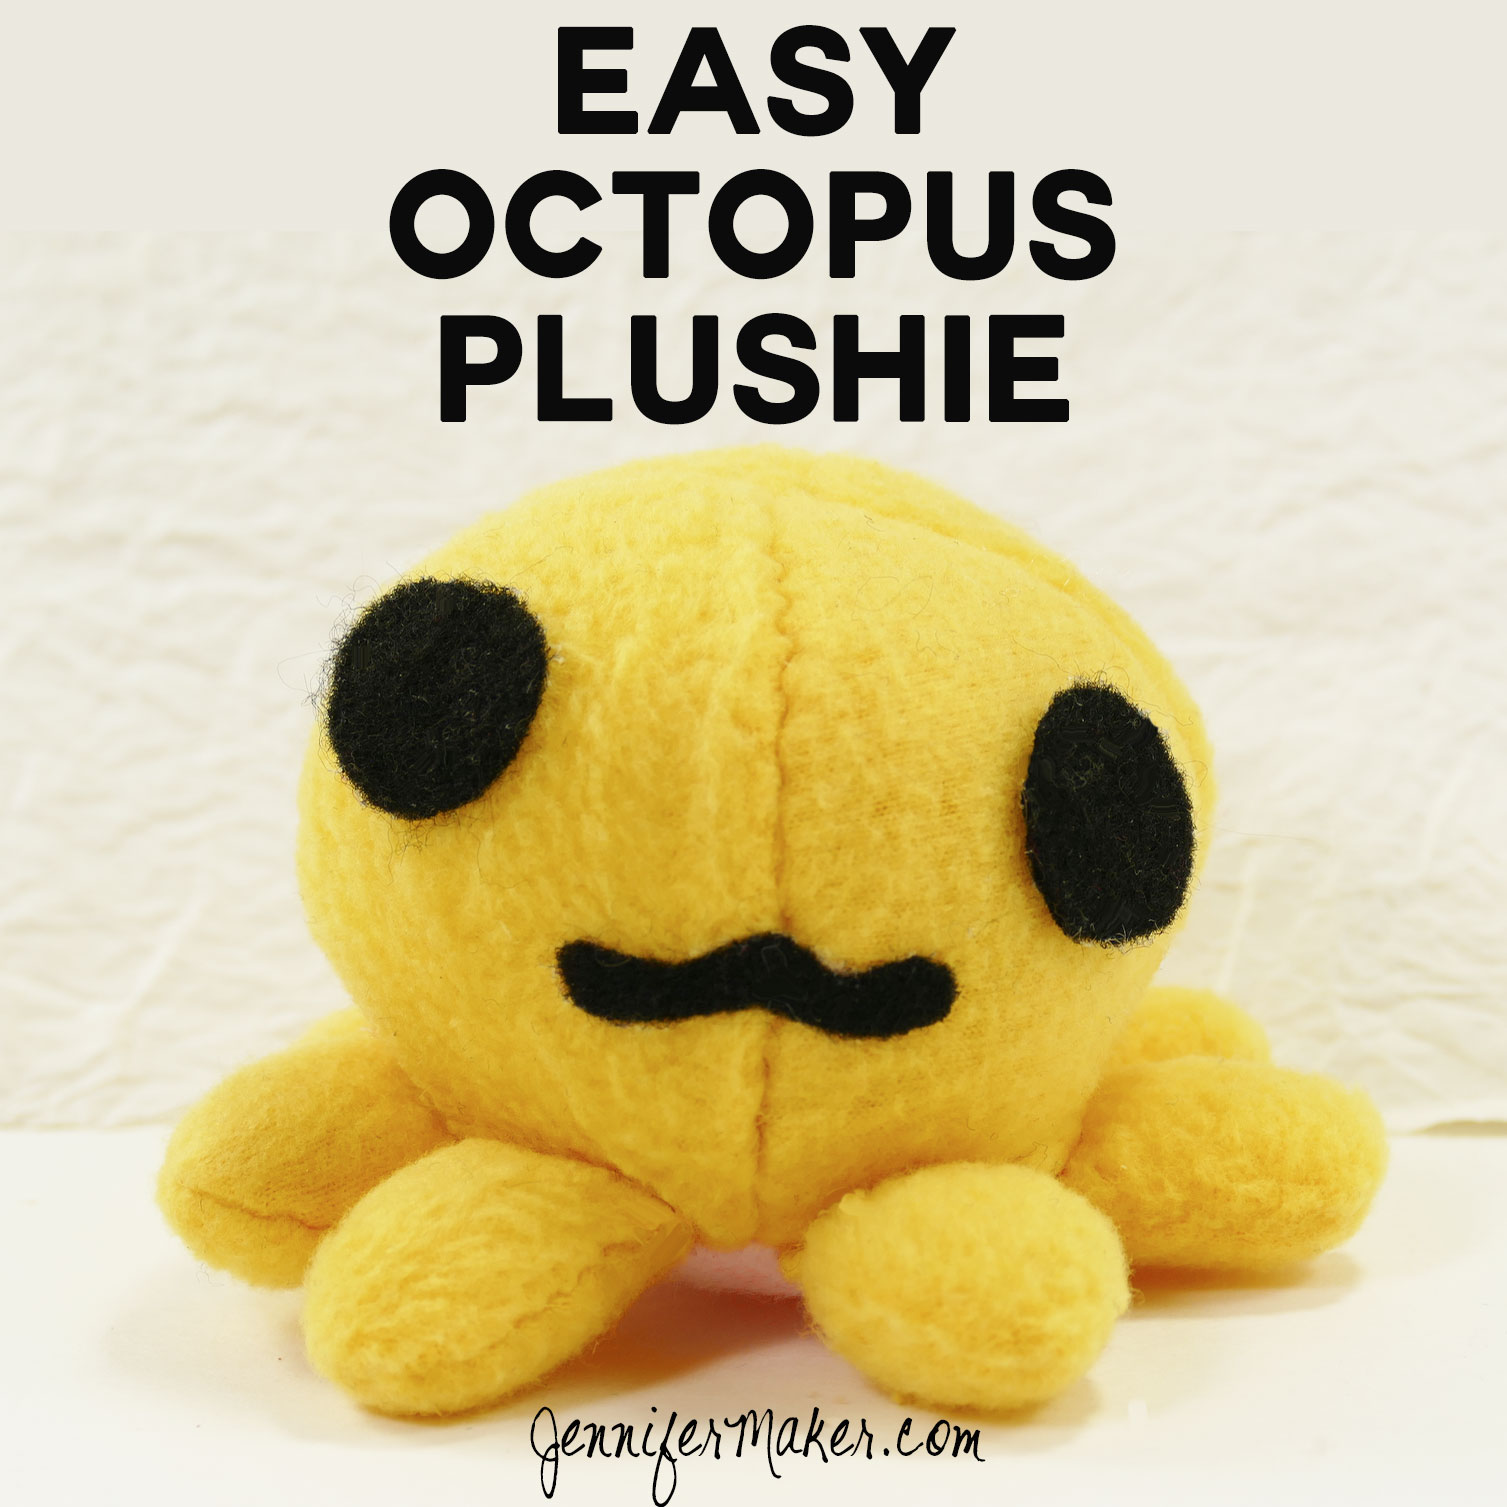
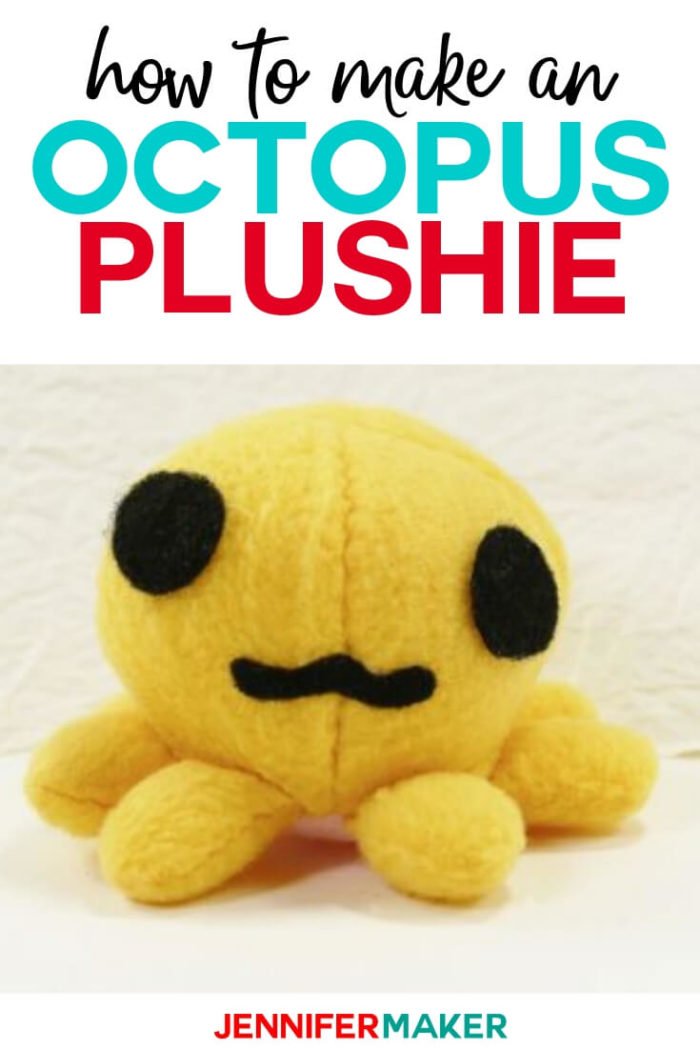
Plushies are so much fun to make! My almost 13-year-old child designed this little octopus plushie and wants to share it with you. She loves to make small plushies (she’s very good at it!) and has made this octopus several times. Alexa designed this plushie completely on her own, as well as took all the photos and wrote the instructions (with a little help from me in proofreading). I’m very proud of her!
Exciting News: Cricut is coming out with a NEW machine called the Cricut Maker which cuts material (including fleece) among many other things! Once it releases on August 20 and we have a our own machine to experiment with, we’ll re-release this pattern as a Cricut Maker-friendly cut file so you can cut out your octopus fleece pieces on the Maker to make it even easier. I am also planning many more designs that will use the Maker! I’m so excited!

This post contains some affiliate links for your convenience (which means if you make a purchase after clicking a link I will earn a small commission but it won’t cost you a penny more)! Read my full disclosure policy.
Octopus Plushie Materials
- Fleece in two colors
- Wonder Under (optional)
- Needle
- Thread
- Scissors (or another way to cut out your fleece, like the upcoming Cricut Maker)
- Design #45 – Our free pattern (available in the resource library — get the password by filling out the form at the bottom of this post)
Octopus Plushie Step-by-Step Tutorial
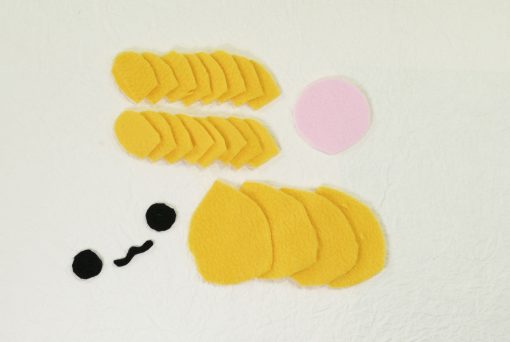
First, cut out the paper patterns. Then cut out your fleece pieces using the patterns. Note that the teardrop body piece is cut out four times, the leg (tentacles) piece gets cut out 16 times, and the eye gets cut out twice. Everything else is cut once.
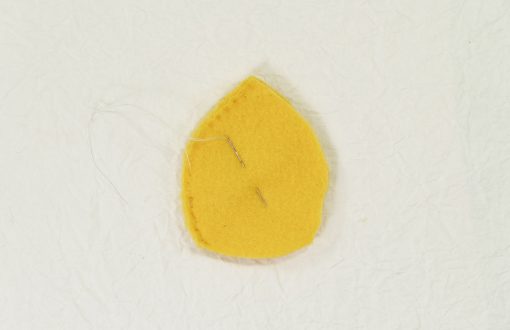
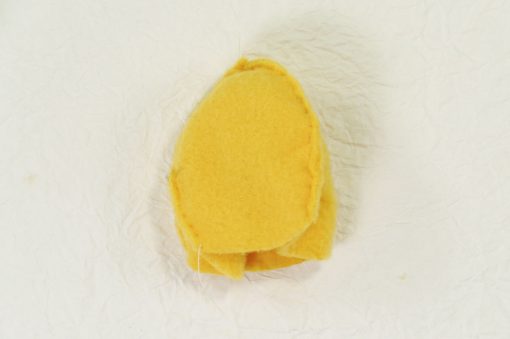
Sew two of the body pieces together along the long edge.
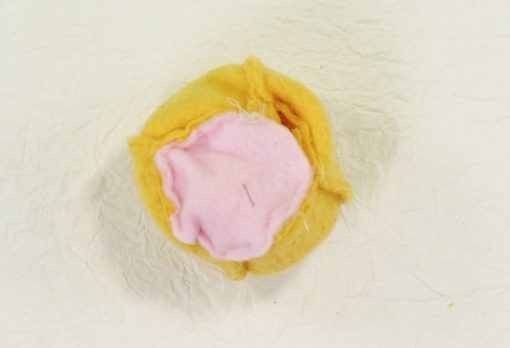
After you sew those two body pieces together, put the eyes and mouth on either by sewing them on or by using double-sided fusing.
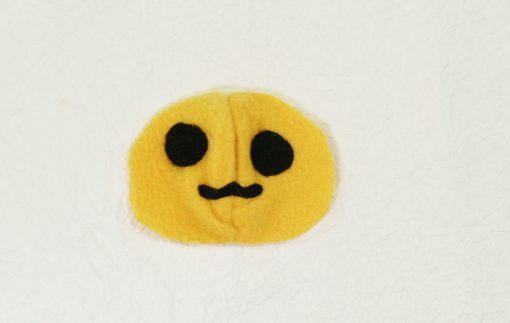
Sew the other two body pieces to the first two pieces, right sides together, until all are attached.

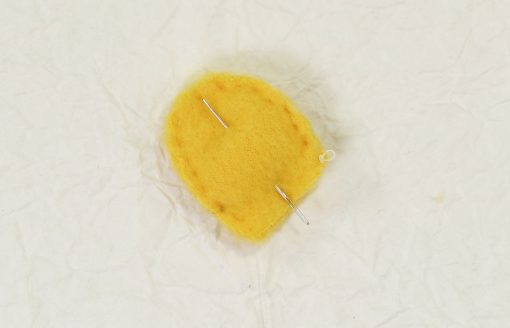
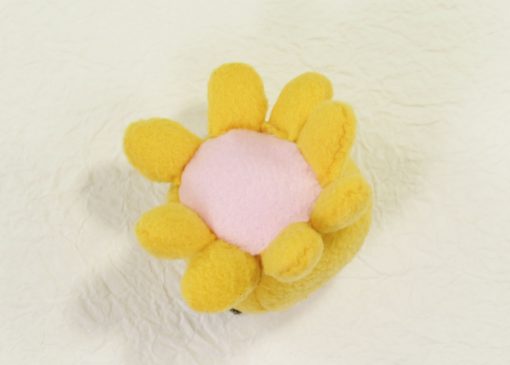
Sew two of the leg pieces together, but do not sew along the straight part. Do this for all eight legs.
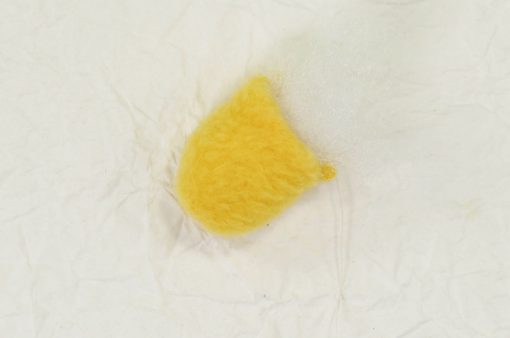
Turn each leg right side out and stuff with fill or even fabric scraps.
With the body turned inside out, sew each of the eight legs onto the bottom edge of the body.

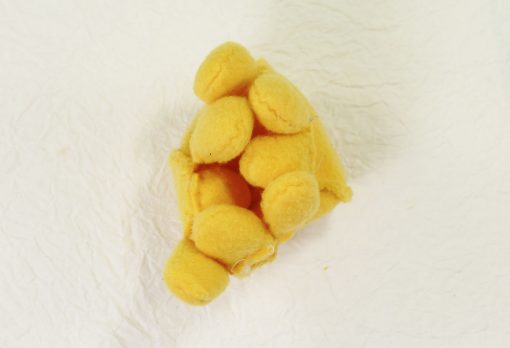
Tuck all the legs in, making sure that your body is still inside out. Now sew the base circle around the edge of the bottom of the body, leaving 1 1/2″ unsewn.
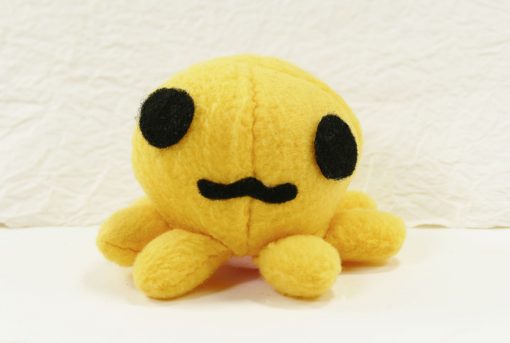
Turn your plushie right side out, stuff with fill, and then sew up the bottom with an invisible stitch (also called a ladder stitch).
Enjoy your cute octopus plushie!
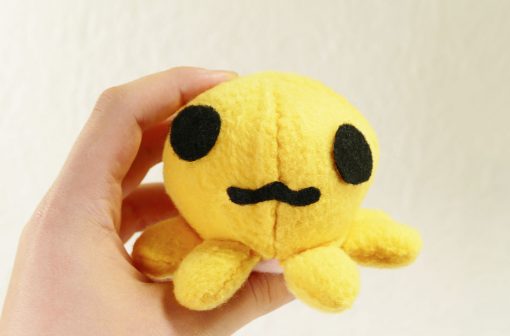
Congratulations! You finished your plushie!
Alexa says it can be tedious to sew on all the tentacles (legs), so take breaks if you need them but try to finish it.
And there you have it — a cute little octopus plushie! If you plan to get the Cricut Maker, be sure to bookmark this page and return later to get the Cricut cut file for this pattern.
Get the Octopus Plushie Pattern Free
Get access to ALL of my free cut files!

Subscribe (free!) to my newsletter with updates and tips PLUS get instant access to my resource library with this file and all of my other free files, printables, and patterns! Once subscribed, I will send you a newsletter with details about my new free files each week.
Enter my free resource library for my latest files, printables, and patterns! Password is 'craftthelove' -- please copy and paste that in at the link above. Thanks for being a subscriber!!
If you make an octopus plushie, please share your photos by emailing them to us at [email protected] — thanks!
Love,


The Cricut Maker seems like exactly what I was looking for. Were the new features mentioned anywhere before the official announcement made a few weeks ago? I’m just really frustrated because I didn’t know the Maker was coming out and so when my sister told me she’d buy the Cricut for me for my birthday early July she just went ahead and bought the most recent one they offered (Air 2). I’m more of a sewer than paper crafter and the way they advertised Air 2 I figured it would do what I needed for sewing too. If I had known they would come out with one that cuts fabric properly I would have just waited a month more. It sucks even more that the rotary blades aren’t even backwards compatible and my sister already dished out $300 for the Air 2 bundle and I can’t even return it anymore since it’s already over a month since I had it.
Either way, cute octopus! I might make it for my niece 🙂
I didn’t know anything about the Cricut Maker before it was announced, and I don’t think most anyone else did either. I hear some bloggers were invited to a special event a week or so beforehand, but I was not among them. (I don’t think I’m on Cricut’s radar at all.) But I am sure they were sworn to secrecy. I’m sure this is really frustrating for you!
This is so stinkin’ cute! I totally want one in every color. Thanks for sharing your tutorial with us at Merry Monday this week!
That is super cute! Would make a cute baby gift. Crazy that a Cricut can cut fabric.
This is adorable and tell Alex he did a wonderful job. I am considering getting a Cricut but now I’m even more interested. Such a cool machine. Thanks for sharing at #HomeMattersParty