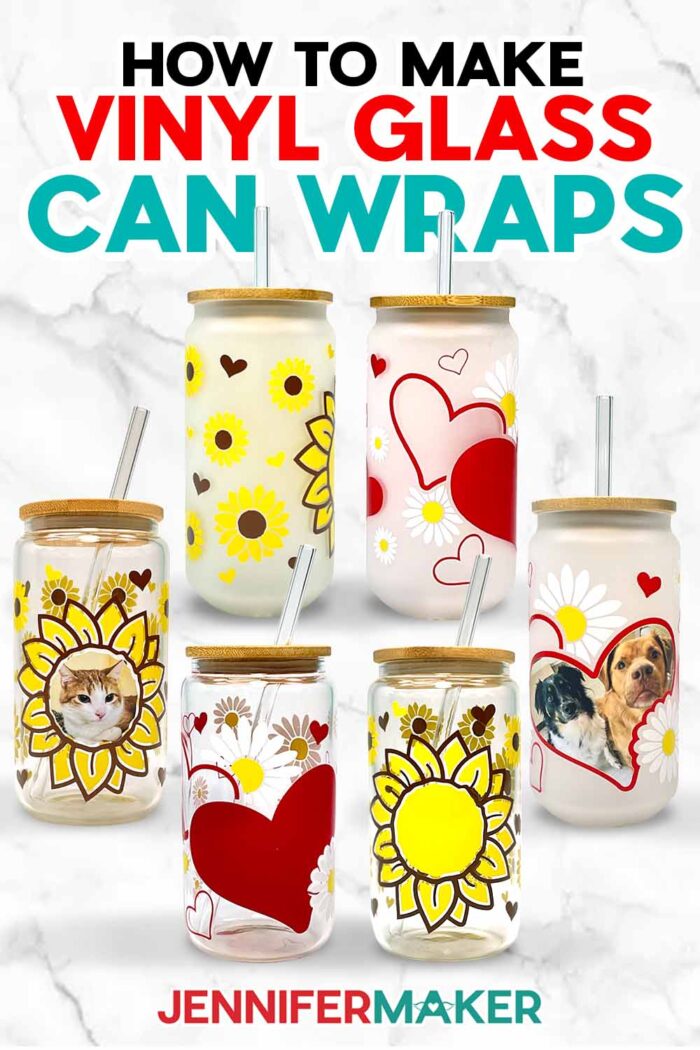
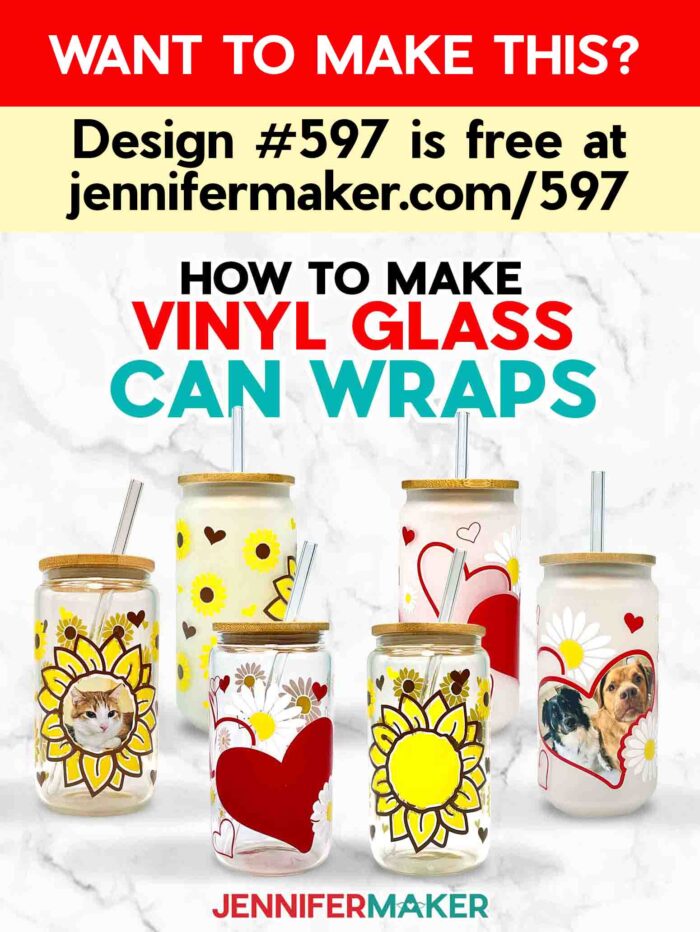
Learn how to make glass can wraps out of vinyl!
Loved my sublimation beer can glasses project, but not a sublimation crafter yet? Get your Cricut ready, because I’m here to teach you how to decorate glass cans cheaply and easily with full-color layered vinyl designs! They’re fun and easy, and anyone can make them — with the help of a special tool you may already have in your kitchen!

This is a Cricut Mystery Box project — it uses the same vinyl colors from the premium vinyl sampler that you could have gotten in the “Easter Bunny” mystery box in March 2024. While this mystery box is no longer available, you can still purchase the vinyl colors below in my material list. Learn more in my Cricut Mystery Box Guide.
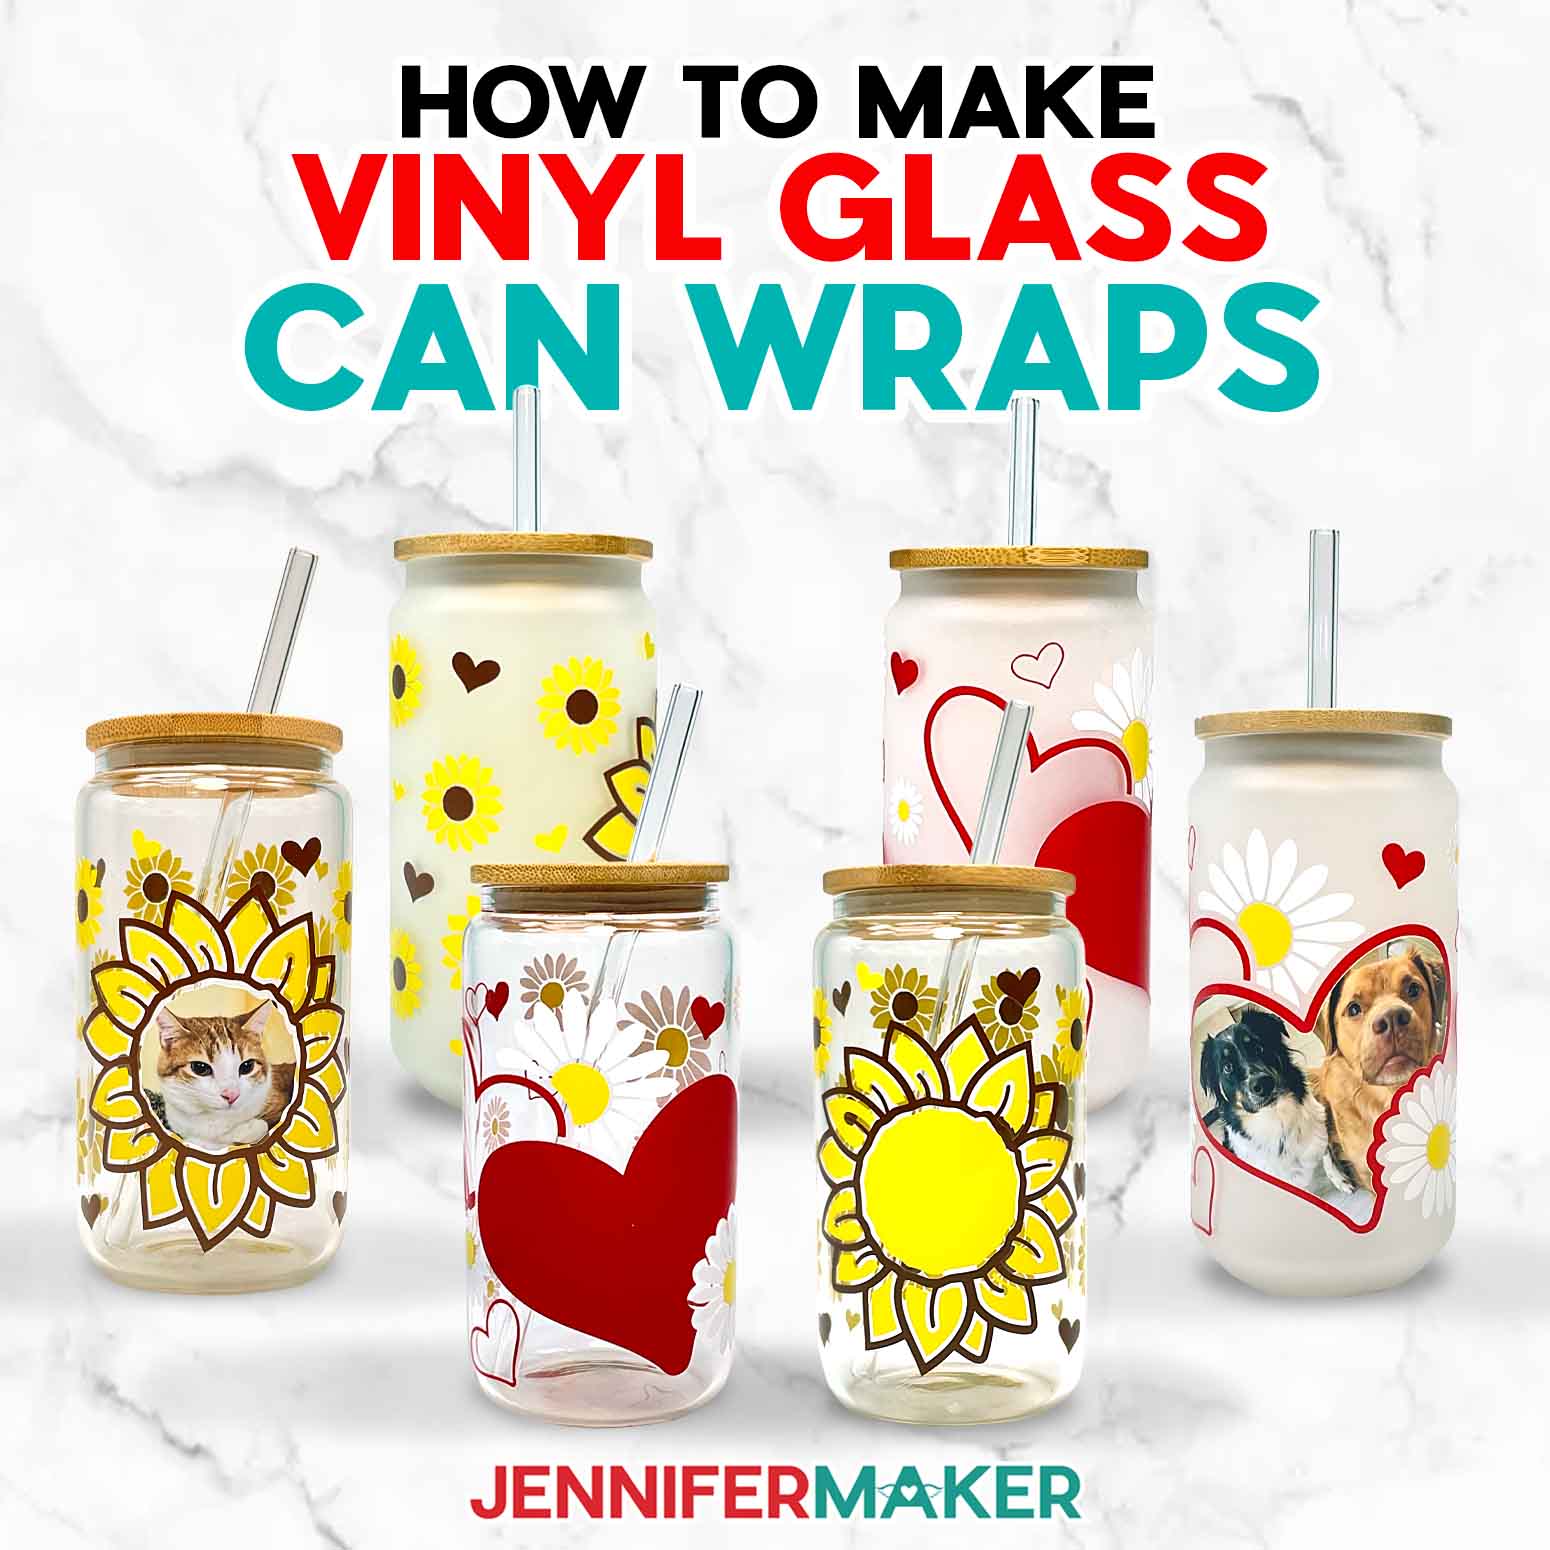
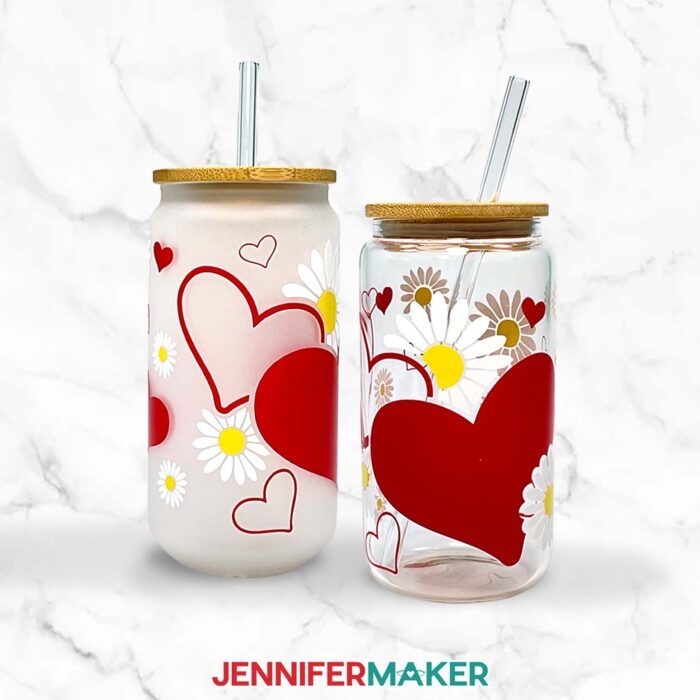
Glass cans are cute and versatile, with their huge array of permanent vinyl decorating possibilities! In this tutorial, I’ll show you how to make glass can wraps with layers of permanent vinyl, so you can create amazing FULL color designs.
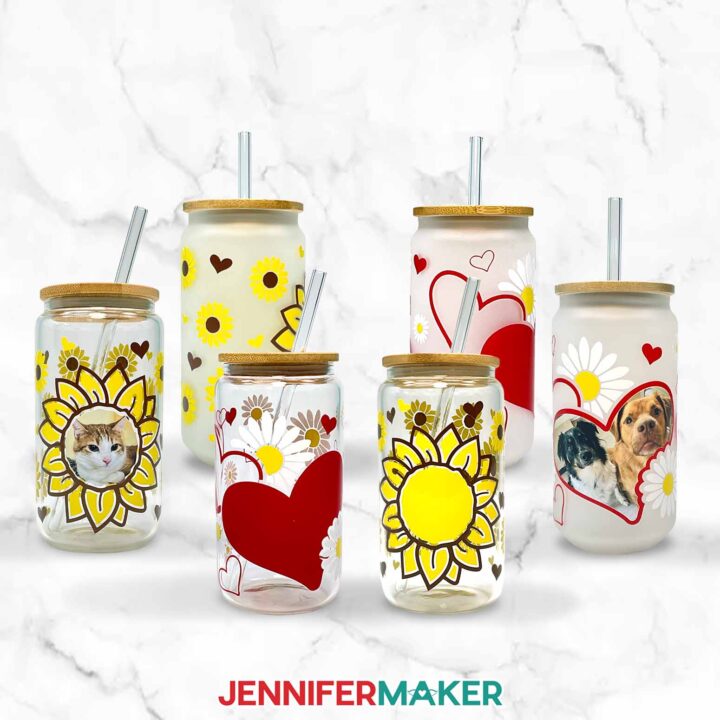
I’ve got two cute designs for you: an adorable hearts and daisies design, and a design with a load of lovely sunflowers. You can find the link below for the design file, which is an instant download from my free design library.

First I’ll walk you through how to cut your vinyl design using a Cricut, and then I’ll share my helpful tips for getting a precisely-layered application of your glass can wraps.
You can use my PDF files to cut your vinyl glass can wraps by hand, but it’s MUCH easier with a cutting machine. I’ll demonstrate with a Cricut Maker 3 to cut the SVGs, but you can also use an original Maker, an Explore series machine, a Cricut Venture, a Joy Xtra, or another machine that uses cut files.
Cricut Joy users, I didn’t forget about you! I’ve included a slightly modified version of the file designed to fit your Cricut Joy cutting machine, and I’ll show you some slight differences in the application in the video tutorial.
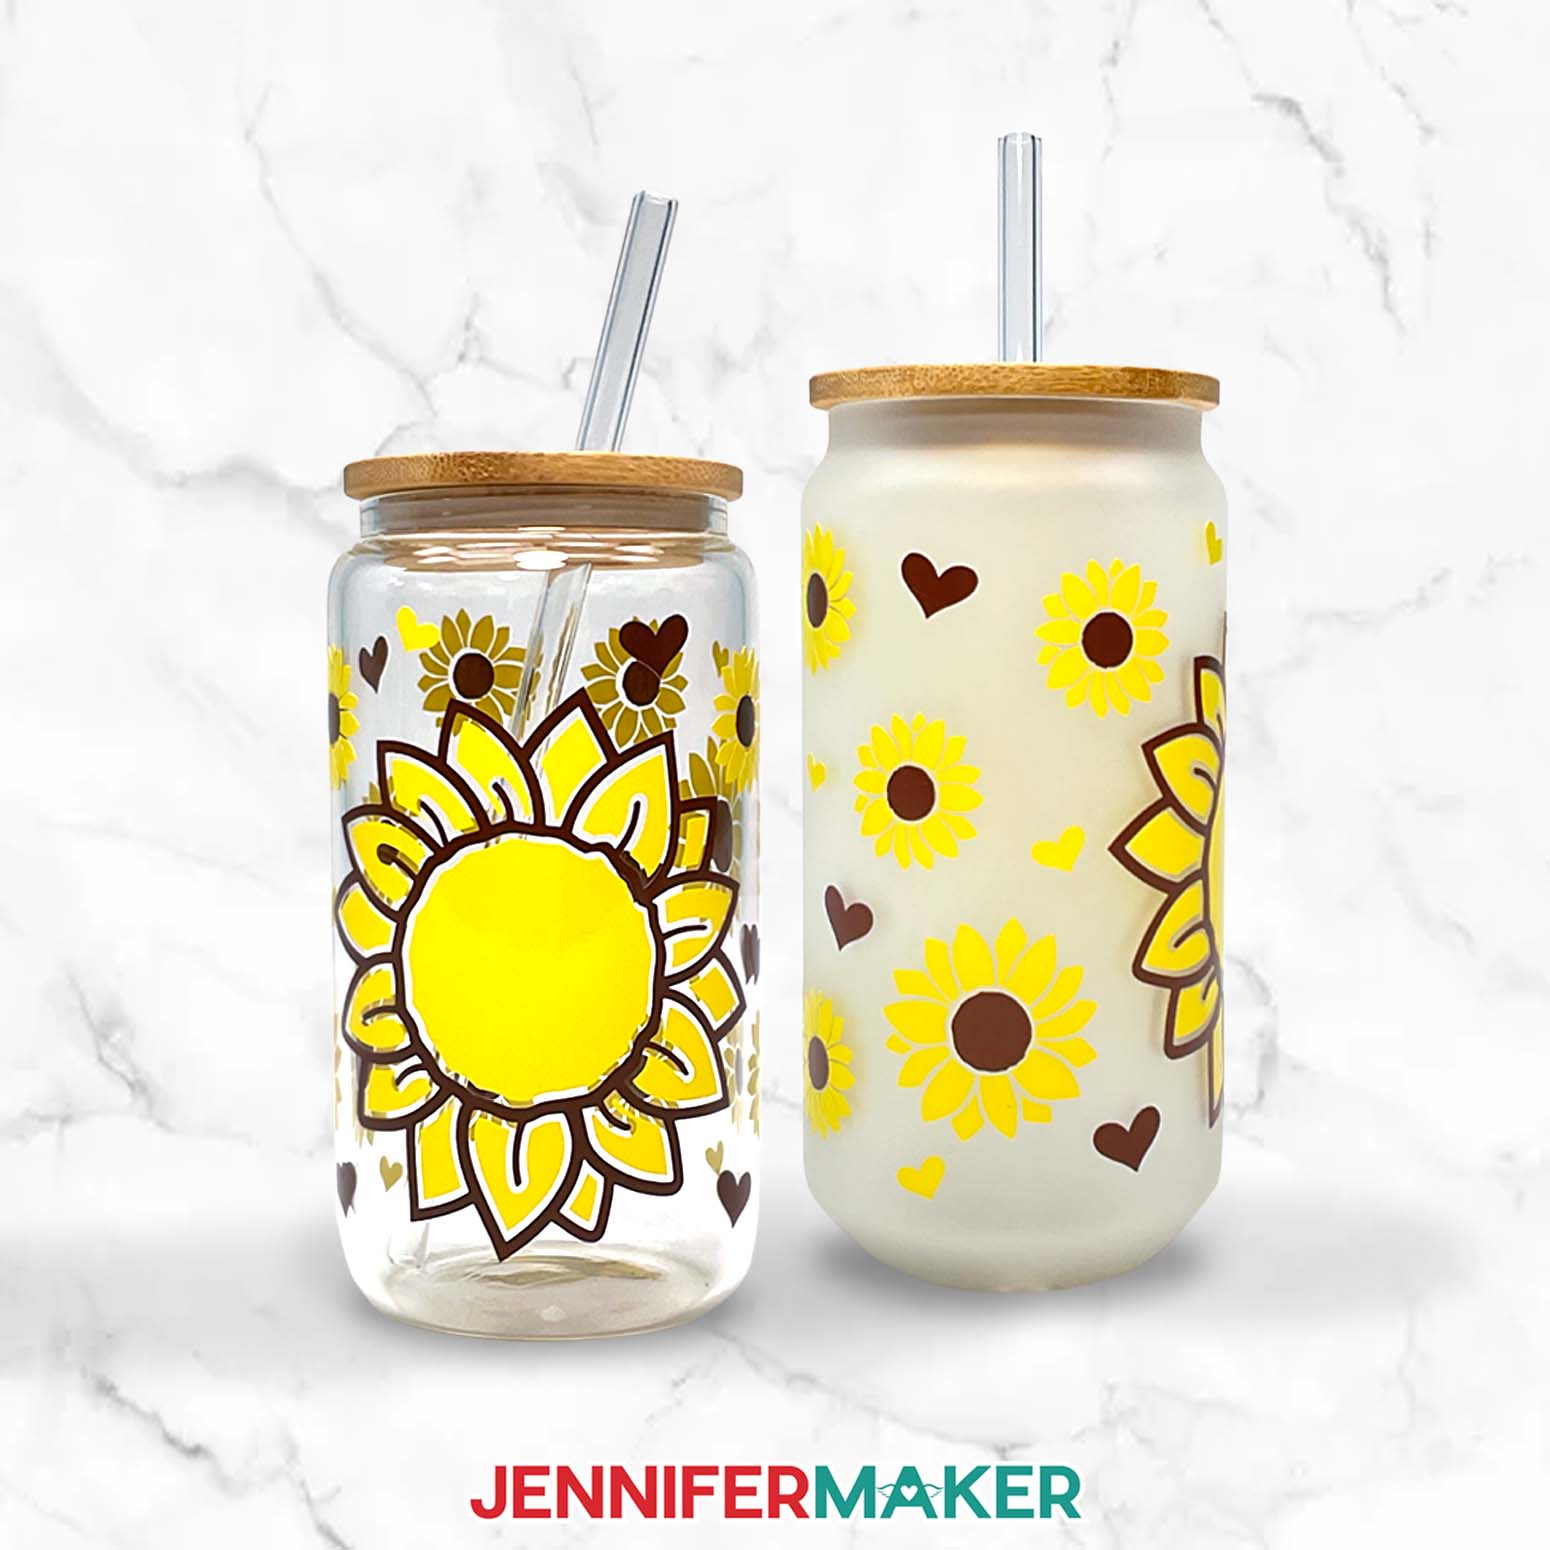
So, what supplies and other tools will you need to make glass can wraps? First, you’ll need some glass cans, or any other straight-sided glasses about the same size. Whether you choose clear or frosted glass is up to you — each kind has its own unique look when the vinyl is applied!
To create your decal stickers, you’ll need some colorful vinyl of course! You don’t have to use the colors I used — you can use ANY colors you like. Just be sure that your vinyl is the permanent adhesive type, not removable or heat transfer vinyl.
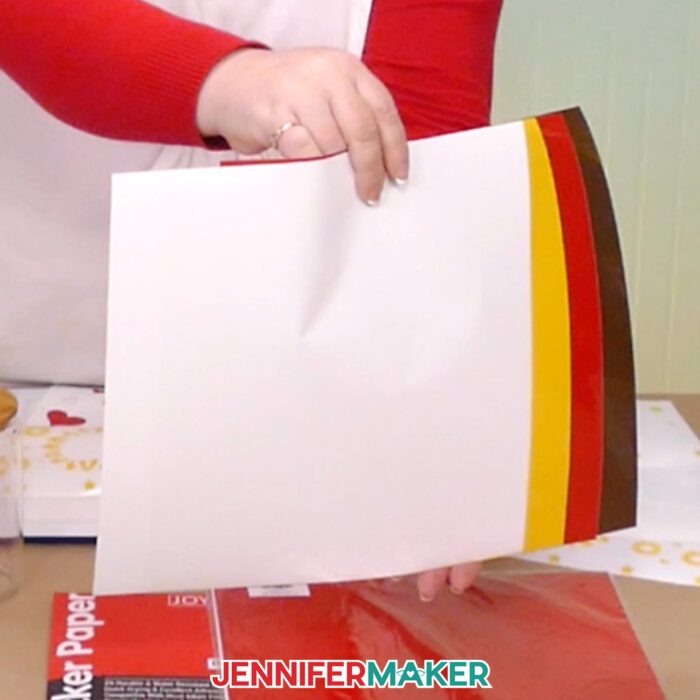
Layering vinyl can be tricky, but I’ve got an awesome hack that makes creating layered glass can wraps super easy. You’ll just need some StandardGrip transfer tape and a little parchment paper to get the job done. That’s right, the stuff from your kitchen! I’ll show you exactly how I did it in the video tutorial.
There are just a couple of other things you’ll need, and I’ve got a full list of tools and supplies (plus links to where to find them!) if you scroll down this post.
To keep them looking their best, hand wash your vinyl-decorated glass cans with warm water and a mild dish soap. Then gently towel-dry them or let them air dry. Do not wash them in your dishwasher or leave them to soak in water — that can cause the vinyl to lose its stickiness and peel off your glass.
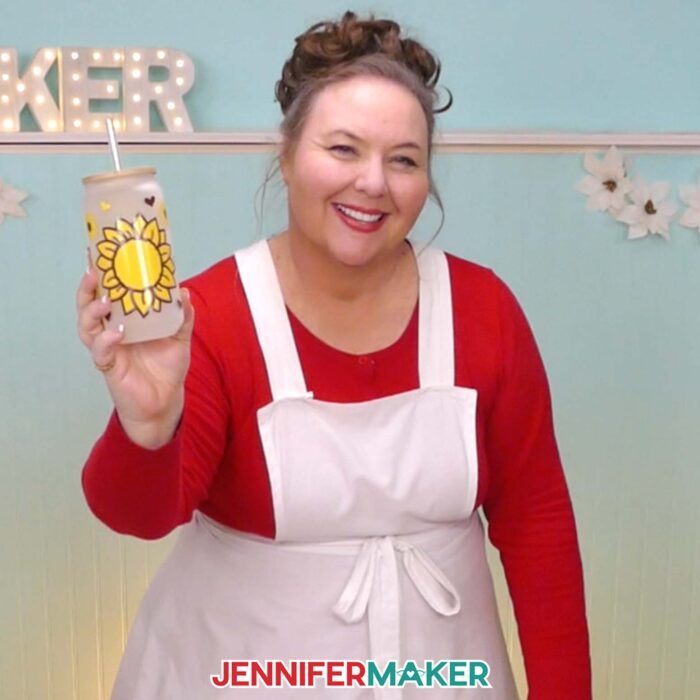
With spring and summer on the way, make some glass can wraps and decorate fun new drinkware! These cute glasses are perfect for holding a nice, cold drink while you relax, gather with friends, or while you’re crafting!
Ready to learn how to make glass can wraps with adhesive vinyl? This post contains some affiliate links for your convenience (which means if you make a purchase after clicking a link I will earn a small commission but it won’t cost you a penny more)! Read my privacy policy and full disclosure policy.
Materials And Tools to Make Glass Can Wraps
See my Amazon shopping list with exactly what I used!
-
One (1) 18 oz Glass Can or Sublimation Glass Can, Frosted -OR-
-
12” x 12” Permanent Vinyl (I used red, yellow, and white for the heart design, and yellow and brown for the sunflower design.)
- A way to cut your designs – I’m using the Cricut Maker 3, but you can also use the Maker, Explore series machines, Venture, Joy, Joy 2, or Joy Xtra
- Cricut Green StandardGrip Machine Mat 12″ x 12″
- Lint roller
- Fan (for ventilation)
- Brayer
- Spatula
-
Scraper -OR-
-
Coffee Filter or Lint-Free Cloth -AND-
- Design #597 My free SVG/PDF/DXF design files are available in my free resource library – get the password by filling out the form at the bottom of this page
How To Make Glass Can Wraps with Vinyl!
Glass Can Wraps
Learn how to make glass can wraps using vinyl!
Materials
- One (1) 18 oz Glass Can or Sublimation Glass Can, Frosted -OR-
- One (1) 18 oz Glass Can or Sublimation Glass Can, Clear
- 12” x 12” Permanent Vinyl (I used red, yellow, and white for the heart design, and yellow and brown for the sunflower design.)
- StandardGrip Transfer Tape
- Design #597 (My free SVG/PDF/DXF design files are available in my free resource library - get the password by filling out the form at the bottom of this page)
Tools
- A way to cut your vinyl - I’m using the Cricut Maker 3, but you can also use the Cricut Maker, a Cricut Explore Series machine, the Cricut Venture, the Cricut Joy, and the Cricut Joy Xtra.
- Cricut Green StandardGrip Machine Mat 12" x 12"
- Brayer
- Weeding Tool
- Scraper -OR-
- XL Scraper
- Scissors
- Parchment Paper
- Painter's Tape
- Optional: Cricut Brightpad Go (for weeding and lining up layers)
- Coffee Filter -OR-
- Lint-Free Cloth -AND-
- Isopropyl Alcohol
Instructions
STEP 1: GET MY FREE VINYL ON GLASS CAN DESIGNS
First, download my Glass Can Wraps designs from my free library – look for Design #597. Alternatively, you can use the Save This Project form near the top of this post and the design link will be emailed to you. In the SVG folder, you’ll find two layered vinyl designs to cut on a cutting machine. You’ll also find Cricut Joy-sized versions of the designs for Joy users. There’s also a DXF folder with cut files, and a PDF folder with versions you can print and cut by hand. Upload the SVG file you need to Design Space to get started. I’ll demonstrate with the Heart design. TIP: If you’re not sure how to upload, go to jennifermaker.com/svgs to learn how to unzip and upload SVG files.
STEP 2: PREPARE AND CUT YOUR GLASS CAN WRAP DESIGN
CRICUT DESIGN SPACE
- Open Cricut Design Space and click “New Project.”
- Click “Upload” and then “Upload Image.”
- Click “Browse.”
- Select the SVG file of your choice.
- On the Prepare to Upload screen, it will say “Cut Image” with the design preview.
- Click “Upload.”
- Find your design in Recent Uploads and add it to the Canvas.

- Ungroup the design.
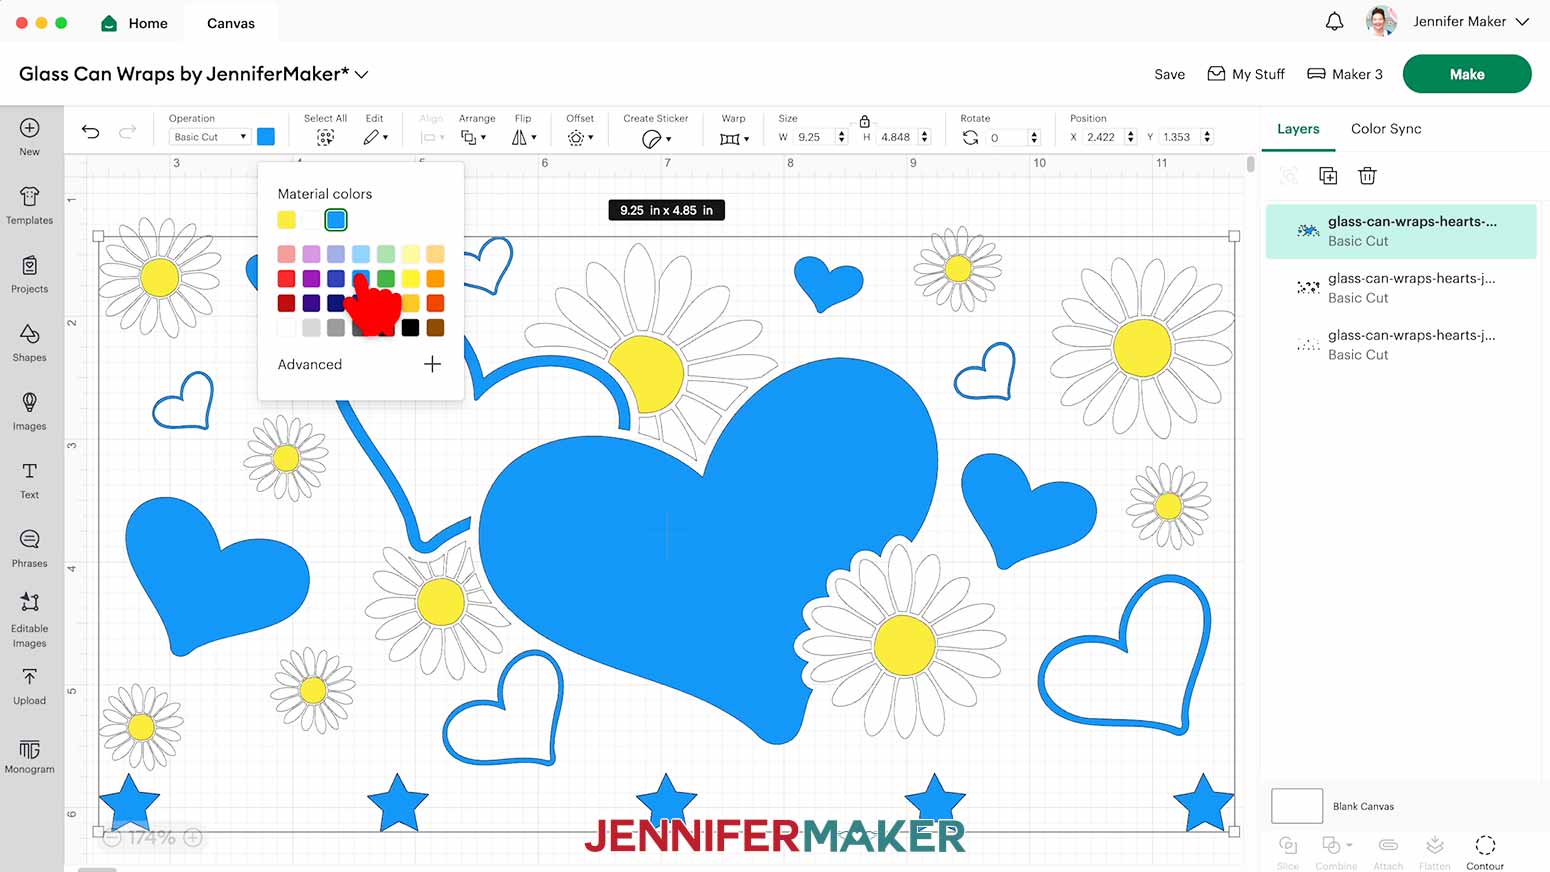
- If you do not want to change the colors to match your vinyl, skip to step 12. If you do want to change the colors to match your vinyl, click a layer in the Layers Panel.
- Click the color box next to Operation and select a new color to match your material.
- Repeat steps 9-10 for any other layers with colors you’d like to change.
- Make sure the correct machine is selected in the top right.
- Click “Make.”
- If prompted, click “On Mat,” choose your mat size, and click “Confirm.”
- On the Prepare screen, make sure the correct Material Size is selected for your materials.
- Select the first mat again and click “Continue.”


CUTTING
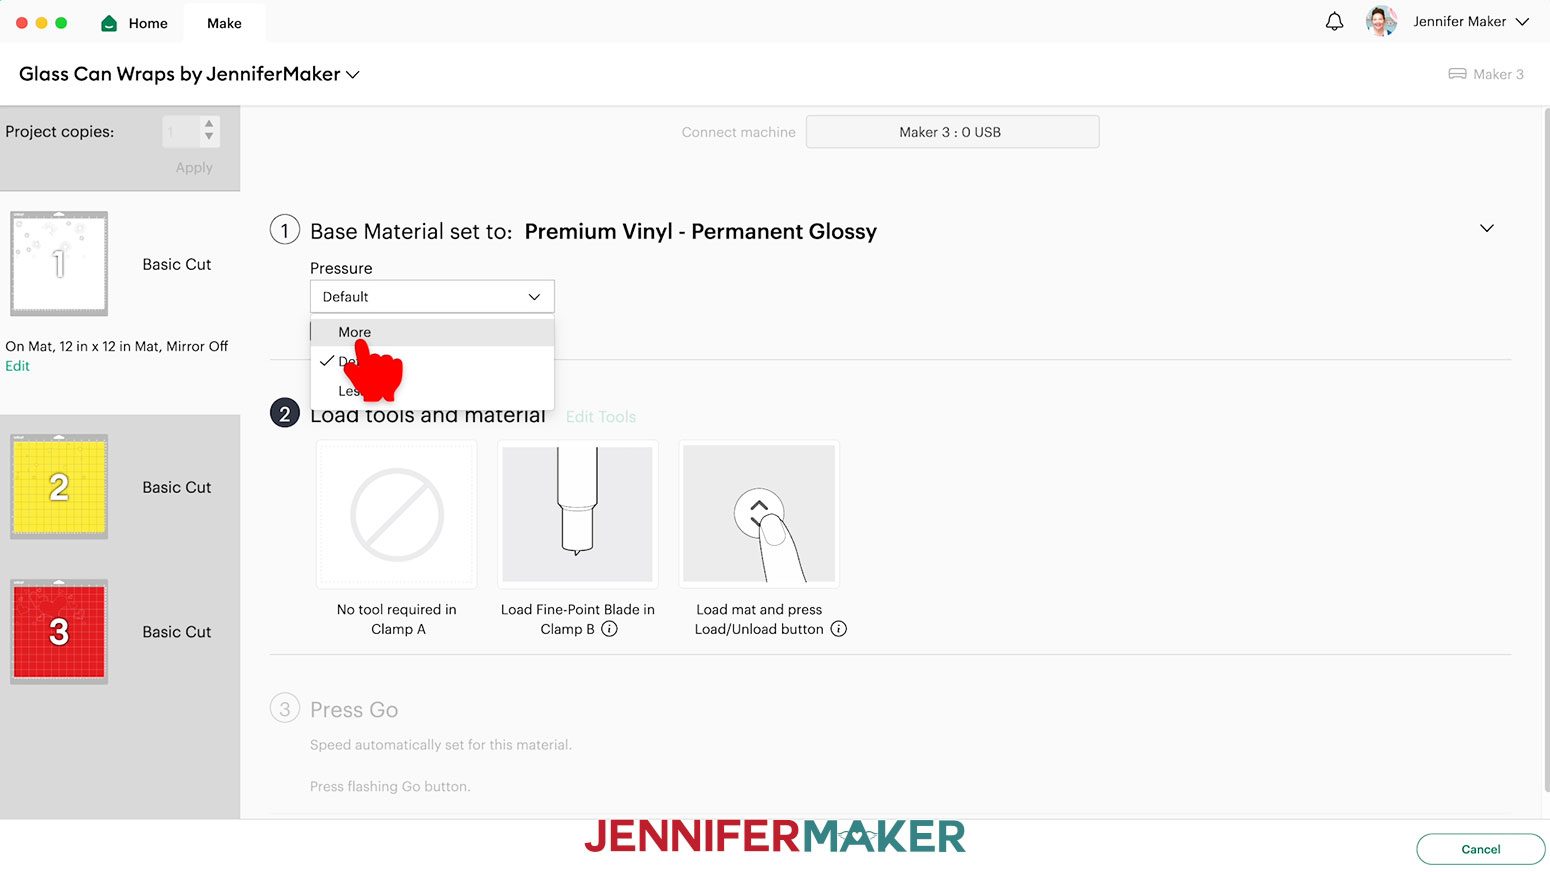
- On the Make screen, set the Base Material for your mats. I used the “Premium Vinyl - Permanent Glossy” setting with “More” Pressure for all of my mats.
- Place your first mat’s vinyl face up on a green StandardGrip machine mat.
- Use a brayer to make sure it’s fully adhered.
- Check that your Premium Fine-Point Blade is clean and in the clamp.
- Press the flashing “Load/Unload” button to load the prepared mat into your Cricut.
- Press the flashing “Go” button to begin cutting.
- When it has finished cutting, unload the mat, flip it over onto your work surface, and roll it back to release the vinyl. TIP: If you have any issues with your cuts, go to jennifermaker.com/cleaner-cuts. Follow steps 2-7 to continue cutting the rest of your mats.
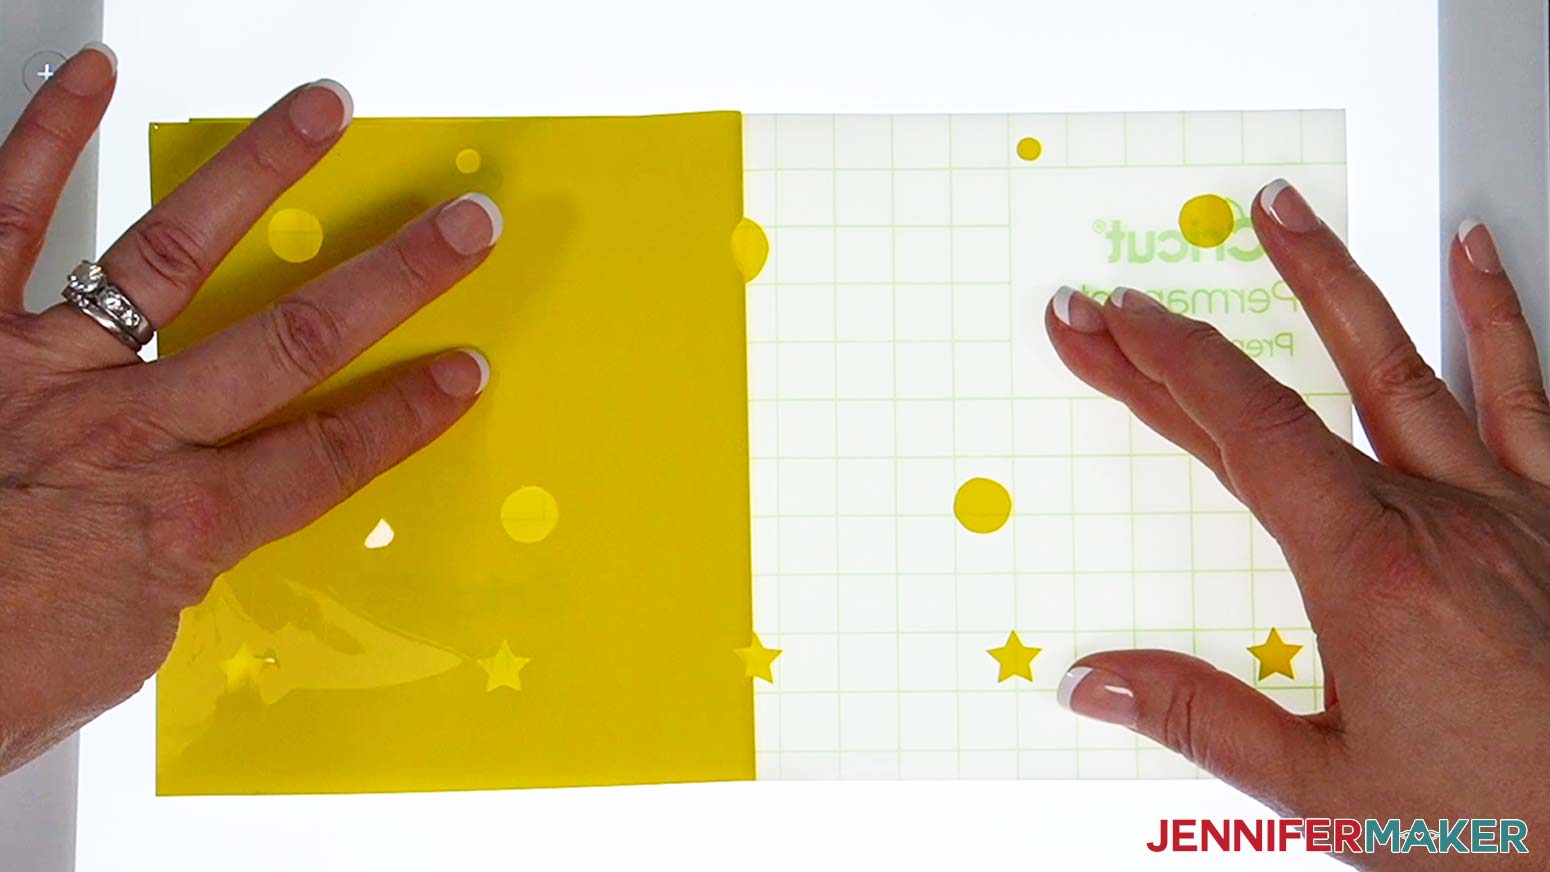
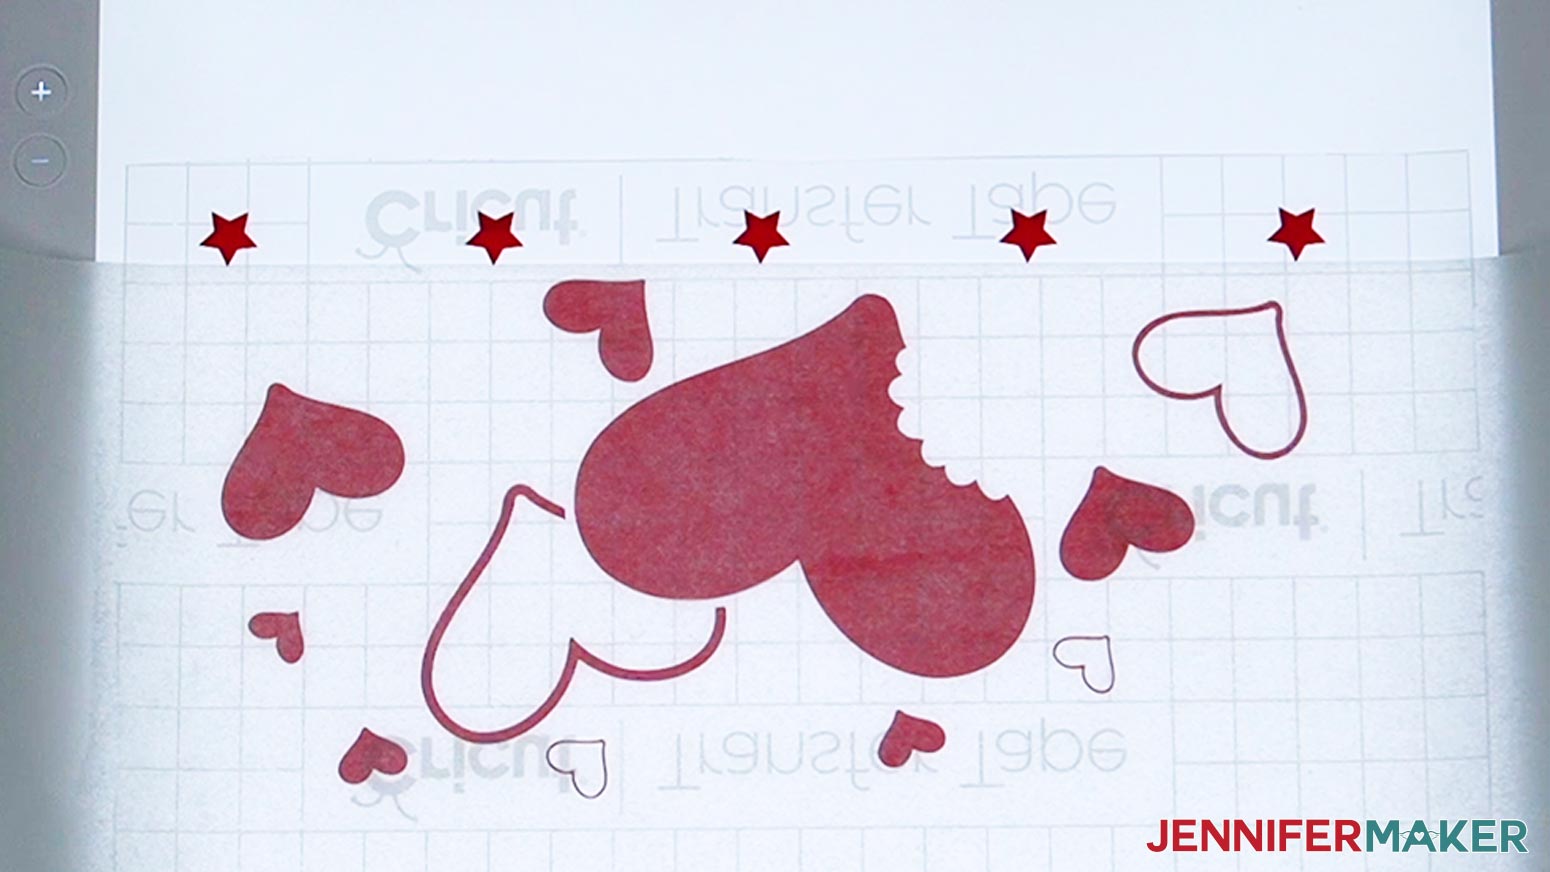
- Use a weeding tool to carefully peel away a corner of the vinyl.
- Slowly peel back the extra background vinyl, keeping the peeled vinyl nearly parallel with the surface as you pull, leaving the designs behind on the carrier sheet. If any pieces lift up, use your weeding tool to carefully tack them back down to the carrier sheet before continuing.
TIP: Use a light box like a Cricut Bright Pad to help see the cut lines while weeding. Use your weeding tool to gently lift and remove any other areas you want to remove, like the insides of the heart cutouts.
TIP: If a piece lifts up completely and you’re not sure where it goes, look closely at the vinyl backing sheet – there should be an indentation in the shape of the piece for you to use as a guide to place it back down. Refer to the Cricut Design Space screen if you’re not sure about some pieces.
- Here are what my cut and weeded designs look like. For the Hearts design, there are three weeded sheets of vinyl. For the Sunflowers design, there are two weeded sheets.
 TIP: Use a light box like a Cricut Bright Pad to help see the cut lines while weeding. Use your weeding tool to gently lift and remove any other areas you want to remove, like the insides of the heart cutouts.
TIP: If a piece lifts up completely and you’re not sure where it goes, look closely at the vinyl backing sheet – there should be an indentation in the shape of the piece for you to use as a guide to place it back down. Refer to the Cricut Design Space screen if you’re not sure about some pieces.
TIP: Use a light box like a Cricut Bright Pad to help see the cut lines while weeding. Use your weeding tool to gently lift and remove any other areas you want to remove, like the insides of the heart cutouts.
TIP: If a piece lifts up completely and you’re not sure where it goes, look closely at the vinyl backing sheet – there should be an indentation in the shape of the piece for you to use as a guide to place it back down. Refer to the Cricut Design Space screen if you’re not sure about some pieces.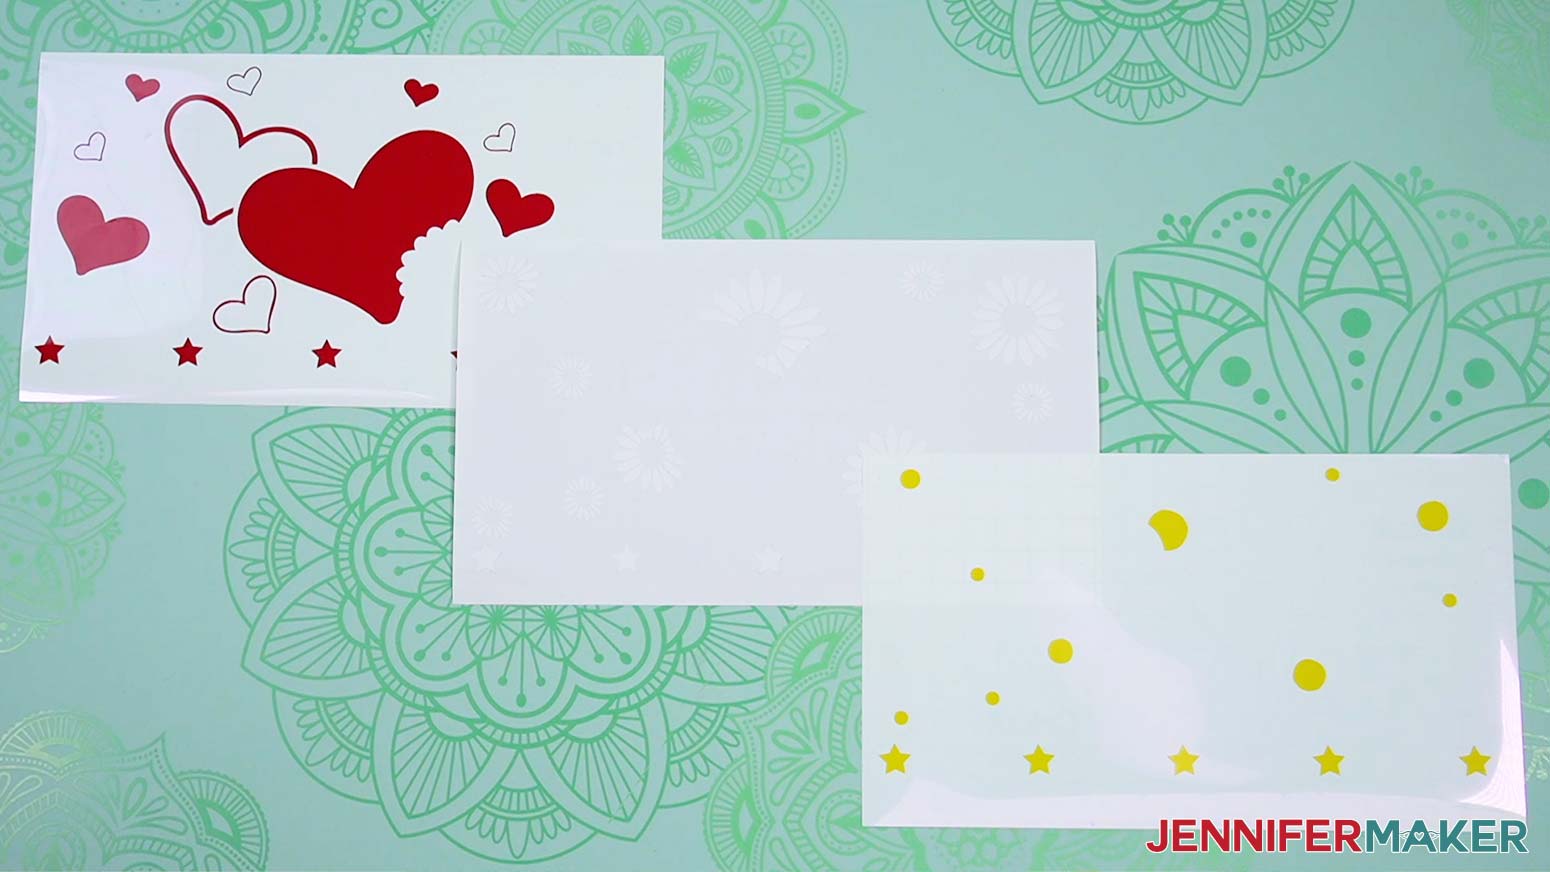
STEP 3: APPLY YOUR GLASS CAN WRAP DESIGN
- Cut a piece of StandardGrip Transfer Tape a little larger than your largest vinyl layer. If it’s a new piece of transfer tape, you may want to reduce the stickiness by patting your hands on it, or sticking the tape to a piece of fabric a few times. NOTE: Since the layers of vinyl in these designs all apply directly to the glass (rather than overlapping each other), the order in which you layer them does not matter.
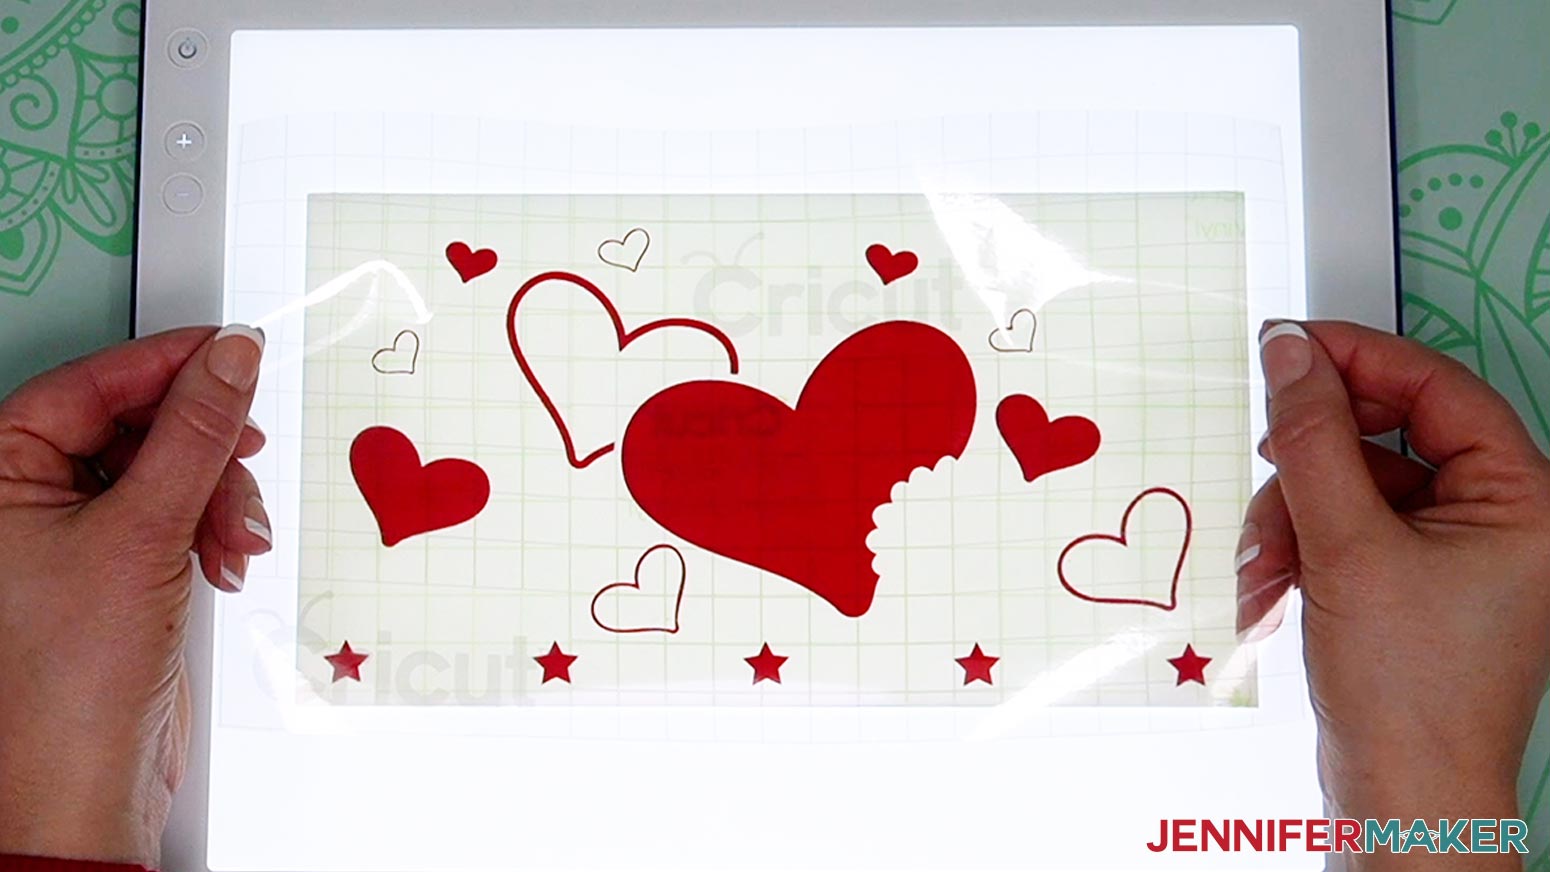
- Using the “taco method,” curve the transfer tape into a taco shape and touch it down onto the first vinyl design.
TIP: If you’re using a light box, use it to line up the grid on the transfer tape with your cut and weeded vinyl pieces for straighter application to the glass later.
- Lower the rest of the transfer tape down onto the vinyl, using your fingers to smooth it out from the center outward.
- Use your scraper to burnish the vinyl onto the transfer tape well.
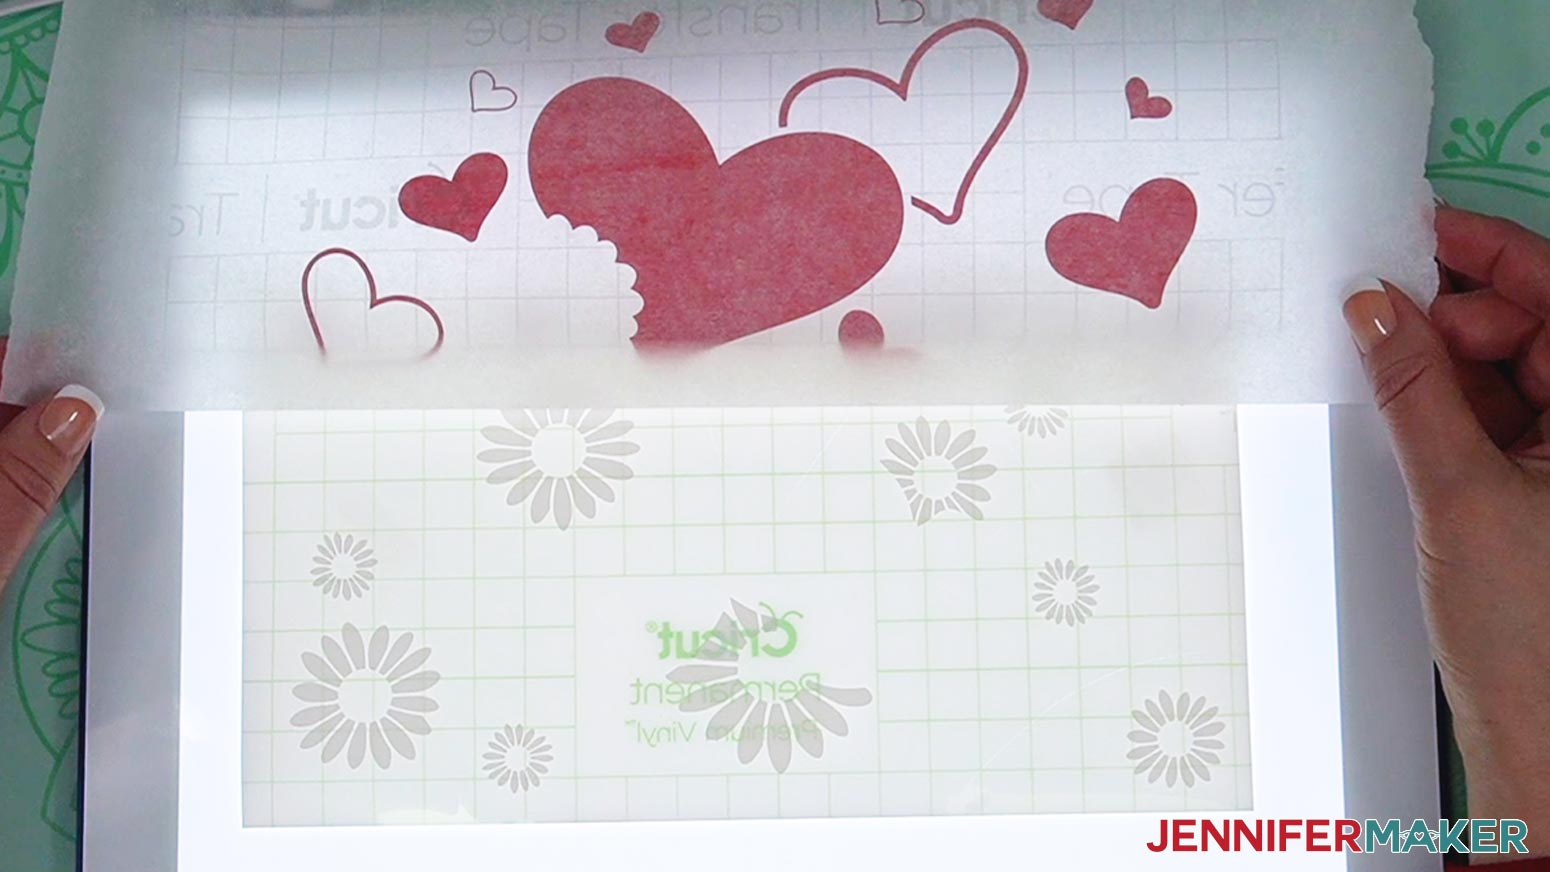
- Carefully peel off the vinyl backer, leaving the vinyl design on the transfer tape.
- Place the vinyl and transfer tape on your work surface, sticky side up.
- Cut a piece of parchment paper a little larger than your largest vinyl layers.
- Using the taco method again, apply the parchment paper to the design on the tape, but leave the star registration marks uncovered.
NOTE: The registration marks on the Cricut Joy versions of the designs are on the left and right sides of the designs, rather than along the bottom, but the directions are the same.
- Set the vinyl and parchment paper stack aside, sticky side up.
- Place your second vinyl design layer on your work surface.
- Grab the first vinyl design and position it over your second vinyl design, and line up the stars. When they’re lined up as precisely as possible, press the top layer’s stars down onto the bottom ones, then smooth the transfer tape down with your fingers.
- Press the top of the transfer tape (the part that’s not attached to the vinyl sheet) onto your work surface to form a “hinge” you can fold back.
- Fold back the “hinge” and peel off the parchment paper.
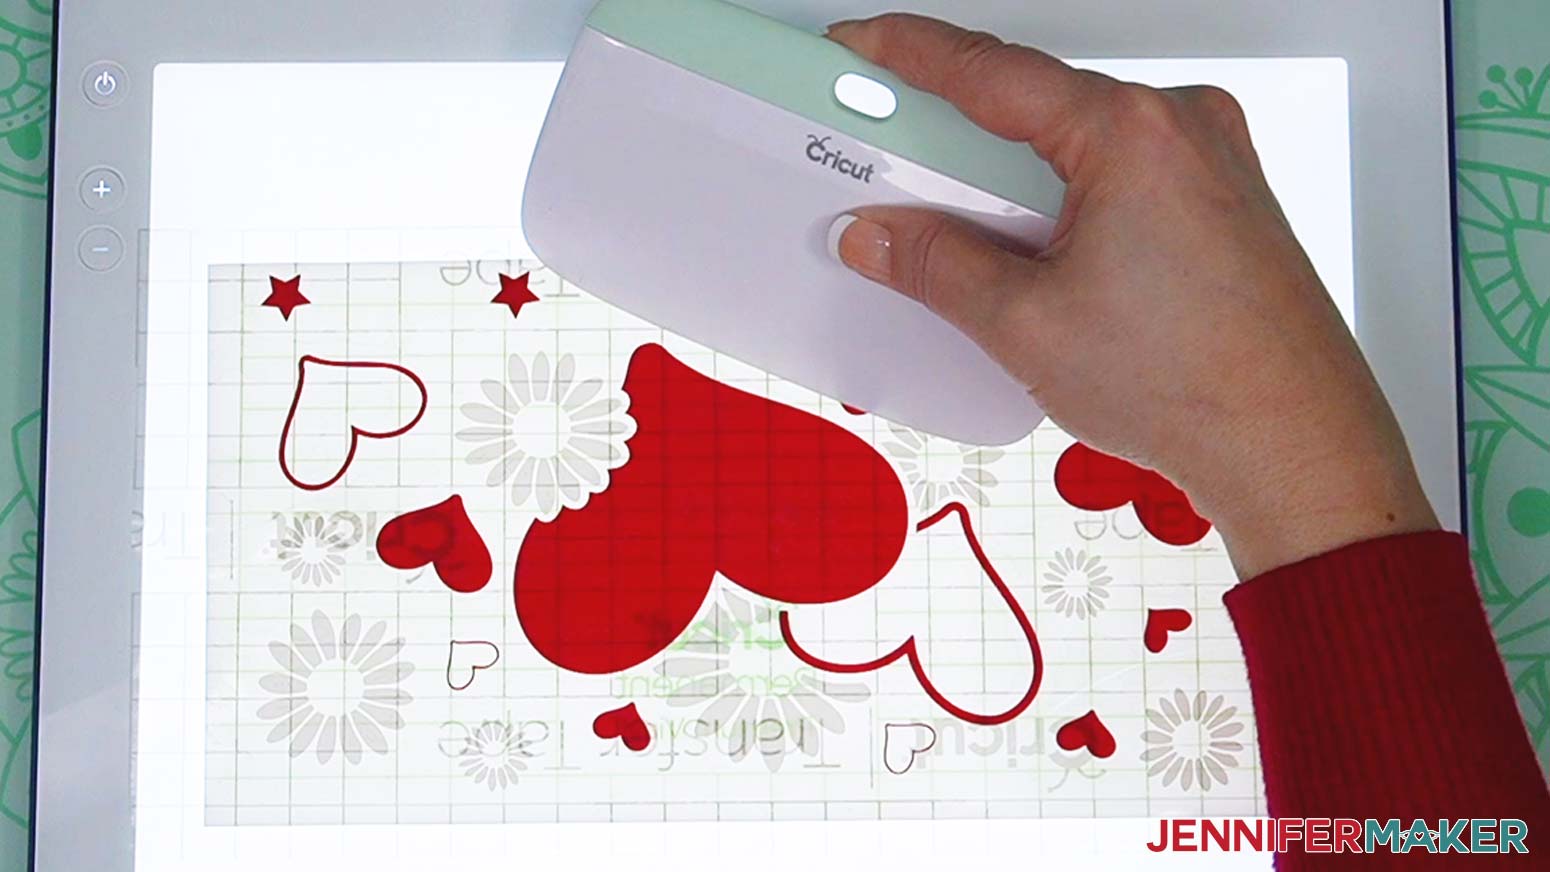
- Lower the first layer of vinyl down onto the second layer of vinyl.
- Starting with the bottom middle, use your scraper to burnish outward.
- If you have a two-layer vinyl design, skip to step 25.
- Peel up the two layers that are stuck down, and flip them over so the backer is facing up.
- Peel off the vinyl backer, leaving the second vinyl design on the transfer tape.
- Using the taco method, apply the same piece of parchment paper to the vinyl layers, again leaving the star registration marks uncovered.
- Place the third layer of the design on your work surface.
- Hold the combined layers over the third layer, parchment side down, and line up the stars. When they’re lined up as precisely as possible, lower the assembled layers’ stars down onto the ones on the third layer underneath.
- Peel away the parchment paper.
- Smooth the layers together with your fingers.
- Starting with the bottom middle, use your scraper to burnish outward.
- Flip the design over and burnish it from the back, as well.
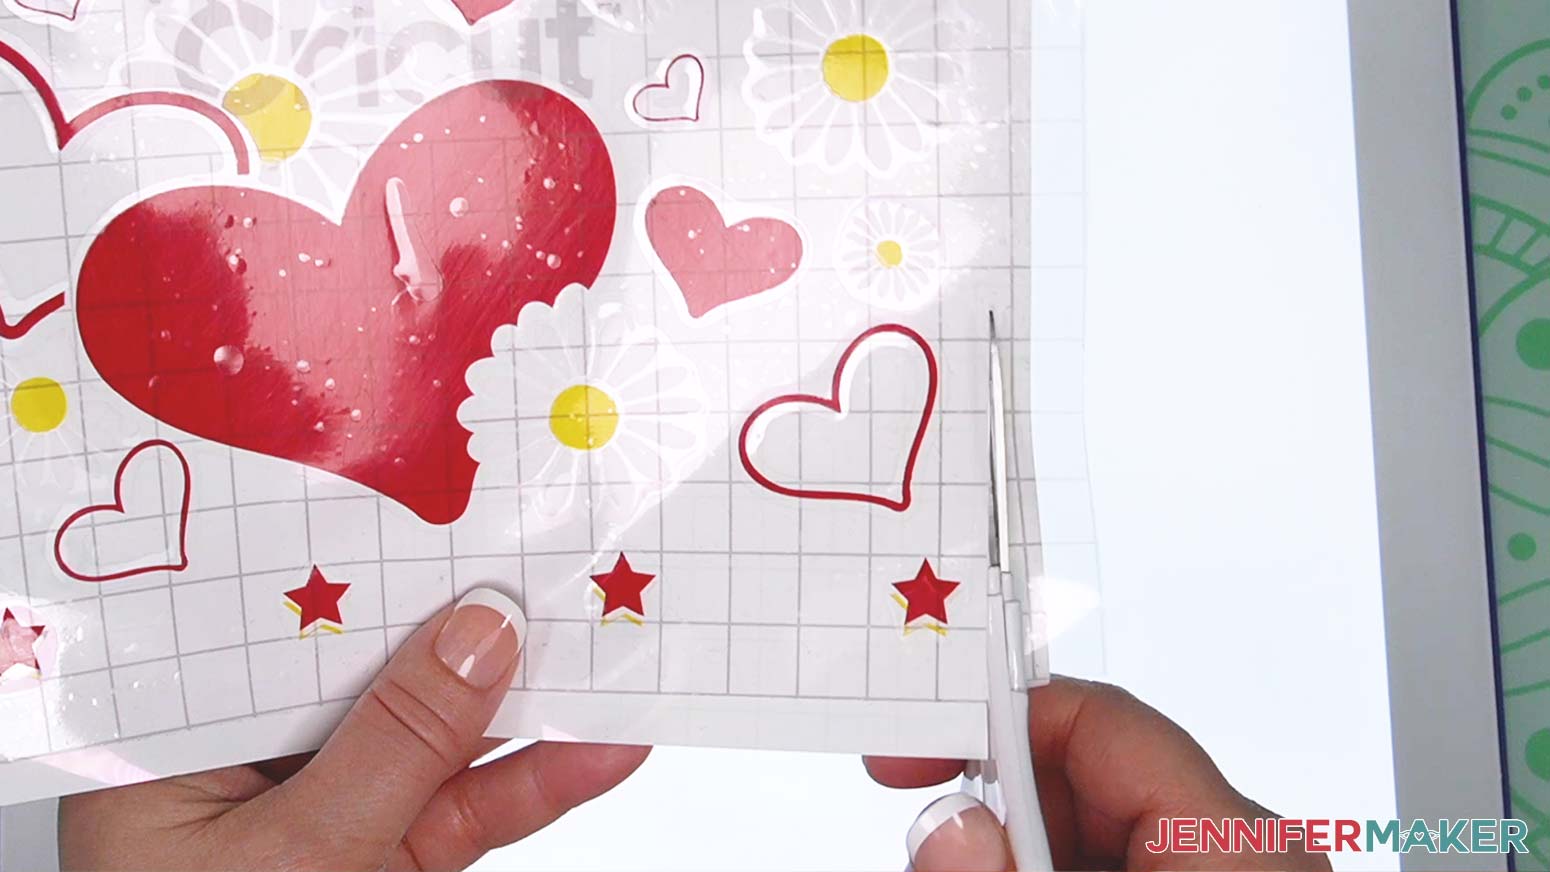
- Cut the excess tape and backing off around the edges of the design. Trim the ends especially close to the vinyl pieces, leaving only about ⅛” around them. Since the stars have served their purpose in helping us line up the layers, you can cut those off as well.
- Use a coffee filter or lint-free cloth and a little isopropyl alcohol to clean the outside of your glass can from skin oils and lint.
- Tear off four pieces of painter’s tape each about 2” long, then set them aside.
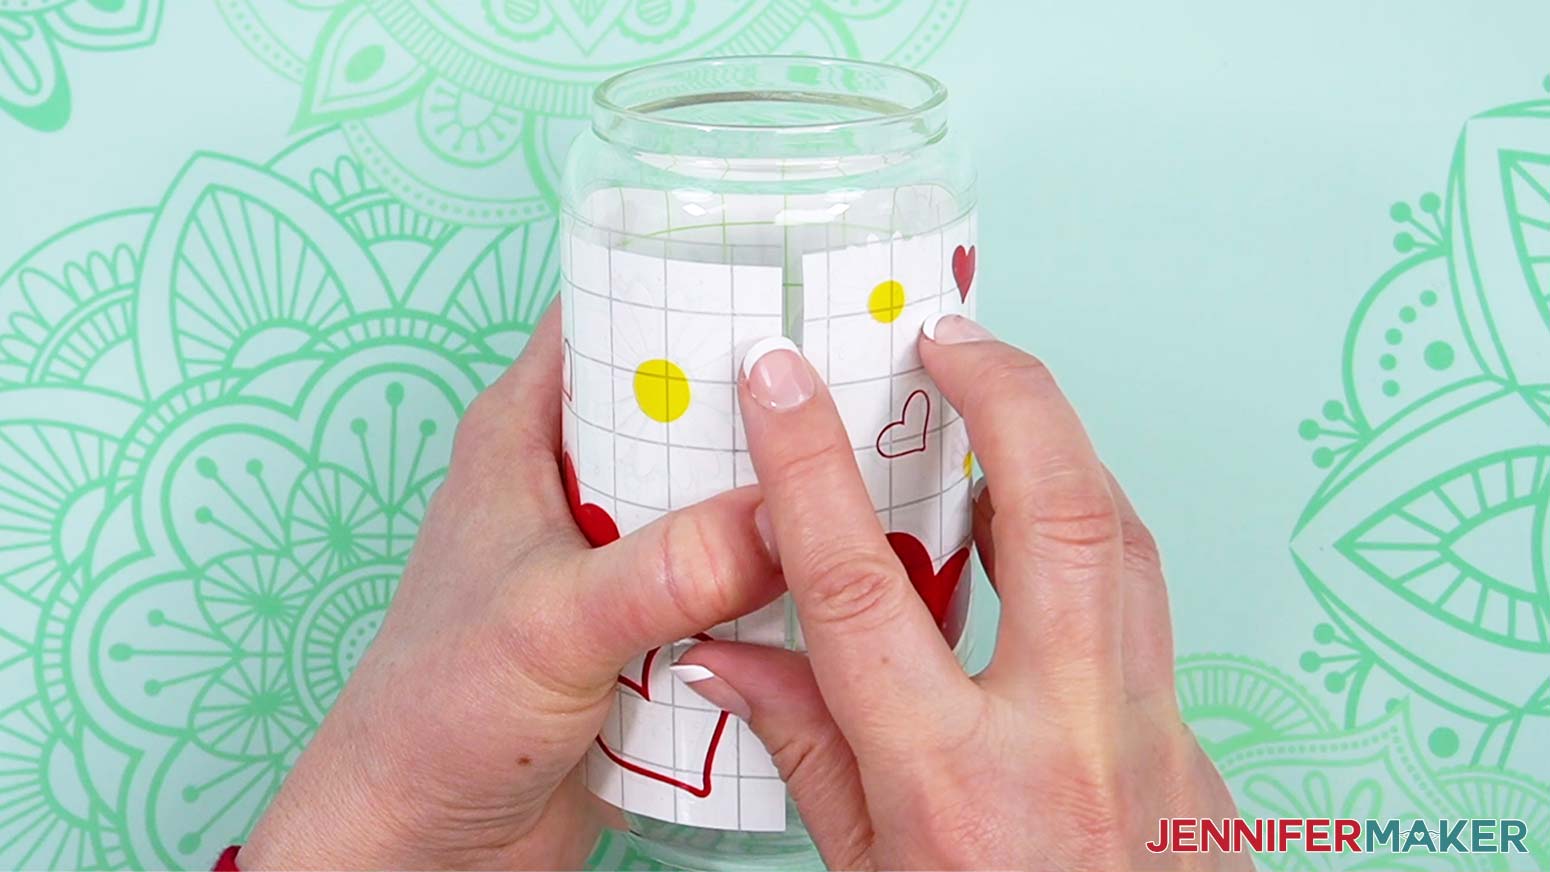
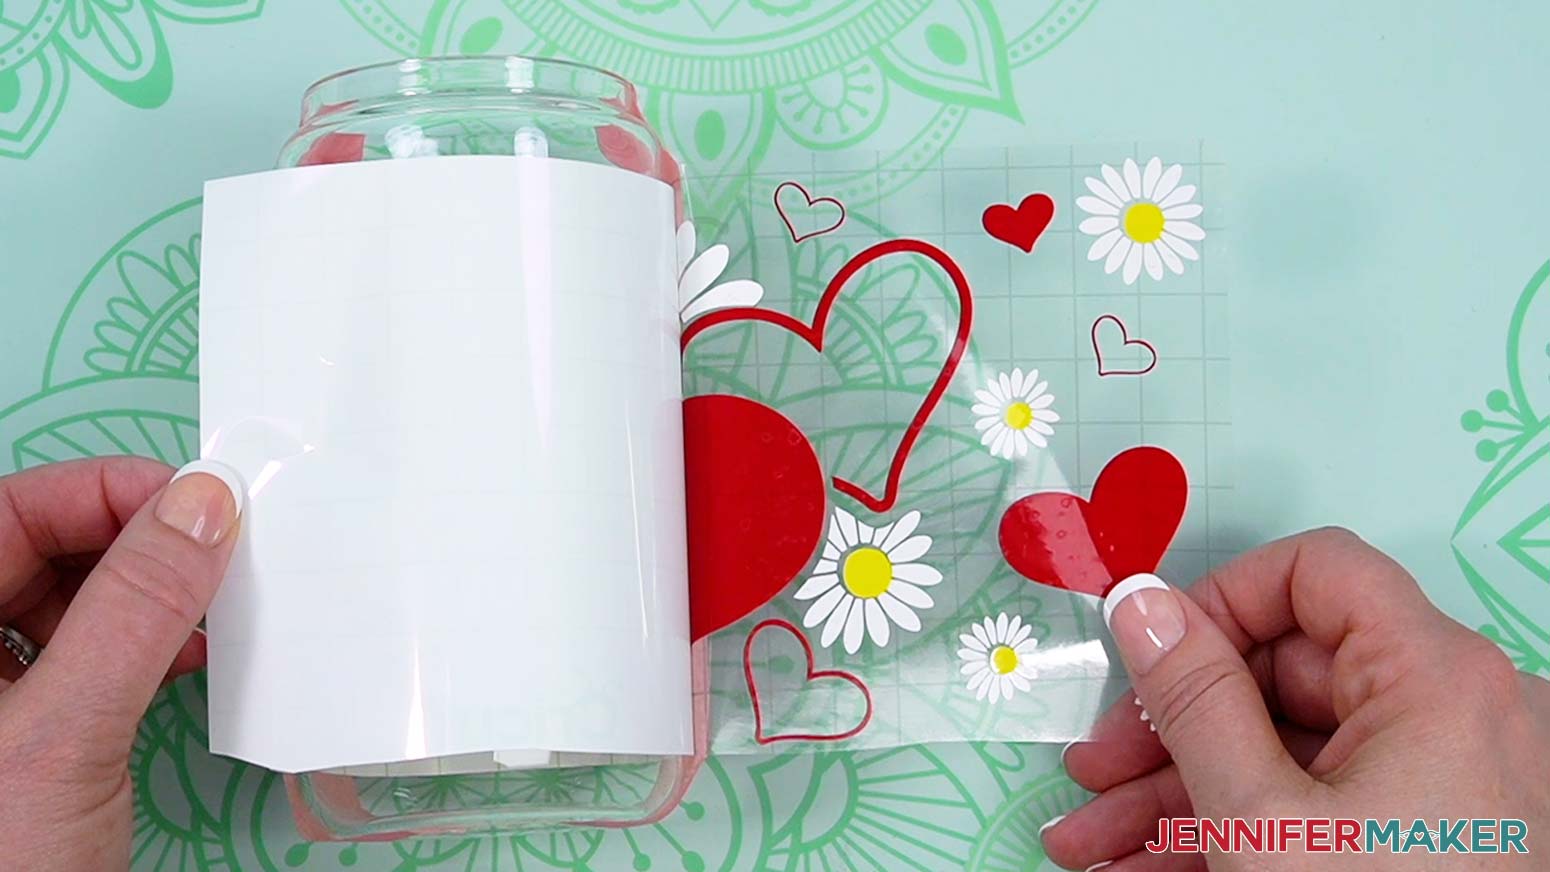
- With the vinyl backing touching the glass, wrap the design around the glass. Make sure it lines up to your liking.
TIP: If you used a light box to align the vinyl design with the grids on your transfer tape, use the grid to help line up the design on the glass.
- Take one piece of painter’s tape and apply it to the top center of the design, so the tape is touching the glass on the top.
- Apply another piece of painter’s tape on the bottom of the design, below the first, making sure it touches the glass on the bottom.
- Rotate the glass to where the ends of the design meet.
- Apply the other two pieces of painter’s tape to the top and bottom edge of one of the loose ends.
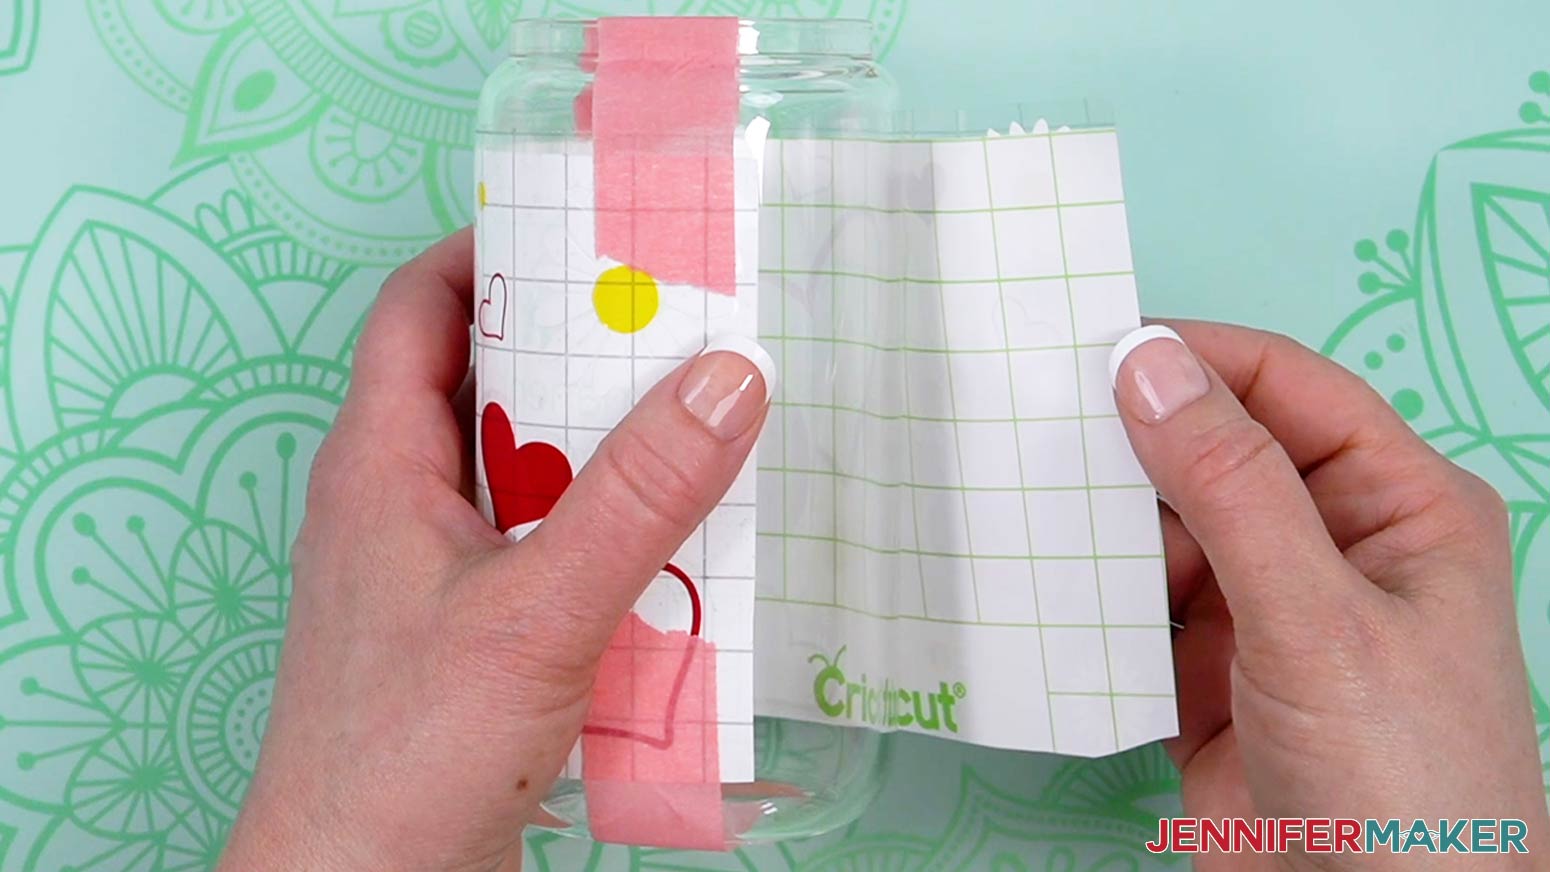
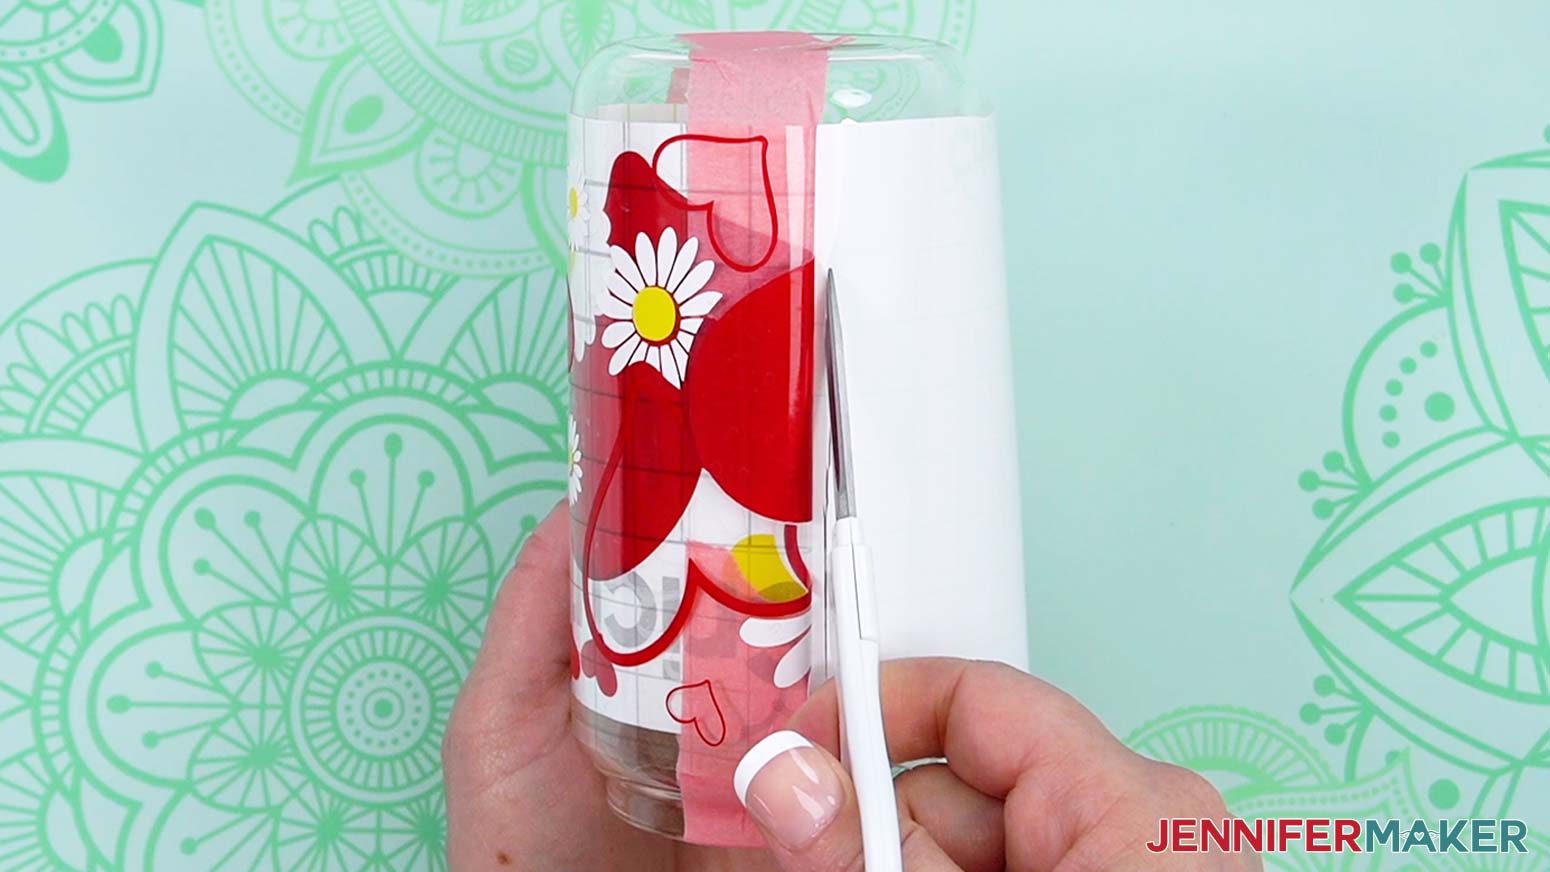
- On the loose side of the design, peel back the backer from the vinyl until you reach the middle where the painter’s tape is.
- Trim off the backing material close to the painter’s tape.
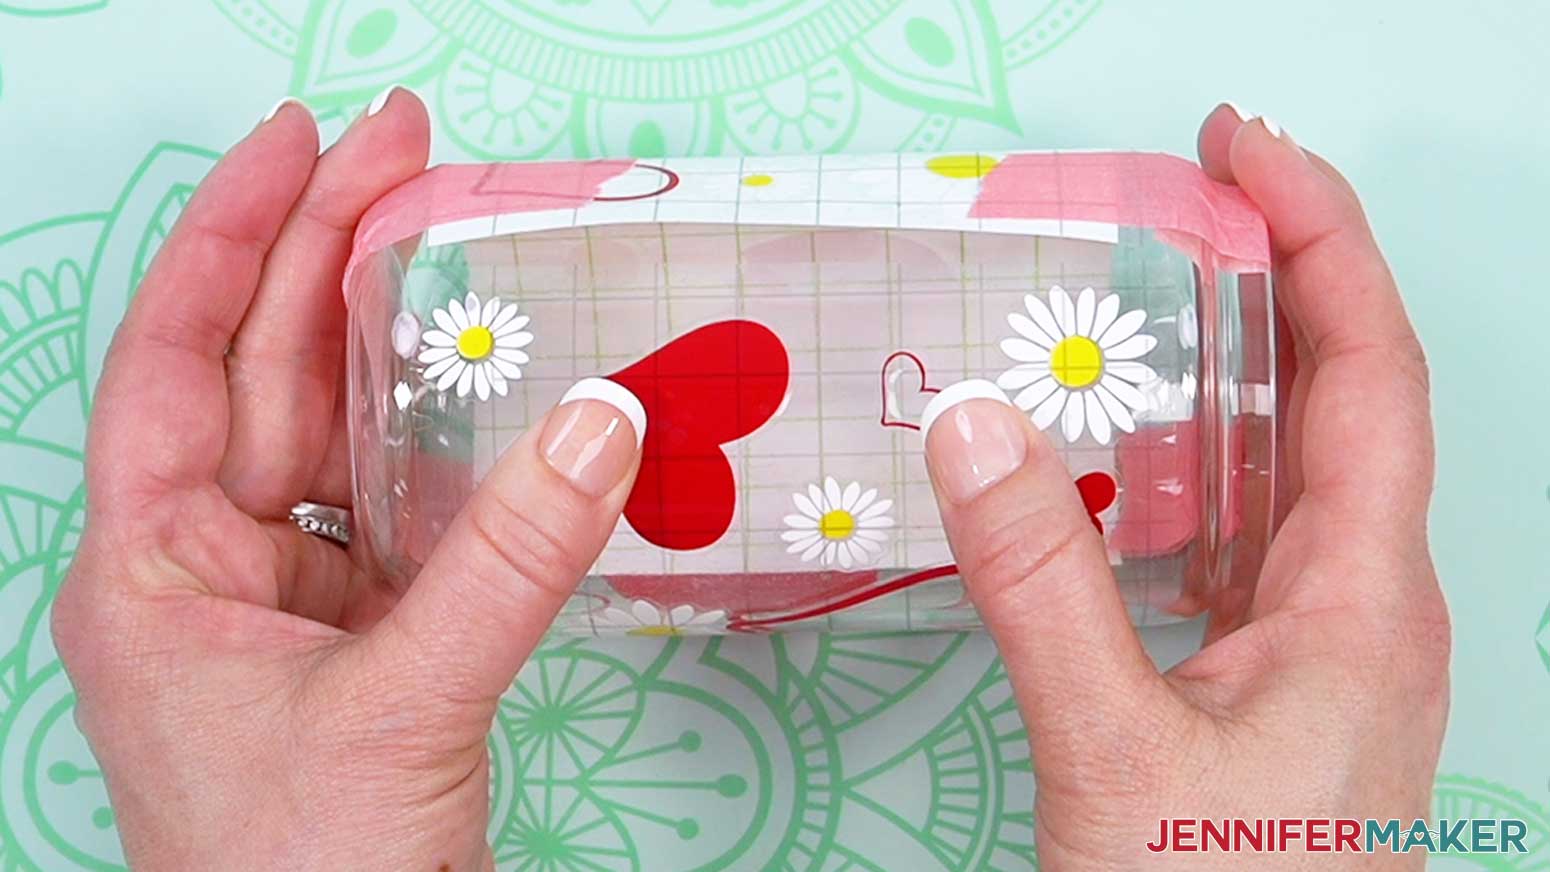
- Beginning next to the painter's tape, lay the transfer tape back down into place, tacking it down to the glass in the center first.
- From the center of the tape outwards, use your thumbs to smooth out the rest of the transfer tape onto the glass. Turn the glass as you apply it. A large scraper tool can help smooth it down.
- Remove all four pieces of painter’s tape from the transfer tape and glass.
- Pull back some of the backer at the center of the design, then starting at the center and moving outwards, use your fingers or your scraper tool to smooth out the transfer tape onto the glass, peeling the backer back as you go.
TIP: If you find the backer gets in your way, you can peel it completely off before smoothing down the transfer tape – just be careful not to stick it (or the vinyl) to itself or to anywhere on the glass it doesn’t belong.
- Once the whole design has been applied to the glass, use your scraper tool to burnish it down. Be careful not to use too much pressure, or you may break the glass.
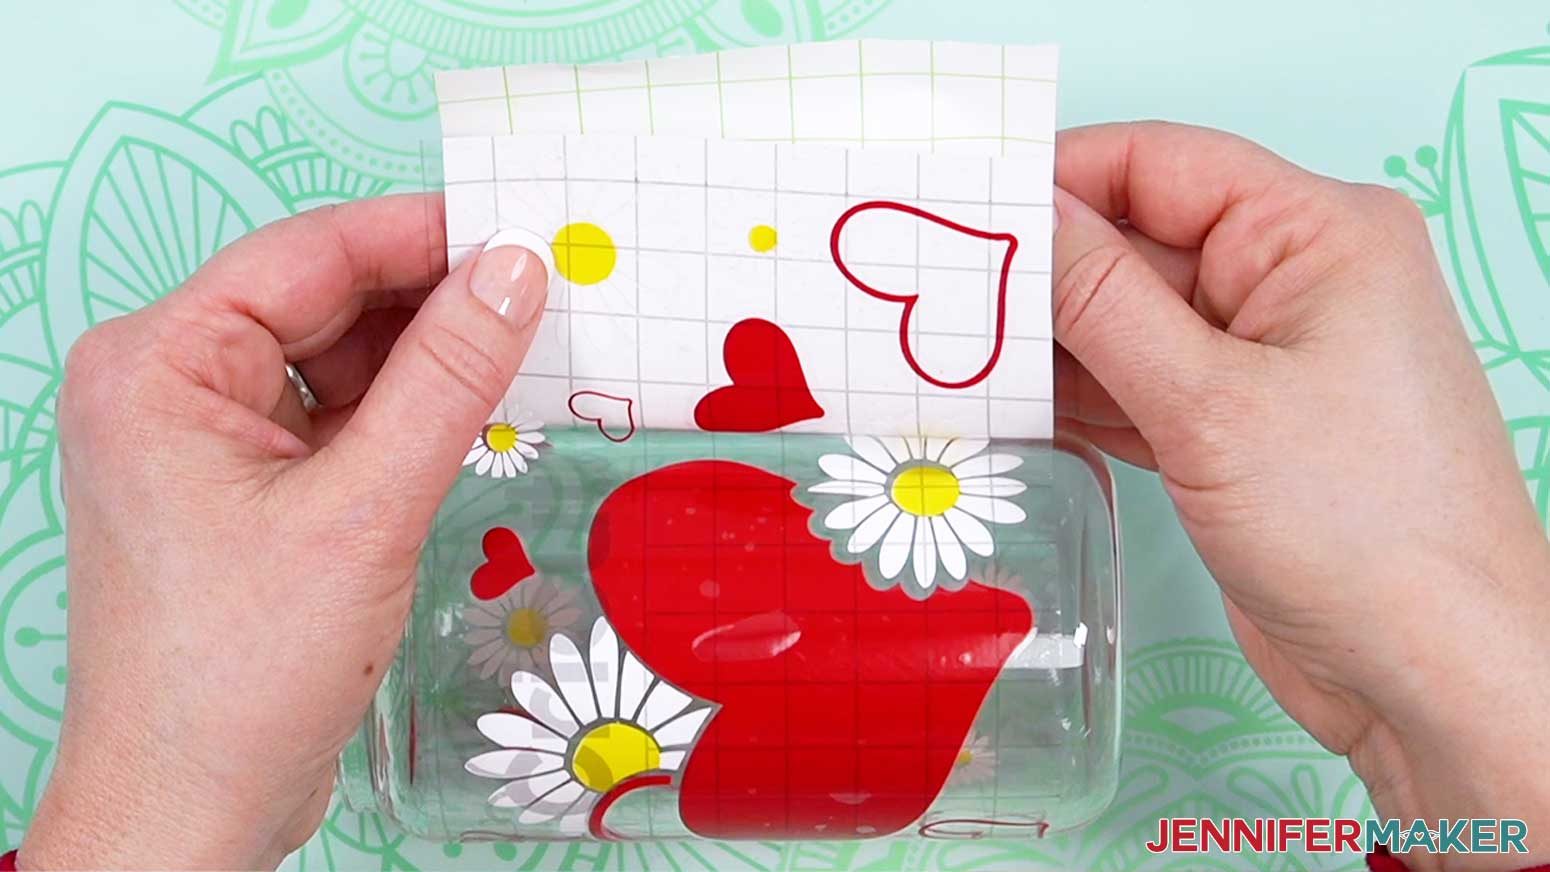
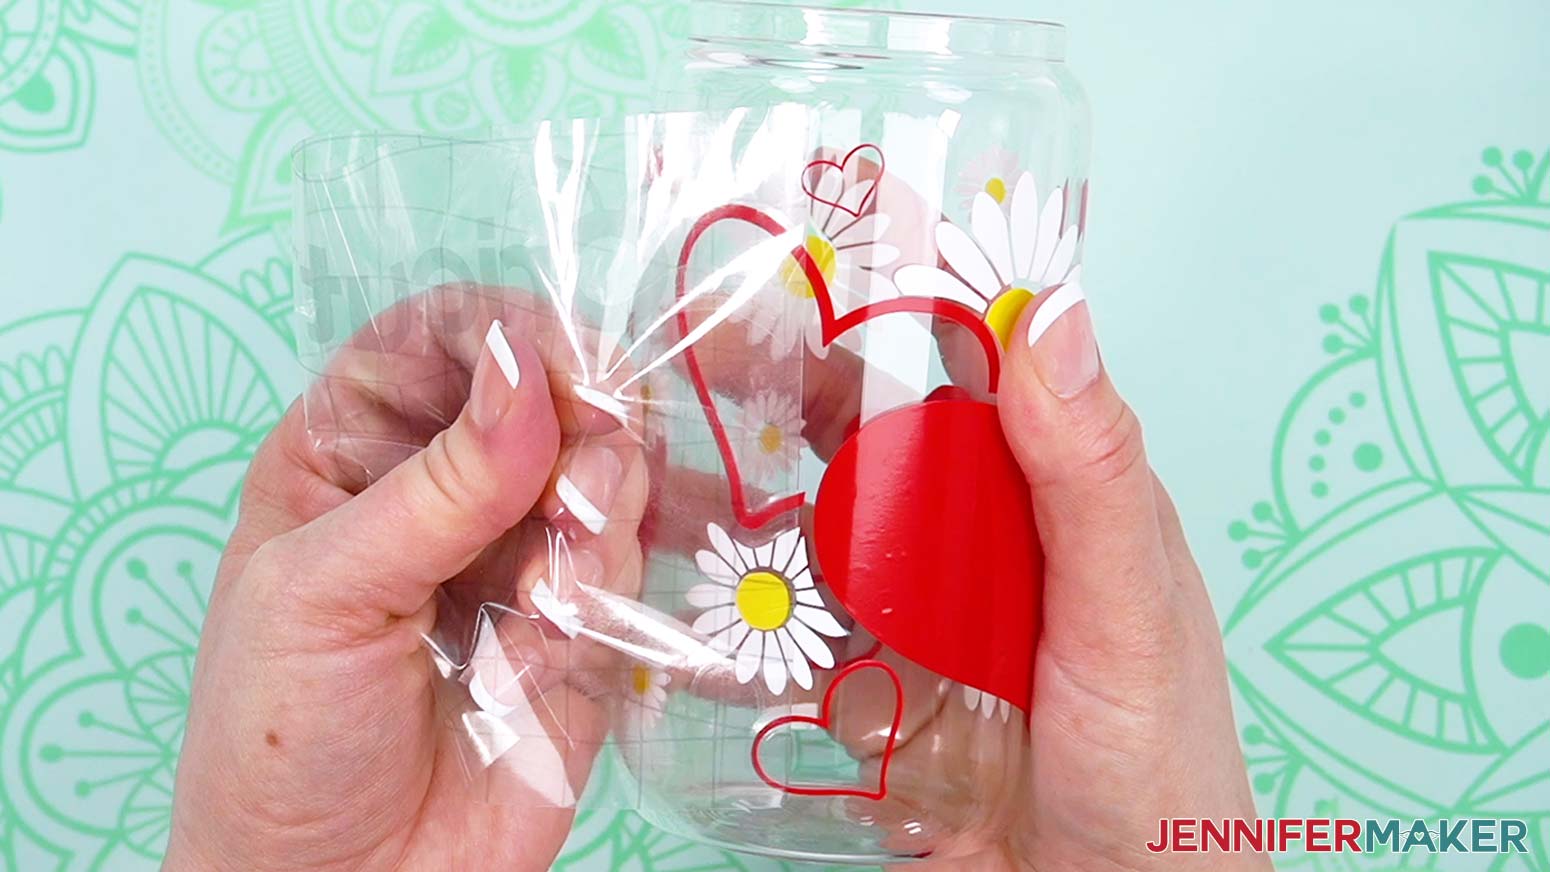
- Starting at one corner, slowly peel off the transfer tape, making sure you’re not pulling any of the vinyl off of the glass.
- Your vinyl-decorated glass can is finished!
 NOTE: The registration marks on the Cricut Joy versions of the designs are on the left and right sides of the designs, rather than along the bottom, but the directions are the same.
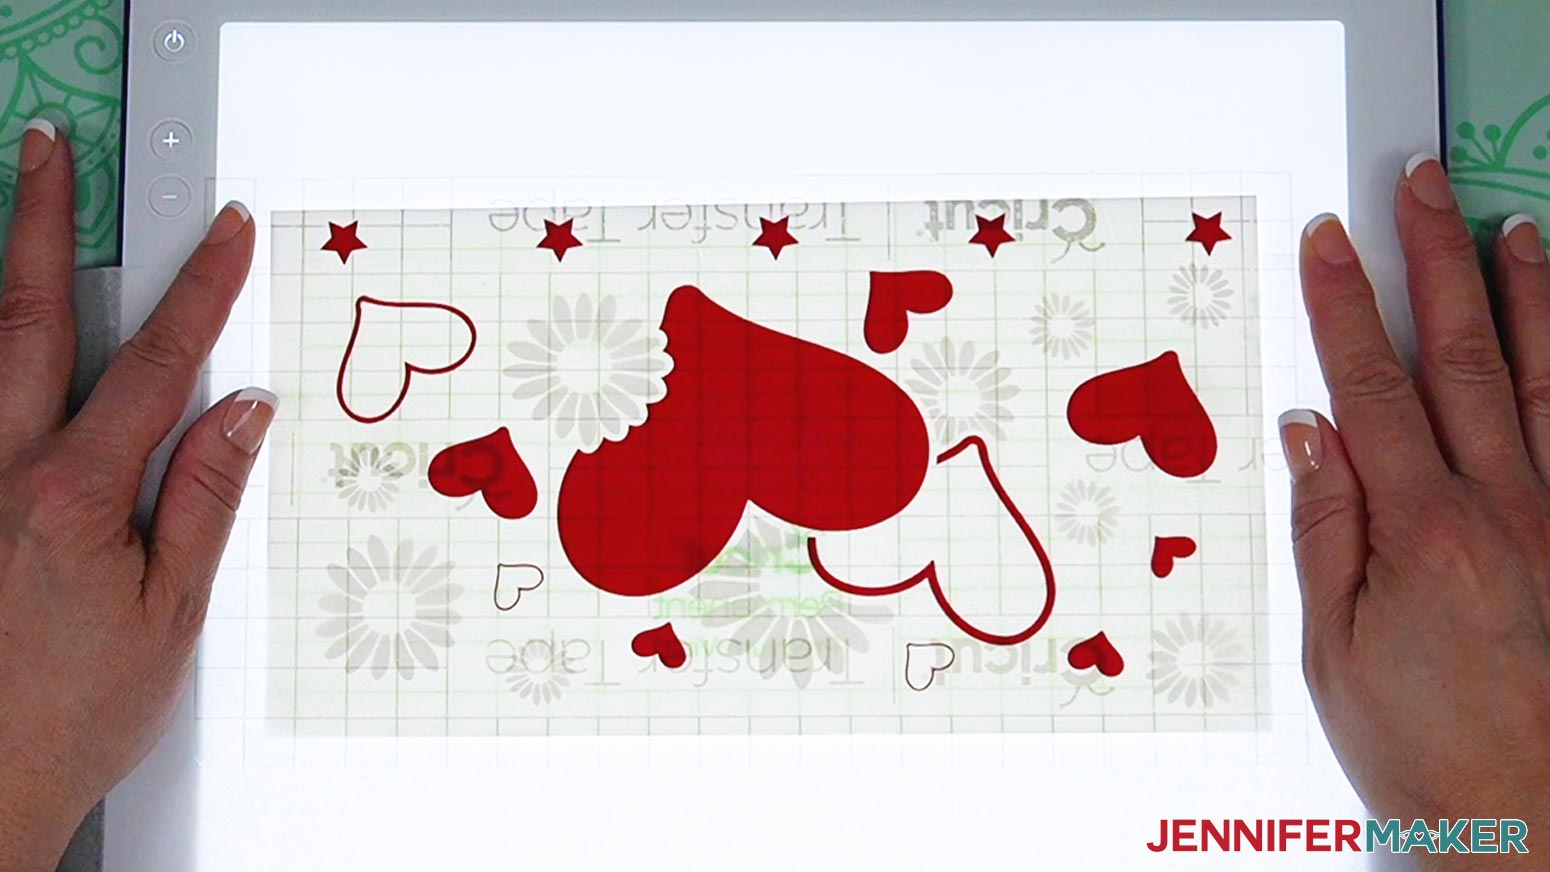

 TIP: If you used a light box to align the vinyl design with the grids on your transfer tape, use the grid to help line up the design on the glass.
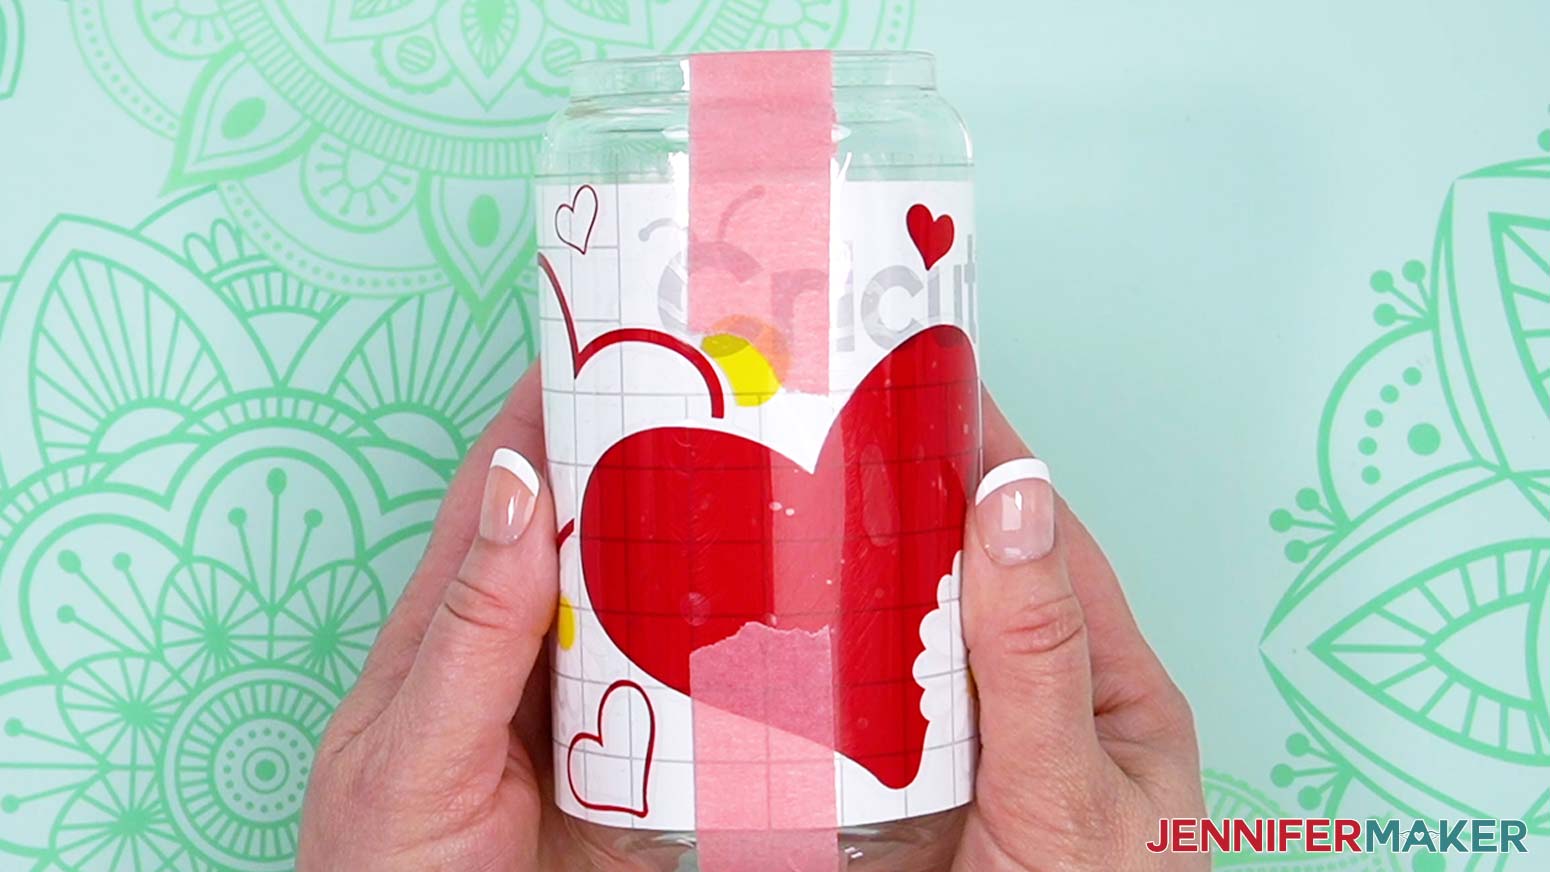
 TIP: If you find the backer gets in your way, you can peel it completely off before smoothing down the transfer tape – just be careful not to stick it (or the vinyl) to itself or to anywhere on the glass it doesn’t belong.
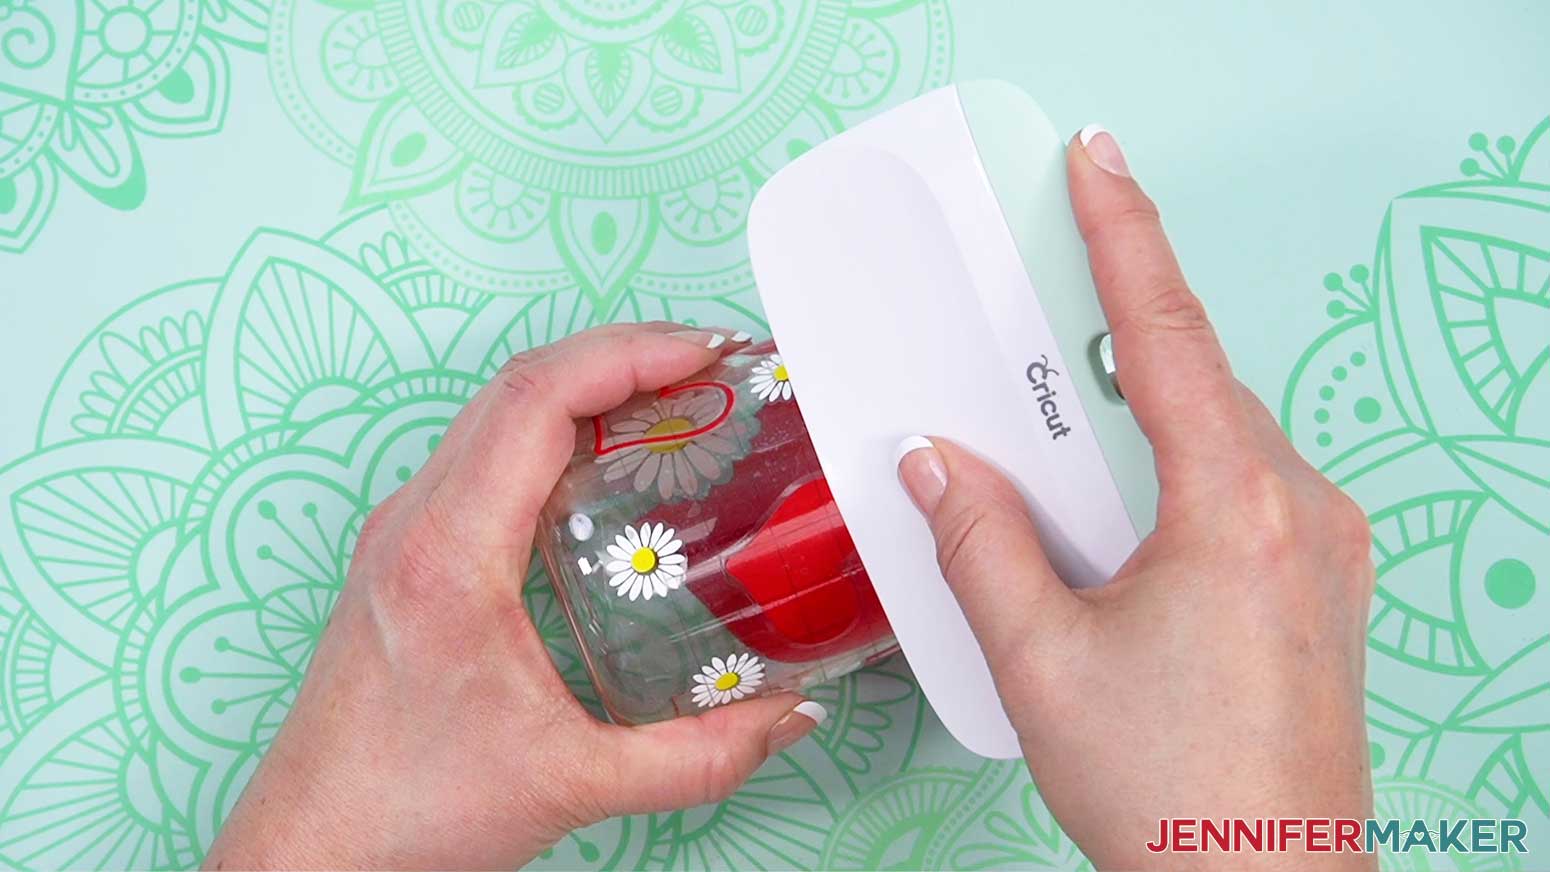
STEP 4: SHOW IT OFF
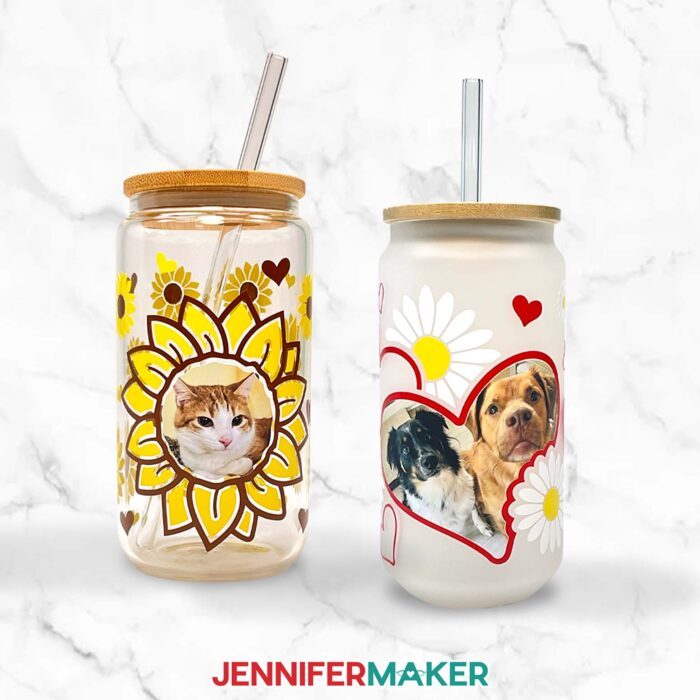
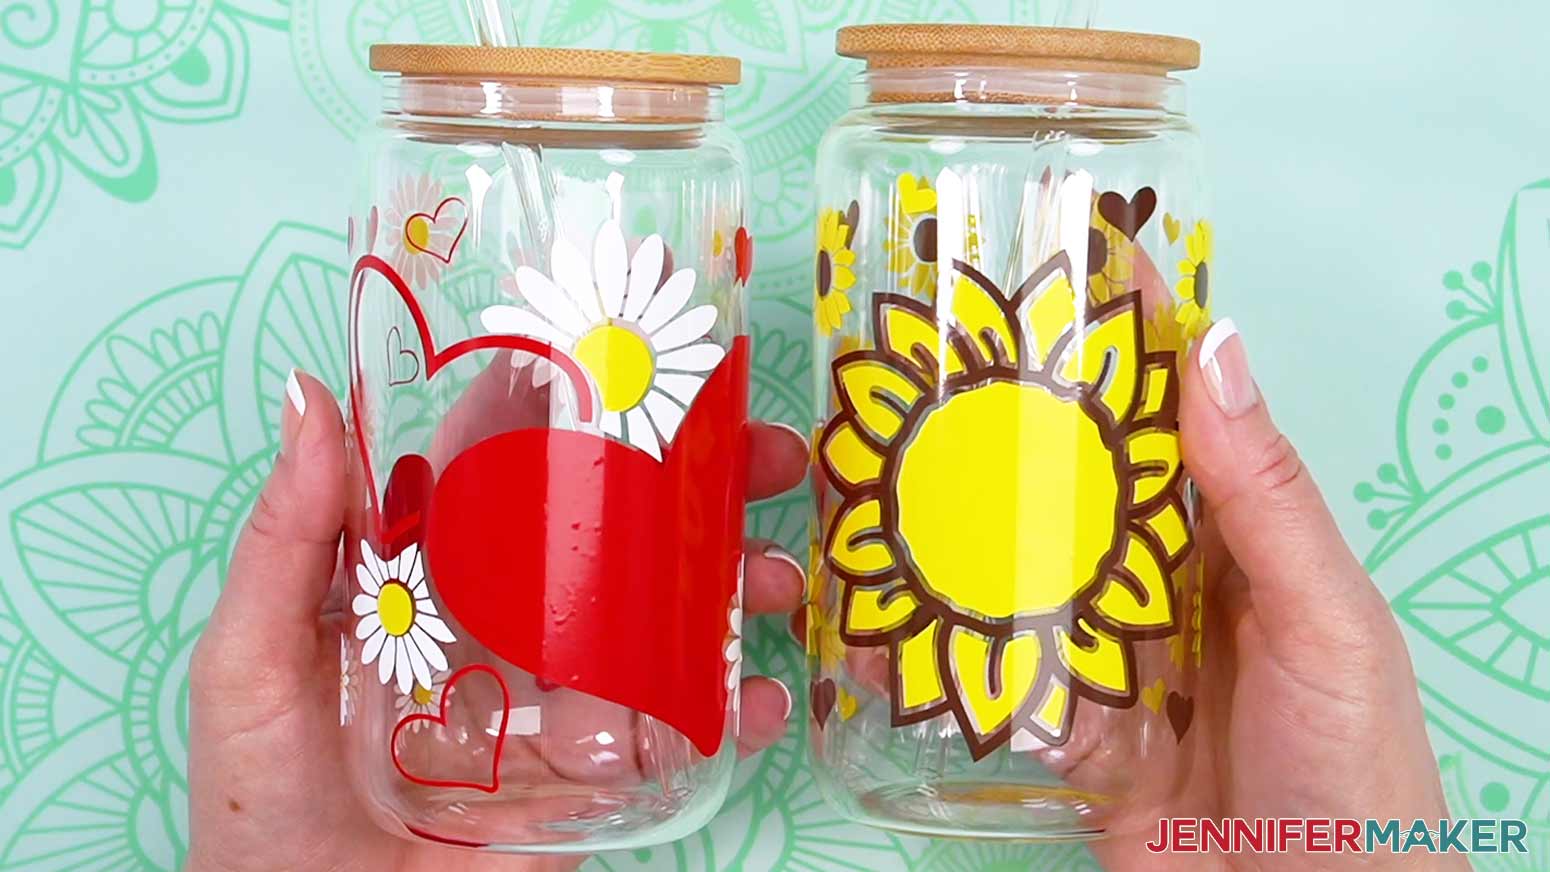
Here’s what my finished glass cans look like!

Notes
Assembled Design Sizes: Sunflowers: 9.25” x 4.38” Hearts: 9.25” x 4.5”
Care Instructions: To keep your vinyl-decorated glass cans looking their best, hand wash them with warm water and a mild dish soap. Do not wash in the dishwasher or soak them in water. Avoid contact with abrasives or other dishes and utensils.
Answers to Your Questions About How to Make Vinyl Glass Can Wraps
Q: What is the size for a glass can wrap?
A: The glass can wraps in this tutorial fit a cup similar to an 18 oz Libbey glass tumbler or glass can. You can modify them to fit any size glass — just measure your glass blank and size the design accordingly.
Q: Can you vinyl wrap glass?
A: Absolutely! This tutorial will teach you how to apply layers of permanent adhesive vinyl to a straight-side glass can. I’ll walk you through all the steps and show you how to prepare your glass for the best application and longest-lasting results.
Q: How do you get vinyl to stick to glass permanently?
A: Clean glass is key to getting your permanent vinyl to stick permanently. You can clean it first with an alcohol wipe, with alcohol and lint-free cloth, or even a coffee filter.
Q: Do you need special vinyl for glass? What is the best vinyl for glass cups?
A: To make vinyl-decorated glass cups, I recommend using a high quality permanent vinyl like Cricut Premium Vinyl. Make sure the vinyl you use is not removable or heat-transfer vinyl.
Q: Can vinyl on glass be washed? Is permanent vinyl dishwasher safe?
A: Vinyl on glass can be hand washed with warm water and a mild dish soap. Permanent vinyl is not dishwasher safe, as the heat involved will cause the adhesive to warm up and the vinyl to detach from the cup.
Q: How long does vinyl on glass last?
A: Vinyl cup wraps can last years if cared for carefully. Follow my care instructions for best results!
Q: Can you microwave a cup with vinyl?
A: No, you should not microwave a cup with vinyl. Doing so will heat your cup and the adhesive on the vinyl, causing it to peel away. It’s best to fill your cup with only cold or room-temperature drinks.
Q: Can you show me how to do layered vinyl on a cup?
A: This tutorial is perfect if you want to learn how to layer vinyl on a glass cup! If you’re looking for a tutorial on layering vinyl onto a plastic cup or mug, check out these:
Q: What can I use to layer vinyl?
A: I’ll show you how to use parchment as transfer paper for your vinyl layers. You can apply layered vinyl to any hard surfaces that are non-porous, like glasses, mugs, plastic cups, signs, and many other projects.
Q: Do you have any other cup projects I can make?
A: Here are some handy links to other cup tutorials you may want to make!
Tumbler making: Glitter Tumblers, Sublimate Straight-Side Tumblers, Sublimate Tapered Tumblers, Etched Tumblers, Waterslide Decal Tumblers
Mug making: Vinyl Mug Designs, Vinyl Quote Coffee Mugs, Floral Sublimation Mugs, Watercolor Ink Mugs, Layered Infusible Ink Mugs, Infusible Ink Pen Mugs
Each tutorial comes with a list of tools and materials you’ll need, plus links to where to find them! You can find the materials at your local full service craft store, or purchase them online — I like ordering from Amazon because of the fast shipping (and free shipping!) I get with my Prime account.
Get my free files to make glass can wraps!
I’d love to see YOUR vinyl glass can wraps! Please share a photo in our Facebook group or on social media and tag me with #jennifermaker.
Love,

Want to remember this? Save this tutorial on How to Make Glass Can Wraps to your favorite Pinterest Board!