Learn how to sublimate clear HTV for new project options!
Sublimation has become one of my favorite ways to customize T-shirts. There are so many fun ways to do it! However, sublimation has its limitations. It requires a white or light-colored surface, made from (or coated with) polyester. Typically you can only sublimate on white shirts made out of at least 65% polyester. If you sublimate onto the wrong fabric, the dye will wash right out. How annoying is that!? And if you sublimate onto dark fabric, it won’t show up, unless you try a method like bleaching for sublimation, which is super cool…but may not be the look you’re going for. Luckily for you, I’ve found my new favorite way to sublimate onto 100% cotton shirts, AND dark fabric, too! Let’s learn how to sublimate clear HTV using these colorful designs made with an AI art generator!

This is a Cricut Mystery Box project — it uses the same blue LightGrip Machine Mat that you could have gotten in the “Game On” mystery box in July 2023. While this mystery box is no longer available, you can still purchase the mat below in my material list. Learn more in my Cricut Mystery Box Guide.

Sublimation involves heating sublimation dye until it reaches a gaseous state, where it’s then infused into a polymer-coated surface. Sublimation dye is translucent, so while it’s super vibrant, it doesn’t show up very well on fabric other than light-colored garments made of mostly polyester.
There are workarounds out there for other materials and colored fabrics, including white sublimatable HTV which only just came out recently, after the original publication of this tutorial!
I’ve done SO many tests to find the best way to apply full-color designs to dark shirts and cotton shirts. The results of these tests were mixed, and while I found some solid techniques, some methods are lackluster at best.

There are methods like printable heat-transfer vinyl that only require an inkjet printer, but I often find that the image will fade sooner than hoped for. I’ve tried Easy Subli too, which gives good results — but is kind of time-consuming, with lots of extra steps. Sublimation spray is fine in a pinch, but in my experience the image will fade the first time you wash the shirt.
Not all of my attempts at sublimating dark fabrics or cotton have been difficult or disappointing, though. While some of these tests have been a flop, others have actually yielded some really nice solutions to the problem. I’ve had lots of success sublimating glitter, holographic, and glow-in-the-dark vinyl. These gave great results — IF you want your image to be sparkly, holographic, or glow green when the lights go down.

Why do these work when regular permanent vinyl doesn’t? Because these specialty vinyls have a polymer coating on them, which can be sublimated! But what if you don’t want to use glitter, holographic, or glow-in-the-dark vinyl, or printable vinyl?
Clear sublimation HTV is my favorite way to achieve this result on a non-polyester shirt. And I’m going to walk you through the whole preparation and sublimation process!
But how does sublimated clear HTV show up on a black shirt, when sublimation dyes are translucent? When we originally created this tutorial, white sublimation HTV wasn’t available yet! So, how’d we achieve those vibrant colors you need to make our images look its best? We used this hack: A combination of the clear sublimation HTV and white iron-on vinyl. Spoiler alert: It worked great!
To follow this tutorial using cotton T-Shirts and clear sublimation HTV, you’ll need regular white HTV if you’re making a color shirt, as well as some standard sublimation supplies like a sublimation printer (I’ll use my converted Epson Eco-Tank), a heat press (like a Cricut EasyPress 2, or another style), sublimation transfer paper, and other items you can find in my materials list. Follow my list so you can make sure to get the right products.
I’ll also use my Cricut Maker 3 cutting machine to print then cut the sublimation paper, and cut the vinyl. Any of the Maker or Explore series Cricut cutting machines will work, because they have Print Then Cut capabilities.
If you’ve never used this kind of vinyl, don’t worry! My tutorial will guide you through the whole process of how to sublimate clear HTV so you end up with an awesome result the first time.
Ready to learn how to sublimate clear HTV? This post contains some affiliate links for your convenience (which means if you make a purchase after clicking a link I will earn a small commission but it won’t cost you a penny more)! Read my full disclosure policy.
Materials And Tools to Sublimate Clear HTV
See what I used in my Amazon shopping list!
- White T-Shirts to sublimate – I tested a Gildan Heavy Cotton T-Shirt, Gildan Hammer Cotton T-Shirt, and a Gildan Women’s Softstyle Cotton T-Shirt
- Black T-Shirts to sublimate – I tested a Gildan Heavy Cotton T-Shirt, Gildan Hammer Cotton T-Shirt, and a Gildan Women’s Softstyle Cotton T-Shirt
- Clear Sublimation HTV – I used sheets 12″ x 12″ sheets by HTVRONT
- White iron-on vinyl – I’m using Cricut’s Everyday Iron On
- 8.5″ x 11″ Sublimation paper – I like A-SUB 125 g Sublimation Paper
- 12″ x 12″ White Cardstock
- Plain printer paper for calibration and protecting the print during brayering
- Sublimation Printer or a printer converted for sublimation)
- Hiipoo Sublimation Ink
- A way to cut your printed design and vinyl – I used the amazing Cricut Maker 3 but you can also use the original Maker or an Explore series machine with the Fine-Point Blade
- Heat Press – I used my EasyPress 2, but you can also use a traditional press
- Pressing Mat – I used my Cricut EasyPress Mat
- Cricut StandardGrip Machine Mat 12″ x 12″
- Cricut LightGrip Machine Mat 12″ x 12″
- Lint Roller
- Proper ventilation including an open window and fan
- My handy T-Shirt Rulers -or- a flexible tape measure
- White Butcher Paper
- Heat resistant tape
- Brayer
- Weeding Tool
- Design #502 – My free sublimation design files are available in my free resource library – (get the password by filling out the form at the bottom of this page)

How to Sublimate Clear HTV

How to Sublimate Clear HTV
Learn how to sublimate clear HTV for use on 100% cotton t-shirts AND dark-colored shirts! We'll use Cricut Design Space's Print Then Cut feature along with clear HTV and white iron-on vinyl.
Materials
- White T-Shirt to sublimate - I'm using Gildan Heavy Cotton in Adult Size Medium -OR-
- Black T-Shirt to sublimate - I'm using Gildan Heavy Cotton in Adult Size Medium
- Clear Sublimation HTV
- White iron-on vinyl - I'm using Cricut's EveryDay Iron On
- Sublimation paper - I like A-SUB 125g Sublimation Paper
- White Cardstock 12" x 12"
- Plain printer paper - for calibration and protecting the print during brayering
- Design #502 (My free sublimation design files are available in my free resource library – get the password by filling out the form at the bottom of this page)
Tools
- Sublimation Printer or Printer Converted for Sublimation
- Hiipoo Sublimation Ink
- A way to cut your printed design and vinyl. I used the amazing Cricut Maker 3 but you can also use the original Maker or an Explore series machine with the Fine-Point Blade.
- Heat Press - I used my EasyPress 2, but you can also use a traditional press
- Pressing Mat - I used my Cricut EasyPress Mat
- Cricut green StandardGrip Machine Mat, 12" x 12"
- Cricut blue LightGrip Machine Mat, 12" x 12"
- Lint Roller
- Proper ventilation - I like to use this fan
- My Handy T-Shirt Rulers -OR-
- A Flexible Tape Measure
- White Butcher Paper
- Heat Resistant Tape
- Brayer
- Weeding Tool
Instructions
STEP 1: GET A SUBLIMATION DESIGN
You can use my free Vacation Sublimation PNG design files from my free resource library—look for design #502. Get a free password to my library with thousands of designs here.
Download the files and unzip the file. If you need help unzipping the file, see my guide.
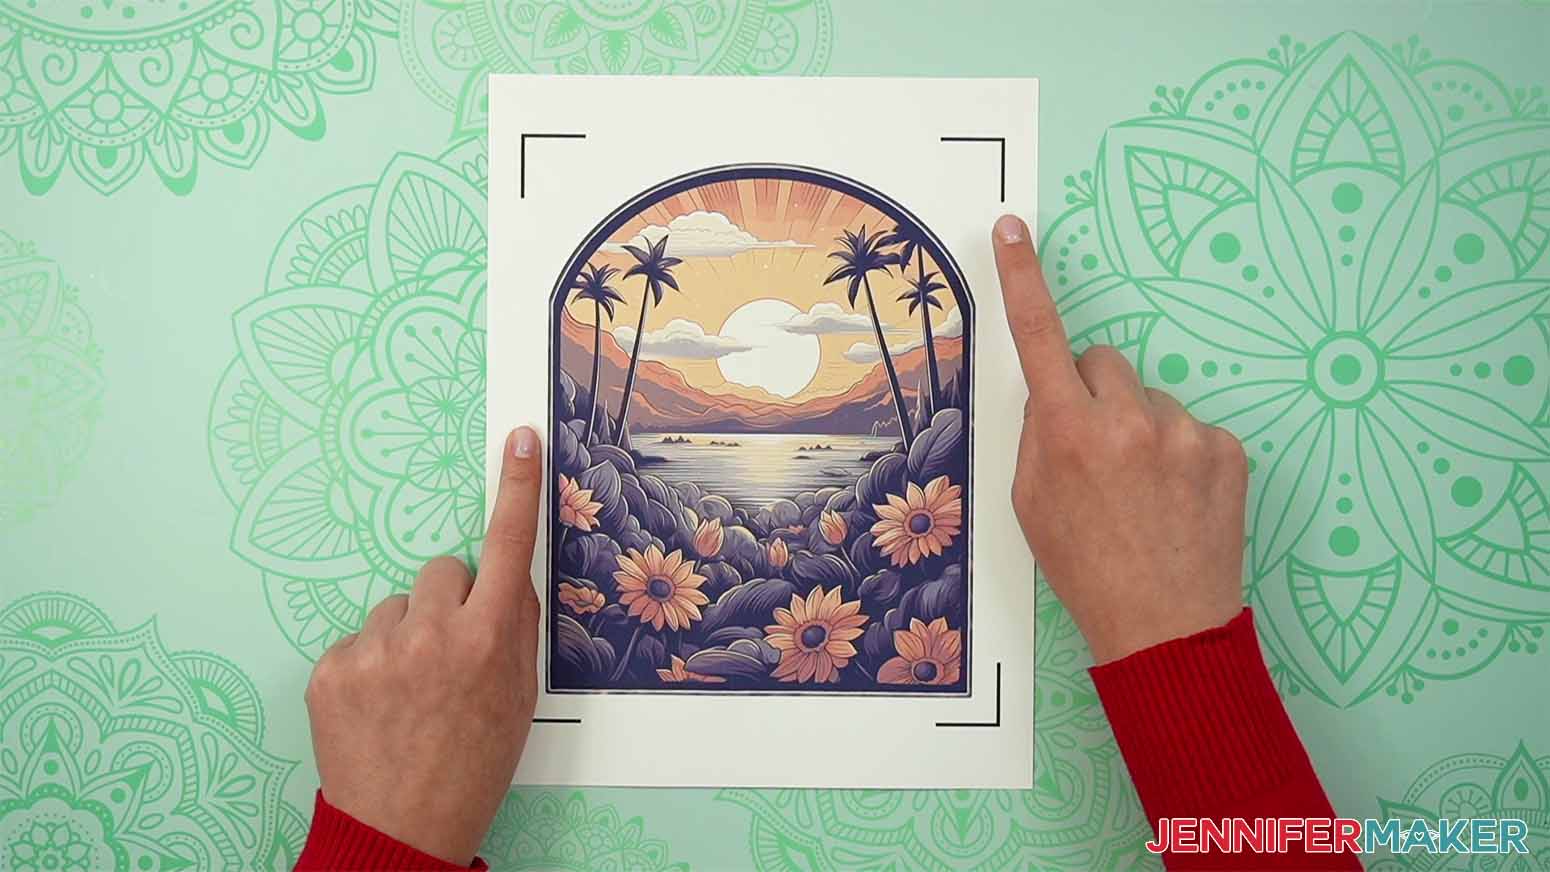
There are three PNG designs in my collection: Sunflower Beach, Palm Beach, and Beach Vibes.
I'll show you how to use the Sunflower Beach PNG with Cricut’s Print Then Cut feature to sublimate on both black and white 100% cotton shirts. You can use these steps for any of the designs in the collection.
NOTE: Sublimation printing requires high-quality design files for the best results. I've used PNGs. Since we're using Cricut's Print then Cut feature, we'll upload the designs to Cricut Design Space. The software brings PNGs in very large, but it's easy to fix, I'll show you!
We’ll also use my handy T-Shirt ruler guides! You can download them from my free library under Design #433. They're easy to prepare, so make a set to have on hand if you'd like.
TIP: Since we’re using the Print Then Cut feature on our Cricut, I highly recommend you calibrate your Cricut before beginning this project. See my Print Then Cut Calibration video to learn how.
STEP 2: UPLOAD AND PREPARE YOUR DESIGN
Upload the PNG file to Cricut Design Space and add it to your Canvas.
TIP: If you're not sure how to upload a file to Cricut Design Space, watch this helpful video training series I made. If you are on an iPad or iPhone, here is how to download and upload SVG files to the Cricut Design Space app.
For a PNG, use the same upload steps until you reach a screen with the PNG on the left.
Select "Complex" for the image type and then click "Continue" in the lower right corner.
![]()
You do not need to do anything on the next screen, so click "Apply & Continue."
![]()
For Upload Type, select "Print Then Cut" and click "Upload."
![]()
You should now see your design in your Recent Uploads. Select it and click "Add to Canvas."
First I’ll take you through how to sublimate on a white, 100% cotton shirt using clear HTV.
Here is what my Sunflower Beach design looks like on the Canvas. You can zoom out to see the entire design by clicking on the minus (-) sign on the lower left.
![]()
As you can see, the design is quite large. That's because of the way Design Space uploads PNGs. We need to resize the image to fit the shirt, and make it fit within the maximum Print Then Cut dimensions. Click the red exclamation mark in the Layers Panel. It will tell you that the image is too large for your paper. If the dimension listed doesn't match the sublimation paper you're using, click "Change Paper Size" to adjust it. Then, click "Auto-Resize Image" to make the design as large as possible,
![]()
The design will now be 6.76" x 8.5" and the red exclamation point in the Layers Panel will disappear. This will be the image we print on sublimation paper.
![]()
NOTE: If you'd like your image to be larger than the 6.76" x 8.5" image size, you can use my Tiling Sublimation Projects tutorial to slice the image and transfer the parts together.
We need to create the layer for our clear HTV. I want it to be the same size as my design because I like the look of softer edges without the clear vinyl showing. I'll show you a different way to make your layers a bit bigger for the black shirt.
Click "Duplicate."
![]()
Use the Layers Panel to make sure you have the new layer selected and change the Operation to "Basic Cut." The shape will automatically change to gray, which is fine.
![]()
STEP 3: PRINT AND CUT YOUR DESIGN
Make sure the correct machine is selected, then click "Make It" in the upper right corner.
![]()
If prompted, click "On Mat," "12 x 12," and "Confirm" in the popup.
On the Prepare screen you will have two mats - one "Print Then Cut" and one "Basic Cut."
Double-check that your design fits within the maximum dimensions for Print Then Cut and that the "Material Size" fits your sublimation paper. Mine is 8.5" x 11". Set the Basic Cut mat's size to match your vinyl.
Turn ON the "Mirror" toggle for BOTH mats.
Select the first mat again, then click "Continue."
![]()
On the Make screen, click the green "Send to Printer" button to prepare to print the design.
Select your sublimation printer, then turn on “Add Bleed” and “Use System Dialog” before clicking the "Print" button.
![]()
NOTE: Your printer’s controls will appear but might be hidden behind Cricut Design Space. Minimize your Cricut window to find it. It may look different depending on your printer, computer, and software. Use my settings as a guideline, but adjust as needed to fit your tools.
Make sure your sublimation printer is selected under "Printer." I’ll use the drop-down menu to adjust the media type to "Photo Matte Paper" and the quality to "Best." Pick the closest similar settings for your printer. Since we have already mirrored the design, make sure NOT to flip the image if it's an option in your printer settings.
![]()
Before I print I will make sure my paper is loaded correctly in my printer. Check your printer manual and paper packaging for help identifying the right side to print on and how to load it. Then press "Print."
After your design has been printed, set it aside until the ink is completely dry to avoid any smears during the cutting process.
See the black corner marks around the design? These are called registration marks and are used by your Cricut machine to tell it exactly where to cut your project.
On your Make Screen, set the Print Then Cut mat's material to "Photo Paper," which you can find by clicking "Browse All Materials" in the upper right of the screen. Type in "photo paper" in the search bar and click the magnifying glass icon. Select "Photo Paper" from the results list and click "Done." Set the pressure to "More" for cleaner cuts.
Place your printed sheet on your blue LightGrip machine mat like it is on the screen prompt. Lay a clean piece of printer paper over the top and use a brayer to adhere it well.

Remove the blank piece of printer paper. Check that your Fine-Point Blade is clean and in Clamp B.
Then, load the mat with your printed sheet into the machine and press the flashing button to cut your design.
When the cut is finished, unload the mat, flip it over, and roll it back to release the paper. This helps prevent the material from curling and ripping.
Back in Cricut Design Space, move on to Mat 2 on the Make screen to cut the clear HTV.
Set the Base Material to "Vinyl" per the manufacturer’s suggestions. If it’s not in your favorites, click “Browse All Materials” and type "Vinyl" in the search bar to find it. Set the pressure to "More" for cleaner cuts.
![]()
Use a brayer to smooth the clear HTV - shiny side down - onto a clean green StandardGrip mat. The matte side should be facing up.
![]()
Line up your mat with the guides on your machine, check that the Fine-Point Blade is clean and in clamp B, and press the flashing load/unload button. Then press the flashing Go button to cut the clear HTV.
TIP: If you ever have any questions about cutting vinyl, I have a great resource to help -- my Ultimate Guide to Vinyl, which explains how to tell which side of the iron-on vinyl goes down on the mat.
When the cut is finished, unload the mat, flip it over, and roll it back to release the vinyl. This helps prevent the material from curling and ripping.
![]()
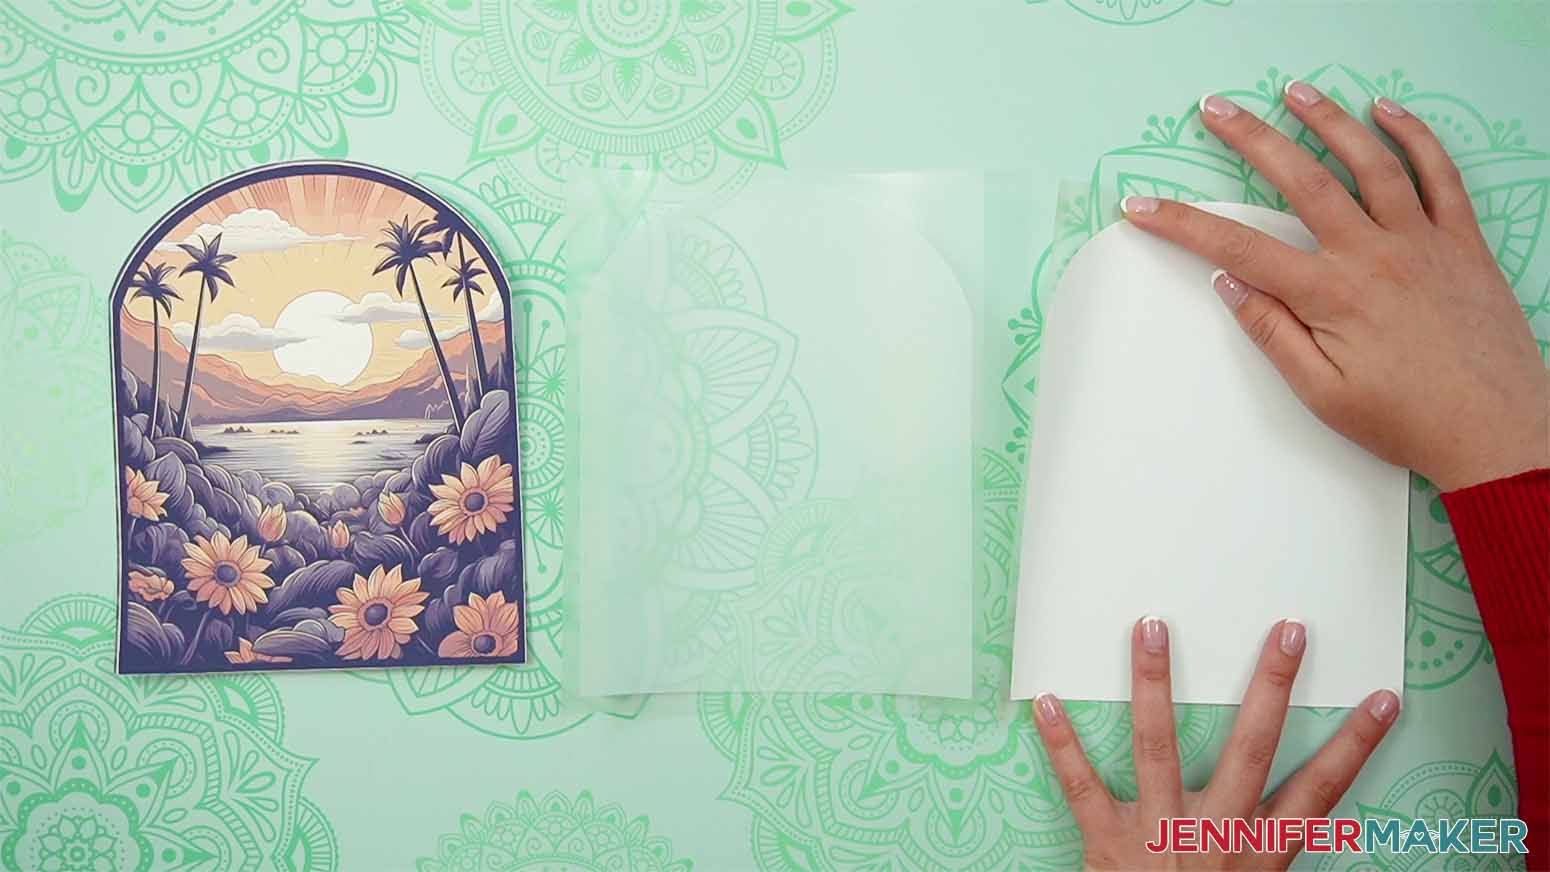
Next, trim away the excess clear HTV and "weed" the design by removing the excess vinyl around the outside edges of the solid design shape.
![]()
Here's what the cut pieces for my white shirt's design look like.
![]()
STEP 4: SUBLIMATE YOUR DESIGN
I'm using my EasyPress, but you can also use another type of heat press. If you're using different materials or tools, consult the Cricut Heat Guide or my Sublimation Cookbook to check your settings.
Set the temperature of your press to 385° F (196C°) and the time to 30 seconds.
![]()
Make sure you have proper ventilation by opening a window or turning on a fan.
Use a lint roller to remove any dust and debris from the t-shirt.
![]()
We also need to preheat the entire shirt before sublimating. When the press is ready, fold the shirt in half the long way and place it on your pressing mat. Press it for 10 seconds to remove moisture and create a central crease.
![]()
Open the shirt and slide a piece of clean white cardstock inside to prevent ink bleed through at the design's sides.
![]()
If using a ruler guide, line up the correct T-Shirt Ruler Guide's center line on the crease. Now your design will be placed in the standard spot for a t-shirt of this size and style. I’m using a white Gildan heavy cotton t-shirt in size Medium so I’ll use the Adult Crew Neck ruler.
Using the t-shirt guide, find where you'd like to place the clear HTV layer and position it sticky side down. The HTV carrier sheet is sticky so you don't need to tape this down.
![]()
Remove the guide, then adjust the inner cardstock to be under the design if needed.
Cover the clear HTV with white butcher paper and press at 385° F (196° C) for 30 seconds using heavy pressure. Press down with both hands and use some of your body weight.
![]()
When the time is up, lift the EasyPress straight upward. Remove the butcher paper but wait until the HTV has completely cooled before removing the carrier sheet, about 5-10 minutes - this is a COLD peel.
Once completely cooled, remove the carrier sheet.
![]()
Next, place your printed and cut design face down on top of the HTV, making sure it’s properly aligned. Use heat-resistant tape to secure it.
![]()
Place clean butcher paper on top of the whole area.
Press the design at 385° F (196° C) for 55 seconds using medium to firm pressure just with your hands.
Remove the butcher paper and let the design cool off for a few seconds before removing the tape and paper while it’s still warm to reveal your design.
![]()
Admire your finished shirt!
![]()
VARIATION: WHITE IRON-ON AND CLEAR HTV ON A DARK SHIRT
This "hack" uses layers of sublimation paper, clear HTV, AND white iron-on vinyl. Adding a base layer of white vinyl is good for dark-colored shirts. It will provide the opaque surface needed to see the sublimated design on a dark background. We usually use white glitter iron-on vinyl for this technique, but this way you can skip the sparkle!
PREPARE THE DESIGN
Upload your PNG to your Design Space Canvas and resize the image like you did in Step 1.
This time, we want to create two new layers - one for the clear HTV and one for the white. I also want the layers to be just a tiny bit smaller than my design because I like the look of softer edges and how the design fades into the dark fabric. But you can make it slightly larger than the design if preferred.
Select the image and click the Offset icon in the toolbar, set the slider to -0.05, choose rounded corners, and click "Apply."
![]()
Use the Layers Panel to make sure you have the Offset layer selected and change the Operation to "Basic Cut." The shape will automatically change to gray, which is fine. This will be my clear HTV layer.
![]()
Select the offset you just made and click the Offset icon in the toolbar again. Set the slider to -0.05, select rounded corners, and click "Apply."
![]()
This offset should default to black. I’ll use the Layers Panel to make sure I have the correct Offset layer selected, and change the color to white. This will be my white iron-on vinyl layer.
![]()
The two offsets should be just barely smaller than the design. This approach helps blend the design’s edges, but if you want to have all of the design on white and more visible, set the Offsets to 0.
That is all for the Canvas. Make sure the correct machine is selected, then click "Make It" in the upper right corner.
![]()
PRINT AND CUT THE DESIGN
Follow the same steps in Step 3 above to print and cut your design and HTV layers. Note that here you will have three mats instead of two. Make sure all are mirrored before continuing to print and cut.
![]()
For the white iron-on vinyl layer, prepare a green StandardGrip machine mat with the white HTV, shiny side down, and secure it with a brayer.
![]()
Use the same material settings as before for the clear HTV and the printed design. For the white vinyl mat, change the Base Material to "Everyday Iron-On" and choose "More" pressure for cleaner cuts.
![]()
When the cuts are finished, flip over each mat, and roll it back to release the material. This helps prevent the material from curling and ripping.
Next, trim away the excess clear HTV and the excess white iron-on and "weed" the designs by removing the excess vinyl around the outside edges of the solid design shapes.
![]()
Here's what the three cut pieces for my black shirt's design look like.
SUBLIMATE THE DESIGN
Set the temperature of your press to 340° F (171° C) and the time to 10 seconds.
Make sure you have proper ventilation by opening a window or turning on a fan.
Just like before, use a lint roller to remove any dust and debris from the T-shirt.
We also need to preheat the entire shirt before sublimating. When the press is ready, fold the shirt in half the long way and place it on your pressing mat. Press it for 10 seconds to remove moisture and create a central crease.
![]()
Open the shirt and slide a piece of clean white cardstock inside to prevent ink bleed through at the design's sides.
![]()
If using a ruler guide, line up the correct T-Shirt Ruler Guide's center line on the crease. Now your design will be placed in the standard spot for a t-shirt of this size and style. I’m using a black Gildan heavy cotton t-shirt in size Medium so I’ll use the Adult Crew Neck ruler.
Using the T-shirt guide, find where you'd like to place the white iron-on vinyl and place it face down.
![]()
Remove the guide, then adjust the inner cardstock to be under the design if needed.
Cover the project with white butcher paper and press at 340° F (171° C) for 10 seconds using medium pressure just to tack the vinyl to the shirt.
![]()
When the time is up, lift the EasyPress straight upward. Remove the butcher paper and carefully hot peel the carrier sheet from the vinyl.
![]()
Next, increase the temperature of your press to 385° F (196° C) and the time to 25 seconds.
Place your clear HTV over the white vinyl, making sure it’s properly aligned.
![]()
Place clean butcher paper on top of the whole area.
Press the design using heavy pressure at 385° F (196° C) for 25 seconds.
![]()
When the time is up, lift the EasyPress straight upward. Remove the butcher paper but wait until the clear HTV has completely cooled before removing the film, about 5-10 minutes - this is a COLD peel.
Once completely cooled, remove the carrier sheet.
![]()
Next, place your printed and cut design face down on top of the layered HTV, making sure it’s properly aligned. The paper will be just slightly larger than the vinyl layers. Use heat-resistant tape to secure it.
![]()
Place clean butcher paper on top of the whole area.
Using firm, medium to heavy pressure, press the design at 385° F (196° C) for 55 seconds.
Remove the butcher paper and let it cool off for a few seconds before removing the tape and paper while it’s still warm to reveal your design.
TIP: Wait 5-10 seconds before removing the print to prevent ghosting.
Admire your finished shirt!
![]()
STEP 5: SHOW IT OFF!
Here is what both of my finished black and white 100% cotton shirts look like!
![]()
Now you can give the gift of summer vibes with one of these shirts! Or you can don your new shirt on your summer vacation. No summer travel plans? These shirts will bring the beach vibes to you at home too!
Notes
Care Instructions: Wait 24 hours before the first wash. Wash inside-out in cold water and tumble dry low or hang dry for the longest-lasting results.
Beach Vibes design is shown on Gildan Hammer Cotton T-Shirt in Adult Size Medium in White and Black
Palm Beach design is shown on Gildan Women's Softstyle Cotton T-Shirt in Size Medium in White and Black
Answers to Your Questions About How to Sublimate Clear HTV
Q: Can you sublimate on clear HTV vinyl?
A: Yes and no. Let me explain! The clear heat transfer vinyl I used for this project is designed to be sublimated, and is often sold as “clear sublimation HTV”, “sublimation vinyl”, or “HTV for sublimation.” Regular clear HTV vinyl isn’t designed to accept sublimation dye, and will not work for sublimation projects.
Q: Can you sublimate on any clear vinyl?
A: Nope. See the question above, and remember that the only vinyl suitable for sublimation is clear sublimation HTV, white sublimation HTV, white glitter HTV, holographic HTV, and glow-in-the-dark HTV.
Q: What temperature is clear HTV?
A: When using an EasyPress, you’ll want to press your clear HTV at 385° F (196° C) for 30 seconds to apply it to your shirt, and then sublimate at the same temperature for 55 seconds.
Q: What temp should my heat press be on for sublimation?
A: Each sublimation project will be different, but for THIS project you’ll press your clear HTV at 385° F (196° C) for 30 seconds to apply it to your shirt, and then sublimate at the same temperature for 55 seconds.
Q: Why is my sublimation not bright?
A: If your sublimation is coming out looking faded or more dull than you expected, it may be due to your heat or time being off. I recommend sublimating your clear HTV for 55 seconds at 385° F (196° C).
Q: Is sublimation hot or cold peel?
A: While some sublimation is hot peel, most is cold. After sublimating the clear HTV, let the sublimation paper sit for 5-10 seconds before hot peeling. In regards to the vinyl, the clear sublimation HTV is cold peel. After applying the clear sublimation HTV you should let it cool completely before attempting to peel away the carrier sheet. The white iron-on vinyl, however, is hot peel in this project (but not usually). Remember that sometimes we use materials differently based on the project!
Q: How do you make sublimation not fade?
A: Even the best sublimation T-shirts on white polyester fabrics will eventually fade a little bit. To keep the sublimation image on your shirt looking nice and vibrant, turn your shirts inside out before washing them. That way, the front of the shirt won’t rub against other things in the machine. Use warm or cold water and a mild detergent to keep the design vibrant, and don’t wash them with a lot of other colors. Gentle cycle is best. Take your sublimated shirts out of the wash right when they’re done — you don’t want them sitting crumpled up and wet. Hang dry or use a dryer set to air dry or low heat. The main reason is to not expose your sublimation shirts to super high heat again, as the ink might sublimate out. Most dryers won’t get that hot on a normal setting, but the heat can still accelerate fading, as well as wear on the vinyl itself — so hanging dry is always a good idea.
Q: What kind of paper should I use?
A: While some people will use just regular laser paper, I really recommend you use special sublimation paper for the best and most vibrant results and ink transfer. I used A-SUB paper during my tests.
Q: What kind of ink should I use?
A: You must use special sublimation ink — a regular inkjet printer using regular printer ink will not work for sublimation. My favorite sublimation ink is Hiipoo Ink. If you ever have issues with your colors or print quality, check out my helpful post to help solve your sublimation color problems.
Q: How do I test my sublimation prints for vibrancy and color?
A: Use my free subliflower designto see how your colors look!It’s Design #385 in my resource library!
Q: How can I learn more about sublimation?
A: Can’t remember how long to press that sublimation blank? Not sure what order to stack your layers? Confused about how to get the best transfer? The Sublimation Cookbookguide can help, with step-by-step sublimation printing project recipes for over 150 different sublimation blanks. Each of these “recipes” show you exactly what to use, how long to press, how hot to press it, and how to take care of your sublimated project for long lasting results.
Get my free PNG files to Sublimate Clear HTV
(If you do not see the signup form above, click here.)
Now that you know how to sublimate clear HTV, I’d love to see YOUR awesome sublimation creations. Please share them with me! You can post a photo in our Facebook group or tag me on social media with #jennifermaker.
Love,

Want to remember this? Save this tutorial on How to Sublimate Clear HTV to your favorite Pinterest Board!