Learn how to make EASY paper stained glass nature designs with your Cricut!
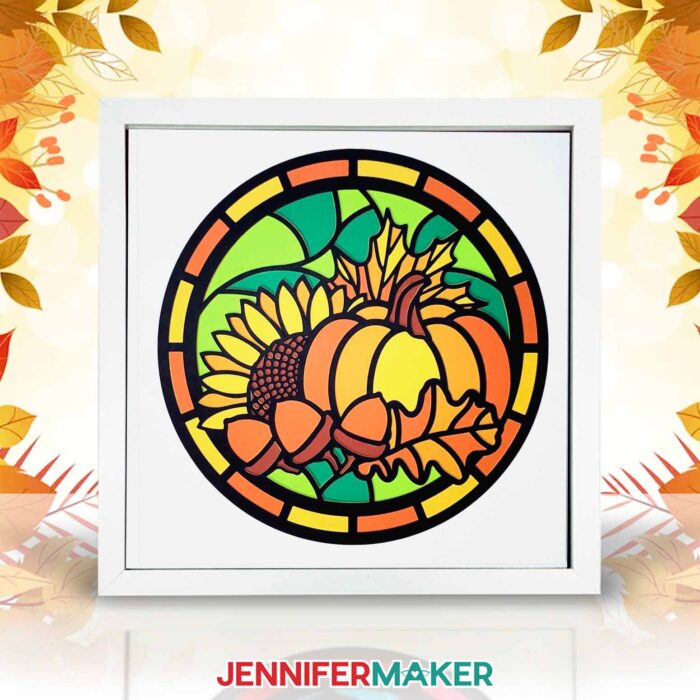
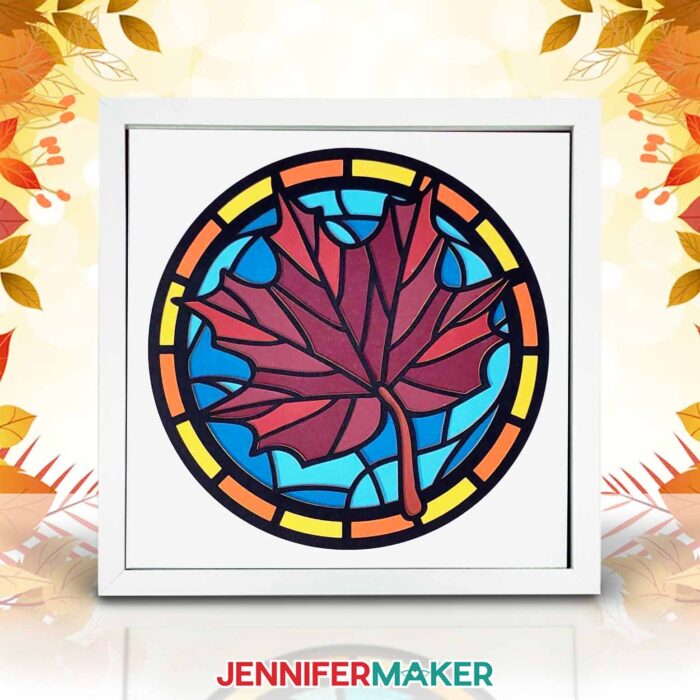
Believe it or not, autumn is on the way, and I’ve been feeling the urge to bring fall colors into my everyday. I’ve shared some lovely stained glass projects with you lately, and I’m back with some nature paper stained glass designs for fall! These are fun twists on a traditional shadow box craft, and can be made with the help of ANY Cricut cutting machine. And since they don’t need sun to bring out their colors, they’ll always shine brightly — even on rainy days!

Stained glass windows are stunning, but they’re not the easiest to create. You have to deal with sharp sheets of glass, potentially harmful fumes, and lots and lots of trial and error. Not to mention, Cricut machines can’t cut glass. Don’t worry, I’ve got a lovely alternative for you to try: Paper stained glass!
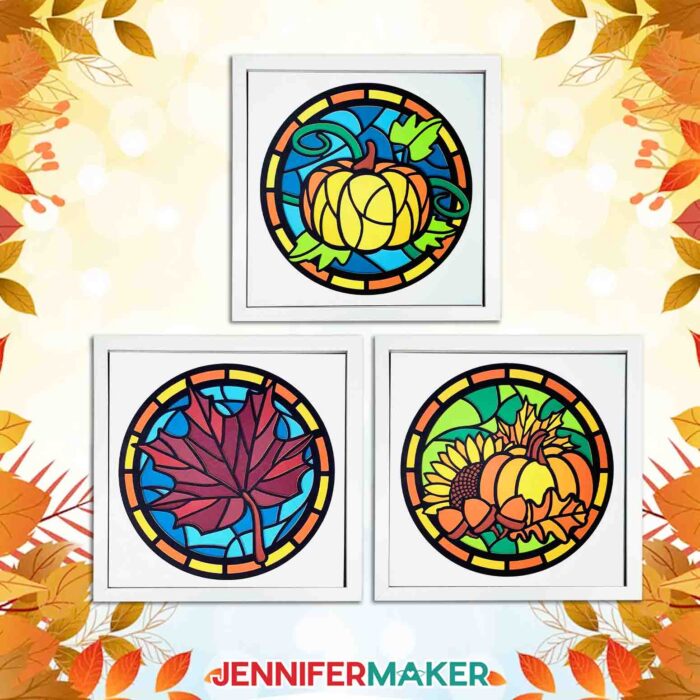
If you’re new to my paper stained glass art projects, you’ll be blown away by how easy they are to make! I’ve created a collection of autumn designs so you can make paper stained glass windows to match the season. They feature autumn leaves, pretty pumpkins, and will draw fall colors into every corner of your home. You don’t even need to hang them in natural light to enjoy them!
All you need to do is follow the tutorial for my previous paper stained-glass windows project — the steps are exactly the same! In the video, I’ll walk you through how to prepare the design in Cricut Design Space, then show you how to cut and assemble it. One nice thing about these designs is that they can be resized smaller or larger, so you can display them all sorts of ways. Just make sure you get the right size frame! You can cut these on all Cricut cutting machines, too.
Aside from a cutting machine and your usual paper crafting tools, you’ll need some cardstock. I’ve noted all of the colors I used in the materials list below, but you can use a different color scheme to match your decor and make it your own.
I’ll even show you my best practices on how to get the best cut results, with nice, clean edges and intricate designs — even when sizing down your projects.
Then we’ll get to the fun part: assembling the layers on our nature paper stained glass window! I’ll share how to get a 2D look as well as a 3D look, and you can choose which one you prefer. I love experimenting with different ways to customize simple projects like this one!
Whether it’s your first time using a cutting machine or you’re more experienced (or just want an easy and fun craft to do with younger children), my nature paper stained glass windows are the perfect project for an afternoon — not to mention a great way to practice the art of paper crafting!
Let me show you how easy it is to make a nature paper stained glass craft! This post contains some affiliate links for your convenience (which means if you make a purchase after clicking a link I will earn a small commission but it won’t cost you a penny more)! Read my full disclosure policy.
Materials to Make Nature Paper Stained Glass Designs
See my full and complete Amazon shopping list for the exact items used in this project!
- One (1) Sheet 12” x 12” White Glitter Cardstock
- One (1) Sheet 12” x 12” 65 lb. Black Cardstock
- One (1) Pack 12” x 12” Recollections 65 lb. Glitter Blues (I used one sheet each of two shades for each design)
- A variety of colored 65 lb. cardstock, depending on the design. I used the following:
One (1) Pack 12” x 12” Recollections Red Palette - One (1) Pack 12” x 12” Recollections Green Palette
- One (1) Pack 12” x 12” Recollections Orange & Yellow Palette
- One (1) 12″ x 12″ Shadow Box Frame
- A method to cut your cardstock: I’m using the Cricut Maker 3, Cricut Joy, and Cricut Venture, but you can also use the Cricut Maker, Cricut Explore Series, or Cricut Joy Xtra for this project!
- Cricut Green StandardGrip Mat 12″ x 12″ -OR- Cricut Joy Green StandardGrip Mat 4.5″ x 6.5″ -OR- Cricut Venture 24″ x 28″ StandardGrip Mat
- Brayer Tool
- Spatula
- Weeding Tool
- Scraper (For cleaning machine mats between cutting each layer)
- Ruler
- Bearly Art Glue
- Bearly Art Adhesive Foam Squares (optional)
- 1″ Double-Sided Adhesive Foam Tape (optional)
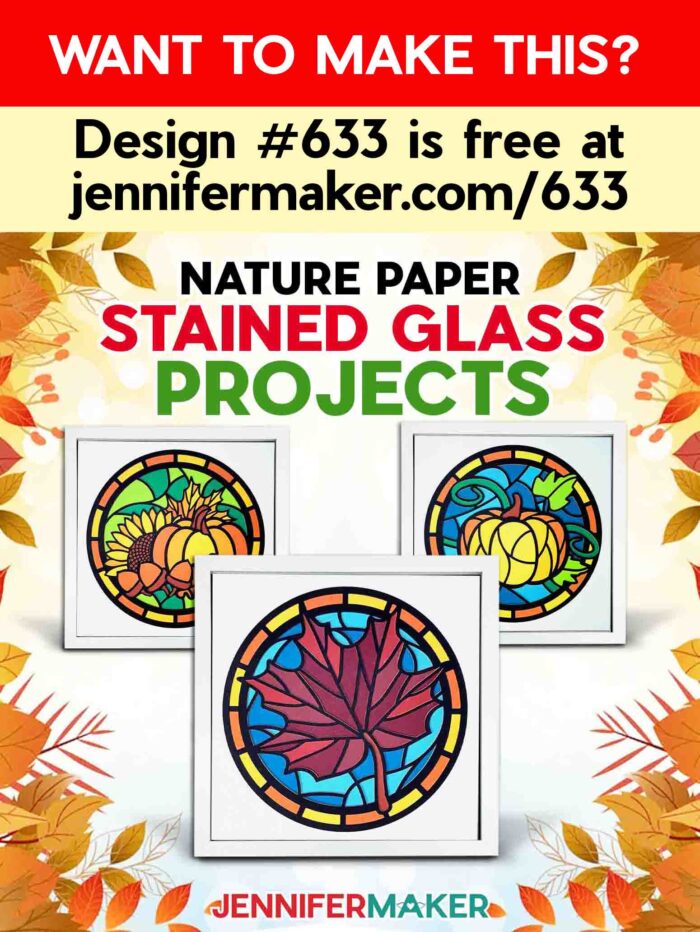
- Design #633 (My free SVG/DXF/PDF design files are available in my free resource library – get the password by filling out the form at the bottom of this page)
How to Make Your Own Paper Stained Glass Projects
Layered Paper Stained Glass
Learn how to make faux layered paper stained glass art!
Materials
- One (1) Sheet 12” x 12” White Glitter Cardstock
- One (1) Sheet 12” x 12” 65 lb. Black Cardstock
- One (1) Pack 12” x 12” Recollections 65 lb. Glitter Blues (I used one sheet each of two shades for each design)
- A variety of colored 65 lb. cardstock, depending on the design. I used the following:
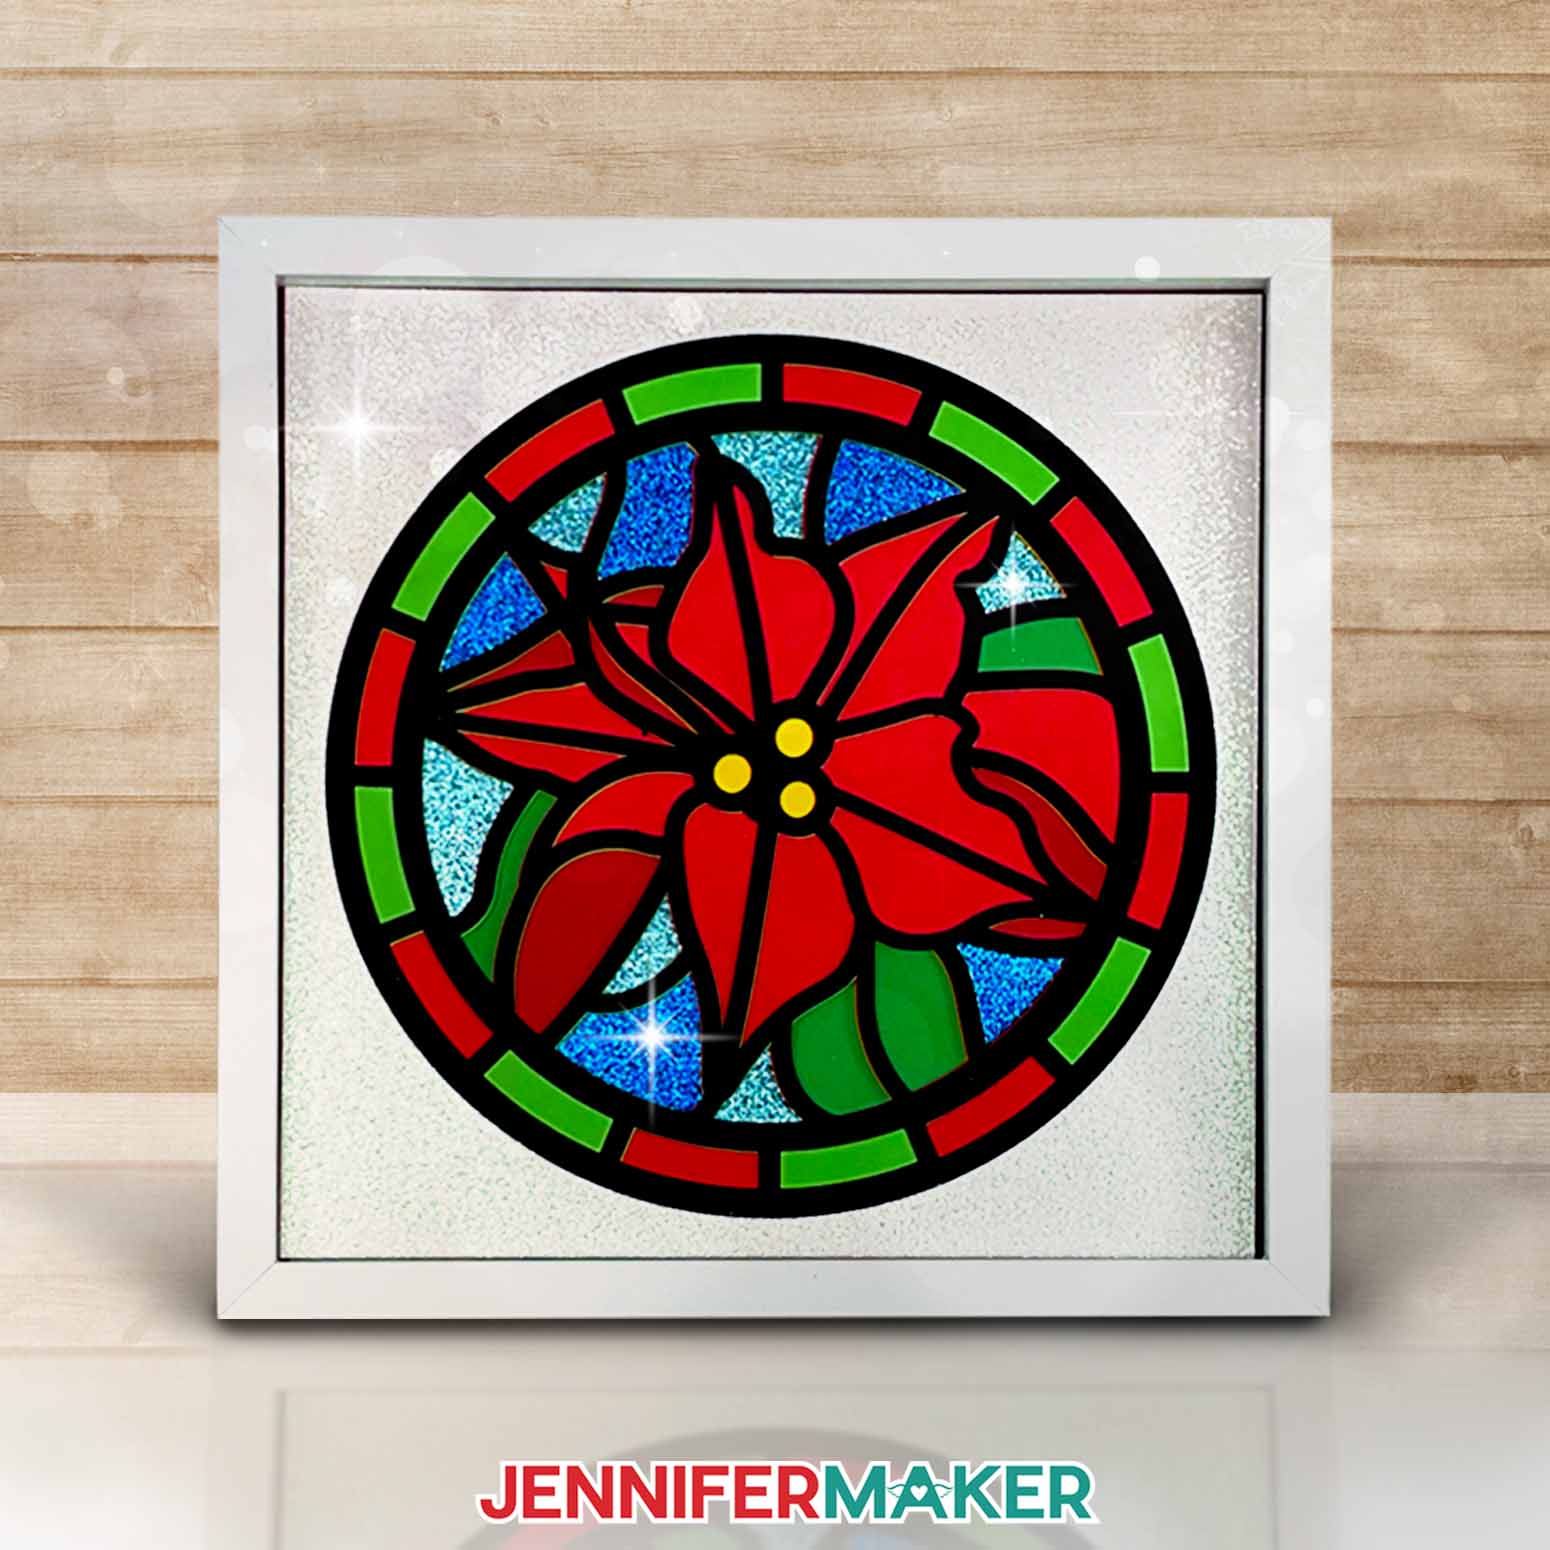
- One (1) Pack 12” x 12” Recollections Red Palette (One sheet each of two shades for the Rose and one sheet each of two shades for the Poinsettia)
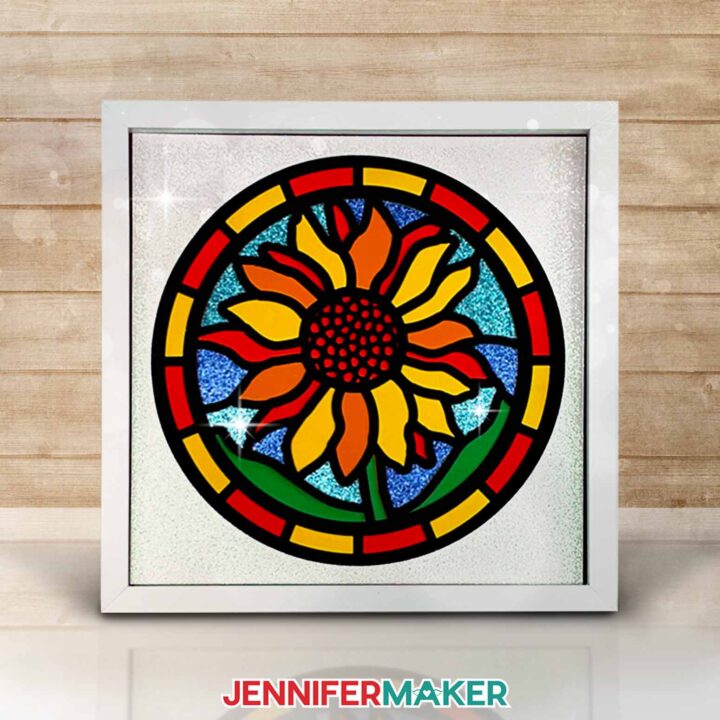
- One (1) Pack 12” x 12” Recollections Green Palette (One sheet each of two shades for the Rose, one sheet of one shade for the Poinsettia, and one sheet of one shade for the Sunflower)
- One (1) Pack 12” x 12” Recollections Orange & Yellow Palette (One sheet each of three shades for the Daffodil and one sheet each of three shades for the Sunflower)
- One (1) Pack 24” x 28” Cricut Cardstock Sampler, Bright Bow - (Optional: One sheet each of 7 shades for the Cricut Venture version of the Sunflower)
- One (1) Pack 28” x 22” Orange Posterboard - (Optional: One sheet for Cricut Venture version of the Sunflower)
- One (1) 12" x 12" Shadow Box Frame
- Design #563 (My free SVG/DXF/PDF design files available in my free resource library - get the password by filling out the form at the bottom of this page)
Tools
- A method to cut your cardstock: I’m using the Cricut Maker 3, but you can also use the Cricut Venture, Cricut Maker, Cricut Explore Series, Cricut Joy Xtra, or Cricut Joy for this project!
- Cricut Green StandardGrip Mat 12″ x 12″
- Brayer Tool
- Spatula
- Weeding Tool
- Scraper (For cleaning machine mats between cutting each layer)
- Ruler
- Bearly Art Glue
- OPTIONAL: Bearly Art Adhesive Foam Squares
- OPTIONAL: 1" Double-Sided Adhesive Foam Tape
Instructions
STEP 1: GET MY LAYERED PAPER STAINED GLASS DESIGNS
First, download my Layered Paper Stained Glass designs from my free library – look for Design #563. Alternatively, you can use the Save This Project form near the top of this post and the design link will be emailed to you.
TIP: If you're not sure how to download, unzip, and upload, go to jennifermaker.com/svgs to learn how to unzip and upload SVG files.
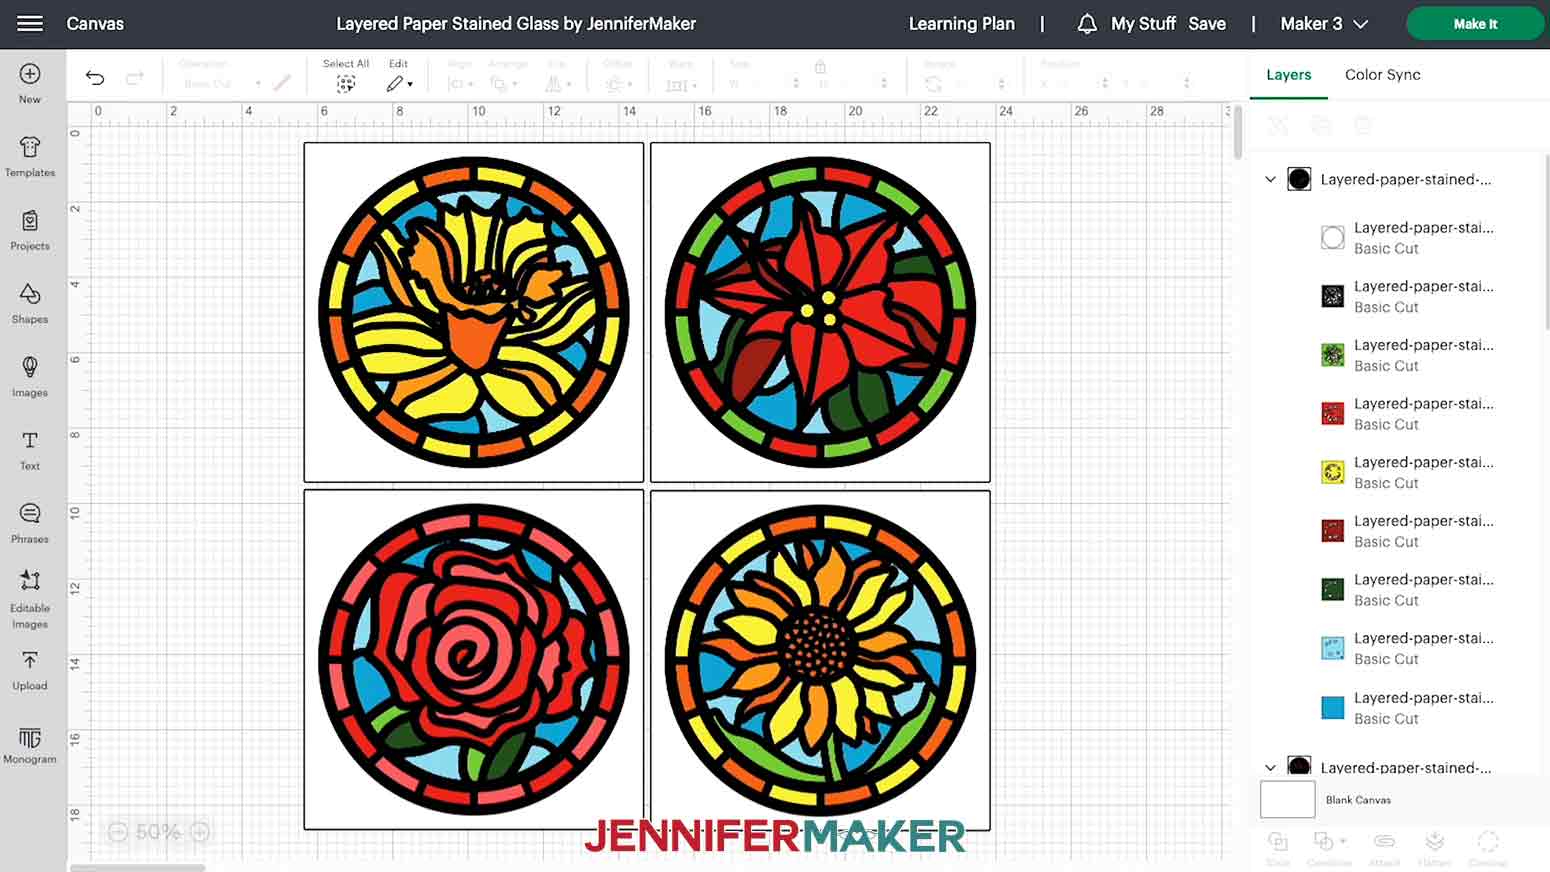
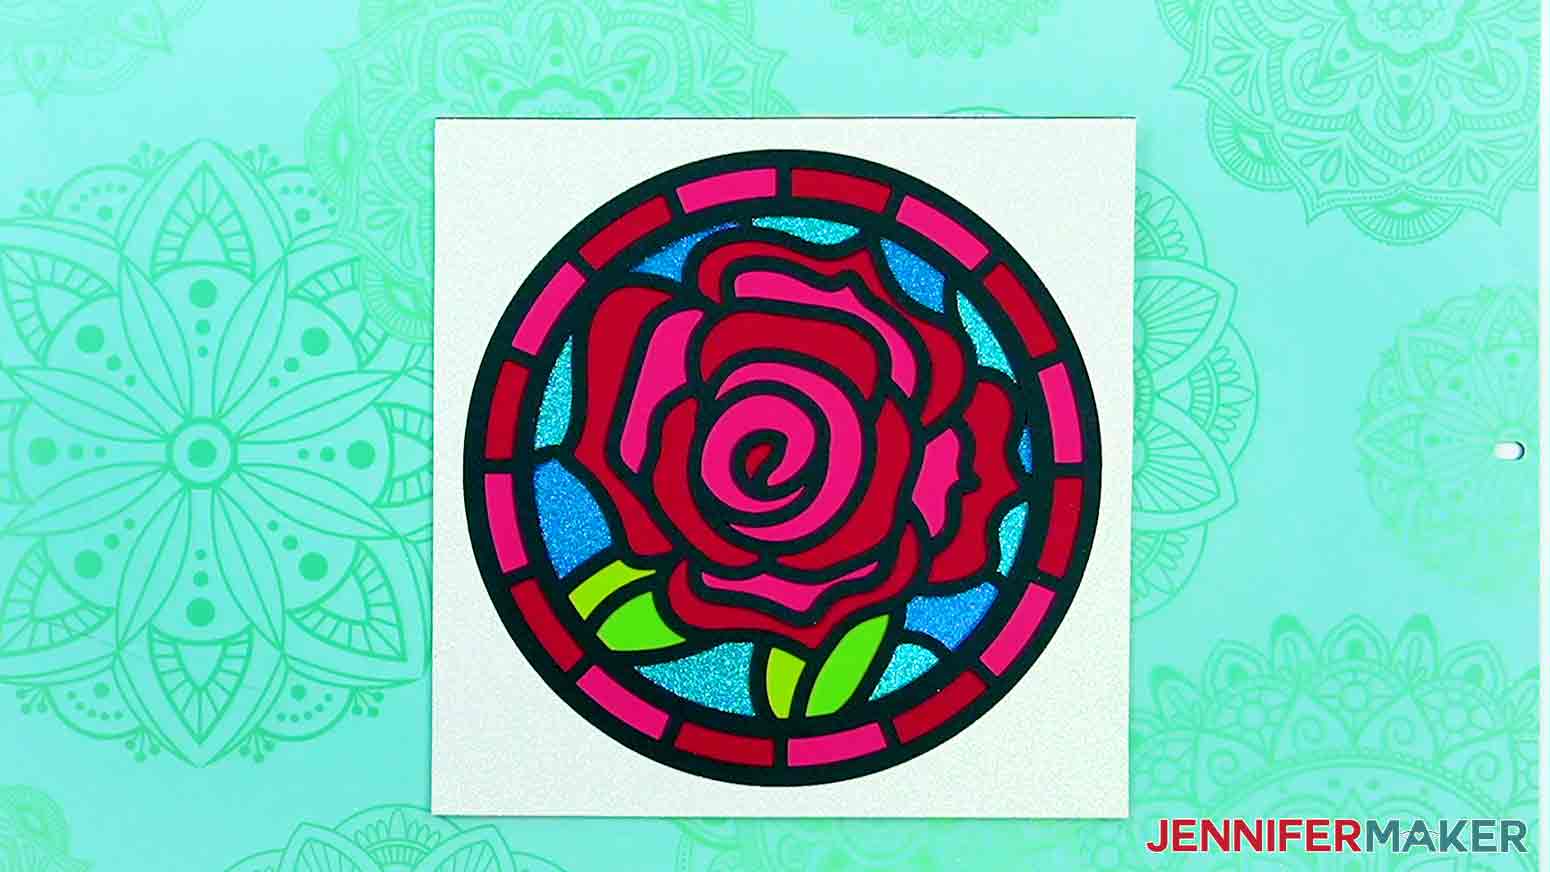
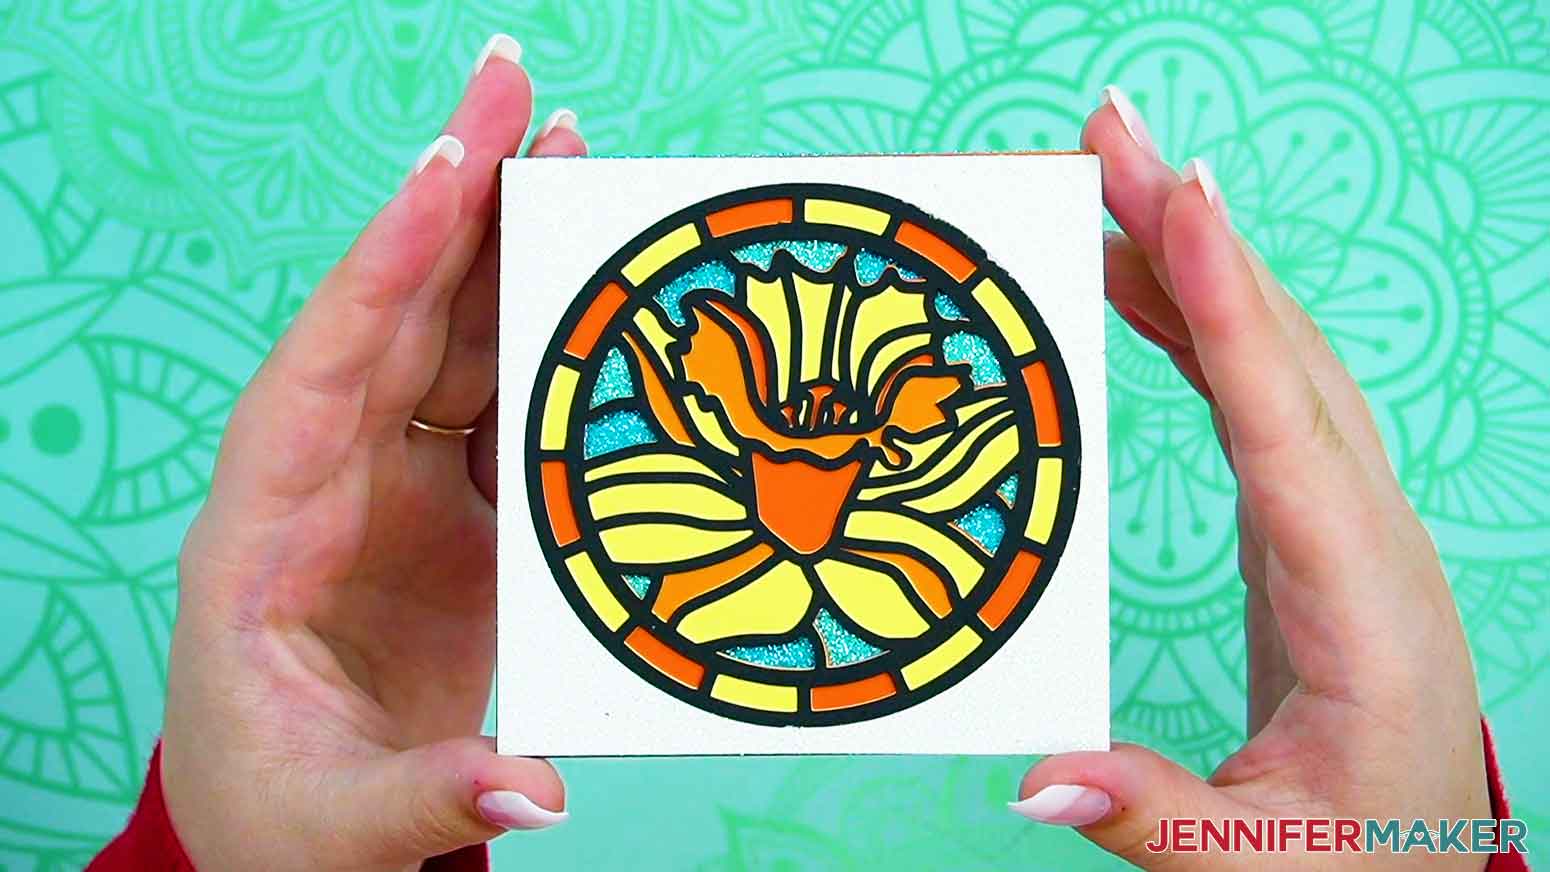
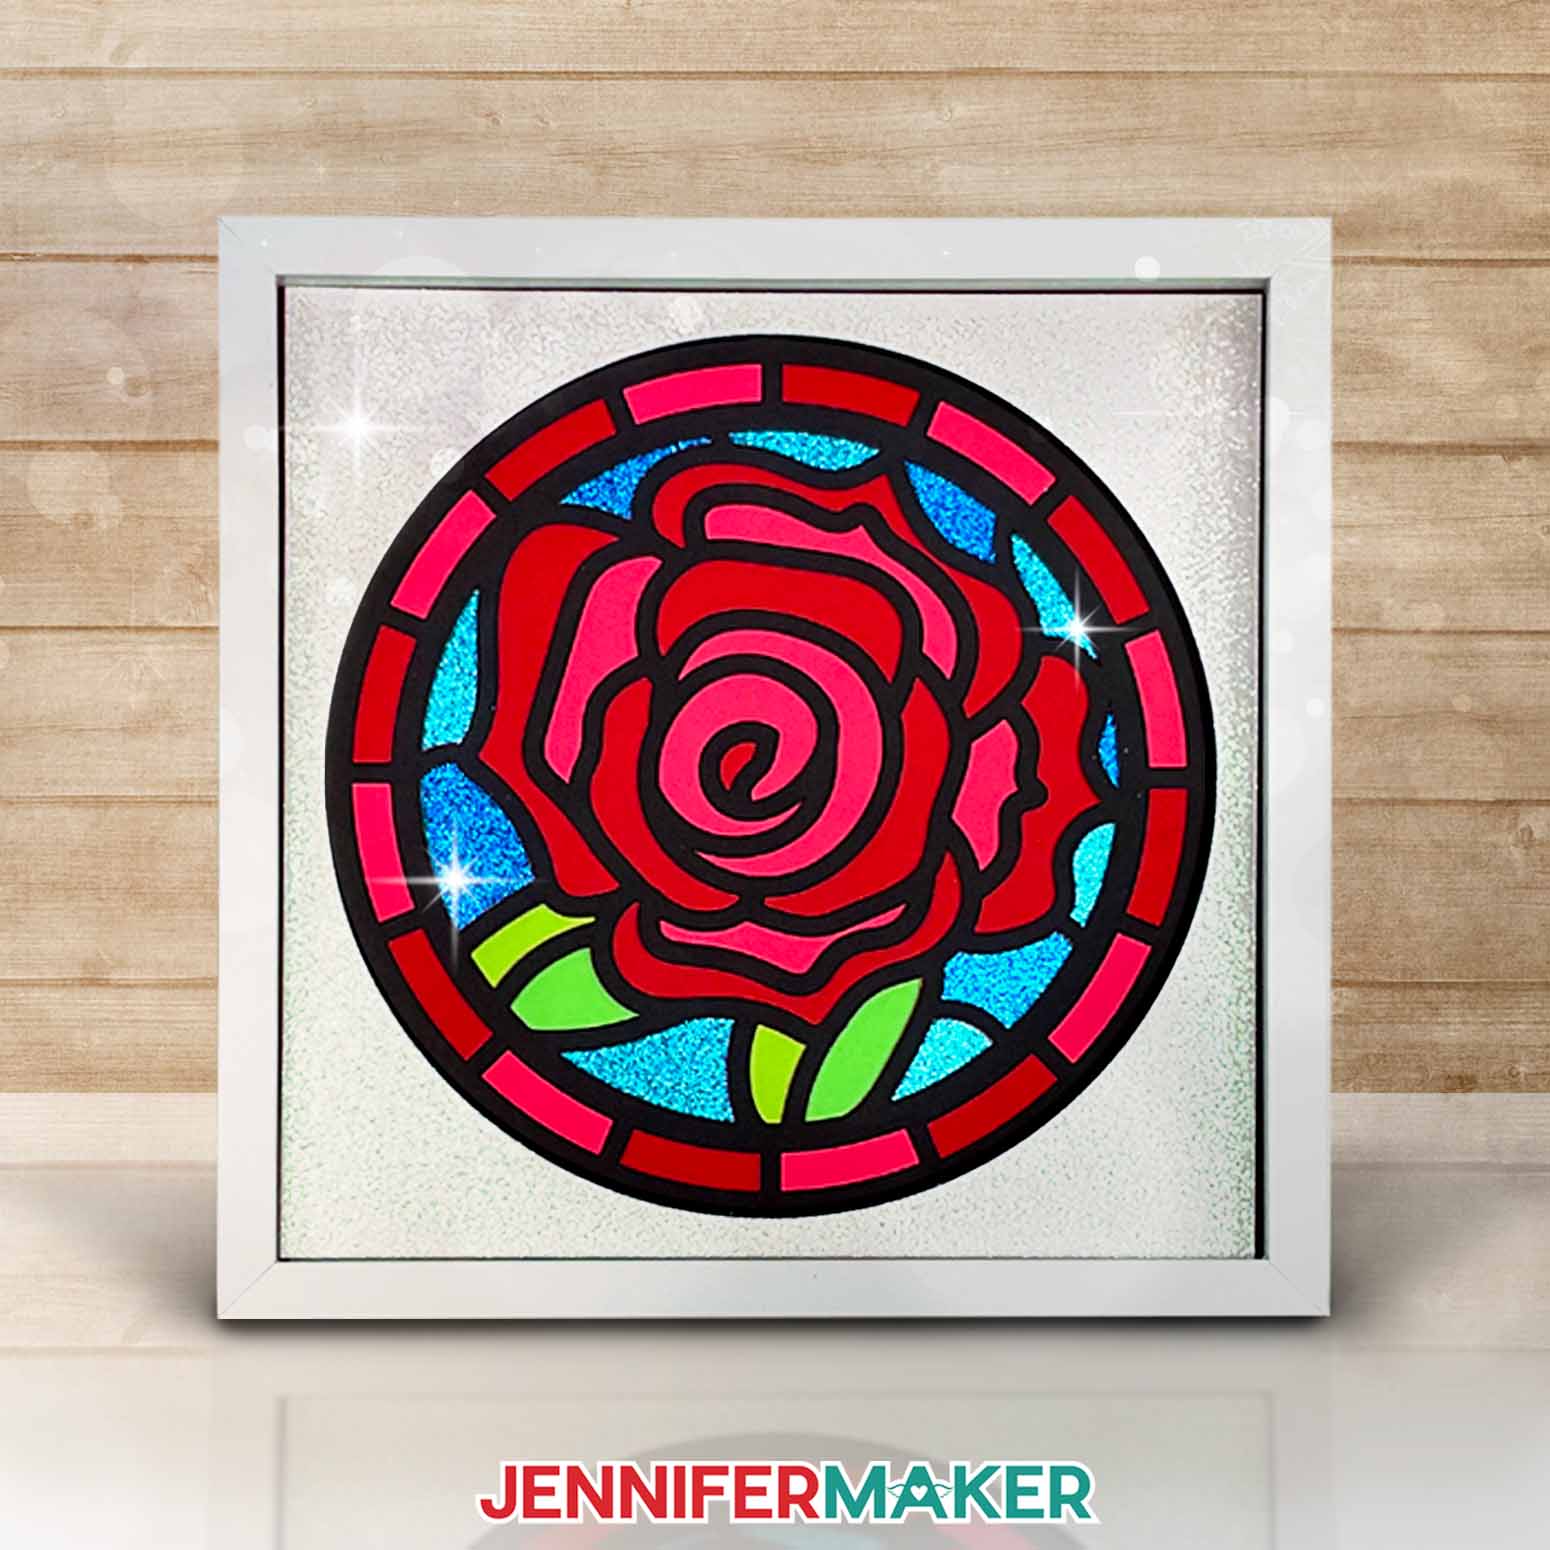
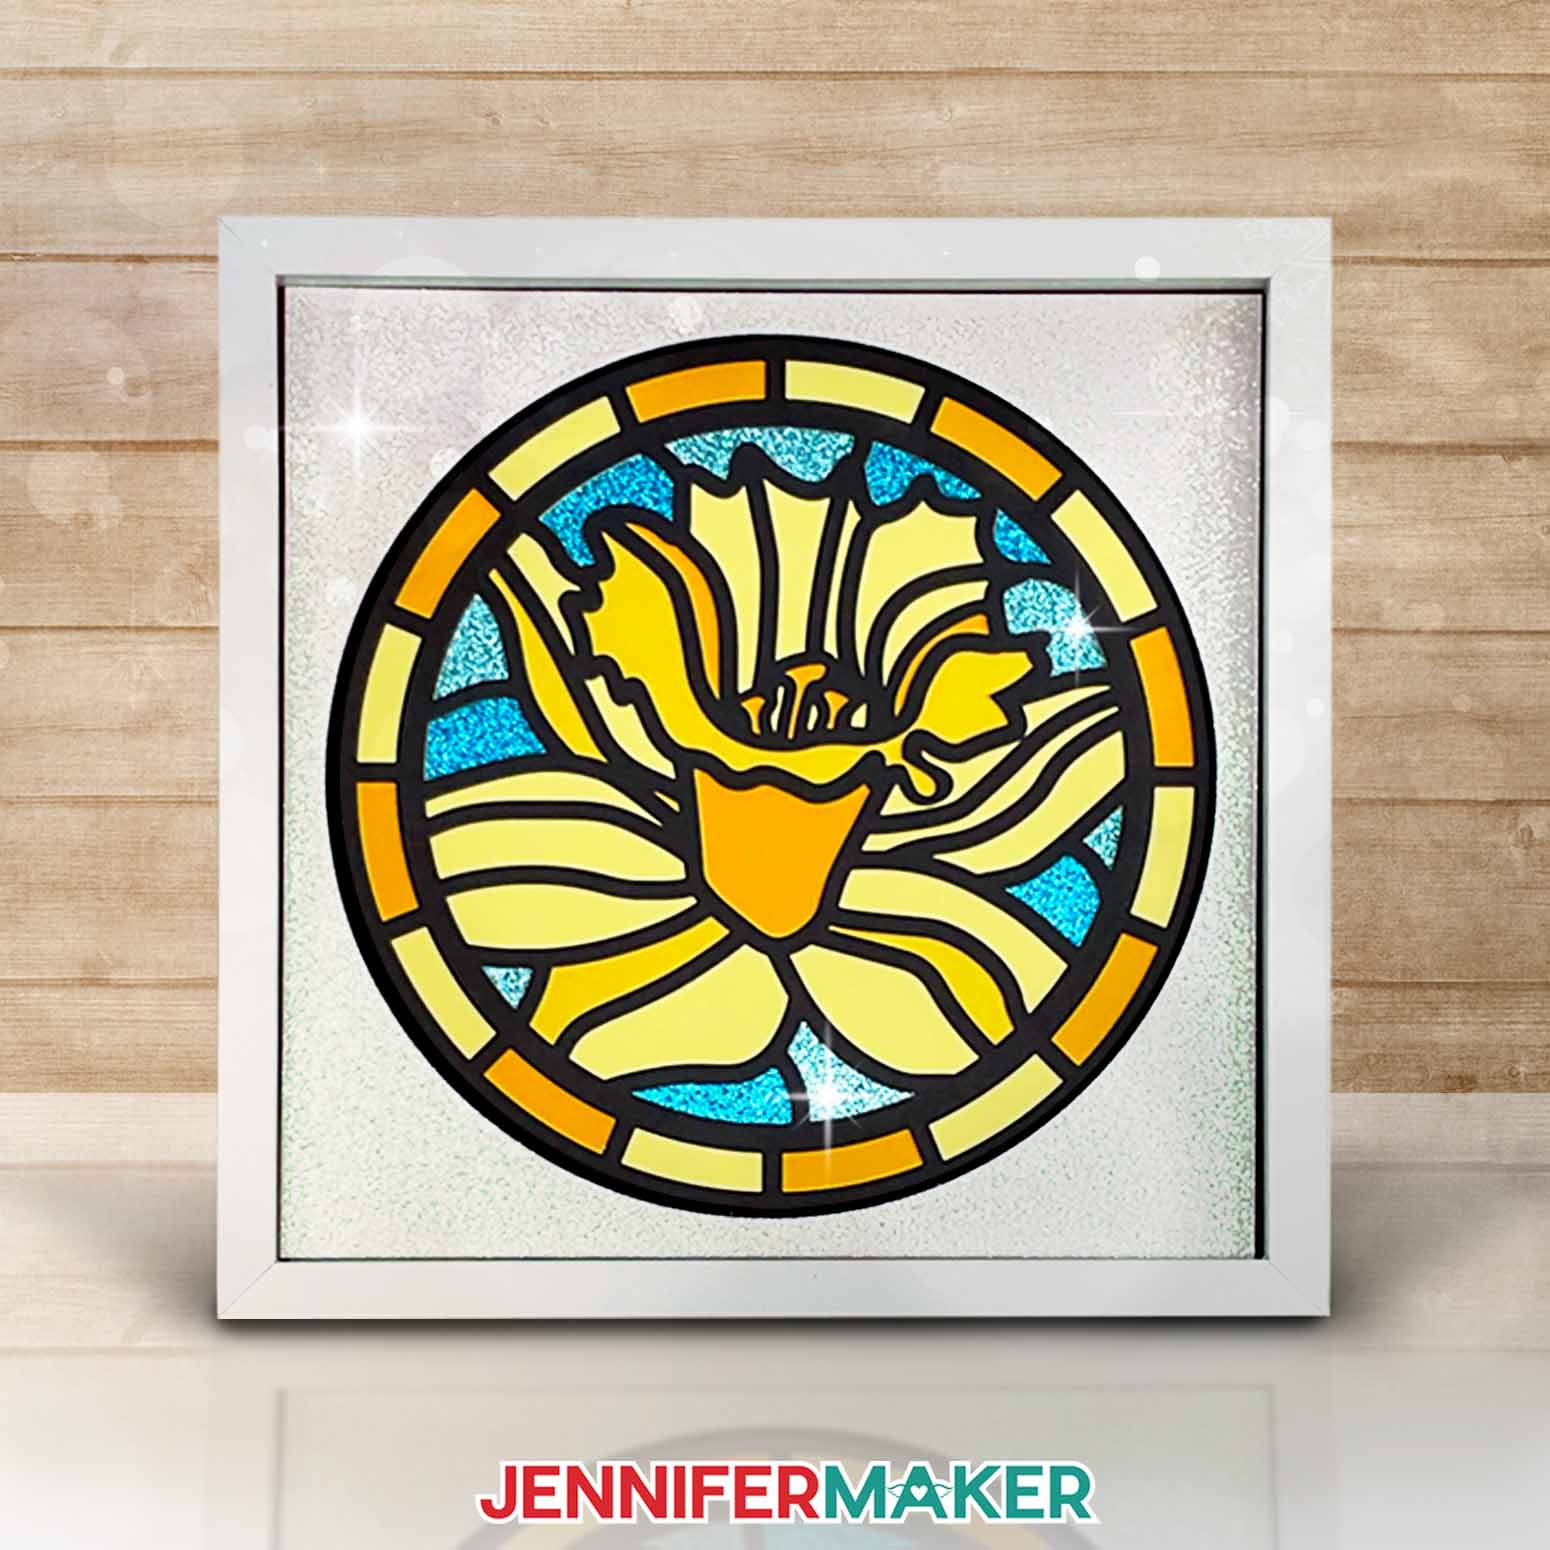
My collection has four designs: a Daffodil, a Rose, a Sunflower, and a Poinsettia. I’ll show you how to make each of the four designs.
STEP 2: PREPARE YOUR LAYERED PAPER STAINED GLASS DESIGN
MEASURE THE FRAME
1. Determine what frame you plan to use – these designs work best with square frames, so I used a 12” x 12” shadow box.
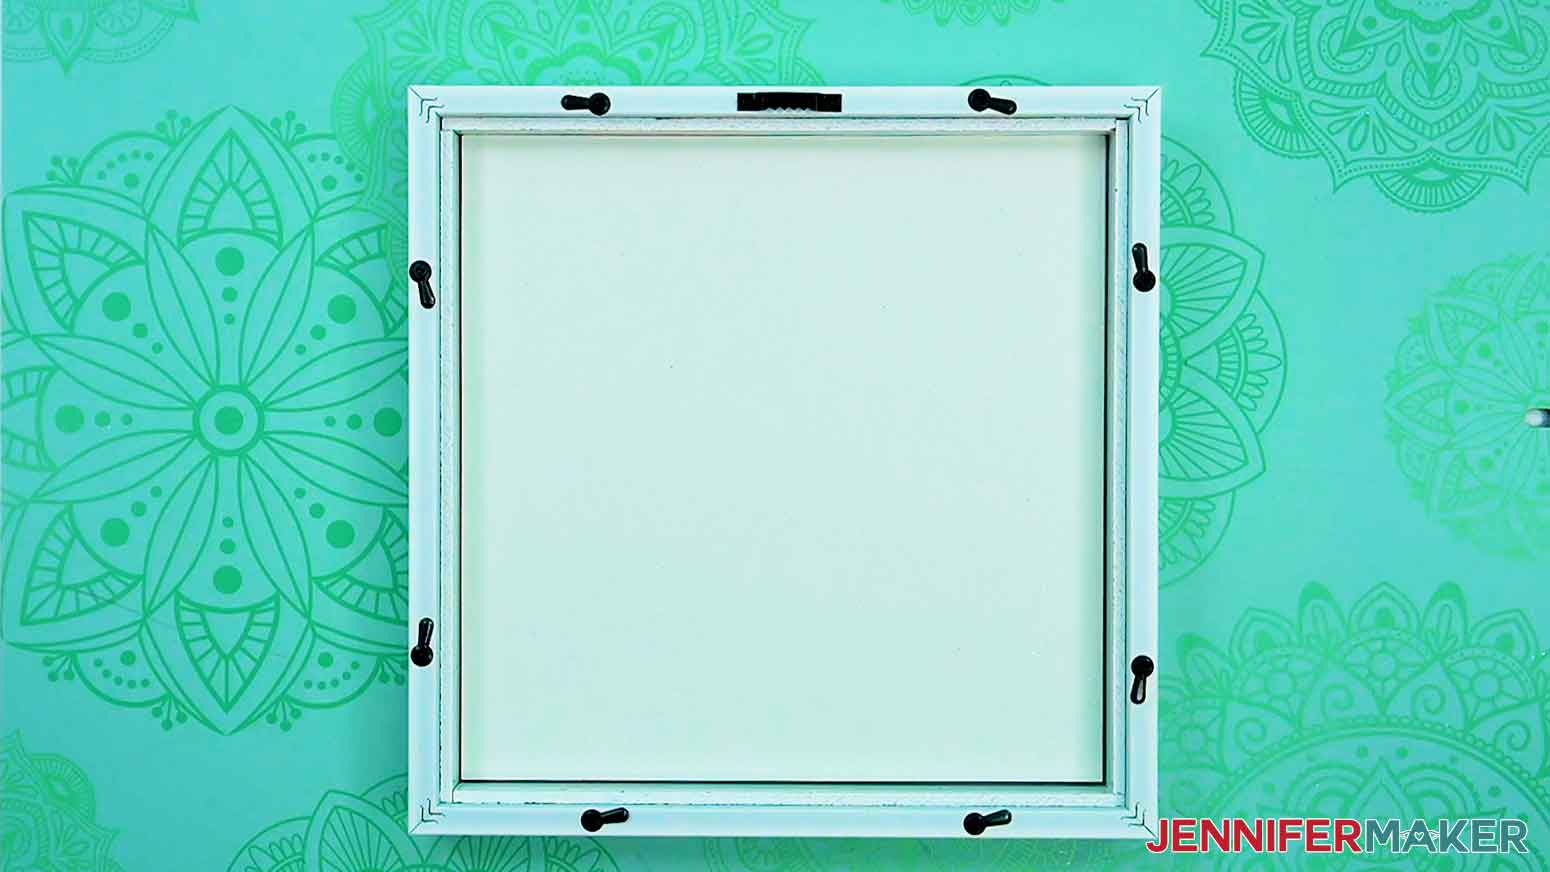
2. Remove the back of the frame.
3. Use a ruler to measure the exact size of the open space inside the frame.
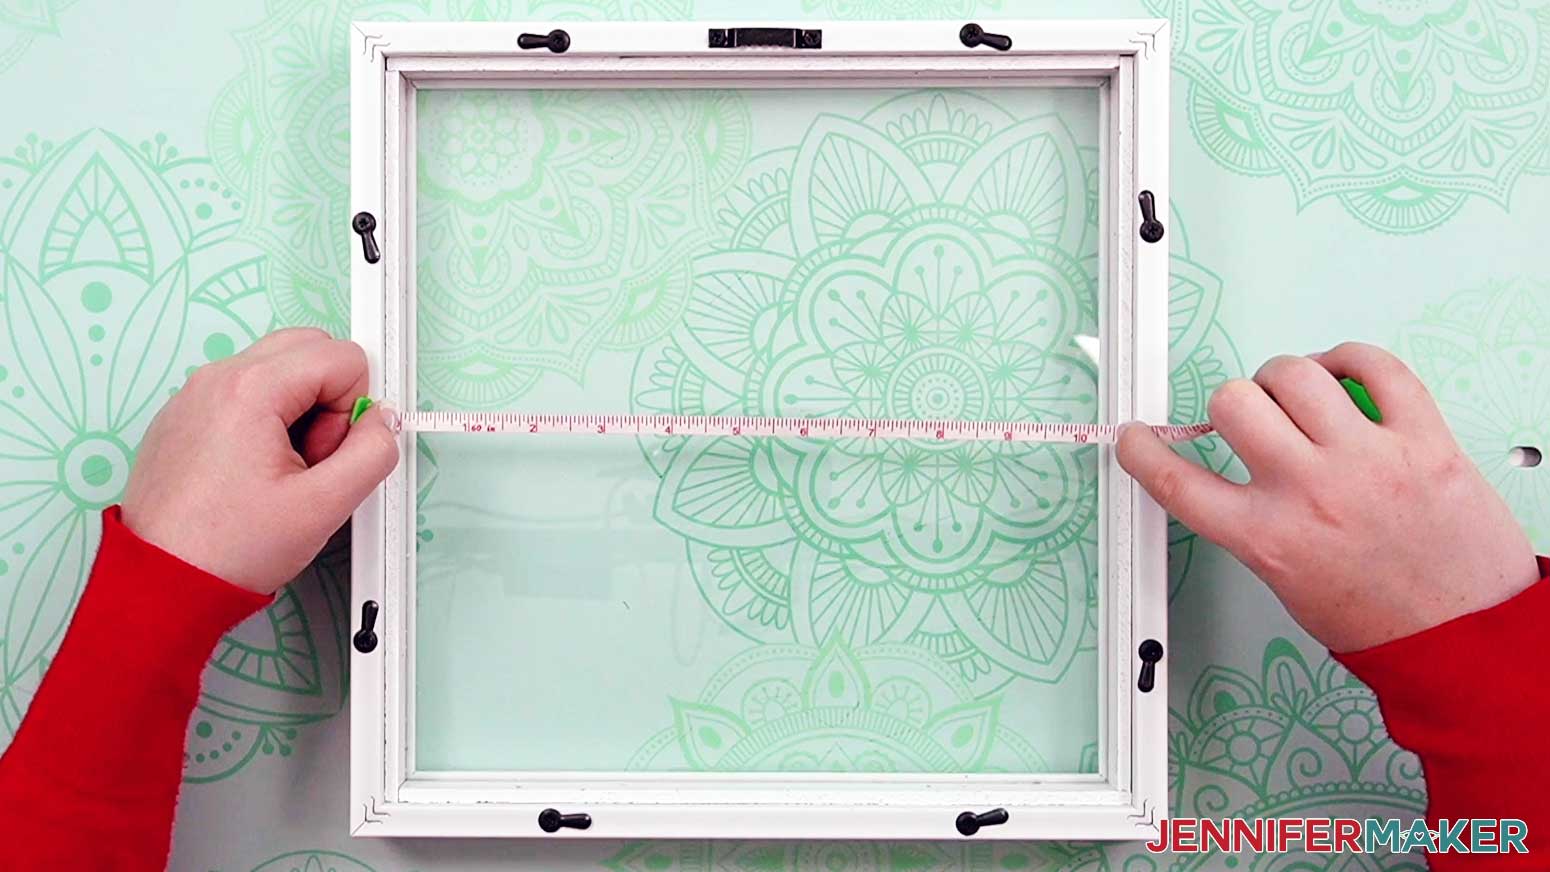
4. Make note of the size, then proceed to Cricut Design Space.
CRICUT DESIGN SPACE
NOTE: I recommend only uploading and cutting one design at a time to make assembly easier.
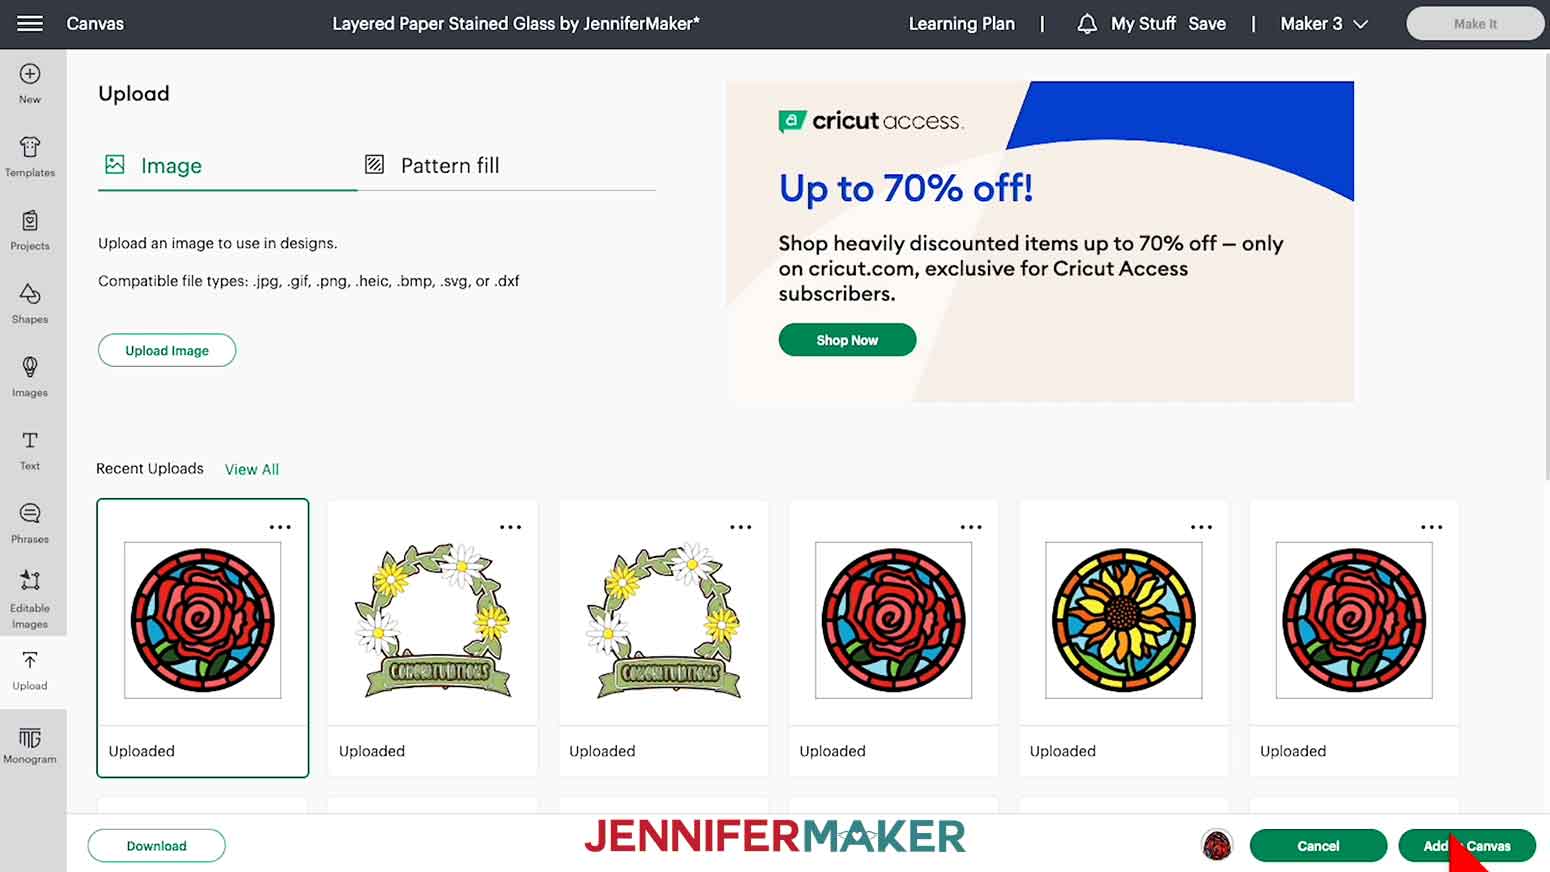
1. Open Cricut Design Space and click “New Project”
2. Click “Upload” and then “Upload Image”
3. Click “Browse”
4. Select the SVG file
5. On the Prepare to Upload screen, the design preview will say “Cut Image.”
6. Click “Upload”
7. Find your design in Recent Uploads and add it to the Canvas
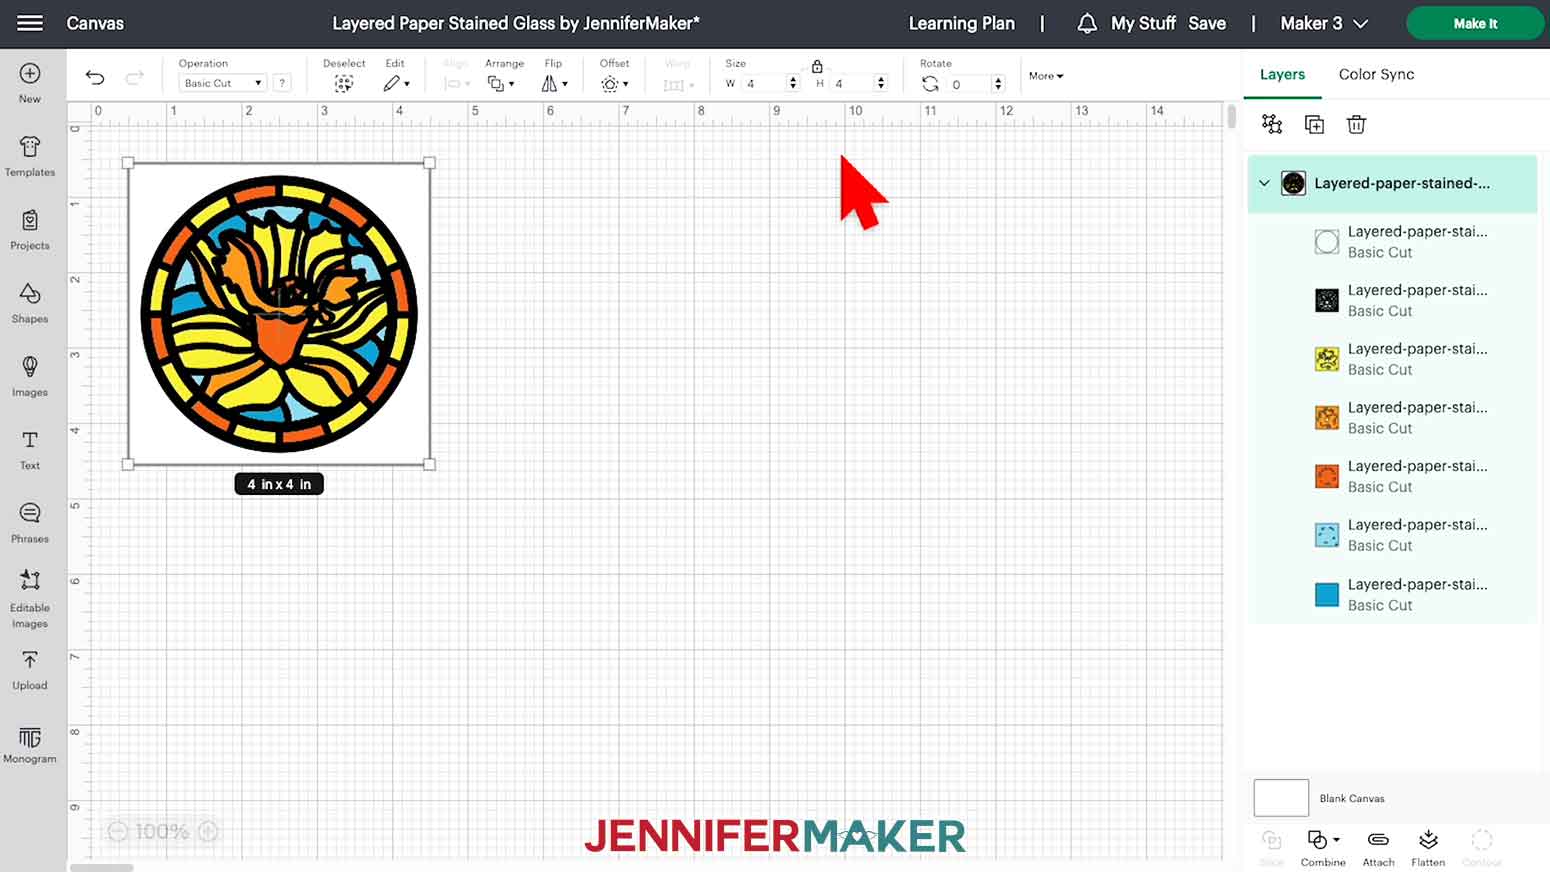
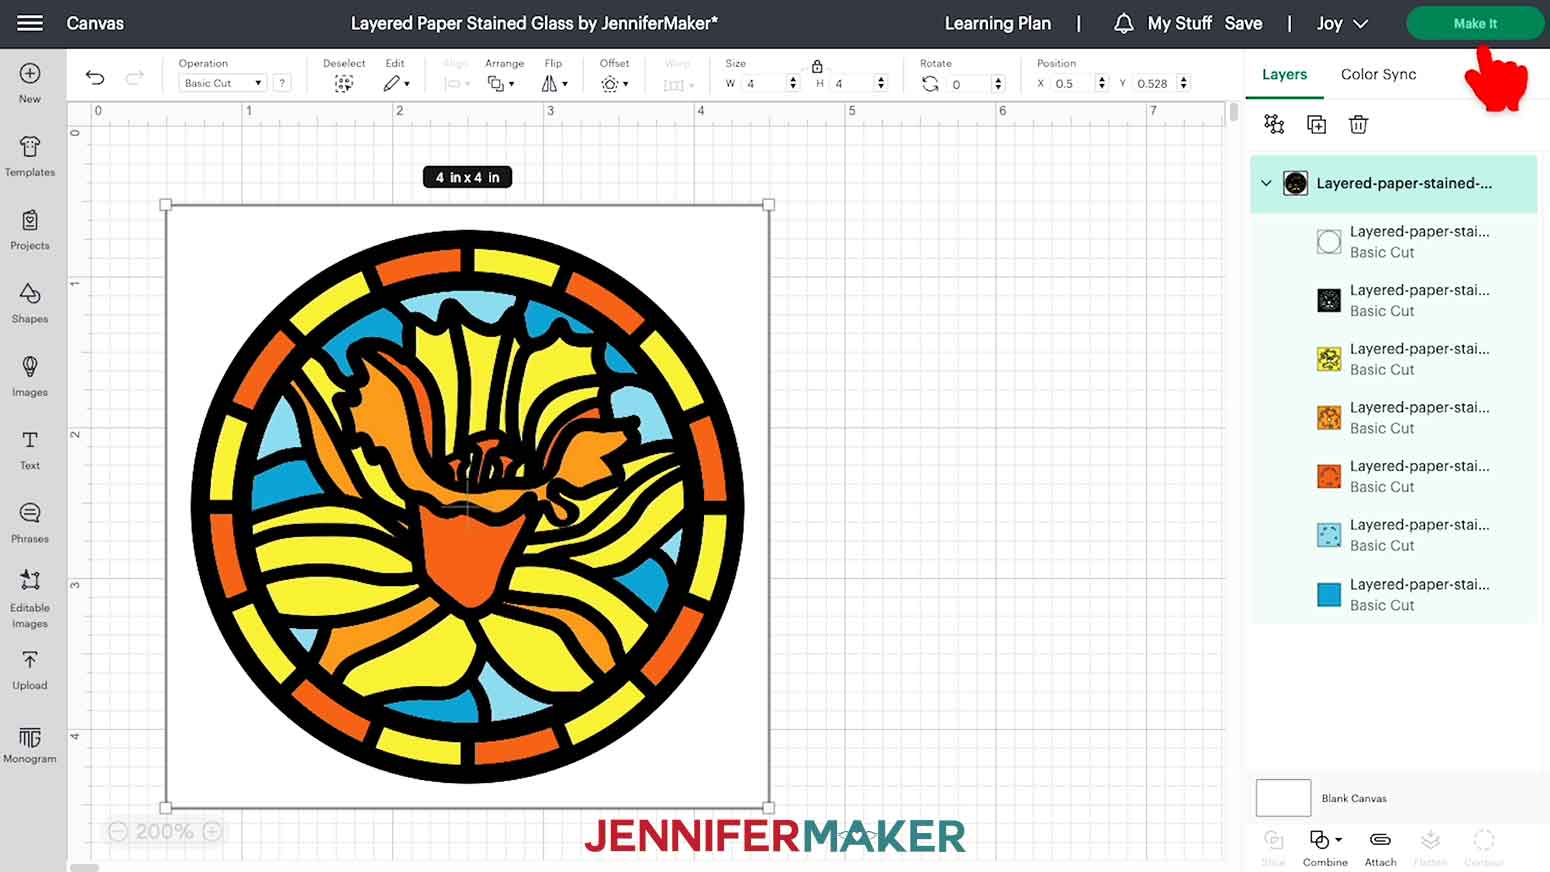
8. Click the minus (-) sign to zoom out to see the entire design.
9. Each image uploads as an 11.5” square. If necessary, resize the image to match your frame’s opening. To do this, change the dimensions under “Size”, making sure the lock icon is closed.
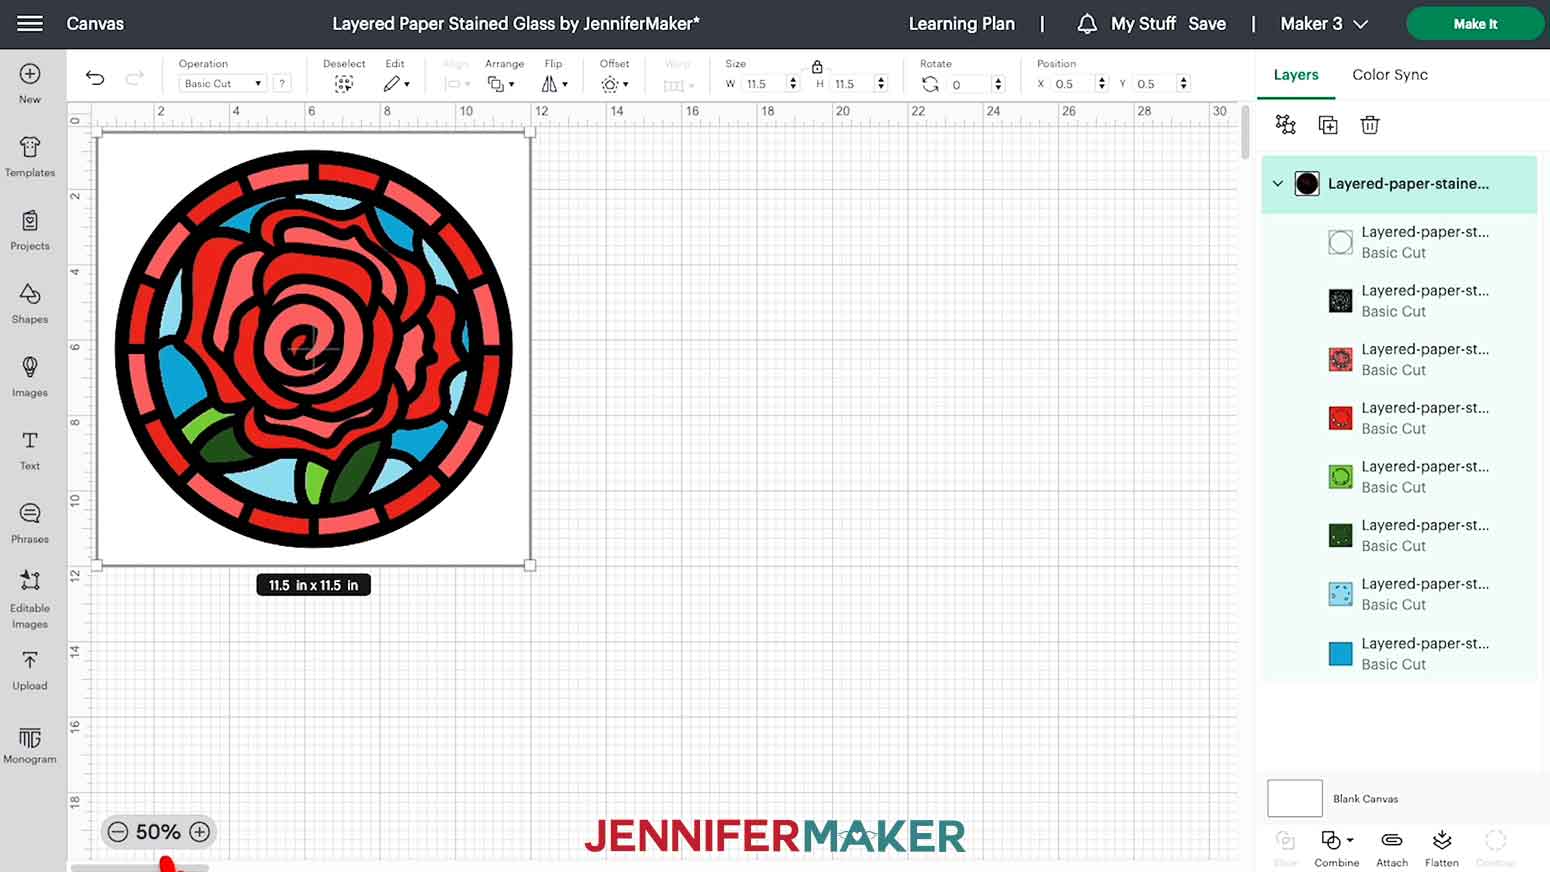
10. Make sure the correct machine is selected in the top right
11. Click “Make It”

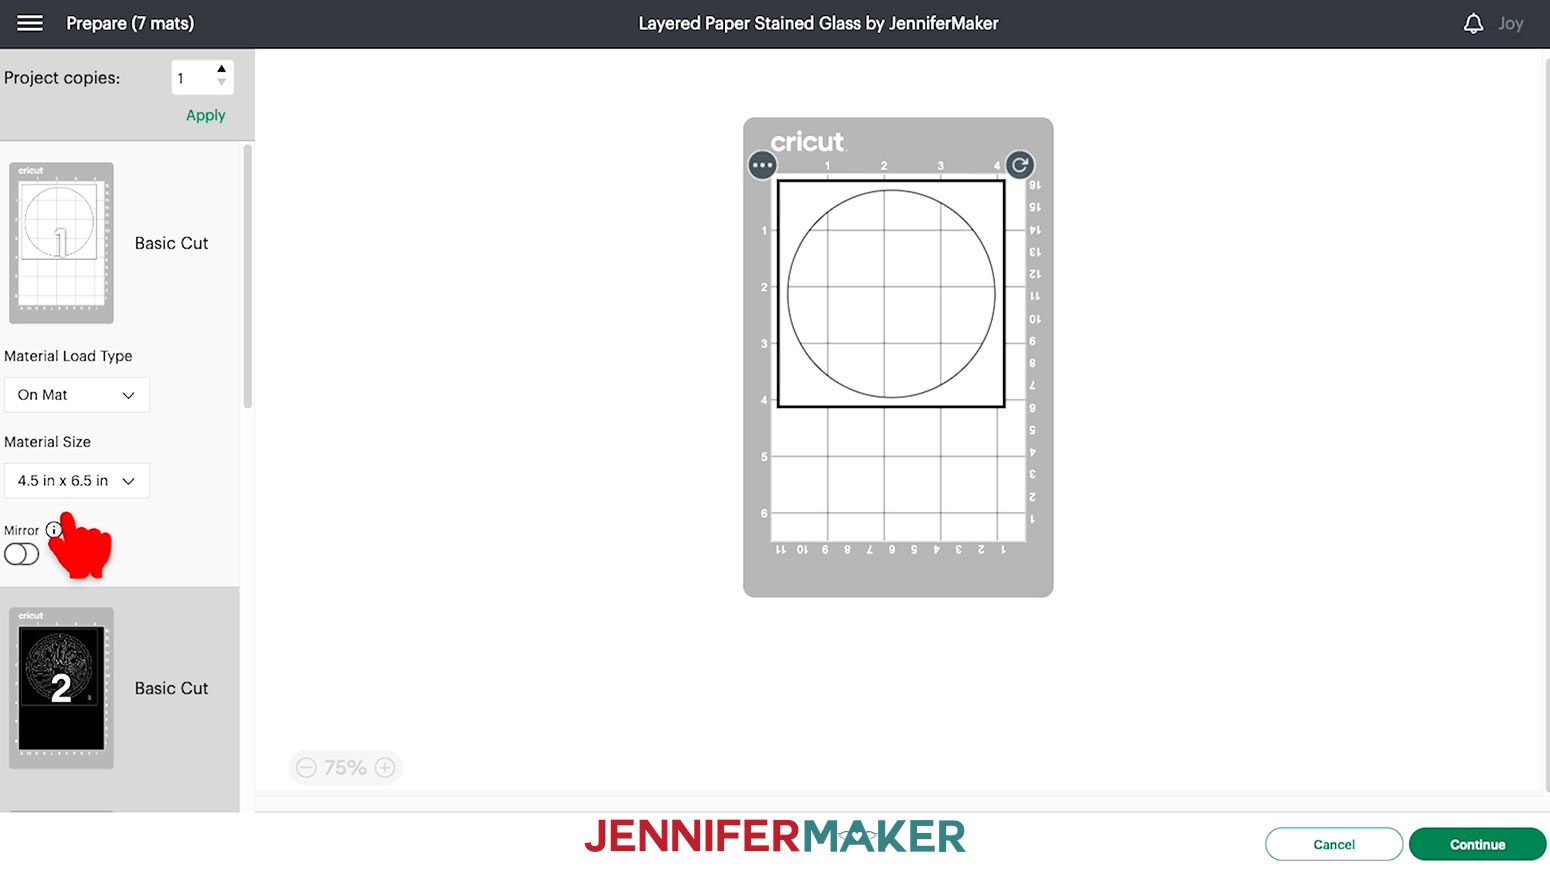
12. If prompted, click "On Mat," choose your mat size, and click “Confirm.”
13. On the Prepare Screen, each design should have the following number of mats: Daffodil – 7 mats, Rose – 8 mats, Sunflower – 8 mats, Poinsettia – 9 mats
14. Your material size should be 12” x 12” for all the mats if using the same cardstock selections as me.
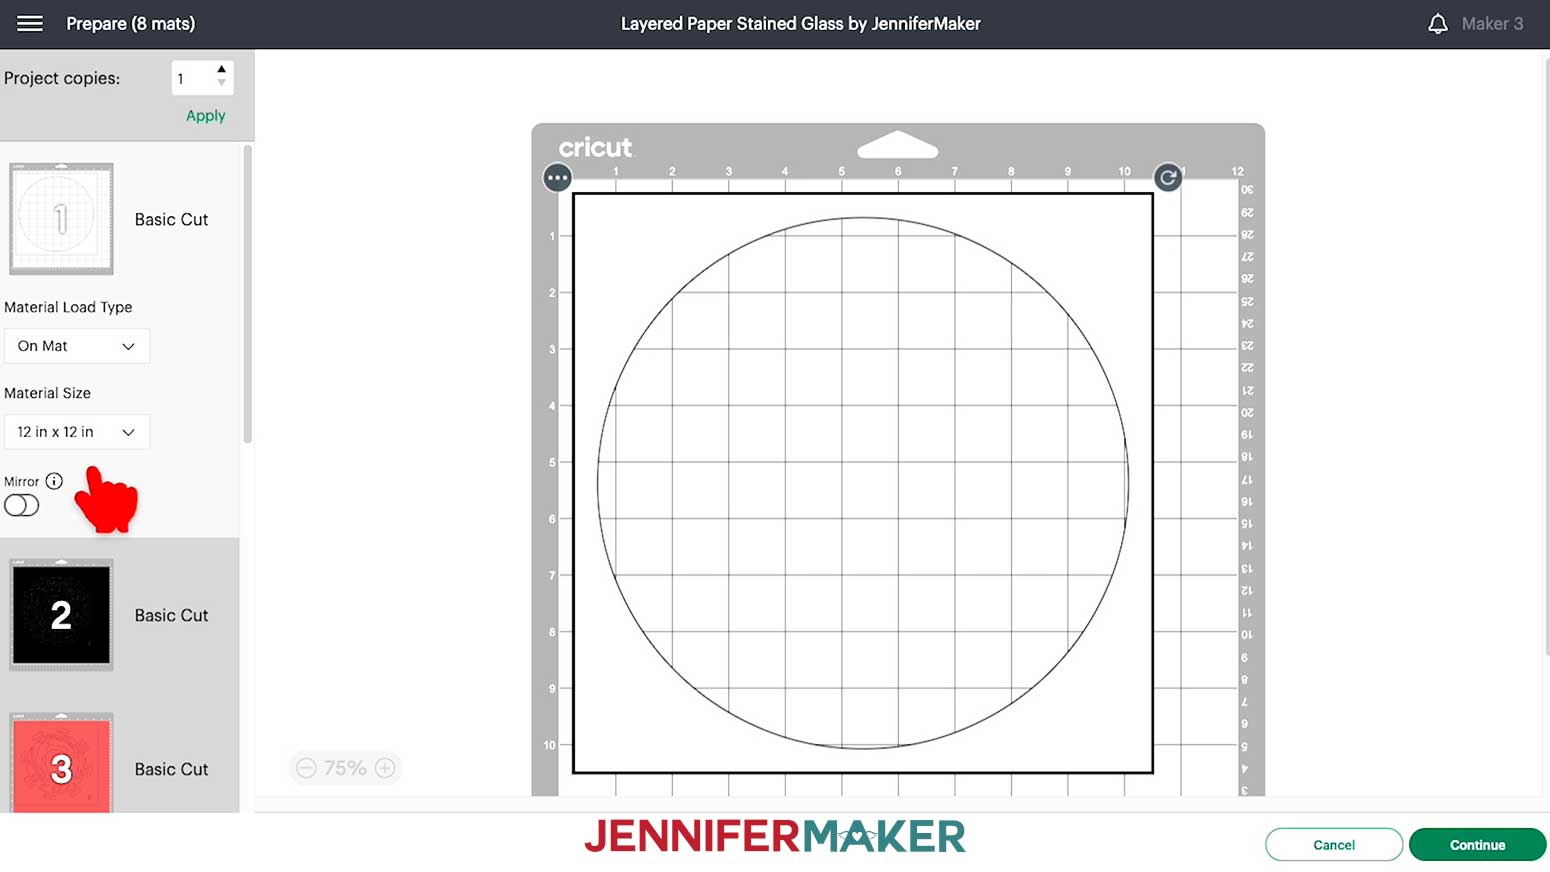
15. Click “Continue”
STEP 3: CUT YOUR LAYERED PAPER STAINED GLASS DESIGN
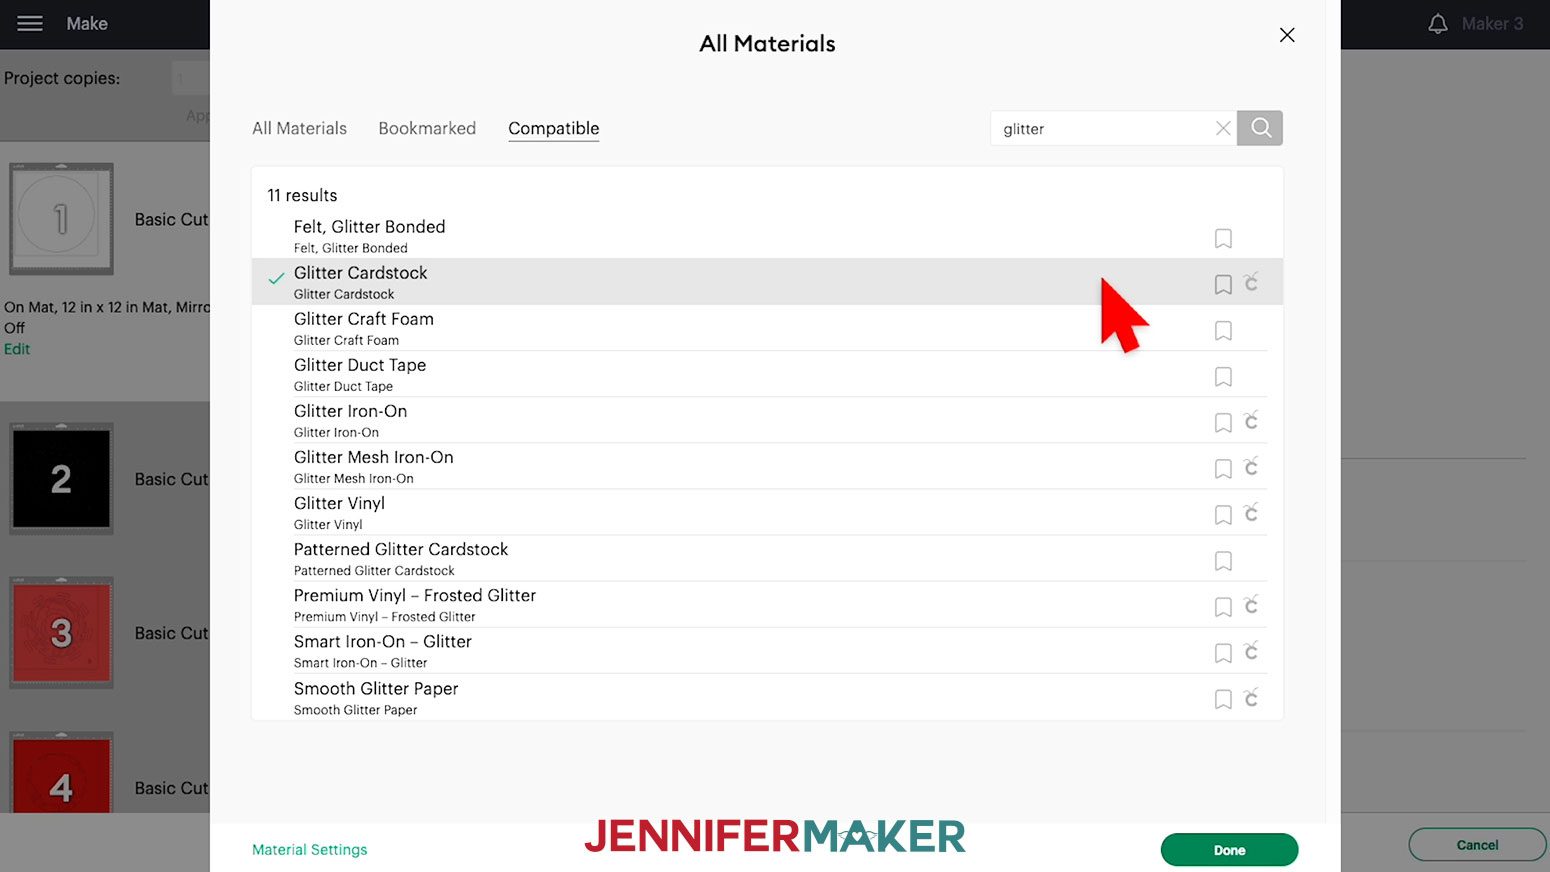
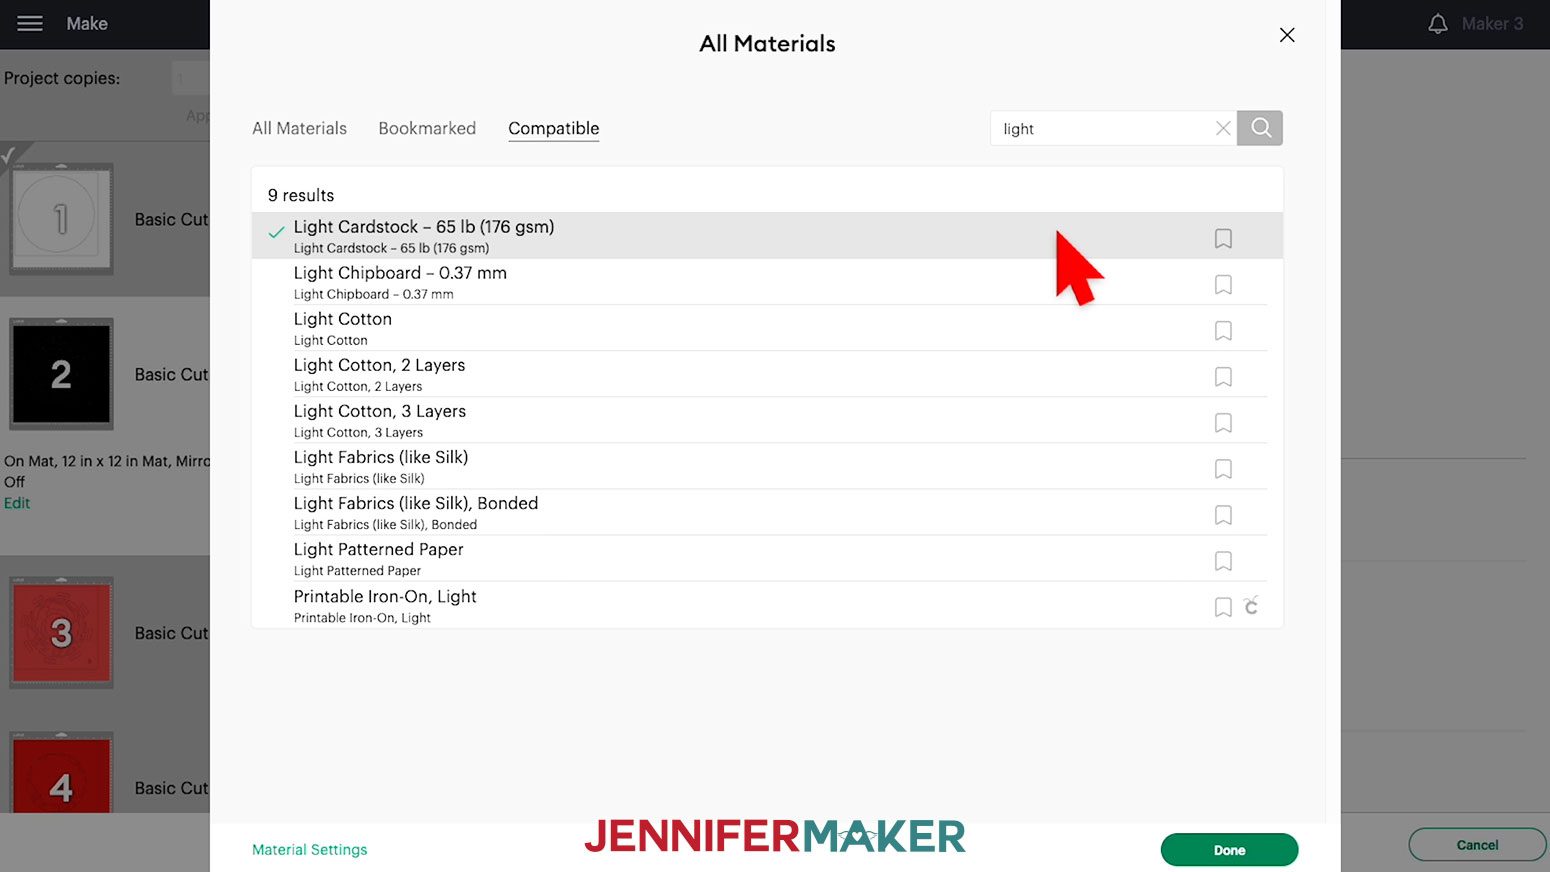
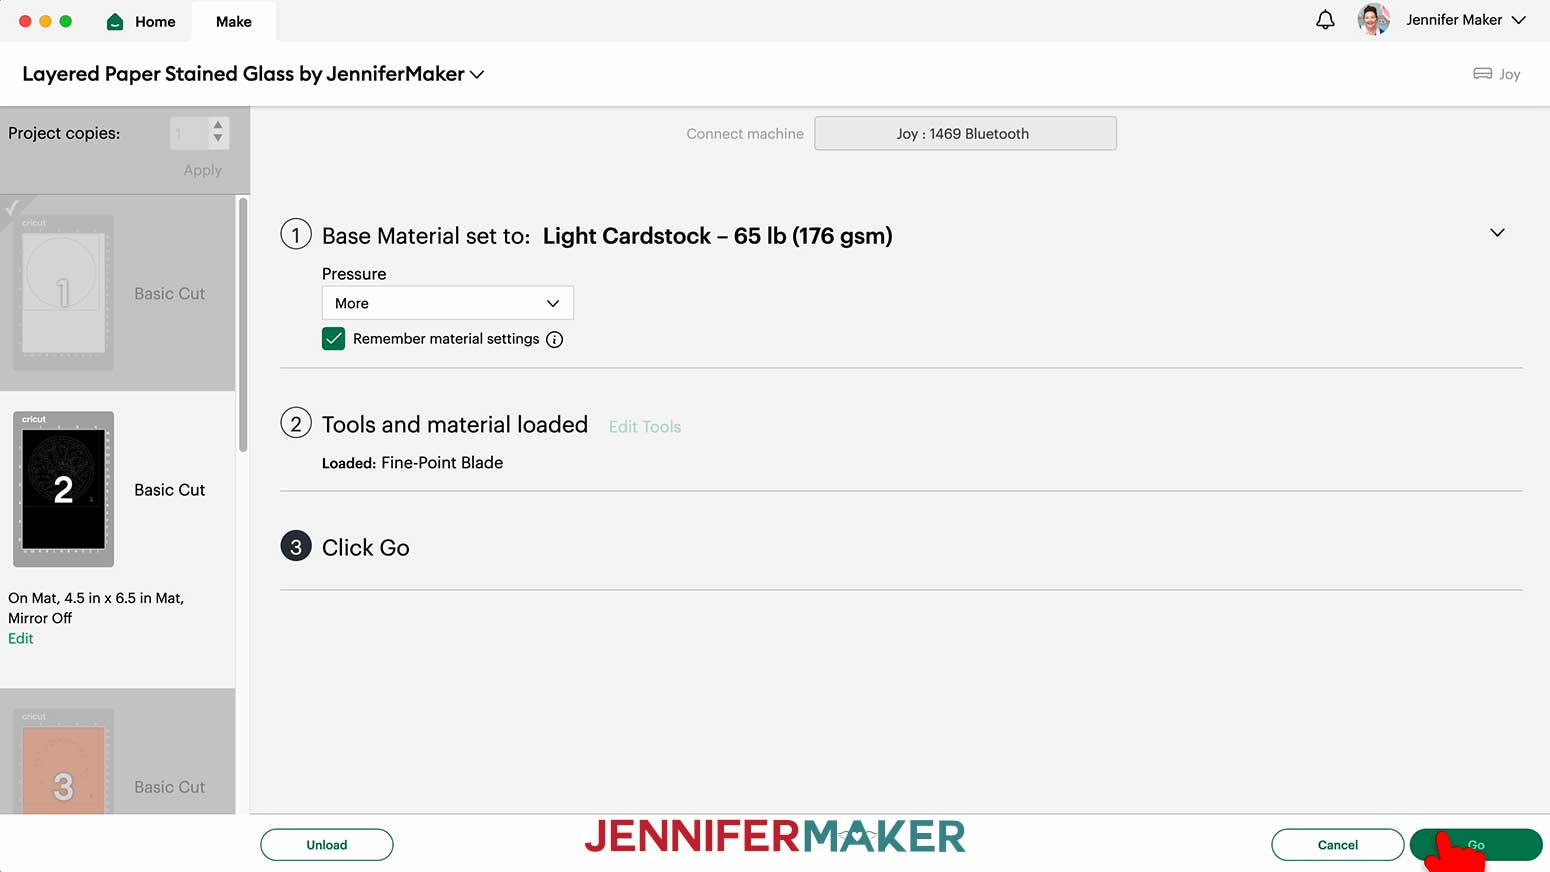
1. On the Make Screen, click “Browse All Materials.”
2. Search for and select the correct material setting for the mat being cut. I used a mix of “Glitter Cardstock” and “Light Cardstock – 65 lb (176 gsm)” depending on the color of the mat.
3. Select “More” for the Pressure
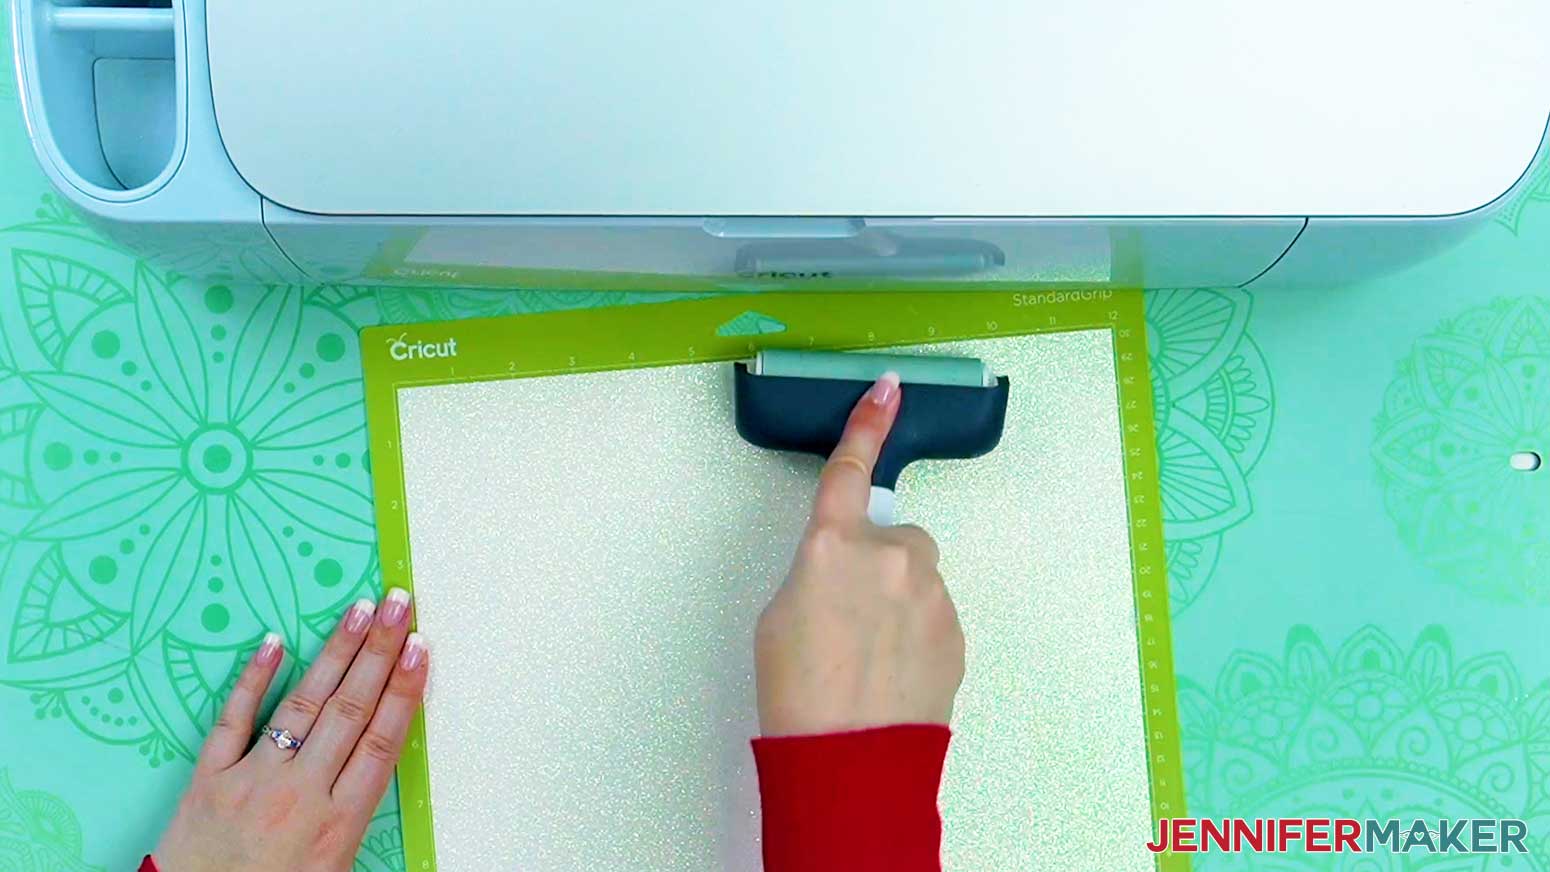
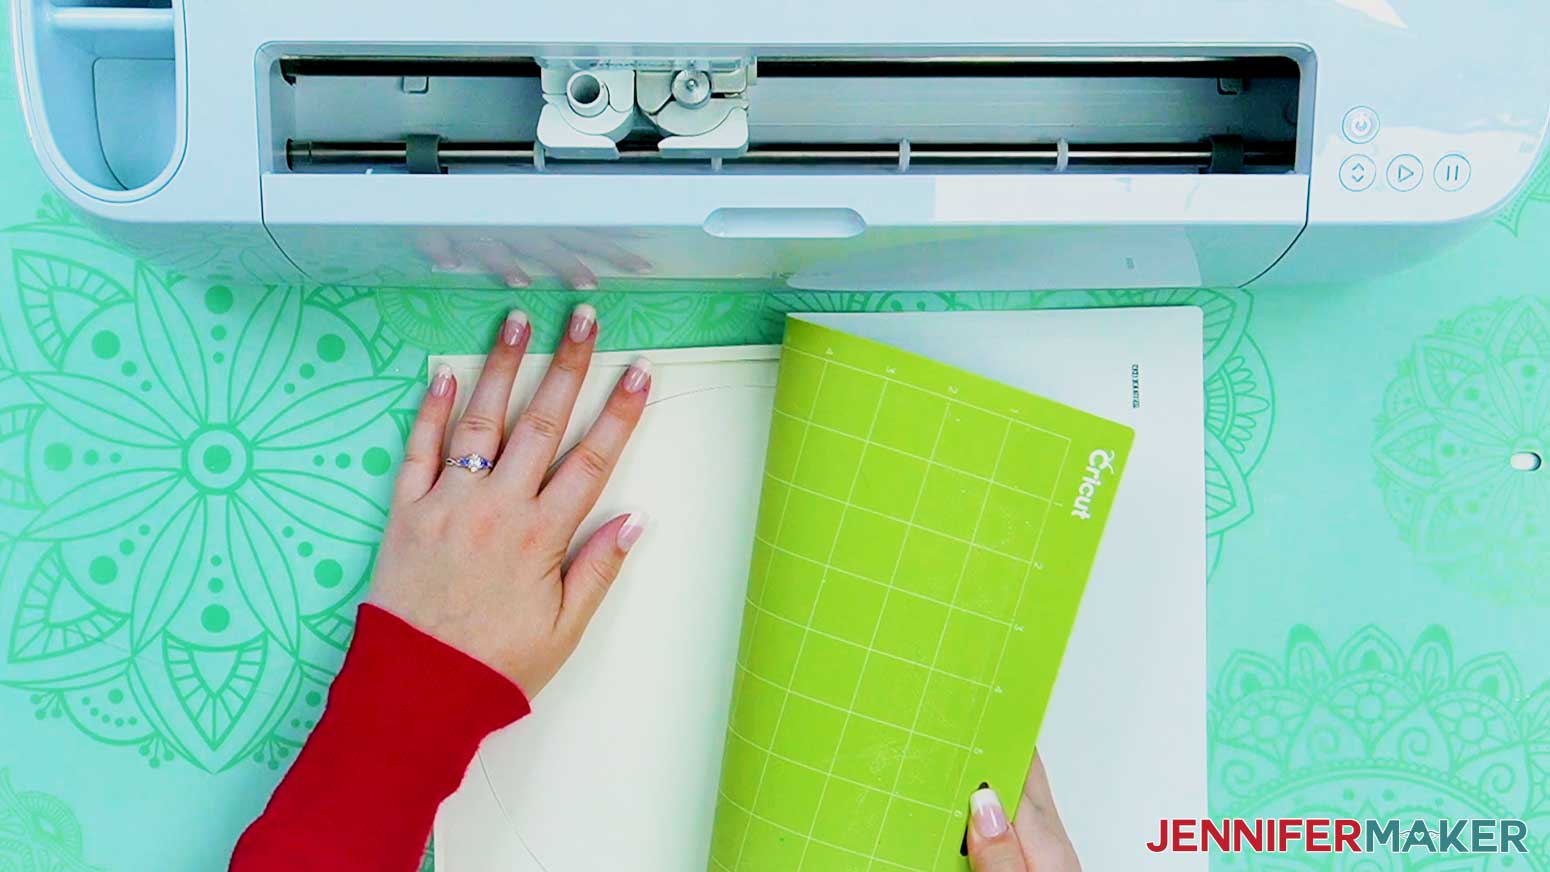
4. Place the cardstock for your first mat face up on a green StandardGrip machine mat.
5. Use a brayer to adhere the cardstock.
6. Press the flashing arrows to load the machine mat into your Cricut
7. Press the flashing “Go” button to begin cutting
8. Once the cutting is complete, and before unloading your mat, check to see if the cut went all the way through. If not, press Start for another pass.
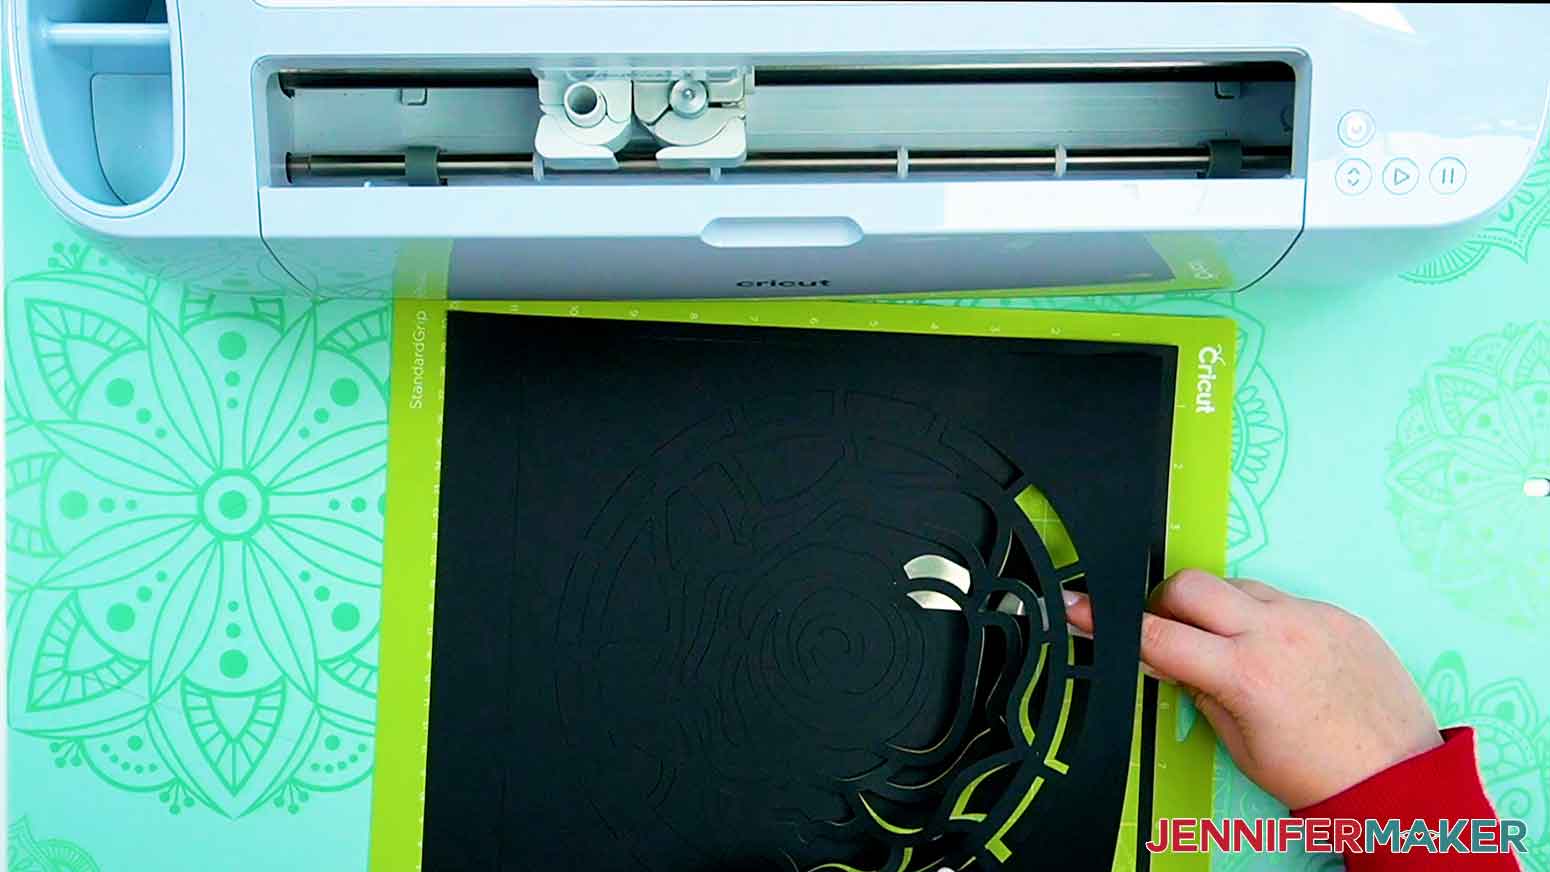
9. Press the flashing arrows to unload the machine mat.
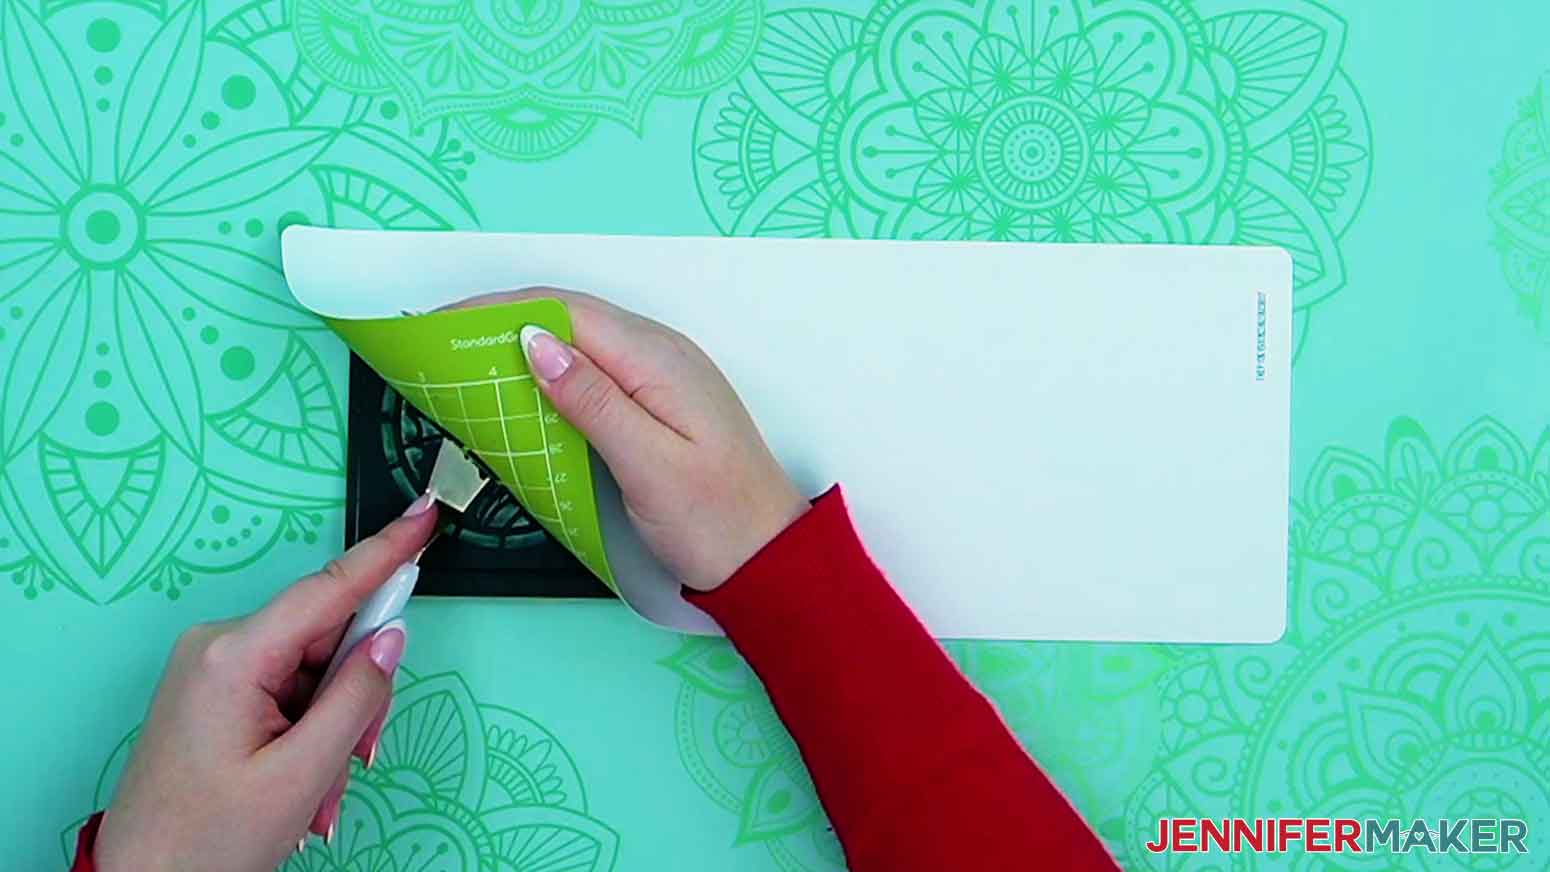
10. Flip the mat over onto your work surface and gently pull the mat away from the cardstock.
TIP: Use a spatula to help remove delicate cuts from the mat. See my tutorial How To Cut Intricate Designs On A Cricut for more cutting tips!
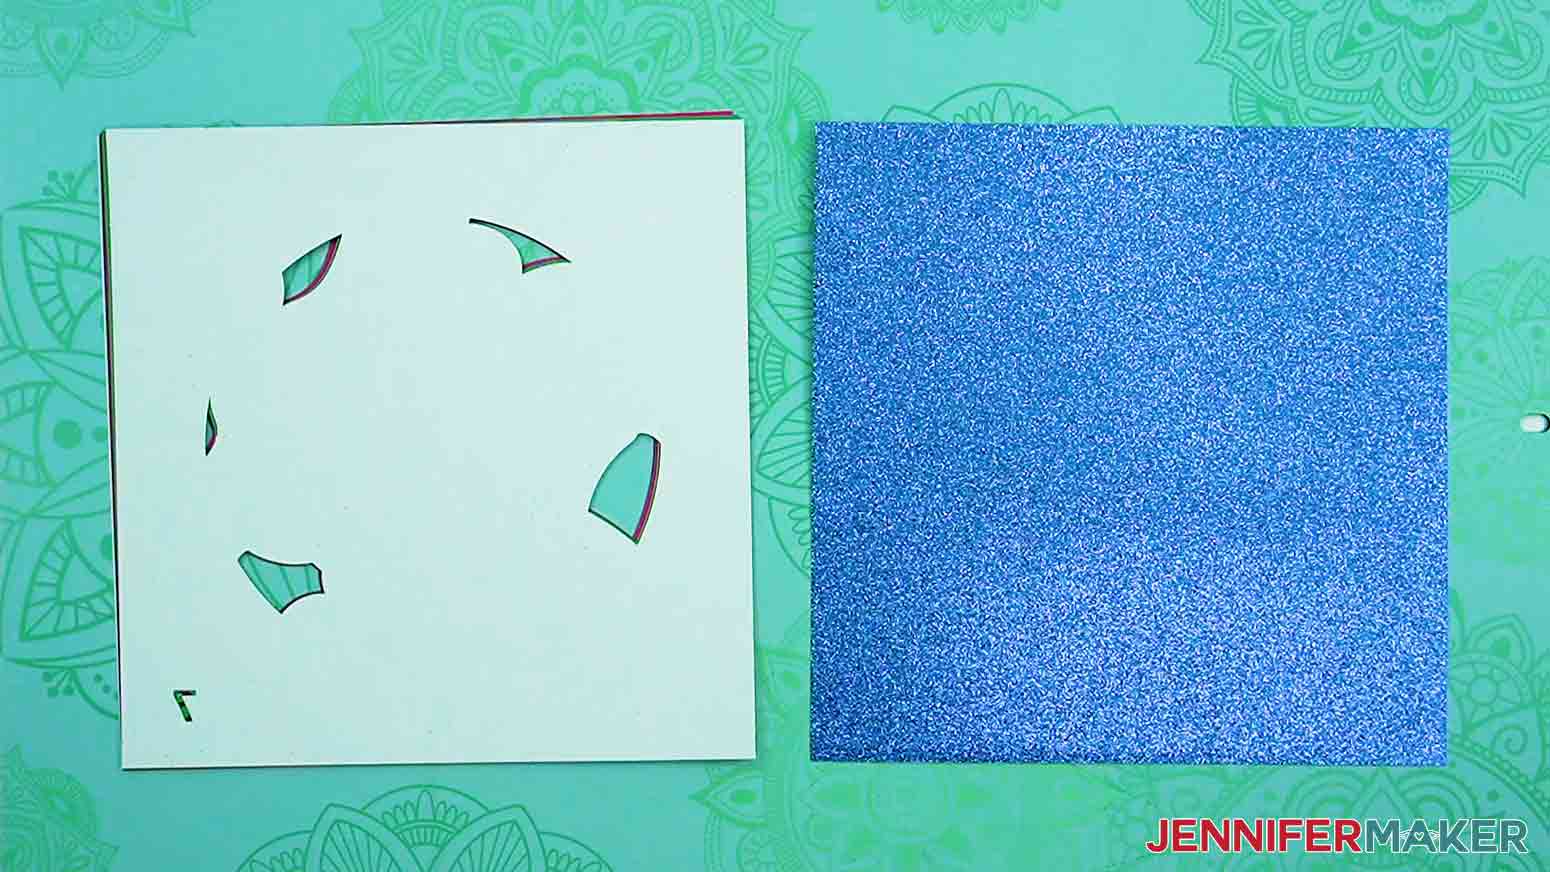
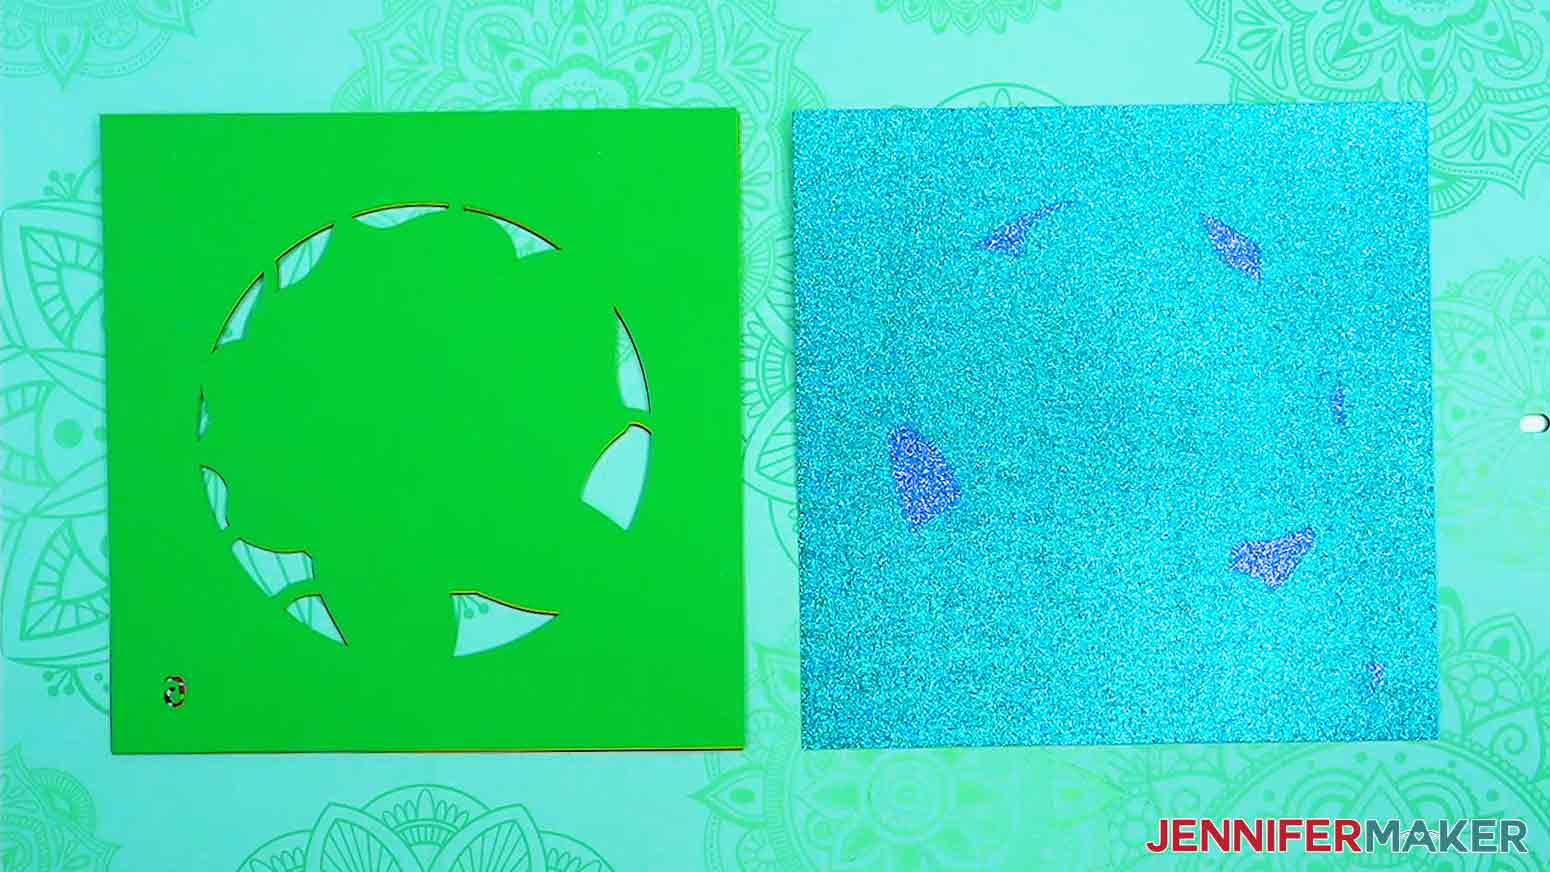
11. Repeat steps 1-10 for each mat. Refer to your screen to make sure you’re loading the correct color and type of cardstock.
STEP 4: ASSEMBLE YOUR LAYERED PAPER STAINED GLASS DESIGN
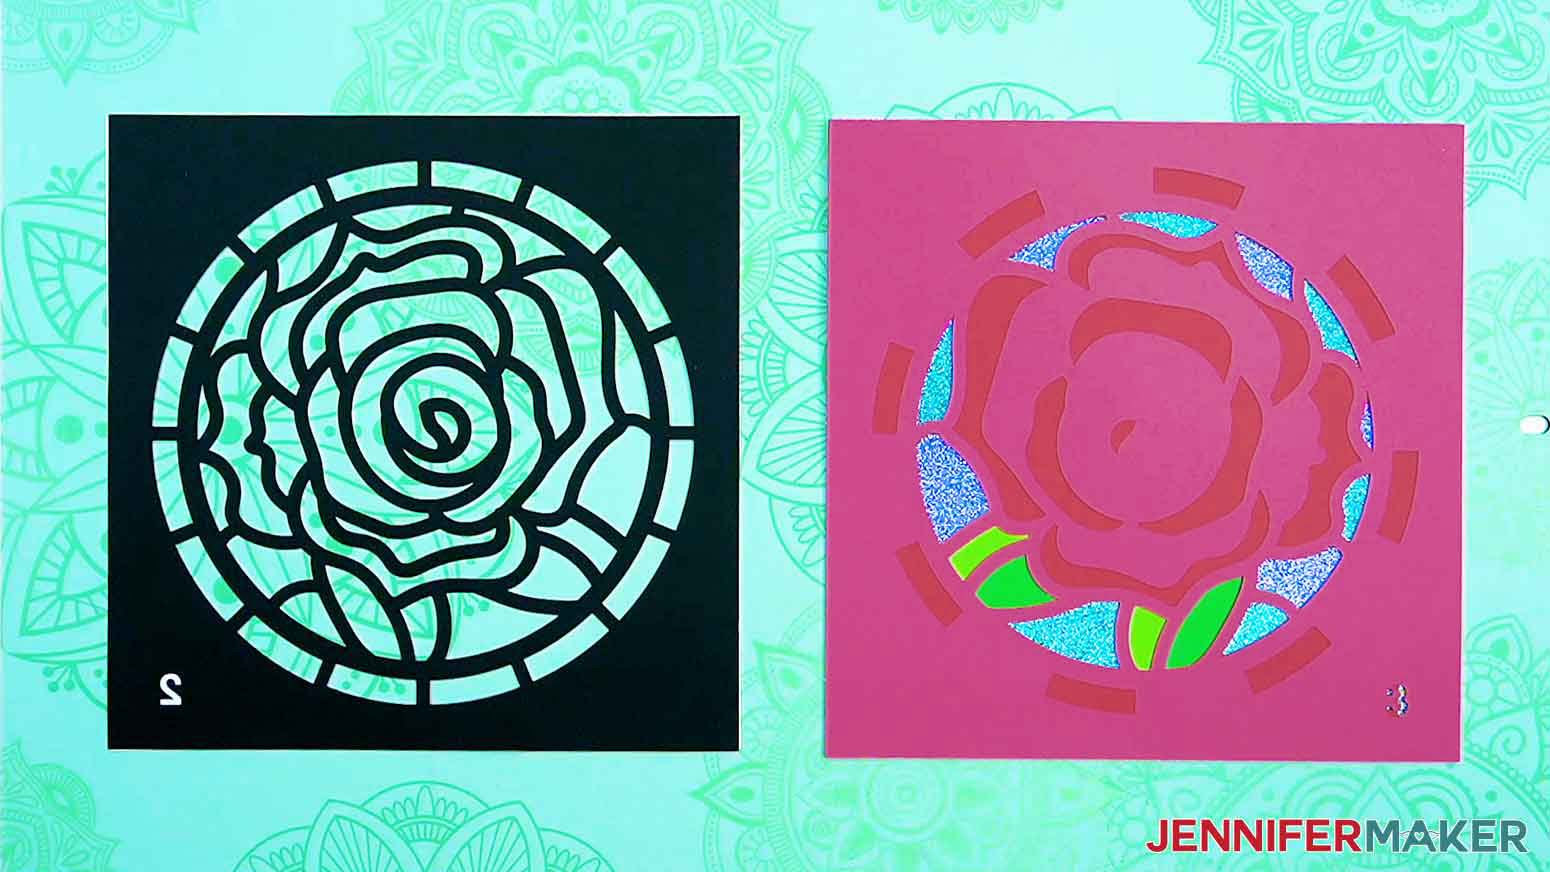
1. Stack the design layers face up in the correct order from top to bottom.
TIP: The top layer will always be the square with the circle cutout, while the bottom layer will always be the solid square. The middle layers have numbers cut in the bottom right corner to help place each in the correct order.
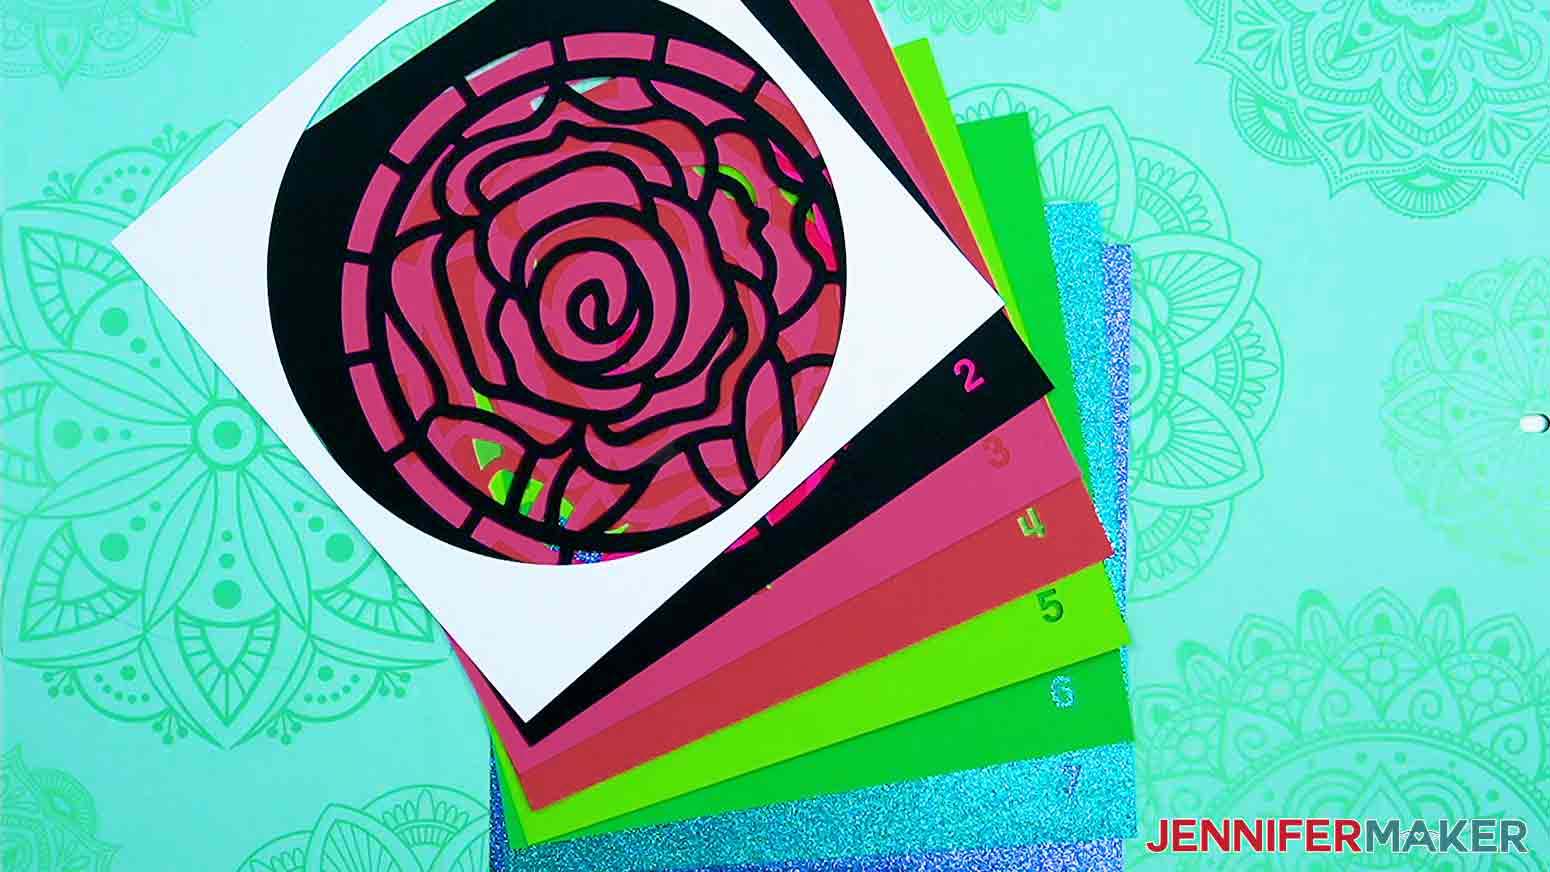
2. Flip the cardstock stack face down on your work surface so the solid back piece is visible on top.
3. Flip the back layer right side up and place it next to the cardstock stack.
4. Place several dots of craft glue on the back of the next layer in the stack
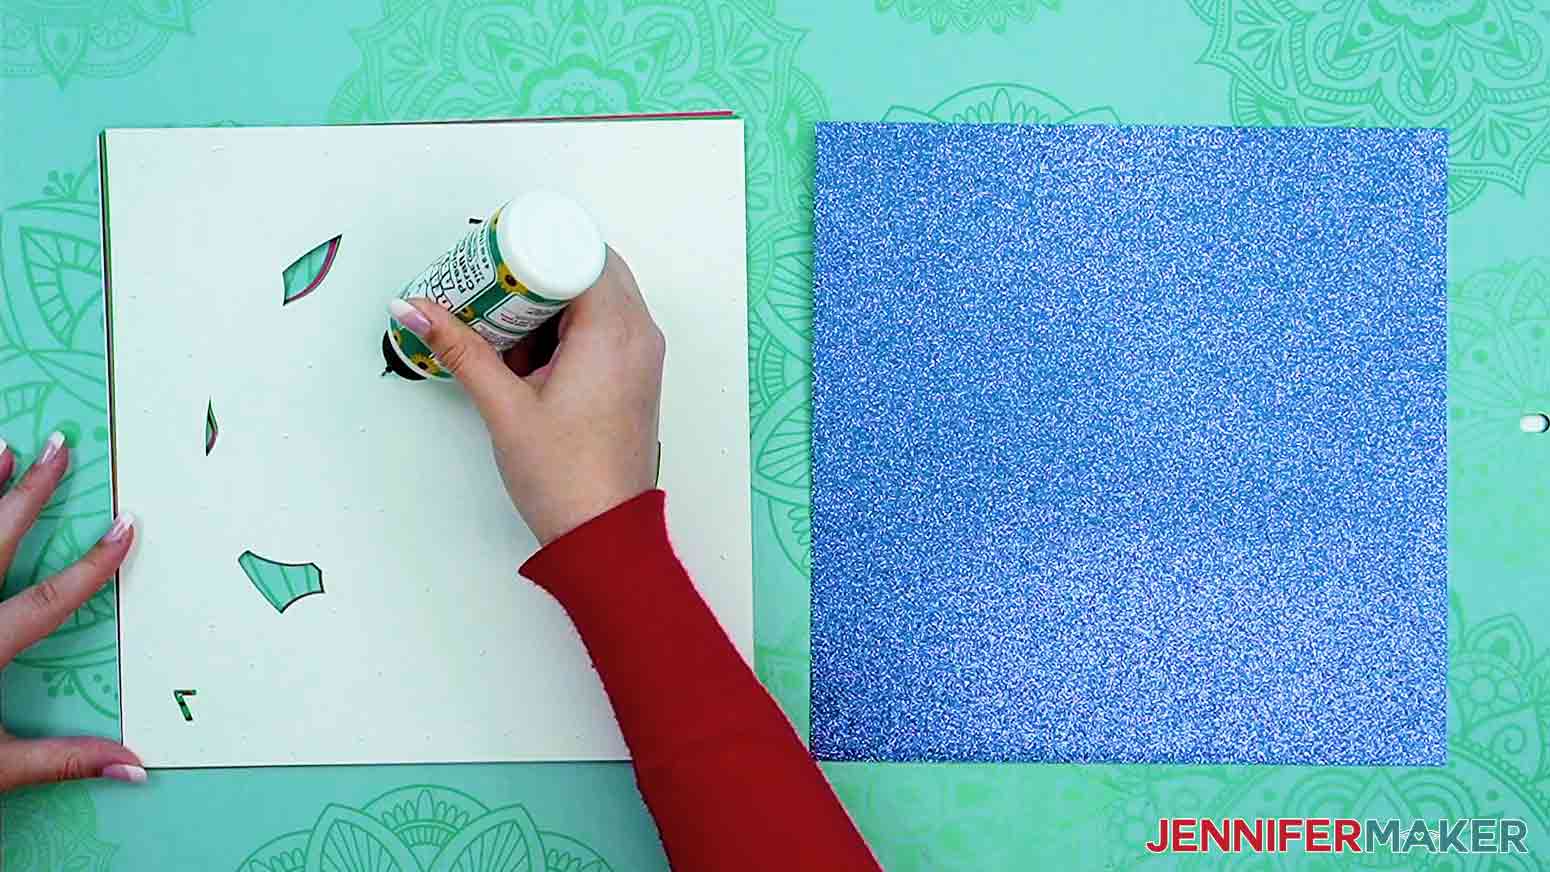
5. Flip the layer with the glue over and adhere it to the front of the bottom layer. (Make sure to align the edges as closely as possible.)
6. Allow the glue to set for a minute before gluing the next layer in the same manner.
7. Follow steps 3-6 above to adhere the rest of your layers.
8. After gluing all your layers together, view your assembled layers from the front to make sure everything looks correct
TIP: These designs look best when the layers touch each other, but adhesive foam squares can be used between each layer to give depth to the designs. For more information on assembling a layered design using adhesive foam squares, see my How to Layer A Floral Heart tutorial.
9. Clean the glass inside the frame with alcohol and a lint-free cloth or coffee filter.
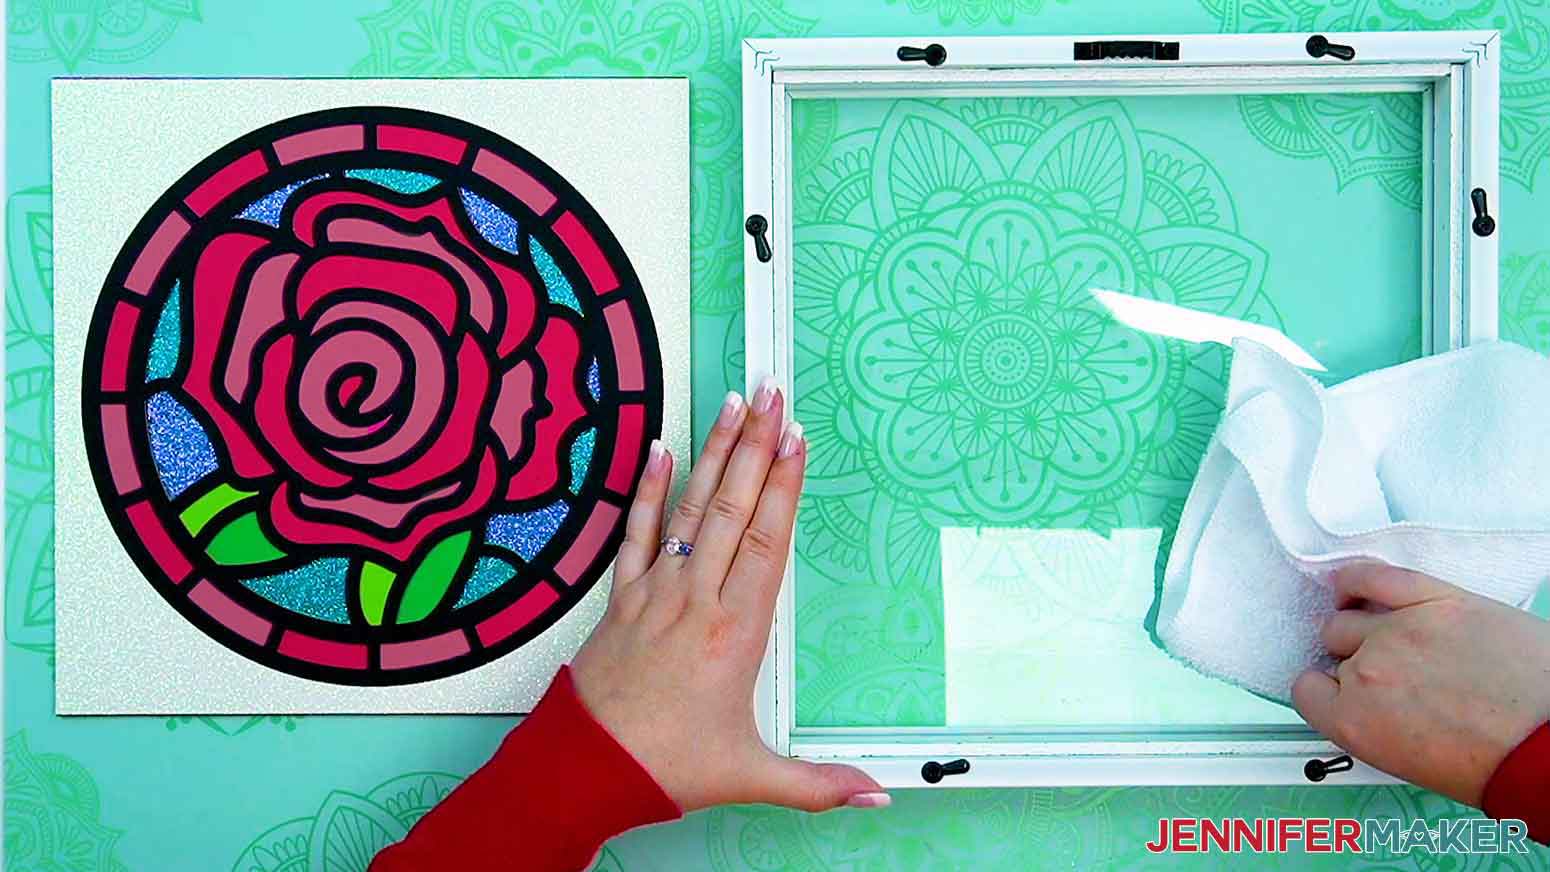
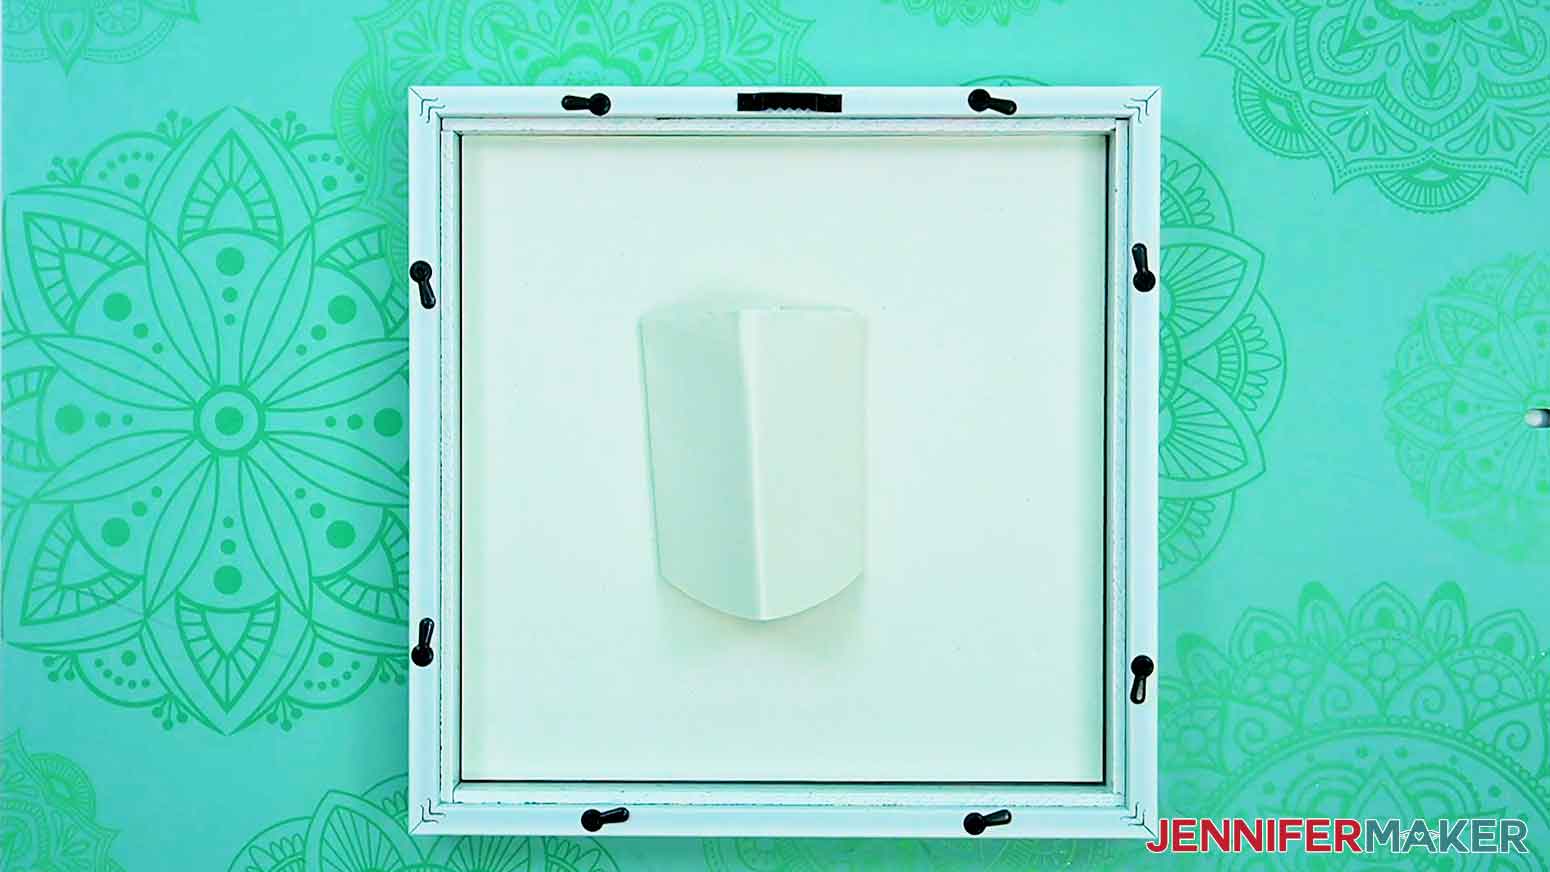
10. Place the assembled cardstock layers into the frame so the top layer is touching the glass and the solid back layer is touching the frame's backing.
11. Close the frame.
TIP: Make sure the design is oriented correctly so that any hanger is at the top of the design when the frame is closed.
TIP: If you have extra room between the cardstock and the back of the frame, as I did, you can use stacked adhesive foam squares as fillers between the cardstock and the backer. Alternatively, fold a large scrap piece of heavy cardstock several times and place it between the layers of cardstock and the backer to help hold the layers of cardstock against the glass. (The circle cut from the top glitter cardstock layer works great for this!).
BONUS:
Cut your Design on the Cricut Joy!
1. Follow Step 1 above to get my Layered Paper Stained Glass designs.
2. Follow the directions in Step 2 above to measure your frame and upload your chosen design to your Design Space Canvas.
3. Reduce the size of your design so it can be cut on the Cricut Joy. To do this, select all layers and change their dimensions under “Size.” Make sure the lock icon is closed to maintain the proportions. I chose to make my design 4” square.
NOTE: The maximum size a Cricut Joy can cut is 4.25” x 6.25” when using a standard-sized mat.
4. Make sure the correct machine is selected in the top right
5. Click “Make It”
6. If prompted, click "On Mat," choose your mat size, and click “Confirm.”
7. Choose 4.5” x 6.5” or 4.5” x 12” for your material size. I cut my cardstock to 4.5” x 6.5”.
8. Click “Continue”
9. On the Make Screen, click “Browse All Materials.”
10. Search for and select the correct material setting for the mat being cut. I used a mix of “Glitter Cardstock” and “Light Cardstock – 65 lb (176 gsm)” depending on the color of the mat.
11. Select “More” for the Pressure
12. Place the cardstock for your first mat face up on a green Joy StandardGrip machine mat.
13. Use a brayer to adhere the cardstock.

14. Insert the machine mat into your Cricut Joy.
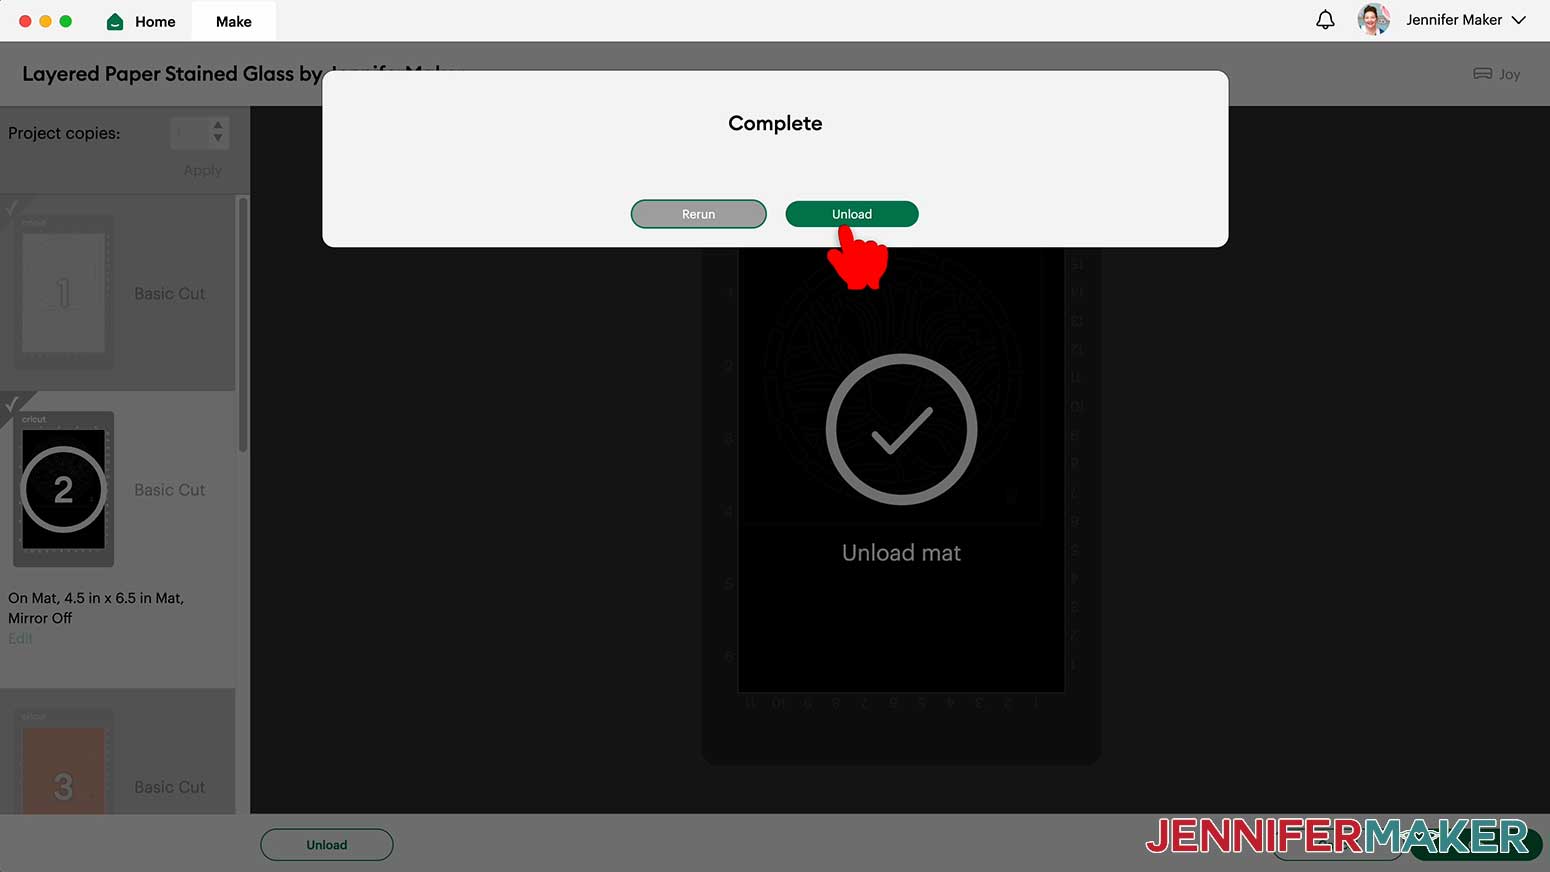
15. Click the “GO” button in Design Space to begin cutting.
16. Once the cutting is complete, and before unloading your mat, check to see if the cut went all the way through. If not, click “Rerun” in Design Space for another pass.
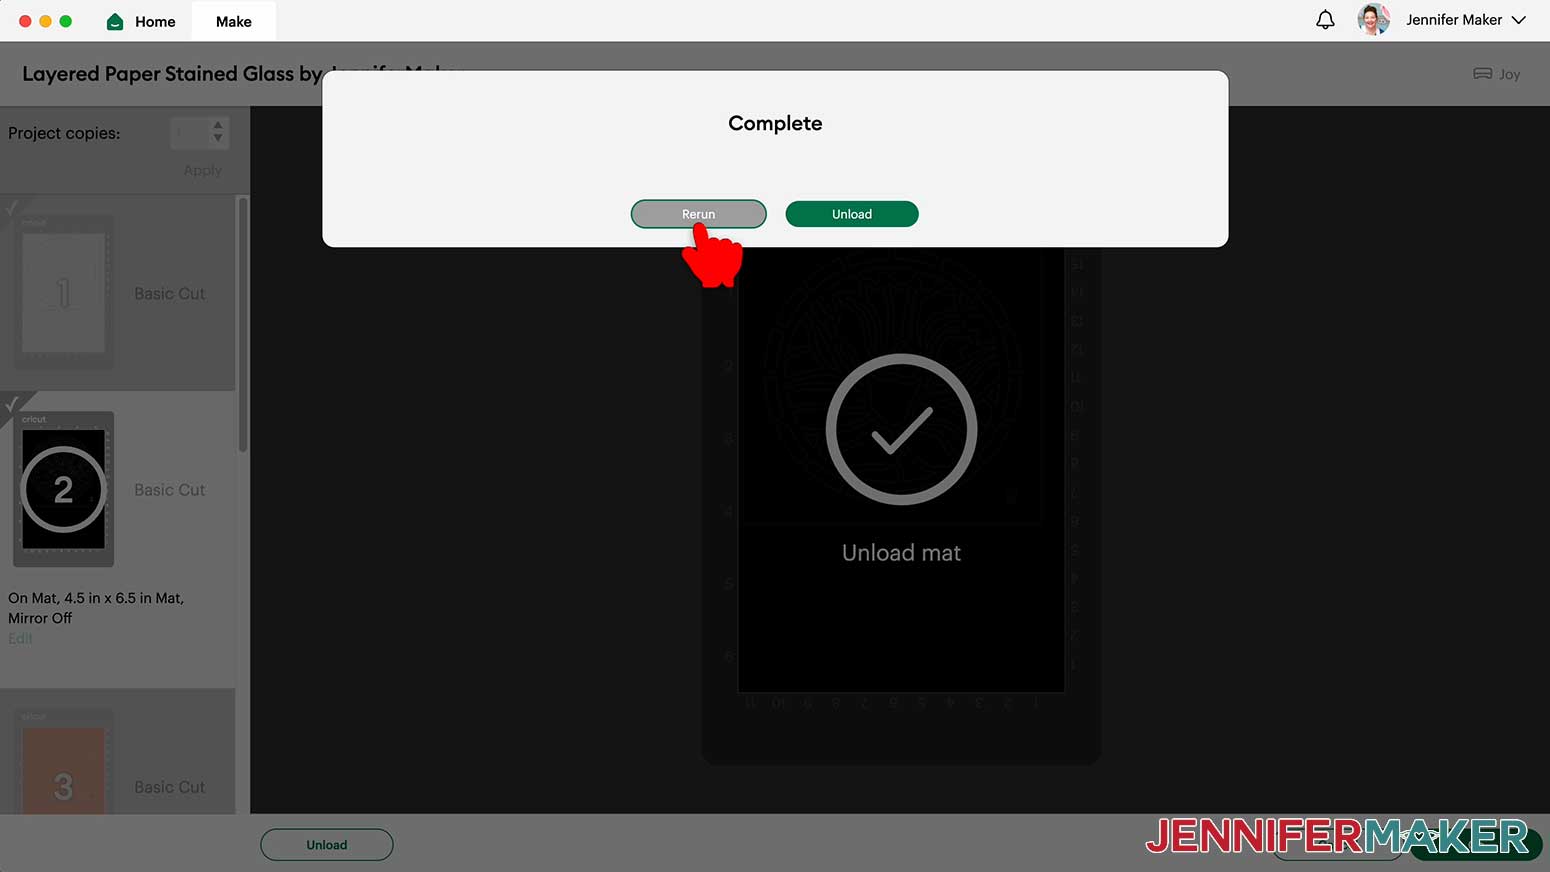
17. Click “Unload” in Design Space to unload the machine mat.
18. Flip the mat over onto your work surface and gently pull the mat away from the cardstock.
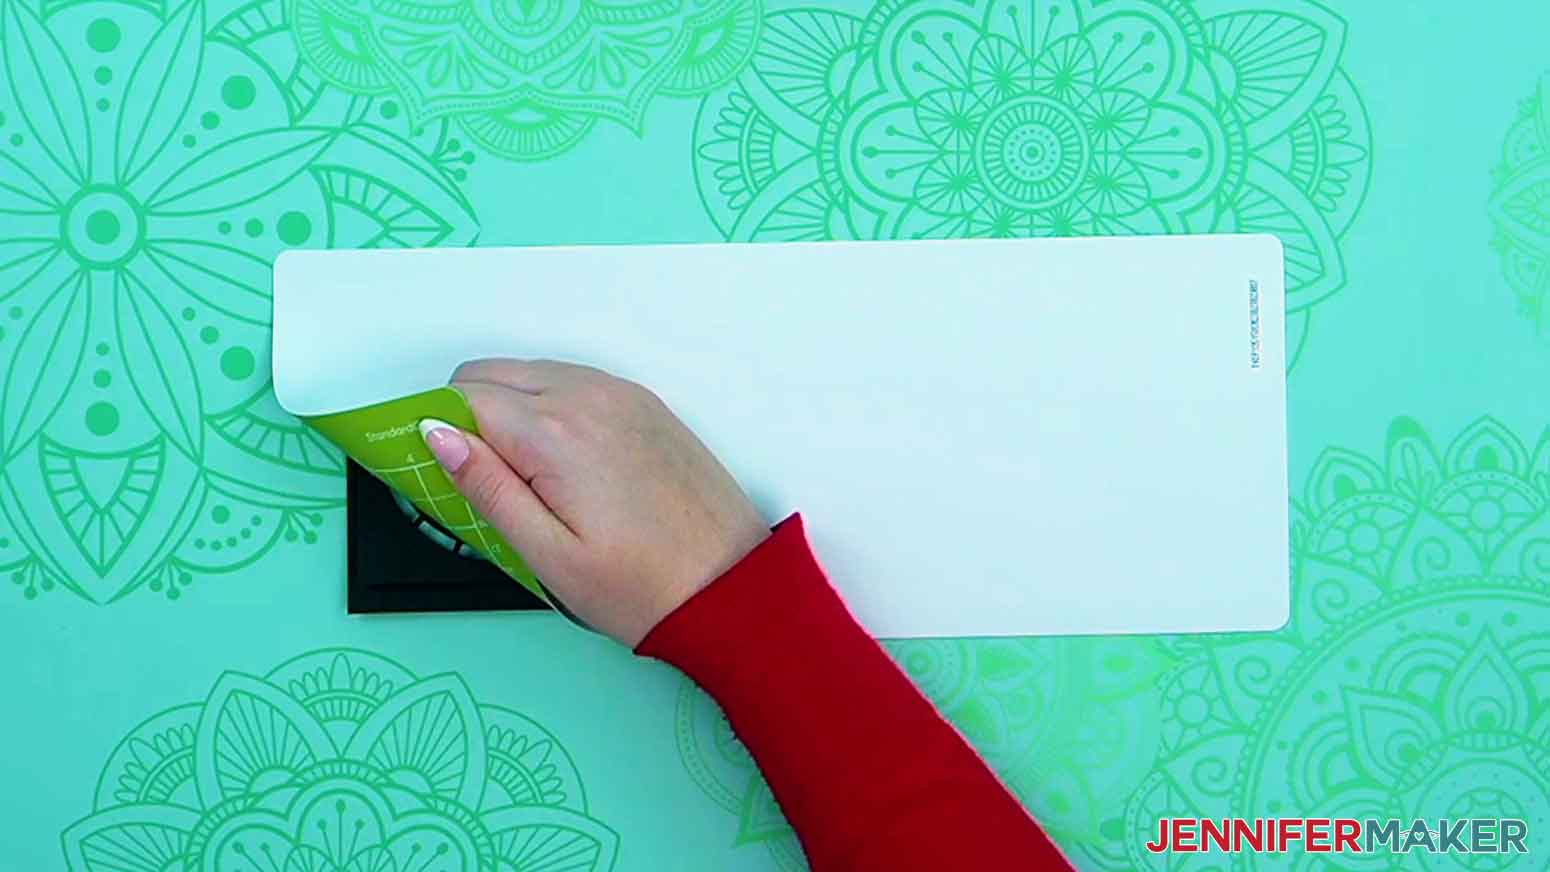
TIP: Use a spatula to help remove delicate cuts from the mat. See my tutorial How To Cut Intricate Designs On A Cricut for more cutting tips!
19. Repeat steps 9-18 for each mat. Refer to your screen to make sure you’re loading the correct color and type of cardstock.
20. Follow the directions in Step 4 above to assemble your Joy-sized Layered Paper Stained Glass design!
Joy-size designs are great to display by themselves, in miniature frames, or they can be used as embellishments on larger cards and other projects.
STEP 5: SHOW IT OFF
Here is what my finished Layered Paper Stained Glass designs look like! Framed layered paper designs make great gifts and home décor. These designs can also be cut in various sizes to suit your needs.

Notes
Finished size:
11.5” x 11.5” for each design
(12” x 12” in frame)
Answers to Your Questions About Making Paper Stained Glass Nature Designs
Q: What is layered paper art called?
A: I usually call it just that, “layered paper art,” but the technical term for layered pieces of paper cut in a design is “three dimensional decoupage.” I also call them “shadow boxes,” “mandalas,” or any combination of those terms. What do you call them?
Q: How do you make fake stained glass without glass? Can you show me how to do layered art that looks like stained glass?
A: I sure can, just follow this tutorial! I show you how to make a faux stained glass window art project out of card stock and glue or small squares of adhesive foam — no glass or stained-glass equipment necessary.
Q: What materials look like stained glass?
A: You may have several materials in your craft supplies that look like stained glass. I’ve seen many stained glass-inspired projects that anyone can make — even young children still developing their fine motor skills! There are projects that use sheets of tissue paper, tissue paper shapes, plastic wrap, wax paper, contact paper, or even use a laminating sheet. There are so many ways to create a beautiful piece of art inspired by stained glass! There’s even projects where crafters made their faux stained glass windows into actual working sun catchers to “wow” you on a sunny day!
Q: How do you display layered paper art?
A: You can display your layered paper stained glass projects in a glass frame or shadowbox, on an easel or stand, or you can make it a part of another craft. Watch the video to find out how I used my tiny Cricut Joy-sized version!
Q: What is the best knife for paper cutting art?
A: For projects where hand-cutting is recommended or the easiest method, I really like Cricut’s craft blade, the TrueControl knife. For craft projects that are intricate, detailed, or require more precise cuts, I highly recommend investing in a cutting machine like a Cricut. There are several different models (and other brands) to consider, so make sure to do your research and get the one that’s best for your crafting needs — and your wants! Those are important, too.
Q: How do you make 3D layered paper art with Cricut?
A: This tutorial is a great place to learn how! If you’re jonesing for another style of 3D layered paper art, just take a look around my blog — I have SO many different layered paper projects, you’re sure to find something you like! And if not, you can always learn to design your own in my classes.
Q: How do I get all of these bits of paper off of my machine mat?
A: Use a small scraper to slough the small pieces of cardstock that get cut out and left behind on your mat — it’s a small hack that can save a ton of time!
Q: My cardstock keeps ripping on the intricate cuts. What can I do?
A: Be sure you’re using a clean and sticky machine mat, good-quality cardstock, and a clean blade. See my Cricut Cutting Problems blog post to learn the tips and tricks I use to get clean cuts every time.
Q: How do I choose which Cricut to buy?
A: That’s a great question, and one only you can answer. Depending on your budget, needs, desires, and available space, you may prefer one model of Cricut over another. I have a useful blog post to help you figure out which one might work best for you!
Q. Do I have to use a Cricut machine?
A: No! We always include several versions of each digital item in the ZIP file. If you have a Silhouette Cameo, which uses Silhouette Studio, you can use the DXF file in Silhouette Basic Edition. If you have upgraded to Silhouette Designer Edition, Designer Edition Plus, or Business, you can use the SVG format with your Silhouette machine. If you don’t have a cutting machine, you can print and then cut out my digital download PDF files, too! The ZIP archive in my resource library includes these file types and more!
Q: Are your free SVGs and PNGs just for personal use or also commercial use?
A: First thing, I’m honored that you’d ask! Yes, you can sell completed projects using my designs (with limitations) along with other designs in my free library — please read about licenses here so you know what you can and cannot do. If you use them, please share photos with us! We love to see them.
Get my free SVG/DXF/PDF files to make your own paper stained glass project!
(If you do not see the signup form above, click here.)
I love seeing what you make with my designs and how you use them! Please share a photo of your paper stained glass projects in our Facebook group or tag me on social media with #jennifermaker.
Love,

Want to remember this? Save this Paper Stained Glass Tutorial to your favorite Pinterest Board!