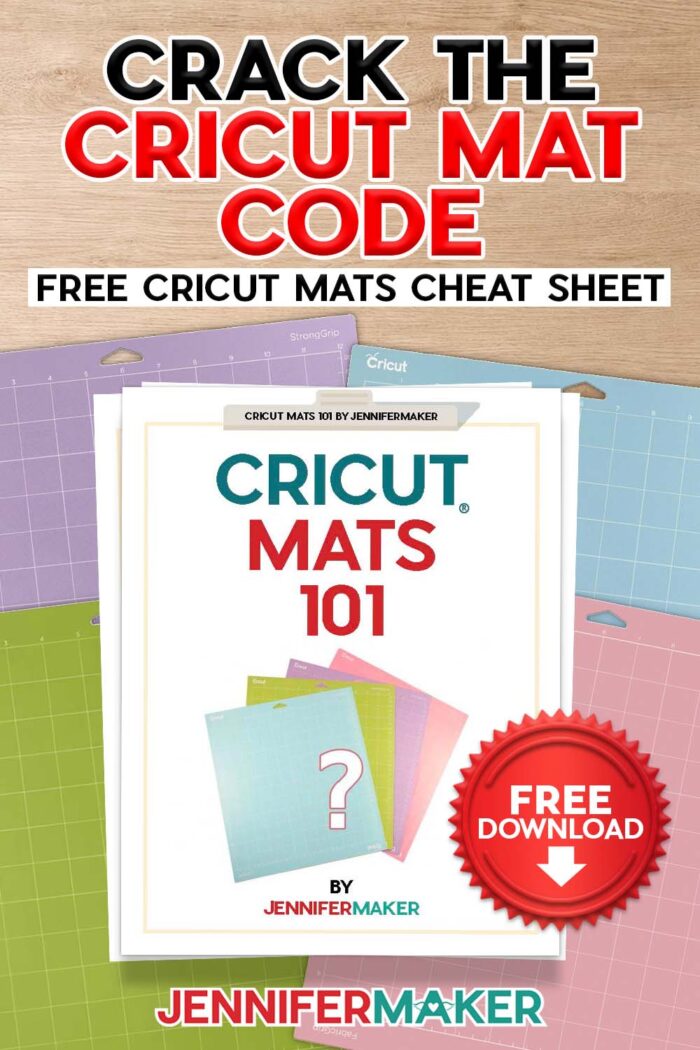
Confused by Cricut cutting mats? This beginner-friendly Cricut Mat Guide explains how to match specific materials to each mat for the best results every time.
Blue, green, purple, or pink—which Cricut mat should you use?
It’s a simple question until you’re standing at your craft table with three different mats, a sheet of cardstock or vinyl you don’t want to waste, and a tutorial that simply says, “Place it on your mat.”
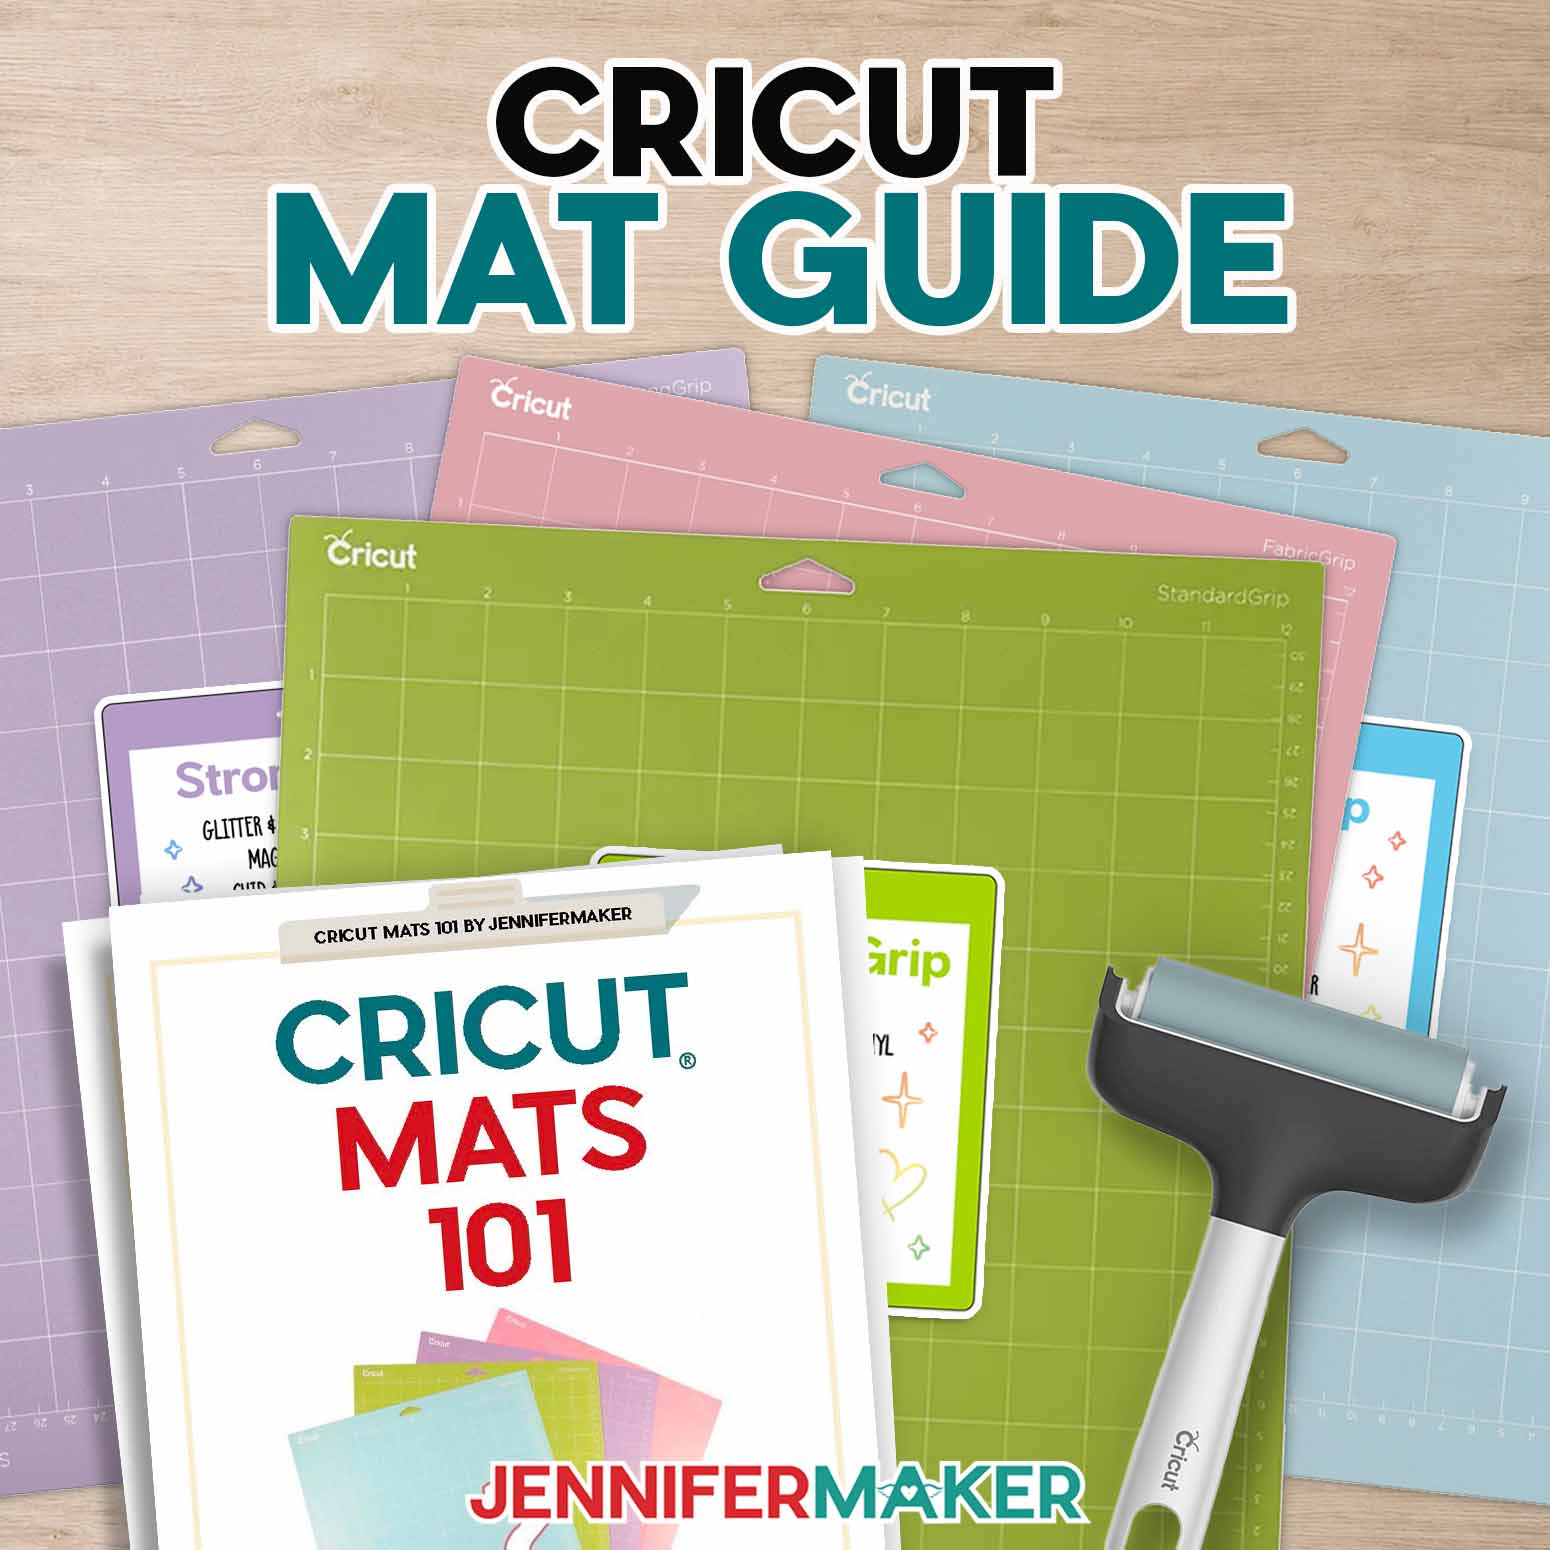
If your Cricut mats have become a colorful stack of uncertainty that leaves you scratching your head, you’re in good company. The colors are supposed to make choosing easier, but that only works once you know what each one is telling you. So, let’s break them down!
Cricut mats got you confused? Download my free Cricut Mats Cheat Sheet for quick and easy reference to each mat’s supported materials, plus a free Cricut mat care guide and bonus Print Then Cut mat cover labels.
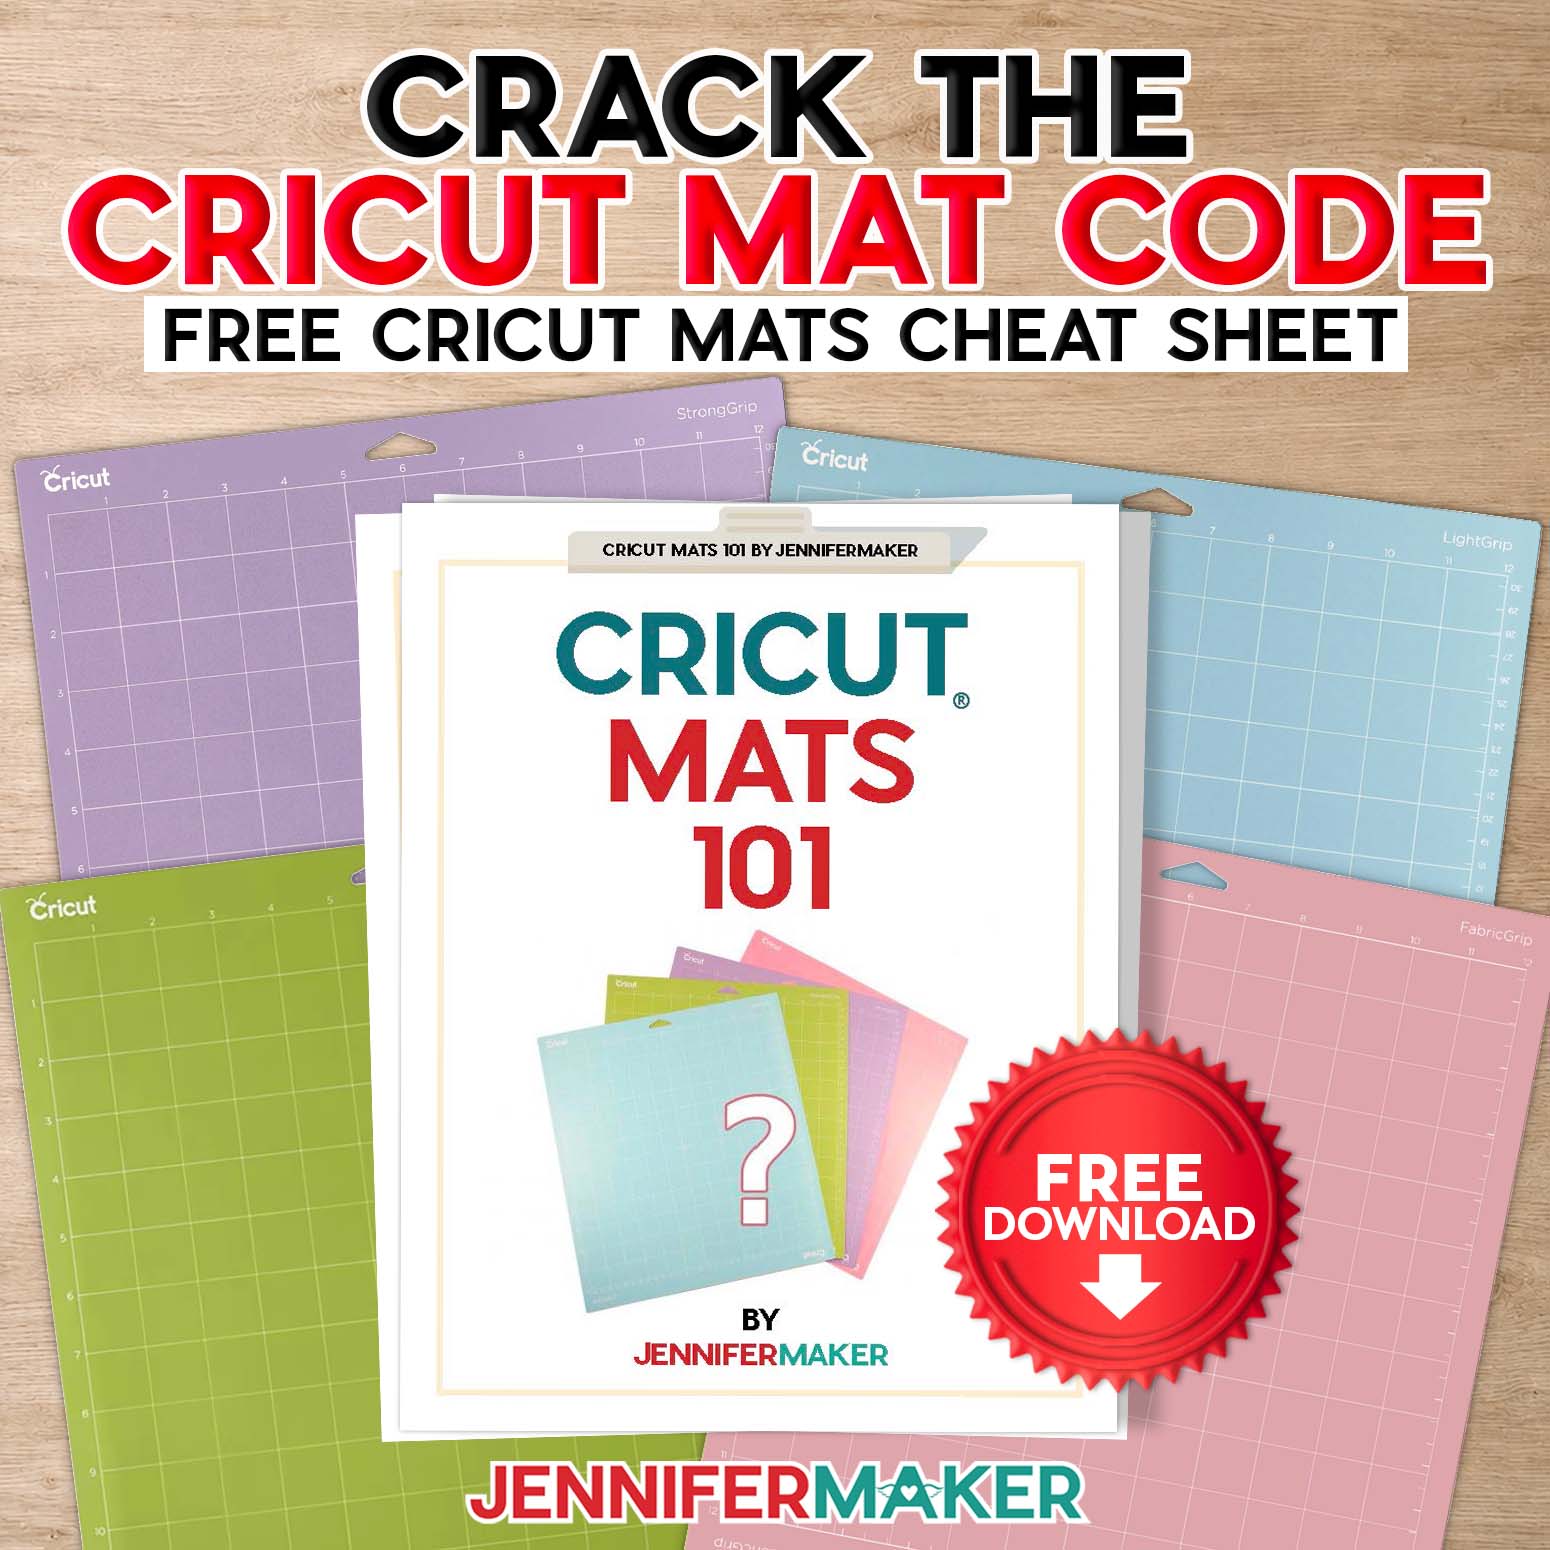
Each Cricut mat color represents a different level or type of grip:
- Blue LightGrip mat: slightly sticky, suitable for lightweight and delicate materials
- Green StandardGrip mat: sticky enough for most jobs, like your everyday, medium-weight materials
- Purple StrongGrip mat: extra sticky to really hold those thick, heavy, or specialty materials
You have some special mats, too, with specific functions:
- Pink FabricGrip mat: made with a specially formulated adhesive designed for fabrics
- Cricut Card mat: works with pre-cut inserts to make cardmaking quick and easy
And some materials don’t need any mats at all:
- Cricut Smart materials with a special backing that your Cricut cutting machine can detect
A mat that is too sticky can curl or tear delicate paper, while a mat that is not sticky enough can allow material to lift during cutting, so you want to choose the correct mat. This guide will help you get it right every time!
Ready to dive deep into the different types of mats? This beginner Cricut Mat Guide will help you understand mat colors, how to use the mats, and how to maintain your mats to extend their life. This post contains some affiliate links for your convenience, which means if you make a purchase after clicking a link I may earn a small commission, but it won’t cost you a penny more! Read my full disclosure policy.
Quick Answer: Which Cricut Mat Should I Use?
Choose the mat that provides enough grip to hold your material securely without making it difficult to remove.
Blue LightGrip Mat
Best for: Lightweight, delicate, and printable materials
Use it for:
- Copy paper
- Scrapbook paper
- Thin cardstock
- Vellum
- Construction paper
- Sticky Notes
- Light Vinyl
- Wrapping paper
Remember: Blue is for delicate materials that need gentle handling.
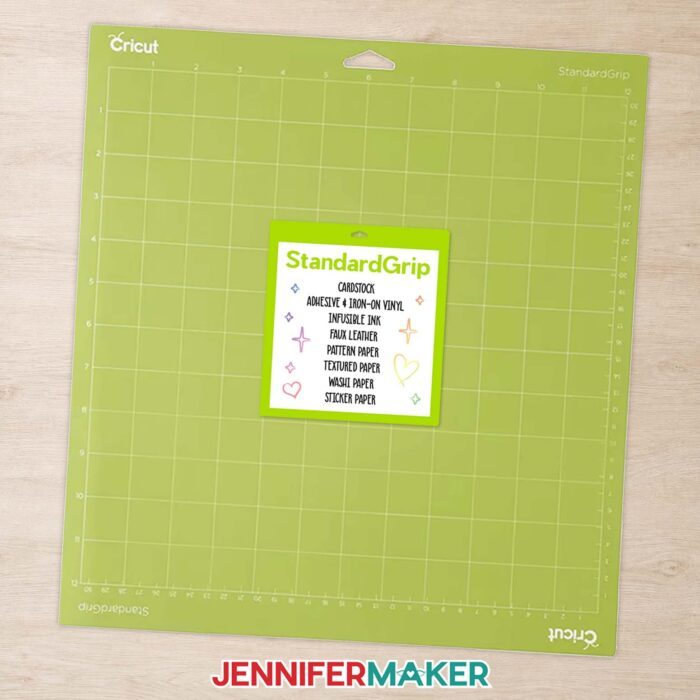
Green StandardGrip Mat
Best for: Everyday Cricut materials
Use it for:
- Regular cardstock
- Adhesive & iron-on vinyl
- Infusible ink
- Faux leather
- Pattern paper
- Textured paper
- Washi paper
- Sticker paper
Remember: Green is the everyday workhorse for your most common crafting materials.
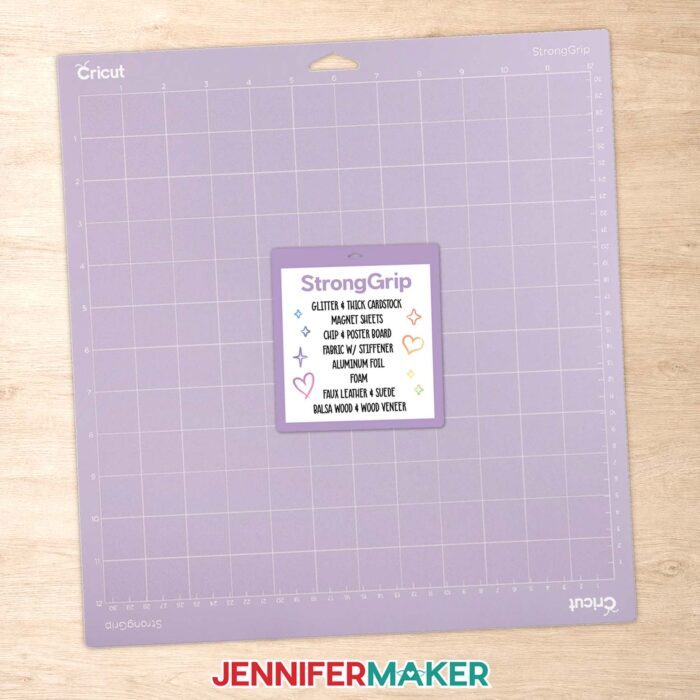
Purple StrongGrip Mat
Best for: Thick, heavy, or rigid materials
Use it for:
- Glitter & Thick cardstock
- Magnet sheets
- Chip & poster board
- Fabric with stiffener
- Aluminum foil
- Foam
- Leather & suede
- Balsa wood & wood veneer
Remember: Purple is for heavyweight materials that need a little extra tack to stay in place.
Pink FabricGrip Mat
Best for: Compatible fabric projects
Use it for:
- Unbonded fabric
- Bonded fabric
- Crepe Paper
- Burlap
- Felt
- Other sewing and appliqué materials supported by your machine
Remember: Pink is designed specifically for fabric.
Cricut Card Mat
Best for: Cutting, drawing, or foiling on folded cards
Use it for:
- Insert Cards
- Cutaway Cards
- Compatible Watercolor Cards
- Projects specifically designed for a Card Mat
Remember: The divider protects the back of the folded card while the front is being worked on.
No Mat
Best for: Compatible Smart Materials
You may be able to cut without a mat when using:
- Smart Vinyl
- Smart Iron-On
- Smart Paper Sticker Cardstock
- Smart Label materials
Your machine must support matless cutting, and the material must meet the minimum size requirements for the design. Explore 3 and newer, Maker 3 and newer, all Joys, and the Venure can use Smart Materials.
Memorizing lists takes the fun out of crafting, so I made a set of quick and easy labels for the basic cutting mats. Just download my files, Print Then Cut the labels on a compatible Cricut machine, then stick each label to its matching mat’s protective cover sheet for a handy reference.
Cricut Mat Guide: Understanding How Each Mat Works
A Cricut mat has two jobs:
- Hold your material flat and still while the machine cuts, draws, scores, or foils.
- Release the finished material without stretching, curling, or tearing it.
That means the best mat is not automatically the stickiest one. You want enough grip to keep the material from shifting, but not so much that your finished pieces are difficult to remove. Vellum may stick to a purple StrongGrip Mat, for example, but it will probably be much harder to release without damage.
And remember, grip strength is not the same as cutting strength. The mat only holds the material in place, while the machine, blade, and Cricut Design Space setting determine whether it can actually be cut.
Some projects may also require extra steps, such as taping the edges, moving the star wheels, or positioning the material in a specific area. Since materials like vinyl and cardstock can work on more than one grip, we’ll look at those gray areas below.
Blue Cricut Mat: LightGrip
The blue LightGrip Mat has the gentlest adhesive of the main Cricut machine mats. It is intended for lightweight materials that might curl, crease, or tear on a more aggressive adhesive.
What materials go on a blue Cricut mat?
Use the blue mat for materials such as:
- Construction paper
- Printer or copy paper
- Vellum
- Thin cardstock
- Printable sticker paper
- Printable vinyl
- Printable waterproof sticker materials
- Printable iron-on
- Smart Label scraps
- Lightweight vinyl
Cricut officially includes vinyl on both its LightGrip and StandardGrip lists. The blue mat is therefore a valid choice when it holds your particular vinyl sheet flat and secure.
When should I avoid the blue mat?
The blue mat may not provide enough hold for:
- Heavy cardstock
- Thick glitter cardstock
- Chipboard
- Leather
- Thick poster board
- Other stiff or heavy specialty materials
If the material begins lifting or shifting during the cut, stop the machine if necessary and reassess. The material may need a stronger grip, a new mat, or a more suitable material setting.
Beginner tip for the LightGrip Mat: A new blue mat may feel surprisingly sticky. That does not make it a green mat; it simply means the adhesive is fresh. When removing delicate paper, flip the mat over and bend the mat gently away from the paper instead of pulling the paper upward to reduce curling.
Make It With the Blue LightGrip Mat: Waterproof Print Then Cut Stickers
Ready to put your blue mat to work? Design #367 in my free library shows you how to make kiss-cut sticker sheets, die-cut stickers, and personalized labels with Print Then Cut, plus how to waterproof your stickers. You will also practice positioning a printed sheet on the mat and removing it without curling the material.
You’ll practice: Print Then Cut · Kiss cuts · Die cuts · Personalization
Difficulty: Easy · Time: About 30 minutes
Green Cricut Mat: StandardGrip
The green StandardGrip Mat is the everyday workhorse of the Cricut mat family. For many beginners, it will be the mat used most often because it works with popular materials such as cardstock, vinyl, and iron-on.
What materials go on a green Cricut mat?
Use the green mat for:
- Regular cardstock
- Patterned paper
- Embossed cardstock
- Adhesive vinyl
- Iron-on vinyl or heat-transfer vinyl
- Other medium-weight craft materials
These are some of the most common materials you’ll use in Cricut crafting.
Is the green mat good for vinyl?
Yes. The green StandardGrip Mat is an excellent everyday choice for adhesive vinyl and iron-on.
Regular adhesive vinyl appears on both Cricut’s blue and green mat recommendations, so there is some flexibility. Start with green for an everyday vinyl project. Use blue when you are working with a lighter printable product or when green provides more grip than the material needs.
When should I avoid the green mat?
Choose another mat when:
- Thin paper or vellum is difficult to remove without curling.
- Heavy or rigid material will not remain flat.
- You are cutting unbonded fabric with a Rotary Blade.
- You are using a folded-card project designed for a Card Mat.
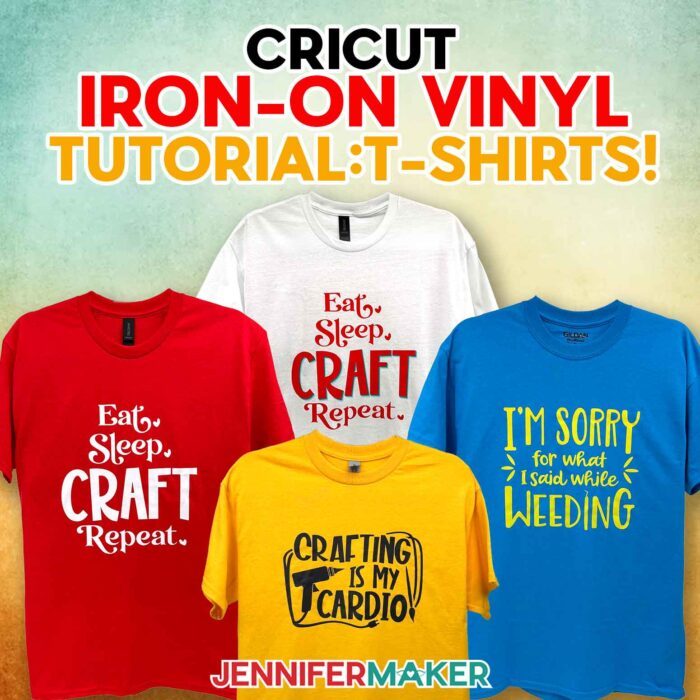
Make It With the Green StandardGrip Mat: Iron-On Vinyl T-Shirt
Iron-on vinyl is one of the most popular materials to use with a green StandardGrip Mat. With Design #748, you will learn how to mirror your design, place iron-on shiny-side down, check the cut, weed the excess vinyl, and press the design onto a shirt.
You’ll practice: Mirroring · HTV placement · Weeding · Heat application
Difficulty: Easy · Time: About 20 minutes
Purple Cricut Mat: StrongGrip
The purple StrongGrip Mat is made for heavyweight and specialty materials. Its stronger adhesive helps resist the additional movement and force involved in cutting thicker materials.
What materials go on a purple Cricut mat?
Cricut recommends the StrongGrip Mat for:
- Thick cardstock
- Glitter cardstock
- Magnet material
- Chipboard
- Poster board
- Fabric with stiffener
- Leather
Certain specialty wood projects also use a purple mat. For example, Cricut’s natural wood veneer instructions specify a StrongGrip Mat, a brayer, painter’s tape around the edges, and a compatible Deep-Point Blade workflow.
Does every thick material belong on purple?
No. Always check the instructions for the exact material. For example, some types of craft-foam or wood may require a different mat, blade, cutting pressure, or number of passes. The purple mat’s job is to hold the material; the blade and machine determine whether and how it can be cut.
Should I tape material to a StrongGrip Mat?
Some heavy-material and Knife Blade instructions tell you to secure all four edges with masking tape or blue painter’s tape. Do this when Cricut’s instructions for your material call for it—especially for chipboard, matboard, wood, or similar multi-pass cuts. Do not cover the area your blade needs to cut, and keep tape and material within the appropriate working area.
When should I avoid the purple mat?
Do not place delicate paper, vellum, or ordinary lightweight material on a purple mat simply because it is the stickiest option. StrongGrip adhesive can make those materials difficult to remove without damage.
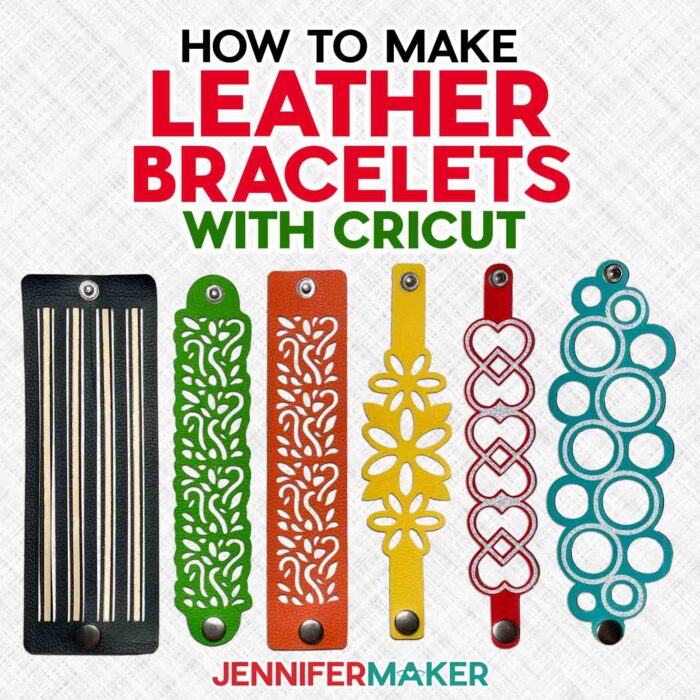
Make It With the Purple StrongGrip Mat: Leather Bracelets
Ready to try a specialty material? Design #571 shows you how to cut faux leather on a purple StrongGrip Mat and optionally add iron-on details cut on a green mat. You will learn how to position and secure the leather, protect it from roller marks, and check the cut before unloading your mat.
You’ll practice: Specialty-material placement · Edge taping · Test checking · Using two mat types
Difficulty: Medium · Time: About 45 minutes
Pink Cricut Mat: FabricGrip
The pink FabricGrip Mat is not simply another level between green and purple. It is engineered specifically for Cricut projects that require cut fabric. Its base is stronger and denser so it can withstand the pressure associated with fabric-cutting blades, while its adhesive allows fabric to be secured and released.
What materials go on a pink Cricut mat?
Use it for fabric that is compatible with your Cricut machine and blade, including common sewing and appliqué materials. With Cricut Maker machines, FabricGrip is designed for fabric used with the Rotary Blade, including fabric without a stabilizer. Cricut Explore machines require bonded fabric when using the Bonded-Fabric Blade.
Can I cut fabric on a green or purple mat?
Cricut specifically lists fabric with stiffener as a StrongGrip material, while the pink FabricGrip Mat is designed for broader fabric-cutting.
Choose the mat based on:
- Whether the fabric is bonded or unbonded
- The blade you are using
- Your Cricut model
- The instructions for that specific fabric setting
Do not assume every Cricut machine supports the same fabric tools.
Important cleaning warning: Do not wash a pink FabricGrip Mat with soap and water. This mat uses a different adhesive and can be permanently damaged by moisture. Visible fibers should be lifted with tweezers, followed by light contact with transfer tape to pick up remaining lint.
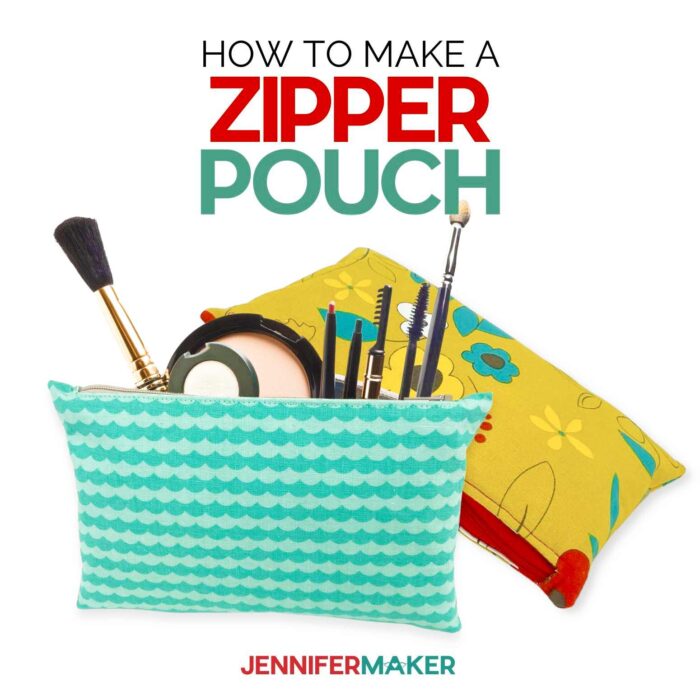
Make It With the Pink FabricGrip Mat: DIY Zipper Pouch
See how a Cricut can help with more than paper and vinyl! Design #352 walks you through preparing, marking, and cutting fabric on the pink mat before sewing the pieces into a finished lined zipper pouch.
You’ll practice: Fabric preparation · FabricGrip placement · Cricut marking · Sewing assembly
Difficulty: Easy · Time: About 1 hour 15 minutes
You’ll also need: A sewing machine, zipper, and fusible interfacing
Cricut Card Mats
A Card Mat is designed for folded cards rather than loose sheets of cardstock. Its divider allows the back of a folded card to slide underneath while the front rests on the adhesive cutting surface. This protects the back of the card while the machine cuts, draws, or foils the front.
What materials go on a Cricut Card Mat?
Card Mats are intended for compatible:
- Cricut Insert Cards
- Cricut Cutaway Cards
- Cricut Watercolor Cards
- Other card projects specifically designed for that Card Mat and machine
Cricut currently offers machine-specific Card Mats for Cricut Joy, Cricut Joy Xtra, and Explore or Maker machines. The Explore and Maker Card Mat 2 x 2 can hold up to four compatible cards, while newer machine combinations may also support a Card Mat 1 x 2.
Do I have to use a Card Mat to make cards?
No. You can make an unfolded cardstock card on a regular blue or green machine mat, then score and fold it.
Use a Card Mat when the project is designed to cut or draw directly on an already-folded compatible card.
Card Mat beginner tip: Move the machine’s white star wheels so they don’t leave tracks on the card. The correct position differs by machine, so follow the instructions for your exact model.
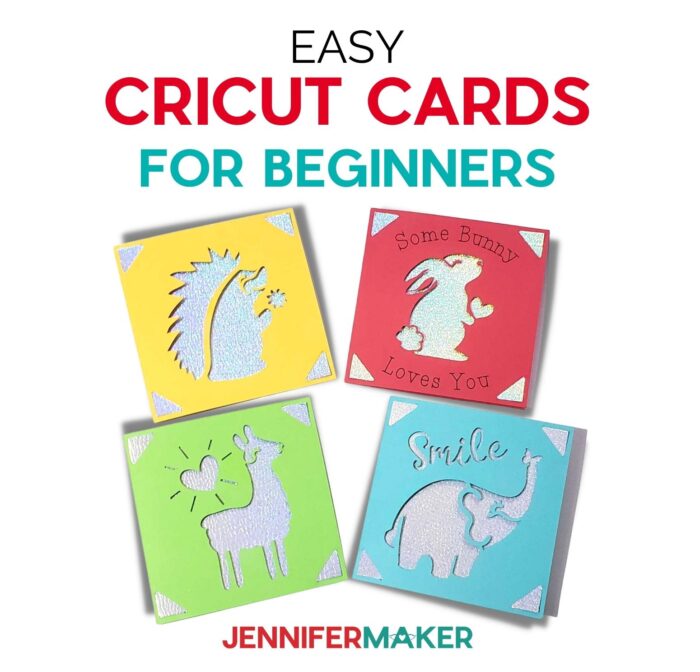
Make It With a Cricut Card Mat: Cricut Cards for Beginners
Not sure how a Card Mat differs from a regular machine mat? Design #398 includes files for both methods. Make a bunny, elephant, llama, or hedgehog card while practicing pens, score lines, folded-card placement, and simple personalization.
You’ll practice: Card Mat loading · Pens · Score lines · Custom messages
Difficulty: Easy · Time: About 20 minutes
And if you come across a set of instructions that doesn’t tell you which mat to use (note: all of my library projects recommend the best mat for the material!), start with this quick color shortcut:
- Cutting thin or delicate material? Opt for blue.
- Cutting an everyday material? Go for green.
- Cutting something thick, rigid, or heavily textured? Start with purple.
- Cutting fabric? Grab your pink mat.
- Making a folded Cricut card? Use the Card Mat.
- Using Smart Material in a compatible machine? You may not need a mat.
- Still unsure? Test a small piece before cutting your main project.
When You Don’t Need a Cricut Mat
Compatible Smart Materials can feed directly into certain Cricut machines without a mat.
For Explore and Maker models, matless Smart Material cutting applies to Cricut Explore 3 and later and Cricut Maker 3 and later. Cricut Joy-series machines also support machine-specific Smart Materials without a mat.
Examples include:
- Smart Vinyl
- Smart Iron-On
- Smart Paper Sticker Cardstock
- Smart Label materials
However, small scraps may no longer be wide or long enough to feed correctly without a mat. Cricut recommends placing undersized Smart Material scraps on a compatible cutting mat.
In Design Space, make sure the load type you select matches what you actually place in the machine: Without Mat, On Mat, or On Card Mat. The chosen load type affects which material settings Design Space displays.
Common Cricut Mat Mistakes and How to Fix Them
My paper tears when I remove it: The mat may provide more grip than your material needs, or you may be pulling the paper upward. Try a blue LightGrip Mat for thin paper. When the cut is finished, flip everything over and peel the mat away from the paper.
My cardstock curls: Avoid lifting the cardstock straight off the adhesive. Turn the mat over and bend the mat away from the cardstock. If the cardstock still curls badly, consider whether a blue mat would provide enough hold with an easier release.
My material moves during cutting: Check for:
- A dusty or fiber-covered mat
- Insufficient grip for the material
- Lifted corners
- Material hanging beyond the adhesive area
- The wrong load type or material setting
- A mat that has reached the end of its useful life
Clean the mat using a method that is safe for that mat color. If material still slides after cleaning, I recommend replacing the mat rather than applying third-party adhesive products as these can damage the mat further.
My thick material lifts at the edges: Confirm that StrongGrip is recommended and that your machine and blade support the material. For certain Knife Blade, wood, chipboard, and matboard projects, Cricut instructs users to tape all four edges with light-adhesive masking or painter’s tape.
I chose the correct mat, but the material did not cut through: The mat only holds the material, so there is likely another culprit if your cuts don’t go all the way through. Also check:
- Blade compatibility
- Blade condition
- Exact material setting in Cricut Design Space
- Cut pressure in Design Space
- Whether the project requires multiple passes
- Machine compatibility
- Test-cut results
My pink mat is covered in fibers: Do not rinse or scrub it. Water can permanently damage the FabricGrip adhesive. Instead, use tweezers to lift visible threads, then lightly use transfer tape to pick up remaining fibers.
How to Care for Cricut Mats
Cricut mats are consumable, but a few simple habits can help renew their stickiness level and extend the life of your mats.
After each project, remove leftover scraps and replace the protective plastic cover. Try to handle the mat by its edges, since oils and lotions from your hands can reduce the adhesive’s grip.
When cutting smaller materials, vary where you place them instead of always using the upper-left corner. This helps prevent one area of the mat from wearing out much faster than the rest.
Store mats flat or hang them from the hole at the top so they do not bend or warp. It can also help to label certain mats for messy materials such as glitter cardstock, felt, fabric, or faux leather.
For light cleaning, gently remove scraps and fibers with a scraper or tweezers. Blue, green, and purple mats can be cleaned more thoroughly with alcohol-free baby wipes or warm water and a small amount of degreasing dish soap, then left to air-dry completely.
The pink FabricGrip Mat needs different care. Do not wash it with soap and water. Instead, remove visible threads with tweezers and use transfer tape to lift remaining lint.
Avoid alcohol, harsh cleaners, abrasive scrubbers, oils, and adhesive sprays. If a clean mat still allows the correct material to lift or shift during cutting, it is probably time to replace it.
Keep the cleaning instructions handy: Download my free Cricut Mat Guide with a bonus section on How to Clean a Cricut Mat.
Where Can I Get More Cricut Help?
If you still have questions about Cricut mats and more, don’t sweat it! We all start our Cricut journeys at the beginning, and no question is silly when you’re trying something new.
Here are a few useful resources I recommend:
JenniferMaker tutorials: My step-by-step Cricut blog posts are a great place to start because you can pause, reread, zoom in on photos, and follow along at your own pace.
JenniferMaker YouTube channel: If you like to follow videos, short videos and full tutorials can help you see exactly what each step looks like in real time.
Cricut community groups: There are lots of Cricut Facebook groups where Cricut friends share tips, answer similar questions, and show what worked for them. Just remember that advice can vary, so when in doubt, check the tutorial instructions or your material manufacturer’s guidance. I’d love for you to join us in the JenniferMaker Cricut Group!
Free workshops: Workshops are a very special place to get more guided help because they give you a focused project and a clear path to follow.
Official Cricut support: For machine, account, Cricut Access, or technical problems, look for official Cricut Member Care options through Cricut’s current support pages. I’d use official online chat or support links instead of random phone lines or free phone numbers you find elsewhere online.
Between tutorials, videos, community help, and expert help when you need it, you don’t have to figure everything out alone.
Frequently Asked Questions About Cricut Mats
Q: Which Cricut mat should I use for vinyl?
A: Use the green StandardGrip Mat as a reliable everyday choice for regular adhesive vinyl and iron-on. Cricut also lists vinyl as compatible with the blue LightGrip Mat, so blue can be used when it securely holds the sheet. Printable vinyl is specifically included in Cricut’s LightGrip recommendations.
Q: Which Cricut mat should I use for cardstock?
A: Use blue for thin or delicate cardstock, green for regular cardstock, and purple for thick or glitter cardstock. If ordinary cardstock curls or tears during removal, the adhesive may be stronger than the paper needs.
Q: Which Cricut mat should I use for sticker paper?
A: Use the blue LightGrip Mat for printable sticker paper and printable waterproof sticker materials. Select the corresponding printable-material setting in Design Space rather than a generic paper setting.
Q: Which Cricut mat should I use for iron-on vinyl?
A: Use the green StandardGrip Mat for regular iron-on or HTV. Cricut lists printable iron-on with the blue LightGrip Mat, so check whether you are using regular cut iron-on or a printable product.
Q: Which Cricut mat should I use for glitter cardstock?
A: Cricut recommends the purple StrongGrip Mat for glitter cardstock. Confirm the exact glitter-cardstock material setting and perform a test cut before using a valuable sheet.
Q: Which Cricut mat should I use for fabric?
A: Use the pink FabricGrip Mat with a compatible fabric blade and machine. Maker machines can use the Rotary Blade for unbonded fabric, while Explore fabric workflows require bonded fabric and a compatible Bonded-Fabric Blade. Stiffened fabric may instead use the purple StrongGrip Mat.
Q: Can Cricut Joy use the same mats as Cricut Maker or Explore?
A: No. Cricut Joy and Joy Xtra use different mat widths. Cricut Joy uses 4.5-inch-wide mats, while Joy Xtra uses 8.5-inch-wide mats. Maker and Explore machines generally use 12-inch-wide machine mats.
Q: Do Smart Materials need a Cricut mat?
A: Not when they are used in a compatible machine and meet the minimum dimensions for matless loading. Small Smart Material scraps should be placed on an appropriate cutting mat.
Q: Can I use a StrongGrip Mat when my StandardGrip Mat is no longer sticky?
A: It is better to clean or replace the worn StandardGrip Mat than to substitute a stronger mat for a delicate material. Excessive grip can damage paper during removal. Cricut also advises replacing mats that continue to slip after proper cleaning.
Q: Can I make my Cricut mat sticky again with spray adhesive?
A: Cricut does not recommend third-party adhesive sprays or glue pens. The company warns that these products may damage the machine or affect warranty coverage. Clean the mat appropriately first, use temporary edge tape when suitable, or replace the mat.
Q: How often should I replace a Cricut mat?
A: There is no single replacement schedule. Mat life depends on what you cut, how frequently you use it, how much fiber and debris collect on it, and how it is stored. Replace a mat when it is clean but can no longer keep appropriate material from sliding.
Final Thoughts: Start With the Material, Then Choose the Mat
The next time you find yourself asking, “Which Cricut mat should I use?”, start with this simple color key:
- Blue for light and delicate
- Green for everyday
- Purple for heavy and specialty
- Pink for fabric
Then check three things: your machine, your blade, and the exact Design Space material setting.
You don’t need to memorize every material Cricut can cut. You only need a dependable starting point, a small test piece, and permission to pause when something doesn’t look right.
One torn sheet does not mean you are bad at Cricut. It usually means the project is teaching you something about grip, pressure, material weight, or removal technique. Make the adjustment, try again, and keep on crafting a life you love!
Love,

Want to remember this? Save this Cricut Mat Guide to your favorite Pinterest board!