Learn how to make easy, 15-minute gifts using your Cricut cutting machine and some basic items!

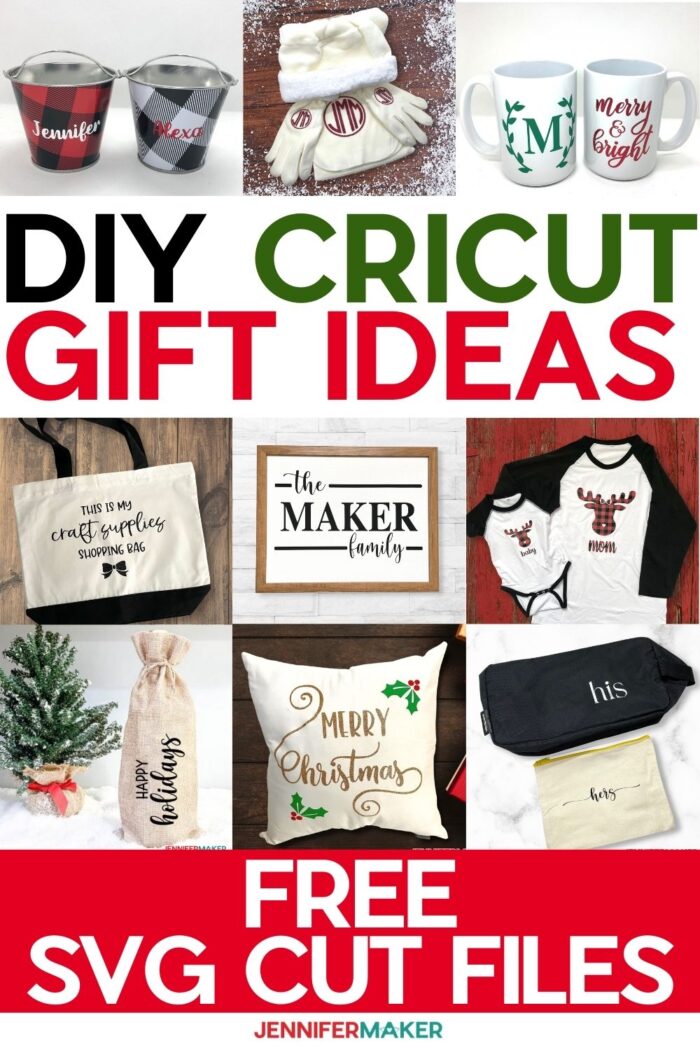
Finding the perfect gift for everyone on your list can be a real challenge, let’s be honest. So that’s why I’m sharing some really great DIY Cricut gift ideas, many that can be made in less than 15 minutes!
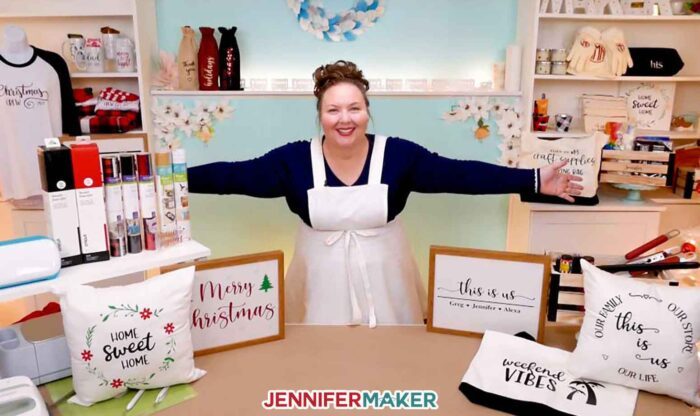
Honestly, this has been one of my favorite projects to date! Not only are these gifts fun to make, they are all so cute and you can tell they are truly gifts from the heart! Many of these can be personalized which I really love! And all you need is a few supplies to make ALL OF THESE!
I spent hours coming up with these fun DIY Cricut gift ideas to hopefully save you time AND inspire you to spread some Christmas cheer.
And if you don’t have a Cricut yet and want one for Christmas, or maybe your birthday, make sure to share this tutorial so whoever might be thinking about getting you one, but is still on the fence, can see all the amazing things you can do with a Cricut!
So let’s take a look at what we’ll need to make these twelve quick and easy gifts. I wanted to keep this super simple and I mean SUPER SIMPLE, so I only used two materials: Permanent vinyl and iron-on vinyl.
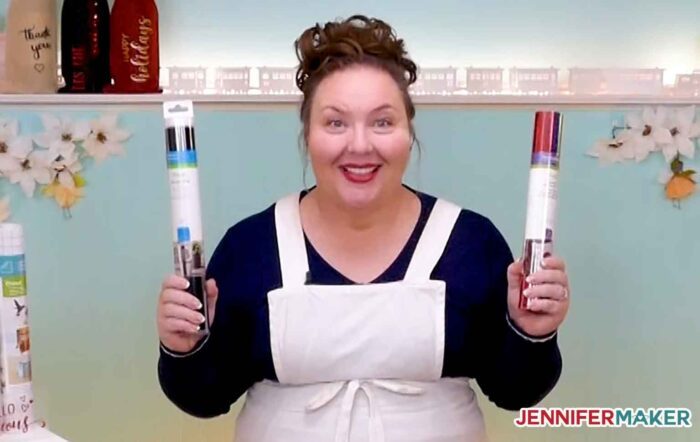
That’s it! That’s what makes these DIY Cricut gift ideas so great.
And these DIY gift ideas aren’t only for the holidays, most are good for any occasion. I’m teaching you the techniques, so you can apply what you know to your own projects as well, which is really my mission: to help you craft a life you love! And you know I love sharing and this time I’m sharing a lot!
More than 30 designs that you can mix and match to make SO MANY THINGS and they are all my gift to you!
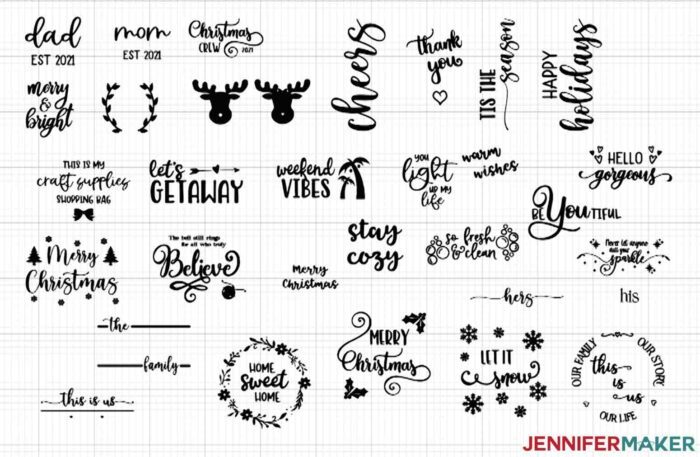
I have designs for dad and mom, things for Christmas and home decor, designs for crafters, weekenders, and travelers, sign designs of all sorts, his and hers designs, and family designs.

I told you there were a lot! And there’s something for every occasion and everyone on your list and I mean everyone because you can put any of these designs on anything you can think of: shirts for the whole family, a wine bag or makeup bag for a friend or how about a pillow or a tote bag… so many possibilities!
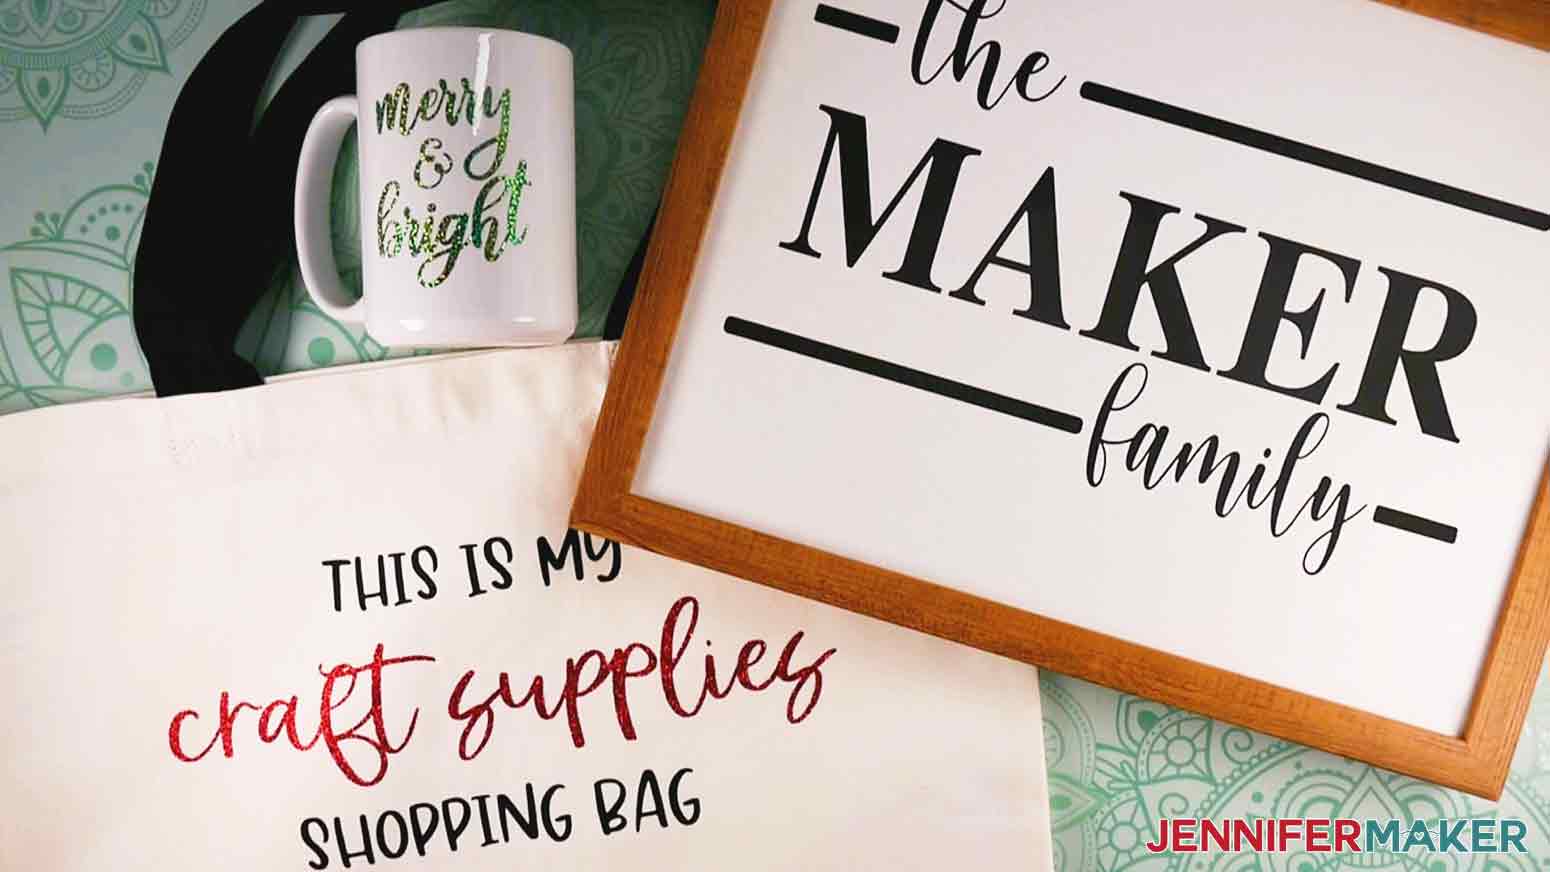
Now it would take FOREVER to show you how to make each one of these DIY Cricut gift ideas, and honestly there are too many possible combinations, so I’m going to show you how to make three different projects which will help teach you the skillset to make ALL of these DIY Cricut gift ideas!
Let me show you how easy it is to make DIY Cricut Gifts! This post contains some affiliate links for your convenience (which means if you make a purchase after clicking a link I will earn a small commission but it won’t cost you a penny more)! Read my full disclosure policy.
Materials to Make Your Own DIY Cricut Gifts
View my Amazon shopping list with the exact items we used to make this project
- Mugs (Any Size/Color – Does Not Need Sublimation Coating for Vinyl)
- Candles
- Mini Gift Pails
- Crates
- Wine Bag
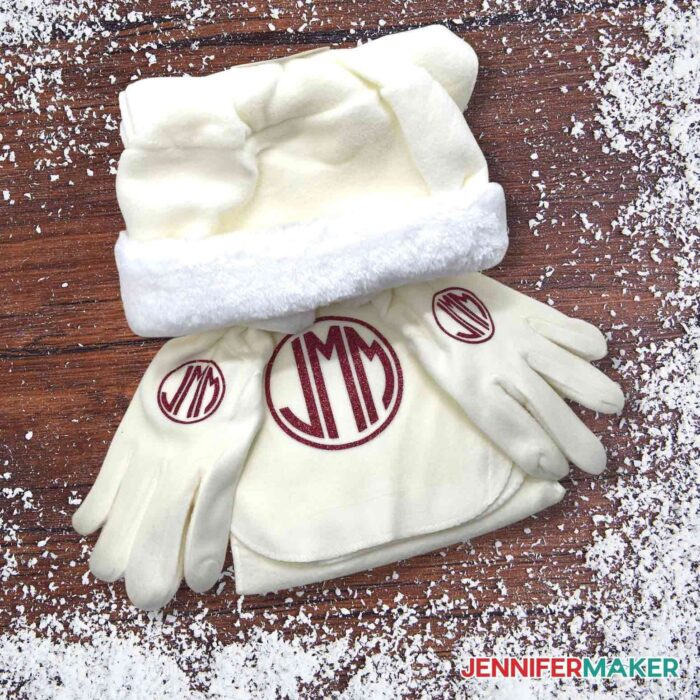
- Scarf/Gloves Set
- Pajama Shirts
- Makeup Bag
- Toiletry Bag
- Totes
- Framed Canvas Sign
- Pillow Case
- Poly-Fil (For Pillows)
- Iron On Vinyl (I used Cricut Everyday Iron-On Vinyl, Foil Iron-On Vinyl, Patterned Iron-On Vinyl, Holographic Sparkle Iron-On Vinyl, Cricut Smart Iron-On Vinyl)
- Permanent Vinyl (I used Cricut Premium Permanent Vinyl, Textured Metallic Permanent Vinyl, Holographic Sparkle Permanent Vinyl, Shimmer Permanent Vinyl)
- StandardGrip Transfer Tape (for smooth permanent vinyls)
- StrongGrip Transfer Tape (for textured permanent vinyls, like glitter)
- Isopropyl Alcohol and a Lint-Free Cloth (to clean mug)
- (Optional) Fonts: I used a LOT of fonts! See the list below the instructions to see what I used on each project.
- Green StandardGrip Mat (12″ x 12″)
- Weeding Tool
- Scraper
- Scissors
- Cricut EasyPress (For Iron-On Projects)
- Cricut Easy Press Mat
- Parchment Paper (For Layering Vinyl)
- Cricut Roll Holder (optional)
- Cricut Brayer (optional)
- Design #362 – My 30 free designs (available in my free resource library – get the password by filling out the form at the bottom of this page)
How to Make DIY Cricut Gifts
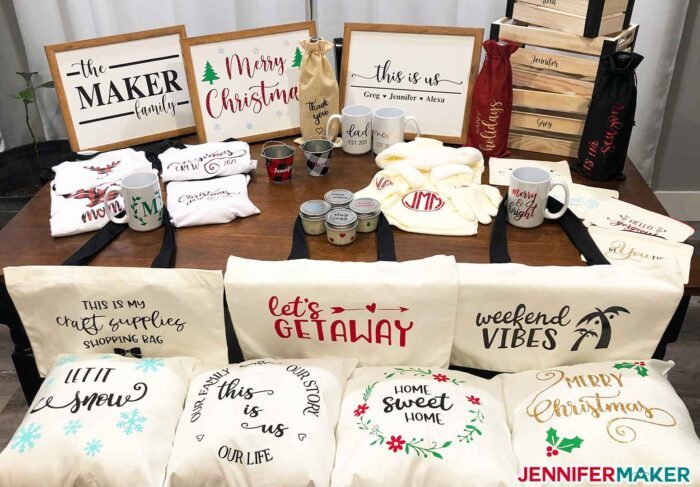
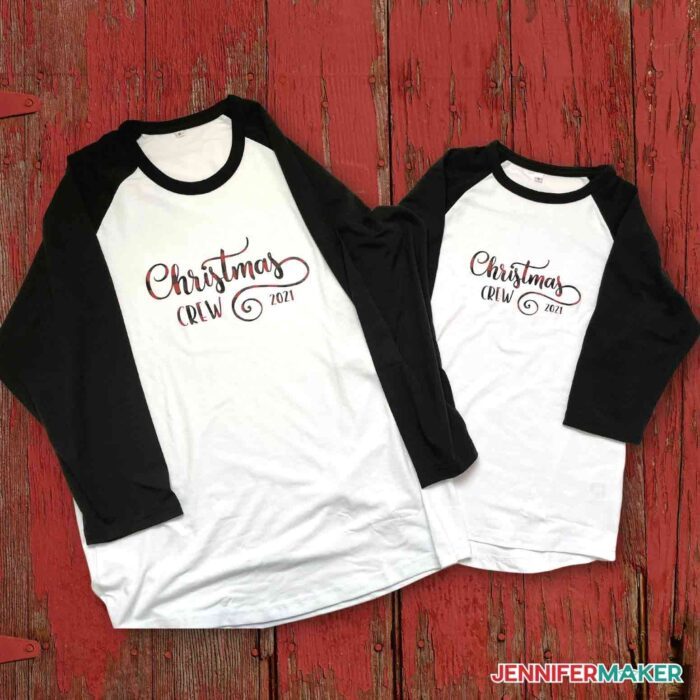
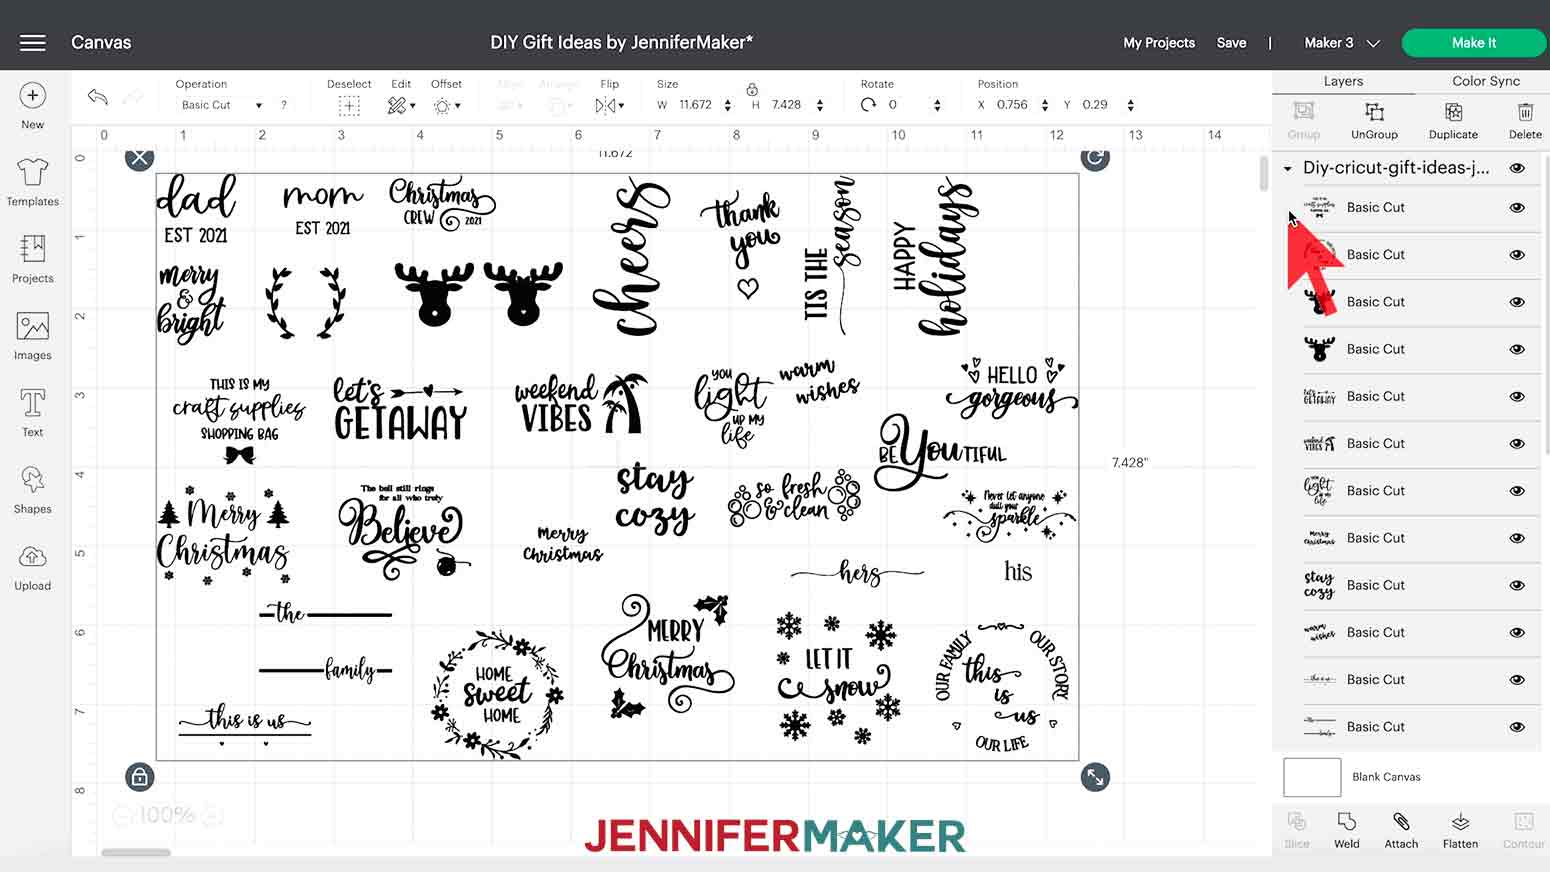
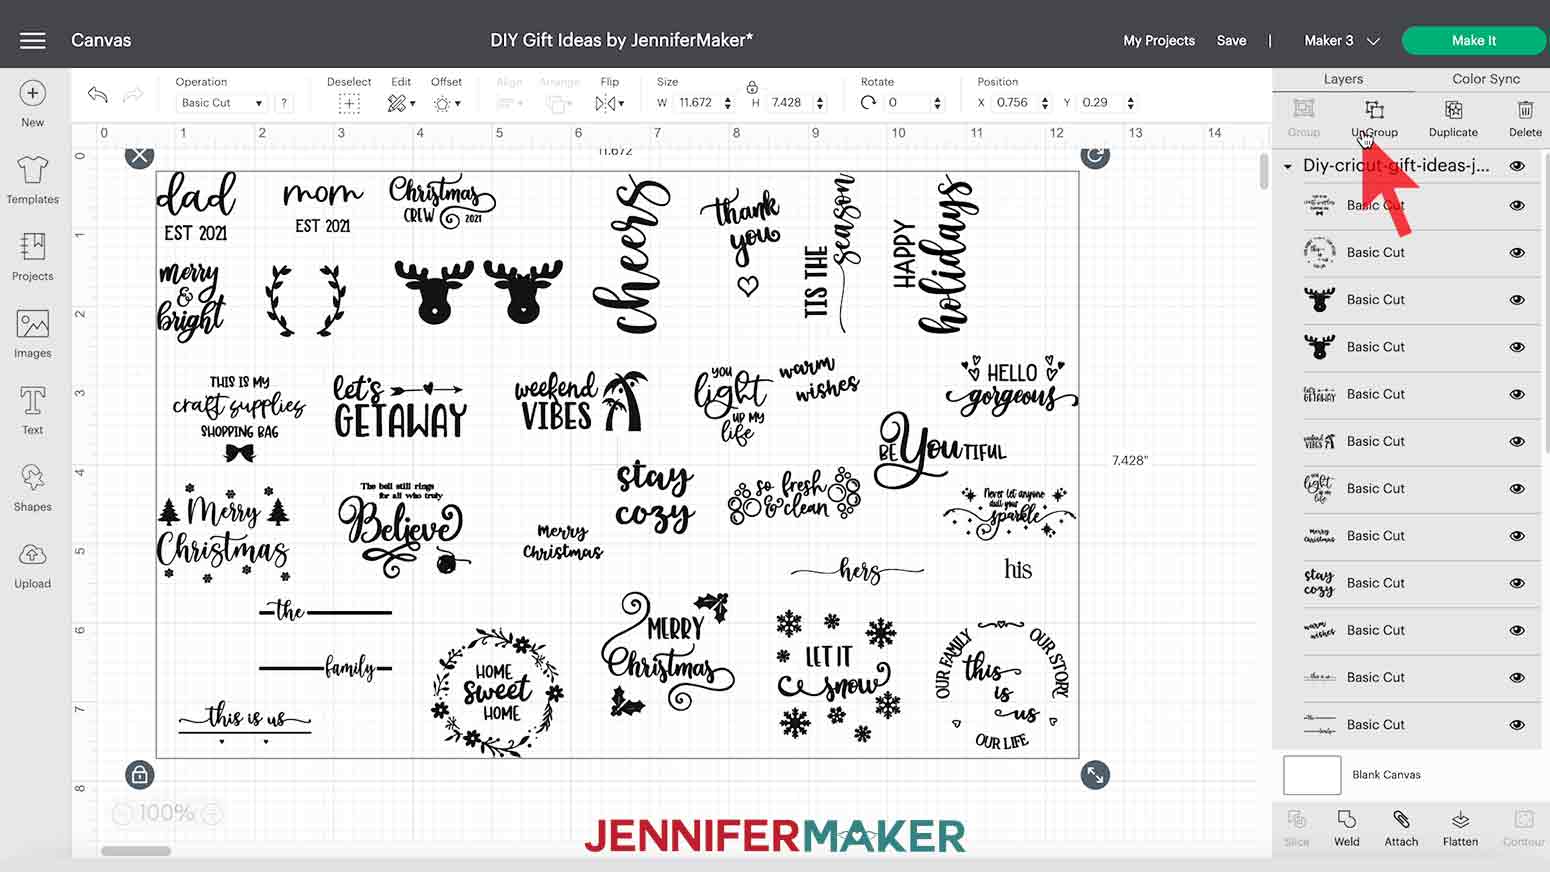
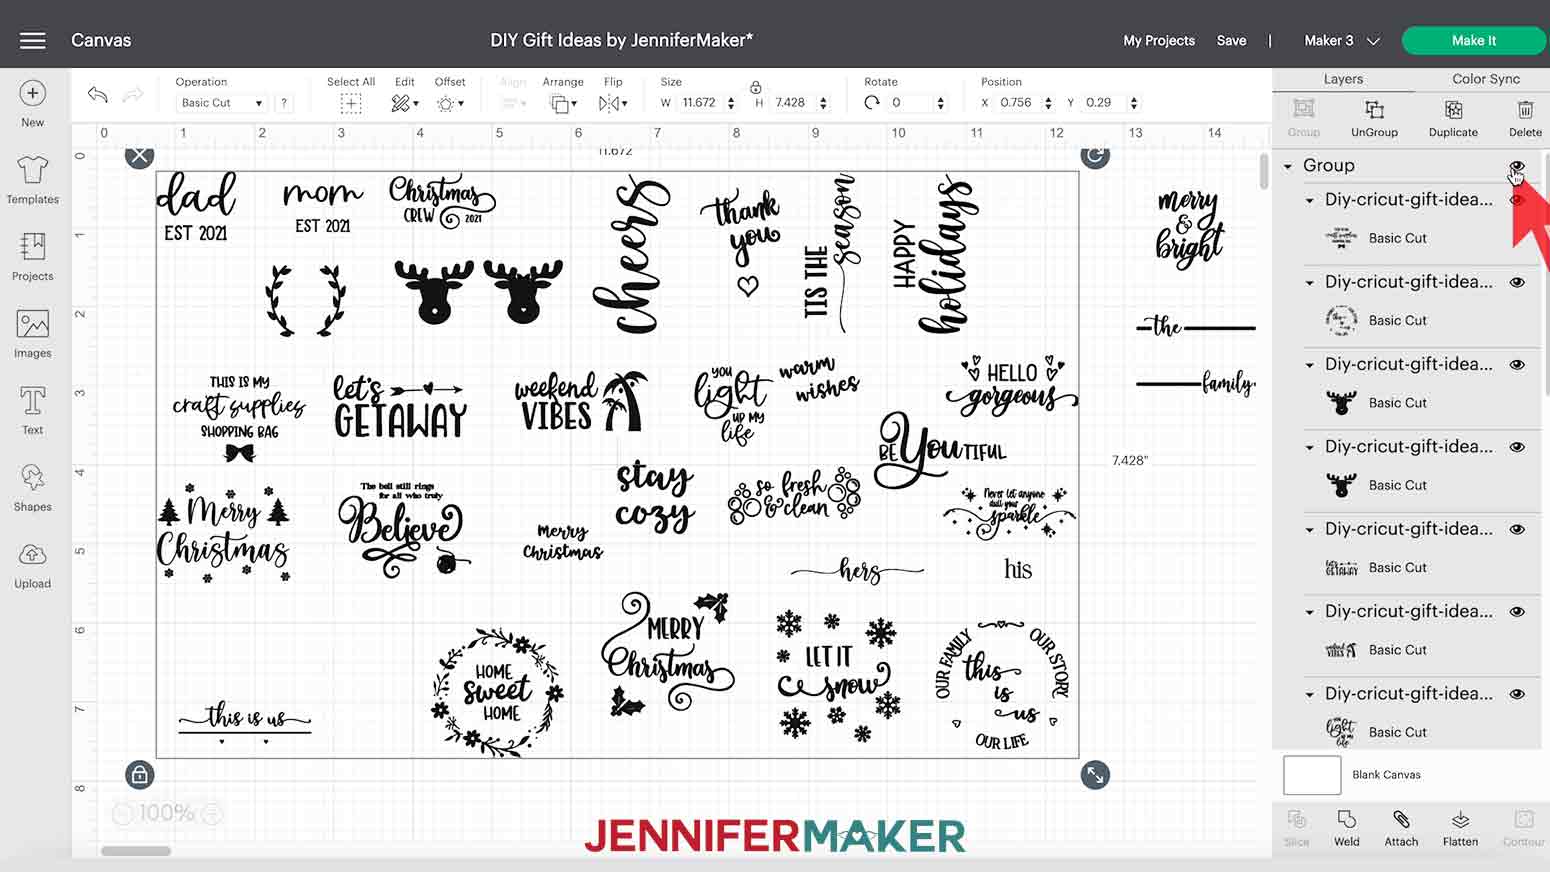
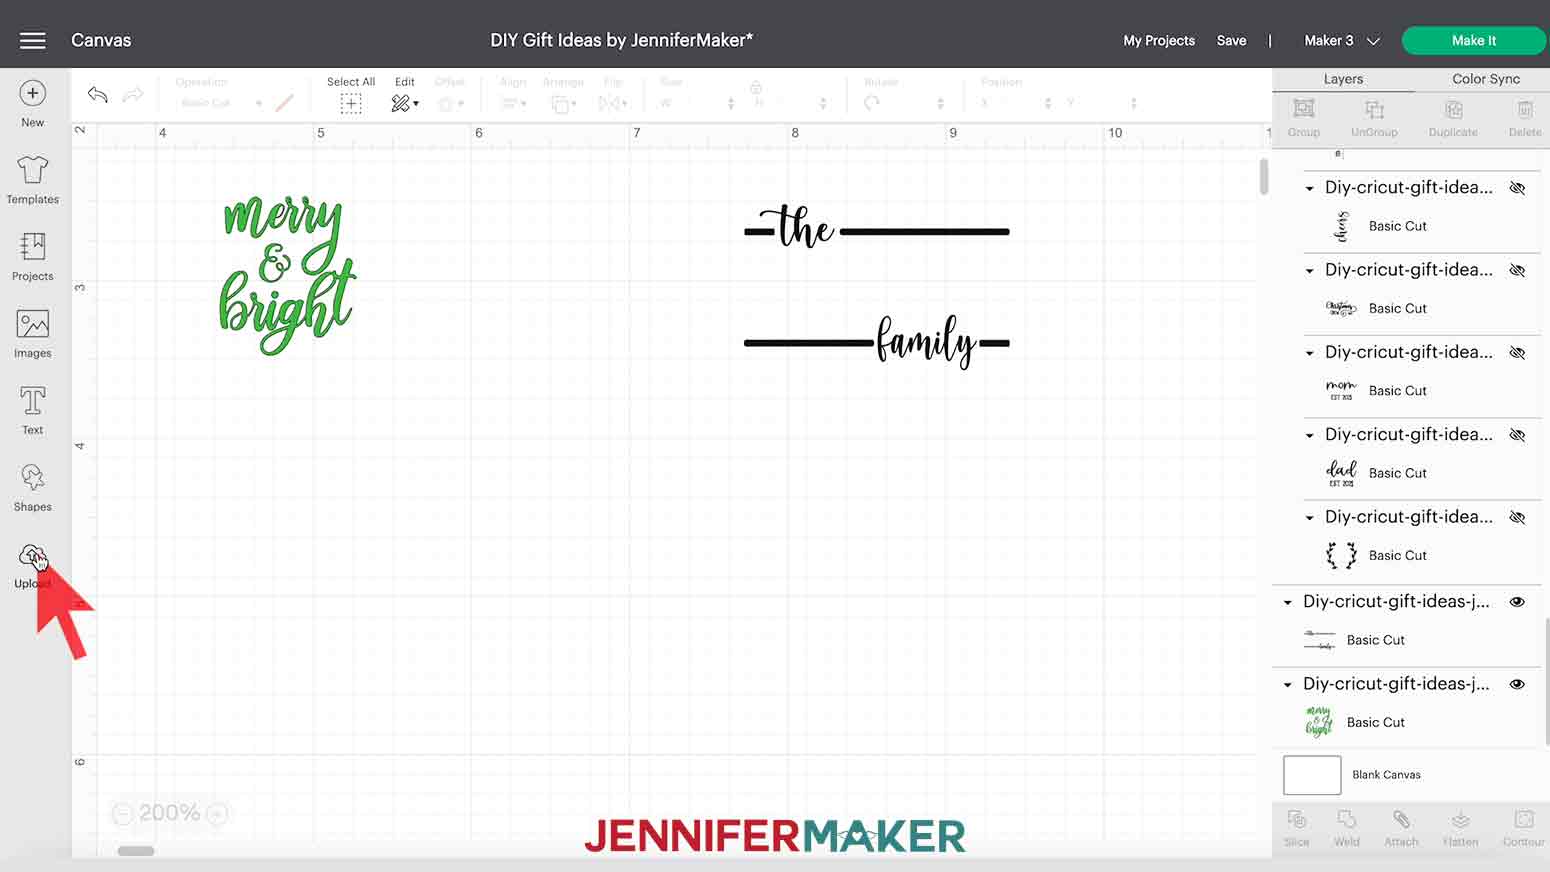
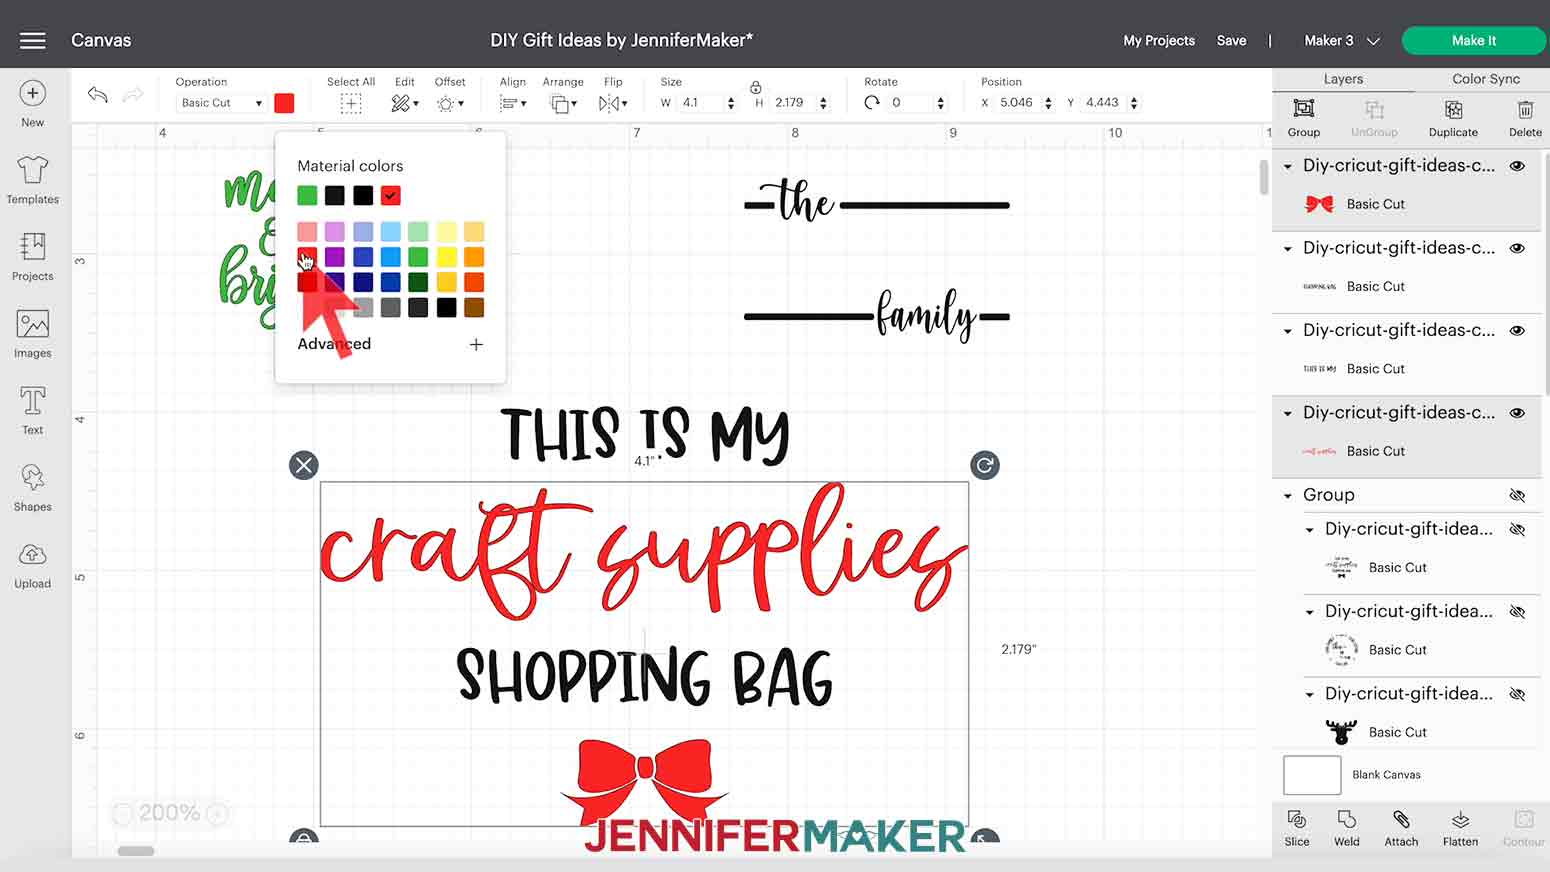
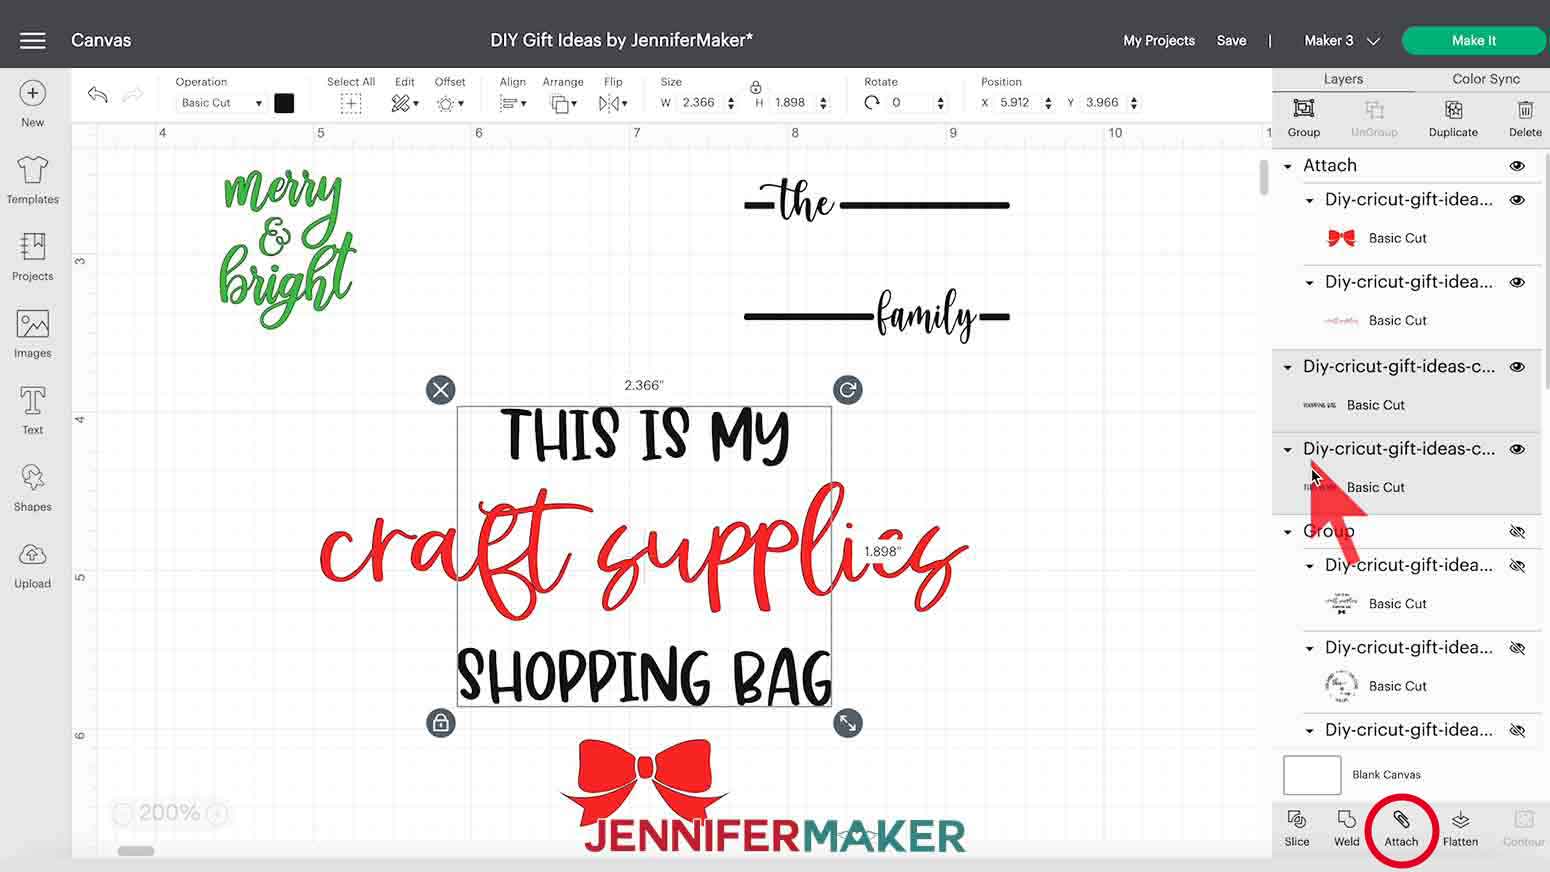
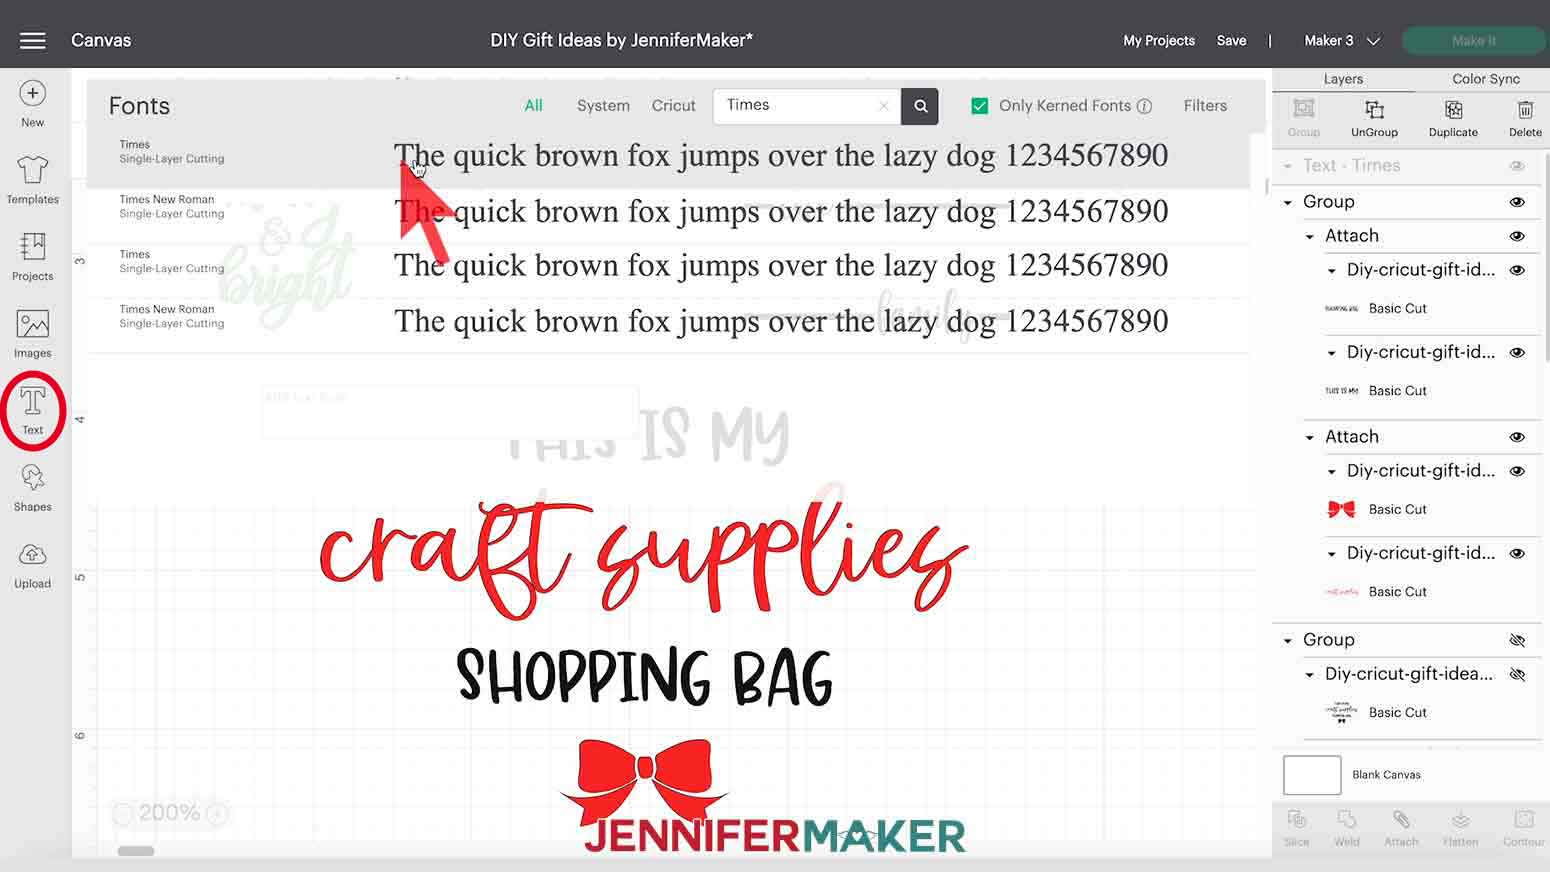
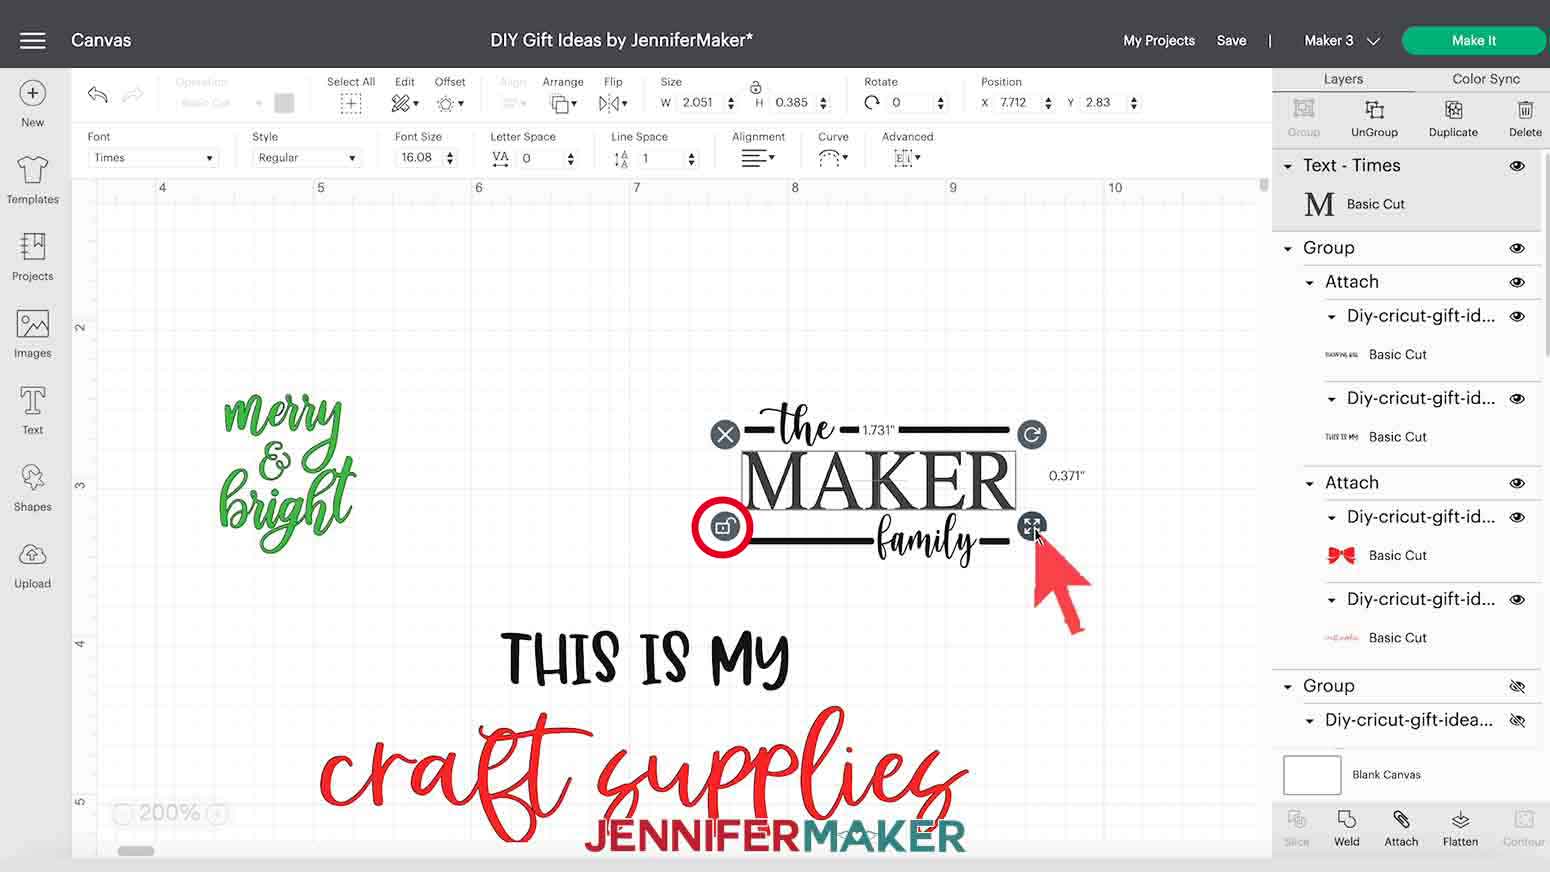
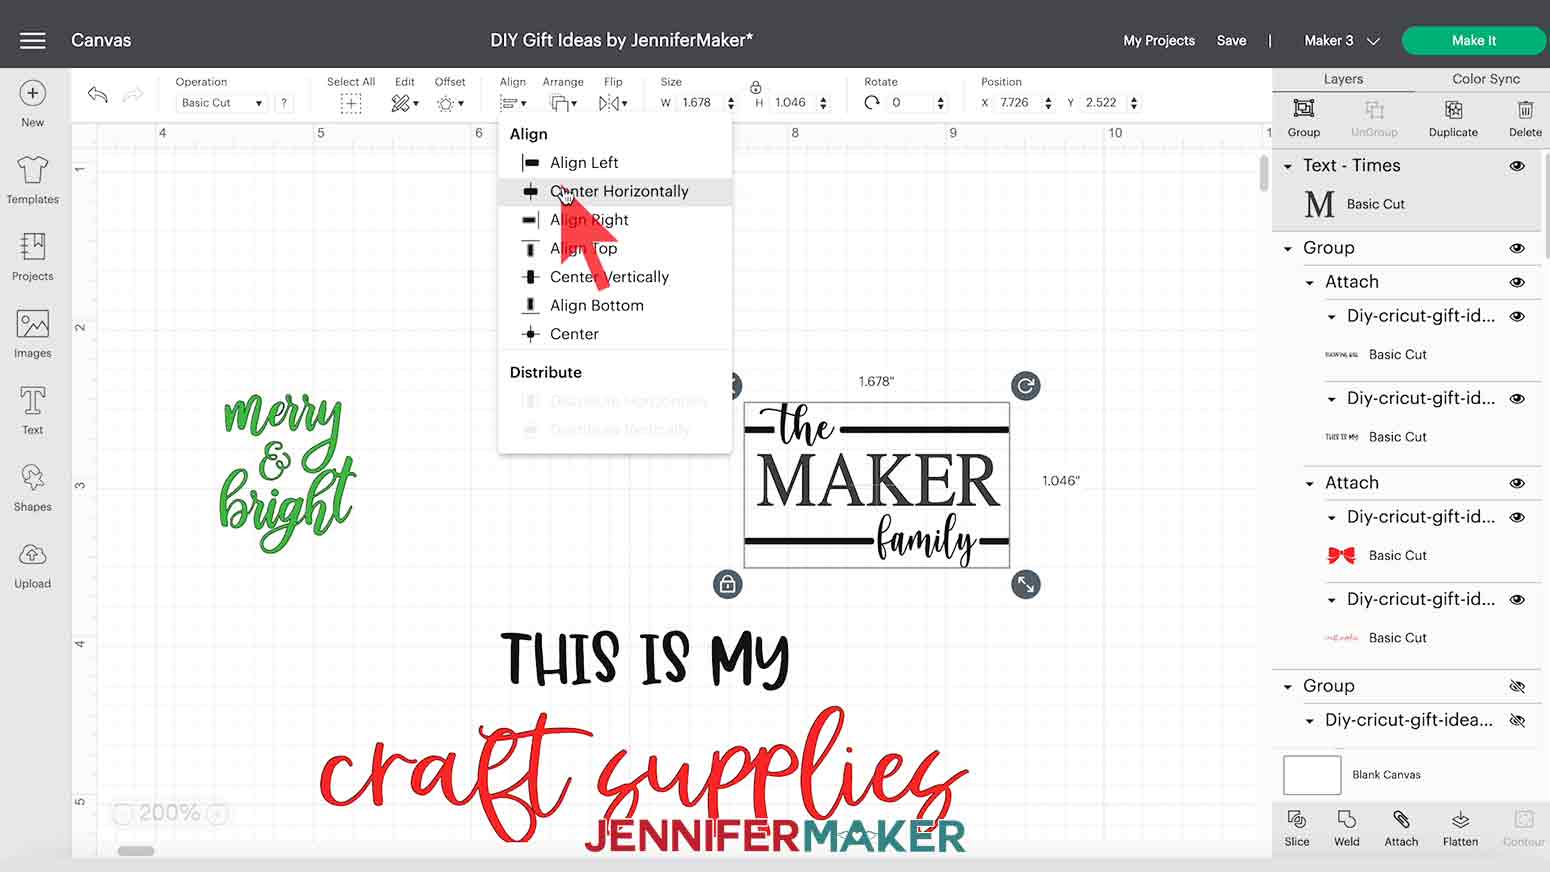
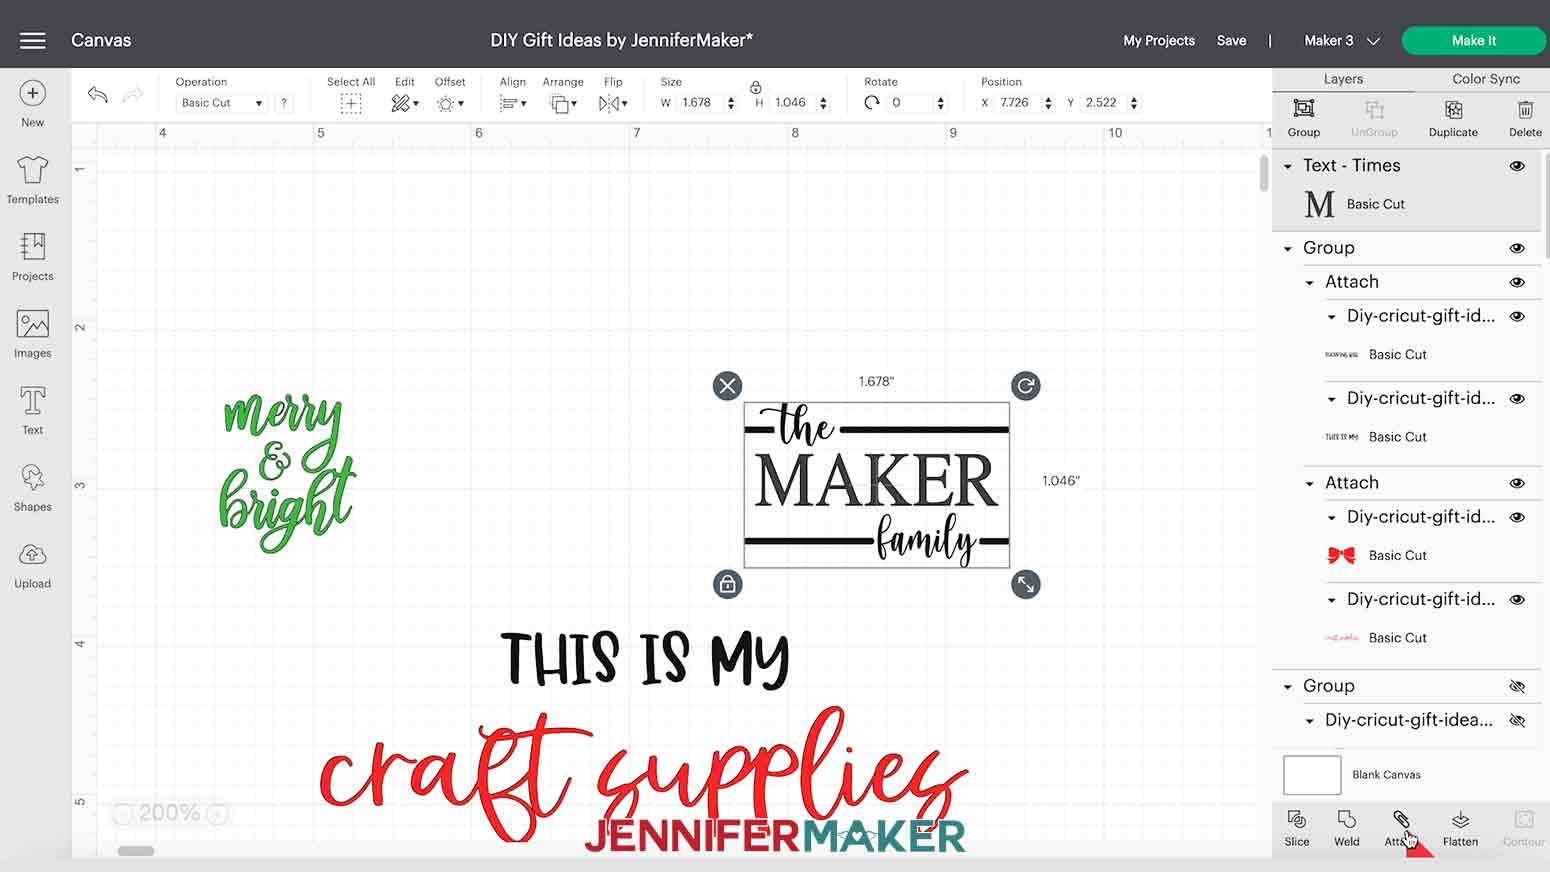
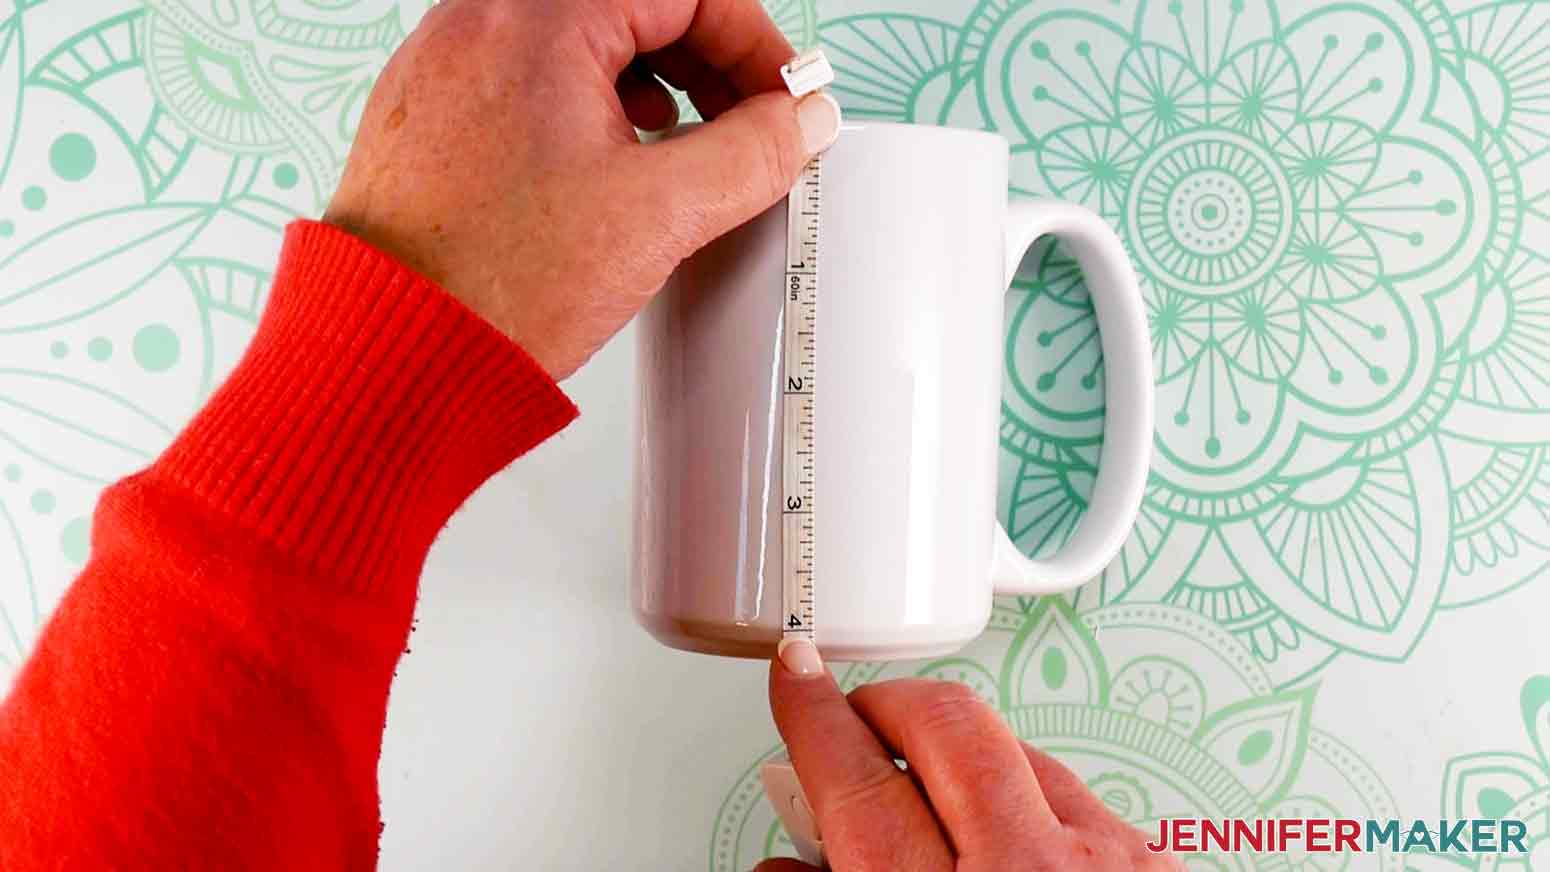
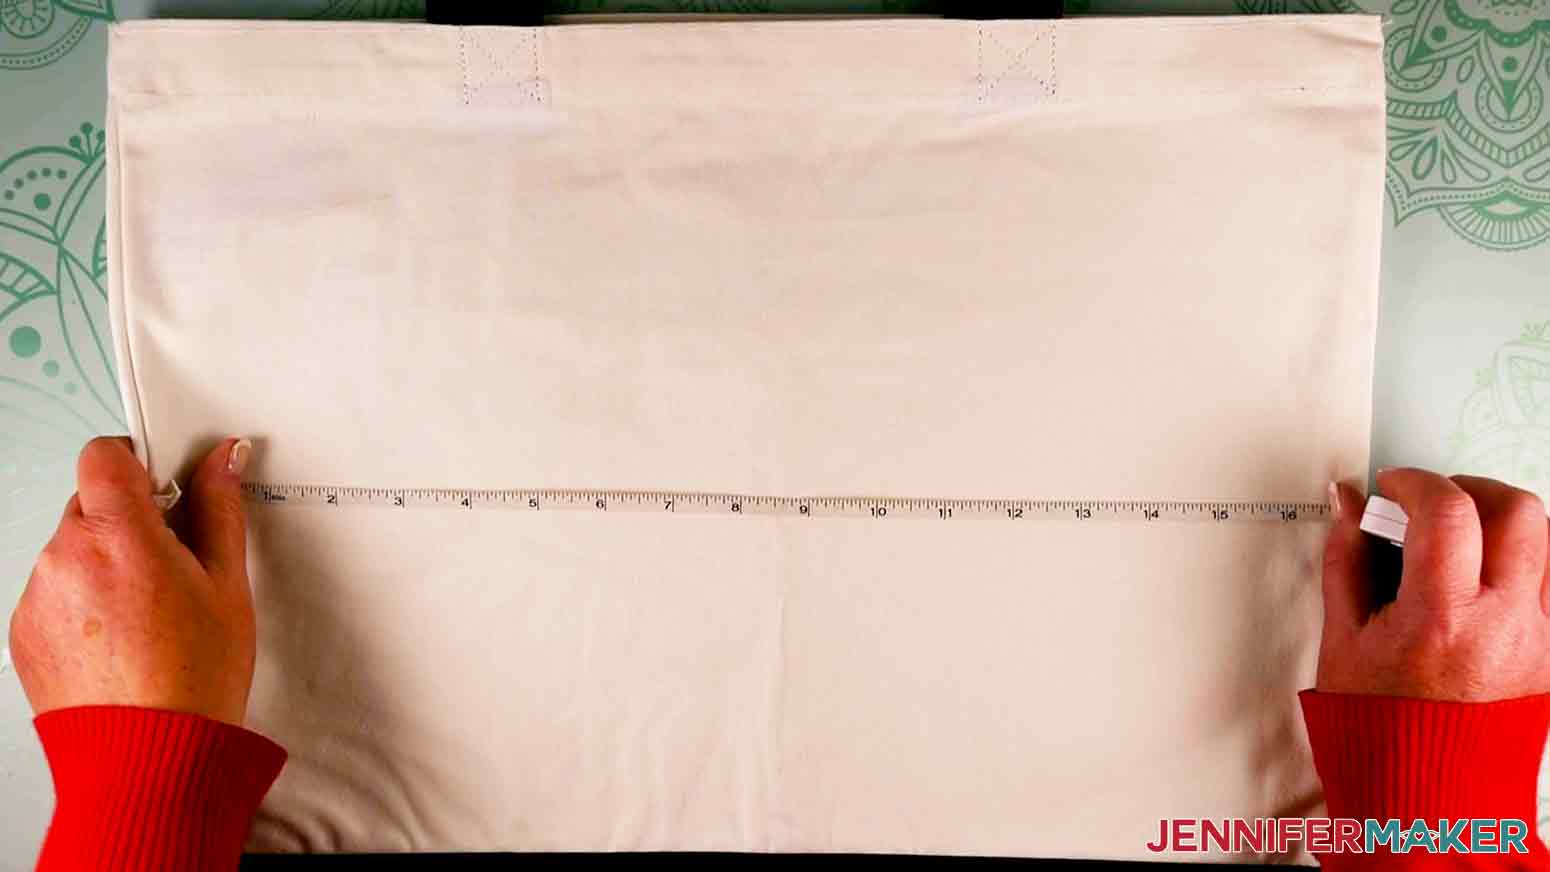
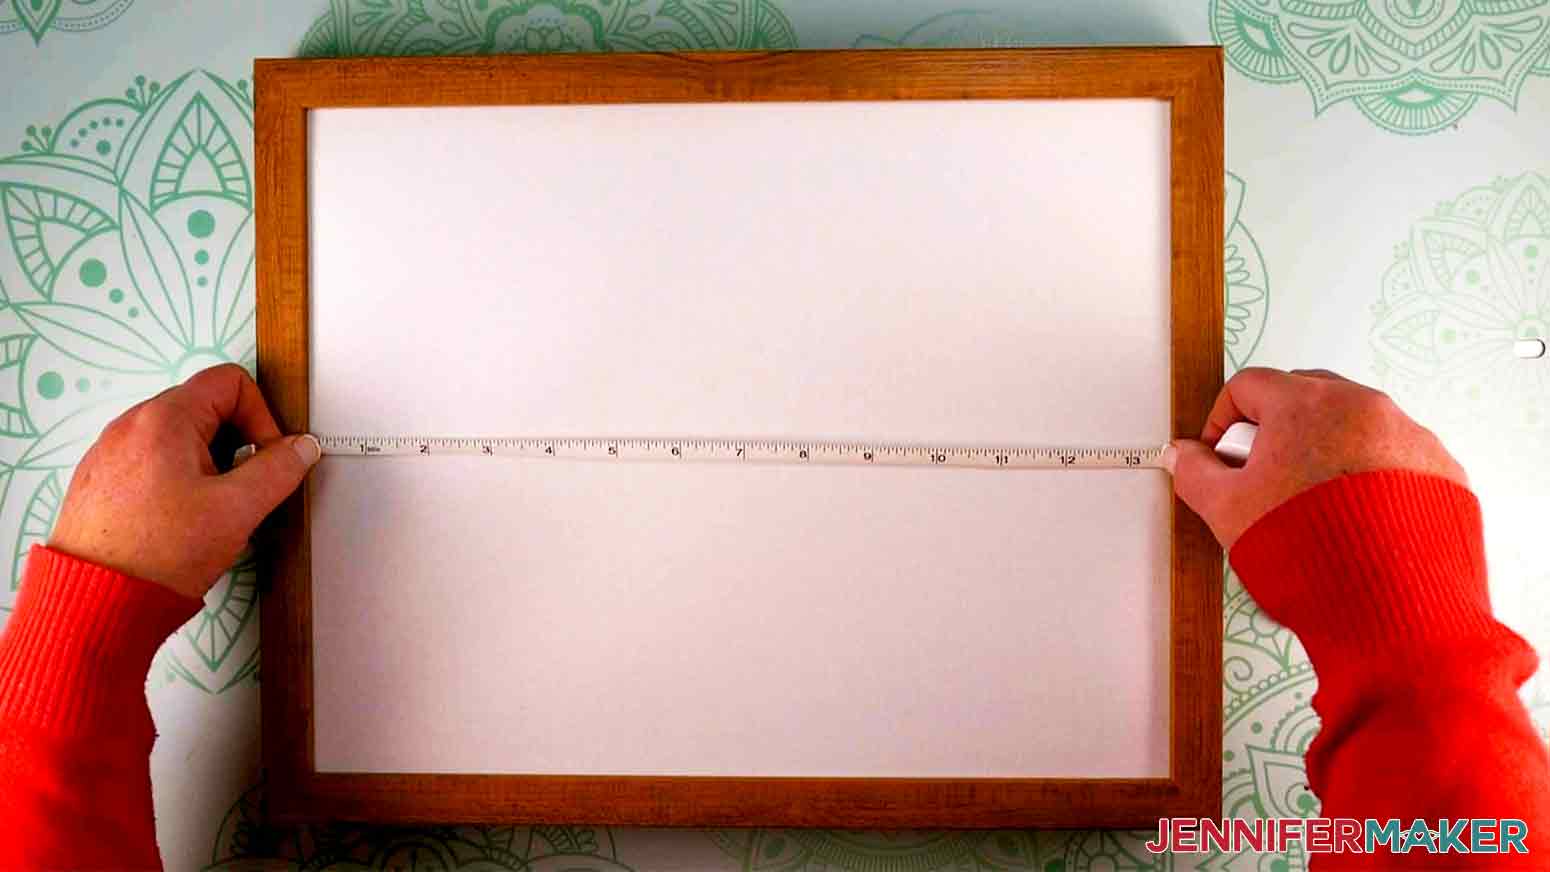
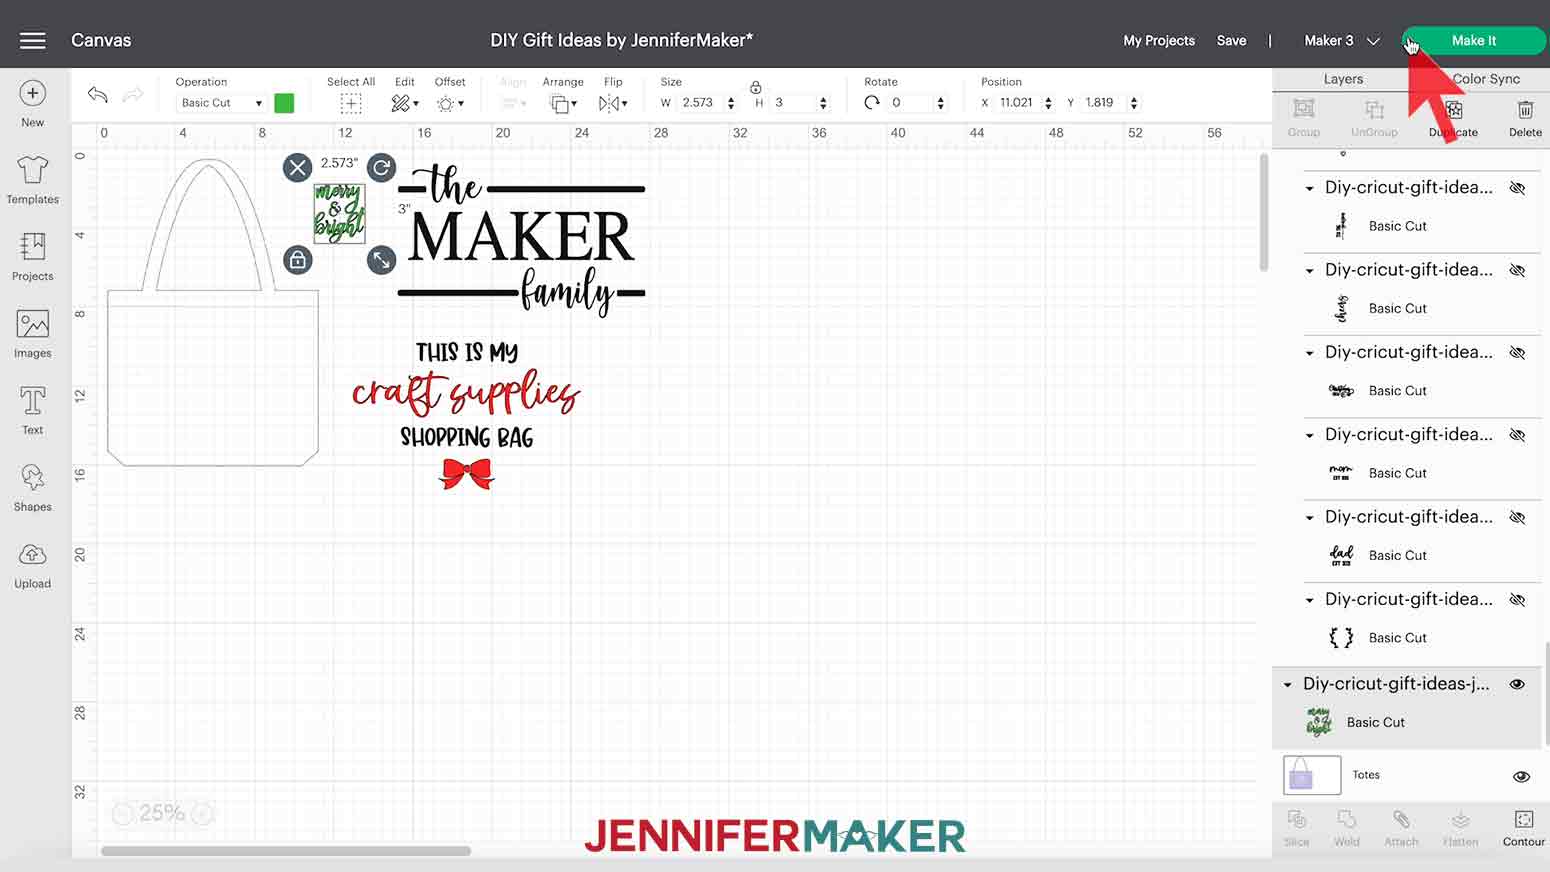
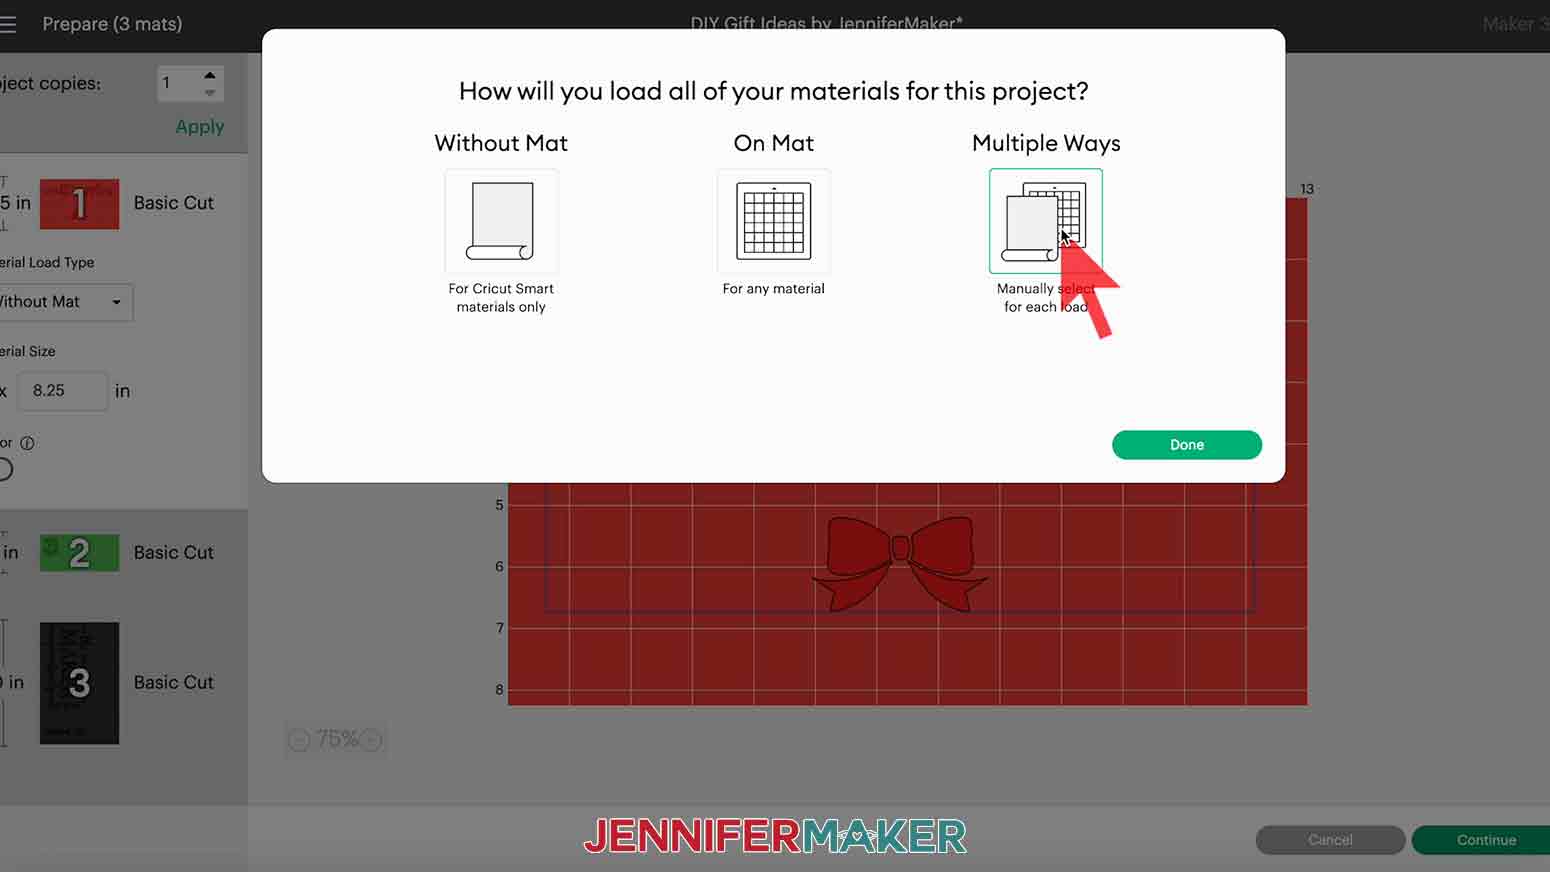
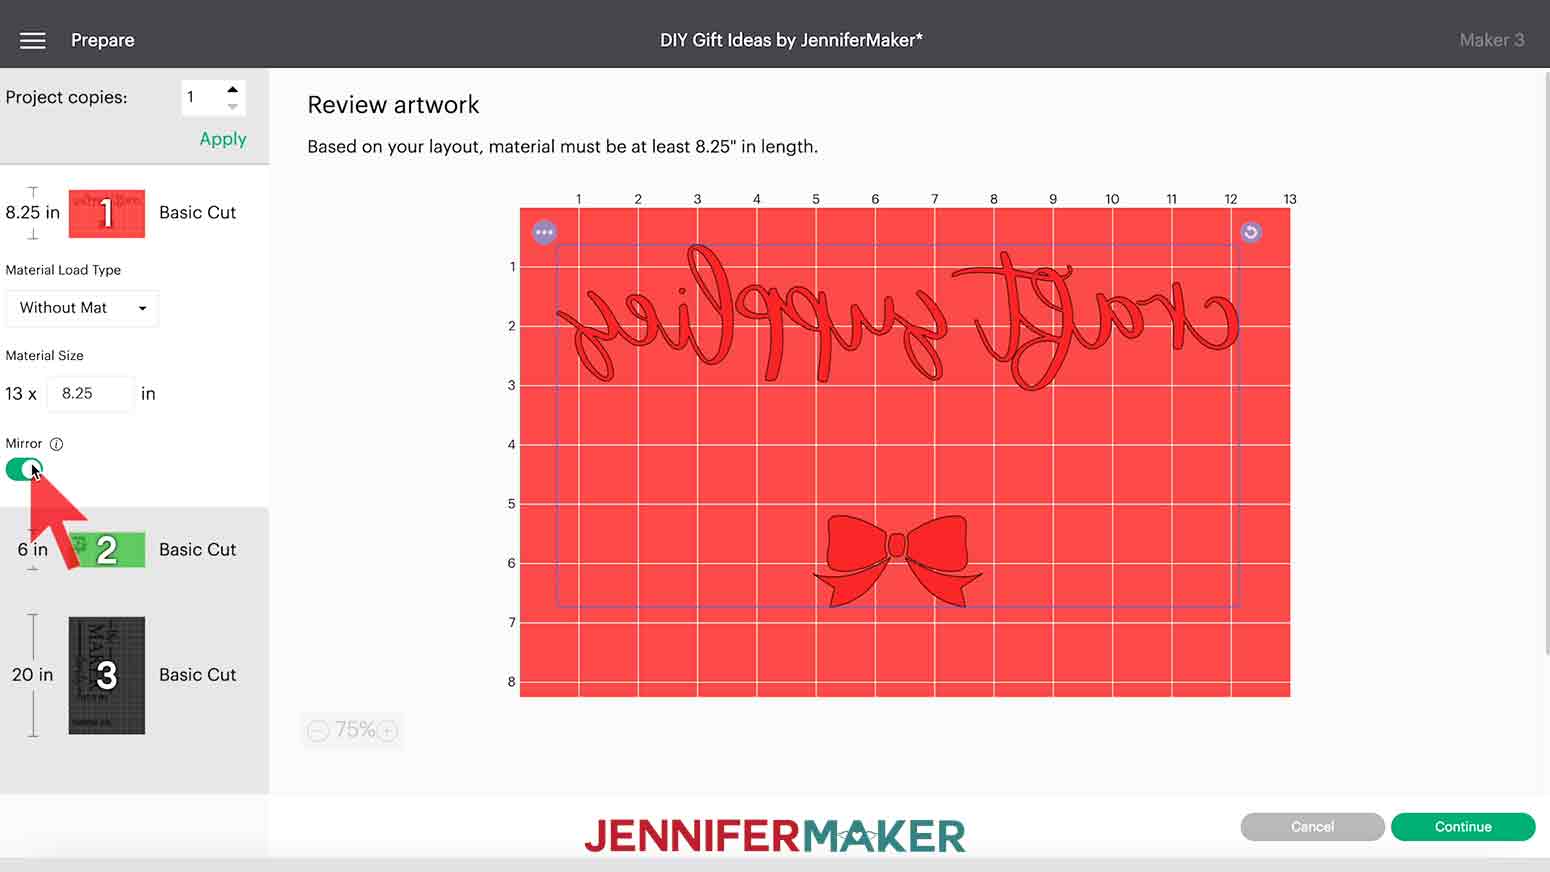
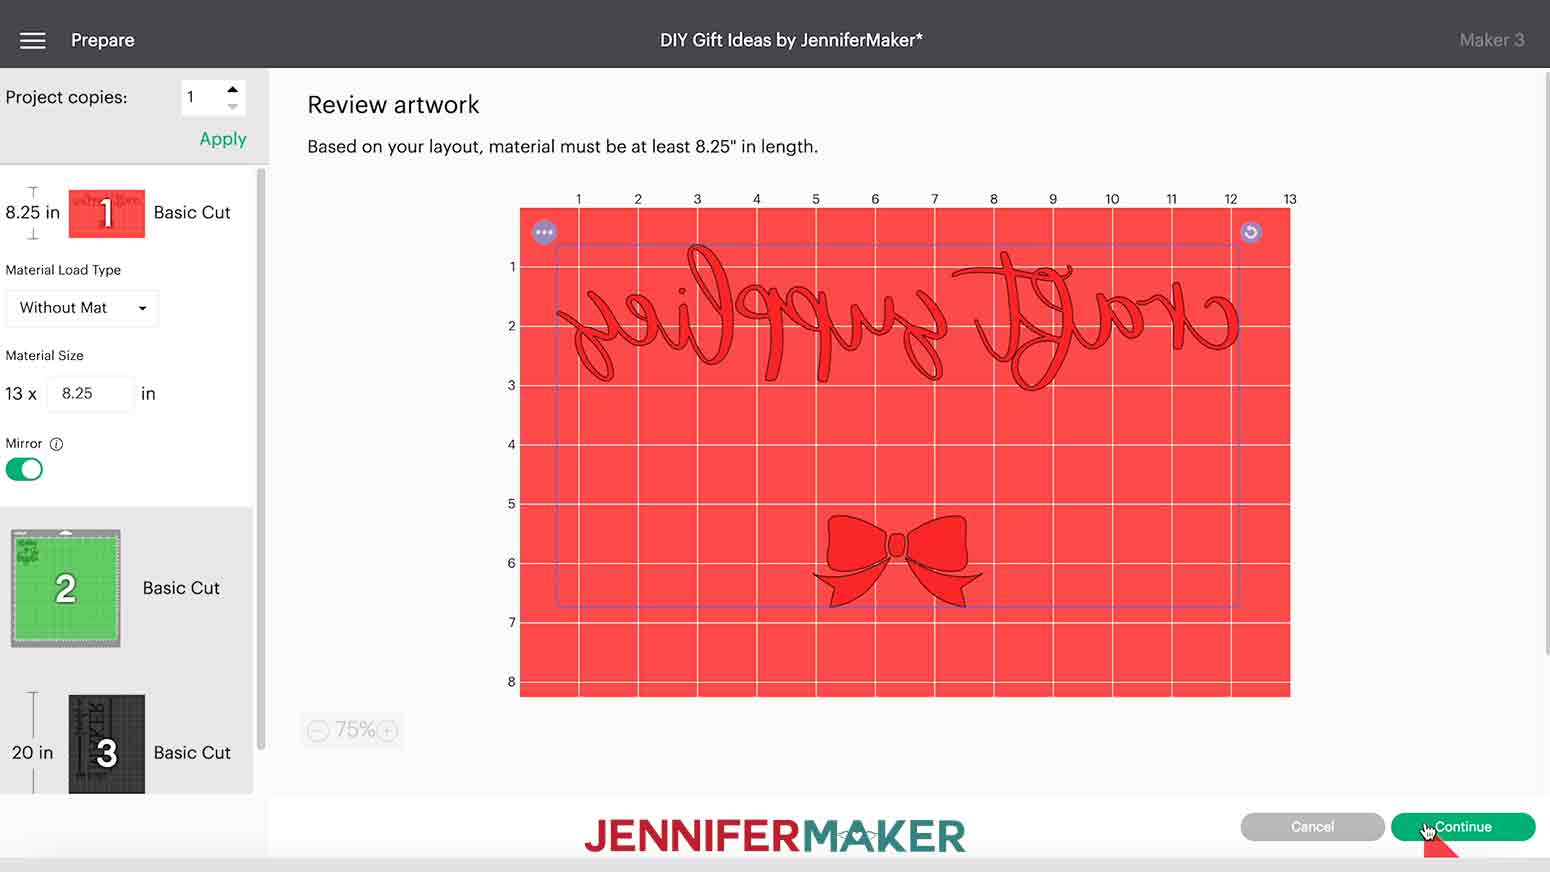
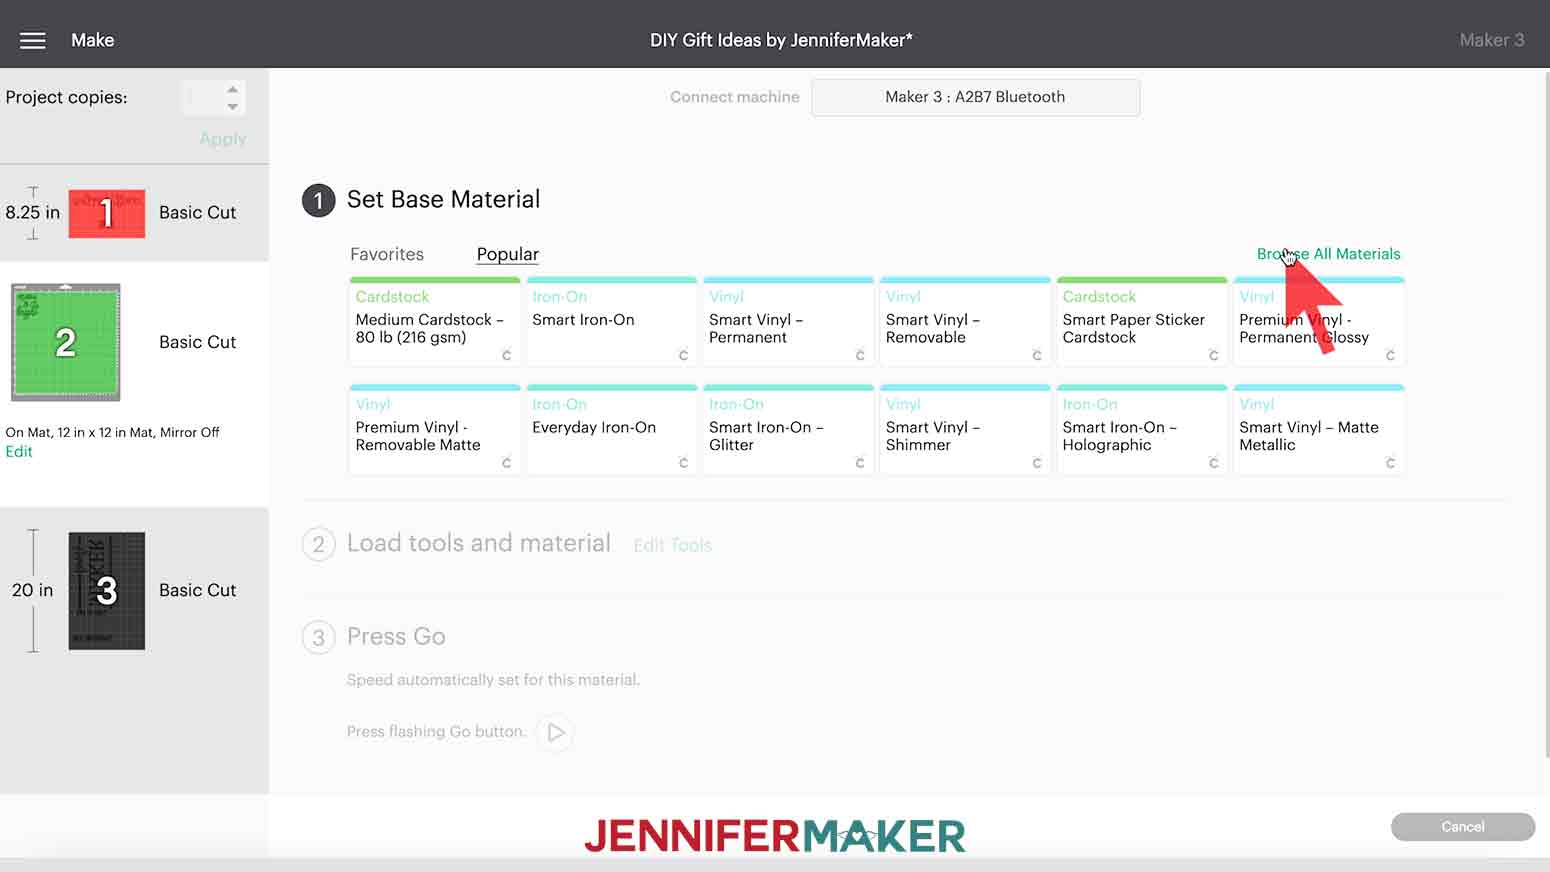
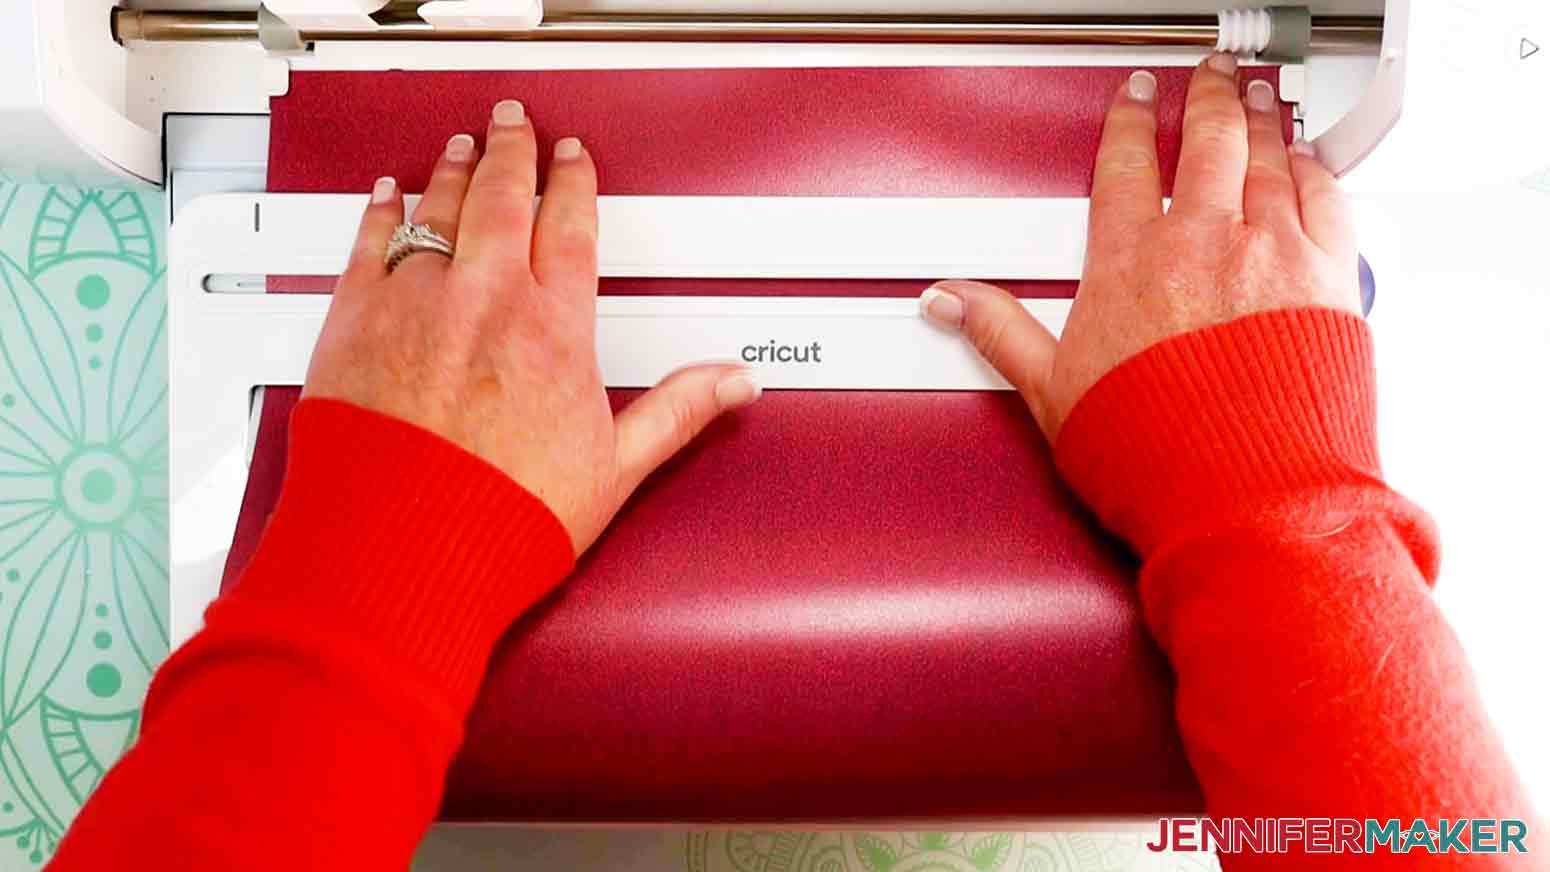
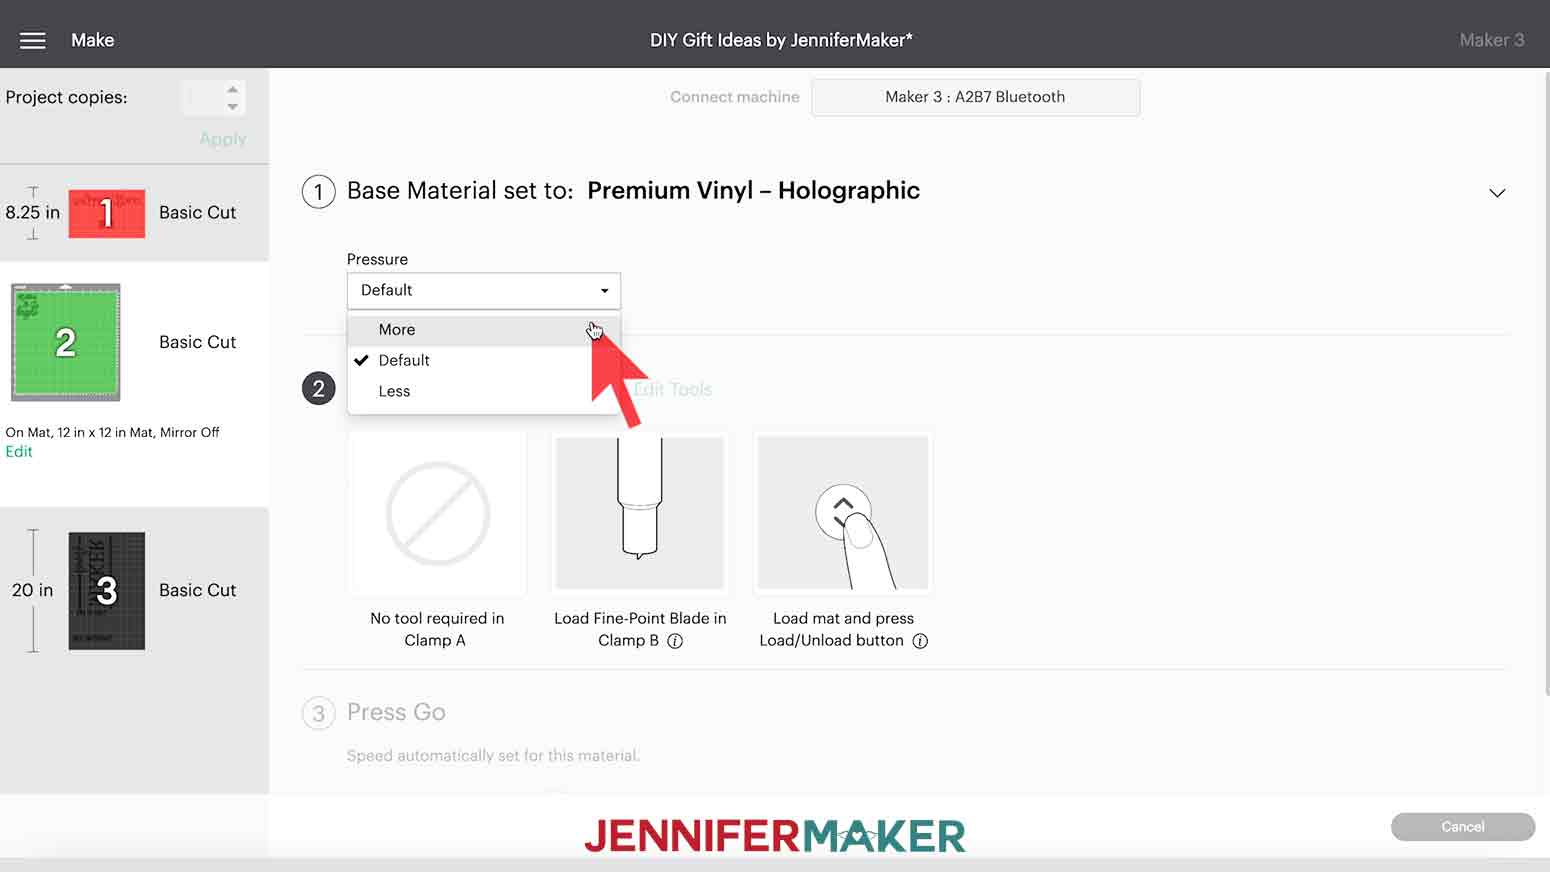
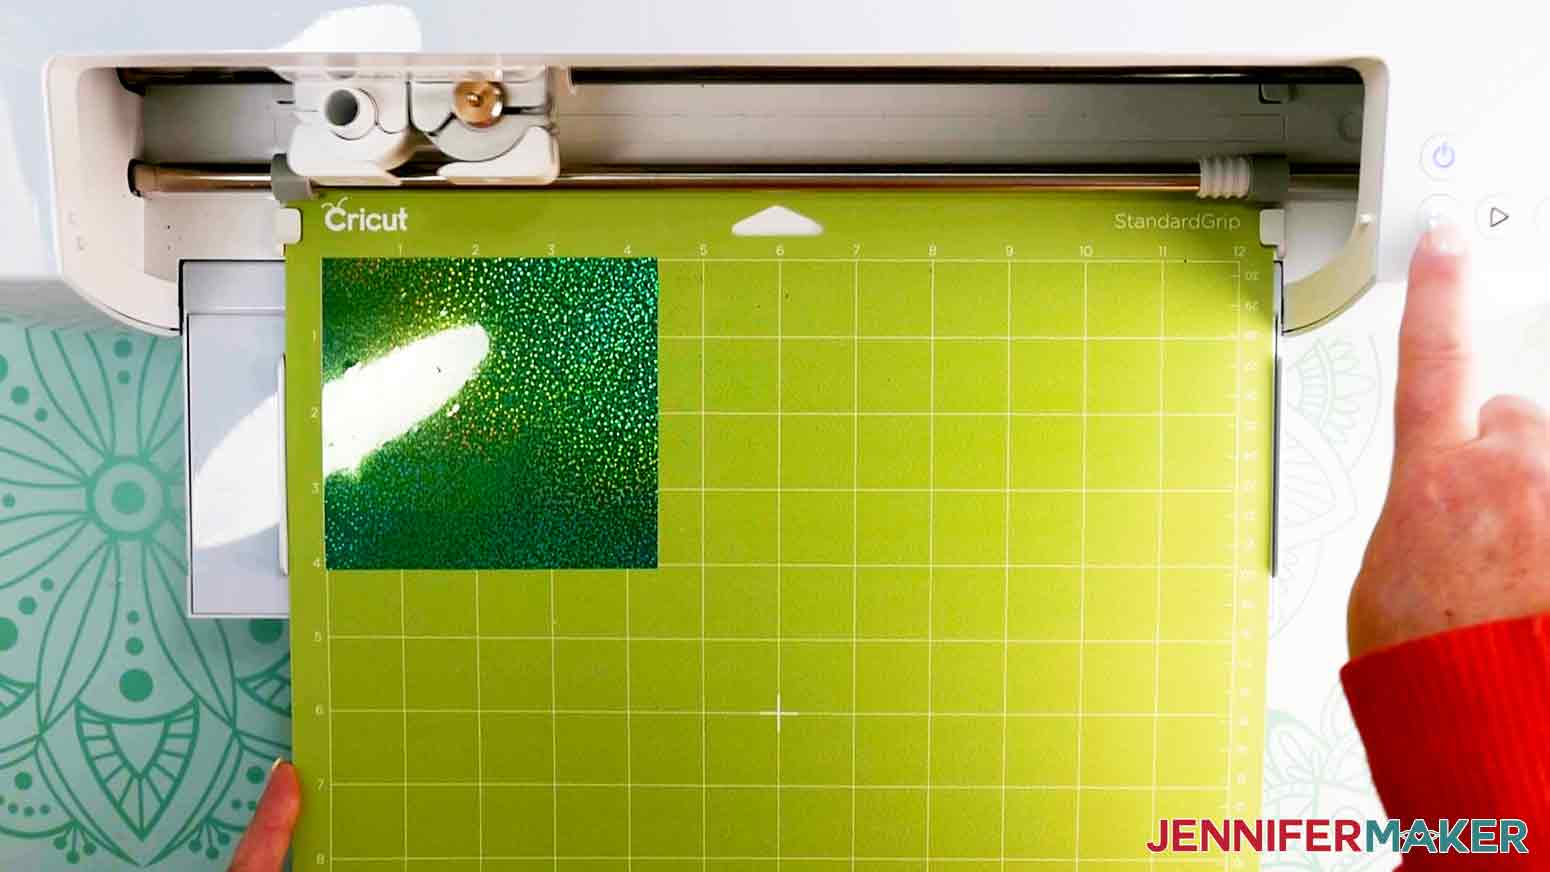
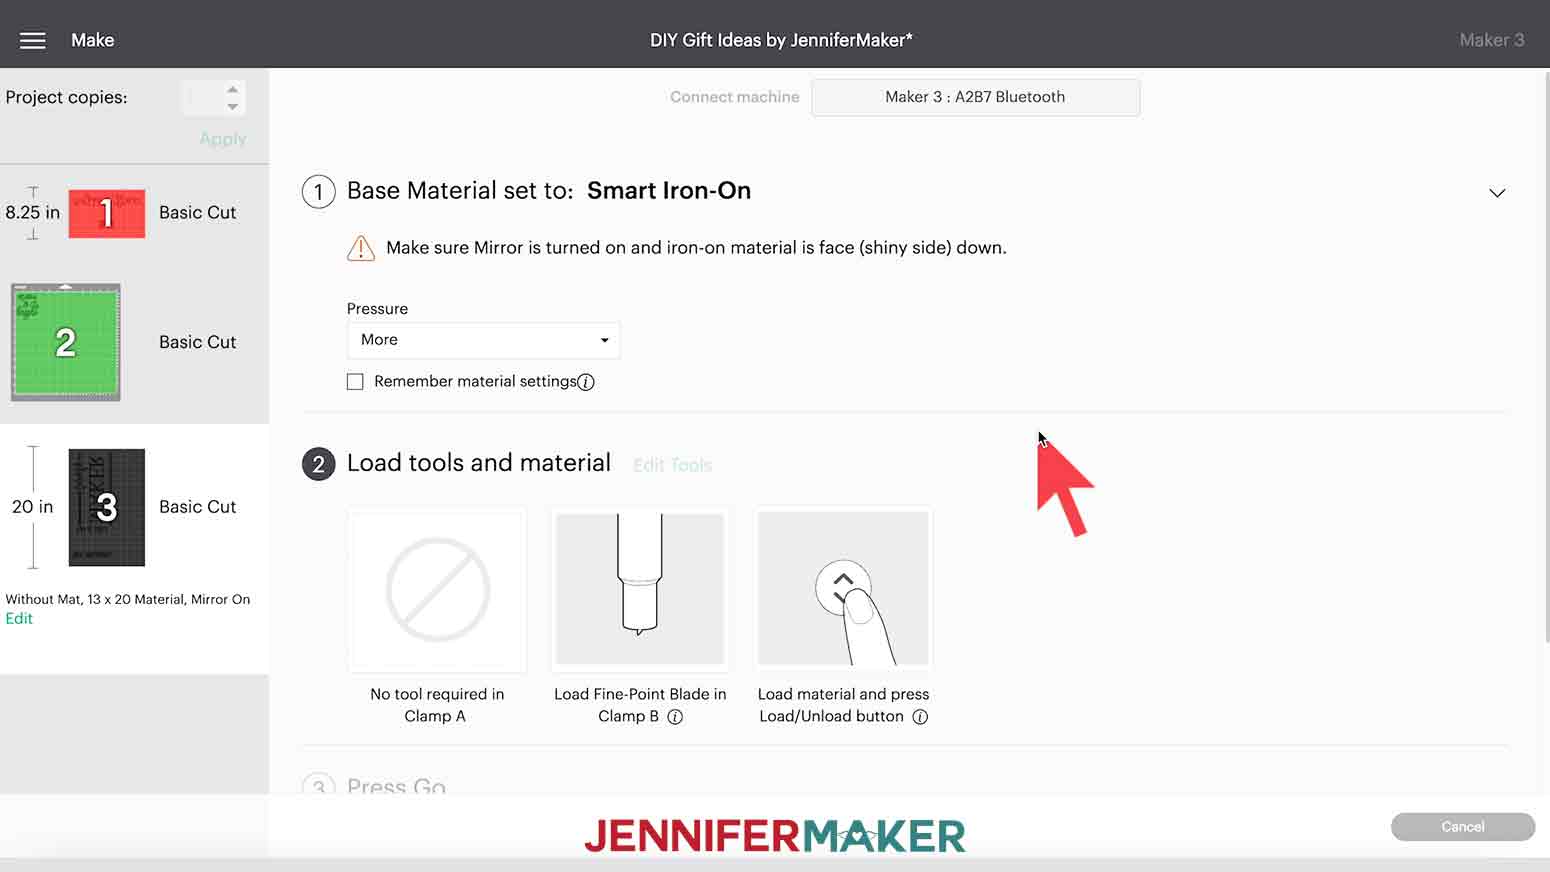
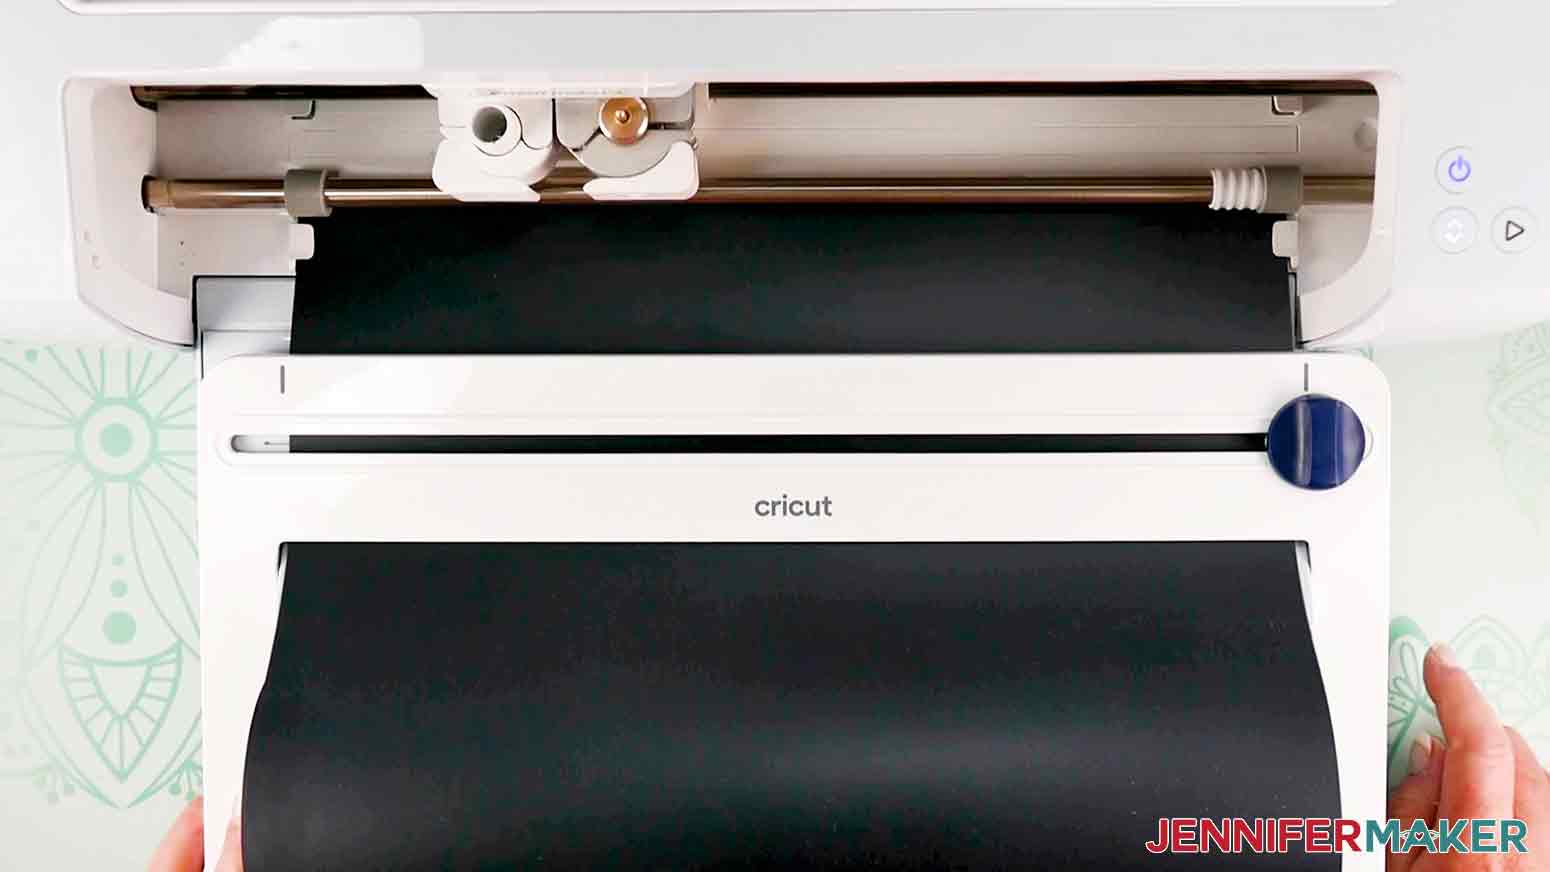
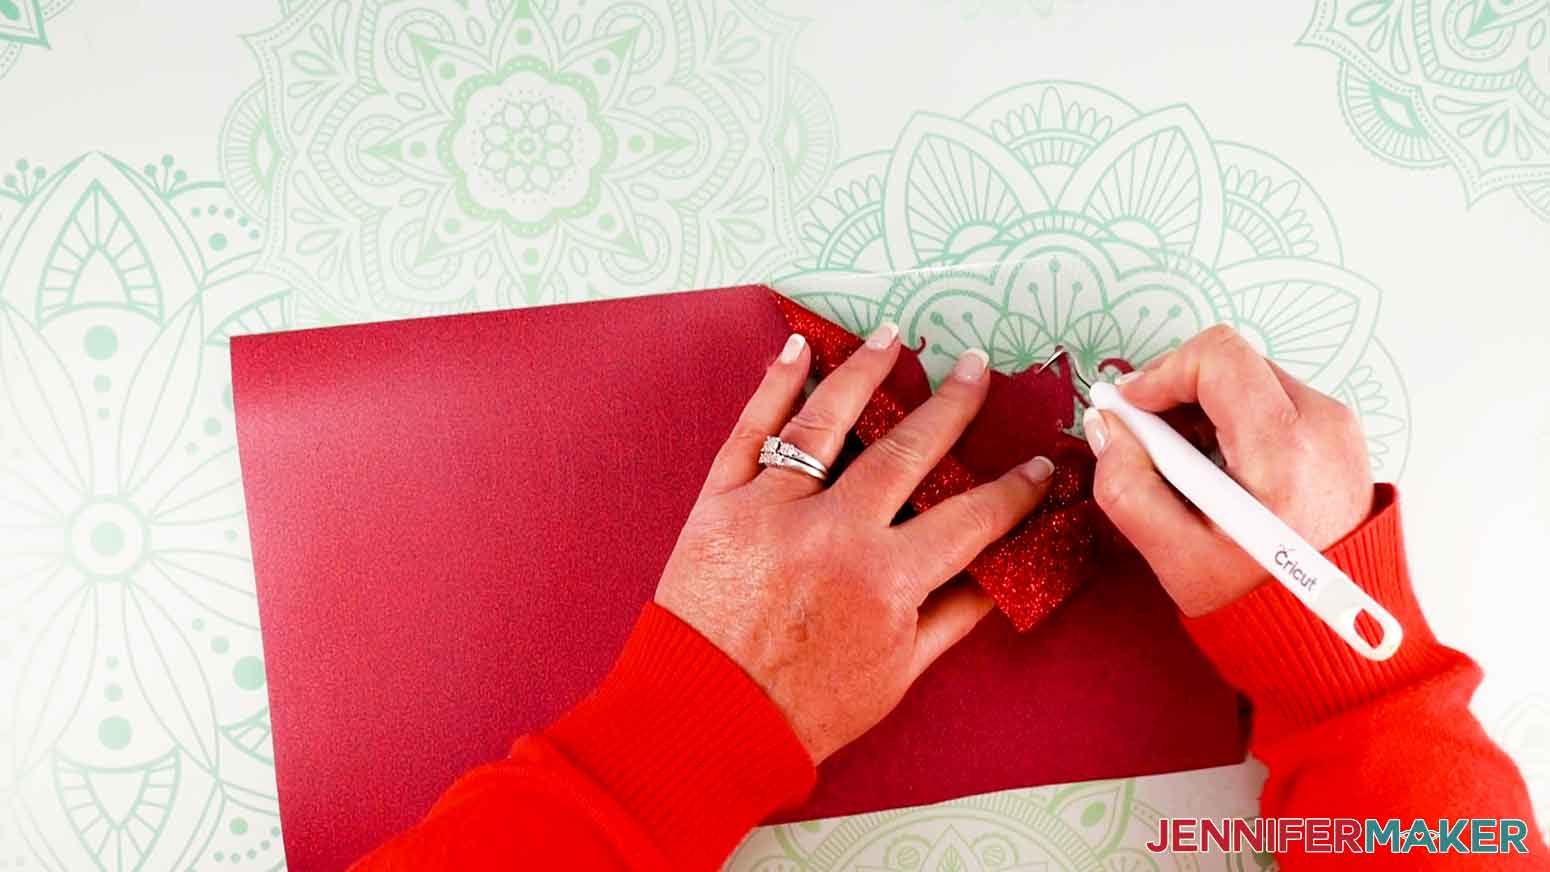
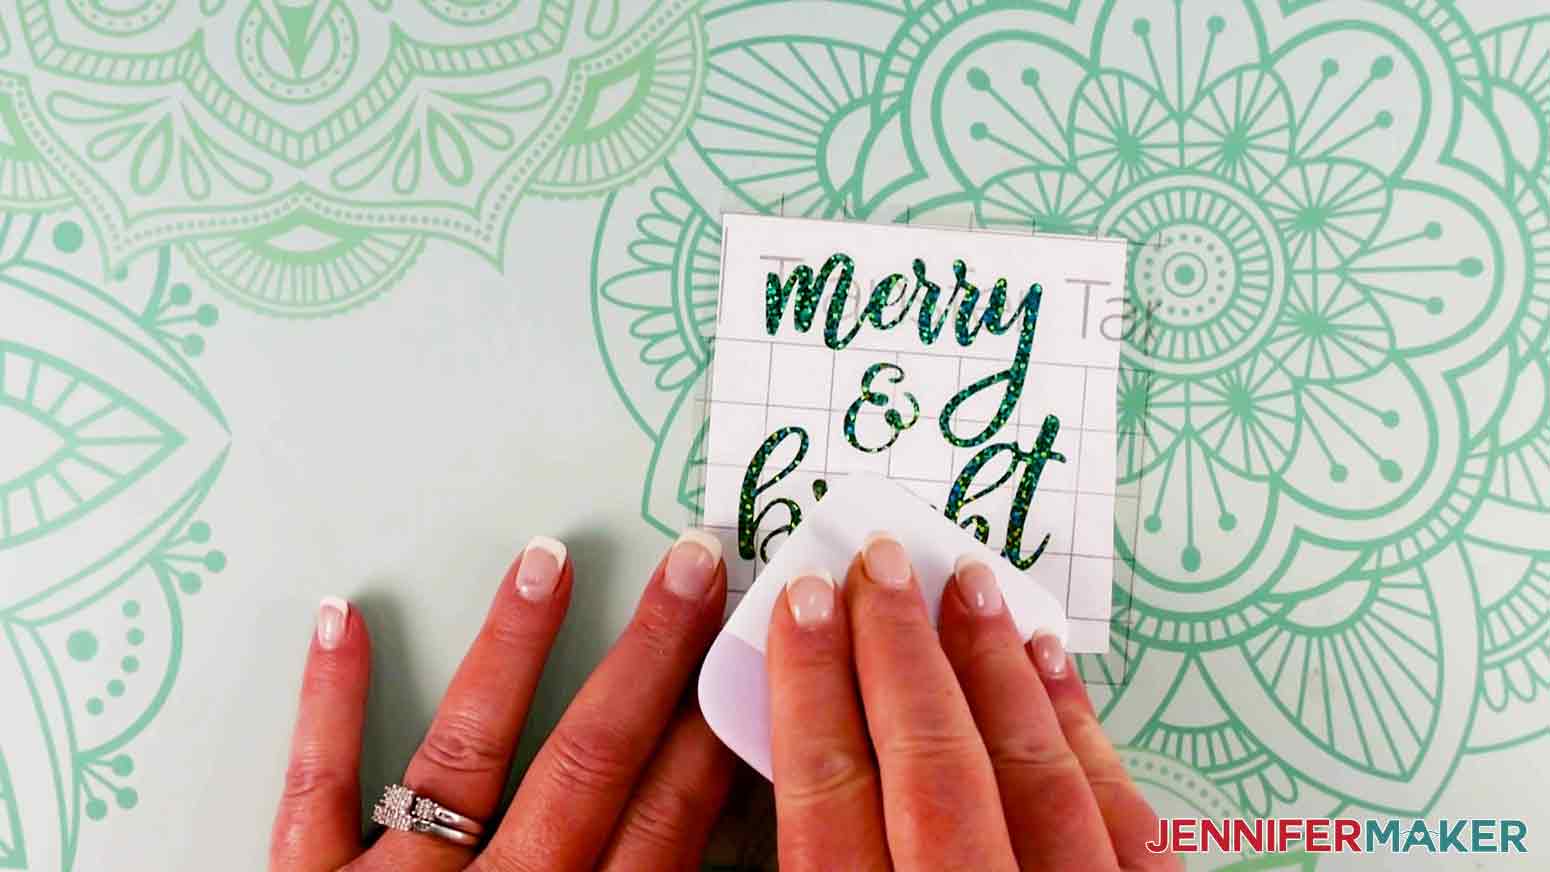
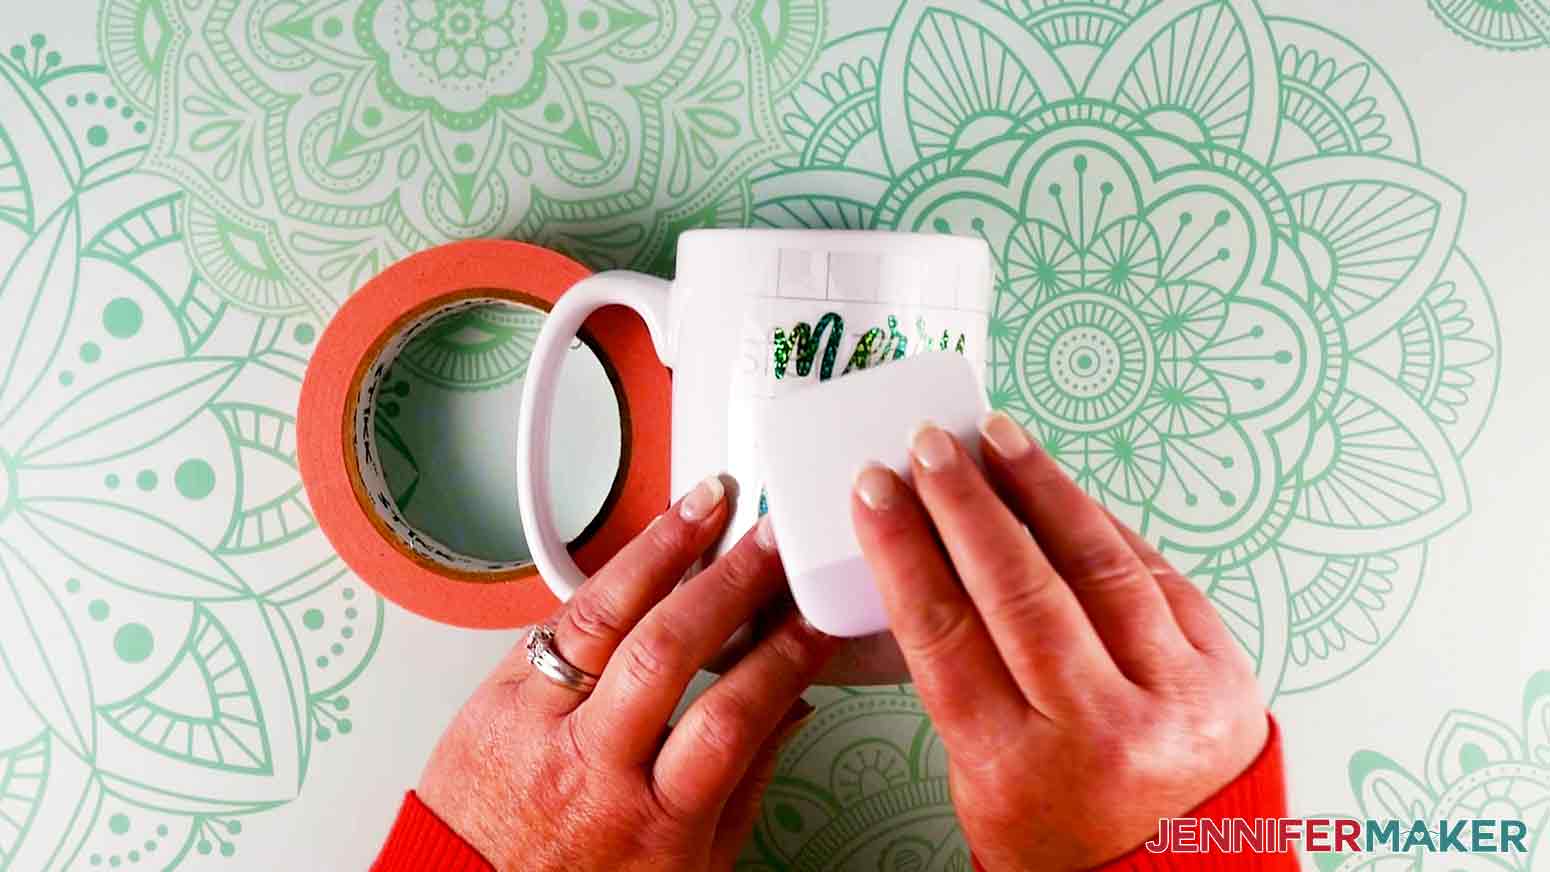
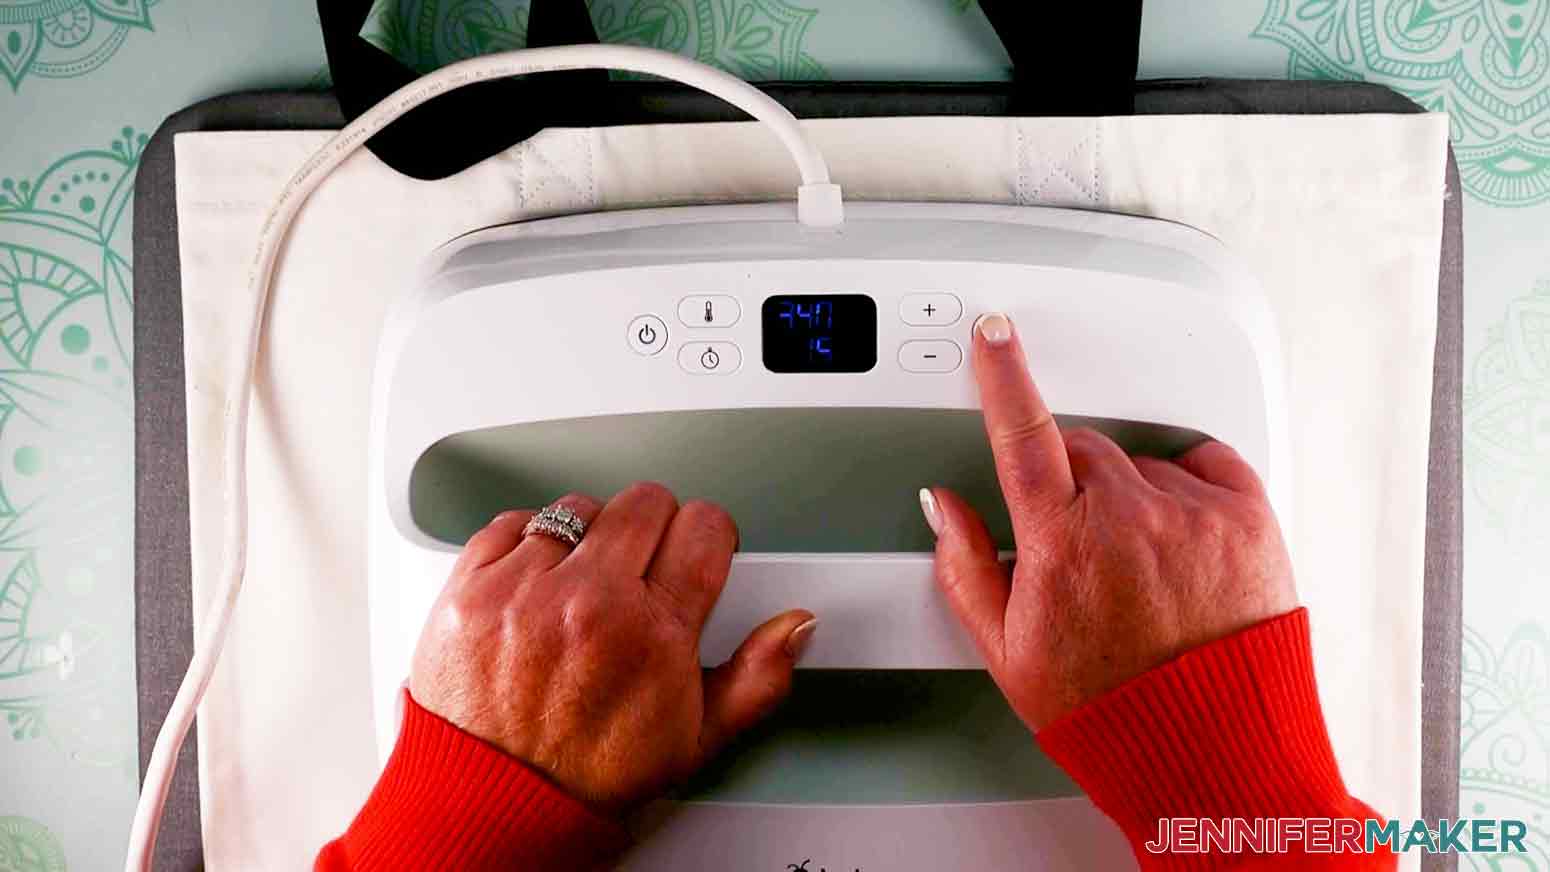
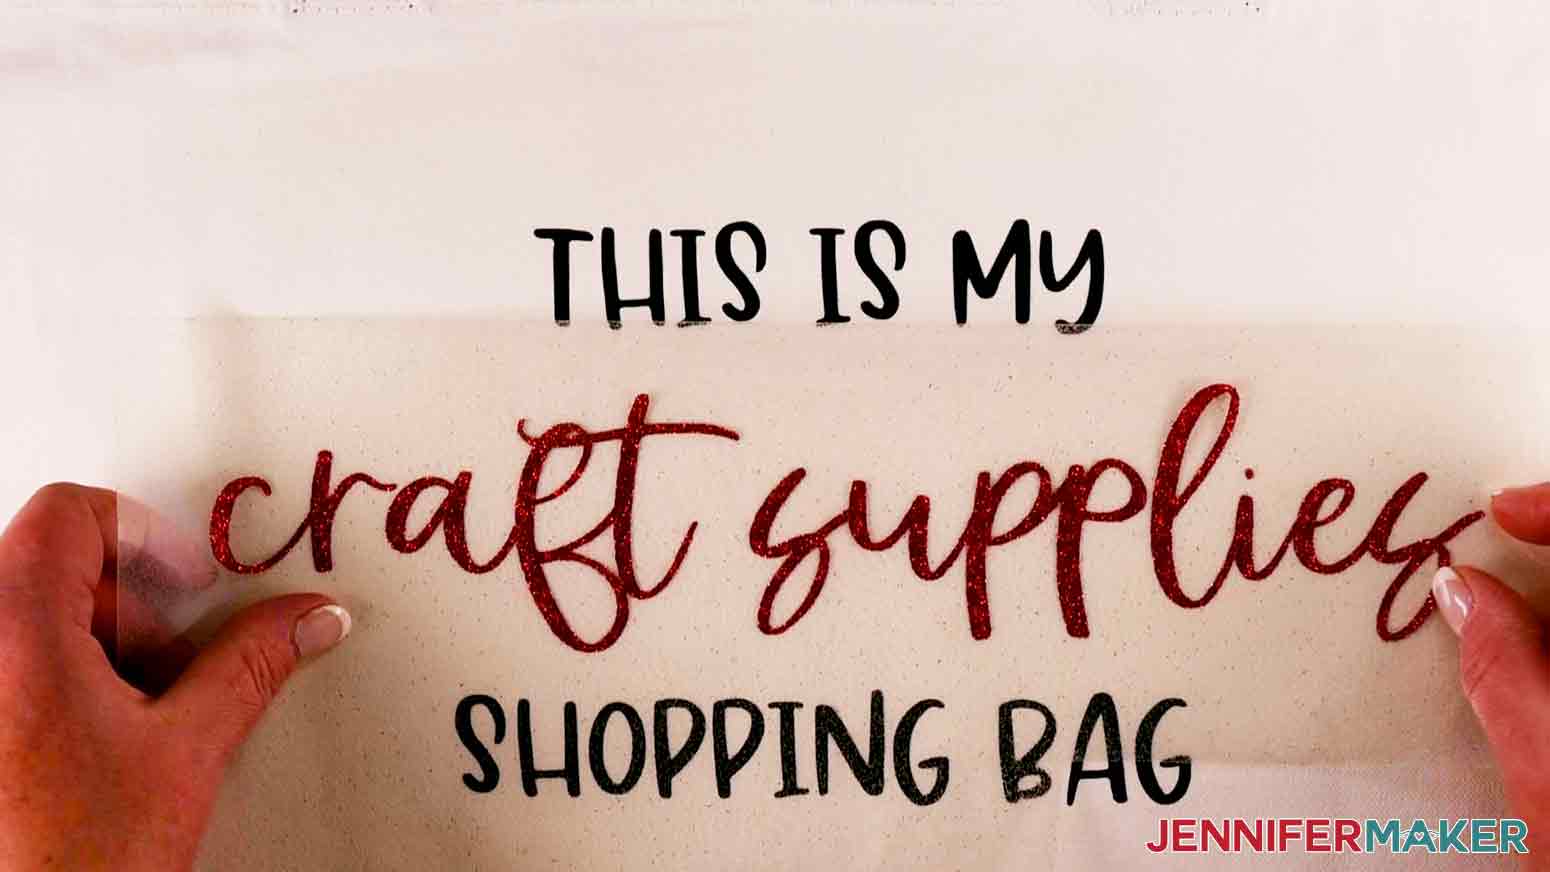
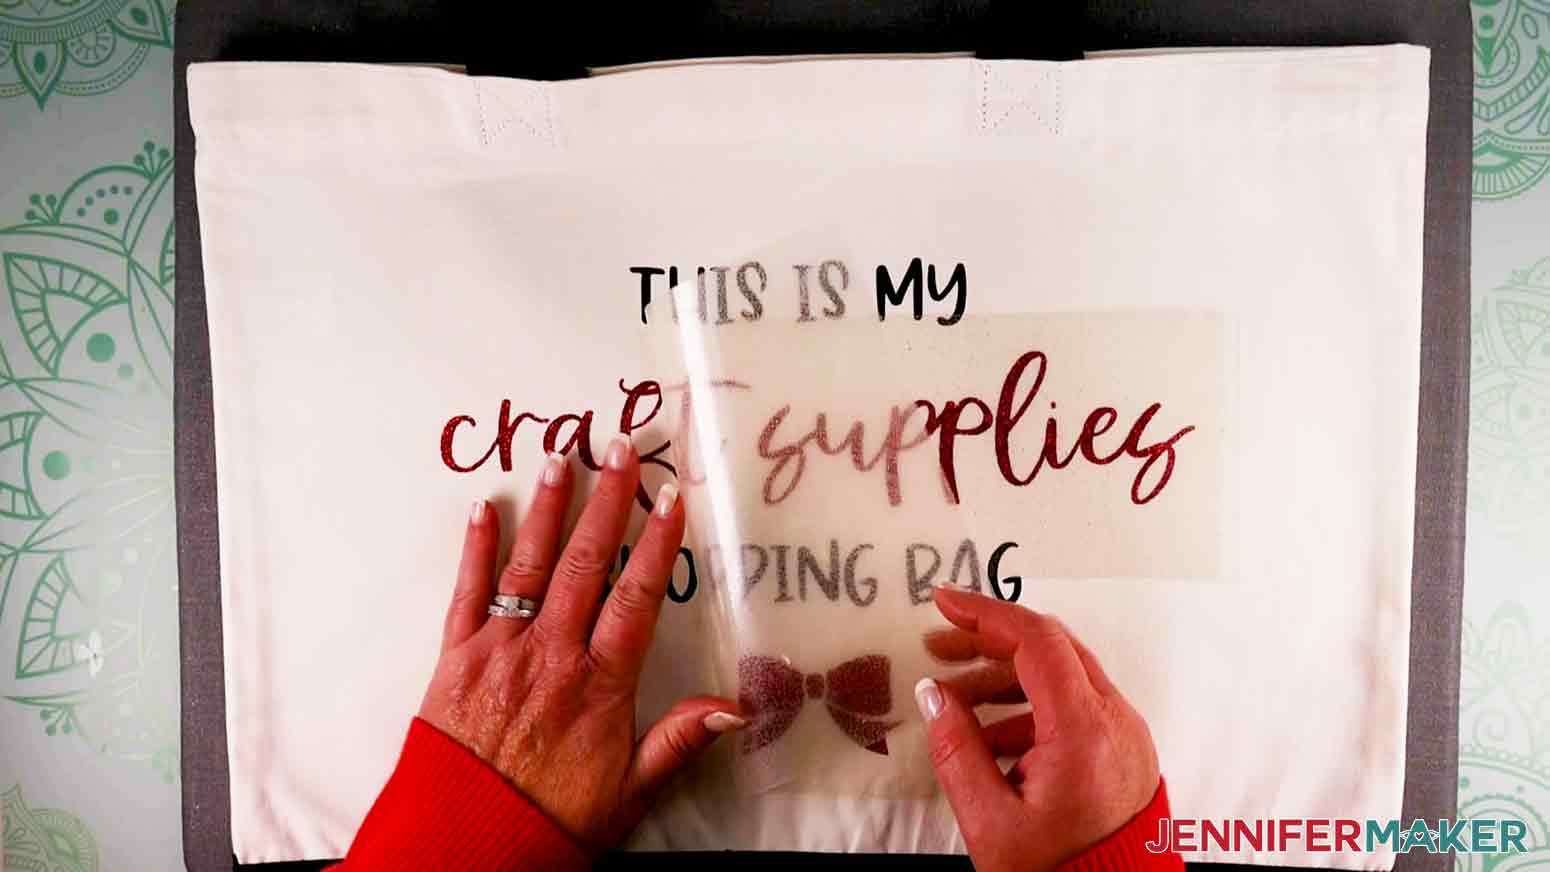
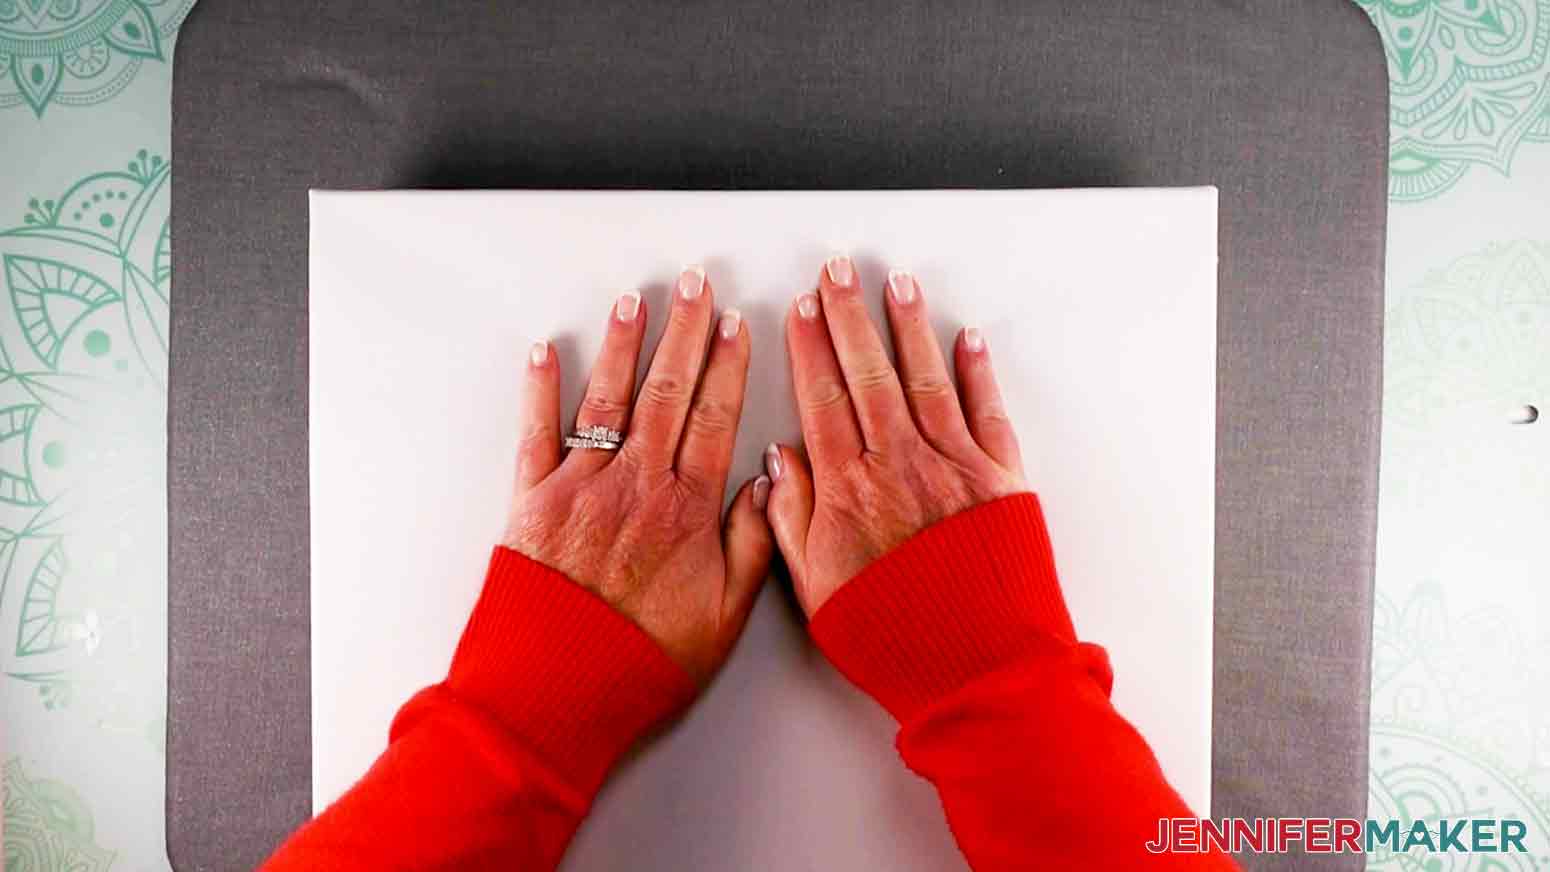
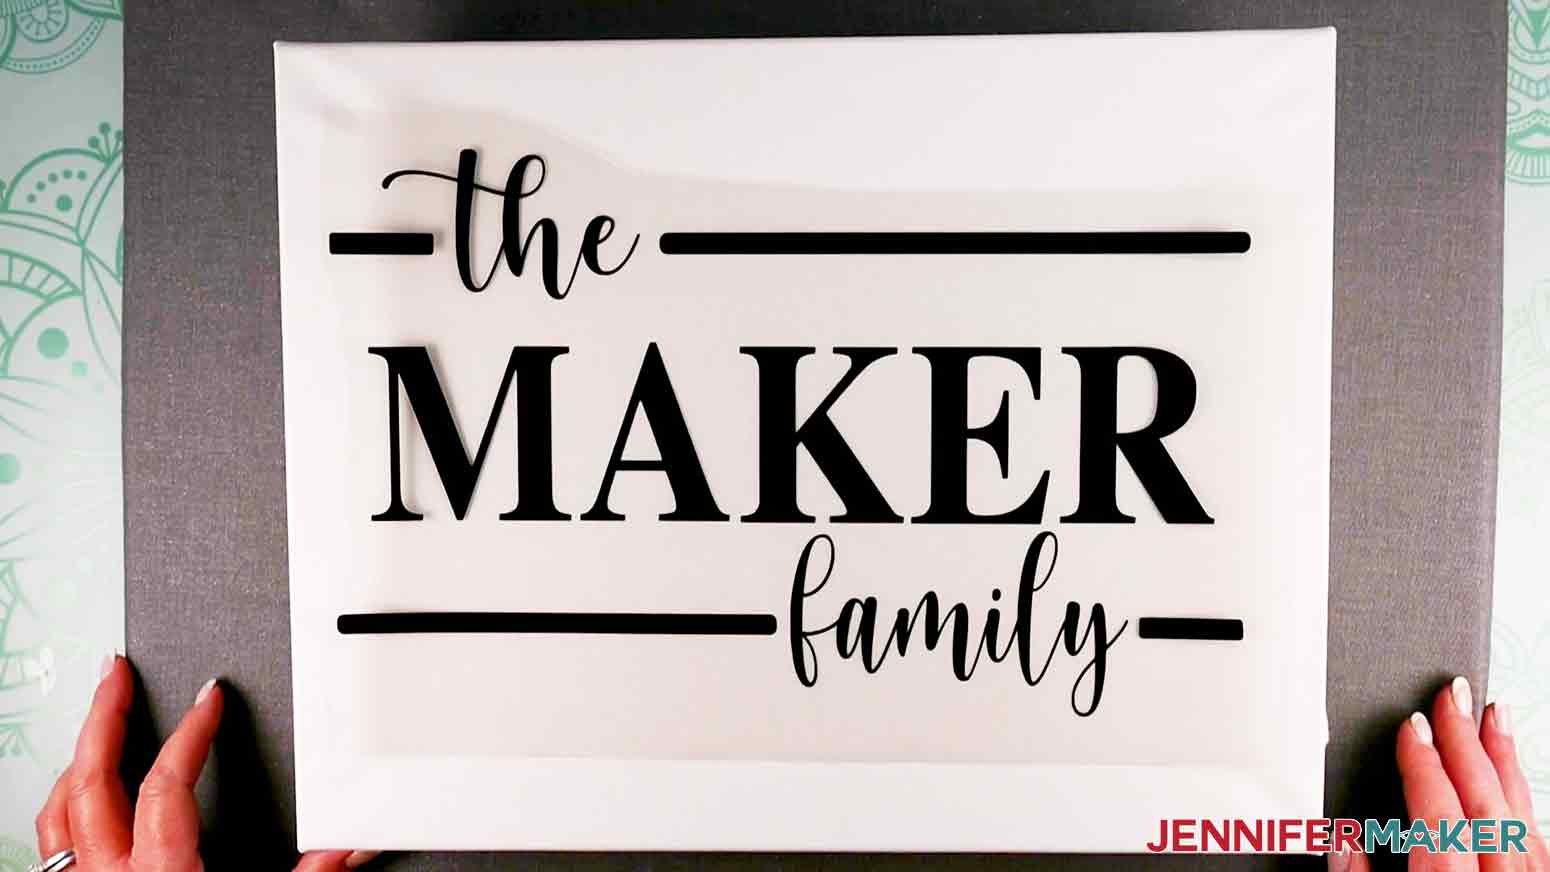
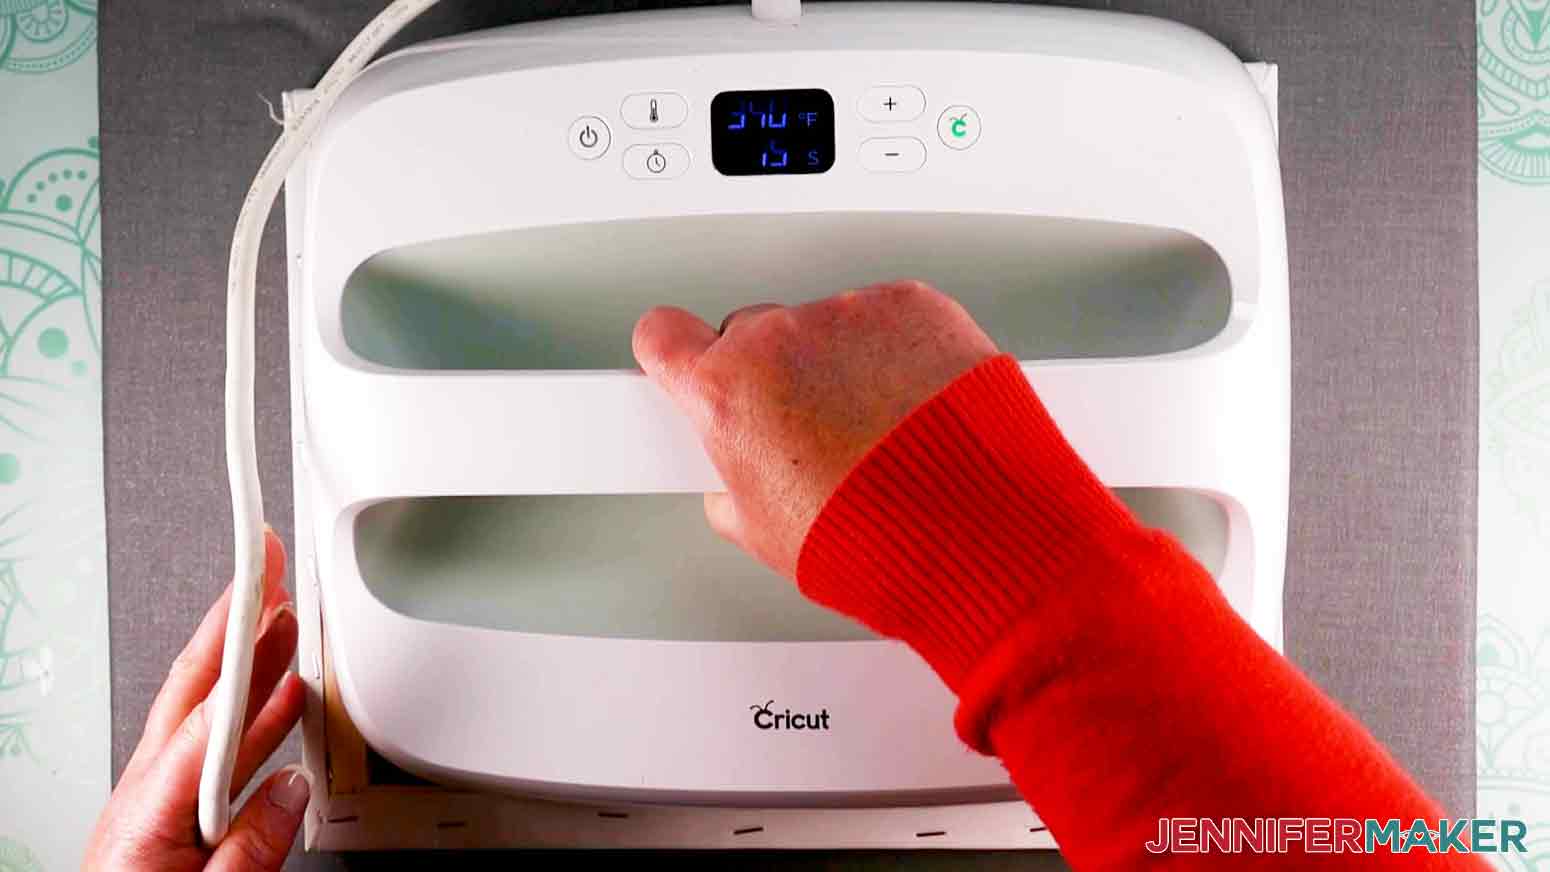
Use your cutting machine to add a personalized touch to these DIY Cricut gift ideas! The first step is to download my DIY Cricut Gift Ideas designs from my free resource library -- it's design #362. TIP: If you are not sure how to upload an SVG cut file to Cricut Design Space, watch this helpful video training series I made. If you are on an iPad or iPhone, here is how to download and upload SVG files to the Cricut Design Space app. This is what my DIY Cricut Gift Ideas SVG files look like when they are uploaded to Cricut Design Space. I’ve included two SVG file options for this project. If you want to keep it simple choose the one titled "diy-cricut-gift-ideas-jennifermaker-SVG.svg." All you need to do is ungroup, hide or delete what you don’t want, resize and make it. If you want to try something a little more advanced and use two or three colors in your designs I’ve also included individual design files. You will find those in the folder called "SVG Files for Layering" in the zip file. There are many options to choose from in the DIY Cricut Gift Ideas SVG file! I'm going to show you just a few to help you get the skill set you need to make them all! First, we are going to upload the main SVG file with all of the designs. We need to hide or delete all of the designs you are not making today. Your file should still be selected but if not, click once on your design and click Ungroup at the top of the Layers panel. Once everything is ungrouped, you can now click on each design and then click the eye icon to hide the design or Delete at the top of the Layers panel to remove the design. TIP: A quicker way to hide your designs is to drag the one(s) you want off to the side then click and drag a bounding box over the remaining designs and click “Group” at the top of the layers panel. Now you can either hide the group by clicking on the eye icon next to where it says “Group” in the layers panel or hit delete if you aren’t going to use them. I'm going to hide all of the designs I don't want to make. I may want to make them another time! You can take this tutorial and apply it to any of the designs but today, I'm going to show you how to apply holographic permanent vinyl to a ceramic mug and how to apply iron-on vinyl to a canvas sign and tote bag. Now I have two designs left on my Cricut Design Space Canvas. These two are going to be cut in one color each. I am going to make the Merry & Bright design with green holographic permanent vinyl on a mug so I will change the color of that design. Click on the color picker in the top menu and select green. I'll also show you how to apply iron-on to a canvas sign using the family design. Lastly, I will make the adorable craft supplies design on a tote with two colors of vinyl. Let's upload that design next. For the multi-colored design, upload the file from the "SVG Files for Layering" folder. The design for the craft supplies SVG is divided so that we can easily change the colors. Click Upload on the left side of your canvas and then Upload Image. Click Browse to find your SVG file and click Open. Once uploaded, select it and click Add to Canvas. On the canvas, click Ungroup at the top of the layers panel to separate the SVG. I am going to make "craft supplies" and the bow red. Select "craft supplies" and then press and hold the Shift key to also select the bow. With both selected, click on the Color Menu and change the color to red, or whatever color you'd like! It will be helpful to cut these so that the two lines of each color stay in place. I'm going to select the red layers, if they aren't still selected, and click Attach. You'll want to do the same thing with the two black layers of this design. Now select the whole design and click “Group” so if you need to resize, everything gets resized together. This design is ready to go but before we move on, we need to add the personalization to our canvas sign design. HOW TO PERSONALIZE A DESIGN: Click the Text icon and then choose your font from the dropdown font menu. I chose to personalize my canvas sign with the Times font but you can use any font you'd like. Once your font is selected, type your family name in the text box. Click on any blank space on the canvas to exit the text editing mode. Click and drag your personalized name to your design to resize it. I found it better to unlock the text to resize it to get the right look. I used the resize handle on the lower right of the design to change the size. Once you have your personalization just right, you can use the alignment tool to center it just to be sure. Select both your personalization and the family design by clicking and dragging your mouse over both or by pressing the shift key as you select both layers. When both are selected, click Align and Center Horizontally. Once you have it aligned, you need to attach your layers. Again, if both layers aren't still selected, select both and click Attach. NOTE: If you'd like to cut the personalization in a different color, then you would not attach it to your design. Now that you have your designs ready, we need to make sure they are sized correctly. HOW TO RESIZE A DESIGN: In order to share all of my designs, some are smaller then you'd typically use to apply to a gift. You'll definitely want to make sure you measure the blank space on your gift before sizing your design. Based on my measurements, I chose to make my mug design 3" tall, my tote design 11.5" wide, and my canvas design 12.5" wide. NOTE: If you plan to make your canvas design more than 11.5" wide, you will need a 24" mat or reference this tutorial for a larger than mat project. Additionally, if you are using a Cricut Maker 3 or Explore 3, you can use Smart Materials. Once you have sized all of your designs, you're almost ready to cut your designs. IMPORTANT: If you have any designs that are the same color on your canvas and plan to cut them on different types of vinyl, you need to change their colors (otherwise they will appear on the same mat on the next screen). It doesn't matter what color they are on your canvas because you choose the vinyl you put on the cutting mat. When your colors are set, make sure you have the correct machine selected and click Make It. If you are using a Maker 3, Explore 3, or Joy, you will be asked if you will be cutting your designs without a mat, with a mat, or multiple ways. I will be using multiple materials on the Maker 3 so I will select Multiple Ways and click Continue. On the Prepare screen, you will see a preview of the designs you are about to cut. If you are using the Maker 3 or Explore 3, this is where you can select On Mat or Without Mat for each of your mats (if you chose Multiple Ways like me). If you are making any of the designs with iron-on vinyl, it is important that you toggle mirror ON. Permanent vinyl does not need to be mirrored. I am making two of my designs with iron-on so I will toggle those to mirror ON. Once your designs are prepared, click Continue on the bottom right. Now it's time to select your material. Design Space chooses the cut order so first, I'm going to cut the red part of the tote design in glitter iron-on vinyl. Find your material and select More Pressure. NOTE: If you do not see your material as an option on the screen, click Browse All Materials to search for it We need to load the material with the shiny side down. Then start the cut. NOTE: Glitter iron-on can sometimes be tricky. I recommend a test cut to make sure your settings will cut through your vinyl. For other Cricut tips and tricks, check out this blog post! Next, we will cut the mug design, I'm going to select Cricut Holographic Permanent Vinyl in green. Remember, if you don't see your material on the screen, click Browse All Materials and search for your material. Like before, I prefer to cut with more pressure to help with a cleaner cut. Place your vinyl on your mat with the liner against the mat and the pretty side up. Load your mat into your Cricut and cut your vinyl. Lastly, I'm going to cut my canvas sign design and the rest of the tote design on Cricut Smart Iron-On in Black Matte. If you're using Smart Iron-On, make sure you cut a long enough piece. Design Space tells you just how much you need! If you choose to use the Roll Holder, there is no need to cut your vinyl, just make sure your roll is long enough and you can trim the vinyl after the cut. Select the material and more pressure. Load your material, shiny side down and the matte side up, and cut your material. When your Cricut is done, unload your vinyl by pressing the arrows button on the Cricut. Once your designs are cut, use your weeding tool to carefully remove the excess vinyl from your designs. APPLYING HOLOGRAPHIC VINYL TO MUG: Now for the exciting part! Your designs are weeded and ready to apply! First we'll apply the permanent vinyl design to the mug. Cut a piece of transfer tape the same size or slightly larger than your design. Remove the backing from the transfer tape. Apply the transfer tape to your vinyl design by holding the transfer tape in the shape of a taco, a "U" shape, then put the bottom of your “taco” onto the middle of your vinyl design. Smooth the transfer tape over the decal from the center outward. This minimizes wrinkles and bubbles. With the transfer tape in place, use a scraper tool or other hard and flat-edged item (like a store loyalty card) to transfer the vinyl decal design to the transfer tape. It’s important to scrape it well to transfer the vinyl decal. Flip over the vinyl and gently peel away the backing of the vinyl. Before we apply the vinyl, we will clean the mug with Isopropyl Alcohol and a lint-free cloth to remove any dirt or dust. Then I will rest my mug on a roll of tape to hold it in place while I apply the vinyl. Align your vinyl design on your mug and then press down on the vinyl from the inside outward. You can use your scraper tool to help. Gently peel the transfer tape away from the vinyl and mug. How simple and pretty to make such beautiful gift mug to gift. APPLYING REGULAR AND GLITTER IRON-ON TO TOTE: The totes I am using are cotton canvas material. If you are using something different, be sure to check what material your tote is made out of so you can apply the appropriate settings to your EasyPress. Here is a quick reference to EasyPress settings. We have two different types of iron-on vinyl to apply. I'm going to start with the hotter setting for the regular Smart Iron-on Vinyl. I preheated my EasyPress 2 to 340° for the first application. Lay your tote flat across your EasyPress Mat. If you don't have a mat, you can use a folded towel under your tote. Preheat the tote for 5 seconds. Lay your design on your tote. with the cut vinyl against the material. The shiny side will be facing up. TIP: If you are having trouble centering your design, you can fold your design in half to line up the right and left edges. Make a slight crease down the center of your vinyl. This will not hurt the vinyl. Place your EasyPress over your design and press your design with light pressure for 30 seconds. Remove your EasyPress and gently flip over the tote. Press the design from the back for 15 more seconds. Flip the tote back to the front side and when the liner is cool to touch, gently peel it away from the tote. Next we will press the glitter iron-on vinyl. Lower your Easy Press temperature to 270°. While it cools, line up the design over the black vinyl. To help align the red, you can use the center of the bow as a reference to center the red layer over the black. IMPORTANT: If the carrier sheet of the vinyl does not completely cover the black, you will need to cover the exposed black vinyl with parchment paper or the vinyl will melt against the Easy Press. Once your Easy Press has cooled to the correct setting, press the design for 30 seconds with light pressure. When done, flip the tote and press it for another 15 seconds from the back. Flip it back and when the liner is cool to touch, gently peel it away from your tote. TIP: Cricut Smart and Glitter Iron-On are cool peel vinyls. If you try to remove the liner too soon, the vinyl will come up. Patience is key for good adhesion to your tote. If your glitter iron-on vinyl still does not stick once it is cool, you can repress it with a little more pressure. APPLYING CRICUT SMART IRON-ON TO CANVAS SIGN: Now it is time to make our last DIY gift, a personalized canvas sign! Pressing to a stretched, raised canvas can be a little tricky because the canvas gives a little when pressure is applied. I recommend folding a towel and placing it under your canvas to help provide pressure under the canvas. A book works well too. If using the same canvas signs as me, you'll want to remove the canvas from the frame before pressing the vinyl. Again, refer to the Cricut Heat Guide to make sure you are using the correct settings for your materials. Preheat the EasyPress to 340° and then preheat the canvas sign for 5 seconds and align your weeded design over your canvas sign and gently press it against the canvas. Press the design for 30 seconds. Once done, flip the canvas sign and press it from the back for 15 seconds. Once pressed, allow the liner to cool to touch and gently remove it from your design. How fun and easy was it to make those three gifts? You can use these techniques to apply permanent or iron-on vinyl to many different gifts this holiday season. Here are all the great DIY gifts that I made! Dad/Mom: Falling Leaves Script (Free alternative: Goldie Rainbow) Est 2021: Berson Dream Trio (Free alternative: Storytime) Merry & Bright: Berson Dream Script (Free alternative: Chocolate) Christmas Crew: Amastery (Free alternative: Chocolate) Cheers: Cream Candy (Free alternative: Hello) Thank You: Amastery Script (Free alternative: Chocolate) Tis The Season: Beachwood/Homework (Free alternatives: Magical Feather/Homework) This Is My Craft Supplies Shopping Bag: Falling Leaves Trio (Free alternative: Goldie Rainbow) Let's Getaway: Beachwood/Beachwood Sans (Free alternative: Magical Feather) Weekend Vibes: Beachwood/Beachwood Sans (Free alternative: Magical Feather) Warm Wishes/Merry Christmas/Stay Cozy: Tingler (Free alternative: Timberly) You Light Up My Life: Falling Leaves Trio (Free alternative: Goldie Rainbow) Hello Gorgeous: Berson Dream Trio/Berson Dream Script (Free alternative: Chocolate) BeYOUtiful: Falling Leaves/Amastery Script (Free alternative: Goldie Rainbow) So Fresh & So Clean: Farmland Acres Never Let Anyone Dull Your Sparkle: Augustine/Berson Dream Script His: Romantica Serif Hers: Cream Candy (Free alternative: Hello) Merry Christmas (with trees): Cream Candy (Free alternative: Hello) The Bell Still Rings: Gloria Ramsey Two Faced Serif/Amastery The Family: Cream Candy (Free alternative: Hello) This Is Us (Rectangular): Adinda (Free alternative: Adinda) Home Sweet Home: Falling Leaves (Home) / Beachwood (Sweet) Merry Christmas (with Holly): Amastery Duo (Free alternative: Joseph Sophia) Let It Snow: Amastery Duo (Free alternative: Joseph Sophia) This Is Us (Circular): Home (This Is Us) / Romantica Serif (Our Family, Our Story, Our Life) Monogram (on Scarf/Gloves): Circle Monogram Font Crates: Goldie Rainbow (Free alternative: Goldie Rainbow) Gift Buckets: Timberly (Free) As an Amazon Associate and member of other affiliate programs, I earn from qualifying purchases.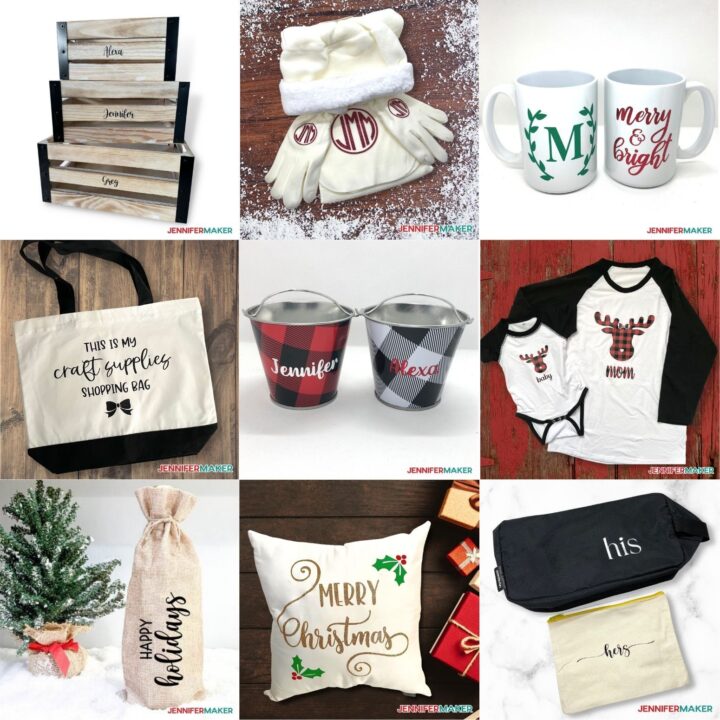
DIY Cricut Gift Ideas
Materials
Tools
Instructions
STEP 1: GET MY FREE DIY CRICUT GIFT IDEAS SVG FILES
STEP 2: PREPARE THE DIY CRICUT GIFT IDEAS SVGS FOR YOUR GIFTS
STEP 3: CUT AND WEED YOUR VINYL DESIGNS
STEP 4: APPLY YOUR VINYL DESIGNS
![]()
STEP 5: SHOW IT OFF
Notes
FONTS
Recommended Products

Answers to Your Questions About Making DIY Cricut Gifts
Q: Can I change the design to make my own style of project?
Yes! You are welcome to create a new project from scratch or change up the text in my designs using the text tool for your own personal use.
Q: Can I sell these designs on my Etsy shop/online store?
Thank you for wanting to create and sell our designs! The only thing we ask is that when selling the completed designs that you give credit to JenniferMaker.com and that you not sell the digital files. If you use them, please share photos with us!
Get my free SVG files to make my DIY Cricut Gift Ideas
I love seeing what you make with my designs and how you use them! Please share a photo of your DIY Cricut Gifts made in our Facebook group or tag me on social media with #jennifermaker.
Love,

Want to remember this? Save this DIY Cricut Gift Ideas to your favorite Pinterest Board!