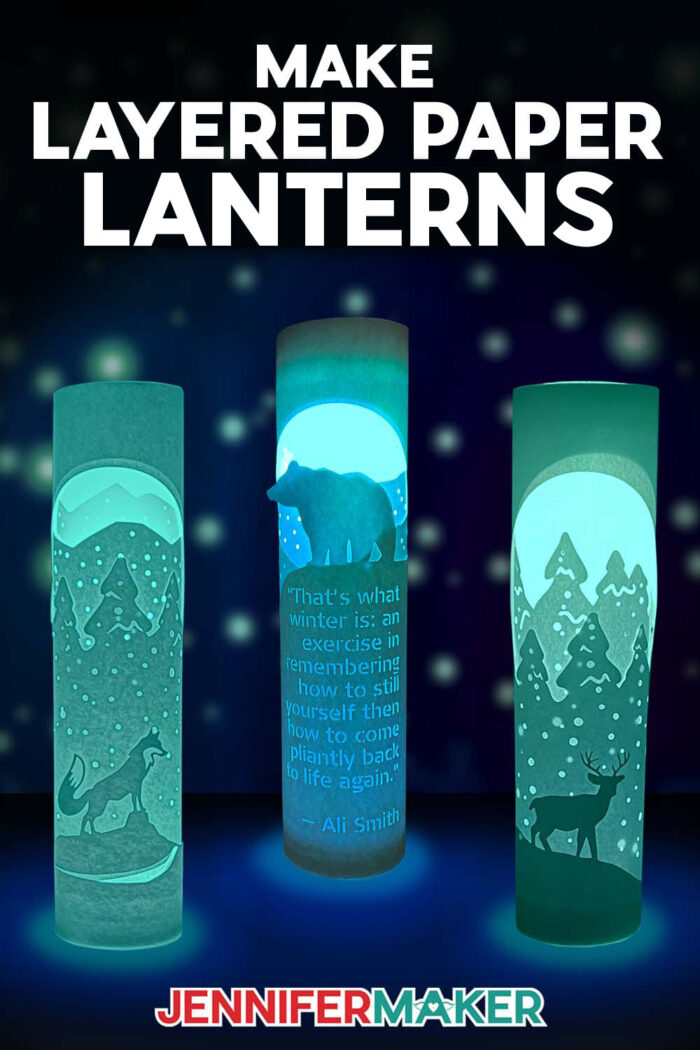
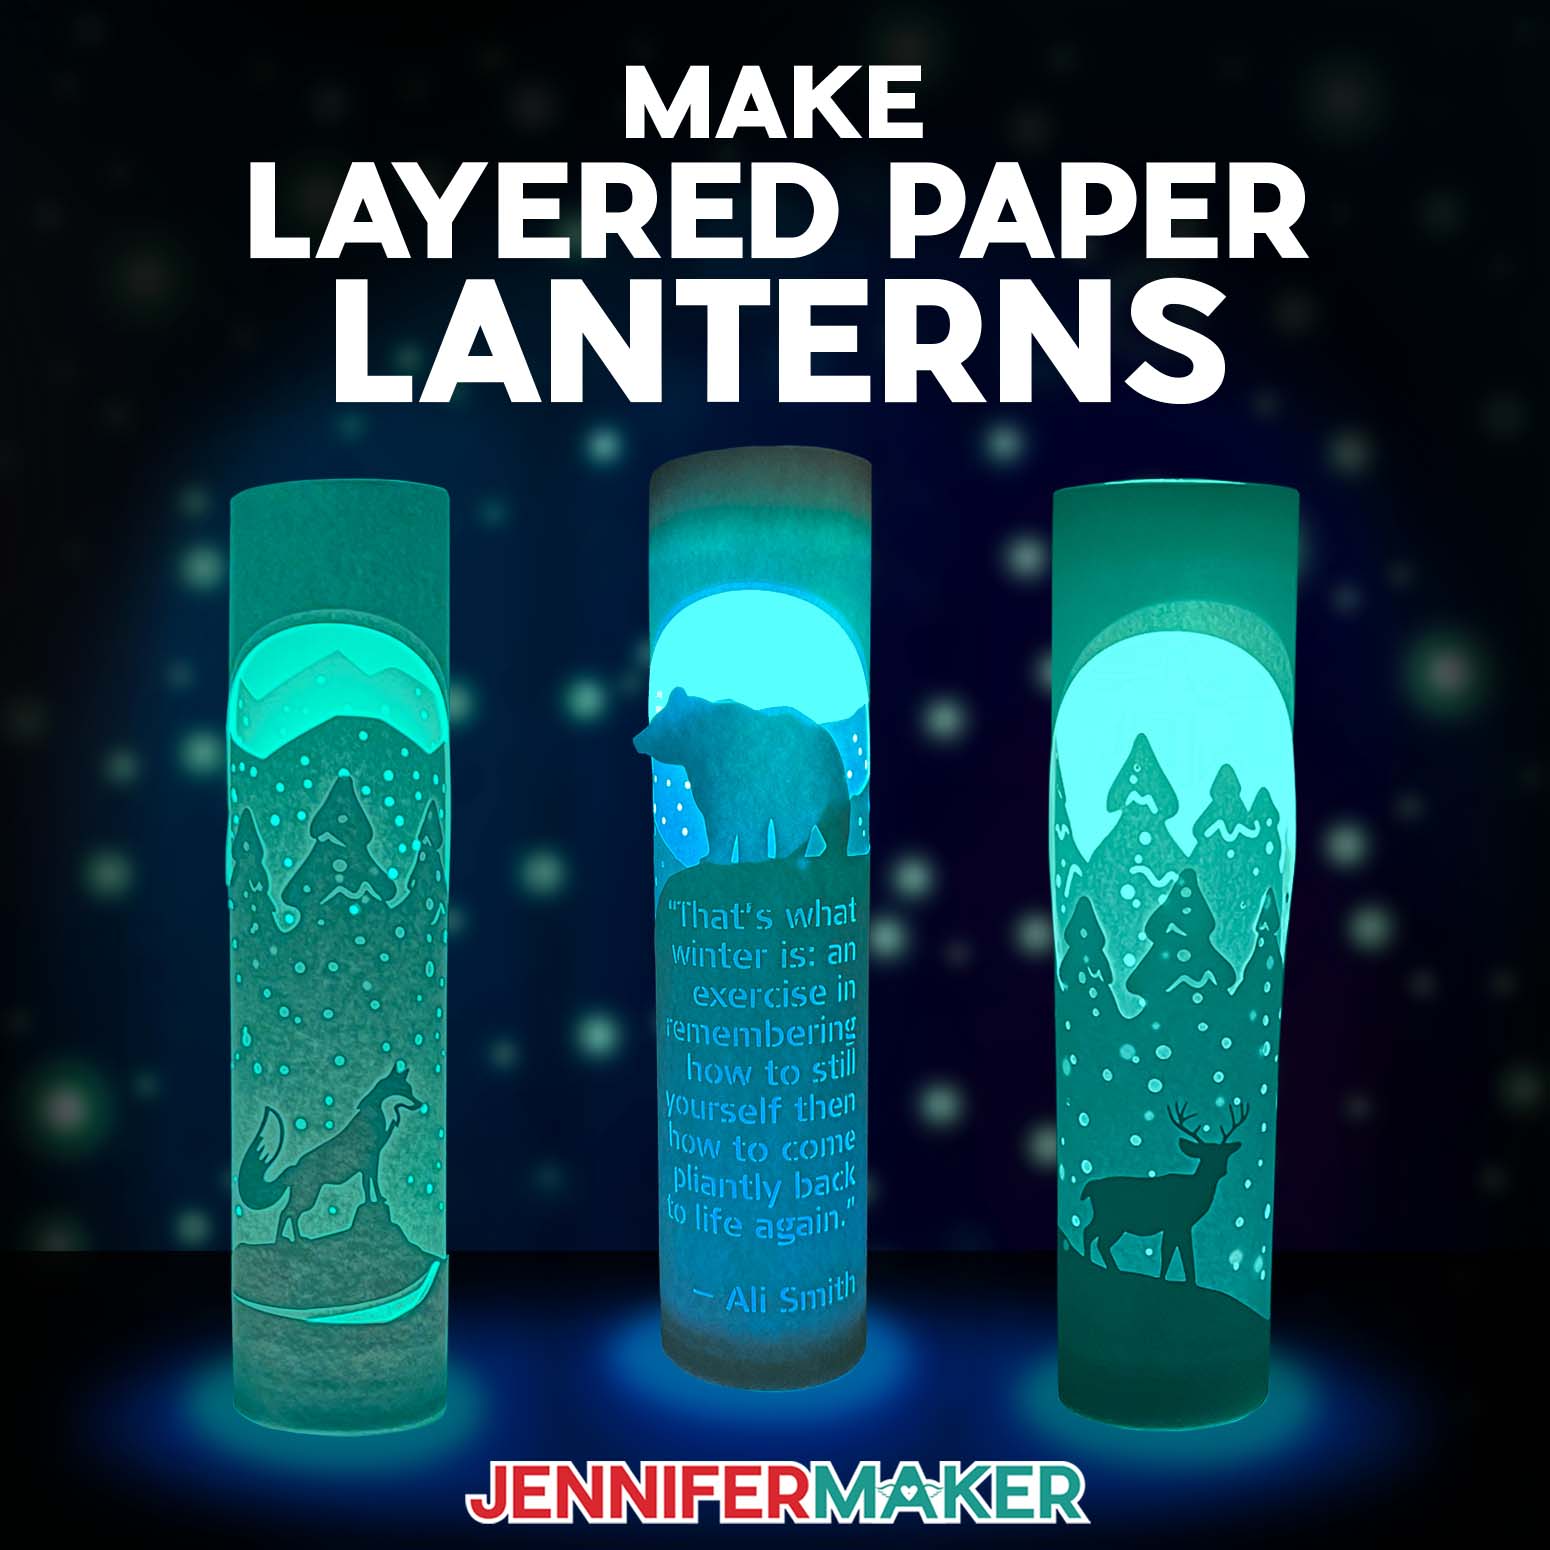
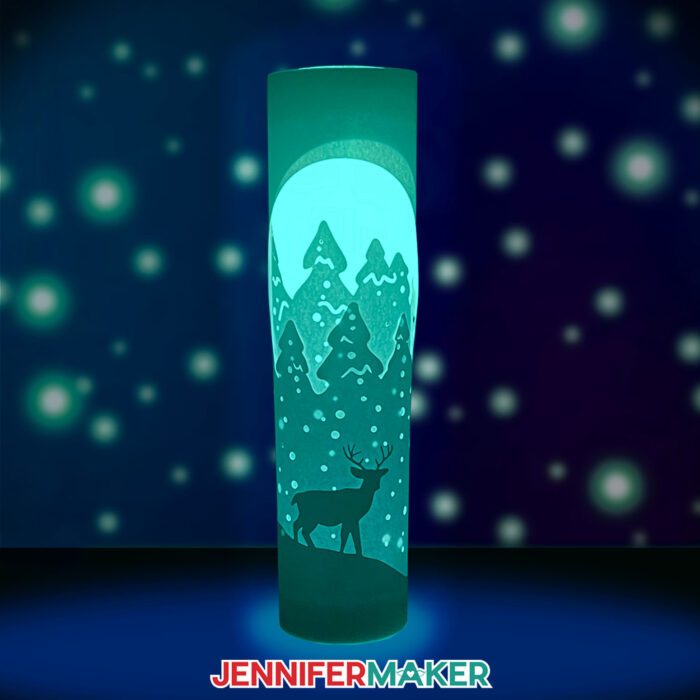
Learn how to make amazing, nature-inspired layered paper lanterns with lights!
With the days turning to night so early this time of year, we all need a little more light in our lives. Luminaries are one of my favorite things to make with my Cricut cutting machines, and I’ve got three new designs to share with you! My nature-inspired layered paper lanterns with lights are a lovely way to illuminate those dark and chilly winter nights. But did you know you can personalize them, too?
Watch the full step-by-step layered paper lanterns tutorial:

I just love the rustic vibes of these designs, because they remind me of the beautiful Michigan wilderness. Sometimes I even get to see some amazing wildlife in my own backyard!
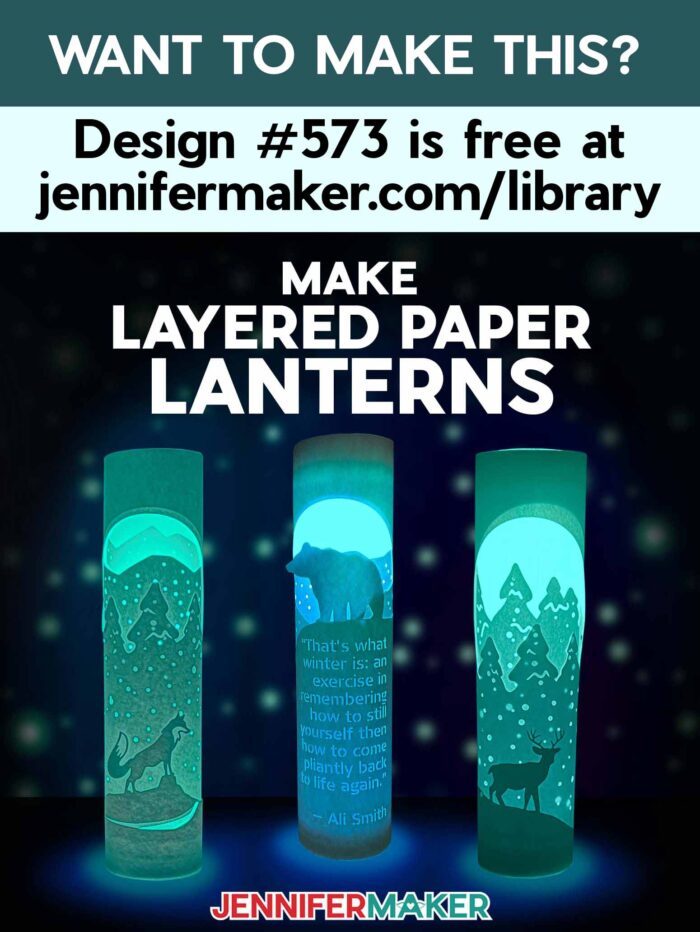
In this tutorial, I’ll show you how easy my layered paper lanterns with lights come together with little more than cardstock, vellum, some tape, and a light! First, I’ll show you how to make the Fox lantern. And if that wasn’t cool enough, I’ll even show you how to personalize a lantern using your own special message, quote, or song lyrics. You can use my quote, or one of your own!
I’ll show you how to make the Fox lantern, and later how to customize your own Bear lantern, using text and a special kind of typeface that can be cut out of paper. You can use my quote, or one of your own! I’ve also included a Deer design you can make that follows the same steps as the Fox.
First, download my layered paper lanterns with lights designs from my free library — look for design number 573. Alternately, you can use the Save This Project form near the top of this post and the design link will be emailed to you.
I’ll show you how to make lanterns using three 12 x 12 inch sheets of 65 lb white cardstock, and two sheets of 12 x 12 inch white vellum. You can also use 8.5 x 11 inch materials, if you resize the lantern pieces in Cricut Design Space. White paper lanterns are gorgeous and detailed when they’re all lit up, but I’ll demonstrate how to put one together using colored cardstock — it’s much easier to tell the layers apart on video that way.
A Cricut machine can make creating lanterns easy, so you’ll be able to quickly make them for events like baby showers, a romantic anniversary, or even an evening garden party. How beautiful would they look as a wedding party decoration, too? I’m sharing PDF files to cut these designs by hand, but I prepared the SVG files in Cricut Design Space and cut the pieces with a Cricut Maker 3 . You can also use a Cricut Maker, any Explore-series machine, the Cricut Venture, or any cutting machine that uses SVGs and fits 12 x 12″ materials. If you’re opting for a version that uses 8.5 x 11 inch materials, you can even cut it on the Cricut Joy Xtra!

Along with your cutting machine, you’ll need the typical paper crafting tools like a Green StandardGrip machine mat, a brayer, spatula, weeding tool, and a scraper.
If you’re new to making paper lanterns with lights, you might be wondering what kind of light to use! The most important thing to note is that you should never EVER use real candles in a paper lantern. Instead, opt for safe LED lights!
To make your paper lanterns glow, I recommend using one or two battery-operated, remote-control LED puck lights. One puck light is great for a softer glow, and two will really light up your space — especially through all those layers! I’ll show you how to assemble lanterns both ways. Or, you can use fairy lights as paper lantern lights, too! Your assembly will be a little different, but they’re a great option if that’s all you have on hand.
Scroll down for a full list of materials and tools to make these — there’s links to everything I used, too!
Making LED paper lanterns is an easy and affordable way to add some unique lighting to your home décor. Create your own designs to match the seasons, customize your own quotes and images, and have fun lighting up your space! You may love your new lantern so much that it becomes a permanent fixture in your living room, bedroom, or anywhere else you need some ambient light.

Let me show you how easy it is to make layered paper lanterns with lights! This post contains some affiliate links for your convenience (which means if you make a purchase after clicking a link I will earn a small commission but it won’t cost you a penny more, there is no additional cost)! Read my full disclosure policy.
Materials to Make A Paper Lantern with Lights
View my Amazon shopping list with the exact items we used to make this project
- One (1) or Two (2) Battery-Operated LED Puck Lights -AND- Three (3) to six (6) AAA Batteries
- Two (2) Sheets of 12”x12” Vellum
- Three (3) Sheets of White 12” x 12” 65 lb Cardstock
- ¼” Double Sided Tape
- A way to cut your materials – I’m using the Cricut Maker 3 but you can also use the original Maker, an Explore series machine, the Venture or Joy Xtra.
- Cricut Green StandardGrip Machine Mat 12″ x 12″ (remember to put paper with a fancy side right side up!)
- Scraper Tool – to remove small pieces stuck to the mat
- Brayer
- Spatula
- Weeding Tool – optional for popping out small cutouts from intricate areas
- Design #573 (My free SVG/DXF/PDF design files are available in my free resource library – get the password by filling out the form at the bottom of this page
How to Make Your Own Layered Paper Lantern with Lights
Paper Lanterns with Lights
Learn how to make paper lanterns with lights using a little glue, some cardstock, an LED light, and about 45 minutes of your time!
Materials
- Three (3) Sheets of 12" x 12" 65 lb. Cardstock (I used white)
- One (1) Sheet of 12”x12” Vellum
- A way to light up your lantern, such as One (1) Battery-Operated LED Puck Light -AND-
- Three (3) AAA Batteries
- ¼” Double Sided Tape
- Fine Point Permanent Marker
- Design #573 (My free SVG/DXF/PDF design files are available in my free resource library – get the password by filling out the form at the bottom of this page)
Tools
- A method to cut your cardstock - I'm using the Cricut Maker 3, but you can also use the Cricut Maker, a Cricut Explore Series machine, the Cricut Venture, or the Cricut Joy Xtra
- Cricut Green Standard Grip Machine Mat 12" x 12"
- Brayer
- Scraper
- Spatula
- Weeding Tool (for popping out small cutouts from intricate areas)
- Craft Glue (I used Bearly Art Precision Glue)
Instructions
STEP 1: GET MY FREE PAPER LANTERNS WITH LIGHTS DESIGNS
First, download my Paper Lanterns with Lights designs from my free library -- look for Design #573. Alternatively, you can use the Save This Project form near the top of this post and the design link will be emailed to you.
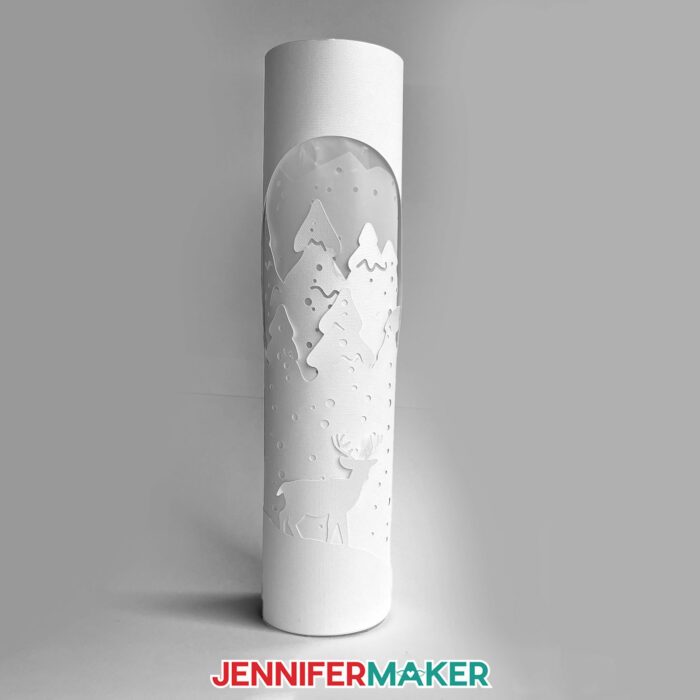
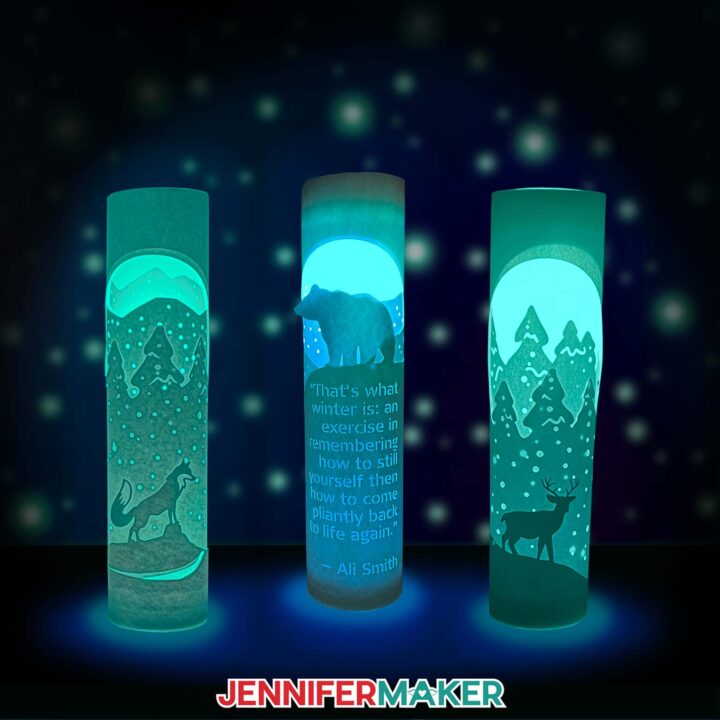
There are three designs in the folder: a bear, a deer, and a fox.
In this tutorial, I will show you how to prepare and assemble the bear and fox luminaries, but you can also follow these steps to make the deer design. I’ll also show you how to personalize the bear luminary with your own custom text in Cricut Design Space.
Upload your chosen SVG file to Design Space to get started.
TIP: If you’re not sure how to upload, go to jennifermaker.com/svgs to learn how to unzip and upload SVG files.
PROJECT 1: FOX PAPER LANTERN WITH LIGHT
STEP 2: PREPARE YOUR DESIGN
CRICUT DESIGN SPACE
1. Open Cricut Design Space and click “New Project.”
2. Click “Upload” and then “Upload Image.”
3. Click “Browse.”
4. Select the SVG file you want to use.
5. On the Prepare to Upload screen, it will say “Cut image” with the design preview.
6. Click “Upload.”
7. Find your design in Recent Uploads and add it to the Canvas.
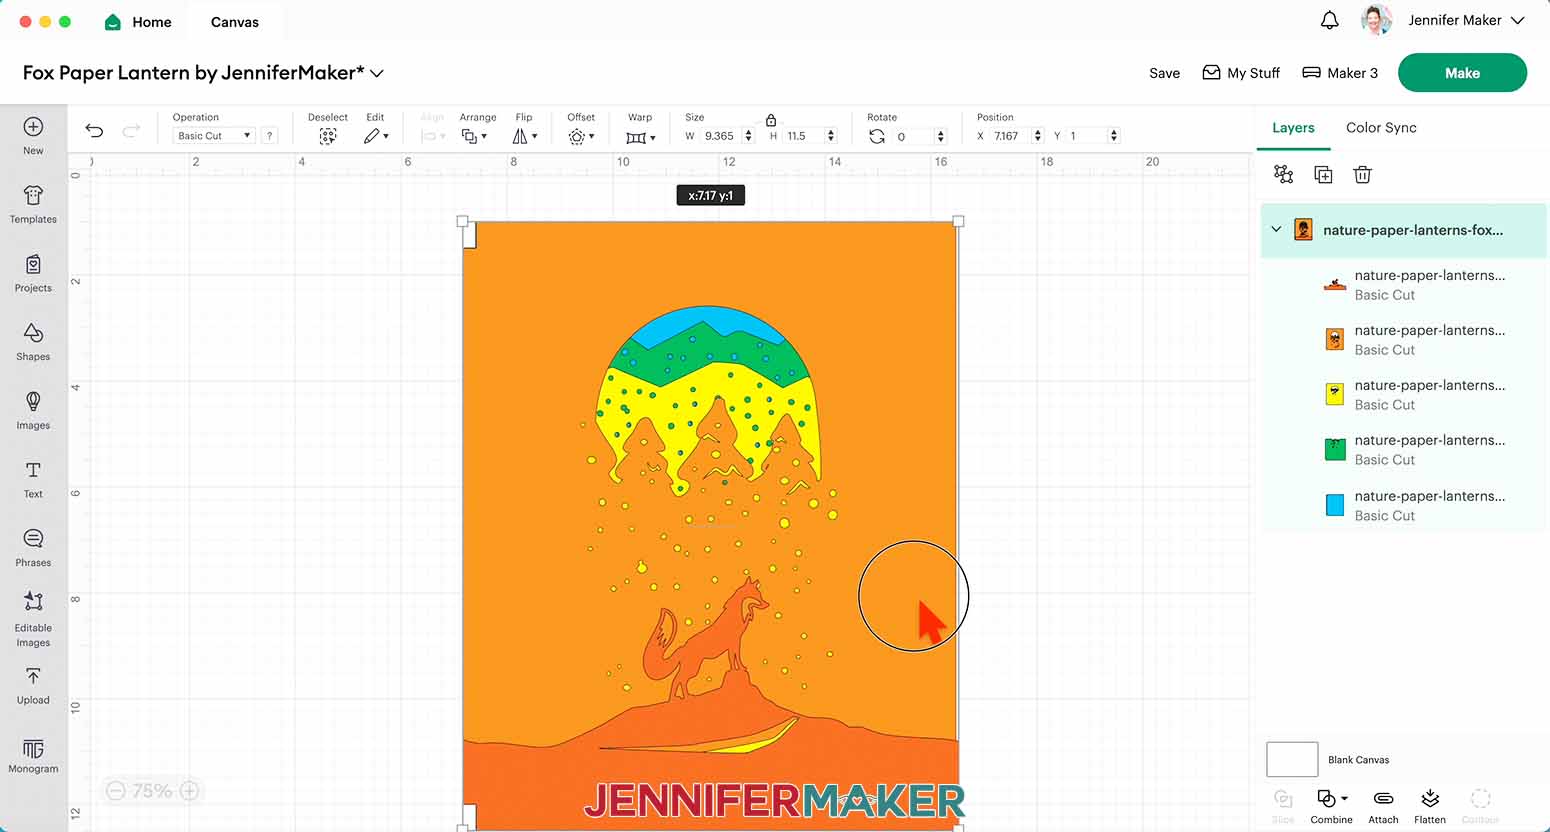
8. With the design selected, click the “Ungroup.”
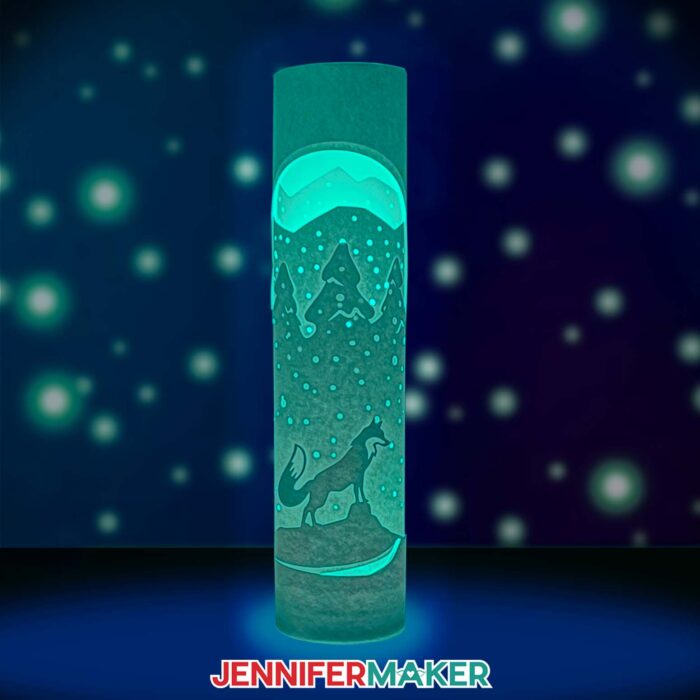
9. The layers are colored so Cricut Design Space cuts them in the order they’ll be layered. The fox design has five layers. The top three are meant to be cut using 65 lb cardstock: a dark orange front layer with the fox, a lighter orange second layer with trees and a moon cutout, and a yellow mountain layer. The green mountain layer and blue back layer can be cut from vellum.
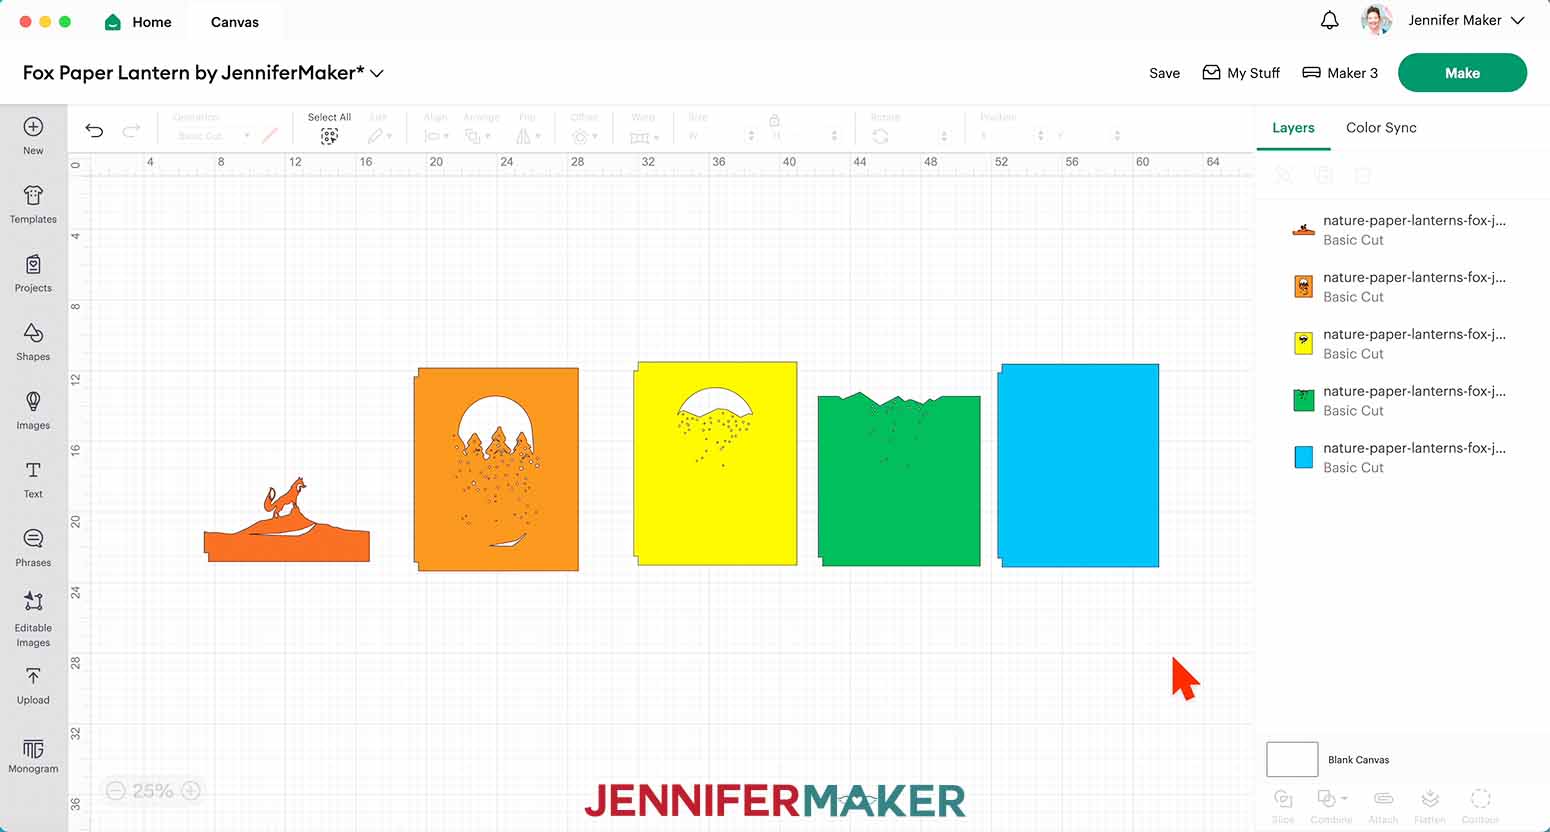
NOTE: You don’t need to use these colors of cardstock, the colors are just to help you keep the layers straight.
10. Your layers are ready to cut!
11. Make sure the correct machine is selected in the top right.
12. Click “Make.”
13. If prompted, click "On Mat," choose your mat size, and click “Confirm.”
14. On the Prepare Screen, you should have five mats for the fox layered pillar luminary: 1 dark orange (65 lb cardstock), 1 light orange (65 lb cardstock), 1 yellow (65 lb cardstock), 1 green (vellum), and 1 blue (vellum).
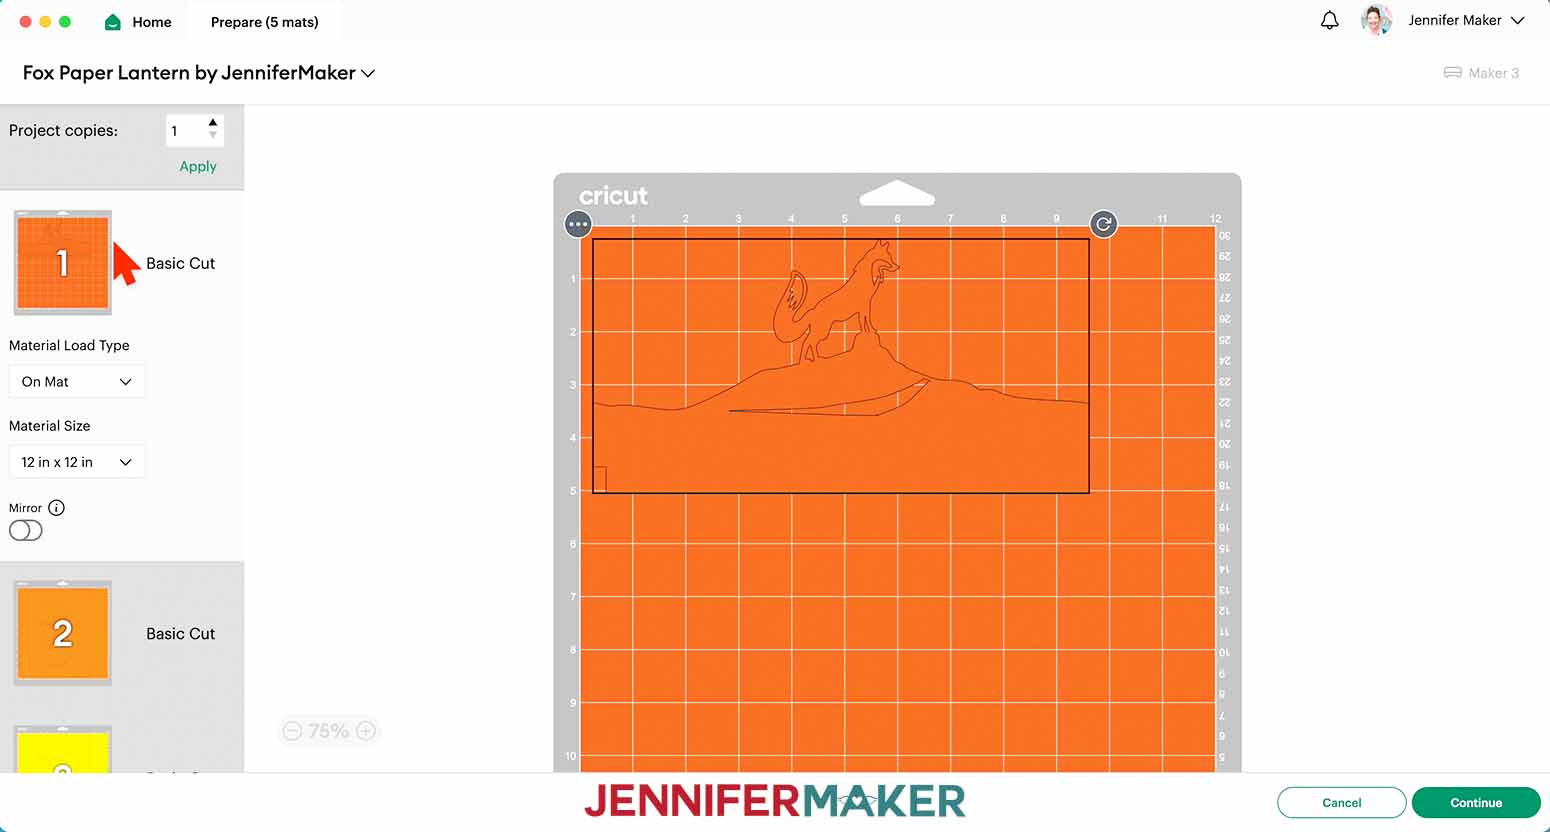
15. With the first mat selected, click “Continue.”
CUTTING
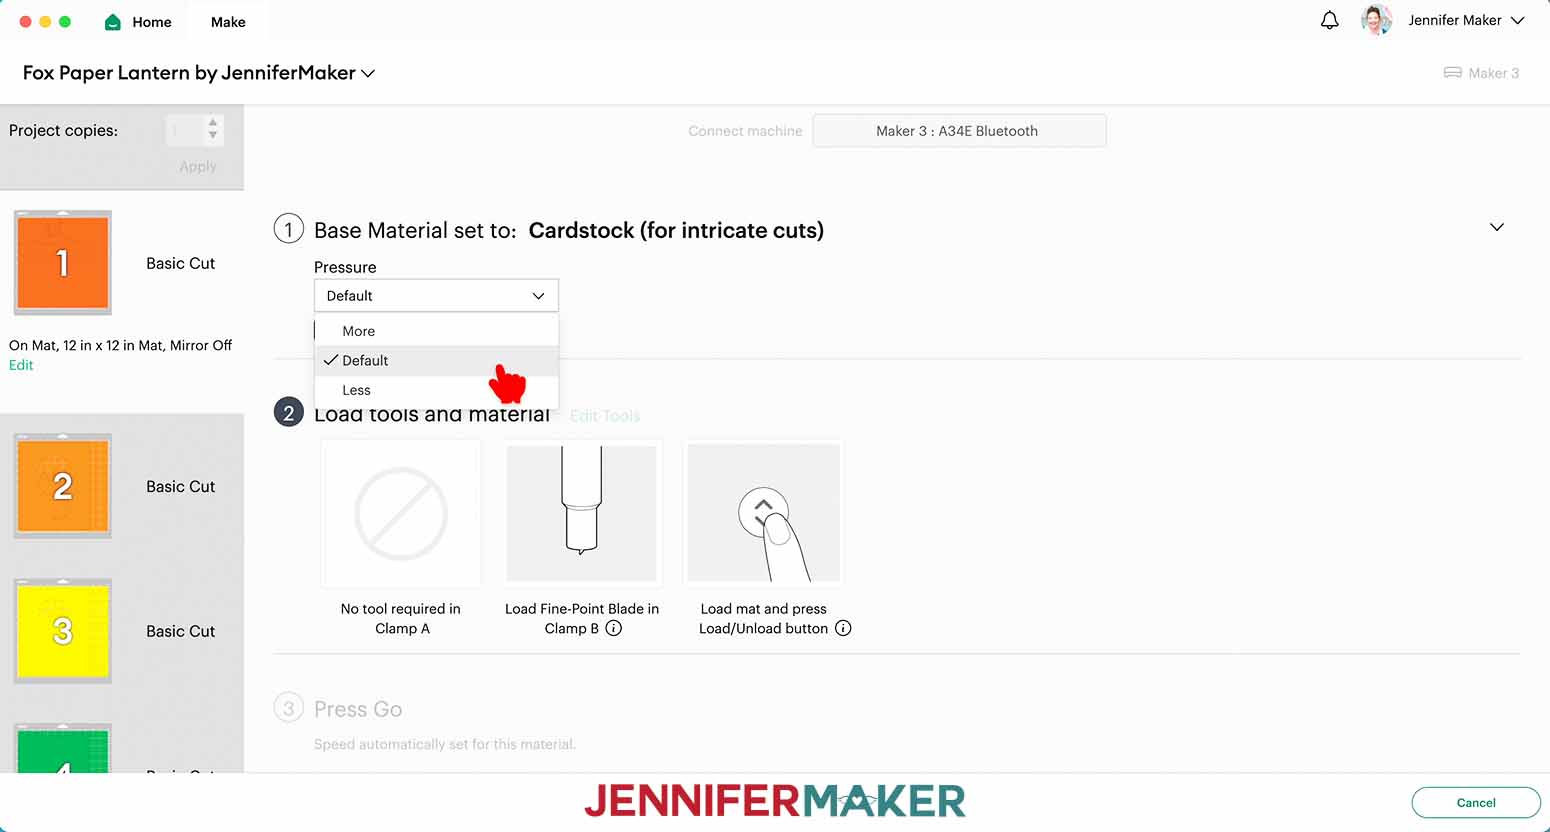
1. On the Make Screen, click “Browse All Materials.”
2. Search for and select the settings needed for the materials you’re using.
3. I used white 65 lb. cardstock for the dark orange, light orange, and yellow mats with the “Cardstock (for intricate cuts)” Setting with Default Pressure.
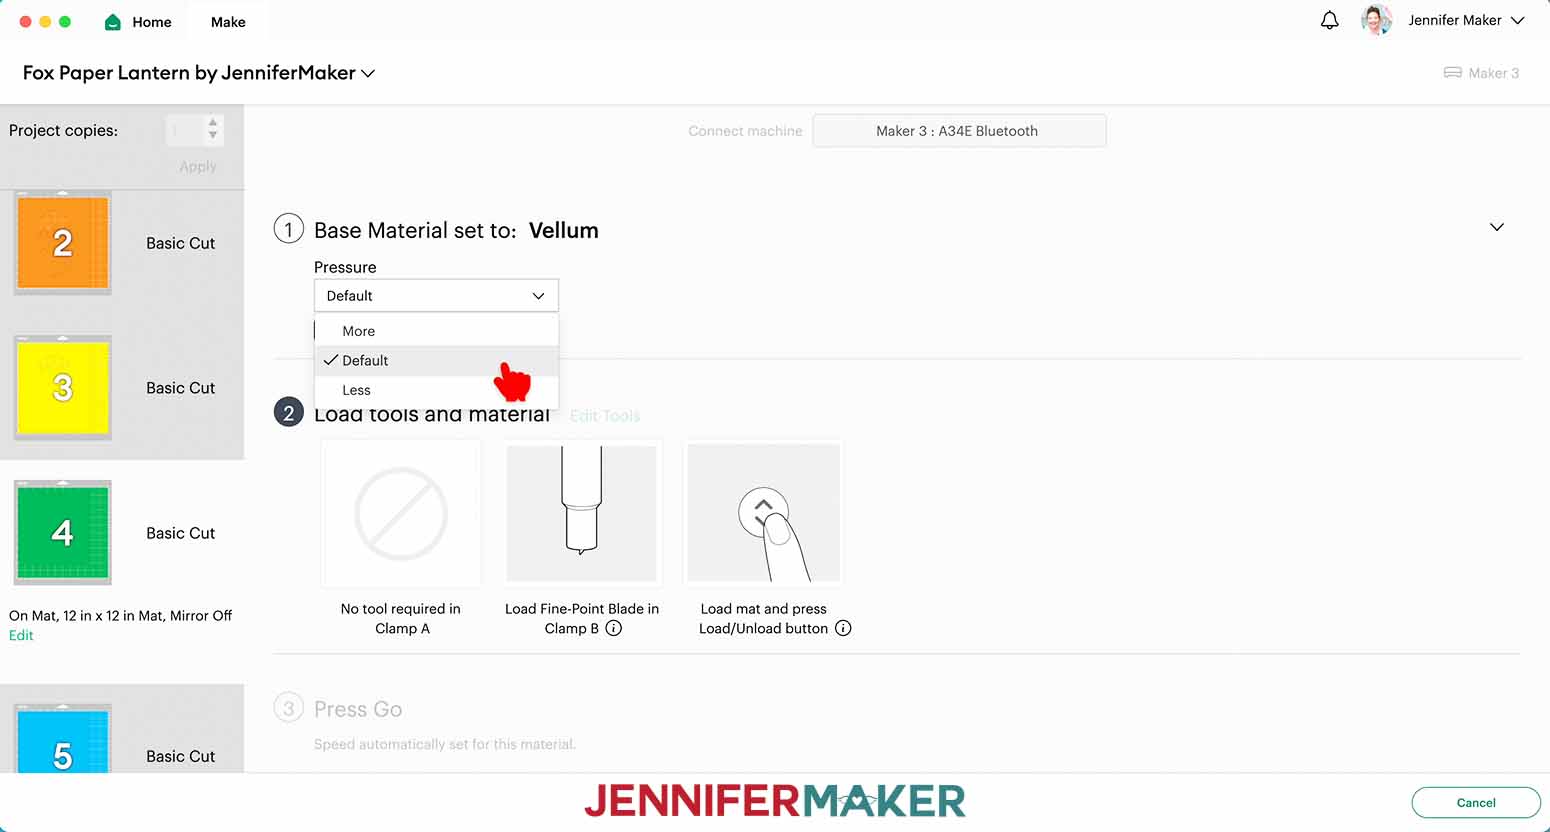
4. I used vellum for the green and blue mats with the “Vellum” Setting with Default Pressure.
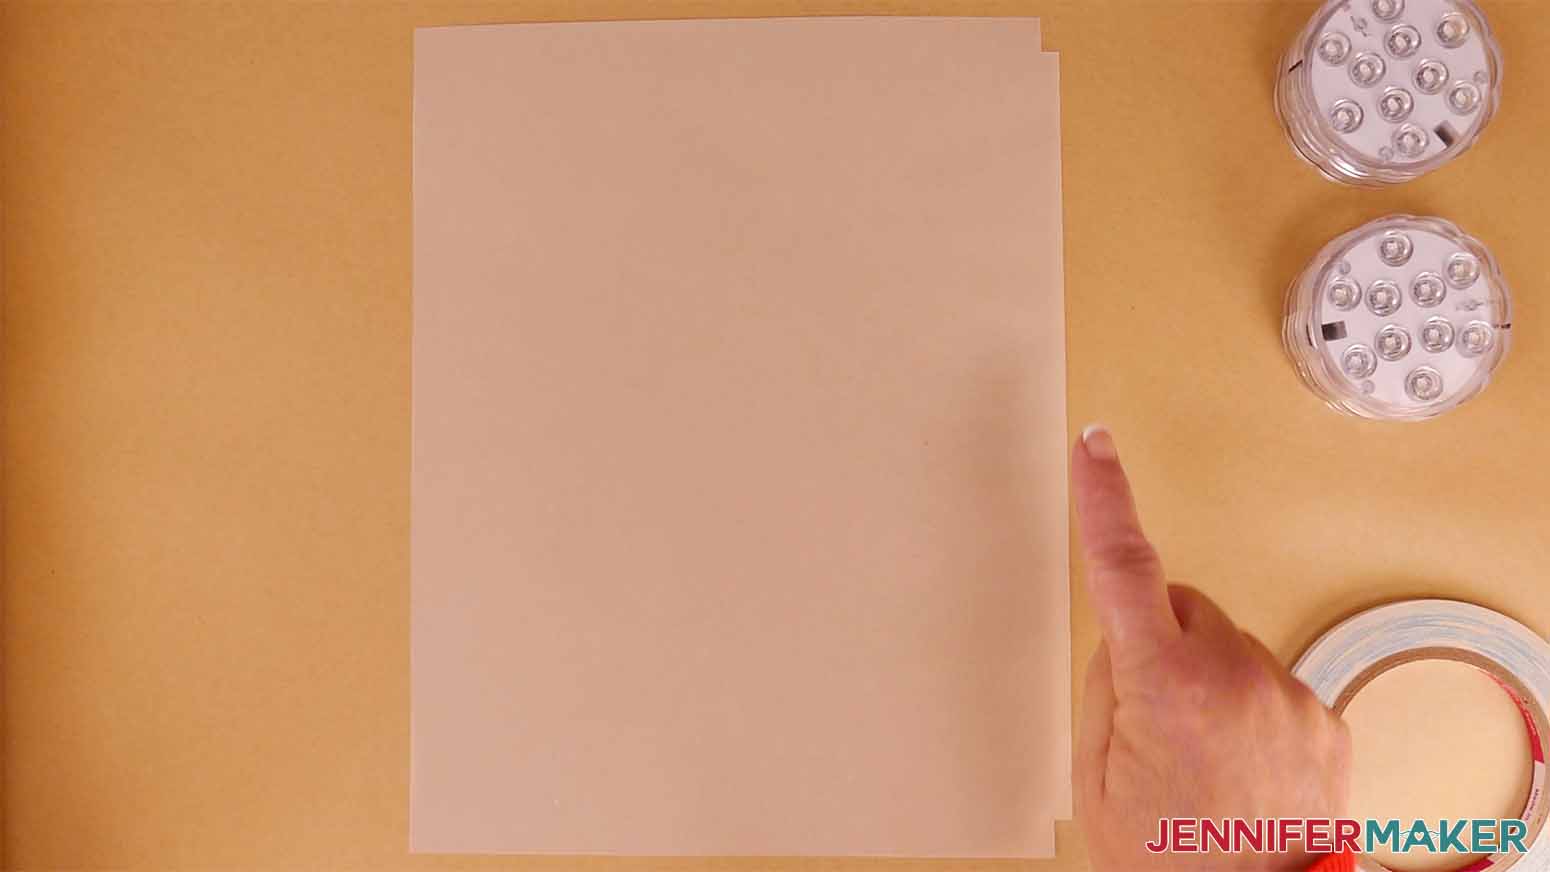
5. Place your first paper face up on a StandardGrip machine mat.
TIP: Refer to your Design Space screen to make sure you’re loading the correct type of paper for the current mat.
6. Use a brayer to make sure it’s fully adhered.
7. Check that your Fine-Point Blade is clean and in the clamp.
8. Press the flashing “Load/Unload” button to load the prepared mat into your Cricut.
9. Press the flashing “Go” button to begin cutting.
10. When it has finished cutting, unload the mat, flip it over onto your work surface, and roll it back to release the paper.
11. Use a spatula to carefully remove any intricate parts.
12. Set the piece aside face up.
13. Use a scraper tool to remove cardstock bits left behind on your mat between cuts.
14. Follow steps 1-13 to cut and remove your remaining pieces.
15. If there are cutouts stuck in the layers, use a weeding tool to pop them out.
TIP: If you have trouble with any of your cuts, check out my Cricut Tips & Tricks for Cleaner Cuts.
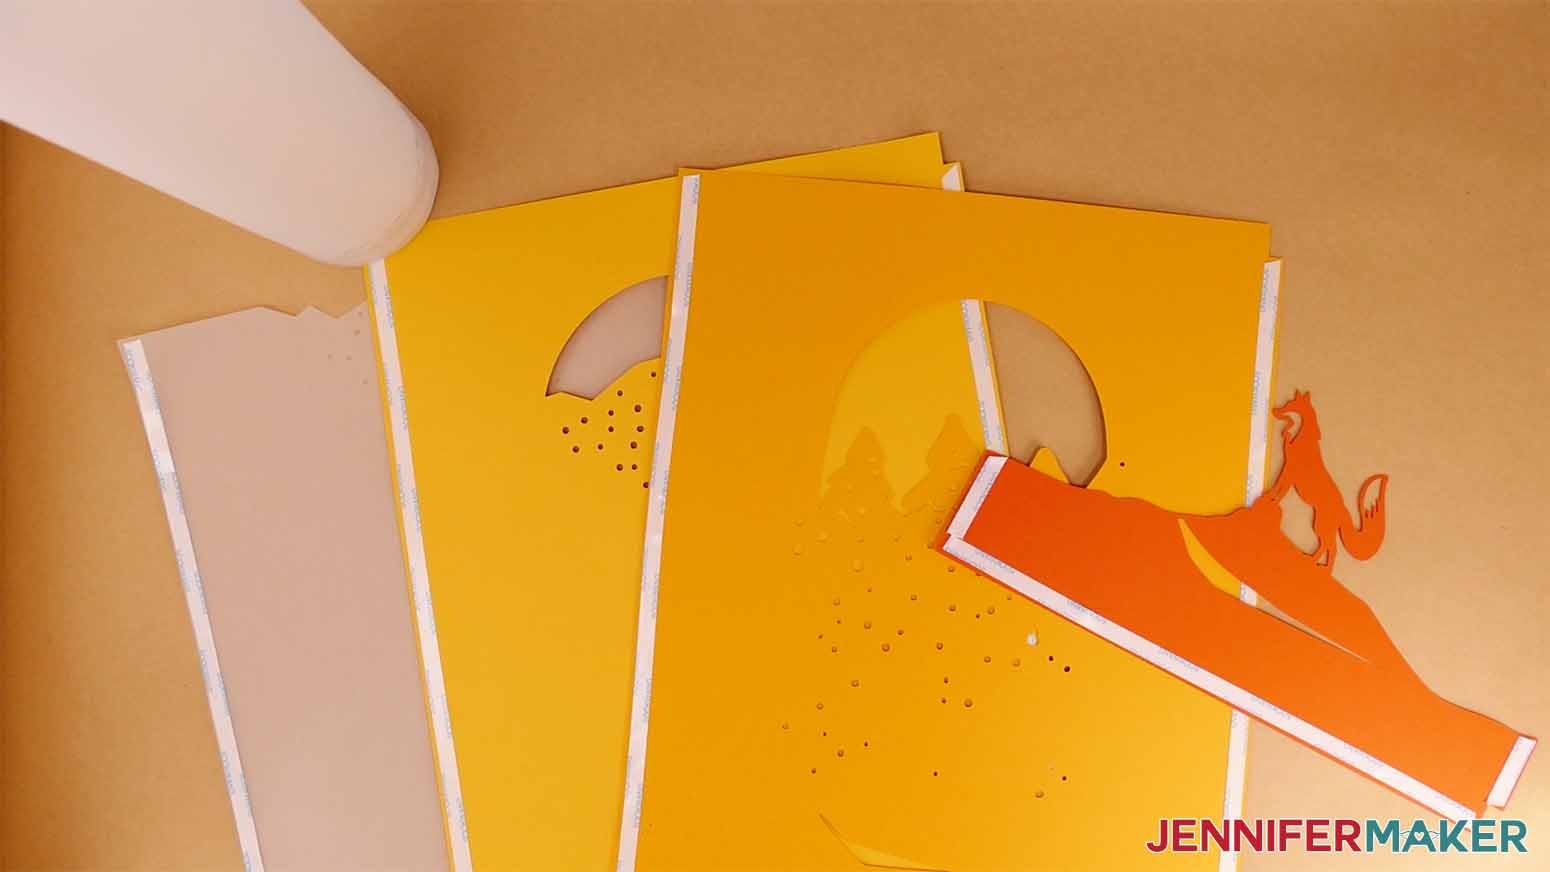
16. Here are what my cut pieces for the fox lantern look like.

STEP 3: ASSEMBLE YOUR FOX PAPER LANTERN WITH A SINGLE LIGHT
1. Use a permanent marker to draw a vertical line in one of the creases in the top half of the puck light. This will help us line up our layers in a consistent spot.

TIP: You can use one light for a softer glow, or two lights for a brighter light. To learn how to assemble with two lights, skip to Project 2, Step 3.
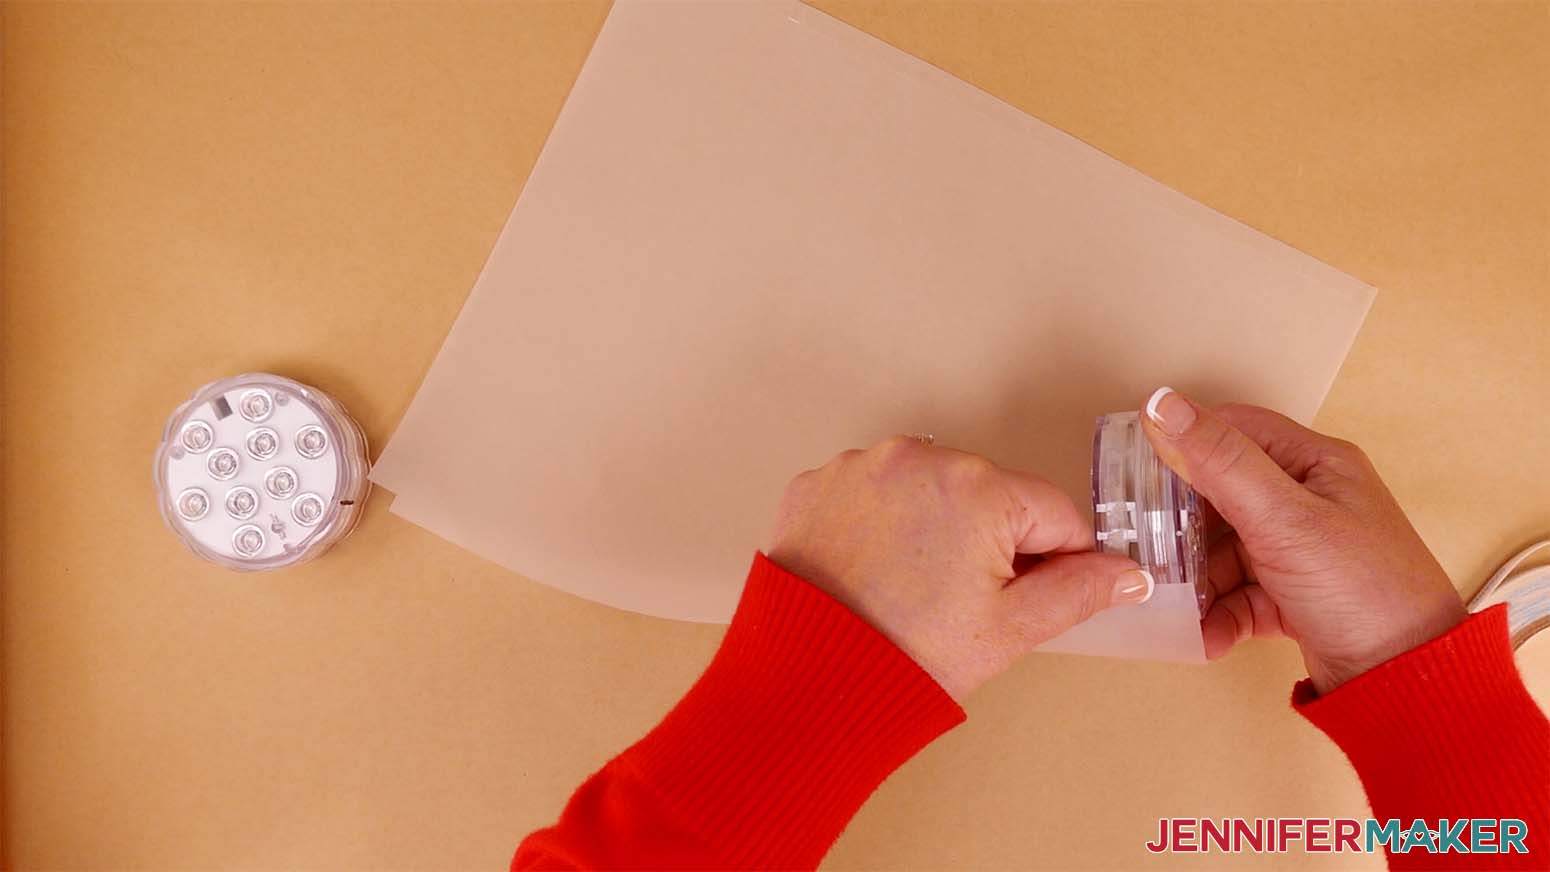
2. Apply a piece of ¼” double-sided tape around the top half of the puck light, removing the backing as you go. It’s important to only tape the top half so you can screw off the bottom when batteries need replacing.
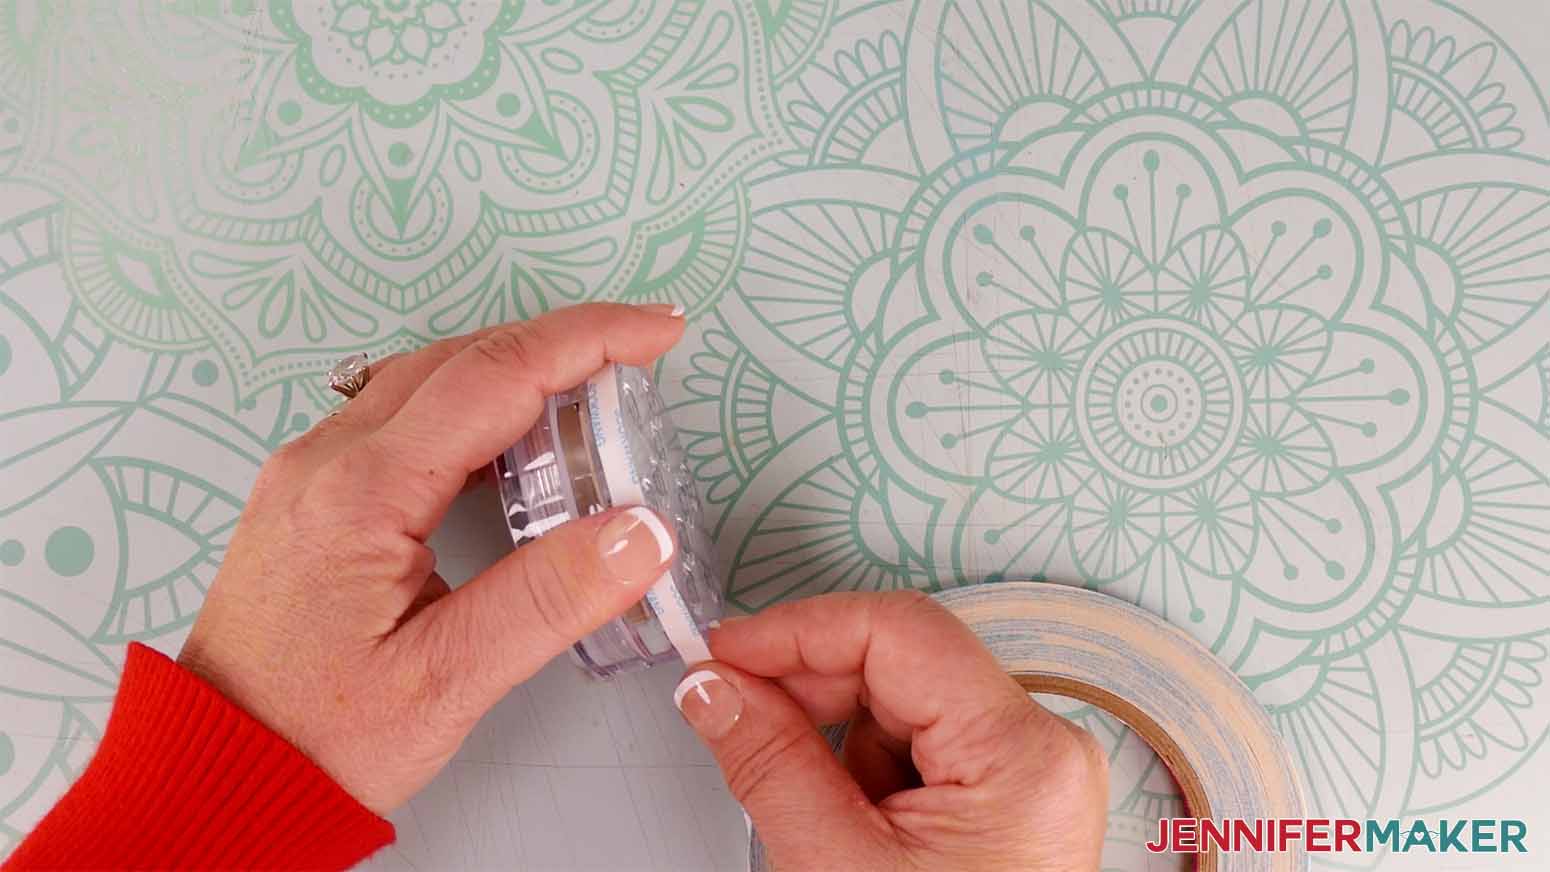
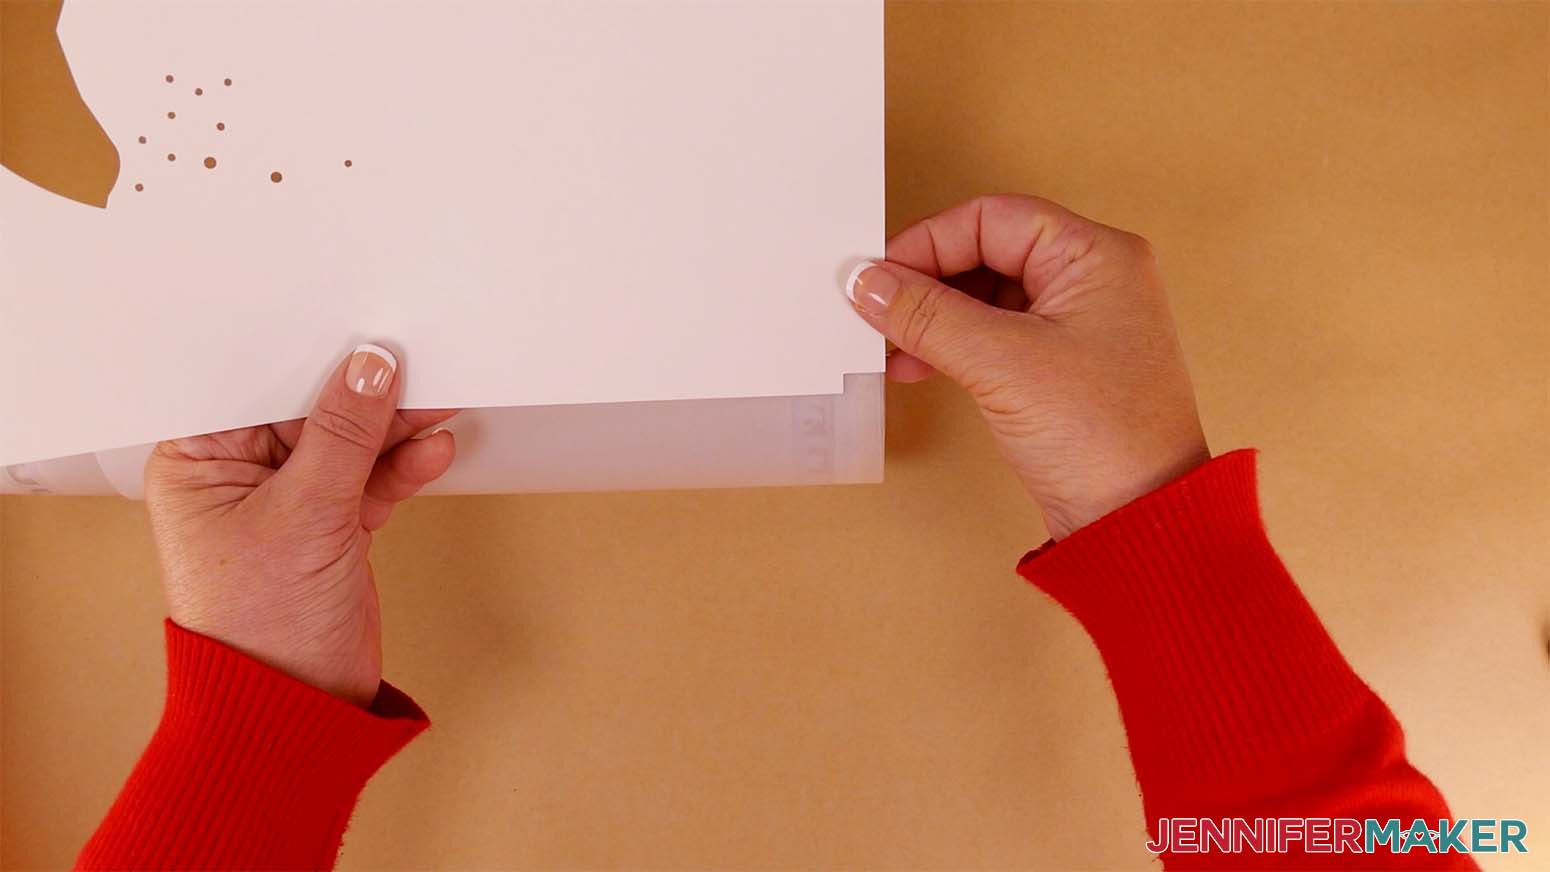
3. Find your bottom layer of vellum and lay it down so the corners with the rectangular cutouts are on the right side.
4. Run a piece of double-sided tape along the left hand side, then peel off the backer.

5. Pick up the vellum and line up the bottom rectangle cutout with the line on the puck light, attaching the tape to the puck light. Make sure the light is pointed to shine in the direction of the paper, so it illuminates the inside of the lantern when it’s assembled.
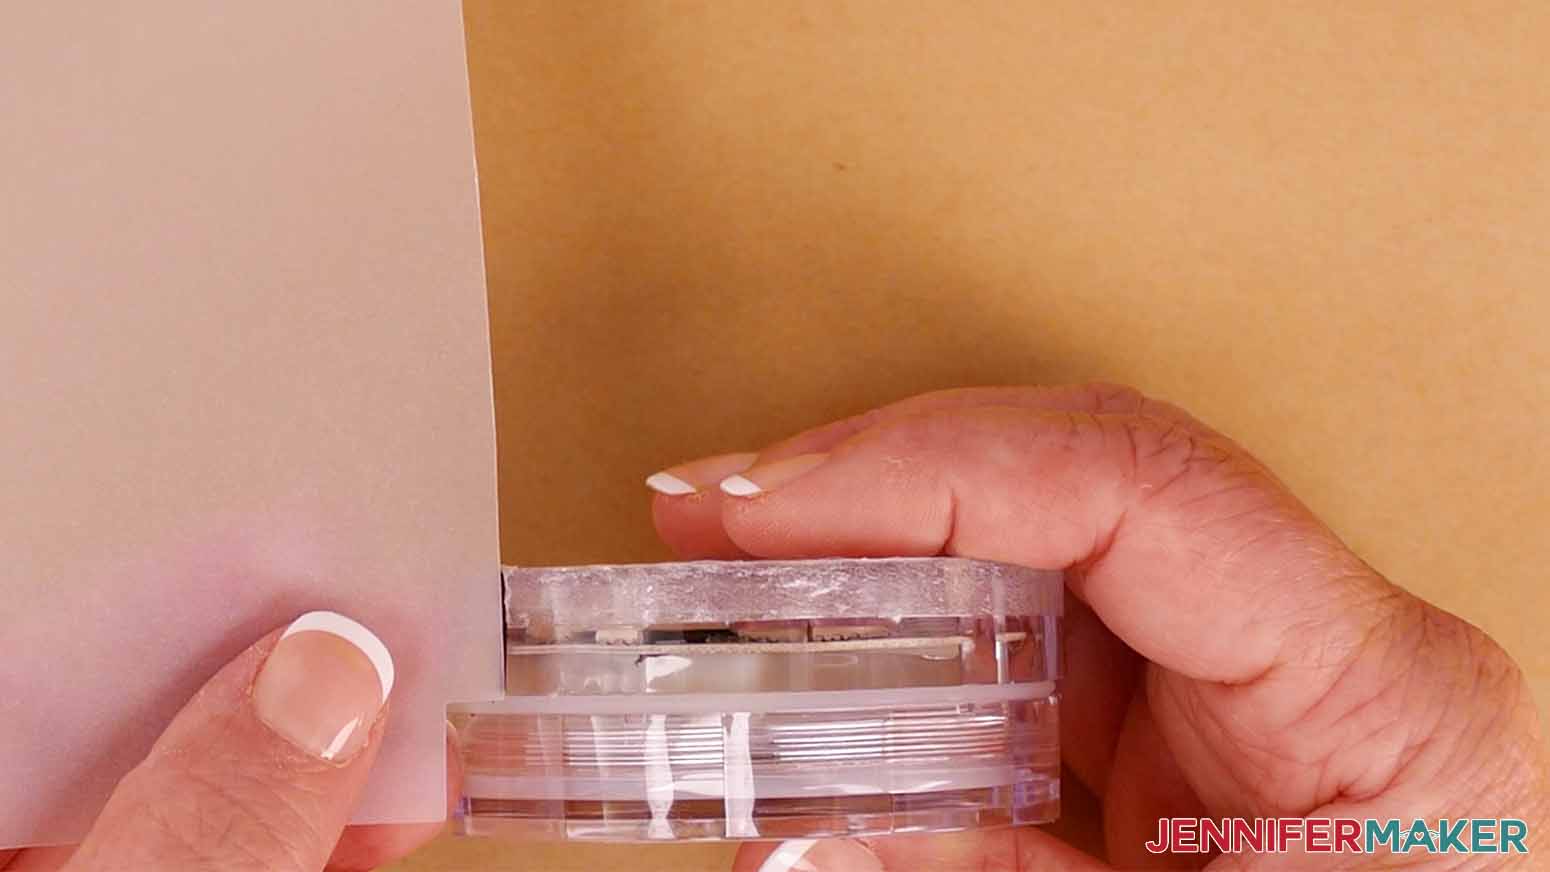
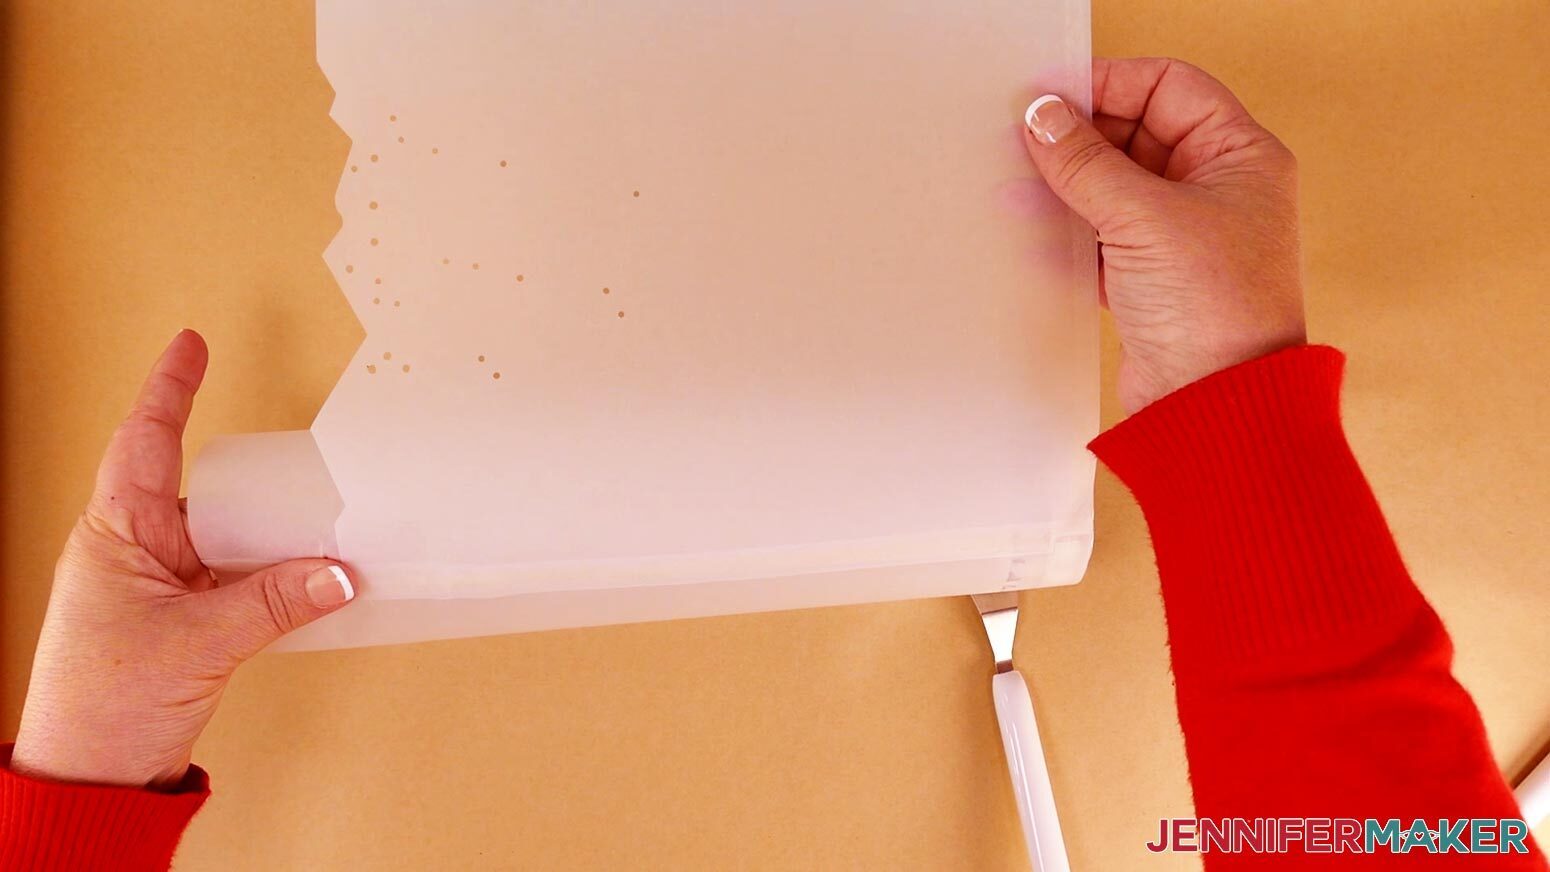
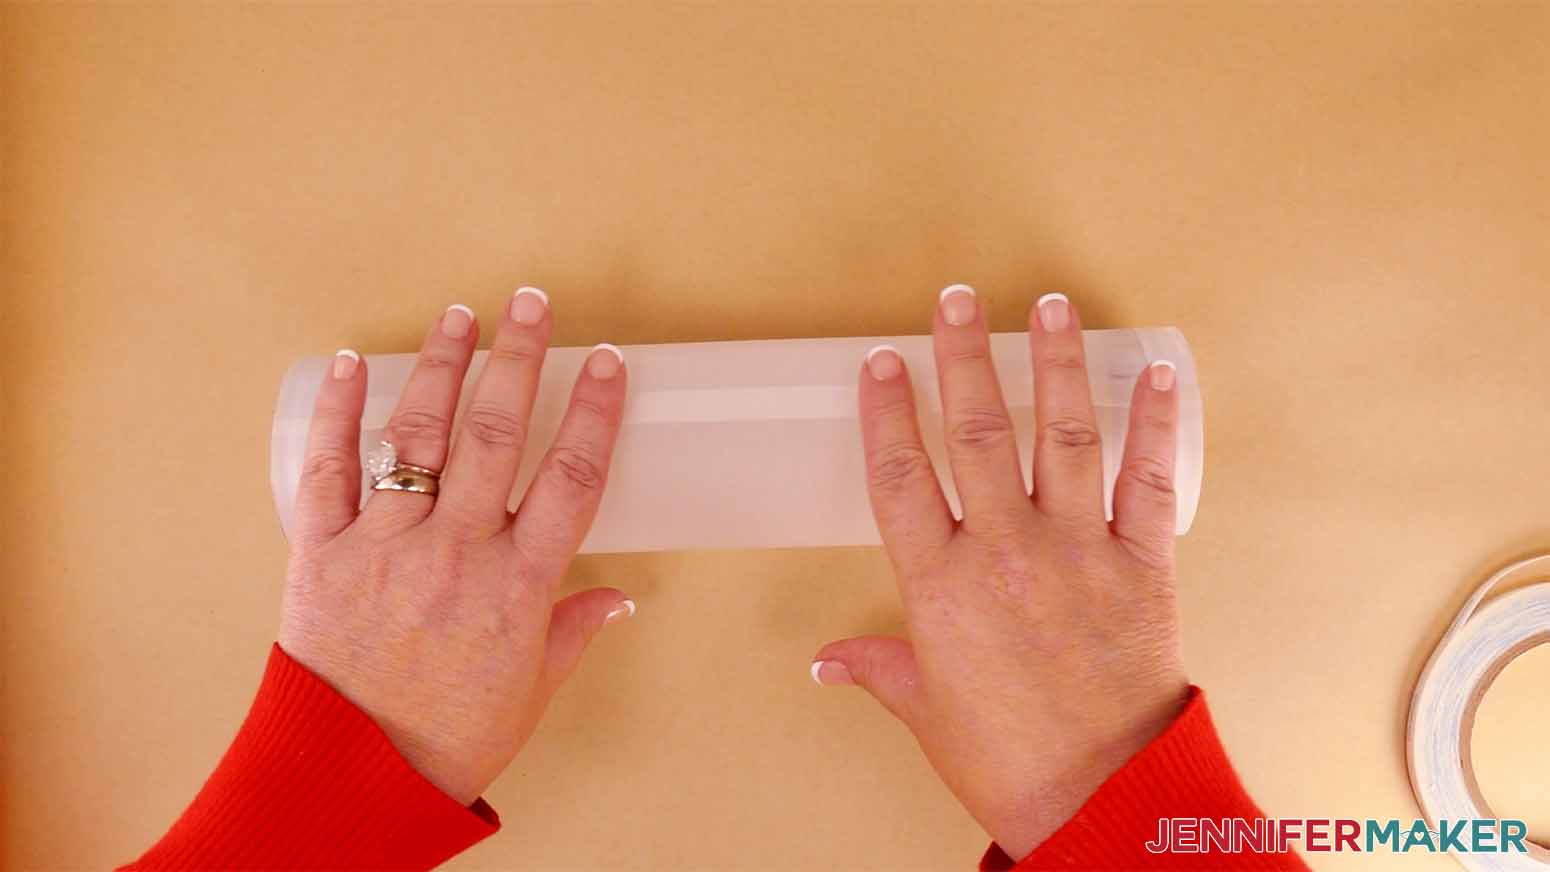
6. Slowly wrap the vellum around the puck light, keeping the vellum’s edge flush with the edge of the light. This is important, so the lantern sits correctly.
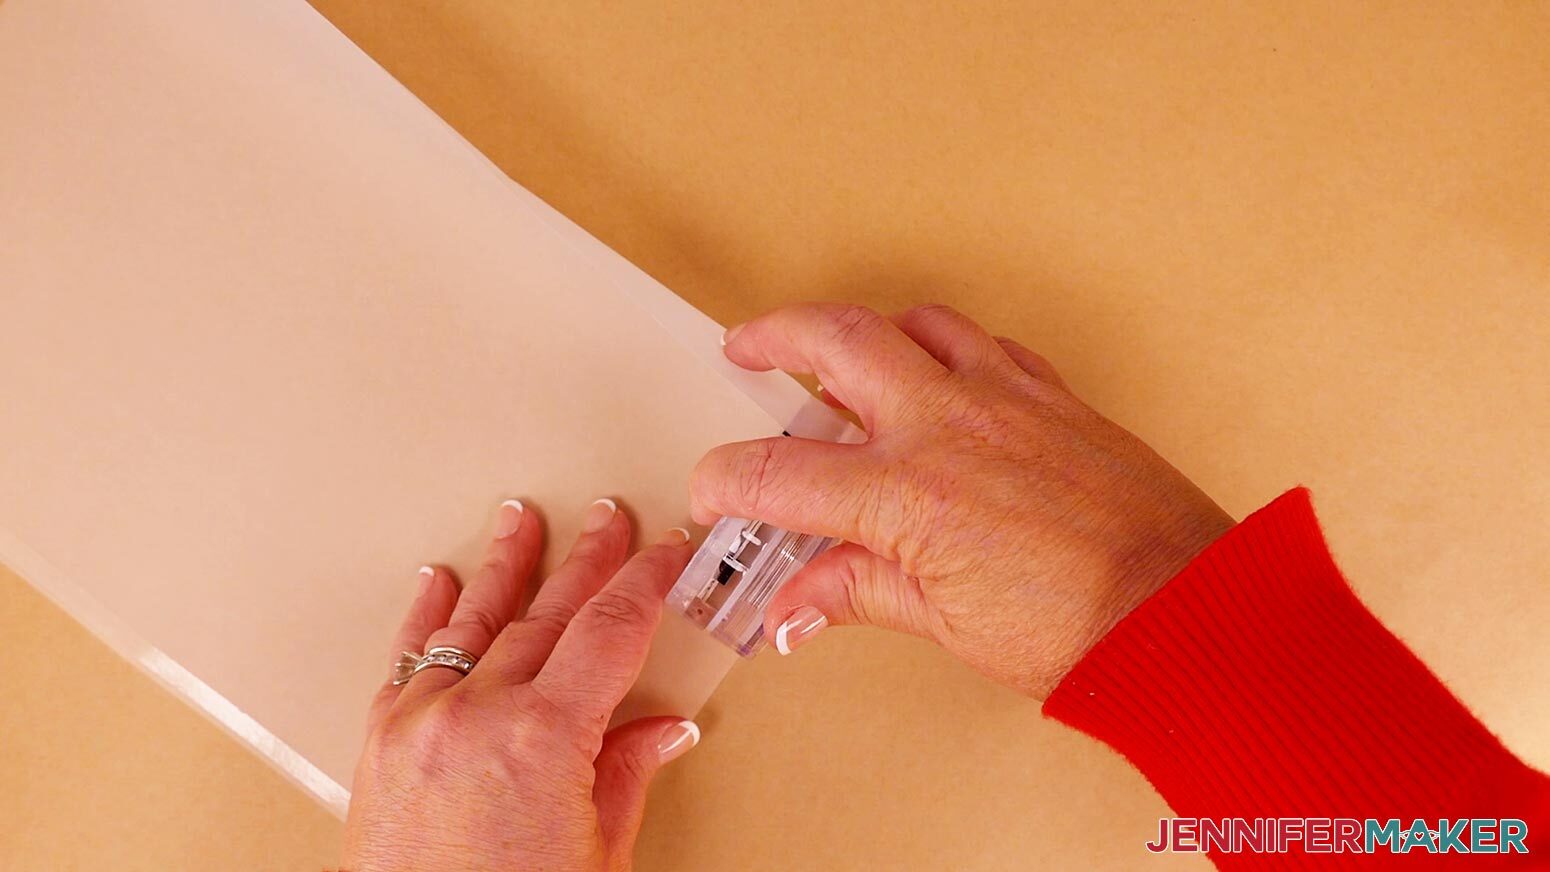
7. With the top and bottom edges flush, gently press down on the tape to attach the ends of the vellum.
TIP: Lay the tube on its side and insert a spatula to gently press down on the taped areas to adhere them.
8. Lay out each of the rest of the layers so their rectangle cutout corners are on the right.
9. Add tape along the right, left, and bottom edges of each of the layers. Leave the backing on for now.
TIP: Try to get as close to the edges as possible for the best results.
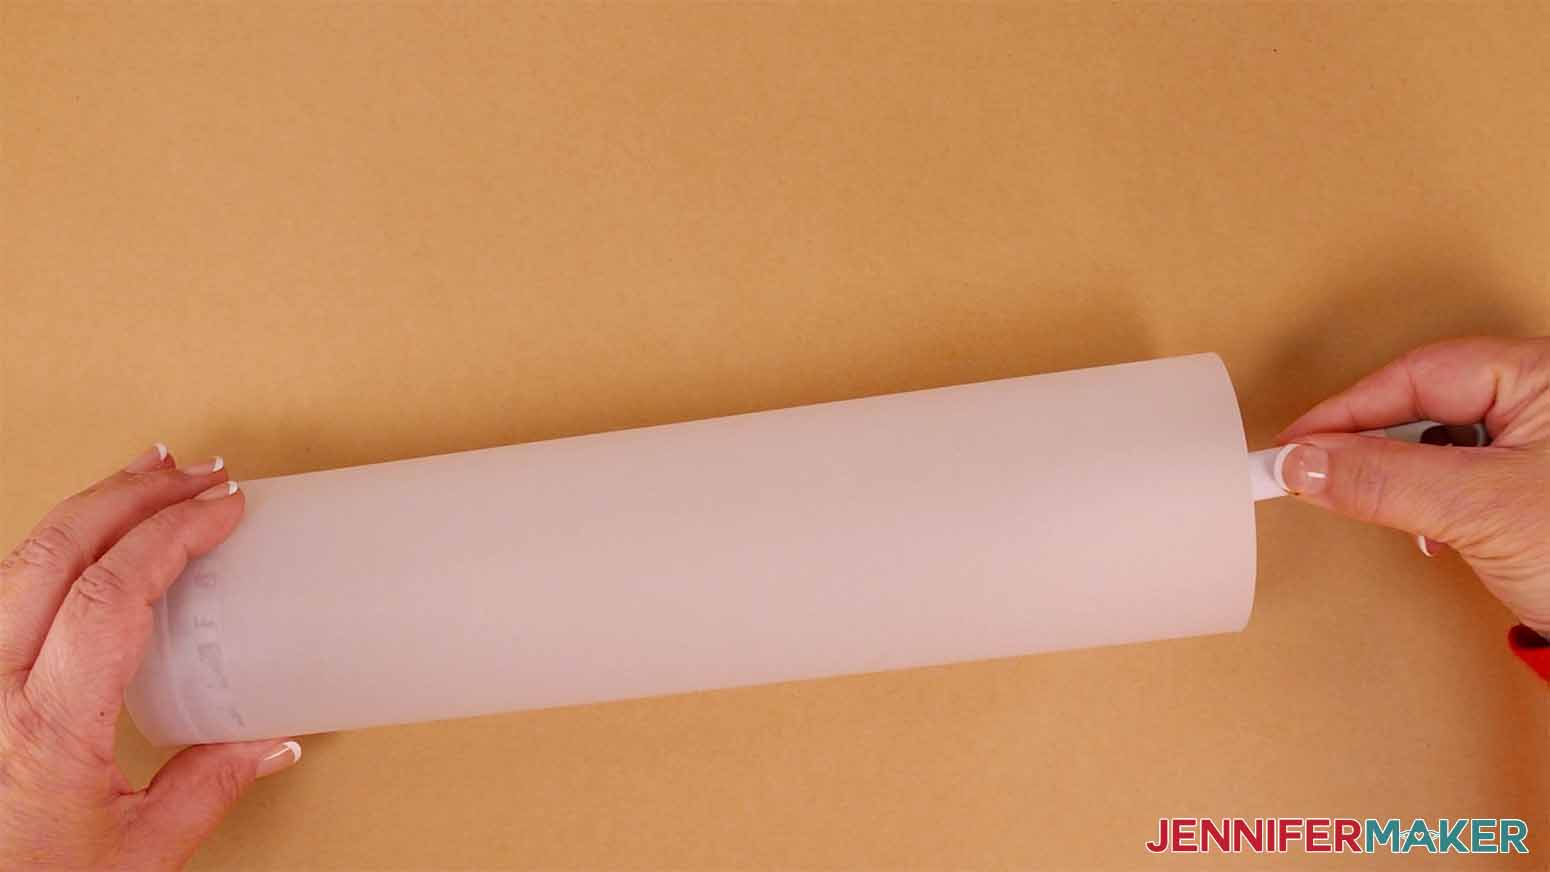
10. Lay the luminary tube on its side, with the opening on the right.
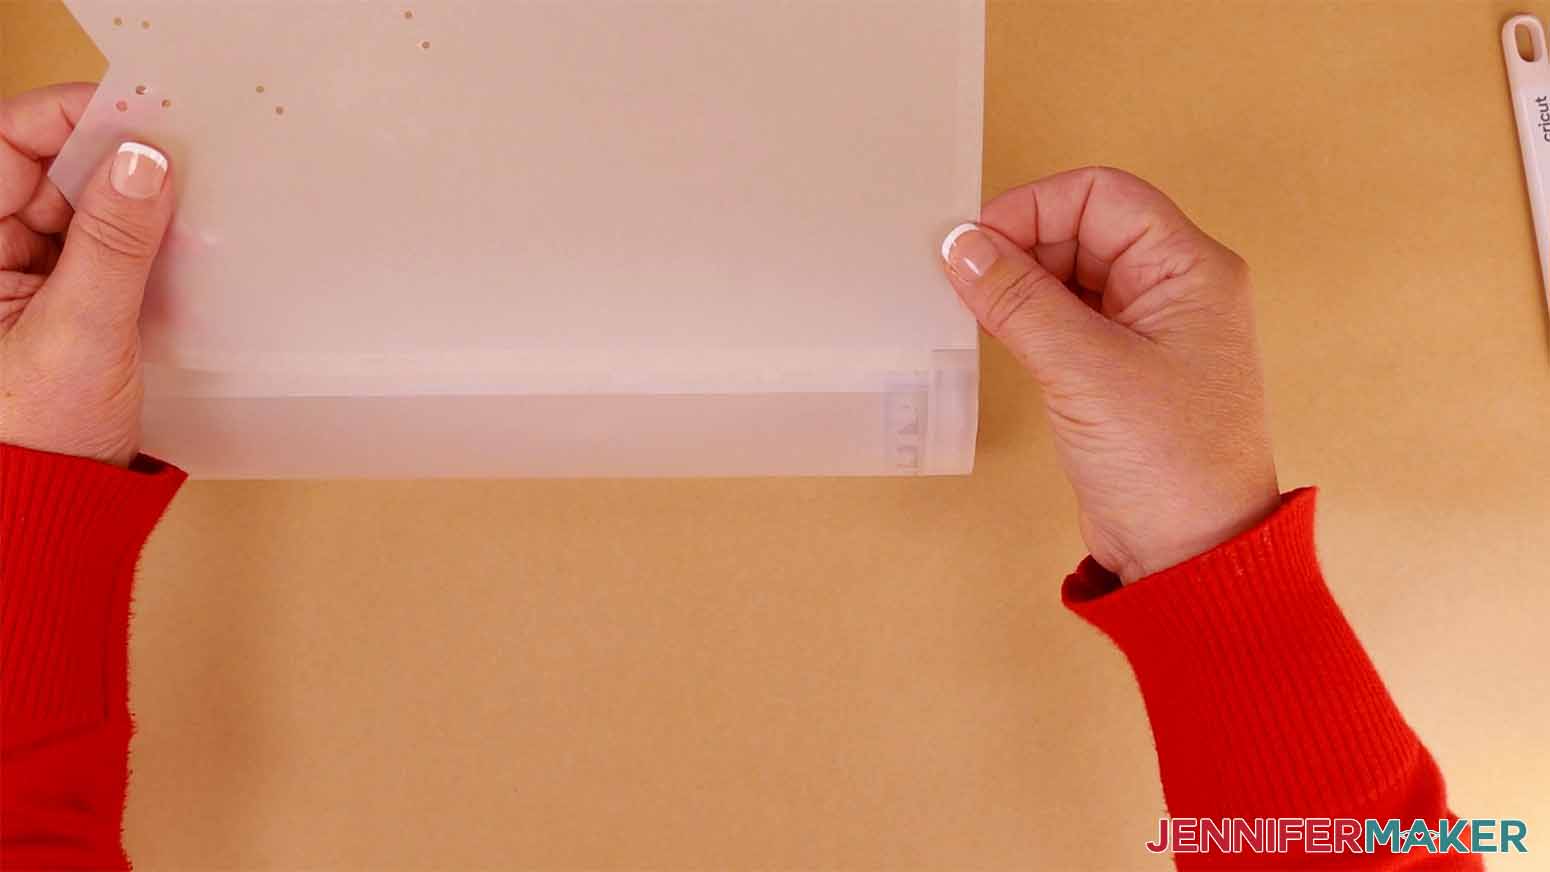
11. Find the second layer of vellum with the mountains, and remove the tape backing from all edges.
12. Line up the rectangle cutout on the mountain layer with the rectangle cutout on the tube, then press down on the tape along the length of the tube to adhere it over the original tape seam.

13. With the top and bottom aligned, gently wrap the second vellum layer around the puck light, pressing down to adhere the tape as you go.
14. Gently press down on the tape seam to finish attaching the second layer of vellum.
15. Find the third layer, the cardstock mountain layer with the smallest design cutout.
16. Remove the tape backing and line up the rectangle cutout to the one on the vellum.

17. Attach the cardstock to the tube the same way as the previous layer.
TIP: The cardstock will be a little harder to curve into shape than the vellum. Just go slowly, molding the cardstock and attaching the tape as you go.
18. Press firmly onto the seam to secure the layer to the tube.
19. Repeat steps 16-18 for the remaining cardstock layers.
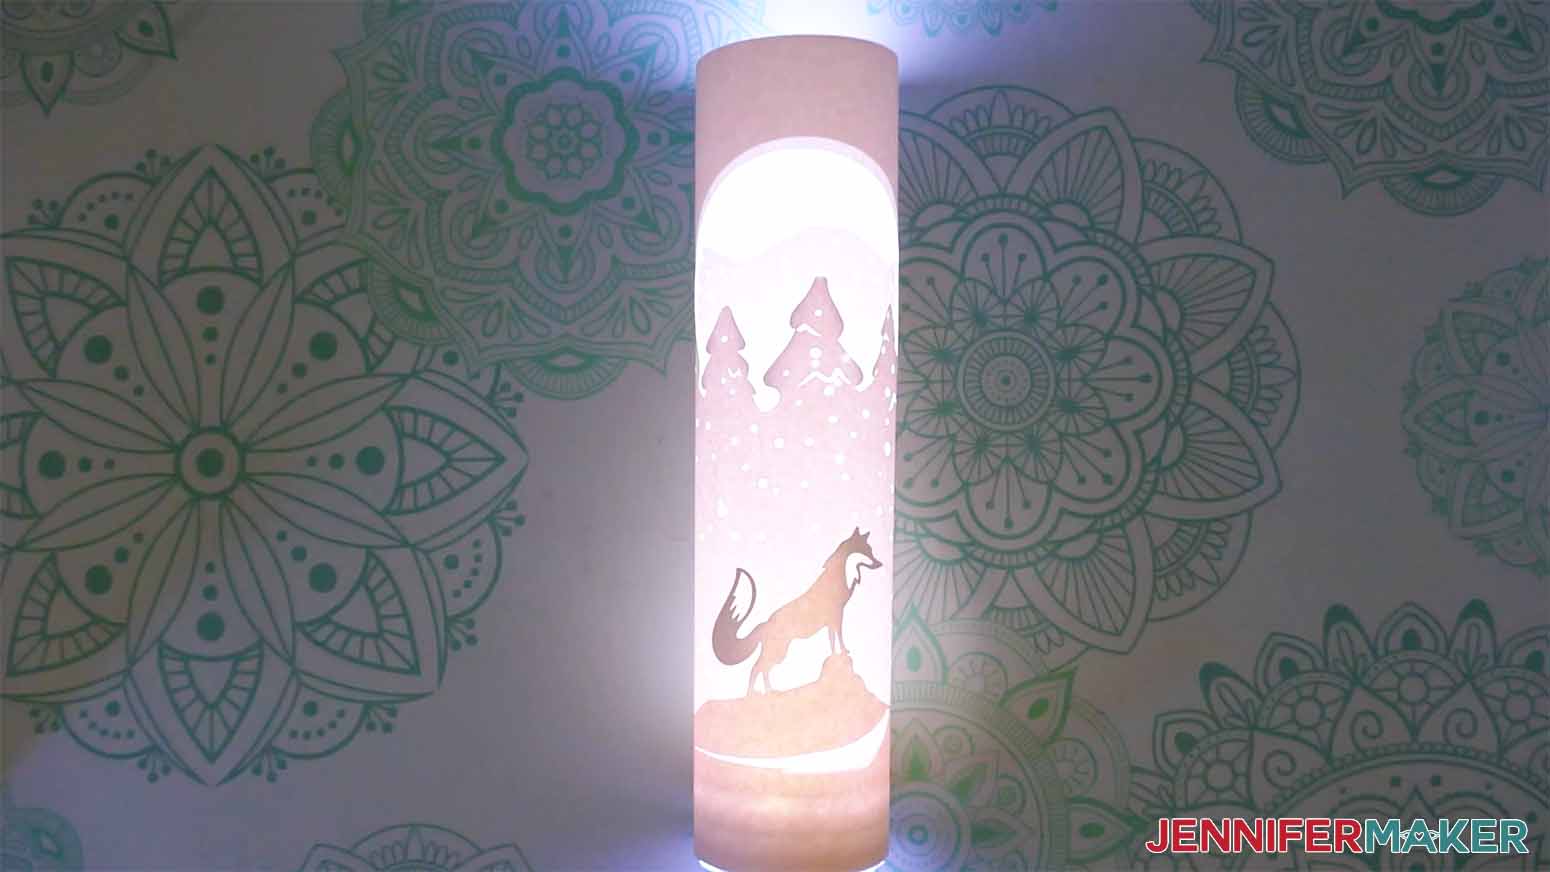
20. Your fox luminary is finished! Operate the light with the remote for a beautiful display.
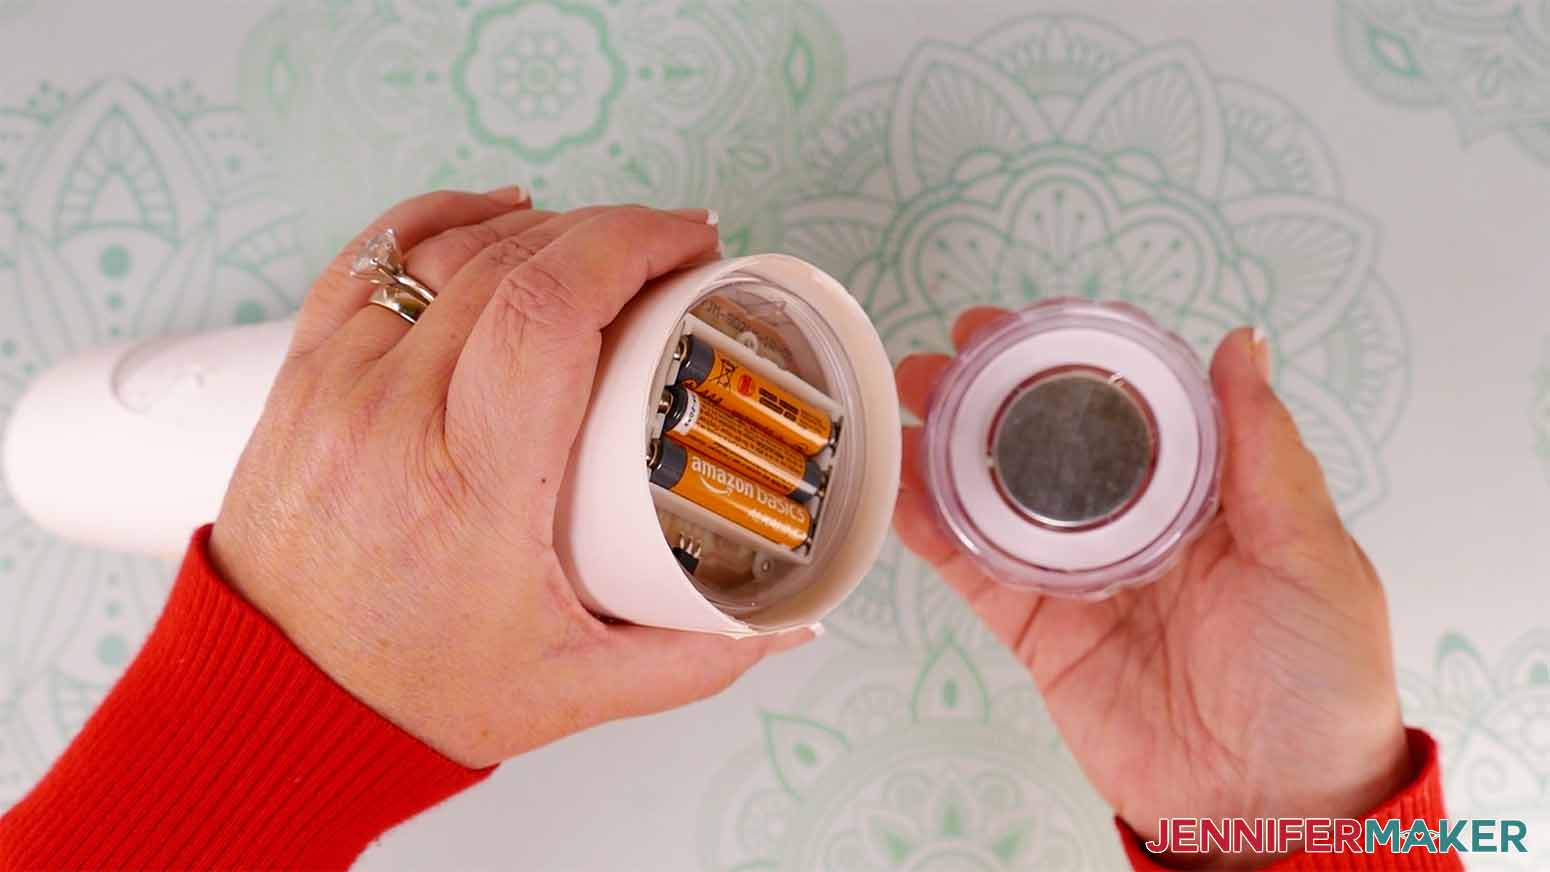
TIP: To replace the batteries, insert your fingertips into the divots in the bottom of the puck light and twist to open.
PROJECT 2: CUSTOMIZED BEAR PAPER LANTERN WITH LIGHTS
STEP 2: PREPARE YOUR CUSTOM DESIGN
CRICUT DESIGN SPACE
1. Open Cricut Design Space and click “New Project.”
2. Click “Browse.”
3. Select the bear SVG file.
4. On the Prepare to Upload screen, it will say “Cut image” with the design preview.
5. Click “Upload.”
6. Find your design in Recent Uploads and add it to the Canvas.
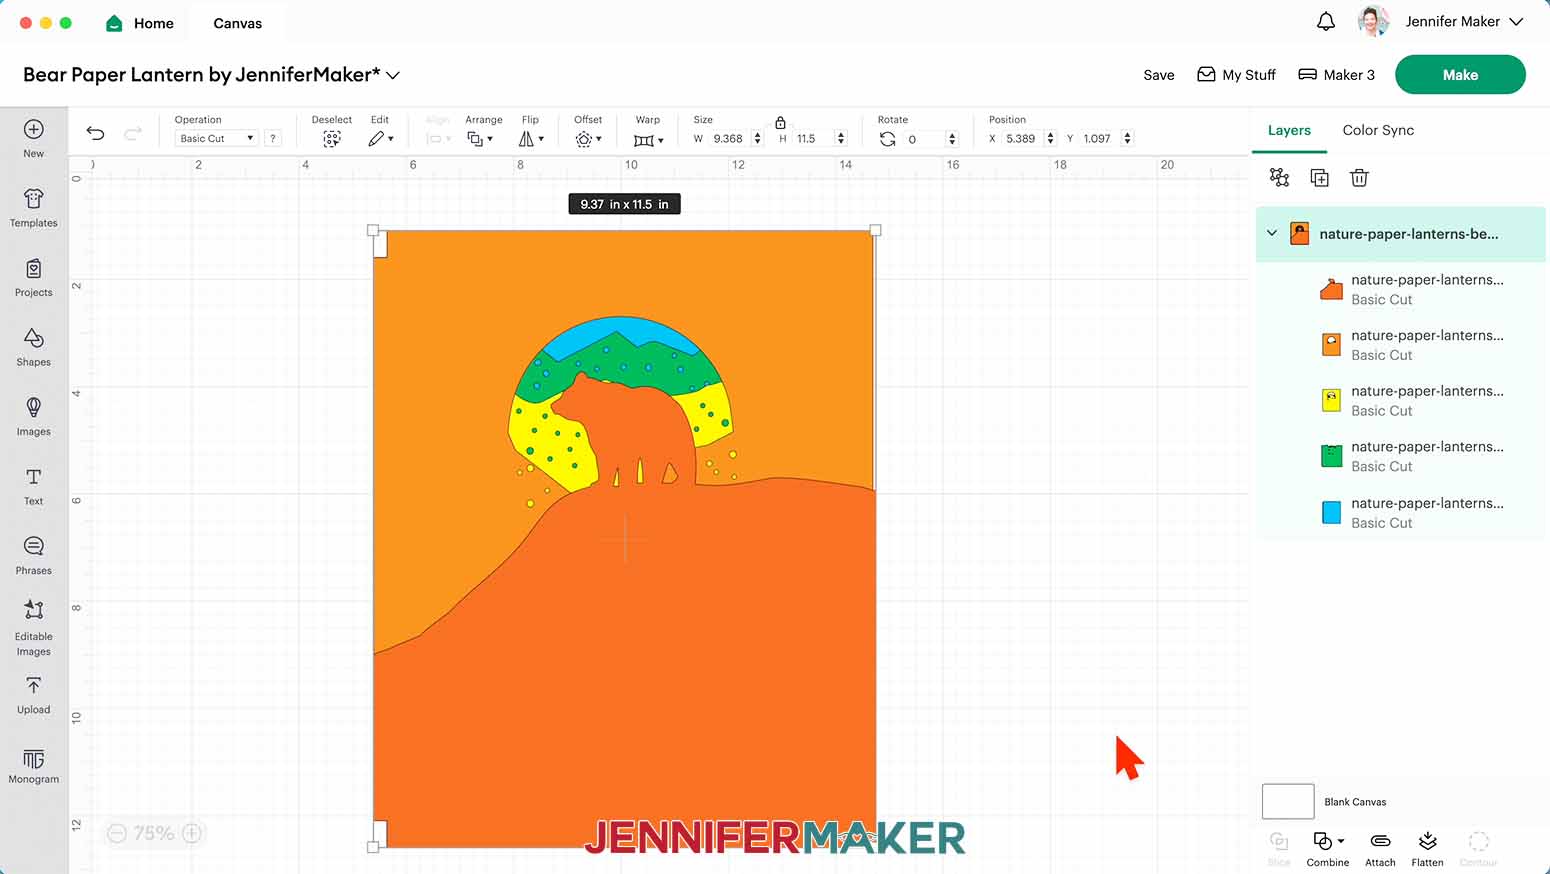
7. With the design selected, click “Ungroup.”
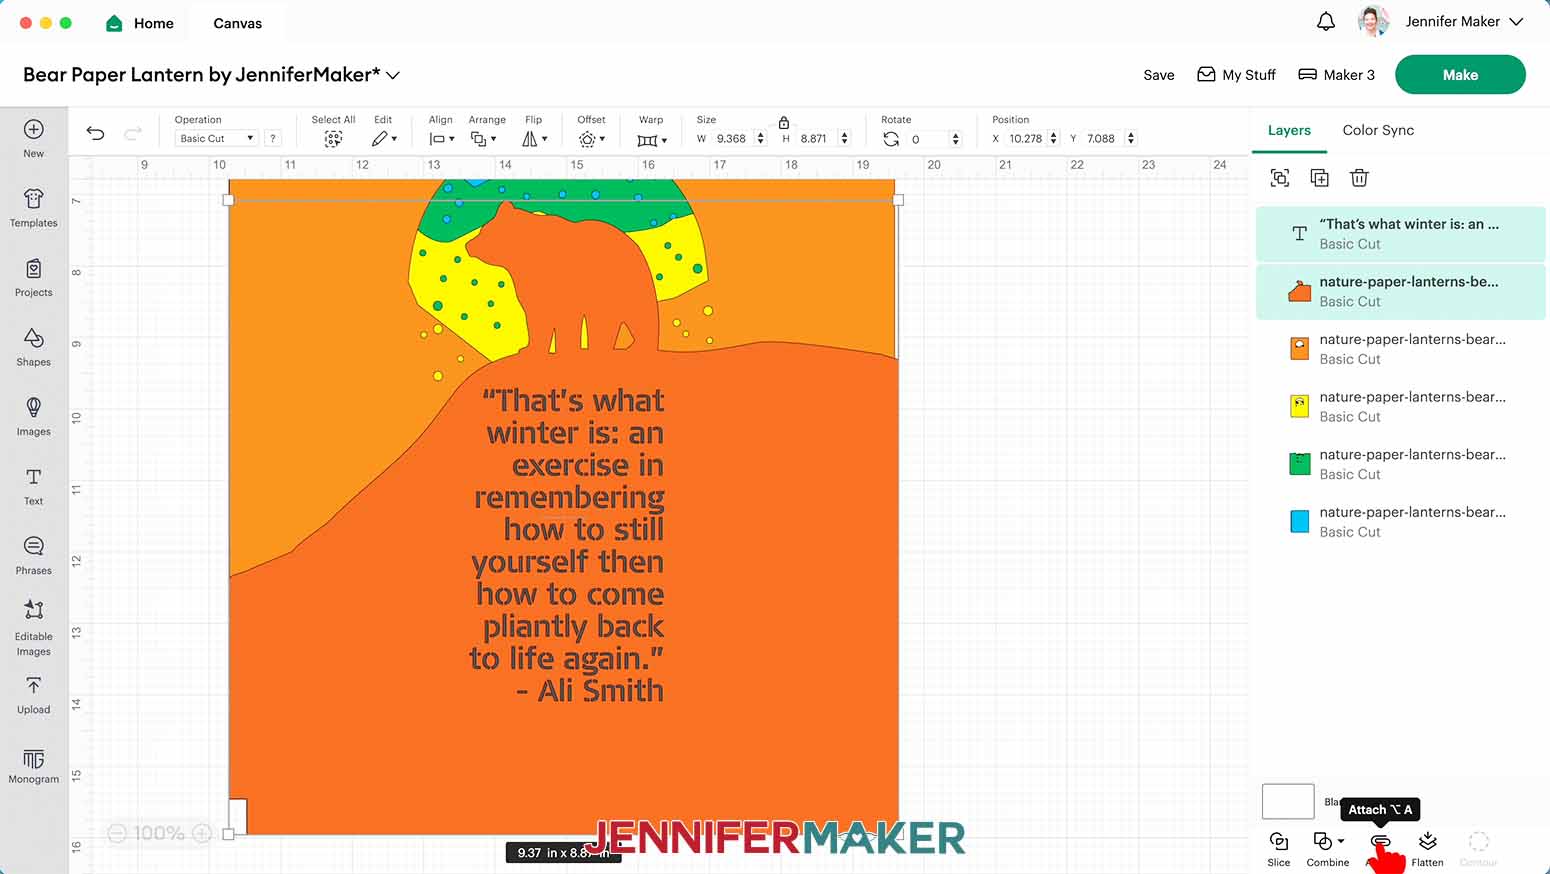
8. Click the Text icon to add a text box, then type or paste in the text you’d like to use.
9. Resize the text smaller so it’s easier to work with.
10. Change the text Alignment to "Right."
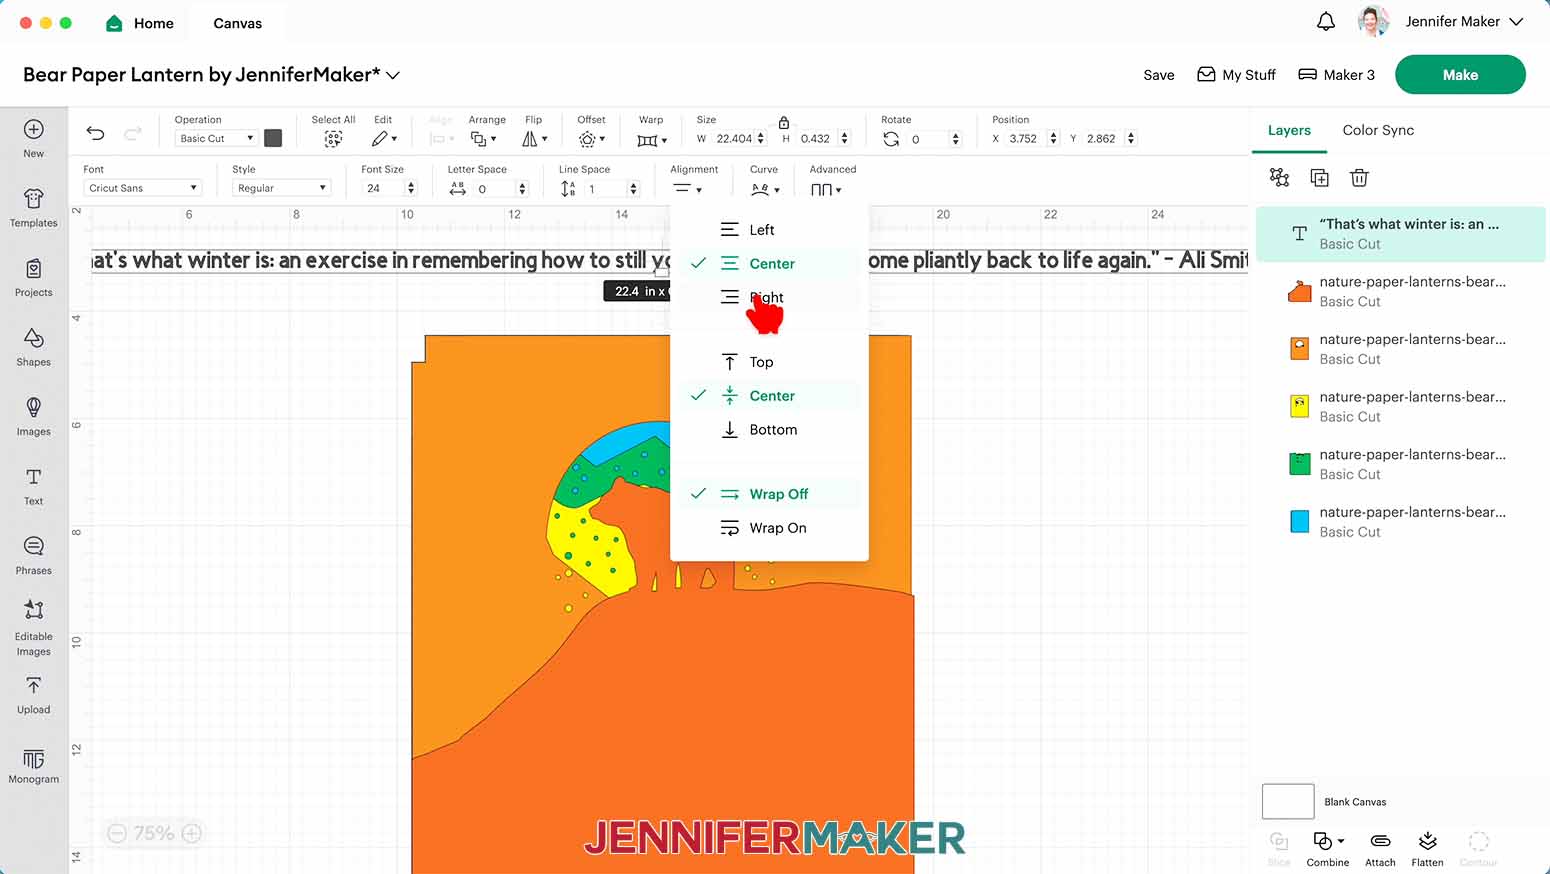
11. Under “Alignment,” make sure “Wrap On” is also selected. This will make it easier to resize and adjust the text in a moment.
12. Highlight the text and open the Font menu. We need a typeface that will remain intact after cutting, so click “Stencil” in the styles. Click “Filters” and check the box for “Free.” I’ll select "Signa Stencil" from the options.
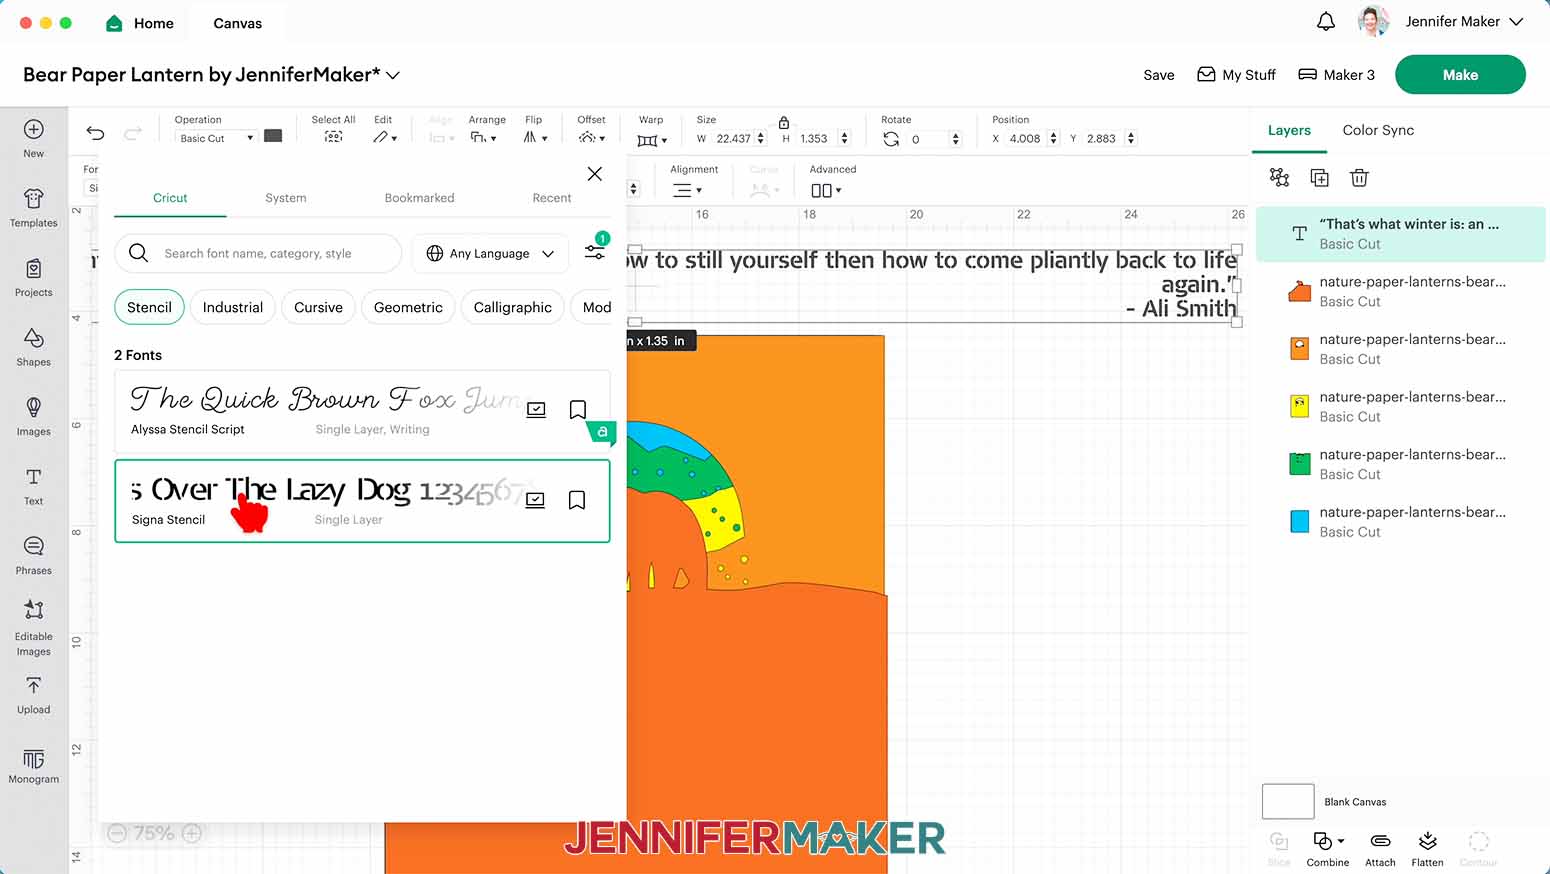
NOTE: Set the text size to 27 pt.
13. Click and drag the text box corner to adjust the size and layout of the text. The text edges should fit fully in the hill area underneath the bear, filling up the space between the bear’s nose and back leg.
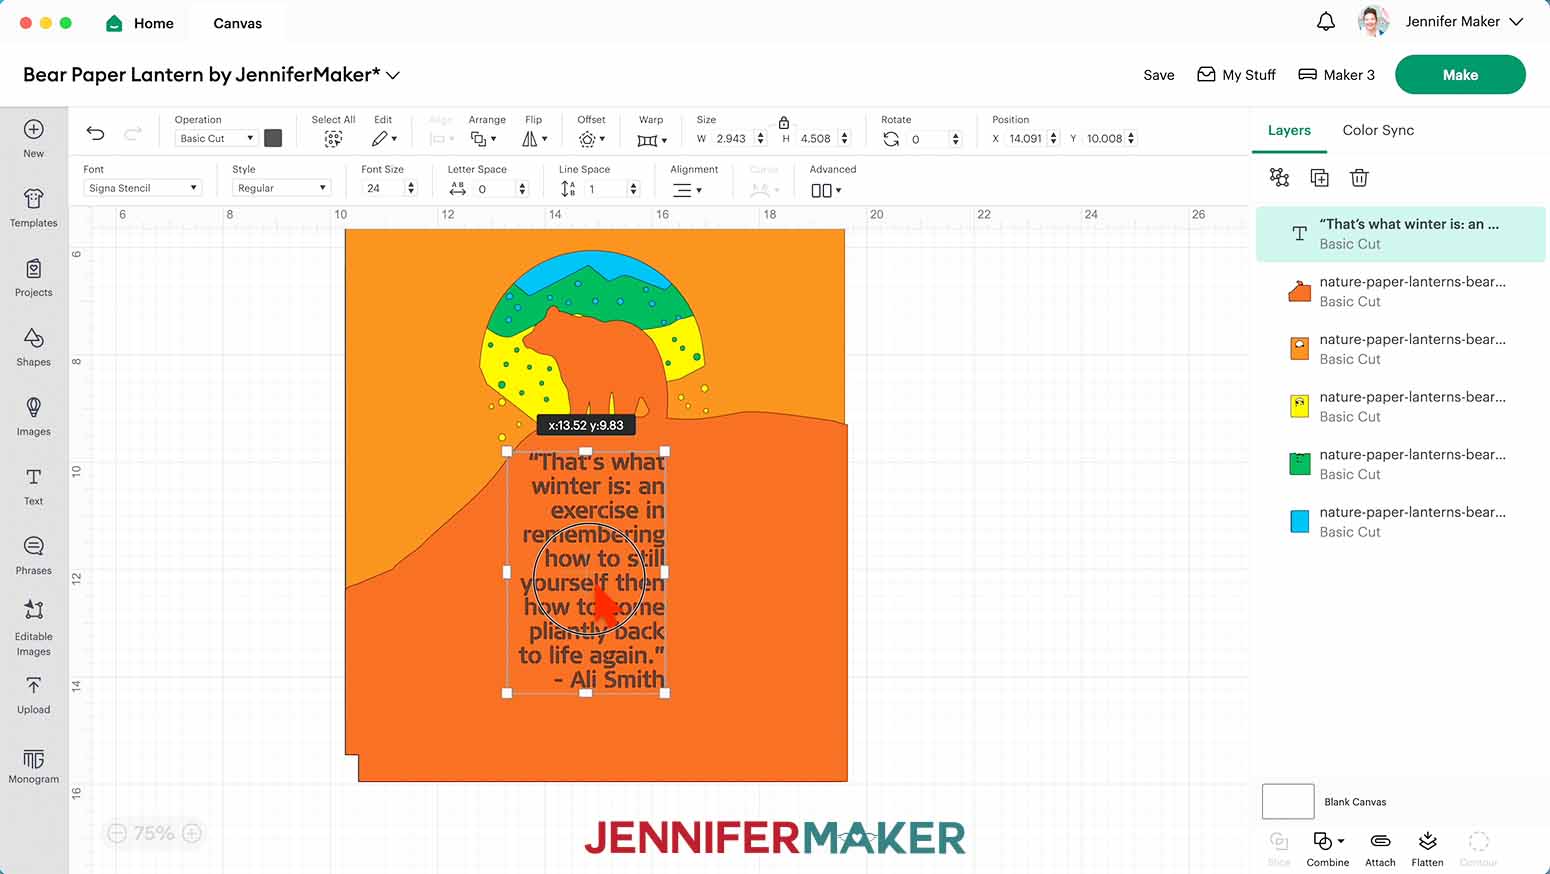
14. Delete extra spaces from the ends of lines to make the layout flow better.
15. If needed, click and drag the bottom edge of the box up so the text is at least 0.5” from the top of the rectangle cutout on the bear layer. This allows for the width of the puck light.
NOTE: The width of the text box should be roughly the width of the bear – about 2.75” to 3” wide.
16. Hold Shift and select the text and the dark orange bear layer in the Layers Panel, then click “Attach.”
17. Make sure the correct machine is selected in the top right.
18. Click “Make.”
19. On the Prepare Screen, you should have five mats for the bear layered pillar luminary: 1 dark orange (65 lb cardstock), 1 light orange (65 lb cardstock), 1 yellow (65 lb cardstock), 1 green (vellum), and 1 blue (vellum).
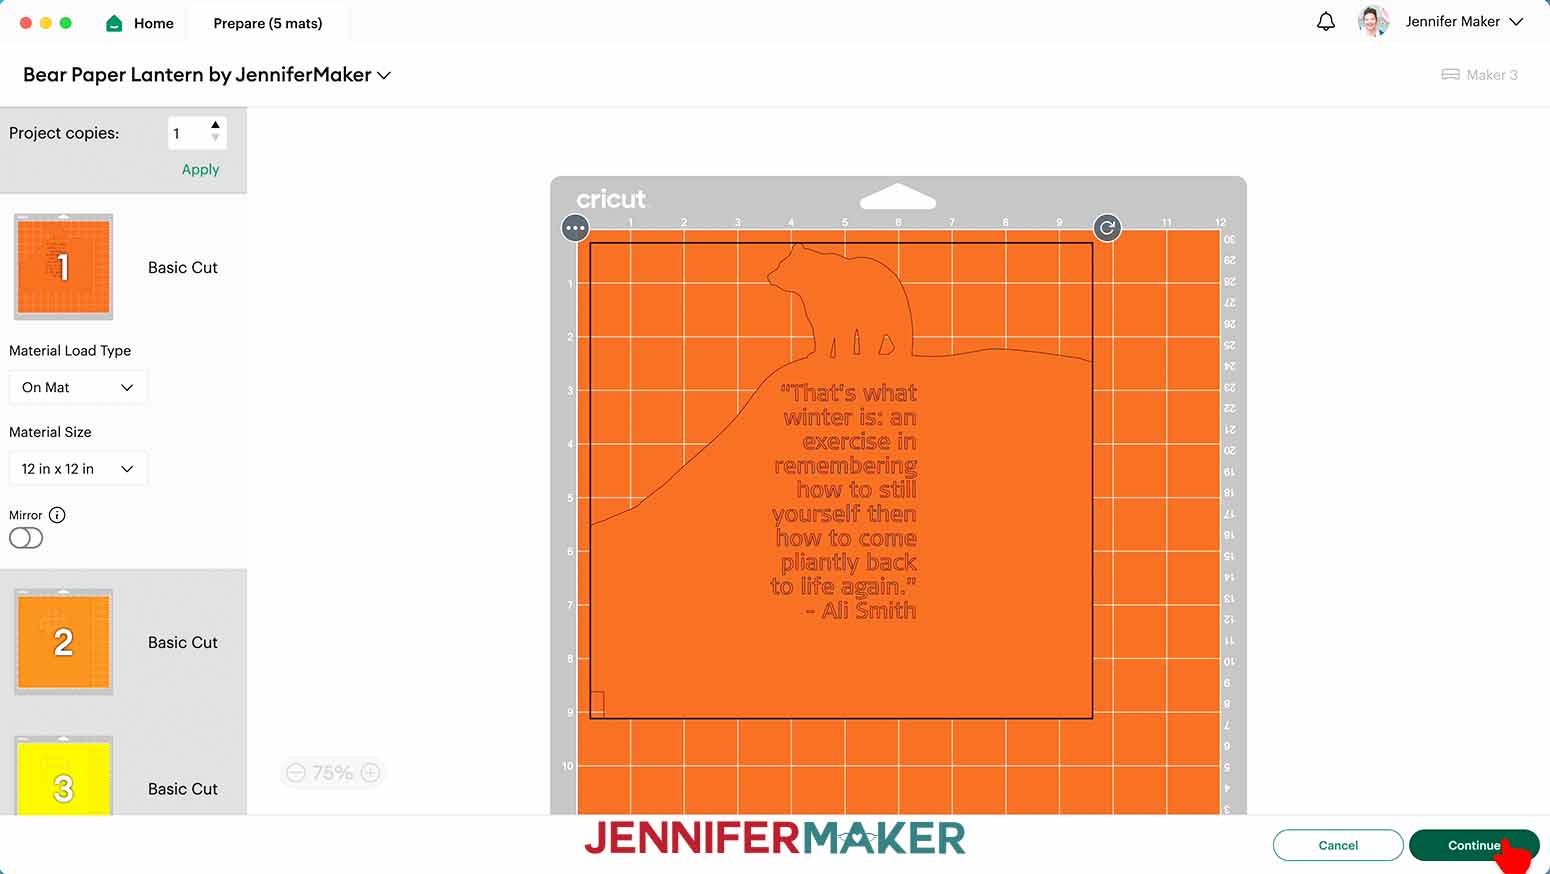
20. With the first mat selected, click “Continue.”
CUTTING
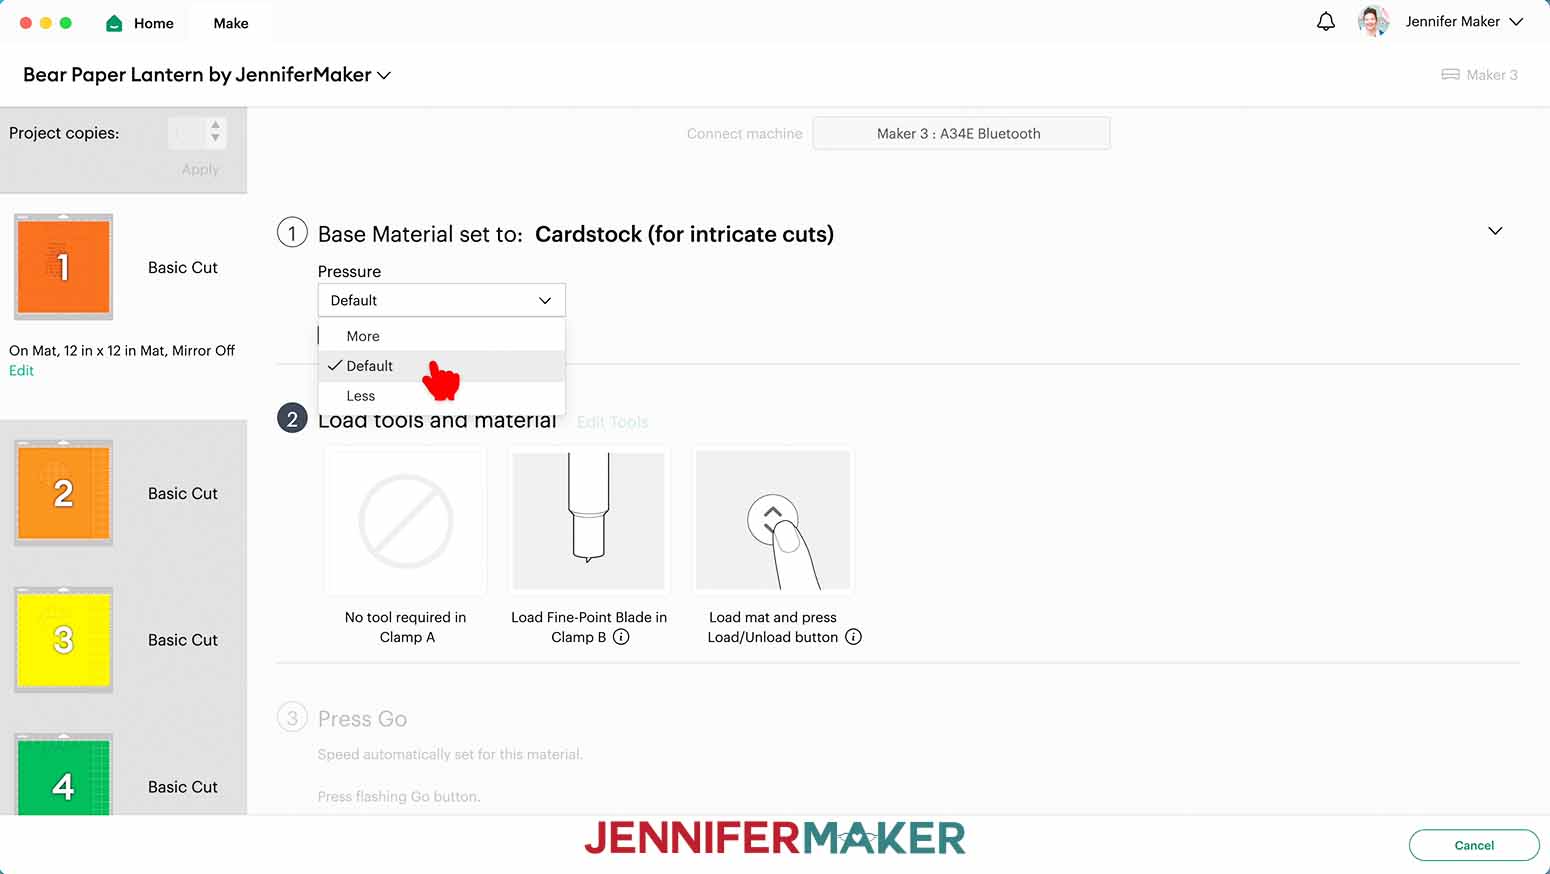
1. On the Make Screen, click “Browse All Materials.”
2. Search for and select the settings needed for the materials you’re using.
3. I used white 65 lb. cardstock for the dark orange, light orange, and yellow mats with the “Cardstock (for intricate cuts)” Setting with Default Pressure.
4. I used vellum for the green and blue mats with the “Vellum” Setting with Default Pressure.

5. Place your first paper face up on a StandardGrip machine mat.
TIP: Refer to your Design Space screen to make sure you’re loading the correct type of paper for the current mat.
6. Use a brayer to make sure it’s fully adhered.
7. Check that your Fine-Point Blade is clean and in the clamp.
8. Press the flashing “Load/Unload” button to load the prepared mat into your Cricut.
9. Press the flashing “Go” button to begin cutting.
10. When it has finished cutting, unload the mat, flip it over onto your work surface, and roll it back to release the paper.
11. Use a spatula to carefully remove any intricate parts.
12. Set the piece aside face up.
13. Use a scraper tool to remove cardstock bits left behind on your mat between cuts.
14. Follow steps 1-13 to cut and remove your remaining pieces.
15. If there are cutouts stuck in the layers, use a weeding tool to pop them out.
TIP: If you have trouble with any of your cuts, check out my Cricut Tips & Tricks for Cleaner Cuts.
16. Here are what my cut pieces for the customized bear lantern look like.

STEP 3: ASSEMBLE YOUR BEAR PAPER LANTERN WITH TWO LIGHTS
1. Use a permanent marker to draw a vertical line in one of the creases in the top half of the puck light. This will help us line up our layers in a consistent spot.
TIP: You can use one light for a softer glow, or two lights for a brighter light. If using two lights, draw a vertical line on both. To learn how to assemble with one light, see Project 1, Step 3.
2. Apply a piece of ¼” double-sided tape around the top half of the puck light, removing the backing as you go. It’s important to only tape the top half so you can screw off the bottom when batteries need replacing.
3. Prepare the other puck light the same way.
4. Find your bottom layer of vellum and lay it down so the corners with the rectangular cutouts are on the right side.
5. Run a piece of double-sided tape along the left hand side, then peel off the backer.
6. Pick up the vellum and line up the bottom rectangle cutout with the line on one of the puck lights. Make sure the light is pointed to shine in the direction of the paper, so it illuminates the inside of the lantern when it’s assembled.
7. Grab the other puck light and align the line you drew with the rectangle cutout on the other end of the vellum. Again, make sure the light is pointed to shine in the direction of the paper.
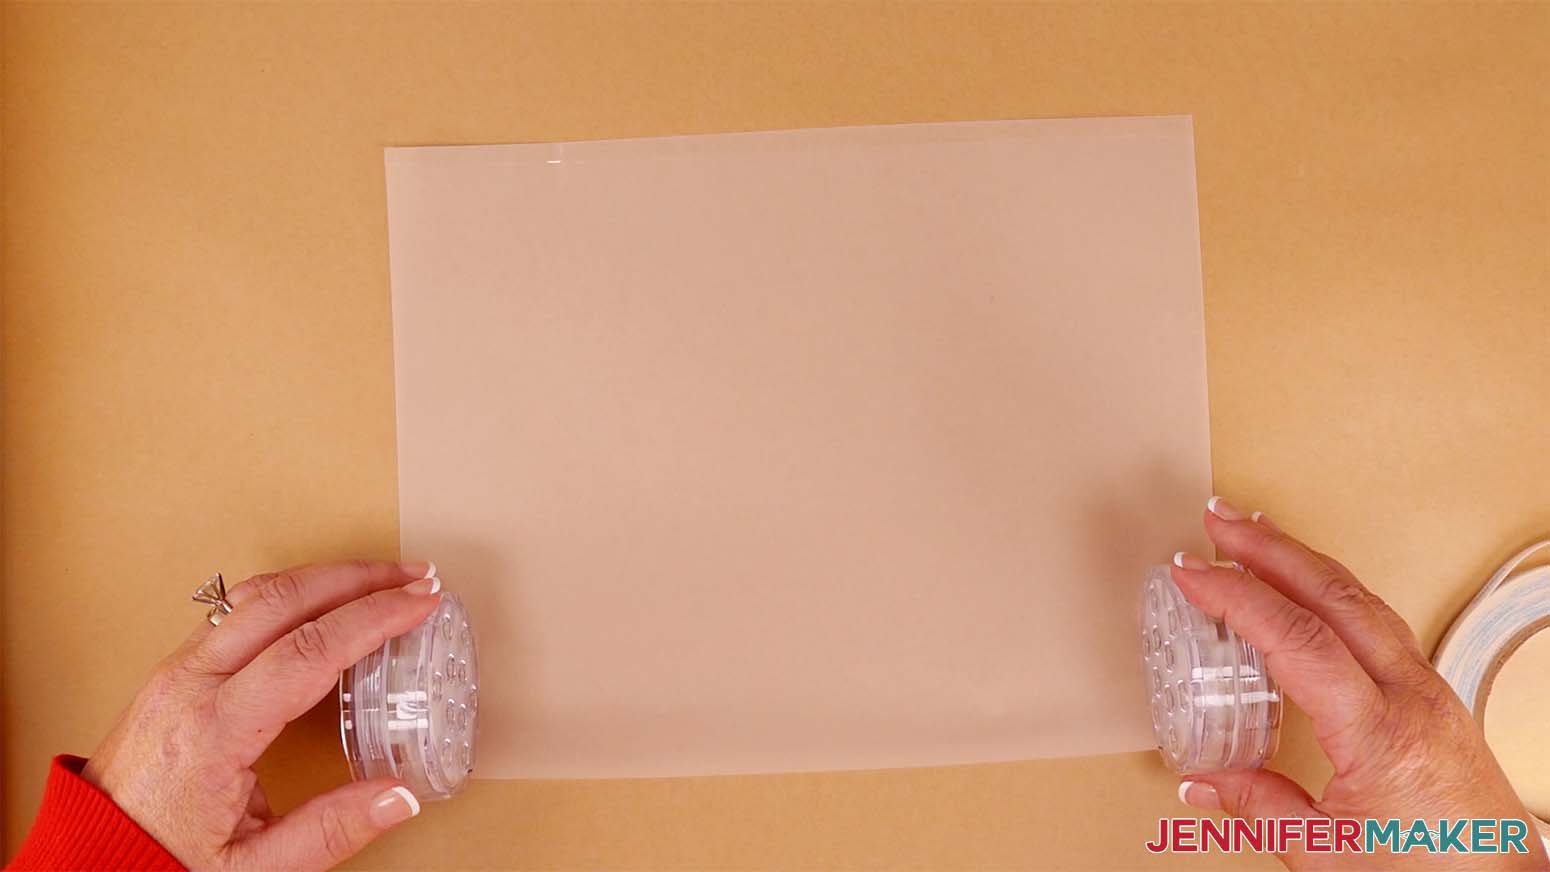
8. Slowly and carefully wrap the vellum around the puck lights, keeping the vellum’s edges flush with the edge of the lights. This is important, so the lantern sits correctly.
9. Gently roll the lights to attach the vellum. Alternate sides to attach them little by little, evenly adhering the tape and forming a tube with lights on each end. Pull the ends slightly apart and press to adhere the tape as you go to keep the vellum taut.

TIP: While it’s very important that the bottom puck is flush with the paper, the top puck has a little room for error.
10. With the top and bottom edges flush, gently press down on the tape to attach the ends of the vellum.
11. Lay out each of the rest of the layers so their rectangle cutout corners are on the right.
12. Add tape along the right, left, and bottom edges of each of the layers. Leave the backing on for now.
TIP: Try to get as close to the edges as possible for the best results.

13. Lay the luminary tube on its side, with the more flush end on the right.
14. Find the second layer of vellum, the layer with the mountains, and remove the tape backing.
15. Line up the rectangle cutout on the mountain layer with the rectangle cutout on the tube, then press down on the tape along the length of the tube to adhere it over the original tape seam.
16. With the top and bottom aligned, gently wrap the second vellum layer around the puck light, pressing down to adhere the tape as you go.
17. Gently press down on the tape seam to finish attaching the second layer of vellum.
18. Find the third layer, the cardstock mountain layer with the smallest design cutout.
19. Remove the tape and line up the rectangle cutout to the one on the vellum.
20. Attach the cardstock to the tube the same way as the previous layer.
TIP: The cardstock will be a little harder to curve into shape than the vellum. Just go slowly, molding the cardstock and attaching the tape as you go.
21. Press firmly onto the seam to secure the layer to the tube.
22. Repeat steps 19-21 for the remaining cardstock layers.
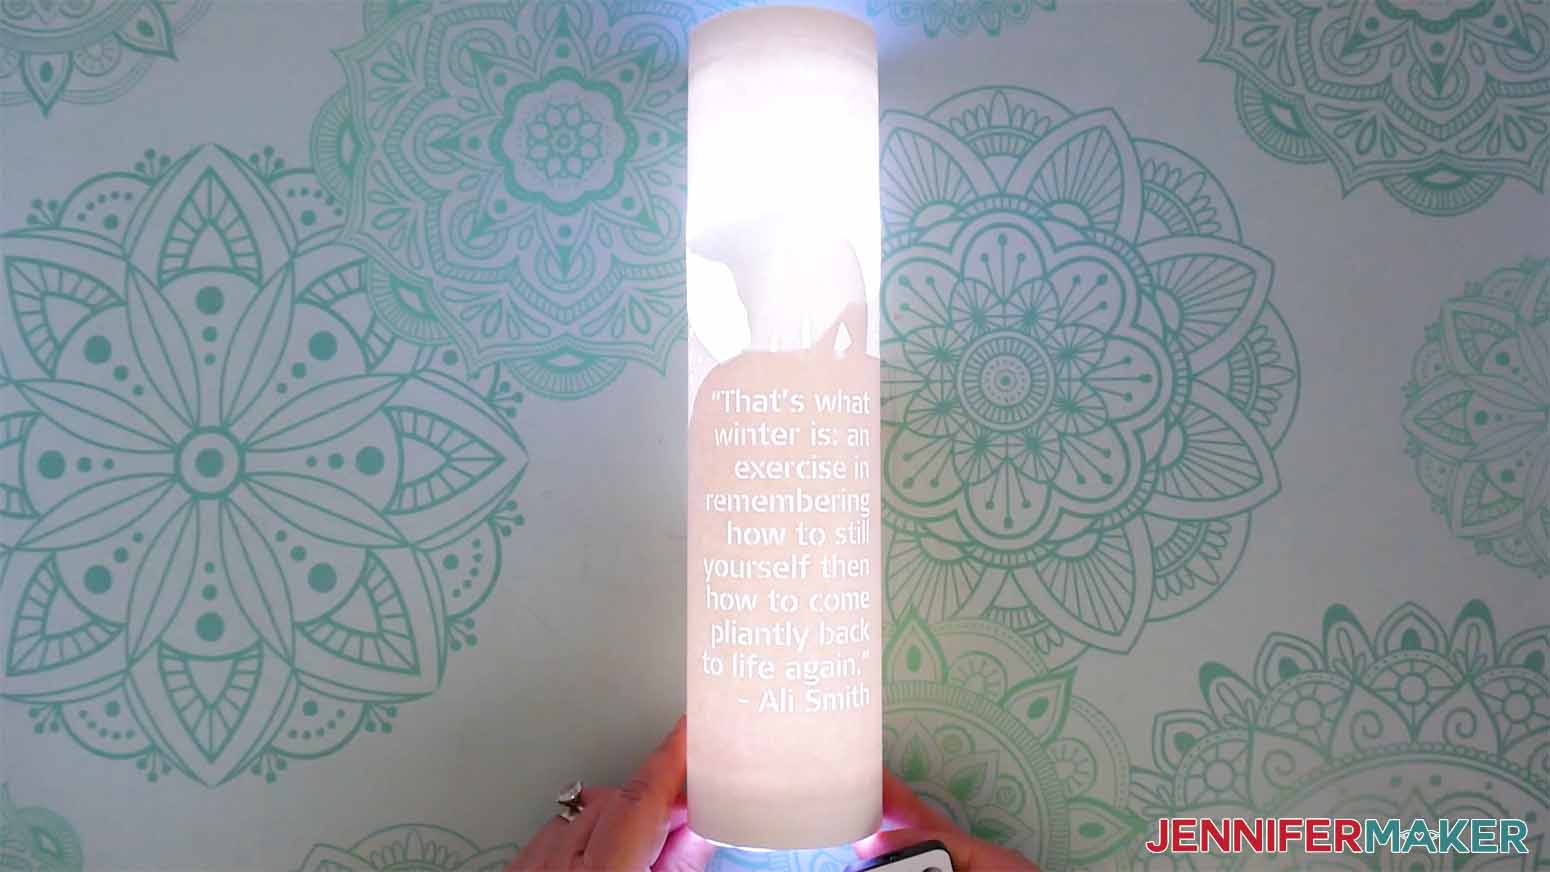
23. Your custom bear luminary is finished! Operate the lights with the remotes for a beautiful display.
TIP: To replace the batteries, insert your fingertips into the divots in the bottom of the puck light and twist to open.
STEP 4: SHOW IT OFF!
Here is what my finished paper lanterns with lights look like!
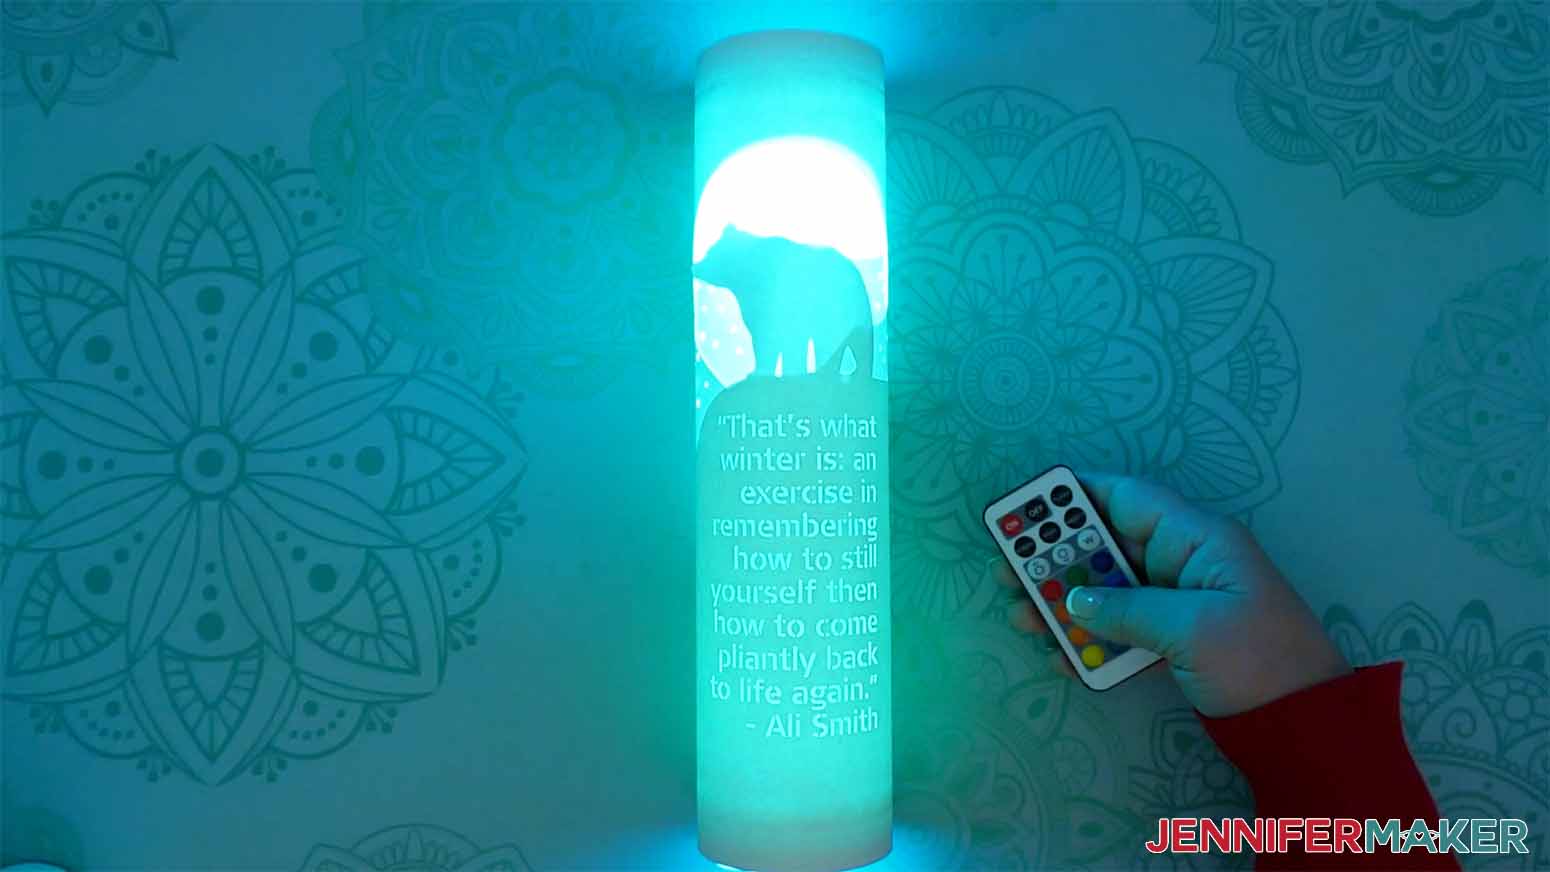
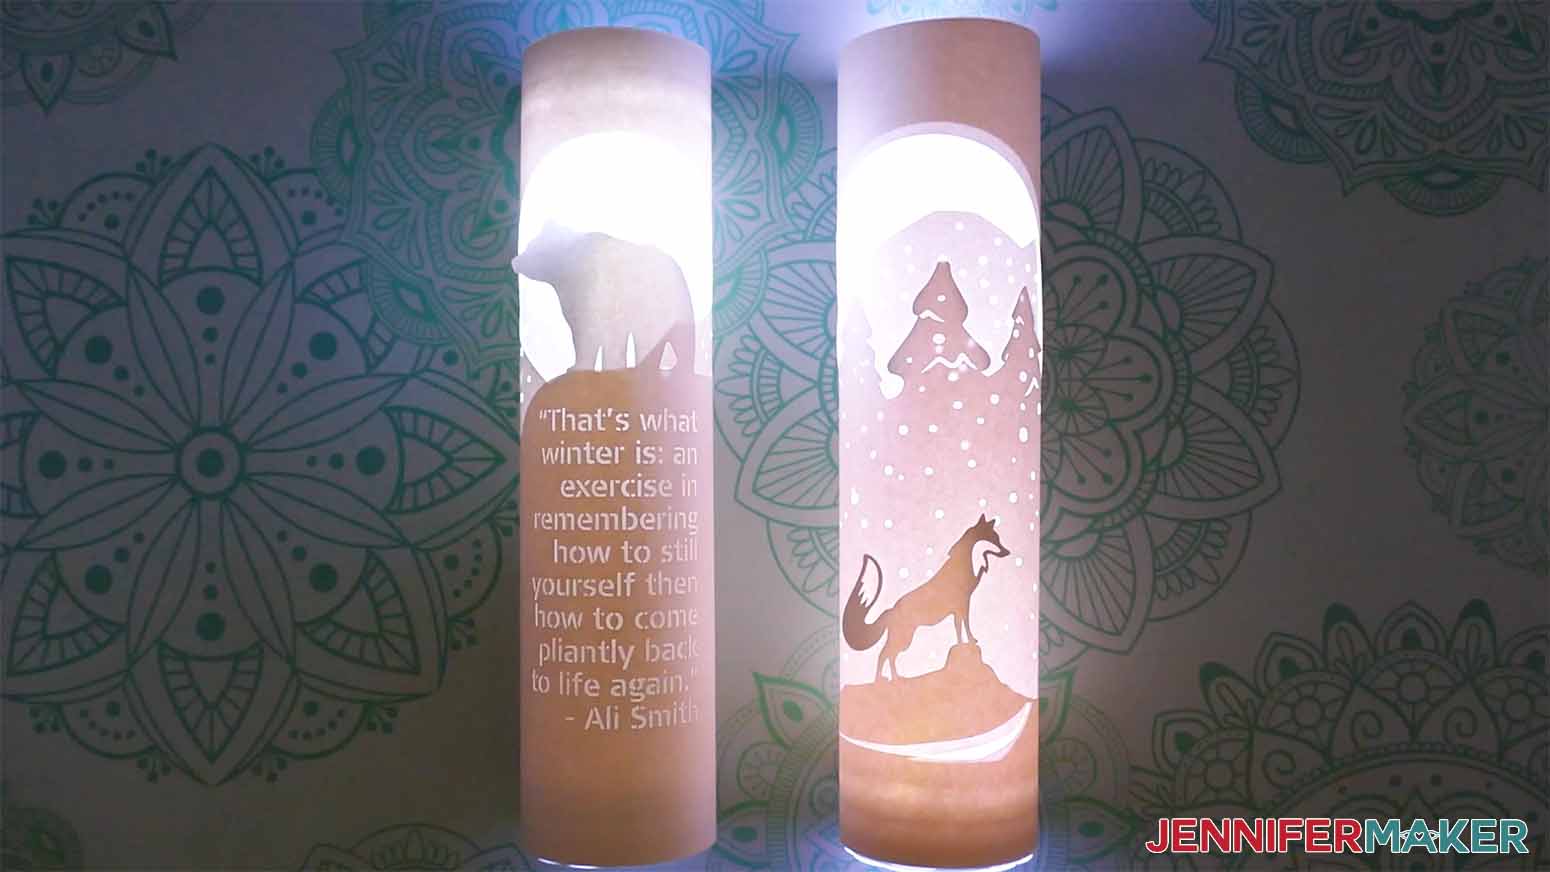
Now you can display your luminary on a table or fireplace mantel to bring light to a dark winter evening!
Notes
Typefaces Used: Cricut Signa Stencil
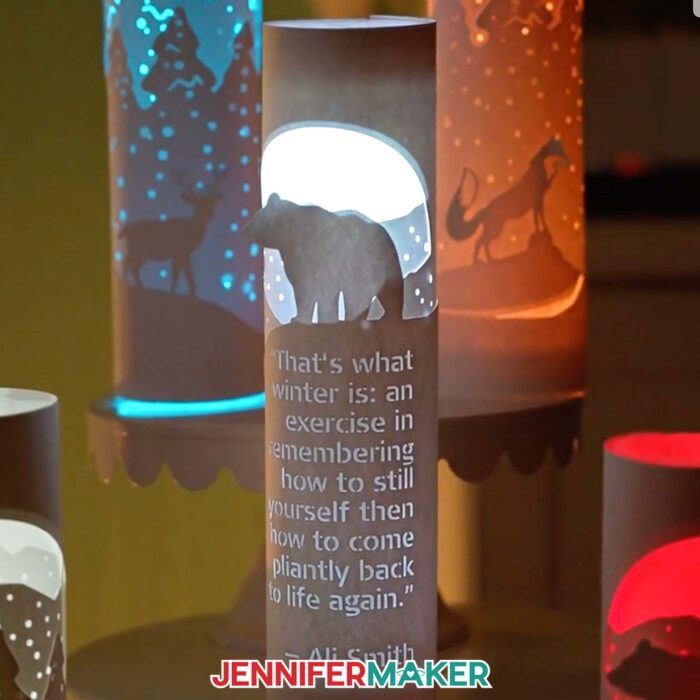
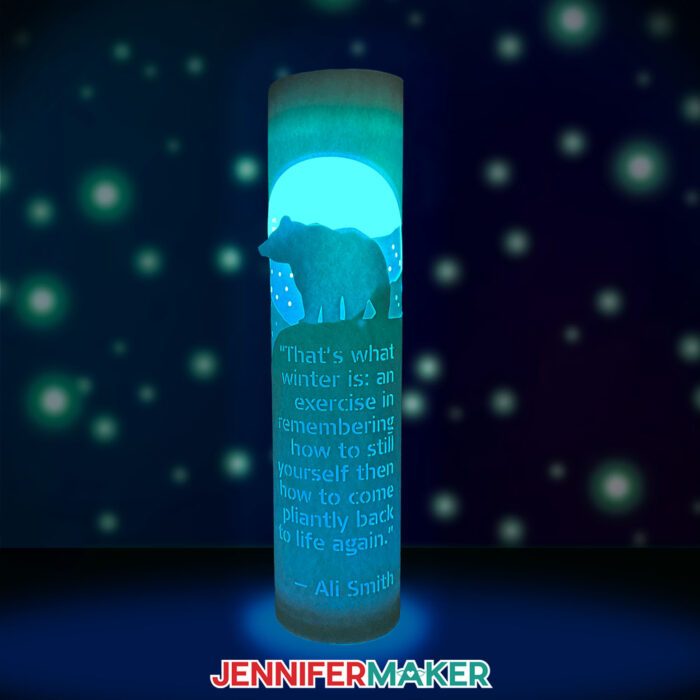
Quote Used:
“That’s what winter is: an exercise in remembering how to still yourself then how to come pliantly back to life again.” - Ali Smith
Finished Size: Each finished luminary is 11.5” tall.
Answers to Your Questions About Making a Paper Lantern with Lights
Q: Can you put lights in paper lanterns? Can you put LED lights in paper lanterns?
A: Of course! They wouldn’t be lanterns without a light! However, it’s extremely important that you use LED lights — they don’t heat up like other lights can. The LED puck lights are perfect for a round lantern because the light becomes part of the base! If you’re making star lanterns, red paper lanterns for Lunar New Year, or lanterns for other special occasions, always be sure to use an LED light.
Q: How long do paper lantern lights last?
A: Paper lantern lights last as long as the batteries do! Because you’ll be using LED lights instead of real candles (which is extremely unsafe, don’t do it!), your lights will last until the AA or AAA batteries run out. When they do, it’s easy to change them — simply use the notches on the bottom of the puck light to twist off the battery compartment. Fill it with fresh batteries, screw it back on, and voila!
Q: How do you make a simple paper lantern?
A: Follow this tutorial! But if you’re looking for an even simpler tutorial that uses even fewer materials, check out my Cylinder Paper Lanterns, my Paper Lantern with Animal Friends, my Autumn Luminaries, or my super easy Christmas Tree Luminaries.
Q: What kind of paper do you use for paper lanterns?
A: I recommend using 65 pound cardstock and vellum for your paper lanterns with lights, but you can replace the vellum with regular copy paper or even parchment paper for a very similar (and budget-friendly) look.
Q: Can you make lanterns with a Cricut?
A: Lanterns are one of my favorite things to make with a Cricut! You don’t need a cutting machine to make paper lanterns, but having one makes cutting really intricate and detailed designs a total breeze.
Q: Are paper lanterns out of style?
A: I have no idea, but I think that if something makes you happy, who cares if it’s out of style? Paper lanterns are one of my favorite crafts to make, especially in the cooler, darker months. There’s nothing “out of style” about making things you love. That’s why I always say, “Craft a life you love!”
Q: What is a good substitute for vellum paper?
A: Copy paper, parchment paper, wax paper, tracing paper — these are all great substitutes for vellum (and often at low prices compared to actual vellum).
Q: Is tracing paper and vellum the same?
A: Yes and no. While they’re not technically the same, they are both perfectly suitable for projects like this, and can be used interchangeably for paper lanterns with lights. Got tracing paper instead of vellum? You’re good to go!
Get my free SVG file collection to create layered paper lanterns with lights!
I love seeing what you make with my designs and how you use them! Please share photos of your layered paper lanterns with lights in our Facebook group or tag me on social media with #jennifermaker.
Love,

Want to remember this? Save this Paper Lanterns with Lights Tutorial to your favorite Pinterest Board!