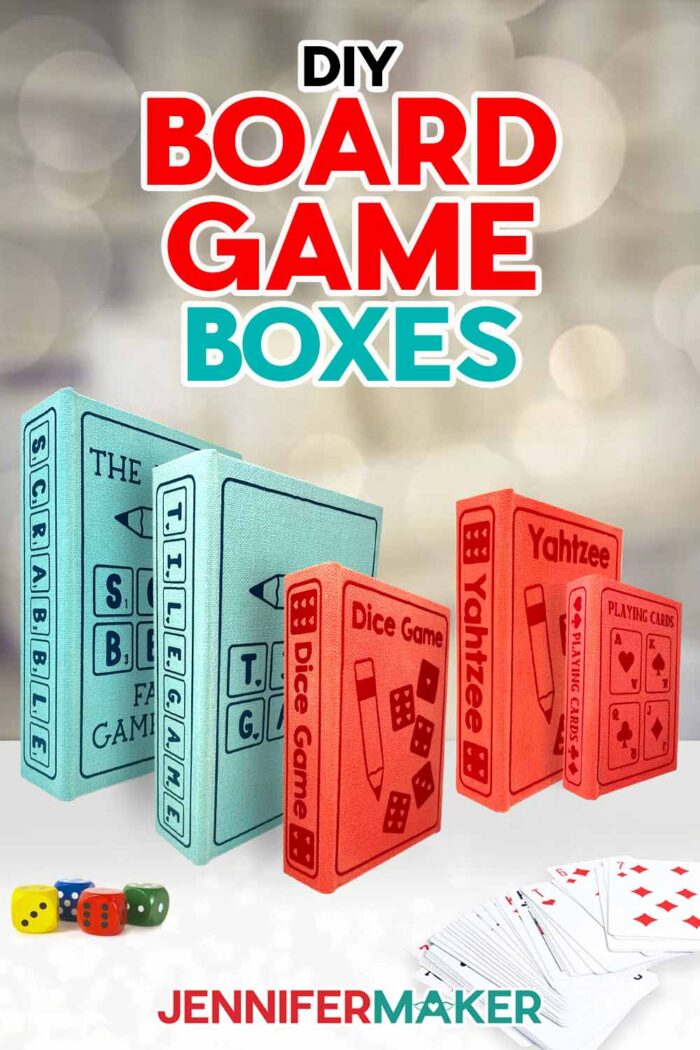
Learn how to make a custom DIY board game box for family play time!
Have an old board game that has all it’s pieces, but the original box is in bad shape? Or maybe you wish you could keep your games accessible, but you’re tired of the visual clutter? Greg, Alexa, and I play games as a family all the time. Often, however, cardboard game boxes can break down with repeated use. Not to mention, they’re not always the prettiest to have out on display. In this tutorial, I’ll show you how to make a perfect DIY Board Game Box for your library of card games and board games!
Watch the full step-by-step video tutorial on making a DIY board game box:

I just love this more aesthetically pleasing way to store and display board games! They’re a great solution for maximizing space and beautifying your game storage. Plus, when your board game collection is out in your living space, you’re more likely to slow down, put away your phone for a while, and play a game with your family.

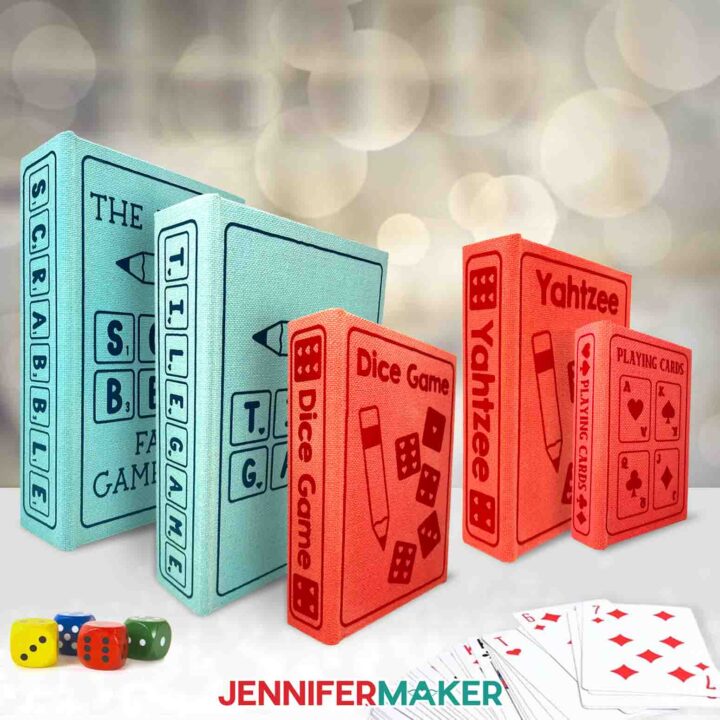
In this tutorial, I’ll show you how to make a DIY board game box for each of the top games you and your family like to play on family game night. If you decorate them in your favorite colors, they’ll fit right in with your home decor. I’ve made boxes for several of my favorite games, and trust me when I say that board game storage has never looked so good!
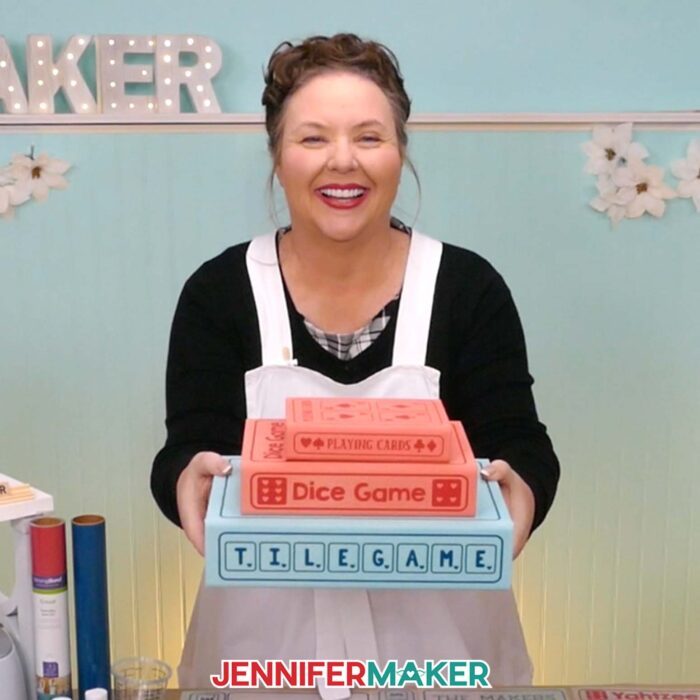
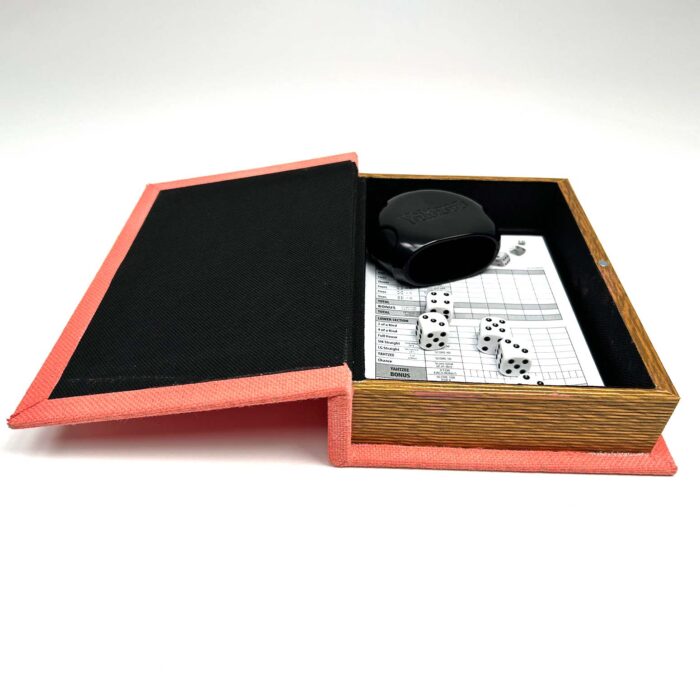
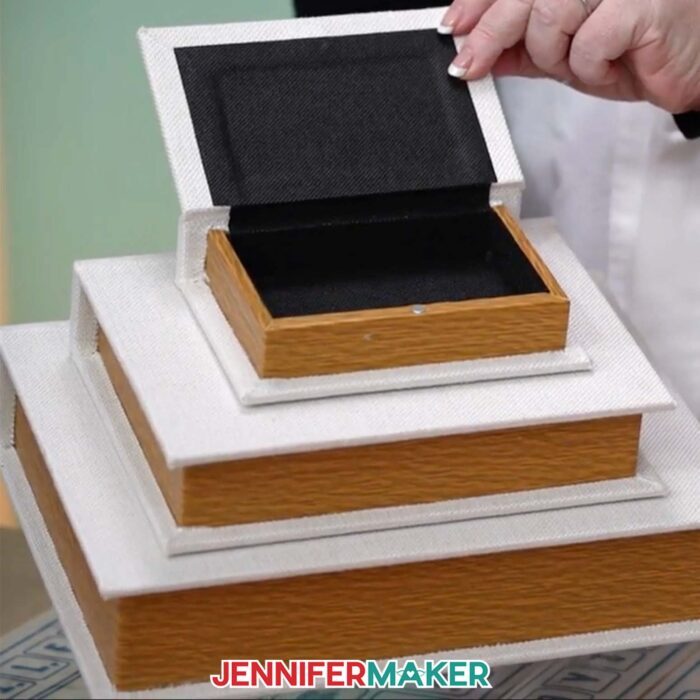
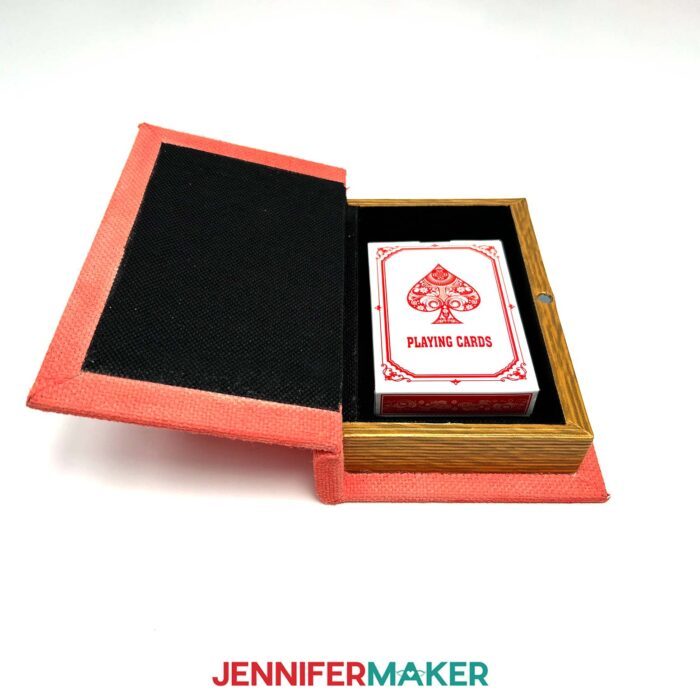
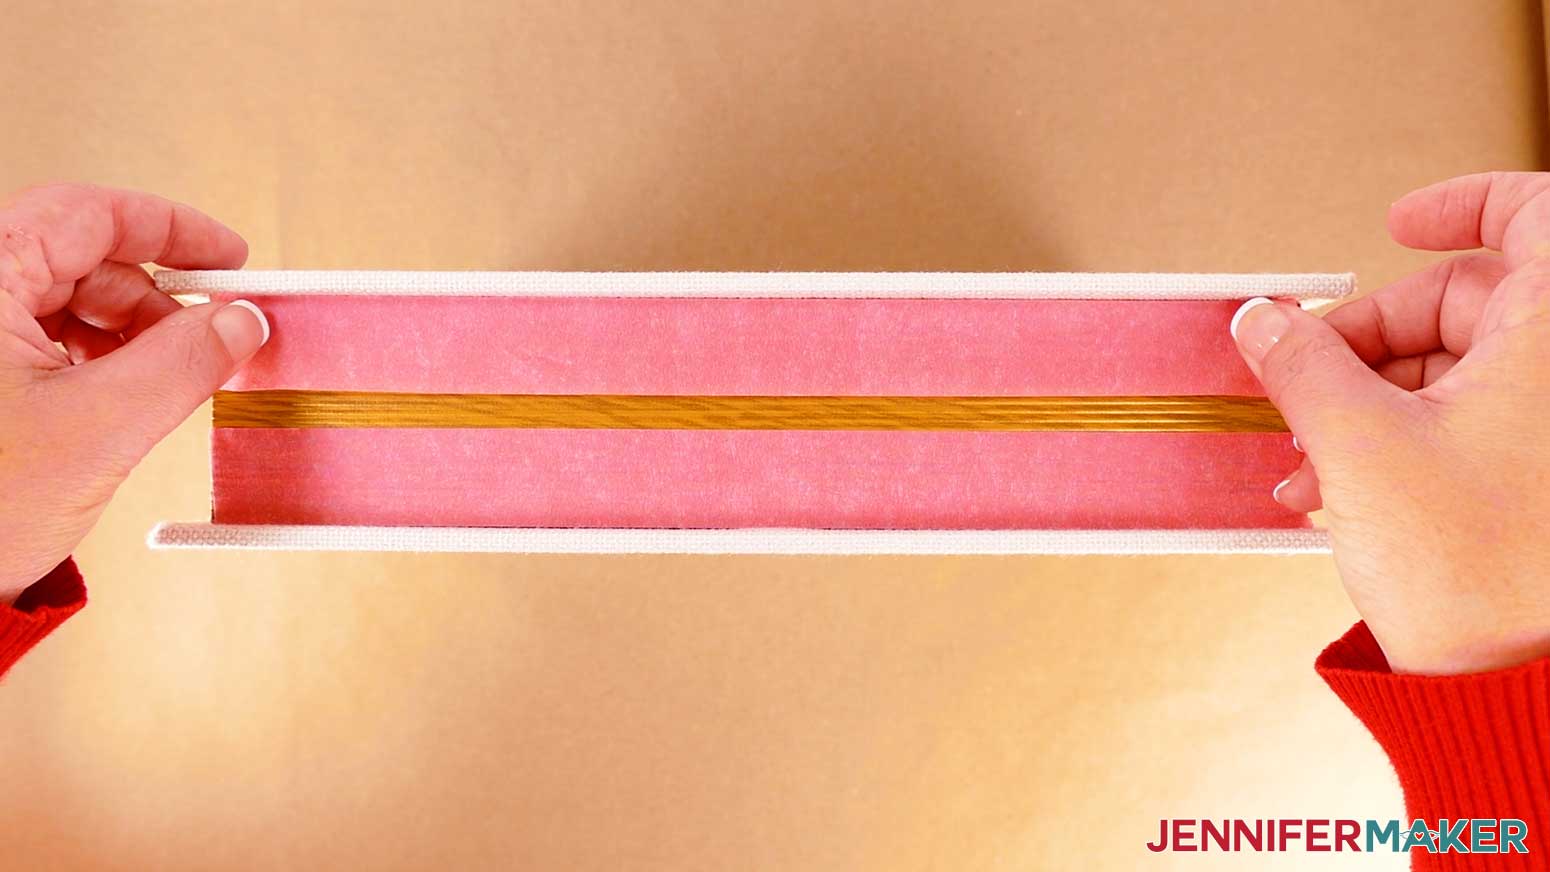
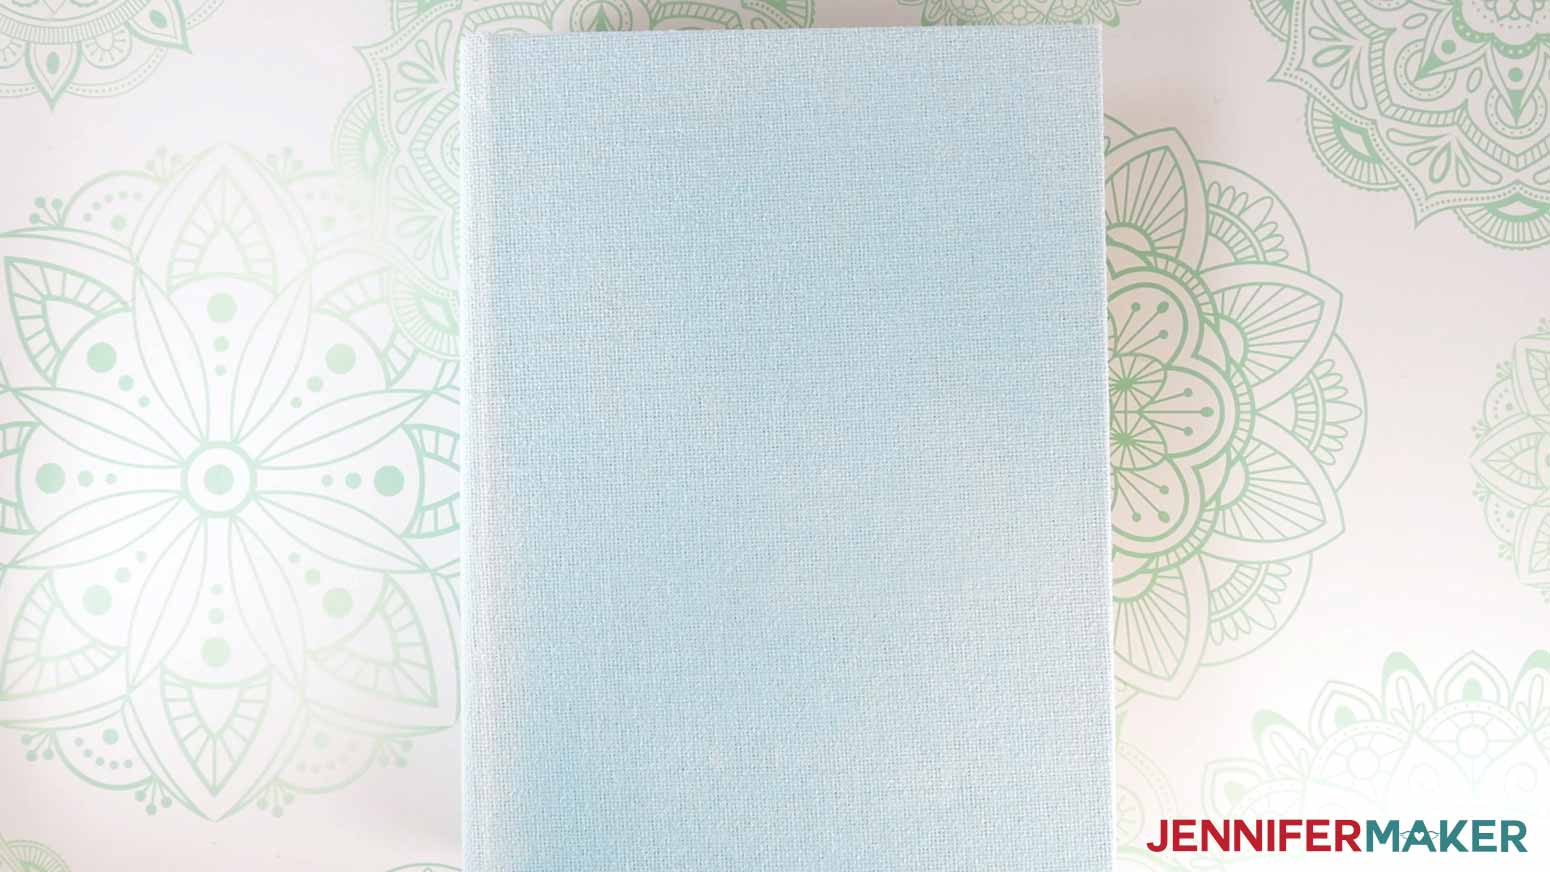
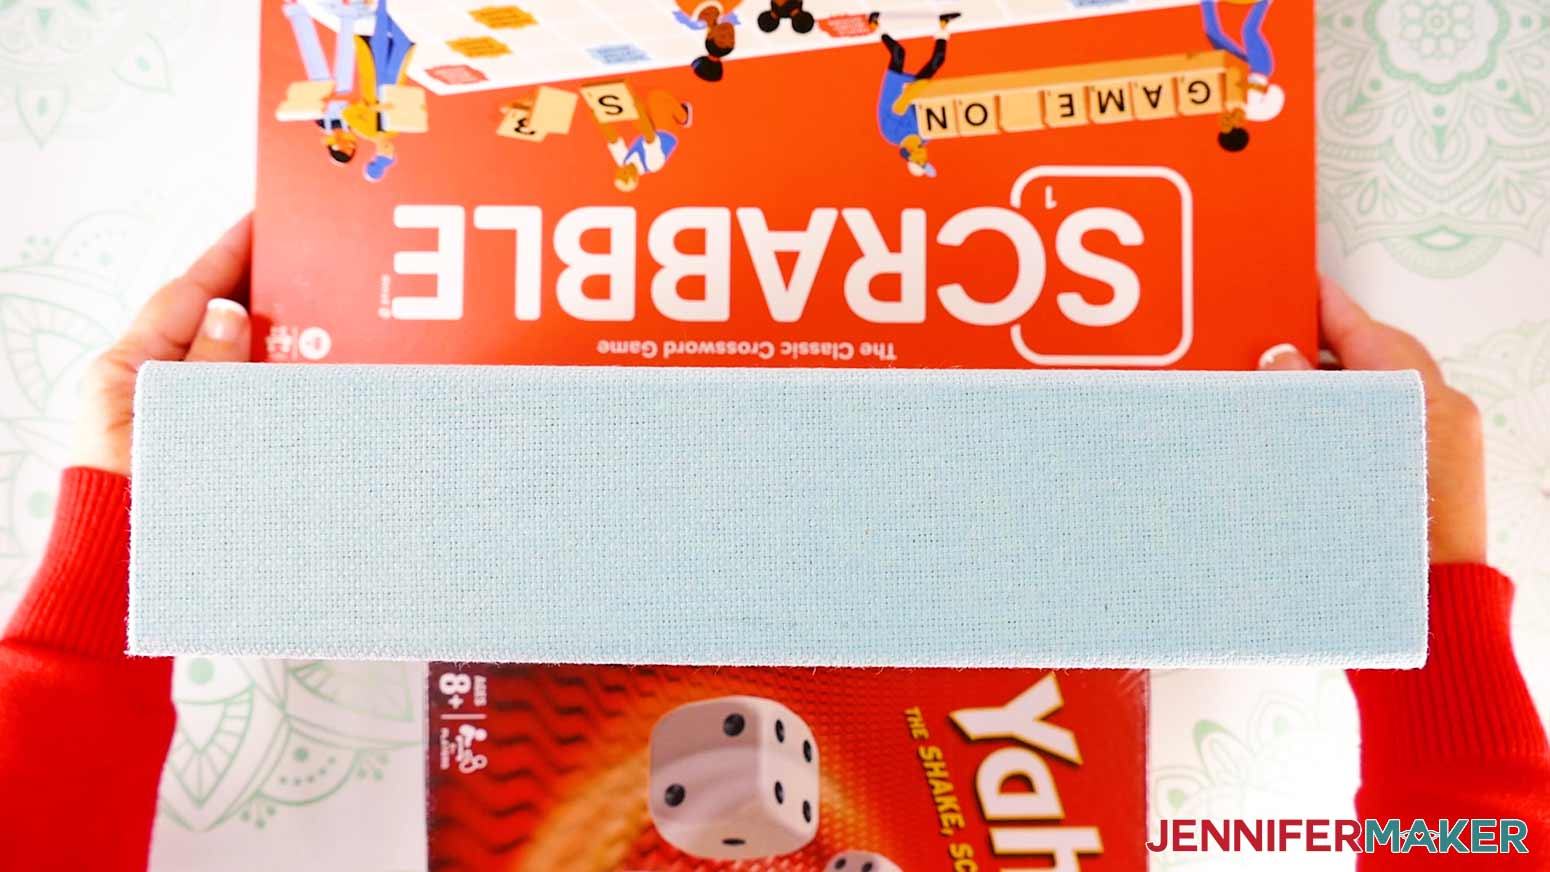
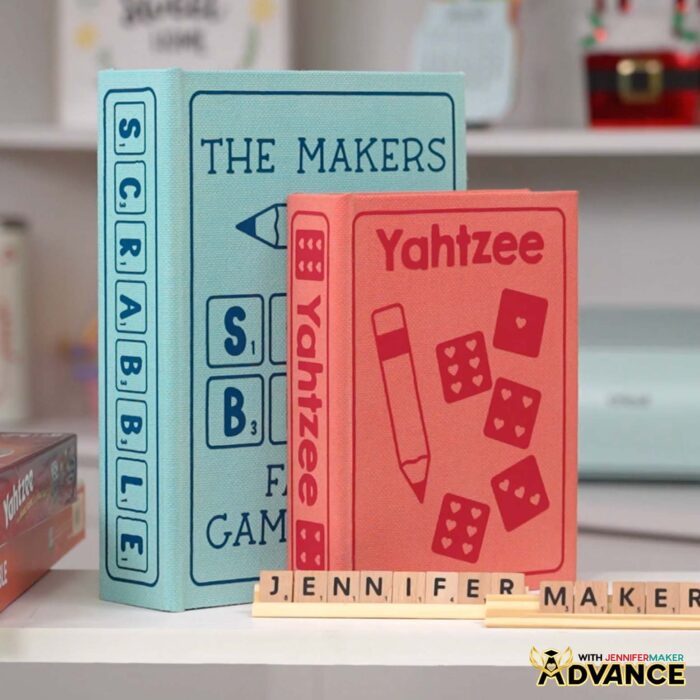
My board game board boxes start off with a pre-made rigid box with a hinged lid and a magnetic closure. They’re designed to look like books, but open up to a hollow space that makes the perfect storage for your game board, cards, and game pieces. The sides of the box even look like pages! Each box is made from wood, which means they’re strong and sturdy — great for heavy games. You know, the ones whose boxes never quite held up to the weighty contents inside?
Each book box looks pretty on its own with its sleek white fabric cover, but I’ll show you how to decorate the box lid using acrylic paint, textile medium, and iron-on HTV vinyl. Use the colors I did for inspiration, or paint yours a different color to match your own unique style!
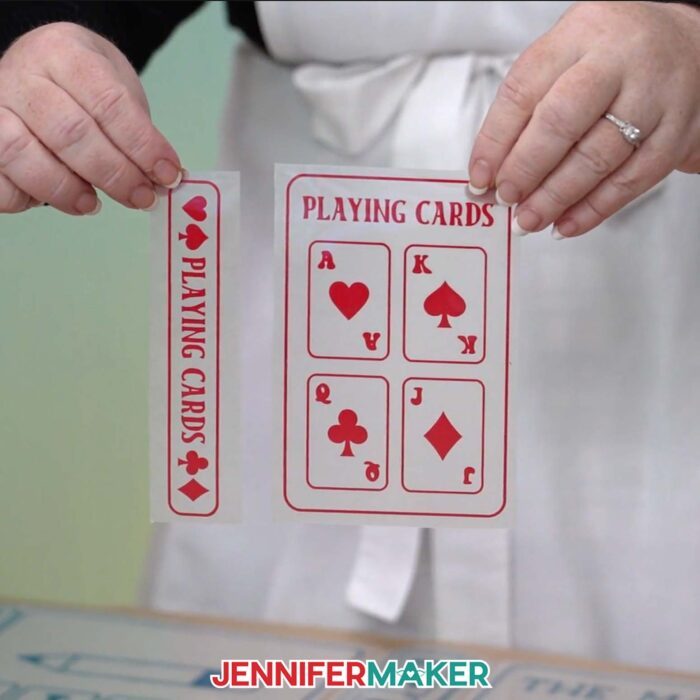
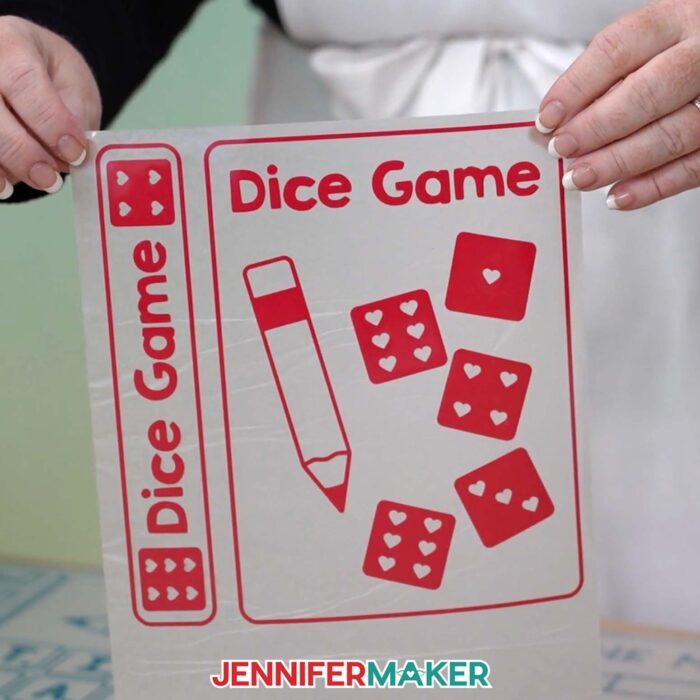
There are three board game box SVG designs in my free download folder, one for each size box: A large design for a tile game (think Scrabble®), a medium design for a dice game (like Yahtzee®), and a small design for a card game or deck of playing cards. There’s also an SVG file with more elements you can use to decorate your boxes!
First, we’ll paint the fabric on the game board box. I’ll show you how to prepare the box for painting, as well as how to mix your acrylic paint and textile medium. This helps get a smoother application of paint onto the box. I’ll show you my best techniques for getting nice, consistent coverage.
After your book box has had a chance to dry overnight, it’s time to decorate it for the game you’ll stash inside. First, I’ll show you how to make sure your design is sized right for your box, and how to adjust it if needed.
Then, we’ll cut the design from iron-on vinyl. You can do this by hand if you don’t have a cutting machine, but I’ll demonstrate how to cut the HTV design easily with a cutting machine. I’ll demonstrate with my Cricut Maker 3, but you can also use an original Maker, an Explore series machine, the Venture, or another full size cutting machine that uses SVG or DXF cut files. You’ll need a StandardGrip machine mat and a few other tools that I have linked below in my materials list to prepare your design for pressing.
After your decal is cut and weeded, it’s time to apply it to your board game box. I share the time and temperature settings in the tutorial for the materials I used — but if you used different materials, consult my HTV Cookbook for the right settings, because they might be different.

My DIY board game box project is an easy way to give your games the glow-up they need to become a pretty part of your every day! They’ll look great in your family library, or stacked on your coffee table waiting to be played. They can also double as a gift box for gifting a homemade or store-bought board game to someone special! Happy crafting, and game ON!
Let me show you how to make a board game box! This post contains some affiliate links for your convenience (which means if you make a purchase after clicking a link I will earn a small commission but it won’t cost you a penny more, there is no additional cost)! Read my full disclosure policy.
Materials to Make A DIY Board Game Box
View my Amazon shopping list for the exact items I used!
- Decorative Book Boxes (I used one small, one medium, and one large)
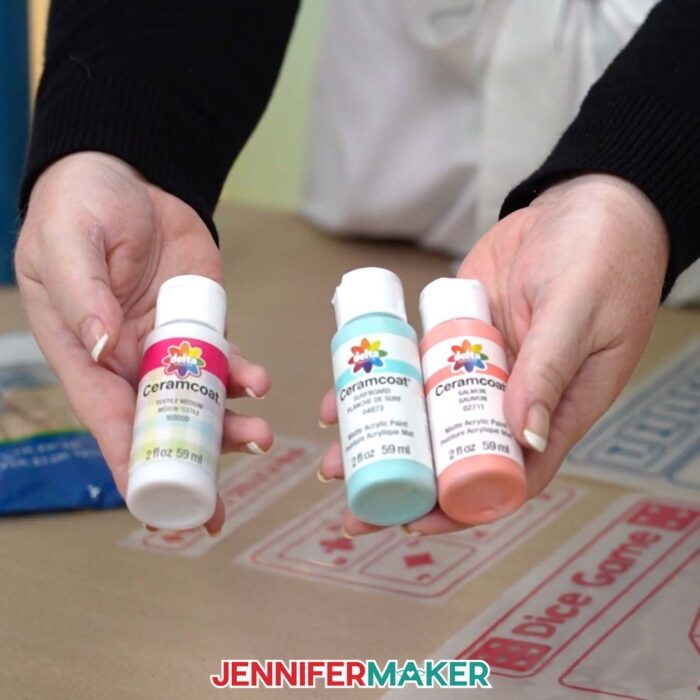
- Acrylic Paint (any color – I used the Surfboard and Salmon colors) -AND-
- Textile Medium (for mixing with acrylic paint)
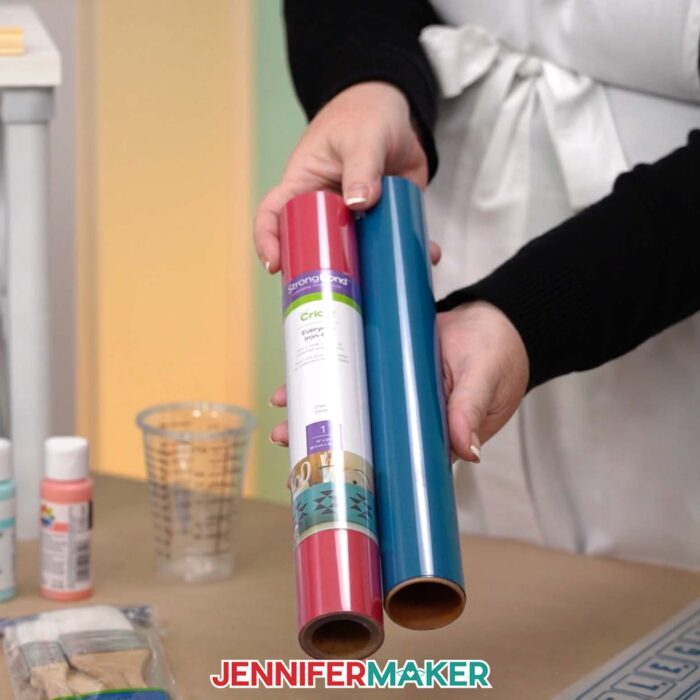
- Cricut Everyday Iron-On Vinyl (Teal – or any color to match your painted box) -OR-
- Siser EasyWeed HTV (Turquoise – optional instead of Cricut Teal) -OR-
- Cricut Everyday Iron-On Vinyl (Cherry Red)
- A way to cut your materials – I’m using the Cricut Maker 3 but you could also use the Cricut Maker, a Cricut Explore Series machine, a Cricut Venture, or a Cricut Joy Xtra
- Cricut StandardGrip Machine Mat 12” x 12”
- Heat Press – I used the Cricut EasyPress 2 – 12″ x 10″
- Cricut EasyPress Mat
- Paint Brushes
- Plastic Cup or Bowl (for mixing paint with textile medium and water)
- Heat-Resistant Tape
- Brayer
- Weeding Tool
- Tweezers
- Scraper
- Scissors
- Butcher Paper (to protect your work surface while painting)
- Disposable Gloves (optional for keeping hands clean while painting)
- Lint Roller (optional for removing dust/debris from box before painting)
- Measuring Tape (optional for measuring the size of your box and/or game)

How to Make a DIY Board Game Box!
DIY Board Game Box
Learn how to create a DIY board game box for storing your favorite games on bookshelves!
Materials
- Decorative Book Boxes (set of three - one small, one medium, and one large)
- Acrylic Paint (any color - I used the Surfboard and Salmon colors) -AND-
- Textile Medium (for mixing with acrylic paint)
- Cricut Everyday Iron-On Vinyl - Teal (or any color to match your painted box) -OR-
- Siser EasyWeed HTV - Turquoise (optional to use instead of Cricut Teal) -OR-
- Cricut Everyday Iron-On Vinyl - Cherry Red
- Design #681 (My free SVG/PDF/DXF design files are available in my free resource library - get the password by filling out the form at the bottom of this page)
Tools
- A way to cut your materials - I’m using the Cricut Maker 3, but you can also use the Maker, Explore series machines, Venture, or Joy Xtra
- Cricut Green StandardGrip Machine Mat 12" x 12"
- Heat Press - I used the Cricut EasyPress 2 12" x 10"
- Cricut EasyPress Mat
- Paint Brushes
- Plastic Cup or Bowl (for mixing paint with textile medium and water)
- Heat Resistant Tape
- Brayer
- Weeding Tool
- Tweezers
- Scissors
- Scraper
- Butcher Paper (to protect your work surface while painting)
- Disposable Gloves (optional for keeping hands clean while painting)
- Lint Roller (optional for removing dust/debris from box before painting)
- Measuring Tape (optional for measuring the size of your box and/or game)
Instructions
STEP 1: GET MY FREE GAME BOX DESIGNS
First, download my DIY Board Game Box designs from my free library – look for Design #681. Alternatively, you can use the Save This Project form near the top of this post and the design link will be emailed to you.
In the SVG folder, you’ll find versions of my designs to cut on a cutting machine. There is also a DXF folder with cut files, and a PDF folder with versions you can print and cut by hand.
The designs are sized for the book boxes in my materials list, so you’ll find “small,” “medium,” and “large” file versions. There is also a “pieces” file with some common board game pieces you can use to create your own design!
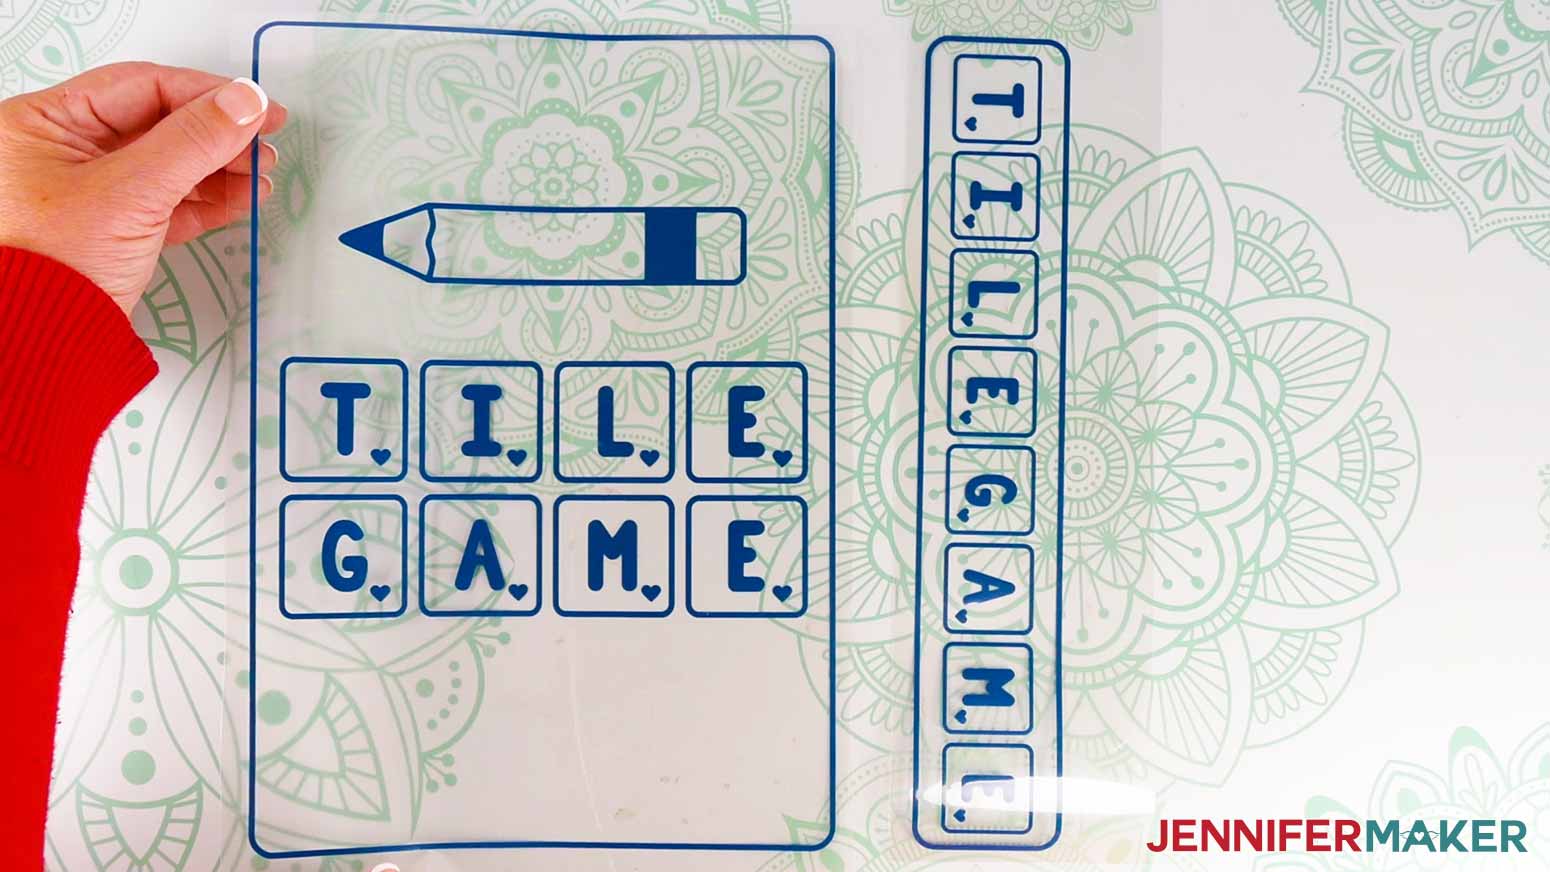
Upload the SVG file you need to Design Space to get started. I’ll demonstrate with the large box and tile game design.
TIP: If you’re not sure how to upload, go to jennifermaker.com/svgs to learn how to unzip and upload SVG files.
STEP 2: PAINT YOUR BOARD GAME BOX
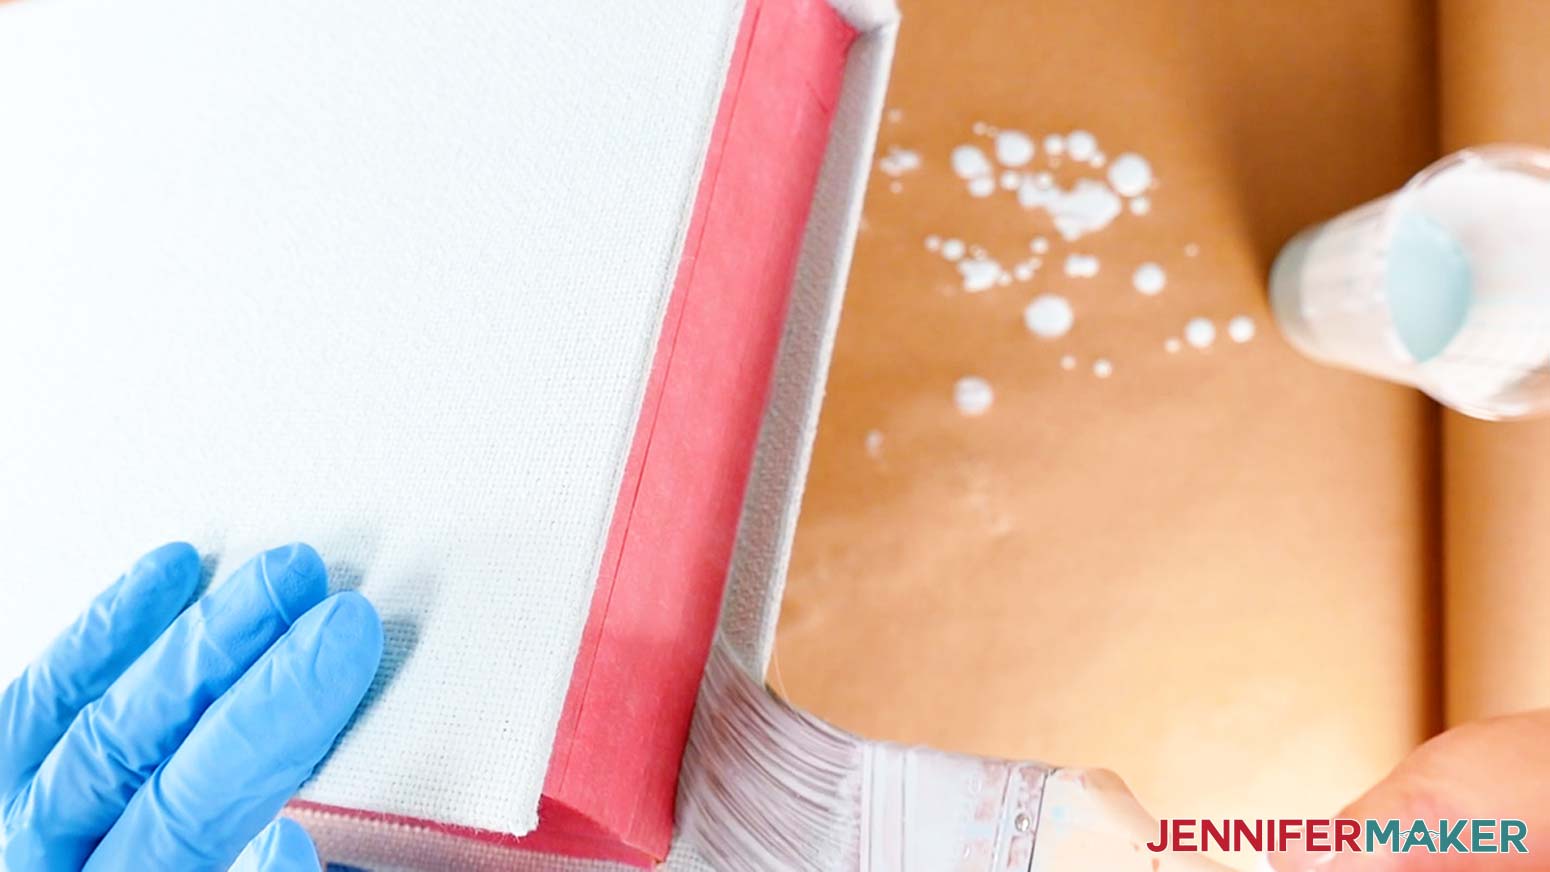
- Cover your work surface with two layers of butcher paper to protect it.
- Since we will only be painting the linen fabric part of the book box, completely cover the book box’s fake pages with painter’s tape. Be sure to protect the areas near the spine, against the cover edges, and along the inside liner of the box with the tape.

- Remove any stickers from the book box.
- Use a lint roller to remove any debris or loose fibers on the book box.
- Put on a pair of disposable gloves to keep your hands clean while painting.
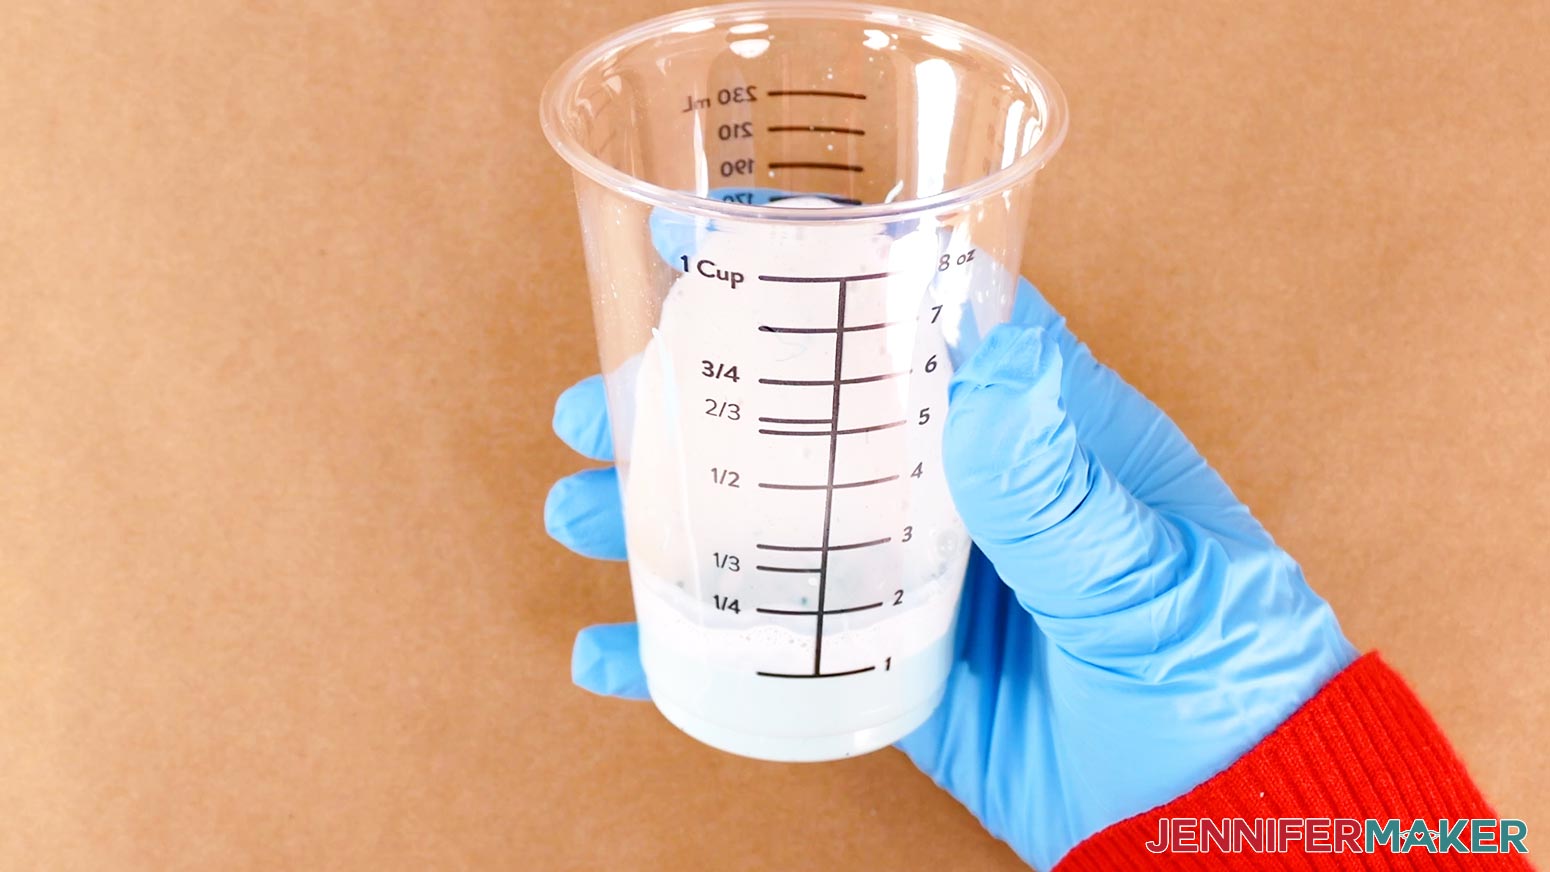
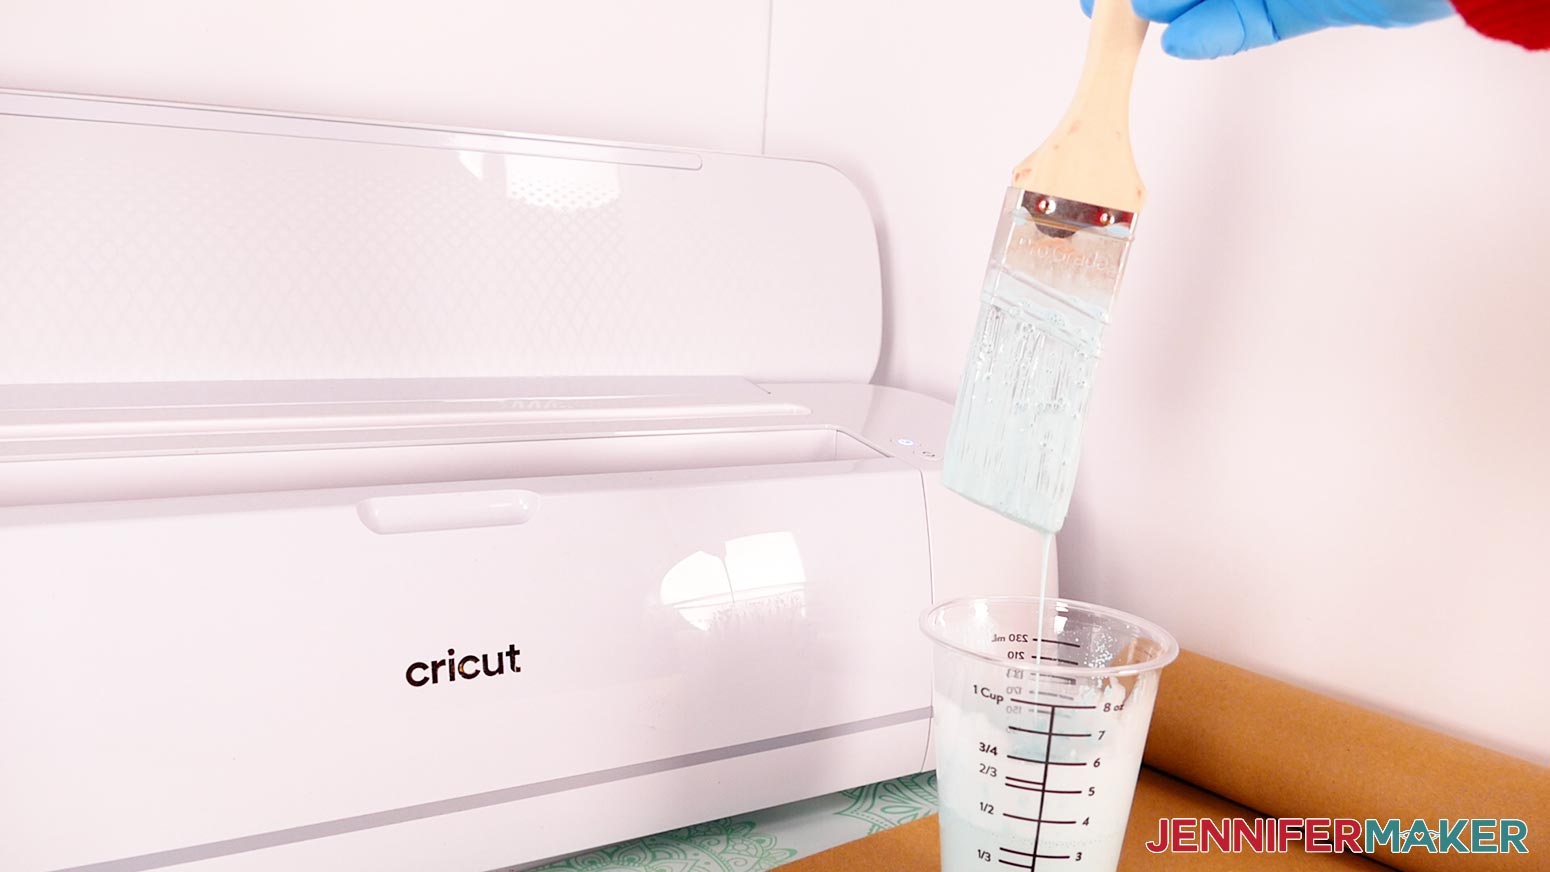
- In a disposable measuring cup, add two parts acrylic paint to one part textile medium.
TIP: Prepare more paint than you think you need to reduce color inconsistency from mixing multiple batches.
NOTE: I’ll add 2 oz. of paint and 1 oz. of textile medium, which will make enough to cover my large box. - Add about one part tap water to the acrylic paint and textile medium in the cup, then use a paintbrush to combine the mixture until it is thin enough to drip off the brush easily. Add more water if needed to reach the right consistency.
TIP: Use the smaller paintbrush for smaller boxes and the larger one for larger boxes.
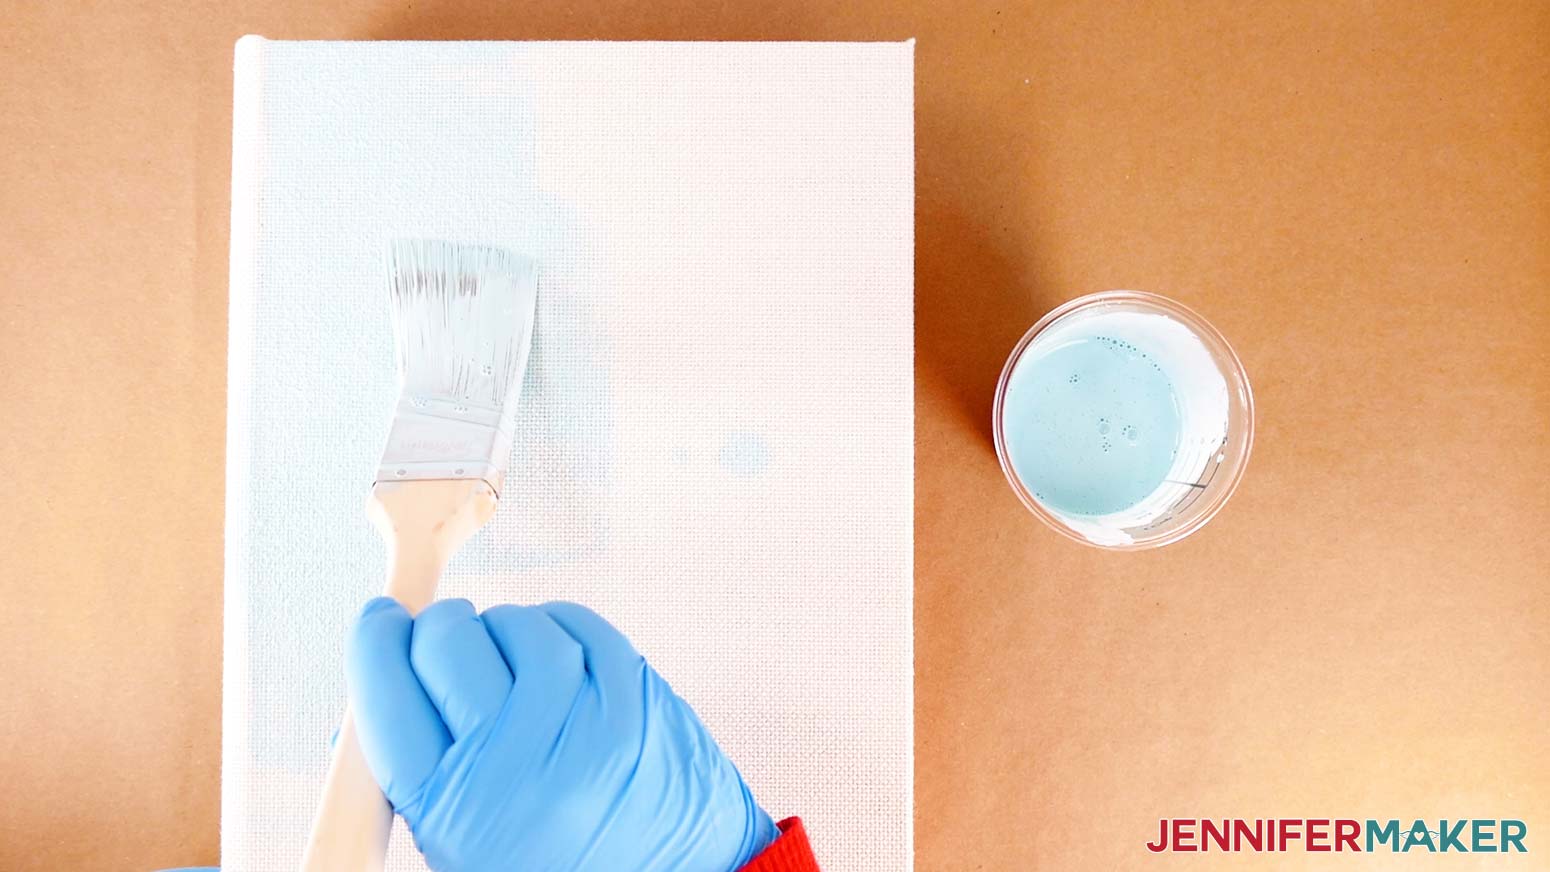
NOTE: Thinning out the paint results in a smoother application and requires less paint for full coverage. - Paint the front of the box with a smooth, even coat. It may be patchy at first, but keep painting.
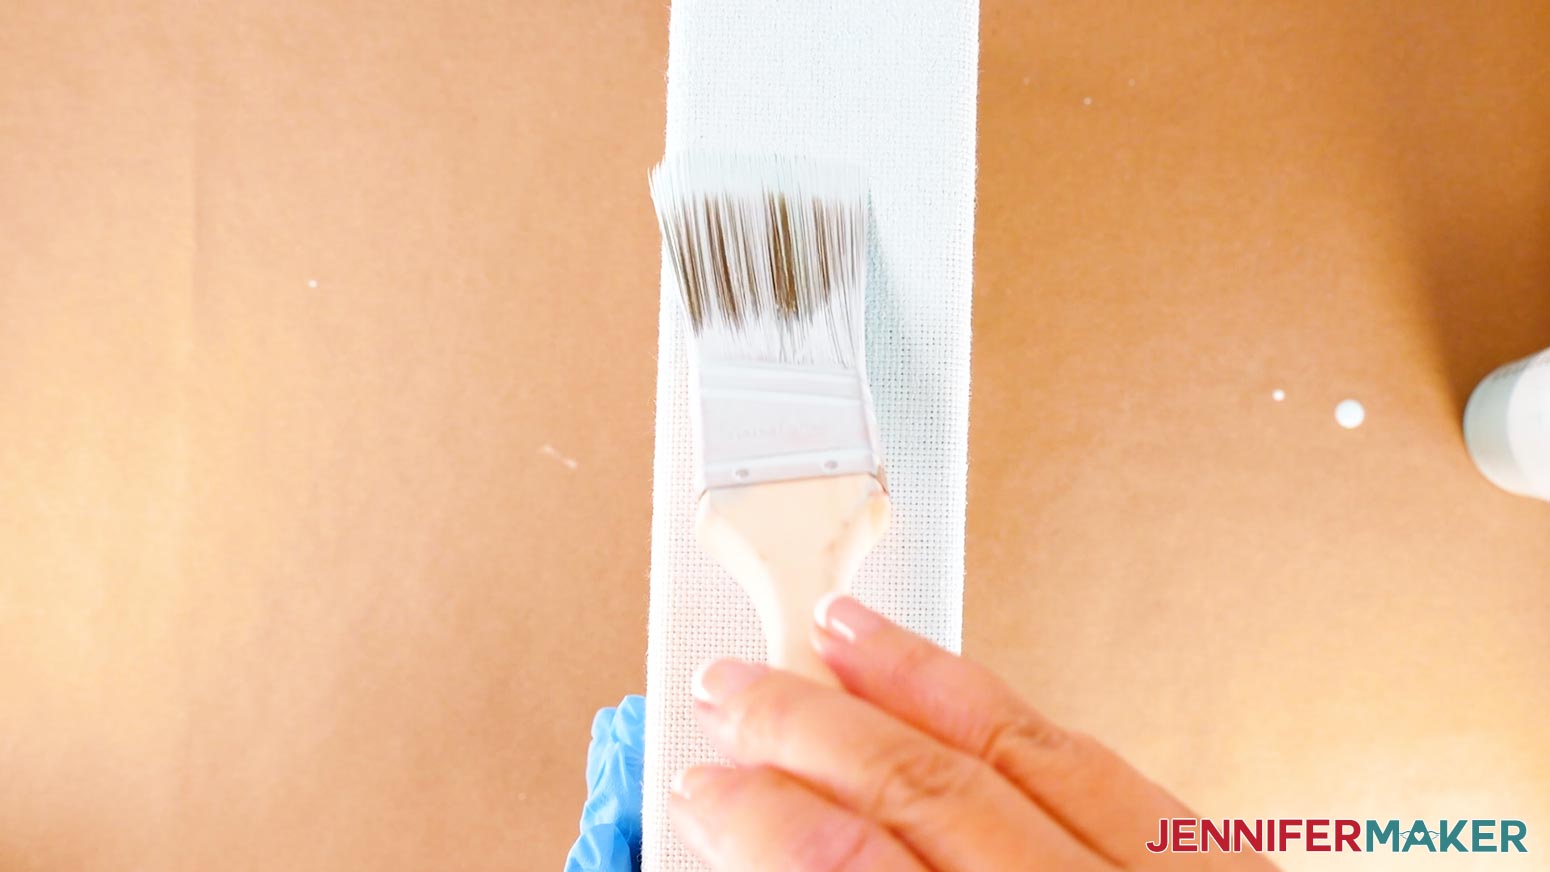
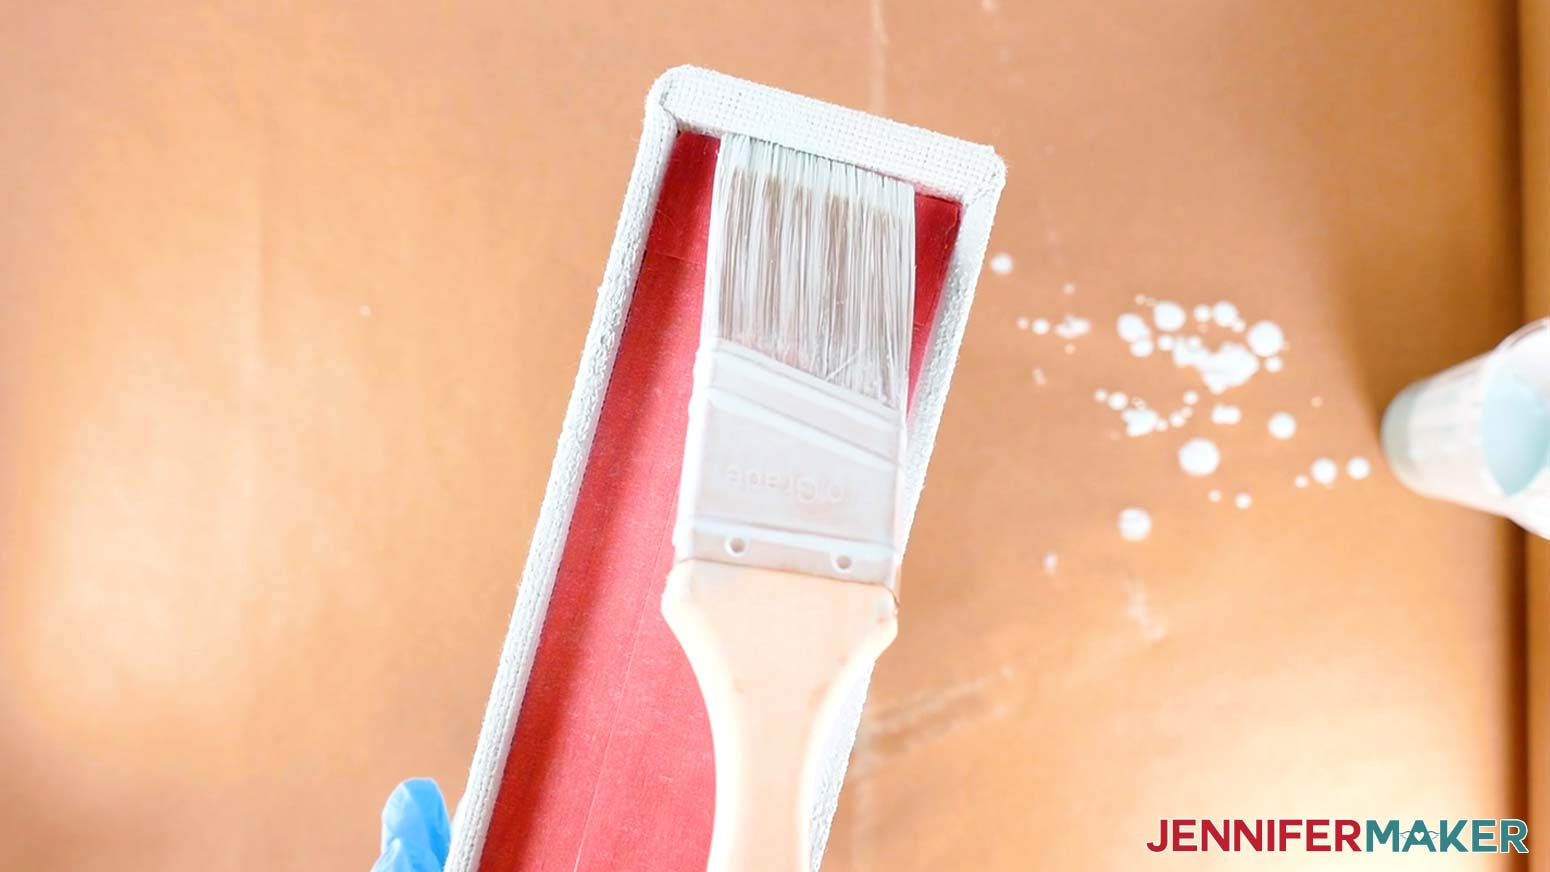
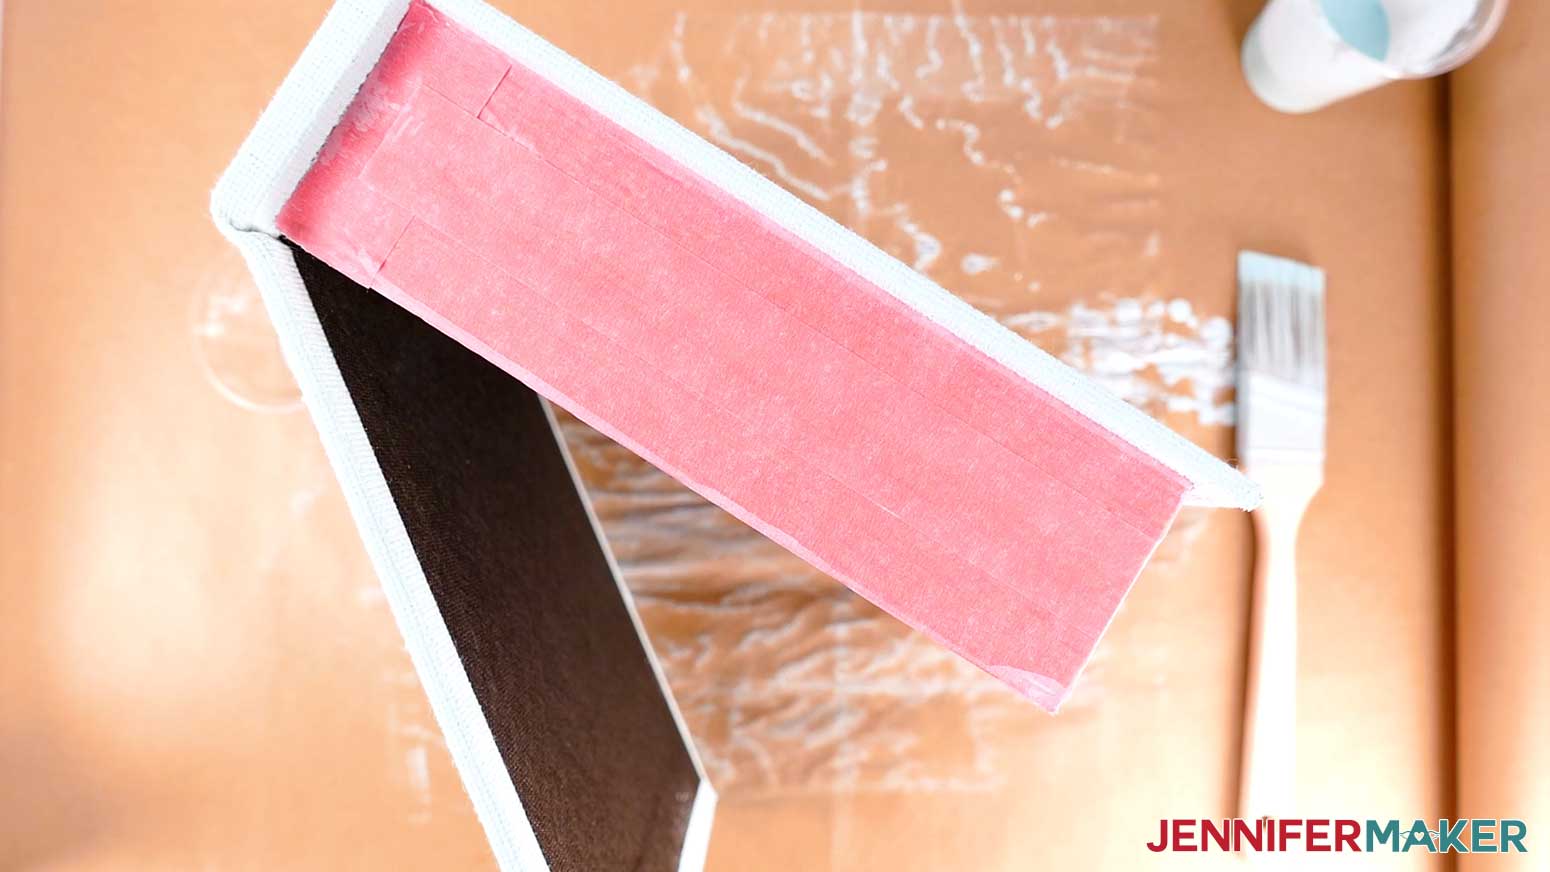
TIP: The fibers soak up a lot of paint very quickly. If you start to run out of paint, use the rest to finish the area you’re on. That way, if the second mix doesn’t quite match your current color, it won’t be as noticeable. - Turn the spine upward, and then paint it.
TIP: Try to keep one gloved hand clean so you can use it to reposition the book as needed without getting it messy. - Then paint the back of the book box.
- Open the box and paint around the inside edges, just on the light-colored fabric.
- Make sure the thin edges and any hidden spots of fabric are painted, too.
- Spotcheck for any unwanted bits of paint on the faux pages or the black liner before the paint dries completely, and use a wet paper towel with a drop of dish soap to remove any excess paint you find.
- Stand the open box on end and let it dry for at least eight hours, rotating the book to its opposite end after 30-60 minutes to keep it from sticking to the butcher paper. Allow the box to dry for 24 hours for best results.
TIP: Use the timer on your phone or a kitchen timer so you don’t forget to rotate! - One coat of paint should be enough to get full coverage, so dispose of the butcher paper once the book box is dry.
STEP 3: PREPARE AND CUT THE IRON-ON VINYL DECAL
CRICUT DESIGN SPACE
- In Cricut Design Space, open a blank Canvas.
- Click “Upload” and then “Upload Image.”
- Click “Browse.”
- Select the SVG you want to use.
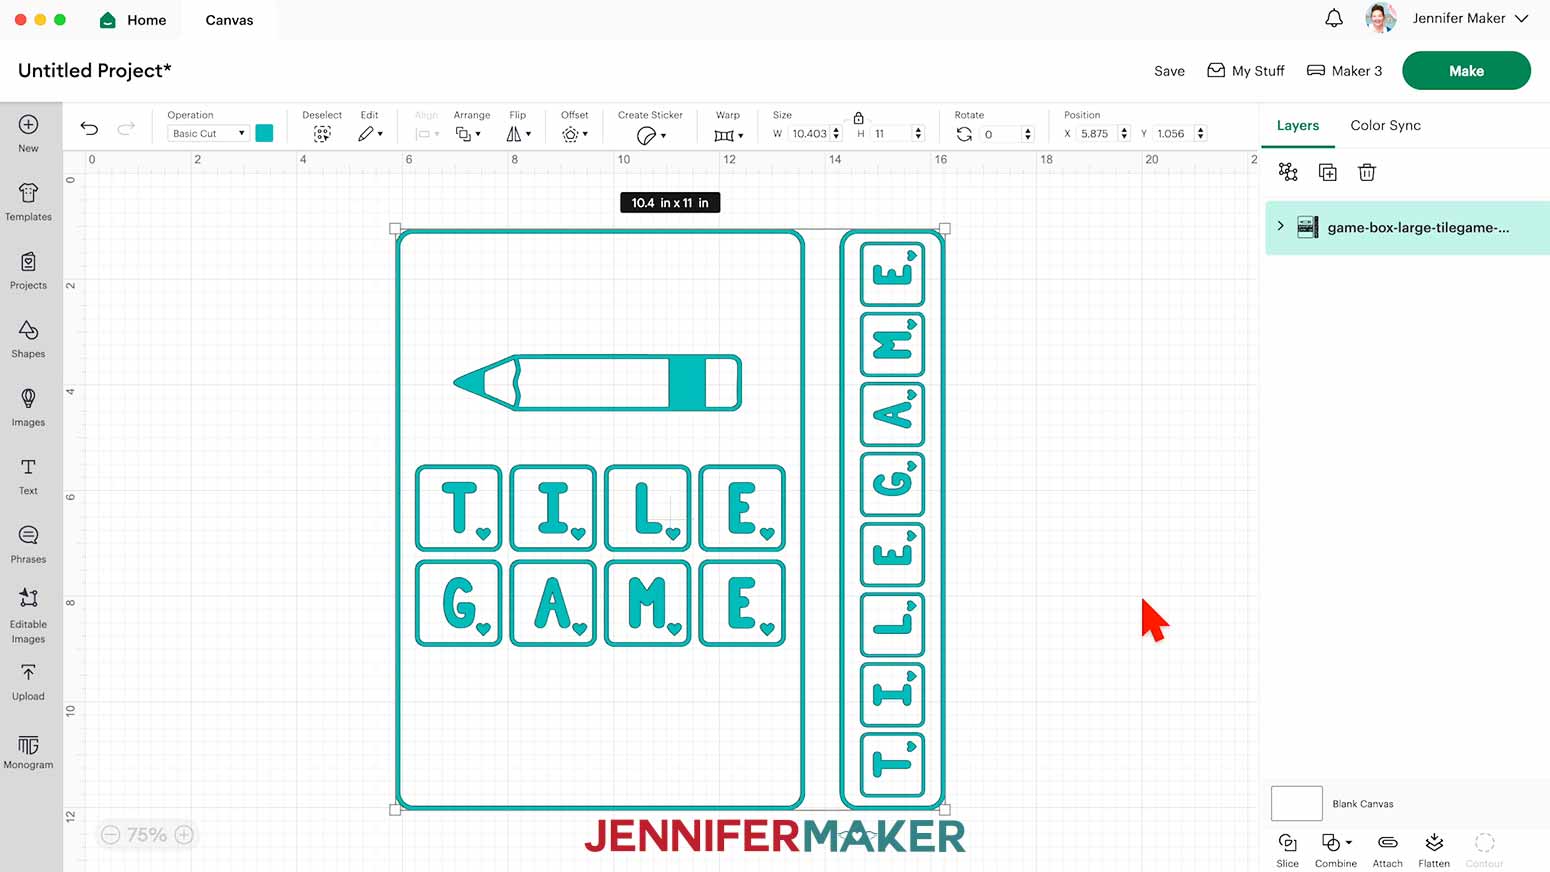
NOTE: I’ll choose the “large-tilegame” file. - Click “Open” and then “Continue.”
- Click “Upload” to add the design to your Canvas.
NOTE: If your project uploads differently than is shown on this page (with the layers stacked on top of each other vs spread out), this is intentional to make sure your design does not change sizes on you. If you prefer to use the unstacked version of the design files, upload one of the files in the “Unstacked” folder and then make sure your layers match these dimensions:
game-box-large-tilegame-jennifermaker-SVG: 10.4" x 11"
game-box-medium-dicegame-jennifermaker-SVG: 8" x 8.38"
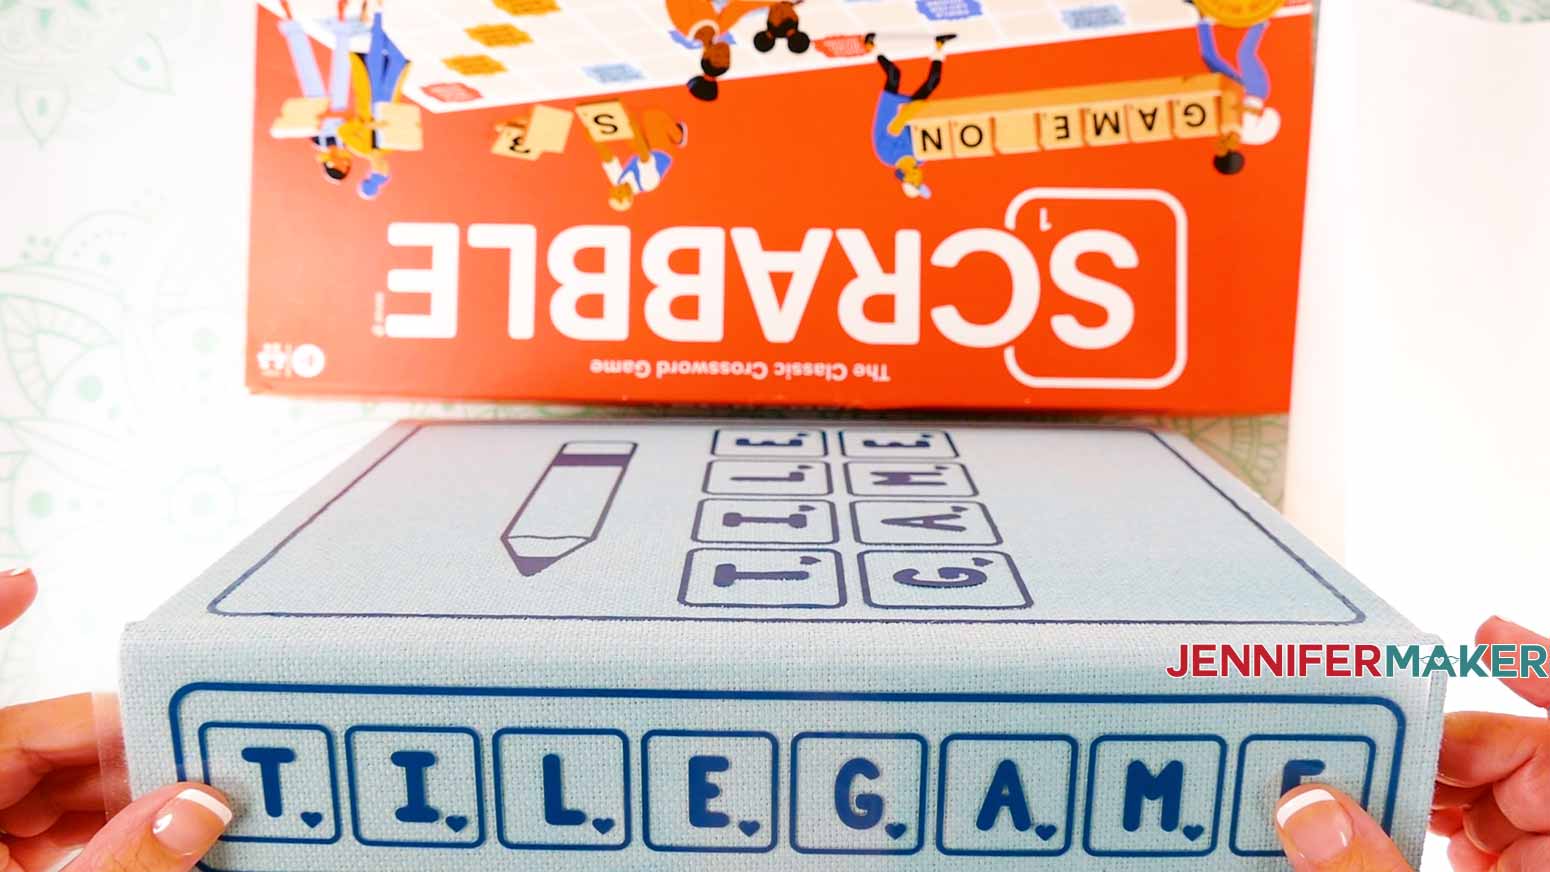
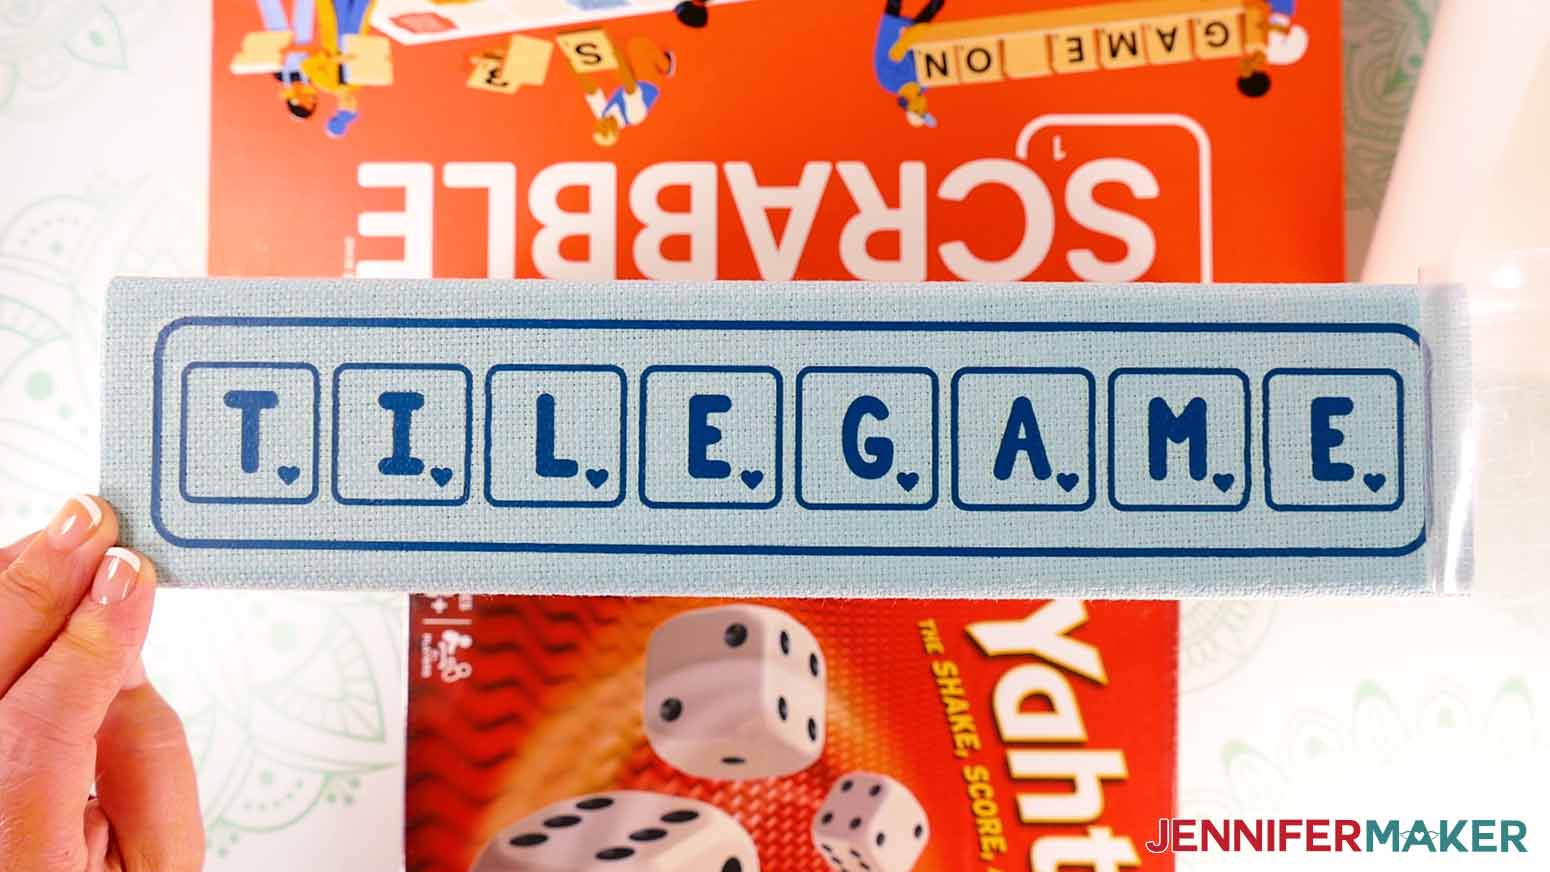
game-box-small-cards-jennifermaker-SVG: 4.96" x 5.75" - The cover design will be for the front of the book box's cover, and the vertical bar will be the game title for the book box's spine.
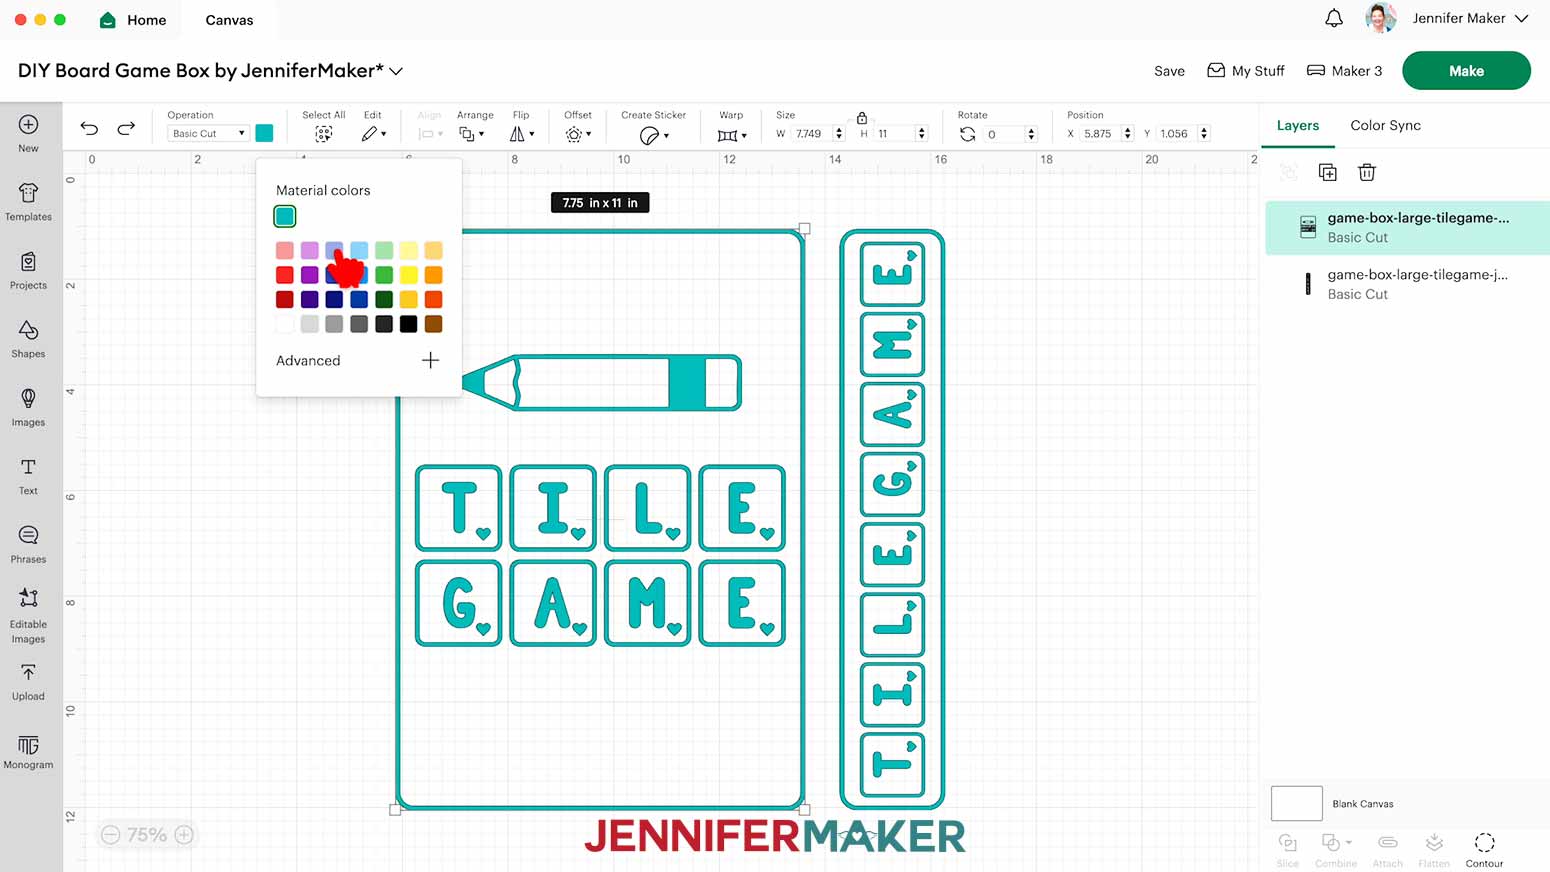
- Click “Save” and give your project a name.
- Use a ruler to measure the length and width of the box’s front cover. Record the dimensions.
- Measure and record the spine’s dimensions, as well.
- Check the size of the design files to make sure they’ll fit on the book cover and the spine when cut.
NOTE: Remember to include your desired margins between the border of the design and the edges of your box. This design is meant to fit the large box in my supply list. - Click the “Ungroup” icon to ungroup the design.
- If you’d like to resize an element, select it.
- In the “Size” menu at the top, keep the “Lock” icon closed.
- Click and drag one of the corner resizing handles on the element’s bounding box to make the design smaller or larger as needed while maintaining its proportions.
- If you’d like to change a decal’s color, select that design in the Layers Panel. Then click the Color Box and choose a different color in the menu.
- Your vinyl decals are ready to cut!
CUTTING
- Make sure the correct machine is selected in the top right.
- Click “Make.”
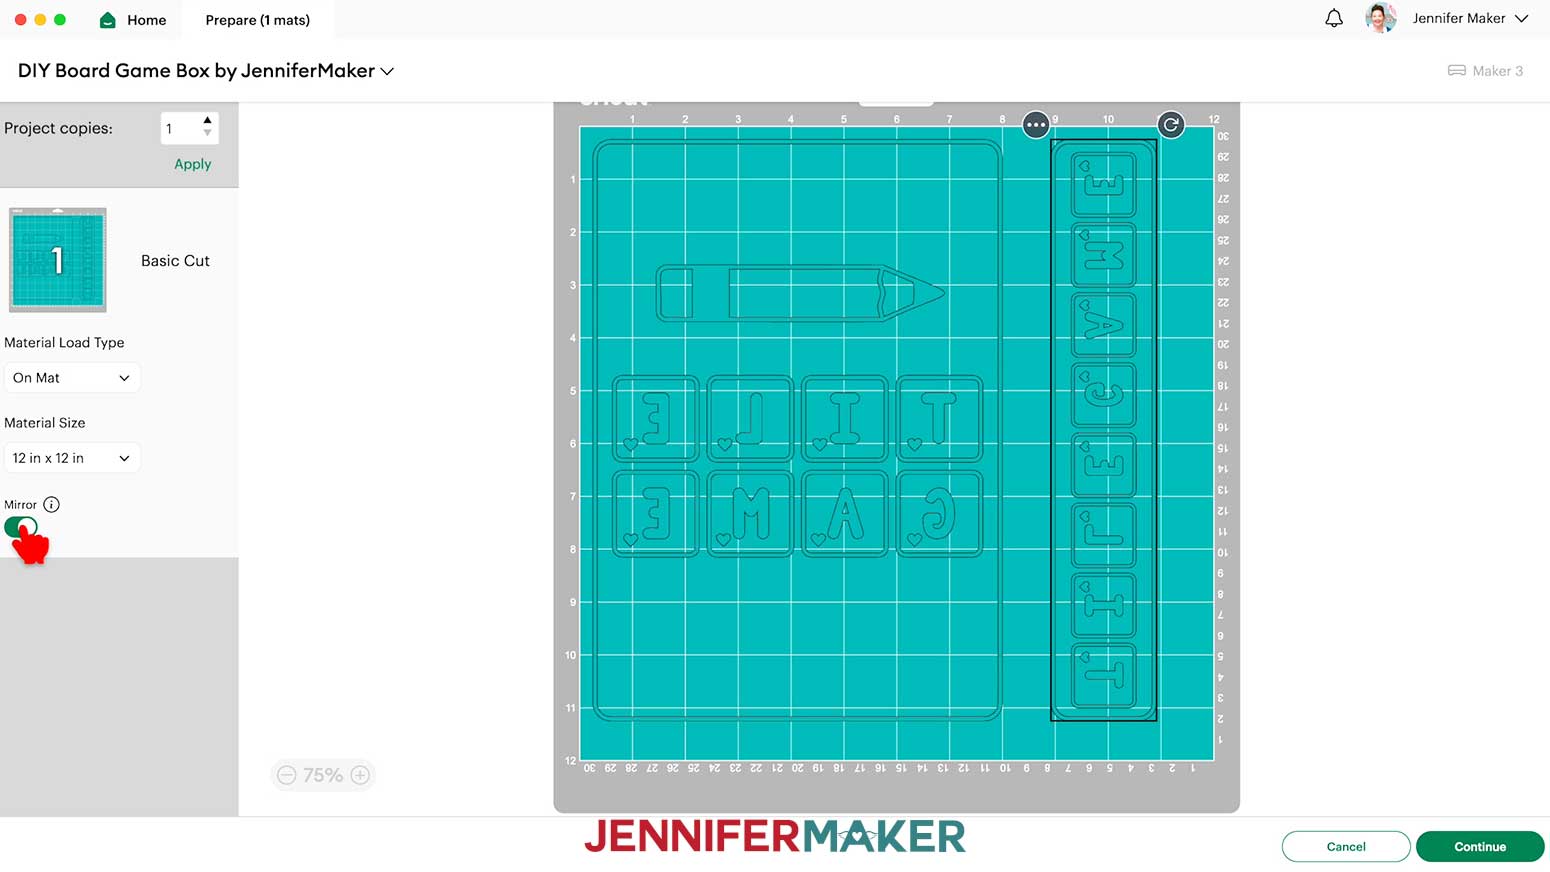
- On the Prepare screen, make sure the correct Material Size is selected for your mat.
NOTE: I’ll use the “12 in x 12 in” setting. - If needed, move the cover design and spine design apart so there is enough room to cut them apart with scissors later.
- Toggle on “Mirror” since we’ll cut the design from heat transfer vinyl (HTV).
- Click “Continue.”
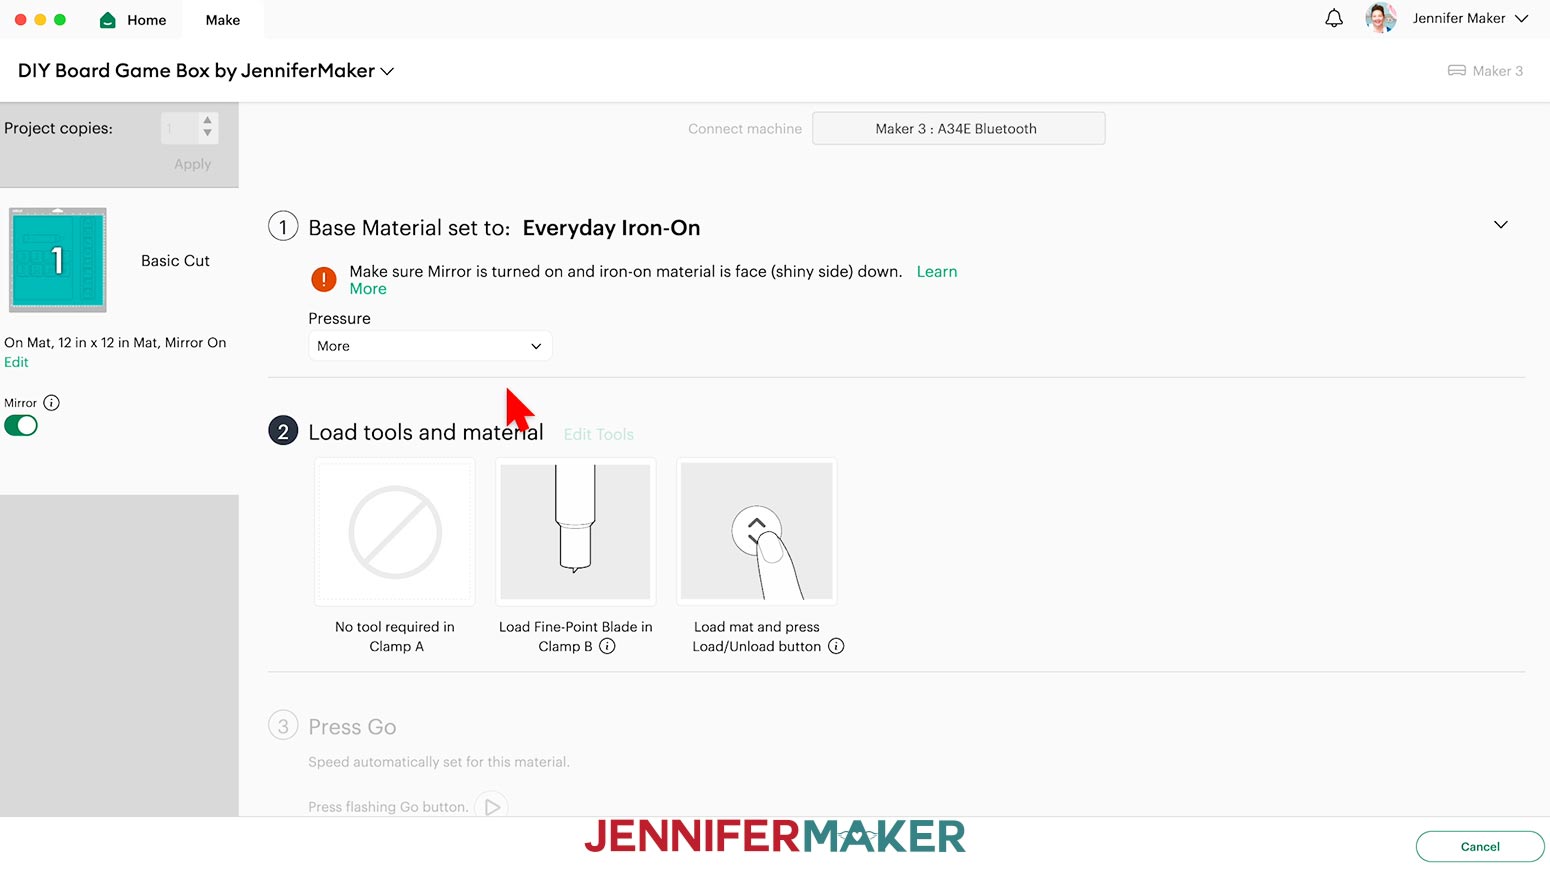
- On the Make screen, set the Base Material for your mats. I used the “Everyday Iron-On” setting with “More” Pressure with good results.
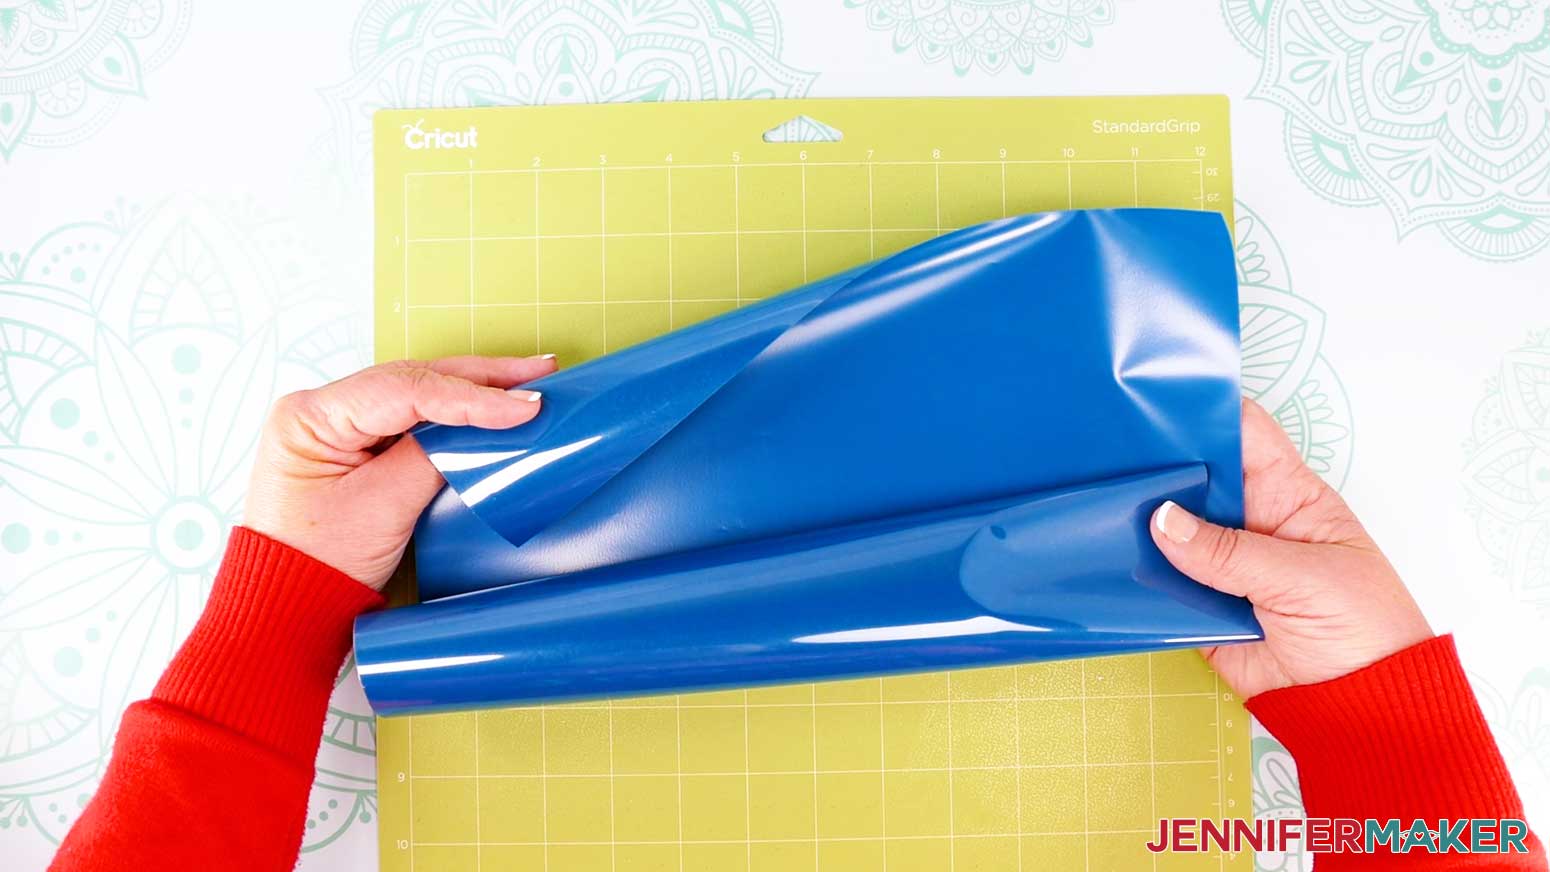
TIP: Changing the Pressure to “More” results in a cleaner cut. - Place your iron-on vinyl shiny side down on a green StandardGrip machine mat.
- Use a brayer to make sure it’s fully adhered.
- Check that your Premium Fine-Point Blade is clean and in the clamp.
- Press the flashing “Load/Unload” button to load the prepared mat into your Cricut.
- Press the flashing “Go” button to begin cutting.
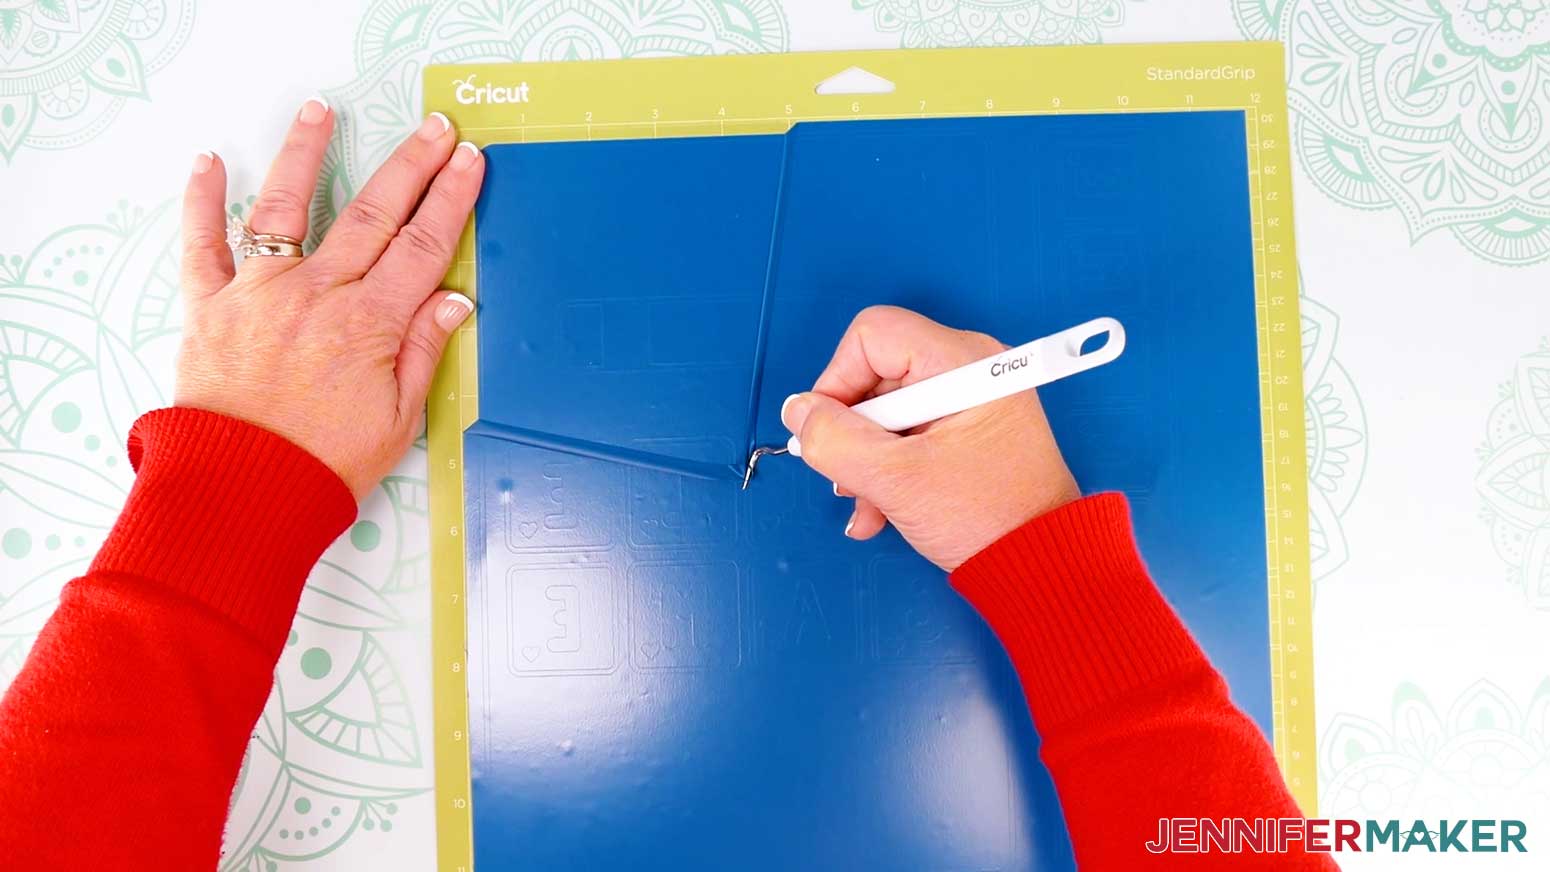
- When the cuts are complete, unload the mat, flip it over onto your work surface, and roll it back to release the iron-on vinyl.
- Use scissors to cut your design into separate pieces for the book cover and the spine.
NOTE: Make sure you keep each section’s elements on a single piece of the carrier sheet! - Use your weeding tool to remove the excess vinyl around the designs and inside any letters. I like to work from larger to smaller sections during weeding.
TIP: It can be easier to weed vinyl, especially small, detailed designs, while it is adhered to the machine mat. - Your decals are now ready to apply!
STEP 4: APPLY THE IRON-ON VINYL DECAL TO YOUR BOARD GAME BOX
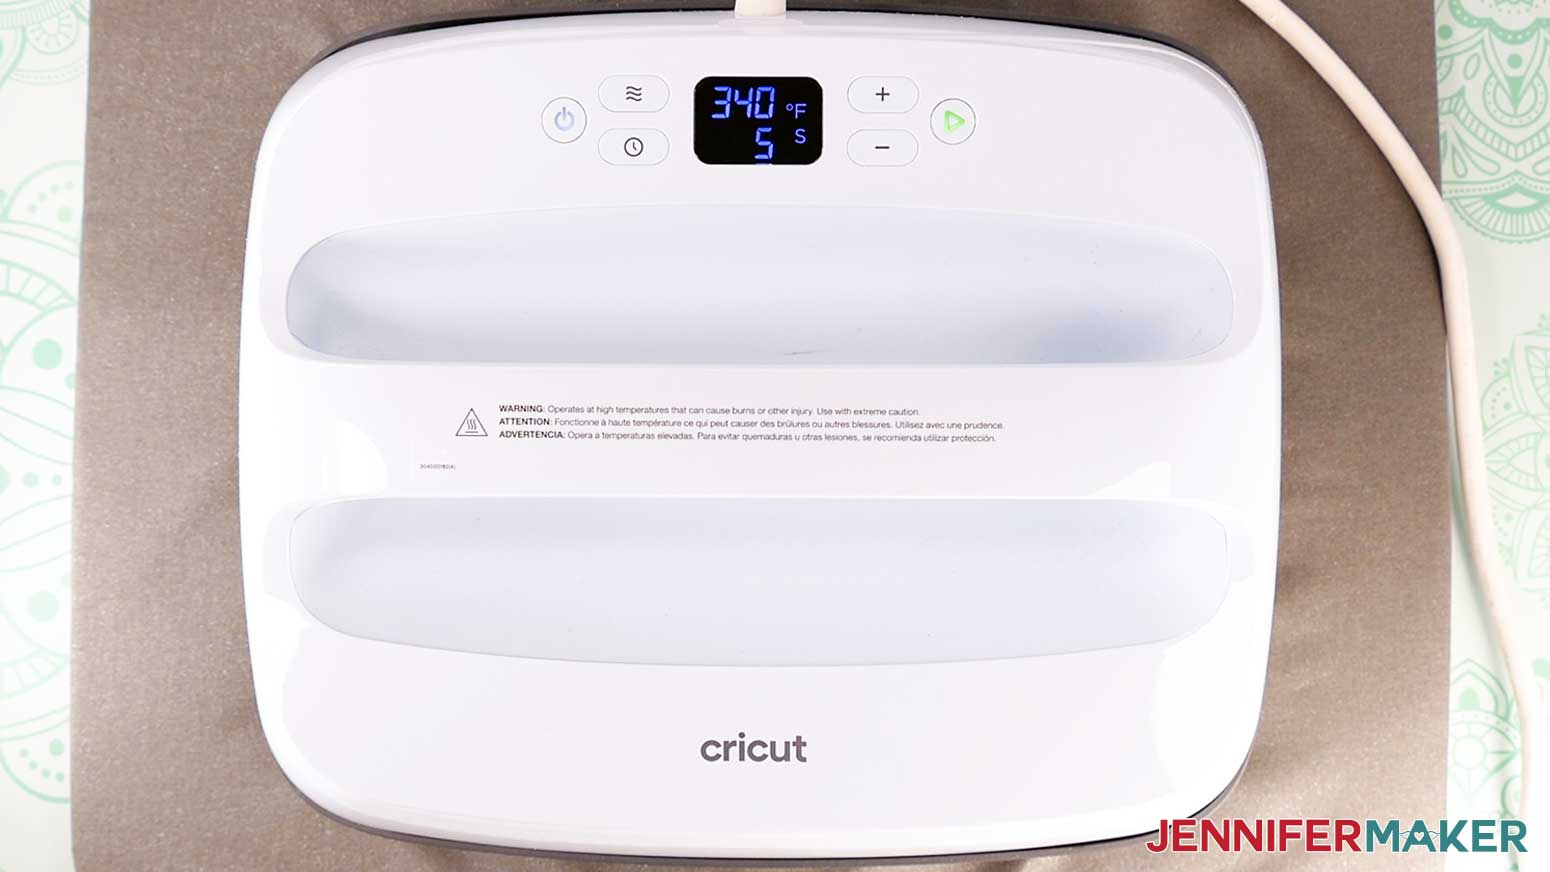
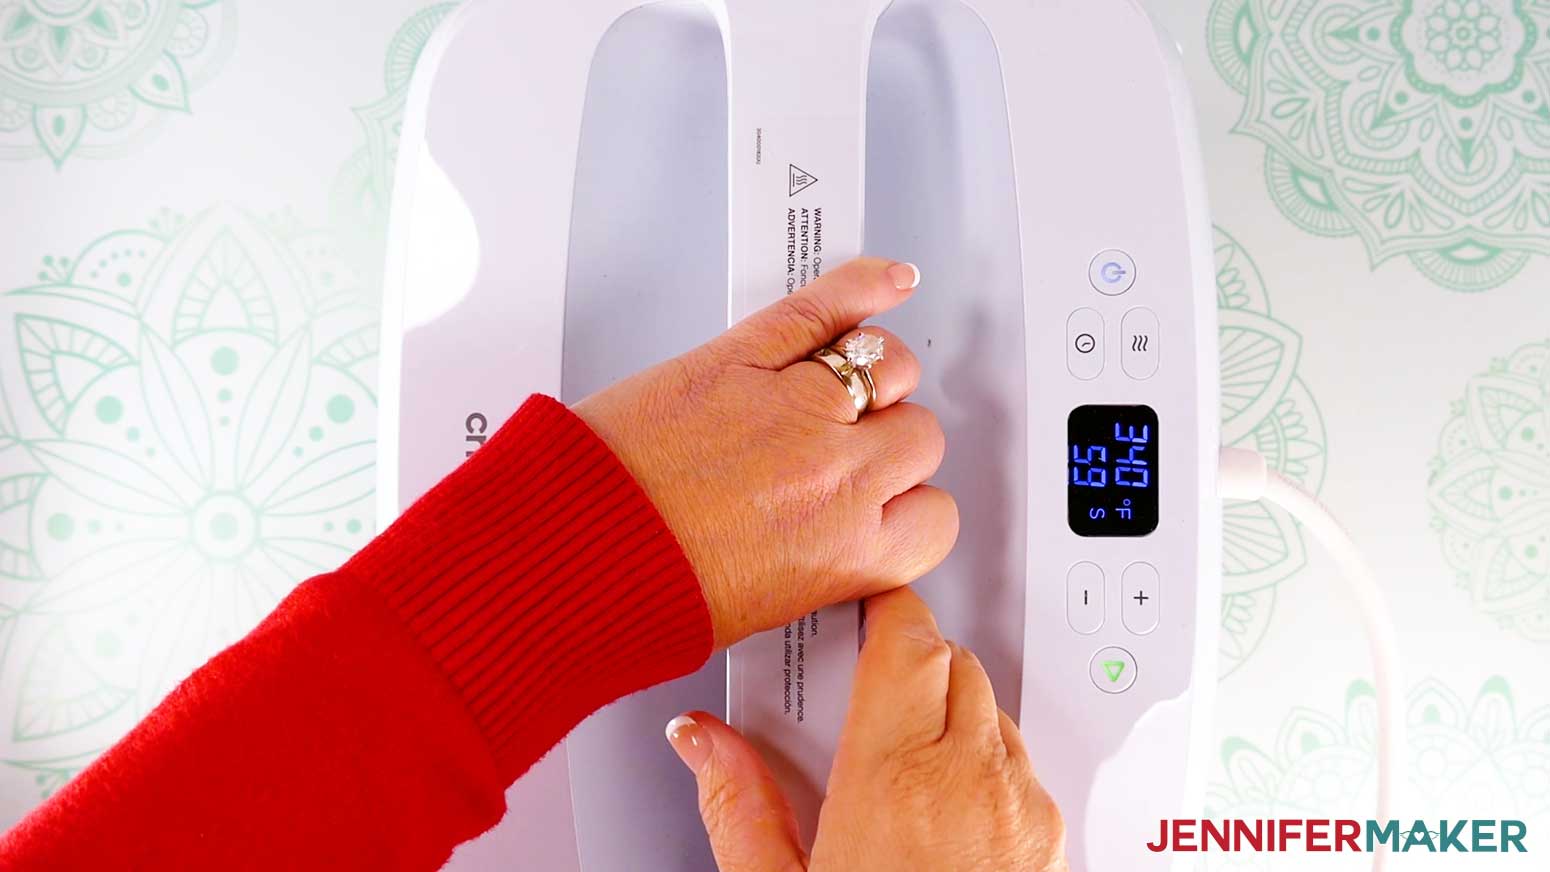
- Preheat your heat press.
NOTE: I’ll use the Cricut EasyPress set to 340°F (171° C) with the timer set for five seconds. If you’re using a different heat press or type of iron-on vinyl, my HTV Cookbook has recipes for many combinations! You can find it at jennifermaker.com/htv-cookbook. - Place your (dry) painted book box on a solid surface. Make sure the front cover is on top and it opens the way you want. Keep it closed while applying the vinyl.
- Use a lint roller to clean the front cover of your box.
- Once your EasyPress is at temperature, cover the box with a sheet of white, uncoated butcher paper, then use the press to preheat the entire front cover for five seconds to remove moisture.
NOTE: Always remember to place your press back on the base after use because it’s very hot. - Remove the butcher paper and allow the book box cover to cool.
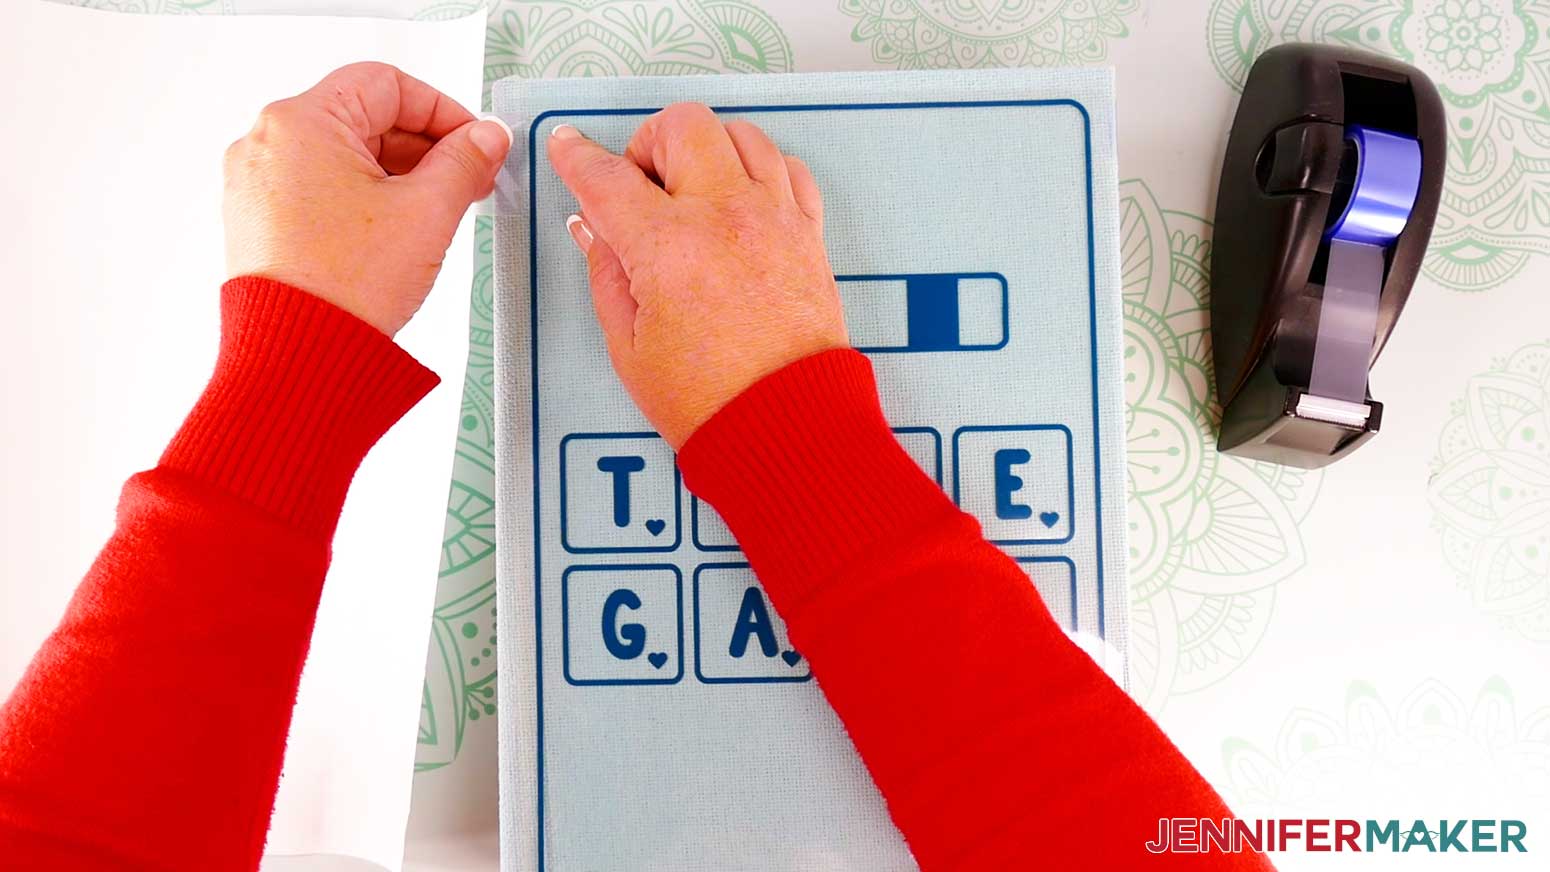
- Place the cover decal vinyl side down on the box’s front cover, making sure the border is an even distance from all the edges.
TIP: If your alignment isn’t quite right, lift up the carrier sheet to move and reposition the decal.
NOTE: If you’re unsure of the design’s orientation, refer back to your Design Space Canvas. - Press down on the sticky parts of the clear carrier sheet to keep it in place.
- Tape down the carrier sheet’s corners with heat resistant tape to keep the decal in place while pressing.
- Cover the box and decal with a sheet of white uncoated butcher paper.
- Make sure the temperature of your EasyPress is at 340℉ (171℃), and set the timer for 60 seconds.
- Heat the entire front cover decoration with strong pressure for 60 seconds.
TIP: If you can’t heat the entire design at once, try to heat it evenly in sections without much overlap. - When the time is up, lift the press straight up and remove the butcher paper.
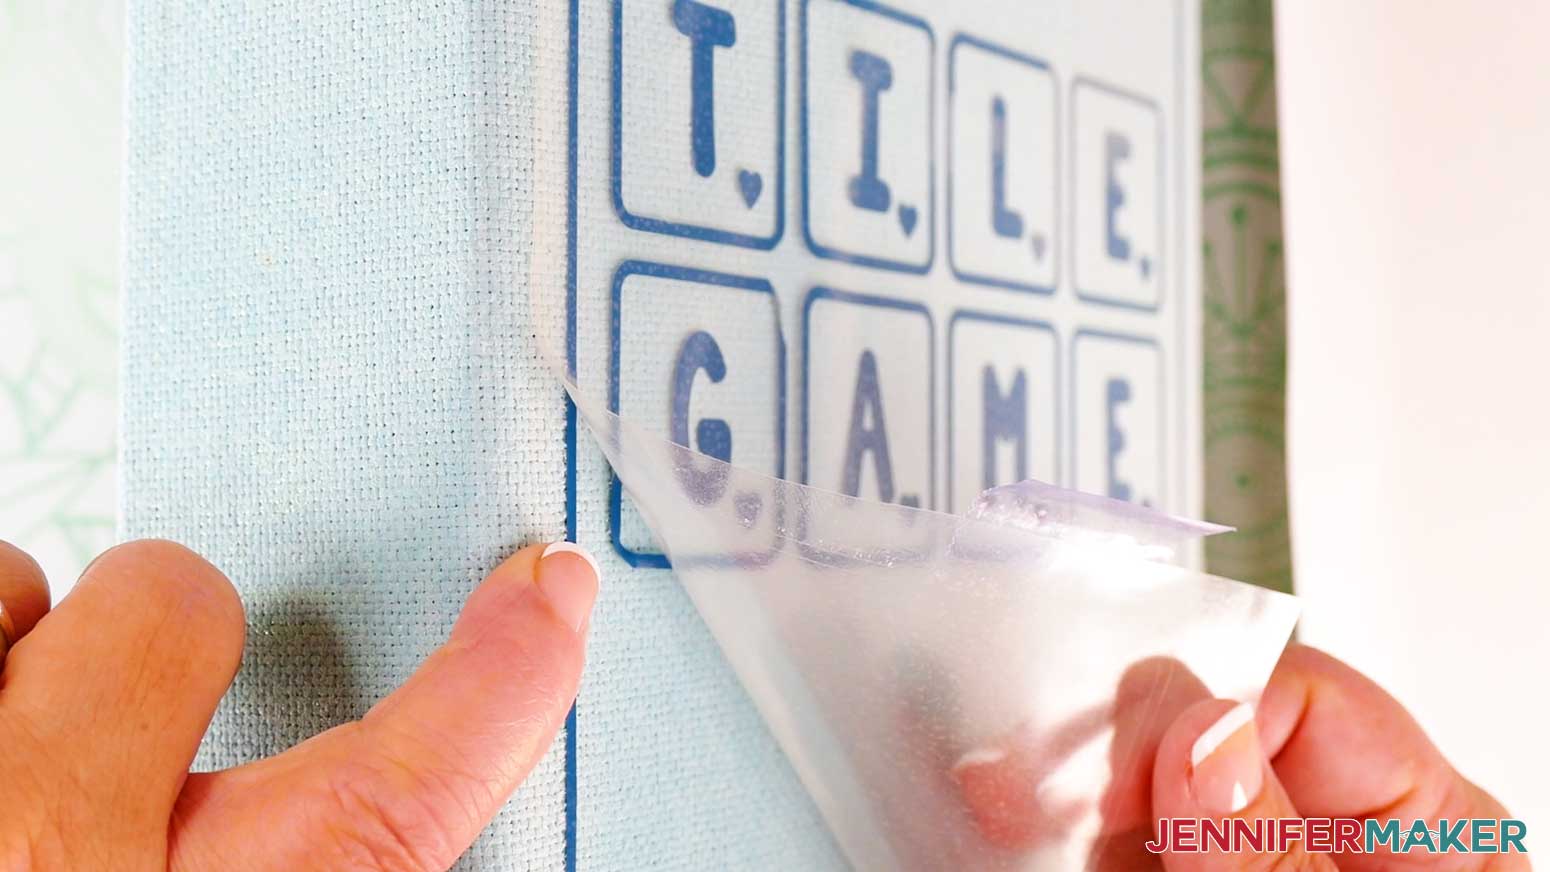
- Allow the vinyl to cool, then slowly peel up the carrier sheet.
- If any vinyl areas don’t stick well, replace the carrier sheet and re-press in 30 second increments until the vinyl is fully adhered, allowing time to cool between presses.
NOTE: The thin pieces of vinyl around the border can be difficult to adhere, so pay extra attention to those areas. - Once the cover is done, set the box on its side with the spine facing up and the front cover facing away from you.
- Place heavy items like books or other board games against both flat sides of the box to keep it upright.
TIP: It helps to use items a little shorter than the box so the spine is a flat surface to press. - Use a lint roller to clean the box’s spine.
- Set your heat press to 340℉ (171℃) and the timer to five seconds, then preheat the spine to remove moisture.
- Allow the book box spine to cool.
- Center the decal on the book’s spine, vinyl side down.
TIP: Make sure the words are readable when the book’s cover is facing up, or if you tilt your head to the right when the book is standing face up with the spine facing you. - Repeat Steps 7-14 to press the vinyl decal to the spine.
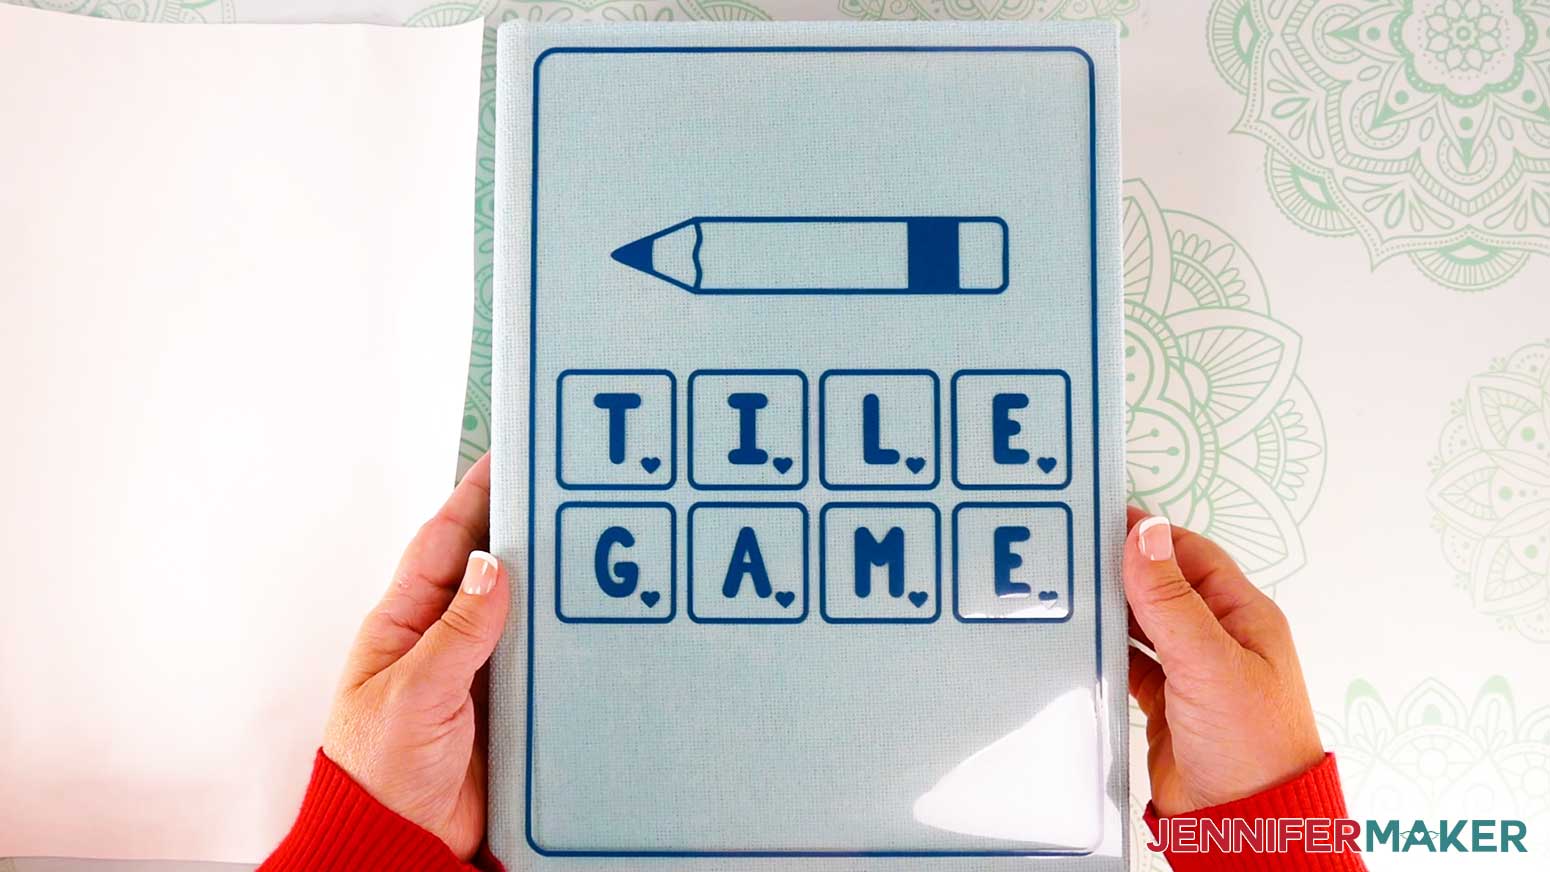
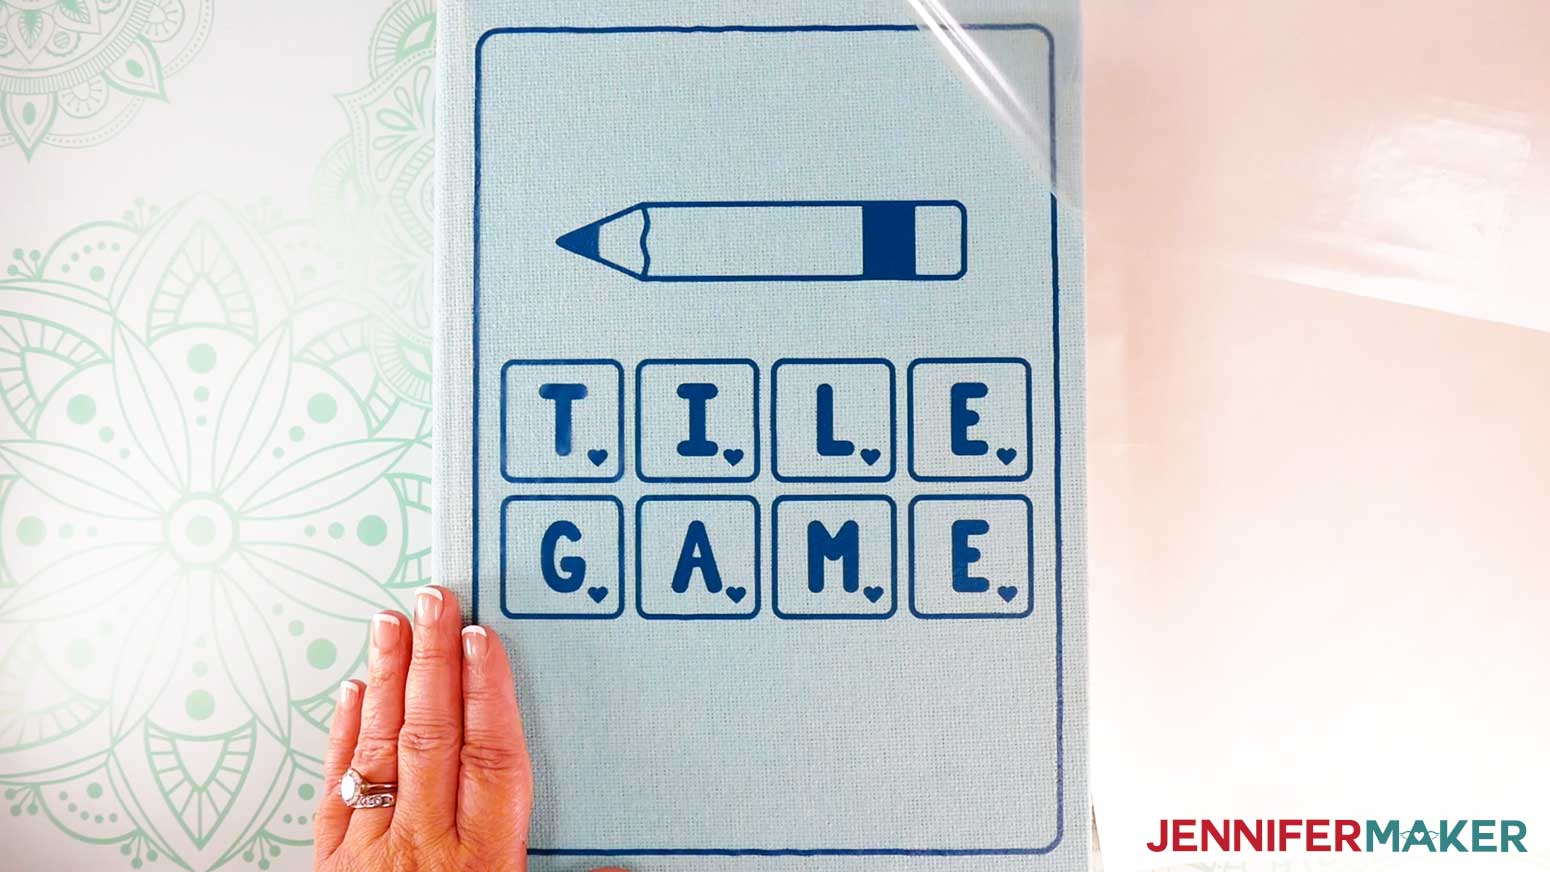
TIP: Even with the supports, the box might be a bit unsteady. Try to avoid moving the press around, and keep the box still. Remember, the press is hot! - Once the decals are fully adhered, your DIY Board Game Box is ready to go!
STEP 5: SHOW IT OFF
Your DIY Board Game Box is finished! Add your game pieces to your box, and store them on your bookshelf or wherever you like!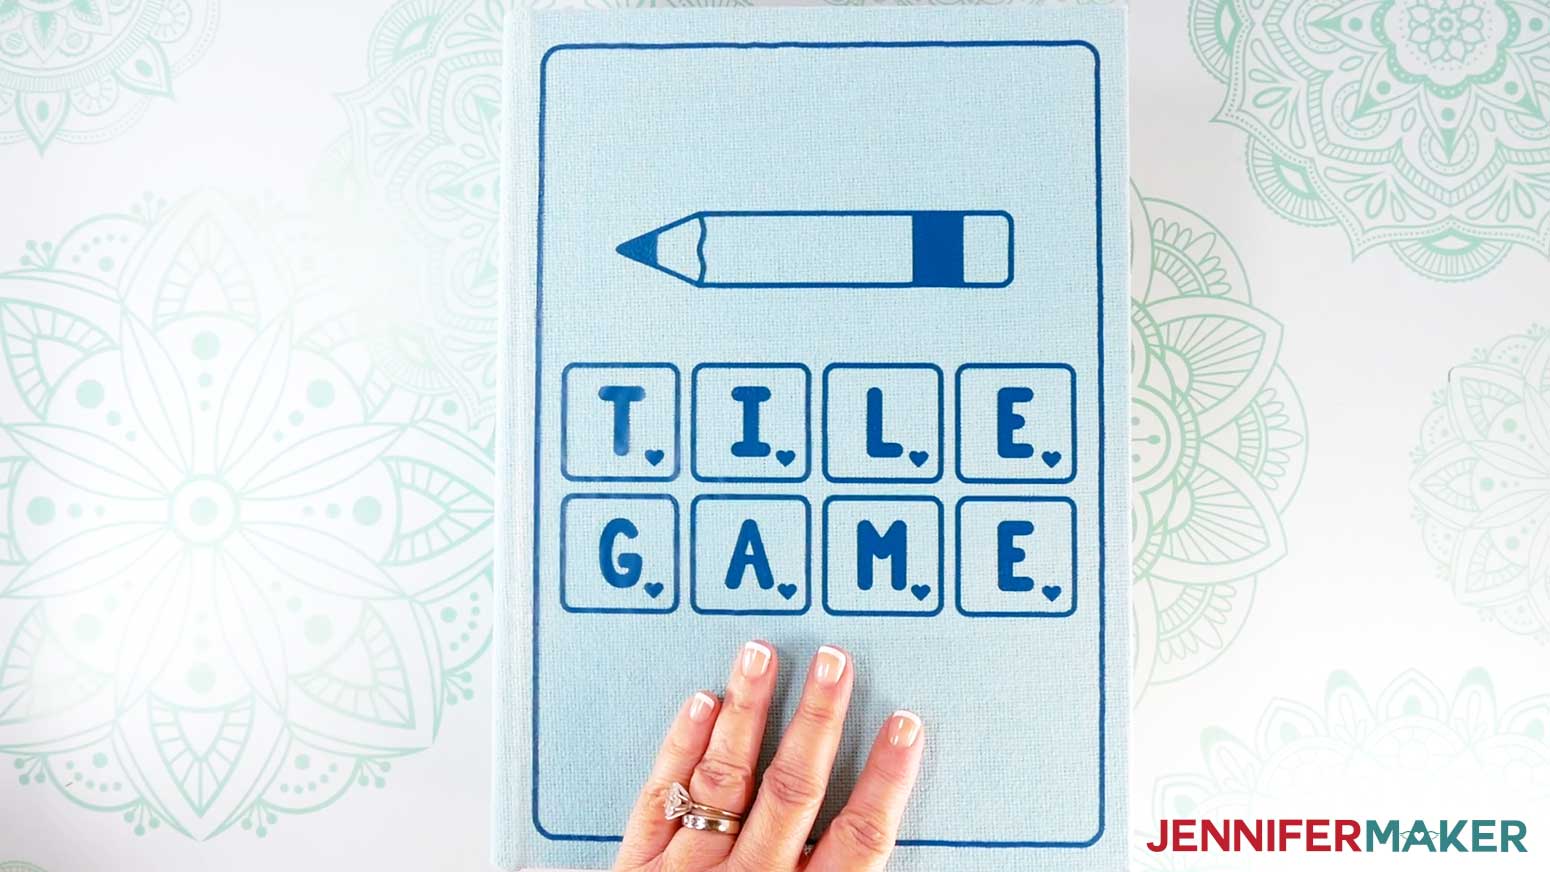
Notes
Finished Project Dimensions:
Large Box: 8.75"W x 12"H x 2.75"D
Large Box Cover Design: 7.75" x 11", Spine Design: 2" x 11"
Medium Box: 6.75"W x 9.125"H x 2"D
Medium Box Cover Design: 6" x 8.375", Spine Design: 1.5" x 8.375"
Small Box: 4.375"W x 6.375"H x 1.5"D
Small Box Cover Design: 3.75" x 5.75", Spine Design: 0.875" x 5.75"
Fonts Used:
Playing Cards Design: Corisa Script / Free Alternative: Cabbagetown
Playing Cards: JM Groovy
Dice Game Design: Whimsical Bold / Free Alternative: Grandstander
Tile Game Design: JM Block Caps
Answers to Your Questions About Making a DIY Board Game Box
Q: I want to make my own custom board game box for a game. How do I design my own board game box?
A: You can learn how to design your own custom DIY board game box in my ADVANCE program. Learn more about ADVANCE here!
Q: Can I cut a DIY board game box on a Cricut Joy Xtra or original Cricut Joy?
A: The designs are sized to fit the boxes in my materials list, and can be made with the Joy Xtra. They are a bit too big to be cut on the Cricut Joy, though. However, if you have smaller boxes you’d like to use, you can scale down the designs to fit on the Cricut Joy.
Q: Do I have to use a Cricut to cut my custom board game box design?
A: No! You can make the designs for your perfect game box with materials that work with your equipment, or even just with scissors. We always include several versions of each free file in the free download ZIP file. If you have a Silhouette Cameo, which uses Silhouette Studio, you can use the DXF file in Silhouette Basic Edition. If you have upgraded to Silhouette Designer Edition, Designer Edition Plus, or Business, you can use the SVG format with your Silhouette machine to cut each intricate design. If you don’t have a cutting machine, you can print and then cut out my digital download PDF files, too! The ZIP archive in my resource library includes these file types and more!
Q: Help! My Cricut Design Space screen looks different than yours!
A: If you’re using the latest version of Cricut Design Space, your screen may have slight variations than the screen you see on the video tutorial. Good news: All of the same functions are there, they may just be in different spots or have new icons. Pause the video if you need, or follow along with the written tutorial. If you get stuck, ask for expert support in our Facebook group. Our group has become not just a help center, but also a vibrant community of real people and crafters! Plus, you can catch the latest news on JenniferMaker tutorials and more.
Q: Where can I find the supplies and tools to make a DIY board game box?
A: My game box SVG files can be made with simple supplies you may already have in your crafting stash. I like to shop on Amazon for their free shipping with my Amazon Prime membership (just make sure to look for sellers with 5-star reviews). You can also find most, if not all of the supplies and tools at your local craft store.
Q: Can I make and sell these custom board game box designs?
A: I love supporting creative entrepreneurs! If you want to use my designs and projects for commercial use, please familiarize yourself with my important licensing information before selling your crafts.
I do not permit sale of my digital items, but you can sell the creative goods you make with them — as long as you follow my licensing requirements. That means you cannot sell the board game box SVG files, but you can sell decorated boxes that you made with the files within the guidelines linked above.
Q: What fonts did you use?
A: Playing Cards Design: Corisa Script / Free Alternative: Cabbagetown
Playing Cards: JM Groovy
Dice Game Design: Whimsical Bold / Free Alternative: Grandstander
Tile Game Design: JM Block Caps
Get my free SVG files to make a DIY board game box!
(If you do not see the signup form above, click here.)
I love seeing what you make with my designs and how you use them! Please share a photo of your custom board game box in our Facebook group or tag me on social media with #jennifermaker.
Love,

Want to remember this? Save this DIY Board Game Box tutorial to your favorite Pinterest Board!