

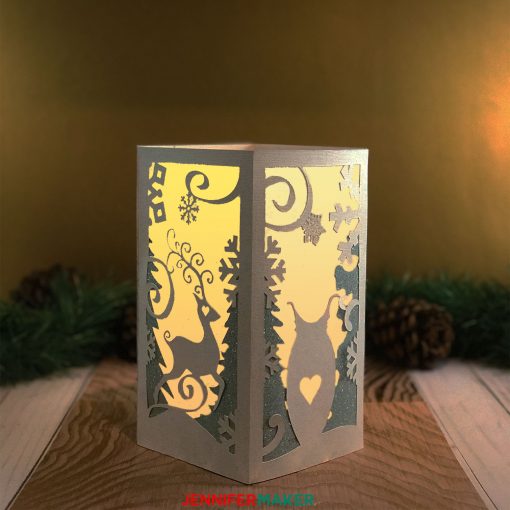
 The winter solstice is here and night comes early. This is the perfect time to illuminate our homes with soft lights and stay warm. So for Day 20 of the MAKE IT MERRY: 25 Days of Maker Projects Christmas, I’ve designed a paper lantern with a winter theme. On each of the four sides is an animal that I see around my my Michigan home in winter—deer, owl, fox, and rabbit. Snowflakes fall around them and the majestic evergreens stand proudly in the distance. This is a lovely luminary and celebrates all that is wondrous about winter.
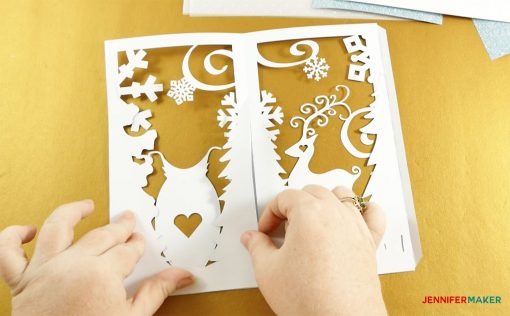
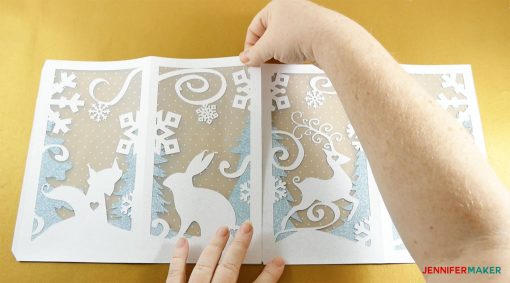
This was a really fun project to design! My craft room overlooks the woods and I see plenty of wildlife. Lots of bunnies, of course, but also the occasional deer and fox. The horned owls hang out in the branches of the tall trees, though I don’t often see them as they often are tucked into their nests. The curly lines represent the wintry winds that blow from the west (my craft room faces west, which is also where those woods are). I put a few snowflakes on the wind, too, as we get plenty of snow. And if you look closely, you can see that the snowflakes and trees at the edges of each panel are continued on to the neighboring panels.
Learning to make lanterns and luminaries like this is a part of my CUT ABOVE SVG Design Course and I’ll be opening enrollment for that course again in the new year—if you’re interested in learning how to design your own lanterns (and you absolutely can—it’s not that hard), check out the course information and get on the waiting list.
Let me show you how to make this paper lantern! This post contains some affiliate links for your convenience (which means if you make a purchase after clicking a link I will earn a small commission but it won’t cost you a penny more)! Read my full disclosure policy.
Materials for Winter Paper Lantern
- 12″ x 12 65 lb. or heavier cardstock, four sheets (I used two sheets of white glitter cardstock and and two sheets of blue glitter cardstock)
- 12″ x 12″ or 8.5″ x 11″ vellum, two sheets (I used a vellum with dots because it reminded me of falling snow, but it’s no longer available)
- Spray adhesive and tacky glue
- An LED tealight
- A way to cut your cardstock (I used a Cricut)
- Design #83 – My free SVG cut files/patterns for the winter lantern (available in my free resource library—get the password at the bottom of this post)
How to Make Your Winter Paper Lantern
First, download Design #83 which is the SVG or DXF cut file for this project from my free resource library. If you’re going to cut it out on your cutting machine, upload the file to your design software. If you’re not sure how to upload an SVG cut file to Cricut Design Space, watch this helpful video training series I made.
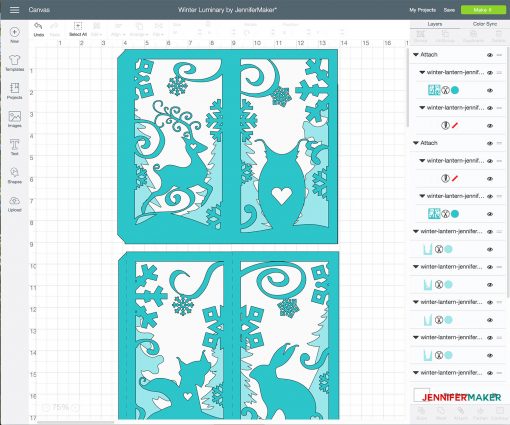
Please note that there are two layers of score lines in my files. If you intend to score your lantern (which I recommend because it makes it easier to fold), be sure to ungroup everything, select the score layers, change them from the default “cut” to “score,” and then attach them to their respective cut layers (the animal panels). You need to do all this before you cut it to avoid having the score lines cut your design. If you do NOT want to score it, hide or remove those lines entirely before you cut it out.
Tip: This lantern is designed to be 9″ tall. You can make it smaller if you want by resizing all of the layers at the same time. I do not recommend you go smaller than 6″, however, as the snowflake detail will become to cut.
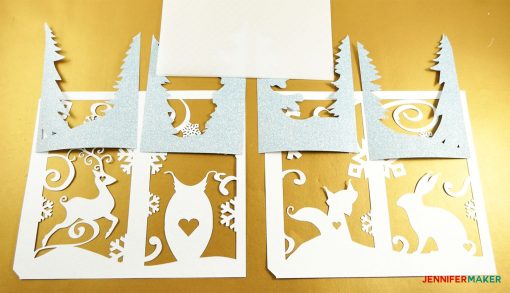
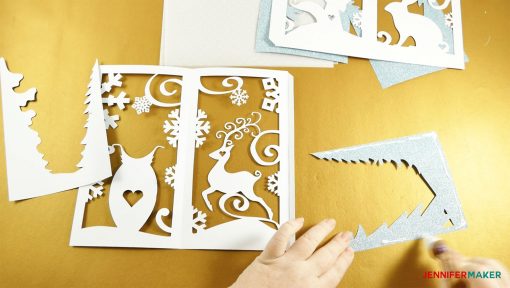
Cut out your cardstock and vellum—you will end up with two sets of animal panels, two sets of tree panels, and four vellum panels.
Fold your animal panels in the middle and at the tabs on the edges. Folding it before you attach the other panels is helpful in making sure you do not attach anything over the fold lines.
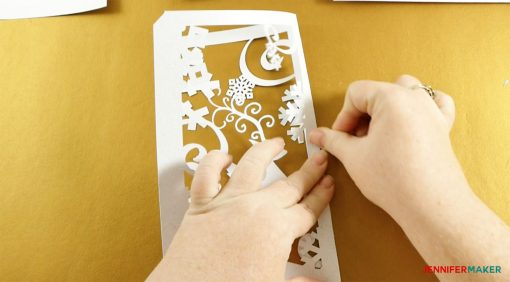
Put either spray adhesive or glue on the back of one animal panel and/or the tree panel. Which one you use depends on your material. I used glitter cardstock, so glue worked best—spray adhesive wasn’t quite strong enough. (Note: If you put glue on the tree panel instead, it must go on the front and you have to be careful not to put it anywhere that might show.)
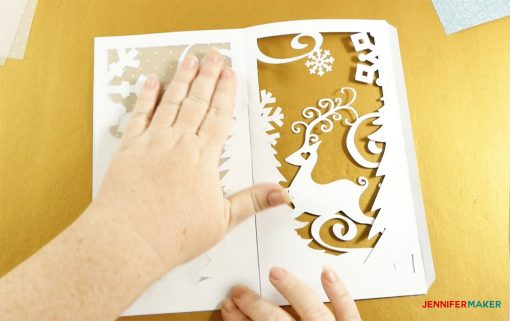
Place the tree layer on the back of the animal layer. Refer to the diagram to see which trees go behind which animals, and note that the trees do continue from one panel to the other, so you’ll want to put them in the right order and orientation for the best effect.
Now just glue on the vellum layer to the back of the combined animal and tree layer. Be careful not to allow the vellum to overlap a fold.
Repeat for the other set of animal and tree panels.
Now put glue on each tab on each set of panels and glue together to form a square lantern.
Place an LED candle inside, turn down the lights, and enjoy the show!
Get my free cut files for the Winter Paper Lantern
If you make a winter paper lantern, I’d LOVE to see it! Please send a photo to me at [email protected] or tag me on social media with #jennifermaker.
See all of the tutorials and free designs in my MAKE IT MERRY: 25 Days of Maker Projects Christmas!
Love,

Want to remember this? Save this winter paper lantern to your favorite Pinterest board!


Curious if this could work shrunk down some?
I think it would be fine shrunk down a bit. You can always try!