
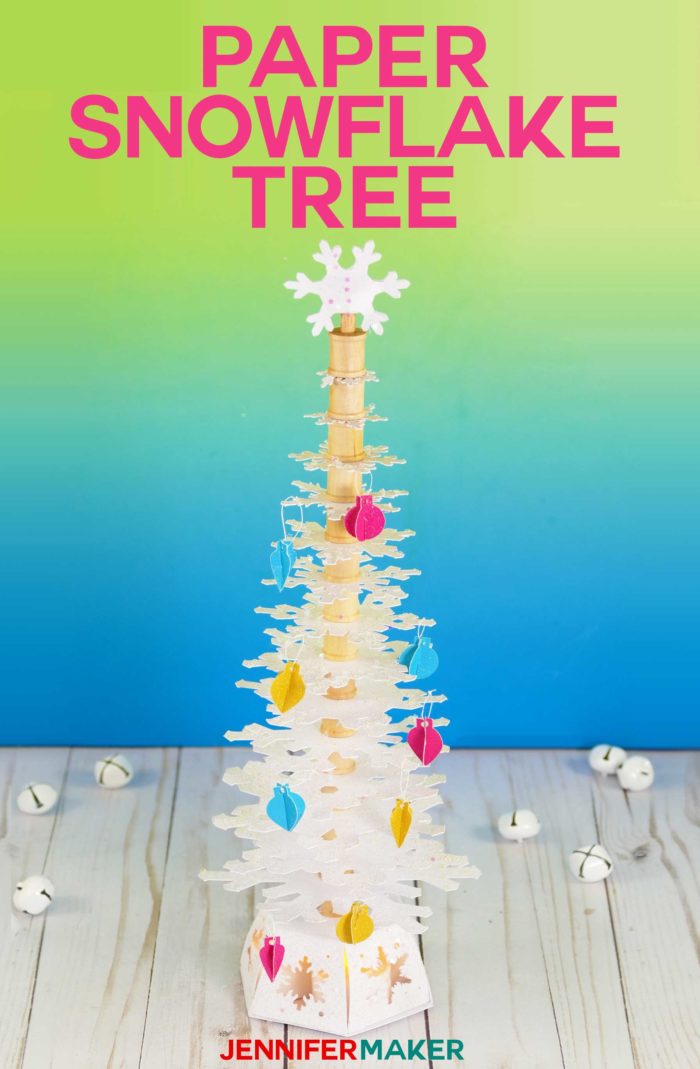
Make a unique Christmas tree out of paper snowflakes and light up your holiday nights.
Paper snowflakes are an age-old tradition. Last year I designed several detailed paper snowflake templates with hidden designs and decorated my craft room with them. This year I’m taking it one step further. I’ve designed a paper snowflake Christmas tree that’s also a pretty luminary. It’s simple, sweet, and the perfect decor to warm up your winter evenings.
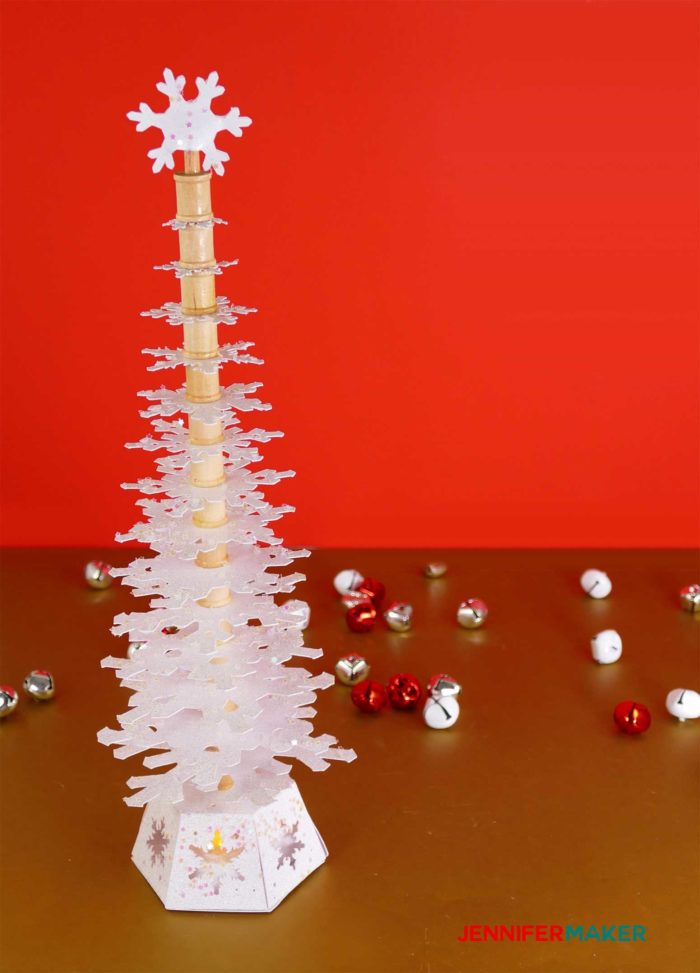

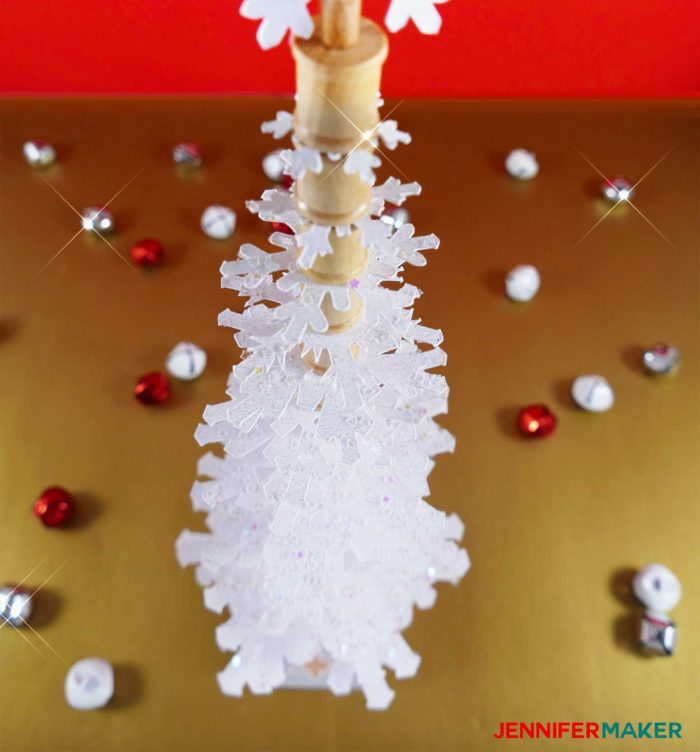
This 15″ tall paper snowflake Christmas tree has several fun features. First, each paper snowflake in my Christmas tree is just a little different from the others, just like in nature. Second, I designed the tips of the snowflakes so they can hold little ornaments without slipping off.
The Christmas tree base, which is all paper, holds three LED tealights. Three of the sides of the six-sided base are glued, but the other three sides lift up so you can turn on and off the tealights.
Structurally, the Christmas tree itself is held up with a wooden dowel. The snowflakes are separated with little wooden spools that slip over the dowel. You could also use beads, but I prefer the spools because they keep the snowflakes parallel to one another.
I used white Cricut Kraft board to make this paper snowflake tree, which is strong and sturdy. You can cut Kraft board on nearly any cutting machine (you do NOT need a Cricut Maker to cut it). I tried cutting this out of thick chipboard on the Maker, and while it did produce VERY strong snowflakes, it just too too long to cut. So use Kraft board!
Like all of my luminaries and lanterns in my “Make the Light” project, this paper snowflake tree contains a puzzle. If you solve it successfully, you’ll unlock the little paper ornaments to decorate your tree. So to get this deluxe version, download the basic version from my resource library, upload it to your favorite design software (such as Cricut Design Space) or open the PDF in Adobe Reader, and look carefully at the design. Count how many detailed snowflakes you see on the basic version. Type your answer as a number (not a word) at this page: Snowflake Luminary Access
>> Enter the Luminary’s Secret “Password” at This Page <<
Tip: If you do not want to do the puzzle and play the game but still want the luminary pattern and all of its ornaments, you can also buy the full deluxe digital patterns here along with several bonus ornament designs, including string lights, angel, heart, bells (2), bows (4), gingerbread, candy canes (2), birds (2), birdhouses (2), and snowflakes (4).
I’m so excited to show you how to make a paper snowflake Christmas tree. This post contains some affiliate links for your convenience (which means if you make a purchase after clicking a link I will earn a small commission but it won’t cost you a penny more)! Read my full disclosure policy.
Materials for the Paper Snowflake Christmas Tree Luminary
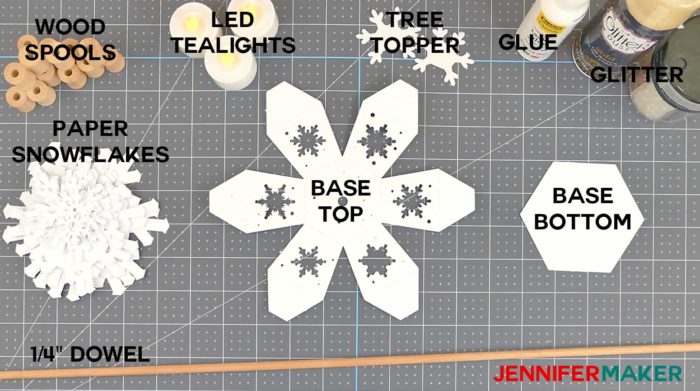
- Two sheets of white 12″ x 12″ Kraft board (I recommend Kraft board over cardstock if you plan to hang ornaments from the branches; otherwise cardstock is fine)
- 1/4″ round wooden dowel (14″ long)
- 16 small wooden spools (3/4″ high)
- Tacky glue
- Hot glue & hot glue gun
- (Optional) Glitter spray or glitter
- 3 LED tealights to put inside the base of your tree luminary
- A way to cut your paper (I used the amazing Cricut)
- TrueControl knife, X-acto knife, or saw (to cut your dowel to size)
- Design #112 – My free SVG/DXF/PDF cut file/pattern (available in my free resource library—get the password at the bottom of this post)
How to Make Your Paper Snowflake Christmas Tree Luminary
First, download the paper snowflake Christmas tree pattern (Design #112) for this project from my free resource library. If you’re going to cut it out on your cutting machine, upload the file to your design software. If you’re not sure how to upload an SVG cut file to Cricut Design Space, watch this helpful video training series I made. If you’re on an iPhone or iPad, here’s how to download and upload SVG files to the Cricut Design Space app.
Attention Cricut Design Space Users: If you upload the SVG file and it appears too small (the simple hexagon shape in the file should be 3.79” x 3.28”), use the “stacked” version of the SVG to retain the proper sizing.
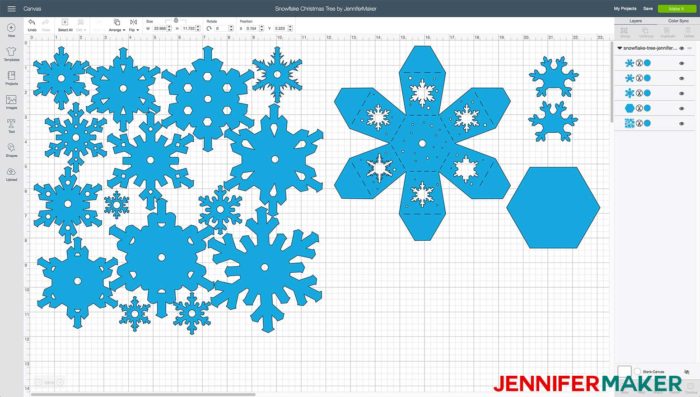
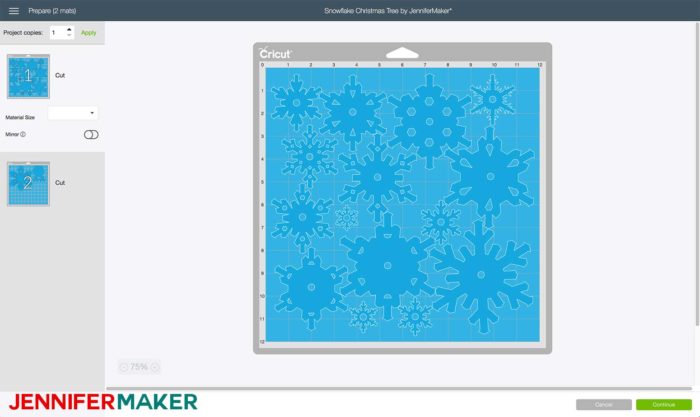
Note for cutting machine users: I grouped all of the paper snowflakes into one layer in the optimal configuration so they would all fit onto 1 piece of 12″ x 12″ paper. So you should be able to upload the file and click the green Make It button immediately. The project will fit onto two mats.
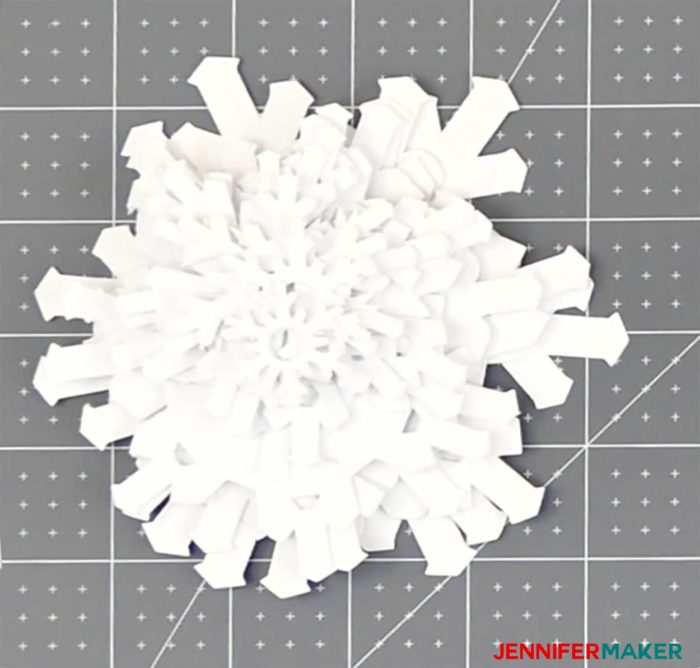
Once everything is cut out, arrange your paper snowflakes from largest to smallest in a pile.
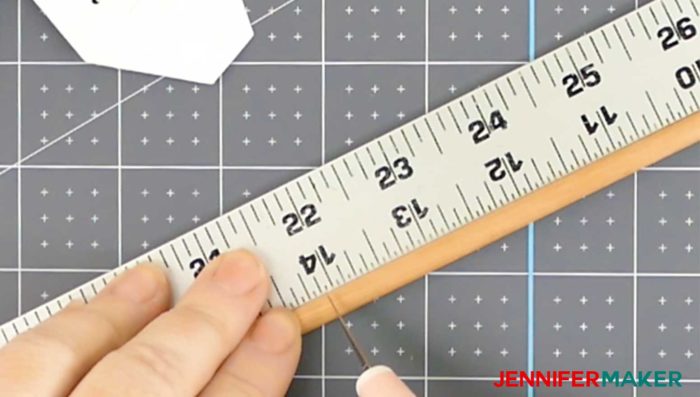
Now cut your dowel to 14″. I used a Cricut TrueControl Knife, but an X-acto knife or even a saw would work too.
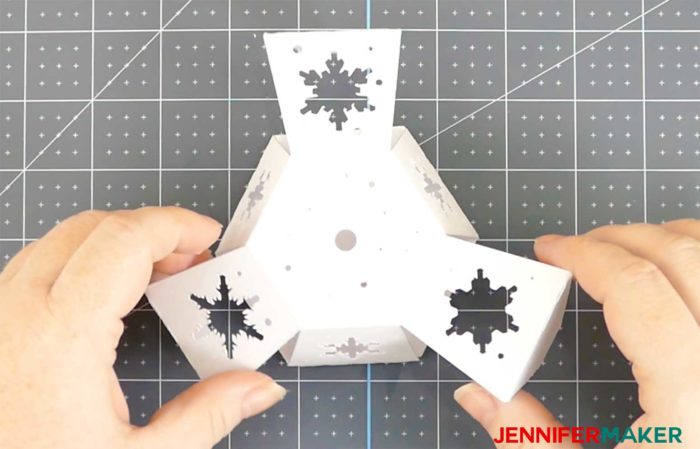
Set the dowel aside and pick up your base top (the six-sided piece with six snowflake cut-outs). Fold all sixe sides and flaps.
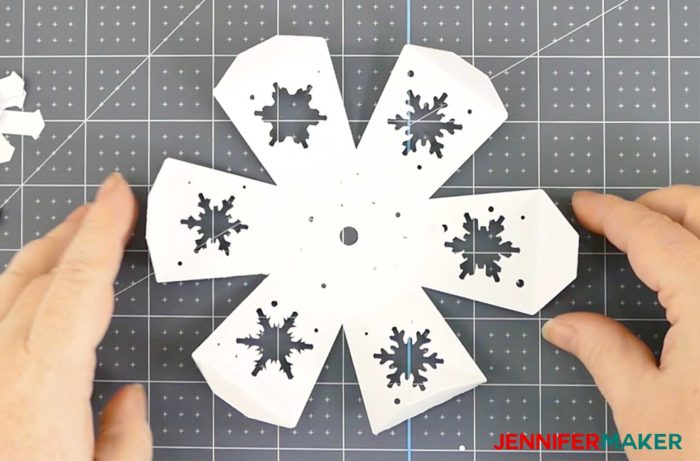
Now glue every other flap of the base top to the base bottom. So that means you’ll glue three flaps and other three will not be glued. (Note: I glued the flaps to the inside of the base.)
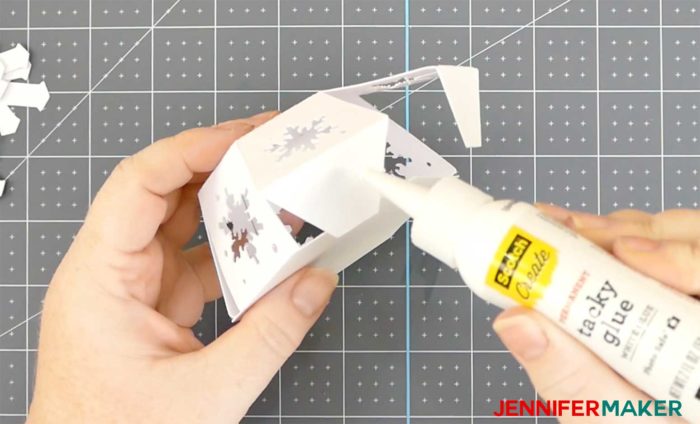
Place your dowel into the hole in the top of your base of your paper snowflake Christmas tree. Secure it to the inside bottom of the base with hot glue.

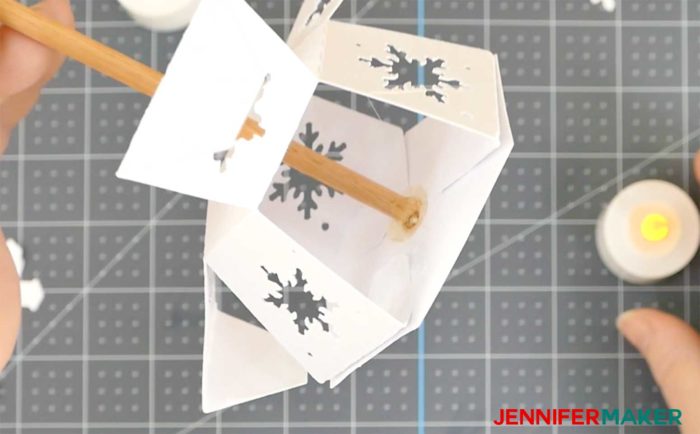
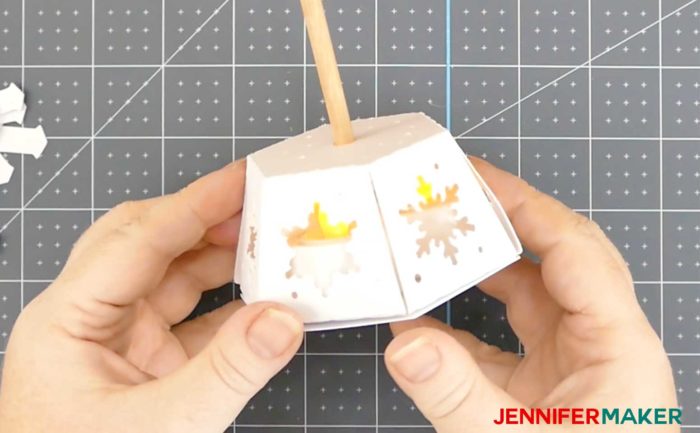
Now you can put three LED tealights inside the base, snug up against the dowel. Once inside, you can fold the sides down and tuck the flaps under the tealights to keep everything in place. If you do not glue the flaps down, you can open and close these to turn the LED tealights on your Paper Snowflake Christmas Tree on and off.
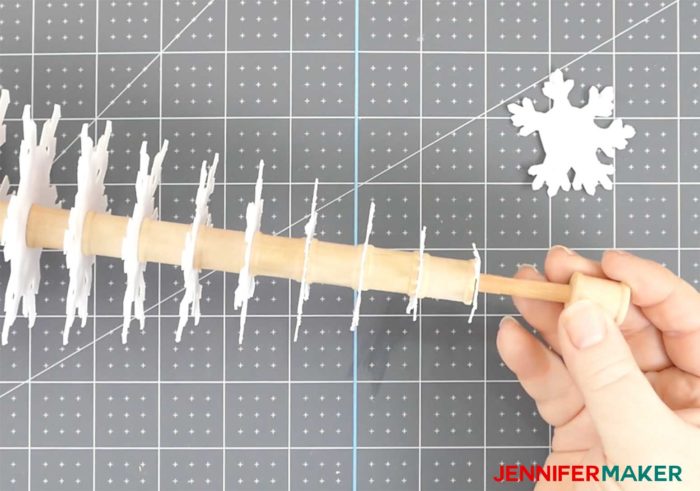
Slide a wood spool over the end the wood dowel and slide it all the way down to the base.

Now the fun begins! Slide the largest paper snowflake onto the dowel, all the way down to the spool.
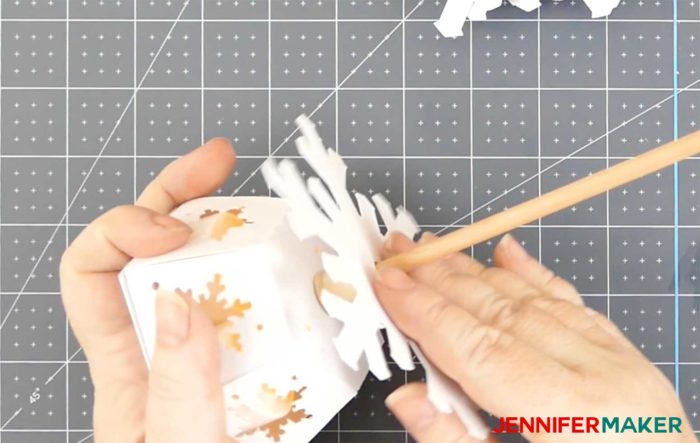
Repeat with another spool and another snowflake, from largest to smallest, until your dowel is completely filled with paper snowflakes!

Once you place the last snowflake on, slide on your last wooden spool too.
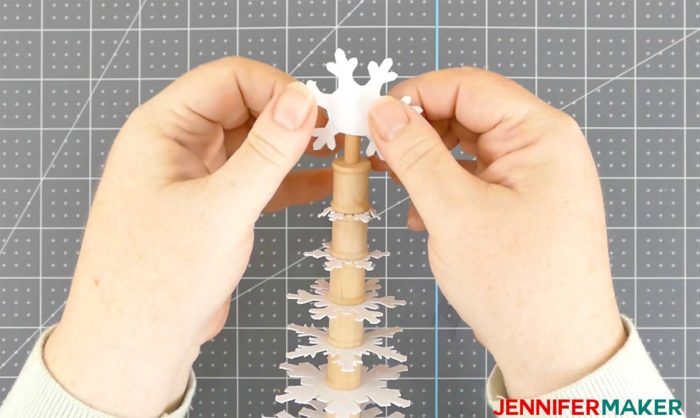
Now it’s time to make the snowflake topper. To do this, glue the two topper pieces together at the points only, not the center. Once the glue is dry, open up the center and slide it onto the top of your paper snowflake Christmas tree.
Your Paper Snowflake Christmas Tree is now assembled! If you like, you can fancy it up with a little glitter spray or even some glitter. I did both!
Of course, we need ornaments, too! So I’ve designed several little paper ornaments that you can cut out and put on your Paper Snowflake Christmas tree. You can get the paper ornaments in three shapes by downloading the bonus version (see the directions at the start of this post on how to do that). Here’s the Paper Snowflake Tree with the ornaments available in the bonus version.

I also made some pretty birds, birdhouses, angels, bows, candy canes, gingerbread men, and snowflakes that you can get if you get the deluxe version.
Get my free cut files for the Paper Snowflake Christmas Tree Luminary
If you make a paper snowflake tree luminary, I’d love to see it! Please send me a photo at [email protected] or tagged me on social media with #jennifermaker. If you do, I’ll add your name to my Master Lantern Makers list!

If you’re eager to make more luminaries and lanterns today, check out these seven fun projects!


Want to remember this? Save this Paper Snowflake Christmas Tree Luminary to your favorite Pinterest board!


this is so much fun. We had a couple of unfortunate things happen roof blown off awnings blew down contractor issues but thanks to your Christmas time crafts our spirits are up and the family (all three of us) are enjoying making the crafts. I will be sending pictures of each craft we made. Thank you so very much.