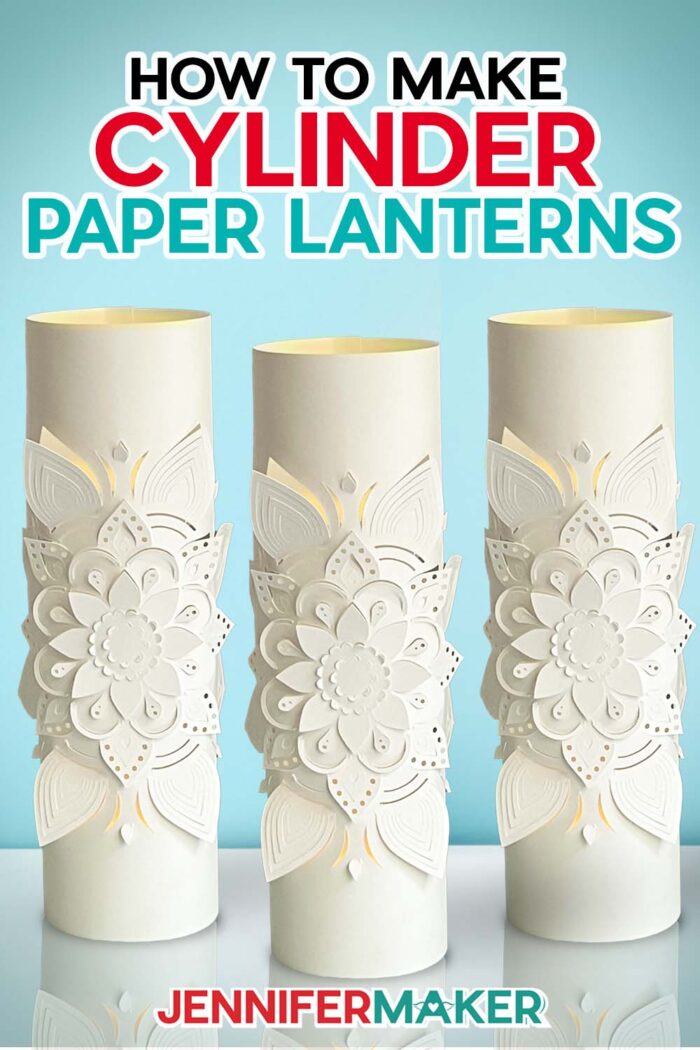
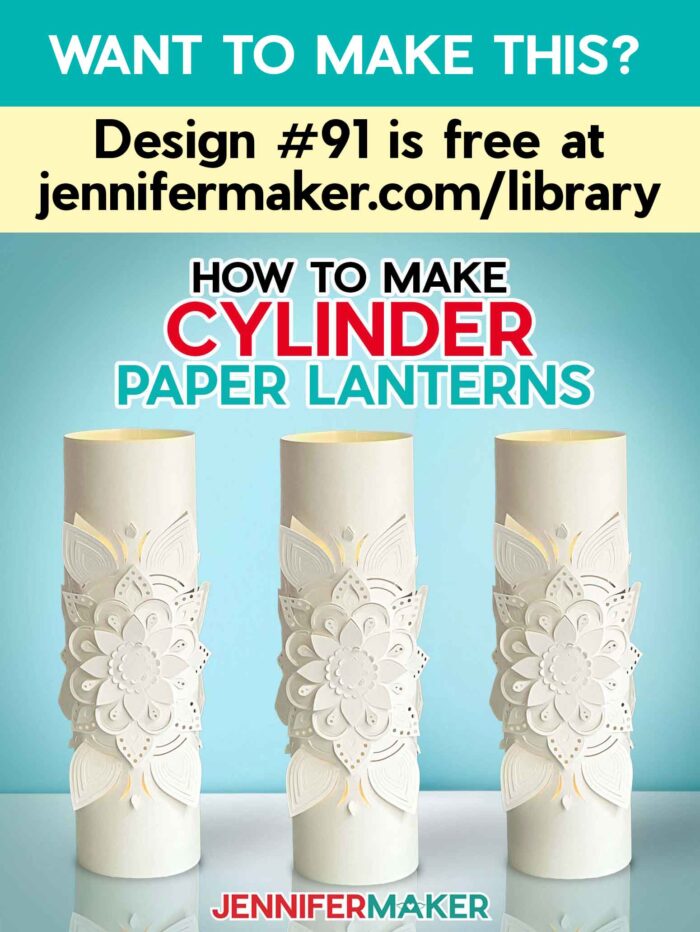
Make beautiful cylinder paper lanterns using my free delicate designs!
I love lanterns! Something about making such a functional, fun item out of paper really lights up my day! I’ve shared lots of intricate lantern patterns, but these designs are special because you can cut them from one piece of paper. They’re so easy, you can cut and assemble enough for a party in just a few hours. That makes these cylinder paper lanterns an excellent last-minute, budget-friendly DIY choice. I’ll show you how to make both designs and add you own personal touches!

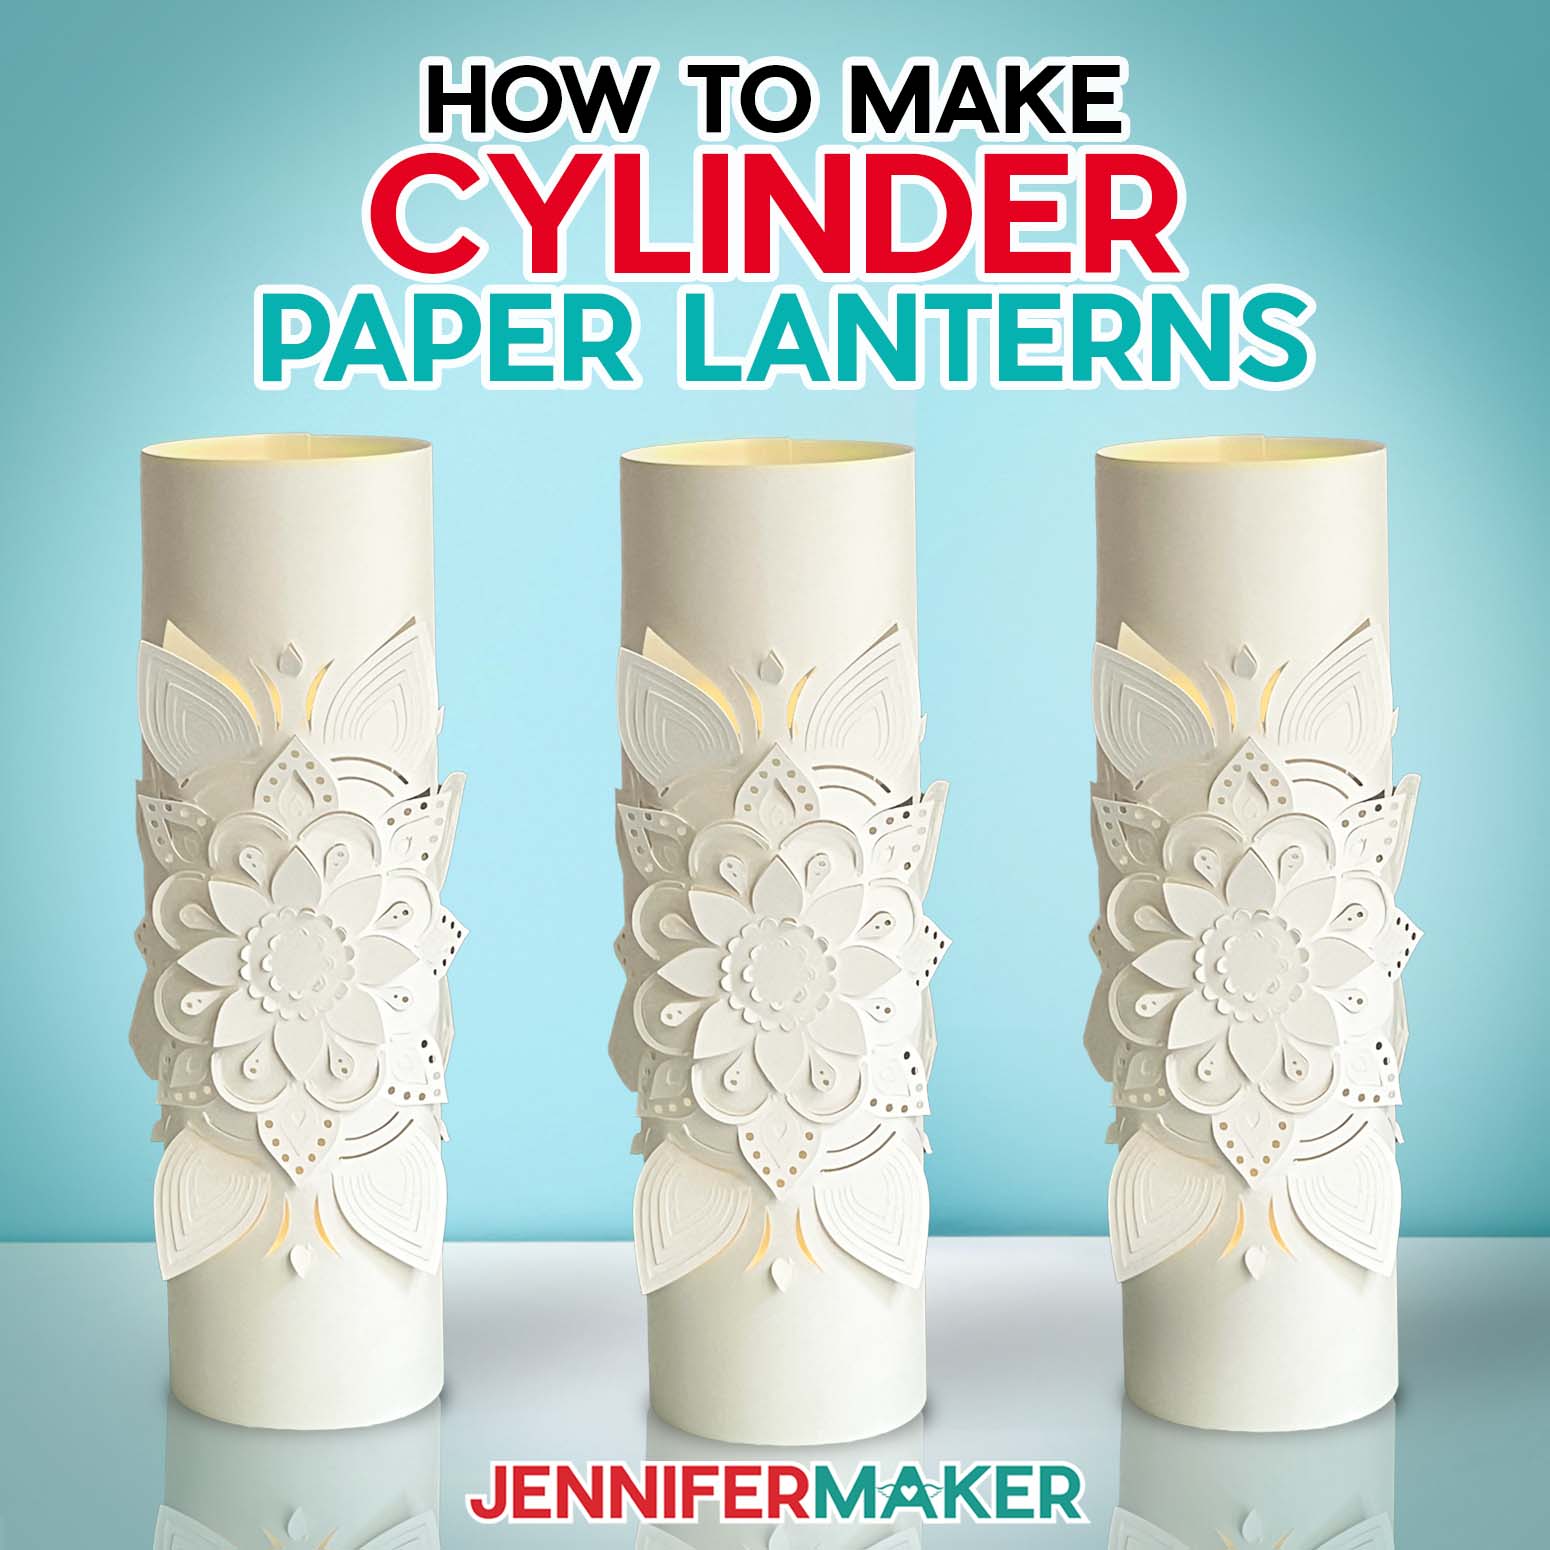
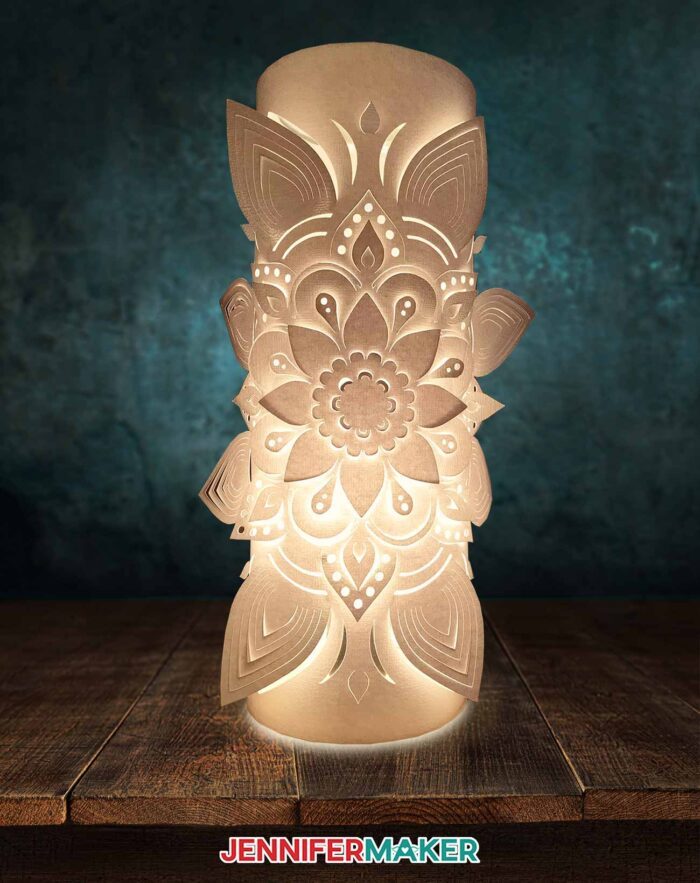
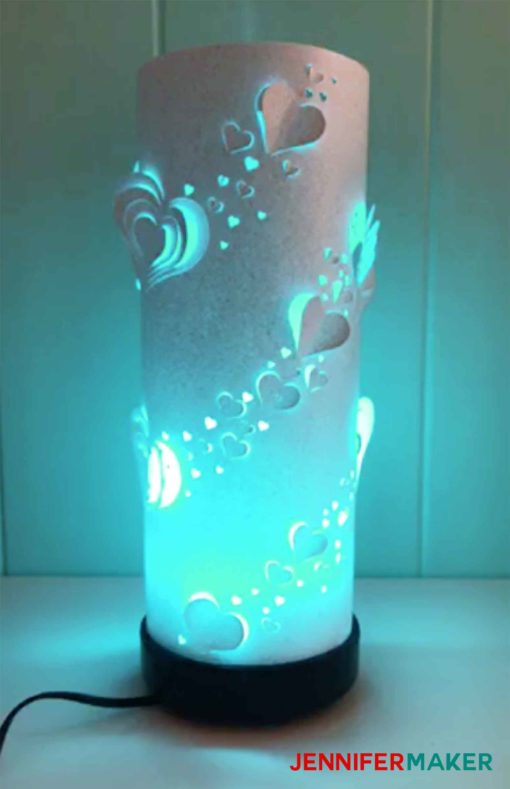
The mandala lantern design is just so beautiful — I love how it lights up a room!
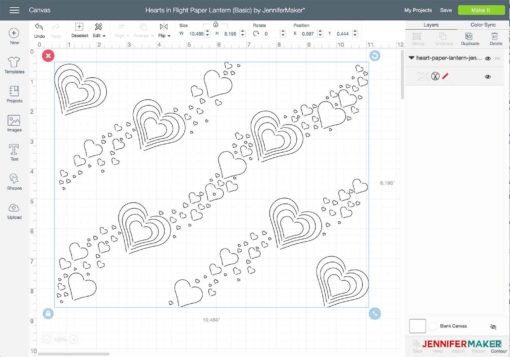
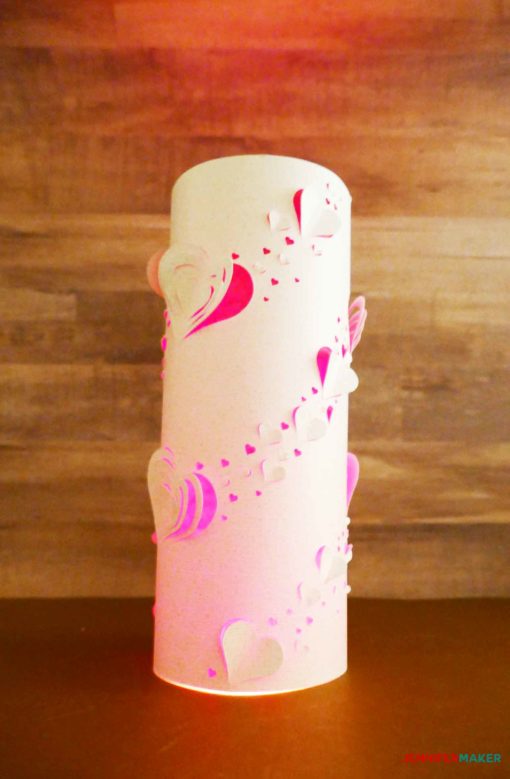
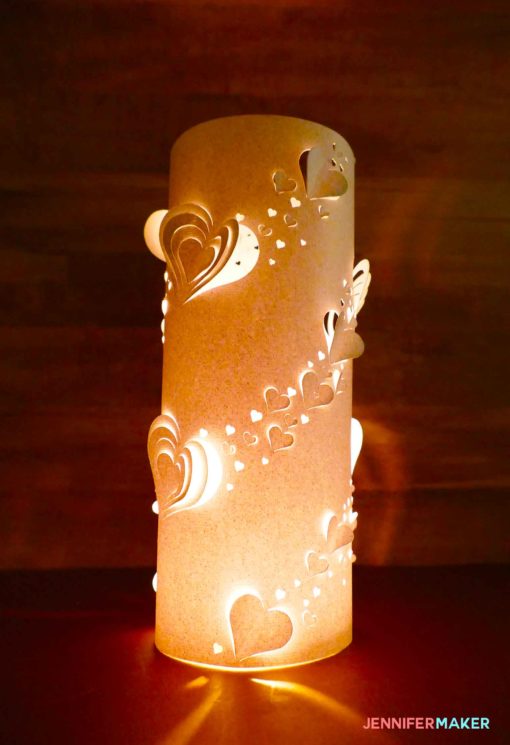
The hearts in flight design features many hearts flying up and around the lantern in swirls. Some hearts are simple, some are complex, some are broken, and some are full. But all hearts on this DIY paper lantern represent love and light.
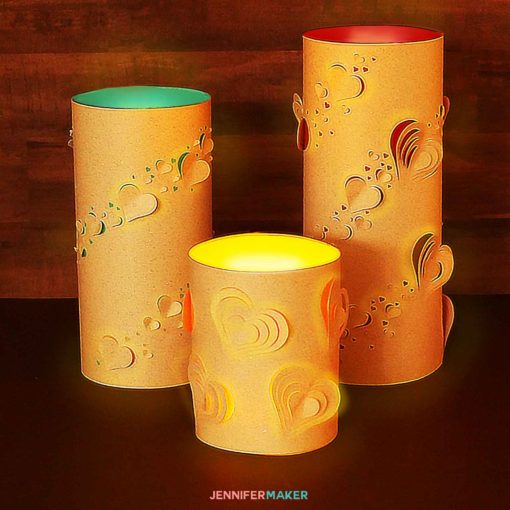
I think this would be a lovely DIY paper lantern for many occasions. Use it to honor the passing of someone you love. Make a knock-out centerpiece of white paper lanterns at a wedding. Or just display it on your desk as a reminder of all of your loves. I’d love to see how you use yours.
The intricate floral cylinder paper lantern design has a clear front and back, so it would look best from the front or the side. I’d love to see a set of them decorating a mantle!
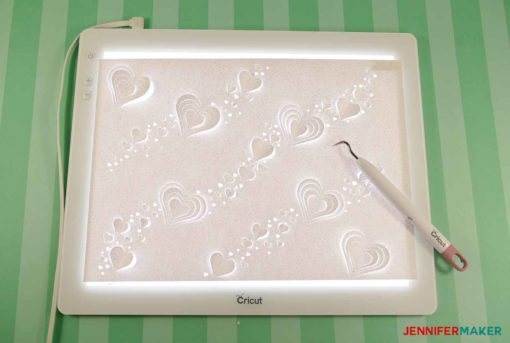
Since some of the cuts in these beautiful lanterns are detailed, use a brayer to really secure your cardstock to the machine mat. If it’s not secure, the cuts could move the cardstock, throwing off the whole project!
After the cuts are complete, I like to use a spatula to lift delicate cut areas to avoid ripping anything. And removing the tiny cutouts left behind is much easier with a scraper.
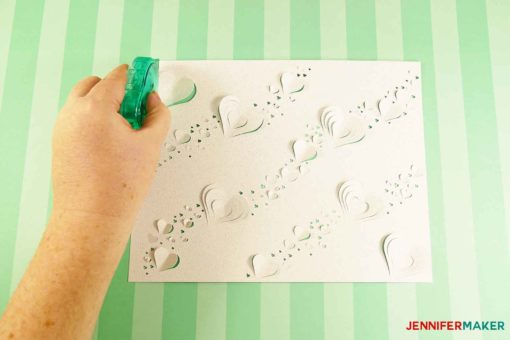
Then, you can use your fingers or a weeding tool to lift the cut areas, creating delicate dimension and open sections to let more light (or color) through. I have detailed information in the tutorial below.
I’ve tried both double-sided tape and good quality craft glue to secure the seam on the lantern form. Both work well, so use whichever you prefer! Just make sure the top and bottom edges are even, otherwise the paper lamp could turn out slanted.
When you’re all done, you can use the cylinder paper lanterns in many ways. They’d be perfect for a baby shower, birthday party, or other event, but here are a few ideas:
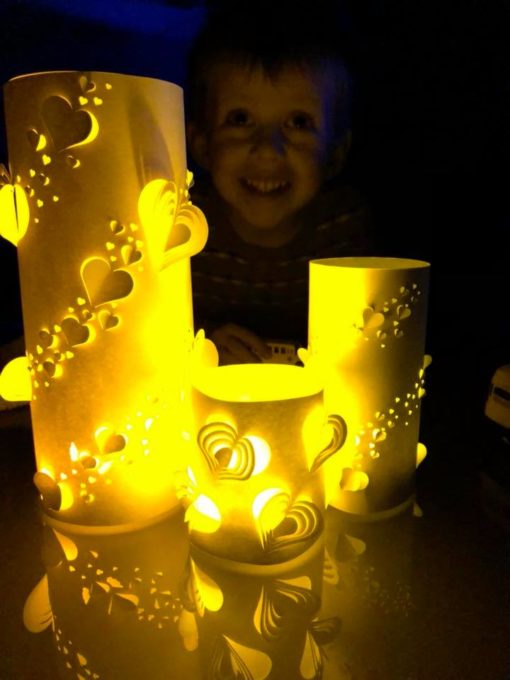
Reader Megan Barrett put tea lights in her heart lanterns… so adorable! Curious where she got the medium and small lanterns? See my note about the Lantern Puzzle down below!
My hearts in flight cylinder paper lantern fit right over a aromatherapy essential oil diffuser! With its color-changing LED, it’s even better than a tea light! If you want to get a similar LED diffuser, I’ve linked one in my materials list.
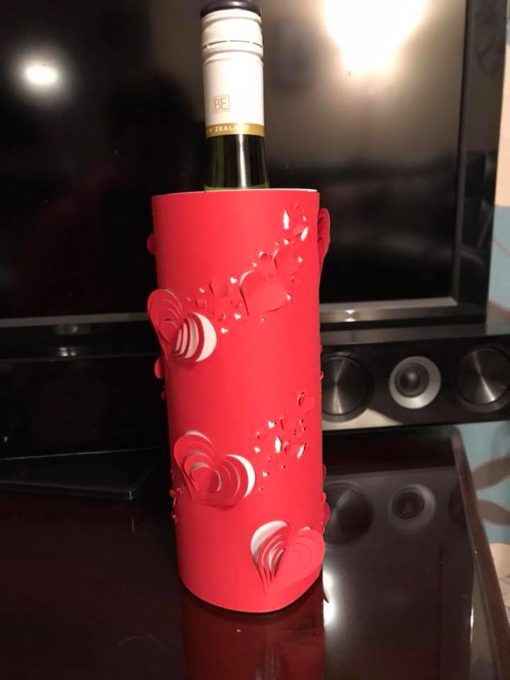
Reader and supporter Sue Reeve had a great idea to slip a lantern design over a wine bottle! This would be a great way to gift a bottle of wine or bubbly!
So let me show you how to make a cylinder paper lantern! This post contains some affiliate links for your convenience (which means if you make a purchase after clicking a link I will earn a small commission but it won’t cost you a penny more)! Read my full disclosure policy.
Materials for Cylinder Paper Lanterns
Click here to see the exact items I got from Amazon to make these lanterns!
- One (1) sheet of 65 lb cardstock, 8.5 x 11″ (even glitter cardstock for the hearts design or different colors) or 12″ x 12″ cardstock
- Vellum the same size as your cardstock – optional to add a diffusing layer inside. Plain copy paper works, too, if you’re using 8.5″ x 11″ cardstock!
- Double sided tape -OR-
- Good quality glue, like Bearly Precision Art Craft Glue
- Light Pad – optional, but helpful when weeding designs, especially on white materials
- LED tealights to put inside your lantern -OR-
- Flameless pillar candle – for the 12″ x 12″ version
- LED aromatherapy diffuser (the original I used is no longer offered, but this small diffuser should fit!)
- Cricut Green StandardGrip Machine Mat, 12″ x 12″
- Weeding tool – to help lift the cut pieces during assembly
- Brayer – to secure the cardstock to the mat
- Spatula – to help lift delicate sections from the mat
- Scraper – to remove tiny cutoffs from the mat
- A method to cut your cardstock – I used the Cricut Maker 3 cutting machine, but you can also use a Cricut Maker series, a Cricut Explore series, or a Cricut Venture with the Fine-Point Blade
- Design #91 – My free cylinder lantern SVG/PDF/DXF files available in my free resource library(get the password at the bottom of this post).
How to Make a Cylinder Paper Lantern
First, download Design #91 from my free resource library. If you’re going to cut it out on your cutting machine, upload the SVG to your design software. If you’re not sure how to upload an SVG cut file to Cricut Design Space, watch this helpful video training series I made.
These are easy to prepare for a cutting machine like a Cricut — there are no layers or score lines to worry about. Just add the design you want to your Canvas, and click Make It.
My hearts in flight design is intended to be cut on 8.5″ x 11″ cardstock placed in landscape orientation on a Green StandardGrip machine mat. On the Prepare screen, leave the Material Size at 12″ x 12″ and then place the cardstock as I’ve described to get the right result. The Cricut machine doesn’t know you told a fib!
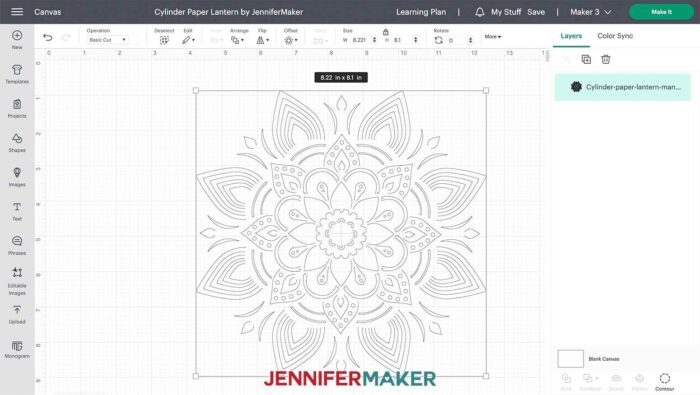
The mandala lantern looks best if cut on a 12” x 12” sheet of cardstock. Center in on the Prepare screen mat for the best results.

Important: None of these cut files include the exterior outline of the lantern, as the edges of your paper define that. You can use either 8.5” x 11” or 12” x 12” paper. Simply position this cut design in the center of your paper and cut.
Set your material to match the cardstock you’re using and change the Pressure to “More” for a clean cut.
Once your cardstock is cut, unload the mat and flip it over. Roll the mat back to release the cardstock. You can also use a spatula to gently release the delicate details. Take your time so you don’t rip anything.
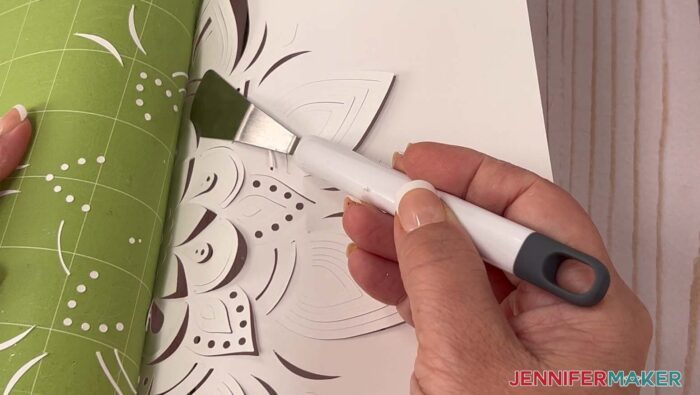
Next, you’ll need to weed out all of the little pieces. For the larger shapes, carefully fold back each side so they stand up off the surface of the paper. The easiest way to do this is to bend the paper a bit so you catch one side of the shape under your finger, then gently fold it up. A weeding tool and light table can help you find all the cuts.
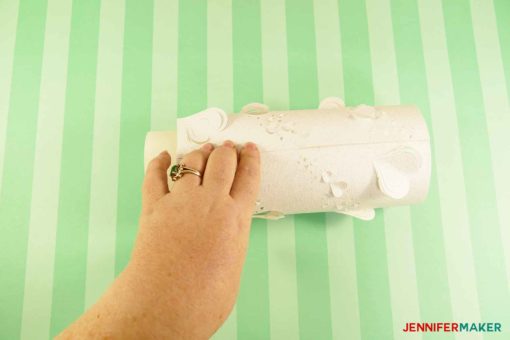
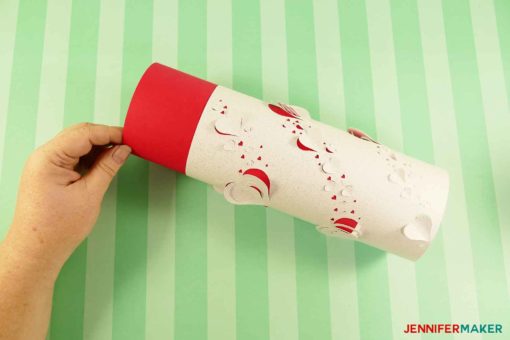
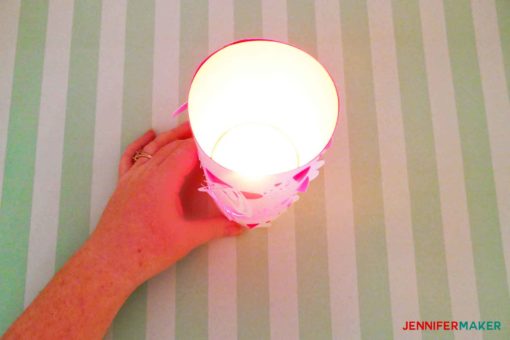
Once all of your shapes are either pushed out or bent up, gently bend your paper into a cylinder and tape or glue it closed. You may find it helpful to put the paper around something cylindrical while you do this, such as a candle or bottle.
You can enjoy your DIY paper lantern as is now, or add some extra color by inserting a piece of rolled 8.5″ x 11″ or 12″ x 12″ colored vellum or paper. I like it both “naked” and with the colored insert!
Insert an LED light and enjoy your cylinder paper lantern! If you added the inner paper, you can add string lights inside. The liner will keep them from escaping out the cuts!
These are so easy, you can make a nice selection of cylinder lanterns in no time! Try experiments like making a colorful paper lantern using your favorite color, or open the hearts different amounts to make the light more natural.
Your paper lantern colors are really only limited by the options in your stash, so get creative!
Answers to Your Questions About Cylinder Paper Lanterns
Q: How should I close the seam on a cylinder paper lantern?
A: I’ve used both double-sided tape and high-quality craft glue to close round paper lanterns with good results. Just make sure the tape is very secure or the glue is very dry before letting go.
Get my free cut files for the DIY Cylinder Paper Lanterns
If you make these DIY cylinder paper lanterns, please do send me a photo at [email protected] or tag me on social media with #jennifermaker. If you do, I’ll add your name to my Master Lantern Makers list!

Want to remember this? Save the Hearts in Flight Paper Lantern project to your favorite Pinterest board!