
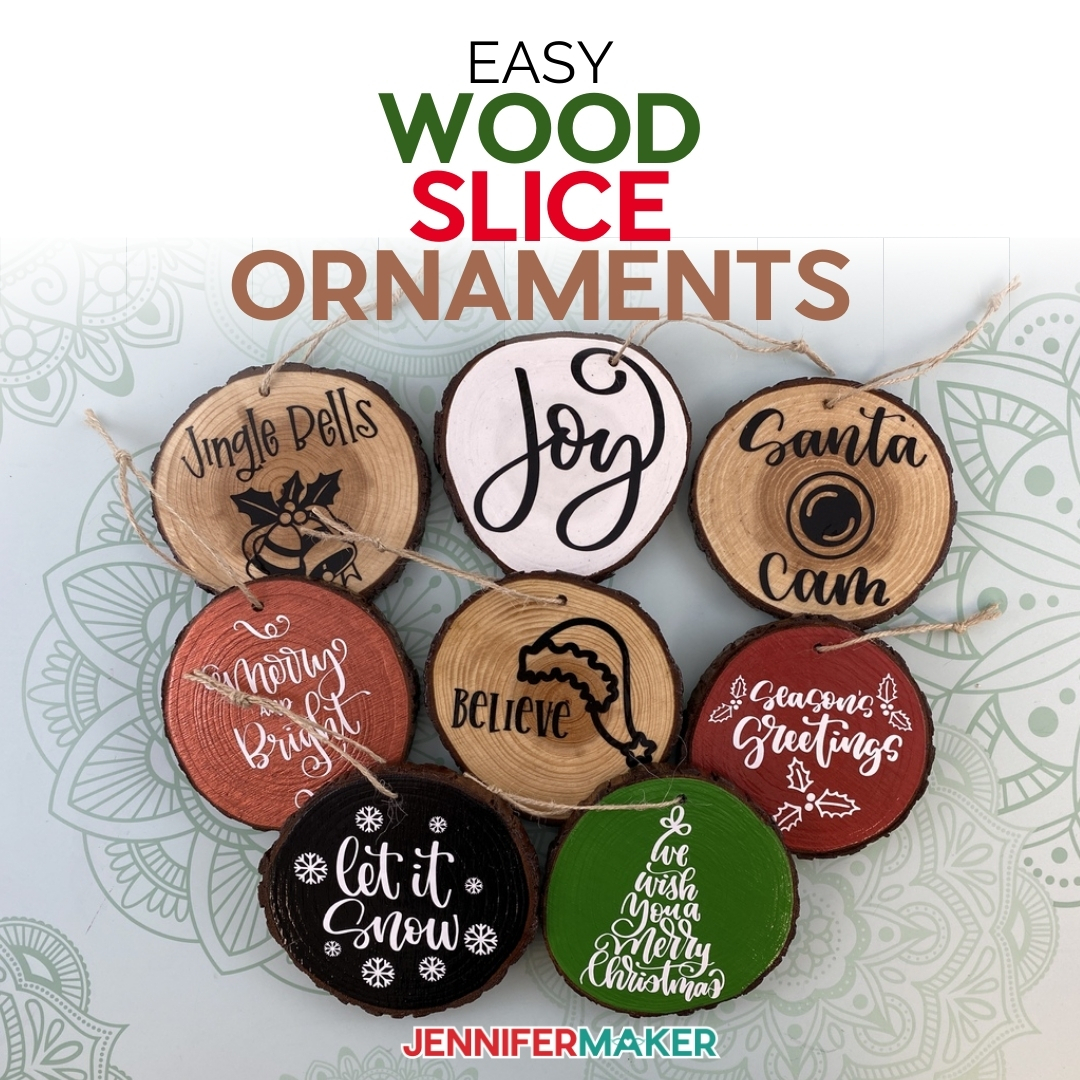
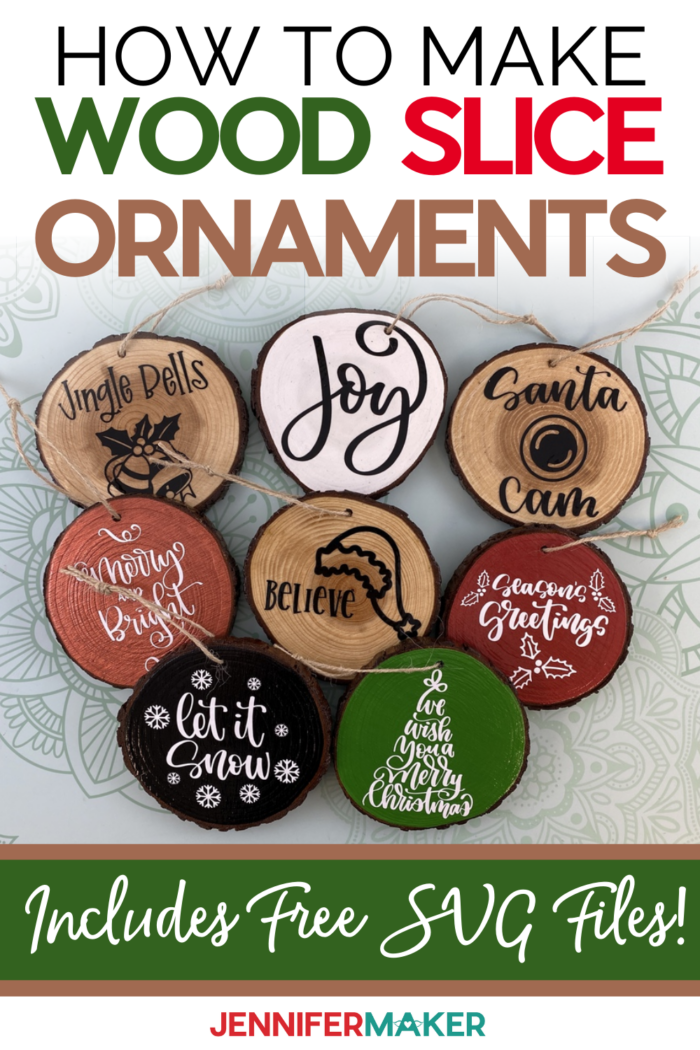
Learn how to make fun wood slice ornaments to decorate your Christmas tree or use as fun gift wrapping decorations.
Looking for a little rustic charm this holiday season? These wood slice ornaments are super easy to make and very on trend. Ornaments are a fun and inexpensive project to make, and a wonderful gift to give, just like my DIY Tile Ornaments. So for Day 5 of The Great Maker 25-Day Gift-Away Challenge, I am showing you how to make fun Wood Slice Ornaments!
See exactly how to make Wood Slice Ornaments in my tutorial video (or keep scrolling if you prefer a printable step-by-step photo tutorial):

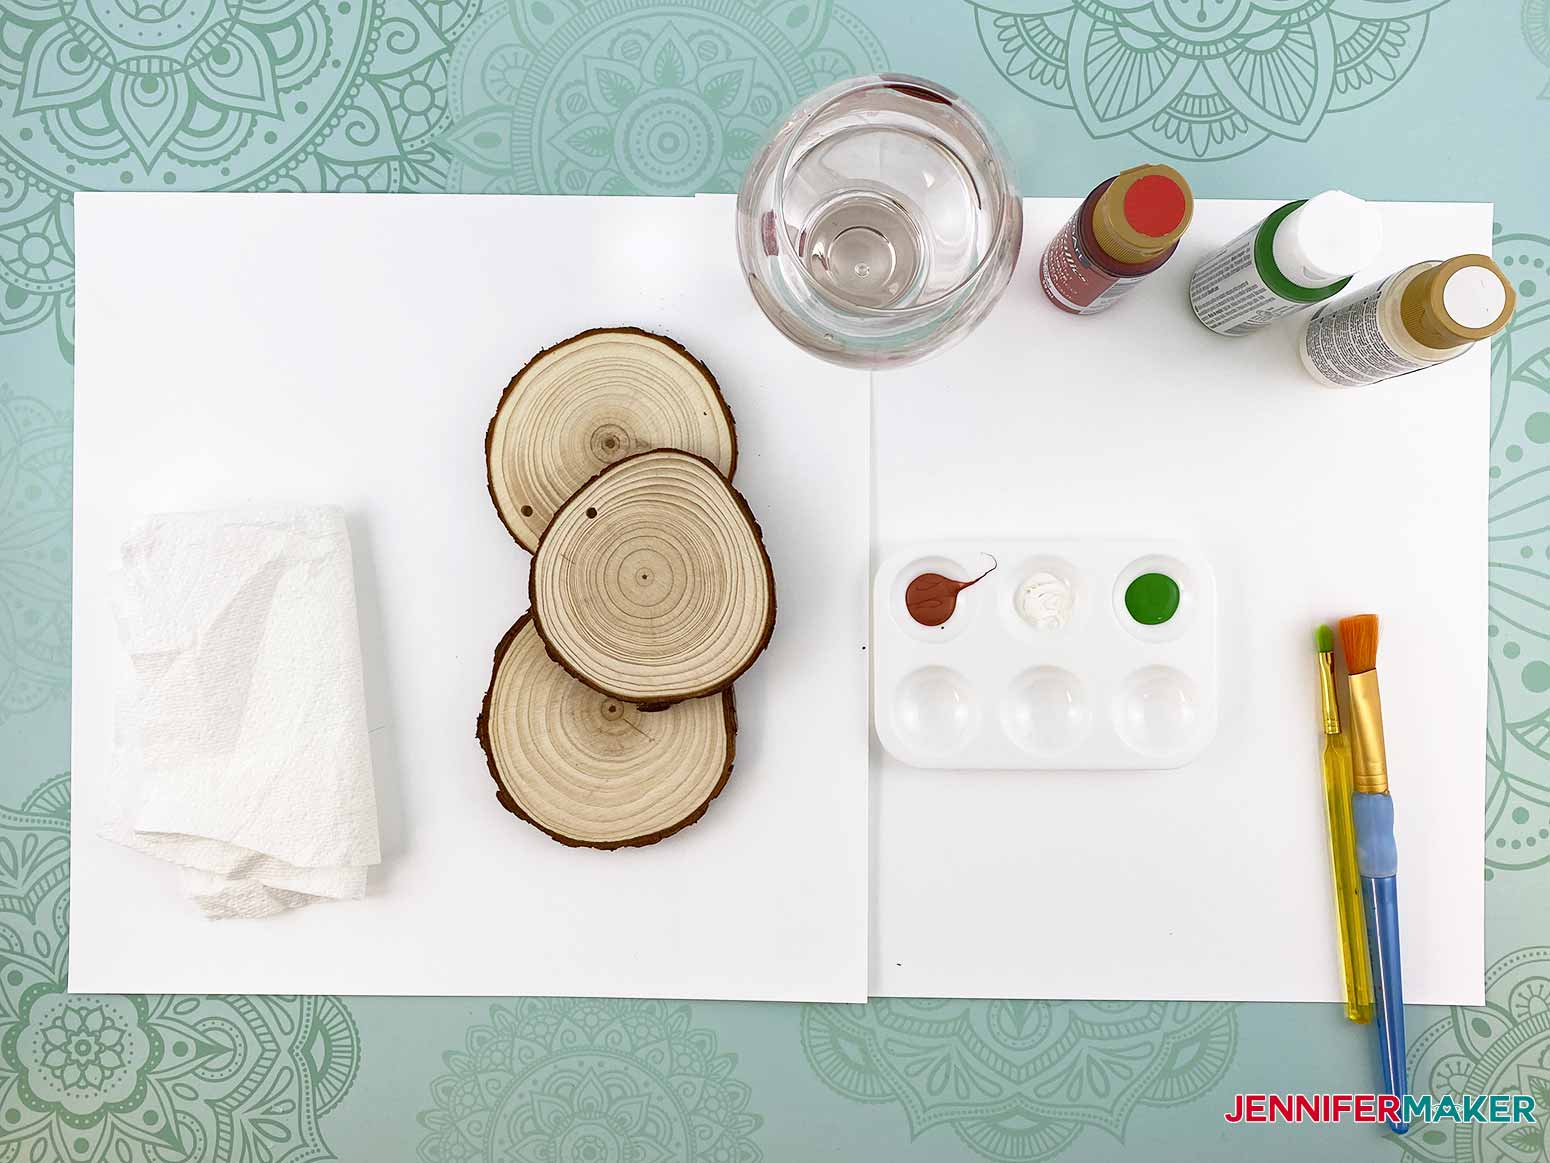
For this project, you need some natural wood slices about three and a half to four inches in diameter. You may have a branch out back you can cut down with a mitre saw — if you do make your own wood slices, I recommend you first bake your wood slices in the oven for about an hour at 220° F to get them ready to decorate!
If you can’t cut your own wood slices, no worries — you can buy wood slices in the exact size you need for ornaments, pre cut and pre-drilled for hanging! I got this stack of slices off Amazon (see material list below), and you can also find them at craft stores.
I recommend you use paint or varnish to coat and protect your wood slices, as it will make it easier to apply your decorations with vinyl. You can use acrylic paint and or gloss varnish on your wood slice ornaments.
To decorate your wood slice ornaments, use permanent adhesive vinyl — I’m using white and black vinyl in this tutorial. You’ll also need some standard grip transfer tape to get the vinyl onto your wood slices. You can also use heat transfer vinyl (iron on vinyl) if you prefer.
Last but not least, you’ll want a way to hang your wood slice ornaments — you can dress them up with some pretty ribbon or keep the rustic look going with simple twine or string.
Tools used for this project include a way to cut your designs — I recommend a cutting machine like a Cricut. If you decide to paint your wood slices, you’ll want something to hold your paints, a cloth, a cup of water, and a large and small paintbrush.
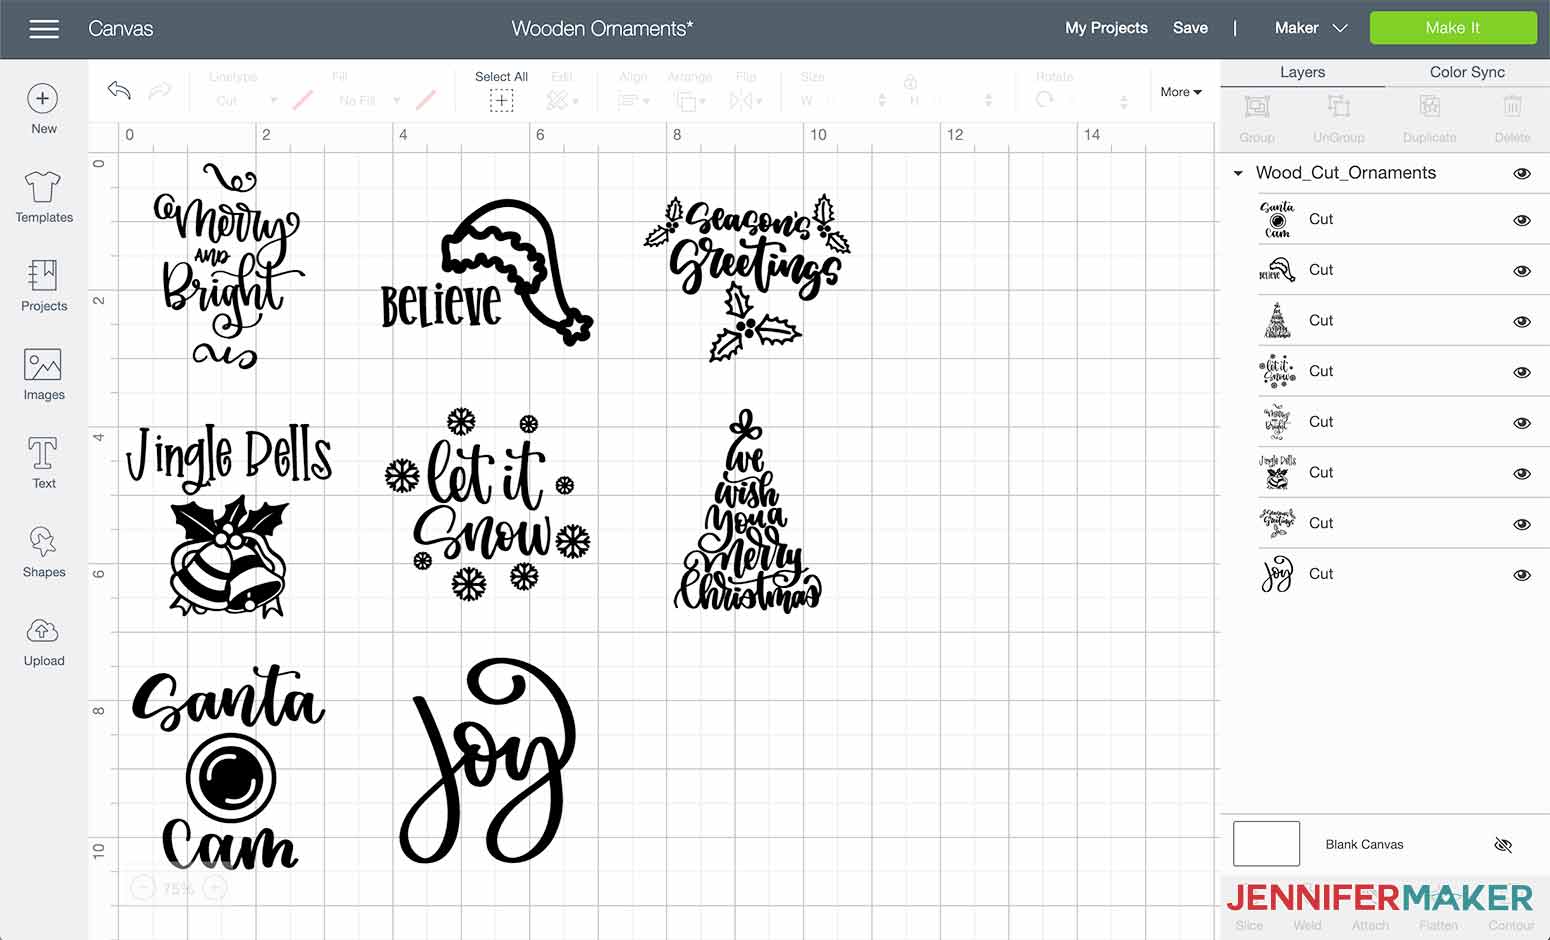
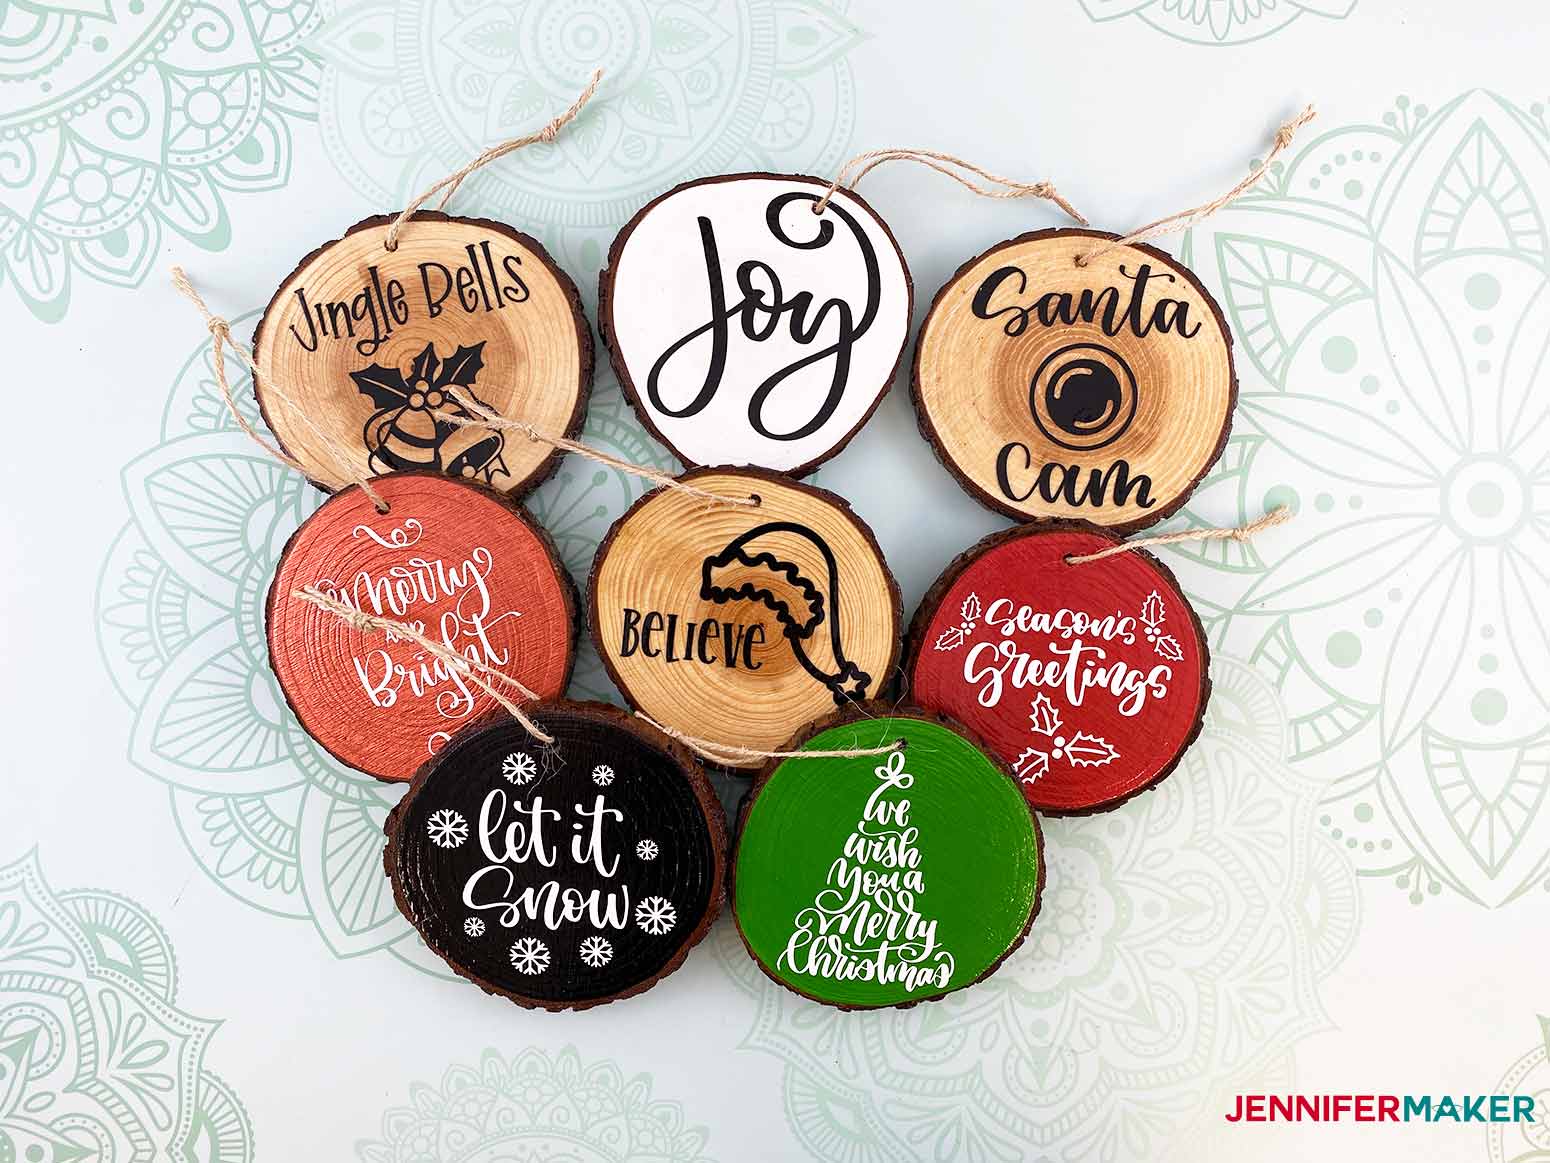
Other than that, all you need are some cute designs to put on your ornaments. You can design your own decals, or use my designs! I’ve prepared eight fun holiday designs for you to use free.

So let me show you where to find the free designs for these wood slice ornaments, and then I’ll show you how to cut and apply them! This post contains some affiliate links for your convenience (which means if you make a purchase after clicking a link I will earn a small commission but it won’t cost you a penny more)! Read my full disclosure policy.
Materials to Make Wood Slice Ornaments
View my Amazon shopping list with the exact items we used to make this project!
- Natural wood slices (3.5″-4″)
- Permanant Adhesive Vinyl (I used Black and White)
- Gloss Varnish (this is the brand I used)
- Acrylic paint (Royal Ruby, True Red, Warm White, Christmas Green, Black)
- Standard Grip Transfer Tape
- Cricut Standard Grip Cutting Mat
- Paint Brushes
- Scissors
- Cricut Scraper
- A way to cut your vinyl (I used the Cricut Maker cutting machine but this can also be cut on a Cricut Explore or Cricut Joy)
- Font used for Jingle Bells – Fontdinerdotcom from Dafont
- Font used for Believe – Coconut Meringue from Dafont
- Design #256 – My eight free ornament design files (available in my free resource library—get the password by filling out the form at the bottom of this page)

How to Make Wood Slice Ornaments
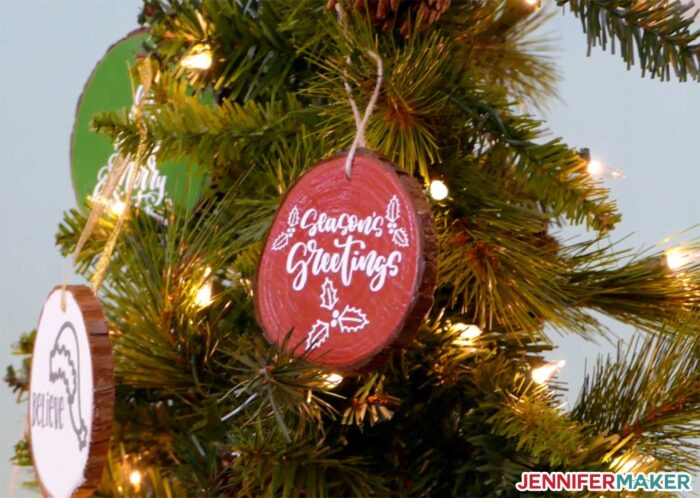
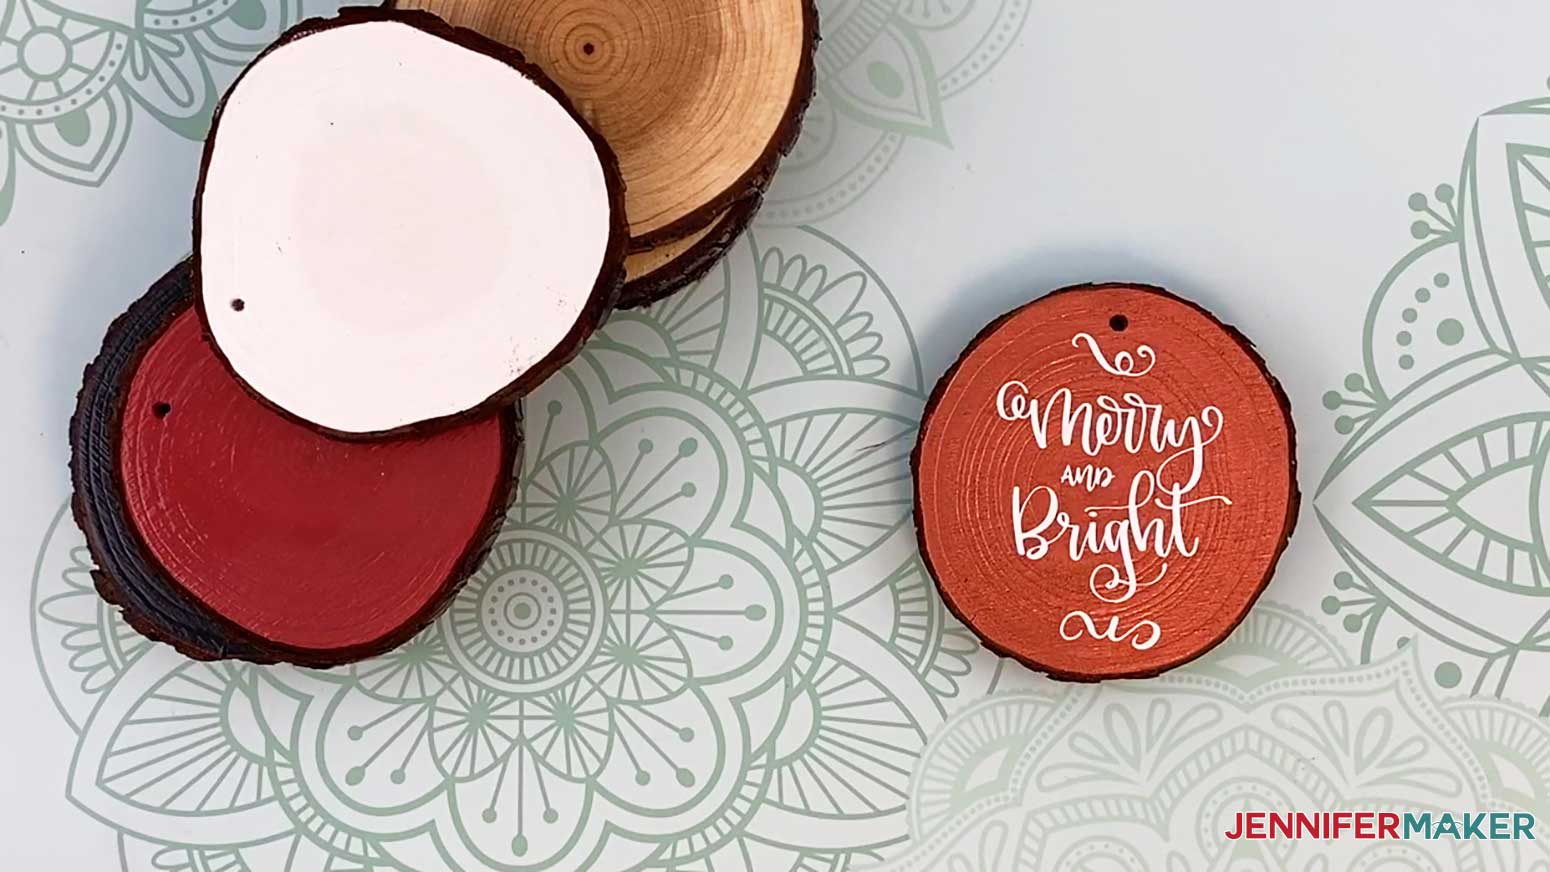
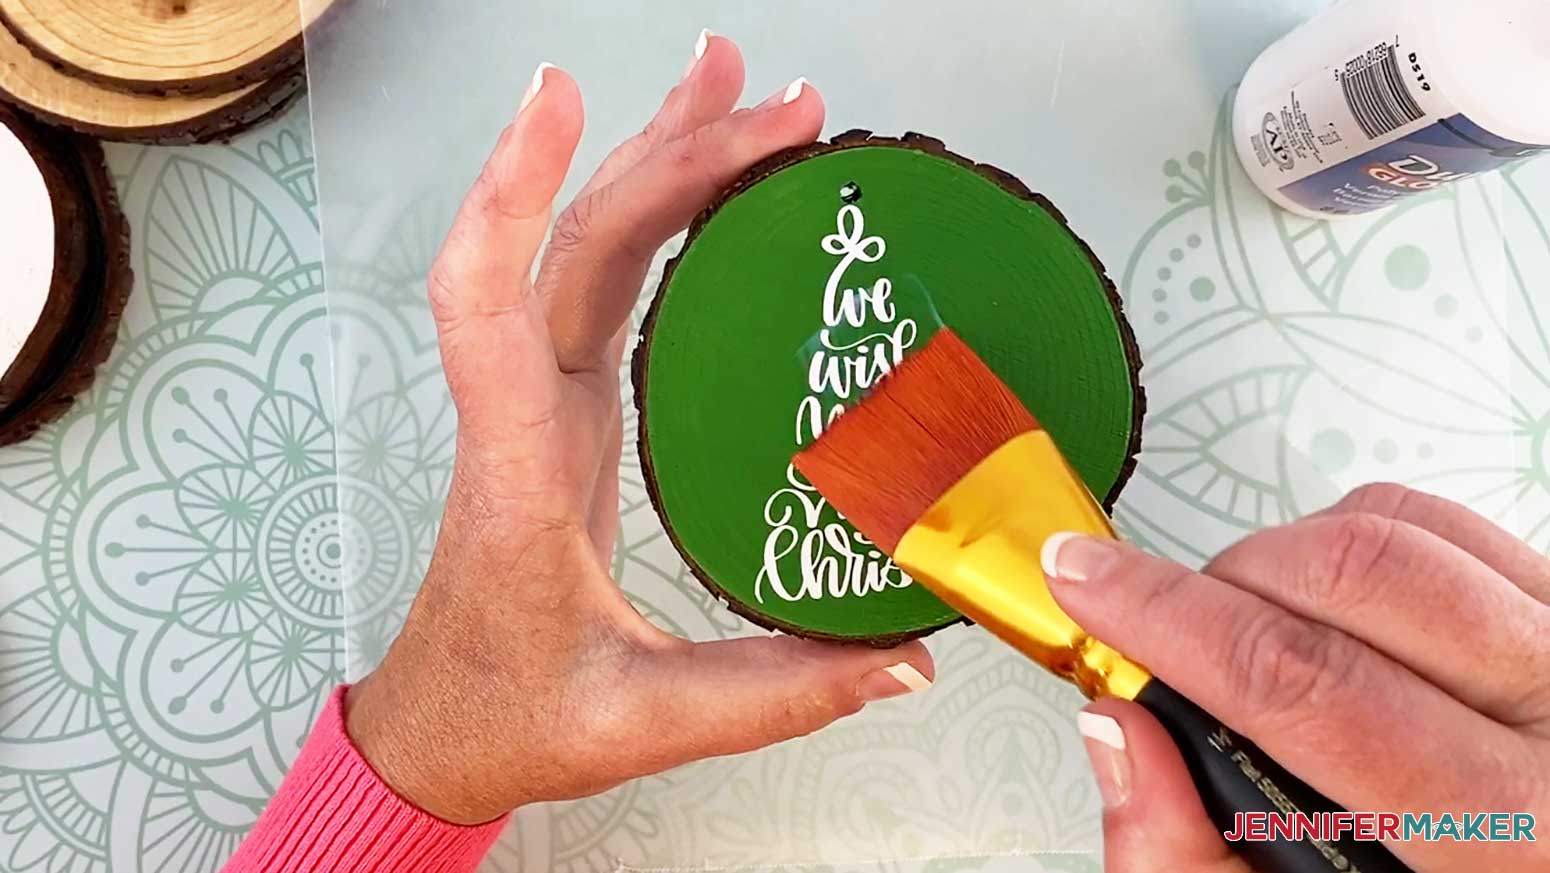
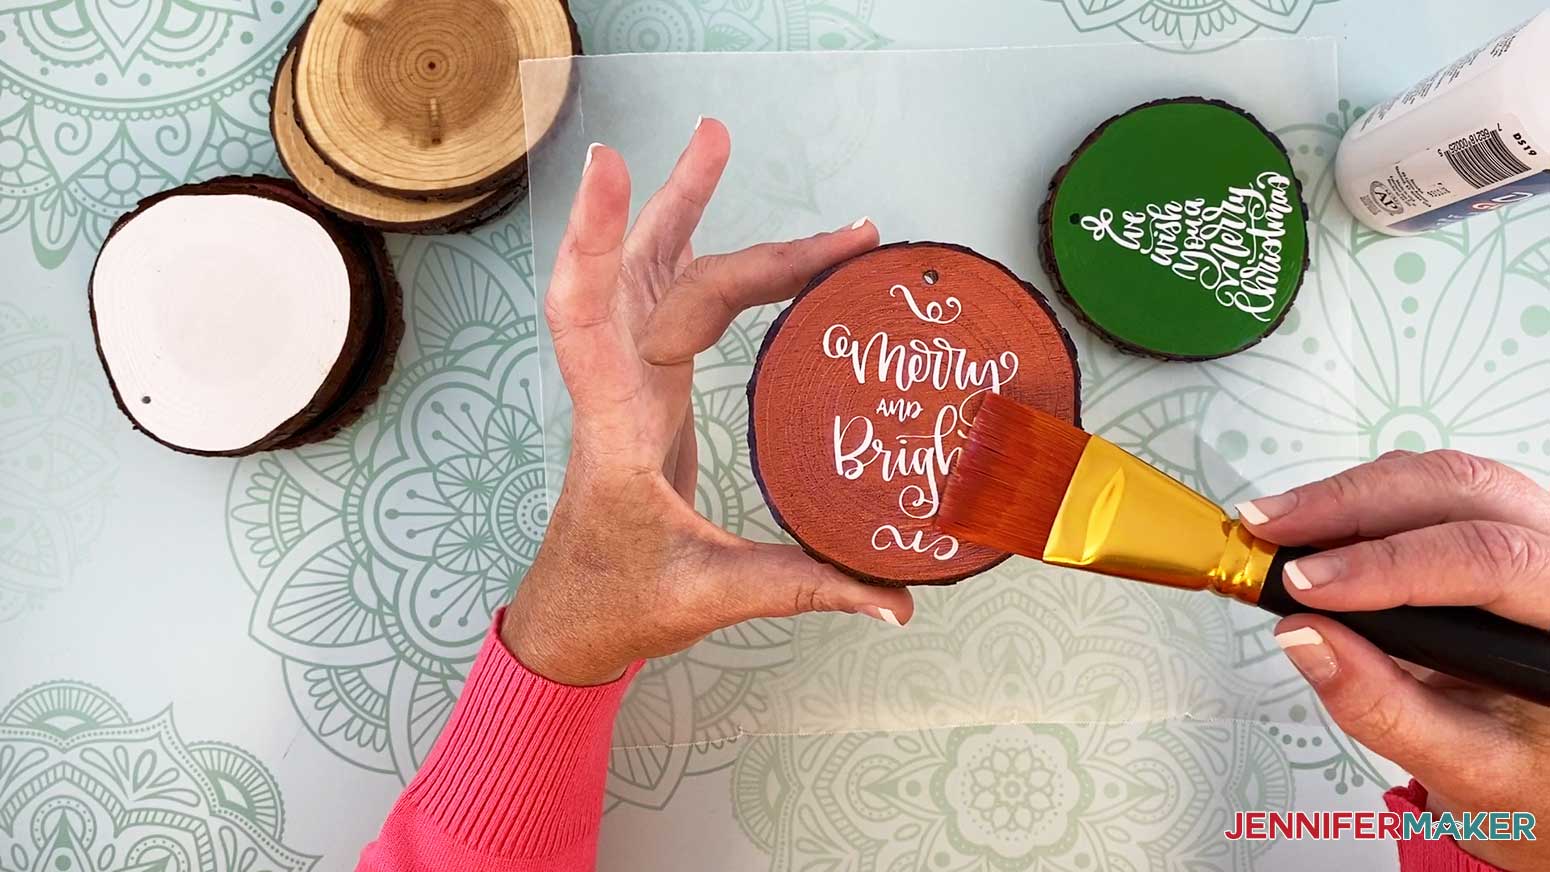
Give your tree a festive look with my wood slice ornaments. I'll show you how to take my designs and make beautiful ornaments for your tree or to give as a gift. First, download Design #256 which is my free Wood Slice Ornaments SVG/DXF/PDF from my free resource library. If you're going to cut it on your cutting machine, upload the file to your design software. This is what the Wood Slice Ornaments SVG file looks like in Cricut Design Space. Tip: If you're not sure how to upload an SVG cut file to Cricut Design Space, watch this helpful video training series I made. If you're on an iPhone or iPad, here's how to download and upload SVG files to the Cricut Design Space app. Grab your wood slice ornaments, a cloth, something to hold your paints, a cup of water, and a large and small paintbrush. Let me show you how to cut the vinyl ornament designs on a Cricut. First, upload the SVG cut file you downloaded in step 1 to Cricut Design Space. If you're unsure how to unzip and upload SVG files, please watch my SVGs Made Simple training series at jennifermaker.com/svgs Once your paint and/or varnish has dried completely, you are ready to add the wood slice ornament designs you cut and weeded in the previous step. Pick up the design you already put on your transfer tape and place it on the ornament, being careful to center the design the way you want. Use a scraping tool to adhere the vinyl to the wood slice ornament really well. We don't want that falling off or peeling off later! This is what the Merry and Bright design looks like on a wood slice ornament painted with ruby red metallic paint. Continue adding the designs to the remaining ornaments! This is the FUN part! Continue applying varnish to the remaining ornaments. And this is what the wood slice ornaments look like when all done! Aren't these just so cool! I think I love the painted ones the best! All of my wood slice ornaments are hand lettered with the exception of Jingle Bells which is Fontdinerdotcom and Believe which is Coconut Mirangue. Special thanks to the JenniferMaker Design Fairy Team, specifically Design Fairy Caitlin, for helping me design and assemble this awesome design. As an Amazon Associate and member of other affiliate programs, I earn from qualifying purchases.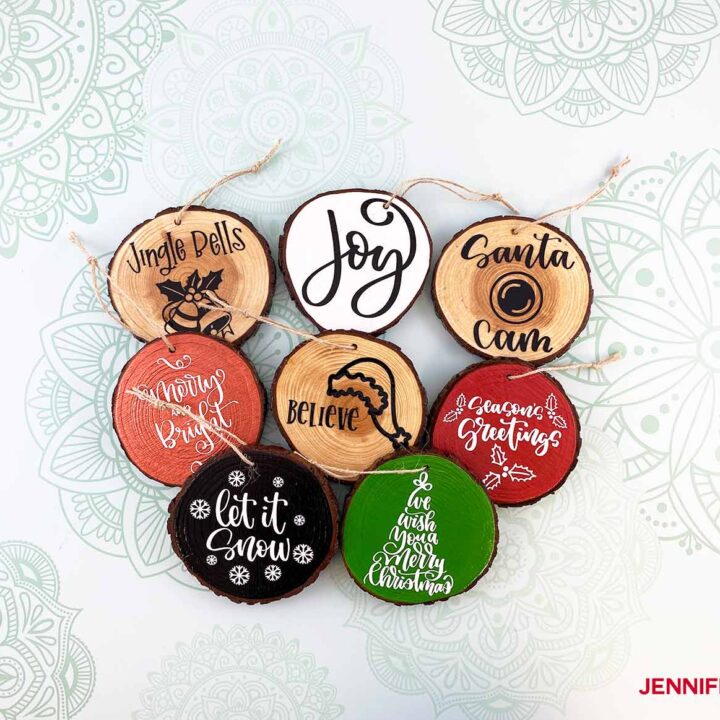
Wood Slice Ornaments
Materials
Tools
Instructions
STEP 1: GET MY FREE WOOD SLICE ORNAMENTS FILE
STEP 2: PREPARE YOUR WOOD SLICES
The wood slice ornaments arrive dusty from bark and wood bits so dip a wet cloth in water and wipe the surface of the wood slice ornament.
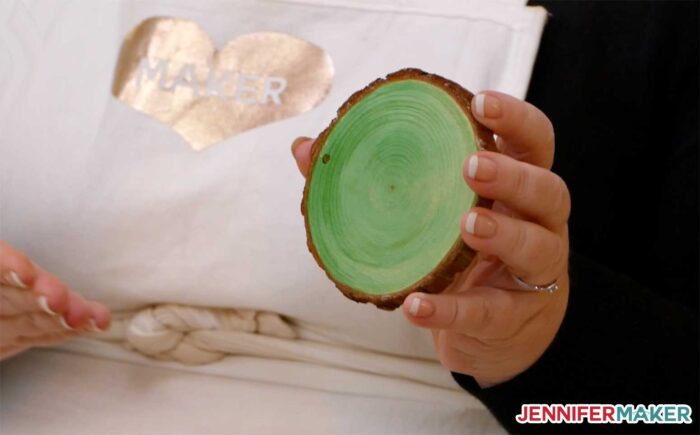
You can paint your wood slice ornaments with regular acrylic paint. Red, green, white, and black are great choices, and you should feel free to keep some unpainted to show the lovely natural wood.
To paint them, take a small paintbrush, dip it in water and begin painting around the outside of the wood. Frequently dip your brush in water to help the flow of the paint but do not leave your brush too watery.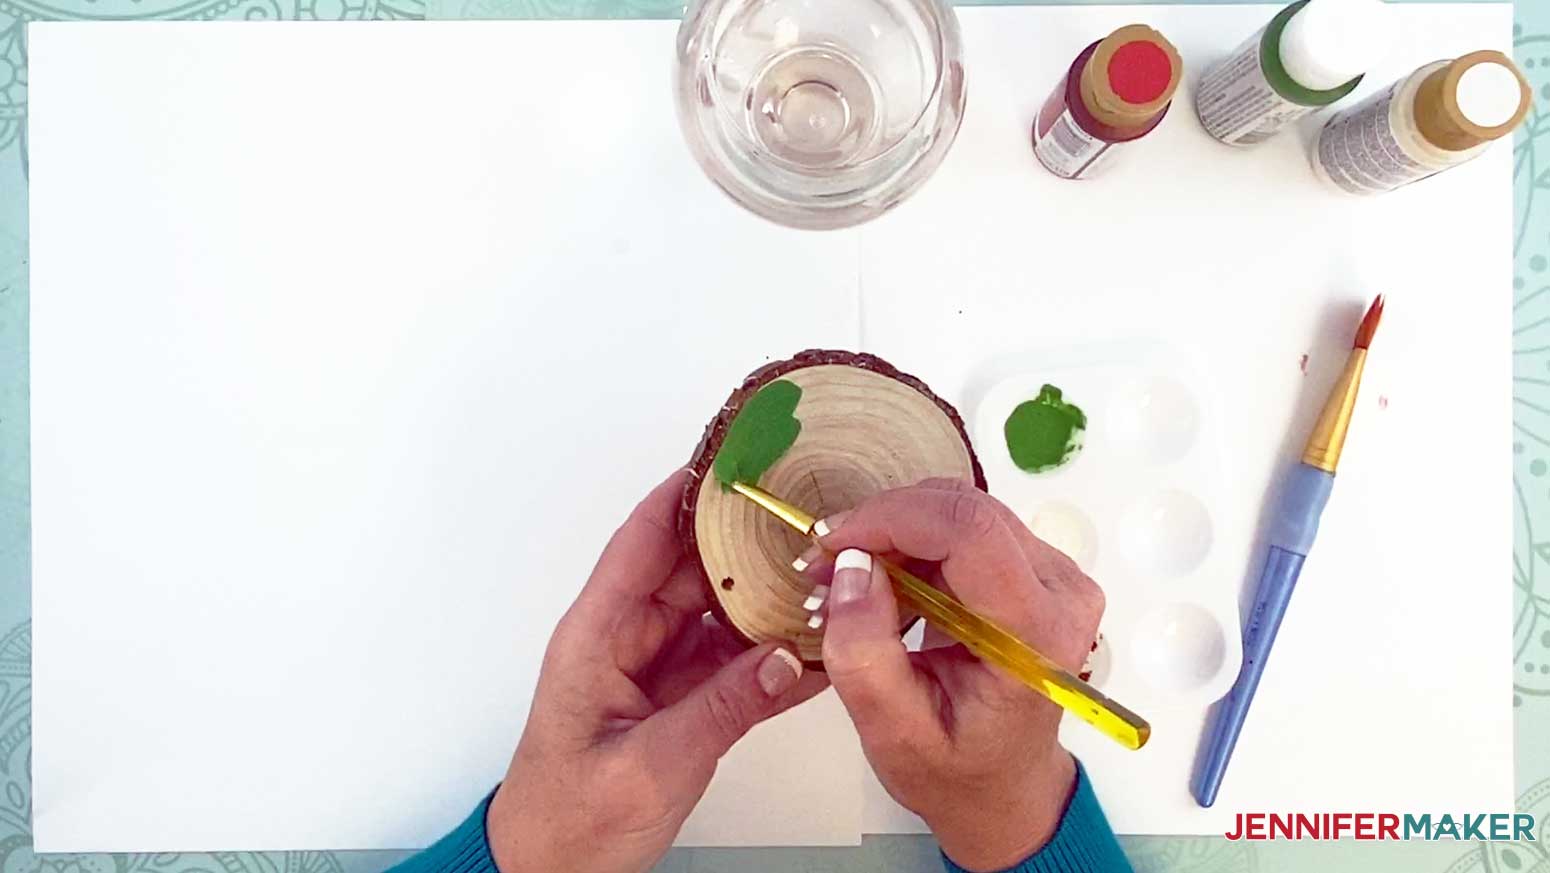
Continue painting around the wood slice ornament.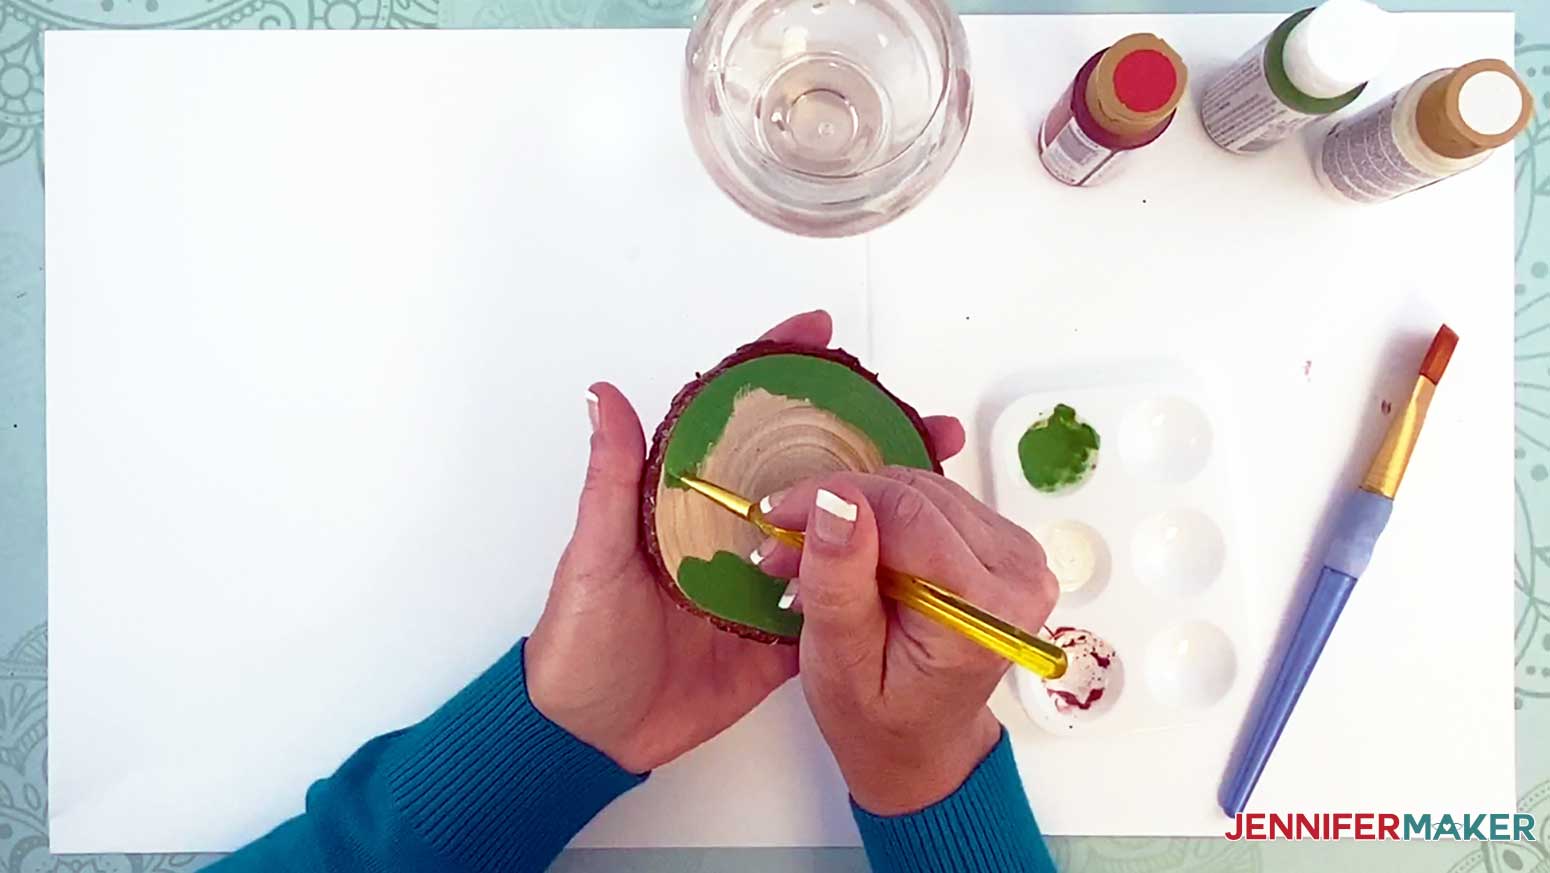
Grab a larger brush and begin painting the inside of the wood slice. Paint your brush strokes with the grain of the wood. Repeat this process for the different paint colors you choose to paint your wood slices.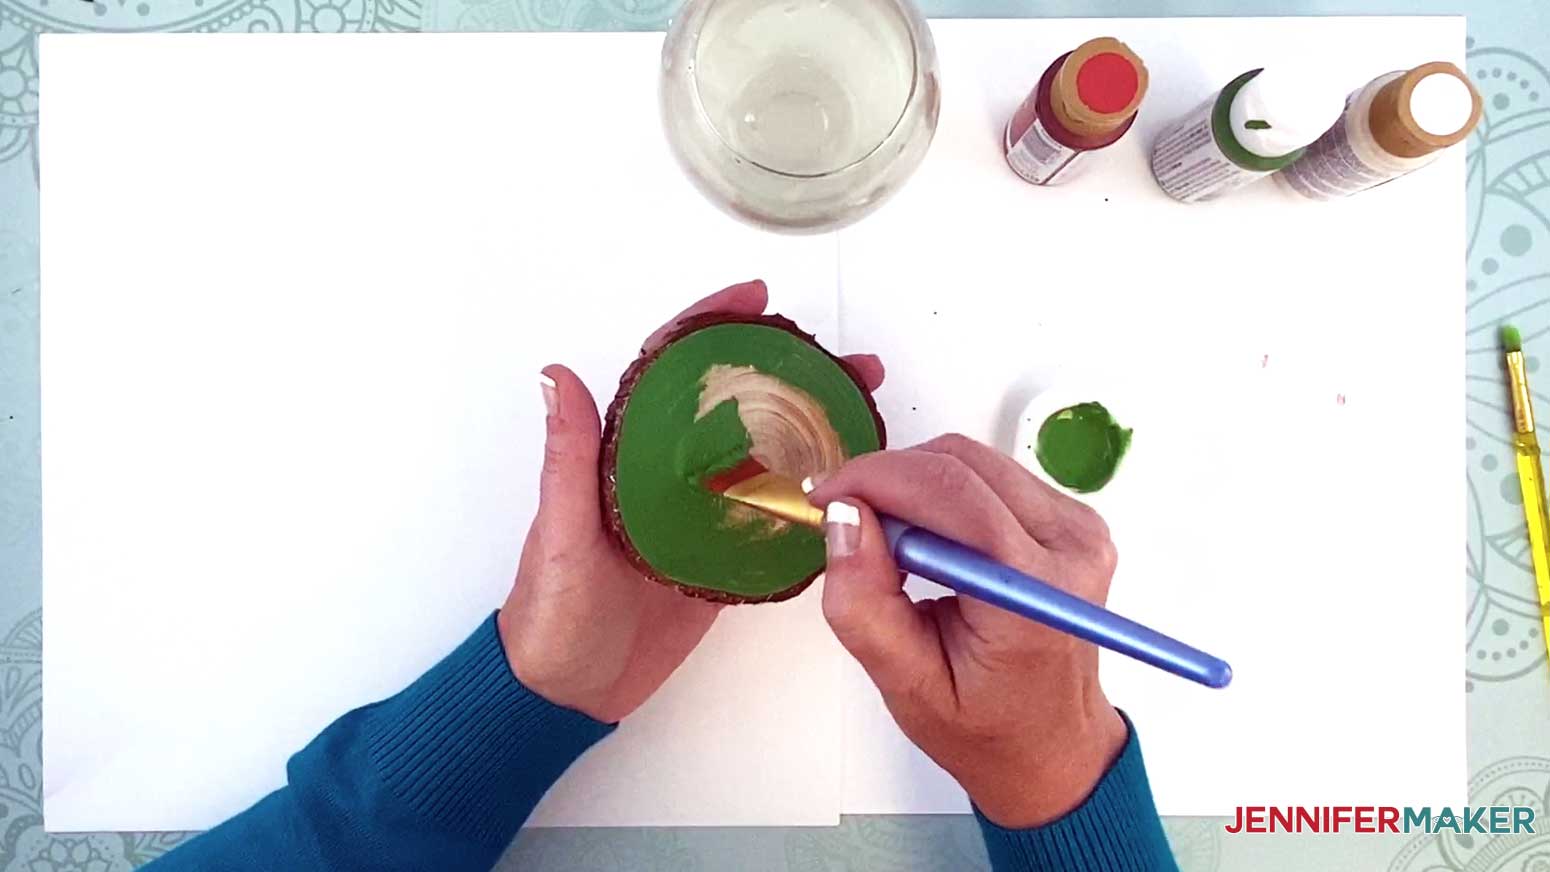
You're also welcome to varnish your wood slices in advance, as well! Just be sure to do that after your acrylic paint has dried.
Set all of your wood slices aside to dry and move on to the next step!STEP 3: CUT THE ORNAMENT DESIGNS
Once you have uploaded the designs into Cricut Design Space, decide if you want any of the designs to be cut in a different color of vinyl. I think black and white vinyl are good choices for most ornaments, but you get to decide! To change the color of a design layer, just select a layer by clicking on it then go to the color box at the top of the screen and click it to choose a new color. 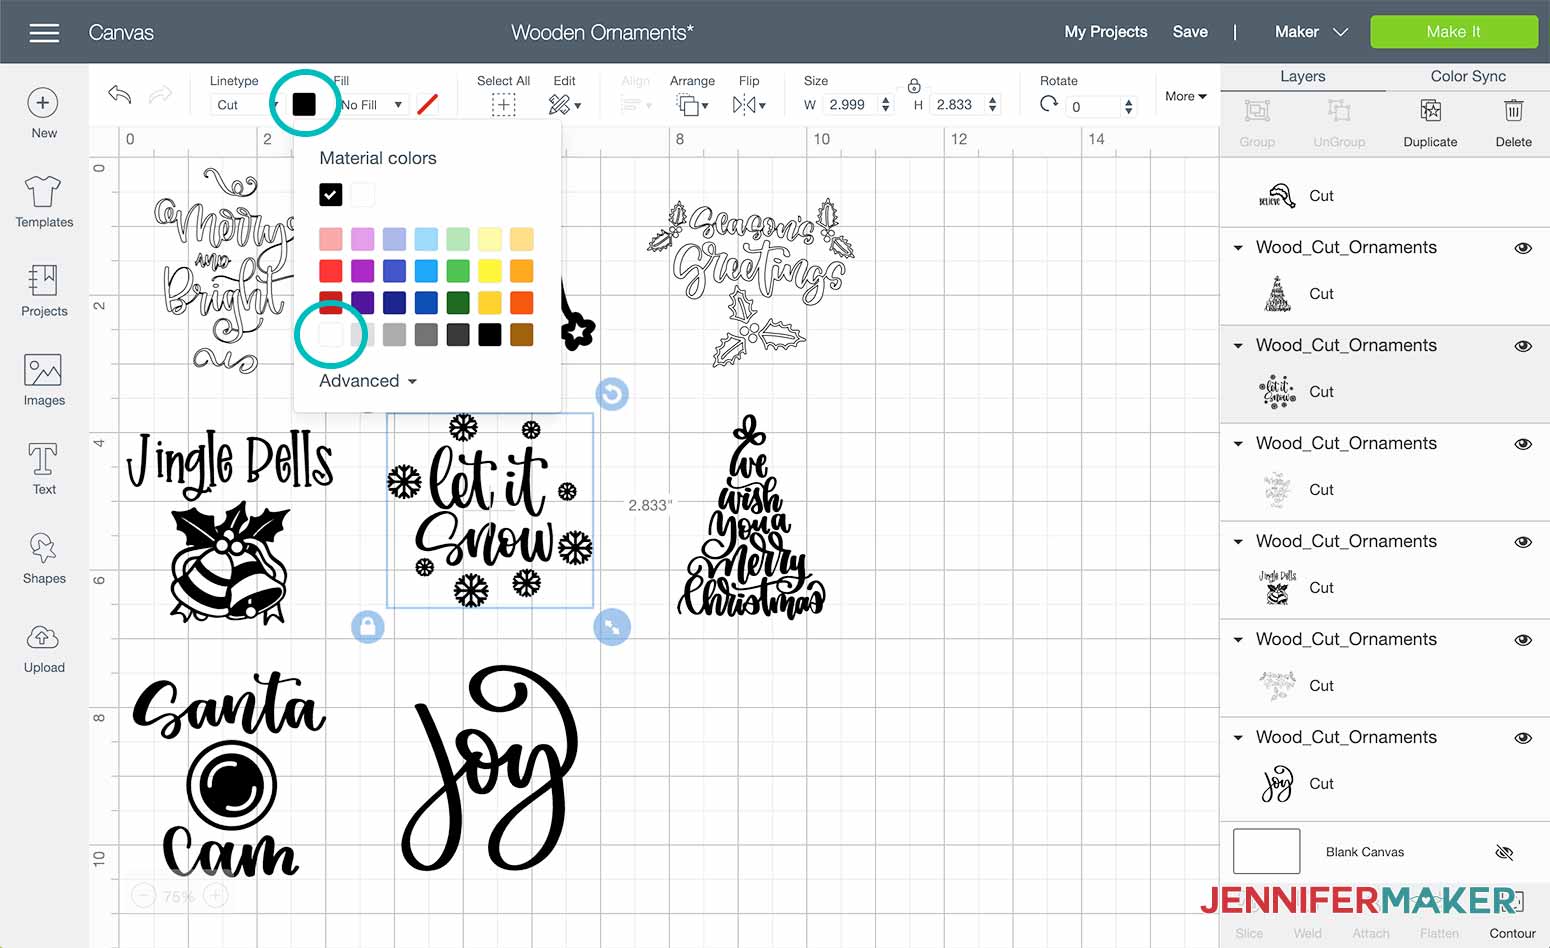
The wood slice ornament designs are sized to fit the natural wood ornaments in the project materials, however, it is always a good idea to measure the size of your ornaments as they could be slightly different and you may need to resize the designs. If you need help resizing this SVG, please see my resizing guide at jennifermaker.com/resizingguide
If you want to cut different colors of vinyl at the same time, which is a huge timer saver, take a look at my Cricut ShortCut on how to cut more than one color of material at once at jennifermaker.com/shortcut1
When you're ready to cut your project, click Make It and choose your material -- I am using Premium Vinyl here.
To cut adhesive vinyl, place the vinyl pretty side up (which means backing side down) on your cutting mat. You do not need to mirror adhesive vinyl.
Once your designs have cut, weed the design with a weeding tool, and place a piece of Standard Grip transfer tape on top of it.STEP 4: DECORATE YOUR WOOD SLICE ORNAMENTS
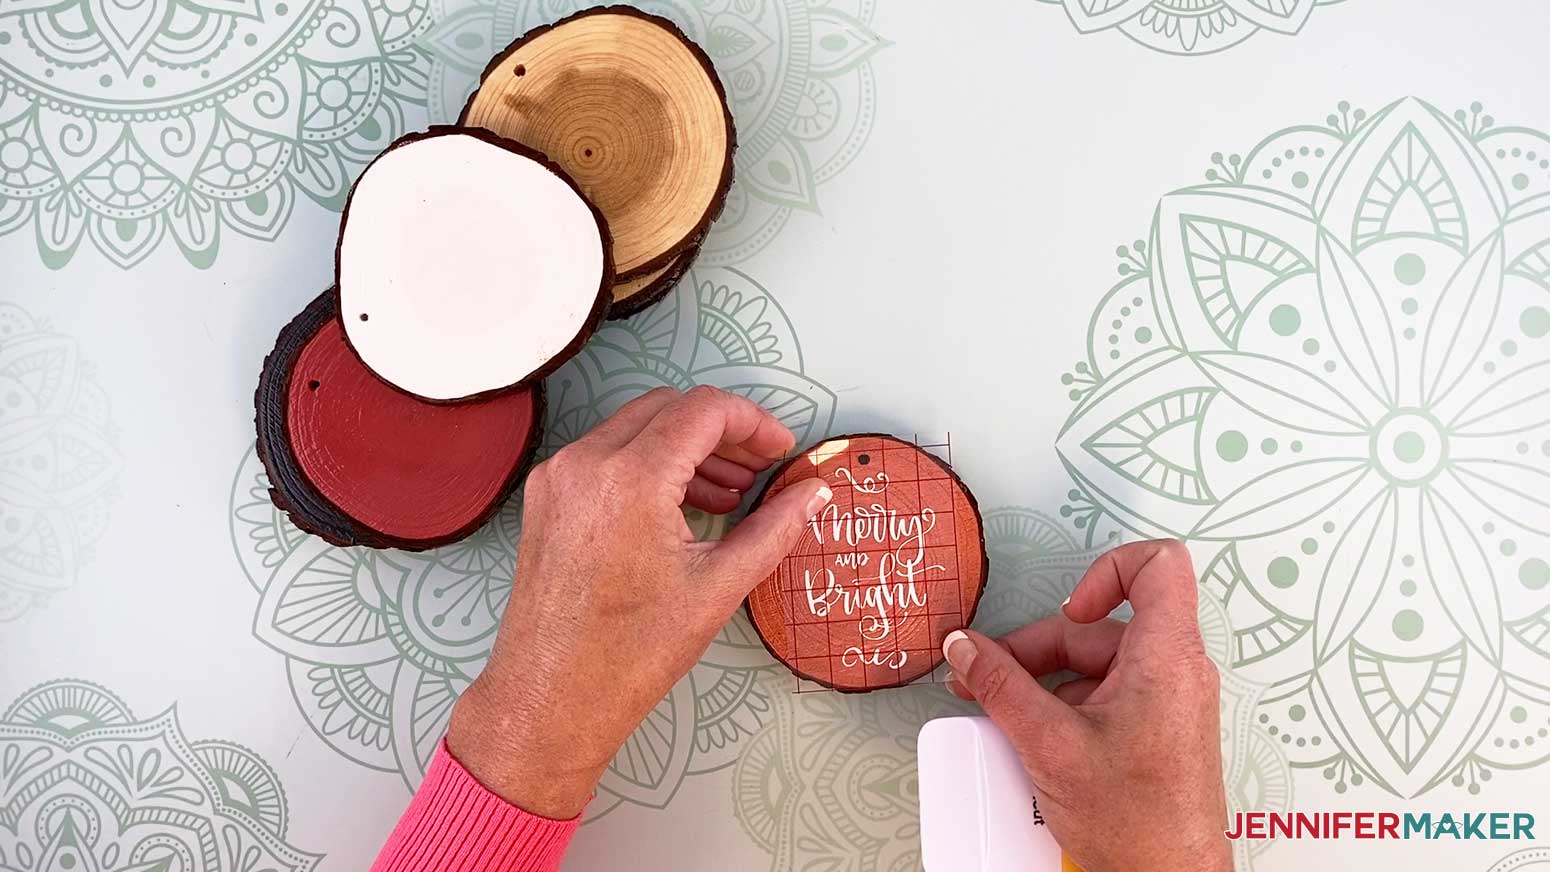
When you have the design where you like it, press it down, smoothing from the center outward to minimize any bubbles or wrinkles.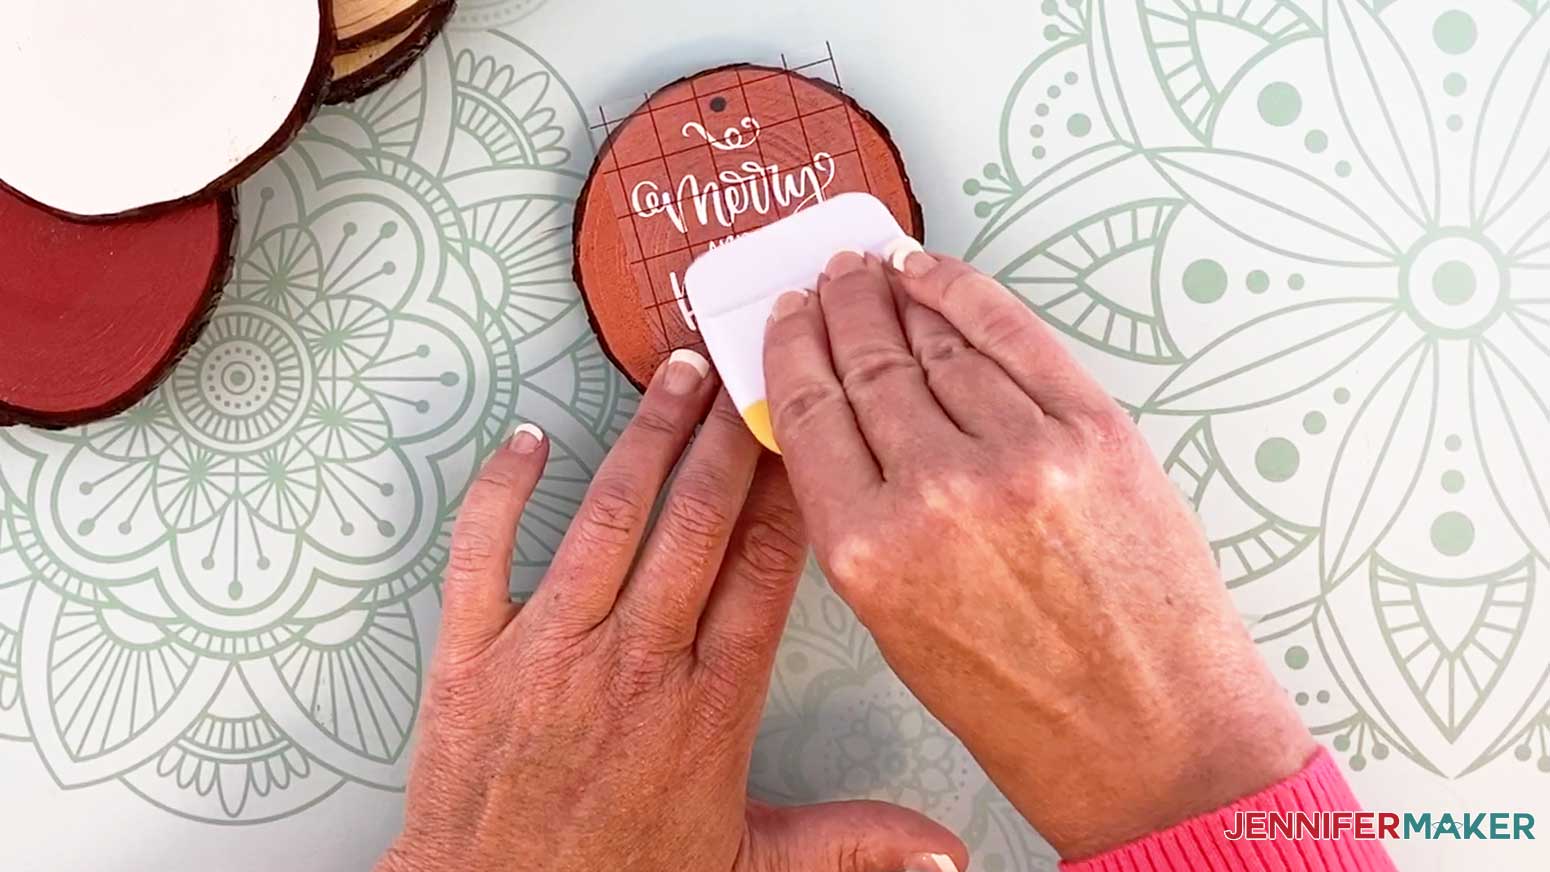
Carefully remove the transfer tape. It should come right off, but if you have any issues, go slower and use the tip of your weeding tool to help you keep the vinyl in place as you go.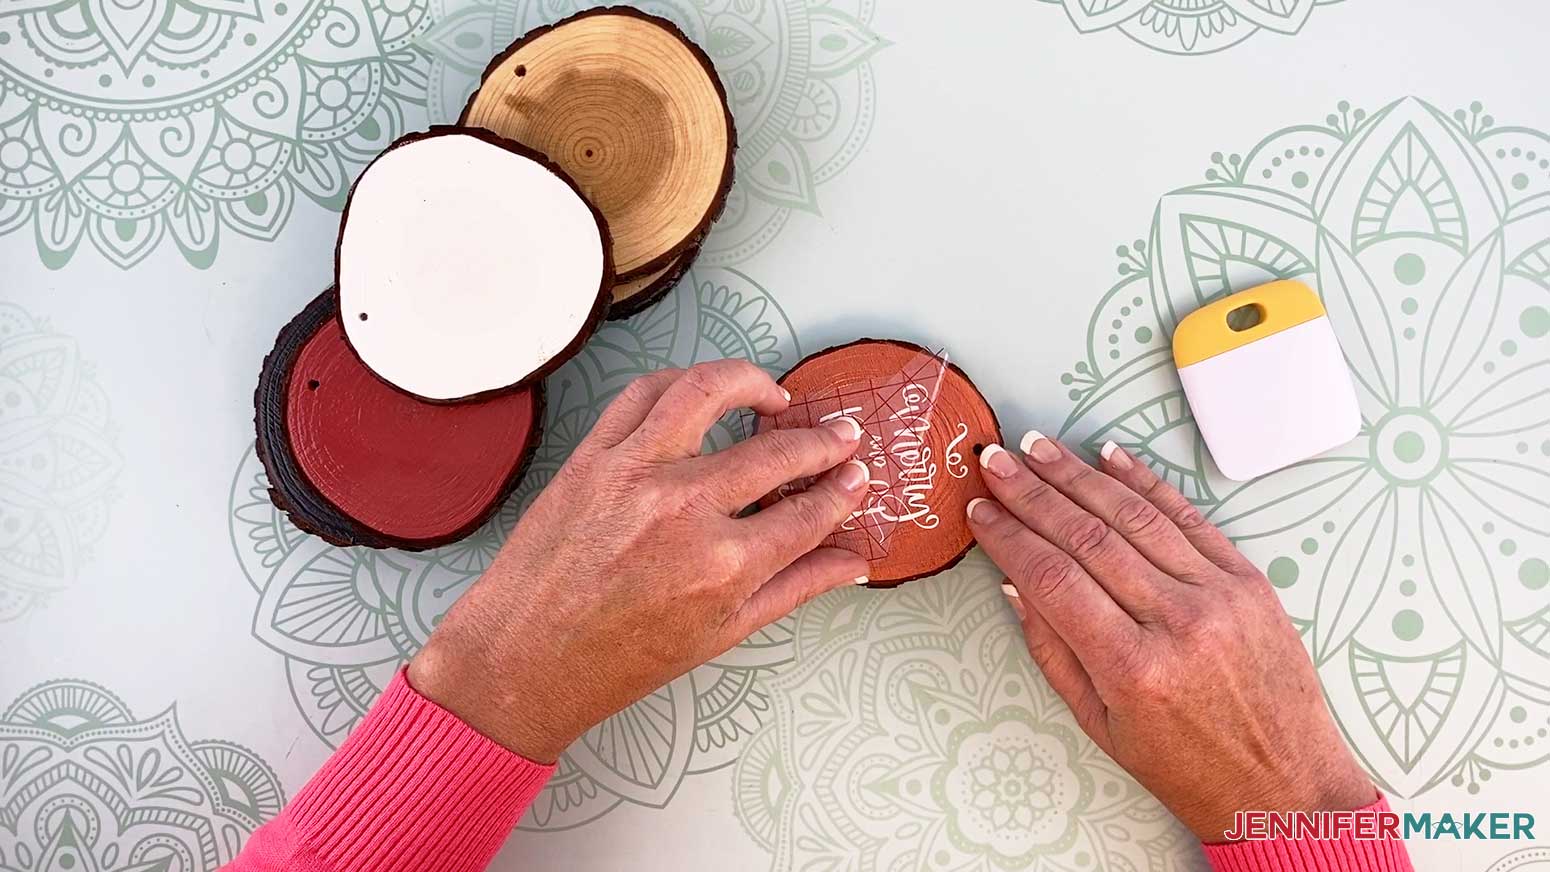
You can use a gloss varnish to seal the vinyl on the wood slice. It's not necessary to seal the vinyl — this is up to you!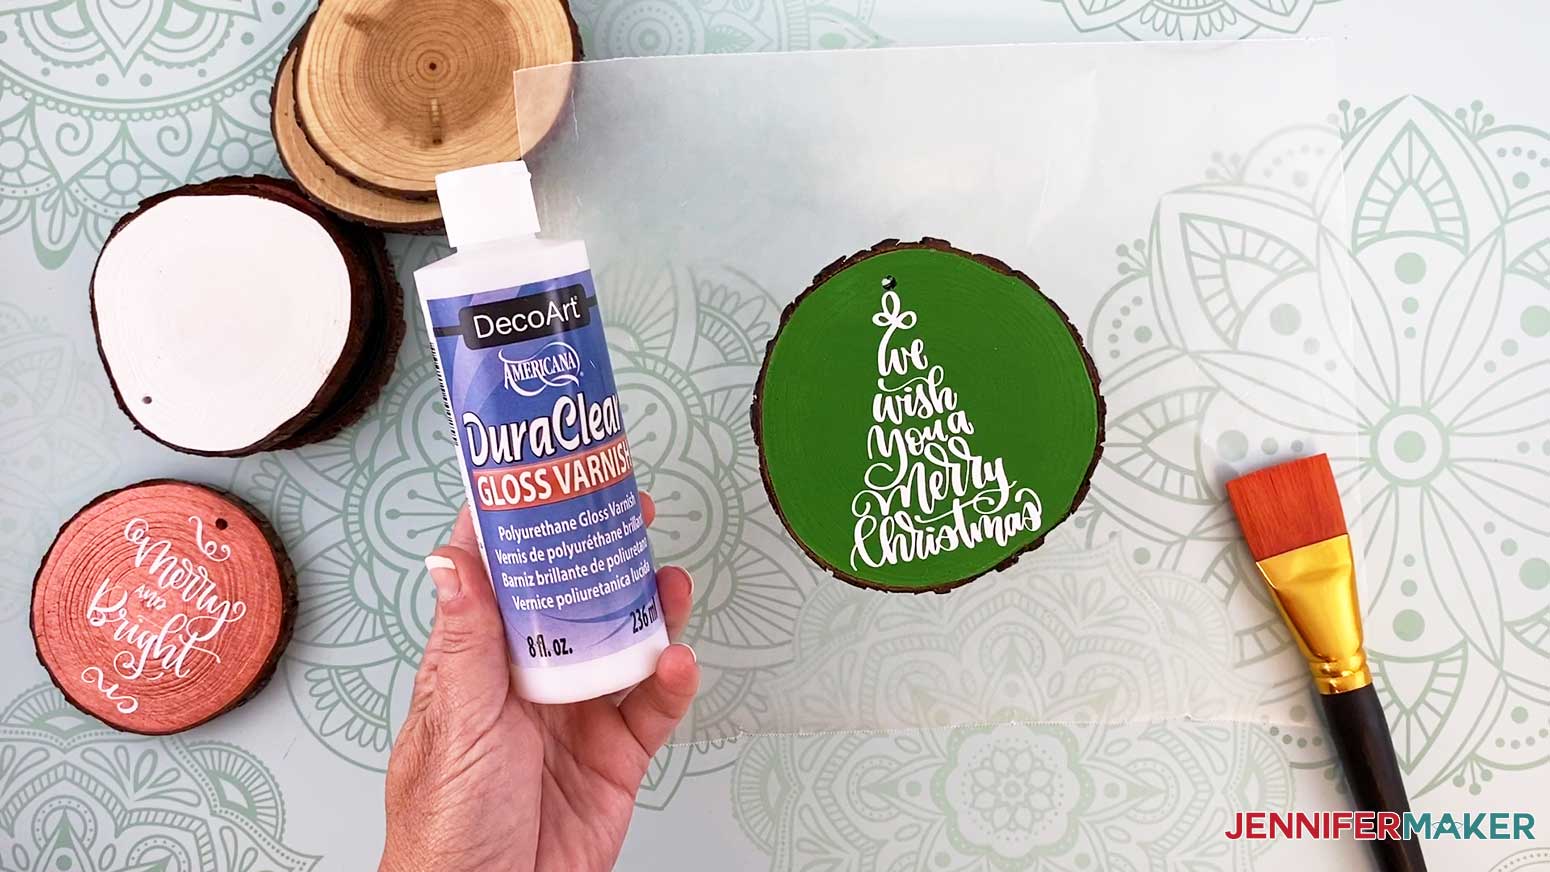
To seal your ornament, just pour a quarter-size amount of varnish on the ornament. and use a paintbrush to spread the varnish over the ornament. 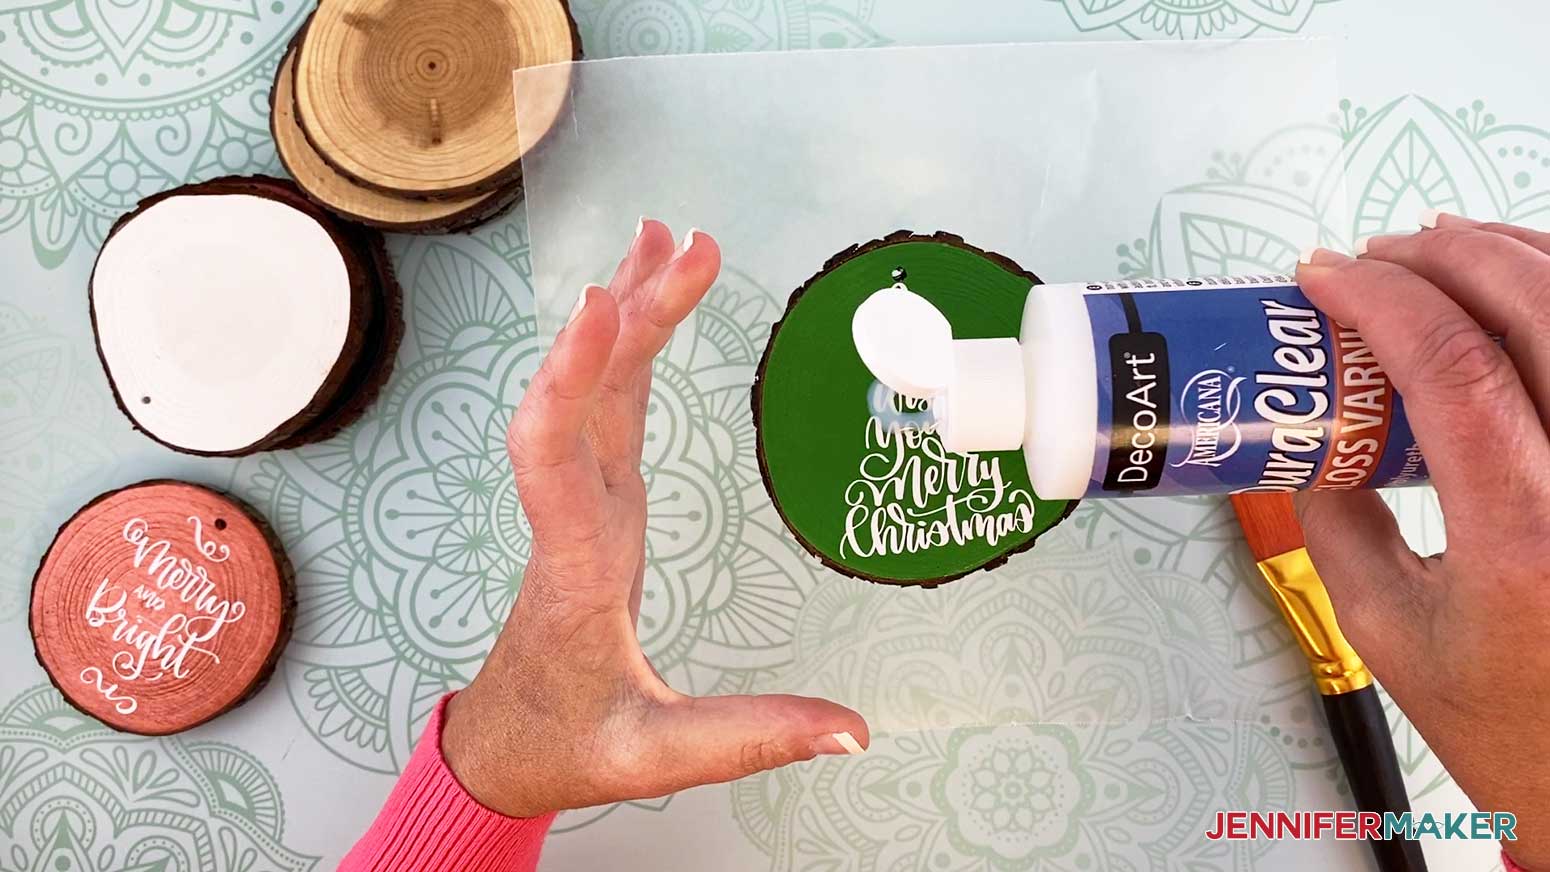
Once your wood slice ornaments are dry, add a piece of string or ribbon for hanging on a tree or package.STEP 4: SHOW IT OFF
Notes
FONTS
ACKNOWLEDGMENTS
Recommended Products


Answers to Your Questions About How to Make Wood Slice Ornaments
Q: Does the varnish make the ornament waterproof and keep the vinyl from coming off?
Permanent vinyl, which is recommended for this project, is very durable! I recommend paint or varnish before applying the vinyl because it will make the wood surface smooth, which is what vinyl needs to adhere well! Many people choose to apply a sealer afterwards as well, which would probably help with the waterproof aspect, but if you are just worried about the vinyl coming off, it shouldn’t if you follow the instructions!
Q: Can you use Mod Podge instead of the varnish?
Absolutely!
Q: Can you use cedar instead?
Yes, any wood should work! Cedar would be very pretty!
Q: Can you use spray paint instead of acrylic paint?
You sure can, but you will need to be very careful not to paint the natural wood sides of the ornament! You will have more control if you can paint with a paintbrush on this project.
Q: Do you need to sand the wood first?
If you are purchasing them from a store, you do not need to sand them, but if you are making them from fresh cut wood, then you will need to sand them to smooth them out.
Get my free SVG files to Make Wood Slice Ornaments
I’d love to see your Wood Slice Ornaments and all the ways you decorate them! Please share a photo in our Facebook group or tag me on social media with #jennifermaker.
See all of the projects, tutorials, and free designs in The Great Maker 25-Day Gift-Away Challenge!
Love,

Want to remember this? Save this Wood Slice Ornaments tutorial to your favorite Pinterest Board!


Thank you so cute!
Thank you so much!
Looking forward to replenishing my supplies and getting started
Yes! Sounds like a good plan!
Jennifer I would like to put pictures on a wooden ornament for my mother of her great grandkids and put their birthdate on it. My mother is almost 90 so she can see the great grandkids pic and she will now therir birtbate. Would it be about the same? Would you use clear vynel? I would also like to do a 13 month calander and not sure how. I would like to put pictures on the top and then put their picture on the date. Please advise.
Hi Candy! For the ornament I would consider using printable vinyl, a print then cut design might be the easiest route to take. I don’t currently have a month to month calendar project, you might be better off looking into a company like Zazzle to make a custom calendar.
What font is the “Joy” in? We made these, but are thinking of using the font to make individual ornaments with family names. Thank you!
When are you doing the giveaway for the Grand prizes?
If not December 26th, shortly there after, Julie.