
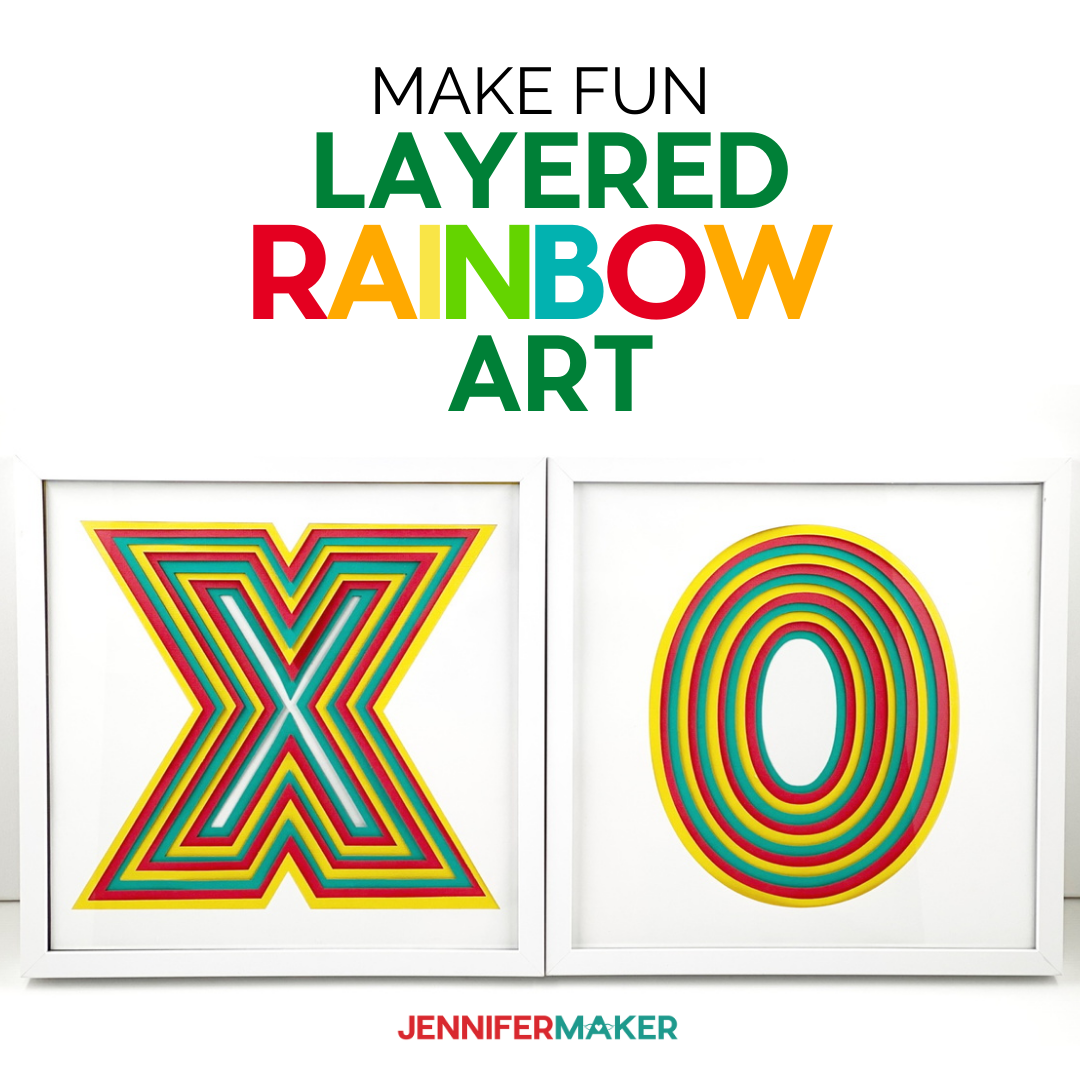
Learn how to make this fun 3D Layered Paper Art with “hugs” and “kisses” for your home with this easy tutorial!
I absolutely love to create 3D layered paper art designs and they can be adapted to fit into any theme! For this holiday season, I wanted to make sure to include a new 3D design, one perfect for the holidays. I have several of these on my blog because they are so popular. You can find my series of four Layered Paper Art Designs (the flower, the crystal/diamond, the pinwheel, and the star) and my blog for more inspiration. These Layered Art designs are so easy to make, just open my design in Cricut Design Space, load the paper, and start cutting. So for the last day of the 25-Day Gift-Away, I am showing you how to make a 3D Layered Paper Art, perfect to frame for your home!
See exactly how to cut and assemble this hugs and kisses 3D paper art in my tutorial video (or keep scrolling if you prefer a printable step-by-step photo tutorial):

 What is The Great Maker 25-Day Gift-Away? This is an annual tradition here at JenniferMaker! Every day for the first 25 days of December we gift you with a brand new project, design, tutorial, and video. On top of that, we host a giveaway with 25 prizes. Some of the amazing prizes are Cricut cutting machines, sewing machines, gift cards, and beautiful print editions of our popular Cricut Coach Playbook. You can even earn bonus entries for sharing photos of the daily projects! Click here to learn more about The Great Maker 25-Day Gift-Away!
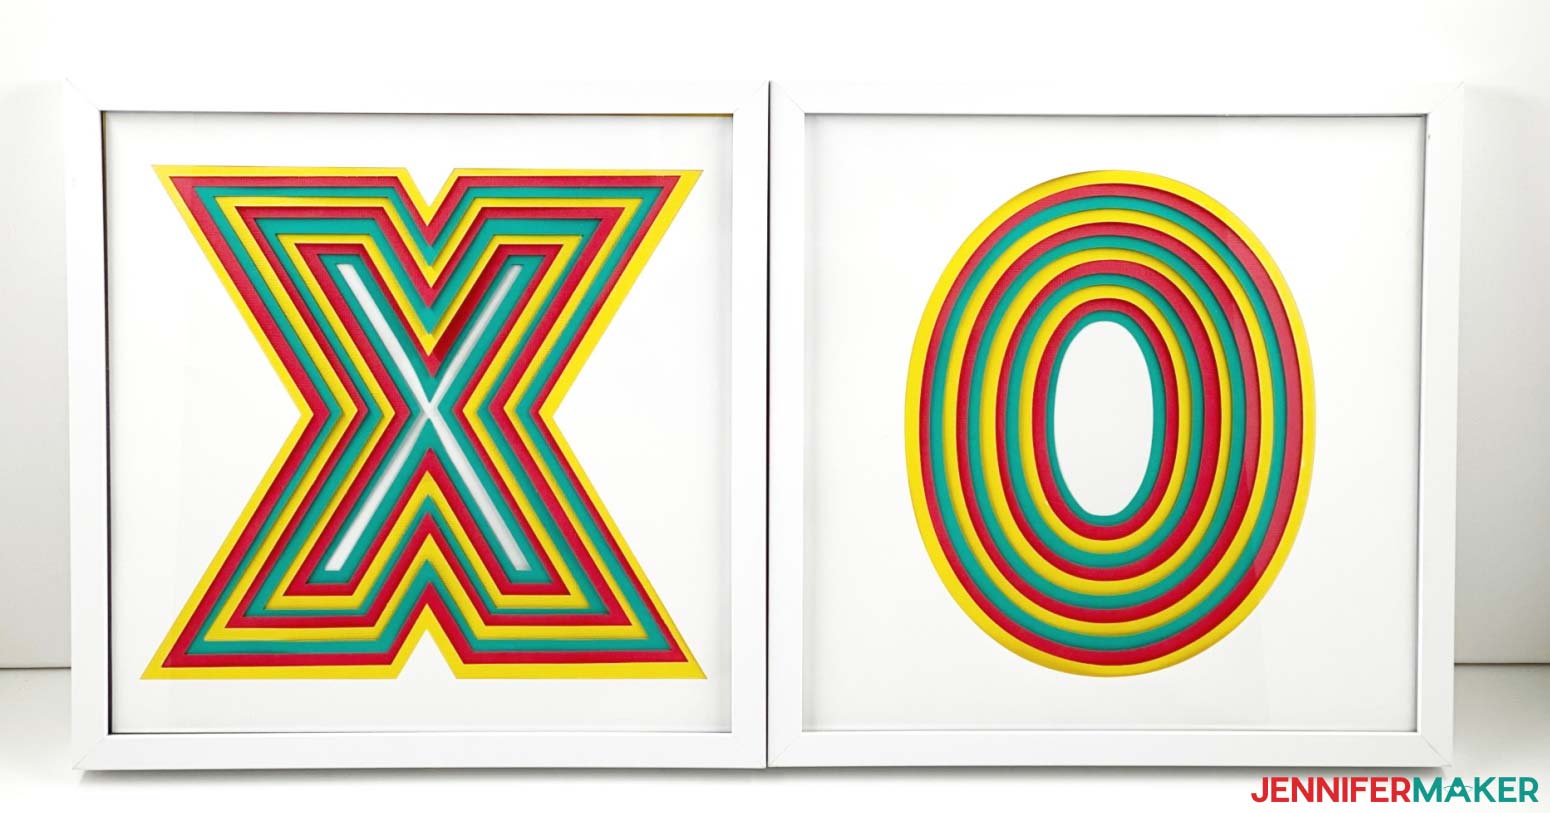
So these are my hugs and kisses paper art! You know, XOXO! The O represents the hug, like this. And the X is the kiss. I’ve always wondered WHY these symbols represented hugs and kisses. It turns out the X stands for a kiss because back in the middle ages, people would sign their name with an X. Then they would KISS the X to demonstrate their sincerity. So the X is the kiss!

To make the set of paper art, with one hug and one kiss, you need about 30 sheets of 65 lb. cardstock — the 12″ x 12″ size. You can use 80 lb. or 110 lb. instead if that’s what you have. For these here, I used four sheets of white cardstock and seven sheets of red, blue, and red cardstock each.
You’ll also want some foam mounting tape, I recommend the half inch size. If you don’t have that, you could use foam dots or foam core cut into small pieces.
The only other supply you’ll need is a white shadow box frame. The ones I used are 11″ x 11″ square.
I used a Cricut cutting machine to cut my cardstock, along with the fine point blade and a green standard grip cutting mat.
And that’s all you need. This is a really easy project — great for beginners!
So let me show you where to find the designs, and then I’ll show you how to cut and assemble your hugs and kisses! This post contains some affiliate links for your convenience (which means if you make a purchase after clicking a link I will earn a small commission but it won’t cost you a penny more)! Read my full disclosure policy.
Materials to Make the Hugs & Kisses Layered Art
View my Amazon shopping list with the exact items we used to make this project!
- Two (2) 11″ x 11″ white shadow boxes
- Twenty-five (25) sheets of 65lb., 12″ x 12″ cardstock – Choose three colors with seven (7) pieces of each
- Four (4) sheets of 12″ x 12″ white cardstock
- One (1) package Foam mounting tape, 1/2″ x 150″
- One (1) Cricut Standard Grip Cutting Mat
- One (1) pair of Scissors
- A way to cut your paper (I used the Cricut Maker cutting machine, but you can also use the Cricut Explore)
- Design #276 – My free SVG design files (available in my free resource library—get the password by filling out the form at the bottom of this page)
How to Make a Hugs & Kisses 3D Layered Paper Art Project
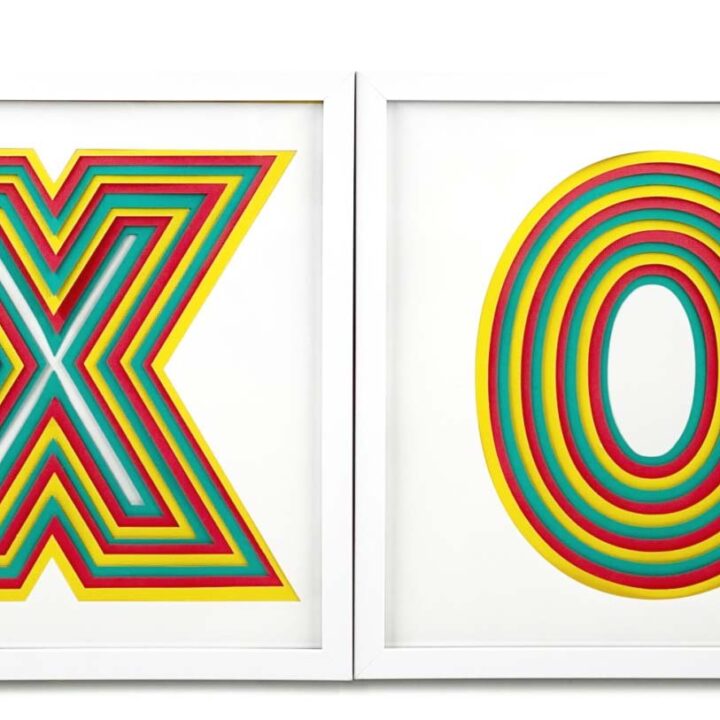
Hugs & Kisses 3D Layered Paper Art
Make these fun and vibrant 3D layered paper project to display in your home and match your decor!
Materials
- Two (2) 11" x 11" white shadow boxes
- Twenty-five (25) sheets of 65lb., 12" x 12" cardstock - Choose three colors with seven (7) pieces of each
- Four (4) sheets of 12" x 12" white cardstock
- One (1) package Foam mounting tape, 1/2" x 150"
- Design #276 - My free SVG 3D Layered Paper Art design file available in my free resource library—get the password by filling out the form at the bottom of this page
Tools
Instructions
STEP 1: Get my 3D Layered Paper Art Design
Get Design #276 which is the free SVG file for this tutorial. You can download it from my free resource library (get the password to the library in the form at the bottom of this post).
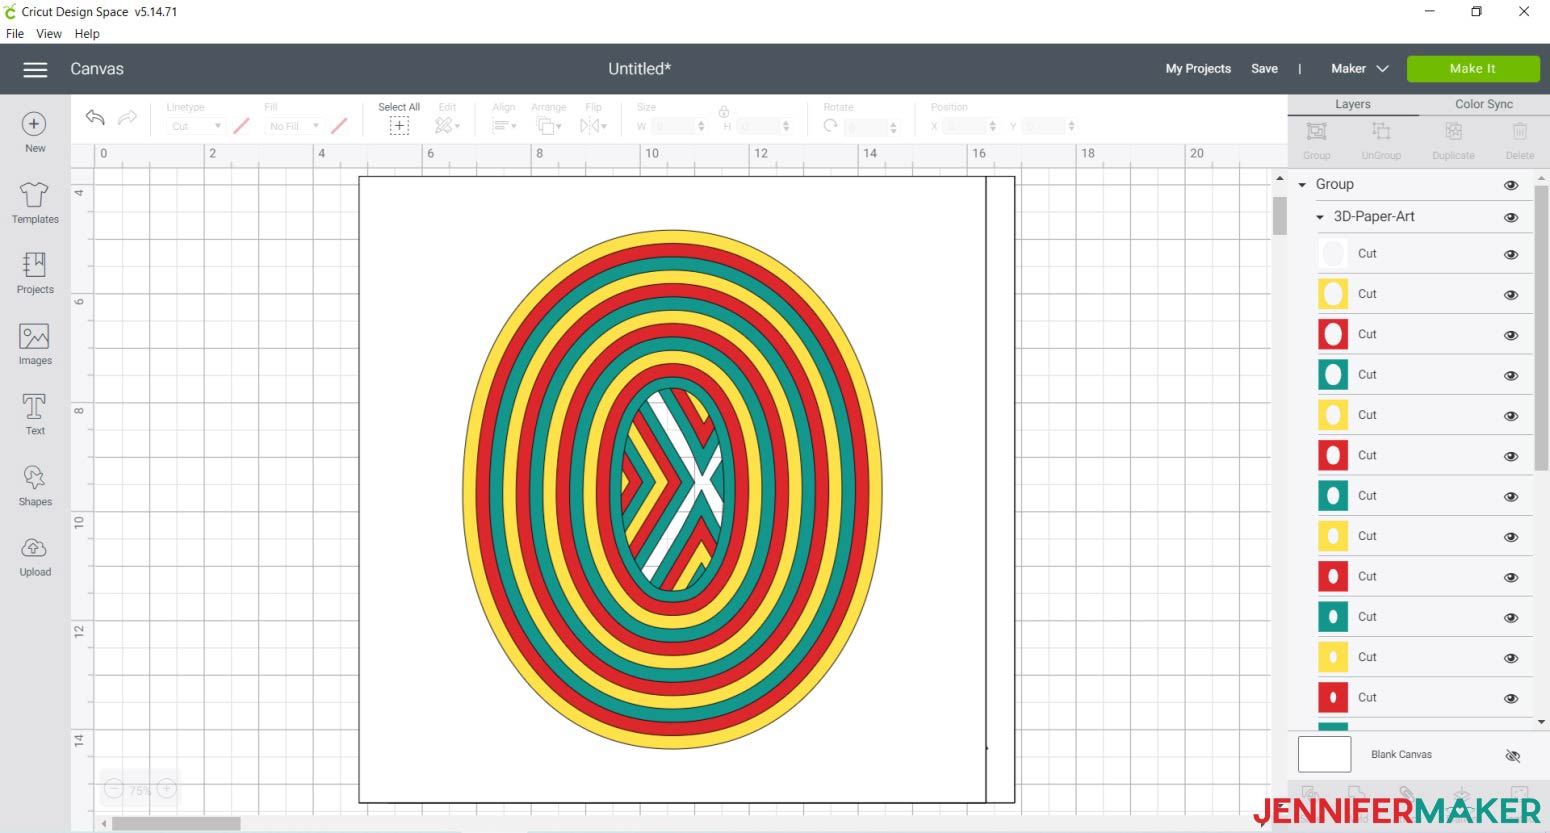
This is what my 3D Paper Art design looks like in Cricut Design Space.
Tip: If you are not sure how to upload an SVG cut file to Cricut Design Space, watch this helpful video training series I made. If you are on an iPad or iPhone, here is how to download and upload SVG files to the Cricut Design Space app.
STEP 2: Cut the 3D Layered Paper Art Design
Ungroup the 3D Paper Art design once you have brought it into Design Space. Separate the X from the O like this:
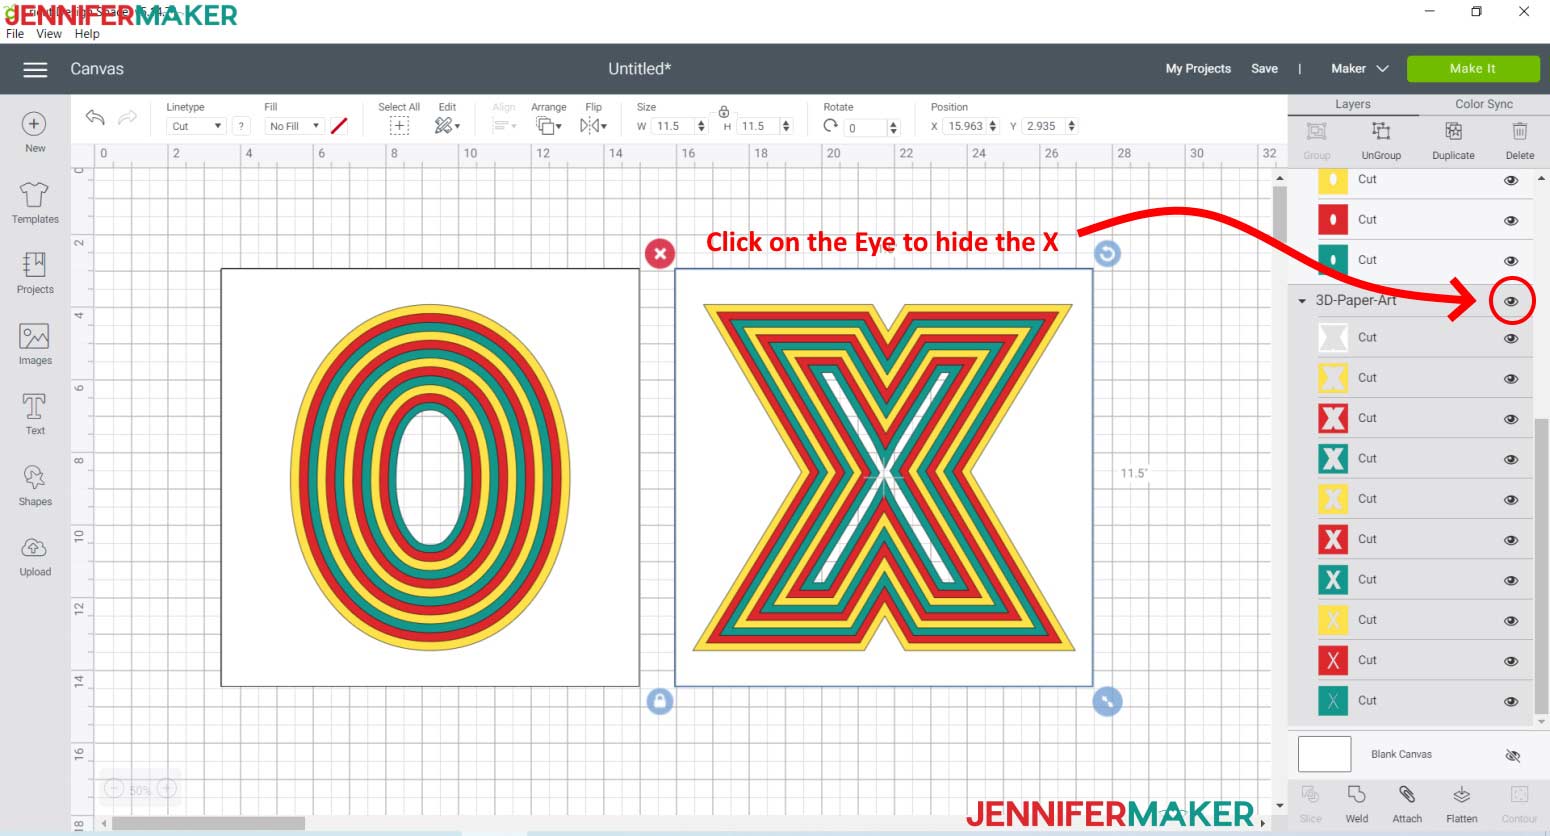
Next, click on the X to make it active and go to the right-hand column, to the very first Eye, and click on it. Doing so will prevent the X from being made until you are ready for it. After the X is no longer in the Design Space window, your screen will look like this:
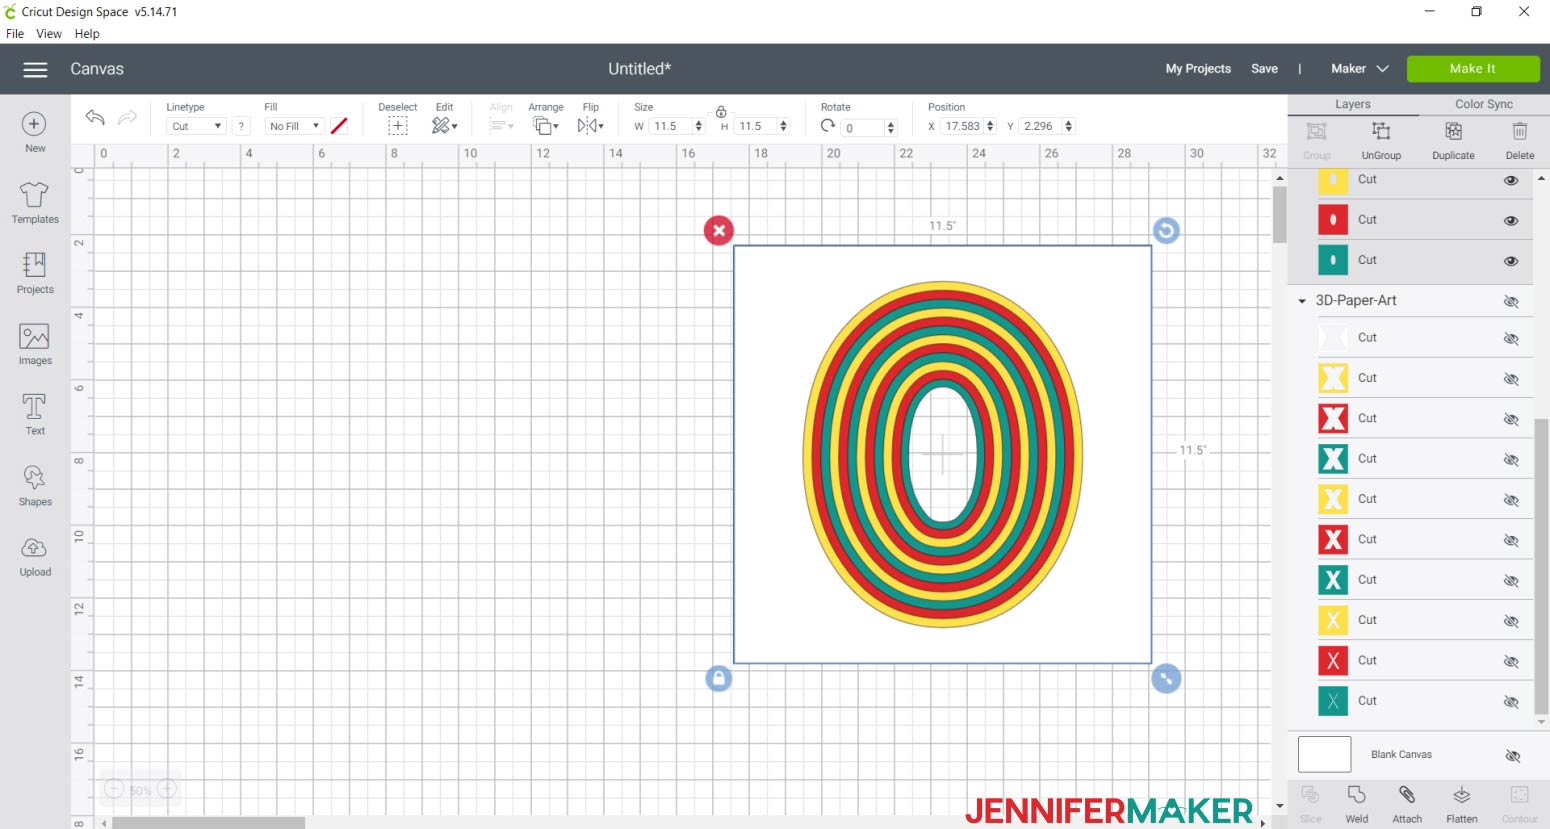
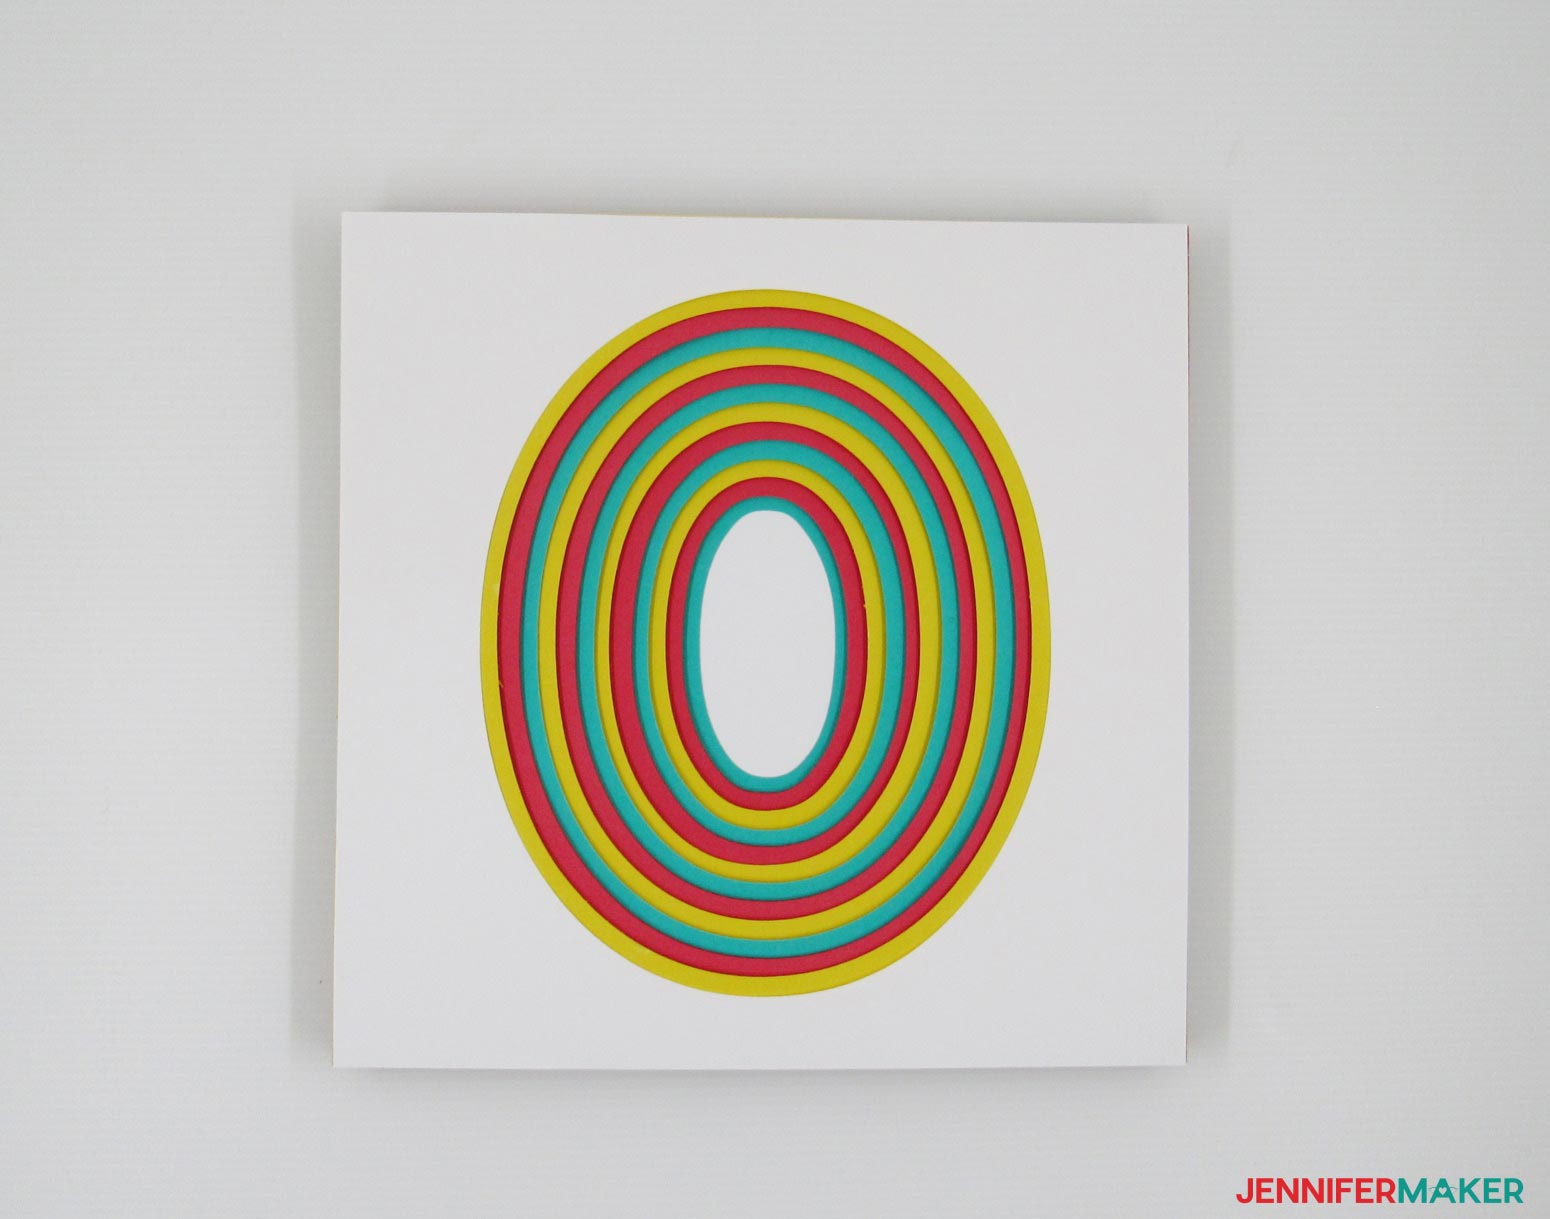
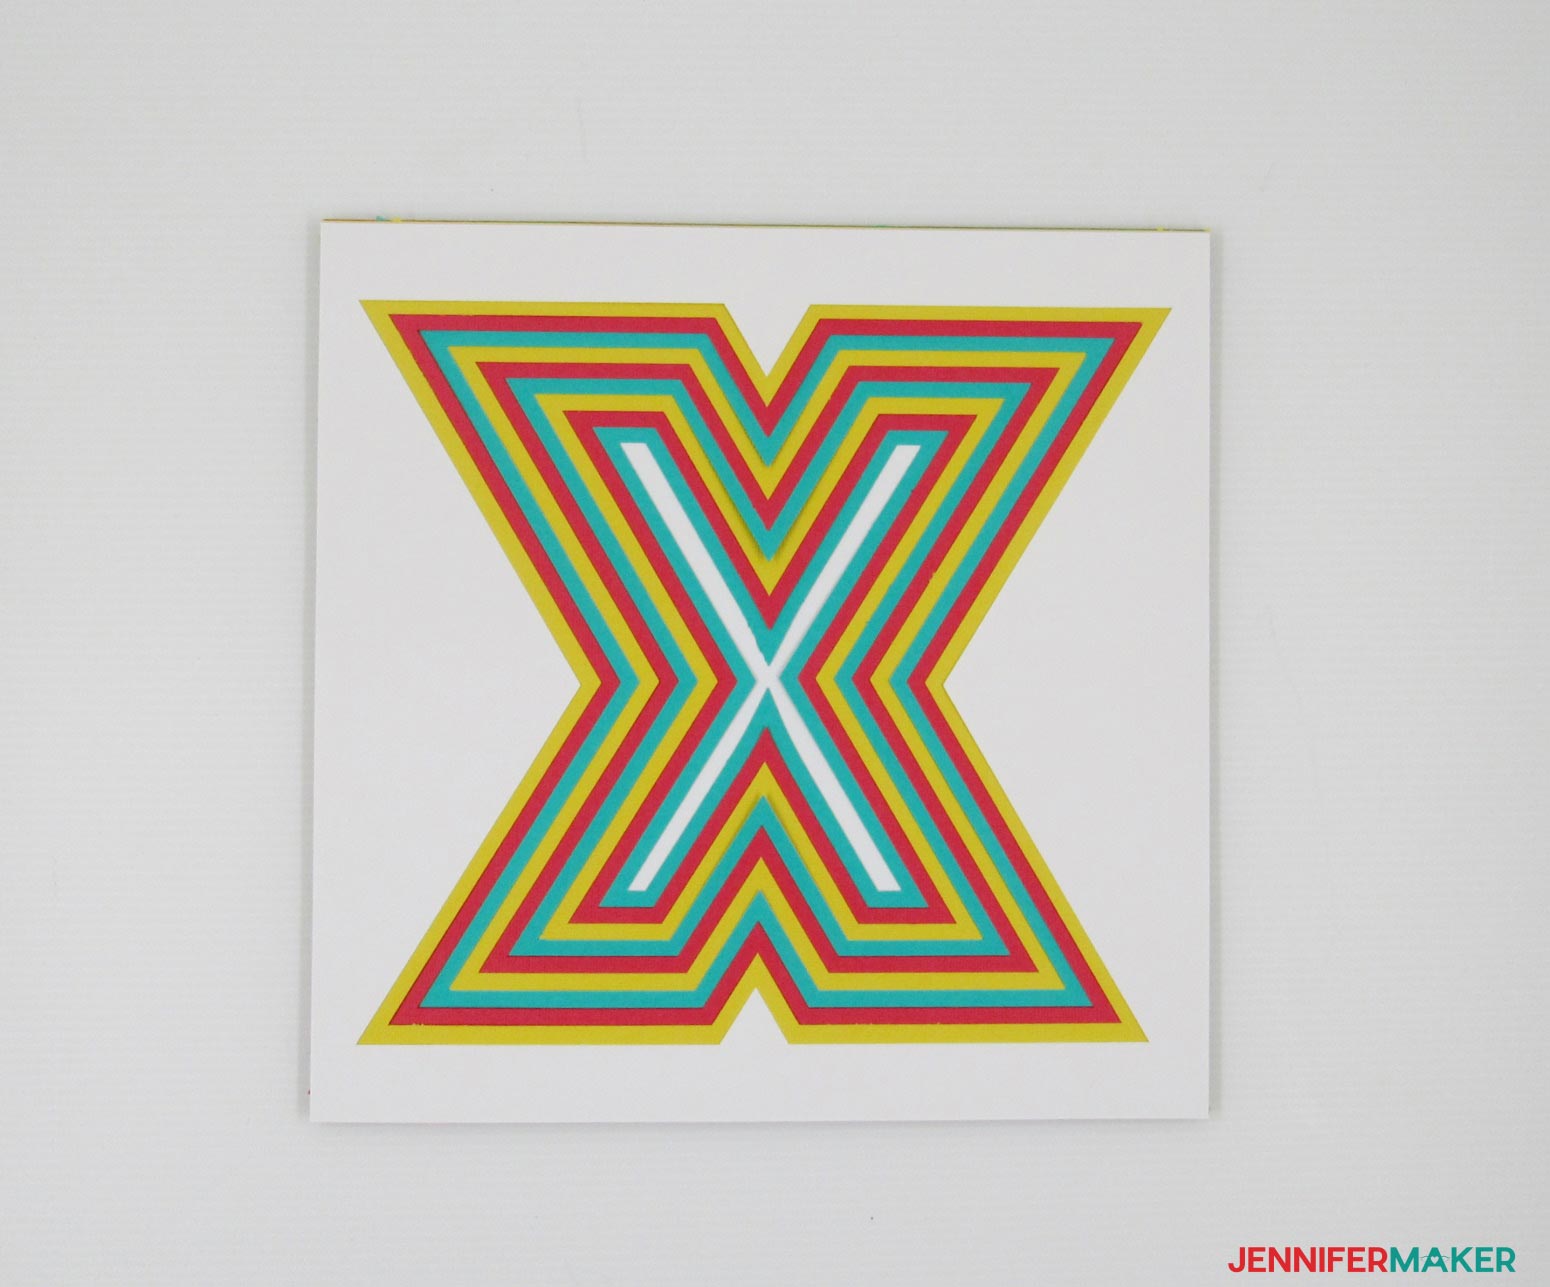
The O design contains 13 layers for the design plus one additional piece of cardstock layer for the back. Each of the 13 layers takes approximately 45 seconds to cut. The X design contains 10 layers for the design plus one additional piece of cardstock layer for the back. Each of the 10 layers takes approximately 45 seconds to cut. The file is sized 11" x 11" which fits my shadowbox frame perfectly.
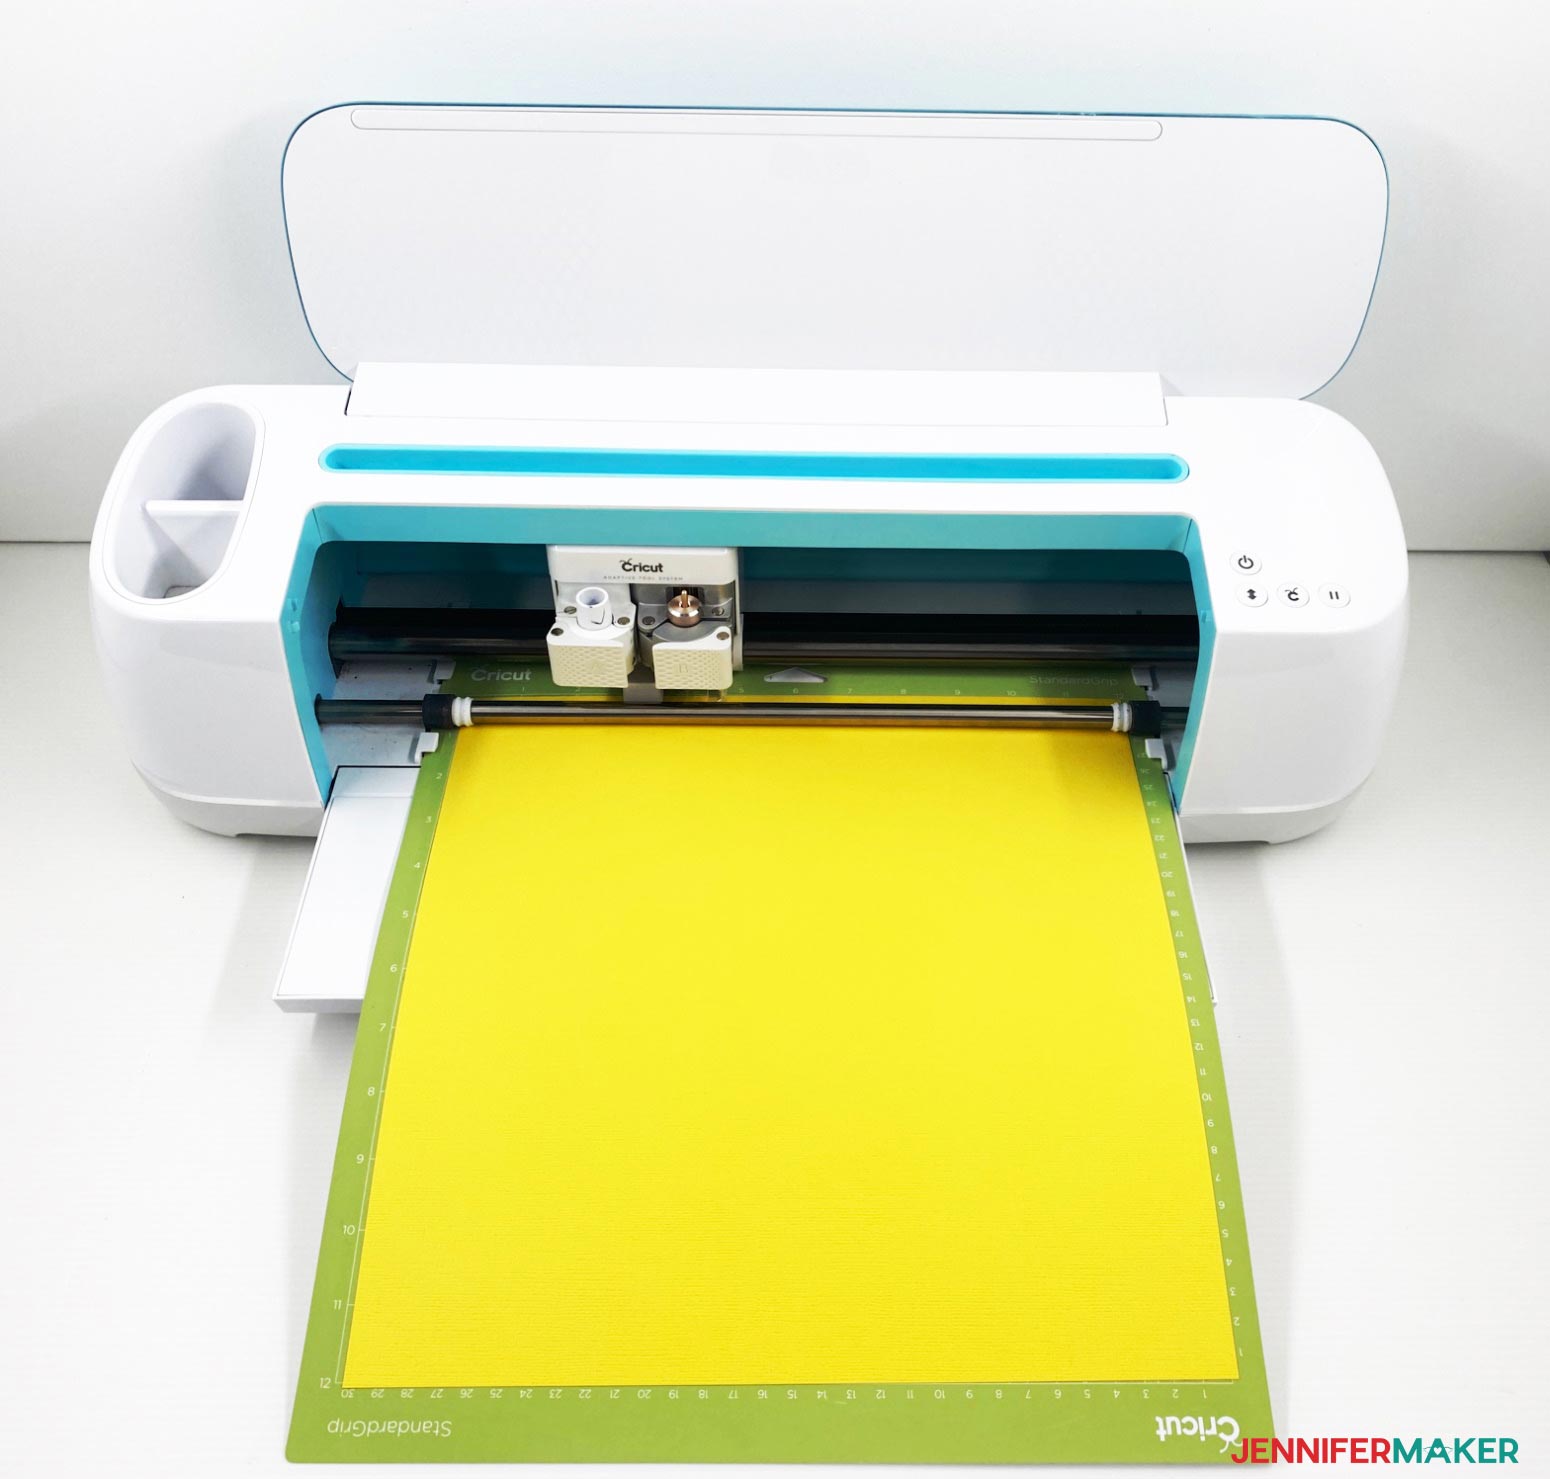
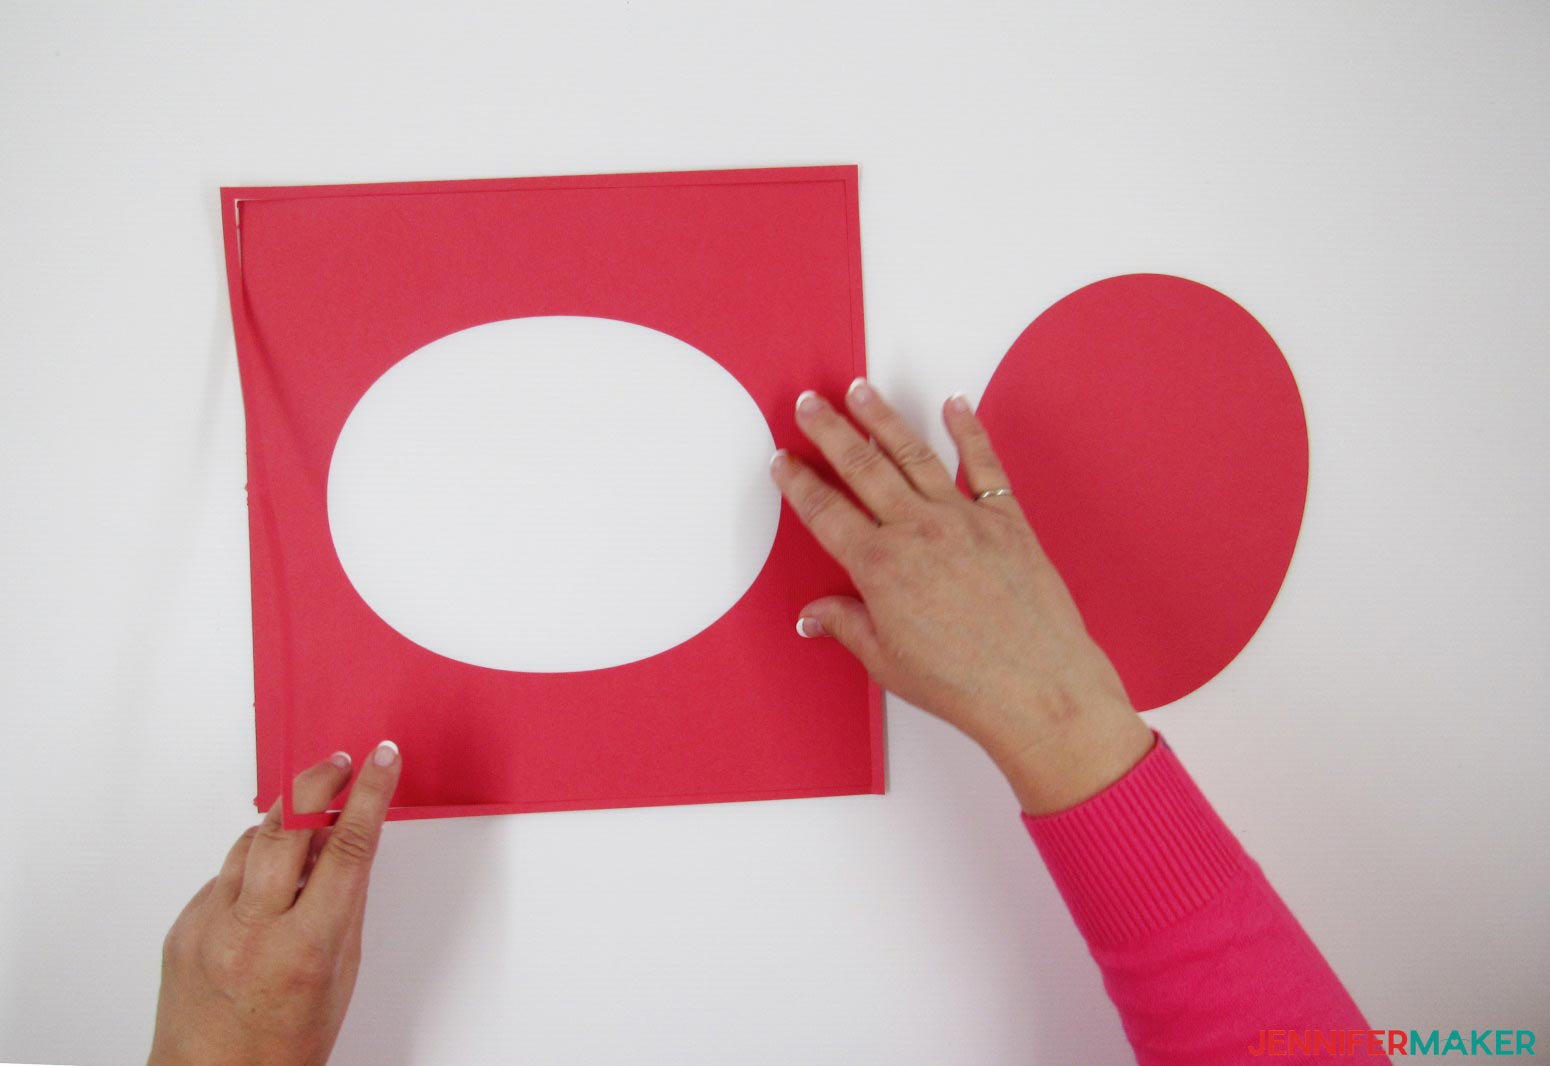
After you have cut each layer, be sure to remove the cardstock from the mat as pictured below. Removing it in this manner will prevent the cardstock from curling.
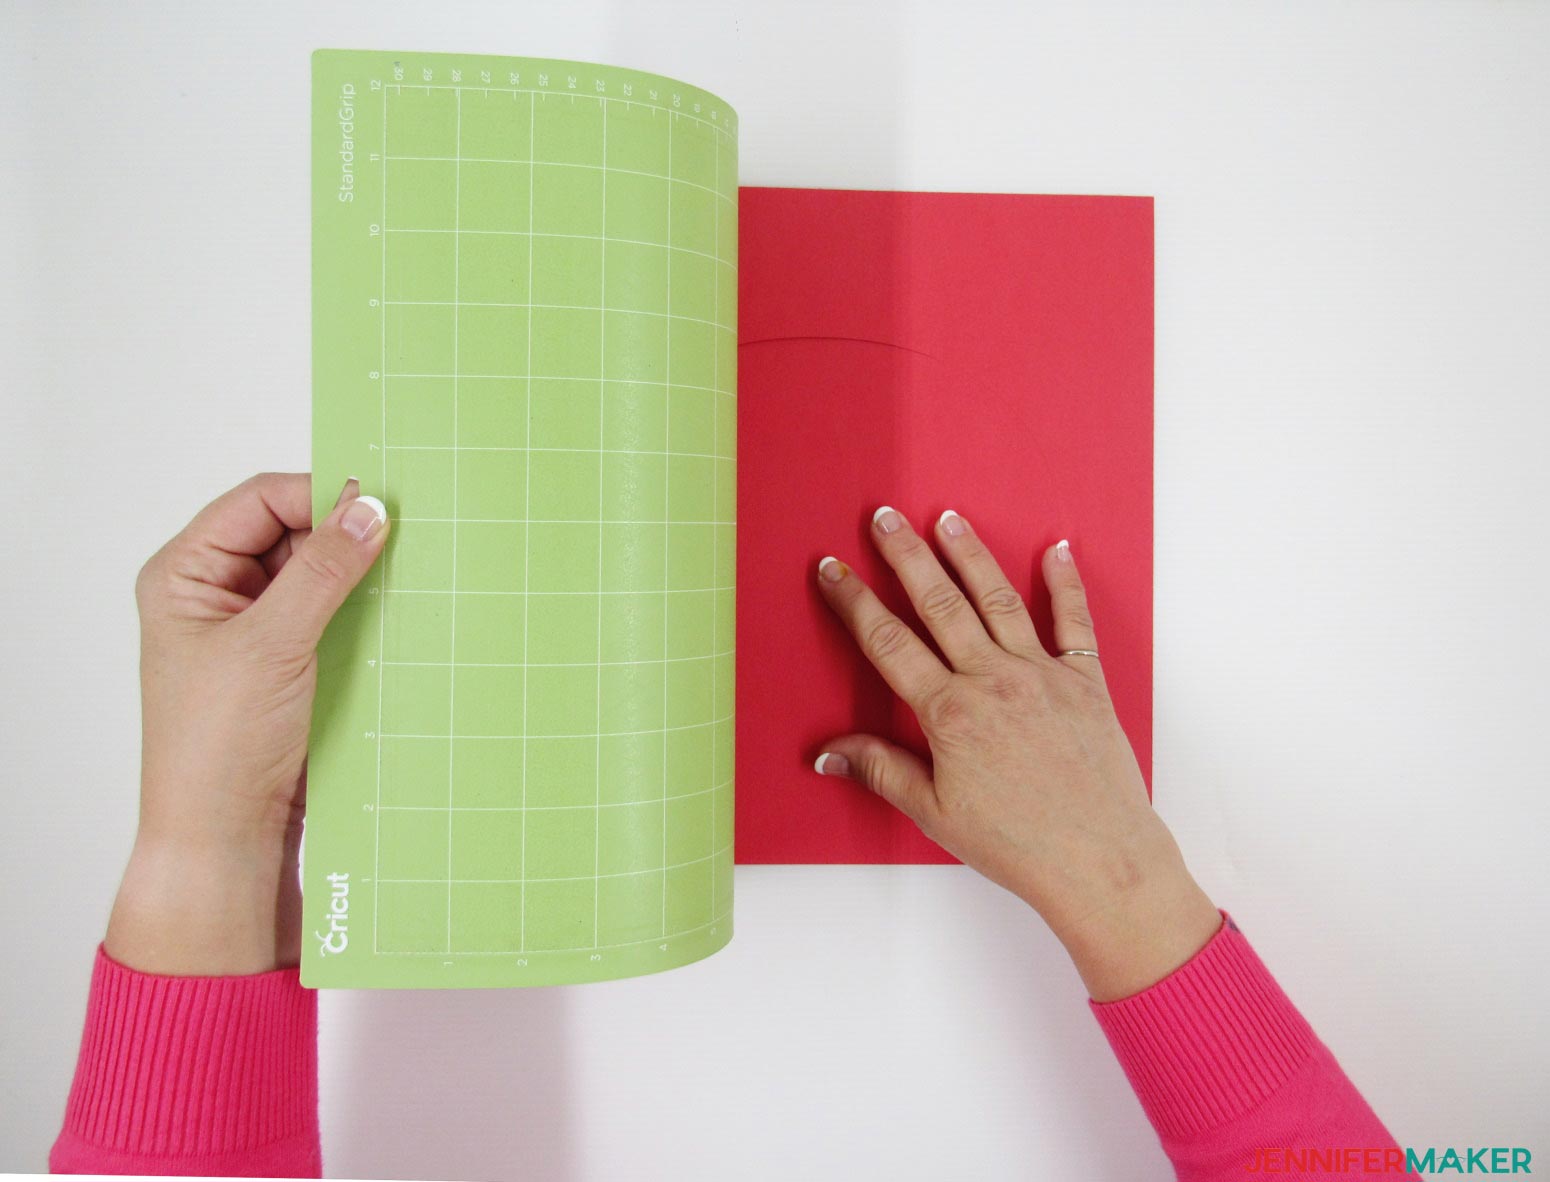
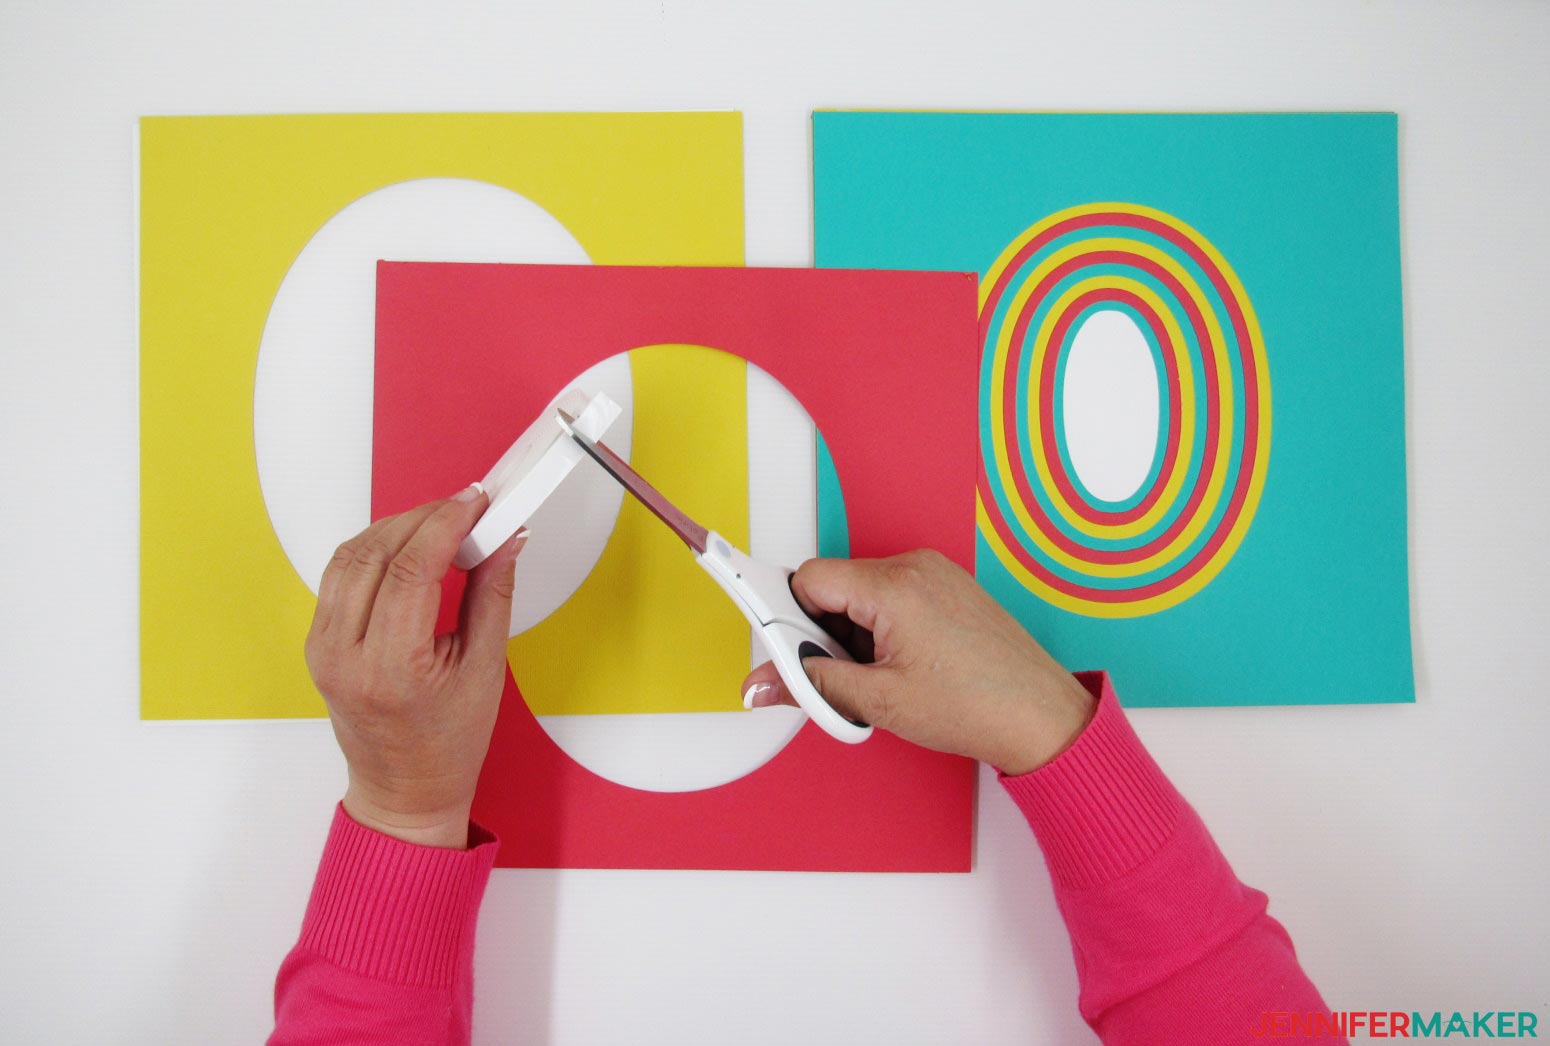
Carefully remove the cut cardstock from the rest of the design.
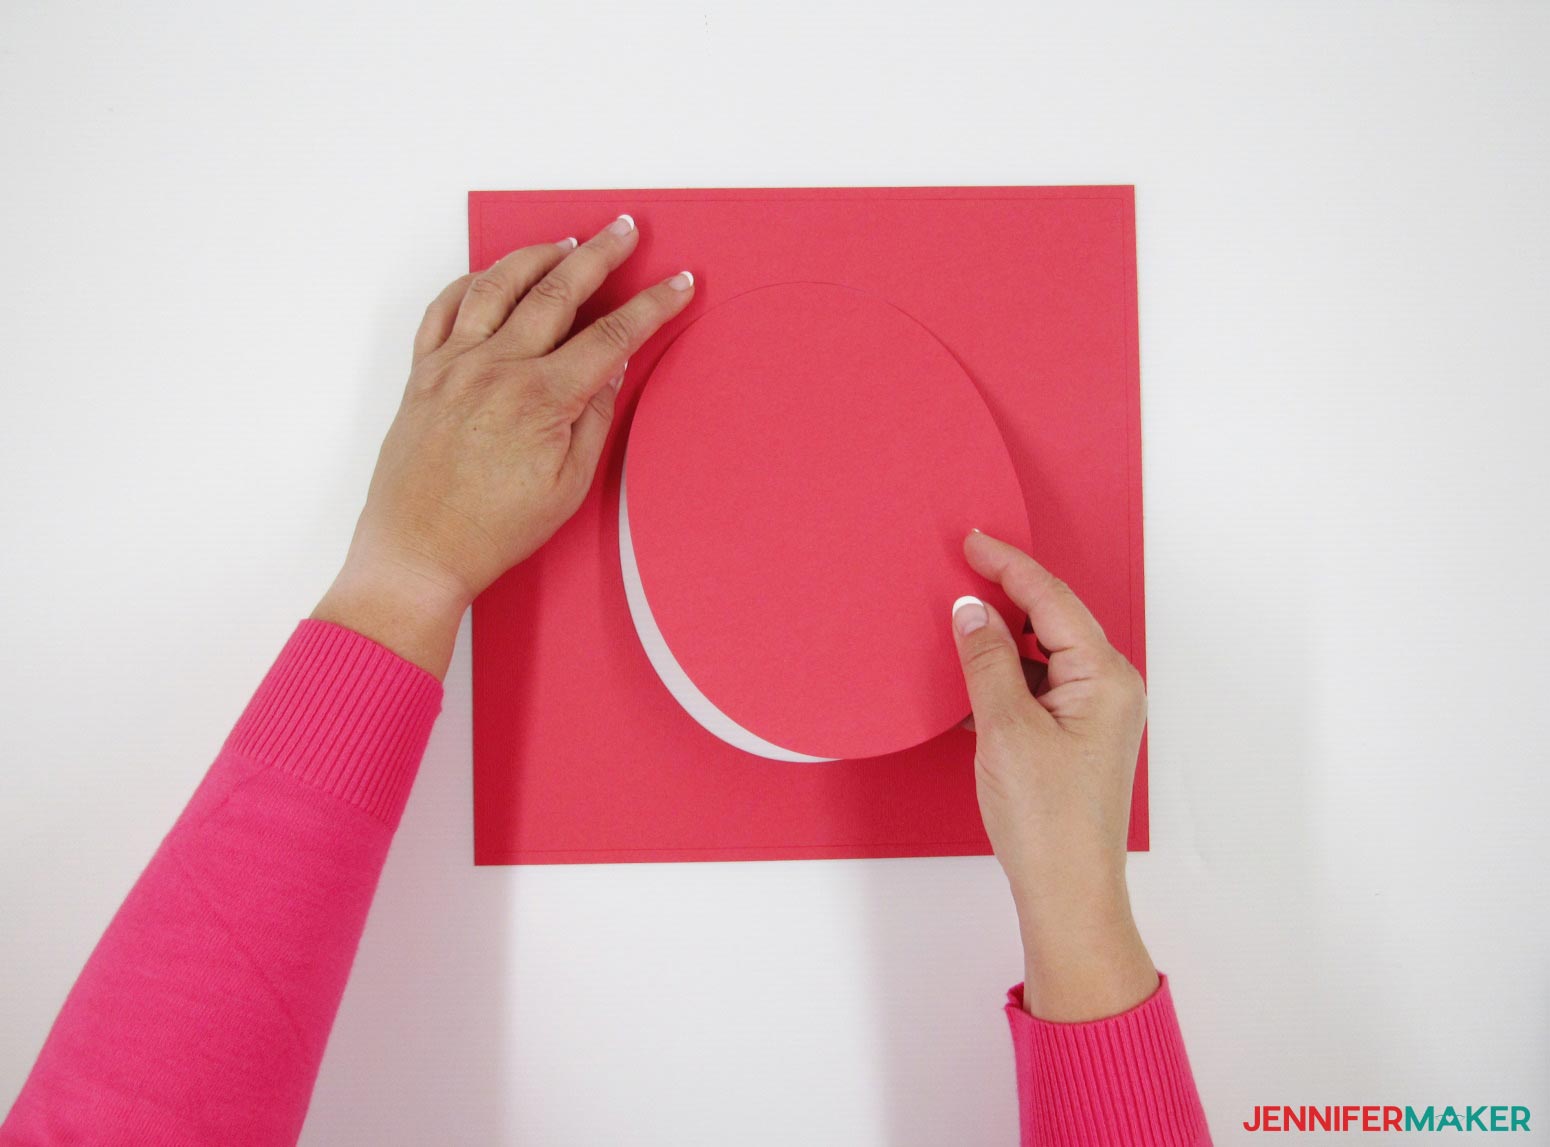
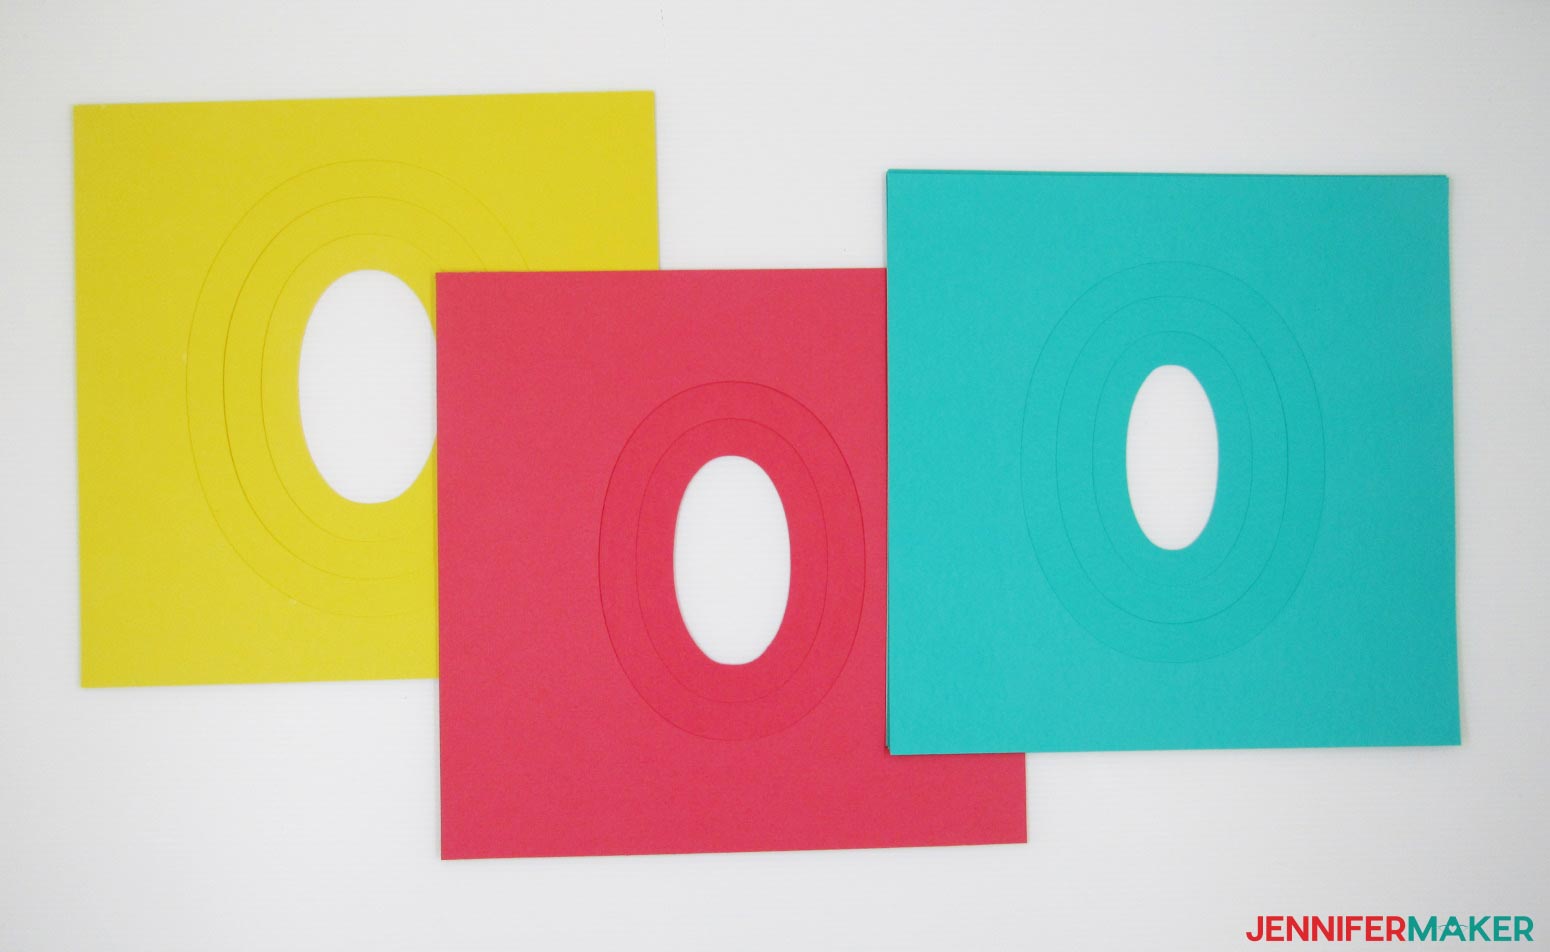
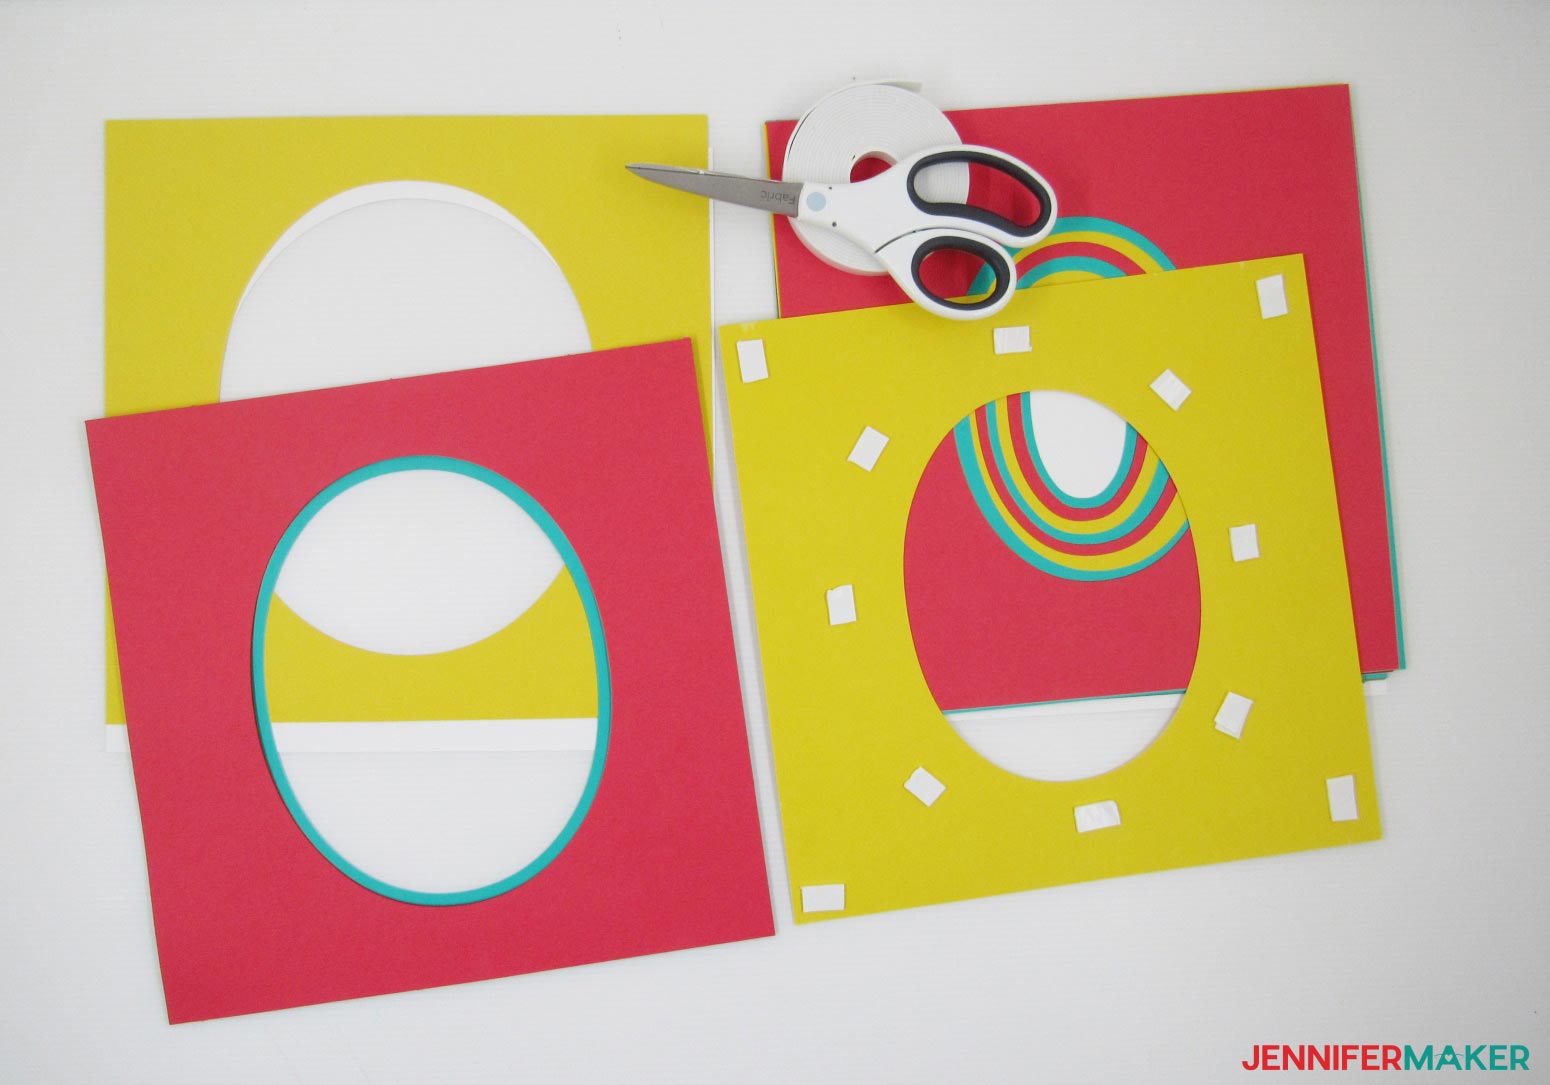
As you cut each layer of the design. I found it helpful to put the finished layers in order, and by color, as they are cut.
STEP 3: Assemble the 3D Layered Paper Art Design
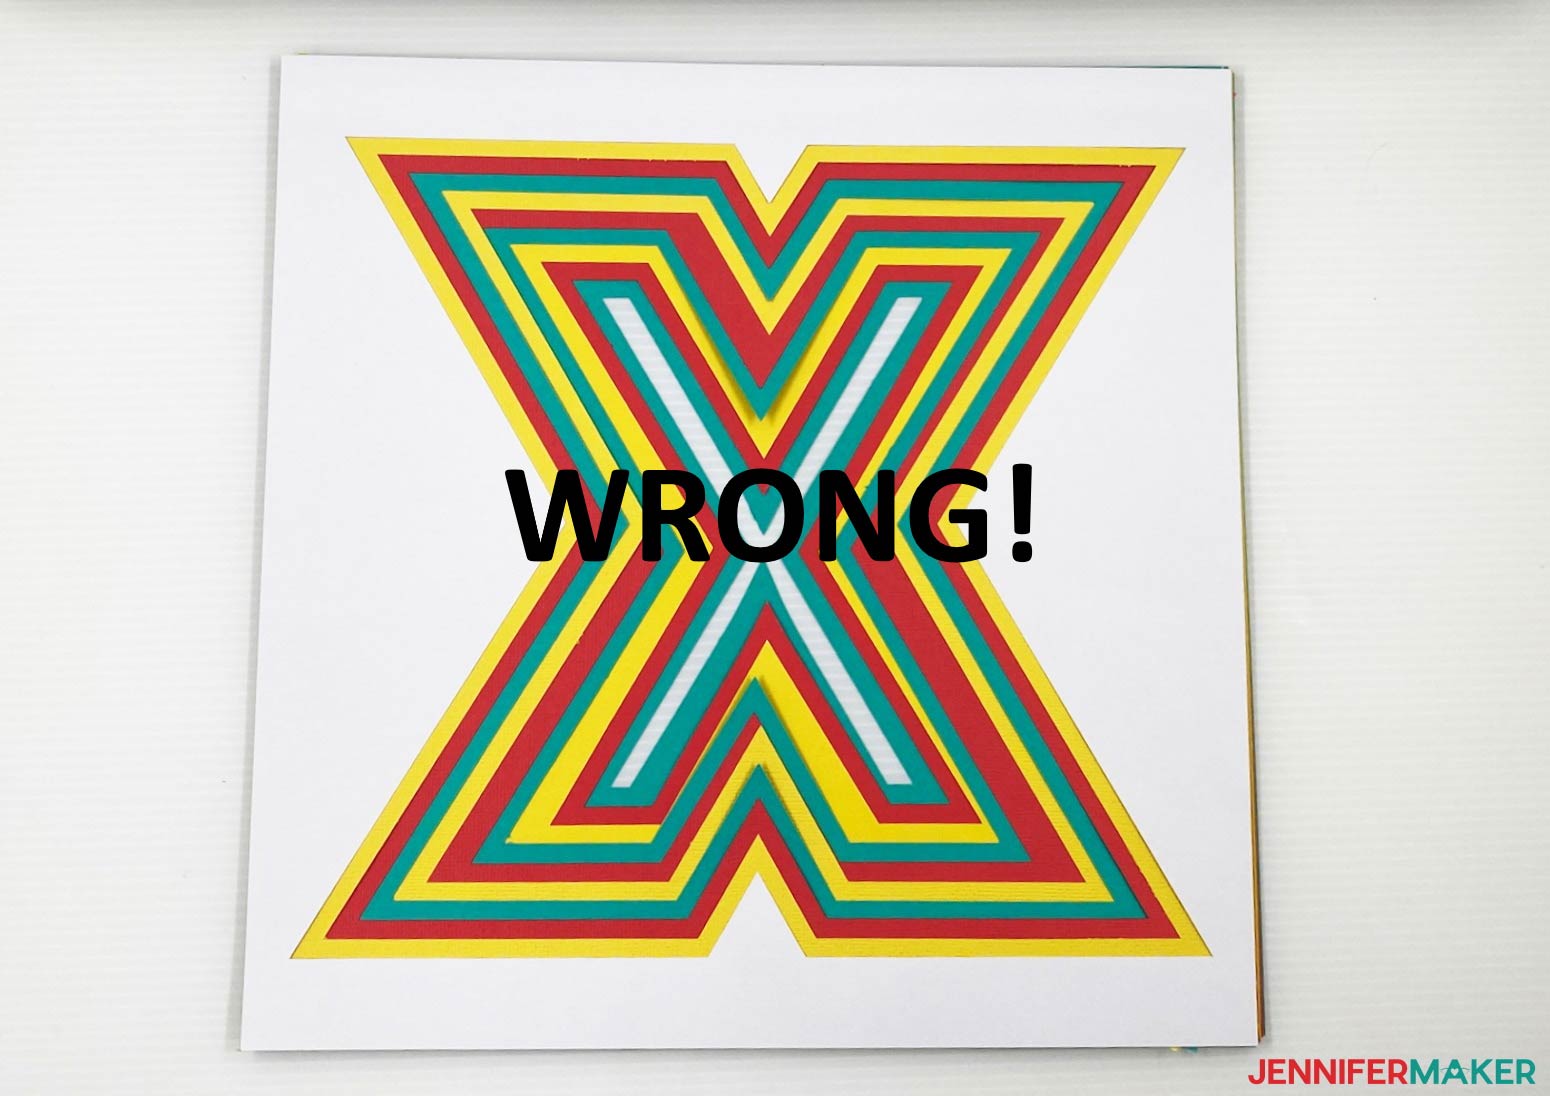
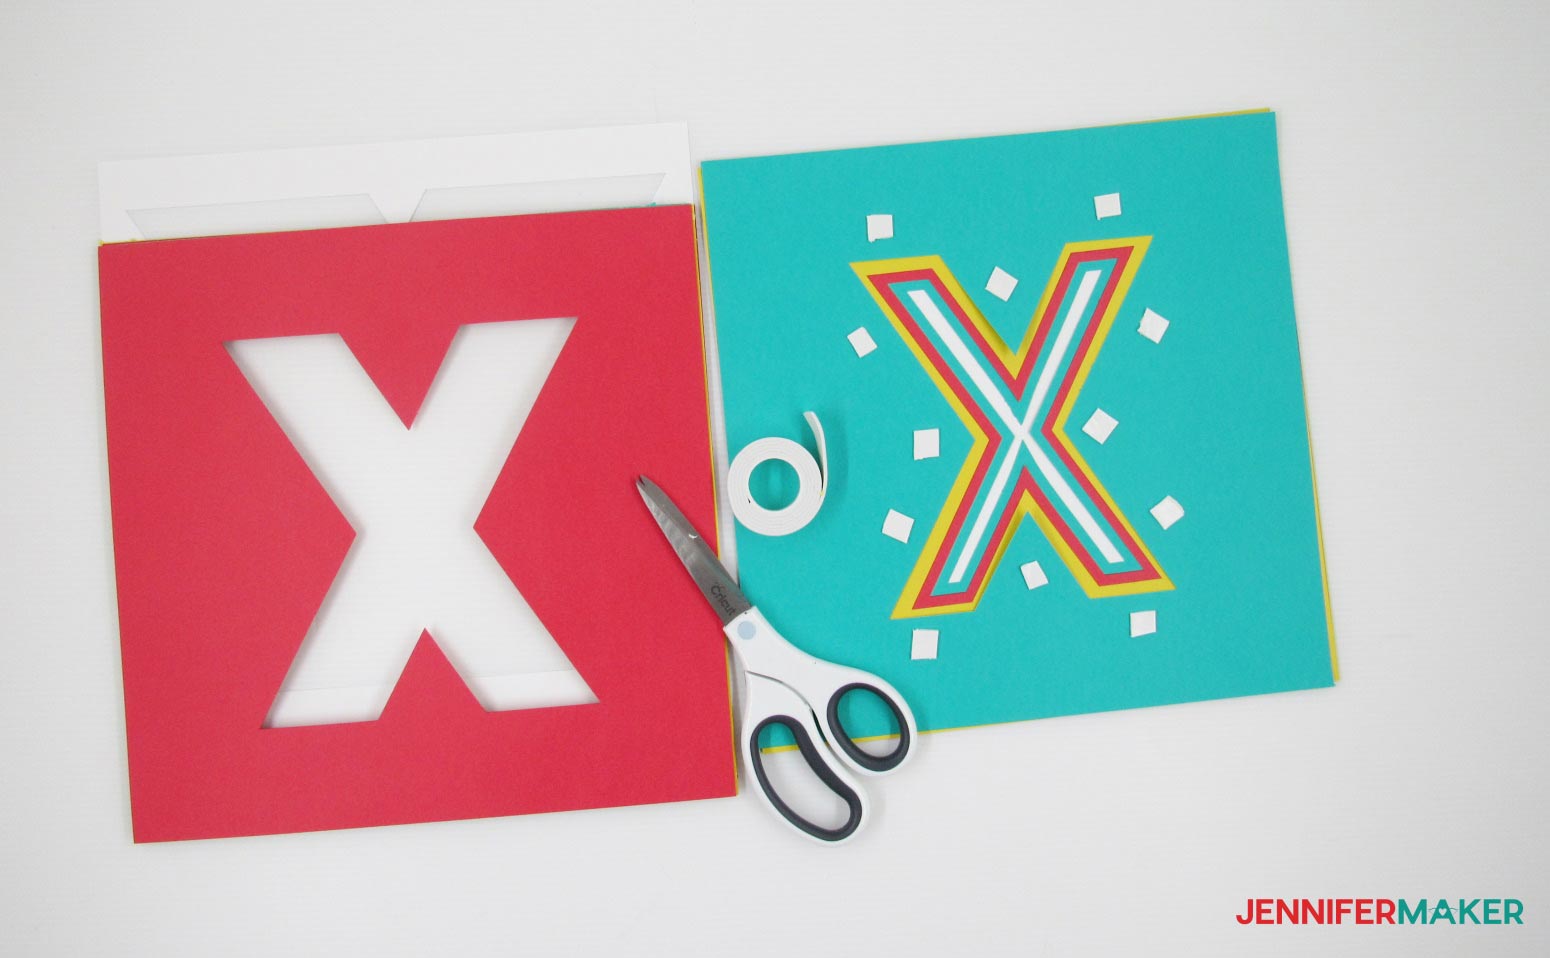
Once all paper layers are cut, gather your cut cardstock, foam mounting tape, and scissors for assembly. Make sure the cut cardstock layers are placed in the correct orientation. This is especially important for when you put the X together!
Here is how I sorted the O and made sure everything fit as it should:
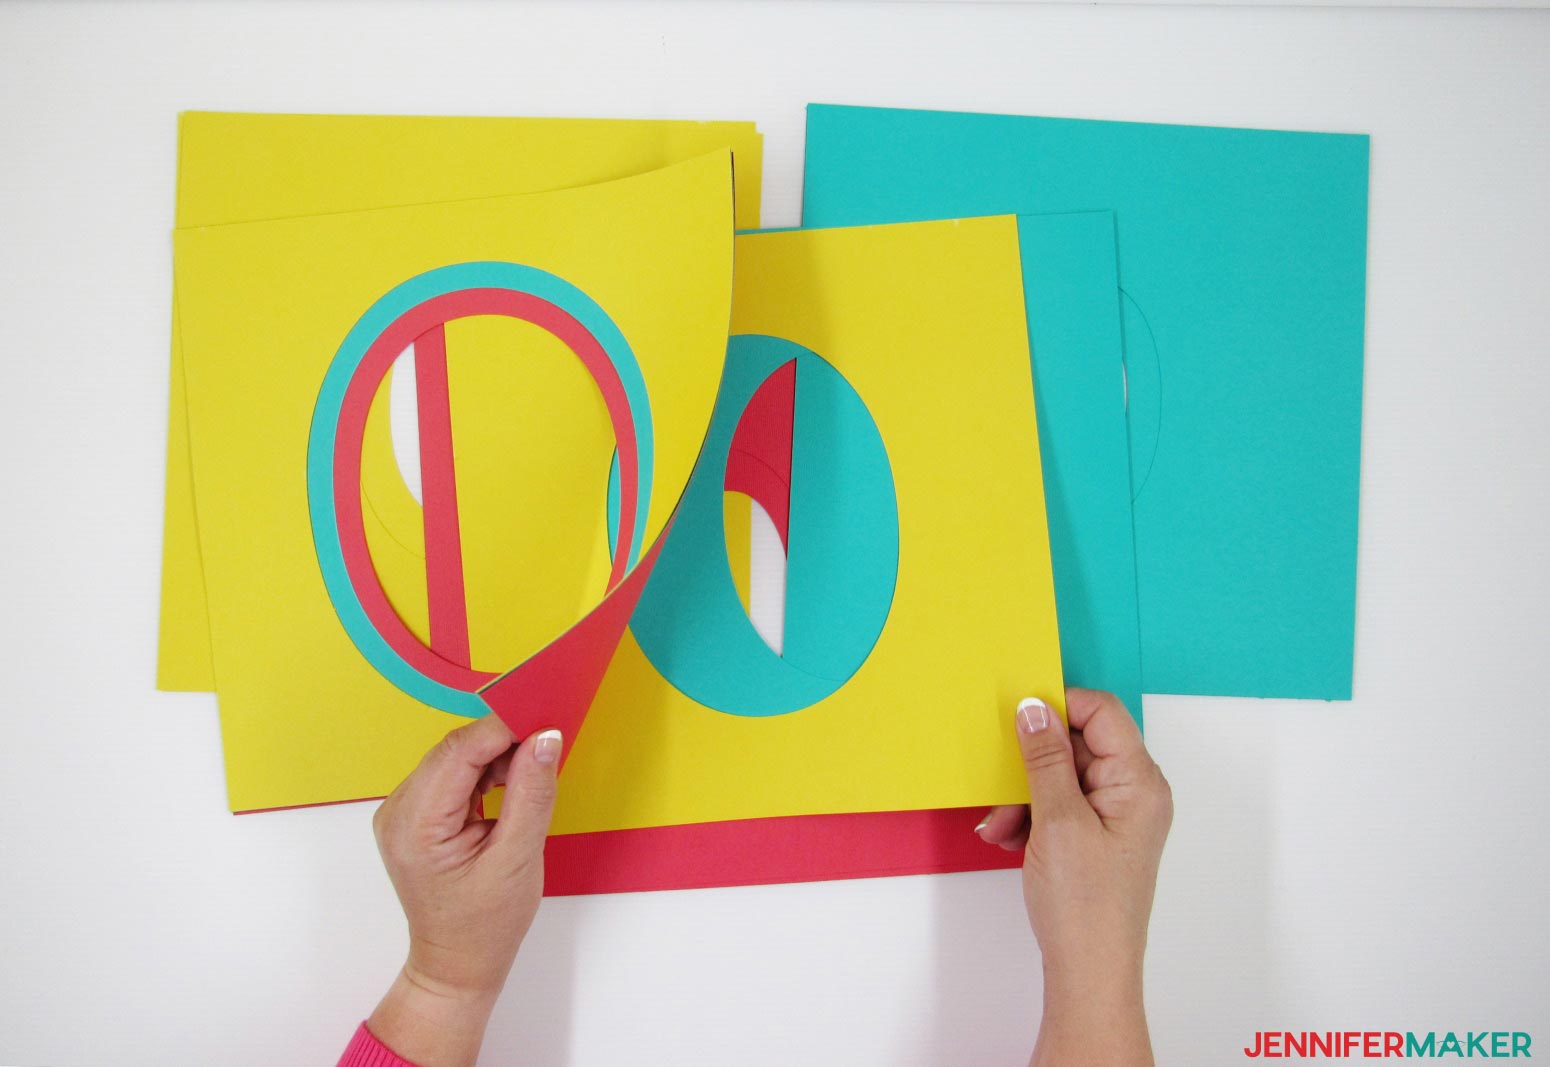
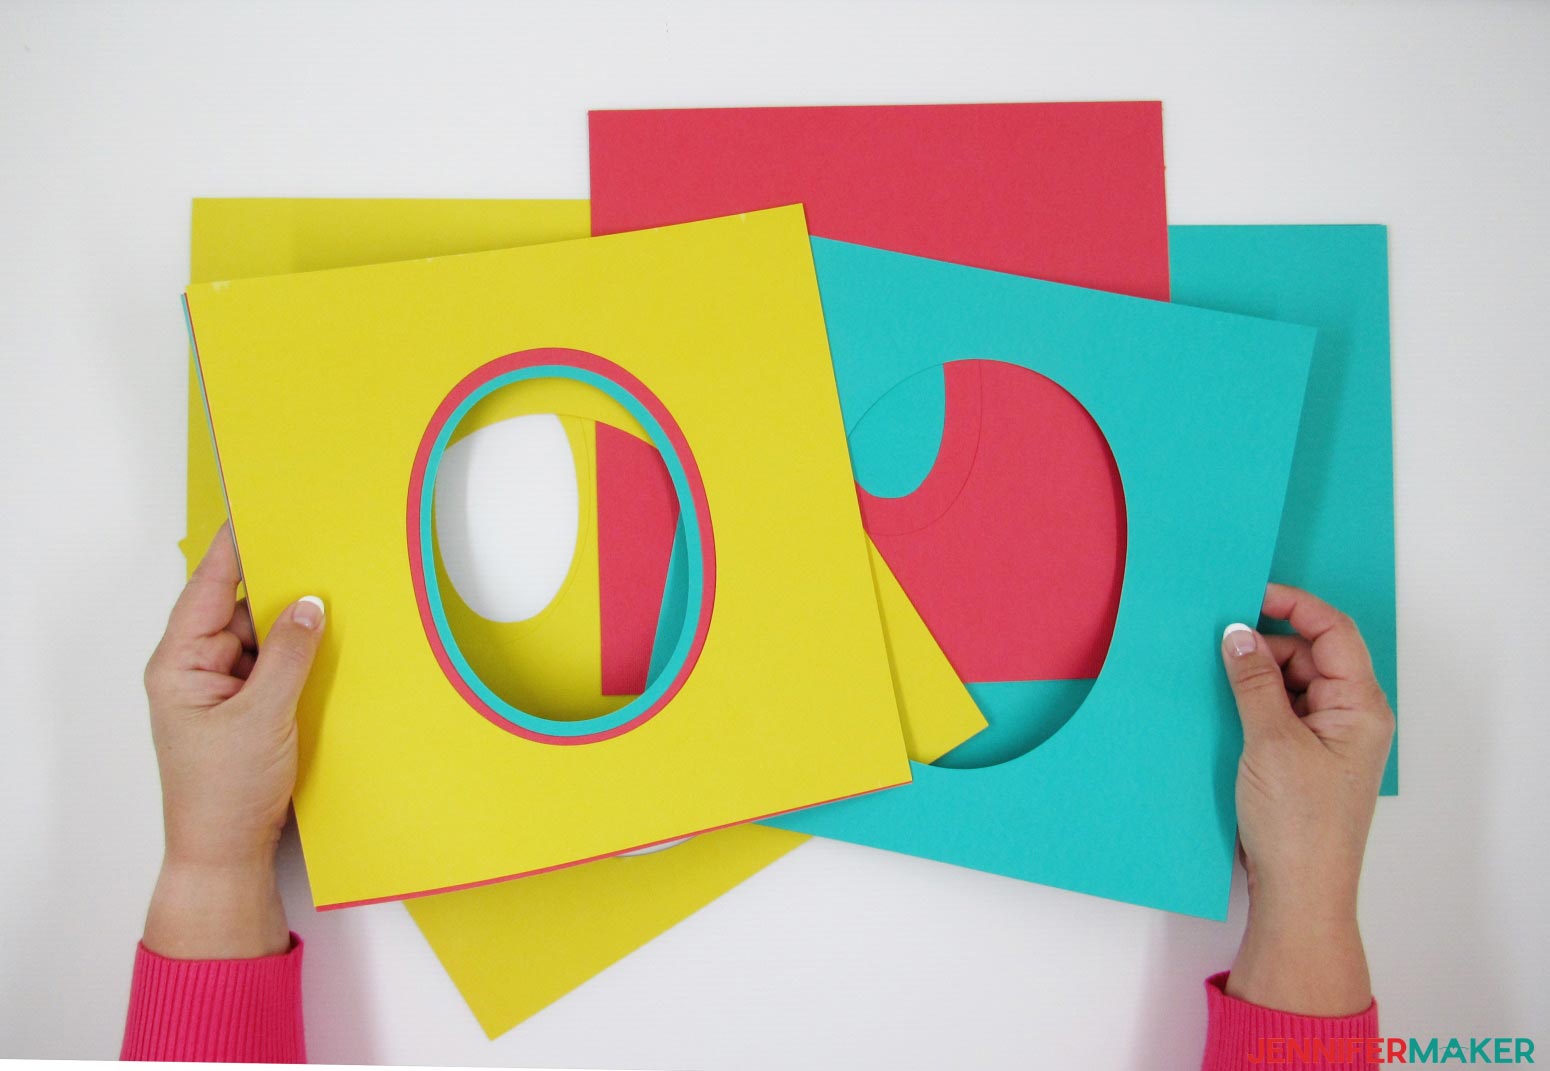
This is what your cut O layers should look like with proper orientation:
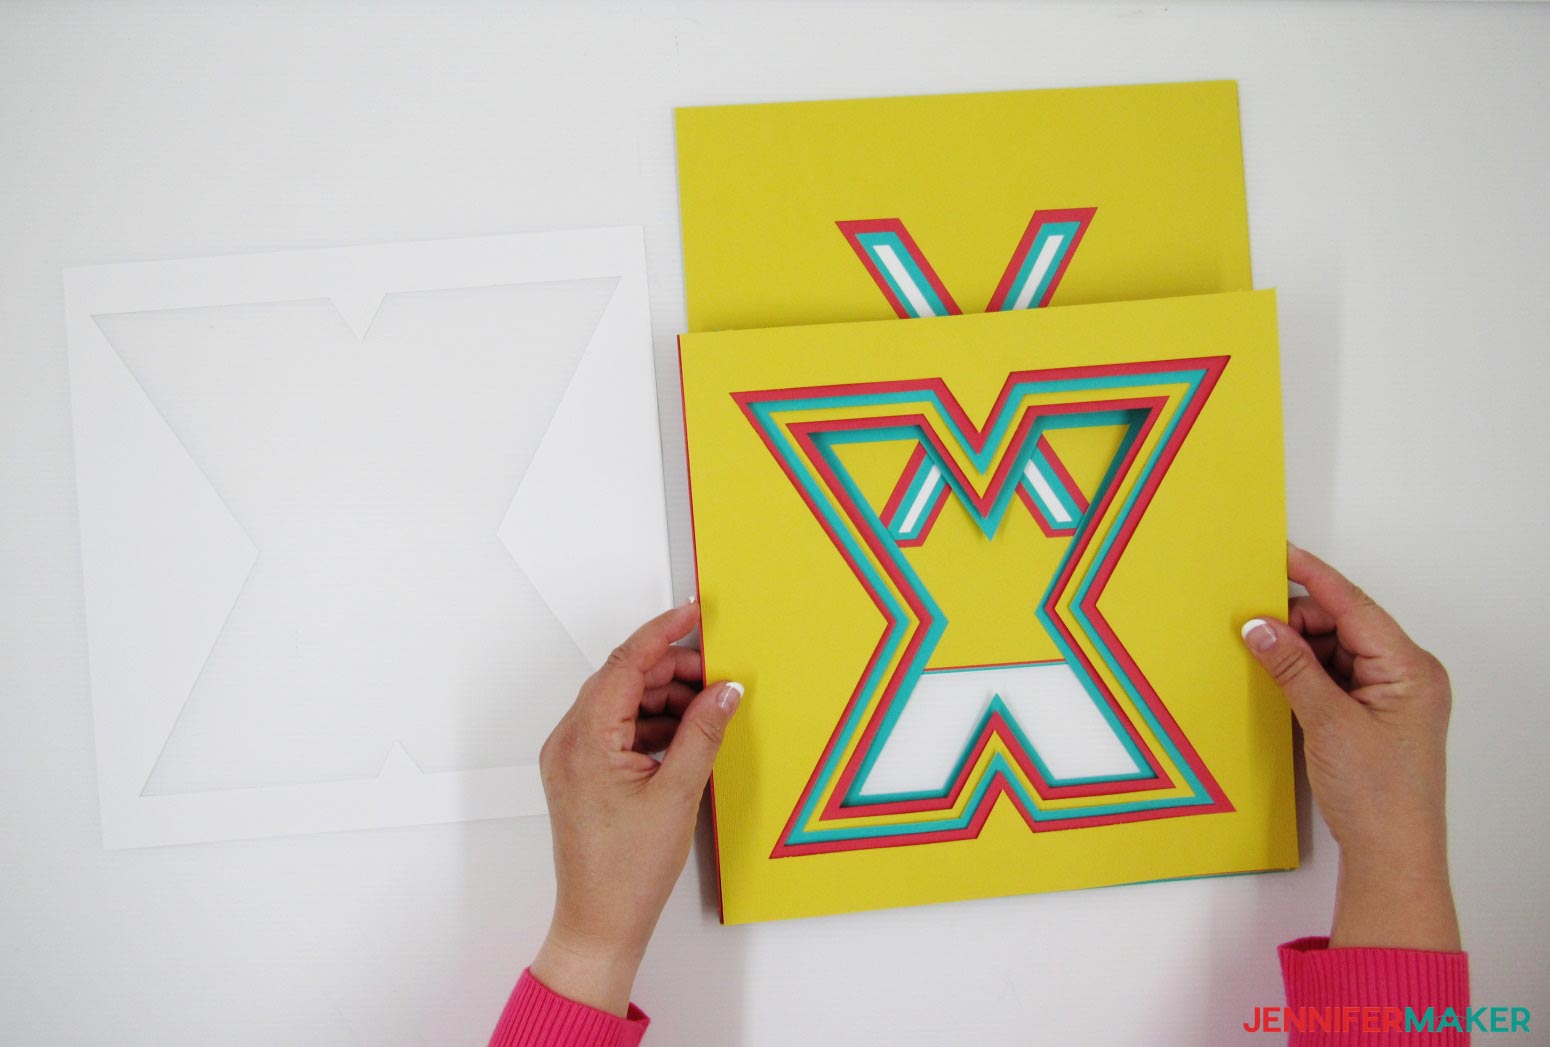
Moving on to the X, you will need to be especially careful with your orientation. It will be fairly easy to add a layer that is upsidedown or backwards as you sort. Please see the picture below for what not to do, keep this in mind as your cut and sort the layers.
This layout is correct and what your X should look like before applying the foam mounting tape and framing.
After you have properly sorted the O and the X you are ready to apply the foam mounting tape. I found placing the foam mounting tape at each of the four corners wasn't really necessary, so when I assembled the X I omitted adding it. What is most important is to make sure that the O's and X's layers are properly supported at their interior cuts. You will want to be close enough to the edge for support, but not so close that you can see the foam mounting tape.
As you attach each layer together, I found it best to align the bottom edges and then lay the stack on top of the new layer.
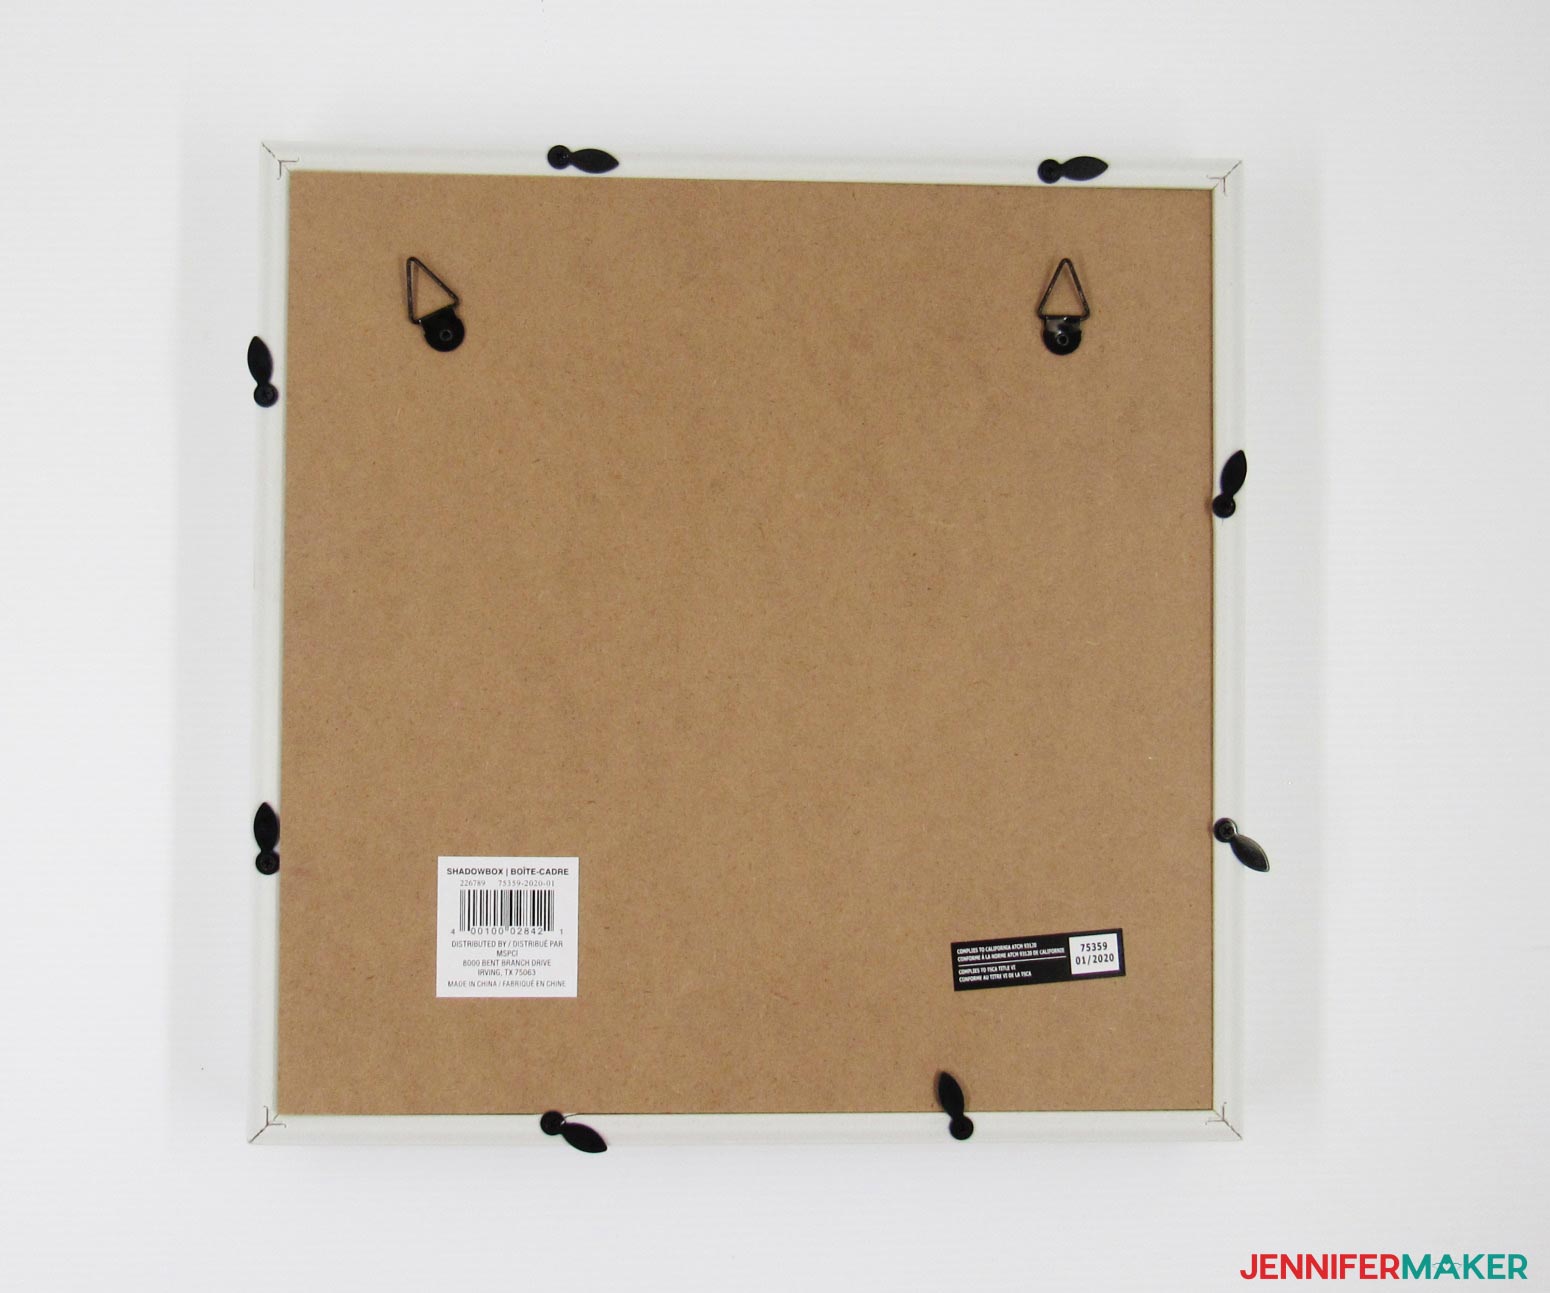
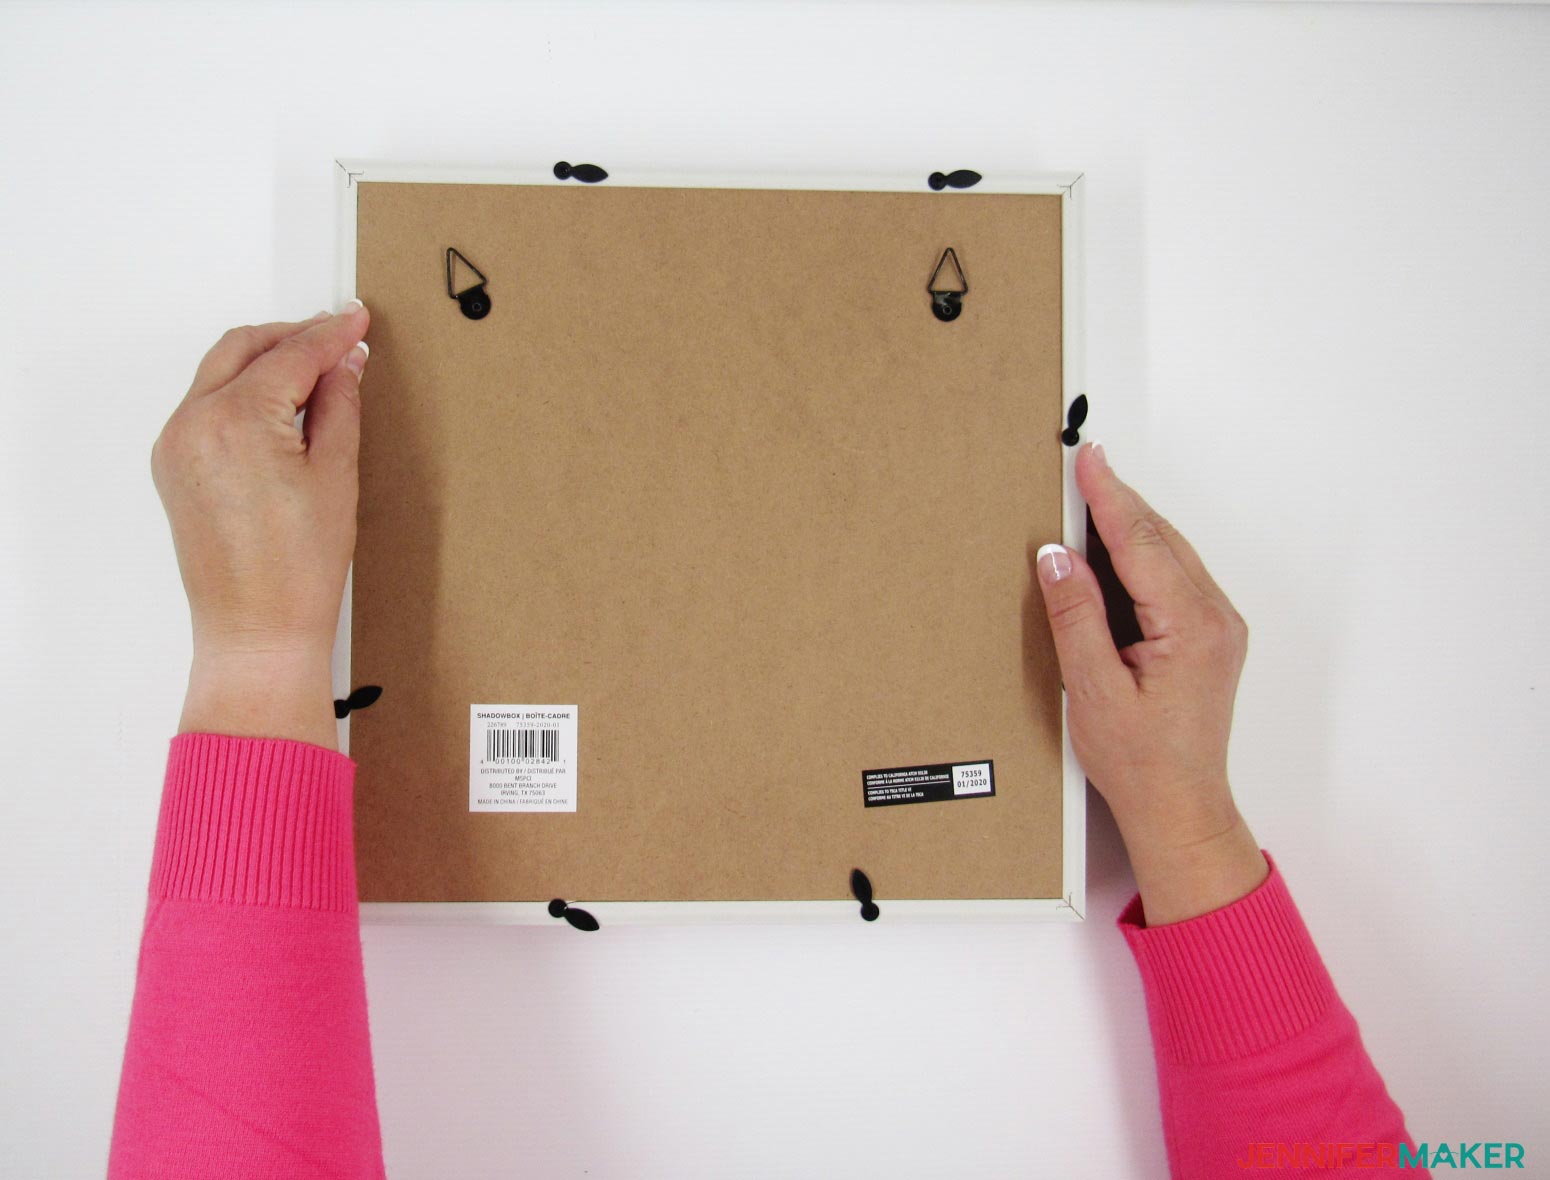
You are now ready to frame your design! Open the back of your frame.
I decided to tape the first, white layer, to the inside edges of the frame. I did so because I was concerned about the design shifting. You may or may not wish to do this.

Insert the cardstock layers into the frame and don't forget to add the uncut cardstock at the back of your design. Once your design has been placed within the frame, you will want to insert and close the frame's back.
STEP 4: Show it Off
You are now ready to hang your beautiful piece of artwork. This is what the 3D Paper Art looks like when completely assembled.
Notes
Special thanks to the JenniferMaker Design Fairy Team, specifically Design Fairy Kristin, for helping me design and assemble this awesome design.
Answers to Your Questions About Making 3D Layered Paper Cut Designs
Q: Can I cut this design on my Cricut Joy?
A: Yes, it should be able to make it if you reduce it down in size once you upload it to Design Space. Just make sure it is under 4.25″ wide. If you’re unclear on how to resize SVG designs, please see my resizing tutorial.
Q: How do I resize this in Design Space to fit my frame?
A: I have a blog post that explains How to Resize SVG Files in Cricut Design Space.
Q: Do I need to use spacers between the layers?
A: You don’t have to use any spacers between the layers. There are so many layers that the project has a 3D look even without additional spacers.
Q: I can only see the O, I can’t see the X. What am I doing wrong?
If you can only see the O, you just need to click the little eye icon in the layers panel. The X will then be visible. Another option is to click ungroup and then you can pull the O away!
Q: How do I keep the layers in place inside the frame?
A: I recommend using foam core underneath the last year to keep the design in place inside your frame.
Q: If I don’t use a frame, how do I keep the layers together?
A: If you aren’t using a frame I suggest using spray adhesive on the back of each layer to attach them.
Q: Can you use 65 lb cardstock? Or a different weight of cardstock?
A: Yes, you can. Just make sure you choose the appropriate setting for your material.
Q: Can I cut this on a Silhouette?
A: Yes, you can. You need to ungroup and separate all the layers. In Silhouette Studio select the object, go to the Object menu and choose ungroup.
Q: Can this be made with images such as hearts or other pictures?
Absolutely! Here is a tutorial that shows you how to make Custom Shadow Boxes.
Q: Can we use glue dots instead?
Absolutely! Glue dots are a great option to use on this project
Get my free SVG files to make a 3D Layered Paper Art Design
I’d love to see your 3D Layered Art Projects! Please share a photo in our Facebook group or tag me on social media with #jennifermaker.
Love,

Want to remember this? Save this 3D Layered Art Project tutorial to your favorite Pinterest Board!


Love the XO project. Will you ever do just letters only, I would love to do my daughters initials.
Thanks again..
That’s a great idea! Would you suggest it for me so I can remember? You can request it here: https://jennifermaker.com/projectrequests/
Im only getting the O not the X what am I doing wrong?
If both letters aren’t visible for you, you can click the little eyeball icon on the “hugs-and-kisses” line item in the layers menu! Once you click it you can see the X.