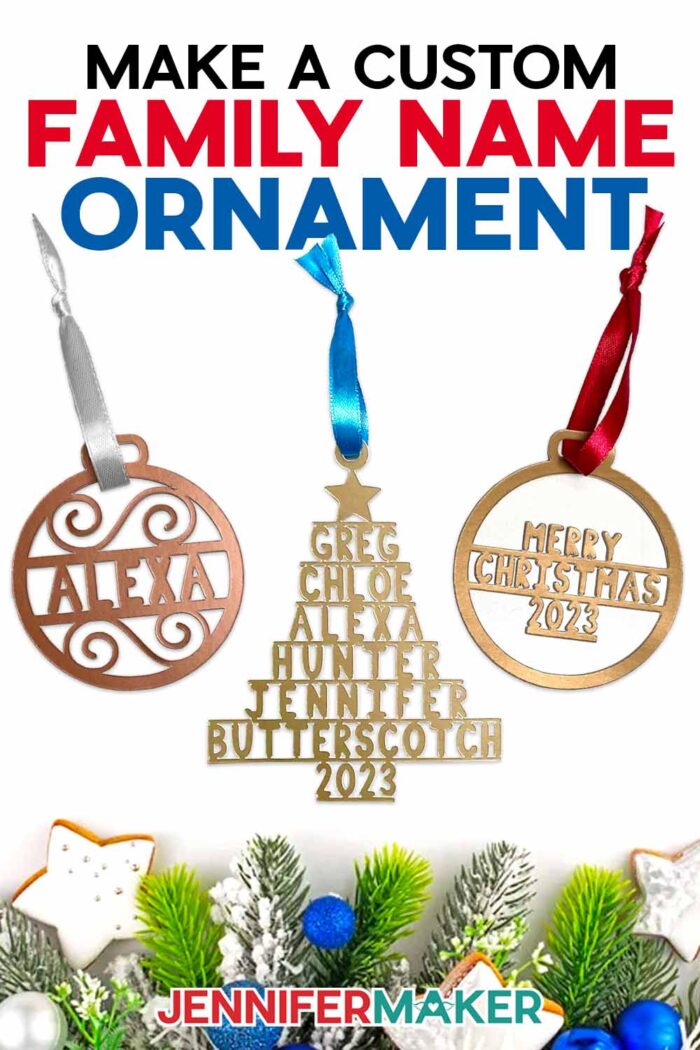
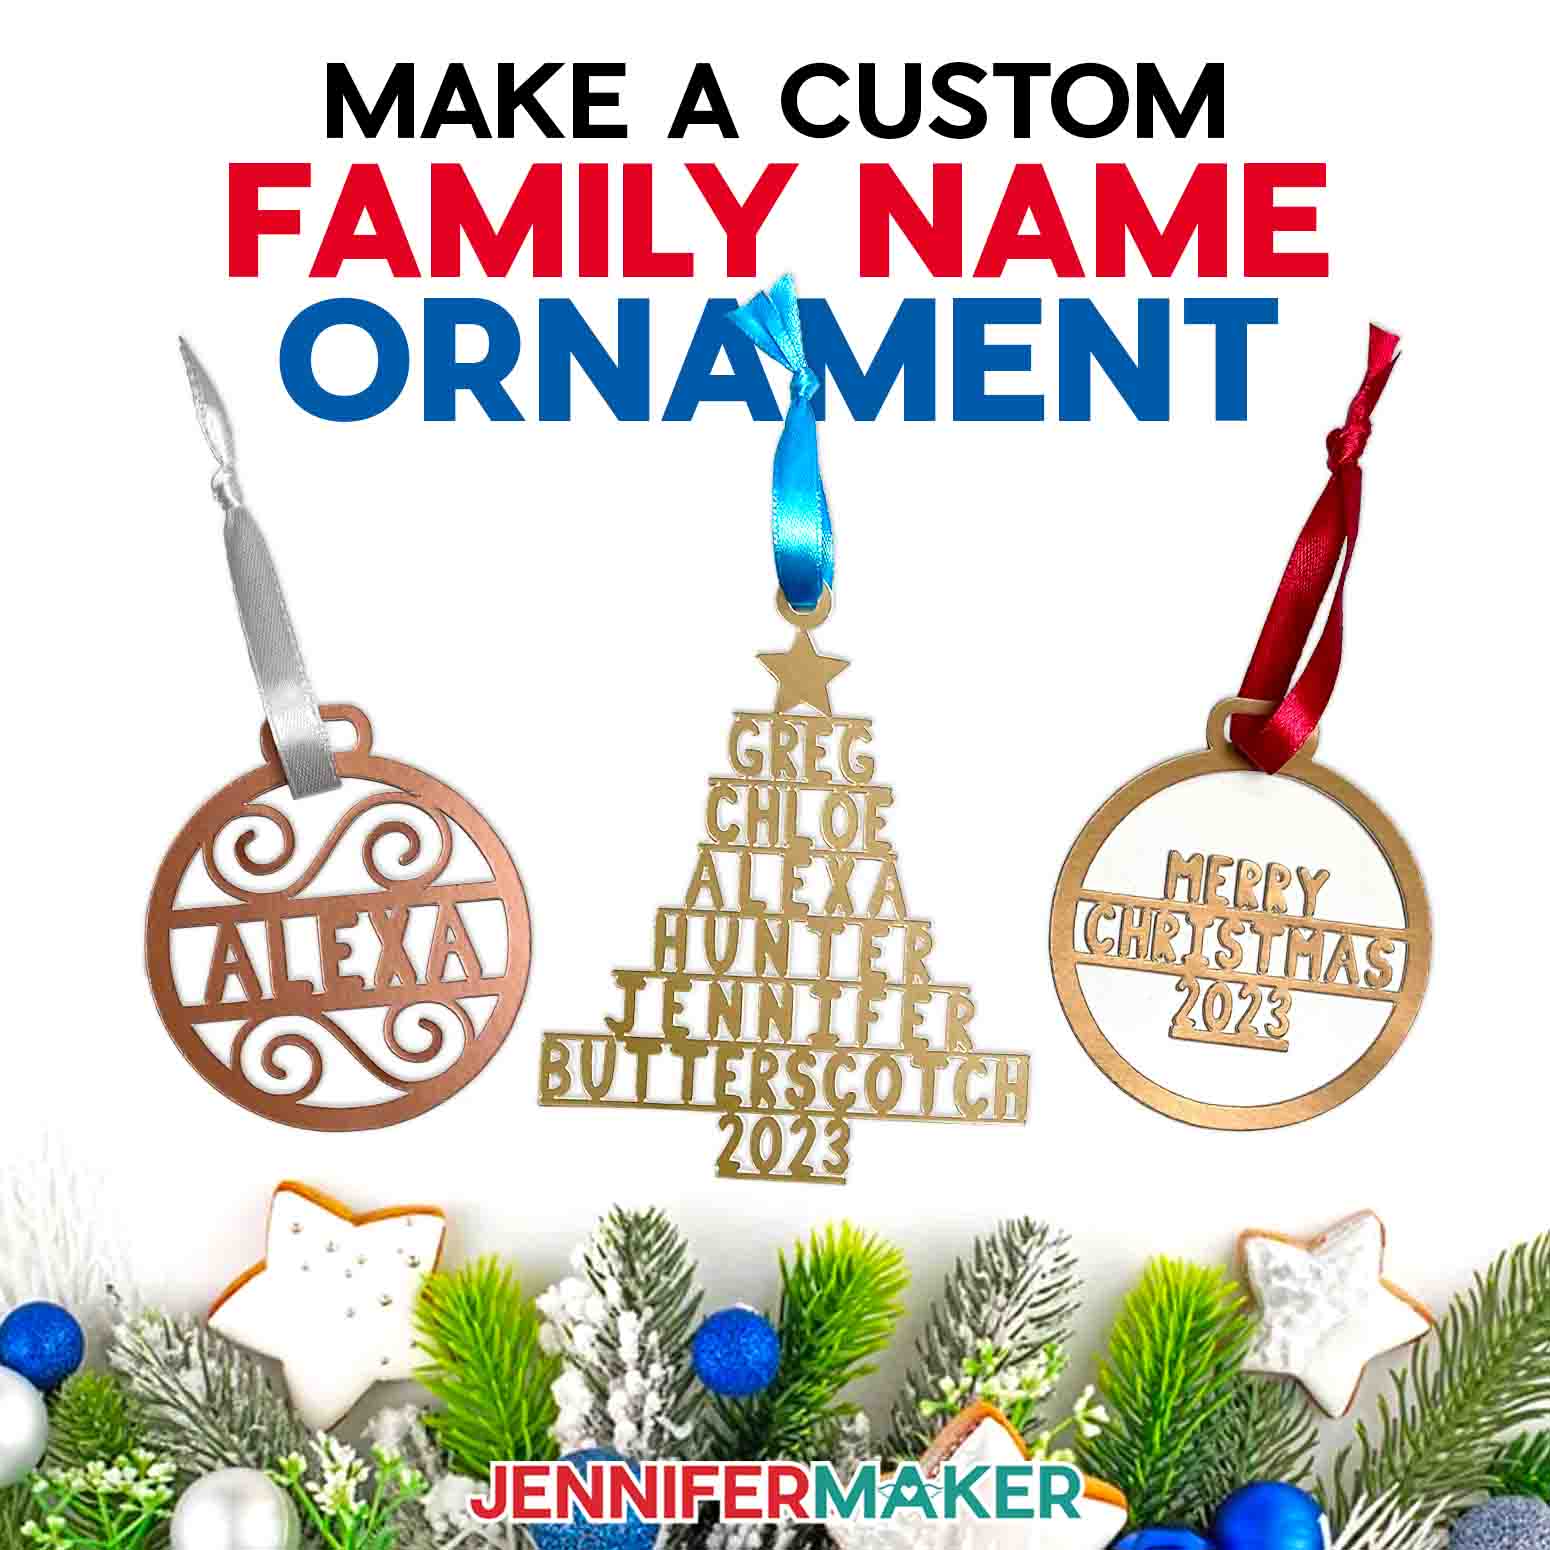
Learn how to make a custom family name ornament out of paper!
Want the perfect way to keep your favorite people close during the holiday season? Make a paper custom family name ornament with me! I’ll show you how to make your own, whether you want to make a Christmas tree design with multiple names, add just one to a pre-made design, or maybe try something in between! And they all cut well on paper using your cutting machine!
Watch the full step-by-step custom family ornament tutorial:

In my testing, I found that cutting family member names out of paper is so much easier with the right font. I’m excited to share a brand new typeface made for this project, JM Block Caps! The file is right in the free zip file, then you can follow my simple steps to add a new font to Cricut Design Space. JM Block Caps uses consistent lines and heights, so it’s easy to connect your letters and characters with straight lines on the top and bottom!

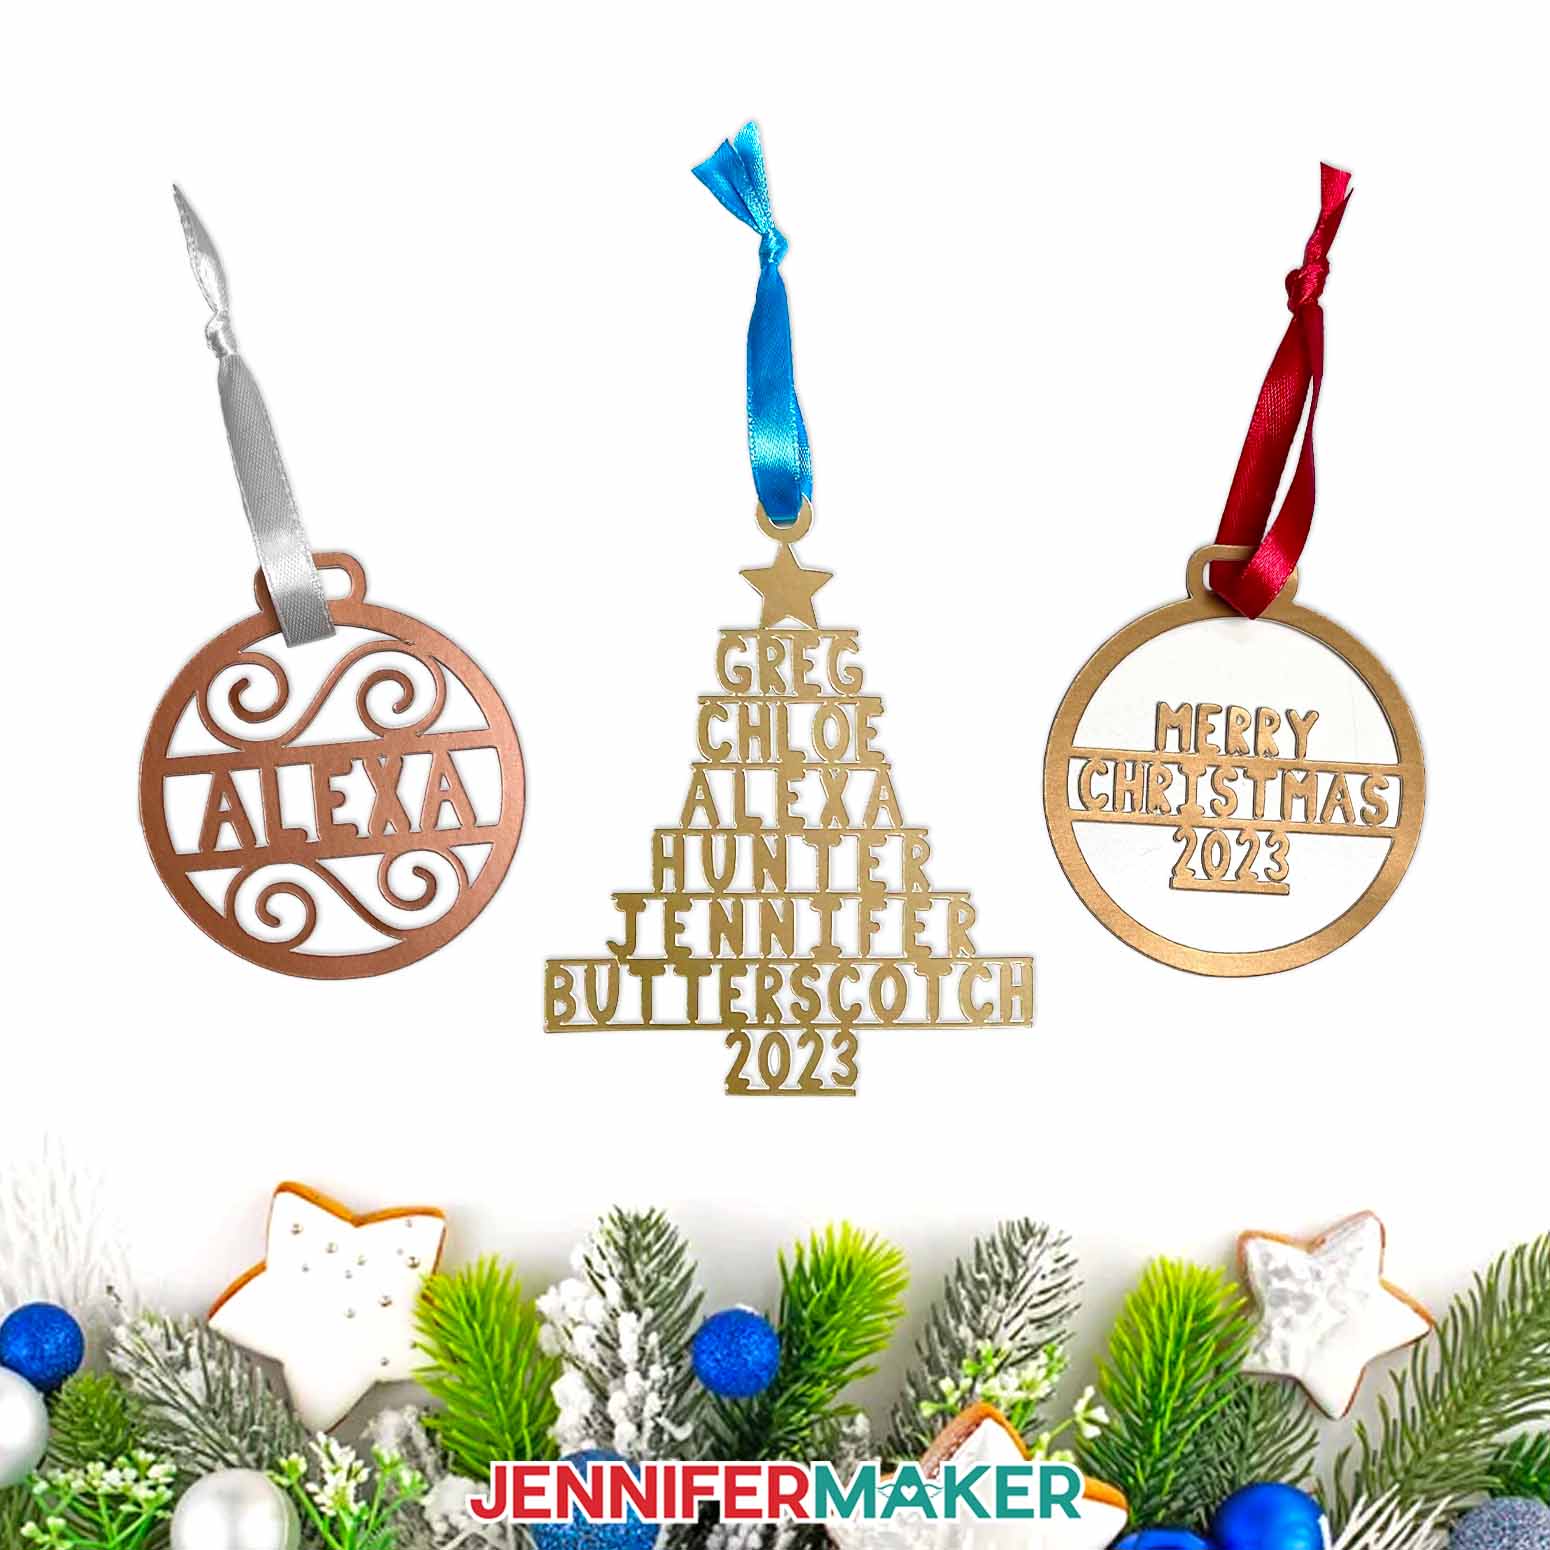
So that means you can make the full tree ornament, add a family’s name to one of my pre-made round ornaments, or add a few lines of text to the blank version if you’re not quite ready to tackle the tree! They would all make a perfect gift or add a special touch to decor!

I’ll show you how to create your custom family name ornaments in Cricut Design Space, including all the steps to get the tree outline, even if your names don’t quite cooperate at first using letter spacing. If you have a large family, consider making more than one to spread them out so each person’s name is easy to read!
The next most important thing is using high-quality paper. Cheaper paper is made using short fibers that can tear rather than cut. So I’ll show you how to make a single layer using metallic poster board, or how to layer medium weight cardstock with glue to make it just as sturdy! Even with the best paper, it’s a good idea to review my blog post on How to Get The Best Cuts with your Cricut to get ready to make custom ornaments!
There are slight variations in the steps for the posterboard and cardstock versions, so pay attention while making your family Christmas ornaments. I used high-quality metallic poster board, medium weight plain cardstock, and foil cardstock with good results. But remember, not all machines cut the same, and the results are also impacted by your design’s details, so be patient. Think of this project as more of a design inspiration than a a precise tutorial and you’ll learn a lot!
I prepared my files in Cricut Design Space and used a Cricut Maker 3 to cut all my materials, but you could use an original Cricut Maker, a machine from the Cricut Explore series, a Cricut Venture, or a Joy Xtra. The round ornaments or a tree with short names should work on the Joy! A green StandardGrip machine mat works well for all the different types of materials. Our usual papercrafting tools will help, too, especially the spatula to lift delicate sections and weeding tool to pop out tiny cutouts. If you want to make the layered cardstock version, good quality craft glue is the easiest way to go. Then you just need some ribbon to finish them up!
Let me show you how to design and cut a custom family name ornament! This post contains some affiliate links for your convenience (which means if you make a purchase after clicking a link I will earn a small commission but it won’t cost you a penny more, there is no additional cost)! Read my full disclosure policy.
Materials to Make A Custom Family Name Ornament
View my Amazon shopping list with the exact items we used to make this project.
- Cricut Metallic Poster Board -OR-
- Recollections Essentials 8.5″ x 11″ 65 lb cardstock – for a layered version
- Ribbon – I used colors, but white or red ribbon would look nice!
- Craft Glue
- A way to cut your materials – I’m using the Cricut Maker 3 but you can also use the original Maker, an Explore series machine, the Venture or Joy Xtra. You can use a Joy, just make sure your letters are at least .9″ tall so the line width are still sturdy.
- Cricut Green StandardGrip Machine Mat 12″ x 12″ (remember to put paper with a fancy side right side up!)
- Scraper Tool – to remove small pieces stuck to the mat
- Spatula
- Weeding Tool – optional, helps to pop out tiny cutouts
- Pair of Scissors
- Self-healing mat
- Craft knife (be careful!)
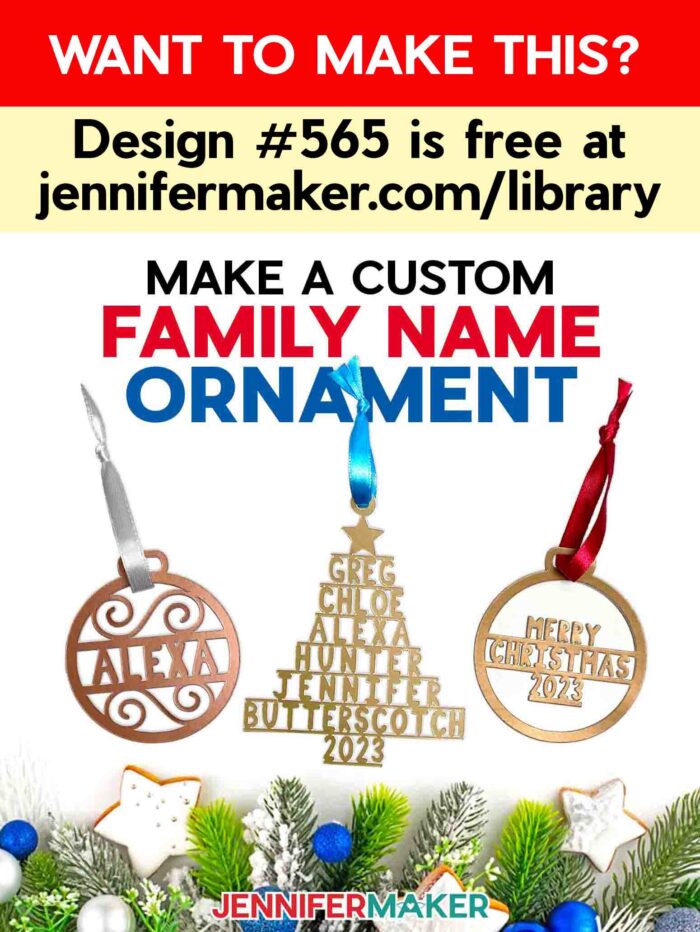
- Design #565 (My free SVG/DXF/PDF design files are available in my free resource library – get the password by filling out the form at the bottom of this page
How to Make Your Own Custom Family Name Ornament

Custom Family Name Ornament
Learn how to make a custom family name ornament with Cricut Design Space!
Materials
Tools
- A way to cut your poster board - I’m using the Cricut Maker 3 but you can also use the original Maker, an Explore series machine, the Venture, the Joy, or the Joy Xtra.
- Cricut Green StandardGrip Machine Mat, 12" x 12"
- Brayer
- Scraper
- Cricut True Control Knife
- Bearly Art Precision Craft Glue
- Scissors
- Weeding Tool
- Spatula
- Self-Healing Cutting Mat
Instructions
STEP 1: GET MY FREE CUSTOM FAMILY NAME ORNAMENT DESIGNS
First, download my Custom Family Name Ornament designs from my free library – look for Design #565. Alternatively, you can use the Save This Project form near the top of this post and the design link will be emailed to you.
TIP: If you’re not sure how to upload, go to jennifermaker.com/svgs to learn how to unzip and upload SVG files.
In the download folder, there is a design kit SVG with elements we’ll use for the different ornament types.
There is also a folder with a new typeface, JM Block Caps, which we’ll use for the tree and round ornament designs. Follow the steps in my tutorial on uploading fonts to Cricut Design Space to add it before you start your designs.
STEP 2: PREPARE YOUR FAMILY NAMES TREE DESIGN
CRICUT DESIGN SPACE
1. Open Cricut Design Space and click “New Project.”
2. Click “Upload” and then “Upload Image.”
3. Click “Browse.”
4. Select the design kit SVG file, “family-name-ornaments-jennifermaker-SVG.svg.”
5. On the Prepare to Upload screen, it will say “Cut image” with the design preview.
6. Click “Upload.”
7. Find your design in Recent Uploads and add it to the Canvas.
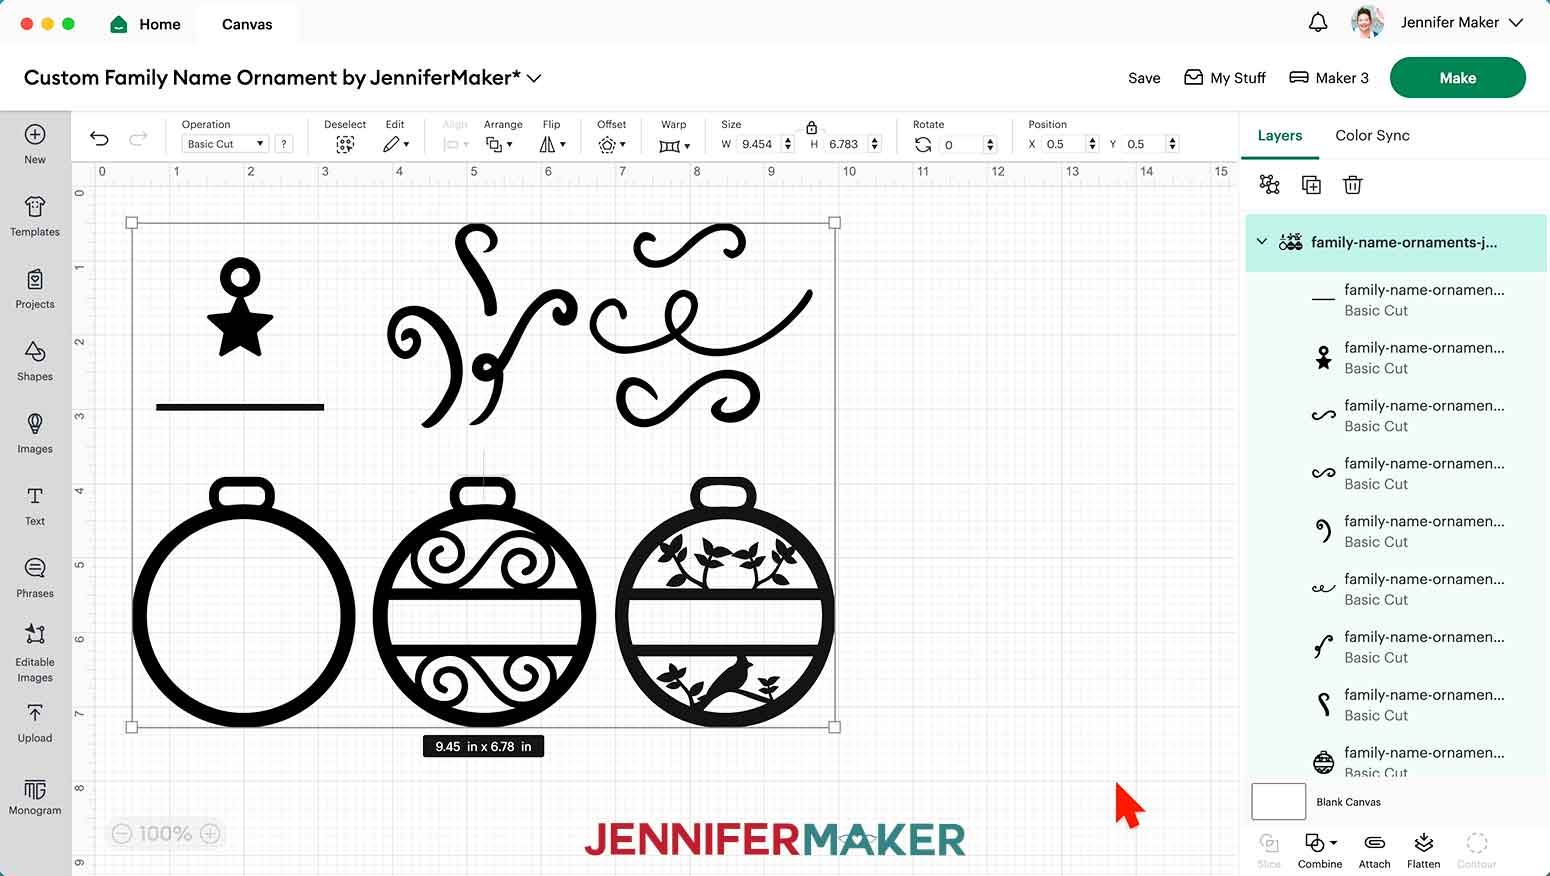
8. With the kit selected, click “Ungroup.”
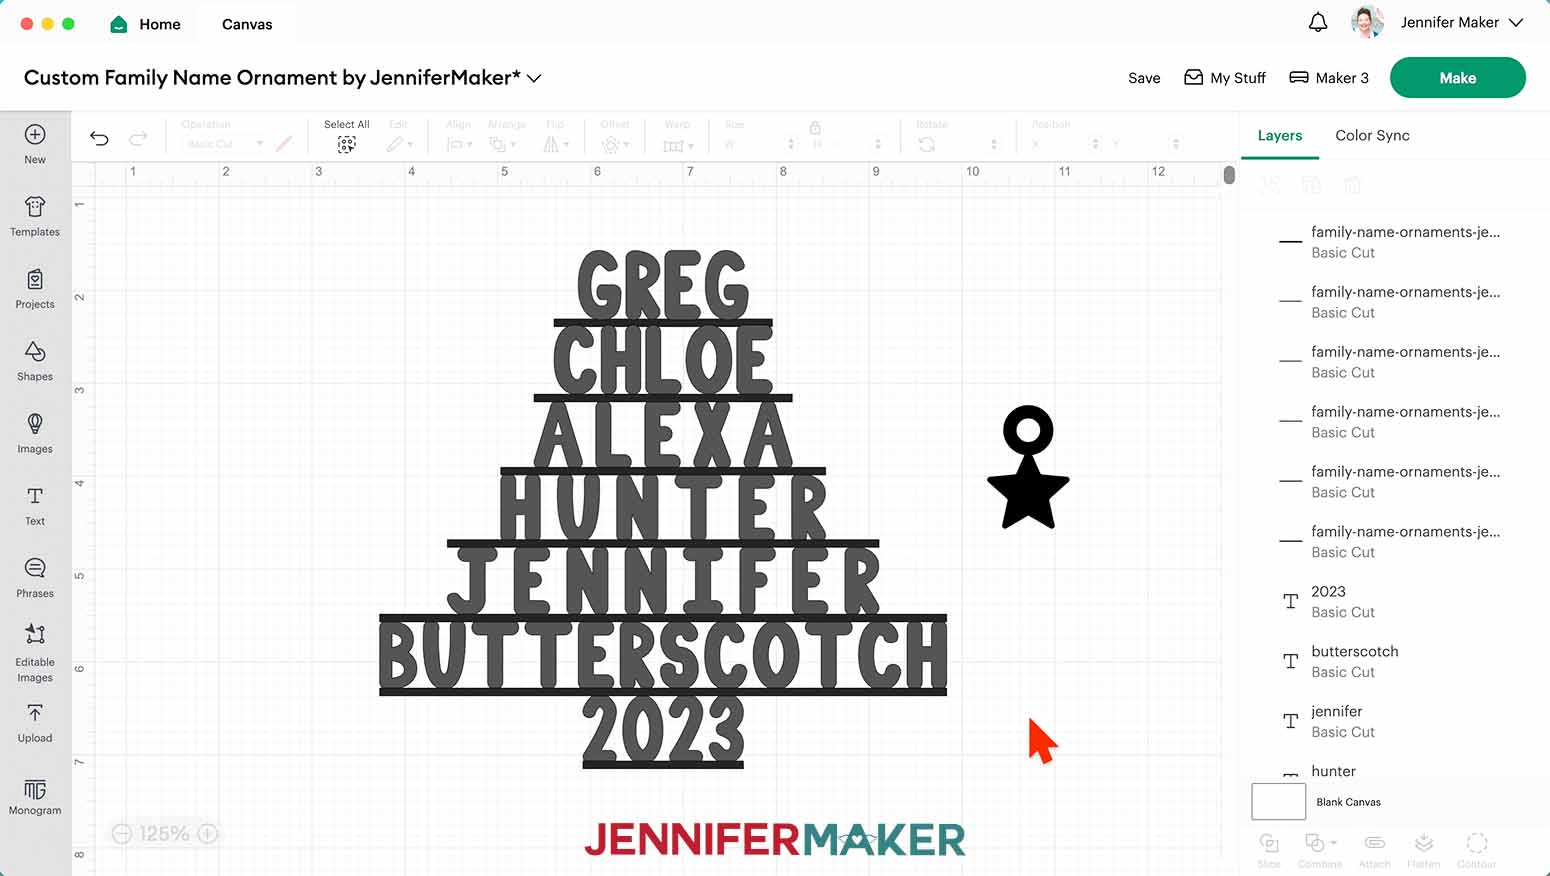
9. Delete everything other than the star hanger and the horizontal line.
TIP: Move them so you have open space to work on the design.
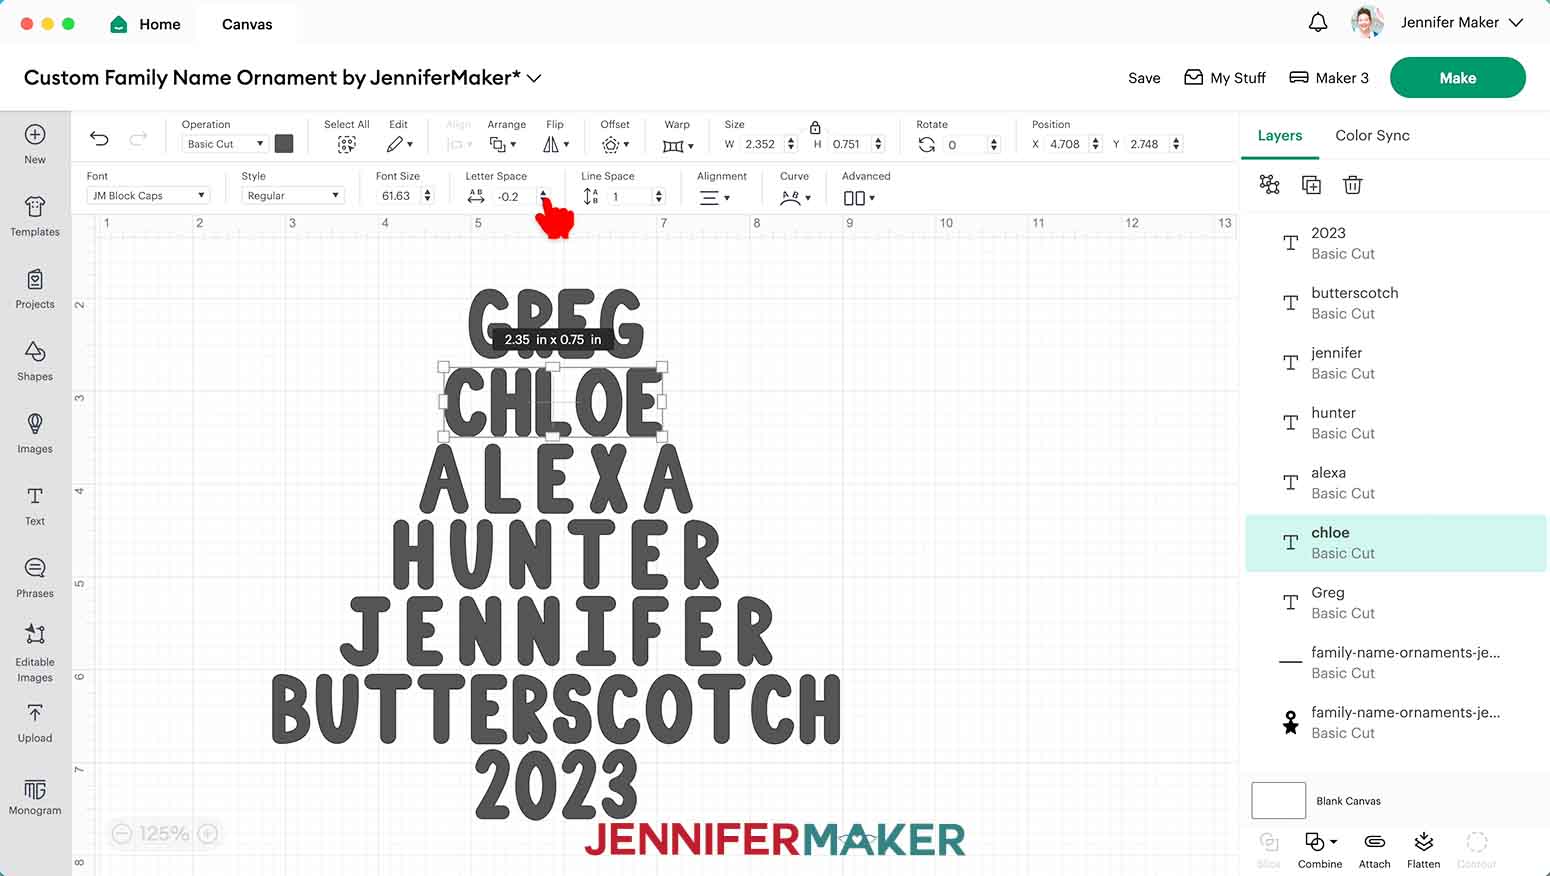
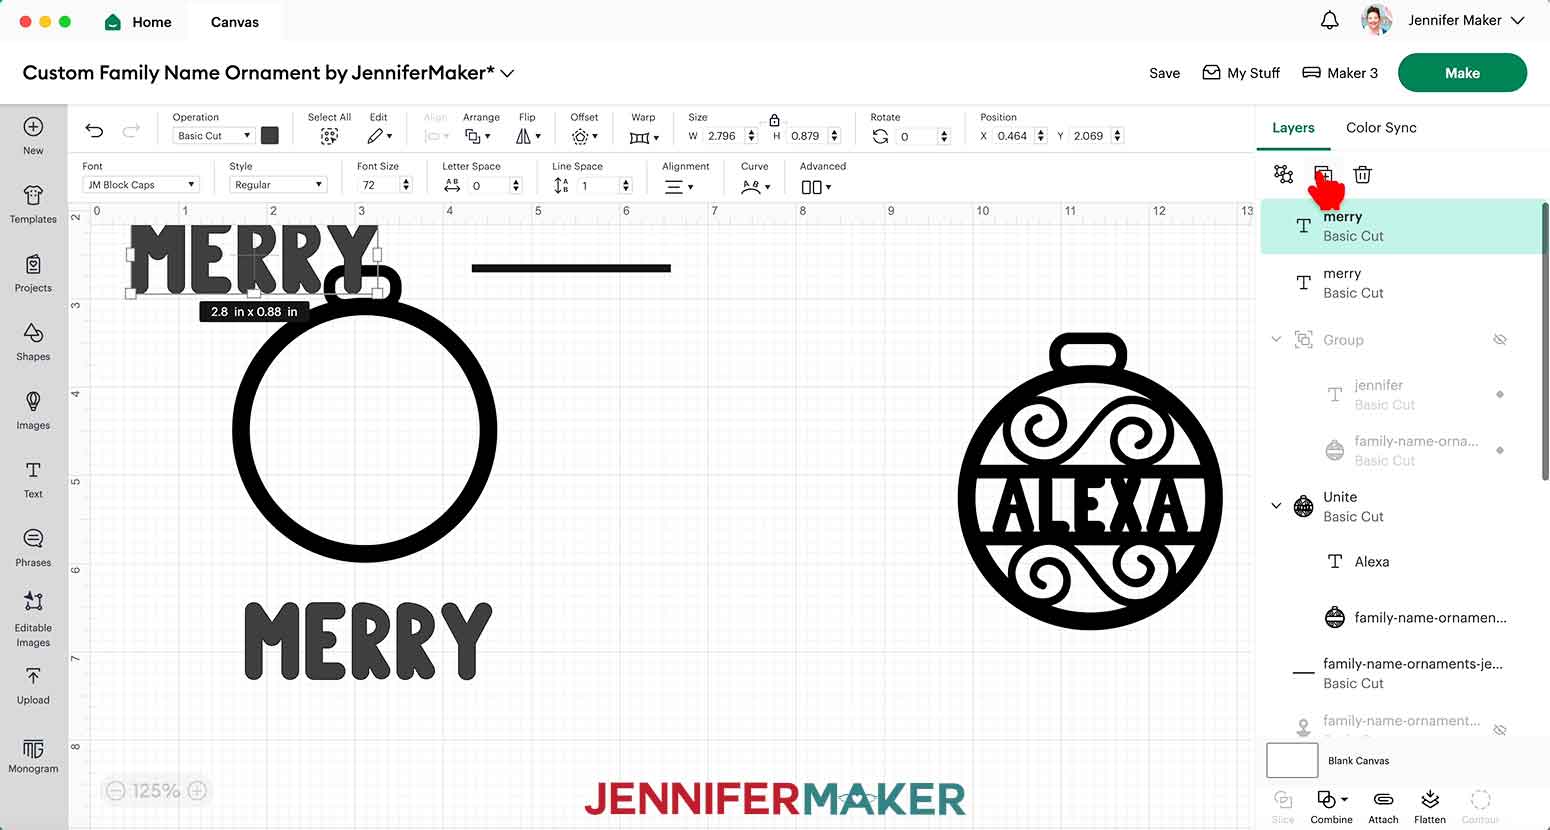
10. Click “Text” and type the shortest name you want to use.
11. Select the “Font” menu.
12. Click “System” to see your added typefaces and search for “JM Block Caps,” then click it.
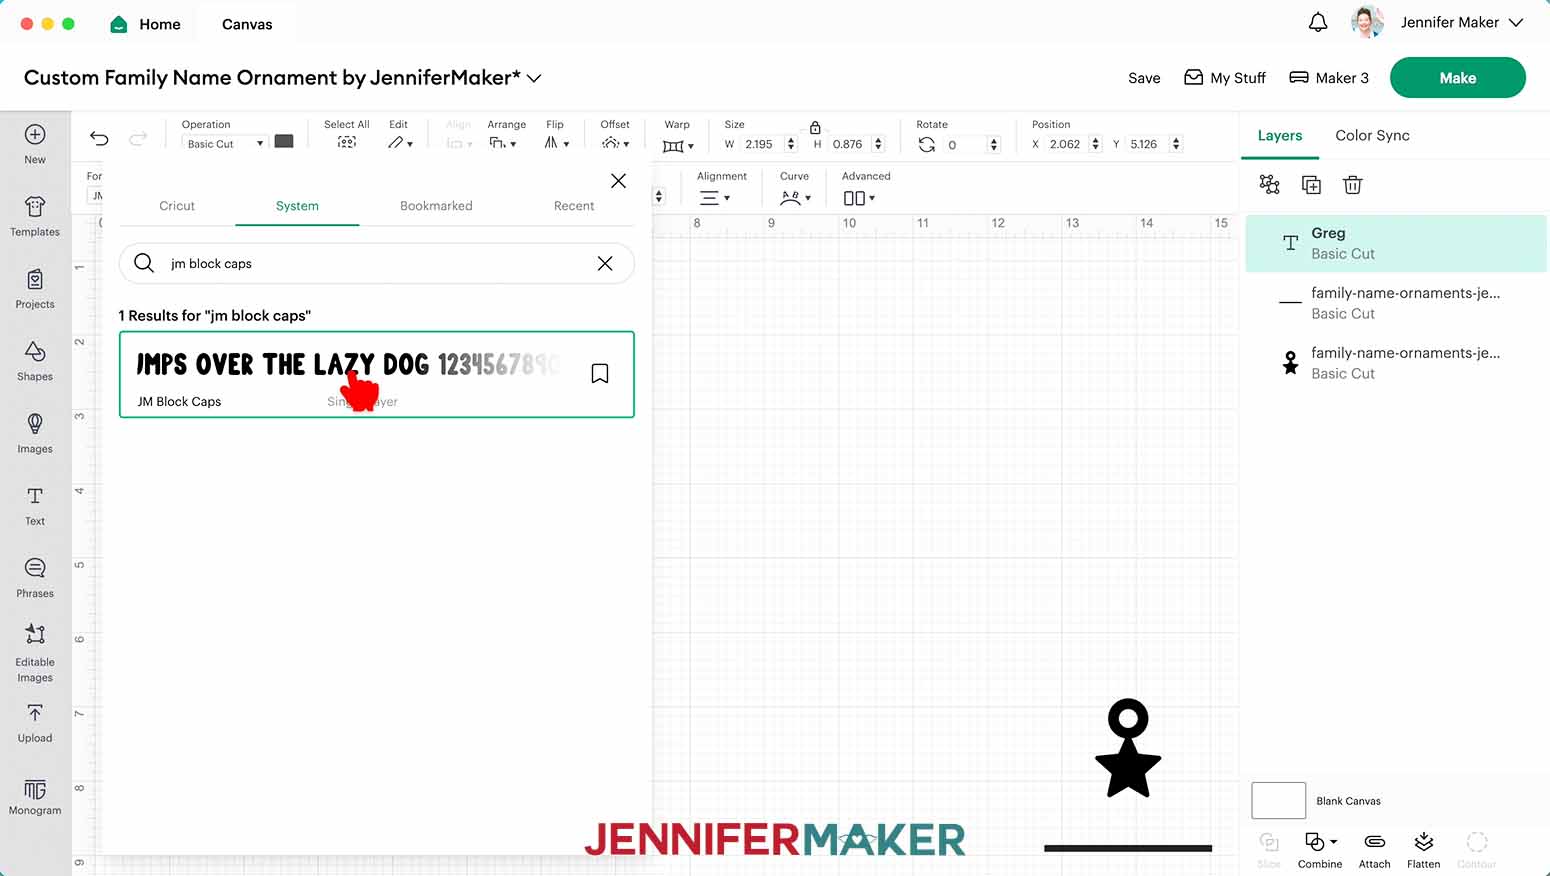
13. Close the Font pop-up.
14. With the Size lock icon closed, change the text’s H (height) to “.75” tall.
15. Click “Duplicate”.
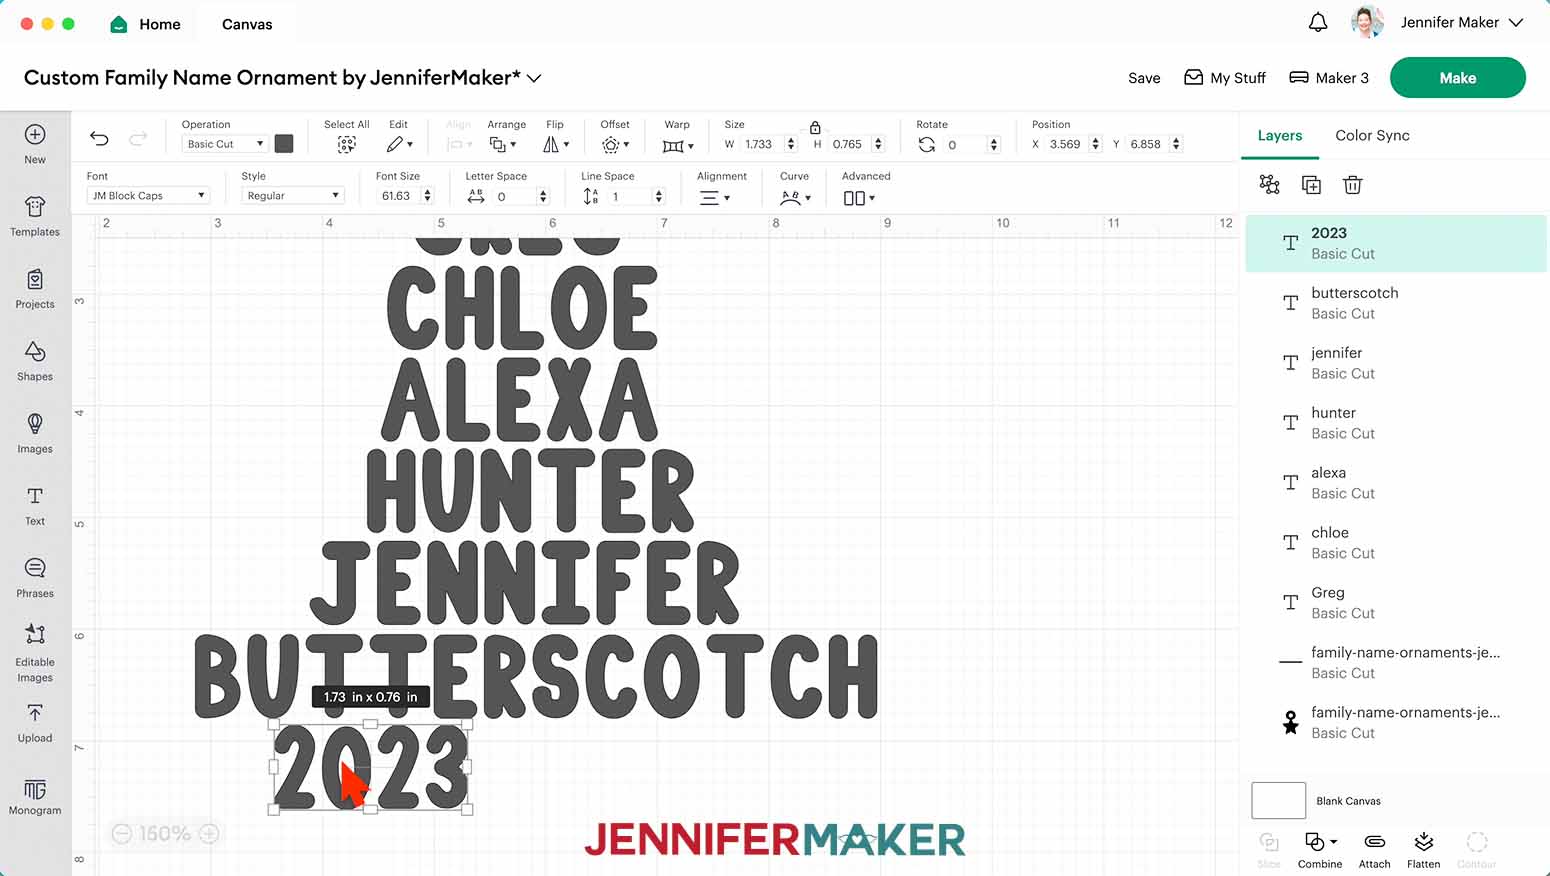
16. Double-click the new Text box to activate editing mode, then type the next longest name.
17. Drag the new name below the last one on the Canvas with a little space in between them.
18. Repeat Steps 15-17 until you’ve added all the names you want, and the year at the bottom.
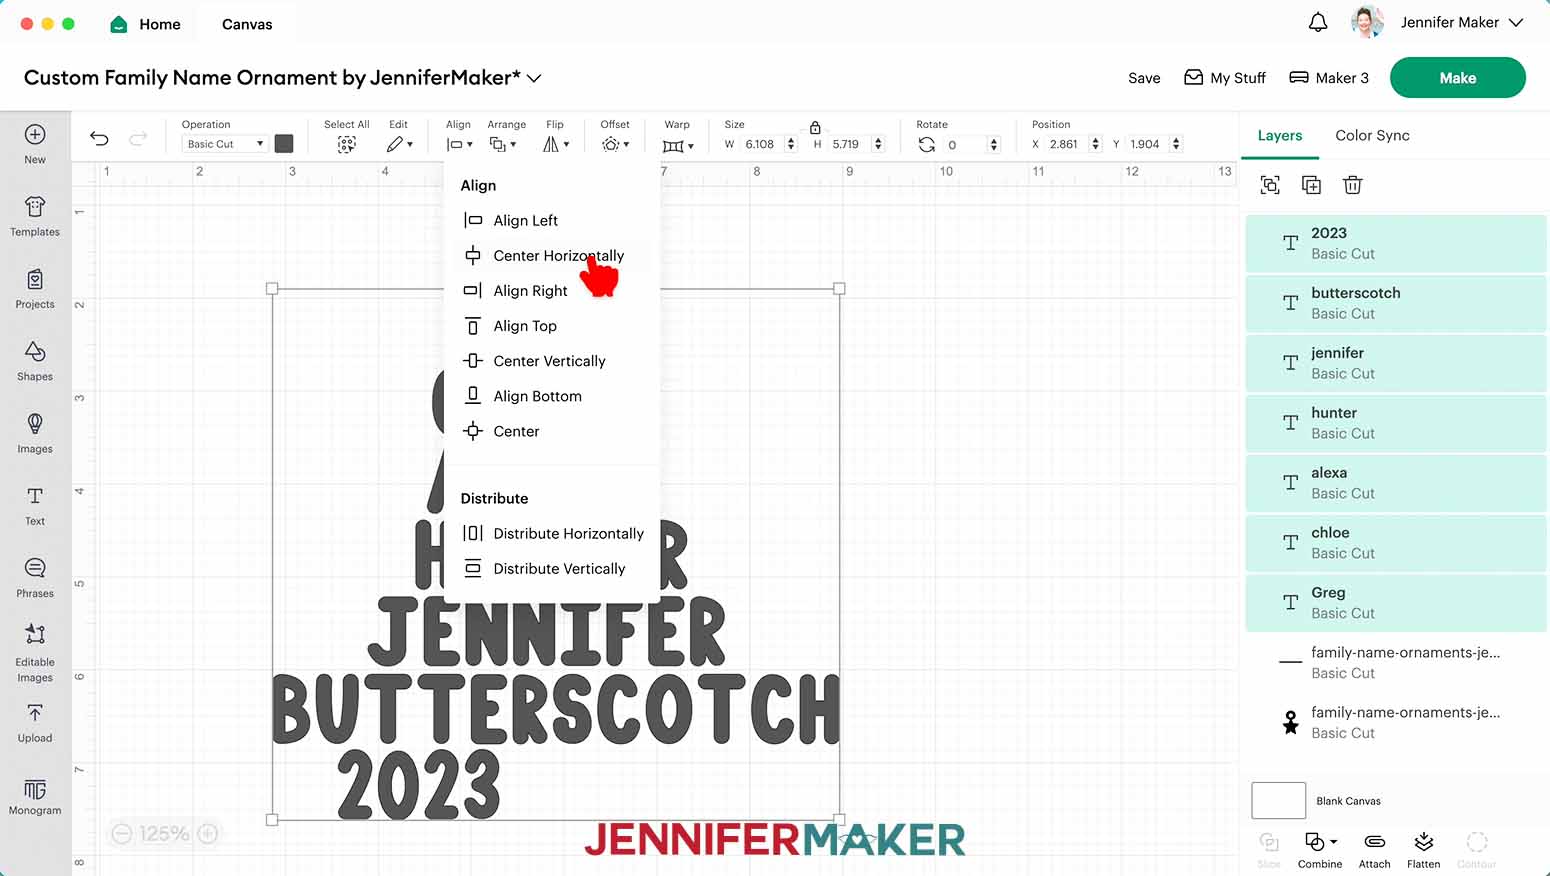
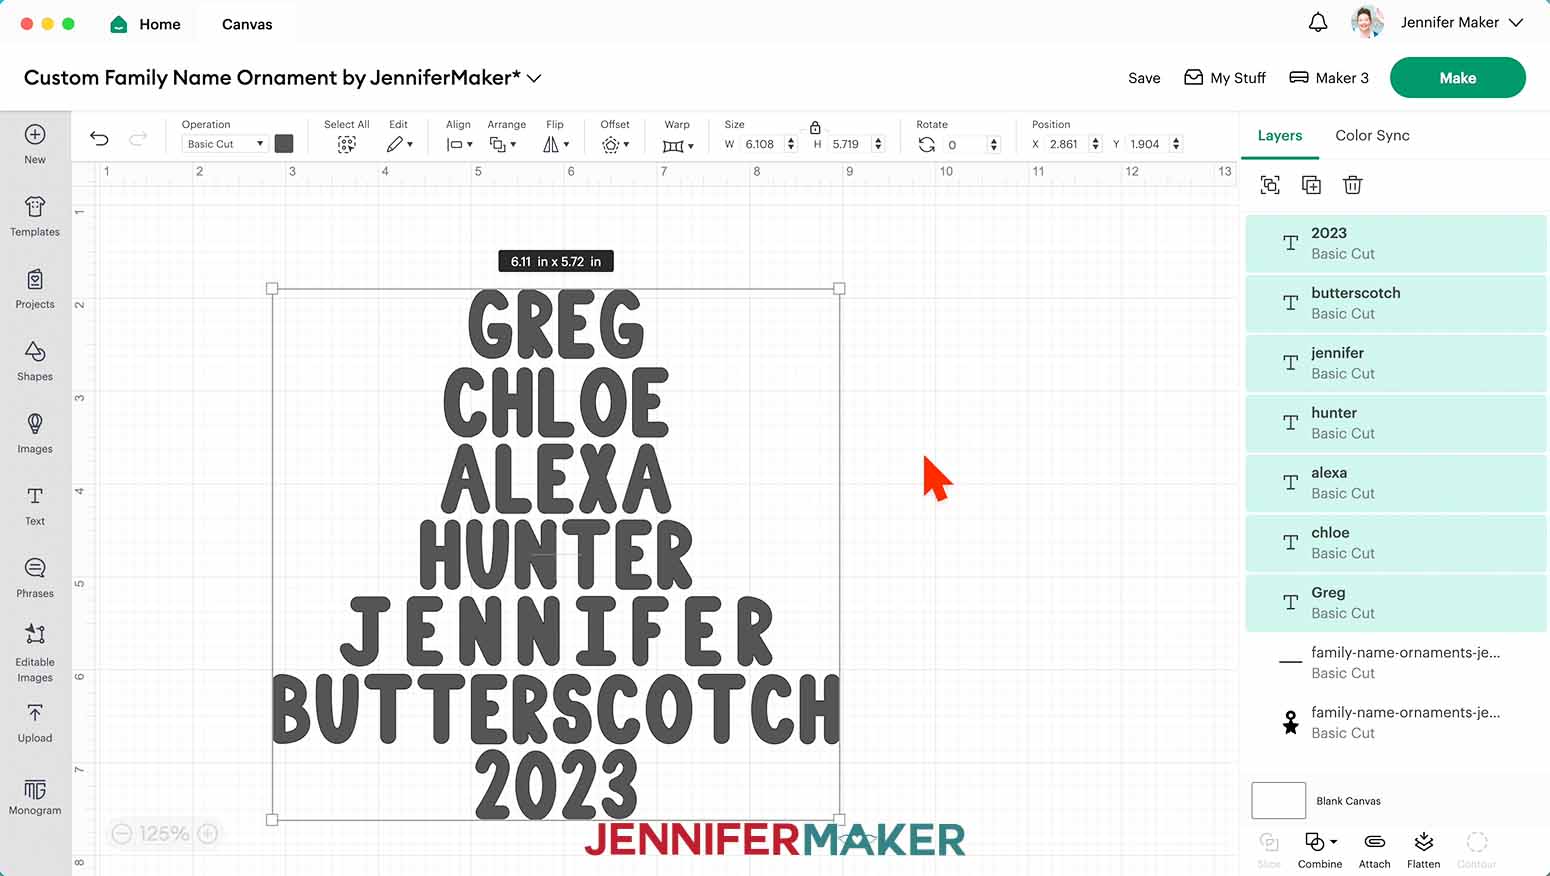
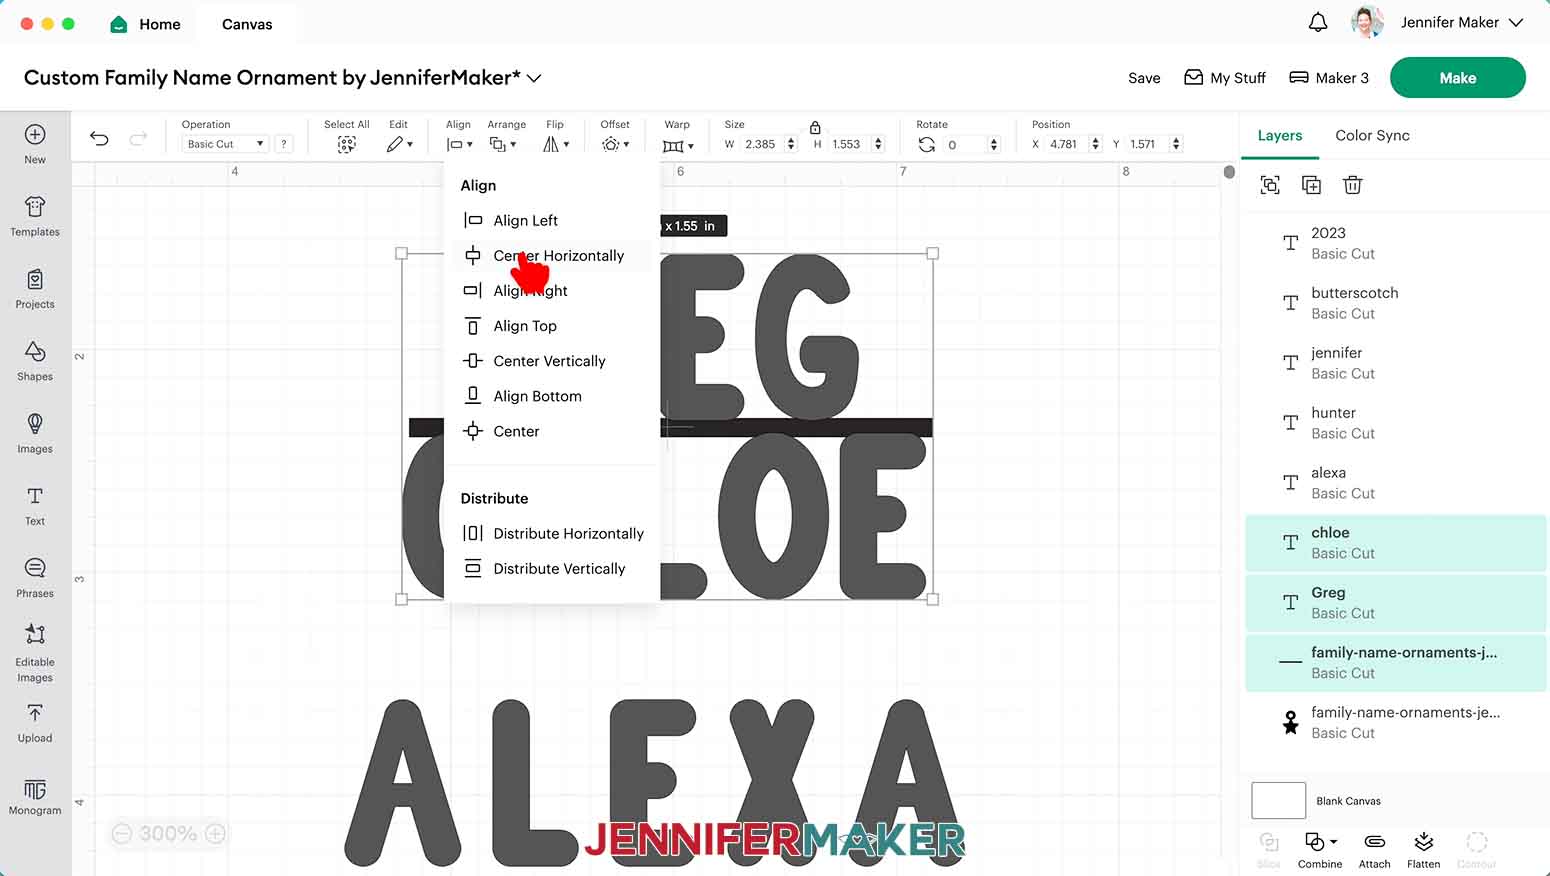
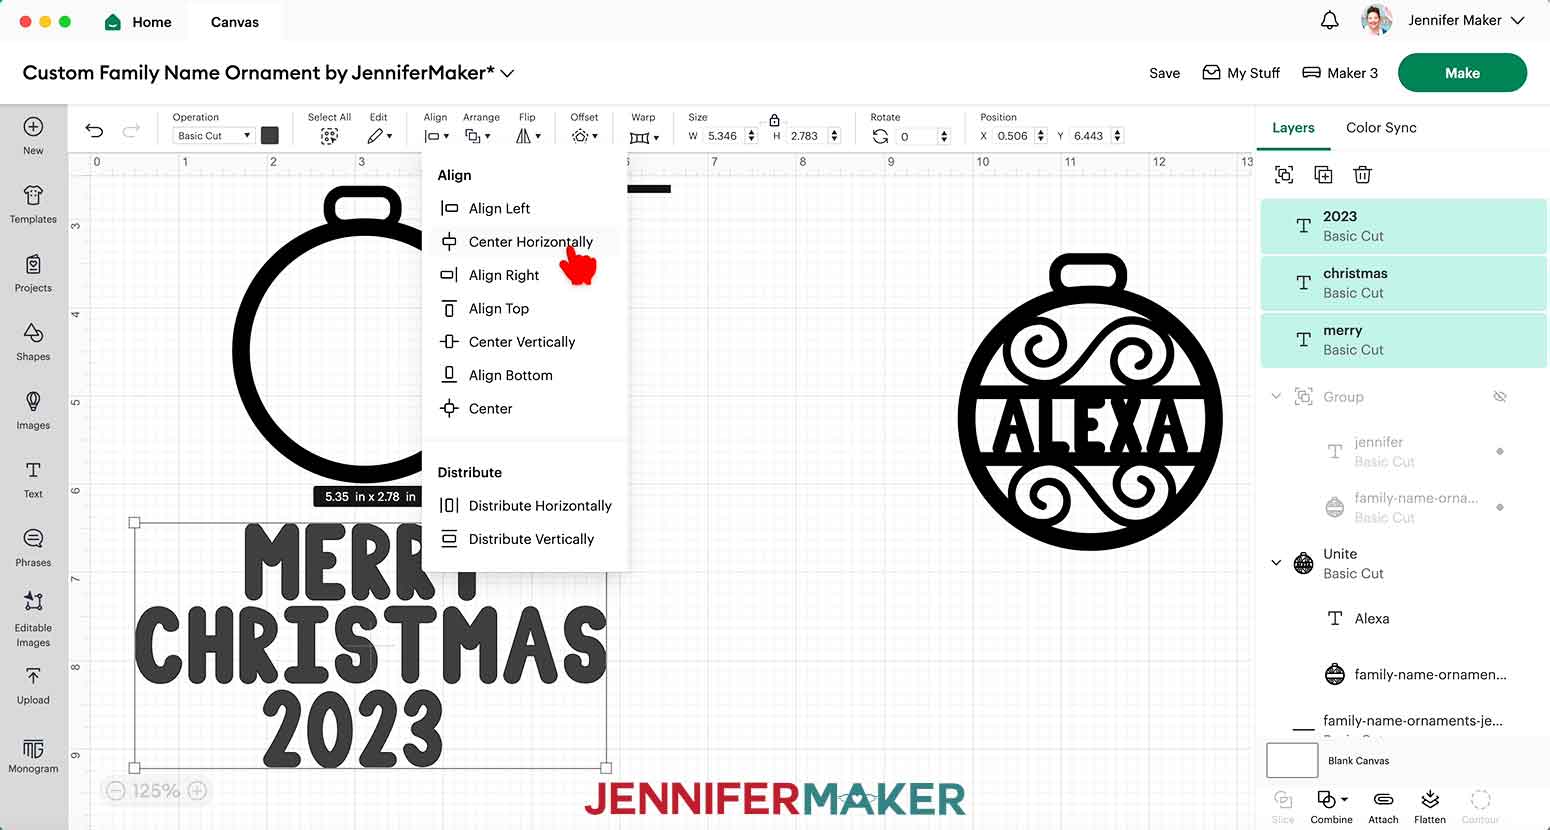
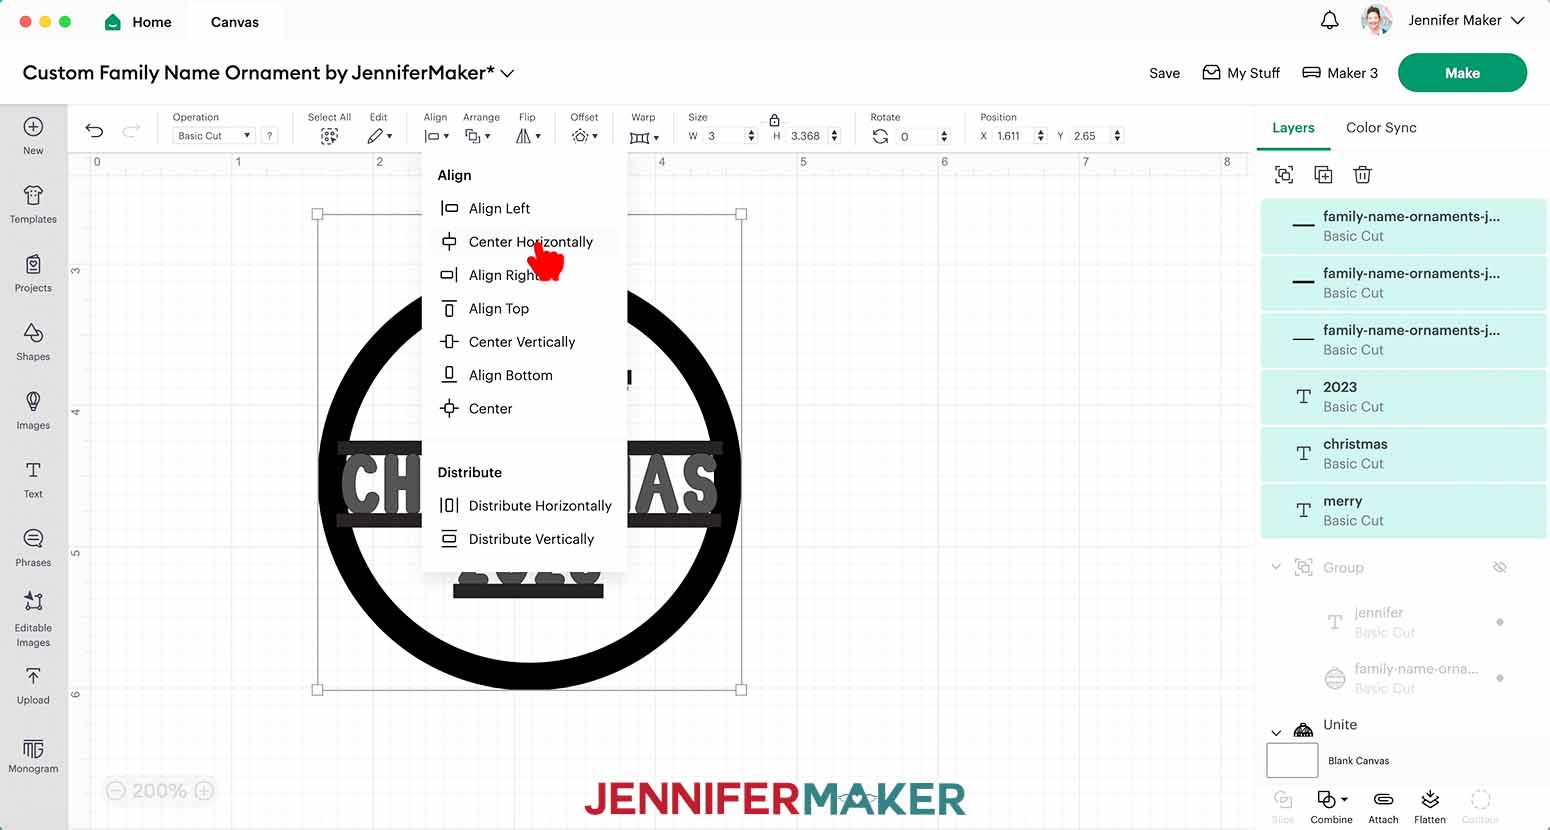
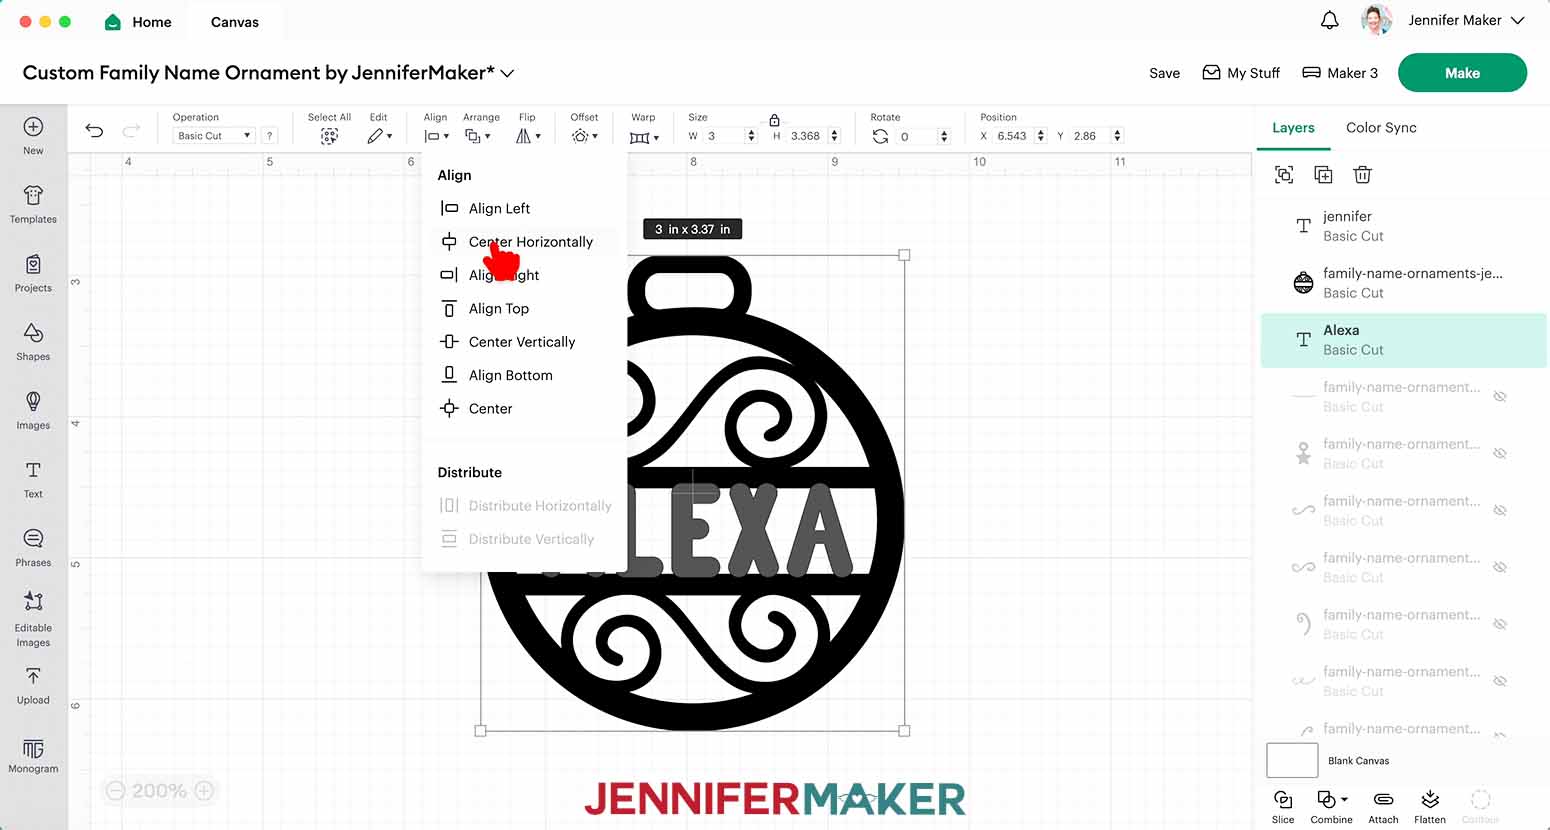
19. Click and drag your cursor over the letters and numbers to select them all.
20. Select the “Align” menu and click “Center Horizontally.”
21. If the outline doesn’t look like a triangular tree, select the lowest name that should be wider than the one above it.
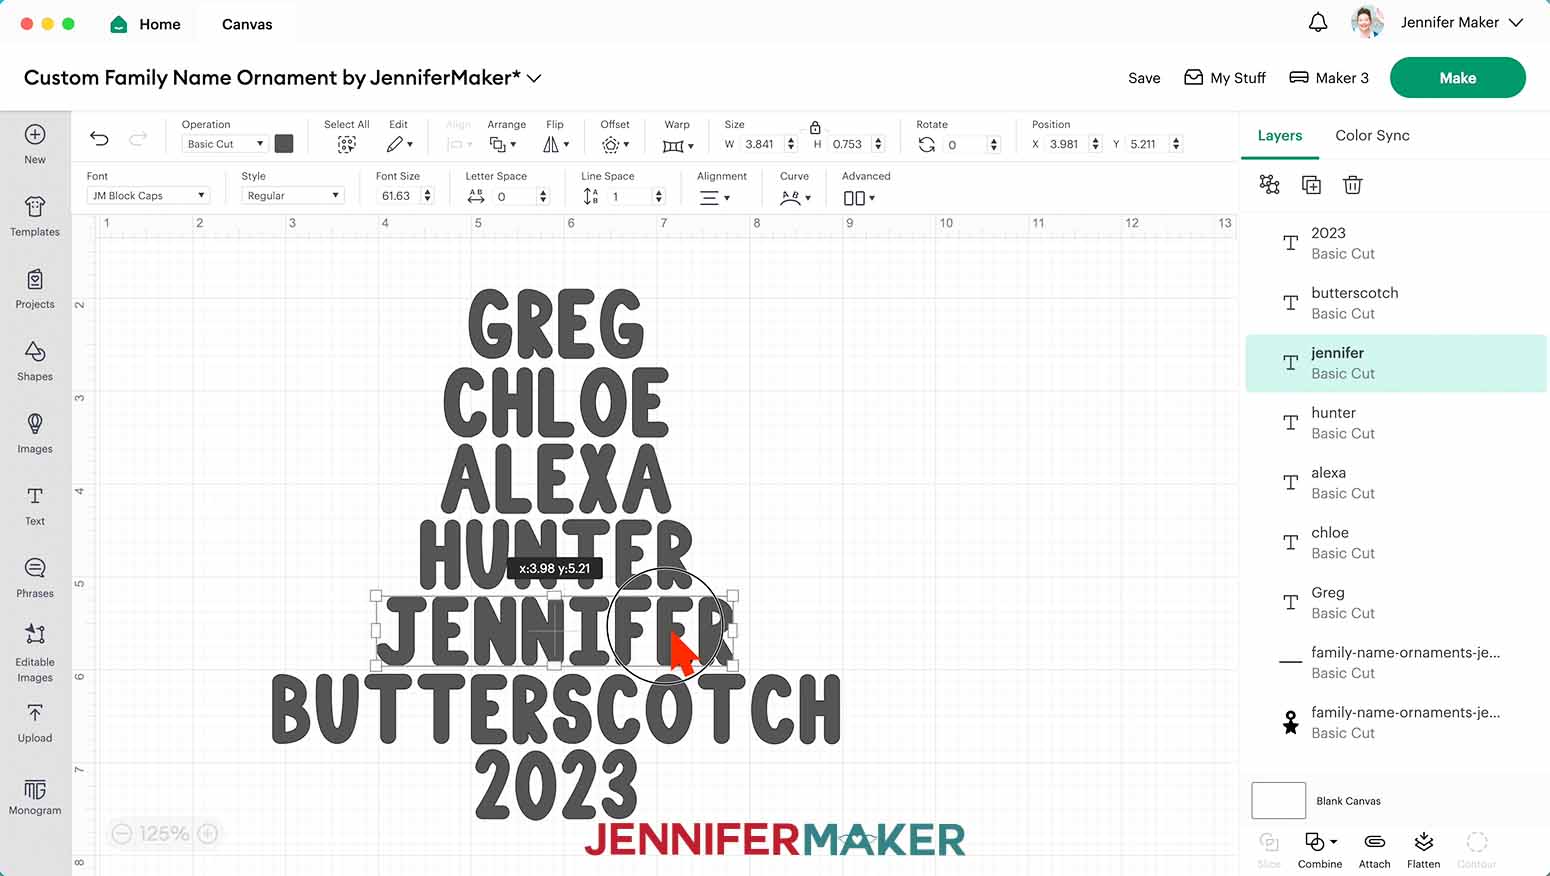
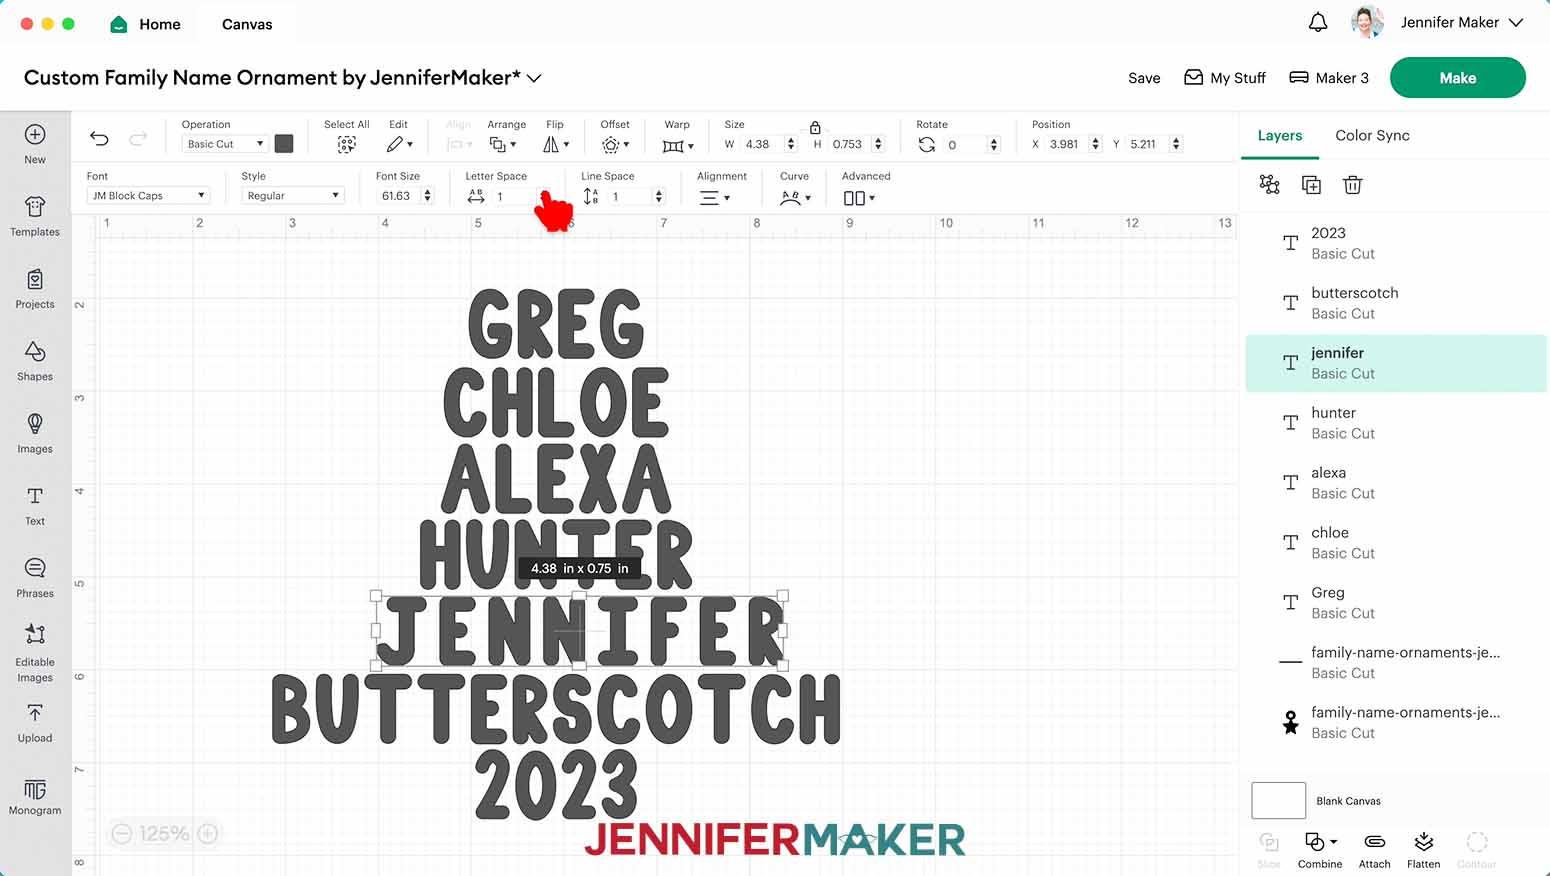
22. Click the small up arrow in the “Letter Spacing” tool to evenly add more space between the letters to make the name wider without changing the font size.
23. When it looks wide enough, select all the name and number layers and use “Align” and “Center Horizontally” again.
24. Use Steps 21-23 to move up through the tree’s layers to make the names look more like a tree.
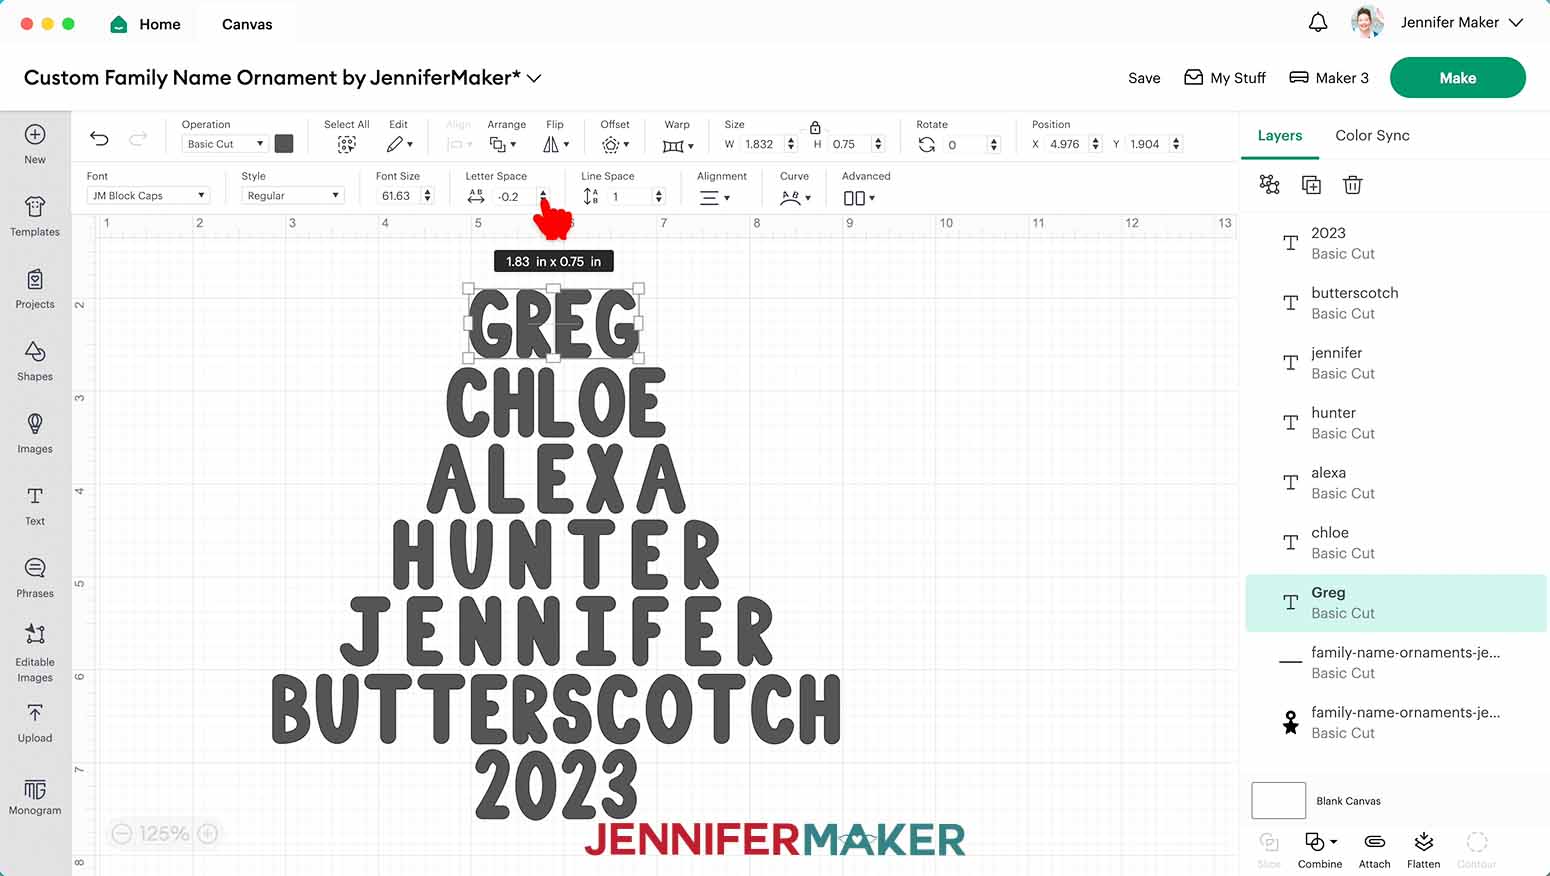
25. If you can’t increase a name’s Letter Spacing without it looking too spread out, click the name above it, but this time click the down arrow for “Letter Spacing” to bring the upper name’s letters closer together and make it narrower.
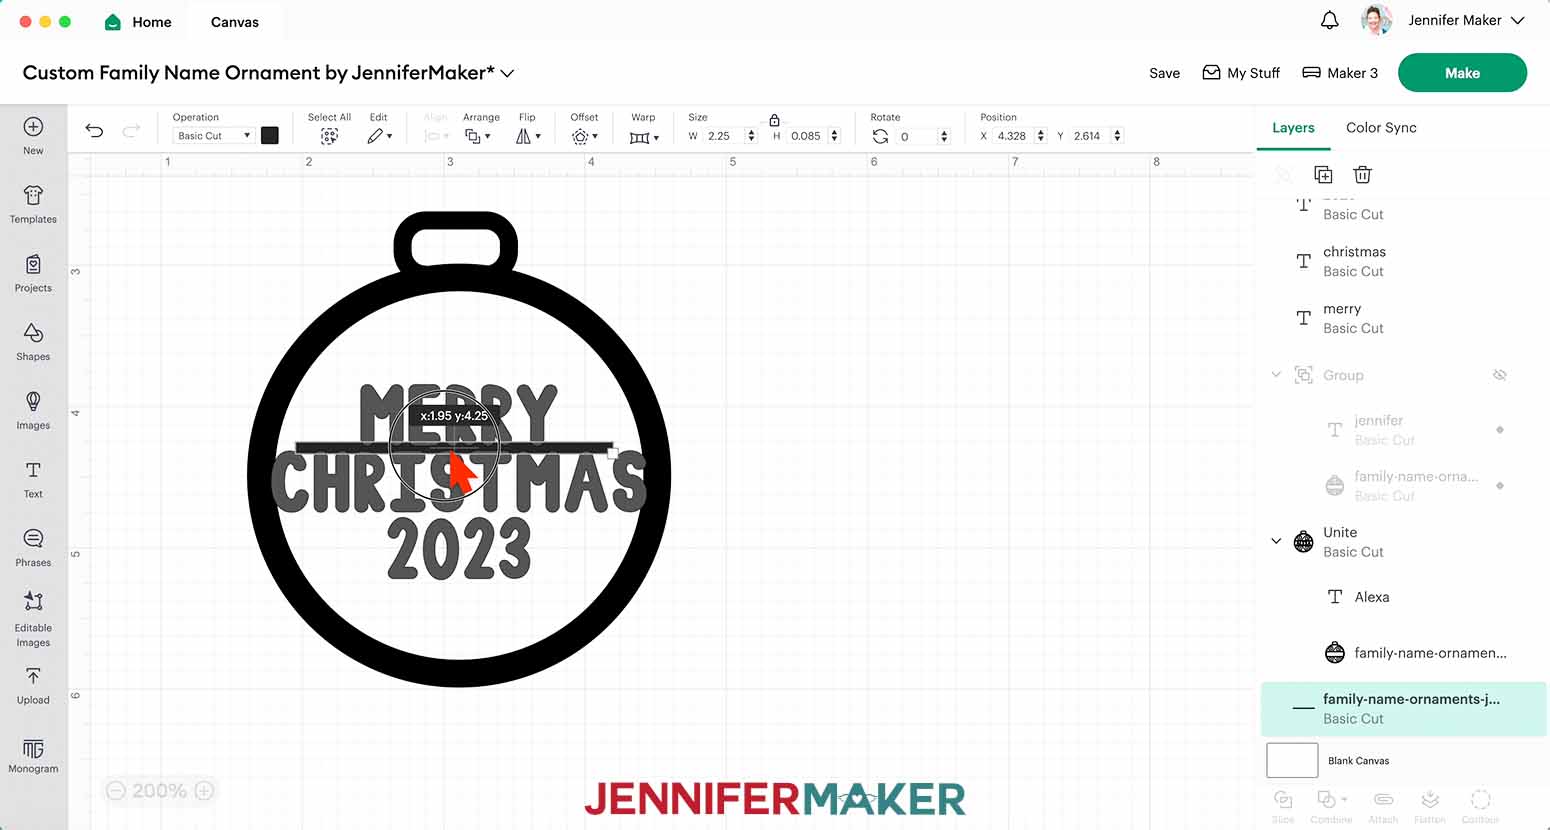
26. Move the top name up and drag the horizontal line underneath it.
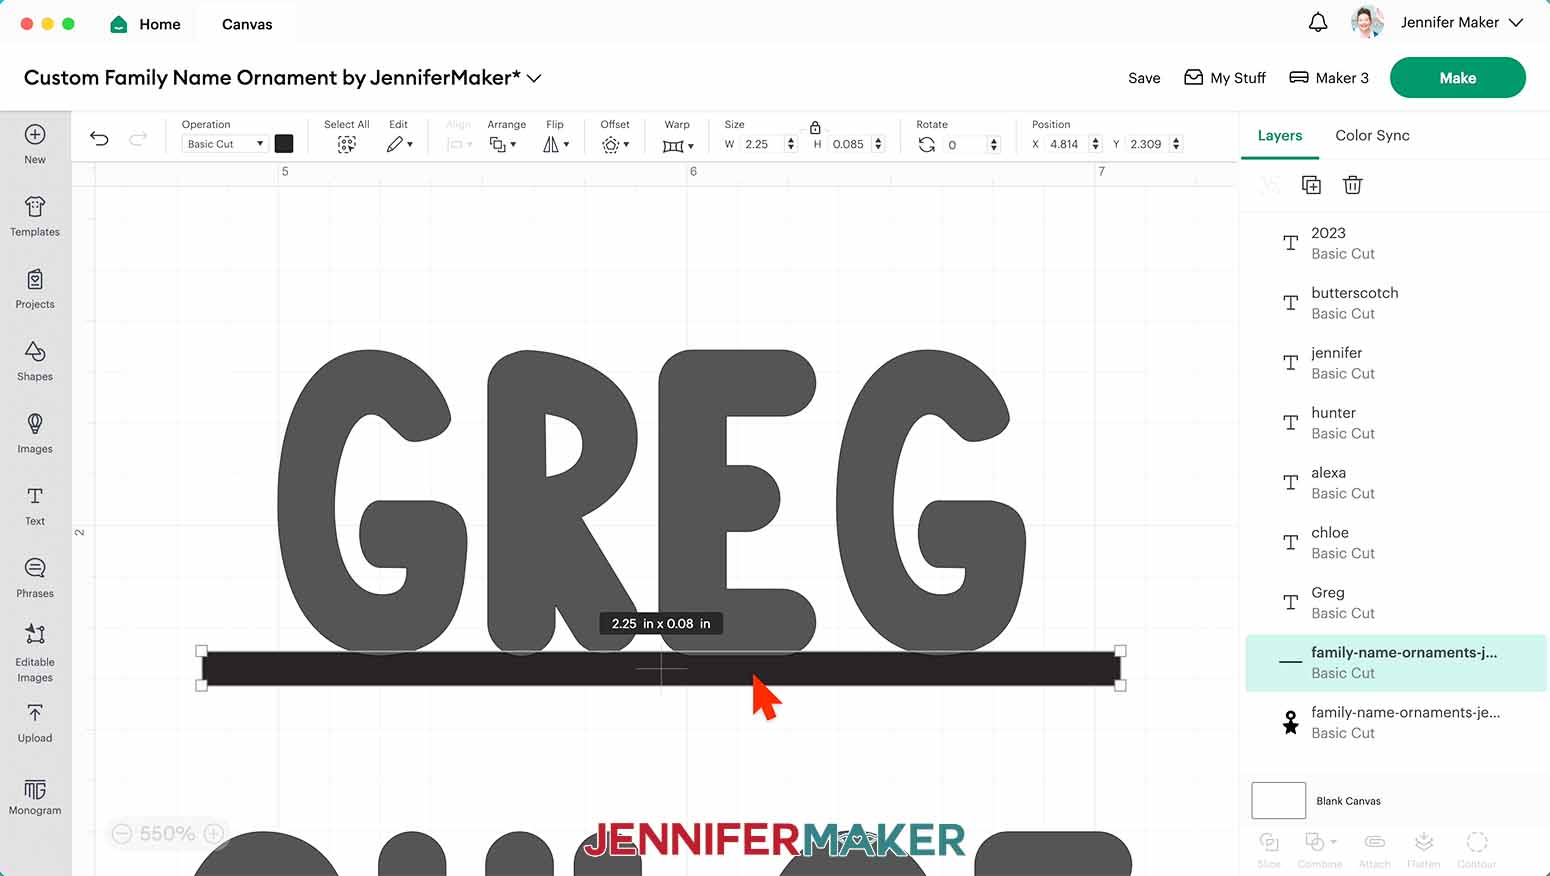
27. Zoom in and adjust the line so it overlaps the bottoms of all the letters a little.
28. If the line looks too short next to the letters, unlock the Size lock and increase the Height a little.
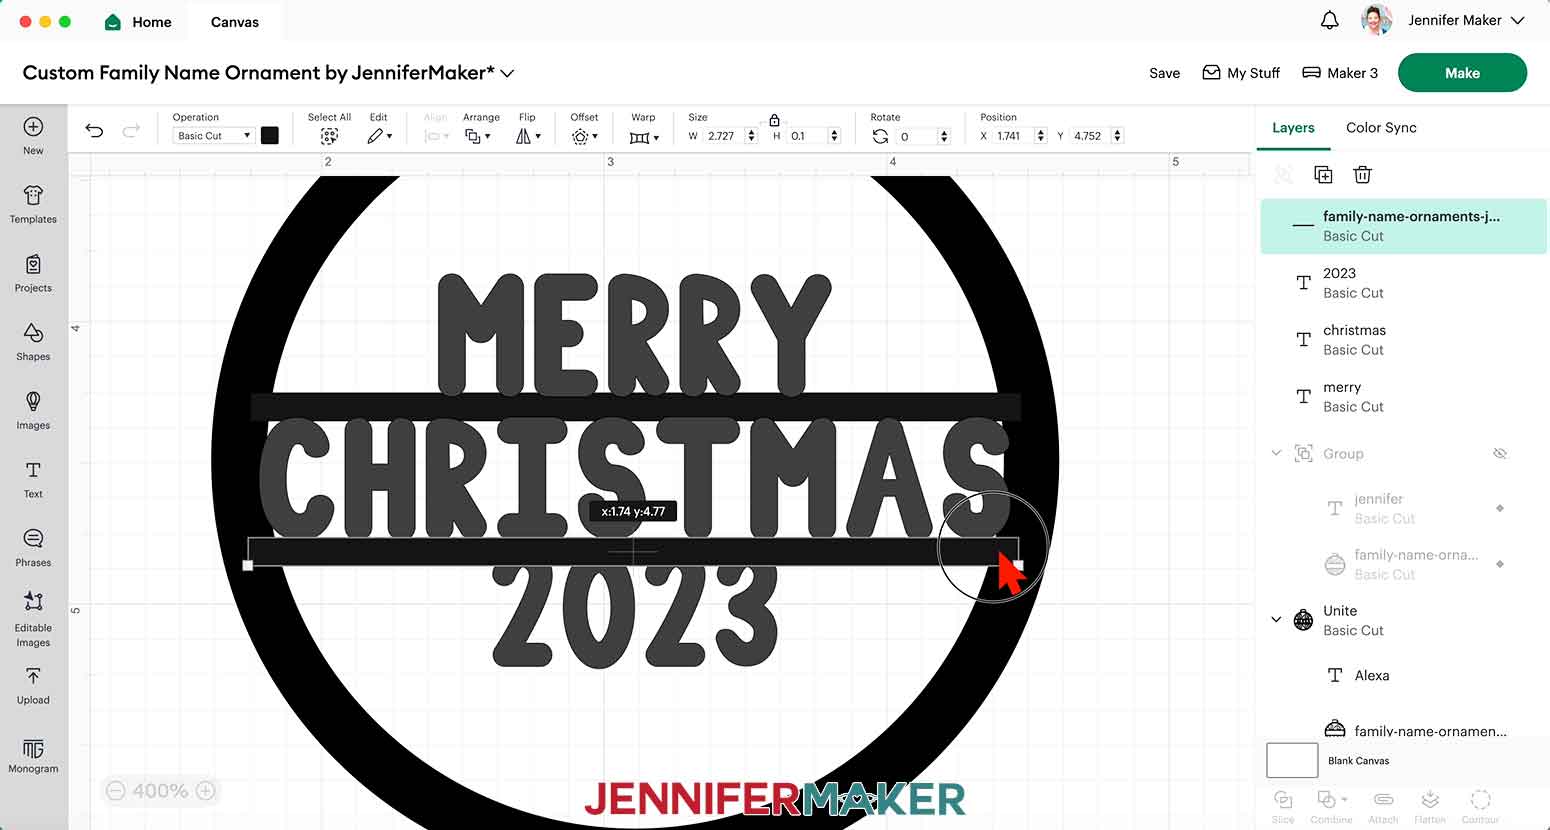
29. Click the name below to check its Width.
30. With the lock icon open, change the horizontal line’s Width to match the lower name’s.
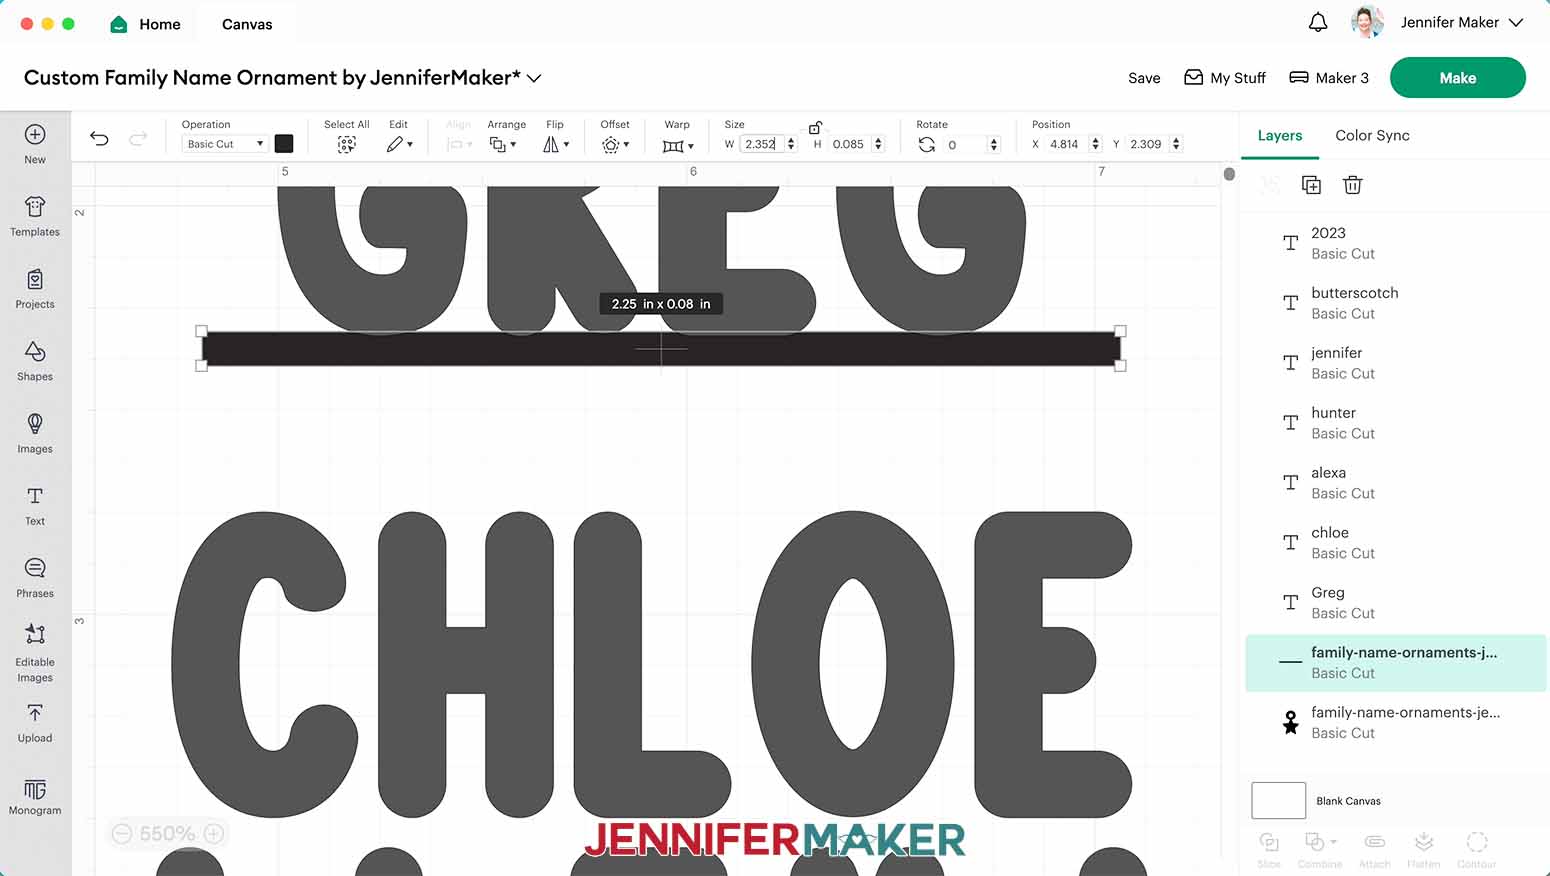
31. Click the lower name and move it up so the tops of its letters barely overlap the line’s bottom.
32. Select the placed names and the line, then click “Align” and “Center Horizontally” to check the layout.
33. Duplicate the line so you have a new one with the correct height to connect the next name in your list.
34. Use Steps 27-33 to connect the rest of the names until you’re ready to position the year.
35. Make the line under the lowest name the same width as the word so it touches each letter.
36. Position the year under the bottom line.
37. Duplicate the line and make it the same width as the year.
38. Drag the line with the same width under the year to touch all the numbers.
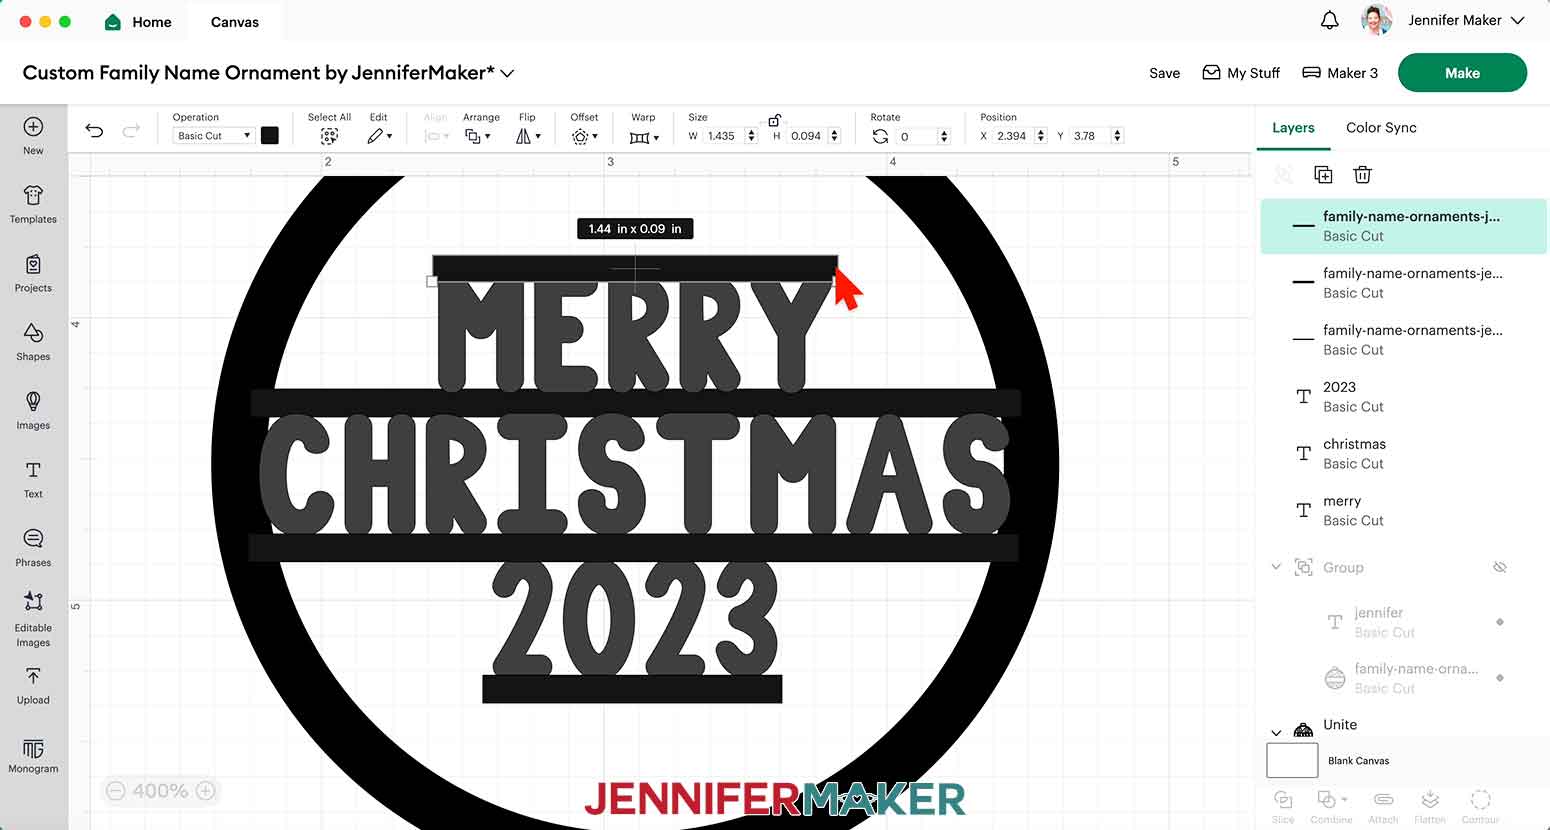
39. Duplicate the line and move it to slightly overlap the top name’s upper edge.
40. With the lock icon open, adjust the line’s Width to look correct above the name.
41. Move the star and hanger piece to slightly overlap the line’s top edge.
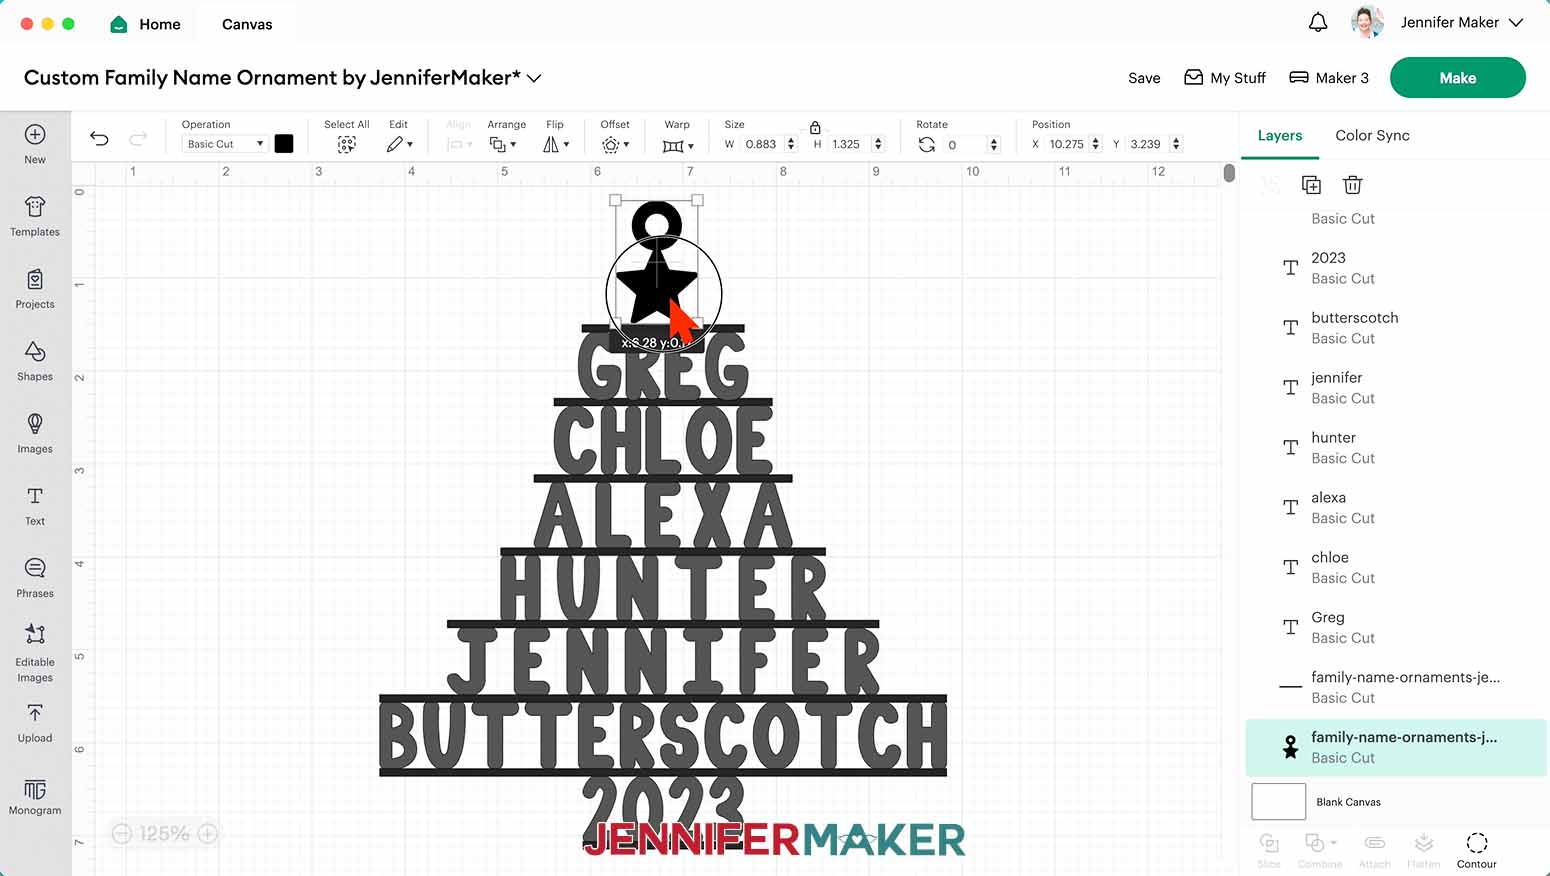
42. Select everything and then click “Align” and “Center Horizontally” to check the layout.
43. Adjust any spots that you want, making sure the names look evenly spaced vertically, the outline looks roughly like a tree, and that all of the letters and numbers are connected to the lines above and below them.
44. Just in case anything shifted off center, select it all and use “Center Horizontally” one more time.
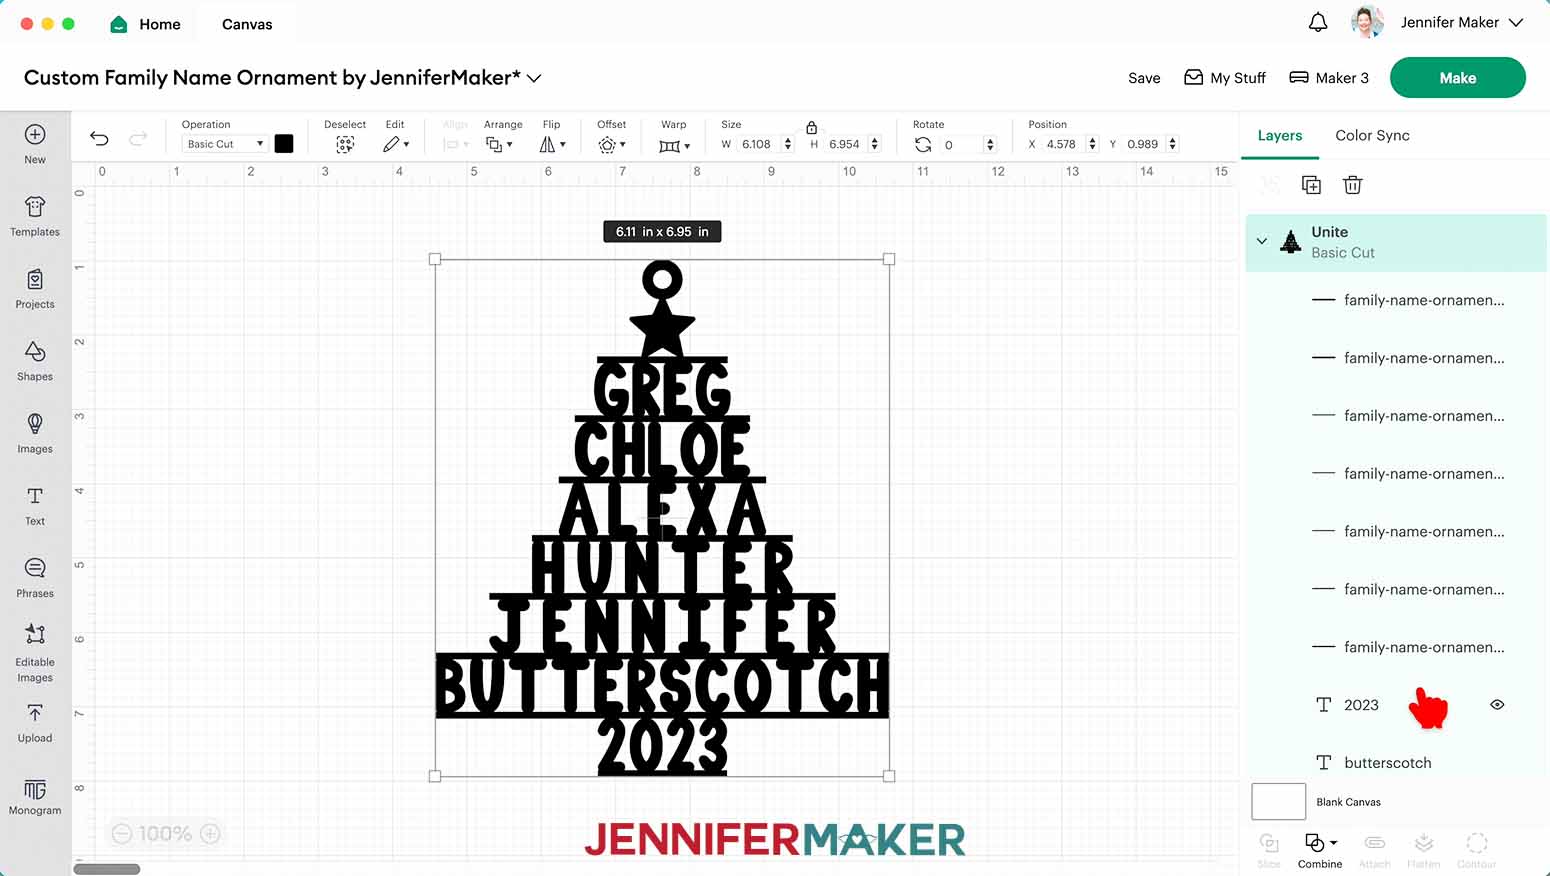
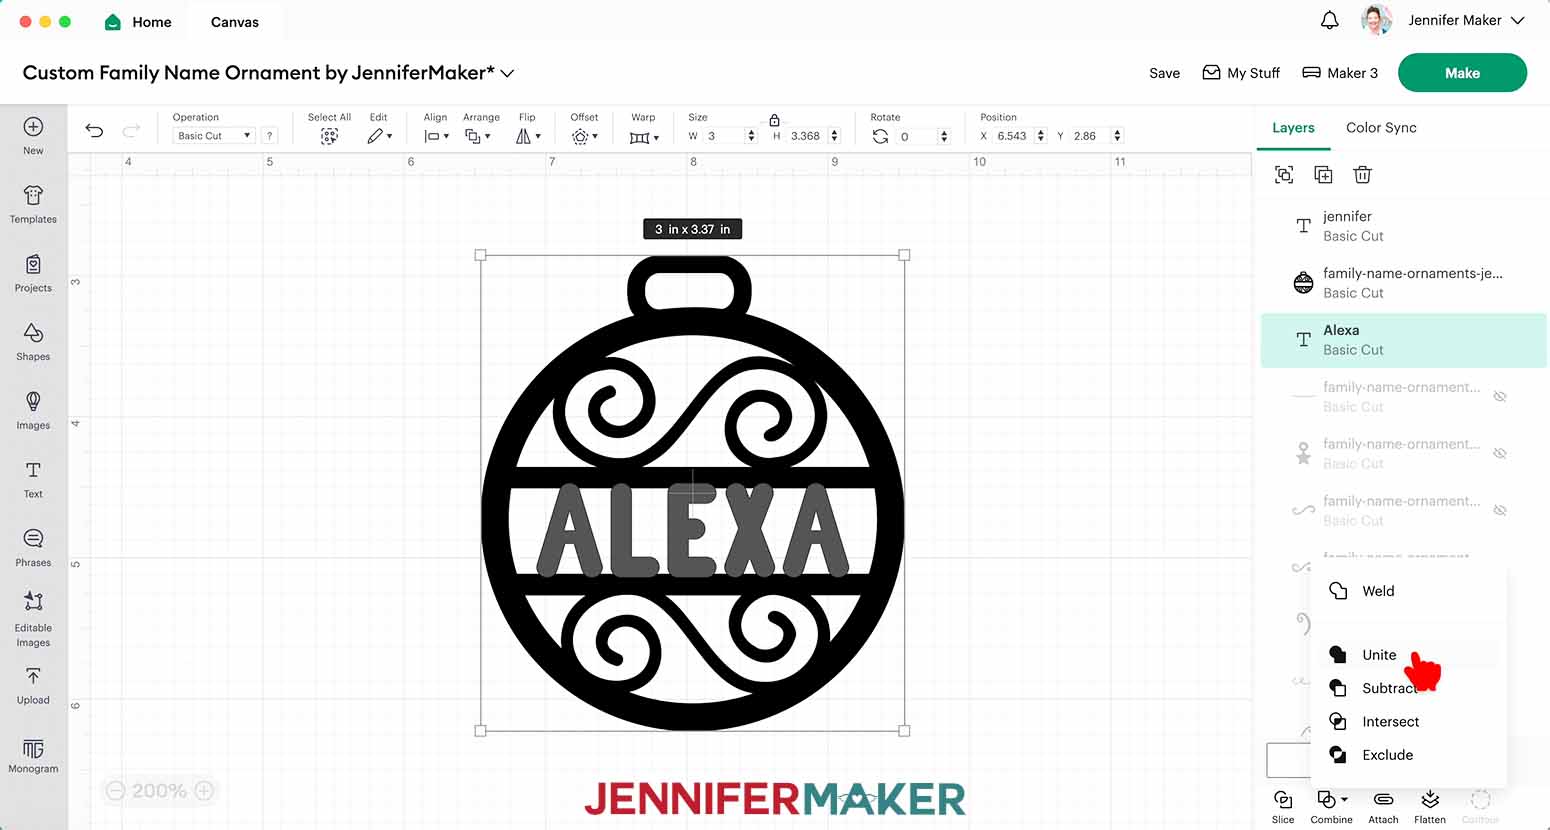
45. Select the entire design.
46. Click “Combine” and “Unite” to make everything cut together.
NOTE: If you want to use medium cardstock instead of metallic poster board, duplicate the design twice so you can cut and glue three layers together.
47. Make sure the correct machine is selected in the top right.
48. Click “Make.”
49. If prompted, click "On Mat," choose your mat size, and click “Confirm.”
50. On the Prepare Screen, If needed, change the Material Size to match each paper you’re using.
51. Select the first mat again and click “Continue.”
CUTTING
1. On the Make Screen, click “Browse All Materials.”
2. Search for and select the settings needed for the materials you’re using. These are the settings you can use for each material:
- Metallic Poster Board - “Metallic Poster Board” with “More” Pressure
- 65 lb. Cardstock - “Medium Cardstock - 80 lb (216 gsm)” with More Pressure
3. Place your paper face up on a green StandardGrip machine mat and use a brayer to make sure it’s fully adhered.
4. Check that your Fine-Point Blade is clean and in the clamp.
5. Press the flashing “Load/Unload” button to load the prepared mat into your Cricut.
6. Press the flashing “Go” button to begin cutting.
TIP: Before unloading the mat, gently lift a corner of the paper to make sure the cuts went all the way through. If not, press the “Go” button again to make a second cut pass in the same spot.
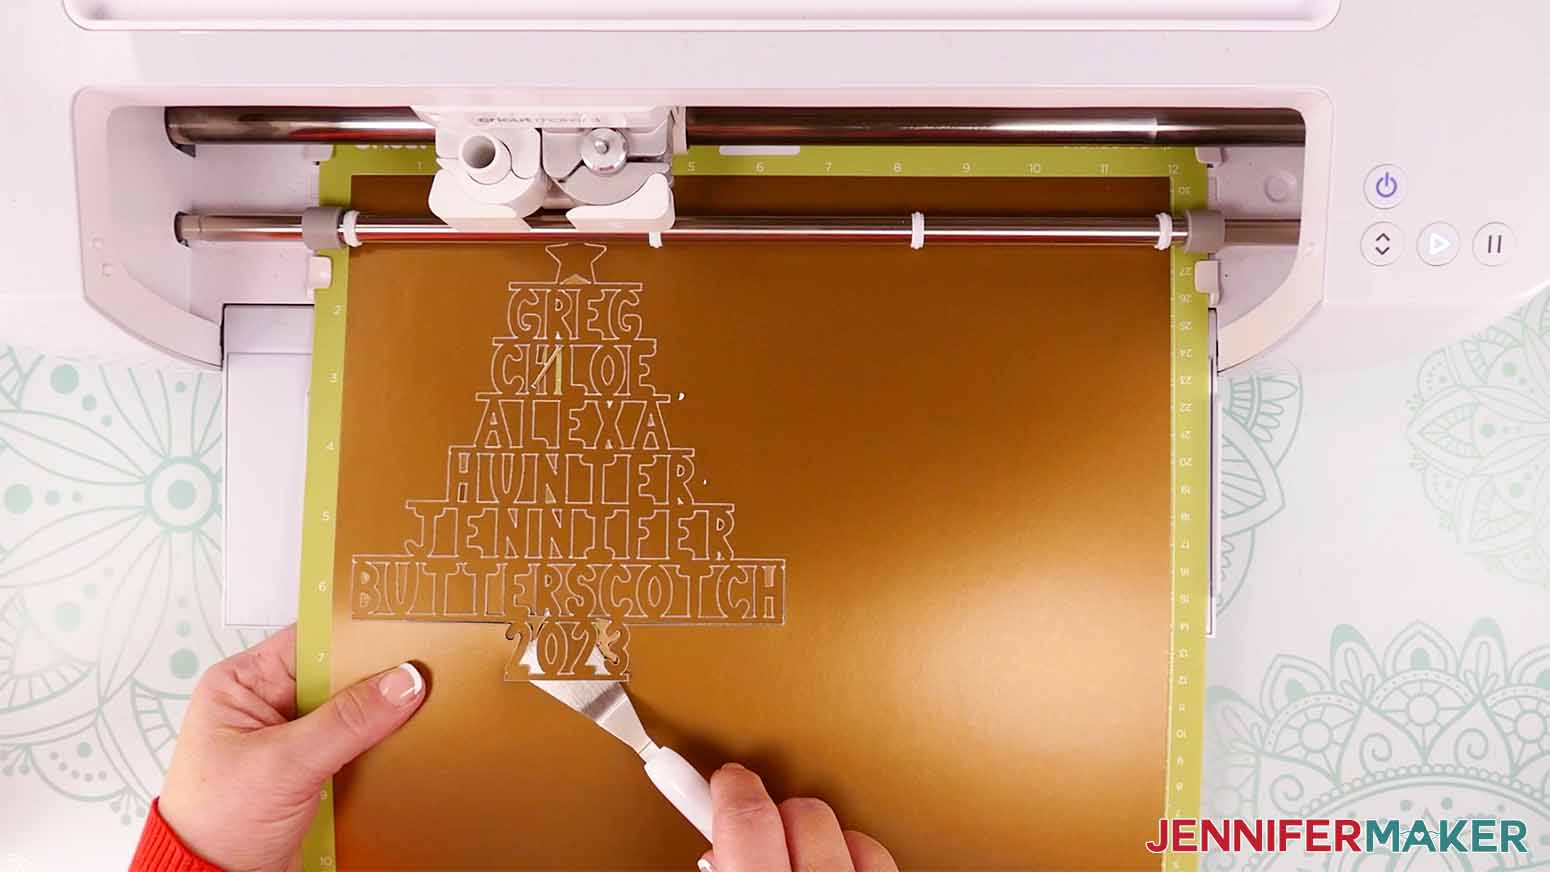
7. When it has finished cutting, unload the mat, flip it over onto your work surface, and roll it back to release the paper.
TIP: Be careful when removing intricate pieces. Use a spatula to carefully remove any intricate parts and a weeding tool to pop out any small pieces. If you have trouble with any of your cuts, check out my Cricut Tips & Tricks for Cleaner Cuts.
STEP 3: ASSEMBLE YOUR TREE FAMILY NAME ORNAMENT
POSTER BOARD ORNAMENT
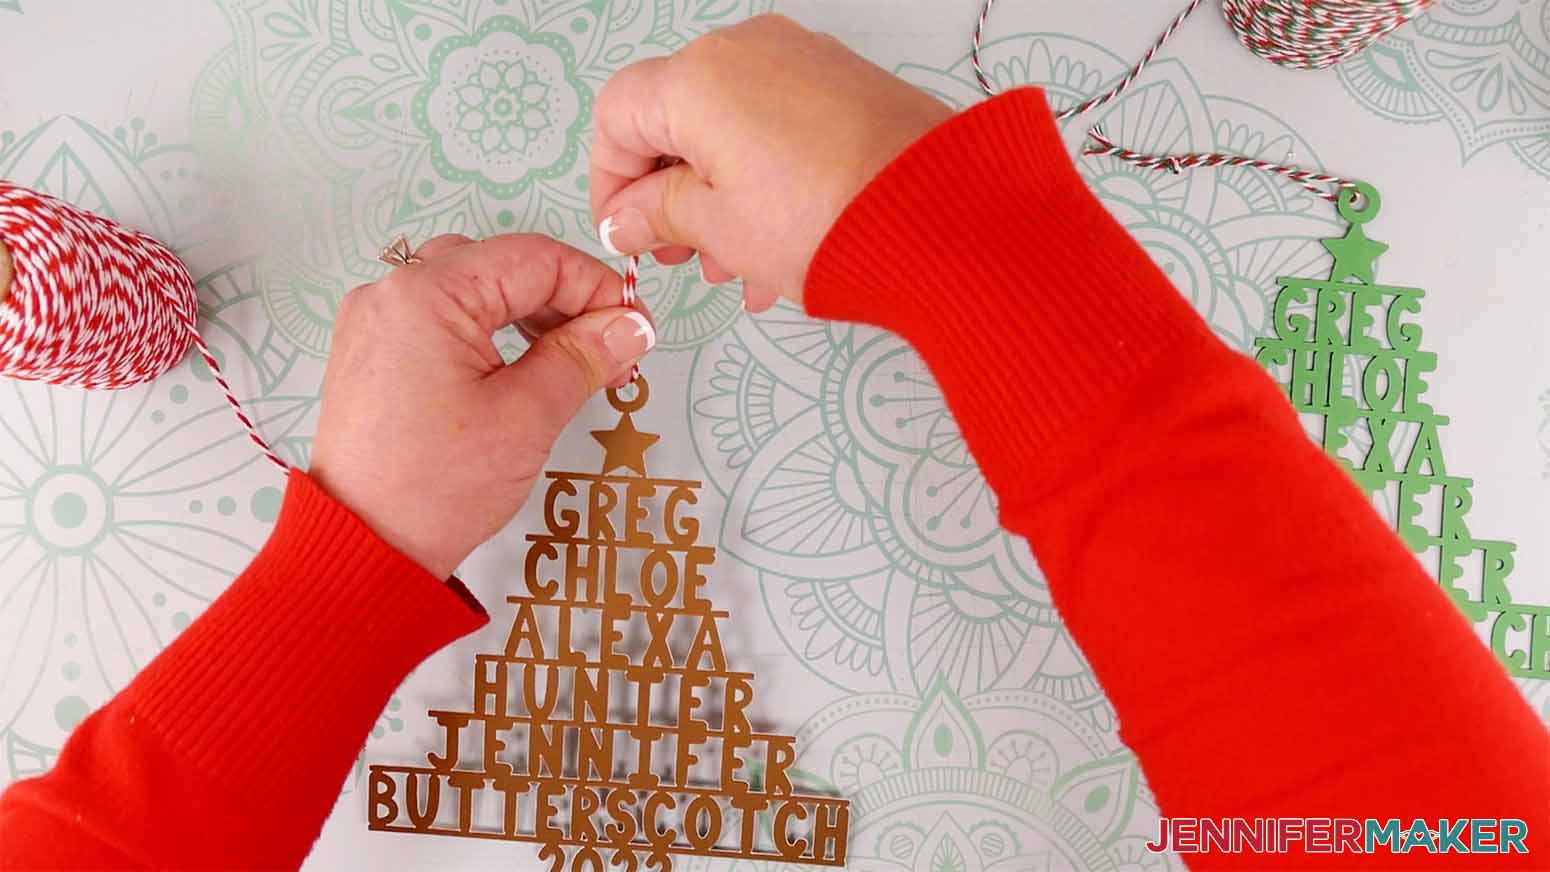
1. Cut a piece of ribbon about 6” long.
2. Loop it through the ornament’s hanger spot and tie it closed.
CARDSTOCK ORNAMENT
1.. Add small dots of glue to the back of one piece, but don’t get too close to the edges.
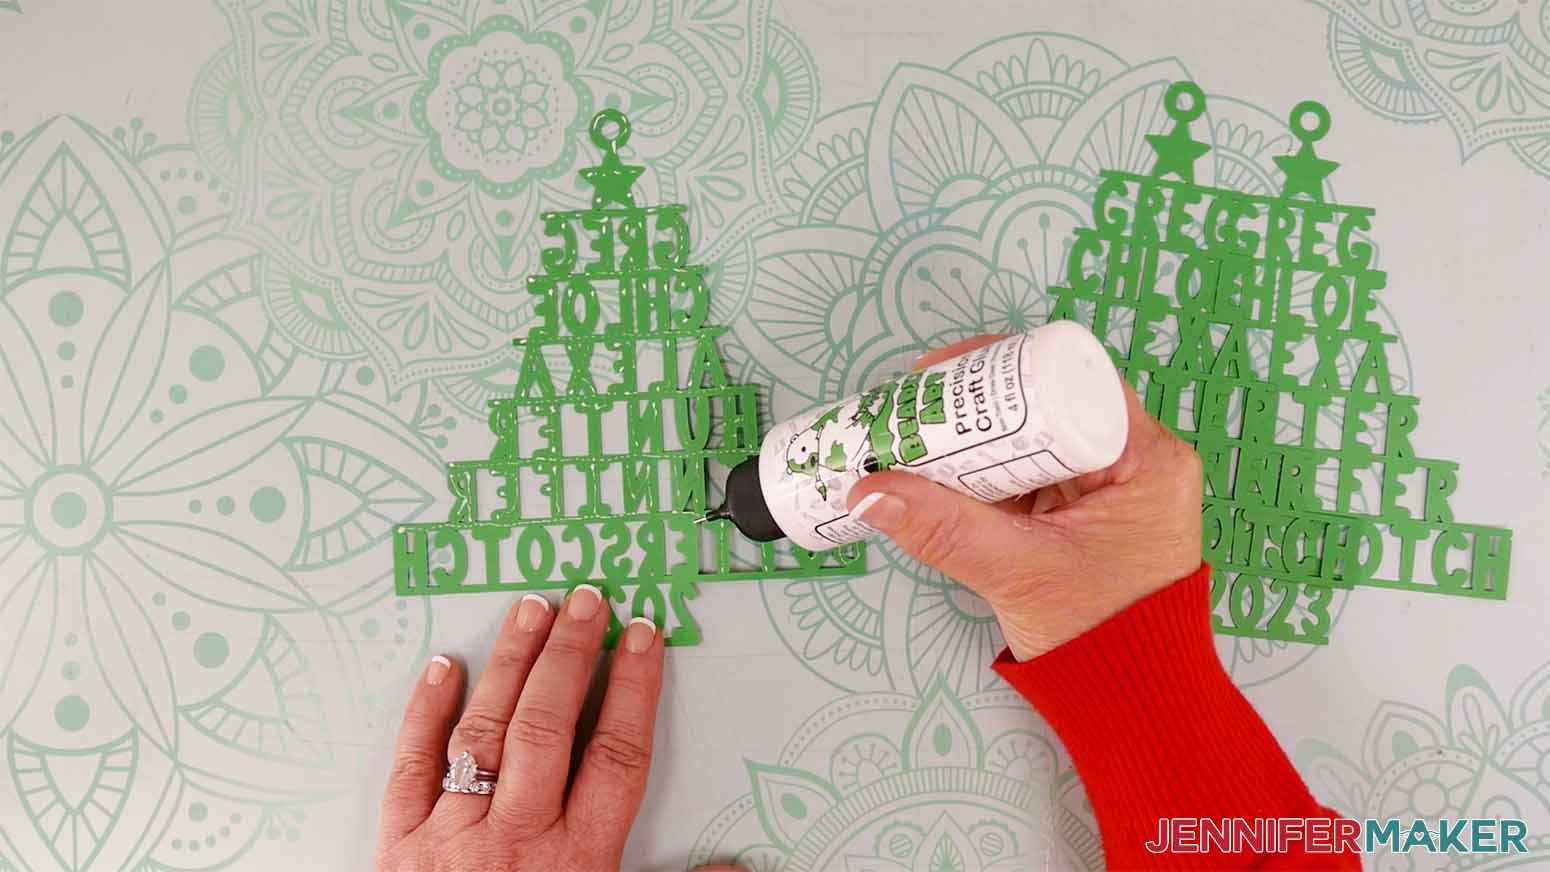
2. Lightly place the glued piece on the face-up layer.
3. Before pressing it down, gently adjust the layers so they’re perfectly aligned.
4. Press the two layers in place.
5. Let the glue dry for 15 seconds.
6. Use the same process to glue the third layer on top of the previous one.
7. Let the ornament dry completely.
8. Cut a piece of ribbon about 6” long.
9. Loop it through the ornament’s hanger spot and tie it closed.
PROJECT 2: ROUND CUSTOM FAMILY NAME ORNAMENT
STEP 2: PREPARE YOUR ROUND CUSTOM DESIGN
BLANK ORNAMENT
CRICUT DESIGN SPACE
1. Open Cricut Design Space and click “New Project.”
2. Click “Upload” and then “Upload Image.”
3. Click “Browse.”
4. Select the design kit SVG file, “family-name-ornaments-jennifermaker-SVG.svg.”
5. On the Prepare to Upload screen, it will say “Cut image” with the design preview.
6. Click “Upload.”
7. Find your design in Recent Uploads and add it to the Canvas.
8. With the kit selected, click “Ungroup.”
9. Delete everything but the horizontal line and blank ornament frame.
10. Click “Text.”
11. Type the first word you want to use.
12. Select the “Font” menu.
13. Click “System” to see your added typefaces and search for “JM Block Caps,” then click it.
14. Close the Font pop-up.
15. Click “Duplicate” to make a new text box with the same settings.
16. Double-click the new Text box to activate editing mode, then type the next word.
17. Drag the new word below the last one on the Canvas with a little space in between them.
18. Repeat Steps 15-17 to add the third word, or the year at the bottom.
19. Hold Shift and select the three Text Layers in the Layers Panel.
20. Click “Align” and “Center Horizontally.”
21. With the Lock icon closed, click and drag a corner of the bounding box in until the largest word fits in the widest part of the ornament frame.
22. Move the horizontal line near the ornament.
23. Drag the horizontal line into the space between the top two words.
24. Zoom in and adjust the line so it overlaps the bottoms of all the letters a little.
25. Unlock the Size lock and drag the line’s sides out until it overlaps but doesn’t go beyond the frame on both sides.

26. If the line looks too short next to the letters, increase the Height a little.
27. Click the lower word and move it up so the tops of its letters barely overlap the line’s bottom.
28. Duplicate the line and drag it down to slightly overlap the middle word’s bottom edges.
29. Move the final word or year up so its upper edges slightly overlap the line.
30. Optionally, you can connect the tops and bottoms, too. Duplicate the line again and move it to overlap the bottom word or year’s lower edge.
31. With the Lock icon open, adjust the line’s Width so it goes just barely beyond the characters.
32. Duplicate the line and use the same steps to connect the tops of the top word, too.
33. Hold Shift to select the three text layers, the lines, and the ornament frame.
34. Select the “Align” menu and click “Center Horizontally.”
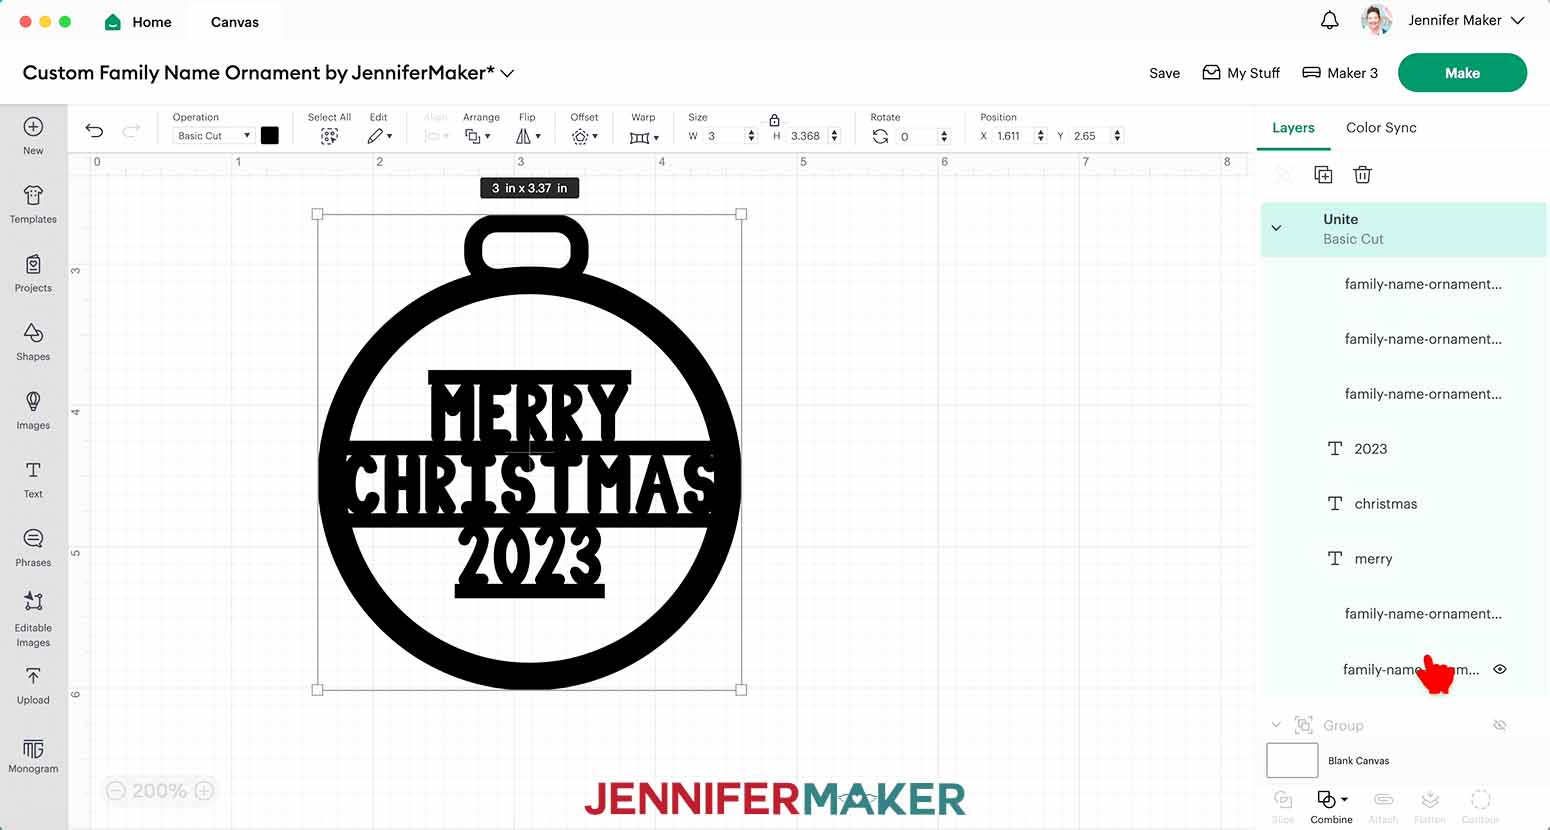
35. Click “Combine” and “Unite” to make everything cut as one piece.
36. If you want to make your ornament using medium weight cardstock, click “Duplicate” twice so you have 3 layers.
37. Make sure the correct machine is selected in the top right.
38. Click “Make.”
39. If prompted, click "On Mat," choose your mat size, and click “Confirm.”
40. On the Prepare Screen, make sure your mats look correct.
41. If needed, change the Material Size to match each paper you’re using.
42. Select the first mat again and click “Continue.”
DESIGN ORNAMENT
CRICUT DESIGN SPACE
1. Follow steps 1-8 above to add your design kit SVG to your canvas.
2. Delete everything but the ornament frame you want to use.
3. Follow steps 10-14 above to add the name you want to use.
4. Drag the name over the open band in the ornament.
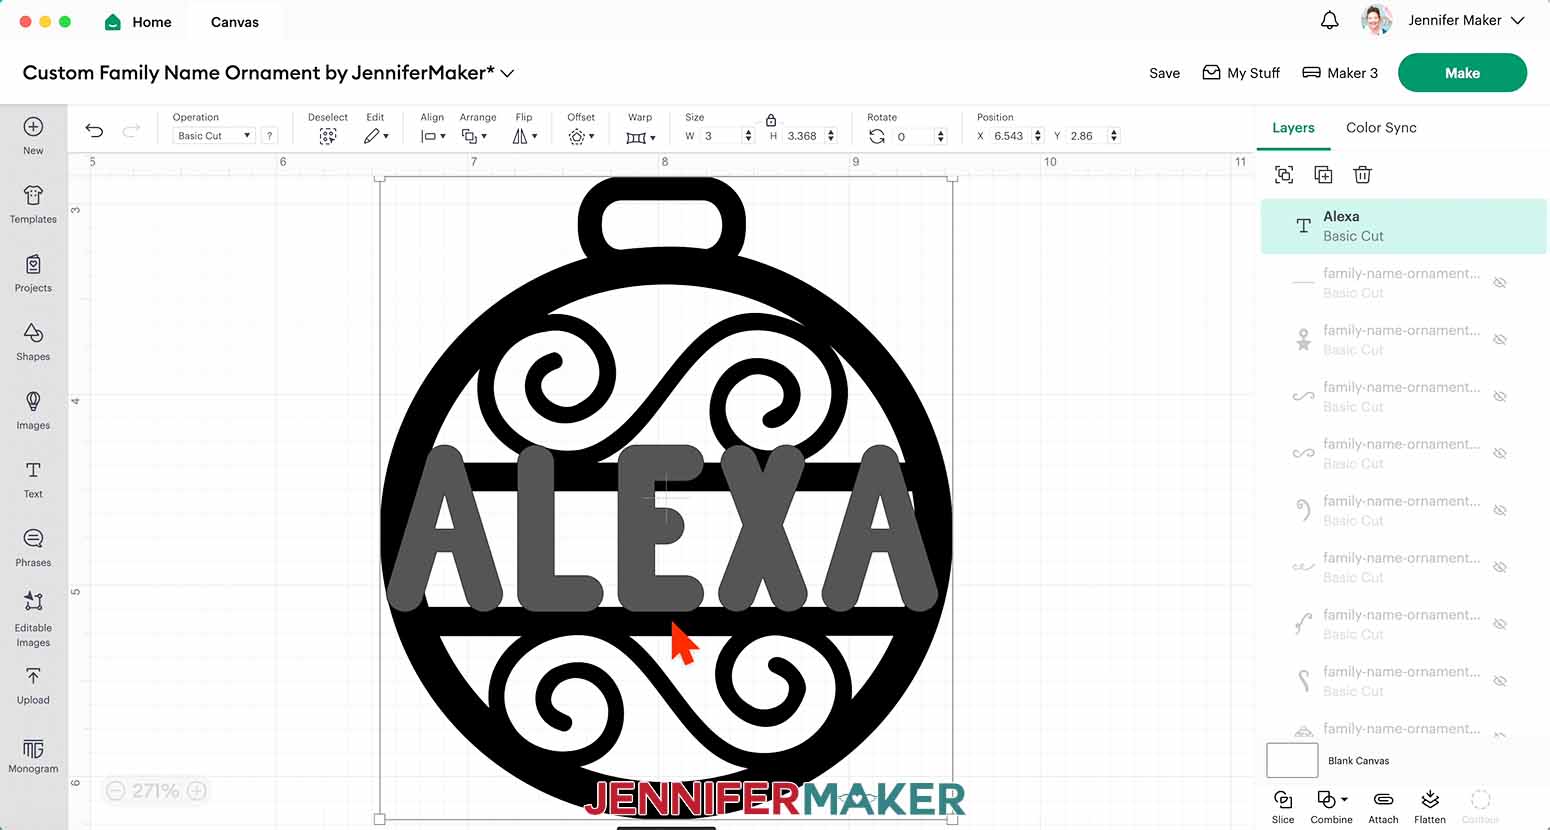
5. Zoom in to see more clearly.
6. With the Size lock icon closed, click and drag a corner of the text’s bounding box until it fits in the band and just barely overlaps the upper and lower lines.
TIP: If your name is longer than the open area at this height, click the down arrow near “Letter Spacing” to decrease the open space between each letter and make the word more narrow. If it’s still too wide, unlock the size and drag one of the corners in until the name fits. JM Block Caps is forgiving with resizing while others - especially script styles - are not.
7. Click and drag your cursor over the ornament and name to select them both.
8. Select the “Align” menu and click “Center Horizontally.”
9. Click “Combine” and “Unite” to make everything cut as one piece.
10. If you want to make your ornament using medium-weight cardstock, click “Duplicate” twice so you have 3 layers.
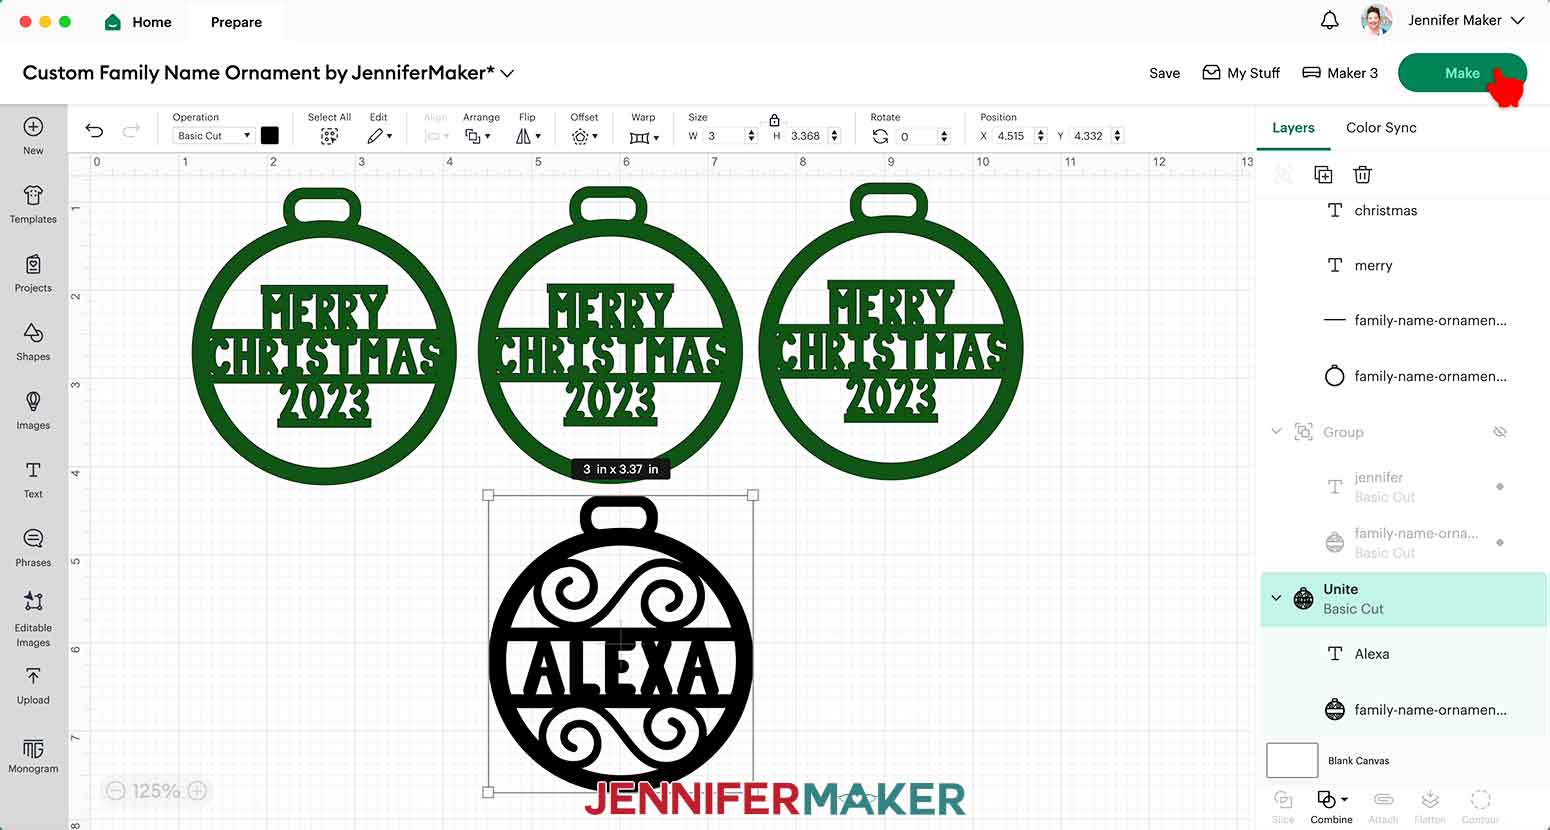
11. Make sure the correct machine is selected in the top right.
12. Click “Make.”
13. If prompted, click "On Mat," choose your mat size, and click “Confirm.”
14. On the Prepare Screen, make sure your mats look correct
15. If needed, change the Material Size to match each paper you’re using.
16. Click “Continue.”
CUTTING
1. On the Make Screen, click “Browse All Materials.”
2. Search for and select the settings needed for the materials you’re using. These are the settings you can use for each material:
- Metallic Poster Board - “Metallic Poster Board” with “More” Pressure
- 65 lb. Cardstock - “Medium Cardstock - 80 lb (216 gsm)” with “More” Pressure
3. Place your paper face up on a green StandardGrip machine mat and use a brayer to make sure it’s fully adhered.
4. Check that your Fine-Point Blade is clean and in the clamp.
5. Press the flashing “Load/Unload” button to load the prepared mat into your Cricut.
6. Press the flashing “Go” button to begin cutting.
TIP: Before unloading the mat, gently lift a corner of the paper to make sure the cuts went all the way through. If not, press the “Go” button again to make a second cut pass in the same spot.
7. When it has finished cutting, unload the mat, flip it over onto your work surface, and roll it back to release the paper.
TIP: Be careful when removing intricate pieces. Use a spatula to carefully remove any intricate parts and a weeding tool to pop out any small pieces. If you have trouble with any of your cuts, check out my Cricut Tips & Tricks for Cleaner Cuts.
STEP 3: ASSEMBLE YOUR ROUND CUSTOM FAMILY NAME ORNAMENT
POSTER BOARD ORNAMENT
1. Cut a piece of ribbon about 6” long.
2. Loop it through the ornament’s hanger spot and tie it closed.
CARDSTOCK ORNAMENT
1. Add small dots of glue to the back of one piece, but don’t get too close to the edges.
2. Lightly place the glued piece on the face-up layer.
3. Before pressing it down, gently adjust the layers so they’re perfectly aligned.
4. Press the two layers in place.
5. Let the glue dry for 15 seconds.
6. Use the same process to glue the third layer on top of the previous one.
7. Let the ornament dry completely.
8. Cut a piece of ribbon about 6” long.
9. Loop it through the ornament’s hanger spot and tie it closed.
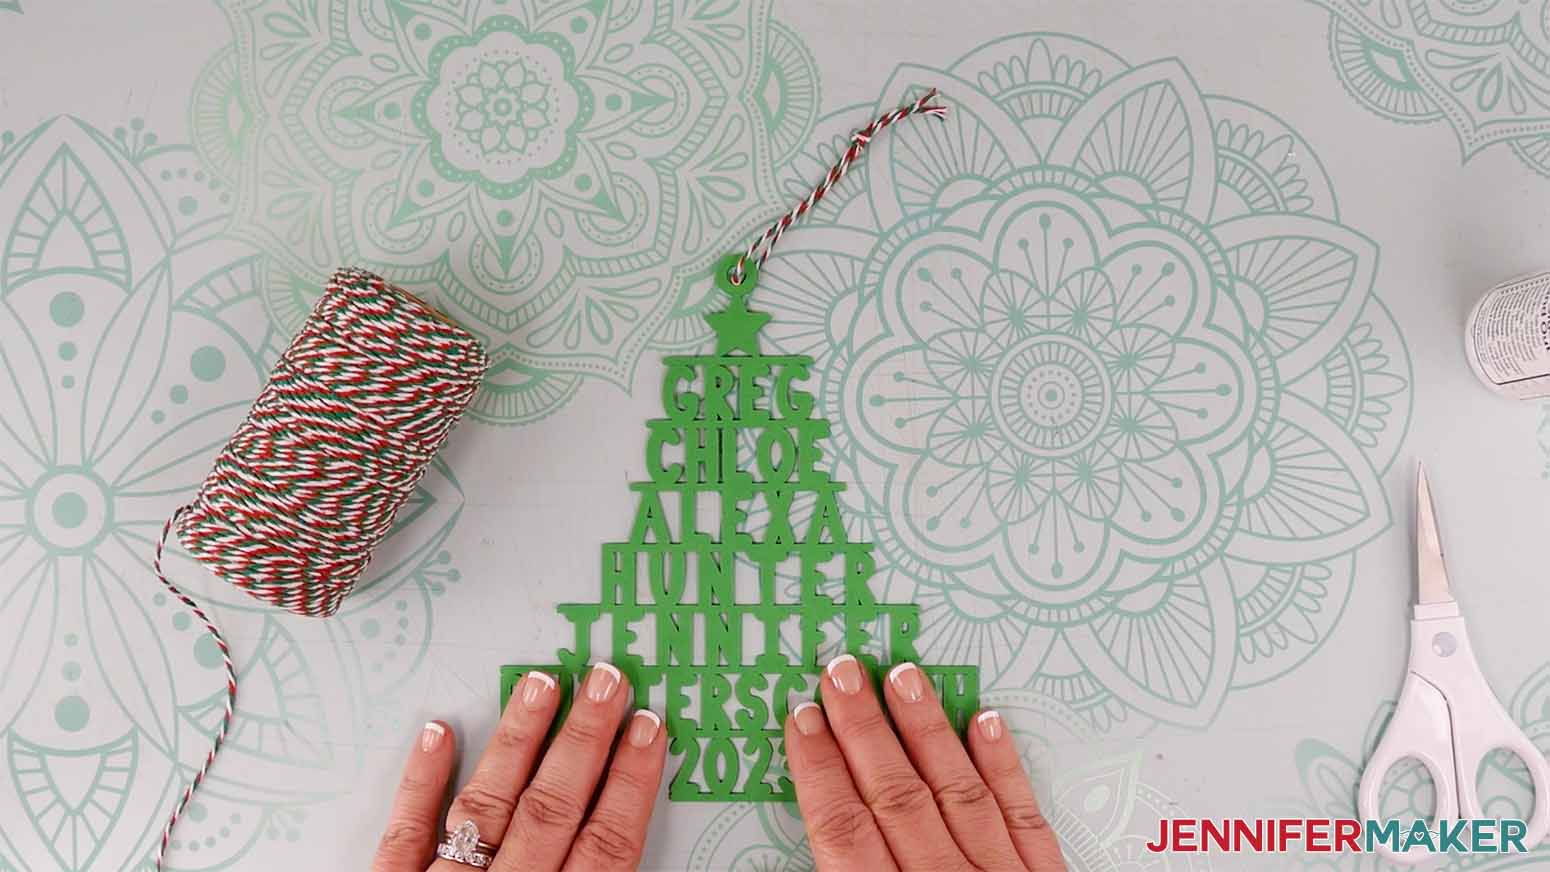
STEP 4: SHOW IT OFF!
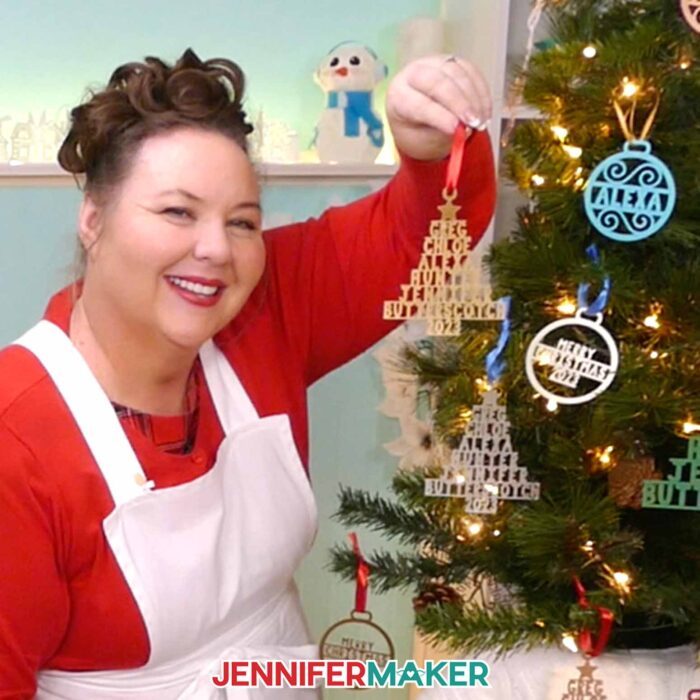
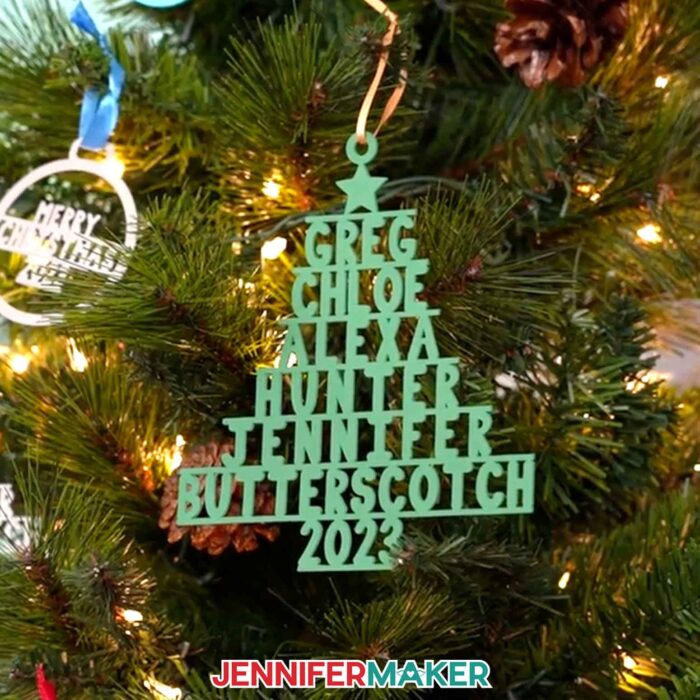
Here is what my finished ornaments look like!
Notes
Typefaces Used:
JM Block Caps
Finished Size:
Tree: I resized to 5” height. Width will vary depending on names
Bulb ornament: about 3” round (the top piece makes the height slightly taller)
Answers to Your Questions About Making a Custom Family Name Ornament
Q: How do you make a photo ornament?
A: You can use my snowglobe tutorial to make a photo ornament! Have your Cricut write a special message or the current year on the back for a wonderful keepsake.
Q: What other ornaments can I make with a Cricut?
A: I have a list of 100+ free ornament designs, including glittery projects, acrylic ornaments, etched images, and much more! There are lots of choices perfect for a first Christmas or the perfect keepsake.
Q: Can I cut this project on a Cricut Joy?
A: If you can fit your family names at .9″ tall, yes, the designs will fit on a Joy! The width is the limiting factor, so play with your design to make it fit!
Q: What kind of paper do I use for the SVG cut files?
A: You can use high-quality 65 lb or higher cardstock to make a family tree ornament — the color is up to you. If you want to use the exact same materials I used, check the list above.
Q: How do I keep my layers stuck together?
A: I used little dots of craft glue to keep the paper together.
Q: My cardstock keeps ripping on the intricate cuts. What can I do?
A: Be sure you’re using a clean and sticky machine mat, good-quality cardstock, and a clean blade. See my Cricut Cutting Problems post for all the tips I use to get clean cuts every time.
Q. Do I have to use a Cricut?
A: No! My capable design staff and I always include several versions of each digital item. If you have a Silhouette Cameo, which uses Silhouette Studio, you can use the DXF cut files in Silhouette Basic Edition. If you have upgraded to Silhouette Designer Edition, Designer Edition Plus, or Business, you can use the SVG files. If you don’t have a cutting machine, you can print and then cut out my digital download PDF files, too and then use scissors or a craft knife to cut out your pieces. The ZIP file in my resource library includes these file types and more!
Q. Are your free SVGs just for personal use or also commercial use?
A: Yes, you can sell completed projects using these designs, we only ask that you give credit to JenniferMaker.com and do not sell the digital files. If you use them, please share photos with us! We love supporting small businesses!
Get my free SVG file collection to create your own custom family name ornament!
I love seeing what you make with my designs and how you use them! Please share a photo of your custom family name ornament in our Facebook group or tag me on social media with #jennifermaker.
Love,

Want to remember this? Save this Tutorial on How To Make A Custom Family Name Ornament to your favorite Pinterest Board!