Learn how to make a waterfall card with a Cricut!
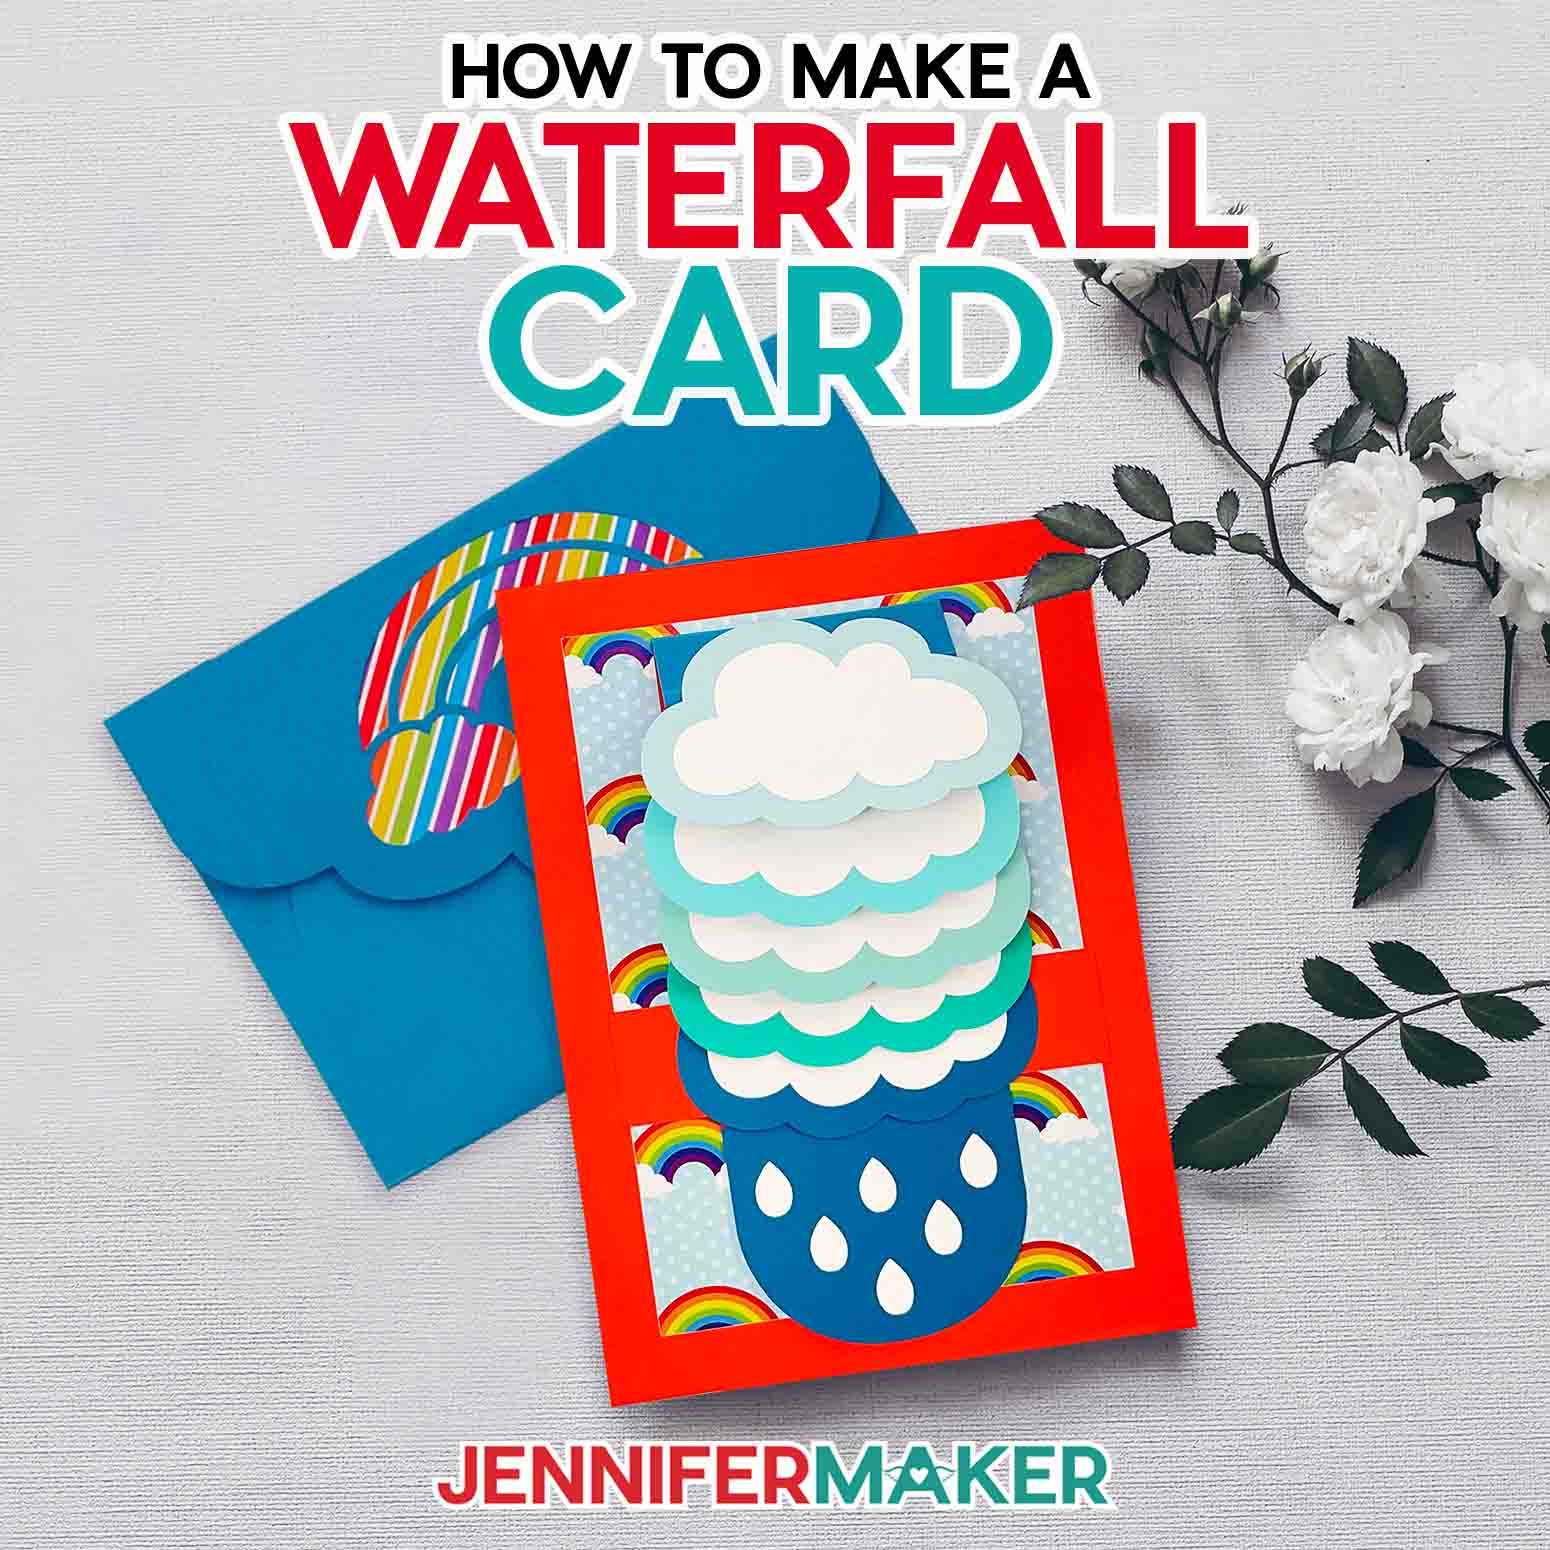
Ready to add movement to your cardmaking? My new free waterfall card design is sure to brighten anyone’s day! It’s easy to cut with a cutting machine (even a Cricut Joy!) and is totally customizable with different cardstock. There’s even an included envelope, so you can make and mail it the same day! You can add a special message on the front or back of the clouds, or inside the card. Once you have the steps down, you can customize your own cards using other shapes, too!
Want to save this project? Enter your email below and we’ll send the project straight to your inbox.
See the full step-by-step video tutorial on how to make a waterfall card:

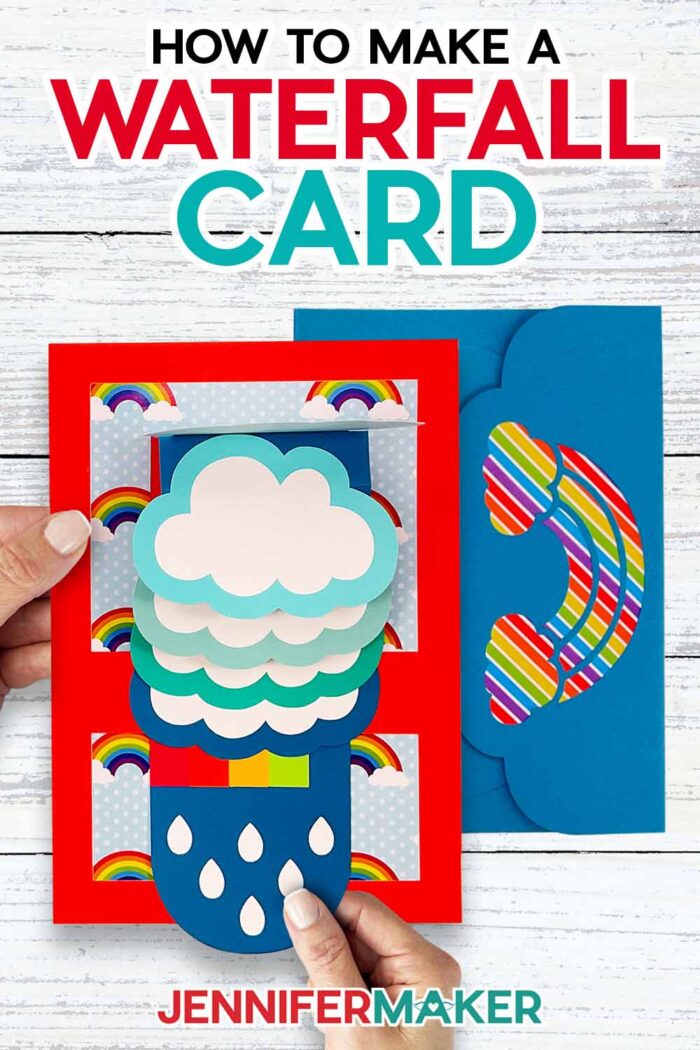
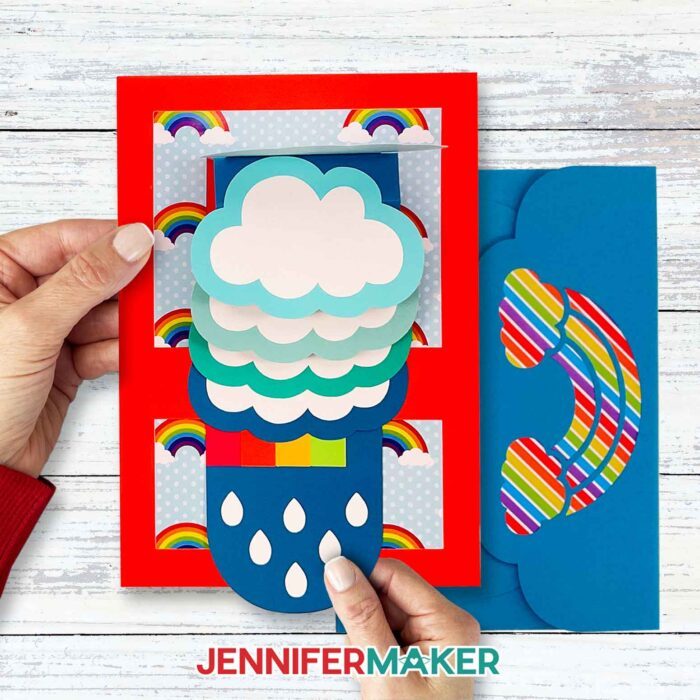
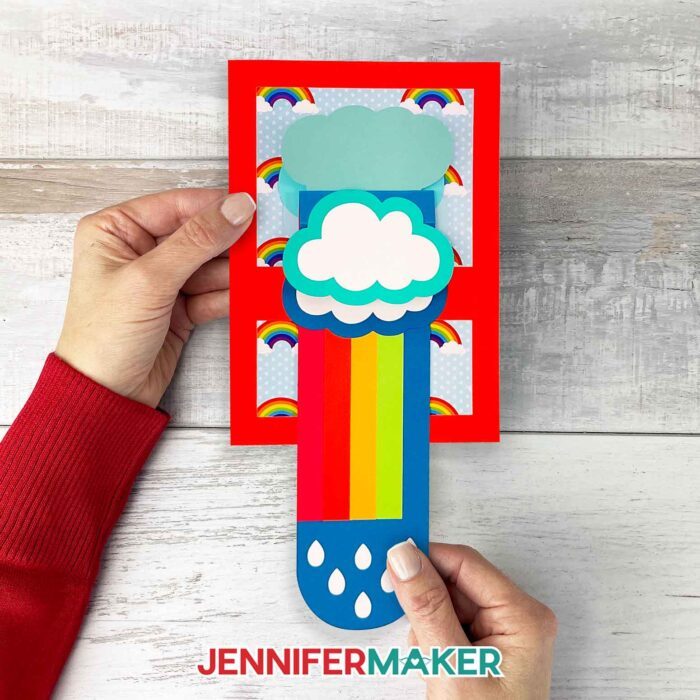
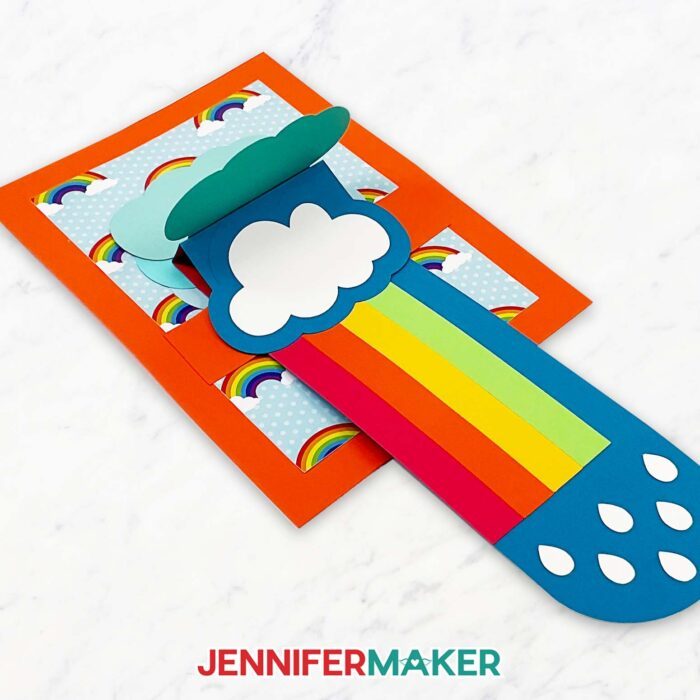
A waterfall card is such a fun, interactive project! When you (or a loved one!) pull the tab, it lifts several flaps in order. The flaps cascade so smoothly, that’s where the “waterfall” name comes from!
There are many ways to use this papercrafting technique, but waterfalls make me think of the rainbows they can create! So, I added raindrops to my pull tab, and when you pull them down the clouds flip to reveal a rainbow! I left my clouds plain, but you can also add images or messages to be revealed one at a time.
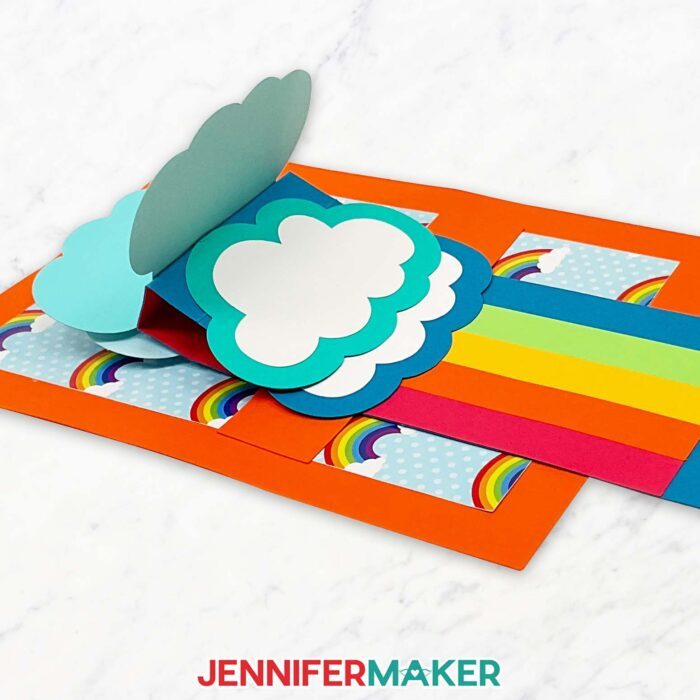
A waterfall card looks complex, but it’s really easy to make as long as you follow the instructions! The key is the long strip that the bottom tab controls. Specially creased and adhered panels on the folded strip move with the motion, creating the waterfall effect.
Since we want the card to move smoothly, careful gluing is really important. If you add glue to the wrong surface or let it bleed beyond the edges, your tab might stick, or the clouds could get stuck together. We don’t want to dam up the waterfall, so use high-quality craft glue and add it carefully. Easy waterfall cards are perfect for my favorite adhesive: Bearly Art Precision Glue. Precision is in its name for a reason!
Also, quality cardstock is a must for this waterfall card. Cheap paper won’t hold up as well to the movement. Using high-quality, solid-core cardstock will create a more durable and polished result.
The designs cut perfectly on my Cricut Maker 3, but also work well on original Maker or Cricut Explore machines with a green Cricut 12″ x 12″ StandardGrip Machine Mat. I used a Cricut Fine Point Blade for the SVGs with “no-score-tool” in the file and a Single Scoring Wheel or Scoring Stylus for versions with “score-tool-needed.” You can use either approach, but you’ll need to adjust some lines to use the score line version. All of the information is available in my tutorial on How to Make an Envelope.
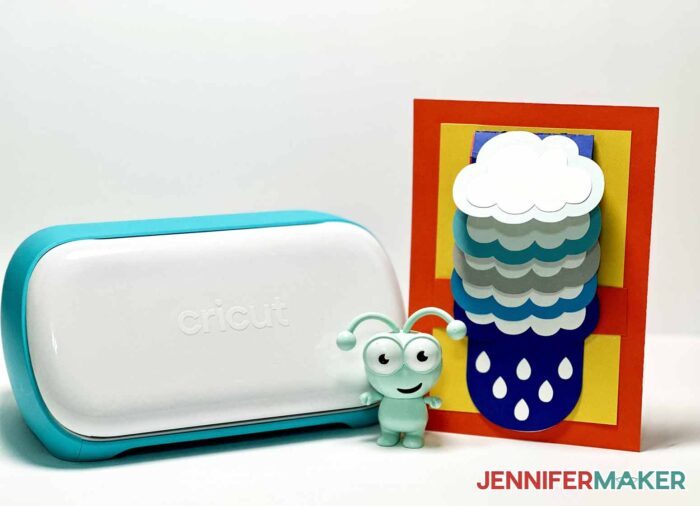
If you want to make a waterfall card with a Joy, you’ll use the included blade and the “no-score” card SVG. The large orange 5″ x 7″ rectangle is too large for the machine, but you can cut it by hand easily. Just remember to hide that layer on your Canvas before clicking “Make It!” Then, just use smaller paper or cut the sheet to fit on a green StandardGrip Machine Mat in the 4.5″ x 6.5 or 4.5″ x 12″ size. I like to use a paper trimmer to get even edges, but scissors will also work.
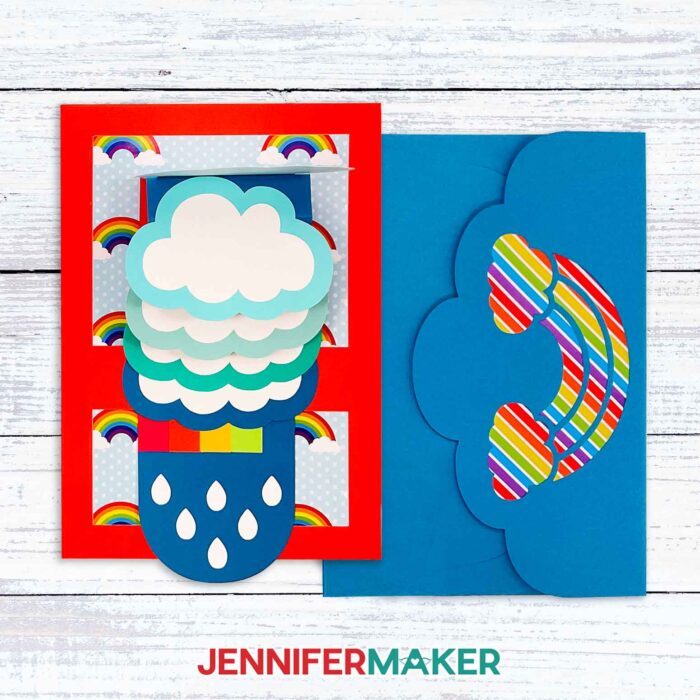
These would make a lovely Valentine’s Day gift, or a perfect pick me up at any time of year! And yes, you can mail your waterfall card! I’ll show you how easy it is to make your own envelop to with the included design. It’s a perfect fit, and a great way to highlight patterned paper. The envelope SVG won’t fit on the Joy mat, but any 5″ x 7″ or A7 size envelope will fit the card. Of course, you can print and cut the PDF by hand, too!
Ready to make your own waterfall card? This post contains some affiliate links for your convenience (which means if you make a purchase after clicking a link I will earn a small commission but it won’t cost you a penny more)! Read my full disclosure policy.
Materials & Tools to Make a Waterfall Card
- Five (5) Sheets of 12″ x 12″ or 8.5″ x 11″ 65 lb Solid Core Cardstock in various colors for main card pieces – I used one sheet each of red, orange, yellow, green, and white
- Five (5) Sheets of 65 lb Cardstock in Various Blues and Teals for cloud pieces and slider piece
- Two (2) Sheets of 8.5″ x 11″ 65 lb Solid Core Cardstock in a Coordinating Color for the envelope
- One or Two (1-2) Sheets of A5 or Larger Patterned Paper – optional for card and envelope liners
- A method to cut your cardstock – I used the amazing Cricut Maker 3, but you can also use a Cricut Maker series machine, a Cricut Explore series machine, a Joy series machine or the Cricut Venture
- Cricut Green StandardGrip Machine Mat 12″ x 12″
- Craft Glue – I used Bearly Art Precision Glue
- Brayer
- Spatula
- Scraper
- Paper Trimmer – optional, but helpful for cutting paper to size for the Joy mats
- Scoring Stylus or Single Scoring Wheel – optional for files with score lines)
- Design #478 (My free SVG/PDF/DXF design files available in my free resource library – get the password by filling out the form at the bottom of this page
How to Make a Waterfall Card

Waterfall Card
Learn how to create a fun rainbow waterfall card with a matching envelope!
Materials
- Five (5) Sheets of 12" x 12" or 8.5" x 11" 65 lb. Solid Core Cardstock (various colors for main card pieces - I used one (1) sheet of red, one (1) sheet of orange, one (1) sheet of yellow, one (1) sheet of green, and one (1) sheet of white)
- Five (5) Sheets of 8.5" x 11" 65 lb. Recollections Blue Ombre Cardstock (for cloud pieces and slider piece)
- Two (2) Sheets of 8.5" x 11" 65 lb. Solid Core Cardstock in a Coordinating Color (for envelope - I used the darkest blue from this Recollections Blue Ombre cardstock pack)
- One or Two (1-2) Sheets of A5 or Larger Patterned Paper (optional for card and envelope liners)
- Design #478 (My free SVG/PDF/DXF design files available in my free resource library - get the password by filling out the form at the bottom of this page)
Tools
- A method to cut your cardstock - I used the amazing Cricut Maker 3, but you can also use the Cricut Maker, a Cricut Explore Series machine, or even the Joy if you're willing to cut one piece -- the 5" x 7" rectangle -- with a trimmer instead
- Cricut Green StandardGrip Machine Mat 12" x 12"
- Scoring Stylus (optional for files with score lines) -OR-
- Single Scoring Wheel (optional for files with score lines)
- Craft Glue (I used Bearly Art Precision Glue)
- Brayer
- Spatula
- Scraper
- Paper Trimmer (optional for Joy users to cut cardstock to size)
Instructions
STEP 1: GET MY FREE WATERFALL CARD DESIGN FILES
First, download my Waterfall Card SVG/DXF/PDF files from my free resource library. It's Design #478. I’ve included a file for the card and a file for a matching envelope.
I’ve also included a version of each design with score lines that you can cut using a scoring tool, and a version with dashed cut lines that only needs the Fine-Point Blade. The scored versions have “score-tool-or-stylus" in the file name, and the dashed cut line versions have "no-score-tool-needed" in the file name. For this tutorial, I’m going to show you how to make the card and envelope using the files with dashed cut lines.
NOTE: If you’d like to make the version with score lines using a scoring wheel or stylus, you can refer to my tutorial on How to Make Envelopes to learn how to adjust the files. All Score layers in the files have a red color swatch, no fill color in the Layers Panel, and are grouped with their corresponding Cut layers.
Upload your chosen card and envelope SVG files to Cricut Design Space.
TIP: If you're not sure how to upload an SVG cut file to Cricut Design Space, watch this helpful video training series I made. If you're on an iPhone or iPad, here's how to download and upload SVG files to the Cricut Design Space app.
STEP 2: PREPARE AND CUT YOUR WATERFALL CARD DESIGNS
Add the card and envelope files to your Canvas. You can zoom out to see all of the designs by clicking on the minus (-) sign on the lower left.
This is what my Waterfall Card designs look like on my Canvas.
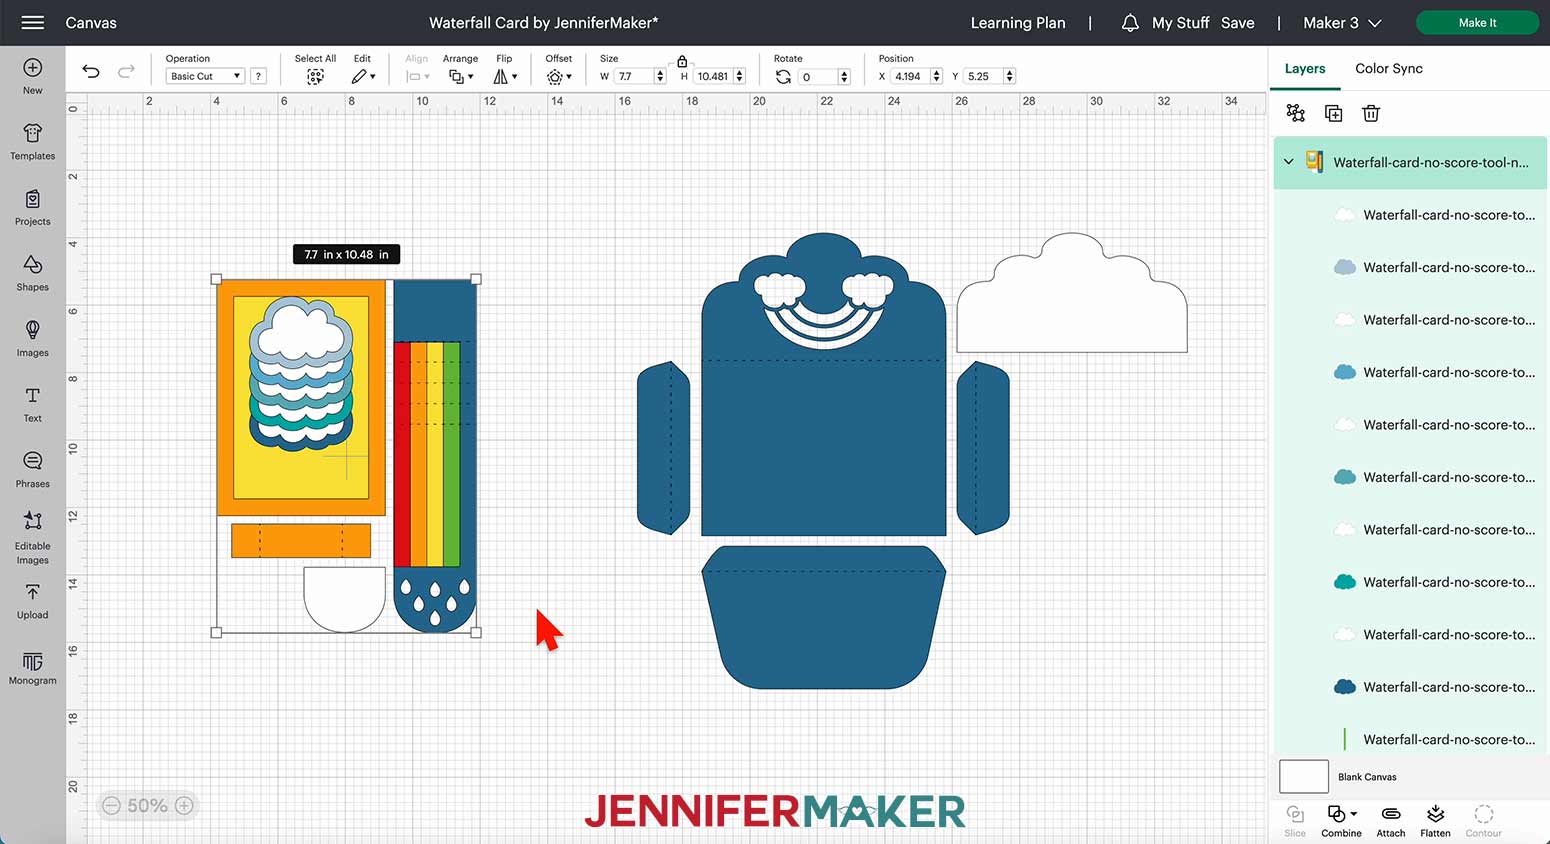
The design is set up to make one 5" x 7" waterfall card and one standard-sized A7 envelope (7.25" x 5.25"). The card design has a 4" x 6" liner which you can cut on patterned paper if you prefer. The envelope design also has a 6.8" x 3.5" liner that can be cut on patterned paper. If you're mailing your card, I don't recommend resizing the designs.
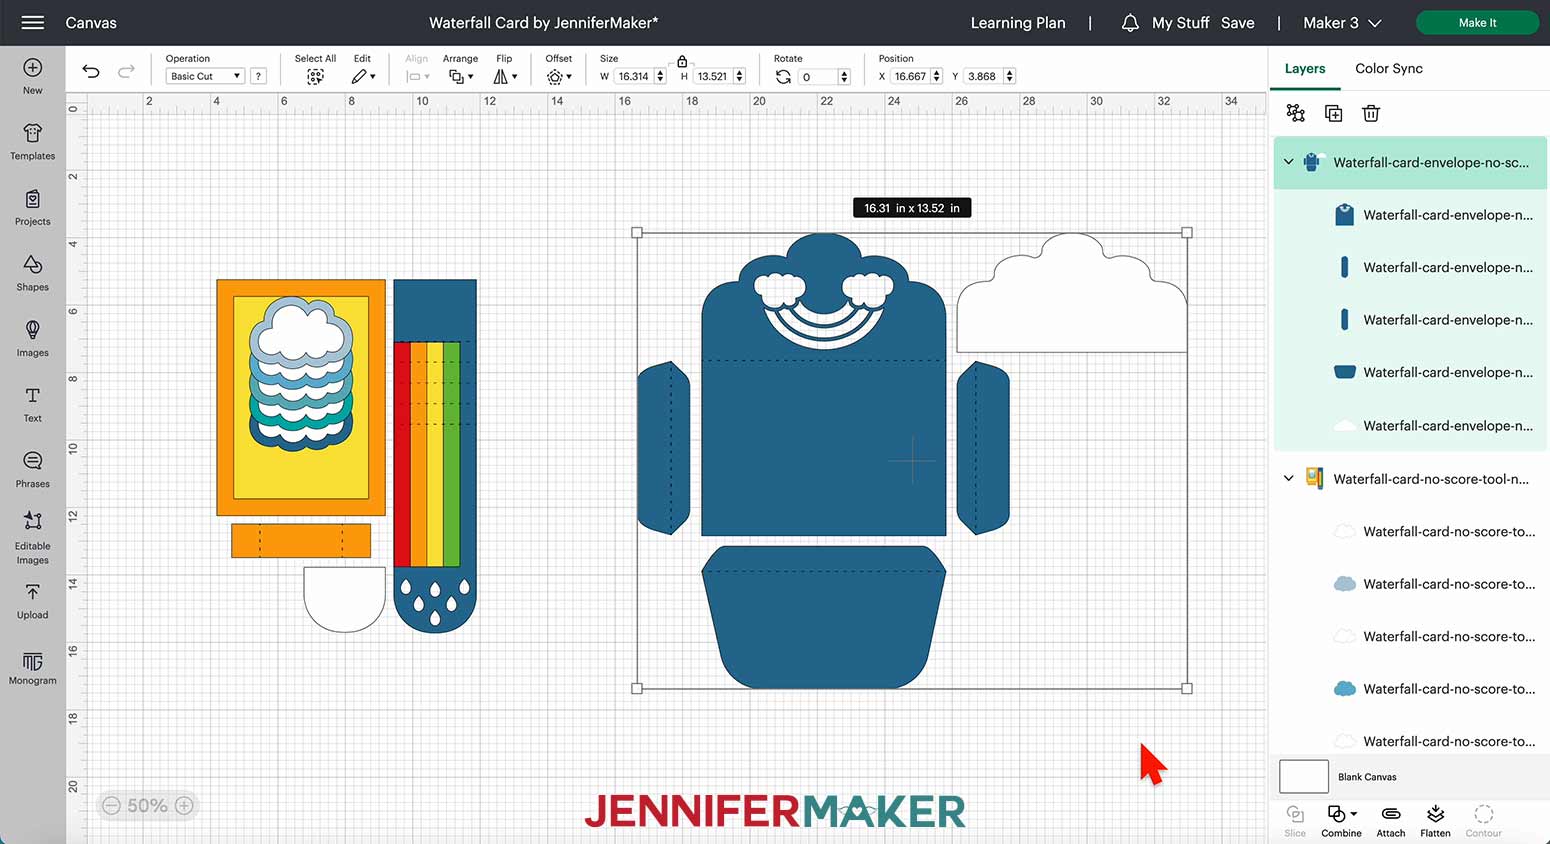
If you're cutting your card and envelope liners on patterned paper like I am, you'll need to change the color of those pieces to make sure they cut on separate mats from the other elements.
Start by clicking the “Ungroup” button at the top of the Layers Panel (the two stacked squares on the very left). Then, click off of the design to deselect everything. Select the 4" x 6" yellow rectangle on your Canvas, then select the color swatch box next to “Operation” in the top menu, and click on a new swatch to change the color. I'll make mine gray.

You can also change the color of your envelope liner -- the white piece with a scalloped top -- using the same method.
Since we’re using the dashed cut line version of the files, our designs are now ready to cut!
Check that the right machine is listed in the top right corner, then click "Make It.”
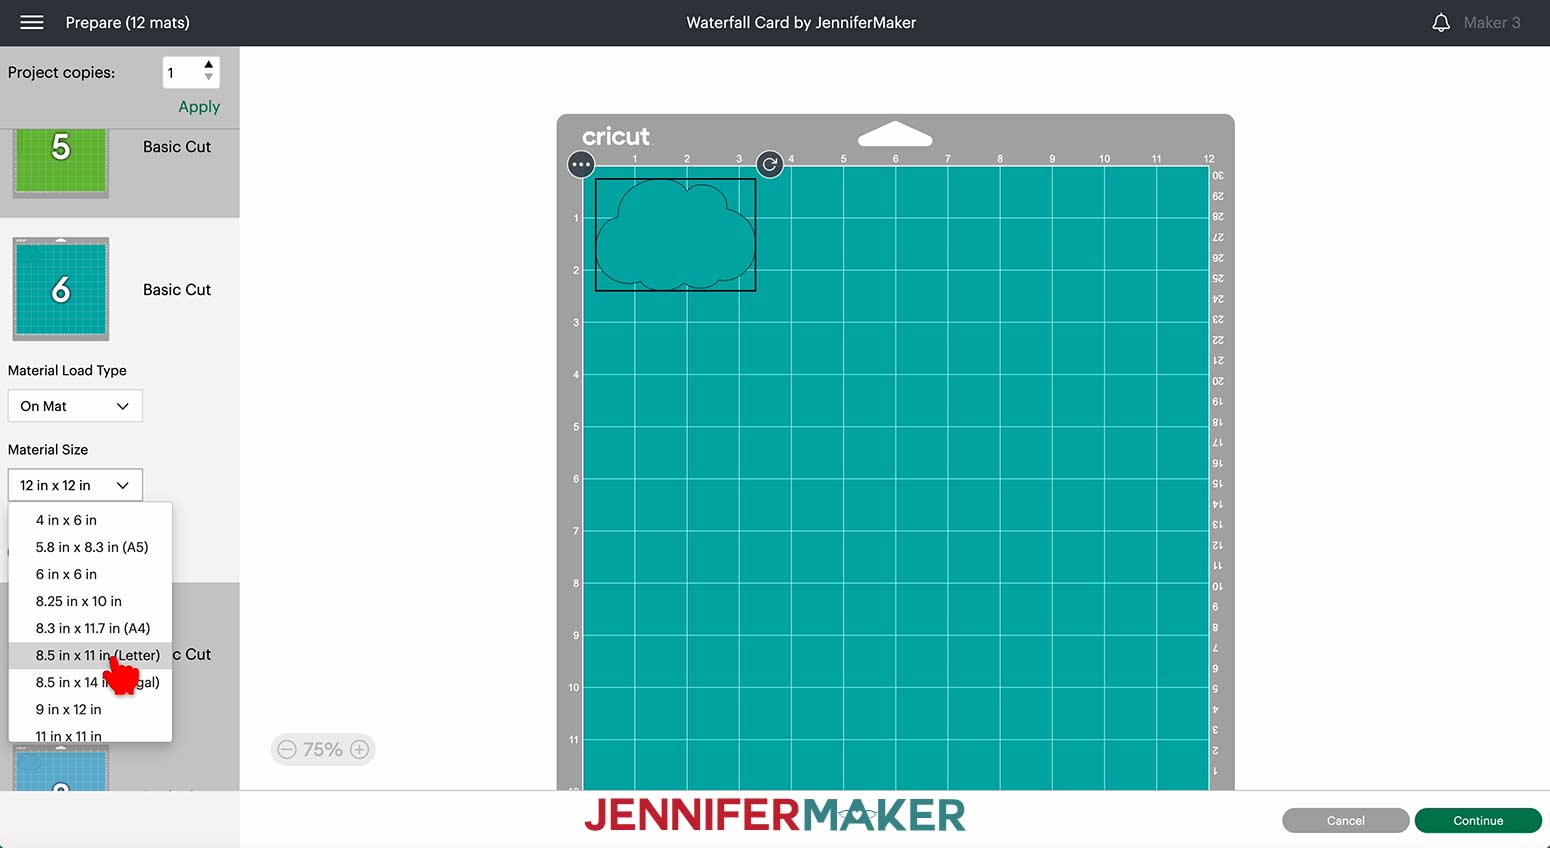
If prompted, click “On Mat,” “12 in x 12 in,” and “Confirm.”
You should see twelve mats on your Prepare screen. If you’re using 8.5” x 11” paper for any of your pieces, you’ll need to change the Material Size for those mats from “12 in x 12 in” to “8.5 in x 11 in (Letter).” Once you’ve changed the size of your first mat, the remaining mats of the same color will change to match so you don’t have to change each one individually.
If you're using the A5 sheets of patterned paper, you'll need to change the Material Size for those mats (mine are gray) to "5.8 in x 8.3 in (A5)."
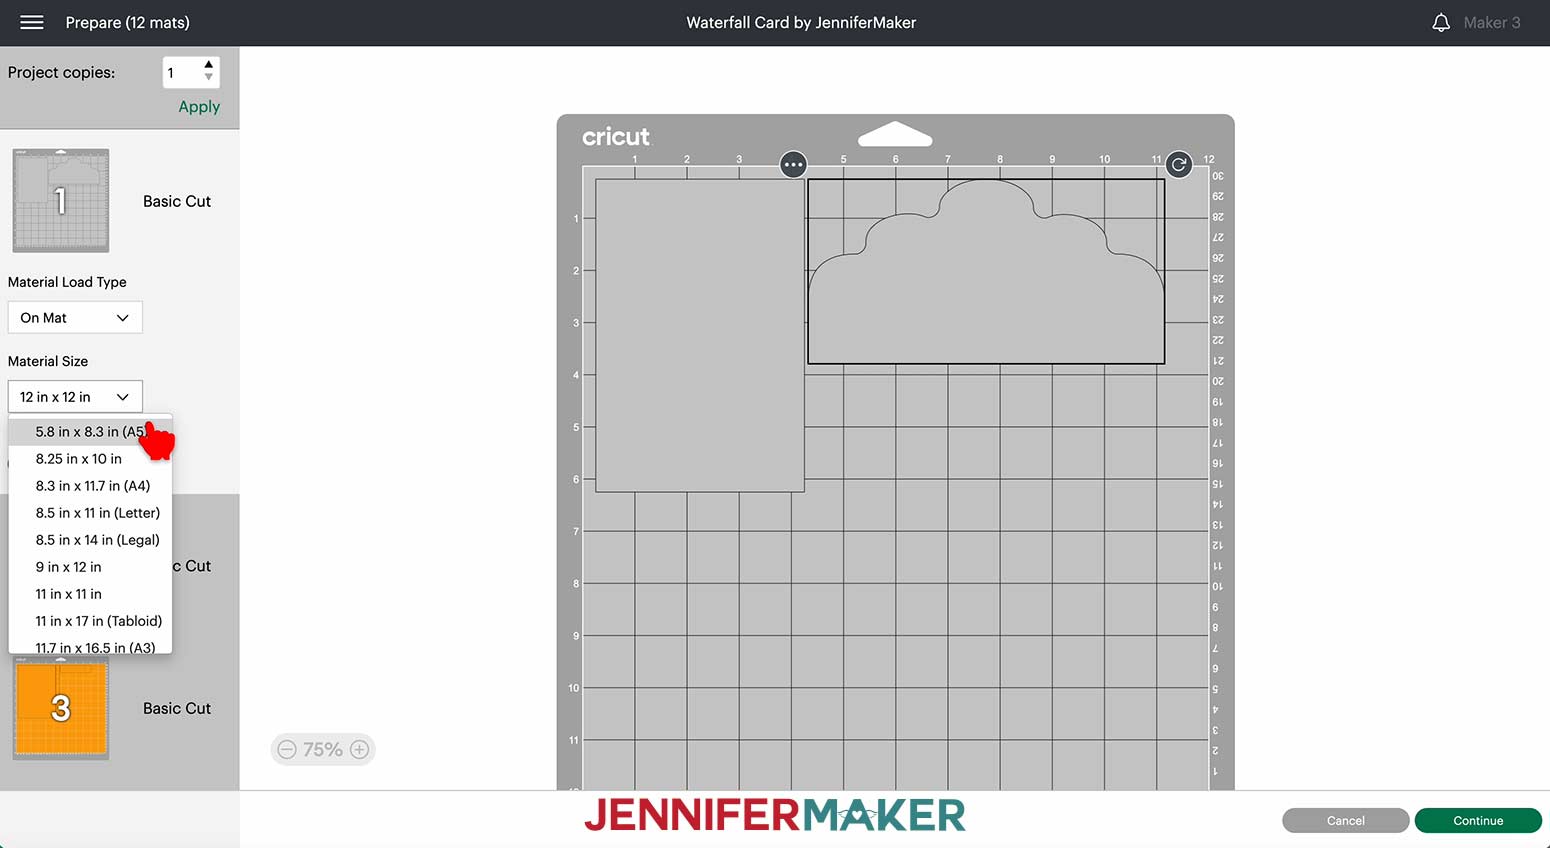
You should now have fourteen mats if you used the same color approach as me. If everything looks good, select your first mat again and click “Continue” in the bottom right.
On the Make screen, select your material settings. We can use the "Medium Cardstock - 80 lb (216 gsm)” setting for all of our mats. Change the Pressure to "More" for cleaner cuts.
TIP: If you’re using the same cardstock for all your mats and the “Remember material settings” box is available, check it to save time between cuts!
Place your first mat's cardstock face up on your green StandardGrip machine mat and use a brayer to make sure it's fully adhered. Check that your Fine-Point Blade is clean and in Clamp B. Then, load the mat into the machine and press the flashing button to begin cutting.
When the cut is finished, unload the mat, flip it over, and roll it back to release the cardstock. This helps prevent the material from curling and ripping.
If necessary, use a scraper tool to remove any pieces left on the mat.
Follow the steps above to cut and remove your remaining pieces from the mat, loading the colors in the order indicated on your screen.
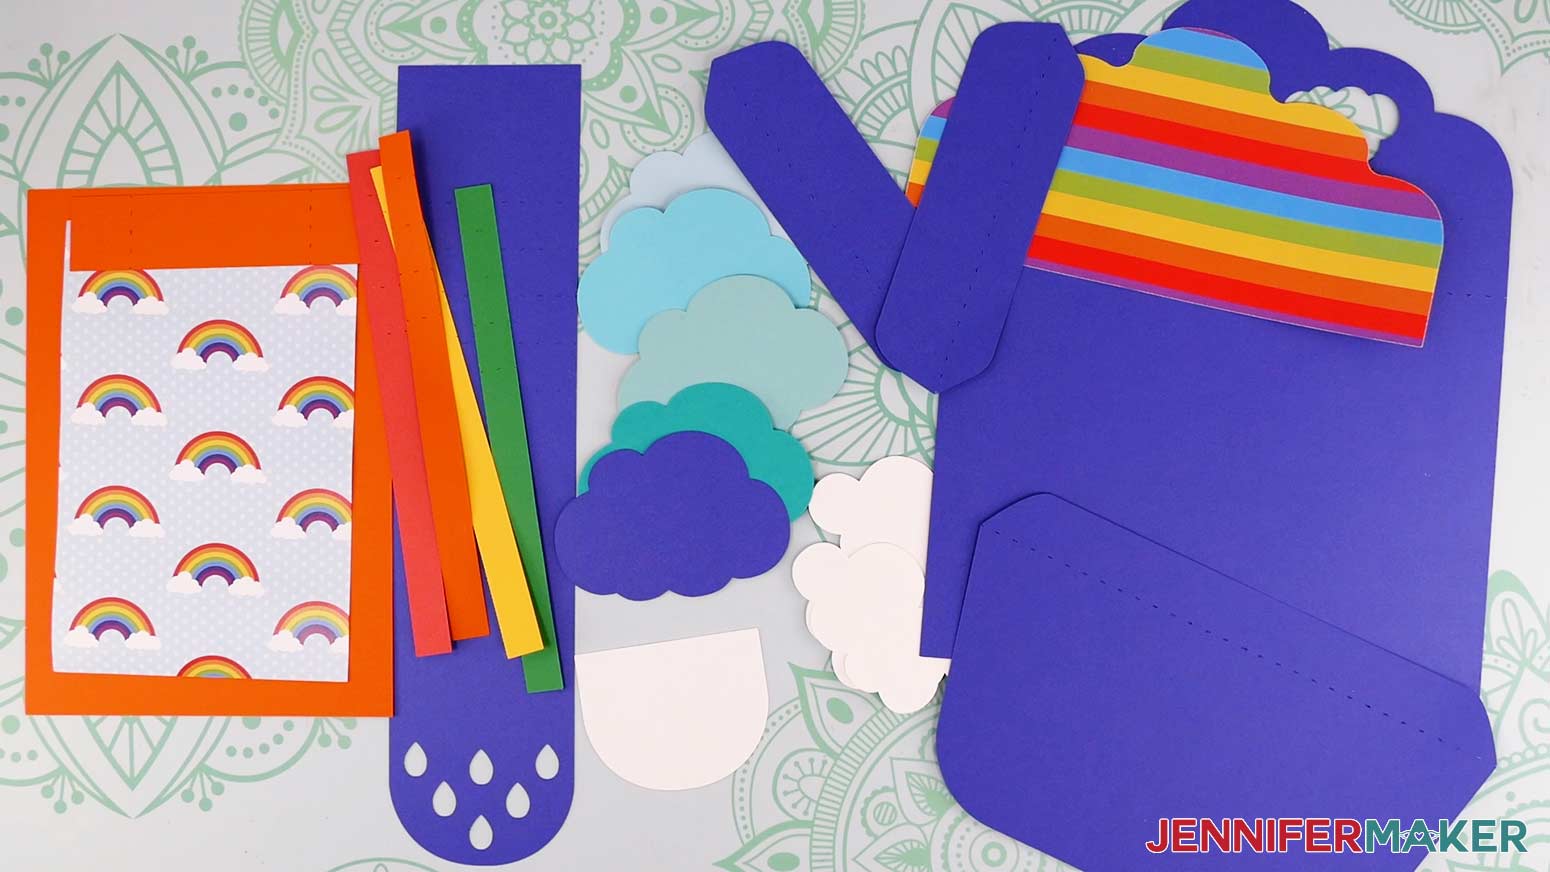
Here's what my cut pieces for the waterfall card and envelope look like.
STEP 3: ASSEMBLE THE WATERFALL CARD
Assemble the Card
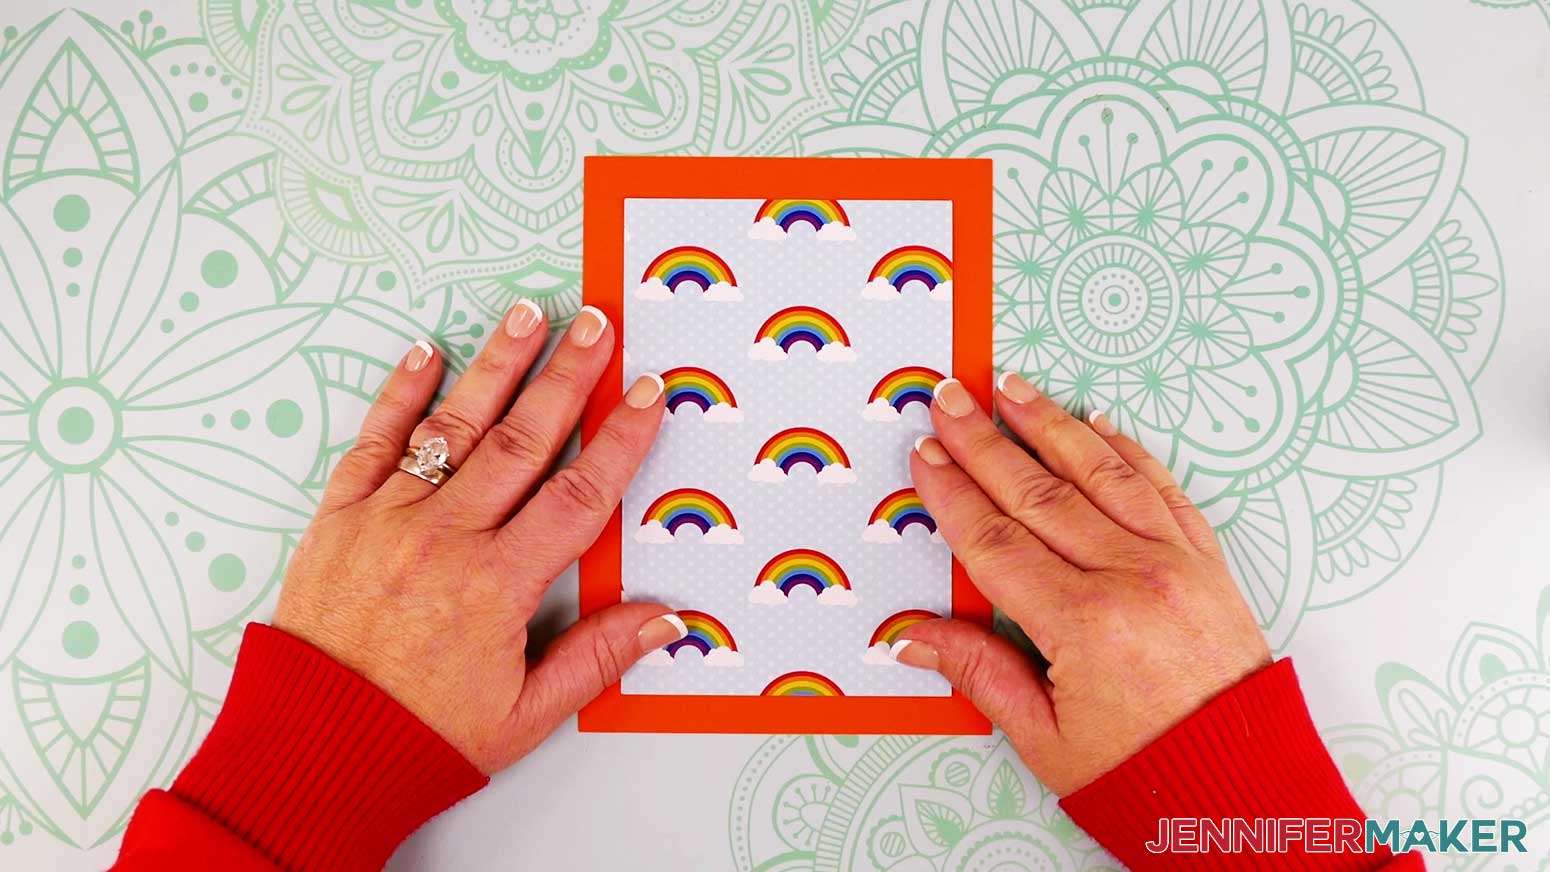
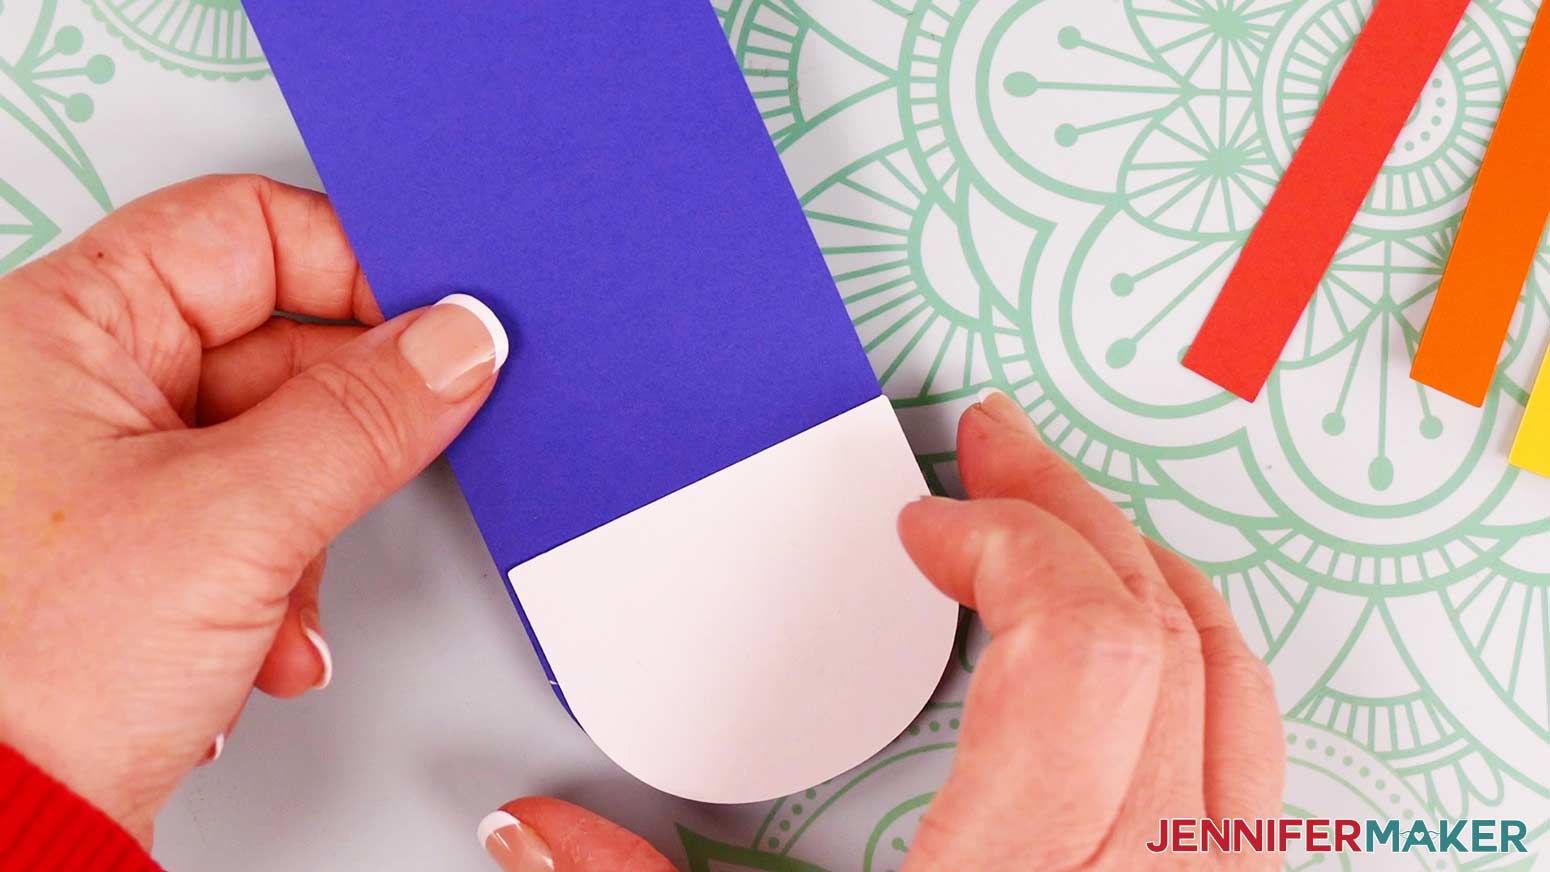
Find the two largest rectangular pieces. These will form the base of the card. Glue the smaller piece to the larger one, making sure it's centered within the rectangle. Make sure you don't use too much glue, or it could cause your paper to warp. I put a thin line around the outside edge of the smaller rectangle and just enough in the center to hold it down.
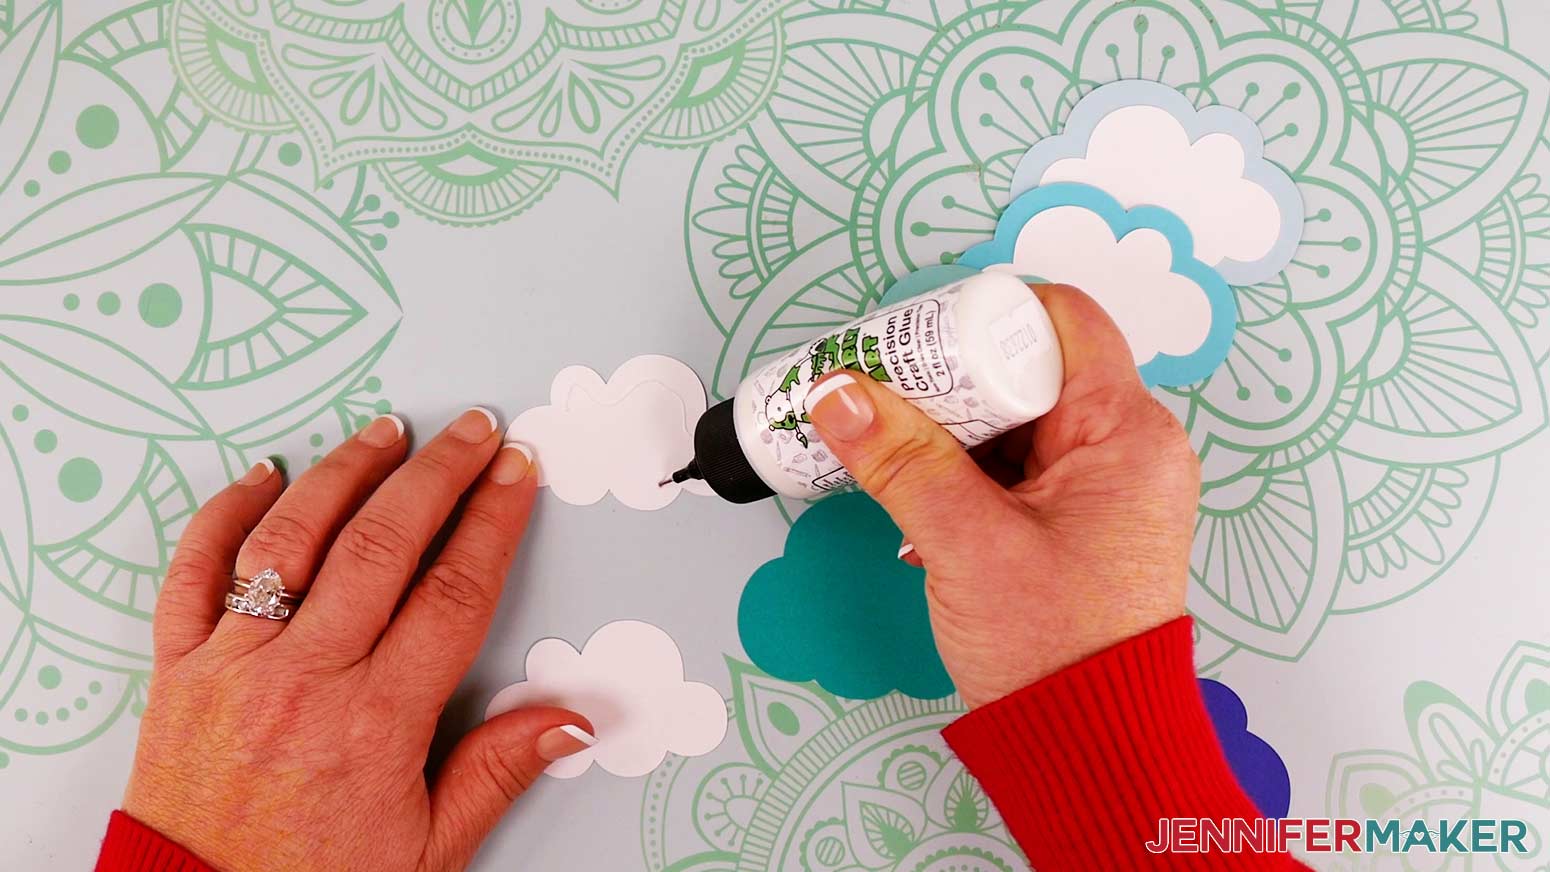
Now find the ten cloud pieces -- five of them will be white and five of them will be shades of blue. Glue the white pieces to the colored pieces, making sure each one is centered within the cloud shape.
Next, find the pieces for the rainbow slider. There will be one long blue piece with raindrop cutouts at one end, four strips for the red, orange, yellow, and green rainbow stripes, and one white semicircle shape for the raindrop liner.
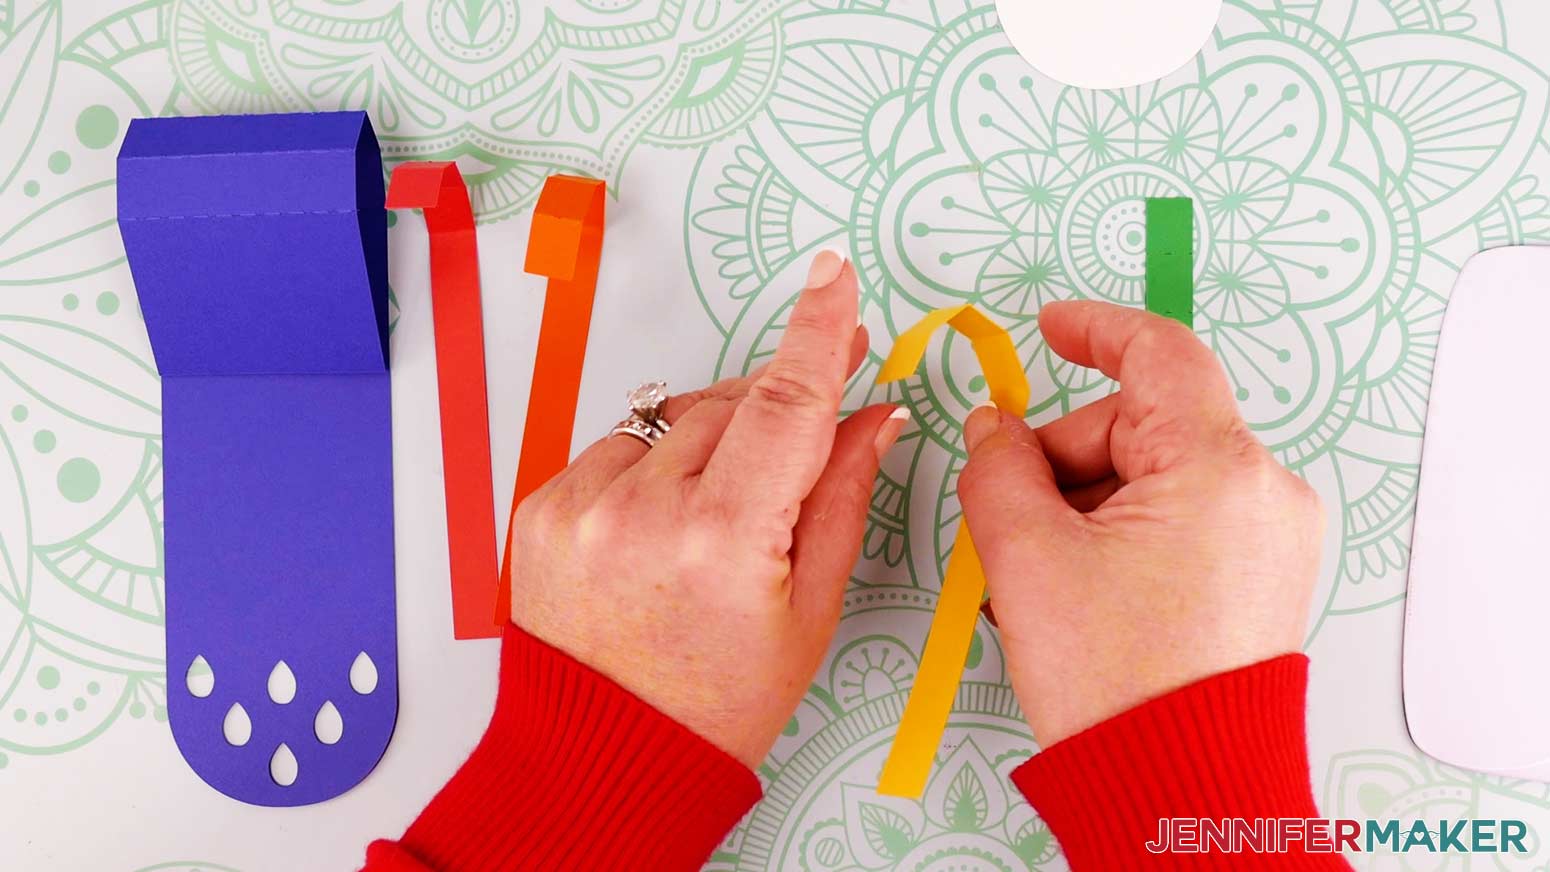
Fold along all the scored or dashed lines. You can use a scraper tool to get nice, sharp creases. Make sure you fold in the same direction for each crease.
Now glue the semicircle piece on the back of the large slider piece, behind the raindrop cutouts. The back of your slider piece will be the side with the folded sections facing away from it.
You can align the rounded edges of both pieces to get the placement just right. Make sure you don't get glue too close to the raindrop cutouts.
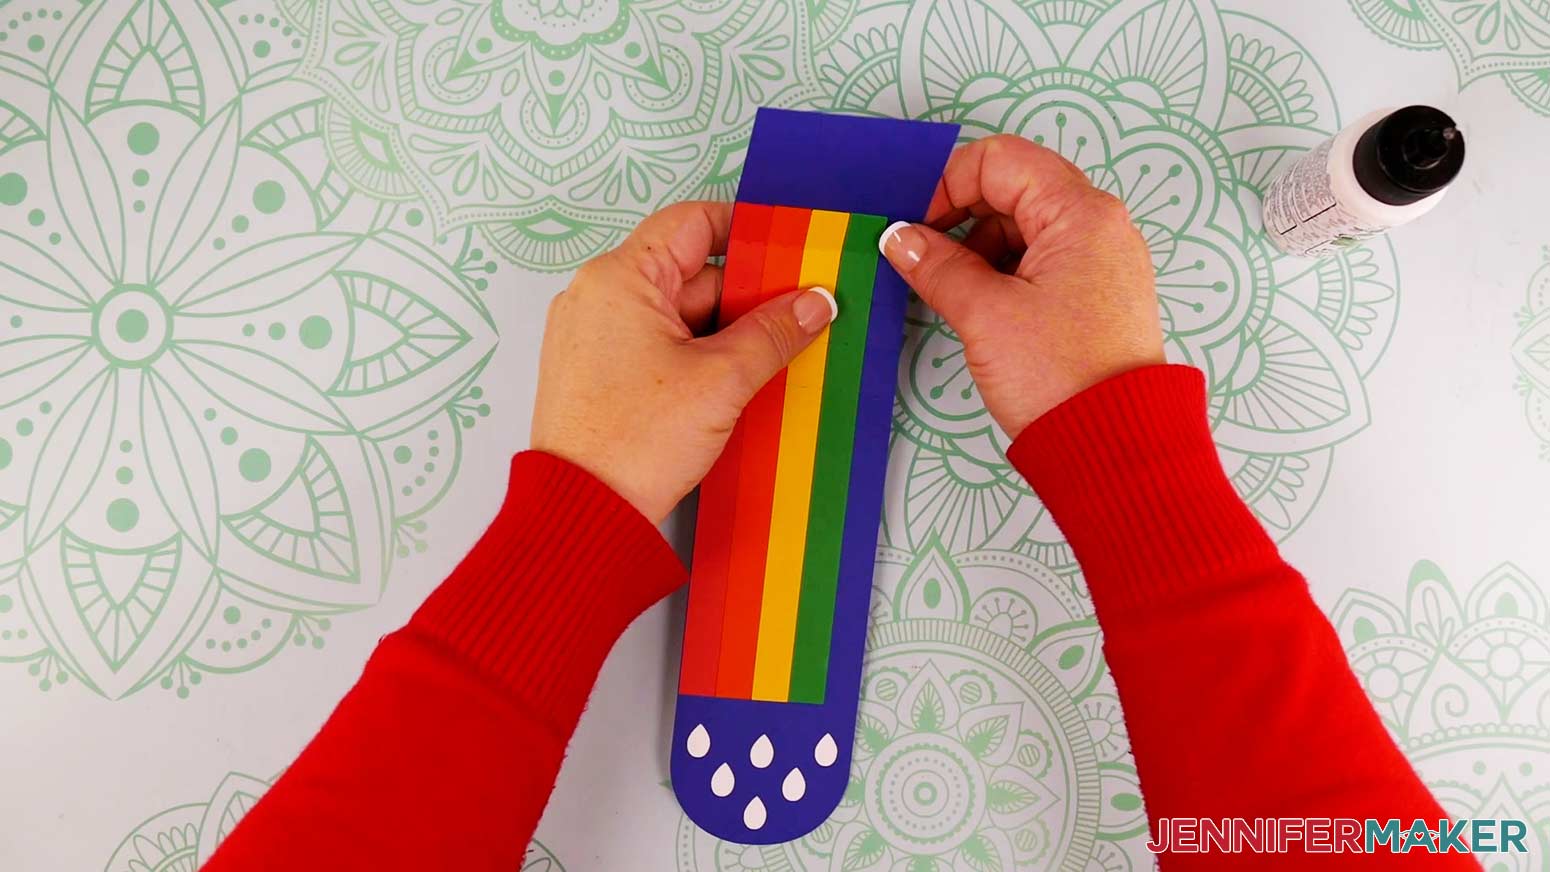
Now we can attach our rainbow stripes to the front, or opposite side, of the slider piece.
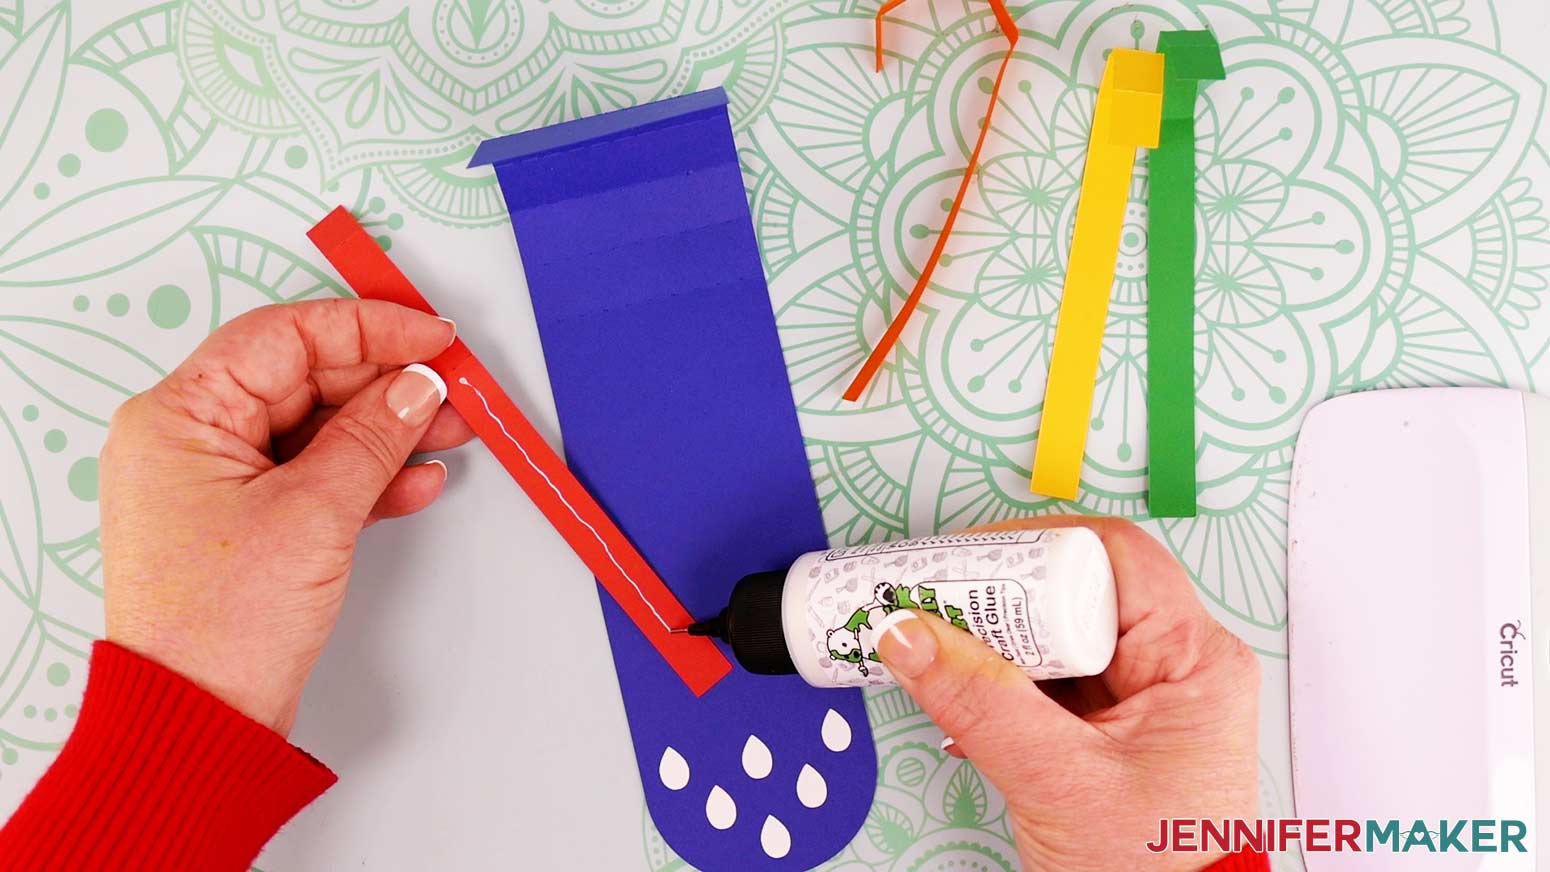
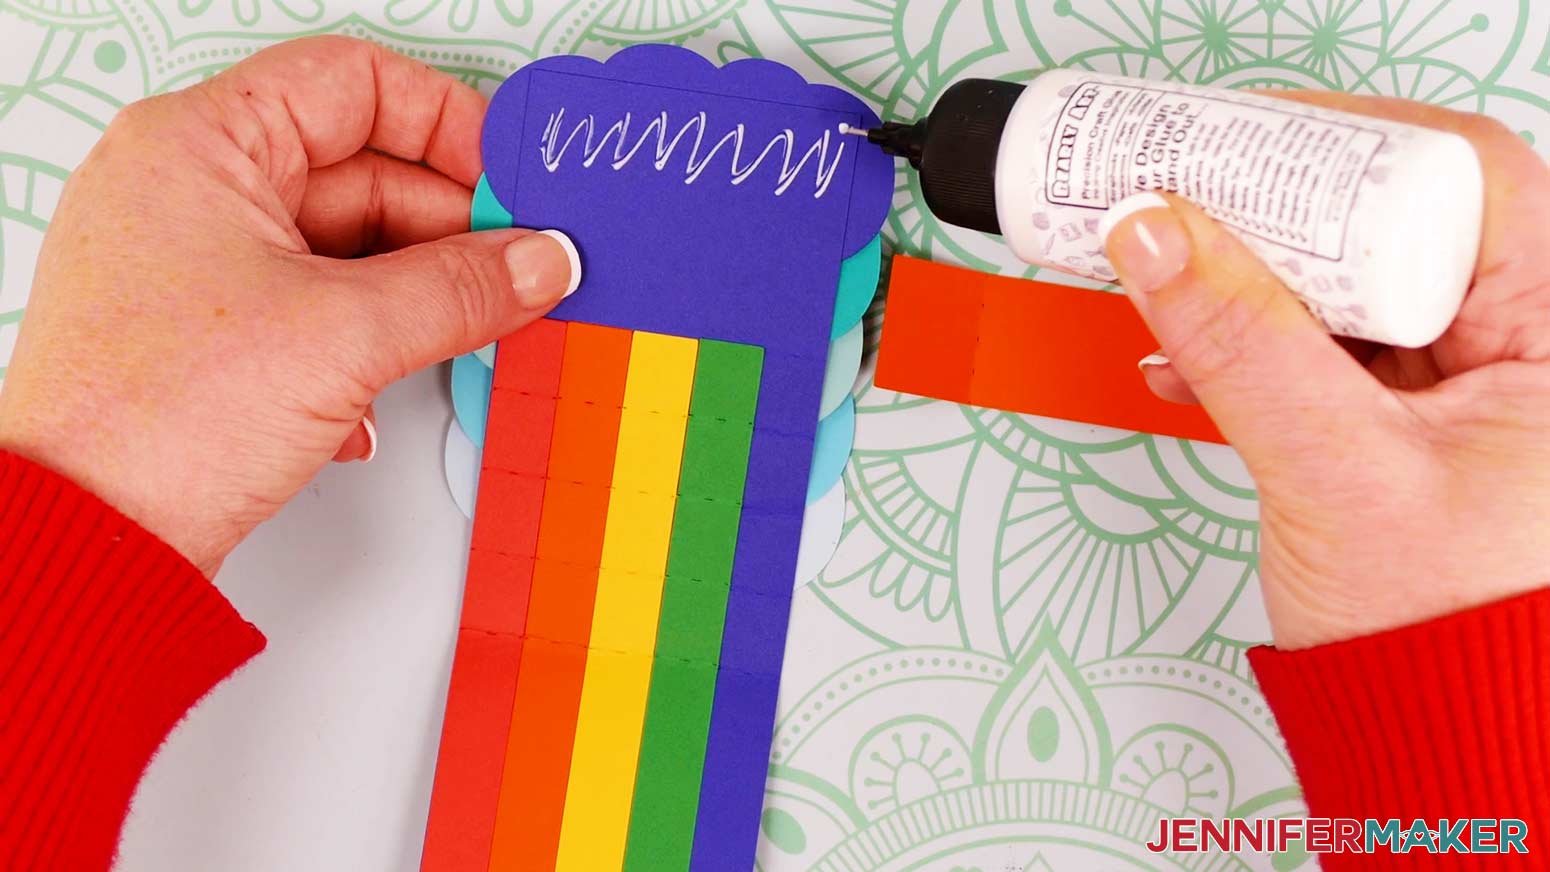
Glue the stripes one at a time, starting with the red one. Apply a thin line of glue to the back side of the largest section on the red stripe. Don't add glue to the top four folded sections yet. Remember, the back of the stripe is the side with the folded sections facing away from it.
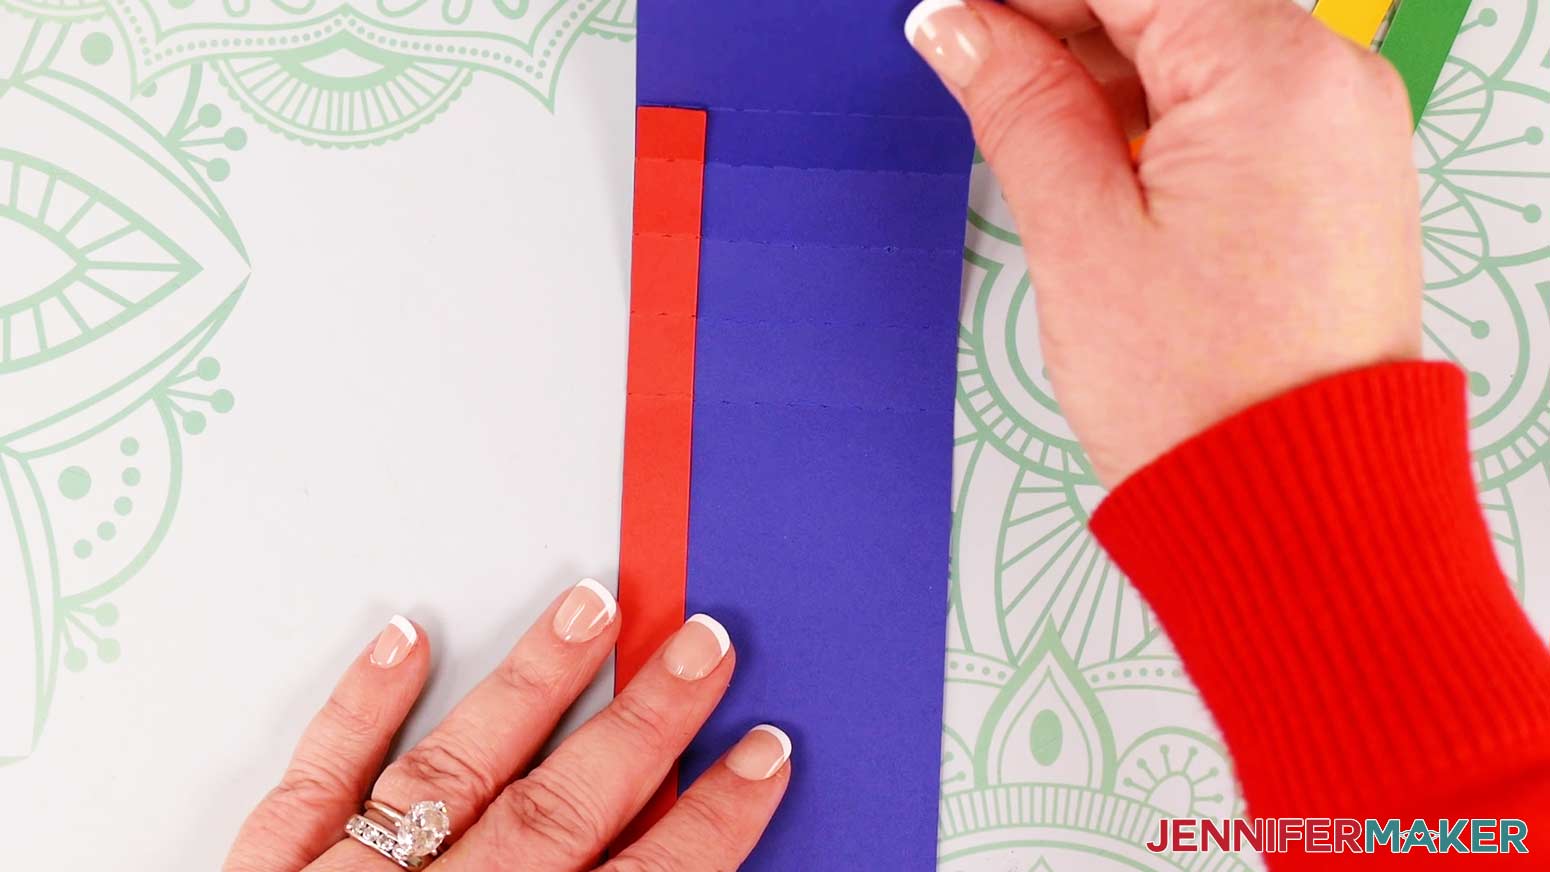
Attach that section to the bottom of the slider piece along the very left edge. Make sure you're attaching the stripe to the FRONT side. When the stripe is correctly positioned, the first crease above the largest section of the red stripe will line up with the first crease of the slider piece, and the left edges of both pieces will be aligned.
Now you can attach the remaining sections of the red stripe. Add four small lines of glue to the slider piece within each of the next four folded sections, avoiding the creases. Make sure to keep the glue on the left side, just where the red stripe will be.
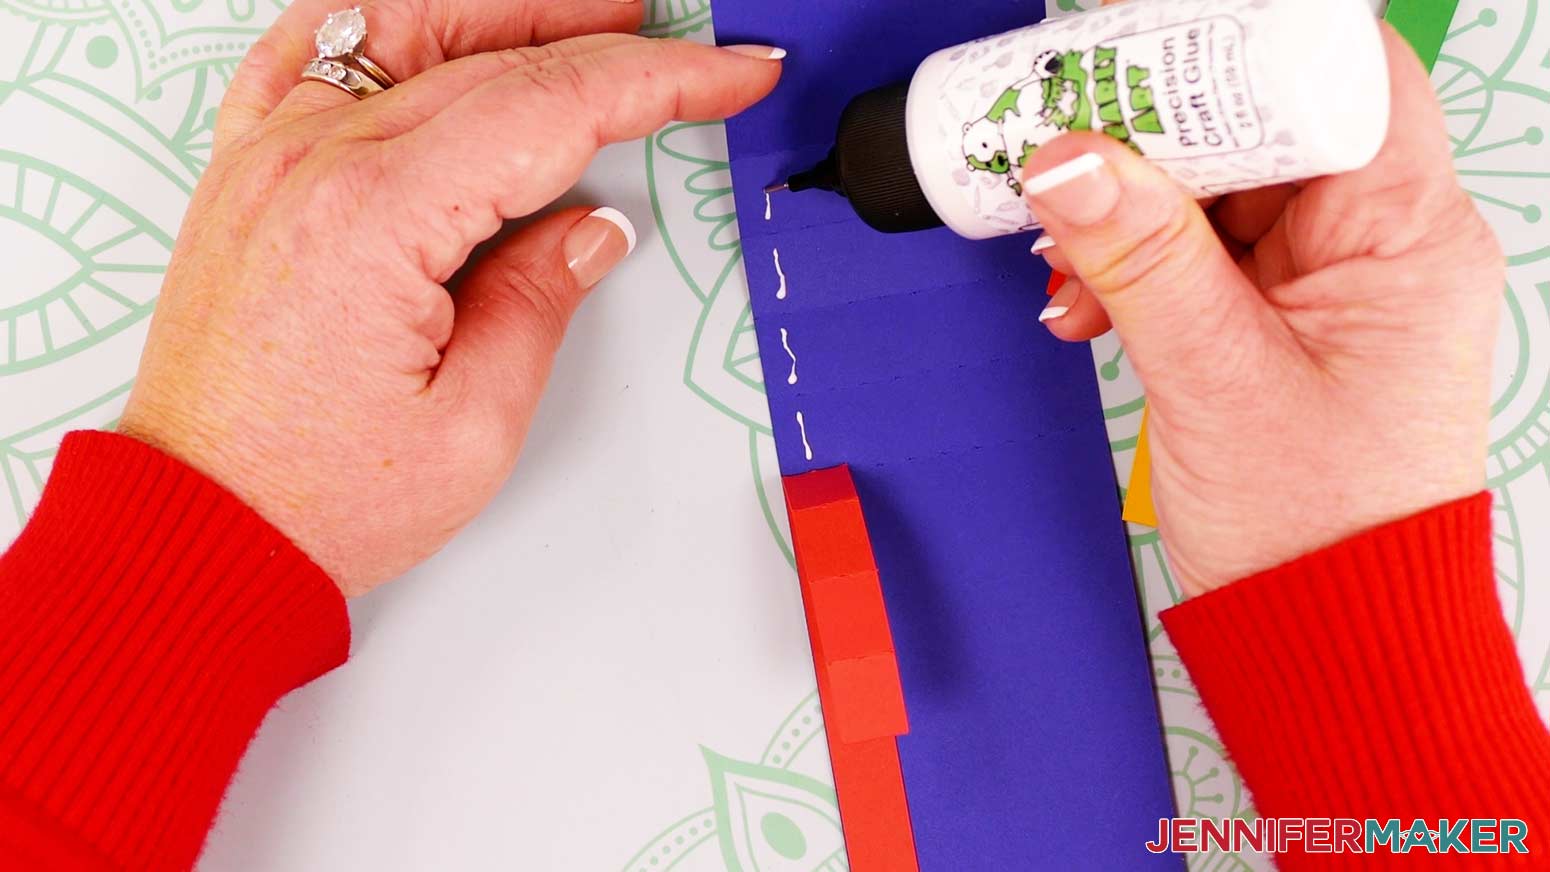
TIP: You can also add glue to the back of the red stripe in the four remaining sections. Use whichever method is easier for you.
Carefully press the four sections of the red stripe against the slider piece, making sure each of the creases are aligned as you go. Before the glue dries, fold the attached pieces at each crease to make sure they're aligned properly. If you notice any areas catching or wrinkling, reposition them now.
Now attach the remaining rainbow stripes -- orange, yellow, and green -- using the same process. You can easily align each stripe's left edge by pressing it into place against the previous stripe's right edge.
When you're finished, your rainbow stripes should look similar to mine.
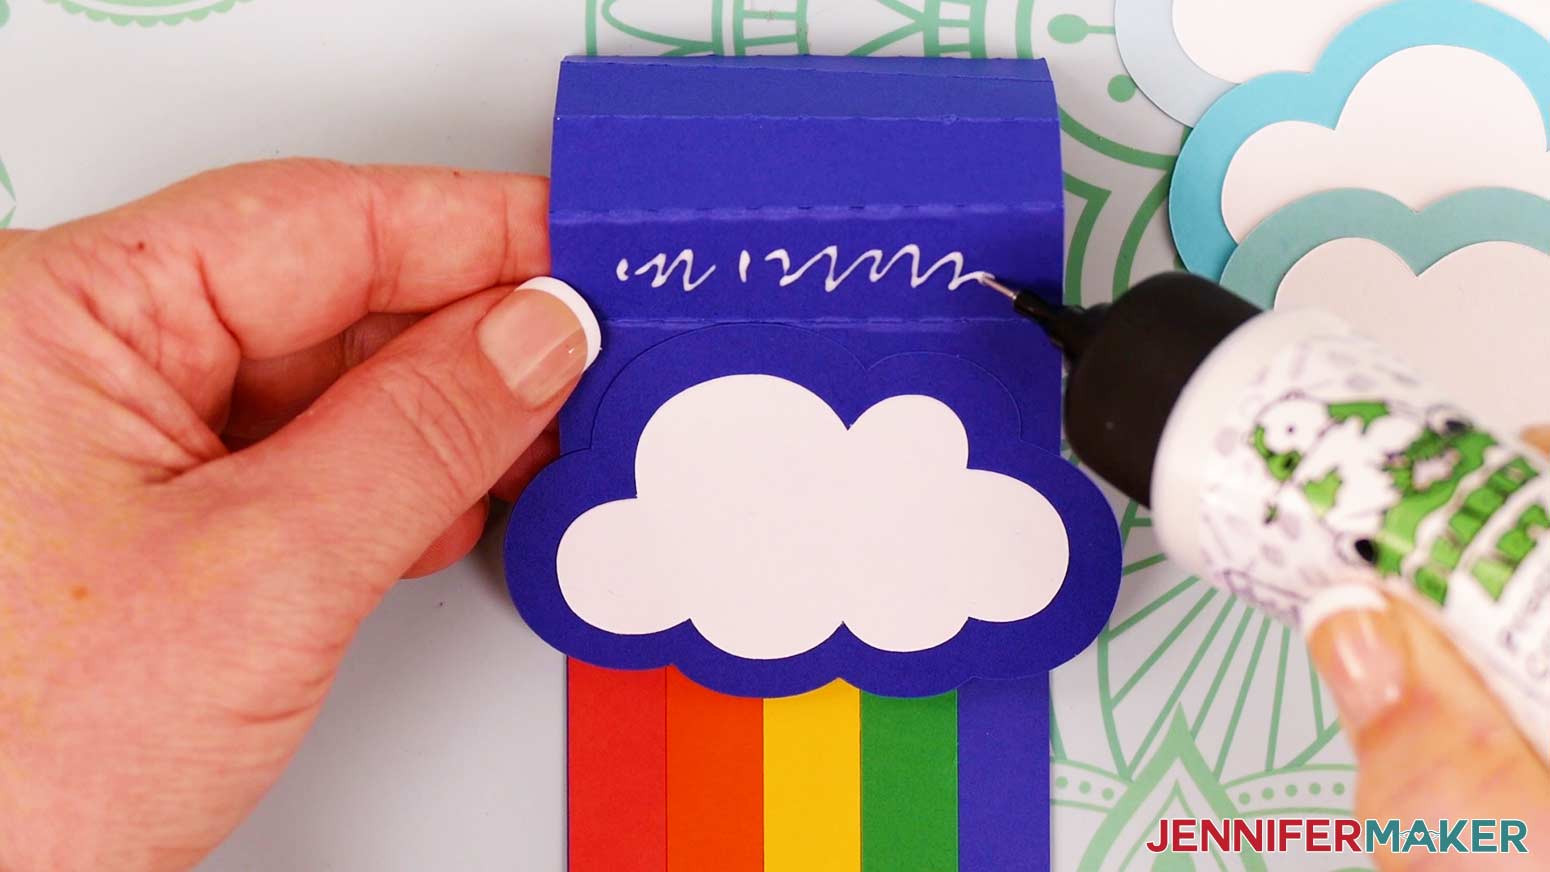
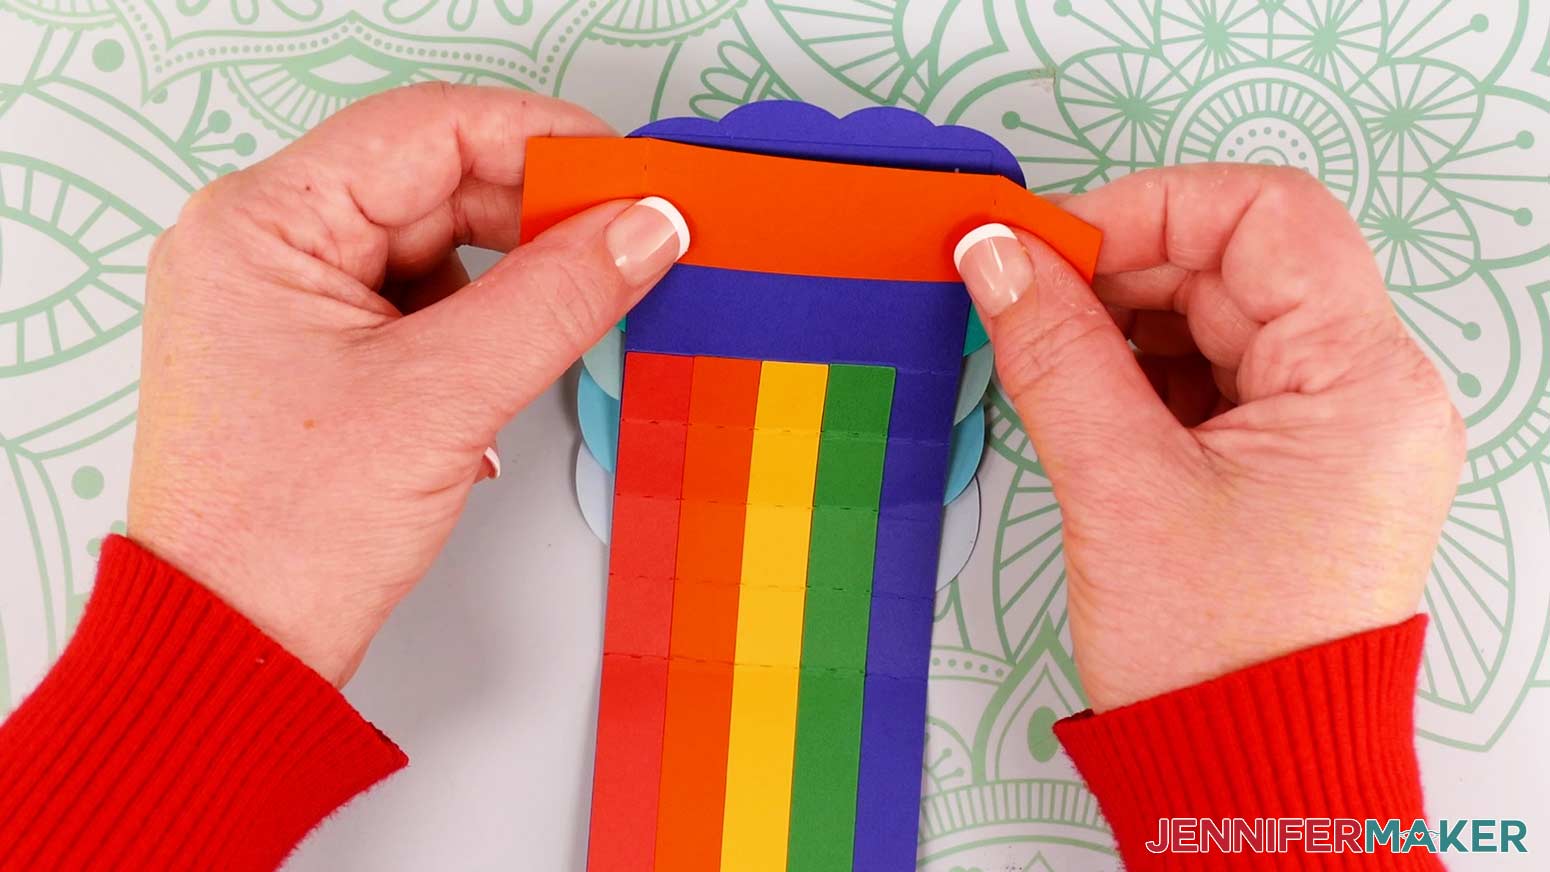
Now we can attach the cloud pieces. Start by attaching your bottom cloud first. My bottom cloud is the darkest shade of blue, which matches the color of my slider piece. We'll attach this piece to the largest folded section of the slider piece on the BACK side. This will be the same side to which we attached the raindrop liner.
Start by folding over your slider piece at the first crease so the folded sections completely cover the rainbow stripes. The largest section should now be at the bottom. This is where we'll attach the bottom cloud.
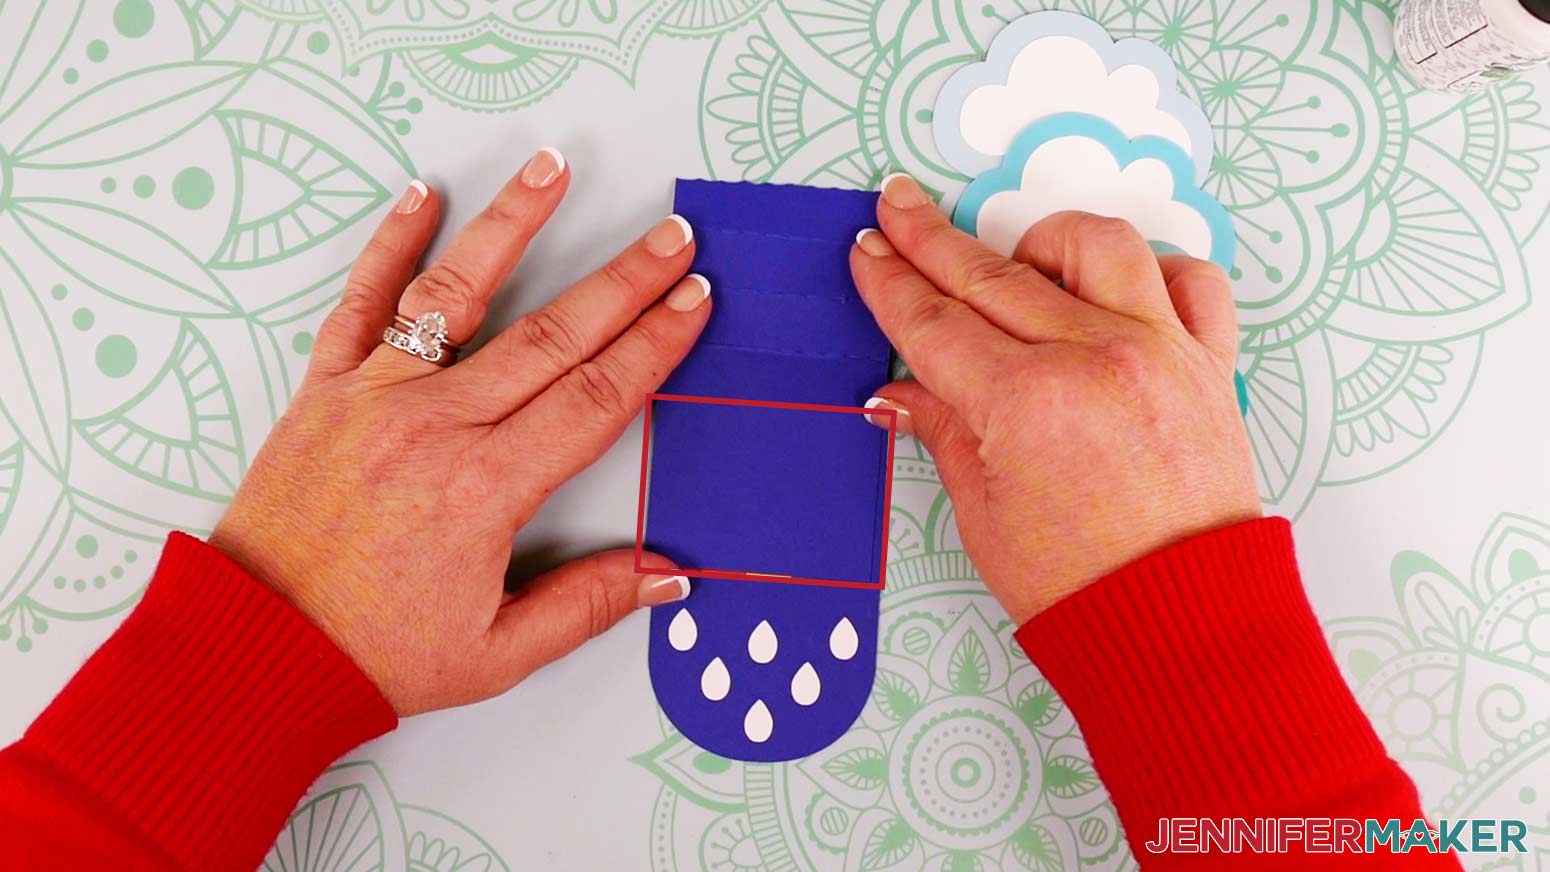
We're going to align the top part of the cloud to the crease at the top of this section. Make sure the cloud shape does not extend above this crease, as that will cause problems with the "waterfall" effect later.
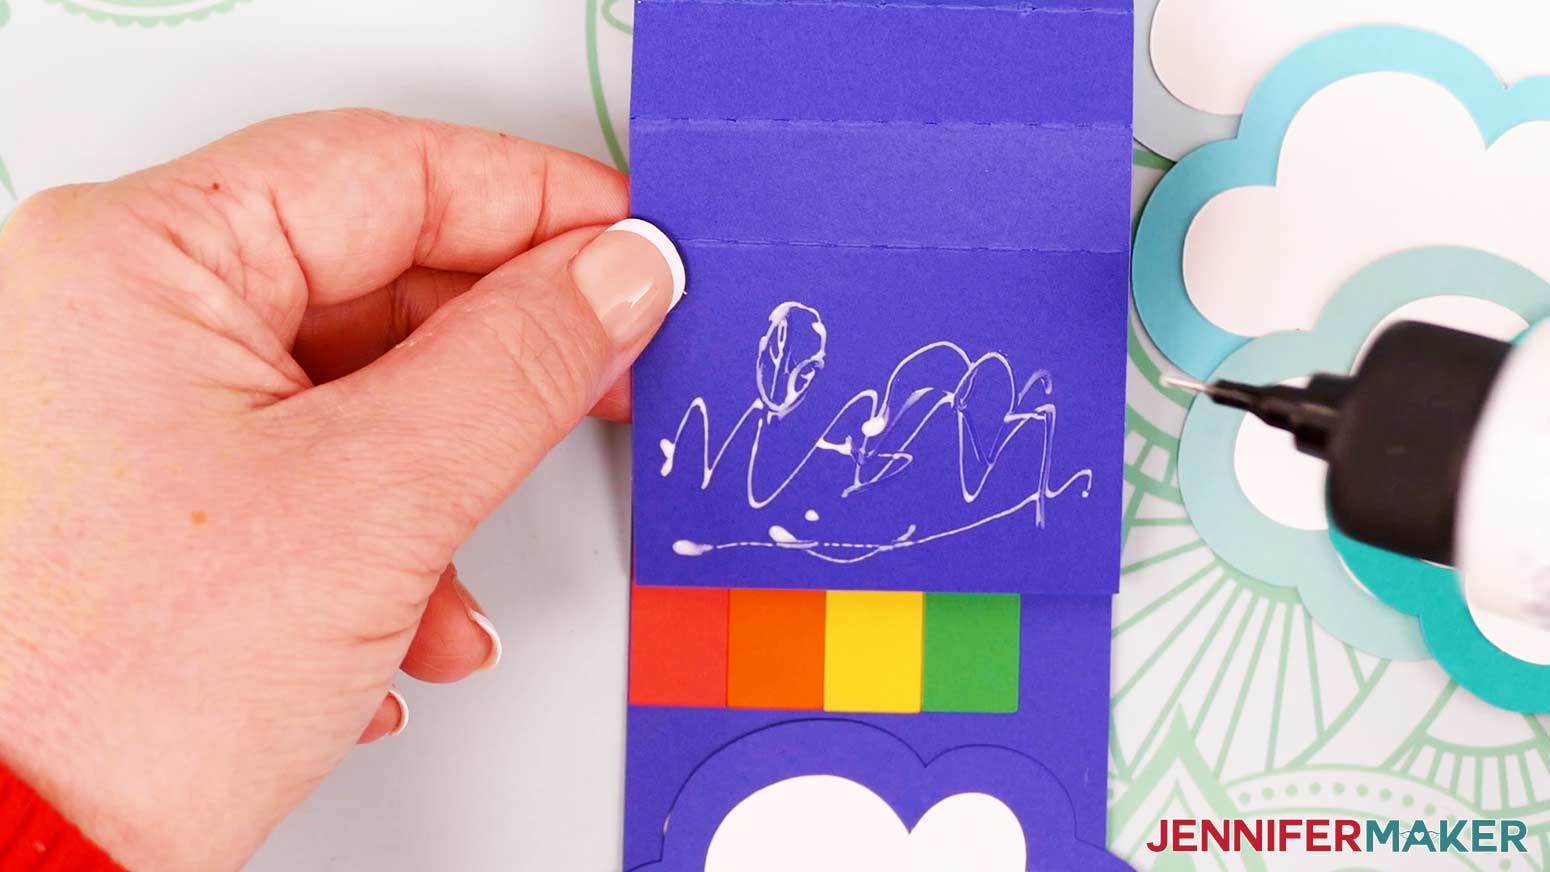
Before applying glue, place the cloud piece on the slider piece in its appropriate location. Pay attention to the areas where the cloud covers the slider. This is where we'll apply the glue. Make sure you don't apply glue to the uncovered areas outside of the cloud shape (the top left and top right corners).
Remove the cloud and add glue to the bottom section of the slider piece where needed. Don't get any glue on the upper folded sections yet.
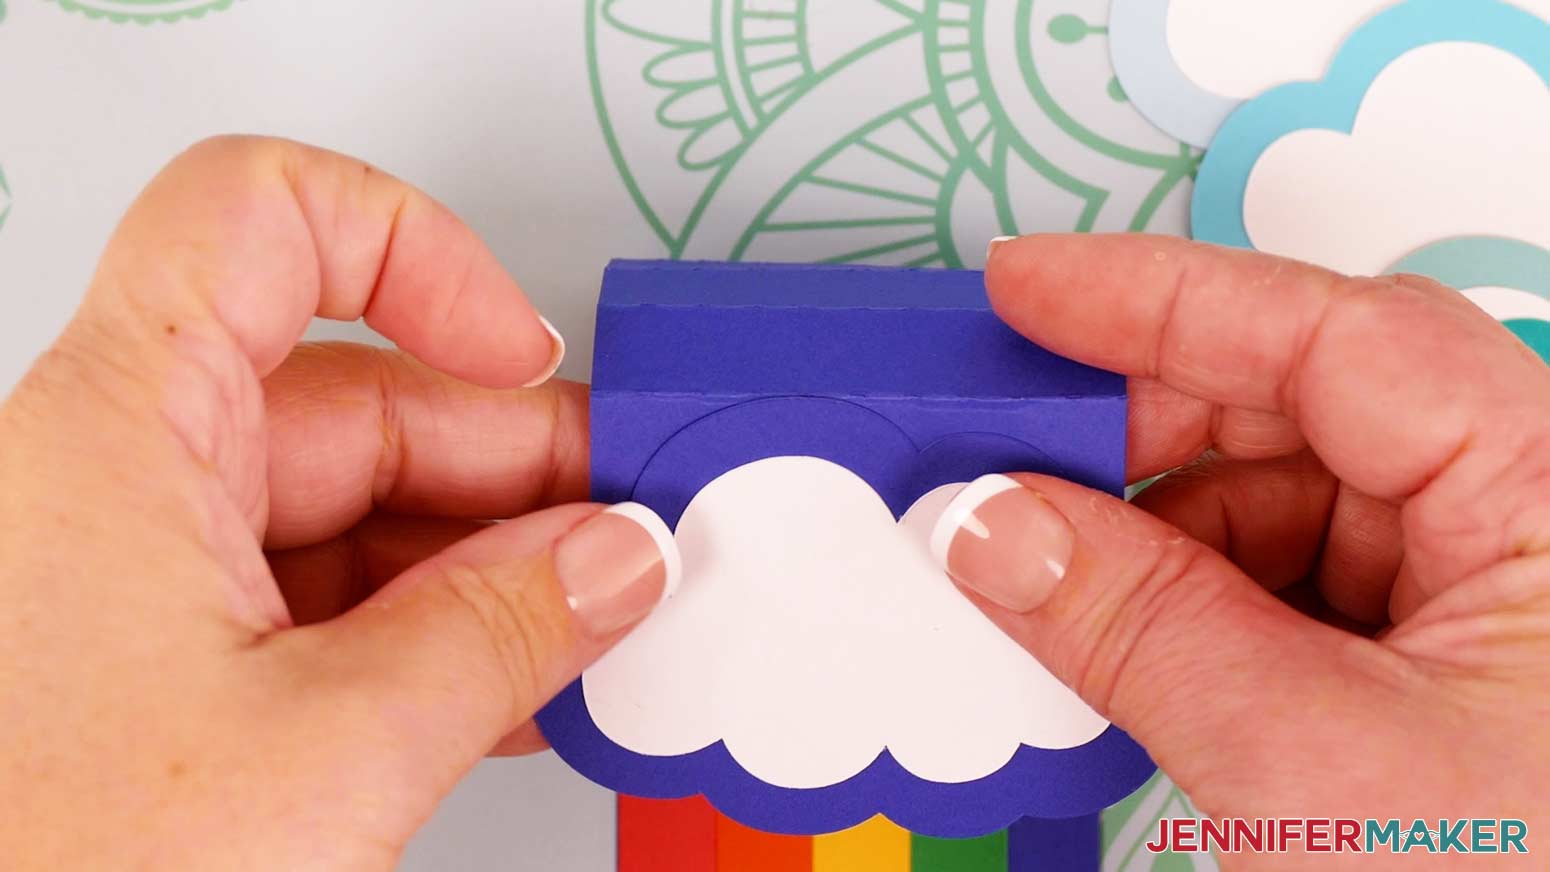
Carefully attach the bottom cloud to the slider with the white side of the cloud facing out. Hold it for a few seconds to let the glue set.
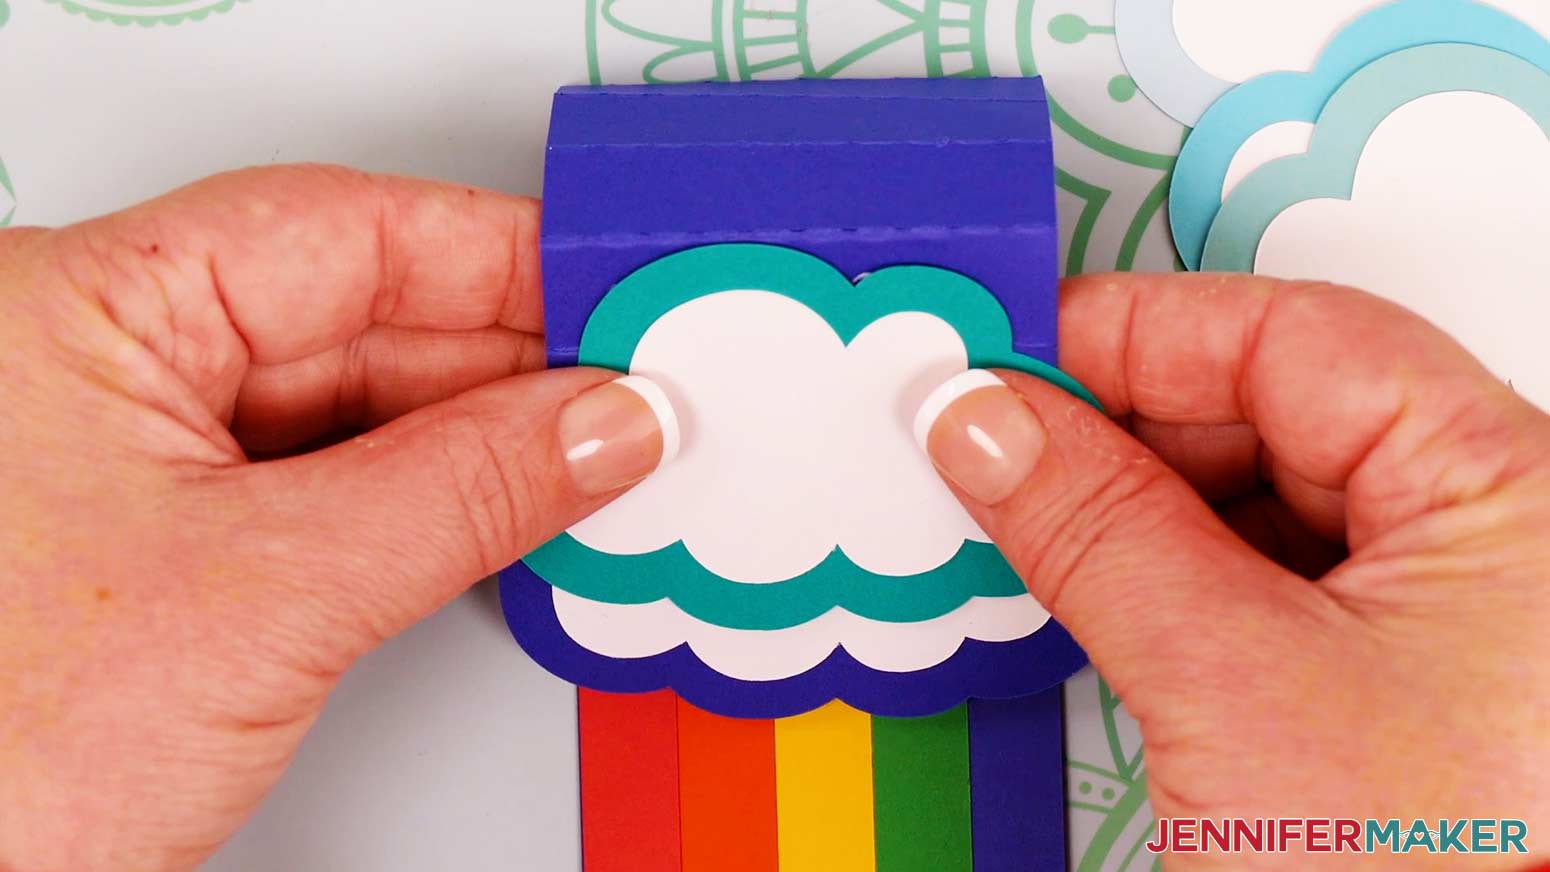
Now let's attach the cloud that will go directly above this one. Mine is a dark teal color. Just like before, place the cloud piece on the slider piece in its appropriate location before applying any glue.
NOTE: For the top four clouds, we will only be attaching their top sections to the slider piece. The bottom of each cloud will remain free so the sliding part of the card will function correctly.
Add glue to the slider's folded section just above your first attached cloud. Make sure to keep the glue away from the areas that will be outside the cloud you're about to attach.
Carefully place the next cloud onto the glued section of your slider and press down until the glue dries.
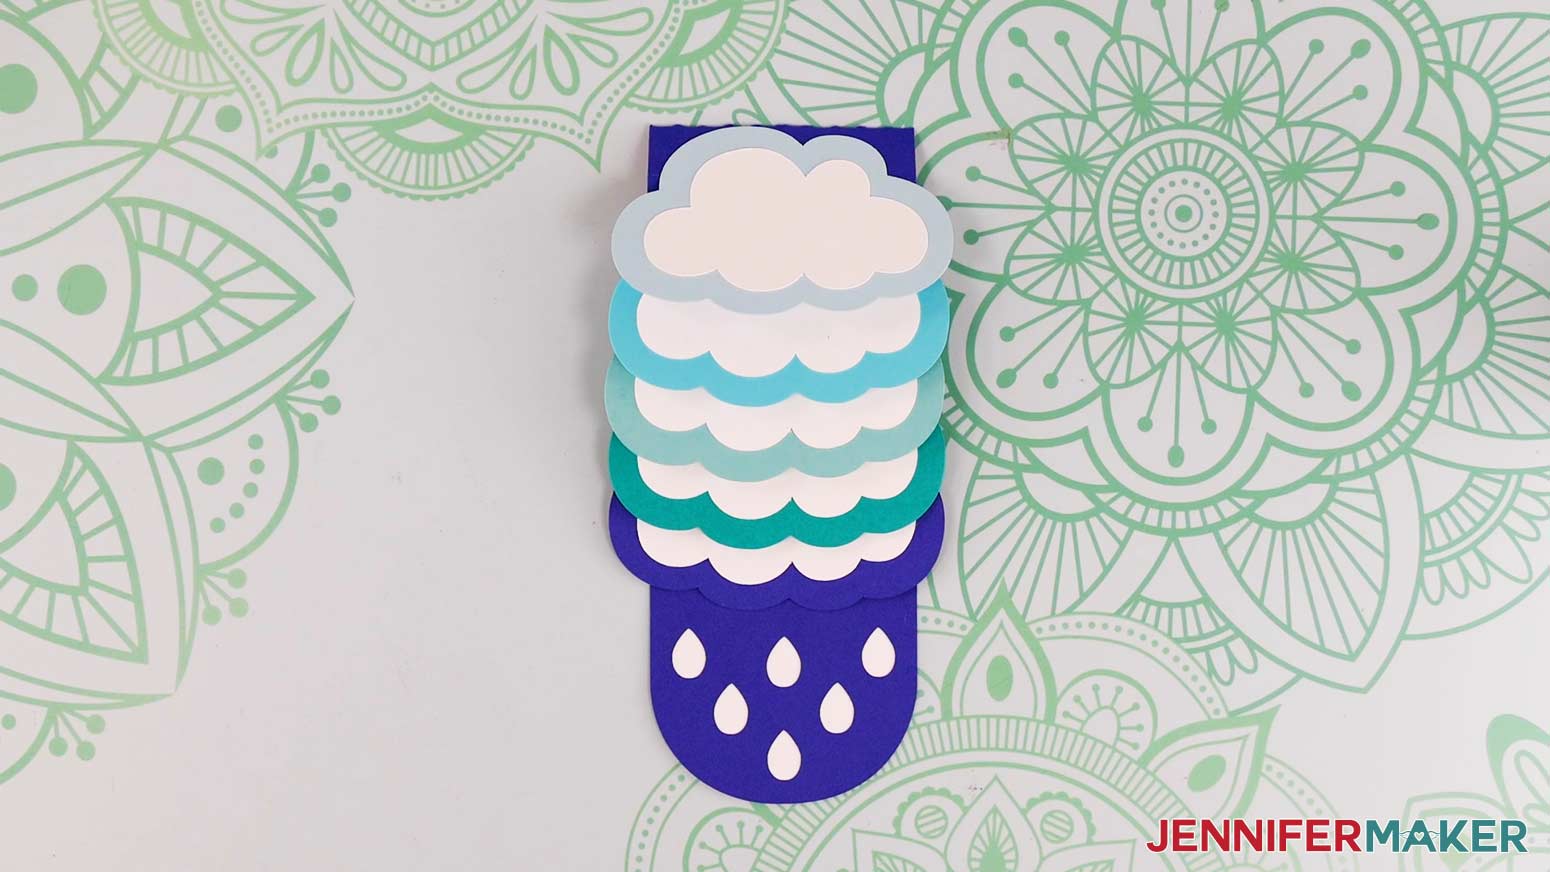
Repeat these steps for the three remaining clouds, paying attention to the color of each one as you attach them so you get them in the order you prefer. I created an ombre effect with mine, with my lightest blue cloud at the top.
Remember not to let the tops of any of the clouds extend above the creases of the sections to which they're attached.
The last step is to attach the assembled rainbow slider to the card base using the holder piece, which is the smallest rectangular piece with dashed cut lines at both ends.
First attach the holder to the assembled slider just behind the bottom cloud. The dashed or scored lines on the holder are there for alignment purposes only -- you don't need to fold them. You can align each of them at the left and right edges of the slider base piece on the same side as the rainbow stripes.
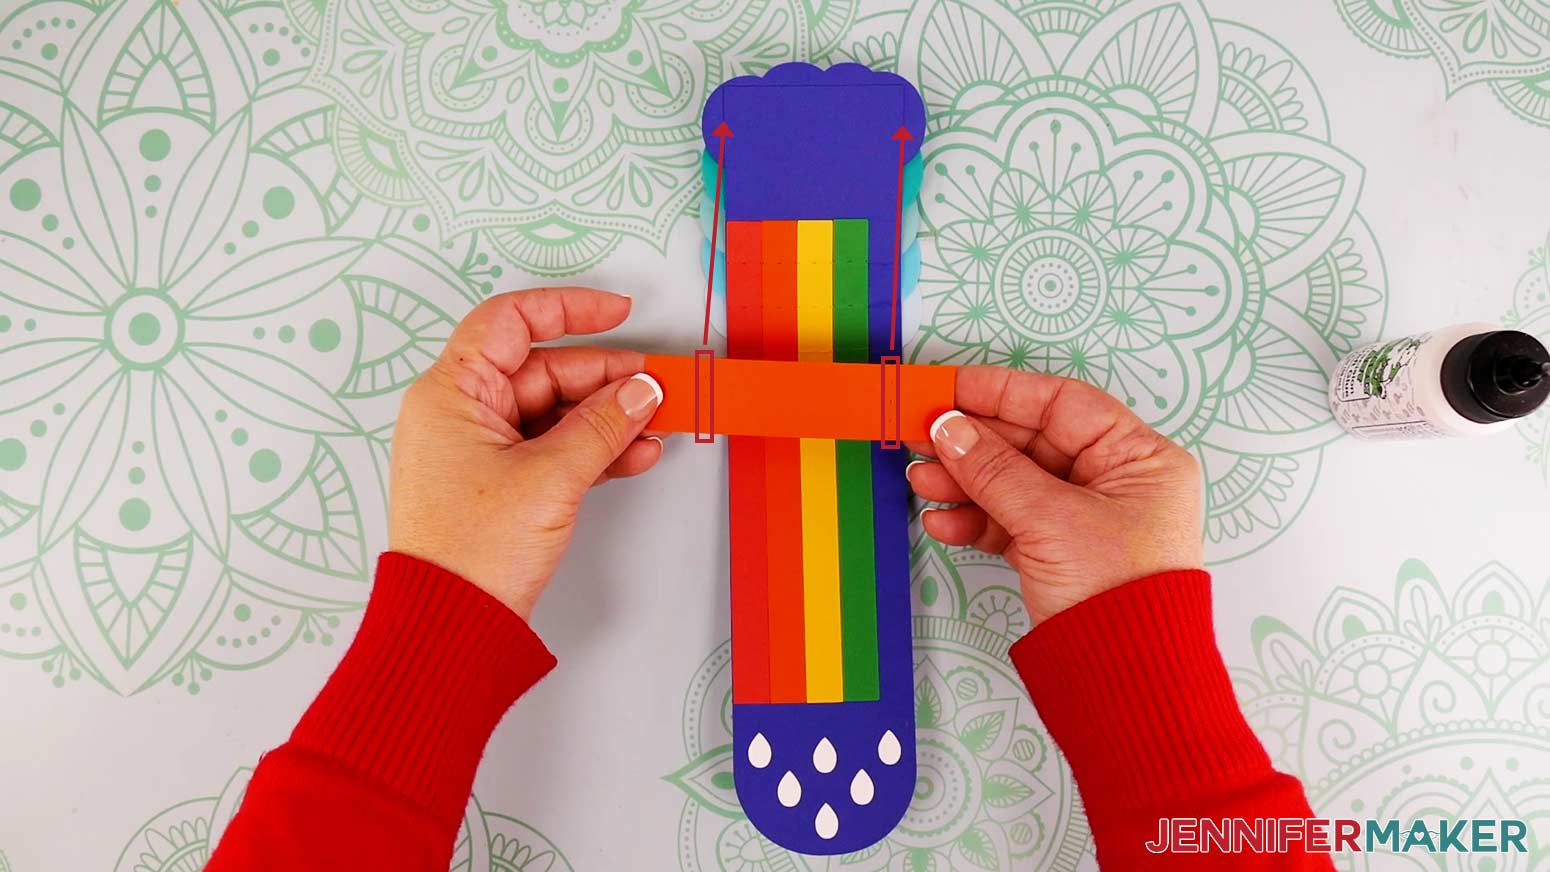
When correctly positioned, the holder piece will extend out past the cloud on the left and right sides.
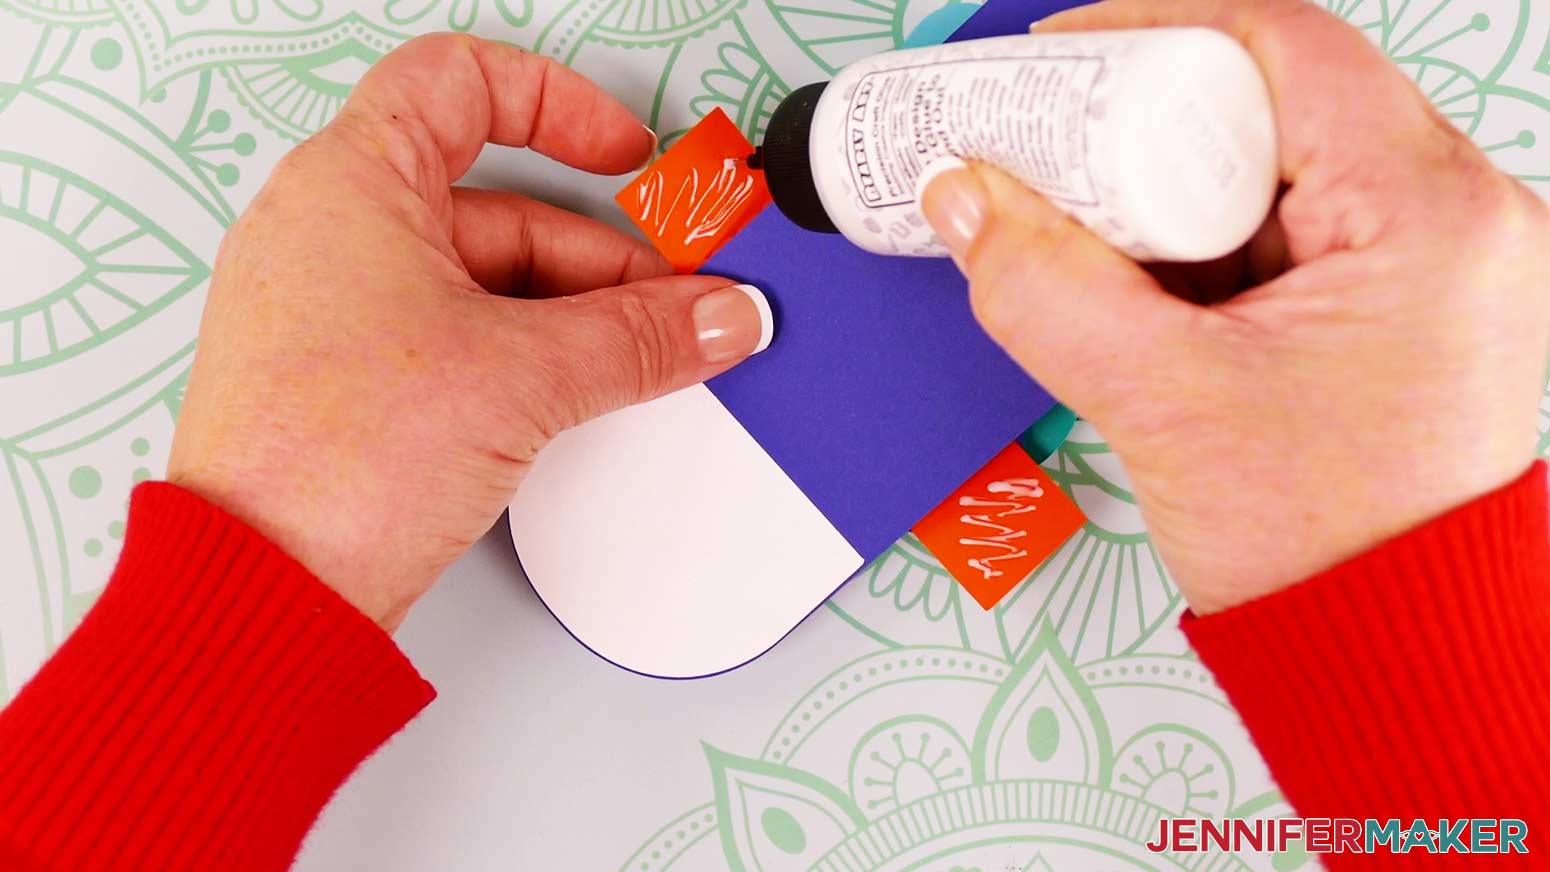
Apply glue to the bottom section of the slider base piece in the area where the holder will be attached.
Align the bottom of the holder piece with the bottom edge of the slider base piece. Make sure the alignment lines on either side of the holder are correctly aligned to the slider edges, and then press down so it's well adhered.
Now fold the slider over so the rainbow stripes are completely covered. Flip the folded slider over to the back side with the raindrop liner. Apply glue to the extended ends of the holder piece on this side. You only need to apply a small amount of glue at the left and right edges of the holder piece -- just enough to hold the slider in place on the card base.
IMPORTANT: Make sure you don't get any glue on the back of the main slider piece. The only parts of the assembled slider that should be attached to the card base are the left and right edges of the holder. If you accidentally glue any of the other parts to the card base, your finished waterfall card will not work properly.
Flip your slider back over so the clouds are facing you. Carefully align the top edge of the top cloud to the top edge of the card liner (the smaller rectangle on the card base). Make sure your slider is centered from left to right on the card base and press down on the holder edges to adhere it to the card.
NOTE: You may notice a small sliver of cardstock on the left and right edges of the holder extending past the edges of the card liner. This is intentional and is there to help cover up any gaps in case the slider isn't perfectly centered on the card.
That's it! Once the glue is completely dry, you can pull down on the raindrop section of the slider piece to see the amazing waterfall effect in action.

Assemble the Envelope
Find the large piece with the rainbow design cutout, the three flap pieces, and the liner piece. Fold along the scored or dashed lines. Use your scraper tool if needed to get sharp creases.
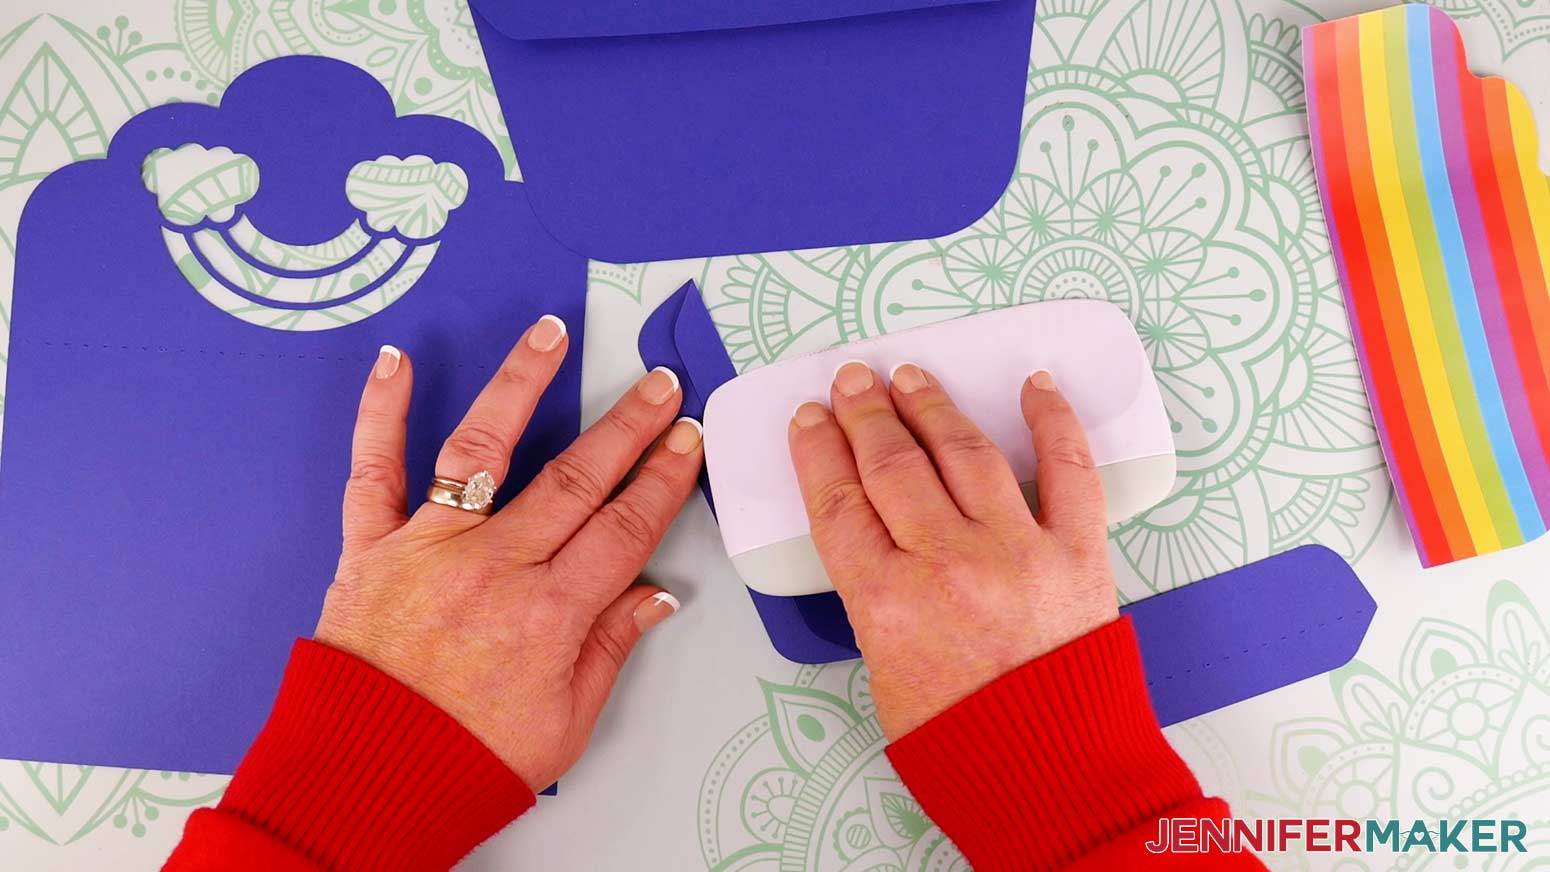
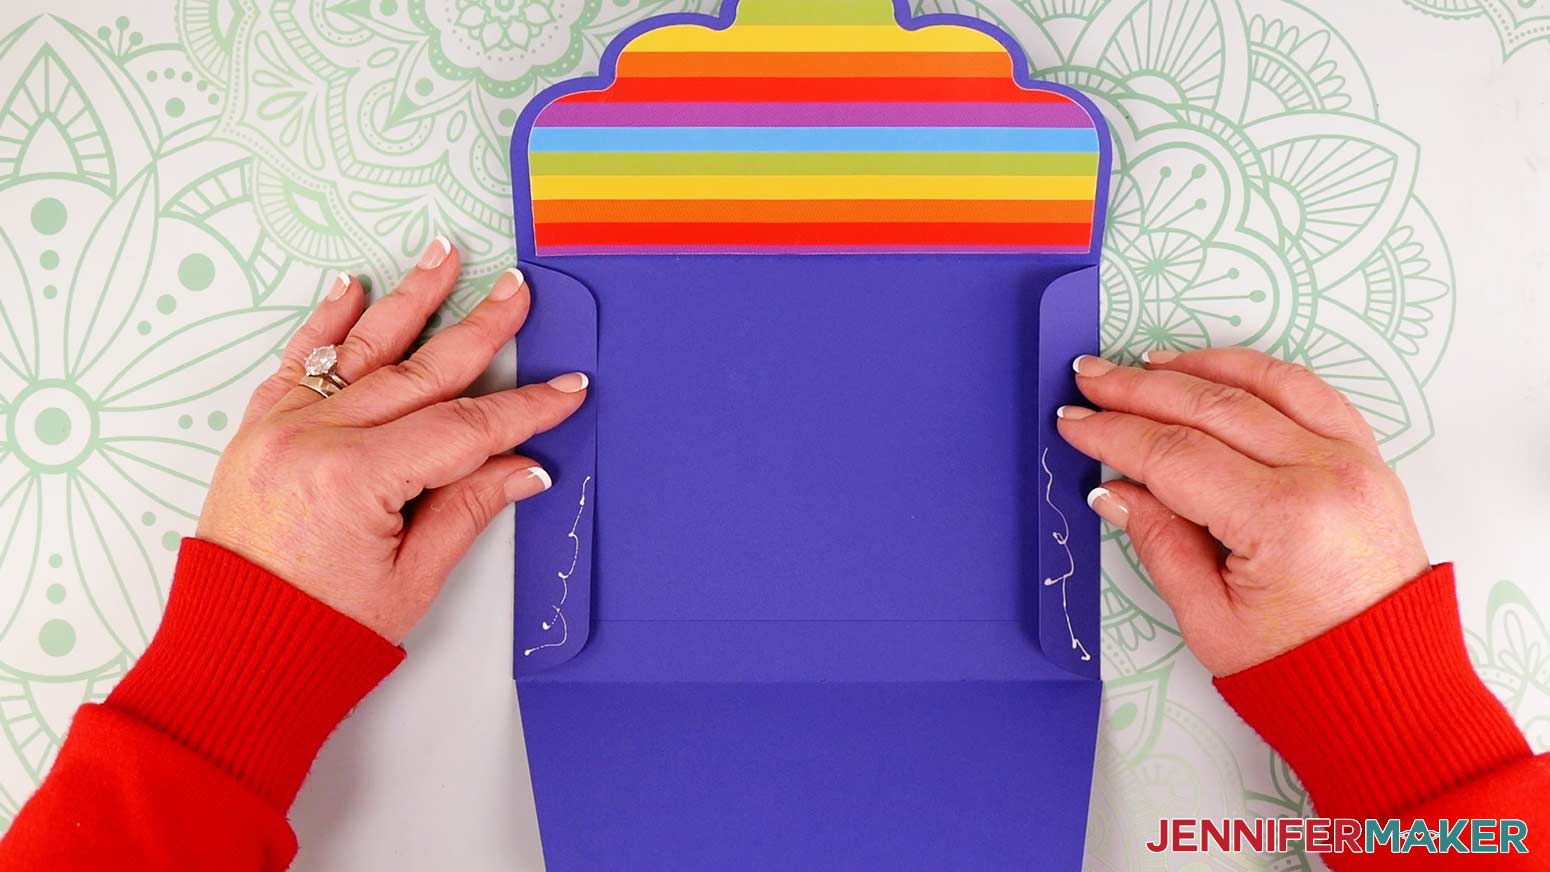
Now attach the left and right flaps -- the two smaller pieces -- to the large base piece.
NOTE: If you cut your envelope on paper with a different color or pattern on each side, make sure you attach the flaps to the back, or inside, of the base piece.
Apply glue to the tab of each flap. The tabs are the thinner sections of each piece.
Align the edge of the fold on each flap piece at the left and right edges of the envelope base. Make sure the top of the flaps don't extend past the fold on the envelope base. Press down to adhere each flap's tab to the base.
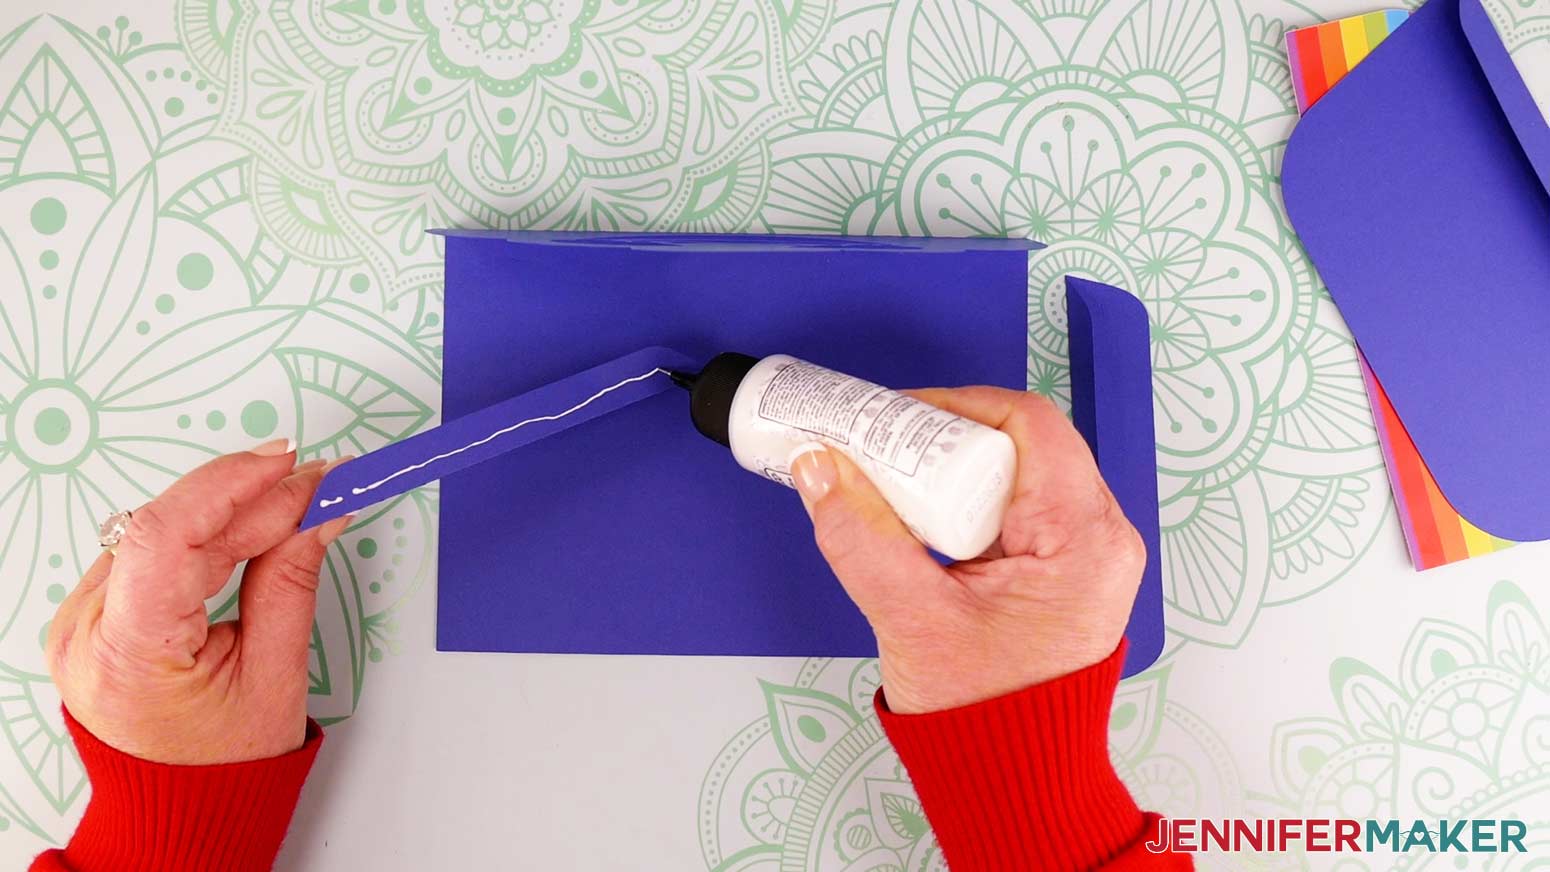
Now attach the large flap to the bottom of the envelope base using its tab. Make sure it's centered from left to right and the edge of the fold is aligned to the bottom edge of the base piece.
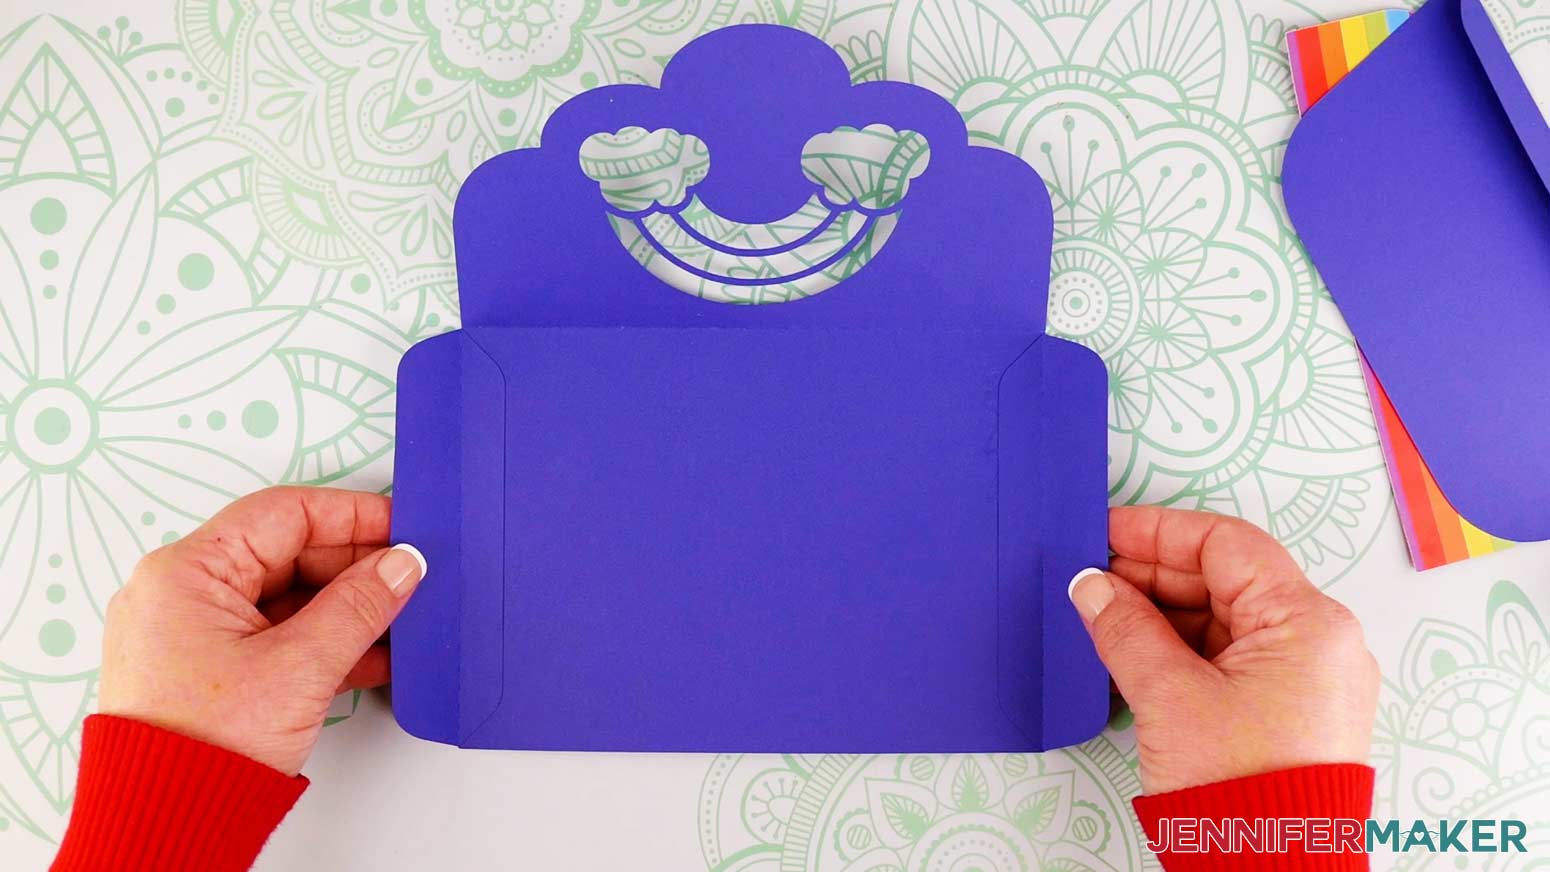
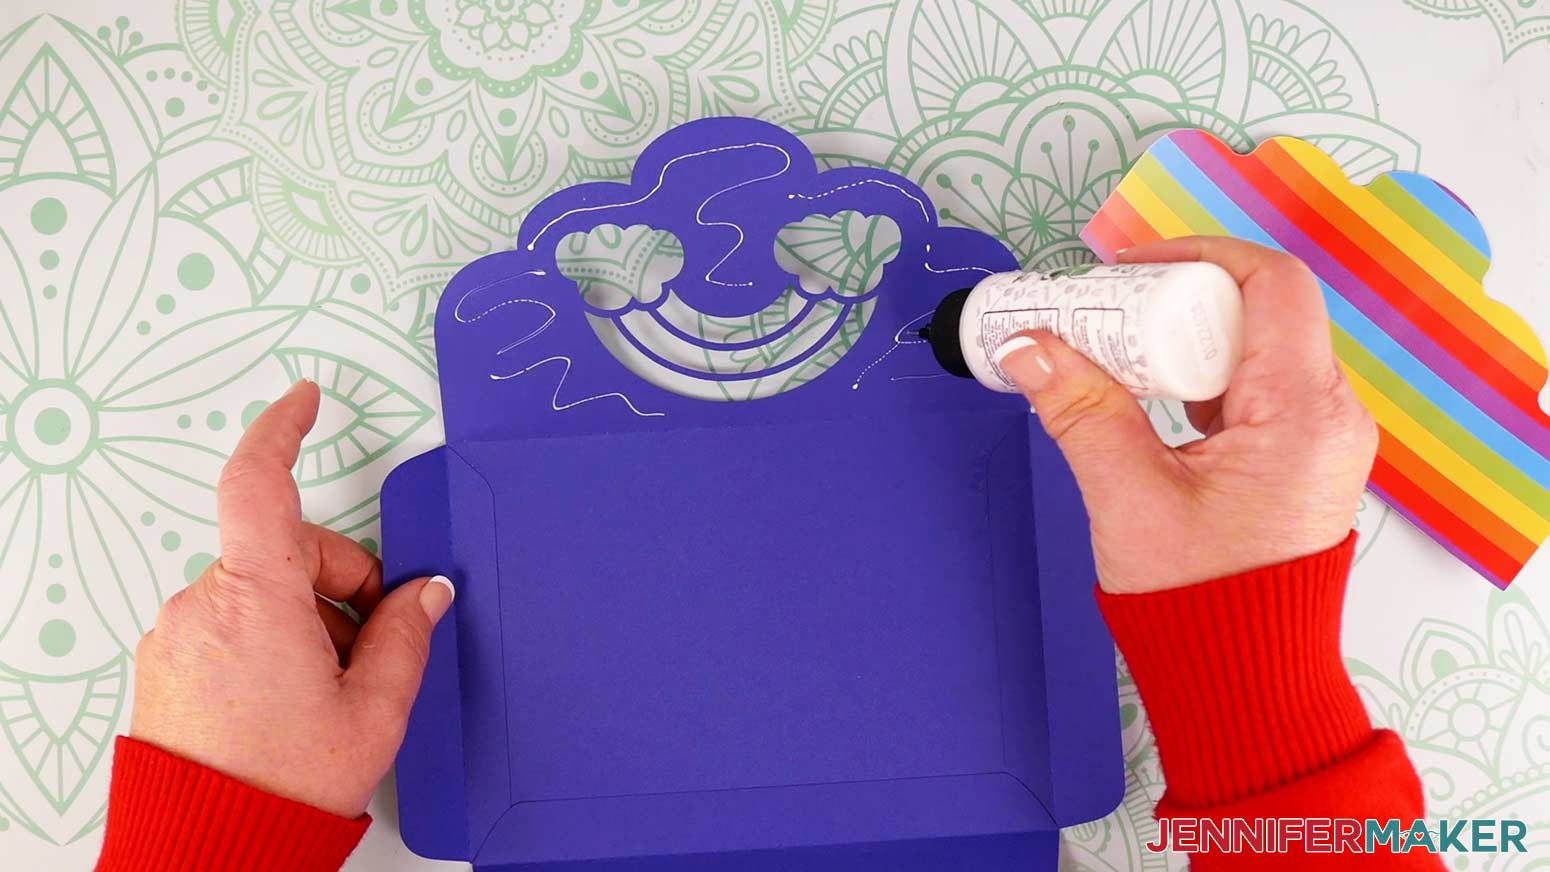
Attach the liner to the top section of the envelope base so it shows through the rainbow cutout.
Apply glue to the base piece, avoiding the very edges and the cutout sections. Don't apply any glue below the fold.
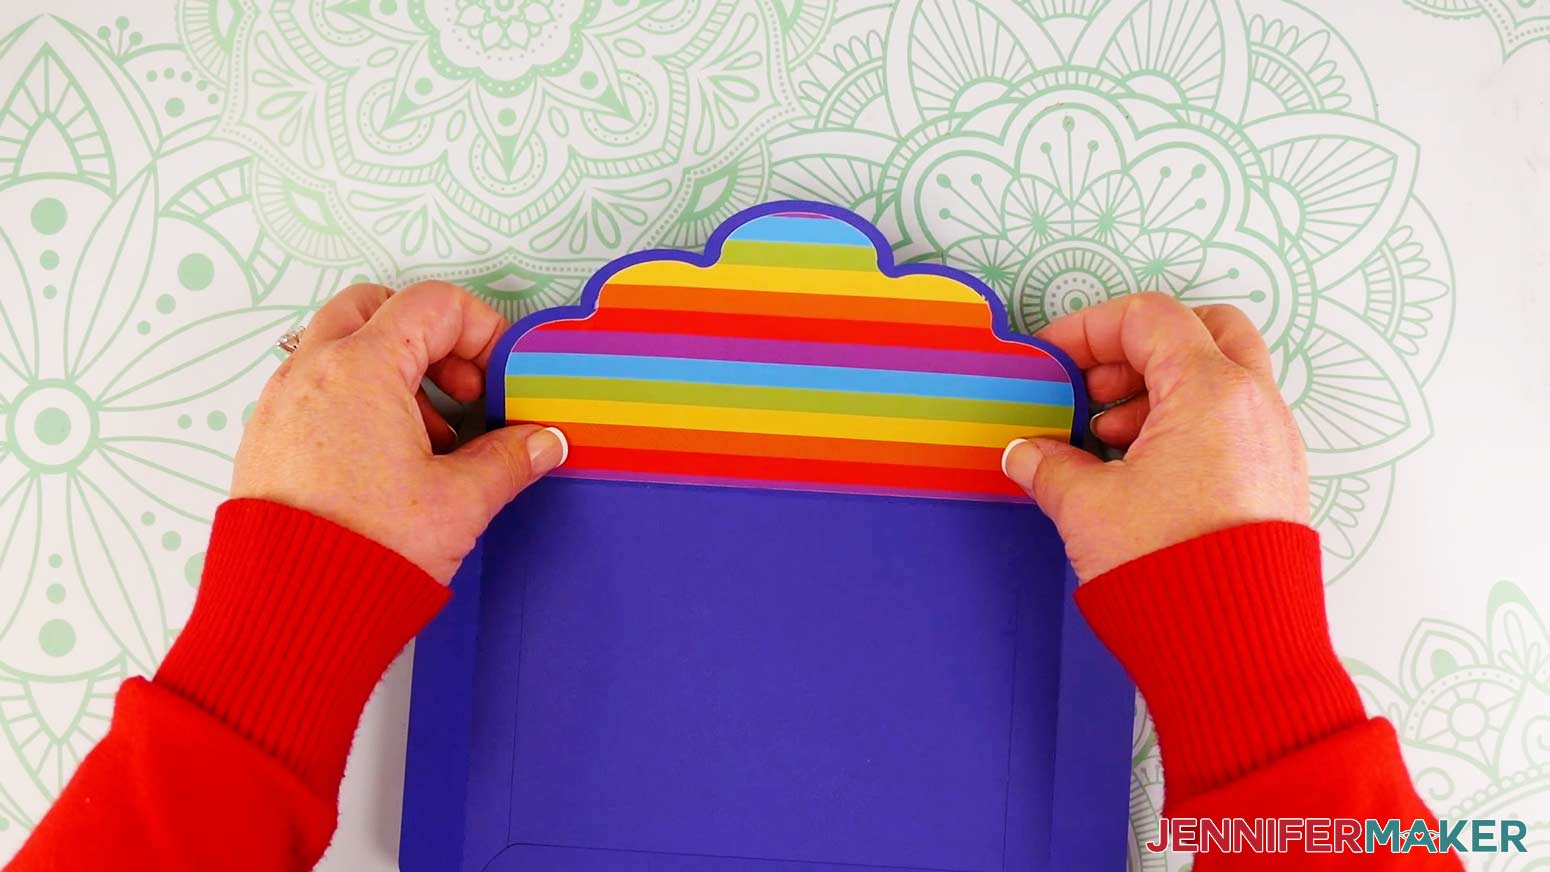
Press the liner down against the base, centering it so there's an even amount of the top flap visible around all the outside edges of the liner. Make sure the flat edge of the liner is positioned just slightly above the fold on the base piece.
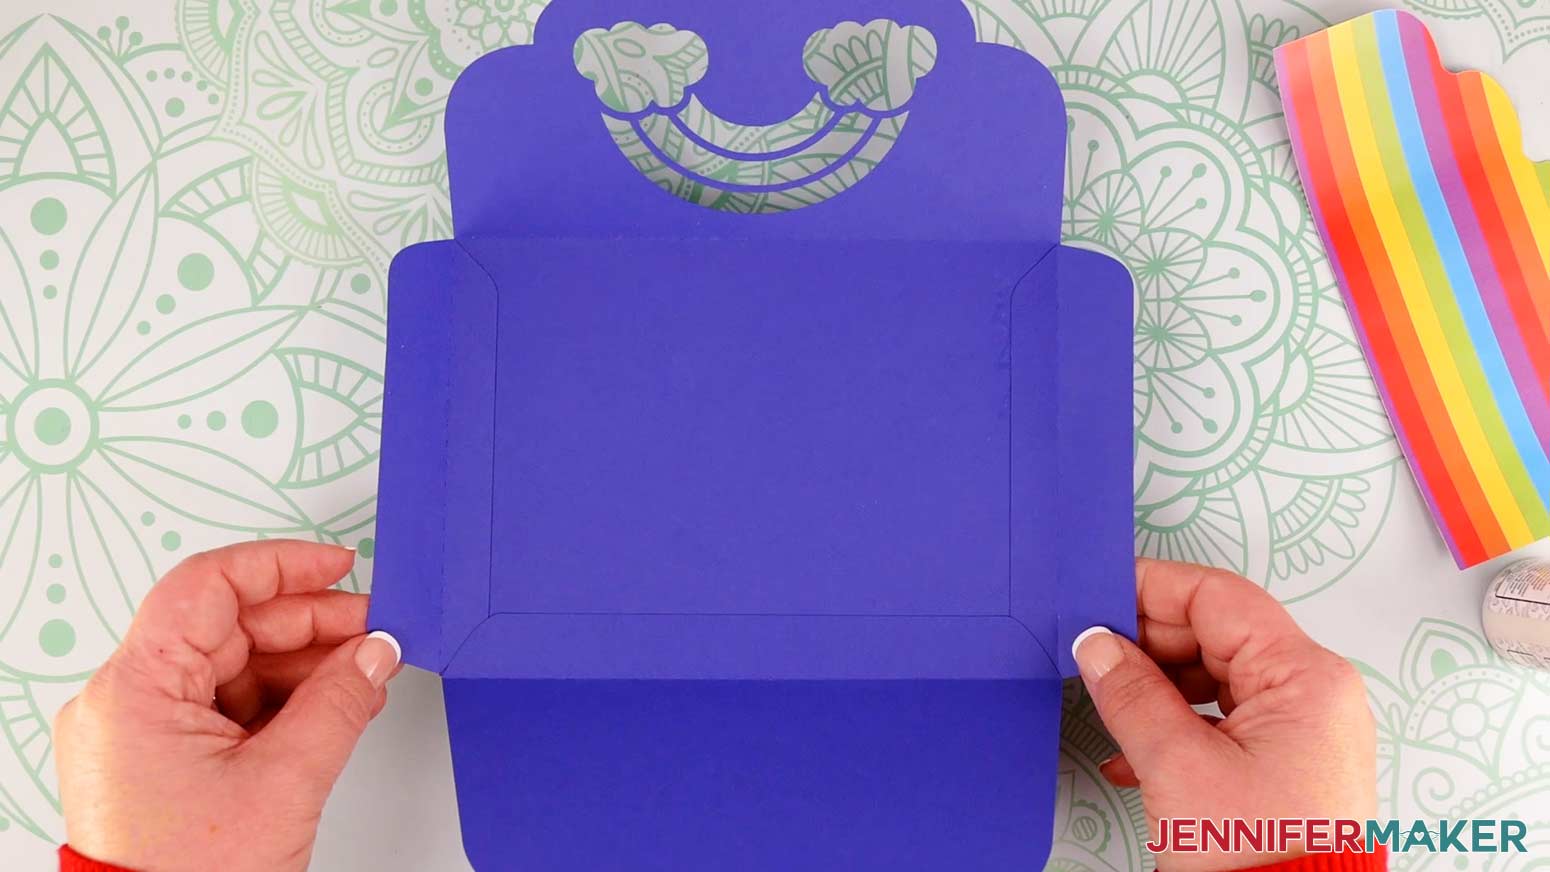
The last step is to attach the bottom flap to the side flaps to close up the envelope. Fold all the flaps inward toward each other if they aren't already. Find the areas where they overlap and apply glue there. Then press down to adhere them to each other.
NOTE: Make sure you don't get any glue on the inside of the envelope, or you won't be able to put anything inside!
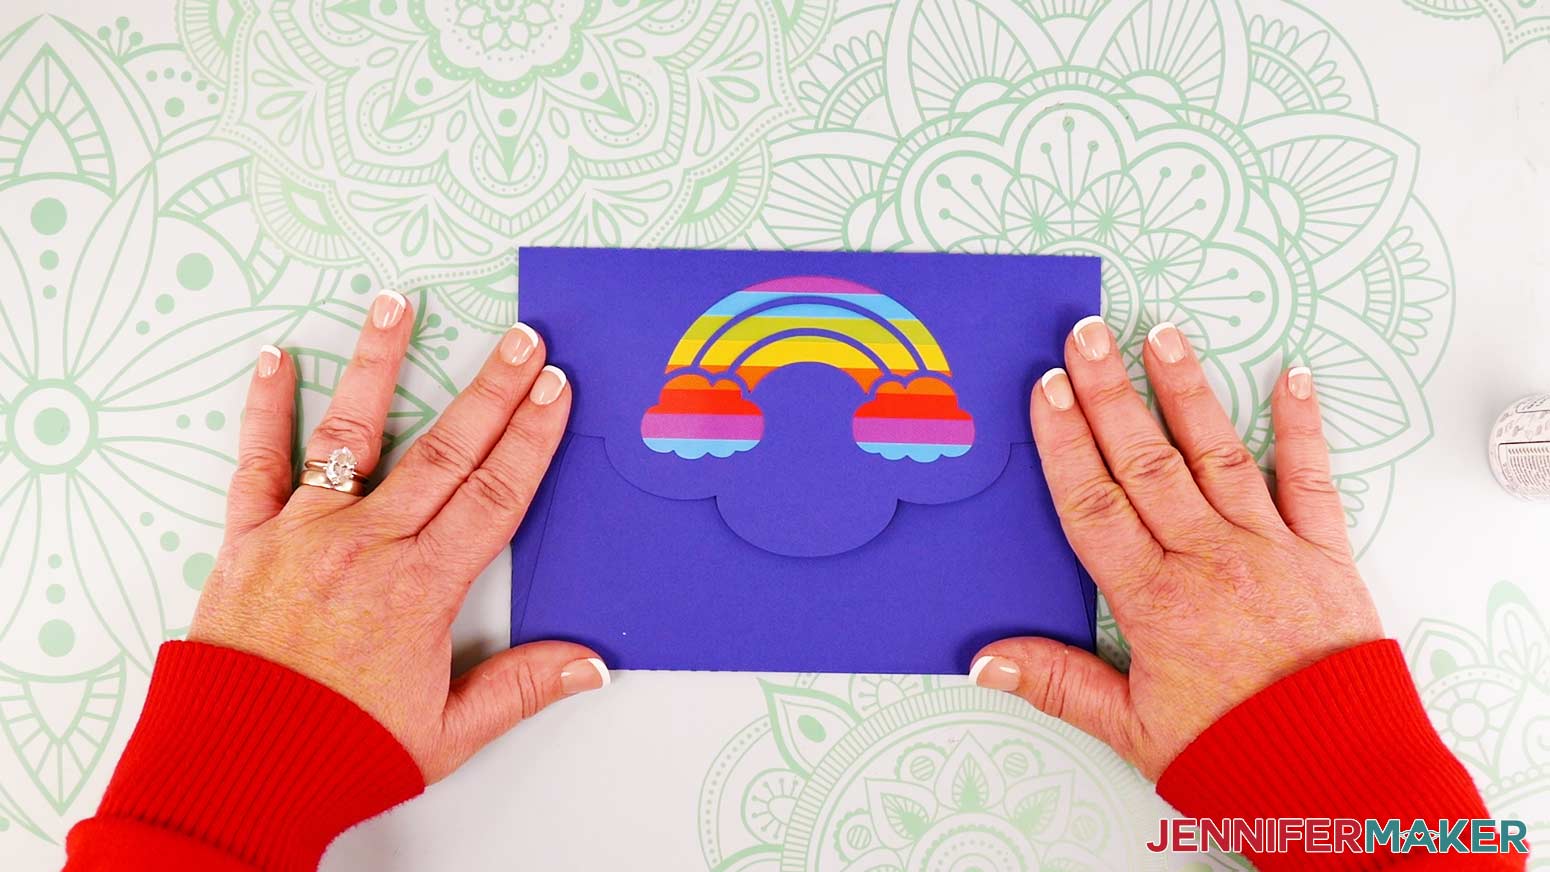
Now your envelope is finished! Just slide your assembled waterfall card inside, seal it with glue, double-sided tape, or a sticker, and it's ready for mailing.
TIP: If you want to go above and beyond, I have lots of fun sticker options for you to try when sealing your envelope.
STEP 4: SHOW IT OFF!
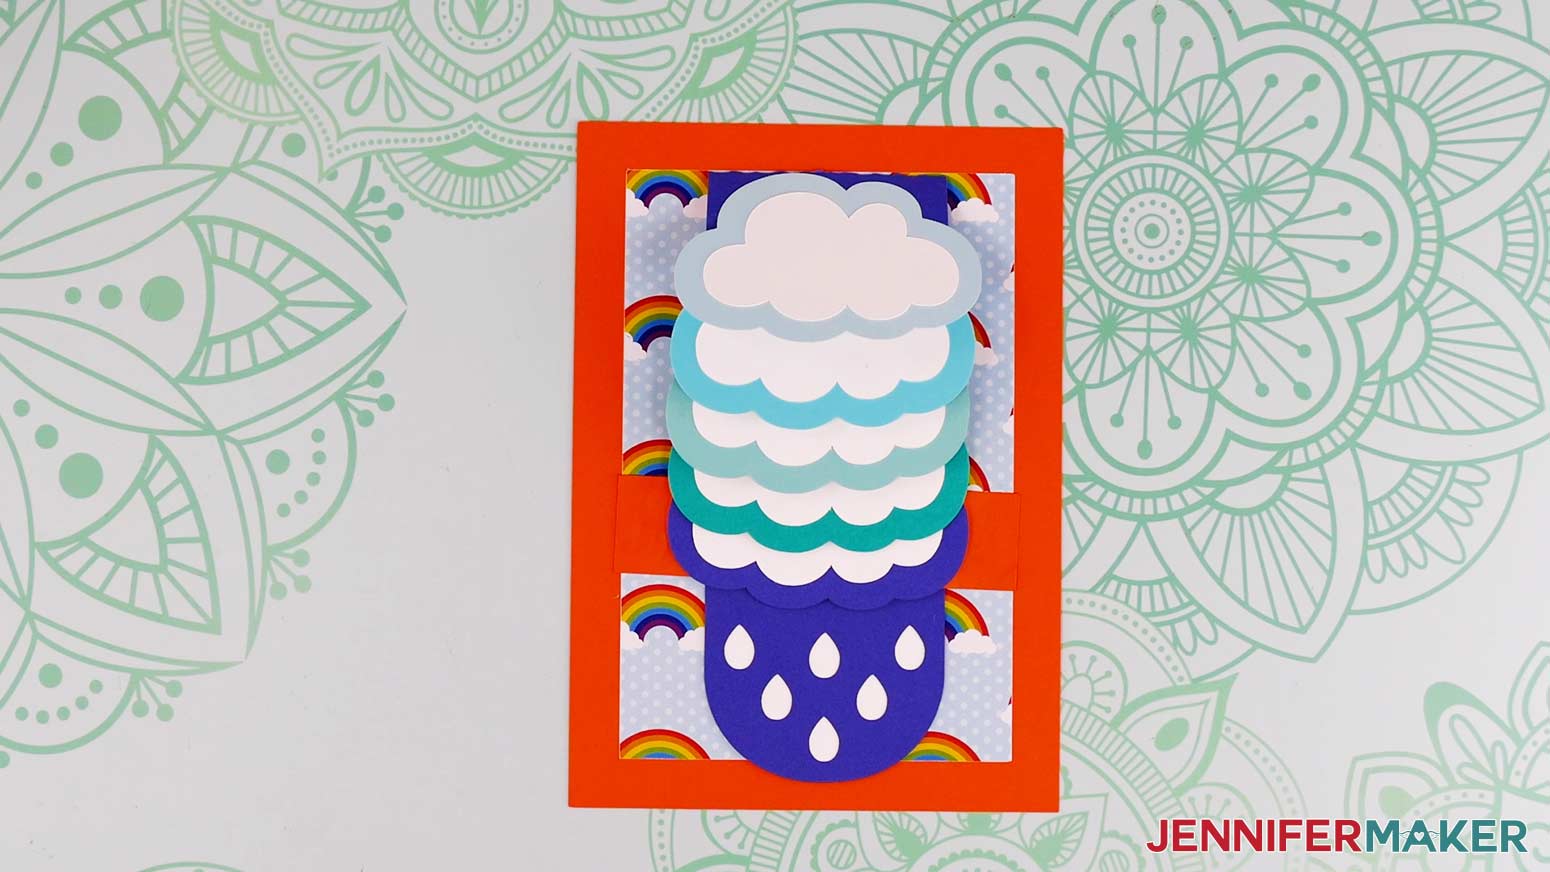
You're done! Here's what my finished waterfall card and matching envelope look like. Aren't they adorable?
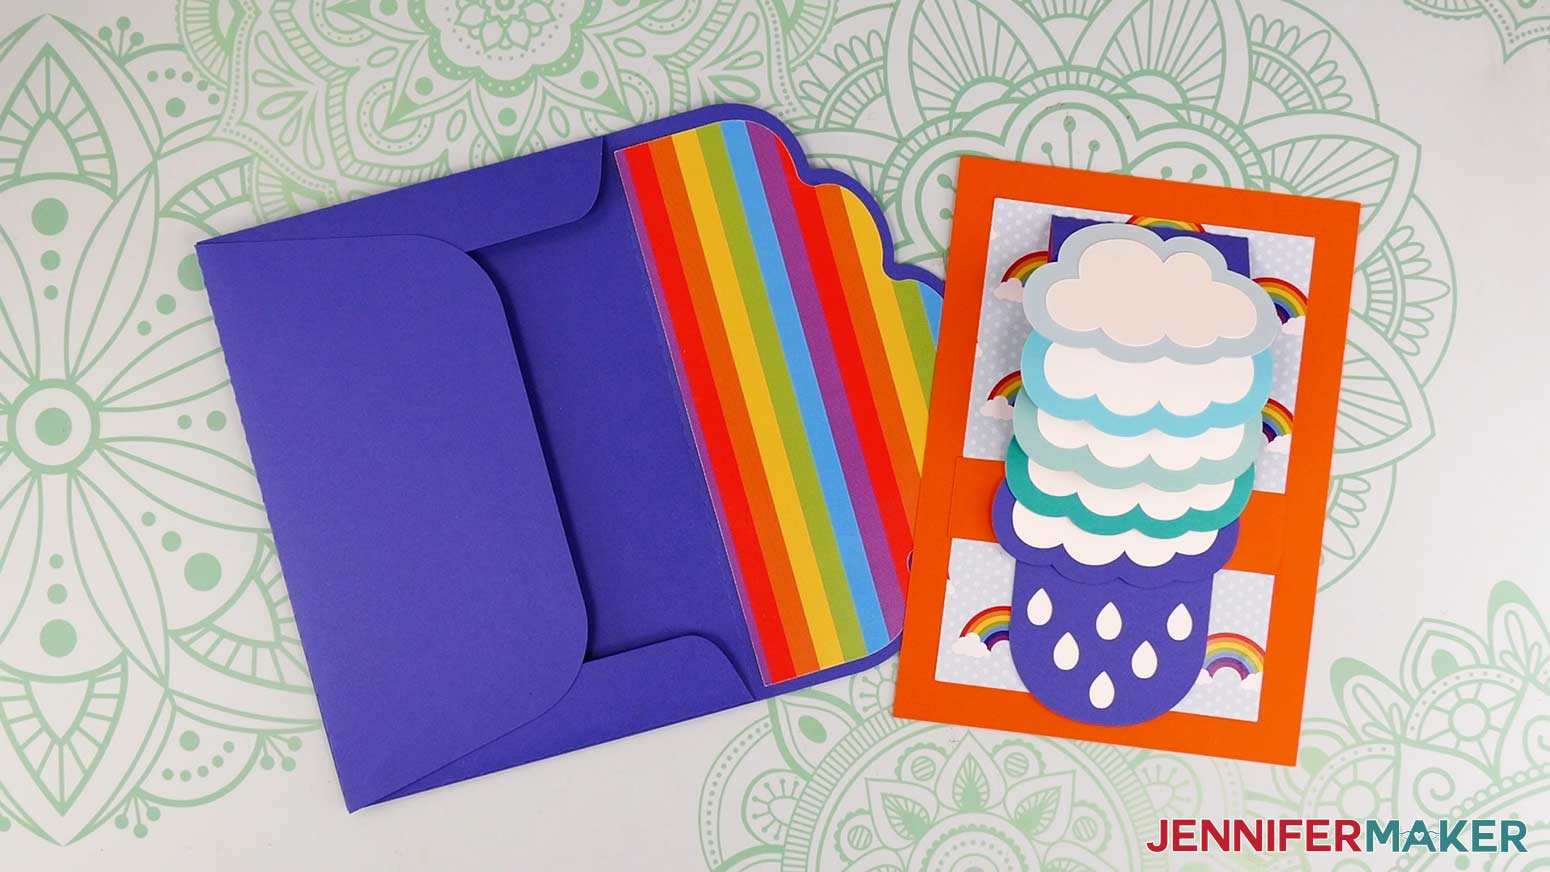
Now you can write fun notes on each of the clouds or on the back of the card, place it in the envelope, and mail it to someone special.
Notes
Finished Card Size: 5" x 7"
Finished Envelope Size: 7.25" x 5.25"
Answers to Your Questions About How to Make a Waterfall Card
Q: How do you make a waterfall card?
A: Getting the fun folds and layout correct are really important for a successful waterfall card, so following a tutorial is the best way to make one until you understand the specifics. My free rainbow design is a good beginner project, and it’s easy to customize!
Q: How do you glue a waterfall card?
A: It’s very important to glue the tabs precisely so the flaps move and flip correctly. My tutorial has images to help identify the right technique.
Q: What are the dimensions for waterfall card?
A: The assembled waterfall card is 5″ x 7″ and the finished envelope is 7.25″ x 5.25″ (A7 size) so they fit together perfectly.
Q: How do you make a waterfall card on Cricut?
A: By using my free SVGs, you can add a waterfall mechanism to any base card with a Cricut. In Cricut Design Space, replace the clouds with other shapes, add messages, and adjust the design as you like. Just make sure the elements stay in proportion with the long piece of card. Then you can resize it all to fit on a card base and hide the existing card pieces!
Q: What Cricut should I buy to make cards?
A: You can use any Cricut to make cards, just make sure you try a few mat options to see which combination works best for you.
Q. What do I need for Cricut card making?
A: All you rally need is some card stock, your cutting machine, and a mat! High-quality glue helps, too.
Q. Will these cards cost more postage to mail?
A: Depending on your card’s dimensions, thickness, and weight, it may cost more than an average card. I recommend measuring and weighing it and checking with your mail service just in case. For designs with moving parts, like pull tab cards, make sure the pieces will fit and not be damaged in trainsit.
Get my free SVG files to make a Waterfall Card and Envelope!
I’d love to see YOUR waterfall card and all the designs you make with this tutorial! Please share a photo in our Facebook group or tag me on social media with #jennifermaker.
Love,

Want to remember this? Save this tutorial on making a Waterfall Card to your favorite Pinterest Board!