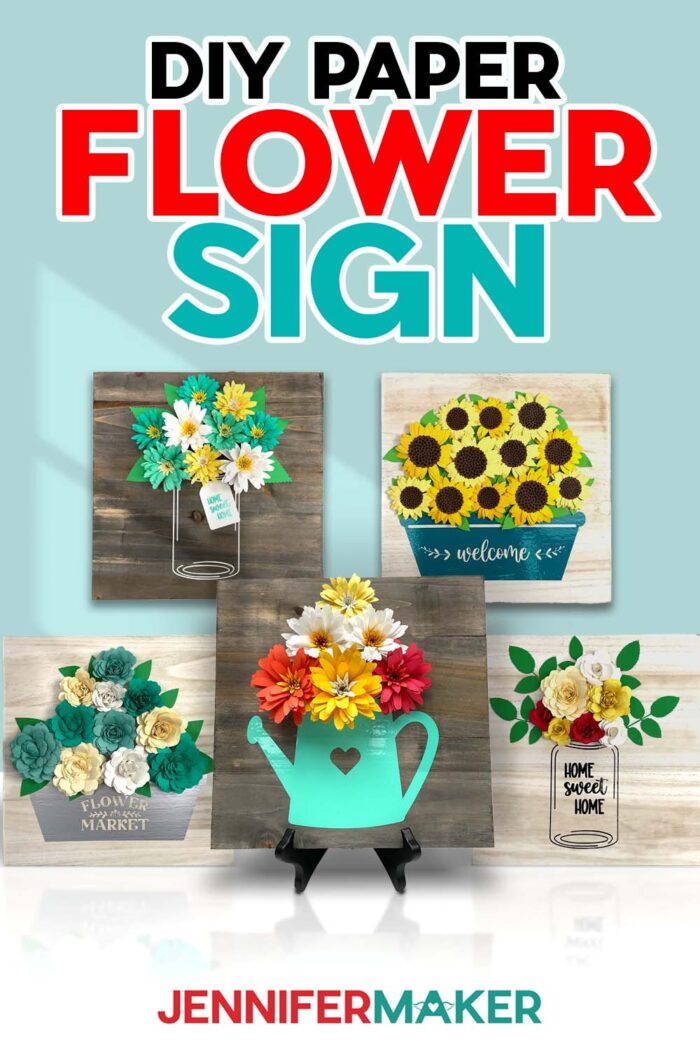
Learn how to make a paper flower sign with realistic blooms!
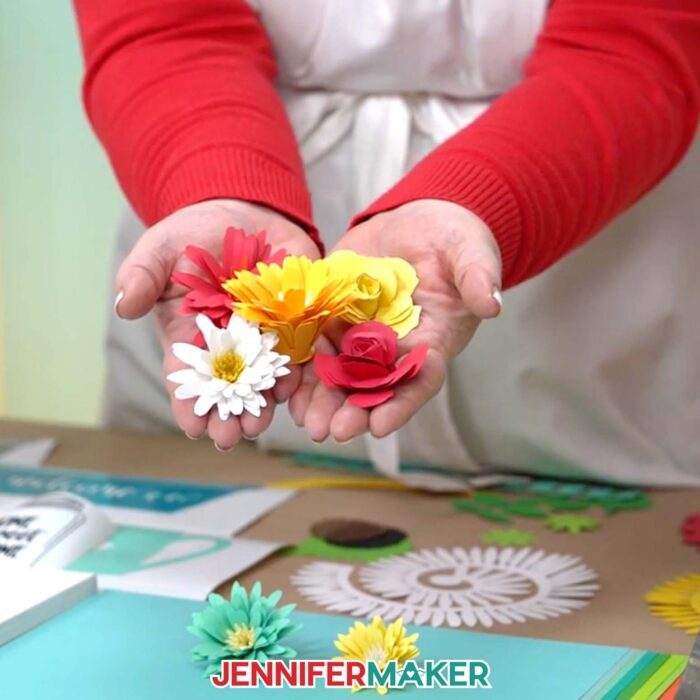
Paper flowers are so easy and gratifying to make, but how do you use them? There are many ways to incorporate cardstock flowers into your crafts, like photo backdrops, shadow boxes, and even a standing bouquet and vase! In this tutorial, I’ll show you how to cut and assemble paper blooms that look just like fresh flowers. Then we’ll use adhesive vinyl, a wooden panel, and a bit of glue to create a bouquet that never dies — it’s a colorful paper flower sign you can hang on your wall!
Watch the full step-by-step tutorial on how to make a paper flower sign!

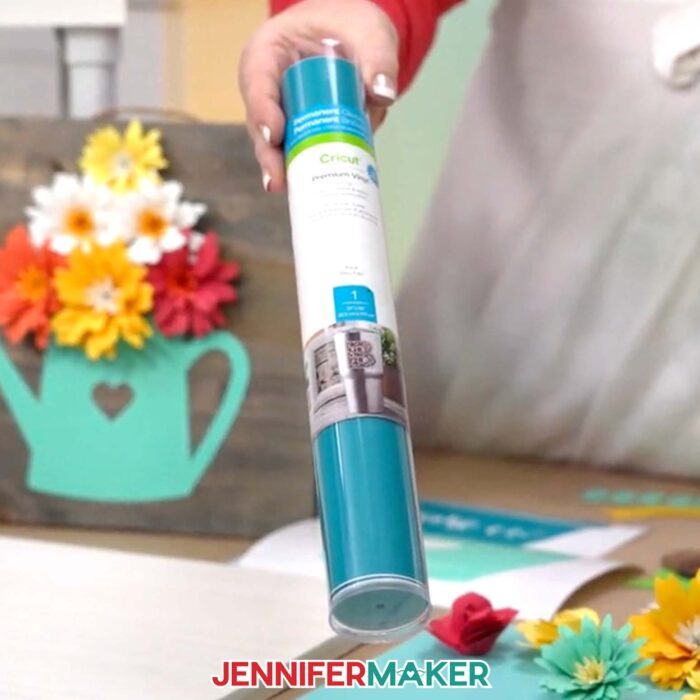
This is a Cricut Mystery Box project — it uses the same vinyl colors from the premium vinyl sampler that you could have gotten in the “Spring Pollen” mystery box in April 2024. While this mystery box is no longer available, you can still purchase the vinyl colors below in my material list. Learn more in my Cricut Mystery Box Guide.
Paper flowers look just like real flowers, except they stay “alive” virtually forever! Colorful flowers add life to living spaces, and I love to add contrasting pops of color within my arrangements. It’s so much fun to decorate wood signs with blossoms in your own choice of colors! I’ll show you how you can use your favorite flowers and some vinyl decals to decorate a unique sign to match your decor — or give one as the perfect gift!

In the tutorial, I’ll show you how to pick the right size design to fit your panel — this is super important so your finished piece looks right. I’ll also help you figure out how big to make your flowers so they’ll look proportional to the vinyl “container” on your final paper flower sign. I’ll walk you through how to resize and prepare the flowers and vinyl decals in Cricut Design Space — then how to cut and assemble them.
Once your vinyl is cut and weeded and your flowers are cut and assembled, I’ll show you how to decide where to place the vase so your flower bouquet looks right — AND how to apply the vinyl correctly. I’ll share all my tips and tricks for working with the panel’s texture and transfer tape so your vinyl application looks as smooth as possible — even with the most delicate and detailed of vinyl design elements.
Next, I’ll show you how to arrange your paper flowers so your composition looks great — and as realistic as can be! I’ll also share my tips and tricks for getting the blooms on your paper flower sign to stick — and stay — where they belong. Hint: Rather than using craft glue to attach them to the board, I recommend using a hot glue gun and glue stick instead.

Are you looking for more ways to customize your paper flower sign? Personalized tags are something you can easily make in my ADVANCE program! Learn more about ADVANCE here!
So, are you ready to jump in and make your own paper flower sign? These are so much fun to design and create, and a lovely way to decorate a space that needs some bright and cheerful pops of color!
Let me show you how to make a Paper Flower Sign! This post contains some affiliate links for your convenience (which means if you make a purchase after clicking a link I will earn a small commission but it won’t cost you a penny more, there is no additional cost)! Read my full disclosure policy.
Materials to Make a Paper Flower Sign
View my Amazon shopping list for the exact items I used!
-
One (1) White Wooden Sign -OR-
-
One (1) Gray Wooden Sign
-
Cricut Permanent or Value Vinyl (I used Aqua, White, and Black)
-
Flowtool or Quilling Tool
-
A way to cut your materials – I’m using the Cricut Maker 3, but you can also use a Cricut Maker series, a Cricut Explore series, the Cricut Venture, or a Cricut Joy series machine
-
Pencil for alignment marking
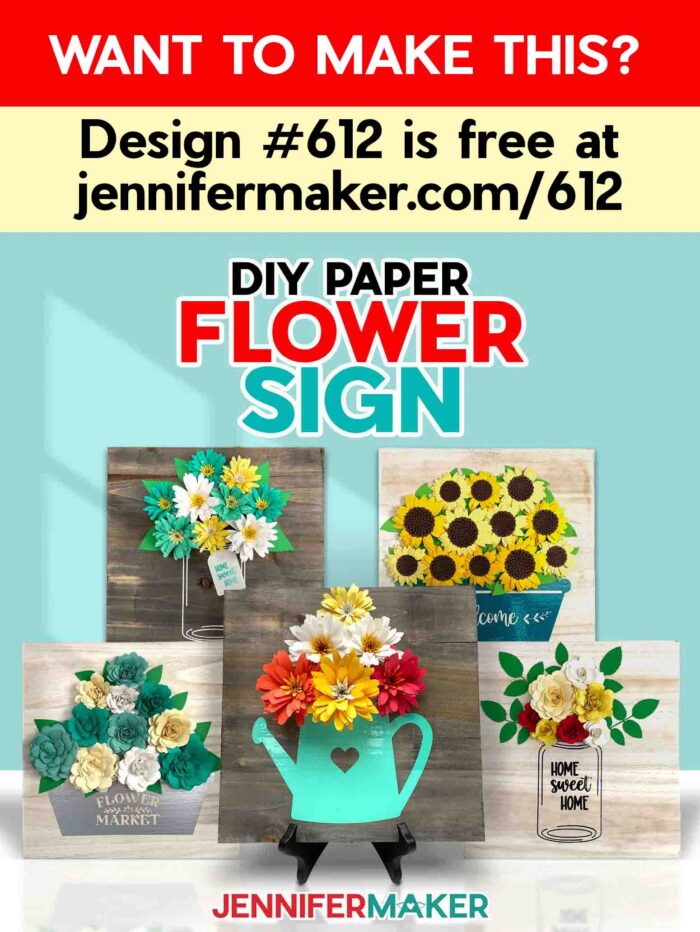
- Design #612 – My free flower sign design files (available in my free library – get the password by filling out the form at the bottom of this post)
How to Make a Paper Flower Sign
Paper Flower Sign
Learn how to make a paper flower sign!
Materials
- One (1) White Wooden Sign -OR-
- One (1) Gray Wooden Sign
- Cricut Permanent Vinyl in Aqua, White, and Black
- StandardGrip Transfer Tape
- 12" x 12" 65 lb. Cardstock - Green Palette
- 12" x 12" 65 lb. Cardstock - Teal Palette
- 12" x 12" 65 lb. Cardstock - Citrus Palette
- 12" x 12" 65 lb. Cardstock - Red Palette
- Design #612 (My free SVG/PDF/DXF design files are available in my free resource library - get the password by filling out the form at the bottom of this page)
Tools
- A way to cut your materials - I’m using the Cricut Maker 3 but you could also use the Cricut Maker, an Explore Series machine, a Venture, Joy Xtra, or Joy.
- Cricut Green StandardGrip Machine Mat 12” x 12”
- Flowtool or Quilling Tool
- Brayer
- Spatula
- Scraper
- Weeding Tool
- Bearly Art Glue
- Glue Gun & Glue Sticks
- Silicone Finger Protectors
- Ruler
- Pencil for alignment marking
Instructions
STEP 1: GET MY FREE PAPER FLOWER SIGN DESIGNS
First, download my Paper Flower Sign designs from my free library – look for Design #612. Alternatively, you can use the Save This Project form near the top of this post and the design link will be emailed to you.
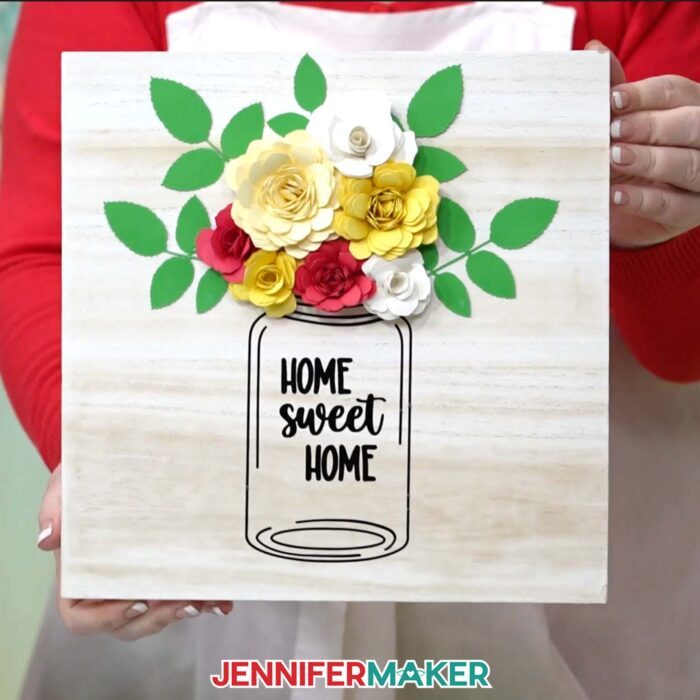
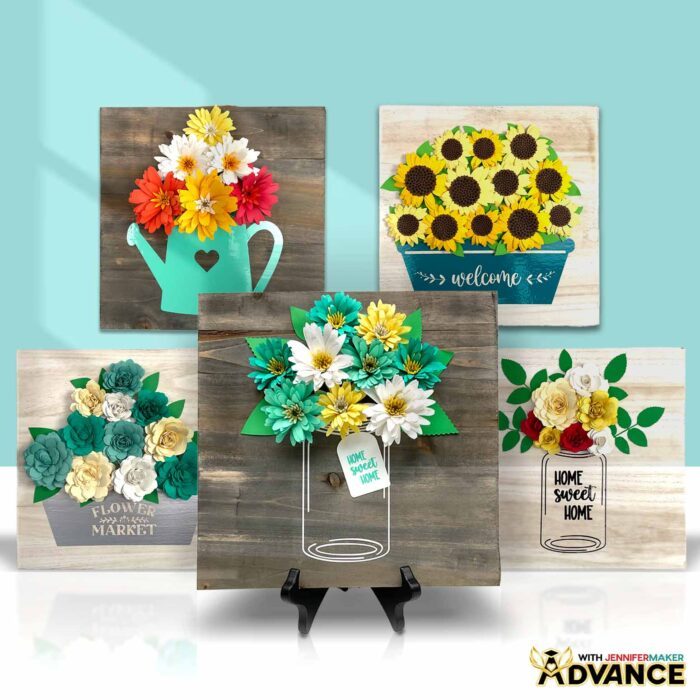
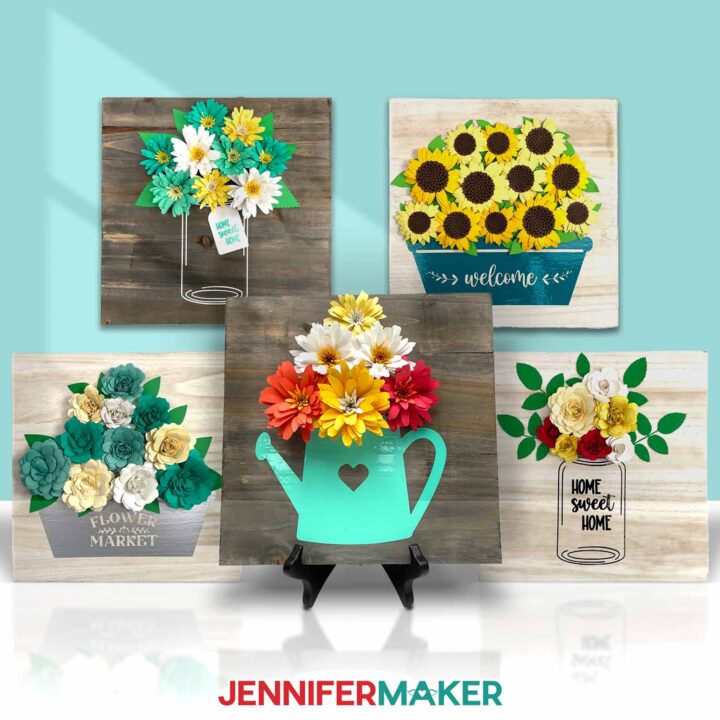
In the SVG folder, you’ll find a file with three flower holder options: a cute watering can planter with a heart cutout; a low planter that says “Welcome;” a mason jar that says “Home Sweet Home;” and a low planter that says “Flower Market.”
I’ve also included SVG files for the flowers I used in my designs:
Gardenias
Gerbera Daisies
Leaves
Roses
And Sunflowers.
There is also a DXF folder with cut files, and a PDF folder with versions you can print and cut by hand.
Upload the files you need to Design Space to get started.
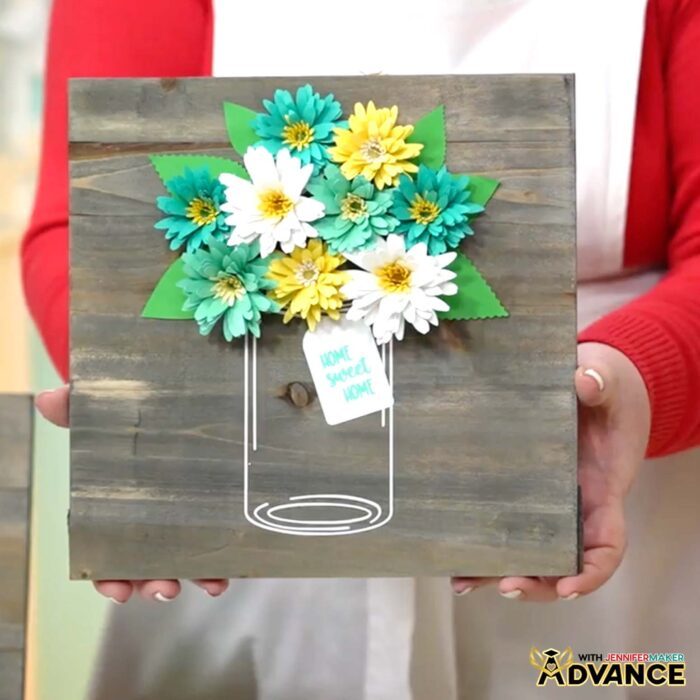
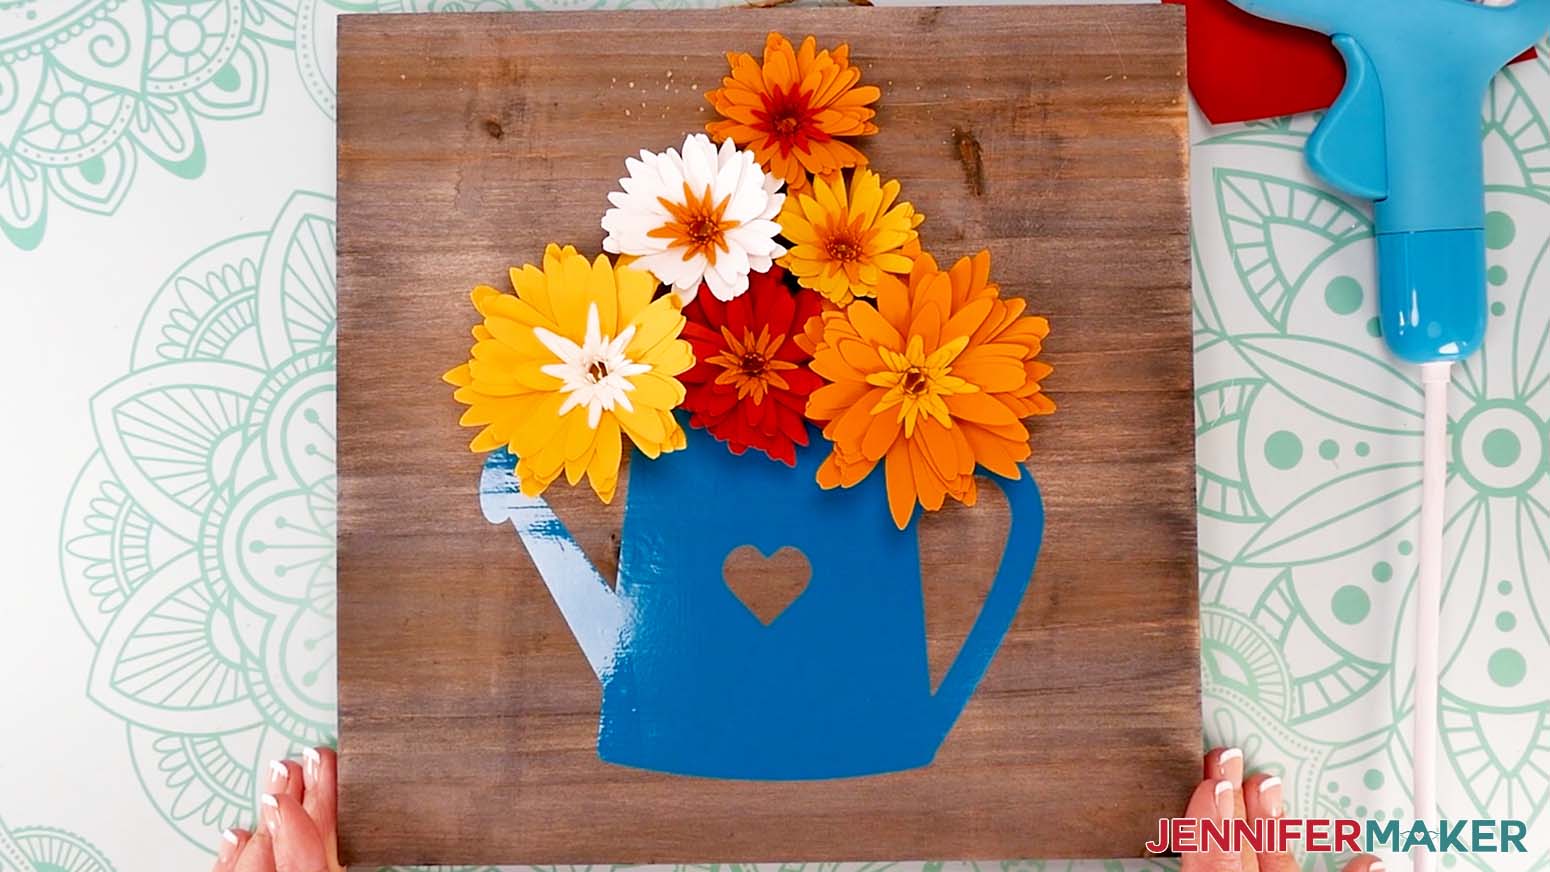
I’ll show you how I prepared and assembled the watering can sign with rolled paper daisies, the mason jar sign with rolled paper roses and gardenias, and the welcome planter sign with rolled paper sunflowers.
TIP: If you’re not sure how to upload, go to jennifermaker.com/svgs to learn how to unzip and upload SVG files.
OPTION 1: SQUARE WATERING CAN SIGN WITH PAPER DAISIES
STEP 2: PREPARE YOUR SQUARE PAPER FLOWER SIGN
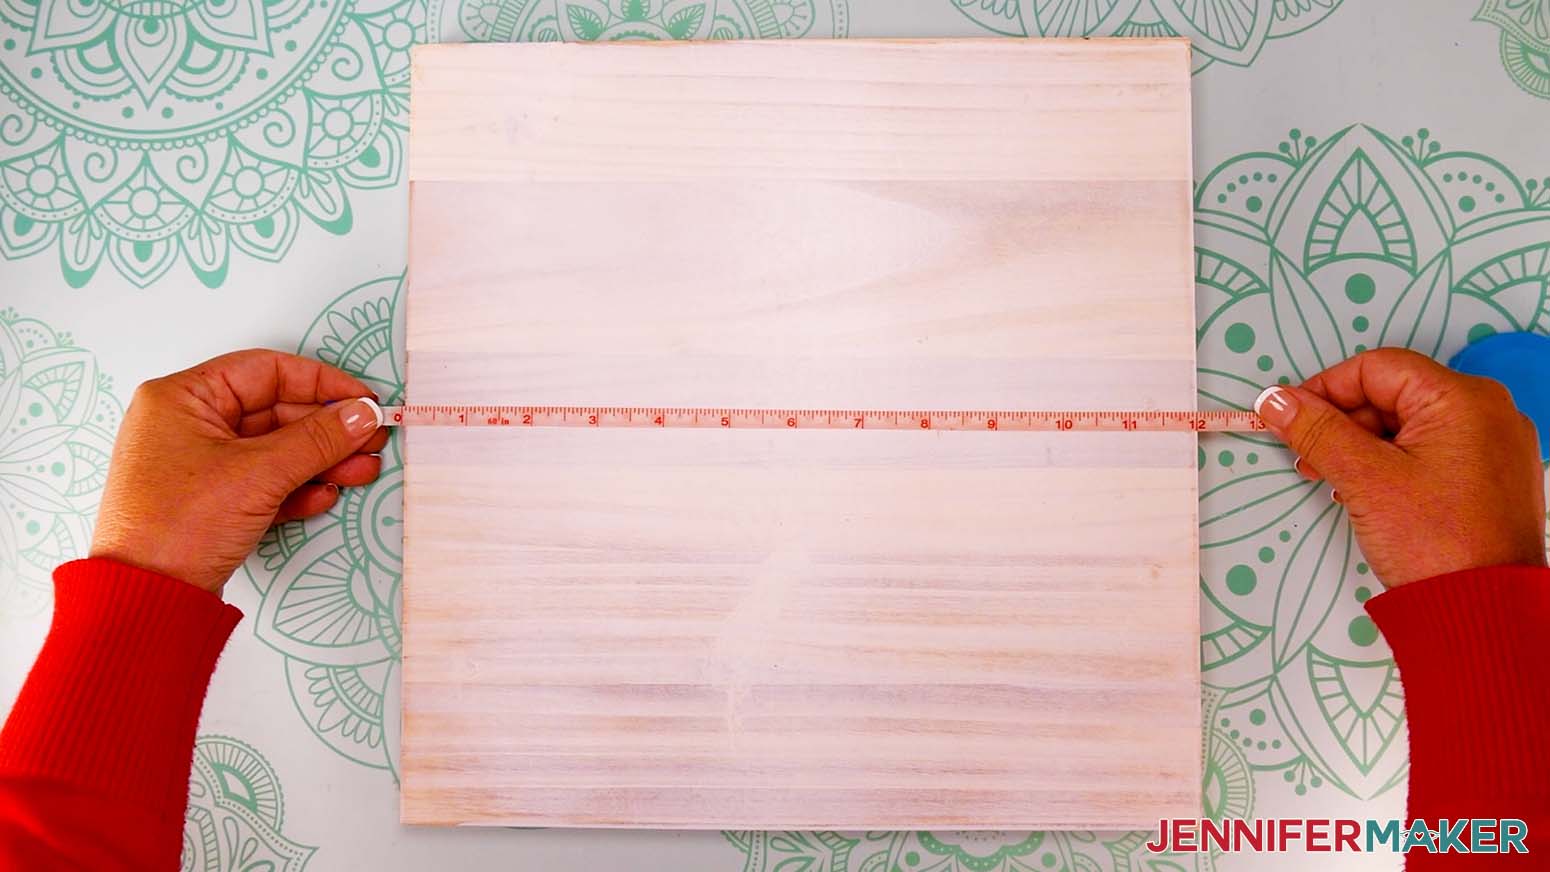
- Measure your blank to find the height and width in the orientation you want to use. Mine is a square, but you can also use signs with different dimensions.

- Measure the area you’d like to decorate.
- For the watering can decal, it looks best in the lower section of the sign with a 1” margin on either side and below it.
- For the bouquet, picture the final look you want. I like to have the flowers overlap the decal’s top, and be mounded so there are more at the bottom and just a few at the top, ending about 1” below the sign’s edge.
CRICUT DESIGN SPACE
- First, open Cricut Design Space and click “New Project.”
- Click “Blank Canvas”
- Click “Upload,” then click “Upload Image.”
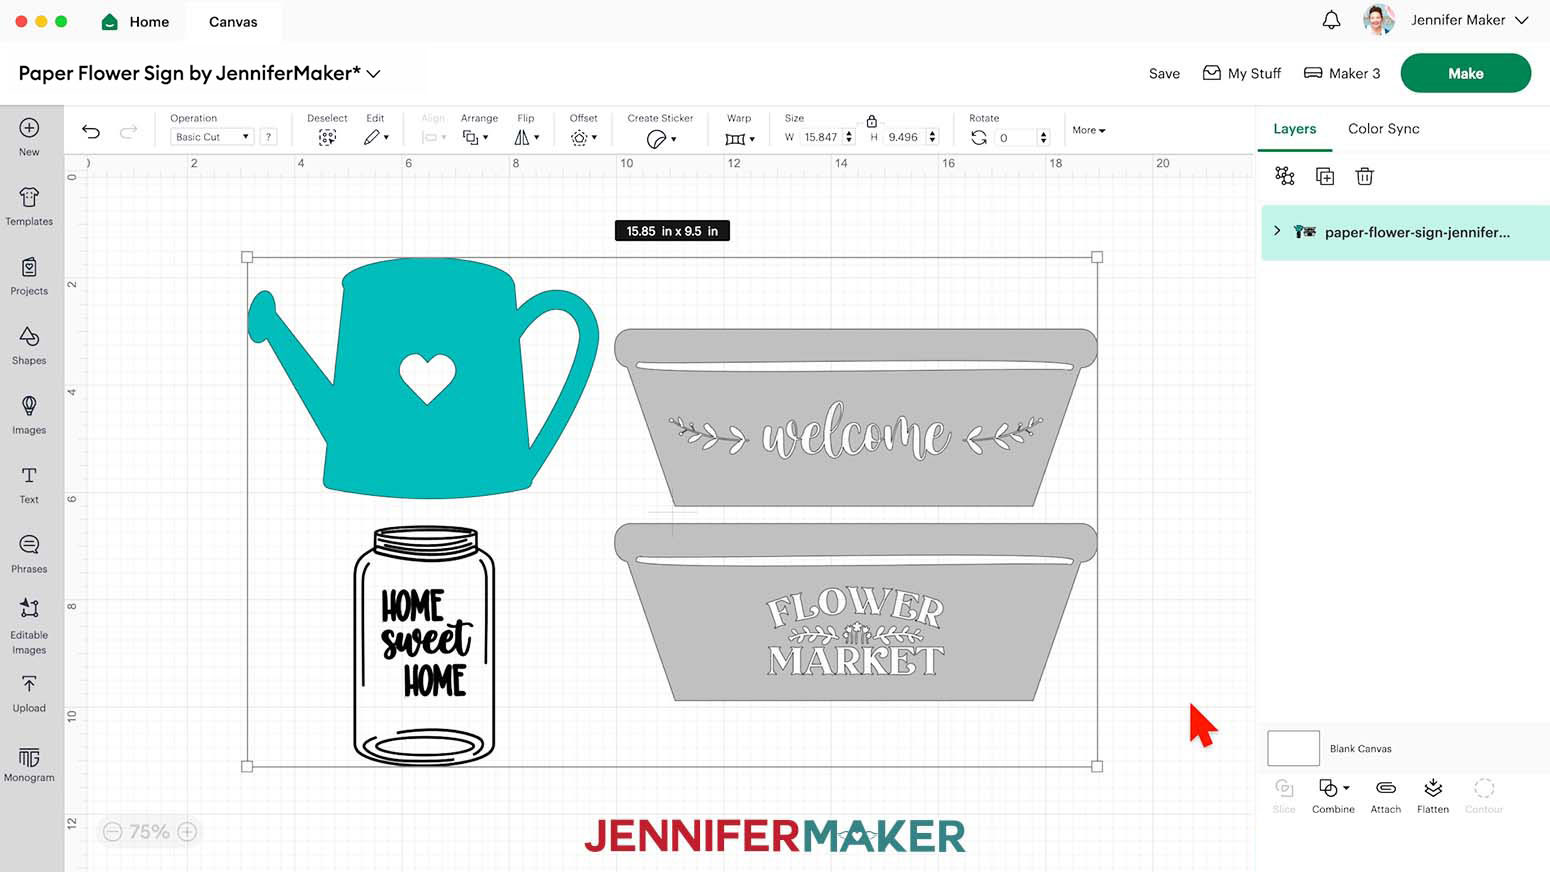
- Click “Browse” and select the SVG file with the vase options. It’s called “paper -flower-sign-jennifermaker-SVG.”
- Click “Open.”
- Click “Continue” and finally click “Upload” to add the design to your Canvas.
- Select the vase collection and Ungroup the design.
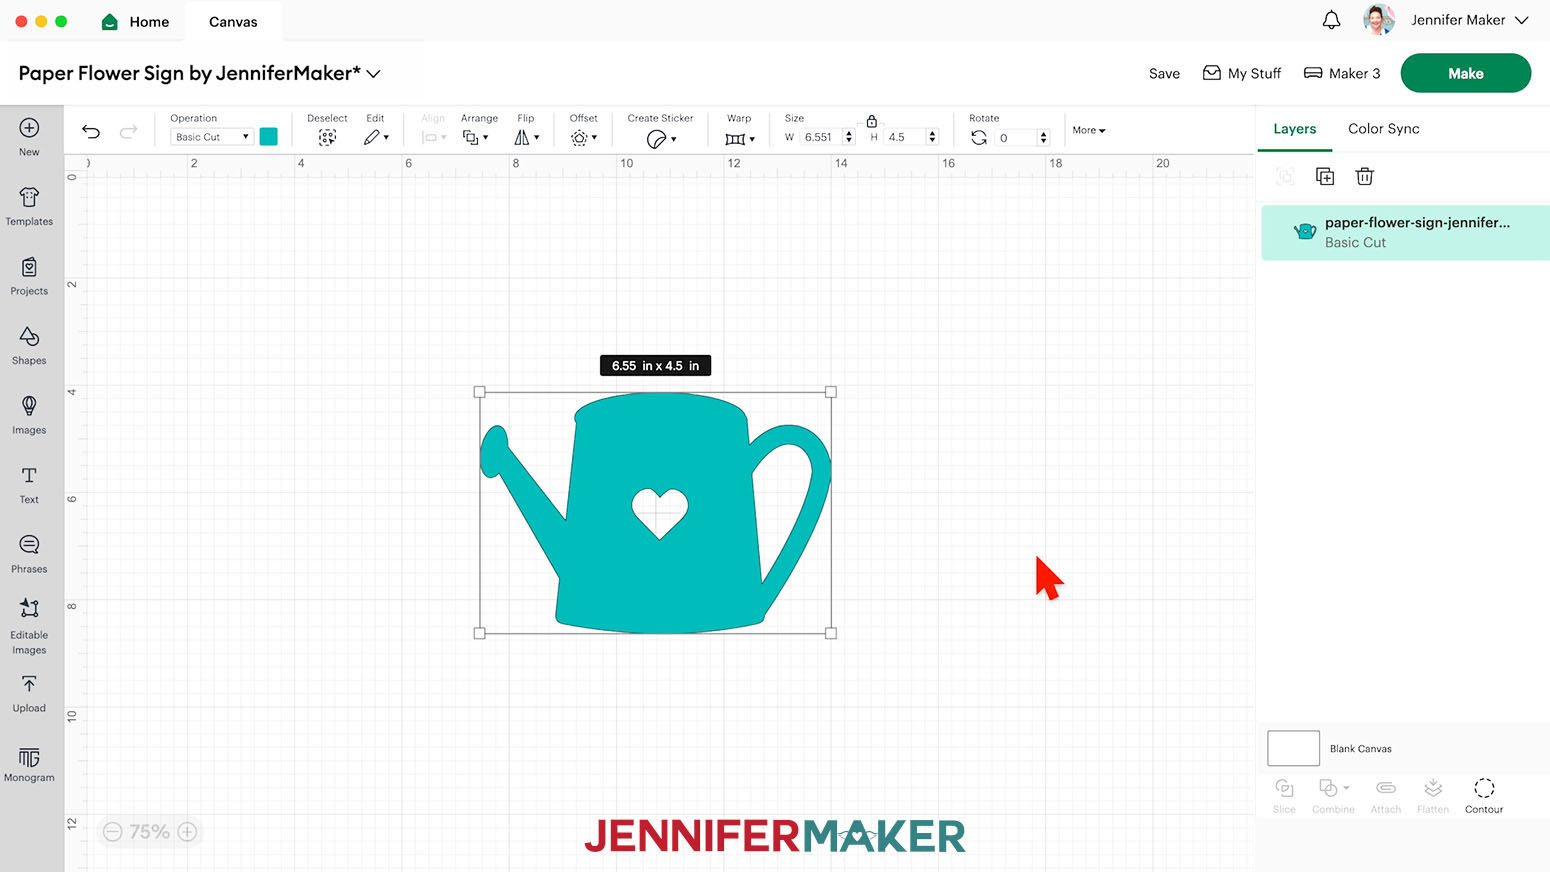
- Delete the vases you don’t want to use.
NOTE: I'll use the watering can. - Then use steps 3-6 to add your flower SVG to the Canvas, too.
NOTE: I’ll add the daisies. - If you’re making the daisies, don’t Ungroup the design.
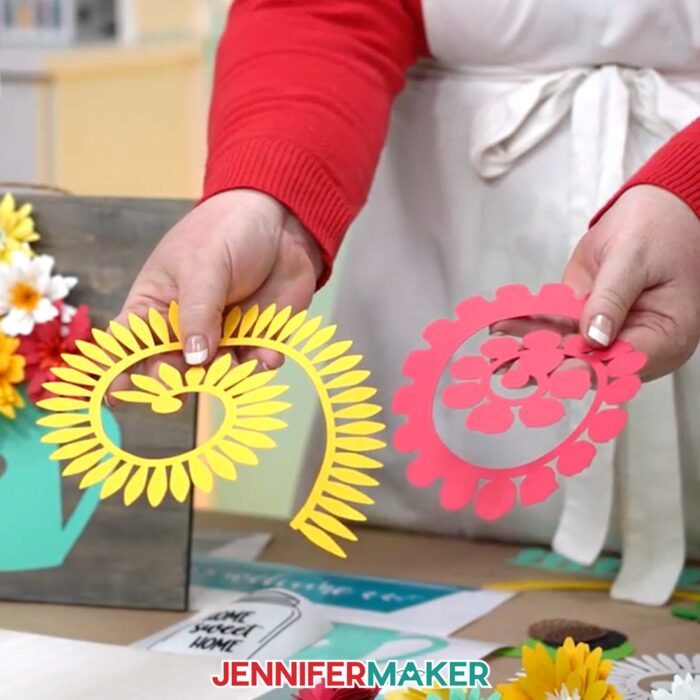
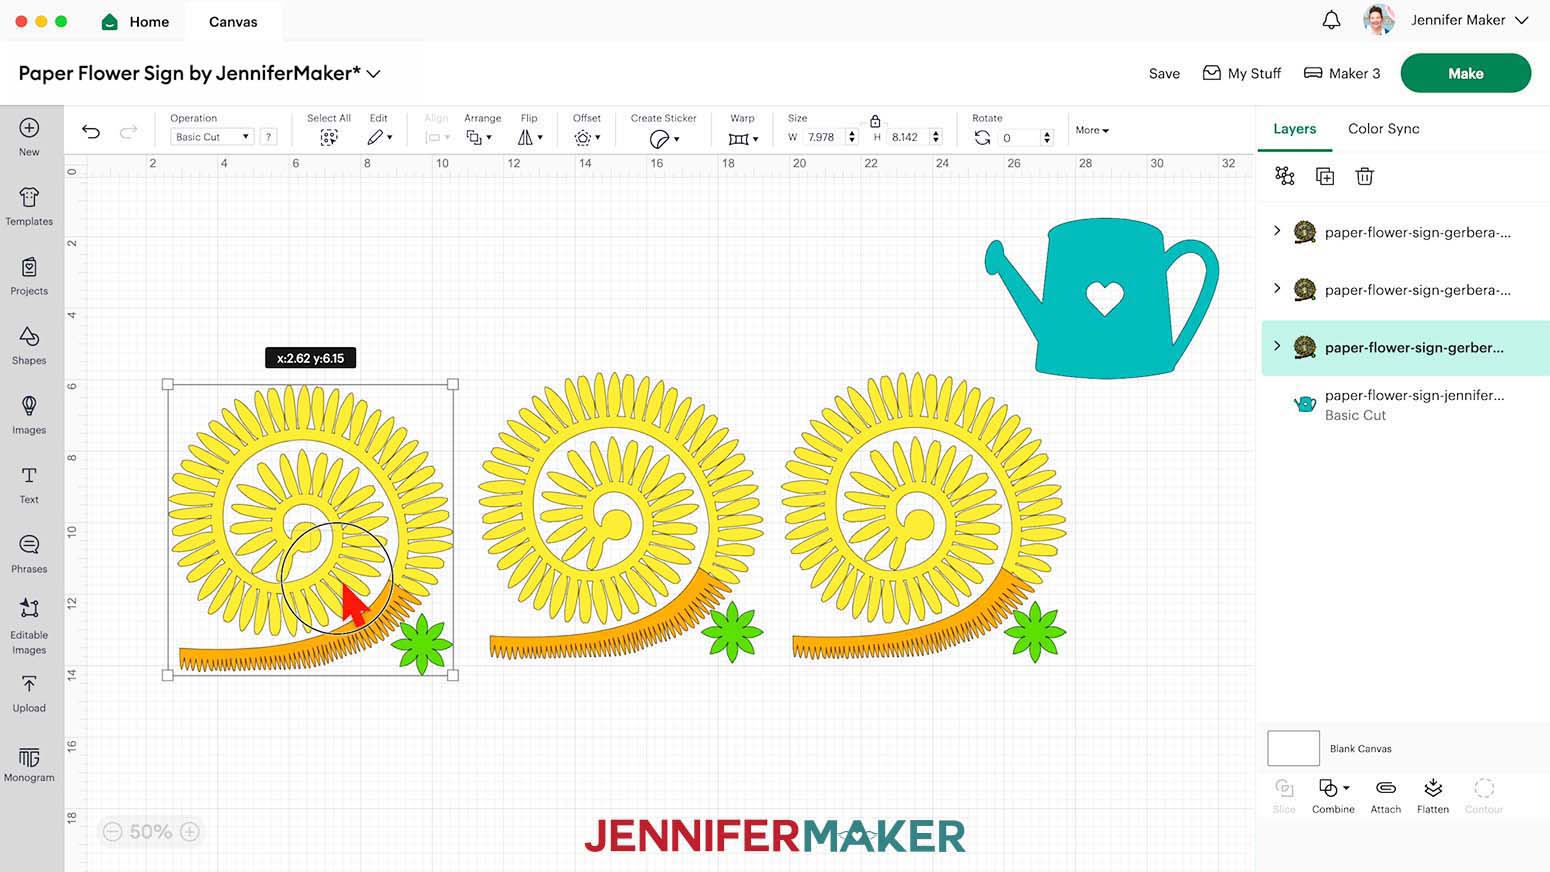
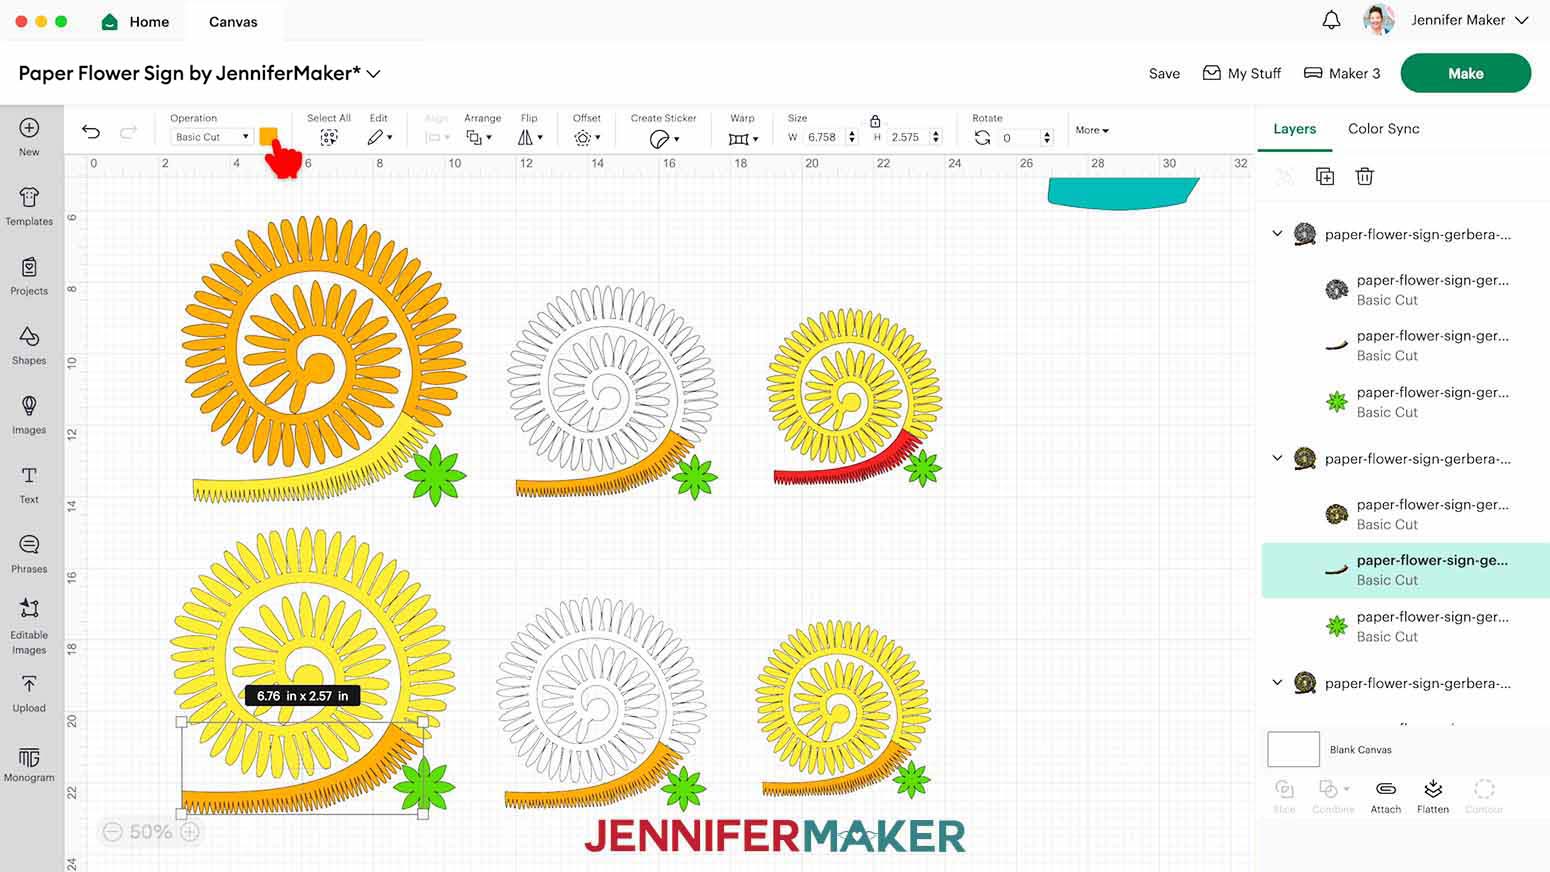
NOTE: The design includes a large yellow petal spiral, an orange petal “tail,” and a green base. - Select the grouped flower elements and duplicate them two times. You should now have three identical sets of flower elements.
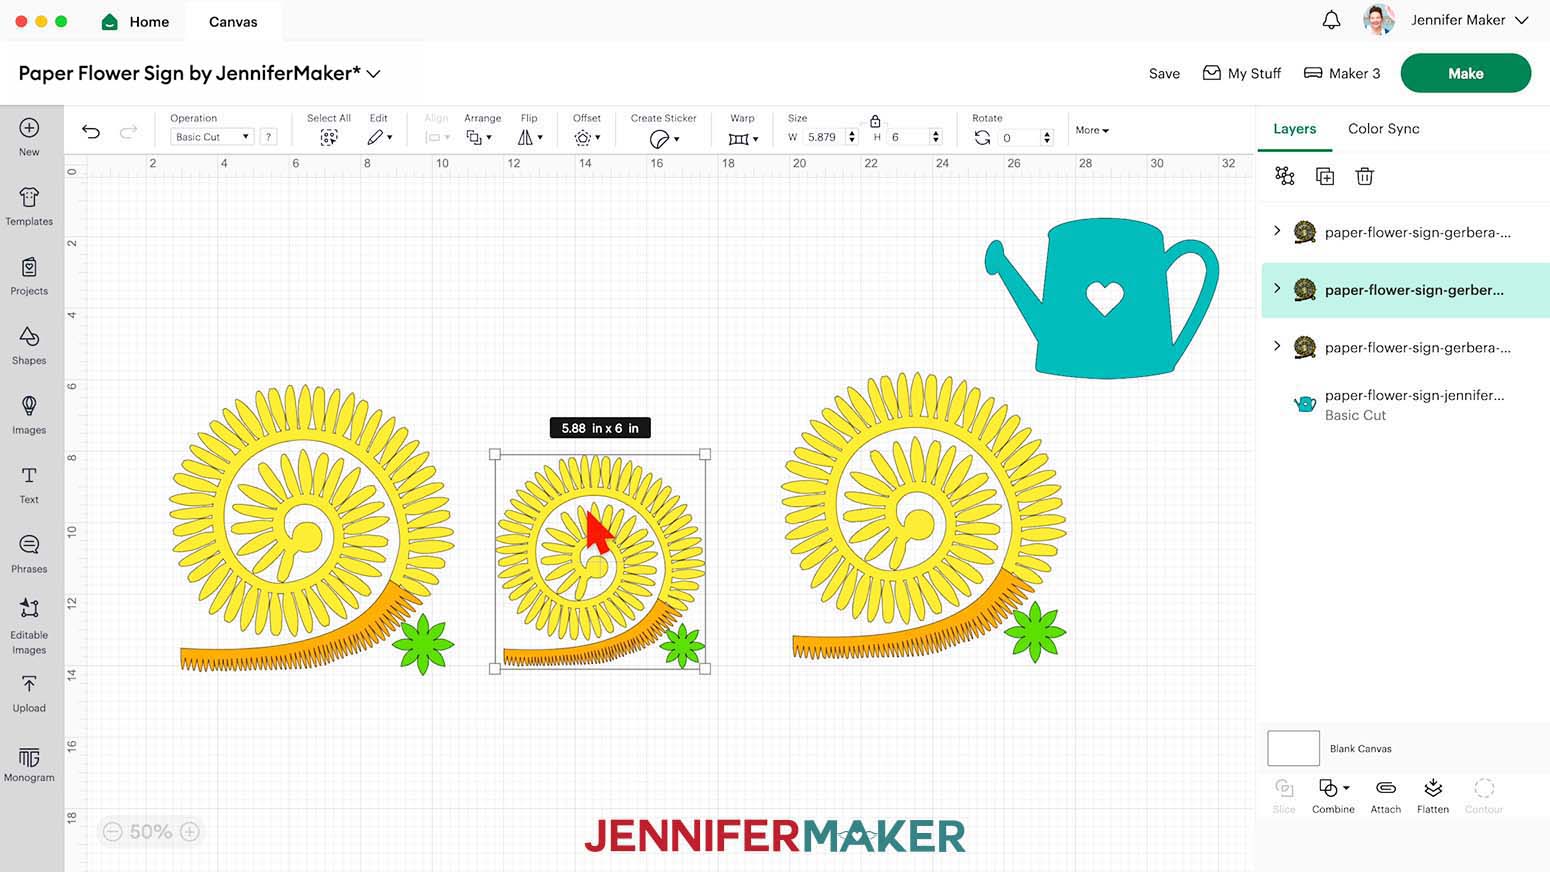
- Let’s resize some of the flower element sets so that there is some nice variation when we put everything together. With the Lock icon closed to maintain the proportions, select the second set of flower elements and resize them to 6” high.
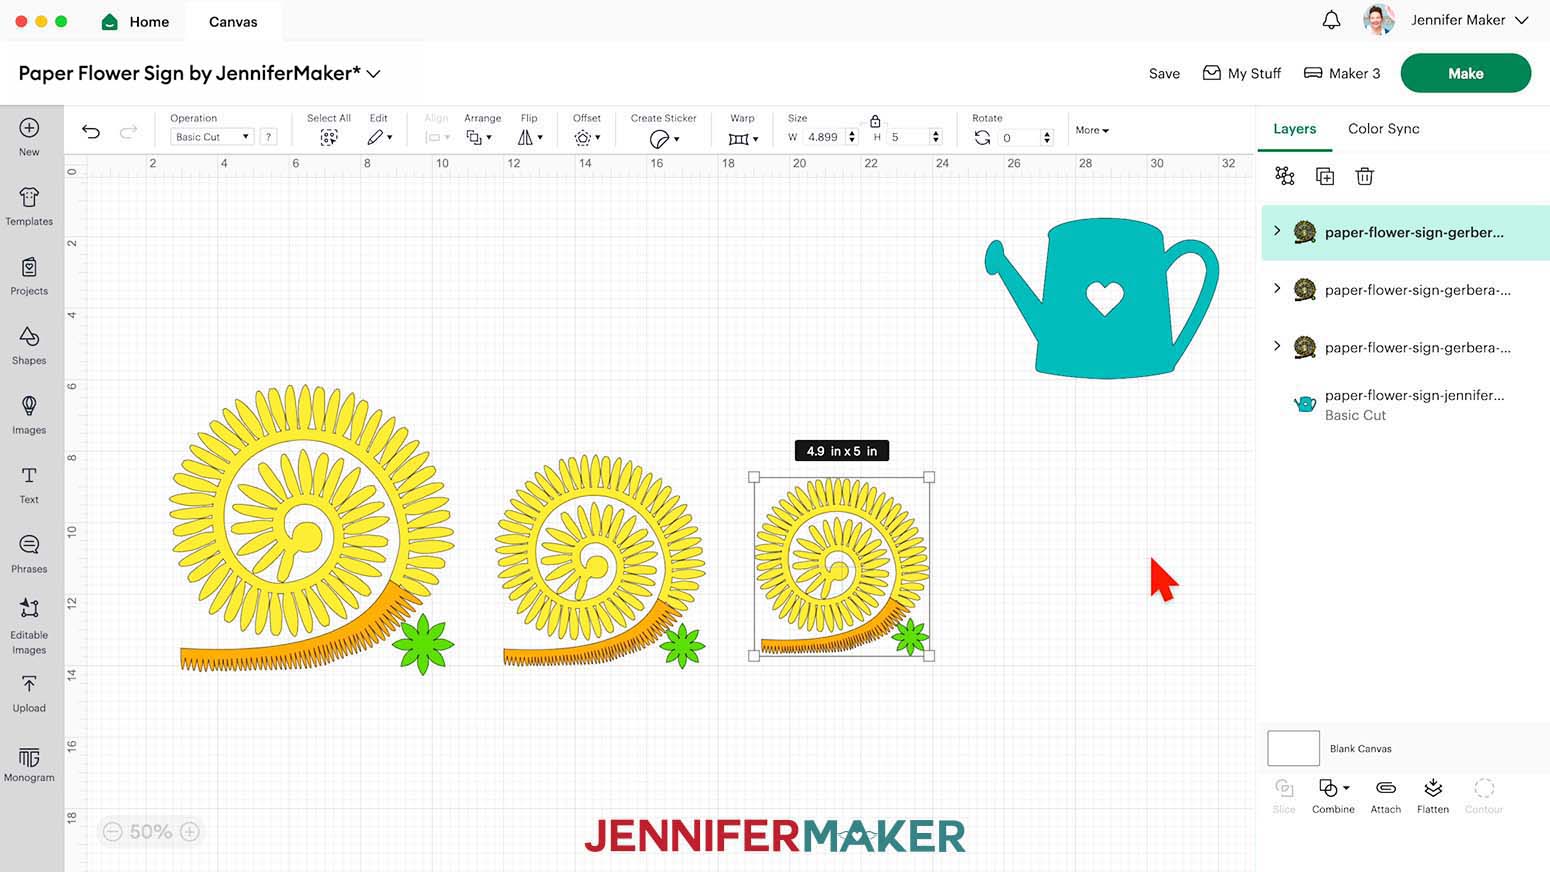
- Select the third set of flower elements and resize them to 5” high.
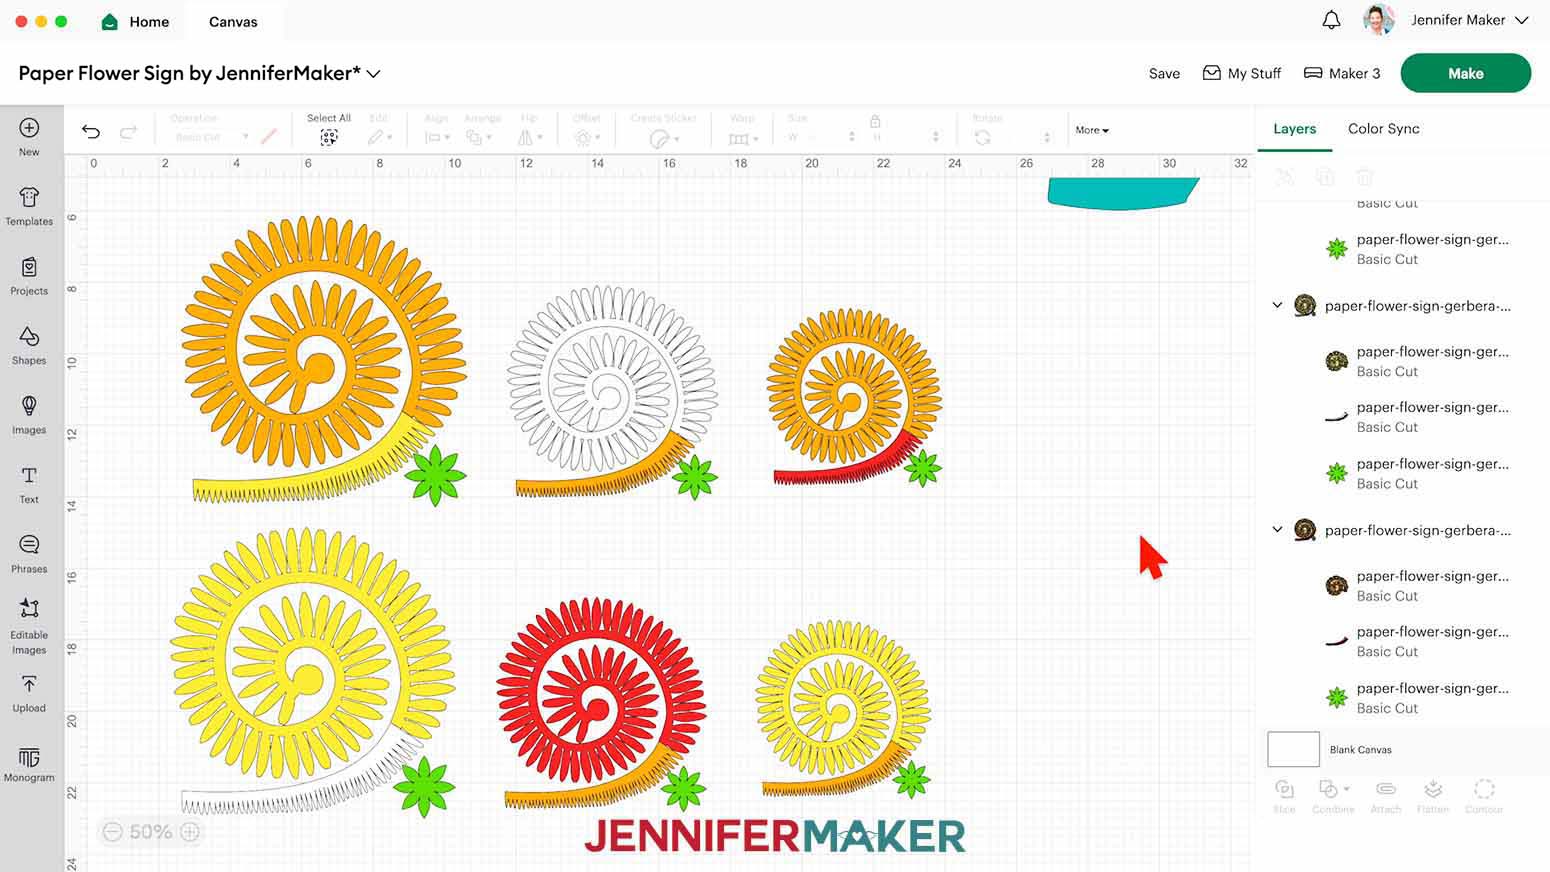
- Now select all three sets of flower elements at the same time and duplicate them. This will give you six total flowers of different sizes.
- If you want to change the colors of any of the flower elements, expand the group in the Layers Panel by clicking the arrow next to it and then select the element you want to change the color of. Then change the color using the Color Box by “Operation.”
- Give your design a name and save it.
- Your designs are finished and ready to cut!
CUTTING CARDSTOCK AND ADHESIVE VINYL
- Select the correct machine from the top right drop-down menu.
- Click “Make.”
- On the Prepare screen, make sure the correct Material Size is selected for your materials.
NOTE: For the vinyl, leave it at 12" x 12", but you can cut the material slightly larger than the design area to save the rest for another project. - Since we’re using cardstock and adhesive vinyl, do not “Mirror” any mats.
- Select the first mat and click “Continue.”
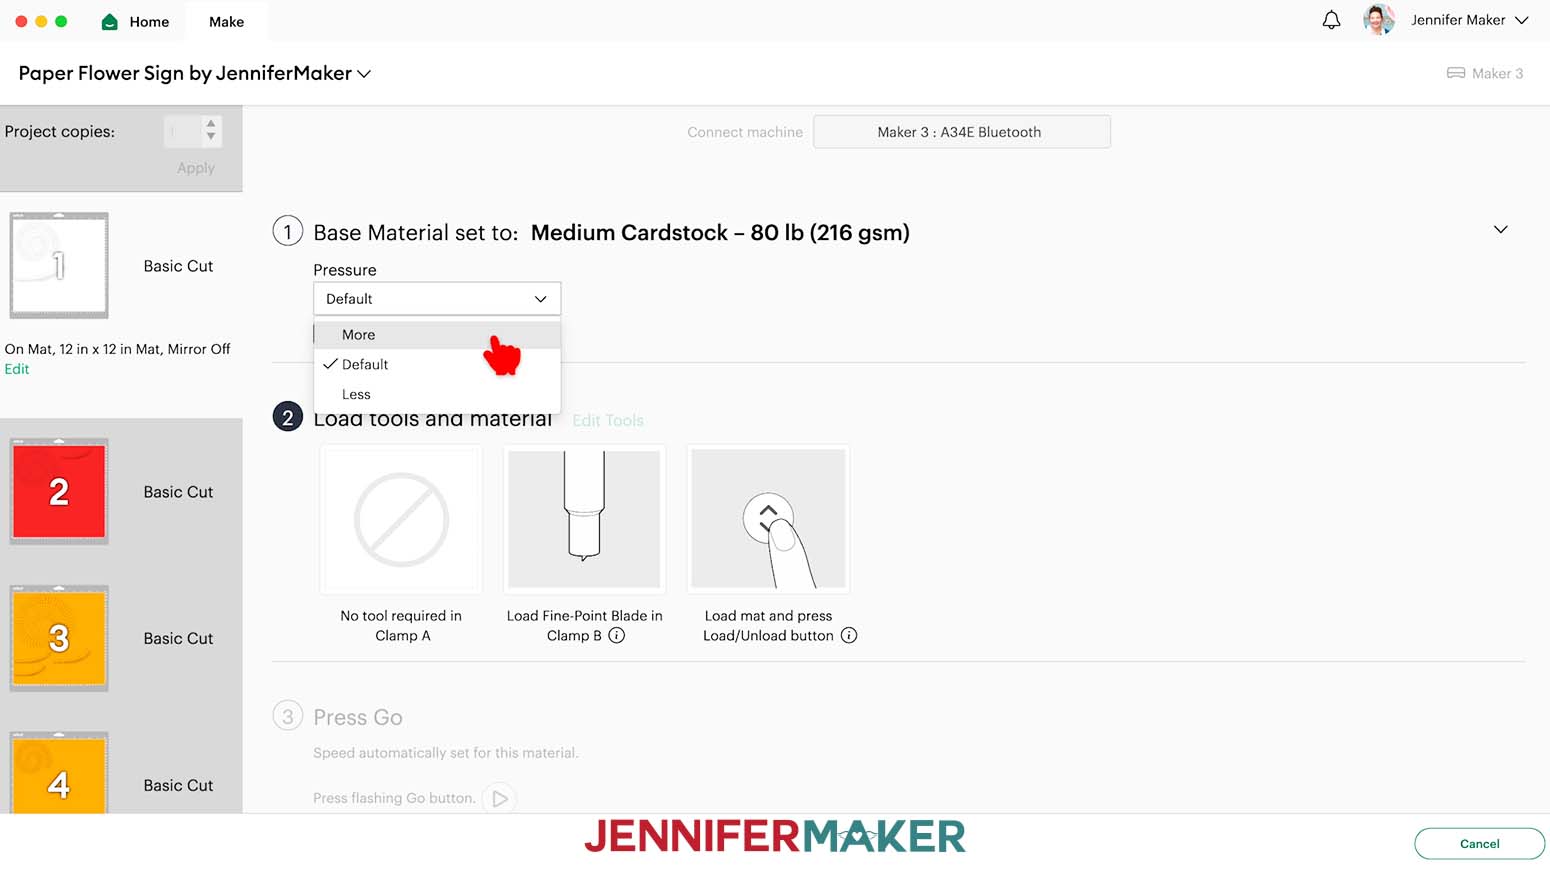
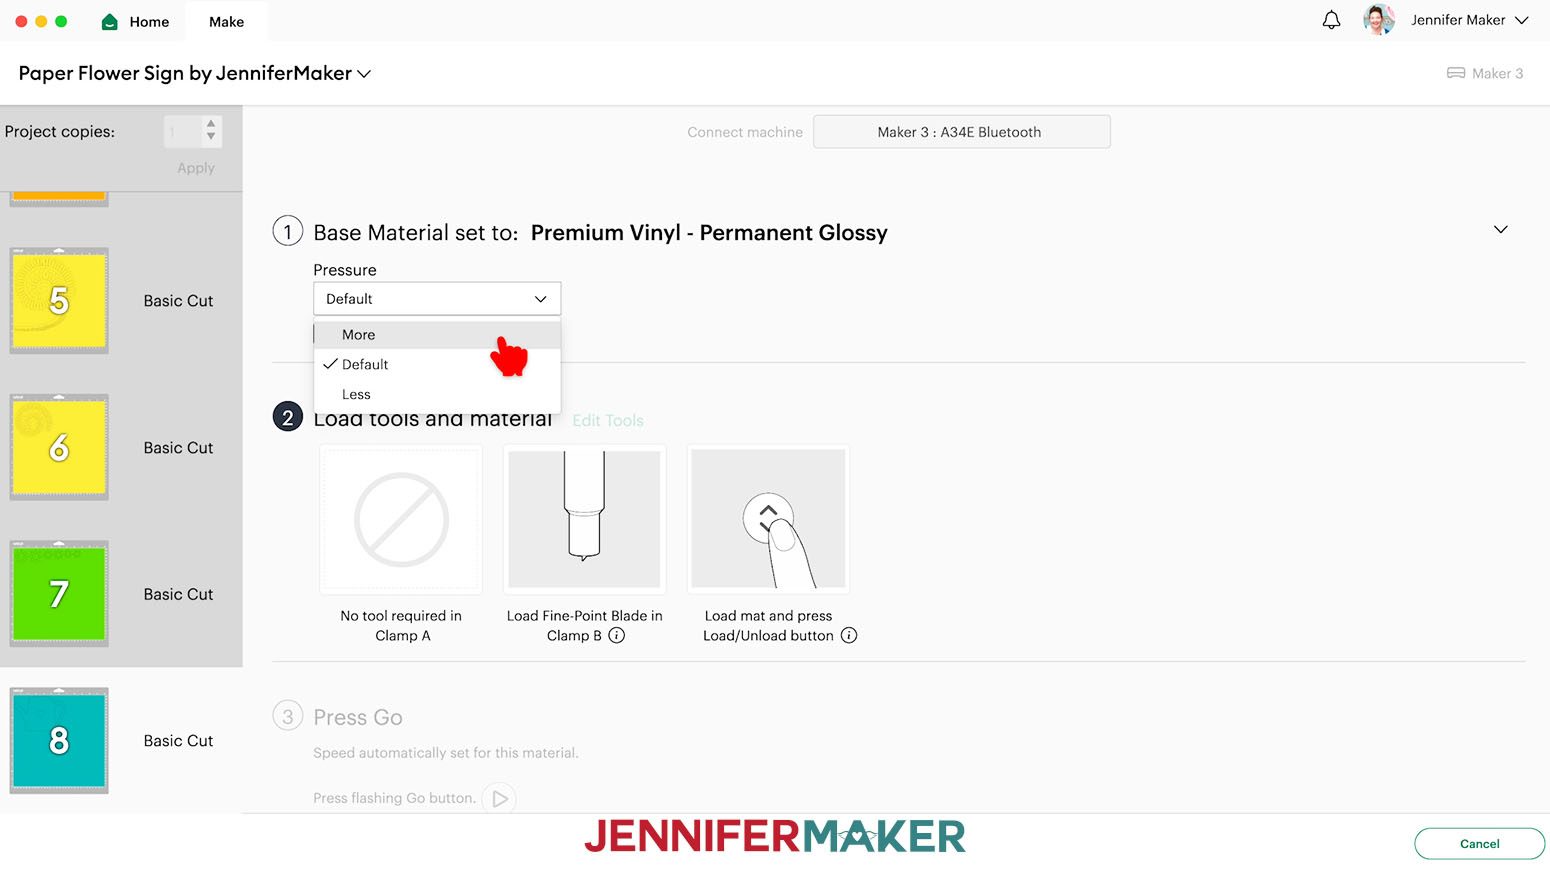
- On the Make screen, I used these Material Settings:
For the cardstock, I used the “Medium Cardstock - 80 lb (216 gsm)” setting with “More” pressure.
For the adhesive vinyl, I used the “Premium Vinyl - Permanent Glossy” setting with “More” pressure. - Place your first mat’s material face up on a green StandardGrip machine mat. Mine is cardstock.
- Use a brayer to make sure it’s fully adhered.
- Check that your Premium Fine-Point Blade is clean and in the clamp.
- Press the flashing “Load/Unload” button to load the prepared mat into your Cricut.
- Press the flashing “Go” button to begin cutting.
- When it has finished cutting, don’t unload the mat right away. Instead, gently lift a corner to make sure the material is cut all the way. If not, press the “Go” button again to make the same cuts in the same spots.
- When the cuts are complete, unload the mat, flip it over onto your work surface, and roll it back to release the material.
TIP: If you have any issues with your cuts, check out my Tips for Cleaner Cuts tutorial. - Set your flower pieces aside face up.
- Continue cutting the rest of your cardstock mats.
- When you get to the mat for your watering can, use Steps 6-12 to cut your decal. Remember, place the adhesive vinyl shiny side up so it covers the design area on the screen.
- When the decal cuts are complete, unload the mat, flip it over onto your work surface, and roll it back to release the vinyl.
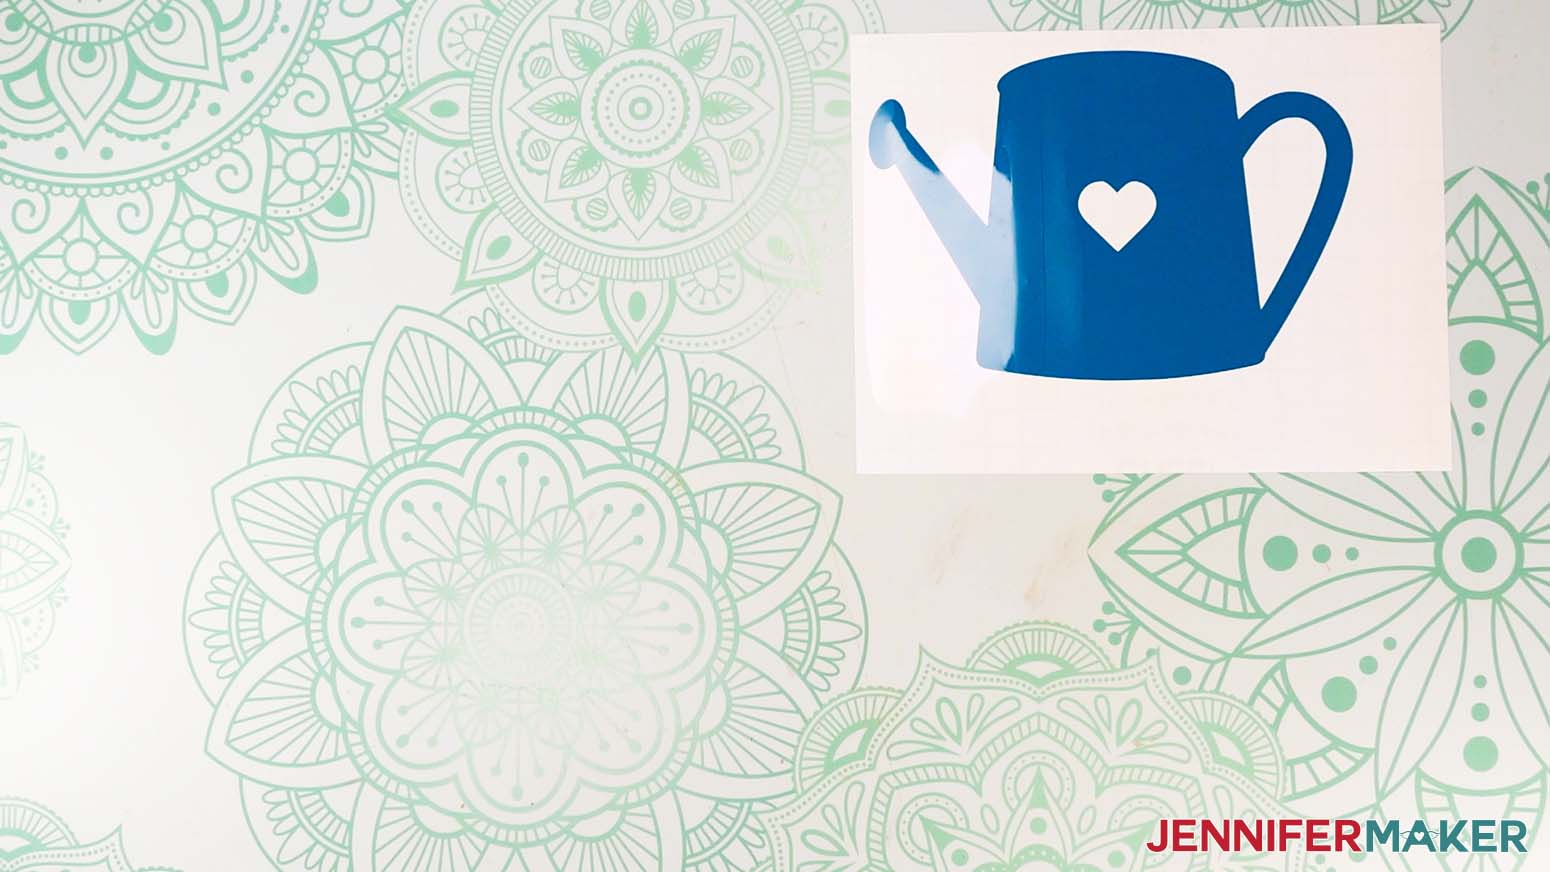
- Use a weeding tool to carefully peel away the extra background vinyl from your decal. I like to work from larger to smaller sections during weeding.
TIP: It can be easier to weed vinyl, especially small, detailed designs, while it is adhered to the machine mat. - Poke your weeding tool into each section you want to remove inside the design and gently lift it away.
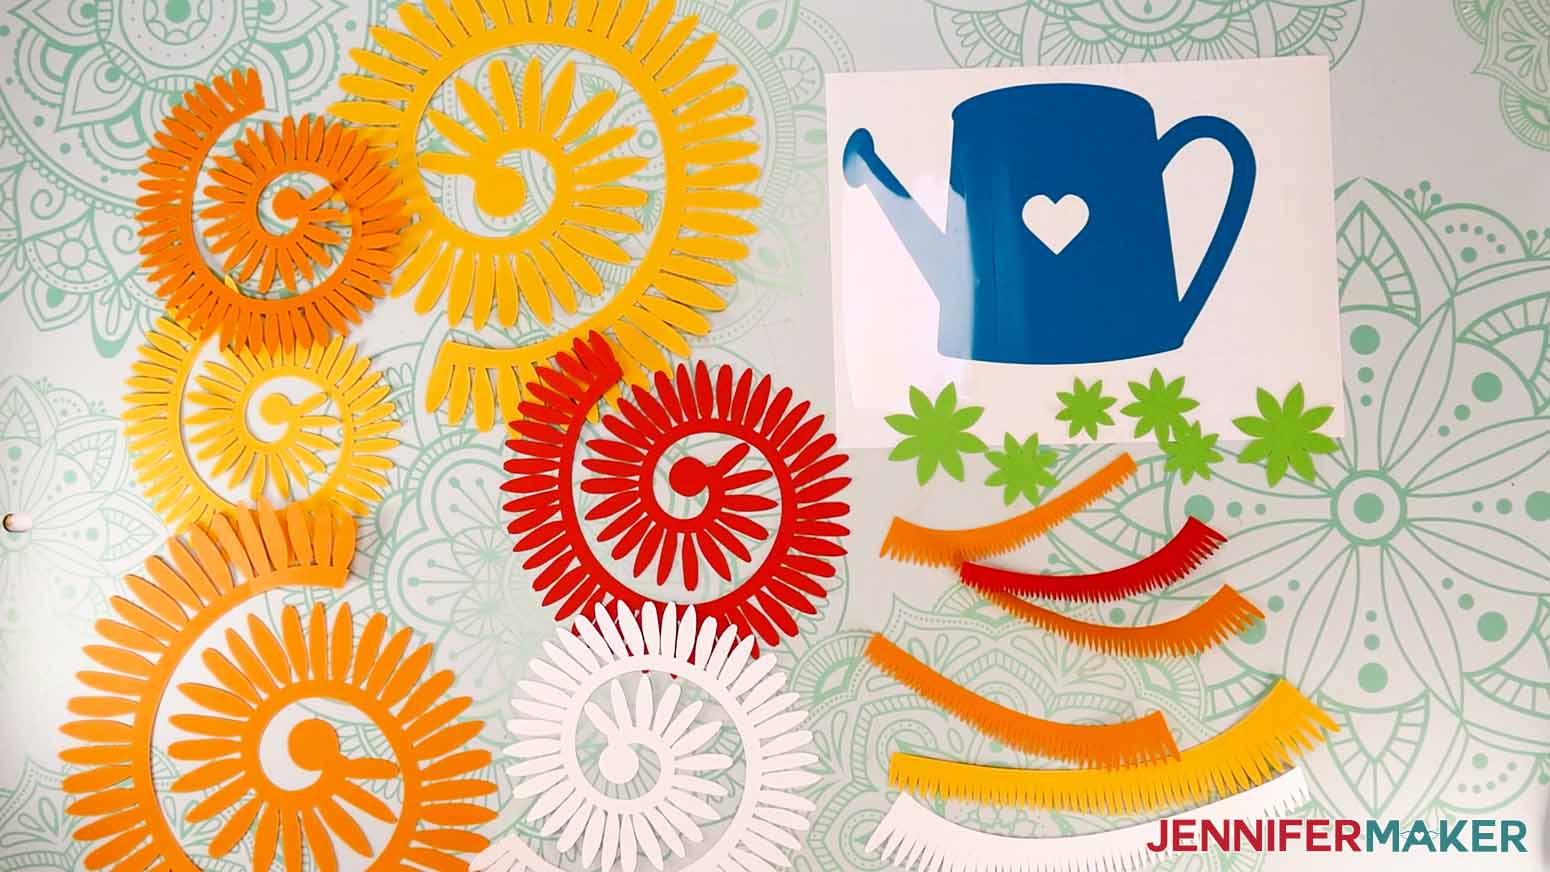
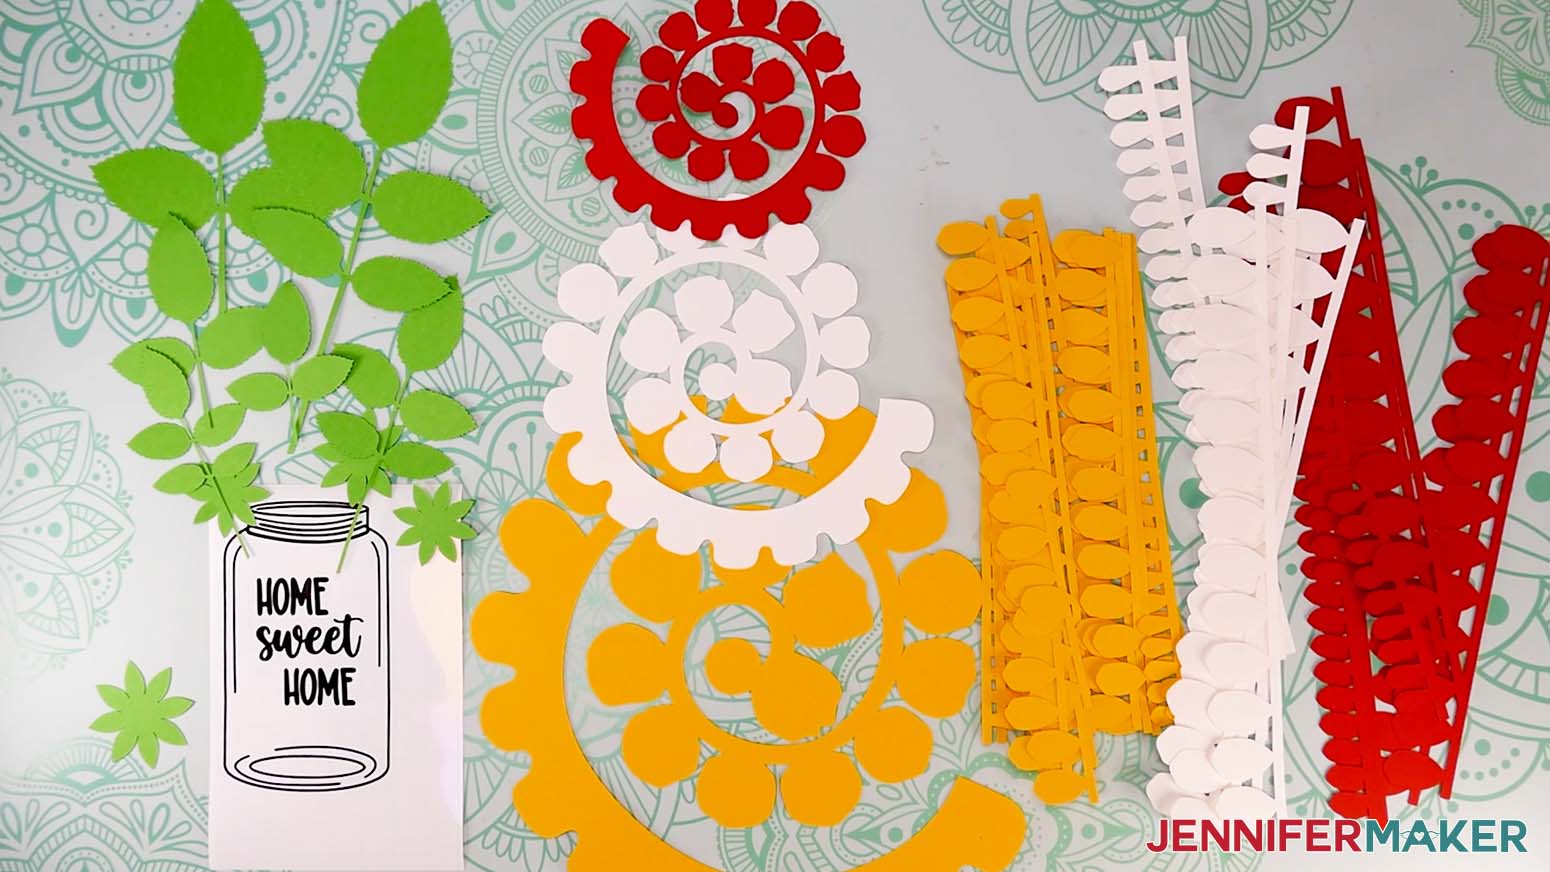
- Here are what my cut and weeded decal and the flowers look like.
STEP 3: ASSEMBLE YOUR PAPER FLOWER SIGN
- Cut a piece of StandardGrip transfer tape that is slightly larger than the decal.
- Remove the backer from the transfer tape and place it face down on the decal using my "taco method."
NOTE: Hold your transfer tape in the shape of a “taco,” then put the bottom of the “taco” onto the middle of your design. - Smooth the transfer tape over the decal from the center outward and burnish it down using a scraper tool on both sides.
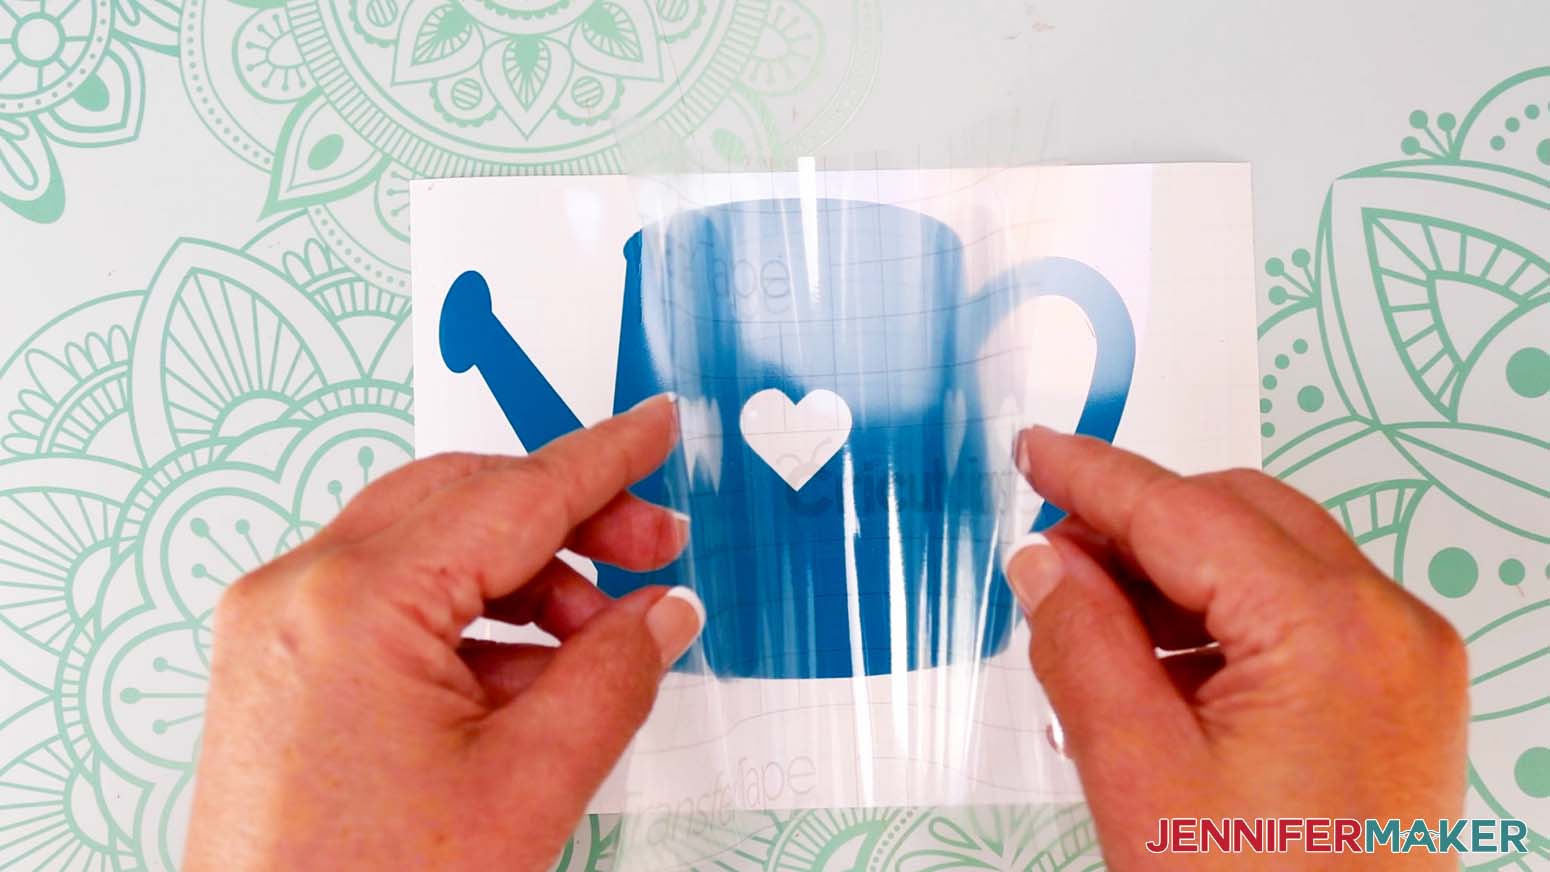
- Gently bend the decal in half side to side, then make a small crease in the center edges on the top and bottom of the transfer tape. (Do not crease the vinyl itself).
- Then gently bend the decal in half in the other direction, and make small creases in both center edges of the transfer tape (do not crease the vinyl itself).
- Place the sign blank in the correct orientation on your work surface. Make sure that any hanging hardware on your wood panel is on the top side.
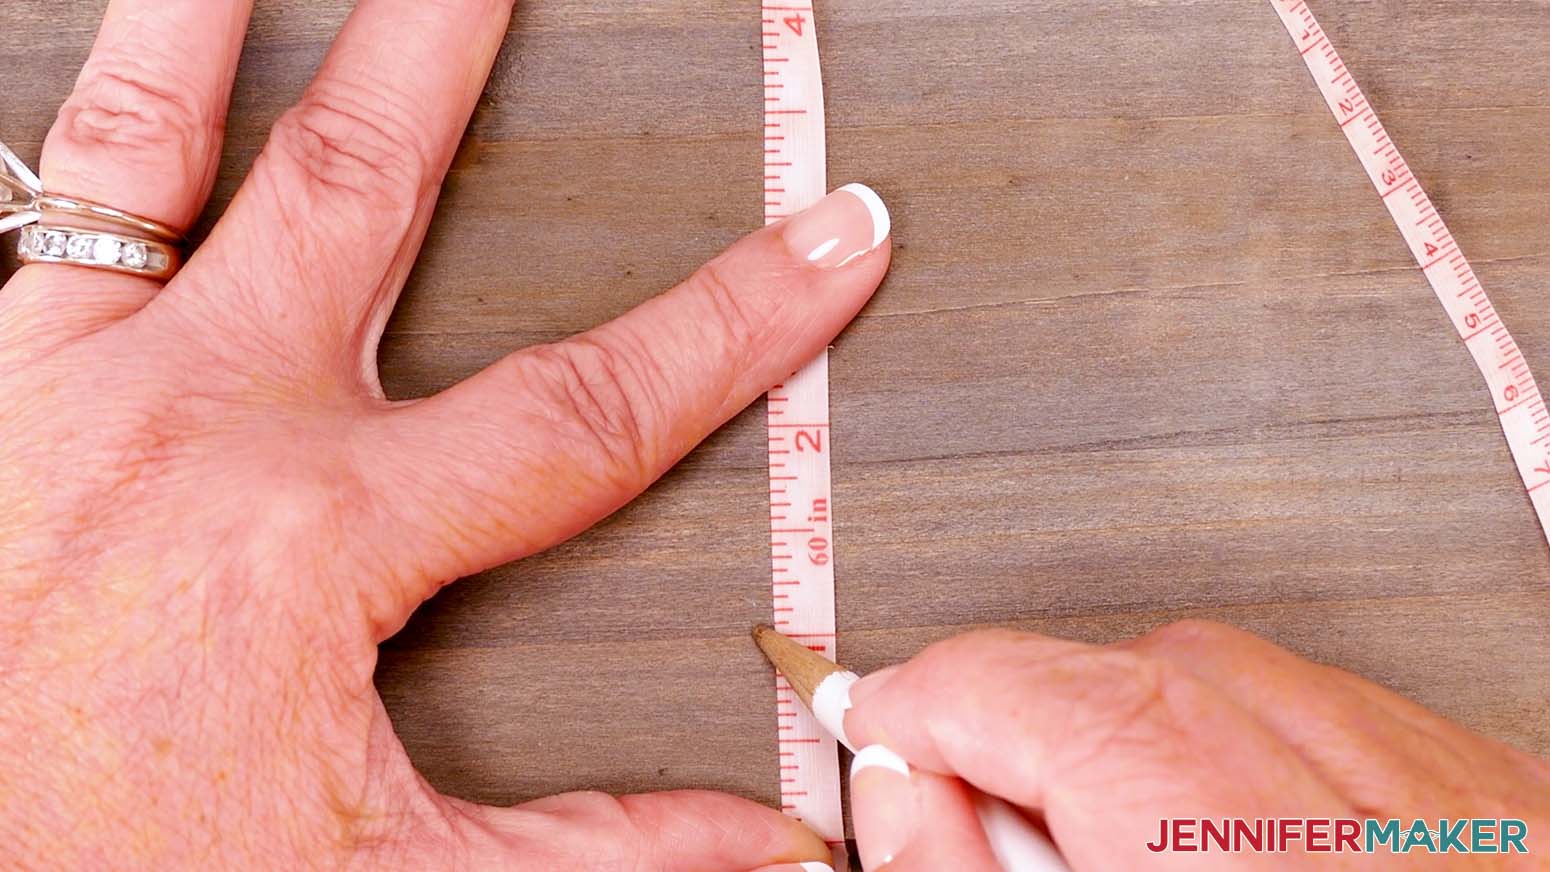
- Using a ruler or measuring tape and pencil, determine the middle of the width of the wood sign at the bottom edge. Then, measure 1” from the bottom of the wood sign. Make a small mark there in the middle.
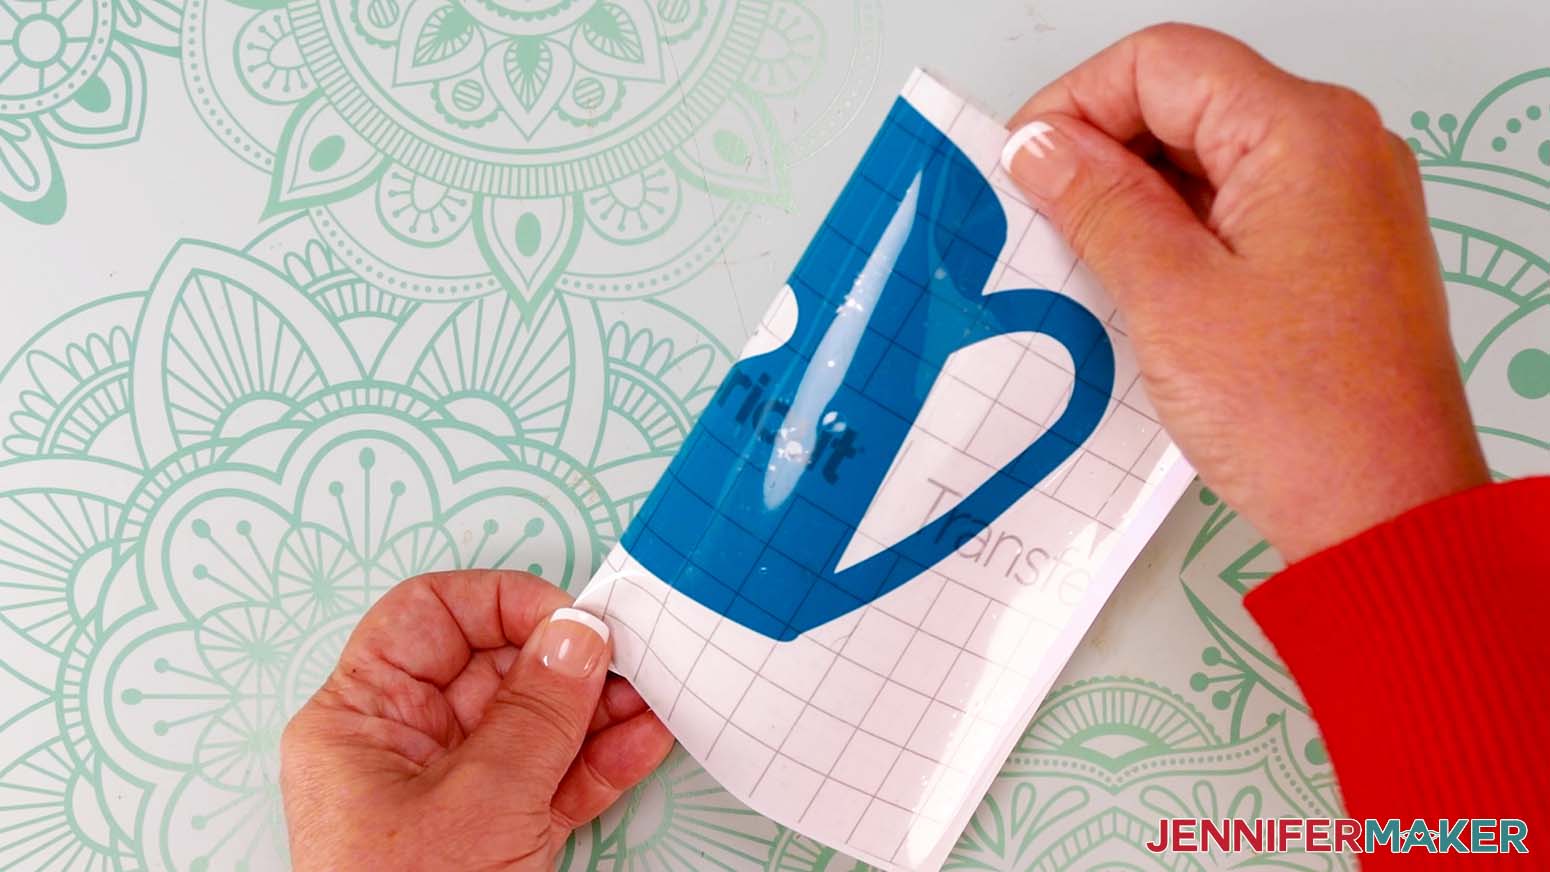
- Peel the backer off of the decal so the vinyl moves to the transfer tape.
- Hold the decal (still on the transfer tape) over the wood sign so the bottom is 1” up from the lower edge and the middle creases align with the pencil marks.
NOTE: Make sure the creases at the sides are even so the decal won’t be skewed. - Place the decal on the sign.
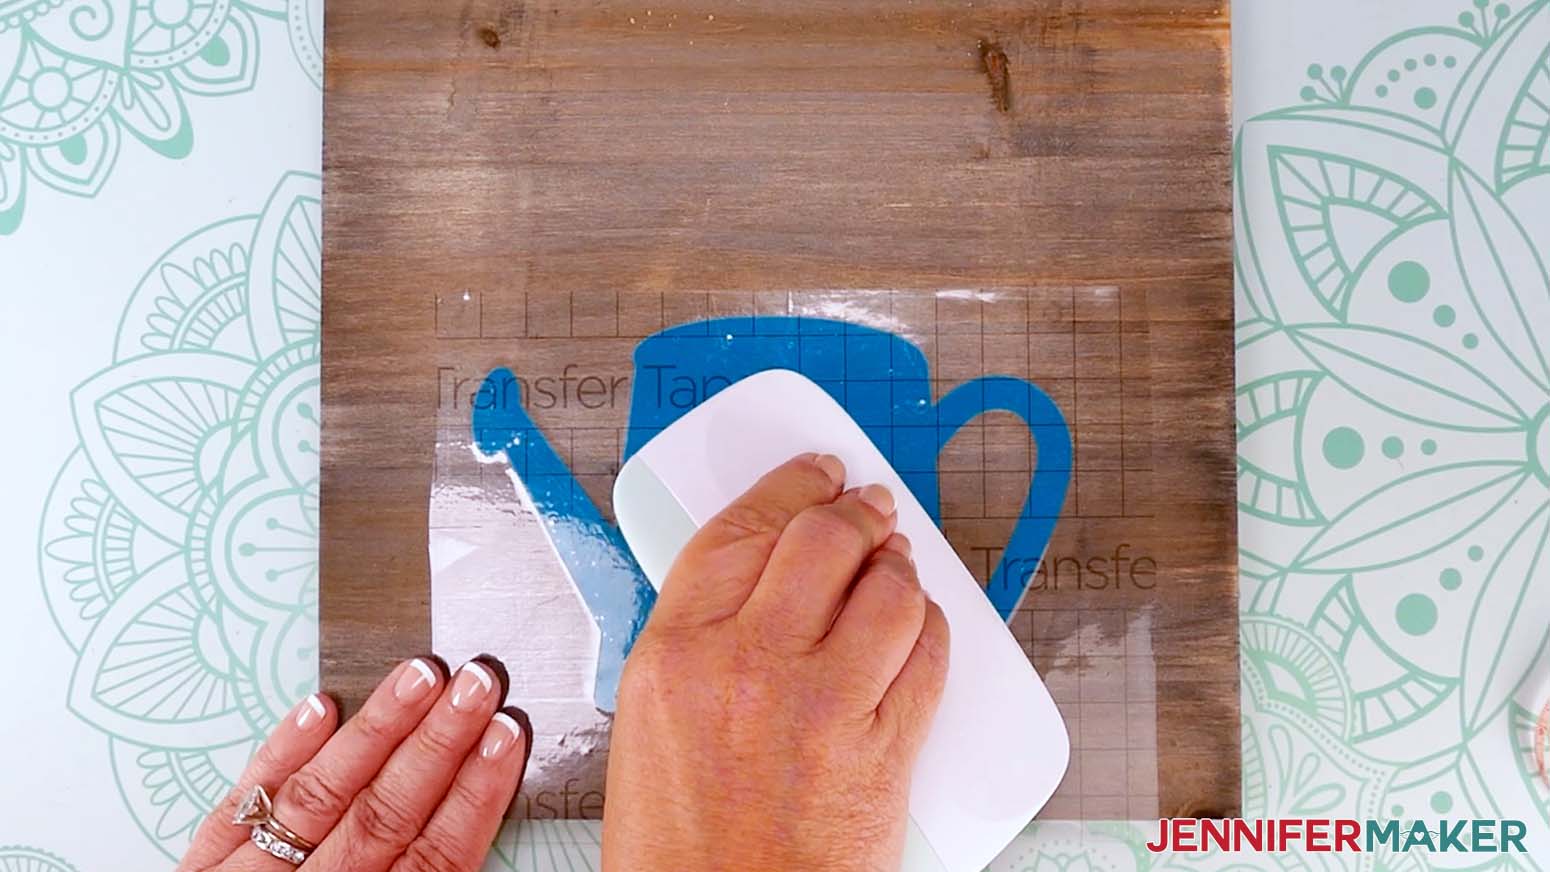
- Using your finger, rub from the center of the vinyl outward, tacking the decal into place.
- Then, take your time and use a scraper to press out as many bubbles as possible.
TIP: If your blank has some texture like mine, run the scraper with the direction of the texture. - Gently remove the transfer tape, leaving the vinyl on the blank.
TIP: Use your scraper tool to gently smooth out any bubbles that were missed, working from the center outward. If there are stubborn bubbles that you can’t push out, poke a tiny hole with your weeding tool to let the air out, then smooth it down with your scraper.

ROLLING DAISIES
- Plug in your hot glue gun and have your finger protectors ready.
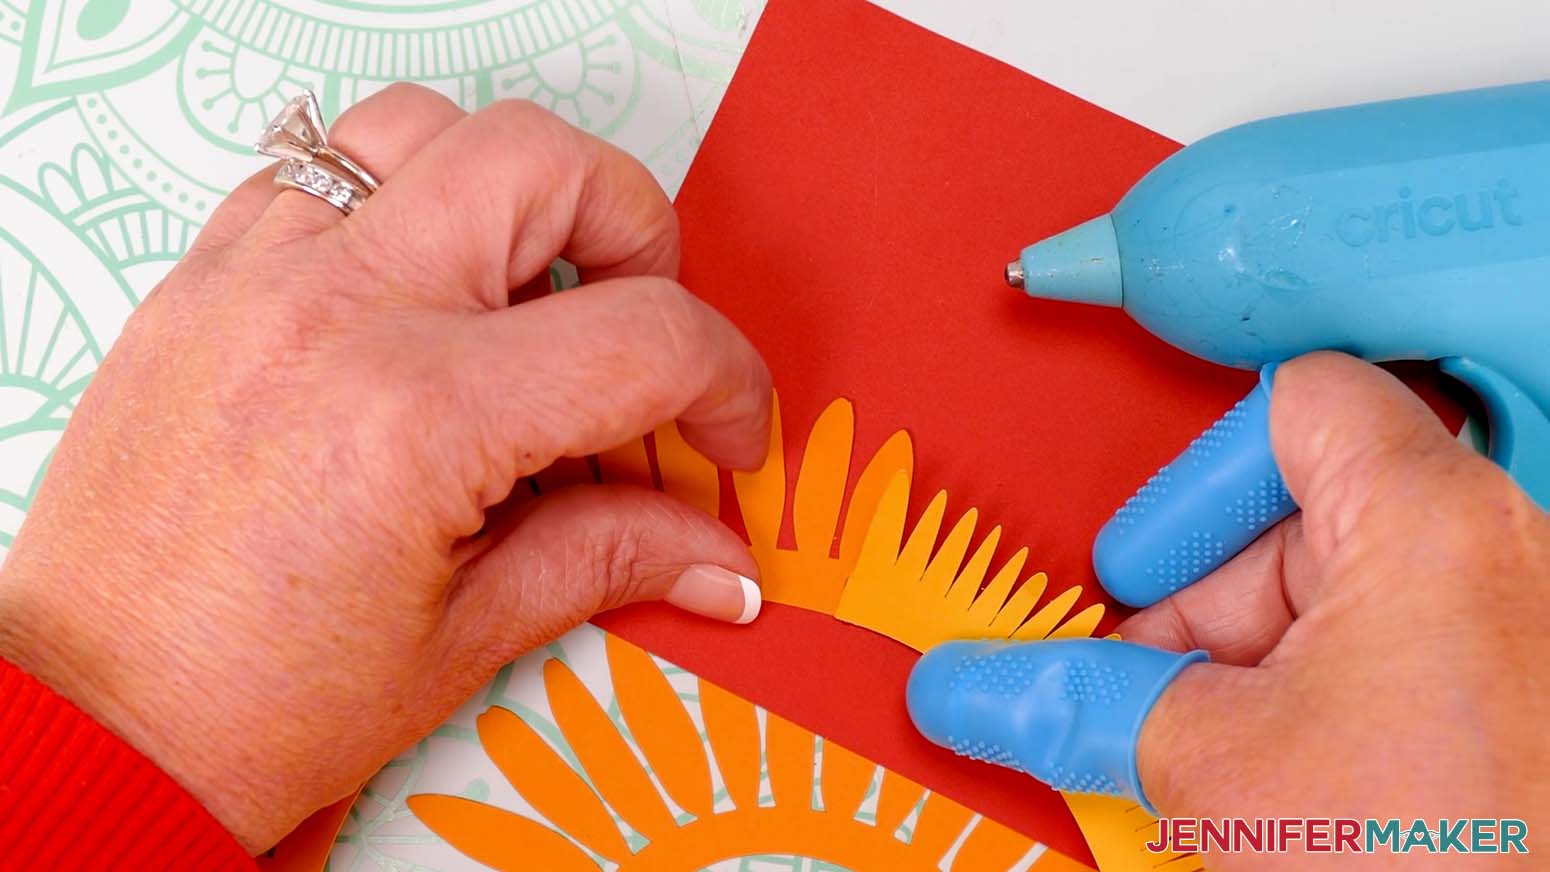
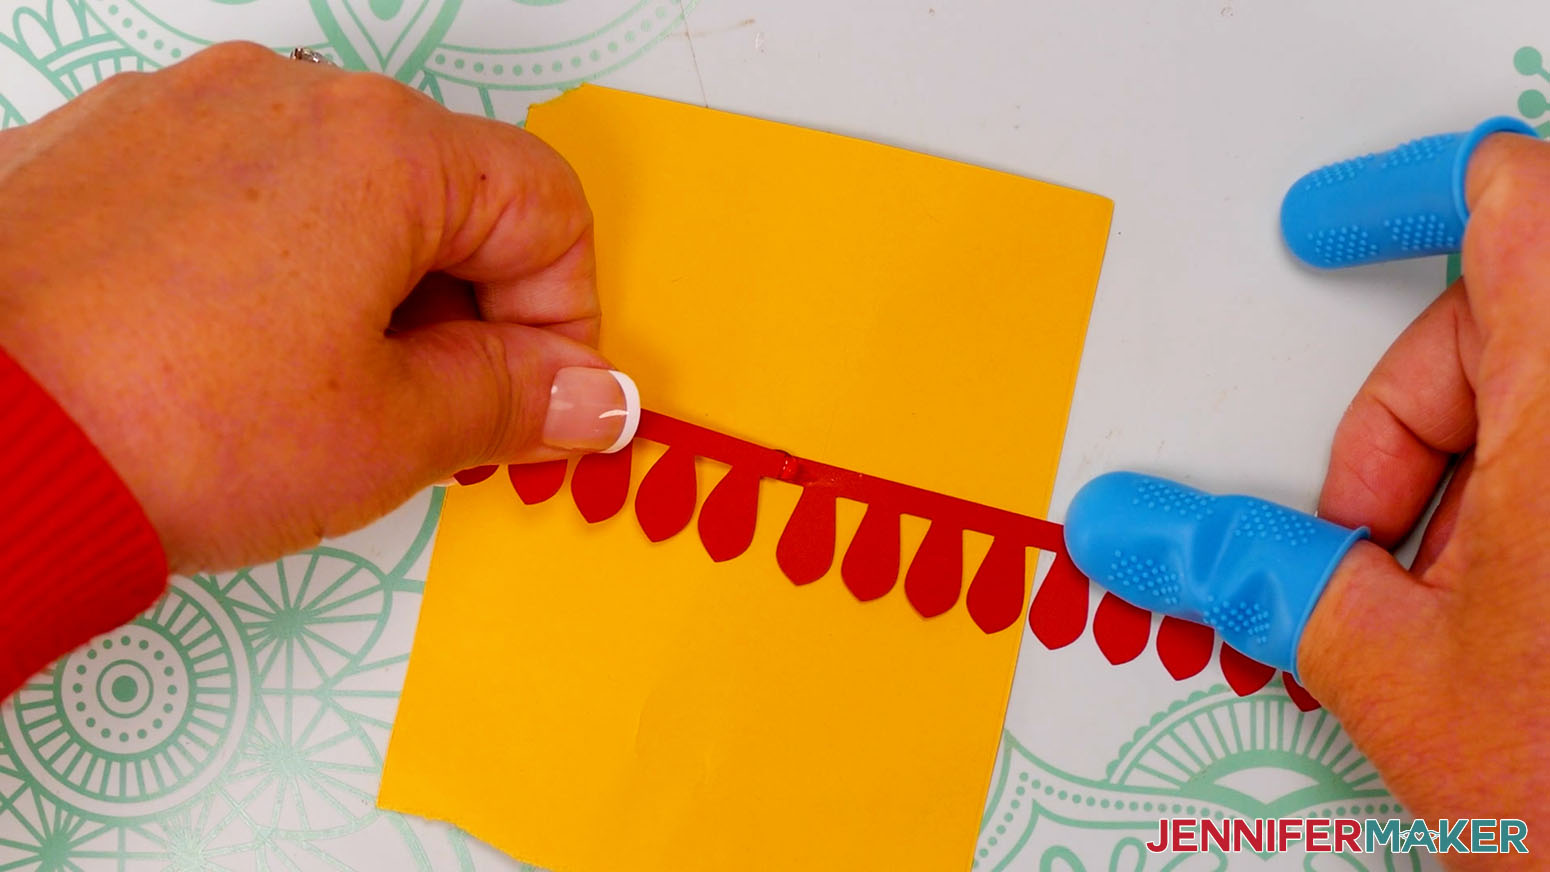
- Mix and match the tails and big spiral pieces of flowers of the same size so the flowers will have contrasting outer petals and centers.
- Use your glue gun to glue the new pairs together so the adjacent petals slightly overlap.
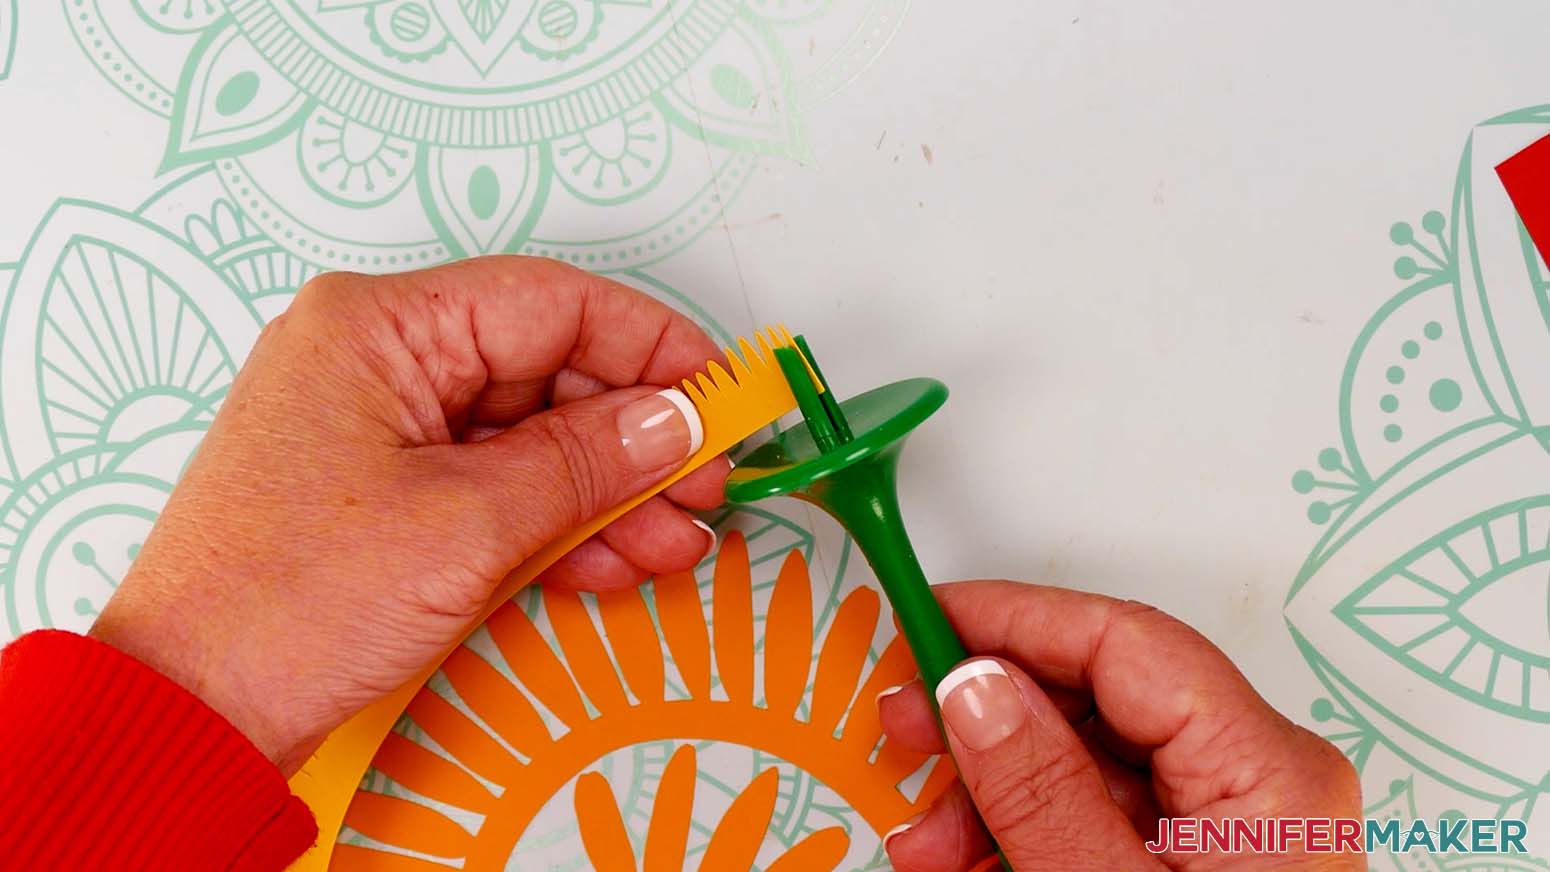
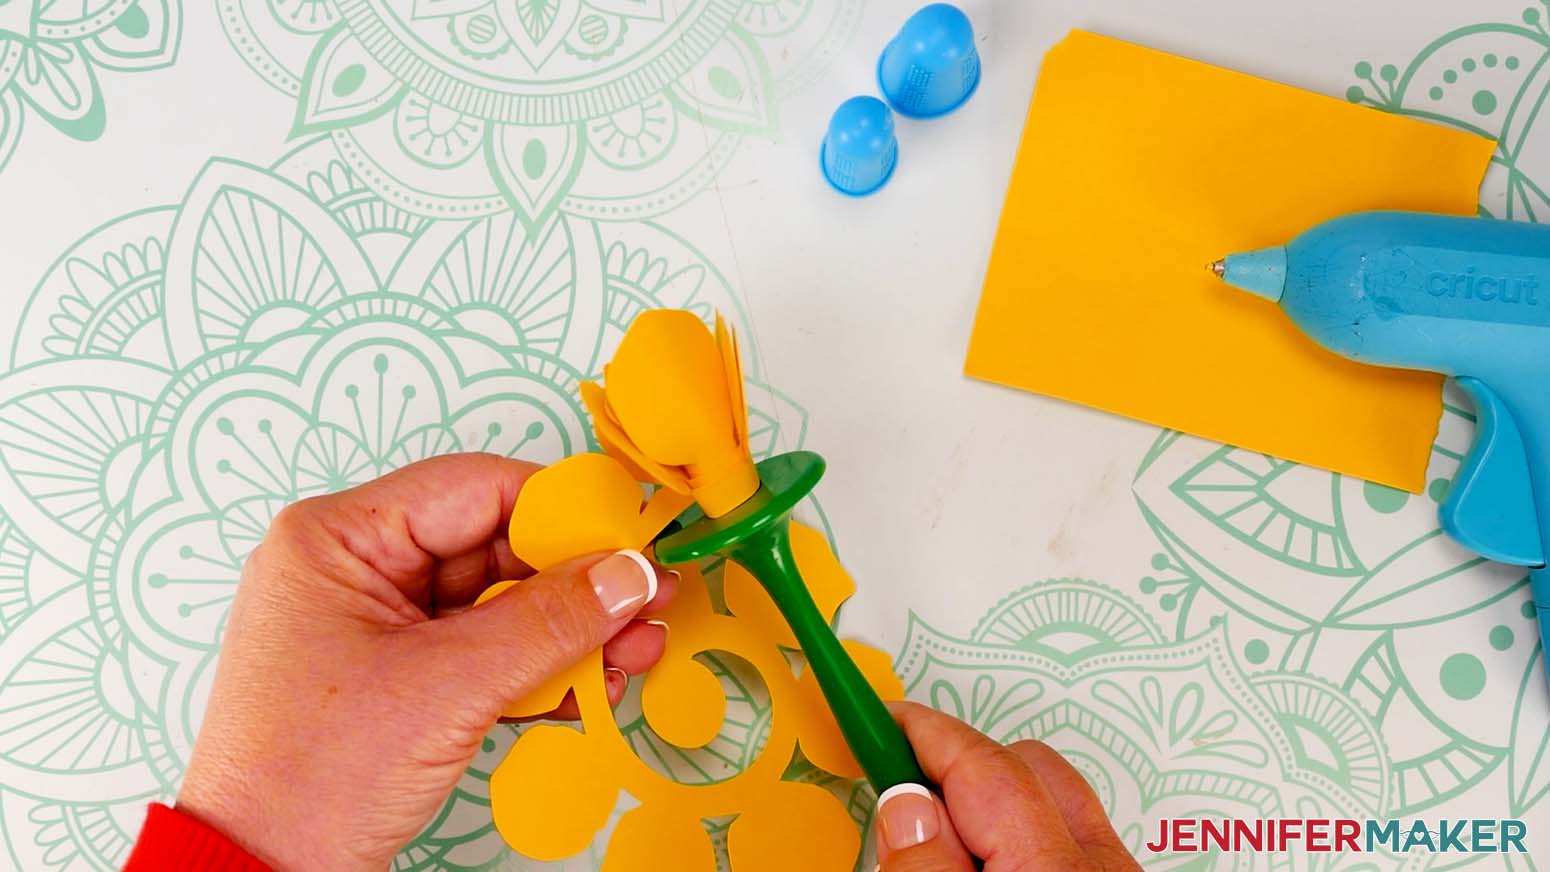
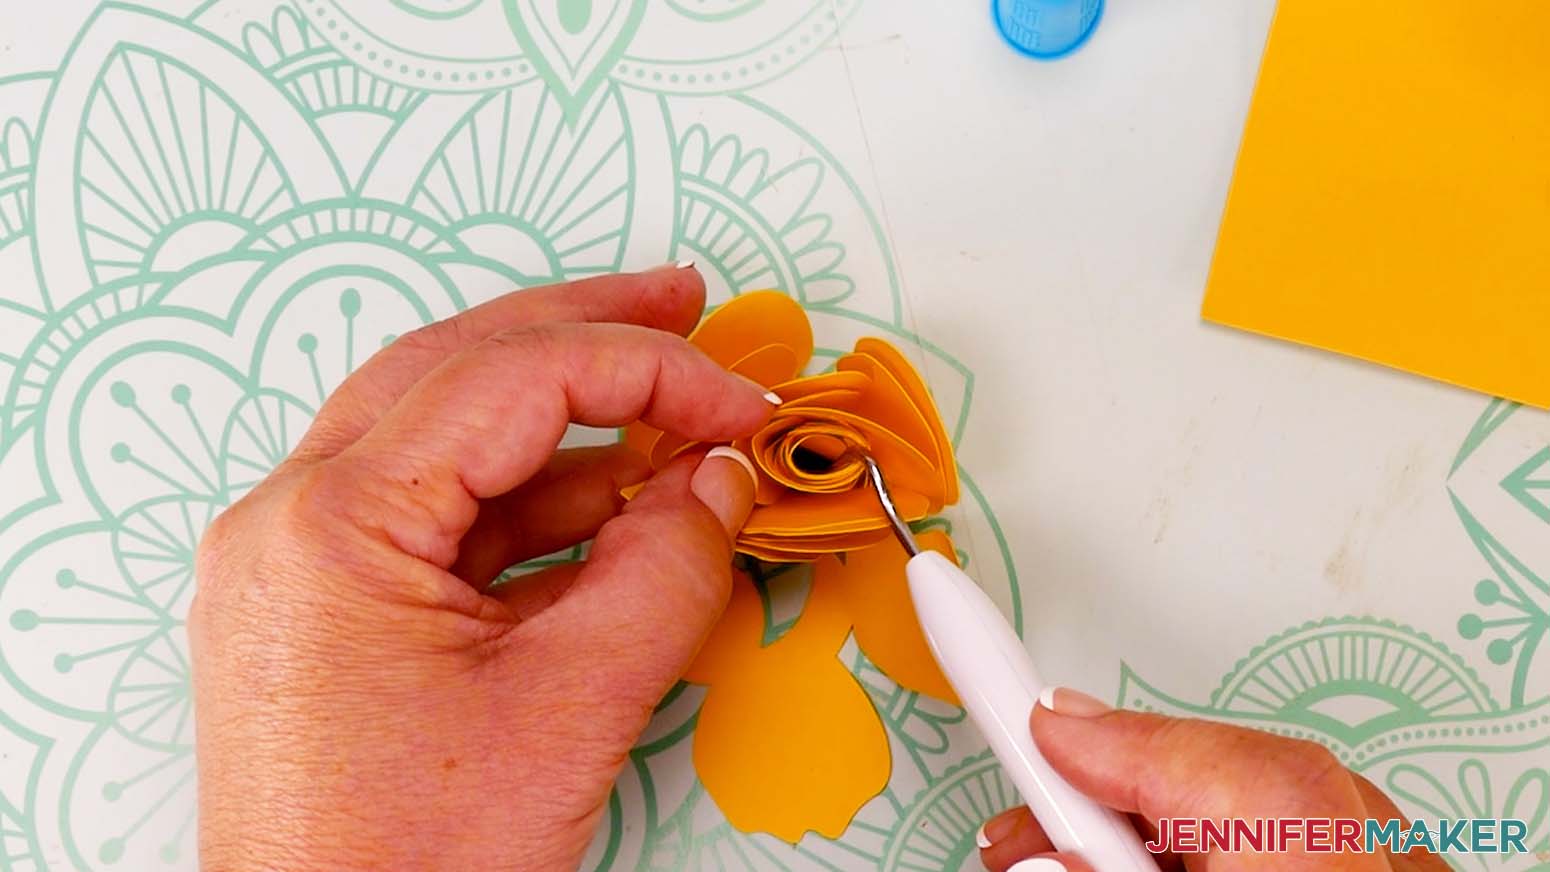
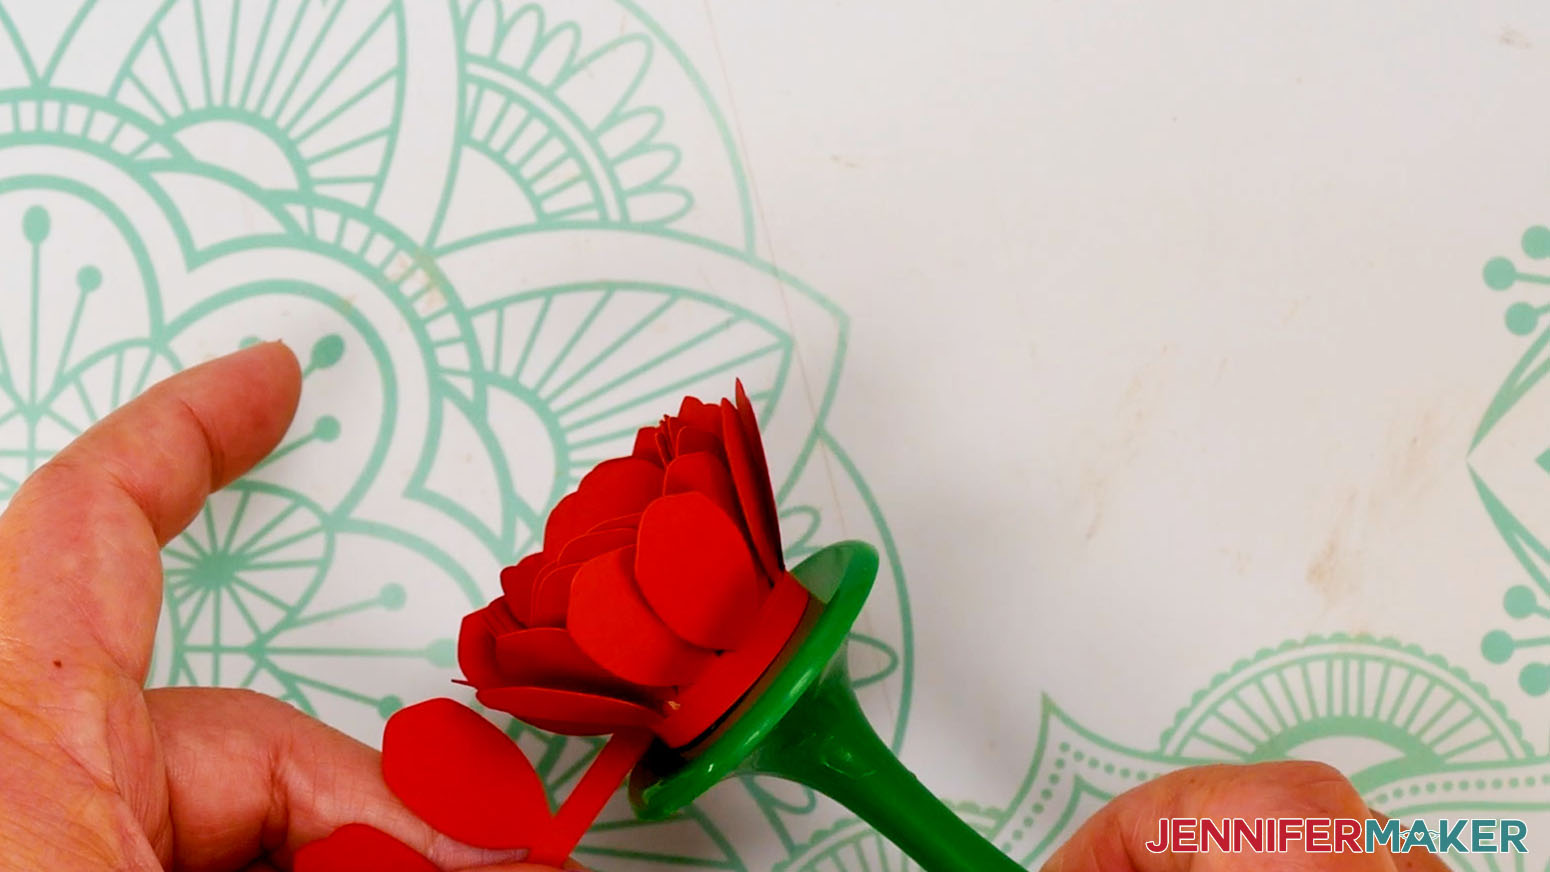
- Put the loose center end of a flower spiral in the rolling tool’s spindle slot.
NOTE: I’m using a Flowtool, but you can also use a regular quilling tool. - While keeping the flower’s end in place, roll the tool toward you so the spiral begins winding around the spindle and itself.
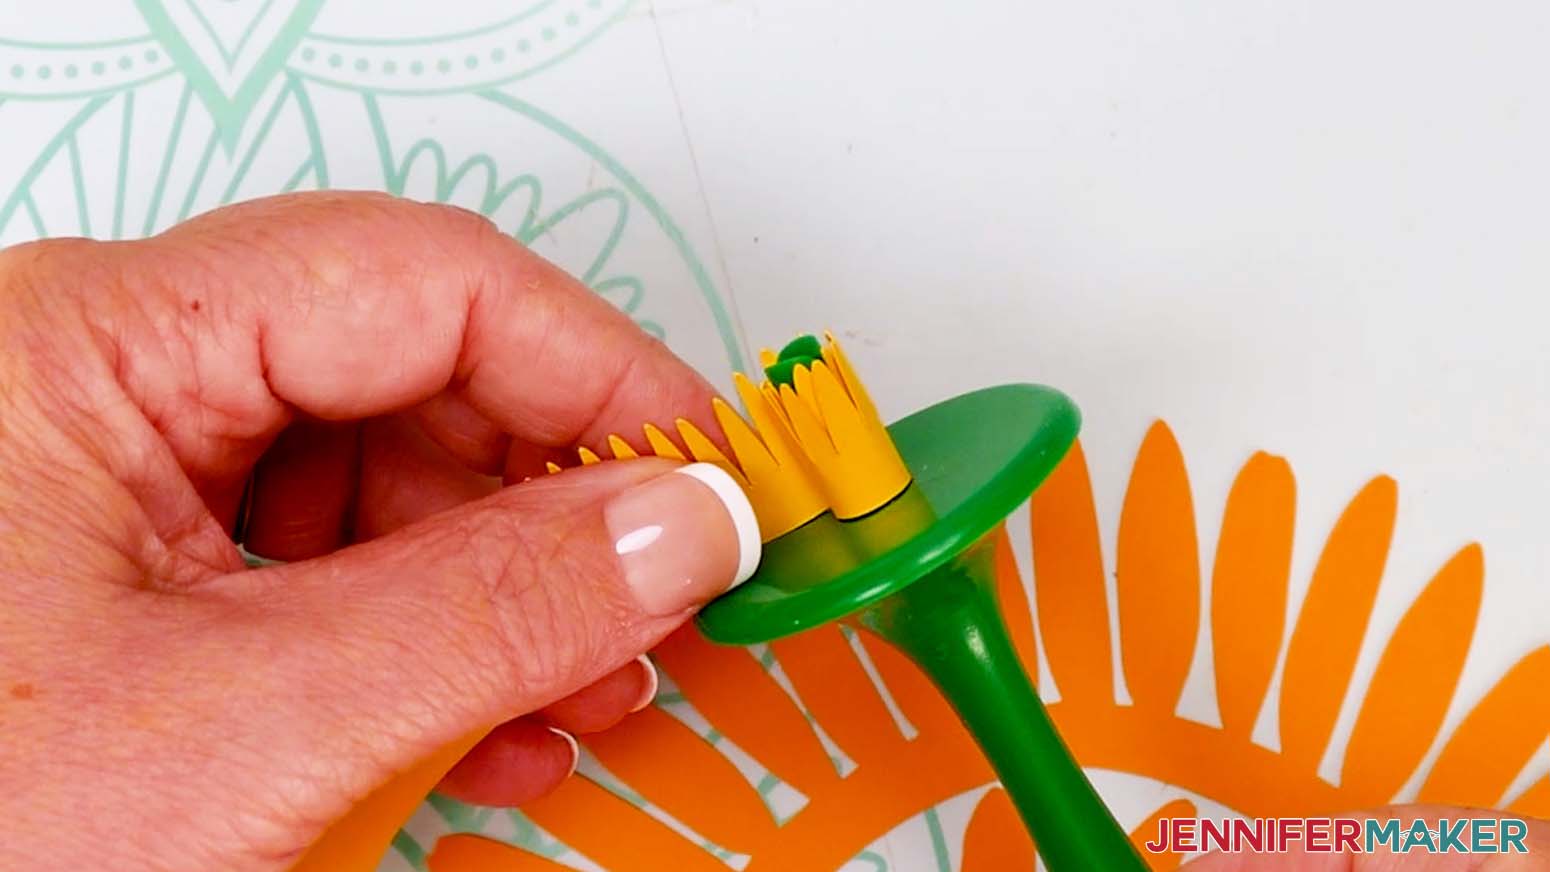
- Continue rolling your paper, keeping the bottom edges aligned with one another as best you can.
TIP: If you’re using the Flowtool, the platform around the spindle helps keep the bottom edges aligned. - When almost the entire spiral is rolled around the spindle, hold the flower lightly and remove the tool.
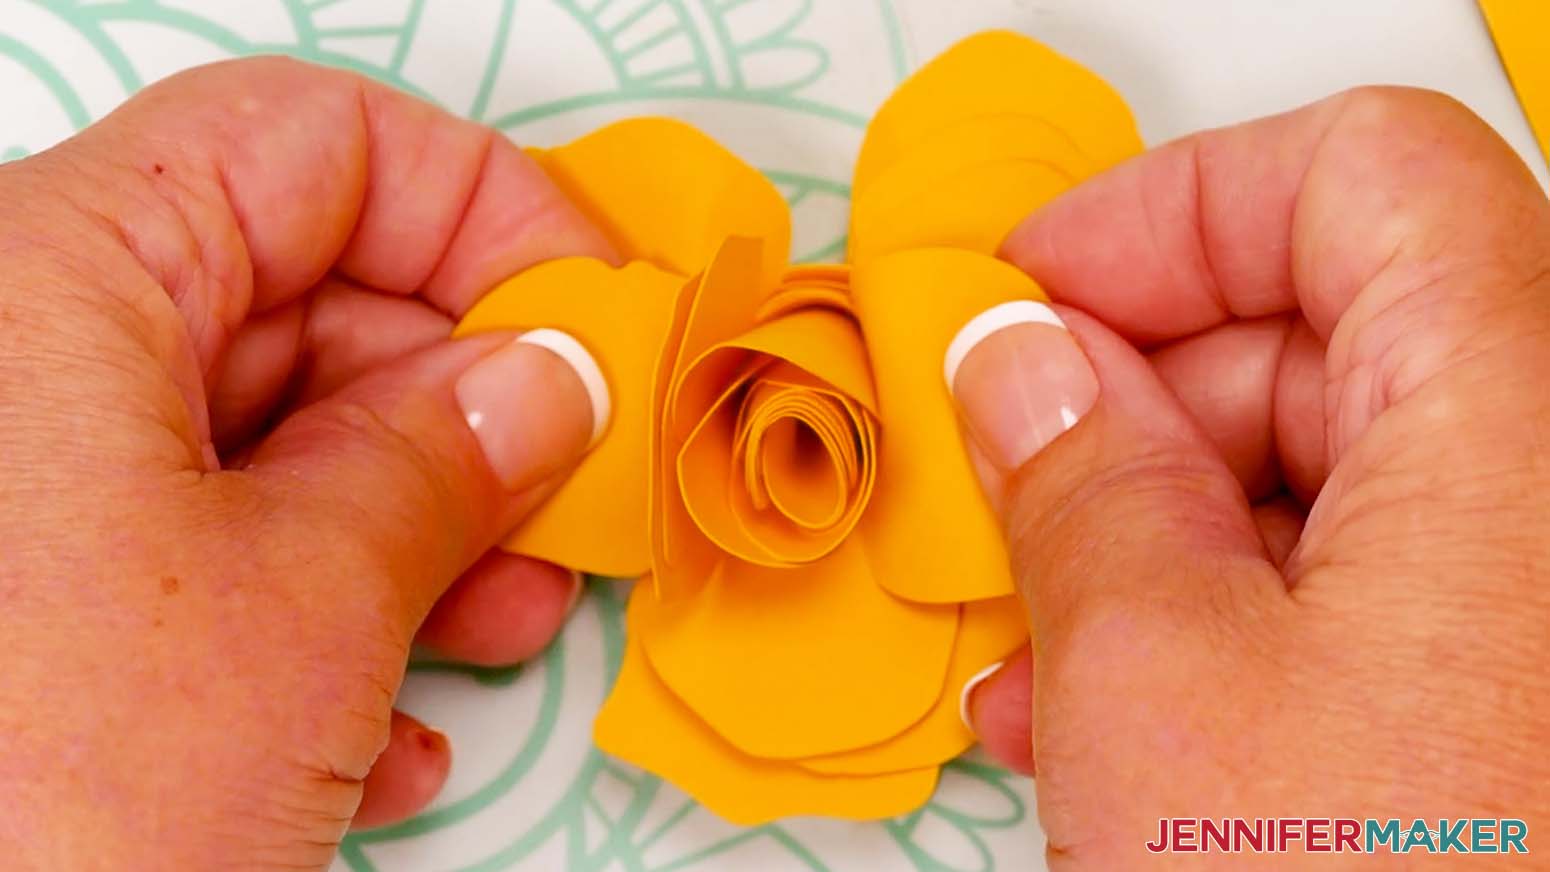
TIP: If you hold the flower tightly, it will be hard to remove the tool. Relax your grip on the spiral a little to let the tool come loose and allow the flower to unfurl just a little. - Roll the rest of the spiral around the flower and fold up the circle to touch the bottom edge.
- Adjust the flower until the spiral’s bottom edges cover most of the bottom circle.
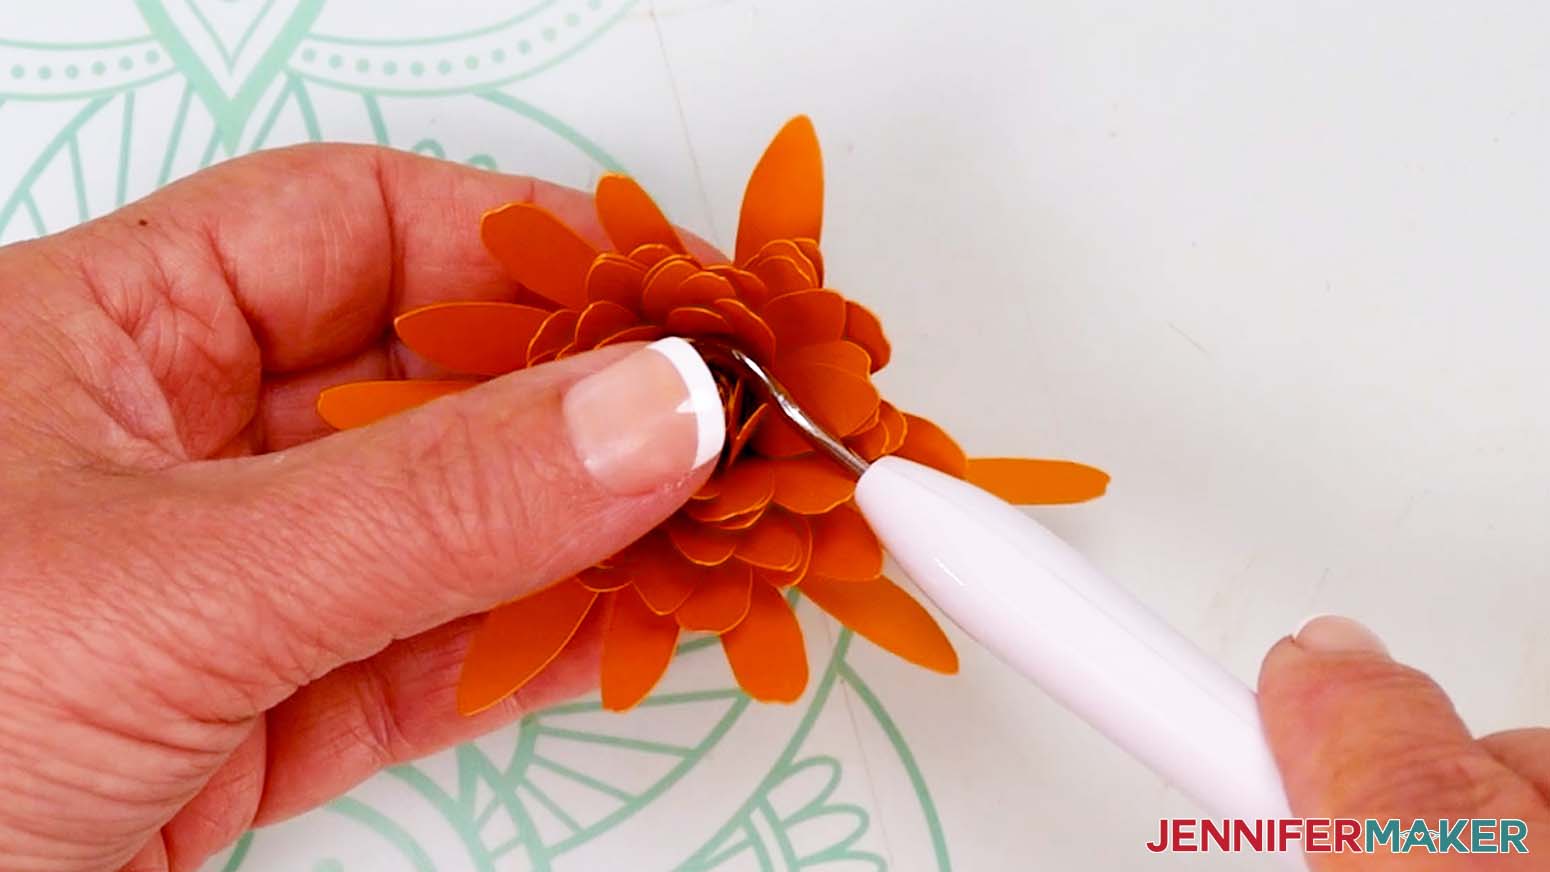
TIP: If the flower doesn’t seem to unfurl as you would expect, it may be that one of the separate petals is caught on another petal — gently separate it. - If you like, unwind the center to open the flower up more.
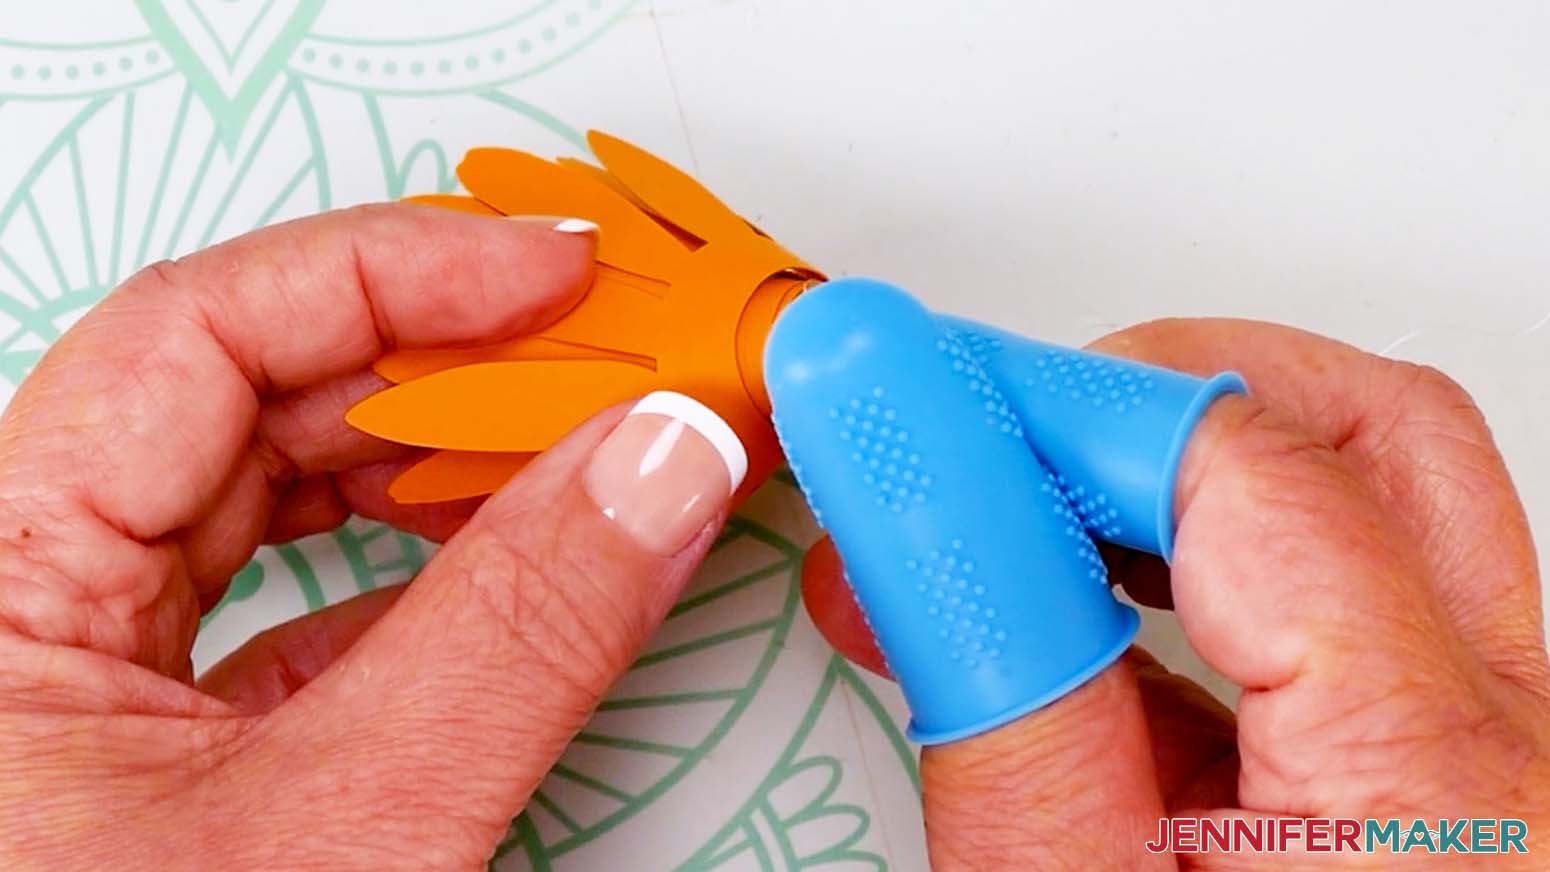
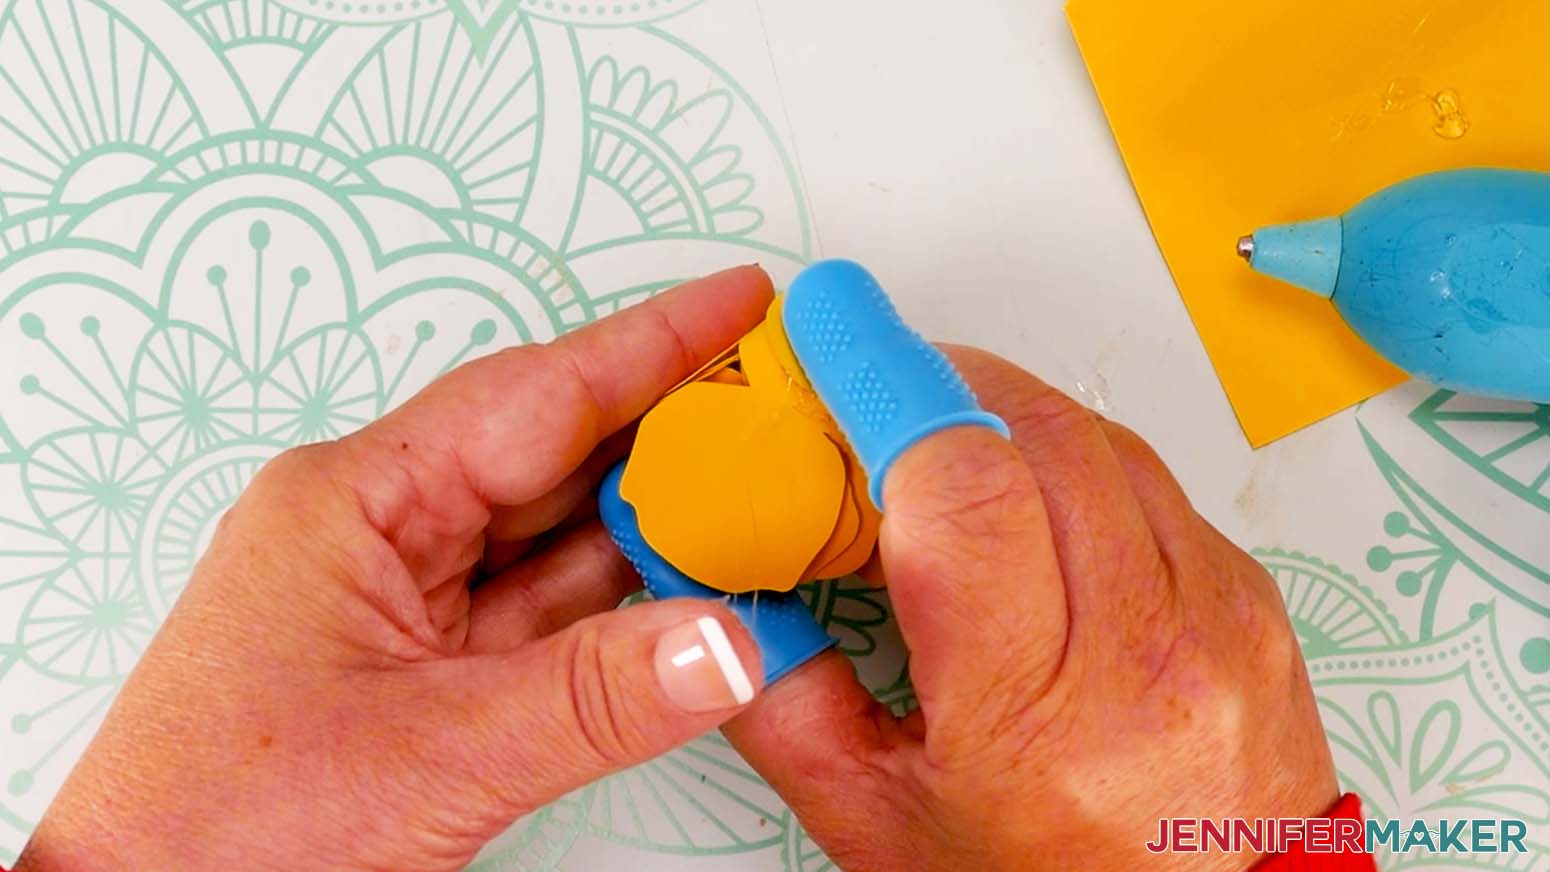
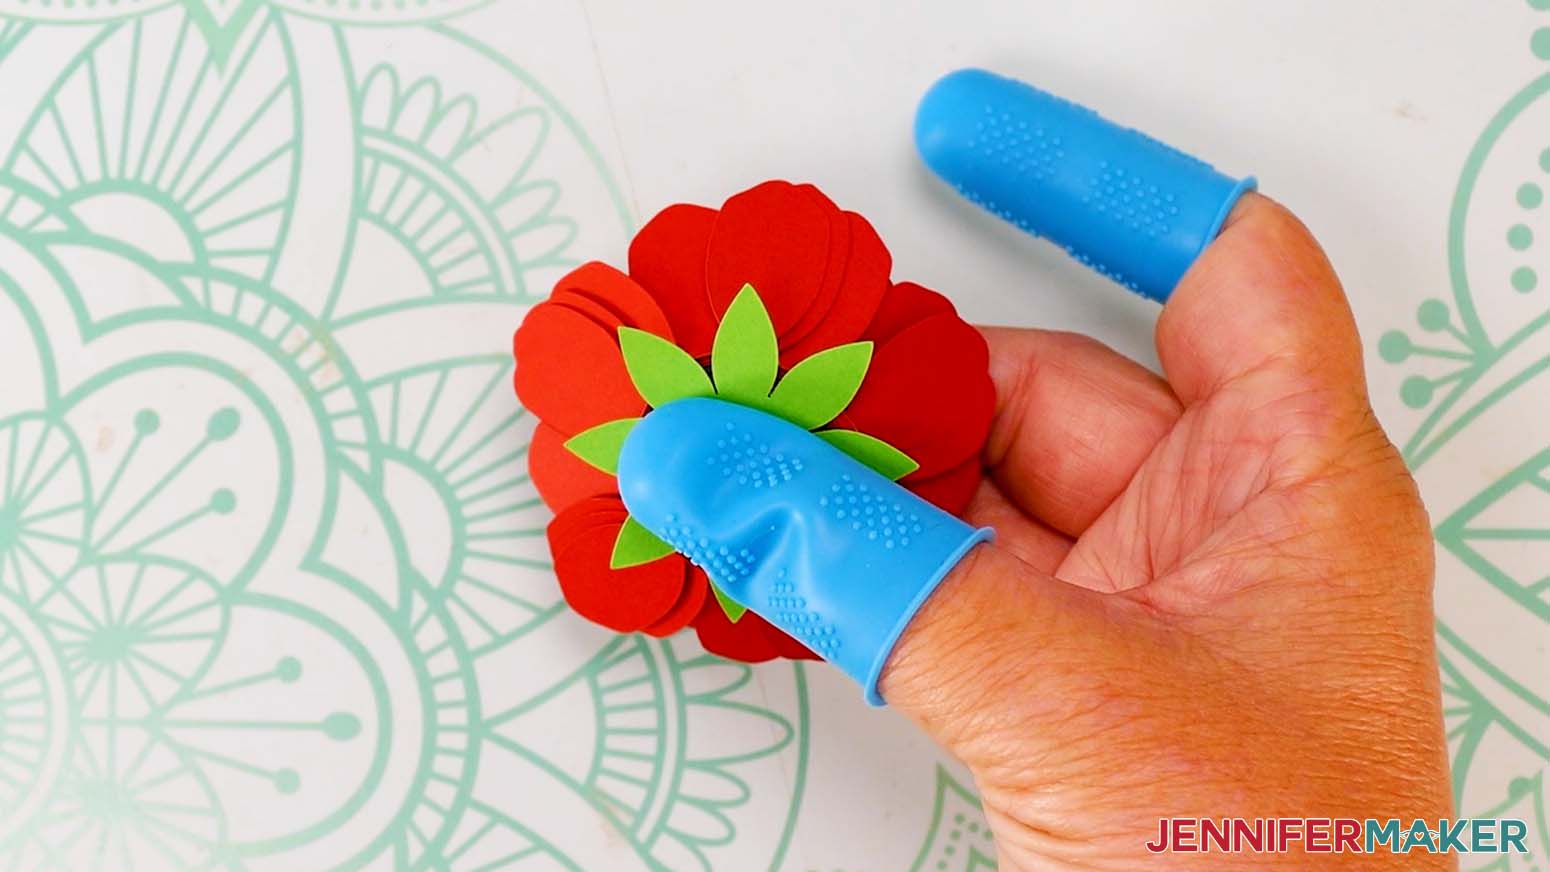
TIP: Your weeding tool or tweezers can help you loosen the middle while keeping the rest of the flower together - Put on your finger protectors.
- Add hot glue to the base circle and press it against the bottom edges of the flower petals to set it.
- Hold the circle in place to let the glue dry.
- Put hot glue on top of the green 8-point leaf circle. Press the daisy down on it to adhere it.
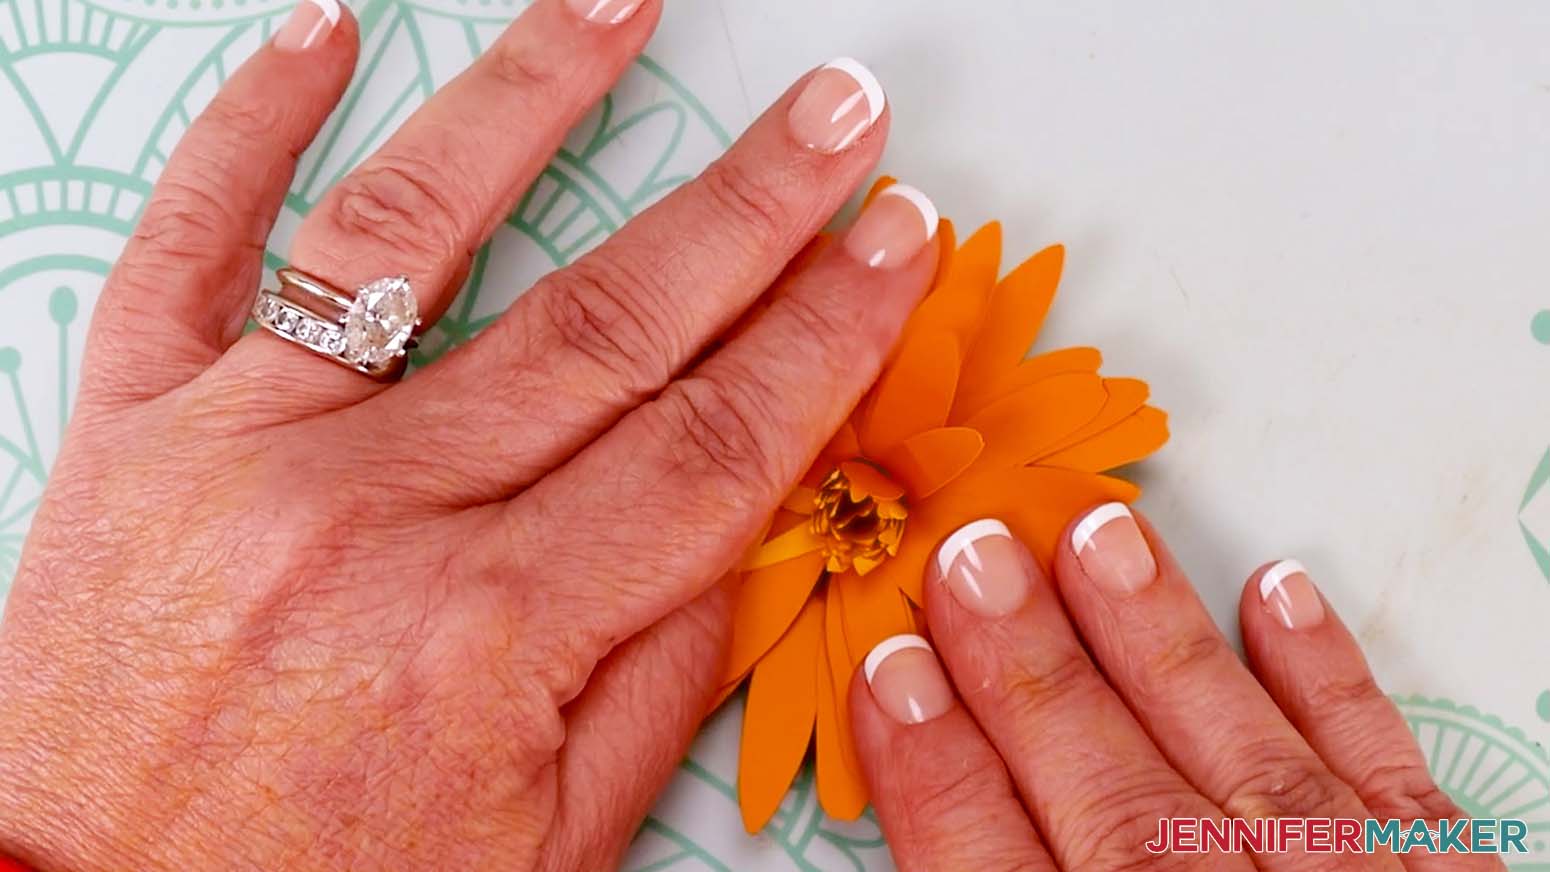
- Use your fingers, Flowtool, or other tool to press all the petals outward, away from the center — even the little ones. Real Gerbera daisies have splayed petals like that.
- Roll the rest of the flowers using the same method.

ATTACH THE FLOWERS
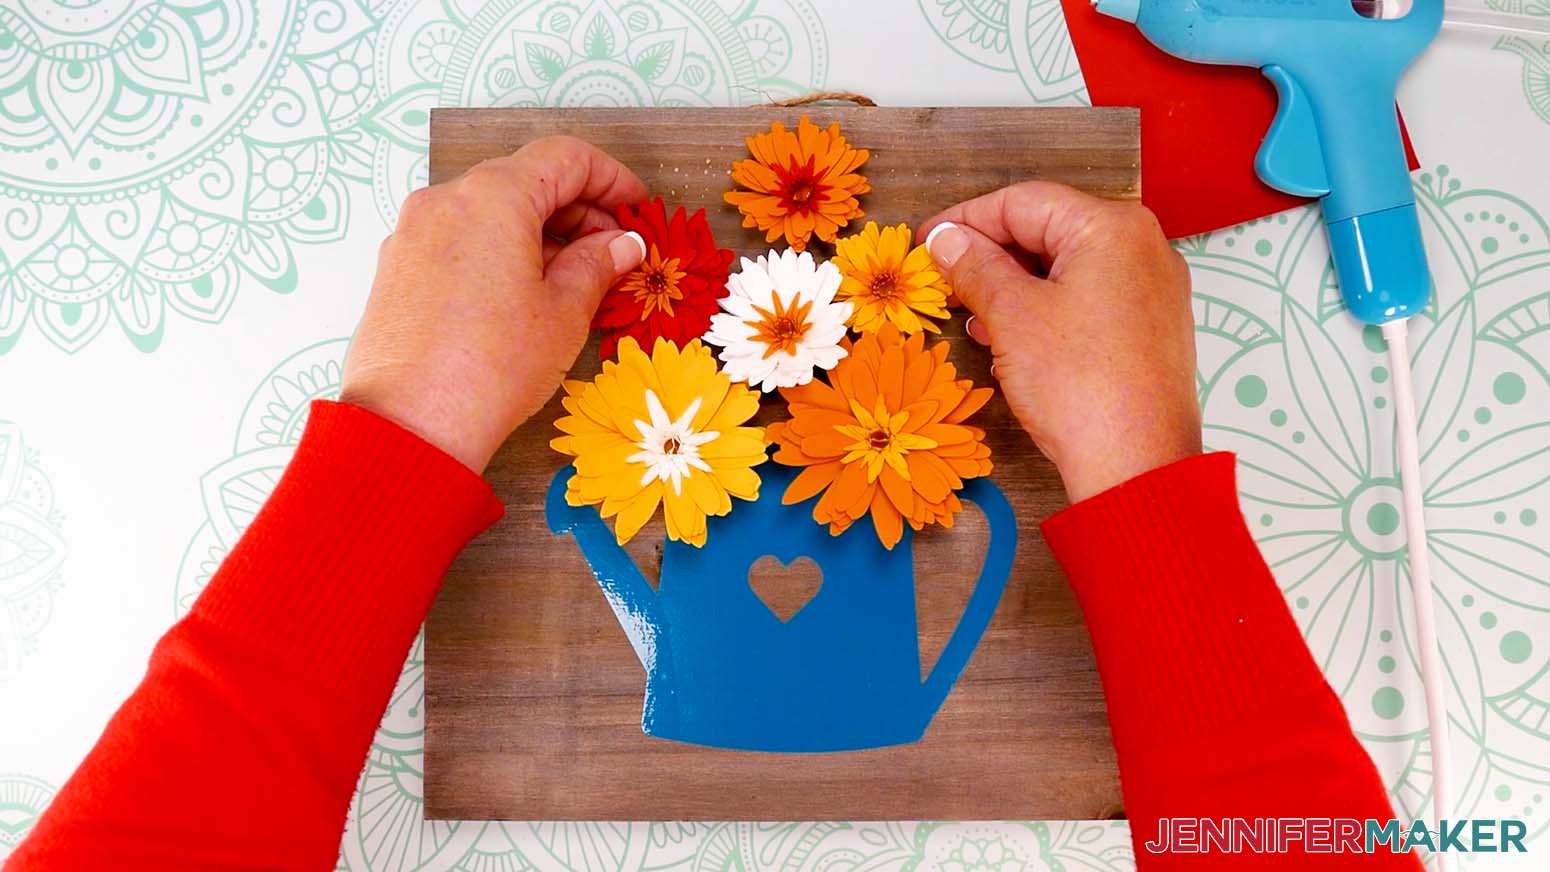
- Without using glue, place the flowers and leaves down above the watering can decal on the wood sign and move them around until you find an arrangement you like.
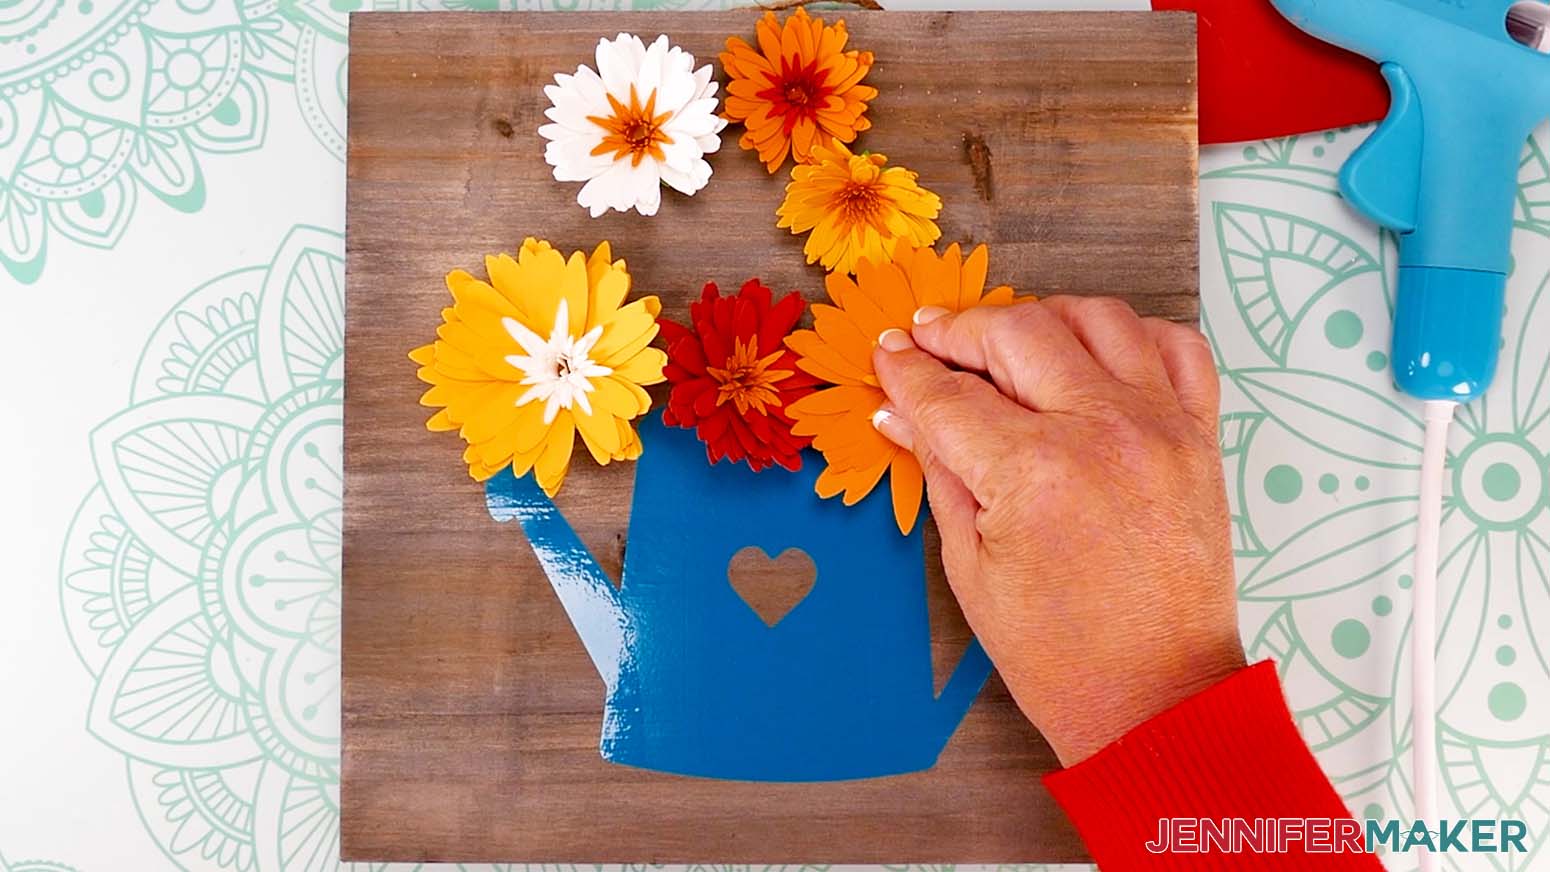
- Lift up a flower and apply hot glue to the bottom side.
- Place the flower back down on the wood sign and gently press down to adhere it.
- Repeat until everything is glued down.

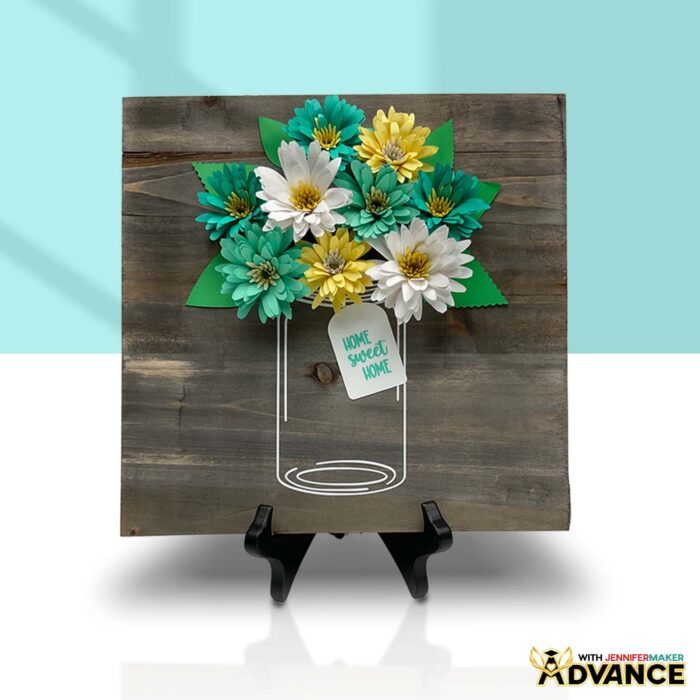
OPTION 2: MASON JAR PAPER FLOWER SIGN WITH PAPER ROSES AND GARDENIAS
STEP 2: PREPARE YOUR PAPER FLOWER SIGN
- Follow the Steps in Option 1 to check your sign’s measurements and plan your sign’s layout.
- For the bouquet, picture the final look you want. I like to have the flowers overlap the decal’s top, and be mounded so there are more at the bottom and just a few at the top, ending about 1” below the sign’s edge.
CRICUT DESIGN SPACE
- Follow the Steps in Option 1 to have just the mason jar, gardenia, and rose SVGs on your Canvas.
NOTE: Don’t Ungroup the flower designs until after you resize them. - Duplicate the rose two times and the gardenia three times. You should now have three roses and four gardenias.
- Let’s resize some of the flower element sets so that there is some nice variation when we put everything together. Select the second rose and resize it to 6” tall.
NOTE: Keep the Lock icon closed to maintain the design’s proportions. - Select the third rose and resize it to 4.5” tall.
- Select the second gardenia and resize it to 9” tall.
- Select the third gardenia and resize it to 7.75” tall.
- Resize the fourth gardenia to 7.75” tall as well.
- If you want to change the colors of any of the flower elements, select the element, then change the color.
- Your designs are finished and ready to cut!
CUTTING CARDSTOCK AND ADHESIVE VINYL
- Select the correct machine from the top right drop-down menu.
- Click “Make.”
- Follow the preparation and cutting steps from Option 1 to cut your decal, gardenias, roses, leaves, and vinyl.
- The mason jar design is detailed, so place it back on the machine mat during weeding and work carefully.
- Use a weeding tool to carefully peel away the extra background vinyl from around the mason jar.
- Then weed the extra vinyl inside the jar by poking your weeding tool into each section you want to remove. I like to work from larger to smaller sections during weeding. Gently lift it away from the design.
- Here are what my cut and weeded decal and the flowers look like.
STEP 3: ASSEMBLE YOUR PAPER FLOWER SIGN
- Use the steps from Option 1 to transfer your decal to the sign so it’s centered and 1” up from the bottom edge.
NOTE: When transferring a delicate design, burnish the vinyl very well and take extra time making sure it sticks to the blank. Since there is less surface area than a blocky decal, it can take extra attention.
ROLLING ROSES AND GARDENIAS
- Plug in your hot glue gun and have your finger protectors ready.
- To roll a rose, put the loose center end of a flower spiral in the rolling tool’s spindle slot.
NOTE: I’m using a Flowtool, but you can also use a regular quilling tool. - While keeping the flower’s end in place, roll the tool toward you so the spiral begins winding around the spindle and itself.
- Continue rolling your paper, keeping the bottom edges aligned with one another as best you can.
TIP: If you’re using the Flowtool, the platform around the spindle helps keep the bottom edges aligned. - When almost the entire spiral is rolled around the spindle, hold the flower lightly and remove the tool.
TIP: If you hold the flower tightly, it will be hard to remove the tool. Relax your grip on the spiral a little to let the tool come loose and allow the flower to unfurl just a little. - Roll the rest of the spiral around the flower and fold up the circle to touch the bottom edge.
- Adjust the flower until the spiral’s bottom edges cover most of the bottom circle.
TIP: If the flower doesn’t seem to unfurl as you would expect, it may be that one of the separate petals is caught on another petal — gently separate it. - If you like, unwind the center to open the flower up more.
TIP: Your weeding tool or tweezers can help you loosen the middle while keeping the rest of the flower together - Put on your finger protectors.
- Add hot glue to the base circle and press it against the bottom edges of the flower petals to set it.
- Hold the circle in place to let the glue dry.
- Use your fingers, Flowtool, or other tool to press all the petals outward, away from the center — even the little ones. Real roses have petals that are shaped or curled outward.
- Roll the rest of the roses using the same method.
- To assemble a gardenia, glue all the strips of petals together, end to end. Start with the smaller petals, then the larger petals.
- Roll the gardenia the same way as the rose, starting with the smaller petals.
- Once the gardenia is completely rolled up, remove it from your quilling tool and hold it together so it doesn’t unroll.
- Add hot glue to the bottom of the gardenia roll and press the 8-point leaf circle to the bottom of the flower.
- Roll the rest of the gardenias using the same method.
ATTACH THE FLOWERS
Follow the steps in Option 1 to plan and hot glue your leaves and flowers in place.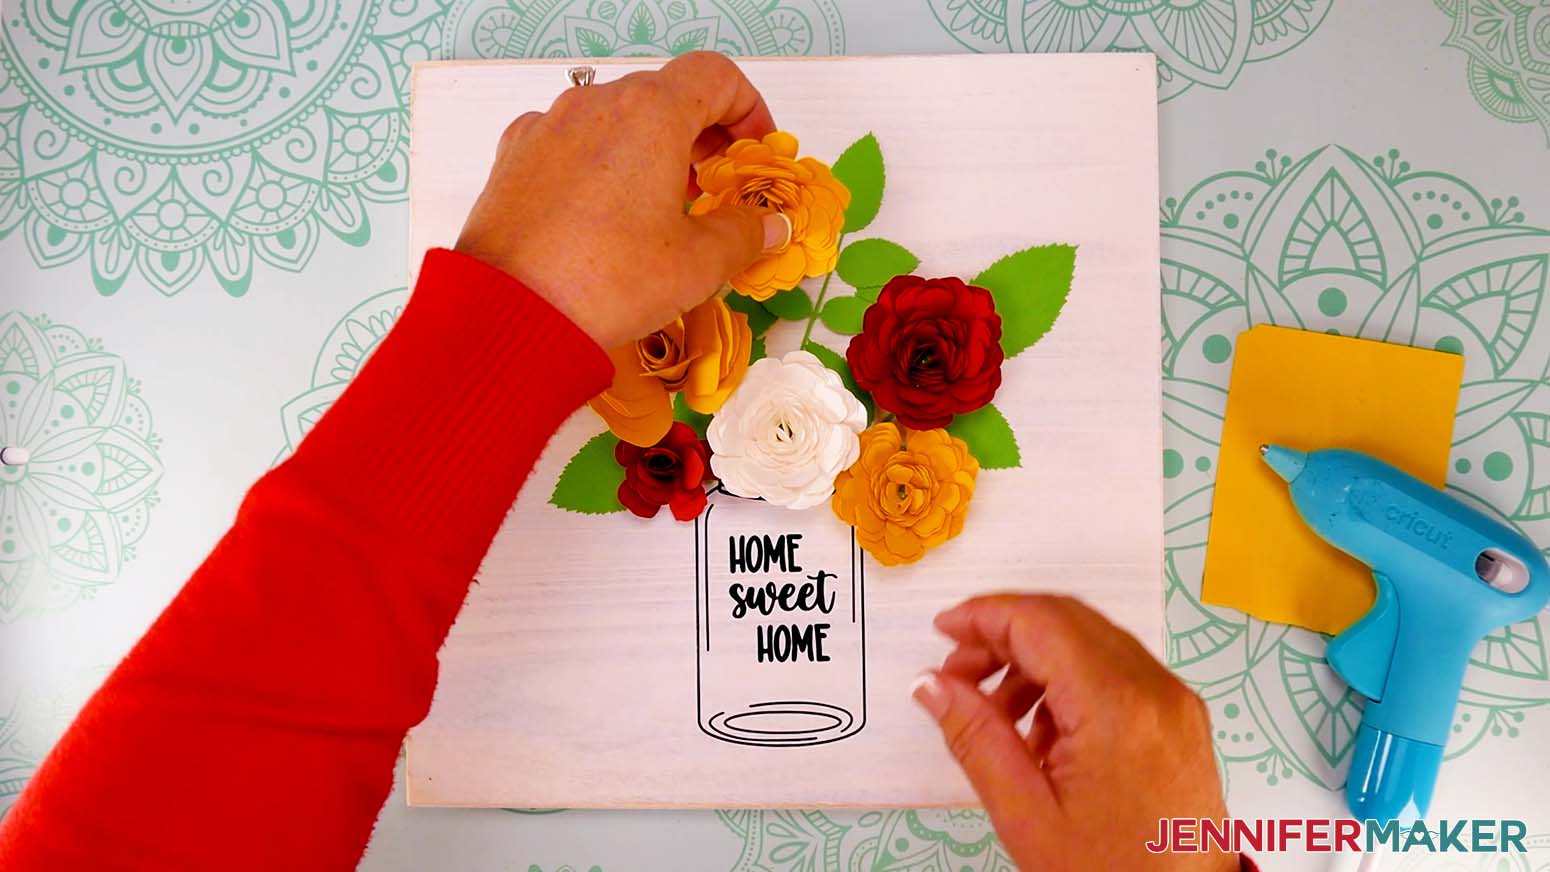
OPTION 3: WELCOME PLANTER PAPER FLOWER SIGN WITH SUNFLOWERS
STEP 2: PREPARE YOUR PAPER FLOWER SIGN
Use the steps in Option 1 to measure your blank and plan your design.
CRICUT DESIGN SPACE
- Follow the main steps to place the Welcome planter and sunflower SVGs on your Canvas.
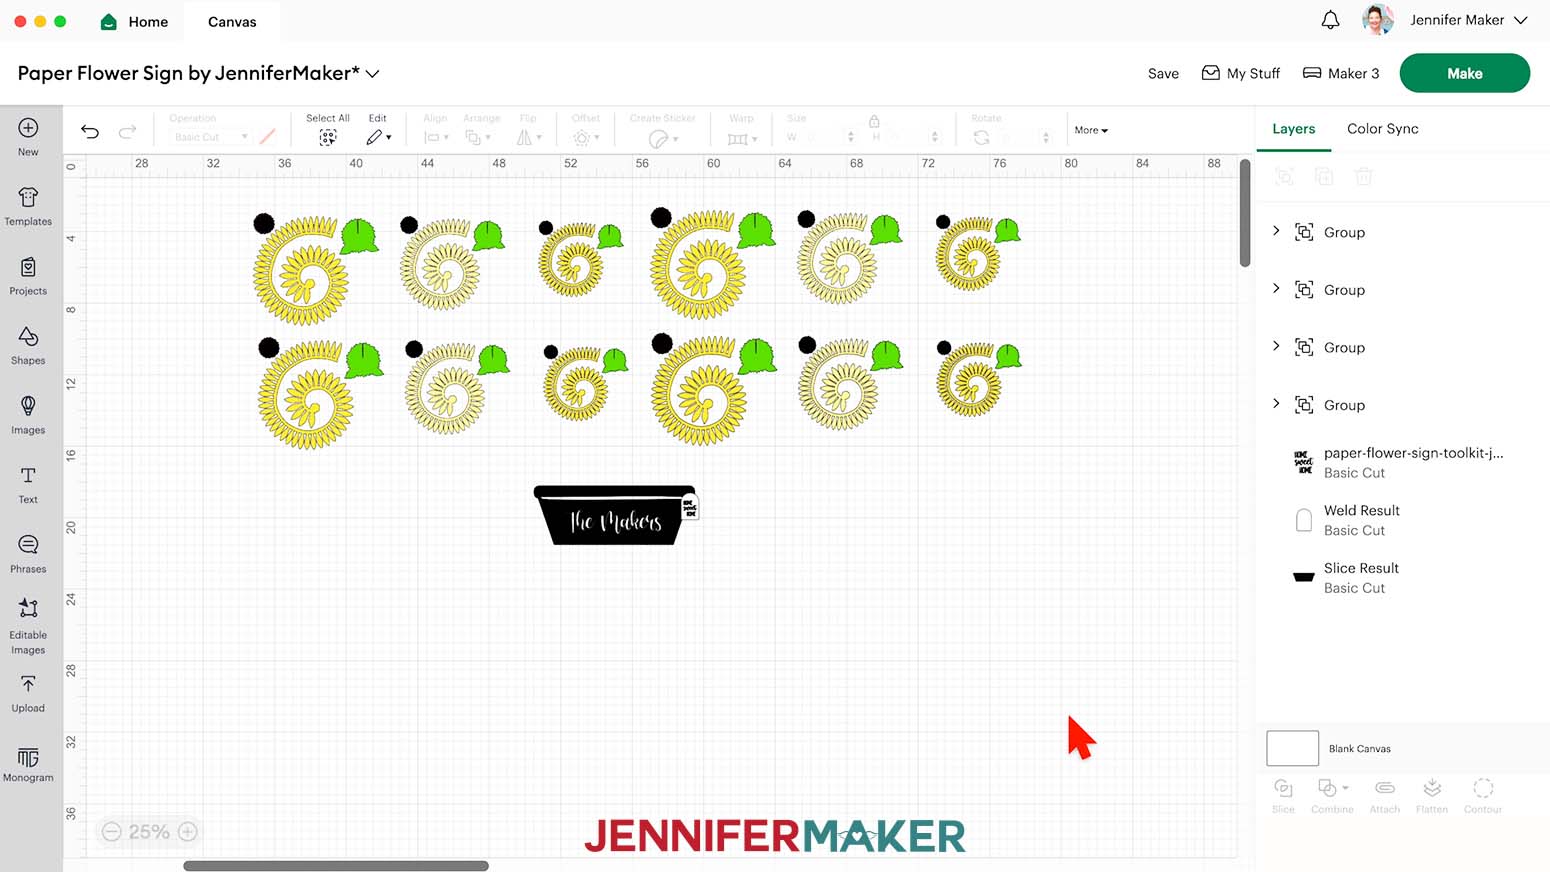
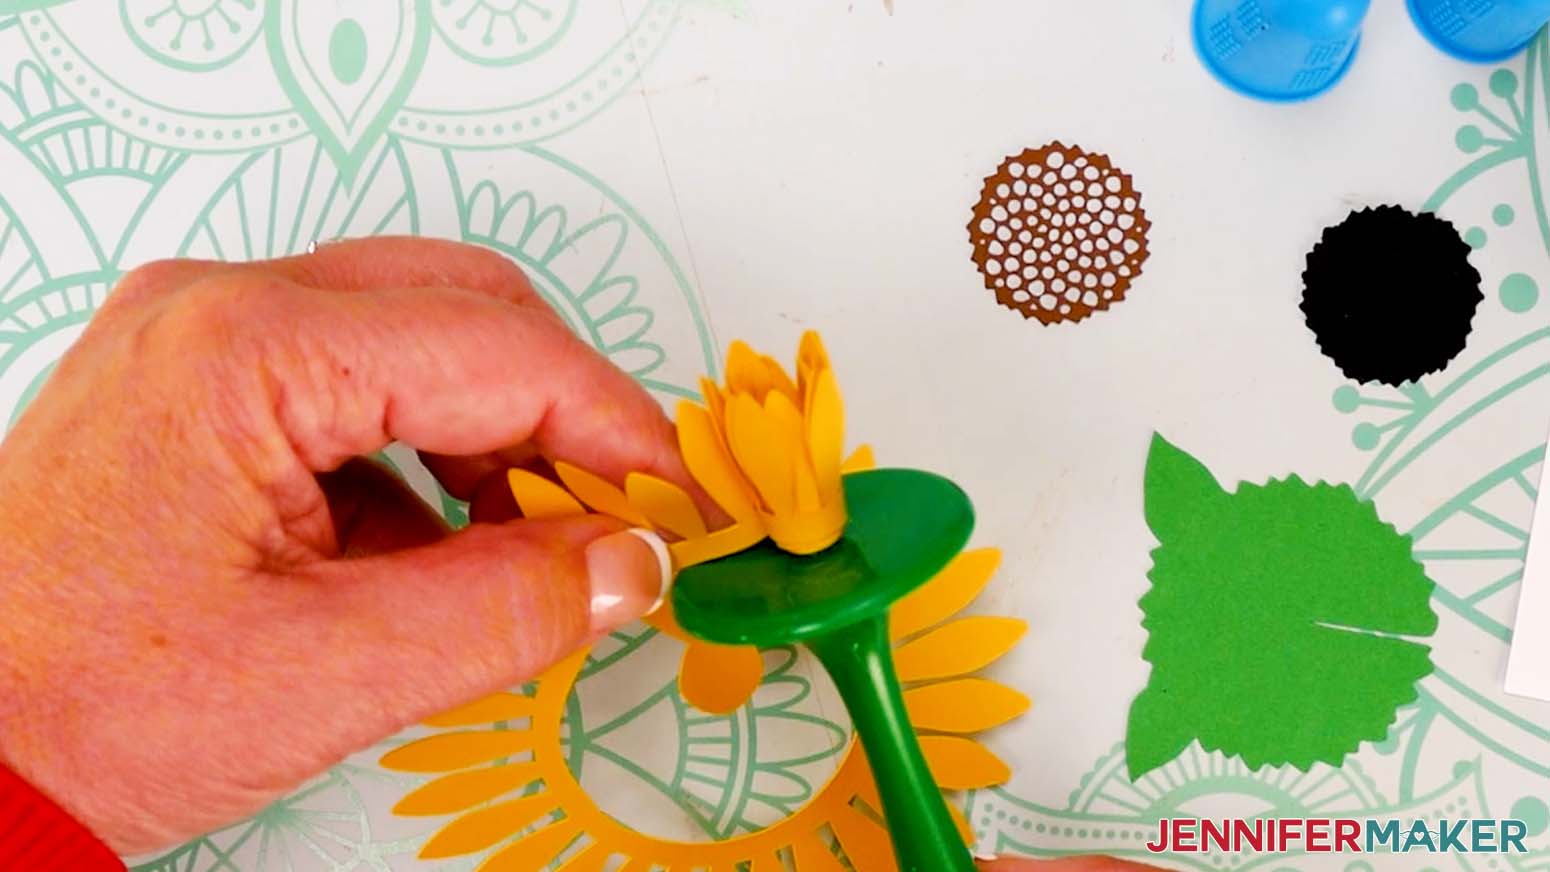
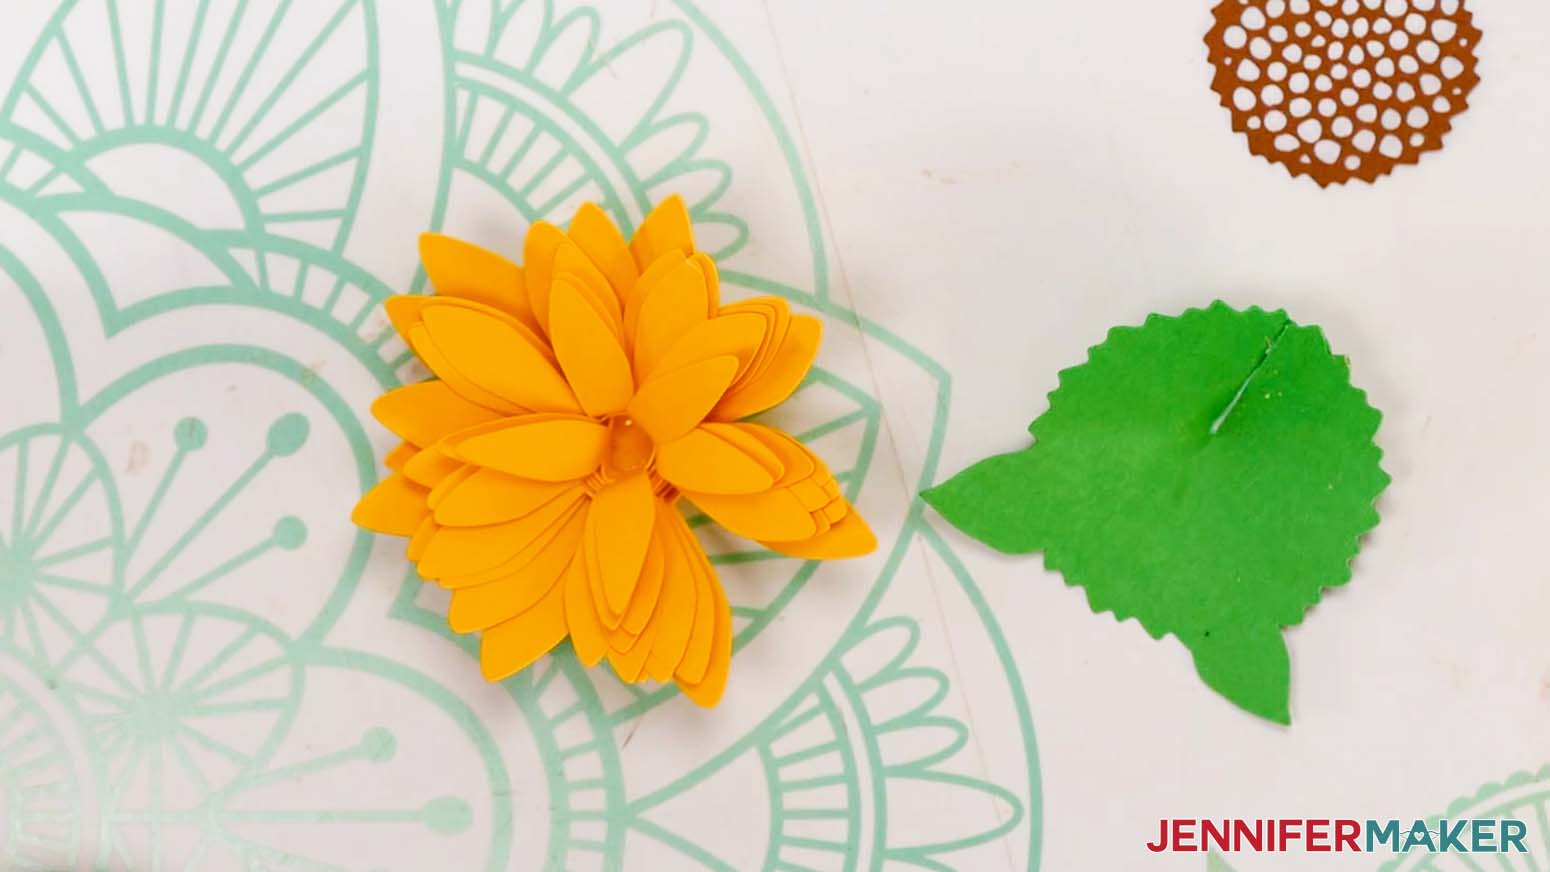
NOTE: If you’re using the sunflower like me, there are four elements in the design: a yellow coil of petals, a green base, a black circular piece for the center of the flower, and a brown circular piece for the top center of the flower. - Select the grouped flower elements and duplicate them two times. You should now have three identical sets of flower elements.
- Select the second set of flower elements and resize them to 5.25” high with the lock icon closed.
- Select the third set of flower elements and resize them to 4.25” high with the lock icon closed.
- Do the same with the last set of flower elements.
- If you want to change the color of a sunflower, select the petal layer and pick a new option under the Color Box menu.
NOTE: I made one sunflower a lighter yellow so it would cut on a new sheet. - Now select all three sets of flower elements at the same time and duplicate them three times. This will give you 12 total flowers of different sizes.
- Your designs are finished and ready to cut!
CUTTING CARDSTOCK AND ADHESIVE VINYL
Follow the steps in Option 1 to cut your decal and flower pieces.
STEP 3: ASSEMBLE YOUR PAPER FLOWER SIGN
Follow the decal transfer steps in Option 1 to place your Welcome planter design in the center of the sign, 1” up from the bottom to leave plenty of space for the sunflowers.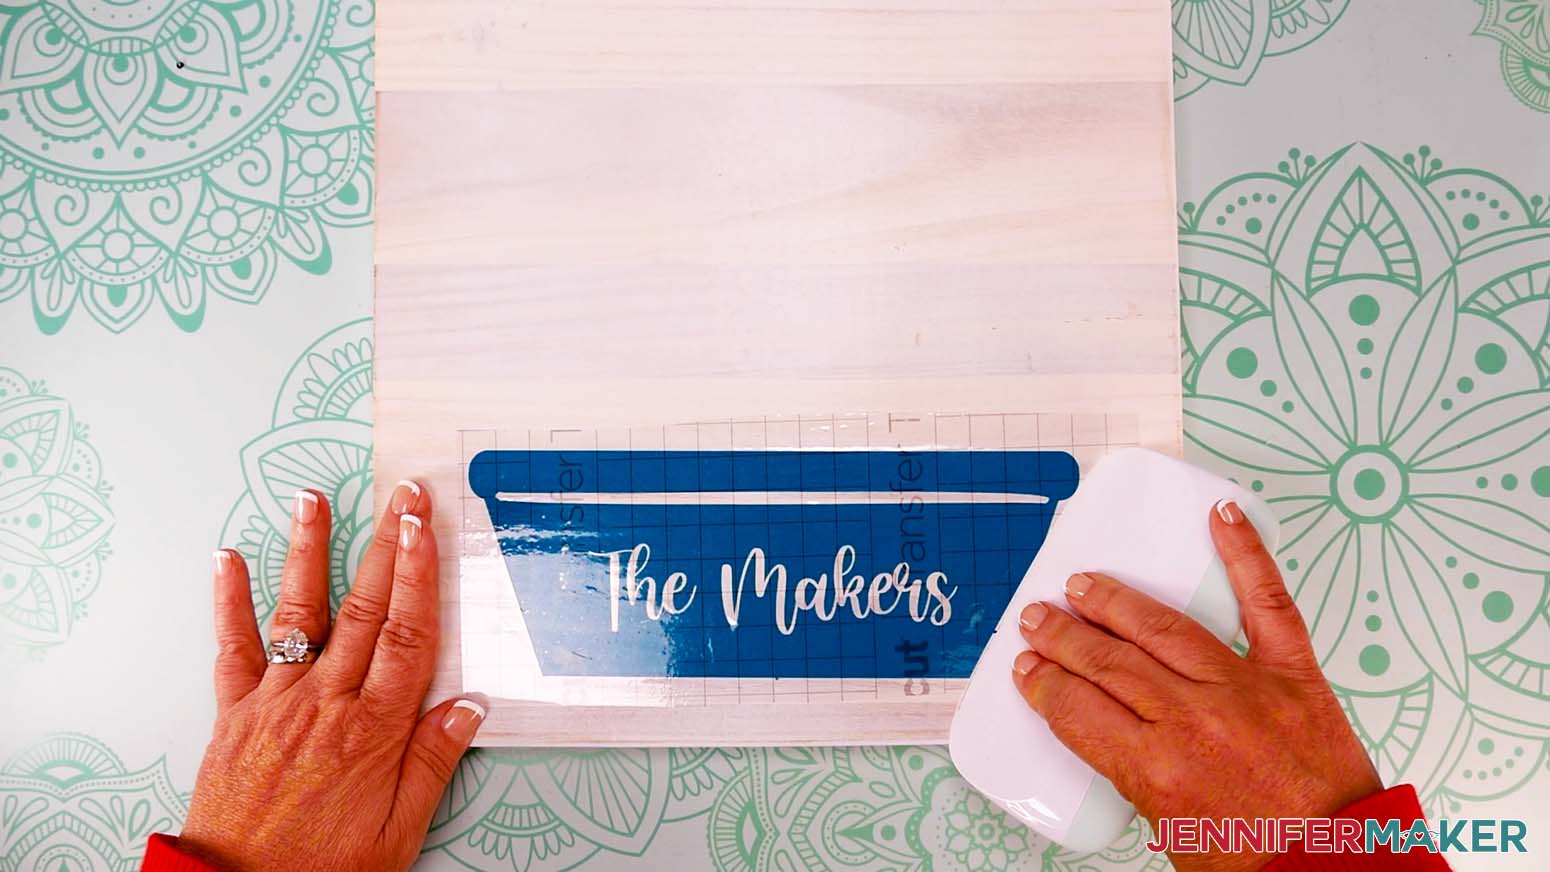
ASSEMBLING SUNFLOWERS
- Plug in your hot glue gun and have your finger protectors ready.
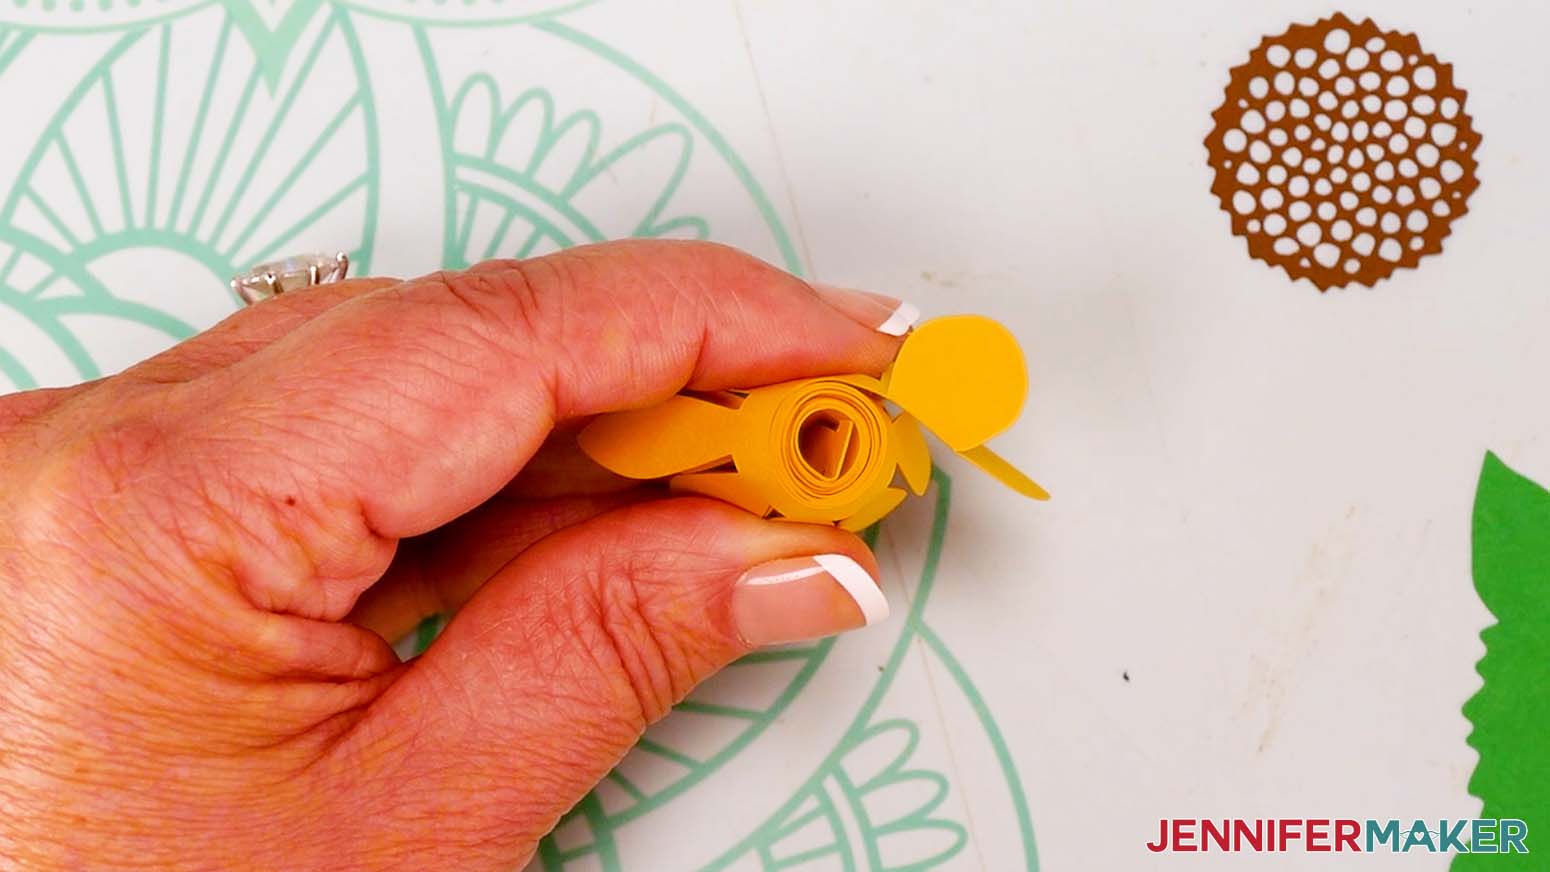
- To roll a sunflower, put the loose outer end of a flower spiral in the rolling tool’s spindle slot.
NOTE: I’m using a Flowtool, but you can also use a regular quilling tool. - While keeping the flower’s end in place, roll the tool toward you so the spiral begins winding around the spindle and itself.
- Continue rolling your paper, keeping the bottom edges aligned with one another as best you can.
TIP: If you’re using the Flowtool, the platform around the spindle helps keep the bottom edges aligned. - When almost the entire spiral is rolled around the spindle, hold the flower lightly and remove the tool.
TIP: If you hold the flower tightly, it will be hard to remove the tool. Relax your grip on the spiral a little to let the tool come loose and allow the flower to unfurl just a little. - Roll the rest of the spiral around the flower and fold up the circle to touch the bottom edge.
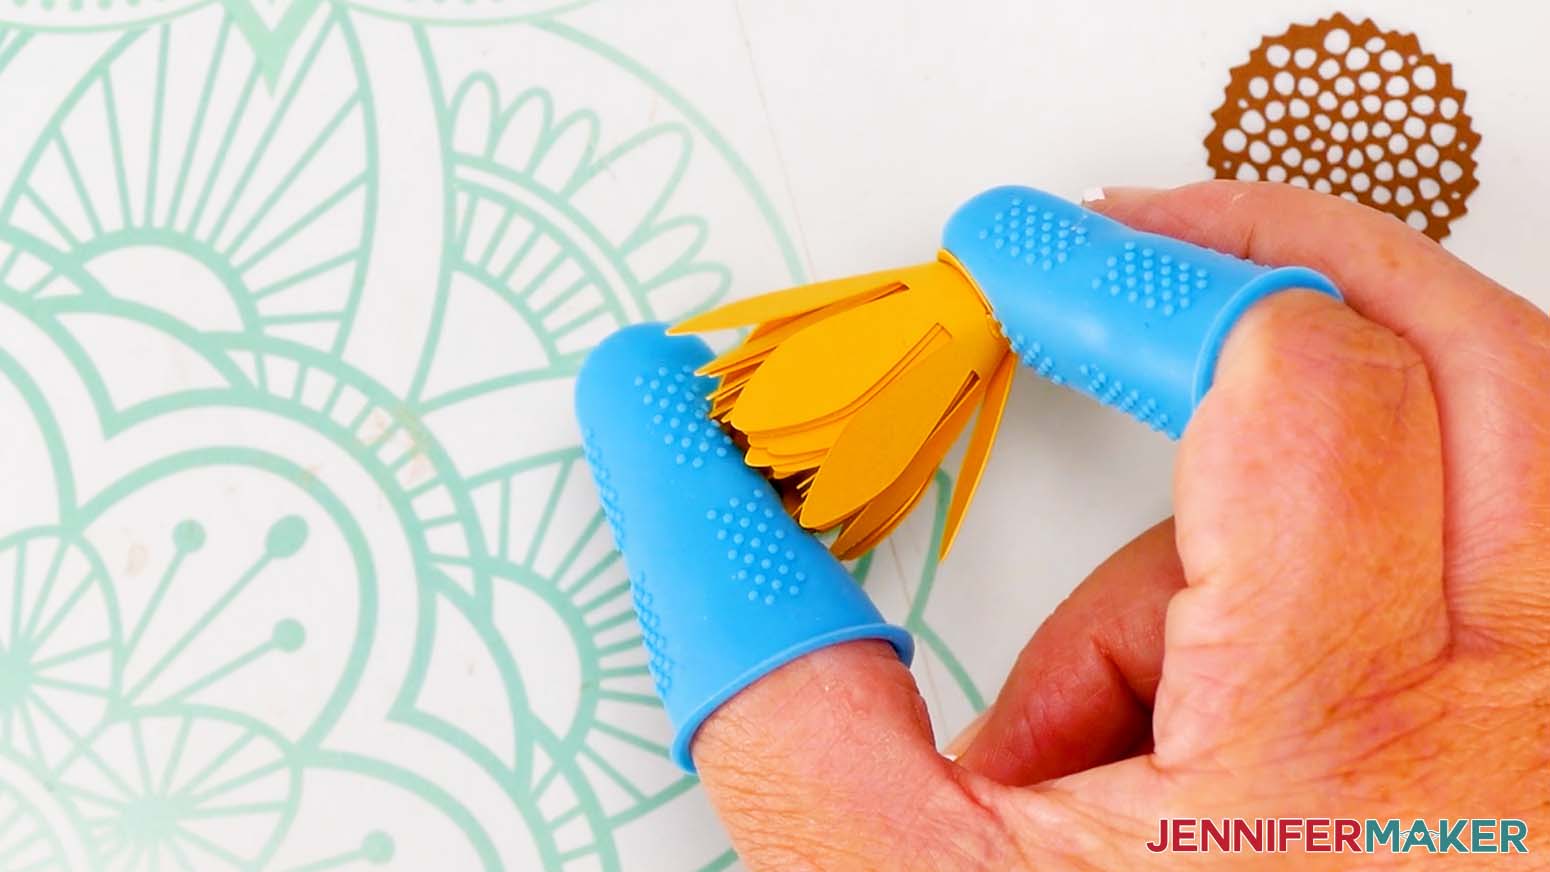
- Put on your finger protectors.
- Add hot glue to the base circle and press it against the bottom edges of the flower petals to set it.
- Hold the circle in place to let the glue dry.
- Turn your sunflower right side up and open up all the petals. Flatten them away from the center.
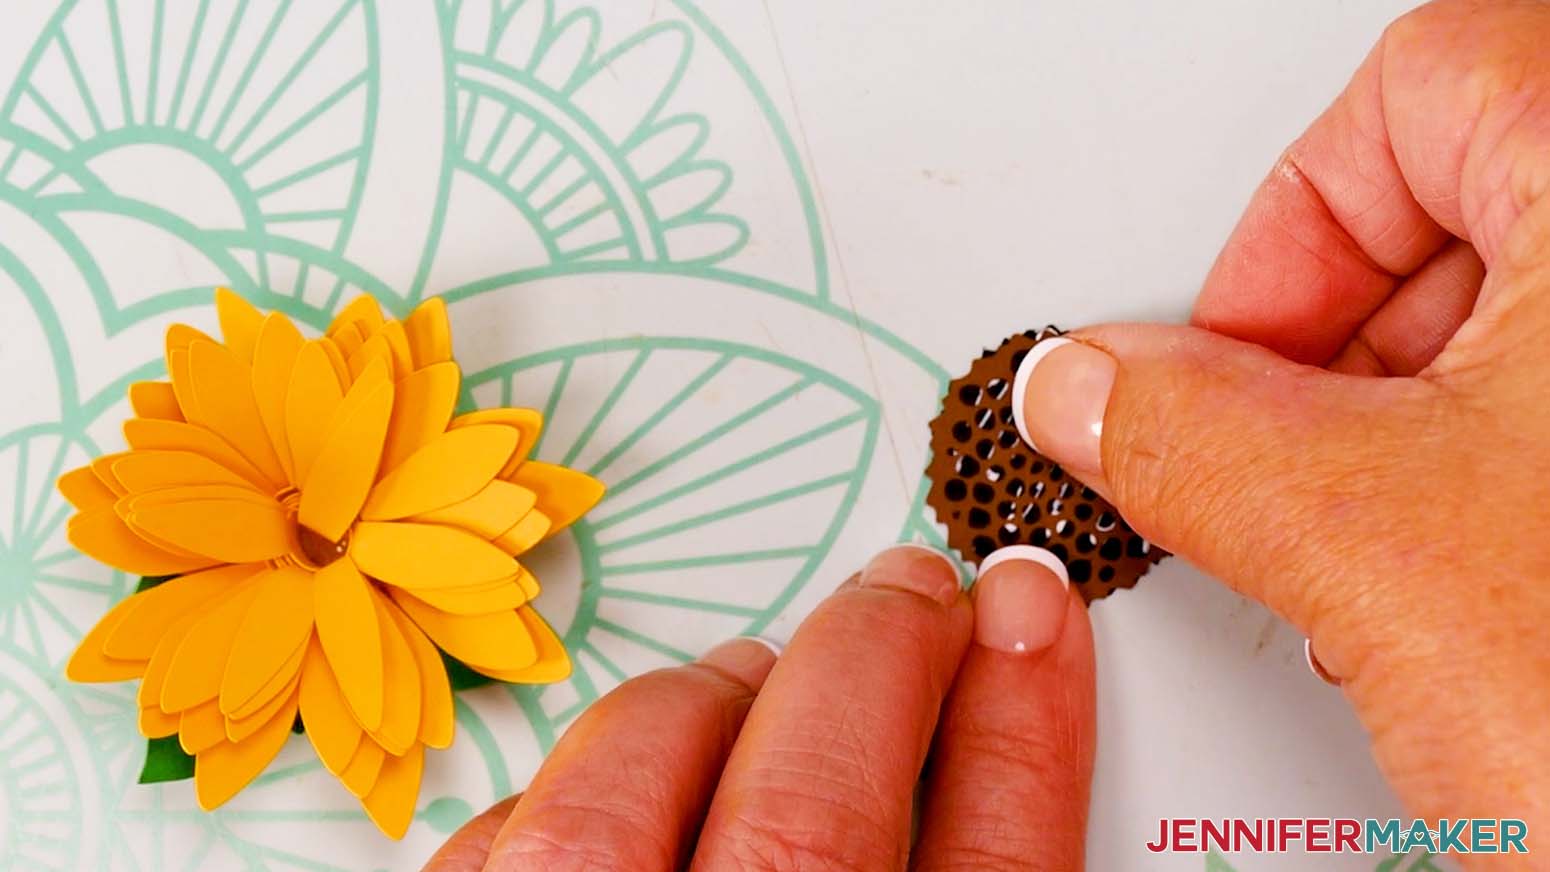
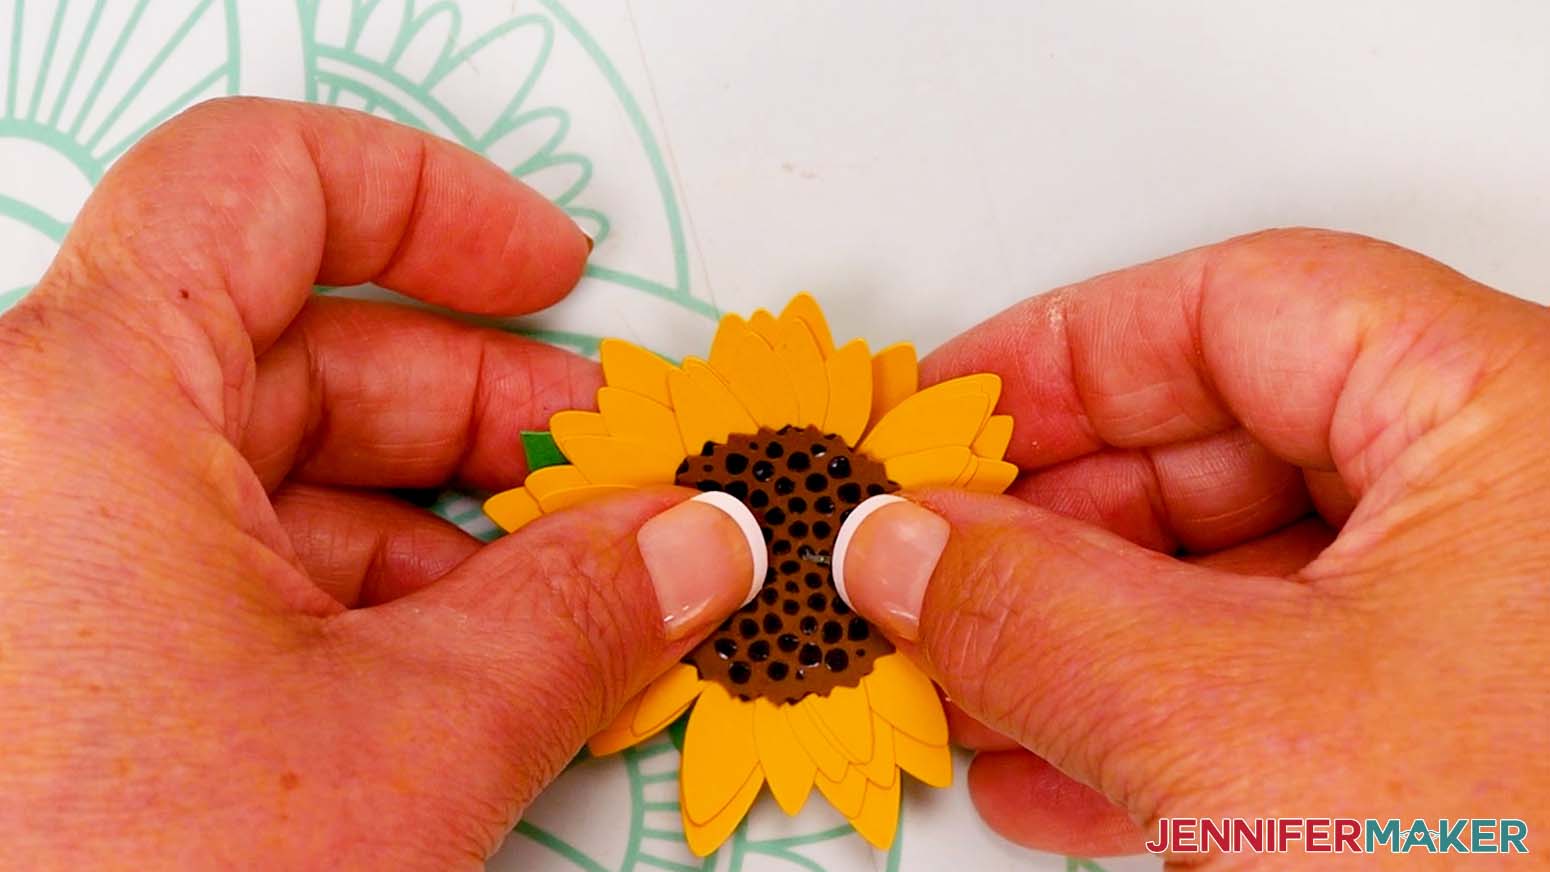
- Attach the brown seed head on top of the black seed head with craft glue and press to set.
- Attach the assembled seed head to the sunflower and press to set.
- Add glue to the rolled part of the back of the sunflower. Attach the flat green sepal.
- Assemble the rest of the sunflowers using the same method.
ATTACH THE FLOWERS
Follow the placement and gluing steps from Option 1 to secure your leaves and flowers to the planter design, leaving at least 1” of the sign visible.
STEP 4: SHOW IT OFF
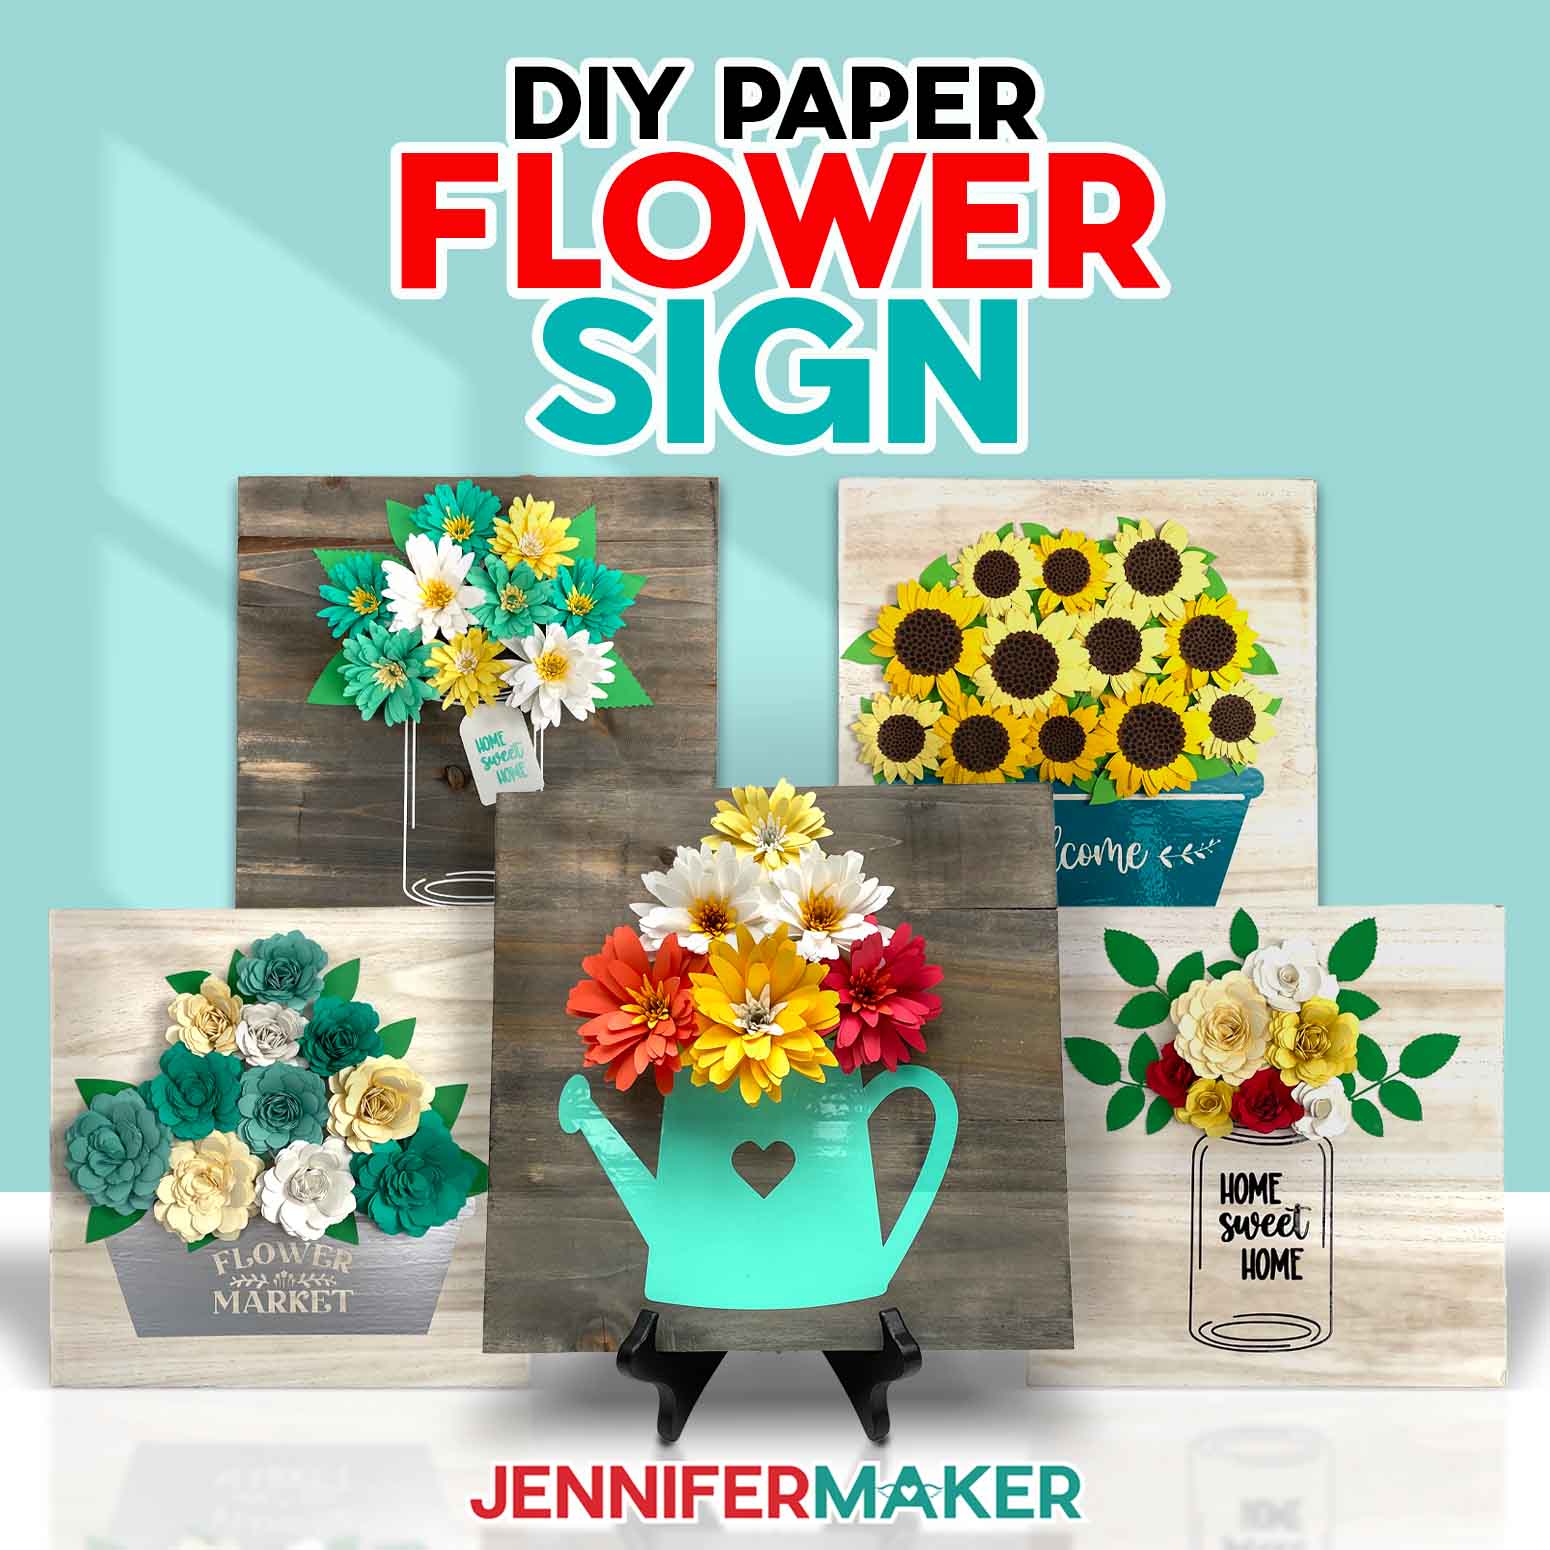
Here is what my finished Paper Flower Signs look like.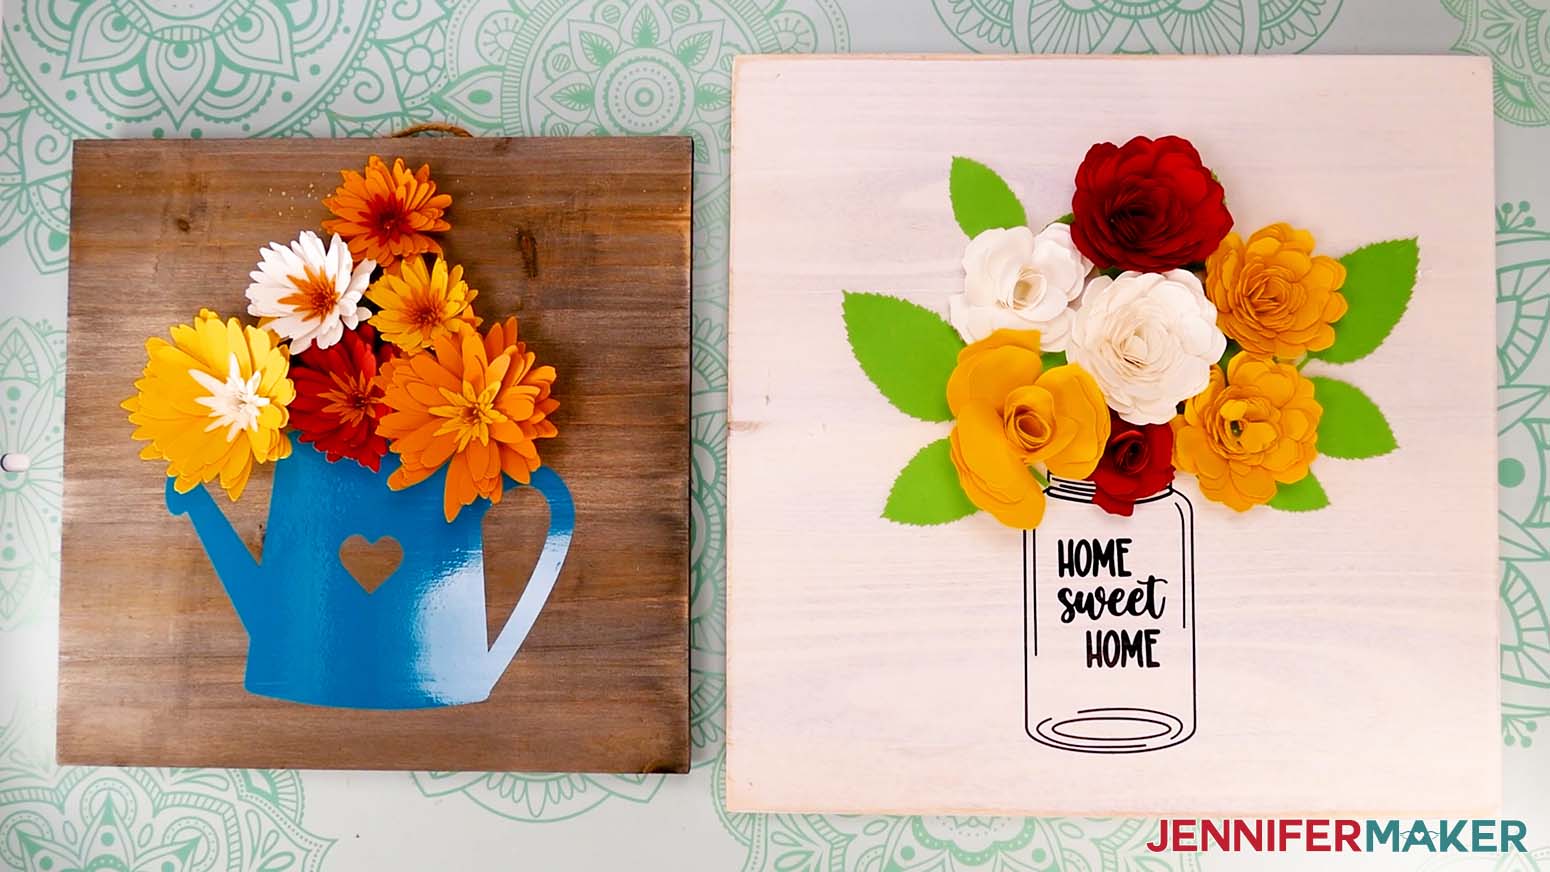
Notes
Typefaces used:
Goldie Rainbow (Free alternative: Goldie Rainbow)
Transcity (Free alternative: Sunflower)
Sweetie Almeera (Free alternative: Goldie Rainbow)
Falling Leaves (Free alternative: Delight Winter)
JM Sweet (free in my resource library)
Finished Sizes:
10" x 10" and 12" x 12"
Answers to Your Questions About How to Make a Paper Flower Sign
Q: How do I make paper flowers?
A: Search for “paper flower” on my blog to find all of the great ways you can use paper to create beautiful blooms — and tutorials to help you make them! Paper flowers can be used to decorate items, wreaths, or even make a floral backdrop. Play with different color schemes to coordinate with decor or a party theme. Add them to other crafts, create a personalized bouquet for a thoughtful gift, or make a lot of handmade paper flowers for a flower wall or photo backdrop at a birthday party, bridal shower, baby showers, or any other special event!
Q: How many papers do you need to make a paper flower?
A: It depends on the size of your flowers! For most smaller flowers, one piece of cardstock is enough (unless you want to make them multi-colored). If you’re making large flowers for a party backdrop, you’ll need more pieces of cardstock per flower.
Q: Which fonts did you use?
A: I used the following typefaces in this project: Goldie Rainbow, Transcity, Sweetie Almeera, Falling Leaves, and JM Sweet.
Q: Where are the tag instructions?
A: The cute accent tags are not done-for-you designs — they’re examples of tags you can design yourself in my ADVANCE program. Learn more about ADVANCE here!
Q: What paper is best for making paper flowers?
A: When making DIY paper flowers, I recommend using high quality 65 pound cardstock. It’s durable and strong, but easy to fold and curve into the shapes necessary to build the flowers. If you don’t have a local retail store, there are many cardstock sources online. Just check their average rating (read the 5-star reviews), see if their delivery times fit your goals, and look for free shipping because paper can be heavy!
Q. Do I have to use a Cricut?
A: No! My awesome team and I always include several versions of each digital item. If you have a Silhouette Cameo, which uses Silhouette Studio, you can use the DXF cut files in Silhouette Basic Edition. If you have upgraded to Silhouette Designer Edition, Designer Edition Plus, or Business, you can use the SVG file. A Brother Scan N Cut works, too, If you don’t have one of these powerful tools, you can print and then cut out my digital download PDF file, too. The ZIP file in my resource library includes these file types and more! And good news, you can also use Cricut cut files and Design Space on a mobile device. Just make sure you have the latest version of the app.
Q: Can I sell these paper flower signs on my Etsy shop/online store?
A: Thank you for wanting to create and sell items to interested buyers using our paper flower signs! Please read about licenses here so you know what you can and cannot do with our pop-up flower cards. While the paper flower sign files are free for personal use, if you want to use them for commercial use or sell them with small businesses on the Etsy app or elsewhere, please read the link above and do not sell my digital items or files, as that would infringe on JenniferMaker’s intellectual property rights. The same goes for my other collections of free SVGs digital files, and paper flower downloads. If you use them, please share photos with us! We love supporting small businesses and creative entrepreneurs!
Q: How do you roll paper flowers easily?
A: My current favorite is a Flowtool, but using a quilling tool can really help to you roll paper flower more easily! You can purchase one or use my tutorial to make a DIY quilling tool.
Q: What are the easiest paper flowers to make?
A: Rolled paper flowers are very easy and come together quickly, and that’s why I included them in this tutorial. They’re great for when you need to make a bunch of flowers at once, like for a bouquet. There are many types of paper flowers you can make, in all sizes (even GIANT ones!) but I find rolled flowers like these to be the easiest.
Q: My flowers don’t look as nice as yours. What am I doing wrong?
A: You might be too hard on yourself! I’ve been making paper flowers for a long time, so be patient with yourself. Most of the time, I’ve seen that people are either rolling their flowers too tightly (it’s hard to keep them loose to look natural), or they are having trouble cutting their cardstock to get nice edges. For a project with this number of flowers, you are going to make sure your blade and machine mat are nice and clean all the way through! Here are some great tips on Getting Cleaner Cuts!

Q: Do you have other easy paper flower projects?
A: Sure do! Check out my Paper Vase with Flowers, Paper Flower Shadow Boxes, Paper Flower Dress Canvas, Paper Flower Backdrop, and Paper Flower Letter to explore more paper flower projects.
Get my free SVG files to make a Paper Flower Sign!
I love seeing what you make with my designs and how you use them! Please share a photo after you learn how to make a paper flower sign in our Facebook group or tag me on social media with #jennifermaker.
Love,

Want to remember this? Save this Tutorial on How to Make a Paper Flower Sign to your favorite Pinterest Board!