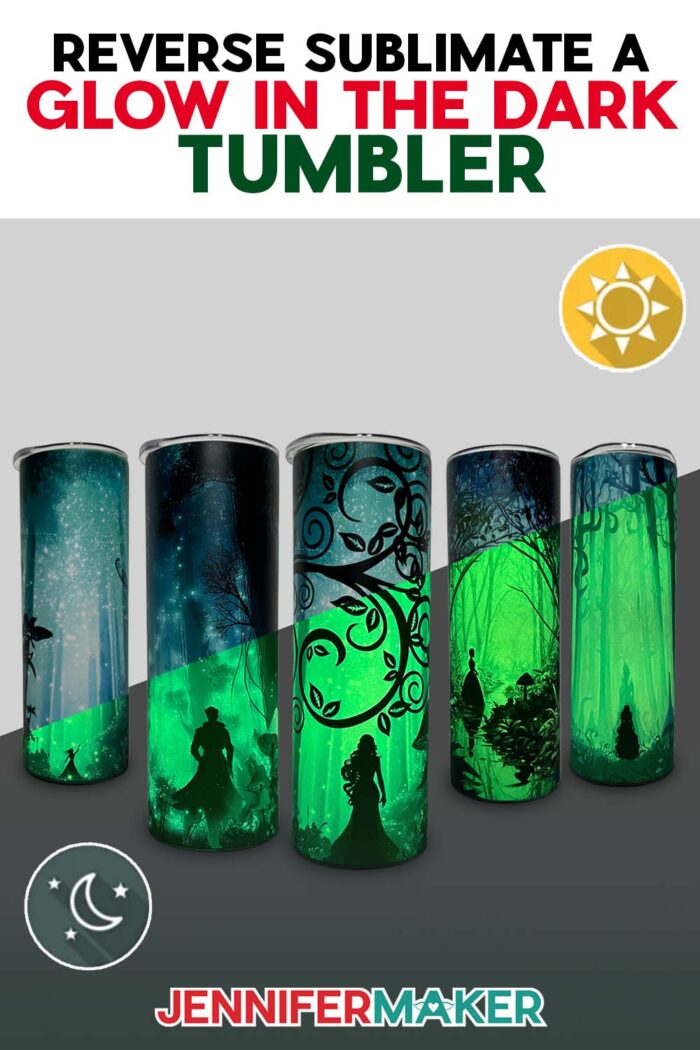
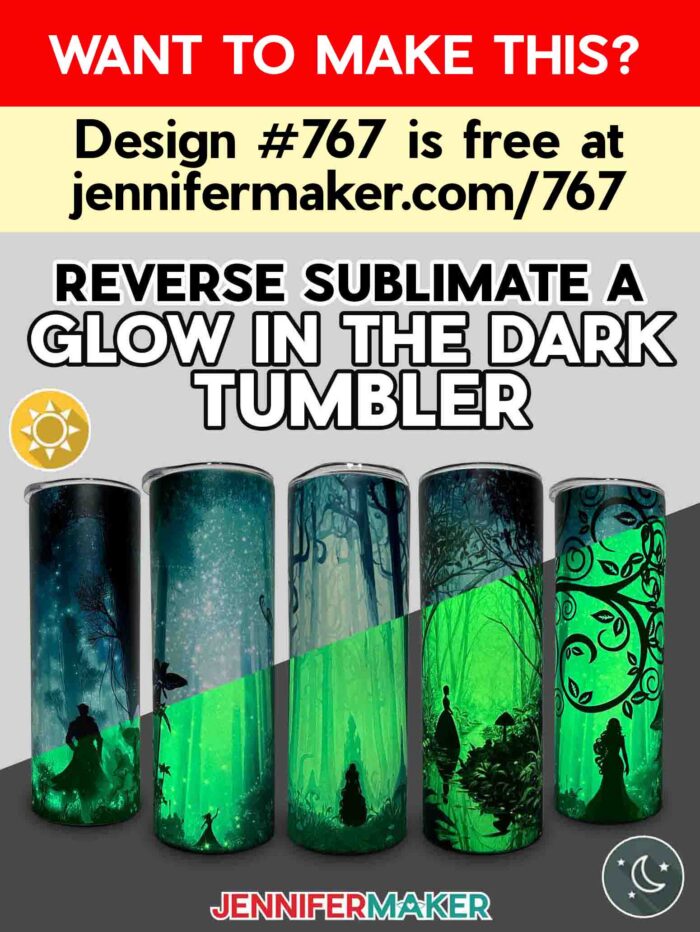
Learn how to make amazing effects on a glow in the dark tumbler with reverse sublimation!
The first time I saw a glow in the dark tumbler with reverse sublimation, I felt like I was holding a little bit of magic. One moment, it looked like a regular tumbler with a pretty design. Then the lights went out, and oh my goodness! It glowed like a bottle of captured moonlight, with bold, interesting designs laid over top. I had to know how it worked, and I found out that doing sublimation with a glow in the dark tumbler isn’t about adding more. Instead, it’s about thinking in reverse. Let me show you what I mean!
Watch the full step-by-step tutorial on how to make a glow in the dark tumbler with reverse sublimation:

Traditional tumbler sublimation focuses on filling every inch of a blank with bright vibrant colors and bold images. The sublimation process uses high heat and sublimation ink to transfer designs into a sublimation-ready surface like a tumbler, mug, or T-shirt. Usually, the goal is to make sure there’s no white space at all.
But reverse sublimation? That’s the secret to downright magical glow in the dark tumblers.
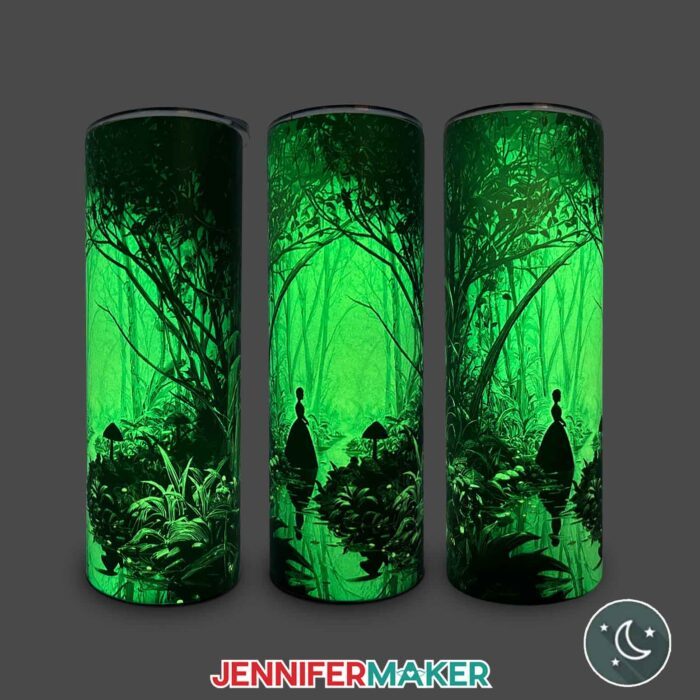
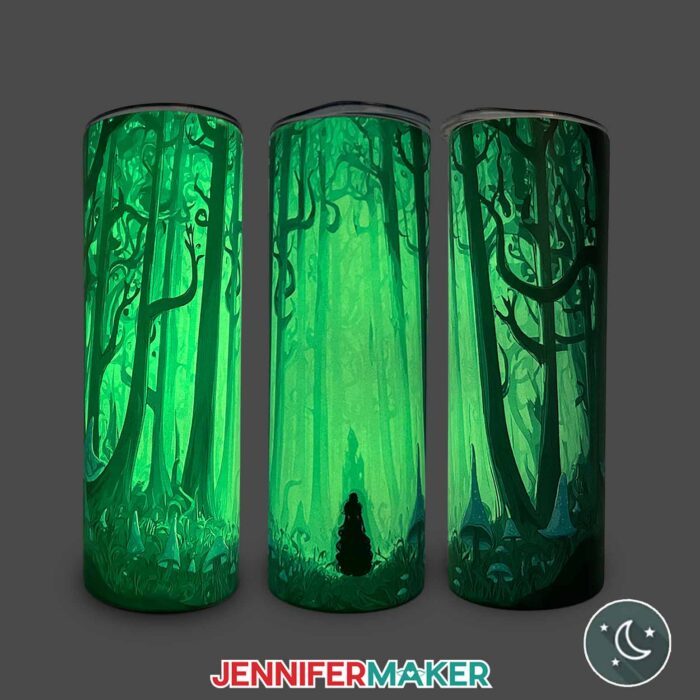
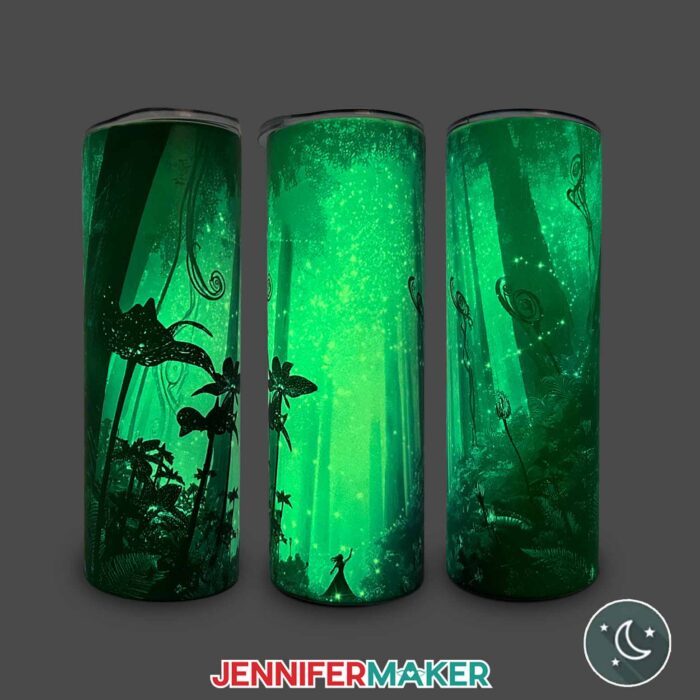
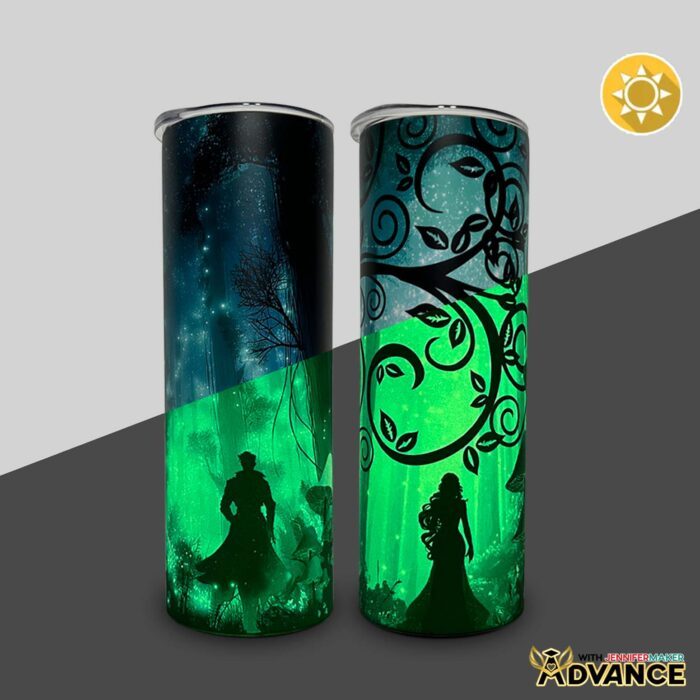
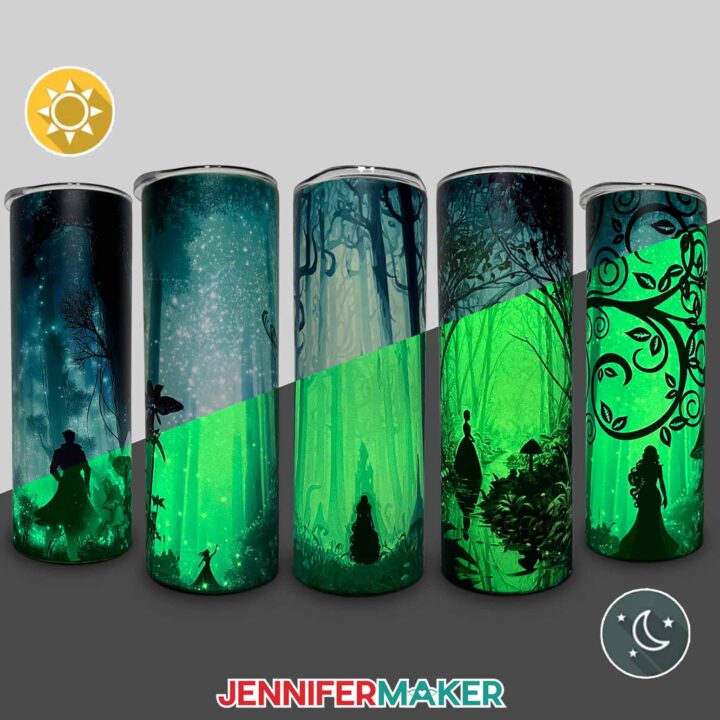
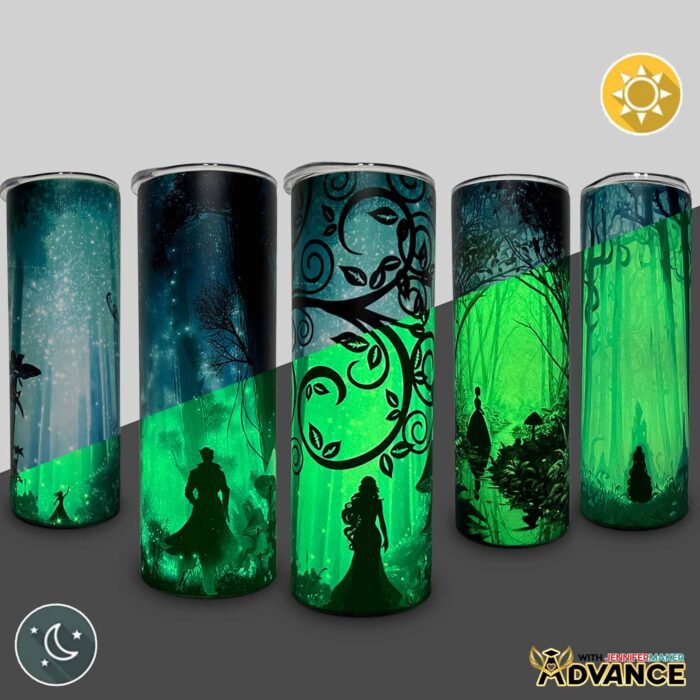
Instead of trying to cover everything, we intentionally leave areas without ink. Wherever your design is lighter, that’s where the glow of the tumbler can peek through. The darker areas block the light, creating contrast that makes the glowing parts shimmer even more! The result is an incredibly captivating tumbler that looks one way in daylight and transforms into something completely different in the dark. It’s enchanting!
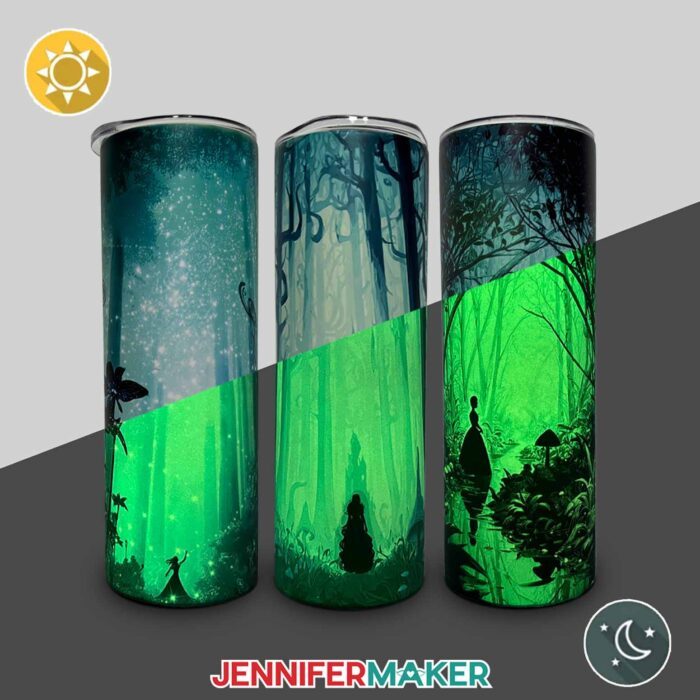
Speaking of enchanting, the designs for this project include glowing forests, sparkling streams, and a mushroom path, and they’re free for you to use for glow in the dark tumblers or any other projects you can imagine. I made them with the help of an AI generator and image editing software.
The cups I used are glow in the dark sublimation tumbler blanks made of durable stainless steel. The ones in my shopping list are just a bit smaller than the typical 20 oz tumblers I often use, but they had the best results in my testing. They’re still the perfect size for your favorite fall beverage! When they’re charged under direct sunlight or even UV light, they store up energy and then glow softly when the lights go out. It’s so satisfying to see that glow shine through your sublimation design.
For this project, you’ll need a sublimation printer (or a way to purchase a sublimation print) with sublimation ink, and good sublimation transfer paper for the highest quality print. And since I’m always chasing the best results, I swapped out the usual blue tape for yellow heat tape. It’s thinner, stretches better, and lets the heat transfer evenly. Once the design is wrapped, it’s held snug with a plastic shrink wrap sleeve, then placed in a sublimation-purposed convection oven for just a few minutes to let the ink permanently infuse into the tumbler’s surface.
When you pull your glow in the dark sublimation tumblers out of the oven (use heat resistant gloves, of course) and peel back the paper, it’s pure magic. Even before the lights go out, the design looks so cool: crisp edges, dynamic shapes, and that professional finish that makes your tumbler feel like something straight out of a boutique. But when you switch off the lights? Oh, it’s a moment. The darker parts of the design contrast against the glow effect of the light areas, revealing every hidden detail. You’ll be saying, “I made that?!”
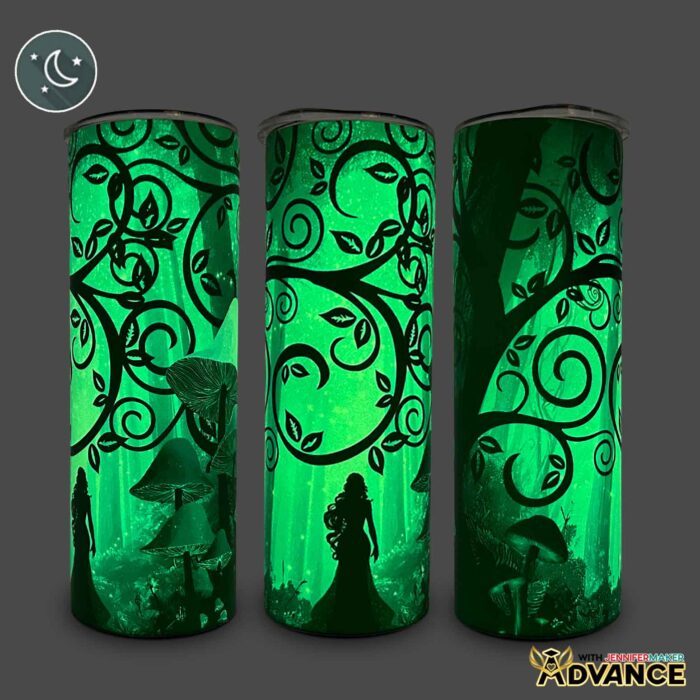
If you’re ready to take your creativity to the next level, my ADVANCE with JenniferMaker workshop for this project is where the real magic happens! In this special tutorial, I’ll show you exactly how to create your own custom glow in the dark design using my exclusive toolkit. You’ll learn how to balance light and shadow in your artwork so your design glows beautifully in the right places, whether you want to use my designs or your own. This workshop gives you the tools and confidence to make it happen! I can’t wait to see what you create when your imagination starts to glow! Click here to learn more about the ADVANCE with JenniferMaker program!
I love that these tumblers are not only unique and eye-catching, but also practical. Customized tumblers are always a great gift idea for birthdays, special events, holidays, or just because.
The glow lasts for hours, and it’s so easy to recharge. Just set your tumbler in direct sunlight or near UV light for a bit, and it’ll be glowing again in no time.
And like most handmade things, if you take care of it properly, it will last a long time! For the best results, hand wash your tumbler with gentle soap and warm water. Then let it air dry to keep the glow in the dark coating and the design looking fabulous for many spooky seasons to come.
What I love most about this project is how it changes the way you think about sublimation. It’s not just about transferring ink, it’s about creating art with light and color. You don’t have to be a pro to try it, either. Once you understand how it works, the process only takes a short time, and it’s truly so much fun to watch the results reveal themselves when the lights go out.
My step-by-step guide shows exactly how to get a seamless wrap and how to bake your tumbler for the best results. You’ll see how easy it can be to create your own glowing masterpiece, whether you’re using one of my free designs or your own artwork. Be sure to watch my full video tutorial where I show every step, from printing to the big reveal moment that never gets old!
For even more tips and tricks for sublimation success, check out my Sublimation Cookbook. It’s packed with loads of information to help you achieve great results consistently, including recommended time, temperature, and heat press settings for tons of unique materials.
Want to learn how to make a glow in the dark tumbler with reverse sublimation? Let me show you how fun and easy it can be! This post contains some affiliate links for your convenience (which means if you make a purchase after clicking a link I will earn a small commission but it won’t cost you a penny more)! Read my full disclosure policy.
Materials to Make a Glow In The Dark Tumbler with Reverse Sublimation
View my Amazon shopping list with the exact items I used.
- One (1) 20 oz. Glow In the Dark Straight Side Sublimation Tumbler
- One (1) Sheet of 8.5” x 11” A-Sub Sublimation Paper 105g -OR-
- One (1) Sheet of 8.5” x 11” A-Sub Sublimation Paper 125g
- Sublimation Printer – I used a converted Epson EcoTank ET-2800 Printer
- Sublimation Ink
- Convection Oven
- Silicone Baking Mat
- Oven Thermometer
- Fan (for ventilation)
- Heat-Resistant Gloves
- 10mm Yellow Heat-Resistant Tape
- Looped Tape Measure
- Scissors
- Paper Trimmer
- Scraper
- 5” x 10” Heat Shrink Wrap Sleeves (if your tumbler doesn’t come with them)
- Heat Gun
- Isopropyl Alcohol -AND-
- Lint Free Cloth
- Tumbler Clamp
- Cooling Rack
- Cricut BrightPad Go (optional to help see the edges of the design)
- Design #767 (My free PNG design files are available in my free library – get the password by filling out the form at the bottom of this page)
How to Make a Glow In The Dark Tumbler with Reverse Sublimation
Sublimate a Glow in the Dark Tumbler
Learn how to sublimate a glow in the dark tumbler with reverse sublimation designs!
Materials
- One (1) 20 oz. White Glow in the Dark Straight Tumbler
- One (1) Sheet of 8.5” x 11” A-Sub Sublimation Paper 105g -OR-
- One (1) Sheet of 8.5” x 11” A-Sub Sublimation Paper 125g
- Design #767 (My free PNG design files are available in my free resource library - get the password by filling out the form at the bottom of this page)
Tools
- Sublimation Printer - I used a converted Epson EcoTank ET-2800 Printer
- Sublimation Ink
- Convection Oven
- Oven Thermometer
- Silicone Baking Mat
- Fan (for ventilation)
- Heat-Resistant Gloves
- 10mm Yellow Heat-Resistant Tape -OR-
- 20mm Blue Heat-Resistant Tape
- Looped Tape Measure
- Scissors
- Paper Trimmer
- Scraper
- 5” x 10” Heat Shrink Wrap Sleeves (if tumblers don't come with them)
- Heat Gun
- Isopropyl Alcohol -AND-
- Lint-Free Cloth
- Tumbler Clamp
- Cooling Rack
- OPTIONAL: Tumbler Cradle
- OPTIONAL: Cricut BrightPad Go
Instructions
STEP 1: GET MY FREE GLOW IN THE DARK TUMBLER DESIGNS
First, download my Glow in the Dark Tumbler files from my free library – look for Design #767. Alternatively, you can use the Save This Project form near the top of this post and the design link will be emailed to you.
In the PNG folder, you’ll find my “path,” “spark,” and “stream” tumbler designs, which have been specially created to look amazing in both daylight and in the dark. I made these designs with the help of AI art generation and adjusted them with image editing software.
I’ll show you how to use these files to print a sublimation wrap and apply it to a 20 oz. straight-sided, glow-in-the-dark tumbler like the one in my supplies list.
TIP: If you’re not sure how to upload, go to jennifermaker.com/svgs to learn how to unzip and upload PNG files.
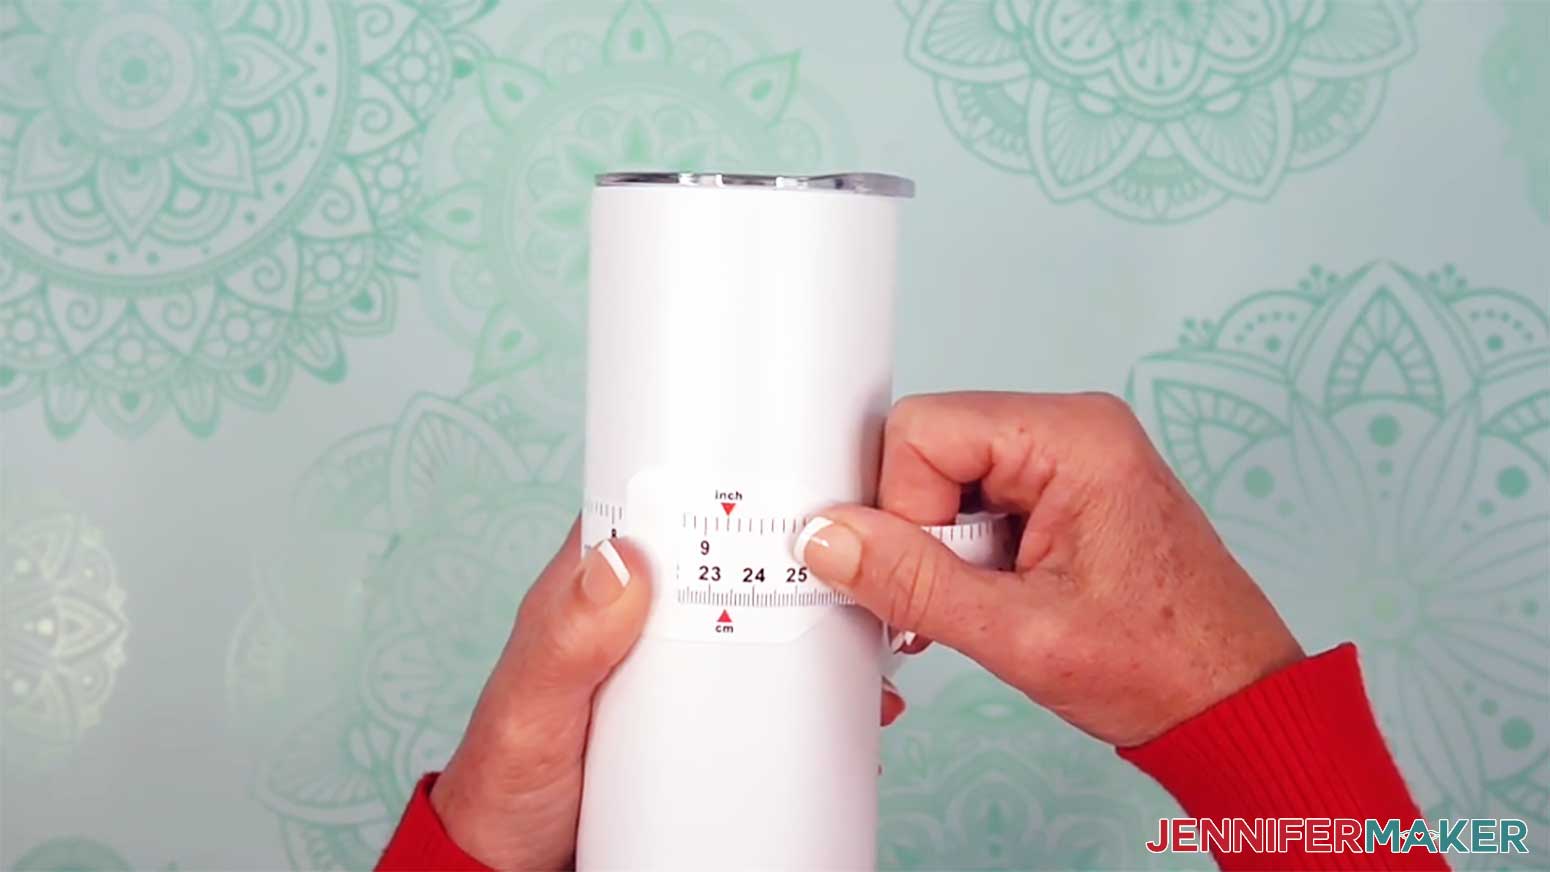
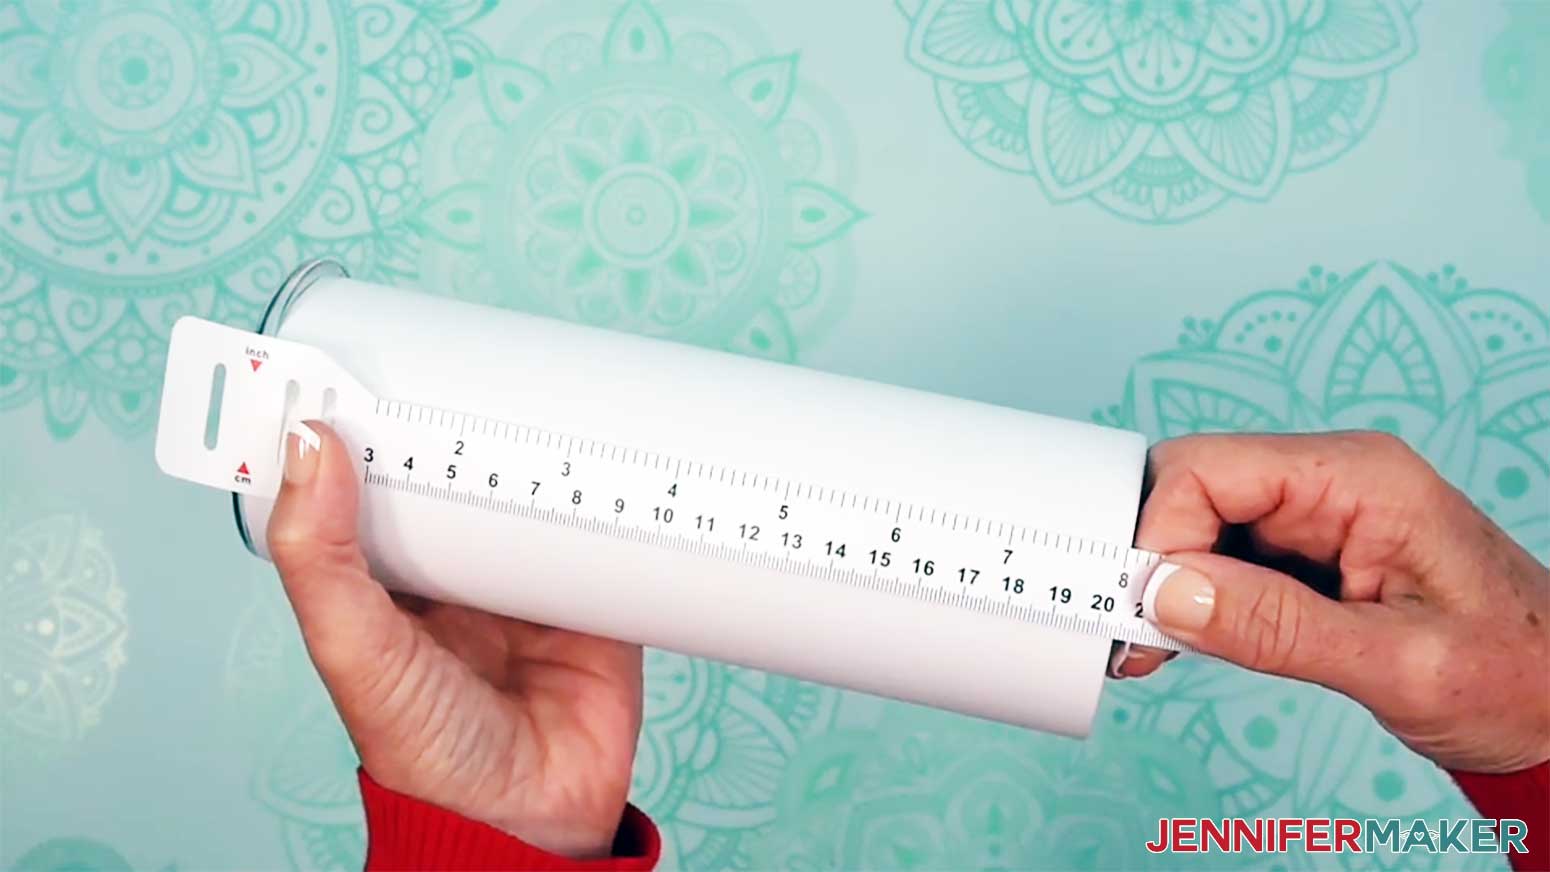
STEP 2: MEASURE YOUR TUMBLER’S DESIGN AREA
- Use the looped measuring tape to find the tumbler’s circumference to get the wrap’s width. Record your measurement on a piece of scrap paper.
NOTE: The tumbler in my list is 9.19” around.
- Then measure the tumbler’s height to see how tall the wrap should be and record the measurement.
TIP: If your tumbler is indented at the top and bottom, only measure the straight edge.
NOTE: The sublimation area for my tumbler is 8.1” high.
STEP 3: PRINT YOUR TUMBLER’S REVERSE SUBLIMATION DESIGN
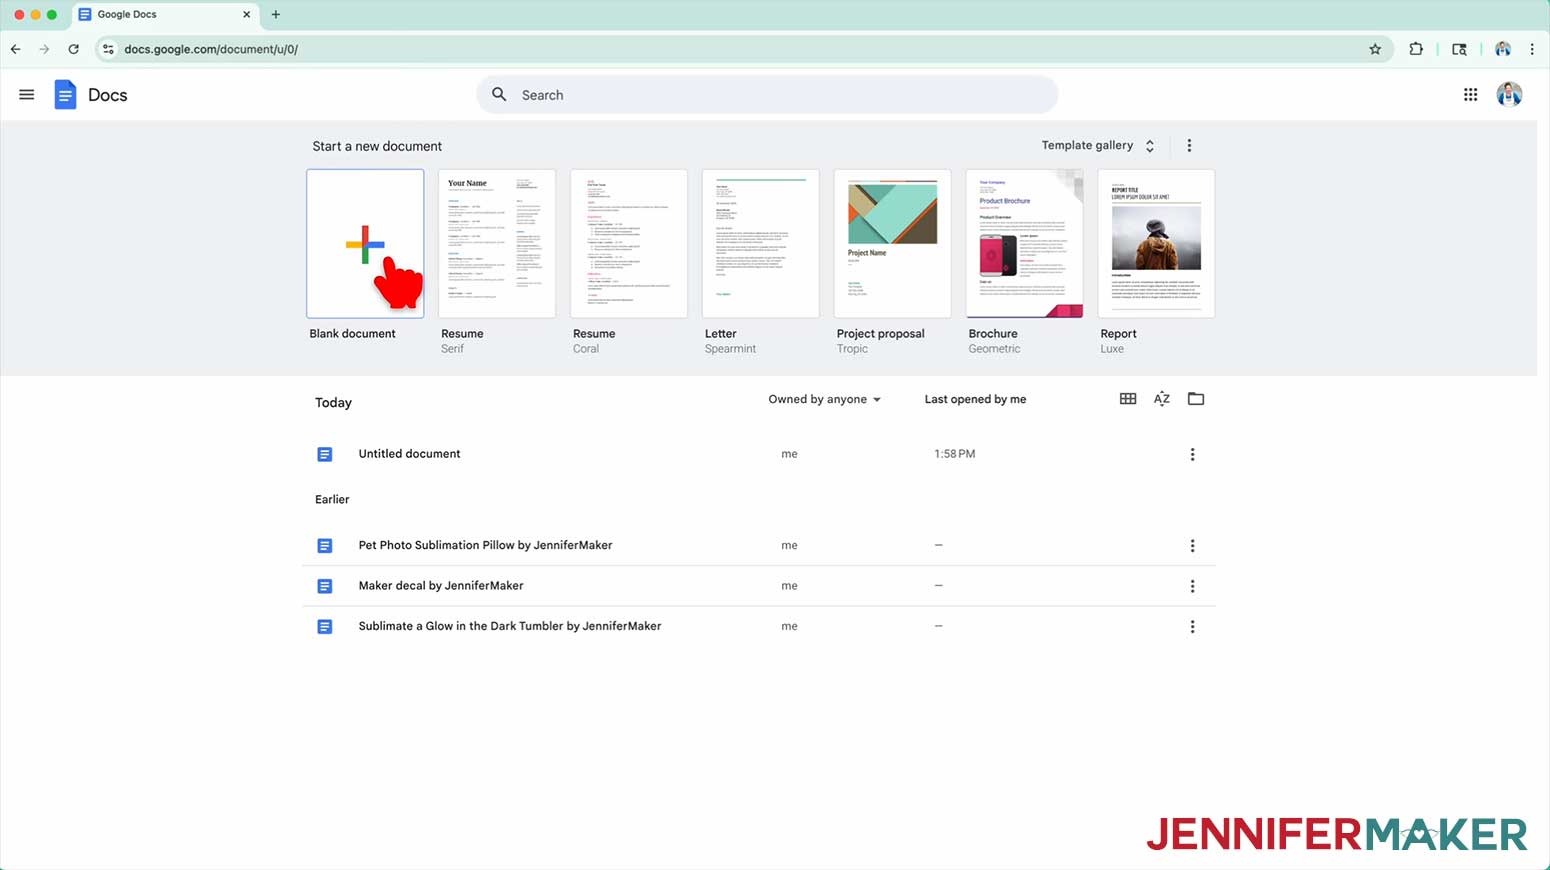
- Open Google Docs in the Google Chrome web browser on your computer.
NOTE: You will need a free Google account to use the free Google Docs software.
TIP: You can also download and open the Google Docs app, but you’ll have limited access to features, so I do not recommend it on a mobile device. - Click “Blank document” at the top left to open a new document.

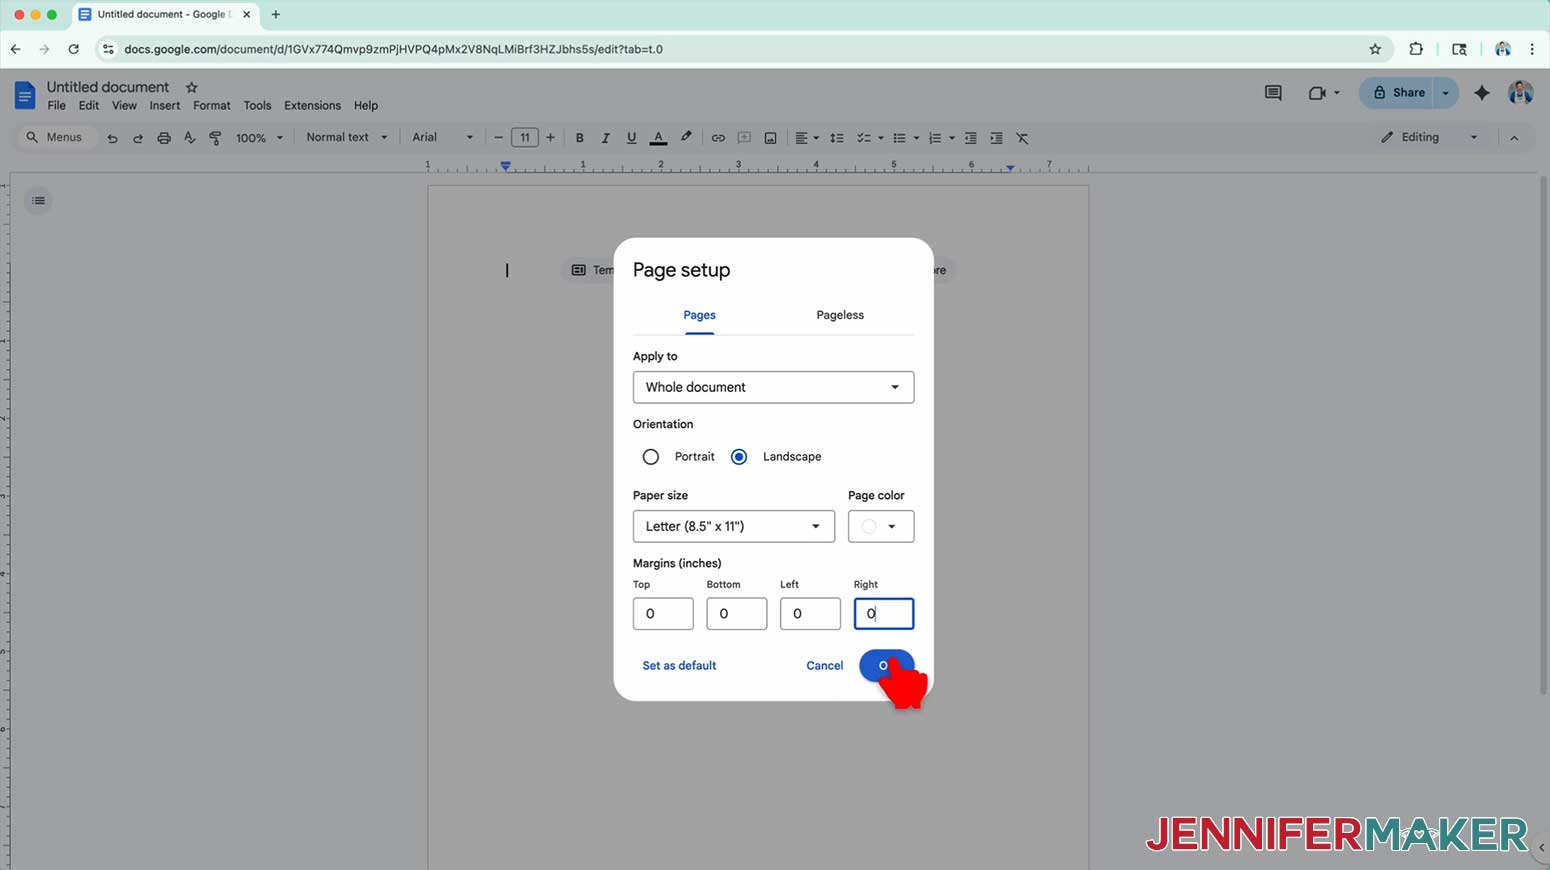
- Go to the File menu and select “Page setup.”
- Select the bubble next to “Landscape” to better fit the wrap’s orientation.
- Change your Paper Size to match your sublimation paper size.
NOTE: I’m using 8.5” x 11” or letter-size paper. - Change your margins to “0” to use more of the page.
- Click “OK” to apply the settings.
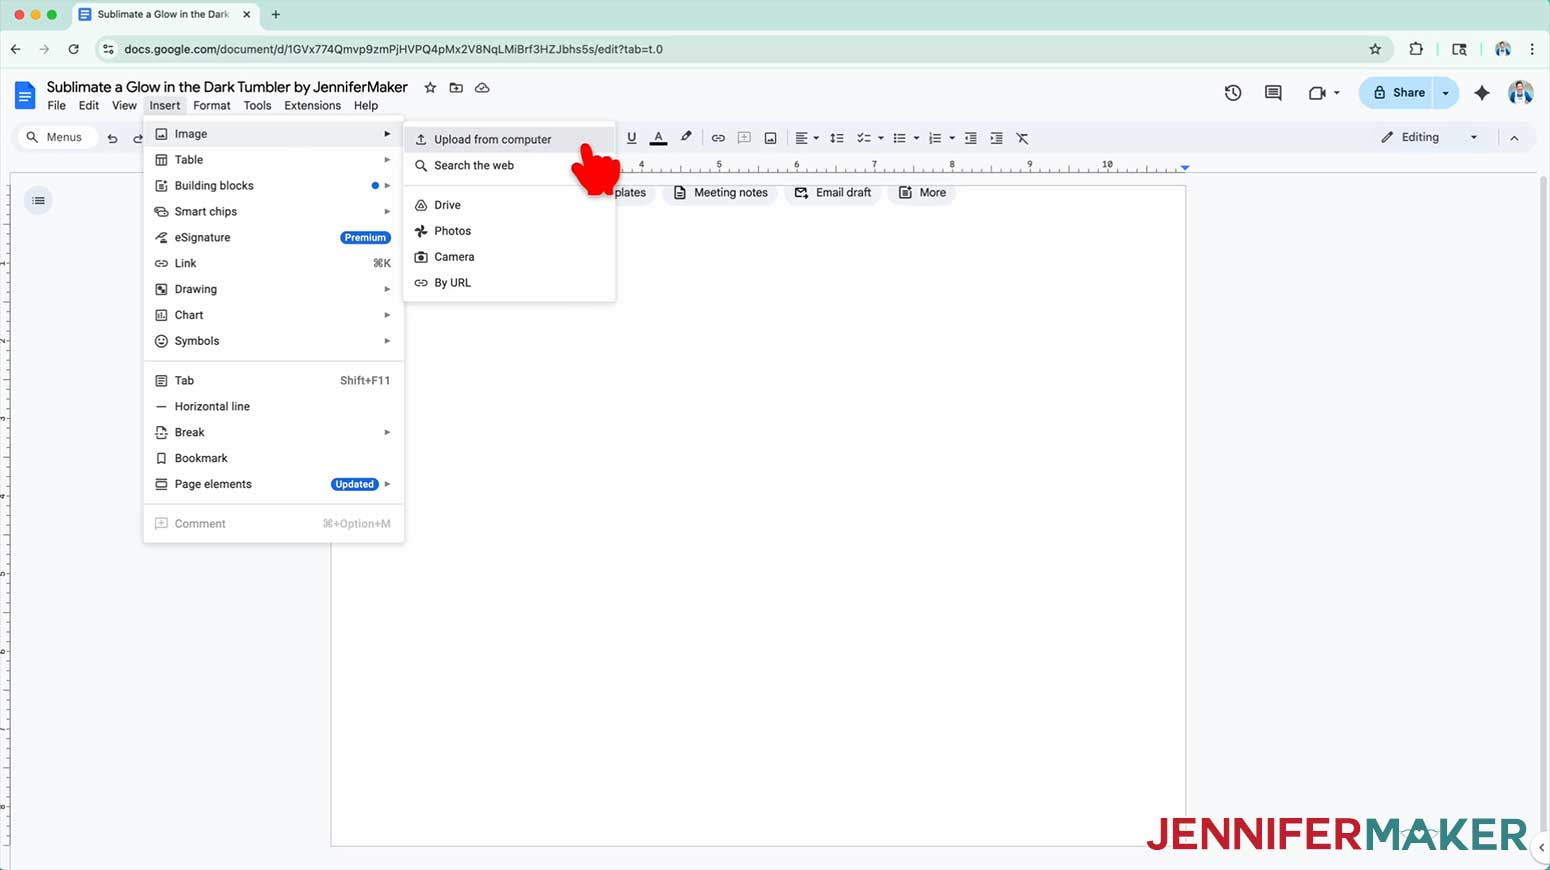
- Click the area that says “Untitled document” at the top and type a name for the file.
- Go to the “Insert” menu, select “Image,” and select “Upload from Computer.”
- Select the PNG file with your sublimation design.
TIP: You’ll most likely find it in your Downloads folder.
NOTE: I’ll demonstrate with the “path” design. - Click “Open” to add the image to your document.
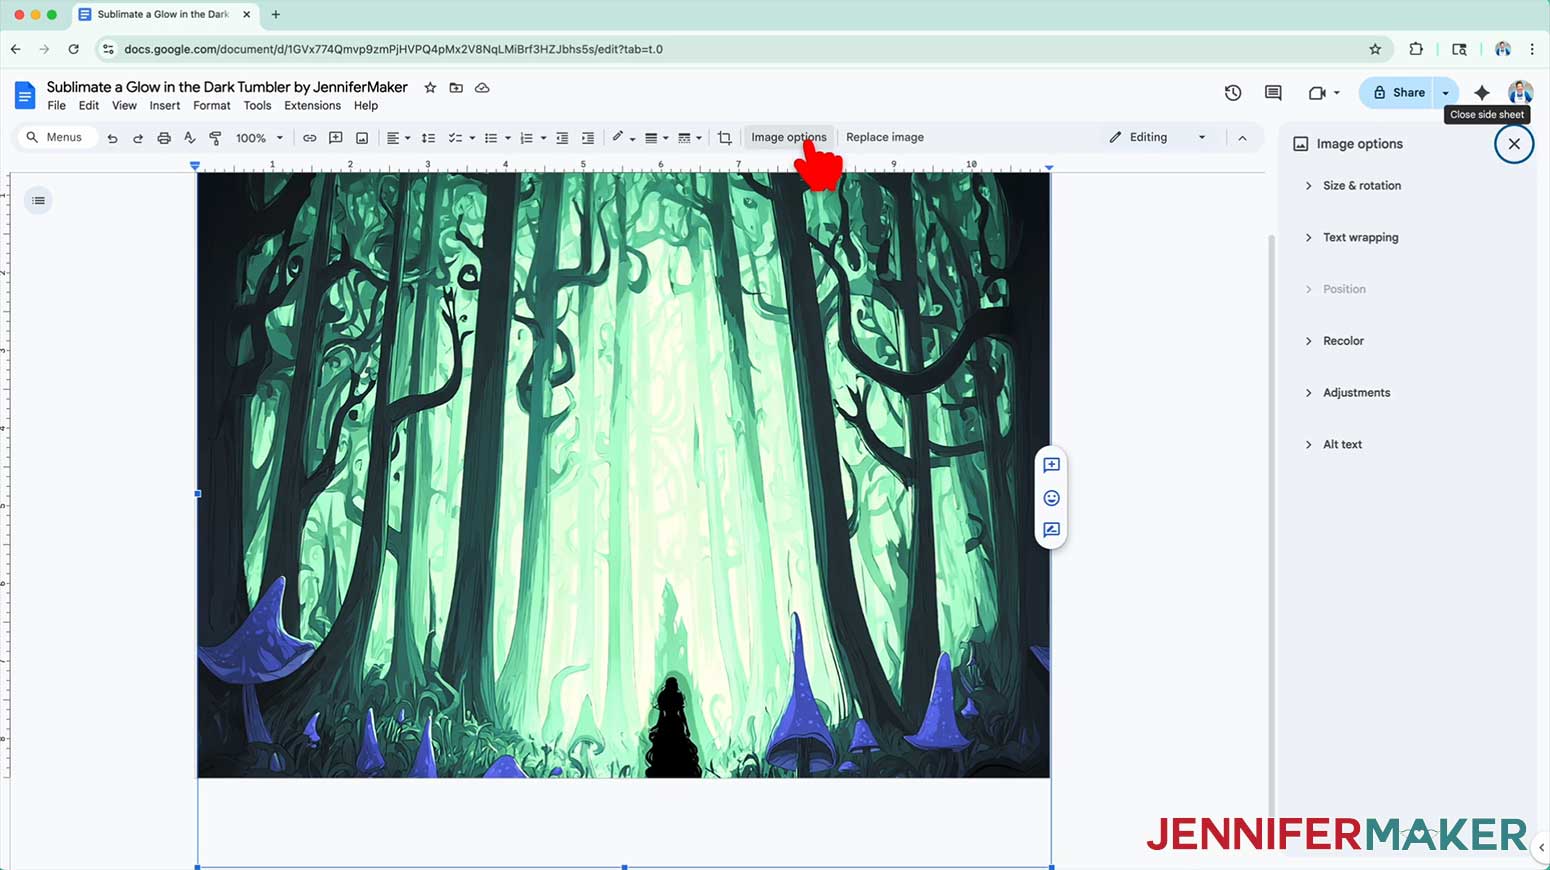
NOTE: My glow-in-the-dark tumbler designs are high-contrast images with dark areas in the foreground and lighter areas in the background. The light areas of the design are where the glow from the tumbler will shine through. We call this “reverse sublimation” since we put less ink on the areas we want to be bright and vibrant. - Select the image and click “Image Options” at the top of the canvas.
NOTE: You can also open the menu by going to “Format,” “Image,” and “Image Options.” - Select “Size & Rotation.”
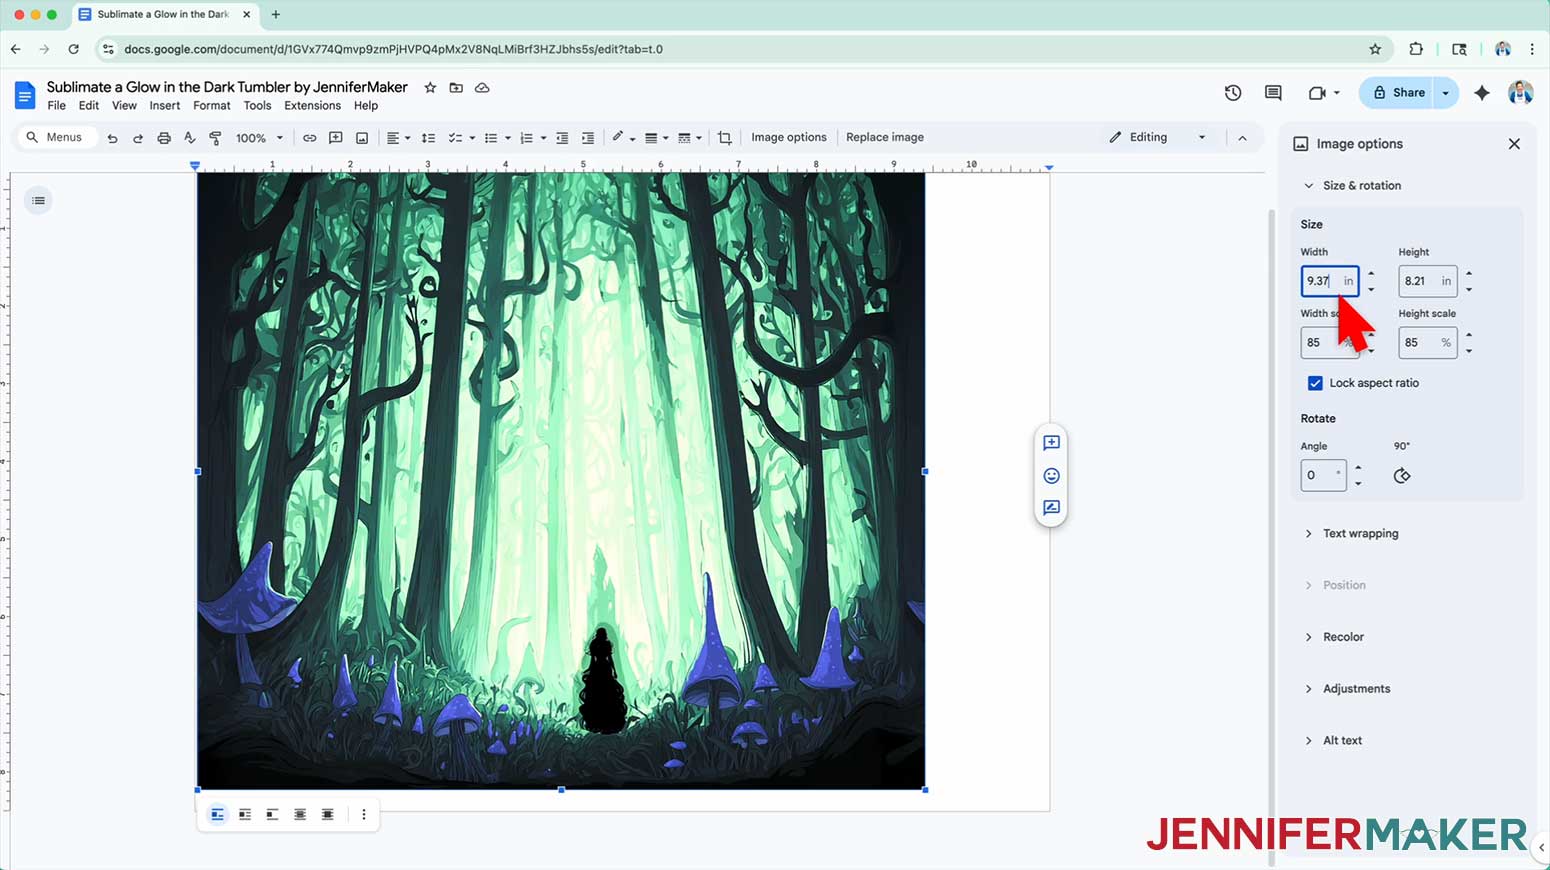
- Keep the “Lock aspect ratio” box checked to maintain the design’s proportions.
- Change the “Width” field to 9.37” to account for a slight overlap at the seam.
NOTE: These designs were made to fit the tumbler in my supplies list, with the overlap built into the design. When the width is set to 9.37”, the seam line falls at 9.19”, which matches the tumbler’s width. If you use a different tumbler, add about 3/16”, or 0.188”, to the width of your design to make sure your print overlaps at the seam. - Make sure the “Height” field automatically adjusts proportionately.
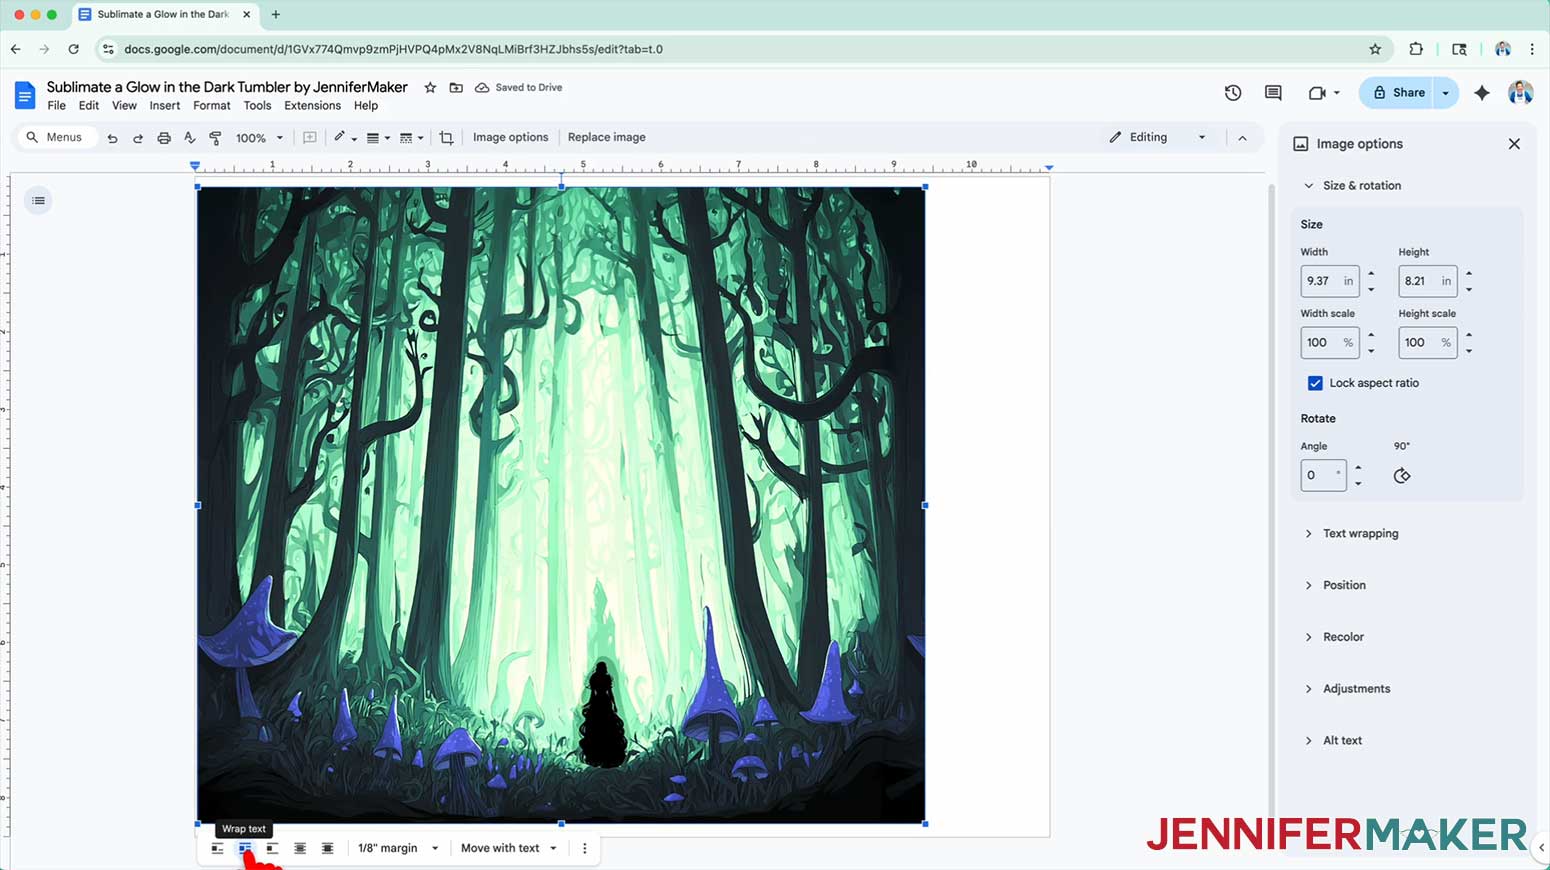
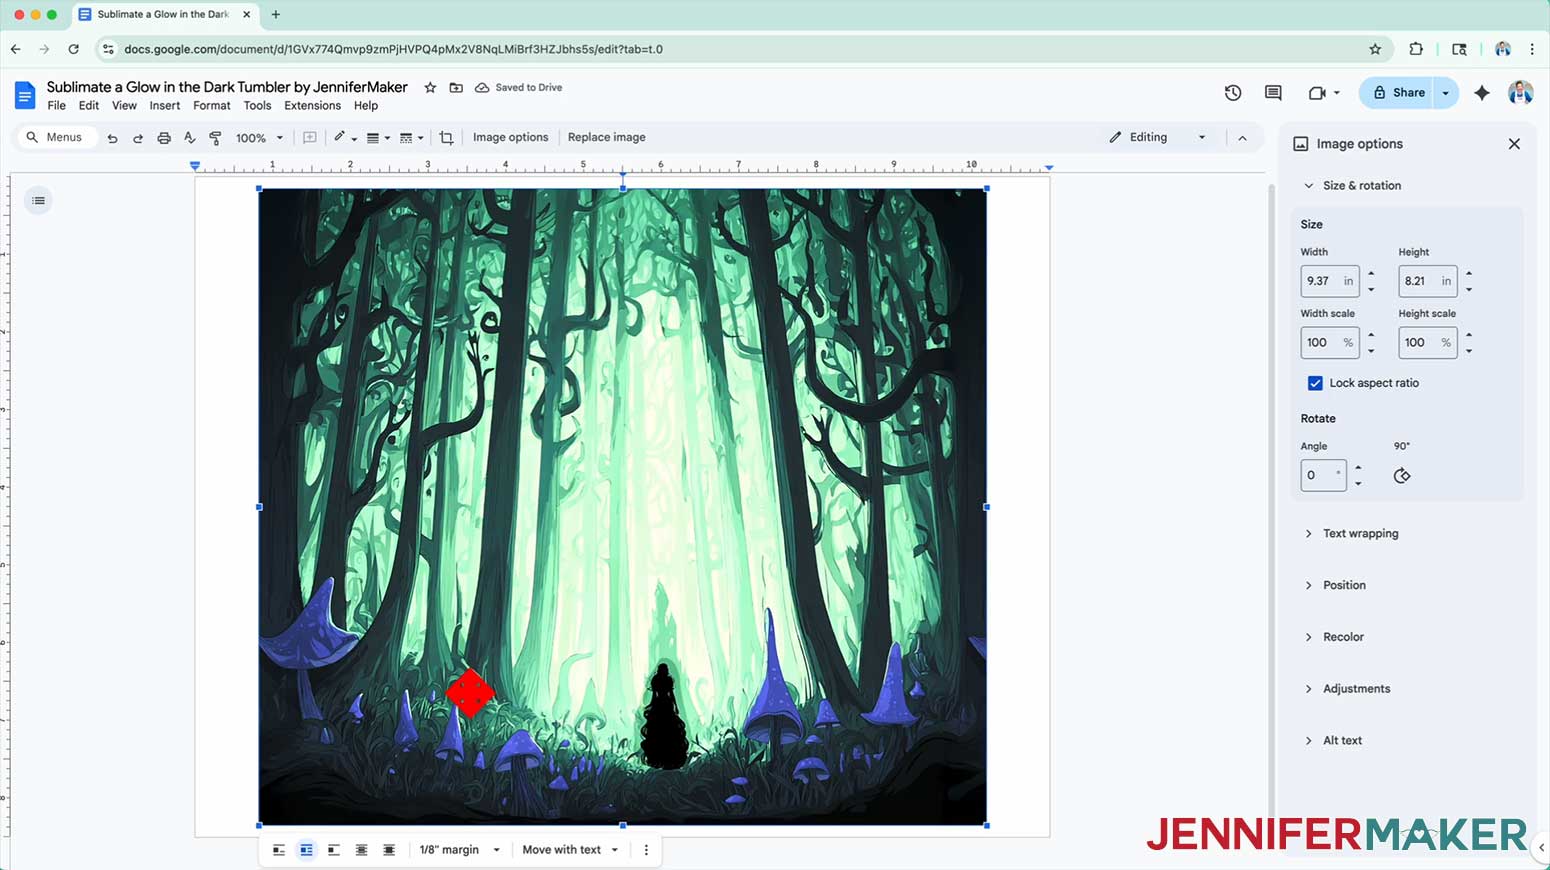
NOTE: If you use a different tumbler than the one in my list, the adjusted height might not match your tumbler’s size. I recommend using these designs with the tumblers in my list. - Click the image and select the “Wrap text” icon from the menu that appears below it.
NOTE: This setting lets you move the design anywhere on the page. - Click and drag the image to the center of your page to ensure nothing will get cut off at the edges.
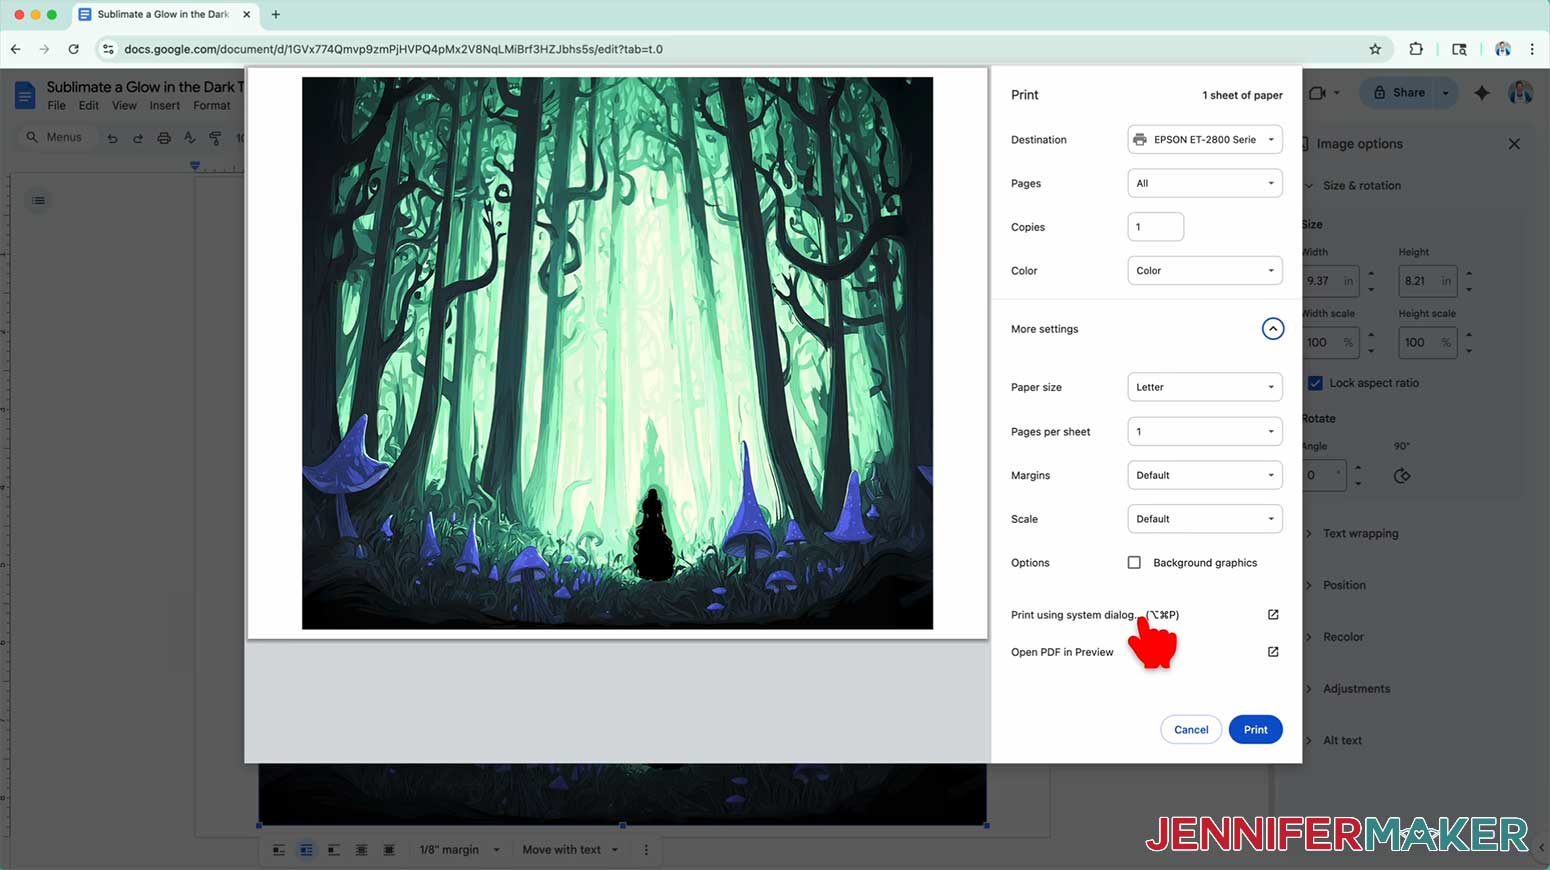
- Go to the “File” menu and choose “Print.”
- Select your sublimation printer under “Destination.”
- Click the arrow beside “More Settings,” and then click “Print Using System Dialog.”
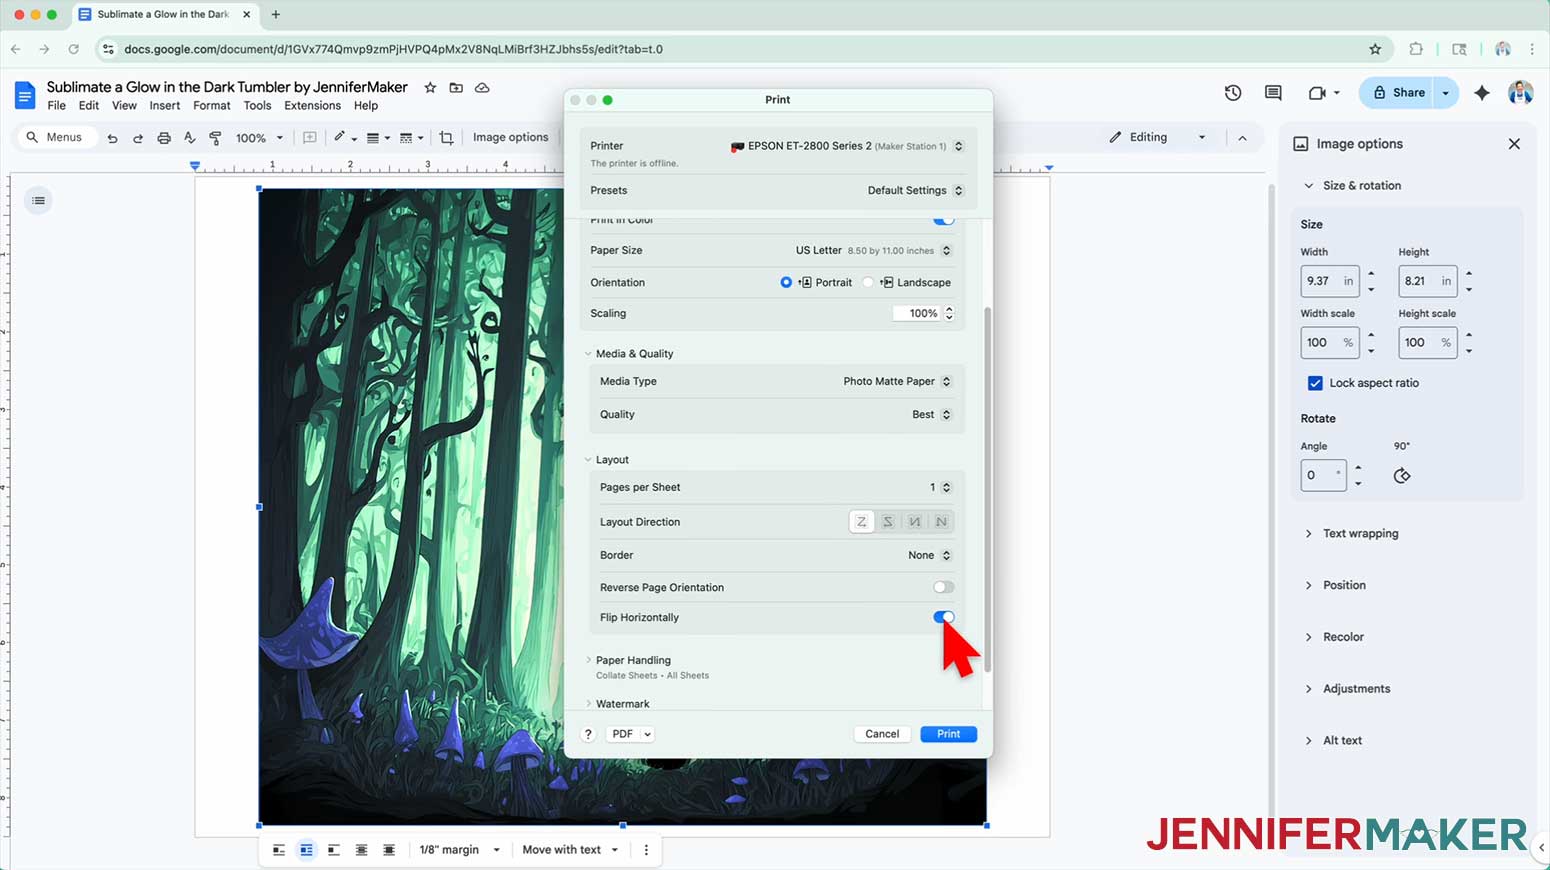
- Your print menu may look different. Just make sure that you “Mirror” the image and select the highest quality matte paper setting. Double-check the sublimation printer and paper size settings to make sure they are correct.
NOTE: The “Mirror” option is sometimes labeled as “Flip Horizontally.” If you’re having trouble finding these options, they are sometimes found under a “Layout” section or tab. - Load a sheet of sublimation paper correctly into your sublimation printer.
NOTE: Check the packaging for information on how to load the paper. - Click “Print.”
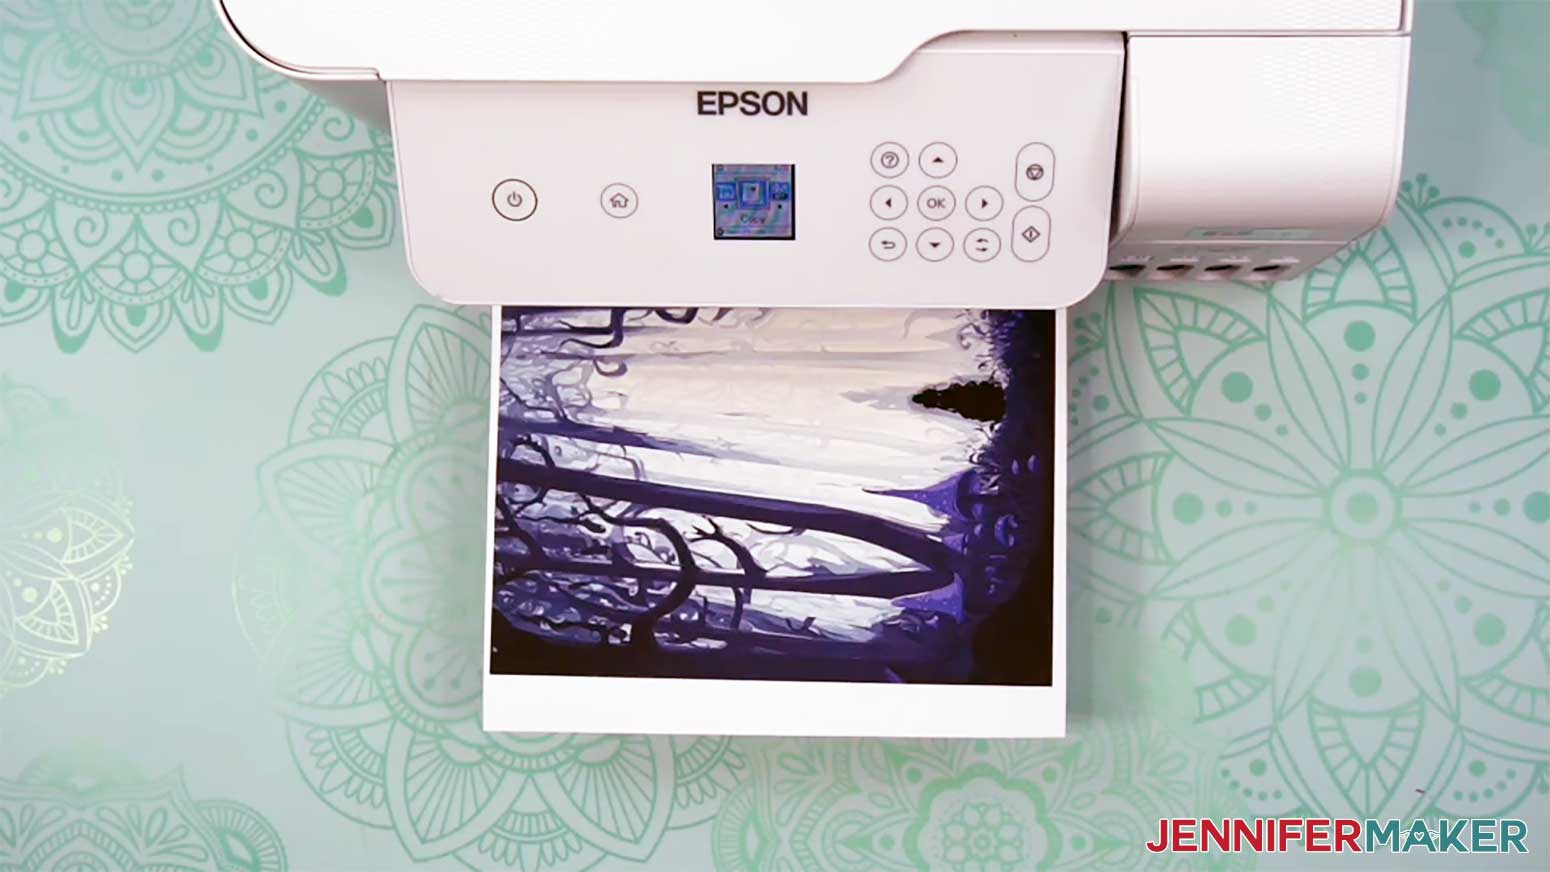
- Allow the print to dry before handling it, as the ink can smear.
NOTE: The printed design will appear less vibrant before pressing. - Your print is ready to apply to your tumbler!
STEP 4: SECURE THE PRINT TO YOUR TUMBLER
- Lay the printed design face down on your work surface.
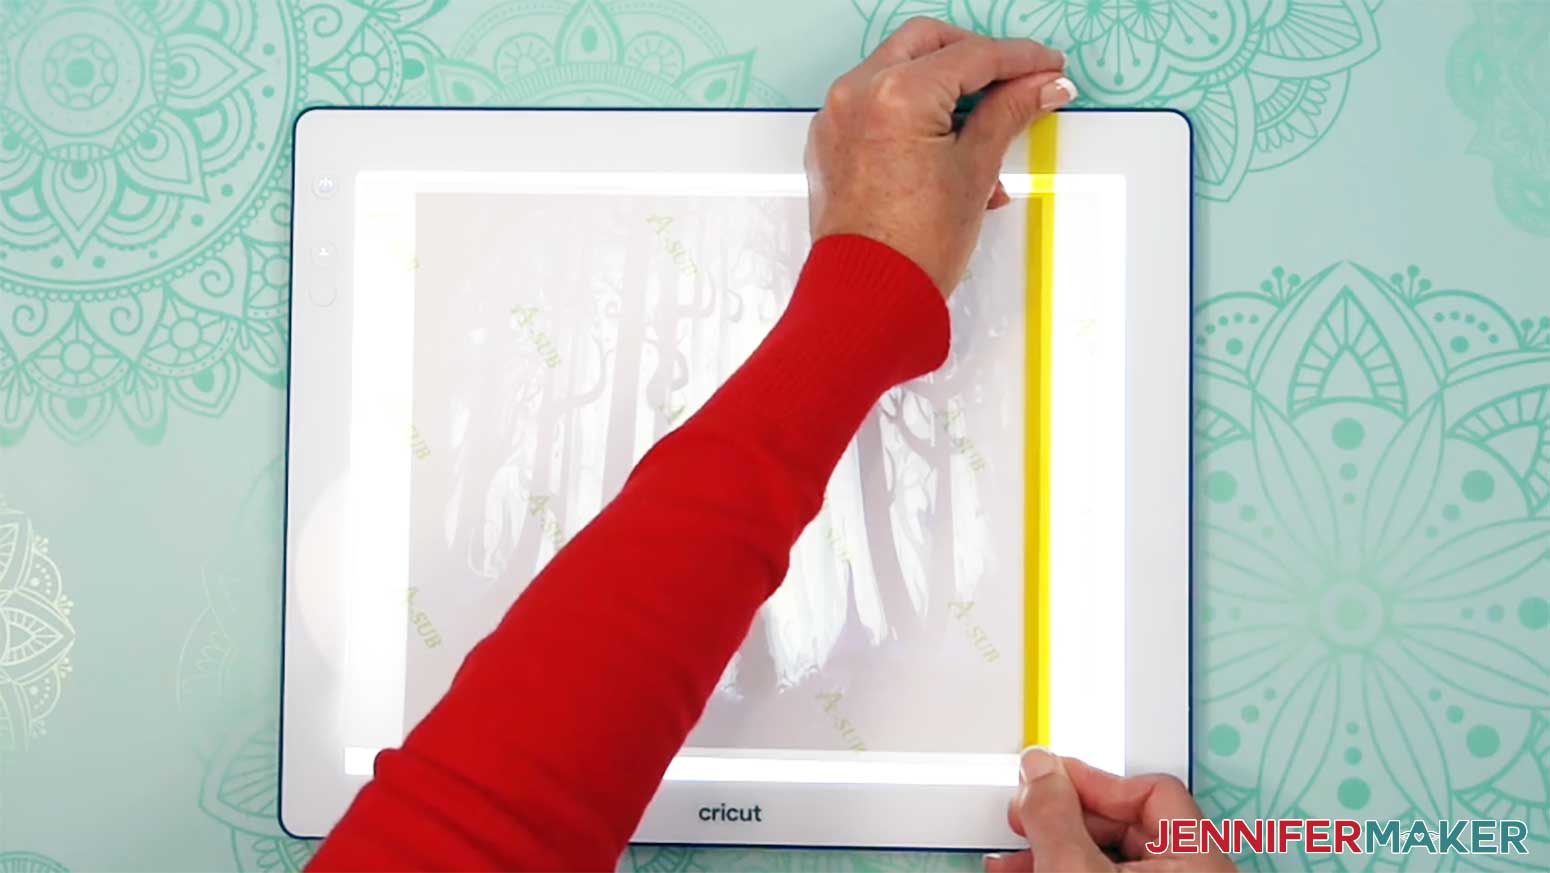
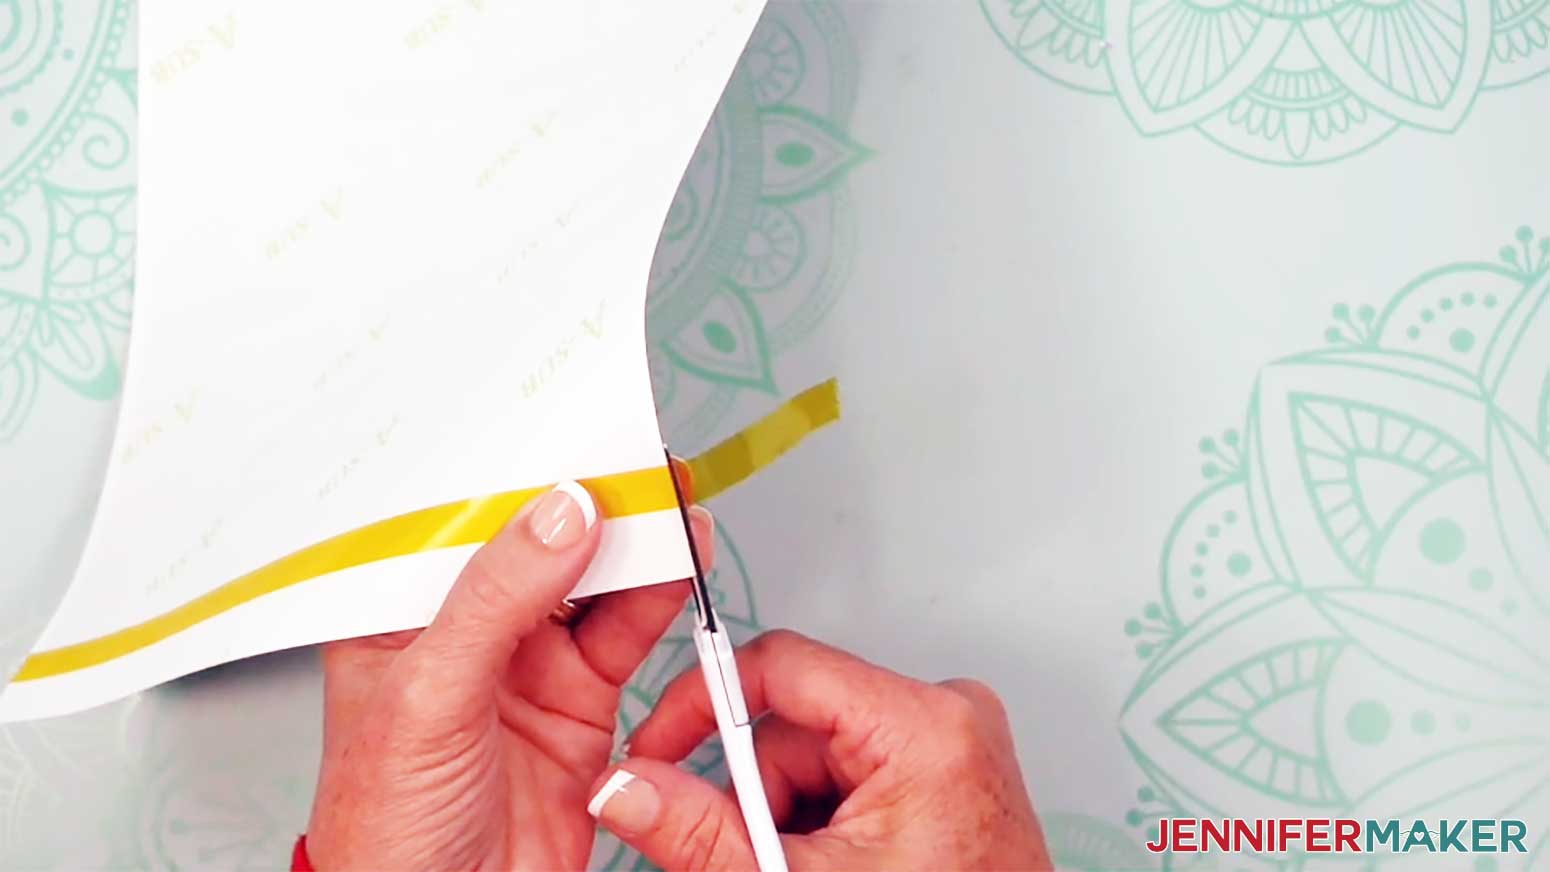
- Place a long strip of heat-resistant tape along a vertical seam edge so it covers about 1/4” of the print’s edge to prevent dark edges on your tumbler where the seam overlaps.
NOTE: I recommend using the yellow heat-resistant tape in my supplies because it’s thinner and narrower than blue tape, leading to fewer issues at the seam. It’s also stretchier and easier to apply to the top and bottom of the tumbler.
TIP: Use a Cricut BrightPad or lightbox to make the edge of the print easier to see. - Use scissors to trim away excess tape on the top and bottom sides.
- Use a paper trimmer to cut the taped seam edge right along the print so no white is remaining at the edge.
TIP: Don’t trim away more than ⅛” of the print’s edge or you won’t be able to overlap the seam, resulting in a white line on your tumbler.
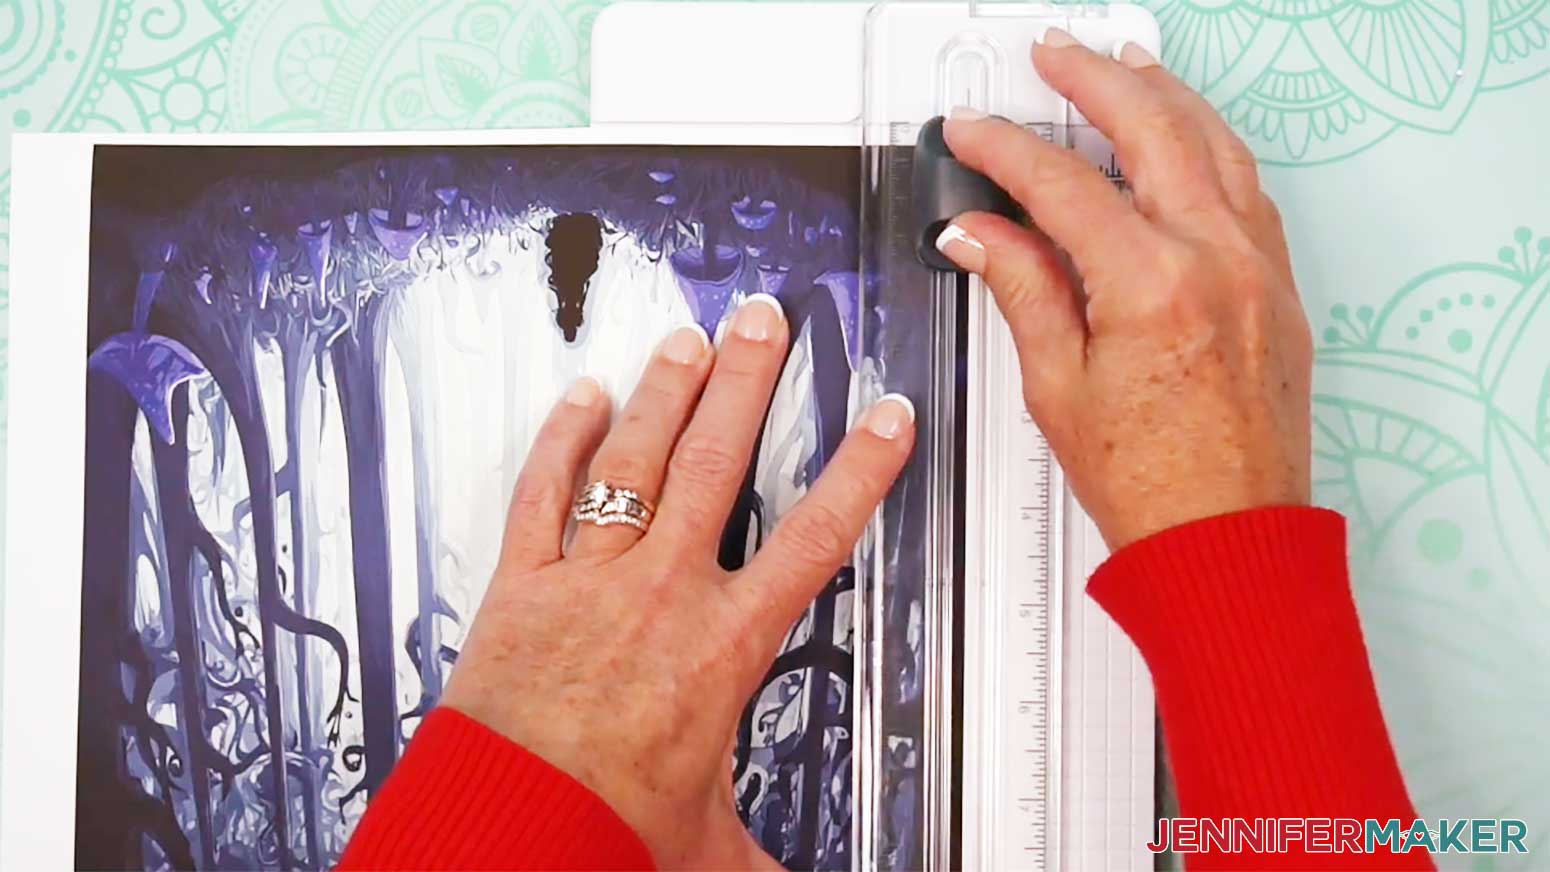
NOTE: Don’t get your fingers near the blade! - Use the paper trimmer to cut away excess white paper along the other seam edge.
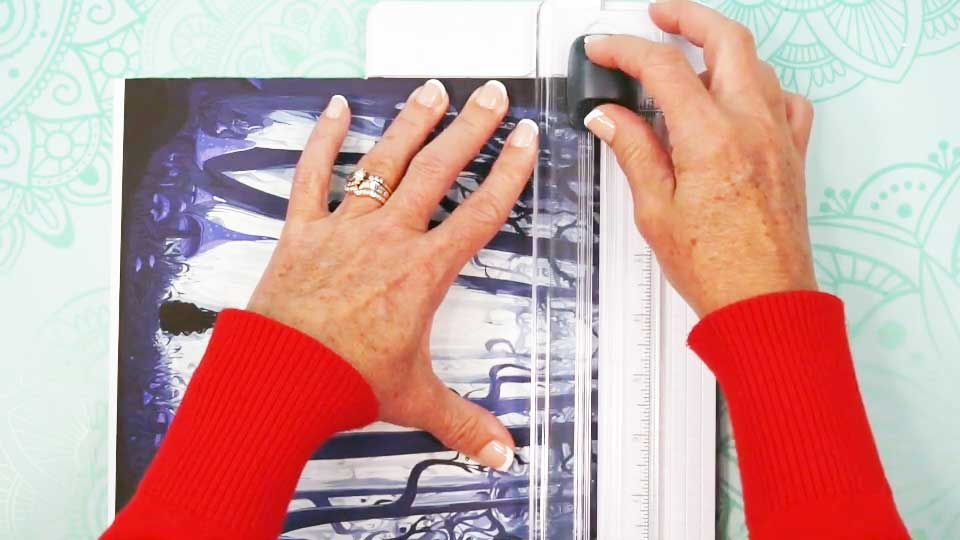
- Then use the paper trimmer to cut away excess white paper along the top edge of the print.
TIP: Leaving extra paper at the bottom of the print makes it easier to tape later.
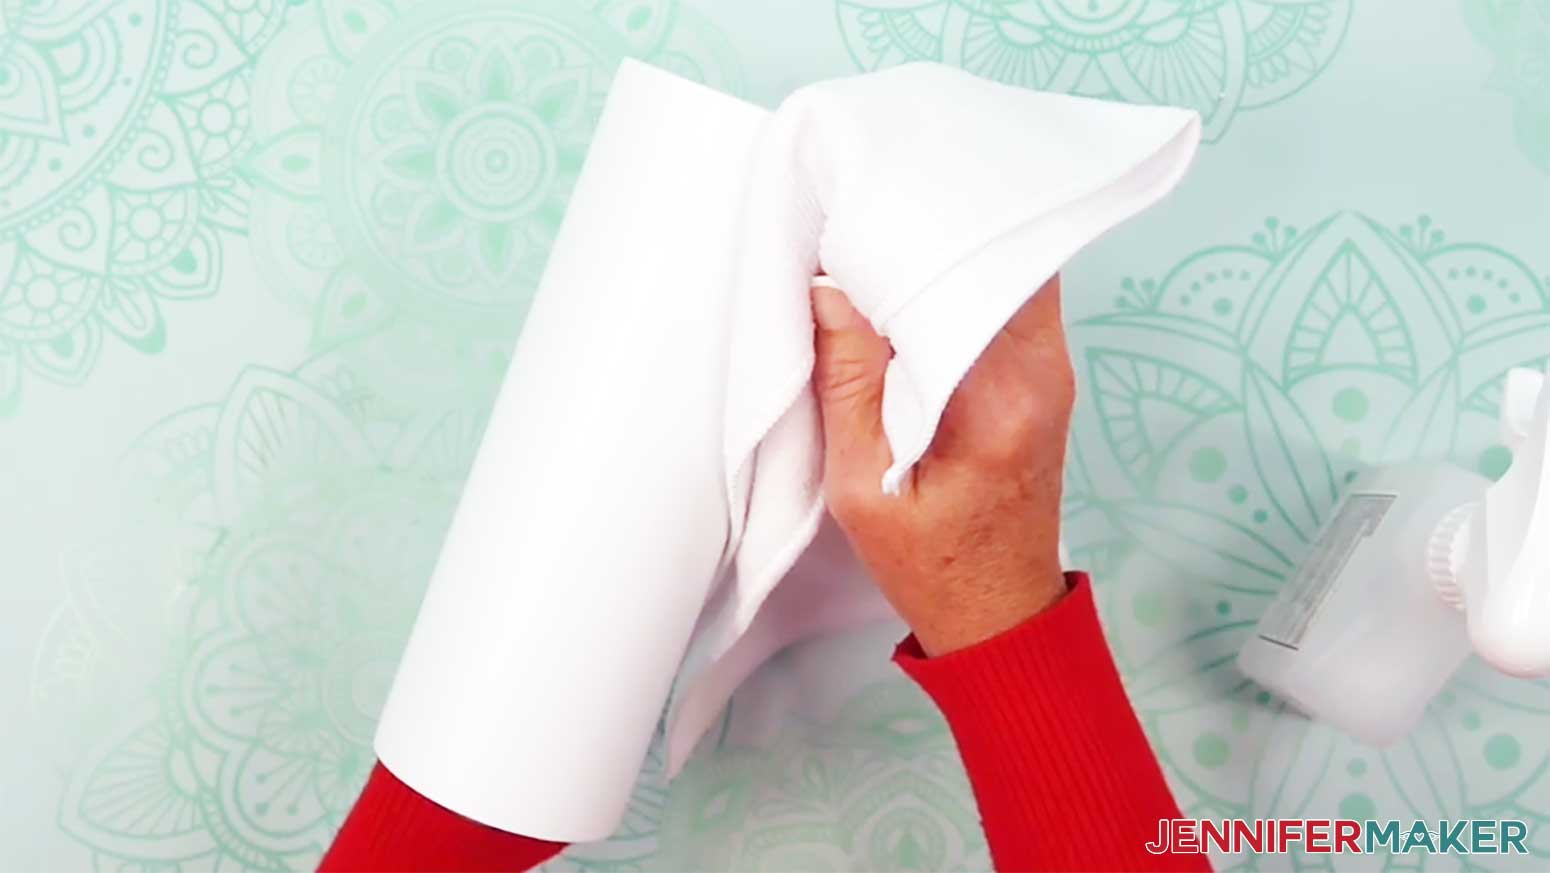
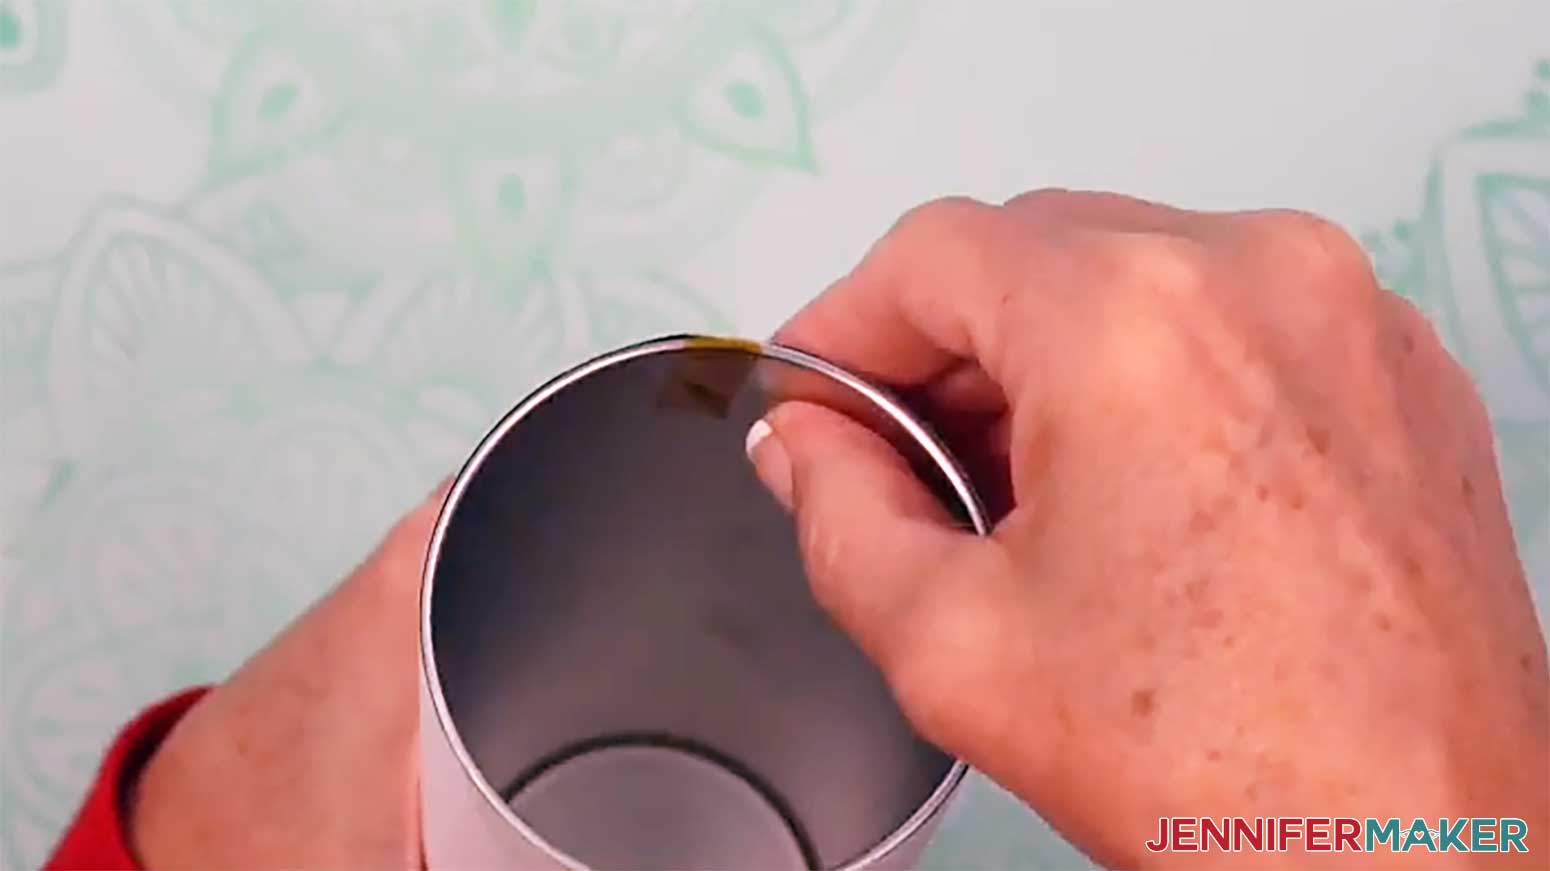
- Clean your tumbler with a lint-free cloth and rubbing alcohol to remove debris or skin oils and let it dry.
- Wrap the design around the tumbler with the ink facing in and with the elements oriented correctly.
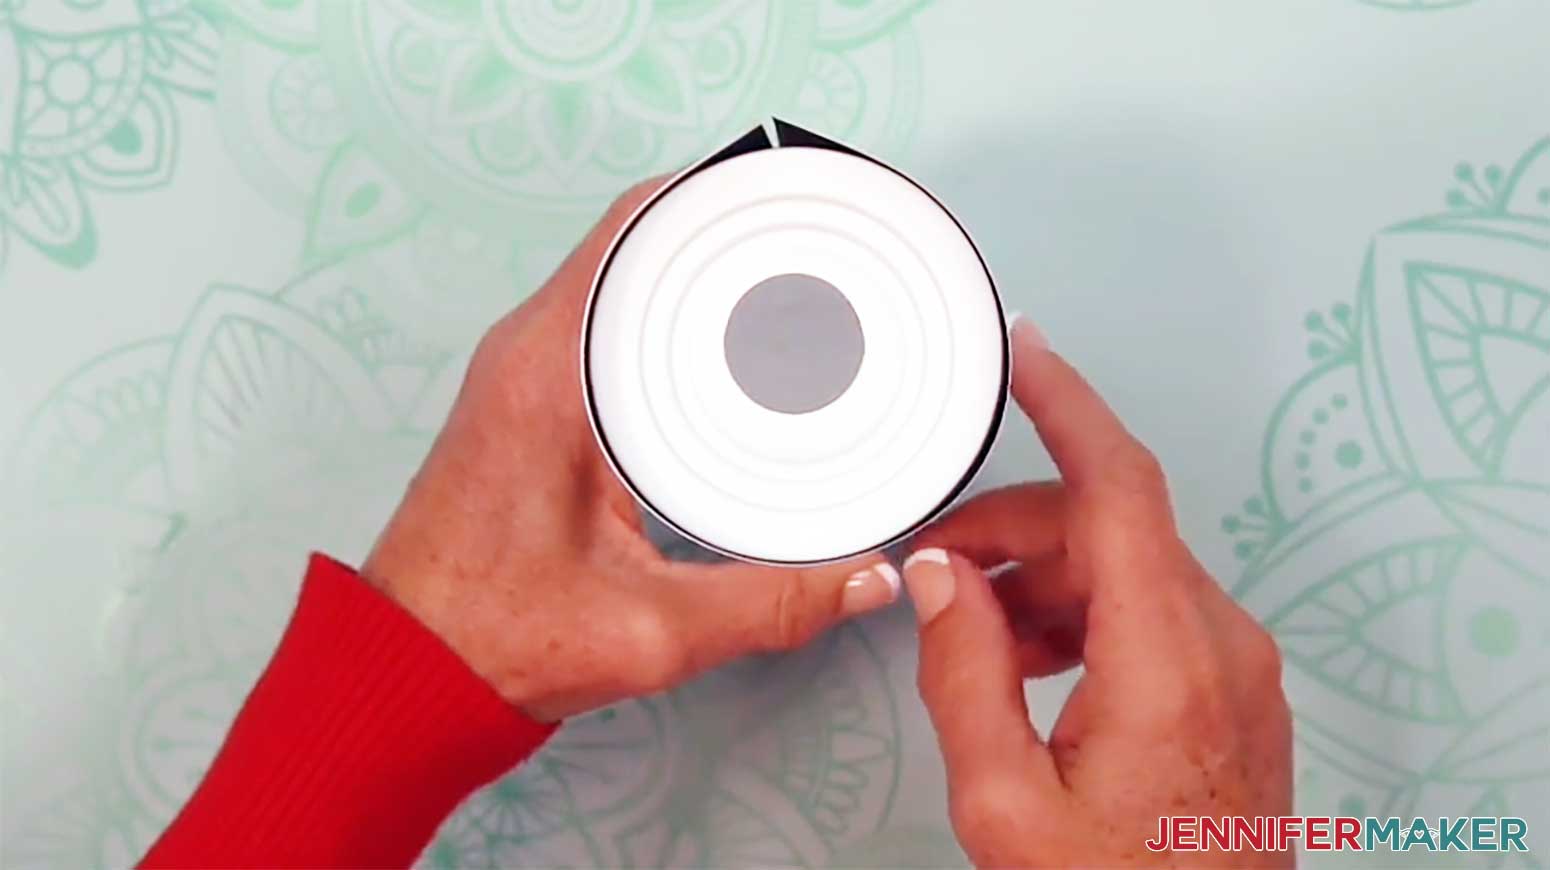
TIP: Try not to touch your clean tumbler or the print to avoid smudging or damaging the ink. - Flip the tumbler and wrap upside down, then tap the edges on the work surface. Use the wrap’s visible print edge at the tumbler’s bottom to line up the seam.
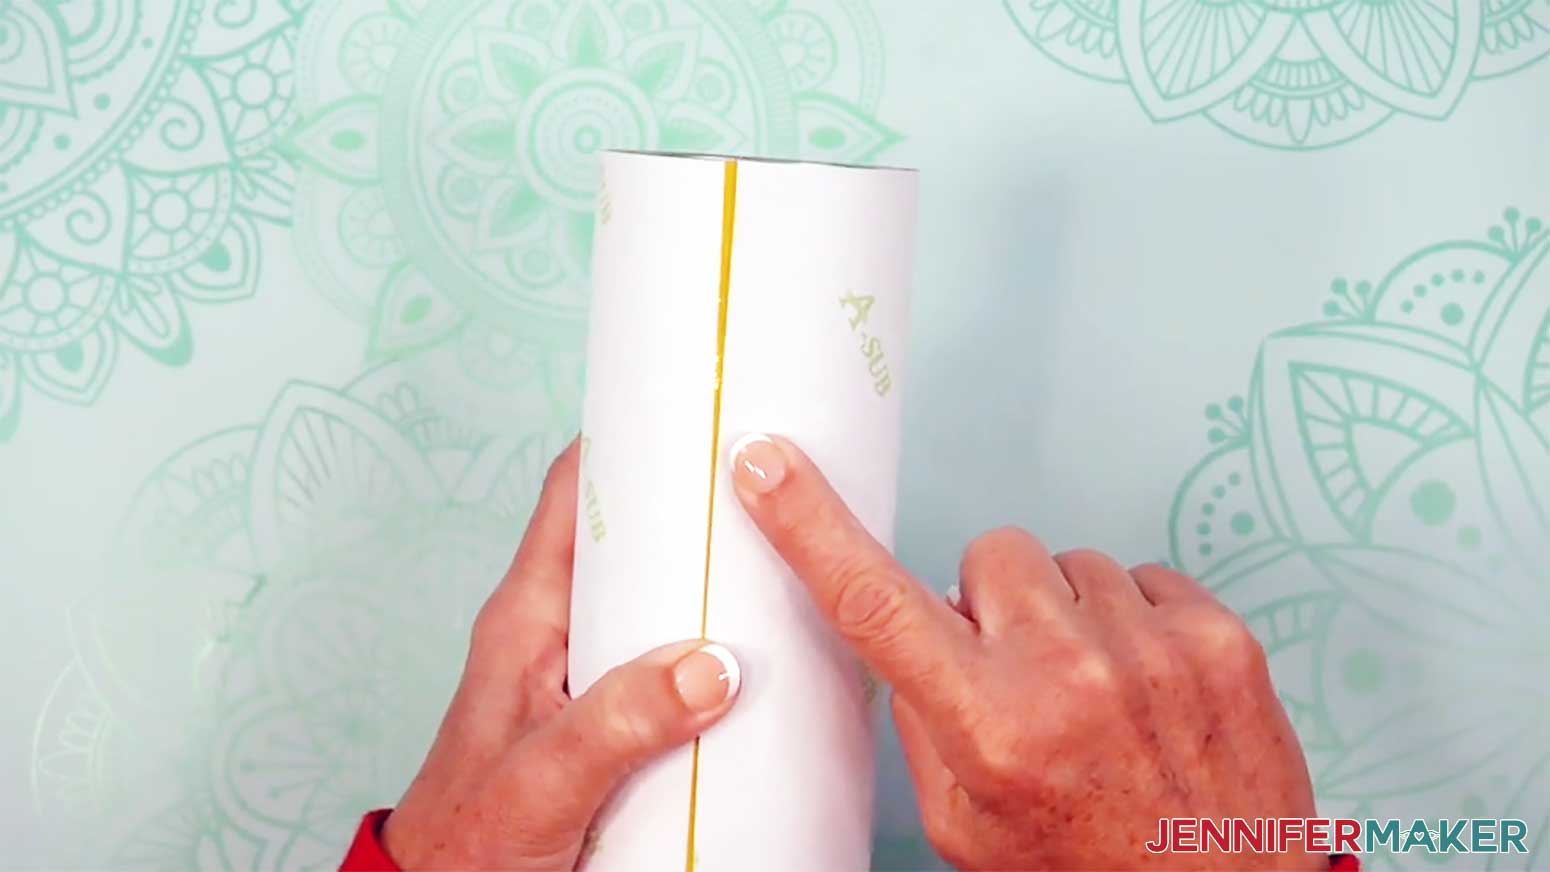
- Once the edges are aligned, wrap the print tightly against the tumbler.
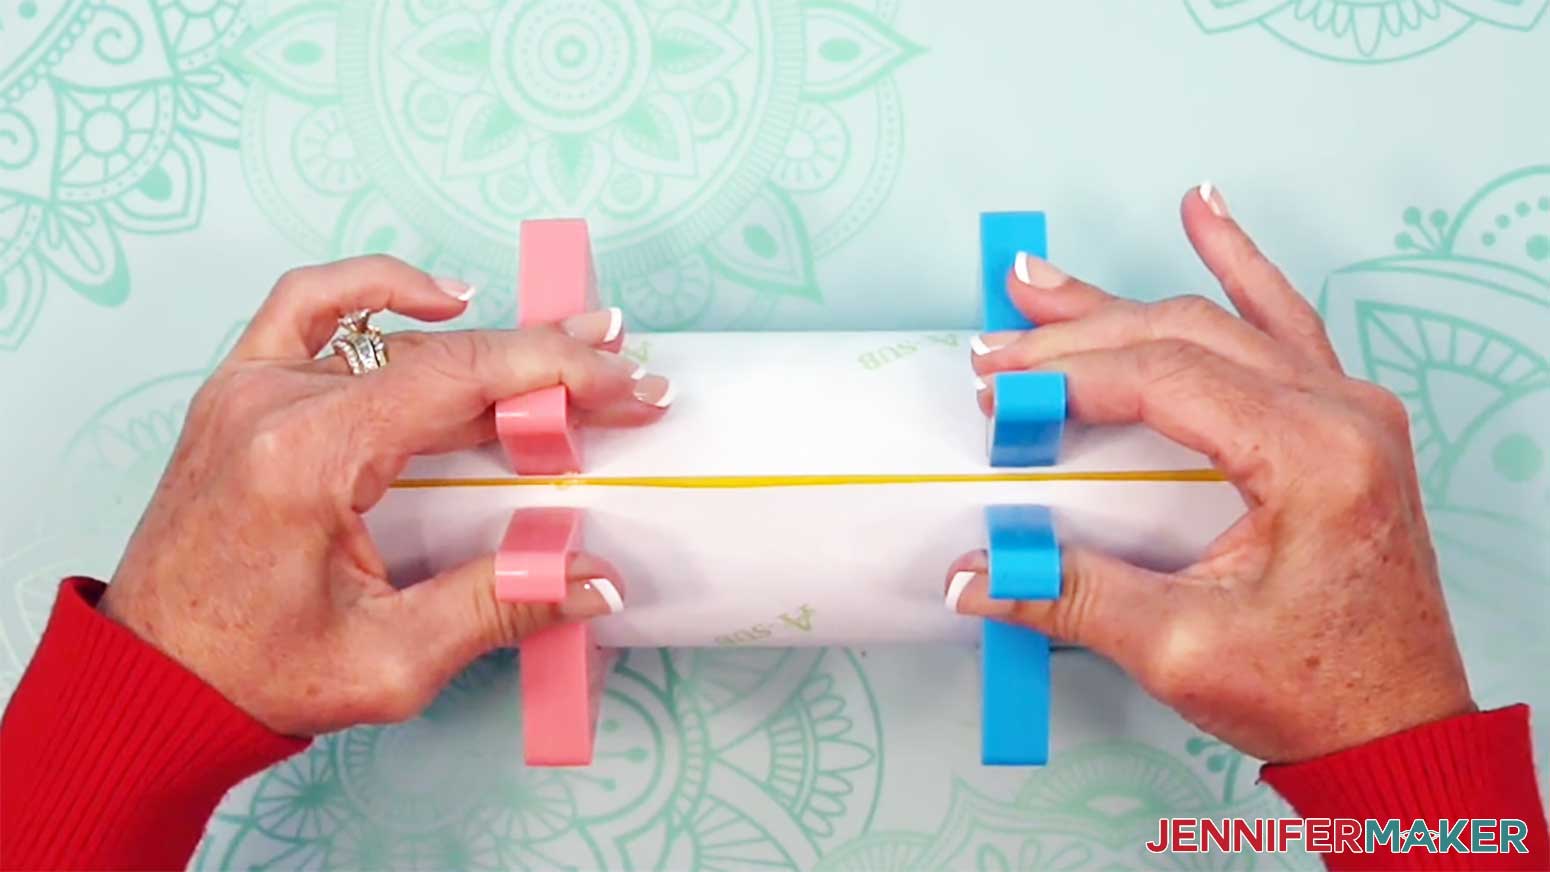
- Use tumbler clamps to hold the print in place.
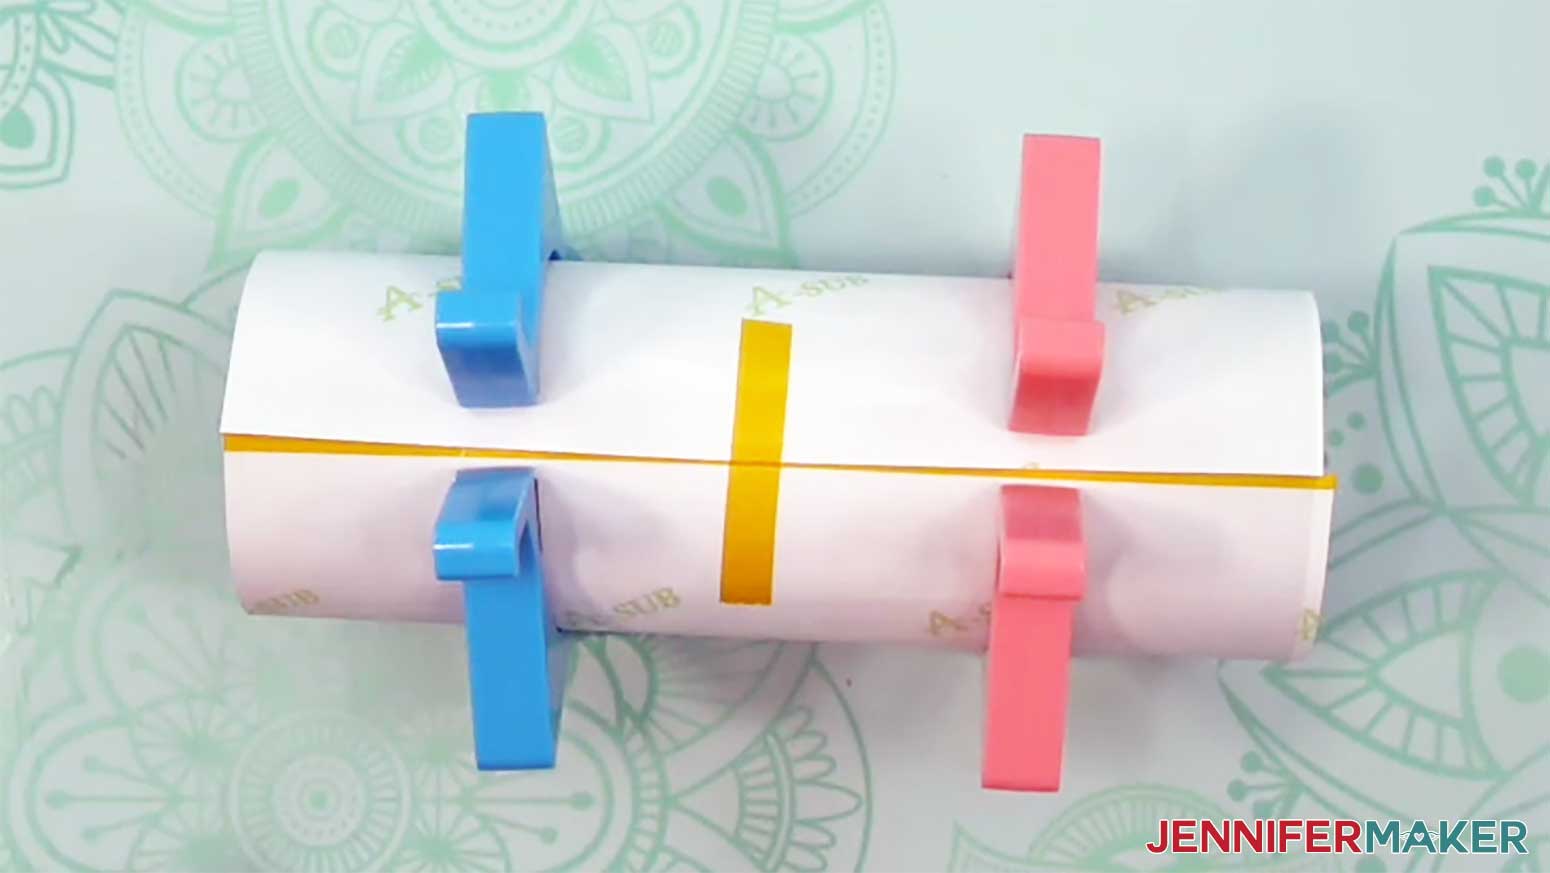
- Lay the tumbler on its side horizontally and place a vertical piece of heat-resistant tape securely on the untaped seam edge near the middle. Don't let the tape touch the other edge of the print or the tumbler yet.
- Pull the loose section of the tape to wrap the print as tight as possible, with the untaped edge overlapping the taped edge.
NOTE: Taping the wrap down tightly and avoiding wrinkles or air pockets will help prevent inconsistencies during sublimation. - Then press the tape across the seam, onto the back of the taped edge.
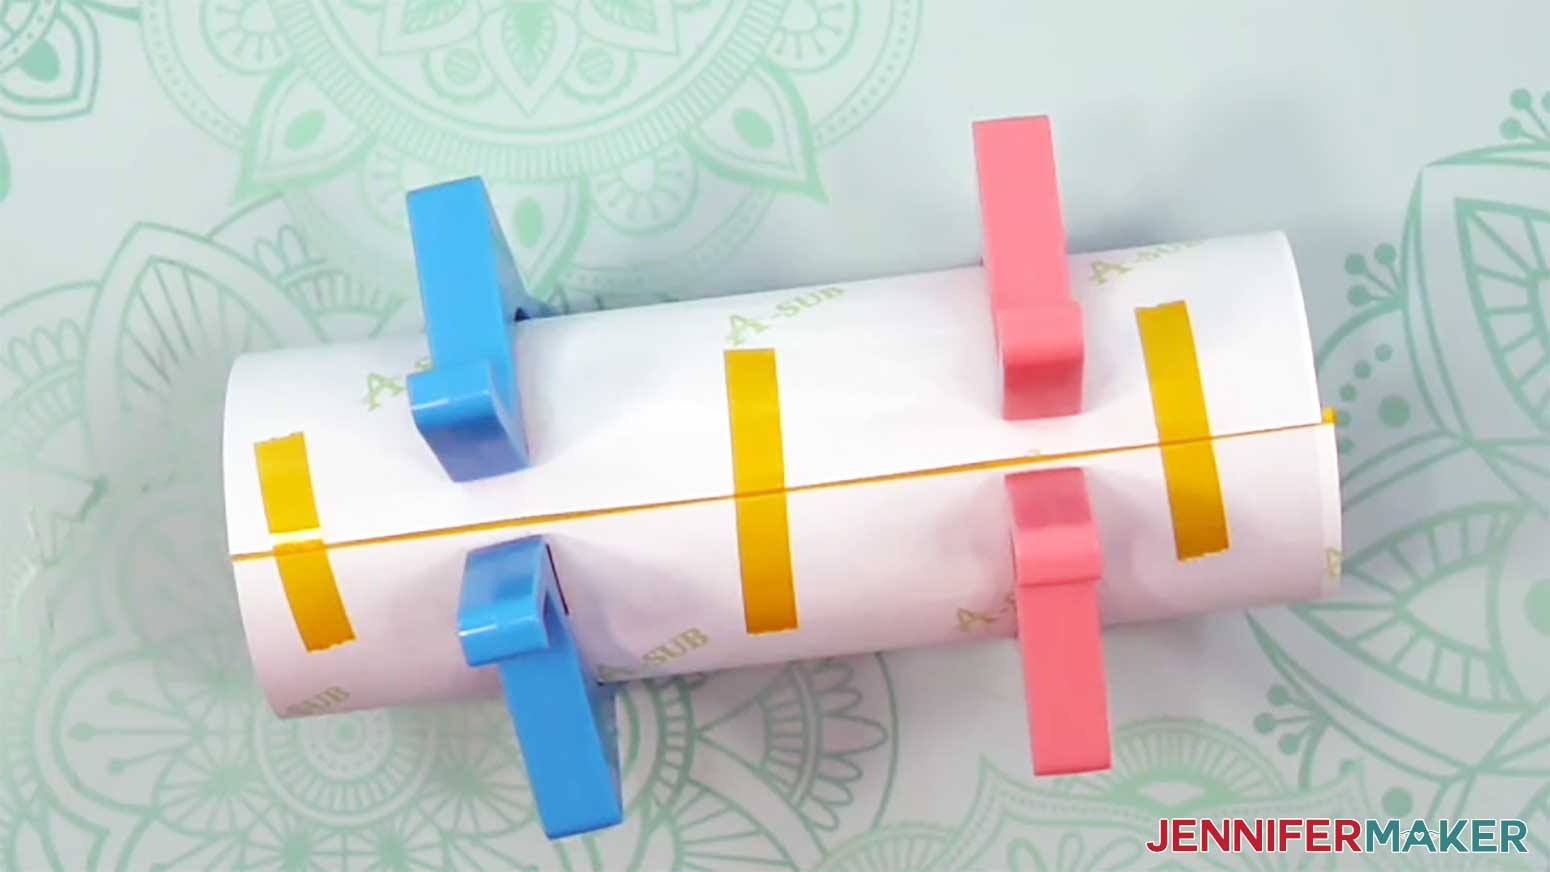
- Use short strips of heat-resistant tape across the seam on the top and bottom edges of the print to pull the paper tightly around the tumbler and secure it.
- Secure the wrap with short pieces of tape across the seam between the middle and the top edge, and the middle and the bottom edge.

- Remove the tumbler clamp.
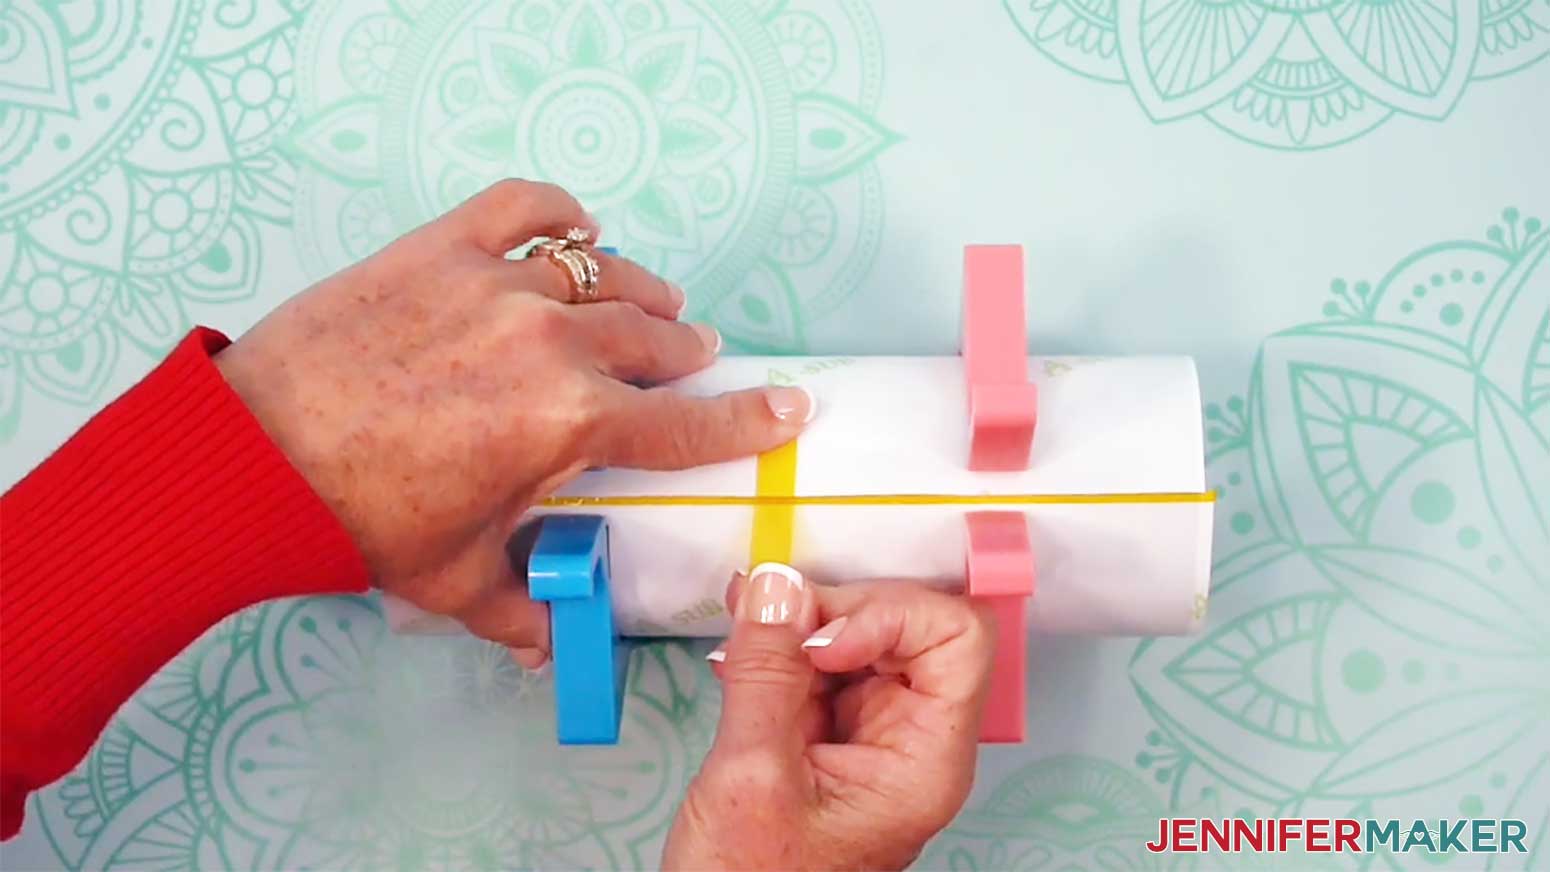
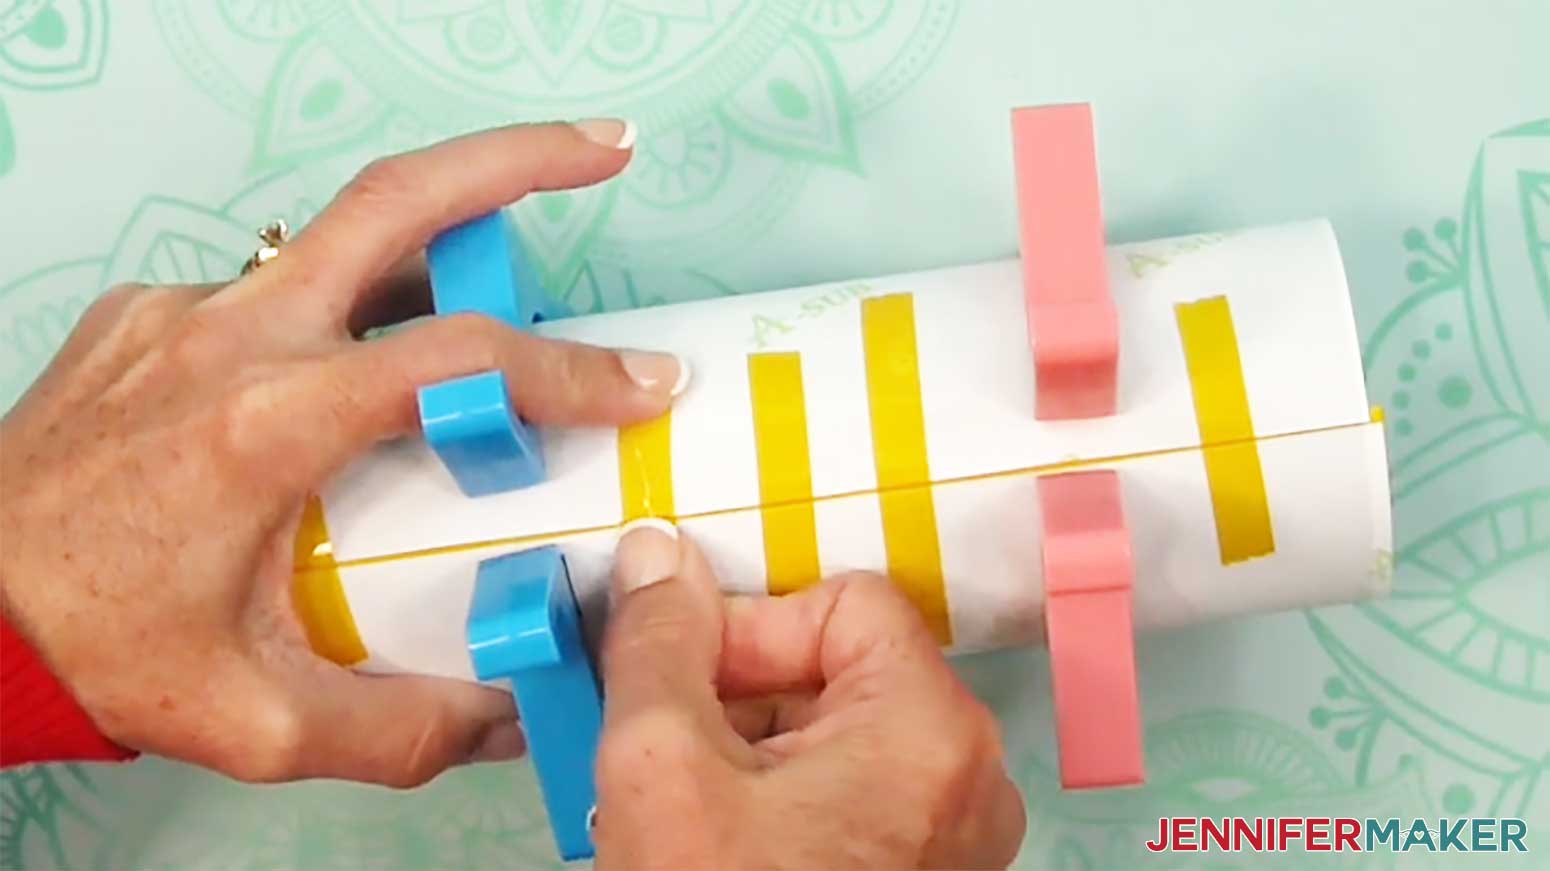
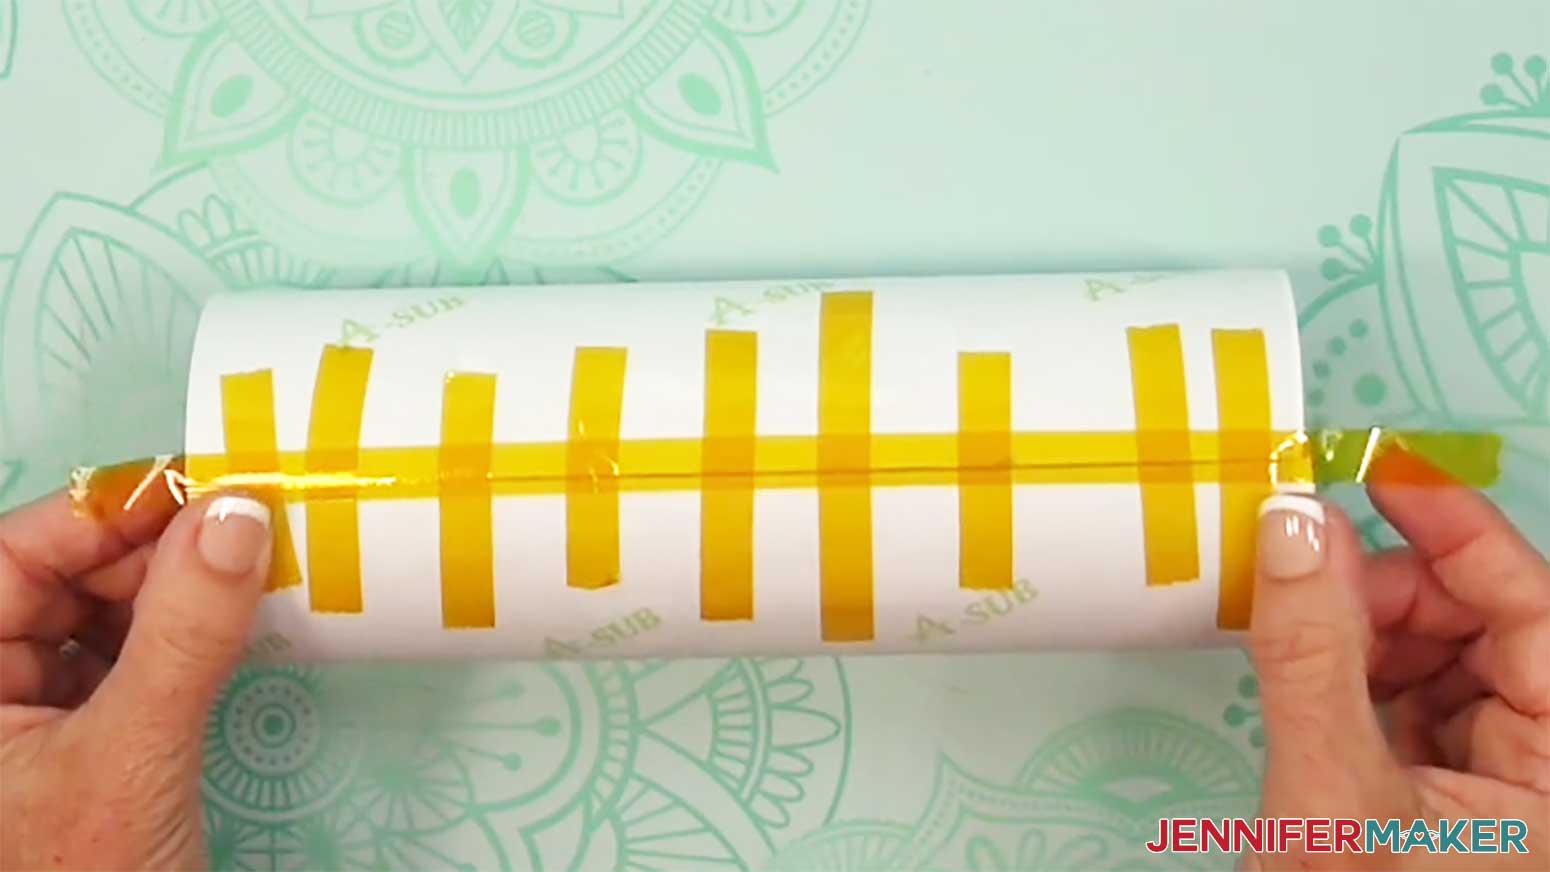
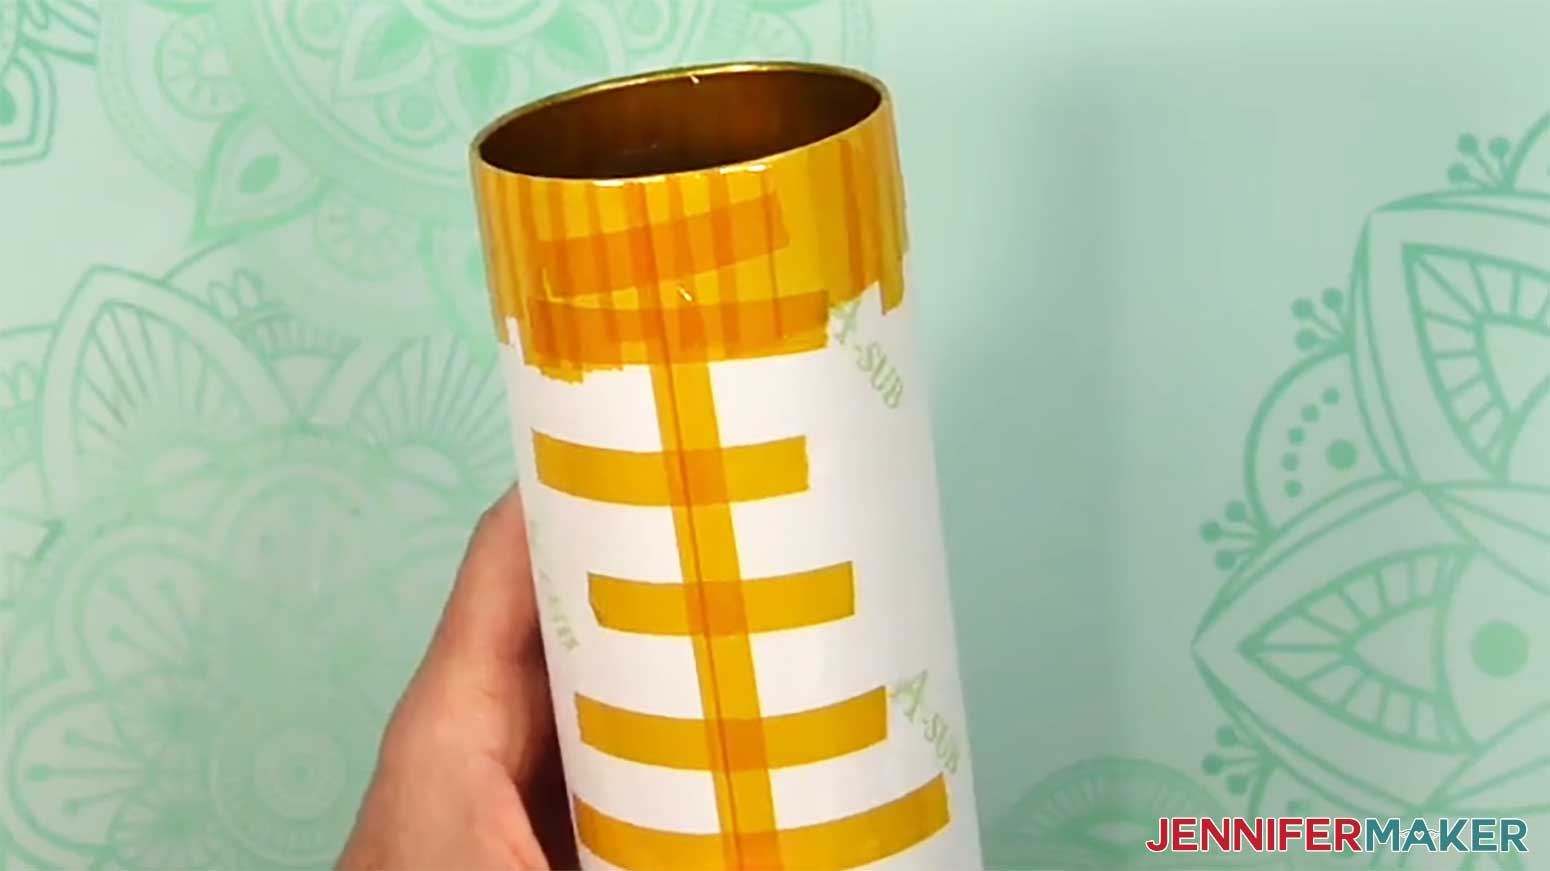
- Apply a long piece of heat-resistant tape along the seam from top to bottom, allowing excess tape on both ends.
- Pressing outward from the center, use your scraper to press the tape down tightly along the seam to seal it, and along the edge of the overlap to press the top layer fully against the tumbler.
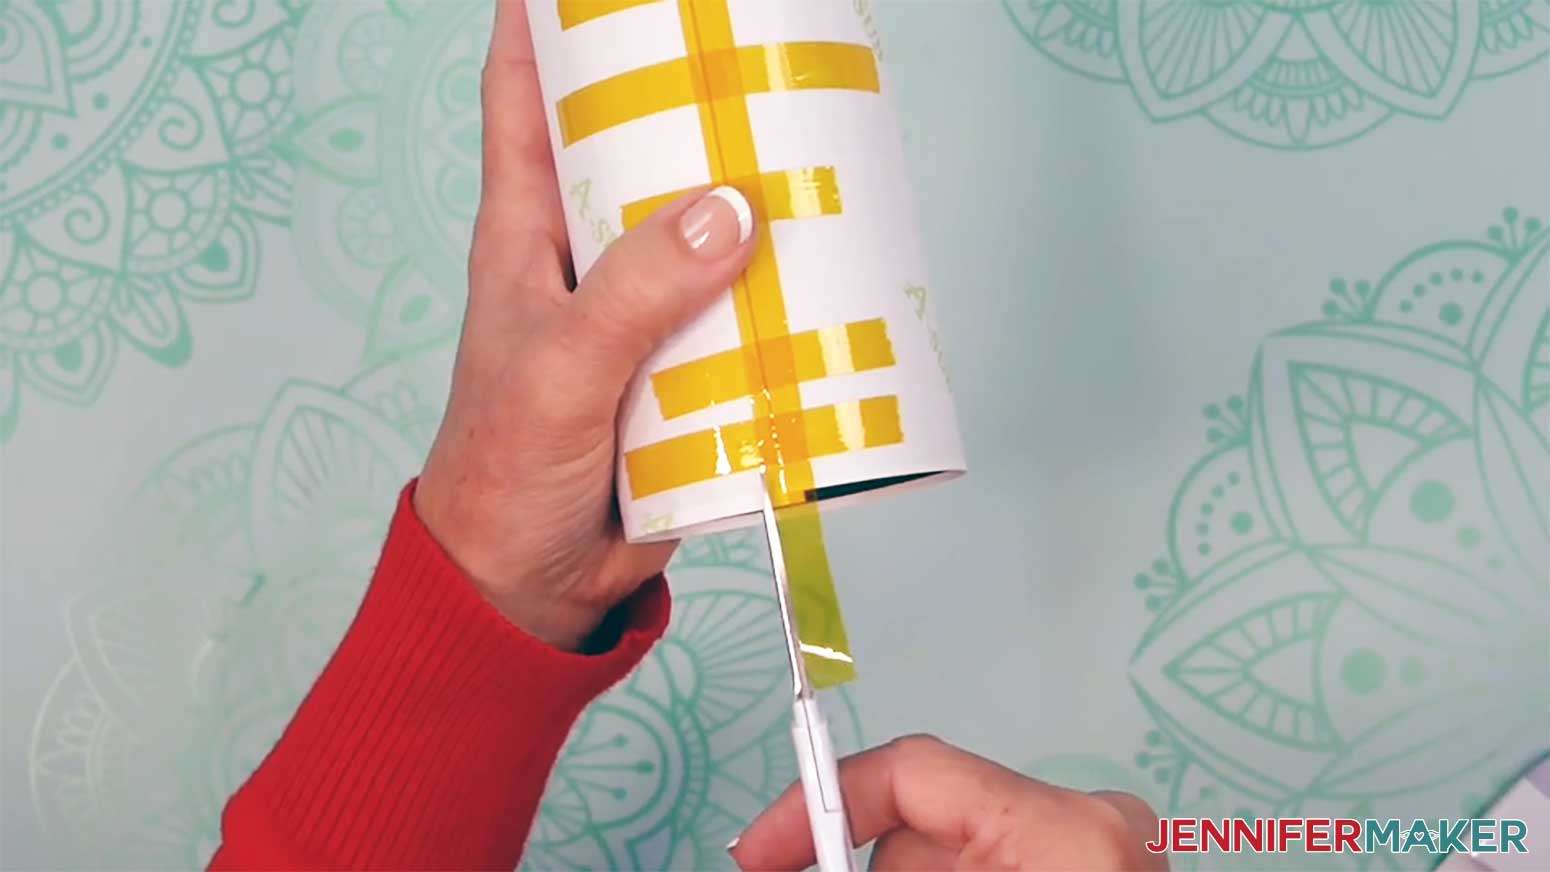
- Thinking of it like a compass, hold the tumbler so the bottom is facing you and the excess tape is in the North position at the top.
NOTE: Avoid setting the opposite end on your work surface so you don’t bunch up the loose tape! - Use scissors to snip the print along the excess tape’s sides, just to the rim of the tumbler.
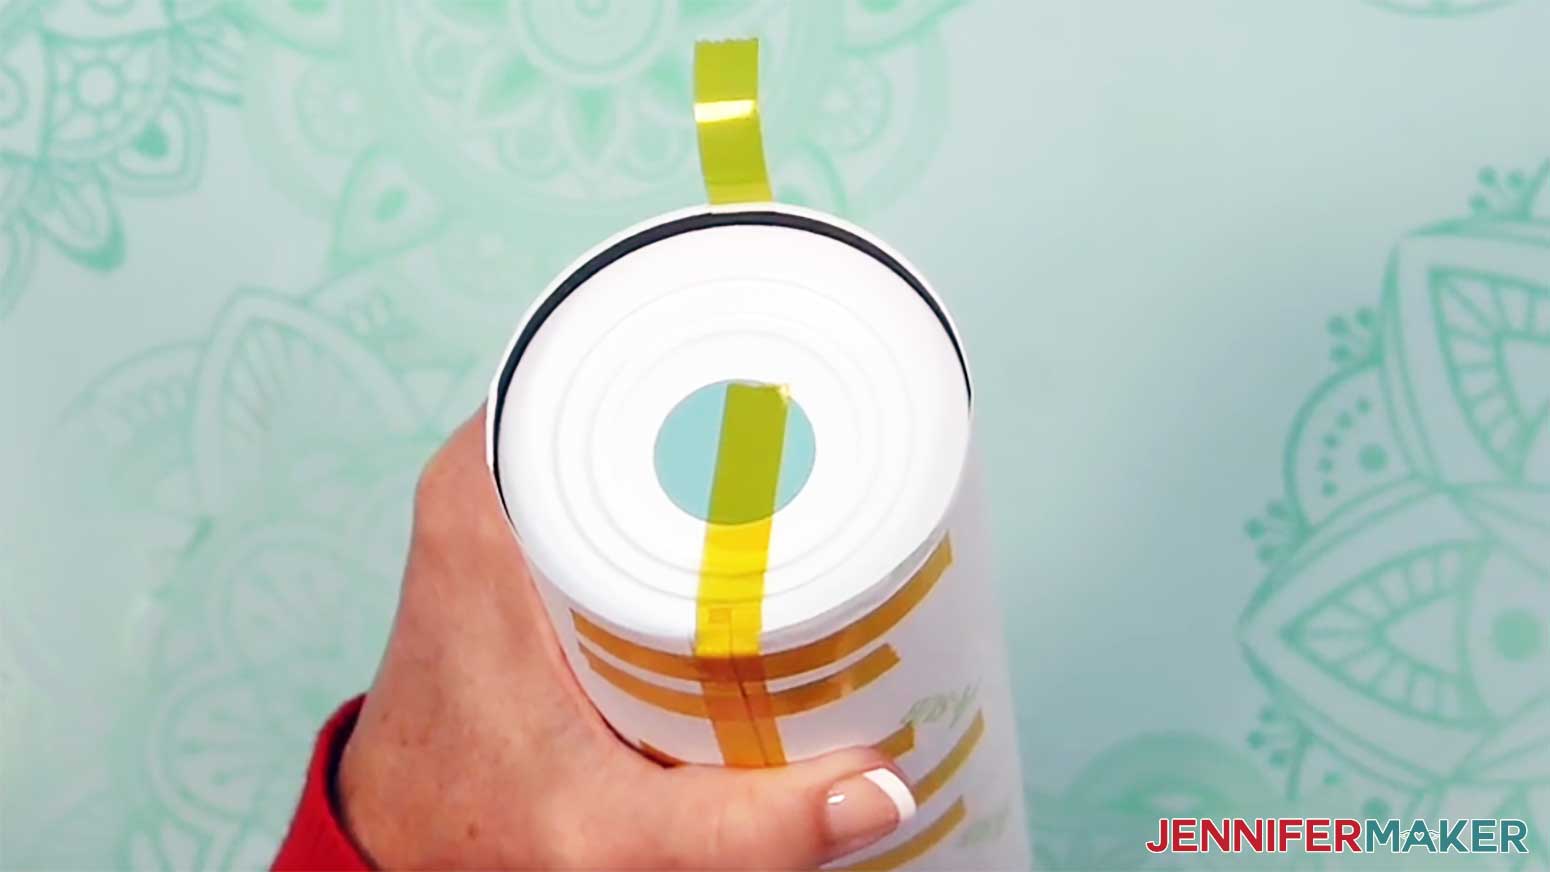
- Pull the excess tape and attached paper tab tightly toward the tumbler’s bottom center.
- Press the tape firmly onto the tumbler, making sure there are no air bubbles between the tape and the tumbler.
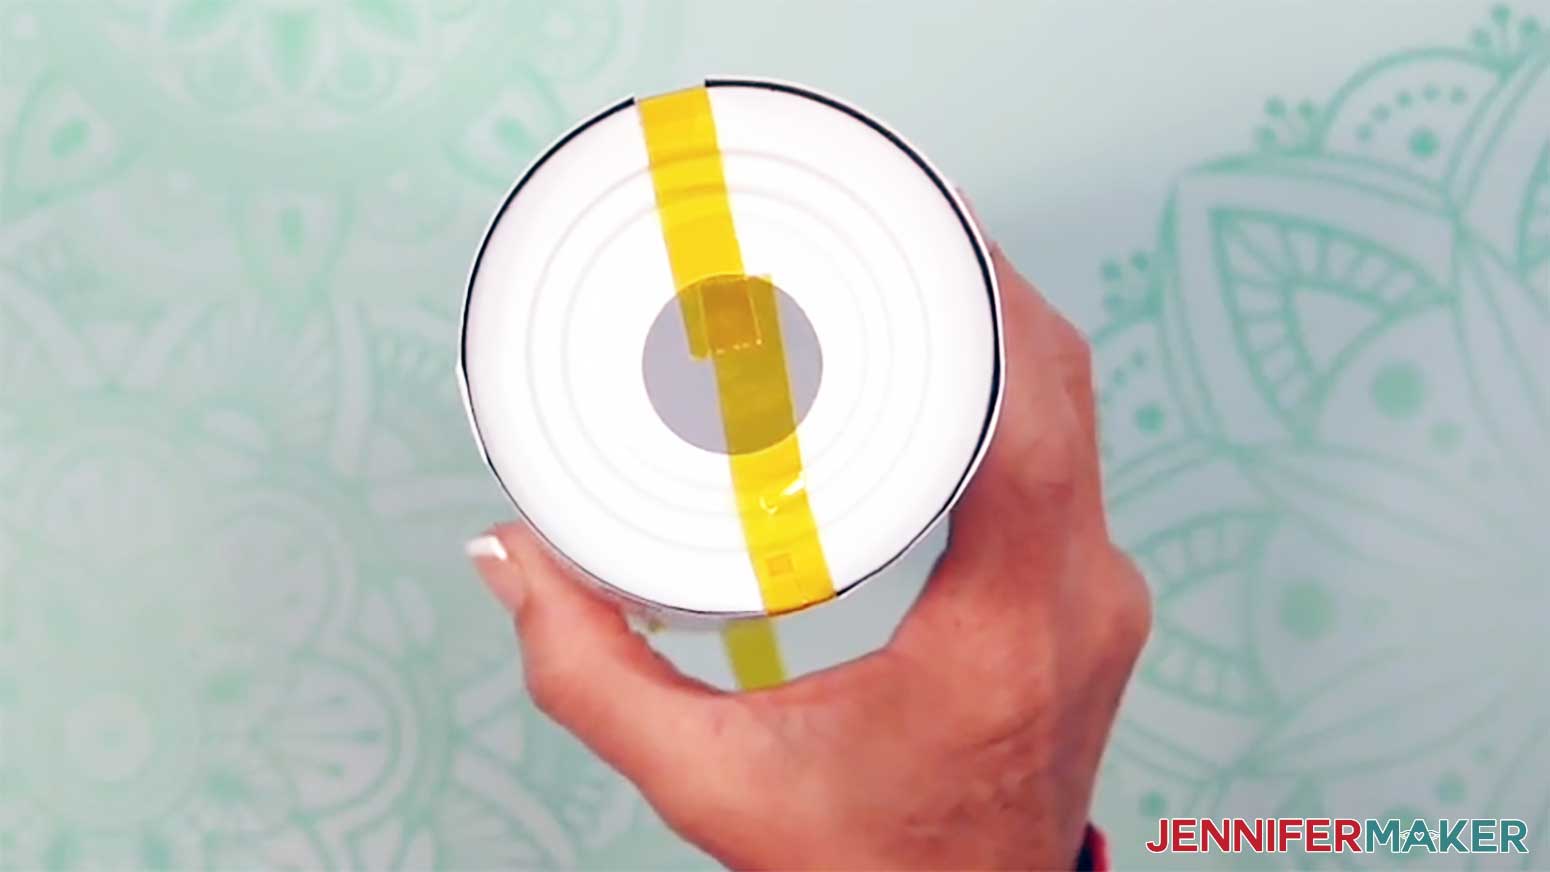
TIP: Use a scraper tool to press out bubbles if needed. - Add a strip of tape in the bottom’s south position, allowing excess tape on the free end.
TIP: Rotating the tumbler can make it easier to add the tape.
NOTE: This extra taping helps ensure even coverage at the ends. - Repeat Steps 21-23 to secure the South piece of tape to the tumbler.
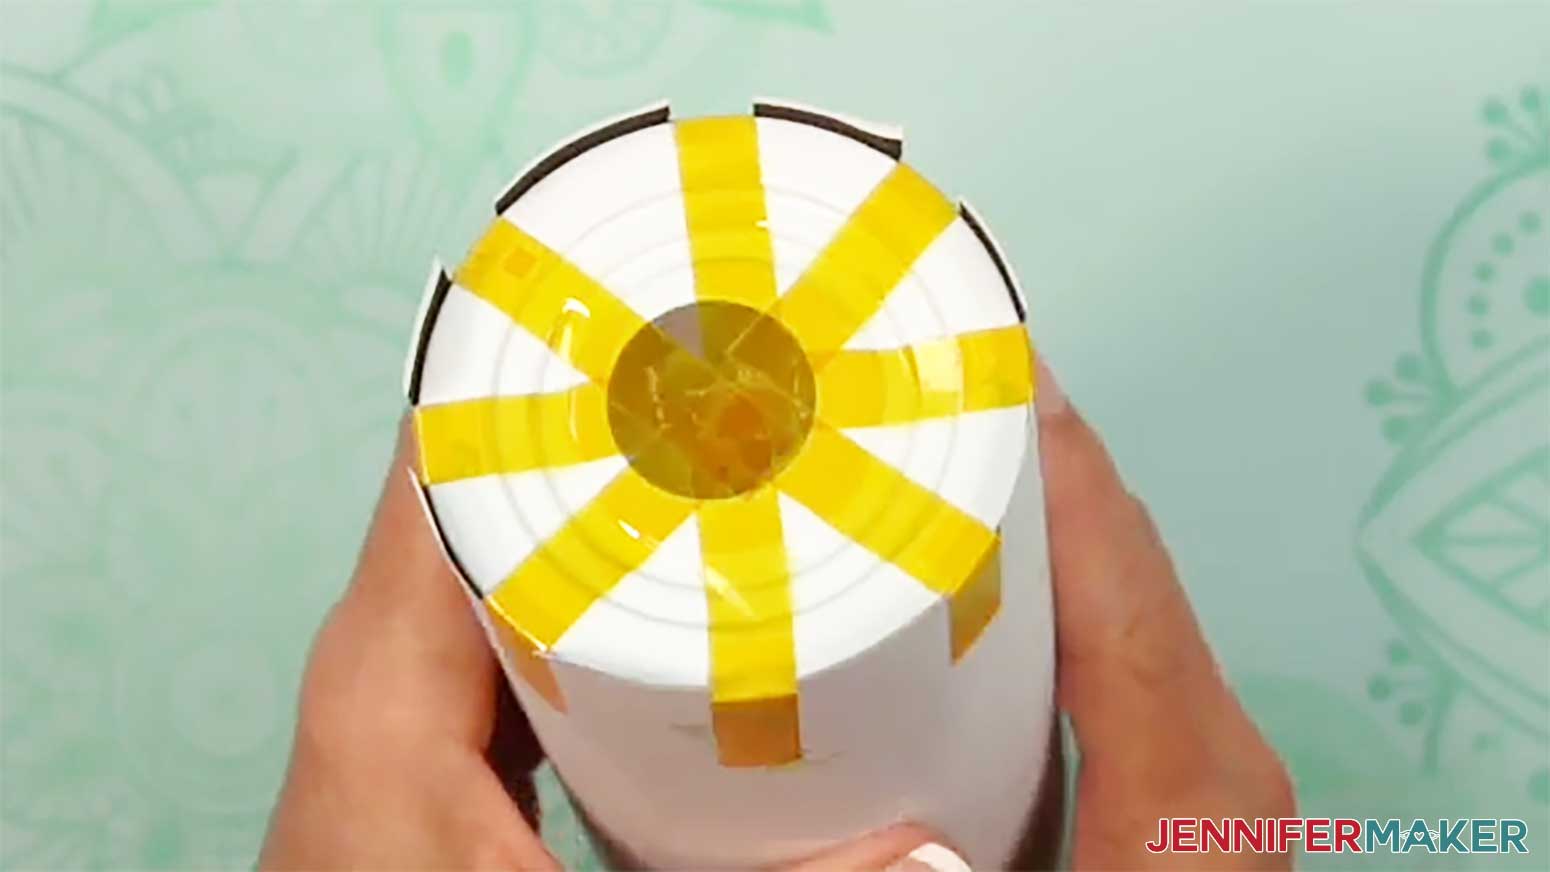
- Then secure the East and West sides of the tumbler’s bottom the same way, as well as all of the intermediate positions between the taped sides, for a total of eight pieces of tape.
- Now there are eight tabs remaining between the pieces of tape. Use scissors to cut each of these tabs down the middle, making a total of 16 tabs.
- Using the same method as above, secure each of these sixteen tabs to the tumbler’s bottom with heat-resistant tape.
- To secure the top of your tumbler, pull the excess tape from the seam over the edge and press it to the inside of the tumbler.
TIP: The tape is a little stretchy, but that’s okay! Stretching helps secure the tape tightly around the tumbler’s top edge. - Then add and secure heat-resistant tape in the cardinal directions, intermediate directions, and all around the tumbler’s top edge, similar to the way you taped the bottom.
- Use your scraper tool to go over all areas of tape to make sure there are no air bubbles.
- Your tumbler is ready to shrink wrap and sublimate!

STEP 5: SHRINK WRAP AND SUBLIMATE YOUR TUMBLER
IMPORTANT: Before sublimating, open a window and turn on your fan to improve your ventilation.
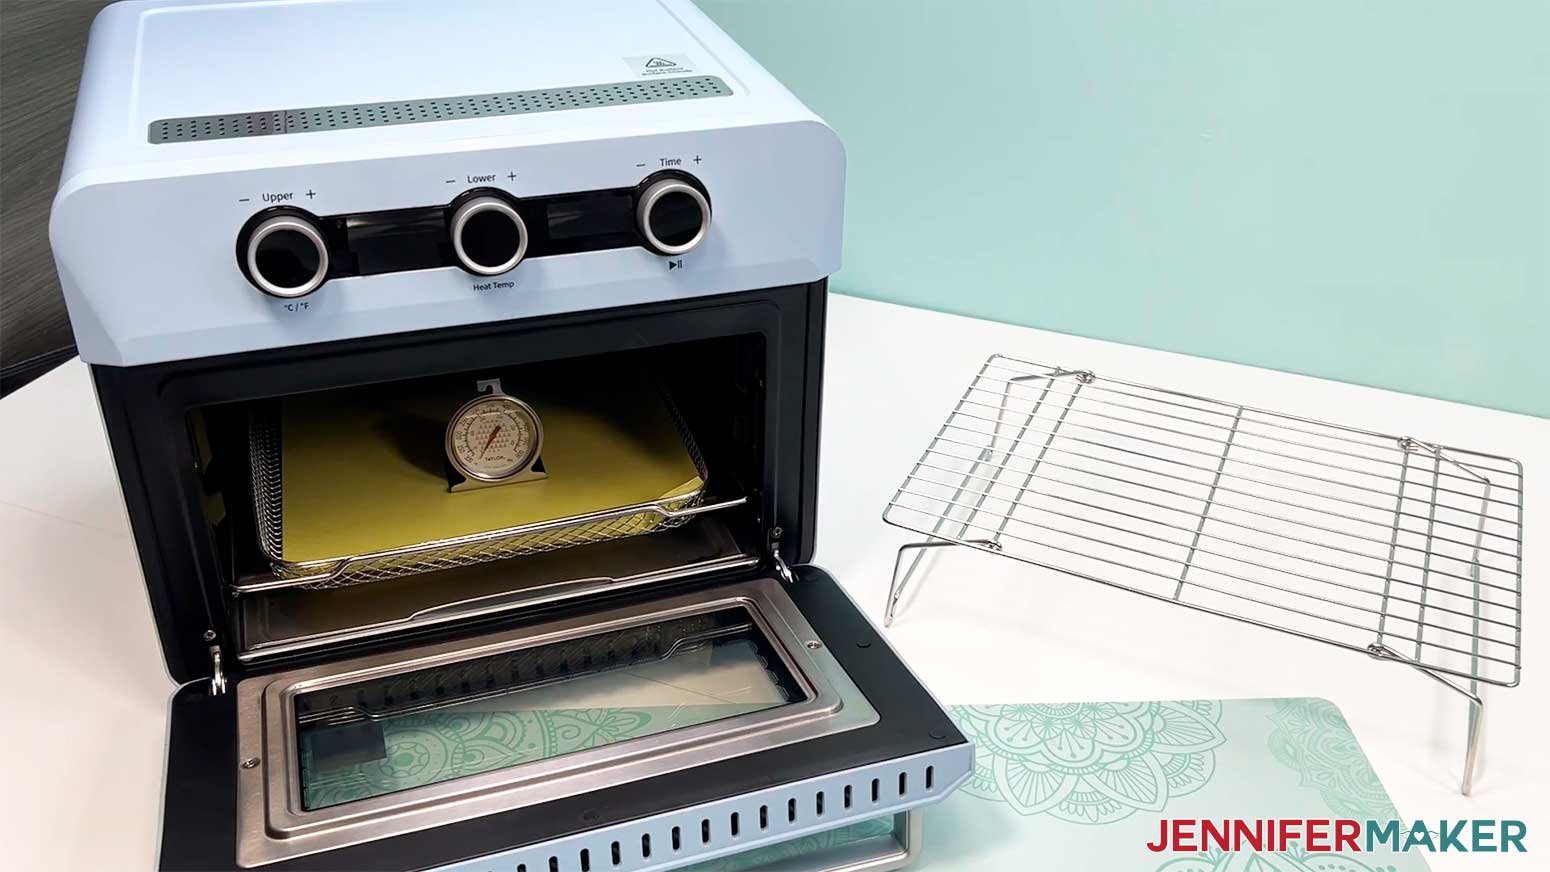
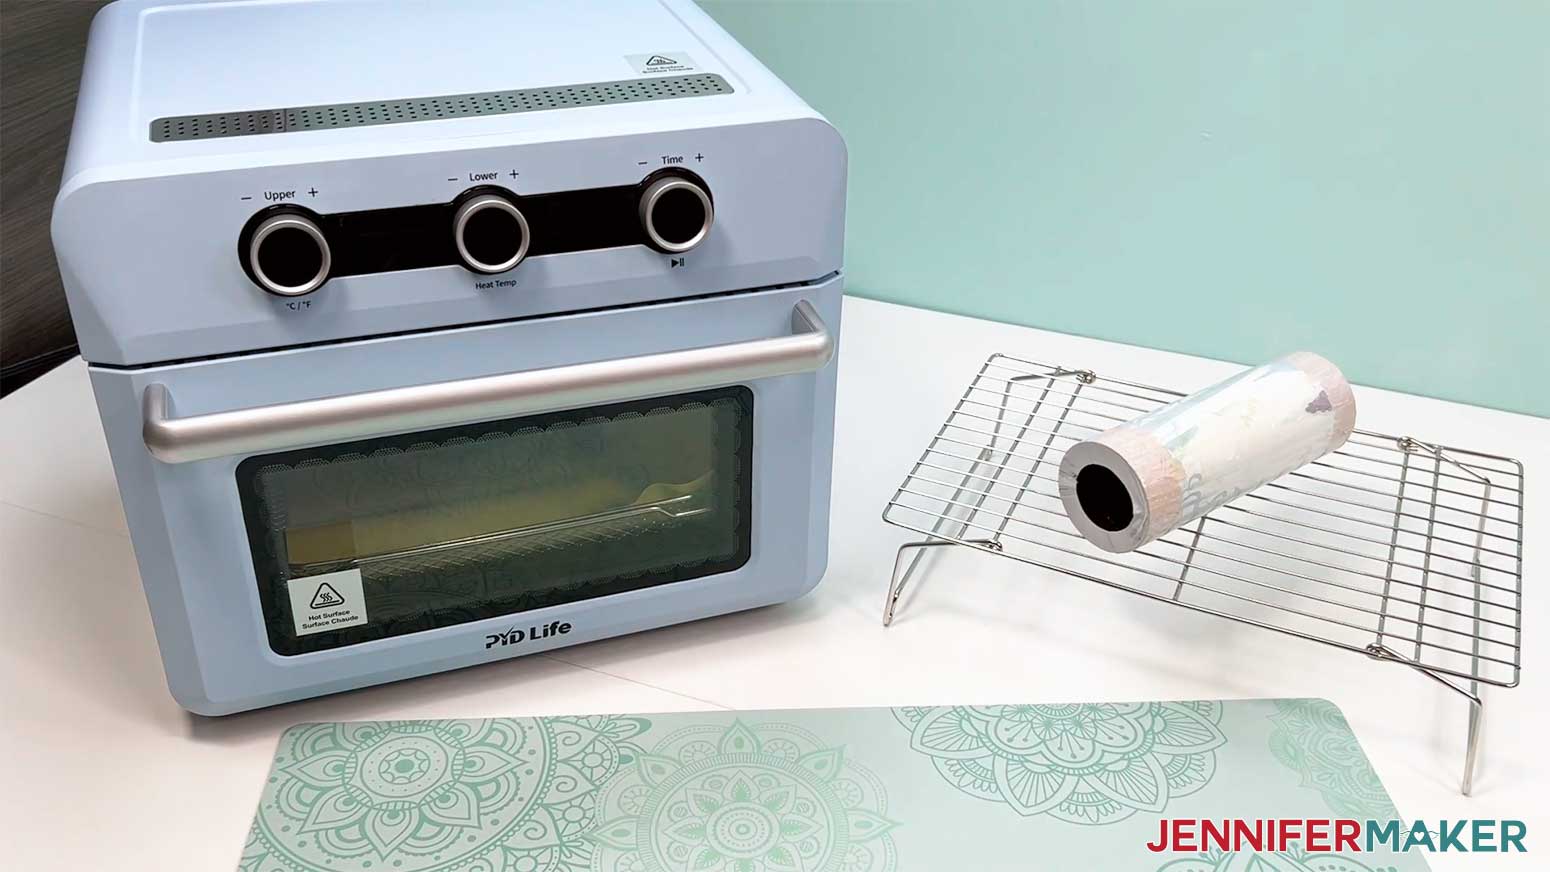
- Place a silicone baking mat onto the sublimation convection oven’s wire tray.
TIP: This will keep the tumbler from rolling later. - Place an oven thermometer in the center to make sure the temperature is correct.
- Preheat your convection oven to 375°F (191°C).
TIP: I’ll use the settings that I’ve found work the best for this type of project, but if you’re not sure where to start, check out my Sublimation Cookbook to get time and temperature settings for tons of sublimation projects!
NOTE: If your tumbler is a different brand from the one in my list, check the manufacturer’s heating instructions to find the best temperature setting for your tumbler. - Put on your heat-resistant gloves.
- Grab a shrink-wrap sleeve that is the right size for your tumbler.
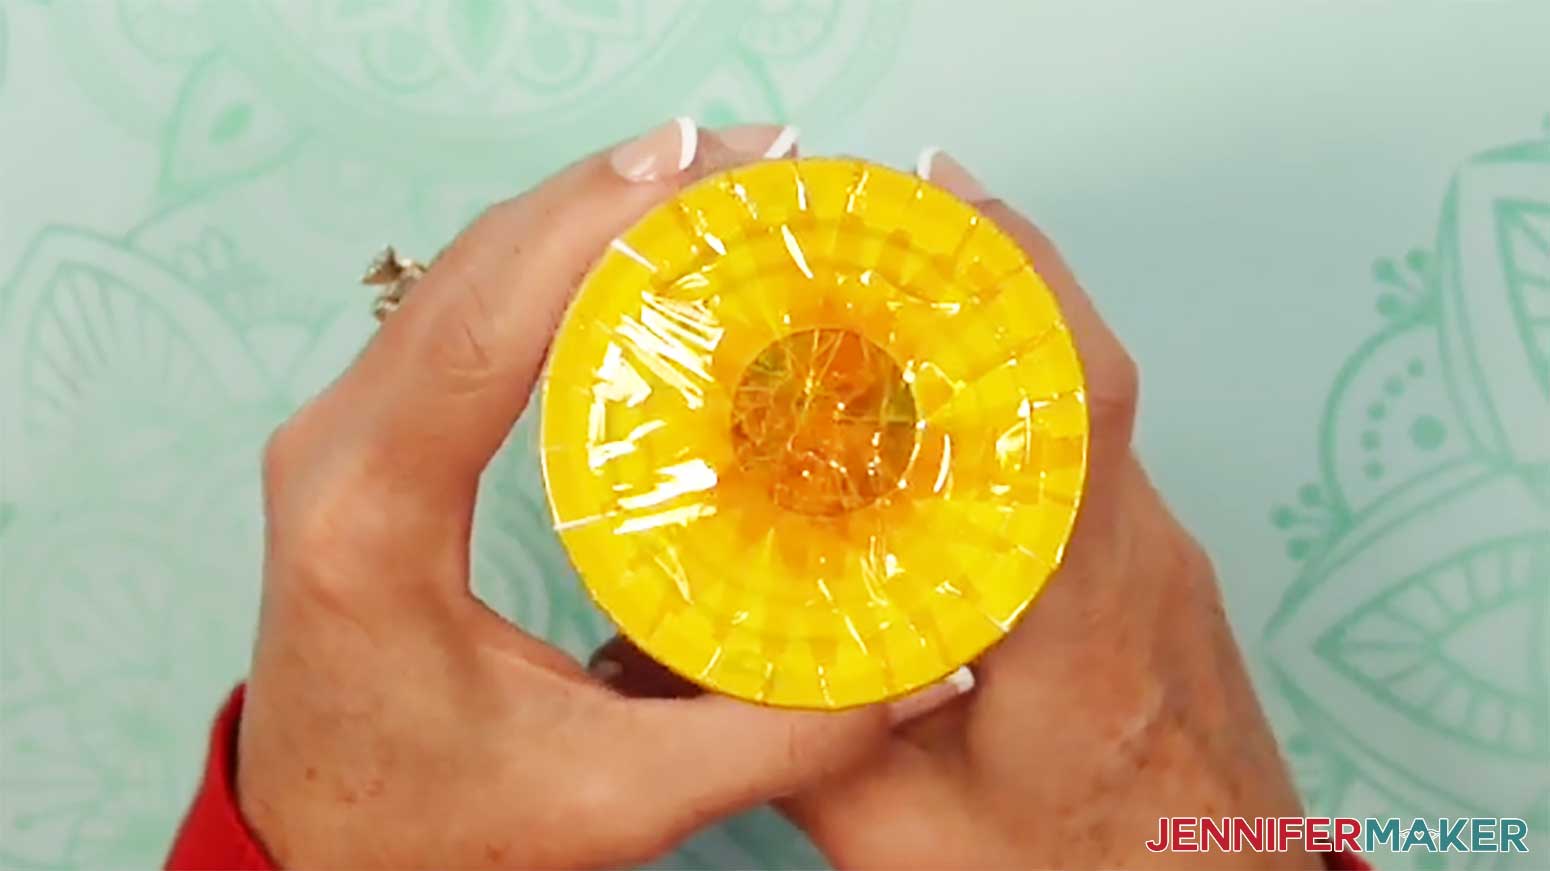
NOTE: During testing, I found that the shrink-wrap sleeves that come with the glow-in-the-dark tumblers in my list were prone to melting and came apart in a sticky mess in my oven. I recommend purchasing and using the shrink-wrap sleeves in my supplies list instead. - Open the shrink-wrap sleeve and pull it over your tumbler.
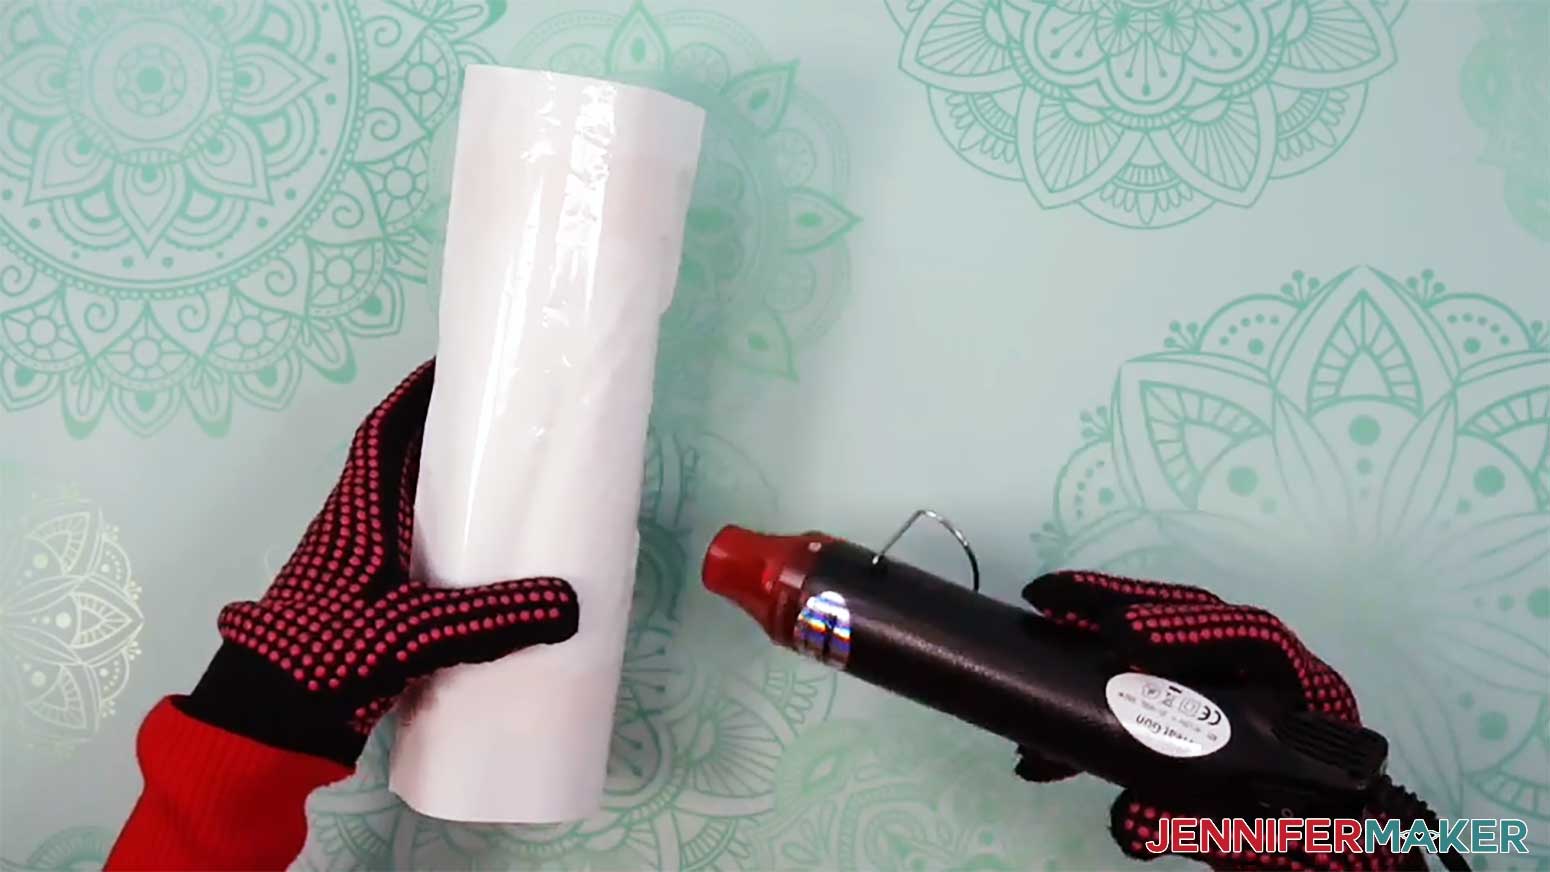
- Turn your heat gun to a low setting and slowly heat the wrap until it conforms to the tumbler.
NOTE: Try not to focus your heat on one area for a long period of time to avoid starting the sublimation process prematurely. - Use the heat gun to smooth out loose areas of the wrap, but don’t make the wrap too tight or it will pull apart in the oven.
- Allow the tumbler to cool.
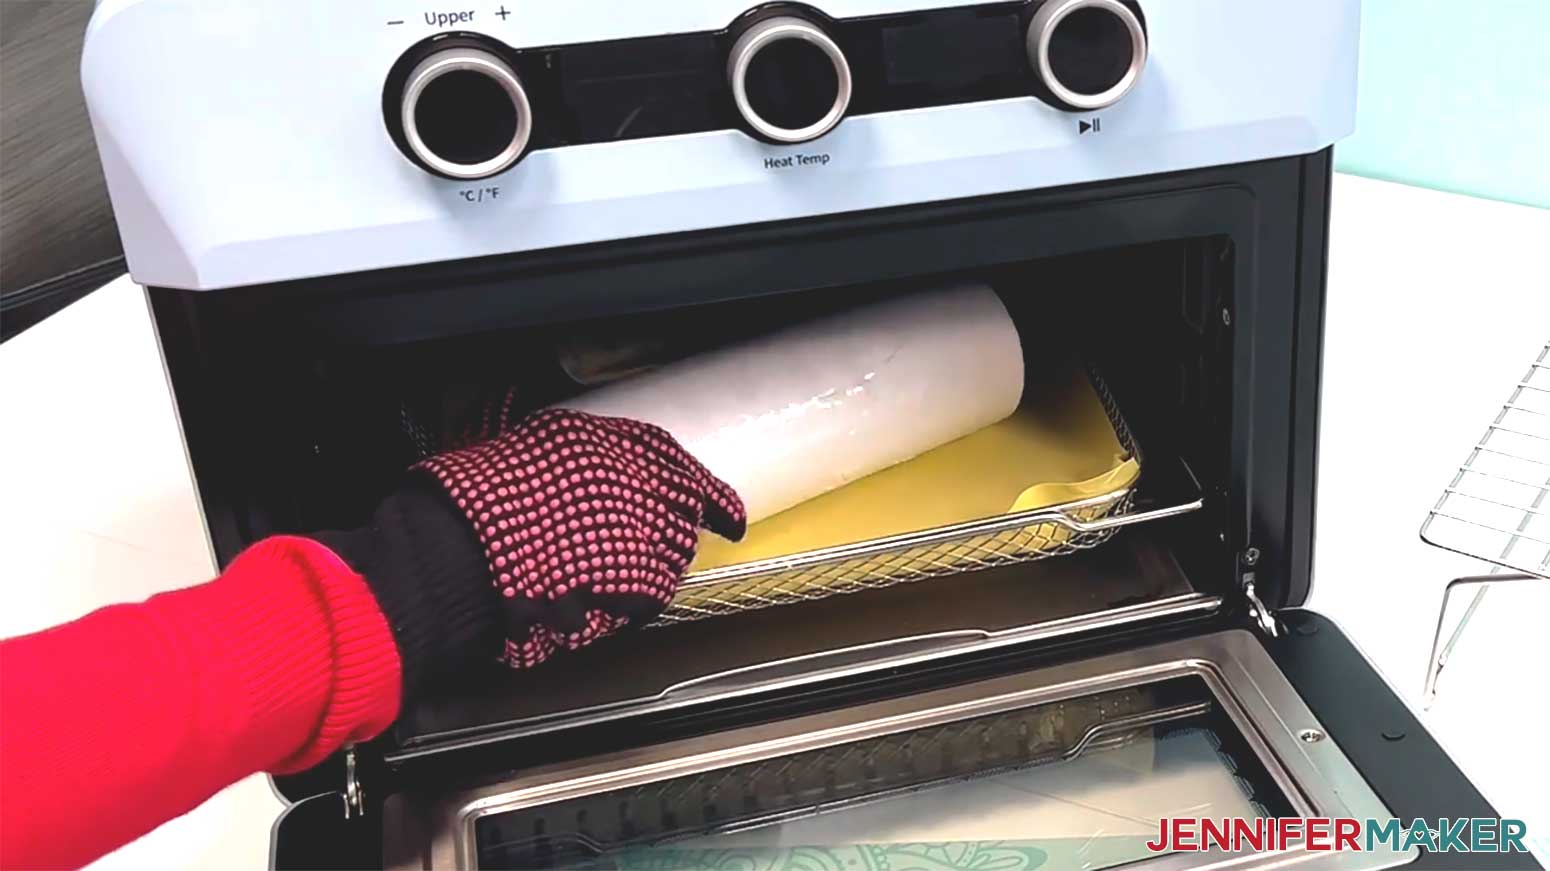
- Once the tumbler is cool and the oven is at the correct temperature, lay the prepared tumbler horizontally on the silicone baking mat.
TIP: Keep your gloves on, the oven is hot!
NOTE: I recommend baking only one tumbler at a time to avoid issues like uneven heating or shrink-wrap sticking together. - Heat the tumbler for six minutes, rotating once halfway through with your gloves on.
NOTE: This helps even out the heat on the tumbler. - After six minutes, the tumbler will be VERY hot. With your gloves on, carefully take it out of the oven and let it rest on a cooling rack for one to two minutes until it’s safer to handle.
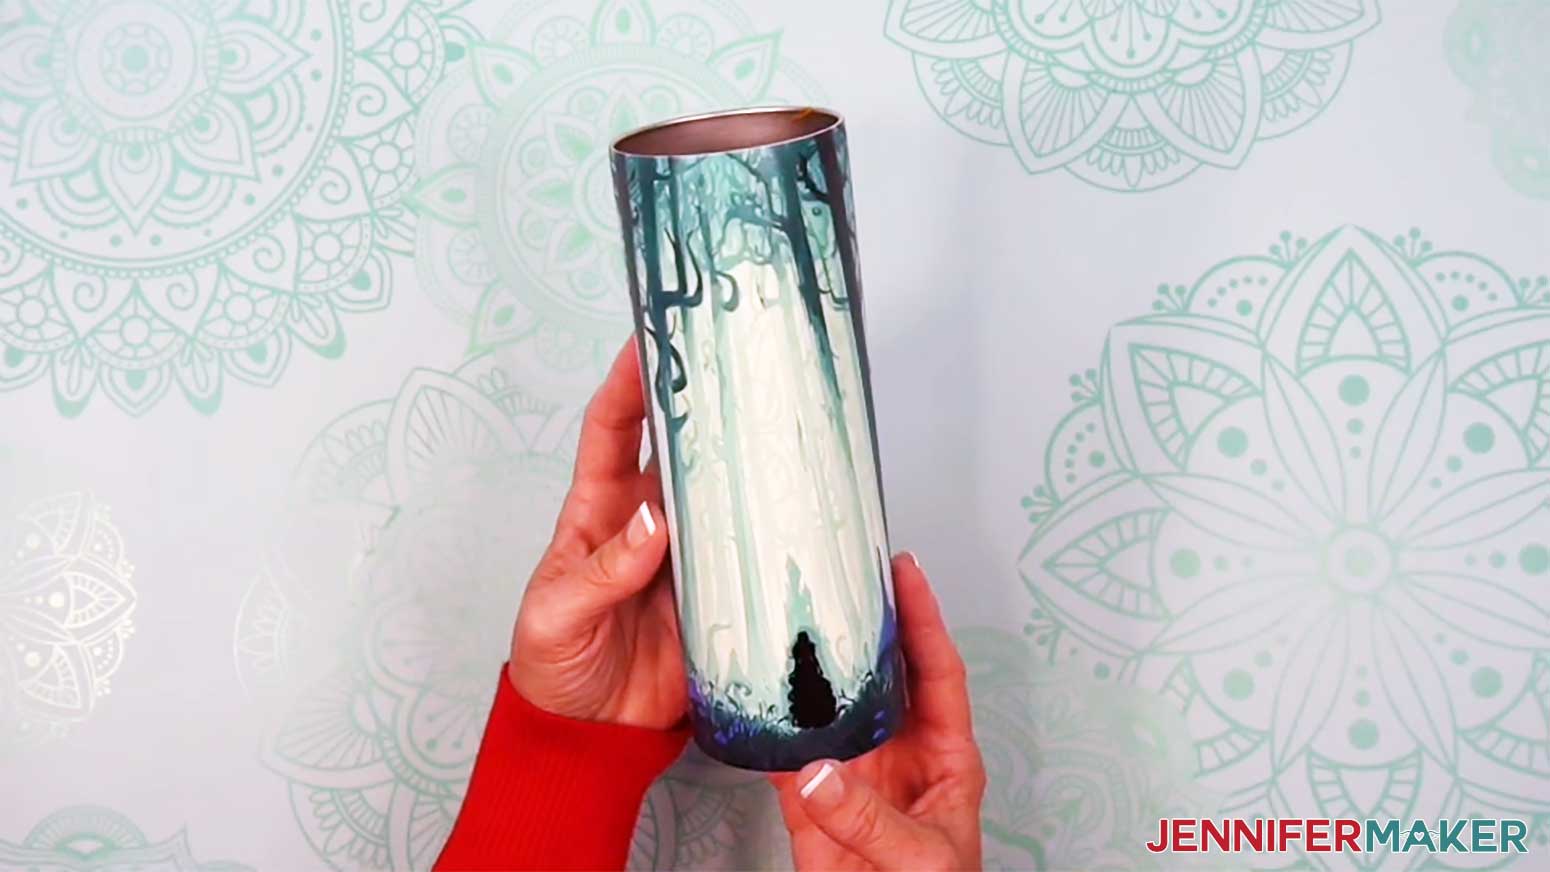
- While the tumbler is still warm, carefully peel away the shrink-wrap, tape, and sublimation paper to reveal your design!
STEP 6: SHOW IT OFF
Now you know how to sublimate a glow in the dark tumbler that looks beautiful day or night! You can use any light in the house to charge your tumbler, but letting it sit in direct sunlight for a few hours gave me the brightest glow!
Notes
Finished Size
Print Size: 9.37” x 8.21”
Tumbler Size: 9.19” Circumference, 8.1” Tall
Care Instructions: Hand wash with gentle soap, warm water, and soft cloth. Allow to air dry.
Answers to Your Questions About How to Make Glow In The Dark Tumblers with Reverse Sublimation
Q: Is there a way to create a custom design for reverse sublimation on a tumbler?
A: You can learn how to create a custom design for a 20 oz glow in the dark tumbler with reverse sublimation in my ADVANCE program. Learn more about ADVANCE here!
Q: Can you do glow in the dark sublimation?
A: Yes, absolutely! You can sublimate onto glow in the dark tumblers and other coated blanks made with a sublimation-ready surface designed to hold both the sublimation ink and the glow pigment underneath. In this project, the key is using a technique called reverse sublimation. Instead of layering on as much color as possible, you intentionally leave lighter areas in your design so the glow in the dark effect can shine through once the lights go out. Be sure to watch the video tutorial to see how I did it!
Q: What is the difference between sublimation and reverse sublimation?
A: In traditional sublimation, the goal is to cover as much of your blank’s surface as possible with bright vibrant colors using sublimation ink and heat. You typically want bold, full coverage and no empty space so the design looks rich and vivid. But reverse sublimation turns that idea upside down by intentionally leaving light and even white areas in the design! With glow in the dark tumblers specifically, you want those lighter areas because that’s how the glow shines through. The elements sublimated in a dark color block the light, while the lighter sections allow the glow to peek out. So instead of packing in more ink, you’re strategically leaving space to let the light from underneath create your image.
Q: Can you tell me how to activate glow in the dark tumblers?
A: You can use any light source to charge your glow in the dark tumbler, but for the strongest glow, let it sit in direct sunlight for a while. The light charges the glow pigment inside the tumbler’s coating, and when the lights go out, the stored energy is released as that gorgeous, mesmerizing glow that gleams in a dark room. You can also use UV light (like from a lamp or flashlight) to charge it faster. Even a few minutes will do the trick.
Q: Can you wash sublimation tumblers in the dishwasher?
Q: How long do you leave a sublimation tumbler in the oven?
A: Follow the video tutorial to find my recommended time and temperature settings for sublimating 20 oz sublimation glow in the dark tumblers.
Q: Where do I find sublimation tumbler designs?
A: You can use any of the images included in the project files to design your own tumbler, or find more in my library! You can also use your own photos and designs, images created through AI generators as long as you follow the tool’s guidelines, graphics from Canva or other online sources depending on usage requirements, or stock photos for your tumbler. If you want to take your designs further, I share online resources and best practices so you can get better results when designing and sublimating in my Advance program!
Q: Can you use a heat gun to sublimate on tumblers?
A: A heat gun sounds handy, but it just can’t provide the even, consistent heat sublimation needs. Although I use a heat gun on the shrink wrap to hold everything in place, you’ll get much better sublimation results with a convection oven or a tumbler press.
Q: Are sublimation fumes toxic?
A: Sublimation ink does release fumes, so it’s always smart to work in a well-ventilated space. And for safety, never use the same oven you cook food in for sublimation projects.
Q: Can you reuse a sublimation print?
A: Though it may look like there’s ink left on your sublimation transfer paper after pressing, there’s not actually enough to create another press. You can try to reuse your sublimation artwork wrap, but your second attempt will probably look super faded and not the way you expect.
Q: Can you sublimate a YETI tumbler?
A: YETI tumblers don’t have the special polymer coating needed for sublimation, so the ink won’t infuse properly into the material. To get those bright, permanent results, make sure to use tumblers that are made just for sublimation.
Q: Can a Cricut do sublimation printing?
A: While a Cricut cutting machine can be useful in some sublimation projects, it does not sublimate or print sublimation ink. However, you can use a Cricut and Infusible Ink pens to draw designs onto paper, which can be sublimated, or use a Cricut to cut SVG designs out of Infusible Ink transfer sheets. If you want to sublimate your glow-in-the-dark tumbler with printed designs, you’ll need a sublimation printer, a crafting oven or tumbler press, and other tools and materials you can find above in my materials list.
Q: Can I make and sell sublimated tumblers?
A: If you want to use my designs and projects for commercial use, please familiarize yourself with my important licensing information before selling your crafts.
Get my free PNG files to make glow in the dark tumblers with reverse sublimation and more!
(If you do not see the signup form above, click here.)
I love seeing your sublimated projects, and how you use them! Once you’ve learned how to make your own glowing reverse sublimation tumblers, inspire others and share a photo of your glow in the dark drinkware project in our Facebook group or tag me on social media with #jennifermaker.
Love,

Want to remember this? Save this How To Make a Glow In The Dark Tumbler with Reverse Sublimation Tutorial to your favorite Pinterest Board!