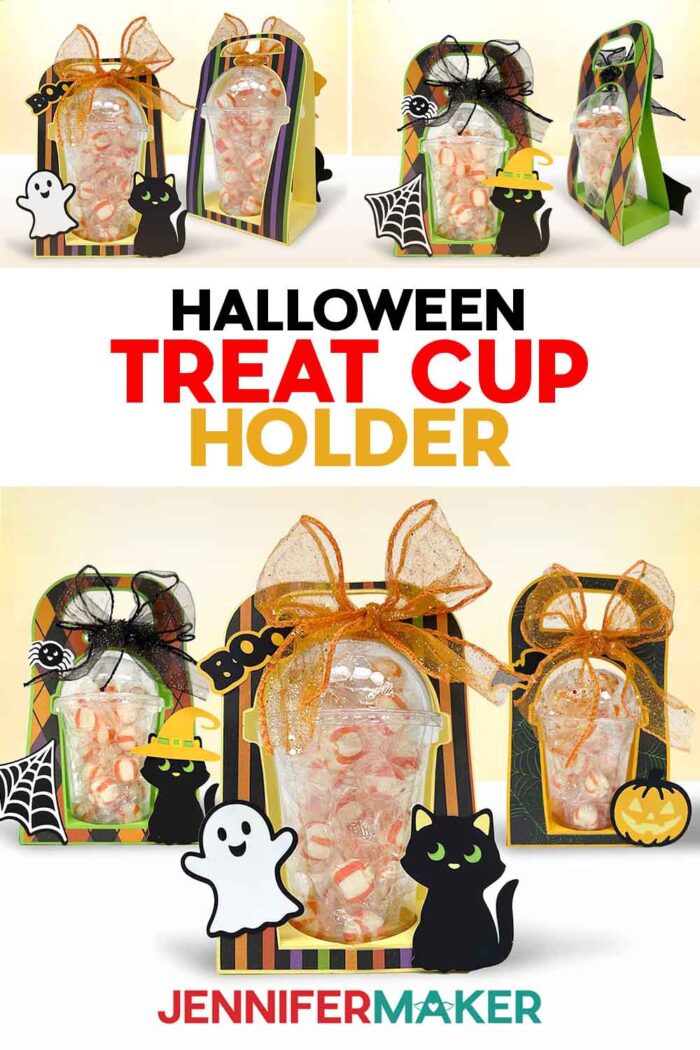
Learn how to make frightfully fun Halloween treat cup holders for candy and more!
This Halloween, pretty pumpkins line the porch steps, my windows are full of seasonal suncatchers, and enchanting lanterns glow once the sun sets. It feels downright magical, but I still wanted a way to make the treats as festive as the decorations. Every time I saw those adorable candy cup gift ideas, I thought the same thing: “That looks way too complicated. How could a paper holder carry that much candy, anyway?” I was skeptical, so that’s exactly why I created these Halloween treat cup holders. Turns out you can make them simple, super sturdy, and so much easier than they look! They’re a cute twist on goody bags, guaranteed to bring smiles before anyone even tastes the treats inside!
Watch the full step-by-step tutorial on how to make Halloween treat cup holders:

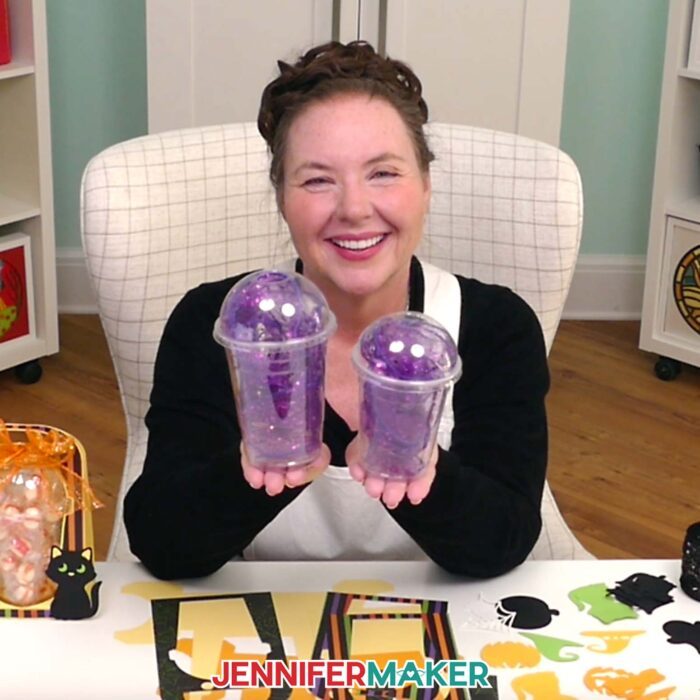
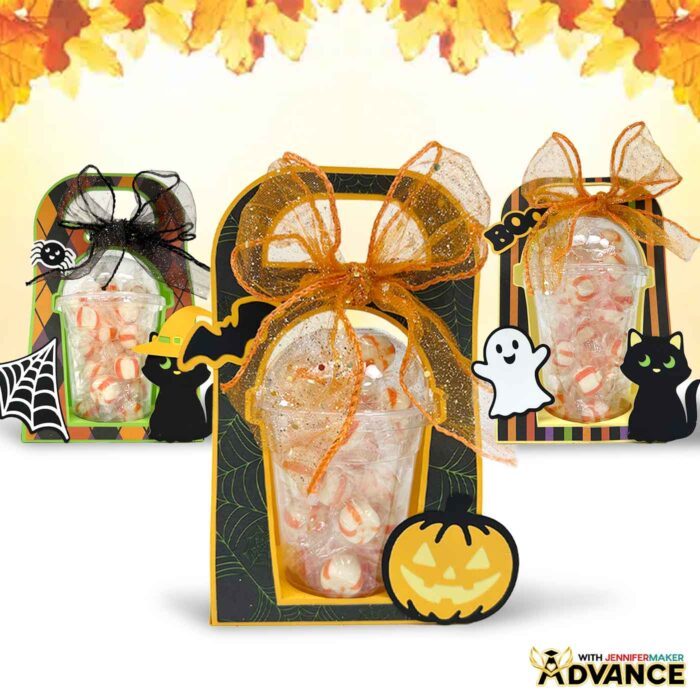
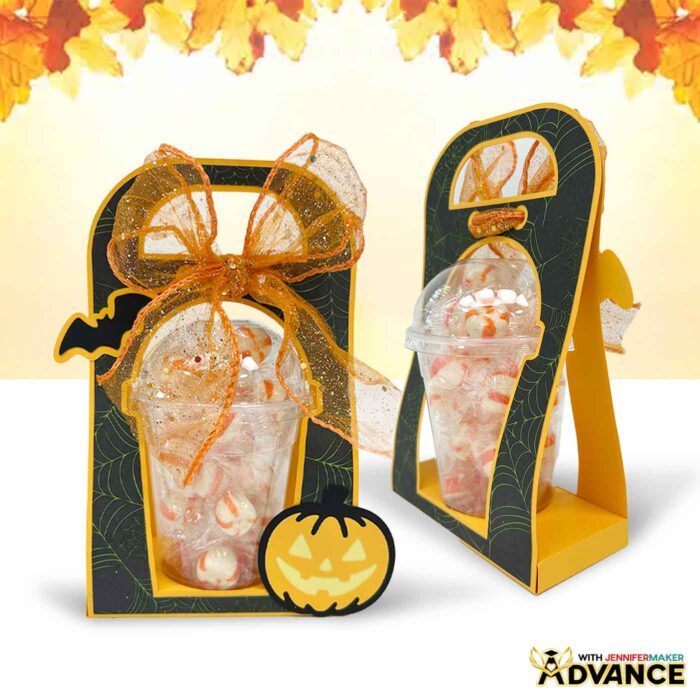
With just cardstock, a dome-lid cup, and a bit of glue, you can whip up a candy container that’s just as fun to display as it is to share. These holders are built around clear plastic cups with dome lids, the same style you might usually see filled with whipped cream on top of an iced pumpkin spice latte or frozen fall frappé. Instead, you’ll heap them high with candy, treats, or small gifts, then slide the cup right into its custom-fit holder. The design is strong enough to carry literal pounds of candy without tipping or collapsing, so you don’t have to worry about your hard work falling apart. And here’s a tip I discovered while testing: if you keep the holder upright by its handle, it’s perfectly secure. However, don’t tip it sideways, or the cup may slide out. Upright and filled to the dome, it’s a Halloween showstopper!
I designed these dome cup holders in two sizes, 12 ounce and 16 ounce. I kept the materials simple so you can focus on the fun part: decorating.
You’ll just need 65 lb cardstock, craft glue, ribbon, and a way to cut your paper. I used my Cricut Maker 4, but you can use any Cricut cutting machine except the Cricut Joy (it’s just a bit too small). You’ll need a green StandardGrip machine mat and a brayer to get the paper stuck down tight for clean cuts. I used Bearly Art Precision Craft Glue (my favorite), and the precision tip makes it easy to glue those tiny embellishment details. And if you don’t have a scoring tool for the creases, no problem. I’ve included no-score versions that use dashed cut lines you can fold by hand.
If you’re crafting with a Cricut Joy Xtra, I didn’t leave you out! I created special files just for the Joy Xtra’s 8.5” x 11” mats. The Joy Xtra version of the design file uses dashed cut lines instead of scoring, and the holder is built in three pieces instead of two, but once glued together, it looks exactly the same as the larger machine versions.

The full step-by-step video tutorial shows you everything: how to prepare the files in Design Space, where to attach score lines, how to cut patterned paper so text faces the right way, and how to fold and glue everything so it comes together smoothly. Watching the flat cutouts bend and glue into a strong little holder that perfectly cradles your treat cup is so satisfying!
Don’t have a Cricut or cutting machine? You can still make these snack packs! Just print and use the PDF templates to cut your cardstock pieces.
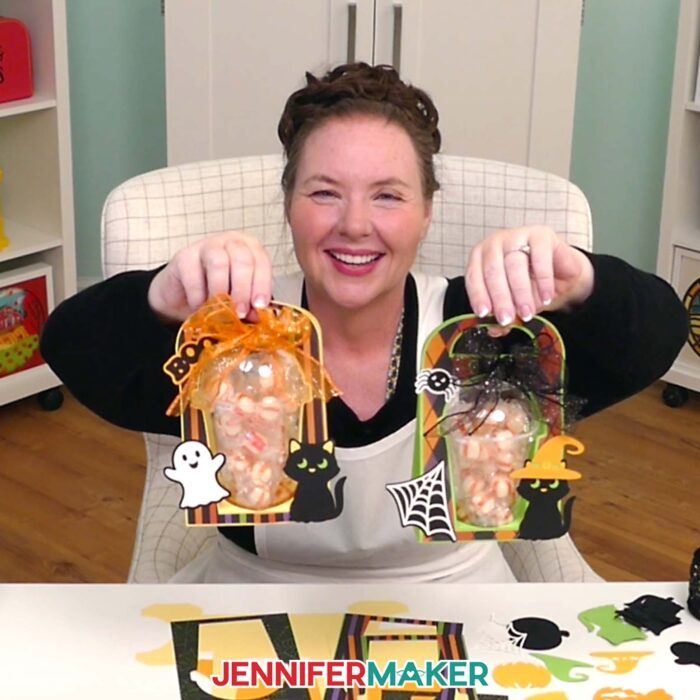
What makes these Halloween treat cup holders really shine are the decorations. I included a witchy black cat, a spider web, and a ghost for Halloween. Once you glue the layers together, they really come to life. I love how a little patterned paper on the decorative panels gives each cup its own personality. Glitter or metallic cardstock will look amazing, too! Tie the top closed with ribbon or twine, and suddenly your treat cups look like something straight out of a boutique gift shop.

And it doesn’t stop at Halloween. If you’re the kind of crafter who loves to go beyond the basics, check out ADVANCE with JenniferMaker. This members-only space is where I share extra-special tutorials, creative techniques, and exclusive cheat sheets you won’t find anywhere else. For this project, members get a bonus workshop on how to customize these cup holders with themed embellishments, making them perfect for weddings, holidays, baby showers, or even everyday gifts. Click here to learn more about the Advance program!
Halloween is one of my favorite times to add a handmade touch to everything, and these holders make it easy to do just that. Instead of a paper lunch sack with a twist tie, imagine handing someone one of these custom-made candy creations! Whether you fill them with candy, trinkets, or other small gifts, you’ll love how fun (and sturdy!) they are to share. And remember, the candy may be sweet, but the container you crafted is what truly makes this a sweet gift to remember!
Do you want to learn how to make your own Halloween treat cup holders? Let me show you how fun and easy it is with my treat cup holder tutorial and design! This post contains some affiliate links for your convenience (which means if you make a purchase after clicking a link I will earn a small commission but it won’t cost you a penny more)! Read my full disclosure policy.
Materials to Make Halloween Treat Cup Holders
View my Amazon shopping list with the exact items I used.
- 16 oz. Cup with Dome Lid -OR-
- 12 oz. Cup with Dome Lid
- 12″ x 12″ 65 lb. Cardstock
- 11.8″ x 11.8″ Halloween Patterned Paper
- 2.5″ Wide Halloween Ribbon Variety Pack
- Orange Candy Puffs
- 1 1/2″ Red Wired Ribbon
- 8.5″ x 11″ 80 lb. Black Cardstock
- A way to cut your materials – I’m using the Cricut Maker 4, but you can also use any Cricut Maker series machine, a Cricut Explore Series machine, or the Cricut Venture
- Cricut Green StandardGrip Machine Mat 12″ x 12”
- Scoring Stylus (optional for files with score lines) -OR-
- Single Scoring Wheel (optional for files with score lines)
- Craft Glue (I used Bearly Art Precision Craft Glue)
- Brayer
- Spatula
- Scraper
- Weeding Tool
- Tweezers
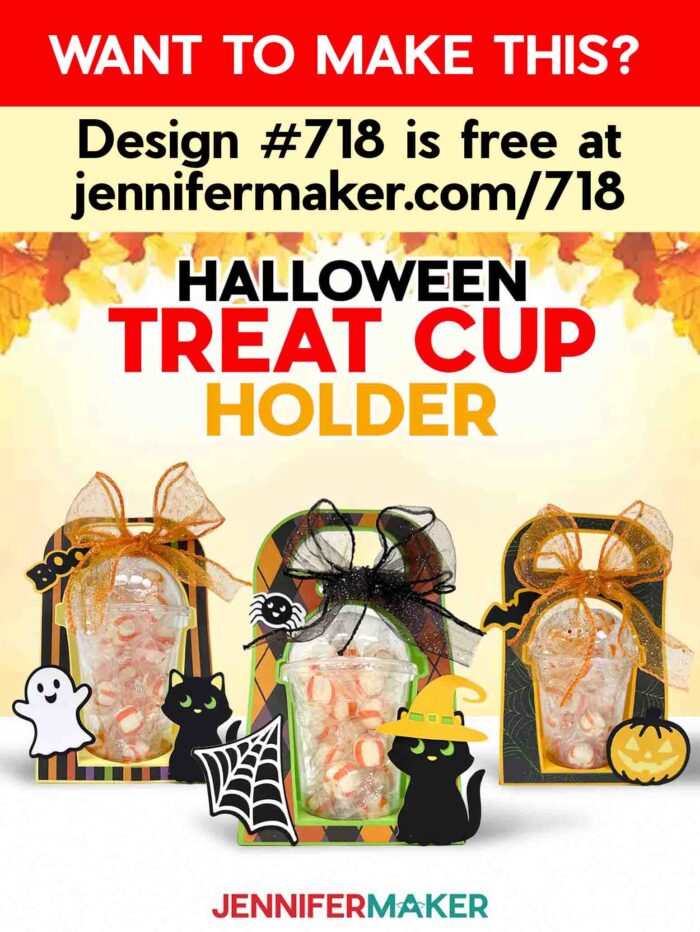
- Design #718 (My free SVG/DXF/PDF design files are available in my free library – get the password by filling out the form at the bottom of this page)
How to Make Halloween Treat Cup Holders
Halloween Treat Cup Holders
Learn how to make a Halloween Treat Cup Holder!
Materials
- One (1) 16 oz. Cup with Dome Lid -OR-
- One (1) 12 oz. Cup with Dome Lid
- Four to Five (4-5) Sheets of 12” x 12” 65 lb. Cardstock - Any Colors
- 11.8" x 11.8" Whaline Halloween Patterned Paper (optional)
- 2.5" Wide Halloween Ribbon Variety Pack
- Filler for the Cup
- Design #718 (My free SVG/PDF/DXF design files are available in my free resource library - get the password by filling out the form at the bottom of this page)
Tools
- A way to cut your materials - I’m using the Cricut Maker 4, but you can use any Maker series machine, a Cricut Explore Series machine, the Cricut Venture, or the Cricut Joy Xtra
- Cricut Green StandardGrip Machine Mat 12" x 12"
- Brayer
- Craft Glue (I used Bearly Art Precision Glue)
- Spatula
- Weeding Tool
- Scraper
- Scissors
- Tweezers (optional)
- OPTIONAL: Paper Towels (for removing excess glue)
- Scoring Stylus (optional for files with score lines) -OR-
- Single Scoring Wheel (optional for files with score lines)
Instructions
STEP 1: GET MY FREE HALLOWEEN TREAT CUP HOLDER DESIGNS
First, download my Halloween Treat Cup Holder designs from my free library – look for Design #718. Alternatively, you can use the Save This Project form near the top of this post and the design link will be emailed to you.
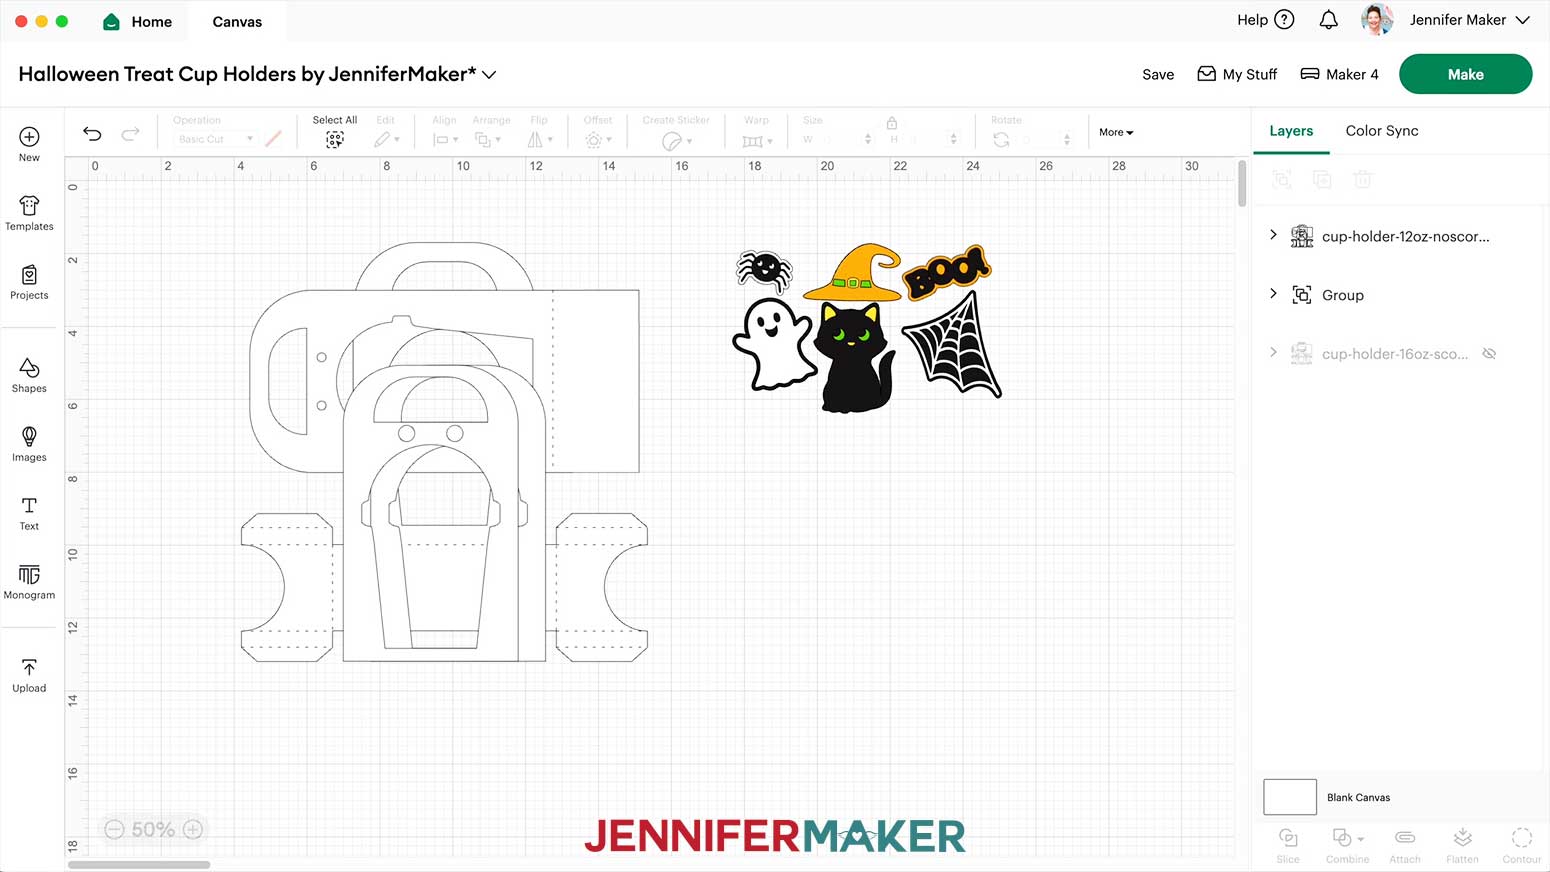
In the SVG folder, you’ll find six files for the holder itself: one with score lines and one with dashed lines (with “noscore” in the name) for both 12 oz and 16 oz cups, and one of each size that can be made on the Joy Xtra. There’s also one file with all the embellishments.
There is also a DXF folder with cut files, and a PDF folder with versions you can print and cut by hand.
Upload the files you need to Design Space to get started. I’ll demonstrate with the 16 oz “score” cup holder SVG file and the embellishments SVG file.
TIP: If you’re not sure how to upload, go to jennifermaker.com/svgs to learn how to unzip and upload SVG files.
STEP 2: PREPARE YOUR HALLOWEEN TREAT CUP HOLDER DESIGN
CRICUT DESIGN SPACE
- Open Cricut Design Space and click “New Project.”
- Click “Upload” and then “Upload Image.”
- Click “Browse.”
- Select the holder SVG file you want.
NOTE: I’ll demonstrate with the 16 oz "score" file. - Click "Open" and then “Continue.”
- Click "Upload" to add the file to your Canvas.
- Follow steps 2-6 to upload the embellishments SVG file and add it to the Canvas.
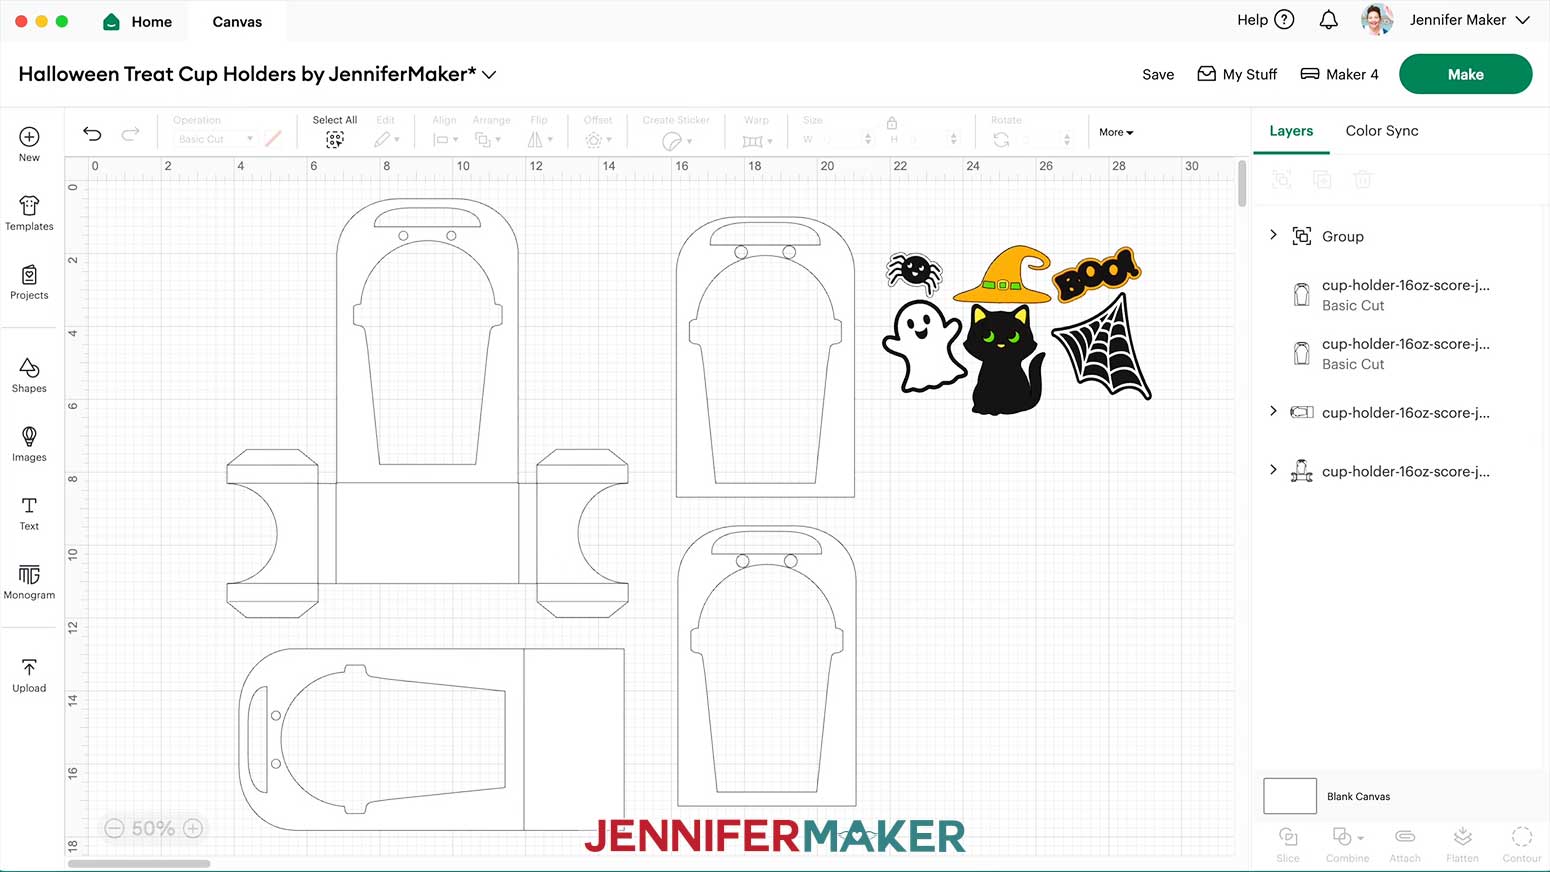
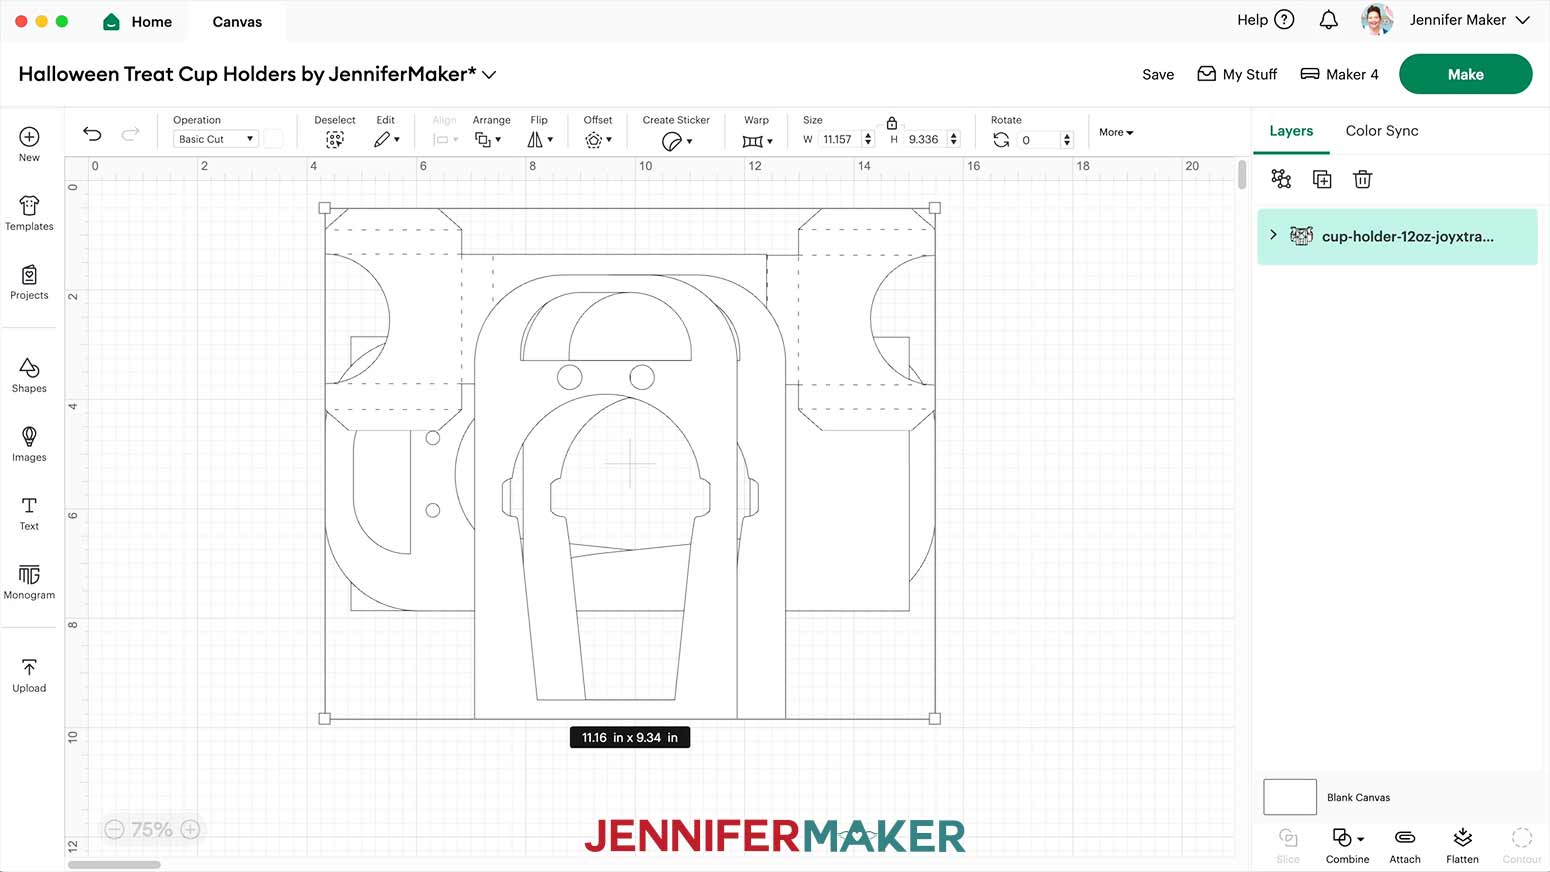
- Here is what they both look like on the Canvas

NOTE: If you’re using the 12 oz "noscore" file, it will look like this on the Canvas. - Ungroup and spread out the holder pieces.
TIP: If you’re using the version of the file WITHOUT score lines, it’s almost ready to cut, but the "score" version has a few extra steps. - The arrows in the Layers Panel mean there are still grouped pieces, so click the top one to see them.
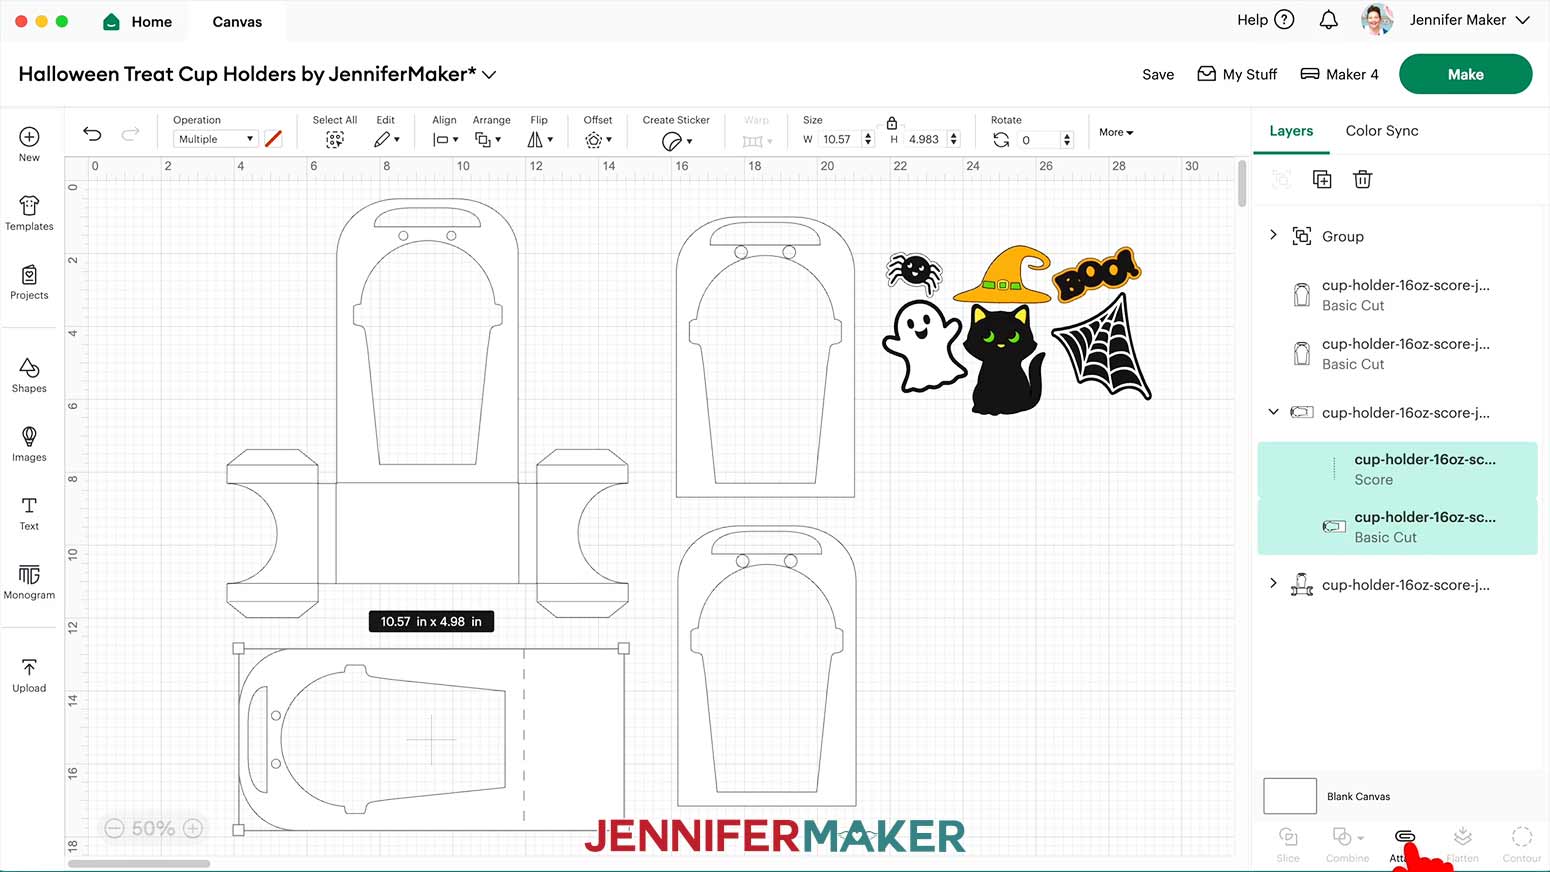
- In this group, the top layer with just lines is our crease layer. Click just the crease lines layer, then go to the “Operation” drop-down next to the Color Box and set it to “Score.”
- Click the group to select both layers, then click “Attach” to keep them together during cutting.
- Repeat the process for the other group with score lines.
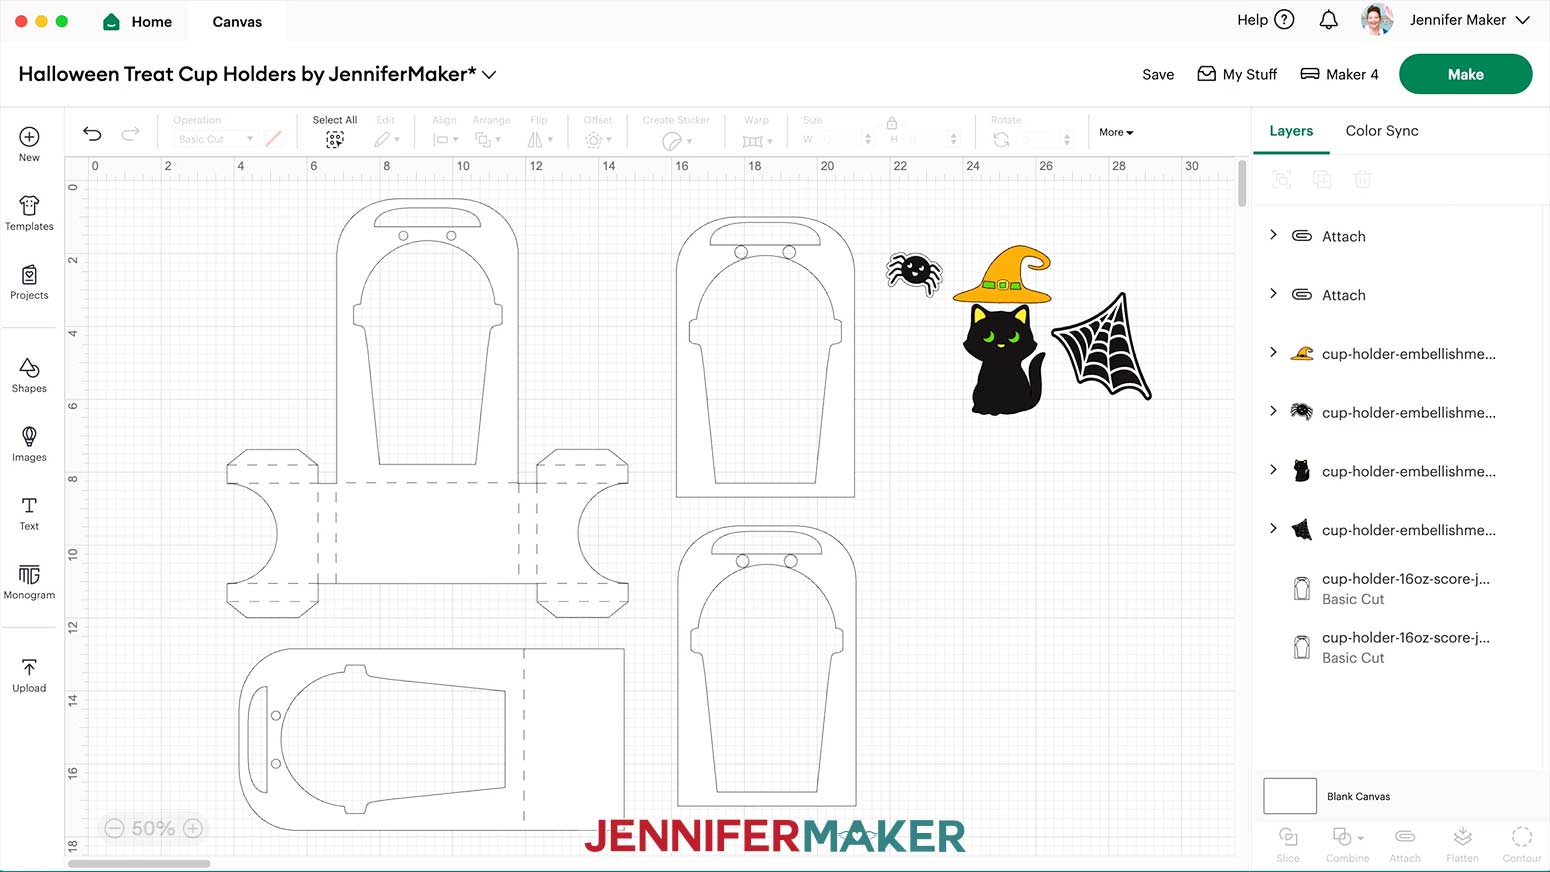
- Ungroup the embellishments and delete any you don’t want to use.
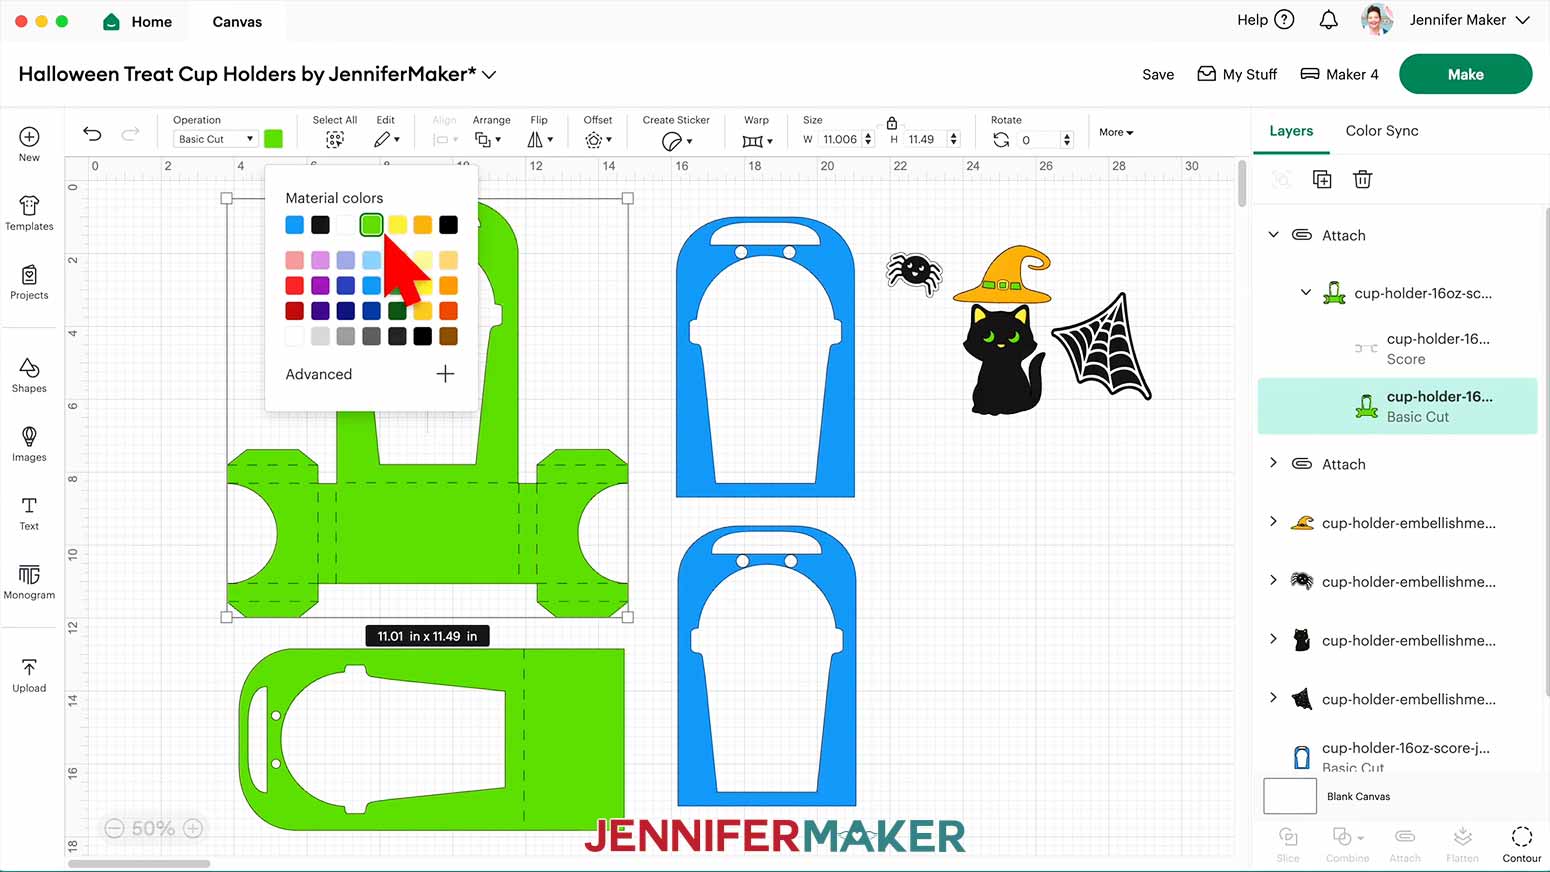
NOTE: I’ll use the cat, hat, web, and spider. - If you’d like to change the color of the holder pieces to match your cardstock, do that now.
- You can also change the colors for the decorative panels.
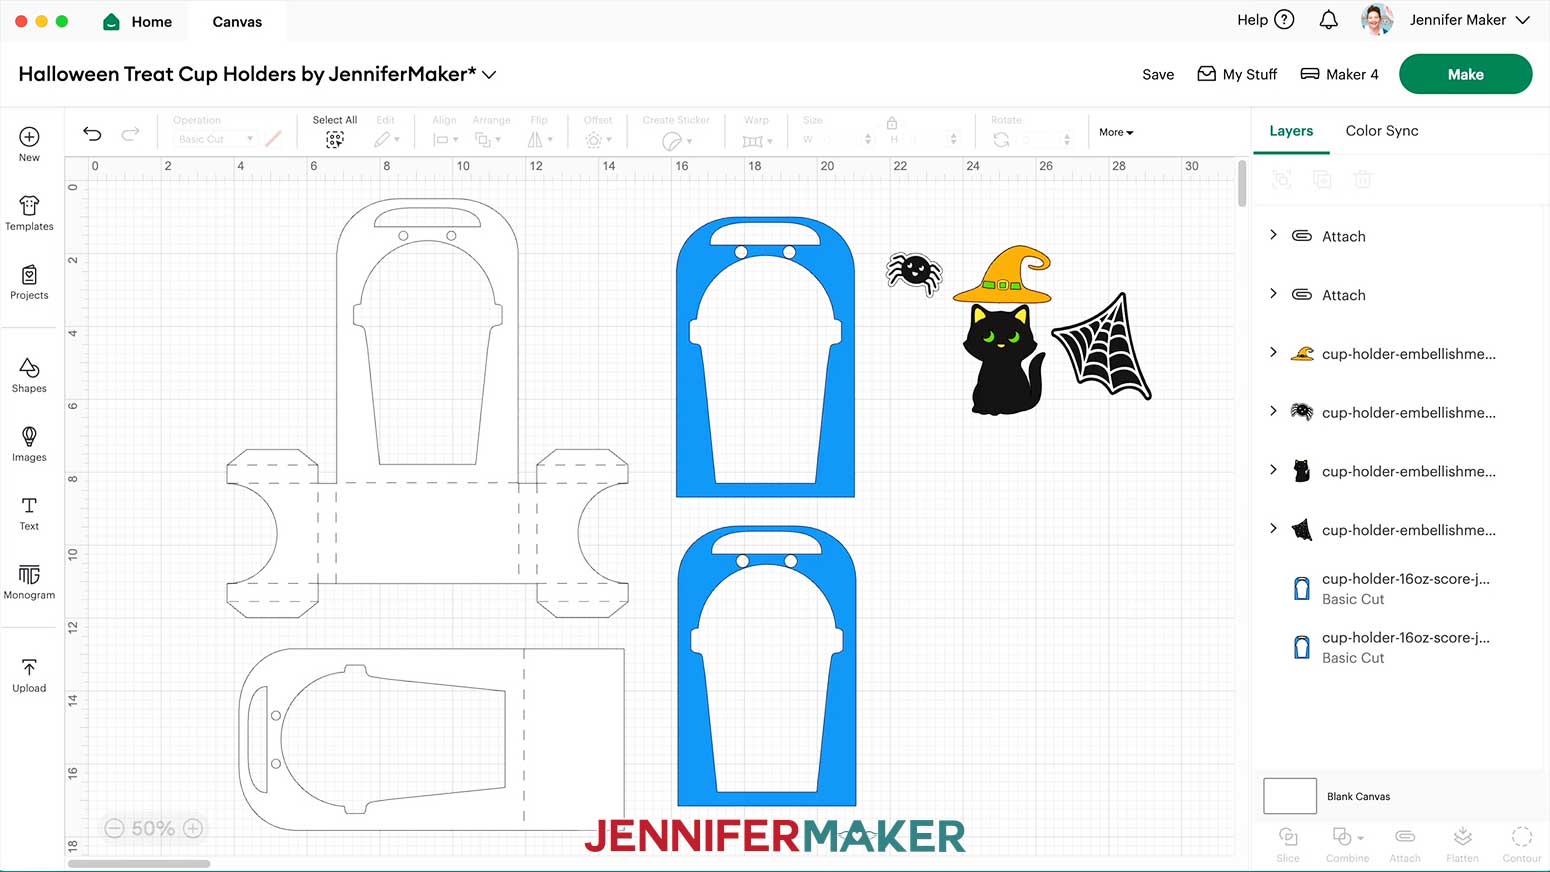
NOTE: I’ll use patterned cardstock on the decorative panels, so I’ll change their color to blue. - Since we attached the score lines to the holder's cut layer, we'll need to expand each group's layers in the Layers Panel first. Then, click just the cut layer before changing the color.
TIP: I’ll save some paper by picking the same green as the cat’s eyes. - When you change the color of the other side, be sure to click the same green under “Material Colors” in the color menu so they go on the right mat.
- When everything looks the way you’d like, check that the right machine is selected at the top right.
- Click “Make.”
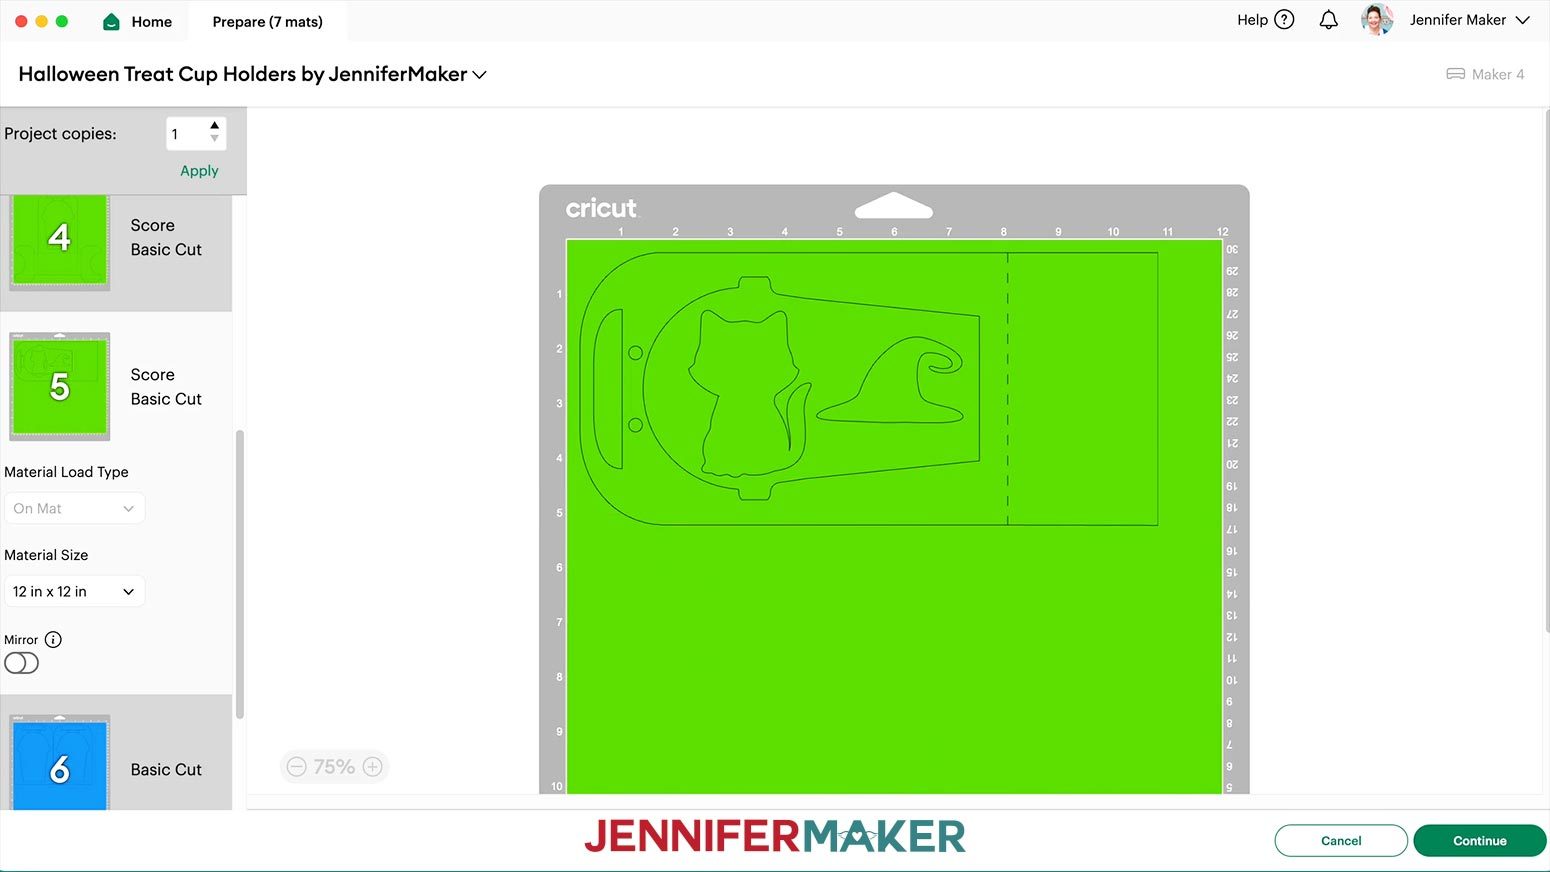
- On the Prepare screen, make sure the correct Material Size is selected for your materials.
NOTE: I’m using all 12” x 12” cardstock. - You might be able to save some paper by moving embellishments inside the cup cutouts, so take a look!
TIP: To move a piece, click it, select the three dots, pick a new mat in the pop-up, then make sure the moved piece doesn’t interfere with anything on the new mat. - If you’re using patterned paper with a directional design, like one with text that needs to face a certain way, make sure to position those pieces so they run from top to bottom.
- Select the mat you want to cut first, and click “Continue.”
NOTE: I’ll pick the big holder mat.


CUTTING
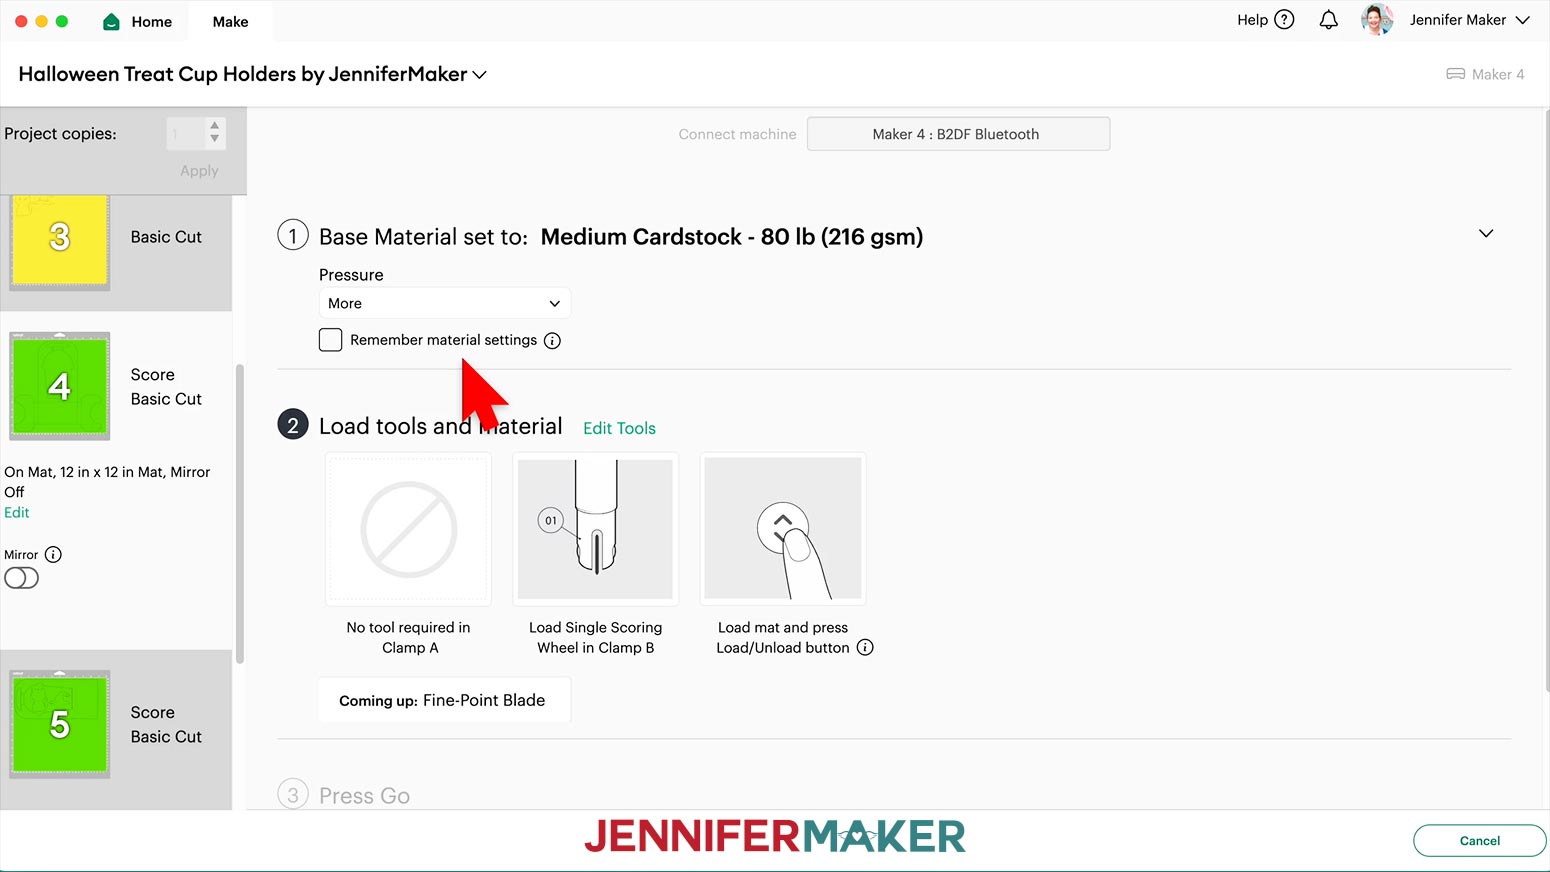
- On the Make screen, set the Material for your mats to the “Medium Cardstock - 80 lb (216 gsm)” setting with “More” Pressure.
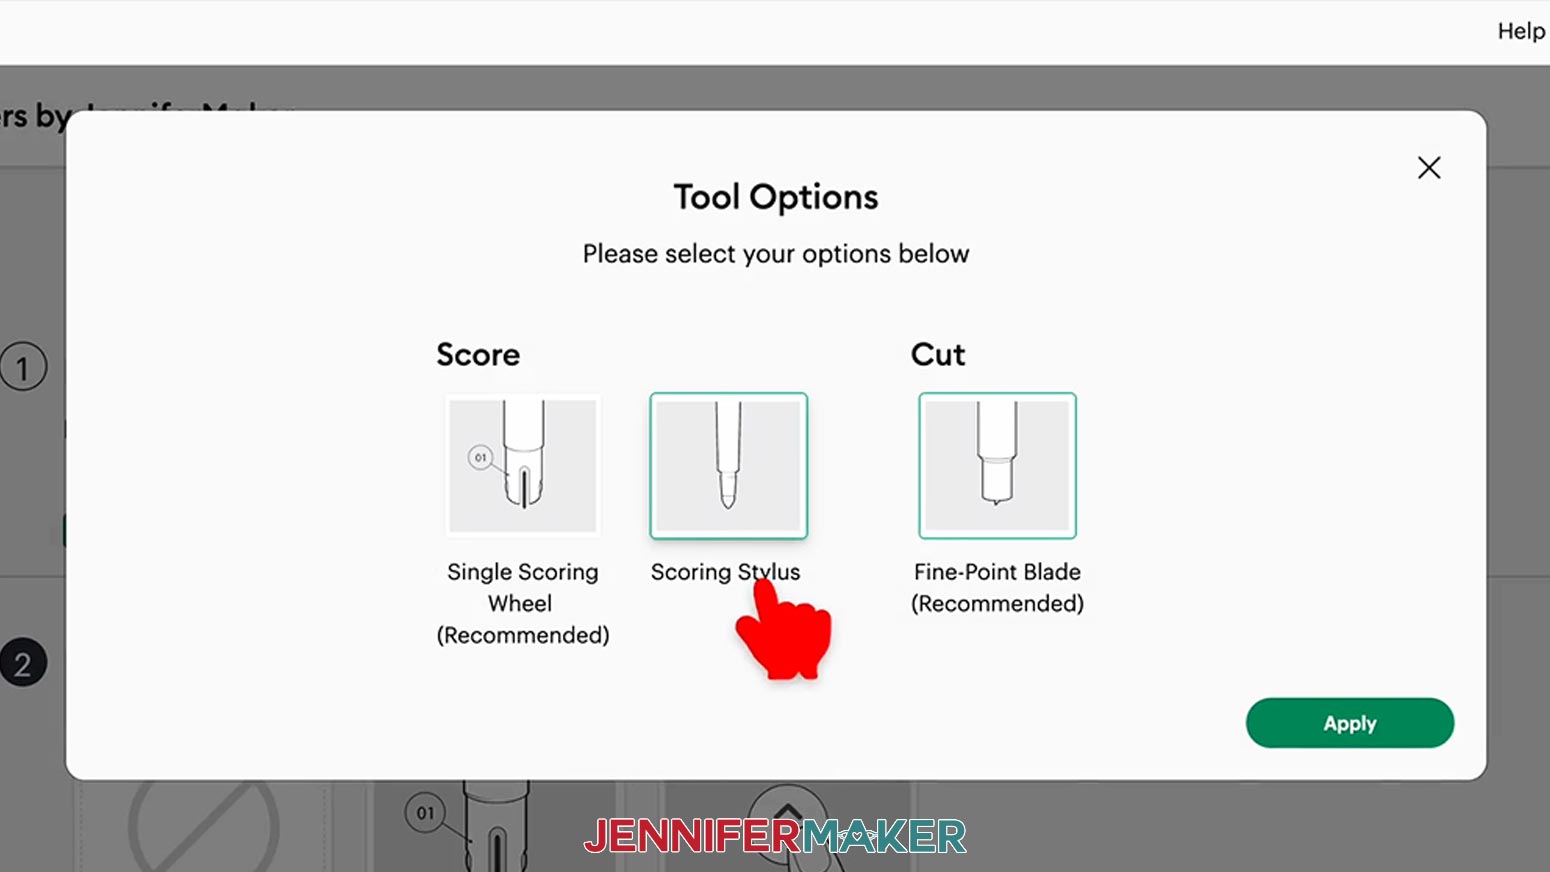
TIP: If you have any issues cutting your pieces, check out my Intricate Cuts tutorial. - If you’re using the “noscore” version, skip ahead to step 3. If you’re using the Scoring Stylus, insert it into the clamp now and update your Tool Options in Design Space. If you’re using the Single Scoring Wheel, insert it into the clamp when prompted.
NOTE: Make sure the score tool is loaded when cutting the cup holder mats. The score function will complete, and then you can change out the Score Wheel for the Fine-Point Blade if needed. - Make sure your tools are clean and in the right spots.
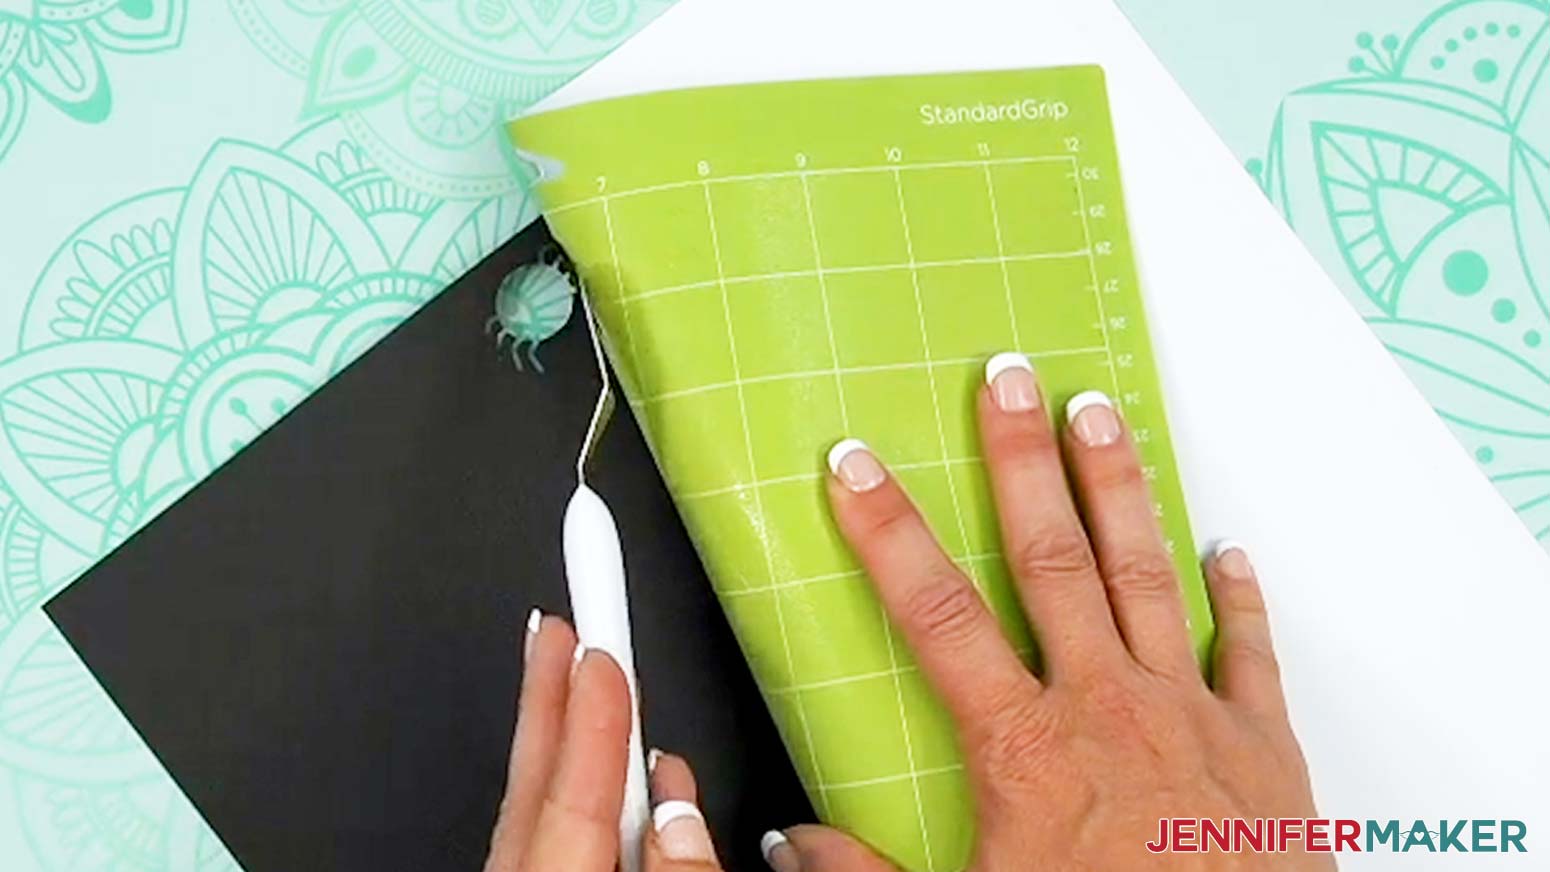
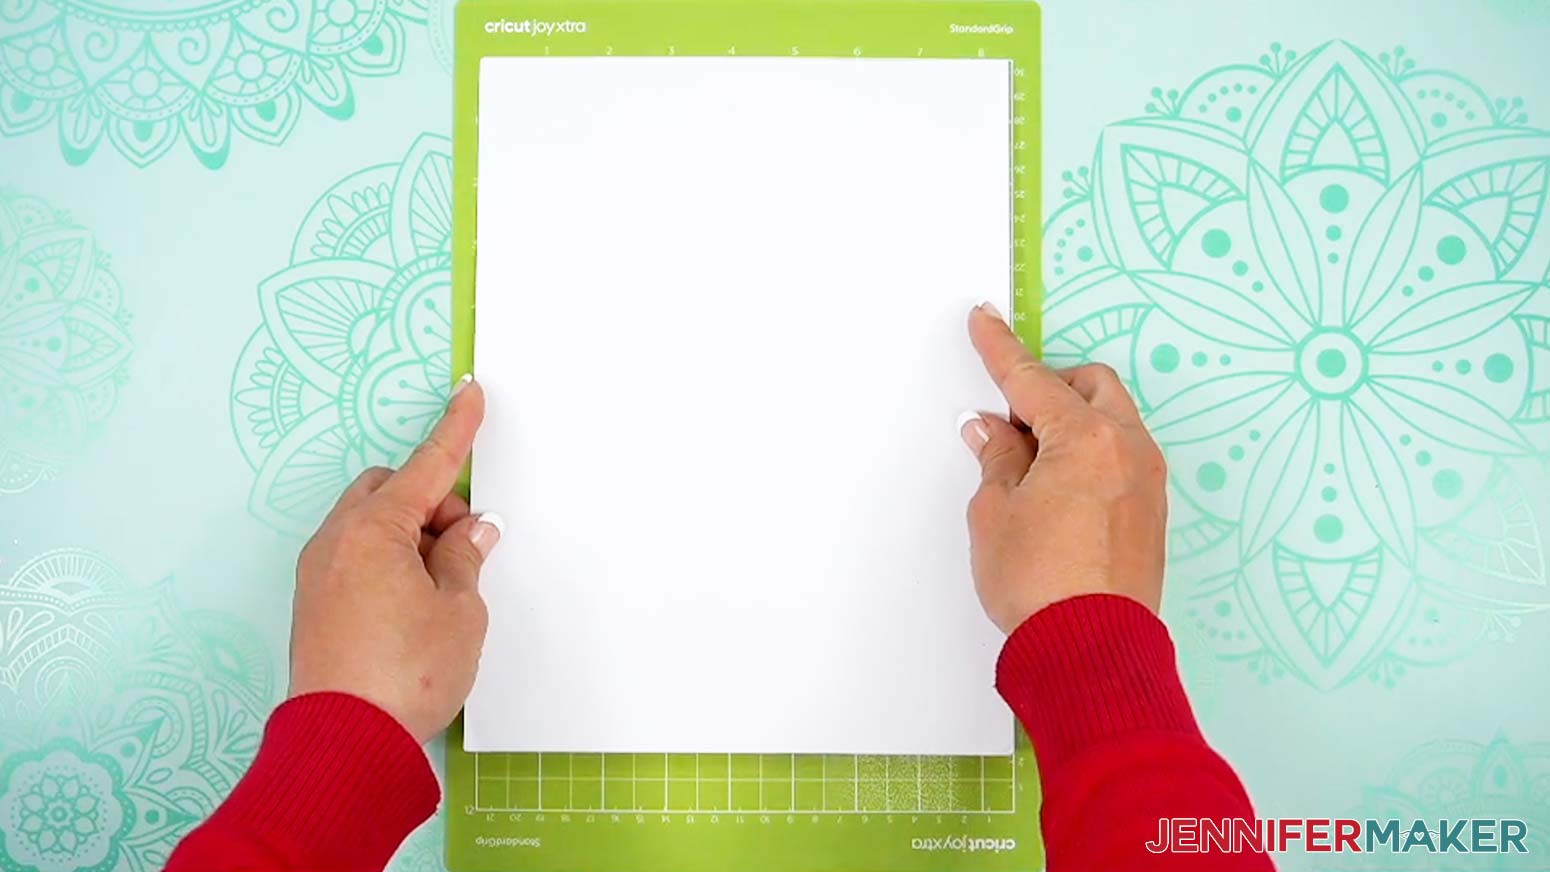
- Place your first mat’s cardstock face up on a green StandardGrip machine mat.
NOTE: If you’re using a Cricut Joy Xtra with the Joy Xtra version of the file and 8.5” x 11” materials, place your mat’s material in the top left corner of the mat, just like you would with a 12” x 12” mat. - Use a brayer to make sure it’s fully adhered.
- Check that your Premium Fine-Point Blade is clean and in the clamp.
- Press the flashing “Load/Unload” button to load the prepared mat into your Cricut.
- Press the flashing “Go” button to begin cutting.
- When it has finished cutting, unload the mat, flip it over onto your work surface, and roll it back to release the paper. Lay the cut pieces right side up on your work surface.
TIP: Use the spatula to help lift delicate parts and the weeding tool to poke out small bits of cardstock that may have been left behind. If you have any issues with your cuts, go to jennifermaker.com/cleaner-cuts. Use a scraper tool to remove the small bits left on your mat after you remove the cut pieces. - Follow the steps to continue cutting the rest of your cardstock mats.
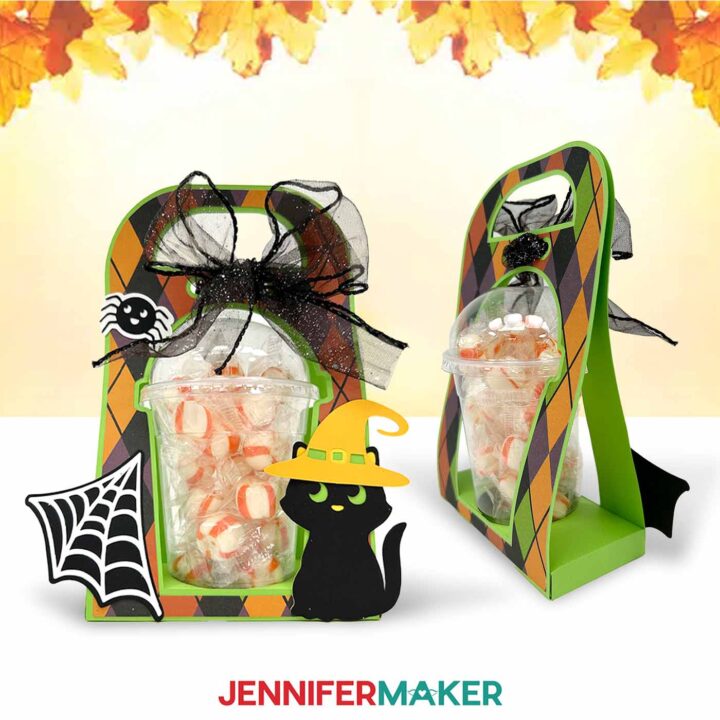
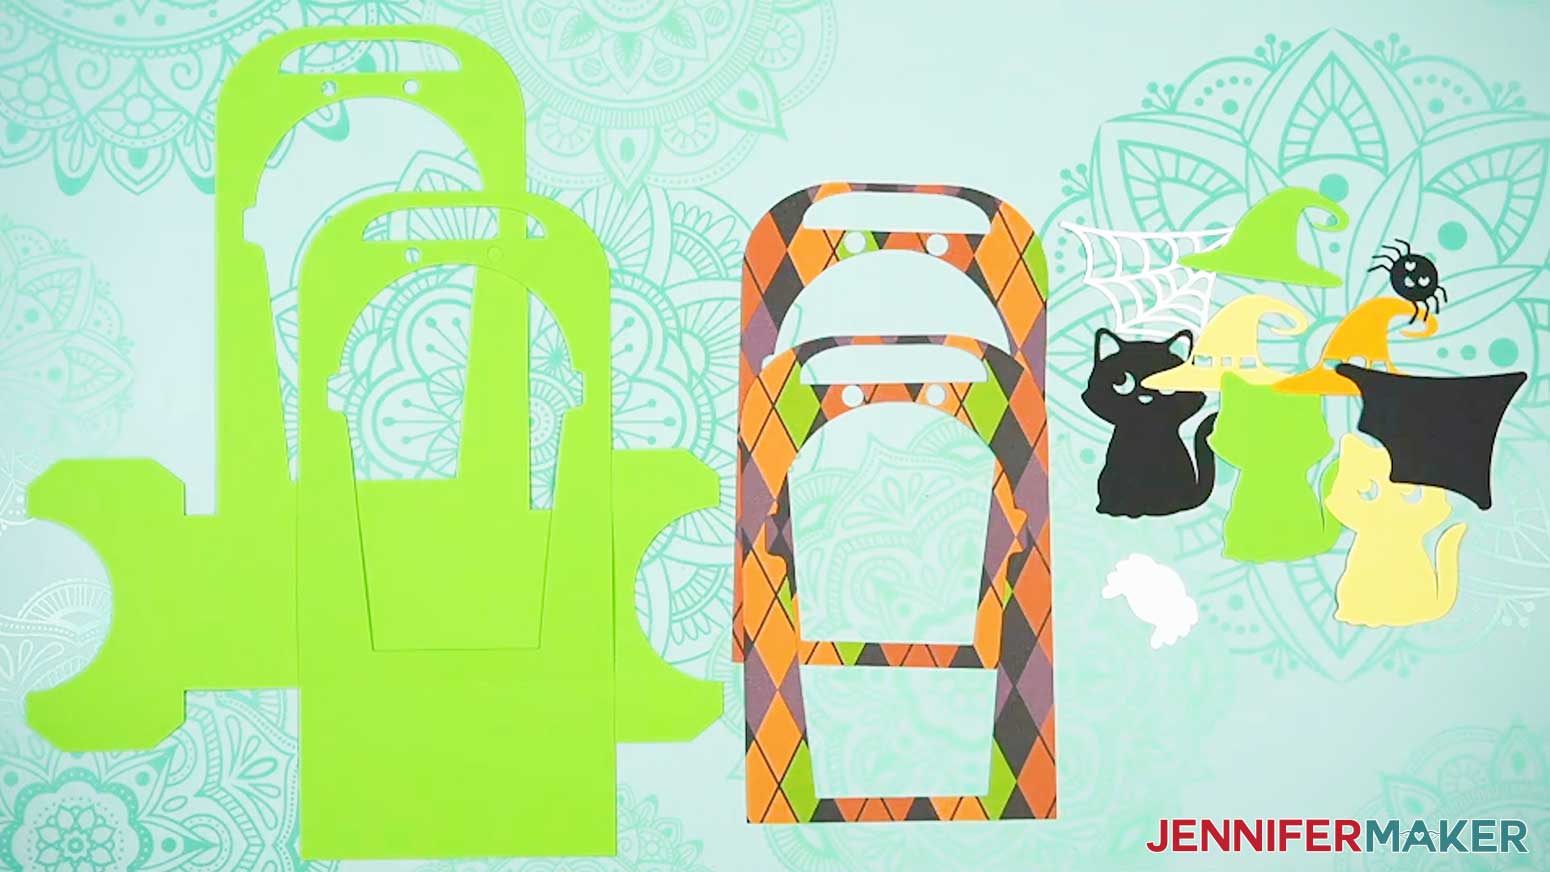
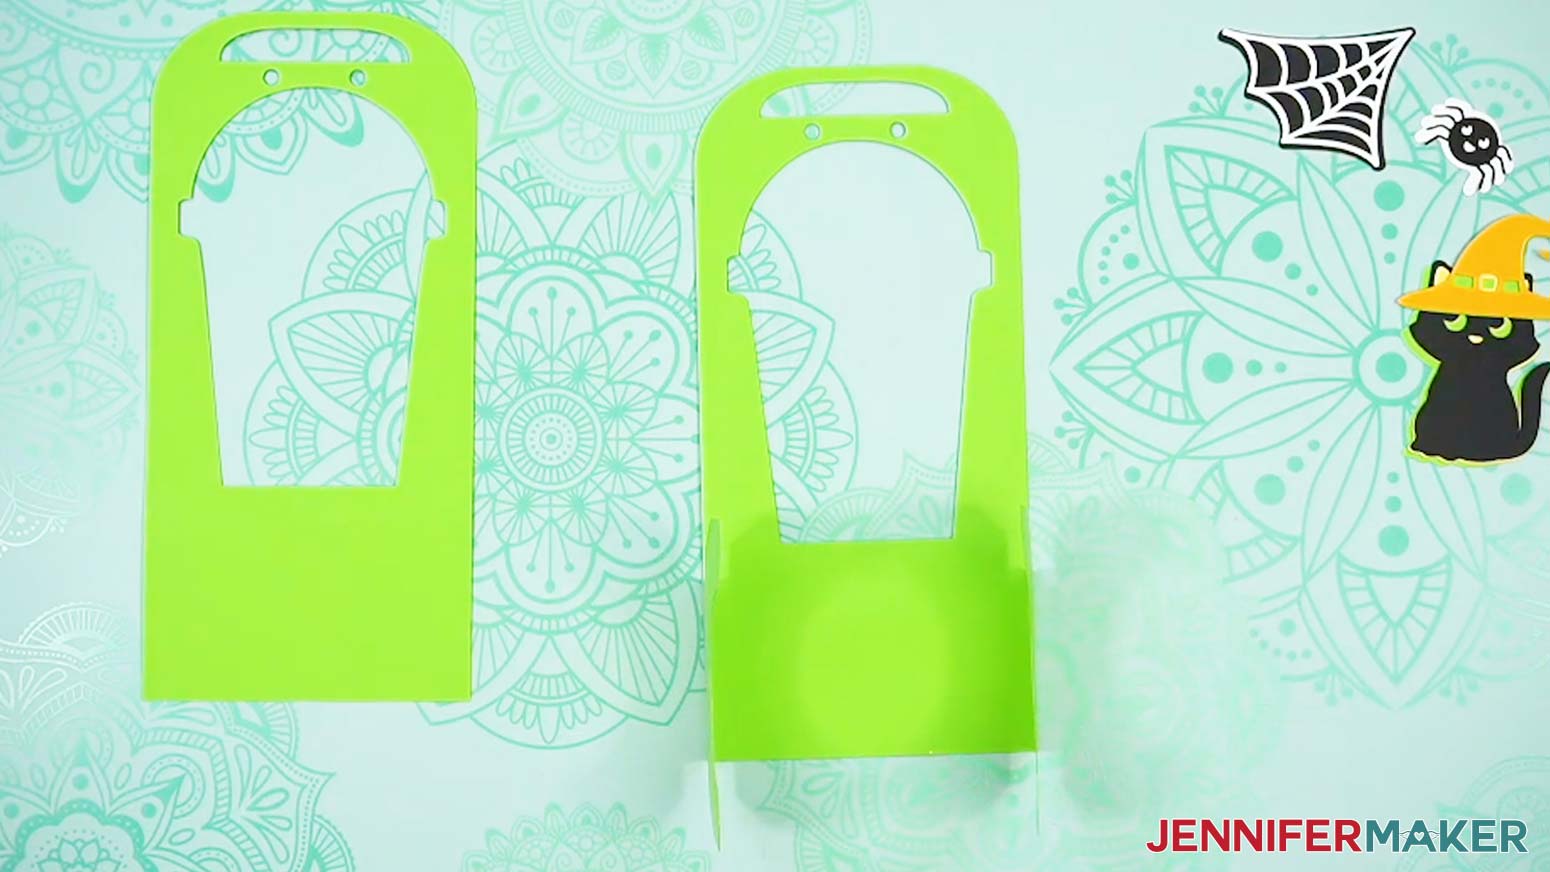
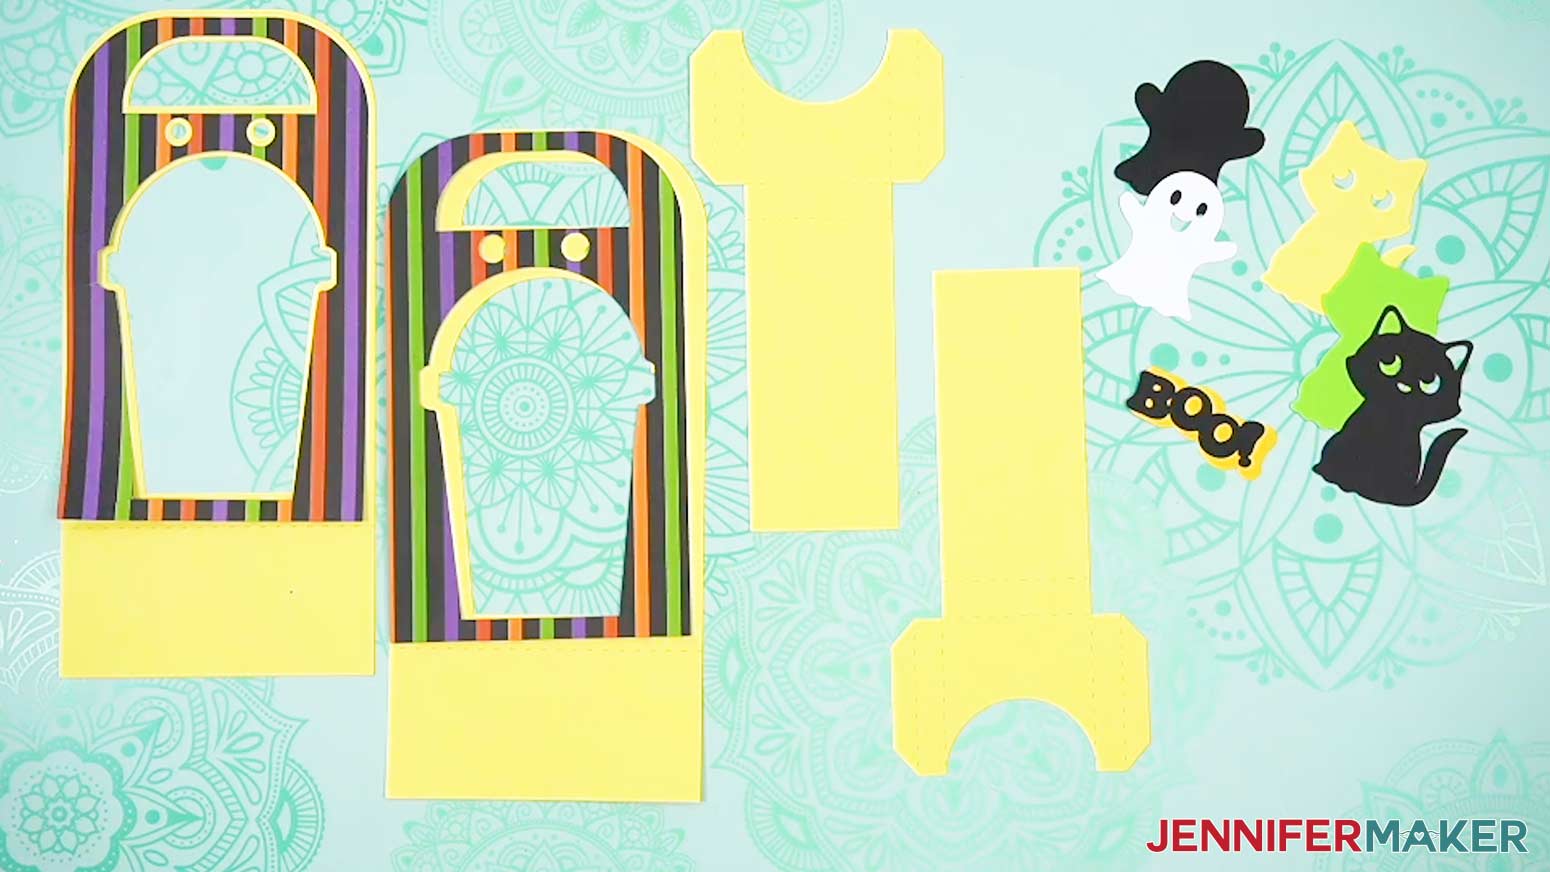
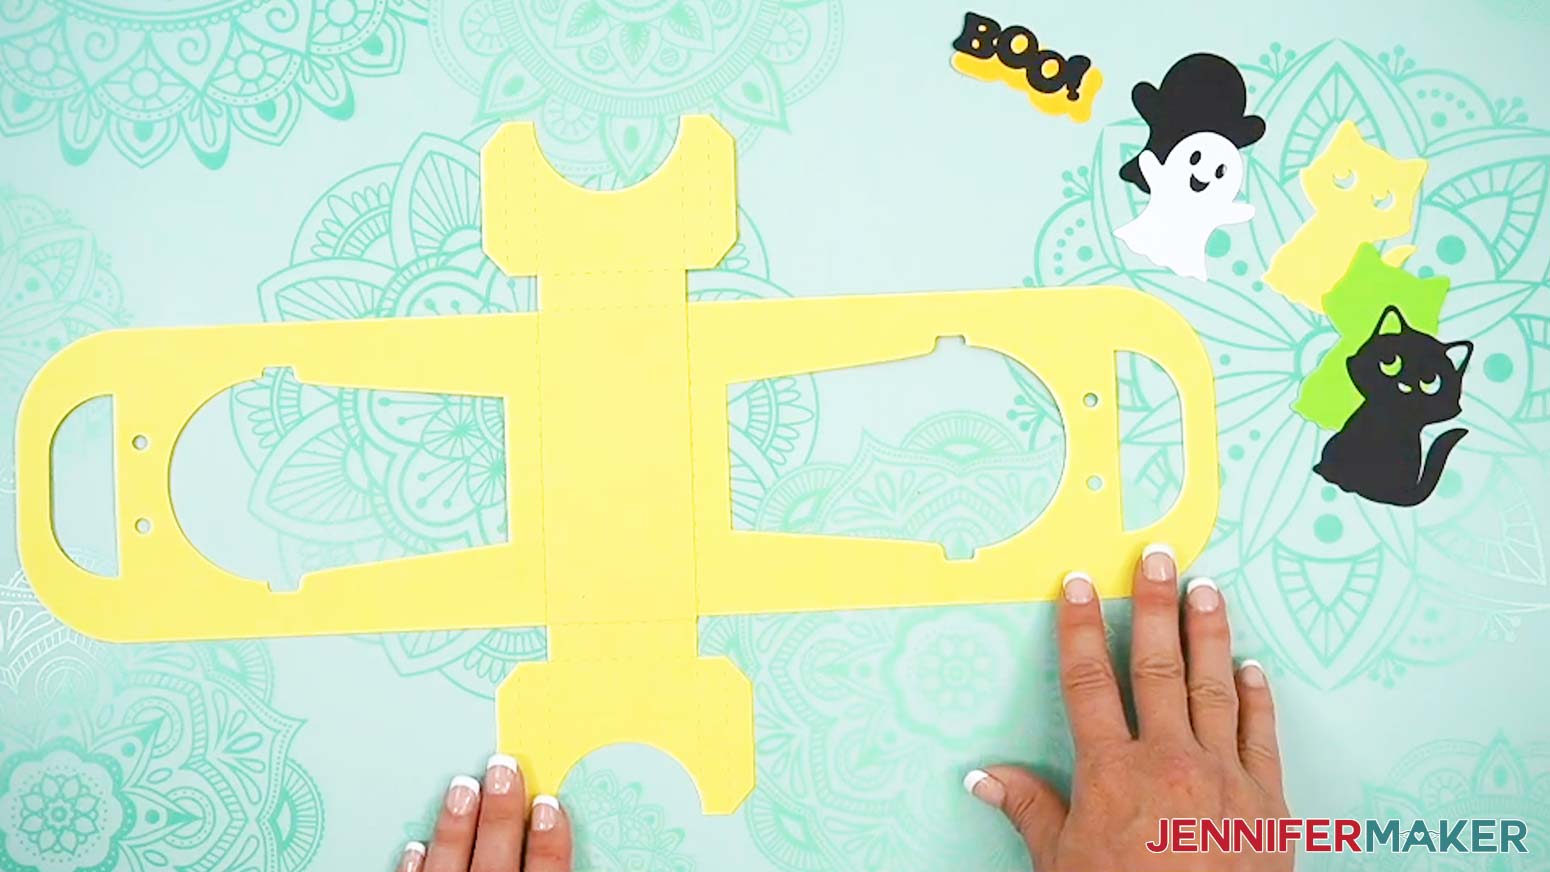
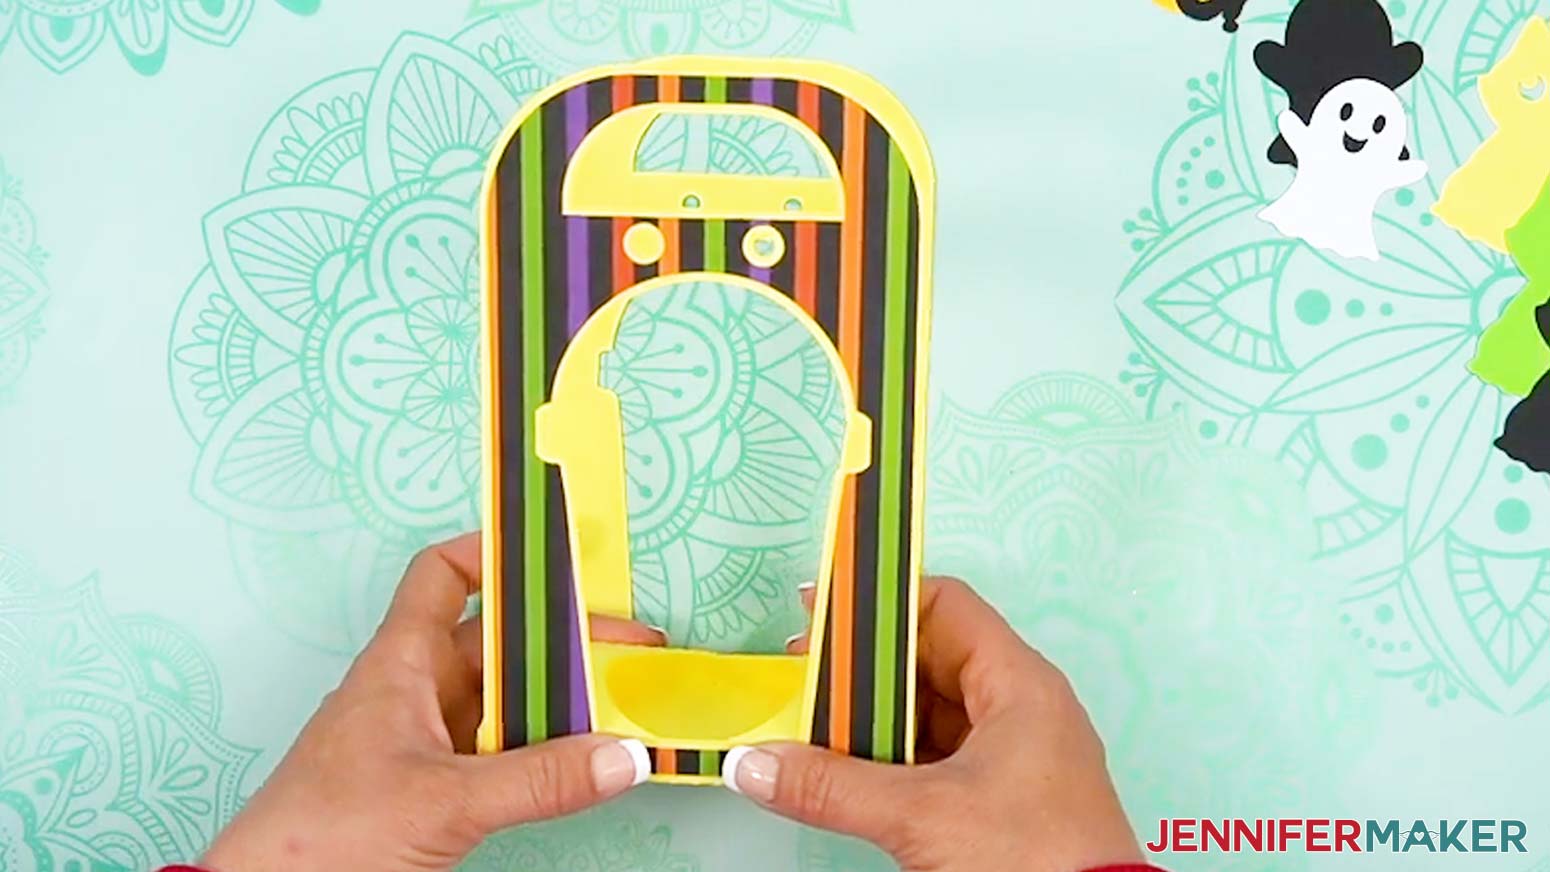
TIP: Be sure to place the right material on each mat. - Here are what my cut pieces look like. There are four pieces with cup-shaped cutouts. One is a large piece that makes up the bottom and front of the holder, one is a large piece that is the back of the holder, and two are smaller pieces that are accent panels.
- You don’t want to mix them up, so sort the fun embellishment layers into piles for each design, then layer them in the same order they appear on your screen in Cricut Design Space.
- The embellishments assemble from least-detailed being the bottom layer to most-detailed being the top layer.

STEP 3: ASSEMBLE YOUR TREAT CUP HOLDER
CUP HOLDER
NOTE: Follow these steps for the regular cup holder assembly. For the Joy Xtra version assembly instructions, skip down to the section titled “Joy Xtra Version.”
- Apply craft glue to the back of one smaller accent panel, avoiding the cutouts.
- Line up the cutouts over a large piece and press down to attach.
TIP: Use a brayer to ensure the layers are adhered evenly and completely. - Repeat steps 1-2 with the other small accent panel, attaching it to the remaining large piece.
- Flip the pieces over so the accent panels are face down on your work surface.
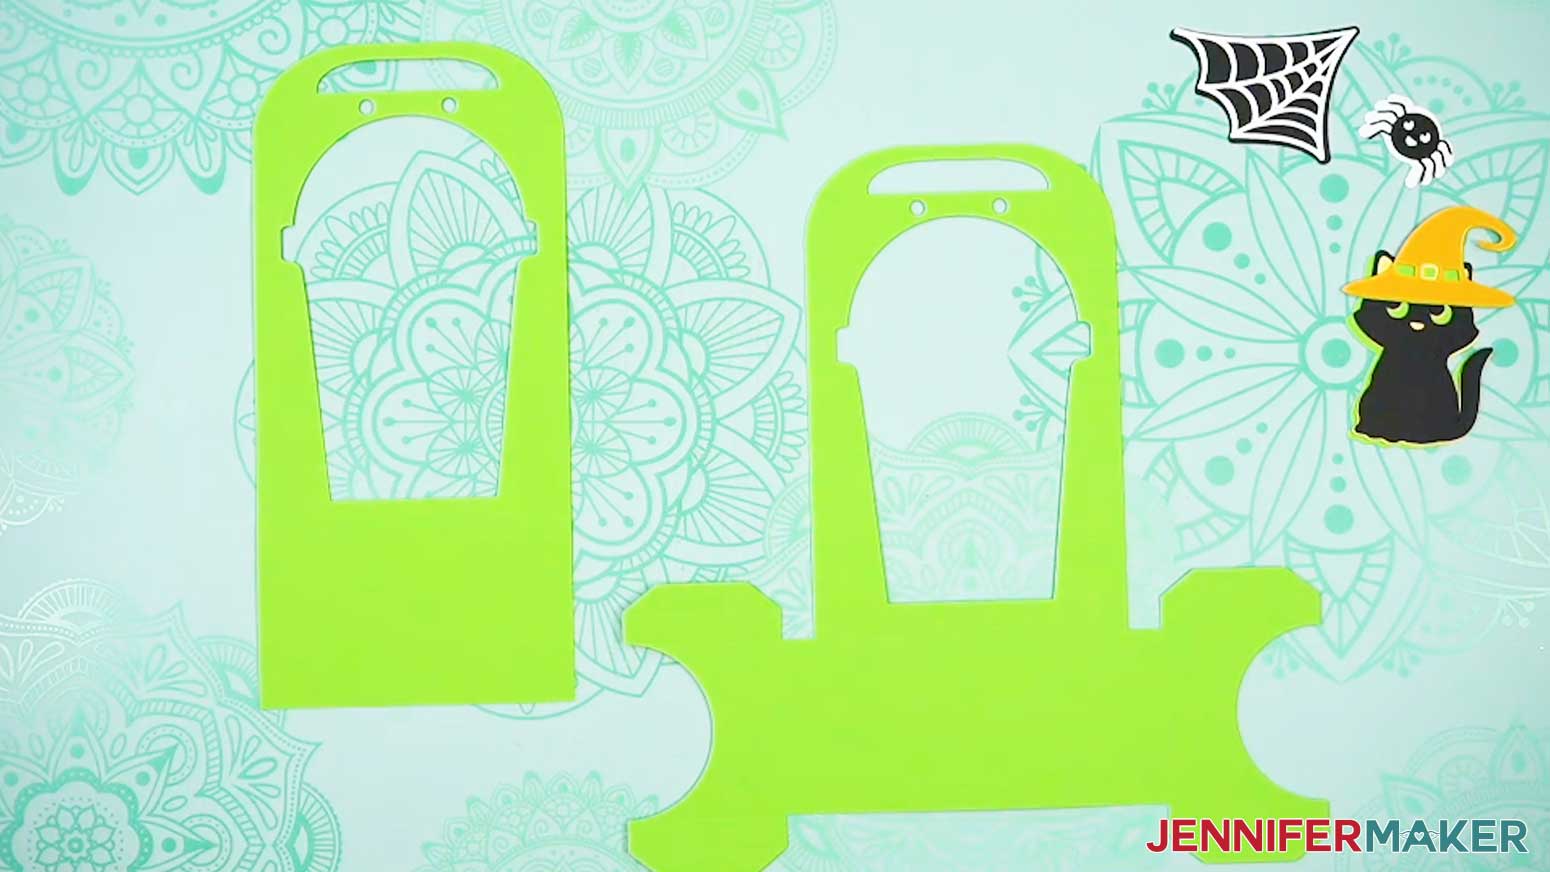
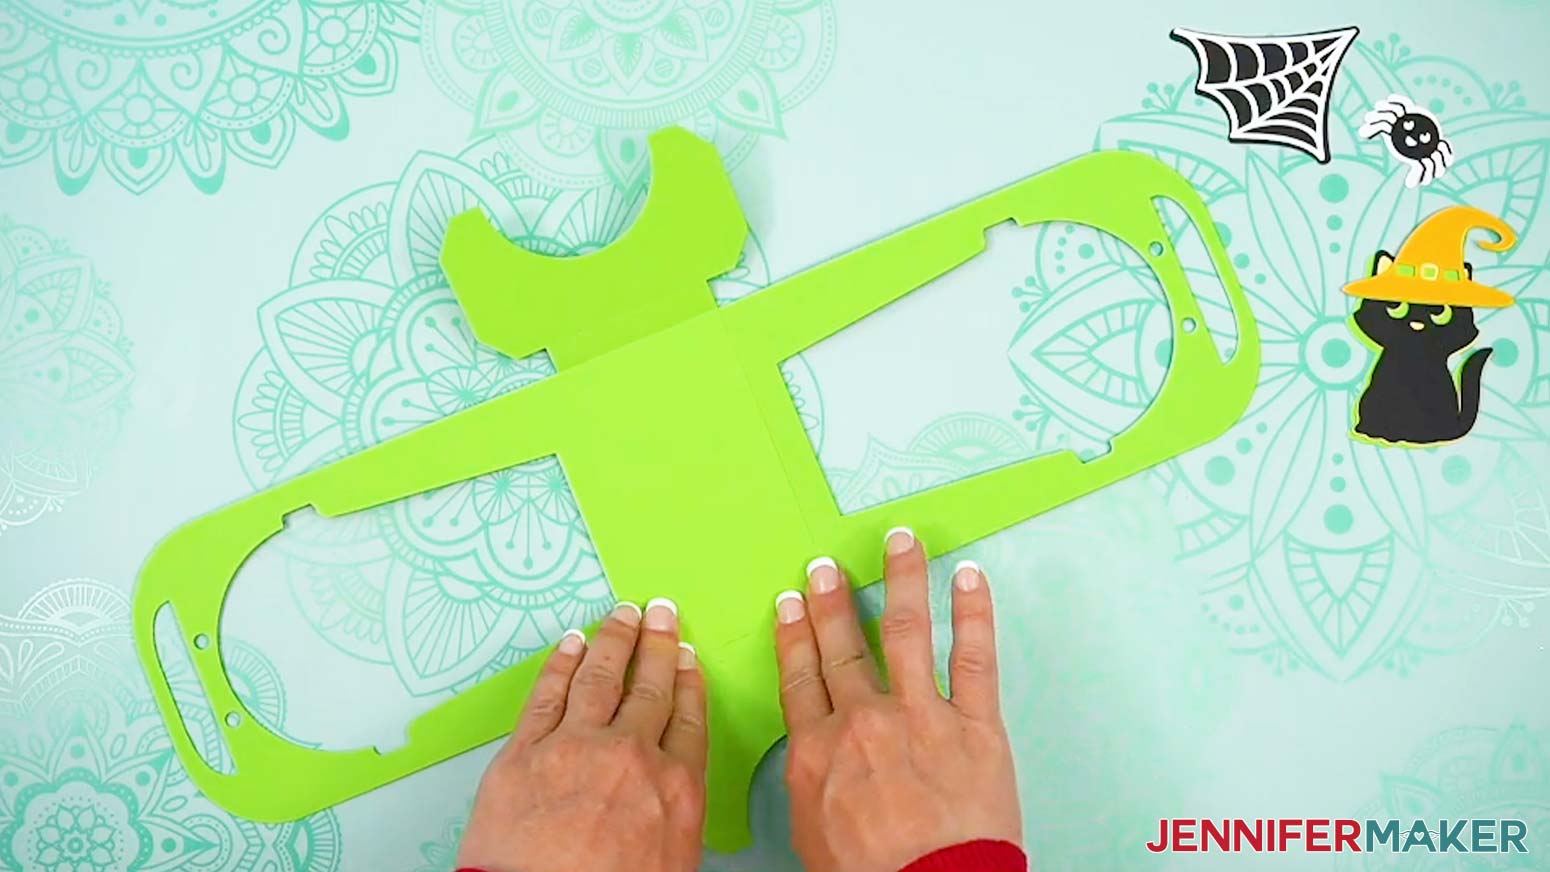
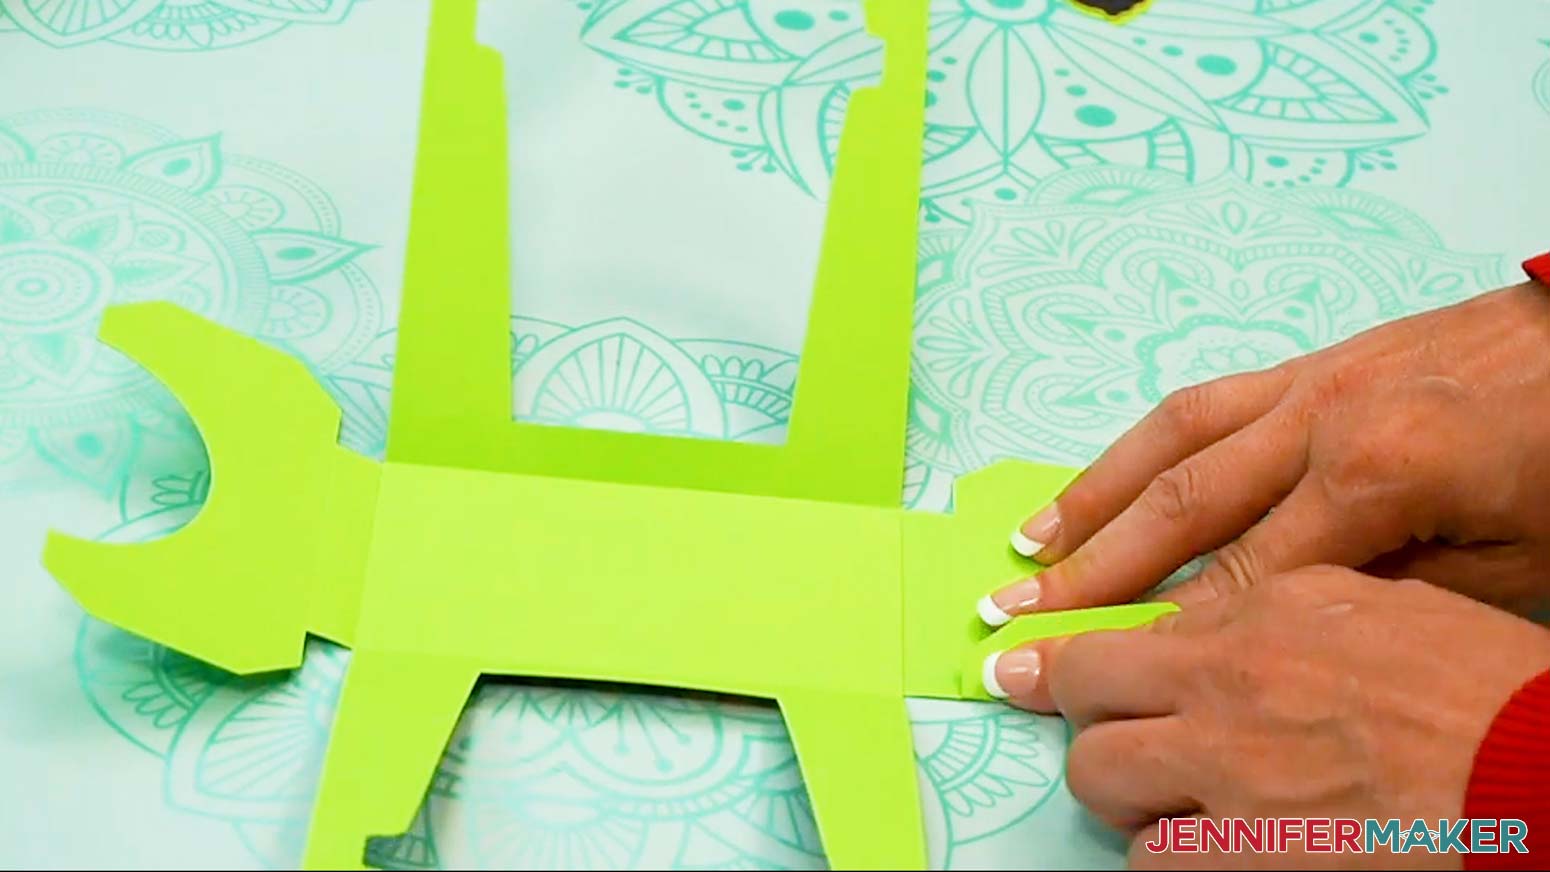
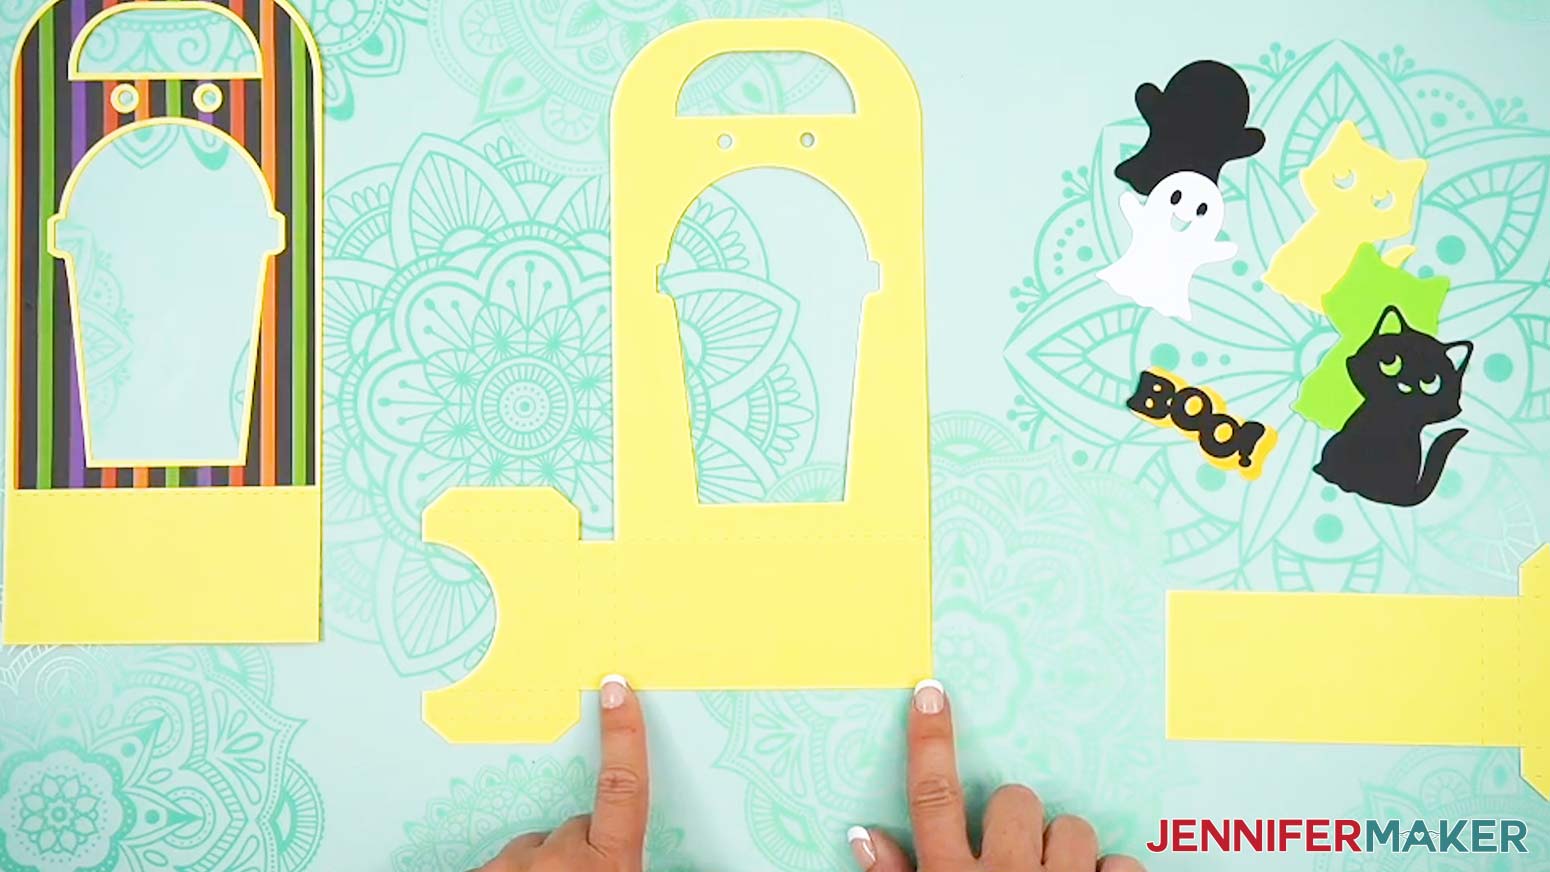
NOTE: If you used a scoring tool, crease lines will look like indented lines. If you used the "noscore" design, the crease lines will look like dashed cut lines. I'll just refer to both as crease lines for the rest of the tutorial. - On the larger piece, fold the large C-shaped tabs up on the crease lines closest to the main part of the piece.
- On the smaller piece, fold up on the crease line to form a rectangular area at the bottom.
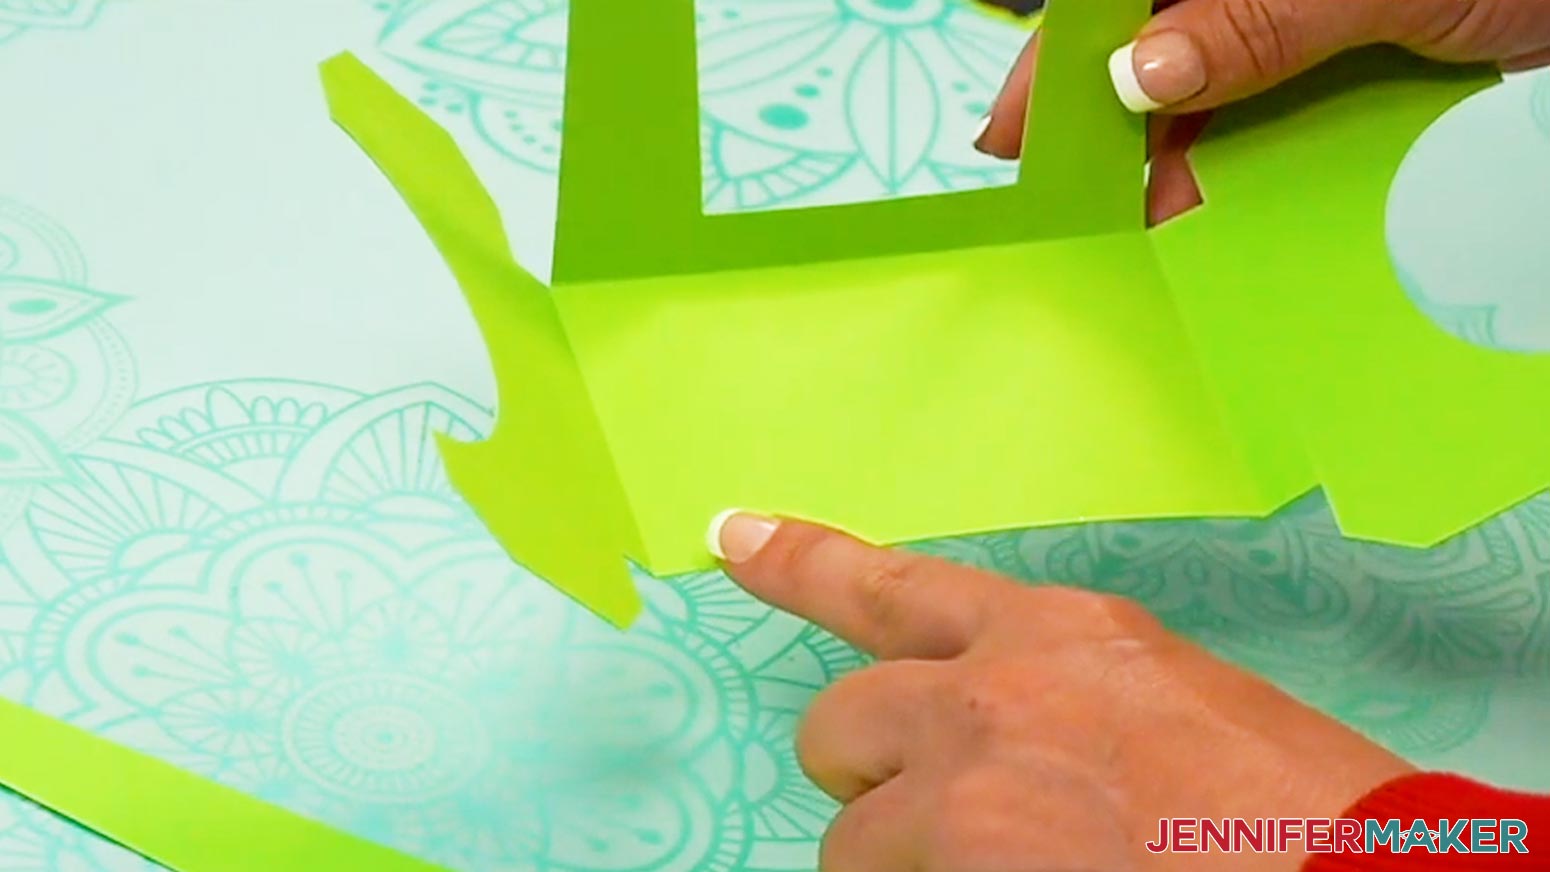
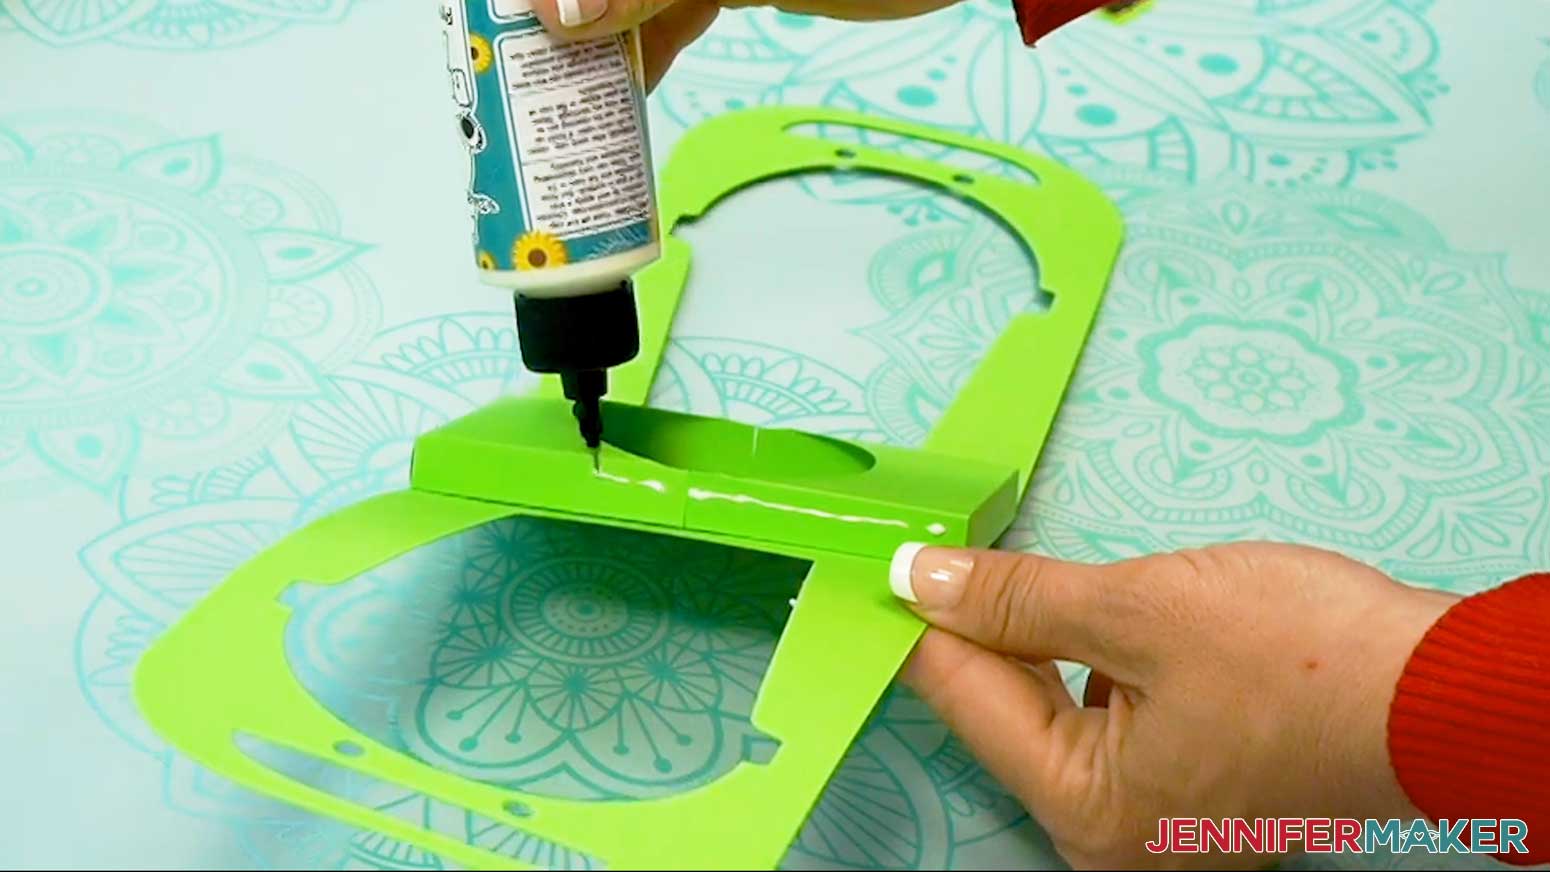
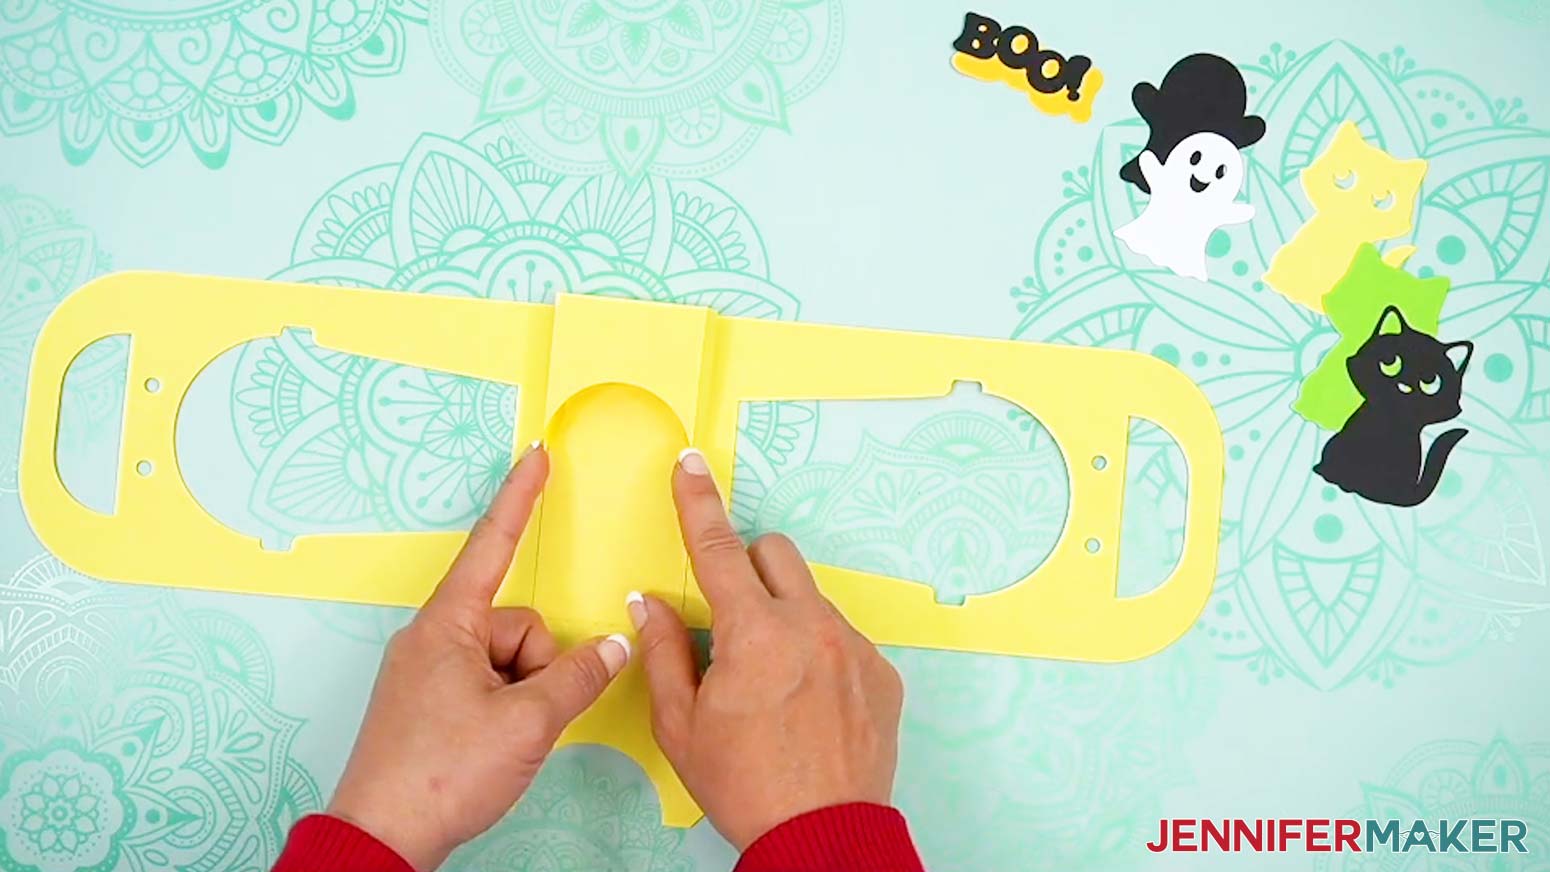
- Apply craft glue to the back of the smaller piece’s rectangular area.
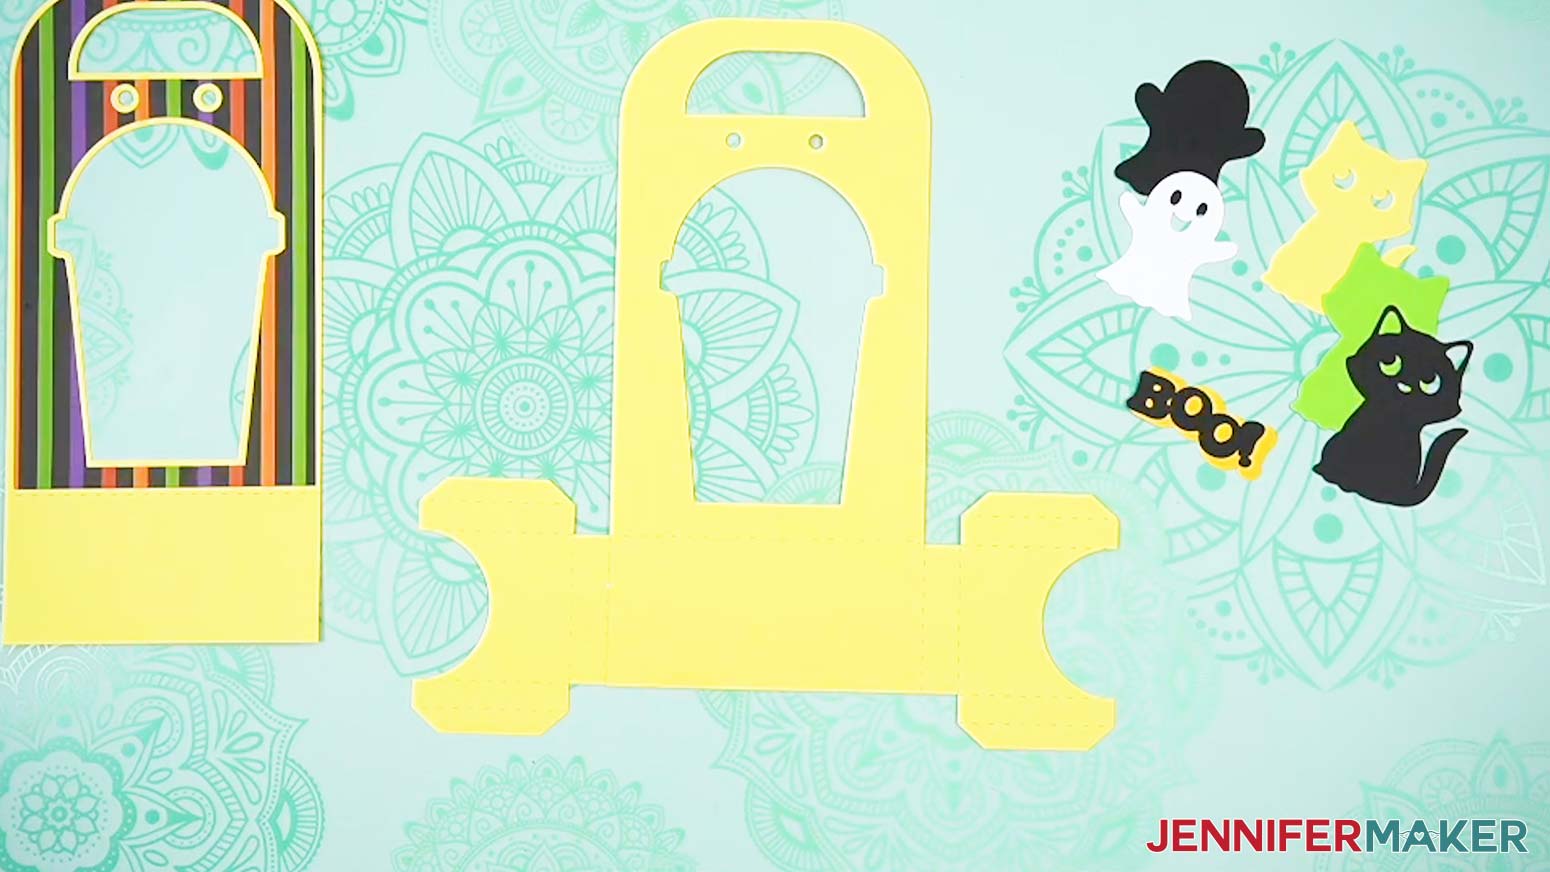
- Using the crease lines as guides, attach the rectangular area of the smaller piece to the rectangular area on the larger piece to form the base of the cup holder.
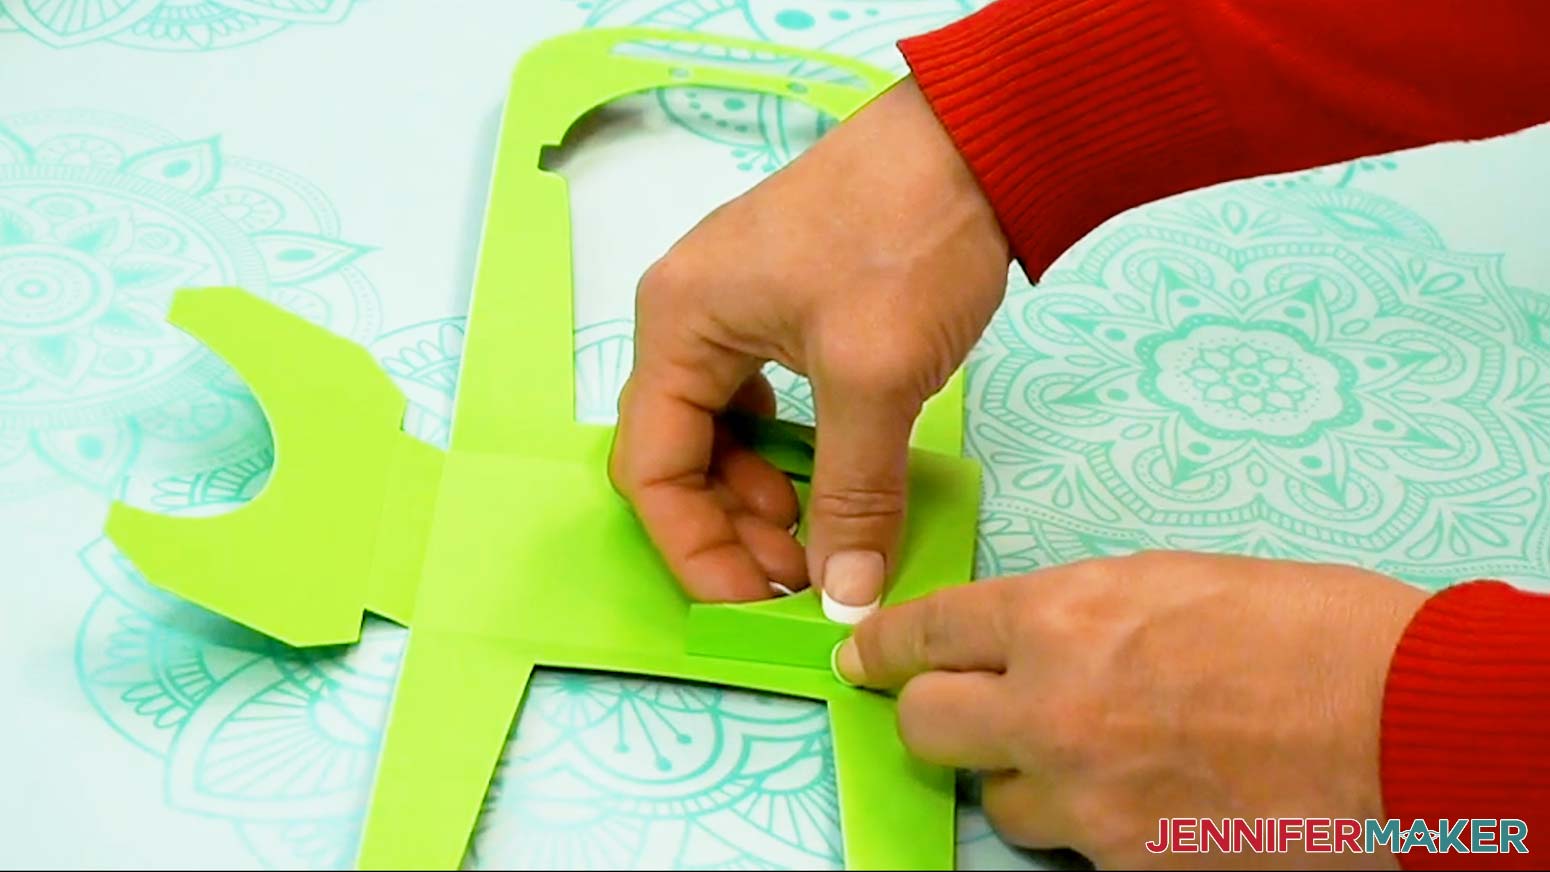
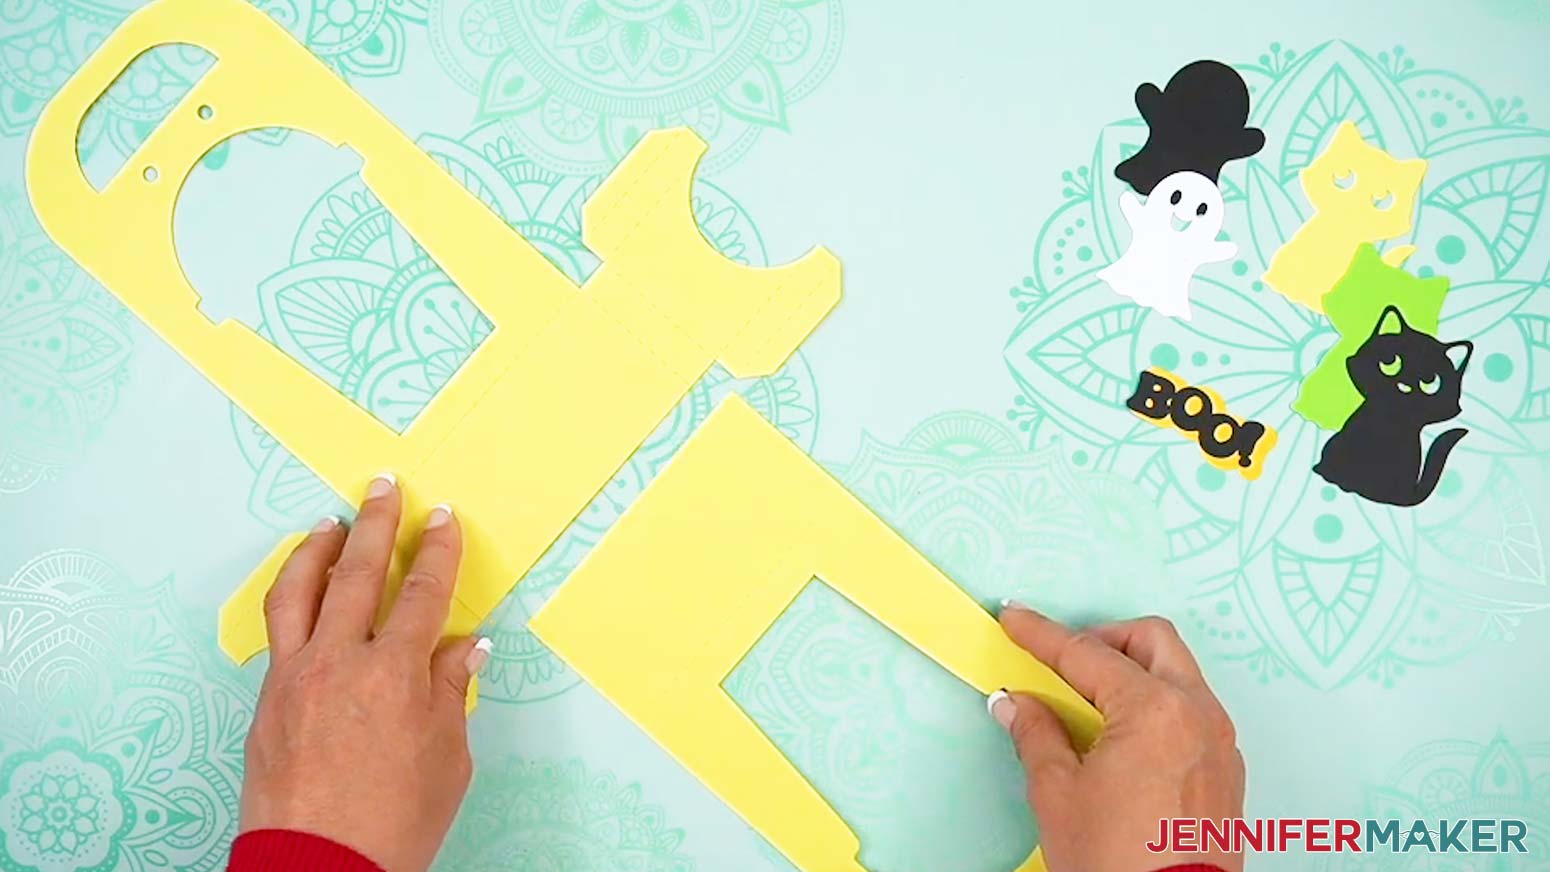
TIP: Use a brayer to ensure the layers are adhered evenly and completely. - Fold up on the rest of the crease lines on both C-shaped pieces.
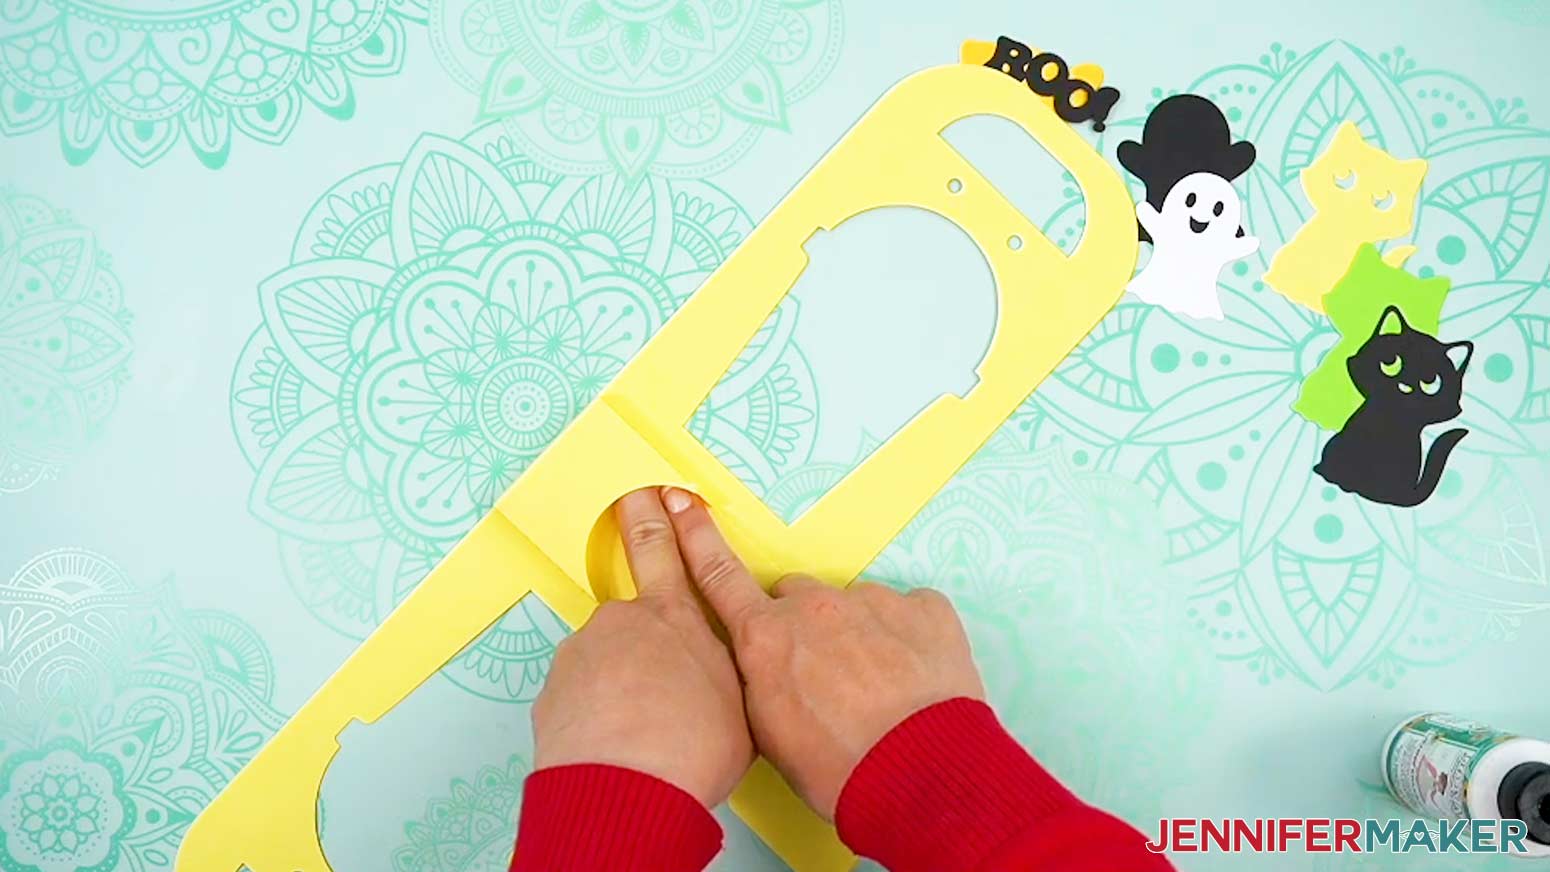
- Bend one of the C-shaped pieces over so the tabs are touching the rectangular base of the cup holder.
- Add craft glue to the bottom of the folded tabs underneath, then press them down onto the base rectangle to adhere. Be sure to keep the edges of the folded C-shaped piece parallel with the edges of the base.
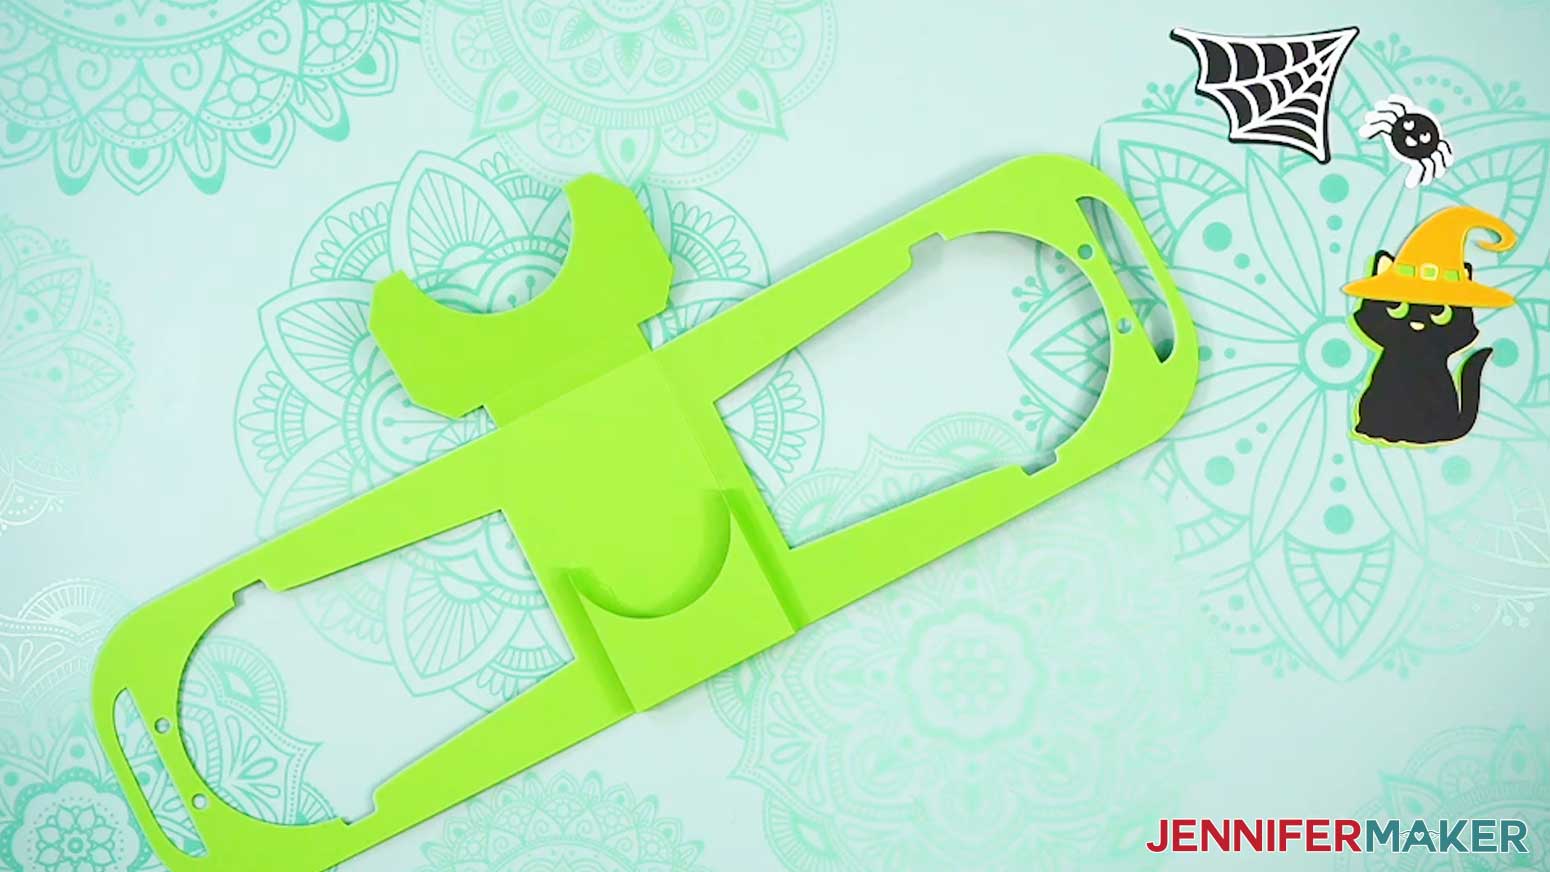
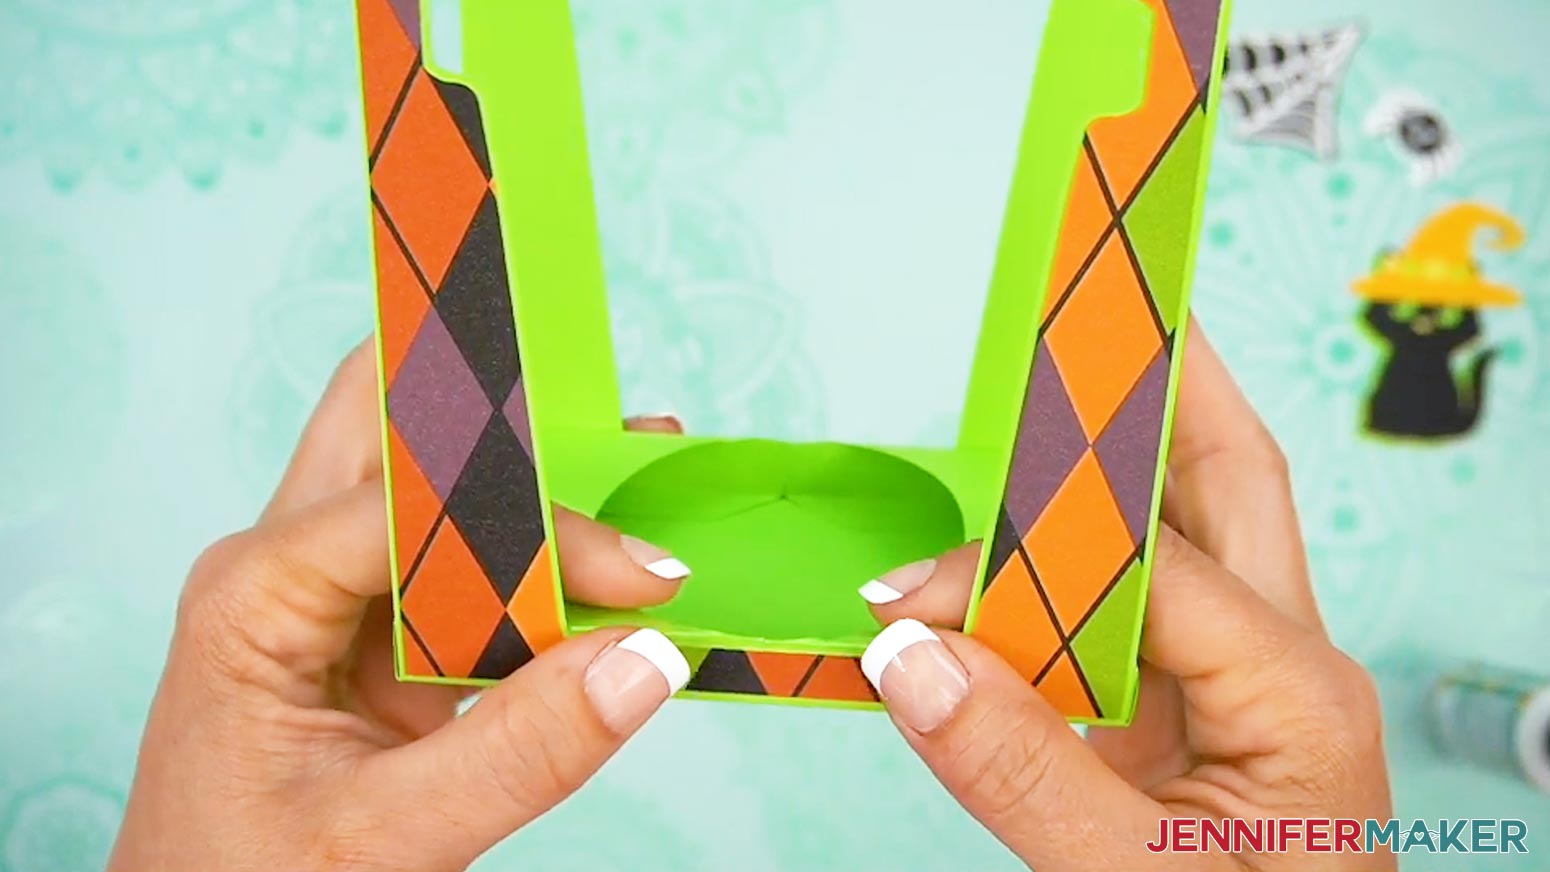
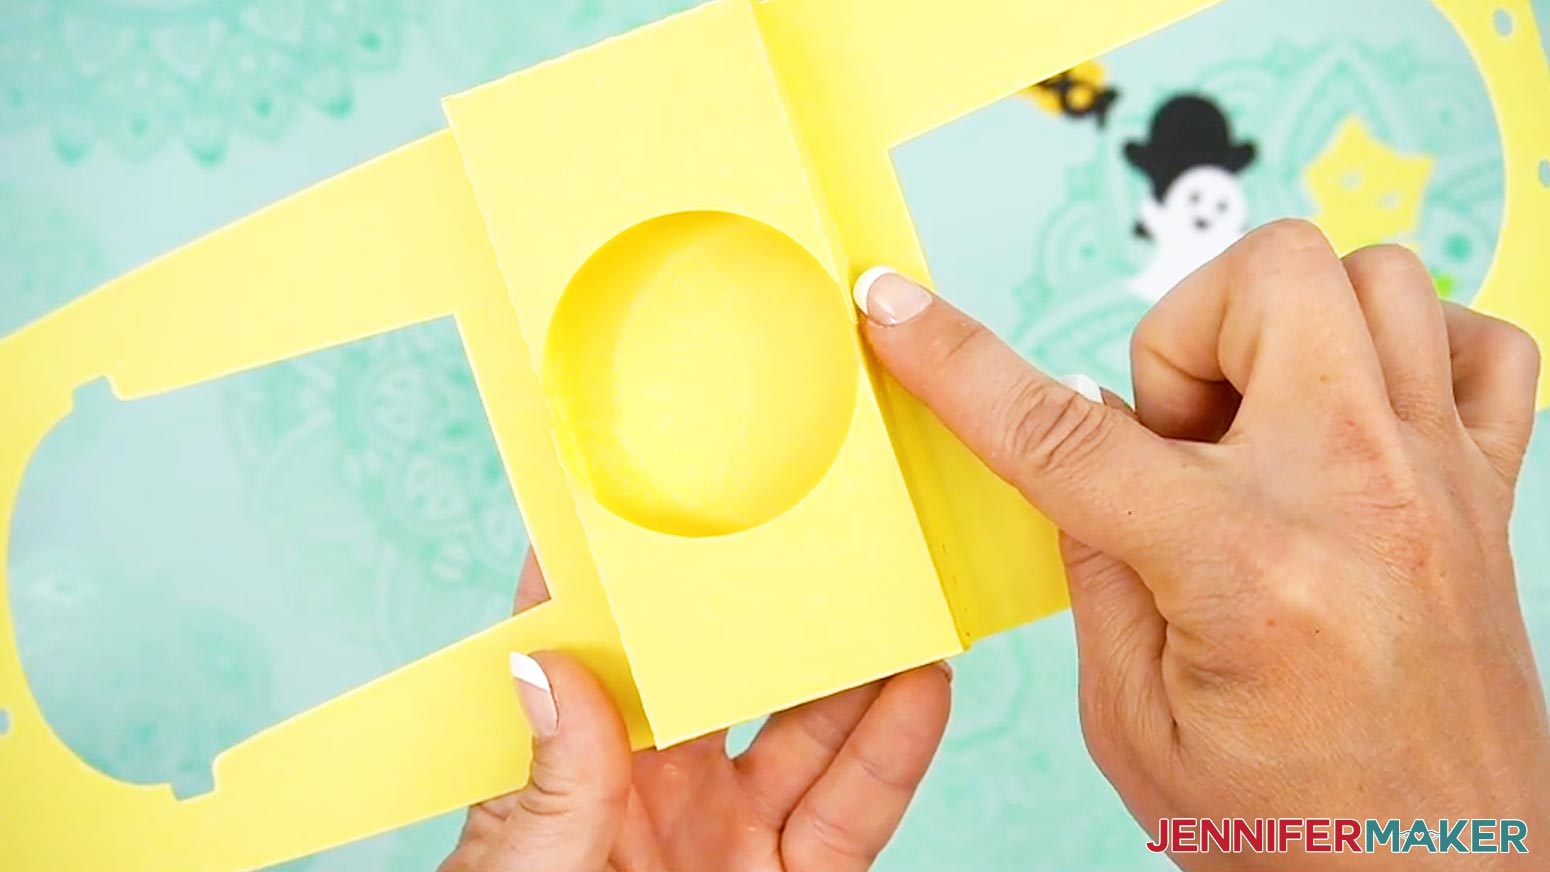
TIP: I found it easiest to glue down one tab at a time. - Repeat steps 10-11 with the C-shaped piece on the other side. When glued, it should resemble a box with a circle cutout in the center.
TIP: Try to make the edges of each side match up and almost touch in the center, rather than overlap. - Add craft glue to the sides of the attached C-shaped pieces.
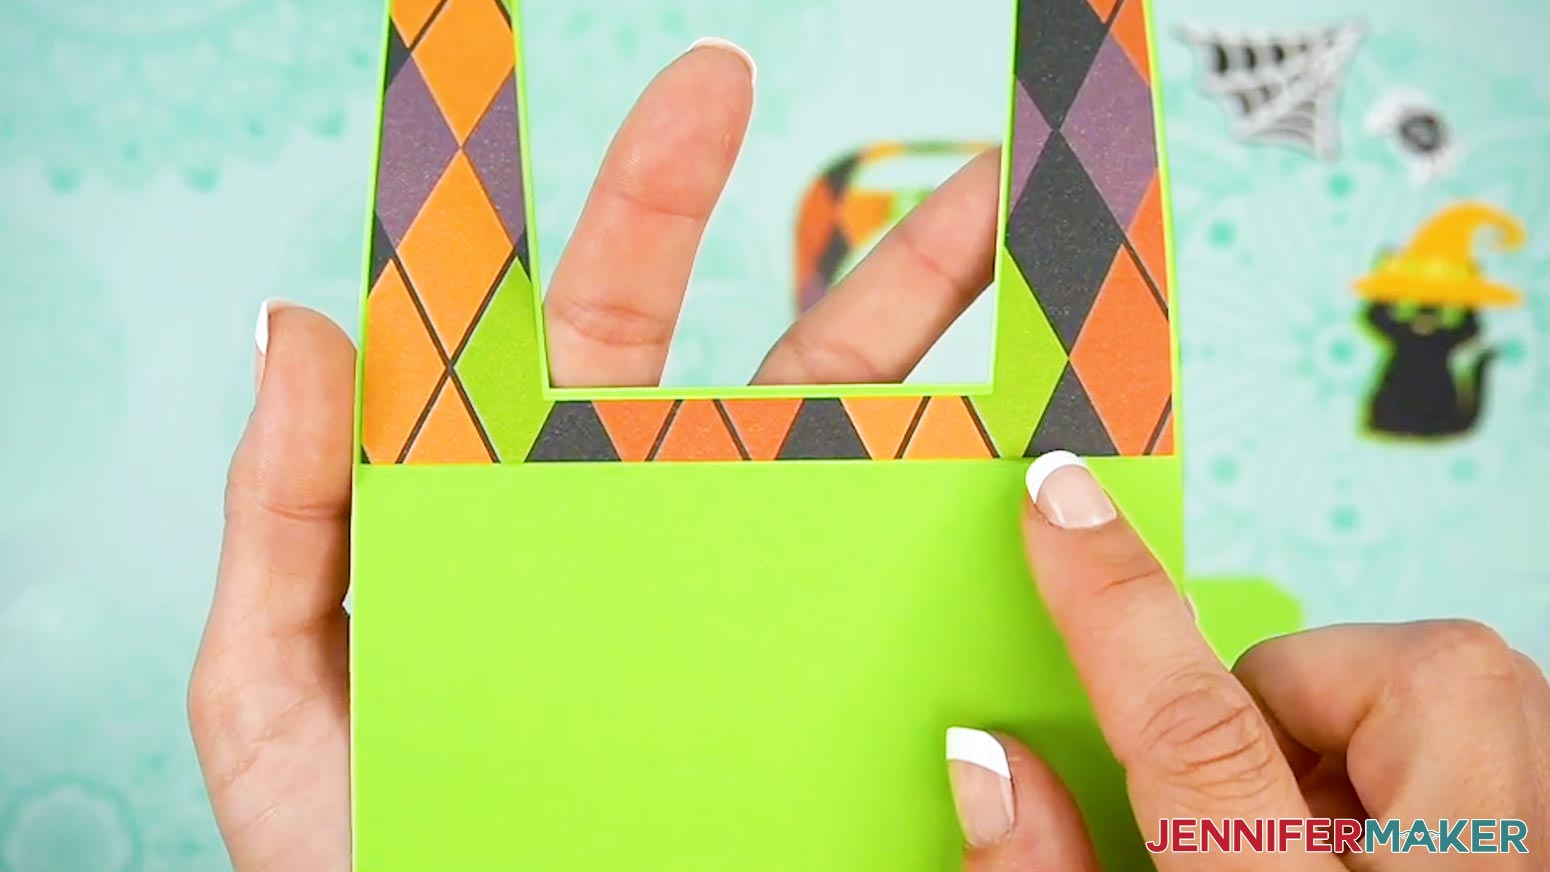
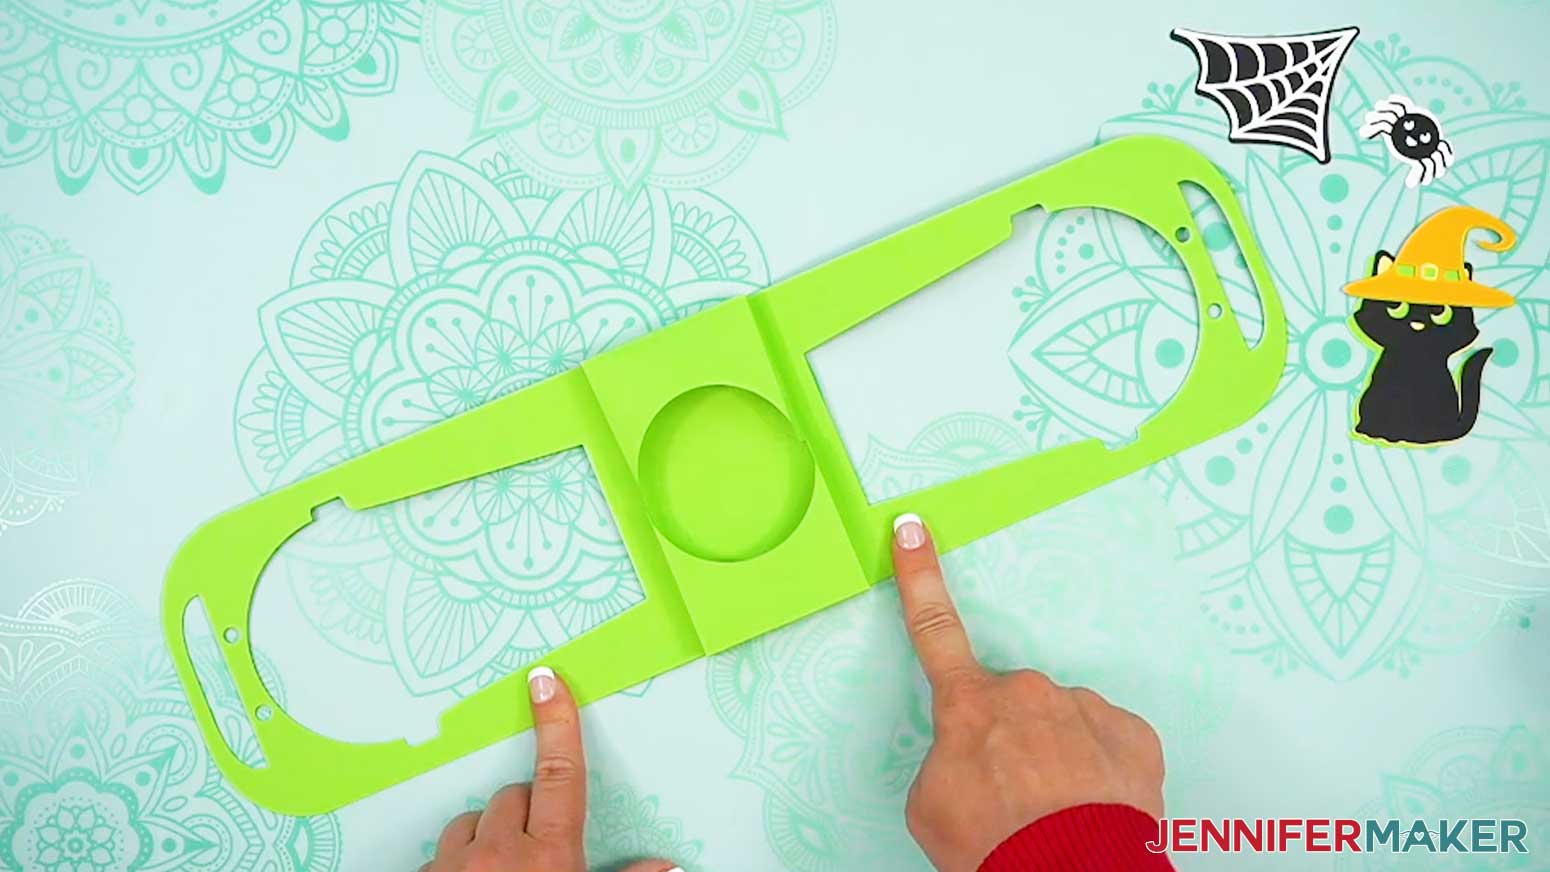
- Fold up the sides of the holder and press with your fingers to attach them to the sides of the glued C-shaped base pieces.
TIP: You can also pinch them together from inside the circle cutout.

EMBELLISHMENTS
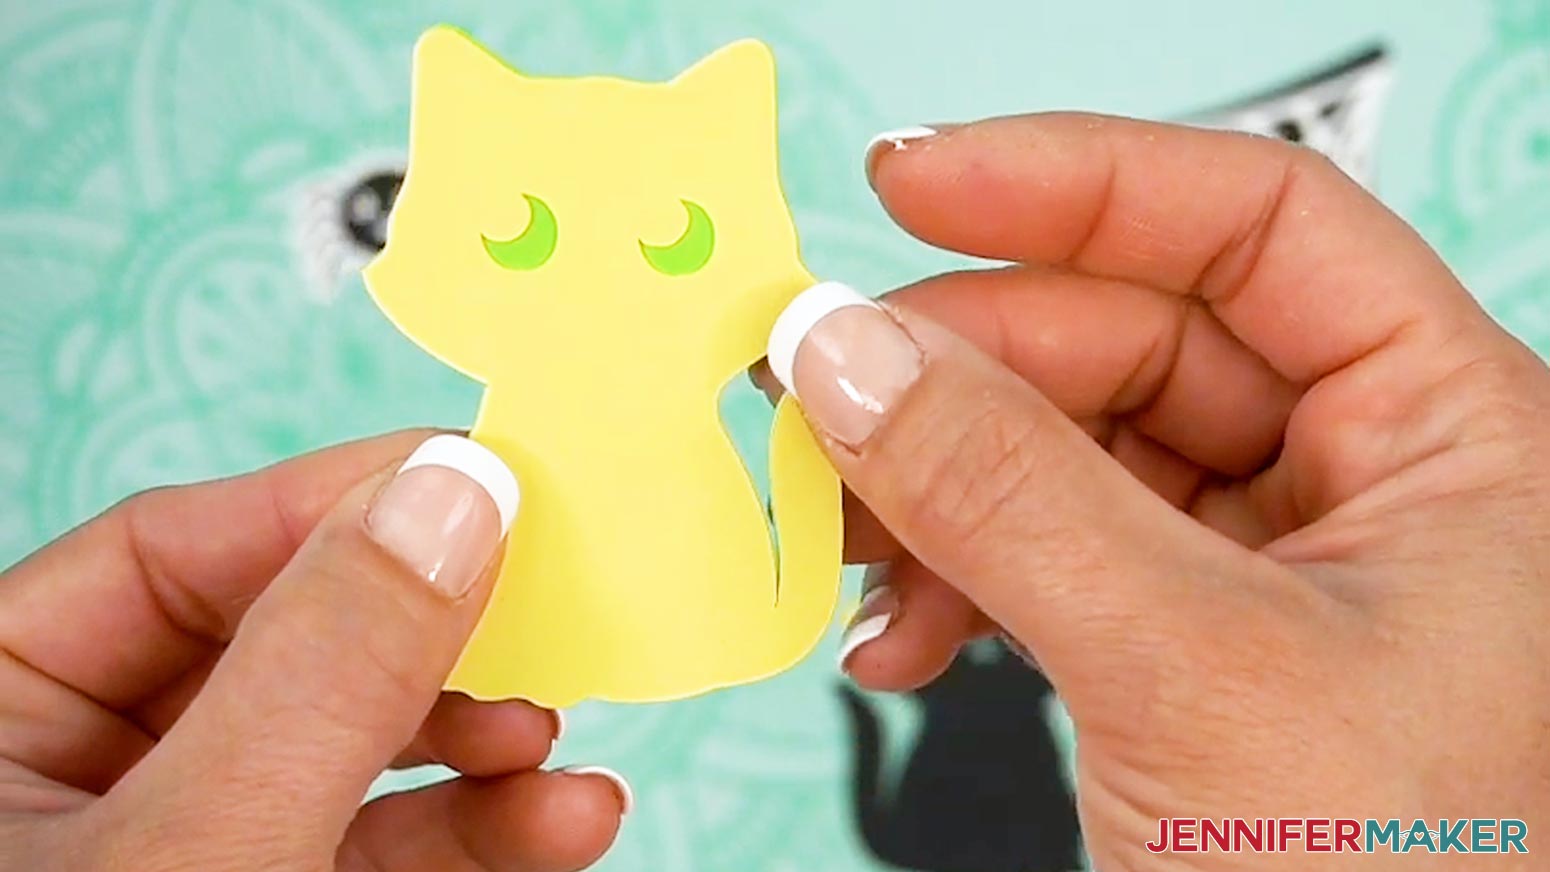
- Flip one of the stacked embellishments over so it’s face down on your work surface.
- Flip the bottom layer over so it’s right side up, and carefully apply glue to the back of the next layer, making sure to get the thinnest bits, too.
- Turn the glued piece over so it’s glue side down, and place it onto the bottom layer, carefully lining up the edges before it dries.
TIP: You can use a paper towel to clean up any excess glue. - Press gently to adhere.
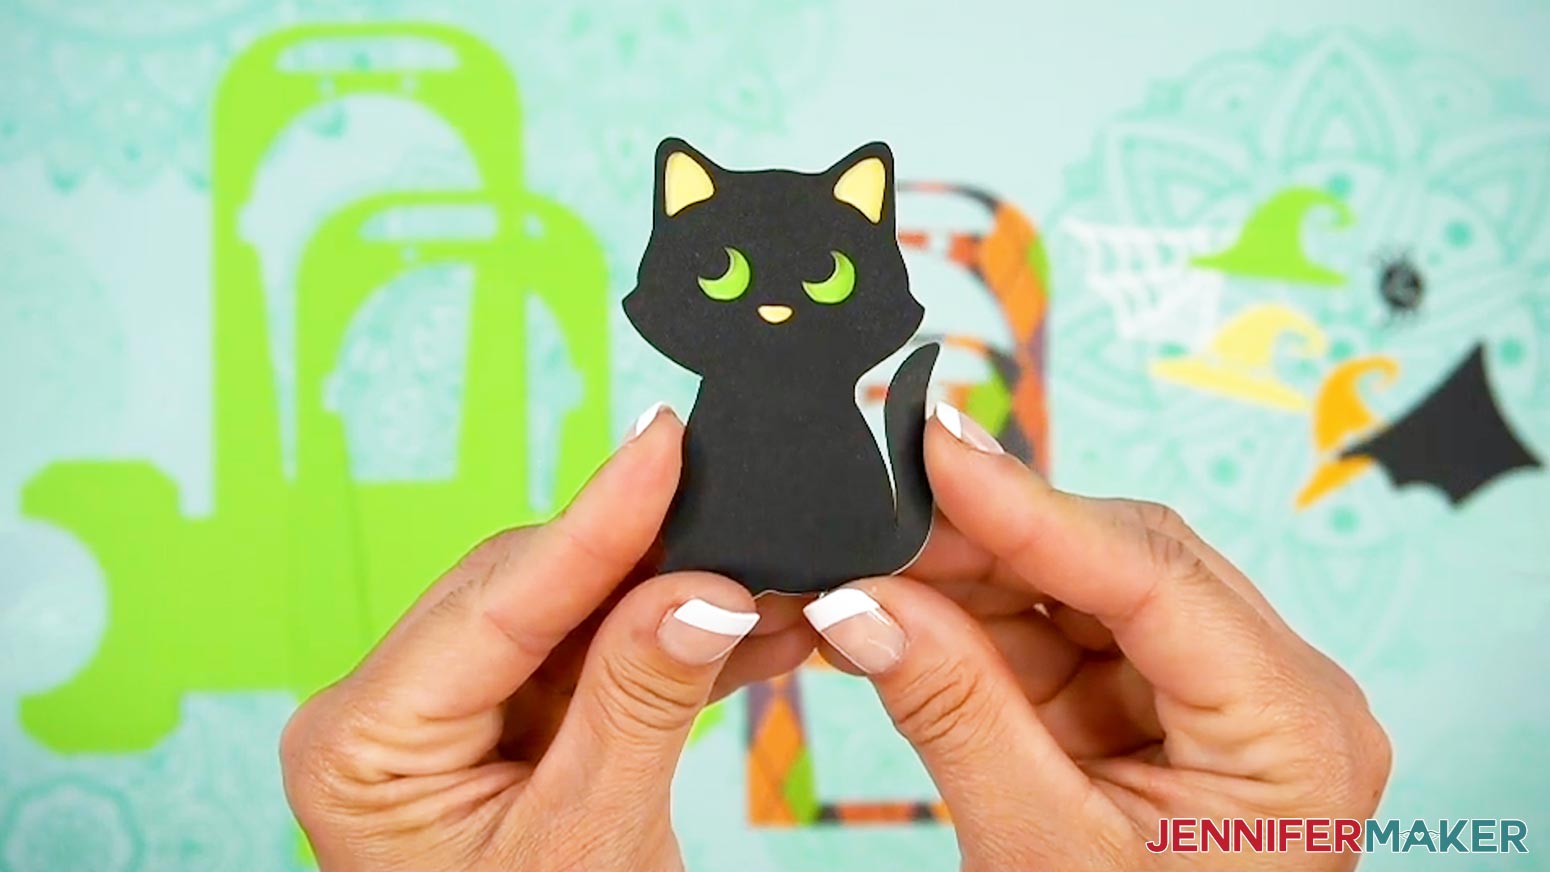
- Repeat this process to finish the layers.
NOTE: I’ll attach the hat to the cat so his ears still peek out! - Then assemble the rest of your embellishments the same way.
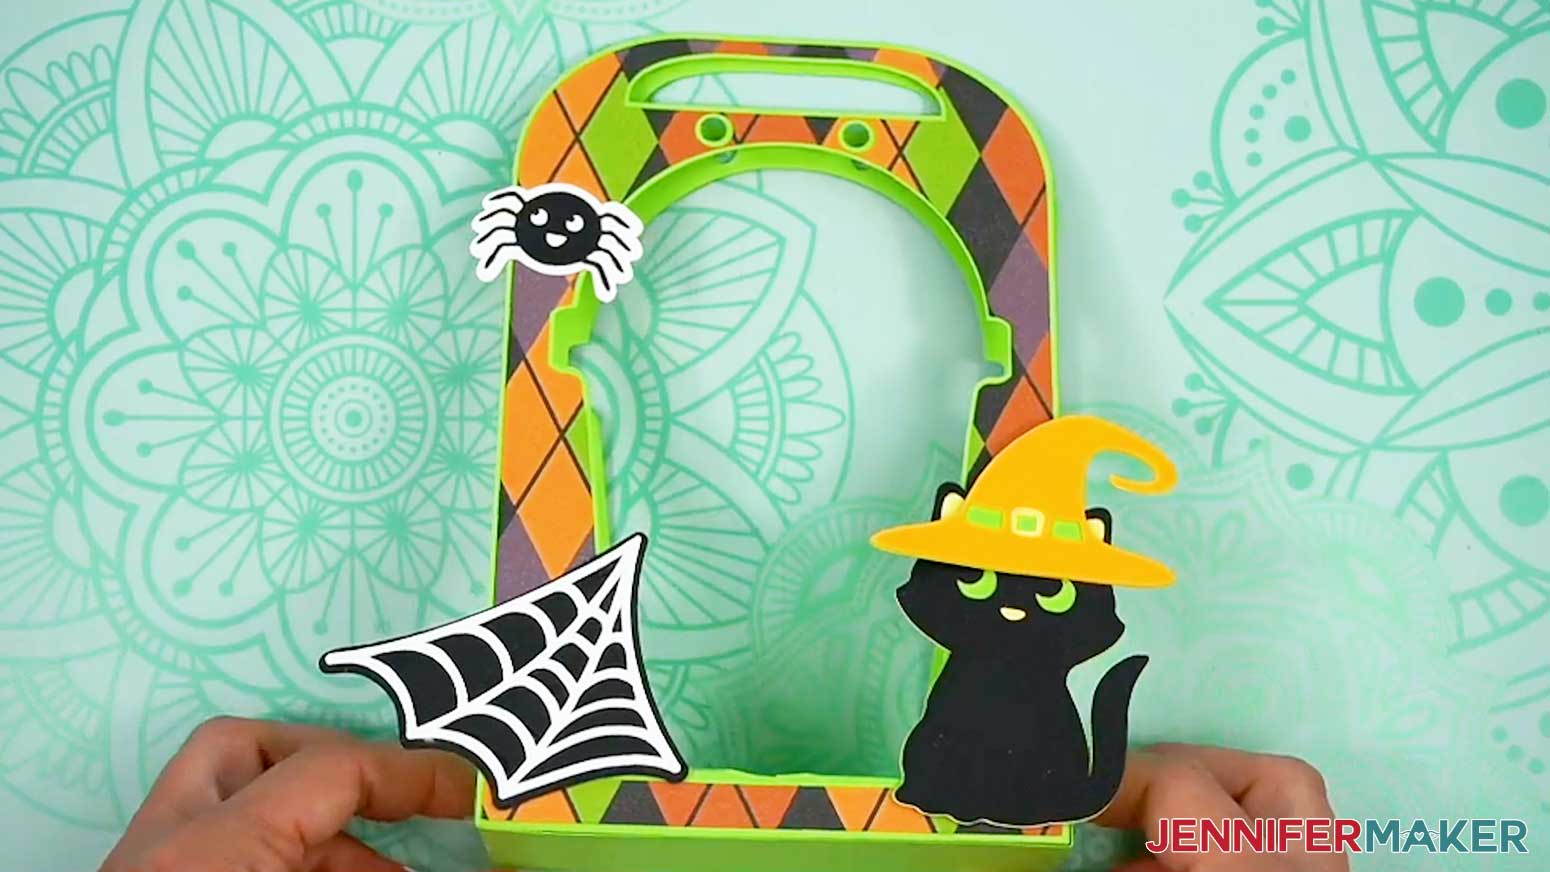
- Once your embellishments are assembled and dry, apply craft glue to the back of each one and adhere them to the outside of the holder, wherever you like.
TIP: Don’t place them past the bottom edge, or your holder may not stand correctly.

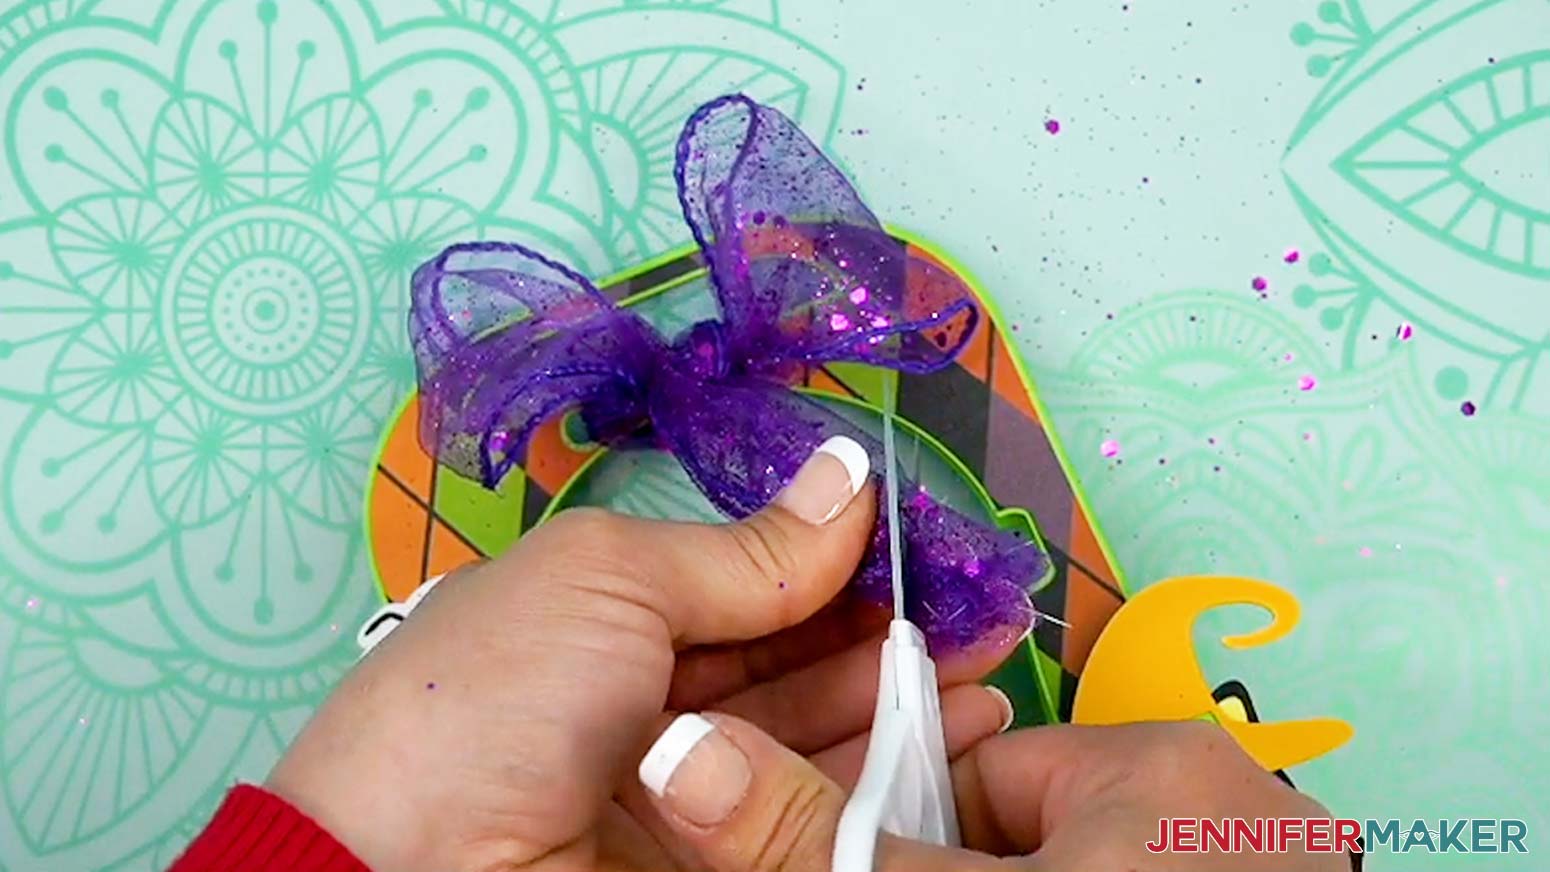
STEP 4: FINISHING TOUCHES
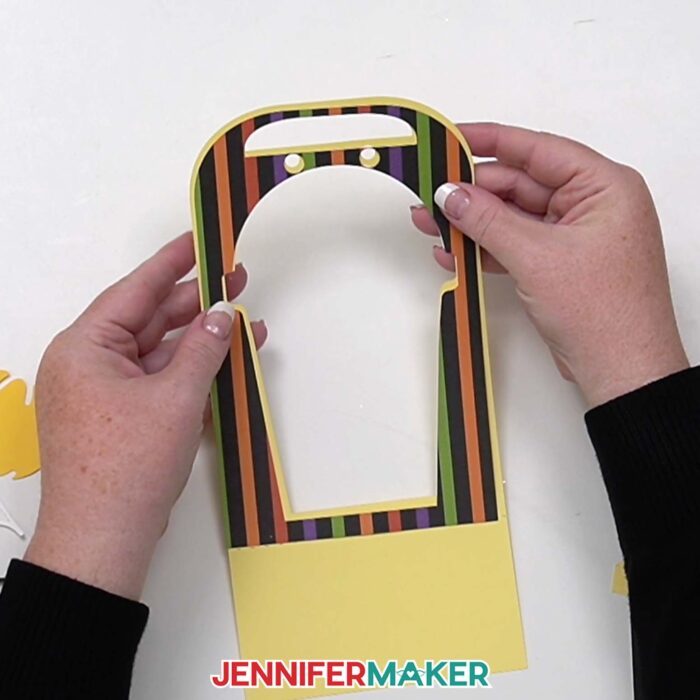
- Cut a 24" piece of ribbon.
- Insert an end through each of the two small holes on the back layer of the assembled holder, and pull them all the way through the front layer of the holder so they’re even on both sides and the paper layers come together.
- Tie the ribbon in a bow at the front, then trim the ends as needed.
- Open the cup and fill it with treats.
NOTE: Really mound them on top so they fill the dome! They’re pretty strong, and should be able to hold a few pounds if you have small, heavy items. - Put on the lid, then slide the cup in through the back of the holder, inserting the bottom into the circular cutout in the base.

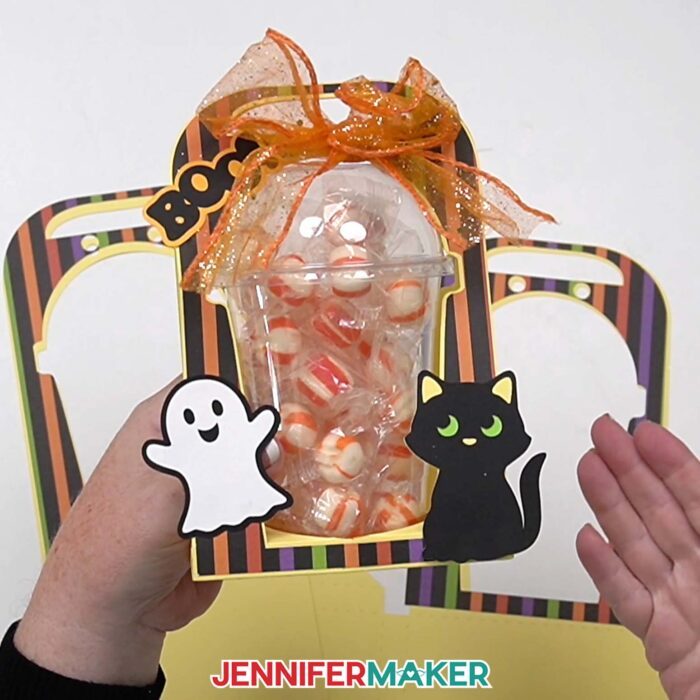
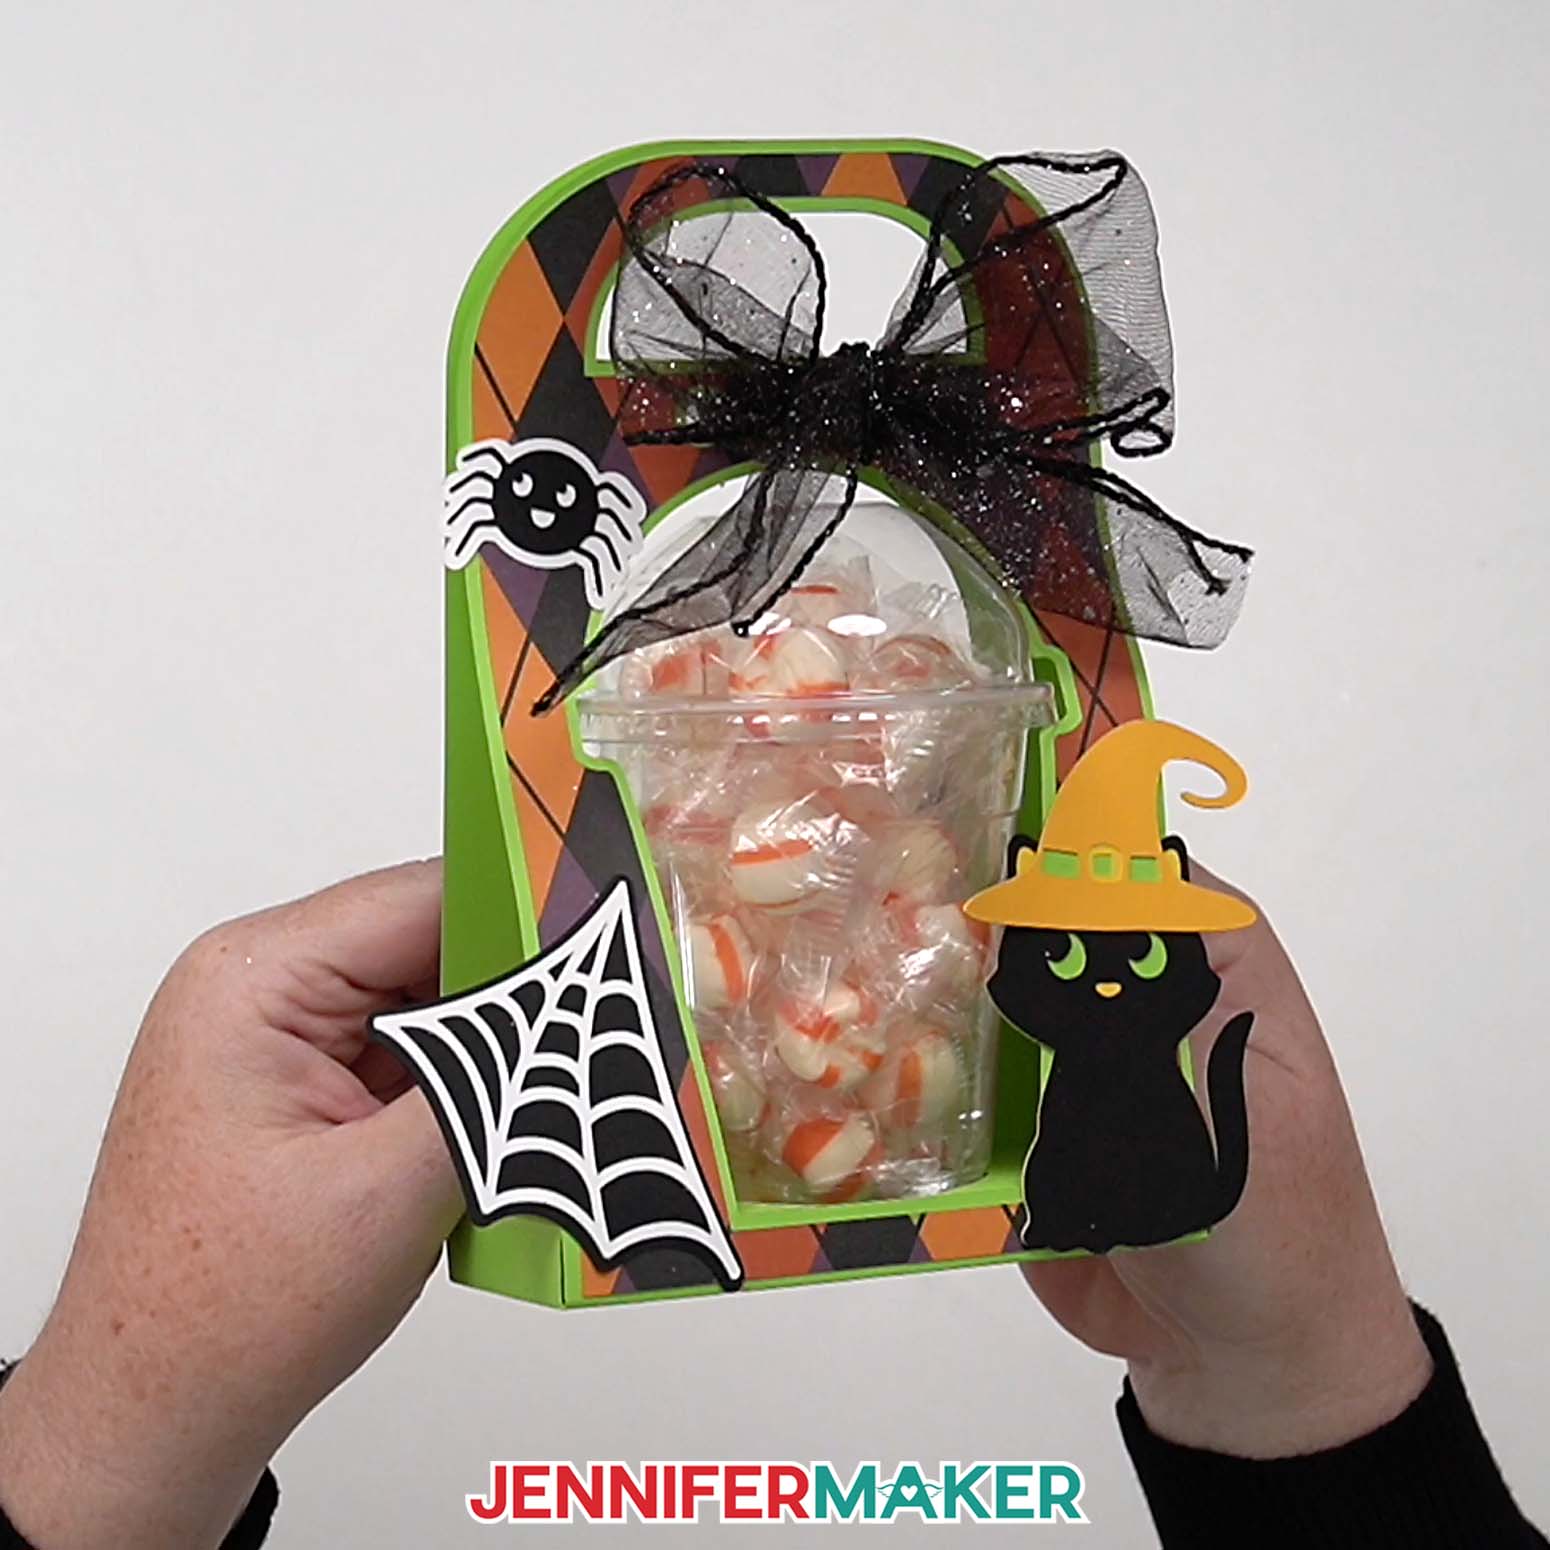
STEP 5: SHOW IT OFF!
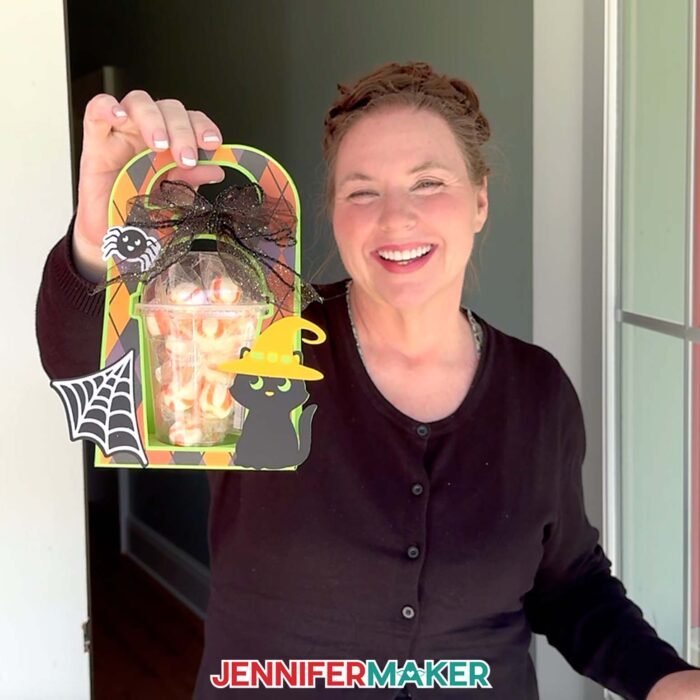
Here is my finished Halloween treat cup holder!
JOY XTRA VERSION
- To work with the Joy Xtra, all the pieces need to fit on 8.5” x 11” paper, so I designed the holder in three pieces to fit the smaller paper.
- Ungroup them in Cricut Design Space to see the pieces. Since the Joy Xtra doesn’t have a score tool, we’ll use dashed cut lines for the creases.
- Add and choose your embellishments, and change any colors following the steps in the main tutorial. Just make sure all four pieces for the holder are the same color so the transitions will be less noticeable later.
- Set the decorative panels to a new color so they get their own mat.
- Check that your Joy Xtra is selected at the top right, then click “Make.”
- Check that your material sizes are set correctly, and adjust them if needed using the dropdown menus on the Prepare Screen.
TIP: Remember, keep the pieces’ orientation in mind if you’ll use patterned paper! - The cutting process is the same as I showed you before. Place your mat’s material in the top left corner of the mat, and follow the prompts in Design Space.
- The Joy Xtra files will have four pieces to form the holder: the front piece, back piece, and two side pieces that fold up to form the box area.
- Glue an accent panel onto one of the large pieces.
- Secure it with your brayer.
- Repeat for the other accent panel and large piece.
- Then flip one piece over face down, and leave the other face up.
- Apply glue to the rectangular area on the face down piece.
- Add a C-shaped piece on top of the large flipped-over piece, aligning the rectangles. Press down to adhere.
- Glue the other piece with the C-shaped tab on its rectangle.
- Apply it on top of the others, lining up the rectangles, but pointing in the opposite direction. Press it down to adhere it well.
- Take the last large piece with the accent and apply glue to the rectangle on the back.
- Align it under the other pieces and press to adhere. Be sure to line up the rectangles so the paper can bend on the dashed cut lines.
- Use your brayer to secure the layered pieces.
- Fold up on the rest of the dashed cut lines on and around both of the C-shaped pieces.
- Fold one of the C-shaped pieces over on the crease lines so the tabs touch the rectangular base, forming a three-dimensional pocket.
- Add craft glue to the bottom of one tab on the pocket.
- Press it down straight onto the base to secure it.
- Repeat with the other tab on the pocket.
TIP: Try to keep the edges of the pocket parallel with the edges of the base. - Repeat with the other C-shaped piece on the other side.
TIP: Try to make the edges of each side match up and almost touch in the center, rather than overlap. - Add some craft glue along the long, thin sides of the base box.
- Fold up the holder’s sides to meet the glue.
- Use your fingers to press them in place until they dry.

Notes
Assembled Size, including embellishments:
12 oz: 8 ¼” tall x 6” wide x 2 ½” deep
16 oz: 7 ¾” tall x 6” wide x 3” deep
Answers to Your Questions About Making Halloween Treat Cup Holders
Q: Is there a way to create custom treat cup holder designs?
A: You can learn how to create your own customized treat cup holders in my ADVANCE program. Learn more about ADVANCE here!
Q: What is the best setting to cut cardstock on Cricut?
A: I typically use the Medium Cardstock setting with “More” Pressure to cut light and medium cardstock, and it works well!
Q: What blade do you need to cut cardstock on Cricut?
A: I use my Premium Fine-Point blade for most of my Cricut projects, cardstock included. Clean the blade often and it will hold up for a long time!
Q: Can I make Halloween treat cup holders without a Cricut?
A: Yes! It is much easier to cut the shapes precisely with a cutting machine, but along with SVG files for Cricut, I’ve included a PDF version in the free design folder so you can cut the pieces by hand with scissors or a craft knife.
Q: What kinds of things besides candy can I put inside a domed treat cup?
A: Instead of candy, you can put cookies, chips, pretzels, cut up vegetables, cake balls, or small gifts inside! The cup and holder should be able to hold at least a couple of pounds.
Q: Why is my Cricut not cutting all the way through my cardstock?
A: Your blade may need to be cleaned. Check out my Tips for Cleaner Cuts blog post to troubleshoot your cutting problems.
Q: I don’t see the Score lines in Cricut Design Space, where are they?
A: Make sure you have uploaded the design with “score” in the name. Then in the Design Space Layers Panel, click the arrows to expand the grouped layers. The top layer should be red in the Color Box, which is how I indicate a line should be the Score operation. Change the Operation to Score and there it is!
Q: How can I tell which weight my cardstock is if I lost the packaging?
A: I would find a piece of cardstock of a known weight, then compare it to the unknown pieces. The feel of each weight is very different, so the heavier the weight, the stiffer the cardstock.
Q: I’ve downloaded the file and it opens to the treat cup as a Chrome HTML document and not an SVG.
A: The file type is probably automatically opening in the browser. Open a new project in Cricut Design Space and upload the SVG file to the Canvas, then you can follow the tutorial.
Q: Can you use double stick tape (where it’s wide enough) instead of glue?
A: As long as the double stick tape works with the cardstock that is being used, it will work. Just make sure to give adequate coverage to keep everything well adhered. Since the results can vary, I recommend testing your combination of supplies before making several cups.
Q: Can you make the embellishments with print then cut?
A: Sure, you can select the layers for a given embellishment and click “Flatten” to make it into a Print Then Cut piece. Make sure the embellishments either fit completely on the sides of the holder, or are printed on heavy enough paper to not bend and curl if pasted so that parts are not on the holders.
Q: If you have a two-sided paper and the two sides are not the same, but, you want to score the paper, is it safe to put the good side down on the mat and not ruin it?
A: It depends on the type of paper and how sticky the machine mat is. Usually it is fine, but testing it with an extra sheet is a good idea if you’re not sure.
Q: Are the no-score score lines just printed, or are they somehow scored with the Maker cutting tool?
A: The no-score lines are dashed cut lines made with the cutting blade. They make a dashed cut line you can crease along.
Q: Help! My Cricut Design Space screen looks different from yours!
A: If you’re using the latest version of Cricut Design Space, your screen may have slight variations from the screen you see on the video tutorial. Good news! All of the same functions are there, they may just be in different spots or have new icons. Pause the video if you need, or follow along with the written tutorial. If you get stuck, ask for expert support in our Facebook group. Plus, you can catch the latest news on JenniferMaker tutorials and more.
Q: Can I make and sell Halloween treat cup holders using your design?
A: If you want to use my treat cup holder designs and project for commercial use, please familiarize yourself with my important licensing information before selling your crafts.
Get my free SVG/DXF/PDF files to make your own Halloween treat cup holders!
(If you do not see the signup form above, click here.)
I absolutely love seeing your crafted Halloween projects! Once you’ve learned how to make Halloween treat cup holders, inspire others and share photos of your projects in our Facebook group or tag me on social media with #jennifermaker.
Love,

Want to remember this? Save this Halloween Treat Cup Holders Tutorial to your favorite Pinterest Board!