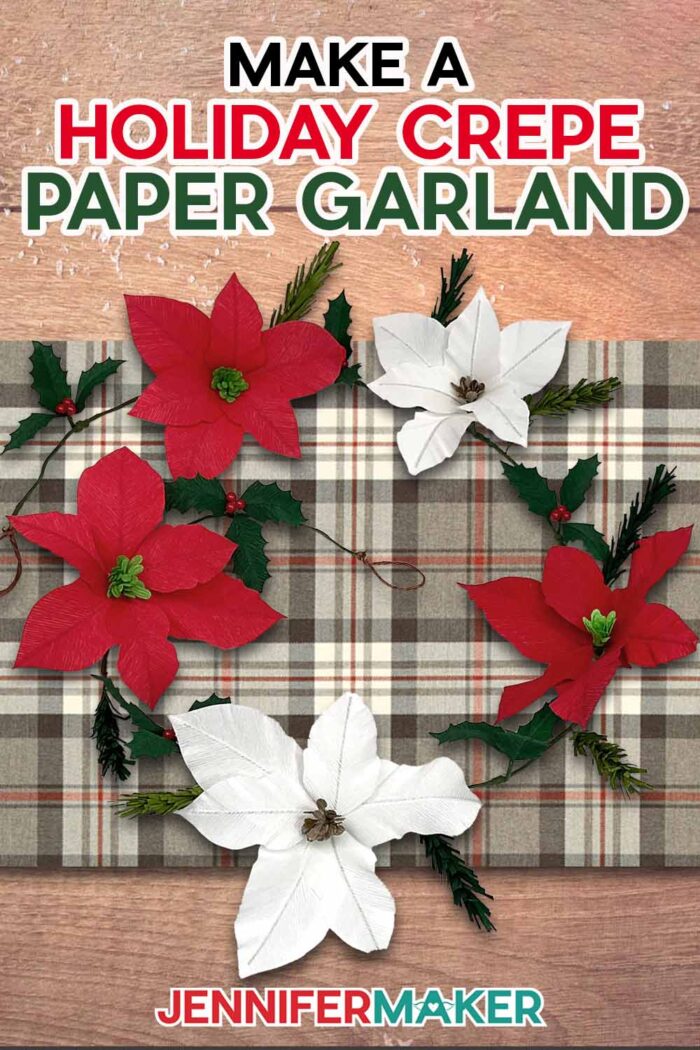
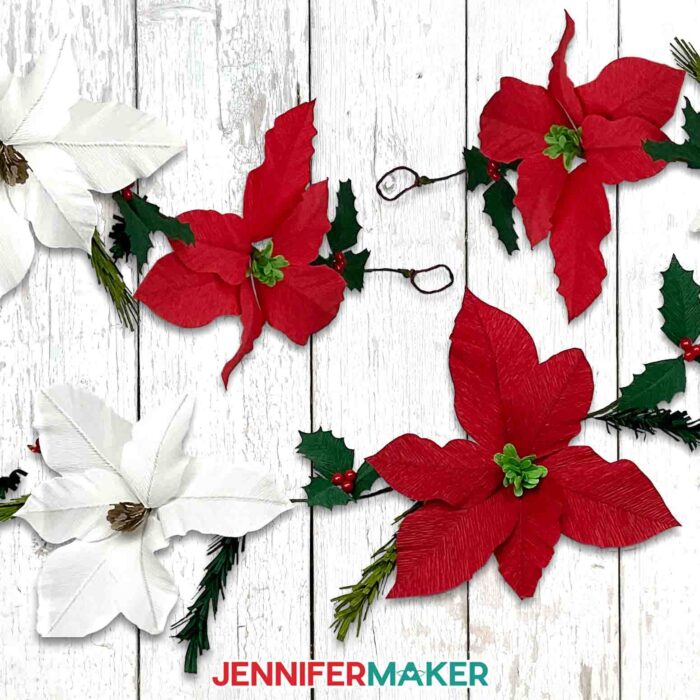
Make a realistic crepe paper floral garland for the holidays!
Fresh flowers are gorgeous, but not always practical — or affordable. That’s a big reason why I absolutely love creating blooms out of paper, and Christmastime is no exception! That’s why I’m going to teach you the secret to an uber-realistic paper floral garland full of wintery blooms and branches. Keep reading to learn more about how to make a beautiful strand of paper flowers to last through the new year — and beyond!

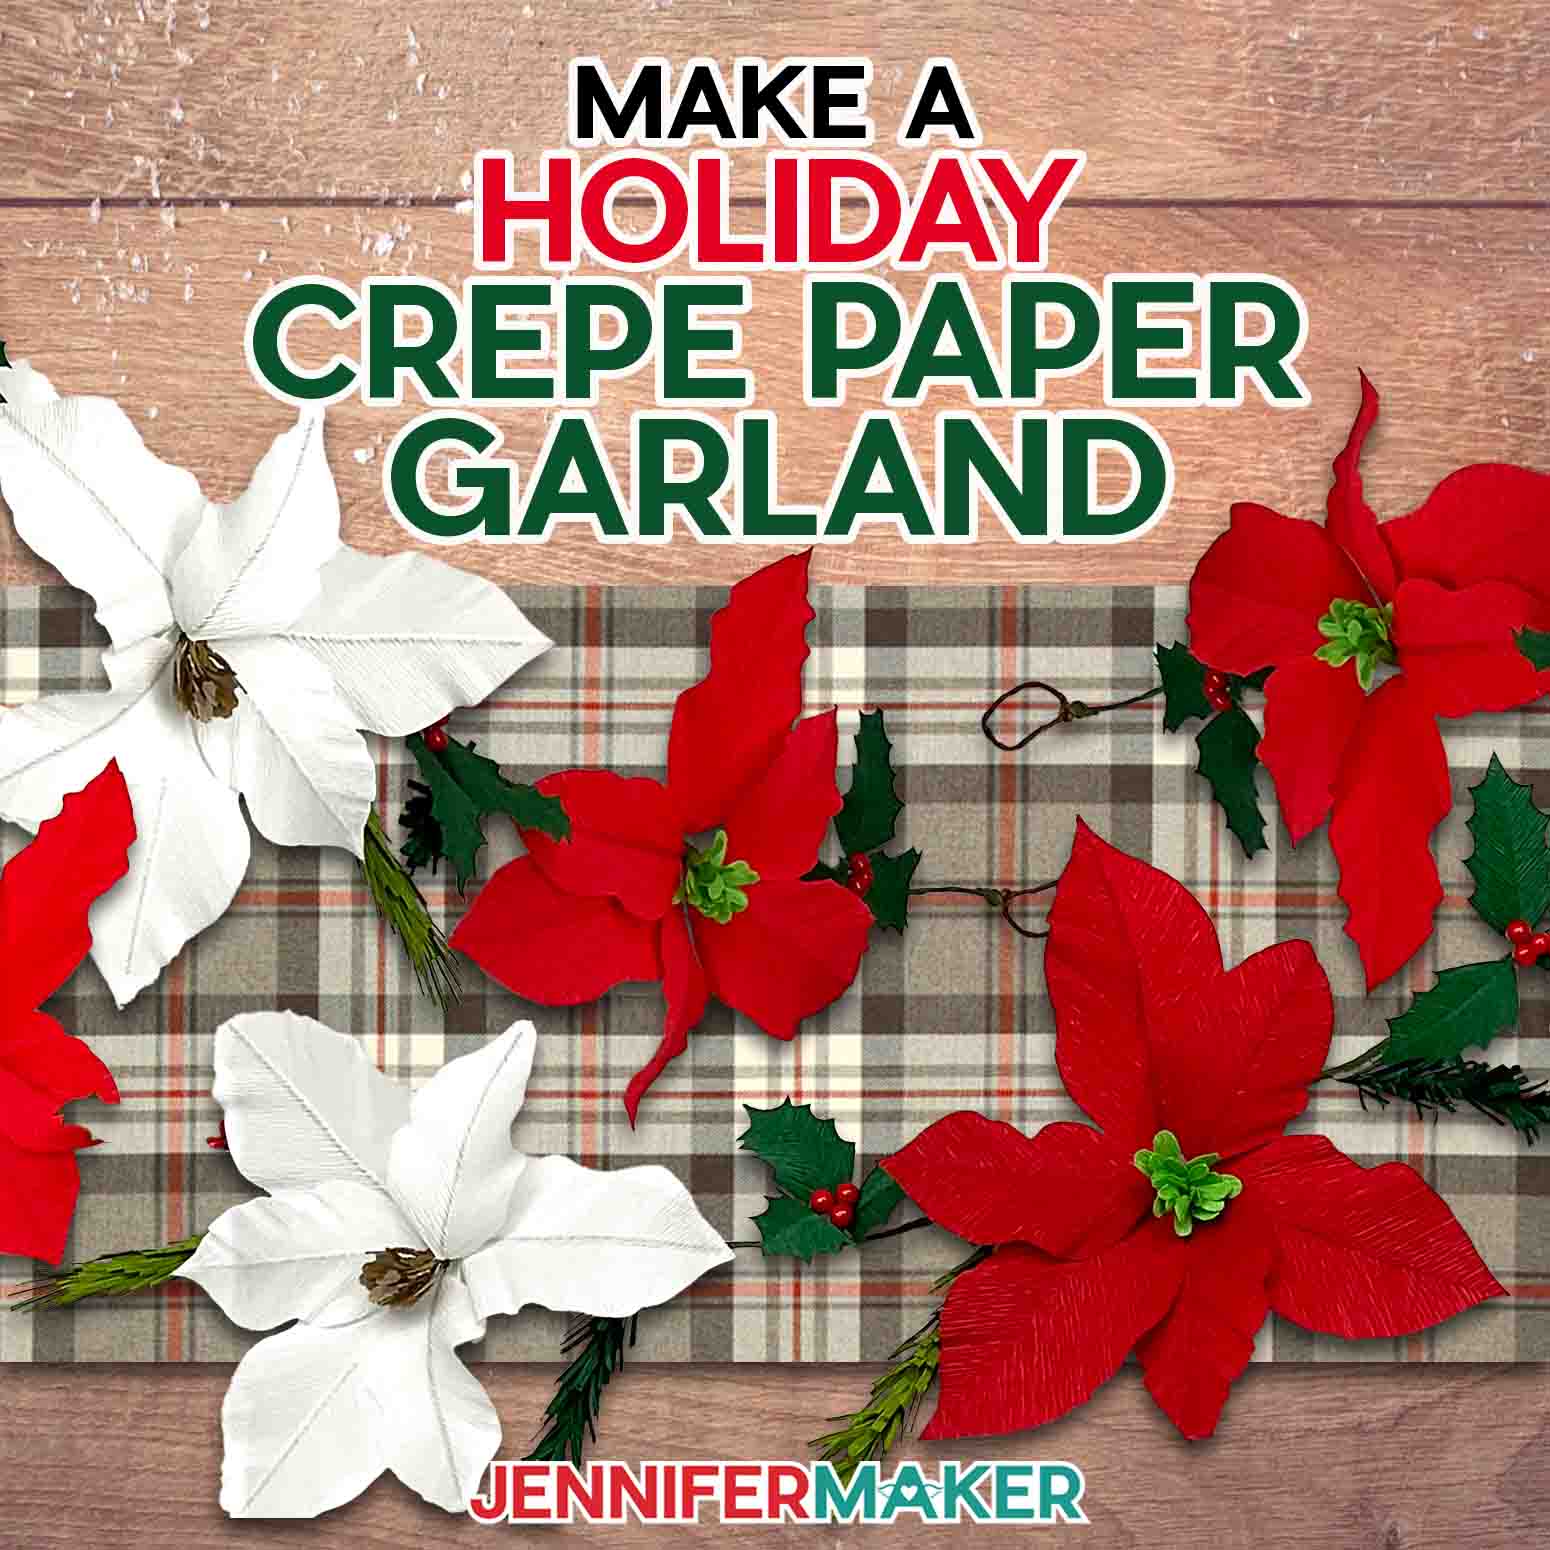
Paper flowers are the perfect holiday decor or party decoration for any occasion — especially in the colder months! Why? Because while you’re spending time enjoying the festivities, your gorgeous holiday garland will look fresh, vibrant, and hyper-realistic all winter long!
So, what’s the secret to these mindblowing blooms?

It lies in the paper. You’ve probably noticed that crepe paper has a pronounced, almost wrinkly-looking grain that runs across the material. You know what kind of plant has a similar texture? You guessed it. Poinsettias! I’ll show you exactly how to get your grain running in the right direction to make your poinsettias look just like the real thing.
I recommend using the crepe paper from my materials list to make your poinsettias, holly, and pine branches. Why? It comes in a pack with a cohesive seasonal color palette which takes the guesswork out of finding the right material in the right colors. It’s already been done for you! This particular crepe paper is also a bit thicker and sturdier than other crepe paper I’ve used, and I found it less likely to tear. That means it’s easier to work with, and has a better chance of holding up through NEXT Christmas!

I’ll show you how to cut your crepe paper on a Cricut Maker 3, but you can also use the original Cricut Maker for this project. Along with a cutting machine, you’ll need a purple StrongGrip machine mat and a rotary blade and housing, which will cut through the delicate crepe paper without damaging it like a regular fine-point blade would.
You’ll need a few other tools and materials, like a couple different kinds of bendable floral wire and green floral tape, along with some wire cutters and a measuring tape. If you’re making the holly, you’ll need some artificial berries like the ones in my materials list. Unlike many faux flower projects, there’s no hot glue necessary — you can use regular craft glue instead. That means no cords or potential burns to worry about. Easy peasy!
After it’s finished, you can hang or lay it across your fireplace mantel, decorate your bannister, or wrap it around your Christmas tree! You can even use it as part of your centerpiece on your holiday table. Wrap fairy lights around the wire to turn the holiday ambience up even more!
Follow my easy tutorial and your fun DIY paper flower garland will be the perfect addition to your holiday décor!

Ready to learn how to make a paper floral garland? This post contains some affiliate links for your convenience (which means if you make a purchase after clicking a link I will earn a small commission but it won’t cost you a penny more)! Read my full disclosure policy.
Materials And Tools to Make a Crepe Paper Floral Garland
See my full and complete Amazon shopping list for the exact items used in this project!
- One (1) Package of Winter Garden Heavy Crepe Paper (I used the Snowflake, Peppermint, Holly Berry, Spearmint, Pistachio, and Pine colors)
- 24 Gauge Green Floral Wire (for stems)
- Wire Cutters
- At least 6′ of Thick Floral Wire (for garland base)
- 1/2″ Wide Green Floral Tape
- Artificial Holly Berries
- LED Fairy Lights (optional)
- A way to cut your materials – I’m using the Cricut Maker 3, but you can also use the Cricut Maker, a Cricut Explore Series machine, the Cricut Venture, or even the Cricut Joy Xtra
- Cricut Rotary Blade with Housing
- Cricut Purple StrongGrip Machine Mat 12″ x 12”
- Brayer
- Spatula
- Scraper
- Measuring Tape or Ruler
- Painter’s Tape (optional)
- Tweezers (optional)
- Bearly Art Precision Craft Glue
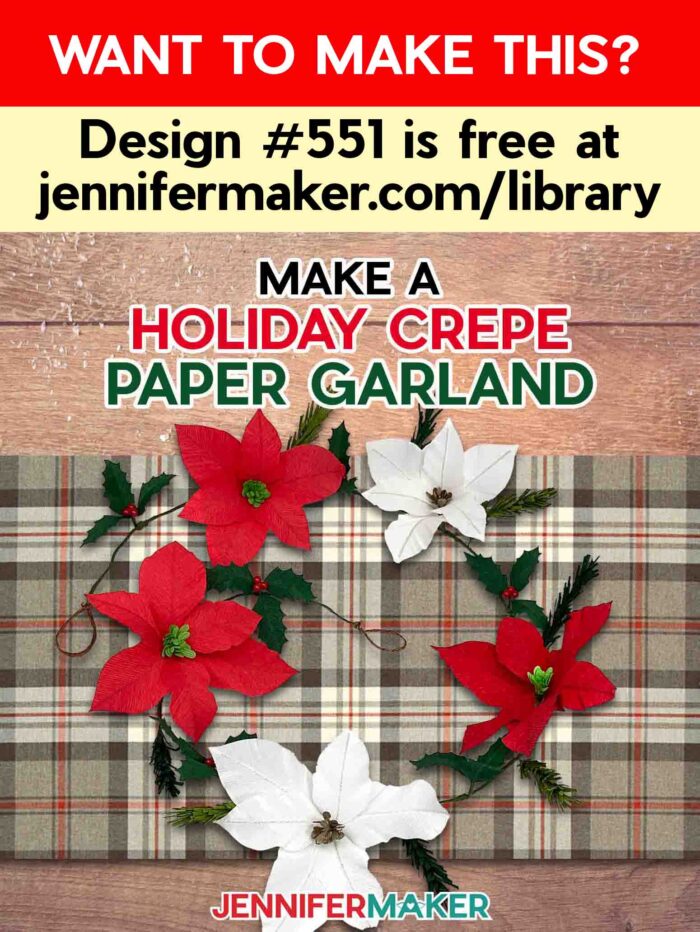
- Design #551 – My free SVG/DXF/PDF design files are available in my free resource library – get the password by filling out the form at the bottom of this page
How to Make a Crepe Paper Floral Garland!

Paper Floral Garland
Learn how to cut crepe paper with your Cricut to make a beautiful paper floral garland with poinsettias, holly leaves, and pine branches.
Materials
- One (1) Package of Winter Garden Heavy Crepe Paper (I used the Snowflake, Peppermint, Holly Berry, Spearmint, Pistachio, and Pine colors)
- 24 Gauge Green Floral Wire (for stems)
- At Least 6' of Thick Floral Wire (for garland base)
- 1/2" Wide Green Floral Tape
- Artificial Holly Berries
- LED Fairy Lights (optional)
- Design #551 (My free SVG/PDF/DXF design files are available in my free resource library - get the password by filling out the form at the bottom of this page)
Tools
- A method to cut your heavy crepe paper - I'm using the Cricut Maker 3 but you can also use the original Cricut Maker.
- Cricut Rotary Blade with Housing
- Cricut Purple StrongGrip Machine Mat 12" x 12”
- Craft Glue (I used Bearly Art Precision Glue)
- Wire Cutters
- Brayer
- Spatula
- Scissors
- Scraper
- Measuring Tape or Ruler
- Painter's Tape (optional)
- Tweezers (optional)
Instructions
STEP 1: GET MY FREE PAPER FLORAL GARLAND DESIGNS
First, download my Paper Floral Garland designs from my free library -- look for Design #551. Alternatively, you can use the Save This Project form near the top of this post and the design link will be emailed to you.
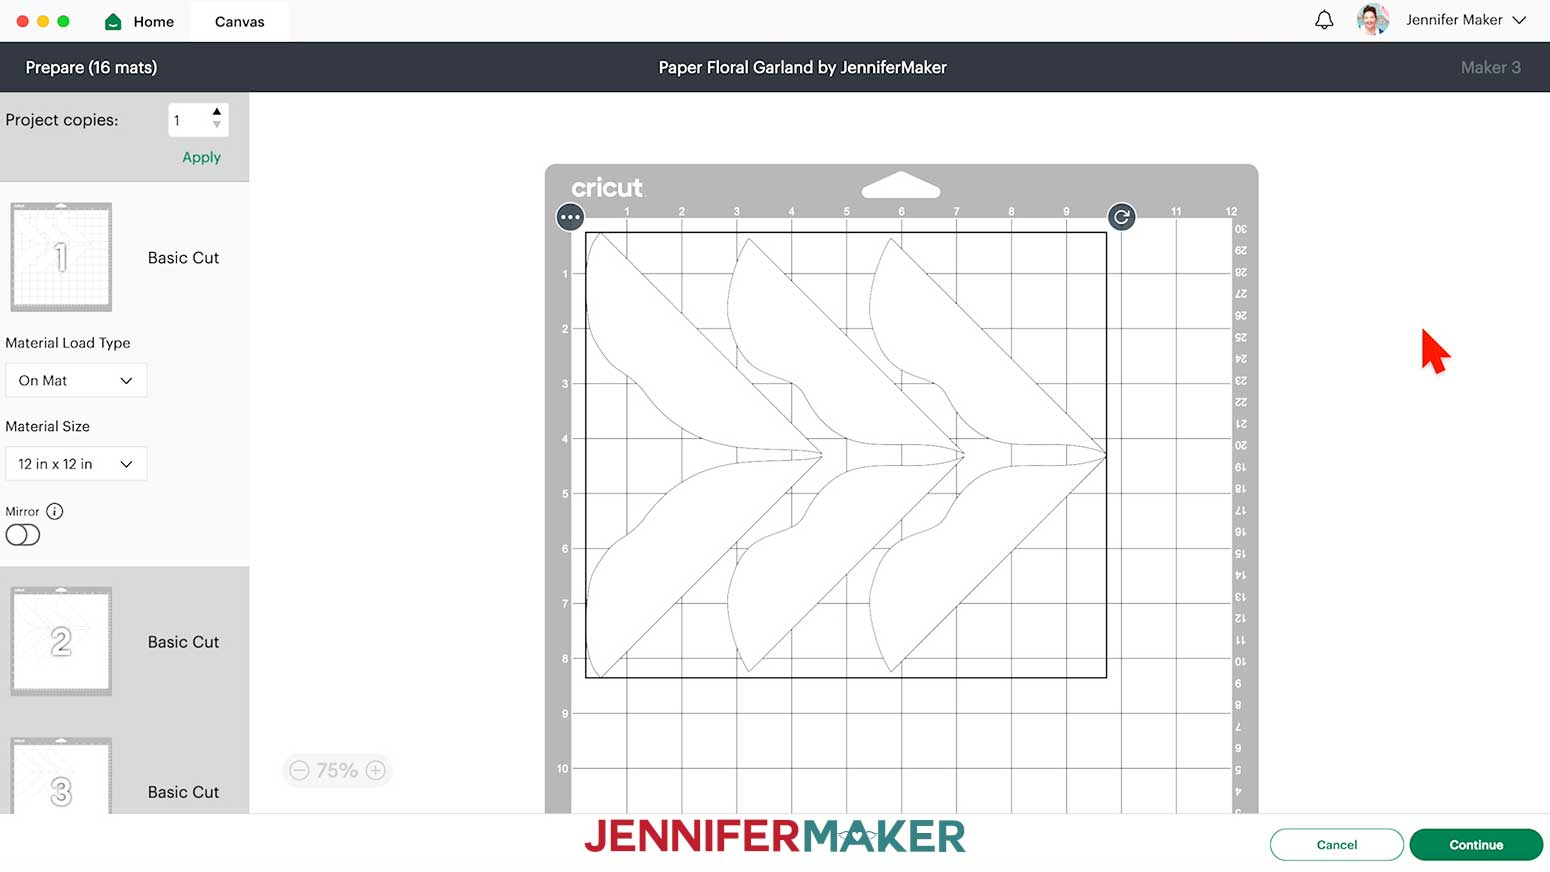
The SVG file includes designs for one 8” wide poinsettia (12 red bract or “petal” pieces and two bright green stamen pieces), six green holly leaf pieces to make a 6” wide holly stem, and two green rectangular pine needle pieces for a single 7” tall pine branch. You will notice that the poinsettia bracts (the red shapes) and the holly leaves are oriented diagonally in the file. This ensures that the grain of the crepe paper is running in the correct direction when the pieces are cut.
Upload the file to Design Space to get started.
TIP: If you’re not sure how to upload, go to jennifermaker.com/svgs to learn how to unzip and upload SVG files.
STEP 2: PREPARE YOUR DESIGN
CRICUT DESIGN SPACE
1. Open Cricut Design Space and click “New Project.”
2. Click “Upload” and then “Upload Image.”
3. Click “Browse.”
4. Select the SVG file.
5. On the Prepare to Upload screen, it will say “Cut image” with the design preview.
6. Click “Upload.”
7. Find your design in Recent Uploads and add it to the Canvas.
8. Click the minus (-) sign to zoom out and see the entire design.
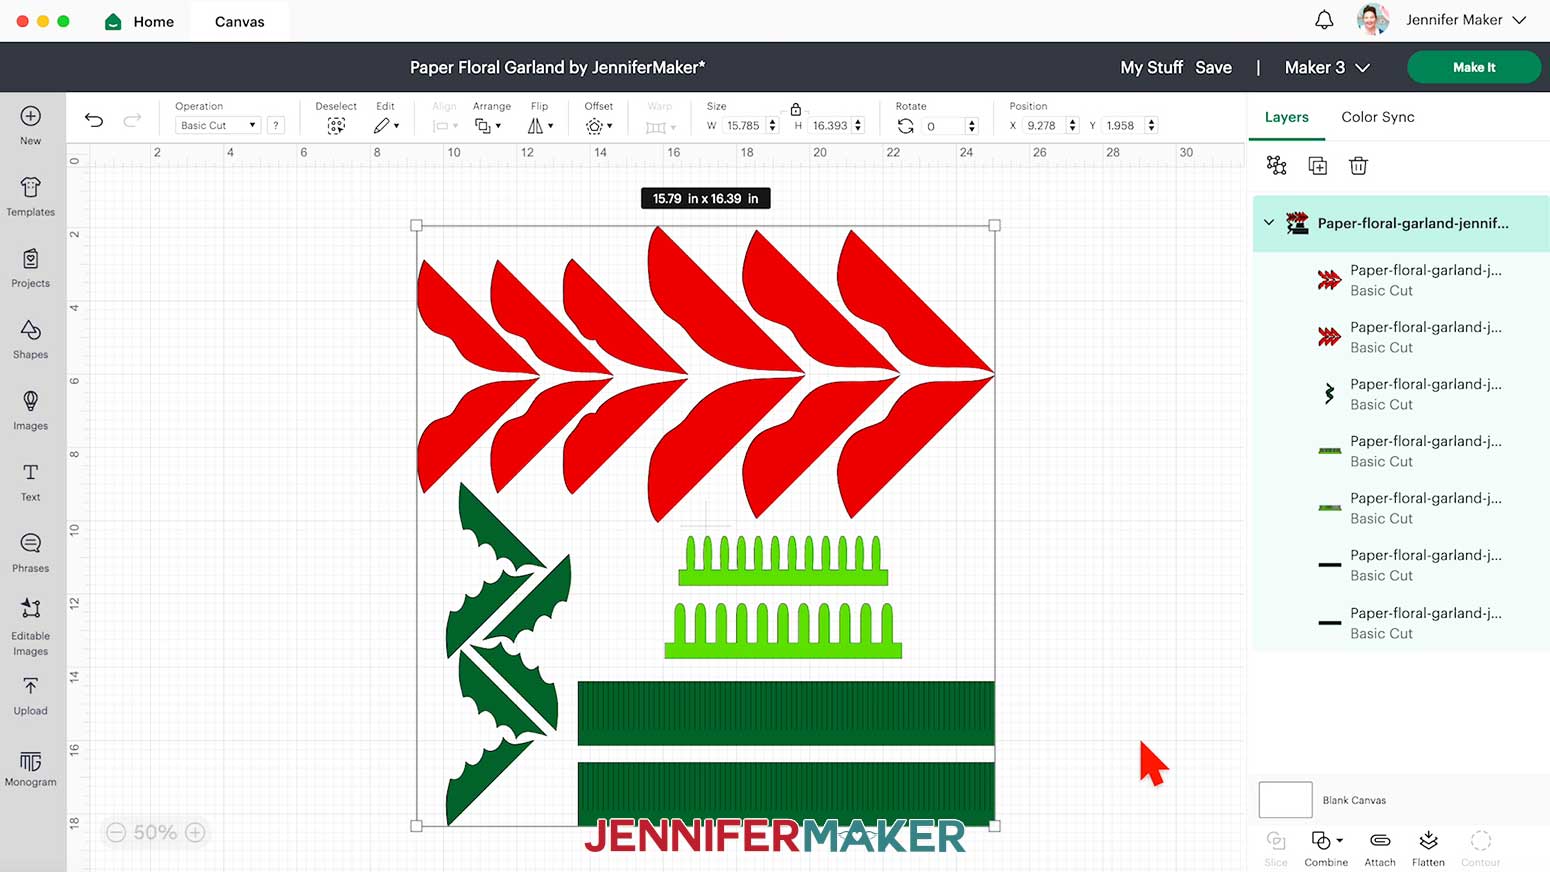
9. Click the Ungroup icon.
10. Duplicate any pieces you would like to cut more of by selecting the layer and clicking the Duplicate icon.
NOTE: For my 6’ garland, I made five poinsettias, six holly stems, and eight pine branches. If you would like to do the same, you will need to duplicate both sets of poinsettia bracts and stamens four times, the holly leaves five times, and the pine needle pieces three times (or seven times if you would like fuller branches).
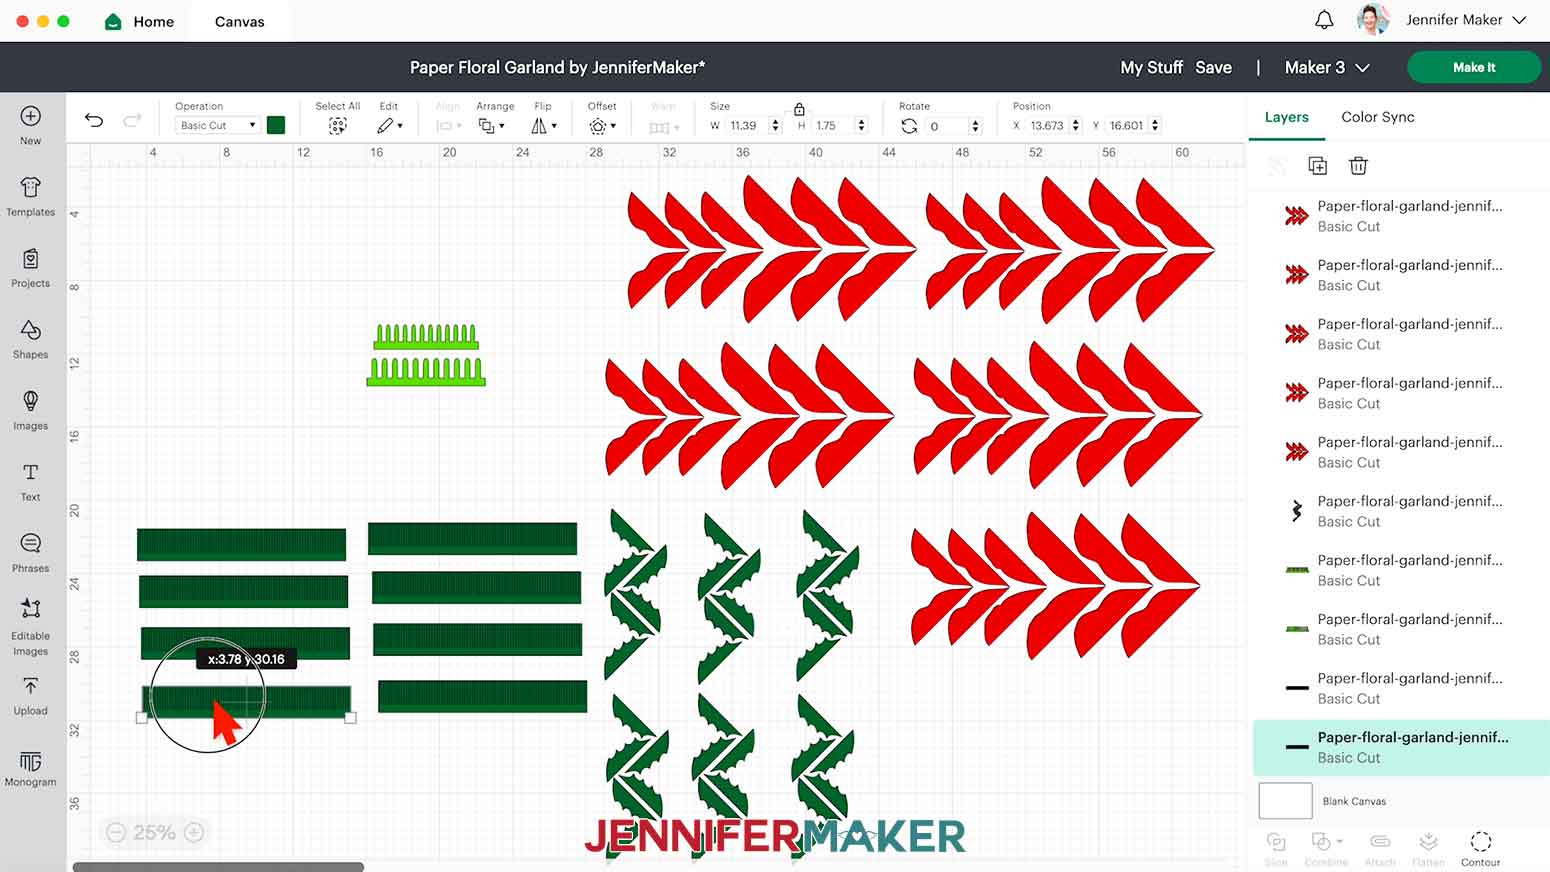
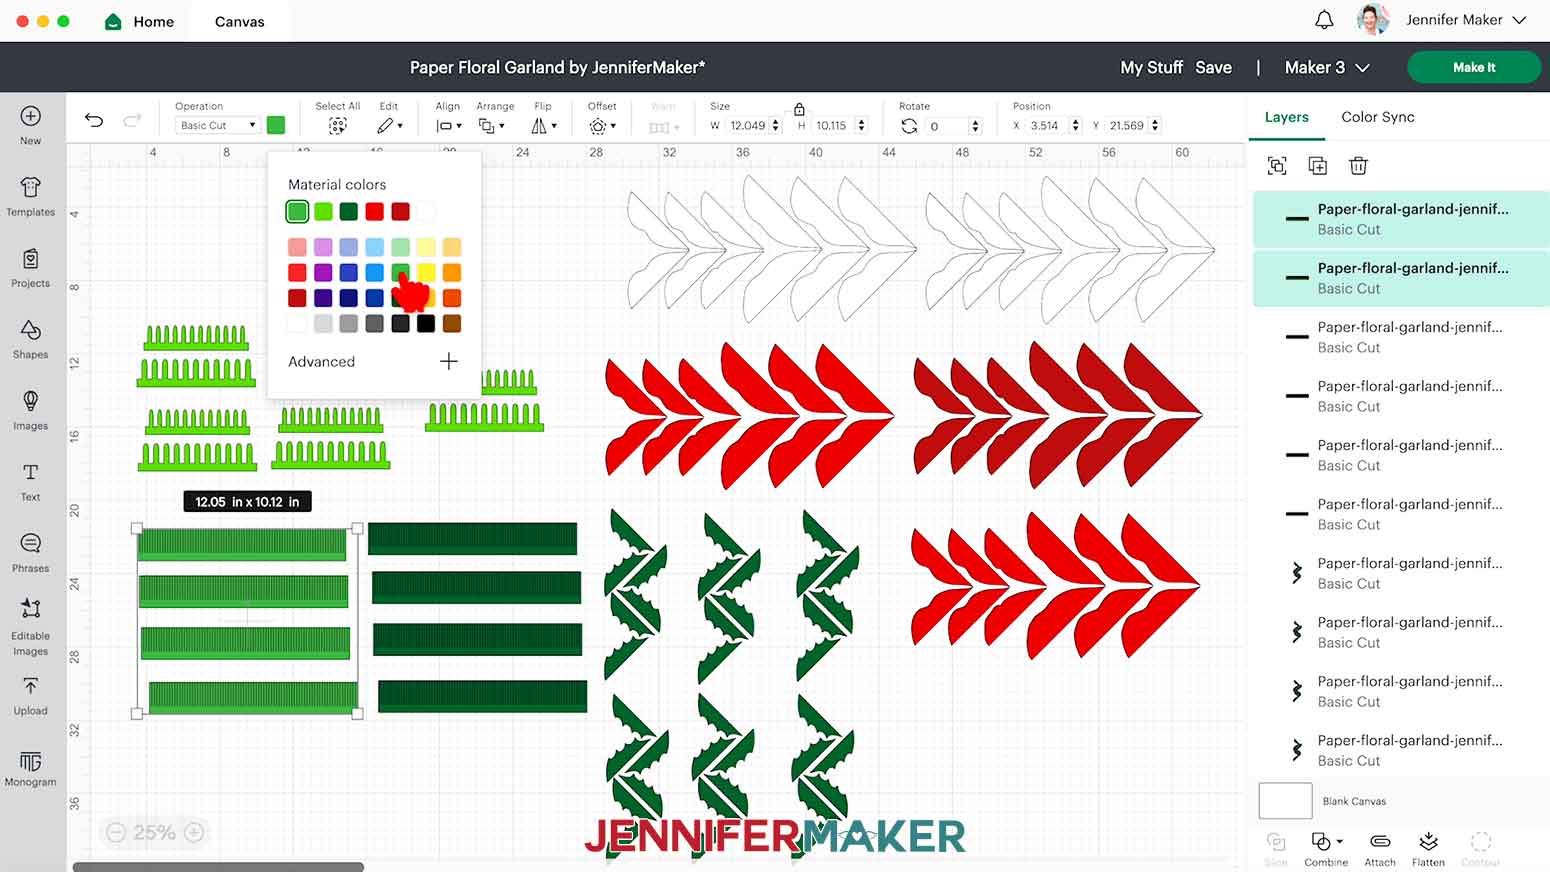
11. Change the color of any pieces based on the crepe paper colors you’ll be using by selecting the layer, clicking the color swatch next to Operation, and choosing a new color.
12. Your layers are ready to cut!
IMPORTANT: Do not rotate any of the pieces on the Canvas or the Prepare Screen. If you do, your crepe paper grain will not be facing the correct direction on your cut pieces.
13. Make sure the correct machine is selected in the top right.
14. Click “Make It.”
15. If prompted, click "On Mat," choose your mat size, and click “Confirm.”
16. On the Prepare Screen, you should have 16 mats if you’re making the same garland I am (two red poinsettias, two white poinsettias, one dark red poinsettia, six sets of holly leaves, and eight pieces of pine needles in two different greens).
17. Move the pieces on the mats so nothing extends below the horizontal 10” mark. Select an object you’d like to move, click the three dots in the upper left, choose “Move object,” and select a new mat of the same color with open space to place it. Remember, do NOT rotate any of the pieces.
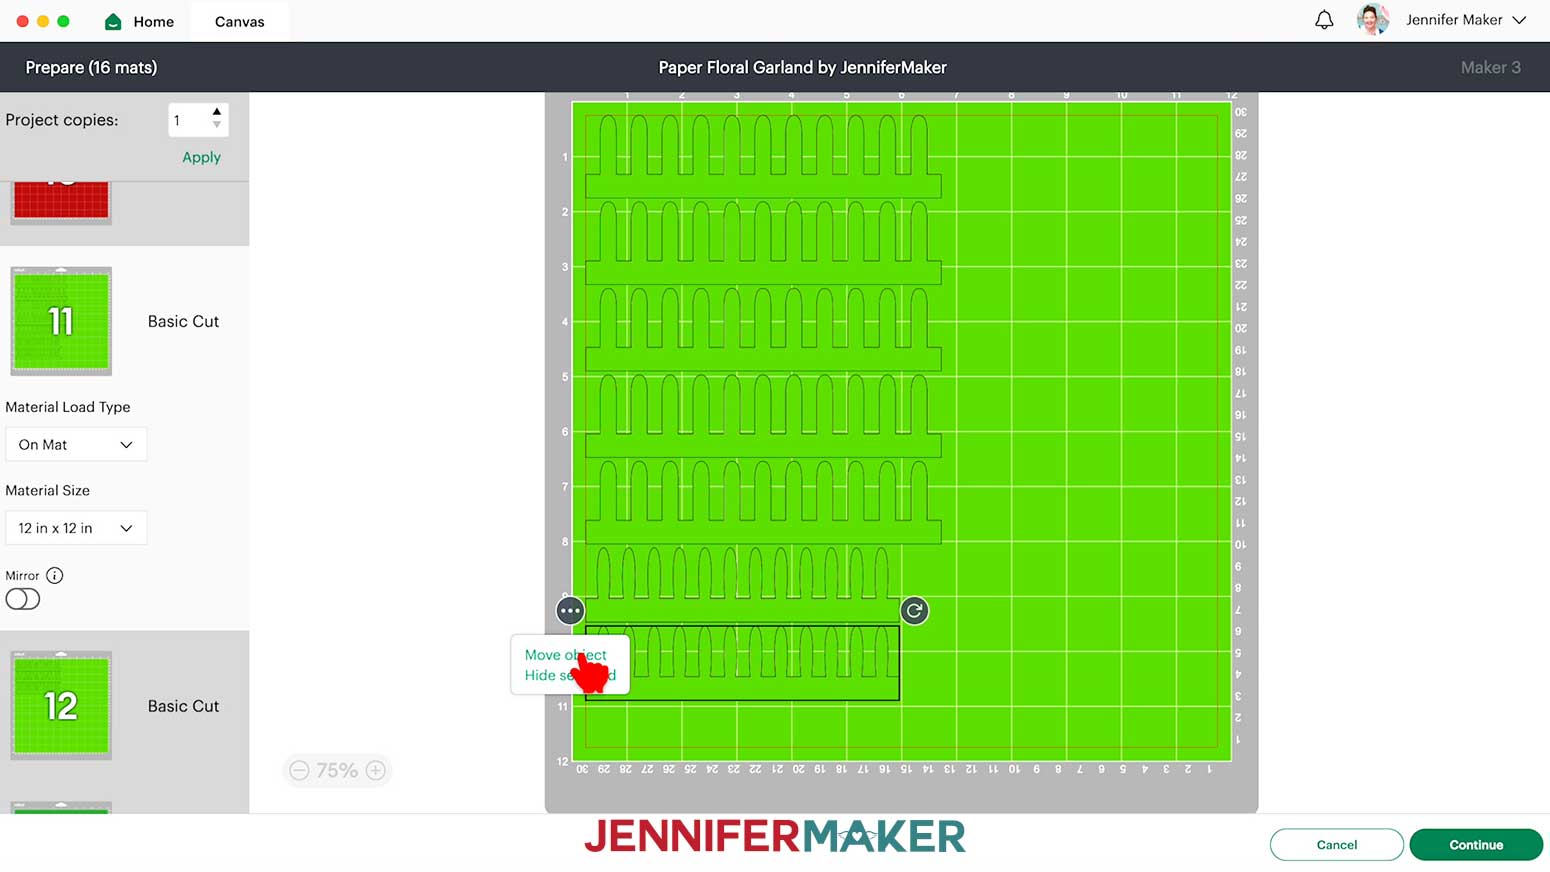
18. Select the first mat again and click “Continue.”
CUTTING
1. On the Make Screen, click “Browse All Materials.”
2. Search for and select the Fabric setting “Medium Fabrics (like Cotton).”
3. Leave the Pressure at Default and select the “Remember material settings” box.

4. Hold your crepe paper roll horizontally (so the lines are vertical) and use scissors to cut a piece slightly wider than the area your first mat's pieces cover. Do NOT stretch the paper.
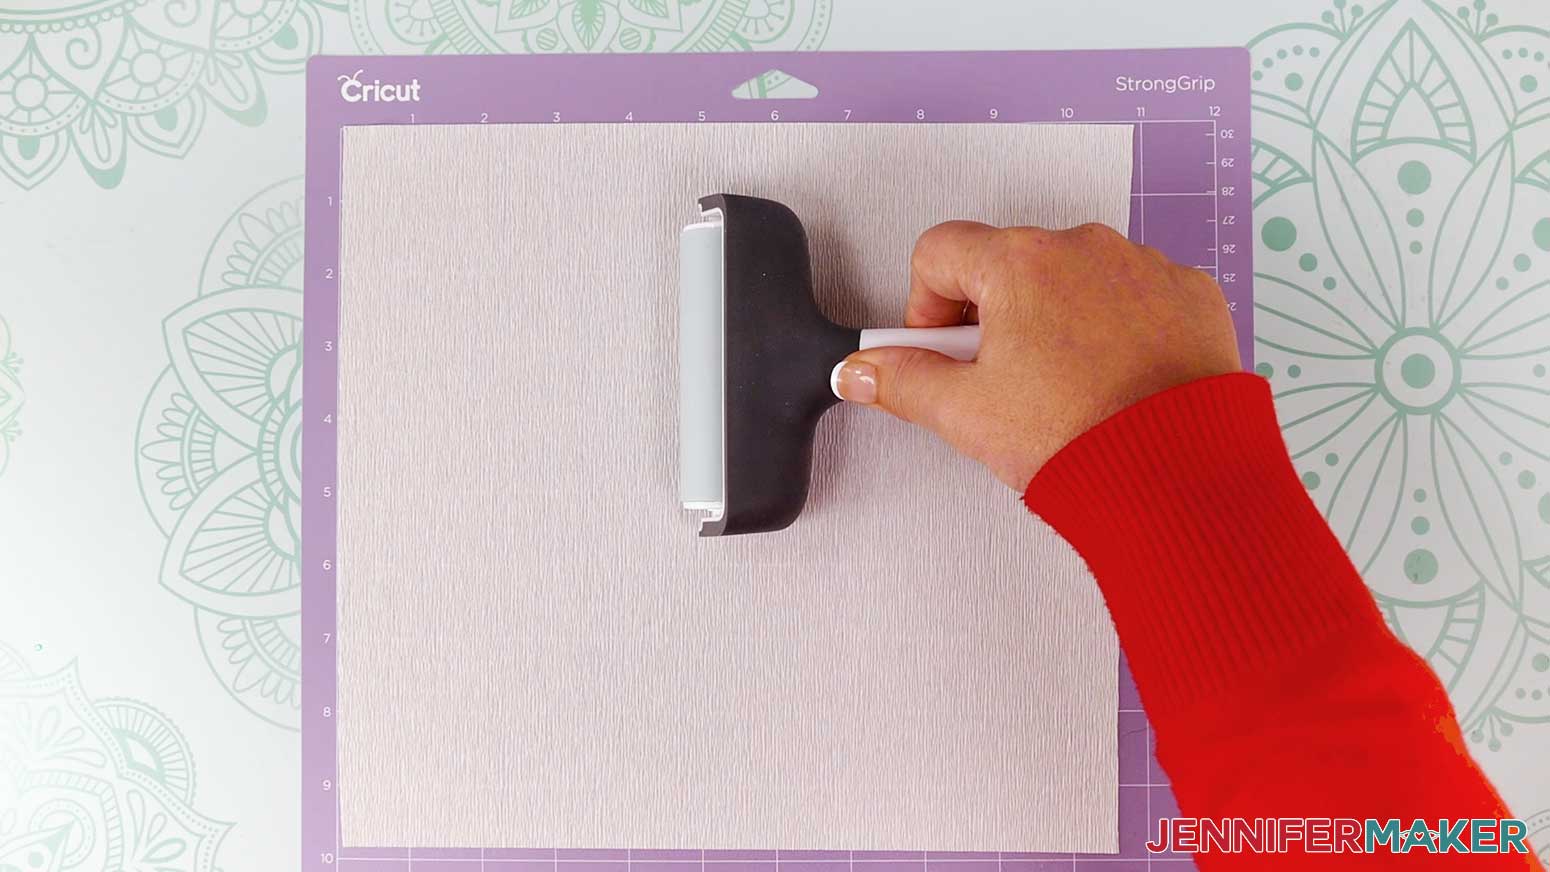
5. Place your cut piece face up on a StrongGrip machine mat.
IMPORTANT: Make sure the grain of your paper is running vertically on the mat. Also make sure you’re using a clean, sticky mat.
6. Roll a brayer along the entire piece of crepe paper with firm pressure to fully adhere it to the mat.
7. Load your Rotary Blade into Clamp B.

8. Press the flashing “Load/Unload” button to load the prepared mat into your Cricut.
9. Press the flashing “Go” button to begin cutting.
10. Before unloading your mat, check to see if the cut went all the way through. If not, press the start button for another pass.
11. If everything cut smoothly, unload the mat, flip it over onto your work surface, and gently roll it back to release the paper.
TIP: Try to remove the pieces by pulling them away from the mat in the same direction as the paper grain so you don’t stretch them. You can also use a spatula to carefully remove any intricate parts and scissors to cut away any small areas still attached to the paper sheet. If you have trouble with any of your cuts, check out my Cricut Tips & Tricks for Cleaner Cuts.

12. Follow steps 4-11 to cut and remove the rest of your pieces.
TIP: As you remove pieces from the mat, organize them into separate stacks for each flower, holly stem, and pine branch.

STEP 3: ASSEMBLE YOUR PAPER FLORAL GARLAND
POINSETTIAS
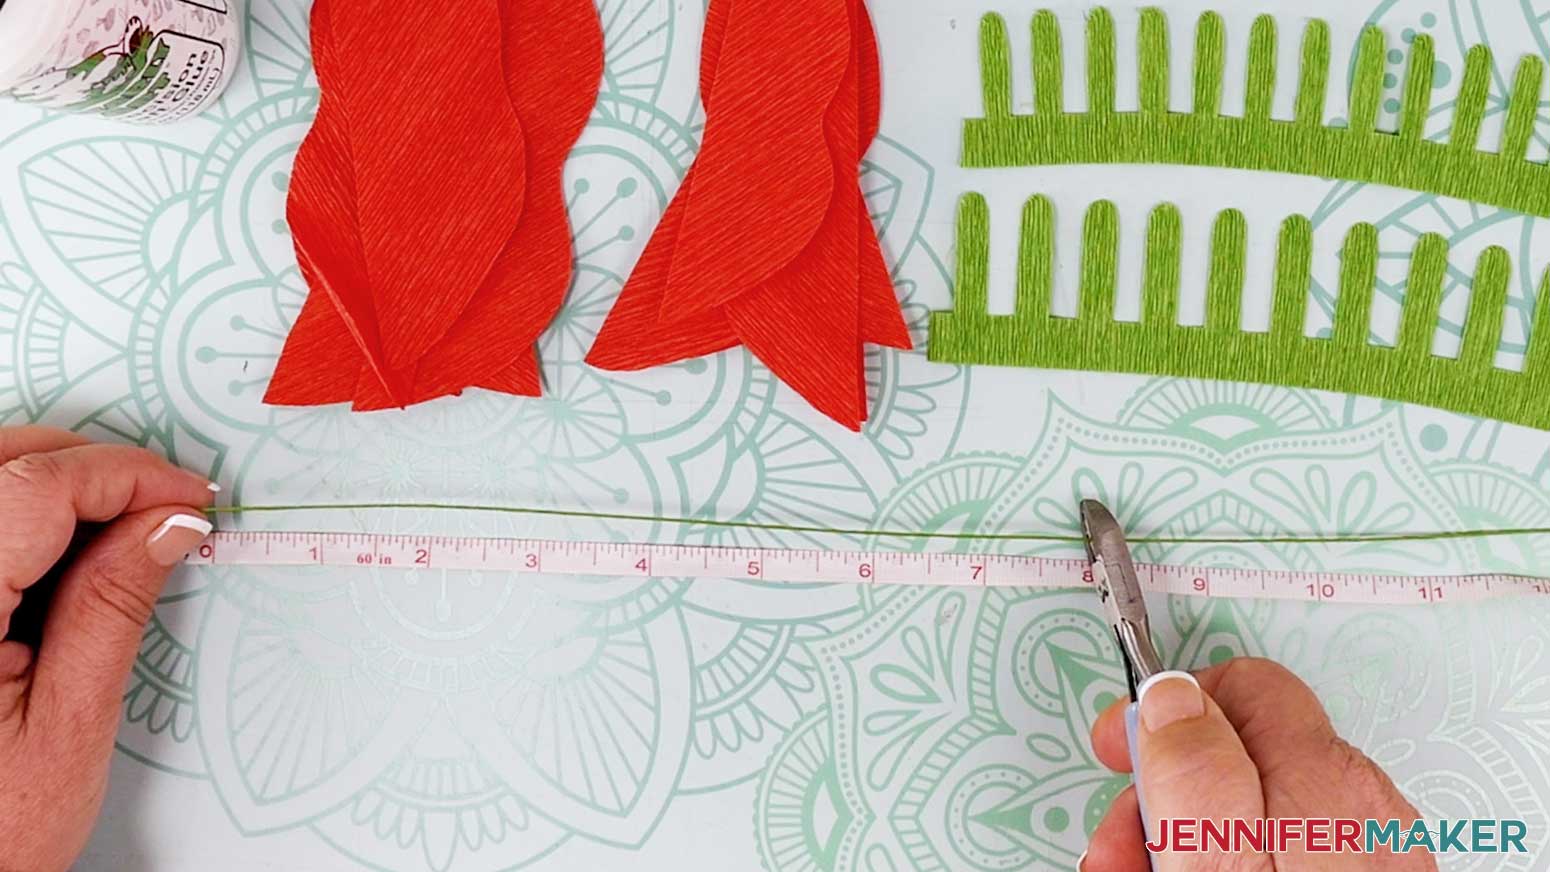
1. Use wire cutters and a tape measure or ruler to cut a piece of floral wire about 8” long for the flower stem.
2. Grab the two stamen pieces and shape them. Stretch the very tip of each stamen (the rounded part) horizontally to widen it at the top.
3. Apply a line of glue a few inches long at one end of the straight bottom edge on the smaller stamen piece.

TIP: If your crepe paper isn’t the same color on both sides, add glue to the front/pretty side and wrap the stamen piece so the back side is facing out. This way, when you look at the attached and fluffed stamen from the top, you’ll be able to see the pretty side of the paper.
4. Attaching just the glued section, wrap the stamen around one end of the floral wire piece.

5. Continue wrapping the stamen around the wire, adding more glue as you go.
6. After the entire small stamen piece is attached, add glue to the larger stamen piece and wrap it around the small one.

7. Follow steps 3-5 to wrap the large stamen piece.

8. Cut a piece of floral tape 8-10” long and give it a gentle stretch to activate the stickiness.
9. Wrap the floral tape around the bottom of the attached stamen pieces to secure them to the stem.
NOTE: Pull gently as you wrap – this encourages the tape to stick to itself.

10. Fluff the stamen pieces by separating them from each other and gently pushing all the tips outward.
11. Cut three 6” pieces and three 8” pieces of floral wire for the three small and three large poinsettia bracts.

12. Straighten the wire pieces if needed before attaching anything to them.
13. Find the 12 bract half pieces and match them up along their straight edges to create three small bracts (petals) and three large bracts.
NOTE: Make sure the paper grain for each bract is lined up so it makes a “V” shape like the veins of a real flower.
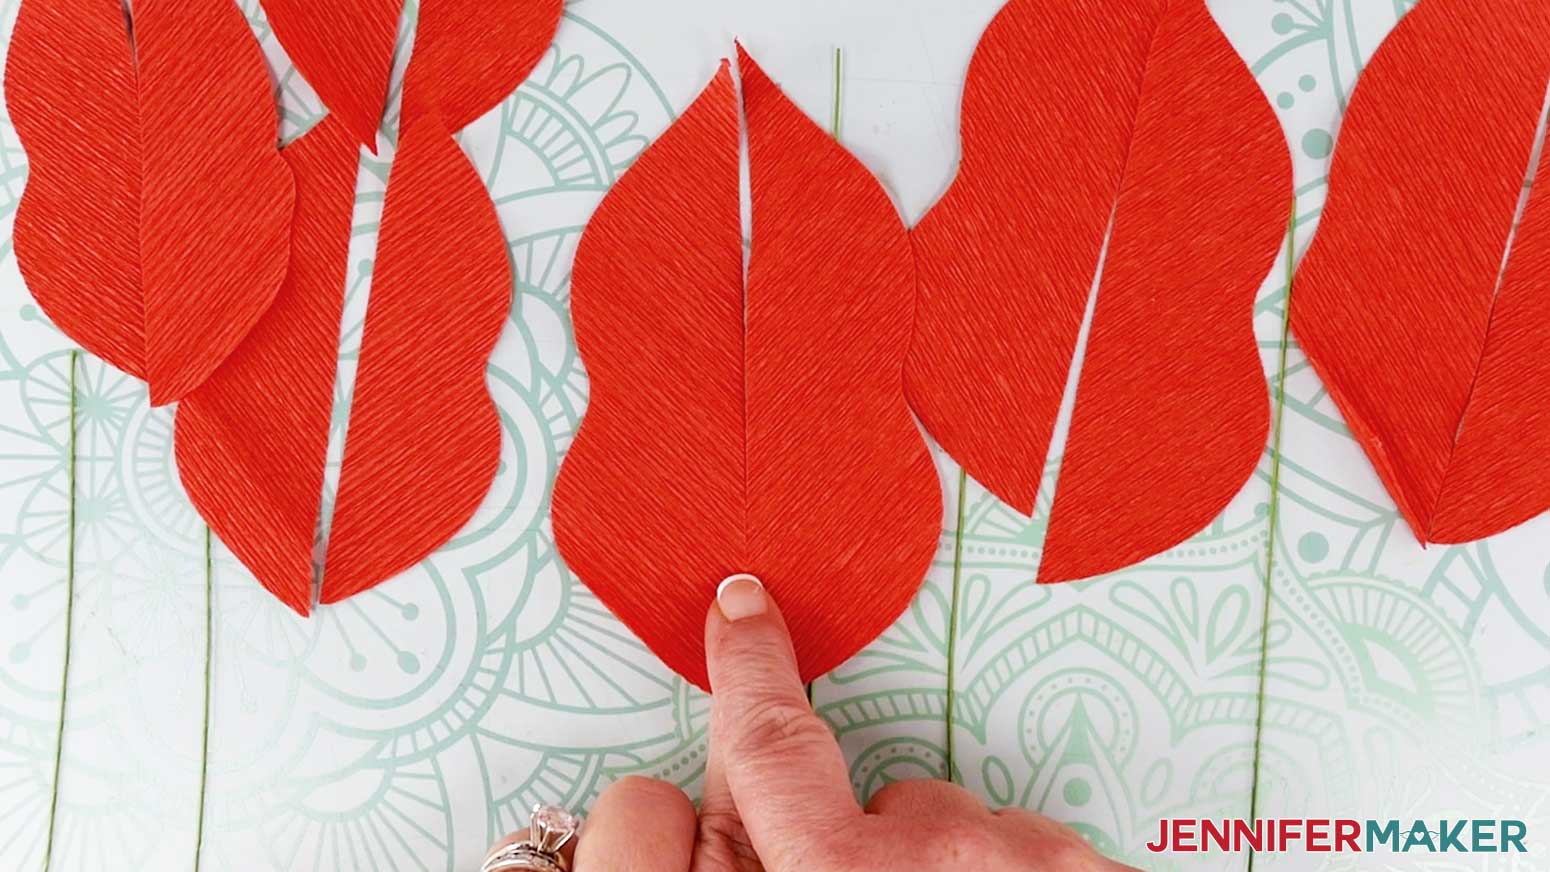
14. Apply a line of glue to the straight edge of one small bract half, about 1/16” from the edge.

15. Attach a 6” long wire piece to the glued area starting approximately ½” below the tip of the bract. Allow it to dry for at least 15 seconds.
NOTE: Be careful not to stretch the bract piece as you attach the wire. If the piece is curled, you may need to hold it in place with your fingers until the glue dries.
16. Apply another line of glue on top of the attached wire section and at the very tip of the piece.
17. Place the straight edge of your matching small bract half on top of the glue, starting at the bottom of the bract and sandwiching the wire between both pieces.
NOTE: The overlapped area in the center of the bract halves should be about ⅛” wide.

18. Set the assembled bract aside to dry completely.
19. Follow steps 14-18 to attach the rest of your bract half pairs, making sure to attach small bracts to 6” wire pieces and large bracts to 8” wire pieces.
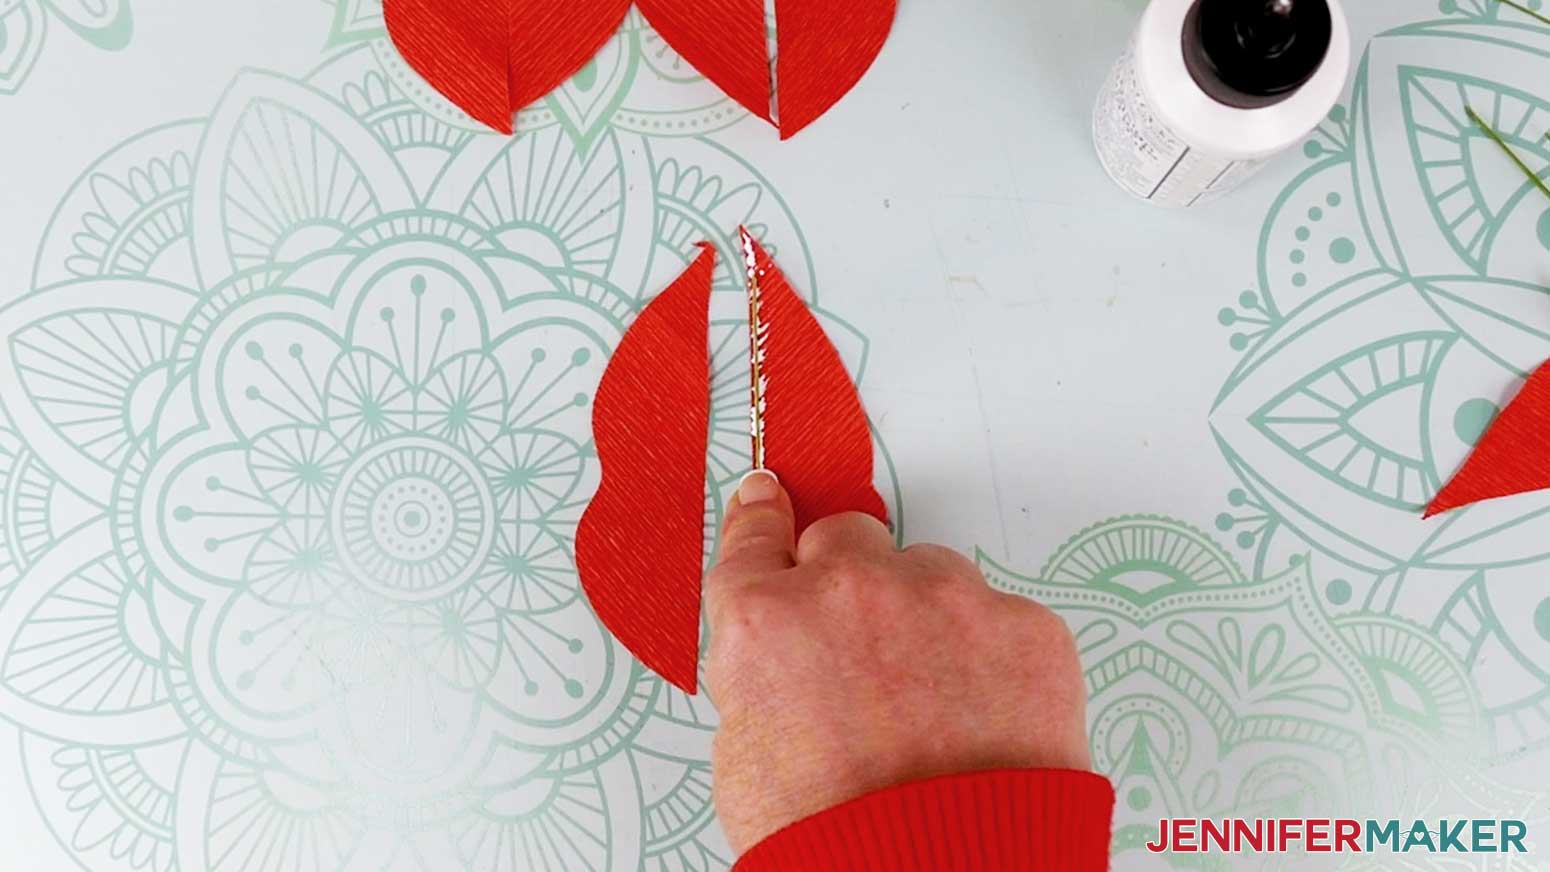
20. Cut the overlapped areas at the tips of each completed bract to make a perfect point at the top.
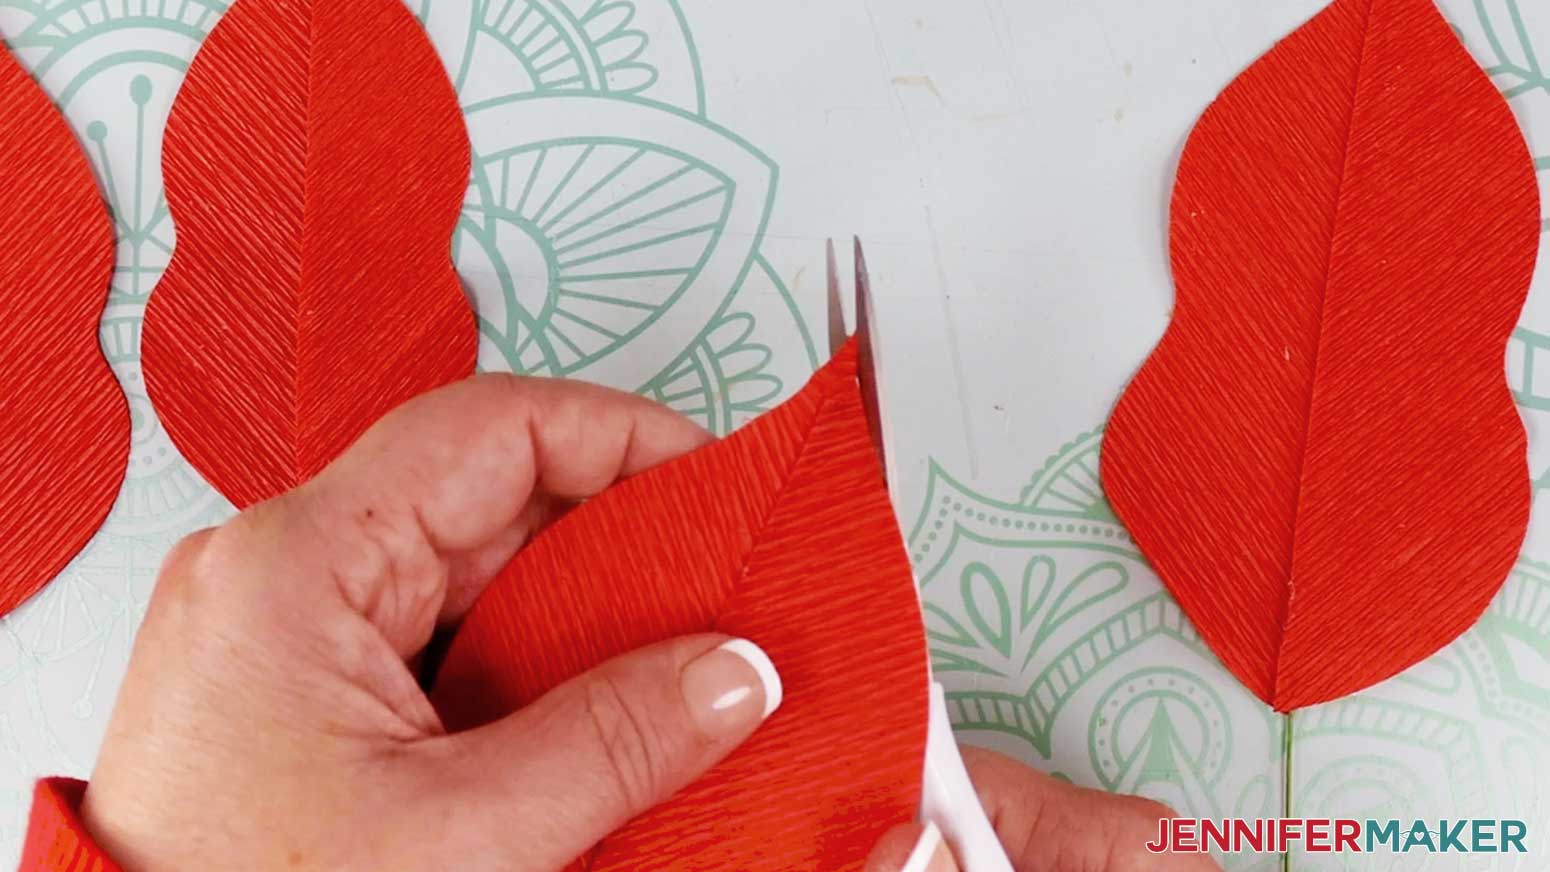
21. Gently curve the wire of each bract outward to create a slight upward arch from the bottom of the stem to the top.
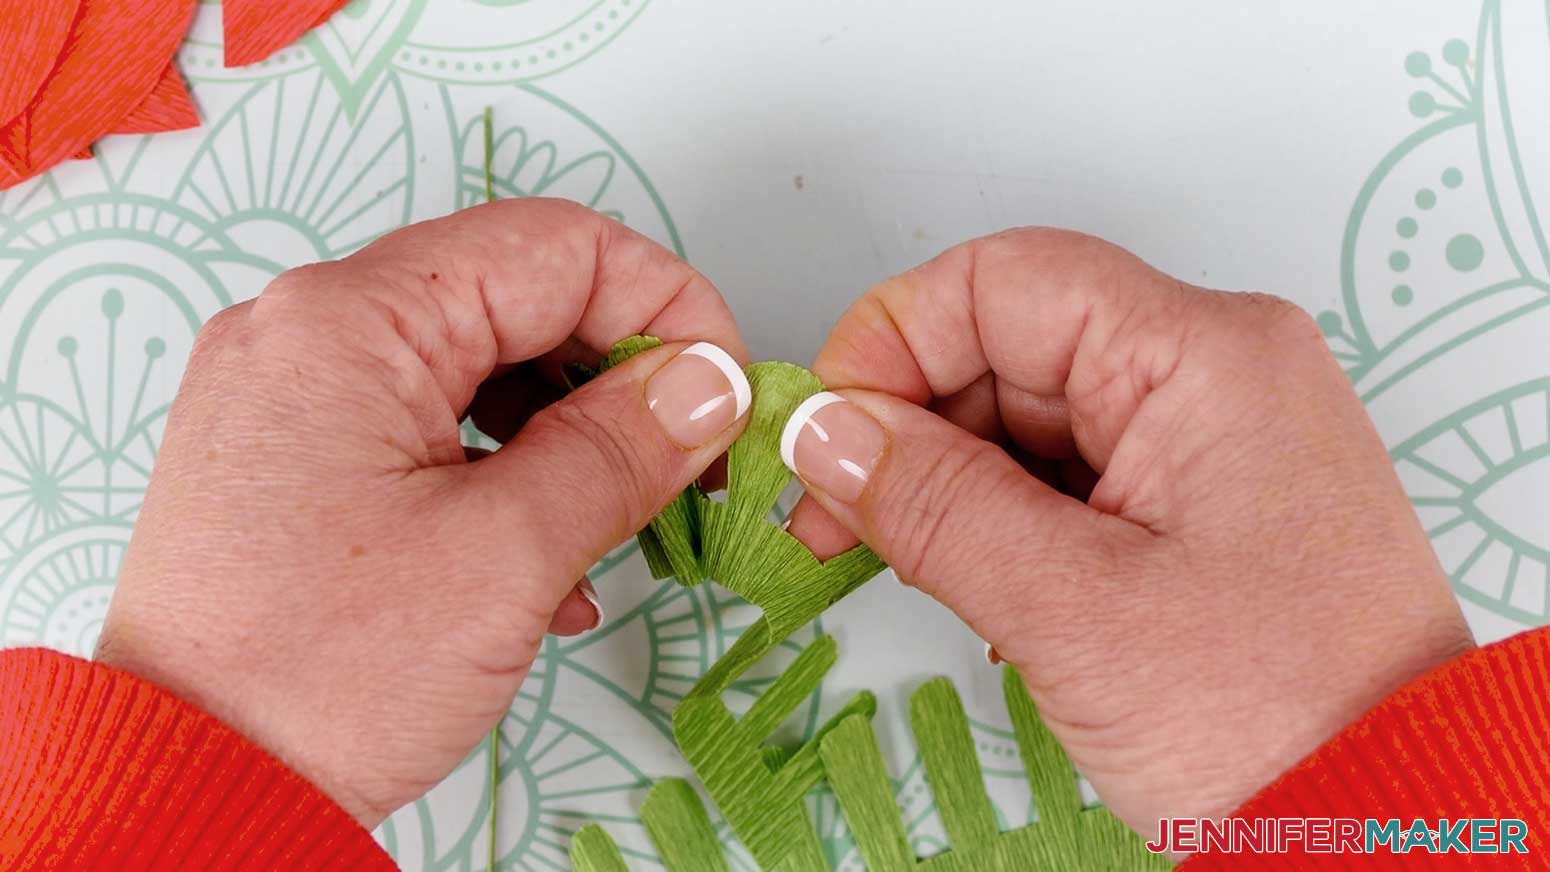
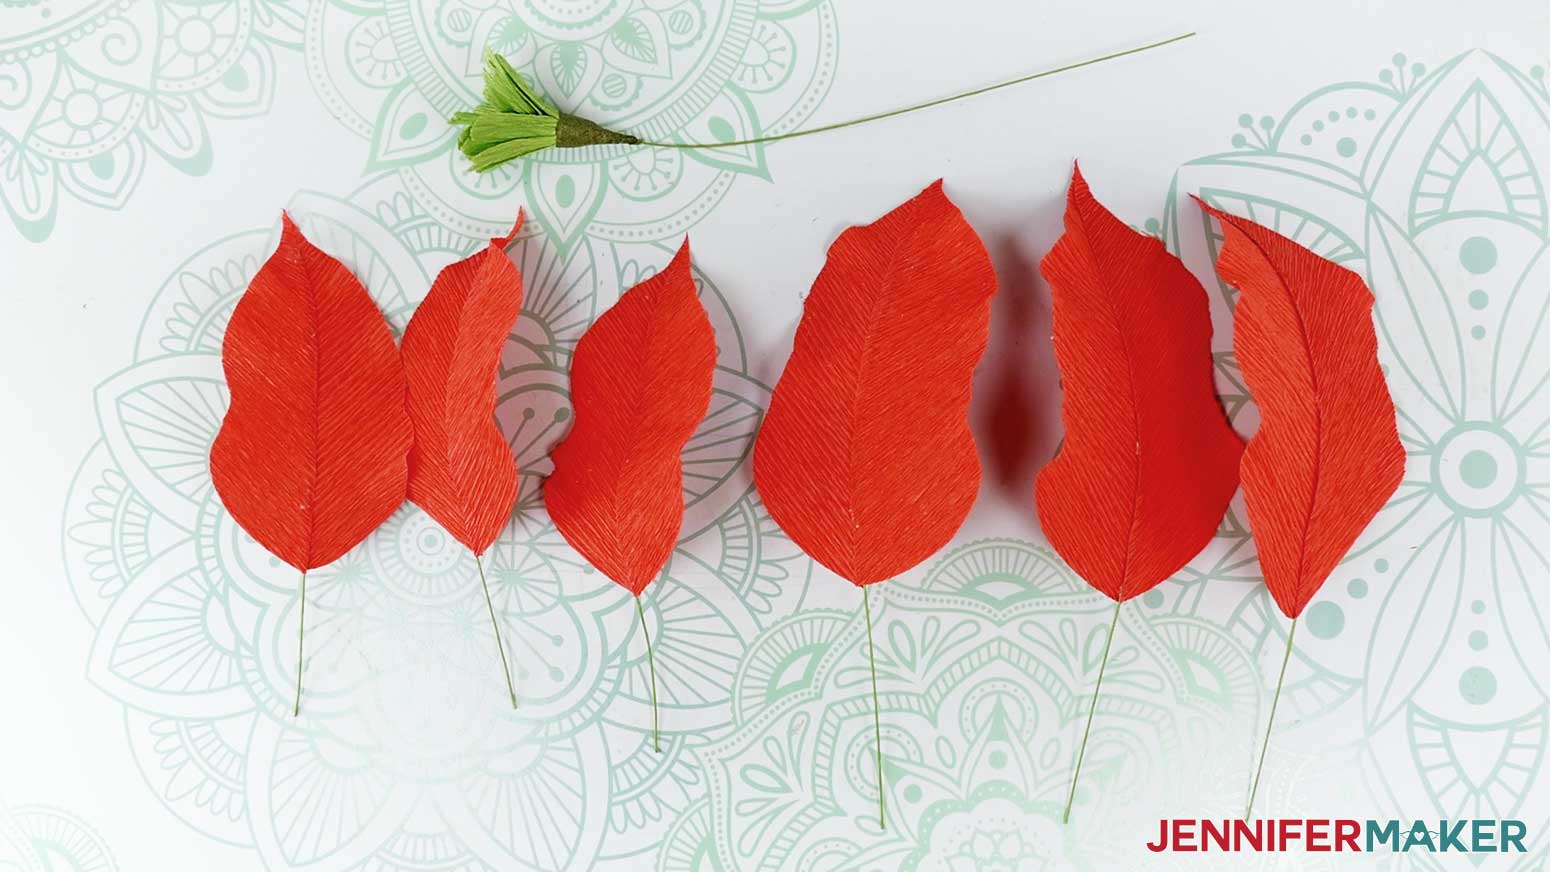
22. Shape your completed bracts by stretching the crepe paper along the outer edges of each one. Using both hands, pinch a section of the paper between your thumb and forefinger and pull outward against the grain to stretch the bract in that area and make a gentle wave in the paper.

23. Repeat step 22 along the entire edge of each bract. When finished, your bracts should look similar to mine.
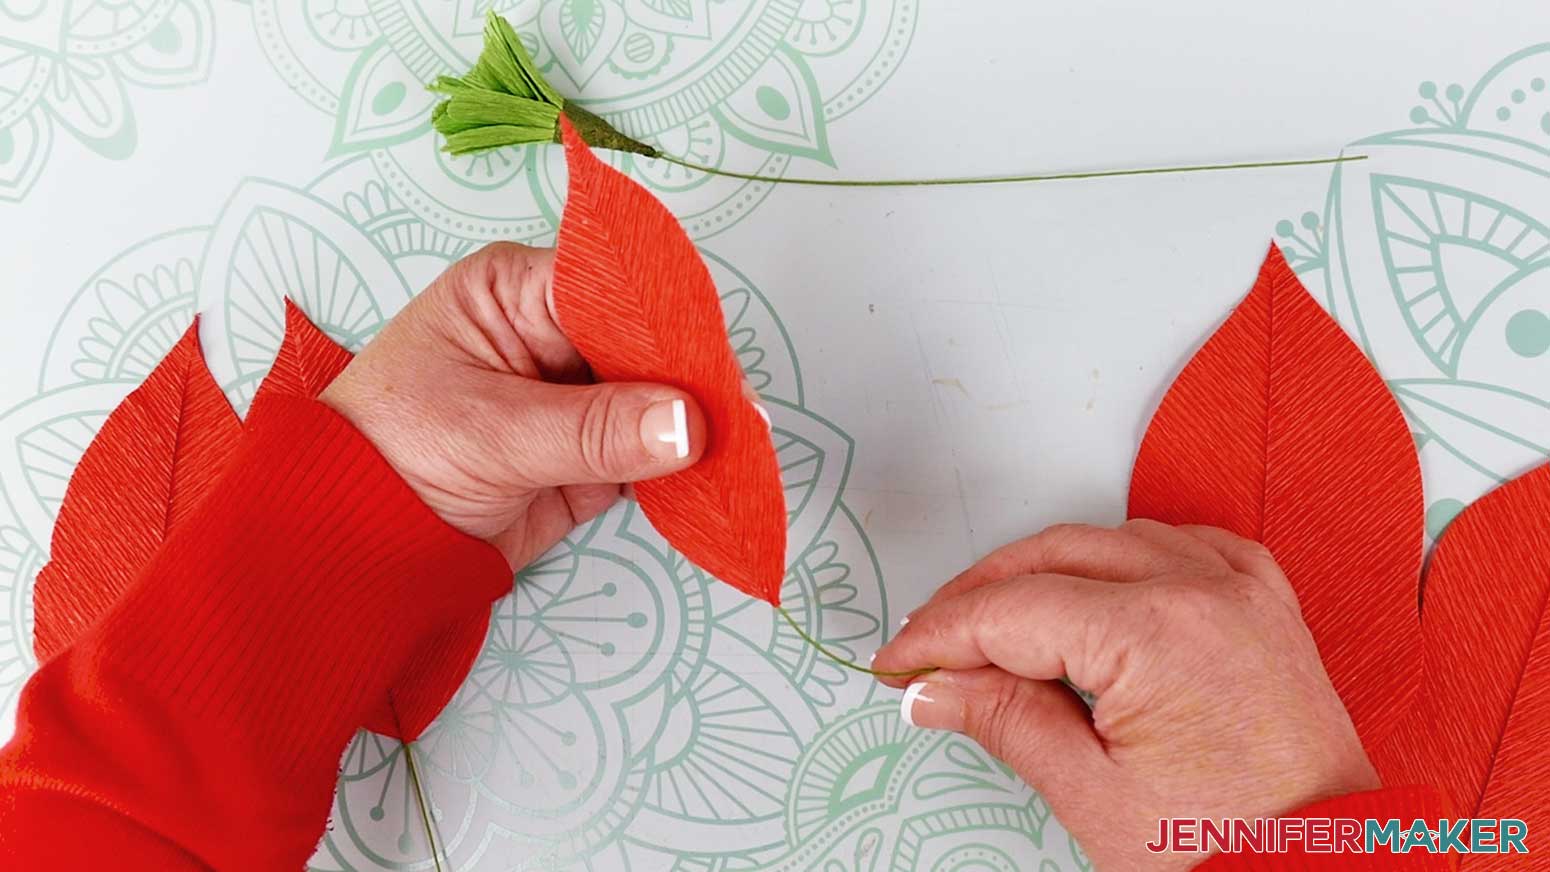
24. Arrange the three small bracts around the stem piece, aligning the base of the bracts with the top of the floral tape on the stamen.
25. Cut a piece of floral tape 8-10” long, stretch it, and then wrap it around the stems of the small bracts to secure them to the longer poinsettia stem.
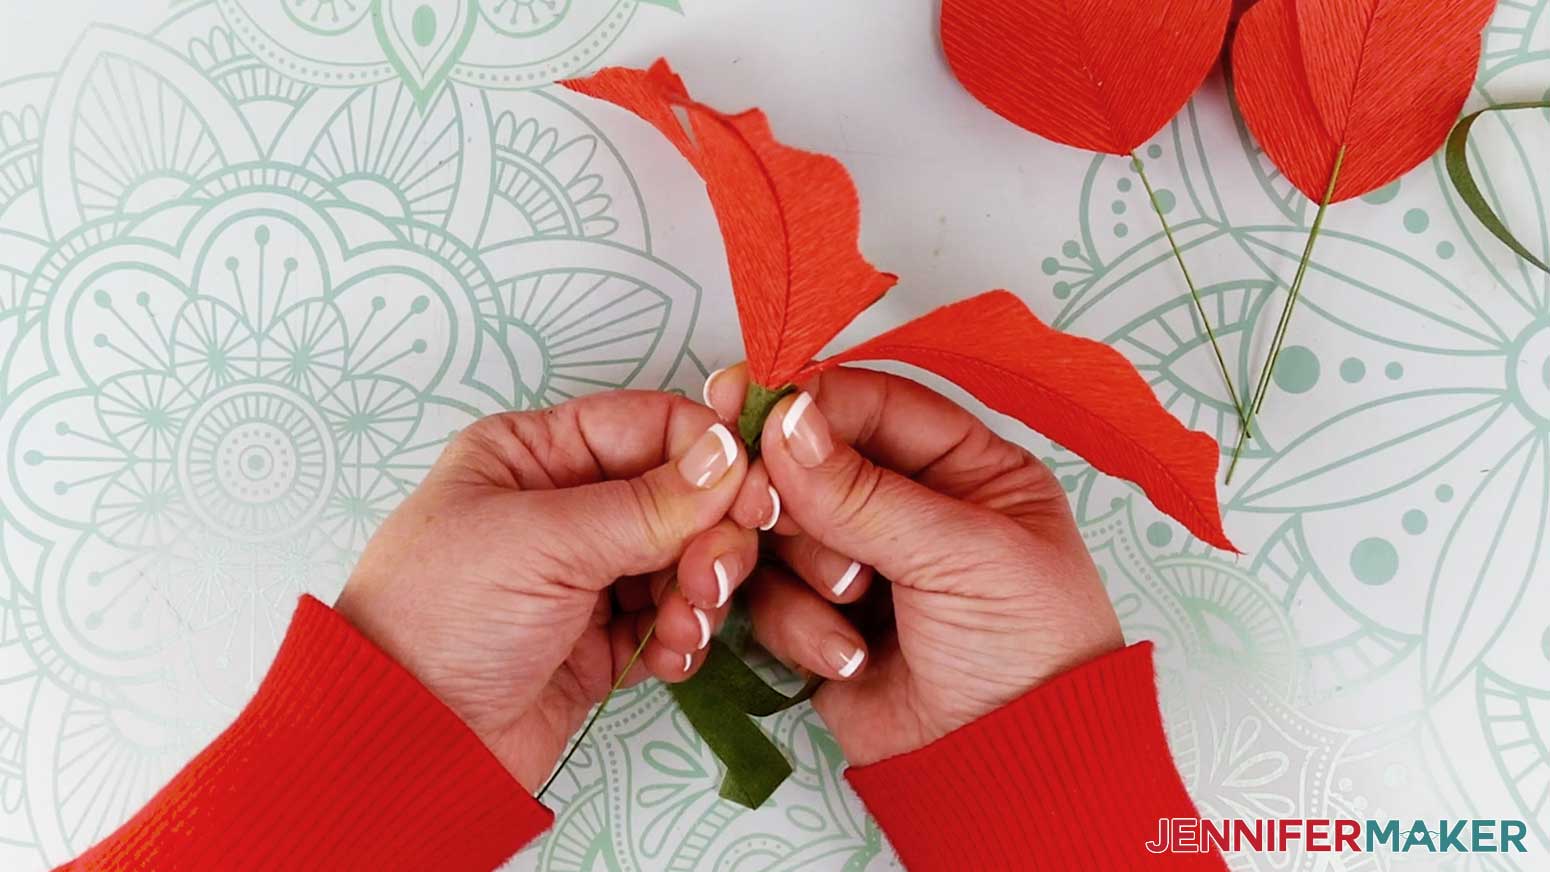
26. Follow step 25 to attach the three large bracts to the stem just below the small bracts.
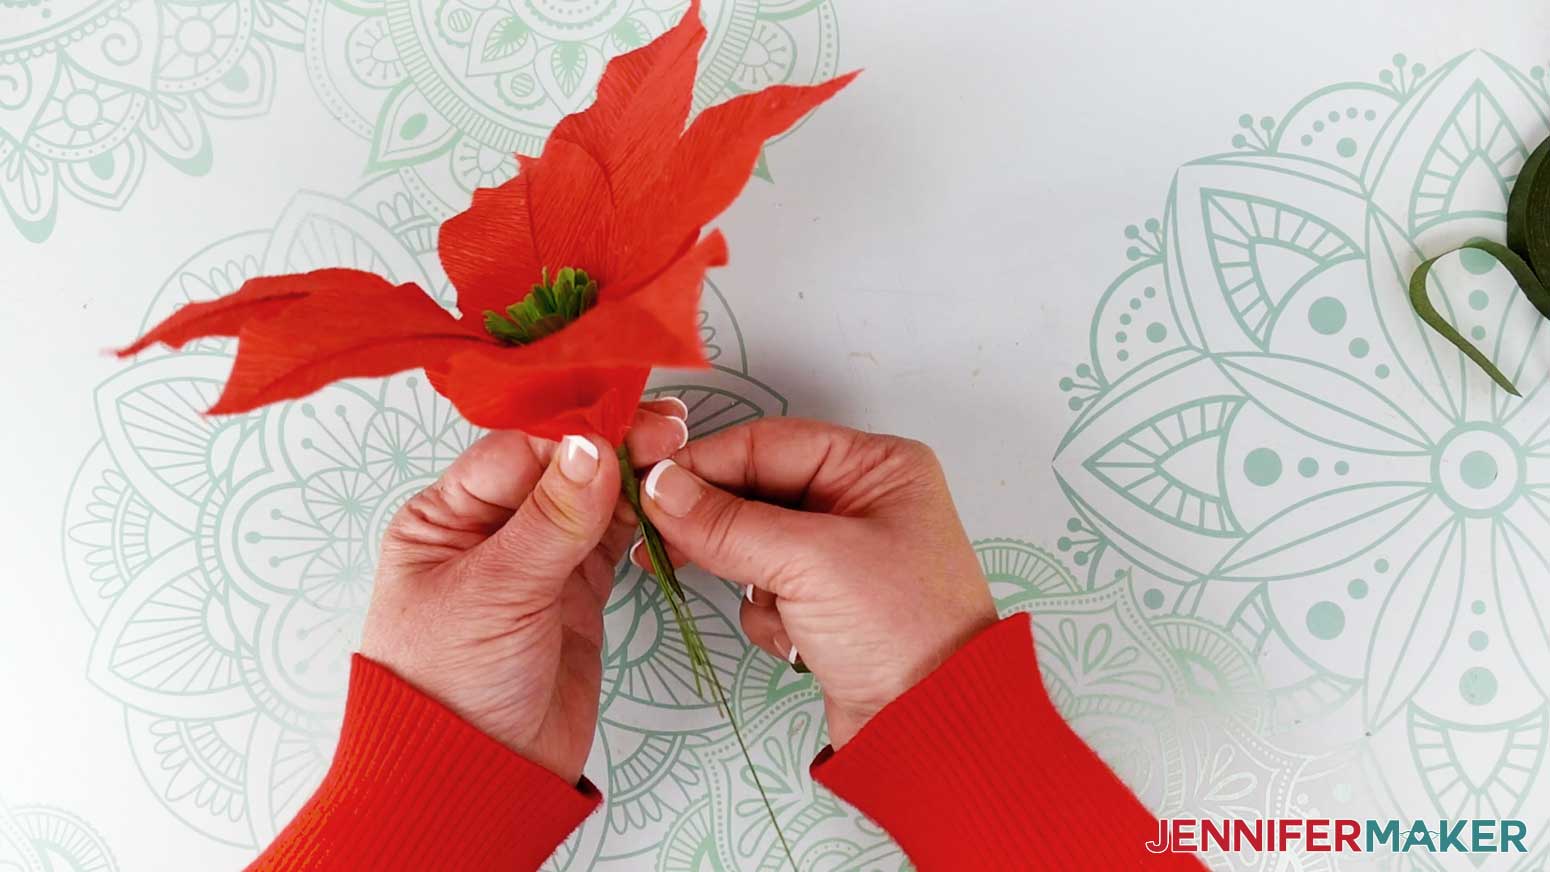
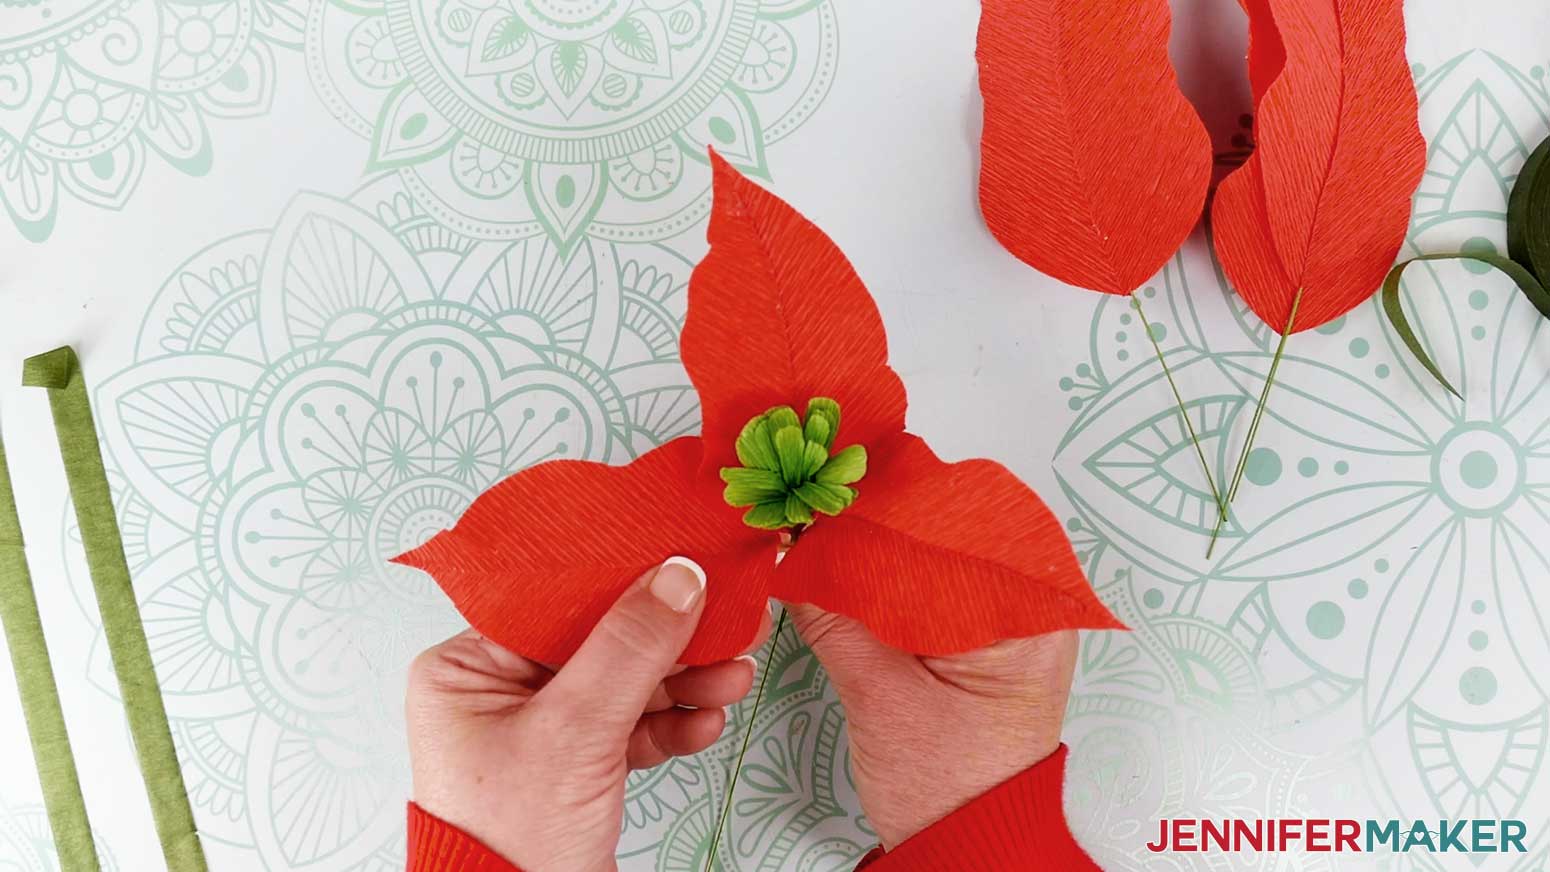
27. Bend and arrange the attached bracts so they’re evenly spaced around the center of the stamen.
28. Your first poinsettia is complete!

29. Follow steps 1-27 for the rest of your poinsettias.
HOLLY STEMS
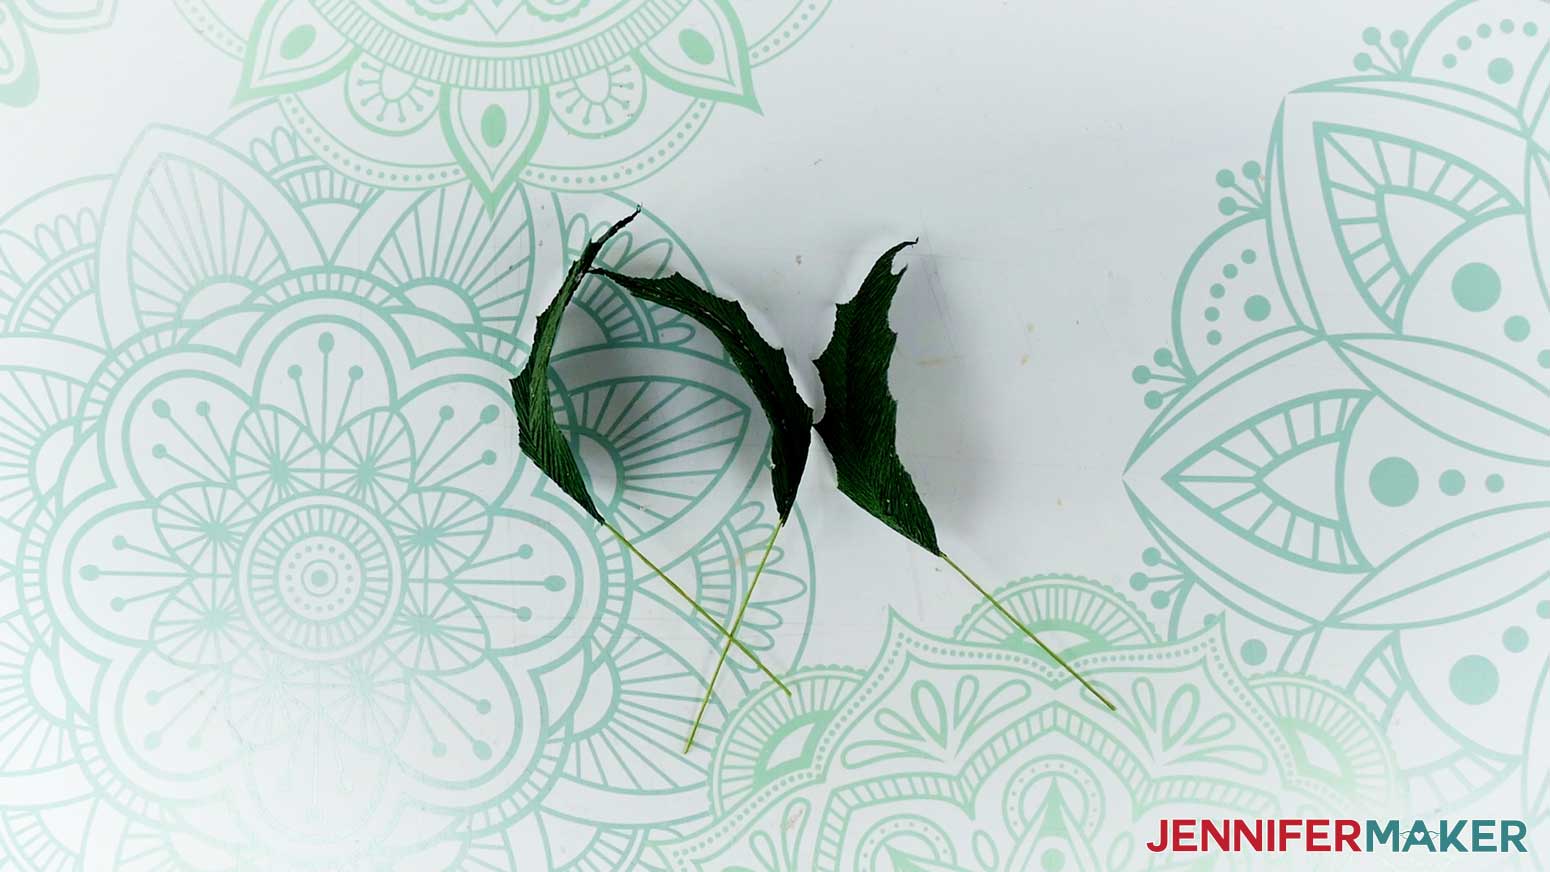
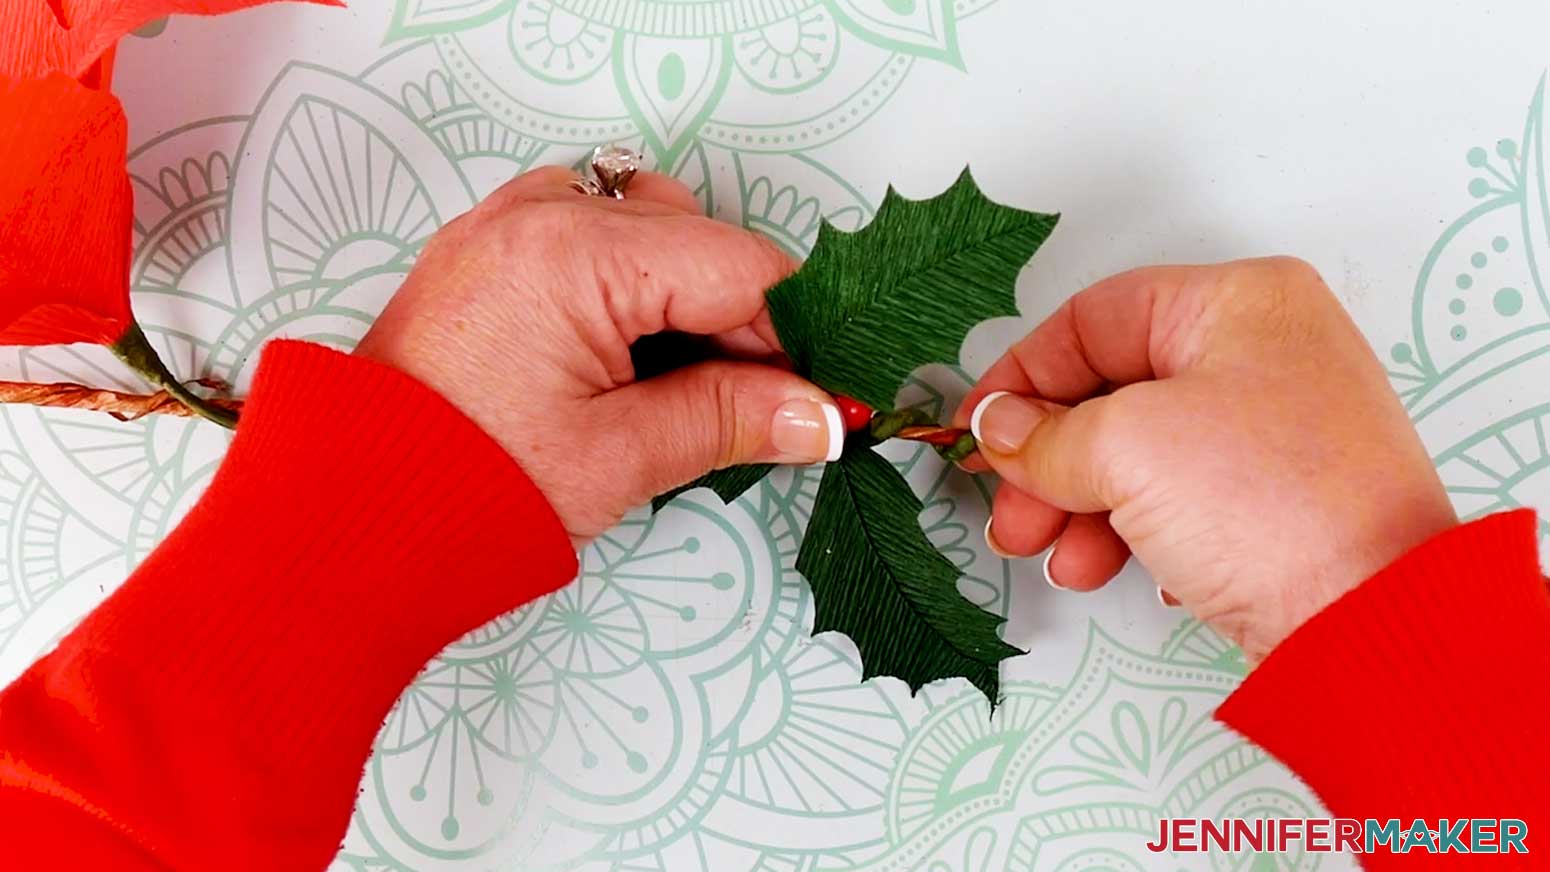
1. Cut three pieces of floral wire approximately 5.25” long for the leaf stems.

2. To make the leaves, follow the POINSETTIAS steps 12-21 above.
3. When you’re finished, your three holly leaves should look similar to mine.
4. Cut a piece of floral tape approximately 4” long and stretch it.
5. Grab three holly berries and wrap their wire stems together with the tape.

6. Cut another piece of floral tape 8-10” long and stretch it.
7. Arrange the three assembled leaves around the berries so each one is in between two berries and the bottom of each leaf is aligned with the bottom of the berry spheres.
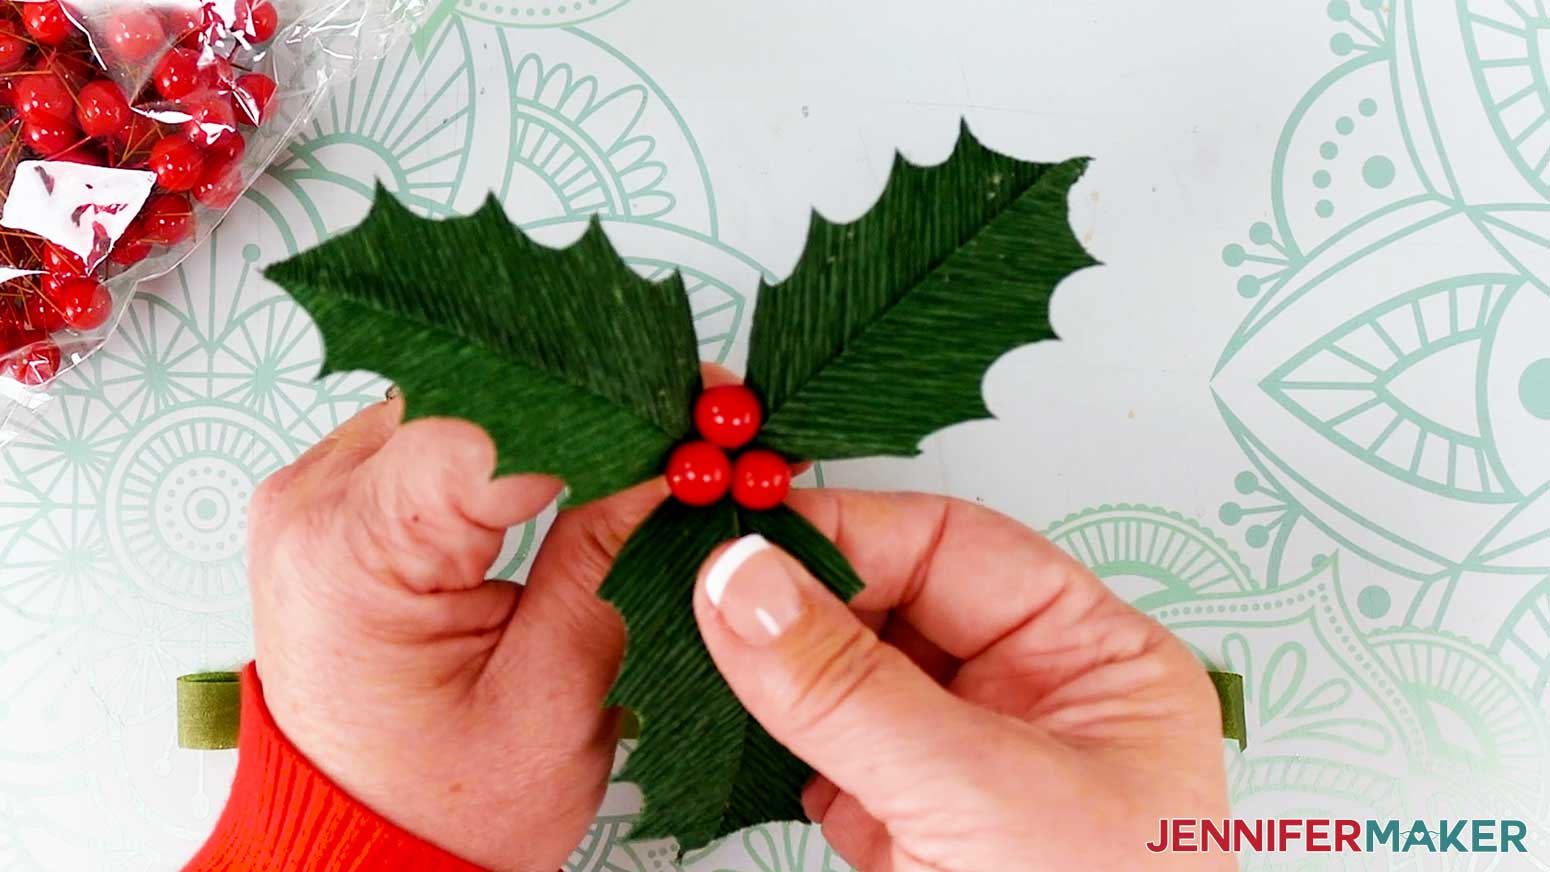
8. Wrap the floral tape around the leaf stems to secure them to the berries’ stems.
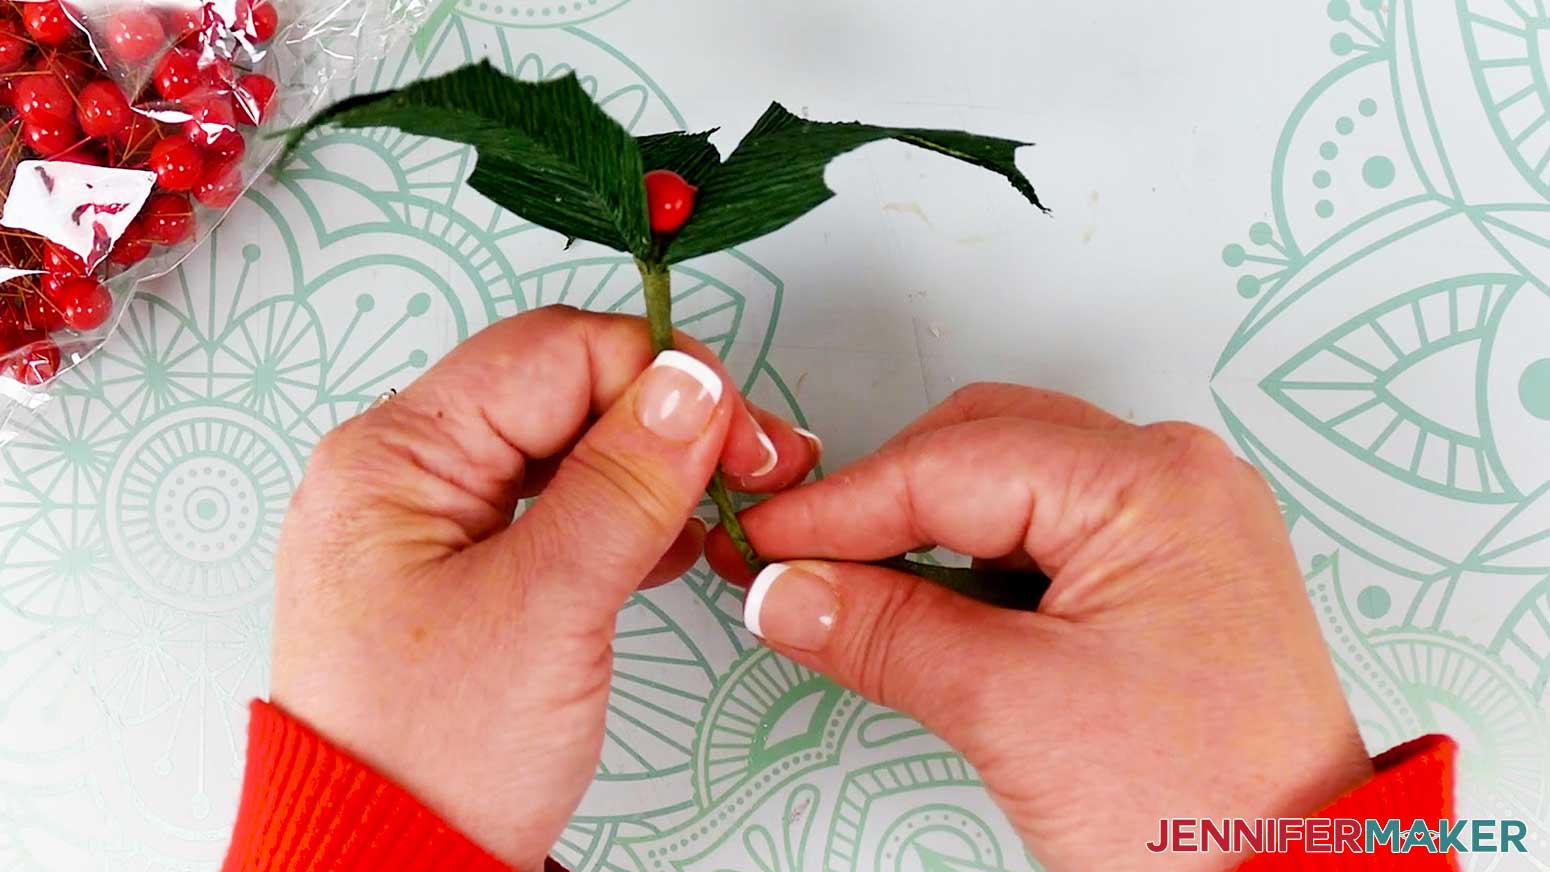
9. Your first holly stem is complete!

10. Follow steps 1-8 for the rest of your holly.
PINE BRANCHES
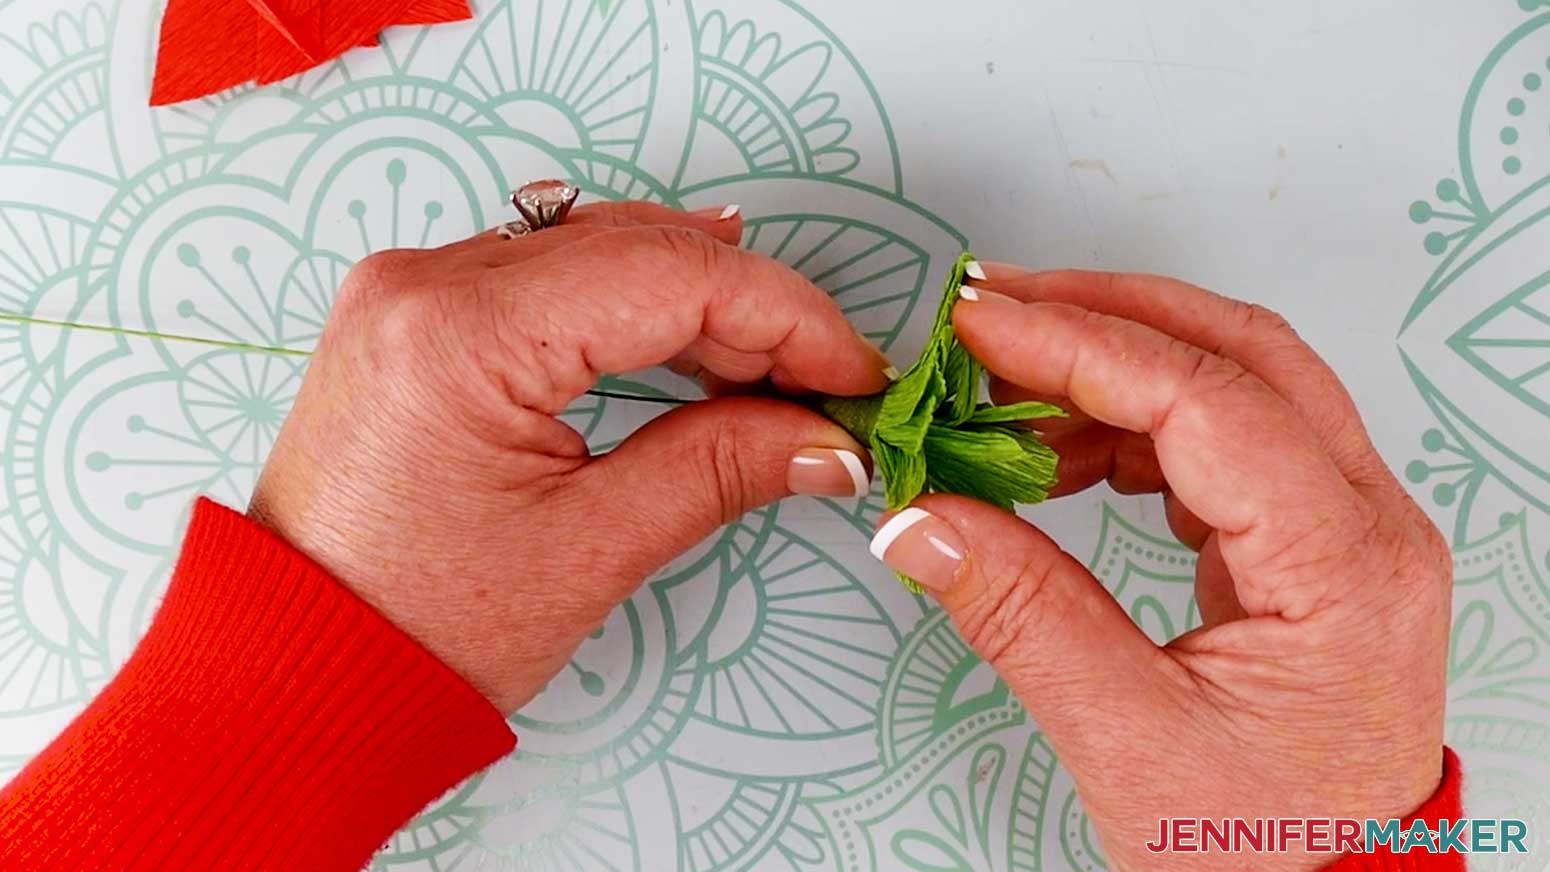
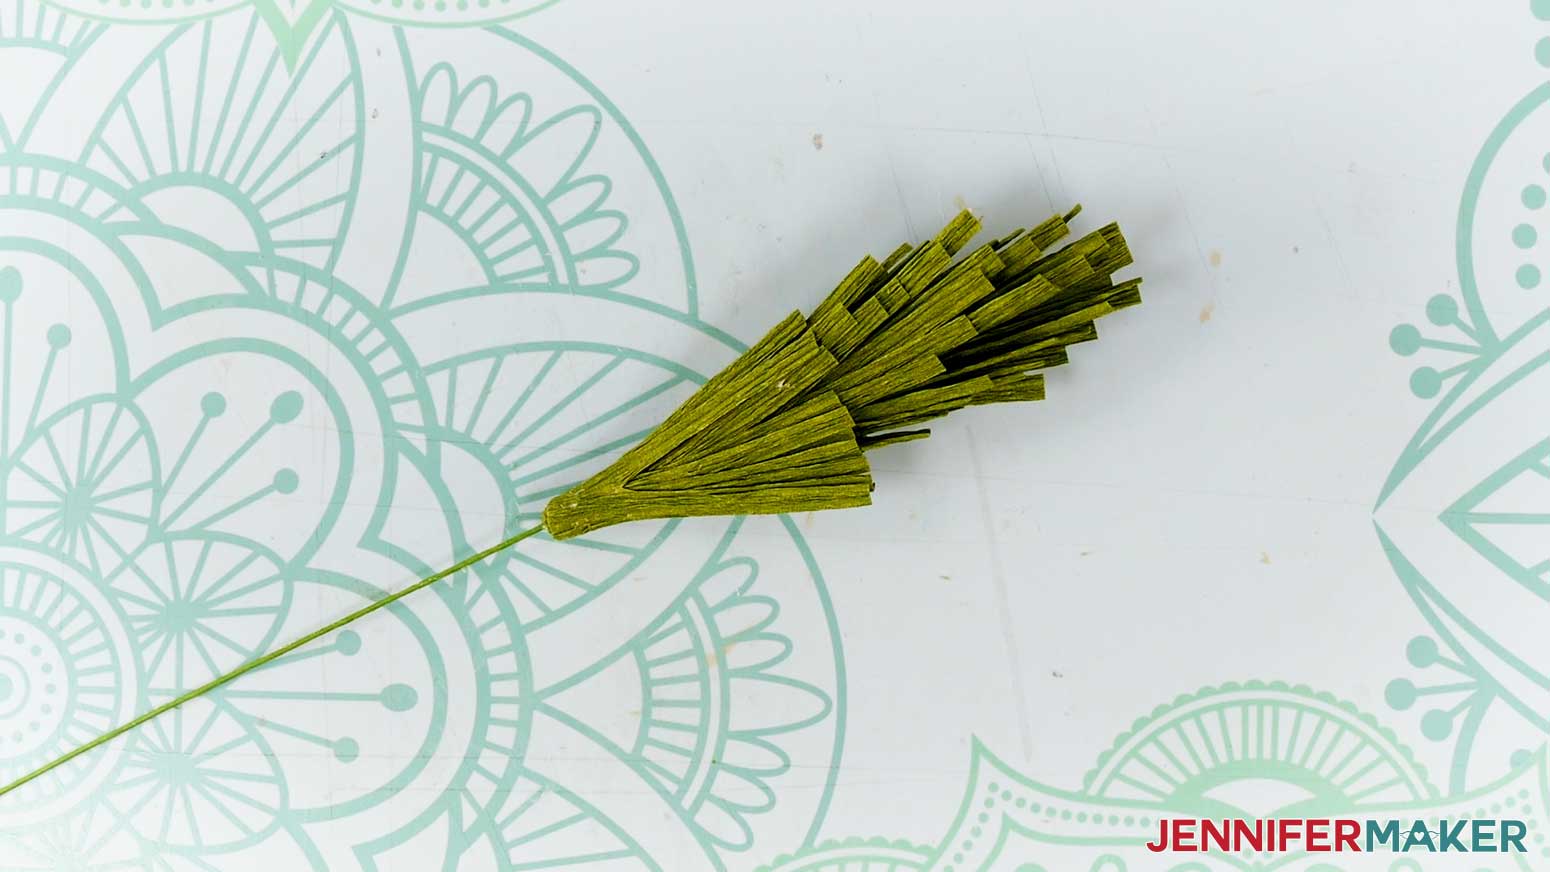
1. Cut a piece of floral wire about 8” long.
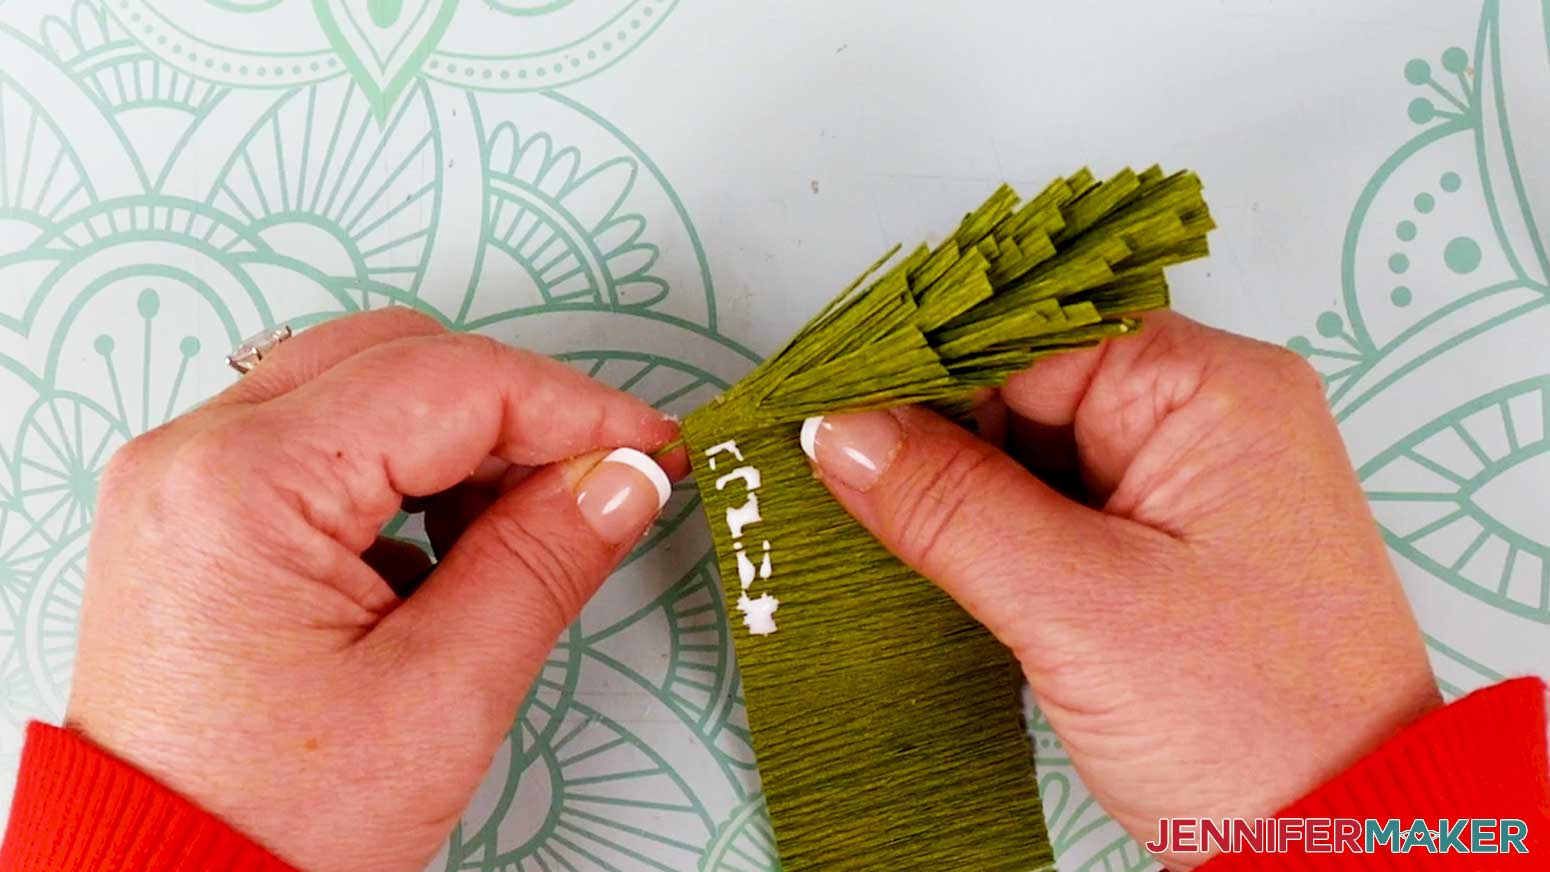
2. Grab one of the pine needle pieces. Apply a couple inches of glue at one end of the straight bottom edge on the back of the piece. Try not to get any glue on the top part of the piece with the pine needle strips.

3. Start wrapping the glued end around the top of the floral wire, angling the strip of paper slightly downward as you wrap.

4. Continue adding glue to the bottom of the paper piece in small sections. Wrap each glued section around the wire, gradually moving down the wire until you reach the end of the pine needle strip.
TIP: It’s OK if you stretch the crepe paper as you wrap. It’s also OK if you get glue on the outside of the pine needles – it will dry clear and won’t be noticeable after fluffing the needles.
5. If you would like a longer or fuller pine branch, attach a second pine needle piece following steps 2-4 above.
6. Cut off any unused portion of your second piece with scissors, leaving about 2” at the bottom of the stem.
7. Fluff the needles after the glue is dry by pulling each one outward and downward away from the stem.

8. Your first pine branch is complete!

9. Follow steps 1-8 for the rest of your pine branches.
ASSEMBLE THE GARLAND
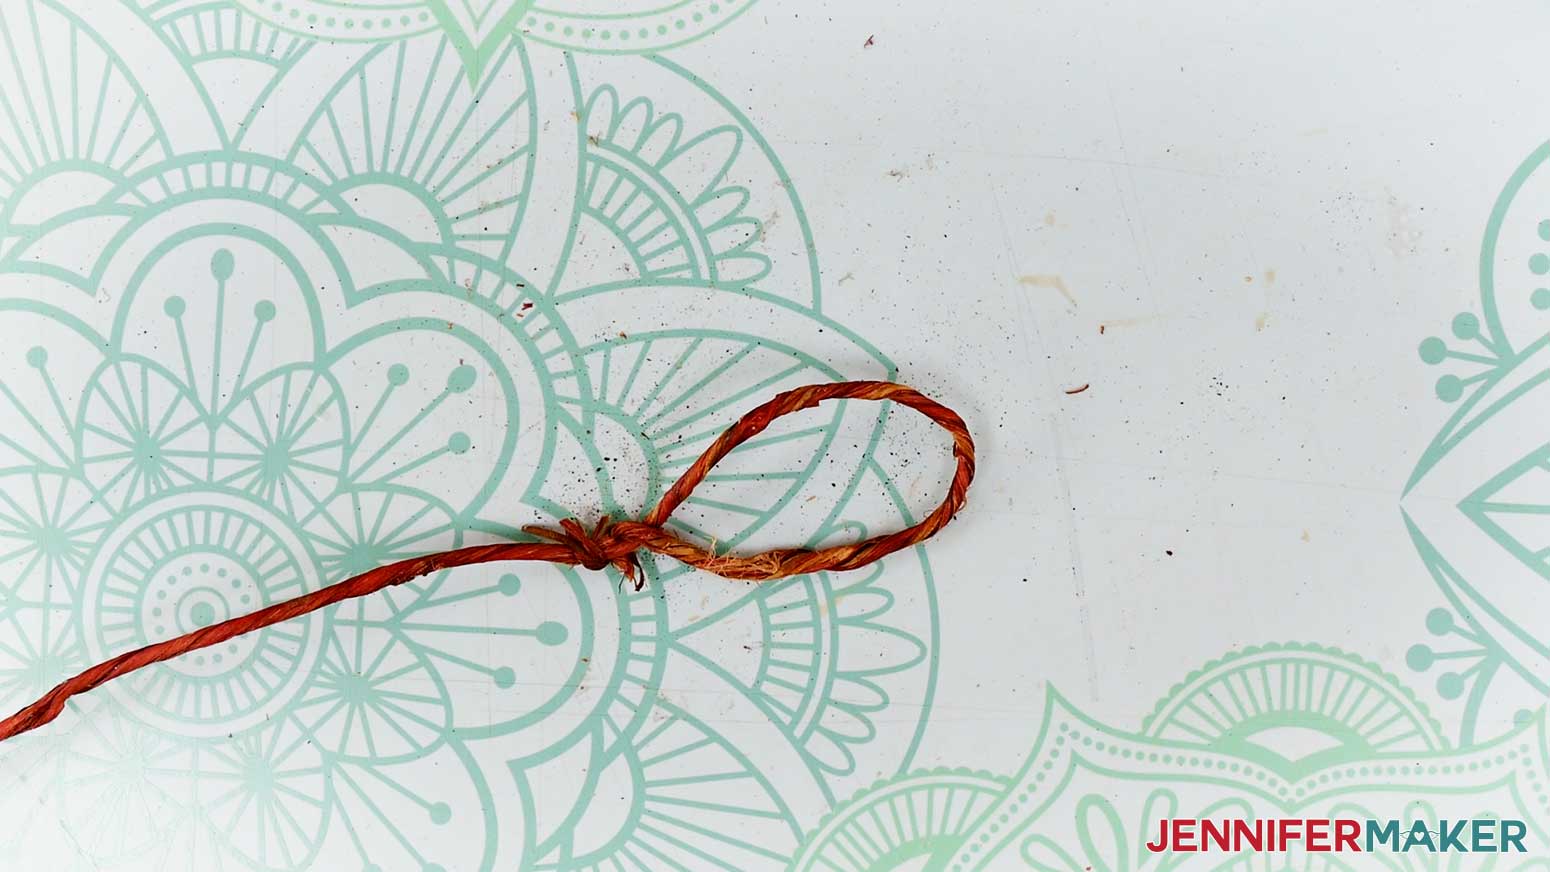
1. Using wire cutters, cut the thick brown floral wire to length for your garland base. Cut your piece about a foot longer than you think you’ll need. My garland is about 6’ long, so I cut 7’ of wire.
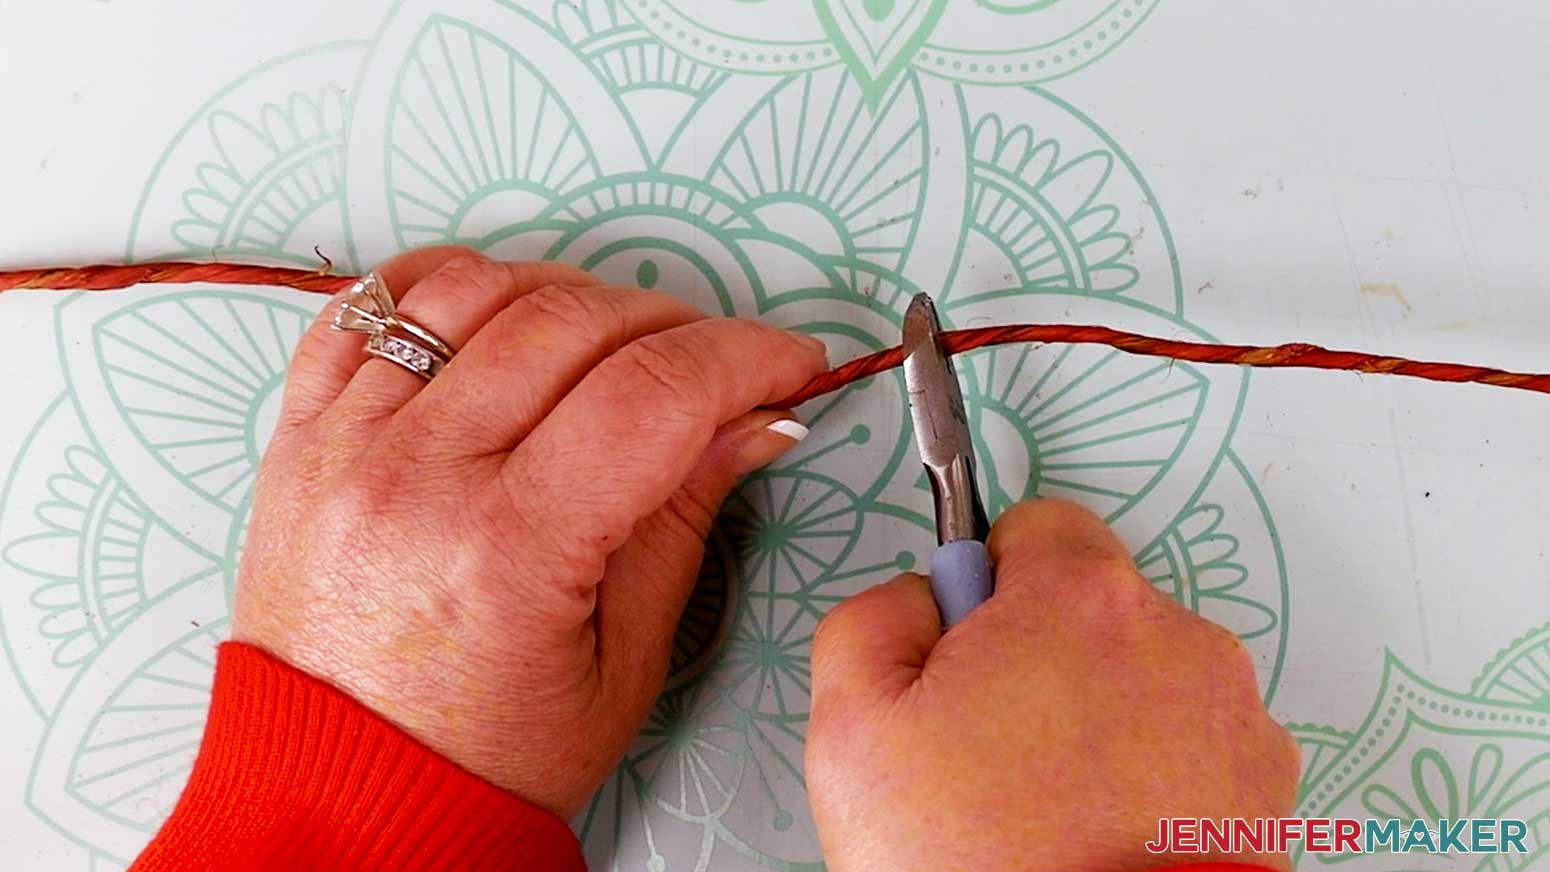
2. Loop the wire over at each end by about two to three inches. Wrap the ends of the loops around the wire base a few times to secure them.
3. Arrange your poinsettias evenly across the length of the garland. The space between them will depend on the number of poinsettias you made and the length of your garland wire. Mine were about 11 inches apart.
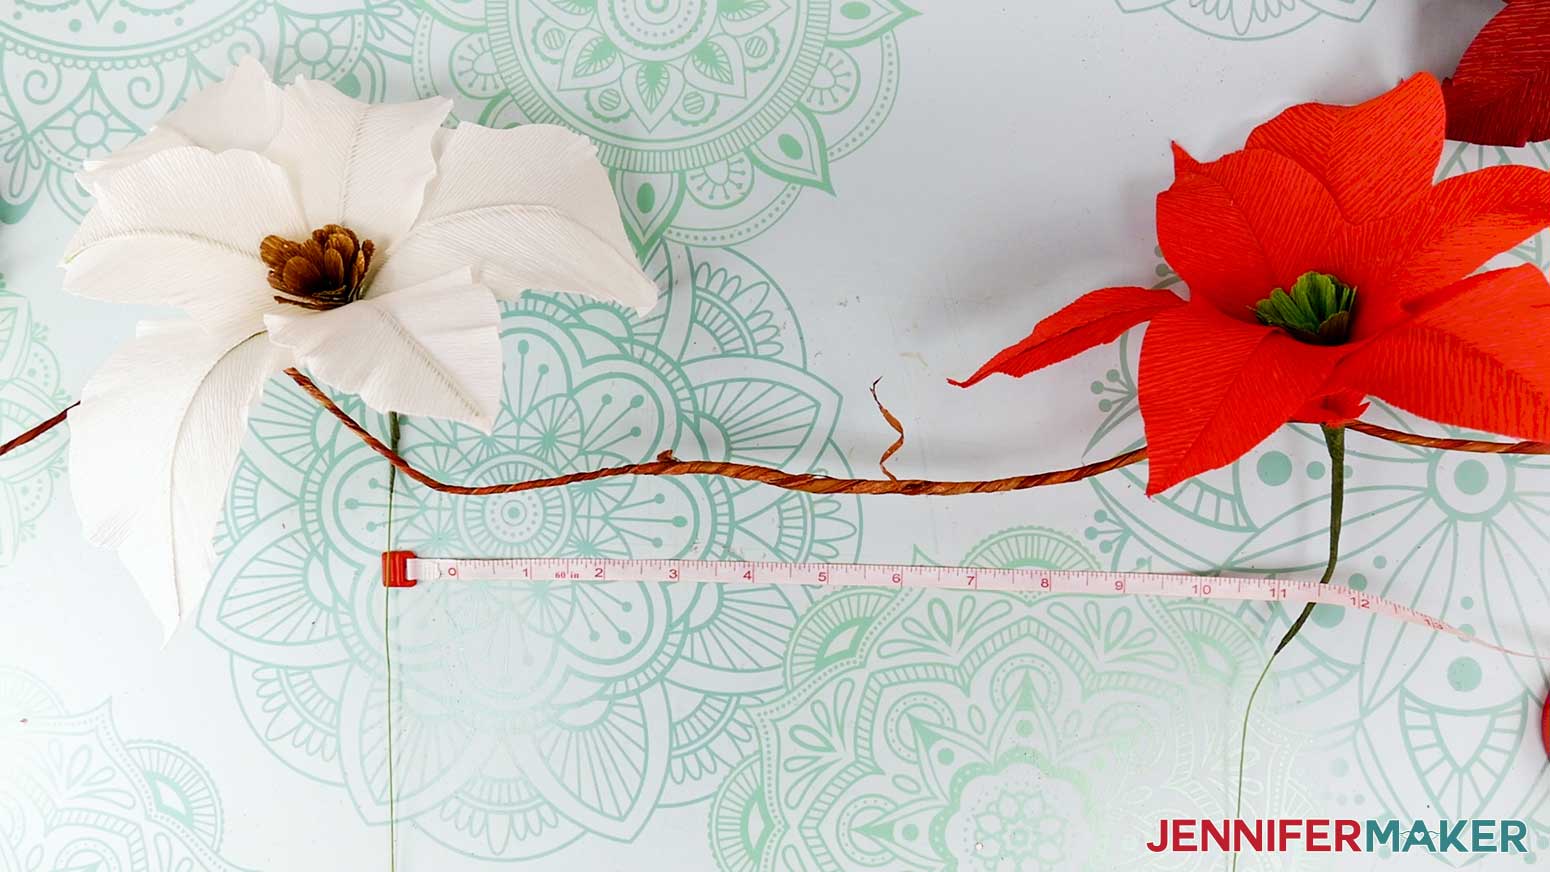
4. Wrap the flower stems around the garland base, leaving about two inches of stem loose at the base of each flower.
5. Wrap the remaining stem length tightly to secure it to the garland.
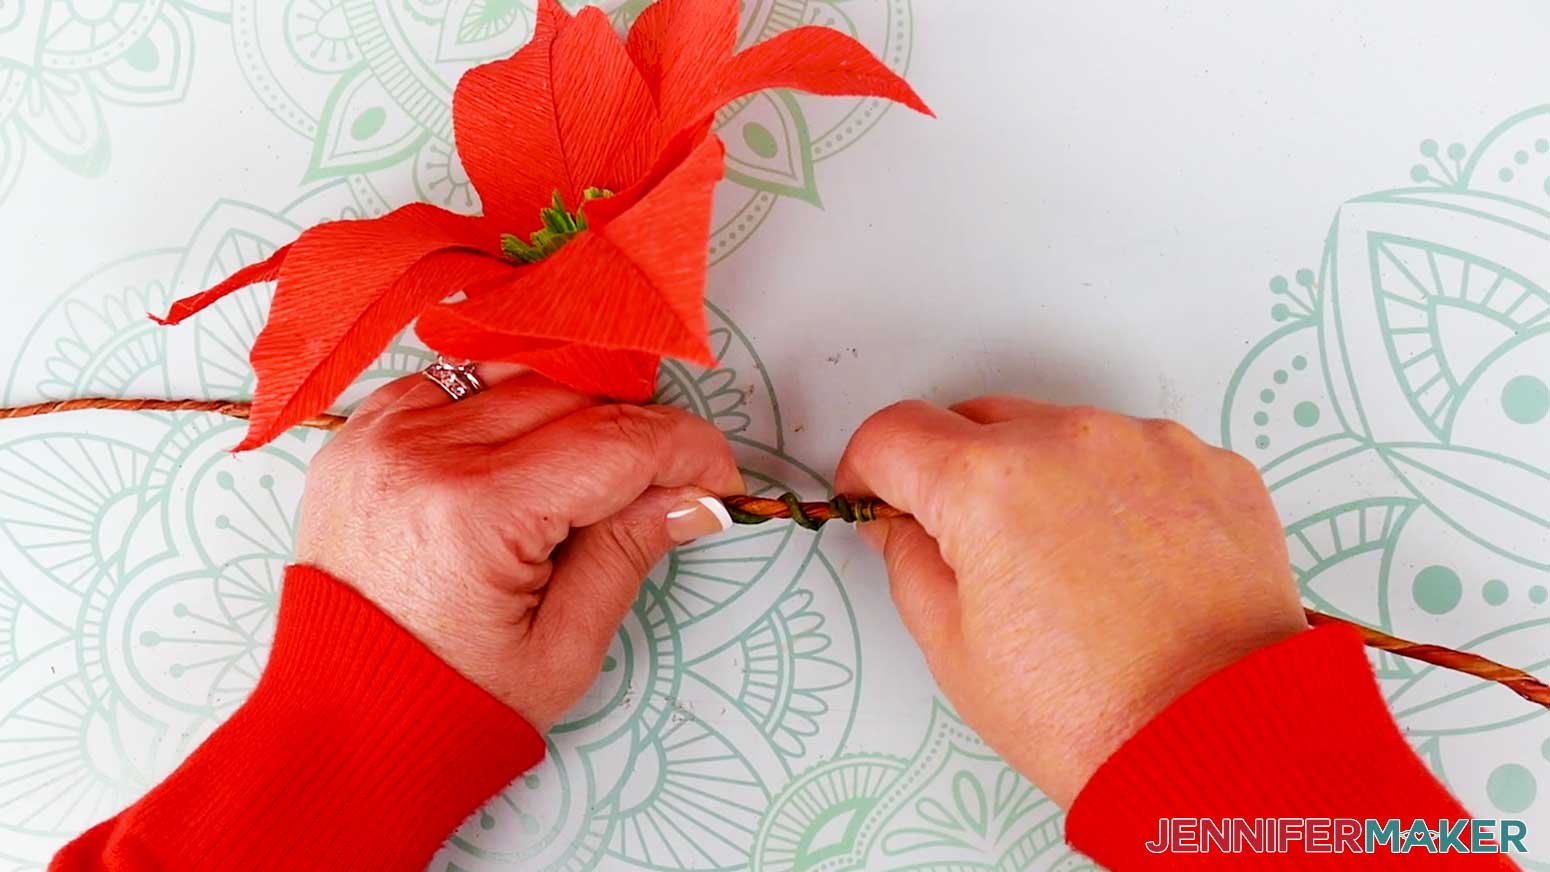
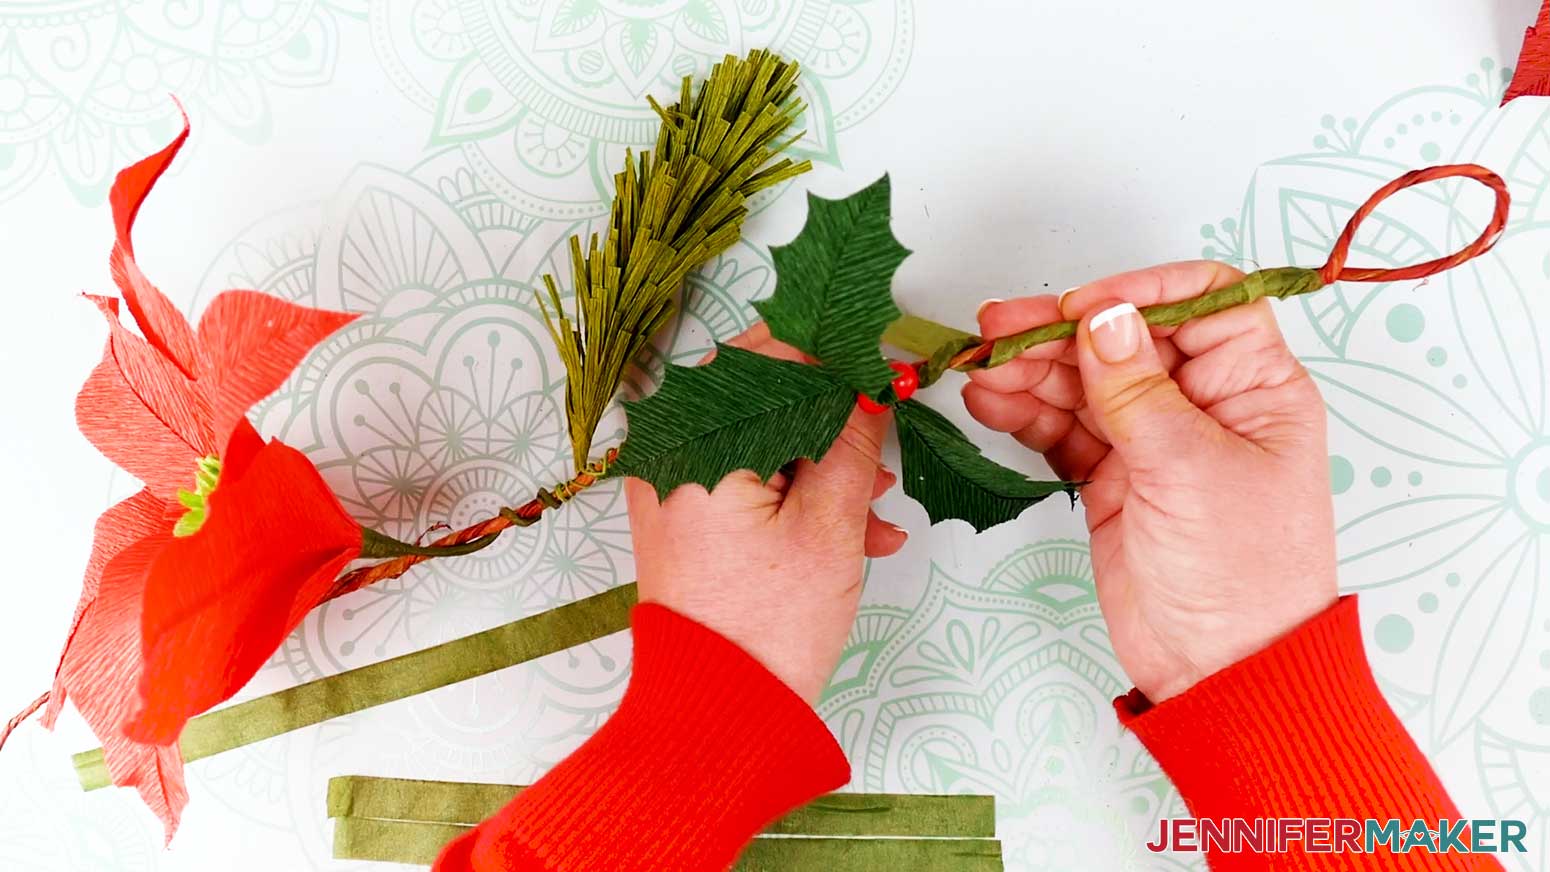
6. Arrange the pine branches and holly leaves in between the attached poinsettias and at the ends of the garland as you see fit.
7. Wrap the holly stems and pine branches around the garland wire the same way you wrapped the poinsettia stems.
NOTE: You don’t need to leave any of the stem wire loose for these – you can wrap the whole stem around the garland starting at the base of the holly or pine branch.
8. When you’re happy with the placement of everything, wrap 8-10” long pieces of floral tape in sections around the entire garland wire base to secure everything and hide the wrapped stems.
STEP 4: SHOW IT OFF!
Here is my finished paper floral garland! Doesn’t it look so real?
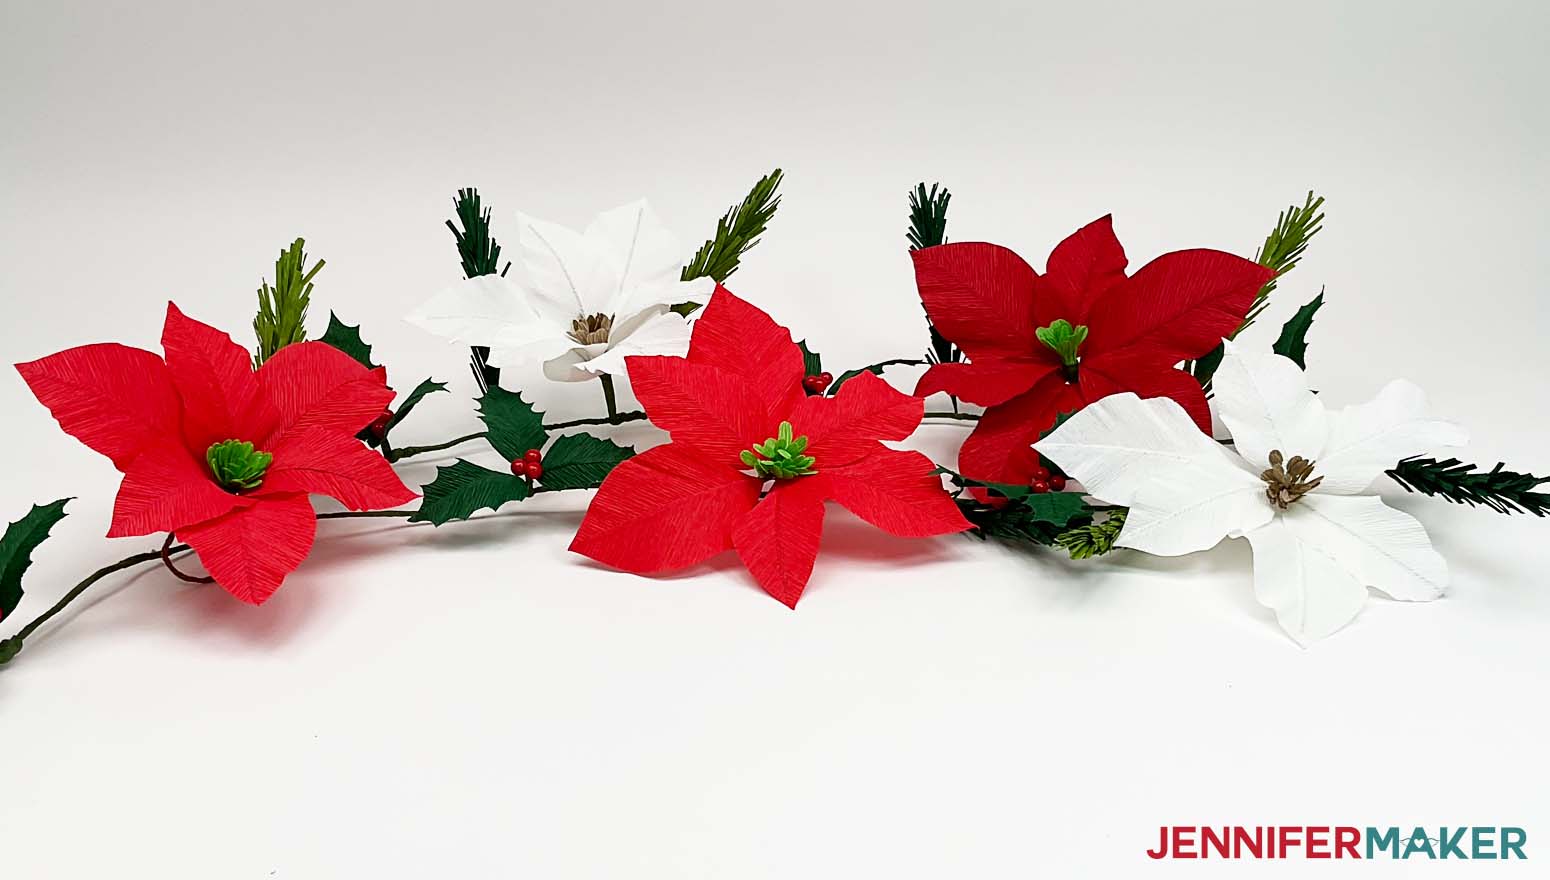
You can display yours on a mantel or drape it over a railing. You can even make some separate poinsettias, holly stems, or pine branches to display in a vase or around your home!
Notes
Finished Sizes:
Garland: Approximately 6' Long
Single Poinsettia: Approximately 8" W x 8" D x 11" H
Single Holly Stem: Approximately 6" W x 6" D x 4" H
Single Pine Branch: Approximately 1.5" W x 1.5" D x 9" H
Answers to Your Questions About How to Make a Paper Floral Garland
Q: How can I make a paper floral garland?
A: My step-by-step tutorial will teach you everything you need to know to make a beautiful crepe paper garland with poinsettias, holly, and pine sprigs.
Q: How do you make homemade garland for Christmas?
A: To make my holiday flower garland, follow my tutorial to prepare and cut the flowers and pine needles from crepe paper. Then follow me as we assemble the plants and attach them to the floral wire. Check your local craft store for the supplies, or use the link in my materials list to see what I used.
Q: How do you hang paper flower garland?
A: In my tutorial, I will show you how to add loops to the ends of the bendable wire. You can hang the loops with tacks, nails, hooks, tape, or wrap the garland up your bannister, your Christmas tree, or lay it across your fireplace mantel or holiday table.
Q: How do you protect crepe paper flowers?
A: To get the most out of your crepe paper flowers, keep them out of direct sunlight to avoid color fading. And because the crepe paper is so fragile and can be damaged when exposed to humidity, store them alone in a sturdy, airtight box to keep them dry and safe from being crushed in your holiday storage.
Q: How long do crepe paper flowers last?
A: If you keep your crepe paper garland away from direct sunlight and moisture (don’t hang them outside!) and store them carefully, it should last through at least a few holiday seasons.
Q: How do you make a poinsettia out of paper?
A: First you’ll prepare and cut your pieces from crepe paper, with the grain in the paper running a certain way (it’s easiest with a cutting machine and a rotary tool). Next, you’ll glue your stamen piece to a length of floral wire. After that, it’s time to attach the poinsettia bracts to their own pieces of wire. Finally, I’ll guide you through attaching all the bracts together and curving each one so your flower looks like a real poinsettias.
Q: How do you make fake poinsettias look real?
A: One of my favorite things about this tutorial is just how realistic the poinsettias look! The secret lies in the material. Crepe paper has a very pronounced grain that runs one way across the material. You know what else has a similar texture? Poinsettias! With strategic cuts, you can create super realistic-looking poinsettias thanks to the unique texture of the crepe paper. The floral wire also lends to curving the bracts into a more true-to-life shape!
Q: Can you put fake poinsettias outside?
A: I would not recommend displaying your delicate crepe paper flower garland outside, as it’ll be exposed both to direct sunlight as well as humidity! These two factors are bad for crepe paper, as they cause it to both fade and become droopy with moisture.
Q: Do you have any other paper flowers I can make?
A: I have tons of paper flower tutorials to suit your needs! Most of them can be made easily from supplies you probably already have in your craft supplies, and many don’t even require a cutting machine. Whip some up for a special occasion or make them a part of your every day home décor!
Check out these floral DIY projects:
- Crepe Paper Peony
- Rolled Paper Flowers
- Paper Flower Bouquet and Vase
- Paper Flower Backdrop
- Lace Paper Flowers
- Coffee Filter Roses, Peonies, and Poppies
- Paper Flower Letters
- Giant Spellbound Rose
- Paper Tulips
- Flower Fairy Doll
- Paper Flower Shadow Box
- Giant Paper Sunflower
- … MORE paper flower designs
Get my free SVG files to make a Crepe Paper Floral Garland!
I’d love to see YOUR beautiful paper garlands! Please share a photo in our Facebook group or tag me on social media with #jennifermaker.
Love,

Want to remember this? Save this tutorial on How to Make a Paper Floral Garland to your favorite Pinterest Board!