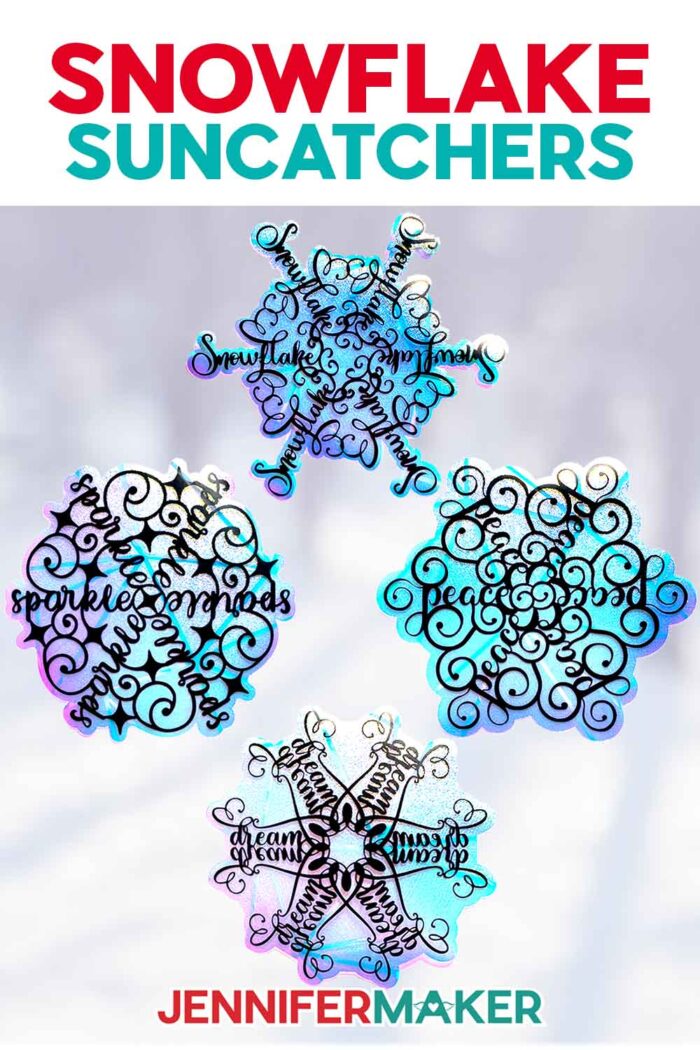
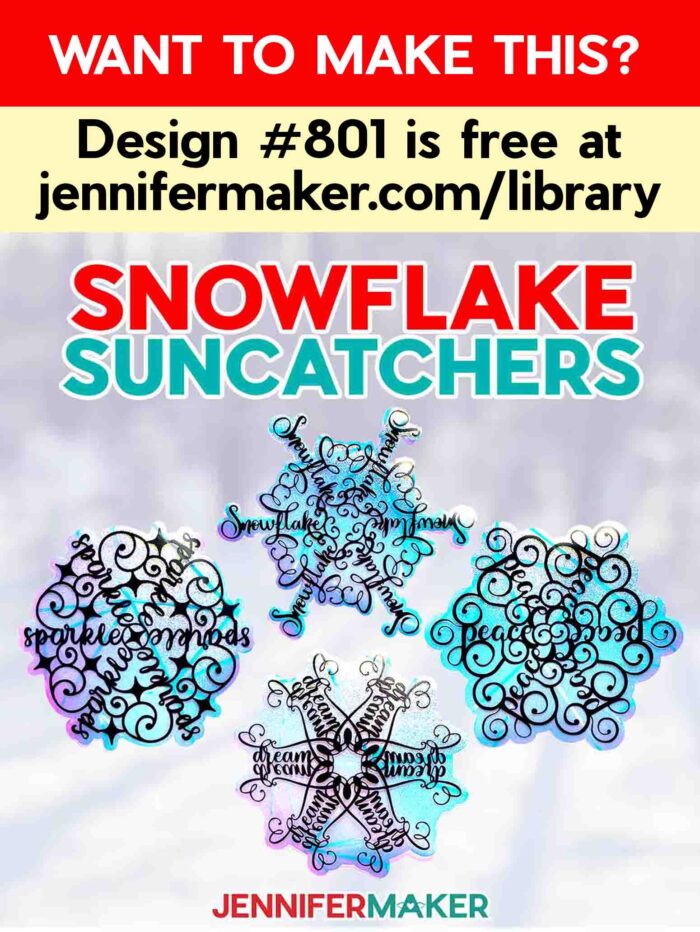
Learn how to make gorgeous DIY rainbow window clings featuring snowflake word art designs!
Out on the farm, I’m reminded daily that the most inspirational moments are often the simplest ones: sunlight slipping across the windows, a quiet view of the fields, and the comfort of small routines that make a day feel gentle instead of rushed. That kind of beauty doesn’t shout – it just shows up, and if you’re paying attention, it feels like a gift. This winter, I wanted to bring a little glow indoors in the easiest, prettiest way I know how, which is exactly what these suncatchers with festive snowflake designs do.
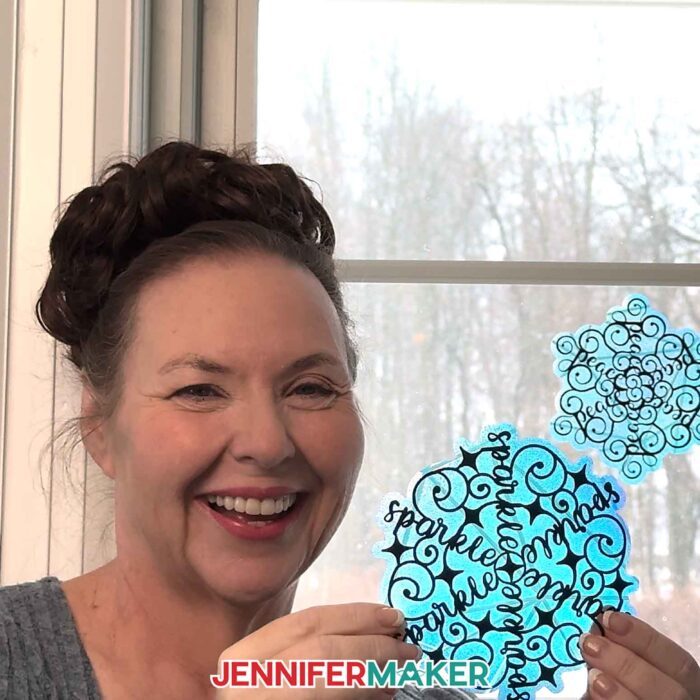
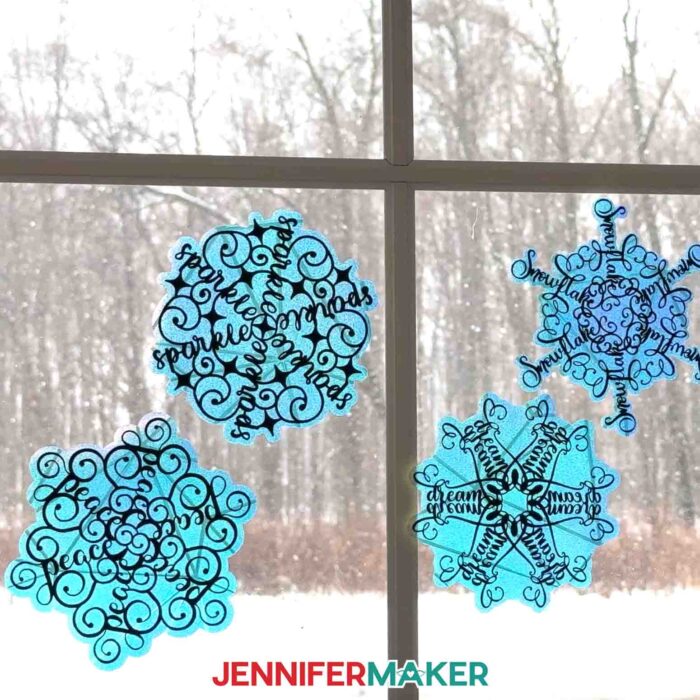
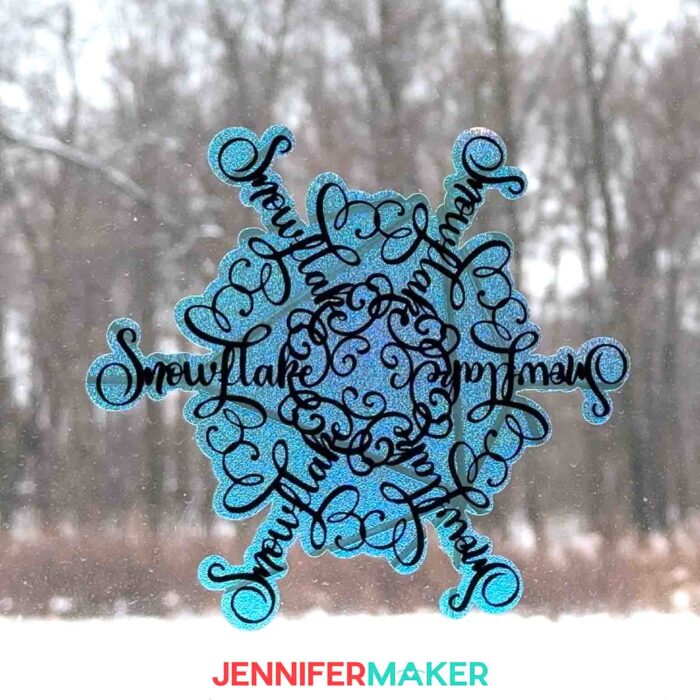
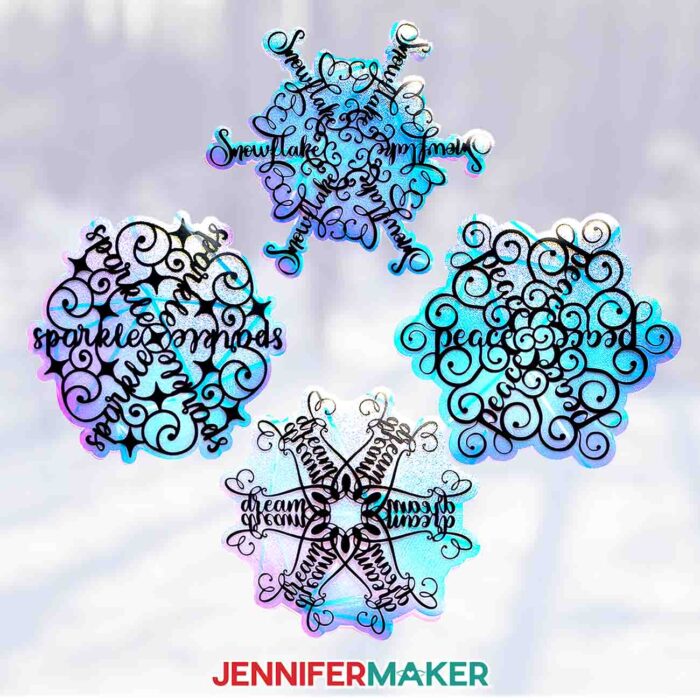
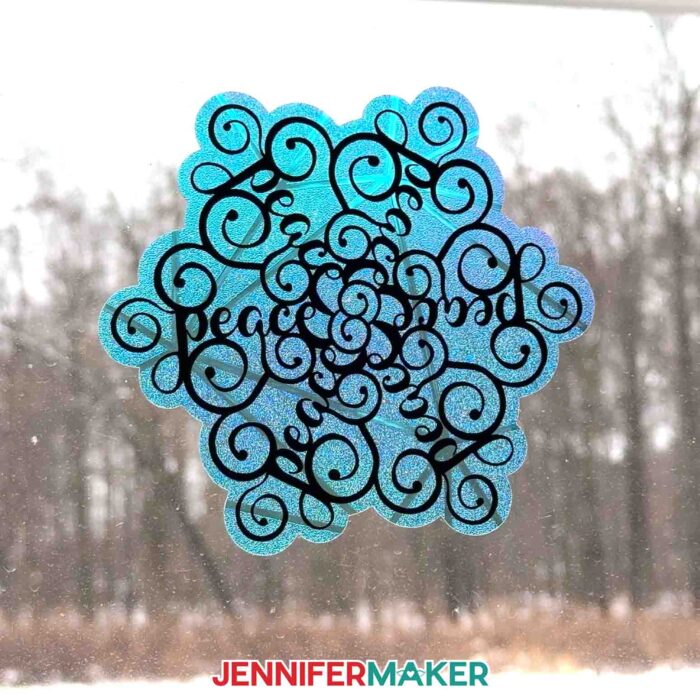
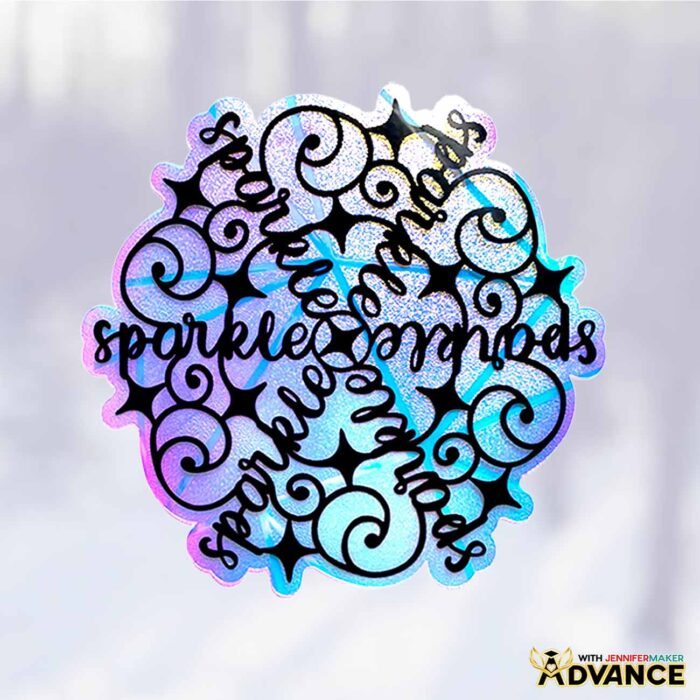
I’ve made rainbow window clings before, and I always love how they catch the light, but these festive word snowflakes feel extra special because the “snowflake” itself is made from something so simple: a single word, turned into art. When that word becomes the pattern and the distinct shapes radiate outward from the center, it creates this unexpectedly elegant snowflake design that looks delightfully detailed… not to mention, full of rainbows when the light hits it!
Then, see the full step-by-step video tutorial on how to make suncatcher window clings, just use your snowflake design:

Aren’t they simply magical? I just love how the word designs come together in the center of the snowflake to make it take shape. Be sure to download my free festive snowflake designs below if you want to make some, too!
Here’s what you’ll want to have ready: rainbow window cling material for the base, permanent vinyl for the intricate snowflake designs, StandardGrip transfer tape, a Scraper Tool for burnishing, and a Weeding Tool for weeding those small vinyl details.
I cut my snowflake window clings on a Cricut Maker 3, but any Cricut cutting machine can cut both the window cling and the vinyl. The big thing to remember is that the window cling material can be curly, so rather than fighting it, use your machine mat to help you. In the tutorial, I put the cling layer back on a mat with the carrier sheet down so it stays flat while I’m aligning and applying the vinyl. That one step makes the whole process feel calmer and more controlled.
In Cricut Design Space, your cut settings are important. For the window cling base, I use the “Stencil Film” setting with “More” pressure, and place the window cling material carrier-sheet-down on a purple StrongGrip machine mat.
For the vinyl layer, I use the “Premium Vinyl – Permanent Glossy” setting with “More” pressure on a green StandardGrip machine mat.
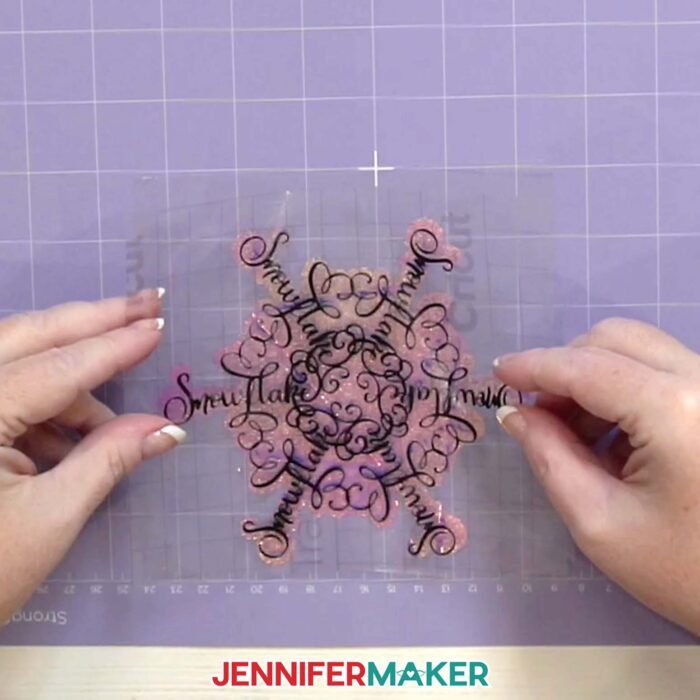
Weeding is where you’ll really appreciate a clean cut, because these vinyl snowflake designs have lots of little angles and openings that give them their whimsical shape. Take your time here. If any small pieces try to lift up, simply pat them back down or use your Weeding Tool to keep them in place.
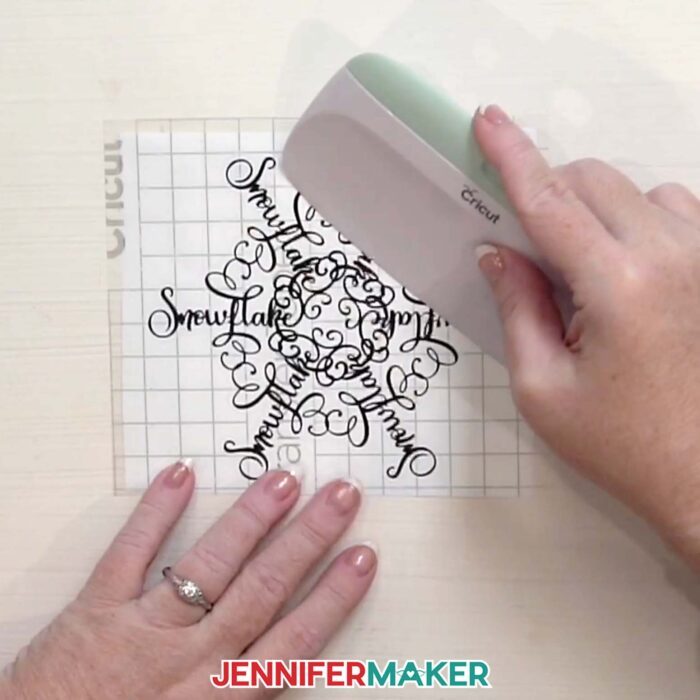
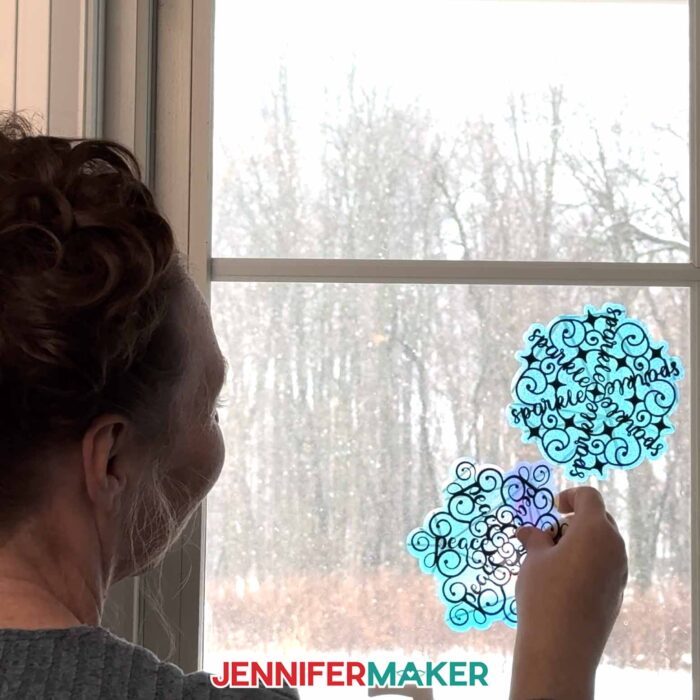
Once your snowflake designs are weeded, the fun part begins: transfer and assembly. I cut the transfer tape slightly larger than the decal, peel off the backing, and use the “taco” method to help center the tape on the vinyl. Then, I burnish from the middle outward with my Scraper Tool, because that helps the vinyl stick to the tape evenly.
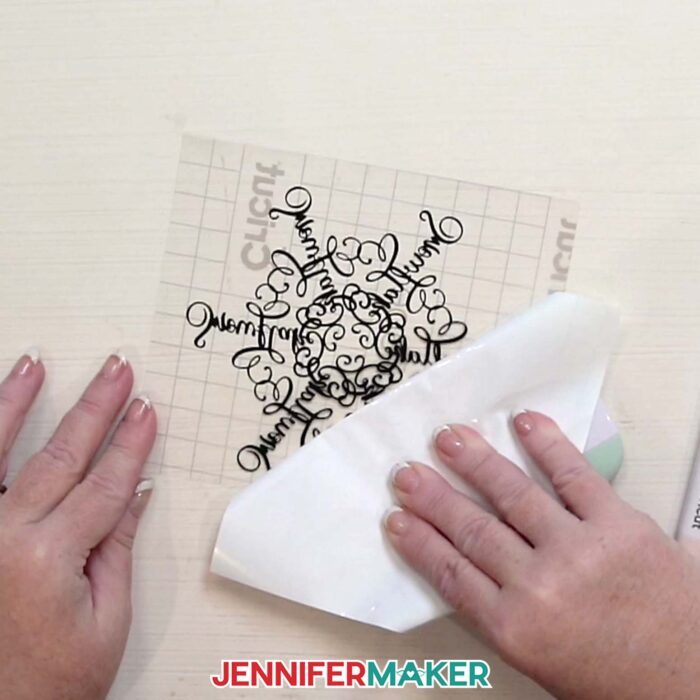
Flip it over, peel the vinyl backing away gently, and hover it right over your cling layer, lining it up so your word art is centered on the cling material’s shape. Then I’ll show you how to press out any bubbles from under the vinyl, and what to do if any tiny areas lift while you’re peeling the transfer tape away. The goal is a smooth finish so the words and snowflake details look crisp and clean against the rainbow film when the light hits them. It’s the kind of delightfully simple project that makes your window feel like a winter wonderland… even if your view says otherwise!
This year, I’m feeling especially grateful for Merry Maker Mingle, because it has helped me find joy in the season in the sweetest way. There’s something downright magical about spending time together on my livestreams, popping into the groups, seeing what everyone is making, and realizing you’re not crafting alone – you’re crafting together. Being part of a world of communities where we share ideas, cheer each other on, celebrate the wins, and laugh our way through the oops moments honestly feels like the heart of the internet to me. It’s been such a bright, happy light this winter, and it’s made this whole season feel warmer, more creative, and way more fun.
I would love for you to follow along and make these stunning window decorations with me, so be sure to reference the video tutorial below while you craft. The designs are different, but the steps are the same! And once you’ve made a few and you feel confident with the process, don’t stop there… try making a suncatcher from your own design!
I teach a workshop in my ADVANCE with JenniferMaker program where I’ll show you how to do just that. We’ll go step-by-step through creating your very own snowflake design using a word you love (or even your name) so it becomes truly one-of-a-kind! It’s such a fun, creative twist because you’re not just choosing a design anymore, you’re designing the art itself. Watching your word transform into a snowflake design with those distinct shapes is absolutely magical. If you’d like to learn how to make your own, and get access to even more techniques, templates, and projects, come join me! Learn more about ADVANCE with JenniferMaker here!
You can find a list of more window cling projects in the questions and answers section below. I just adore how the rainbow film shines through the negative space in the vinyl designs to really make them pop! I hope you’ll share what you make, because seeing your beautiful creations is one of my favorite parts of the season. Happy holidays, and happy crafting!
Let me show you how to turn festive snowflake designs into stunning window clings! This post contains some affiliate links for your convenience (which means if you make a purchase after clicking a link I will earn a small commission but it won’t cost you a penny more, there is no additional cost)! Read my full disclosure policy.
Materials to Make Window Clings with Festive Snowflake Designs
View my Amazon shopping list with the exact items I used.
- Rainbow Window Privacy Film (I used part of a roll)
- One (1) Sheet of:
- A way to cut your materials – I’m using the Cricut Maker 3, but you can also use the Cricut Maker, a Cricut Explore Series machine, the Cricut Venture, or even the Cricut Joy Xtra
- Cricut Green StandardGrip Machine Mat 12” x 12”
- Cricut Purple StrongGrip Machine Mat 12” x 12” (for window cling)
- Cricut StandardGrip Transfer Tape
- Brayer
- Scraper
- Spatula
- Weeding Tool
- Scissors
- Paper Trimmer (optional, especially helpful if you’re using a material more than 12″ wide)
- Parchment Paper
- Isopropyl Alcohol (or a spray bottle of your favorite glass cleaner) – AND –
- Lint-Free Cloth
First, create your word snowflake in Cricut Design Space using this tutorial. Then, follow the suncatcher tutorial to make your cling layer, cut the materials, and put it all together!
How to Make Word Snowflakes
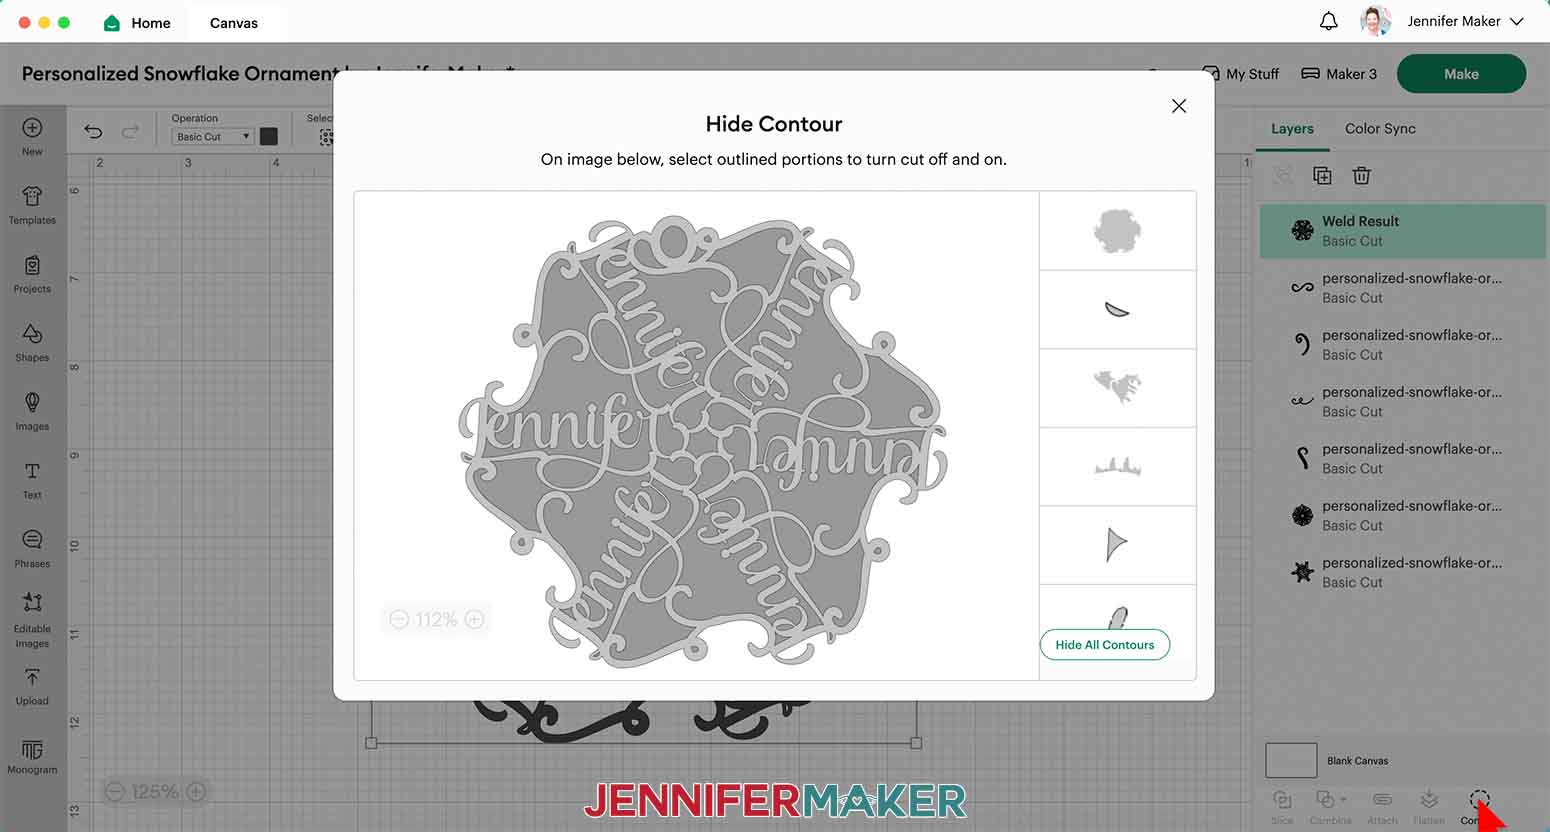
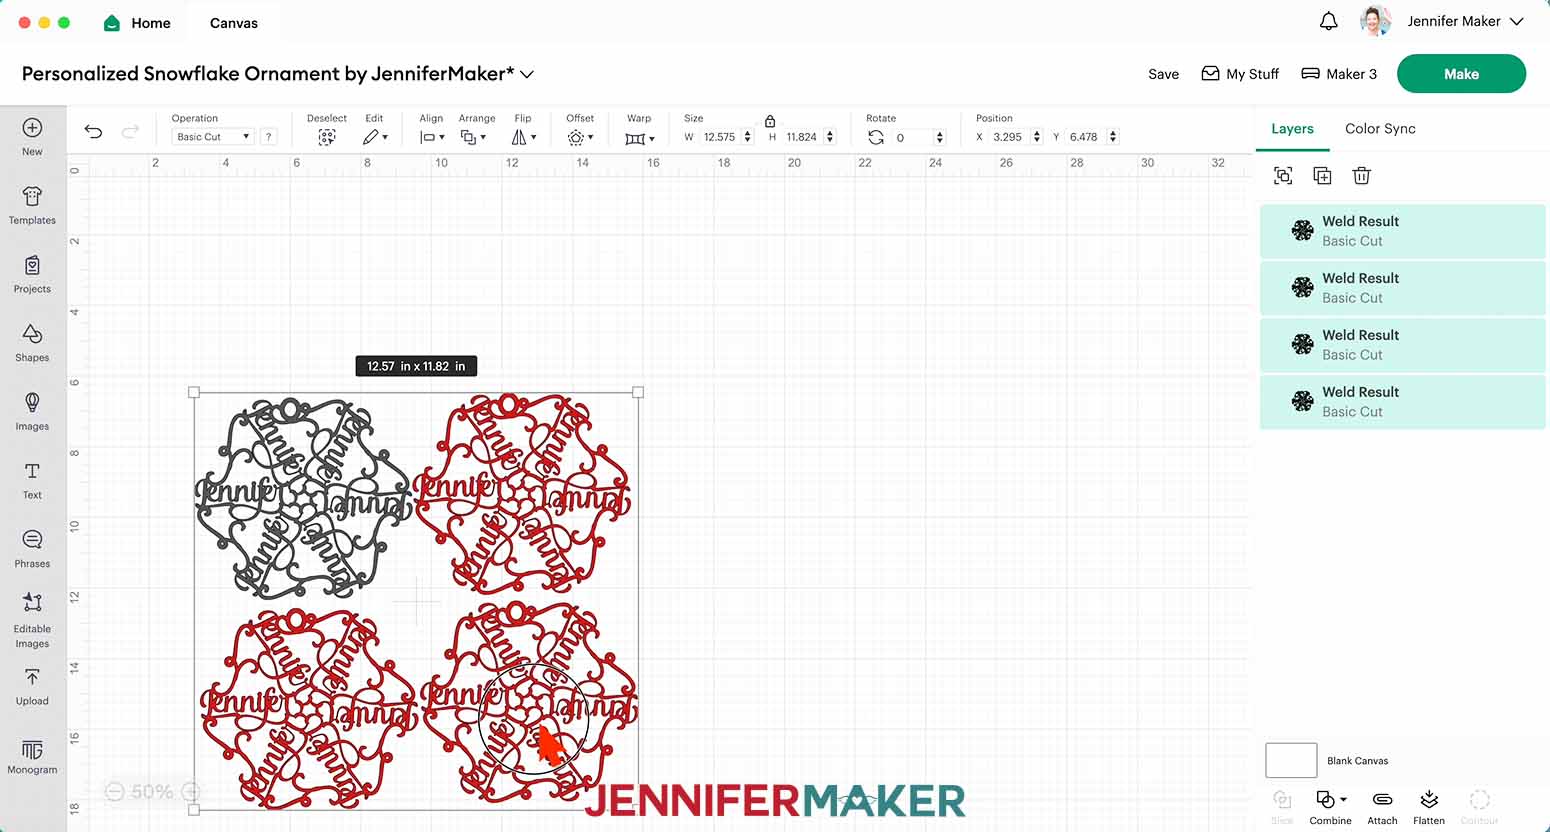
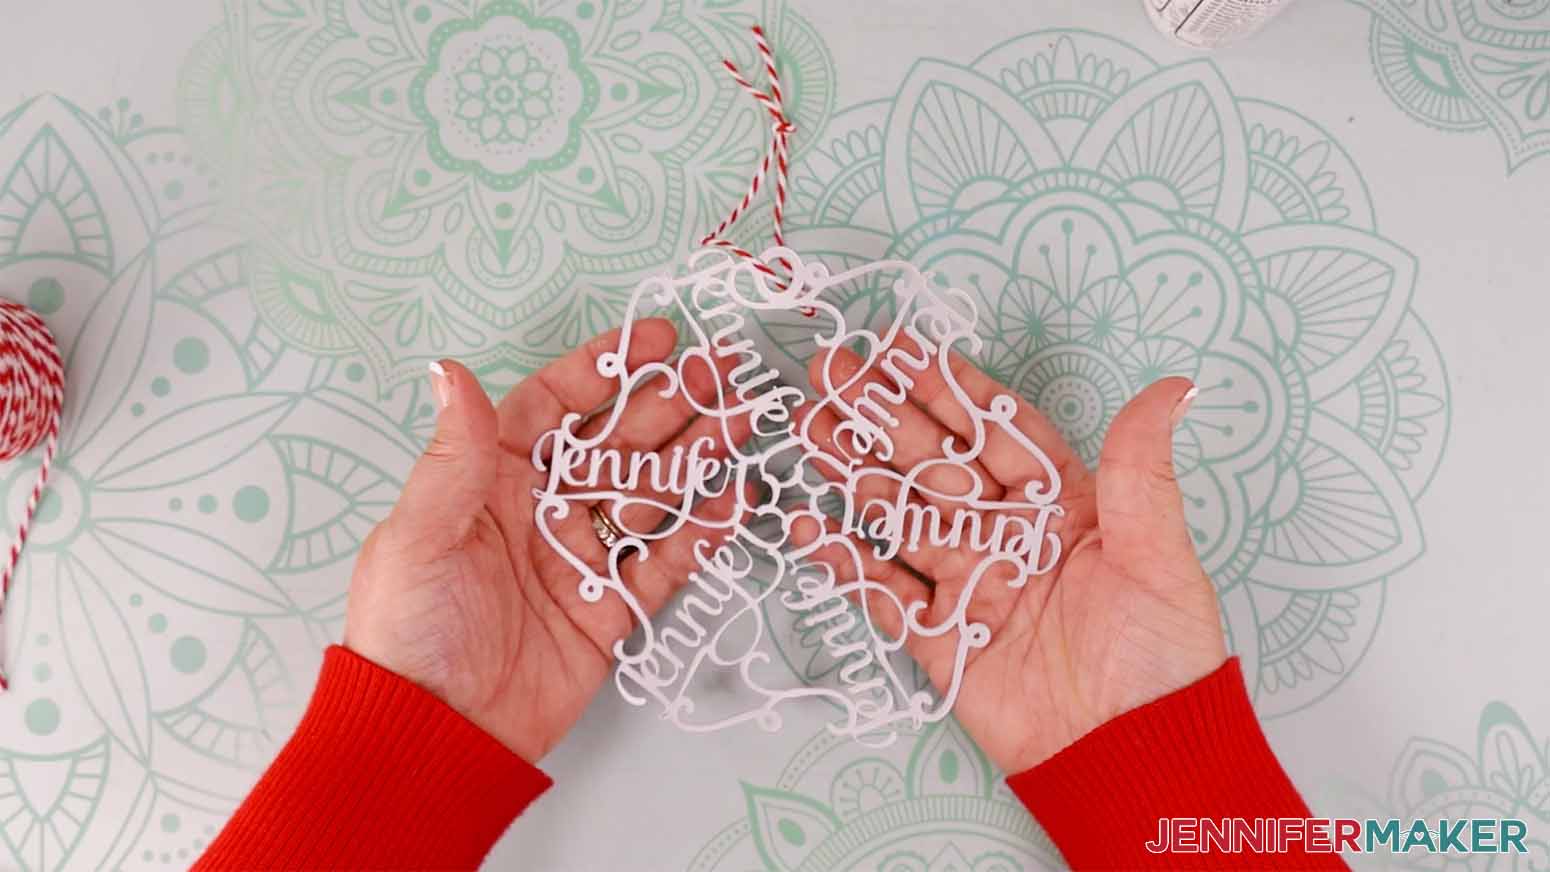
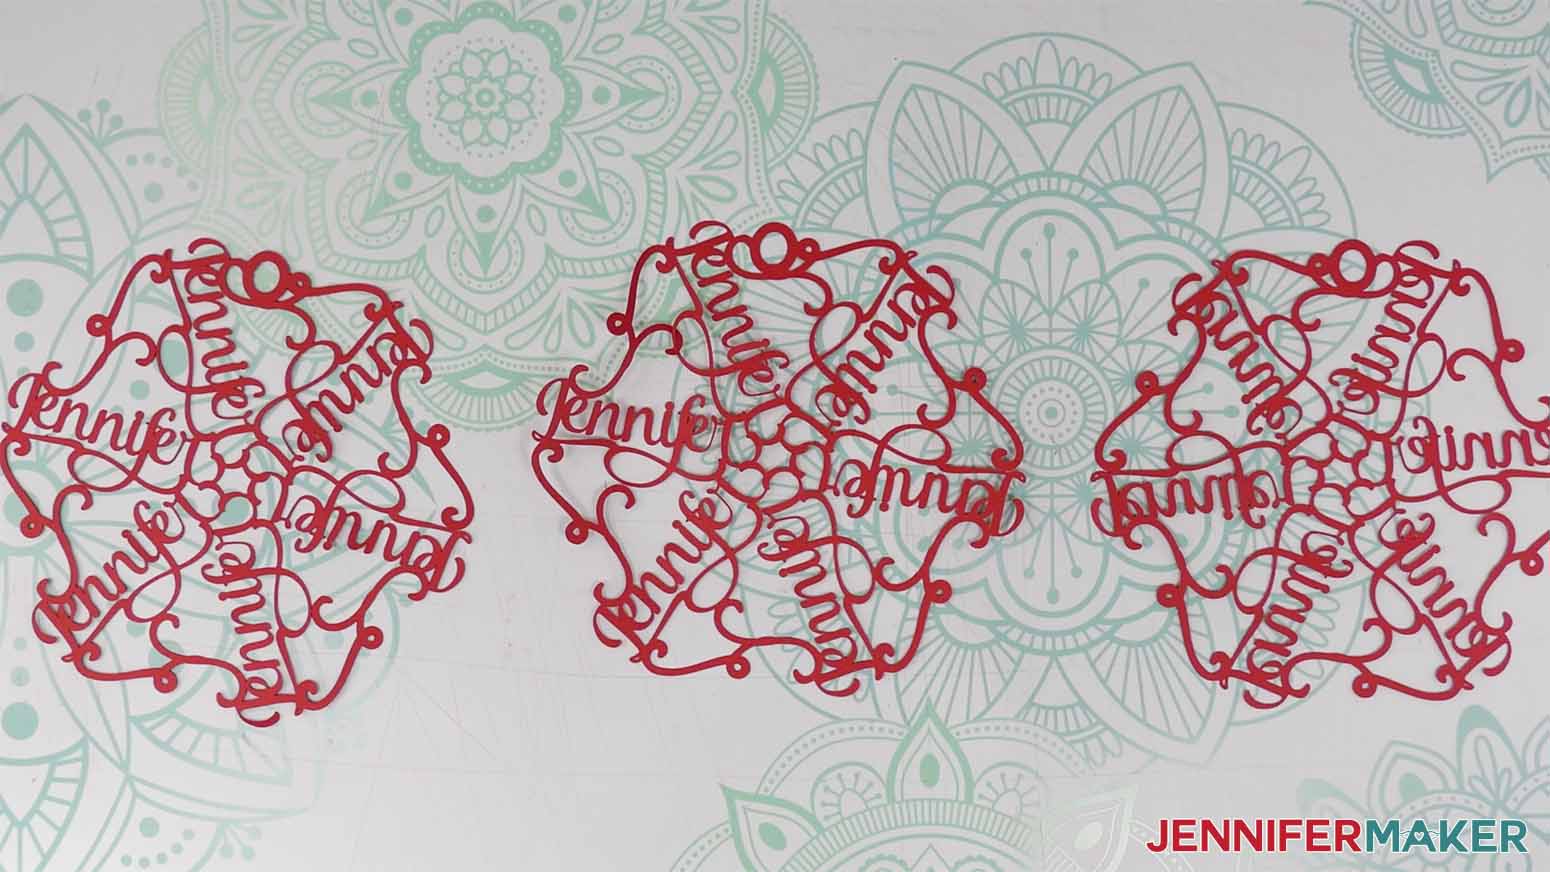
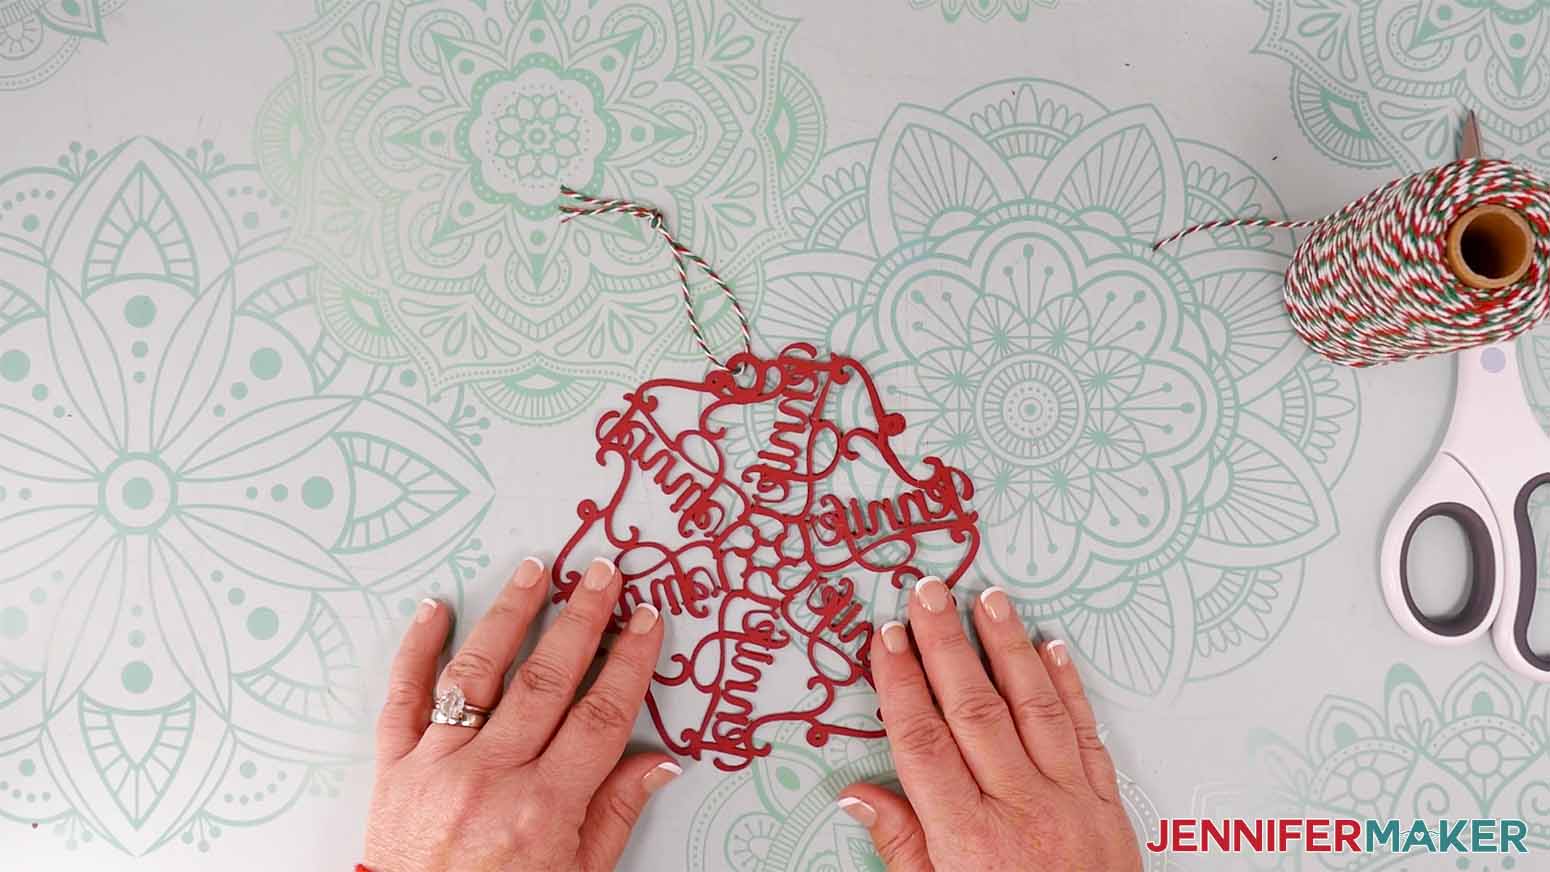
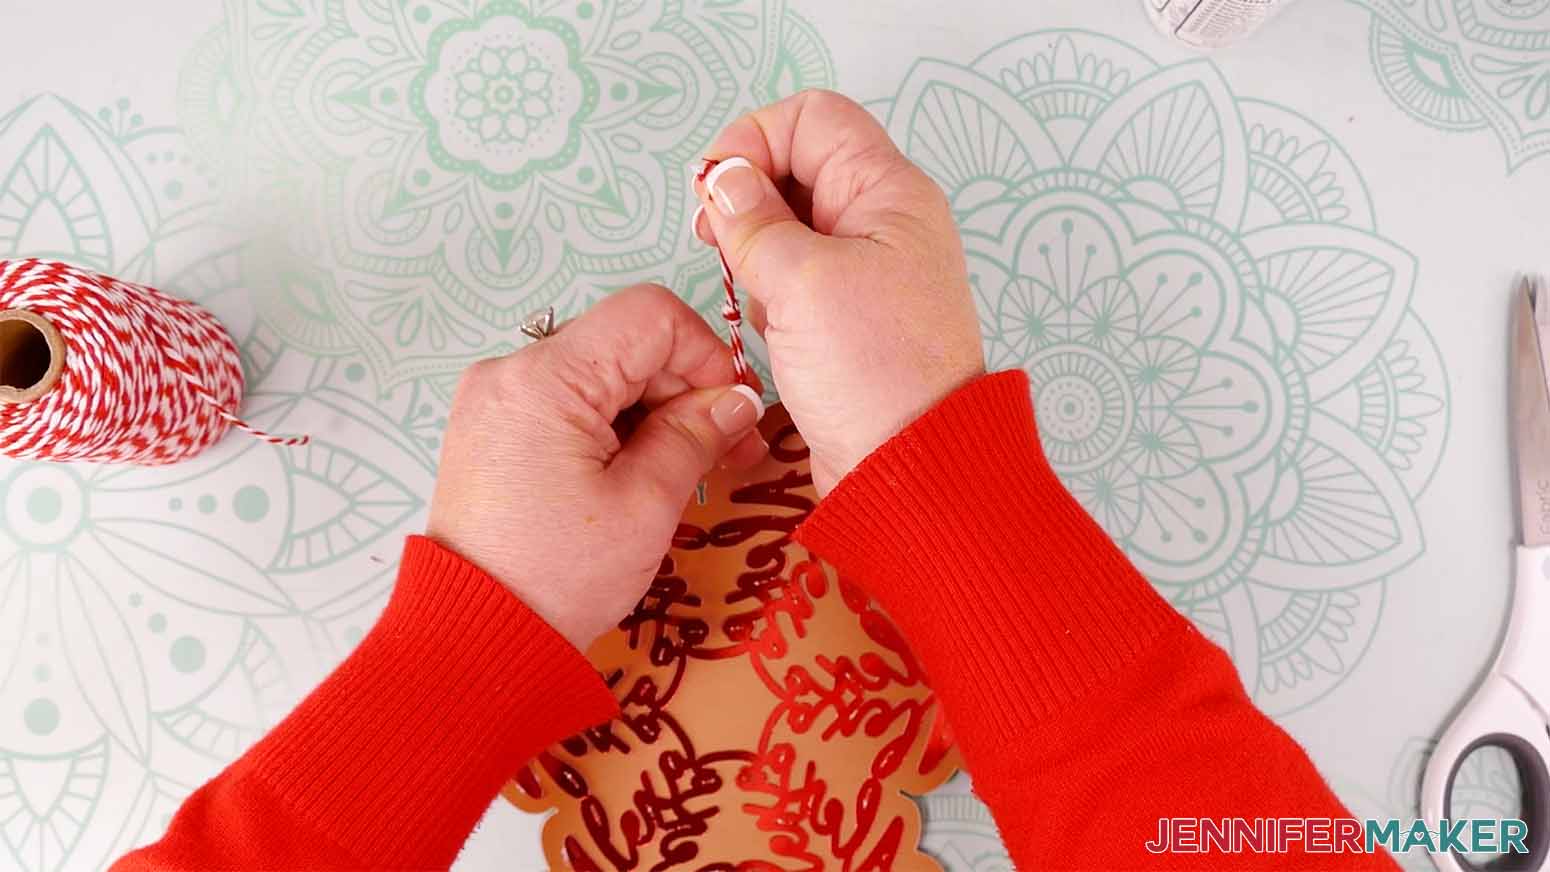
Learn how to make a personalized snowflake ornament with a name using Cricut Design Space and paper. NOTE: Due to the many variables in names, letters, and shapes possible, this is more of a design tutorial to inspire you rather than precise steps to follow. First, download my Personalized Name Snowflake designs from my free library -- look for design #566. Alternatively, you can use the Save This Project form near the top of this post and the design link will be emailed to you. CRICUT DESIGN SPACE CUTTING CRICUT DESIGN SPACE STEP 4: SHOW IT OFF! Here is what my finished ornaments look like!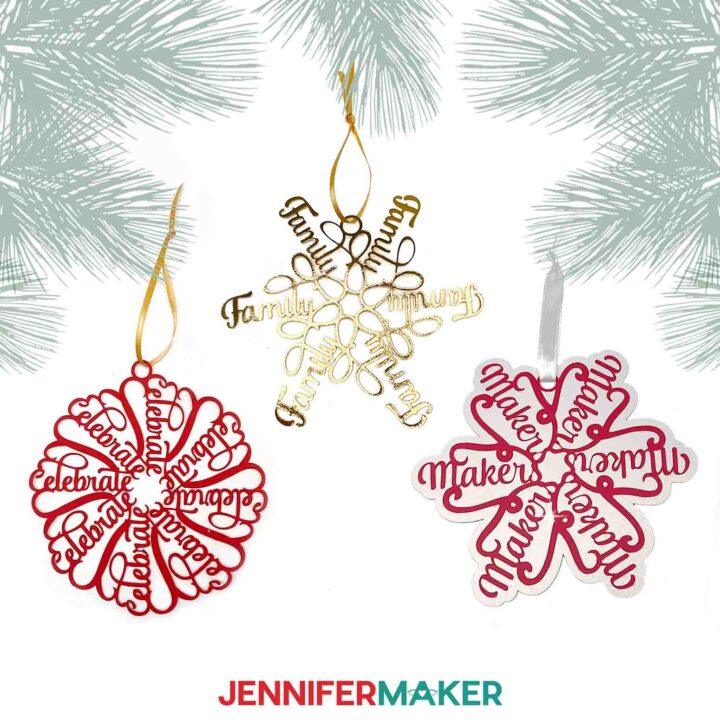
Make A Personalized Snowflake Ornament
Materials
Tools
Instructions
STEP 1: GET MY FREE CUSTOMIZABLE SNOWFLAKE DESIGNS
TIP: If you’re not sure how to upload, go to jennifermaker.com/svgs to learn how to unzip and upload SVG files.
In the download folder, there is a design kit SVG with elements we’ll use for the different ornament types.
There is also a folder with finished designs that you can cut the same way.
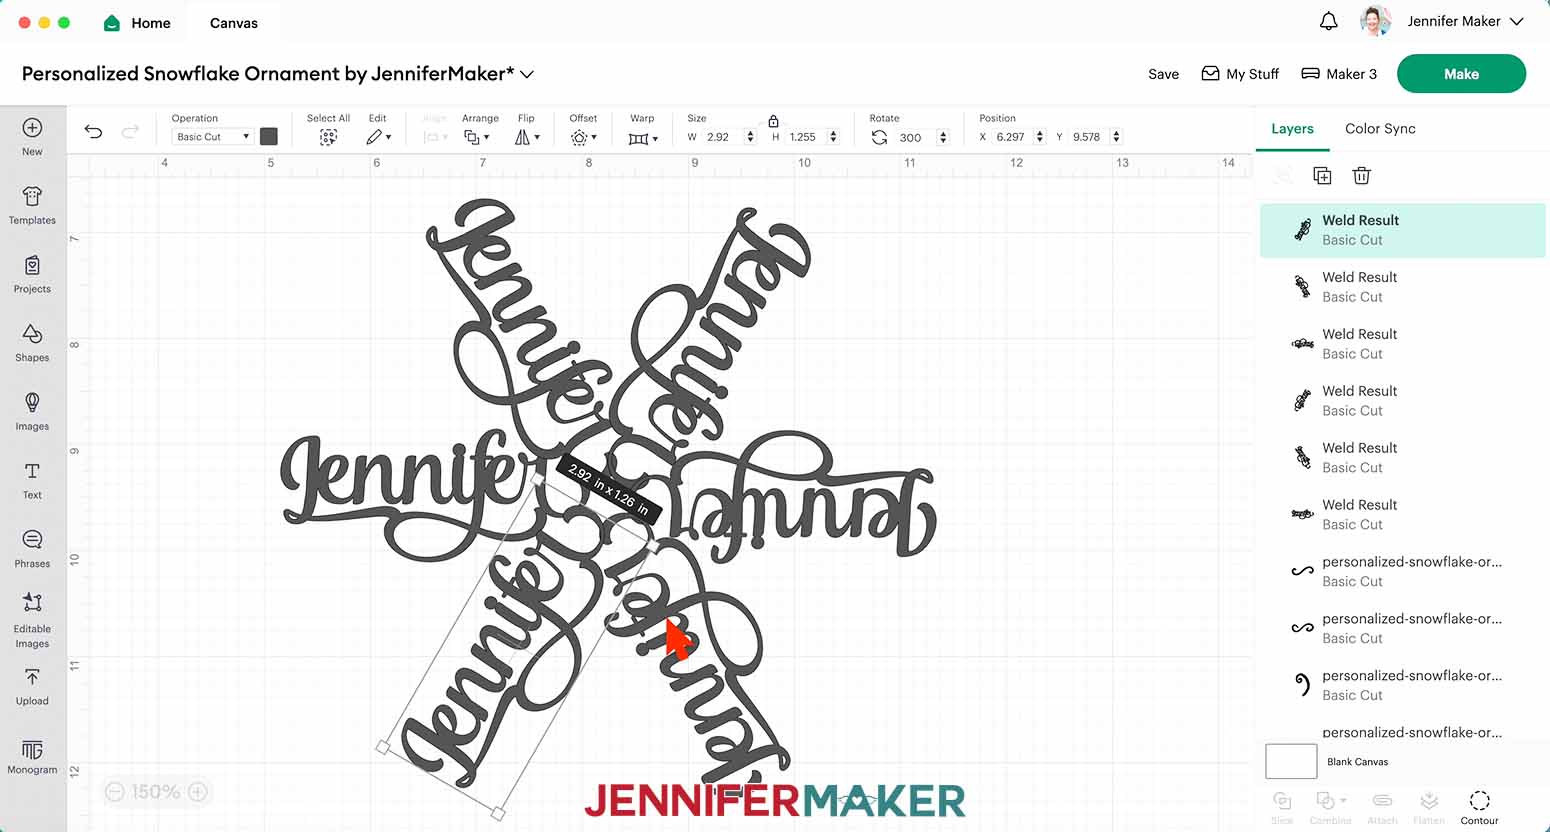
If you want to make a custom snowflake, the typeface is important. I’m going to show you how to design two examples: one using Andalusia and another using Biosha Script. After downloading your choice, follow the steps in my tutorial on uploading fonts to Cricut Design Space to add it before you start your designs.STEP 2: PREPARE YOUR CUSTOM FAMILY NAME SNOWFLAKE ORNAMENT

TIP: A typeface with connected letters, like a script font with pretty thick, consistent lines, will make this project much easier.


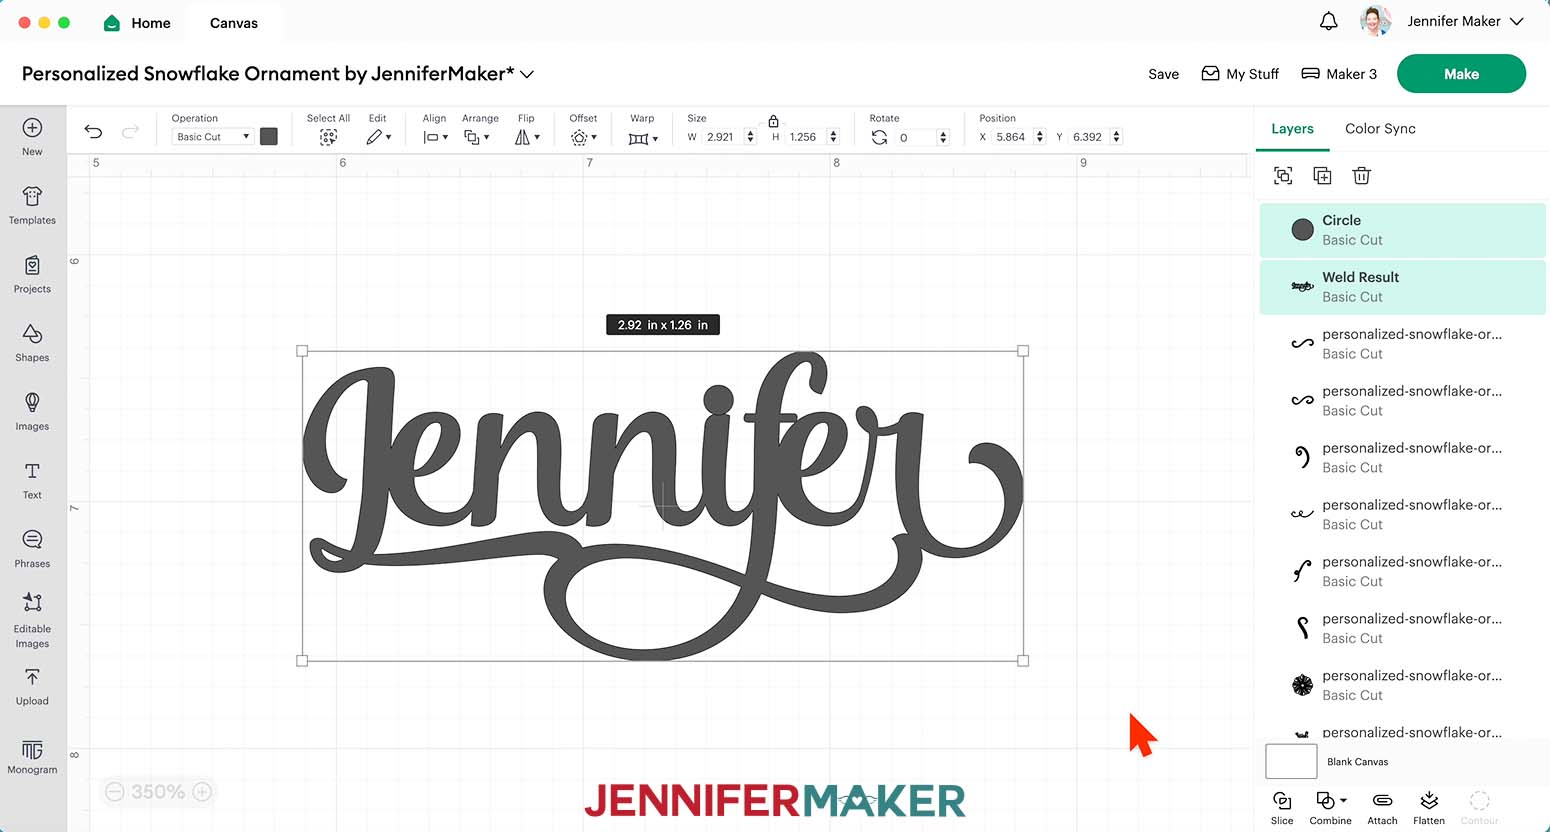

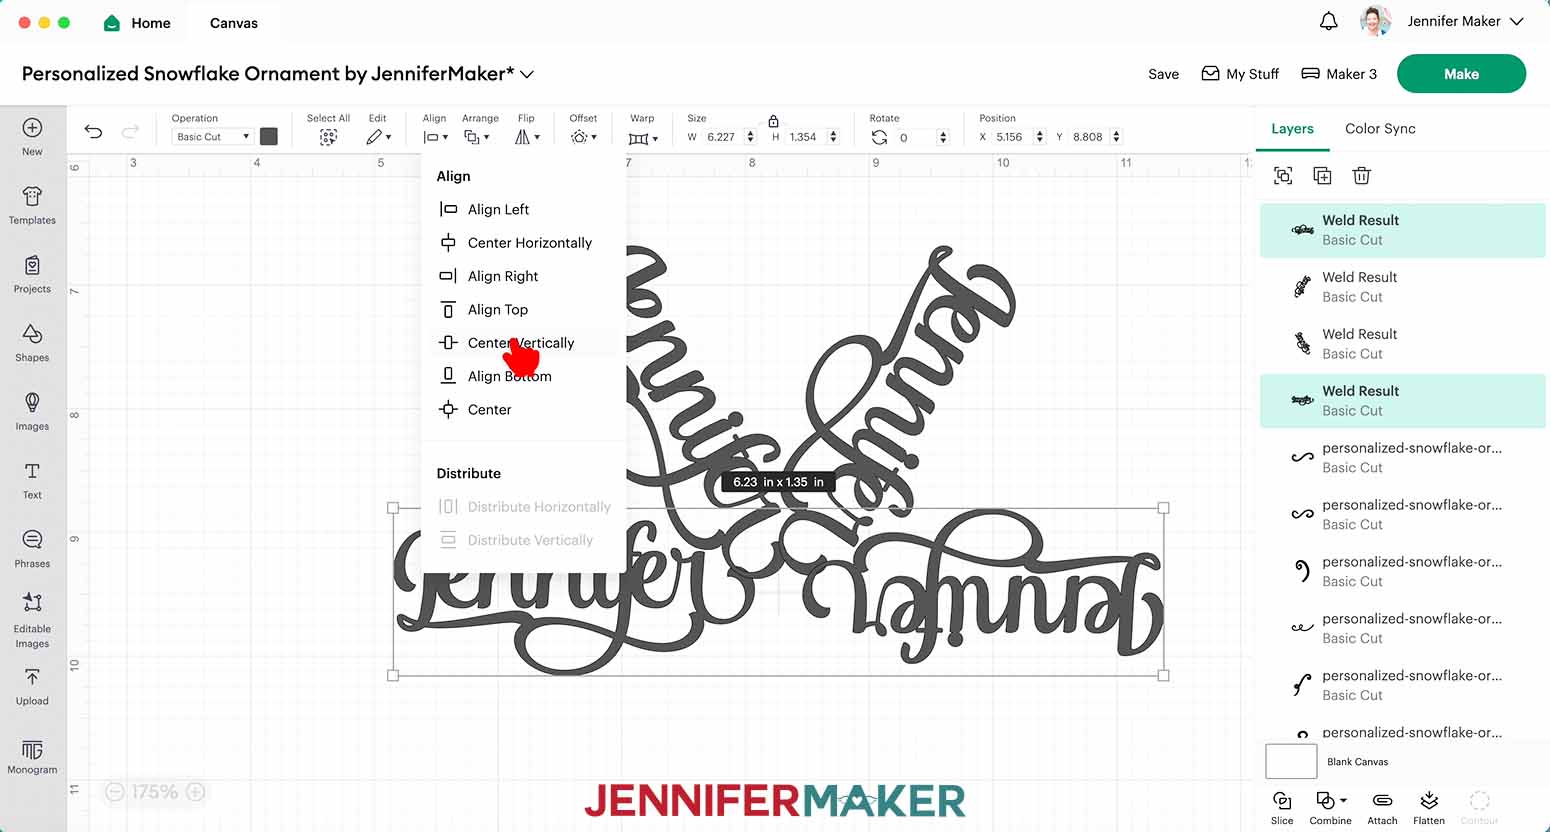
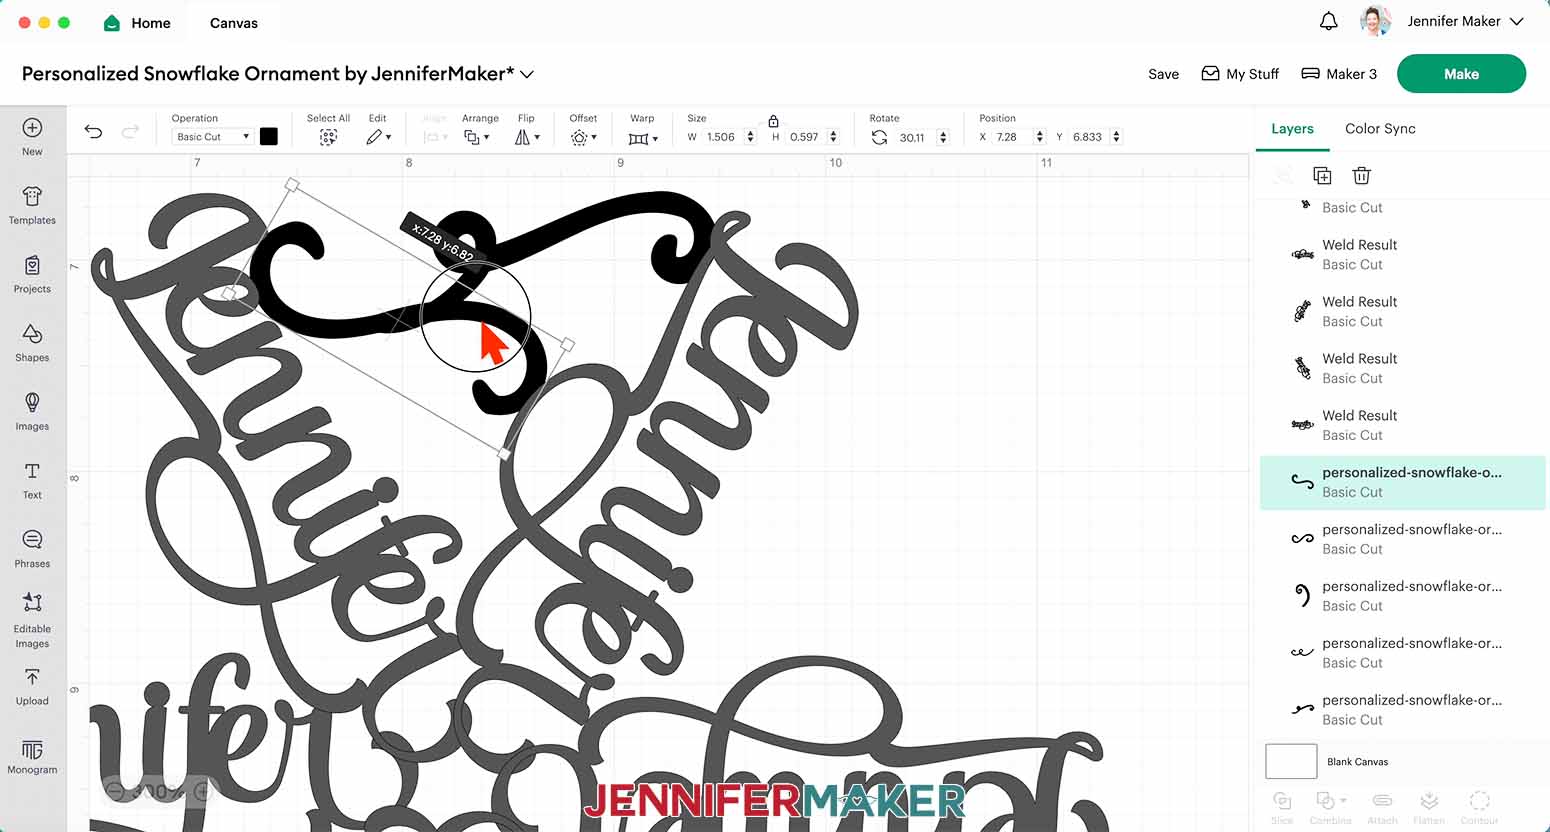
TIP: You might have to slightly adjust the filler elements to touch the words, so check before continuing. Select the element in the Layers Panel to move one independently of the others.
• 65 lb. Cardstock - “Medium Cardstock - 80 lb (216 gsm)” Setting with More Pressure
TIP: Before unloading the mat, gently lift a corner of the paper to make sure the cuts went all the way through. If not, press the “Go” button again to make a second cut pass in the same spot.
TIP: Be careful when removing intricate pieces. Use a spatula to carefully remove any intricate parts and a weeding tool to pop out any small pieces. If you have trouble with any of your cuts, check out my Cricut Tips & Tricks for Cleaner Cuts.STEP 3: ASSEMBLE YOUR NAME SNOWFLAKE ORNAMENT

VARIATION: TEXT ONLY SNOWFLAKE ORNAMENT
TIP: If the bottoms of the letters slant, click the “Rotate” field and tap your up arrow until most of the letters are pretty straight so they’ll be easier to connect.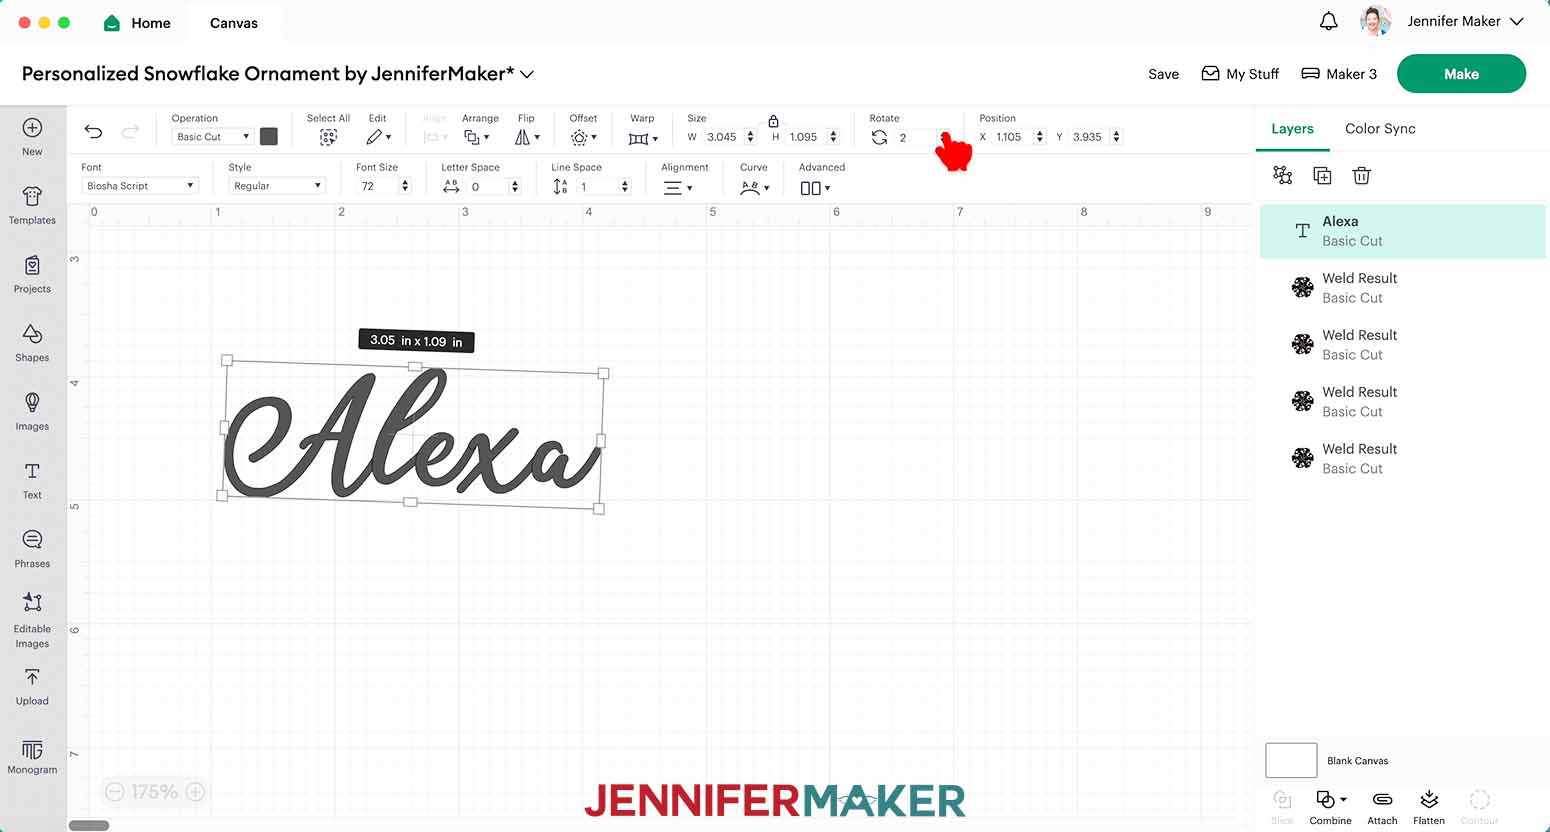

TIP: If the letters’ edges don’t overlap, try repositioning or rotating them until they do.
VARIATION: NAME SNOWFLAKE WITH BACKGROUND


Notes
How to Make Suncatcher Window Clings for Winter!

Suncatchers: Compare the Best Permanent Vinyl
Find out which vinyl makes the best permanent vinyl clings for these adorable winter suncatchers!
Materials
- Rainbow Window Privacy Film (I used part of a roll)
- One (1) Sheet of Black Cricut Value 12" x 12" Permanent Vinyl - OR -
- One (1) Sheet of Black HTVRont 12" x 12" Permanent Vinyl - OR -
- One (1) Sheet of Black Oracal 12" x 12" Permanent Vinyl
- Design #695 (My free SVG/PDF/DXF design files are available in my free resource library - get the password by filling out the form at the bottom of this page)
Tools
- A way to cut your materials - I’m using the Cricut Maker 3, but you can also use the Cricut Maker, a Cricut Explore Series machine, the Cricut Venture, or even the Cricut Joy Xtra
- Cricut Green StandardGrip Machine Mat 12” x 12”
- Cricut Purple StrongGrip Machine Mat 12” x 12” (for window cling)
- Cricut StandardGrip Transfer Tape
- Brayer
- Scraper
- Spatula
- Weeding Tool
- Scissors
- Cricut Portable Trimmer (optional, especially helpful if you’re using a material more than 12″ wide)
- Parchment Paper
- Isopropyl Alcohol (or a spray bottle of your favorite glass cleaner) - AND -
- Lint-Free Cloth
Instructions
STEP 1: GET MY FREE WINTER WINDOW CLING DESIGNS
First, download my Winter Window Clings designs from my free library – look for Design #695. Alternatively, you can use the Save This Project form near the top of this post and the design link will be emailed to you.
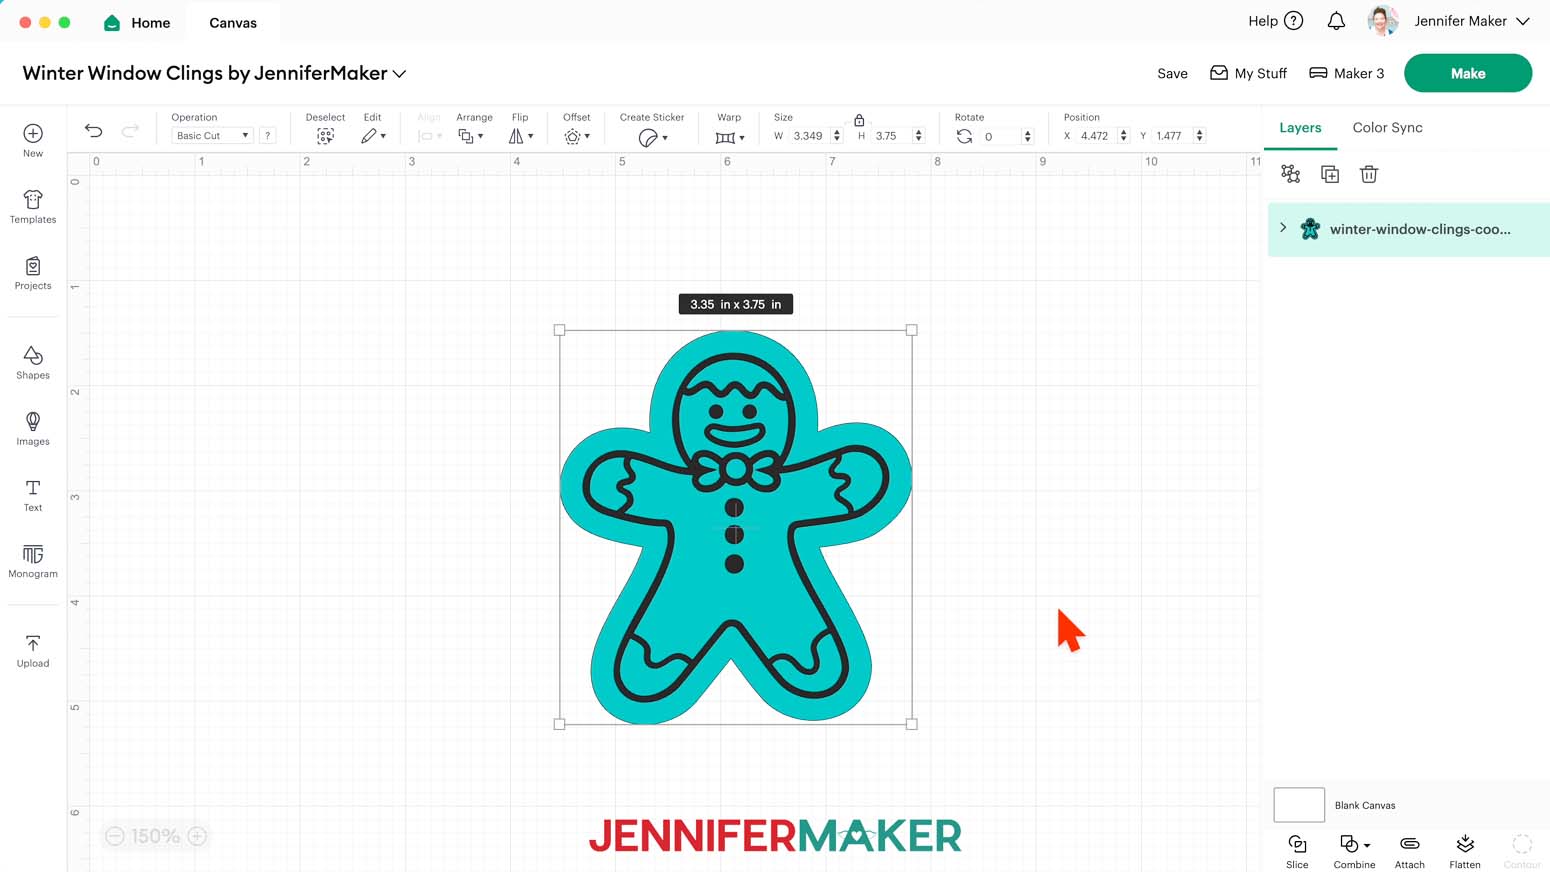
In the SVG folder, you’ll find seven winter window cling designs: a cup of hot cocoa, a gingerbread man, an ornament, a reindeer, and three different snowflakes.
There is also a DXF folder with cut files, and a PDF folder with versions you can print and cut by hand.
Upload the files you need to Design Space to get started. I’ll demonstrate with the gingerbread man, but the steps are the same for all seven designs.
TIP: If you’re not sure how to upload, go to jennifermaker.com/svgs to learn how to unzip and upload SVG files.
STEP 2: PREPARE AND CUT YOUR GINGERBREAD MAN WINDOW CLING DESIGN
CRICUT DESIGN SPACE
- In Cricut Design Space, open a blank Canvas.
NOTE: If you’re new to using Cricut Design Space, go to cricutkickoff.com for my introductory tutorial on Design Space basics. - Click “Upload” and then “Upload Image.”
- Click “Browse.”
- Select the SVG file of your choice.
NOTE: I’ll pick the “cookie” version for the gingerbread man design. - Click “Open,” and then “Continue.”
- Click “Upload” to add the design to your Canvas.
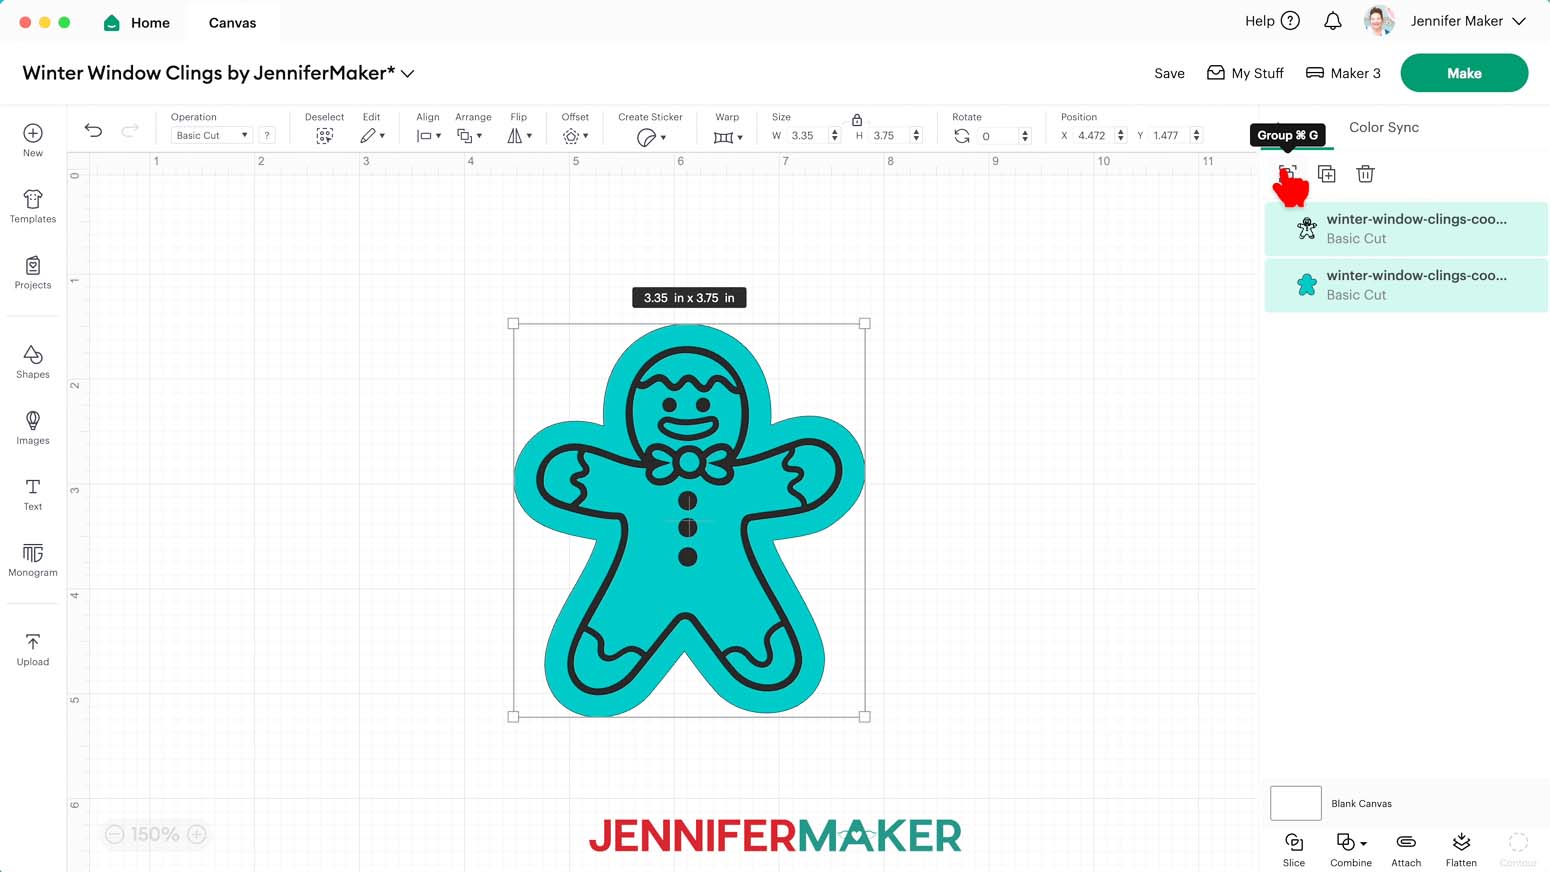
NOTE: Each design has an offset layer on the bottom for the window cling and a details layer on top for the vinyl.
- Click “Save” and give your project a name.
- If you’d like to resize your design, click it, keep the Lock icon closed, and drag a corner of its bounding box to adjust it.
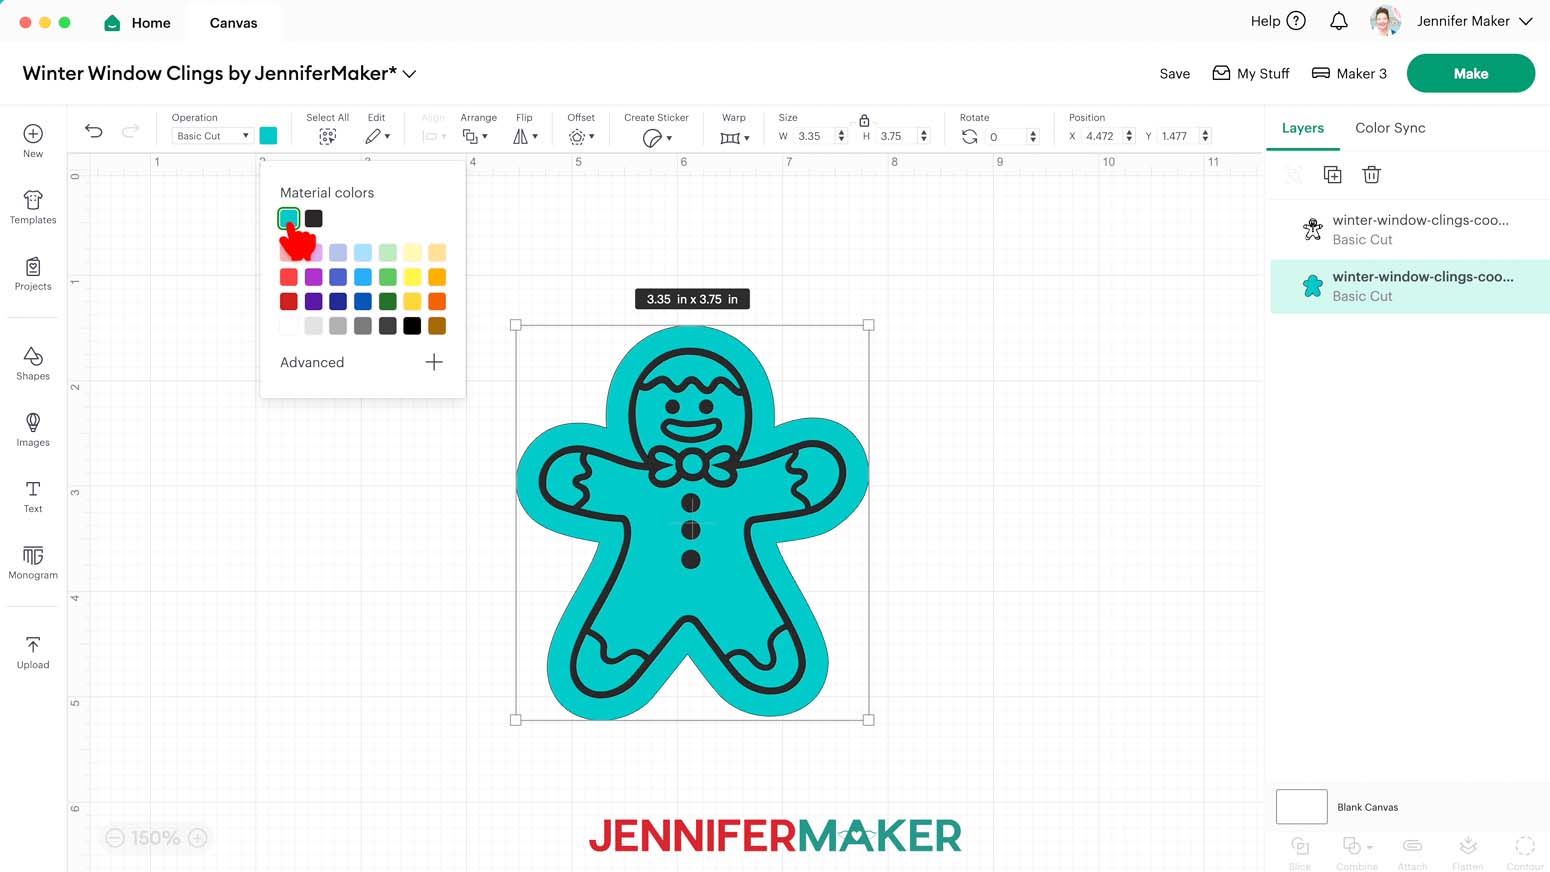
- If you’d like to change the color of a layer to match the window cling or vinyl you’ll use, ungroup the design.
- Then select the appropriate layer in the Layers Panel and use the Color Box to adjust it.
- Your project is ready to cut!

CUTTING
- Make sure the correct machine is selected in the top right.
- Click “Make.”
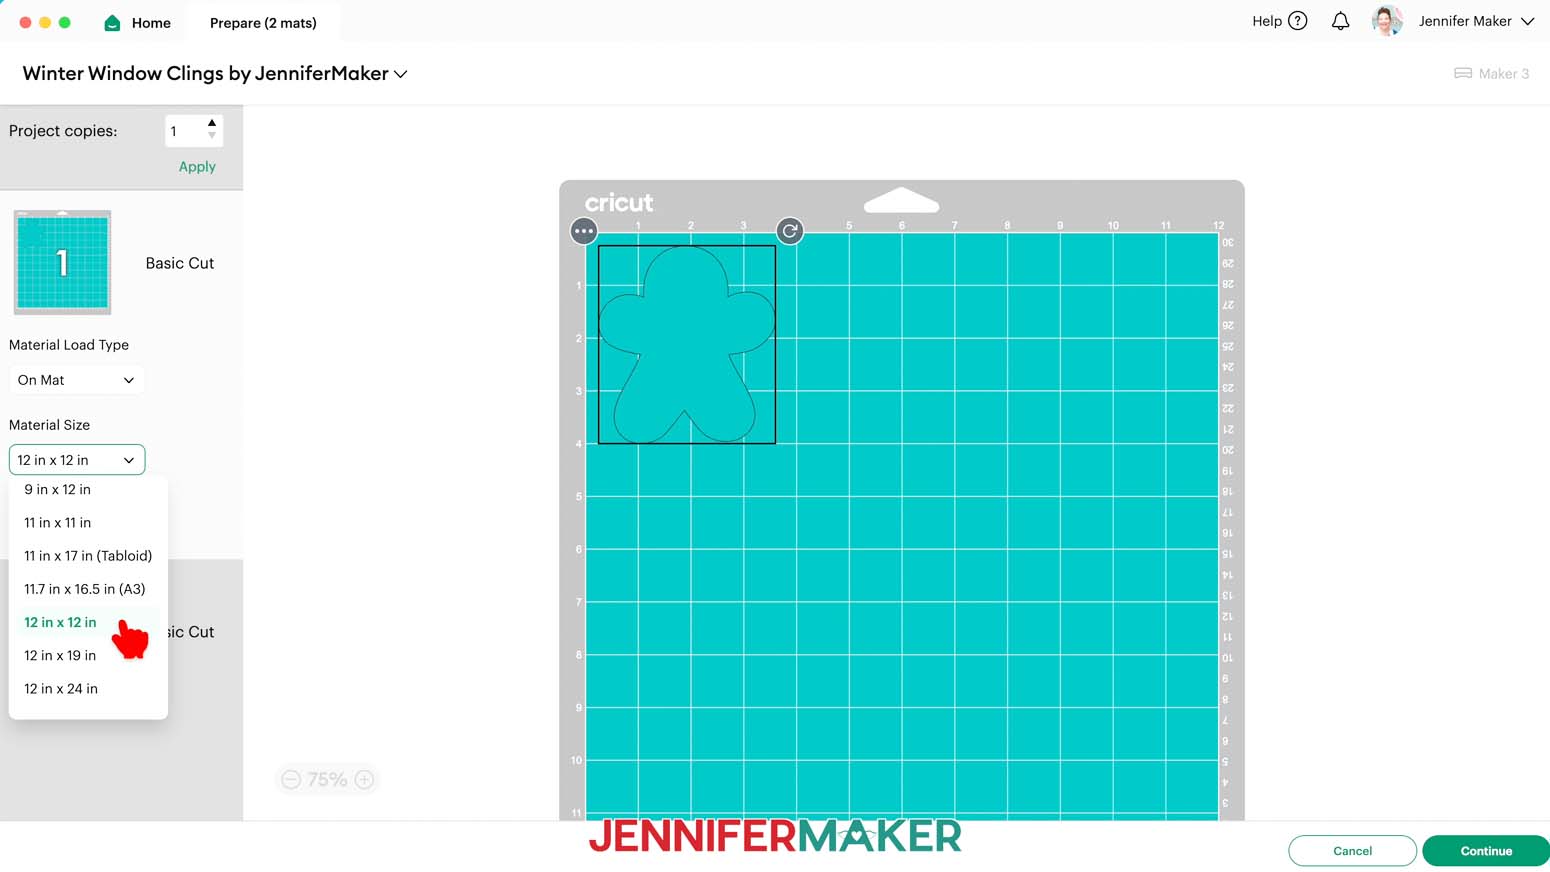
- On the Prepare screen, make sure the correct Material Size is selected for your mats. I’m going to trim my materials to fit the designs, so I’ll keep the 12” x 12” setting so the whole mat is available.
- Select the first mat again and click “Continue.”
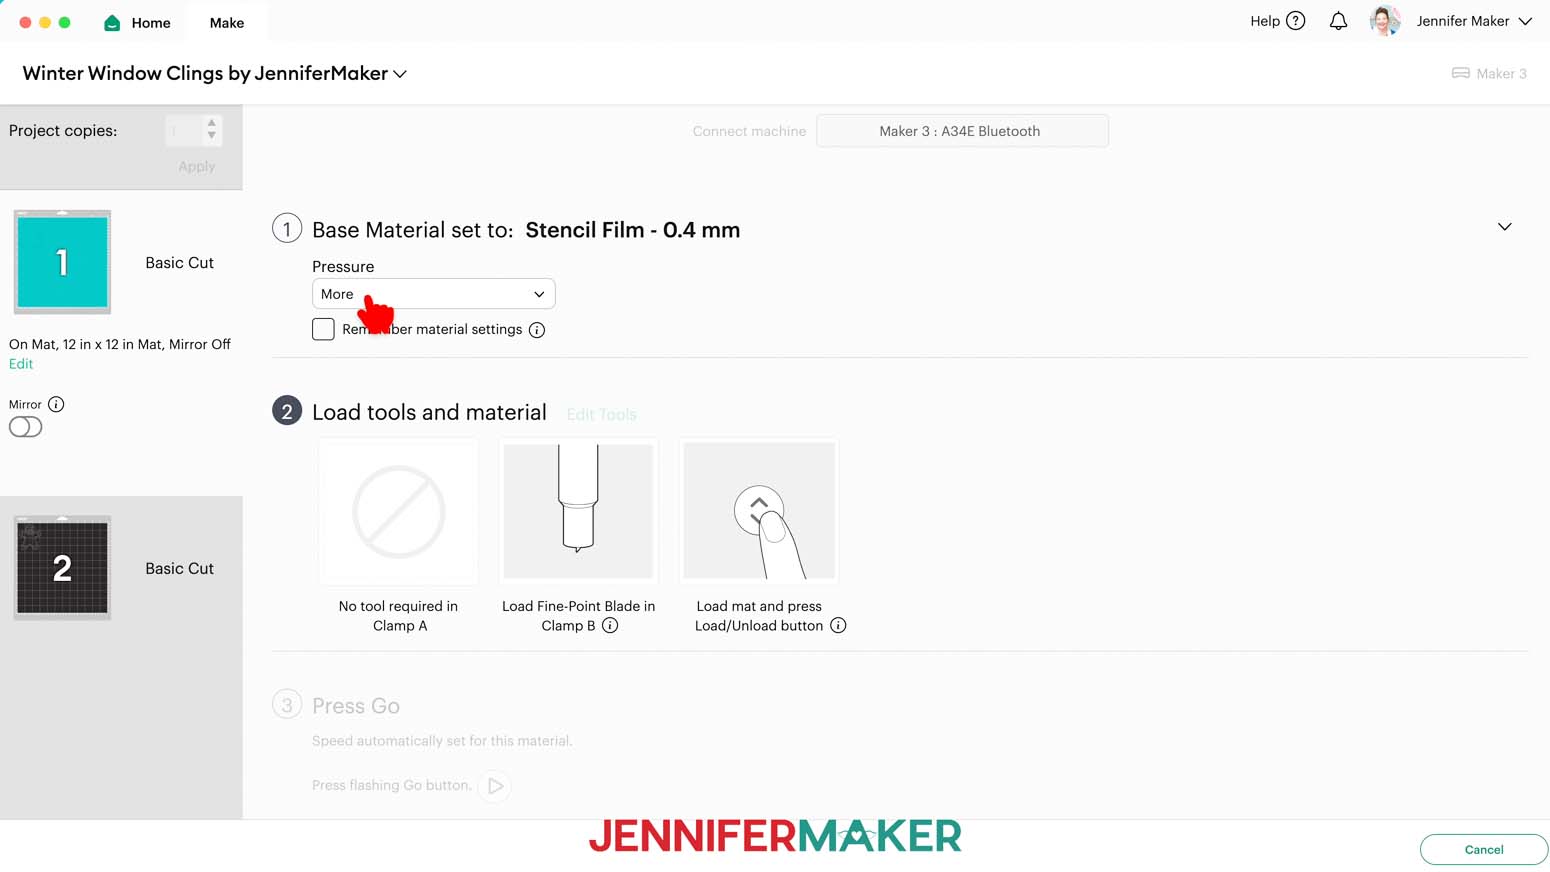
- On the Make screen, set the Base Material for your first mat. Mine is the window cling layer, and I used the “Stencil Film - 0.4 mm” setting with “More” pressure for both the Rainbow and the Holographic window cling.
NOTE: These settings worked well for me, but since all machines are different, making some test cuts is a good idea.
TIP: Changing the Pressure to “More” results in a cleaner cut. - Check the screen to see how large the window cling needs to be to cover the design plus an inch or so around it.
NOTE: Each grid box is one inch. My window cling needs to be about 5” wide and 5” tall to cover my design. - Use a paper trimmer or scissors to trim your vinyl down to size.
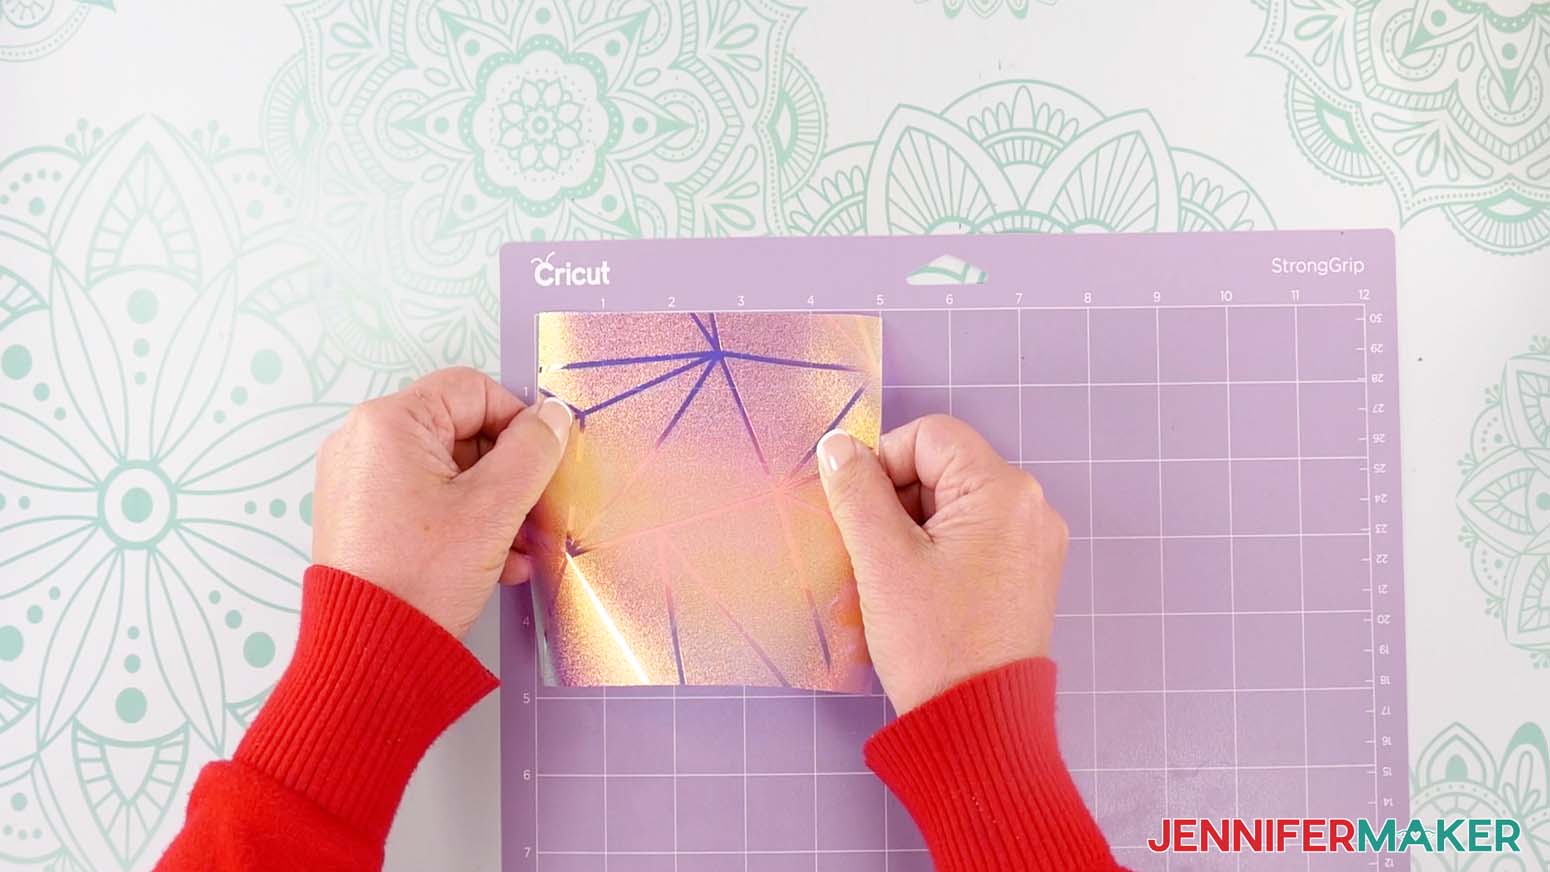
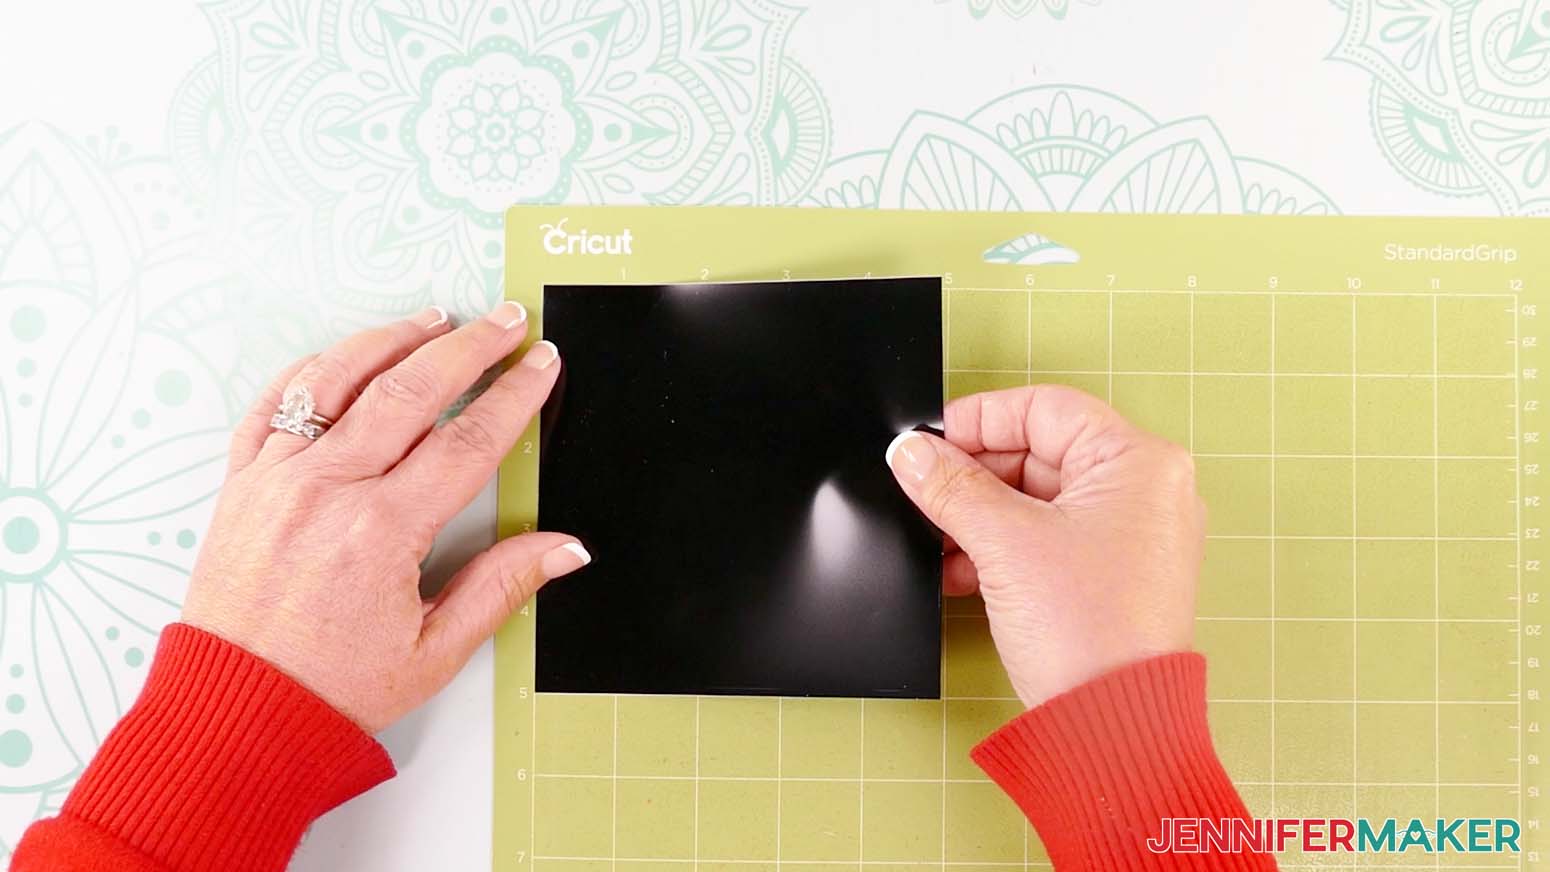
TIP: You can trim your vinyl closer to size and save the smaller pieces for other projects. - Place your window cling shiny side or texture side up on a purple StrongGrip machine mat so it covers the design area on your screen.
- Use a brayer to make sure it’s fully adhered.
- Check that your Premium Fine-Point Blade is clean and in the clamp.
- Press the flashing “Load/Unload” button to load the prepared mat into your Cricut.
- Press the flashing middle button to begin cutting.
- When it has finished cutting, don’t unload the mat right away. Gently lift a corner of the material to make sure the cut went through the film. If it didn’t, press the middle button again to make a second pass in the same place.
NOTE: Cuts should go through the material, but not the carrier sheet. - When the cuts are complete, unload the mat, flip it over onto your work surface, and roll it back to release the window cling and its carrier sheet.
- When you get to your plain vinyl mat, remember to change your material settings. I used the “Premium Vinyl - Permanent Glossy” setting with "More" pressure for my Cricut, HTVRont, and Oracal vinyl.
- Use a trimmer or scissors to cut a piece of vinyl down to size.
NOTE: I’ll make mine 5” x 5” so the design will fit completely and still have extra space around it. - Place your vinyl shiny side up on a green StandardGrip machine mat so it covers the design area on your screen.
- Repeat Steps 9-14 to load and cut your vinyl.
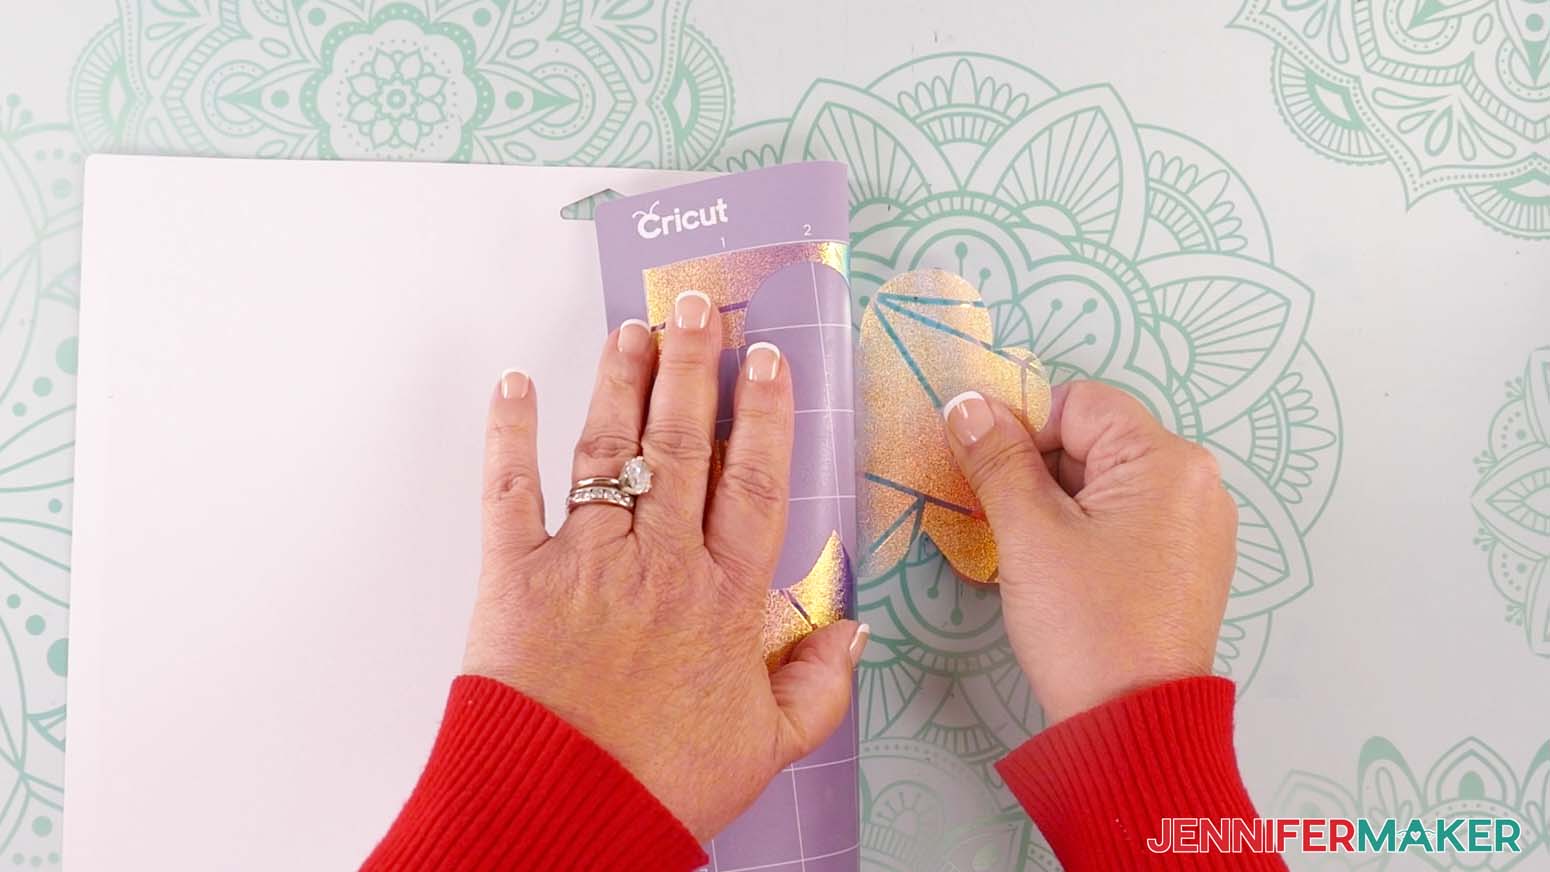
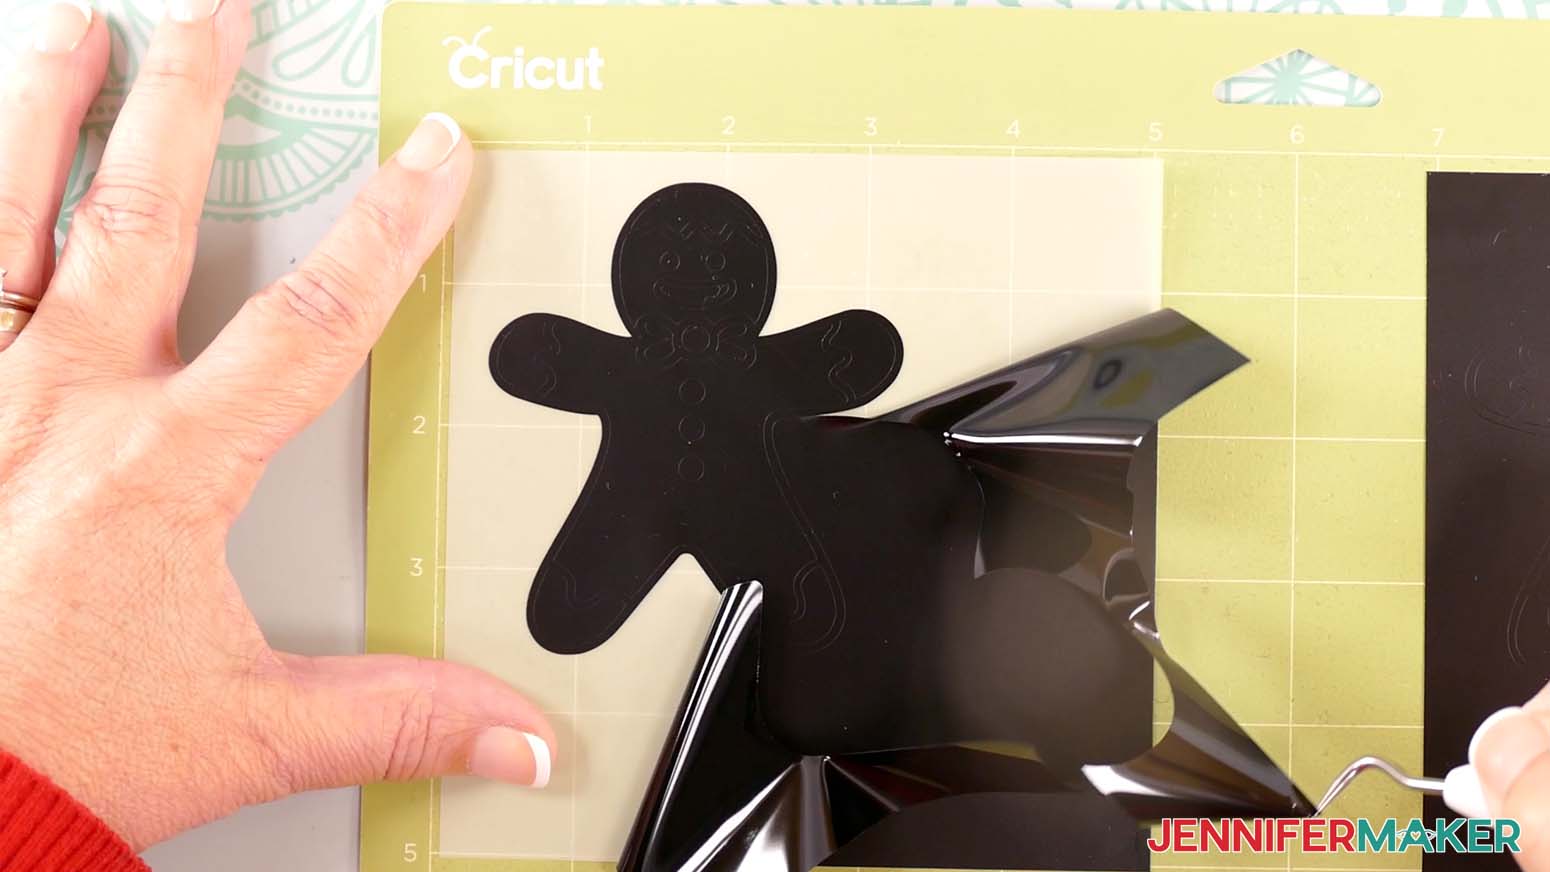
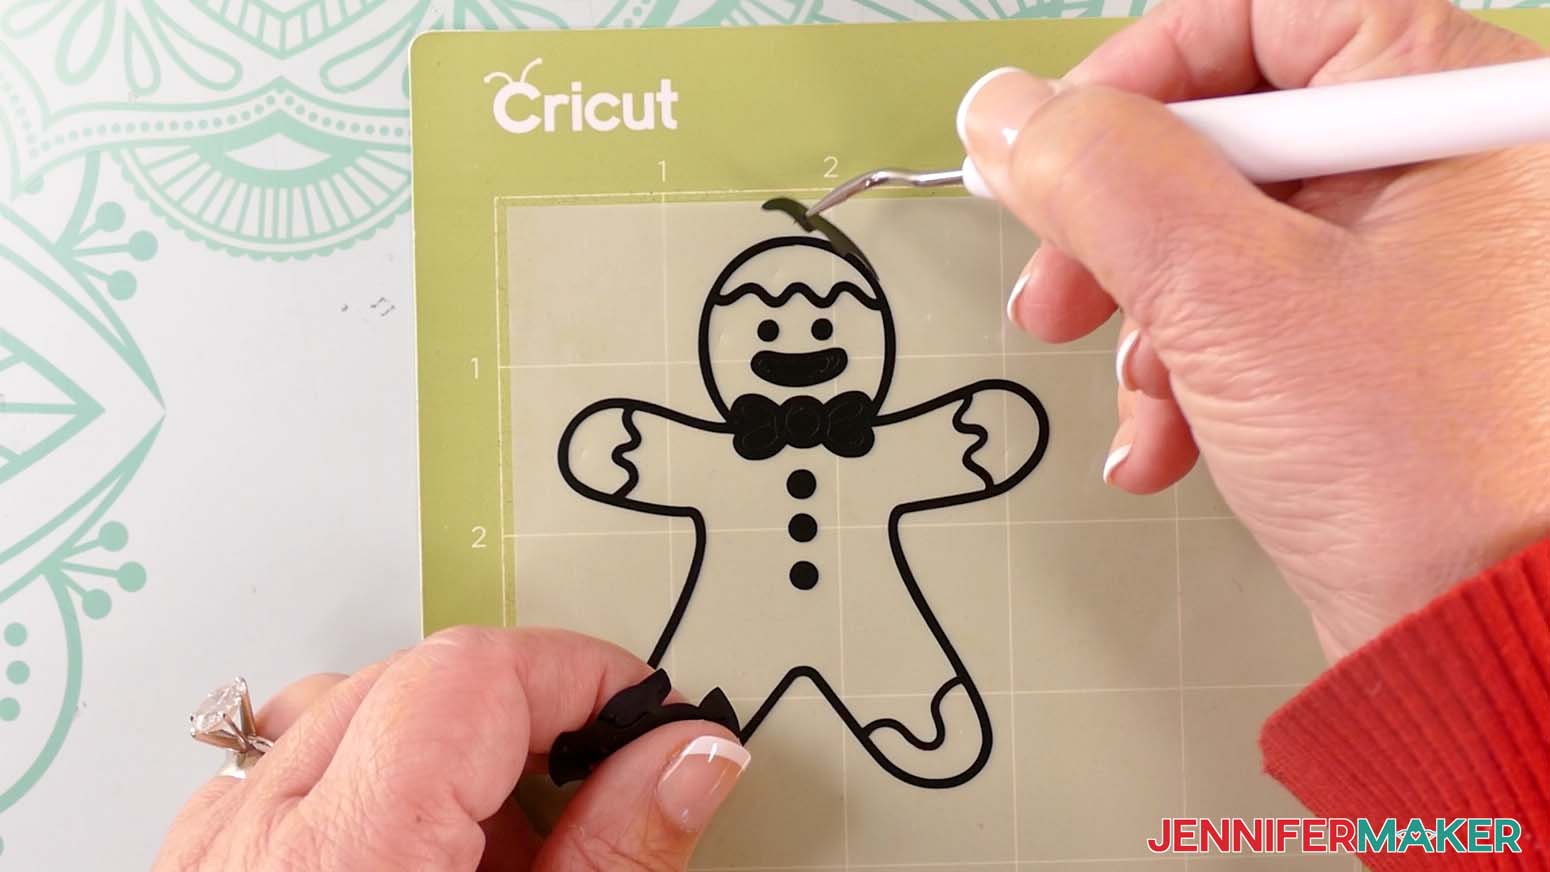
- Use a weeding tool to carefully peel away the extra background vinyl from your vinyl decal. I like to work from larger to smaller sections during weeding.
TIP: It can be easier to weed vinyl, especially small, detailed designs, while it is adhered to the machine mat. - Poke your weeding tool into each section of the design you want to remove. Gently lift it away from the design.
TIP: Make sure you do not pull up any pieces you want to keep! If they come up, gently pat them back in place and try again. - After you’ve finished weeding, lay your window cling and vinyl decals face up.
STEP 3: ASSEMBLE YOUR GINGERBREAD MAN WINDOW CLING
- Place your window cling layer on a machine mat, carrier sheet down, to keep it in place and flat.
TIP: You can also use painter’s tape to secure it to your work surface. - Make sure your vinyl decal is face up on your work surface.
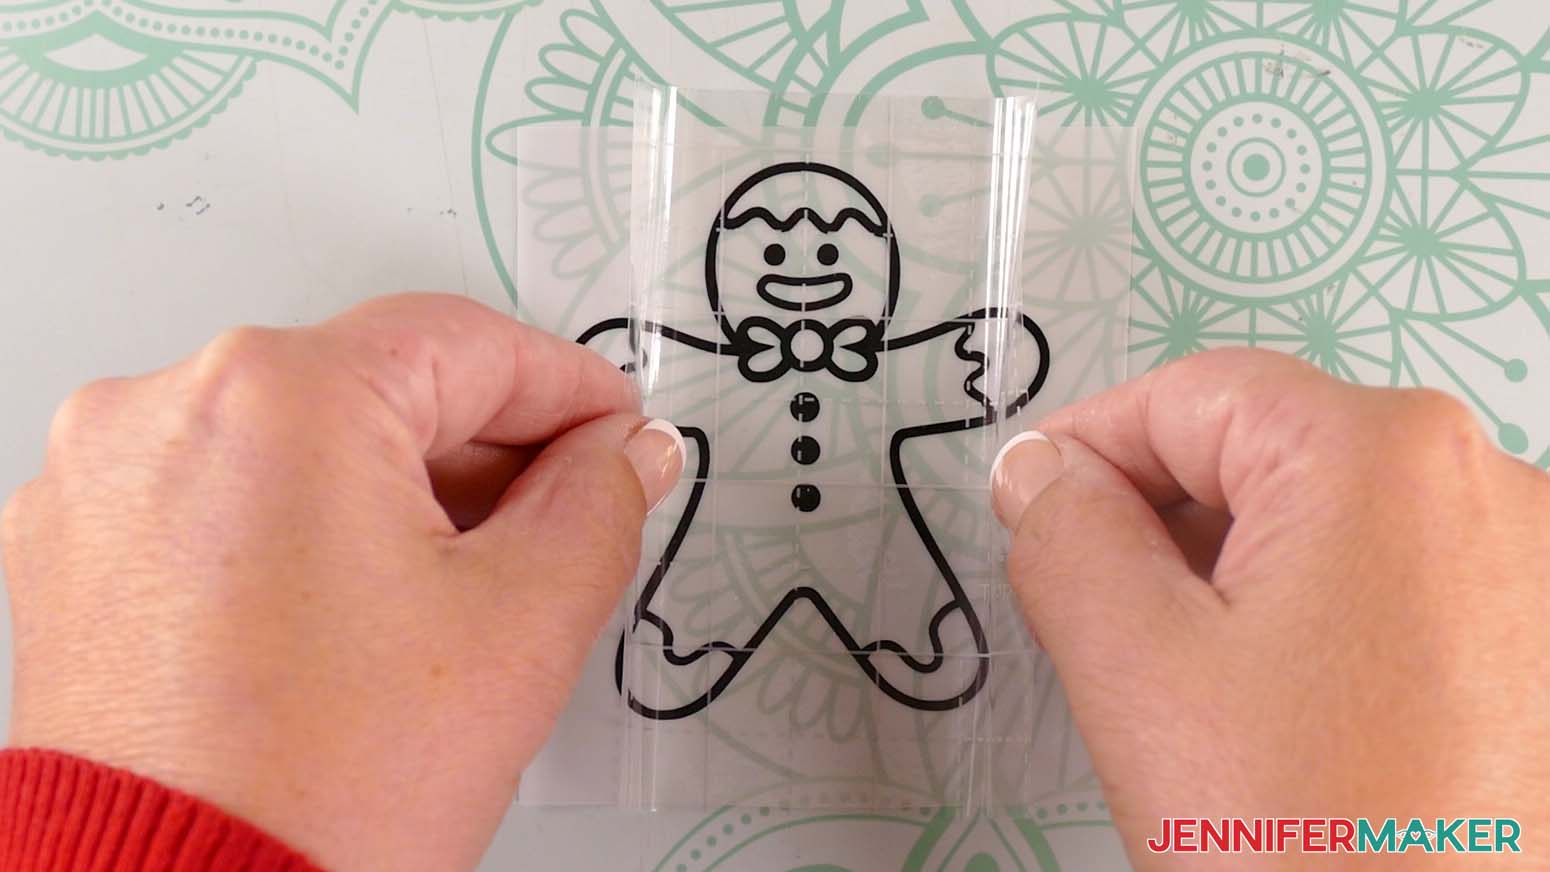
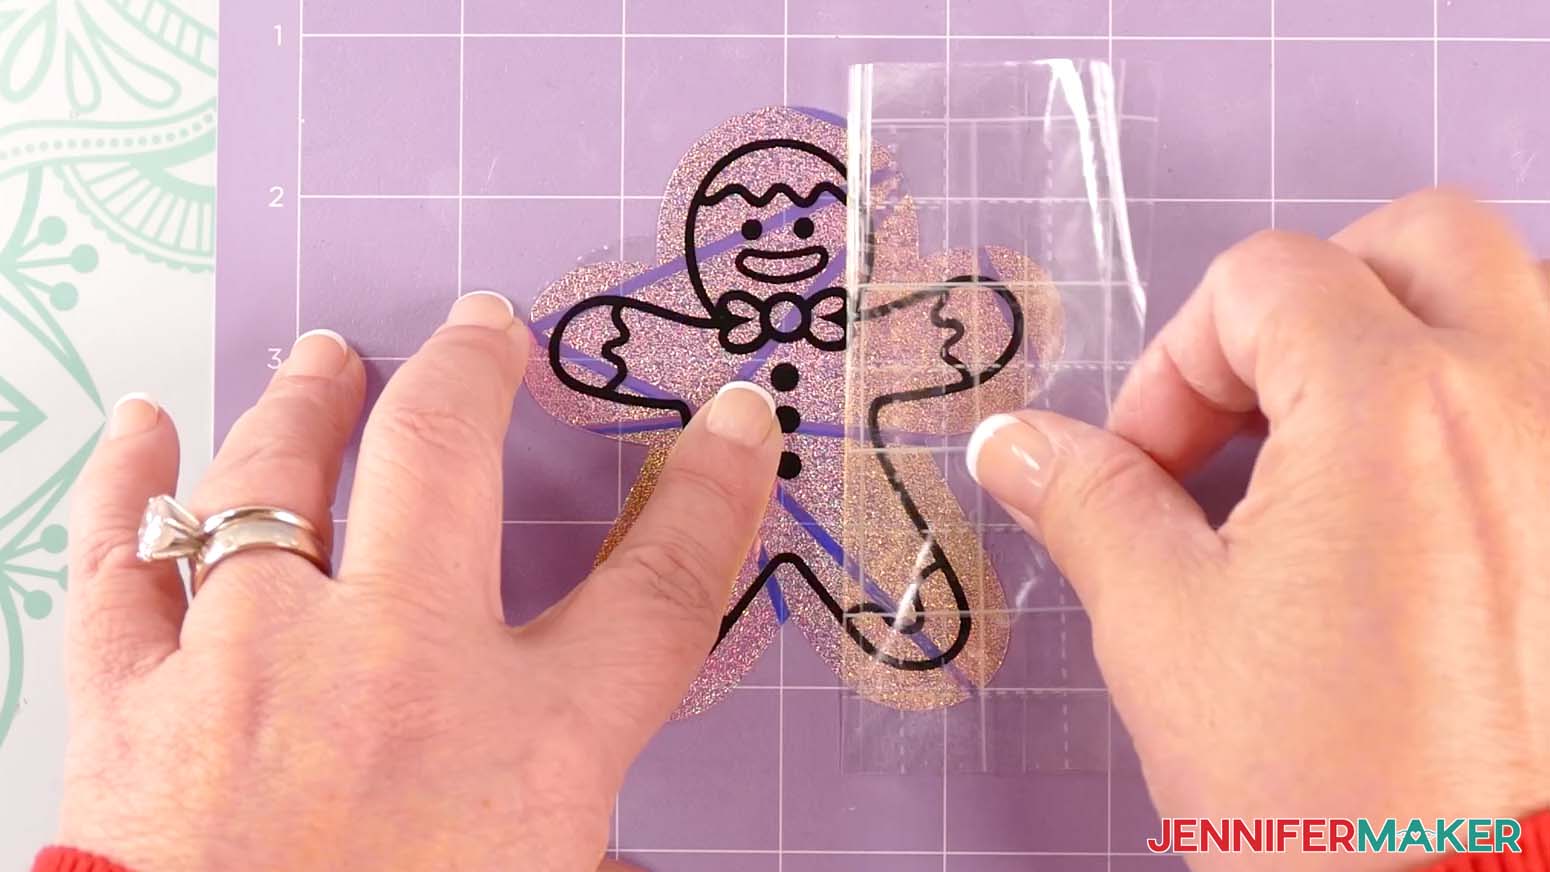
- Cut a piece of StandardGrip transfer tape that is slightly larger than your vinyl decal.
- Remove the backing from the transfer tape.
- Hold your transfer tape in the shape of a “taco” sticky side down, then place the bottom of the “taco” onto the middle of your decal.
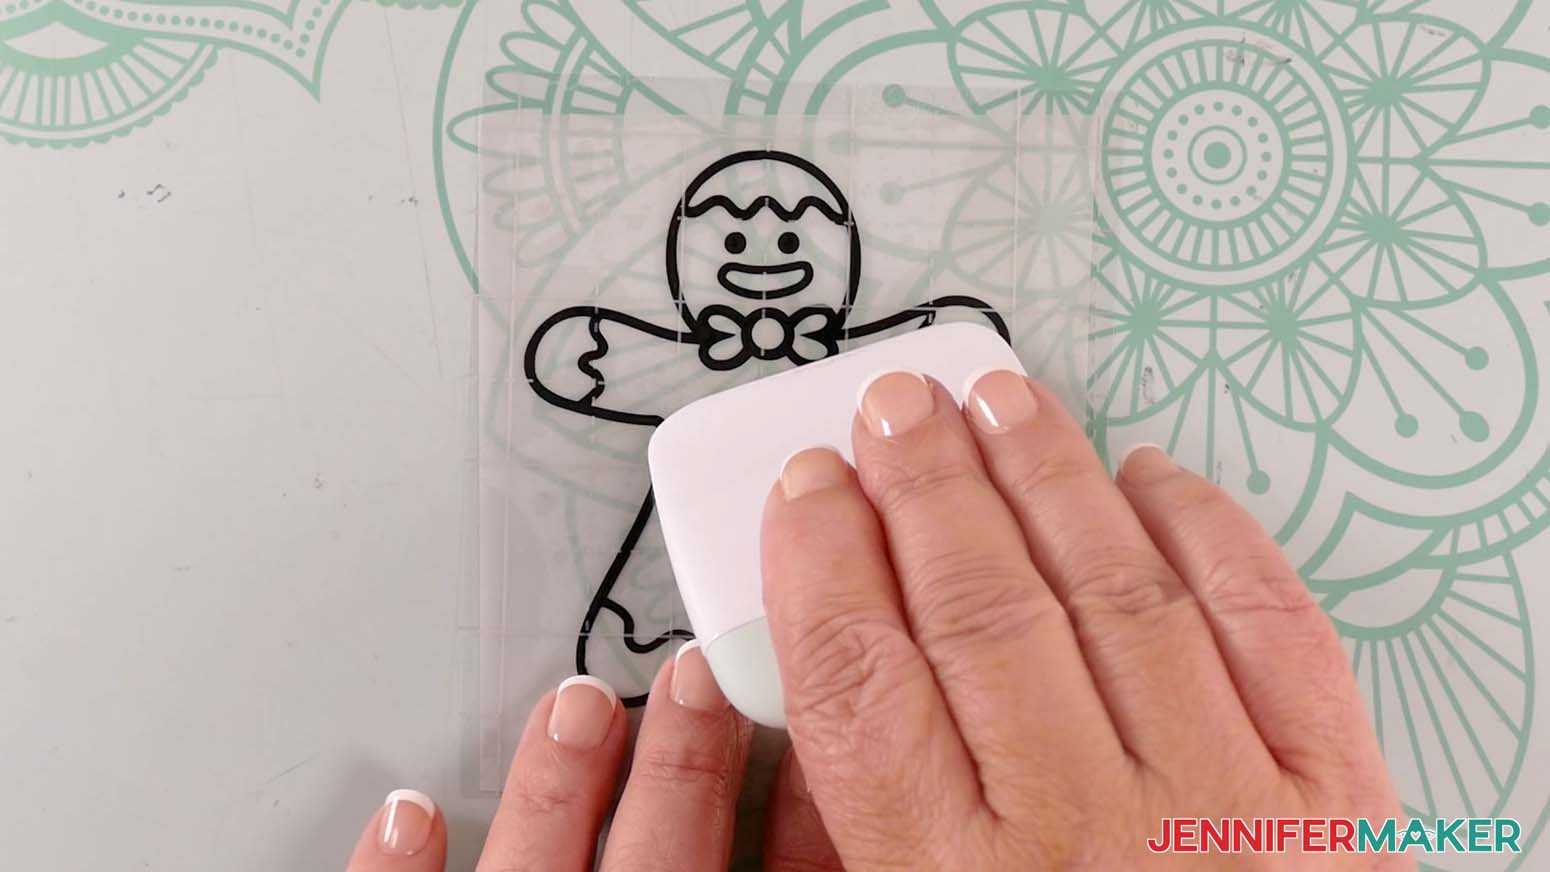
- Smooth the transfer tape over the decal from the center outward and burnish it down using the Scraper Tool.
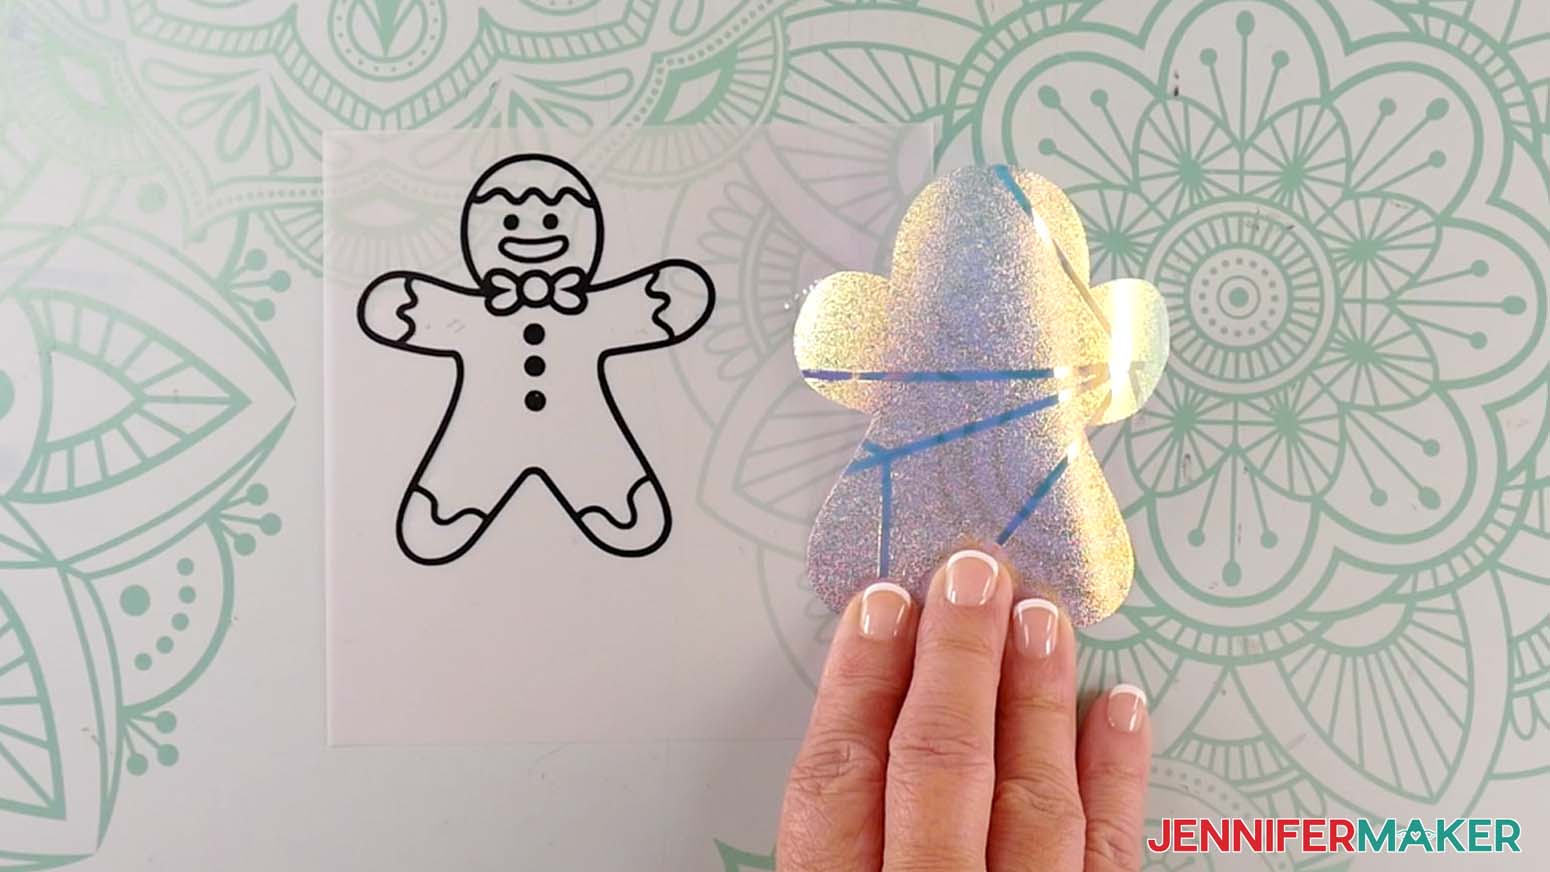
- Flip the design over and gently peel off the backing from the vinyl.
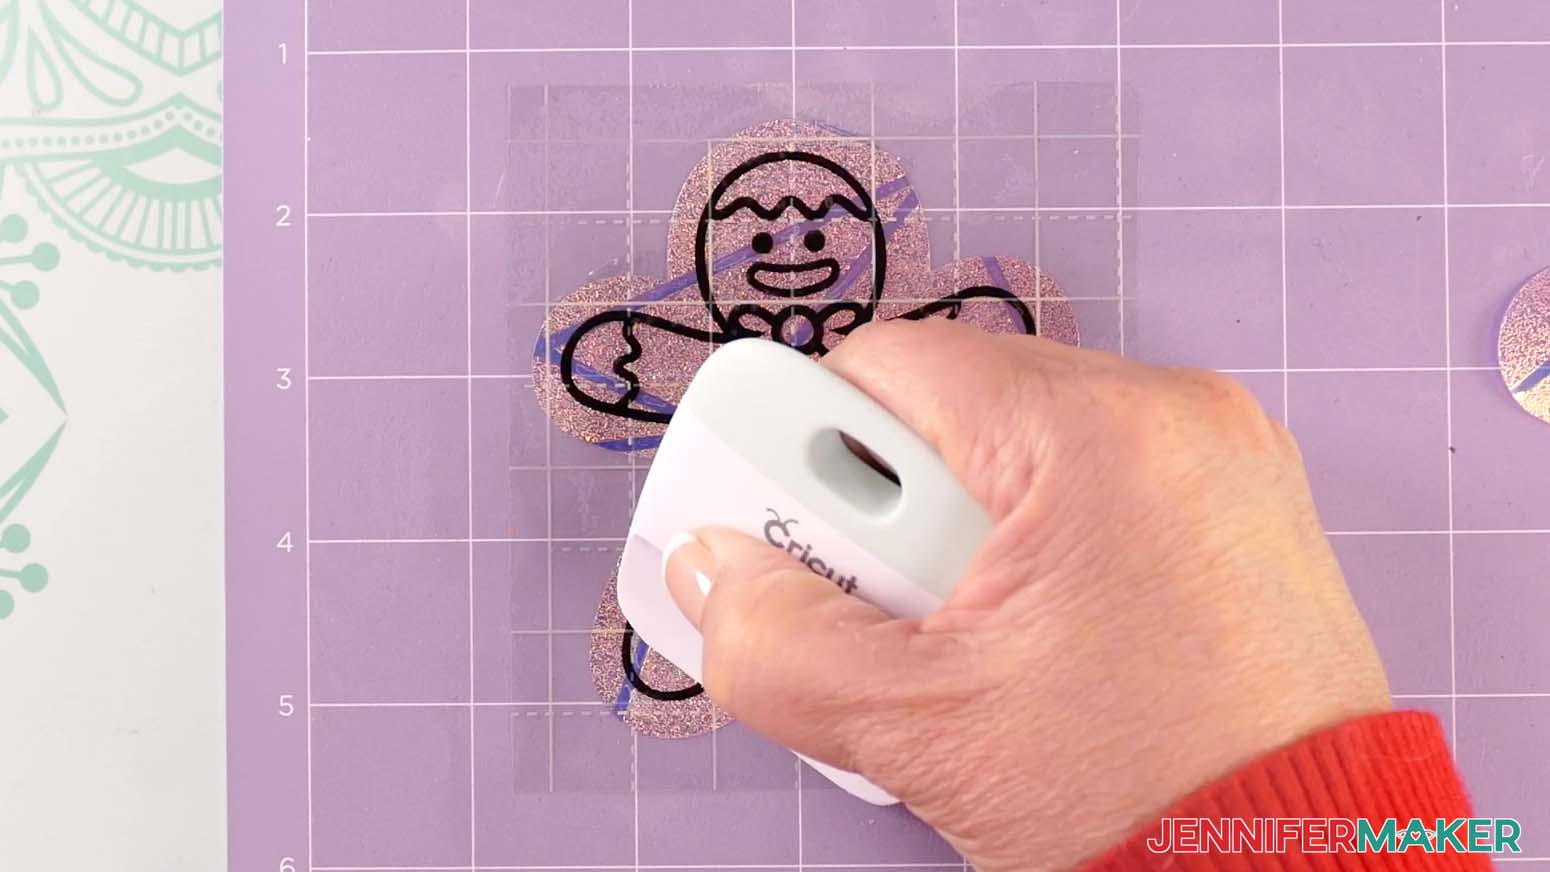
- Use the taco method to place the center of your decal onto the window cling layer.
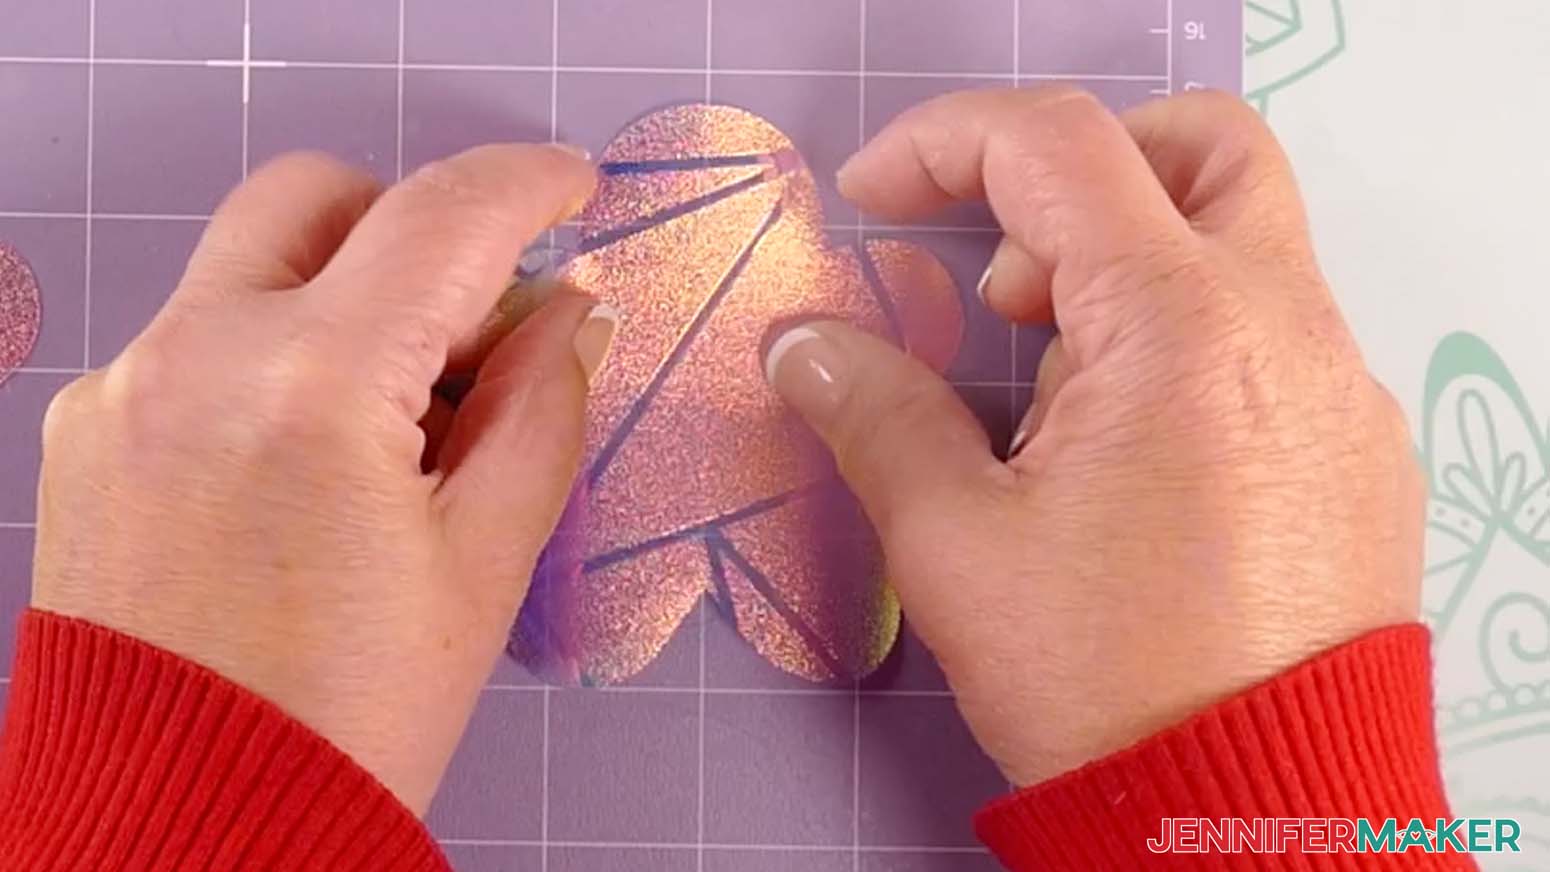
TIP: Gently lift the decal to try again if the vinyl isn’t aligned the way you want it. - Using your finger, rub from the center of the vinyl outward, tacking the vinyl into place on the window cling.
- Take your time and use a scraper to press out as many bubbles as possible.
- Once the vinyl is well-burnished, hold the cling down and gently remove the transfer tape, leaving the vinyl on the window cling.
STEP 4: SHOW IT OFF
You now have a cute gingerbread man winter window cling to show off!
When you’re ready to decorate your window, peel the backing off the cling material, then affix the cling in your desired location!
Notes
Finished Sizes: 4" x 4" to 4" x 6"
All fonts used are hand drawn.
Answers to Your Questions About Window Clings with Festive Snowflake Designs
Q: I want to customize the festive snowflake designs with my own words or names. How do I do that?
A: You can learn how to design a customized word snowflake from my tutorial, and then how to turn it into a window cling in my ADVANCE program. Learn more about ADVANCE here!
Q: I’m new to SVGs — what if I don’t know how to unzip the file?
A: I walk through the download flow in the video, and if you need extra help with unzipping, visit jennifermaker.com/svgs for a quick tutorial.
Q: What machines can cut these materials?
A: Any Cricut cutting machine can cut the permanent vinyl and the window cling material. In the tutorial, I used a Cricut Maker 3 in the main tutorial.
Q: What materials and tools do I need to make the word snowflake window clings?
A: You’ll need window cling material, permanent vinyl for your word snowflake design, StandardGrip transfer tape, a weeding tool, and a Scraper Tool for burnishing. You’ll also need Cricut mats (I use both StandardGrip and StrongGrip in the tutorial).
Q: What Cricut Design Space settings should I use for the window cling layer?
A: In the tutorial, I use the “Stencil Film” setting with “More” pressure for the window cling material, and I place it carrier-sheet-down on a purple StrongGrip mat.
Q: What Cricut Design Space settings should I use for the vinyl layer?
A: For the vinyl tests (and the vinyl layer on the window cling), I use the “Premium Vinyl – Permanent Glossy” setting with “More” pressure on a green StandardGrip mat.
Q: Do I need a Cricut to make these?
A: While I recommend cutting intricate designs like these with a cutting machine, you could cut the window cling material with sharp scissors, and use a craft knife or X-acto knife with a self-healing mat to very carefully cut out the vinyl design by hand.
Q: My window cling material is curling. How do I keep it from shifting while I apply the vinyl?
A: I’ve got an easy fix. Put your weeded window cling layer back on a machine mat, carrier-sheet-down, to hold it flat while you position and burnish your vinyl.
Q: How do I apply the vinyl to the window cling without bubbles?
A: Use StandardGrip transfer tape cut slightly larger than your decal, apply it to the weeded vinyl, burnish from the center outward, peel the vinyl backing away gently, then align and place it onto the cling. Rub from the center outward with your fingers, then use the Scraper Tool to press out bubbles before peeling off the transfer tape. I show you exactly how to do it in the tutorial video!
Q: What if small pieces lift up when I remove the transfer tape?
A: Go slowly, and if a small area lifts, just pat it back into place with your finger or weeding tool and burnish again. When removing transfer tape, it’s normal for a few tiny spots to lift until you get the hang of it, but they’re easy to fix with a little extra burnishing.
Q: Which vinyl brands worked best in your test?
A: Cricut Value Vinyl cut well, weeded easily, and transferred smoothly to the window cling. HTVRont and Oracal were also successful overall. The Dollar Tree vinyl had more issues (including cutting through the backing in spots, difficult weeding, and trouble adhering securely during transfer). Get my full take in the tutorial video!
Q: Is this vinyl test sponsored?
A: No! As always, my reviews are unbiased and completely unsponsored by choice, and I’m not paid by any company to say anything positive or negative.
Q: Can I make a multi-colored version of these word snowflakes?
A: Yes! There’s a way to separate designs into layers in Cricut Design Space, and in the video I preview that idea. If you want the full step-by-step skill, I also teach it more deeply inside my ADVANCE with JenniferMaker program.
Q: How do I put the finished cling on my window?
A: Simply peel the backing off the cling material and place it where you want it on the window. I recommend cleaning your window first for better adherence.
Q: Can I use the snowflake files for other projects?
A: Absolutely! There are a quite a few easy methods (along with projects for ALL skill levels) to use these designs besides making window clings. You can cut them from paper or cardstock to make beautiful paper snowflakes, use a Cricut Pen to draw them onto light colored or white paper for cards and other projects, foil them to turn them into seasonal wall art, turn them into Christmas tree ornaments or gift tags, use them as iron-on vinyl designs, cut them from cardstock and use them to decorate other projects using craft glue, and more! Don’t you just love the versatility of SVGs?
Q: Do you have any more window cling projects I can make?
A: I sure do! Check out these other suncatcher and cling tutorials and designs to brighten up your windows:
Q: Can I make and sell suncatcher window clings?
A: If you want to use my designs and projects for commercial use, please familiarize yourself with my important licensing information before selling your crafts.
Get my free SVG/DXF/PDF files to make suncatchers with festive snowflake designs!
(If you do not see the signup form above, click here.)
I love seeing what you make with my tutorials and how you customize them! Please share a photo of your suncatchers with festive snowflake designs in our Facebook group or tag me on social media with #jennifermaker.
Love,

Want to remember this? Save this Suncatcher Window Clings with Festive Snowflake Designs tutorial to your favorite Pinterest Board!