Learn how to convert an Epson Printer for sublimation!
The first time I saw a plain white mug come out of a press with a full-color design that looked professionally made, I assumed you needed to have a pricey setup for sublimation crafting success. Traditional sublimation printers can certainly be expensive, and a craft room might not be the best place for one. So, I spent a long time researching available alternatives, and luckily I discovered how to achieve the gorgeous prints of your dreams without putting a huge dent in your wallet. Learning how to convert an Epson printer for sublimation is still one of my favorite craft room upgrades because it has opened the door to beautiful crafts right from the very best place of all: my home.
Watch the full step-by-step tutorial on how to convert an Epson printer for sublimation:

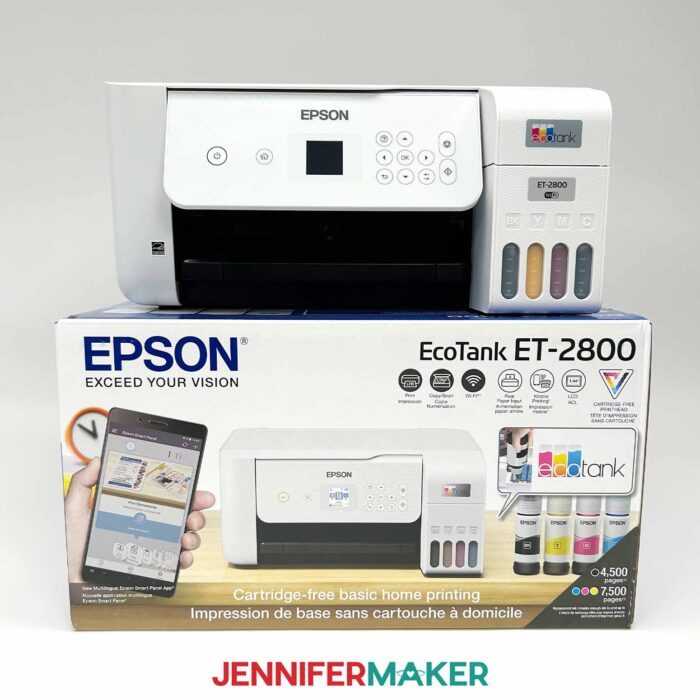
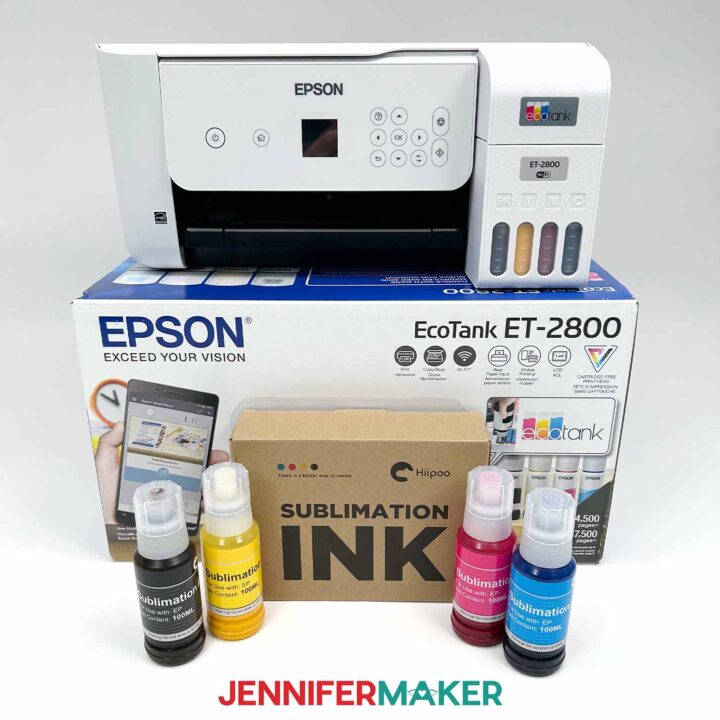
If you’ve been curious about sublimation printing but don’t want to pay full price for dedicated sublimation printers, converting an Epson printer can be a smart, more affordable way to get started. The conversion process isn’t complicated, but it does have one non-negotiable: you need a brand new printer that has never had ink inside. That’s why Epson EcoTank models are so popular for this—they use fillable ink tanks, so you can easily monitor ink levels, refill cleanly, and avoid cartridge headaches. Just keep in mind that once you commit, it’s no longer a regular printer for everyday use unless you do a full system flush—a process I don’t recommend.
The materials are simple, and choosing the right ones makes the whole experience smoother. You’ll want high-quality sublimation ink. Hiipoo sublimation ink in autofill bottles is my go-to because it’s designed for EcoTank-style filling. You’ll also need sublimation paper (I often use A-SUB sublimation paper) and a small stack of regular copy paper for test prints. Once you open the box, make sure to set aside the included Epson ink. Don’t use it, and definitely don’t mix the inks together!

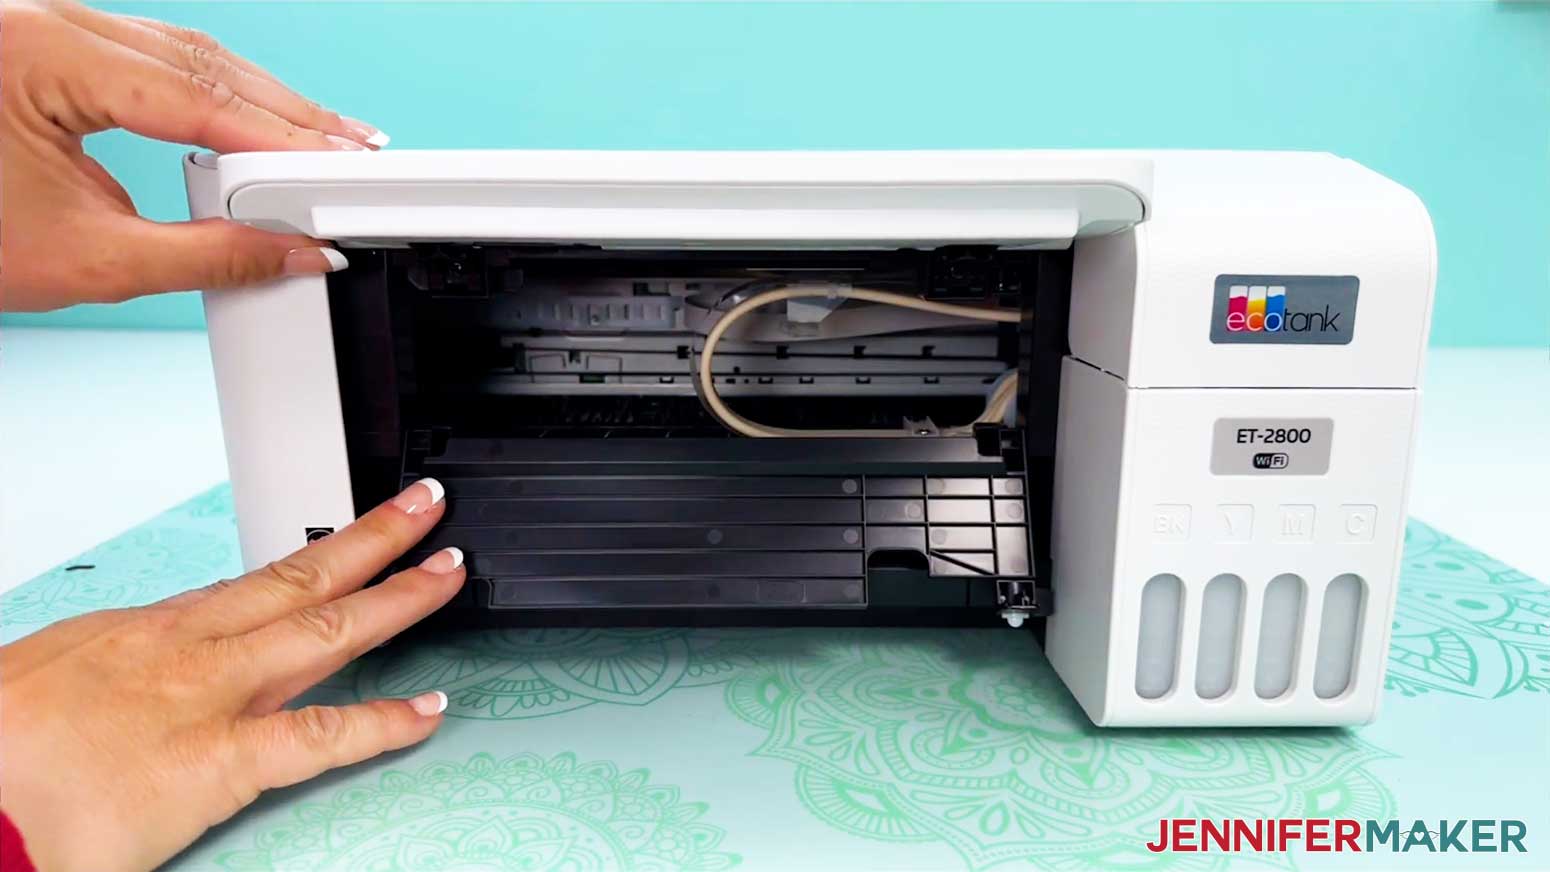
From there, the initial setup steps are mostly about being thorough and patient. After unboxing, remove every bit of protective tape and internal packing you can find. Then we get to the heart of the conversion process: filling the empty tanks with sublimation ink. Each ink bottle fits snugly onto an opening, then gravity works to fill the compartments to the marked line—no squeezing needed. Once the tanks are filled, the printer runs its initialization cycle to pull ink through the system.
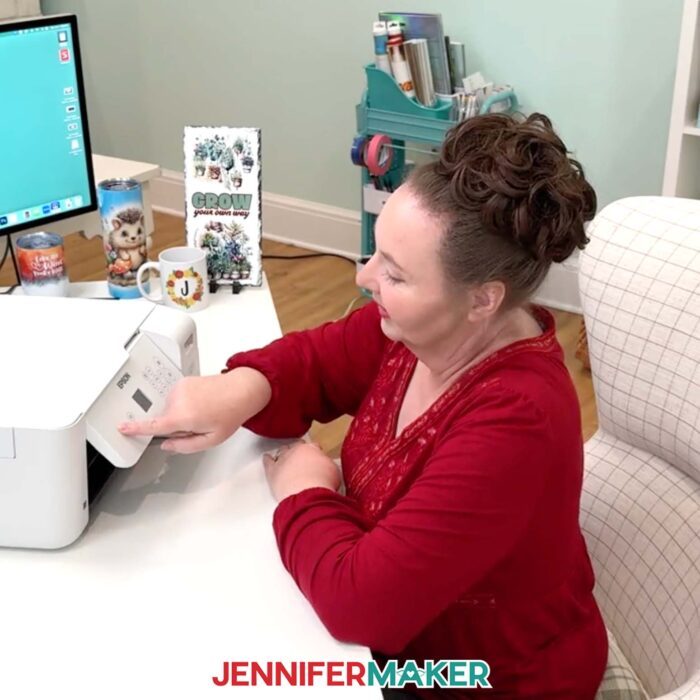
Before you print your first design, run nozzle checks and, if needed, print head cleanings. This is where those early test prints earn their keep—clean, unbroken lines mean you’re ready to move forward. Then connect the printer to your computer, install the drivers, and acquaint yourself with your printer settings. In my video, I walk through the print settings that matter most, including selecting an appropriate paper type, choosing a higher quality print mode, and turning on the mirror option so your design transfers correctly.
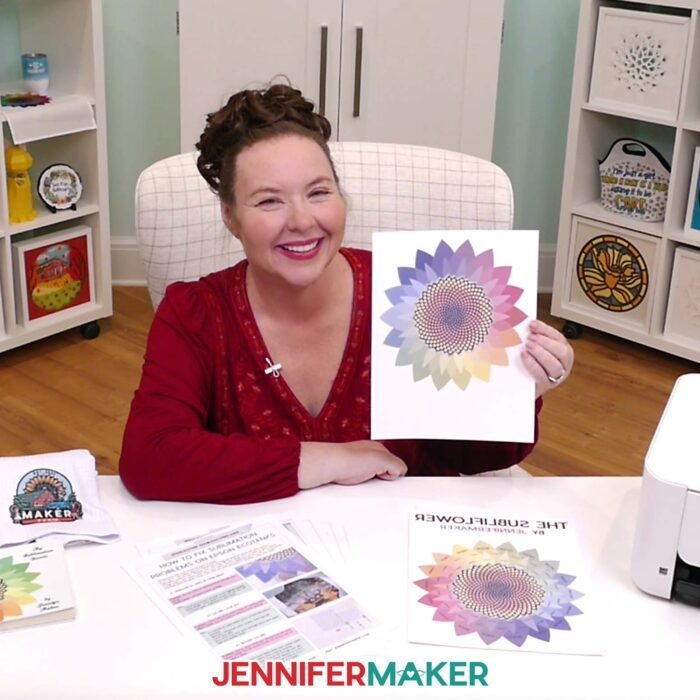
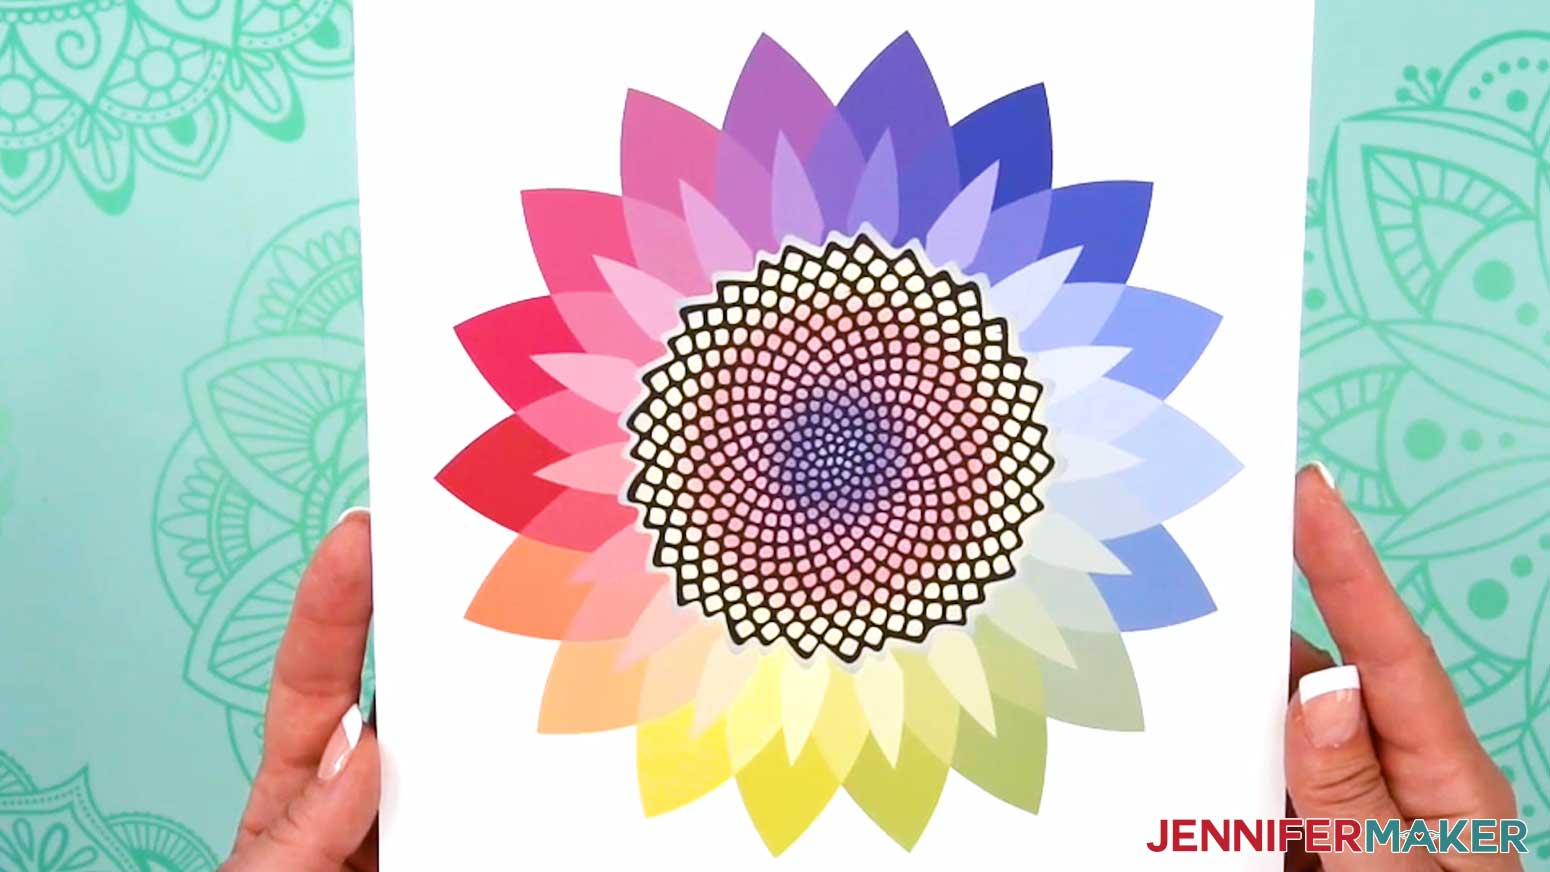
When your design prints, it may look a little muted at first. That’s normal. During pressing, the ink turns to a gaseous state and bonds into the blank’s sublimation-ready surface of polymers, making those vivid colors appear. I’ll demonstrate with my free Subliflower PNG design so you know exactly how your first print should look. You can get the file in my free download!
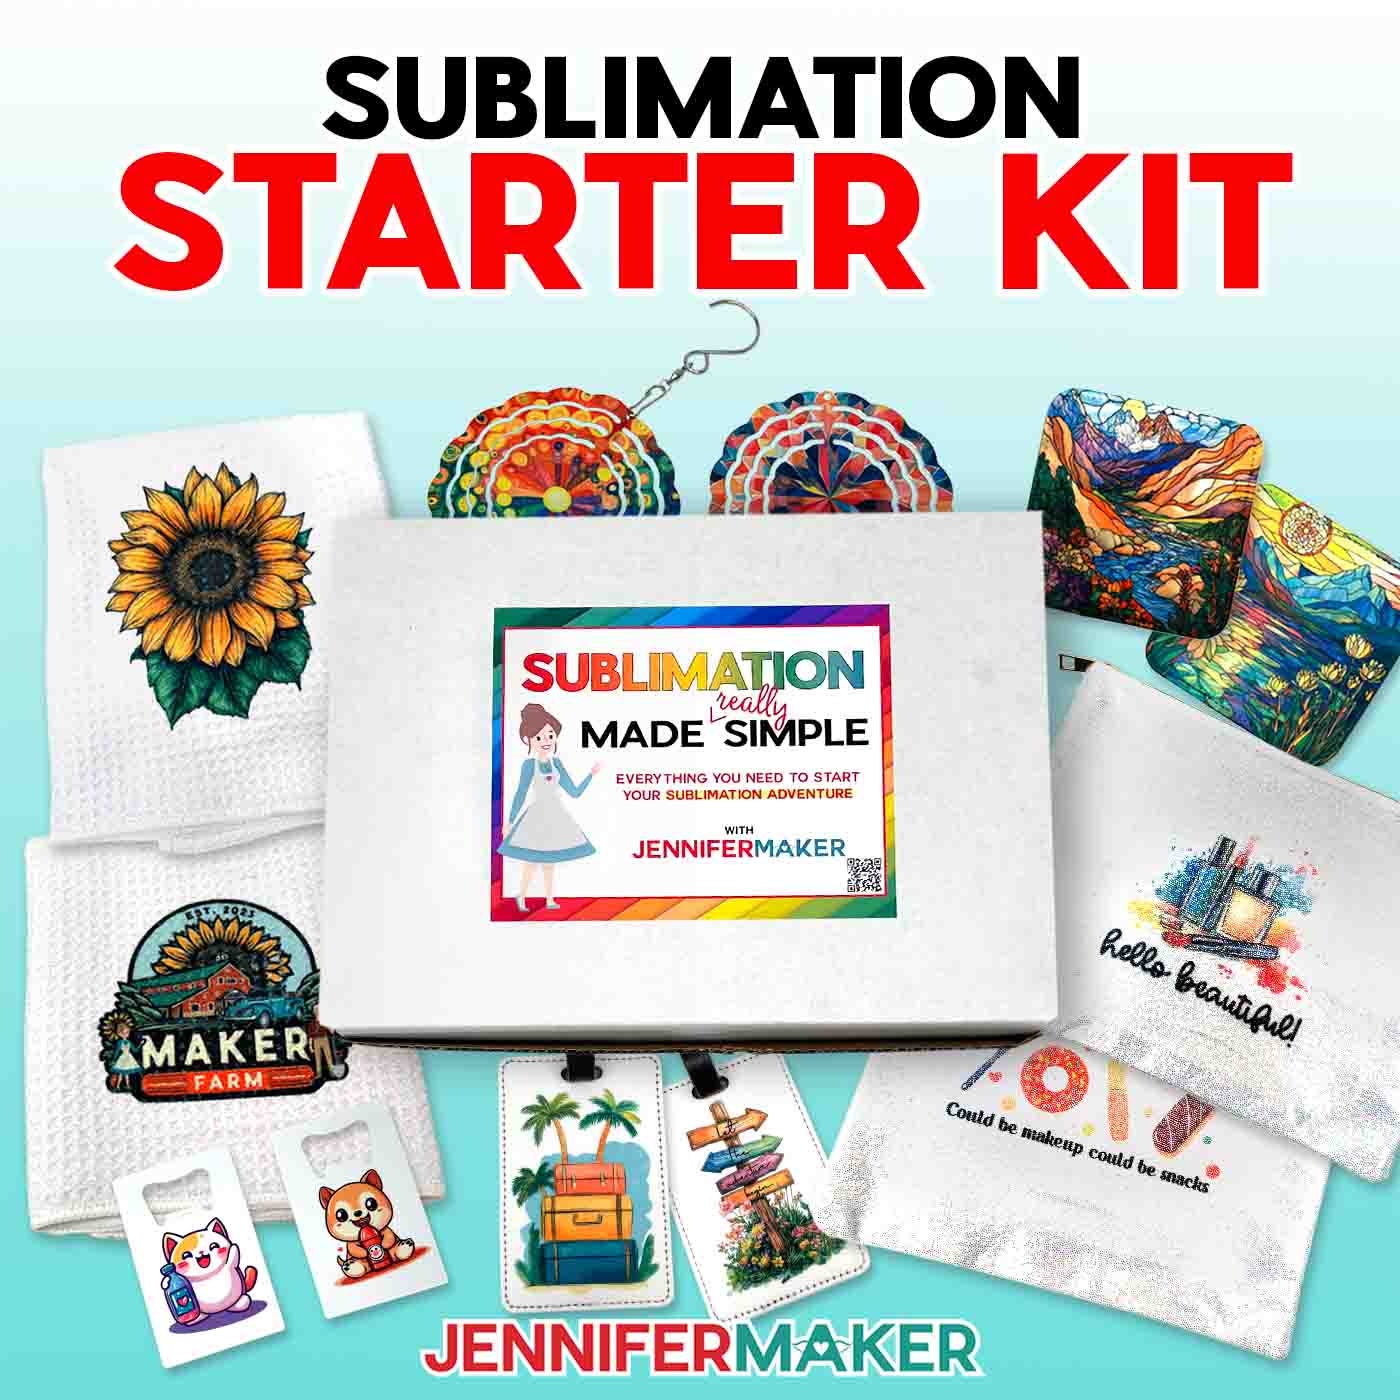
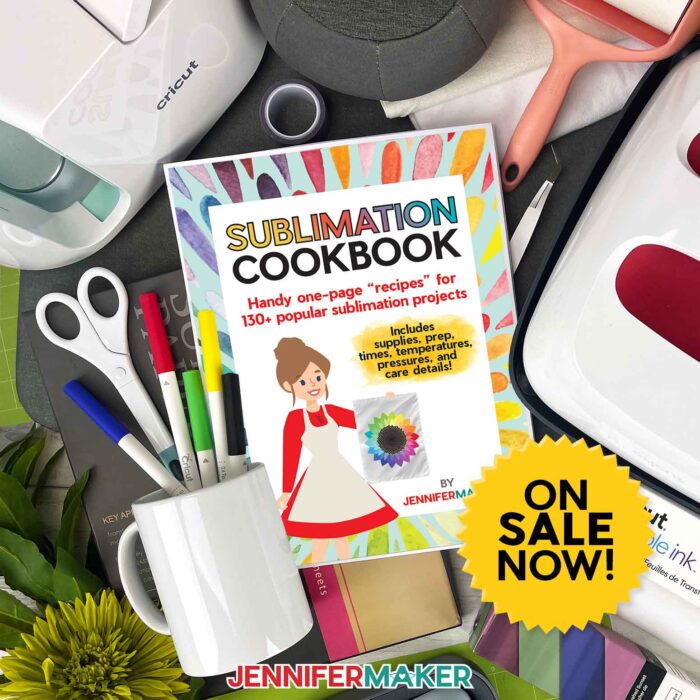
And once you’ve got that first successful print in hand, you’re ready to jump into all sorts of sublimation projects—mugs, shirts, ornaments, coasters, and all the fun things you’ve been saving on your “someday” list. For tips and tricks for sublimation success, check out my Sublimation Cookbook. It’s packed with loads of information to help you achieve great results consistently, including recommended time, temperature, and heat press settings for tons of unique materials.
The easiest way to avoid mistakes when converting your Epson EcoTank printer for sublimation is to keep my step-by-step tutorial video open as you work. I’ll guide you through unboxing your printer, adding the inks, initializing the setup, and completing your very first print. From here, the sky’s the limit!
Want to learn how to convert an Epson printer for sublimation? Let me show you how fun and easy it can be! This post contains some affiliate links for your convenience (which means if you make a purchase after clicking a link I will earn a small commission but it won’t cost you a penny more)! Read my full disclosure policy.
Materials to Convert an Epson Printer for Sublimation
View my Amazon shopping list with the exact items I used.
- Hiipoo Sublimation Ink
- Copy Paper
- A-SUB Sublimation Paper
- Epson EcoTank 2800
- USB Printer Cable
- A computer with Windows or Mac
- Design #752 (My free PNG design file is available in my free library – get the password by filling out the form at the bottom of this page)
How to Convert an Epson Printer for Sublimation
Convert An Epson Printer For Sublimation
Learn how to convert an inkjet printer for sublimation printing!
Materials
Tools
- Epson EcoTank 2800 (New)
- USB Printer Cable
- A computer with Windows or Mac
Instructions
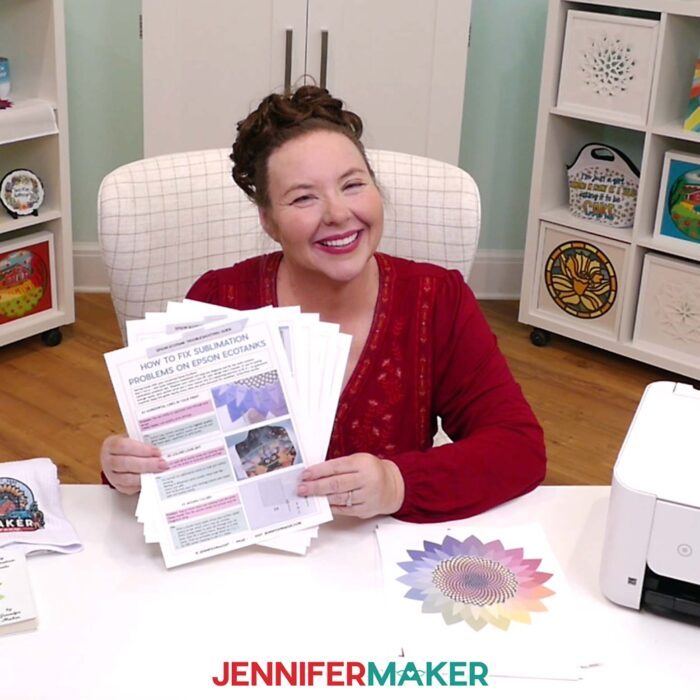
STEP 1: GET MY FREE SUBLIFLOWER DESIGN
First, download my Subliflower printer test files from my free library – look for Design #752. Alternatively, you can use the Save This Project form near the top of this post and the design link will be emailed to you.
TIP: If you’re not sure how to download Zip files and upload designs, go to jennifermaker.com/svgs. The steps are similar for PNGs and Google Docs.
STEP 2: UNBOX YOUR EPSON ECOTANK
- Open your printer’s box and remove the contents surrounding your printer, such as ink, software CDs, and printer cables.
- Set aside the ink that comes with your printer. We will NOT be using it for this.
TIP: Save the ink for a different EcoTank or donate it! - Take the printer out of the box and discard any packaging materials.
- Remove all pieces of protective tape on the outside of the printer.
TIP: Remember to check the various flaps and compartments, including the paper tray and under the scanner.
- Check for and gently remove all internal packaging materials as well.
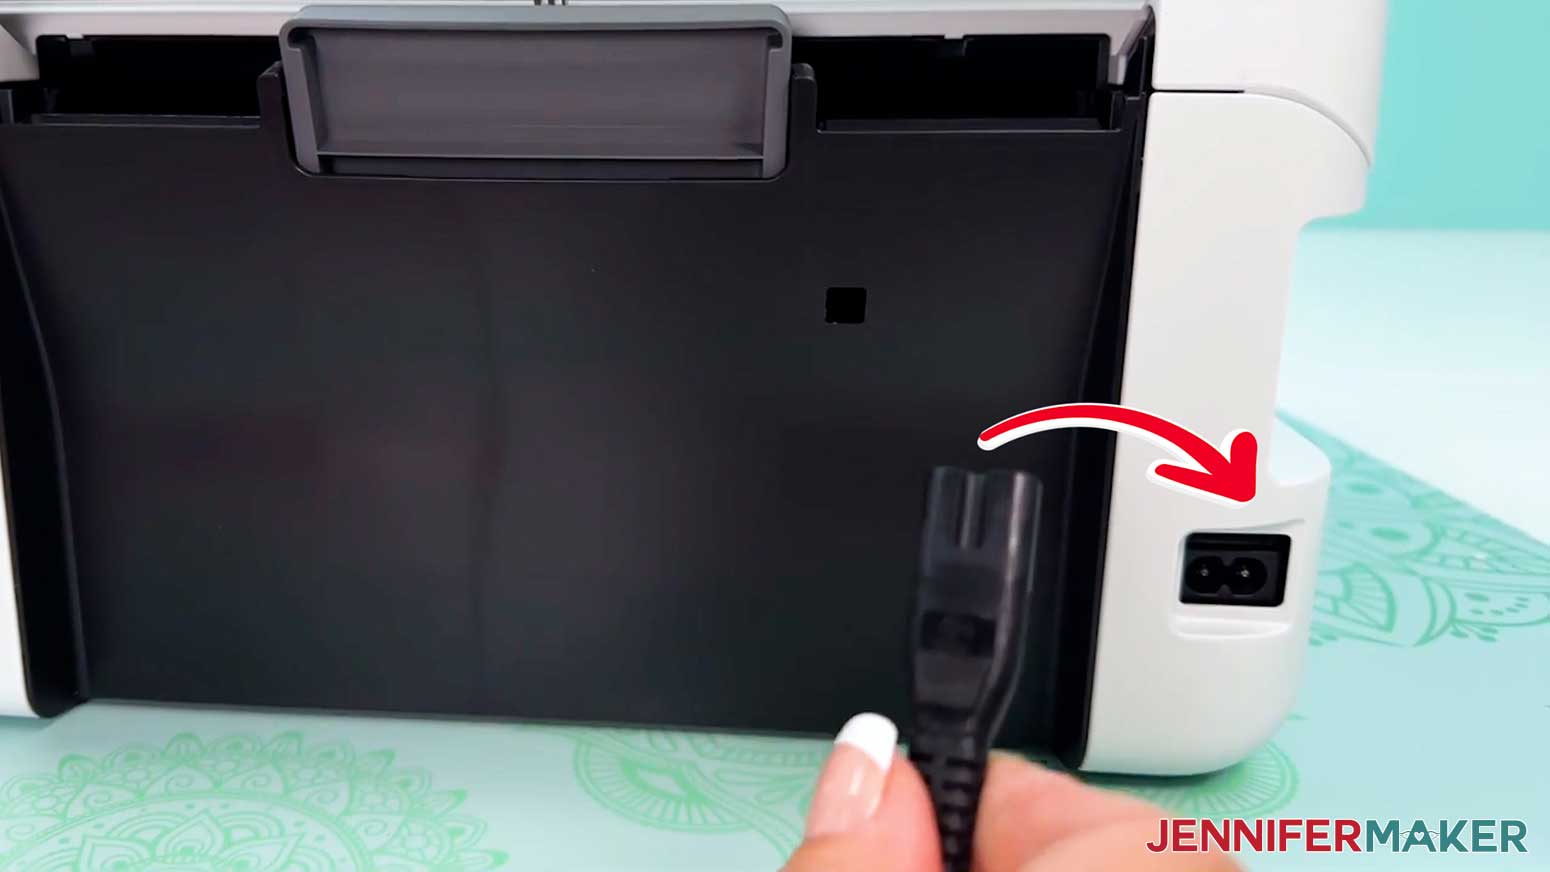
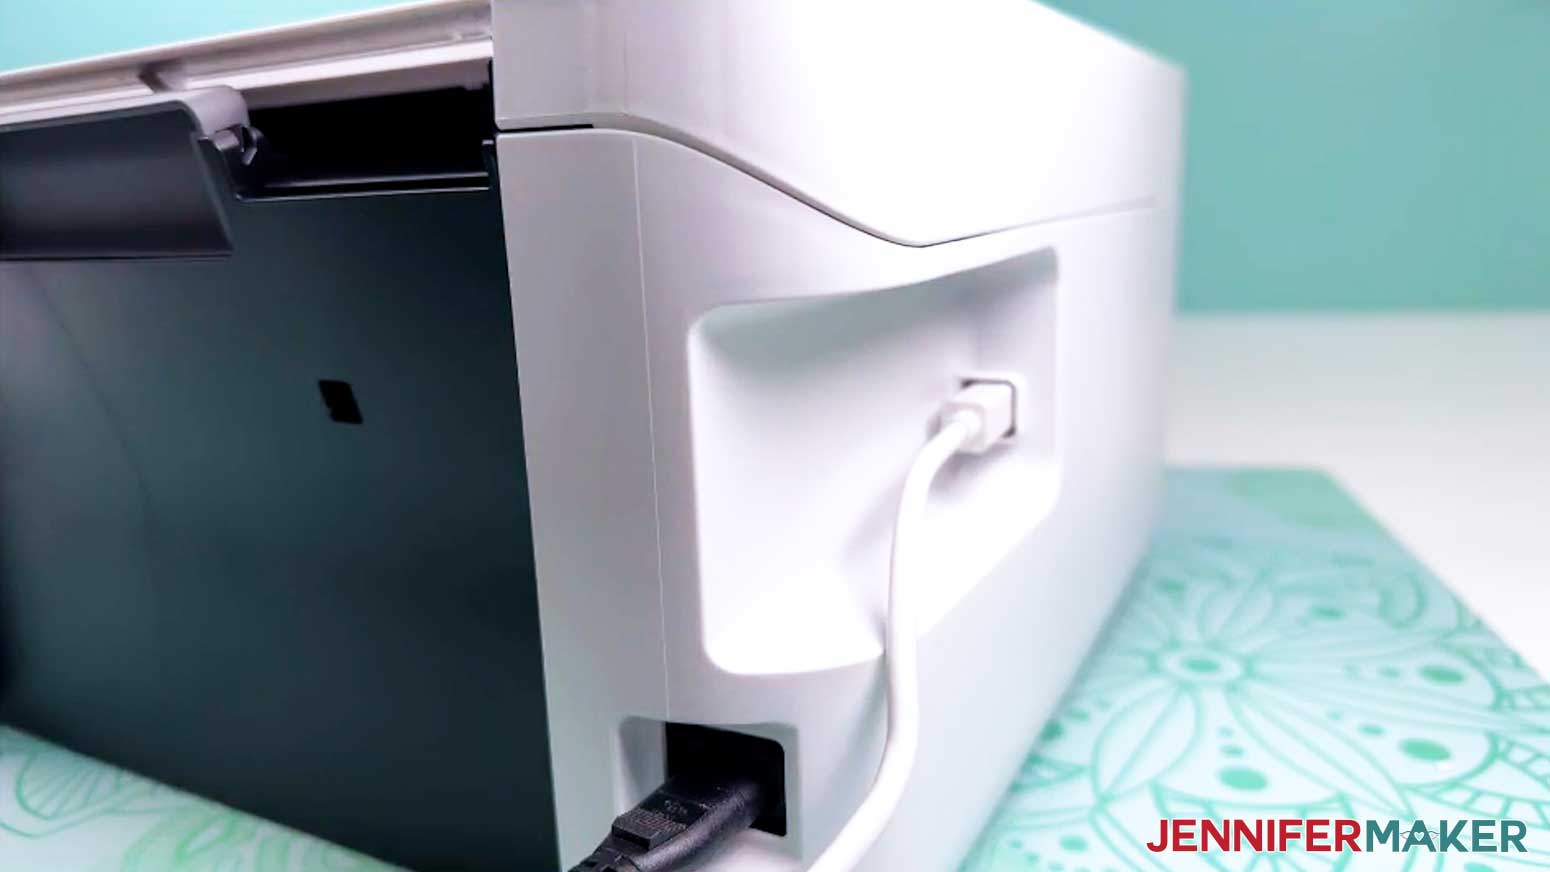
NOTE: Depending on your model, you may be able to raise the control panel and check under the scanner bed. - Plug the power cable into the back of your printer.
- Set up your printer on a stable, flat surface near an electrical outlet.
TIP: Choose a well-ventilated area to keep your printer and other sublimation equipment organized in one area! - Your printer is ready to begin the conversion process!
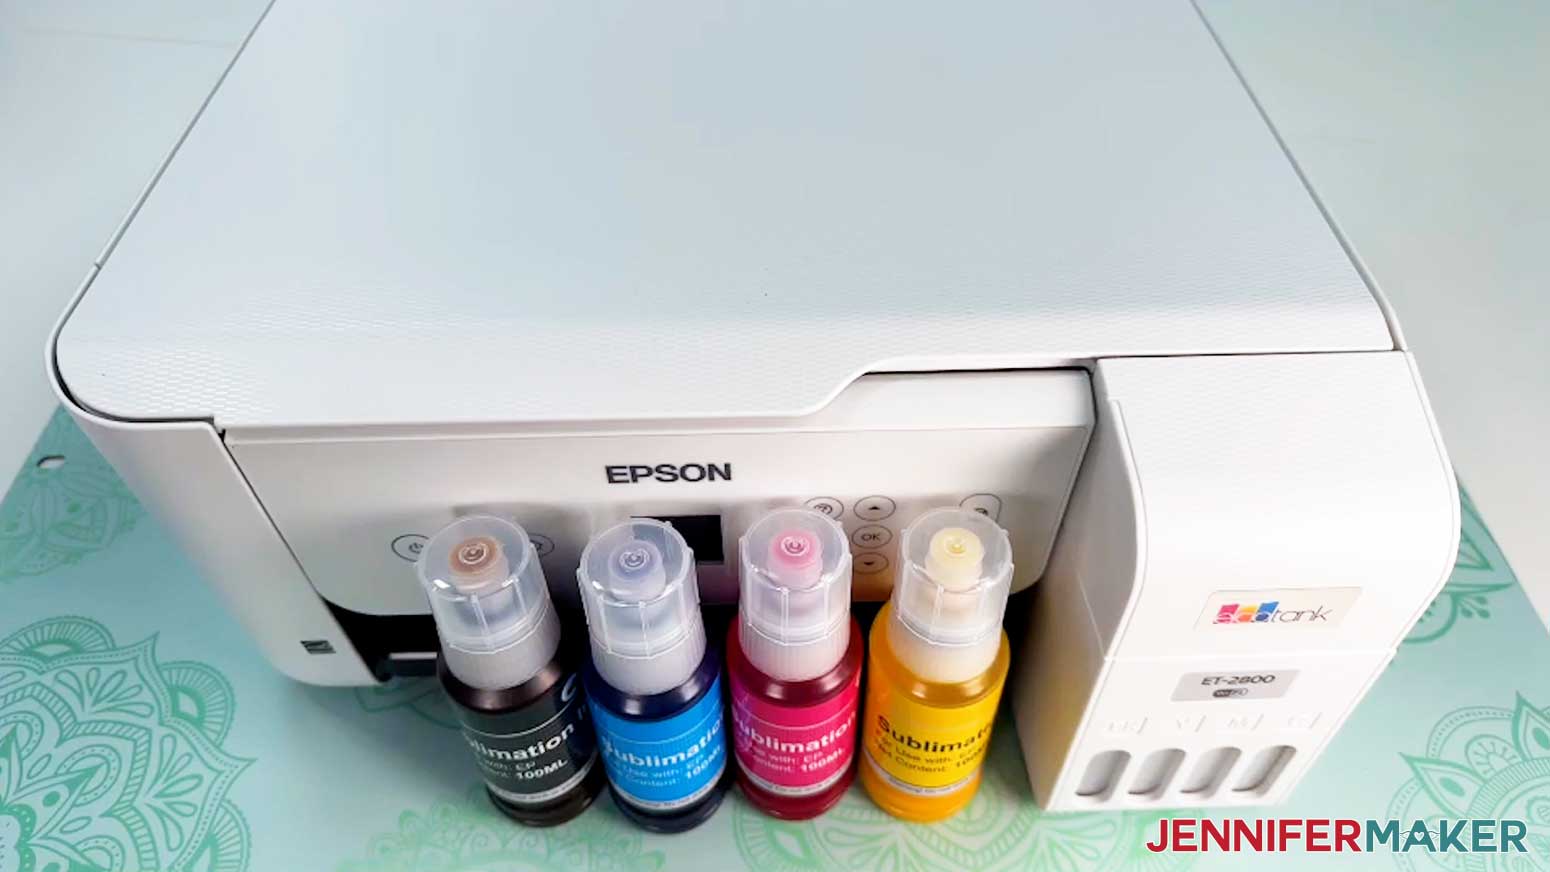
STEP 3: ADD THE SUBLIMATION INK
IMPORTANT: Once you’ve added sublimation ink to your printer, it will no longer be suitable for regular printing unless you perform a complete system flush. Please be aware that this process also voids your printer’s warranty.
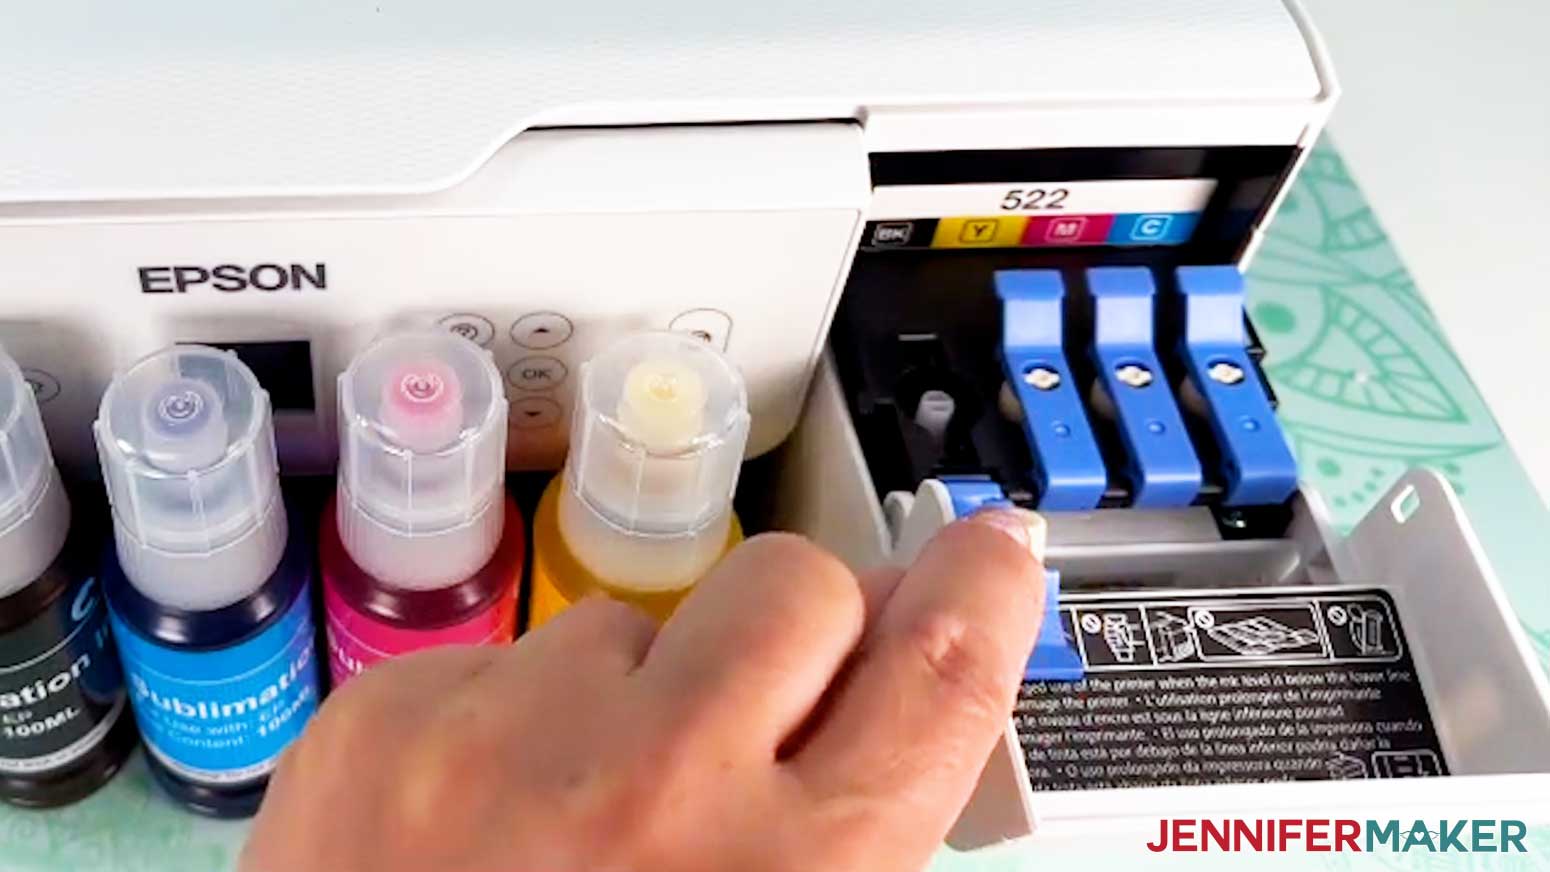
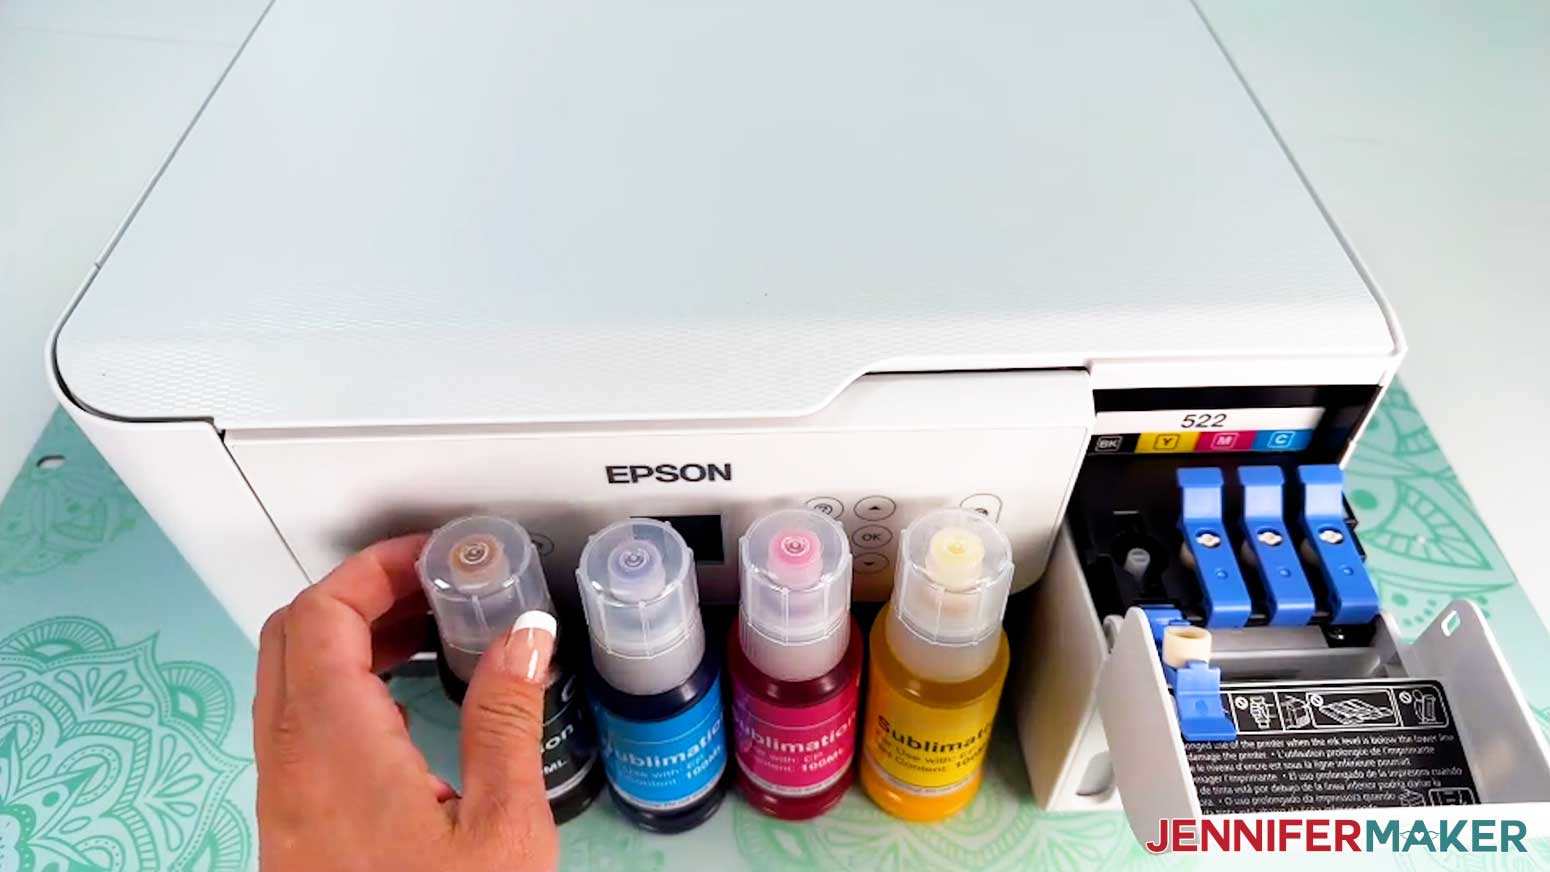
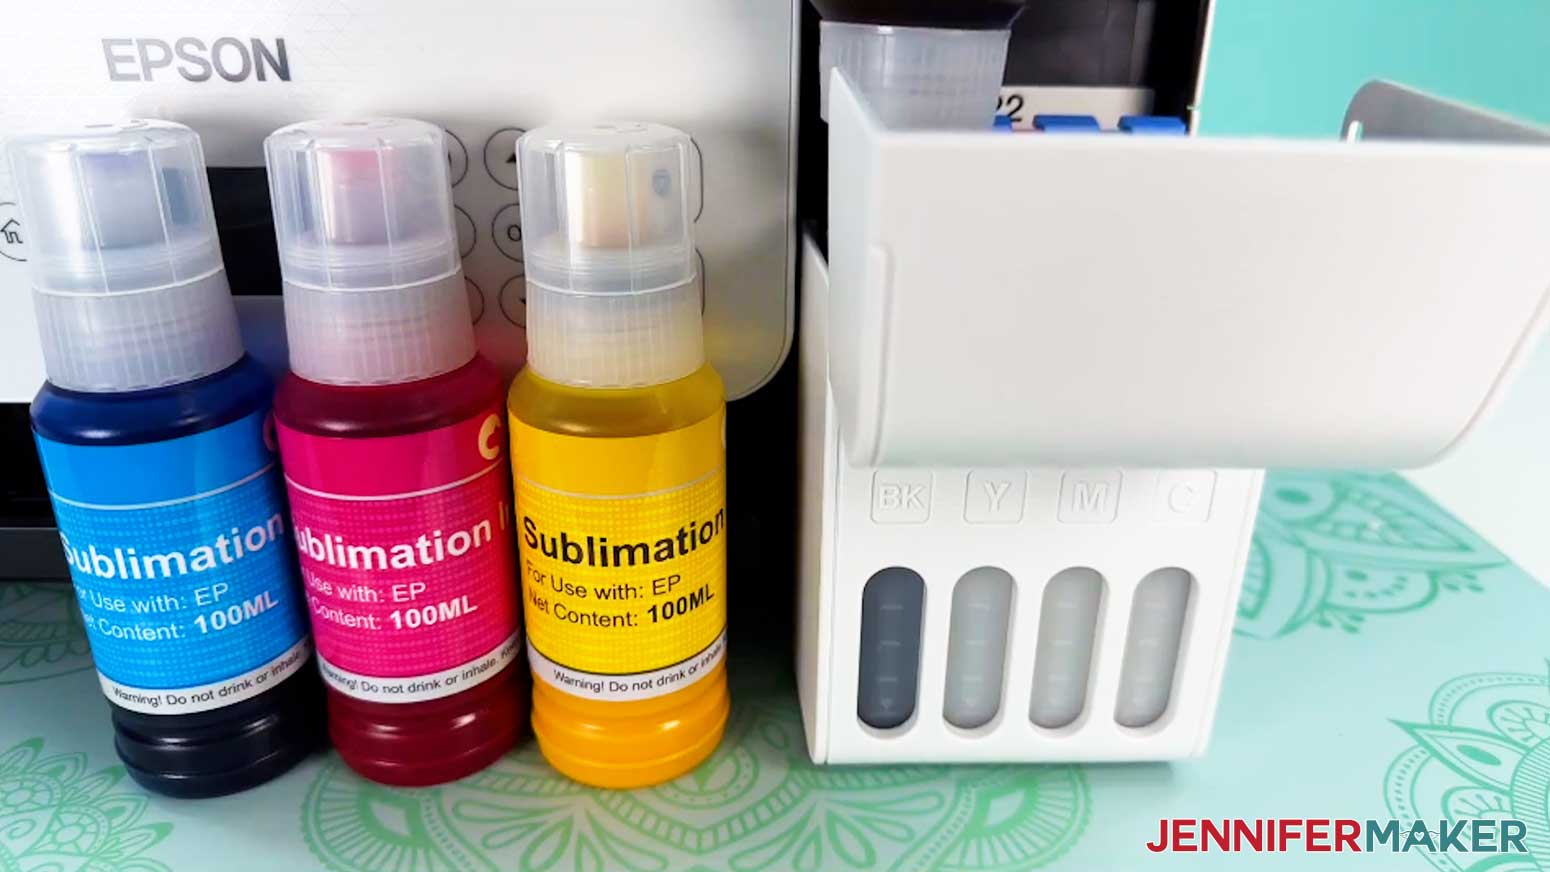
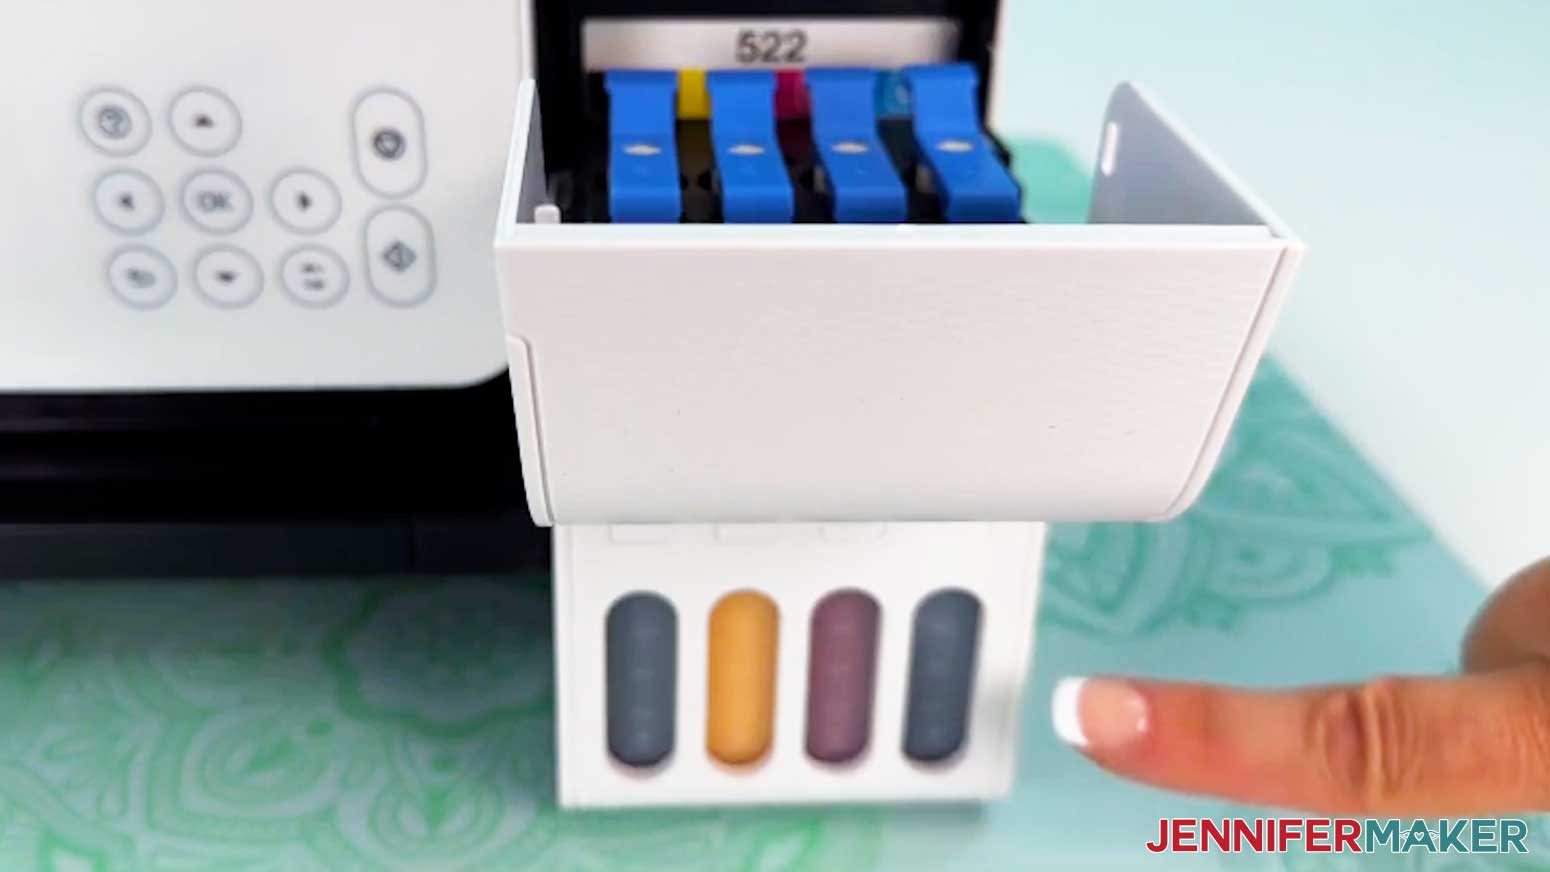
- Pop down the plastic cover above the ink tanks to access the filling compartment.
- Check the tank labels to make sure you know which color goes in each tank.
- Pull back the blue tab on the black ink tank.
- Unscrew the cap off your black sublimation ink bottle.
- Carefully flip over the bottle and place the autofill nozzle into the blank ink tank’s opening. It should click into place.
- Keeping an eye on the tank’s ink level from the front of the compartment, allow the ink to flow into the tank without squeezing the bottle.
- Once the ink reaches the tank’s fill line, remove the bottle and secure the cap.
- Replace the tab on the black ink tank.
- Repeat Steps 3-8 to fill the cyan, magenta, and yellow tanks.
- Your sublimation ink is ready to go!
STEP 4: SET UP YOUR ECOTANK
- Plug your printer into an electrical outlet.
TIP: If your model allows it, tilt the control panel upward to see the display clearly. - Press the power button to begin setup and initialization.
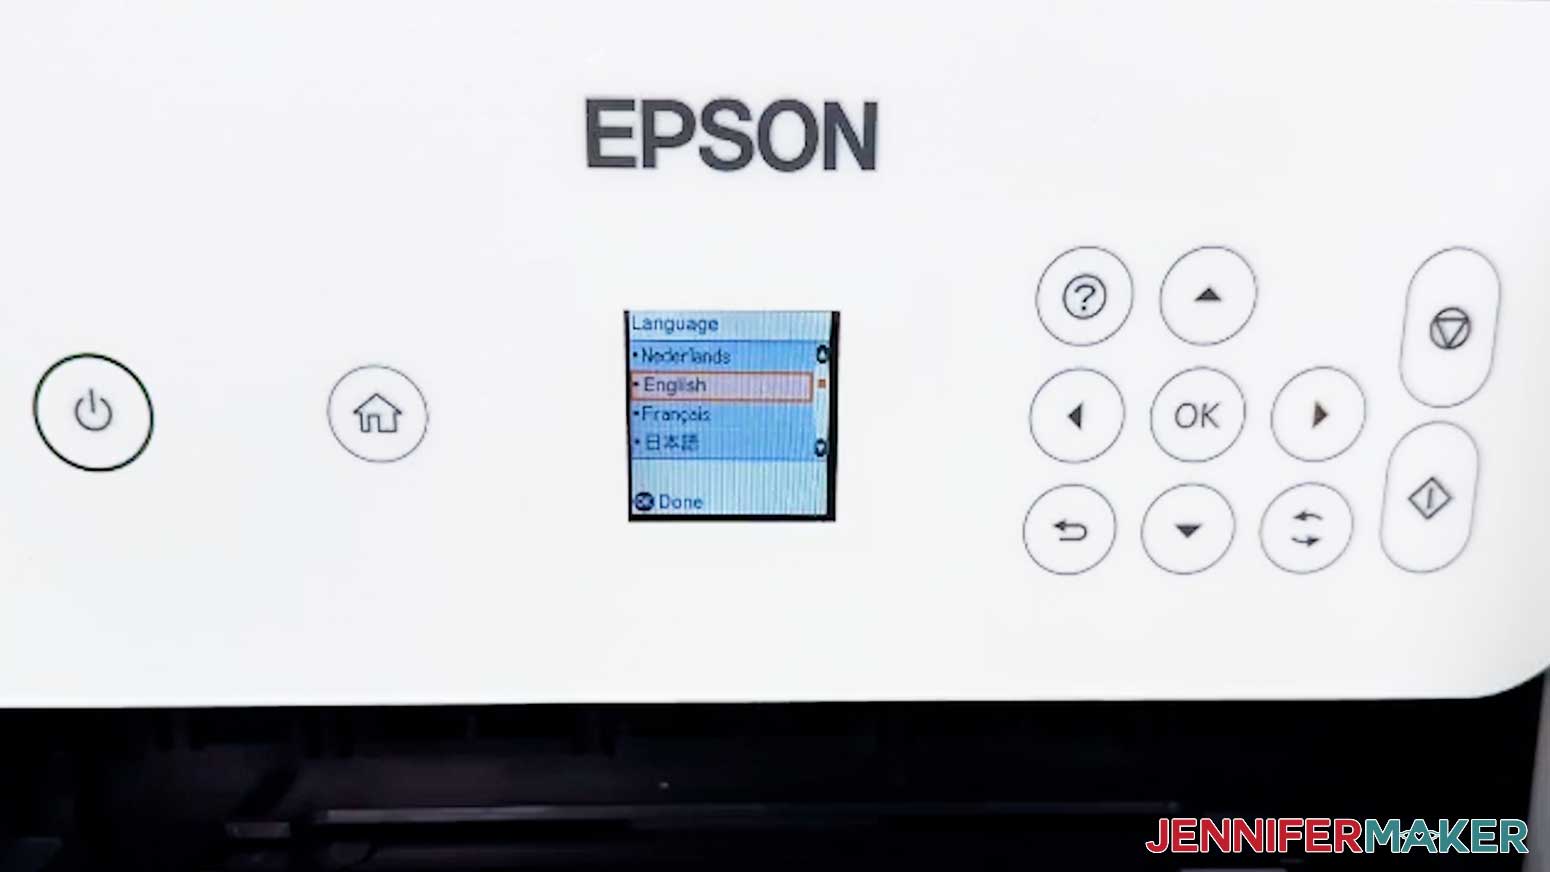
- Follow the initial prompts to set your printer’s basic information, such as language and location.
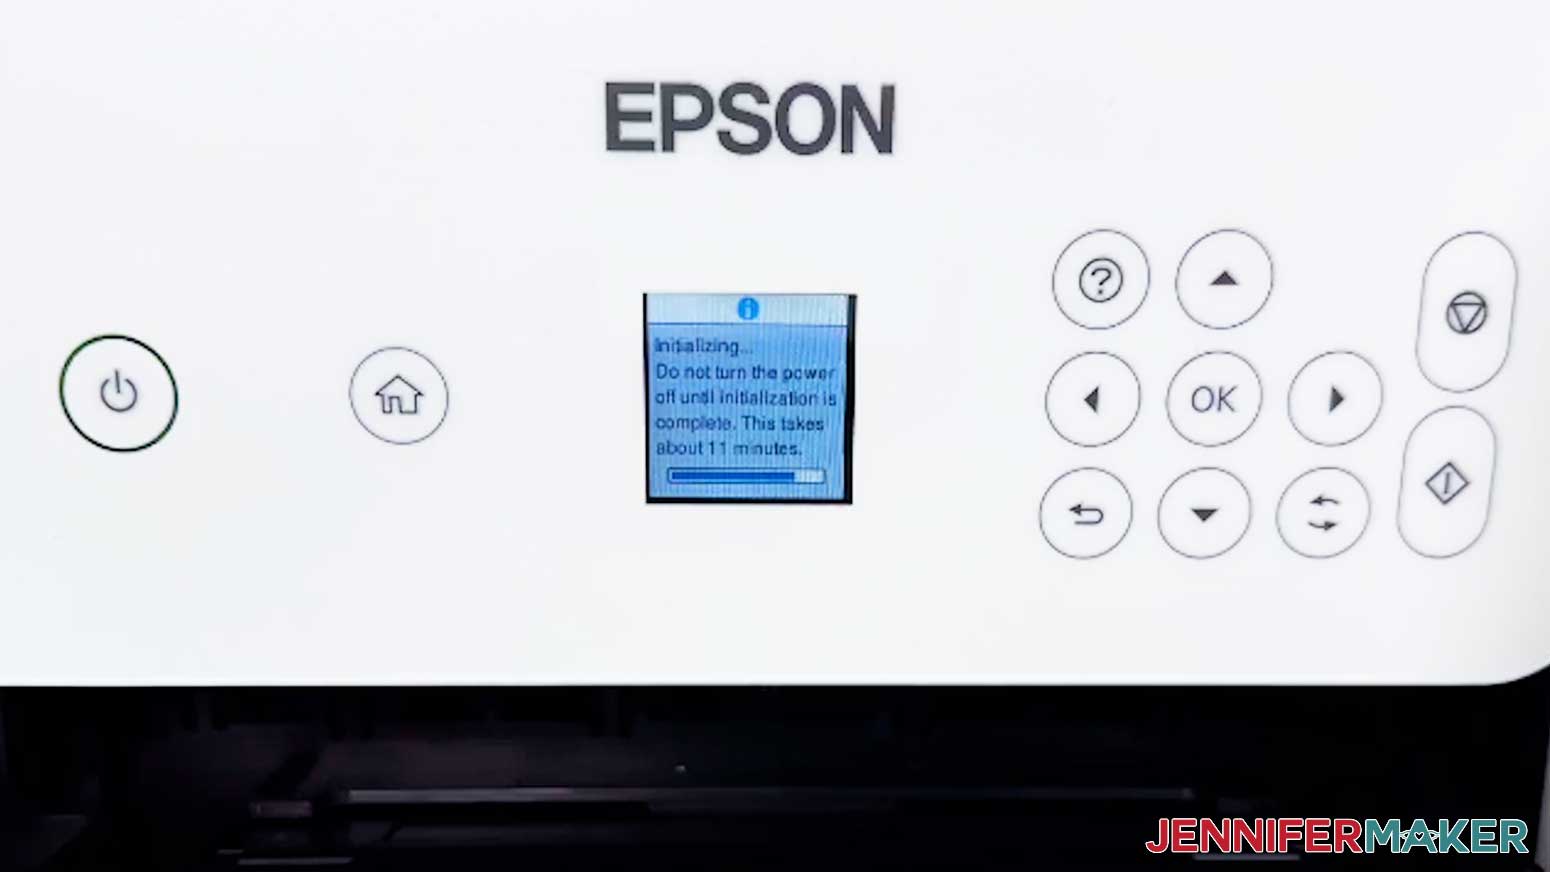
- When the screen asks if your ink has been filled, press the OK button on your control panel.
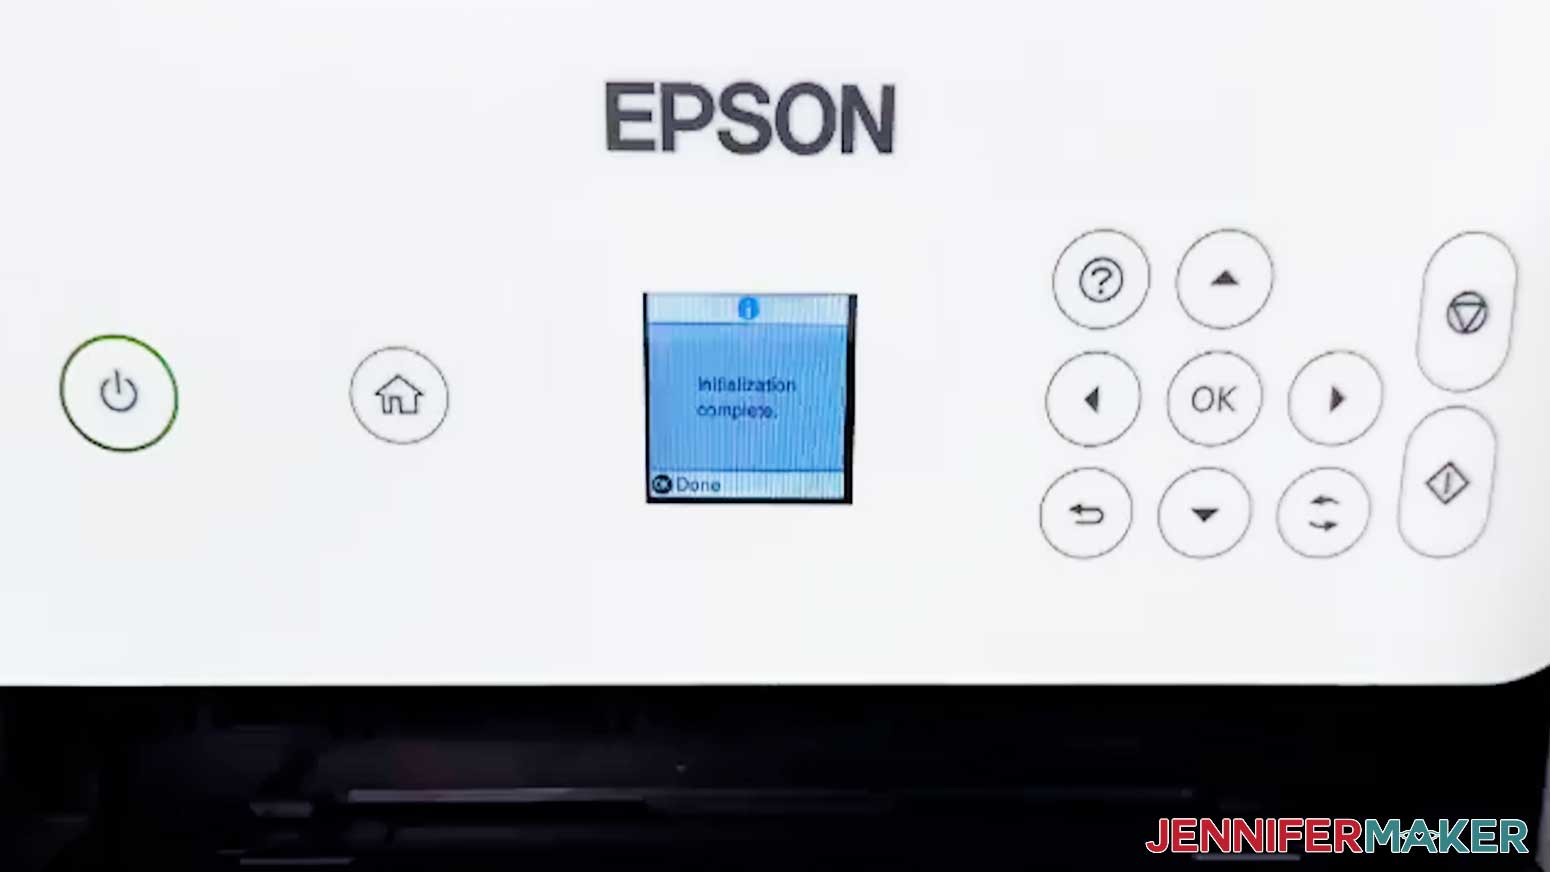
- Follow any additional screen prompts to begin the initialization process. This process can take up to ten minutes, during which you may hear soft humming or clicking. This is completely normal! Allow your printer to run for the entire initialization process.
- Once initialization is complete, add a few sheets of regular copy paper to your printer’s feed tray.
- Follow the steps on your printer’s display console to run a nozzle check.
- Examine the horizontal lines on the test page your printer produces.
- If the test lines are complete and unbroken, skip to Step 11.
- If there are gaps or breaks in the horizontal lines, follow the display console’s instructions to run a print head cleaning. You may need to perform this process two or three times before your test pages print completely.
NOTE: If your printer still shows signs of banding or missing lines after three or four cleanings, let it rest for 24 hours to let the ink settle fully into the printer. Then try another nozzle check. - Next, follow the display console’s instructions to perform a print head alignment. The printer will print a few different alignment pages. Follow the prompts to choose the clearest pattern on each one.
- Once your printer is fully initialized, tuned up, and producing clean lines, it’s ready to start printing sublimation designs!


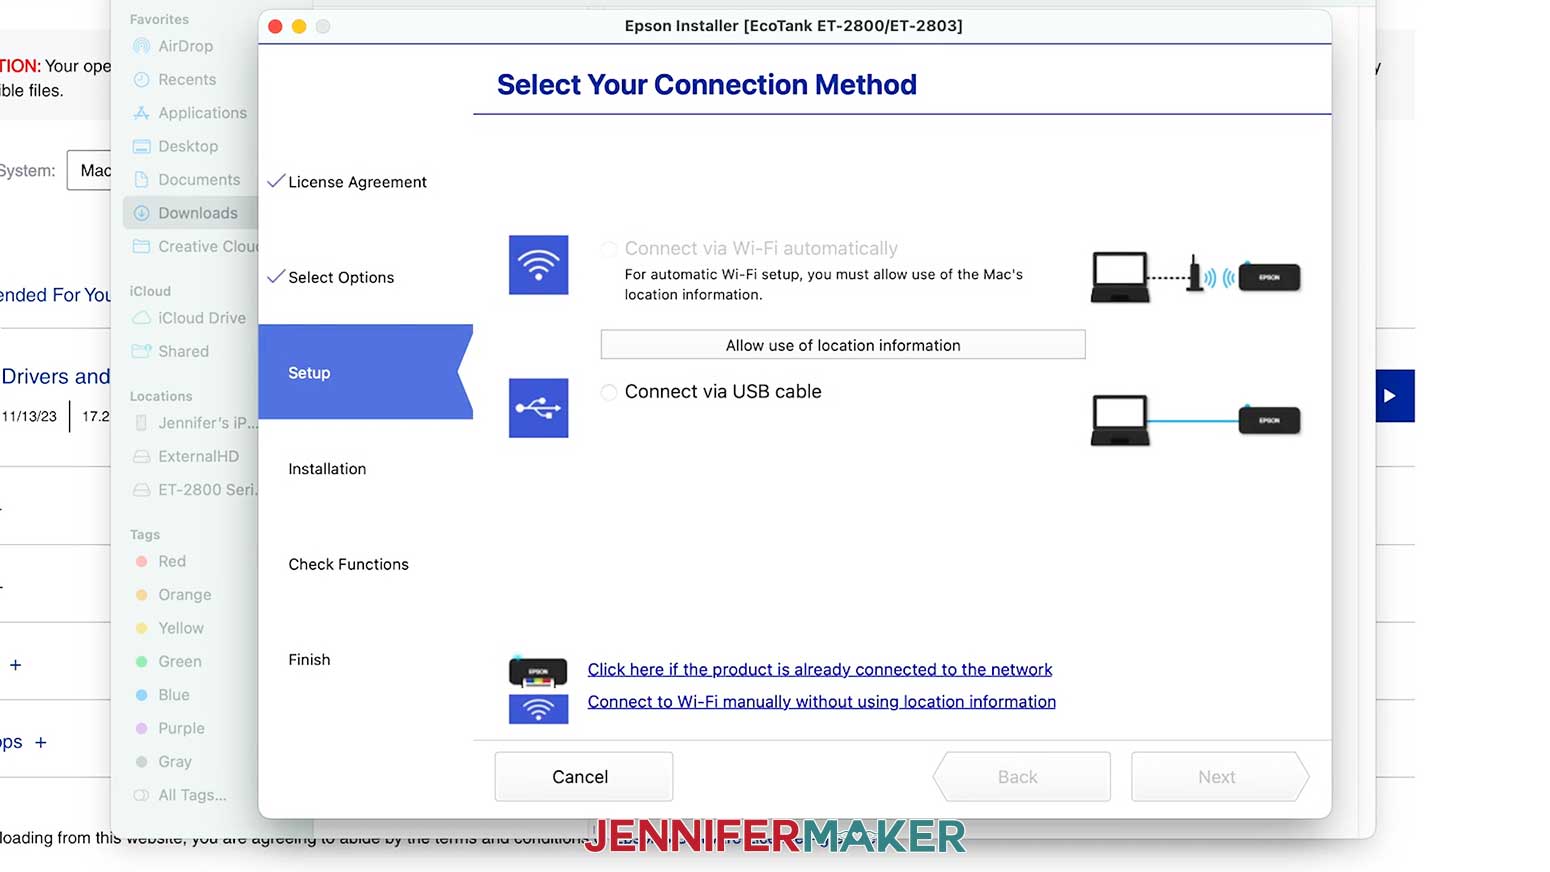
STEP 5: CONNECT TO YOUR COMPUTER VIA USB
- In a browser window on your computer, open the Epson support site.
- Type your printer model in the Product Search bar and click it when it appears in the dropdown box.
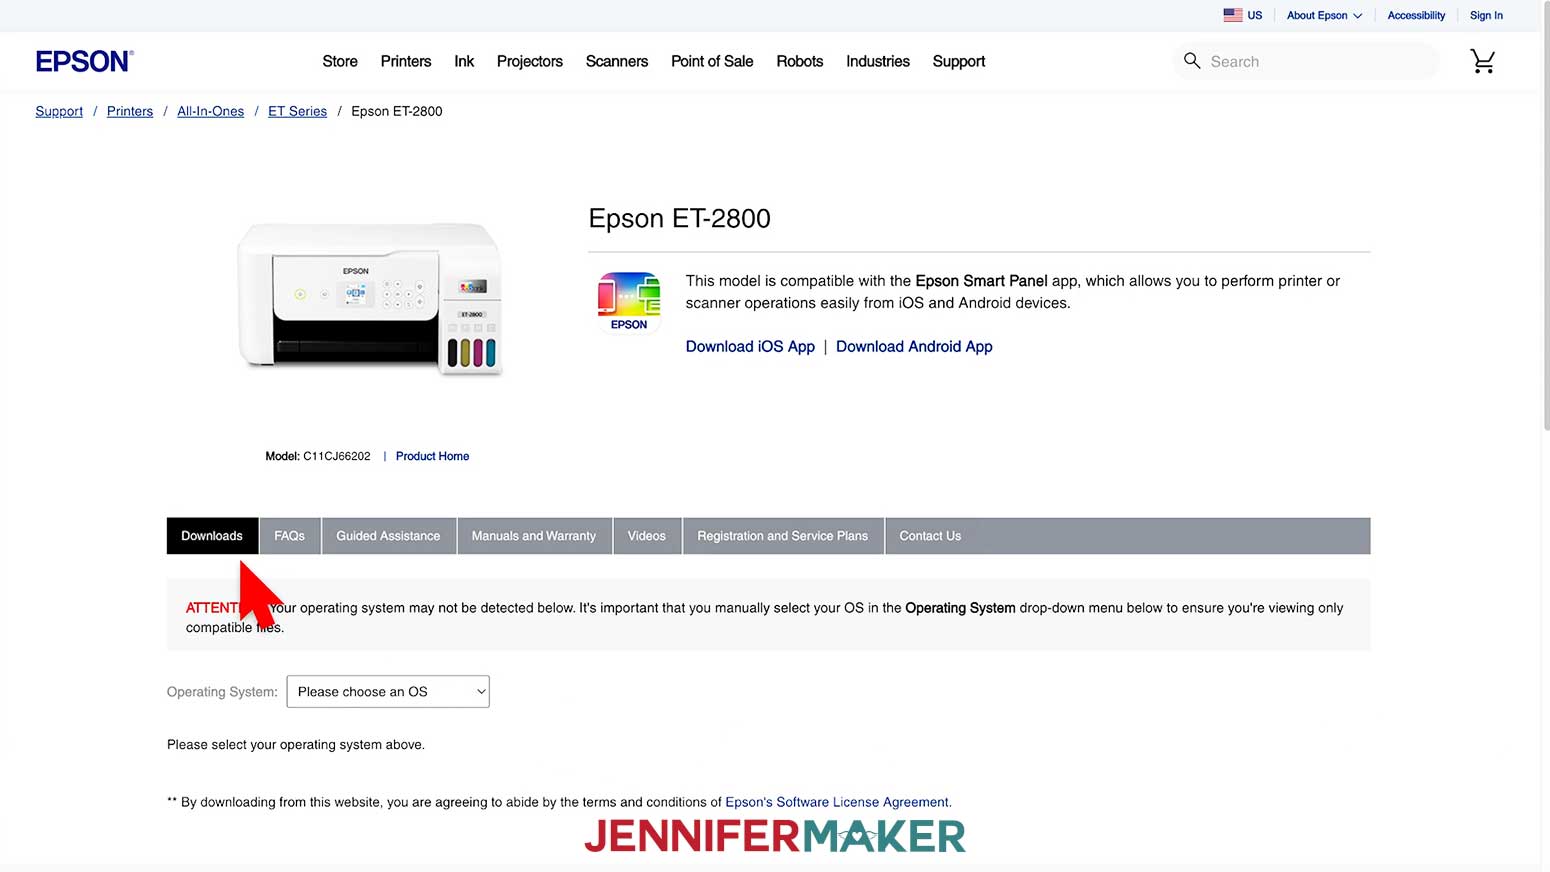
- Check the section heading to confirm you’re in the Downloads section.
- Then choose your operating system from the dropdown and click “GO.”
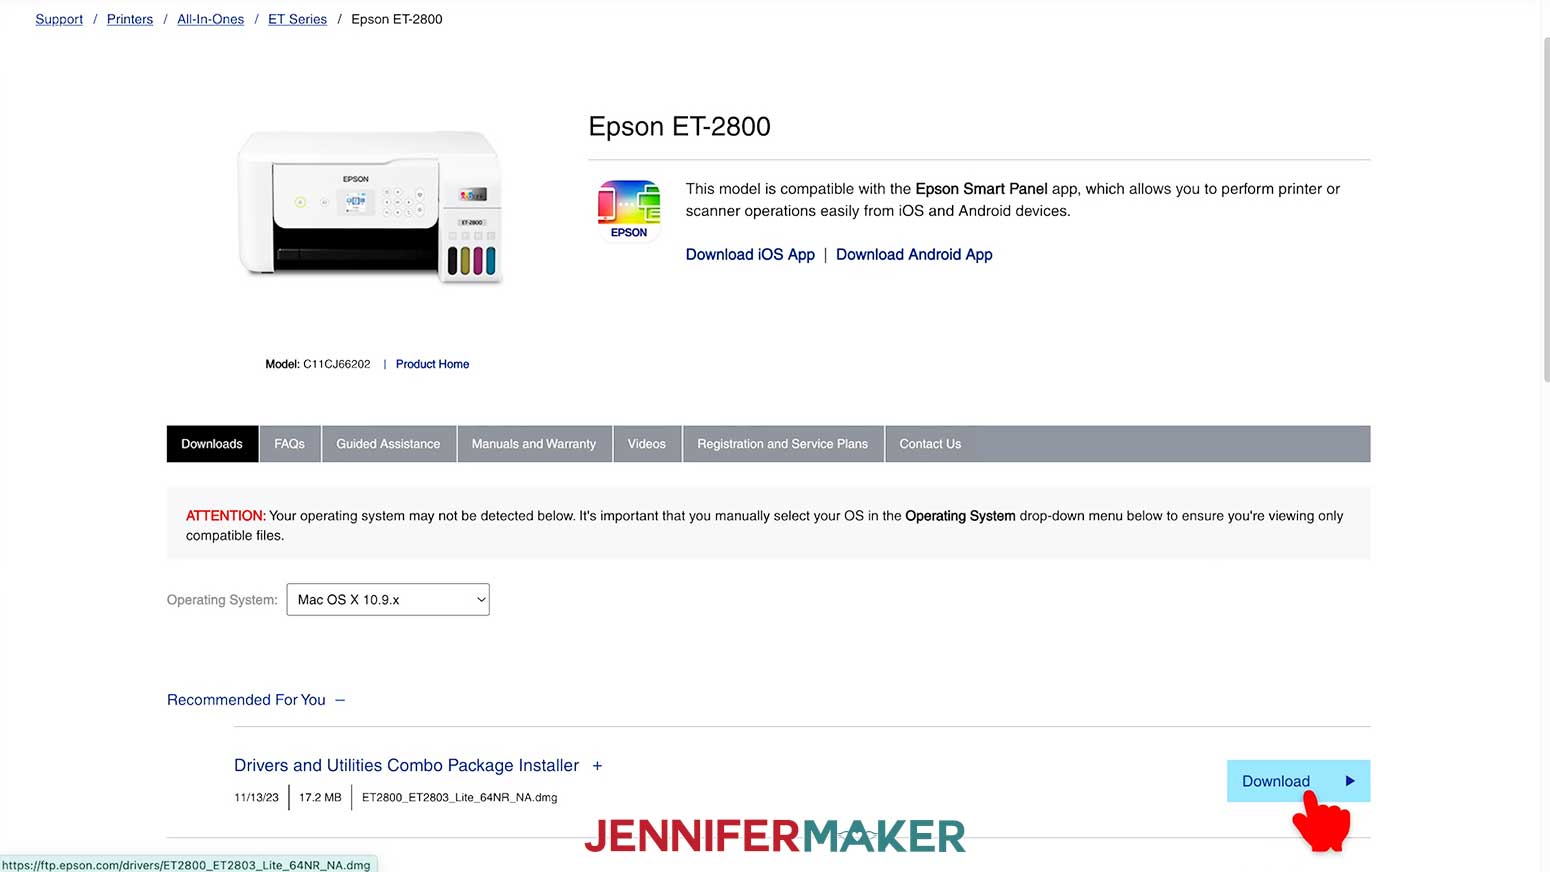
- Download the Drivers and Utilities Combo Package Installer.
- After downloading the file, open it and begin the installation process. The program will walk you through each step.
- When the software prompts you to choose your connection type, select USB.
NOTE: If you prefer to go wireless, you can follow the on-screen instructions for Wi-Fi setup, but keep in mind that USB usually provides a more stable connection. - Connect your USB cable to your printer and your computer when prompted.
- Click “YES” when the installation wizard asks if you want to perform a test print.
- Use Google Docs to print a test copy of my Subliflower design using your new printer.
- If your test page prints out, your printer is successfully connected to your computer.
STEP 6: SHOW IT OFF
Congratulations! You have successfully converted an Epson EcoTank to a sublimation printer! You are now ready to print out beautiful sublimation designs from the comfort of your own home!
Answers to Your Questions About Converting a Printer for Sublimation
Q: Can you use an inkjet printer for sublimation?
A: You can only use an inkjet printer for sublimation if you can complete the steps necessary to convert it to a sublimation printer. A regular printer in its default form with regular ink won’t work for sublimation because sublimation requires a special ink that activates with heat. Not all printer models can be converted, but Epson EcoTank models with refillable ink tanks can. Follow along with my video tutorial to learn how!
Q: Do I have to start with a new Epson printer?
A: Yes, you need to start with a new printer that has never had ink in the system. This makes the process so much easier and helps avoid issues down the road. For best results every time, you don’t want old inkjet printer ink to mix with your new sublimation ink.
Q: What should I do with the ink that comes with my printer?
A: The first thing you should do with the ink that comes with your printer is set it aside. Place it in a spot where you won’t confuse it with the sublimation ink you’ll add to your tank. If you have an EcoTank you use for regular printing, you can use it to refill your tanks. You can also donate the unused ink to local schools or charities, or take it to a store to be recycled.
Q: What is an ICC profile? Do I need to install one?
A: No, you don’t need an ICC profile to get beautiful results with your converted printer. ICC profiles are color-management files that help translate the colors on your screen into the colors your printer produces. But an Epson EcoTank paired with Hiipoo sublimation ink balances the colors nicely, so you can skip ICC profiles entirely.
Q: What should I do if my nozzle check has gaps or my test prints show banding after the initial setup?
A: If your nozzle check has gaps or your test prints look banded, don’t panic! It’s common during initial setup on a brand new printer. Run another nozzle check, let it rest for 24 hours, and try another nozzle check. As a final resort, do a print head cleaning if the lines are broken. It’s normal to need two or three cleanings, and they use quite a bit of ink. If it still looks off after several cleanings, let the printer rest again for about 24 hours so the ink can settle. Then run the nozzle check again. If you think the printer may be clogged, I have a tutorial on addressing a clogged sublimation printer.
Q: Can you reuse a sublimation print?
A: Though it may look like there’s ink left on your sublimation transfer paper after pressing, there’s not actually enough to create another press. You can try to reuse your print, but your second attempt will probably look super faded.
Q: Can a Cricut do sublimation printing?
A: While a Cricut cutting machine can be useful in some sublimation projects, it does not sublimate or print sublimation ink. However, you can use a Cricut and Infusible Ink pens to draw designs onto paper, which can be sublimated. You can also use a Cricut to cut SVG designs out of Infusible Ink transfer sheets.
Q: Where do I find sublimation designs?
A: In addition to the free Subliflower image included in the design files folder for this project, you can find tons of designs you can use for sublimation in my library! You can also use your own photos and designs, images created through AI generators as long as you follow the tool’s guidelines, graphics from Canva or other online sources depending on usage requirements, or stock photos. If you want to take your designs further, I share online resources and best practices so you can get better results when designing and sublimating in my Advance program!
Get my free Subliflower PNG to print your first sublimation design!
(If you do not see the signup form above, click here.)
I love seeing your sublimated projects, and how you use them! Once you’ve converted your Epson printer for sublimation, inspire others and share a photo of your first sublimation project with your new printer in our Facebook group or tag me on social media with #jennifermaker.
Love,

Want to remember this? Save this Convert an Epson Printer for Sublimation Tutorial to your favorite Pinterest Board!