Learn how to make a detailed farmhouse shadow box with floating pieces using cardstock, acetate, and permanent vinyl!
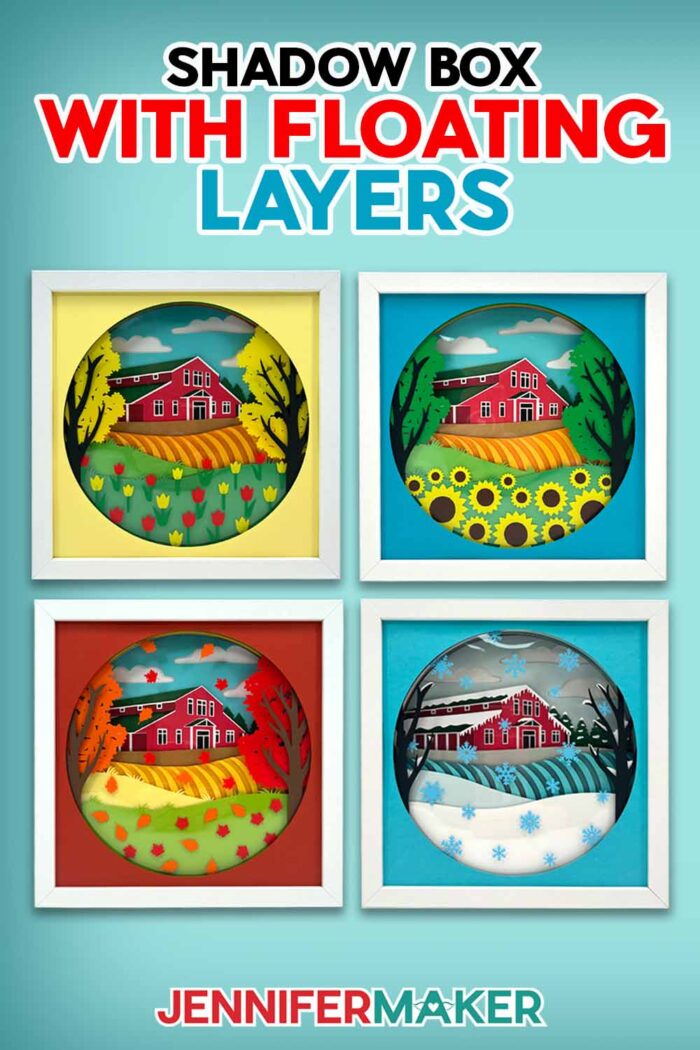
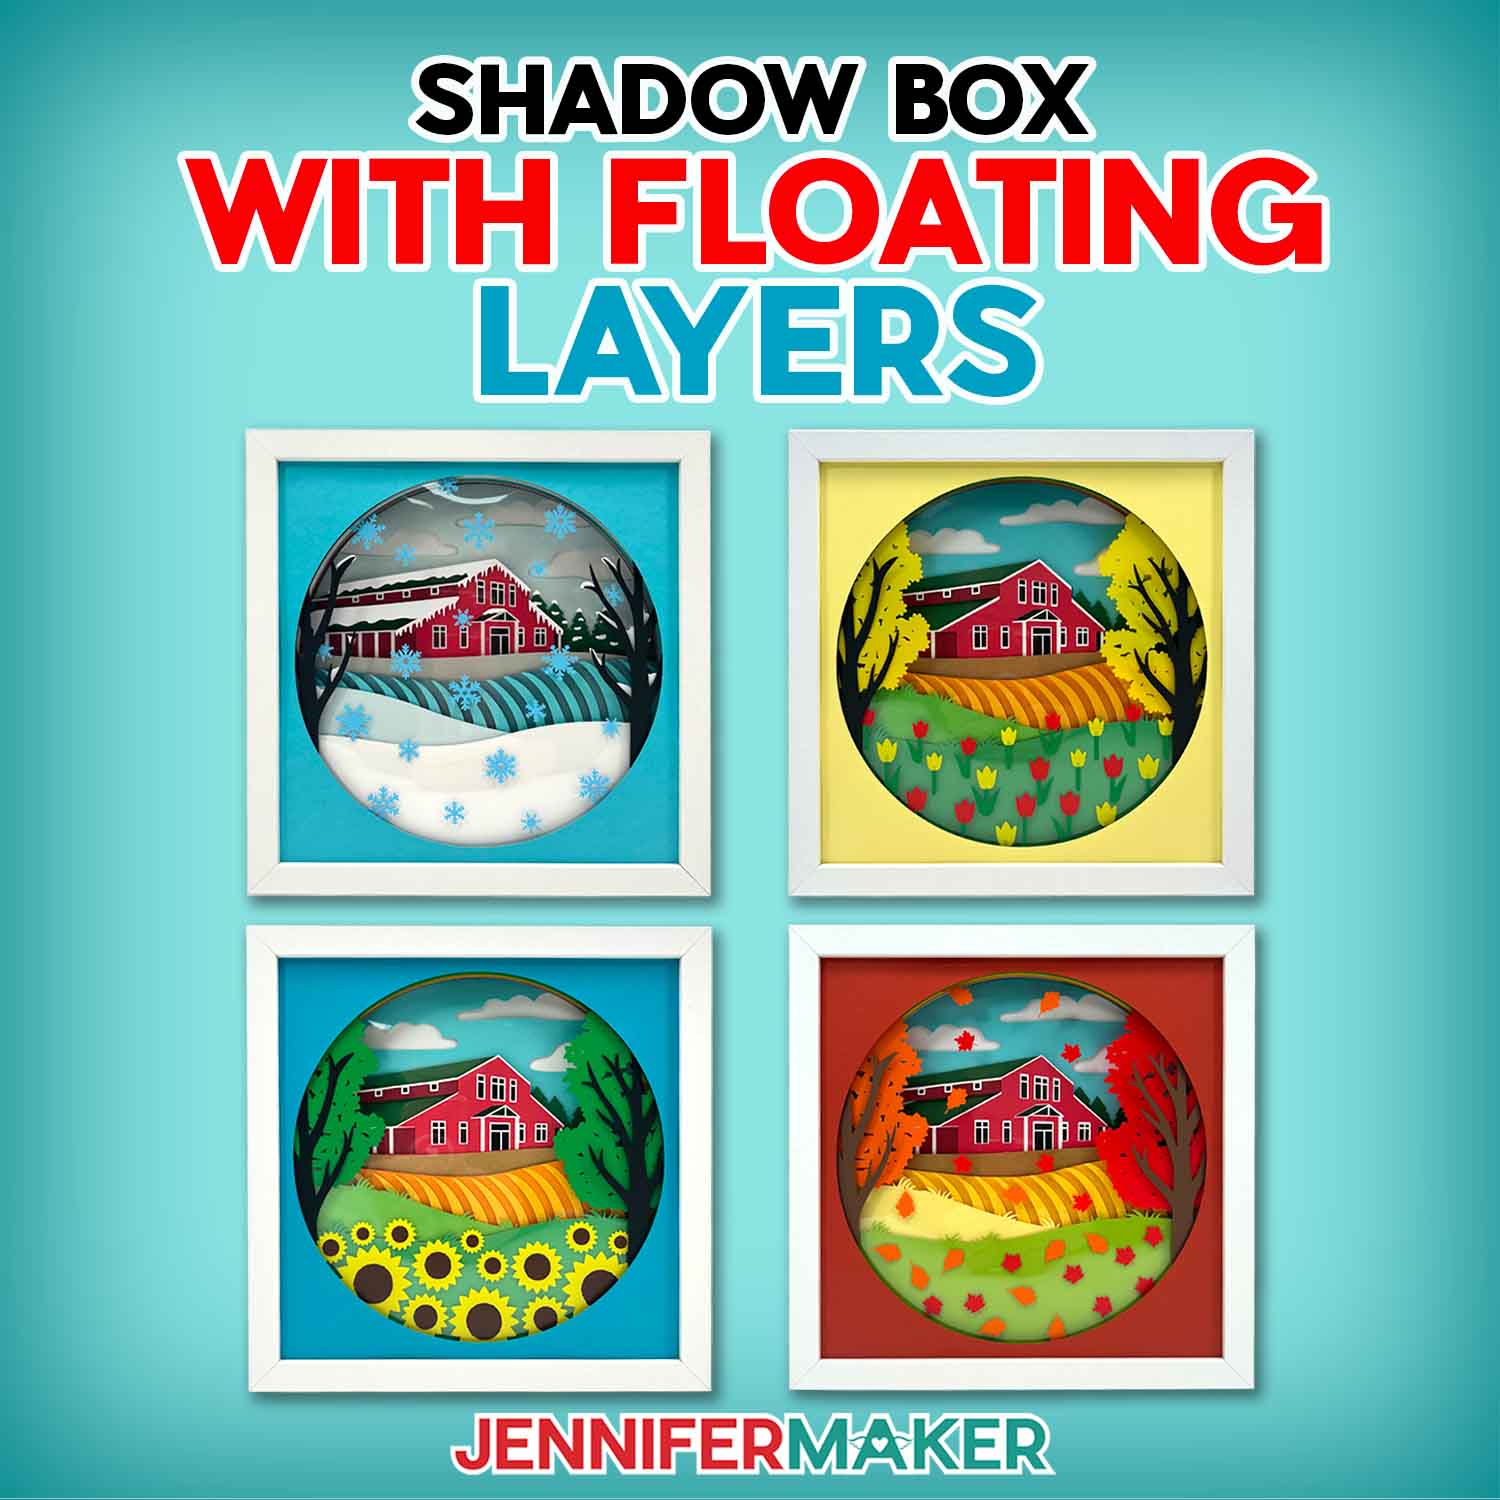
Welcome to project number 700 – can you believe how far we’ve come? Thank you for supporting my dream to share my passion for crafting with you! To celebrate, I have a very special project: a farmhouse shadow box with floating pieces inspired by Maker Farm! I’ve created many layered cardstock shadow boxes on the road to 700. One of the limitations of shadow boxes with cardstock layers is that each layer has to be all one piece. So I decided to create a layer with pieces detached from the rest. Don’t these floating pieces look so cool? They really add a touch of magic, and are so customizable! Can you guess how I do it? Here’s a hint: one of the layers is invisible!
Watch the full step-by-step video tutorial on making a shadow box with floating pieces:

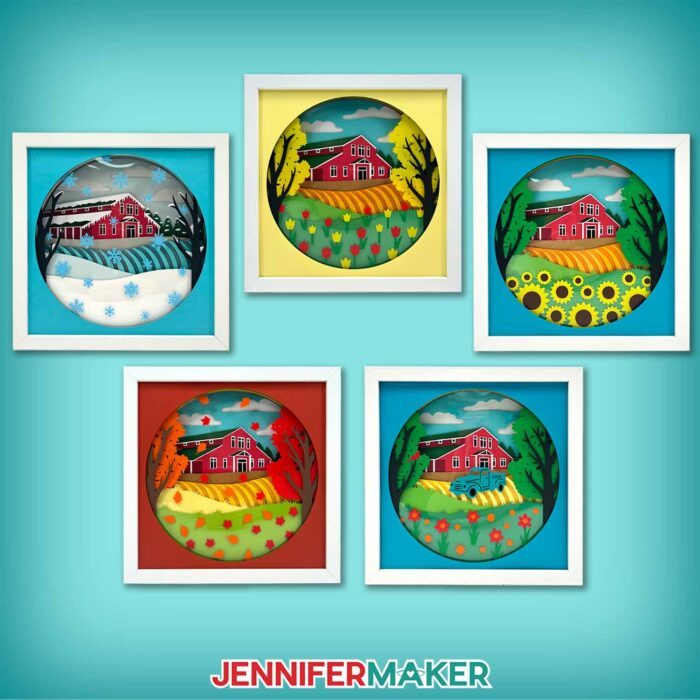
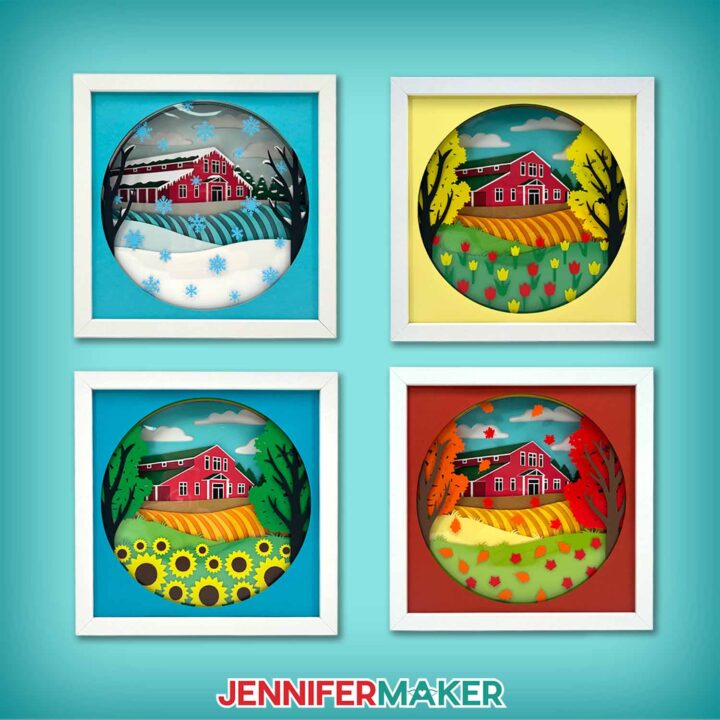
Shadow boxes are an incredibly versatile way to display your favorite art piece. On the other hand, if you’re framing a layered project, standard frames don’t work as well. You need a shadow box’s open area to add depth between the layers. My spring, summer, fall, and winter farm designs have 15 or more layers of cardstock and acetate sandwiched between thick foam tape, so that extra space is important! Without it, though, we couldn’t make the floating pieces. In a regular frame, they would just lie flat against the other layers. Floating is much more fun! Not to mention, the floating pieces showcase my favorite parts of each season! I have pretty tulips for spring, my favorite sunflowers for summer, colorful autumn leaves for fall, and beautiful snowflakes for winter on the farm!

I’m so excited to show you how to make your own farm shadow box with floating pieces! In a way, it’s like you have a little piece of Maker Farm, too! I’ll teach you how to measure your shadow box (even if the original packing includes dimensions, they aren’t always exact!), so make sure you have a ruler or measuring tape handy. Then I’ll demonstrate how to adjust any of the four seasonal designs to fit inside the frame, so you can choose whichever season is your favorite! I’ll even share the cut settings that worked best for me, and show you how to protect your entire piece of acetate from damage during cutting.
And don’t worry, I haven’t forgotten about the floating pieces! To create the floating effect, I’ll show you how I apply vinyl to clear acetate to create an invisible layer with pieces that aren’t connected to the rest of the design, which we can’t do with just cardstock. It looks super neat up close, almost like it defies the laws of gravity! I also have a few tips and tricks for assembling the vinyl on the acetate, including a new way to use special marks for alignment.
And finally, I’ll show you how to build your layers inside the shadow box. The cardstock pieces are numbered to help keep them in order, but I’ll show you where I think the floating pieces look best. I’ll use foam tape to add dimension between some layers, but we’ll glue the more intricate layers together so you can see all of the farmhouse’s little details.
To make your farm shadow box the best it can be, you’ll want to start with 65 lb Solid Core Cardstock. Solid core cardstock is the same color all the way through, so you won’t see white edges where your layers are cut. You’ll also need acetate sheets and a few colors of permanent vinyl to create your floating pieces, plus foam tape and craft glue for layering. Of course, you’ll also want a nice shadow box, too!
To cut your cardstock, vinyl, and acetate, I recommend using a Cricut cutting machine with a Fine-Point Blade and a green StandardGrip Machine Mat. I used my Cricut Maker 3, but you can also use an original Maker, the Cricut Venture, or an Explore Series machines. However, I don’t recommend using a Joy-sized machine. The layers are 10″ x 10″ by default, and the intricate design isn’t likely to cut well at smaller sizes. Other crafting tools that will be a big help include scissors and a weeding tool for preparing vinyl, a scraper for cardstock and burnishing, and transfer tape for applying your floating vinyl pieces to the acetate layer.
Would you like to design your own floating pieces layer for your farm shadow box? I have a workshop designed to teach you that in my Advance program. There’s even a template and toolkit to help get you started! Learn more about Advance with JenniferMaker here!
And for an extra special treat, don’t forget to watch my step-by-step tutorial, which includes a few clips of some of my favorite crafting moments to celebrate lucky number 700!
Let me show you how to make a farm shadow box with floating pieces! This post contains some affiliate links for your convenience (which means if you make a purchase after clicking a link I will earn a small commission but it won’t cost you a penny more, there is no additional cost)! Read my full disclosure policy.
Materials to Make A Shadow Box With Floating Pieces
View my Amazon shopping list for the exact items I used!
- Fourteen (14) Sheets of 12″ x 12″ 65 lb. Cardstock – Recollections Essentials (I used black, white, gray, dark brown, light brown, red, dark red, and light blue)
- 12″ x 12″ 65 lb. Green Cardstock (I used three different shades)
- 12″ x 12″ 65 lb. Orange/Yellow Cardstock (I used light orange, dark yellow, light yellow, and dark red)
- 12″ x 12″ 65 lb. Teal Cardstock (I used four different shades)
- One to Two (1-2) Sheets of 12″ x 12″ Acetate
- One (1) 10″ x 10″ Shadow Box Frame
- Two to Three (2-3) Sheets of 12″ x 12″ Permanent Vinyl (I used red, orange, green, yellow, brown, white, and mint)
- StandardGrip Transfer Tape
- A way to cut your materials – I’m using the Cricut Maker 3, but you can also use the Cricut Maker, a Cricut Explore Series machine, or the Cricut Venture
- Cricut Green StandardGrip Machine Mat 12″ x 12″
- Brayer
- Scraper
- Spatula
- Weeding Tool
- Scissors (for cutting the adhesive foam tape)
- Tweezers (optional)
- 1/4″ Wide Adhesive Foam Tape
- Craft Glue (I used Bearly Art Precision Glue)
- Parchment Paper
- Ruler or Tape Measure (optional for measuring your shadow box opening)
- Isopropyl Alcohol (optional to clean your shadow box glass) -AND-
- Lint-Free Cloth
- Paper Towels (optional for cleaning up excess glue)
How to Make a Shadow Box With Floating Pieces!
Shadow Box With Floating Elements
Learn how to make a detailed farm house shadow box with floating elements using cardstock, acetate, and permanent vinyl!
Materials
- Fourteen (14) Sheets of 12" x 12" 65 lb. Cardstock - Recollections Essentials (I used black, white, gray, dark brown, light brown, red, dark red, and light blue)
- 12" x 12" 65 lb. Green Cardstock (I used three different shades)
- 12" x 12" 65 lb. Orange/Yellow Cardstock (I used light orange, dark yellow, light yellow, and dark red)
- 12" x 12" 65 lb. Teal Cardstock (I used four different shades)
- One to Two (1-2) Sheets of 12" x 12" Acetate
- One (1) 10" x 10" Shadow Box Frame
- Two to Three (2-3) Sheets of 12" x 12" Permanent Vinyl (I used red, orange, green, yellow, brown, white, and mint)
- StandardGrip Transfer Tape
- Design #700 (My free SVG/PDF/DXF design files are available in my free resource library - get the password by filling out the form at the bottom of this page)
Tools
- A way to cut your materials - I’m using the Cricut Maker 3, but you can also use the Cricut Maker, a Cricut Explore Series machine, or the Cricut Venture
- Cricut Green StandardGrip Machine Mat 12" x 12"
- Brayer
- Scraper
- Spatula
- Weeding Tool
- Scissors (for cutting the adhesive foam tape)
- Tweezers (optional)
- 1/4" Wide Adhesive Foam Tape
- Craft Glue (I used Bearly Art Precision Glue)
- Parchment Paper
- Ruler or Tape Measure (optional for measuring your shadow box opening)
- Isopropyl Alcohol (optional to clean your shadow box glass) -AND-
- Lint-Free Cloth
- Paper Towels (optional for cleaning up excess glue)
Instructions
STEP 1: GET MY FREE MAKER FARM SHADOW BOX DESIGNS
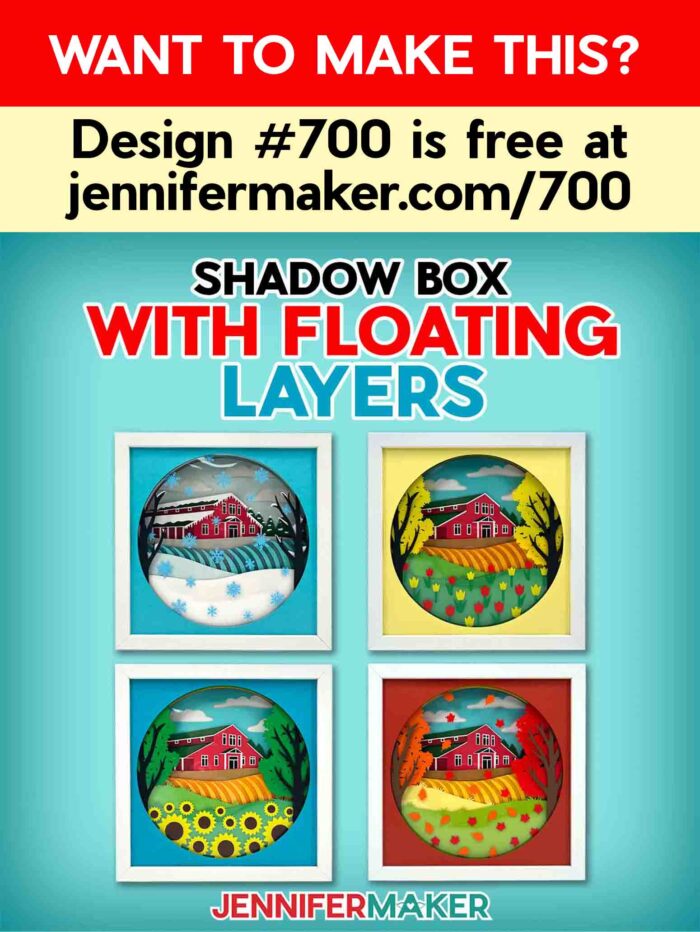
First, download my Maker Farm Shadow Box files from my free library – look for Design #700. Alternatively, you can use the Save This Project form near the top of this post and the design link will be emailed to you.
In the SVG folder, you’ll find “fall,” “spring,” “summer,” and “winter” versions of my Maker Farm design to cut on a cutting machine. There is also a DXF folder with cut files, and a PDF folder with versions you can print and cut by hand.
Upload the SVG file you need to Design Space to get started.
TIP: If you’re not sure how to upload, go to jennifermaker.com/svgs to learn how to unzip and upload SVG files.
STEP 2: PREPARE AND CUT YOUR MAKER FARM DESIGN
CRICUT DESIGN SPACE
- In Cricut Design Space, open a blank Canvas.
NOTE: If you’re new to using Cricut Design Space, go to cricutkickoff.com for my introductory tutorial on Design Space basics. - Click “Upload” and then “Upload Image.”
- Click “Browse.”
- Select the SVG file of your choice.
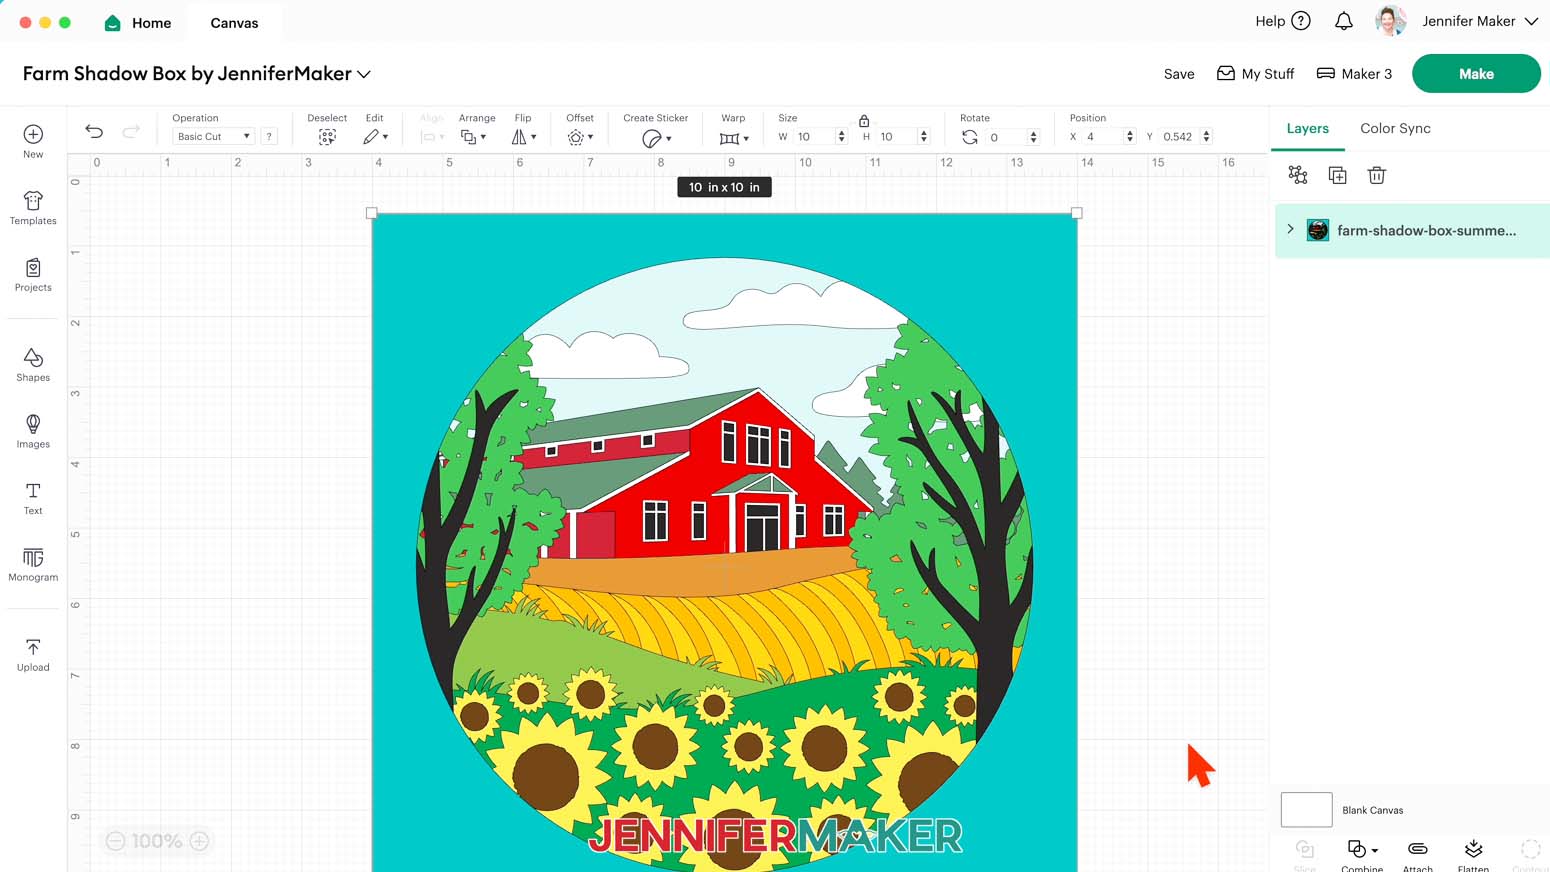
NOTE: I’ll pick the “summer” version. - Click “Open” and then “Continue.”
- Click “Upload” to add the design to your Canvas.
- Click the “Minus (-)” icon in the lower left corner to zoom out and see everything on your canvas.
NOTE: There are 18 total layers stacked on your Canvas, including 14 single-shape cardstock layers, three vinyl layers with registration marks in all four corners, and one gray acetate layer.
NOTE: The “winter” design has an additional acetate layer.
- Click “Save” and give your project a name.
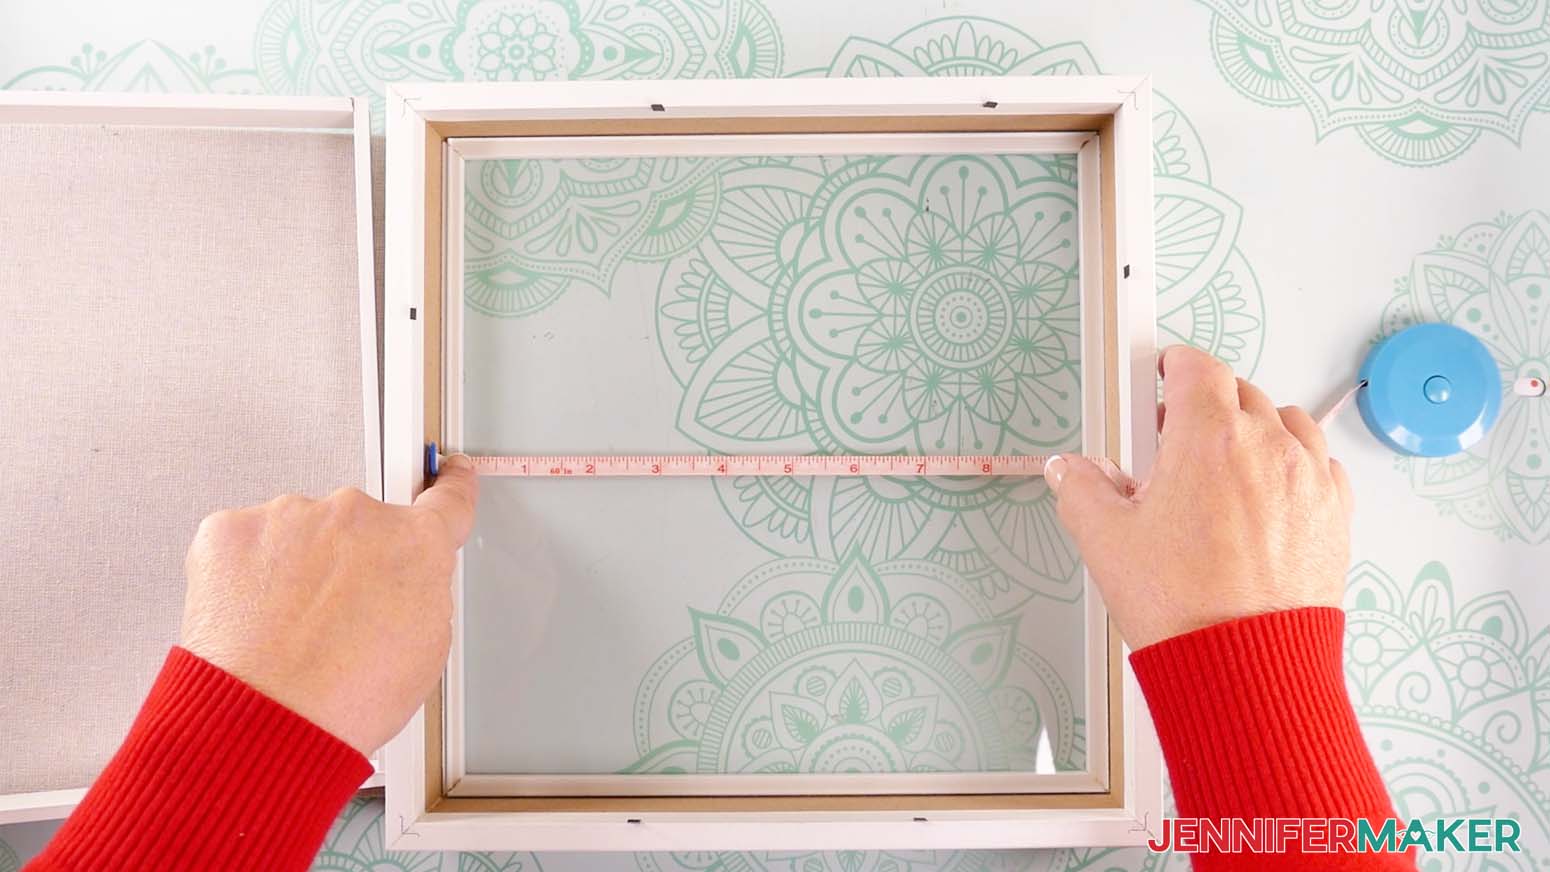
- Your project is designed to fit the 10” x 10” shadow box in the materials list, but most shadow box display areas are smaller than the advertised dimensions. So use a tape measure or ruler to measure the inside of your shadow box.
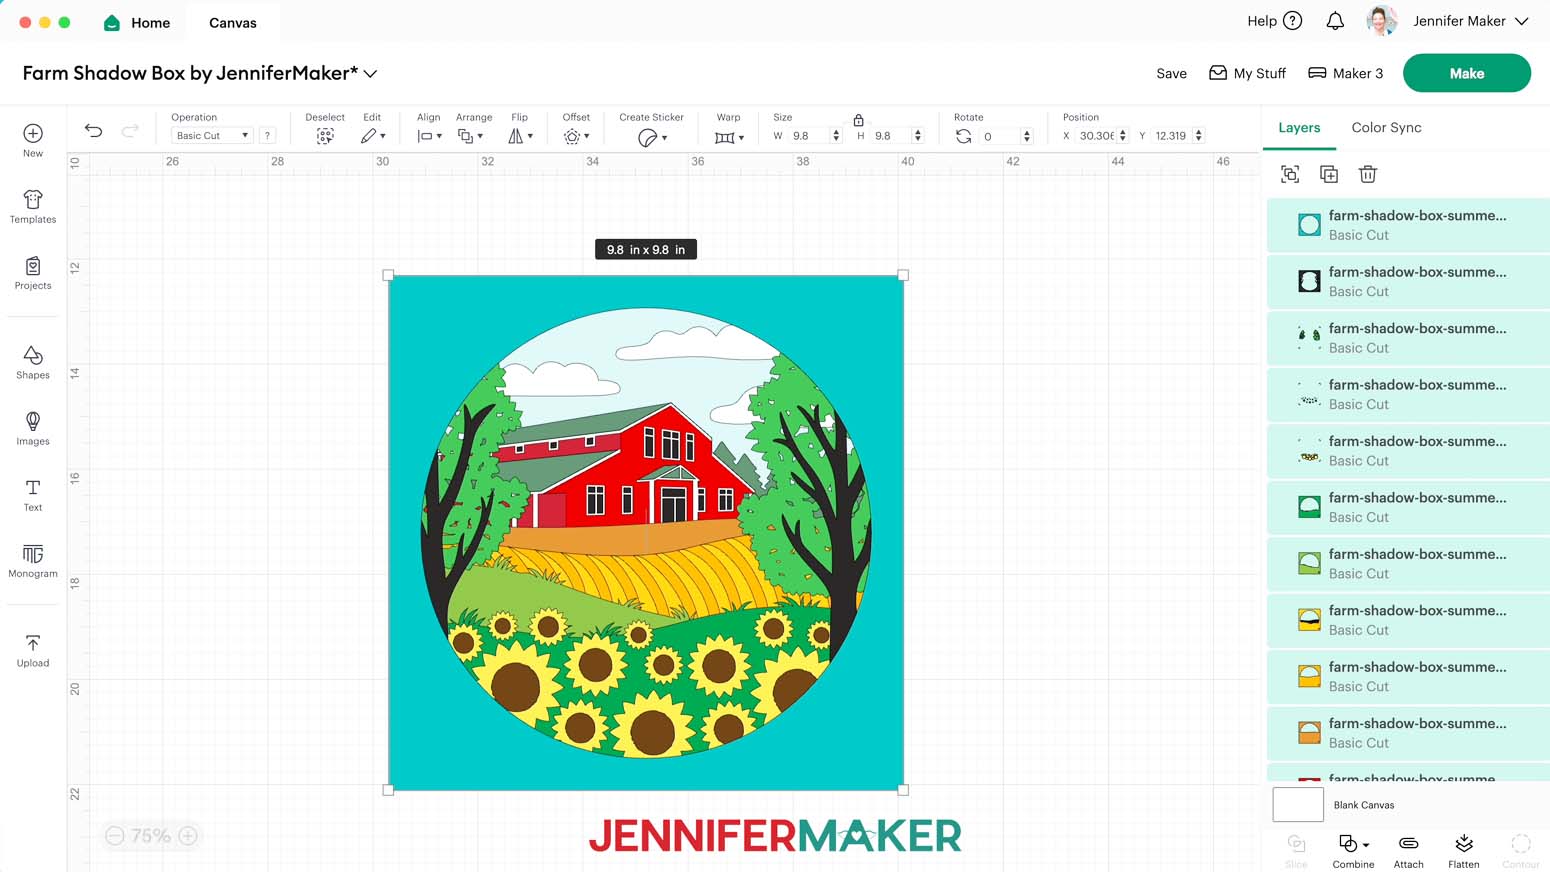
- If you need to resize the design to fit, select all of the layers and make sure the “Lock” icon is closed to maintain the design’s proportions.
- Enter the correct height measurement in the “Height (H)” field, and the “Width (W)” will automatically adjust to match it.
NOTE: Make sure to size your design's layers about 1/8" smaller than your measured dimensions to give your assembled layers enough space in the box. I don’t recommend resizing for a smaller shadow box, as some of the pieces are very intricate and won’t cut well at a smaller size. - And now your layers are ready to cut!
CUTTING
- Make sure the correct machine is selected in the top right.
- Click “Make.”
- On the Prepare screen, make sure the correct Material Size is selected for your materials.
NOTE: I’ll keep the “12 in x 12 in” size for all my mats, including my vinyl (which I’ll trim down to size). - Once you are satisfied with your mat layouts, select the first mat again and click “Continue.”
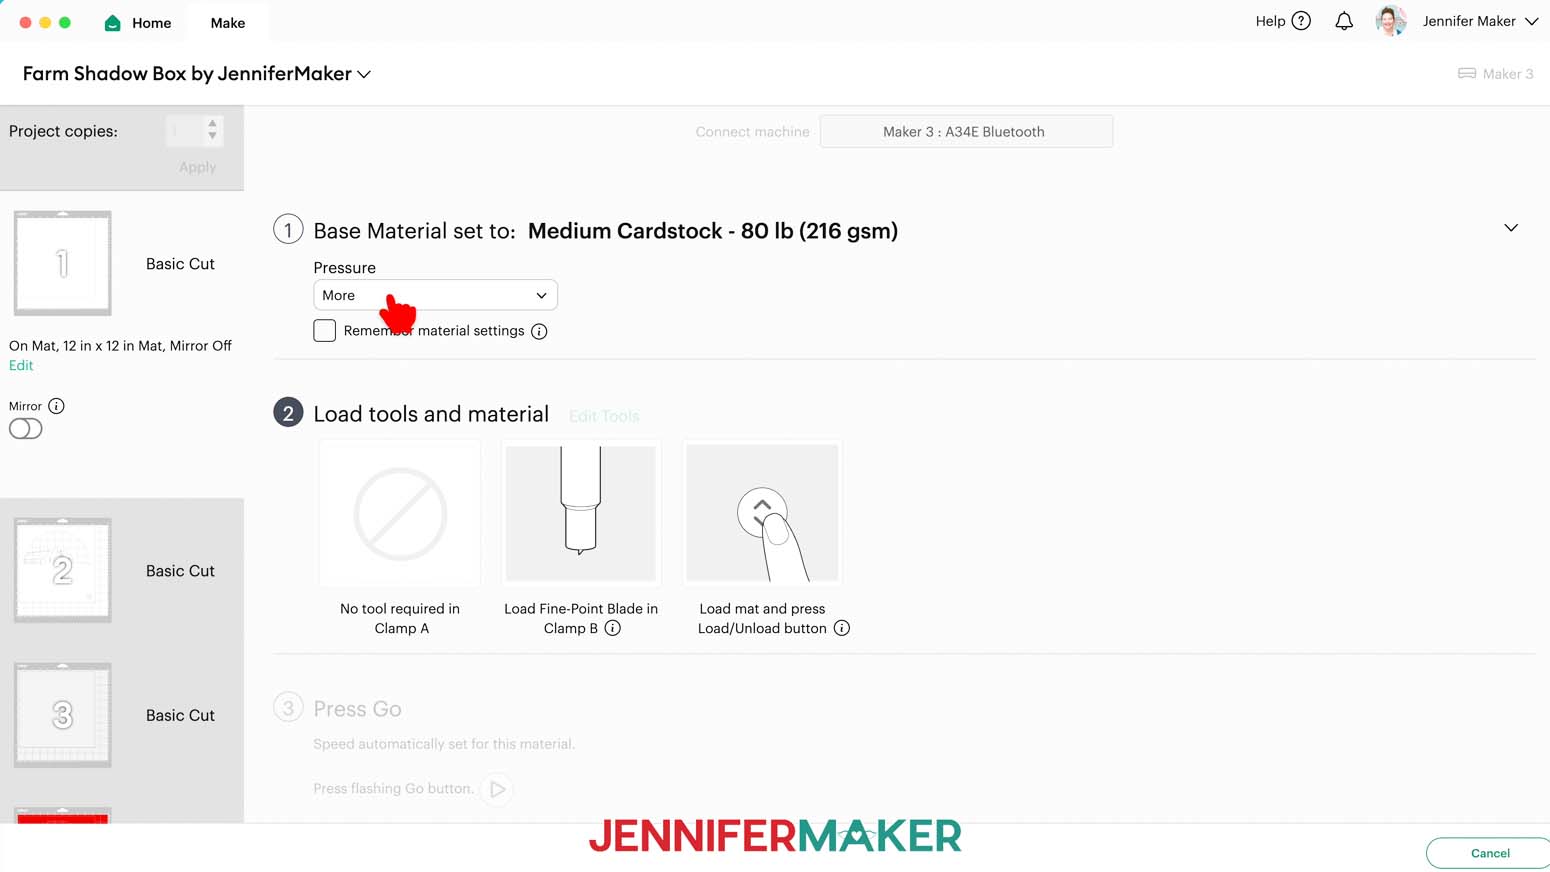
- On the Make screen, set the Base Material for your first mat. Mine is cardstock. For my cardstock mats, I’m using the “Medium Cardstock - 80 lb (216 gsm)” setting with “More” pressure.
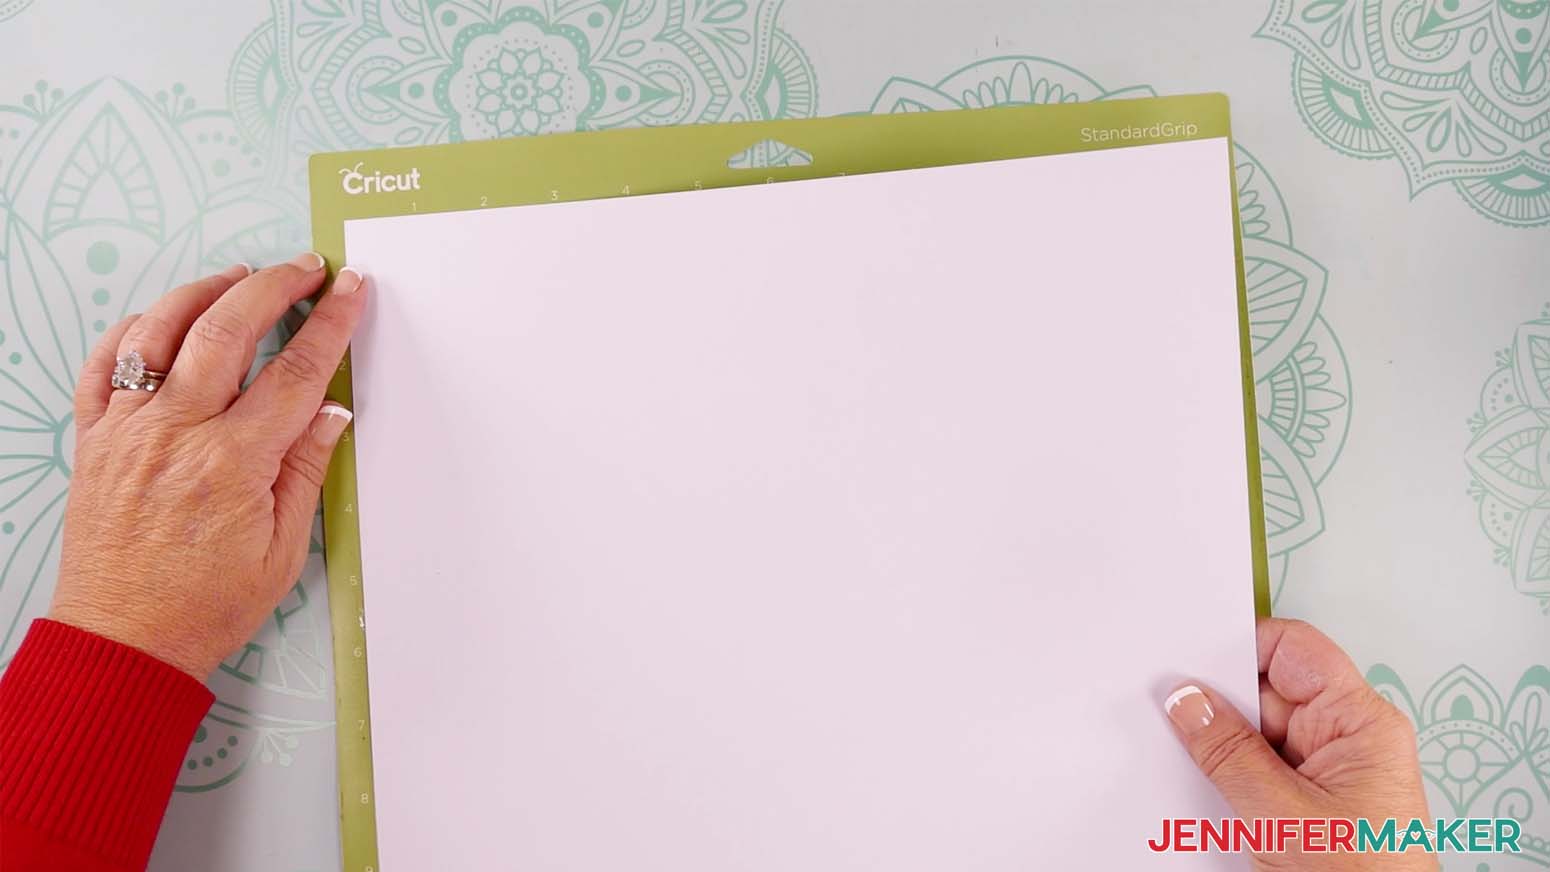
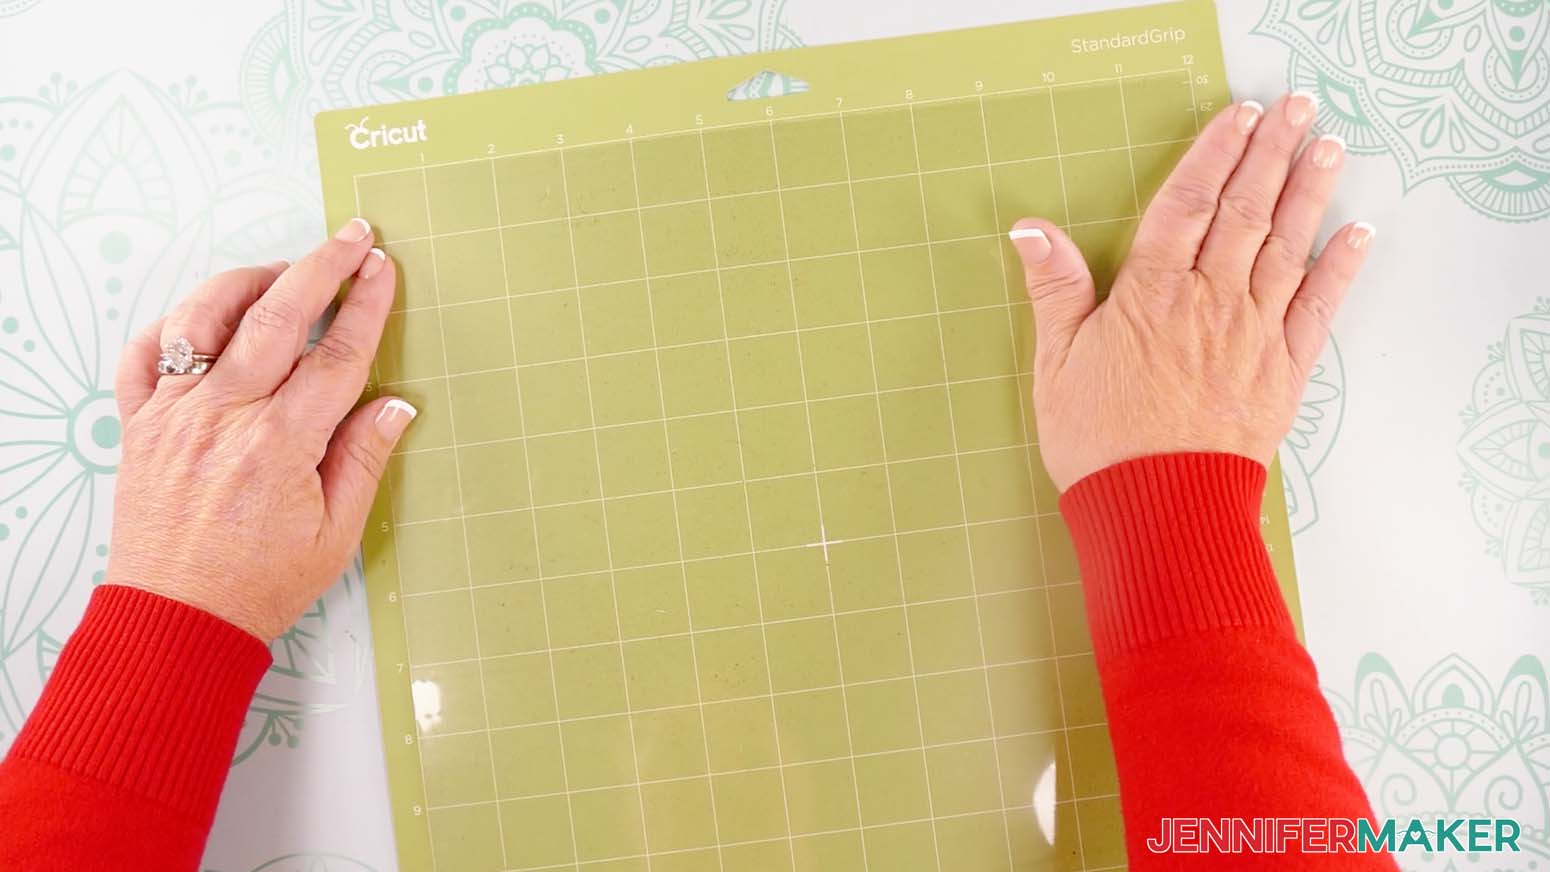
TIP: Changing the Pressure to “More” results in a cleaner cut. - Place your cardstock face up on a green StandardGrip machine mat.
- Use a brayer to make sure it’s fully adhered.
- Check that your Premium Fine-Point Blade is clean and in the clamp.
- Press the flashing “Load/Unload” button to load the prepared mat into your Cricut.
- Press the flashing middle button to begin cutting.
- When it has finished cutting, don’t unload the mat right away. Gently lift a corner of the material to make sure the cuts went all the way through the material. If not, press the middle button again to make a second pass of cuts in the same spots.
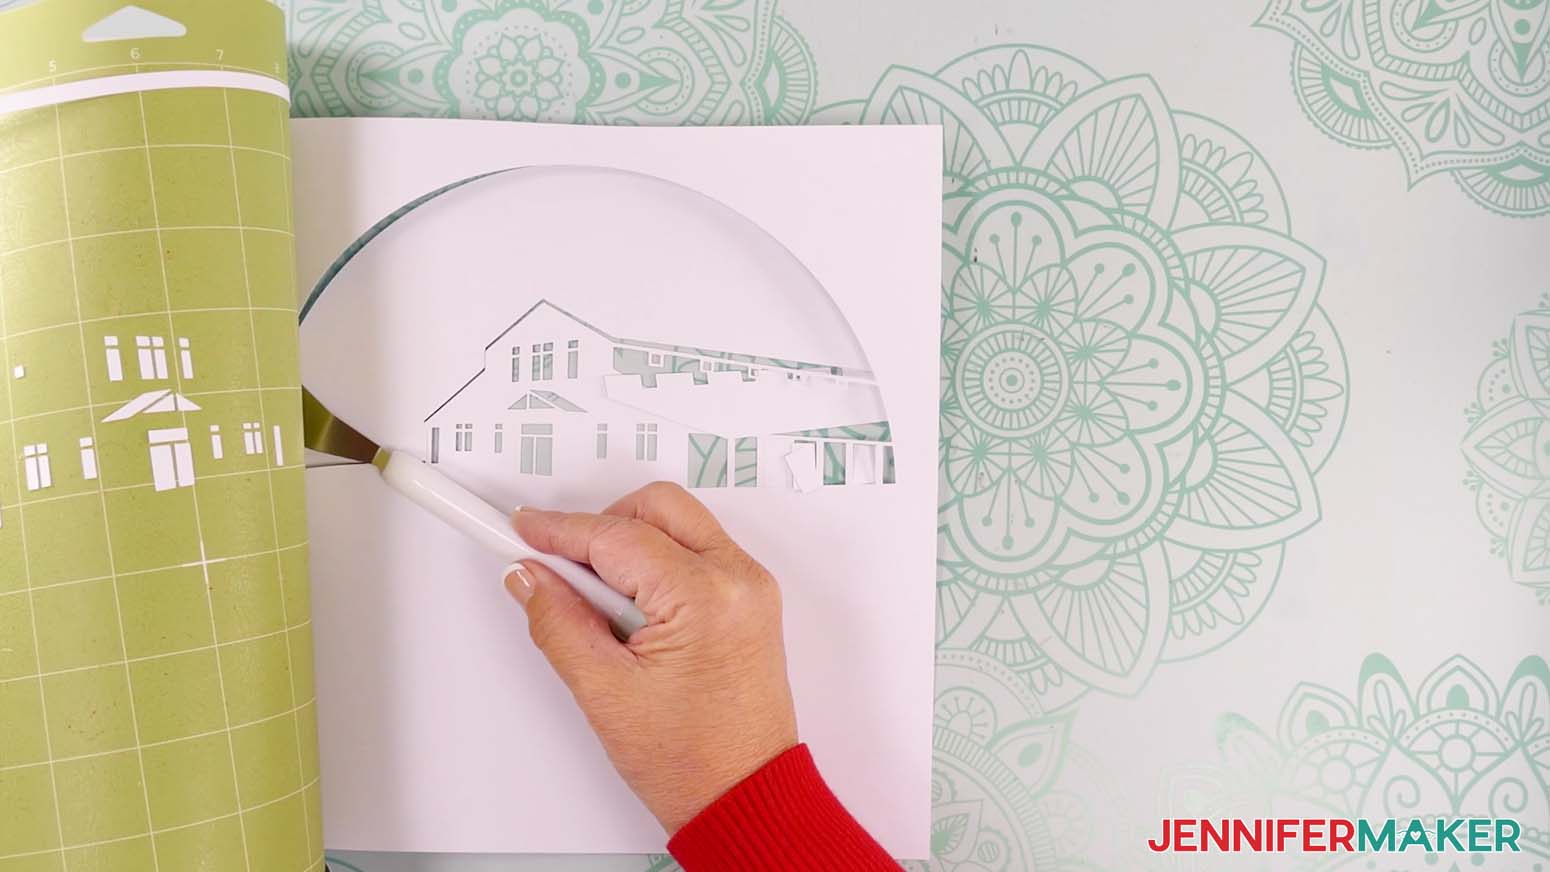
TIP: If you have any issues with your cuts, go to jennifermaker.com/cleaner-cuts. - When the cuts are complete, unload the mat, flip it over onto your work surface, and roll it back to release the cardstock.
TIP: Use the spatula to help lift delicate parts, and the weeding tool to poke out small bits of cardstock that are still attached to your cut pieces. - Use a scraper tool to remove the small bits of cardstock left on your mat after you remove the cut pieces.
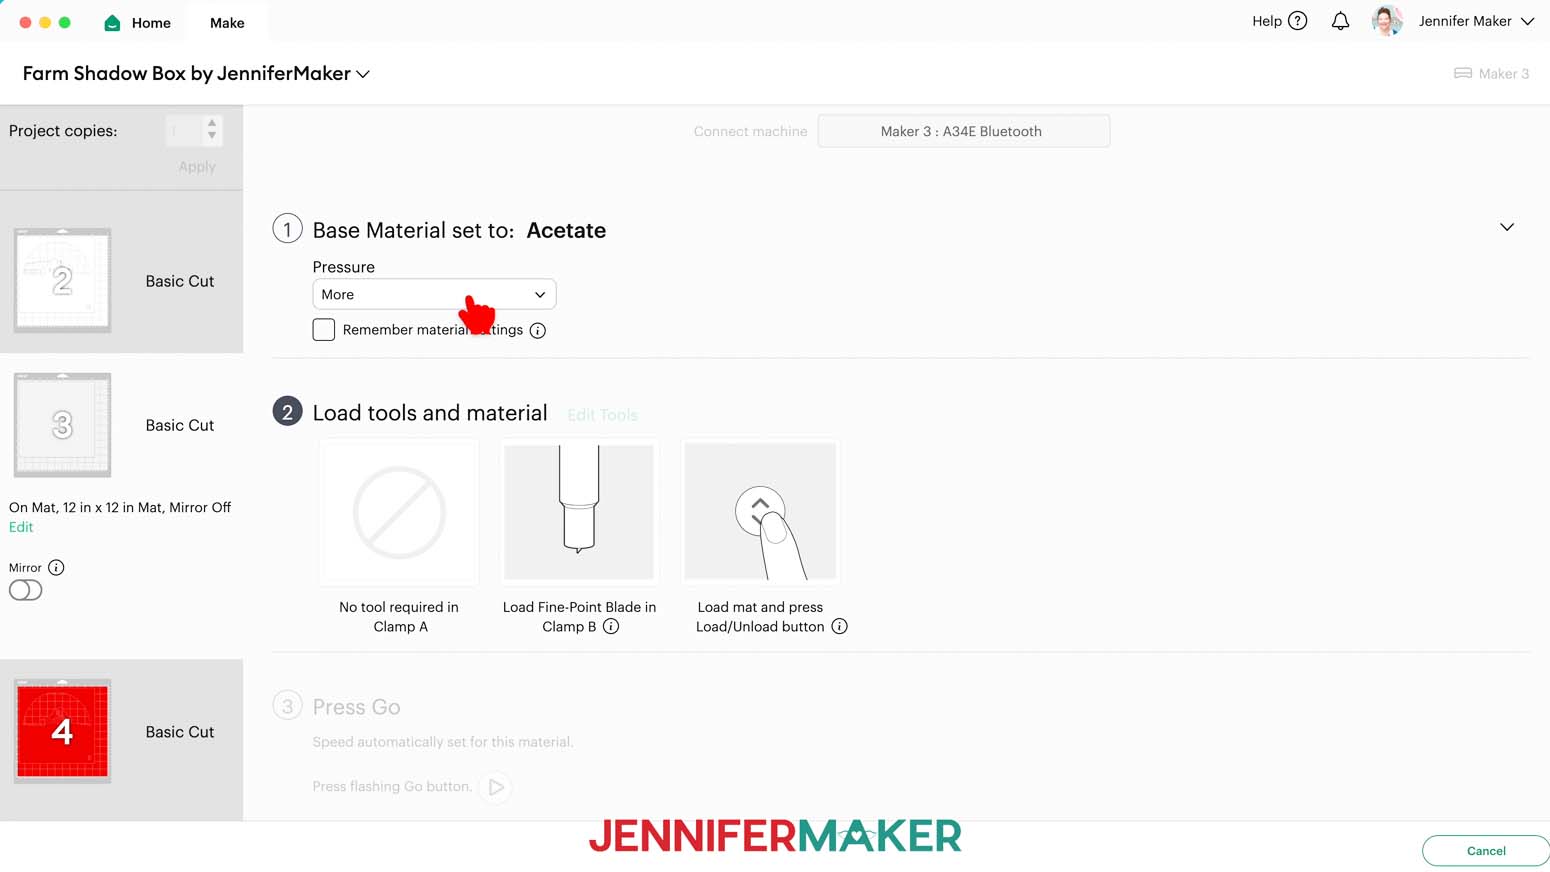
- For your acetate mat, change your material settings in Design Space to “Acetate” with “More” pressure.
- Take the protective film off one side of the acetate only.
- Place the acetate’s side with the protective film down on a green StandardGrip machine mat to keep adhesive and scratches from damaging the material.
- Repeat Steps 7-12 to cut your acetate.
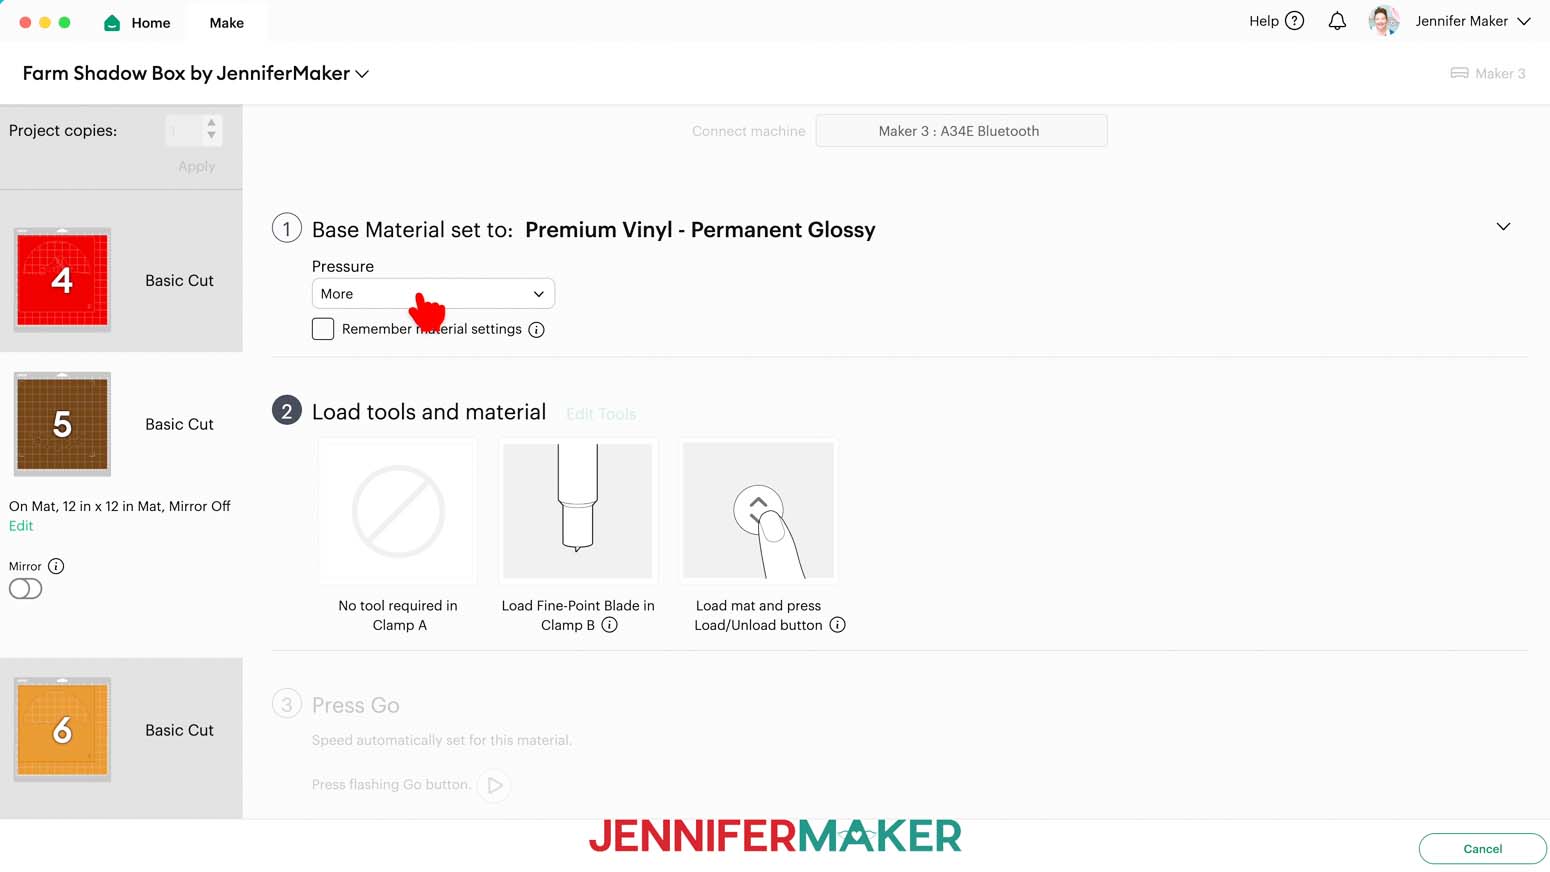
- For your vinyl mats, change your material settings to “Premium Vinyl - Permanent Glossy” with “More” pressure.
- You can use a paper trimmer or scissors to trim your vinyl to cover the design area shown on the screen plus an inch or so of buffer.
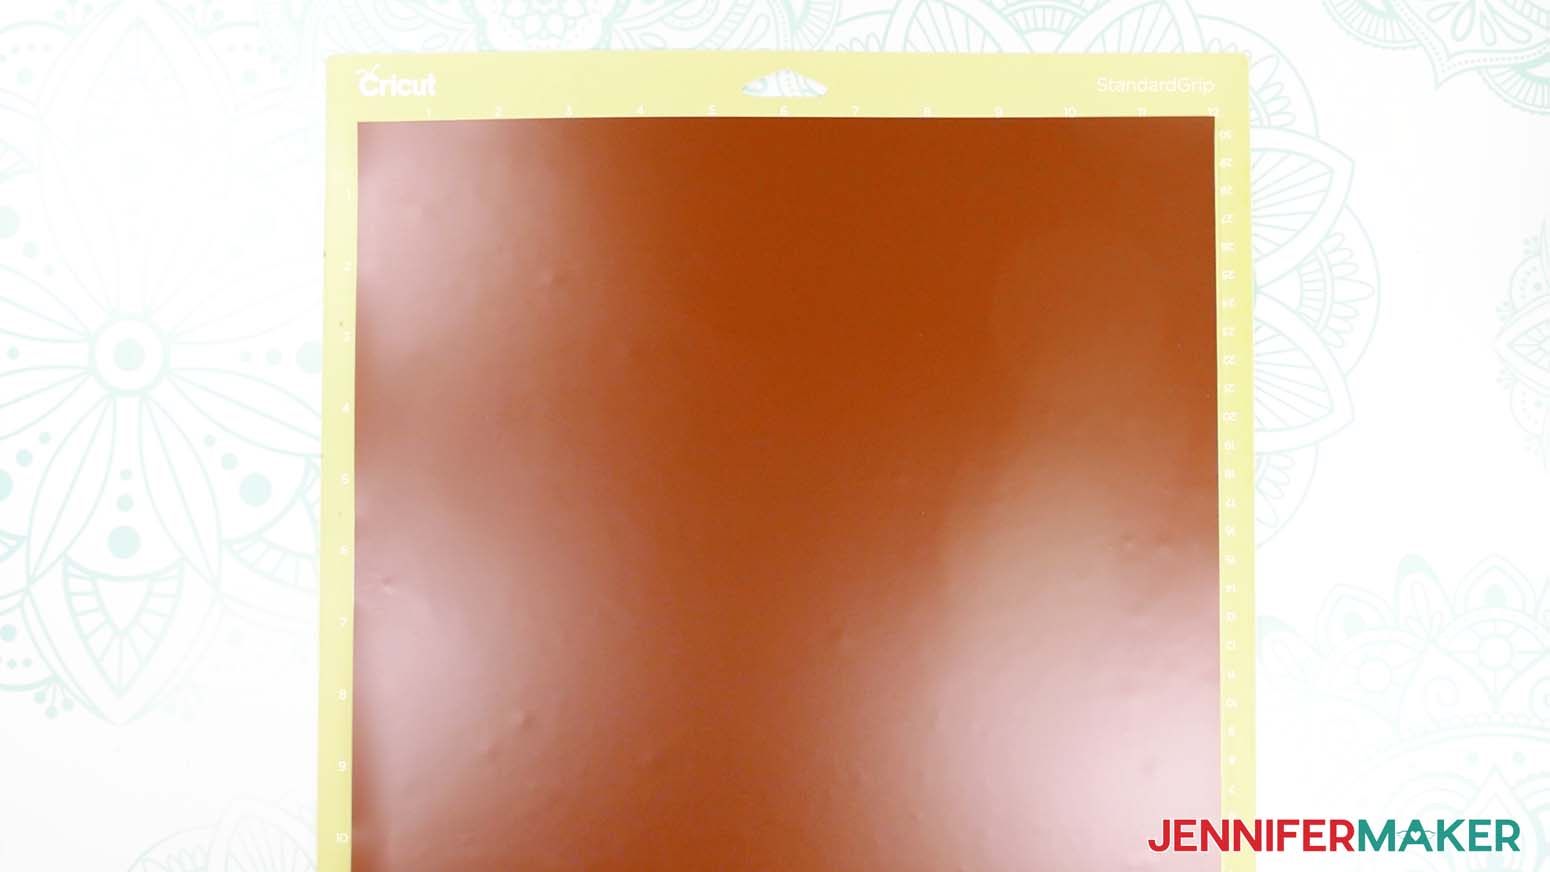
TIP: You can save smaller pieces of vinyl for other projects. - Place your vinyl matte-side-up (if you're using Cricut Value Vinyl like me) on a green StandardGrip machine mat so it covers the design area on your screen.
- Repeat Steps 7-11 to cut your vinyl.
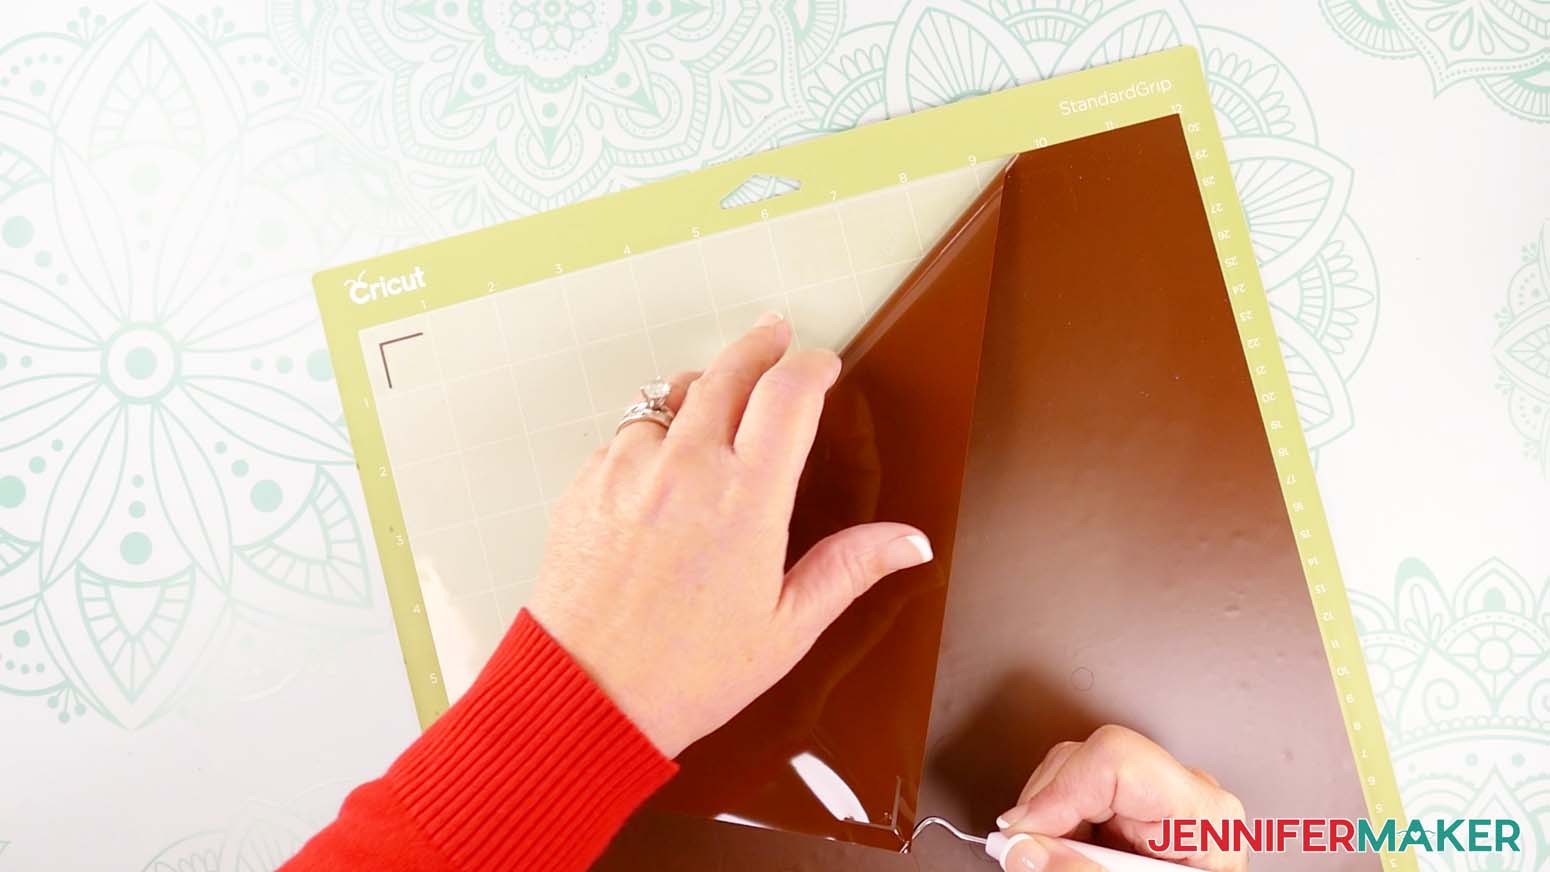
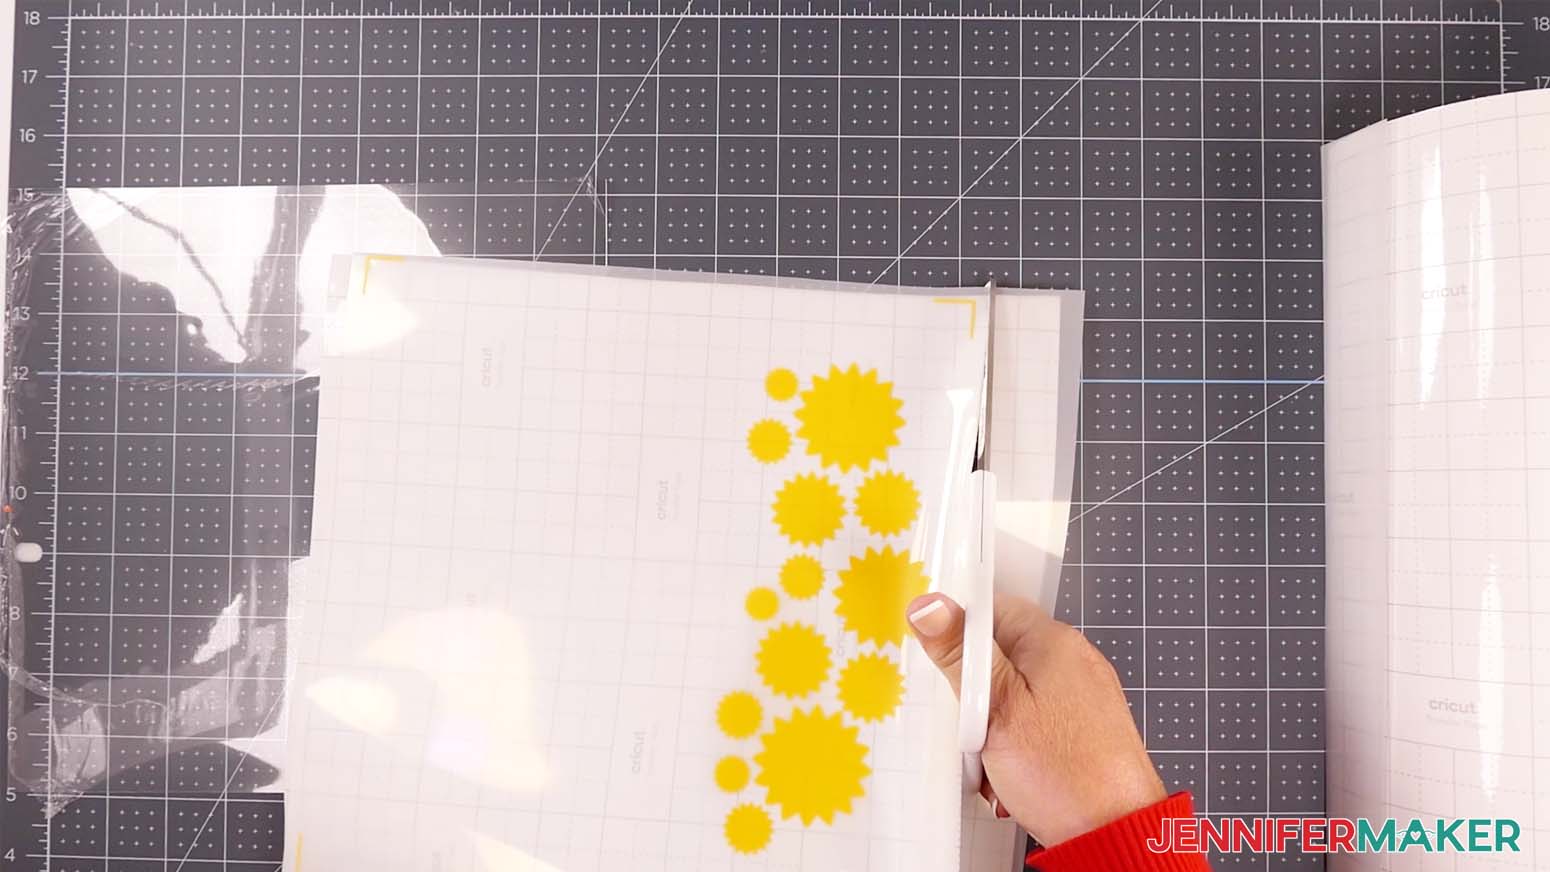
NOTE: For vinyl, cuts should go all the way through the material, but not the carrier sheet. - When the cuts are complete, keep the vinyl on your mat and use your weeding tool to carefully peel away the extra background vinyl.
TIP: It can be easier to weed vinyl, especially small, detailed designs, while it is still adhered to the machine mat. - Poke your weeding tool into small sections of the vinyl you want to remove, like the insides of elements. Gently lift the tool away from the design.
TIP: Make sure you do not pull up any pieces you want to keep! If they come up, gently pat them back in place and try again. Refer back to the Design Space screen if you’re not sure which pieces to remove. - Continue to weed until all that is left is the vinyl for your design. Then flip the mat over onto your work surface and roll it back to release the vinyl with its carrier sheet.
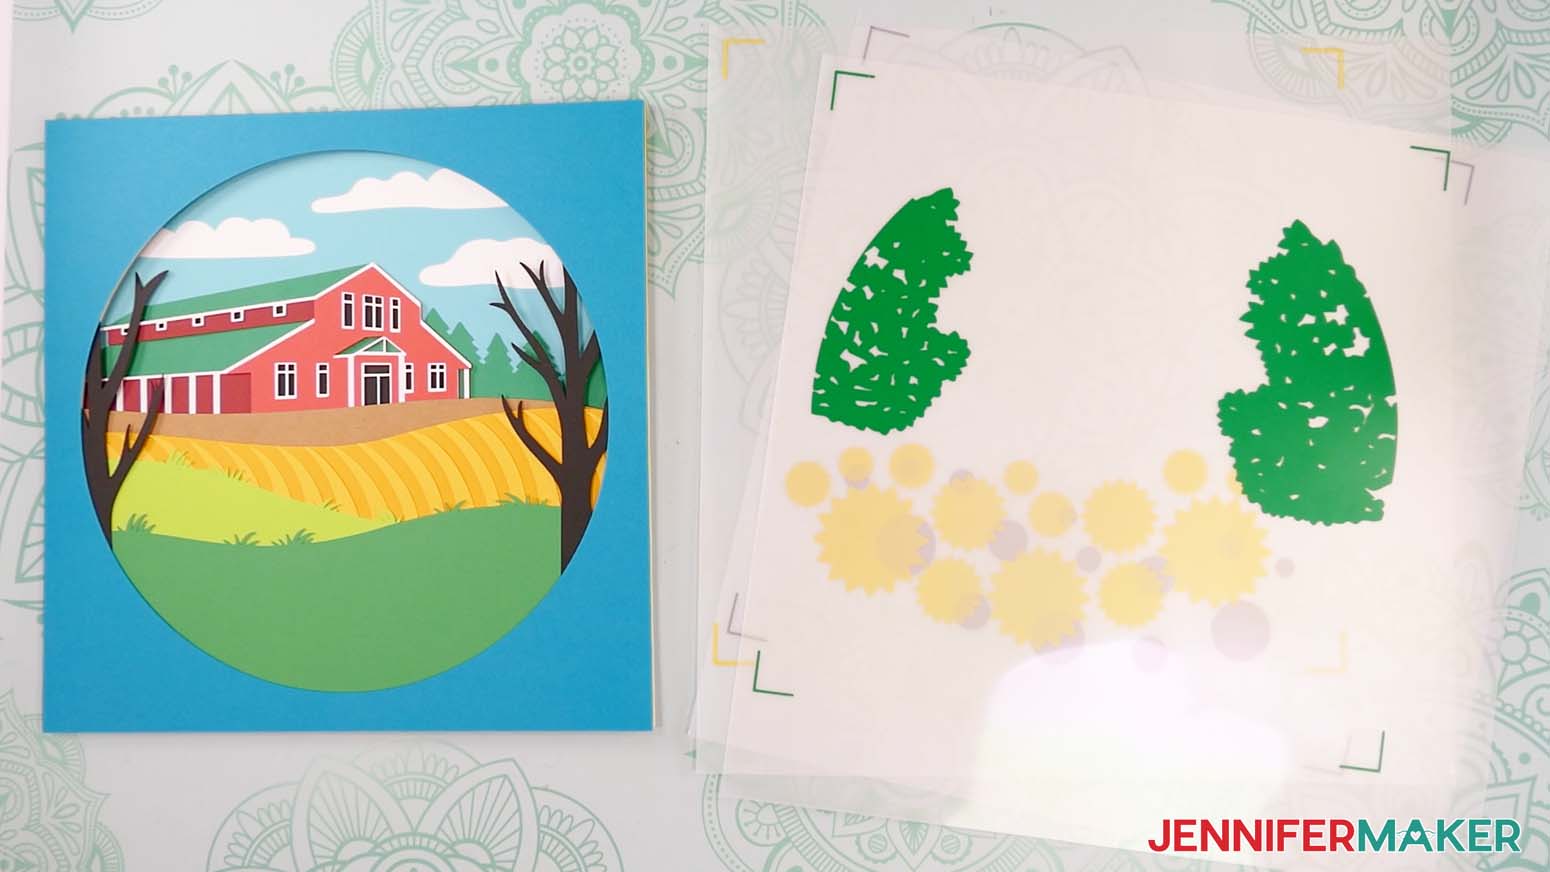
- Lay out all of the pieces face up in organized piles. Keep your vinyl layers with your acetate, and keep your cardstock layers stacked in order.
TIP: Refer to the PDF file that matches your design if you’re not sure about some layers’ order or orientation.
STEP 3: ASSEMBLE YOUR MAKER FARM SHADOW BOX
LAYER YOUR VINYL ONTO YOUR ACETATE
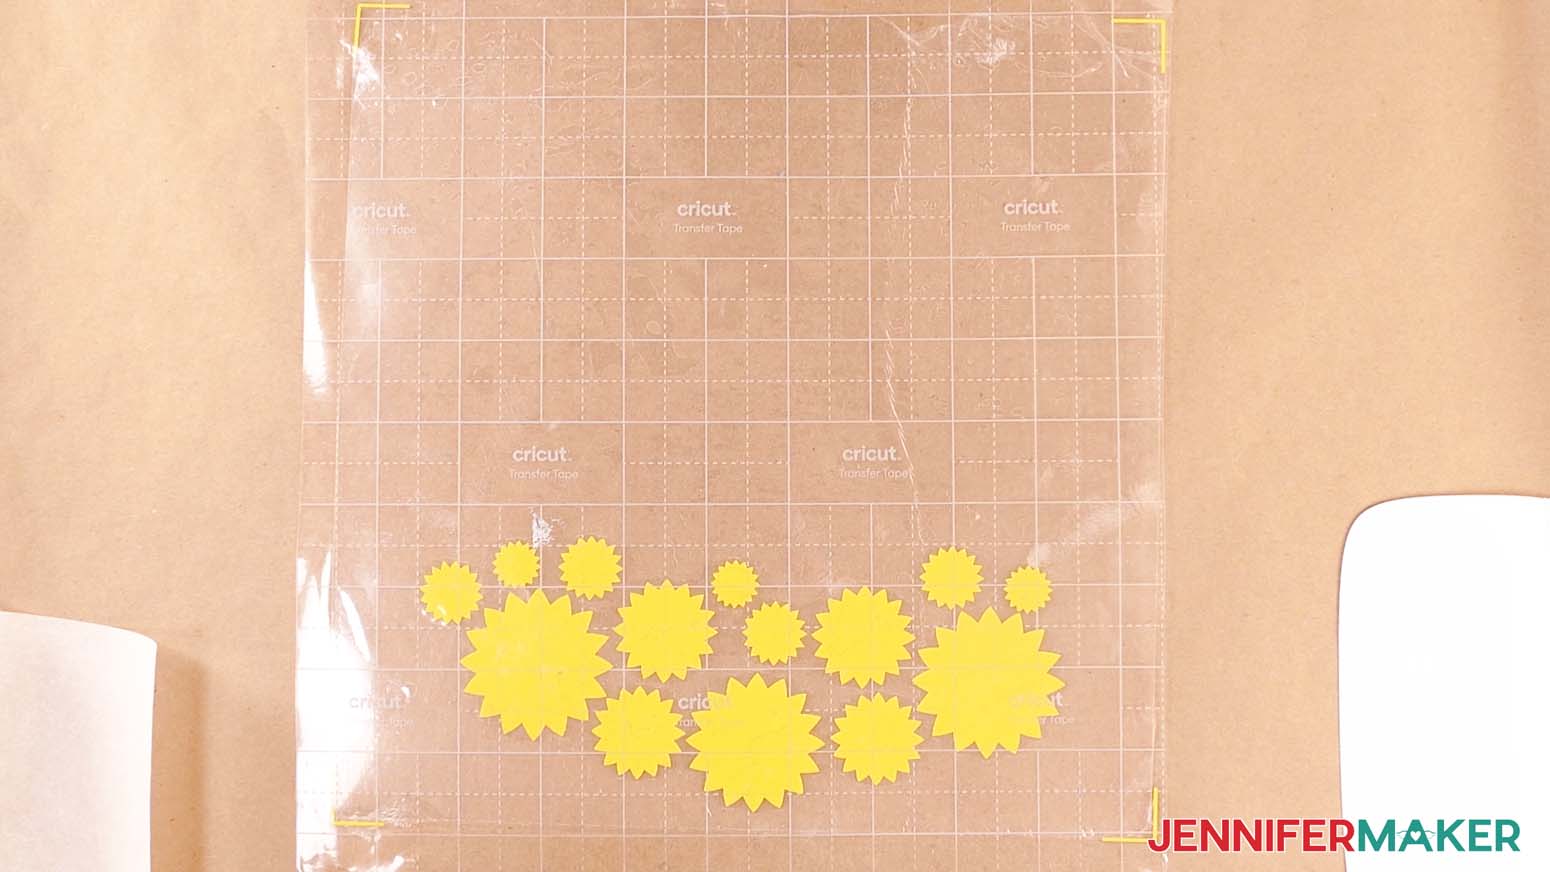
- Lay your design’s bottom-most vinyl decal face up on your work surface.
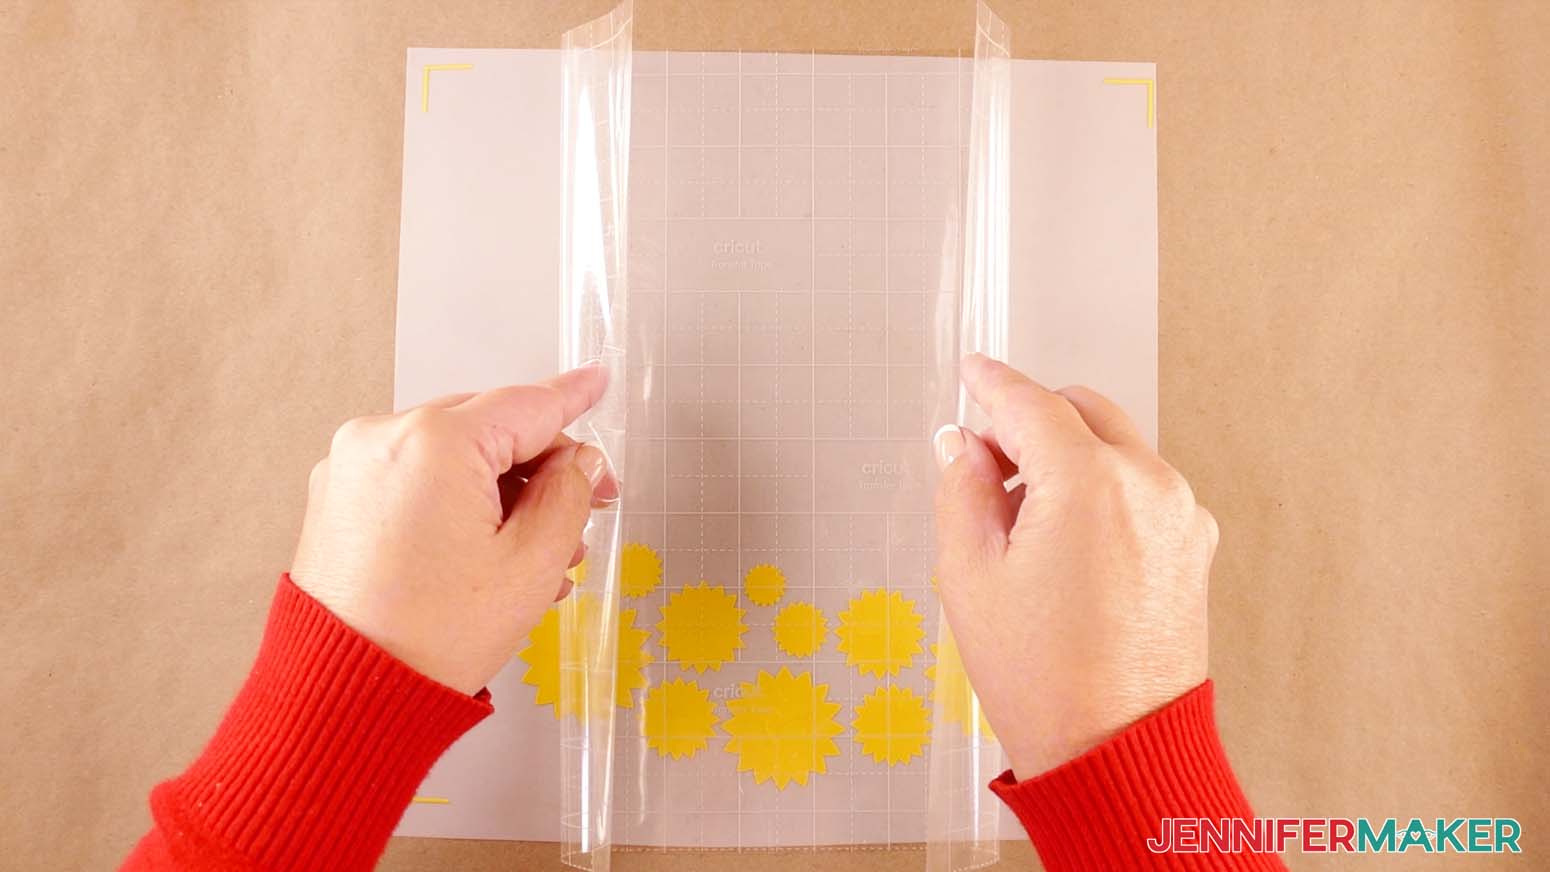
NOTE: I’ll start with the sunflower petals layer on the bottom to make sure the centers are layered on top of them. - Cut a piece of StandardGrip transfer tape just larger than the decal.
NOTE: Make sure the tape covers all four registration marks. - Remove the backing from the transfer tape.
- Press your transfer tape onto a lint-free cloth and peel it back up a few times to make it less sticky.
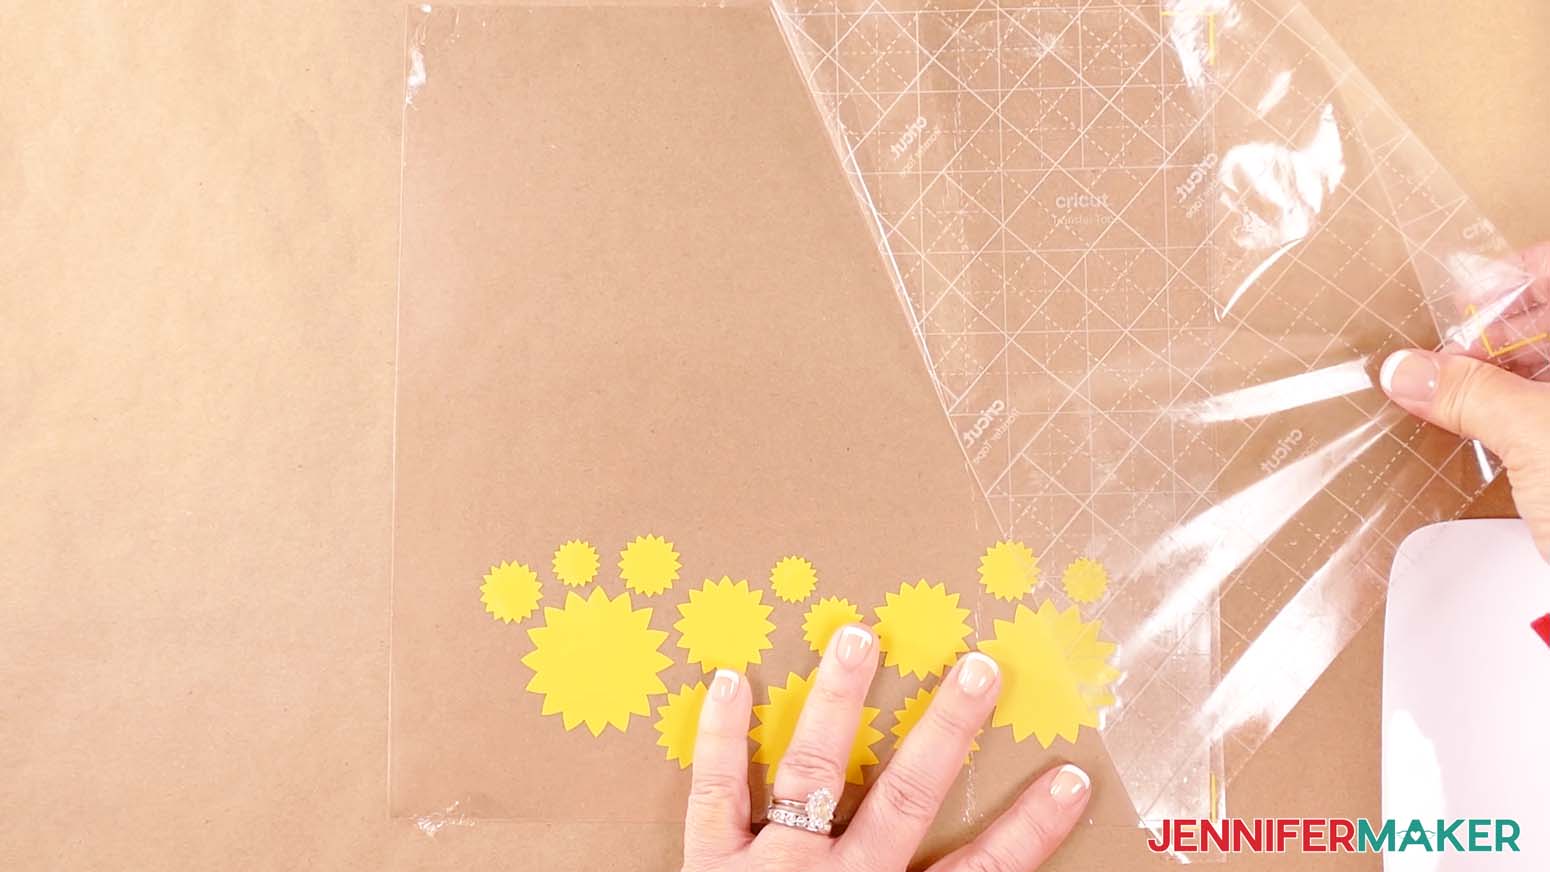
NOTE: If the transfer tape is too sticky, it will be difficult to remove from the acetate layer. - Hold your transfer tape in the shape of a “taco,” sticky side down, then center the bottom of the “taco” onto the middle of the decal, making sure the tape covers the registration marks in all four corners.
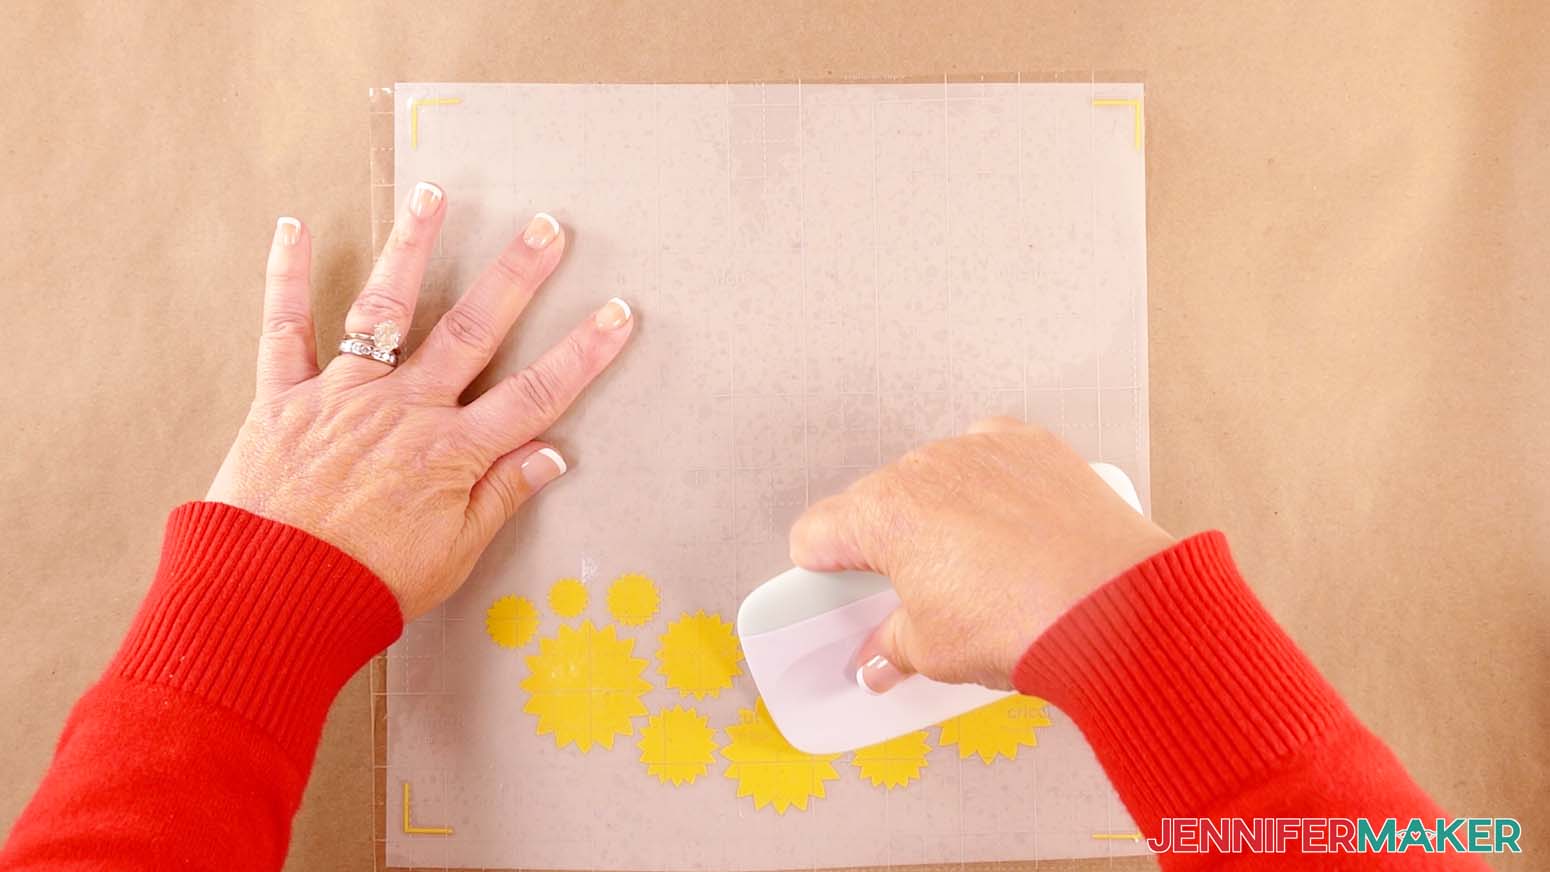
- Smooth the transfer tape over the decal from the center outward and burnish it down using the Scraper Tool.
- Flip your vinyl over and gently peel away the backing.
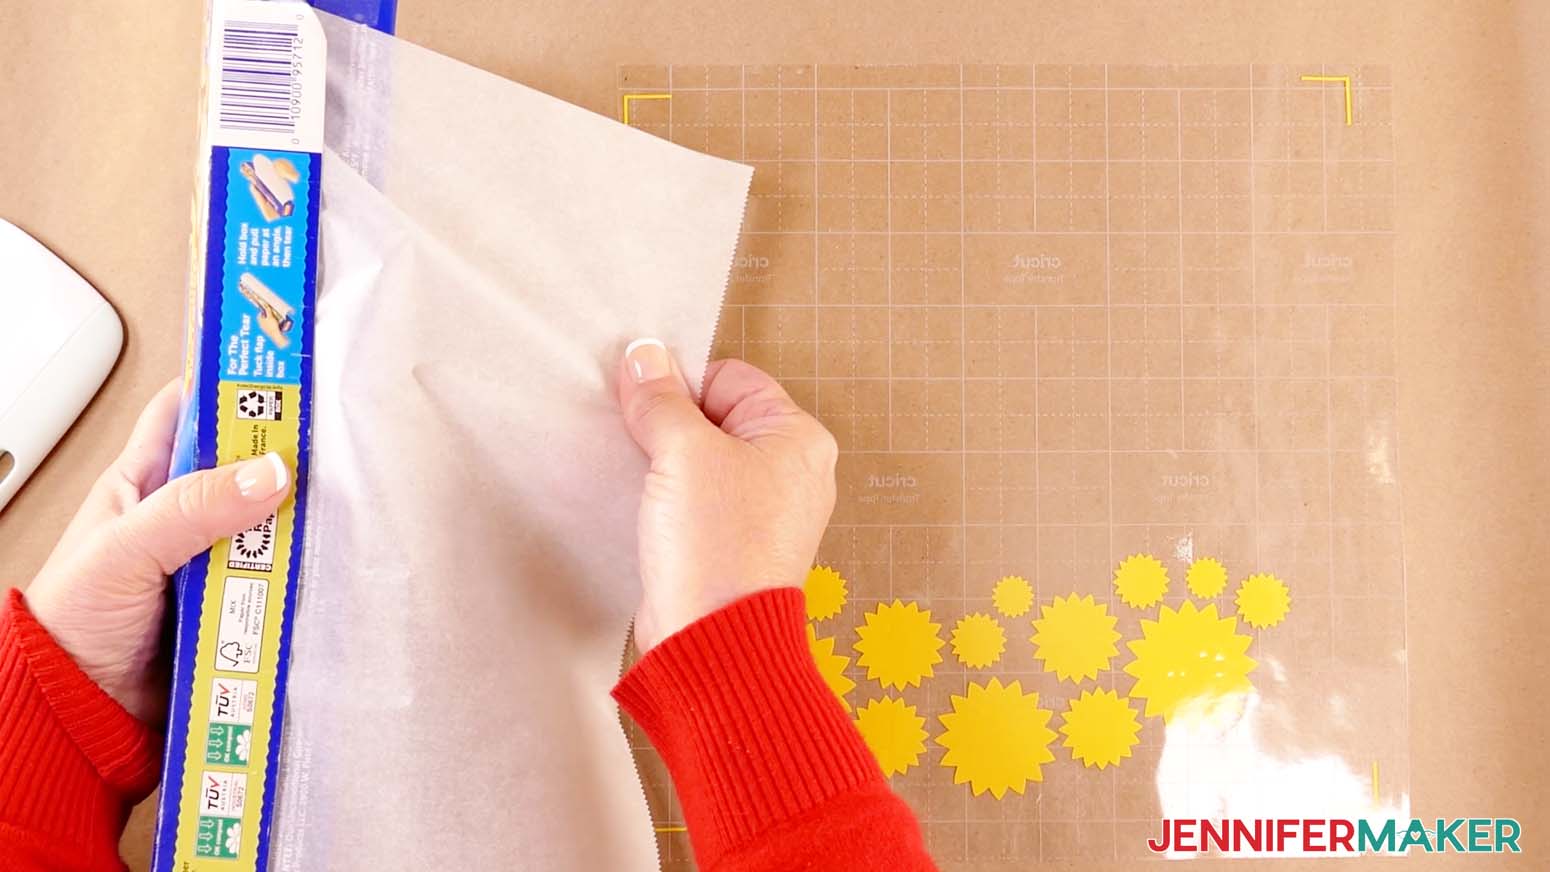
- Cut a piece of parchment paper that is wide enough to cover the vinyl design without covering the registration marks in the corners, and smooth it down on top of the vinyl’s decal and transfer tape.
- If any pieces of vinyl are still exposed, use a scrap piece of parchment paper to cover them and prevent them from sticking before the design is aligned.
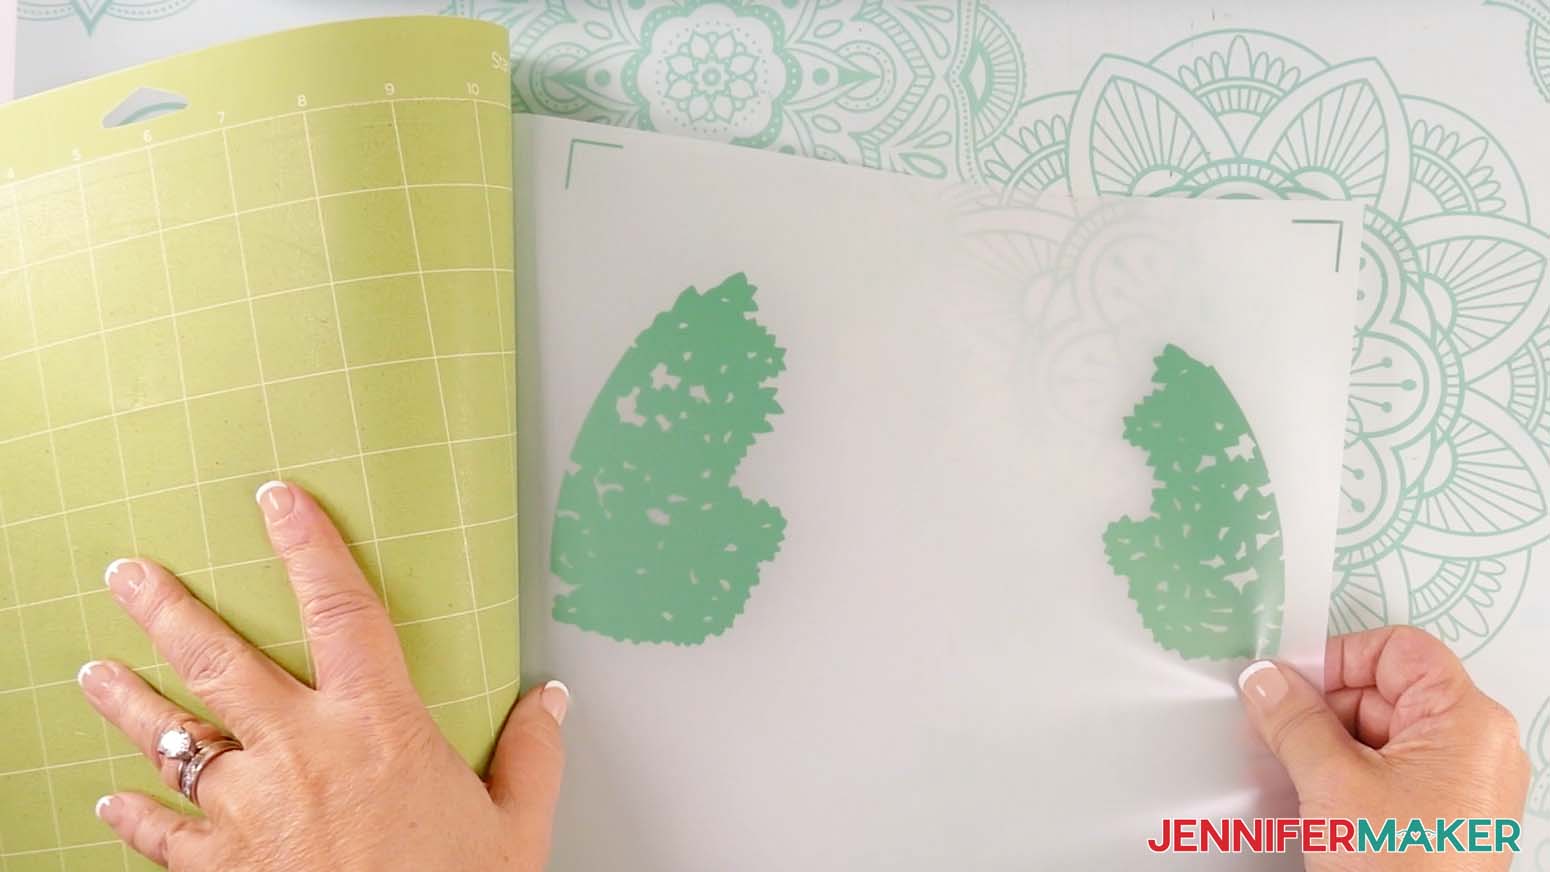
- Lay the acetate protected-side-down on your work surface to prevent damaging the material while layering on the vinyl.
- Use isopropyl alcohol and a lint-free cloth to clean your acetate.
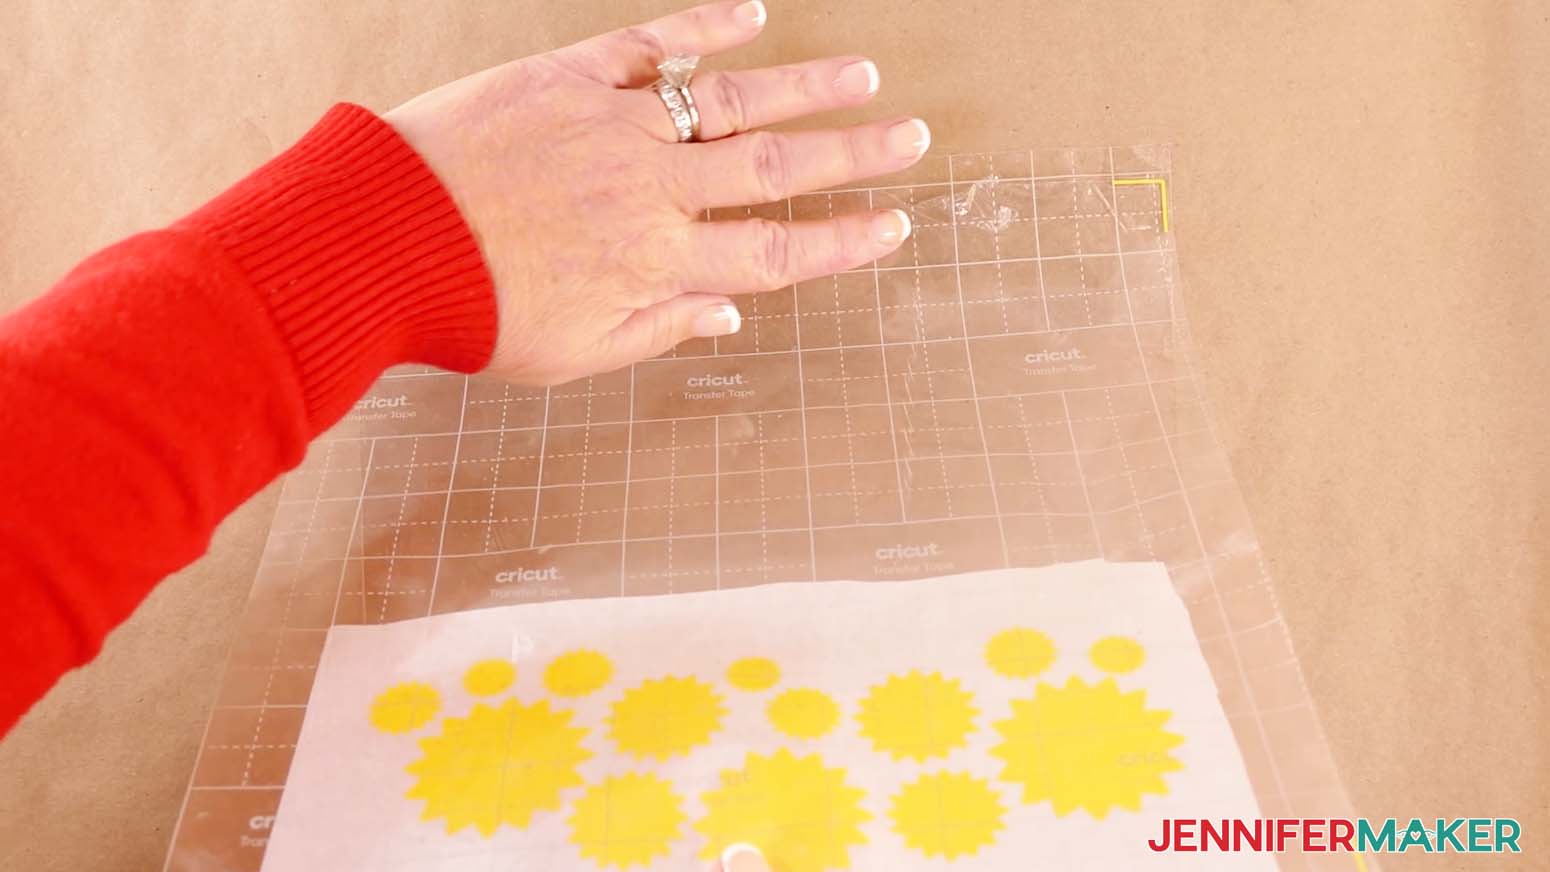
- Flip over your transfer tape and parchment paper, and line up the vinyl corner registration marks with the corners of your acetate sheet.
NOTE: The registration marks are placed so that the acetate sheet fits perfectly inside. - Once they’re lined up, press the top of the transfer tape onto the top of the acetate sheet.
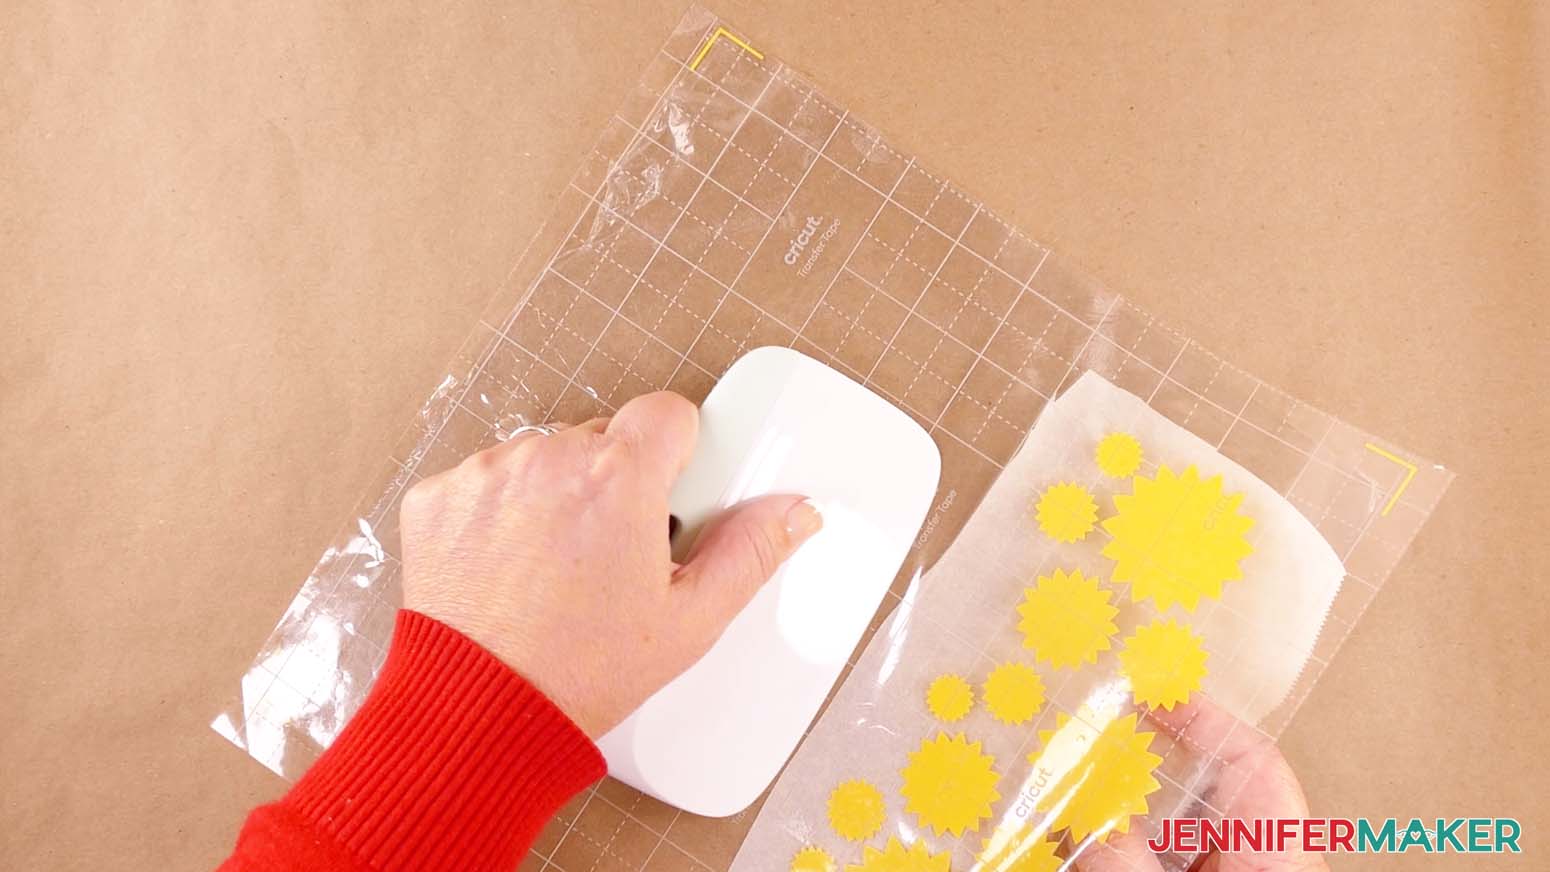
- Take your Scraper Tool in one hand and gently burnish the transfer tape onto the acetate sheet while carefully peeling away the parchment paper with your other hand.
TIP: Rotating the layers to one side can make this easier. - When you get to the vinyl, use your Scraper Tool to burnish it onto the acetate layer.
- Slowly and carefully peel away the transfer tape, leaving the vinyl design on the acetate.
- If there are any air bubbles between your vinyl and acetate, use your finger to push outward and flatten the vinyl.
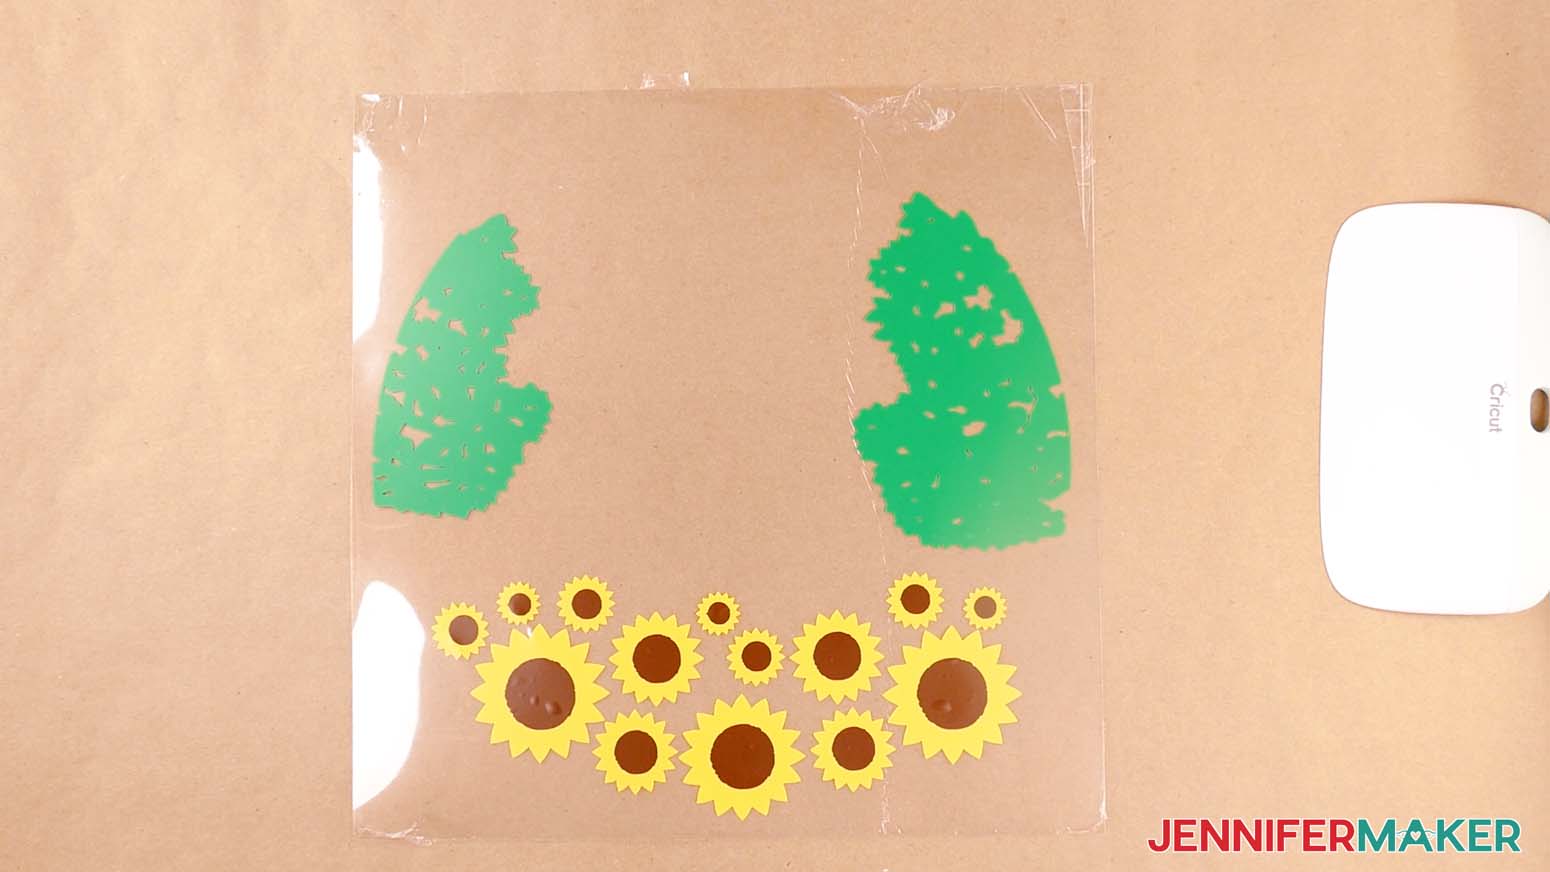
- Repeat Steps 5-17 to apply the remaining layers of vinyl to your acetate sheet.
TIP: You can use the same piece of transfer tape for all your vinyl layers. - Once your layers have all been applied, peel the protective layer from the bottom side of the acetate.
- Spray isopropyl alcohol onto a lint-free cloth and wipe away any smudges or fingerprints on both sides of the acetate sheet.
NOTE: Avoid getting alcohol on the vinyl.
ADD THE LAYERS TO YOUR SHADOW BOX
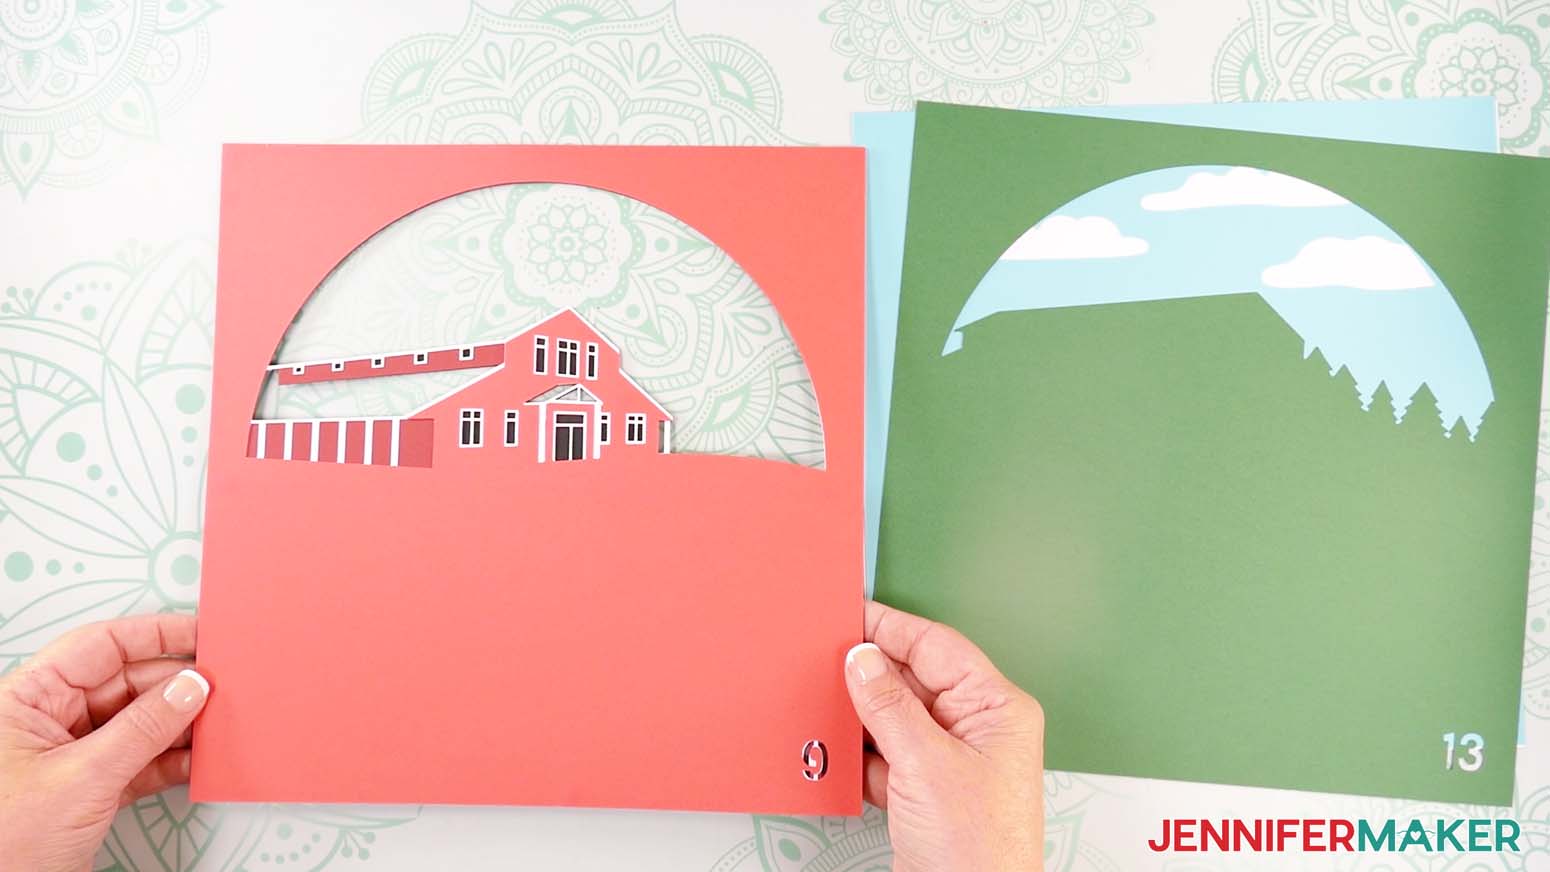
- Stack your layers face up in the order they’ll fit in the frame. Most of the layers are numbered in the bottom right corner to help you order them correctly.
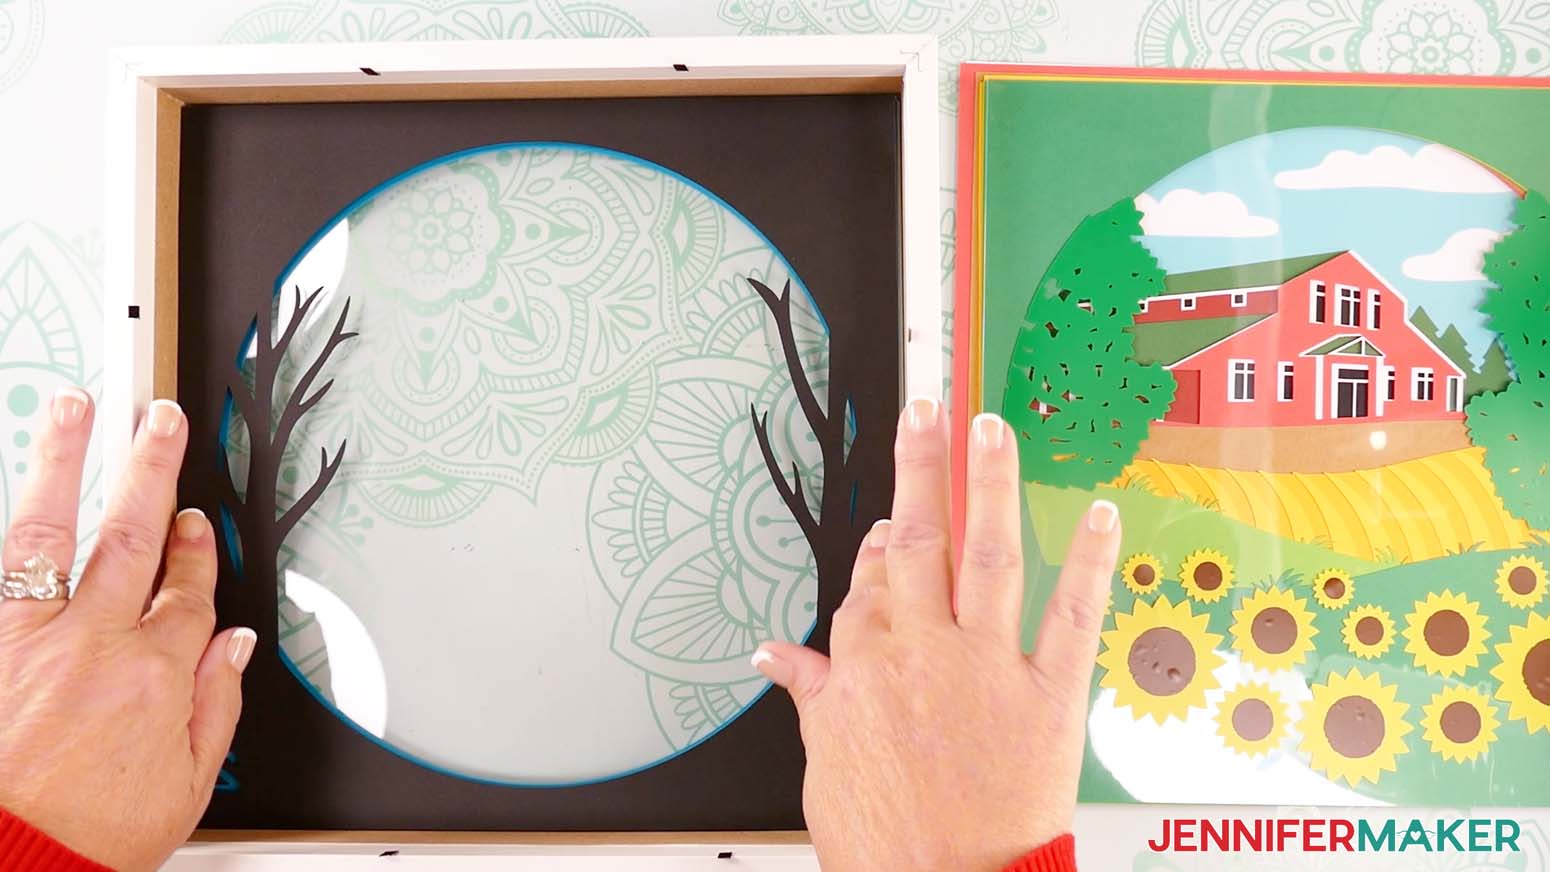
NOTE: Layer 1 (the top layer of cardstock with a single circle cutout), Layer 3 (the vinyl on acetate layer), and Layer 15 (the bottom layer of solid cardstock) are unmarked. - Grab your shadow box frame. Remove the backing and inner spacer piece, then set them aside.
- Take Layer 1, flip it over, and put it face down inside the shadow box frame.
- Cut and place foam tape strips of your desired length on the back of Layer 1. Make sure the strips are spaced around the edge of the paper to ensure even coverage, and avoid getting tape in the cutout areas.
- Peel the backing from each piece of foam tape.
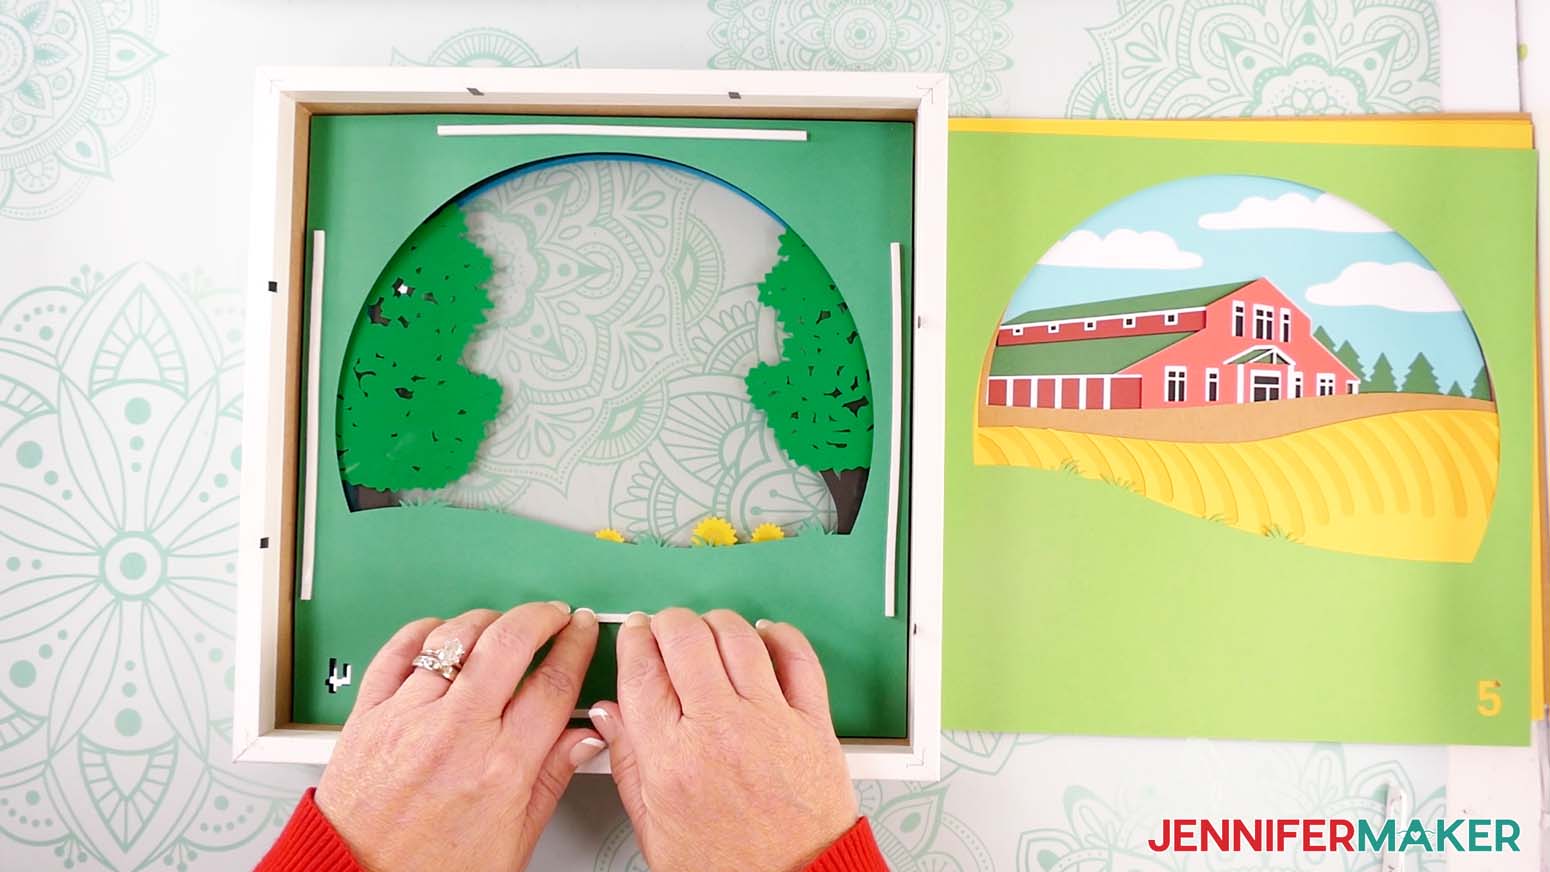
- Flip Layer 2 over and gently lower it face down into the shadow box, directly above Layer 1.
NOTE: Use the sides of the shadow box to help with alignment. - Once you’re sure the second layer is centered properly, press down around the edges to adhere it to the foam tape underneath.
- Repeat Steps 4-7 to add Layers 3 through 8 to your shadow box, placing your foam tape in the same position on the back of each layer to make sure the papers are adequately spaced and supported.
- Set the shadow box and assembled layers aside.
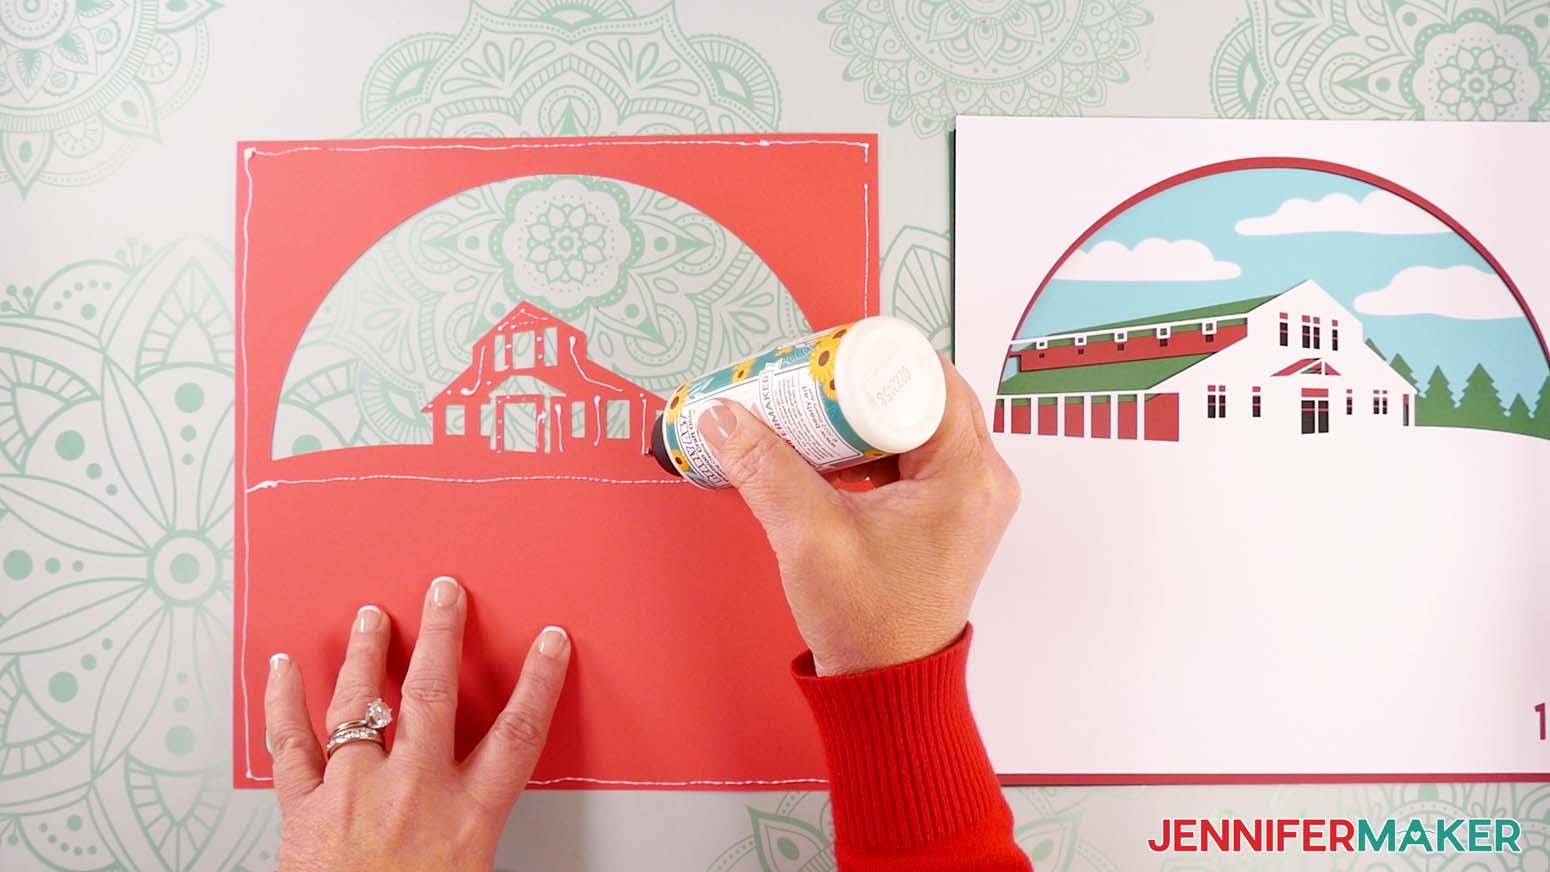
- Place Layer 9 face down on your work surface.
- Add craft glue in a line around the outside edge of the cardstock, around the cutout area, and on the small, detailed areas.
TIP: Work quickly but carefully to avoid letting the glue dry before applying the next layer. - Flip Layer 10 over and align it directly on top of Layer 9.
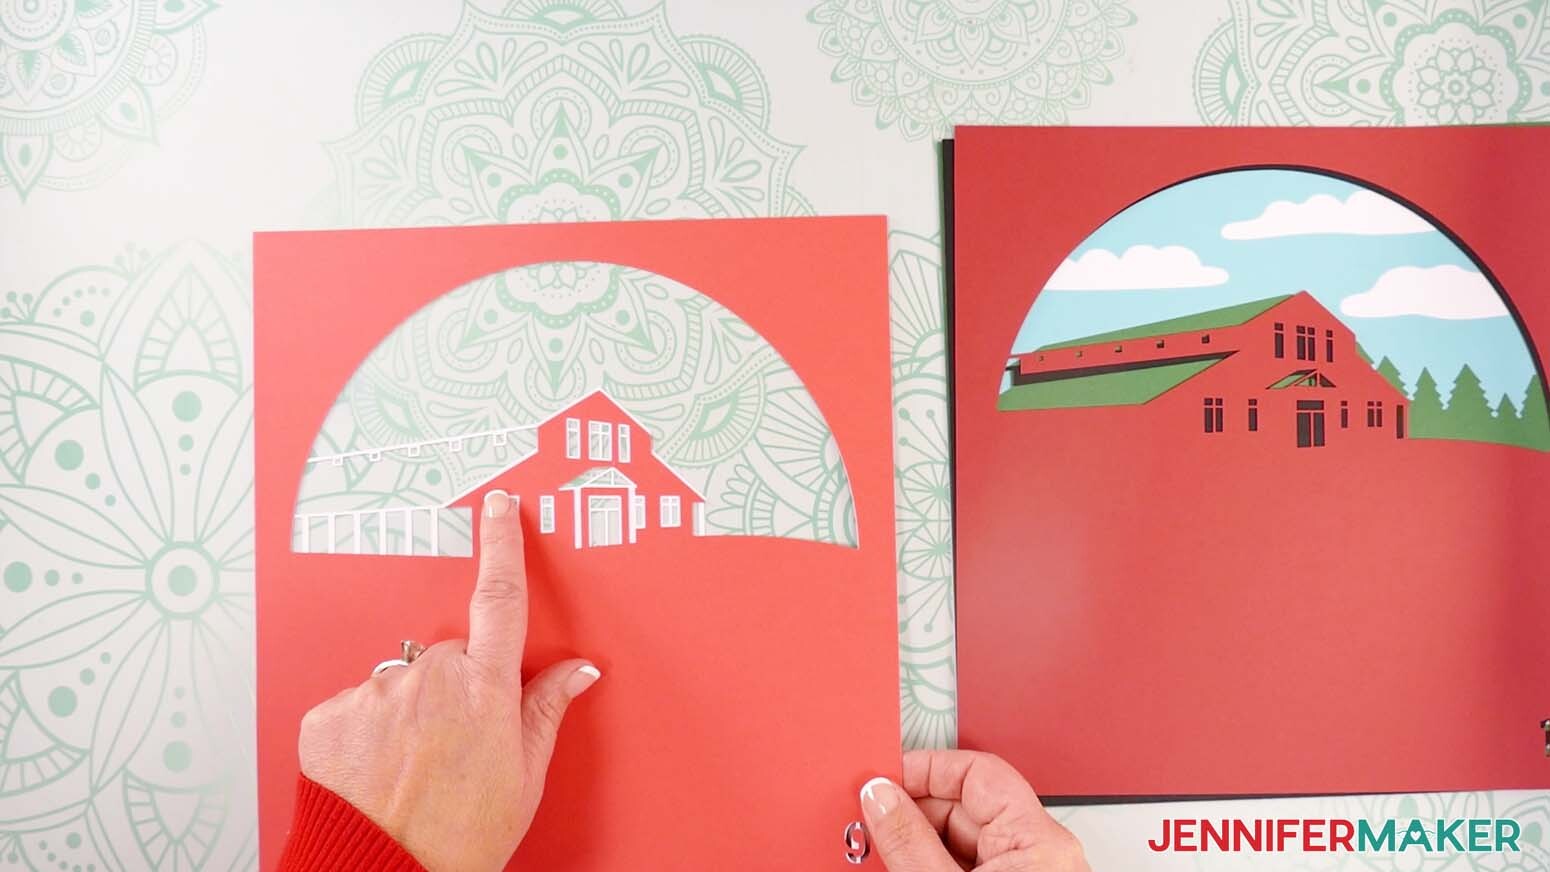
NOTE: Use the cardstock’s edges and corners for alignment. - Flip the layers face up to make sure Layer 10’s areas of white trim around the farm, windows, and doors are visible, then press down and smooth to adhere.
- Gently wipe away any excess glue with a paper towel or your finger.
- Repeat Steps 10-14 to add Layers 11 and 12, making sure each layer’s details are visible before pressing down to adhere.
- Take the shadow box with layers inside and remove the backing from the foam tape on Layer 8.
- Flip glued Layers 9-12 face down and gently lower them into the shadow box, directly above Layer 8.
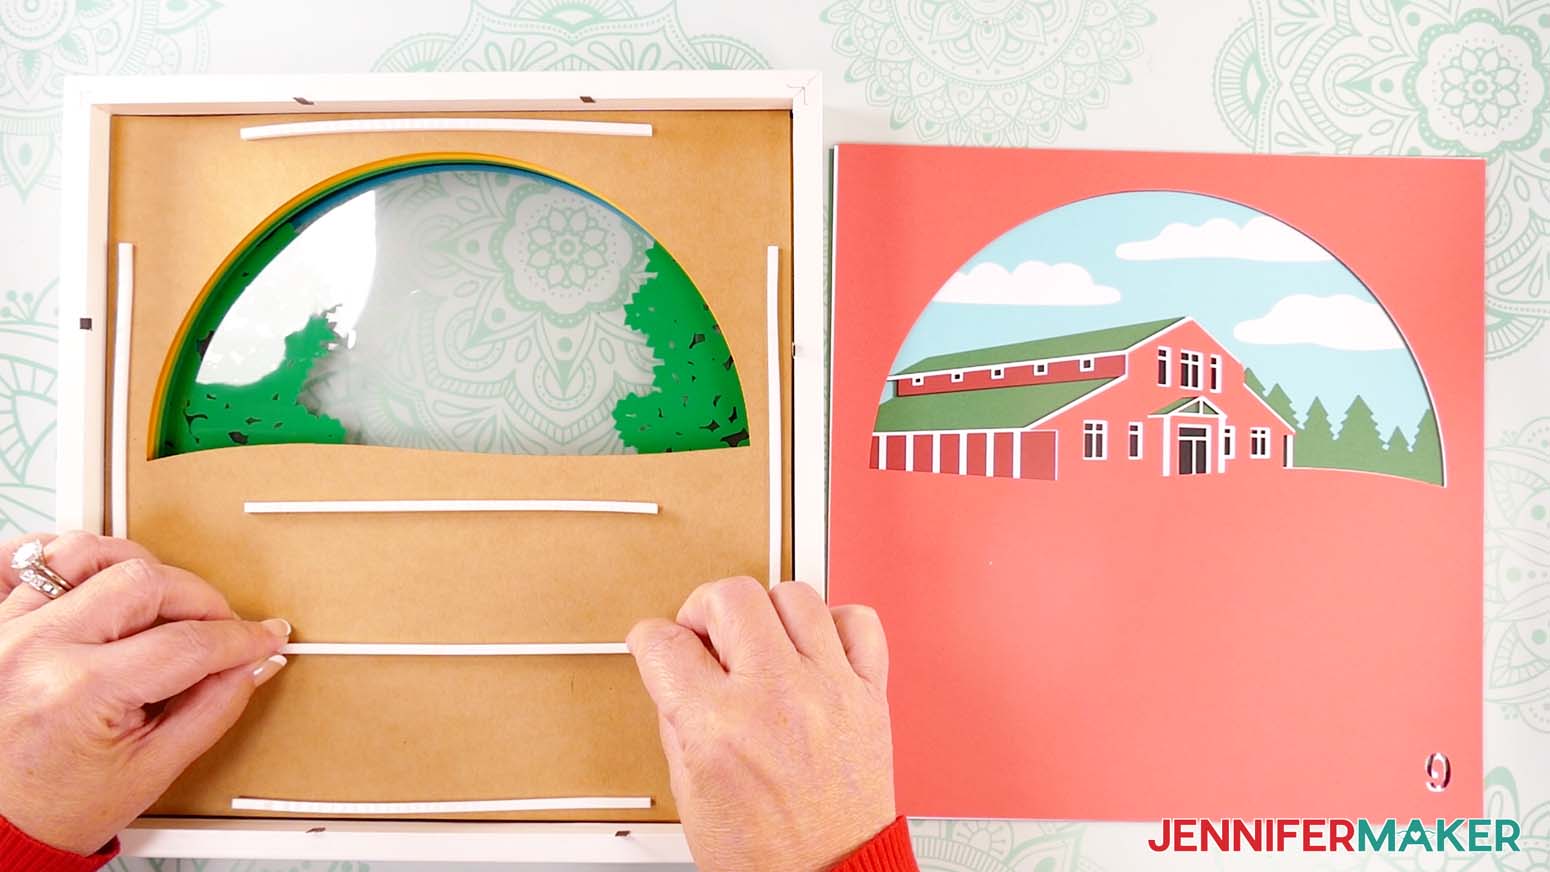
- Repeat Steps 4-7 to add Layers 13-15 to your shadow box, making sure to add foam tape along the edges and across large areas of cardstock that need additional support.
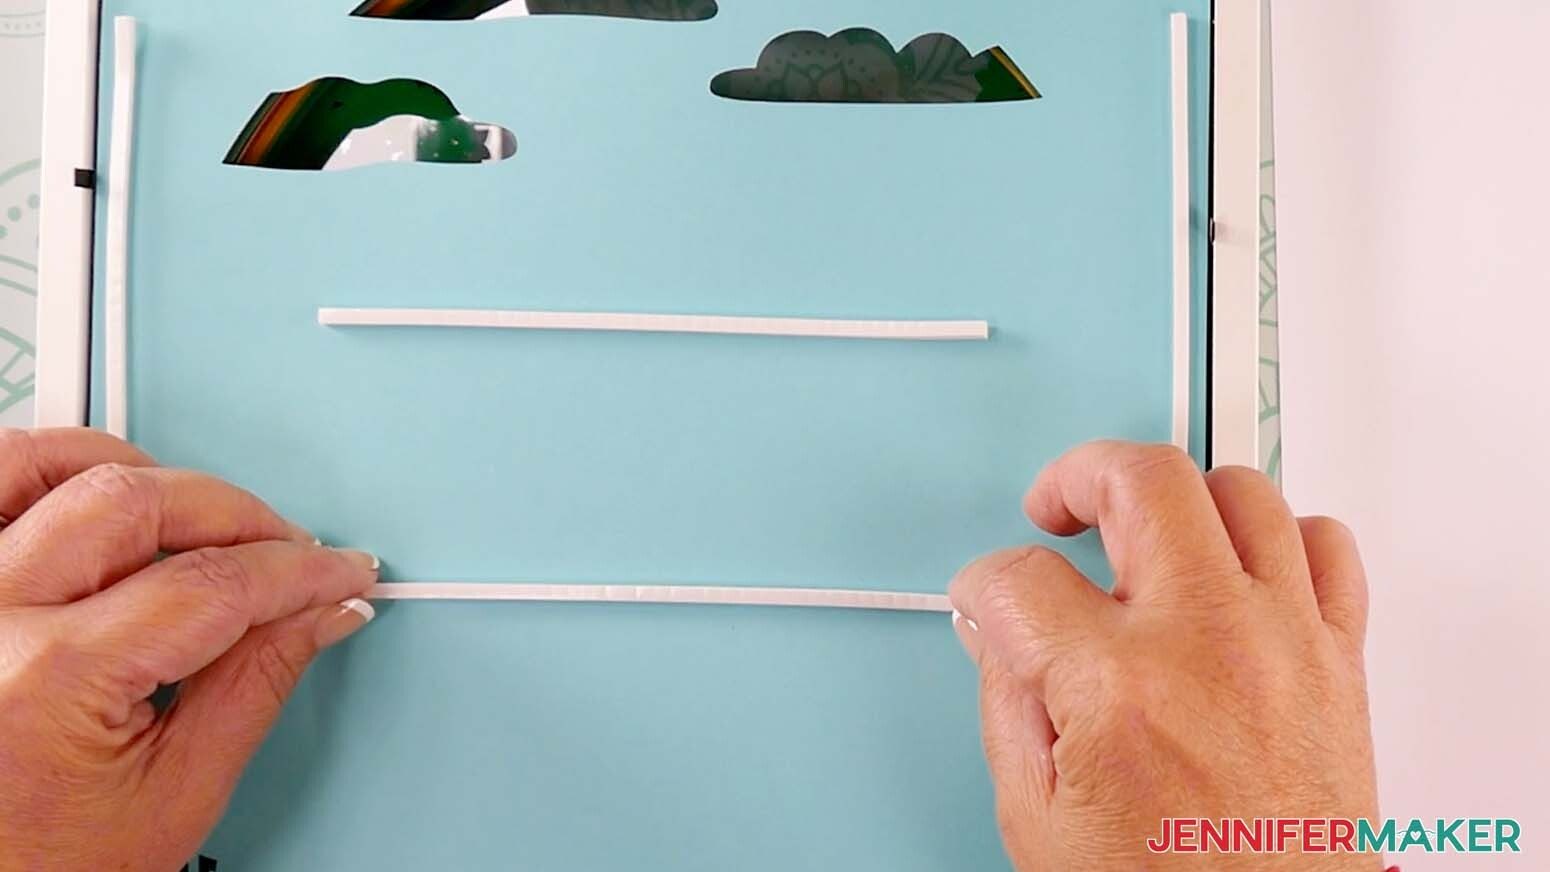
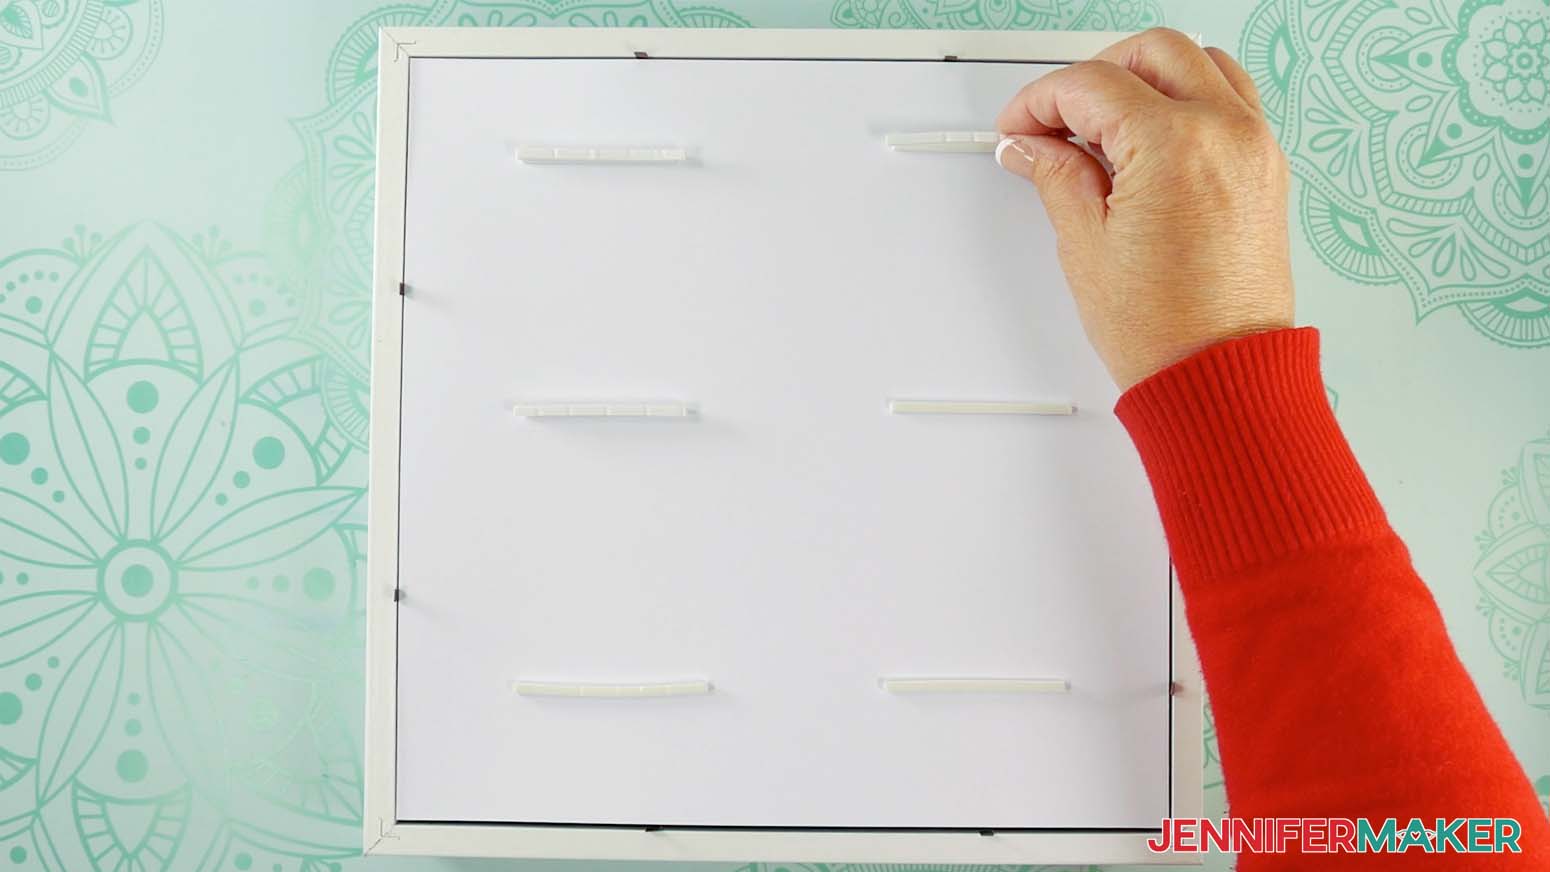
- Once Layer 15 is in place, add a few longer, equally spaced foam strips on its back.
- Peel the backing from each piece of foam tape, then add an additional piece of tape directly on top of each one to create double stacks that will fill extra space in the shadow box. Leave the backing in place on the second layer of strips.
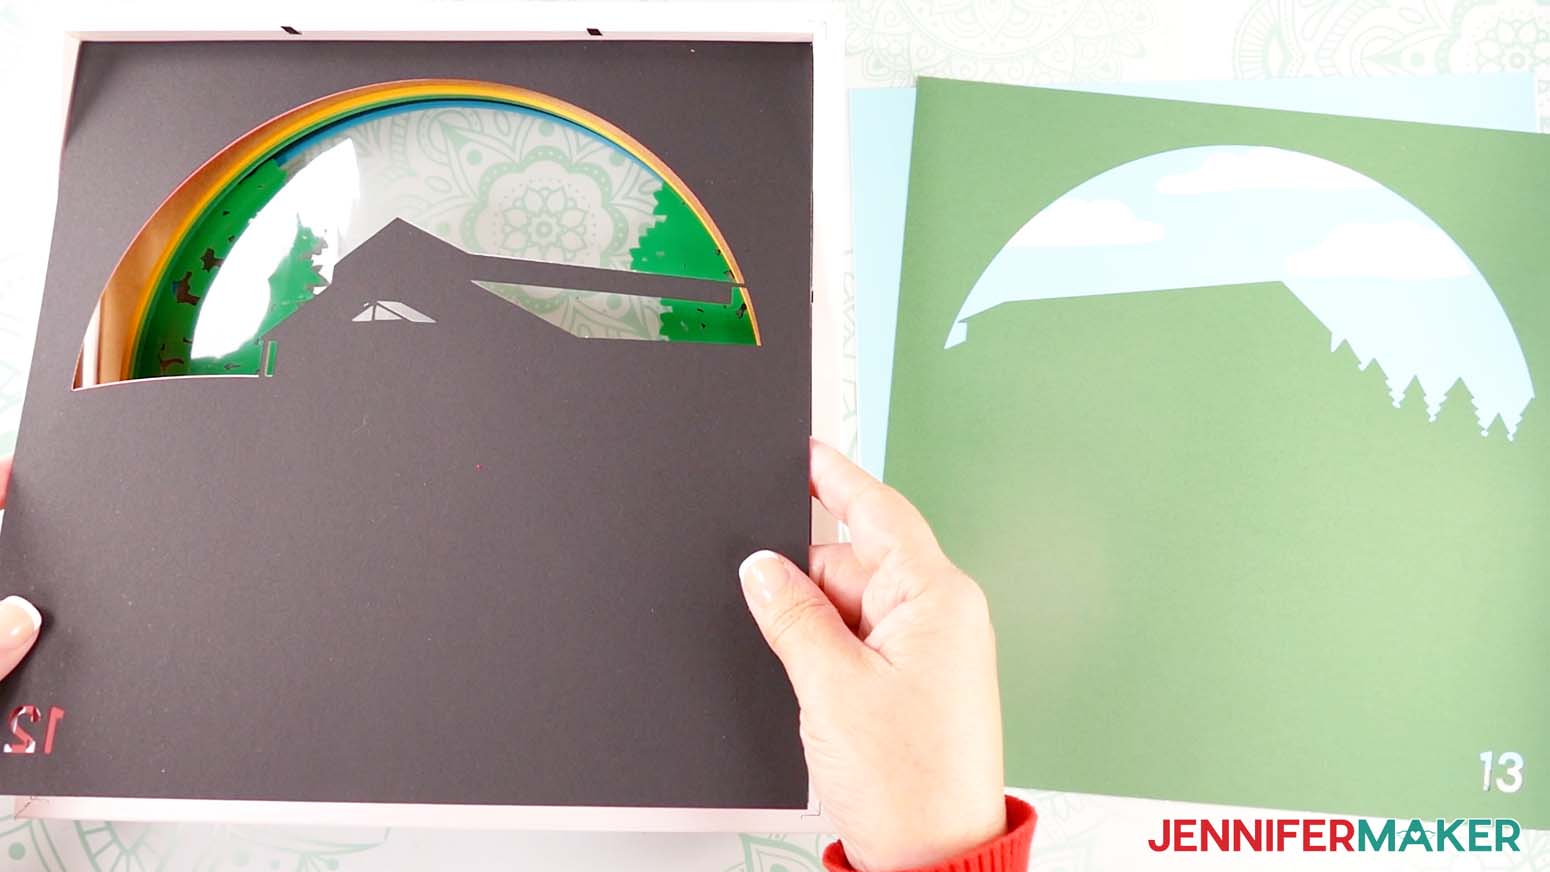
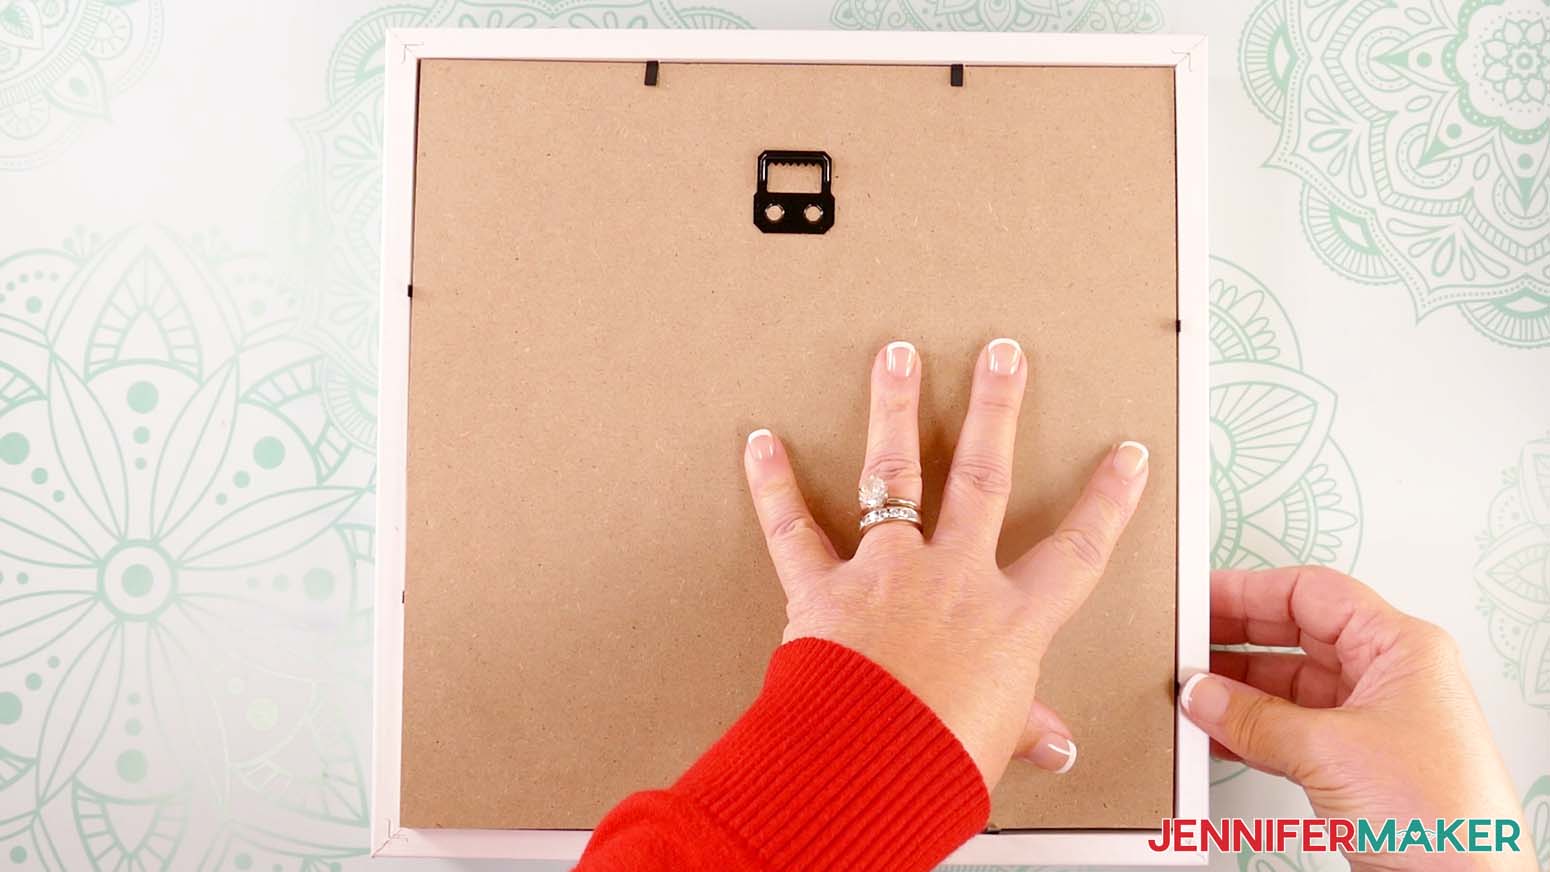
- Place the shadow box’s backing board on top of Layer 15, with the hanger positioned at the top. Press down the metal tabs on all four sides to secure the backing board.
- Flip your project over to view the assembled layers from the front.
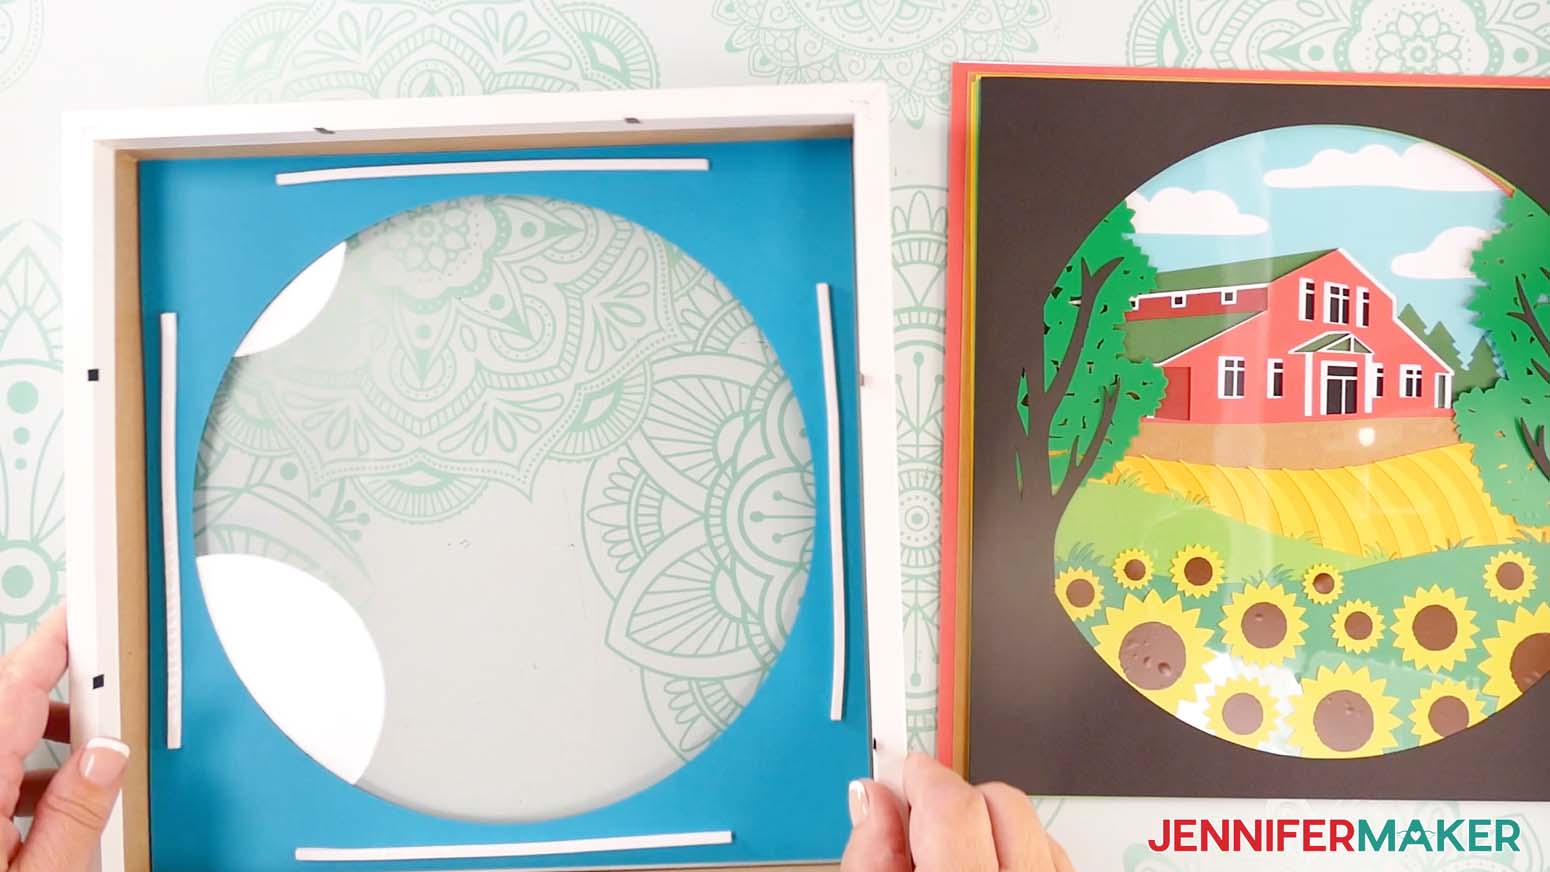
STEP 4: SHOW IT OFF
You now have your very own Maker Farm Shadow Box in the season of your choice! 
Notes
Finished Size
Design Layers: 10” x 10”
In Shadow Box: 11" x 11" x 1.75"
Answers to Your Questions About Making a Shadow Box with Floating Pieces
Q: I want a different design. How do I design my own custom paper bunting banner?
A: You can learn how to design your own customized scene in my ADVANCE program. Learn more about ADVANCE here!
Q: Help! My Cricut Design Space screen looks different from yours!
A: If you’re using the latest version of Cricut Design Space, your screen may have slight variations than the screen you see on the video tutorial. Good news: All of the same functions are there, they may just be in different spots or have new icons. Pause the video if you need, or follow along with the written tutorial. If you get stuck, ask for expert support in our Facebook group. Our group has become not just a help center, but also a vibrant community of real people and crafters! Plus, you can catch the latest news on JenniferMaker tutorials and more.
Q: What are shadow boxes?
A: Shadow boxes are deep-framed display cases that you can put 3D items in for displaying them in your home! They’re made of durable material with a standard glass covering for viewing items. They also have a removable back mounting board for easy access to the inside of the box. You’ll often find a smaller frame inside made from cardboard or a piece of wood which acts a spacer between the glass and the back board and can be used to hold your box’s contents in place.
Q: Can I use a custom frame to display this design?
A: Absolutely! As long as it’s both the right size and the correct depth to fit the layers, you can use any frame or box you want to display your farmhouse with floating pieces. You don’t have to use the one recommended in my shopping list.
Q: Where can I find the supplies and tools to make a farm shadow box with floating pieces?
A: My shadow box with floating pieces SVG files can be made with simple supplies you may already have in your crafting stash. I like to shop on Amazon for their free shipping with my Amazon Prime membership (just make sure to look for sellers with 5-star reviews). You can also find most, if not all of the supplies and tools at your local craft store.
Q: Can I make and sell these shadow box with floating pieces designs?
A: I love supporting creative entrepreneurs! If you want to use my designs and projects for commercial use, please familiarize yourself with my important licensing information before selling your crafts.
I do not permit sale of my digital items, but you can sell the creative goods you make with them — as long as you follow my licensing requirements. That means you cannot sell the farm shadow box SVG files, but you can sell assembled shadow boxes that you made with the files within the guidelines linked above.
Q: How do you get items to float in a shadow box?
A: I make my items float in a shadow box by applying layers of colored vinyl to a sheet of acetate. Since the acetate is clear, the layer looks like it’s invisible and the pieces are floating on their own!
Q: How do you keep things from moving in a shadow box?
A: The easiest way to keep things from moving in a shadow box is to fill up all the space! If you don’t have enough layers to fill the shadow box, you can use the spacer that comes with it. Another way is to use rolls of cardstock to fill up extra space like I did with my Layered Paper Stained Glass project.
Q: What’s the difference between a display case and a shadow box?
A: A display case is a transparent case used to display objects for people to look at. In contrast, a shadow box is a specific type of display case that has space between the glass and the objects inside to create a sense of depth and dimension. This use of 3D results in a “shadow” effect, which gives shadow boxes their name.
Q: What’s the difference between a shadow box and a floating frame?
A: Shadow boxes use space inside the frame to create depth and dimension, whereas floating frames use space between the object and the frame to make the displayed object look like it’s floating.
Get my free SVG/DXF/PDF files to make a shadow box with floating pieces!
(If you do not see the signup form above, click here.)
I love seeing what you make with my designs and how you use them! Please share a photo of your farm shadow box with floating pieces in our Facebook group or tag me on social media with #jennifermaker.
Love,

Want to remember this? Save this farm shadow box with floating pieces tutorial to your favorite Pinterest Board!