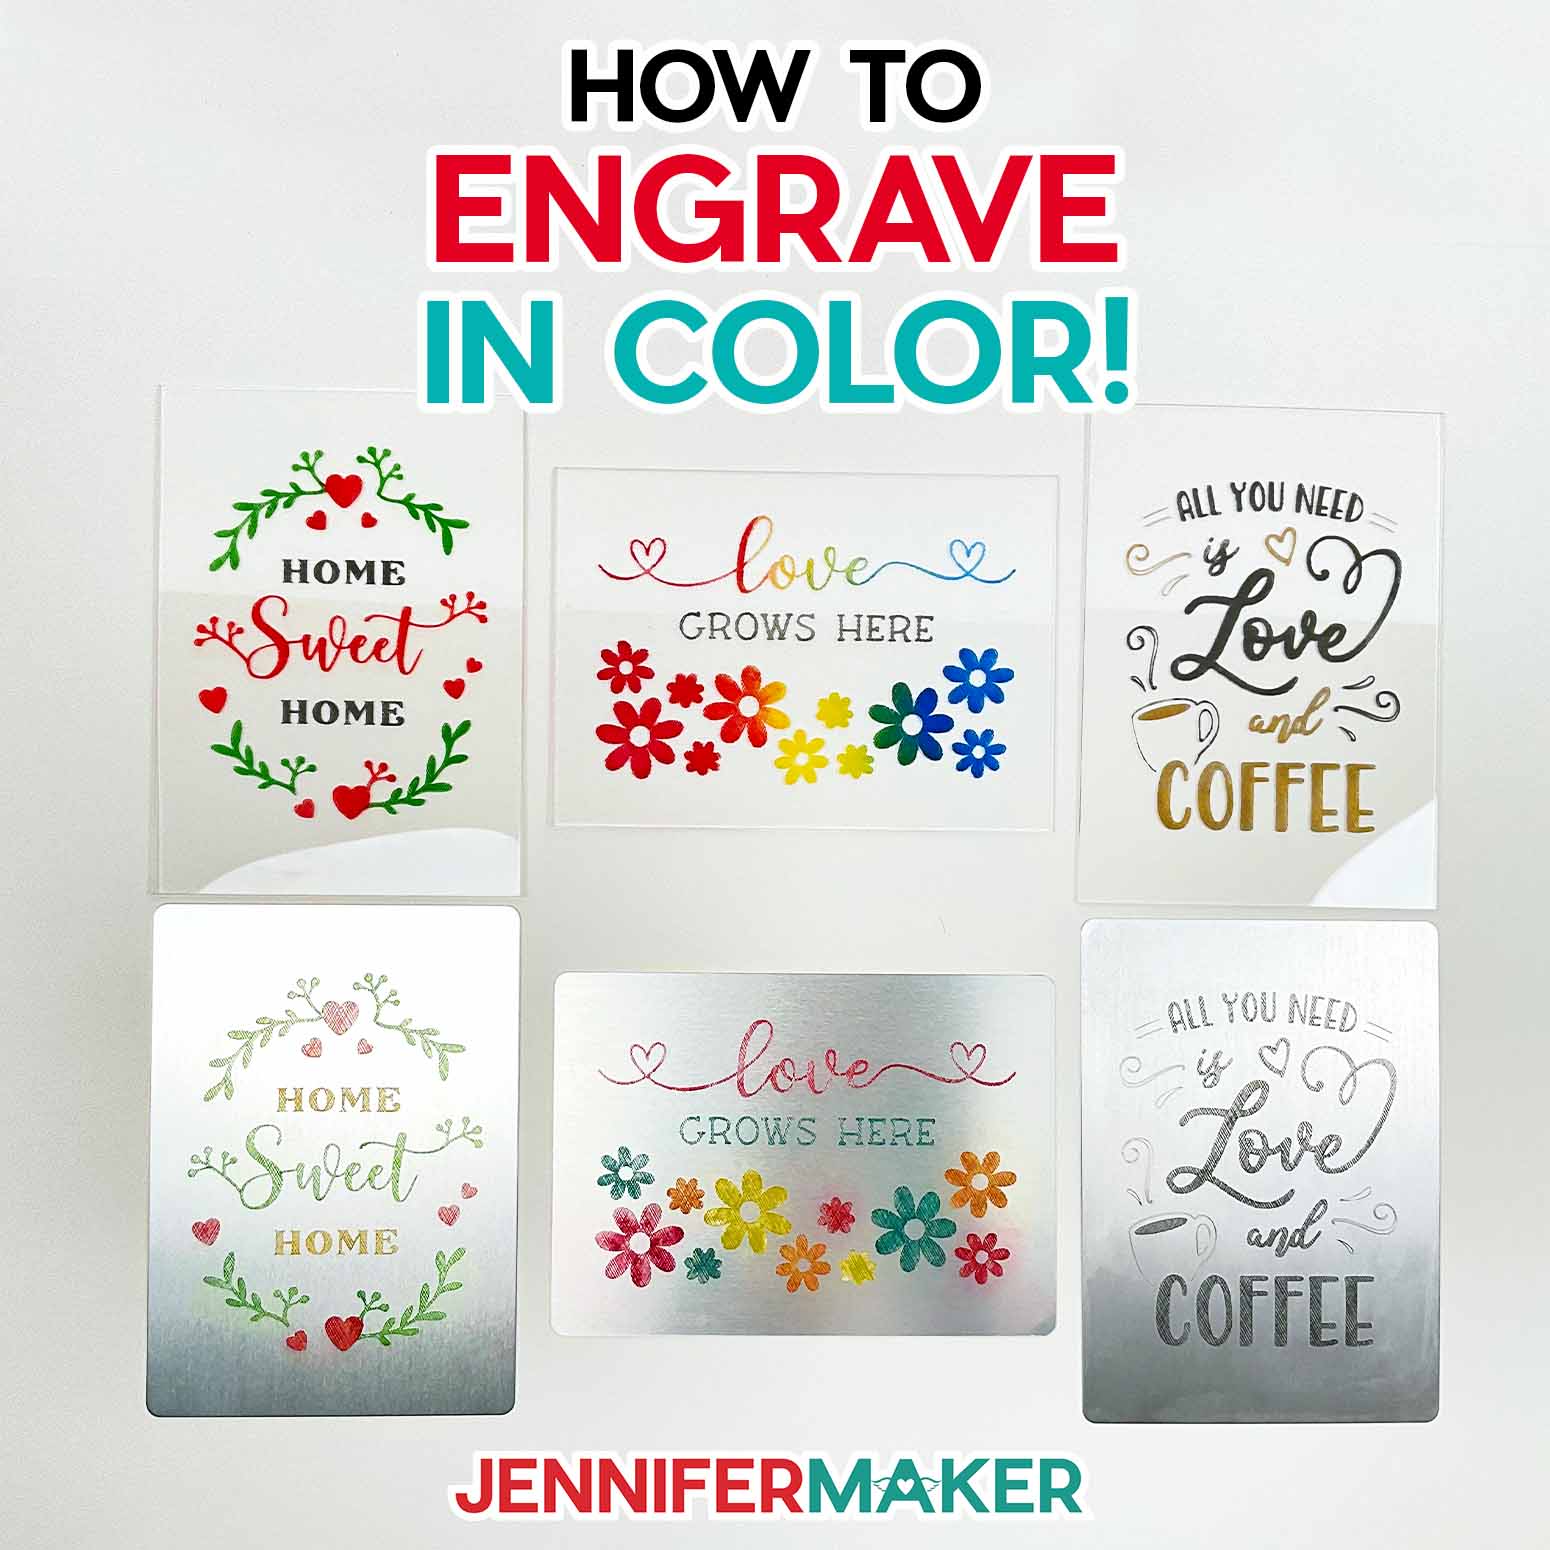
Learn how to color engraving on different materials with paints and inks!
Engraving is one of the more impressive crafts you can do with a Cricut. We’ve had fun learning how to engrave plastic and metal in different projects! But many of you have asked how you can make your engraved areas stand out more. I have an answer: COLOR! I’ve tested several ways to color engraving on different materials and am excited to share my great results! Let’s look at what worked best (or not at all) to color engraved plaque projects!
Watch the full step-by-step color engraving tutorial:

 What is the Merry Maker Mingle? This is an annual tradition here at JenniferMaker! Every day for the first 25 days of December, we gift you with a brand new project, design, tutorial, and video for something YOU asked us to make. On top of that, we host a giveaway with 25 days of prizes. Some of the amazing prizes are Cricut cutting machines, sewing machines, gift cards, and beautiful print editions of our popular Cricut Coach Playbook. You can even earn bonus entries for sharing photos of the daily projects! Click here to learn more about the Merry Maker Mingle!
There are so many choices when it comes to adding colors to our crafts. Different types of paints, inks, waxes, and other coloring agent products— but they’re not always compatible with all of our base material options. Well I’ve found some different methods that make an engraving pattern stand out on both metal plates and acrylic!
I engraved my free designs (which you can download to try!) with both a Cricut cutting machine and a Glowforge laser cutter for these color engraving tests. The SVGs direct the machines to engrave a hatchfill texture, and that’s what we’ll add the color to. It’s a lot of lines for the Cricut machine, so you’ll also need a purple StrongGrip machine mat and painter’s tape. And the most important thing: time! The plaques each take about an hour on the machine, but it’s worth the wait, especially when you add the color. I used aluminum — which I think is the ideal metal — but stainless steel also works with Cricut!
We tried enamel paint, acrylic ink, rub n’ buff metallic wax, paint pens…even dry erase markers! I’ve also seen cream stencil paint as a popular way, but couldn’t get any in time to try. Next time! Some certainly worked better than others, so I picked my three favorites for the material list. They have simple steps, good results, last the longest, and come in various colors. But feel free to let me know if you experiment with other coloring methods!
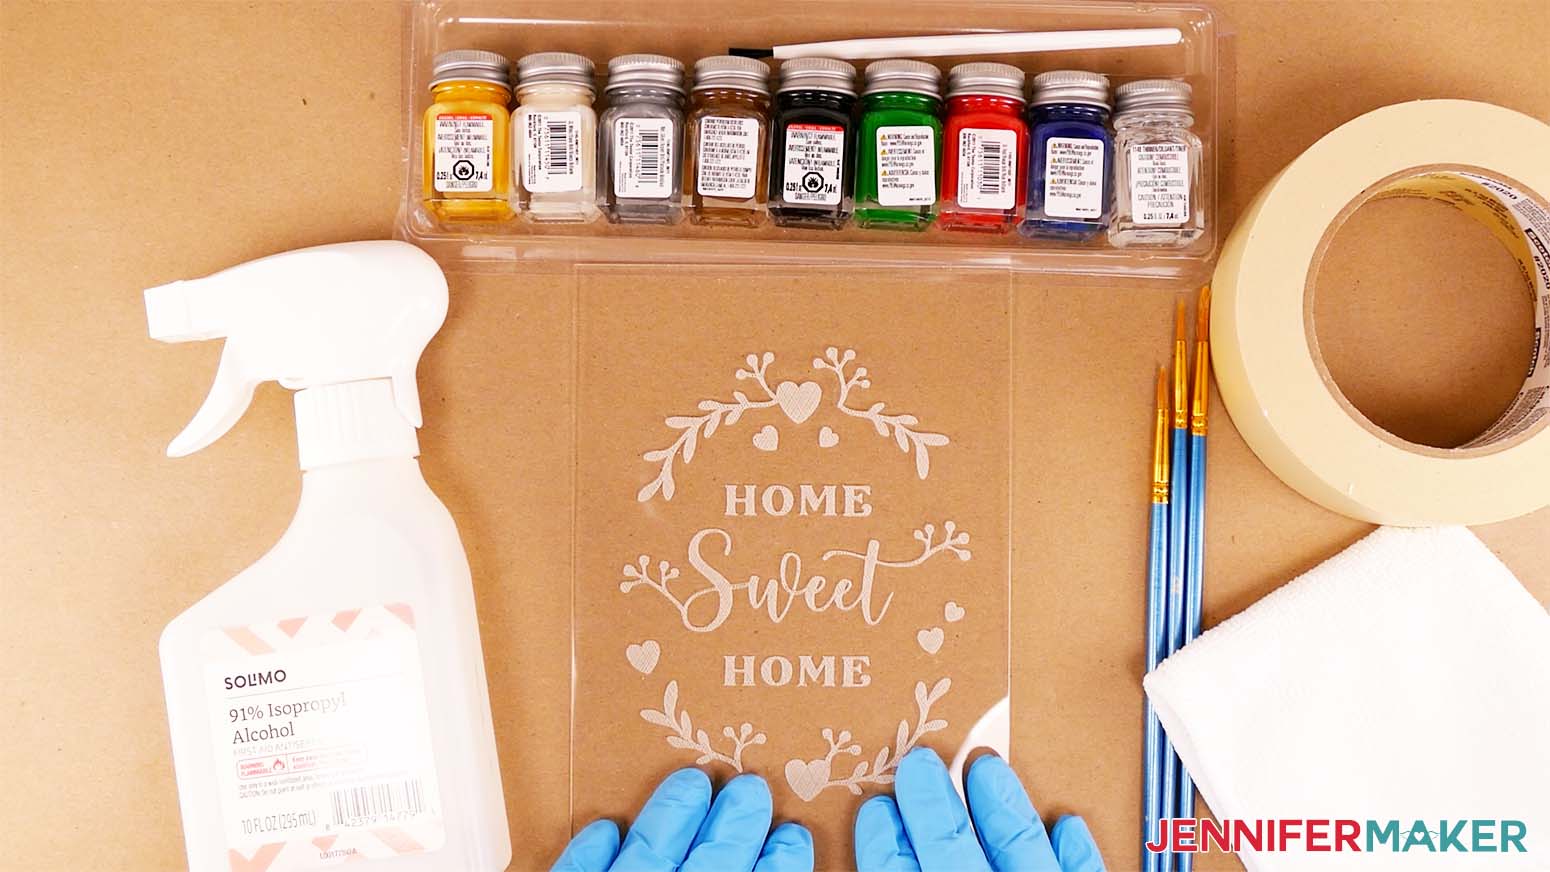
You’ll need different tools to fill in engraved parts, whether you’re using a single color or different colors. Disposable gloves, paper towels, paint brushes, butcher paper, and some spare soft cloths will help with color engraving!
To get the best results, use rubbing alcohol and a soft cloth to clean the surface of the material. I’ll also show you how to make the full color last with some clear spray sealant. It takes some practice and a still day. I tried on a cold, windy day with not-so-lovely results!
Let me show you how easy it is to color engraving projects on various materials! This post contains some affiliate links for your convenience (which means if you make a purchase after clicking a link I will earn a small commission but it won’t cost you a penny more)! Read my full disclosure policy.
Materials to Make a color engraved plaque
View my Amazon shopping list with the exact items used to make this project!
- Acrylic Blank no thicker than 2mm (such as these 5″ x 7″ acrylic plaques) -OR-
- Metal Blank no thicker than 2mm (such as these 5″ x 7″ anodized aluminum plaques)
- Rub n Buff Wax Metallic Finish – I used Gold Leaf and Ebony -OR-
- Enamel Paint – I used Testors Brand Red, Green, Yellow, and Black -OR-
- Acrylic Ink – I used Liquitex Brand Yellow Medium Azo, Naphthol Crimson, Phthalocyanine Blue, and Carbon Black – remember, not acrylic PAINT
- A method to engrave your plaque – I used the amazing Cricut Maker 3 with the engraving tip. You can also use the Cricut Maker. Or a Glowforge!
- Cricut Engraving Tip with Housing
- Cricut Purple StrongGrip Machine Mat 12″ x 12″
- Painter’s Tape or Masking Tape
- Paint Brushes – for applying the enamel paint or acrylic ink
- Soft Towel or Cloth – for brushing off engraved pieces and removing excess color from designs
- Isopropyl Alcohol – to clean your blank before applying color and to help remove excess color
- Disposable Nitrile Gloves
- Butcher Paper – to protect your work surface
- Paper Towels – for blotting up excess ink or paint
- Clear Lacquer Spray – optional, for sealing finished plaque
- Measuring Tape – optional, for measuring the size of your blank
- Plastic or Paper Cups – optional, for holding water to rinse your brushes and/or mixing acrylic inks to make custom colors
- Design #453 – My free SVG/PDF/DXF design files available in my free resource library – get the password by filling out the form at the bottom of this page!
How to Make Your Own Engraved Plaque With Color
Color Engraving
Learn how to color engraving on acrylic and metal plaques.
Materials
- Acrylic Blank no thicker than 2mm (such as these 5" x 7" acrylic plaques) -OR-
- Metal Blank no thicker than 2mm (such as these 5" x 7" anodized aluminum plaques)
- Rub n Buff Wax Metallic Finish (I used Gold Leaf and Ebony) -OR-
- Enamel Paint (I used Testors Brand Red, Green, and Black) -OR-
- Acrylic Ink (I used Liquitex Brand Yellow Medium Azo, Naphthol Crimson, and Phthalocyanine Blue)
- Design #453 (My free SVG/PDF/DXF design files available in my free resource library - get the password by filling out the form at the bottom of this page)
Tools
- A method to engrave your plaque — I used the amazing Cricut Maker 3 with the engraving tip. You can also use the Cricut Maker.
- Cricut Engraving Tip with Housing
- Cricut Purple StrongGrip Machine Mat 12" x 12"
- Painter's Tape or Masking Tape
- Paint Brushes (for applying the enamel paint or acrylic ink)
- Soft Towel or Cloth (for brushing off engraved pieces and removing excess color from designs)
- Isopropyl Alcohol (to clean your blank before applying color and to help remove excess color)
- Disposable Nitrile Gloves
- Butcher Paper (to protect your work surface)
- Paper Towels (for blotting up excess ink or paint)
- Plastic or Paper Cups (optional, for holding water to rinse your brushes and/or mixing acrylic inks to make custom colors)
- Clear Lacquer Spray (optional, for sealing finished plaque)
- Measuring Tape (optional, for measuring the size of your blank)
- Glowforge (optional, another way to engrave your design)
Instructions
STEP 1: GET MY FREE COLOR ENGRAVING DESIGNS
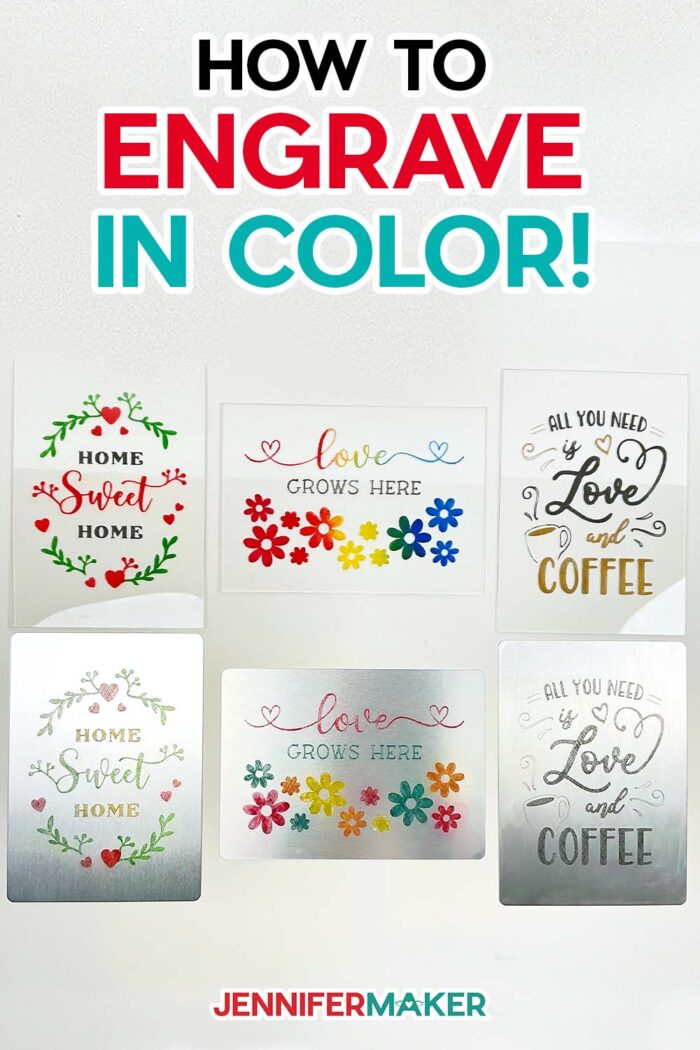
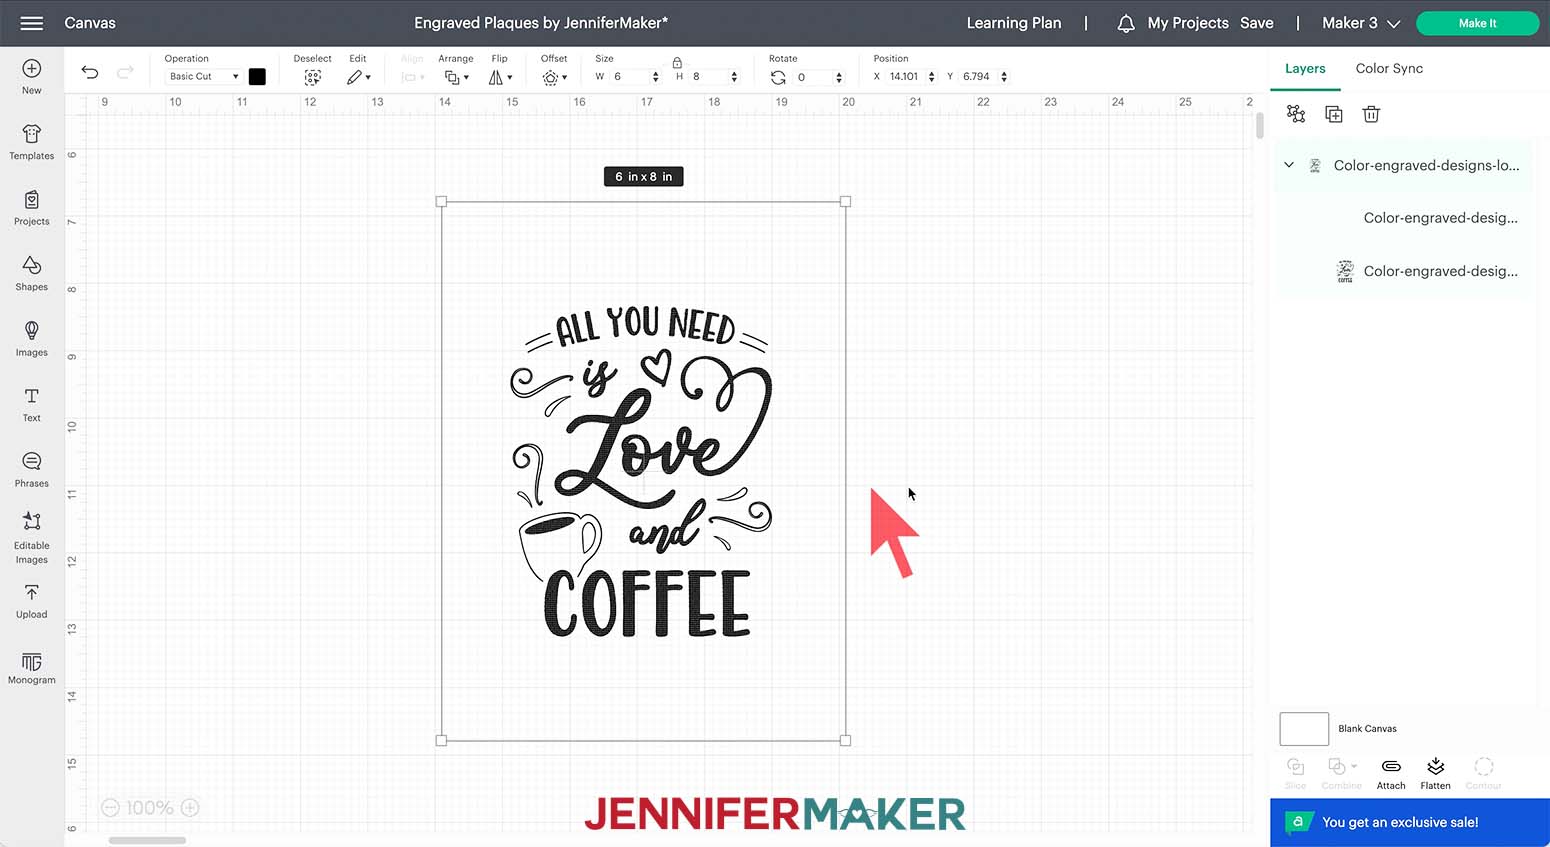
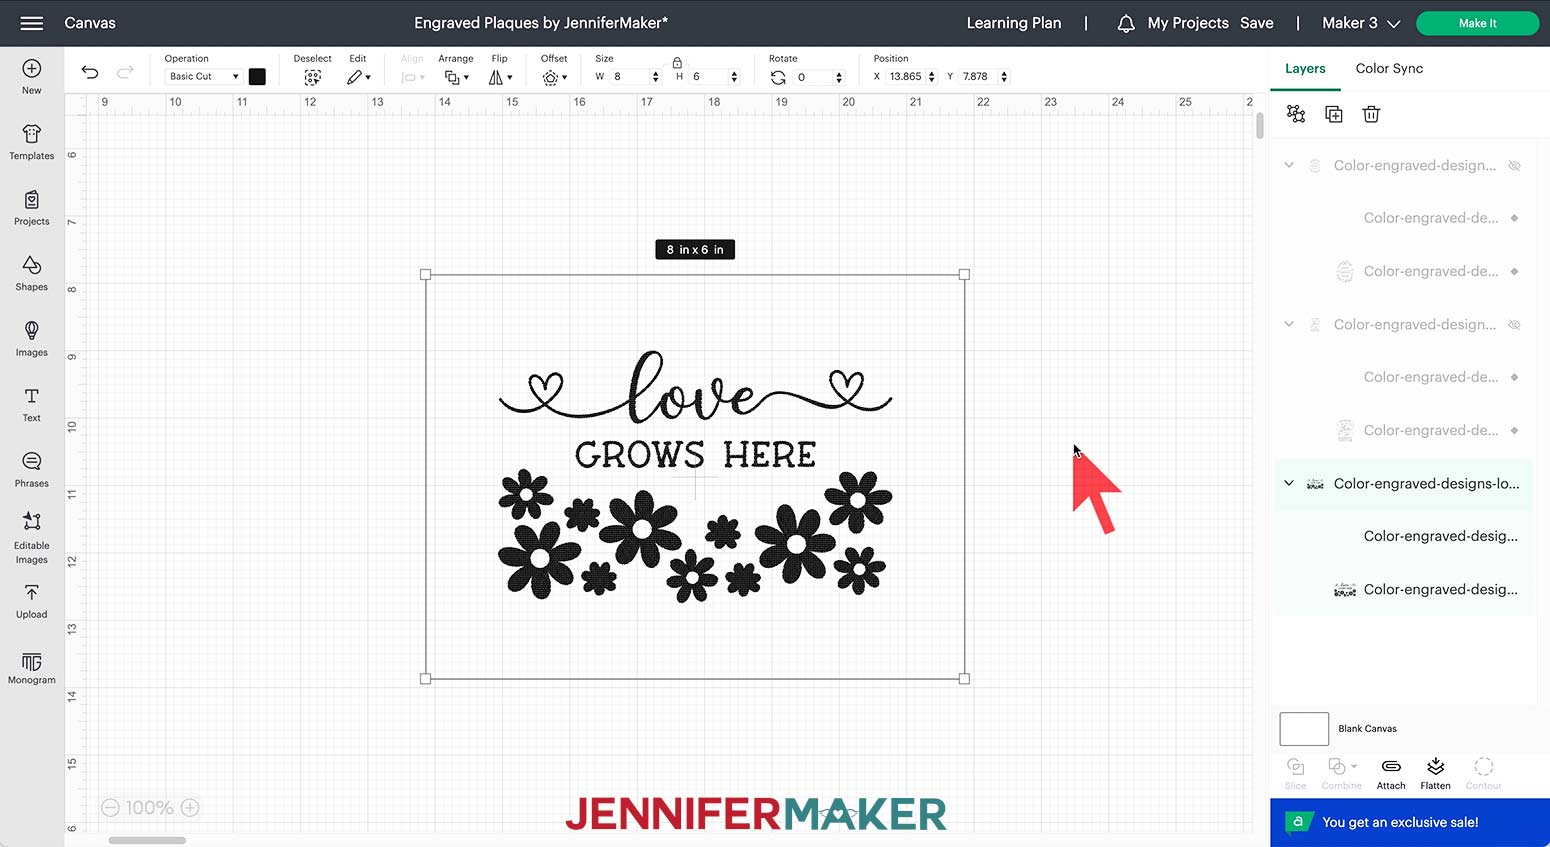
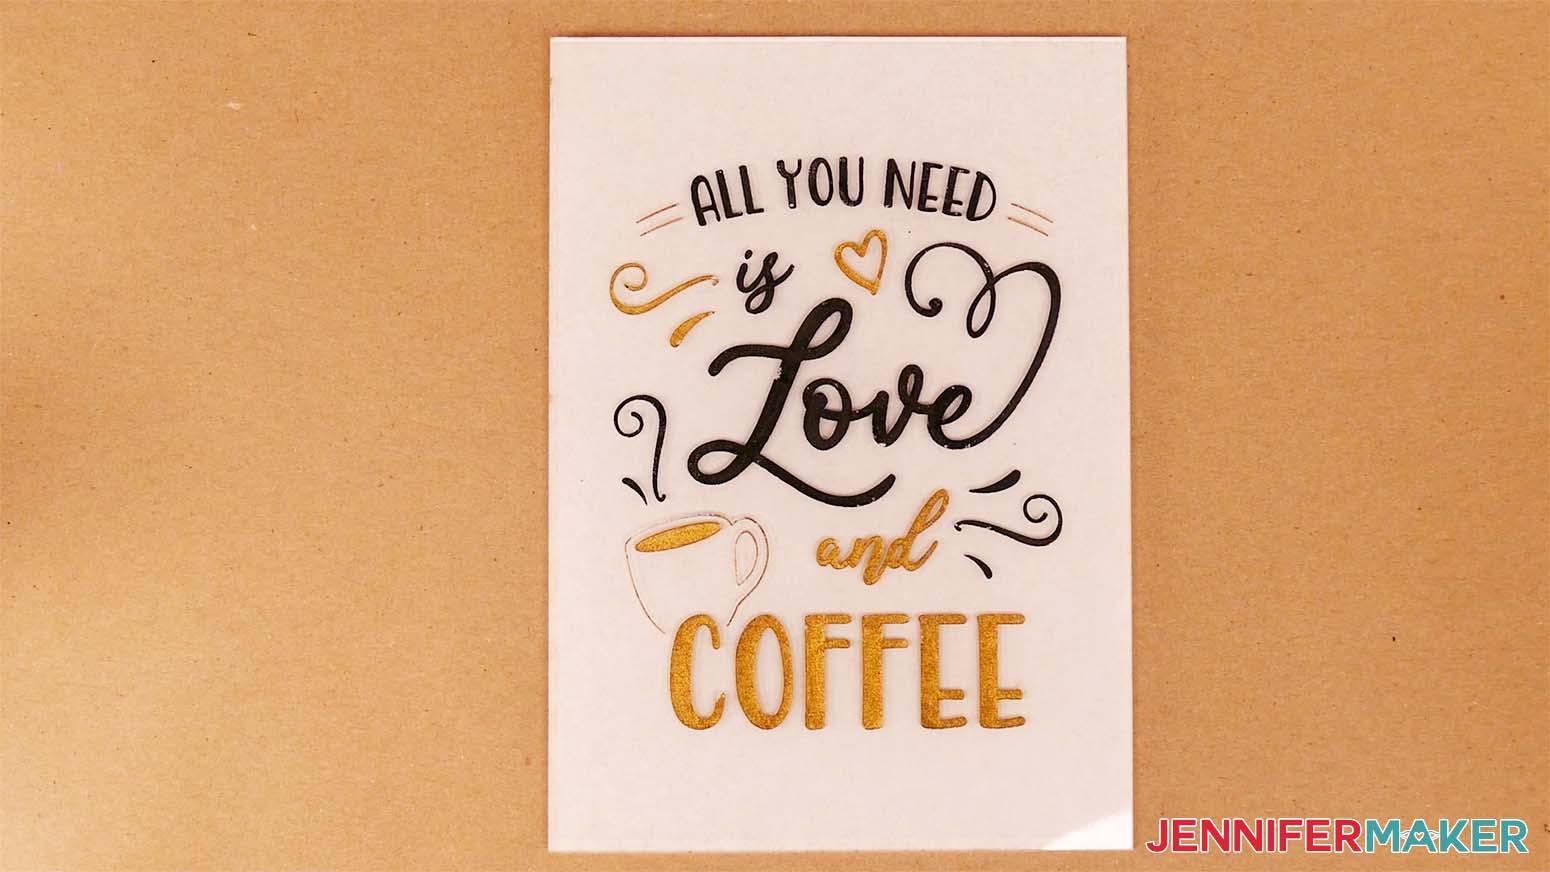
First, download my free Color Engraving SVG/DXF/PDF files from my free resource library. It's Design #453. There are three different designs for you to choose from: Home Sweet Home, All You Need is Love and Coffee, and Love Grows Here.
I’m going to demonstrate my three favorite coloring methods on some 5” x 7” acrylic and metal plaques -- I’ll use a different method with each of the three designs.
First, upload your chosen design to Cricut Design Space and add it to your Canvas.
TIP: If you're not sure how to upload an SVG cut file to Cricut Design Space, watch this helpful video training series I made.
If you're on an iPhone or iPad, here's how to download and upload SVG files to the Cricut Design Space app.
STEP 2: PREPARE AND ENGRAVE YOUR DESIGN
This is what each of my engraving files looks like on my Canvas.
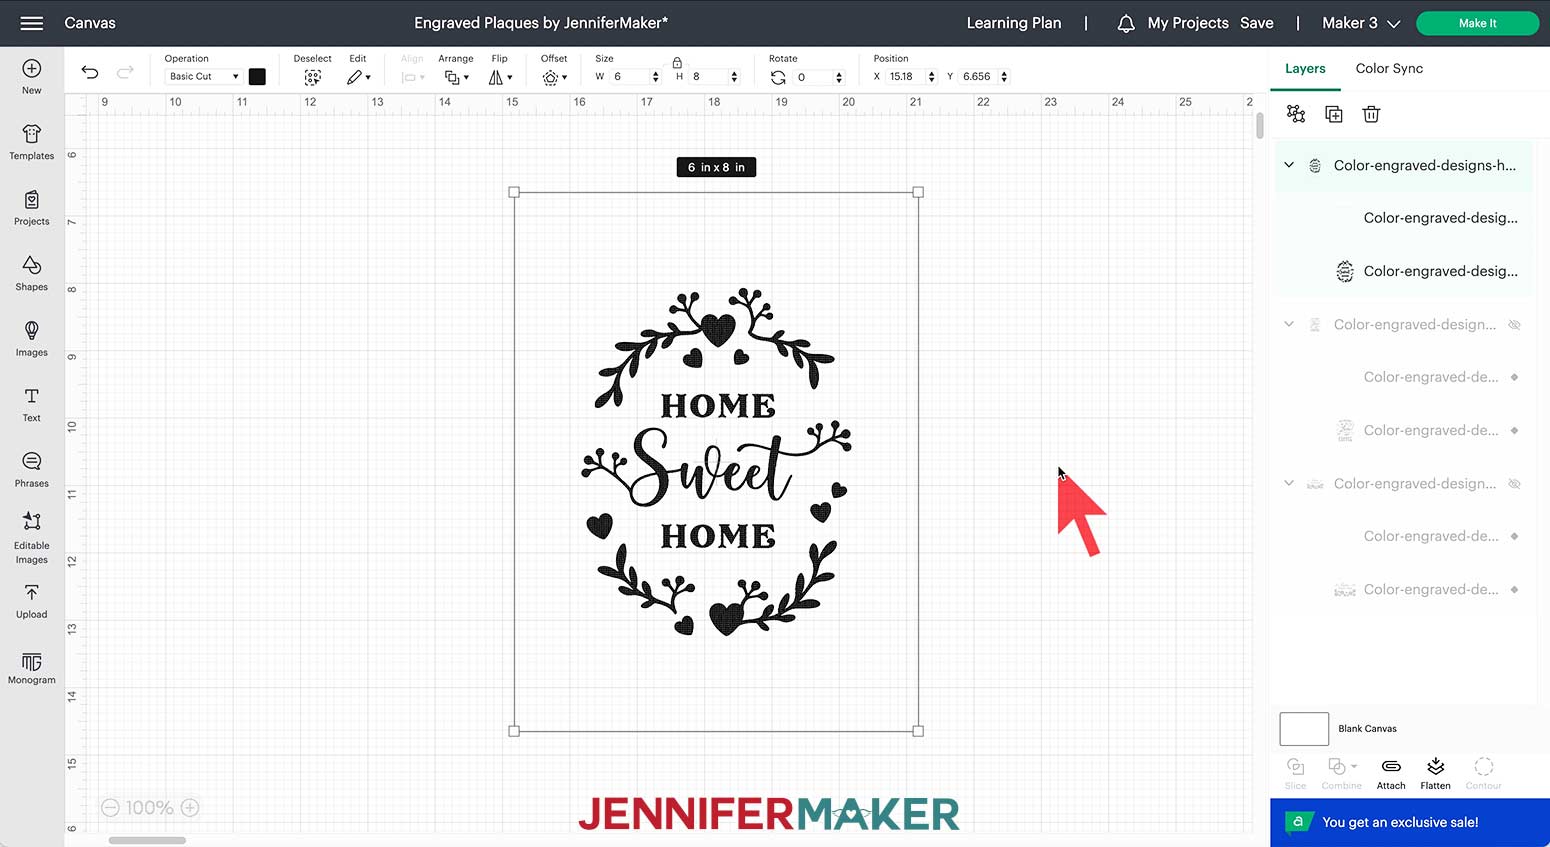
If you zoom in really close, it looks like there is a tiny diamond pattern inside parts of the design and letters. We’re going to transform those into something really important in just a moment.
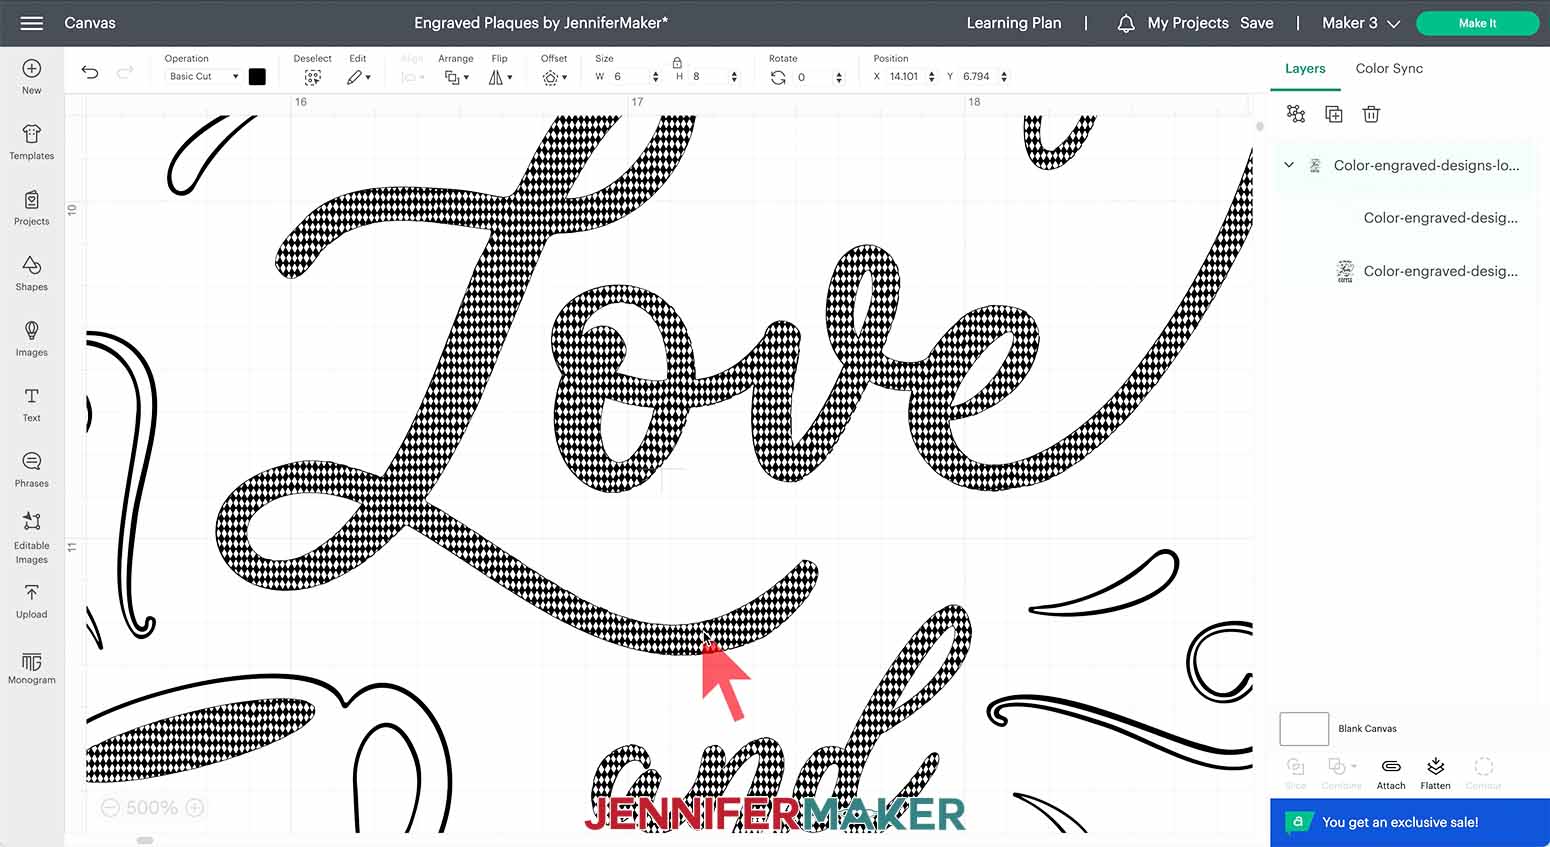
You’ll also notice a rectangular outline around each design. We’ll use this to help position our designs on the mat so they engrave in the perfect spot on our plaques.
NOTE: The rectangular outline in the file may engrave a faint line onto your mat. I engraved several plaques this way using the same mat with no issues. However, if you’d like to keep your mat looking nice and clean, you can choose to remove the outline before engraving. Just select that layer in the Layers Panel and click the Eye icon to hide it or the Delete icon to remove it. Centering will just take extra work.
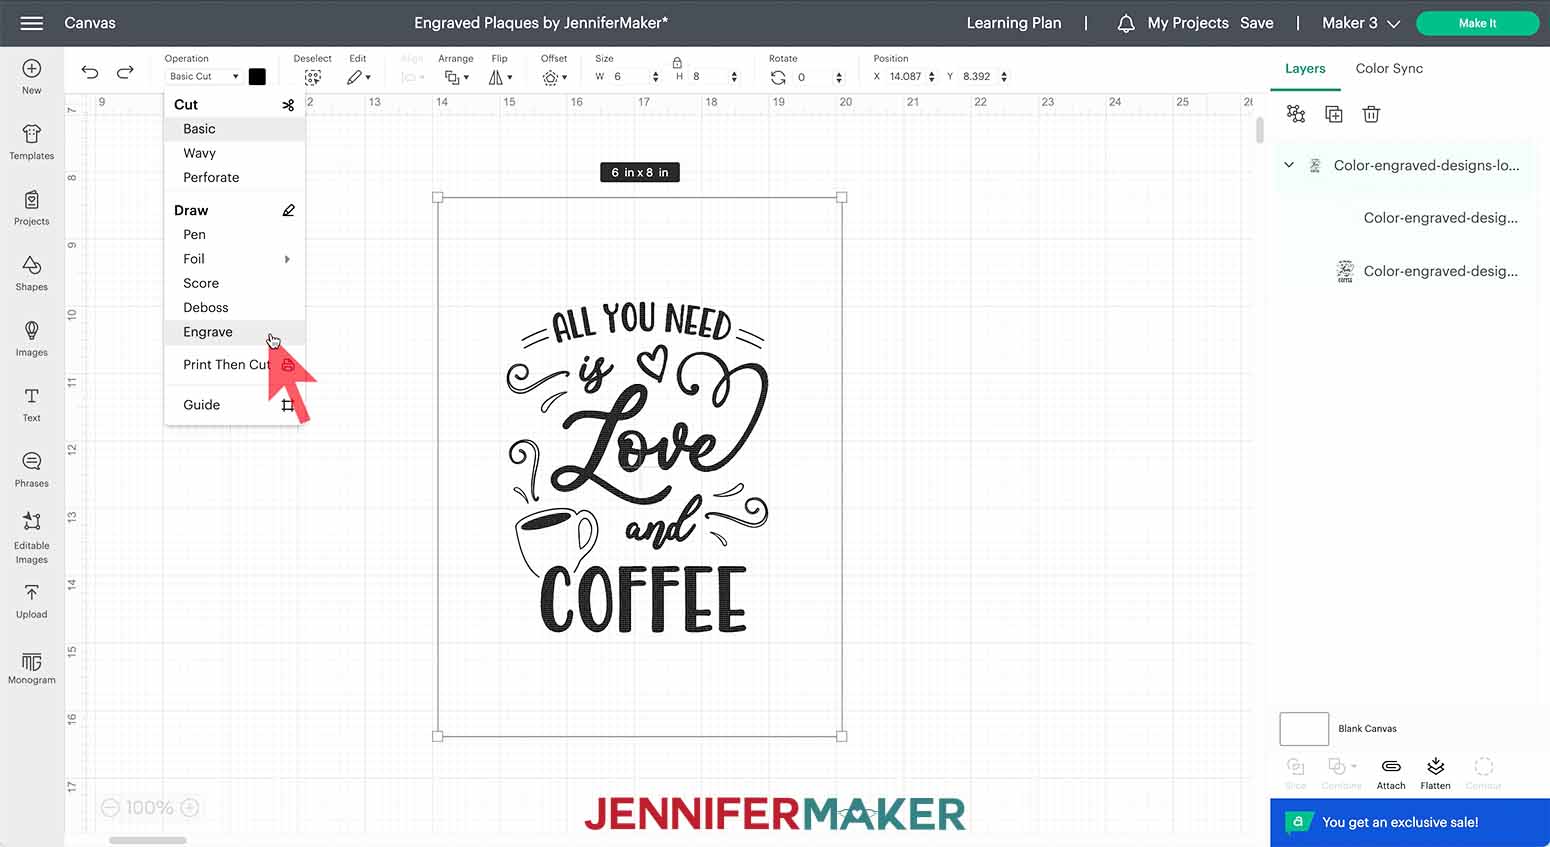
With the image selected, click the field under Operation and select "Engrave."
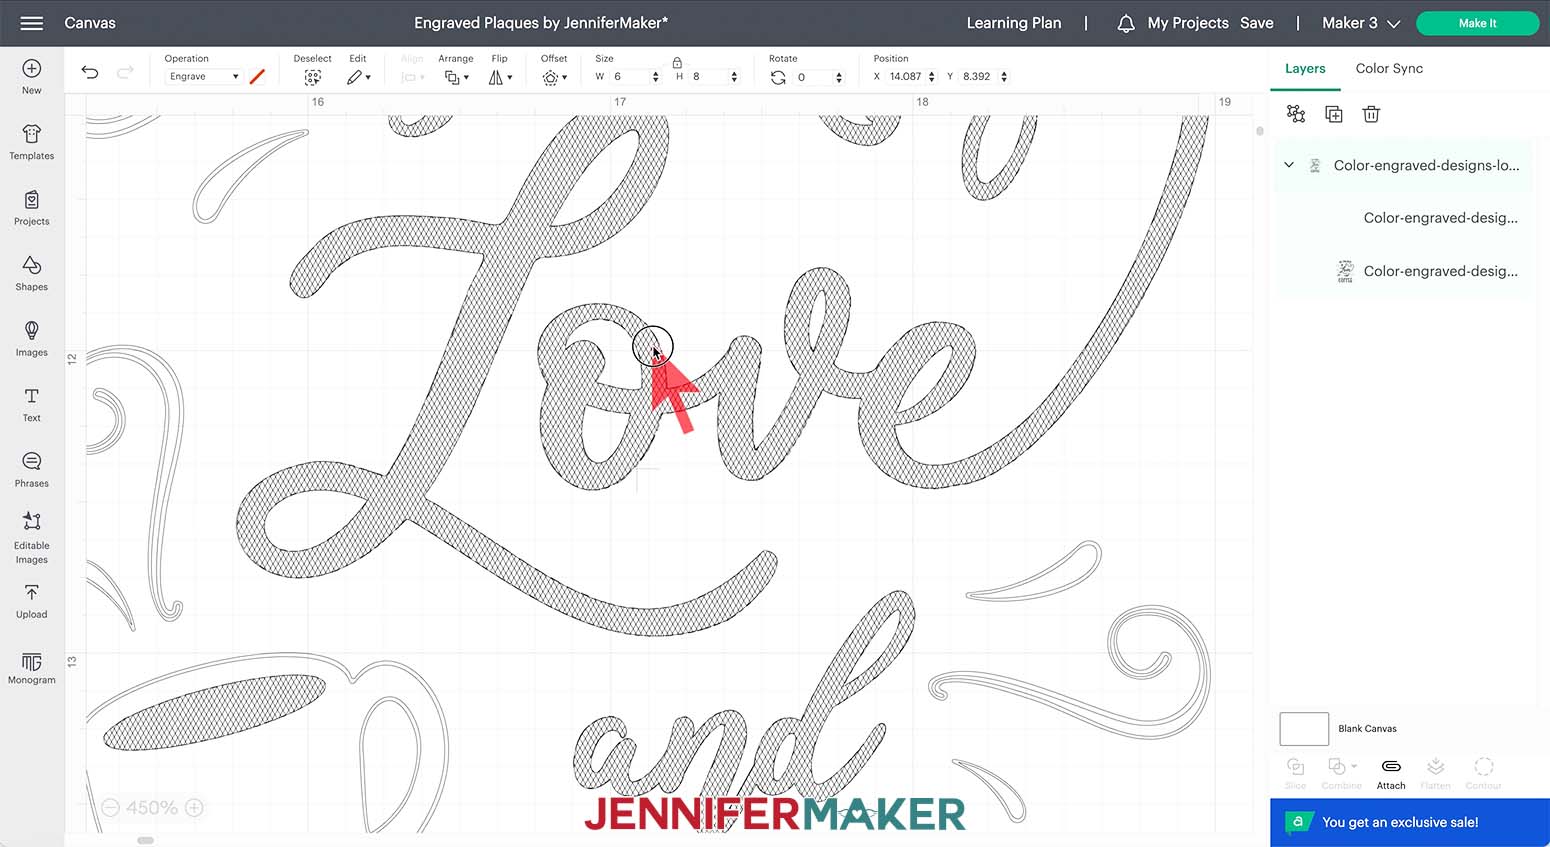
Here’s that transformation I just mentioned. If you zoom back in on the design, you’ll see that diamond pattern has changed into lots of criss-crossed diagonal lines. This is called hatchfill, and it’s used to make your engraved design appear big and bold rather than just an outline. It really makes coloring our designs SO much easier. You’ll love the result, I promise! You can learn more about using this technique to draw, foil, or engrave custom projects with your Cricut by visiting my Handwriting to Cricut Projects tutorial!
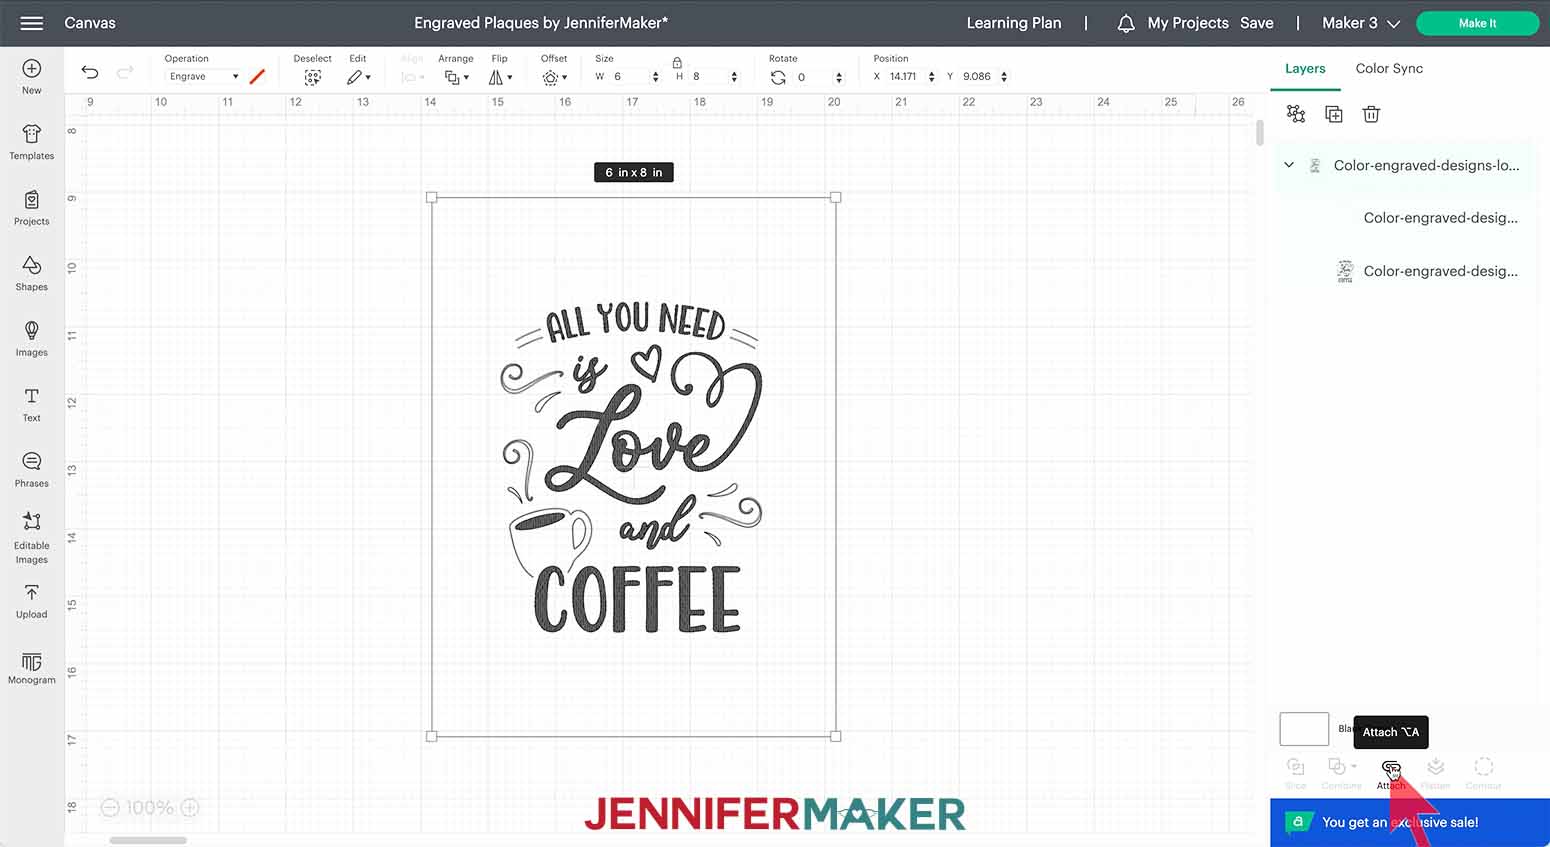
Before deselecting your image, click “Attach” at the bottom of the Layers Panel. This will make sure the outline stays centered with the design for perfect placement on the mat.
Make sure you have the right machine selected (either Maker or Maker 3) and click "Make It."
If prompted, click "On Mat," "12 in x 12 in," and "Confirm."
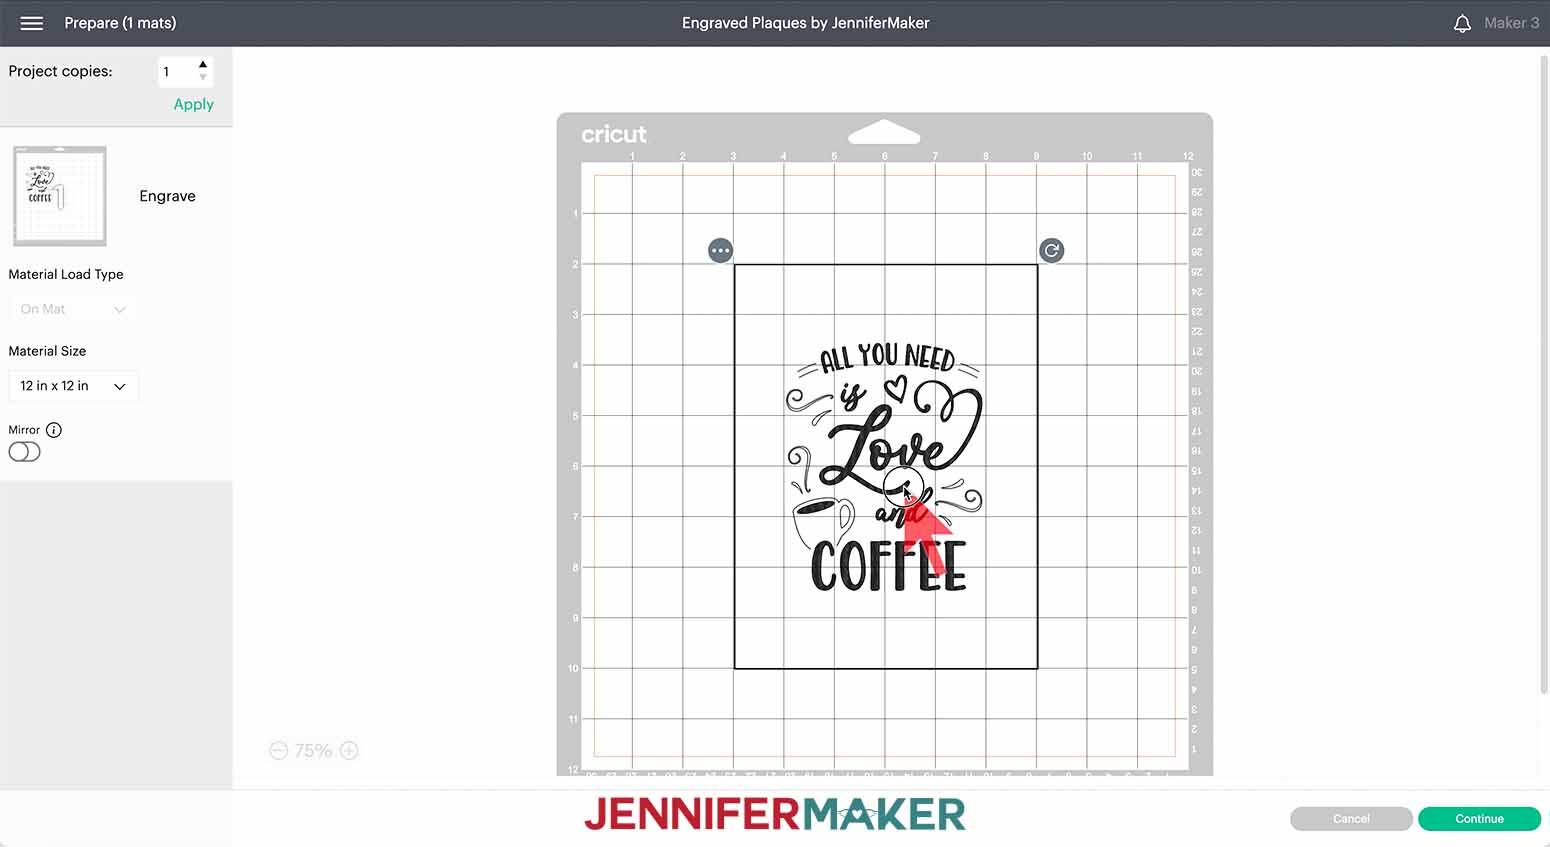
On the Prepare screen, center the image on the mat at the 6" horizontal and vertical marks. Use the rectangle to help align the design with the grid. I’ve sized the rectangle so it’s a bit larger than the 5” x 7” plaque. This way, it won’t engrave the edges of your plaque.
When correctly centered, the vertical designs ("Home Sweet Home" and "Love and Coffee") will have three grid squares on the left and right of the rectangle, and two grid squares above and below it.
For the horizontal "Love Grows Here" design, you’ll have two grid squares on the left and right of the rectangle, and three above and below.
After your image is centered on the mat, click “Continue.”
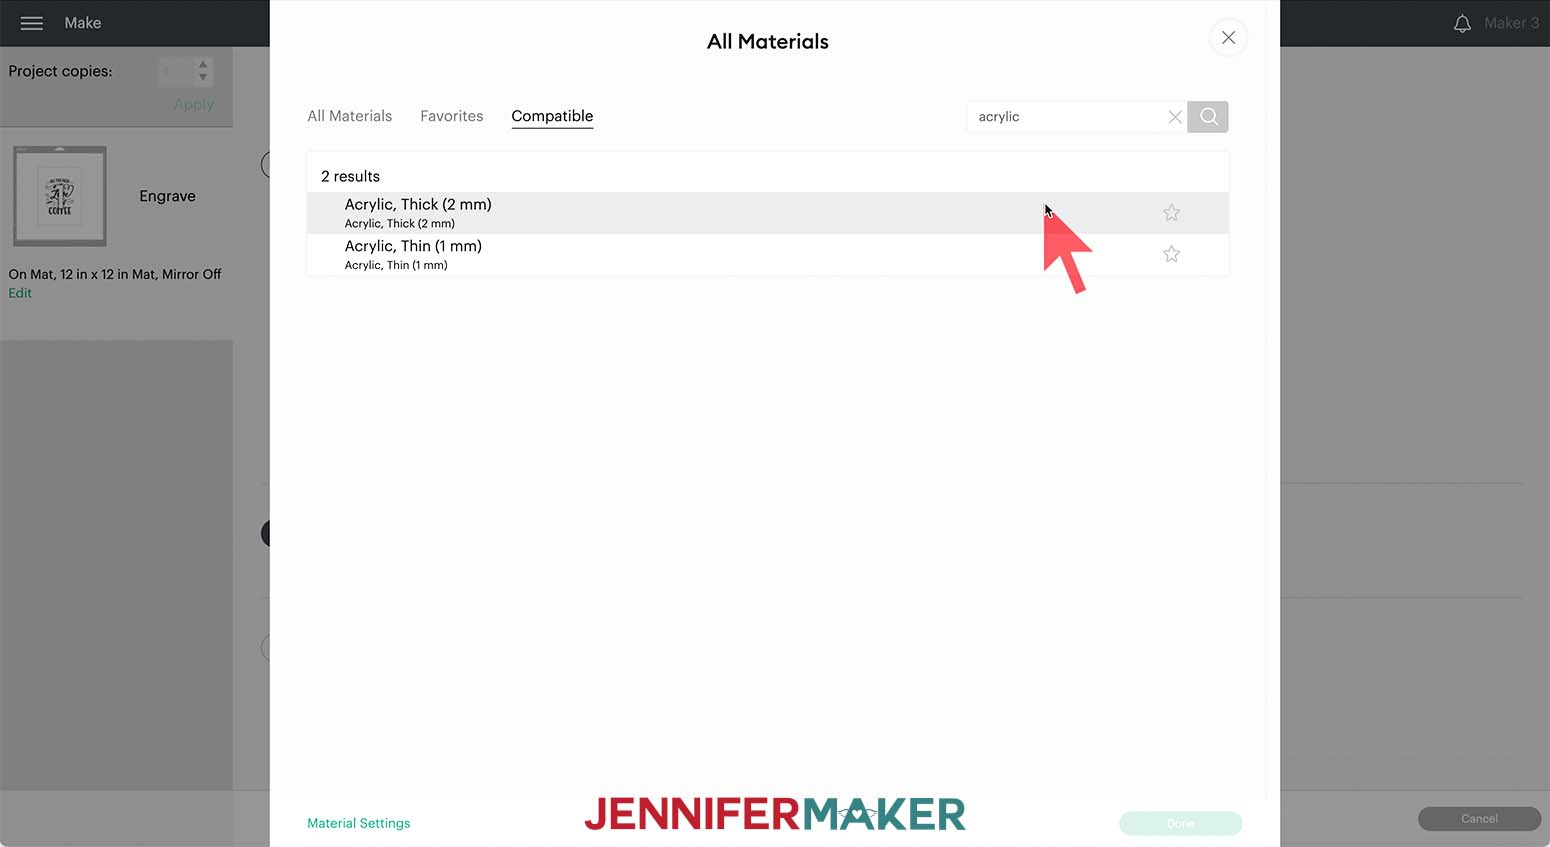
Now we need to select the material settings. If you’re engraving an acrylic plaque, go to "Browse All Materials," search for "acrylic," and select "Acrylic, Thick (2mm)." Then click “Done.” Change the pressure to "More."
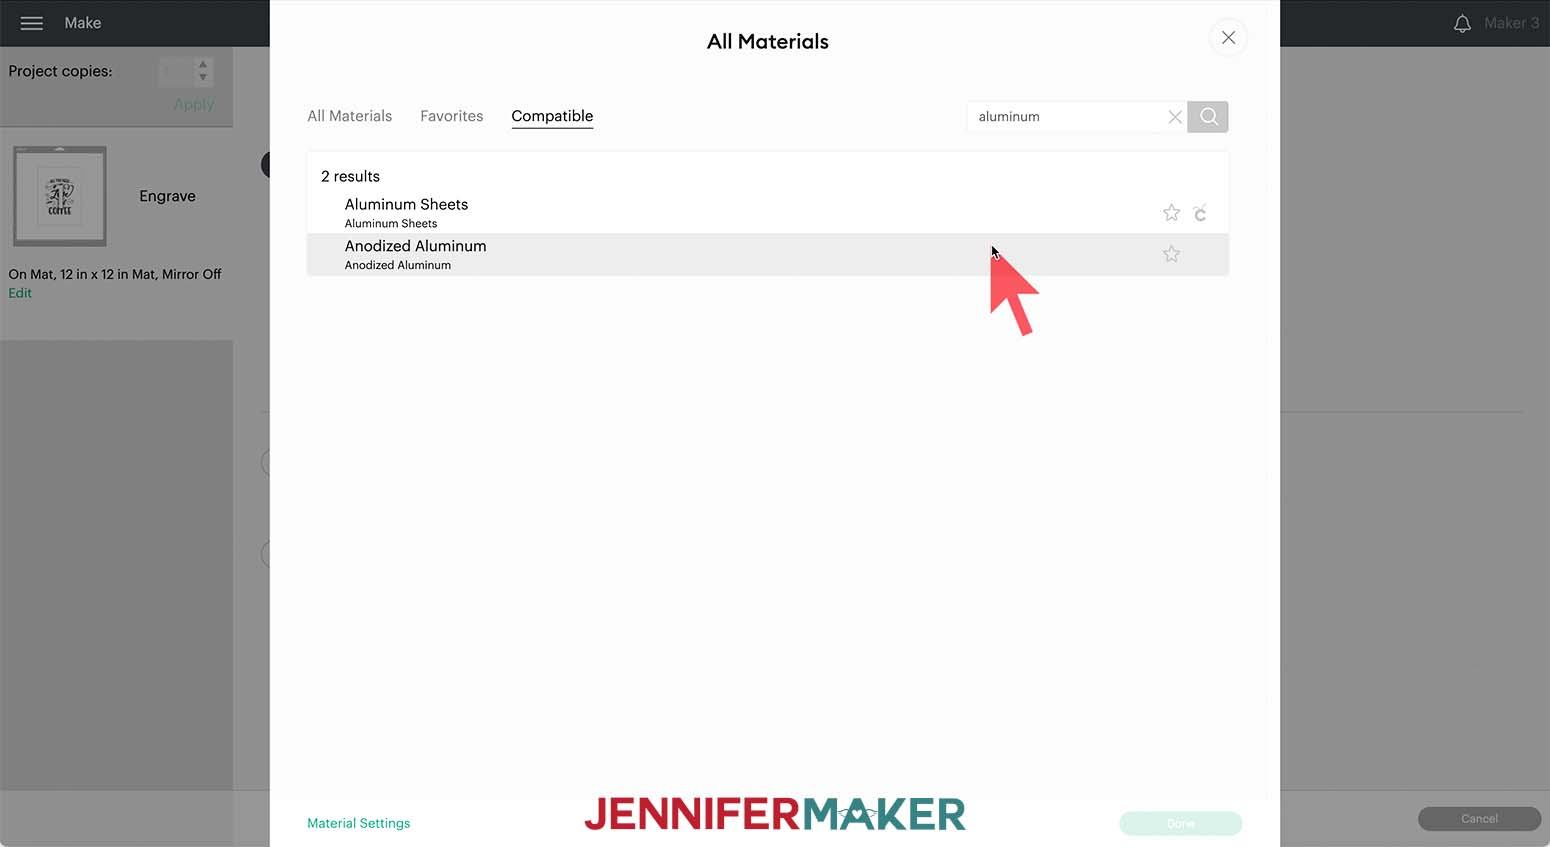
If you’re engraving a metal plaque like the anodized aluminum ones in my materials list, search for “aluminum” and select “Anodized Aluminum.” Then click “Done” and change the pressure to “More.”
IMPORTANT: Due to the hatchfill and size of the finished designs, each of the files take a little over an hour to engrave. Make sure that you are prepared by ensuring you have a good internet connection and that you turn off any auto sleep or screen saver functions on your computer. These functions will stop the engraving process and you will need to start over. It’s also a good idea to connect your machine directly to your computer instead of using a Bluetooth connection.
Put your engraving tool in Clamp B, and move the four white star wheels all the way to the right.
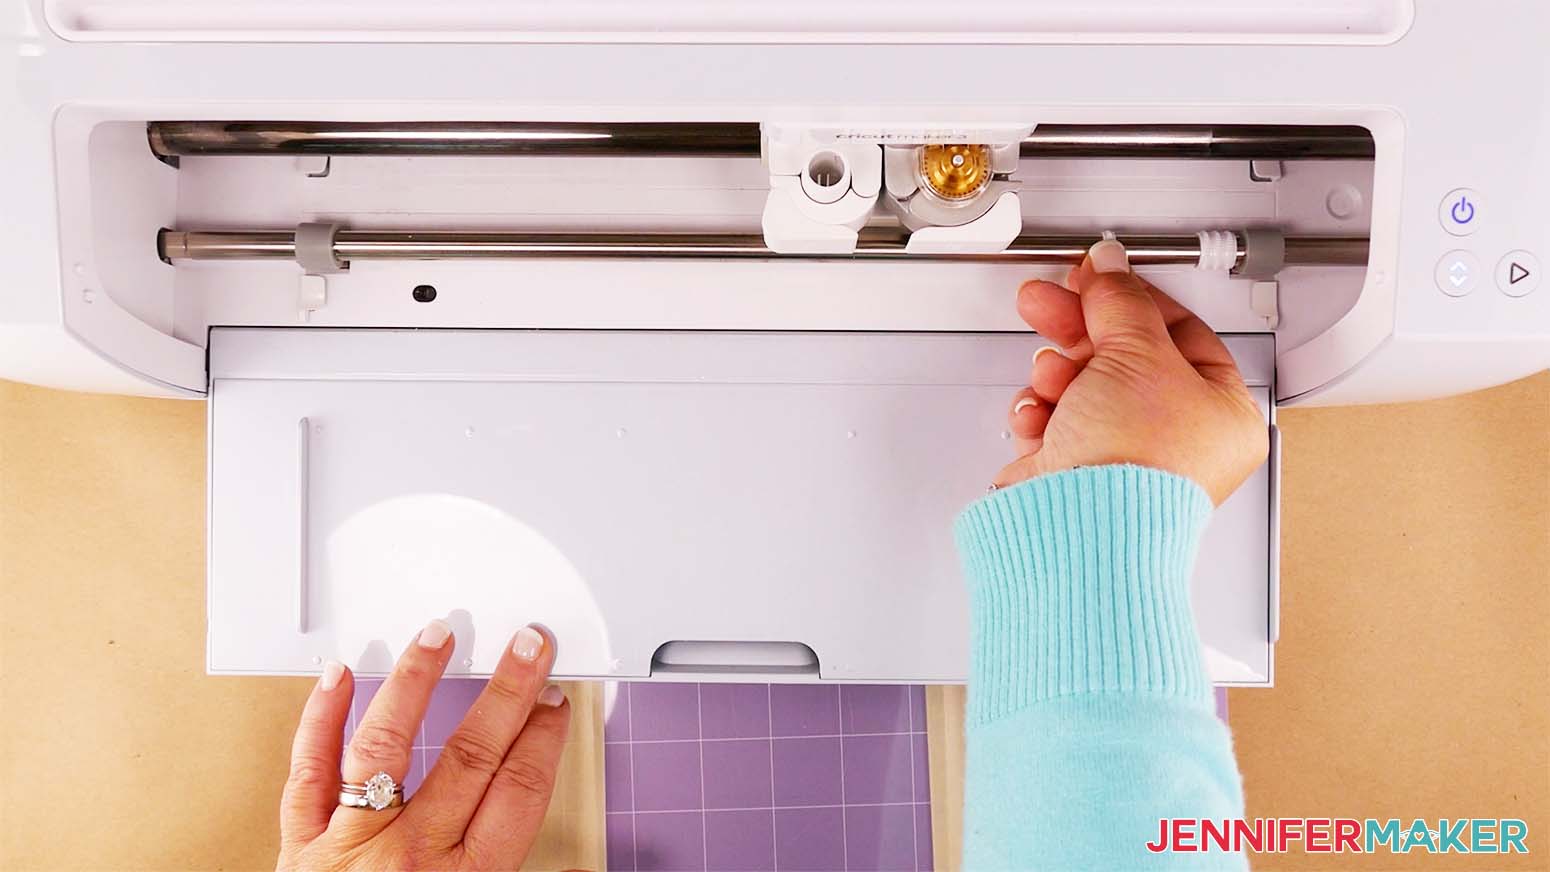
Then, make sure your acrylic or metal plaque is no more than 2 mm thick, otherwise it might not fit under your cutting machine's rollers. If your plaque has a protective film, remove it from the side you will engrave.
Next, center the plaque on your Cricut StrongGrip mat, uncovered side up. Use the cross in the center of the mat as your centering guide. Once centered, tape around the plaque's edges using painter's or masking tape to keep it still during the engraving process.
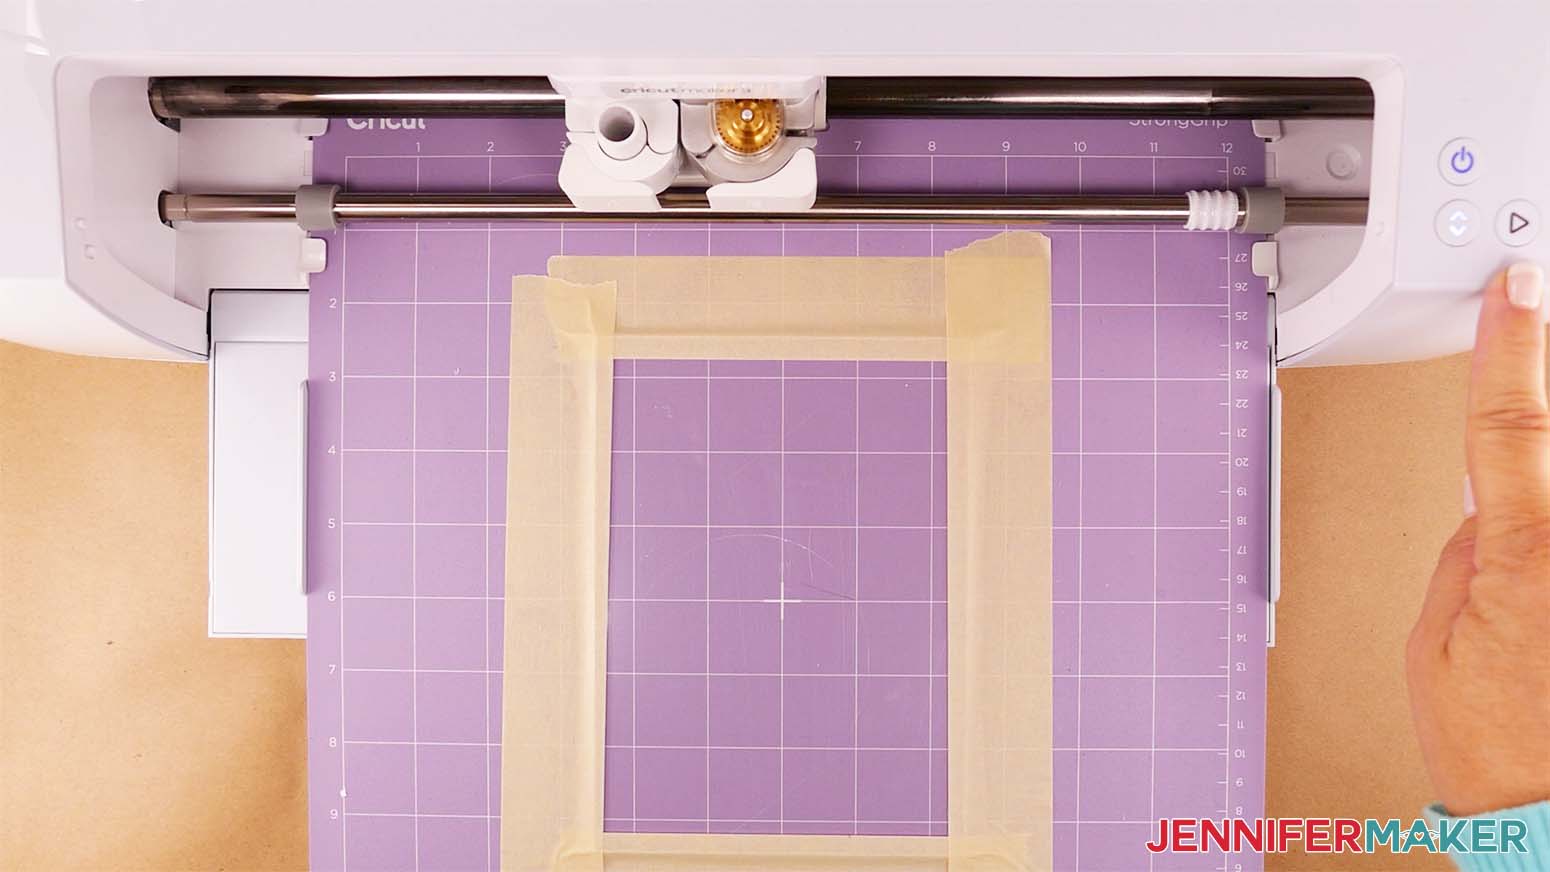
NOTE: If you're engraving a metal plaque, you won't be able to see the cross in the center of your mat, so you can use the grid lines to help position your plaque in the center. Just make sure you have an equal number of grid squares on the left and right of the plaque, and an equal number of squares above and below it before pressing it down and adding tape.
Load your prepared mat and hit the flashing button to begin the engraving.
Since engraving is a more involved process than cutting, I recommend watching your machine during the engraving in case any issues arise.
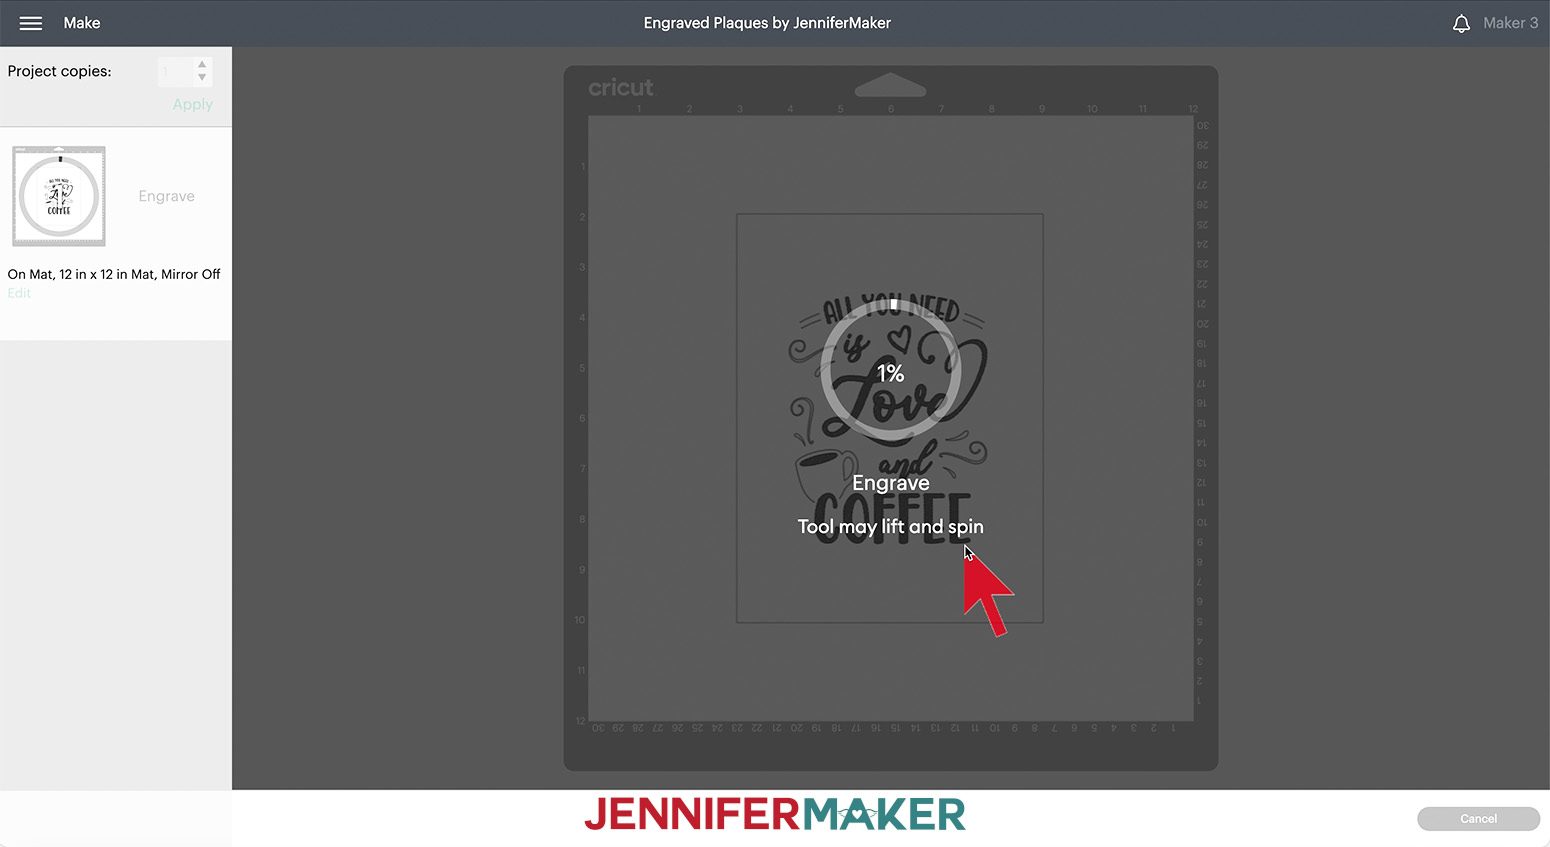
During the engraving, you may notice this message on your computer screen. It's just a note to let you know that if your engraving tool starts lifting and spinning, you shouldn't be alarmed -- that's totally normal.
When your machine has finished engraving, unload the mat and use a soft cloth to brush the debris into a trash can. To remove debris from your machine, use a soft cloth or small vacuum attachment. Don't forget to clean the debris off of your engraving tool.

TIP: You can also use painter's tape or masking tape to lift and remove the debris from your plaque. This works particularly well for the metal engraving debris.
Remove the plaque from the mat and carefully peel off the painter's tape. Brush off any more debris. Remove the back protective film if it's still attached to the plaque.
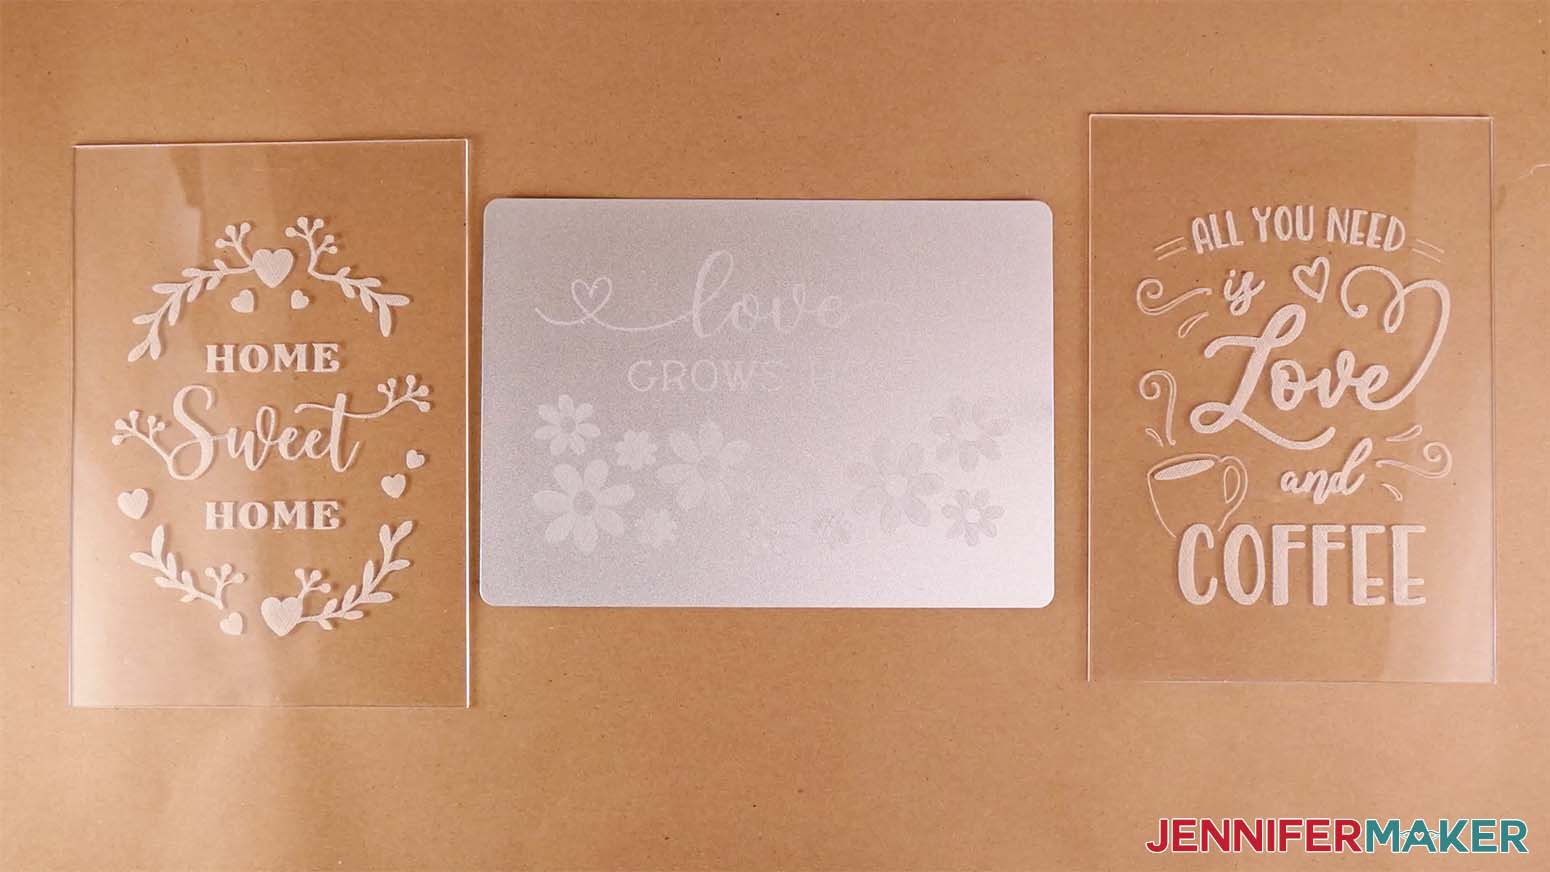
This is what my engraved plaques look like.
STEP 3: COLOR YOUR ENGRAVED DESIGN
Now for the fun part! Let’s color our designs!
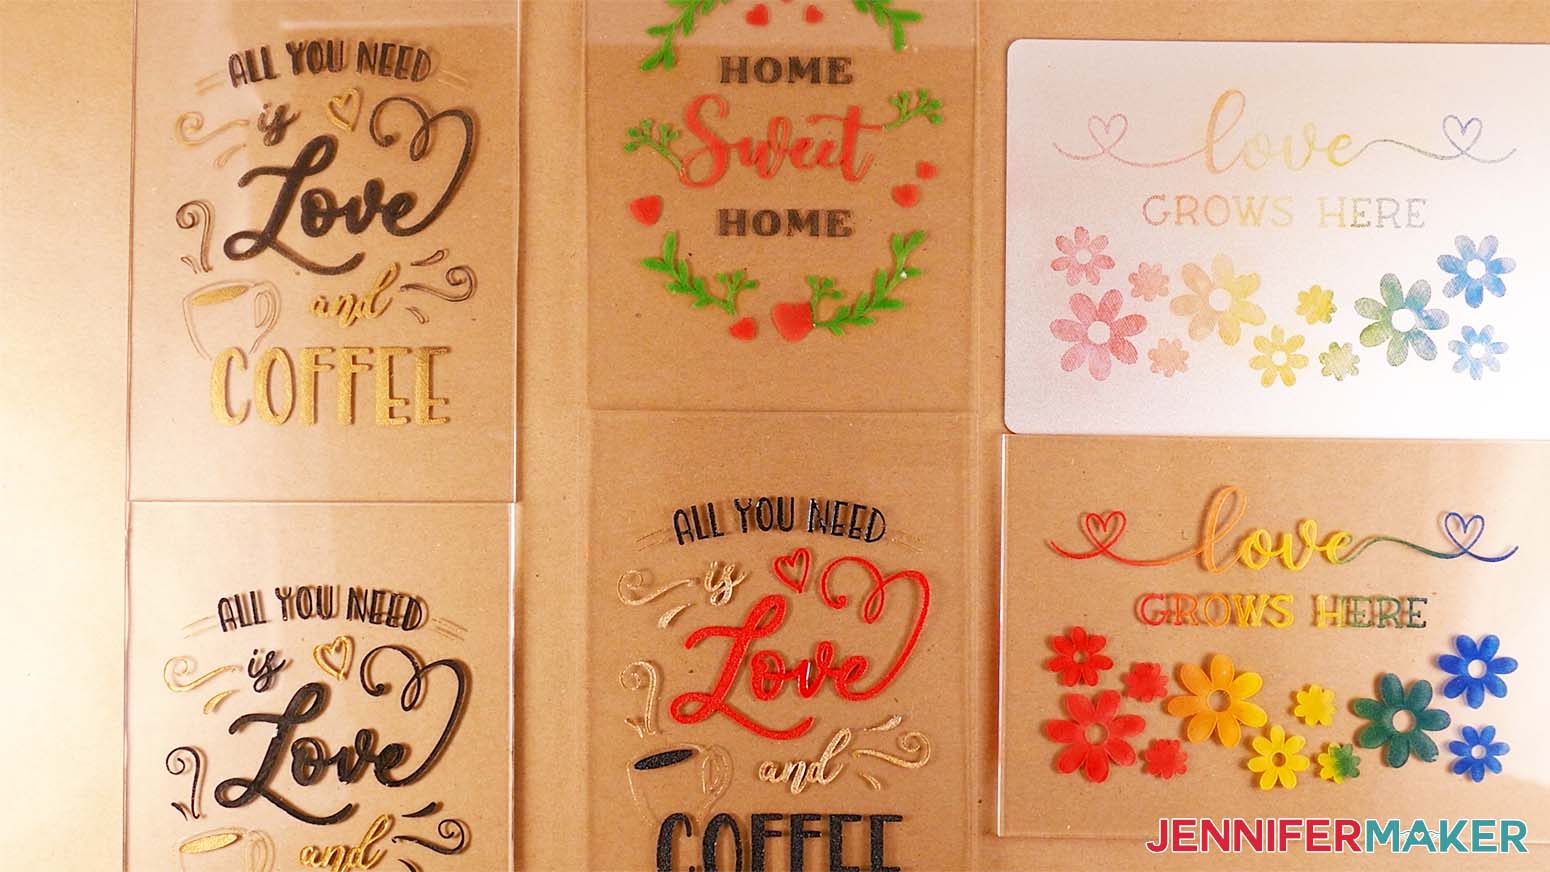
I tried several coloring methods and found three that worked really well and looked awesome on the acrylic and metal plaques: Rub n Buff Finish, Enamel Paint, and Acrylic Ink. I’ll show you how to color your designs using each of these methods.
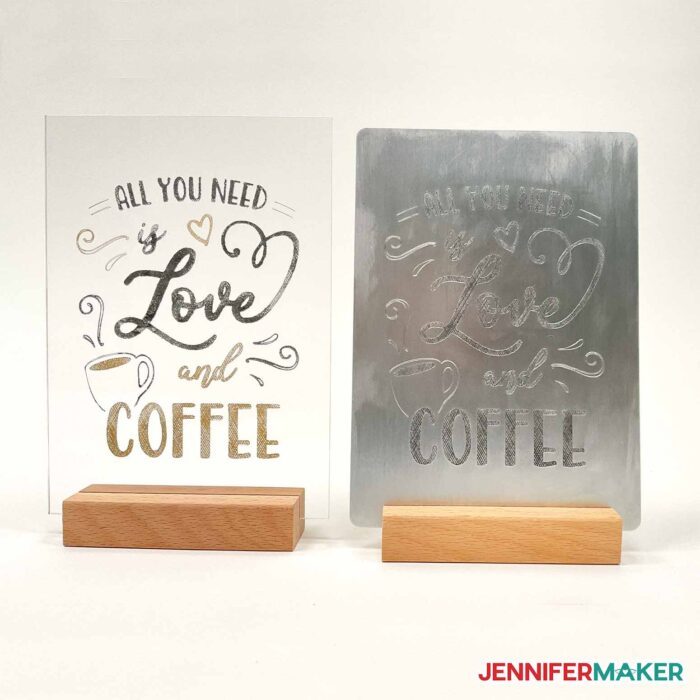
Method 1: Rub n Buff Wax Metallic Finish
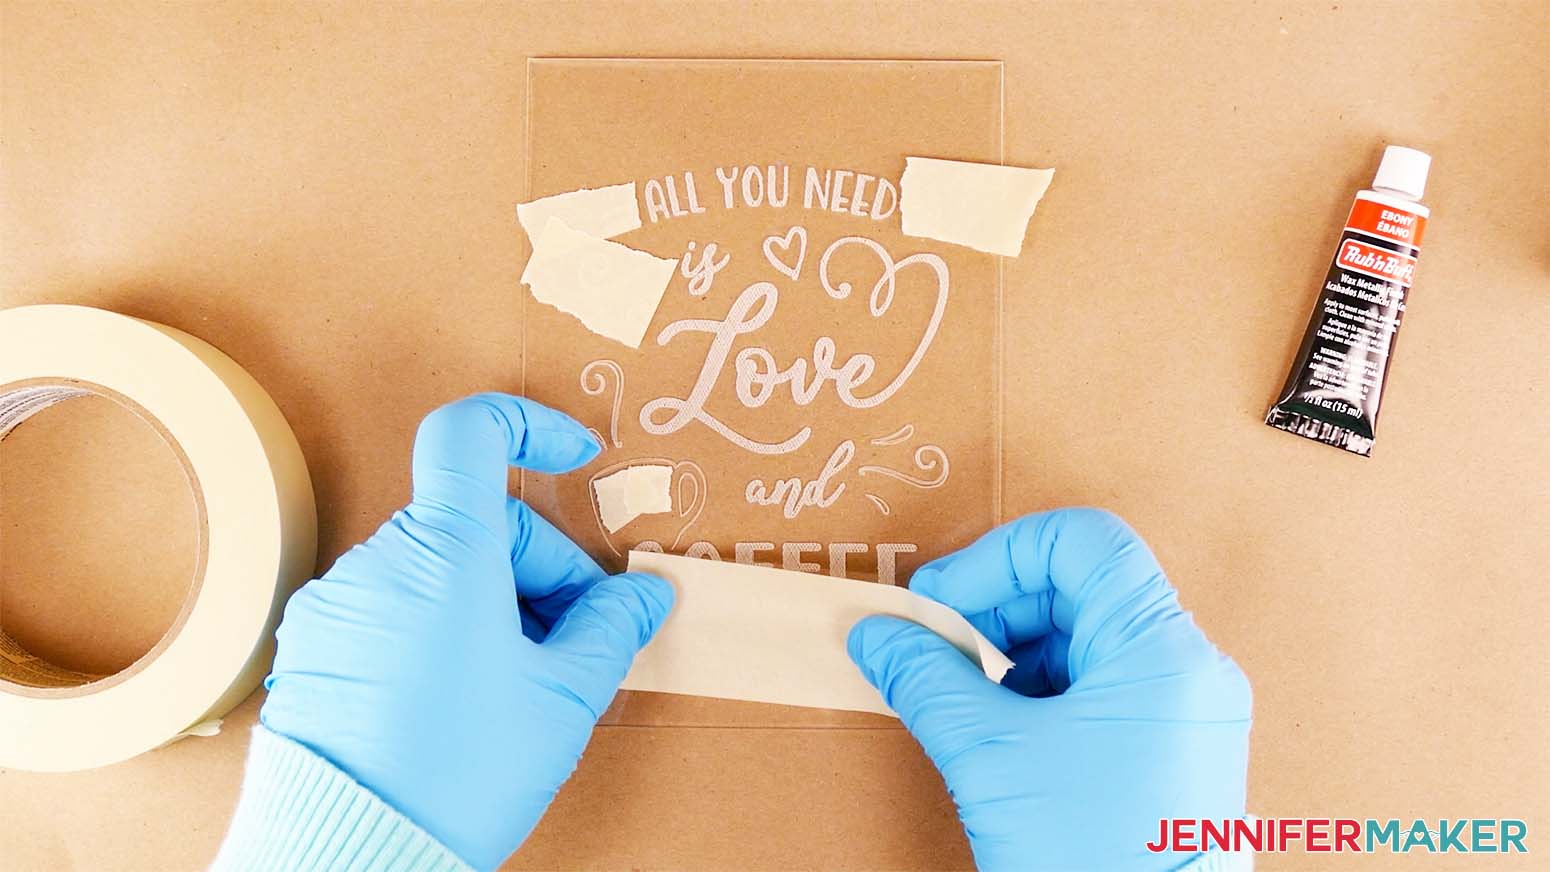
First, I’ll use Rub n Buff on my engraved acrylic "Love and Coffee" plaque. You can follow the same process for a metal plaque.
Rub n Buff is actually a type of wax that has metallic or pigment powder added to it. I’ve used Rub n Buff on a few other projects and really like the classy look it creates. Check out my Color Glass Etching tutorial to see some examples!
For this method, you’ll need clean nitrile gloves, a dry cloth or towel (preferably one that you won’t mind getting messy), rubbing alcohol, butcher paper, and painter’s or masking tape (if you’re using more than one color).

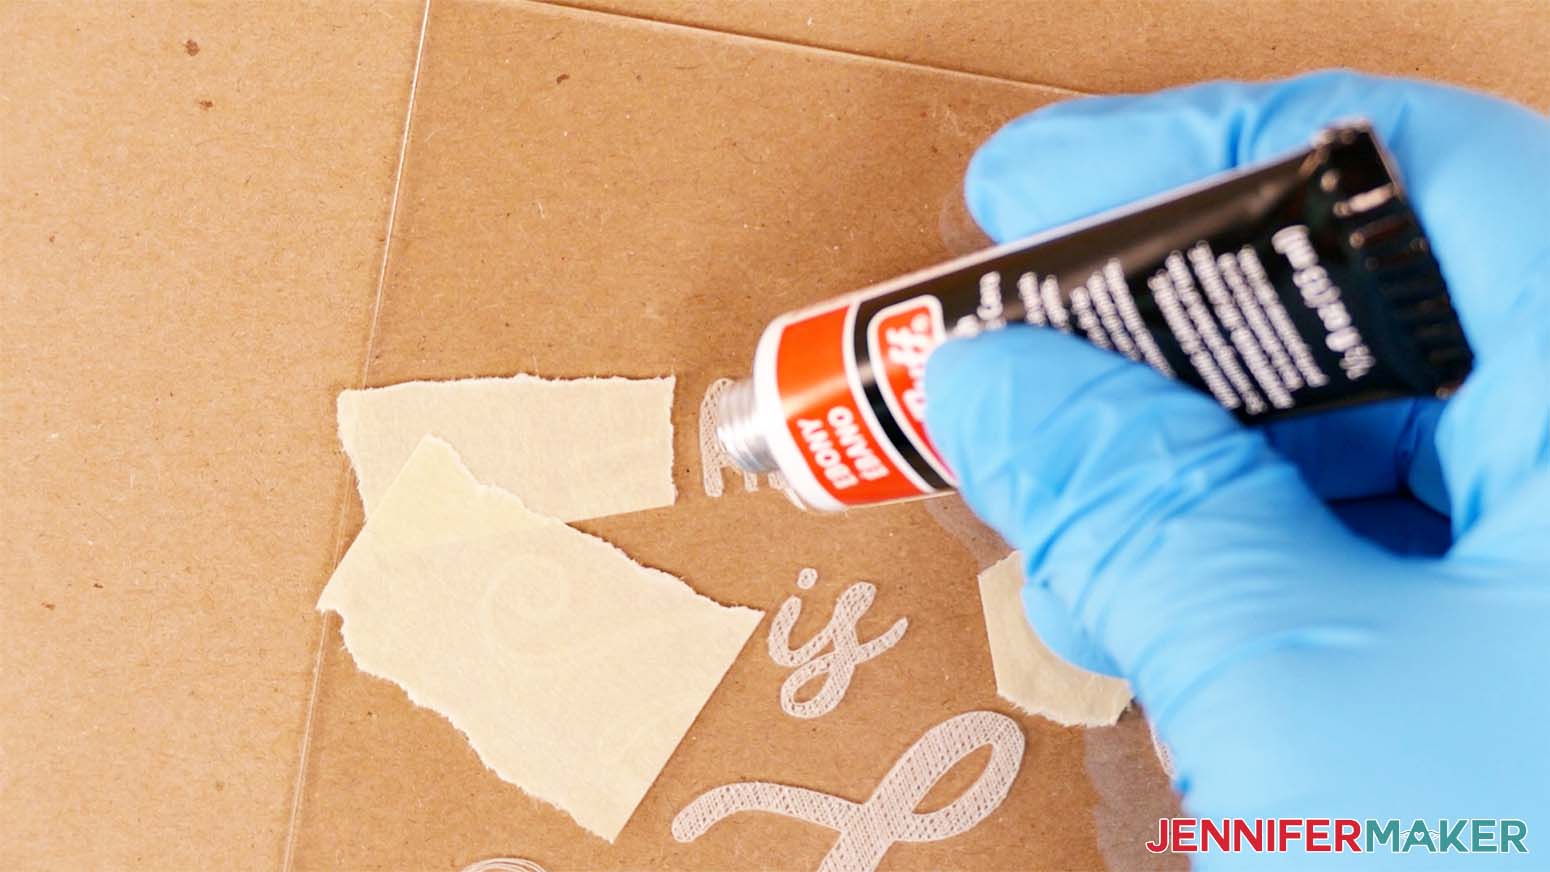
If you're using more than one color, first cover the parts of the design you don't want to be the first color with tape. I’m going to use the Ebony and Gold Leaf colors, and I’ll start with the Ebony, which is black. I’m going to cover the parts of my design that I don’t want to be black.
Cover your work surface with butcher paper and put on your gloves.
Squeeze and apply a tiny amount of Rub n Buff onto your prepared design and buff it into the engraved areas with the cloth. I don’t recommend using paper towels to buff the color in because the rough engraved areas cause the towels to disintegrate into a mess of paper debris pieces. Ask me how I know.
You can wipe the excess off of the plain acrylic, but the wax dries quickly, so you may need to dampen the cloth with water or rubbing alcohol to remove it completely. This method works best if you work on small sections at a time, such as just one or two letters.
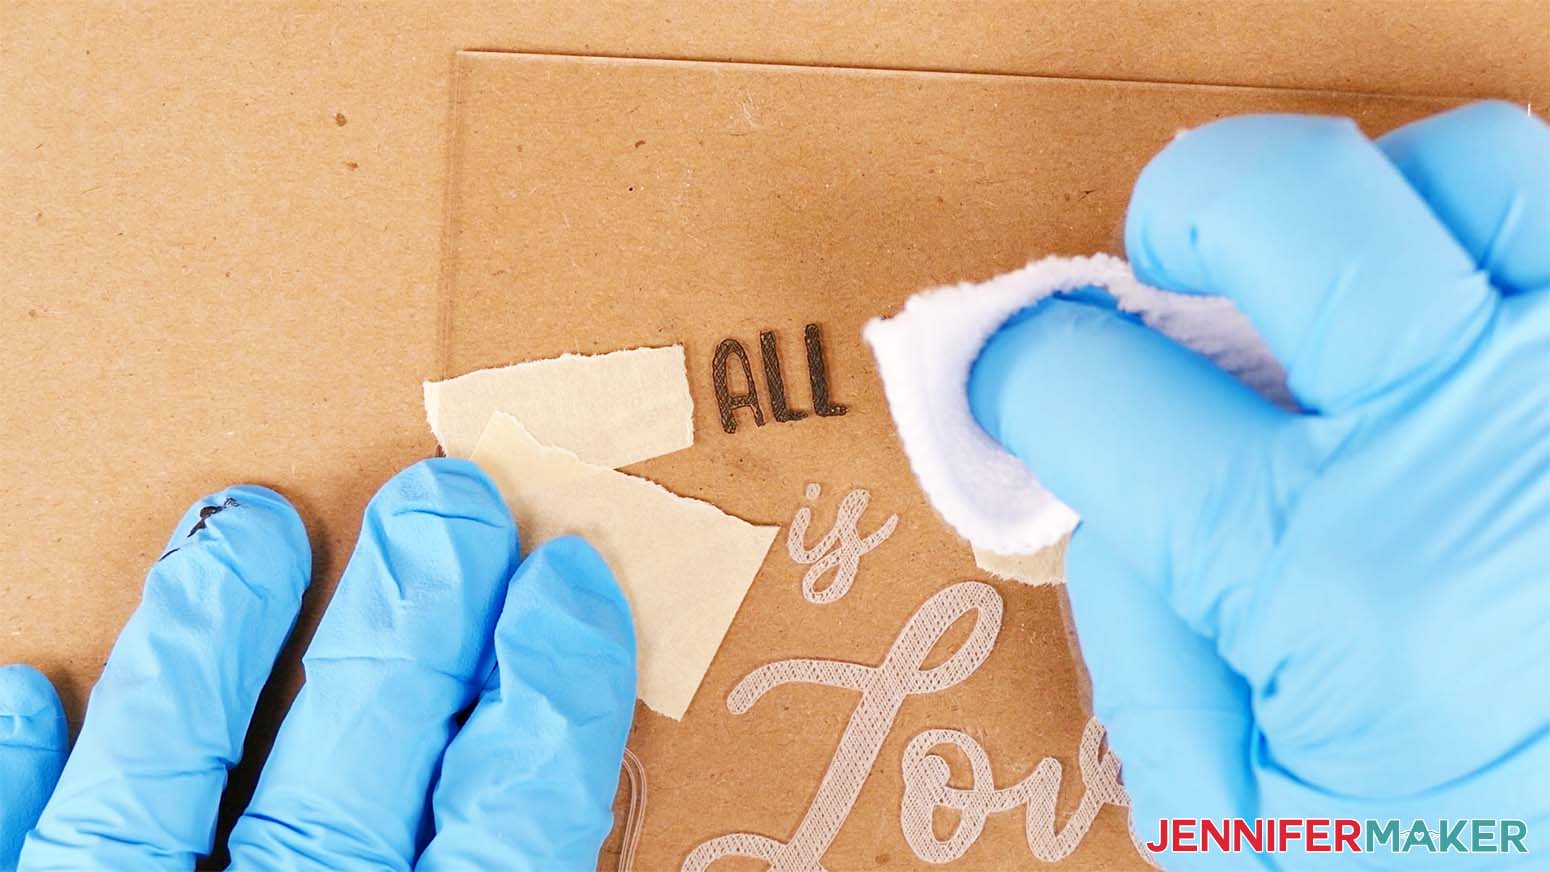
NOTE: The longer the Rub n Buff stays on your acrylic or metal plaque, the harder it is to remove. So it's best to remove the excess quickly before adding more.
Keep applying Rub n Buff and wiping away the excess until you’ve colored all of the exposed sections of your design. Here’s what my plaque looks like after applying the black Rub n Buff.
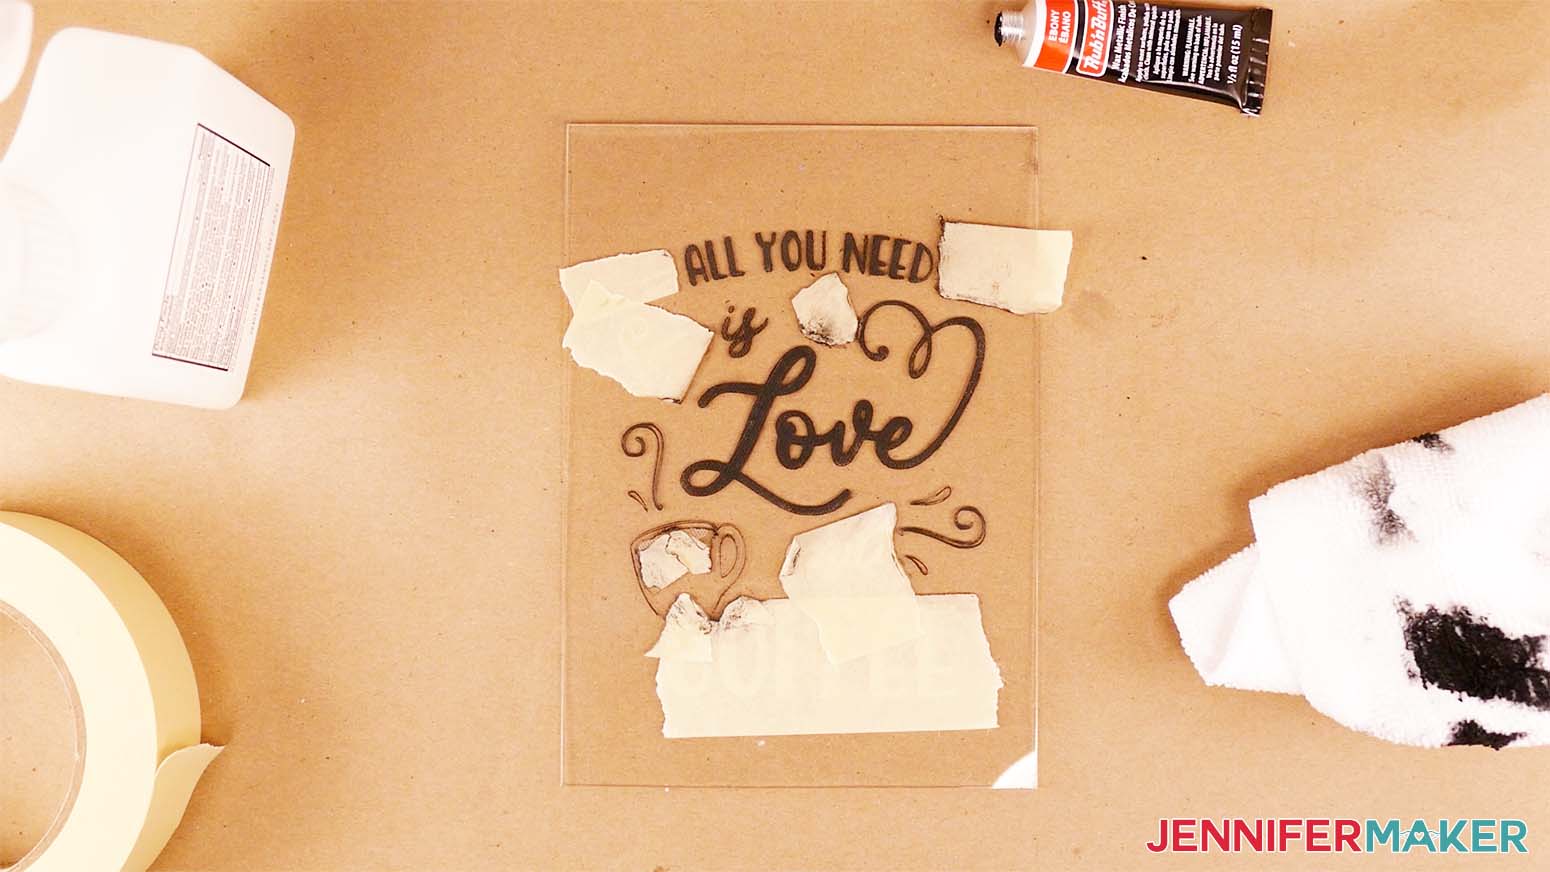
TIP: If you decide that you want your color to be a bit darker, you can always apply a second coat of wax before removing the tape.
Now let’s move on to the gold!
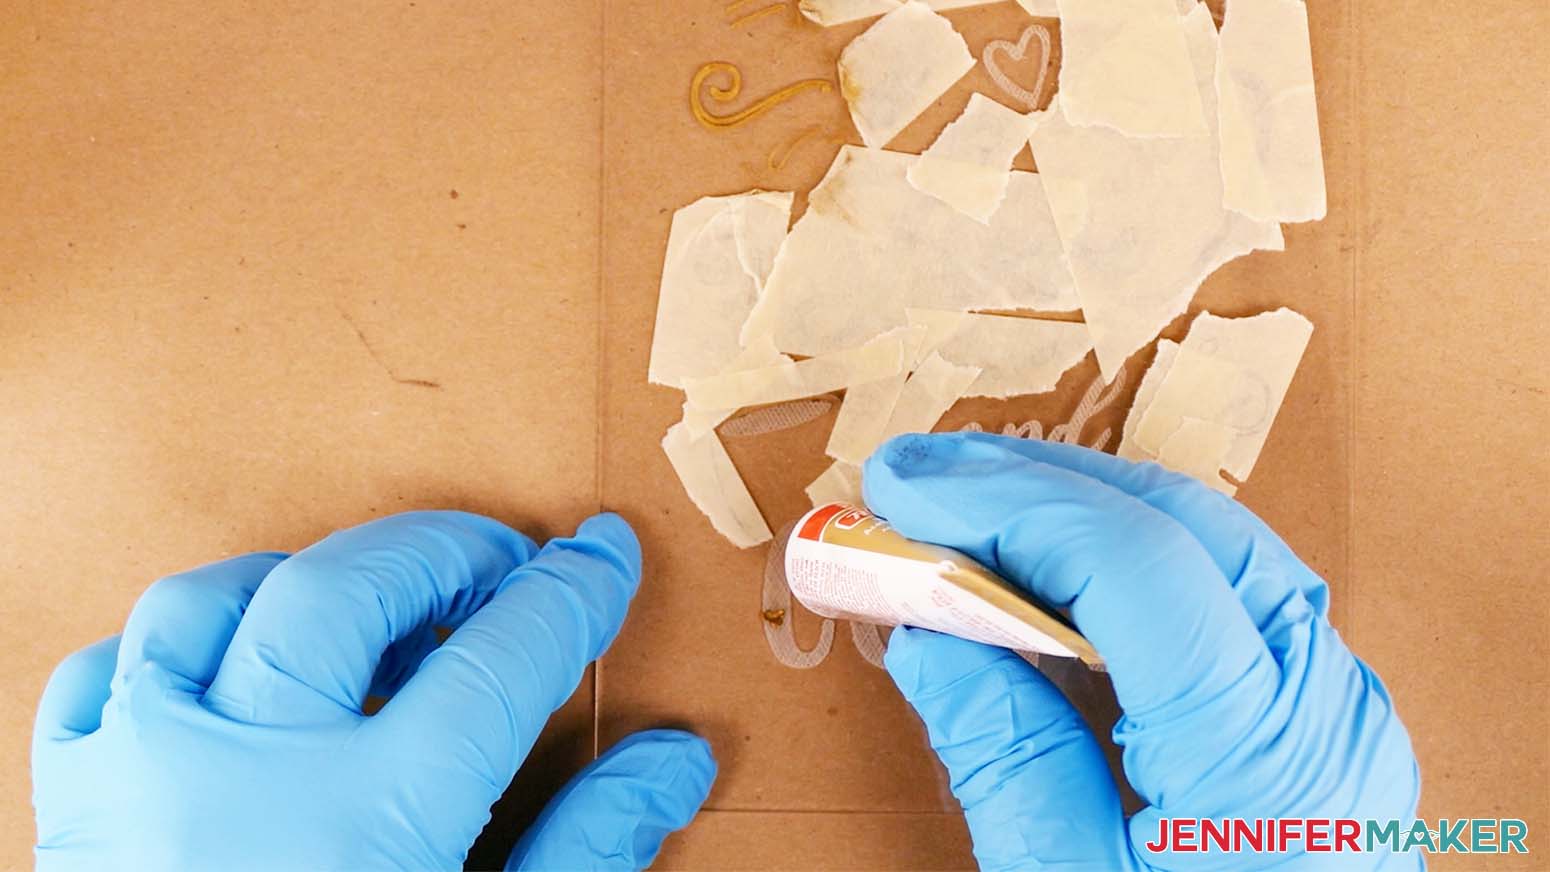
Remove the tape from your uncolored sections and clean off any wax that might have gotten trapped underneath. Then, after making sure your plaque is dry, apply tape on top of the black colored areas so they don’t get any gold mixed in.
Repeat the same process to apply the gold Rub n Buff to the rest of your design.
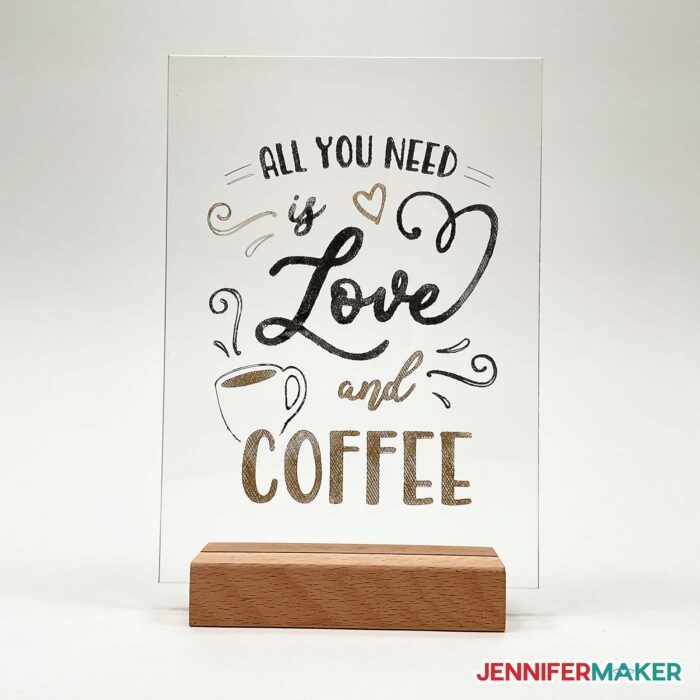
Now remove the tape, wipe off any remaining Rub n Buff from the plain acrylic, and let it dry. Here’s what my finished gold and black plaque looks like. Isn’t it just so pretty?
I even engraved the same design on my Glowforge and colored it using the same method to see how it would compare to the Cricut engraved plaque.
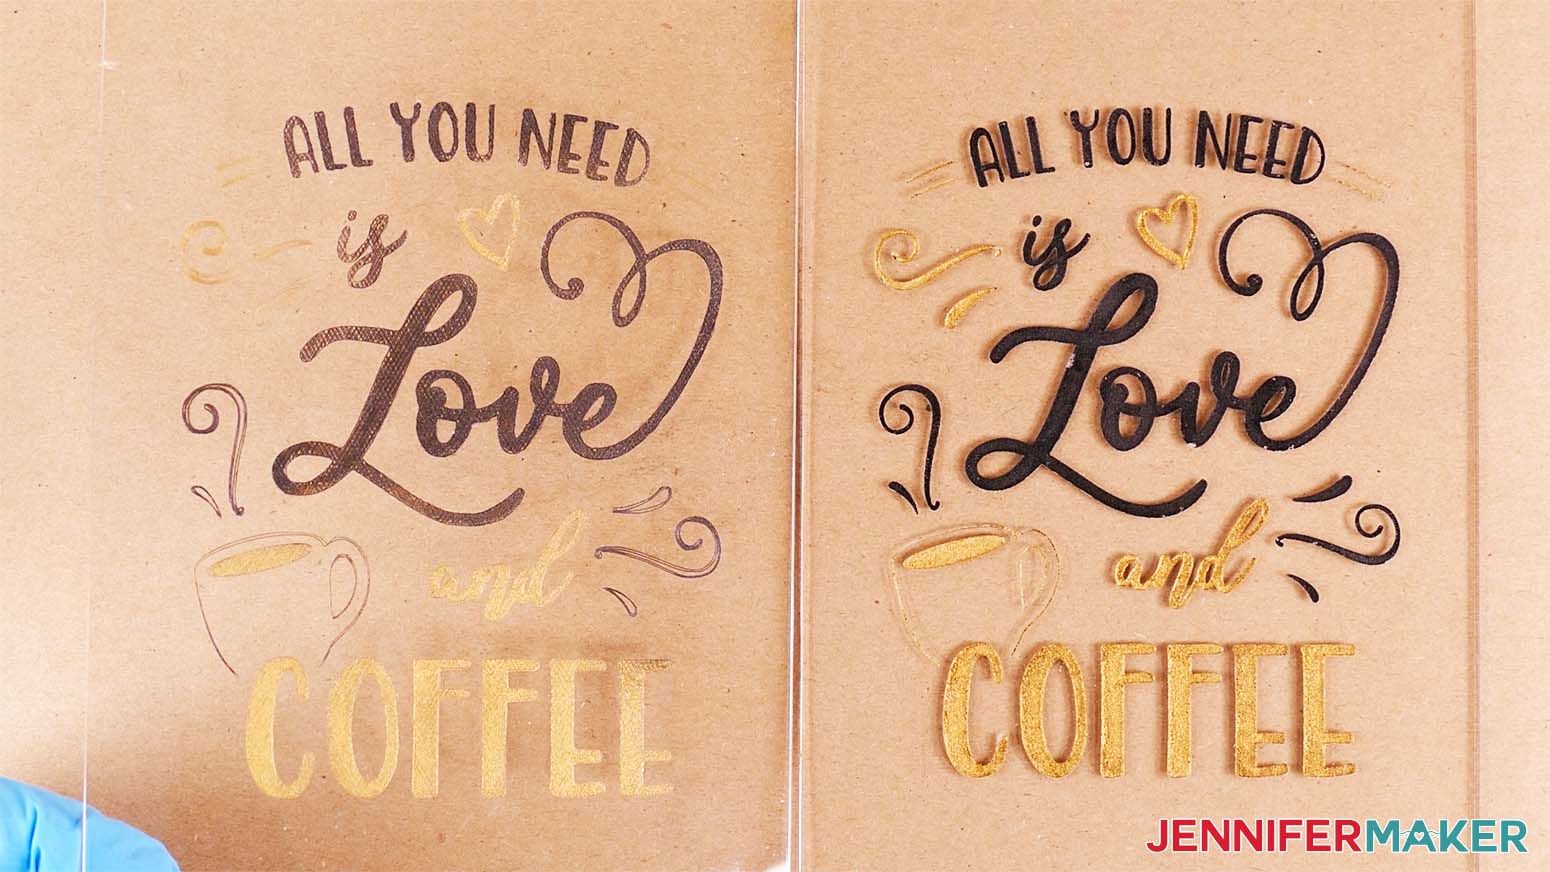
Since Rub n Buff is permanent on its own, you won’t need to seal your finished plaque with anything, and it’s ready to display!
I really like the results of using Rub n Buff, but I also wanted to try some coloring methods with lots of color options.
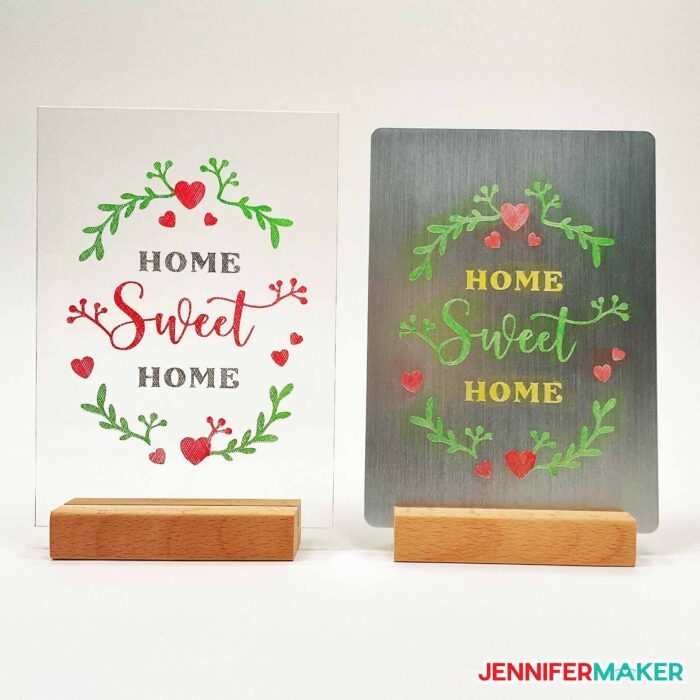
Method 2: Enamel Paints
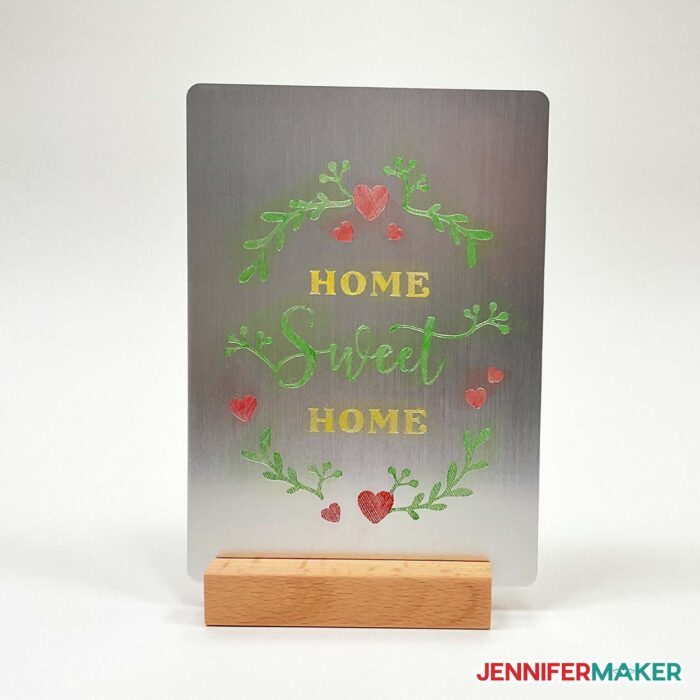
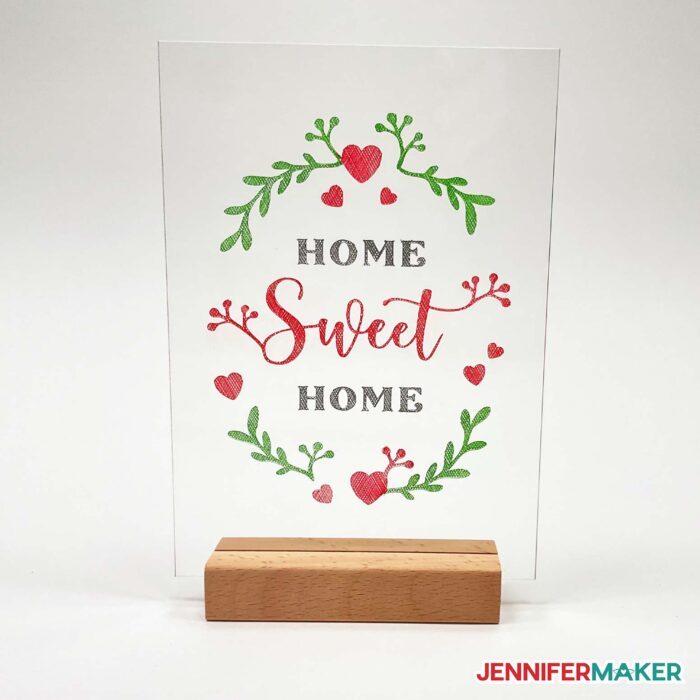
Enamel paints come in all kinds of colors and are really fun to use! I’m going to use the red, green, and black colors on my “Home Sweet Home” engraved acrylic plaque. You can follow the same process for a metal plaque.
For this method, you’ll need clean nitrile gloves, some paint brushes, the bottle of paint thinner that comes with the set in my materials list, a dry cloth or towel (preferably one that you won’t mind getting messy), rubbing alcohol, butcher paper, and painter’s or masking tape (if you’re using more than one color).
I found it helpful to have a separate paint brush for each of the colors I used. This way, I could finish painting first and worry about clean up later.
You may also want to open a window or turn on a fan because the paints do have an odor.
Start by shaking your first bottle of paint to make sure it’s well mixed and ready to use. Cover your work surface with butcher paper and put on your gloves before opening the bottle, as it can be messy.
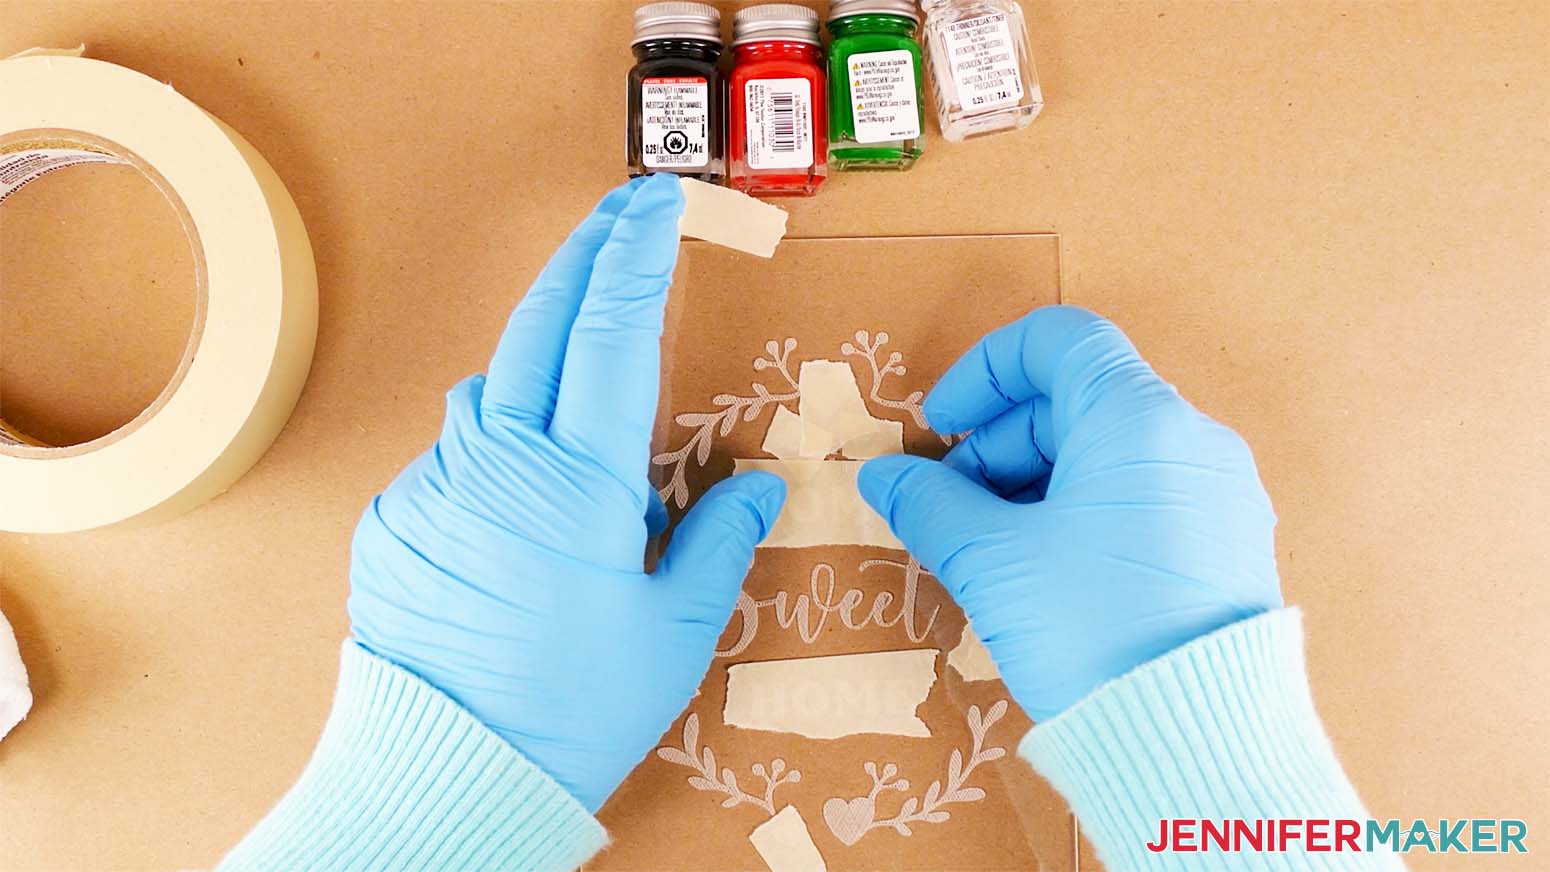
Cover the parts of the design you don't want to be the first color with tape, just like we did with the Rub n Buff. I’m going to start with the green, so I’ll cover all the parts I don’t want to be green first.
Open your first bottle of paint and make sure it looks mixed up. If it looks somewhat separated, try mixing it with your brush first. Then, apply a small amount of paint to a small section of your design. You don’t have to worry about painting within the lines because we’ll wipe away any excess with our cloth.
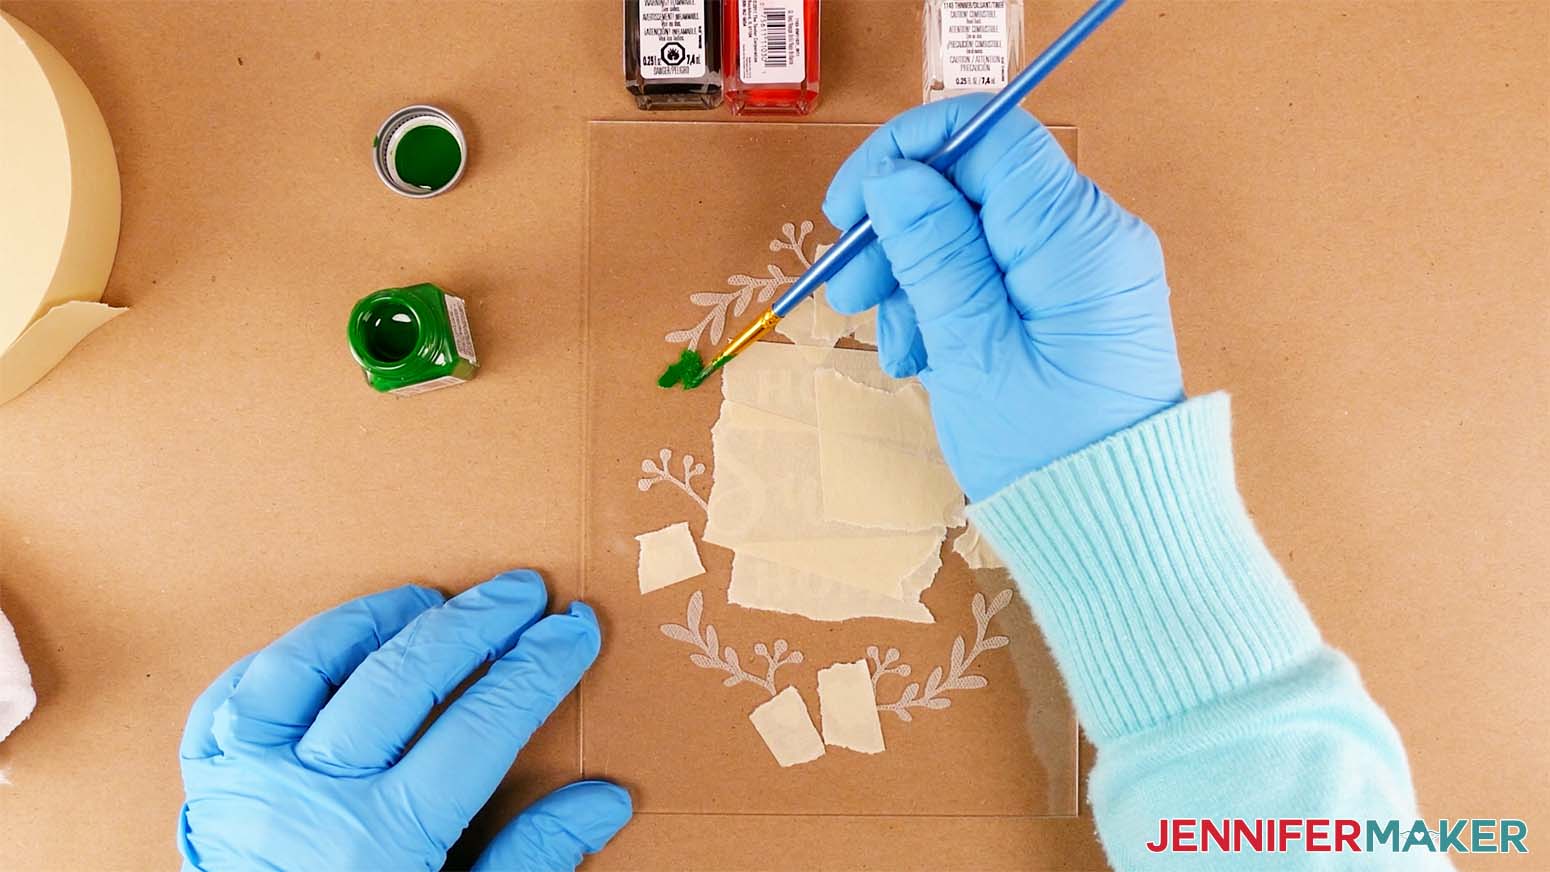
Before adding more paint, wipe the excess off the plain acrylic using your cloth. You can also spread some of the excess paint into nearby engraved areas using a buffing motion, similar to how we buffed the Rub n Buff into our design.
If the paint starts to dry or is hard to remove, try dampening your cloth with rubbing alcohol to remove it completely. Note that water will not remove this type of paint. Be careful not to get too much alcohol into the engraved areas, as it can lighten the color of your paint while it’s still wet.
This is another method that works best if you work on small sections at a time. You can also apply more than one coat of paint to increase the color’s saturation.
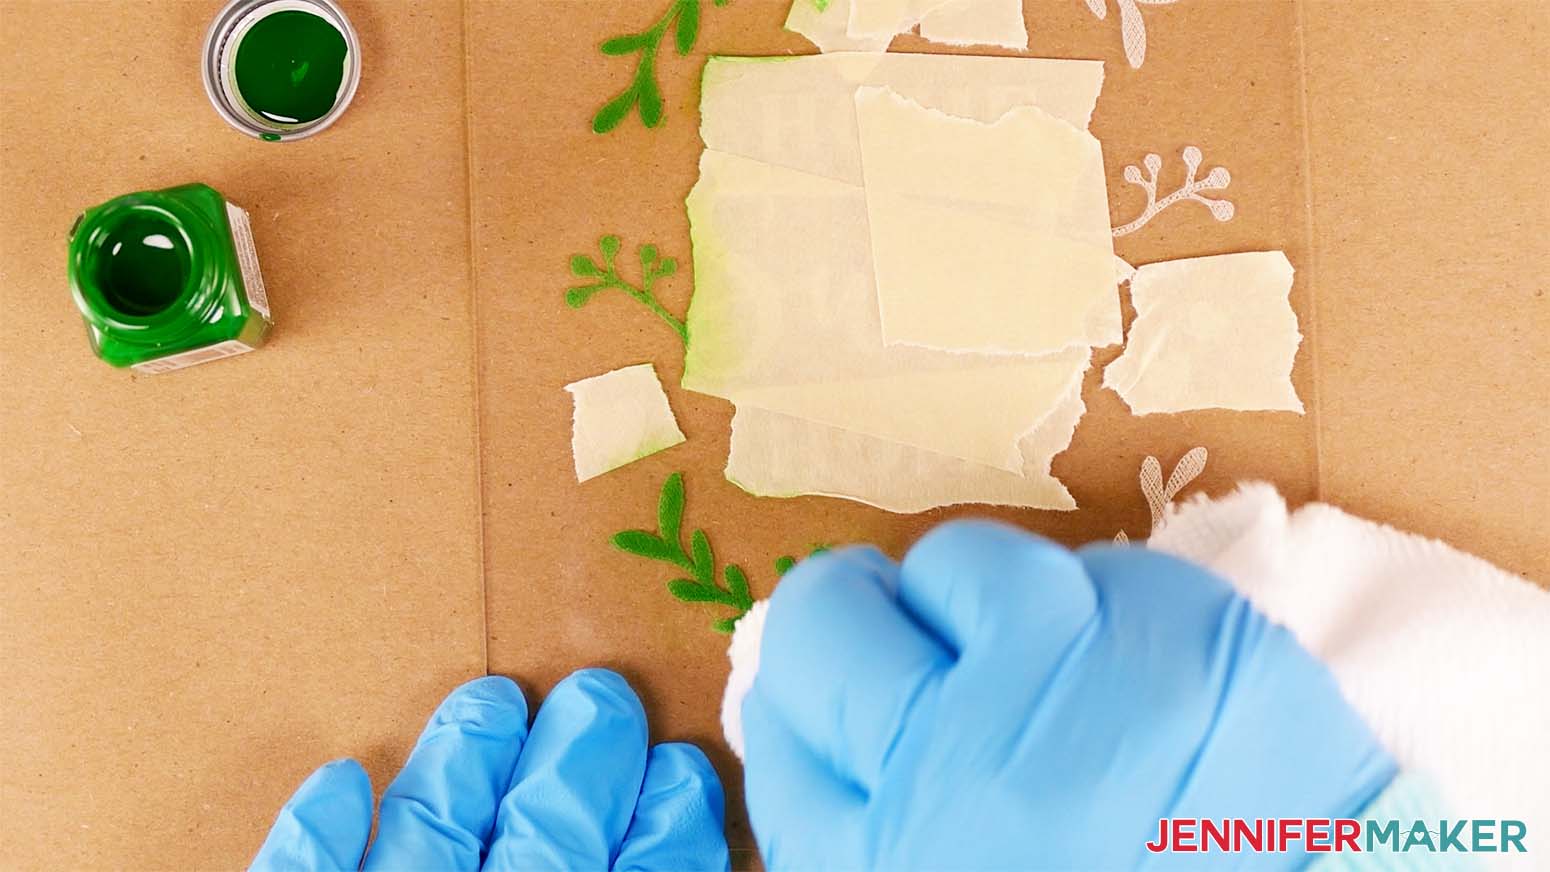
Here’s what my plaque looks like after applying the green paint.
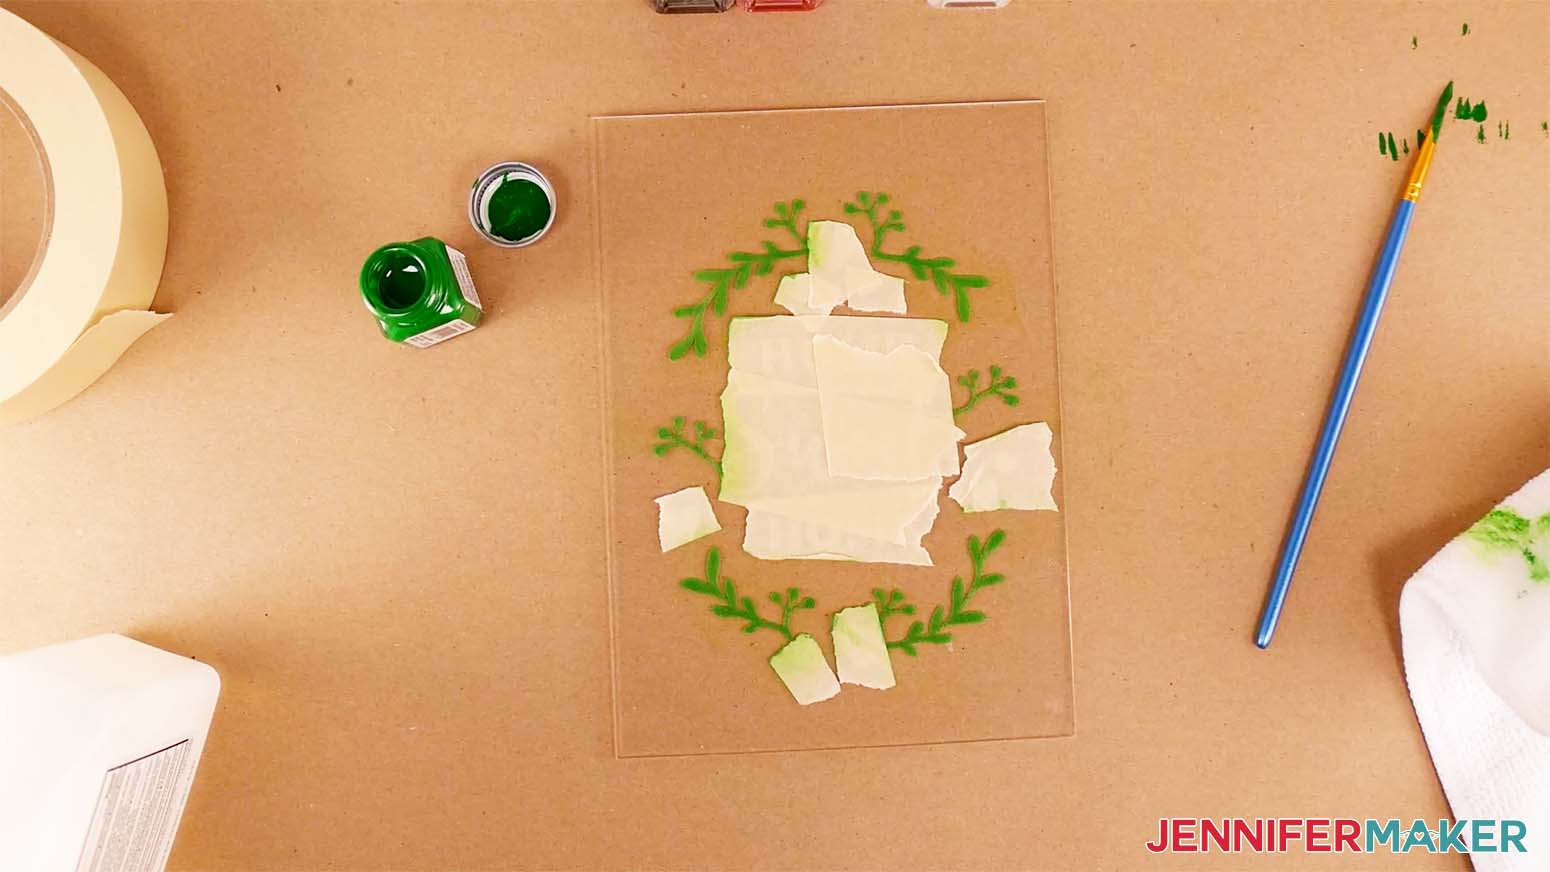
Once you’re finished with your first color, remove the tape from your uncolored sections and clean off any paint that might have gotten trapped underneath.
Set your used paint brush aside. Or, if you want to use the same brush for your next color, clean it in the paint thinner (the clear bottle from the set). You can put your brush directly into the bottle, or you can pour a small amount into a disposable cup and rinse your brush in that. Note that you can’t clean enamel paint off of your brushes using water.
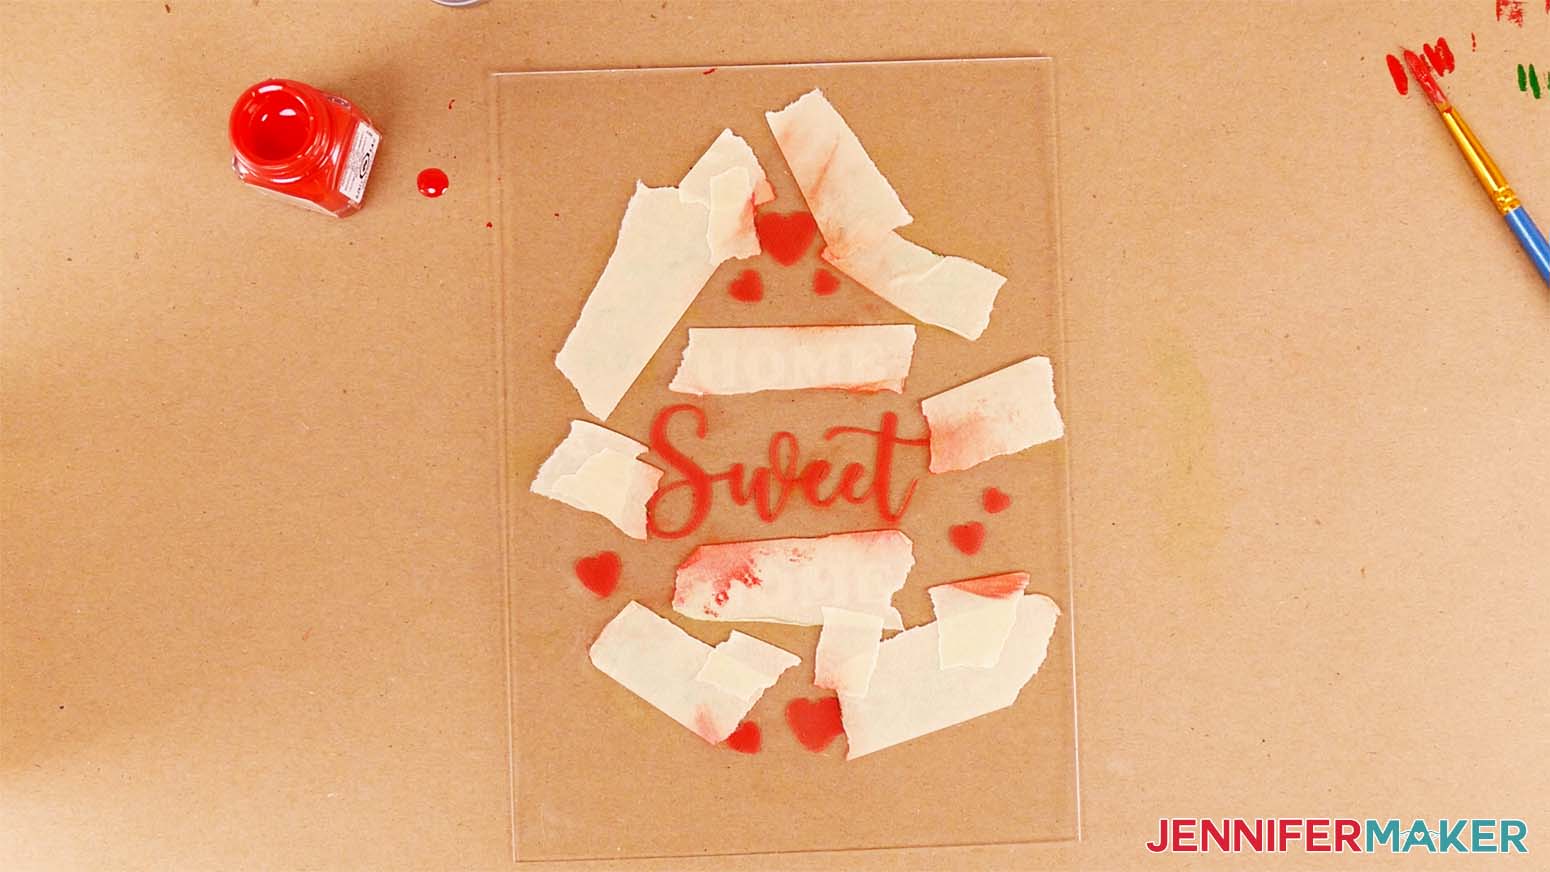
Now let’s apply the red paint! After making sure your plaque is dry -- I waited five to ten minutes after applying my first color -- apply tape on top of the colored areas so they don’t get any other colors mixed in. Then cover any blank engraved areas that won't be red with tape as well.
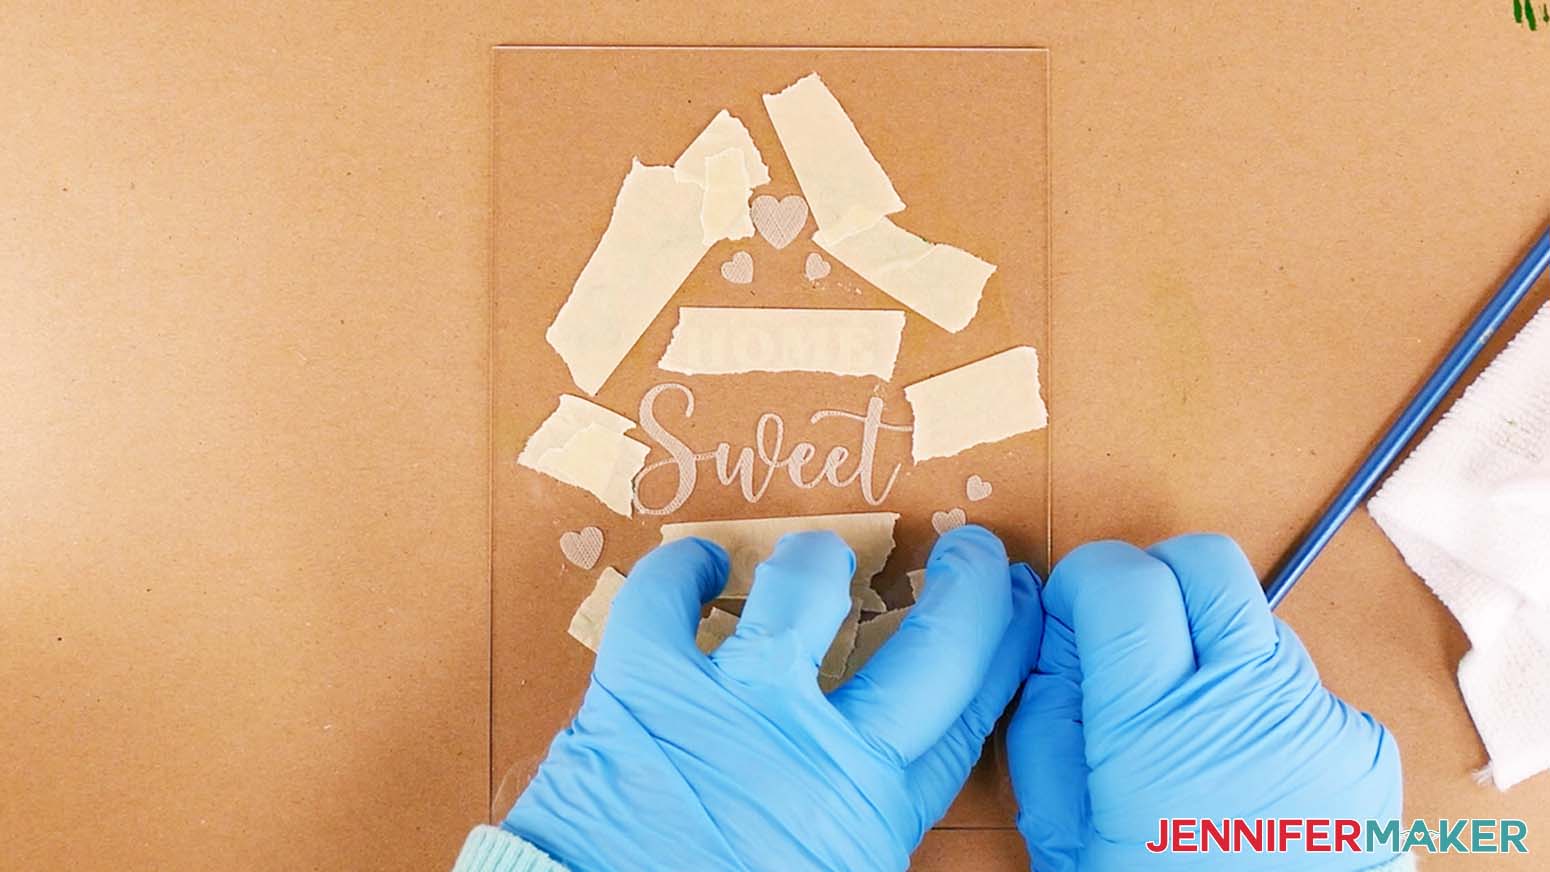
Follow the same process as above to apply color to all the uncovered areas of your design, one small section at a time. Here’s what my plaque looks like after applying the red.
Finally, we’ll apply the black using the same process. I applied black last because it’s the darkest color. You can apply your colors in any order you wish, but if you’re using the same brush for all colors, I recommend starting with the lightest color and ending with the darkest.
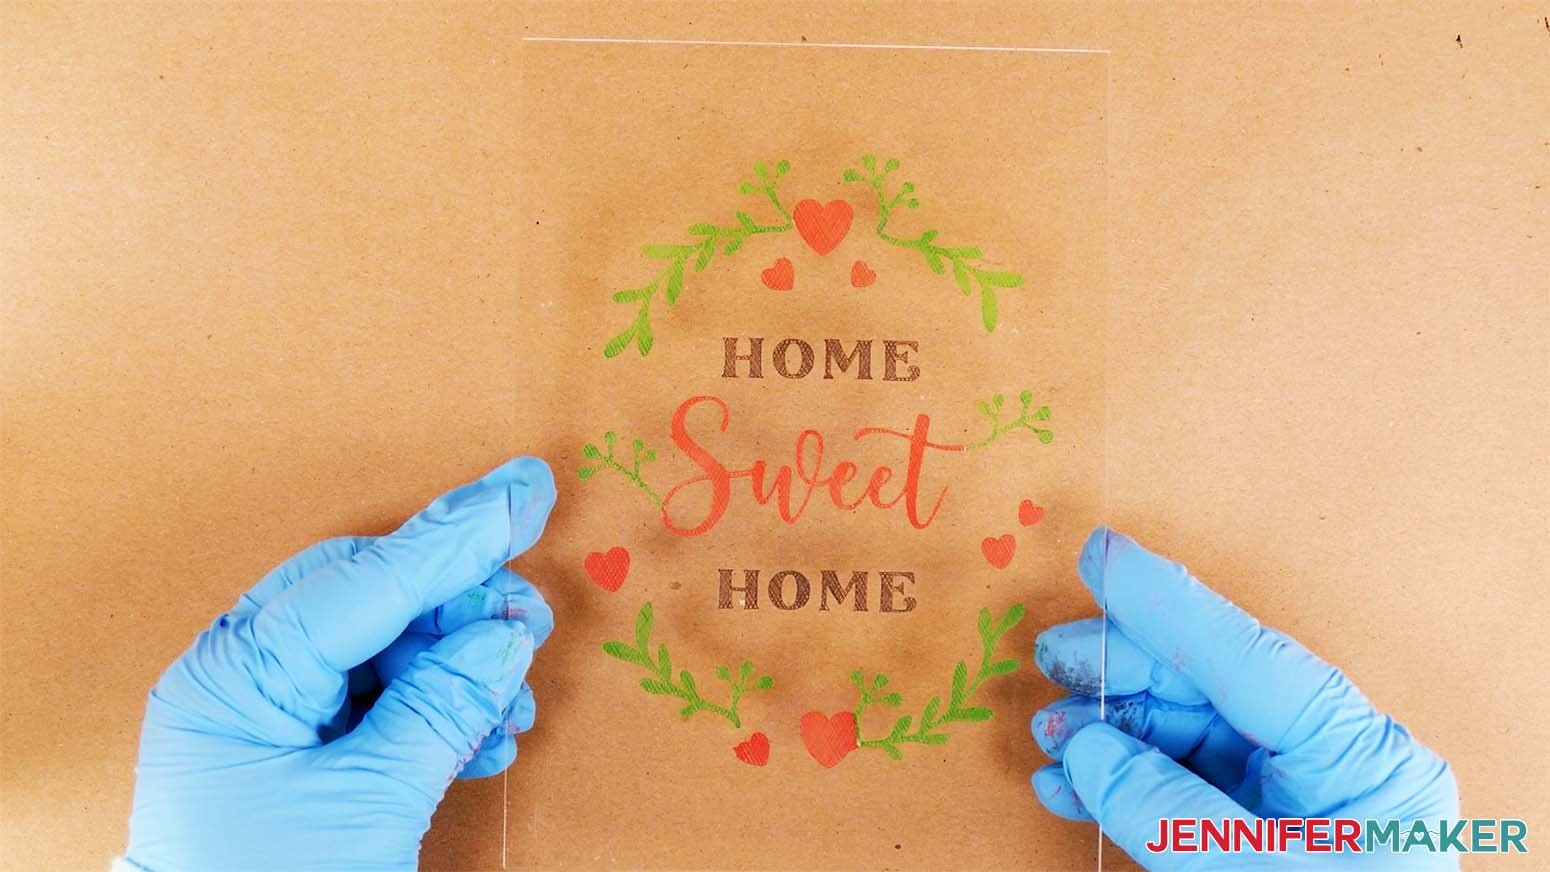
Now remove all the tape, wipe off any remaining paint from the plain acrylic, and let it dry. Here’s what my finished plaque looks like after applying all the paint. Don’t you just love the vibrant colors?
Enamel paints are permanent after they dry. I recommend letting your plaque dry overnight to make sure the paints are completely set. After that, it’s ready to display!
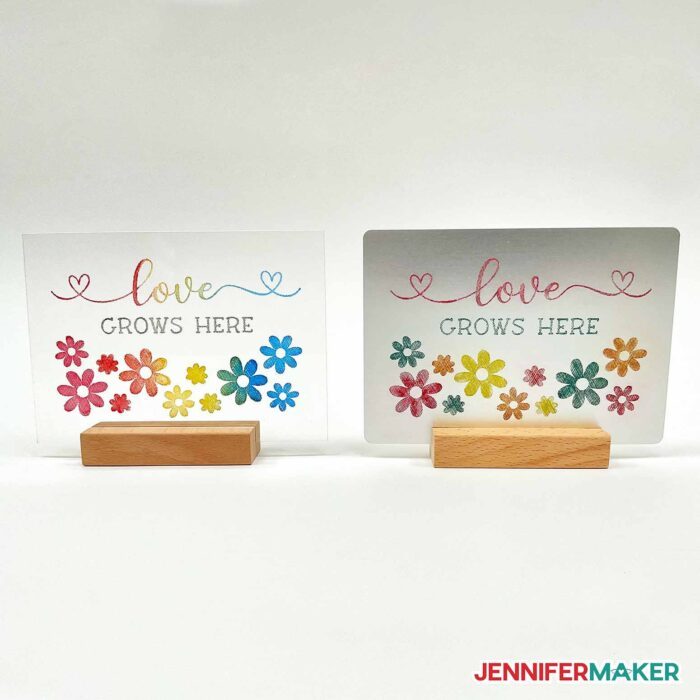
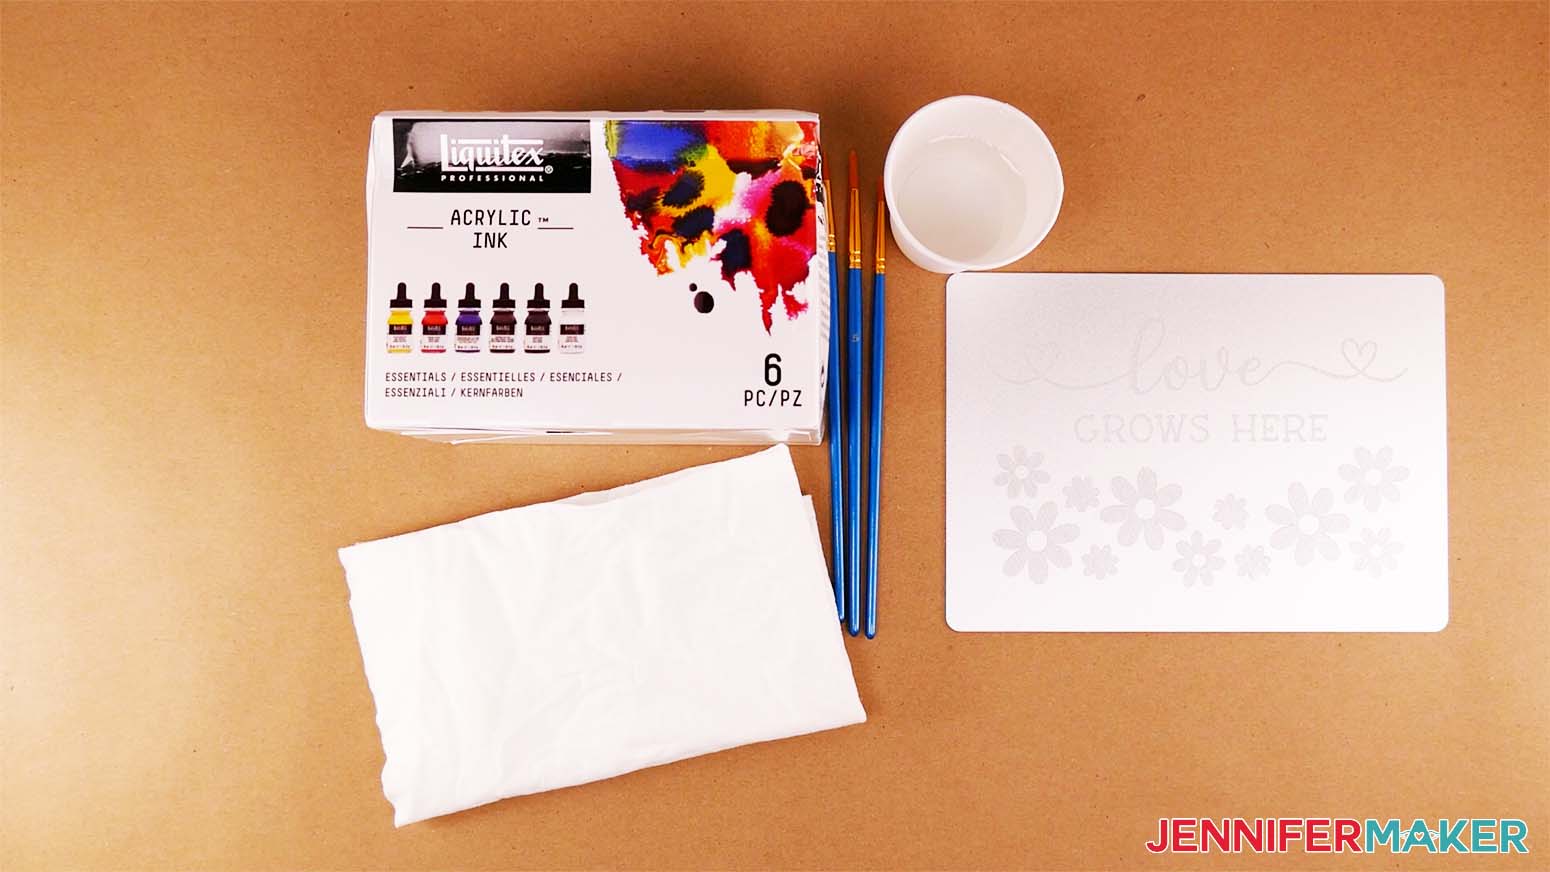
Method 3: Acrylic Inks
Acrylic inks aren’t as permanent as the other two coloring methods, but they’re super easy to mix and blend to create really pretty “watercolor” effects or custom colors.
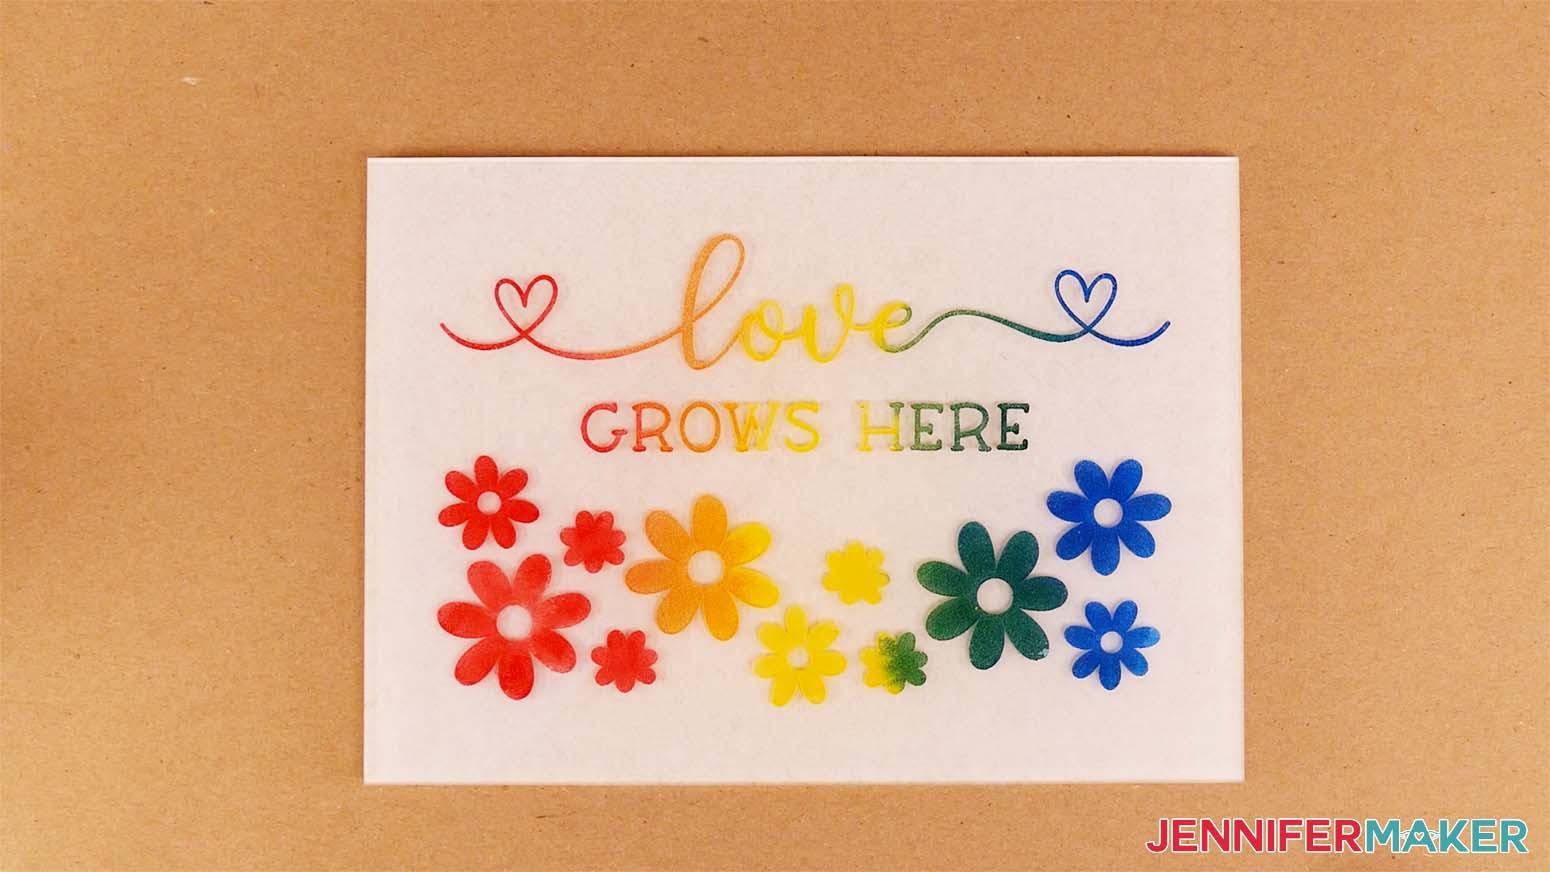
I’m going to blend the red, yellow, and blue inks on my “Love Grows Here” engraved aluminum plaque to make a colorful rainbow over the entire design. You can follow the same process for an acrylic plaque.
For this method, you’ll need some paint brushes, some paper towels, a dry cloth or towel (preferably one that you won’t mind getting messy), a cup of water, butcher paper, and some clean nitrile gloves (if you don’t want to get ink on your hands).
I found it helpful to have a separate paint brush for each of the colors I used. This way, I could finish painting first and worry about clean up later.
Start by shaking your first bottle of ink to make sure it’s well mixed and ready to use. Cover your work surface with butcher paper and put on your gloves before opening the bottle. Acrylic ink is water-based and washes off easily, so you don’t need to wear gloves. It just makes things a little less messy!
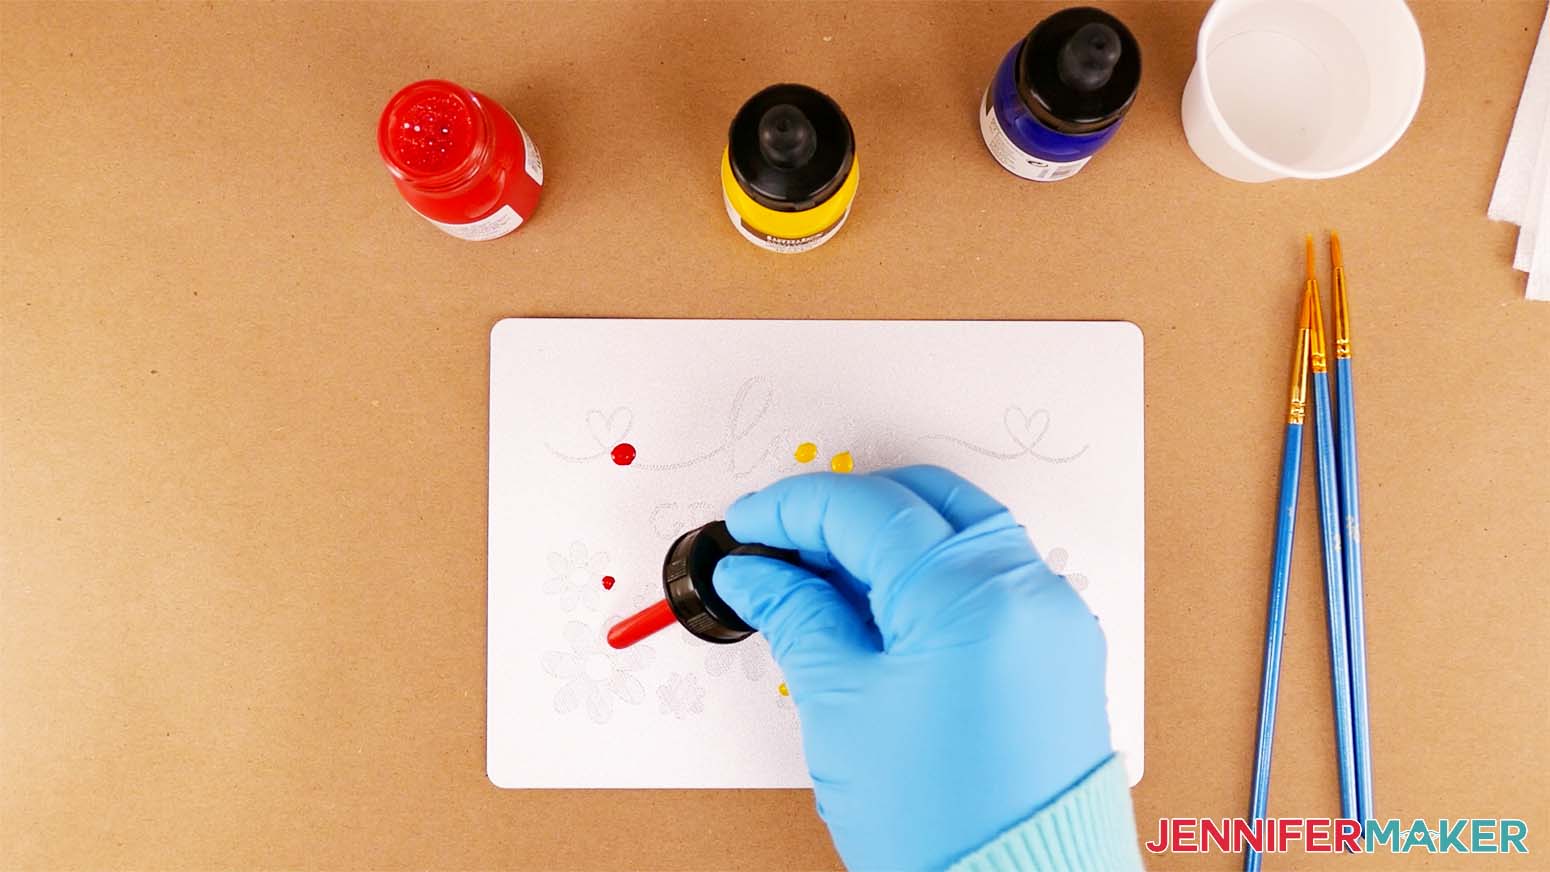
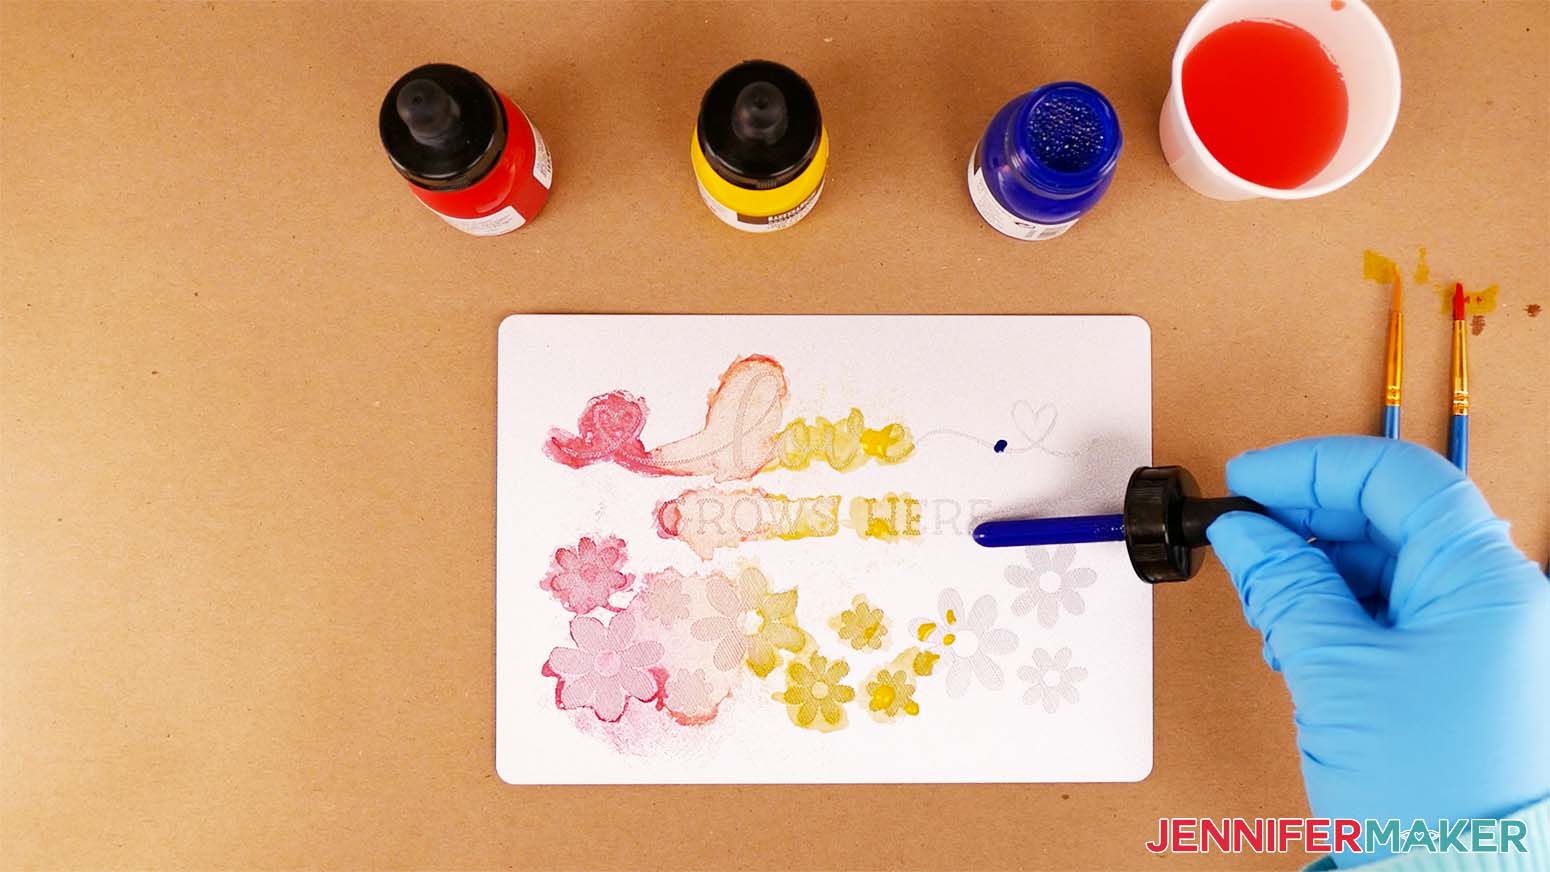
Then, open your first bottle and use the dropper to drop ink over the areas of the design where you want each specific color to be. I started with the yellow because it’s the lightest. You only need to apply a few drops, as the ink is very easy to spread into the engraved areas with a brush. You can always add more ink later if you want the color to be darker or more vibrant.
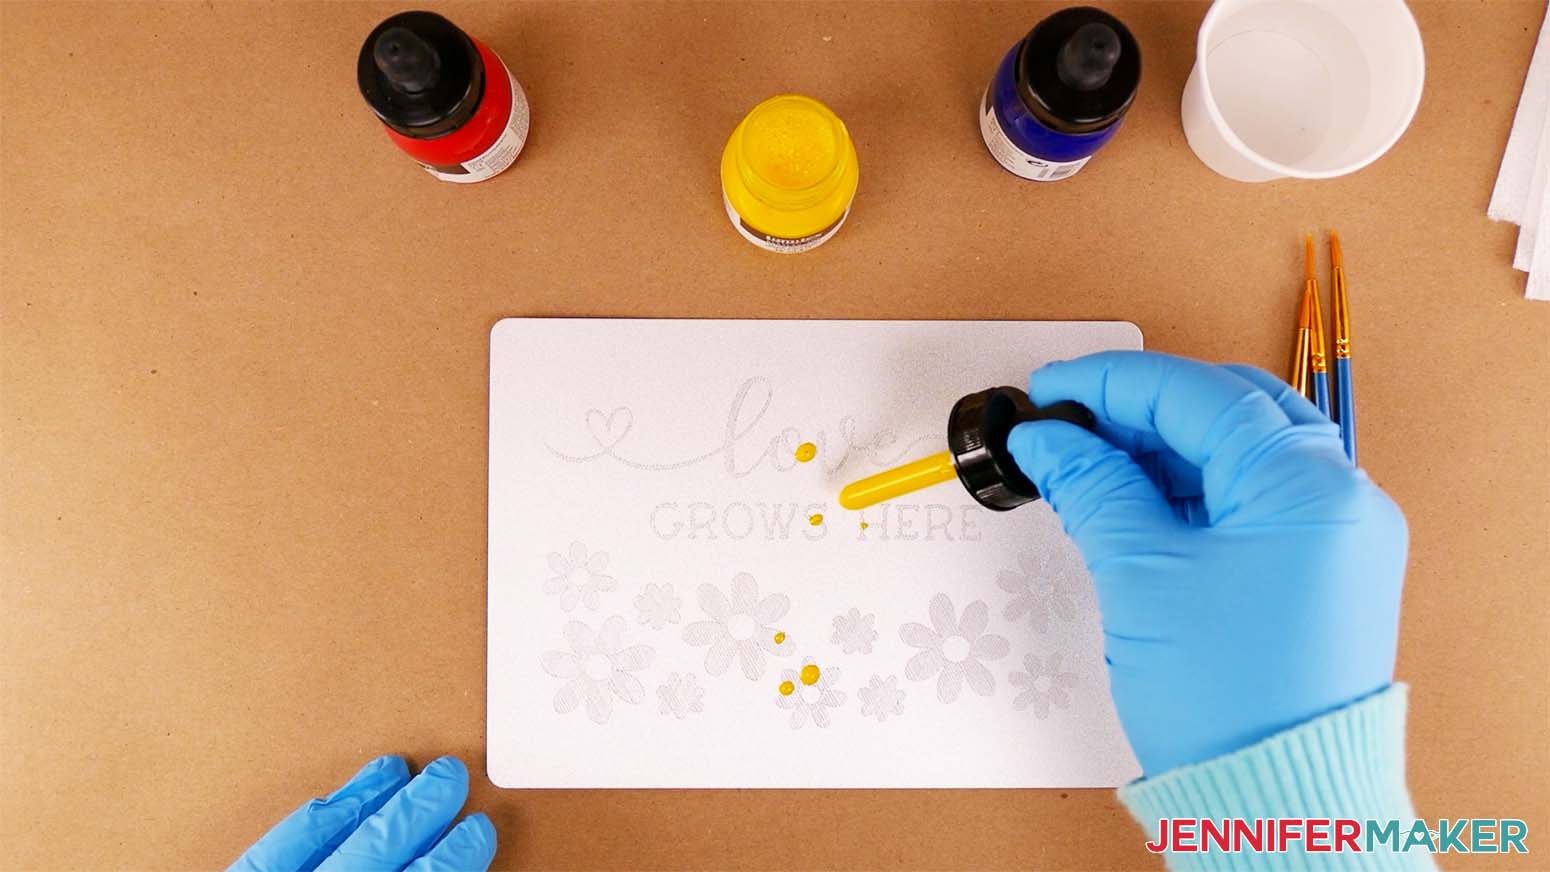
If you're blending colors like I am, you'll want to add a few drops of each of the colors you're blending before you grab your brush to spread the ink. To make my rainbow, I started by adding a few drops of yellow in the center of the design and a few drops of red on the left.
When spreading the ink with your brush, start with the lightest color first. I started with the yellow. Cover all the engraved areas that you want to be your lightest color before moving on. This will help keep the darker colors from accidentally bleeding into the lighter ones.
Use your brush to spread the ink so it covers every nook and cranny of the engraved areas. Don't worry about staying inside the lines. You can easily wipe off the excess later.
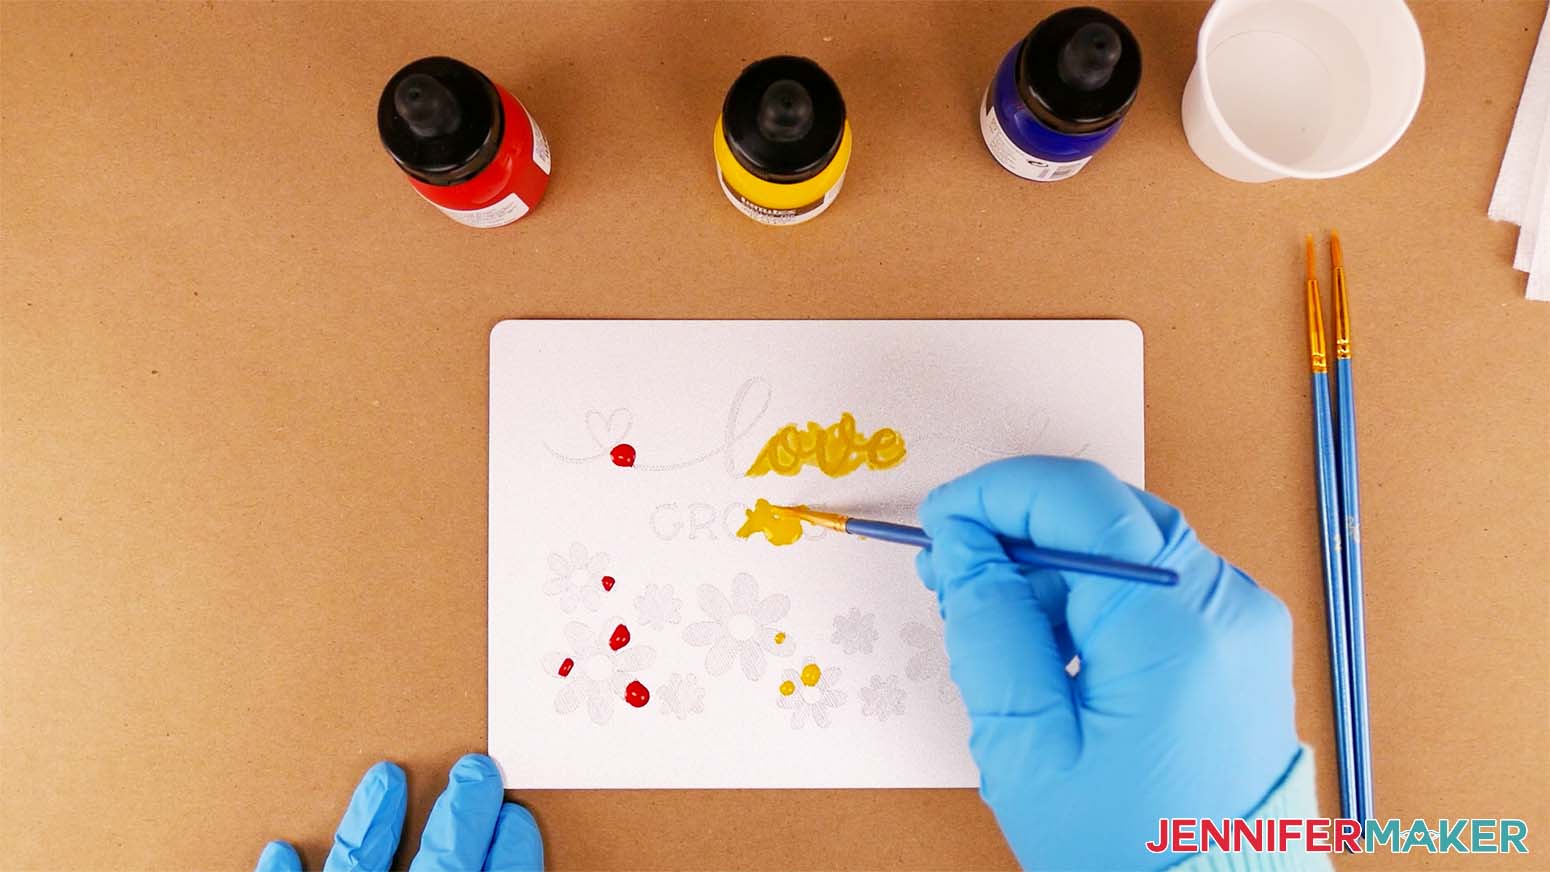
To make orange, I carefully spread some of the yellow ink into the areas right next to the drops of red. The ink colors will naturally want to mix together when they touch. Once you've created a shade of orange you're happy with, spread it into the nearby areas of your engraving before moving on to the red. If you want the orange to be lighter, add another drop or two of yellow. If you want it to be darker, add a drop or two of red.
After you've brushed the ink onto all the areas you want to be that color, use a paper towel to gently blot up any pools of excess ink. Then, move on to your next color before wiping the rest of the excess off of the plain metal or acrylic.
After I finished the left half of my rainbow, I switched to a different paint brush and put my previous brush in a cup of water while I finished working.
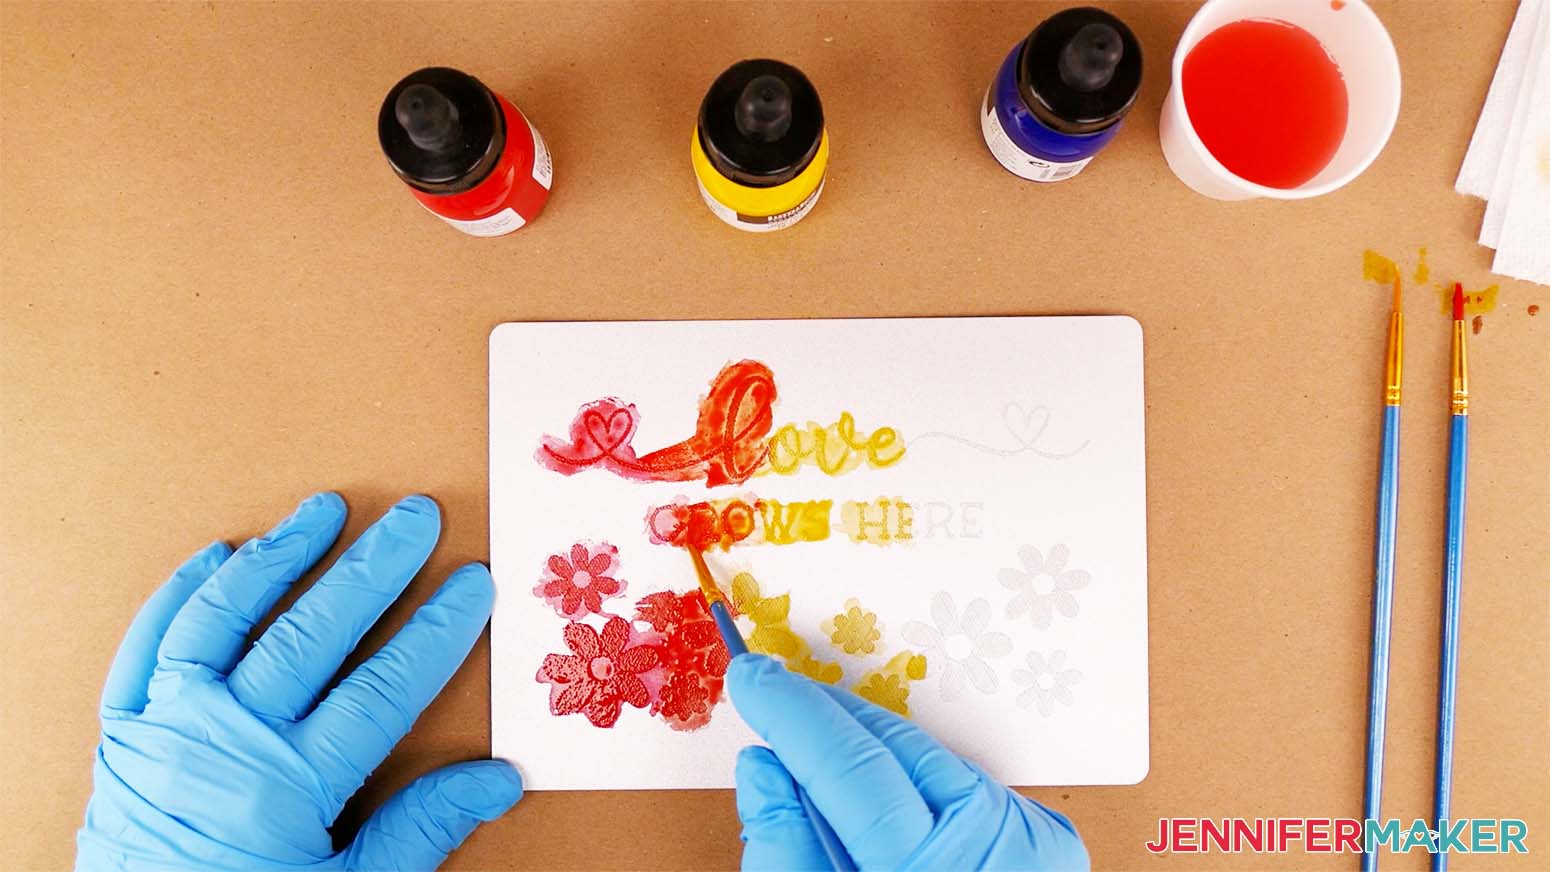
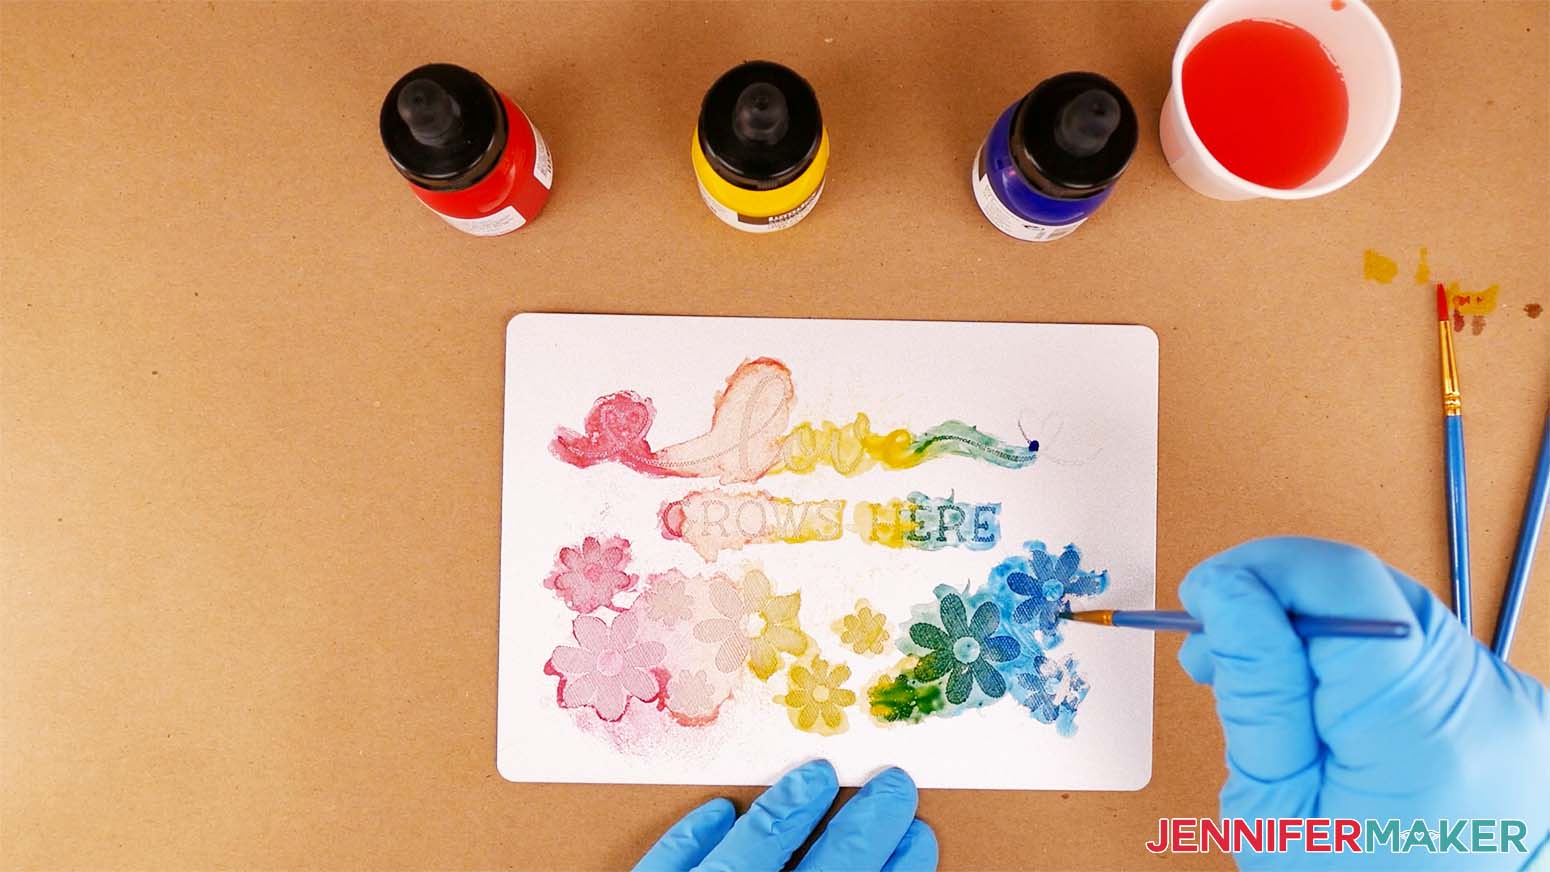
To finish my rainbow, I added several drops of blue ink on the right side of my engraved design. I also added a few more drops of yellow to help make the green color.
Then, you can spread and blend the inks like you did on the left half of your design. Feel free to add a few more drops of one color or another to get just the right shades.
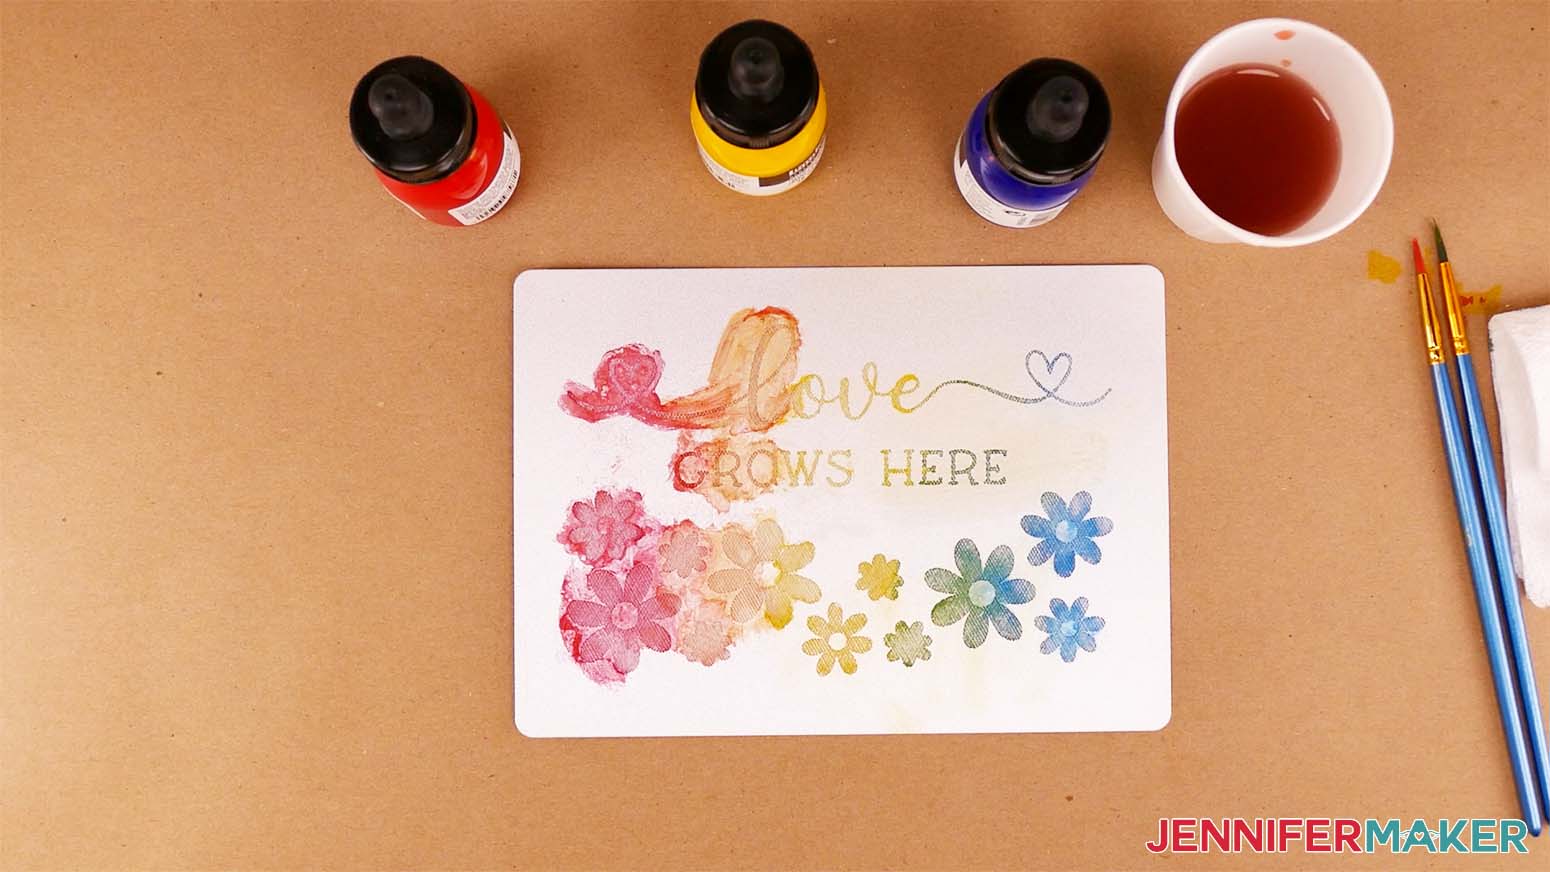
Once you're happy with your colors, use a paper towel to blot up any excess pools of ink and let the plaque sit for five to ten minutes. This lets the inks dry a little, which makes the colors adhere to the engraved areas a bit better.
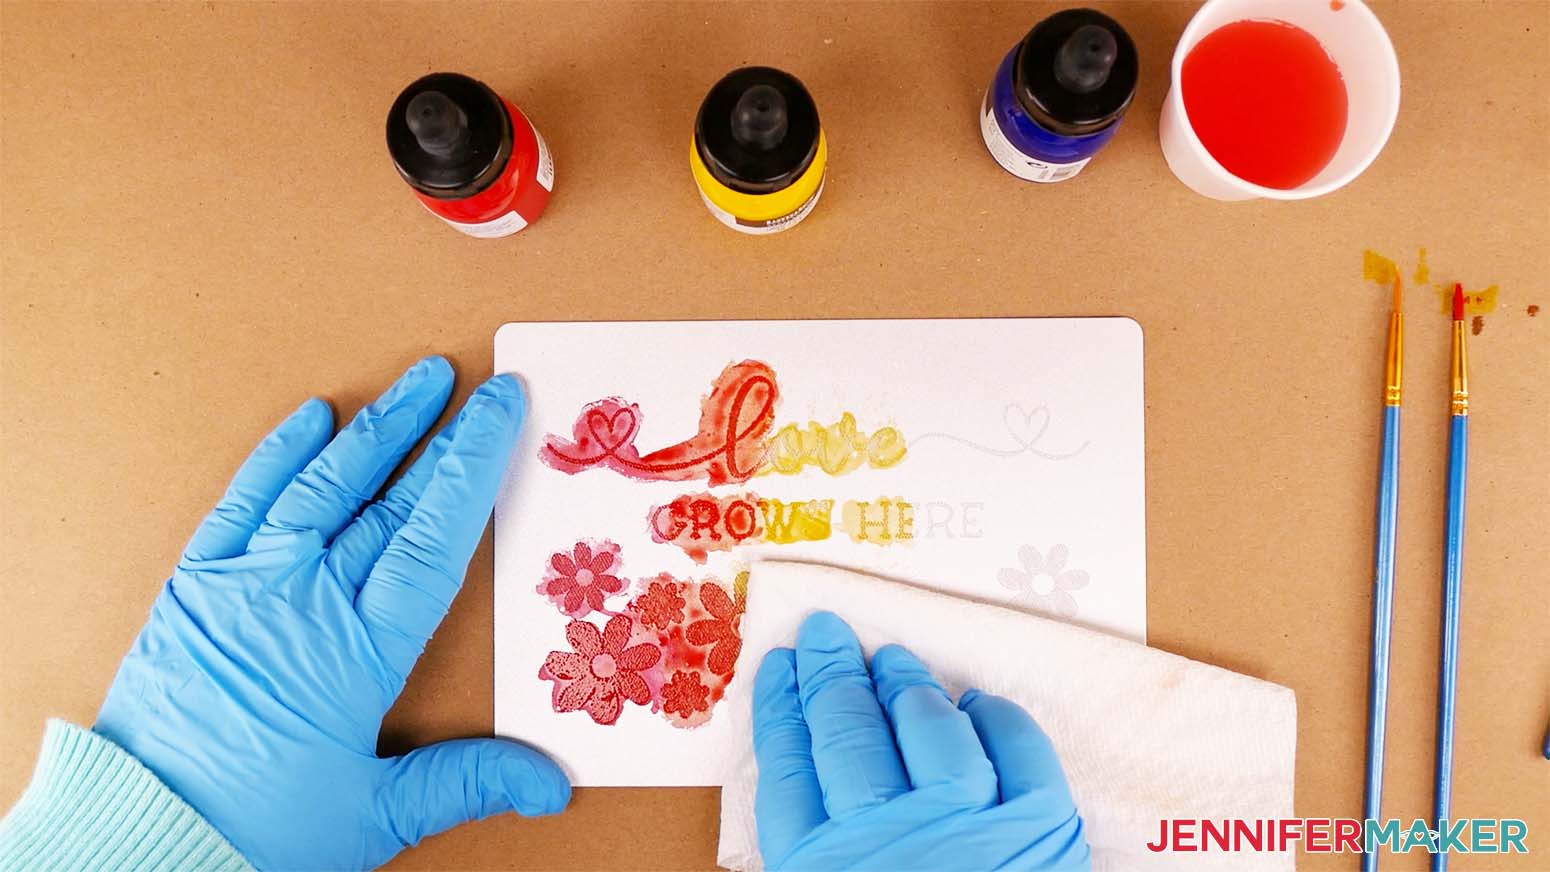
Now you can wipe away the excess ink with a clean cloth dampened with water. Gently wipe around the edges of your design to remove the ink on the plain metal or acrylic. You won't need to scrub or buff like we did with our previous techniques. The more gently you wipe, the better.
TIP: If you accidentally use too much pressure and remove some of the ink from an engraved area, you can just add more ink, let it sit, and then wipe away the excess again.
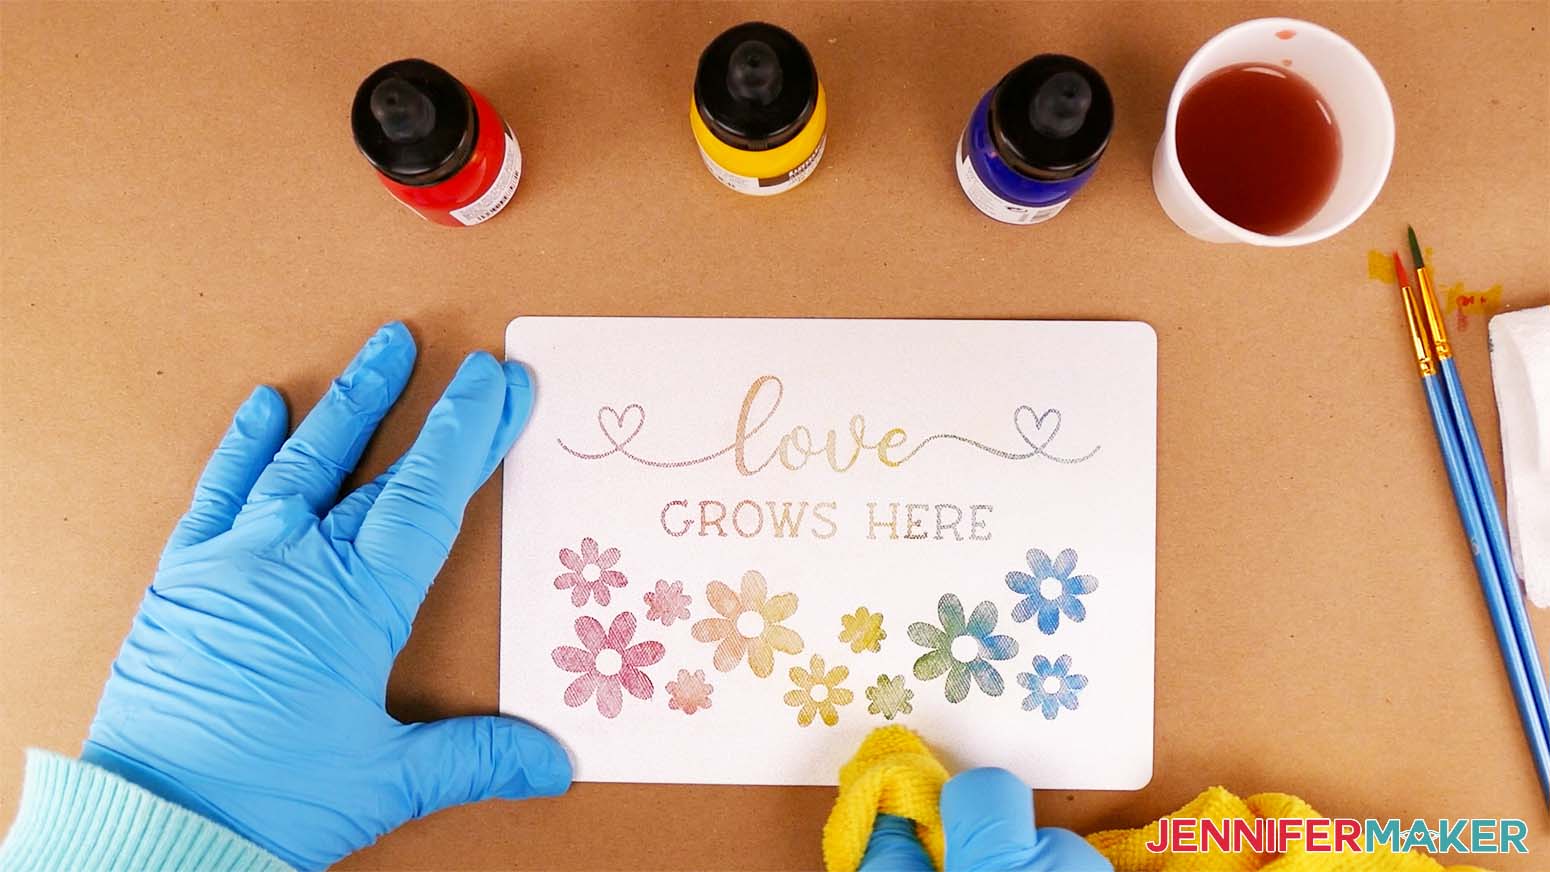
Once you've removed all the excess ink and are happy with your colored design, let it sit for 24 hours to allow the inks to fully dry.
Here’s my finished rainbow plaque. It looks just like a watercolor painting, doesn't it? I just love all the color possibilities there are with these inks! The fun thing about this technique is that every plaque will look a little bit different, making each one its own unique work of art!
I even engraved the same design on my Glowforge and colored it using the same method to see what it would look like. I think it turned out great, don't you?
STEP 4: SHOW IT OFF!
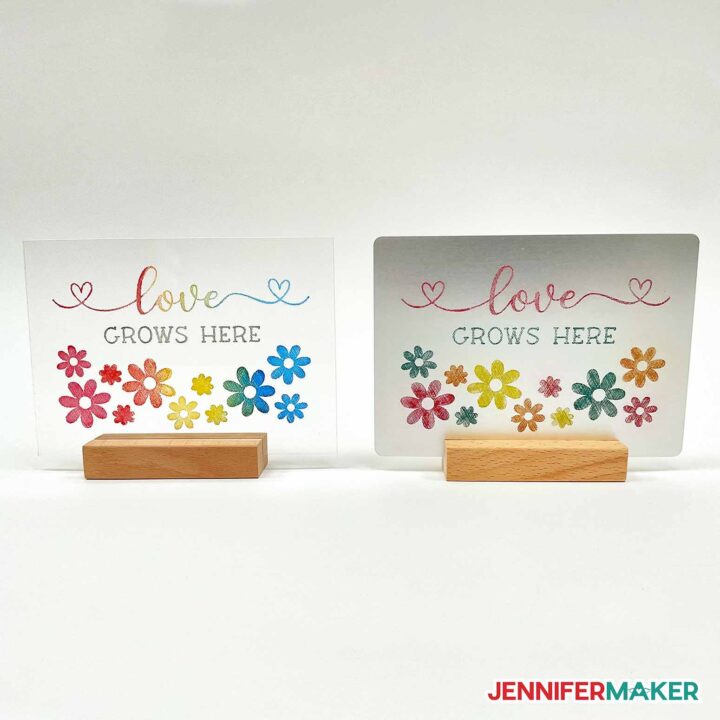
You’re done! Here are what my finished engraved and colored plaques look like. Aren’t they beautiful?
Now you can display your plaque on a table, shelf, or counter (perhaps right next to your coffee maker if you made the “Love and Coffee” design) using stands like the wooden ones that come with the acrylic plaques in my materials list. You can also use some adhesive or mounting strips to hang your plaque on a wall or door.
Notes
Some of the other coloring methods I tested were dry erase markers, metallic oil-based paint pens, and India ink. The dry erase markers and India ink were very easy to wipe away and not as permanent as I would have liked. The paint pens were more permanent but harder to use because the excess was very difficult to wipe away. I picked my three favorites because they were easy to use, lasted the longest, and came in a wide range of colors. Feel free to let me know if you experiment with other coloring methods!
During my tests, I found that plain anodized aluminum plaques worked better with my coloring methods than ones with shiny or painted coatings. You can, of course, experiment with different types of metal to see what works for you!
If you want your acrylic inks to last longer on your finished plaque, you can seal the plaque with a clear sealant, such as the lacquer spray in my materials list. This is a good idea if you're going to display your plaque in an outdoor area or a place with high humidity. Before sealing your plaque, make sure your inks are completely dry and wipe your plaque with a clean, lint-free cloth or towel to remove any dust or bits that could get trapped under the spray sealant. You can also wear some clean gloves when handling your finished plaque to keep from getting fingerprints on it. Make sure to follow the directions on your spray bottle and spray your plaque outside or in a well-ventilated area, such as a garage. Be sure to shake the bottle really well before using it and apply several coats, one at a time, to get the best results. Also make sure to follow the temperature guidelines when using your lacquer spray.
Finished Size: 5" x 7"
Fonts Used:
Transcity (Home Sweet Home design)
Cream Candy (Home Sweet Home design)
Beachwood Sans (Love and Coffee design)
Biosha Script (Love and Coffee design)
Oh juliya (Love Grows Here design)
DTC Barn Acre (Love Grows Here design)
Answers to Your Questions About How to Color Engraving
Q: Can you engrave in color?
A: Yes, but color laser engraving works differently than a Cricut. That’s why I tested ways to add color to engraving after it’s done.
Q: How do you fill engraving in color?
A: Depending on the look you want, you’ll need to use different color engraving applications. I used the same techniques for plaques in acrylic and with a metal surface.
Q: How do you color engraved metal?
A: My tutorial shows you how to paint or buff color into the surface of the metal with ease!
Q: How do you color engraved letters?
A: You can use these same techniques on plastic and metal engraving, just take more time to wipe up the edges for a clean look.
Q: Is laser better than engraving?
A: It really depends on your preferences, the projects you want to make, and your budget. The laser engraving process and laser beams can take a big amount of energy and work at high temperatures to make deep engravings and laser cuts , so there’s more to consider than a Cricut.
Q: How do you add color to acrylic engraving?
A: You can use a wide range of colors on engraved acrylic using my tutorial! Just make sure you use high quality materials to adhere well to the engraved surface.
Q: Can I cut this project on a Cricut Joy?
A: No, the Joy doesn’t have the ability to engrave on materials. If you’d like to try a similar project, you can cut small stencils to use for etching wine bottles with my other tutorial.
Q: What is Merry Maker Mingle?
Each day in December leading to Christmas, I present you with a brand new “gift” — a project to craft, make, or do. You can make these projects on a Cricut cutting machine or by hand if you don’t have one. Most of our Merry Maker Mingle projects will come with a fun video with yours truly, a step-by-step printable photo tutorial, and a free pattern/SVG cut file. Sign up to get daily updates and prizes!
Get my free SVG files to create a color engraved plaque
I love seeing what you make with my designs and how you use them! Please share a photo of your color engraving projects in our Facebook group or tag me on social media with #jennifermaker.
Love,

Want to remember this? Save this Tutorial on How to Color Engraving to your favorite Pinterest Board!